Sierra Wireless MC5720 Express Mini-PCI USB Wireless CDMA 1xEV-DO Module User Manual Getting Started
Sierra Wireless Inc. Express Mini-PCI USB Wireless CDMA 1xEV-DO Module Getting Started
Contents
- 1. User Manual
- 2. User Manual 1
- 3. User Manual 2
- 4. User Manual 3
- 5. User Manual 4
- 6. Noteboook User Manual
- 7. CRN 24570 Notebook User Manual
- 8. CRN 24572 M note user manual
- 9. Regulatory info in user manual
- 10. Notebook User manual
- 11. CRN 25224 W Note Regulatory Notice
- 12. CRN 25224 M Note Regulatory Notice
- 13. HP Compaq Notebook Manual
- 14. HP Manual
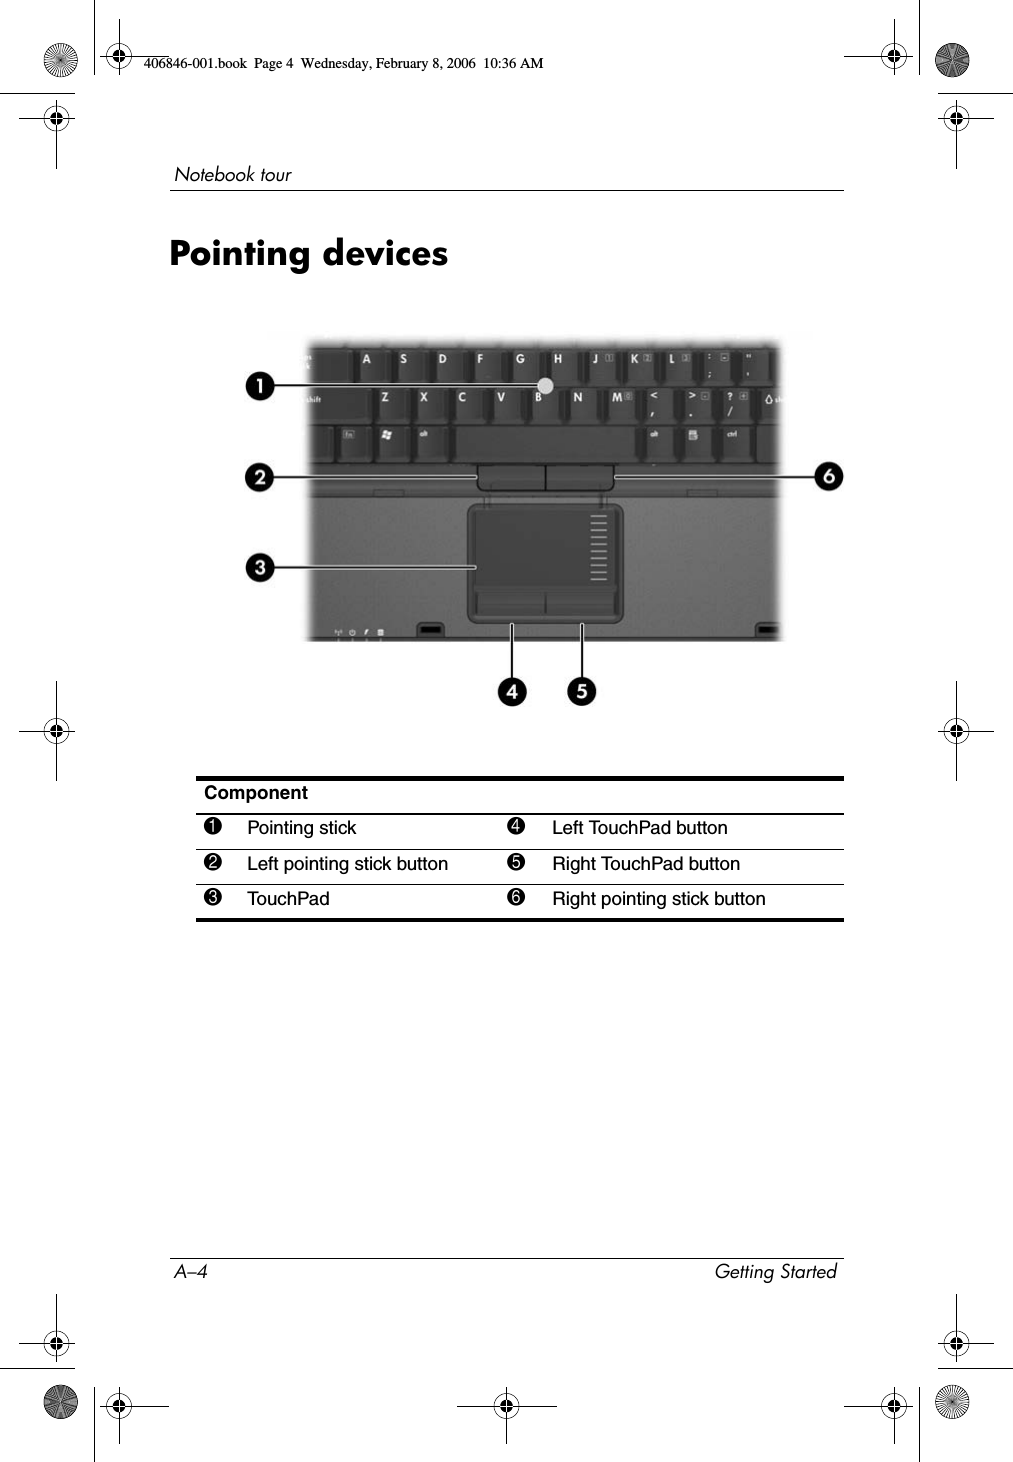
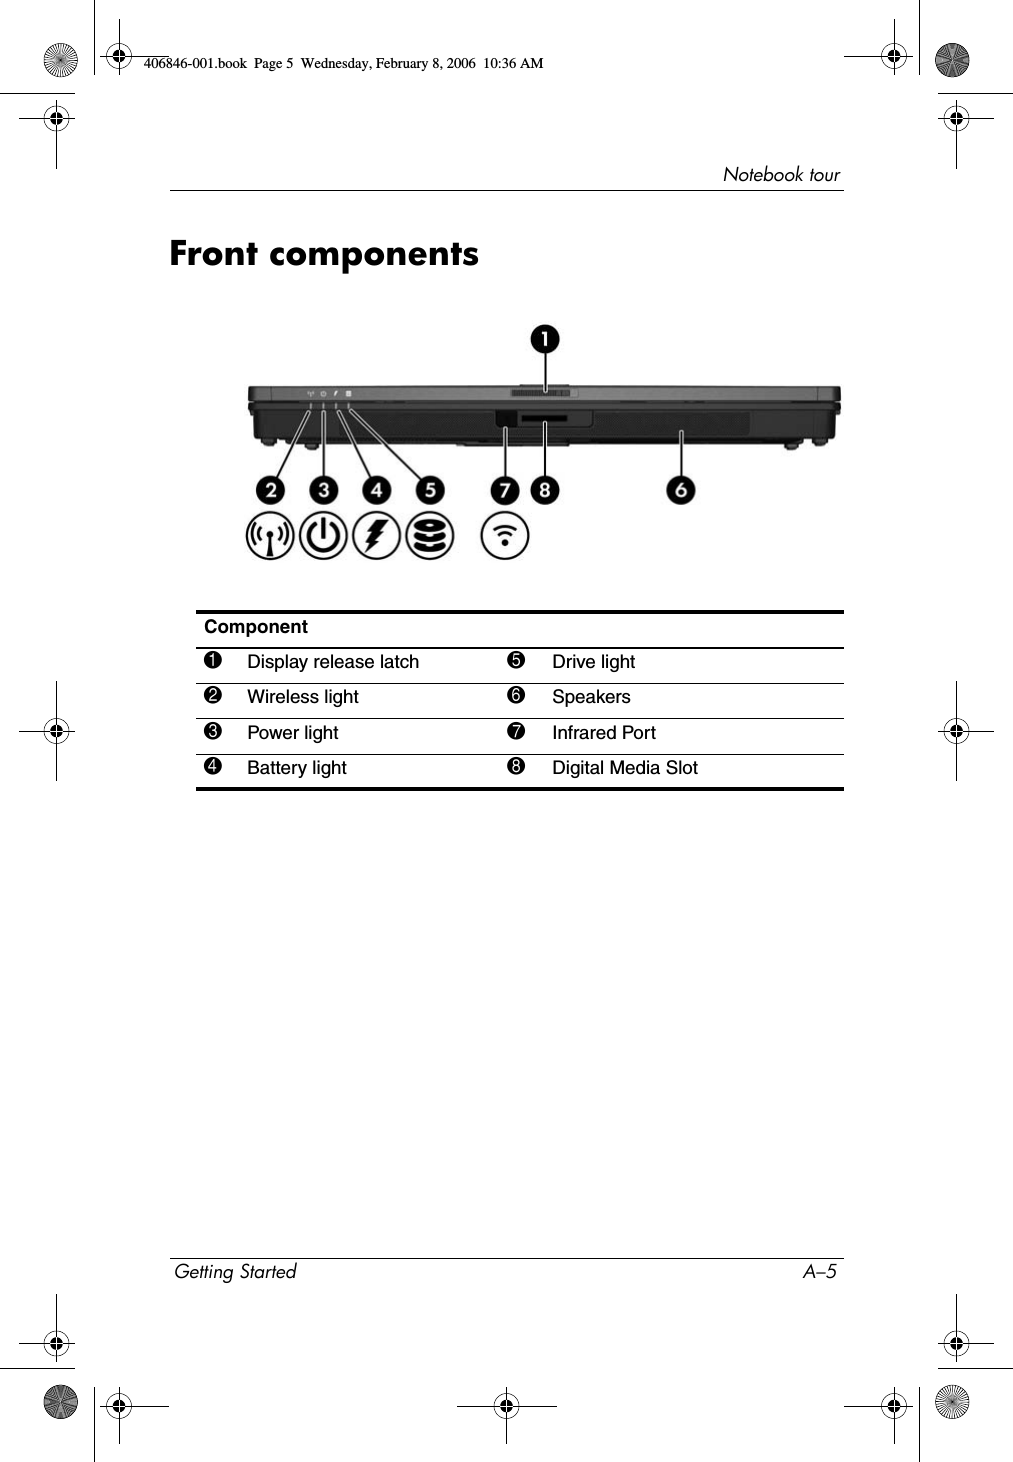
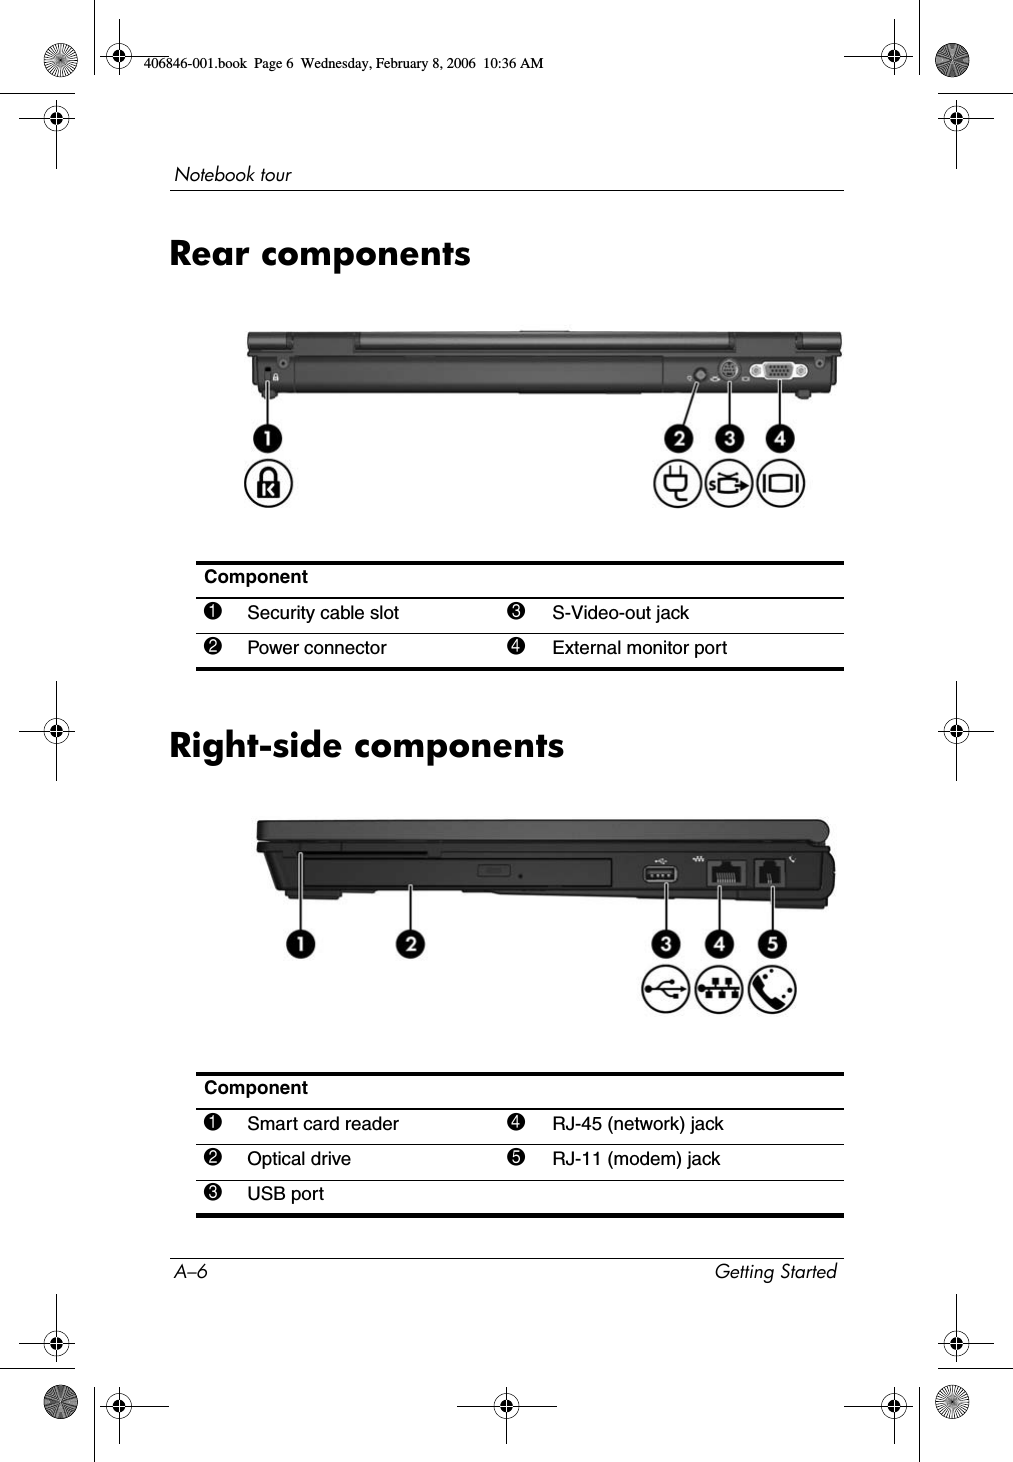
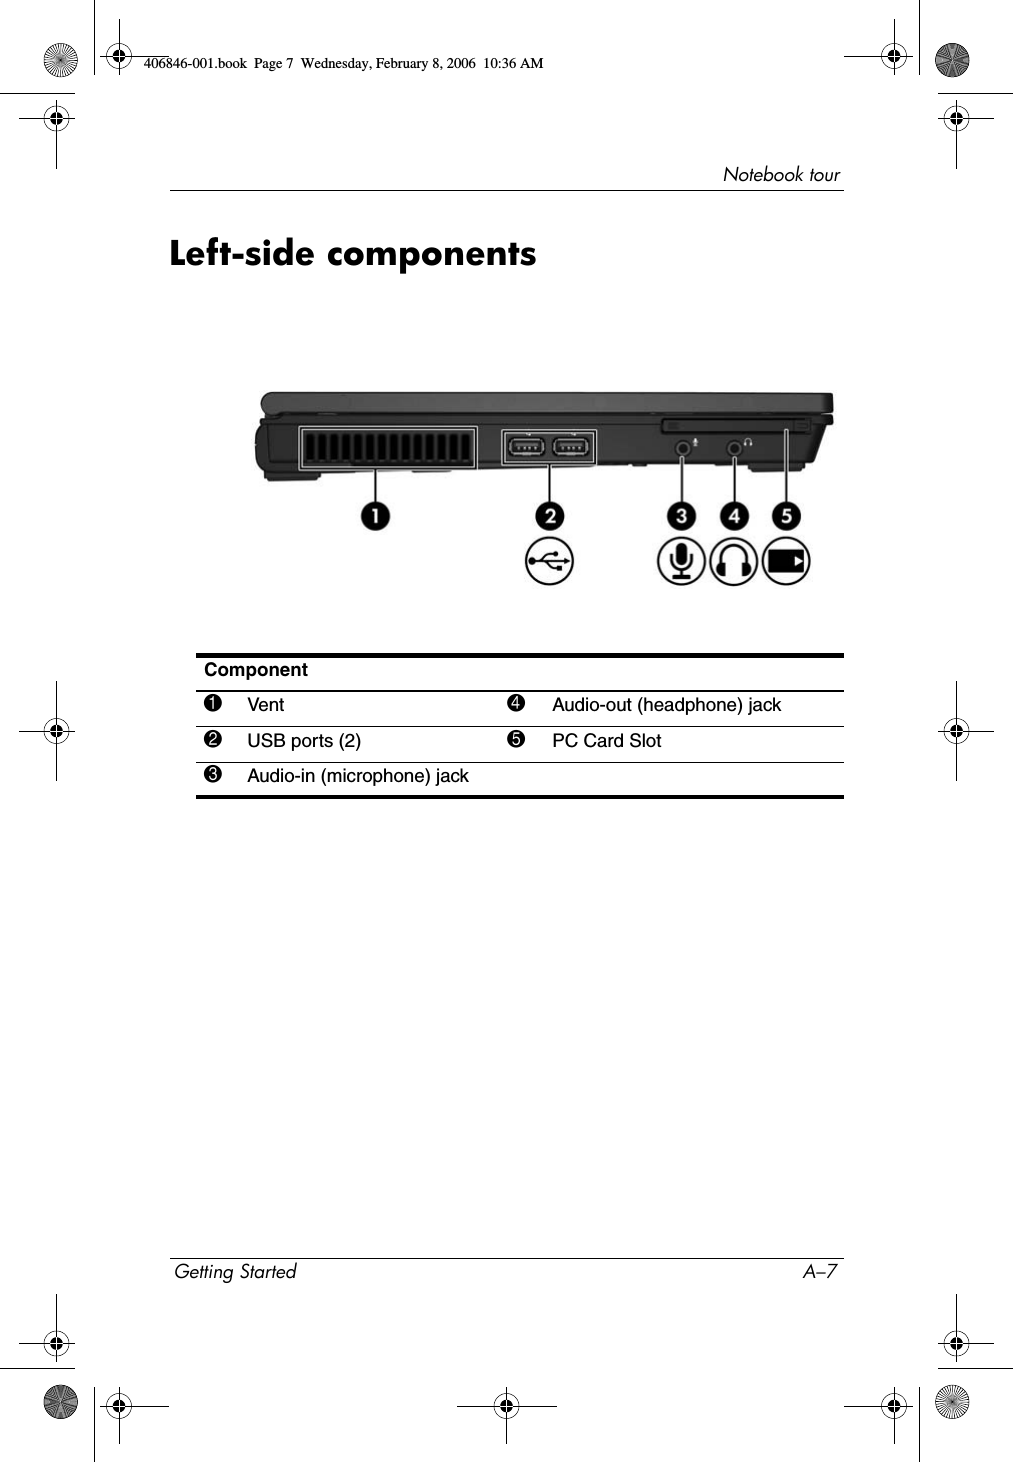
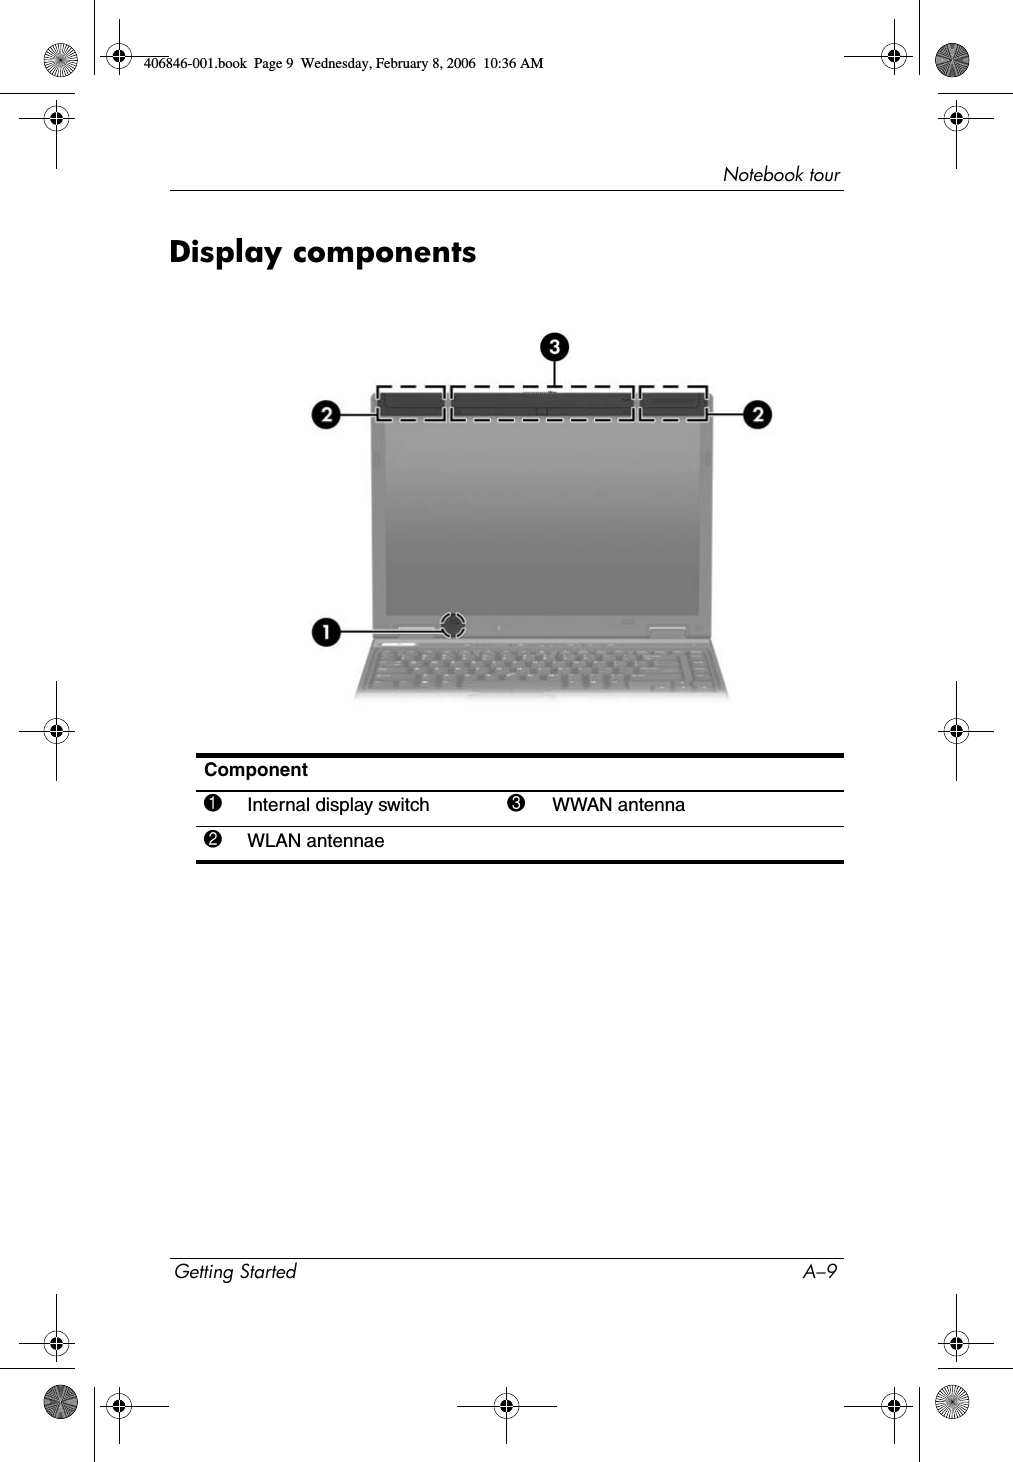
- 15. Notebook Tour
- 16. Regulatory notices
HP Compaq Notebook Manual