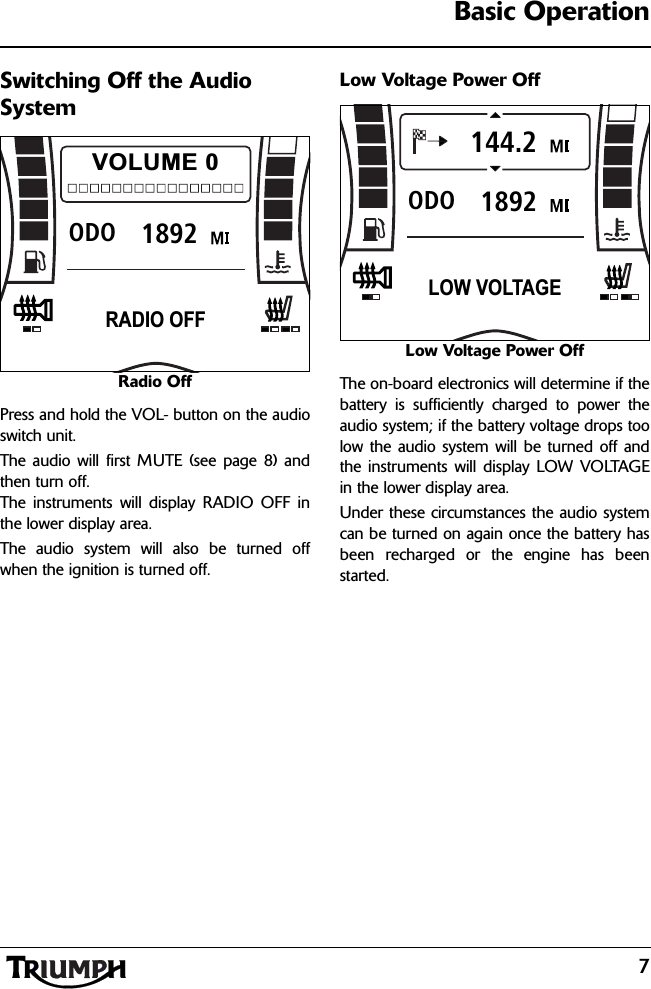
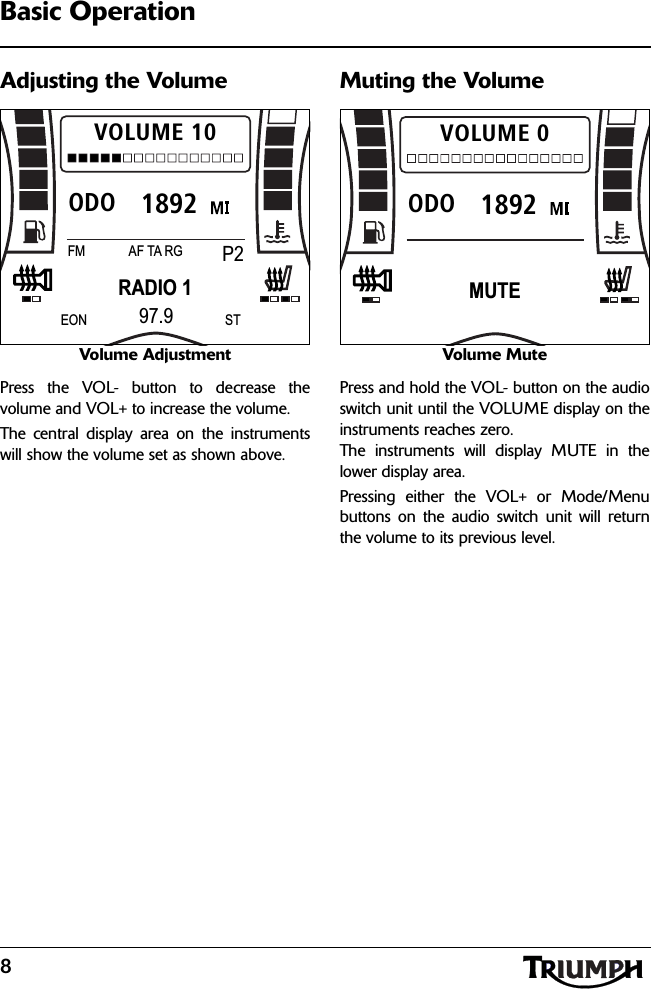
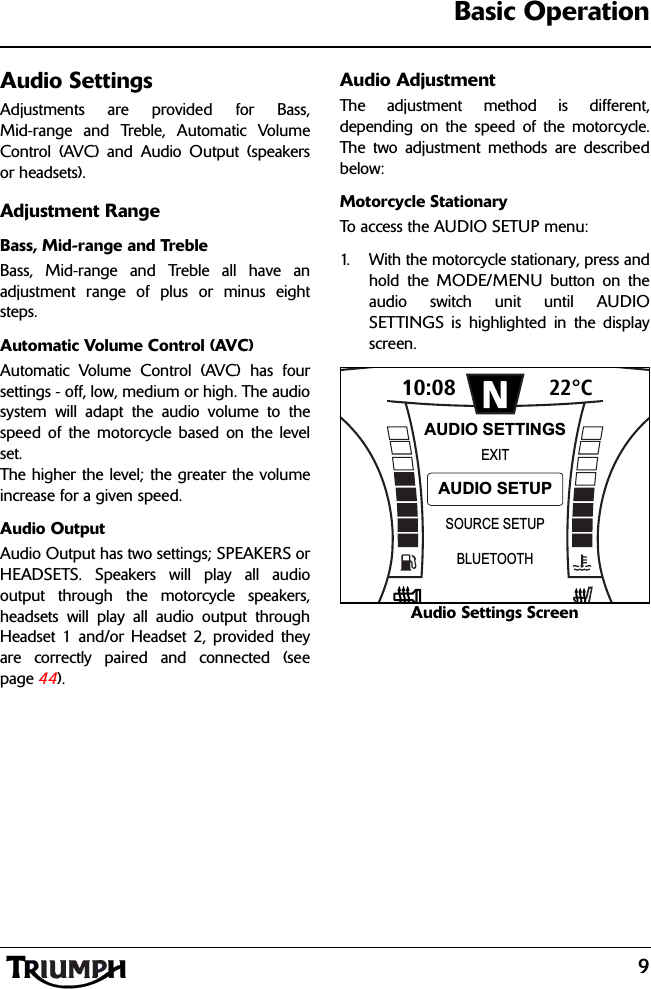
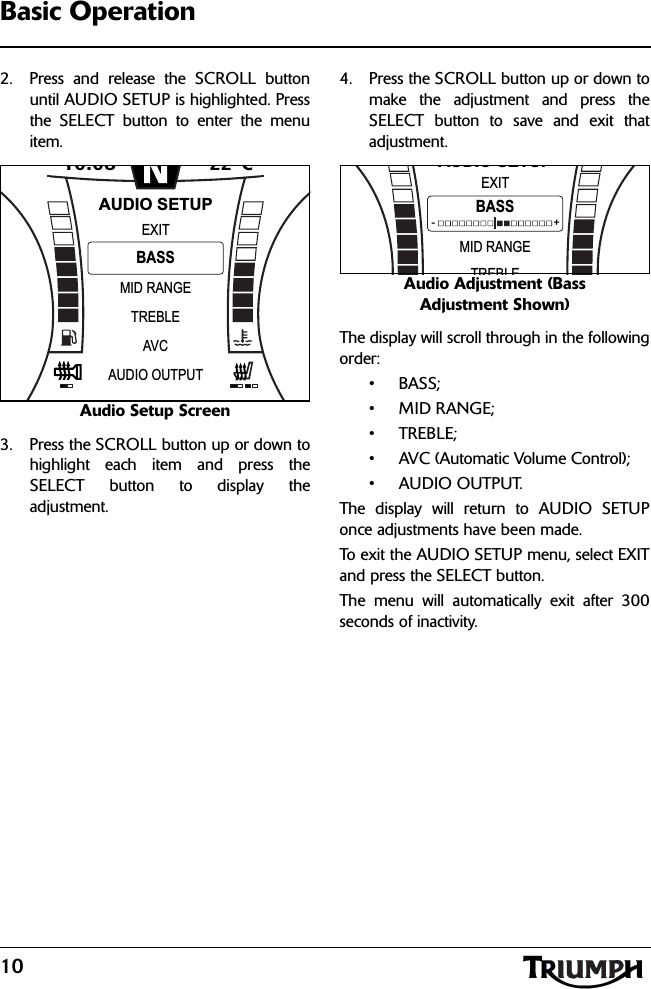
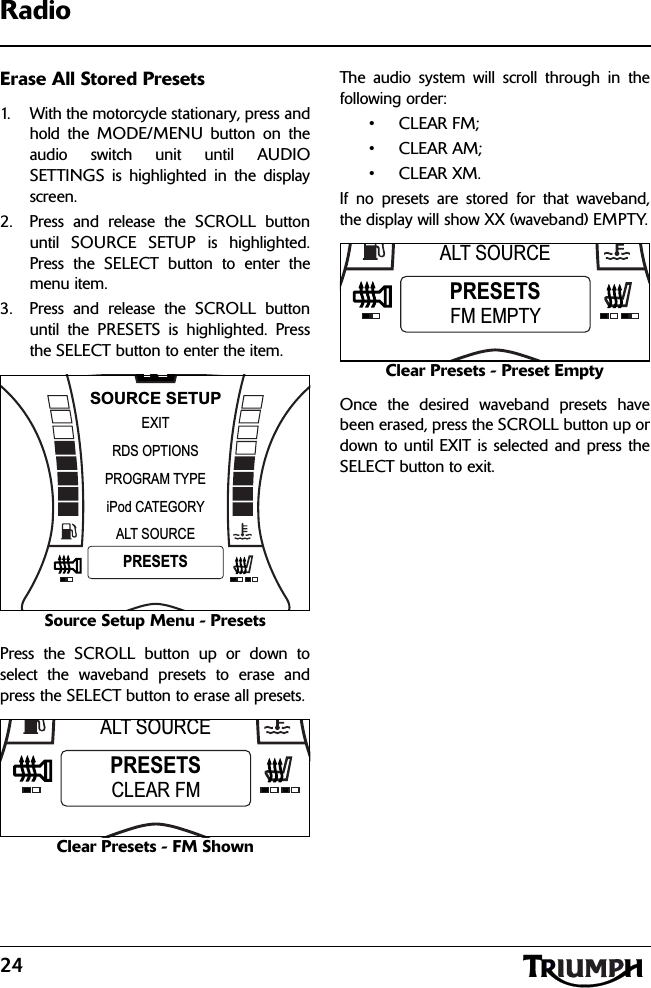
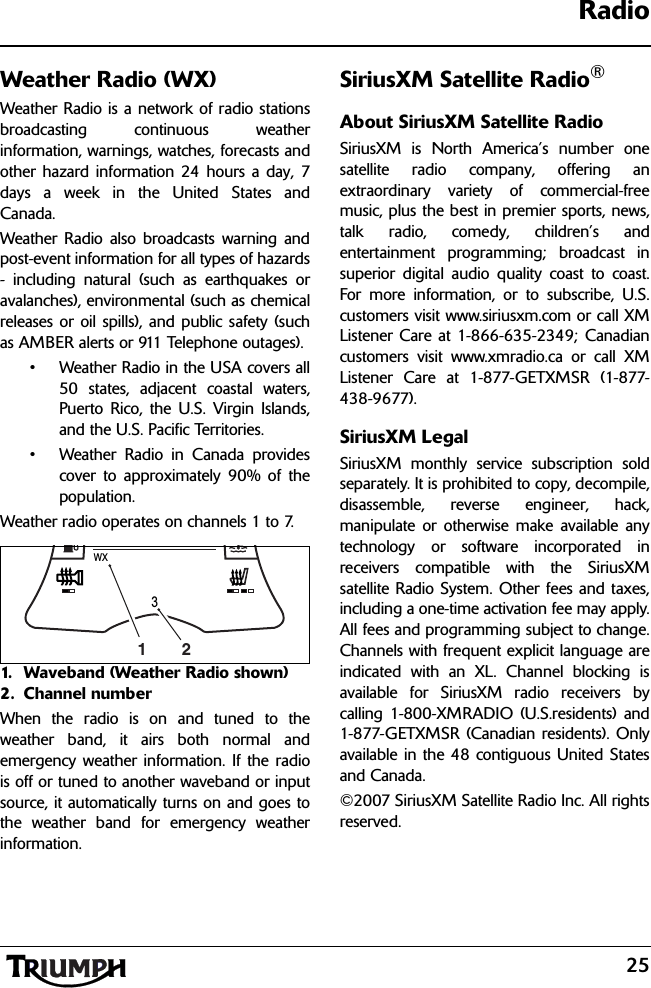
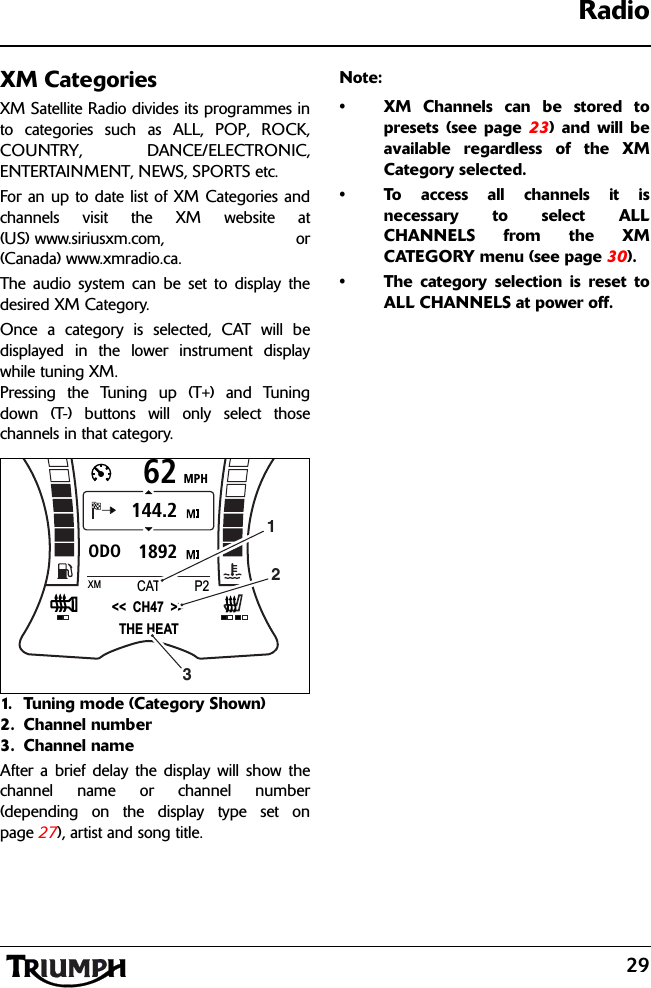
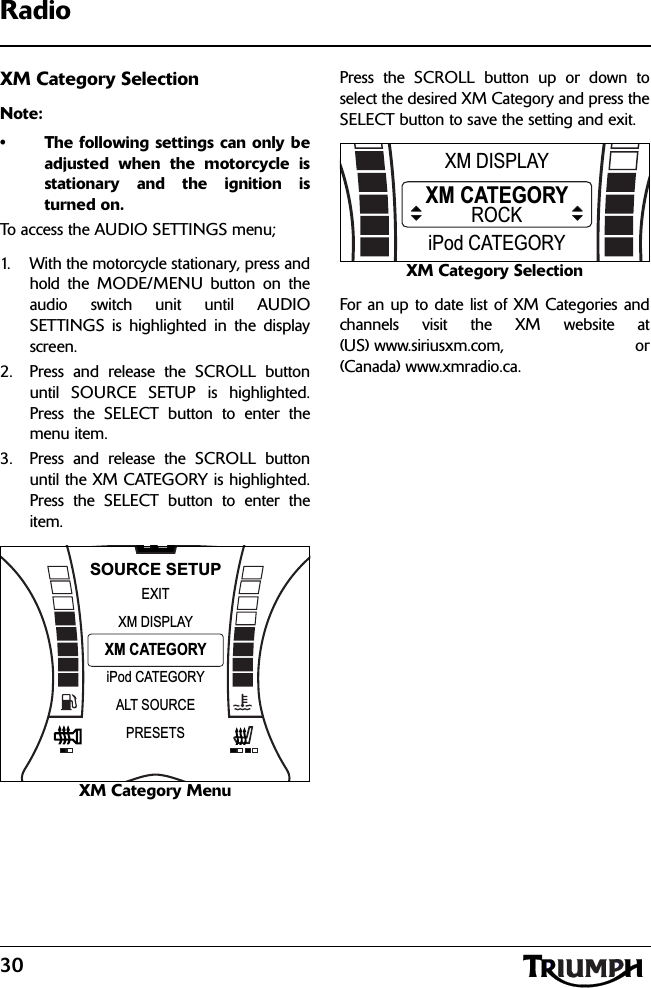
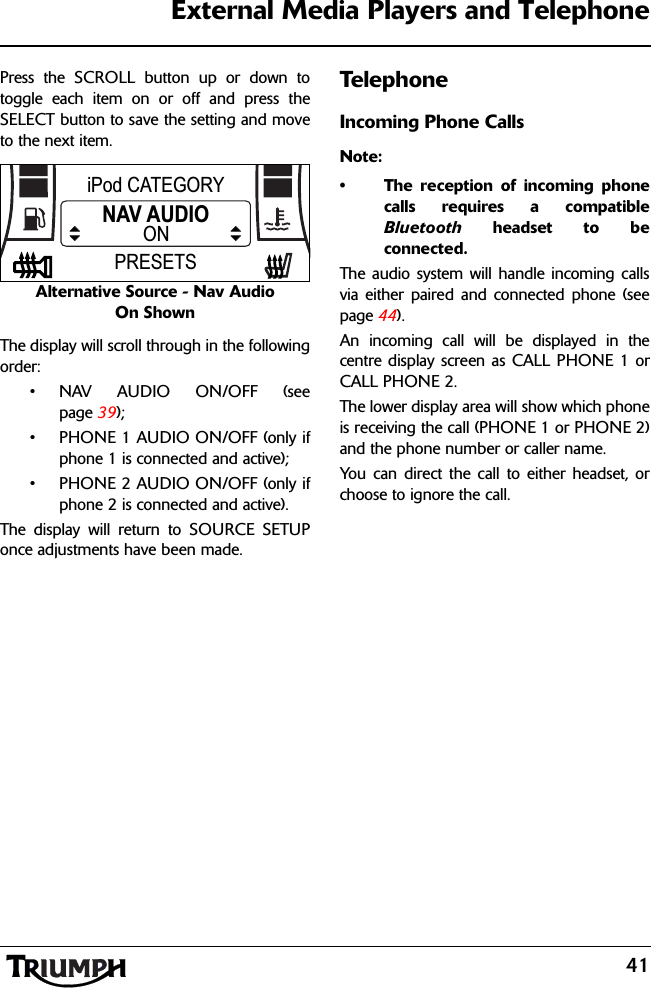
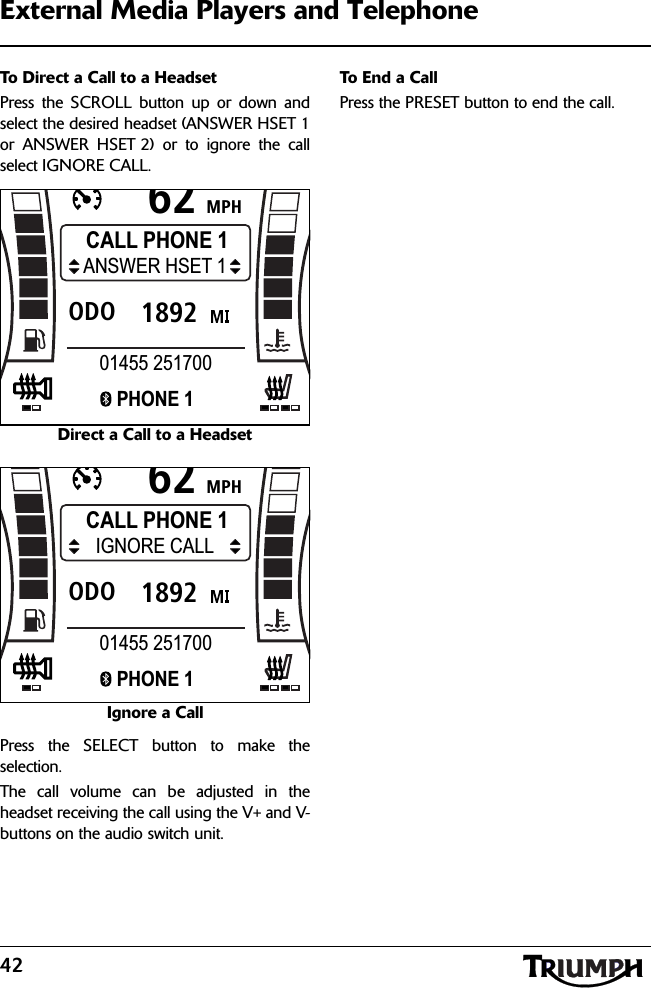
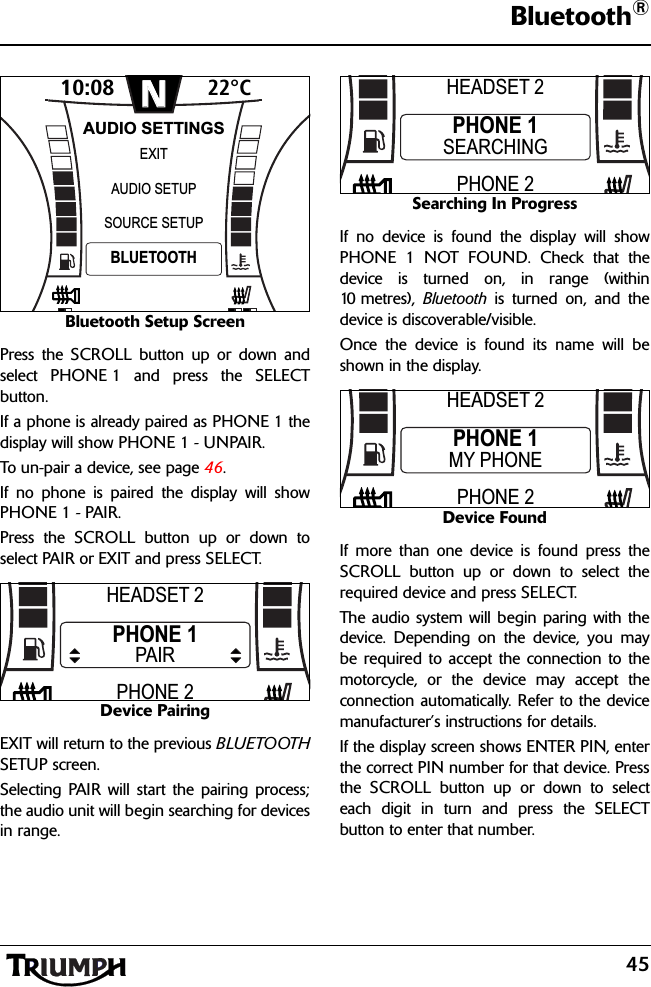
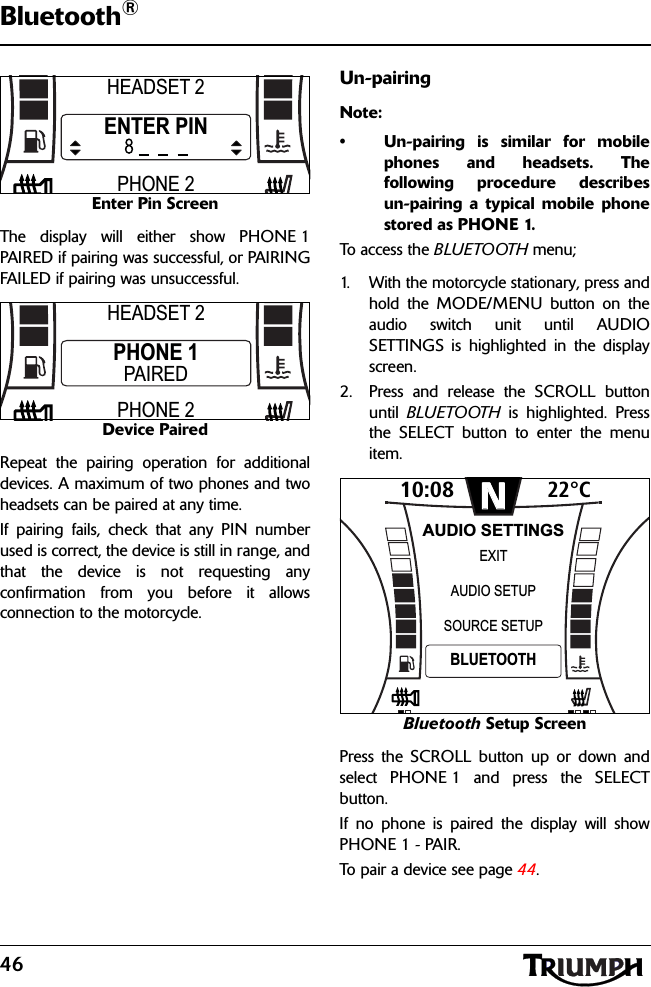
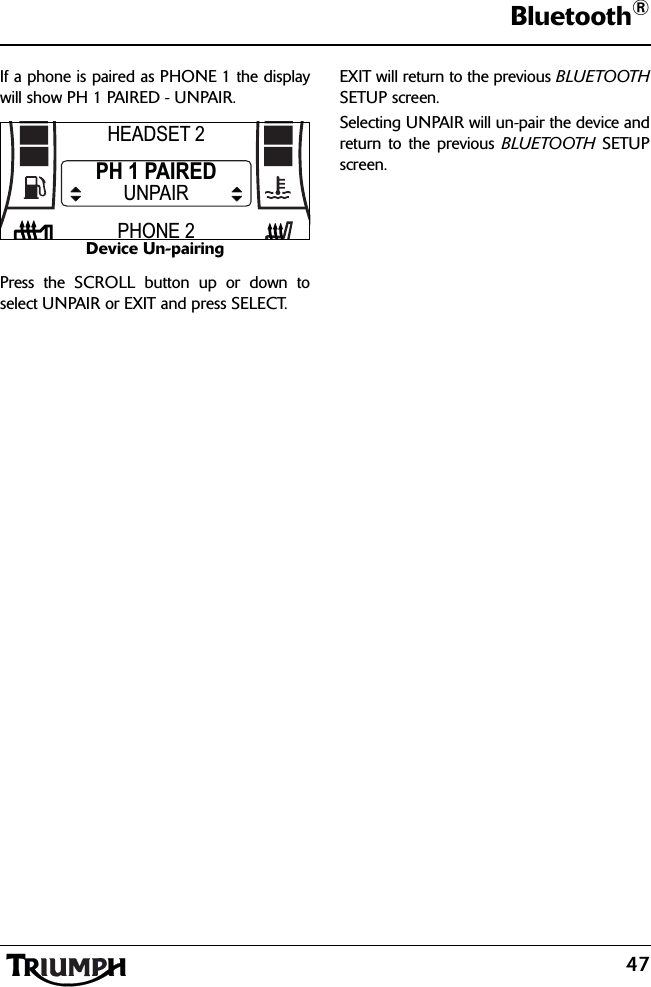
Silicon Laboratories Finland WT32AE Bluetooth Audio Module User Manual VH Audio Handbook EN
Silicon Laboratories Finland Oy Bluetooth Audio Module VH Audio Handbook EN
Contents
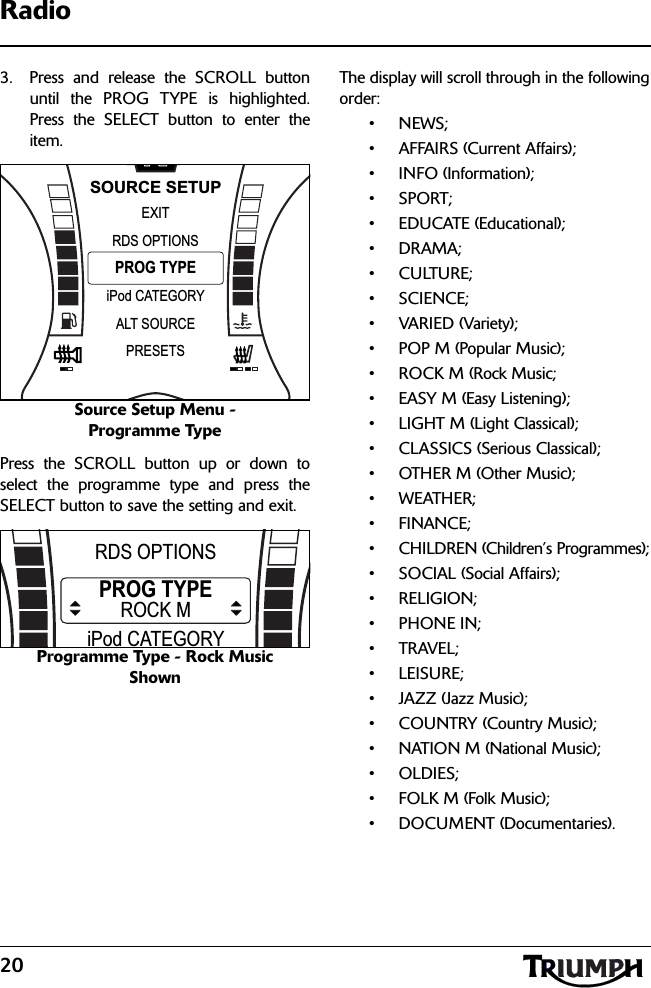
- 1. User Manual
- 2. FCC Audio single
- 3. VH_Audio_Handbook_EN
VH_Audio_Handbook_EN