SofaWare Technologies SBX-11GWLAN-7 Safe@office/VPN-1 Edge User Manual Check Point Safe Office User Guide
SofaWare Technologies Ltd. Safe@office/VPN-1 Edge Check Point Safe Office User Guide
UserManual.wiki
>
SofaWare Technologies
>
SBX-11GWLAN-7 User Manual
>
manual part 2
Contents
1.
manual part 1
2.
manual part 2
manual part 2
Navigation menu
Upload a User Manual
Namespaces
Wiki Guide
HTML
PDF
Info
Views
User Manual
Discussion / Help
Navigation


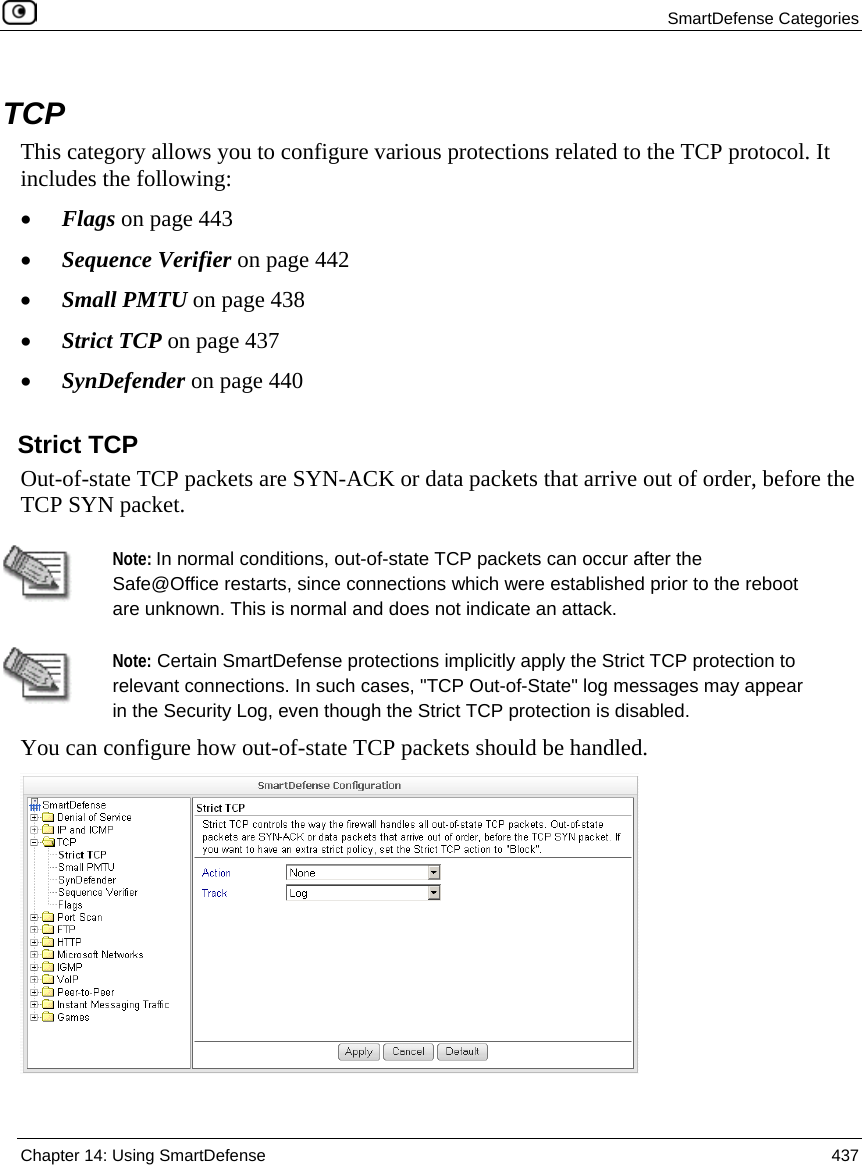


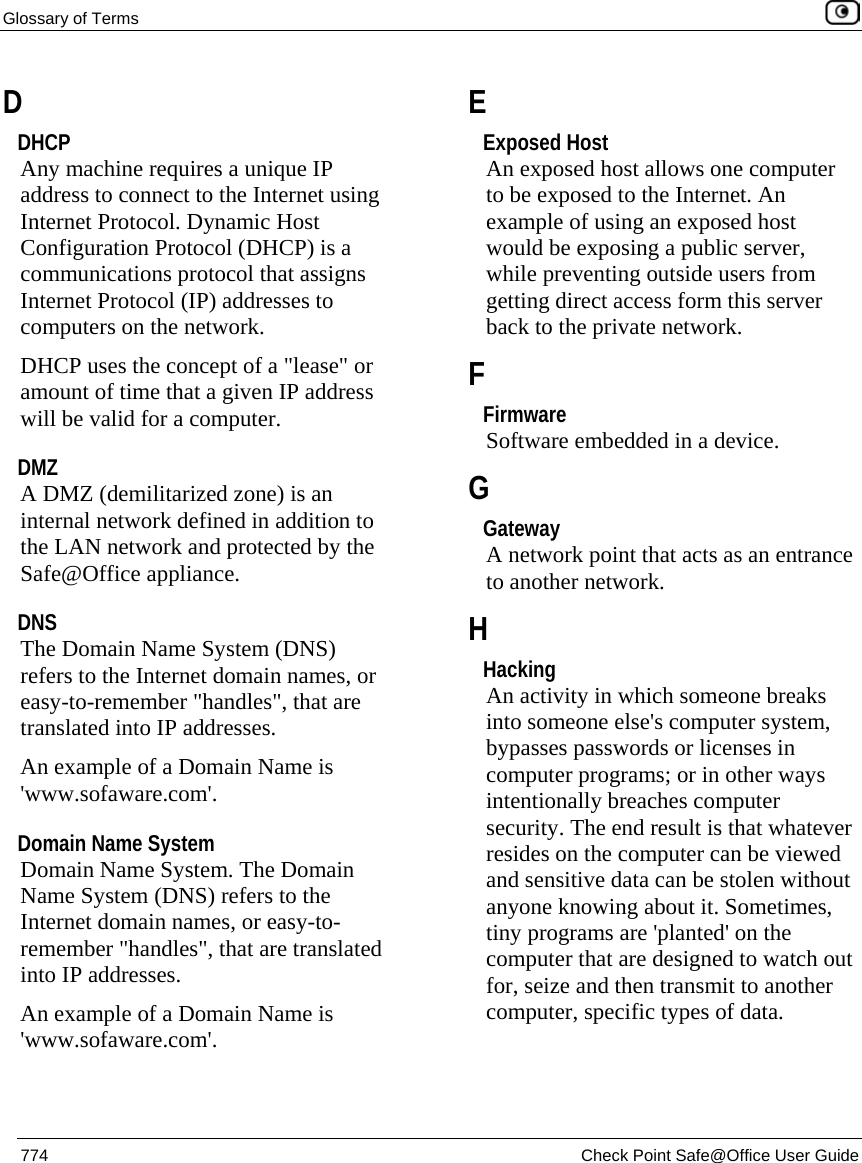
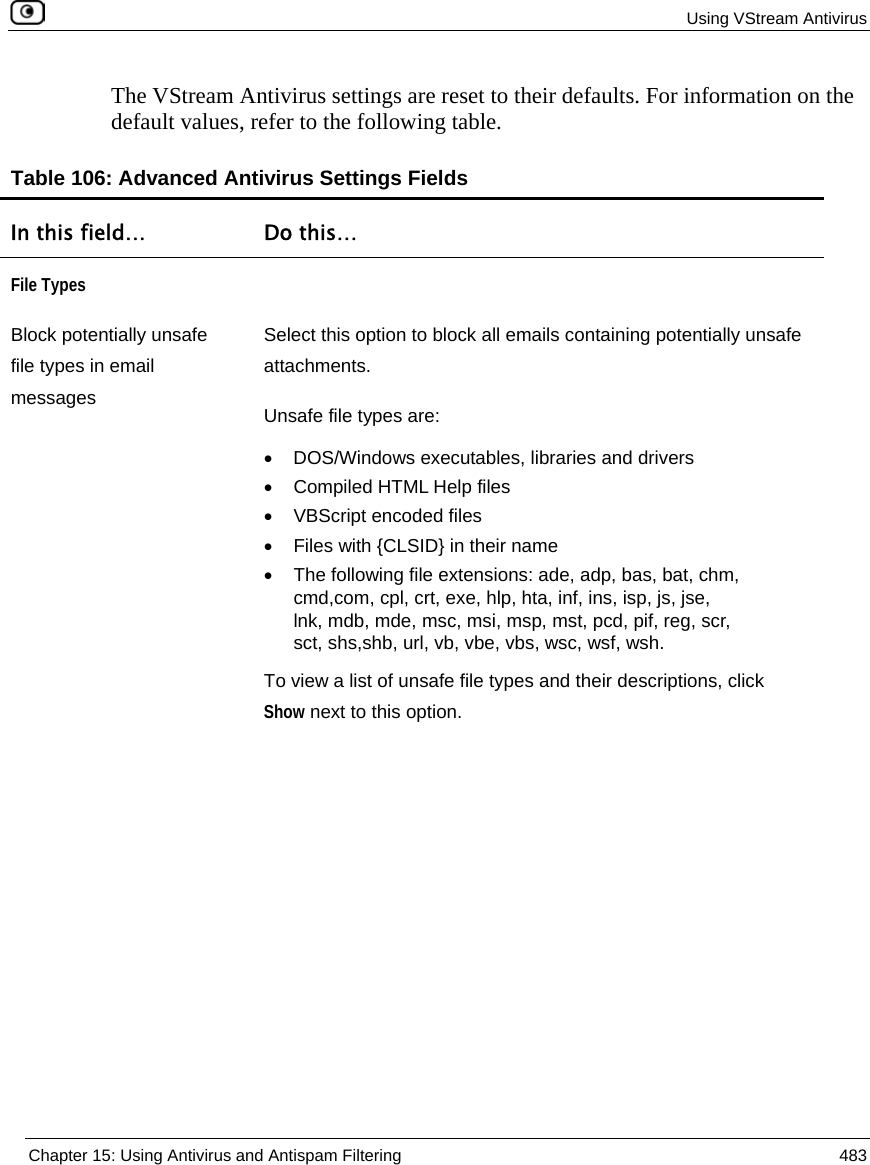
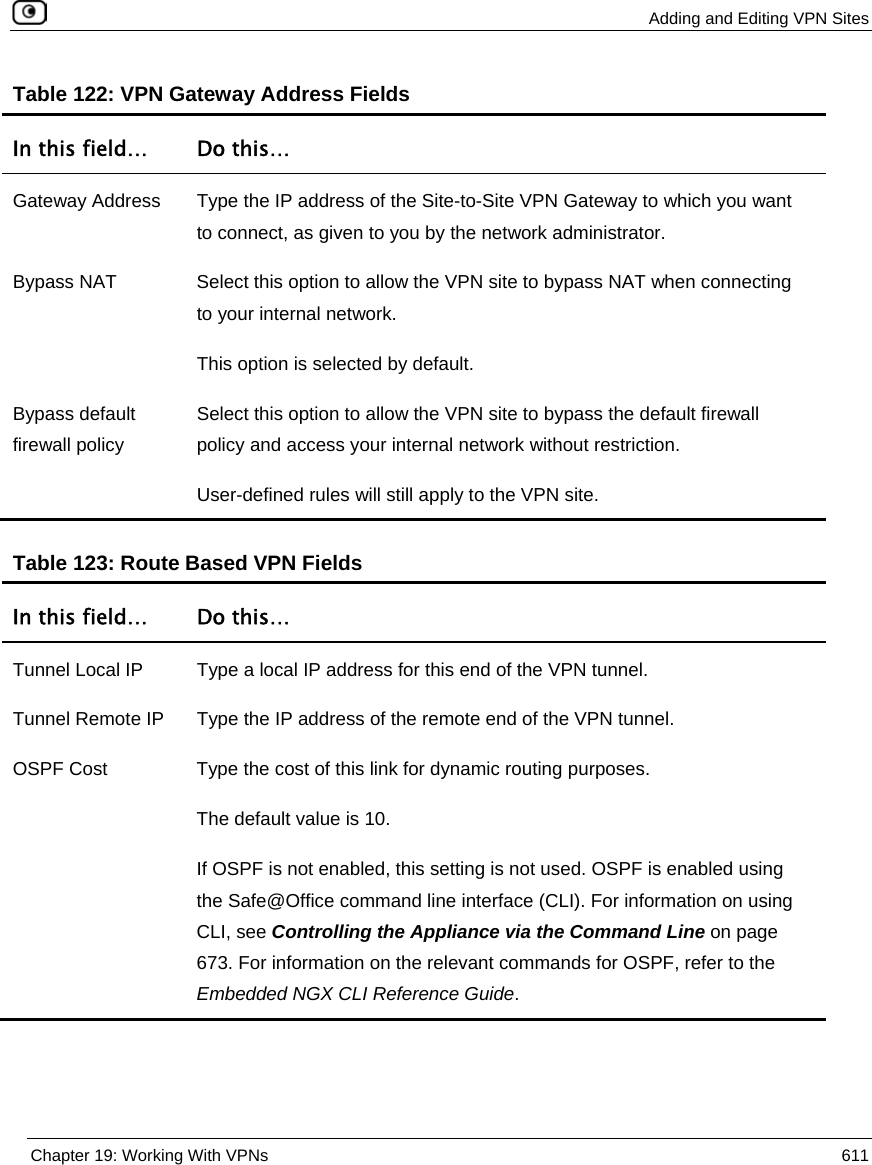
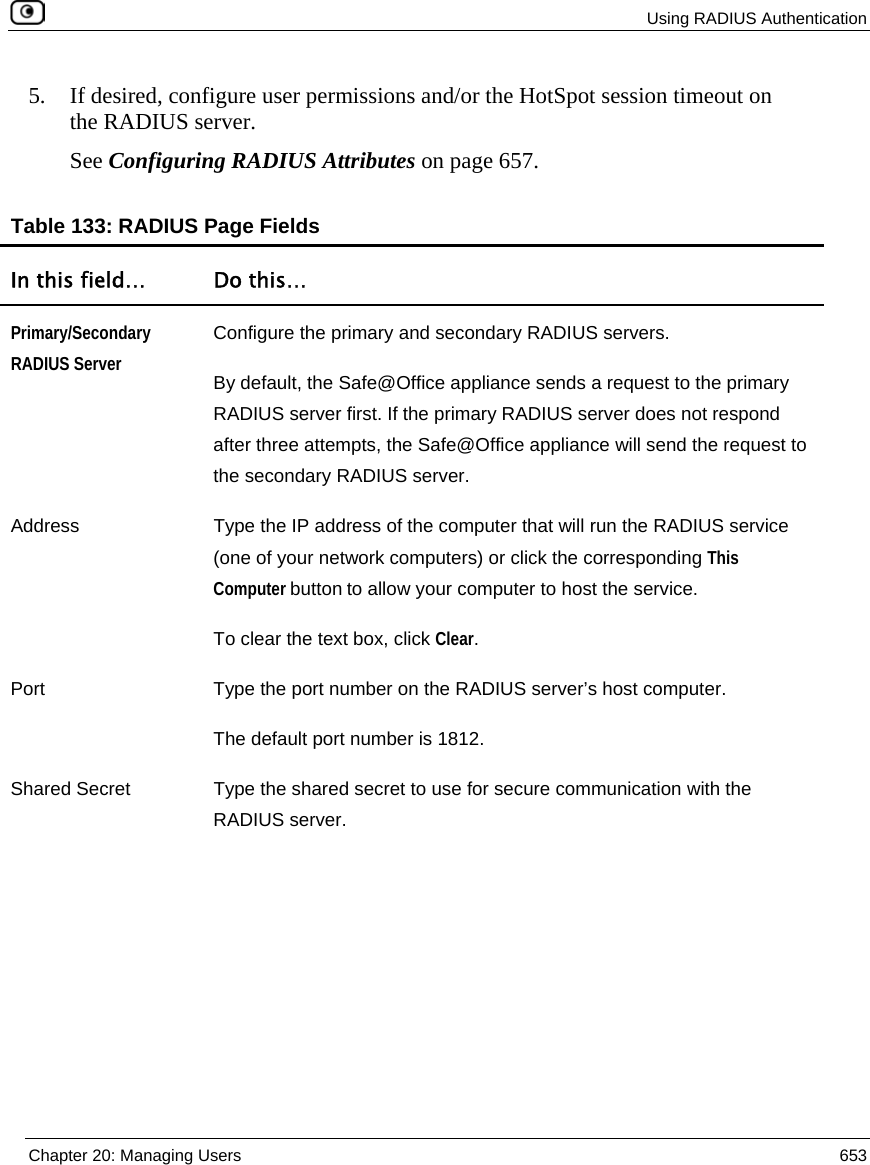
![SmartDefense Categories Chapter 14: Using SmartDefense 445 Table 87: Port Scan Fields In this field… Do this… Number of ports accessed SmartDefense detects ports scans by measuring the number of ports accessed over a period of time. The number of ports accessed must exceed the Number of ports accessed value, within the number of seconds specified by the In a period of [seconds] value, in order for SmartDefense to consider the activity a scan. Type the minimum number of ports that must be accessed within the In a period of [seconds] period, in order for SmartDefense to detect the activity as a port scan. For example, if this value is 30, and 40 ports are accessed within a specified period of time, SmartDefense will detect the activity as a port scan. For Host Port Scan, the default value is 30. For Sweep Scan, the default value is 50. In a period of [seconds] SmartDefense detects ports scans by measuring the number of ports accessed over a period of time. The number of ports accessed must exceed the Number of ports accessed value, within the number of seconds specified by the In a period of [seconds] value, in order for SmartDefense to consider the activity a scan. Type the maximum number of seconds that can elapse, during which the Number of ports accessed threshold is exceeded, in order for SmartDefense to detect the activity as a port scan. For example, if this value is 20, and the Number of ports accessed threshold is exceeded for 15 seconds, SmartDefense will detect the activity as a port scan. If the threshold is exceeded for 30 seconds, SmartDefense will not detect the activity as a port scan. The default value is 20 seconds.](https://usermanual.wiki/SofaWare-Technologies/SBX-11GWLAN-7.manual-part-2/User-Guide-1184424-Page-58.png)


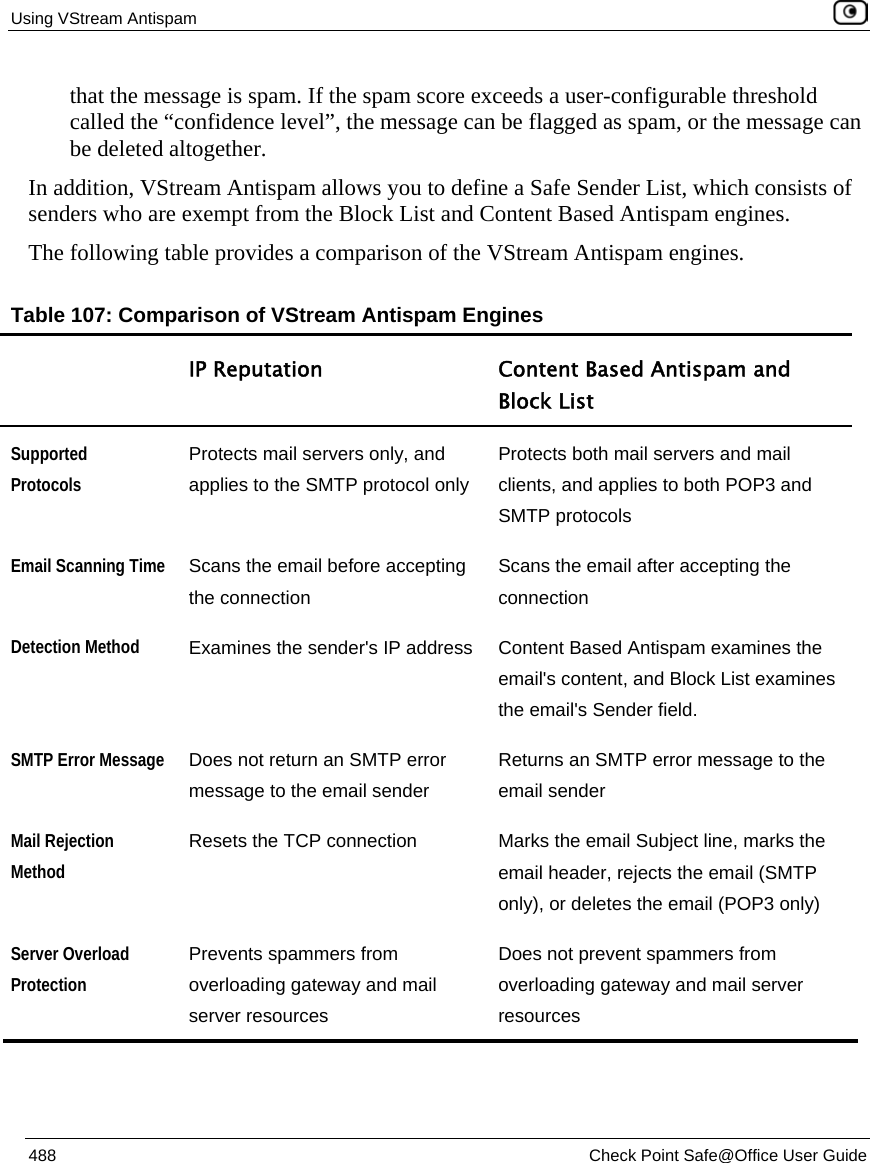


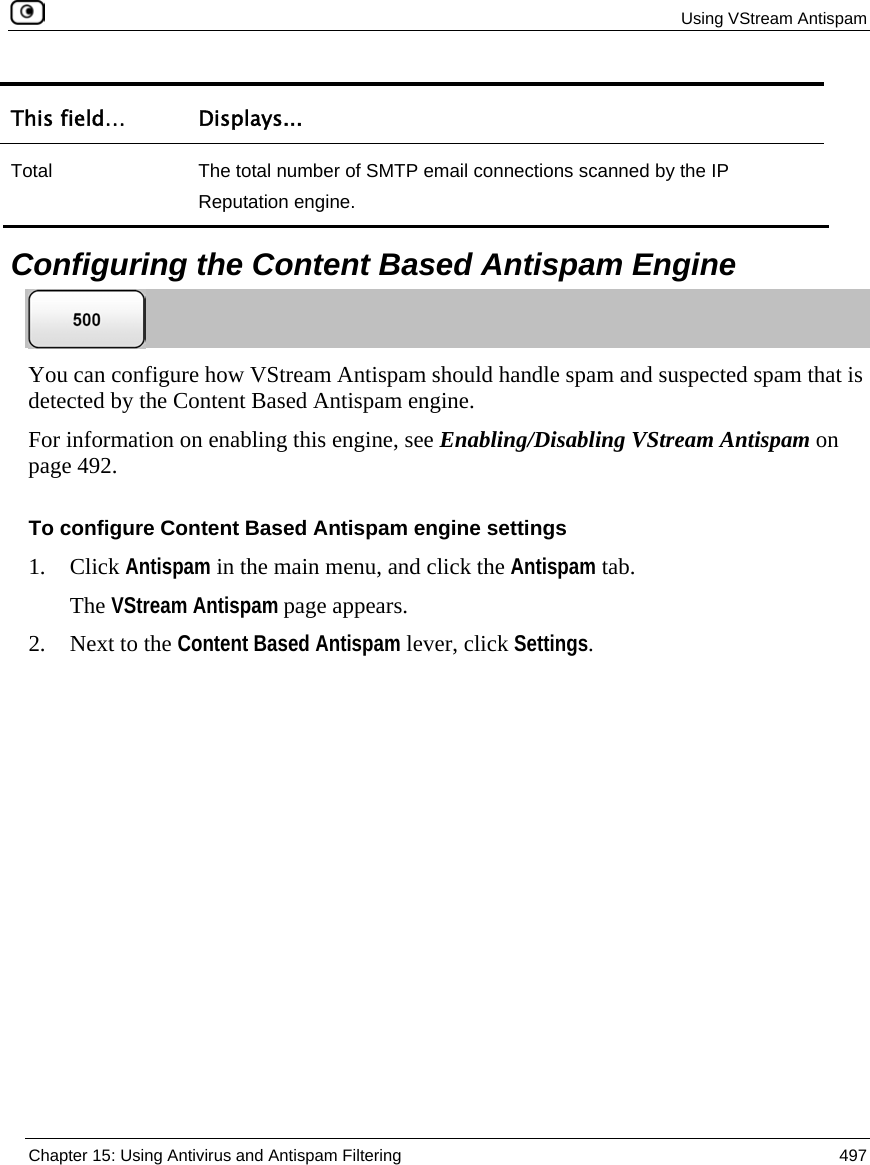

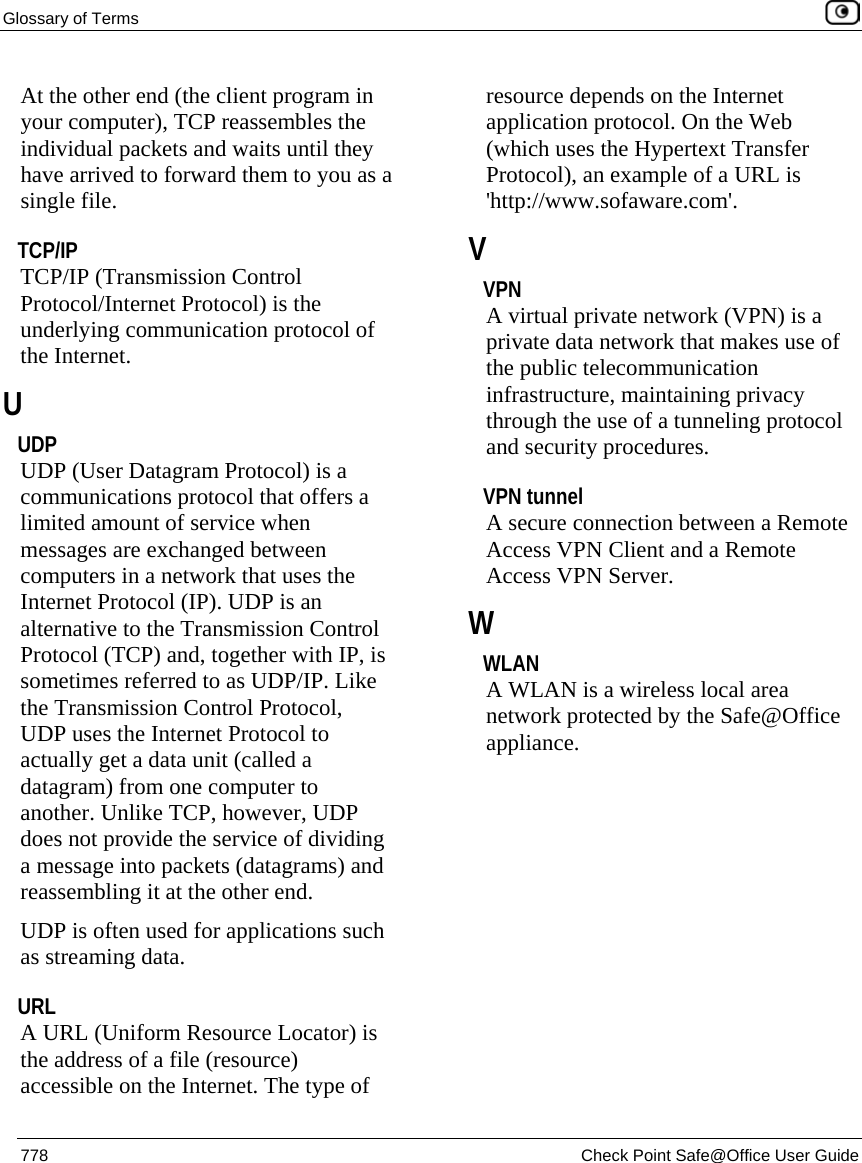
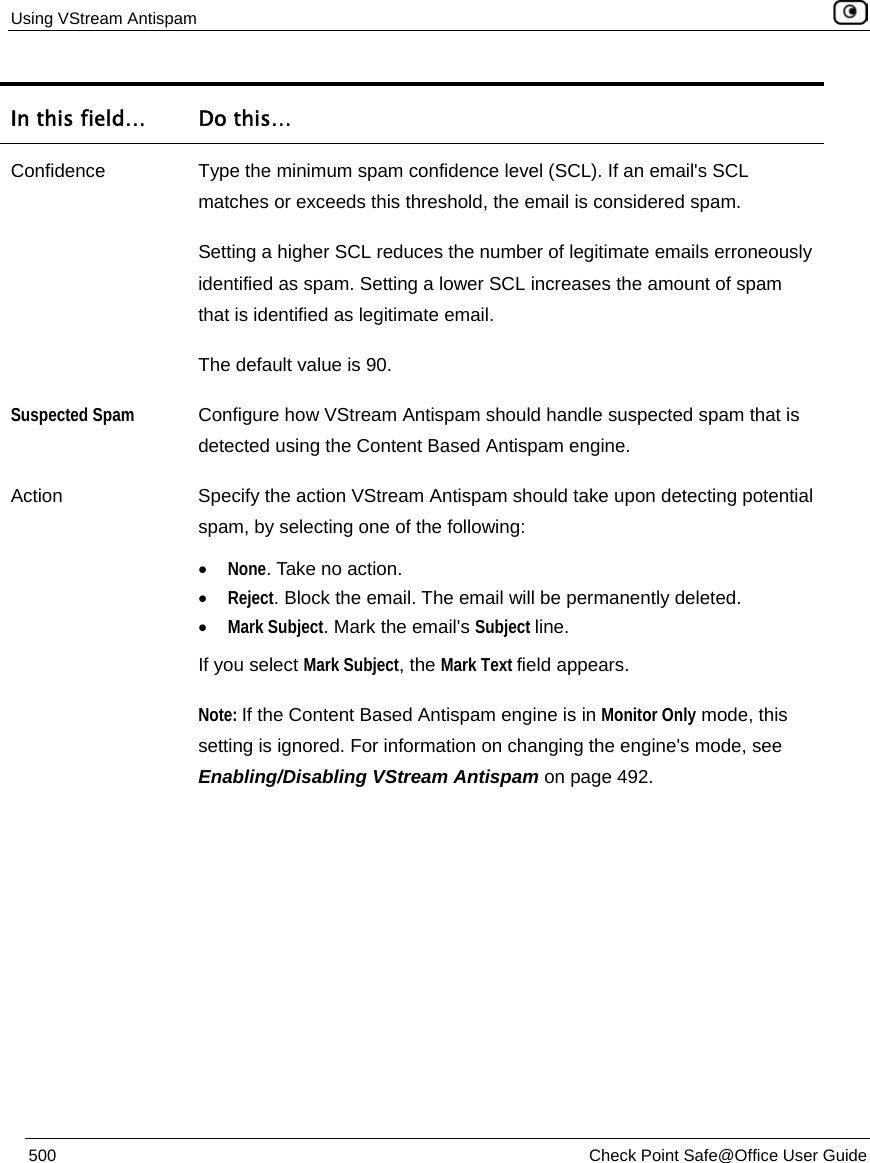
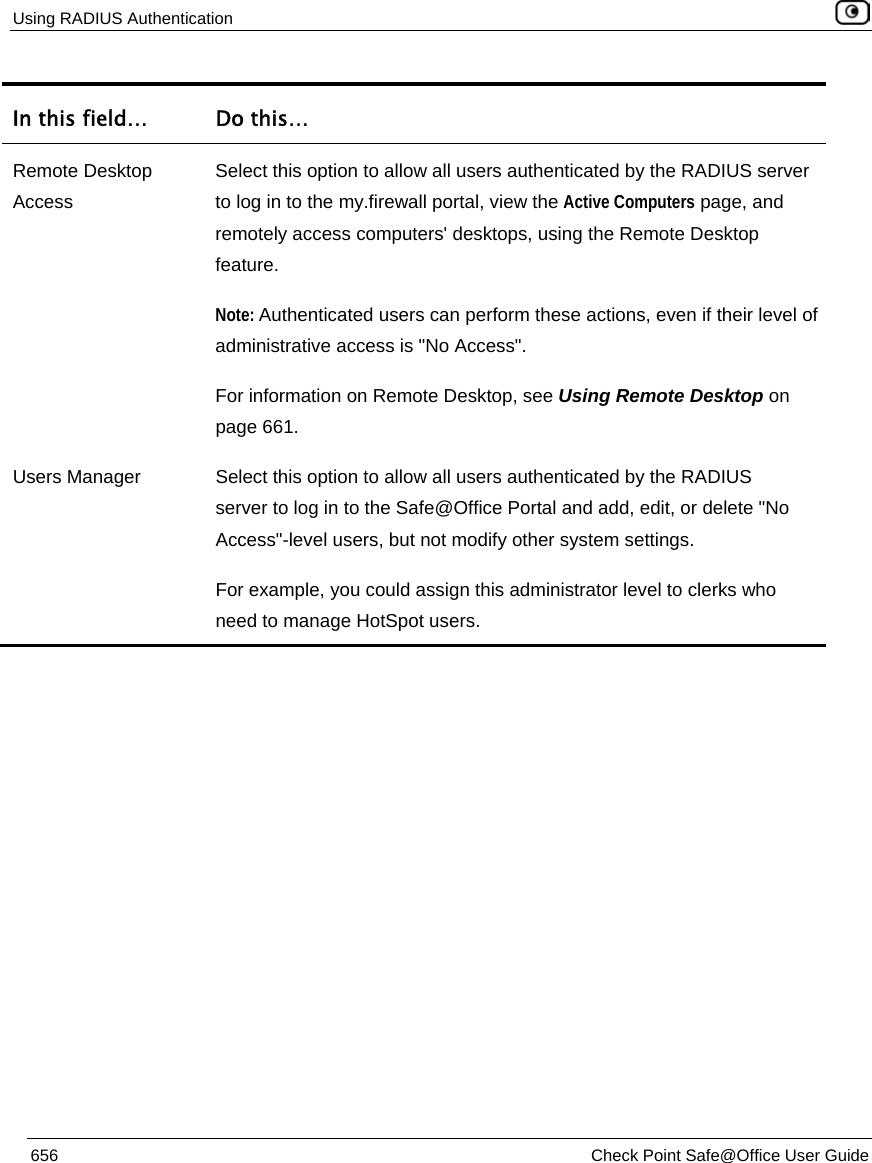
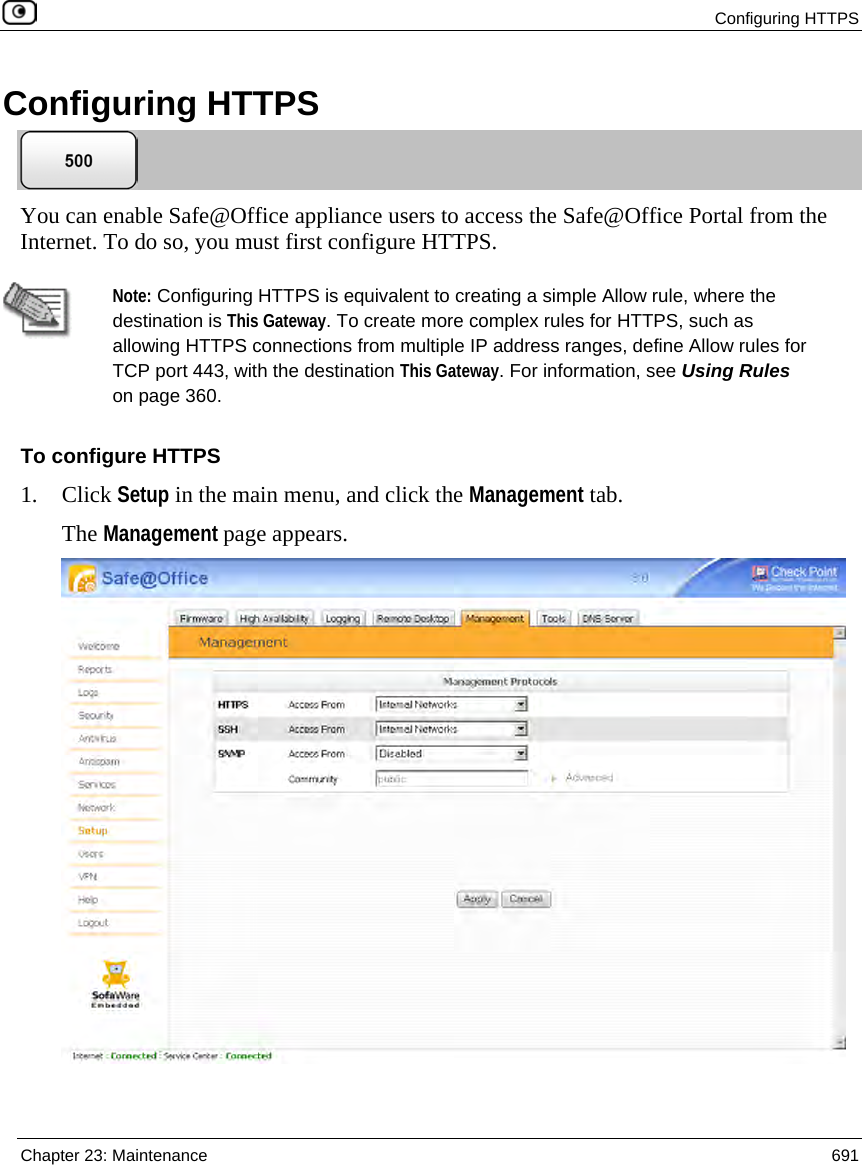
![Using VStream Antispam Chapter 15: Using Antivirus and Antispam Filtering 499 In this field… Do this… Action Specify the action VStream Antispam should take upon detecting spam, by selecting one of the following: • None. Take no action. • Reject. Block the email. The email will be permanently deleted. • Mark Subject. Mark the email's Subject line. If you select Mark Subject, the Mark Text field appears. Note: If the Content Based Antispam engine is in Monitor Only mode, this setting is ignored. For information on changing the engine's mode, see Enabling/Disabling VStream Antispam on page 492. Mark Text Type the prefix to the text appearing in the Subject field of the spam notification email. For example, if you type [SPAM] and the original email's Subject field displays "Earn Money the Easy Way", the spam notification email's Subject field will display: "[SPAM] Earn Money the Easy Way". The default value is [SPAM]. Note: If your email client allows defining rules based on the Subject field, you can create rules specifying that emails whose Subject field contains certain words should be moved to specific folders. For example, you can configure your email client to move all emails whose Subject field contains [SPAM] directly to the Deleted Items folder. Track Specify whether VStream Antispam should log spam, by selecting one of the following: • Log. VStream Antispam should log spam. • None. VStream Antispam should not log spam.](https://usermanual.wiki/SofaWare-Technologies/SBX-11GWLAN-7.manual-part-2/User-Guide-1184424-Page-112.png)
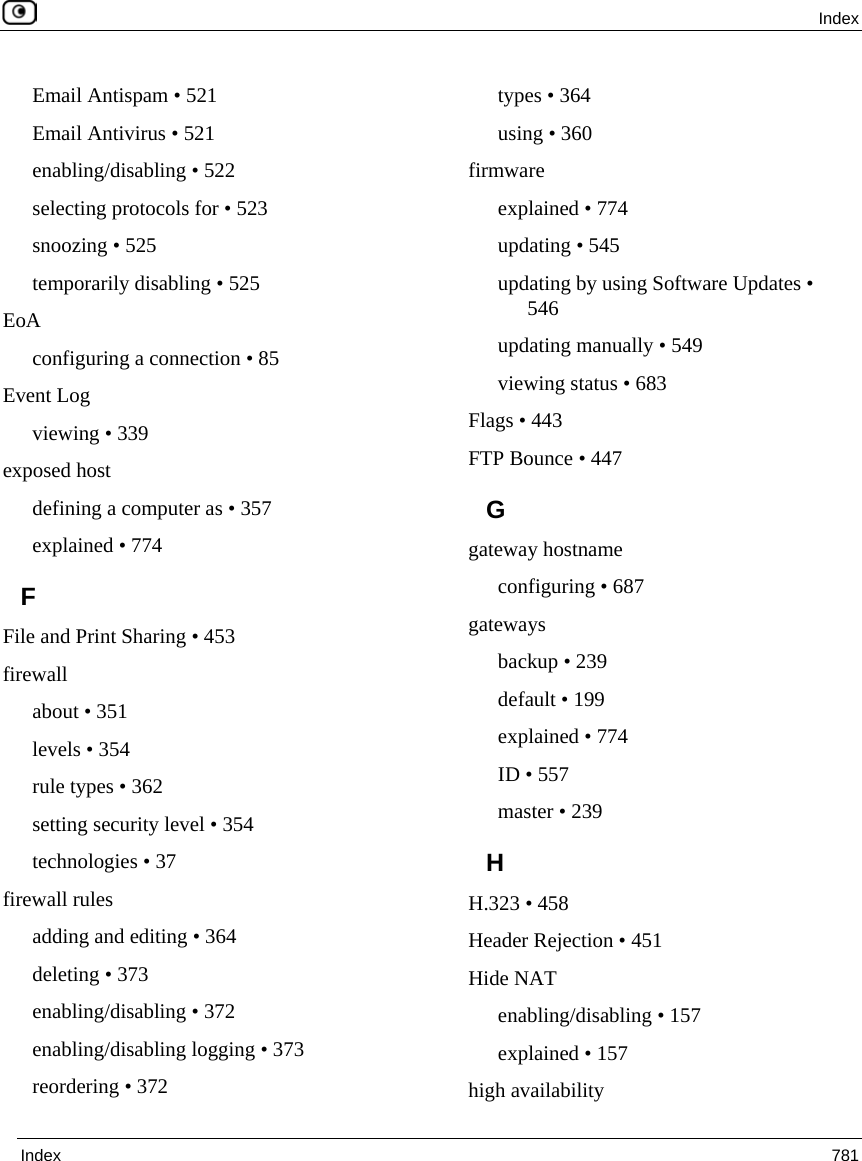
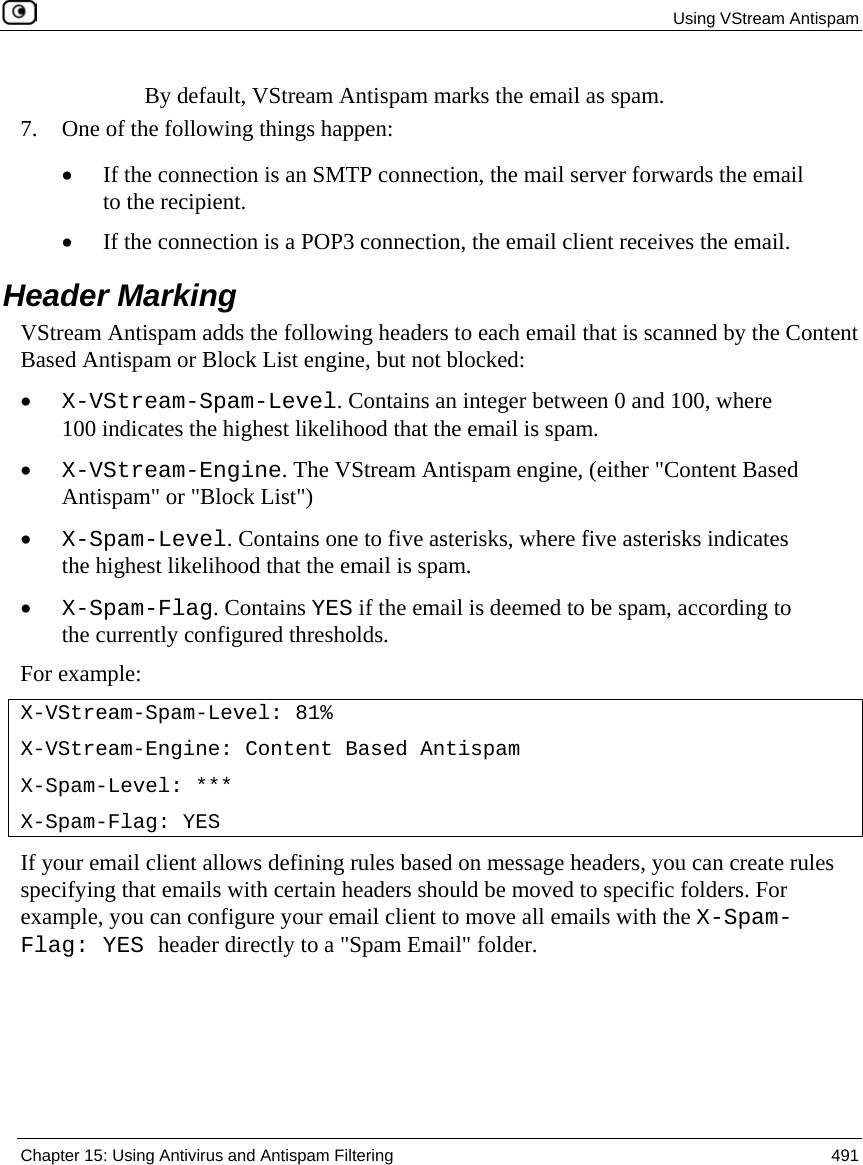
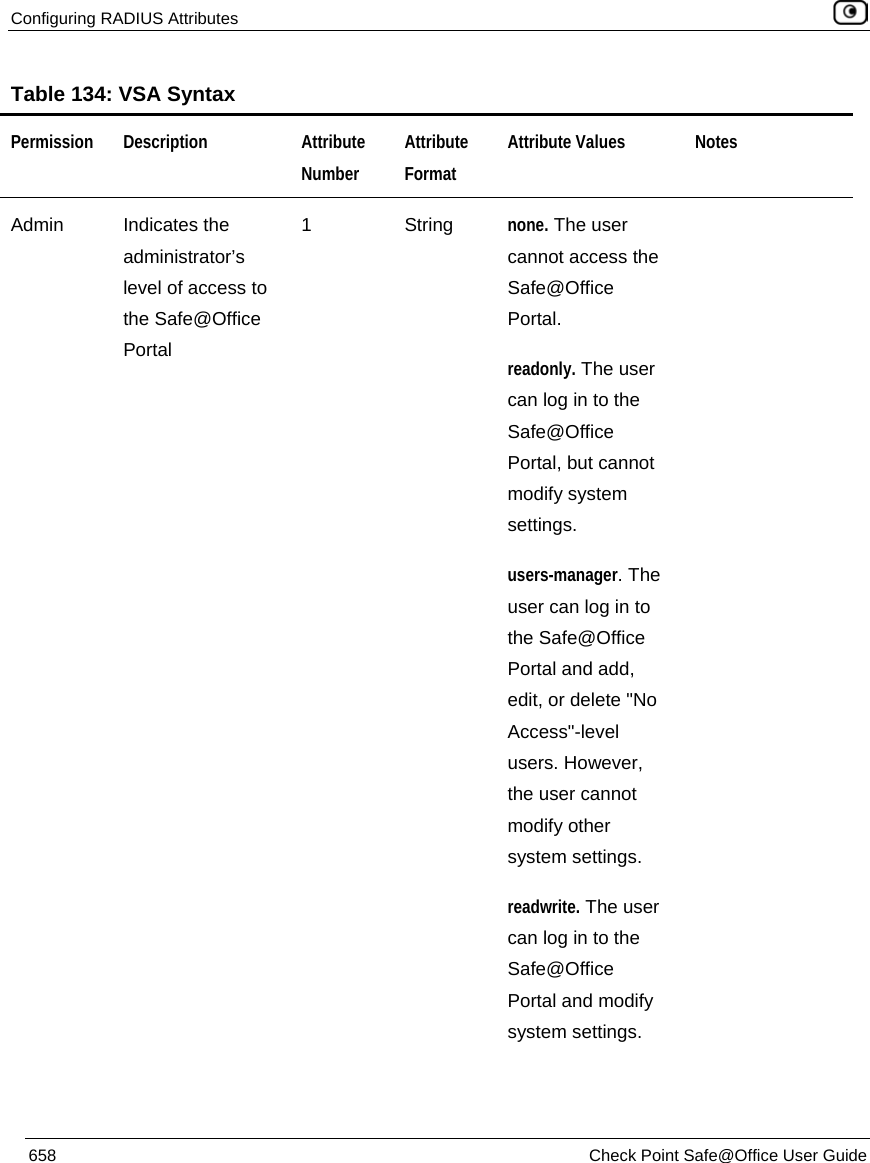
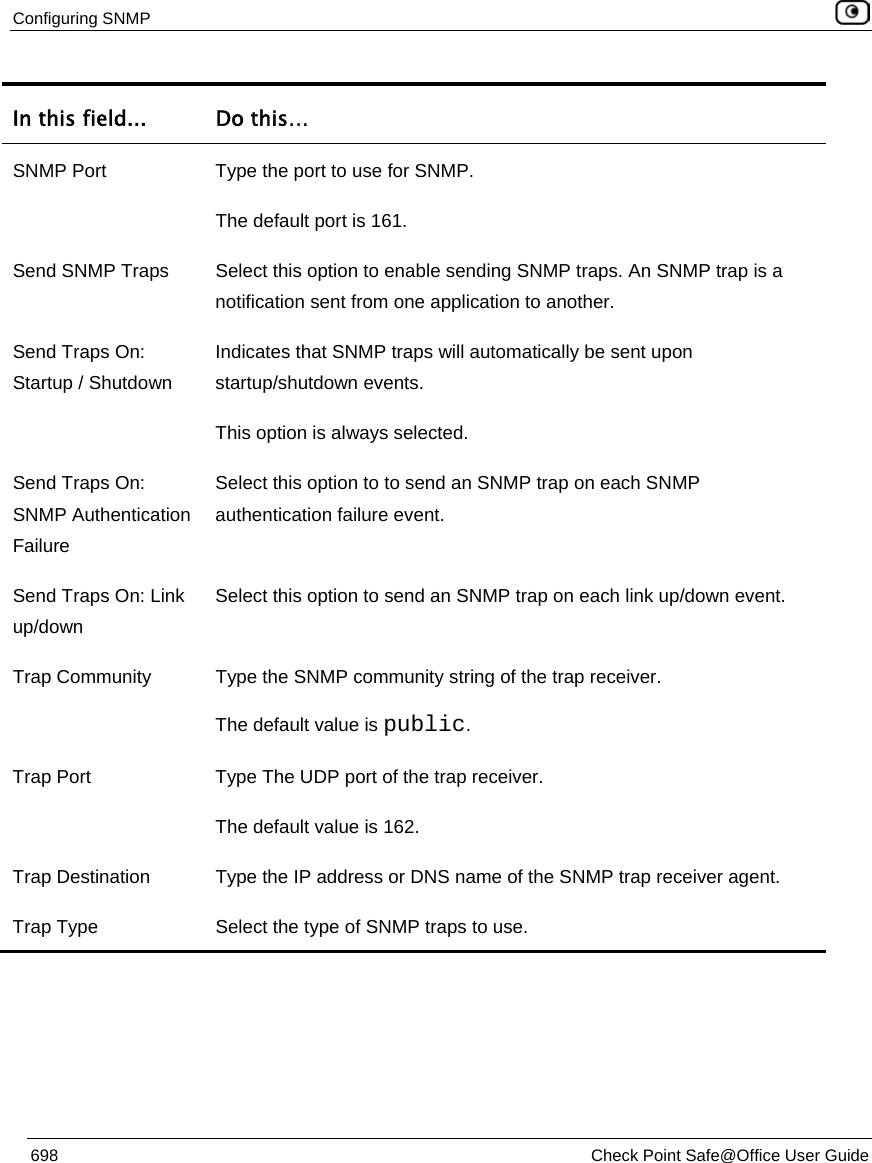
![Using VStream Antispam Chapter 15: Using Antivirus and Antispam Filtering 501 In this field… Do this… Mark Text Type the prefix to the text appearing in the Subject field of the suspected spam notification email. For example, if you type [SUSPECTED SPAM] and the original email's Subject field displays "Earn Money the Easy Way", the suspected spam notification email's Subject field will display: "[SUSPECTED SPAM] Earn Money the Easy Way". The default value is [SUSPECTED SPAM]. Note: If your email client allows defining rules based on the Subject field, you can create rules specifying that emails whose Subject field contains certain words should be moved to specific folders. For example, you can configure your email client to move all emails whose Subject field contains [SUSPECTED SPAM] directly to a Quarantine folder. Track Specify whether VStream Antispam should log suspected spam, by selecting one of the following: • Log. VStream Antispam should log suspected spam. • None. VStream Antispam should not log suspected spam. Confidence Type the minimum spam confidence level (SCL). If an email's SCL matches or exceeds this threshold, the email is considered suspected spam. Setting a higher SCL reduces the number of legitimate emails erroneously identified as suspected spam. Setting a lower SCL increases the amount of potential spam that is identified as legitimate email. The default value is 80.](https://usermanual.wiki/SofaWare-Technologies/SBX-11GWLAN-7.manual-part-2/User-Guide-1184424-Page-114.png)


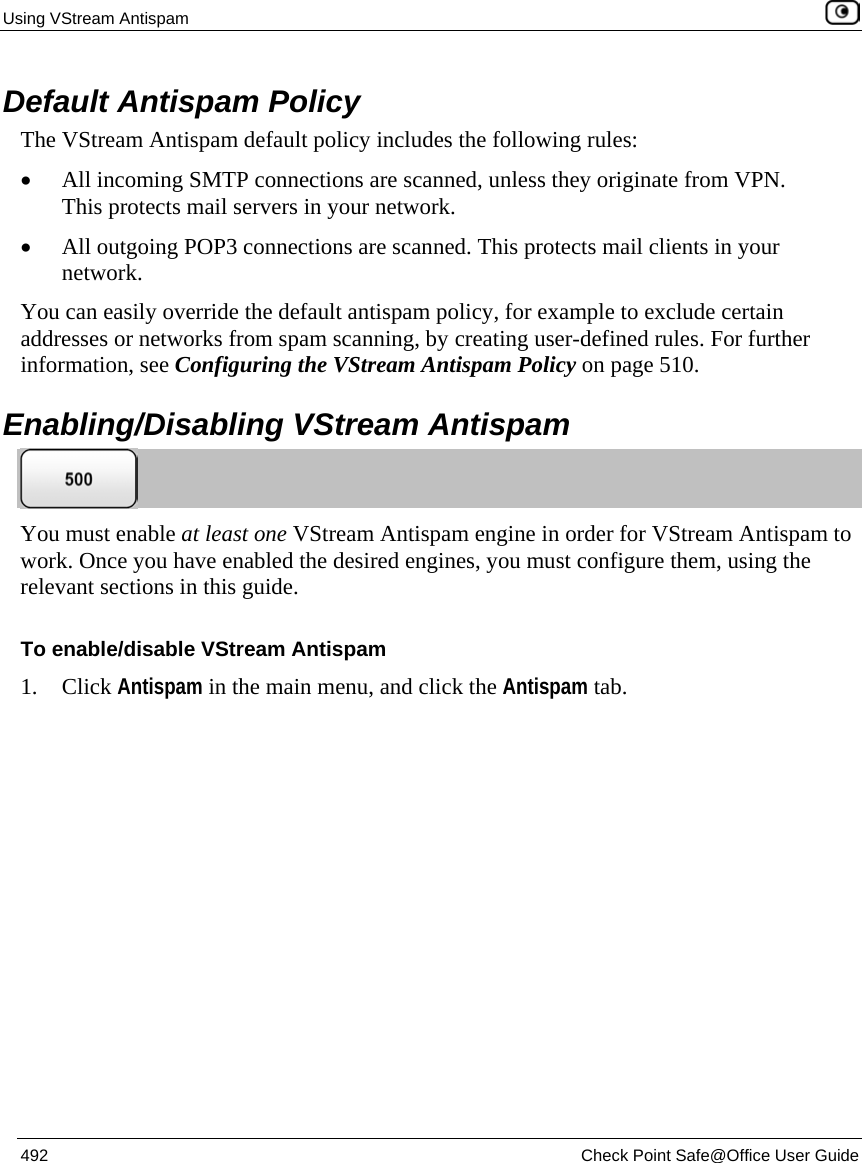
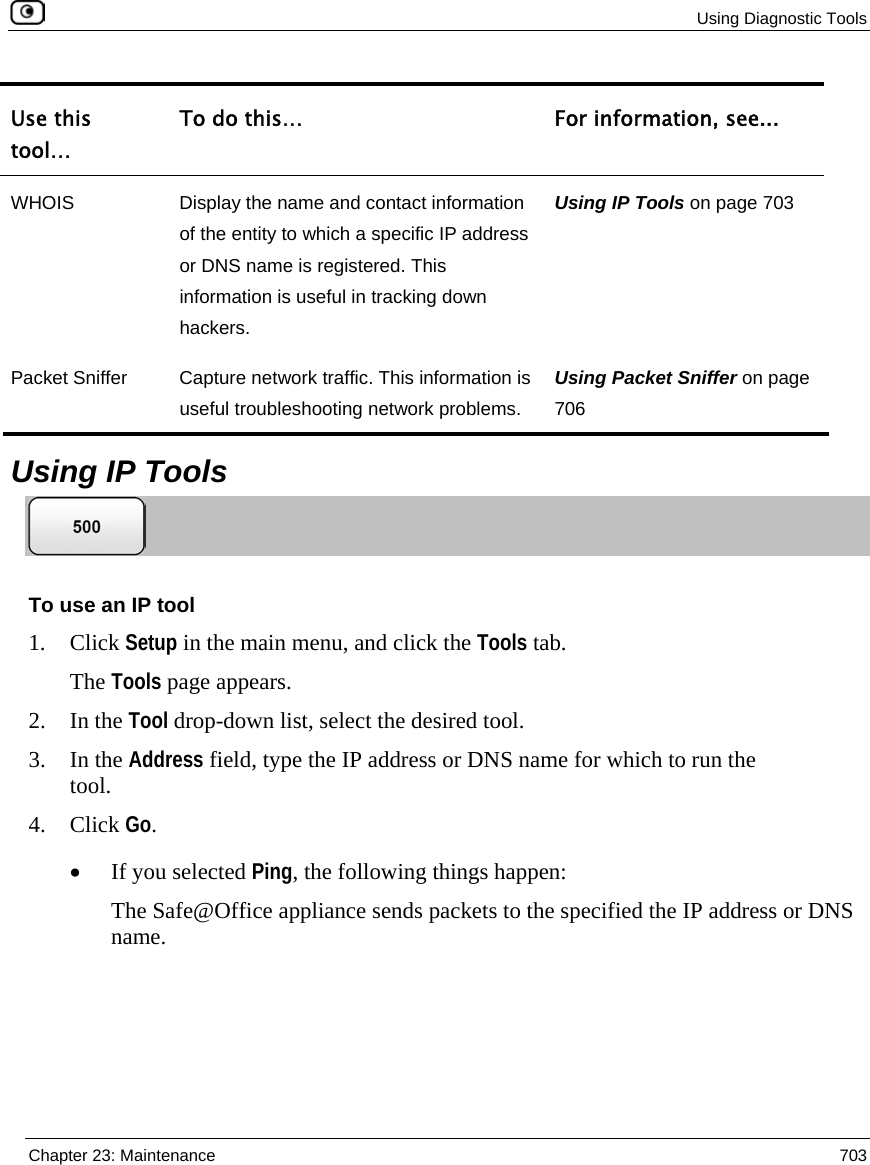
![Using VStream Antispam 506 Check Point Safe@Office User Guide Table 111: Antispam Block List Settings Fields In this field… Do this… Block Action Specify the action VStream Antispam should take upon receiving an email from a blocked sender, by selecting one of the following: • None. Take no action. • Reject. Block the email. • Mark Subject. Mark the email's Subject line. If you select Mark Subject, the Mark Text field appears. Note: If the Block List engine is in Monitor Only mode, this setting is ignored. For information on changing the engine's mode, see Enabling/Disabling VStream Antispam on page 492. Mark Text Type the prefix to the text appearing in the Subject field of the spam notification email. For example, if you type [SPAM] and the original email's Subject field displays "Earn Money the Easy Way", the spam notification email's Subject field will display: "[SPAM] Earn Money the Easy Way". The default value is [SPAM]. Note: If your email client allows defining rules based on the Subject field, you can create rules specifying that emails whose Subject field contains certain words should be moved to specific folders. For example, you can configure your email client to move all emails whose Subject field contains [SPAM] directly to the Deleted Items folder. Track Blocked Email Specify whether VStream Antispam should log emails from blocked senders, by selecting one of the following: • Log. VStream Antispam should log emails from blocked senders. • None. VStream Antispam should not log emails from blocked senders.](https://usermanual.wiki/SofaWare-Technologies/SBX-11GWLAN-7.manual-part-2/User-Guide-1184424-Page-119.png)


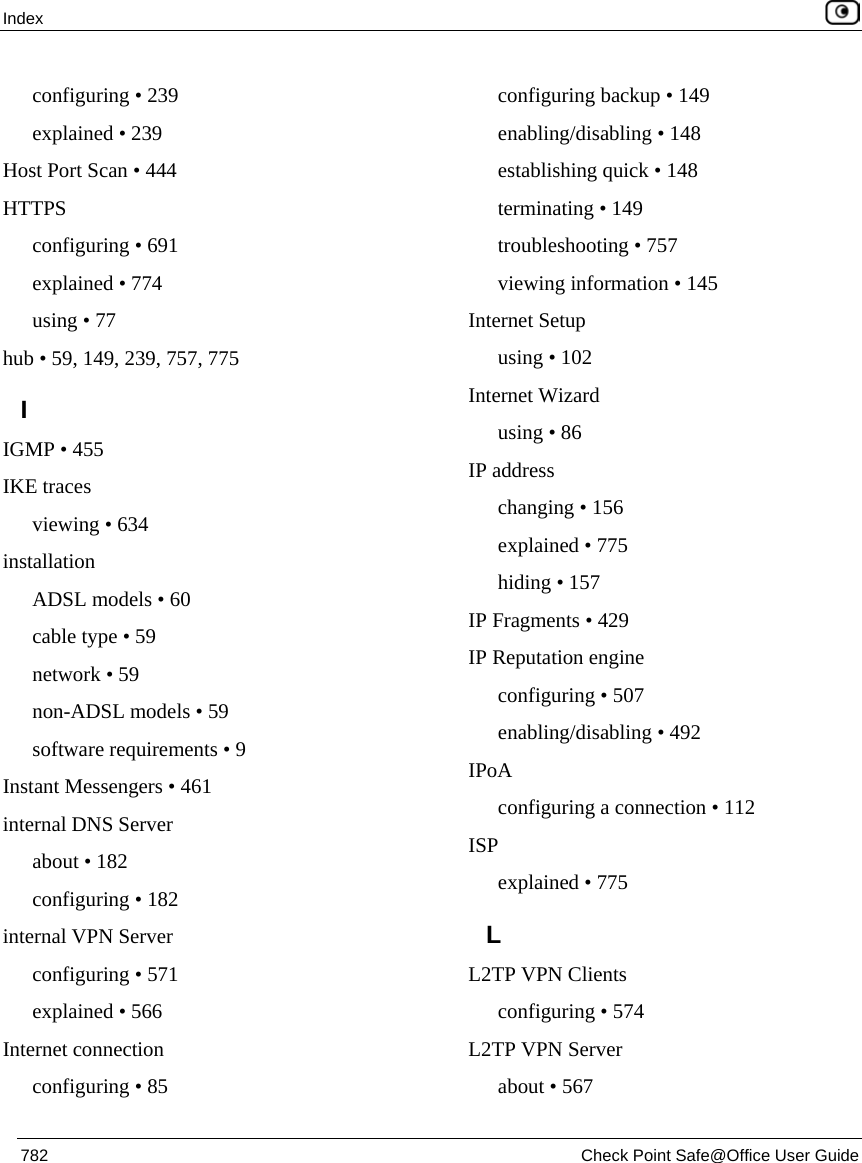
![Using Diagnostic Tools Chapter 23: Maintenance 709 Filter String Syntax The following represents a list of basic filter string elements: • and on page 709 • dst on page 710 • dst port on page 710 • ether proto on page 711 • host on page 712 • not on page 712 • or on page 713 • port on page 713 • src on page 714 • src port on page 714 • tcp on page 715 • udp on page 716 For detailed information on filter syntax, refer to http://www.tcpdump.org. and PURPOSE The and element is used to concatenate filter string elements. The filtered packets must match all concatenated filter string elements. SYNTAX element and element [and element...] element && element [&& element...] PARAMETERS element String. A filter string element.](https://usermanual.wiki/SofaWare-Technologies/SBX-11GWLAN-7.manual-part-2/User-Guide-1184424-Page-322.png)


![Using Diagnostic Tools Chapter 23: Maintenance 713 or PURPOSE The or element is used to alternate between string elements. The filtered packets must match at least one of the filter string elements. SYNTAX element or element [or element...] element || element [|| element...] PARAMETERS element String. A filter string element. EXAMPLE The following filter string saves packets that either originate from IP address 192.168.10.1 or IP address 192.168.10.10: src 192.168.10.1 or src 192.168.10.10 port PURPOSE The port element captures all packets originating from or destined for a specific port. SYNTAX port port Note: This element can be prepended by tcp or udp. For information, see tcp on page 715 and udp on page 716. PARAMETERS port Integer. The port from/to which the packet is sent.](https://usermanual.wiki/SofaWare-Technologies/SBX-11GWLAN-7.manual-part-2/User-Guide-1184424-Page-326.png)