SofaWare Technologies SBX-11GWLAN-7 Safe@office/VPN-1 Edge User Manual Check Point Safe Office User Guide
SofaWare Technologies Ltd. Safe@office/VPN-1 Edge Check Point Safe Office User Guide
Contents
- 1. manual part 1
- 2. manual part 2
manual part 2

Using NAT Rules
388 Check Point Safe@Office User Guide
• Static NAT is configured for a network object (for information, see Using
Network Objects on page 185)
• NAT rules are received from the Service Center
Implicitly defined NAT rules can only be edited or deleted indirectly. For example, in
order to remove a NAT rule created when a certain network object was defined, you must
modify the relevant network object.
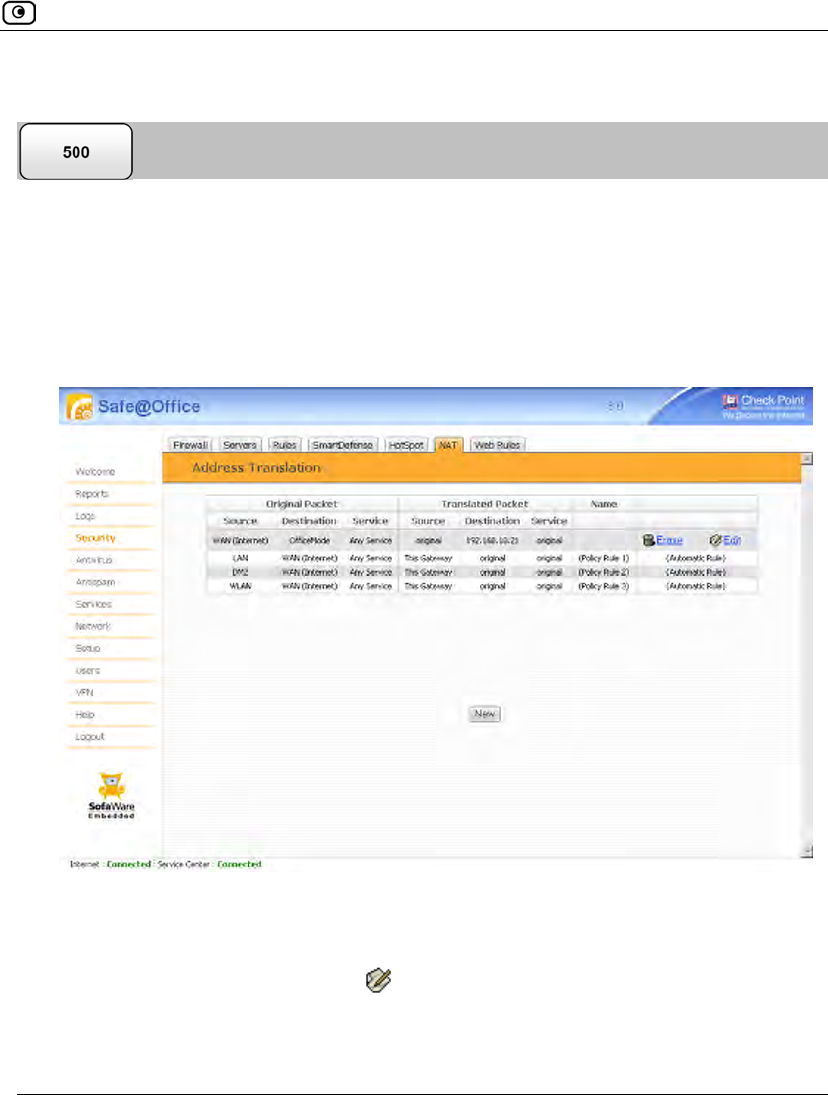
The Address Translation page displays both custom NAT rules and implicitly defined NAT
rules, and it allows you to create, edit, and delete custom NAT rules.
How Does Hide NAT Work?
In Hide NAT, traffic to and from the internal networks traverses an enforcement module.
When a packet from an internal network passes through the gateway, the source IP address
is changed to the hiding IP address, and the source port is changed to a dynamically
assigned port that uniquely identifies the connection. The relationship between the
dynamically assigned port and the internal IP address is recorded in the gateway’s state
tables. When reply packets arrive, the enforcement module uses the destination port to
determine to which connection the packet belongs, and then adjusts the destination port
and IP address accordingly.
Using NAT Rules
Chapter 13: Setting Your Security Policy 389
Adding and Editing NAT Rules
This procedure explains how to add and edit custom NAT rules. You cannot add or edit an
implicitly defined NAT rule directly.
To add or edit a custom NAT rule
1. Click Security in the main menu, and click the NAT tab.
The Address Translation page appears.
2. Do one of the following:
• To add a new rule, click New.
• To edit an existing rule, click next to the desired rule.
Using NAT Rules
390 Check Point Safe@Office User Guide
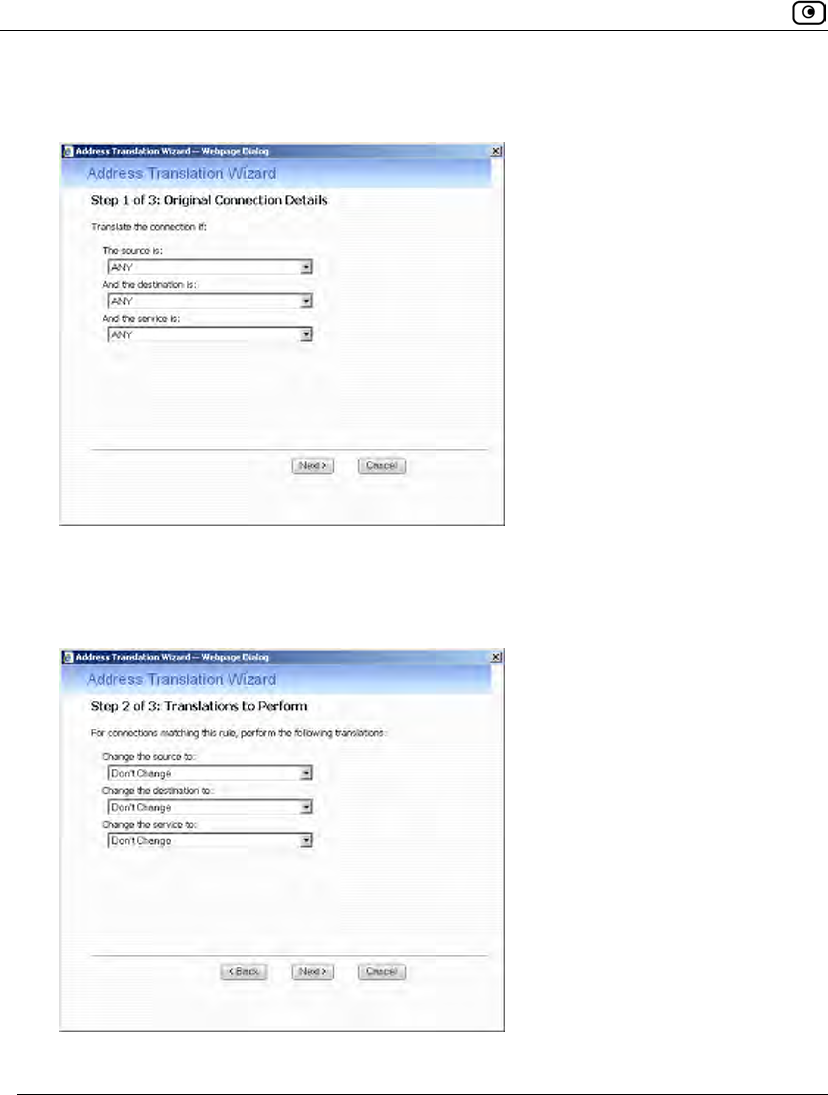
The Address Translation wizard opens, with the Step 1 of 3: Original Connection Details
dialog box displayed.
3. Complete the fields using the relevant information in the following table.
4. Click Next.
The Step 2 of 3: Translations to Perform dialog box appears.
5. Complete the fields using the relevant information in the following table.
Using NAT Rules
Chapter 13: Setting Your Security Policy 391
6. Click Next.
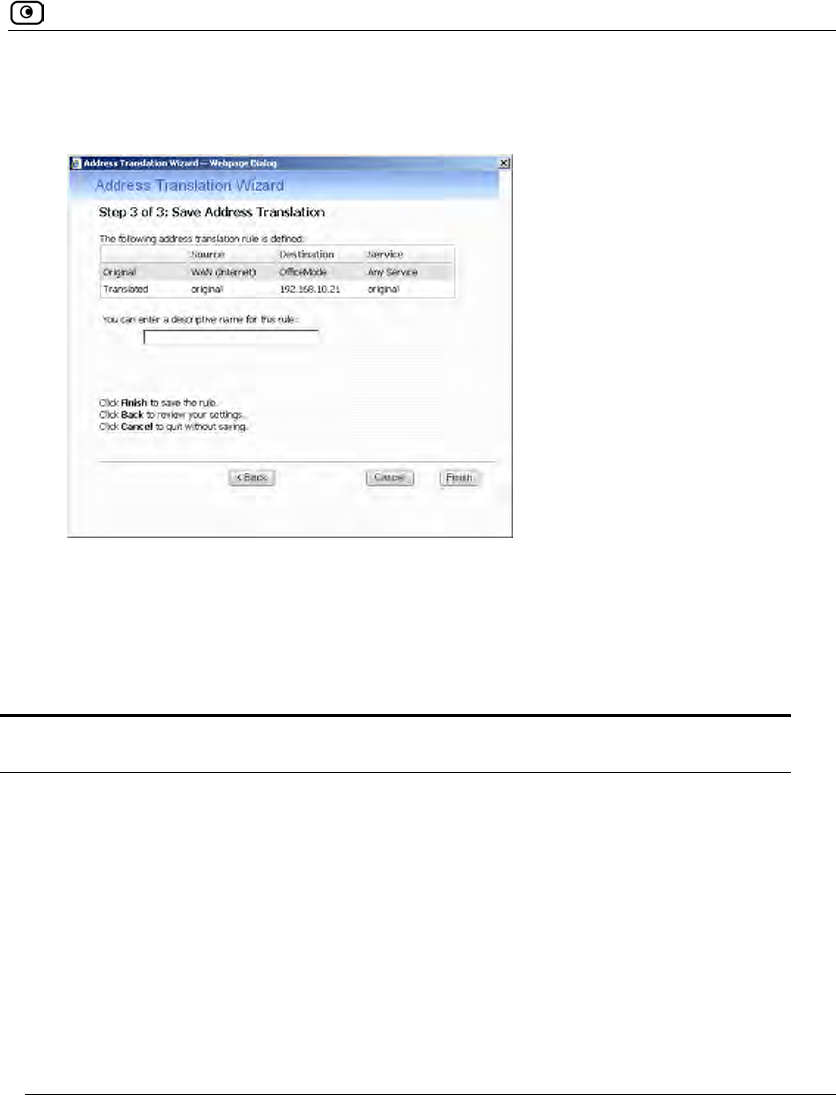
The Step 3 of 3: Save Address Translation dialog box appears.
7. If desired, type a description of the rule in the field provided.
8. Click Finish.
The new rule appears in the Address Translation page.
Table 67: Address Translation Wizard Fields
Field Description
The source is Select the original source of the connections you want to translate. This
list includes network objects.
To specify an IP address, select Specified IP and type the desired IP
address in the field provided.
To specify an IP address range, select Specified Range and type the desired
IP address range in the fields provided.

Using NAT Rules
392 Check Point Safe@Office User Guide
Field Description
And the
destination is
Select the original destination of the connections you want to translate.
This list includes network objects.
To specify an IP address, select Specified IP and type the desired IP
address in the text box.
To specify an IP address range, select Specified Range and type the
desired IP address range in the fields provided.
To specify the Safe@Office IP addresses, select This Gateway.
To specify any destination except the Safe@Office Portal IP addresses,
select ANY.
And the service is Select the original service used for the connections you want to translate.
This list includes network service objects.
Change the
source to
Select the new source to which the original source should be translated.
This list includes network objects.
To specify an IP address, select Specified IP and type the desired IP
address in the field provided.
To specify an IP address range, select Specified Range and type the desired
IP address range in the fields provided.
To specify that the original source should not be translated, select Don't
Change.
Using NAT Rules
Chapter 13: Setting Your Security Policy 393
Field Description
Change the
destination to
Select the new destination to which the original destination should be
translated. This list includes network objects.
To specify an IP address, select Specified IP and type the desired IP
address in the field provided.
To specify an IP address range, select Specified Range and type the desired
IP address range in the fields provided.
To specify that the original destination should not be translated, select
Don't Change.
Change the
service to
Select the new service to which the original service should be translated.
This list includes network service objects.
To specify that the original service should not be translated, select Don't
Change.
Viewing and Deleting NAT Rules
This procedure explains how to view all NAT rules and how to delete custom NAT rules.
You cannot delete implicitly defined NAT rules directly.
To view and delete NAT rules
1. Click Security in the main menu, and click the NAT tab.
The Address Translation page appears with a list of all existing NAT rules.
Implicitly defined NAT rules are marked Automatic Rule in the right-most column.
2. To delete a custom NAT rule, do the following.
a. In the desired rule's row, click .

Using the EAP Authenticator
394 Check Point Safe@Office User Guide
A confirmation message appears.
b. Click OK.
The rule is deleted.
Using the EAP Authenticator
Wi-Fi Protected Access Enterprise (WPA-Enterprise) and 802.1x are Network Access
Control (NAC) protocols that can be used to authenticate users connecting to the Check
Point Safe@Office appliance. Both WPA-Enterprise and 802.1x can be used to control
access to the wireless network; however, WPA-Enterprise has the added capability of
encrypting transmitted data, and 802.1x can be used to secure connections to the
Safe@Office appliance's LAN and DMZ ports as well.
Traditionally, WPA-Enterprise and 802.1x require installing an external Remote
Authentication Dial-In User Service (RADIUS) server. When a user tries to authenticate
using 802.1x or WPA-Enterprise, the Safe@Office appliance sends the entered user
credentials to the RADIUS server. The server then checks whether the RADIUS database
contains a matching set of credentials. If so, then the user is logged in.
While purchasing and configuring a RADIUS server may pose little challenge for a large
enterprise, such a solution may be costly and complex, and may therefore be unsuitable for
smaller networks. In such cases, it is recommended to configure the Safe@Office
appliance's built-in Extended Authentication Protocol (EAP) authenticator, which allows
using the local user database, enabling the use of WPA-Enterprise or 802.1x without an
external RADIUS server.
Using the EAP Authenticator
Chapter 13: Setting Your Security Policy 395
Workflows
The Safe@Office built-in EAP authenticator can be used to authenticate wireless clients or
wired clients connecting to appliance ports.
Using the EAP Authenticator for Authentication of Wireless Clients
To use the EAP authenticator for authentication of wireless clients
1. Configure the Safe@Office appliance as follows:
a. Configure the desired wireless network for use with the EAP
authenticator.
For information on configuring the primary WLAN, see Manually Configuring a
Wireless Network on page 280. For information on configuring a VAP, see
Configuring Virtual Access Points on page 294.
Note: The Security field must set to 802.1x or WPA-Enterprise, and the Authentication
Server field must be set to Internal User Database.
b. Ensure that the Safe@Office appliance has a certificate installed in the
Safe@Office Portal's VPN > Certificate page.
The certificate can be any of the following:
A self-signed certificate generated by the Safe@Office appliance, version
8.0 or later.
If a self-signed certificate is installed on the appliance, but was generated by
an earlier firmware version, you must generate a new certificate. For
instructions on generating a self-signed certificate, see Generating a
Certificate on page 621.
A certificate received from the Service Center.
c. Export the Safe@Office appliance's CA certificate.
See Exporting the Safe@Office Appliance CA Certificate on page 630.
Using the EAP Authenticator
396 Check Point Safe@Office User Guide
d. For each client that should be allowed to connect to the Safe@Office
appliance, add a user with Network Access permissions to the local user
database.
See Adding and Editing Users on page 643.
e. Provide each of the users with the authentication credentials you
configured for them.
2. Configure each wireless client as follows:
a. Configure the client for server authentication.
See Configuring Clients for Server Authentication on Wireless Connections on
page 398.
b. Install the Safe@Office appliance's CA certificate as a trusted root CA.
See Installing the Safe@Office Appliance's CA Certificate on Clients on page
403.
3. Connect the wireless client to the wireless network.
See Connecting Clients to the Safe@Office Appliance on page 408.
Using the EAP Authenticator for Authentication of Wired Clients
To use the EAP authenticator for authentication of wired clients
1. Configure the Safe@Office appliance as follows:
a. Configure the desired port for port-based security using the Safe@Office
EAP authenticator.
See Configuring Port-Based Security on page 375.
Note: The Port Security field must set to 802.1x, and the Authentication Server field must
be set to Internal User Database.
b. Ensure that the Safe@Office appliance has a certificate installed in the
Safe@Office Portal's VPN > Certificate page.

Using the EAP Authenticator
Chapter 13: Setting Your Security Policy 397
The certificate can be any of the following:
A self-signed certificate generated by the Safe@Office appliance, version
8.0 or later.
If a self-signed certificate is installed on the appliance, but was generated by
an earlier firmware version, you must generate a new certificate. For
instructions on generating a self-signed certificate, see Generating a
Certificate on page 621.
A certificate received from the Service Center.
c. Export the Safe@Office appliance's CA certificate.
See Exporting the Safe@Office Appliance CA Certificate on page 630.
d. For each client that should be allowed to connect to the Safe@Office
appliance, add a user with Network Access permissions to the local user
database.
See Adding and Editing Users on page 643.
e. Provide each of the users with the authentication credentials you
configured for them.
2. Configure each wireless client as follows:
a. Configure the client for server authentication.
See Configuring Clients for Server Authentication on Wired Connections on
page 401.
b. Install the Safe@Office appliance's CA certificate as a trusted root CA.
See Installing the Safe@Office Appliance's CA Certificate on Clients on page
403.
3. Connect the client directly to the port, and enter the Network Access user's
authentication credentials when prompted.
Using the EAP Authenticator
398 Check Point Safe@Office User Guide
Configuring Clients for Server Authentication on
Wireless Connections
To configure a Microsoft Windows client for server authentication
1. In the START menu, click Control Panel.
2. Click Network Connections.
3. Double-click on the wireless network connection.
4. Do one of the following:
• If the Choose a Wireless Network screen appears, click Change Advanced
Settings.
• If you are already connected to a wireless network, click Properties.
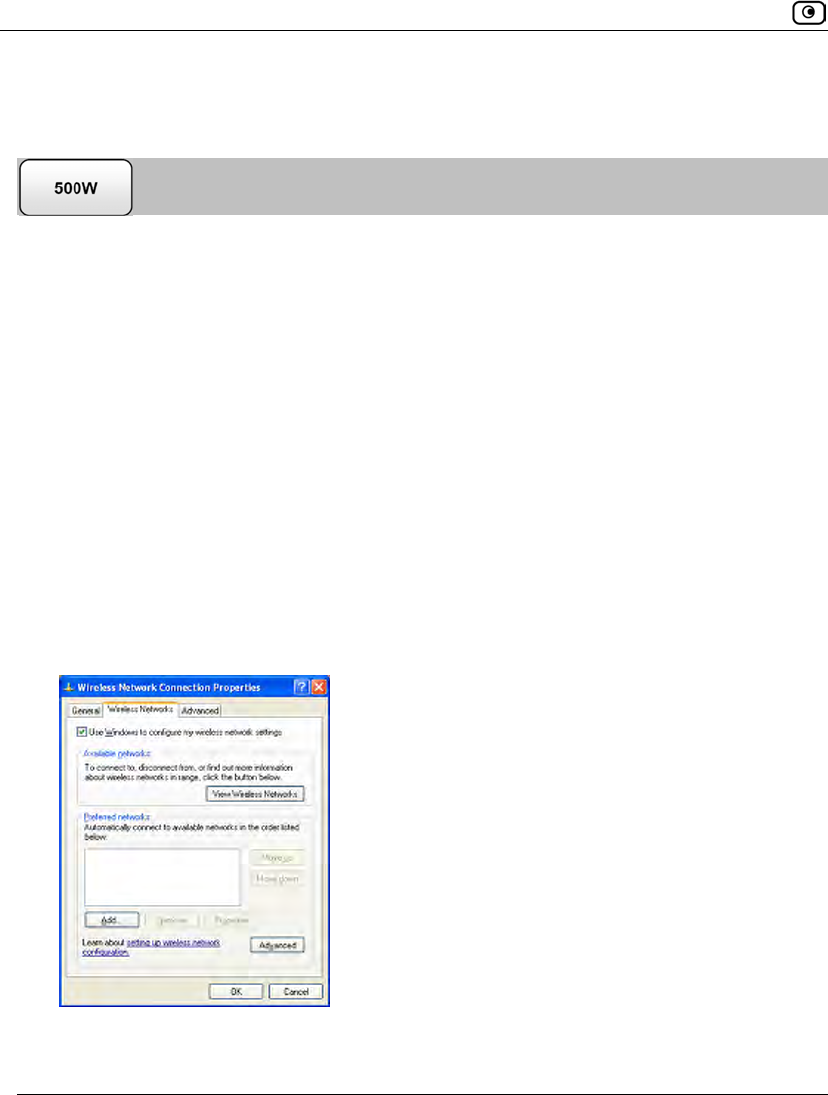
The Wireless Network Connection Properties dialog box appears displaying the General
tab.
5. Click the Wireless Networks tab.
The Wireless Networks tab appears.
6. Click Add and add your network.
Using the EAP Authenticator
Chapter 13: Setting Your Security Policy 399
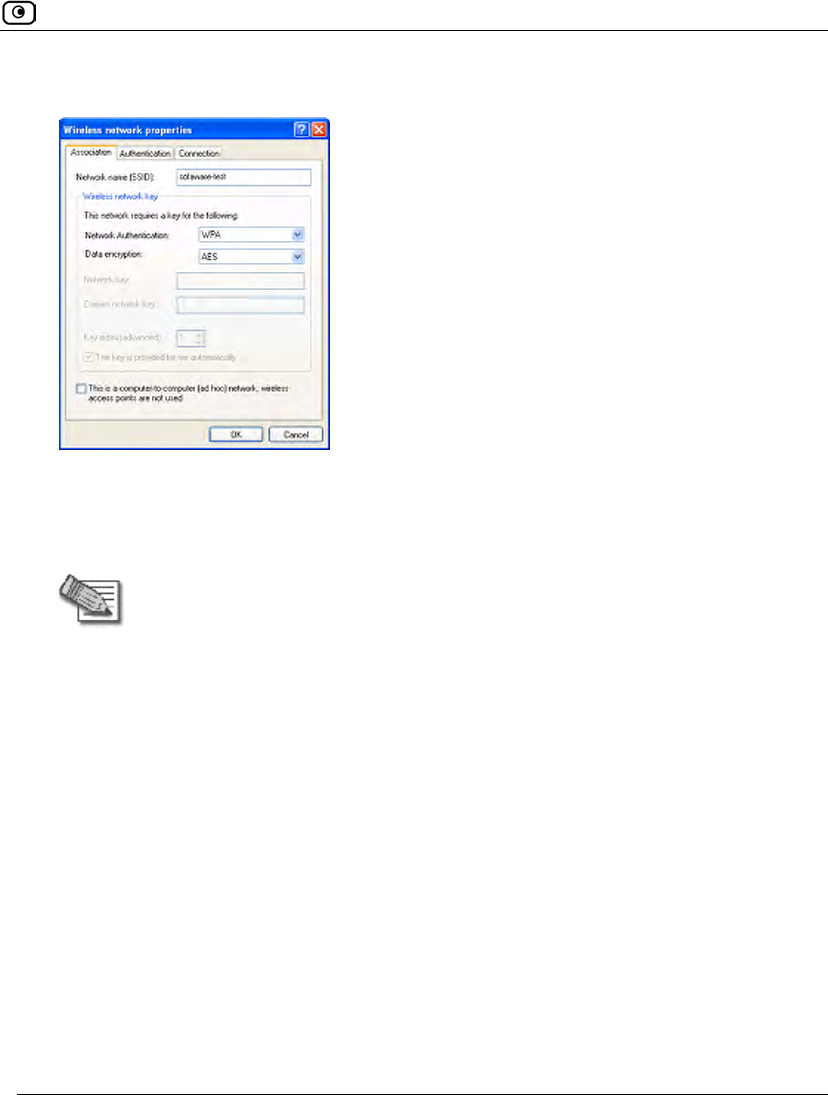
The Wireless network properties dialog box appears displaying the Association tab.
7. In the Network name (SSID) field, type the Safe@Office appliance wireless
network name.
8. In the Network Authentication drop-down list, select WPA.
Note: You must select WPA, regardless of whether the Safe@Office appliance is
configured to use the WPA-Enterprise or 802.1x security protocol.
9. In the Data encryption drop-down list, select AES.
10. Click the Authentication tab.
Using the EAP Authenticator
400 Check Point Safe@Office User Guide
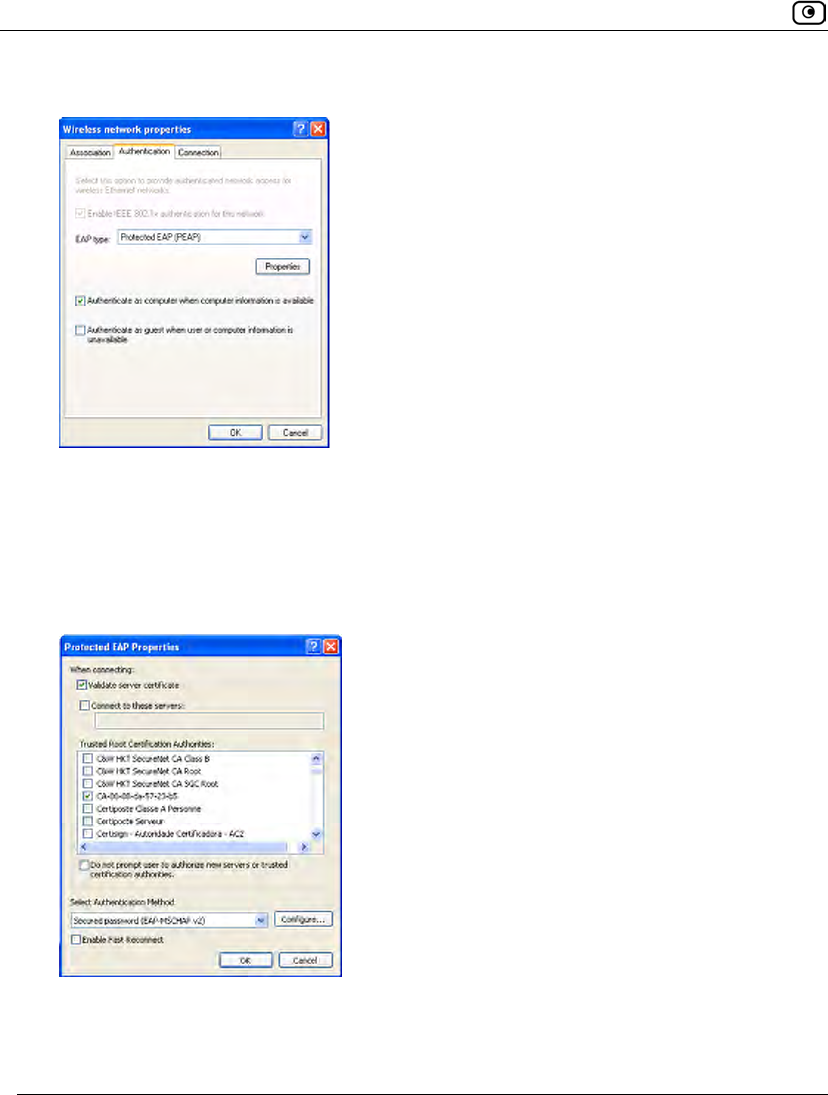
The Authentication tab appears.
11. In the EAP type drop-down list, select Protected EAP (PEAP).
12. Select the Authenticate as computer when computer information is available
check box.
13. Click Properties.
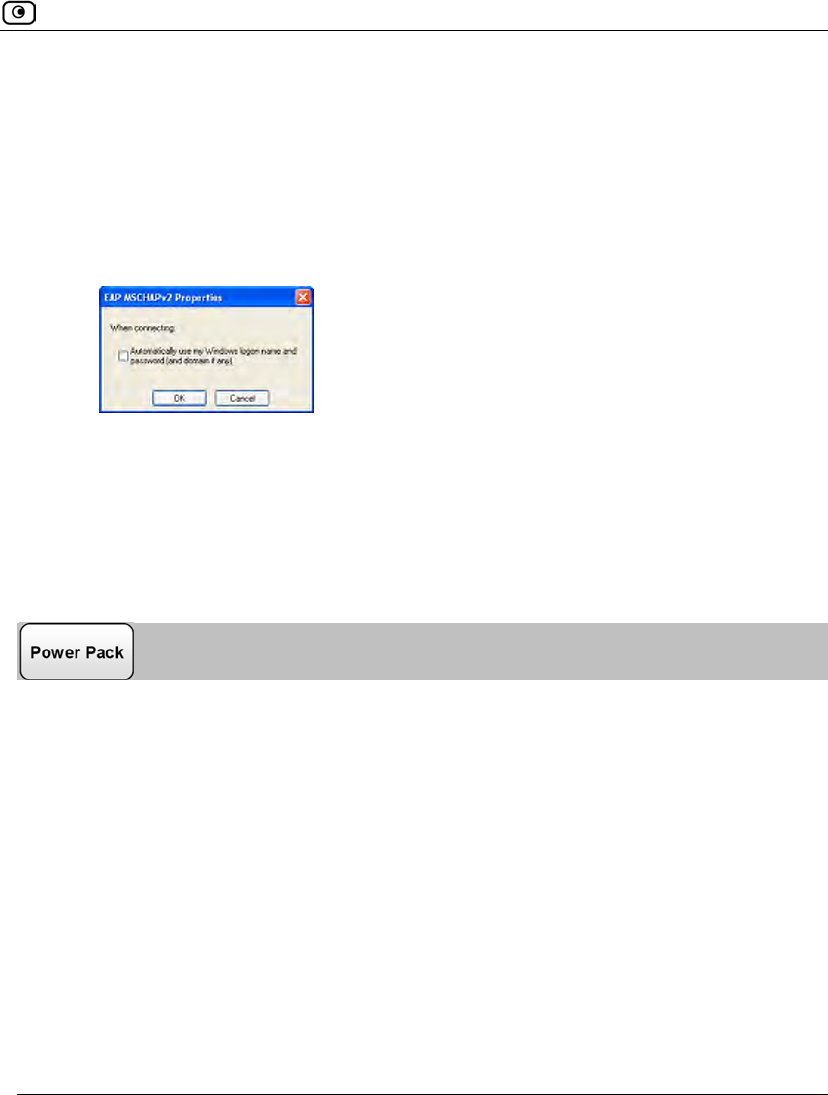
The Protected EAP Properties dialog box appears.
14. Make sure that the Validate server certificate check box is selected.
Using the EAP Authenticator
Chapter 13: Setting Your Security Policy 401
15. In the Select Authentication Method drop-down list, select Secured password
(EAP-MSCHAP v2).
16. If the user credentials for connecting to the Safe@Office appliance differ from
the user credentials for connecting to Windows, do the following:
a. Click Configure.
The EAP MSCHAPv2 Properties dialog box appears.
b. Clear the check box.
c. Click OK.
17. Click OK in all open windows.
Configuring Clients for Server Authentication on Wired
Connections
To configure a Microsoft Windows client for server authentication
1. In the START menu, click Control Panel.
2. Click Network Connections.
3. Right-click on Local Area Connection, and click Properties in the popup menu
that appears.
The Local Area Connection Properties dialog box appears displaying the General tab.
4. Click the Authentication tab.
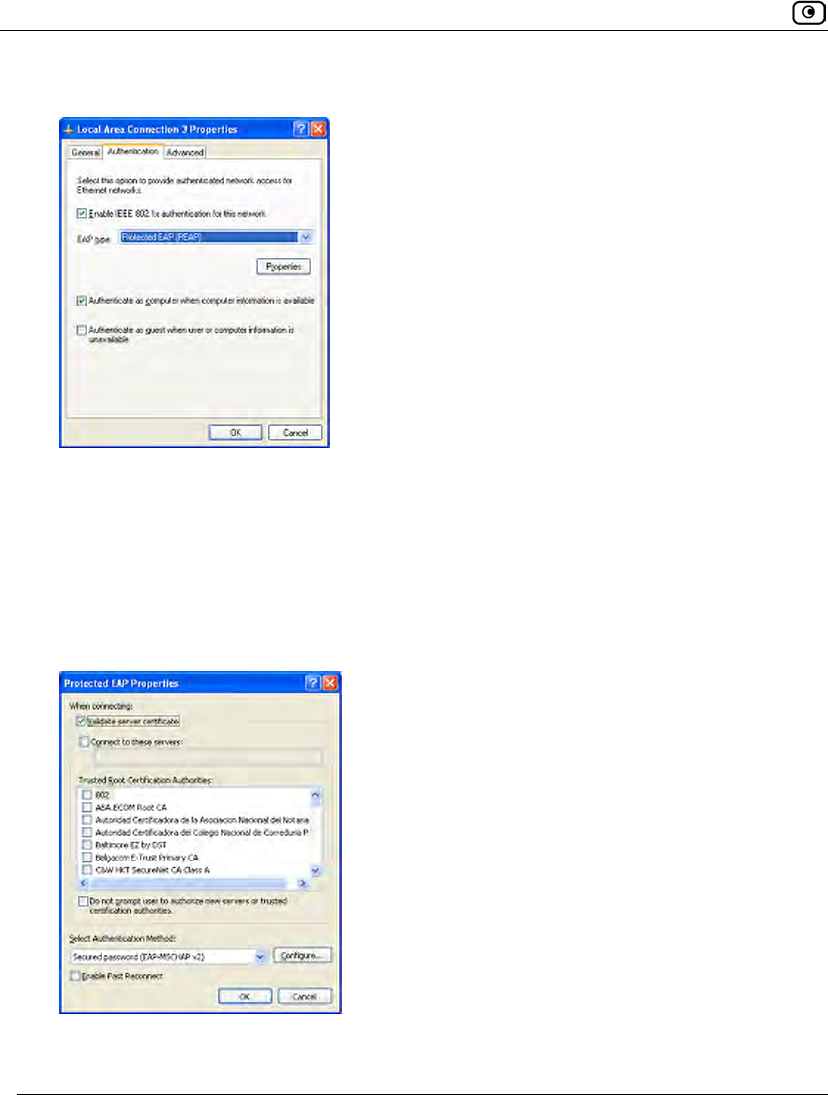
Using the EAP Authenticator
402 Check Point Safe@Office User Guide
The Authentication tab appears.
5. Select the Enable IEEE 802.1x authentication for this network check box.
6. In the EAP type drop-down list, select Protected EAP (PEAP).
7. Select the Authenticate as computer when computer information is available
check box.
8. Click Properties.
The Protected EAP Properties dialog box appears.
9. Make sure that the Validate server certificate check box is selected.
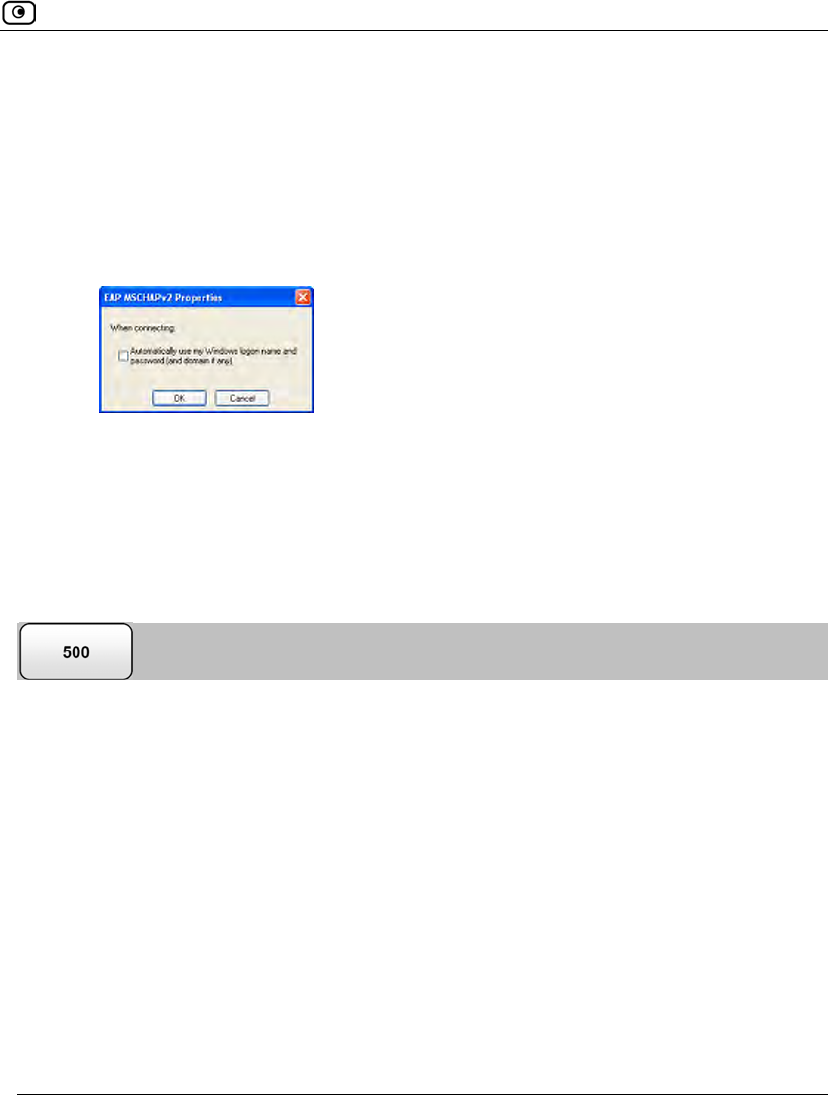
Using the EAP Authenticator
Chapter 13: Setting Your Security Policy 403
10. In the Select Authentication Method drop-down list, select Secured password
(EAP-MSCHAP v2).
11. If the user credentials for connecting to the Safe@Office appliance differ from
the user credentials for connecting to Windows, do the following:
a. Click Configure.
The EAP MSCHAPv2 Properties dialog box appears.
b. Clear the check box.
c. Click OK.
12. Click OK in all open windows.
Installing the Safe@Office Appliance's CA Certificate on
Clients
To install the Safe@Office appliance's CA certificate on a Microsoft Windows client
1. On the client, right-click on the Safe@Office appliance's CA certificate you
exported, and click Install PFX in the pop-up menu that appears.
For information on exporting the CA certificate, see Exporting the Safe@Office
Appliance CA Certificate on page 630.
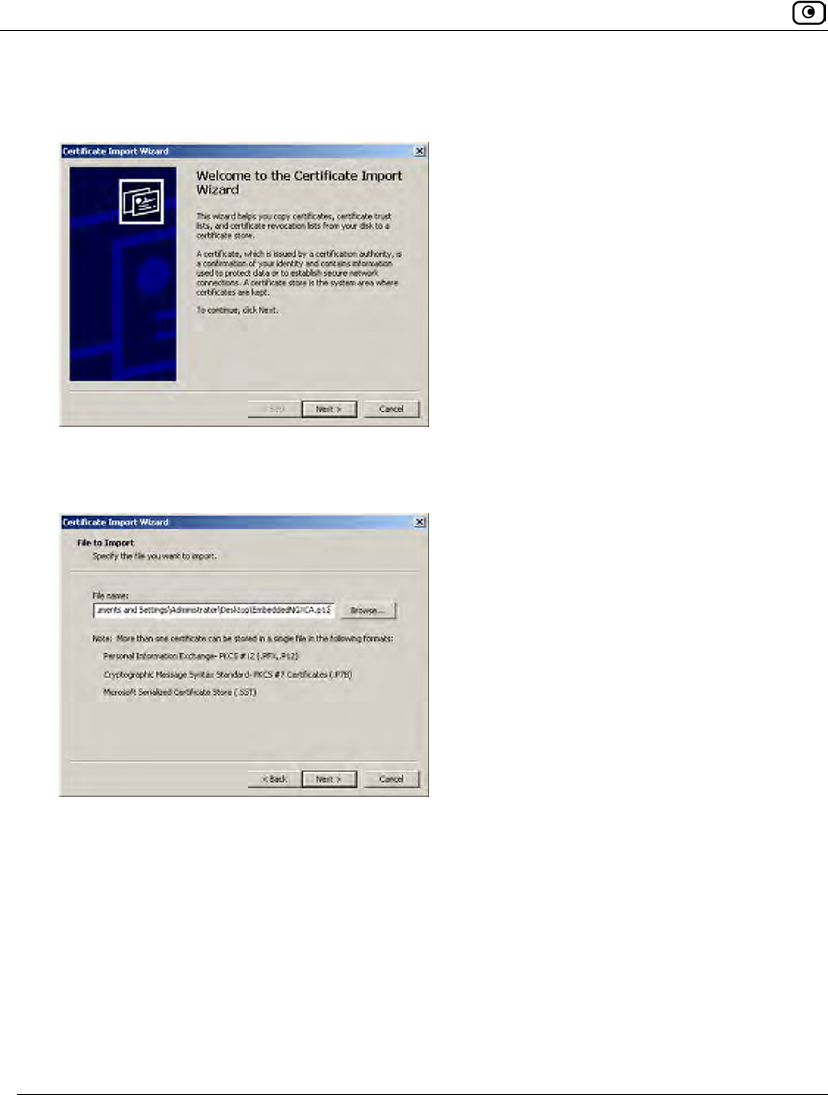
Using the EAP Authenticator
404 Check Point Safe@Office User Guide
The Certificate Import Wizard opens displaying the Welcome to Certificate Import Wizard
screen.
2. Click Next.
The File to Import dialog box appears.
3. Browse to the Safe@Office appliance's CA certificate (*.p12 file).
4. Click Next.
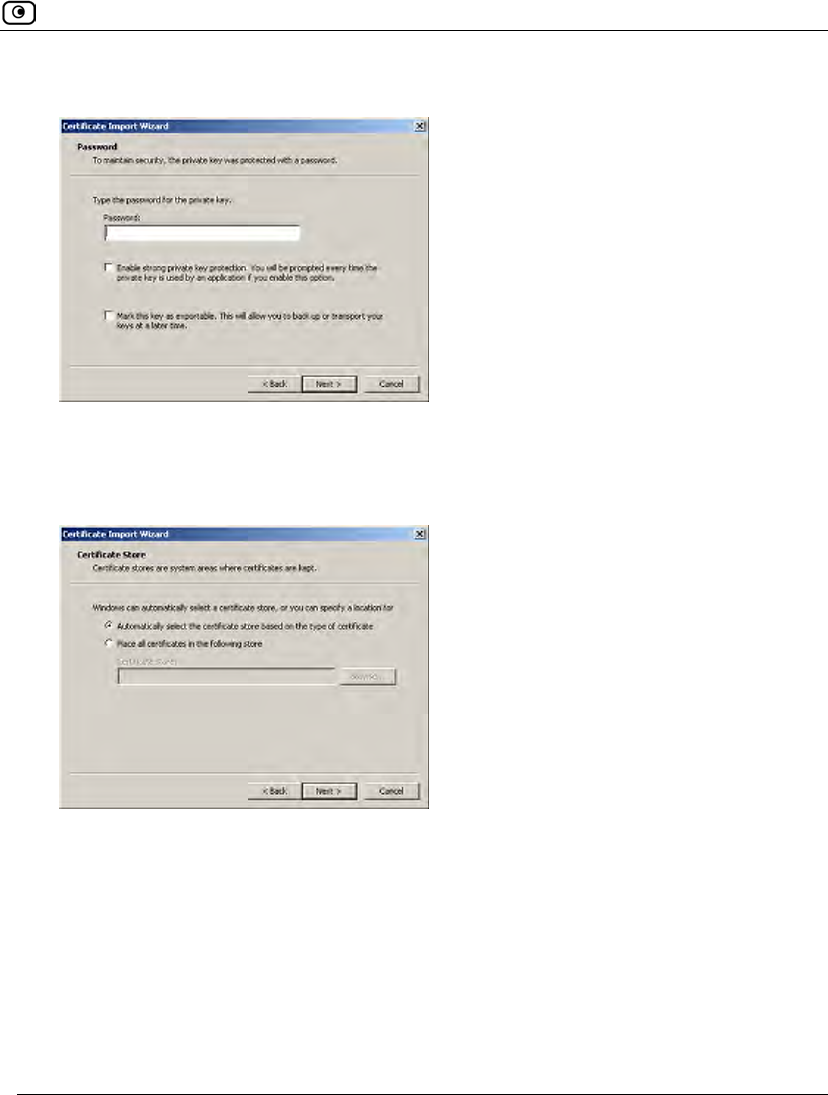
Using the EAP Authenticator
Chapter 13: Setting Your Security Policy 405
The Password dialog box appears.
Do not type a password.
5. Click Next.
The Certificate Store dialog box appears.
6. Click Automatically select the certificate store based on the type of certificate.
7. Click Next.
Using the EAP Authenticator
406 Check Point Safe@Office User Guide
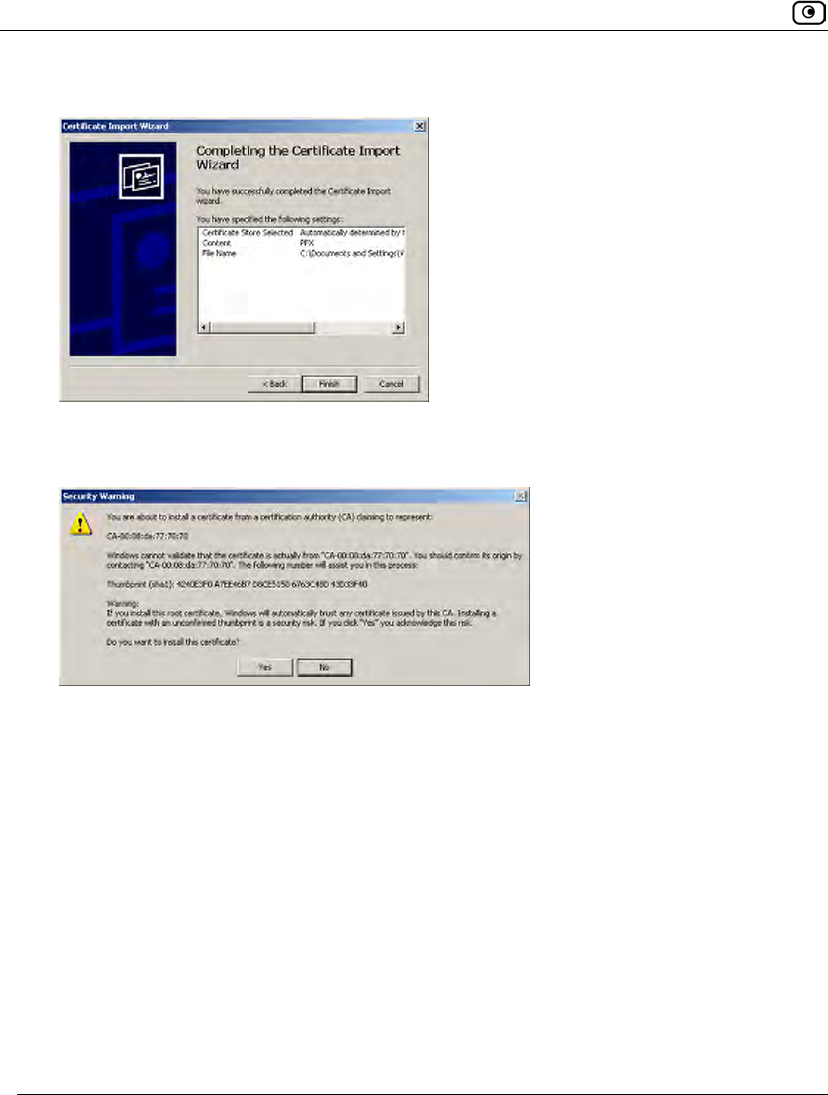
The Completing the Certificate Import Wizard screen appears.
8. Click Finish.
If the Safe@Office appliance certificate was self-signed, a warning message appears.
Do the following:
a. Click Yes.
A success message appears.
b. Click OK.
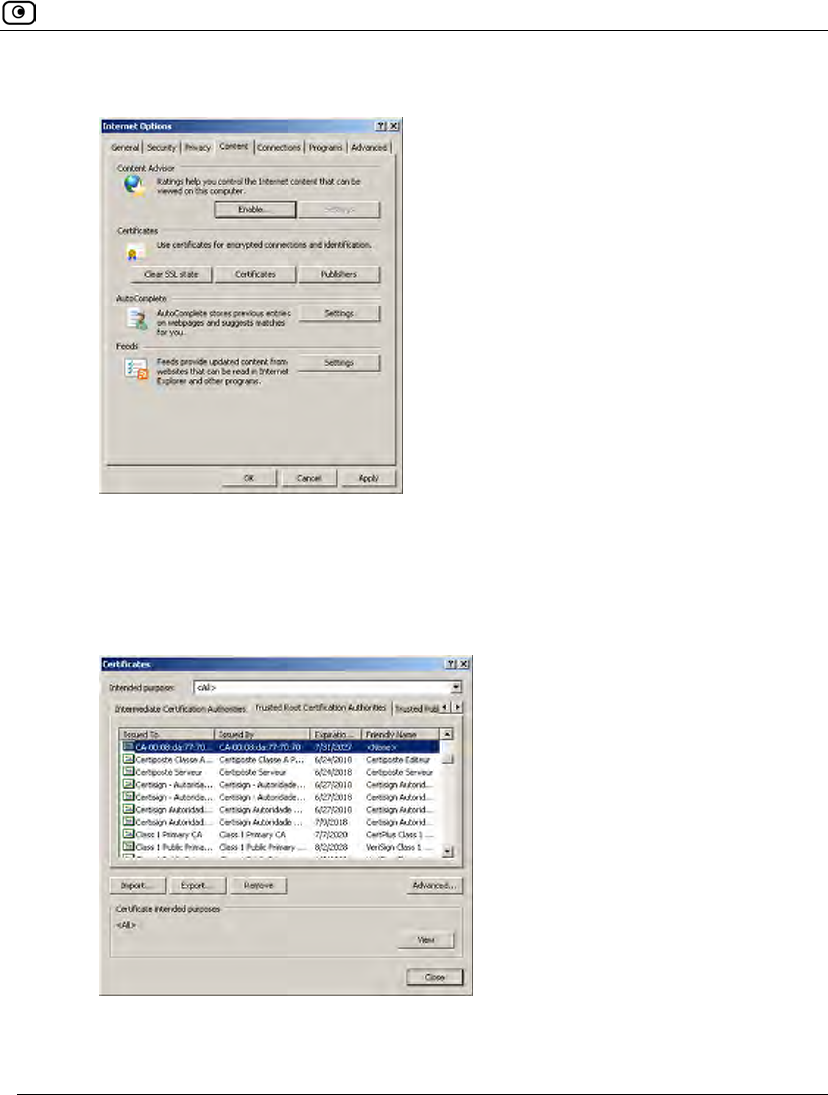
9. To check that the certificate was successfully installed as a trusted root CA, do
the following:
a. On the client, open Internet Explorer.
b. In the Tools menu, click Internet Options.
The Internet Options dialog box appears displaying the General tab.
c. Click the Content tab.
Using the EAP Authenticator
Chapter 13: Setting Your Security Policy 407
The Content tab appears.
d. Click Certificates.
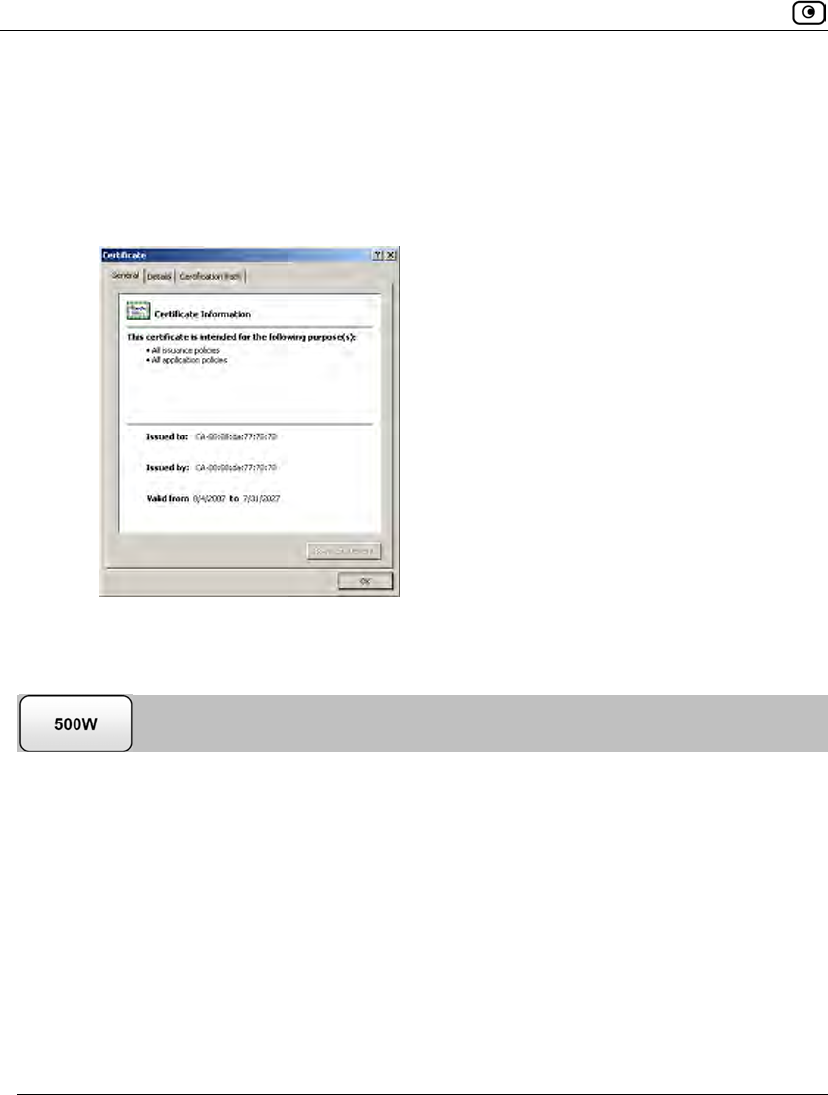
The Certificates dialog box appears.
e. Click the Trusted Root Certification Authorities tab.
The Trusted Root Certification Authorities tab appears.
f. In the list, locate the Safe@Office appliance's CA certificate.
Using the EAP Authenticator
408 Check Point Safe@Office User Guide
The certificate's name is in the format CA-<Identifier>, where
<Identifier> is the Safe@Office appliance's MAC address or gateway
name.
g. To view further information about the certificate, double-click on it.
The Certificate dialog box appears with additional information.
Connecting Wireless Clients to the Safe@Office
Appliance
To connect a Microsoft Windows wireless client to the Safe@Office appliance with
WPA Enterprise authentication
1. In the START menu, click Control Panel.
2. Click Network Connections.
A list of wireless networks appears.
3. Select the Safe@Office appliance wireless network.
4. Click Connect.
Using the EAP Authenticator
Chapter 13: Setting Your Security Policy 409
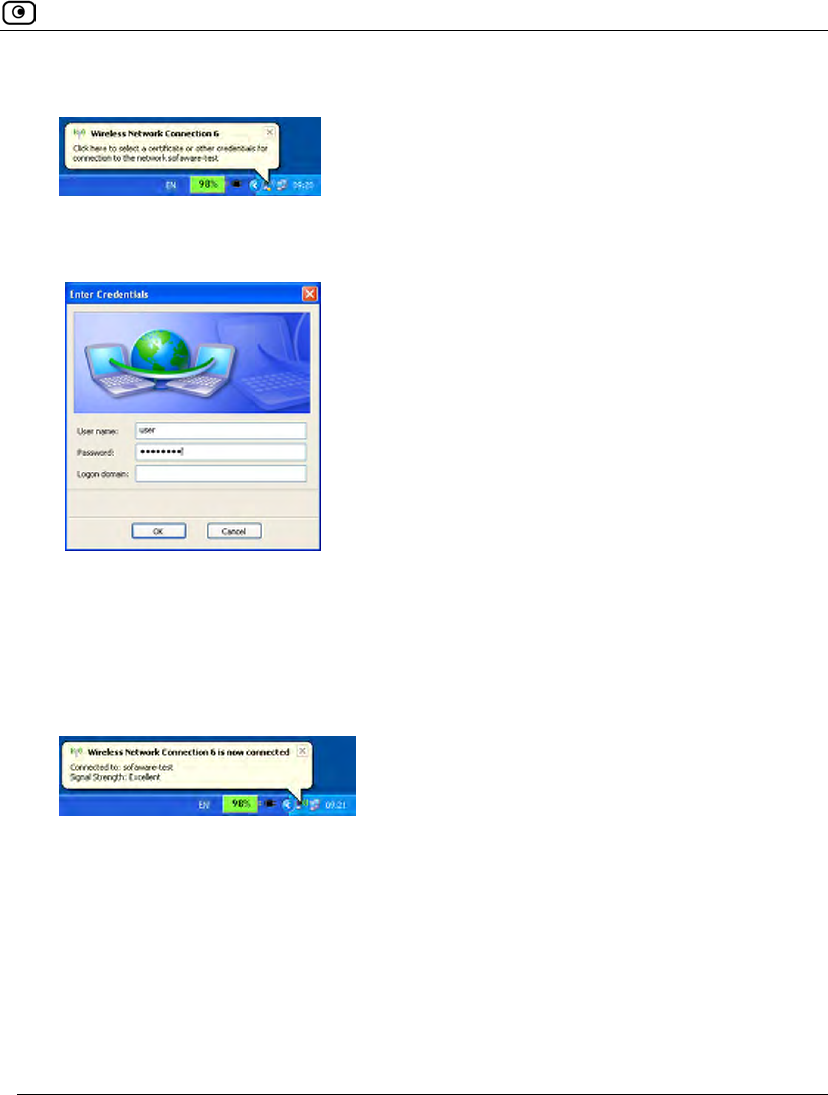
A popup message appears asking you to supply credentials.
5. Click on the popup message.
The Enter Credentials dialog box appears.
6. Type the Network Access user's user name and password in the fields
provided.
7. Click OK.
The wireless client attempts to connect to the network.
Upon successful connection, the client indicates that it is connected to the network.

Overview
410 Check Point Safe@Office User Guide
Chapter 14
This chapter explains how to use Check Point SmartDefense Services.
This chapter includes the following topics:
Overview ..................................................................................................410
Configuring SmartDefense.......................................................................411
SmartDefense Categories .........................................................................419
Resetting SmartDefense to its Defaults....................................................464
Overview
The Safe@Office appliance includes Check Point SmartDefense Services, based on Check
Point Application Intelligence. SmartDefense provides a combination of attack safeguards
and attack-blocking tools that protect your network in the following ways:
• Validating compliance to standards
• Validating expected usage of protocols (Protocol Anomaly Detection)
• Limiting application ability to carry malicious data
• Controlling application-layer operations
In addition, SmartDefense aids proper usage of Internet resources, such as FTP, instant
messaging, Peer-to-Peer (P2P) file sharing, file-sharing operations, and File Transfer
Protocol (FTP) uploading, among others.
Using SmartDefense
Configuring SmartDefense
Chapter 14: Using SmartDefense 411
Configuring SmartDefense
You can configure SmartDefense using the following tools:
• SmartDefense Wizard. Resets all SmartDefense settings to their defaults, and then
creates a SmartDefense security policy according to your network and security
preferences. See Using the SmartDefense Wizard on page 411.
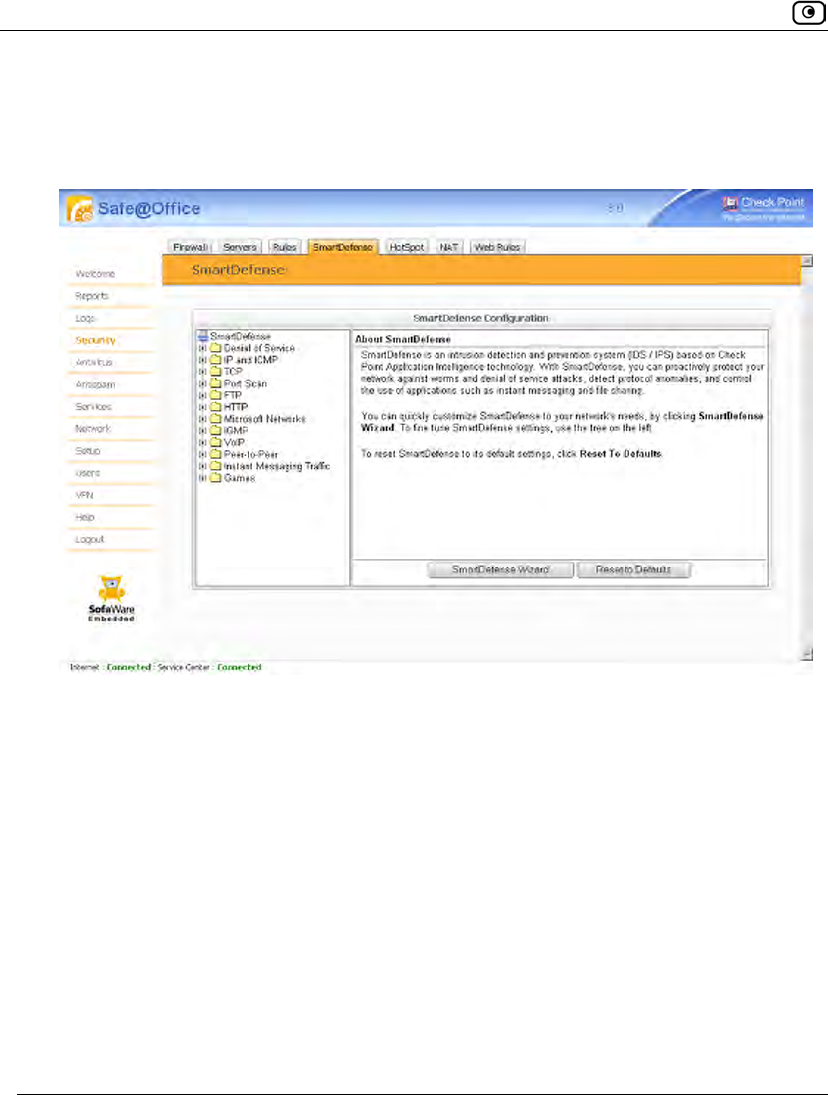
• SmartDefense Tree. Enables you to fine tune individual settings in the
SmartDefense policy. You can use the SmartDefense tree instead of, or in
addition to, the wizard. See Using the SmartDefense Tree on page 417.
Using the SmartDefense Wizard
The SmartDefense Wizard allows you to configure your SmartDefense security policy
quickly and easily through its user-friendly interface.
Note: The SmartDefense wizard clears any existing SmartDefense settings.
After using the wizard, you can fine tune the policy settings using the SmartDefense tree.
See Using the SmartDefense Tree on page 417.
Configuring SmartDefense
412 Check Point Safe@Office User Guide
To configure the SmartDefense policy using the wizard
1. Click Security in the main menu, and click the SmartDefense tab.
The SmartDefense page appears.
2. Click SmartDefense Wizard.
Configuring SmartDefense
Chapter 14: Using SmartDefense 413
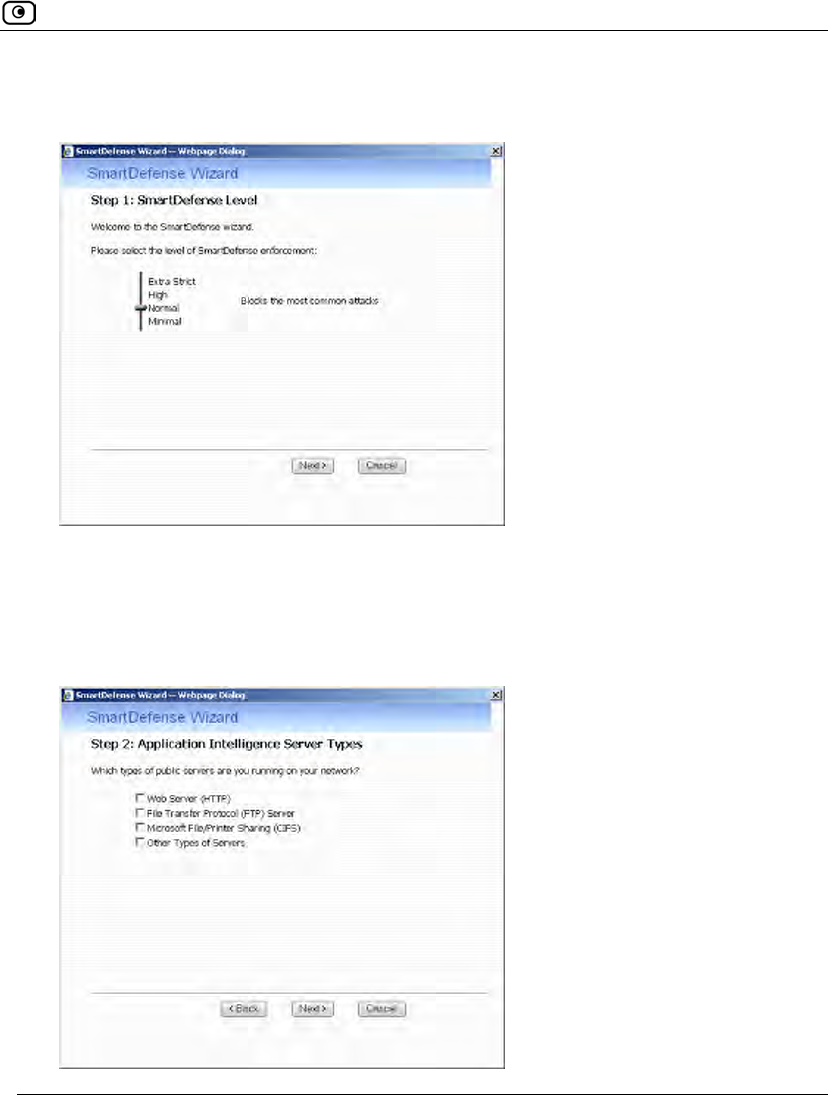
The SmartDefense Wizard opens, with the Step 1: SmartDefense Level dialog box
displayed.
3. Drag the lever to the desired level of SmartDefense enforcement.
For information on the levels, see the following table.
4. Click Next.
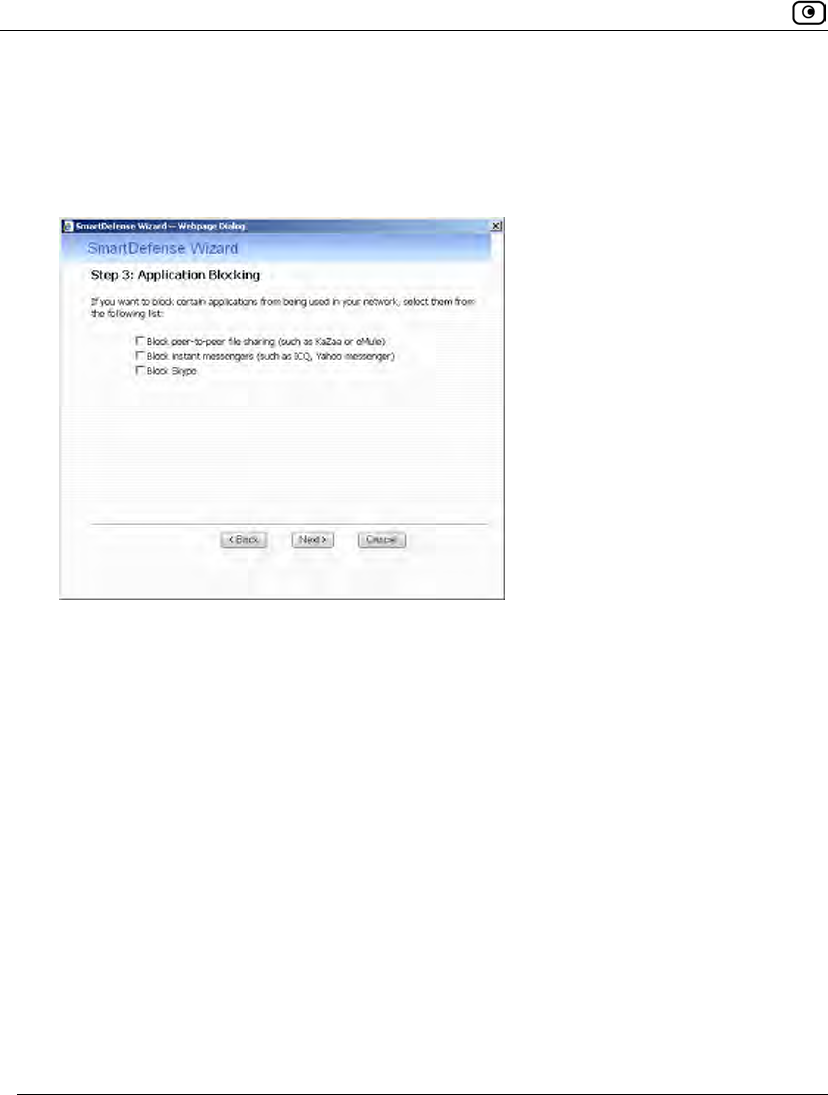
The Step 2: Application Intelligence Server Types dialog box appears.
Configuring SmartDefense
414 Check Point Safe@Office User Guide
5. Select the check boxes next to the types of public servers that are running on
your network.
6. Click Next.
The Step 3: Application Blocking dialog box appears.
7. Select the check boxes next to the types of applications you want to block
from running on your network.
8. Click Next.
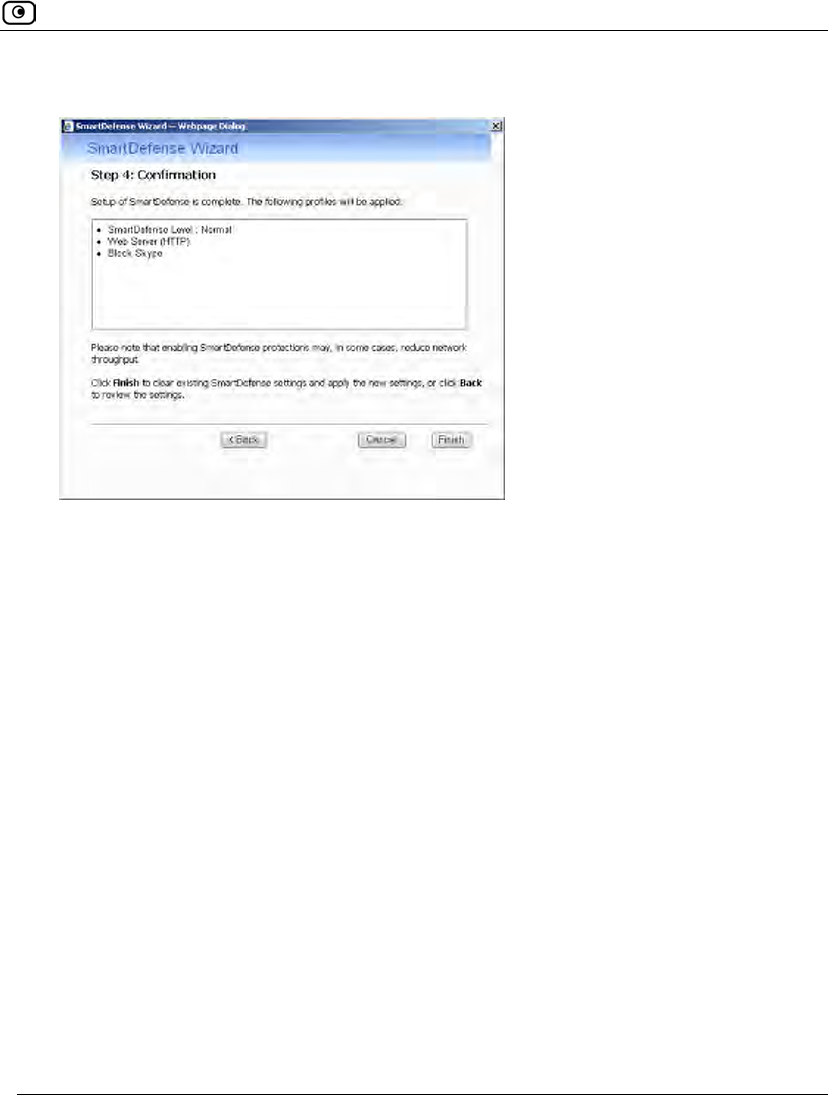
Configuring SmartDefense
Chapter 14: Using SmartDefense 415
The Step 4: Confirmation dialog box appears.
9. Click Finish.
Existing SmartDefense settings are cleared, and the security policy is applied.

Configuring SmartDefense
416 Check Point Safe@Office User Guide
Table 68: SmartDefense Security Levels
This level… Does this…
Minimal Disables all SmartDefense protections, except those that cannot be disabled.
Normal Enables the following:
• Teardrop
• Ping of Death
• LAND
• Packet Sanity
• Max Ping Size (set to 1500)
• Welchia
• Cisco IOS
• Null Payload
• IGMP
• Small PMTU (Log Only)
This level blocks the most common attacks.
High Enables the same protections as Normal level, as well as the following:
• Host Port Scan
• Sweep Scan
• HTTP Header Rejection
• Strict TCP (Log Only)
Extra Strict Enables the same protections as High level, as well as the following:
• Strict TCP (Log + Block)
• Small PMTU (Log + Block)
• Max Ping Size (set to 512)
• Network Quota
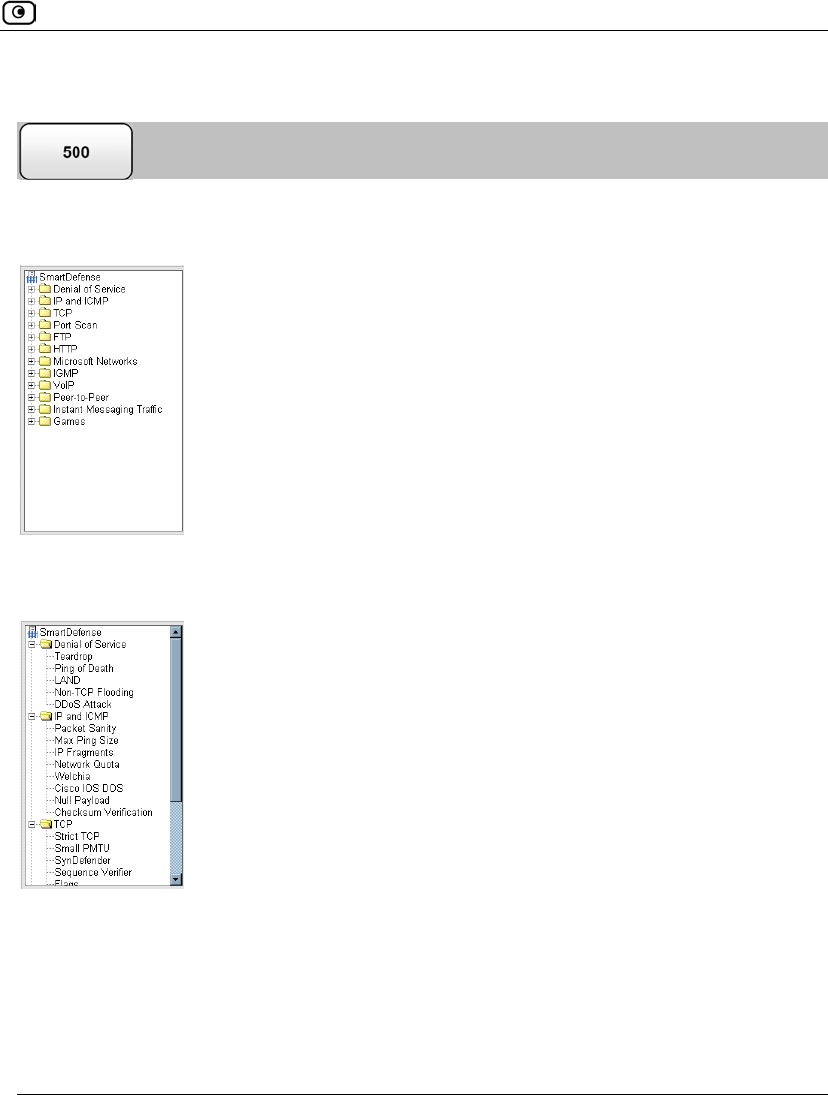
Configuring SmartDefense
Chapter 14: Using SmartDefense 417
Using the SmartDefense Tree
For convenience, SmartDefense is organized as a tree, in which each branch represents a
category of settings.
When a category is expanded, the settings it contains appear as nodes. For information on
each category and the nodes it contains, see SmartDefense Categories on page 419.
Each node represents an attack type, a sanity check, or a protocol or service that is
vulnerable to attacks. To control how SmartDefense handles a specific attack, you must
configure the relevant node's settings.
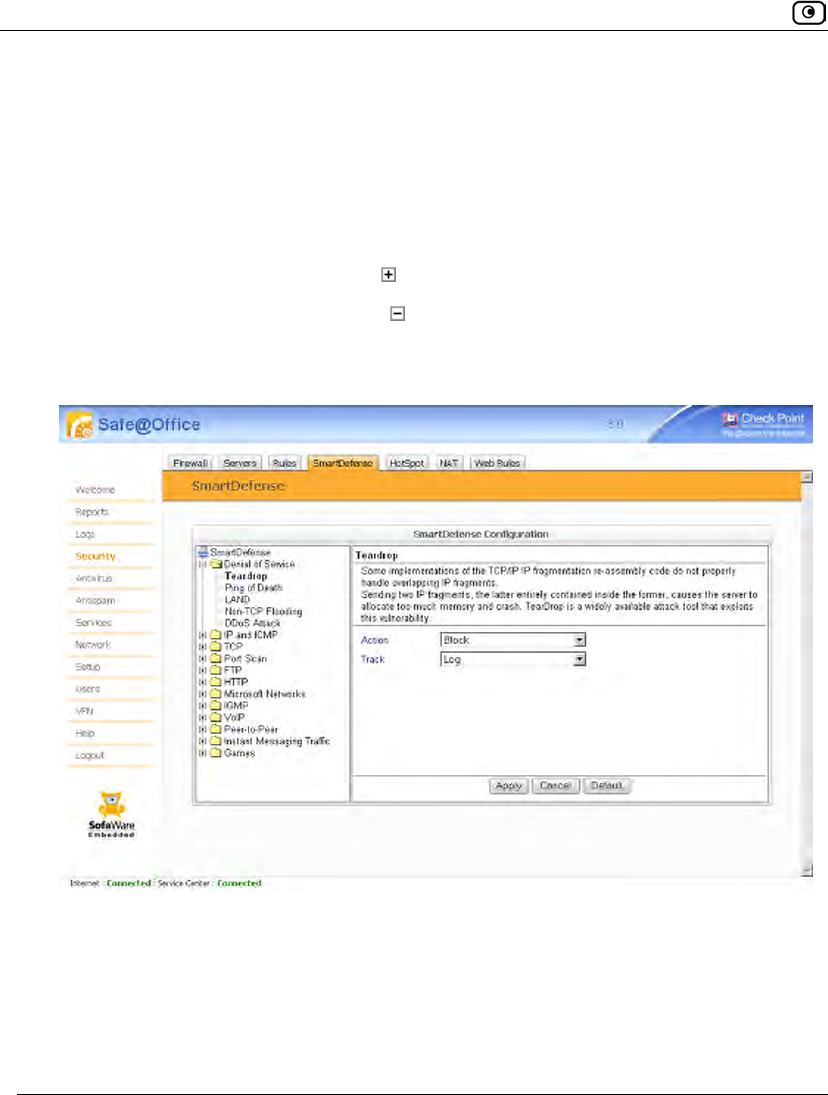
Configuring SmartDefense
418 Check Point Safe@Office User Guide
To configure a SmartDefense node
1. Click Security in the main menu, and click the SmartDefense tab.
The SmartDefense page appears.
The left pane displays a tree containing SmartDefense categories.
• To expand a category, click the icon next to it.
• To collapse a category, click the icon next to it.
2. Expand the relevant category, and click on the desired node.
The right pane displays a description of the node, followed by fields.
3. To modify the node's current settings, do the following:
a) Complete the fields using the relevant information in SmartDefense
Categories on page 419.
b) Click Apply.

SmartDefense Categories
Chapter 14: Using SmartDefense 419
4. To reset the node to its default values:
a) Click Default.
A confirmation message appears.
b) Click OK.
The fields are reset to their default values, and your changes are saved.
SmartDefense Categories
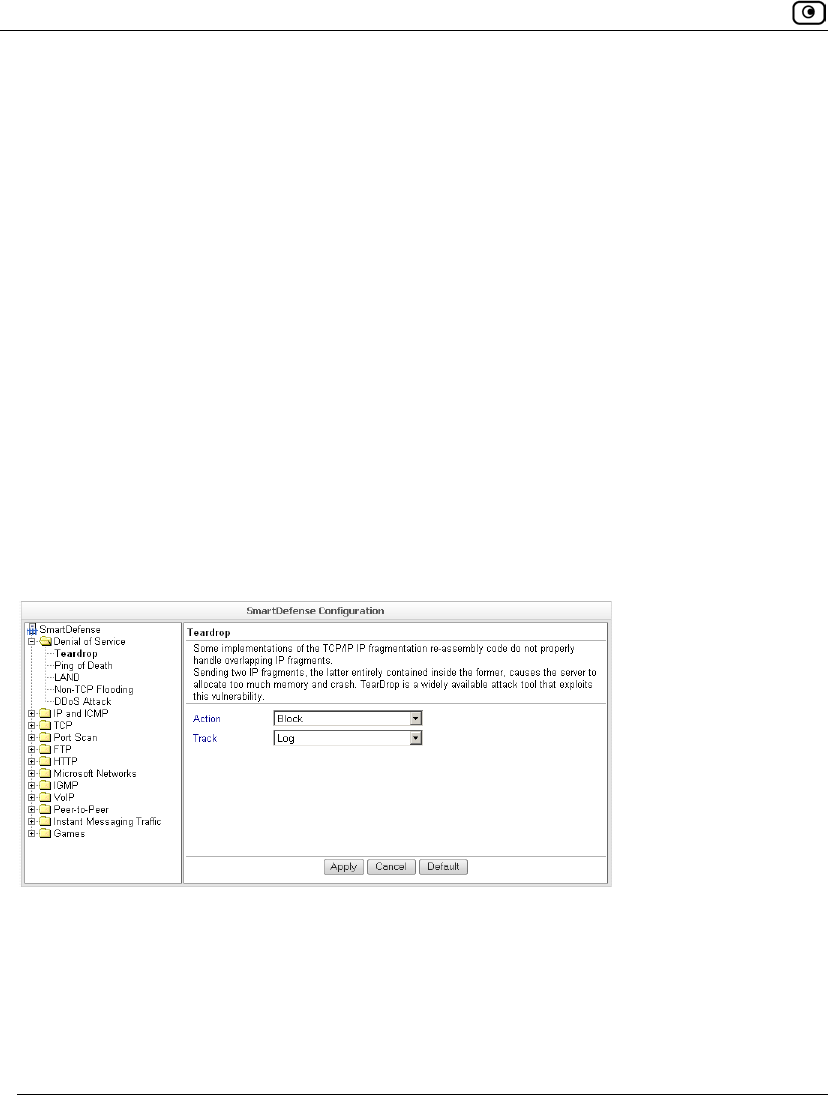
SmartDefense includes the following categories:
• Denial of Service on page 420
• FTP on page 446
• HTTP on page 451
• IGMP on page 455
• Instant Messaging Traffic on page 461
• IP and ICMP on page 426
• Microsoft Networks on page 453
• Peer-to-Peer on page 459
• Port Scan on page 444
• TCP on page 437
• VoIP on page 456
• Games on page 463
SmartDefense Categories
420 Check Point Safe@Office User Guide
Denial of Service
Denial of Service (DoS) attacks are aimed at overwhelming the target with spurious data,
to the point where it is no longer able to respond to legitimate service requests.
This category includes the following attacks:
• DDoS Attack on page 425
• LAND on page 422
• Non-TCP Flooding on page 423
• Ping of Death on page 421
• Teardrop on page 420
Teardrop
In a Teardrop attack, the attacker sends two IP fragments, the latter entirely contained
within the former. This causes some computers to allocate too much memory and crash.
You can configure how Teardrop attacks should be handled.
SmartDefense Categories
Chapter 14: Using SmartDefense 421
Table 69: Teardrop Fields
In this field… Do this…
Action Specify what action to take when a Teardrop attack occurs, by selecting one
of the following:
• Block. Block the attack. This is the default.
• None. No action.
Track Specify whether to log Teardrop attacks, by selecting one of the following:
• Log. Log the attack. This is the default.
• None. Do not log the attack.
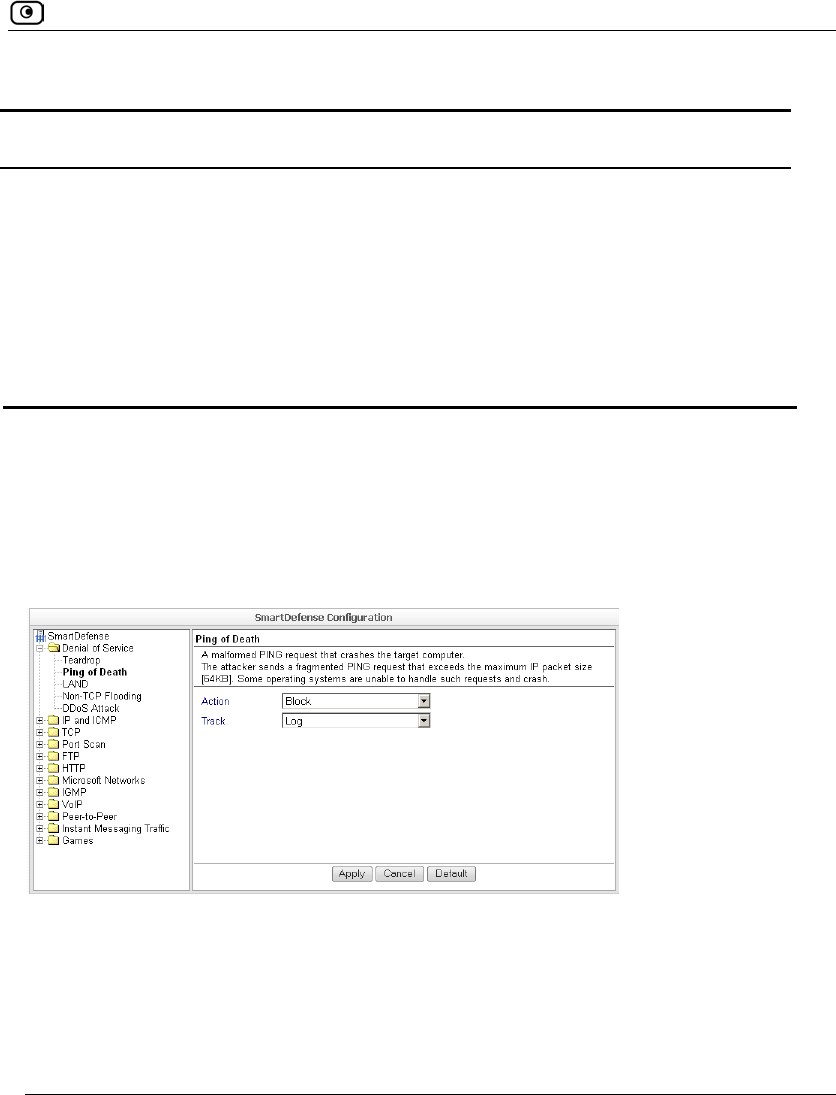
Ping of Death
In a Ping of Death attack, the attacker sends a fragmented PING request that exceeds the
maximum IP packet size (64KB). Some operating systems are unable to handle such
requests and crash.
You can configure how Ping of Death attacks should be handled.
SmartDefense Categories
422 Check Point Safe@Office User Guide
Table 70: Ping of Death Fields
In this field… Do this…
Action Specify what action to take when a Ping of Death attack occurs, by selecting
one of the following:
• Block. Block the attack. This is the default.
• None. No action.
Track Specify whether to log Ping of Death attacks, by selecting one of the
following:
• Log. Log the attack. This is the default.
• None. Do not log the attack.
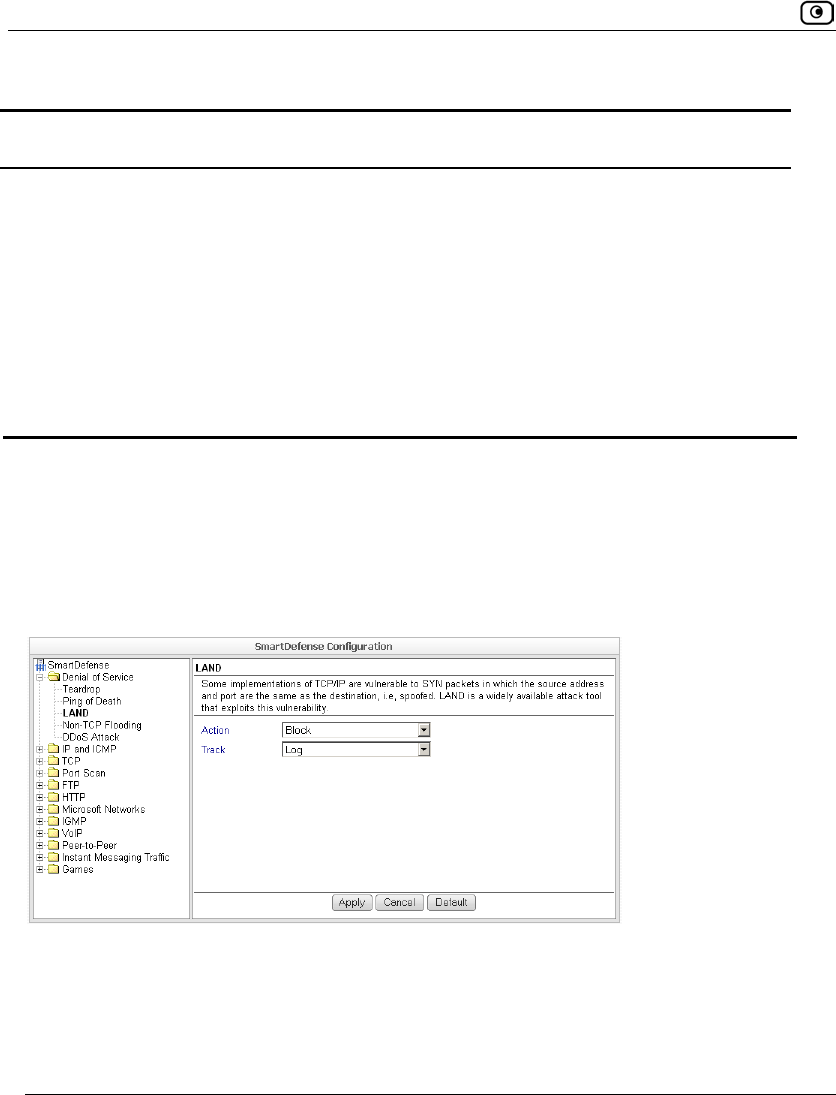
LAND
In a LAND attack, the attacker sends a SYN packet, in which the source address and port
are the same as the destination (the victim computer). The victim computer then tries to
reply to itself and either reboots or crashes.
You can configure how LAND attacks should be handled.
SmartDefense Categories
Chapter 14: Using SmartDefense 423
Table 71: LAND Fields
In this field… Do this…
Action Specify what action to take when a LAND attack occurs, by selecting one of
the following:
• Block. Block the attack. This is the default.
• None. No action.
Track Specify whether to log LAND attacks, by selecting one of the following:
• Log. Log the attack. This is the default.
• None. Do not log the attack.
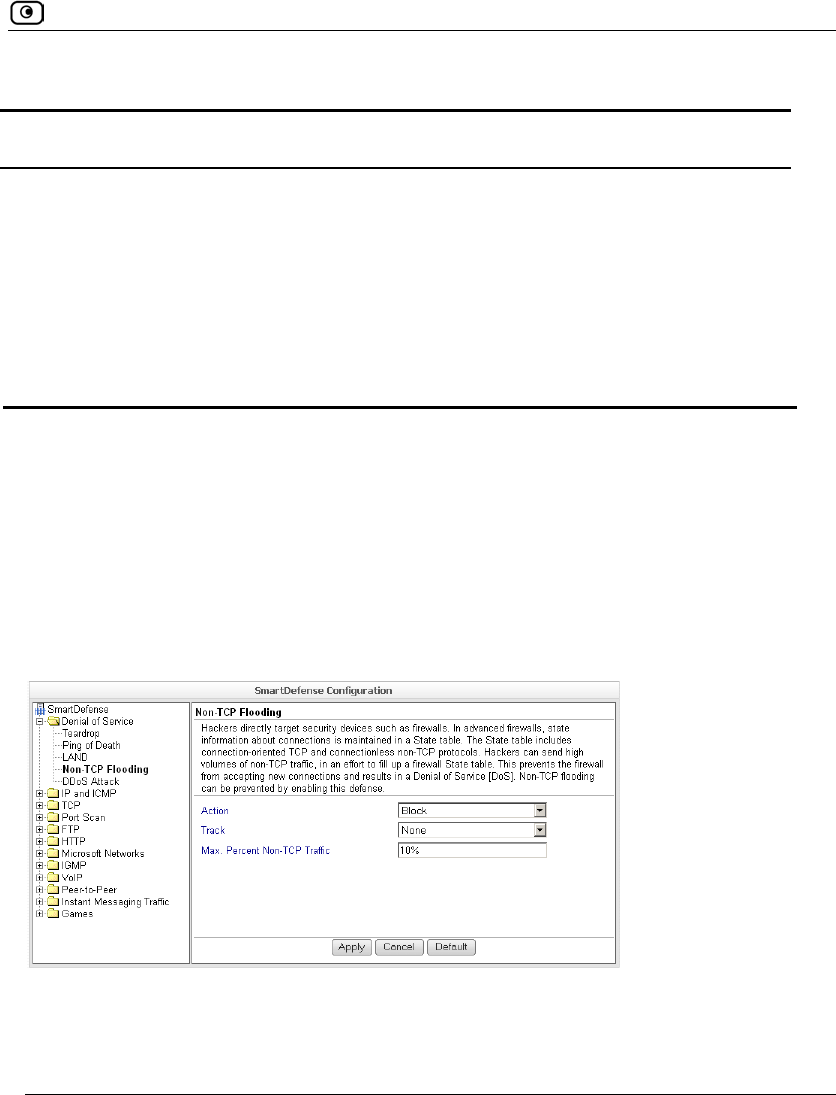
Non-TCP Flooding
Advanced firewalls maintain state information about connections in a State table. In Non-
TCP Flooding attacks, the attacker sends high volumes of non-TCP traffic. Since such
traffic is connectionless, the related state information cannot be cleared or reset, and the
firewall State table is quickly filled up. This prevents the firewall from accepting new
connections and results in a Denial of Service (DoS).
You can protect against Non-TCP Flooding attacks by limiting the percentage of state table
capacity used for non-TCP connections.

SmartDefense Categories
424 Check Point Safe@Office User Guide
Table 72: Non-TCP Flooding Fields
In this field… Do this…
Action Specify what action to take when the percentage of state table capacity used
for non-TCP connections reaches the Max. percent non TCP traffic threshold.
Select one of the following:
• Block. Block any additional non-TCP connections.
• None. No action. This is the default.
Track Specify whether to log non-TCP connections that exceed the Max. Percent
Non-TCP Traffic threshold, by selecting one of the following:
• Log. Log the connections.
• None. Do not log the connections. This is the default.
Max. Percent
Non-TCP Traffic
Type the maximum percentage of state table capacity allowed for non-TCP
connections.
The default value is 10%.
SmartDefense Categories
Chapter 14: Using SmartDefense 425
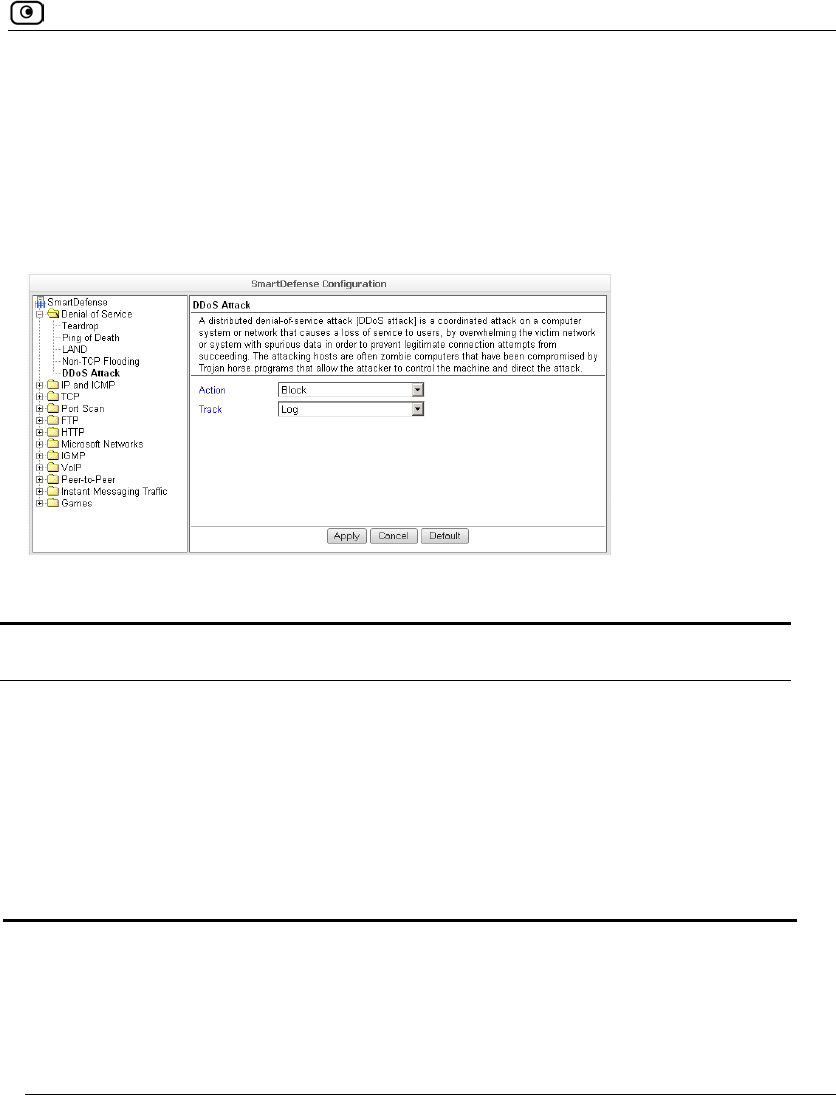
DDoS Attack
In a distributed denial-of-service attack (DDoS attack), the attacker directs multiple hosts
in a coordinated attack on a victim computer or network. The attacking hosts send large
amounts of spurious data to the victim, so that the victim is no longer able to respond to
legitimate service requests.
You can configure how DDoS attacks should be handled.
Table 73: Distributed Denial of Service Fields
In this field… Do this…
Action Specify what action to take when a DDoS attack occurs, by selecting one of
the following:
• Block. Block the attack. This is the default.
• None. No action.
Track Specify whether to log DDoS attacks, by selecting one of the following:
• Log. Log the attack. This is the default.
• None. Do not log the attack.
SmartDefense Categories
426 Check Point Safe@Office User Guide
IP and ICMP
This category allows you to enable various IP and ICMP protocol tests, and to configure
various protections against IP and ICMP-related attacks. It includes the following:
• Checksum Verification on page 436
• Cisco IOS DOS on page 433
• IP Fragments on page 429
• Max Ping Size on page 428
• Network Quota on page 431
• Null Payload on page 435
• Packet Sanity on page 426
• Welchia on page 432
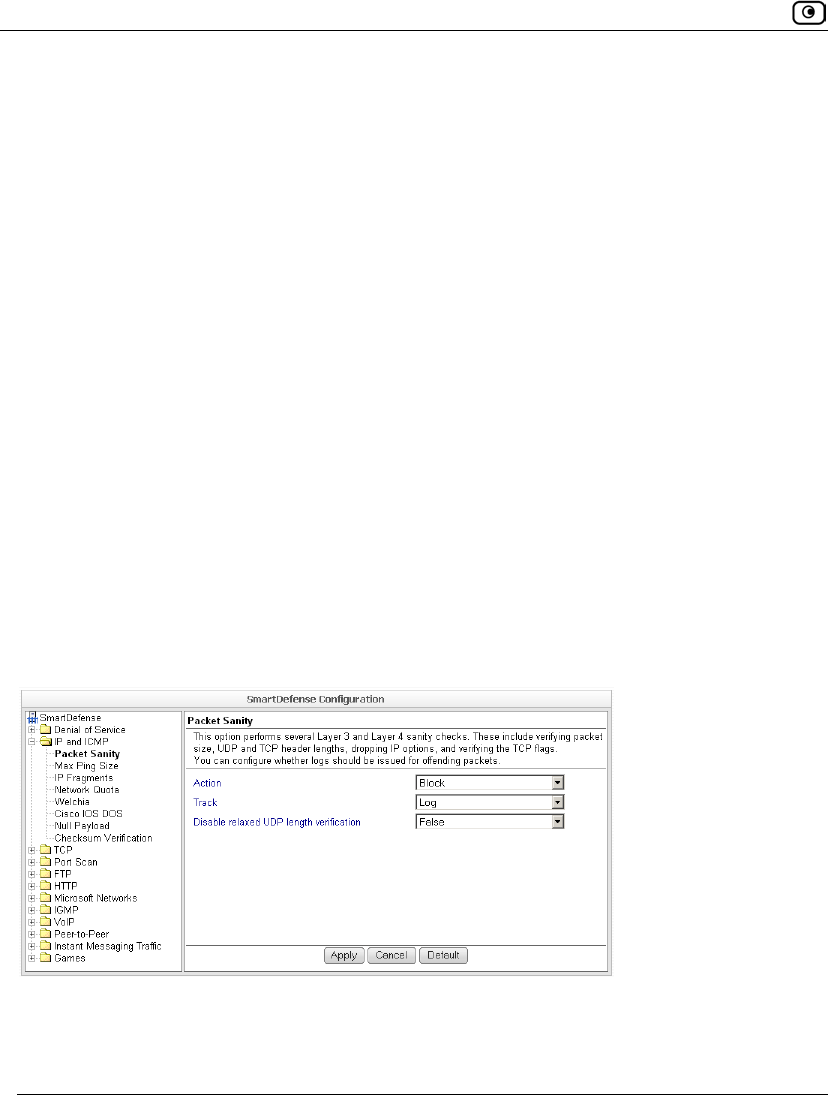
Packet Sanity
Packet Sanity performs several Layer 3 and Layer 4 sanity checks. These include verifying
packet size, UDP and TCP header lengths, dropping IP options, and verifying the TCP
flags.
You can configure whether logs should be issued for offending packets.

SmartDefense Categories
Chapter 14: Using SmartDefense 427
Table 74: Packet Sanity Fields
In this field… Do this…
Action Specify what action to take when a packet fails a sanity test, by selecting
one of the following:
• Block. Block the packet. This is the default.
• None. No action.
Track Specify whether to issue logs for packets that fail the packet sanity tests, by
selecting one of the following:
• Log. Issue logs. This is the default.
• None. Do not issue logs.
Disable relaxed
UDP length
verification
The UDP length verification sanity check measures the UDP header length
and compares it to the UDP header length specified in the UDP header. If
the two values differ, the packet may be corrupted.
However, since different applications may measure UDP header length
differently, the Safe@Office appliance relaxes the UDP length verification
sanity check by default, performing the check but not dropping offending
packets. This is called relaxed UDP length verification.
Specify whether the Safe@Office appliance should relax the UDP length
verification sanity check or not, by selecting one of the following:
• True. Disable relaxed UDP length verification. The Safe@Office
appliance will drop packets that fail the UDP length verification
check.
• False. Do not disable relaxed UDP length verification. The
Safe@Office appliance will not drop packets that fail the UDP
length verification check. This is the default.
SmartDefense Categories
428 Check Point Safe@Office User Guide
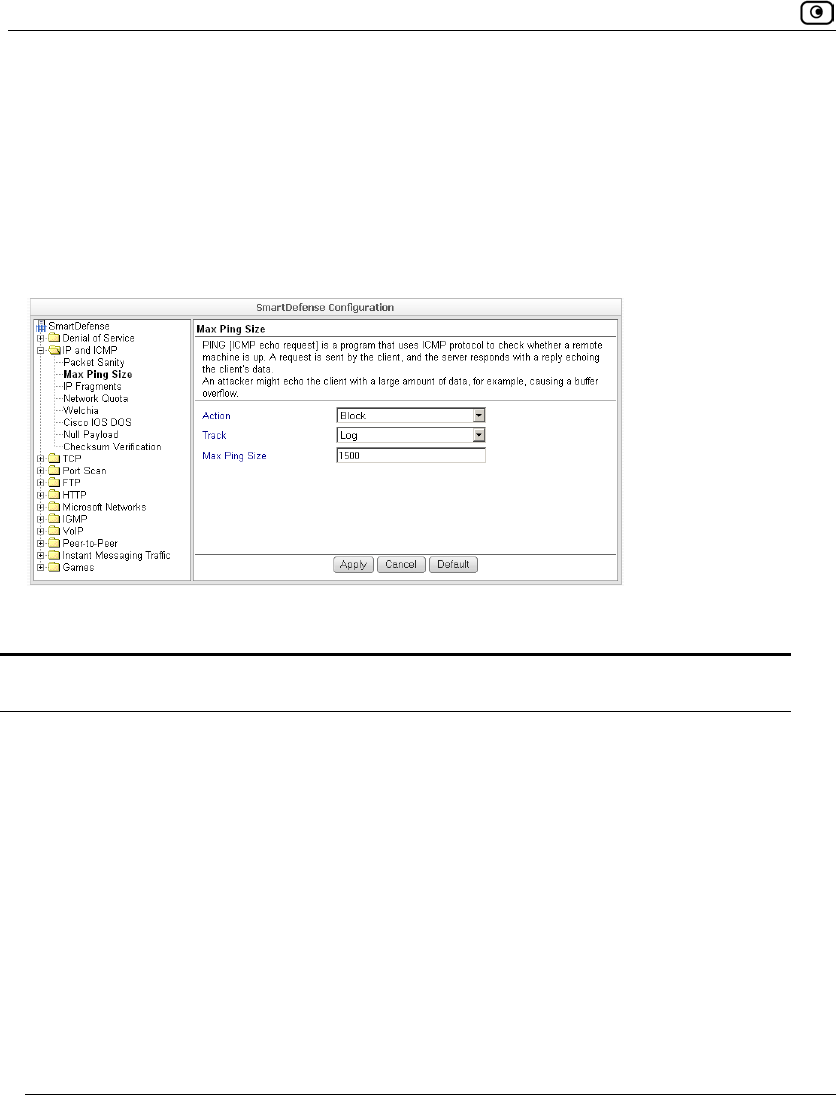
Max Ping Size
PING (ICMP echo request) is a program that uses ICMP protocol to check whether a
remote machine is up. A request is sent by the client, and the server responds with a reply
echoing the client's data.
An attacker can echo the client with a large amount of data, causing a buffer overflow.
You can protect against such attacks by limiting the allowed size for ICMP echo requests.
Table 75: Max Ping Size Fields
In this field… Do this…
Action Specify what action to take when an ICMP echo response exceeds the Max
Ping Size threshold, by selecting one of the following:
• Block. Block the request. This is the default.
• None. No action.
Track Specify whether to log ICMP echo responses that exceed the Max Ping Size
threshold, by selecting one of the following:
• Log. Log the responses. This is the default.
• None. Do not log the responses.
SmartDefense Categories
Chapter 14: Using SmartDefense 429
In this field… Do this…
Max Ping Size Specify the maximum data size for ICMP echo response.
The default value is 548.
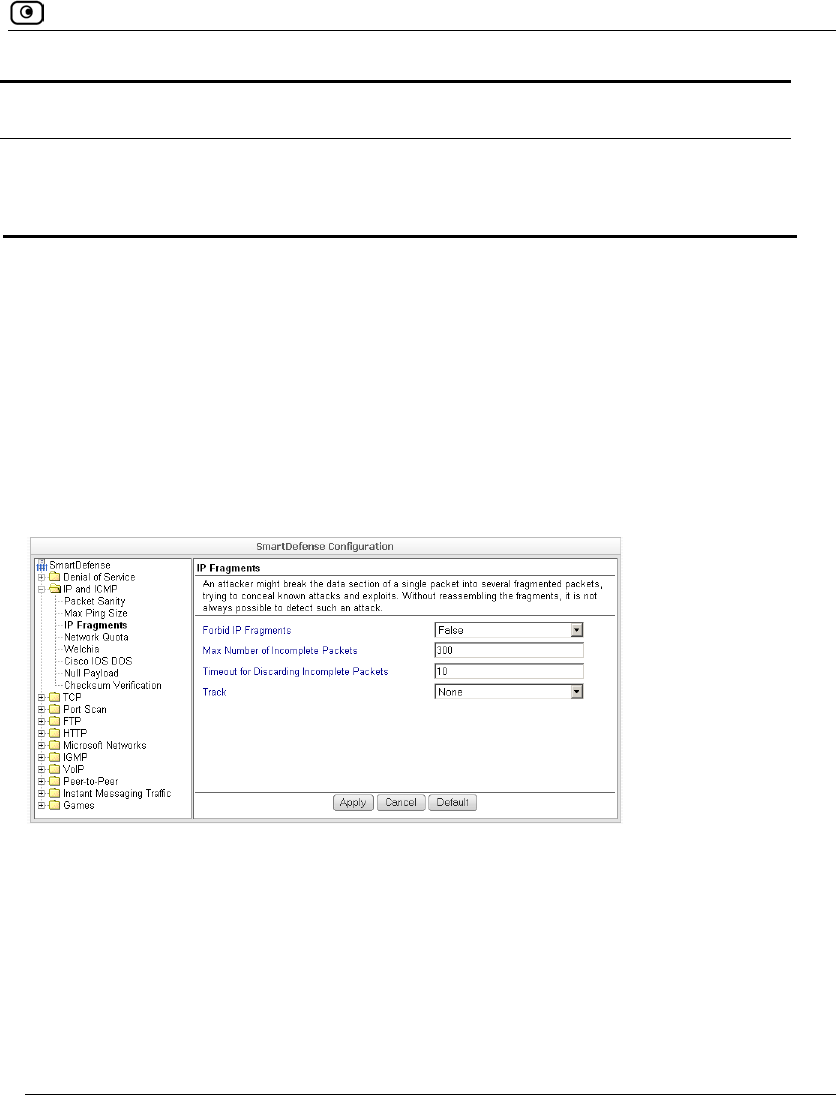
IP Fragments
When an IP packet is too big to be transported by a network link, it is split into several
smaller IP packets and transmitted in fragments. To conceal a known attack or exploit, an
attacker might imitate this common behavior and break the data section of a single packet
into several fragmented packets. Without reassembling the fragments, it is not always
possible to detect such an attack. Therefore, the Safe@Office appliance always
reassembles all the fragments of a given IP packet, before inspecting it to make sure there
are no attacks or exploits in the packet.
You can configure how fragmented packets should be handled.

SmartDefense Categories
430 Check Point Safe@Office User Guide
Table 76: IP Fragments Fields
In this field… Do this…
Forbid IP Fragments Specify whether all fragmented packets should be dropped, by selecting
one of the following:
• True. Drop all fragmented packets.
• False. No action. This is the default.
Under normal circumstances, it is recommended to leave this field set to
False. Setting this field to True may disrupt Internet connectivity, because
it does not allow any fragmented packets.
Max Number of
Incomplete Packets
Type the maximum number of fragmented packets allowed. Packets
exceeding this threshold will be dropped.
The default value is 300.
Timeout for
Discarding
Incomplete Packets
When the Safe@Office appliance receives packet fragments, it waits for
additional fragments to arrive, so that it can reassemble the packet.
Type the number of seconds to wait before discarding incomplete
packets.
The default value is 10.
Track Specify whether to log fragmented packets, by selecting one of the
following:
• Log. Log all fragmented packets.
• None. Do not log the fragmented packets. This is the default.
SmartDefense Categories
Chapter 14: Using SmartDefense 431
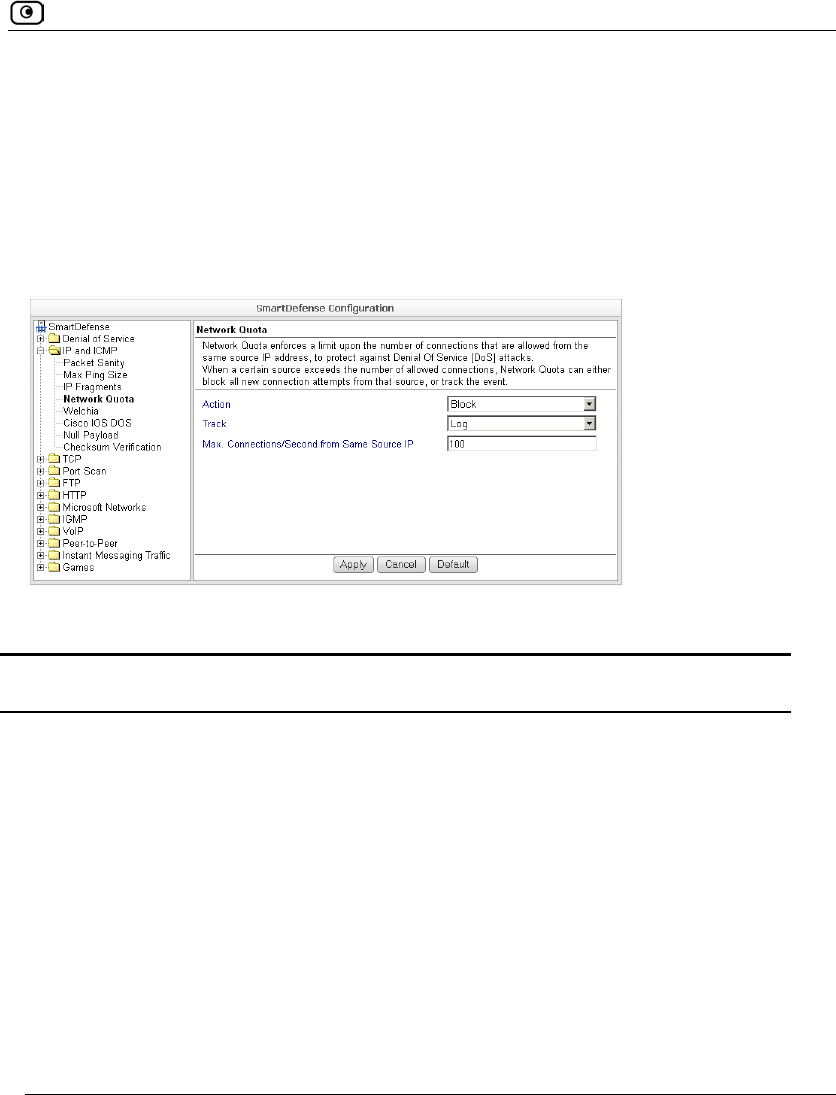
Network Quota
An attacker may try to overload a server in your network by establishing a very large
number of connections per second. To protect against Denial Of Service (DoS) attacks,
Network Quota enforces a limit upon the number of connections per second that are
allowed from the same source IP address.
You can configure how connections that exceed that limit should be handled.
Table 77: Network Quota Fields
In this field… Do this…
Action Specify what action to take when the number of network connections
from the same source reaches the Max. Connections/Second per Source IP
threshold. Select one of the following:
• Block. Block all new connections from the source. Existing
connections will not be blocked. This is the default.
• None. No action.
Track Specify whether to log connections from a specific source that exceed
the Max. Connections/Second per Source IP threshold, by selecting one of
the following:
• Log. Log the connections. This is the default.
• None. Do not log the connections.
SmartDefense Categories
432 Check Point Safe@Office User Guide
In this field… Do this…
Max.
Connections/Second
from Same Source IP
Type the maximum number of network connections allowed per second
from the same source IP address.
The default value is 100.
Set a lower threshold for stronger protection against DoS attacks.
Note: Setting this value too low can lead to false alarms.
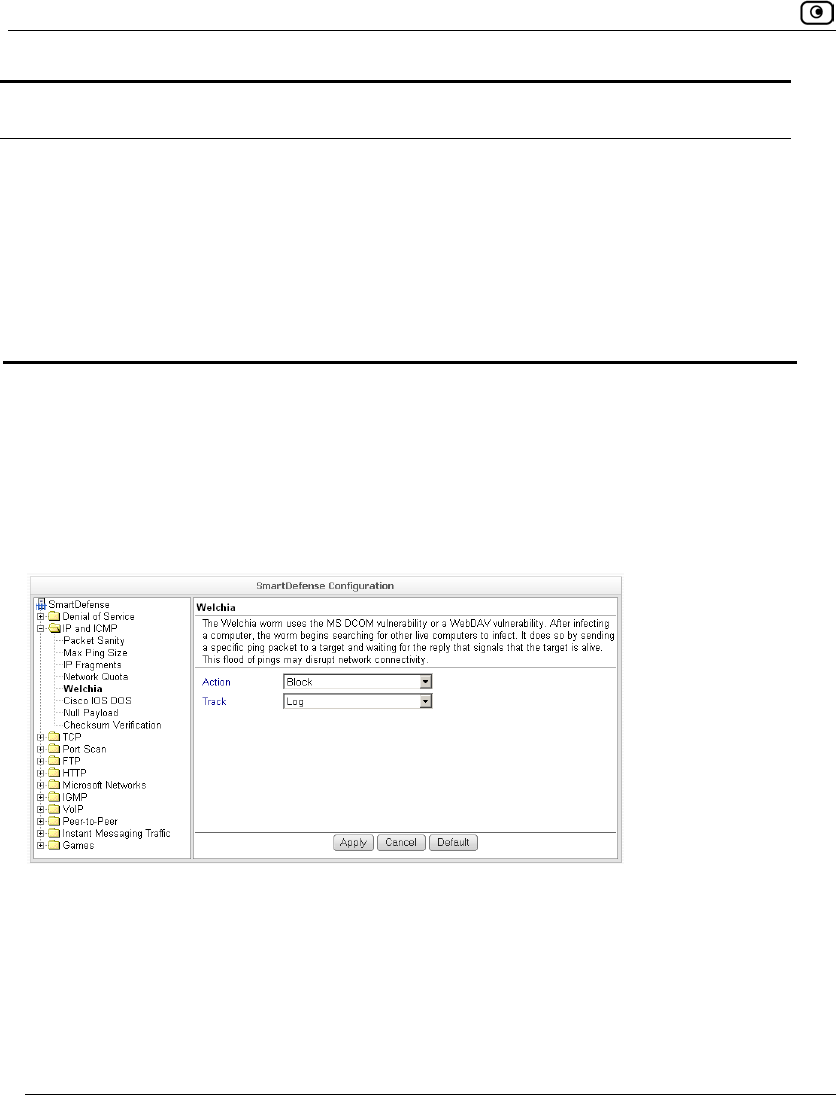
Welchia
The Welchia worm uses the MS DCOM vulnerability or a WebDAV vulnerability. After
infecting a computer, the worm begins searching for other live computers to infect. It does
so by sending a specific ping packet to a target and waiting for the reply that signals that
the target is alive. This flood of pings may disrupt network connectivity.
You can configure how the Welchia worm should be handled.
SmartDefense Categories
Chapter 14: Using SmartDefense 433
Table 78: Welchia Fields
In this field… Do this…
Action Specify what action to take when the Welchia worm is detected, by selecting
one of the following:
• Block. Block the attack. This is the default.
• None. No action.
Track Specify whether to log Welchia worm attacks, by selecting one of the
following:
• Log. Log the attack. This is the default.
• None. Do not log the attack.
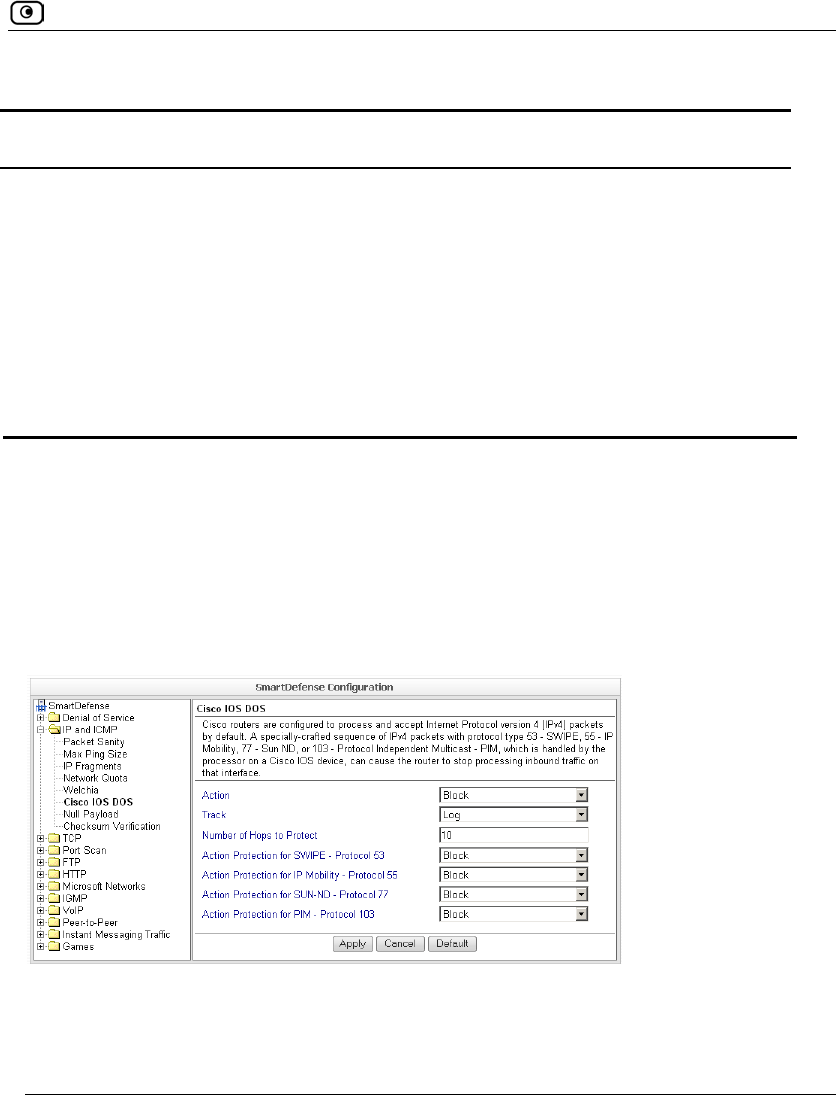
Cisco IOS DOS
Cisco routers are configured to process and accept Internet Protocol version 4 (IPv4)
packets by default. When a Cisco IOS device is sent a specially crafted sequence of IPv4
packets (with protocol type 53 - SWIPE, 55 - IP Mobility, 77 - Sun ND, or 103 - Protocol
Independent Multicast - PIM), the router will stop processing inbound traffic on that
interface.
You can configure how Cisco IOS DOS attacks should be handled.

SmartDefense Categories
434 Check Point Safe@Office User Guide
Table 79: Cisco IOS DOS
In this field… Do this…
Action Specify what action to take when a Cisco IOS DOS attack occurs,
by selecting one of the following:
• Block. Block the attack. This is the default.
• None. No action.
Track Specify whether to log Cisco IOS DOS attacks, by selecting one of
the following:
• Log. Log the attack. This is the default.
• None. Do not log the attack.
Number of Hops to Protect Type the number of hops from the enforcement module that Cisco
routers should be protected.
The default value is 10.
Action Protection for
SWIPE - Protocol 53 /
IP Mobility - Protocol 55 /
SUN-ND - Protocol 77 /
PIM - Protocol 103
Specify what action to take when an IPv4 packet of the specific
protocol type is received, by selecting one of the following:
• Block. Drop the packet. This is the default.
• None. No action.
SmartDefense Categories
Chapter 14: Using SmartDefense 435
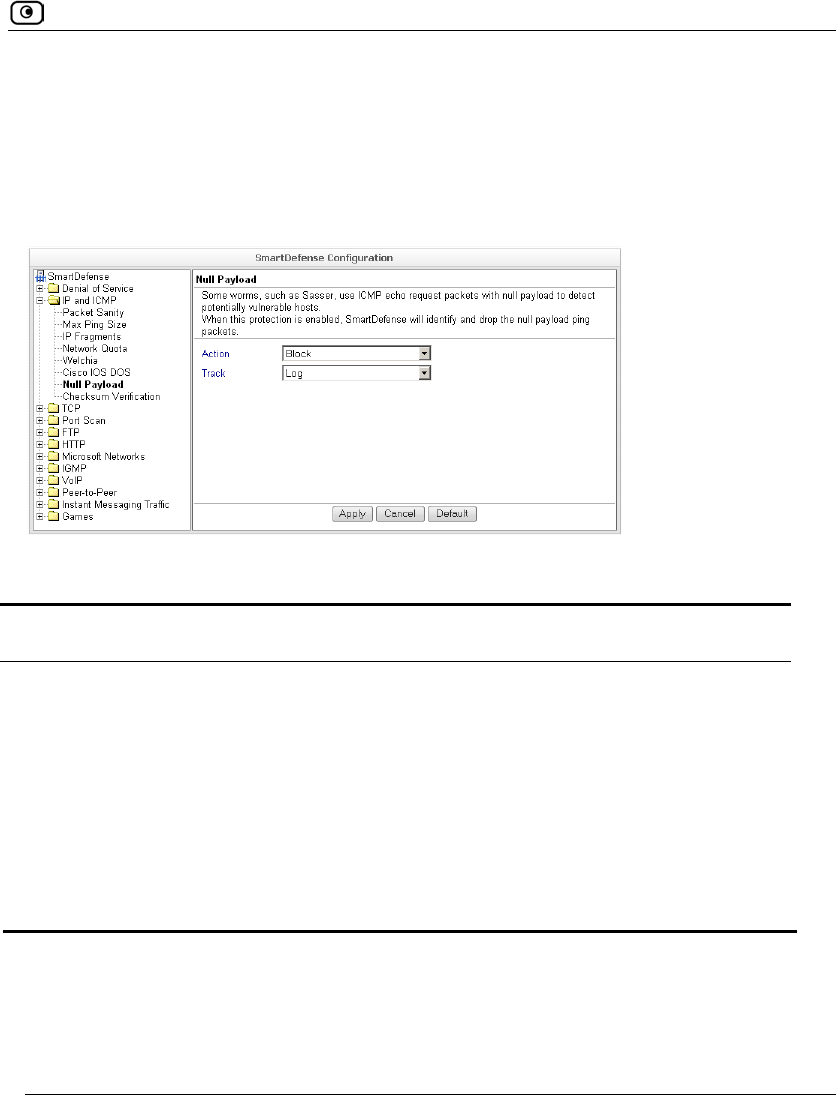
Null Payload
Some worms, such as Sasser, use ICMP echo request packets with null payload to detect
potentially vulnerable hosts.
You can configure how null payload ping packets should be handled.
Table 80: Null Payload Fields
In this field… Do this…
Action Specify what action to take when null payload ping packets are detected, by
selecting one of the following:
• Block. Block the packets. This is the default.
• None. No action.
Track Specify whether to log null payload ping packets, by selecting one of the
following:
• Log. Log the packets. This is the default.
• None. Do not log the packets.
SmartDefense Categories
436 Check Point Safe@Office User Guide
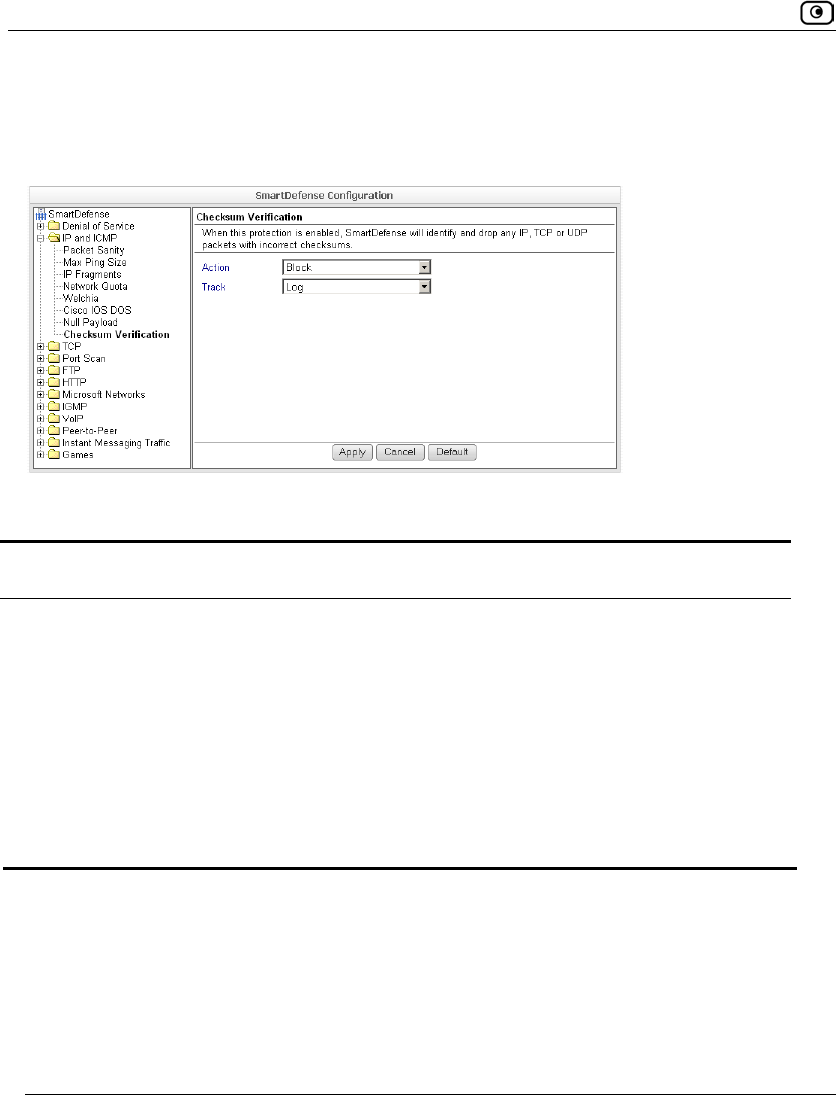
Checksum Verification
SmartDefense identifies any IP, TCP, or UDP packets with incorrect checksums. You can
configure how these packets should be handled.
Table 81: Checksum Verification Fields
In this field… Do this…
Action Specify what action to take when packets with incorrect checksums are
detected, by selecting one of the following:
• Block. Block the packets. This is the default.
• None. No action.
Track Specify whether to log packets with incorrect checksums, by selecting one of
the following:
• Log. Log the packets.
• None. Do not log the packets. This is the default.
SmartDefense Categories
Chapter 14: Using SmartDefense 437
TCP
This category allows you to configure various protections related to the TCP protocol. It
includes the following:
• Flags on page 443
• Sequence Verifier on page 442
• Small PMTU on page 438
• Strict TCP on page 437
• SynDefender on page 440
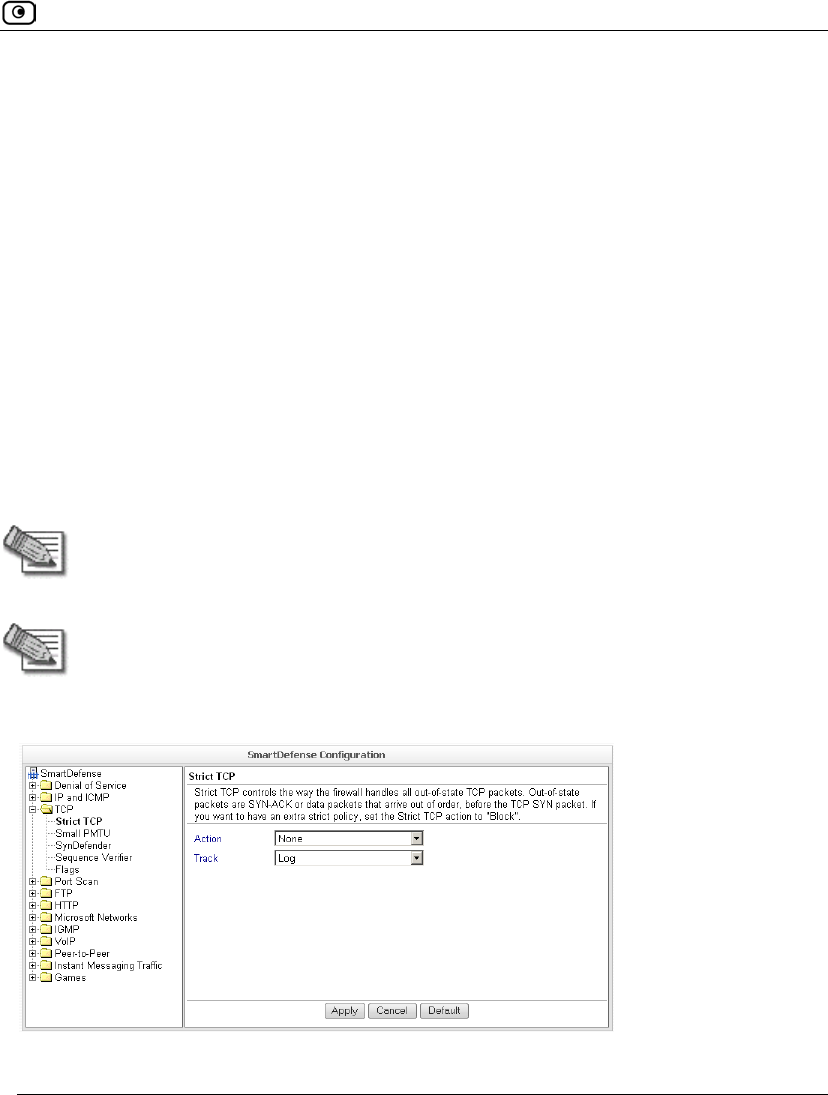
Strict TCP
Out-of-state TCP packets are SYN-ACK or data packets that arrive out of order, before the
TCP SYN packet.
Note: In normal conditions, out-of-state TCP packets can occur after the
Safe@Office restarts, since connections which were established prior to the reboot
are unknown. This is normal and does not indicate an attack.
Note: Certain SmartDefense protections implicitly apply the Strict TCP protection to
relevant connections. In such cases, "TCP Out-of-State" log messages may appear
in the Security Log, even though the Strict TCP protection is disabled.
You can configure how out-of-state TCP packets should be handled.
SmartDefense Categories
438 Check Point Safe@Office User Guide
Table 82: Strict TCP
In this field… Do this…
Action Specify what action to take when an out-of-state TCP packet arrives, by
selecting one of the following:
• Block. Block the packets.
• None. No action. This is the default.
Track Specify whether to log null payload ping packets, by selecting one of the
following:
• Log. Log the packets. This is the default.
• None. Do not log the packets.
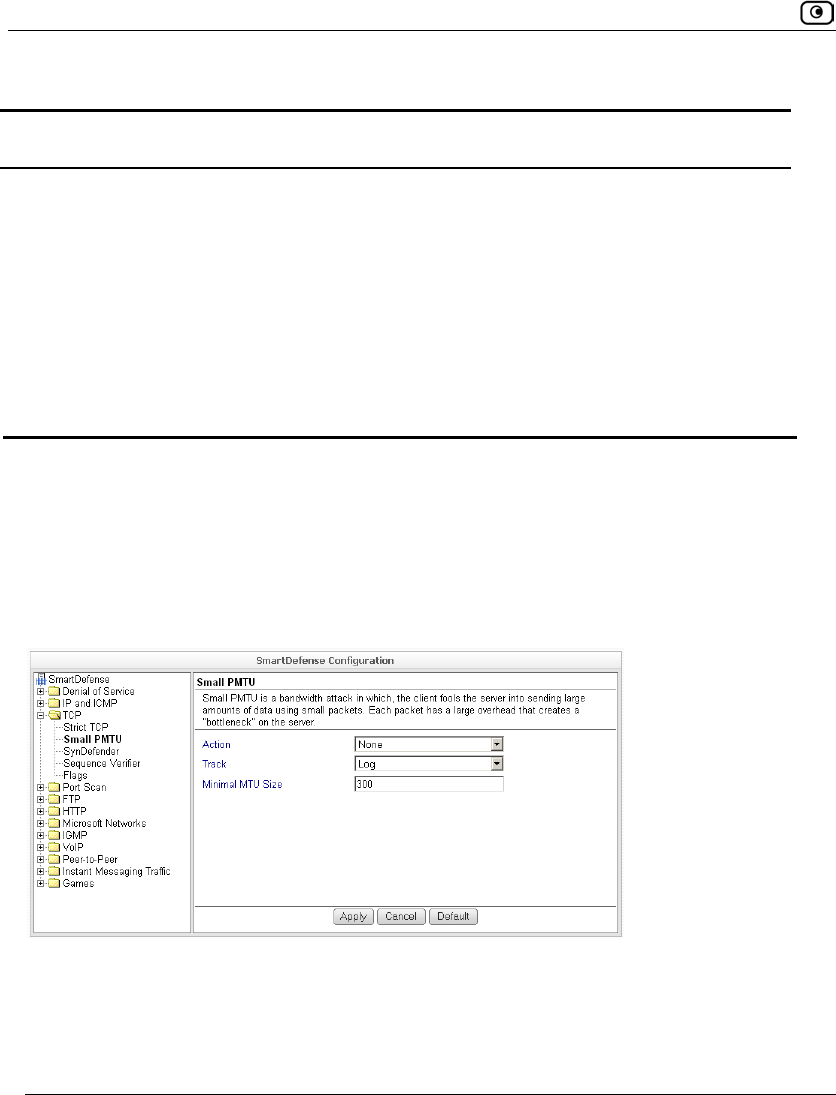
Small PMTU
Small PMTU (Packet MTU) is a bandwidth attack in which the client fools the server into
sending large amounts of data using small packets. Each packet has a large overhead that
creates a "bottleneck" on the server.
You can protect against this attack by specifying a minimum packet size for data sent over
the Internet.

SmartDefense Categories
Chapter 14: Using SmartDefense 439
Table 83: Small PMTU Fields
In this field… Do this…
Action Specify what action to take when a packet is smaller than the Minimal MTU
Size threshold, by selecting one of the following:
• Block. Block the packet.
• None. No action. This is the default.
Track Specify whether to issue logs for packets are smaller than the Minimal MTU
Size threshold, by selecting one of the following:
• Log. Issue logs. This is the default.
• None. Do not issue logs.
Minimal MTU
Size
Type the minimum value allowed for the MTU field in IP packets sent by a
client.
An overly small value will not prevent an attack, while an overly large value
might degrade performance and cause legitimate requests to be dropped.
The default value is 300.
SmartDefense Categories
440 Check Point Safe@Office User Guide
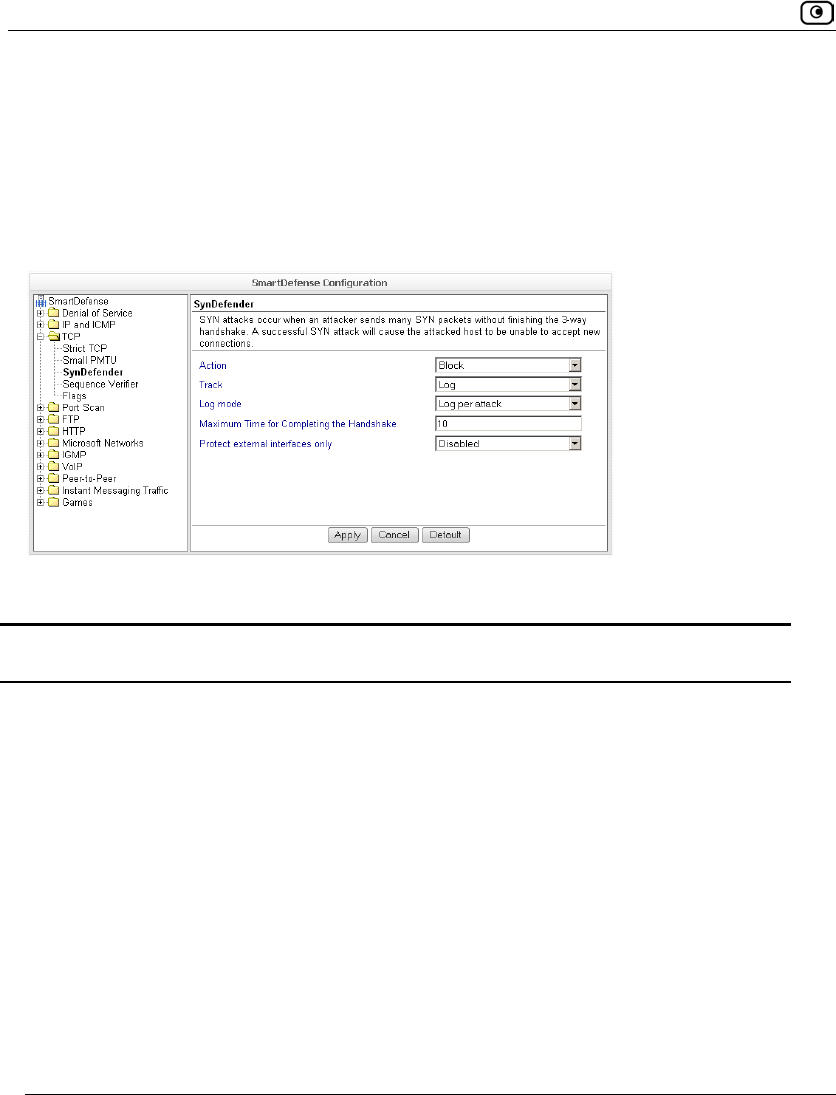
SynDefender
In a SYN attack, the attacker sends many SYN packets without finishing the three-way
handshake. This causes the attacked host to be unable to accept new connections.
You can protect against this attack by specifying a maximum amount of time for
completing handshakes.
Table 84: SynDefender Fields
In this field… Do this…
Action Specify what action to take when a SYN attack occurs, by selecting one of
the following:
• Block. Block the packet. This is the default.
• None. No action.
A SYN attack is when more than 5 incomplete TCP handshakes are
detected within 10 seconds. A handshake is considered incomplete when it
exceeds the Maximum time for completing the handshake threshold.
Track Specify whether to issue logs for the events specified by the Log Mode
parameter, by selecting one of the following:
• Log. Issue logs. This is the default.
• None. Do not issue logs.

SmartDefense Categories
Chapter 14: Using SmartDefense 441
In this field… Do this…
Log mode Specify upon which events logs should be issued, by selecting one of the
following:
• None. Do not issue logs.
• Log per attack. Issue logs for each SYN attack. This is the default.
• Log individual unfinished handshakes. Issue logs for each incomplete
handshake.
This field is only relevant if the Track field is set to Log.
Maximum Time
for Completing
the Handshake
Type the maximum amount of time in seconds after which a TCP handshake
is considered incomplete.
The default value is 10 seconds.
Protect external
interfaces only
Specify whether SynDefender should be enabled for external (WAN)
interfaces only, by selecting one of the following:
• Disabled. Enable SynDefender for all the firewall interfaces. This
is the default.
• Enabled. Enable SynDefender for external interfaces only.
SmartDefense Categories
442 Check Point Safe@Office User Guide
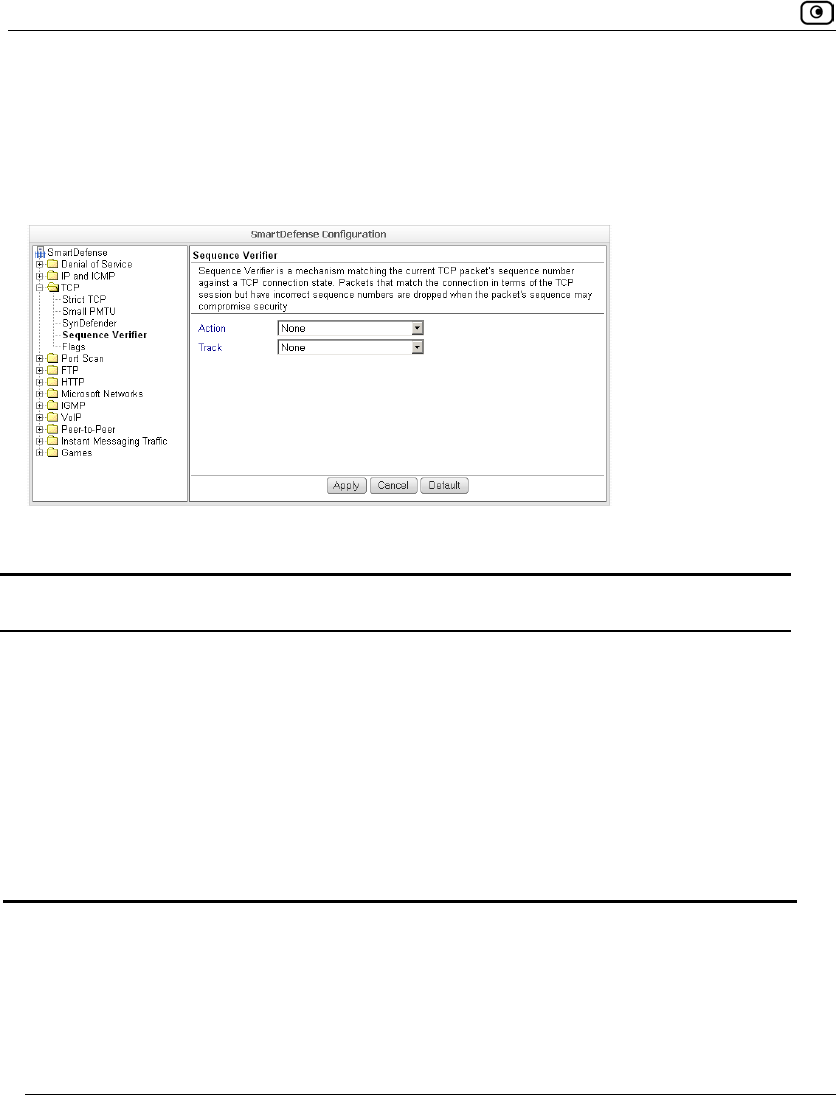
Sequence Verifier
The Safe@Office appliance examines each TCP packet's sequence number and checks
whether it matches a TCP connection state. You can configure how the appliance handles
packets that match a TCP connection in terms of the TCP session but have incorrect
sequence numbers.
Table 85: Strict TCP
In this field… Do this…
Action Specify what action to take when TCP packets with incorrect sequence
numbers arrive, by selecting one of the following:
• Block. Block the packets.
• None. No action. This is the default.
Track Specify whether to log TCP packets with incorrect sequence numbers, by
selecting one of the following:
• Log. Log the packets. This is the default.
• None. Do not log the packets.
SmartDefense Categories
Chapter 14: Using SmartDefense 443
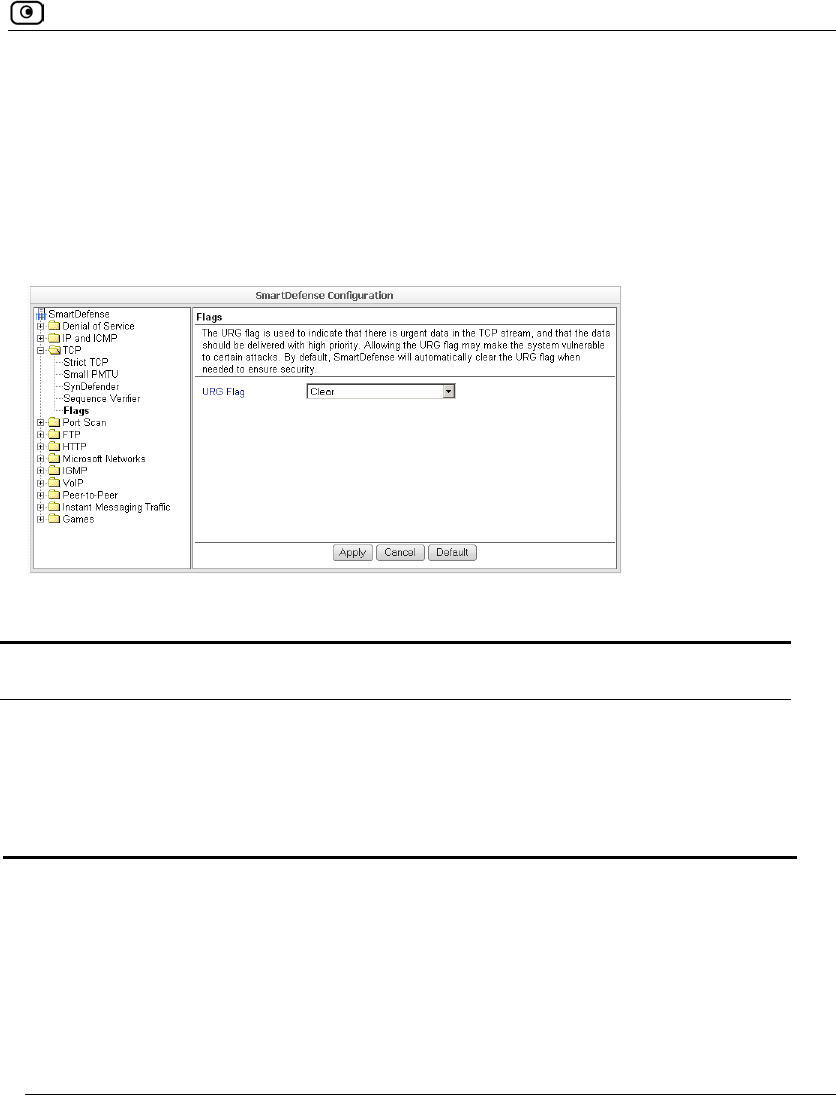
Flags
The URG flag is used to indicate that there is urgent data in the TCP stream, and that the
data should be delivered with high priority. Since handling of the URG flag is inconsistent
between different operating systems, an attacker can use the URG flag to conceal certain
attacks.
You can configure how the URG flag should be handled.
Table 86: Flags Fields
In this field… Do this…
URG Flag Specify whether to clear or allow the URG flag, by selecting one of the
following:
• Clear. Clear the URG flag on all incoming packets. This is the
default.
• Allow. Allow the URG flag.
SmartDefense Categories
444 Check Point Safe@Office User Guide
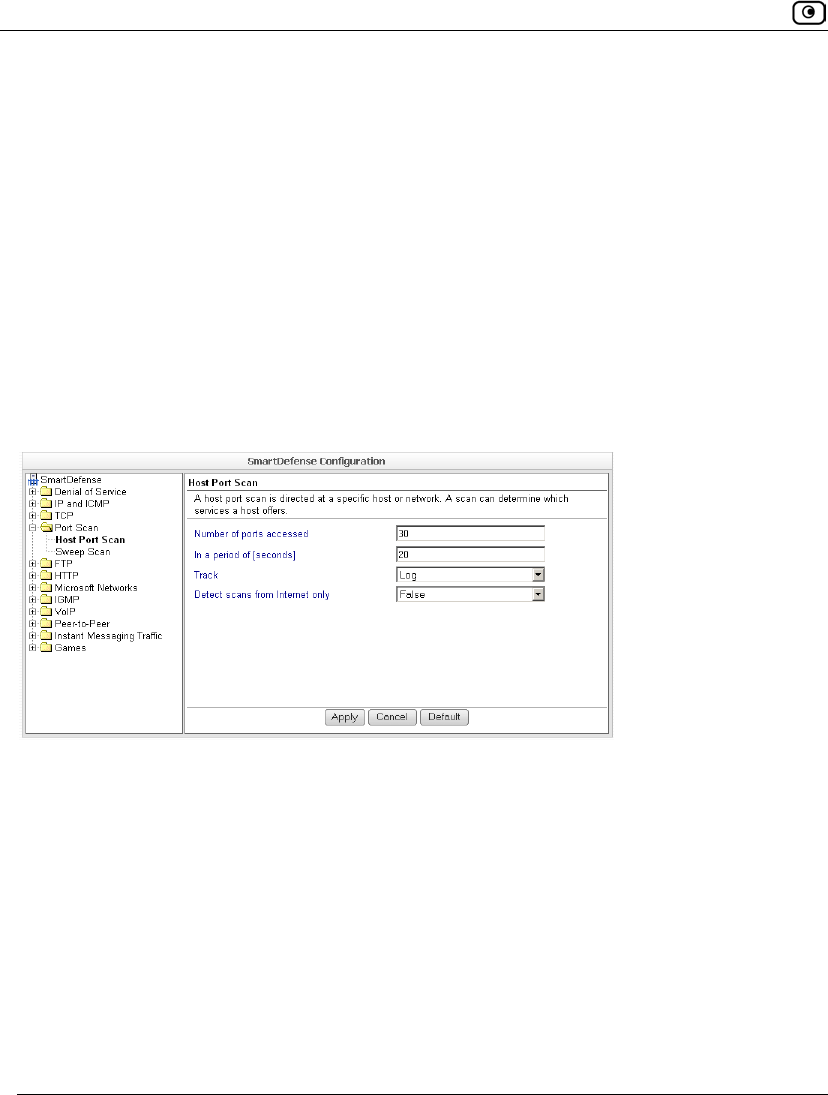
Port Scan
An attacker can perform a port scan to determine whether ports are open and vulnerable to
an attack. This is most commonly done by attempting to access a port and waiting for a
response. The response indicates whether or not the port is open.
This category includes the following types of port scans:
• Host Port Scan. The attacker scans a specific host's ports to determine which of
the ports are open.
• Sweep Scan. The attacker scans various hosts to determine where a specific port
is open.
You can configure how the Safe@Office appliance should react when a port scan is
detected.

SmartDefense Categories
Chapter 14: Using SmartDefense 445
Table 87: Port Scan Fields
In this field… Do this…
Number of ports
accessed
SmartDefense detects ports scans by measuring the number of ports
accessed over a period of time. The number of ports accessed must exceed
the Number of ports accessed value, within the number of seconds specified by
the In a period of [seconds] value, in order for SmartDefense to consider the
activity a scan.
Type the minimum number of ports that must be accessed within the In a
period of [seconds] period, in order for SmartDefense to detect the activity as
a port scan.
For example, if this value is 30, and 40 ports are accessed within a specified
period of time, SmartDefense will detect the activity as a port scan.
For Host Port Scan, the default value is 30. For Sweep Scan, the default
value is 50.
In a period of
[seconds]
SmartDefense detects ports scans by measuring the number of ports
accessed over a period of time. The number of ports accessed must exceed
the Number of ports accessed value, within the number of seconds specified by
the In a period of [seconds] value, in order for SmartDefense to consider the
activity a scan.
Type the maximum number of seconds that can elapse, during which the
Number of ports accessed threshold is exceeded, in order for SmartDefense to
detect the activity as a port scan.
For example, if this value is 20, and the Number of ports accessed threshold is
exceeded for 15 seconds, SmartDefense will detect the activity as a port
scan. If the threshold is exceeded for 30 seconds, SmartDefense will not
detect the activity as a port scan.
The default value is 20 seconds.

SmartDefense Categories
446 Check Point Safe@Office User Guide
In this field… Do this…
Track Specify whether to issue logs for scans, by selecting one of the following:
• Log. Issue logs. This is the default.
• None. Do not issue logs. This is the default.
Detect scans
from Internet only
Specify whether to detect only scans originating from the Internet, by
selecting one of the following:
• False. Do not detect only scans from the Internet. This is the
default.
• True. Detect only scans from the Internet.
FTP
This category allows you to configure various protections related to the FTP protocol. It
includes the following:
• Block Known Ports on page 448
• Block Port Overflow on page 449
• Blocked FTP Commands on page 450
• FTP Bounce on page 447
SmartDefense Categories
Chapter 14: Using SmartDefense 447
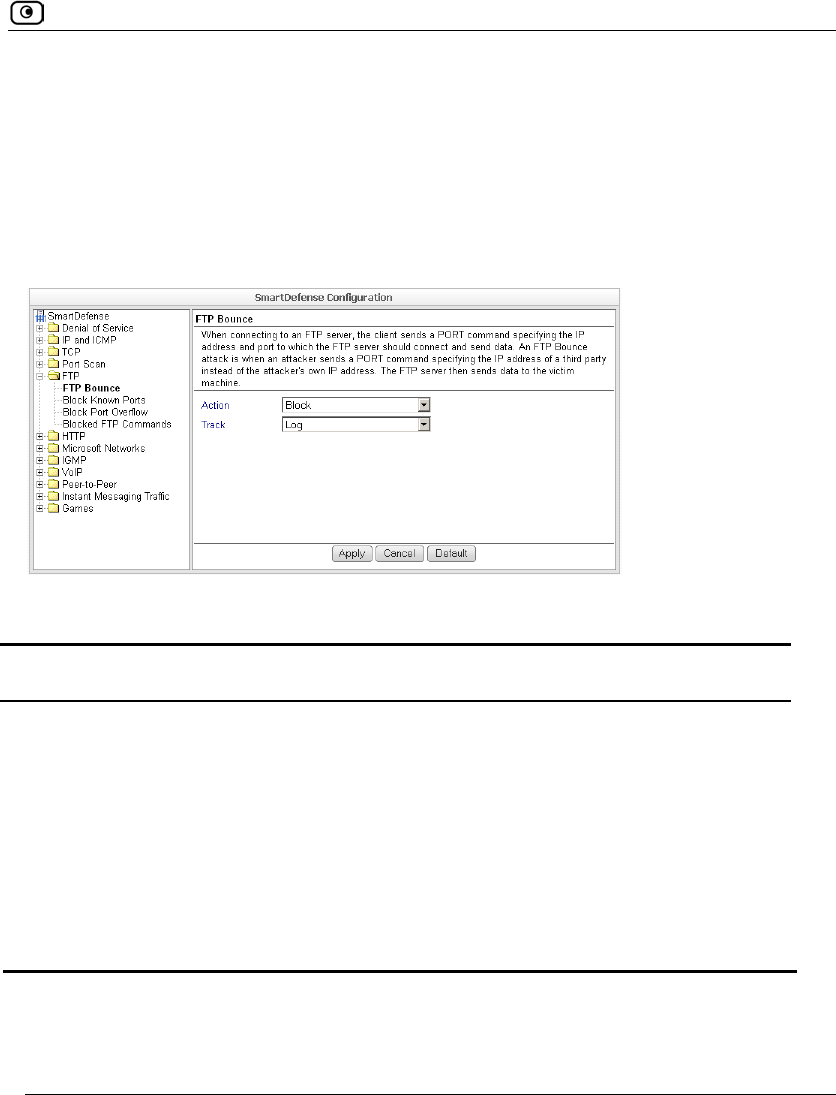
FTP Bounce
When connecting to an FTP server, the client sends a PORT command specifying the IP
address and port to which the FTP server should connect and send data. An FTP Bounce
attack is when an attacker sends a PORT command specifying the IP address of a third
party instead of the attacker's own IP address. The FTP server then sends data to the victim
machine.
You can configure how FTP bounce attacks should be handled.
Table 88: FTP Bounce Fields
In this field… Do this…
Action Specify what action to take when an FTP Bounce attack occurs, by selecting
one of the following:
• Block. Block the attack. This is the default.
• None. No action.
Track Specify whether to log FTP Bounce attacks, by selecting one of the
following:
• Log. Log the attack. This is the default.
• None. Do not log the attack.
SmartDefense Categories
448 Check Point Safe@Office User Guide
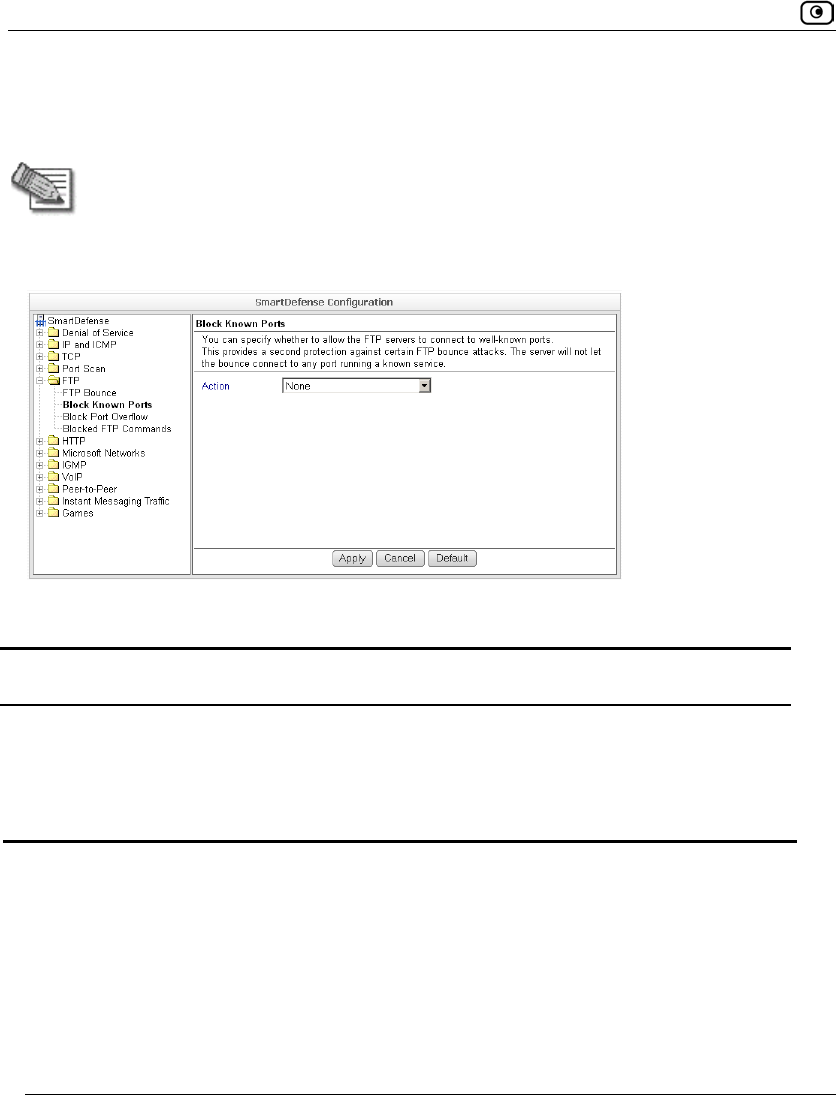
Block Known Ports
You can choose to block the FTP server from connecting to well-known ports.
Note: Known ports are published ports associated with services (for example, SMTP
is port 25).
This provides a second layer of protection against FTP bounce attacks, by preventing such
attacks from reaching well-known ports.
Table 89: Block Known Ports Fields
In this field… Do this…
Action Specify what action to take when the FTP server attempts to connect to a
well-known port, by selecting one of the following:
• Block. Block the connection.
• None. No action. This is the default.
SmartDefense Categories
Chapter 14: Using SmartDefense 449
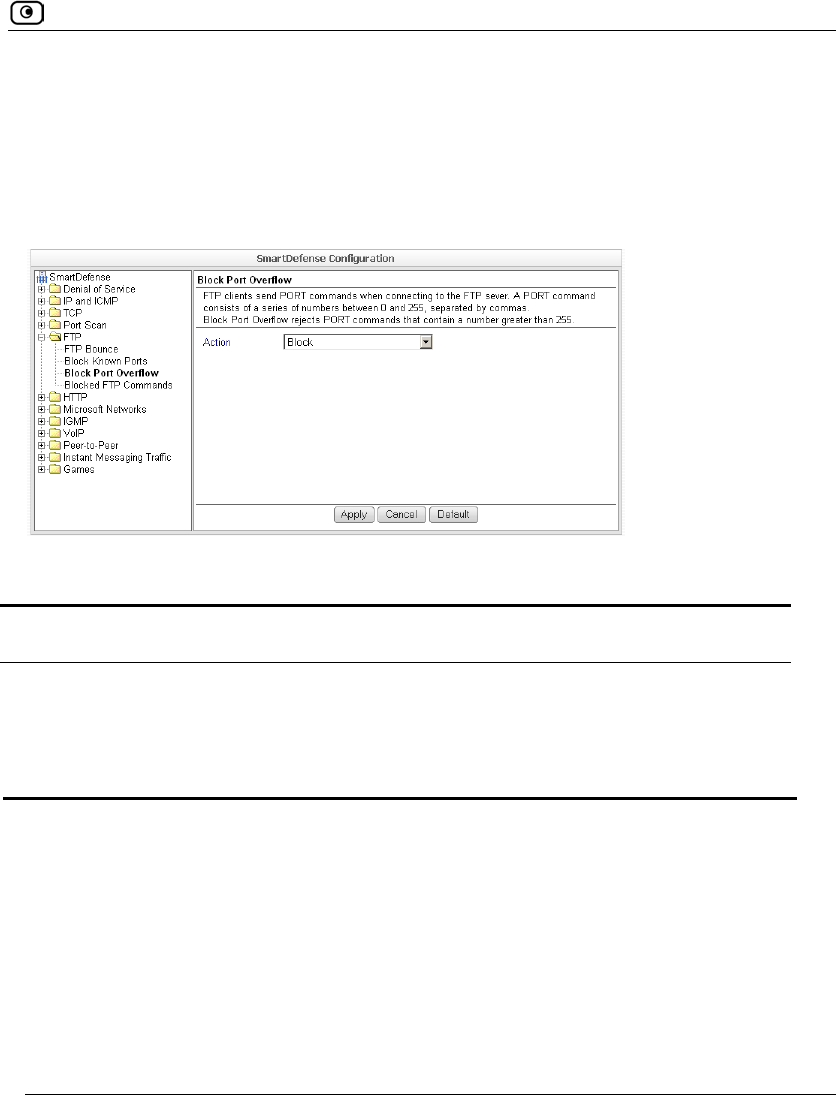
Block Port Overflow
FTP clients send PORT commands when connecting to the FTP sever. A PORT command
consists of a series of numbers between 0 and 255, separated by commas.
To enforce compliance to the FTP standard and prevent potential attacks against the FTP
server, you can block PORT commands that contain a number greater than 255.
Table 90: Block Port Overflow
In this field… Do this…
Action Specify what action to take for PORT commands containing a number
greater than 255, by selecting one of the following:
• Block. Block the PORT command. This is the default.
• None. No action.
SmartDefense Categories
450 Check Point Safe@Office User Guide
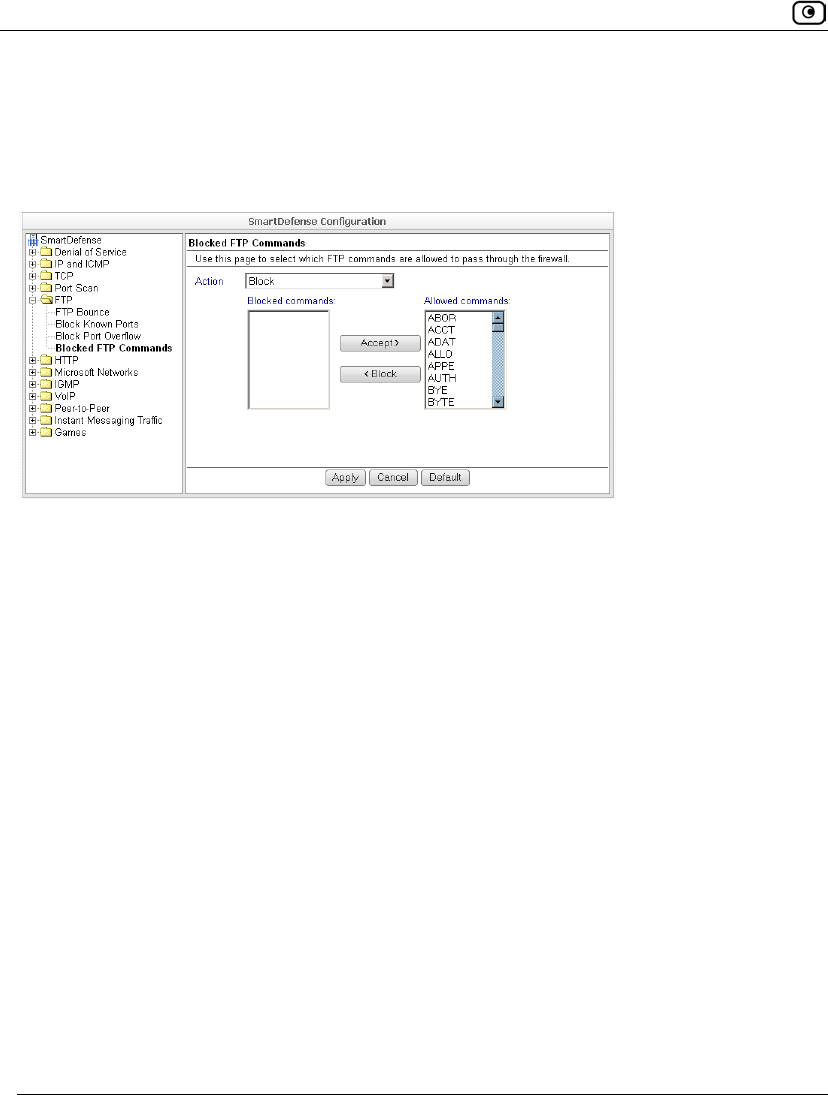
Blocked FTP Commands
Some seldom-used FTP commands may compromise FTP server security and integrity.
You can specify which FTP commands should be allowed to pass through the security
server, and which should be blocked.
To enable FTP command blocking
• In the Action drop-down list, select Block.
The FTP commands listed in the Blocked Commands box will be blocked.
FTP command blocking is enabled by default.
To disable FTP command blocking
• In the Action drop-down list, select None.
All FTP commands are allowed, including those in the Blocked Commands box.
To block a specific FTP command
1. In the Allowed Commands box, select the desired FTP command.
2. Click Block.
The FTP command appears in the Blocked Commands box.
3. Click Apply.
When FTP command blocking is enabled, the FTP command will be blocked.
SmartDefense Categories
Chapter 14: Using SmartDefense 451
To allow a specific FTP command
1. In the Blocked Commands box, select the desired FTP command.
2. Click Accept.
The FTP command appears in the Allowed Commands box.
3. Click Apply.
The FTP command will be allowed, regardless of whether FTP command blocking is
enabled or disabled.
HTTP
This category allows you to configure various protections related to the HTTP protocol. It
includes the following:
• Header Rejection on page 451
• Worm Catcher on page 452
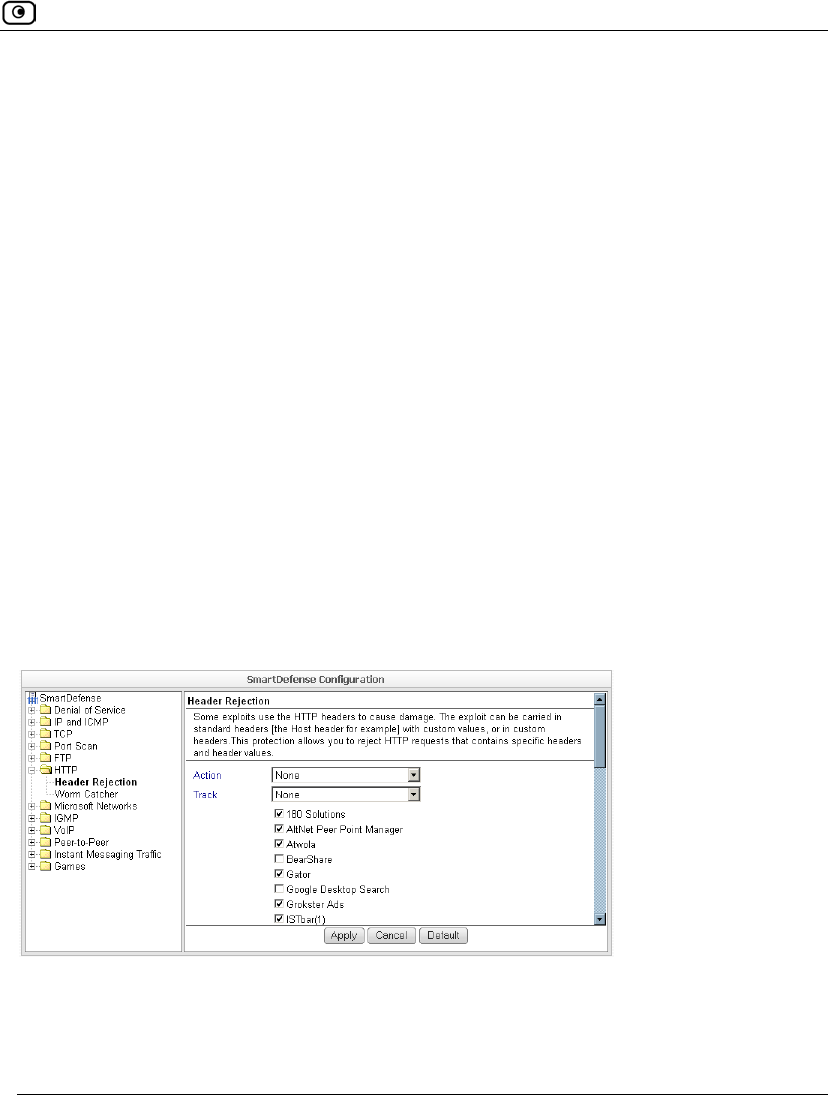
Header Rejection
Some exploits are carried in standard HTTP headers with custom values (for example, in
the Host header), or in custom HTTP headers. You can protect against such exploits by
rejecting HTTP requests that contain specific headers and header values.
SmartDefense Categories
452 Check Point Safe@Office User Guide
Table 91: Header Rejection Fields
In this field… Do this…
Action Specify what action to take when an HTTP header-based exploit is
detected, by selecting one of the following:
• Block. Block the attack.
• None. No action. This is the default.
Track Specify whether to log HTTP header-based exploits, by selecting one of
the following:
• Log. Log the attack.
• None. Do not log the attack. This is the default.
HTTP header values
list
Select the HTTP header values to detect.
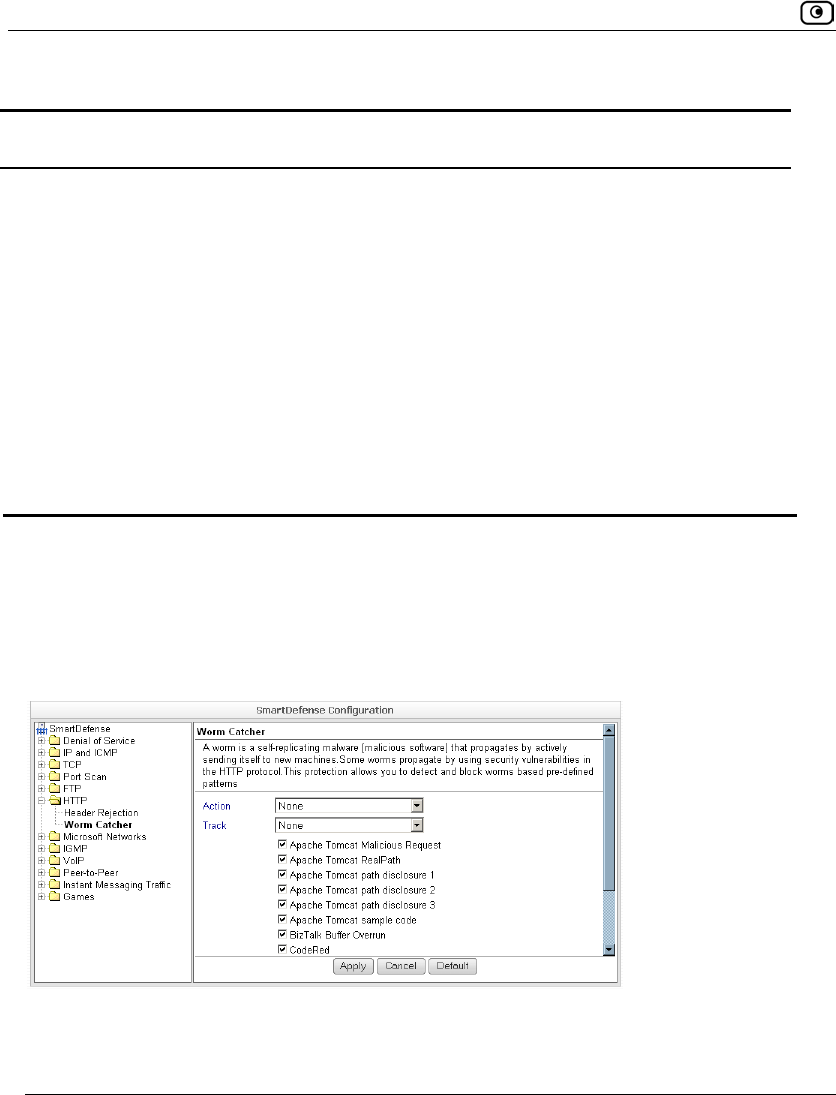
Worm Catcher
A worm is a self-replicating malware (malicious software) that propagates by actively
sending itself to new machines. Some worms propagate by using security vulnerabilities in
the HTTP protocol.
You can specify how HTTP-based worm attacks should be handled.
SmartDefense Categories
Chapter 14: Using SmartDefense 453
Table 92: Worm Catcher Fields
In this field… Do this…
Action Specify what action to take when an HTTP-based worm attack is
detected, by selecting one of the following:
• Block. Block the attack.
• None. No action. This is the default.
Track Specify whether to log HTTP-based worm attacks, by selecting one of
the following:
• Log. Log the attack.
• None. Do not log the attack. This is the default.
HTTP-based worm
patterns list
Select the worm patterns to detect.
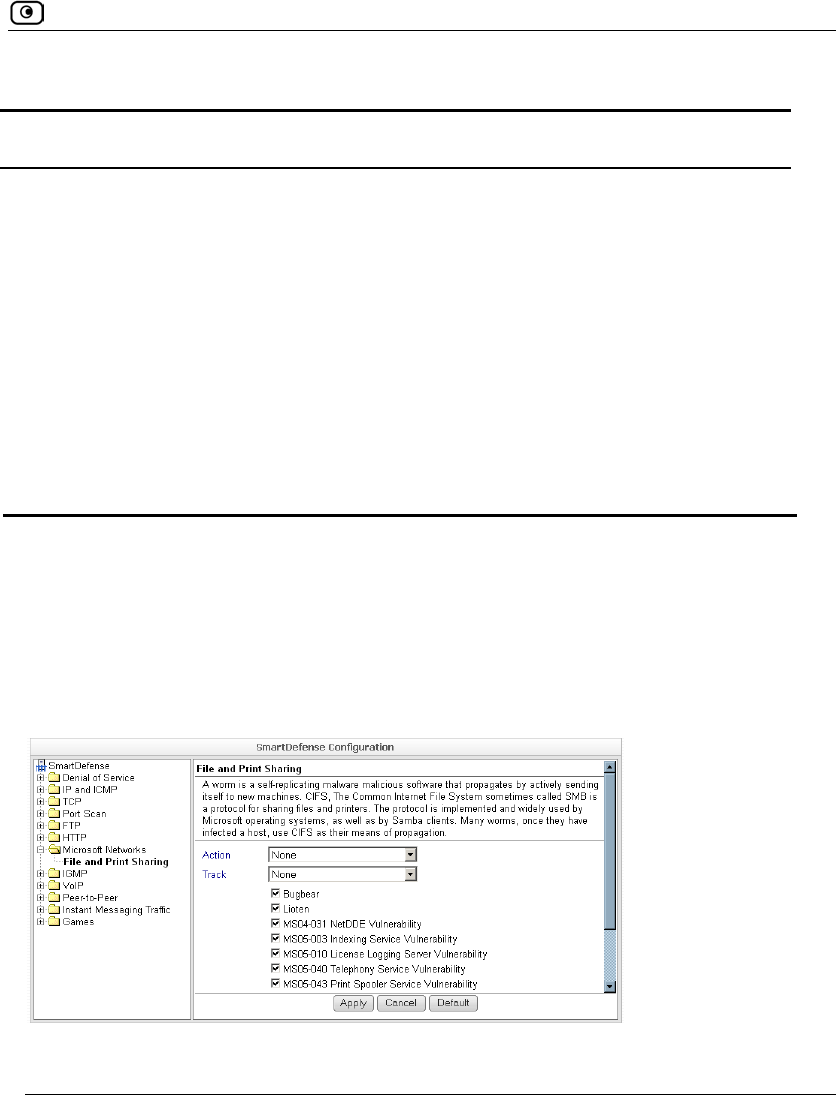
Microsoft Networks
This category includes File and Print Sharing.
Microsoft operating systems and Samba clients rely on Common Internet File System
(CIFS), a protocol for sharing files and printers. However, this protocol is also widely used
by worms as a means of propagation.
You can configure how CIFS worms should be handled.

SmartDefense Categories
454 Check Point Safe@Office User Guide
Table 93: File Print and Sharing Fields
In this field… Do this…
Action Specify what action to take when a CIFS worm attack is detected, by
selecting one of the following:
• Block. Block the attack.
• None. No action. This is the default.
Track Specify whether to log CIFS worm attacks, by selecting one of the
following:
• Log. Log the attack.
• None. Do not log the attack. This is the default.
CIFS worm patterns
list
Select the worm patterns to detect.
Patterns are matched against file names (including file paths but
excluding the disk share name) that the client is trying to read or
write from the server.
SmartDefense Categories
Chapter 14: Using SmartDefense 455
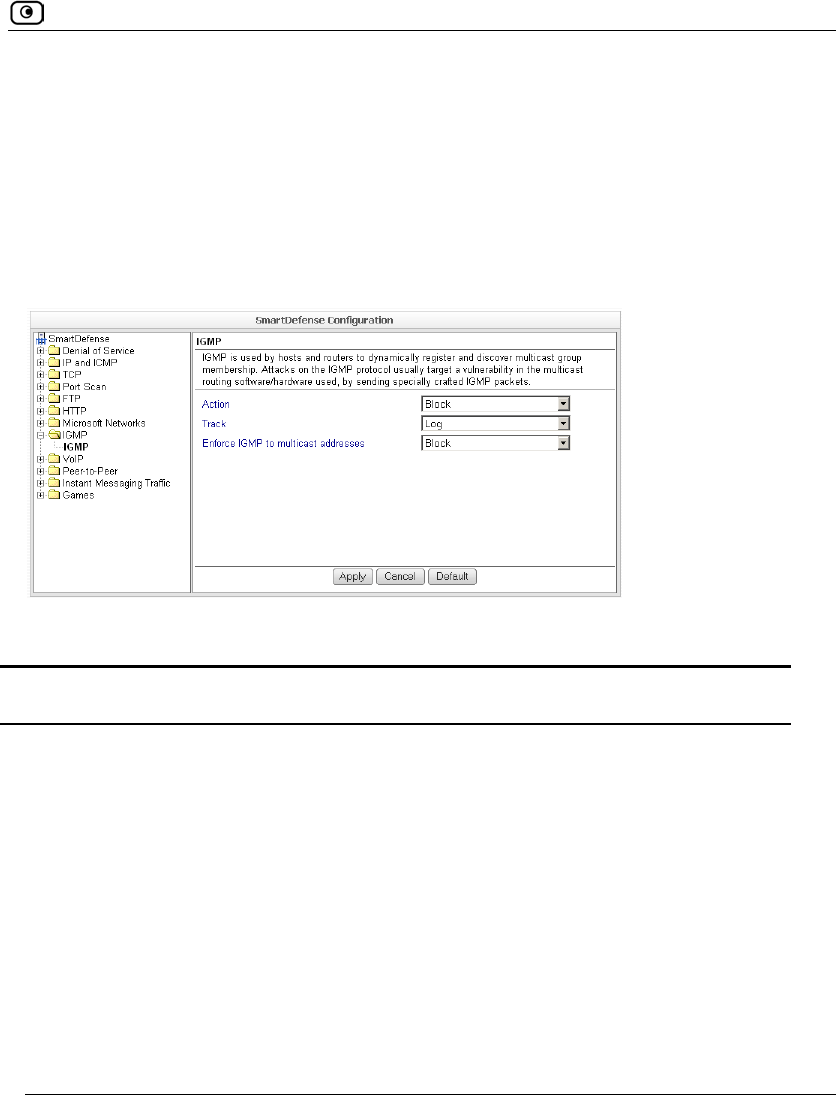
IGMP
This category includes the IGMP protocol.
IGMP is used by hosts and routers to dynamically register and discover multicast group
membership. Attacks on the IGMP protocol usually target a vulnerability in the multicast
routing software/hardware used, by sending specially crafted IGMP packets.
You can configure how IGMP attacks should be handled.
Table 94: IGMP Fields
In this field… Do this…
Action Specify what action to take when an IGMP attack occurs, by selecting
one of the following:
• Block. Block the attack. This is the default.
• None. No action.
Track Specify whether to log IGMP attacks, by selecting one of the following:
• Log. Log the attack. This is the default.
• None. Do not log the attack.

SmartDefense Categories
456 Check Point Safe@Office User Guide
In this field… Do this…
Enforce IGMP to
multicast addresses
According to the IGMP specification, IGMP packets must be sent to
multicast addresses. Sending IGMP packets to a unicast or broadcast
address might constitute and attack; therefore the Safe@Office appliance
blocks such packets.
Specify whether to allow or block IGMP packets that are sent to non-
multicast addresses, by selecting one of the following:
• Block. Block IGMP packets that are sent to non-multicast
addresses. This is the default.
• None. No action.
VoIP
Voice over IP (VoIP) traffic is subject to various threats, such as:
• Call redirections, in which calls intended for one recipient are redirected to
another
• Stealing calls, where the caller pretends to be someone else
• System hacking, using ports that were opened for VoIP connections
This category allows you to configure various protections related to VoIP protocols. It
includes the following:
• SIP on page 457
• H.323 on page 458
SmartDefense Categories
Chapter 14: Using SmartDefense 457
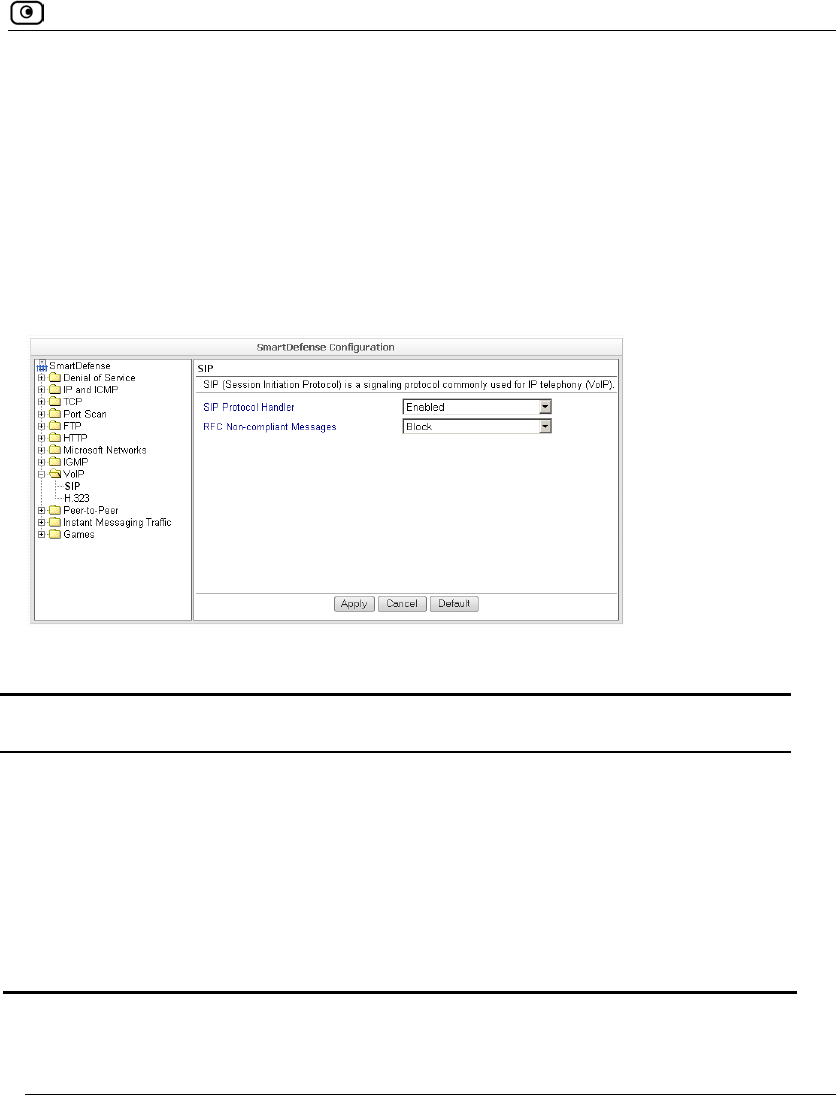
SIP
The SmartDefense SIP Application Level Gateway (ALG) processes the SIP protocol,
allows firewall and NAT traversal, and enables Traffic Shaper to operate on SIP
connections.
By default, the SIP ALG checks SIP sessions for RFC compliance. If desired, you can
allow non-RFC-compliant SIP connections, so that VoIP devices that initiate non-standard
SIP calls can communicate through the firewall. You can also disable the SIP ALG
altogether, if it is not needed by your SIP clients, or if it interferes with their operation.
Table 95: SIP Fields
In this field… Do this…
SIP Protocol
Handler
Specify whether to enable SIP support, by selecting one of the following:
• Enabled. Enable SIP support. This is the default.
• Disabled. Disable SIP support.
RFC Non-
compliant
Messages
Specify what action to take when non-RFC-compliant SIP packets arrive, by
selecting one of the following:
• Block. Block the packets. This is the default.
• None. No action.
SmartDefense Categories
458 Check Point Safe@Office User Guide
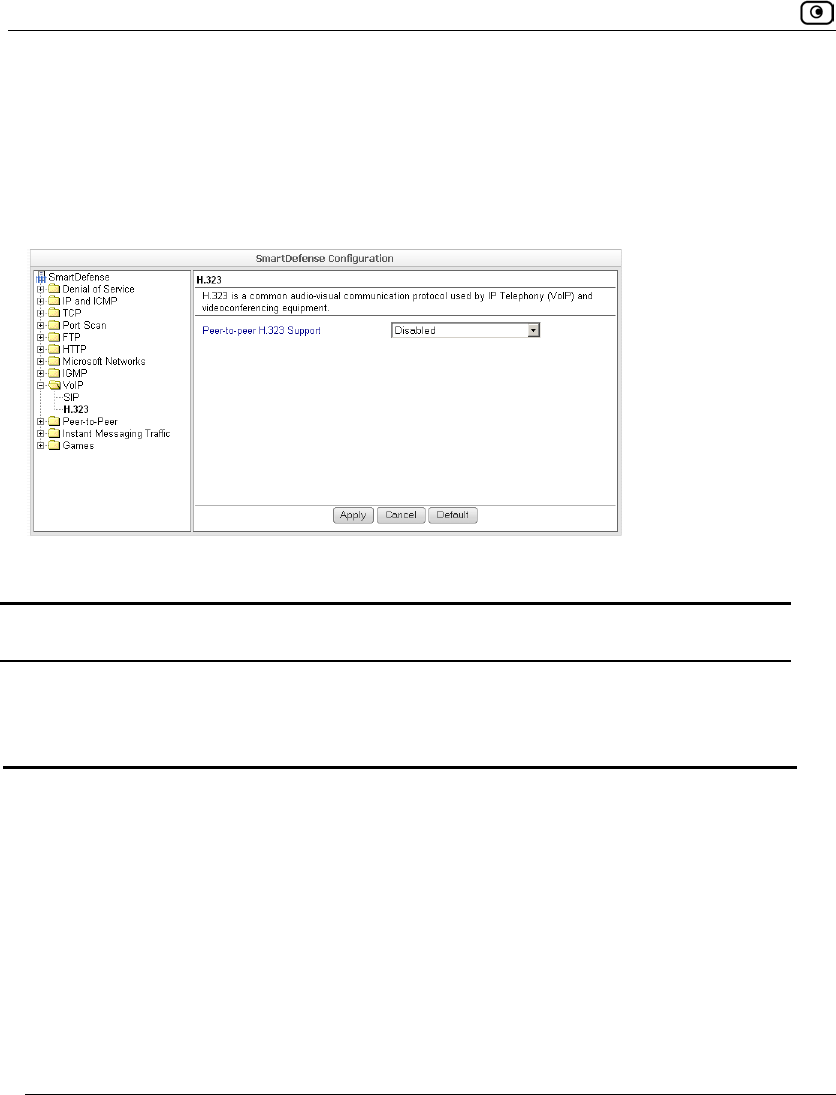
H.323
H.323 telephony is used by various devices and applications, such as Microsoft
Netmeeting. SmartDefense allows you to choose whether to disable or enable the H.323
Application Level Gateway (ALG), which allows firewall and NAT traversal of H.323
calls.
Table 96: H.323 Fields
In this field… Do this…
Peer-to-peer
H.323 Support
Specify whether to enable H.323 support, by selecting one of the following:
• Enabled. Enable H.323 support.
• Disabled. Disabled H.323 support. This is the default.
SmartDefense Categories
Chapter 14: Using SmartDefense 459
Peer-to-Peer
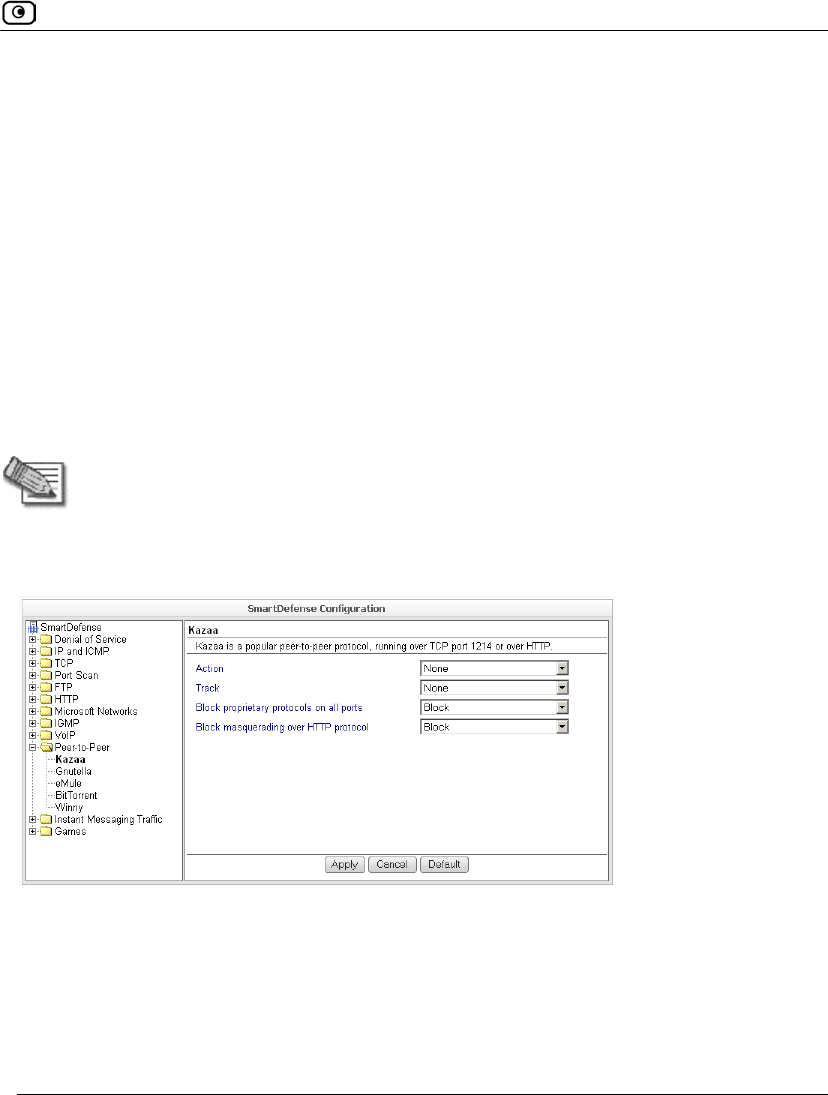
SmartDefense can block peer-to-peer file-sharing traffic, by identifying the proprietary
protocols and preventing the initial connection to the peer-to-peer networks. This prevents
not only downloads, but also search operations.
This category includes the following nodes:
• BitTorrent
• eMule
• Gnutella
• KaZaA
• Winny
Note: SmartDefense can detect peer-to-peer traffic regardless of the TCP port being
used to initiate the session.
In each node, you can configure how peer-to-peer connections of the selected type should
be handled, using the following table.

SmartDefense Categories
460 Check Point Safe@Office User Guide
Table 97: Peer to Peer Fields
In this field… Do this…
Action Specify what action to take when a connection is attempted, by selecting
one of the following:
• Block. Block the connection.
• None. No action. This is the default.
Track Specify whether to log peer-to-peer connections, by selecting one of the
following:
• Log. Log the connection.
• None. Do not log the connection. This is the default.
Block proprietary
protocols on all ports
Specify whether proprietary protocols should be blocked on all ports, by
selecting one of the following:
• Block. Block the proprietary protocol on all ports. This in effect
prevents all communication using this peer-to-peer
application. This is the default.
• None. Do not block the proprietary protocol on all ports.
Block masquerading
over HTTP protocol
Specify whether to block using the peer-to-peer application over HTTP,
by selecting one of the following:
• Block. Block using the application over HTTP. This is the
default.
• None. Do not block using the application over HTTP.
This field is not relevant for eMule and Winny.
SmartDefense Categories
Chapter 14: Using SmartDefense 461
Instant Messaging Traffic
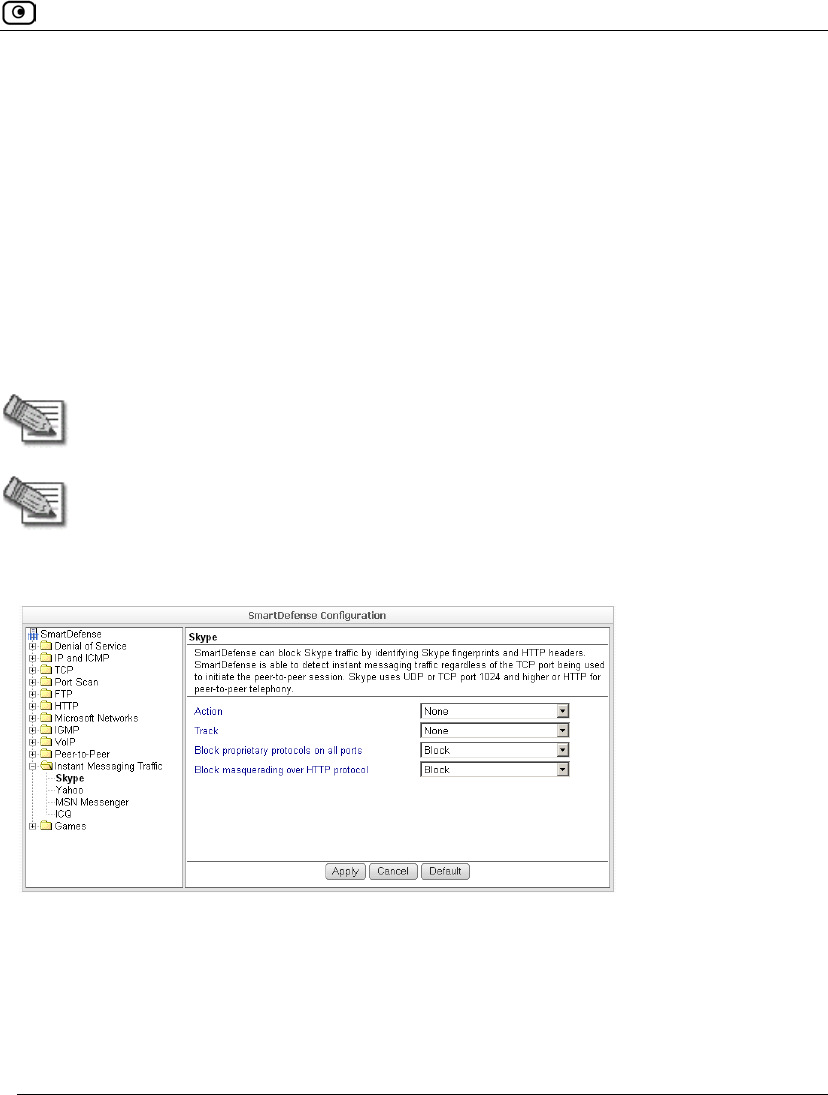
SmartDefense can block instant messaging applications that use VoIP protocols, by
identifying the messaging application's fingerprints and HTTP headers.
This category includes the following nodes:
• ICQ
• MSN Messenger
• Skype
• Yahoo
Note: SmartDefense can detect instant messaging traffic regardless of the TCP port
being used to initiate the session.
Note: Skype versions up to 2.0.0.103 are supported.
In each node, you can configure how instant messaging connections of the selected type
should be handled, using the following table.

SmartDefense Categories
462 Check Point Safe@Office User Guide
Table 98: Instant Messengers Fields
In this field… Do this…
Action Specify what action to take when a connection is attempted, by selecting
one of the following:
• Block. Block the connection.
• None. No action. This is the default.
Track Specify whether to log instant messenger connections, by selecting one
of the following:
• Log. Log the connection.
• None. Do not log the connection. This is the default.
Block proprietary
protocol /
Block proprietary
protocols on all ports
Specify whether proprietary protocols should be blocked on all ports, by
selecting one of the following:
• Block. Block the proprietary protocol on all ports. This in effect
prevents all communication using this instant messenger
application. This is the default.
• None. Do not block the proprietary protocol on all ports.
Block masquerading
over HTTP protocol
Specify whether to block using the instant messenger application over
HTTP, by selecting one of the following:
• Block. Block using the application over HTTP. This is the
default.
• None. Do not block using the application over HTTP.
SmartDefense Categories
Chapter 14: Using SmartDefense 463
Games
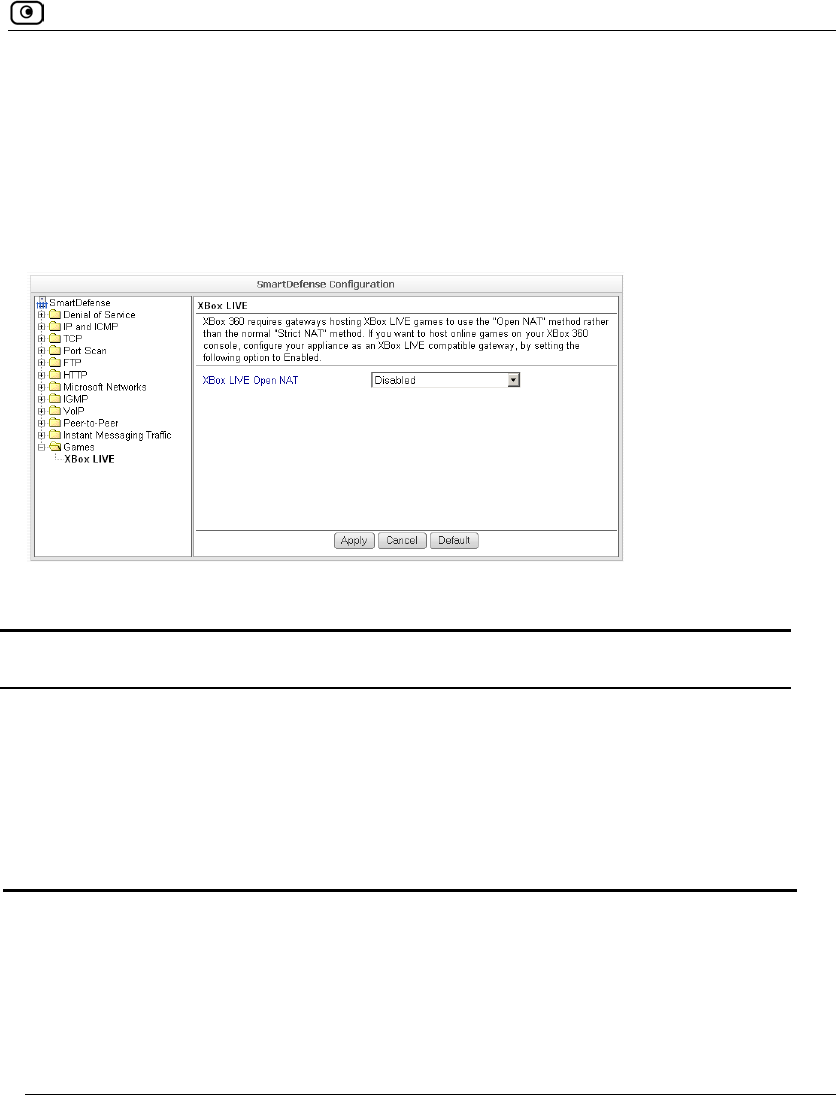
This category includes XBox LIVE.
XBox 360 requires gateways hosting XBox LIVE games to use the "Open NAT" method
rather than the normal "Strict NAT" method. Therefore, if you want to host online games
on an XBox 360 console, you must first configure your Safe@Office appliance to use the
"Open NAT" method.
Table 99: XBox LIVE Fields
In this field… Do this…
Xbox Live OpenNAT Specify whether the Safe@Office appliance should use the "Open NAT"
method, by selecting one of the following:
• Enabled. Use the "Open NAT" method. You will be able to host
XBox LIVE games and join existing ones.
• Disabled. Do not use the "Open NAT" method. You will not be
able to host XBox LIVE games, but you will still be able to join
existing ones. This is the default.

Resetting SmartDefense to its Defaults
464 Check Point Safe@Office User Guide
Resetting SmartDefense to its Defaults
If desired, you can reset the SmartDefense security policy to its default settings. For
information on the default value of each SmartDefense setting, see SmartDefense
Categories on page 419.
For information on resetting individual nodes in the SmartDefense tree to their default
settings, see Using the SmartDefense Tree on page 417.
To reset SmartDefense to its defaults
1. Click Security in the main menu, and click the SmartDefense tab.
The SmartDefense page appears.
2. Click Reset to Defaults.
A confirmation message appears.
3. Click OK.
The SmartDefense policy is reset to its default settings.
Overview
Chapter 15: Using Antivirus and Antispam Filtering 465
Chapter 15
This chapter explains how to use antivirus and antispam filtering.
This chapter includes the following topics:
Overview ..................................................................................................465
Using VStream Antivirus .........................................................................467
Using VStream Antispam.........................................................................487
Using Centralized Email Filtering............................................................521
Overview
The Safe@Office appliance enables you to perform both antivirus and antispam filtering,
to ensure your network remains secure.
Antivirus Filtering Solutions
You can scan connections for viruses, by using VStream Antivirus and/or the Email
Antivirus subscription service (part of the centralized Email Filtering service). The
following table describes the main differences between VStream Antivirus and the Email
Antivirus service:
Table 100: Comparison of Antivirus Filtering Methods
VStream Antivirus Email Antivirus
Supported
Protocols
VStream Antivirus supports
multiple protocols, including
incoming SMTP and outgoing
POP3 connections.
Email Antivirus is specific to email,
scanning incoming POP3 and outgoing
SMTP connections only.
Using Antivirus and Antispam Filtering

Overview
466 Check Point Safe@Office User Guide
VStream Antivirus Email Antivirus
Point of Enforcement VStream Antivirus scans for
viruses in the Safe@Office
gateway itself.
Email Antivirus is centralized, redirecting
traffic through the Service Center for
scanning.
You can use either antivirus solution, or both in conjunction.
Antispam Filtering Solutions
You can scan email messages for spam, by using VStream Antispam and/or the Email
Antispam subscription service (part of the centralized Email Filtering service). The
following table describes the main differences between VStream Antispam and the Email
Antispam service:
Table 101: Comparison of Antispam Filtering Methods
VStream Antispam Email Antispam
Supported
Protocols
VStream Antispam supports
both incoming and outgoing
POP3 and SMTP, as well as
POP3 and SMTP connections
between internal networks.
Email Antispam scans incoming POP3
and outgoing SMTP connections only.
Point of Enforcement VStream Antispam scans for
spam in the Safe@Office
gateway itself.
Email Antispam is centralized, redirecting
traffic through the Service Center for
scanning.
You can use either antispam solution, or both in conjunction.
Using VStream Antivirus
Chapter 15: Using Antivirus and Antispam Filtering 467
Using VStream Antivirus
The Safe@Office appliance includes VStream Antivirus, an embedded stream-based
antivirus engine based on Check Point Stateful Inspection and Application Intelligence
technologies, that performs virus scanning at the kernel level.
VStream Antivirus scans files for malicious content on the fly, without downloading the
files into intermediate storage. This means minimal added latency and support for
unlimited file sizes; and since VStream Antivirus stores only minimal state information per
connection, it can scan thousands of connections concurrently. In order to scan archive
files on the fly, VStream Antivirus performs real-time decompression and scanning of ZIP,
TAR, and GZ archive files, with support for nested archive files.
If you are subscribed to the VStream Antivirus subscription service, VStream Antivirus
virus signatures are automatically updated, so that security is always up-to-date, and your
network is always protected.
VStream Antivirus Actions
When VStream Antivirus detects malicious content, the action it takes depends on the
protocol in which the virus was found. See the following table. In each case, VStream
Antivirus blocks the file and writes a log to the Event Log.
Table 102: VStream Antivirus Actions
If a virus if found in
this protocol...
VStream Antivirus does this... The protocol is detected
on this port...
HTTP • Terminates the
connection All ports on which VStream
Antivirus is enabled by the
policy, not only port 80

Using VStream Antivirus
468 Check Point Safe@Office User Guide
If a virus if found in
this protocol...
VStream Antivirus does this... The protocol is detected
on this port...
POP3 • Terminates the
connection
• Deletes the virus-
infected email from the
server
The standard TCP port 110.
IMAP • Terminates the
connection
• Replaces the virus-
infected email with a
message notifying the
user that a virus was
found
The standard TCP port 143
SMTP • Rejects the virus-
infected email with error
code 554
• Sends a "Virus
detected" message to
the sender
The standard TCP port 25
FTP • Terminates the data
connection
• Sends a "Virus detected"
message to the FTP
client
The standard TCP port 21
TCP and UDP • Terminates the
connection Generic TCP and UDP ports,
other than those listed above
Note: In protocols that are not listed in this table, VStream Antivirus uses a "best
effort" approach to detect viruses. In such cases, detection of viruses is not
guaranteed and depends on the specific encoding used by the protocol.
Using VStream Antivirus
Chapter 15: Using Antivirus and Antispam Filtering 469
Default Antivirus Policy
The VStream Antivirus default policy includes the following rules:
• All SMTP connections are scanned, regardless of the connection's direction.
• All POP3 connections are scanned, regardless of the connection's direction.
• All IMAP connections are scanned, regardless of the connection's direction.
You can easily override the default antivirus policy, by creating user-defined rules. For
further information, see Configuring the VStream Antivirus Policy on page 471.
Enabling/Disabling VStream Antivirus
To enable/disable VStream Antivirus
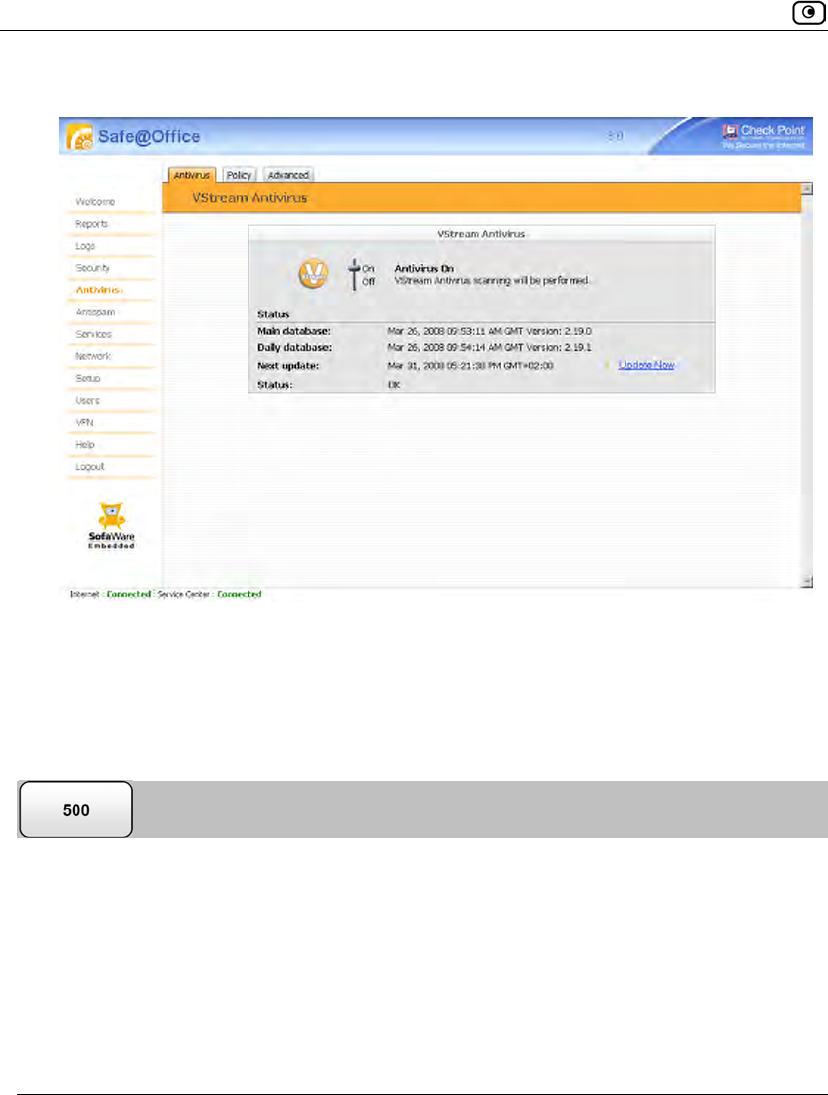
1. Click Antivirus in the main menu, and click the Antivirus tab.
Using VStream Antivirus
470 Check Point Safe@Office User Guide
The VStream Antivirus page appears.
2. Drag the On/Off lever upwards or downwards.
VStream Antivirus is enabled/disabled for all internal network computers.
Viewing VStream Antivirus Signature Database
Information
VStream Antivirus maintains two databases: a daily database and a main database. The
daily database is updated frequently with the newest virus signatures. Periodically, the
contents of the daily database are moved to the main database, leaving the daily database
empty. This system of incremental updates to the main database allows for quicker updates
and saves on network bandwidth.
You can view information about the VStream Antivirus signature databases currently in
use, in the VStream Antivirus page.
Using VStream Antivirus
Chapter 15: Using Antivirus and Antispam Filtering 471
Table 103: VStream Antivirus Page Fields
This field… Displays…
Main database The date and time at which the main database was last updated,
followed by the version number.
Daily database The date and time at which the daily database was last updated, followed
by the version number.
Next update The next date and time at which the Safe@Office appliance will check for
updates.
Status The current status of the database. This includes the following statuses:
• Database Not Installed
• OK
Configuring the VStream Antivirus Policy
VStream Antivirus includes a flexible mechanism that allows the user to define exactly
which traffic should be scanned, by specifying the protocol, ports, and source and
destination IP addresses.
VStream Antivirus processes policy rules in the order they appear in the Antivirus Policy
table, so that rule 1 is applied before rule 2, and so on. This enables you to define
exceptions to rules, by placing the exceptions higher up in the Rules table.
Using VStream Antivirus
472 Check Point Safe@Office User Guide
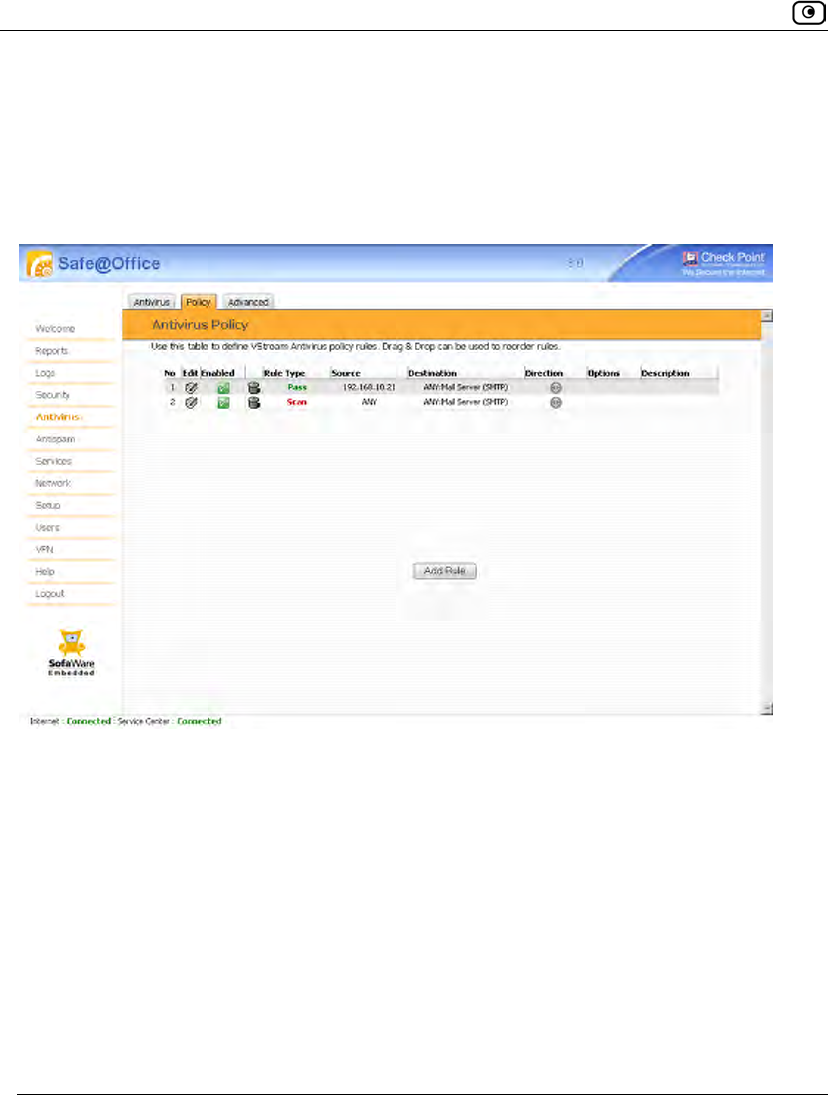
For example, if you want to scan all outgoing SMTP traffic, except traffic from a specific
IP address, you can create a rule scanning all outgoing SMTP traffic and move the rule
down in the Antivirus Policy table. Then create a rule passing SMTP traffic from the
desired IP address and move this rule to a higher location in the Antivirus Policy table than
the first rule. In the figure below, the general rule is rule number 2, and the exception is
rule number 1.
The Safe@Office appliance will process rule 1 first, passing outgoing SMTP traffic from
the specified IP address, and only then it will process rule 2, scanning all outgoing SMTP
traffic.
Using VStream Antivirus
Chapter 15: Using Antivirus and Antispam Filtering 473
The following rule types exist:
Table 104: VStream Antivirus Rule Types
Rule Description
Pass This rule type enables you to specify that VStream Antivirus should not scan
traffic matching the rule.
Scan This rule type enables you to specify that VStream Antivirus should scan traffic
matching the rule.
If a virus is found, it is blocked and logged.
Adding and Editing VStream Antivirus Rules
To add or edit a VStream Antivirus rule
1. Click Antivirus in the main menu, and click the Policy tab.
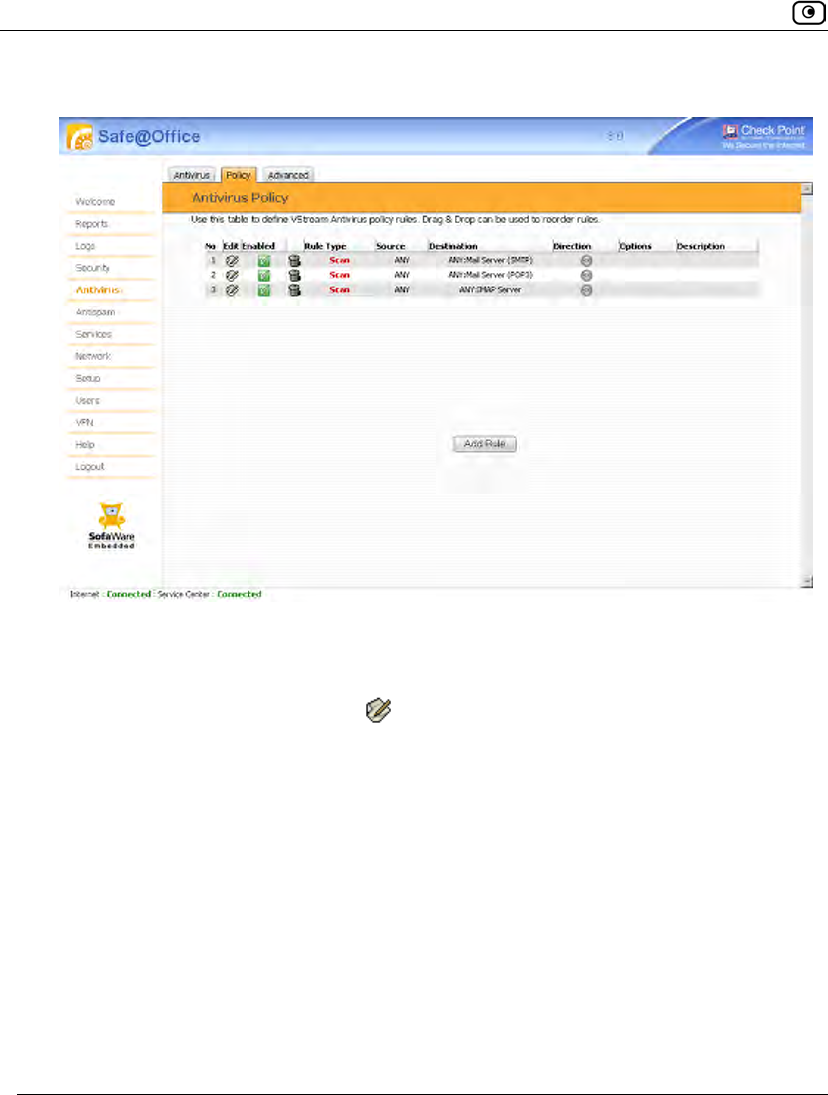
Using VStream Antivirus
474 Check Point Safe@Office User Guide
The Antivirus Policy page appears.
2. Do one of the following:
• To add a new rule, click Add Rule.
• To edit an existing rule, click next to the desired rule.
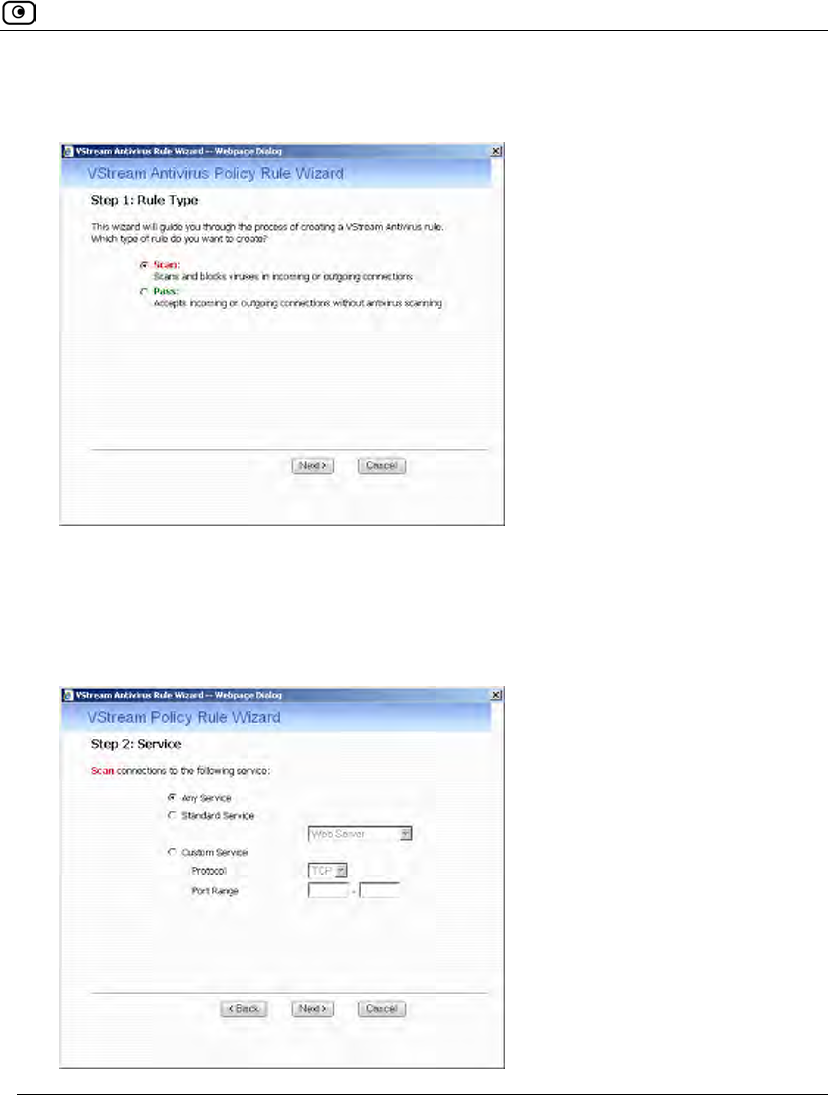
Using VStream Antivirus
Chapter 15: Using Antivirus and Antispam Filtering 475
The VStream Policy Rule Wizard opens, with the Step 1: Rule Type dialog box
displayed.
3. Select the type of rule you want to create.
4. Click Next.
The Step 2: Service dialog box appears.
The example below shows a Scan rule.
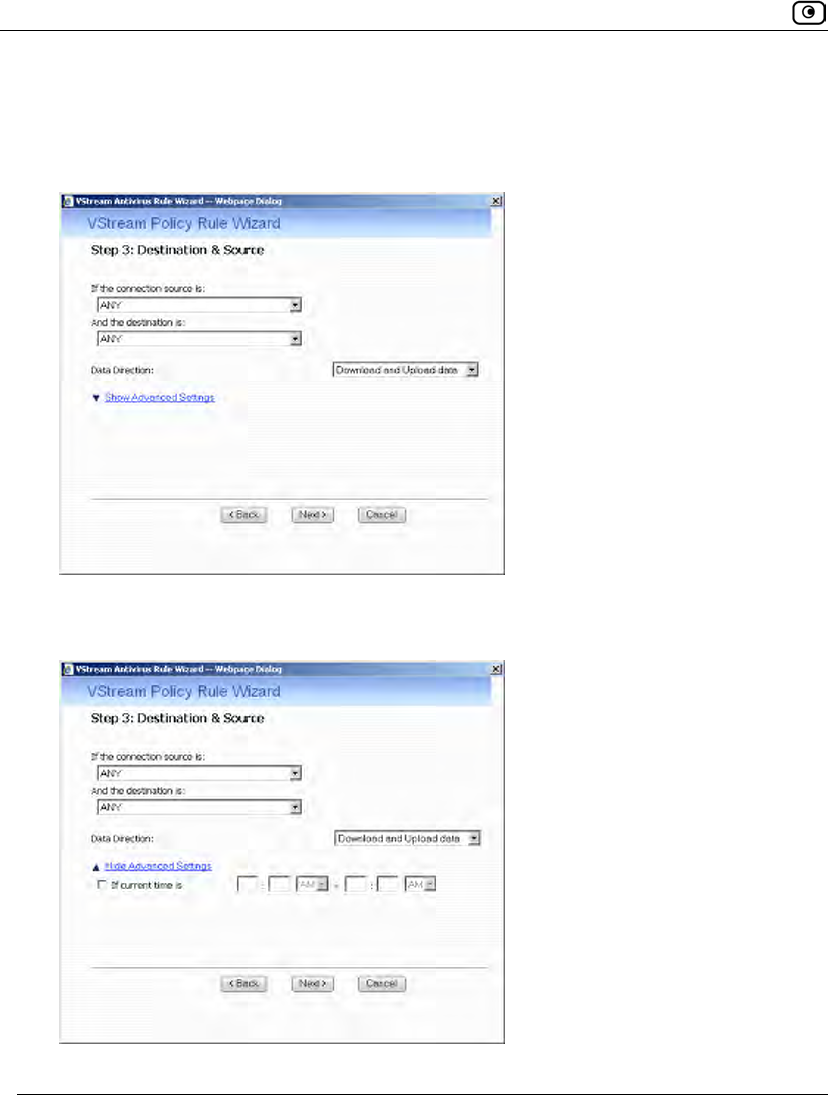
Using VStream Antivirus
476 Check Point Safe@Office User Guide
5. Complete the fields using the relevant information in the following table.
6. Click Next.
The Step 3: Destination & Source dialog box appears.
7. To configure advanced settings, click Show Advanced Settings.
New fields appear.
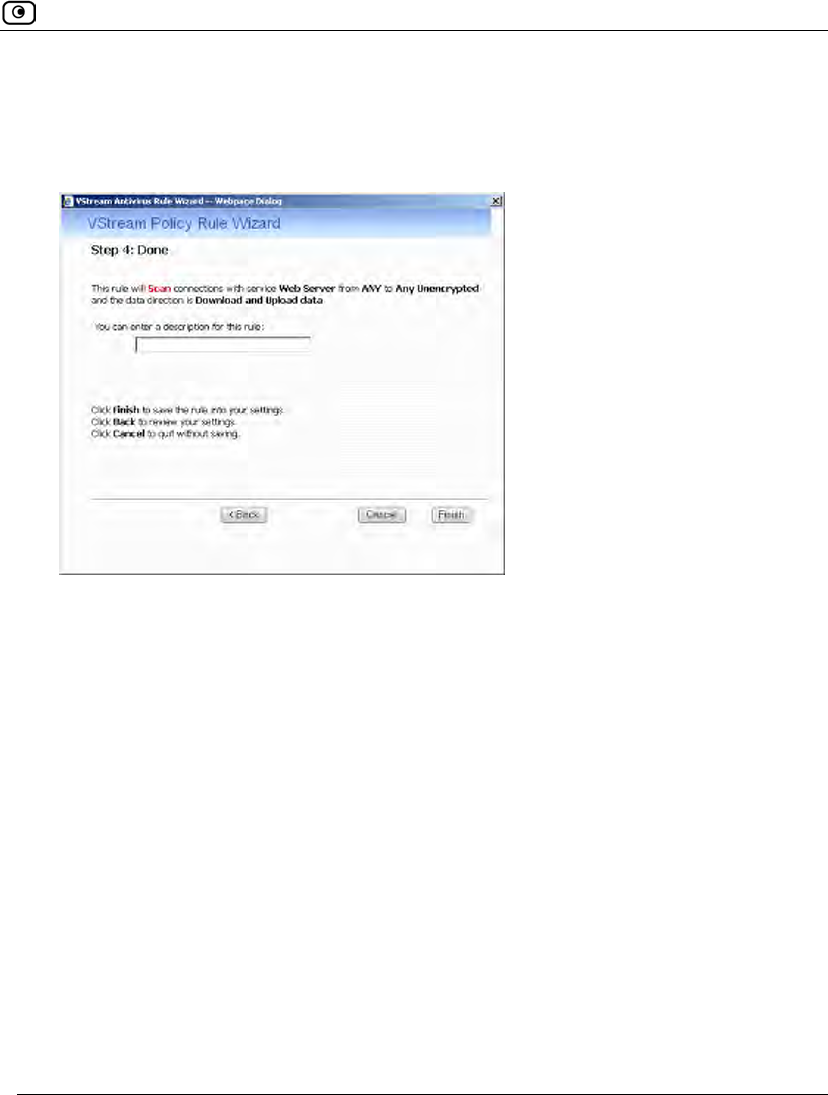
Using VStream Antivirus
Chapter 15: Using Antivirus and Antispam Filtering 477
8. Complete the fields using the relevant information in the following table.
9. Click Next.
The Step 4: Done dialog box appears.
10. If desired, type a description of the rule in the field provided.
11. Click Finish.
The new rule appears in the Antivirus Policy page.

Using VStream Antivirus
478 Check Point Safe@Office User Guide
Table 105: VStream Antivirus Rule Fields
In this field… Do this…
Any Service Click this option to specify that the rule should apply to any service.
Standard
Service
Click this option to specify that the rule should apply to a specific standard
service or network service object.
You must then select the desired service or network service object from the
drop-down list.
Custom Service Click this option to specify that the rule should apply to a specific non-
standard service.
The Protocol and Port Range fields are enabled. You must fill them in.
Protocol Select the protocol (TCP, UDP, or ANY) for which the rule should apply.
Port Range To specify the port range to which the rule applies, type the start port
number in the left text box, and the end port number in the right text box.
Note: If you do not enter a port range, the rule will apply to all ports. If you
enter only one port number, the range will include only that port.
If the
connection
source is
Select the source of the connections you want to allow/block. This list
includes network objects.
To specify an IP address, select Specified IP and type the desired IP address
in the field provided.
To specify an IP address range, select Specified Range and type the desired
IP address range in the fields provided.
To specify any source, select ANY.

Using VStream Antivirus
Chapter 15: Using Antivirus and Antispam Filtering 479
In this field… Do this…
And the
destination is
Select the destination of the connections you want to allow or block. This list
includes network objects.
To specify an IP address, select Specified IP and type the desired IP address
in the text box.
To specify an IP address range, select Specified Range and type the desired
IP address range in the fields provided.
To specify the Safe@Office IP addresses, select This Gateway.
To specify any destination except the Safe@Office Portal IP addresses,
select ANY.
Data Direction Select the direction of connections to which the rule should apply:
• Download and Upload data. The rule applies to downloaded and
uploaded data. This is the default.
• Download data. The rule applies to downloaded data, that is, data
flowing from the destination of the connection to the source of the
connection.
• Upload data. The rule applies to uploaded data, that is, data flowing
from the source of the connection to the destination of the
connection.
If the current time
is
Select this option to specify that the rule should be applied only during
certain hours of the day.
You must then use the fields and drop-down lists provided, to specify the
desired time range.
Using VStream Antivirus
480 Check Point Safe@Office User Guide
Enabling/Disabling VStream Antivirus Rules
You can temporarily disable a VStream Antivirus rule.
To enable/disable a VStream Antivirus rule
1. Click Antivirus in the main menu, and click the Policy tab.
The Antivirus Policy page appears.
2. Next to the desired rule, do one of the following:
• To enable the rule, click .
The button changes to and the rule is enabled.
• To disable the rule, click .
The button changes to and the rule is disabled.
Reordering VStream Antivirus Rules
To reorder VStream Antivirus rules
1. Click Antivirus in the main menu, and click the Policy tab.
The Antivirus Policy page appears.
2. For each rule you want to move, click on the rule and drag it to the desired
location in the table.
Using VStream Antivirus
Chapter 15: Using Antivirus and Antispam Filtering 481
Viewing and Deleting VStream Antivirus Rules
To view or delete an existing VStream Antivirus rule
1. Click Antivirus in the main menu, and click the Policy tab.
The Antivirus Policy page appears with a list of existing VStream Antivirus rules.
2. To resize a column, drag the relevant column divider right or left.
3. To delete a rule, do the following.
a. In the desired rule's row, click .
A confirmation message appears.
b. Click OK.
The rule is deleted.
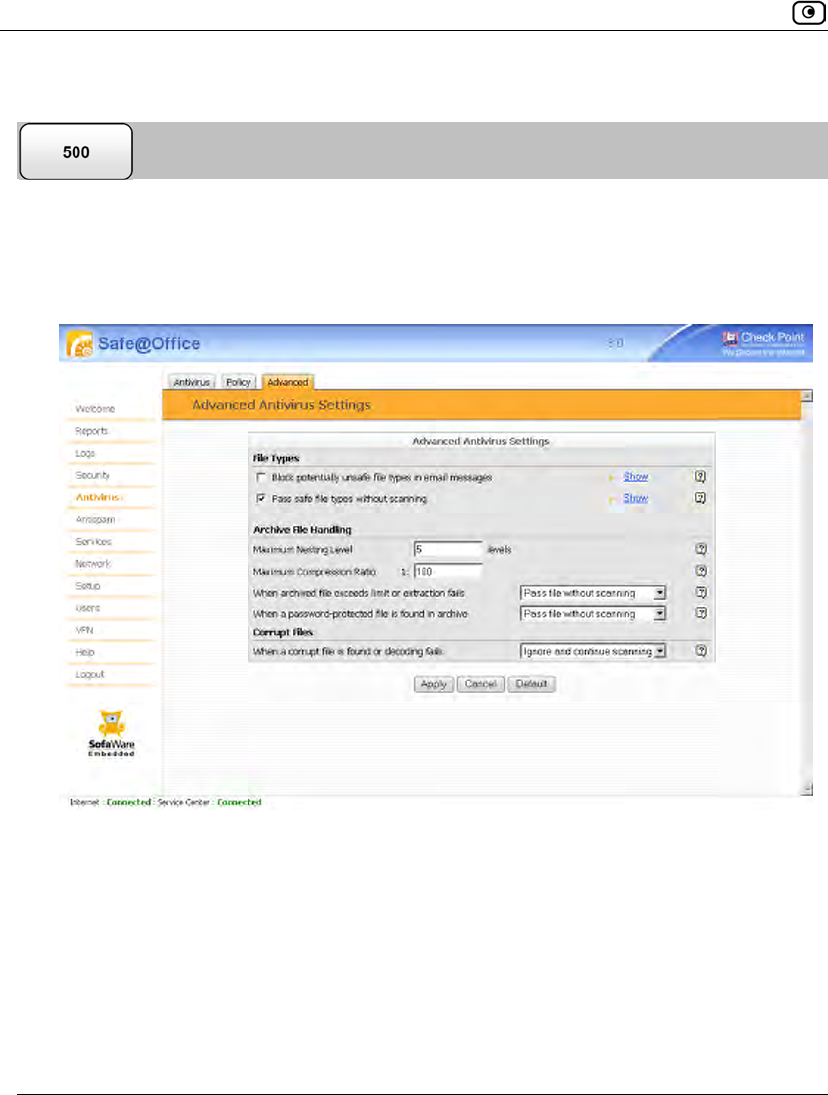
Using VStream Antivirus
482 Check Point Safe@Office User Guide
Configuring VStream Antivirus Advanced Settings
To configure VStream Antivirus advanced settings
1. Click Antivirus in the main menu, and click the Advanced tab.
The Advanced Antivirus Settings page appears.
2. Complete the fields using the following table.
3. Click Apply.
4. To restore the default VStream Antivirus settings, do the following:
a) Click Default.
A confirmation message appears.
b) Click OK.

Using VStream Antivirus
Chapter 15: Using Antivirus and Antispam Filtering 483
The VStream Antivirus settings are reset to their defaults. For information on the
default values, refer to the following table.
Table 106: Advanced Antivirus Settings Fields
In this field… Do this…
File Types
Block potentially unsafe
file types in email
messages
Select this option to block all emails containing potentially unsafe
attachments.
Unsafe file types are:
• DOS/Windows executables, libraries and drivers
• Compiled HTML Help files
• VBScript encoded files
• Files with {CLSID} in their name
• The following file extensions: ade, adp, bas, bat, chm,
cmd,com, cpl, crt, exe, hlp, hta, inf, ins, isp, js, jse,
lnk, mdb, mde, msc, msi, msp, mst, pcd, pif, reg, scr,
sct, shs,shb, url, vb, vbe, vbs, wsc, wsf, wsh.
To view a list of unsafe file types and their descriptions, click
Show next to this option.

Using VStream Antivirus
484 Check Point Safe@Office User Guide
In this field… Do this…
Pass safe file types
without scanning
Select this option to accept common file types that are known to
be safe, without scanning them.
Safe files types are:
• GIF
• BMP
• JFIF standard
• EXIF standard
• PNG
• MPEG video stream
• MPEG sys stream
• Ogg Stream
• MP3 file with ID3 version 2
• MP3
• PDF
• PostScript
• WMA/WMV/ASF
• RealMedia file
• JPEG - only the header is scanned, and the rest of
the file is skipped
To view a list of safe file types, click Show next to this option.
Selecting this option reduces the load on the gateway by skipping
safe file types. This option is selected by default.

Using VStream Antivirus
Chapter 15: Using Antivirus and Antispam Filtering 485
In this field… Do this…
Archive File Handling
Maximum Nesting Level Type the maximum number of nested content levels that
VStream Antivirus should scan.
Setting a higher number increases security. Setting a lower
number prevents attackers from overloading the gateway by
sending extremely nested archive files.
The default value is 5 levels.
Maximum Compression
Ratio 1:x
Fill in the field to complete the maximum compression ratio of
files that VStream Antivirus should scan.
For example, to specify a 1:80 maximum compression ratio, type
80.
Setting a higher number allows the scanning of highly
compressed files, but creates a potential for highly compressible
files to create a heavy load on the appliance. Setting a lower
number prevents attackers from overloading the gateway by
sending extremely compressible files.
The default value is 100.
When archived file
exceeds limit or extraction
fails
Specify how VStream Antivirus should handle files that exceed
the Maximum nesting level or the Maximum compression ratio, and
files for which scanning fails. Select one of the following:
• Pass file without scanning. Scan only the number of
levels specified, and skip the scanning of more deeply
nested archives. Furthermore, skip scanning highly
compressible files, and skip scanning archives that
cannot be extracted because they are corrupt. This is
the default.
• Block file. Block the file.
Using VStream Antivirus
486 Check Point Safe@Office User Guide
In this field… Do this…
When a password-protected
file is found in archive
VStream Antivirus cannot extract and scan password-protected
files inside archives. Specify how VStream Antivirus should handle
such files, by selecting one of the following:
• Pass file without scanning. Accept the file without
scanning it. This is the default.
• Block file. Block the file.
Corrupt Files
When a corrupt file is
found or decoding fails
Specify how VStream Antivirus should handle corrupt files and
protocol anomalies, by selecting one of the following:
• Ignore and continue scanning. Log the corrupt file or
protocol anomaly, and scan the information on a best-
effort basis. This is the default.
• Block file. Block and log the corrupt file or protocol
anomaly.
Updating VStream Antivirus
When you are subscribed to the VStream Antivirus updates service, VStream Antivirus
virus signatures are automatically updated, keeping security up-to-date with no need for
user intervention. However, you can still check for updates manually, if needed.
To update the VStream Antivirus virus signature database
1. Click Antivirus in the main menu, and click the Antivirus tab.
The VStream Antivirus page appears.
2. Click Update Now.
The VStream Antivirus database is updated with the latest virus signatures.
Using VStream Antispam
Chapter 15: Using Antivirus and Antispam Filtering 487
Using VStream Antispam
The Safe@Office appliance includes VStream Antispam, an embedded antispam engine
that scans emails for spam. VStream Antispam is composed three antispam engines, each
of which can be enabled or disabled separately:
• IP Reputation
The IP Reputation engine protects mail servers by checking the email sender’s IP
address against an online and constantly updated IP reputation database, before
accepting the SMTP email connection. If the IP address belongs to a known spammer,
the connection can be immediately blocked at the TCP connection level, thereby
stopping the spam before it reaches your mail server.
Note: If you have a mail server in your network, it is recommended to enable the IP
Reputation engine as a first line of defense for incoming SMTP connections. When
enabled, the IP Reputation engine blocks emails that would otherwise reach your
mail server and require extensive analysis by the Content Based Antispam and
Block List engines, both of which examine email content and consume network,
gateway, and mail server resources. By reducing the amount of emails that require
in-depth analysis, the IP Reputation engine helps prevent Denial of Service (DoS)
attacks on your gateway or mail server.
If you do not have a mail server in your network, there is no need to enable the IP
Reputation engine. (If you do enable this engine anyway, it will have no negative
effects.)
• Block List
VStream Antispam allows configuring a list of senders whose emails should be
blocked. When an email reaches your mail server, the Block List engine determines
whether the sender's email address appears on the list. If so, then VStream Antispam
blocks the emails.
• Content Based Antispam
The Content Based Antispam engine calculates a “spam fingerprint” for each
incoming email message. The fingerprint is then sent to a VStream Antispam data
center and compared to a constantly updated database of spam messages. The data
center returns a "spam score", which is a value in percentages indicating the likelihood

Using VStream Antispam
488 Check Point Safe@Office User Guide
that the message is spam. If the spam score exceeds a user-configurable threshold
called the “confidence level”, the message can be flagged as spam, or the message can
be deleted altogether.
In addition, VStream Antispam allows you to define a Safe Sender List, which consists of
senders who are exempt from the Block List and Content Based Antispam engines.
The following table provides a comparison of the VStream Antispam engines.
Table 107: Comparison of VStream Antispam Engines
IP Reputation Content Based Antispam and
Block List
Supported
Protocols
Protects mail servers only, and
applies to the SMTP protocol only
Protects both mail servers and mail
clients, and applies to both POP3 and
SMTP protocols
Email Scanning Time Scans the email before accepting
the connection
Scans the email after accepting the
connection
Detection Method Examines the sender's IP address Content Based Antispam examines the
email's content, and Block List examines
the email's Sender field.
SMTP Error Message Does not return an SMTP error
message to the email sender
Returns an SMTP error message to the
email sender
Mail Rejection
Method
Resets the TCP connection Marks the email Subject line, marks the
email header, rejects the email (SMTP
only), or deletes the email (POP3 only)
Server Overload
Protection
Prevents spammers from
overloading gateway and mail
server resources
Does not prevent spammers from
overloading gateway and mail server
resources
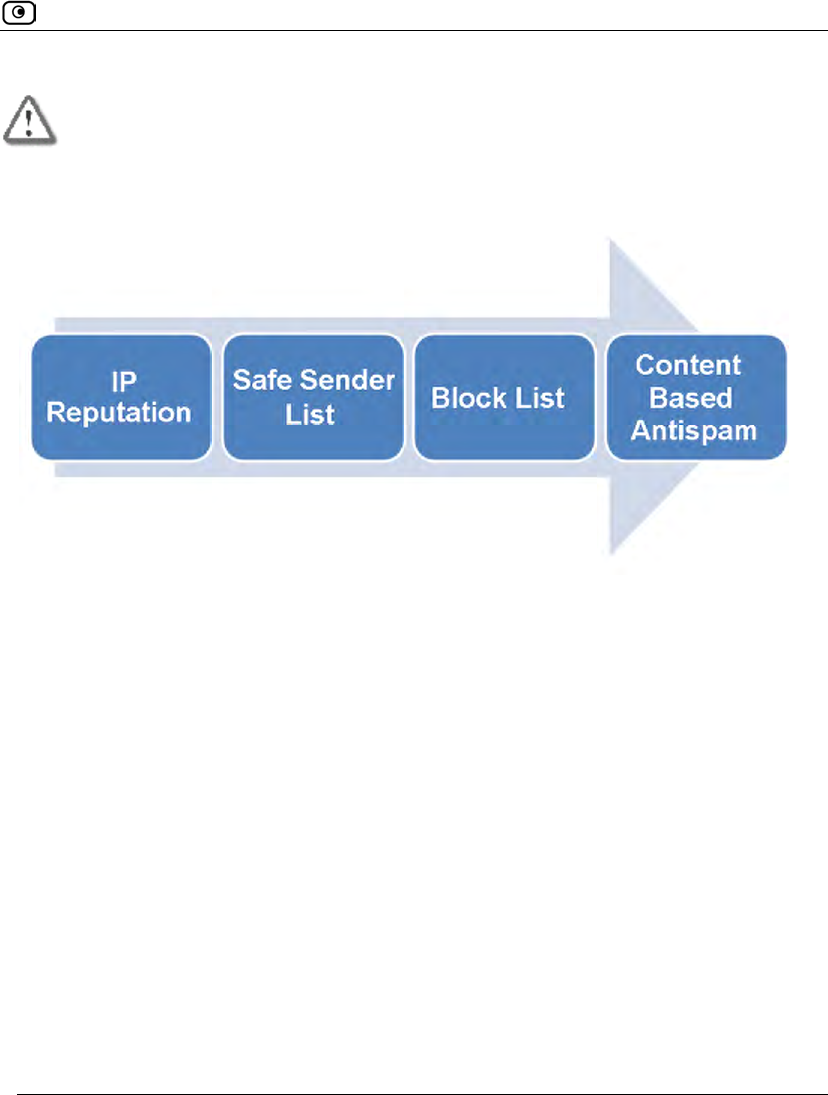
Using VStream Antispam
Chapter 15: Using Antivirus and Antispam Filtering 489
Important: In order to use VStream Antispam, your Safe@Office appliance must be
subscribed to a Service Center.
How VStream Antispam Works
VStream Antispam works as follows:
1. A TCP connection arrives at the SMTP port (TCP 25) or the POP3 port (TCP
110).
2. The connection is checked against the VStream Antispam policy, to determine
whether it should be scanned.
3. If the IP Reputation engine is enabled, and the connection is an SMTP
connection:
a. VStream Antispam sends the connection's source IP address to a VStream
Antispam data center.
b. The VStream Antispam data center checks the reputation of this IP
address against a list of known spam sender IP addresses, and then
returns a spam score.
c. One of the following things happens:
Figure 26: VStream Antispam Flow

Using VStream Antispam
490 Check Point Safe@Office User Guide
If the spam score does not exceed the configured confidence level, the
email passes to the next enabled VStream Antispam engine for
processing.
If the spam score exceeds the configured confidence level, VStream
Antispam determines that the email is spam and handles it as specified by
the IP Reputation engine's settings.
d. VStream Antispam caches the results of the IP Reputation check.
4. VStream Antispam checks whether the email sender appears on the Safe
Sender List. If so, then the email is accepted.
5. If the Block List engine is enabled:
a. VStream Antispam examines the email content and compares the sender
to the list of blocked senders.
b. One of the following things happens:
If the sender is not on the list of blocked senders, the email passes to the
next enabled VStream Antispam engine for processing.
If the sender is on the list of blocked senders, VStream Antispam
determines that the email is spam and handles it as specified by the Block
List engine's settings.
By default, VStream Antispam marks the email subject.
6. If the Content Based Antispam engine is enabled:
a. VStream Antispam examines the email content and creates a spam
fingerprint.
b. VStream Antispam sends the fingerprint to a VStream Antispam data
center, where it is checked against an online database of spam messages.
c. The VStream Antispam data center returns a spam score.
d. One of the following things happens:
If the spam score does not exceed the configured confidence level, the
email is accepted.
If the spam score exceeds the configured confidence level, VStream
Antispam determines that email is spam and handles it and handles it as
specified by the Content Based Antispam engine's settings.

Using VStream Antispam
Chapter 15: Using Antivirus and Antispam Filtering 491
By default, VStream Antispam marks the email as spam.
7. One of the following things happen:
• If the connection is an SMTP connection, the mail server forwards the email
to the recipient.
• If the connection is a POP3 connection, the email client receives the email.
Header Marking
VStream Antispam adds the following headers to each email that is scanned by the Content
Based Antispam or Block List engine, but not blocked:
• X-VStream-Spam-Level. Contains an integer between 0 and 100, where
100 indicates the highest likelihood that the email is spam.
• X-VStream-Engine. The VStream Antispam engine, (either "Content Based
Antispam" or "Block List")
• X-Spam-Level. Contains one to five asterisks, where five asterisks indicates
the highest likelihood that the email is spam.
• X-Spam-Flag. Contains YES if the email is deemed to be spam, according to
the currently configured thresholds.
For example:
X-VStream-Spam-Level: 81%
X-VStream-Engine: Content Based Antispam
X-Spam-Level: ***
X-Spam-Flag: YES
If your email client allows defining rules based on message headers, you can create rules
specifying that emails with certain headers should be moved to specific folders. For
example, you can configure your email client to move all emails with the X-Spam-
Flag: YES header directly to a "Spam Email" folder.
Using VStream Antispam
492 Check Point Safe@Office User Guide
Default Antispam Policy
The VStream Antispam default policy includes the following rules:
• All incoming SMTP connections are scanned, unless they originate from VPN.
This protects mail servers in your network.
• All outgoing POP3 connections are scanned. This protects mail clients in your
network.
You can easily override the default antispam policy, for example to exclude certain
addresses or networks from spam scanning, by creating user-defined rules. For further
information, see Configuring the VStream Antispam Policy on page 510.
Enabling/Disabling VStream Antispam
You must enable at least one VStream Antispam engine in order for VStream Antispam to
work. Once you have enabled the desired engines, you must configure them, using the
relevant sections in this guide.
To enable/disable VStream Antispam
1. Click Antispam in the main menu, and click the Antispam tab.
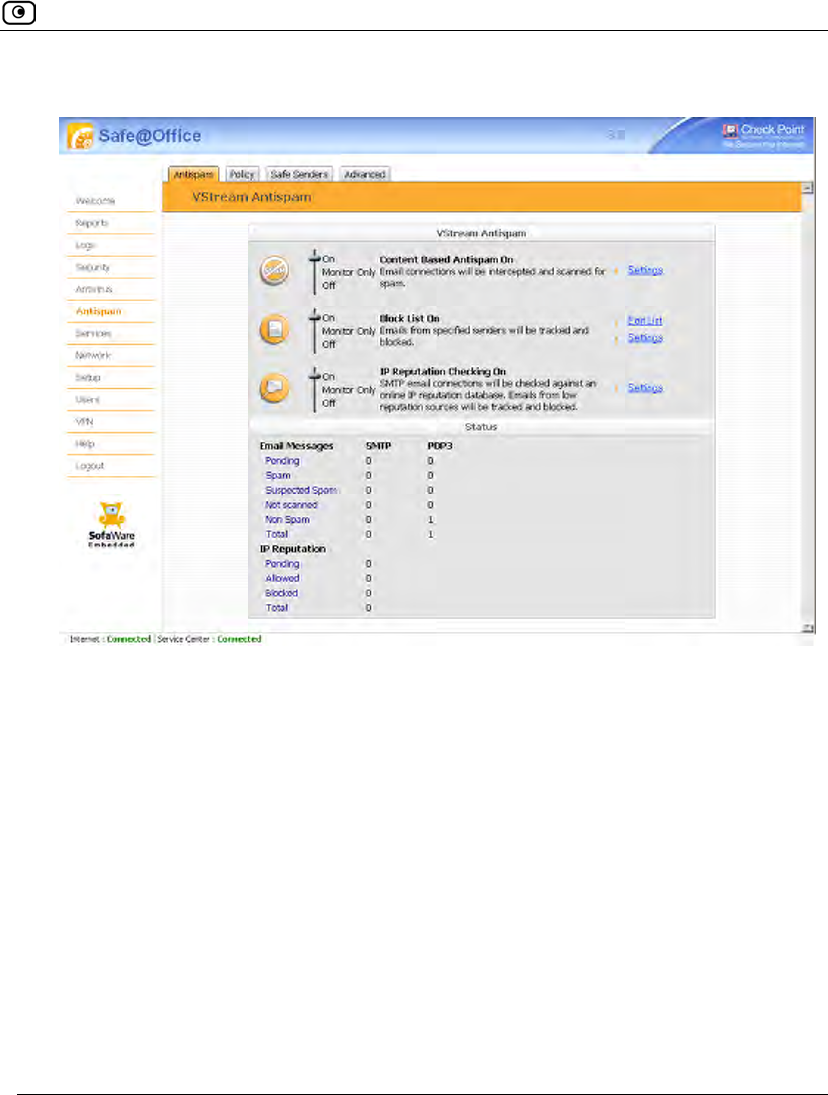
Using VStream Antispam
Chapter 15: Using Antivirus and Antispam Filtering 493
The VStream Antispam page appears.
2. Complete the fields using the information in the following table.

Using VStream Antispam
494 Check Point Safe@Office User Guide
Table 108: VStream Antispam Fields
In this field… Do this…
Content Based
Antispam
Specify the Content Based Antispam engine's mode, by dragging the
lever to one of the following:
• On. The Content Based Antispam engine is on. VStream
Antispam will check email fingerprints against an online spam
detection database. Emails that fail the check will be handled
according to configured Content Based Antispam settings.
• Monitor Only. The Content Based Antispam engine is on.
VStream Antispam will check email fingerprints against an
online spam detection database. Emails that fail the check will
be logged only, and any action configured in the Content Based
Antispam Settings page will not be performed.
• Off. The Content Based Antispam engine is off.
You can then click Settings to configure the Content Based Antispam
settings. For further information, see Configuring the Content Based
Antispam Engine on page 497.
Block List Specify the Block List engine's mode, by dragging the lever to one of the
following:
• On. The Block List engine is on. VStream Antispam will check
email messages against a list of blocked senders. Emails that
fail the check will be handled according to configured Block List
settings.
• Monitor Only. The Block List engine is on. VStream Antispam
will check email messages against a list of blocked senders.
Emails that fail the check will be logged only, and any action
configured in the Antispam Block List Settings page will not be
performed.
• Off. The Block List engine is off.
You can then click Settings to configure the Block List settings. For further
information, see Configuring the Block List Engine Settings on page
504.
Using VStream Antispam
Chapter 15: Using Antivirus and Antispam Filtering 495
In this field… Do this…
IP Reputation
Checking
Specify the IP Reputation engine's mode for SMTP connections, by
dragging the lever to one of the following:
• On. The IP Reputation engine is on. VStream Antispam will
check the reputation of email senders against an online IP
reputation database prior to accepting the TCP connection.
Emails that fail the check will be handled according to
configured IP Reputation settings.
• Monitor Only. The IP Reputation engine is on. VStream
Antispam will check the reputation of email senders against an
online IP reputation database. Emails that fail the check will be
logged only, and any action configured in the Antispam IP
Reputation Settings page will not be performed.
• Off. The IP Reputation engine is off.
You can then click Settings to configure the IP Reputation settings. For
further information, see Configuring the IP Reputation Engine on page
507.
Viewing VStream Antispam Statistics
To view VStream Antispam statistics
• Click Antispam in the main menu, and click the Antispam tab.
The VStream Antispam page appears.

Using VStream Antispam
496 Check Point Safe@Office User Guide
Table 109: VStream Antispam Status Fields
This field… Displays...
Email Messages Statistics for the Content Based Antispam and Block List engines.
Pending The number of SMTP and POP3 email messages pending for the Content
Based Antispam and Block List engines.
Spam The number of SMTP and POP3 email messages that the Content Based
Antispam and Block List engines determined to be spam.
Suspected Spam The number of SMTP and POP3 email messages that the Content Based
Antispam and Block List engines determined to be suspected spam.
Not scanned The number of SMTP and POP3 email messages that were not scanned,
due to temporary loss of contact with the VStream Antispam data center,
or due to gateway resource overload.
Non Spam The number of SMTP and POP3 email messages that the Content Based
Antispam and Block List engines determined to be legitimate.
Total The total number of SMTP and POP3 email messages scanned by the
Content Based Antispam and Block List engines.
IP Reputation Statistics for the IP Reputation engine.
Pending The number of SMTP email connections currently pending for handling by
the IP Reputation engine.
Allowed The number of SMTP email connections allowed by the IP Reputation
engine.
Blocked The number of SMTP email connections blocked by the IP Reputation
engine.
Using VStream Antispam
Chapter 15: Using Antivirus and Antispam Filtering 497
This field… Displays...
Total The total number of SMTP email connections scanned by the IP
Reputation engine.
Configuring the Content Based Antispam Engine
You can configure how VStream Antispam should handle spam and suspected spam that is
detected by the Content Based Antispam engine.
For information on enabling this engine, see Enabling/Disabling VStream Antispam on
page 492.
To configure Content Based Antispam engine settings
1. Click Antispam in the main menu, and click the Antispam tab.
The VStream Antispam page appears.
2. Next to the Content Based Antispam lever, click Settings.
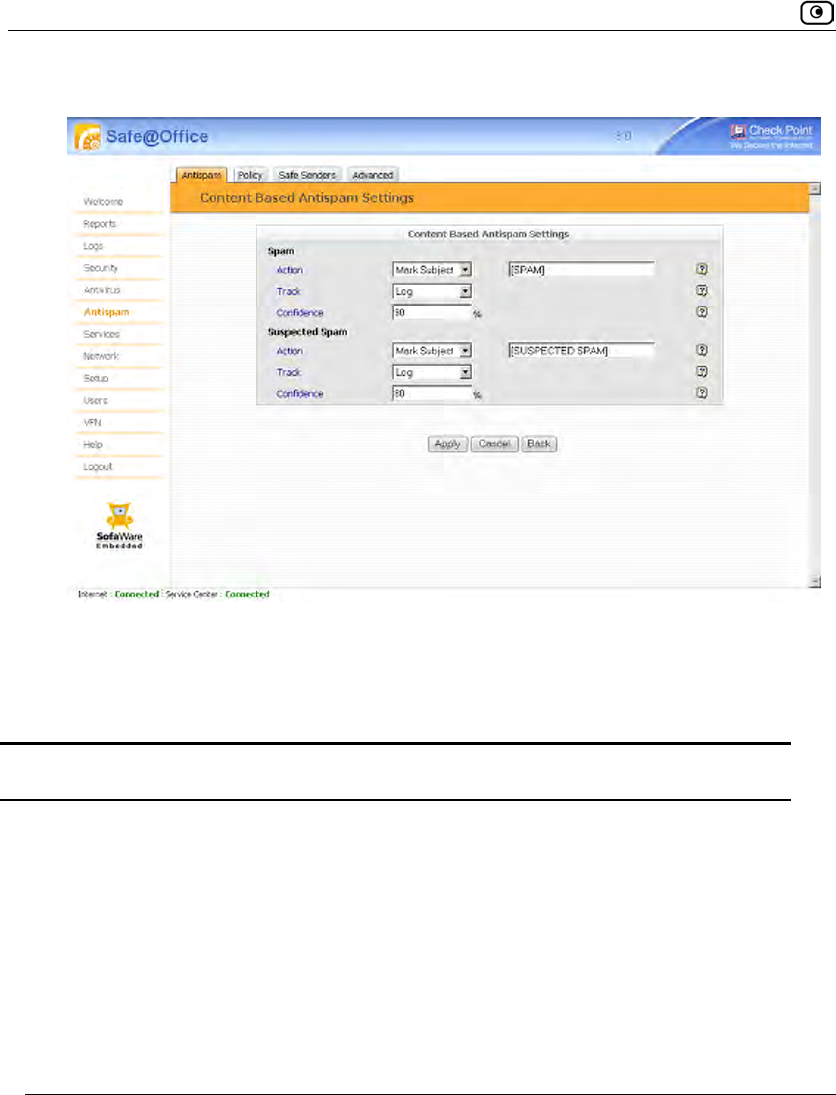
Using VStream Antispam
498 Check Point Safe@Office User Guide
The Content Based Antispam Settings page appears.
3. Complete the fields using the information in the following table.
4. Click Apply.
Table 110: Content Based Antispam Settings Fields
In this field… Do this…
Spam Configure how VStream Antispam should handle spam that is detected
using the Content Based Antispam engine.

Using VStream Antispam
Chapter 15: Using Antivirus and Antispam Filtering 499
In this field… Do this…
Action Specify the action VStream Antispam should take upon detecting spam,
by selecting one of the following:
• None. Take no action.
• Reject. Block the email. The email will be permanently deleted.
• Mark Subject. Mark the email's Subject line.
If you select Mark Subject, the Mark Text field appears.
Note: If the Content Based Antispam engine is in Monitor Only mode, this
setting is ignored. For information on changing the engine's mode, see
Enabling/Disabling VStream Antispam on page 492.
Mark Text Type the prefix to the text appearing in the Subject field of the spam
notification email.
For example, if you type [SPAM] and the original email's Subject field
displays "Earn Money the Easy Way", the spam notification email's Subject
field will display: "[SPAM] Earn Money the Easy Way".
The default value is [SPAM].
Note: If your email client allows defining rules based on the Subject field,
you can create rules specifying that emails whose Subject field contains
certain words should be moved to specific folders. For example, you can
configure your email client to move all emails whose Subject field contains
[SPAM] directly to the Deleted Items folder.
Track Specify whether VStream Antispam should log spam, by selecting one of
the following:
• Log. VStream Antispam should log spam.
• None. VStream Antispam should not log spam.

Using VStream Antispam
500 Check Point Safe@Office User Guide
In this field… Do this…
Confidence Type the minimum spam confidence level (SCL). If an email's SCL
matches or exceeds this threshold, the email is considered spam.
Setting a higher SCL reduces the number of legitimate emails erroneously
identified as spam. Setting a lower SCL increases the amount of spam
that is identified as legitimate email.
The default value is 90.
Suspected Spam Configure how VStream Antispam should handle suspected spam that is
detected using the Content Based Antispam engine.
Action Specify the action VStream Antispam should take upon detecting potential
spam, by selecting one of the following:
• None. Take no action.
• Reject. Block the email. The email will be permanently deleted.
• Mark Subject. Mark the email's Subject line.
If you select Mark Subject, the Mark Text field appears.
Note: If the Content Based Antispam engine is in Monitor Only mode, this
setting is ignored. For information on changing the engine's mode, see
Enabling/Disabling VStream Antispam on page 492.

Using VStream Antispam
Chapter 15: Using Antivirus and Antispam Filtering 501
In this field… Do this…
Mark Text Type the prefix to the text appearing in the Subject field of the suspected
spam notification email.
For example, if you type [SUSPECTED SPAM] and the original email's
Subject field displays "Earn Money the Easy Way", the suspected spam
notification email's Subject field will display: "[SUSPECTED SPAM] Earn
Money the Easy Way".
The default value is [SUSPECTED SPAM].
Note: If your email client allows defining rules based on the Subject field,
you can create rules specifying that emails whose Subject field contains
certain words should be moved to specific folders. For example, you can
configure your email client to move all emails whose Subject field contains
[SUSPECTED SPAM] directly to a Quarantine folder.
Track Specify whether VStream Antispam should log suspected spam, by
selecting one of the following:
• Log. VStream Antispam should log suspected spam.
• None. VStream Antispam should not log suspected spam.
Confidence Type the minimum spam confidence level (SCL). If an email's SCL
matches or exceeds this threshold, the email is considered suspected
spam.
Setting a higher SCL reduces the number of legitimate emails erroneously
identified as suspected spam. Setting a lower SCL increases the amount
of potential spam that is identified as legitimate email.
The default value is 80.
Using VStream Antispam
502 Check Point Safe@Office User Guide
Configuring the Block List Engine
You can configure a list of email addresses and domain names that VStream Antispam
should automatically block, if the Block List engine is enabled.
For information on enabling the Block List engine, see Enabling/Disabling VStream
Antispam on page 492.
Adding Blocked Senders
To add a blocked sender
1. Click Antispam in the main menu, and click the Antispam tab.
The VStream Antispam page appears.
2. Next to the Block List lever, click Edit List.
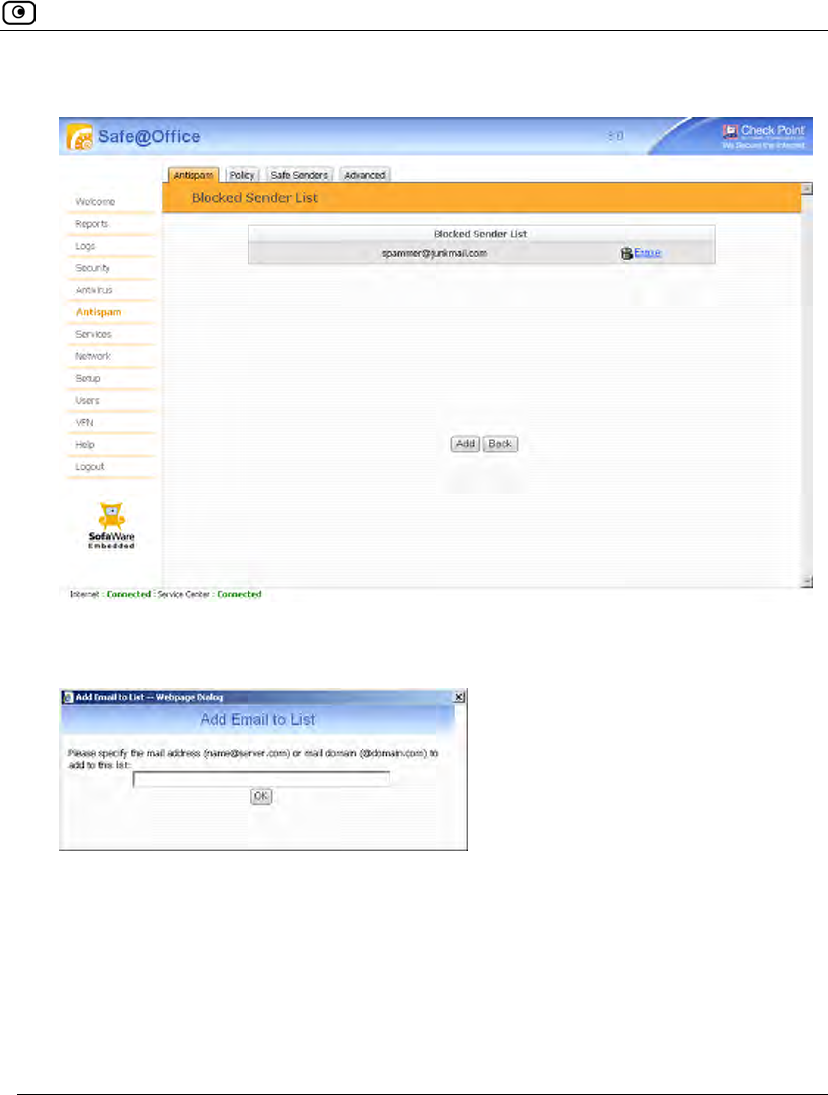
Using VStream Antispam
Chapter 15: Using Antivirus and Antispam Filtering 503
The Blocked Sender List page appears.
3. Click Add.
The Add Email to List dialog box appears.
4. In the field provided, do one of the following:
• To block all email from a specific sender, type the sender's email address.
• To block all email from addresses ending with a specific domain, type the
domain name.
For example, if you type "@special-offers.com", then email addresses such as
johns@special-offers.com and sarahm@special-offers.com will be blocked.
Using VStream Antispam
504 Check Point Safe@Office User Guide
5. Click OK.
The sender appears in the Block Sender List table.
Viewing and Deleting Blocked Senders
To delete a blocked sender
1. Click Antispam in the main menu, and click the Antispam tab.
The VStream Antispam page appears.
2. Next to the Block List lever, click Edit List.
The Blocked Sender List page appears.
3. In the desired sender's row, click .
The sender is deleted.
Configuring the Block List Engine Settings
To configure Block List engine settings
1. Click Antispam in the main menu, and click the Antispam tab.
The VStream Antispam page appears.
2. Next to the Block List lever, click Settings.
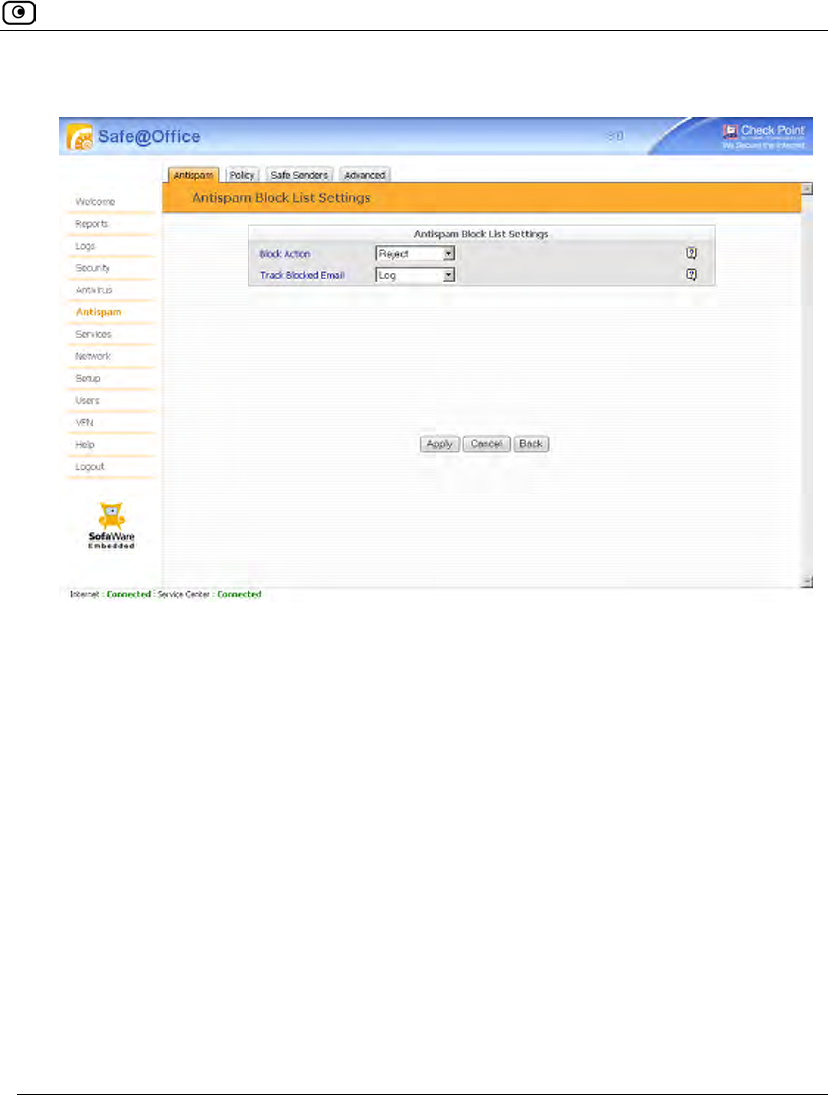
Using VStream Antispam
Chapter 15: Using Antivirus and Antispam Filtering 505
The Antispam Block List Settings page appears.
3. Complete the fields using the information in the following table.
4. Click Apply.

Using VStream Antispam
506 Check Point Safe@Office User Guide
Table 111: Antispam Block List Settings Fields
In this field… Do this…
Block Action Specify the action VStream Antispam should take upon receiving an
email from a blocked sender, by selecting one of the following:
• None. Take no action.
• Reject. Block the email.
• Mark Subject. Mark the email's Subject line.
If you select Mark Subject, the Mark Text field appears.
Note: If the Block List engine is in Monitor Only mode, this setting is
ignored. For information on changing the engine's mode, see
Enabling/Disabling VStream Antispam on page 492.
Mark Text Type the prefix to the text appearing in the Subject field of the spam
notification email.
For example, if you type [SPAM] and the original email's Subject field
displays "Earn Money the Easy Way", the spam notification email's Subject
field will display: "[SPAM] Earn Money the Easy Way".
The default value is [SPAM].
Note: If your email client allows defining rules based on the Subject field,
you can create rules specifying that emails whose Subject field contains
certain words should be moved to specific folders. For example, you can
configure your email client to move all emails whose Subject field contains
[SPAM] directly to the Deleted Items folder.
Track Blocked
Email
Specify whether VStream Antispam should log emails from blocked
senders, by selecting one of the following:
• Log. VStream Antispam should log emails from blocked
senders.
• None. VStream Antispam should not log emails from blocked
senders.
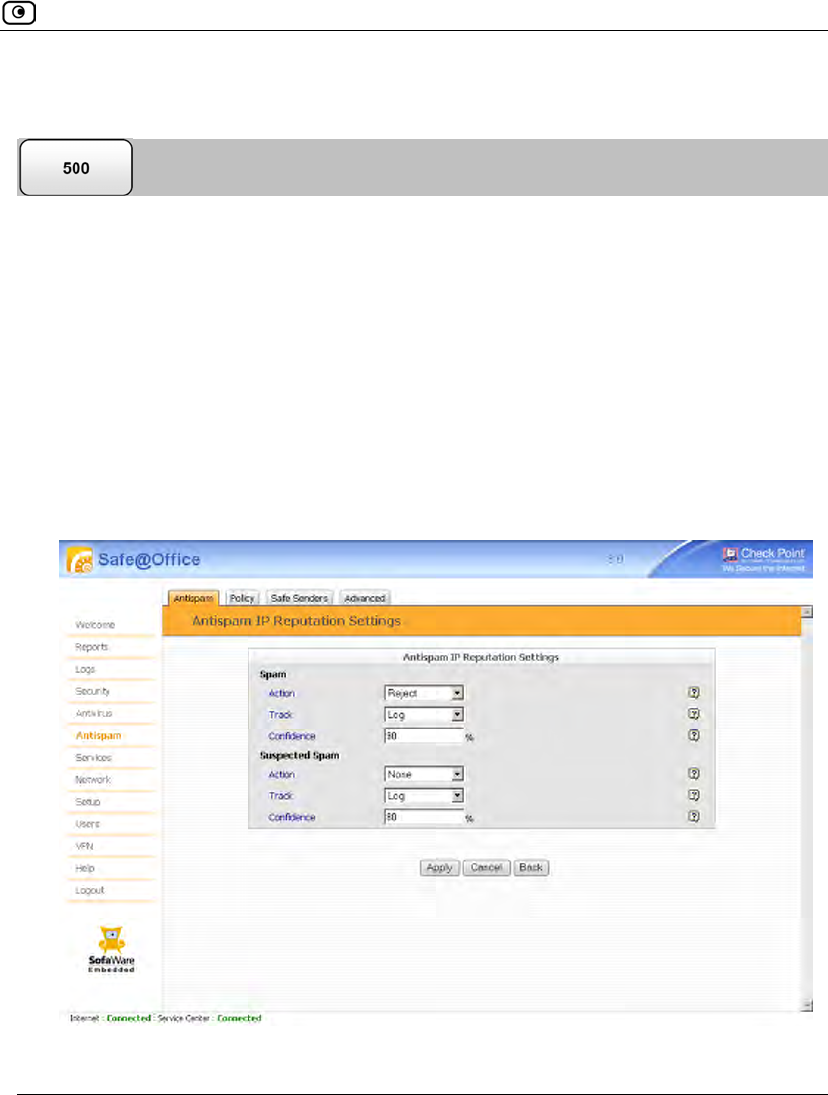
Using VStream Antispam
Chapter 15: Using Antivirus and Antispam Filtering 507
Configuring the IP Reputation Engine
You can configure how VStream Antispam should handle spam and suspected spam that is
detected by the IP Reputation engine.
For information on enabling this engine, see Enabling/Disabling VStream Antispam on
page 492.
To configure IP Reputation engine settings
1. Click Antispam in the main menu, and click the Antispam tab.
The VStream Antispam page appears.
2. Next to the IP Reputation Checking lever, click Settings.
The Antispam IP Reputation Settings page appears.
3. Complete the fields using the information in the following table.

Using VStream Antispam
508 Check Point Safe@Office User Guide
4. Click Apply.
Table 112: Antispam IP Reputation Settings Fields
In this field… Do this…
Spam Configure how VStream Antispam should handle spam that is detected
using the IP Reputation engine.
Action Specify the action VStream Antispam should take upon detecting spam,
by selecting one of the following:
• Reject. Block the email.
• None. Take no action.
Note: If the IP Reputation engine is in Monitor Only mode, this setting is
ignored. For information on changing the engine's mode, see
Enabling/Disabling VStream Antispam on page 492.
Track Specify whether VStream Antispam should log spam, by selecting one of
the following:
• Log. VStream Antispam should log spam.
• None. VStream Antispam should not log spam.
Confidence Type the minimum spam confidence level (SCL) needed to fail this check.
If an email's SCL matches or exceeds this threshold, the email is
considered spam.
Setting a higher SCL reduces the number of legitimate emails erroneously
identified as spam. Setting a lower SCL increases the amount of spam
that is identified as legitimate email.
The default value is 90.
Suspected Spam Configure how VStream Antispam should handle suspected spam that is
detected using the IP Reputation engine.

Using VStream Antispam
Chapter 15: Using Antivirus and Antispam Filtering 509
In this field… Do this…
Action Specify the action VStream Antispam should take upon detecting potential
spam, by selecting one of the following:
• Reject. Block the email.
• None. Take no action.
Note: If the IP Reputation engine is in Monitor Only mode, this setting is
ignored. For information on changing the engine's mode, see
Enabling/Disabling VStream Antispam on page 492.
Track Specify whether VStream Antispam should log suspected spam, by
selecting one of the following:
• Log. VStream Antispam should log suspected spam.
• None. VStream Antispam should not log suspected spam.
Confidence Type the minimum spam confidence level (SCL) needed to fail this check.
If an email's SCL matches or exceeds this threshold, the email is
considered suspected spam.
Setting a higher SCL reduces the number of legitimate emails erroneously
identified as suspected spam. Setting a lower SCL increases the amount
of potential spam that is identified as legitimate email.
The default value is 80.
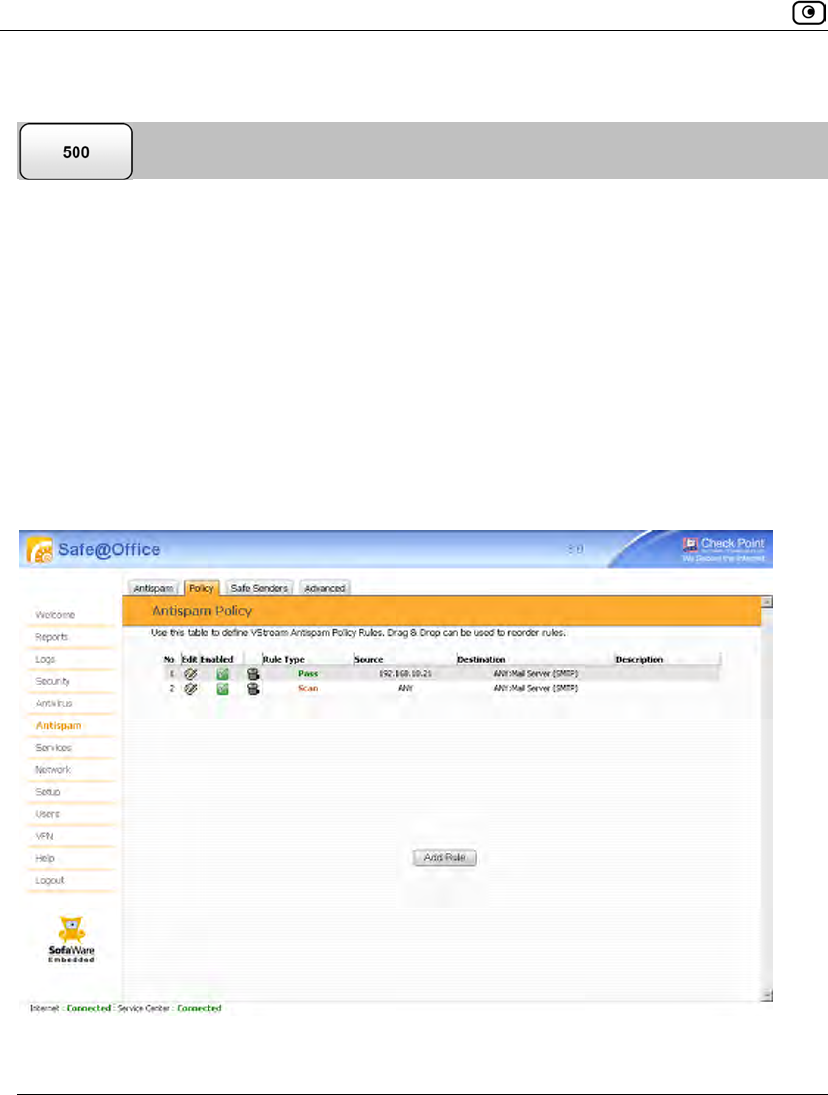
Using VStream Antispam
510 Check Point Safe@Office User Guide
Configuring the VStream Antispam Policy
VStream Antispam includes a flexible mechanism that allows the user to define exactly
which emails should be scanned for spam and which should be considered safe, by
specifying the protocol, and the source and destination IP addresses.
VStream Antispam processes policy rules in the order they appear in the Antispam Policy
table, so that rule 1 is applied before rule 2, and so on. This enables you to define
exceptions to rules, by placing the exceptions higher up in the Rules table.
For example, if you want to scan all outgoing SMTP traffic, except traffic from a specific
IP address, you can create a rule scanning all outgoing SMTP traffic and move the rule
down in the Antispam Policy table. Then create a rule passing SMTP traffic from the
desired IP address and move this rule to a higher location in the Antispam Policy table than
the first rule. In the figure below, the general rule is rule number 2, and the exception is
rule number 1.

Using VStream Antispam
Chapter 15: Using Antivirus and Antispam Filtering 511
The Safe@Office appliance will process rule 1 first, passing outgoing SMTP traffic from
the specified IP address, and only then it will process rule 2, scanning all outgoing SMTP
traffic.
The following rule types exist:
Table 113: VStream Antispam Rule Types
Rule Description
Pass This rule type enables you to specify that VStream Antispam should allow all
emails matching the rule, without scanning the emails.
Scan This rule type enables you to specify that VStream Antispam should scan all
emails matching the rule.
Reject This rule type enables you to specify that VStream Antispam should reject all
emails matching the rule, without scanning the emails.
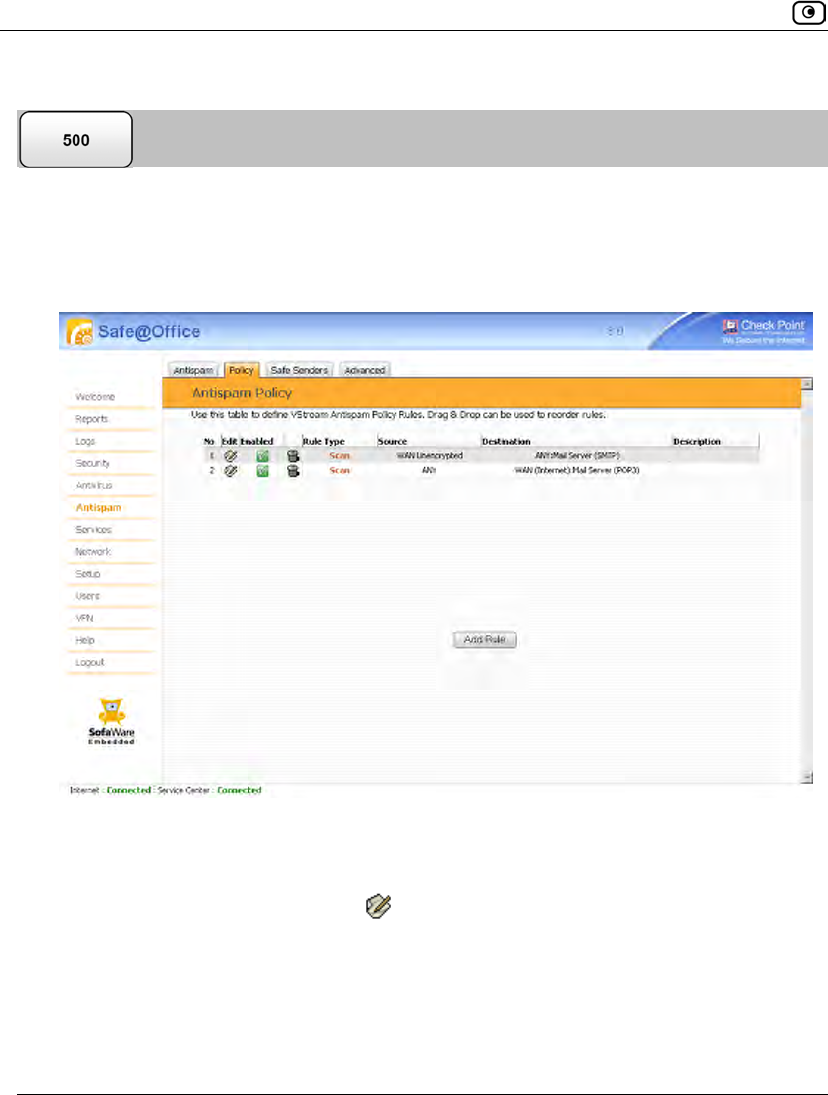
Using VStream Antispam
512 Check Point Safe@Office User Guide
Adding and Editing VStream Antispam Rules
To add or edit a VStream Antispam rule
1. Click Antispam in the main menu, and click the Policy tab.
The Antispam Policy page appears.
2. Do one of the following:
• To add a new rule, click Add Rule.
• To edit an existing rule, click next to the desired rule.
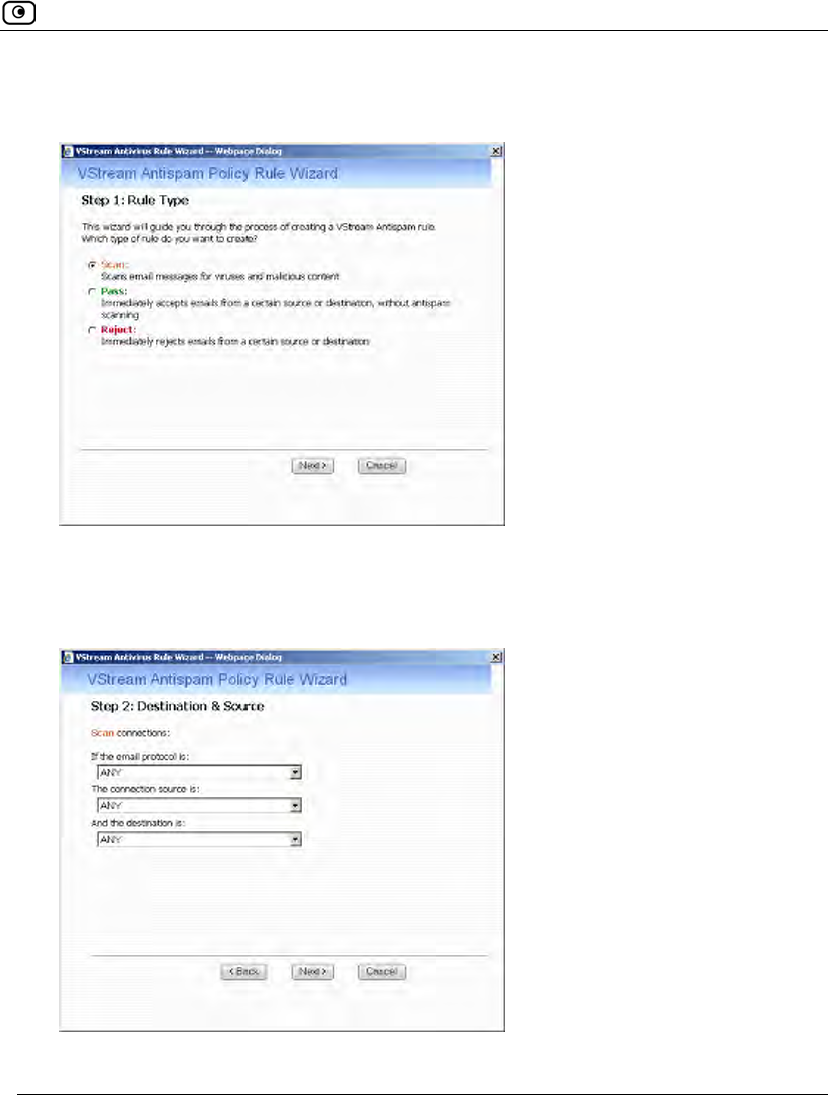
Using VStream Antispam
Chapter 15: Using Antivirus and Antispam Filtering 513
The VStream Antispam Policy Rule Wizard opens, with the Step 1: Rule Type dialog box
displayed.
3. Select the type of rule you want to create.
4. Click Next.
The Step 2: Destination & Source dialog box appears.
5. Complete the fields using the relevant information in the following table.
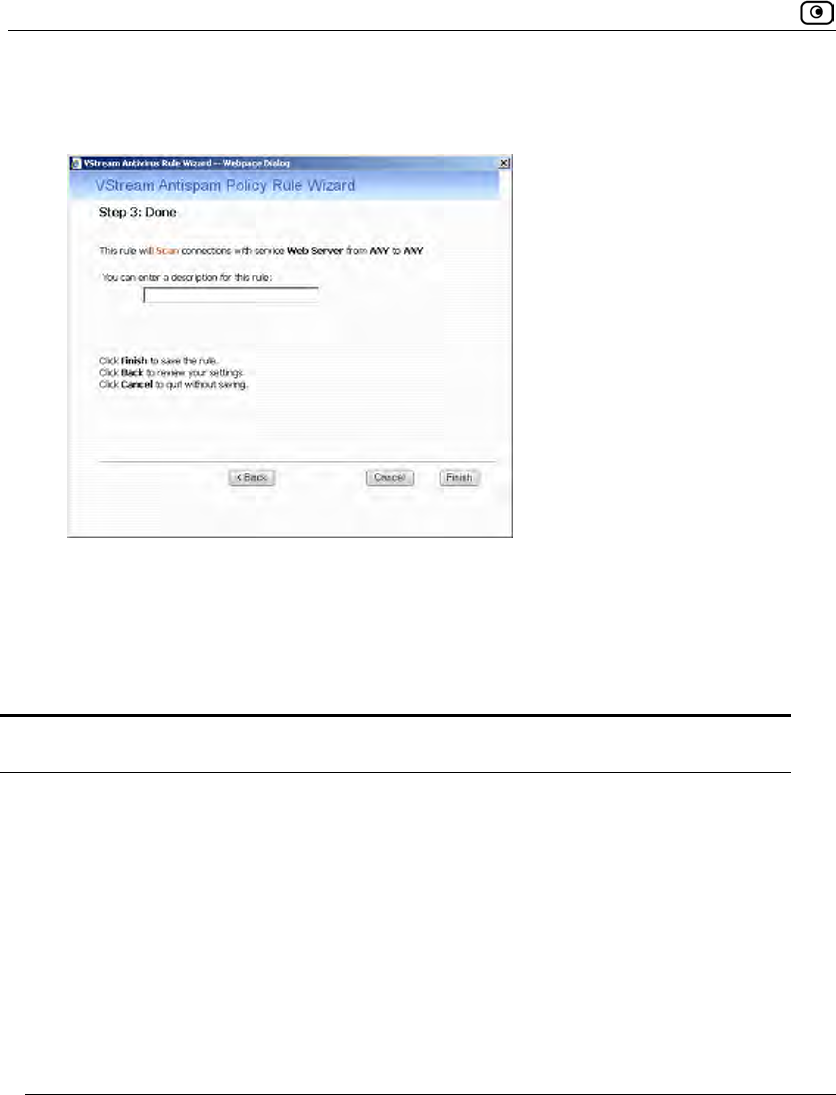
Using VStream Antispam
514 Check Point Safe@Office User Guide
6. Click Next.
The Step 3: Done dialog box appears.
7. If desired, type a description of the rule in the field provided.
8. Click Finish.
The new rule appears in the Antispam Policy page.
Table 114: VStream Antispam Policy Rule Wizard Fields
In this field… Do this…
If the email
protocol is
Select the email protocol to which the rule should apply. The supported
protocols are SMTP and POP3.
To specify both SMTP and POP3, select ANY.
Note: When defining a Reject rule, this field is set to Mail Server (SMTP).

Using VStream Antispam
Chapter 15: Using Antivirus and Antispam Filtering 515
In this field… Do this…
The connection
source is
Select the source of the connections to which the rule should apply.
To specify an IP address, select Specified IP and type the desired IP address
in the field provided.
To specify an IP address range, select Specified Range and type the desired
IP address range in the fields provided.
To specify connections originating from this gateway, select This Gateway.
To specify any source except this gateway, select ANY.
And the
destination is
Select the destination of the connections to which the rule should apply.
This list includes network objects.
To specify an IP address, select Specified IP and type the desired IP address
in the text box.
To specify an IP address range, select Specified Range and type the desired
IP address range in the fields provided.
To specify the Safe@Office IP addresses, select This Gateway.
To specify any destination except the Safe@Office Portal IP addresses,
select ANY.
Description Type a description of the rule.
Using VStream Antispam
516 Check Point Safe@Office User Guide
Enabling/Disabling VStream Antispam Rules
You can temporarily disable a VStream Antispam rule.
To enable/disable a VStream Antispam rule
1. Click Antispam in the main menu, and click the Policy tab.
The Antispam Policy page appears.
2. Next to the desired rule, do one of the following:
• To enable the rule, click .
The button changes to and the rule is enabled.
• To disable the rule, click .
The button changes to and the rule is disabled.
Reordering VStream Antispam Rules
To reorder VStream Antispam rules
1. Click Antispam in the main menu, and click the Policy tab.
The Antispam Policy page appears.
2. For each rule you want to move, click on the rule and drag it to the desired
location in the table.
Using VStream Antispam
Chapter 15: Using Antivirus and Antispam Filtering 517
Viewing and Deleting VStream Antispam Rules
To view or delete an existing VStream Antispam rule
1. Click Antispam in the main menu, and click the Policy tab.
The Antispam Policy page appears with a list of existing VStream Antispam rules.
2. To resize a column, drag the relevant column divider right or left.
3. To delete a rule, do the following.
a. In the desired rule's row, click .
A confirmation message appears.
b. Click OK.
The rule is deleted.
Configuring the Safe Sender List
You can configure a list of email addresses and domain names that are "safe". VStream
Antispam will treat all emails sent from these addresses or domains as legitimate (non-
spam) mail.
Note: The IP Reputation check is performed before accepting the TCP connection,
at which point the sender’s email address is not yet available. Therefore, if the IP
Reputation engine is enabled, and an SMTP session is received from an IP address
that is reputed to be a source of spam, VStream Antispam will block the connection,
regardless of whether the sender's email address is on the Safe Sender List.
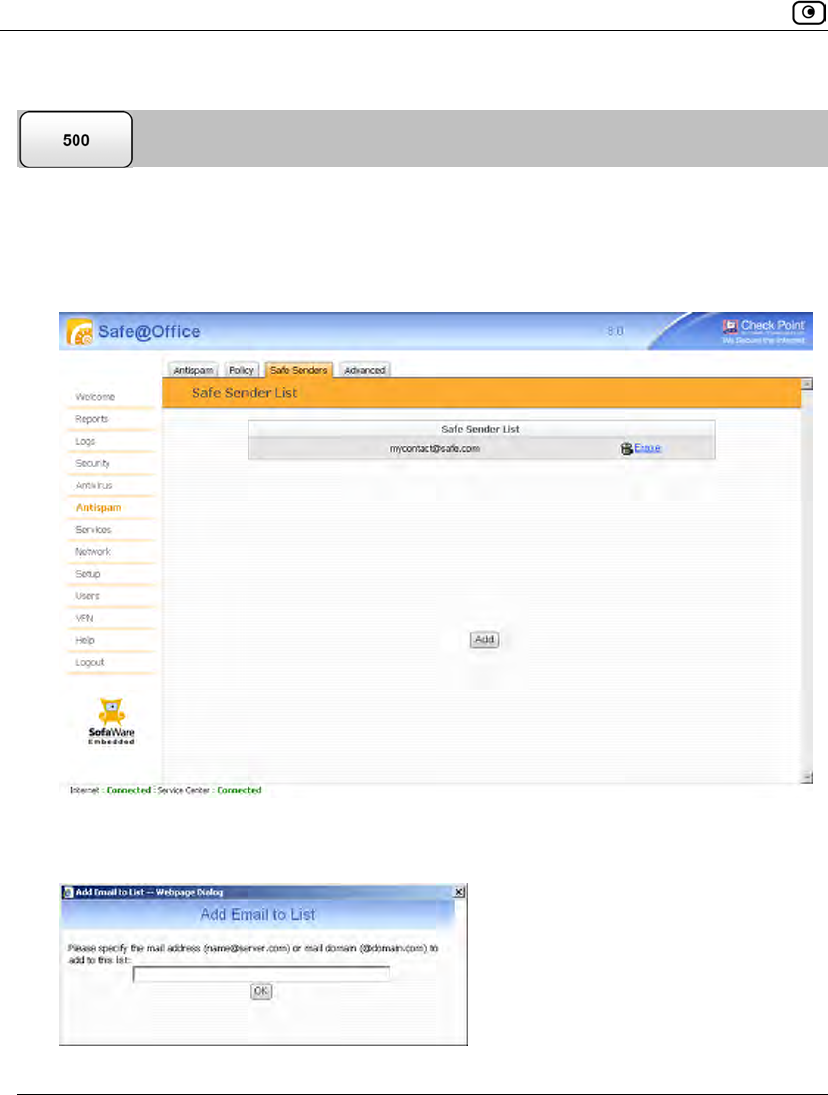
Using VStream Antispam
518 Check Point Safe@Office User Guide
Adding Safe Senders
To add a safe sender
1. Click Antispam in the main menu, and click the Safe Senders tab.
The Safe Sender List page appears.
2. Click Add.
The Add Email to List dialog box appears.
Using VStream Antispam
Chapter 15: Using Antivirus and Antispam Filtering 519
3. In the field provided, do one of the following:
• To allow all email from a specific sender, type the sender's email address.
• To allow all email from addresses ending with a specific domain, type the
domain name.
For example, if you type "@mycompany.com", then email addresses such as
johns@mycompany.com and sarahm@mycompany.com will be allowed.
4. Click OK.
The sender appears in the Safe Senders table.
Viewing and Deleting Safe Senders
To view or delete a safe sender
1. Click Antispam in the main menu, and click the Safe Senders tab.
The Safe Sender List page appears.
2. In the desired sender's row, click Erase.
The sender is deleted.
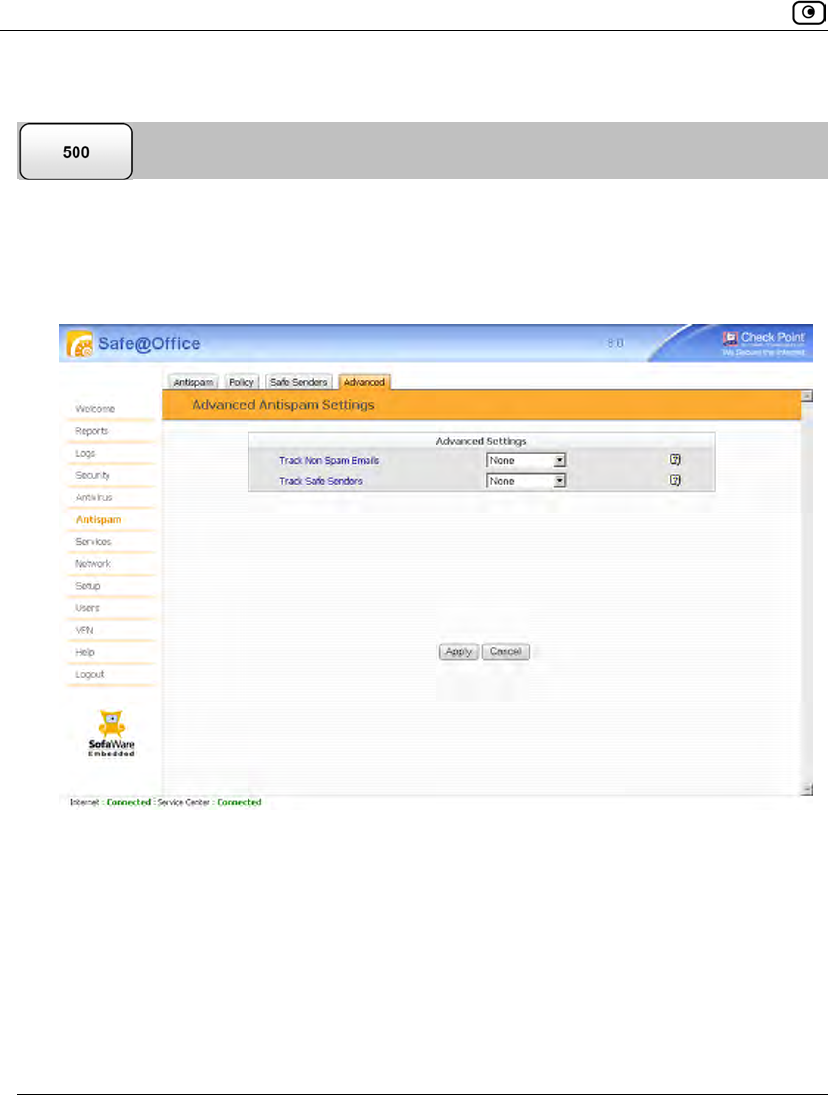
Using VStream Antispam
520 Check Point Safe@Office User Guide
Configuring VStream Antispam Advanced Settings
To configure VStream Antispam advanced settings
1. Click Antispam in the main menu, and click the Advanced tab.
The Advanced Antispam Settings page appears.
2. In the Track Non Spam Emails drop-down list, do one of the following:
• To specify that VStream Antispam should log email that is detected as
legitimate mail, select Log.
• To specify that VStream Antivirus should not log email that is detected as
legitimate mail, select None.
3. In the Track Safe Senders drop-down list, do one of the following:
Using Centralized Email Filtering
Chapter 15: Using Antivirus and Antispam Filtering 521
• To specify that VStream Antispam should log email sent by addresses on the
Safe Sender List, select Log.
• To specify that VStream Antivirus should not log email sent by addresses on
the Safe Sender List, select None.
4. Click Apply.
Using Centralized Email Filtering
There are two centralized Email Filtering services:
• Email Antivirus
When the Email Antivirus service is enabled, your email is automatically scanned for
the detection and elimination of all known viruses and vandals. If a virus is detected, it
is removed and replaced with a warning message.
• Email Antispam
When the Email Antispam service is enabled, your email is automatically scanned for
the detection of spam. If spam is detected, the email’s Subject line is modified to
indicate that it is suspected spam. If your email client allows defining rules based on
the Subject field, you can create rules to divert such messages to a special folder.
Note: Email Filtering services are only available if you are connected to a Service
Center and subscribed to the services. For information on using subscription
services, see Using Subscription Services on page 551.
Note: For information on the differences between the centralized Email Filtering
services and VStream Antivirus or VStream Antispam, see Overview on page 465.
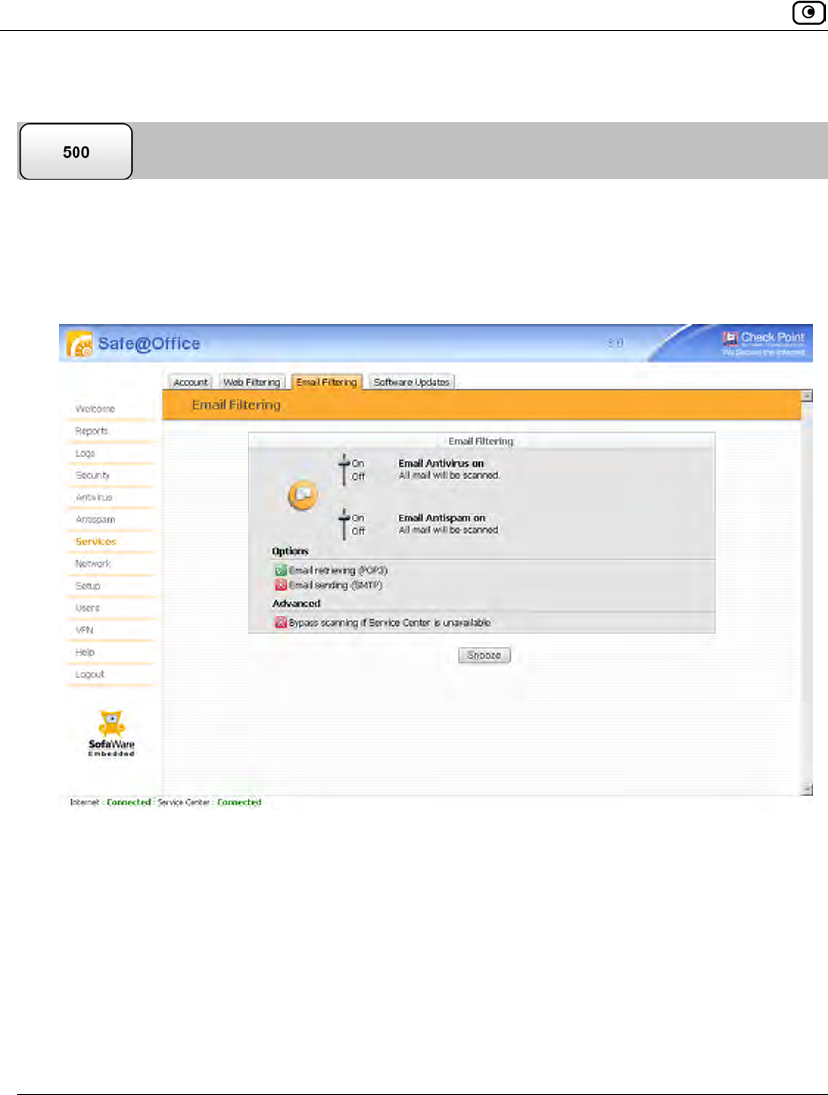
Using Centralized Email Filtering
522 Check Point Safe@Office User Guide
Enabling/Disabling Email Filtering
To enable/disable Email Filtering
1. Click Services in the main menu, and click the Email Filtering tab.
The Email Filtering page appears.
2. Next to Email Antivirus, drag the On/Off lever upwards or downwards.
Email Antivirus is enabled/disabled.
Using Centralized Email Filtering
Chapter 15: Using Antivirus and Antispam Filtering 523
Selecting Protocols for Scanning
If you are locally managed, you can define which protocols should be scanned for viruses
and spam:
• Email retrieving (POP3). If enabled, all incoming email in the POP3 protocol will
be scanned.
• Email sending (SMTP). If enabled, all outgoing email will be scanned.
Protocols marked with will be scanned, while those marked with will not.
Note: If the Safe@Office appliance is remotely managed, contact your Service
Center administrator to change these settings.
To enable virus and spam scanning for a protocol
1. Click Services in the main menu, and click the Email Filtering tab.
The Email Filtering page appears.
2. In the Options area, click or next to the desired protocol.
Using Centralized Email Filtering
524 Check Point Safe@Office User Guide
Configuring Email Filtering Advanced Settings
Note: If the Safe@Office appliance is remotely managed, contact your Service
Center administrator to change these settings.
To configure Email Filtering advanced settings
1. Click Services in the main menu, and click the Email Filtering tab.
The Email Filtering page appears.
2. Next to the Bypass scanning if Service Center is unavailable option, specify
how the gateway should handle Email Filtering when the service is enabled
and the Service Center is unavailable, by doing do one of the following:
• To temporarily block all email traffic, click .
This ensures constant protection from spam and viruses.
The button changes to .
• To temporarily allow all email traffic, click .
This ensures continuous access to email; however, it does not protect against
viruses and spam, so use this option cautiously.
The button changes to .
When the Service Center is available again, the gateway will enforce the configured
Email Filtering policy.
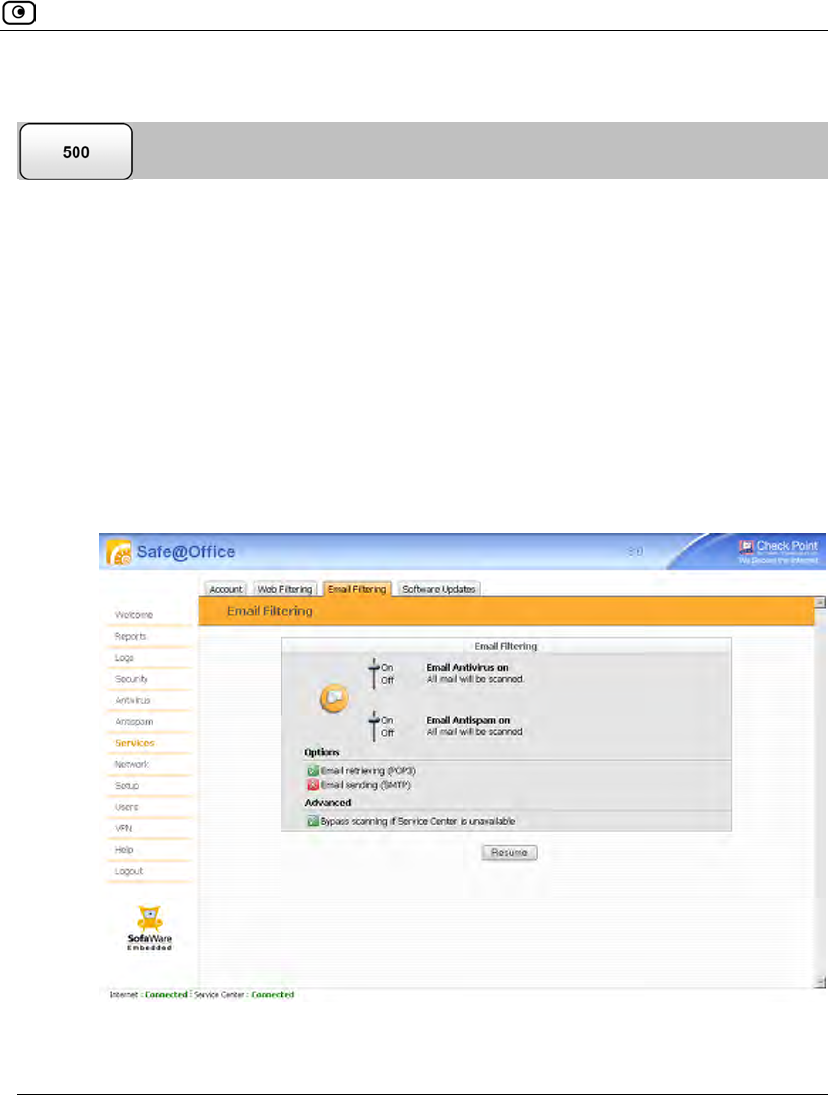
Using Centralized Email Filtering
Chapter 15: Using Antivirus and Antispam Filtering 525
Temporarily Disabling Email Filtering
If you are having problems sending or receiving email you can temporarily disable the
Email Filtering services.
To temporarily disable Email Filtering
1. Click Services in the main menu, and click the Email Filtering tab.
The Email Filtering page appears.
2. Click Snooze.
• Email Antivirus and Email Antispam are temporarily disabled for all internal
network computers.
• The Snooze button changes to Resume.
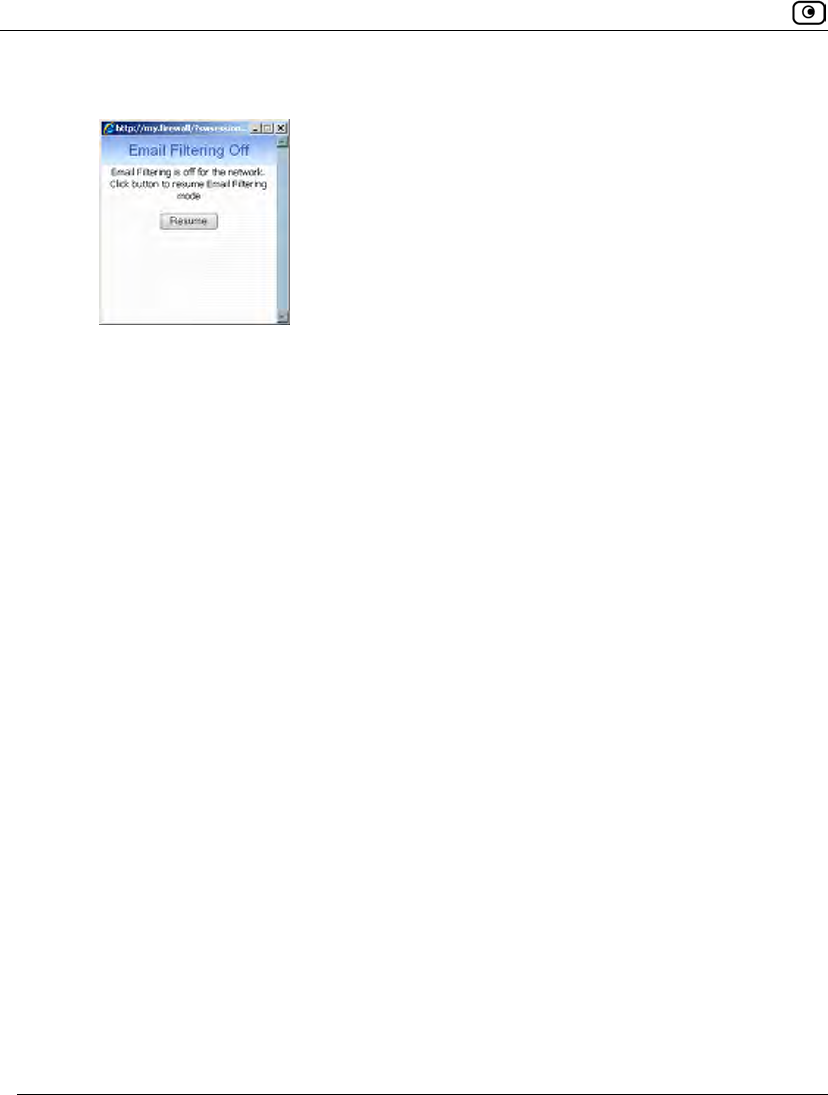
Using Centralized Email Filtering
526 Check Point Safe@Office User Guide
• The Email Filtering Off popup window opens.
3. To re-enable Email Antivirus and Email Antispam, click Resume, either in the
popup window, or on the Email Filtering page.
• The services are re-enabled for all internal network computers.
• If you clicked Resume in the Email Filtering page, the button changes to
Snooze.
• If you clicked Resume in the Email Filtering Off popup window, the popup
window closes.
Overview
Chapter 16: Using Web Content Filtering 527
Chapter 16
This chapter explains how to use Web content filtering.
This chapter includes the following topics:
Overview ..................................................................................................527
Using Web Rules......................................................................................529
Using Web Filtering.................................................................................537
Customizing the Access Denied Page ......................................................543
Overview
You can allow or block users from accessing Web content, by configuring Web rules
and/or the Web Filtering service. The following table describes the main differences
between Web rules and the Web Filtering service:
Table 115: Comparison of Web Content Filtering Methods
Web Rules Web Filtering
Filtering Action Web rules allow and block
specific URLs.
The Web Filtering service is category
based; that is, it filters Web sites based
on the category to which they belong.
Point of Enforcement HTTP requests are analyzed in
the gateway, by comparing each
request against a list of rules.
HTTP requests are analyzed in the
gateway, by extracting each request's URL
and then sending the URL to the Service
Center, to determine to which categories
the URL belongs. The request is then
allowed or denied according to the
configured list of allowed categories.
Using Web Content Filtering

Overview
528 Check Point Safe@Office User Guide
Web Rules Web Filtering
Subscription and
Connection
Requirement
Web rules are included with the
Safe@Office appliance and do
not require a Service Center
subscription or connection.
The Web Filtering service is subscription-
based and requires a connection to the
Service Center.
You can use either Web content filtering solution or both in conjunction. When a user
attempts to access a Web site, the Safe@Office appliance first evaluates the Web rules. If
the site is not blocked or allowed by the Web rules, the Web Filtering service is then
consulted.
Regardless of which method is used, if a user attempts to access a blocked page, the
Access Denied page appears. For information on customizing this page, see Customizing
the Access Denied Page on page 543.
If desired, you can permit specific users to override Web content filtering, by granting
them Web Filtering Override permissions. Such users will be able to view Web pages
without restriction, after they have provided their username password via the Access
Denied page. For information on granting Web Filtering Override permissions, see Adding
and Editing Users on page 643.
In addition, you can choose to exclude specific network objects from Web content filtering
enforcement. Users connecting from these network objects will be able to view Web pages
without restriction, regardless of whether they have Web Filtering Override permissions.
For information on configuring network objects, see Using Network Objects on page 185.
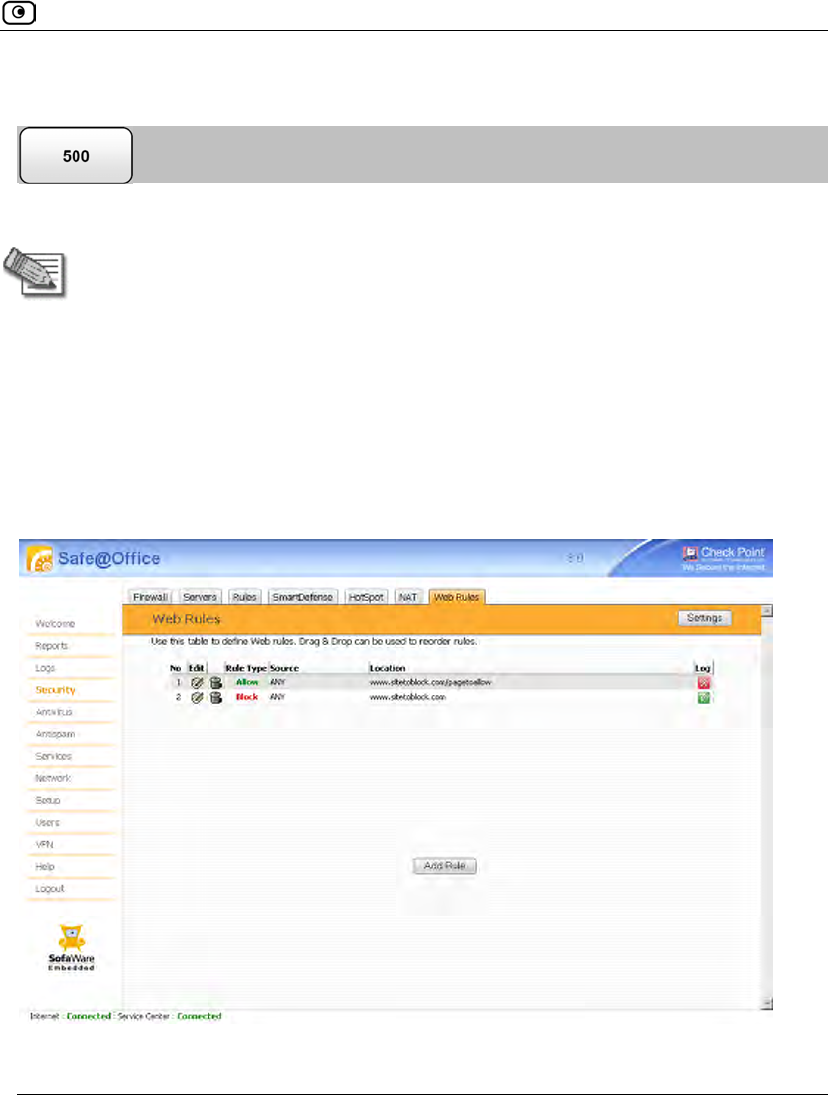
Using Web Rules
Chapter 16: Using Web Content Filtering 529
Using Web Rules
You can block or allow access to specific Web pages, by defining Web rules.
Note: Web rules affect outgoing traffic only and cannot be used to allow or limit
access from the Internet to internal Web servers.
The Safe@Office appliance processes Web rules in the order they appear in the Web Rules
table, so that rule 1 is applied before rule 2, and so on. This enables you to define
exceptions to rules, by placing the exceptions higher up in the Web Rules table.
For example, if you want to block all the pages of a particular Web site, except a specific
page, you can create a rule blocking access to all of the Web site's pages and move the rule
down in the Web Rules table. Then create a rule allowing access to the desired page and
move this rule to a higher location in the Web Rules table than the first rule. In the figure
below, the general rule is rule number 2, and the exception is rule number 1.
Using Web Rules
530 Check Point Safe@Office User Guide
The Safe@Office appliance will process rule 1 first, allowing access to the desired page,
and only then it will process rule 2, blocking access to the rest of the site.
The following rule types exist:
Table 116: Web Rule Types
Rule Description
Allow This rule type enables you to specify that a specific Web page should be
allowed.
Block This rule type enables you to specify that a specific Web page should be
blocked.
Adding and Editing Web Rules
To add or edit a Web rule
1. Click Security in the main menu, and click the Web Rules tab.
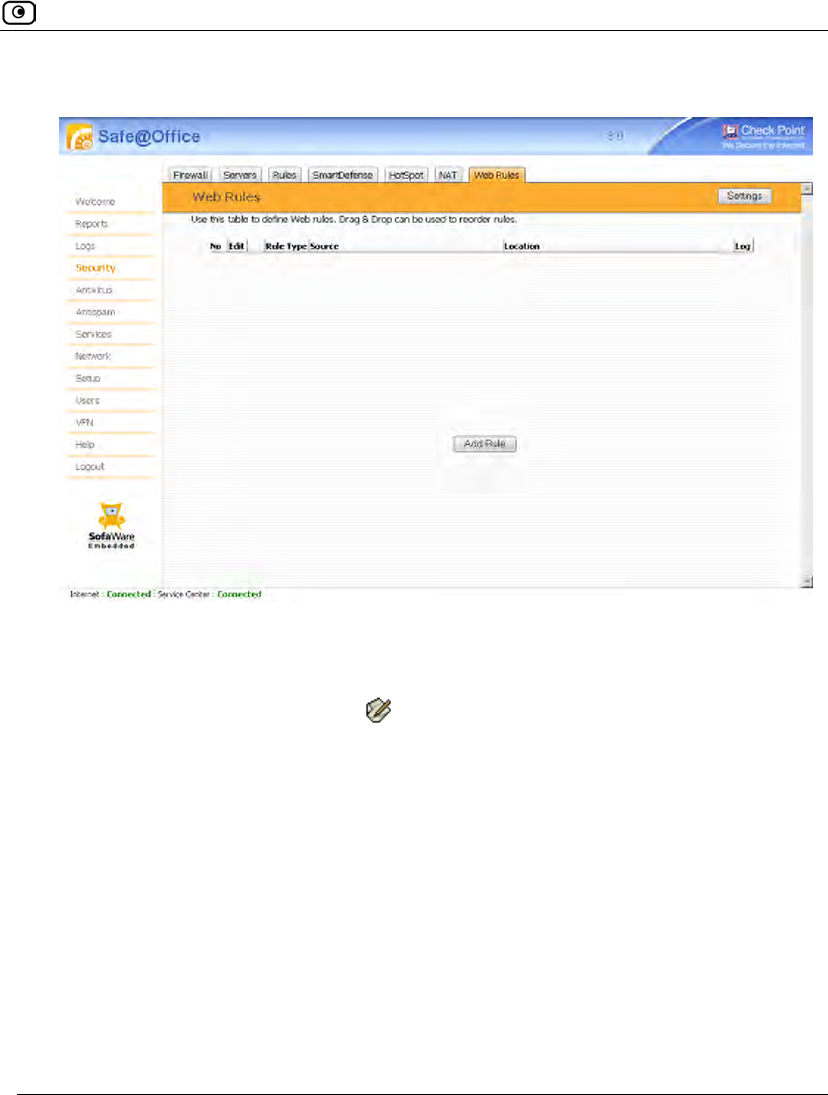
Using Web Rules
Chapter 16: Using Web Content Filtering 531
The Web Rules page appears.
2. Do one of the following:
• To add a new rule, click Add Rule.
• To edit an existing rule, click next to the desired rule.
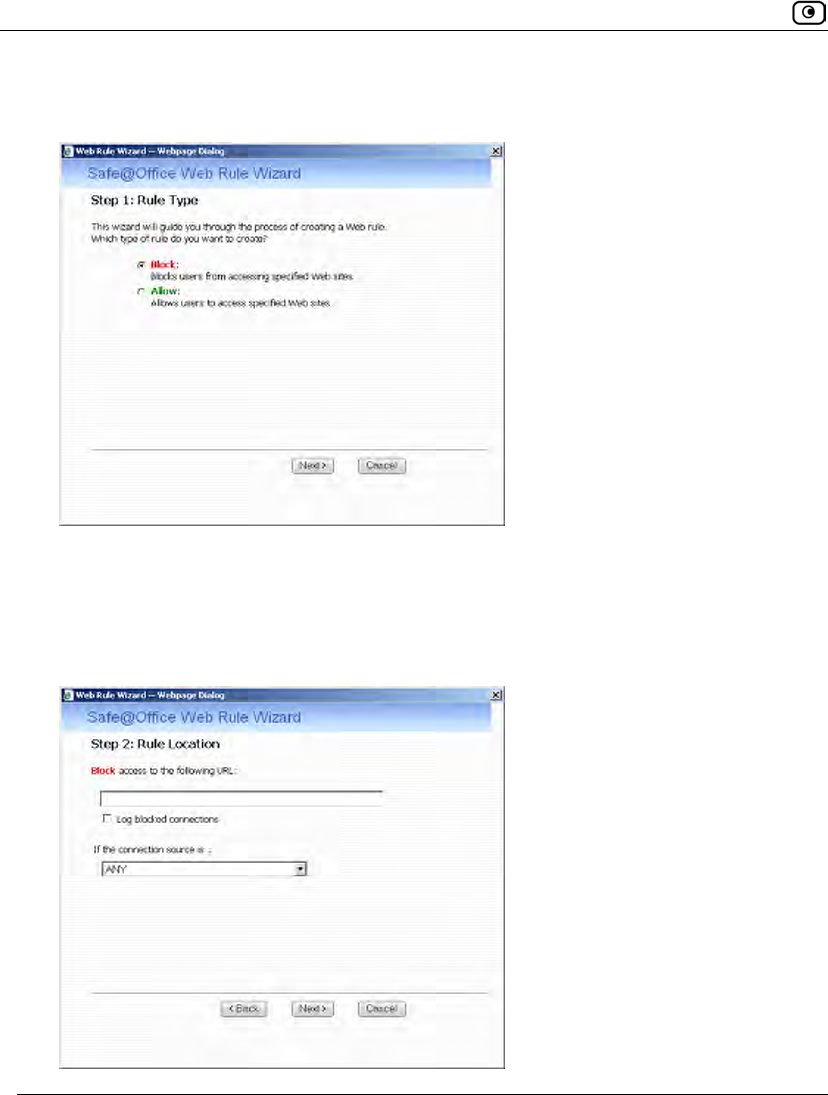
Using Web Rules
532 Check Point Safe@Office User Guide
The Safe@Office Web Rule Wizard opens, with the Step 1: Rule Type dialog box
displayed.
3. Select the type of rule you want to create.
4. Click Next.
The Step 2: Rule Location dialog box appears.
The example below shows a Block rule.
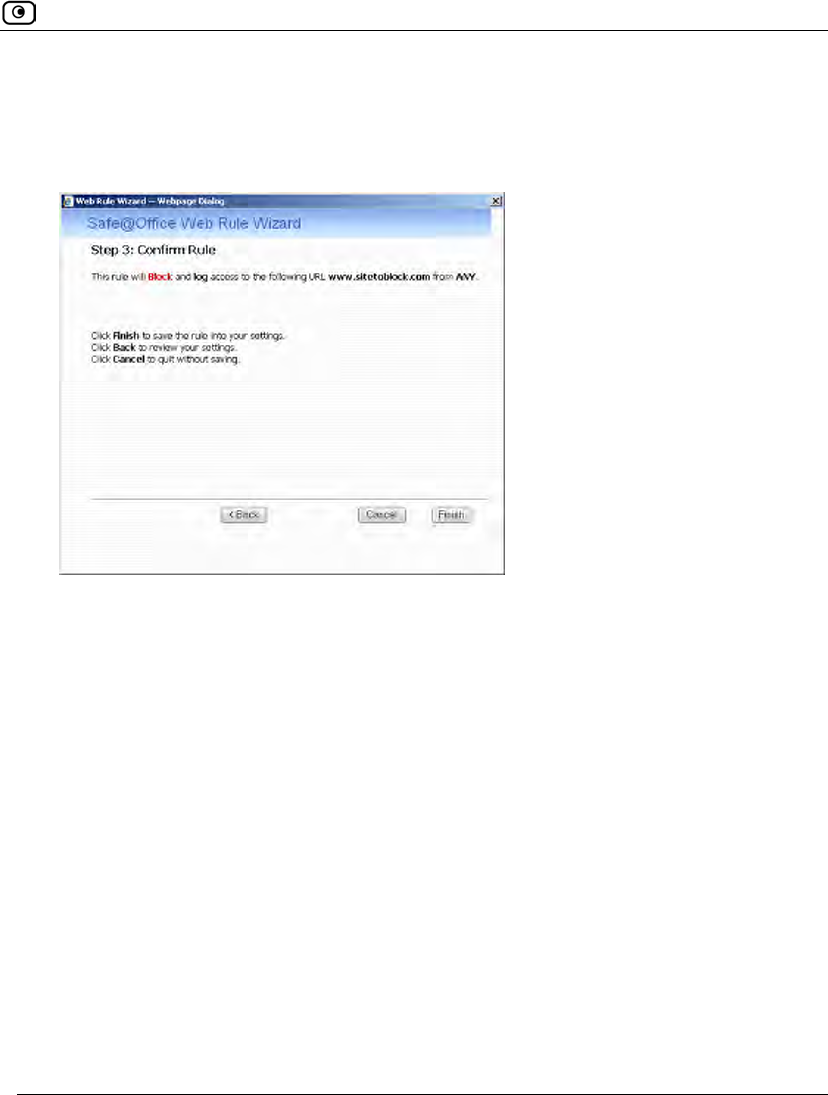
Using Web Rules
Chapter 16: Using Web Content Filtering 533
5. Complete the fields using the relevant information in the following table.
6. Click Next.
The Step 3: Confirm Rule dialog box appears.
7. Click Finish.
The new rule appears in the Web Rules page.

Using Web Rules
534 Check Point Safe@Office User Guide
Table 117: Web Rules Fields
In this field… Do this…
Block/Allow
access to the
following URL
Type the URL or IP address to which the rule should apply.
Wildcards (*) are supported. For example, to block all URLs that start with
"http://www.casino-", set this field's value to: http://www.casino-
*
Note: If you block a Web site based on its domain name
(http://<domain_name>), the Web site is not automatically blocked when
surfing to the Web server's IP address (http://<IP_address>). Likewise, if
you block a Web site based on its IP address, the Web site is not
automatically blocked when surfing to the domain name. To prevent access
to both the domain name and the IP address, you must block both.
Log allowed
connections /
Log blocked
connections
Select this option to log the specified blocked or allowed connections.
By default, allowed Web pages are not logged, and blocked Web pages are
logged.
If the connection
source is
Select the source of the connections you want to allow/block. This list
includes network objects.
To specify an IP address, select Specified IP and type the desired IP address
in the field provided.
To specify an IP address range, select Specified Range and type the desired IP
address range in the fields provided.
Using Web Rules
Chapter 16: Using Web Content Filtering 535
Reordering Web Rules
To reorder Web rules
1. Click Security in the main menu, and click the Web Rules tab.
The Web Rules page appears.
2. For each rule you want to move, click on the rule and drag it to the desired
location in the table.
Enabling/Disabling Web Rule Logging
You can enable or disable logging for a Web rule, by using the information in Adding and
Editing Web Rules on page 530, or by using the following shortcut.
To enable/disable logging for a Web rule
1. Click Security in the main menu, and click the Web Rules tab.
The Web Rules page appears.
2. Next to the desired rule, in the Log column, do one of the following:
• To enable logging, click .
The button changes to and logging is enabled for the rule.
• To disable logging, click .
The button changes to and logging is disabled for the rule.
Using Web Rules
536 Check Point Safe@Office User Guide
Viewing and Deleting Web Rules
To view or delete an existing Web rule
1. Click Security in the main menu, and click the Web Rules tab.
The Web Rules page appears with a list of existing Web rules.
2. To resize a column, drag the relevant column divider right or left.
3. To delete a rule, do the following.
a. In the desired rule's row, click .
A confirmation message appears.
b. Click OK.
The rule is deleted.
Using Web Filtering
Chapter 16: Using Web Content Filtering 537
Using Web Filtering
When the Web Filtering service is enabled, access to Web content is restricted according to
the categories specified in the Allow Categories area of the Web Filtering page.
Note: The Web Filtering service is only available if you are connected to a Service
Center and subscribed to this service. For information on using subscription
services, see Using Subscription Services on page 551.
Enabling/Disabling Web Filtering
To enable/disable Web Filtering
1. Click Services in the main menu, and click the Web Filtering tab.
Using Web Filtering
538 Check Point Safe@Office User Guide
The Web Filtering page appears.
2. Drag the On/Off lever upwards or downwards.
Web Filtering is enabled/disabled.
Using Web Filtering
Chapter 16: Using Web Content Filtering 539
Selecting Categories for Blocking
You can define which types of Web sites should be considered appropriate for your family
or office members, by selecting the categories. Categories marked with will remain
visible, while categories marked with will be blocked and will require the administrator
password for viewing.
Note: If the Safe@Office appliance is remotely managed, contact your Service Center
administrator to change these settings.
Note: The list of supported categories may vary, depending on the Service Center to
which the Safe@Office appliance is connected.
To allow/block a category
1. Click Services in the main menu, and click the Web Filtering tab.
The Web Filtering page appears.
2. In the Allow Categories area, use the scroll bar to scroll through all of the
categories.
3. Click or next to the desired category.
Using Web Filtering
540 Check Point Safe@Office User Guide
Configuring Web Filtering Advanced Settings
Note: If the Safe@Office appliance is remotely managed, contact your Service
Center administrator to change these settings.
To configure Web Filtering advanced settings
1. Click Services in the main menu, and click the Web Filtering tab.
The Web Filtering page appears.
2. Next to the Bypass scanning if Service Center is unavailable option, specify
how the gateway should handle Web Filtering when the service is enabled and
the Service Center is unavailable, by doing do one of the following:
• To temporarily block all connections to the Internet, click .
This ensures that users will not gain access to undesirable Web sites, even when
the Service Center is unavailable.
The button changes to .
• To temporarily allow all connections to the Internet, click .
This ensures continuous access to the Internet.
The button changes to .
When the Service Center is available again, the gateway will enforce the configured
Web Filtering policy.
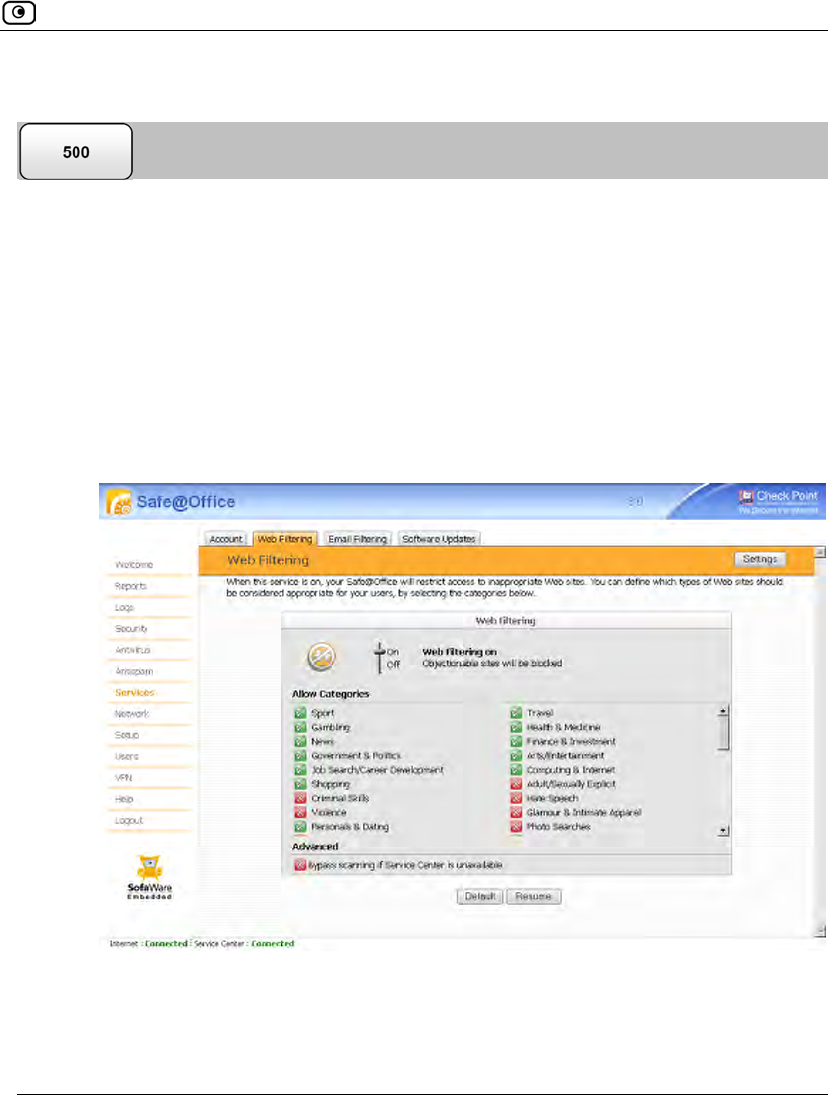
Using Web Filtering
Chapter 16: Using Web Content Filtering 541
Temporarily Disabling Web Filtering
If desired, you can temporarily disable the Web Filtering service.
To temporarily disable Web Filtering
1. Click Services in the main menu, and click the Web Filtering tab.
The Web Filtering page appears.
2. Click Snooze.
• Web Filtering is temporarily disabled for all internal network computers.
• The Snooze button changes to Resume.
Using Web Filtering
542 Check Point Safe@Office User Guide
• The Web Filtering Off popup window opens.
3. To re-enable the service, click Resume, either in the popup window, or on the
Web Filtering page.
• The service is re-enabled for all internal network computers.
• If you clicked Resume in the Web Filtering page, the button changes to
Snooze.
• If you clicked Resume in the Web Filtering Off popup window, the popup
window closes.
Resetting Web Filtering Categories to Defaults
If desired, you can reset the Web Filtering categories to their default settings.
To restore Web Filtering defaults
1. Click Services in the main menu, and click the Web Filtering tab.
The Web Filtering page appears.
2. Click Defaults
A confirmation message appears.
3. Click OK.

Customizing the Access Denied Page
Chapter 16: Using Web Content Filtering 543
Customizing the Access Denied Page
The Access Denied page appears when a user attempts to access a page that is blocked
either by a Web rule or by the Web Filtering service. You can customize this page using
the following procedure.
To customize the Access Denied page
1. Do one of the following:
• Click Security in the main menu, and click the Web Rules tab.
The Web Rules page appears.
• Click Services in the main menu, and click the Web Filtering tab.
The Web Filtering page appears.
2. Click Settings.
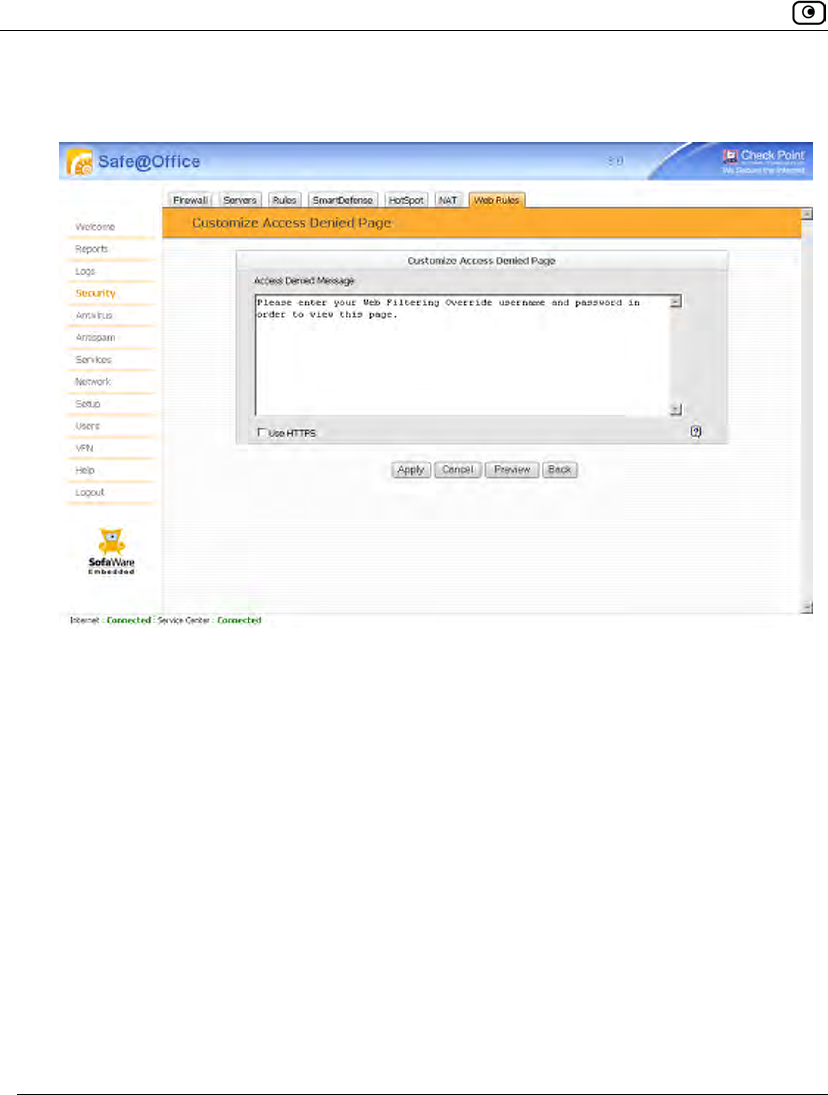
Customizing the Access Denied Page
544 Check Point Safe@Office User Guide
The Customize Access Denied Page page appears. In the following example, this page
was accessed via the Web Rules page.
3. In the text box, type the message that should appear when a user attempts to
access a blocked Web page.
You can use HTML tags as needed.
4. To display the Access Denied page using HTTPS, select the Use HTTPS check
box.
5. To preview the Access Denied page, click Preview.
A browser window opens displaying the Access Denied page.
6. Click Apply.
Your changes are saved.

Overview
Chapter 17: Updating the Firmware 545
Chapter 17
This chapter explains how to update the Safe@Office appliance's firmware.
This chapter includes the following topics:
Overview ..................................................................................................545
Using Software Updates...........................................................................546
Updating the Firmware Manually.............................................................549
Overview
You can update your Safe@Office appliance with new product features and protection
against new security threats. To do so, you must update your appliance's firmware, by
using one of the following methods:
• Software Updates. This subscription service allows checking for new security
and software updates, either automatically or manually. Detected updates are
downloaded and installed without user intervention.
• Manual updates. If you are not subscribed to the Software Updates service, you
must update the firmware manually.
Updating the Firmware
Using Software Updates
546 Check Point Safe@Office User Guide
Using Software Updates
Note: Software Updates are only available if you are connected to a Service Center
and subscribed to this service. For information on using subscription services, see
Using Subscription Services on page 551.
Checking for Software Updates when Remotely Managed
If your Safe@Office appliance is remotely managed, it automatically checks for software
updates and installs them without user intervention. However, you can still check for
updates manually, if needed.
To manually check for security and software updates
1. Click Services in the main menu, and click the Software Updates tab.
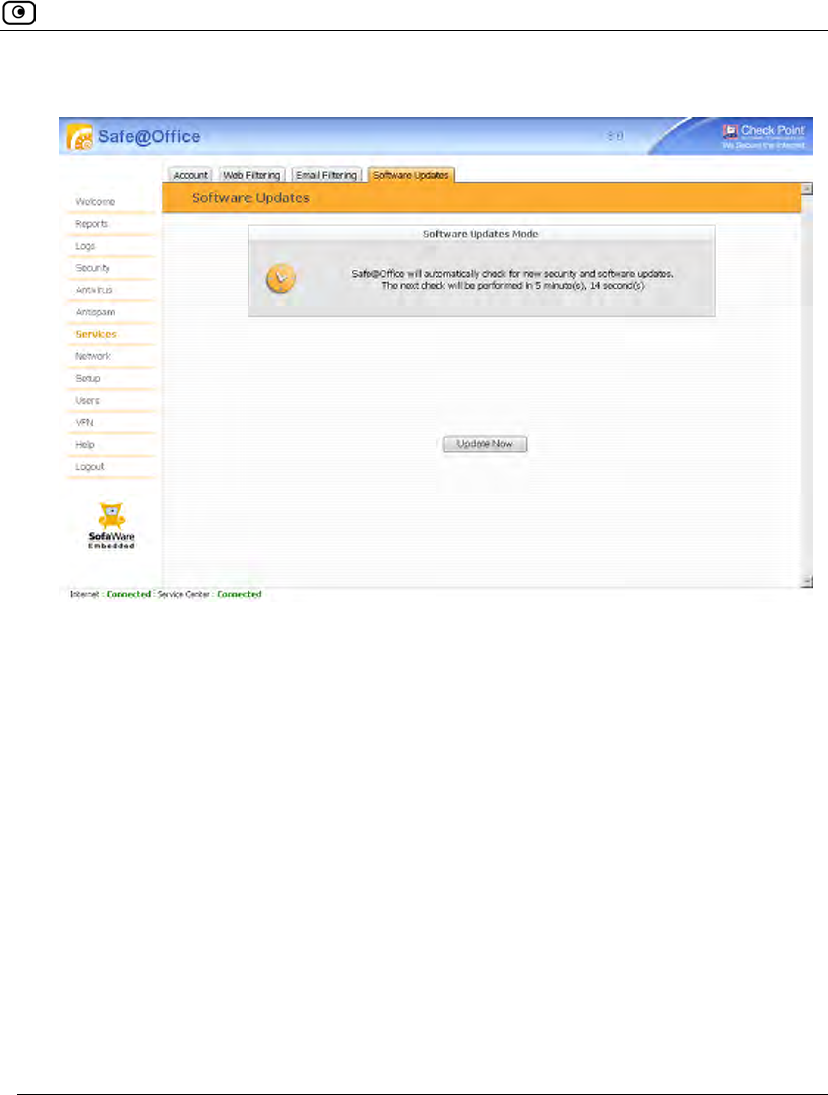
Using Software Updates
Chapter 17: Updating the Firmware 547
The Software Updates page appears.
2. Click Update Now.
The system checks for new updates and installs them.
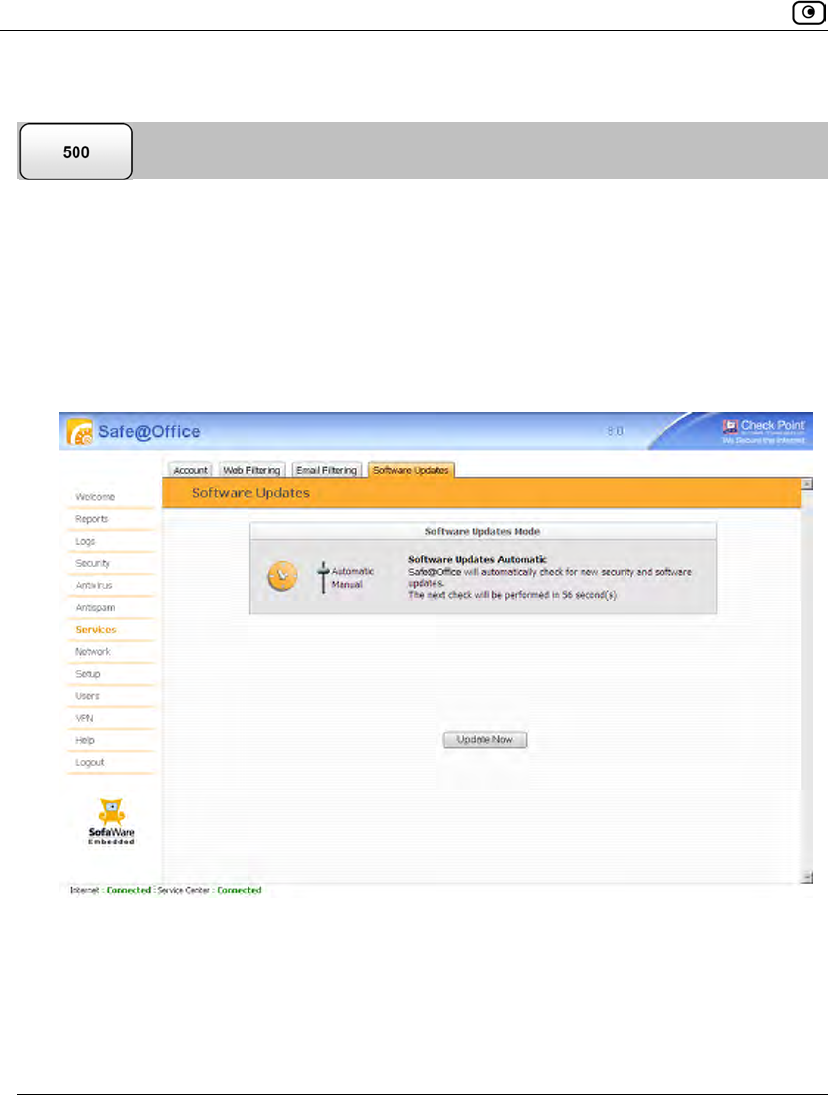
Using Software Updates
548 Check Point Safe@Office User Guide
Checking for Software Updates when Locally Managed
If your Safe@Office appliance is locally managed, you can set it to automatically check
for software updates, or you can set it so that software updates must be checked for
manually.
To configure software updates when locally managed
1. Click Services in the main menu, and click the Software Updates tab.
The Software Updates page appears.
2. To set the Safe@Office appliance to automatically check for and install new
software updates, drag the Automatic/Manual lever upwards.
The Safe@Office appliance checks for new updates and installs them according to its
schedule.
Updating the Firmware Manually
Chapter 17: Updating the Firmware 549
Note: When the Software Updates service is set to Automatic, you can still manually
check for updates.
3. To set the Safe@Office appliance so that software updates must be checked
for manually, drag the Automatic/Manual lever downwards.
The Safe@Office appliance does not check for software updates automatically.
4. To manually check for software updates, click Update Now.
The system checks for new updates and installs them.
Updating the Firmware Manually
To update your Safe@Office firmware manually
1. Click Setup in the main menu, and click the Firmware tab.
The Firmware page appears.
2. Click Firmware Update.
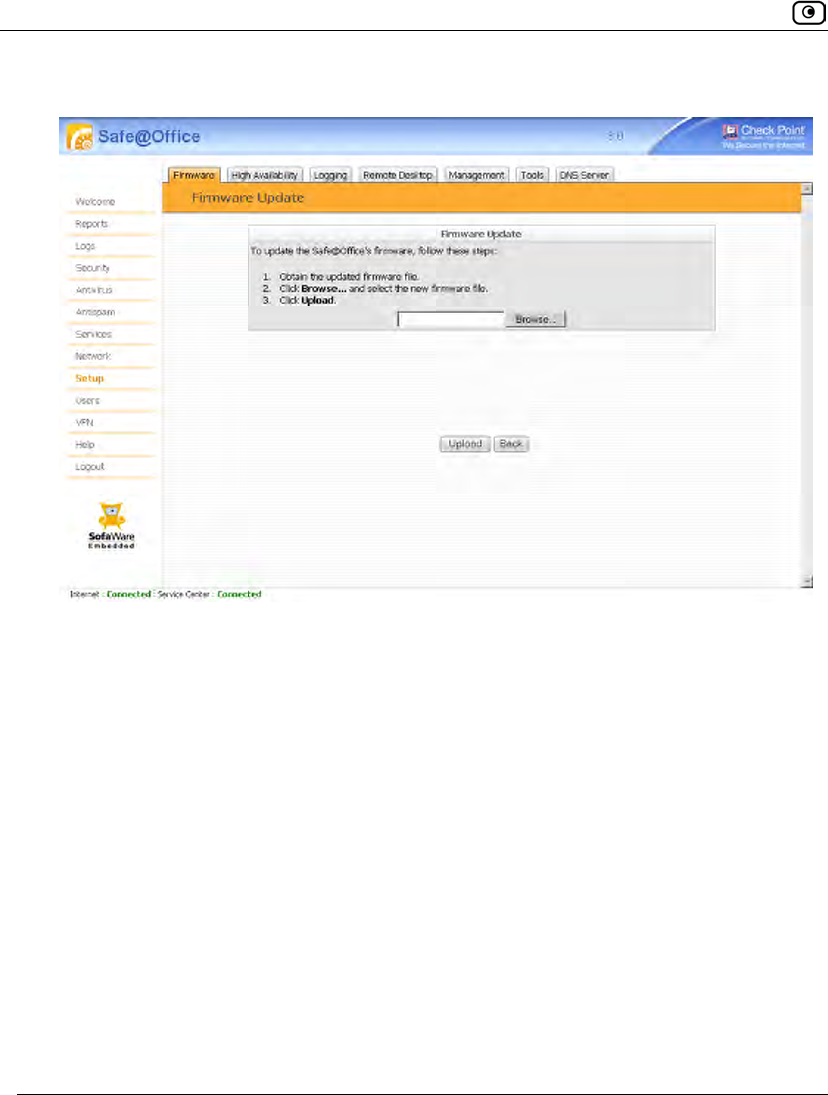
Updating the Firmware Manually
550 Check Point Safe@Office User Guide
The Firmware Update page appears.
3. Click Browse.
A browse window appears.
4. Select the image file and click Open.
The Firmware Update page reappears. The path to the firmware update image file
appears in the Browse text box.
5. Click Upload.
Your Safe@Office appliance firmware is updated.
Updating may take a few minutes. Do not power off the appliance.
At the end of the process the Safe@Office appliance restarts automatically.
Connecting to a Service Center
Chapter 18: Using Subscription Services 551
Chapter 18
This chapter explains how to connect your Safe@Office appliance to a Service Center and
start subscription services.
Note: Check with your reseller regarding availability of subscription services, or surf
to www.sofaware.com/servicecenters to locate a Service Center in your area.
This chapter includes the following topics:
Connecting to a Service Center ............................................................... 551
Viewing Services Information................................................................. 557
Refreshing Your Service Center Connection........................................... 558
Configuring Your Account...................................................................... 559
Disconnecting from Your Service Center................................................ 559
Connecting to a Service Center
To connect to a Service Center
1. Click Services in the main menu, and click the Account tab.
Using Subscription Services
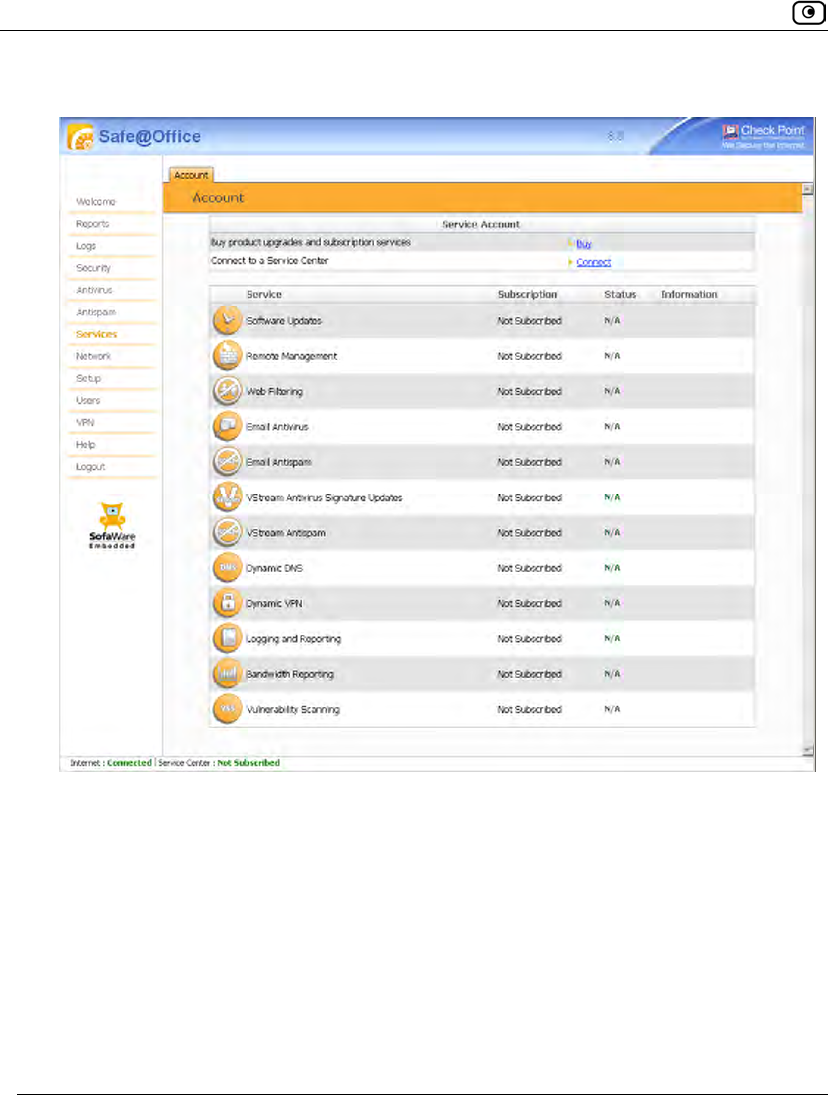
Connecting to a Service Center
552 Check Point Safe@Office User Guide
The Account page appears.
2. In the Service Account area, click Connect.
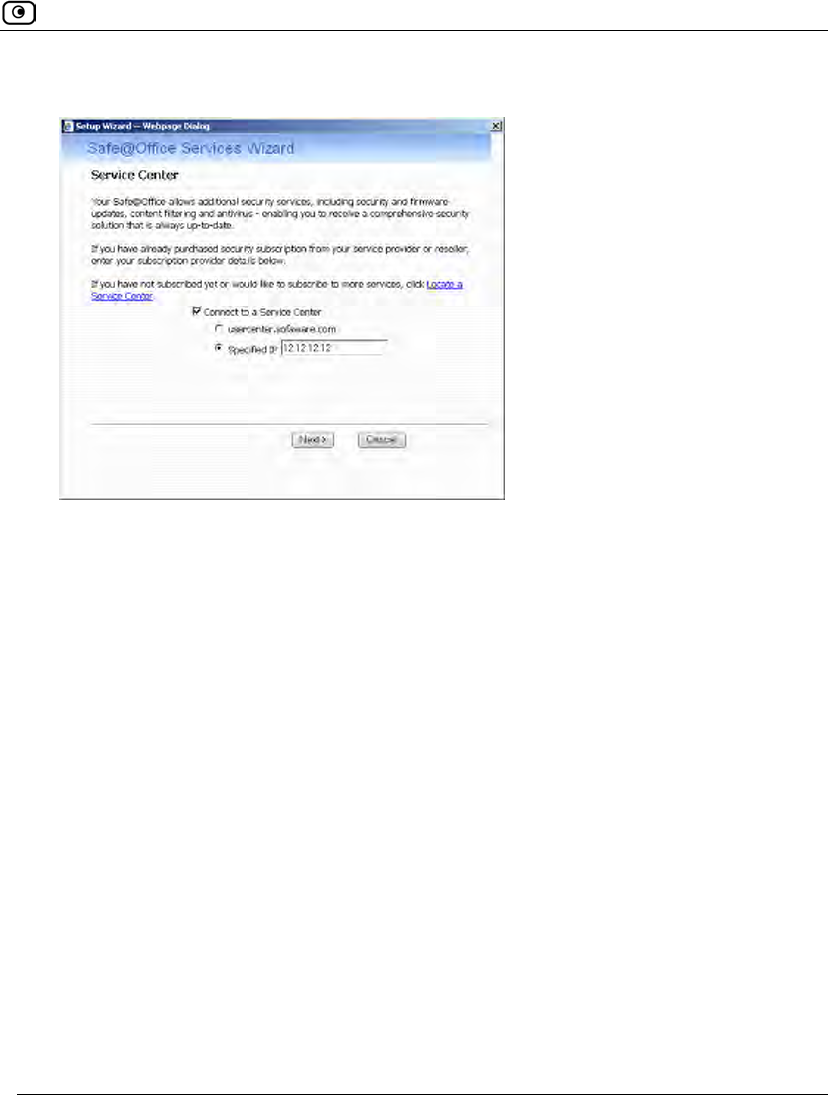
Connecting to a Service Center
Chapter 18: Using Subscription Services 553
The Safe@Office Services Wizard opens, with the Service Center dialog box displayed.
3. Make sure the Connect to a Service Center check box is selected.
4. Do one of the following:
• To connect to the SofaWare Service Center, choose usercenter.sofaware.com.
• To specify a Service Center, choose Specified IP and then in the Specified IP
field, enter the desired Service Center’s IP address, as given to you by your
system administrator.
5. Click Next.
• The Connecting screen appears.
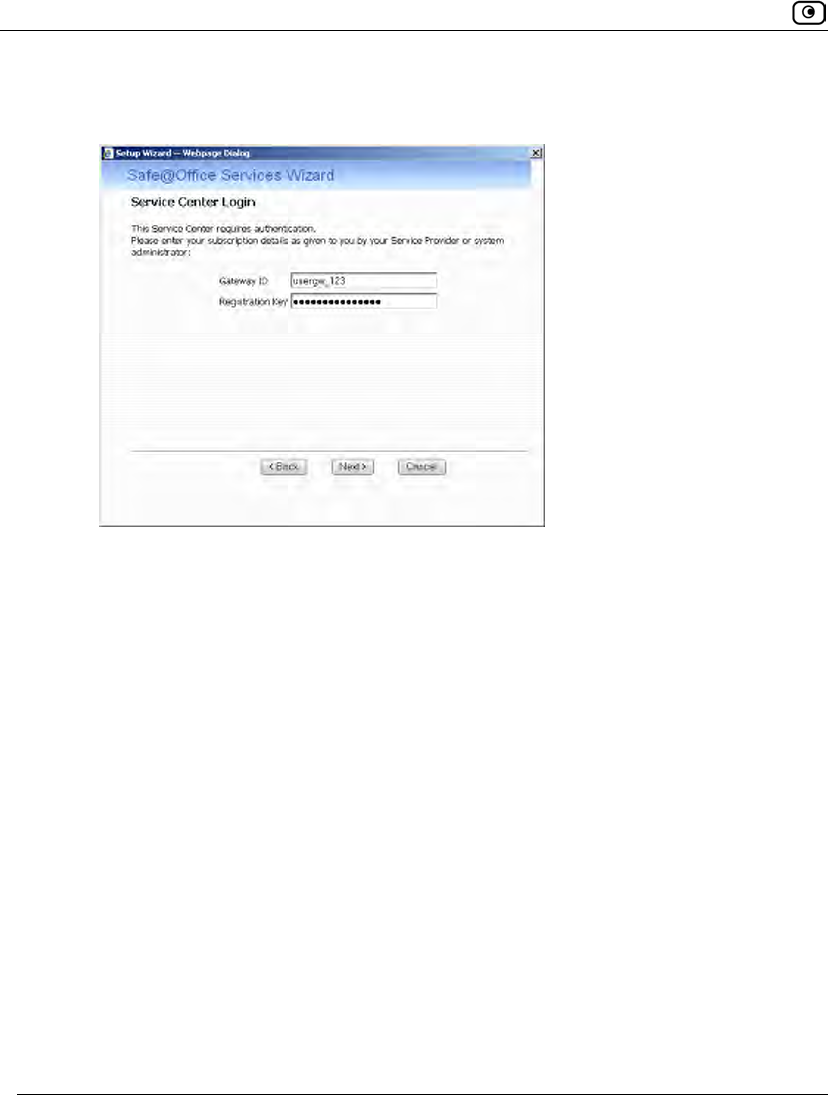
Connecting to a Service Center
554 Check Point Safe@Office User Guide
• If the Service Center requires authentication, the Service Center Login dialog
box appears.
Enter your gateway ID and registration key in the appropriate fields, as given to
you by your service provider, then click Next.
• The Connecting screen appears.
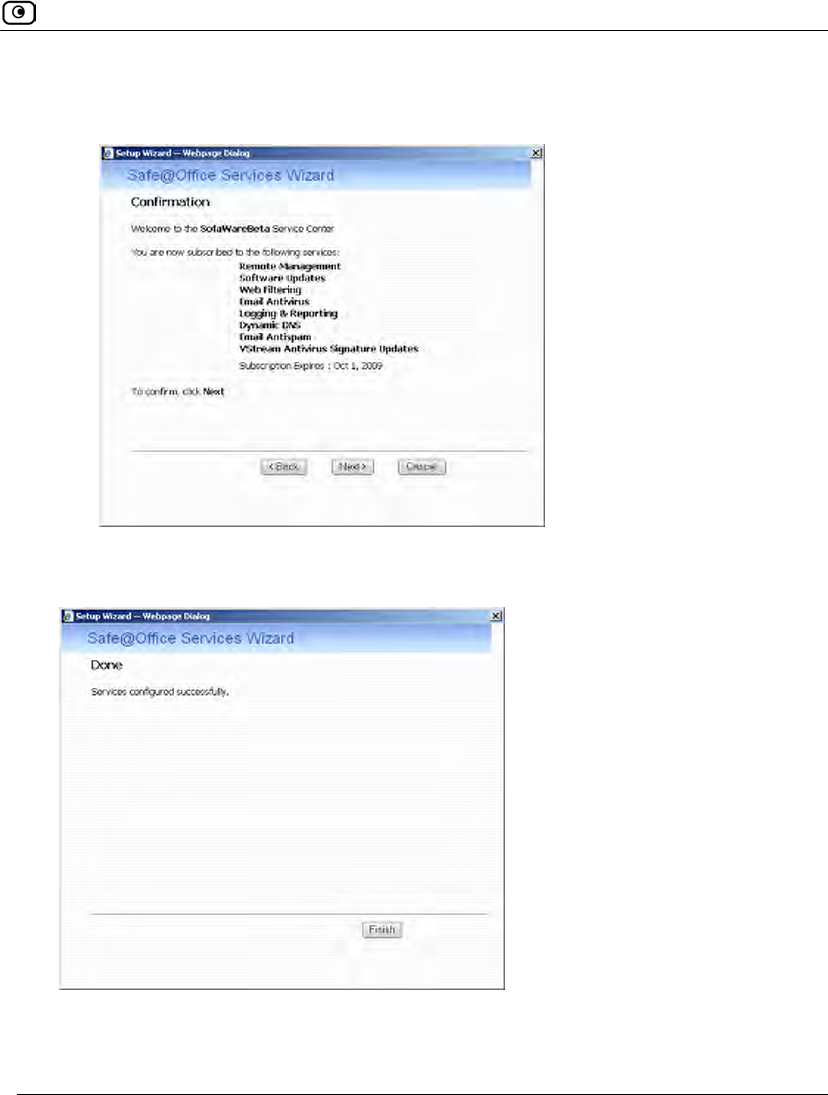
Connecting to a Service Center
Chapter 18: Using Subscription Services 555
• The Confirmation dialog box appears with a list of services to which you are
subscribed.
6. Click Next.
The Done screen appears with a success message.
7. Click Finish.
The following things happen:
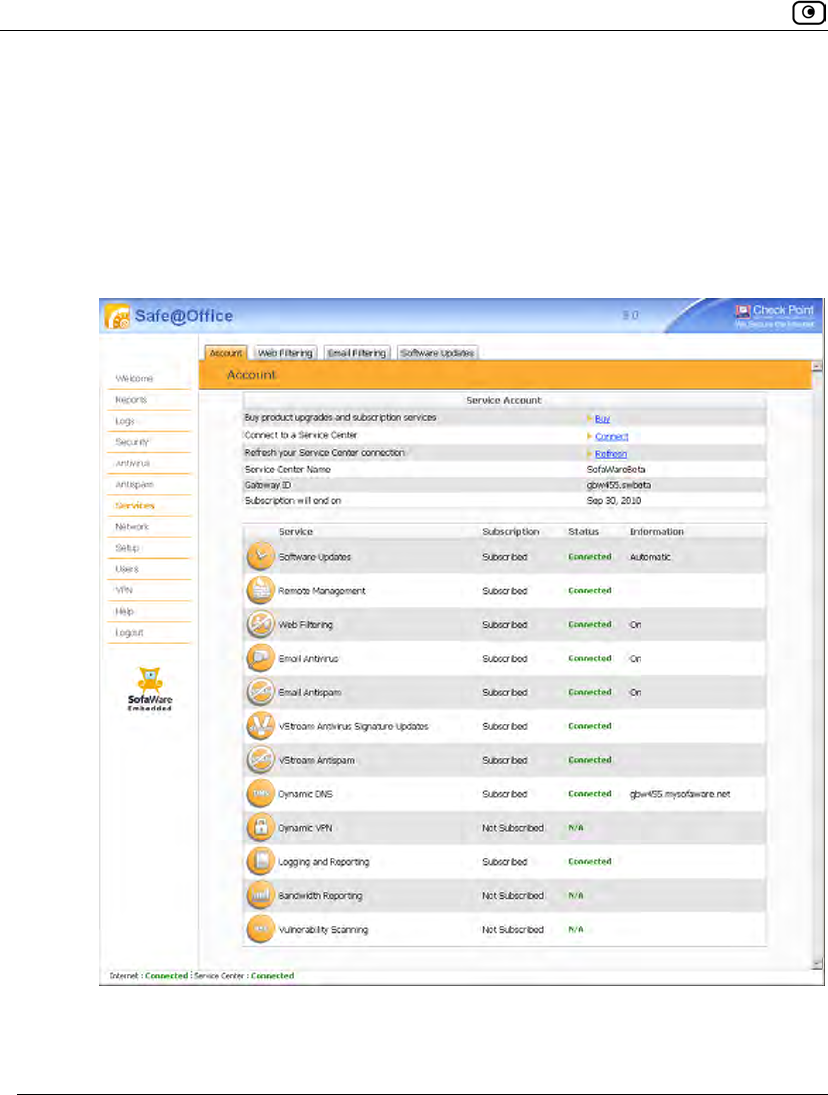
Connecting to a Service Center
556 Check Point Safe@Office User Guide
• If a new firmware is available, the Safe@Office appliance may start
downloading it. This may take several minutes. Once the download is
complete, the Safe@Office appliance restarts using the new firmware.
• The Welcome page appears.
• The services to which you are subscribed are now available on your
Safe@Office appliance and listed as such on the Account page. See Viewing
Services Information on page 557 for further information.
• The Services submenu includes the services to which you are subscribed.
Viewing Services Information
Chapter 18: Using Subscription Services 557
Viewing Services Information
The Account page displays the following information about your subscription.
Table 118: Account Page Fields
This field… Displays…
Service Center
Name
The name of the Service Center to which you are connected (if known).
Gateway ID Your gateway ID.
Subscription will
end on
The date on which your subscription to services will end.
Service The services available in your service plan.
Subscription The status of your subscription to each service:
• Subscribed
• Not Subscribed
Status The status of each service:
• Connected. You are connected to the service through the
Service Center.
• Connecting. Connecting to the Service Center.
• N/A. The service is not available.
Refreshing Your Service Center Connection
558 Check Point Safe@Office User Guide
This field… Displays…
Information The mode to which each service is set.
If you are subscribed to Dynamic DNS, this field displays your gateway's
domain name.
For further information, see Web Filtering on page 537, Virus Scanning
on page 521, and Automatic and Manual Updates on page 546.
Refreshing Your Service Center Connection
This option restarts your Safe@Office appliance’s connection to the Service Center and
refreshes your Safe@Office appliance’s service settings.
To refresh your Service Center connection
1. Click Services in the main menu, and click the Account tab.
The Account page appears.
2. In the Service Account area, click Refresh.
The Safe@Office appliance reconnects to the Service Center.
Your service settings are refreshed.
Configuring Your Account
Chapter 18: Using Subscription Services 559
Configuring Your Account
This option allows you to access your Service Center's Web site, which may offer
additional configuration options for your account. Contact your Service Center for a user
ID and password.
To configure your account
1. Click Services in the main menu, and click the Account tab.
The Account page appears.
2. In the Service Account area, click Configure.
Note: If no additional settings are available from your Service Center, this button will
not appear.
Your Service Center's Web site opens.
3. Follow the on-screen instructions.
Disconnecting from Your Service Center
If desired, you can disconnect from your Service Center.
To disconnect from your Service Center
1. Click Services in the main menu, and click the Account tab.
The Account page appears.
2. In the Service Account area, click Connect.
The Safe@Office Services Wizard opens, with the first Subscription Services dialog box
displayed.

Disconnecting from Your Service Center
560 Check Point Safe@Office User Guide
3. Clear the Connect to a Service Center check box.
4. Click Next.
The Done screen appears with a success message.
5. Click Finish.
The following things happen:
• You are disconnected from the Service Center.
• The services to which you were subscribed are no longer available on your
Safe@Office appliance.

Overview
Chapter 19: Working With VPNs 561
Chapter 19
This chapter describes how to use your Safe@Office appliance as a Remote Access VPN
Client, server, or gateway.
This chapter includes the following topics:
Overview ..................................................................................................561
Setting Up Your Safe@Office Appliance as a VPN Server.....................567
Adding and Editing VPN Sites ................................................................581
Viewing and Deleting VPN Sites.............................................................615
Enabling/Disabling a VPN Site ................................................................615
Logging in to a Remote Access VPN Site................................................616
Logging Out of a Remote Access VPN Site.............................................619
Using Certificates.....................................................................................620
Viewing VPN Tunnels .............................................................................631
Viewing IKE Traces for VPN Connections..............................................634
Viewing VPN Topology...........................................................................635
Overview
You can configure your Safe@Office appliance as part of a virtual private network (VPN).
A VPN is a private data network consisting of a group of gateways that can securely
connect to each other. Each member of the VPN is called a VPN site, and a connection
between two VPN sites is called a VPN tunnel. VPN tunnels encrypt and authenticate all
traffic passing through them. Through these tunnels, employees can safely use their
company’s network resources when working at home. For example, they can securely read
email, use the company’s intranet, or access the company’s database from home.
The are four types of VPN sites:
• SecuRemote Remote Access VPN Server. Makes a network remotely available to
authorized users who connect to the Remote Access VPN Server using the
Check Point SecuRemote VPN Client (provided for free with your
Safe@Office) or another Safe@Office.
Working With VPNs

Overview
562 Check Point Safe@Office User Guide
• SecuRemote Internal VPN Server. SecuRemote can also be used from your
internal networks, allowing you to secure your wired or wireless network with
strong encryption and authentication.
• L2TP VPN Server. Makes a network available to authorized users who connect
from the Internet or from your internal networks using an L2TP client such as
the Microsoft L2TP IPSec VPN Client.
• Site-to-Site VPN Gateway. Can connect with another Site-to-Site VPN Gateway in
a permanent, bi-directional relationship.
• Remote Access VPN Client. Can connect to a Remote Access VPN Server, but
other VPN sites cannot initiate a connection to the Remote Access VPN Client.
Defining a Remote Access VPN Client is a hardware alternative to using
SecuRemote software.
All Safe@Office models provide full VPN functionality. They can act as a Remote Access
VPN Client, a Remote Access VPN Server for multiple users, or a Site-to-Site VPN
Gateway.
A virtual private network (VPN) must include at least one Remote Access VPN Server or
gateway. The type of VPN sites you include in a VPN depends on the type of VPN you
want to create, Site-to-Site or Remote Access.
Note: A locally managed Remote Access VPN Server or gateway must have a static
IP address. If you need a Remote Access VPN Server or gateway with a dynamic
IP address, you must use SofaWare Security Management Portal (SMP)
management.
A SecuRemote/SecureClient or Safe@Office Remote Access VPN Client can have
a dynamic IP address, regardless of whether it is locally or remotely managed.
Note: This chapter explains how to define a VPN locally. However, if your appliance
is centrally managed by a Service Center, then the Service Center can
automatically deploy VPN configuration for your appliance.
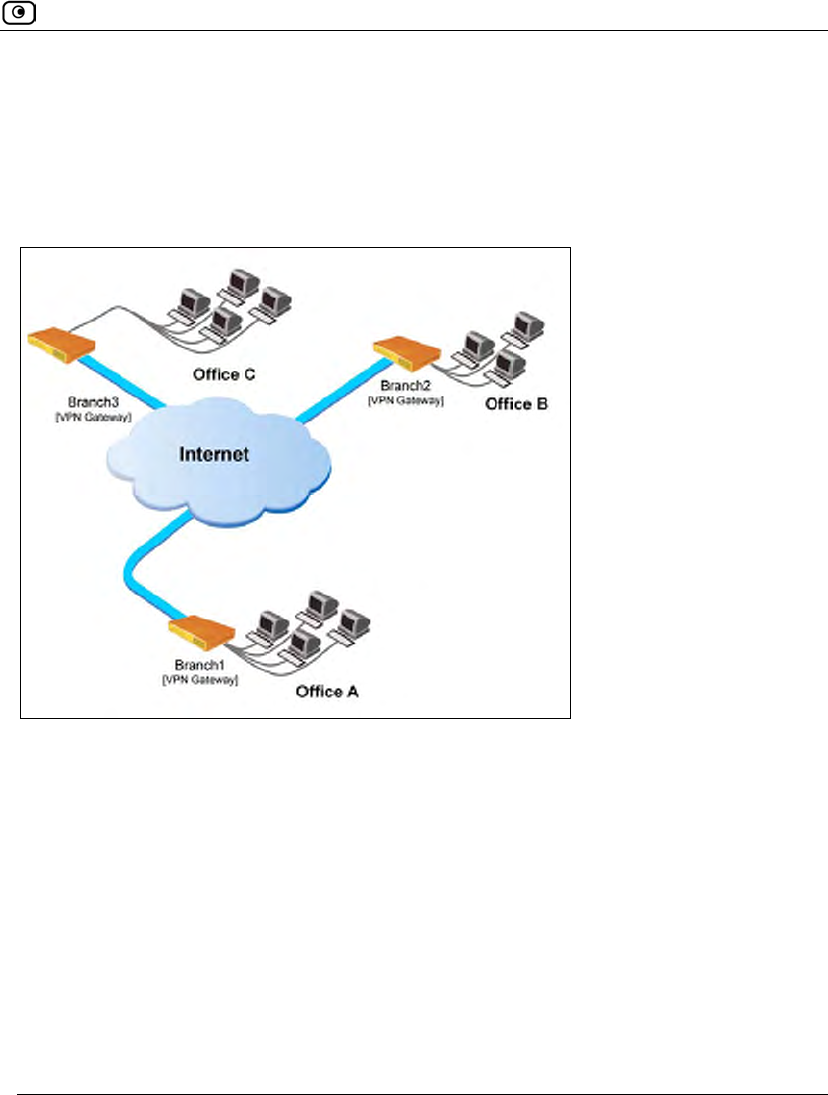
Overview
Chapter 19: Working With VPNs 563
Site-to-Site VPNs
A Site-to-Site VPN consists of two or more Site-to-Site VPN Gateways that can
communicate with each other in a bi-directional relationship. The connected networks
function as a single network. You can use this type of VPN to mesh office branches into
one corporate network.
Figure 27: Site-to-Site VPN
Overview
564 Check Point Safe@Office User Guide
To create a Site-to-Site VPN with two VPN sites
1. On the first VPN site’s Safe@Office appliance, do the following:
a. Define the second VPN site as a Site-to-Site VPN Gateway, using the
procedure Adding and Editing VPN Sites on page 581.
b. Enable a Remote Access VPN Server using the procedure Setting Up
Your Safe@Office Appliance as a VPN Server on page 567.
2. On the second VPN site’s Safe@Office appliance, do the following:
a. Define the first VPN site as a Site-to-Site VPN Gateway, using the
procedure Adding and Editing VPN Sites on page 581.
b. Enable a Remote Access VPN Server using the procedure Setting Up
Your Safe@Office Appliance as a VPN Server on page 567.
Note: You can manually configure each VPN site's internal encryption domain via
the CLI. For information, refer to the Embedded NGX CLI Reference Guide.
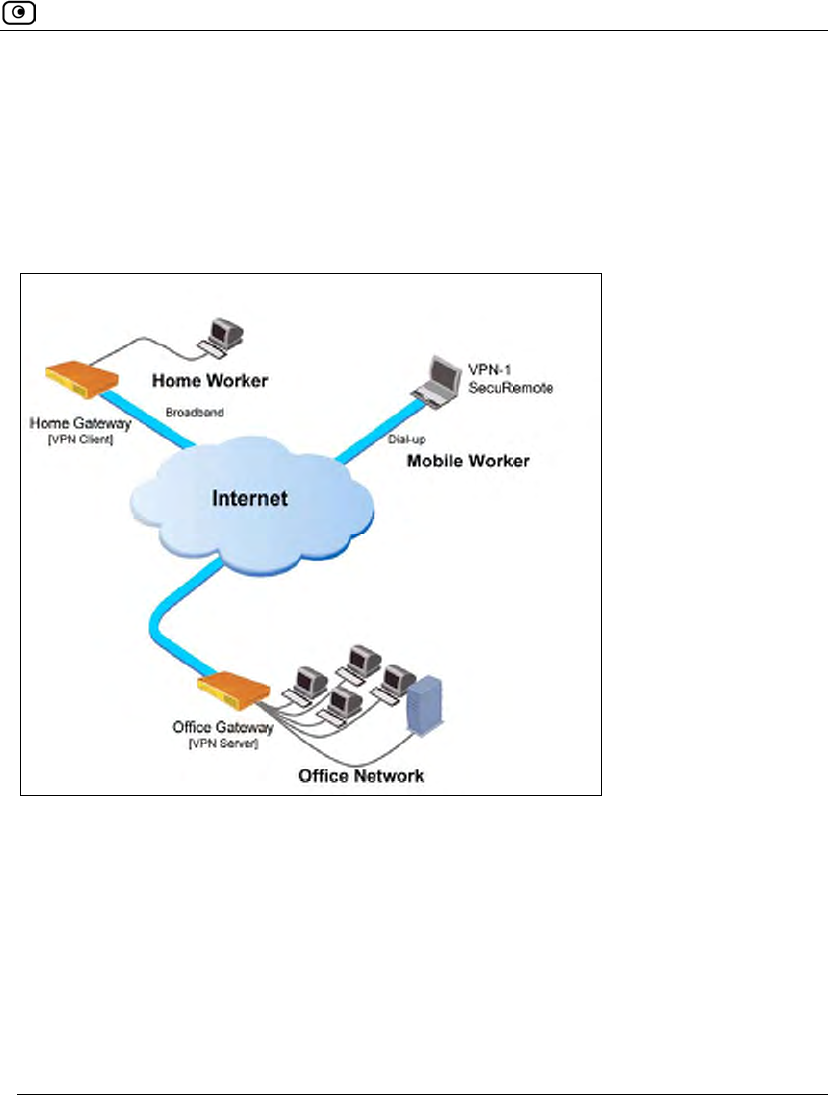
Overview
Chapter 19: Working With VPNs 565
Remote Access VPNs
A Remote Access VPN consists of one Remote Access VPN Server or Site-to-Site VPN
Gateway, and one or more Remote Access VPN Clients. You can use this type of VPN to
make an office network remotely available to authorized users, such as employees working
from home, who connect to the office Remote Access VPN Server with their Remote
Access VPN Clients.
Figure 28: Remote Access VPN

Overview
566 Check Point Safe@Office User Guide
To create a Remote Access VPN with two VPN sites
1. On the remote user VPN site's Safe@Office appliance, add the office Remote
Access VPN Server as a Remote Access VPN site.
See Adding and Editing VPN Sites on page 581.
The remote user's Safe@Office appliance will act as a Remote Access VPN Client.
2. On the office VPN site's Safe@Office appliance, enable a Remote Access
VPN Server.
See Setting Up Your Safe@Office Appliance as a VPN Server on page 567.
Internal VPN Server
You can use your Safe@Office appliance as an internal VPN Server, for enhanced wired
and wireless security. When an internal VPN Server is enabled, internal network PCs and
PDAs with the appropriate software installed can establish a Remote Access VPN session
to the gateway. This means that connections from internal network users to the gateway
can be encrypted and authenticated.
The benefits of using an internal VPN Server are two-fold:
• Accessibility
Using SecuRemote/SecureClient or L2TP, you can enjoy a secure connection from
anywhere—in your wireless network or on the road—without changing any settings.
The standard is completely transparent and allows you to access company resources
the same way, whether you are sitting at your desk or anywhere else.
• Security
Many of today's attacks are increasingly introduced from inside the network. Internal
security threats cause outages, downtime, and lost revenue. Wired networks that deal
with highly sensitive information—especially networks in public places, such as
classrooms—are vulnerable to users trying to hack the internal network.
Using an internal VPN Server, along with a strict security policy for non-VPN users,
can enhance security both for wired networks and for wireless networks, which are
particularly vulnerable to security breaches.
For information on setting up your Safe@Office appliance as an internal VPN Server, see
Configuring the Internal VPN Server on page 571.

Setting Up Your Safe@Office Appliance as a VPN Server
Chapter 19: Working With VPNs 567
Setting Up Your Safe@Office Appliance as a VPN
Server
You can make your network available to authorized users connecting from the Internet or
from your internal networks, by setting up your Safe@Office appliance as a VPN Server.
When the SecuRemote Remote Access VPN Server or SecuRemote Internal VPN Server is
enabled, users can connect to the server via Check Point SecuRemote/SecureClient or via a
Safe@Office appliance in Remote Access VPN mode. When the L2TP (Layer 2 Tunneling
Protocol) VPN Server is enabled, users can connect to the server using an L2TP client such
as the Microsoft Windows L2TP IPSEC VPN Client. L2TP users are automatically
assigned to the OfficeMode network, enabling you to configure special security rules for
them.
SecuRemote/SecureClient supports split tunneling, which means that VPN Clients can
connect directly to the Internet, while traffic to and from VPN sites passes through the
VPN Server. In contrast, the L2TP VPN Client does not support split tunneling, meaning
that all Internet traffic to and from a VPN Client passes through the VPN Server and is
routed to the Internet.
Enabling the Safe@Office VPN Server for users connecting from your internal networks
adds a layer of security to such connections. For example, while you could create a firewall
rule allowing a specific user on the DMZ to access the LAN, enabling VPN access for the
user means that such connections can be encrypted and authenticated. For more
information, see Internal VPN Server on page 566.

Setting Up Your Safe@Office Appliance as a VPN Server
568 Check Point Safe@Office User Guide
To set up your Safe@Office appliance as a VPN Server
1. Configure the VPN Server in one or more of the following ways:
• To accept SecuRemote/SecureClient or Safe@Office remote access
connections from the Internet.
See Configuring the SecuRemote Remote Access VPN Server on page 569.
• To accept SecuRemote/SecureClient connections from your internal networks.
See Configuring the Internal VPN Server on page 571.
• To accept L2TP remote access connections from the Internet, as well L2TP
connections from your internal networks.
See Configuring the L2TP VPN Server on page 572.
2. If you configured the SecuRemote Internal VPN Server, install
SecuRemote/SecureClient on the desired internal network computers.
See Installing SecuRemote on page 573.
3. If you configured the L2TP VPN Server, do the following:
a. Configure the OfficeMode network.
See Configuring the OfficeMode Network on page 172.
All users connecting via L2TP will be assigned to the OfficeMode network.
b. Configure L2TP VPN Clients on the desired internal network computers.
See Configuring L2TP VPN Clients on page 574.
4. Set up remote VPN access for users.
See Setting Up Remote VPN Access for Users on page 650.
Note: Disabling the VPN Server for a specific type of connection (from
SecuRemote/SecureClient clients on the Internet, from SecuRemote/SecureClient
clients on internal networks, or from L2TP clients) will cause all existing VPN
tunnels of that type to disconnect.
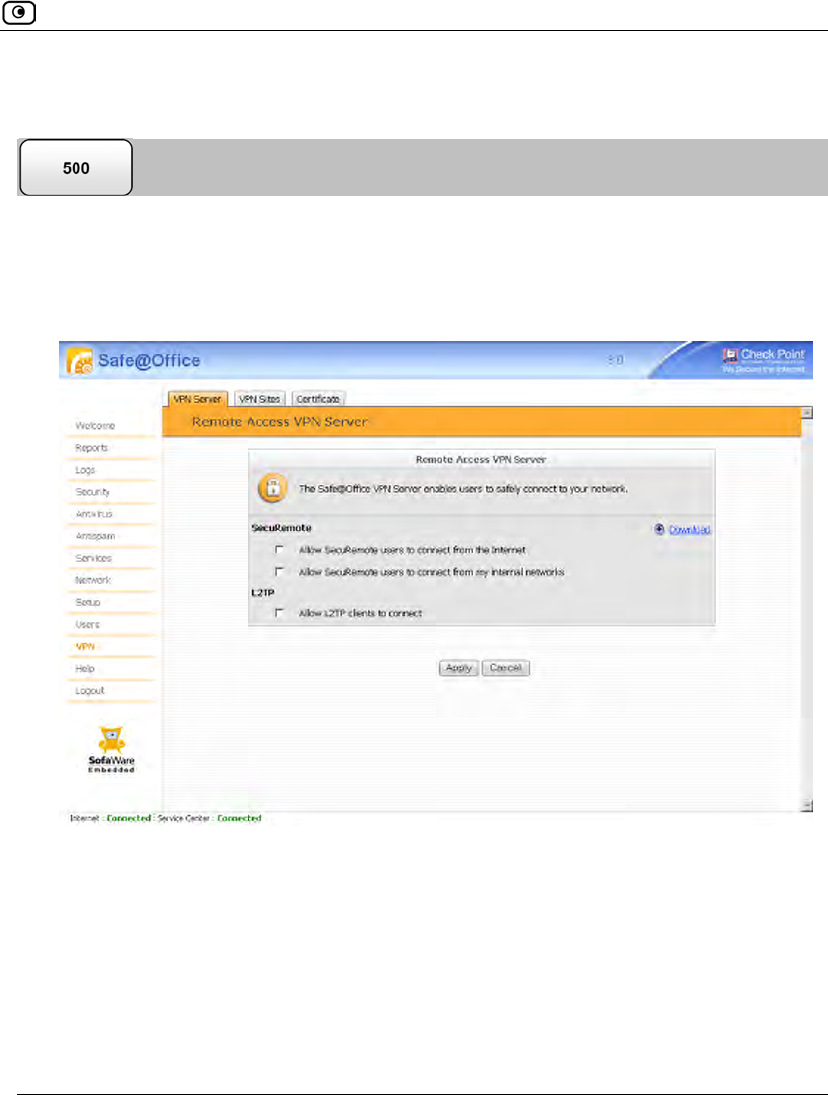
Setting Up Your Safe@Office Appliance as a VPN Server
Chapter 19: Working With VPNs 569
Configuring the SecuRemote Remote Access VPN Server
To configure the SecuRemote Remote Access VPN Server
1. Click VPN in the main menu, and click the VPN Server tab.
The VPN Server page appears.
2. Select the Allow SecuRemote users to connect from the Internet check box.
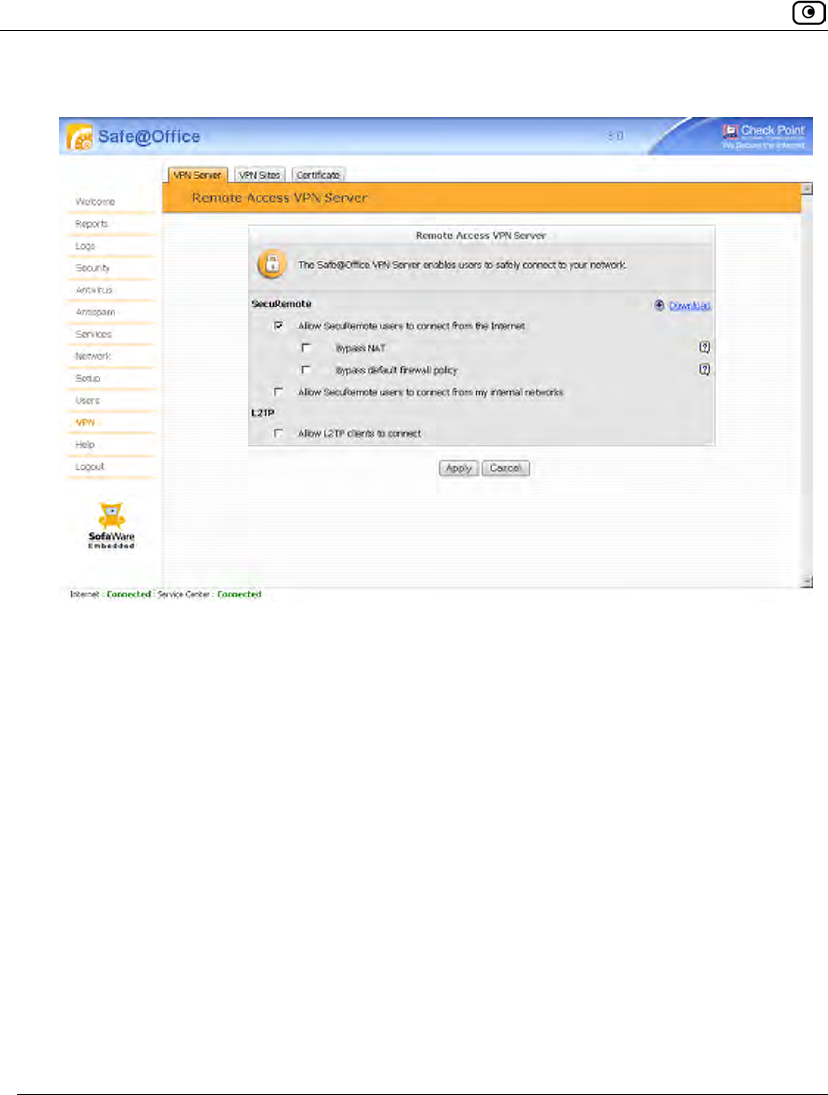
Setting Up Your Safe@Office Appliance as a VPN Server
570 Check Point Safe@Office User Guide
New check boxes appear.
3. To allow authenticated users connecting from the Internet to bypass NAT
when connecting to your internal network, select the Bypass NAT check box.
4. To allow authenticated users connecting from the Internet to bypass the default
firewall policy and access your internal network without restriction, select the
Bypass default firewall policy check box.
User-defined rules will still apply to the authenticated users.
5. Click Apply.
The SecuRemote Remote Access VPN Server is enabled for the specified connection
types.
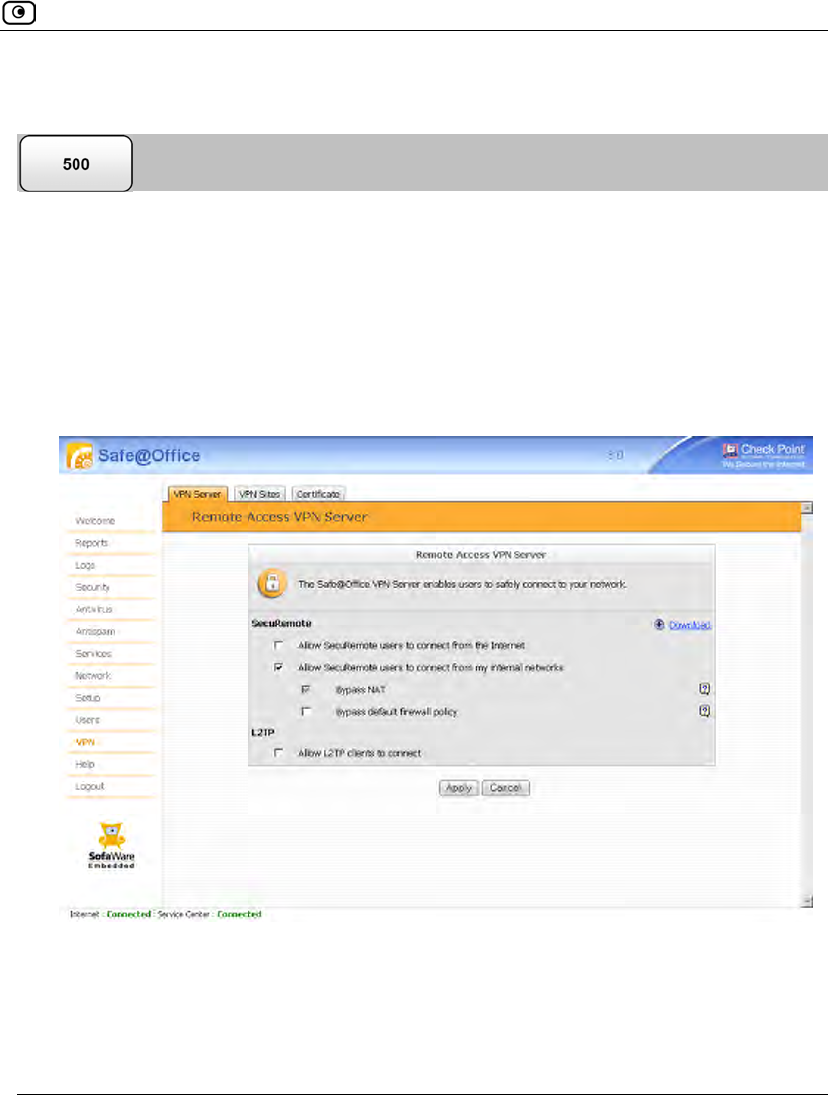
Setting Up Your Safe@Office Appliance as a VPN Server
Chapter 19: Working With VPNs 571
Configuring the Internal VPN Server
To configure the internal VPN Server
1. Click VPN in the main menu, and click the VPN Server tab.
The SecuRemote VPN Server page appears.
2. Select the Allow SecuRemote users to connect from my internal networks check
box.
New check boxes appear.
3. To allow authenticated users connecting from internal networks to bypass the
default firewall policy and access your internal network without restriction,
select the Bypass default firewall policy check box.
User-defined rules will still apply to the authenticated users.
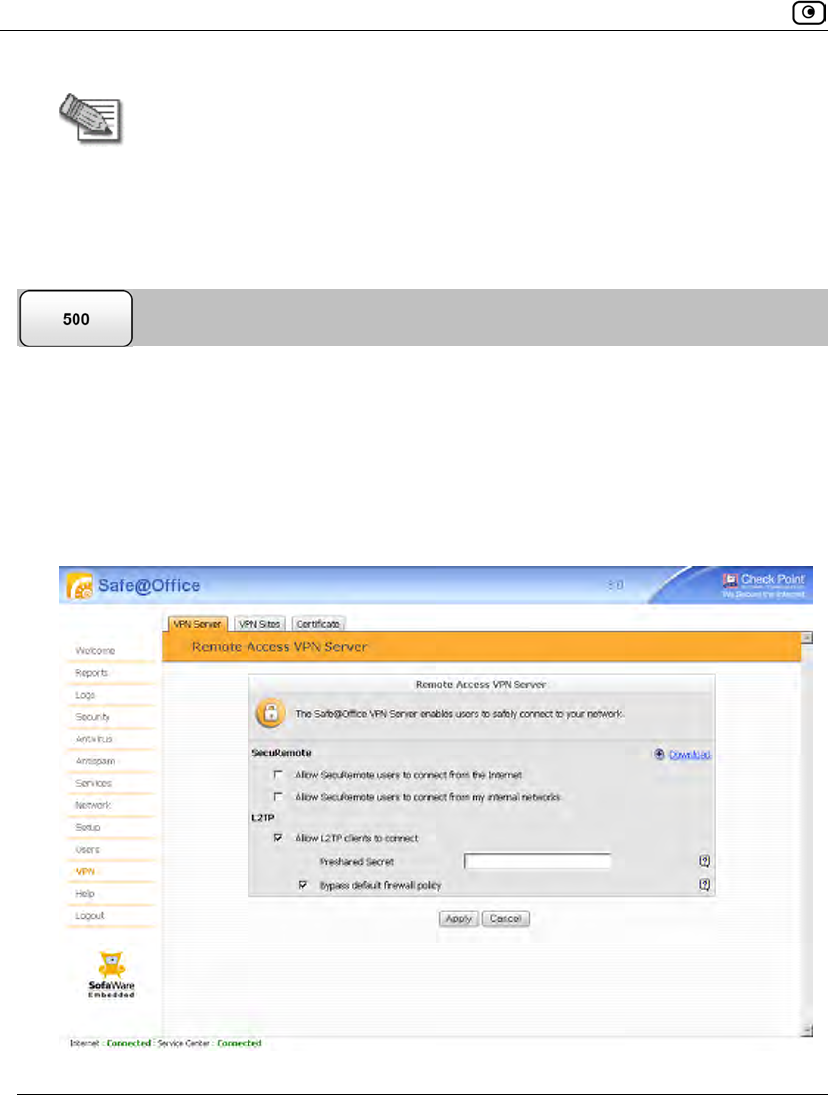
Setting Up Your Safe@Office Appliance as a VPN Server
572 Check Point Safe@Office User Guide
Note: Bypass NAT is always enabled for the internal VPN Server, and cannot be
disabled.
4. Click Apply.
The internal VPN Server is enabled for the specified connection types.
Configuring the L2TP VPN Server
To configure the L2TP VPN Server
1. Click VPN in the main menu, and click the VPN Server tab.
The VPN Server page appears.
2. Select the Allow L2TP clients to connect check box.
New check boxes appear.
Setting Up Your Safe@Office Appliance as a VPN Server
Chapter 19: Working With VPNs 573
3. In the Preshared Secret field, type the preshared secret to use for secure
communications between the L2TP clients and the VPN Server.
The secret can contain spaces and special characters. It is used to secure L2TP
connections for all users.
In addition to entering this secret, each L2TP user will have to authenticate with a
username and password.
For information on defining users with VPN access permissions, see Setting Up
Remote VPN Access for Users on page 650.
4. To allow authenticated users to bypass the default firewall policy and access
your internal network without restriction, select the Bypass default firewall
policy check box.
User-defined rules will still apply to the authenticated users.
5. Click Apply.
The L2TP VPN Server is enabled for the specified connection types.
Installing SecuRemote
If you configured the SecuRemote Internal VPN Server, you must install the
SecuRemote/SecureClient VPN Client on all internal network computers that should be
allowed to remotely access your network via SecuRemote connections.
To install SecureClient/SecuRemote
1. Click VPN in the main menu, and click the VPN Server tab.
The VPN Server page appears.
2. Click the Download link.
The VPN-1 SecuRemote for Safe@Office page opens in a new window.
3. Follow the online instructions to complete installation.
SecureClient/SecuRemote is installed.
Setting Up Your Safe@Office Appliance as a VPN Server
574 Check Point Safe@Office User Guide
For information on using SecureClient/SecuRemote, see the User Help. To access
SecureClient/SecuRemote User Help, right-click on the VPN Client icon in the
taskbar, select Settings, and then click Help.
Configuring L2TP VPN Clients
If you configured the L2TP VPN Server, you must configure the L2TP VPN Client on all
computers that should be allowed to remotely access your network via L2TP connections.
This procedure is relevant for computers with a Windows XP operating system.
Note: The Safe@Office appliance supports the following authentication methods:
• PAP. For both local users and RADIUS users
• EAP-MD5, CHAP. For local users, but not for RADIUS users
To configure L2TP VPN Clients on Microsoft Windows
1. Click Start > Settings > Control Panel.
The Control Panel window appears.
2. Double-click the Network and Dial-up Connections icon.
The Network and Dial-up Connections window appears.
3. Click File > New Connection.
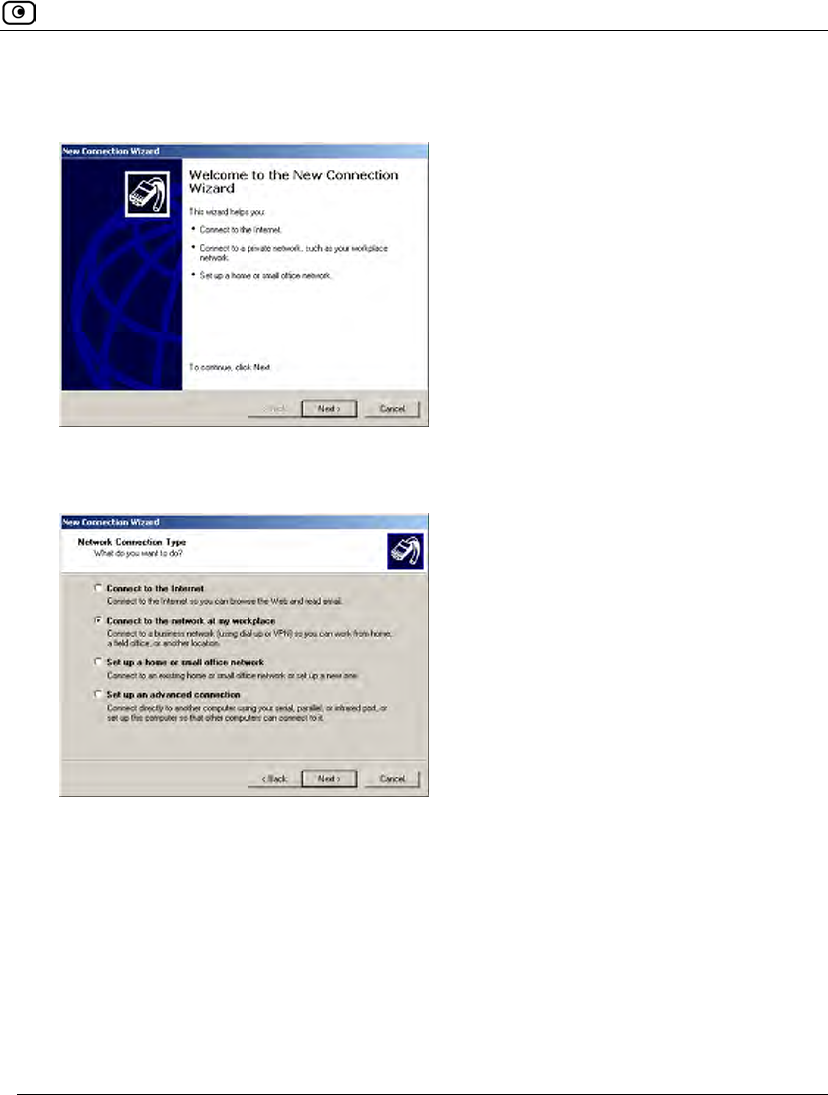
Setting Up Your Safe@Office Appliance as a VPN Server
Chapter 19: Working With VPNs 575
The New Connection Wizard opens displaying the Welcome to the New Connection
Wizard screen.
4. Click Next.
The Network Connection Type dialog box appears.
5. Choose Connect to the network at my workplace.
6. Click Next.
Setting Up Your Safe@Office Appliance as a VPN Server
576 Check Point Safe@Office User Guide
7. The Network Connection dialog box appears.
8. Choose Virtual Private Network connection.
9. Click Next.
The Connection Name dialog box appears.
10. In the Company Name field, type your company's name.
11. Click Next.
Setting Up Your Safe@Office Appliance as a VPN Server
Chapter 19: Working With VPNs 577
The Public Network dialog box appears.
12. Choose Do not dial the initial connection.
13. Click Next.
The VPN Server Selection dialog box appears.
14. In the field, type the Safe@Office appliance's IP address.
Setting Up Your Safe@Office Appliance as a VPN Server
578 Check Point Safe@Office User Guide
The Completing the New Connection Wizard screen appears.
15. Click Finish.
16. In the Network and Dial-up Connections window, right-click on the L2TP
connection, and click Properties in the popup menu.
The connection's Properties dialog box opens.
17. In the Security tab, choose Advanced (custom settings).
18. Click Settings.
Setting Up Your Safe@Office Appliance as a VPN Server
Chapter 19: Working With VPNs 579
The Advanced Security Settings dialog box opens.
19. In the Data encryption drop-down list, select Optional encryption.
20. Choose Allow these protocols.
21. Select the Unencrypted password (PAP) check box, and clear all other check
boxes.
22. Click OK.
23. In Properties dialog box's Security tab, click IPSec Settings.
The IPSec Settings dialog box opens.
24. Select the Use pre-shared key for authentication check box.
25. In the Key field, type the preshared secret you configured on the L2TP VPN
Server.
26. Click OK.
27. In Properties dialog box, click the Networking tab.
Setting Up Your Safe@Office Appliance as a VPN Server
580 Check Point Safe@Office User Guide
28. In the Type of VPN drop-down list, select L2TP IPSec VPN.
29. Click OK.
Adding and Editing VPN Sites
Chapter 19: Working With VPNs 581
Adding and Editing VPN Sites
To add or edit VPN sites
1. Click VPN in the main menu, and click the VPN Sites tab.
The VPN Sites page appears with a list of VPN sites.
2. Do one of the following:
• To add a VPN site, click New Site.
• To edit a VPN site, click Edit in the desired VPN site’s row.
Adding and Editing VPN Sites
582 Check Point Safe@Office User Guide
The Safe@Office VPN Site Wizard opens, with the Welcome to the VPN Site Wizard
dialog box displayed.
3. Do one of the following:
• Select Remote Access VPN to establish remote access from your Remote
Access VPN Client to a Remote Access VPN Server.
• Select Site-to-Site VPN to create a permanent bi-directional connection to
another Site-to-Site VPN Gateway.
4. Click Next.
Adding and Editing VPN Sites
Chapter 19: Working With VPNs 583
Configuring a Remote Access VPN Site
If you selected Remote Access VPN, the VPN Gateway Address dialog box appears.
1. Enter the IP address of the Remote Access VPN Server to which you want to
connect, as given to you by the network administrator.
2. To allow the VPN site to bypass the default firewall policy and access your
internal network without restriction, select the Bypass default firewall policy
check box.
User-defined rules will still apply to the VPN site.
3. Click Next.
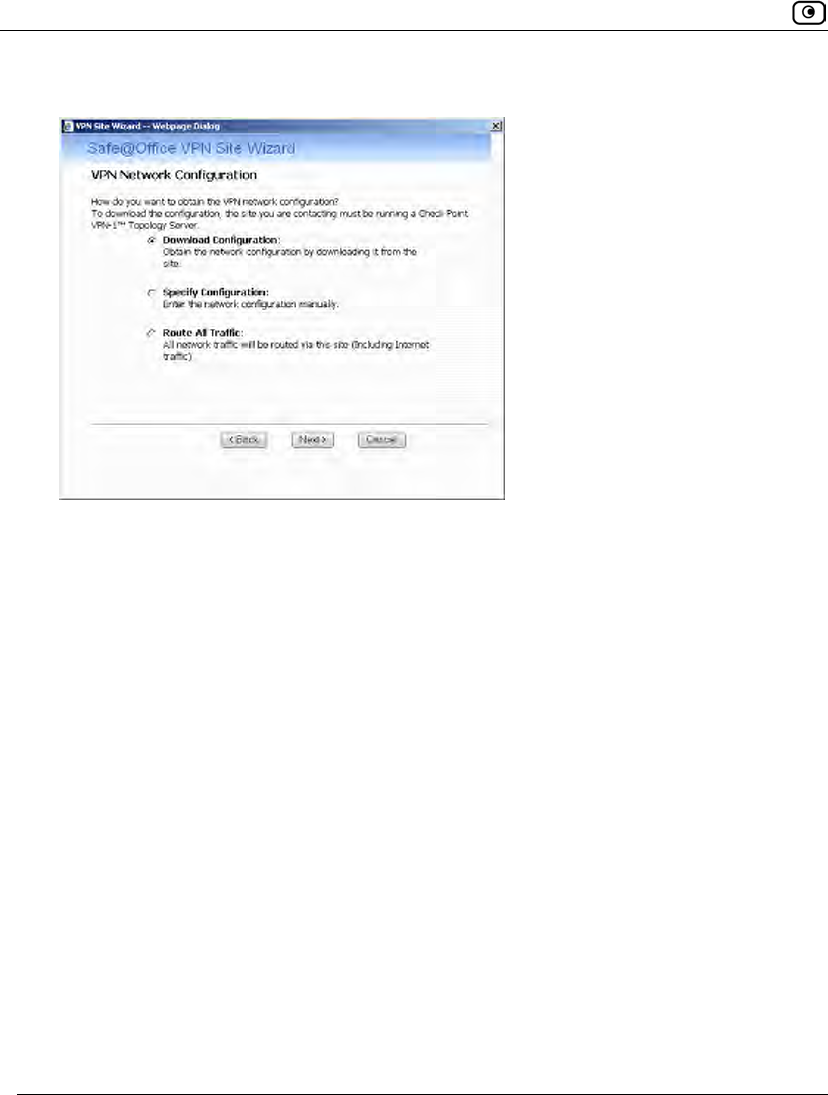
Adding and Editing VPN Sites
584 Check Point Safe@Office User Guide
The VPN Network Configuration dialog box appears.
4. Specify how you want to obtain the VPN network configuration. Refer to VPN
Network Configuration Fields on page 593.
5. Click Next.
The following things happen in the order below:
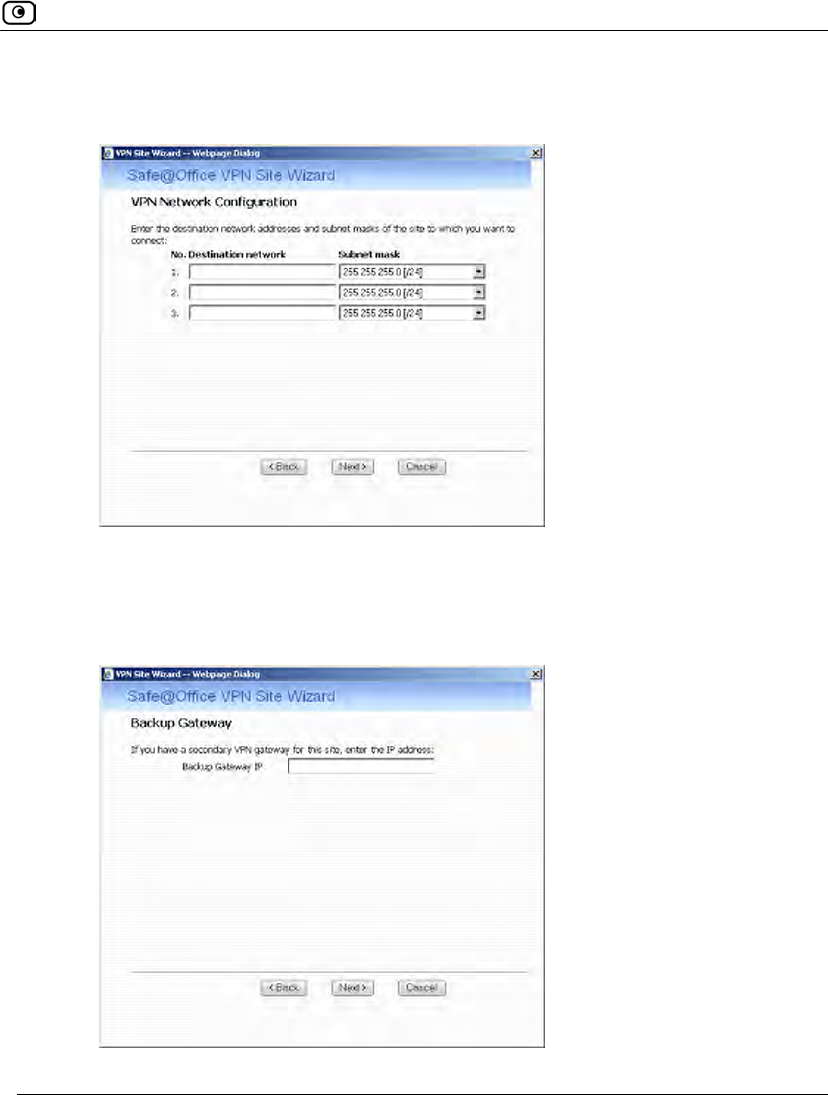
Adding and Editing VPN Sites
Chapter 19: Working With VPNs 585
• If you chose Specify Configuration, a second VPN Network Configuration dialog
box appears.
Complete the fields using the information in VPN Network Configuration Fields
on page 593 and click Next.
• If you chose Specify Configuration or Route All Traffic, the Backup Gateway
dialog box appears.
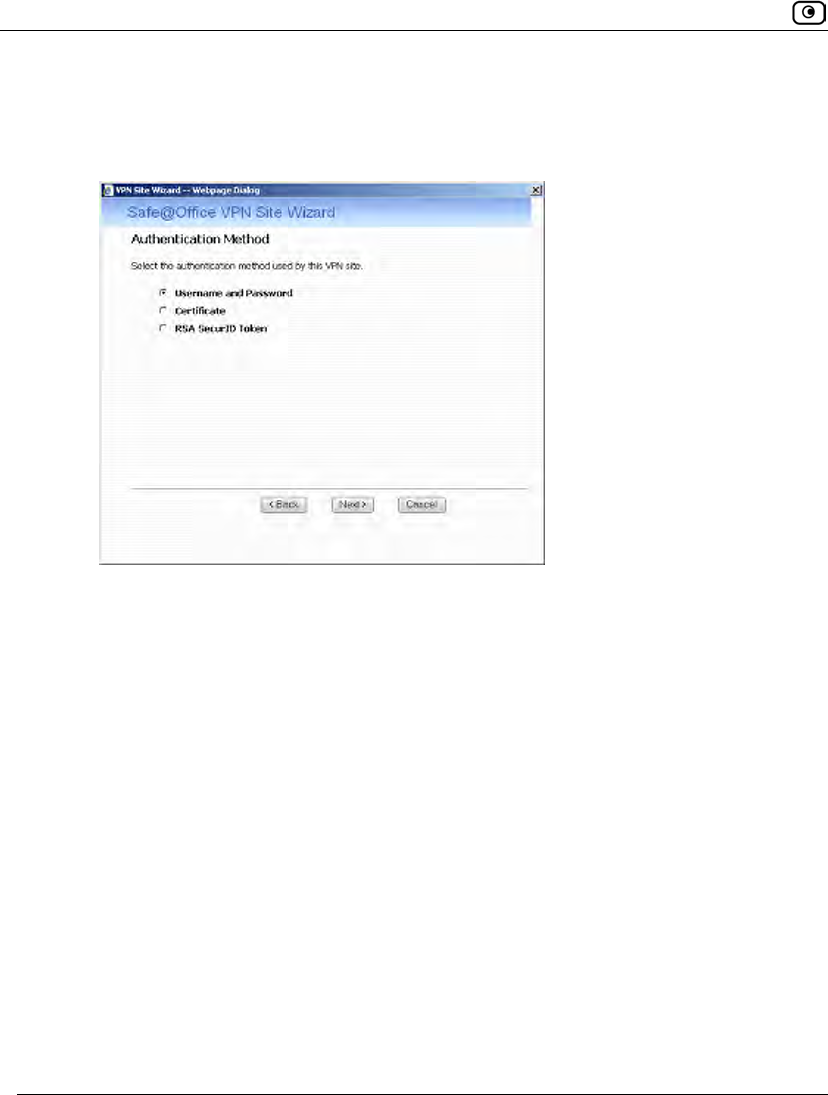
Adding and Editing VPN Sites
586 Check Point Safe@Office User Guide
In the Backup Gateway IP field, type the name of the VPN site to use if the
primary VPN site fails, and then click Next.
• The Authentication Method dialog box appears.
6. Complete the fields using the information in Authentication Methods Fields
on page 595.
7. Click Next.
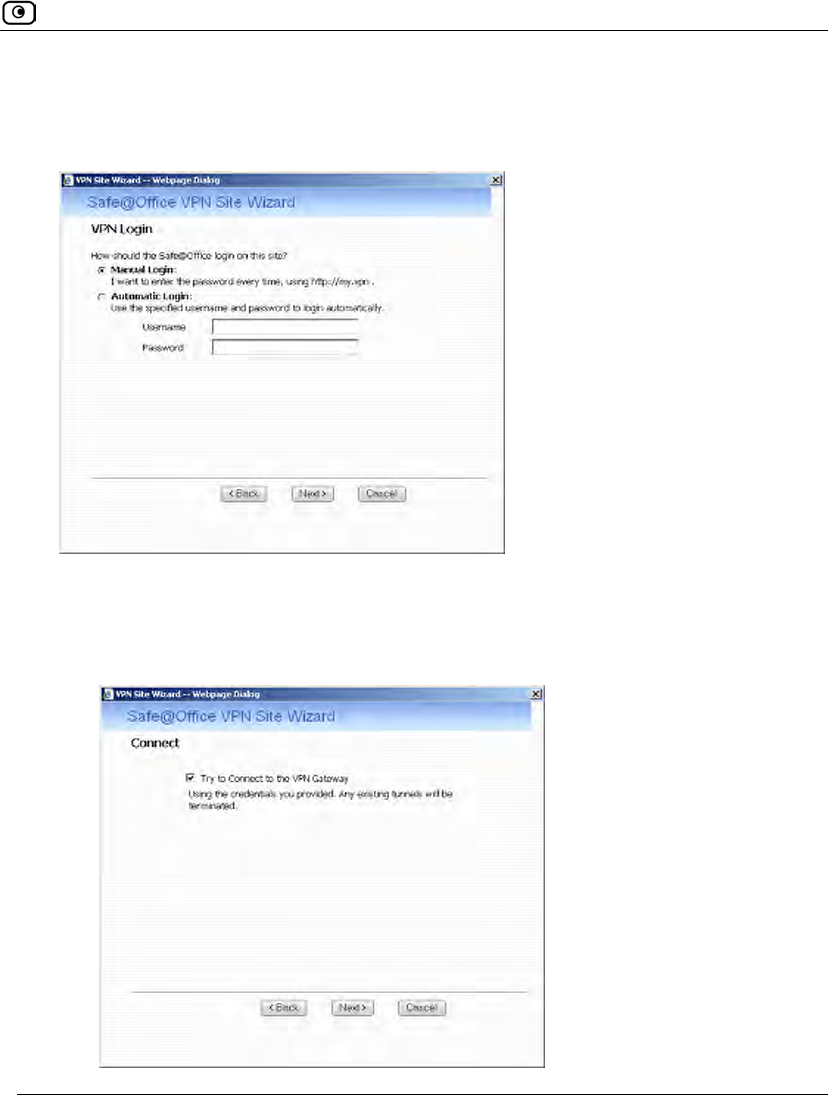
Adding and Editing VPN Sites
Chapter 19: Working With VPNs 587
Username and Password Authentication Method
If you selected Username and Password, the VPN Login dialog box appears.
1. Complete the fields using the information in VPN Login Fields on page 596.
2. Click Next.
• If you selected Automatic Login, the Connect dialog box appears.
Adding and Editing VPN Sites
588 Check Point Safe@Office User Guide
Do the following:
1) To try to connect to the Remote Access VPN Server, select the Try to
Connect to the VPN Gateway check box.
This allows you to test the VPN connection.
Warning: If you try to connect to the VPN site before completing the wizard, all
existing tunnels to this site will be terminated.
2) Click Next.
If you selected Try to Connect to the VPN Gateway, the Connecting… screen
appears, and then the Contacting VPN Site screen appears.
• The Site Name dialog box appears.
3. Enter a name for the VPN site.
You may choose any name.
4. Click Next.
Adding and Editing VPN Sites
Chapter 19: Working With VPNs 589
The VPN Site Created screen appears.
5. Click Finish.
The VPN Sites page reappears. If you added a VPN site, the new site appears in the
VPN Sites list. If you edited a VPN site, the modifications are reflected in the VPN
Sites list.
Adding and Editing VPN Sites
590 Check Point Safe@Office User Guide
Certificate Authentication Method
If you selected Certificate, the Connect dialog box appears.
1. To try to connect to the Remote Access VPN Server, select the Try to Connect
to the VPN Gateway check box.
This allows you to test the VPN connection.
Warning: If you try to connect to the VPN site before completing the wizard, all
existing tunnels to this site will be terminated.
2. Click Next.
If you selected Try to Connect to the VPN Gateway, the Connecting… screen appears,
and then the Contacting VPN Site screen appears.
Adding and Editing VPN Sites
Chapter 19: Working With VPNs 591
The Site Name dialog box appears.
3. Enter a name for the VPN site.
You may choose any name.
4. Click Next.
The VPN Site Created screen appears.
Adding and Editing VPN Sites
592 Check Point Safe@Office User Guide
5. Click Finish.
The VPN Sites page reappears. If you added a VPN site, the new site appears in the
VPN Sites list. If you edited a VPN site, the modifications are reflected in the VPN
Sites list.
RSA SecurID Authentication Method
If you selected RSA SecurID, the Site Name dialog box appears.
1. Enter a name for the VPN site.
You may choose any name.
2. Click Next.
Adding and Editing VPN Sites
Chapter 19: Working With VPNs 593
The VPN Site Created screen appears.
3. Click Finish.
The VPN Sites page reappears. If you added a VPN site, the new site appears in the
VPN Sites list. If you edited a VPN site, the modifications are reflected in the VPN
Sites list.
Table 119: VPN Network Configuration Fields
In this field… Do this…
Download
Configuration
Click this option to obtain the network configuration by downloading it from
the VPN site.
This option will automatically configure your VPN settings, by downloading
the network topology definition from the Remote Access VPN Server.
Note: Downloading the network configuration is only possible if you are
connecting to a Check Point VPN-1 or Safe@Office Site-to-Site VPN
Gateway.

Adding and Editing VPN Sites
594 Check Point Safe@Office User Guide
In this field… Do this…
Specify
Configuration
Click this option to provide the network configuration manually.
Route All Traffic Click this option to route all network traffic through the VPN site.
For example, if your VPN consists of a central office and a number of
remote offices, and the remote offices are only allowed to access Internet
resources through the central office, you can choose to route all traffic from
the remote offices through the central office.
Note: You can only configure one VPN site to route all traffic.
Route Based VPN Click this option to create a virtual tunnel interface (VTI) for this site, so
that it can participate in a route-based VPN.
Route-based VPNs allow routing connections over VPN tunnels, so that
remote VPN sites can participate in dynamic or static routing schemes.
This improves network and VPN management efficiency for large
networks.
For constantly changing networks, it is recommended to use a route-based
VPN combined with OSPF dynamic routing. This enables you to make
frequent changes to the network topology, such as adding an internal
network, without having to reconfigure static routes.
OSPF is enabled using CLI. For information on using CLI, see Controlling
the Appliance via the Command Line on page 673. For information on
the relevant commands for OSPF, refer to the Embedded NGX CLI
Reference Guide.
This option is only available for when configuring a Site-to-Site VPN
gateway.

Adding and Editing VPN Sites
Chapter 19: Working With VPNs 595
In this field… Do this…
Destination network Type up to three destination network addresses at the VPN site to which
you want to connect.
Subnet mask Select the subnet masks for the destination network addresses.
Note: Obtain the destination networks and subnet masks from the VPN
site’s system administrator.
Table 120: Authentication Methods Fields
In this field… Do this…
Username and
Password
Select this option to use a user name and password for VPN
authentication.
In the next step, you can specify whether you want to log in to the VPN site
automatically or manually.
Certificate Select this option to use a certificate for VPN authentication.
If you select this option, a certificate must have been installed. (Refer to
Installing a Certificate on page 620 for more information about
certificates and instructions on how to install a certificate.)
RSA SecurID
Token
Select this option to use an RSA SecurID token for VPN authentication.
When authenticating to the VPN site, you must enter a four-digit PIN code
and the SecurID passcode shown in your SecurID token's display. The
RSA SecurID token generates a new passcode every minute.
SecurID is only supported in Remote Access manual login mode.

Adding and Editing VPN Sites
596 Check Point Safe@Office User Guide
Table 121: VPN Login Fields
In this field… Do this…
Manual Login Click this option to configure the site for Manual Login.
Manual Login connects only your computer to the VPN site, and only when
the appropriate user name and password have been entered. For further
information on Automatic and Manual Login, see, Logging in to a VPN
Site on page 616.
Automatic Login Click this option to enable the Safe@Office appliance to log in to the VPN
site automatically.
You must then fill in the Username and Password fields.
Automatic Login provides all the computers on your internal network with
constant access to the VPN site. For further information on Automatic and
Manual Login, see Logging in to a VPN Site on page 616.
Username Type the user name to be used for logging in to the VPN site.
Password Type the password to be used for logging in to the VPN site.
Adding and Editing VPN Sites
598 Check Point Safe@Office User Guide
The VPN Network Configuration dialog box appears.
3. Specify how you want to obtain the VPN network configuration. Refer to VPN
Network Configuration Fields on page 593.
4. Click Next.
• If you chose Specify Configuration, a second VPN Network Configuration dialog
box appears.
Adding and Editing VPN Sites
Chapter 19: Working With VPNs 599
Complete the fields using the information in VPN Network Configuration Fields
on page 593, and then click Next.
• If you chose Specify Configuration or Route All Traffic, the Backup Gateway
dialog box appears.
In the Backup Gateway IP field, type the name of the VPN site to use if the
primary VPN site fails, and then click Next.
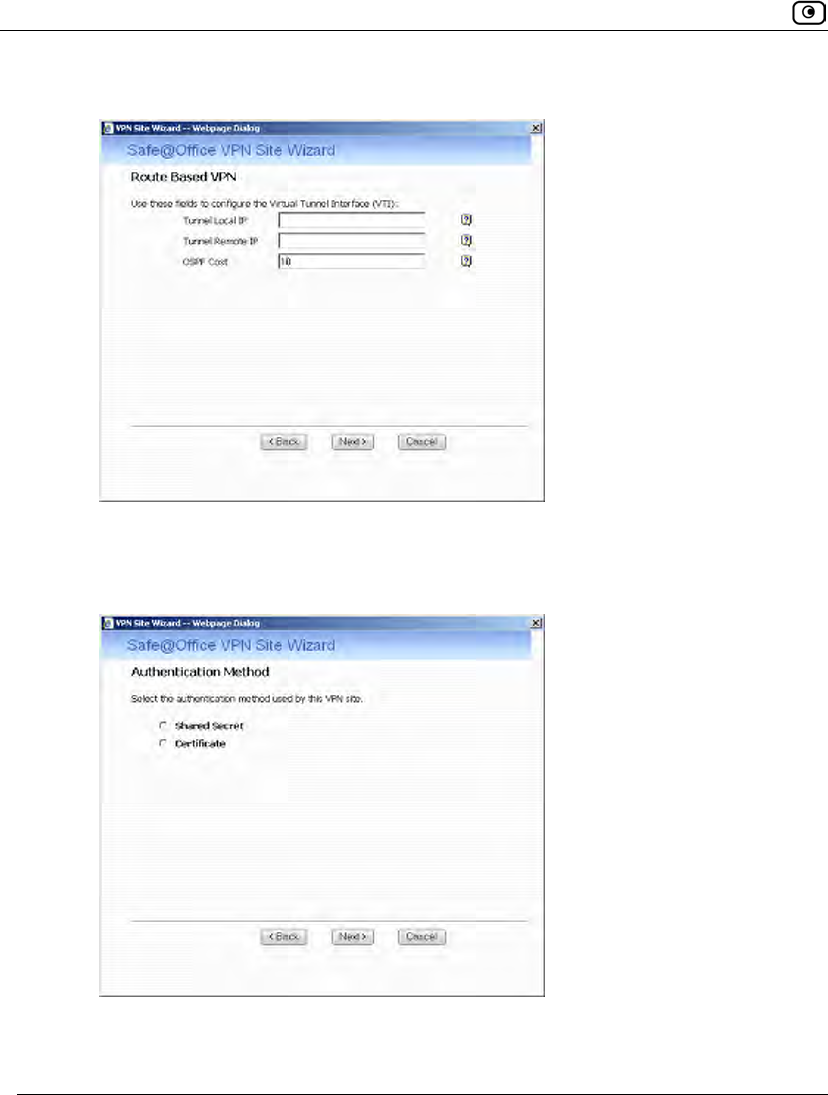
Adding and Editing VPN Sites
600 Check Point Safe@Office User Guide
• If you chose Route Based VPN, the Route Based VPN dialog box appears.
Complete the fields using the information in Route Based VPN Fields on page
611, and then click Next.
• The Authentication Method dialog box appears.
5. Complete the fields using the information in Authentication Methods Fields
on page 612.
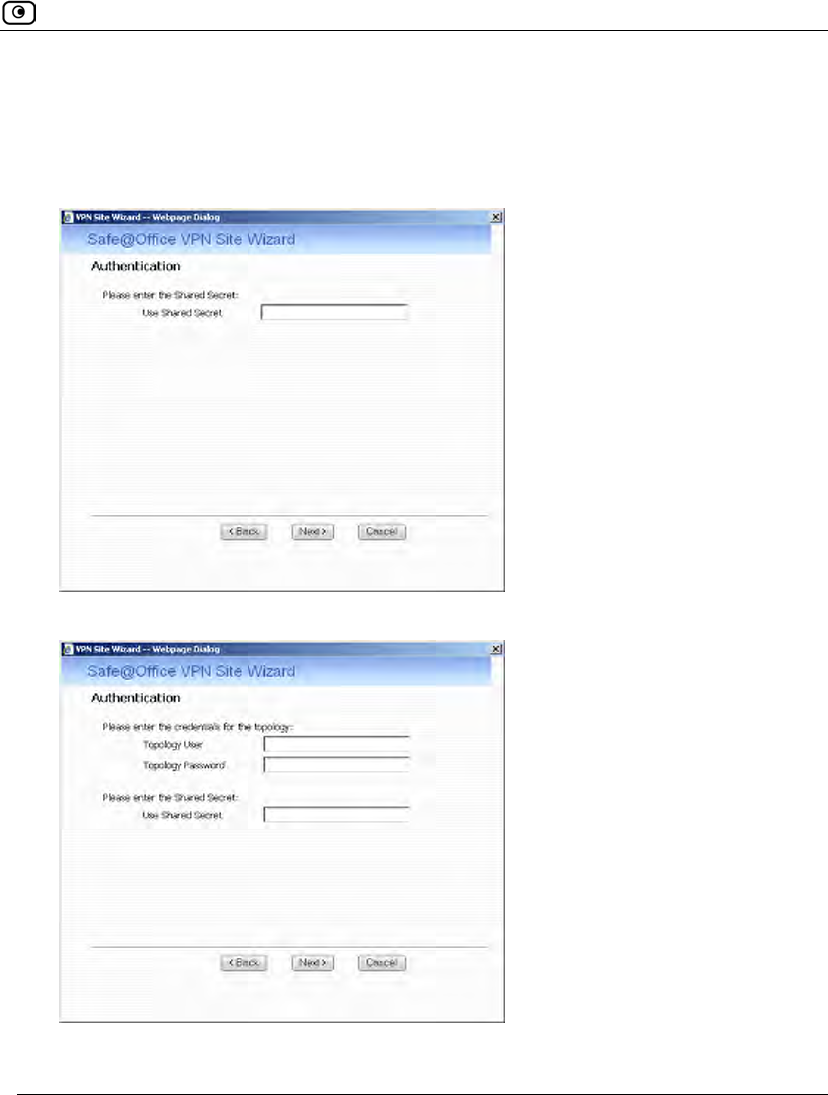
Adding and Editing VPN Sites
Chapter 19: Working With VPNs 601
6. Click Next.
Shared Secret Authentication Method
If you selected Shared Secret, the Authentication dialog box appears.
If you chose Download Configuration, the dialog box contains additional fields.
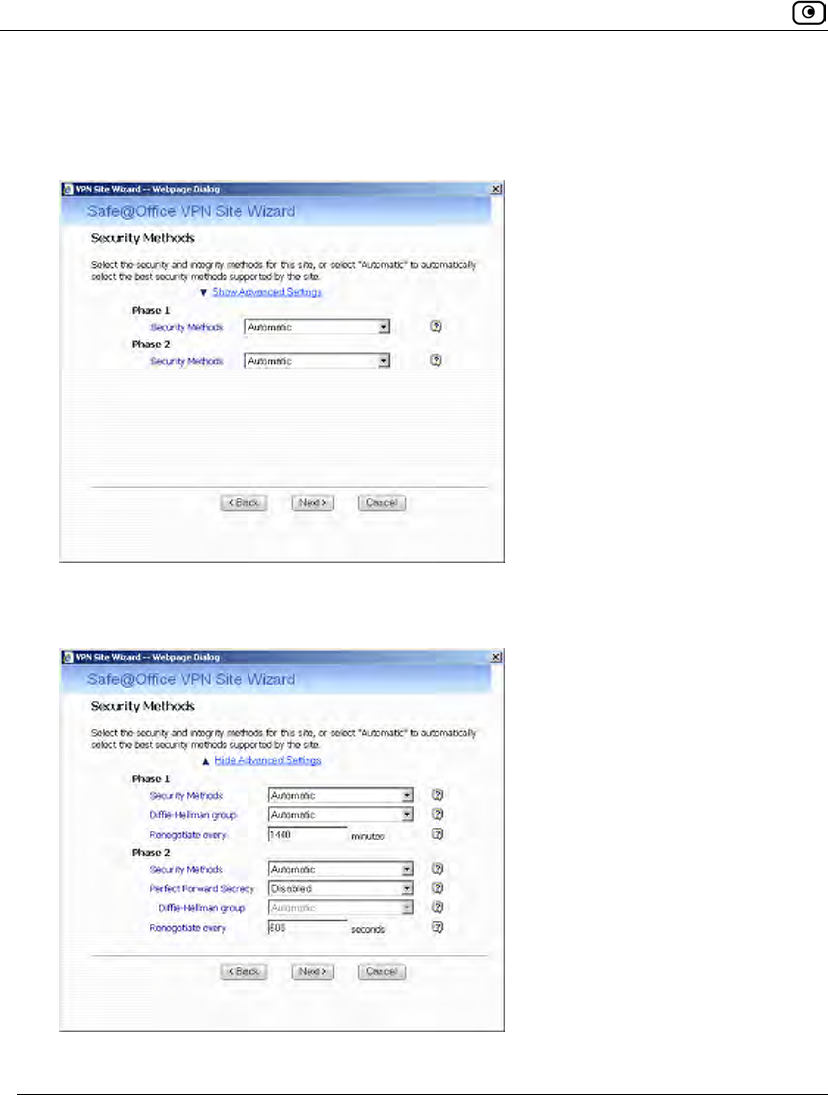
Adding and Editing VPN Sites
602 Check Point Safe@Office User Guide
1. Complete the fields using the information in VPN Authentication Fields on
page 612 and click Next.
The Security Methods dialog box appears.
2. To configure advanced security settings, click Show Advanced Settings.
New fields appear.
Adding and Editing VPN Sites
Chapter 19: Working With VPNs 603
3. Complete the fields using the information in Security Methods Fields on page
613 and click Next.
The Connect dialog box appears.
4. To try to connect to the Remote Access VPN Server, select the Try to Connect
to the VPN Gateway check box.
This allows you to test the VPN connection.
Warning: If you try to connect to the VPN site before completing the wizard, all
existing tunnels to this site will be terminated.
5. Click Next.
• If you selected Try to Connect to the VPN Gateway, the Connecting… screen
appears, and then the Contacting VPN Site screen appears.
Adding and Editing VPN Sites
604 Check Point Safe@Office User Guide
• The Site Name dialog box appears.
6. Type a name for the VPN site.
You may choose any name.
7. To keep the tunnel to the VPN site alive even if there is no network traffic
between the Safe@Office appliance and the VPN site, select Keep this site
alive.
8. Click Next.
Adding and Editing VPN Sites
Chapter 19: Working With VPNs 605
• If you selected Keep this site alive, and previously you chose Download
Configuration, the "Keep Alive" Configuration dialog box appears.
Do the following:
1) Type up to three IP addresses which the Safe@Office appliance
should ping in order to keep the tunnel to the VPN site alive.
2) Click Next.
• The VPN Site Created screen appears.
9. Click Finish.
The VPN Sites page reappears. If you added a VPN site, the new site appears in the
VPN Sites list. If you edited a VPN site, the modifications are reflected in the VPN
Sites list.
Adding and Editing VPN Sites
606 Check Point Safe@Office User Guide
Certificate Authentication Method
If you selected Certificate, the following things happen:
• If you chose Download Configuration, the Authentication dialog box appears.
Complete the fields using the information in VPN Authentication Fields on page
612 and click Next.
Adding and Editing VPN Sites
608 Check Point Safe@Office User Guide
The Connect dialog box appears.
3. To try to connect to the Remote Access VPN Server, select the Try to Connect
to the VPN Gateway check box.
This allows you to test the VPN connection.
Warning: If you try to connect to the VPN site before completing the wizard, all
existing tunnels to this site will be terminated.
4. Click Next.
• If you selected Try to Connect to the VPN Gateway, the following things
happen:
The Connecting… screen appears.
• The Contacting VPN Site screen appears.
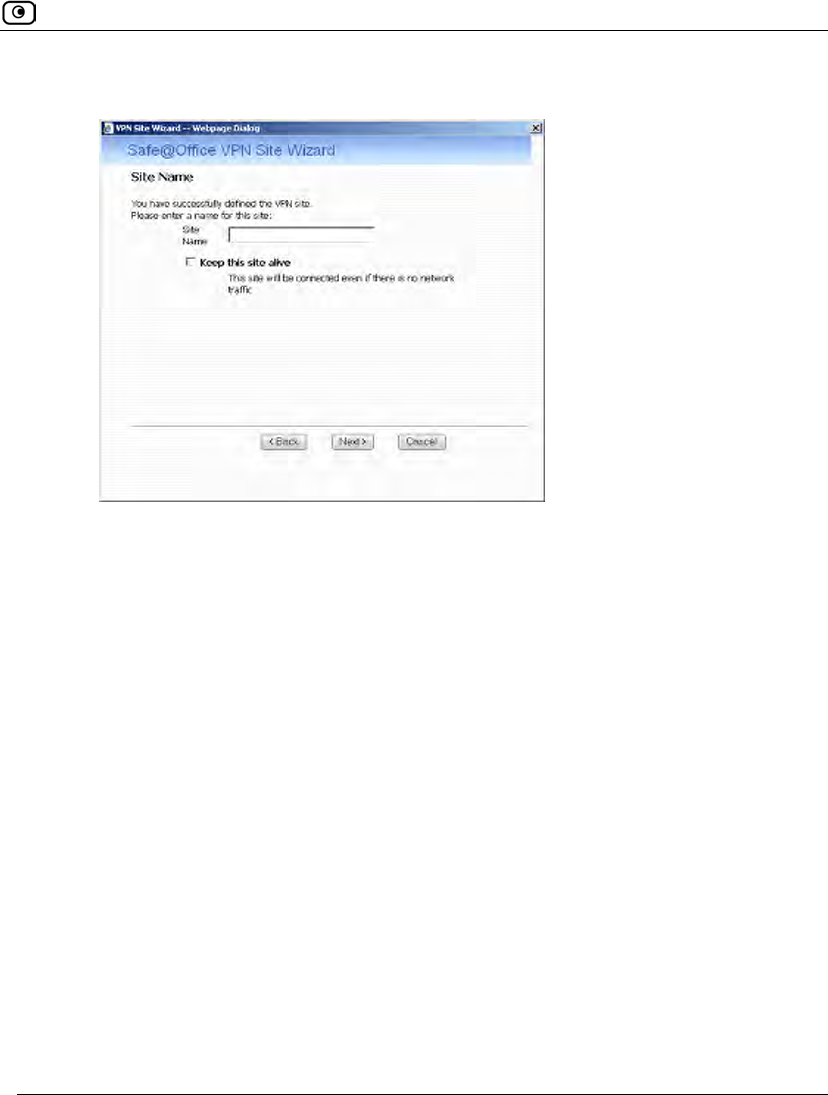
Adding and Editing VPN Sites
Chapter 19: Working With VPNs 609
• The Site Name dialog box appears.
5. Enter a name for the VPN site.
You may choose any name.
6. To keep the tunnel to the VPN site alive even if there is no network traffic
between the Safe@Office appliance and the VPN site, select Keep this site
alive.
7. Click Next.
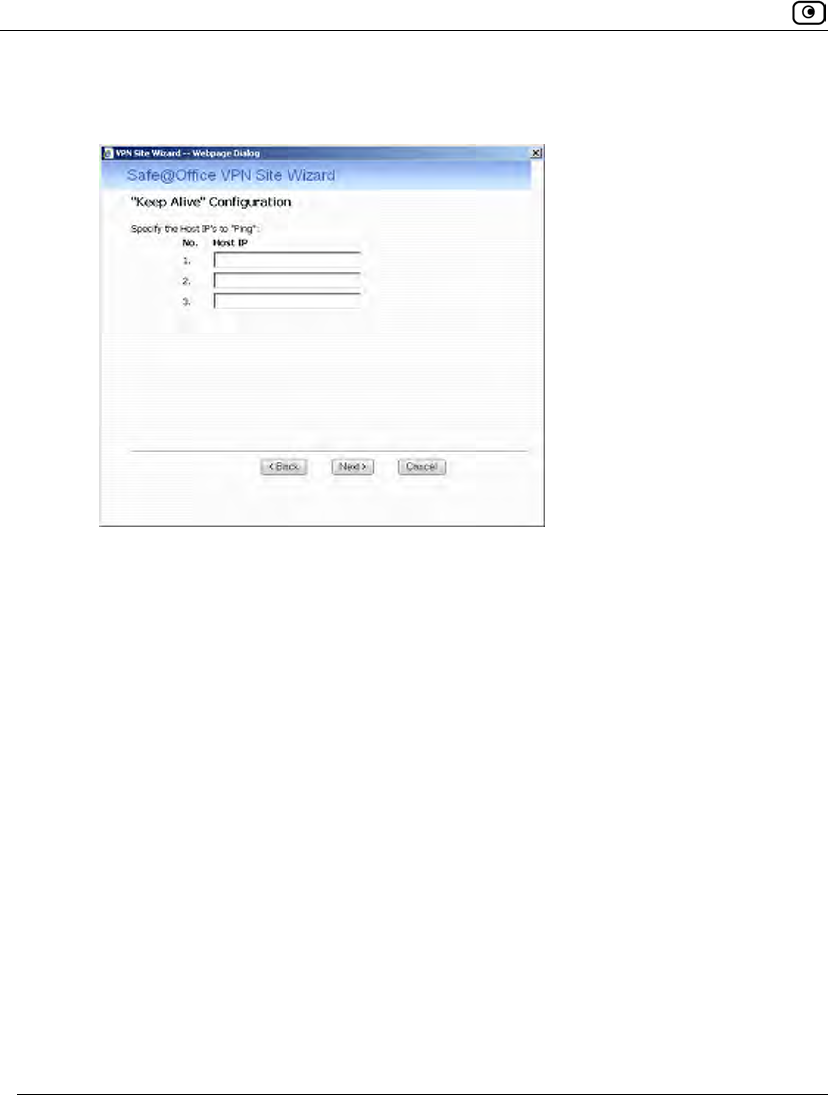
Adding and Editing VPN Sites
610 Check Point Safe@Office User Guide
• If you selected Keep this site alive, and previously you chose Download
Configuration, the "Keep Alive" Configuration dialog box appears.
Do the following:
1) Type up to three IP addresses which the Safe@Office appliance
should ping in order to keep the tunnel to the VPN site alive.
2) Click Next.
• The VPN Site Created screen appears.
8. Click Finish.
The VPN Sites page reappears. If you added a VPN site, the new site appears in the
VPN Sites list. If you edited a VPN site, the modifications are reflected in the VPN
Sites list.

Adding and Editing VPN Sites
Chapter 19: Working With VPNs 611
Table 122: VPN Gateway Address Fields
In this field… Do this…
Gateway Address Type the IP address of the Site-to-Site VPN Gateway to which you want
to connect, as given to you by the network administrator.
Bypass NAT Select this option to allow the VPN site to bypass NAT when connecting
to your internal network.
This option is selected by default.
Bypass default
firewall policy
Select this option to allow the VPN site to bypass the default firewall
policy and access your internal network without restriction.
User-defined rules will still apply to the VPN site.
Table 123: Route Based VPN Fields
In this field… Do this…
Tunnel Local IP Type a local IP address for this end of the VPN tunnel.
Tunnel Remote IP Type the IP address of the remote end of the VPN tunnel.
OSPF Cost Type the cost of this link for dynamic routing purposes.
The default value is 10.
If OSPF is not enabled, this setting is not used. OSPF is enabled using
the Safe@Office command line interface (CLI). For information on using
CLI, see Controlling the Appliance via the Command Line on page
673. For information on the relevant commands for OSPF, refer to the
Embedded NGX CLI Reference Guide.

Adding and Editing VPN Sites
612 Check Point Safe@Office User Guide
Table 124: Authentication Methods Fields
In this field… Do this…
Shared Secret Select this option to use a shared secret for VPN authentication.
A shared secret is a string used to identify VPN sites to each other.
Certificate Select this option to use a certificate for VPN authentication.
If you select this option, a certificate must have been installed. (Refer to
Installing a Certificate on page 620 for more information about
certificates and instructions on how to install a certificate.)
Table 125: VPN Authentication Fields
In this field… Do this…
Topology User Type the topology user’s user name.
Topology
Password
Type the topology user’s password.
Use Shared
Secret
Type the shared secret to use for secure communications with the VPN
site.
This shared secret is a string used to identify the VPN sites to each other.
The secret can contain spaces and special characters.

Adding and Editing VPN Sites
Chapter 19: Working With VPNs 613
Table 126: Security Methods Fields
In this field… Do this…
Phase 1
Security Methods Select the encryption and integrity algorithm to use for IKE negotiations:
• Automatic. The Safe@Office appliance automatically selects
the best security methods supported by the site. This is the
default.
• A specific algorithm
Diffie-Hellman
group
Select the Diffie-Hellman group to use:
• Automatic. The Safe@Office appliance automatically selects a
group. This is the default.
• A specific group
A group with more bits ensures a stronger key but lowers performance.
Renegotiate every Type the interval in minutes between IKE Phase-1 key negotiations. This
is the IKE Phase-1 SA lifetime.
A shorter interval ensures higher security, but impacts heavily on
performance. Therefore, it is recommended to keep the SA lifetime
around its default value.
The default value is 1440 minutes (one day).
Phase 2
Security Methods Select the encryption and integrity algorithm to use for VPN traffic:
• Automatic. The Safe@Office appliance automatically selects
the best security methods supported by the site. This is the
default.
• A specific algorithm

Adding and Editing VPN Sites
614 Check Point Safe@Office User Guide
In this field… Do this…
Perfect Forward
Secrecy
Specify whether to enable Perfect Forward Secrecy (PFS), by selecting
one of the following:
• Enabled. PFS is enabled. The Diffie-Hellman group field is
enabled.
• Disabled. PFS is disabled. This is the default.
Enabling PFS will generate a new Diffie-Hellman key during IKE Phase 2
and renew the key for each key exchange.
PFS increases security but lowers performance. It is recommended to
enable PFS only in situations where extreme security is required.
Diffie-Hellman
group
Select the Diffie-Hellman group to use:
• Automatic. The Safe@Office appliance automatically selects a
group. This is the default.
• A specific group
A group with more bits ensures a stronger key but lowers performance.
Renegotiate every Type the interval in seconds between IPSec SA key negotiations. This is
the IKE Phase-2 SA lifetime.
A shorter interval ensures higher security.
The default value is 3600 seconds (one hour).
Viewing and Deleting VPN Sites
Chapter 19: Working With VPNs 615
Viewing and Deleting VPN Sites
To view or delete a VPN site
1. Click VPN in the main menu, and click the VPN Sites tab.
The VPN Sites page appears, with a list of all VPN sites.
2. To delete a VPN site, do the following.
a. In the desired VPN site's row, click the Erase icon.
A confirmation message appears.
b. Click OK.
The VPN site is deleted.
Enabling/Disabling a VPN Site
You can only connect to VPN sites that are enabled.
To enable/disable a VPN site
1. Click VPN in the main menu, and click the VPN Sites tab.
The VPN Sites page appears, with a list of VPN sites.
2. To enable a VPN site, do the following:
a. Click the icon in the desired VPN site’s row.
A confirmation message appears.
b. Click OK.
The icon changes to , and the VPN site is enabled.
Logging in to a Remote Access VPN Site
616 Check Point Safe@Office User Guide
3. To disable a VPN site, do the following:
Note: Disabling a VPN site eliminates the tunnel and erases the network topology.
a. Click the icon in the desired VPN site’s row.
A confirmation message appears.
b. Click OK.
The icon changes to , and the VPN site is disabled.
Logging in to a Remote Access VPN Site
You need to manually log in to Remote Access VPN Servers configured for Manual Login.
You do not need to manually log in to a Remote Access VPN Server configured for
Automatic Login or a Site-to-Site VPN Gateway: all the computers on your network have
constant access to it.
Manual Login can be done through either the Safe@Office Portal or the my.vpn page.
When you log in and traffic is sent to the VPN site, a VPN tunnel is established. Only the
computer from which you logged in can use the tunnel. To share the tunnel with other
computers in your home network, you must log in to the VPN site from those computers,
using the same user name and password.
Note: You must use a single user name and password for each VPN destination
gateway.
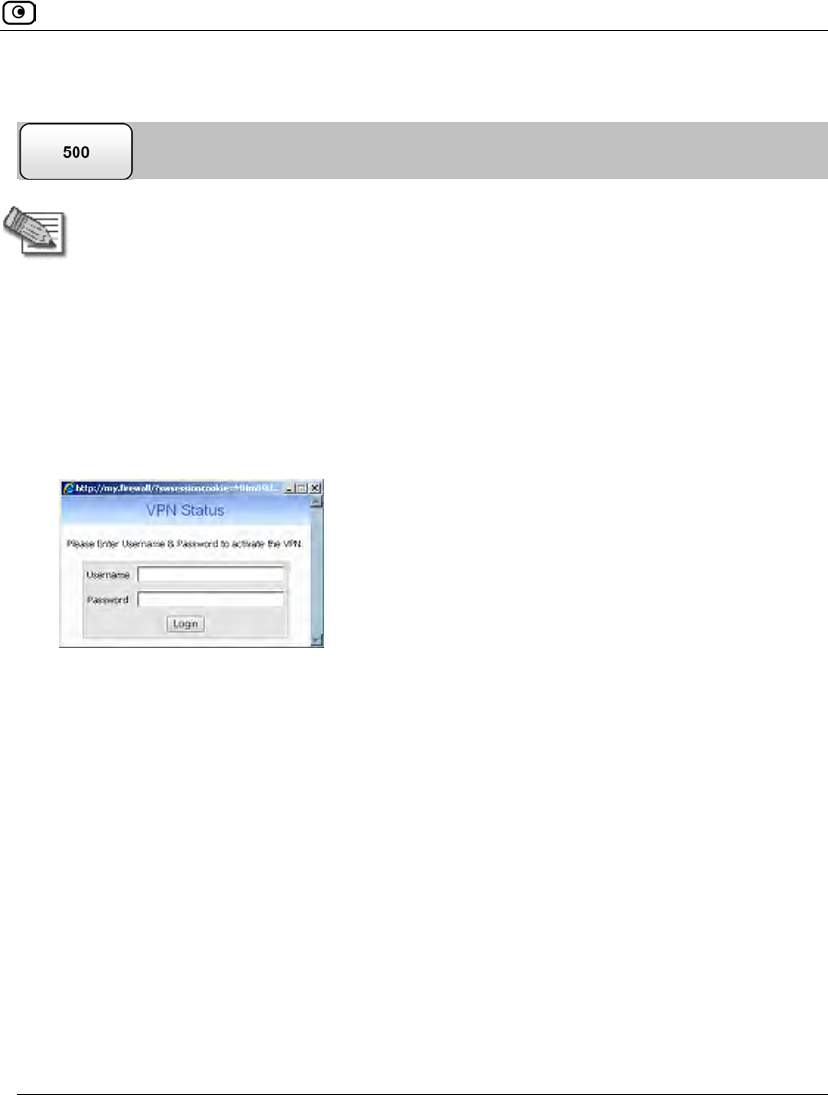
Logging in to a Remote Access VPN Site
Chapter 19: Working With VPNs 617
Logging in through the Safe@Office Portal
Note: You can only log in to sites that are configured for Manual Login.
To manually log in to a VPN site through the Safe@Office Portal
1. Click VPN in the main menu, and click the VPN Sites tab.
The VPN Sites page appears.
2. Next to the desired VPN site, click Login.
The VPN Status dialog box appears.
3. Type your user name and password in the appropriate fields.
4. Click Login.
• If the Safe@Office appliance is configured to automatically download the
network configuration, the Safe@Office appliance downloads the network
configuration.
• If when adding the VPN site you specified a network configuration, the
Safe@Office appliance attempts to create a tunnel to the VPN site.
Once the Safe@Office appliance has finished connecting, the dialog box displays
“Connected”.
• The VPN Status dialog box remains open until you manually log out of the
VPN site.
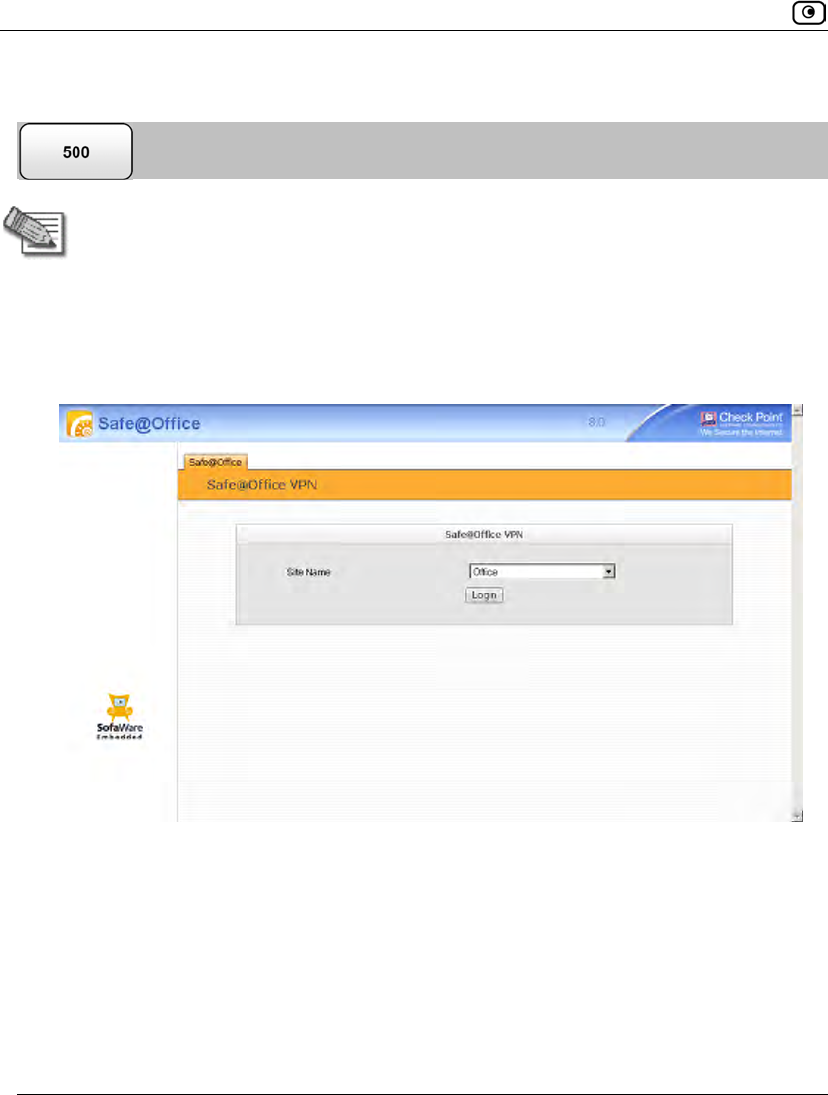
Logging in to a Remote Access VPN Site
618 Check Point Safe@Office User Guide
Logging in through the my.vpn page
Note: You do not need to know the my.firewall page administrator’s password in
order to use the my.vpn page.
To manually log in to a VPN site through the my.vpn page
1. Direct your Web browser to http://my.vpn
The VPN Login screen appears.
2. In the Site Name list, select the site to which you want to log in.
3. Enter your user name and password in the appropriate fields.
4. Click Login.
• If the Safe@Office appliance is configured to automatically download the
network configuration, the Safe@Office appliance downloads the network
configuration.
Logging Out of a Remote Access VPN Site
Chapter 19: Working With VPNs 619
• If when adding the VPN site you specified a network configuration, the
Safe@Office appliance attempts to create a tunnel to the VPN site.
• The VPN Login Status box appears. The Status field tracks the connection’s
progress.
• Once the Safe@Office appliance has finished connecting, the Status field
changes to “Connected”.
• The VPN Login Status box remains open until you manually log out of the
VPN site.
Logging Out of a Remote Access VPN Site
You need to manually log out of a VPN site, if it is a Remote Access VPN site configured
for Manual Login.
To log out of a VPN site
• In the VPN Login Status box, click Logout.
All open tunnels from the Safe@Office appliance to the VPN site are closed, and the
VPN Login Status box closes.
Note: Closing the browser or dismissing the VPN Login Status box will also terminate
the VPN session within a short time.
Using Certificates
620 Check Point Safe@Office User Guide
Using Certificates
A digital certificate is a secure means of authenticating the Safe@Office appliance to other
Site-to-Site VPN Gateways. The certificate is issued by the Certificate Authority (CA) to
entities such as gateways, users, or computers. The entity then uses the certificate to
identify itself and provide verifiable information.
For instance, the certificate includes the Distinguished Name (DN) (identifying
information) of the entity, as well as the public key (information about itself). After two
entities exchange and validate each other's certificates, they can begin encrypting
information between themselves using the public keys in the certificates.
The certificate also includes a fingerprint, a unique text used to identify the certificate. You
can email your certificate's fingerprint to the remote user. Upon connecting to the
Safe@Office VPN Server for the first time, the entity should check that the VPN peer's
fingerprint displayed in the SecuRemote/SecureClient VPN Client is identical to the
fingerprint received.
The Safe@Office appliance supports certificates encoded in the PKCS#12 (Personal
Information Exchange Syntax Standard) format.
Installing a Certificate
The Safe@Office appliance enables you to install PKCS#12 certificates in the following
ways:
• By generating a self-signed certificate.
See Generating a Self-Signed Certificate on page 621.
• By importing a certificate.
The PKCS#12 file you import must have a ".p12" file extension. If you do not have
such a PKCS#12 file, obtain one from your network security administrator.
See Importing a Certificate on page 626.
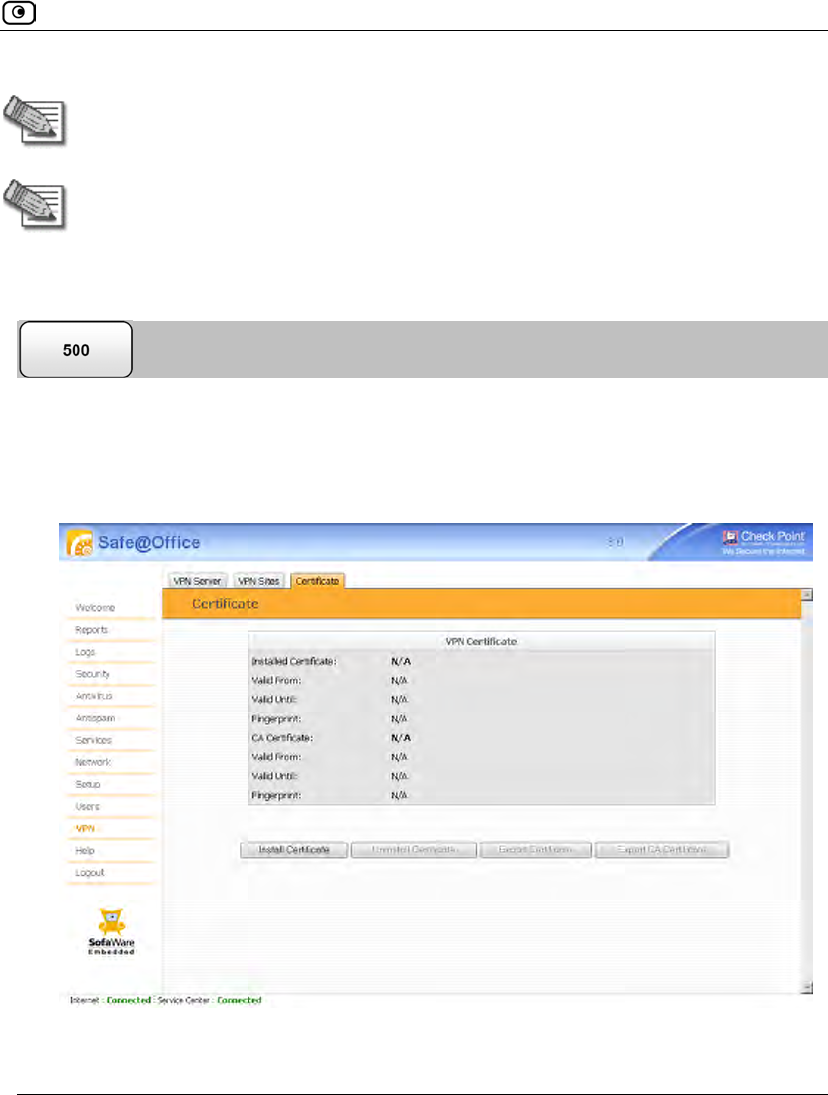
Using Certificates
Chapter 19: Working With VPNs 621
Note: To use certificates authentication, each Safe@Office appliance should have a
unique certificate. Do not use the same certificate for more than one gateway.
Note: If your Safe@Office appliance is centrally managed, a certificate is
automatically generated and downloaded to your appliance. In this case, there is no
need to generate a self-signed certificate.
Generating a Self-Signed Certificate
To generate a self-signed certificate
1. Click VPN in the main menu, and click the Certificate tab.
The Certificate page appears.
2. Click Install Certificate.
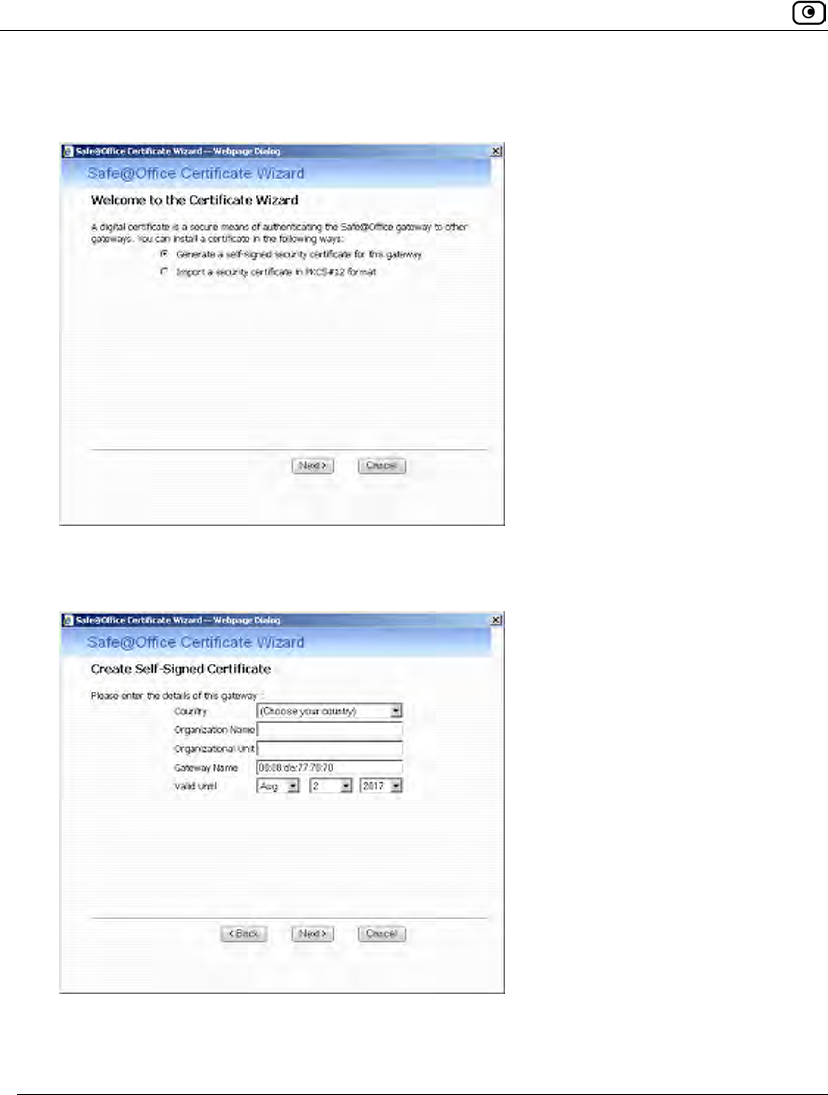
Using Certificates
622 Check Point Safe@Office User Guide
The Safe@Office Certificate Wizard opens, with the Certificate Wizard dialog box
displayed.
3. Click Generate a self-signed security certificate for this gateway.
The Create Self-Signed Certificate dialog box appears.
4. Complete the fields using the information in the following table.
5. Click Next.
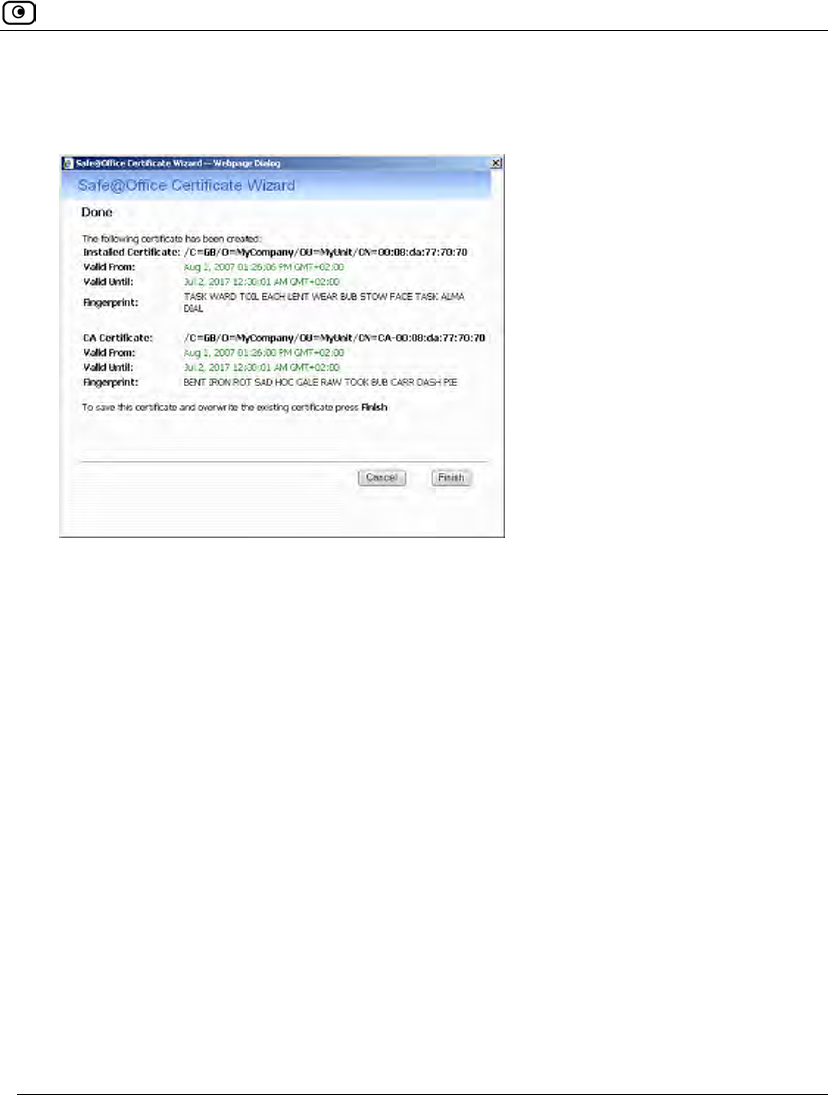
Using Certificates
Chapter 19: Working With VPNs 623
The Safe@Office appliance generates the certificate. This may take a few seconds.
The Done dialog box appears, displaying the certificate's details.
6. Click Finish.
The Safe@Office appliance installs the certificate. If a certificate is already installed,
it is overwritten.
The Certificate Wizard closes.
The Certificates page displays the following information:
• The gateway's certificate
• The gateway's name
• The gateway certificate's fingerprint
• The CA's certificate
• The name of the CA that issued the certificate (in this case, the Safe@Office
gateway)
• The CA certificate's fingerprint
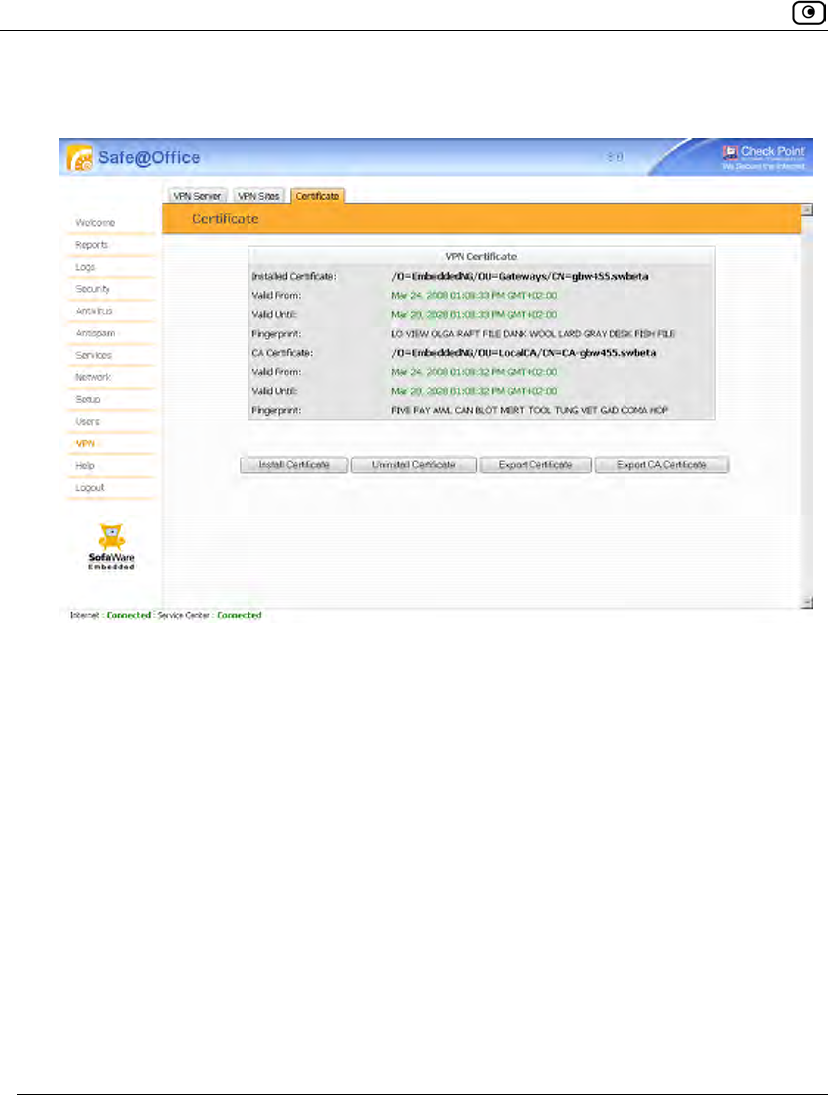
Using Certificates
624 Check Point Safe@Office User Guide
• The starting and ending dates between which the gateway's certificate and the
CA's certificate are valid

Using Certificates
Chapter 19: Working With VPNs 625
Table 127: Certificate Fields
In this field… Do this…
Country Select your country from the drop-down list.
Organization
Name
Type the name of your organization.
Organizational Unit Type the name of your division.
Gateway Name Type the gateway's name. This name will appear on the certificate, and will
be visible to remote users inspecting the certificate.
This field is filled in automatically with the gateway's MAC address. If
desired, you can change this to a more descriptive name.
Valid Until Use the drop-down lists to specify the month, day, and year when this
certificate should expire.
Note: You must renew the certificate when it expires.
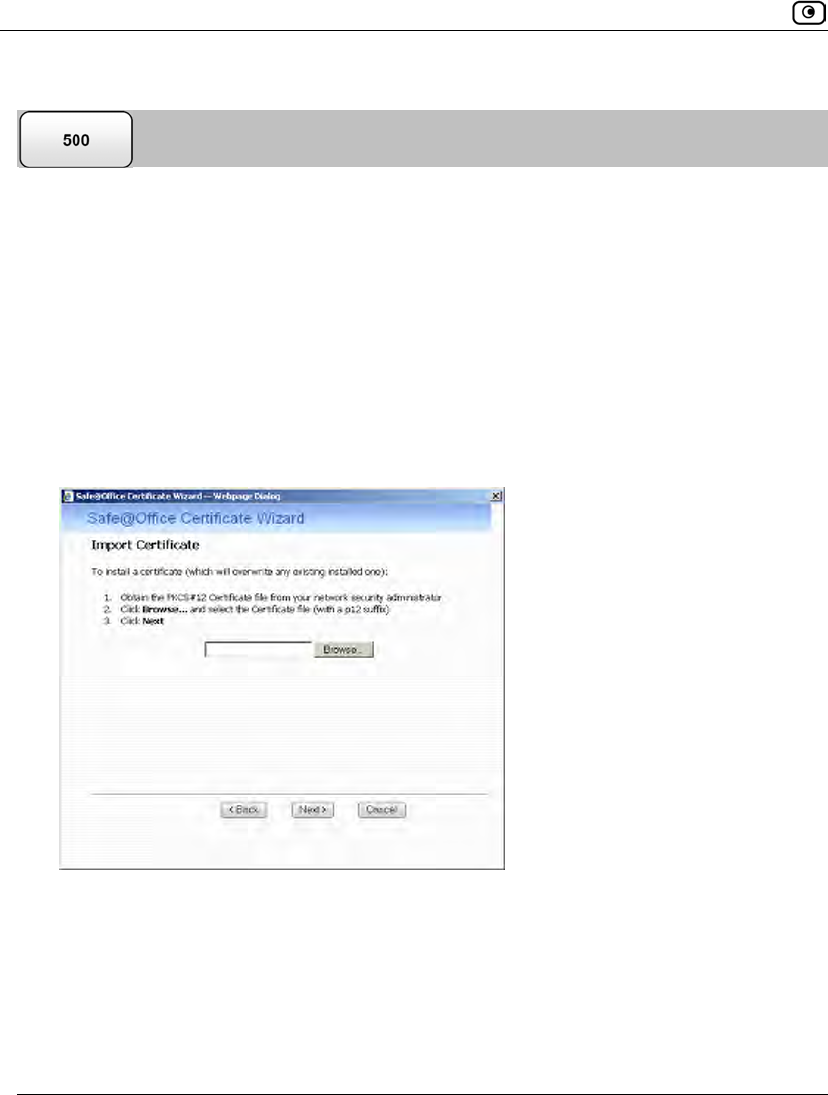
Using Certificates
626 Check Point Safe@Office User Guide
Importing a Certificate
To install a certificate
1. Click VPN in the main menu, and click the Certificate tab.
The Certificate page appears.
2. Click Install Certificate.
The Safe@Office Certificate Wizard opens, with the Certificate Wizard dialog box
displayed.
3. Click Import a security certificate in PKCS#12 format.
The Import Certificate dialog box appears.
4. Click Browse to open a file browser from which to locate and select the file.
The filename that you selected is displayed.
5. Click Next.
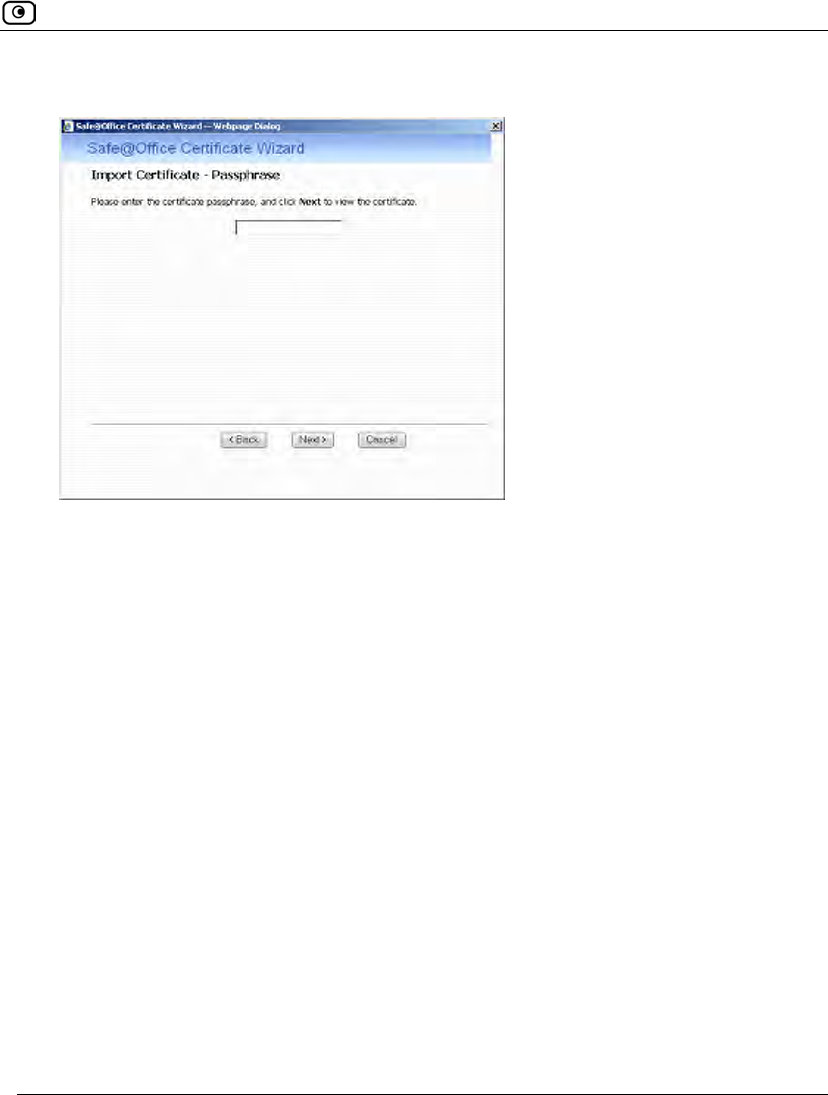
Using Certificates
Chapter 19: Working With VPNs 627
The Import-Certificate Passphrase dialog box appears. This may take a few moments.
6. Type the pass-phrase you received from the network security administrator.
7. Click Next.
The Done dialog box appears, displaying the certificate's details.
8. Click Finish.
The Safe@Office appliance installs the certificate. If a certificate is already installed,
it is overwritten.
The Certificate Wizard closes.
The Certificates page displays the following information:
• The gateway's certificate
• The gateway's name
• The gateway certificate's fingerprint
• The CA's certificate
• The name of the CA that issued the certificate
• The CA certificate's fingerprint
Using Certificates
628 Check Point Safe@Office User Guide
• The starting and ending dates between which the gateway's certificate and the
CA's certificate are valid
Uninstalling a Certificate
If you uninstall the certificate, no certificate will exist on the Safe@Office appliance, and
you will not be able to connect to the VPN if a certificate is required.
You cannot uninstall the certificate if there is a VPN site currently defined to use
certificate authentication.
Note: If you want to replace a currently-installed certificate, there is no need to
uninstall the certificate first. When you install the new certificate, the old certificate
will be overwritten.
To uninstall a certificate
1. Click VPN in the main menu, and click the Certificate tab.
The Certificate page appears with the name of the currently installed certificate.
2. Click Uninstall.
A confirmation message appears.
3. Click OK.
The certificate is uninstalled.
A success message appears.
4. Click OK.
Using Certificates
Chapter 19: Working With VPNs 629
Exporting Certificates
The Safe@Office appliance allows you to export the following certificates:
• The device certificate
Exporting the device certificate is useful for backup purposes.
Note: If your Safe@Office appliance is centrally managed, there is no need to back
up the device certificate, as it can be downloaded from the Service Center as
needed.
• The device Certificate Authority (CA) certificate
When using the Safe@Office EAP authenticator with WPA-Enterprise or 802.1x
security protocols, you must export the device CA certificate and send it to clients that
need to connect to the Safe@Office appliance. For information on the EAP
authenticator, see Using the EAP Authenticator on page 394.
The certificates are exported in PKCS#12 format (that is, as a *.p12 file).
Exporting the Safe@Office Appliance Certificate
To export the Safe@Office appliance certificate
1. Click VPN in the main menu, and click the Certificate tab.
The Certificate page appears with the name of the currently installed certificate.
2. Click Export Certificate.
A standard File Download dialog box appears.
3. Click Save.
The Save As dialog box appears.
4. Browse to a destination directory of your choice.
5. Type a name for the certificate file and click Save.
Using Certificates
630 Check Point Safe@Office User Guide
The certificate is exported as a *.p12 file and saved to the specified directory.
Note: This file contains the gateway's private key, which is confidential and must not
be passed to unauthorized users.
Exporting the CA Certificate
To export the CA certificate
1. Click VPN in the main menu, and click the Certificate tab.
The Certificate page appears with the name of the currently installed certificate.
2. Click Export CA Certificate.
A standard File Download dialog box appears.
3. Click Save.
The Save As dialog box appears.
4. Browse to a destination directory of your choice.
5. Type a name for the CA certificate file and click Save.
The CA certificate is exported as a *.p12 file and saved to the specified directory.
Viewing VPN Tunnels
Chapter 19: Working With VPNs 631
Viewing VPN Tunnels
You can view a list of currently established VPN tunnels. VPN tunnels are created and
closed as follows:
• Remote Access VPN sites configured for Automatic Login and Site-to-Site VPN
Gateways
A tunnel is created whenever your computer attempts any kind of communication with
a computer at the VPN site. The tunnel is closed when not in use for a period of time.
Note: Although the VPN tunnel is automatically closed, the site remains open, and if
you attempt to communicate with the site, the tunnel will be reestablished.
• Remote Access VPN sites configured for Manual Login
A tunnel is created whenever your computer attempts any kind of communication with
a computer at the VPN site, after you have manually logged in to the site. All open
tunnels connecting to the site are closed when you manually log out.
To view VPN tunnels
1. Click Reports in the main menu, and click the Tunnels tab.
The VPN Tunnels page appears with a table of open VPN tunnels.
The VPN Tunnels page includes the information described in the following table.

Viewing VPN Tunnels
632 Check Point Safe@Office User Guide
2. To resize a column, drag the relevant column divider right or left.
3. To refresh the table, click Refresh.
Table 128: VPN Tunnels Page Fields
This field… Displays…
Type The currently active security protocol (IPSEC).
Source
The IP address or address range of the entity from which the tunnel
originates.
The entity's type is indicated by an icon. See VPN Tunnel Icons on page
633.
Destination The IP address or address range of the entity to which the tunnel is
connected.
The entity's type is indicated by an icon. See VPN Tunnel Icons on page
633.
Security The type of encryption used to secure the connection, and the type of
Message Authentication Code (MAC) used to verify the integrity of the
message. This information is presented in the following format: Encryption
type/Authentication type.
In addition, if IPSec compression is enabled for the tunnel, this field displays
the icon.
Note: All VPN settings are automatically negotiated between the two sites.
The encryption and authentication schemes used for the connection are the
strongest of those used at the two sites.
Your Safe@Office appliance supports AES, 3DES, and DES encryption
schemes, and MD5 and SHA authentication schemes.
Viewing VPN Tunnels
Chapter 19: Working With VPNs 633
This field… Displays…
Established The time at which the tunnel was established.
This information is presented in the format hh:mm:ss, where:
hh=hours
mm=minutes
ss=seconds
Table 129: VPN Tunnels Icons
This icon… Represents…
This gateway
A network for which an IKE Phase-2 tunnel was negotiated
A Remote Access VPN Server
A Site-to-Site VPN Gateway
A remote access VPN user
An L2TP user
Viewing IKE Traces for VPN Connections
634 Check Point Safe@Office User Guide
Viewing IKE Traces for VPN Connections
If you are experiencing VPN connection problems, you can save a trace of IKE (Internet
Key Exchange) negotiations to a file, and then use the free IKE View tool to view the file.
The IKE View tool is available for the Windows platform.
Note: Before viewing IKE traces, it is recommended to do the following:
• The Safe@Office appliance stores traces for all recent IKE
negotiations. If you want to view only new IKE trace data, clear all IKE
trace data currently stored on the Safe@Office appliance.
• Close all existing VPN tunnels except for the problematic tunnel, so as
to make it easier to locate the problematic tunnel's IKE negotiation
trace in the exported file.
To clear all currently-stored IKE traces
1. Click Reports in the main menu, and click the Tunnels tab.
The VPN Tunnels page appears with a table of open tunnels to VPN sites.
2. Click Clear IKE Trace.
All IKE trace data currently stored on the Safe@Office appliance is cleared.
To view the IKE trace for a connection
1. Establish a VPN tunnel to the VPN site with which you are experiencing
connection problems.
For information on when and how VPN tunnels are established, see Viewing VPN
Tunnels on page 631.
2. Click Reports in the main menu, and click the Tunnels tab.
The VPN Tunnels page appears with a table of open tunnels to VPN sites.
3. Click Save IKE Trace.
A standard File Download dialog box appears.
4. Click Save.
Viewing VPN Topology
Chapter 19: Working With VPNs 635
The Save As dialog box appears.
5. Browse to a destination directory of your choice.
6. Type a name for the *.elg file and click Save.
The *.elg file is created and saved to the specified directory. This file contains the IKE
traces of all currently-established VPN tunnels.
7. Use the IKE View tool to open and view the *.elg file, or send the file to
technical support.
Viewing VPN Topology
You can view the topology of VPN sites to which the Safe@Office appliance is currently
connected.
To view VPN topology
1. Click Reports in the main menu, and click the Tunnels tab.
The VPN Tunnels page appears with a table of open tunnels to VPN sites.
2. Click View Topology.
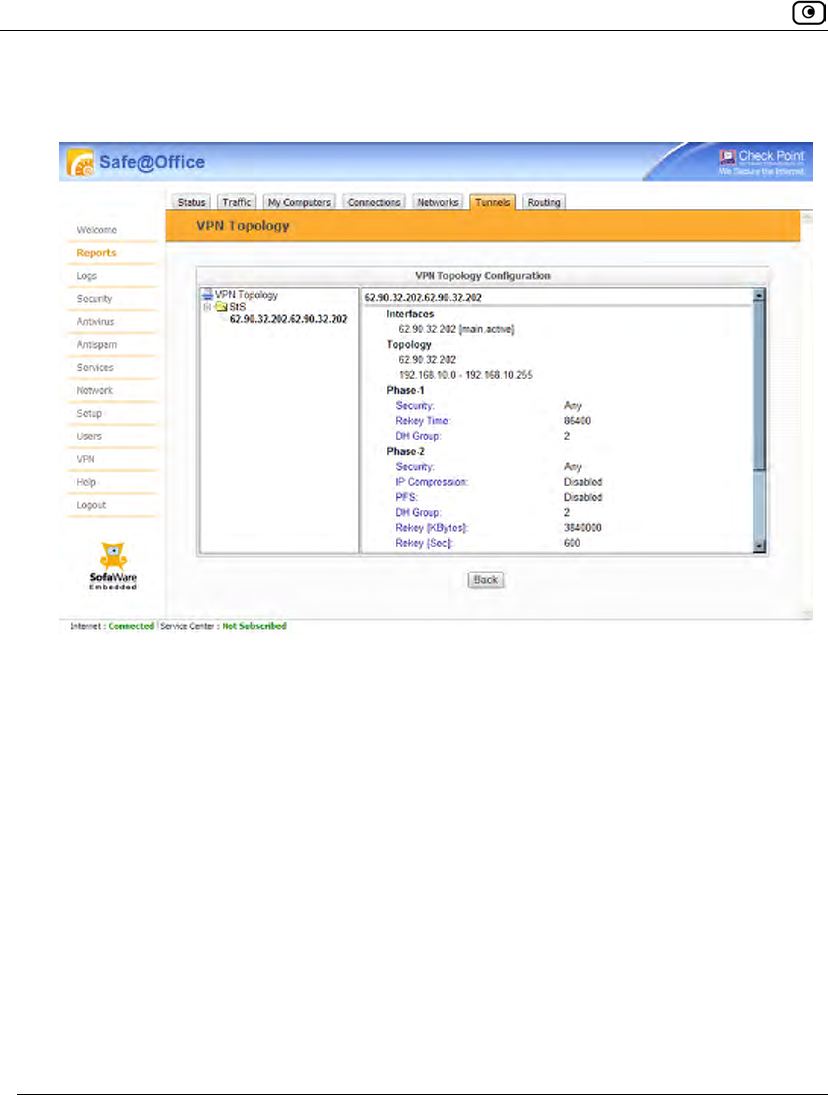
Viewing VPN Topology
636 Check Point Safe@Office User Guide
The VPN Topology page appears displaying a tree of VPN sites to which the appliance
is connected.
3. To view topology information for a VPN site, in the tree, click the VPN site's
name.
The right pane displays the information described in the following table.

Viewing VPN Topology
Chapter 19: Working With VPNs 637
Table 130: VPN Topology Page Fields
This field… Displays…
Split DNS The VPN site's split DNS mappings.
When split DNS is configured for a VPN site, certain domain suffixes are
mapped to corporate DNS servers. This means that requests for these
domain suffixes are sent to the specific DNS servers to which they are
mapped, while all other requests are sent to the ISP's DNS servers. For
example, a VPN site's split DNS mappings might indicate that all requests
for the domain suffix ".acme.com" should be sent to the Acme company's
corporate DNS servers.
Trusted CAs A list of root CAs at the VPN site, whose certificates are trusted by this
gateway.
Sub-CAs A list of second-level CAs at the VPN site, which are signed by a trusted
root CA.
Changing Your Login Credentials
Chapter 20: Managing Users 639
Chapter 20
This chapter describes how to manage Safe@Office appliance users. You can define
multiple users, set their passwords, and assign them various permissions.
This chapter includes the following topics:
Changing Your Login Credentials............................................................639
Adding and Editing Users ........................................................................643
Adding Quick Guest HotSpot Users.........................................................647
Viewing and Deleting Users.....................................................................649
Setting Up Remote VPN Access for Users...............................................650
Using RADIUS Authentication................................................................650
Configuring RADIUS Attributes..............................................................657
Changing Your Login Credentials
You can change your username and password at any time.
To change your login credentials
1. Click Users in the main menu, and click the Internal Users tab.
Managing Users
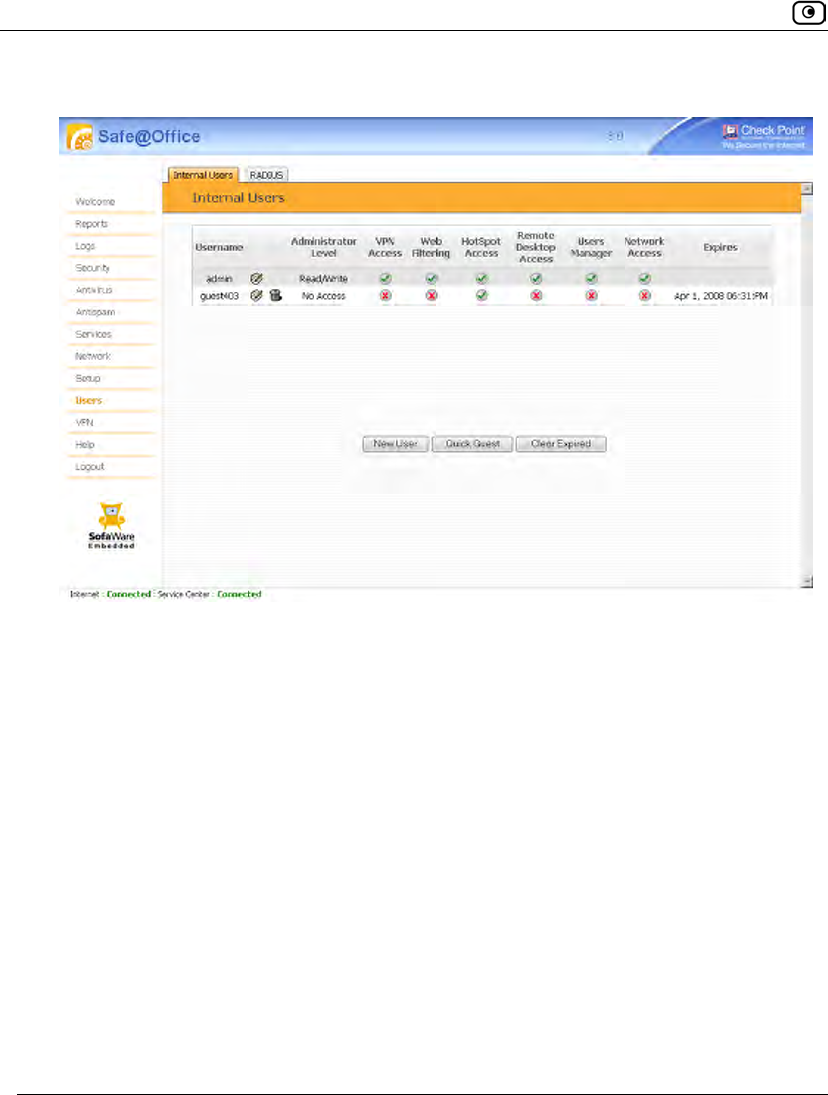
Changing Your Login Credentials
640 Check Point Safe@Office User Guide
The Internal Users page appears.
2. In the row of your username, click Edit.
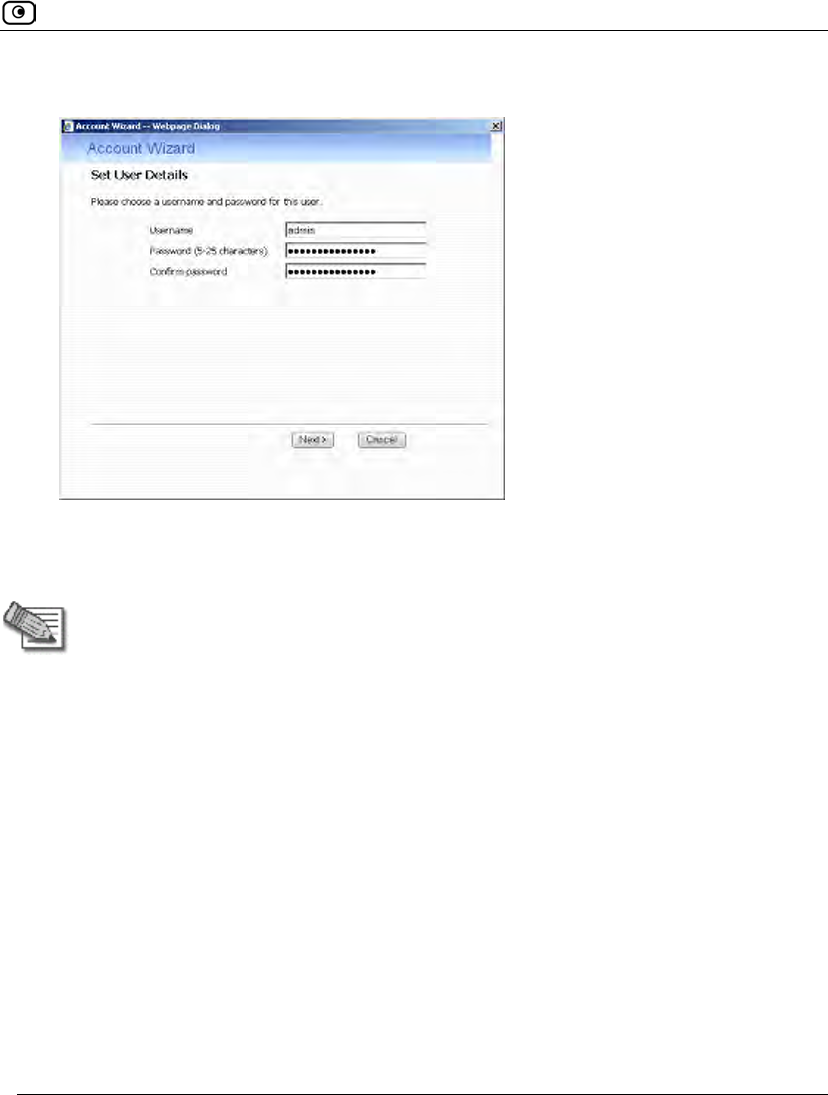
Changing Your Login Credentials
Chapter 20: Managing Users 641
The Account Wizard opens displaying the Set User Details dialog box.
3. Edit the Username field.
4. Edit the Password and Confirm password fields.
Note: Use 5 to 25 characters (letters or numbers) for the new password.
5. Click Next.
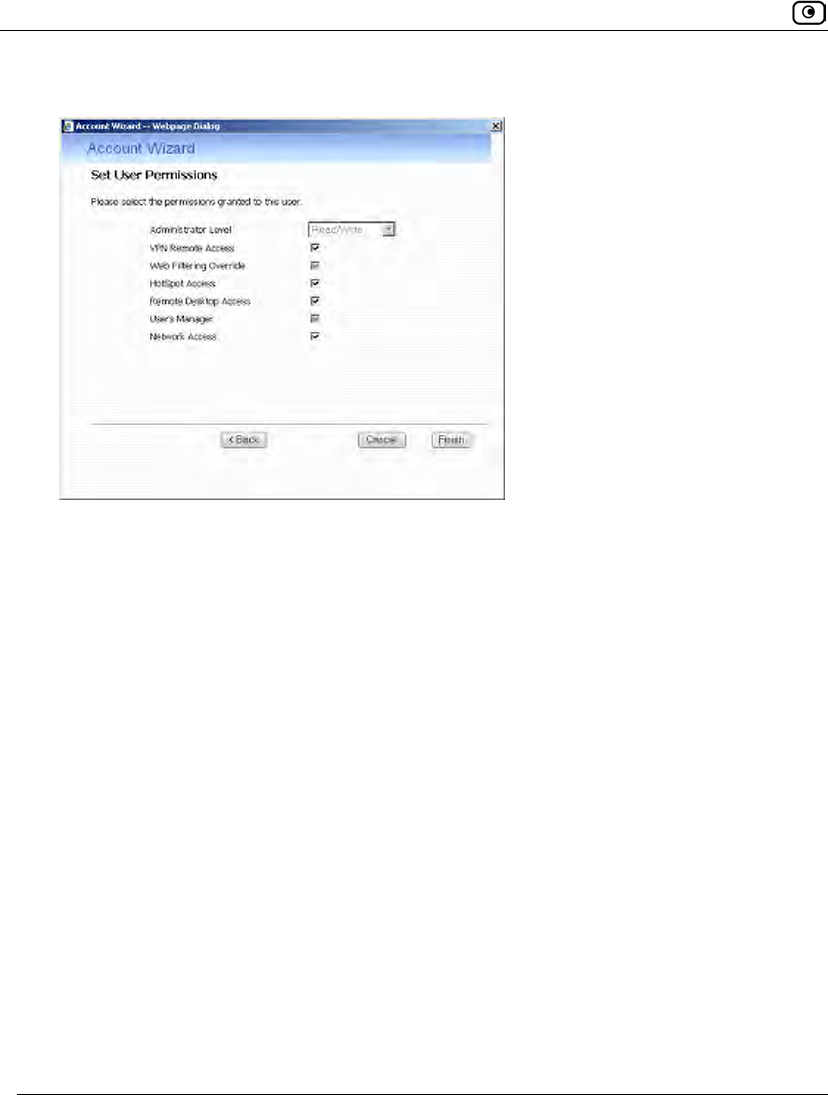
Changing Your Login Credentials
642 Check Point Safe@Office User Guide
The Set User Permissions dialog box appears.
6. Click Finish.
Your changes are saved.
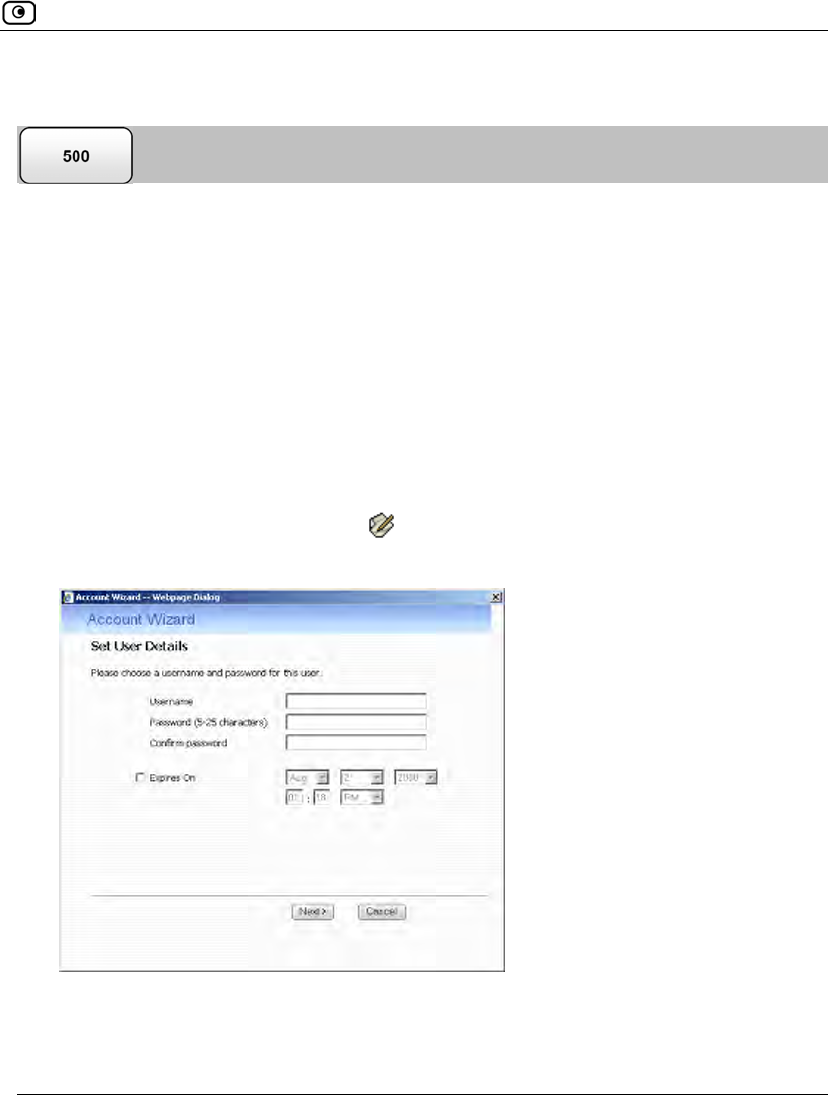
Adding and Editing Users
Chapter 20: Managing Users 643
Adding and Editing Users
This procedure explains how to add and edit users.
For information on quickly adding guest HotSpot users via a shortcut that the Safe@Office
appliance provides, see Adding Quick Guest HotSpot Users on page 647.
To add or edit a user
1. Click Users in the main menu, and click the Internal Users tab.
The Internal Users page appears.
2. Do one of the following:
• To create a new user, click New User.
• To edit an existing user, click next to the desired user.
The Account Wizard opens displaying the Set User Details dialog box.
3. Complete the fields using the information in Set User Details Fields on page
644.
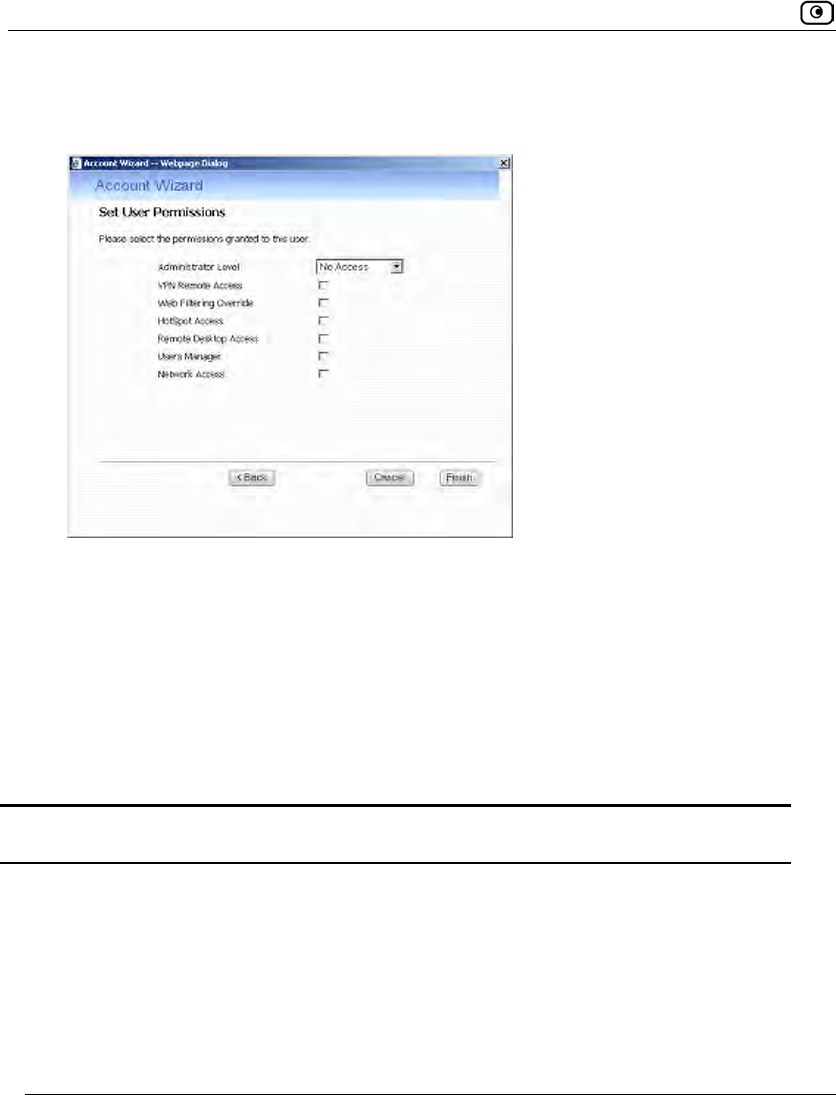
Adding and Editing Users
644 Check Point Safe@Office User Guide
4. Click Next.
The Set User Permissions dialog box appears.
The options that appear on the page are dependant on the software and services you
are using.
5. Complete the fields using the information in Set User Permissions Fields on
page 645.
6. Click Finish.
The user is saved.
Table 131: Set User Details Fields
In this field… Do this…
Username Enter a username for the user.
Password Enter a password for the user. Use five to 25 characters (letters or
numbers) for the new password.
Confirm Password Re-enter the user’s password.

Adding and Editing Users
Chapter 20: Managing Users 645
In this field… Do this…
Expires On To specify an expiration time for the user, select this option and specify
the expiration date and time in the fields provided.
When the user account expires, it is locked, and the user can no longer
log in to the Safe@Office appliance.
If you do not select this option, the user will not expire.
Table 132: Set User Permissions Fields
In this field... Do this...
Administrator Level Select the user’s level of access to the Safe@Office Portal.
The levels are:
• No Access: The user cannot access the Safe@Office Portal.
• Read Only: The user can log in to the Safe@Office Portal,
but cannot modify system settings or export the appliance
configuration via the Setup>Tools page. For example, you
could assign this administrator level to technical support
personnel who need to view the Event Log.
• Read/Write: The user can log in to the Safe@Office Portal
and modify system settings.
The default level is No Access.
The “admin” user’s Administrator Level (Read/Write) cannot be
changed.
VPN Remote
Access
Select this option to allow the user to connect to this Safe@Office
appliance using their VPN client.
For further information on setting up VPN remote access, see see
Setting Up Remote VPN Access for Users on page 650

Adding and Editing Users
646 Check Point Safe@Office User Guide
Web Filtering
Override
Select this option to allow the user to override the Web Filtering service
and Web rules.
This option cannot be changed for the “admin” user.
HotSpot Access Select this option to allow the user to log in to the My HotSpot page.
For information on Secure HotSpot, see Configuring Secure HotSpot
on page 380.
This option only appears in Safe@Office 500 with Power Pack.
Remote Desktop
Access
Select this option to allow the user to log in to the my.firewall portal, view
the Active Computers page, and remotely access computers' desktops,
using the Remote Desktop feature.
Note: The user can perform these actions, even if their level of
administrative access is "No Access".
For information on Remote Desktop, see Using Remote Desktop on
page 661.
Users Manager Select this option to allow the user to log in to the Safe@Office Portal
and add, edit, or delete "No Access"-level users, but not modify other
system settings.
For example, you could assign this administrator level to clerks who
need to manage HotSpot users.
Network Access Select this option to allow the user to connect to this Safe@Office
appliance via a wireless client or by connecting to the appliance's ports,
when the Safe@Office EAP authenticator is used.
For information on the Safe@Office EAP authenticator, see Using the
Safe@Office EAP Authenticator on page 394.

Adding Quick Guest HotSpot Users
Chapter 20: Managing Users 647
Adding Quick Guest HotSpot Users
The Safe@Office appliance provides a shortcut for quickly adding a guest HotSpot user.
This is useful in situations where you want to grant temporary network access to guests,
for example in an Internet café. The shortcut also enables printing the guest user's details in
one click.
By default, the quick guest user has the following characteristics:
• Username in the format guest<number>, where <number> is a unique
three-digit number.
For example: guest123
• Randomly generated password
• Expires in 24 hours
• Administration Level: No Access
• Permissions: HotSpot Access only
For information on configuring Secure HotSpot, see Using Secure HotSpot on page 380.
For information on changing the default expiration period, refer to the Embedded NGX CLI
Reference Guide.
To quickly create a guest user
1. Click Users in the main menu, and click the Internal Users tab.
The Internal Users page appears.
2. Click Quick Guest.
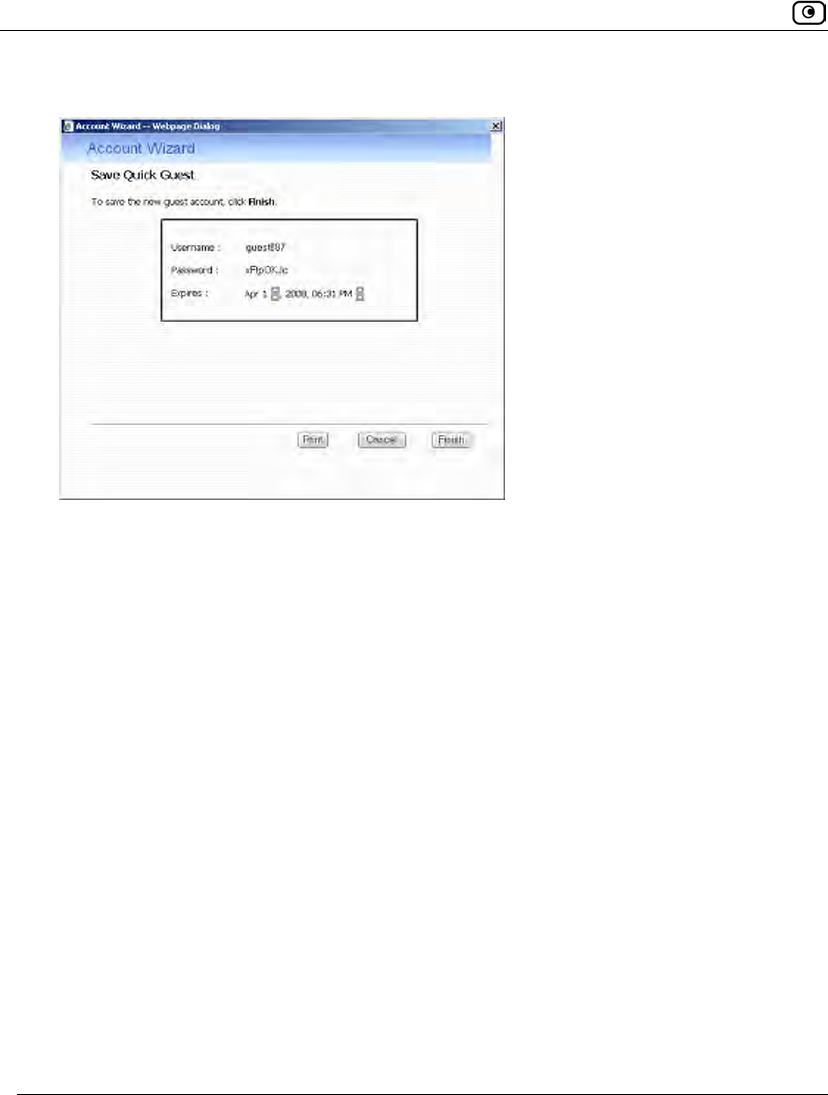
Adding Quick Guest HotSpot Users
648 Check Point Safe@Office User Guide
The Account Wizard opens displaying the Save Quick Guest dialog box.
3. In the Expires field, click on the arrows to specify the expiration date and time.
4. To print the user details, click Print.
5. Click Finish.
The guest user is saved.
You can edit the guest user's details and permissions using the procedure Adding and
Editing Users on page 643.
Viewing and Deleting Users
Chapter 20: Managing Users 649
Viewing and Deleting Users
Note: The “admin” user cannot be deleted.
To view or delete users
1. Click Users in the main menu, and click the Internal Users tab.
The Internal Users page appears with a list of all users and their permissions.
The expiration time of expired users appears in red.
2. To delete a user, do the following:
a) In the desired user’s row, click .
A confirmation message appears.
b) Click OK.
The user is deleted.
3. To delete all expired users, do the following:
a) Click Clear Expired.
A confirmation message appears.
b) Click OK.
The expired users are deleted.
Setting Up Remote VPN Access for Users
650 Check Point Safe@Office User Guide
Setting Up Remote VPN Access for Users
If you are using your Safe@Office appliance as a SecuRemote Remote Access VPN
Server, as an internal VPN Server, or as an L2TP VPN Server, you can allow users to
access it remotely through their Remote Access VPN Clients (a Check Point SecureClient,
Check Point SecuRemote, an L2TP VPN Client, or another Embedded NGX appliance).
To set up remote VPN access for a user
1. Enable your VPN Server, using the procedure Setting Up Your Safe@Office
Appliance as a VPN Server on page 567.
2. Add or edit the user, using the procedure Adding and Editing Users on page
643.
You must select the VPN Remote Access option.
Using RADIUS Authentication
You can use Remote Authentication Dial-In User Service (RADIUS) to authenticate both
Safe@Office appliance users and Remote Access VPN Clients trying to connect to the
Safe@Office appliance.
Note: When RADIUS authentication is in use, Remote Access VPN Clients must
have a certificate.
When a user tries to log in to the Safe@Office Portal, the Safe@Office appliance sends the
entered user name and password to the RADIUS server. The server then checks whether
the RADIUS database contains a matching user name and password pair. If so, then the
user is logged in.
By default, all RADIUS-authenticated users are assigned the set of permissions specified
in the Safe@Office Portal's RADIUS page. However, you can configure the RADIUS server
to pass the Safe@Office appliance a specific set of permissions to grant the authenticated
user, instead of these default permissions. This is done by configuring the RADIUS

Using RADIUS Authentication
Chapter 20: Managing Users 651
Vendor-Specific Attribute (VSA) with a set of attributes containing permission
information for specific users. If the VSA is configured for a user, then the RADIUS server
passes the VSA to the Safe@Office appliance as part of the response to the authentication
request, and the gateway assigns the user permissions as specified in the VSA. If the VSA
is not returned by the RADIUS server for a specific user, the gateway will use the default
permission set for this user.
In addition, you can configure the RADIUS server to pass the Safe@Office appliance a
Secure HotSpot session timeout value. When the RADIUS server's Session-Timeout
Attribute is configured, HotSpot users will be logged out after the specified session
timeout has elapsed.
To use RADIUS authentication
1. Click Users in the main menu, and click the RADIUS tab.
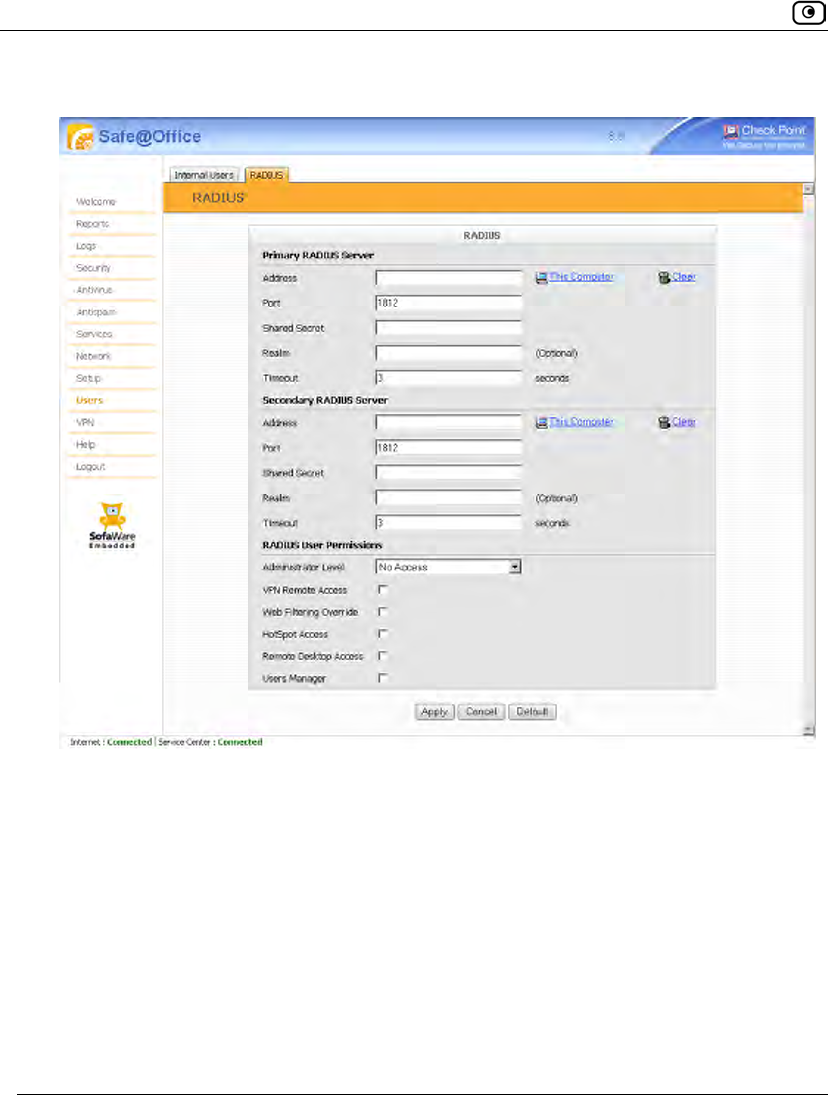
Using RADIUS Authentication
652 Check Point Safe@Office User Guide
The RADIUS page appears.
2. Complete the fields using the following table.
3. Click Apply.
4. To restore the default RADIUS settings, do the following:
a) Click Default.
A confirmation message appears.
b) Click OK.
The RADIUS settings are reset to their defaults. For information on the default
values, refer to the following table.

Using RADIUS Authentication
Chapter 20: Managing Users 653
5. If desired, configure user permissions and/or the HotSpot session timeout on
the RADIUS server.
See Configuring RADIUS Attributes on page 657.
Table 133: RADIUS Page Fields
In this field… Do this…
Primary/Secondary
RADIUS Server
Configure the primary and secondary RADIUS servers.
By default, the Safe@Office appliance sends a request to the primary
RADIUS server first. If the primary RADIUS server does not respond
after three attempts, the Safe@Office appliance will send the request to
the secondary RADIUS server.
Address Type the IP address of the computer that will run the RADIUS service
(one of your network computers) or click the corresponding This
Computer button to allow your computer to host the service.
To clear the text box, click Clear.
Port Type the port number on the RADIUS server’s host computer.
The default port number is 1812.
Shared Secret Type the shared secret to use for secure communication with the
RADIUS server.

Using RADIUS Authentication
654 Check Point Safe@Office User Guide
In this field… Do this…
Realm If your organization uses RADIUS realms, type the realm to append to
RADIUS requests. The realm will be appended to the username as
follows: <username>@<realm>
For example, if you set the realm to “myrealm”, and the user "JohnS"
attempts to log in to the Safe@Office Portal, the Safe@Office
appliance will send the RADIUS server an authentication request with
the username “JohnS@myrealm”.
This field is optional.
Timeout Type the interval of time in seconds between attempts to communicate
with the RADIUS server.
The default value is 3 seconds.
RADIUS User
Permissions
If the RADIUS VSA (Vendor-Specific Attribute) is configured for a user,
the fields in this area will have no effect, and the user will be granted
the permissions specified in the VSA.
If the VSA is not configured for the user, the permissions configured in
this area will be used.

Using RADIUS Authentication
Chapter 20: Managing Users 655
In this field… Do this…
Administrator Level Select the level of access to the Safe@Office Portal to assign to all
users authenticated by the RADIUS server.
The levels are:
• No Access: The user cannot access the Safe@Office Portal.
• Read Only: The user can log in to the Safe@Office Portal,
but cannot modify system settings or export the appliance
configuration via the Setup>Tools page. For example, you
could assign this administrator level to technical support
personnel who need to view the Event Log.
• Read/Write: The user can log in to the Safe@Office Portal
and modify system settings.
The default level is No Access.
VPN Remote Access Select this option to allow all users authenticated by the RADIUS server
to connect to this Safe@Office appliance using their VPN client.
For further information on setting up VPN remote access, see Setting
Up Remote VPN Access for Users on page 650.
Web Filtering
Override
Select this option to allow all users authenticated by the RADIUS server
to override Web Filtering.
This option only appears if the Web Filtering service is defined.
HotSpot Access Select this option to allow all users authenticated by the RADIUS server
to access the My HotSpot page.
For information on Secure HotSpot, see Configuring Secure HotSpot
on page 380.
This option only appears in Safe@Office 500 with Power Pack.

Using RADIUS Authentication
656 Check Point Safe@Office User Guide
In this field… Do this…
Remote Desktop
Access
Select this option to allow all users authenticated by the RADIUS server
to log in to the my.firewall portal, view the Active Computers page, and
remotely access computers' desktops, using the Remote Desktop
feature.
Note: Authenticated users can perform these actions, even if their level of
administrative access is "No Access".
For information on Remote Desktop, see Using Remote Desktop on
page 661.
Users Manager Select this option to allow all users authenticated by the RADIUS
server to log in to the Safe@Office Portal and add, edit, or delete "No
Access"-level users, but not modify other system settings.
For example, you could assign this administrator level to clerks who
need to manage HotSpot users.

Configuring RADIUS Attributes
Chapter 20: Managing Users 657
Configuring RADIUS Attributes
To define a timeout for Secure HotSpot sessions
• Set the Session-Timeout Attribute (attribute 27) to the number of seconds after
which users should be automatically logged out from the hotspot.
To assign permissions to specific RADIUS-authenticated users
1. Create a remote access policy as follows:
a) Assign the policy’s VSA (attribute 26) the SofaWare vendor code (6983).
b) For each permission you want to grant, configure the relevant attribute of
the VSA with the desired value, as described in the following table.
For example, to assign the user VPN access permissions, set attribute number 2 to
“true”.
2. Assign the policy to the desired user or user group.
For detailed instructions and examples, refer to the "Configuring the RADIUS Vendor-
Specific Attribute" white paper.

Configuring RADIUS Attributes
658 Check Point Safe@Office User Guide
Table 134: VSA Syntax
Permission Description Attribute
Number
Attribute
Format
Attribute Values Notes
Admin Indicates the
administrator’s
level of access to
the Safe@Office
Portal
1 String
none. The user
cannot access the
Safe@Office
Portal.
readonly. The user
can log in to the
Safe@Office
Portal, but cannot
modify system
settings.
users-manager. The
user can log in to
the Safe@Office
Portal and add,
edit, or delete "No
Access"-level
users. However,
the user cannot
modify other
system settings.
readwrite. The user
can log in to the
Safe@Office
Portal and modify
system settings.

Configuring RADIUS Attributes
Chapter 20: Managing Users 659
Permission Description Attribute
Number
Attribute
Format
Attribute Values Notes
VPN Indicates whether
the user can
access the
network from a
Remote Access
VPN Client.
2 String
true. The user can
remotely access
the network via
VPN.
false. The user
cannot remotely
access the
network via VPN.
This permission
is only relevant if
the Safe@Office
Remote Access
VPN Server is
enabled. The
gateway must
have a
certificate.
Hotspot Indicates whether
the user can log
in via the My
HotSpot page.
3 String
true. The user can
access the Internet
via My HotSpot.
false. The user
cannot access the
Internet via My
HotSpot.
This permission
is only relevant if
the Secure
HotSpot feature
is enabled.
UFP Indicates whether
the user can
override Web
Filtering.
4 String
true. The user can
override Web
Filtering.
false. The user
cannot override
Web Filtering.
This permission is
only relevant if
the Web Filtering
service is
enabled.

Configuring RADIUS Attributes
660 Check Point Safe@Office User Guide
Permission Description Attribute
Number
Attribute
Format
Attribute Values Notes
RemoteDe
sktop
Indicates whether
the user can
remotely access
computers'
desktops, using
the Remote
Desktop feature.
5 String
true. The user can
log in to the
my.firewall portal,
view the Active
Computers page,
and remotely
access computers'
desktops
(irrespective of their
level of
administrative
access).
false. The user
cannot remotely
access computers'
desktops.
This permission is
only relevant if
the Remote
Desktop feature is
enabled.
Overview
Chapter 21: Using Remote Desktop 661
Chapter 21
This chapter describes how to remotely access the desktop of each of your computers,
using the Safe@Office appliance's Remote Desktop feature.
This chapter includes the following topics:
Overview ..................................................................................................661
Workflow..................................................................................................662
Configuring Remote Desktop...................................................................663
Configuring the Host Computer ...............................................................666
Accessing a Remote Computer's Desktop................................................669
Overview
Your Safe@Office appliance includes an integrated client for Microsoft Terminal Services,
allowing you to remotely access the desktop of each of your computers from anywhere, via
the Safe@Office Portal. You can even redirect your printers or ports to a remote computer,
so that you can print and transfer files with ease.
Remote Desktop sessions use the Microsoft Remote Desktop Protocol (RDP) on TCP port
3389. This port is opened dynamically between the Remote Desktop client and the Remote
Desktop server as needed, meaning that the port is not exposed to the Internet, and your
constant security is ensured.
Note: By default, the Microsoft RDP protocol is secured with 128-bit RC4 encryption.
For the strongest possible security, it is recommended to use Remote Desktop over
an IPSec VPN connection. For information on VPNs, see Working With VPNs on
page 561.
Using Remote Desktop

Workflow
662 Check Point Safe@Office User Guide
Workflow
To use Remote Desktop
1. Configure Remote Desktop.
See Configuring Remote Desktop on page 663.
2. Enable the Remote Desktop server on computers that authorized users should
be allowed to remotely access.
See Configuring the Host Computer on page 666.
3. Grant Remote Desktop Access permissions to users who should be allowed to
remotely access desktops.
See Adding and Editing Users on page 643.
4. The authorized users can access remote computers' desktops as desired.
See Accessing a Remote Computer's Desktop on page 669.
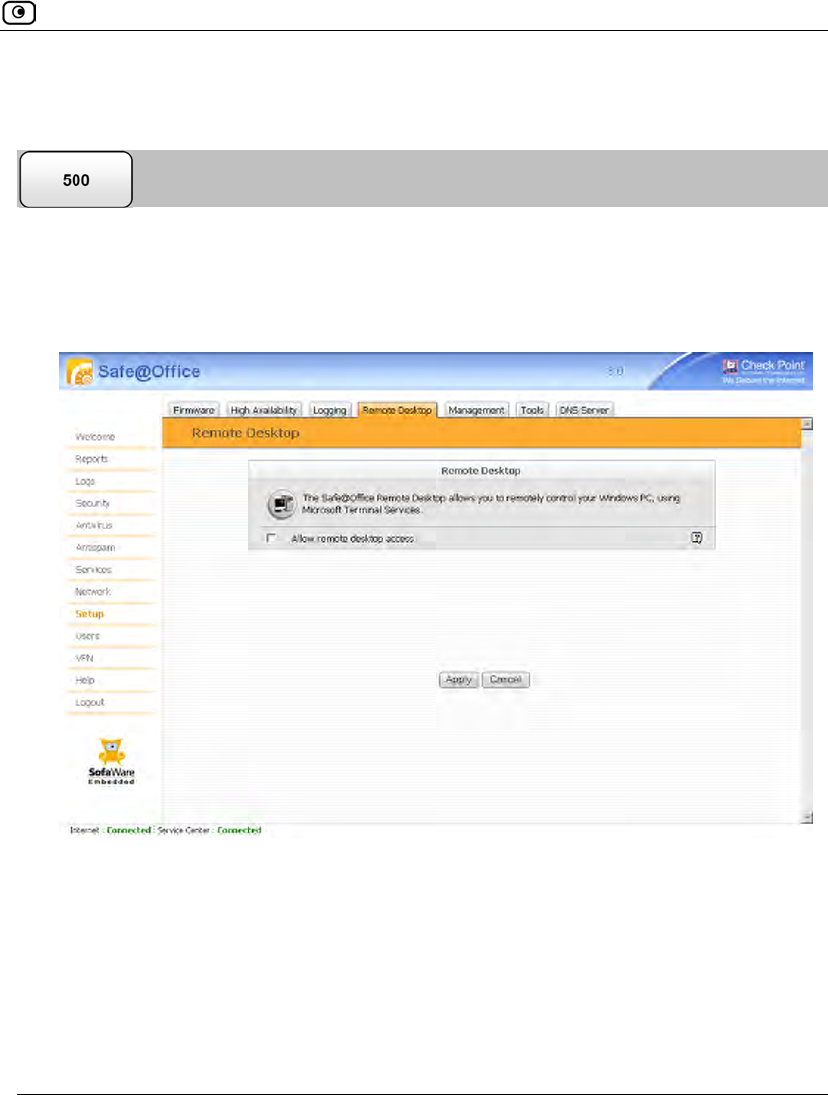
Configuring Remote Desktop
Chapter 21: Using Remote Desktop 663
Configuring Remote Desktop
To configure Remote Desktop
1. Click Setup in the main menu, and click the Remote Desktop tab.
The Remote Desktop page appears.
2. Do one of the following:
• To enable Remote Desktop, select the Allow remote desktop access check
box.
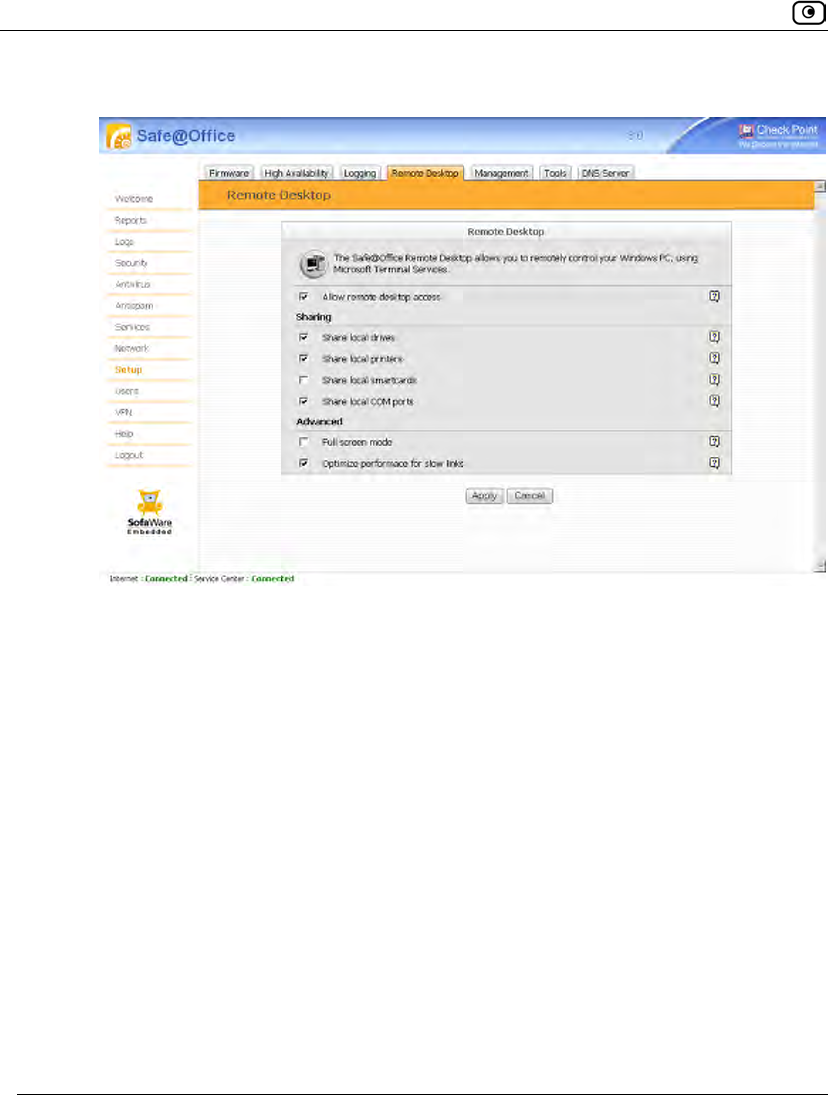
Configuring Remote Desktop
664 Check Point Safe@Office User Guide
New fields appear.
• To disable Remote Desktop, clear the Allow remote desktop access check box.
Fields disappear.
3. Complete the fields using the information in the following table.
4. Click Apply.

Configuring Remote Desktop
Chapter 21: Using Remote Desktop 665
Table 135: Remote Desktop Options
In this field… Do this…
Sharing
Share local drives Select this option to allow the host computer to access hard drives on
the client computer. This enables remote users to access their local hard
drives when logged in to the host computer.
Share local printers Select this option to allow the host computer to access printers on the
client computer. This enables remote users to access their local printer
when logged in to the host computer.
Share local
smartcards
Select this option to allow the host computer to access smartcards on
the client computer. This enables remote users to access their local
smartcards when logged in to the host computer.
Share local COM
ports
Select this option to allow the host computer to access COM ports on
the client computer. This enables remote users to access their local
COM ports when logged in to the host computer.
Advanced
Full screen mode Select this option to open Remote Desktop sessions on the whole
screen.
Optimize
performance for slow
links
Select this option to optimize Remote Desktop sessions for slow links.
Bandwidth-consuming options, such as wallpaper and menu animations,
will be disabled.

Configuring the Host Computer
666 Check Point Safe@Office User Guide
Configuring the Host Computer
To enable remote users to connect to a computer, you must enable the Remote Desktop
server on that computer.
Note: The host computer must have one of the following operating systems installed:
• Microsoft Windows Server 2003
• Microsoft Windows XP Professional
• Microsoft Windows XP Media Center
• Microsoft Windows XP Tablet PC 2005
To enable users to remotely connect to a computer
1. Log on to the desired computer as an administrator.
2. For each remote user who should be allowed to access this computer, create a
user account with a password.
For information, refer to Microsoft documentation.
3. On the desktop, right-click on My Computer, and select Properties in the pop-
up menu that appears.
The System Properties dialog box appears displaying the General tab.
4. Click the Remote tab.
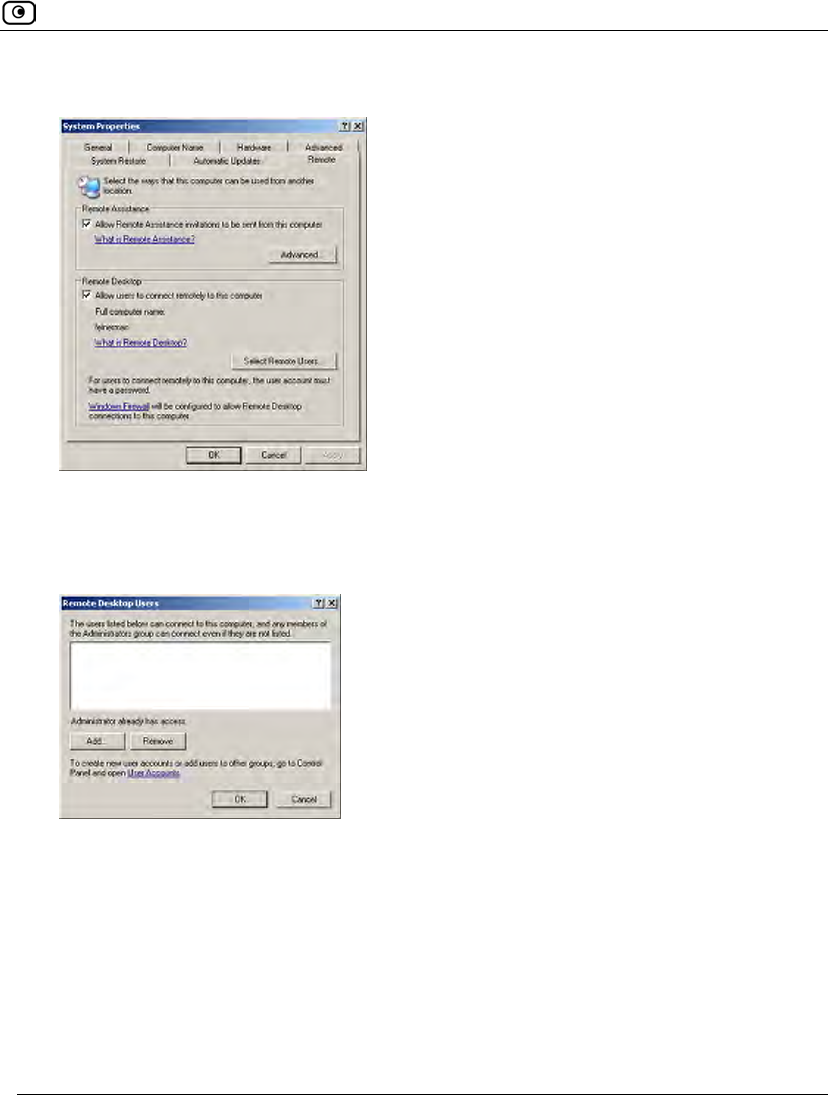
Configuring the Host Computer
Chapter 21: Using Remote Desktop 667
The Remote tab appears.
5. Select the Allow users to connect remotely to this computer check box.
6. Click Select Remote Users.
The Remote Desktop Users dialog box appears.
7. Do the following for each remote user who should be allowed to access this
computer:
a. Click Add.
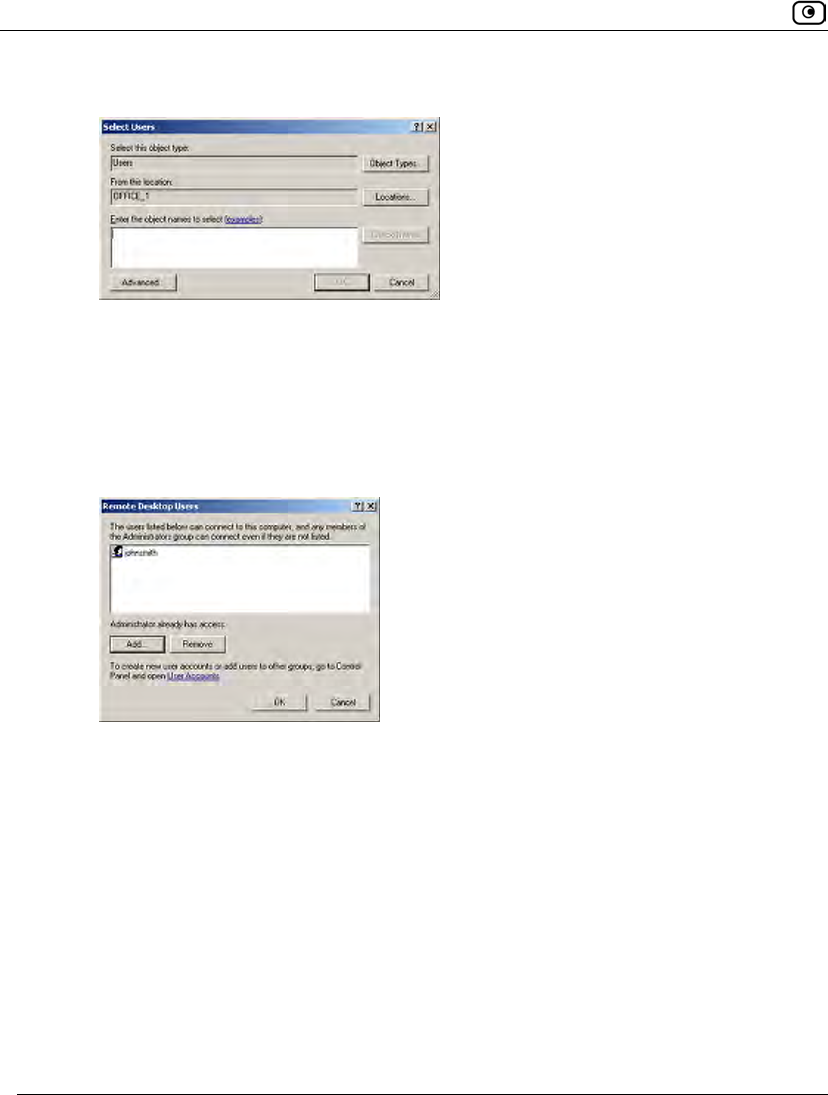
Configuring the Host Computer
668 Check Point Safe@Office User Guide
The Select Users dialog box appears.
b. Type the desired user's username in the text box.
The Check Names button is enabled.
c. Click Check Names.
d. Click OK.
The Remote Desktop Users dialog box reappears with the desired user's username.
8. Click OK.
9. Click OK.
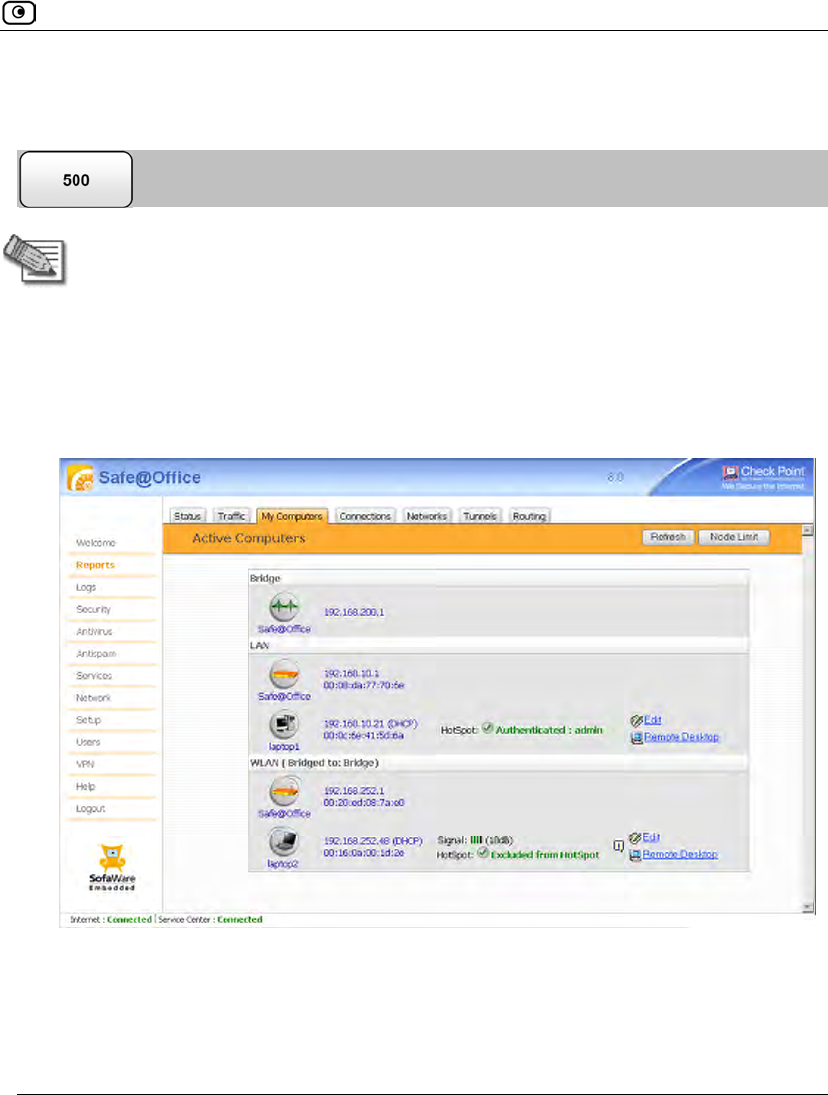
Accessing a Remote Computer's Desktop
Chapter 21: Using Remote Desktop 669
Accessing a Remote Computer's Desktop
Note: The client computer must meet the following requirements:
• Microsoft Internet Explorer 6.0 or later
• A working Internet connection
To access a remote computer's desktop
1. Click Reports in the main menu, and click the My Computers tab.
The My Computers page appears.
2. Next to the desired computer, click Remote Desktop.
The following things happen:
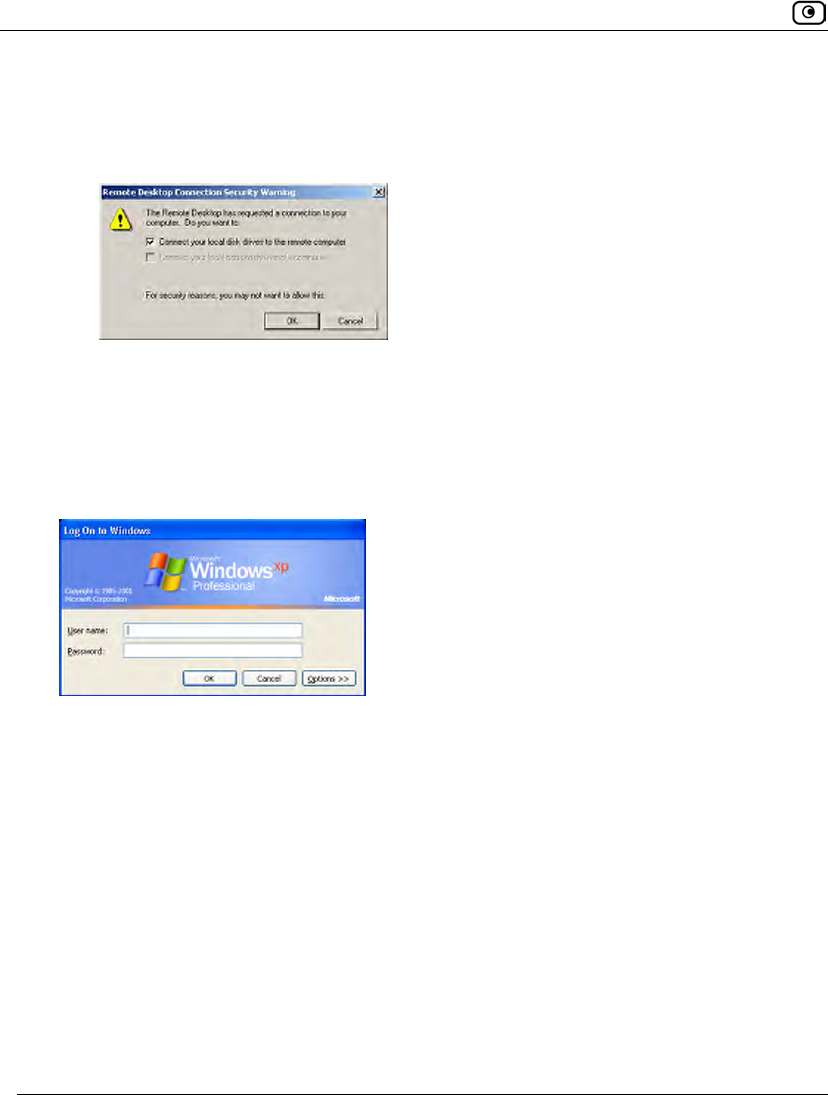
Accessing a Remote Computer's Desktop
670 Check Point Safe@Office User Guide
• If you are prompted to install the Remote Desktop Active X Control, then
install it.
• The Remote Desktop Connection Security Warning dialog box appears.
3. Select the desired connection options.
The available options depend on your Remote Desktop configuration. See
Configuring Remote Desktop on page 663.
4. Click OK.
The Log On to Windows dialog box appears.
5. Type your username and password for the remote computer.
These are the credentials configured for your user account in Enabling the Remote
Desktop Server on page 666.
6. Click OK.
The remote computer's desktop appears onscreen.

Accessing a Remote Computer's Desktop
Chapter 21: Using Remote Desktop 671
You can use the following keyboard shortcuts during the Remote Desktop session:
Table 136: Remote Desktop Keyboard Shortcuts
This shortcut… Does this…
ALT+INSERT Cycles through running programs in the order that they were started
ALT+HOME Displays the Start menu
CTRL+ALT+BREAK Toggles between displaying the session in a window and on the full
screen
CTRL+ALT+END Opens the Windows Security dialog box
Overview
Chapter 22: Controlling the Appliance via the Command Line 673
Chapter 22
This chapter describes various ways of controlling your Safe@Office appliance through
the command line.
This chapter includes the following topics:
Overview ..................................................................................................673
Using the Safe@Office Portal ..................................................................674
Using the Serial Console ..........................................................................676
Configuring SSH......................................................................................679
Overview
Depending on your Safe@Office model, you can control your appliance via the command
line in the following ways:
• Using the Safe@Office Portal's command line interface.
See Using the Safe@Office Portal on page 674.
• Using a console connected to the Safe@Office appliance.
For information, see Using the Serial Console on page 676.
• Using an SSH client.
See Configuring SSH on page 679.
Controlling the Appliance via the
Command Line
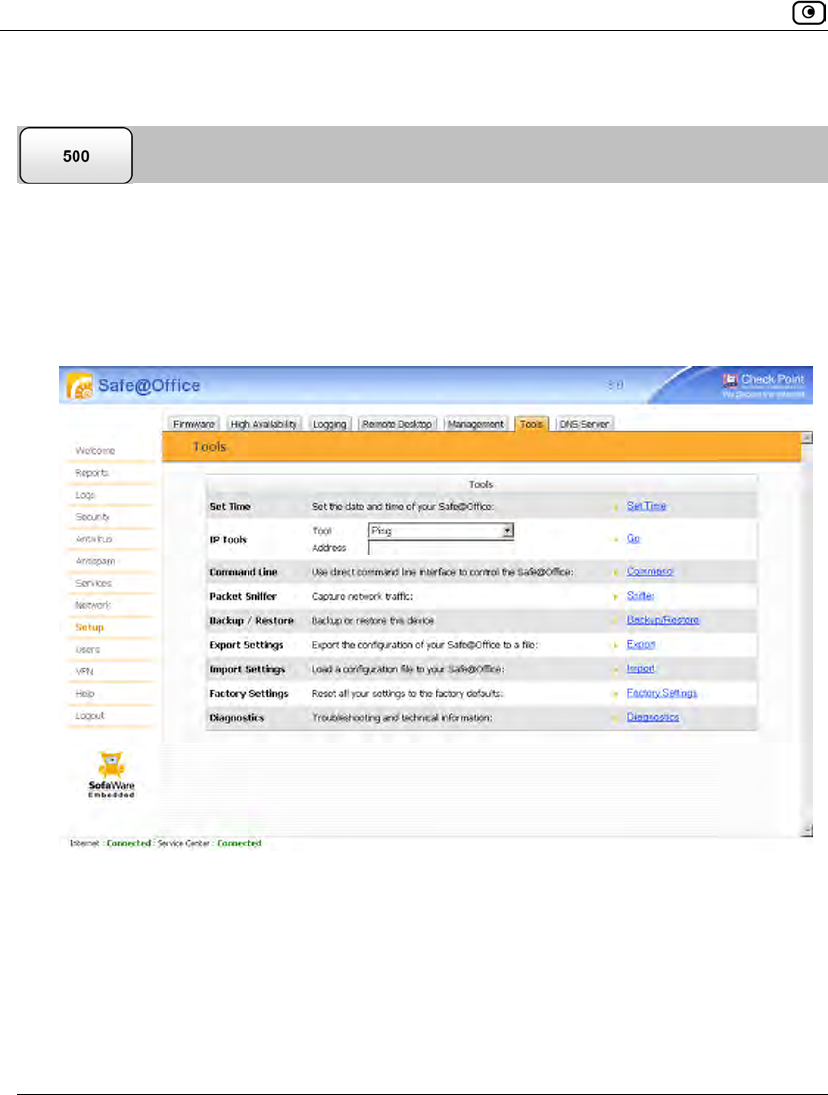
Using the Safe@Office Portal
674 Check Point Safe@Office User Guide
Using the Safe@Office Portal
You can control your appliance via the Safe@Office Portal's command line interface.
To control the appliance via the Safe@Office Portal
1. Click Setup in the main menu, and click the Tools tab.
The Tools page appears.
2. Click Command.
Using the Safe@Office Portal
Chapter 22: Controlling the Appliance via the Command Line 675
The Command Line page appears.
3. In the upper field, type a command.
You can view a list of supported commands using the command help.
For information on all commands, refer to the Embedded NGX CLI Reference Guide.
4. Click Go.
The command is implemented.
Using the Serial Console
676 Check Point Safe@Office User Guide
Using the Serial Console
You can connect a console to the Safe@Office appliance, and use the console to control
the appliance via the command line.
Note: Your terminal emulation software and your Safe@Office appliance's Serial
port must be configured for the same speed.
By default, the appliance's Serial port's speed is 57600 bps. For information on
changing the Serial port's speed, refer to the Embedded NGX CLI Reference
Guide.
To control the appliance via a console
1. Connect the serial console to your Safe@Office appliance's Serial port, using
an RS-232 Null modem cable.
For information on locating the Serial port, see Rear Panel.
2. Click Network in the main menu, and click the Ports tab.
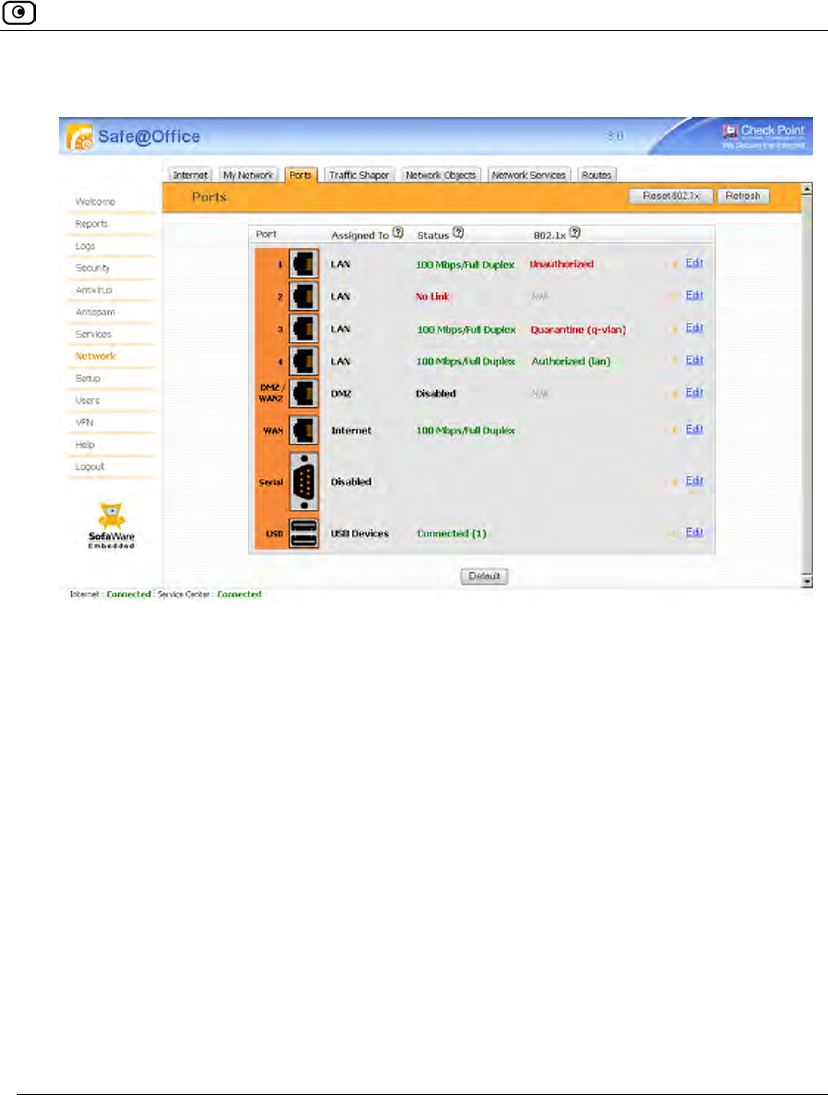
Using the Serial Console
Chapter 22: Controlling the Appliance via the Command Line 677
The Ports page appears.
3. Next to the Serial port, click Edit.
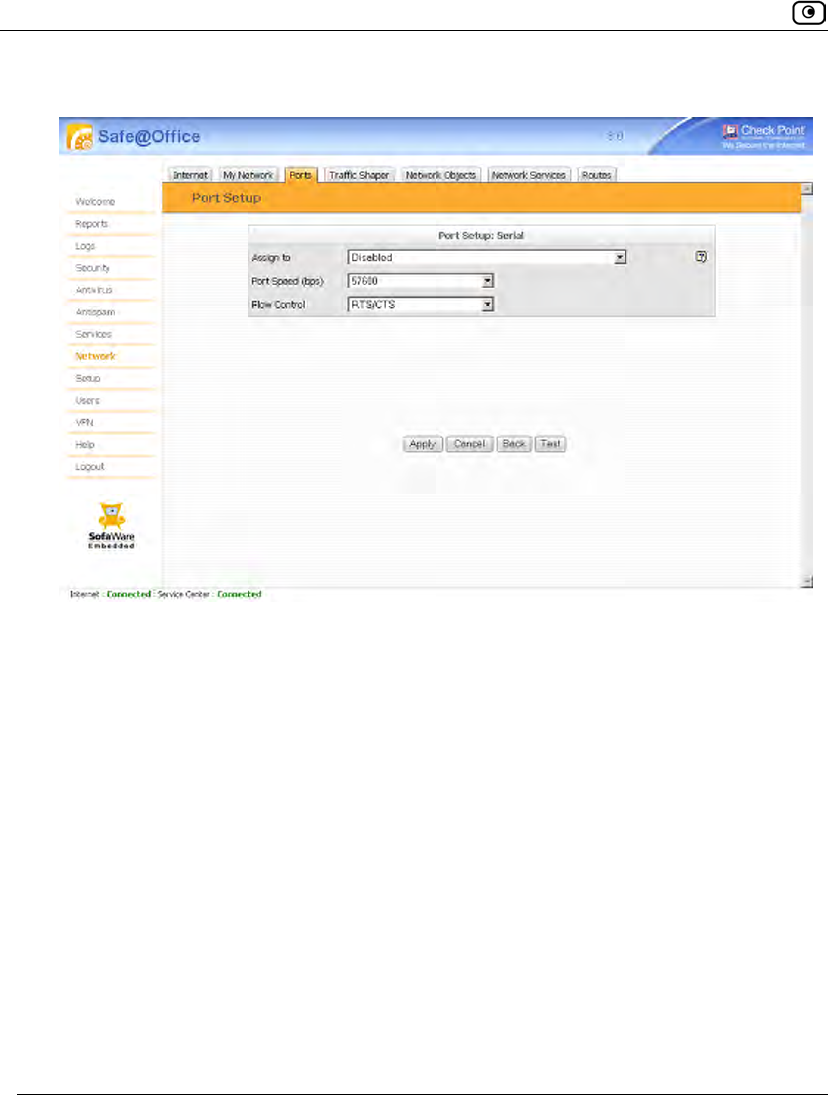
Using the Serial Console
678 Check Point Safe@Office User Guide
The Port Setup page appears.
4. In the Assign to drop-down list, select Console.
5. In the Port Speed drop-down list, select the Serial port's speed (in bits per
second).
The Serial port's speed must match that of the attached serial console. The default
value is 57600.
6. In the Flow Control drop-down list, select the method of flow control supported
by the attached device:
• RTS/CTS. Hardware-based flow control, using the Serial port's RTS/CTS lines.
• XON/XOFF. Software-based flow control, using XON/XOFF characters.
7. Click Apply.
You can now control the Safe@Office appliance from the serial console.
For information on all supported commands, refer to the Embedded NGX CLI
Reference Guide.
Configuring SSH
Chapter 22: Controlling the Appliance via the Command Line 679
Configuring SSH
Safe@Office appliance users can control the appliance via the command line, using the
SSH (Secure Shell) management protocol. You can enable users to do so via the Internet,
by configuring remote SSH access. You can also integrate the Safe@Office appliance with
SSH-based management systems.
Note: The Safe@Office appliance supports SSHv2 clients only. The SSHv1 protocol
contains security vulnerabilities and is not supported.
Note: Configuring SSH is equivalent to creating a simple Allow rule, where the
destination is This Gateway. To create more complex rules for SSH, such as allowing
SSH connections from multiple IP address ranges, define Allow rules for TCP port
22, with the destination This Gateway. For information, see Using Rules on page
360.
To configure SSH
1. Click Setup in the main menu, and click the Management tab.
The Management page appears.
2. Specify from where SSH access should be granted.
Refer to the following table.
Warning: If remote SSH is enabled, your Safe@Office appliance settings can be
changed remotely, so it is especially important to make sure all Safe@Office
appliance users’ passwords are difficult to guess.
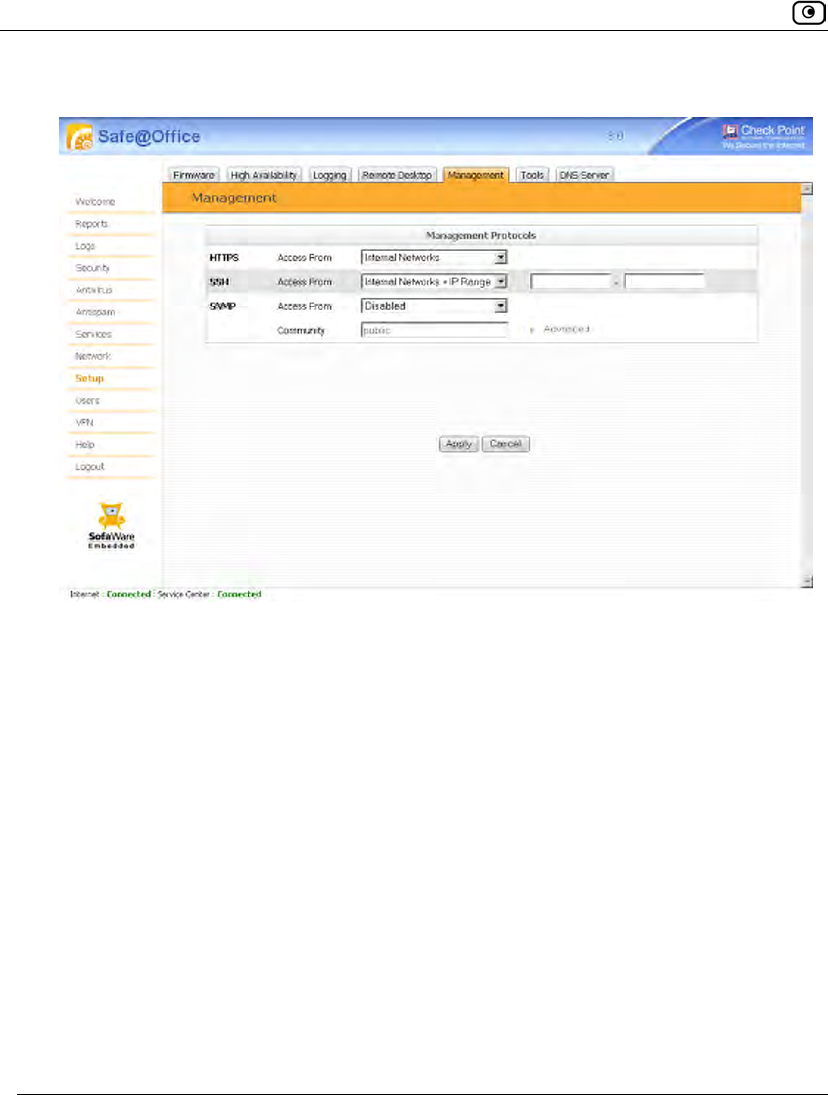
Configuring SSH
680 Check Point Safe@Office User Guide
If you selected Internal Networks + IP Range, additional fields appear.
3. If you selected Internal Networks + IP Range, enter the desired IP address range
in the fields provided.
4. Click Apply.
The SSH configuration is saved. If you configured remote SSH access, you can now
control the Safe@Office appliance from the Internet, using an SSHv2 client.
For information on all supported commands, refer to the Embedded NGX CLI
Reference Guide.

Configuring SSH
Chapter 22: Controlling the Appliance via the Command Line 681
Table 137: SSH Access Options
Select this
option…
To allow access from…
Internal Networks The internal network only.
This disables remote access capability. This is the default.
Internal Networks +
VPN
The internal network and your VPN.
Internal Networks +
IP Range
A particular range of IP addresses.
Additional fields appear, in which you can enter the desired IP address
range.
ANY Any IP address.
Disabled Nowhere.
This disables both local and remote access capability.
This option is relevant to the SNMP protocol only.
Viewing Firmware Status
Chapter 23: Maintenance 683
Chapter 23
This chapter describes the tasks required for maintenance and diagnosis of your
Safe@Office appliance.
This chapter includes the following topics:
Viewing Firmware Status.........................................................................683
Upgrading Your Software Product...........................................................685
Configuring a Gateway Hostname ...........................................................687
Configuring Syslog Logging....................................................................689
Configuring HTTPS .................................................................................691
Configuring SNMP...................................................................................694
Setting the Time on the Appliance ...........................................................699
Using Diagnostic Tools............................................................................702
Backing Up and Restoring the Safe@Office Appliance Configuration ...717
Using Rapid Deployment .........................................................................725
Resetting the Safe@Office Appliance to Defaults ...................................728
Running Diagnostics ................................................................................731
Rebooting the Safe@Office Appliance ....................................................732
Viewing Firmware Status
The firmware is the software program embedded in the Safe@Office appliance.
You can view your current firmware version and additional details.
To view the firmware status
• Click Setup in the main menu, and click the Firmware tab.
Maintenance
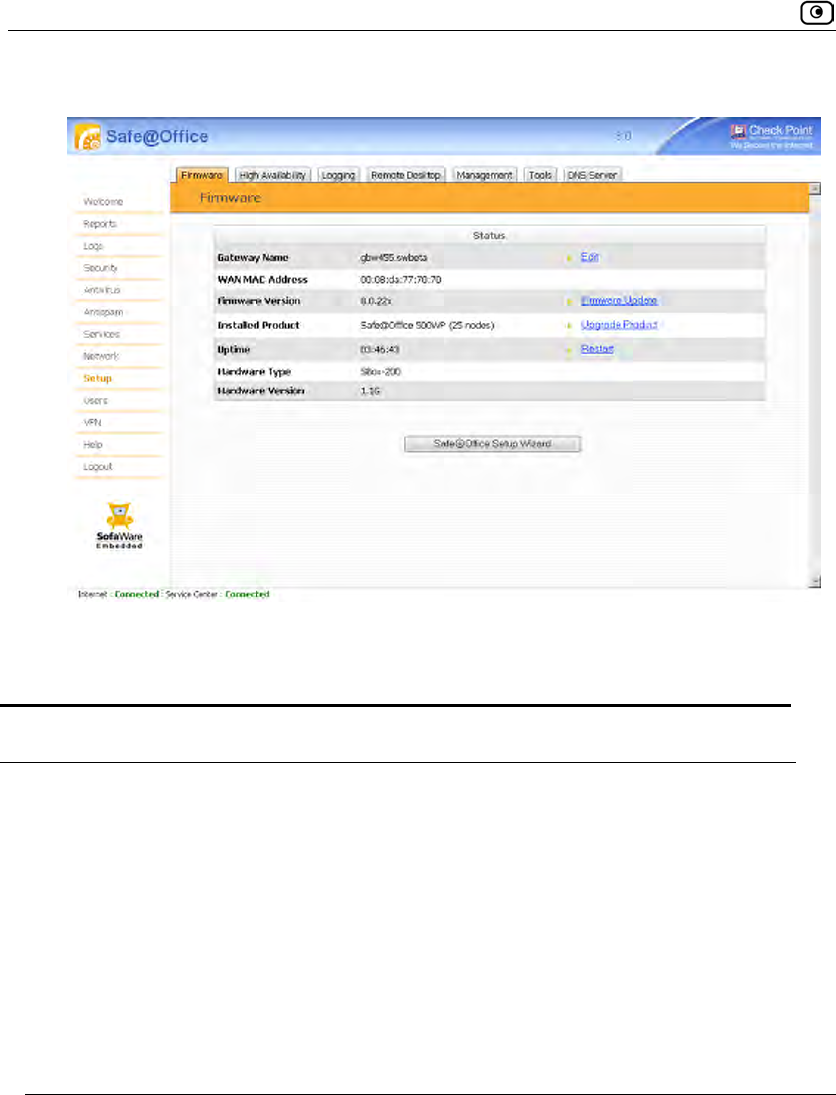
Viewing Firmware Status
684 Check Point Safe@Office User Guide
The Firmware page appears.
The Firmware page displays the following information:
Table 138: Firmware Status Fields
This field… Displays… For example…
WAN MAC Address The MAC address used for
the Internet connection
00:80:11:22:33:44
Firmware Version The current version of the
firmware
7.5
Installed Product The licensed software and
the number of allowed
nodes
Safe@Office 500 (unlimited nodes)
Upgrading Your Software Product
Chapter 23: Maintenance 685
This field… Displays… For example…
Uptime The time that elapsed from
the moment the unit was
turned on
01:21:15
Hardware Type The type of the current
Safe@Office appliance
hardware
SBox-200
Hardware Version The current hardware
version of the Safe@Office
appliance
1.0
Upgrading Your Software Product
You can upgrade your Safe@Office 500 appliance by adding the Safe@Office 500 Power
Pack. After purchasing the Power Pack, you will receive a new Product Key that enables
you to use the Power Pack on the same Safe@Office appliance you have today. There is no
need to replace your hardware. You can also purchase node upgrades, as needed.
Note: To purchase the Power Pack or node upgrades, contact your Safe@Office
appliance provider. Alternatively, you can click Upgrades & Services in the Welcome
page to view and purchase available upgrades.
To upgrade your product, you must install the new Product Key.
To install a Product Key
1. Click Setup in the main menu, and click the Firmware tab.
The Firmware page appears.
2. Click Upgrade Product.
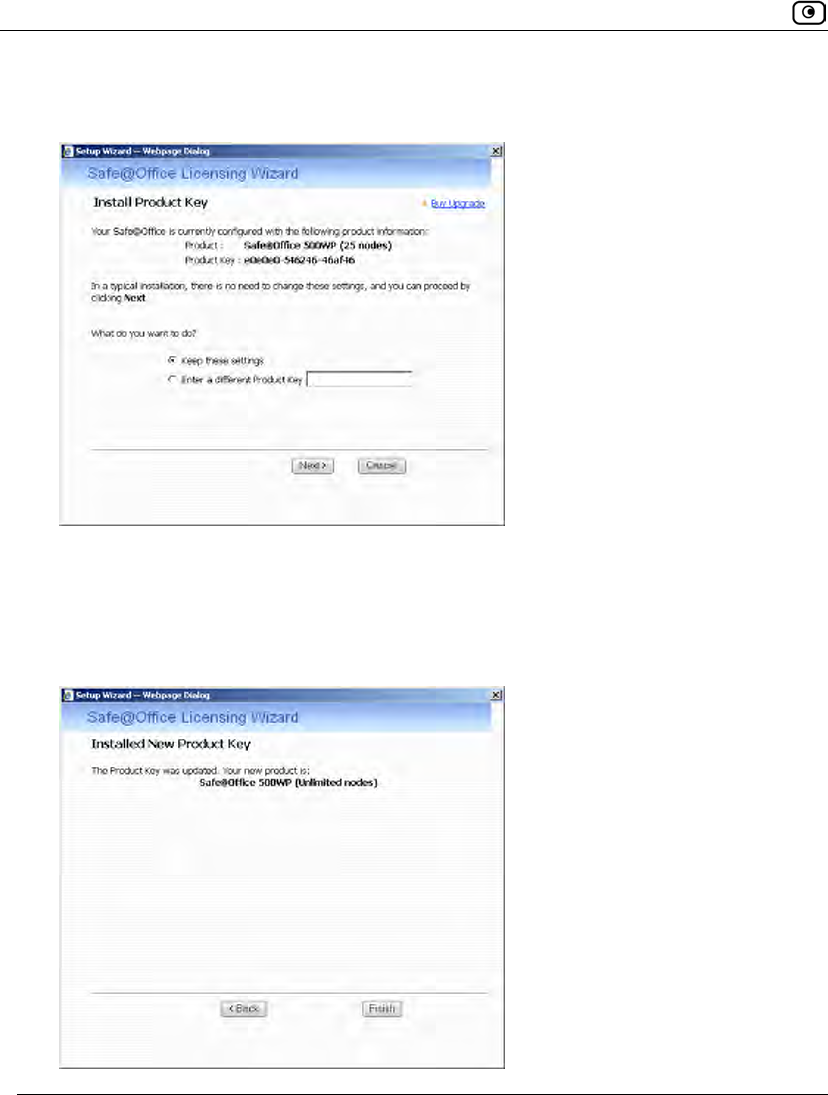
Upgrading Your Software Product
686 Check Point Safe@Office User Guide
The Safe@Office Licensing Wizard opens, with the Install Product Key dialog box
displayed.
3. Click Enter a different Product Key.
4. In the Product Key field, enter the new Product Key.
5. Click Next.
The Installed New Product Key dialog box appears.
Configuring a Gateway Hostname
Chapter 23: Maintenance 687
6. Click Finish.
Configuring a Gateway Hostname
You can define a gateway hostname for the Safe@Office appliance. The gateway
hostname is used to identify the Safe@Office appliance and appears in the following
places:
• The Safe@Office Portal’s title bar
• The Safe@Office appliance's SNMP hostname
• Syslog messages sent by the Safe@Office appliance
• The command line prompt
By default, the Safe@Office appliance's MAC address is used as the gateway hostname.
Note: Configuring the gateway hostname is only available if the Safe@Office is not
subscribed to the Remote Management service. When remotely managed, the
gateway hostname is set by the Service Center.
To configure the gateway hostname
1. Click Setup in the main menu, and click the Firmware tab.
The Firmware page appears.
2. In the Gateway Name row, click Edit.
Configuring a Gateway Hostname
688 Check Point Safe@Office User Guide
The Gateway Name page appears.
3. In the Gateway Name field, type the desired hostname.
4. To reset the gateway hostname to the default value (the appliance's MAC
address), click Default.
5. Click Apply.
Configuring Syslog Logging
Chapter 23: Maintenance 689
Configuring Syslog Logging
You can configure the Safe@Office appliance to send event logs to a Syslog server
residing in your internal network or on the Internet. The logs detail the date and the time
each event occurred. If the event is a communication attempt that was rejected by the
firewall, the event details include the source and destination IP address, the destination
port, and the protocol used for the communication attempt (for example, TCP or UDP).
This same information is also available in the Event Log page (see Viewing the Event Log
on page 339). However, while the Event Log can display hundreds of logs, a Syslog server
can store an unlimited number of logs. Furthermore, Syslog servers can provide useful
tools for managing your logs.
Note: Kiwi Syslog Daemon is freeware and can be downloaded from
http://www.kiwisyslog.com. For technical support, contact Kiwi Enterprises.
To configure Syslog logging
1. Click Setup in the main menu, and click the Logging tab.
Configuring Syslog Logging
690 Check Point Safe@Office User Guide
The Logging page appears.
2. Complete the fields using the information in the following table.
3. Click Apply.
Table 139: Logging Page Fields
In this field… Do this…
Syslog Server Type the IP address of the computer that will run the Syslog service
(one of your network computers), or click This Computer to allow your
computer to host the service.
Clear Click to clear the Syslog Server field.
Syslog Port Type the port number of the Syslog server.
Default Click to reset the Syslog Port field to the default (port 514 UDP).
Configuring HTTPS
Chapter 23: Maintenance 691
Configuring HTTPS
You can enable Safe@Office appliance users to access the Safe@Office Portal from the
Internet. To do so, you must first configure HTTPS.
Note: Configuring HTTPS is equivalent to creating a simple Allow rule, where the
destination is This Gateway. To create more complex rules for HTTPS, such as
allowing HTTPS connections from multiple IP address ranges, define Allow rules for
TCP port 443, with the destination This Gateway. For information, see Using Rules
on page 360.
To configure HTTPS
1. Click Setup in the main menu, and click the Management tab.
The Management page appears.
Configuring HTTPS
692 Check Point Safe@Office User Guide
2. Specify from where HTTPS access to the Safe@Office Portal should be
granted.
See Access Options on page 693 for information.
Warning: If remote HTTPS is enabled, your Safe@Office appliance settings can be
changed remotely, so it is especially important to make sure all Safe@Office
appliance users’ passwords are difficult to guess.
Note: You can use HTTPS to access the Safe@Office Portal from your internal
network, by surfing to https://my.firewall.
If you selected Internal Networks + IP Range, additional fields appear.
3. If you selected Internal Networks + IP Range, enter the desired IP address range
in the fields provided.
4. Click Apply.
The HTTPS configuration is saved. If you configured remote HTTPS, you can now
access the Safe@Office Portal through the Internet, using the procedure Accessing the
Safe@Office Portal Remotely on page 77.

Configuring HTTPS
Chapter 23: Maintenance 693
Table 140: Access Options
Select this
option…
To allow access from…
Internal Networks The internal network only.
This disables remote access capability. This is the default.
Internal Networks +
VPN
The internal network and your VPN.
Internal Networks +
IP Range
A particular range of IP addresses.
Additional fields appear, in which you can enter the desired IP address
range.
ANY Any IP address.
Disabled Nowhere.
This disables both local and remote access capability.
This option is relevant to the SNMP protocol only.
Configuring SNMP
694 Check Point Safe@Office User Guide
Configuring SNMP
The Safe@Office appliance users can monitor the Safe@Office appliance, using tools that
support SNMP (Simple Network Management Protocol). You can enable users to do so via
the Internet, by configuring remote SNMP access.
The Safe@Office appliance supports the following SNMP MIBs:
• SNMPv2-MIB
• RFC1213-MIB
• IF-MIB
• IP-MIB
All SNMP access is read-only.
Note: Configuring SNMP is equivalent to creating a simple Allow rule, where the
destination is This Gateway. To create more complex rules for SNMP, such as
allowing SNMP connections from multiple IP address ranges, define Allow rules for
the relevant port (by default, TCP port 161), with the destination This Gateway. For
information, see Using Rules on page 360.
To configure SNMP
1. Click Setup in the main menu, and click the Management tab.
The Management page appears.
2. Specify from where SNMP access should be granted.
See Access Options on page 693 for information.
If you selected Internal Networks + IP Range, additional fields appear.
Configuring SNMP
Chapter 23: Maintenance 695
The Community field and the Advanced link are enabled.
3. If you selected Internal Networks + IP Range, enter the desired IP address range
in the fields provided.
4. In the Community field, type the name of the SNMP community string.
SNMP clients uses the SNMP community string as a password, when connecting to
the Safe@Office appliance.
The default value is "public". It is recommended to change this string.
5. To configure advanced SNMP settings, do the following:
a. Click Advanced.
Configuring SNMP
696 Check Point Safe@Office User Guide
The SNMP Configuration page appears.
b. Complete the fields using the following table.
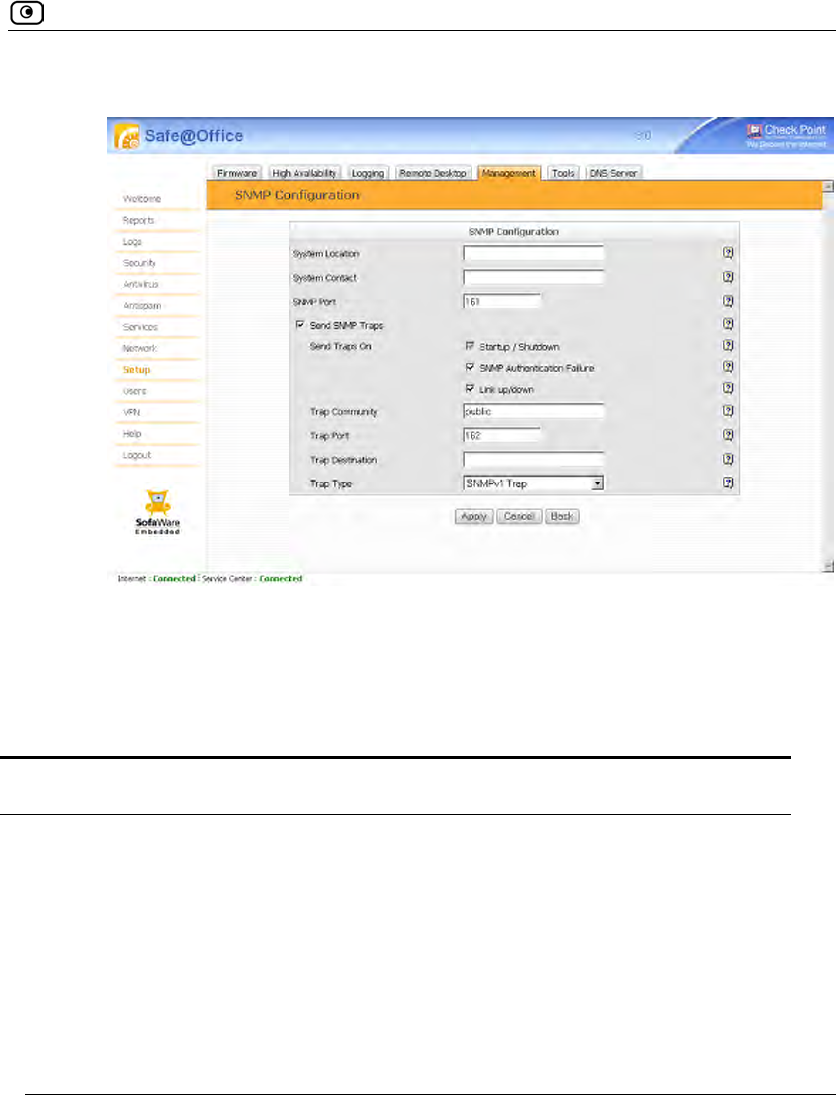
Configuring SNMP
Chapter 23: Maintenance 697
If you selected the Send SNMP Traps check box, additional fields appear.
6. Click Apply.
The SNMP configuration is saved.
7. Configure the SNMP clients with the SNMP community string.
Table 141: Advanced SNMP Settings
In this field... Do this…
System Location Type a description of the appliance's location.
This information will be visible to SNMP clients, and is useful for
administrative purposes.
System Contact Type the name of the contact person.
This information will be visible to SNMP clients, and is useful for
administrative purposes.

Configuring SNMP
698 Check Point Safe@Office User Guide
In this field... Do this…
SNMP Port Type the port to use for SNMP.
The default port is 161.
Send SNMP Traps Select this option to enable sending SNMP traps. An SNMP trap is a
notification sent from one application to another.
Send Traps On:
Startup / Shutdown
Indicates that SNMP traps will automatically be sent upon
startup/shutdown events.
This option is always selected.
Send Traps On:
SNMP Authentication
Failure
Select this option to to send an SNMP trap on each SNMP
authentication failure event.
Send Traps On: Link
up/down
Select this option to send an SNMP trap on each link up/down event.
Trap Community Type the SNMP community string of the trap receiver.
The default value is public.
Trap Port Type The UDP port of the trap receiver.
The default value is 162.
Trap Destination Type the IP address or DNS name of the SNMP trap receiver agent.
Trap Type Select the type of SNMP traps to use.
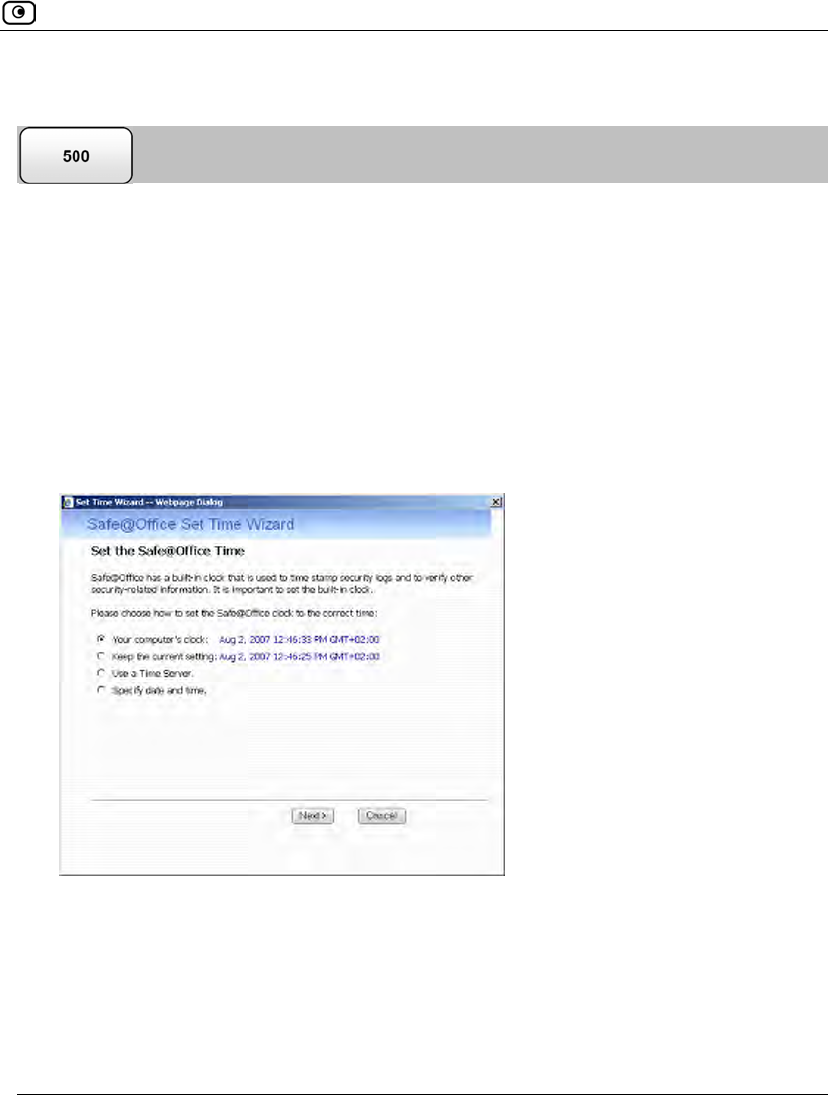
Setting the Time on the Appliance
Chapter 23: Maintenance 699
Setting the Time on the Appliance
You set the time displayed in the Safe@Office Portal during initial appliance setup. If
desired, you can change the date and time using the procedure below.
To set the time
1. Click Setup in the main menu, and click the Tools tab.
The Tools page appears.
2. Click Set Time.
The Safe@Office Set Time Wizard opens displaying the Set the Safe@Office Time dialog
box.
3. Complete the fields using the information in Set Time Wizard Fields on page
701.
4. Click Next.
The following things happen in the order below:
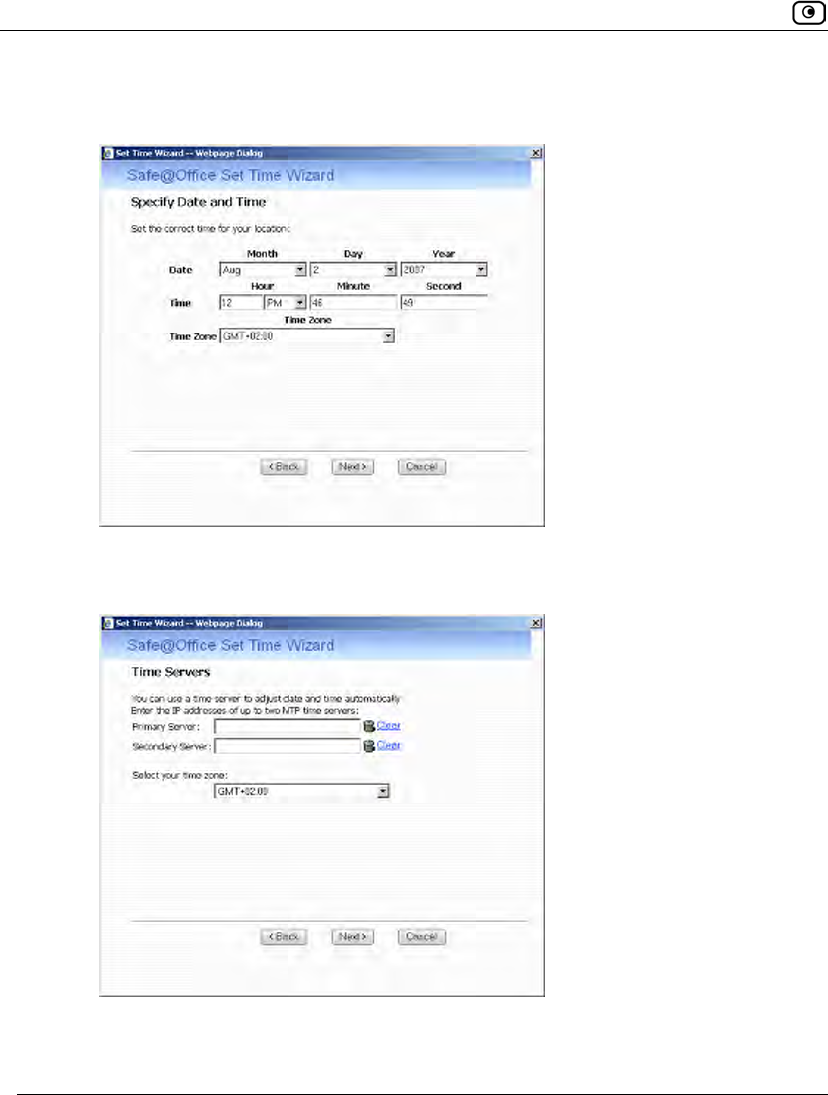
Setting the Time on the Appliance
700 Check Point Safe@Office User Guide
• If you selected Specify date and time, the Specify Date and Time dialog box
appears.
Set the date, time, and time zone in the fields provided, then click Next.
• If you selected Use a Time Server, the Time Servers dialog box appears.
Complete the fields using the information in Time Servers Fields on page 702,
then click Next.
Setting the Time on the Appliance
Chapter 23: Maintenance 701
• The Date and Time Updated screen appears.
5. Click Finish.
Table 142: Set Time Wizard Fields
Select this option… To do the following…
Your computer's clock Set the appliance time to your computer’s system time.
Your computer’s system time is displayed to the right of this
option.
Keep the current setting Do not change the appliance’s time.
The current appliance time is displayed to the right of this option.
Use a Time Server Synchronize the appliance time with a Network Time Protocol
(NTP) server.
Specify date and time Set the appliance to a specific date and time.
Using Diagnostic Tools
702 Check Point Safe@Office User Guide
Table 143: Time Servers Fields
In this field… Do this…
Primary Server Type the IP address of the Primary NTP server.
Secondary Server Type the IP address of the Secondary NTP server.
This field is optional.
Clear Clear the field.
Select your time zone Select the time zone in which you are located.
Using Diagnostic Tools
The Safe@Office appliance is equipped with a set of diagnostic tools that are useful for
troubleshooting Internet connectivity.
Table 144: Diagnostic Tools
Use this
tool…
To do this… For information, see...
Ping Check that a specific IP address or DNS
name can be reached via the Internet.
Using IP Tools on page 703
Traceroute Display a list of all routers used to
connect from the Safe@Office appliance
to a specific IP address or DNS name.
Using IP Tools on page 703
Using Diagnostic Tools
Chapter 23: Maintenance 703
Use this
tool…
To do this… For information, see...
WHOIS Display the name and contact information
of the entity to which a specific IP address
or DNS name is registered. This
information is useful in tracking down
hackers.
Using IP Tools on page 703
Packet Sniffer Capture network traffic. This information is
useful troubleshooting network problems. Using Packet Sniffer on page
706
Using IP Tools
To use an IP tool
1. Click Setup in the main menu, and click the Tools tab.
The Tools page appears.
2. In the Tool drop-down list, select the desired tool.
3. In the Address field, type the IP address or DNS name for which to run the
tool.
4. Click Go.
• If you selected Ping, the following things happen:
The Safe@Office appliance sends packets to the specified the IP address or DNS
name.
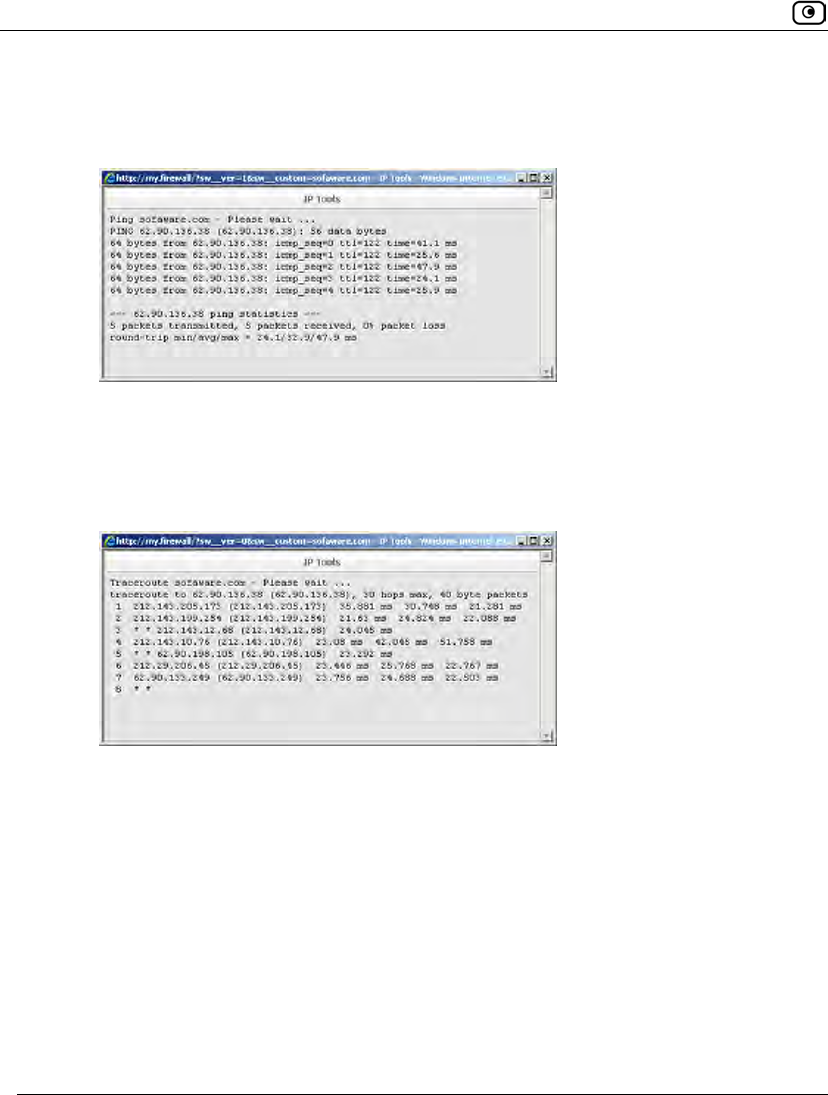
Using Diagnostic Tools
704 Check Point Safe@Office User Guide
The IP Tools window opens and displays the percentage of packet loss and the
amount of time it took each packet to reach the specified host and return (round-
trip) in milliseconds.
• If you selected Traceroute, the following things happen:
The Safe@Office appliance connects to the specified IP address or DNS name.
The IP Tools window opens and displays a list of routers used to make the
connection.
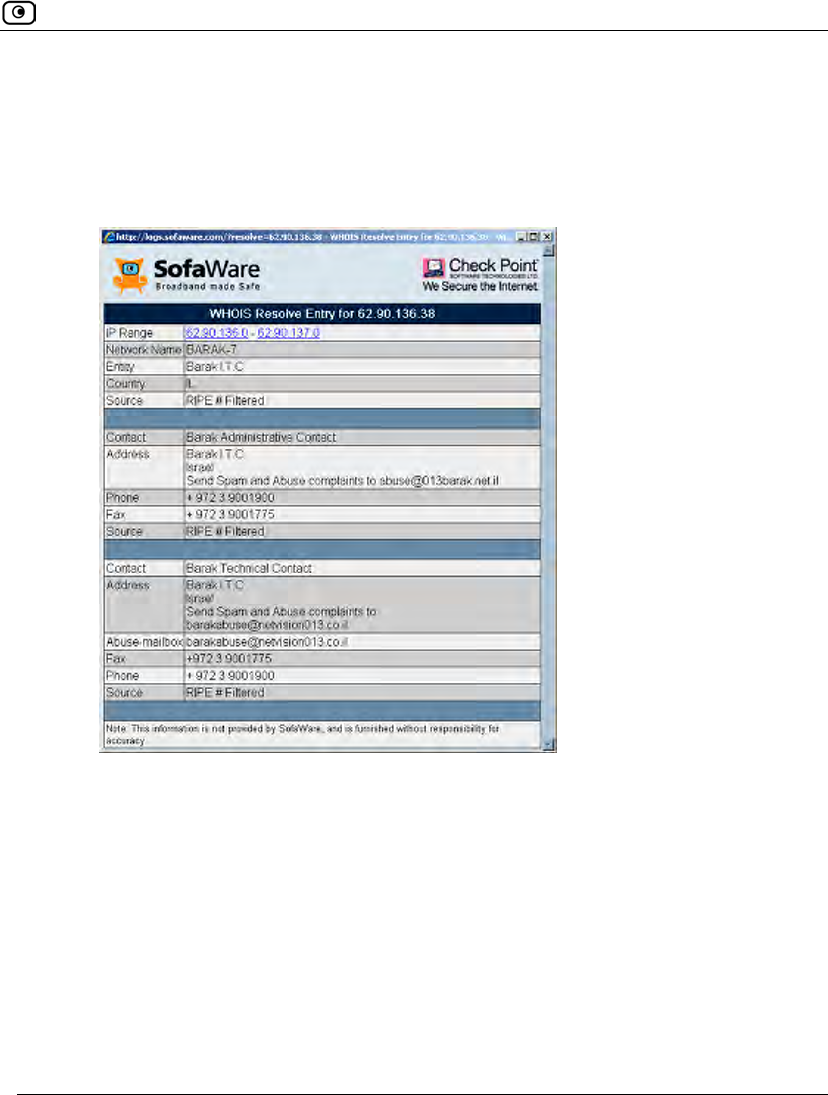
Using Diagnostic Tools
Chapter 23: Maintenance 705
• If you selected WHOIS, the following things happen:
The Safe@Office appliance queries the Internet WHOIS server.
A window displays the name of the entity to which the IP address or DNS name is
registered and their contact information.
Using Diagnostic Tools
706 Check Point Safe@Office User Guide
Using Packet Sniffer
The Safe@Office appliance includes the Packet Sniffer tool, which enables you to capture
packets from any internal network or Safe@Office port. This is useful for troubleshooting
network problems and for collecting data about network behavior.
If desired, you can configure Packet Sniffer to capture each packet twice: once before
firewall processing and once after firewall processing. This allows you to observe exactly
what the Safe@Office firewall does to your packets.
The Safe@Office appliance saves the captured packets to a file on your computer. You can
use a free protocol analyzer, such as Ethereal or Wireshark, to analyze the file, or you can
send it to technical support. Wireshark runs on all popular computing platforms and can be
downloaded from http://www.wireshark.org. Ethereal can be downloaded from
http://www.ethereal.com.
Note: If you enabled the Packet Sniffer's Firewall Monitor option, and you would like to
view the results in Ethereal/Wireshark, you must do the following: open the capture
file, click Edit > Preferences, in the left pane click Protocols > Ethernet, and select the
Attempt to interpret as Firewall-1 monitor file check box. The capture file will display the
interface name on which the packet was captured, and the packet’s processing
direction will be indicated by i (input) or o (output).
To use Packet Sniffer
1. Click Setup in the main menu, and click the Tools tab.
The Tools page appears.
2. Click Sniffer.
Using Diagnostic Tools
Chapter 23: Maintenance 707
The Packet Sniffer window opens.
3. Complete the fields using the information in the following table.
4. Click Start.
The Packet Sniffer window displays the name of the interface, the number of packets
collected, and the percentage of storage space remaining on the appliance for storing
the packets.
5. Click Stop to stop collecting packets.
A standard File Download dialog box appears.
6. Click Save.
The Save As dialog box appears.
7. Browse to a destination directory of your choice.
8. Type a name for the configuration file and click Save.
The *.cap file is created and saved to the specified directory.
9. Click Cancel to close the Packet Sniffer window.

Using Diagnostic Tools
708 Check Point Safe@Office User Guide
Table 145: Packet Sniffer Fields
In this field… Do this…
Interface Select the interface from which to collect packets.
The list includes the primary Internet connection, the Safe@Office
appliance ports, and all defined networks.
Filter String Type the filter string to use for filtering the captured packets. Only
packets that match the filter condition will be saved.
For a list of basic filter strings elements, see Filter String Syntax on
page 709.
For detailed information on filter syntax, go to
http://www.tcpdump.org/tcpdump_man.html.
Note: Do not enclose the filter string in quotation marks.
If you do not specify a filter string, Packet Sniffer will save all packets on
the selected interface.
Capture only traffic
to/from this gateway
Select this option to capture incoming and outgoing packets for this
gateway only.
If this option is not selected, Packet Sniffer will collect packets for all
traffic on the interface.
Firewall Monitor Select this option to capture each packet both before and after firewall
processing, and to record the name of the interface on which the packet
was captured.

Using Diagnostic Tools
Chapter 23: Maintenance 709
Filter String Syntax
The following represents a list of basic filter string elements:
• and on page 709
• dst on page 710
• dst port on page 710
• ether proto on page 711
• host on page 712
• not on page 712
• or on page 713
• port on page 713
• src on page 714
• src port on page 714
• tcp on page 715
• udp on page 716
For detailed information on filter syntax, refer to http://www.tcpdump.org.
and
PURPOSE
The and element is used to concatenate filter string elements. The filtered packets must
match all concatenated filter string elements.
SYNTAX
element and element [and element...]
element && element [&& element...]
PARAMETERS
element String. A filter string element.

Using Diagnostic Tools
710 Check Point Safe@Office User Guide
EXAMPLE
The following filter string saves packets that both originate from IP address is
192.168.10.1 and are destined for port 80:
src 192.168.10.1 and dst port 80
dst
PURPOSE
The dst element captures all packets with a specific destination.
SYNTAX
dst destination
PARAMETERS
destination IP Address or String. The computer to which the packet is
sent. This can be the following:
• An IP address
• A host name
EXAMPLE
The following filter string saves packets that are destined for the IP address 192.168.10.1:
dst 192.168.10.1
dst port
PURPOSE
The dst port element captures all packets destined for a specific port.
SYNTAX
dst port port
Note: This element can be prepended by tcp or udp. For information, see tcp on
page 715 and udp on page 716.

Using Diagnostic Tools
Chapter 23: Maintenance 711
PARAMETERS
port Integer. The port to which the packet is sent.
EXAMPLE
The following filter string saves packets that are destined for port 80:
dst port 80
ether proto
PURPOSE
The ether proto element is used to capture packets of a specific ether protocol type.
SYNTAX
ether proto \protocol
PARAMETERS
protocol String. The protocol type of the packet.
This can be the following: ip, ip6, arp, rarp,
atalk, aarp, dec net, sca, lat,
mopdl, moprc, iso, stp, ipx, or
netbeui.
EXAMPLE
The following filter string saves ARP packets:
ether proto arp

Using Diagnostic Tools
712 Check Point Safe@Office User Guide
host
PURPOSE
The host element captures all incoming and outgoing packets for a specific computer.
SYNTAX
host host
PARAMETERS
host IP Address or String. The computer to/from which the packet
is sent. This can be the following:
• An IP address
• A host name
EXAMPLE
The following filter string saves all packets that either originated from IP address
192.168.10.1, or are destined for that same IP address:
host 192.168.10.1
not
PURPOSE
The not element is used to negate filter string elements.
SYNTAX
not element
! element
PARAMETERS
element String. A filter string element.
EXAMPLE
The following filter string saves packets that are not destined for port 80:
not dst port 80
Using Diagnostic Tools
Chapter 23: Maintenance 713
or
PURPOSE
The or element is used to alternate between string elements. The filtered packets must
match at least one of the filter string elements.
SYNTAX
element or element [or element...]
element || element [|| element...]
PARAMETERS
element String. A filter string element.
EXAMPLE
The following filter string saves packets that either originate from IP address 192.168.10.1
or IP address 192.168.10.10:
src 192.168.10.1 or src 192.168.10.10
port
PURPOSE
The port element captures all packets originating from or destined for a specific port.
SYNTAX
port port
Note: This element can be prepended by tcp or udp. For information, see tcp on
page 715 and udp on page 716.
PARAMETERS
port Integer. The port from/to which the packet is sent.

Using Diagnostic Tools
714 Check Point Safe@Office User Guide
EXAMPLE
The following filter string saves all packets that either originated from port 80, or are
destined for port 80:
port 80
src
PURPOSE
The src element captures all packets with a specific source.
SYNTAX
src source
PARAMETERS
source IP Address or String. The computer from which the packet is
sent. This can be the following:
• An IP address
• A host name
EXAMPLE
The following filter string saves packets that originated from IP address 192.168.10.1:
src 192.168.10.1
src port
PURPOSE
The src port element captures all packets originating from a specific port.
SYNTAX
src port port
Note: This element can be prepended by tcp or udp. For information, see tcp on
page 715 and udp on page 716.
Using Diagnostic Tools
Chapter 23: Maintenance 715
PARAMETERS
port Integer. The port from which the packet is sent.
EXAMPLE
The following filter string saves packets that originated from port 80:
src port 80
tcp
PURPOSE
The tcp element captures all TCP packets. This element can be prepended to port-related
elements.
Note: When not prepended to other elements, the tcp element is the equivalent of
ip proto tcp.
SYNTAX
tcp
tcp element
PARAMETERS
element String. A port-related filter string element that should be
restricted to saving only TCP packets. This can be the
following:
• dst port - Capture all TCP packets destined
for a specific port.
• port - Capture all TCP packets originating from
or destined for a specific port.
• src port - Capture all TCP packets originating
from a specific port.
Using Diagnostic Tools
716 Check Point Safe@Office User Guide
EXAMPLE 1
The following filter string captures all TCP packets:
tcp
EXAMPLE 2
The following filter string captures all TCP packets destined for port 80:
tcp dst port 80
udp
PURPOSE
The udp element captures all UDP packets. This element can be prepended to port-related
elements.
Note: When not prepended to other elements, the udp element is the equivalent of
ip proto udp.
SYNTAX
udp
udp element
PARAMETERS
element String. A port-related filter string element that should be
restricted to saving only UDP packets. This can be the
following:
• dst port - Capture all UDP packets destined
for a specific port.
• port - Captures all UDP packets originating
from or destined for a specific port.
• src port - Capture all UDP packets
originating from a specific port.
Backing Up and Restoring the Safe@Office Appliance Configuration
Chapter 23: Maintenance 717
EXAMPLE 1
The following filter string captures all UDP packets:
udp
EXAMPLE 2
The following filter string captures all UDP packets destined for port 80:
udp dst port 80
Backing Up and Restoring the Safe@Office
Appliance Configuration
The Safe@Office appliance provides the following ways of backing up and restoring its
configuration:
• Backup and restore on your computer
You can export the Safe@Office appliance configuration to a *.cfg file on your
computer, and use this file to backup and restore Safe@Office appliance settings, as
needed.
The file includes all of your settings, except for the security policy and certificate.
• Backup and restore on a USB flash drive
You can back up the appliance configuration and device certificate to a USB flash
drive. You can then restore the Safe@Office appliance settings from the USB flash
drive as needed.
This method requires a USB port on your appliance.
Note: If both cases, the configuration file is saved as a textual CLI script. If desired,
you can edit the file. For a full explanation of the CLI script format and the
supported CLI commands, see the Embedded NGX CLI Reference Guide.

Backing Up and Restoring the Safe@Office Appliance Configuration
718 Check Point Safe@Office User Guide
Backing Up the Appliance Configuration
Exporting the Appliance Configuration to Your Computer
To export the Safe@Office appliance configuration to your computer
1. Click Setup in the main menu, and click the Tools tab.
The Tools page appears.
2. Click Export.
A standard File Download dialog box appears.
3. Click Save.
The Save As dialog box appears.
4. Browse to a destination directory of your choice.
5. Type a name for the configuration file and click Save.
The *.cfg configuration file is created and saved to the specified directory.
You can now import the configuration file as needed. See Importing the Appliance
Configuration from Your Computer on page 721.
Backing Up and Restoring the Safe@Office Appliance Configuration
Chapter 23: Maintenance 719
Backing Up the Appliance Configuration to a USB Flash Drive
The USB flash drive must have at least 64MB of free space.
Note: Some USB flash drives may not be supported by the appliance.
To backup the appliance configuration to a USB flash drive
1. Connect a USB flash drive to one of your Safe@Office appliance's USB ports.
For information on locating the USB ports, see Introduction on page 1.
2. Click Setup in the main menu, and click the Tools tab.
The Tools page appears.
3. Click Backup/Restore.
The Backup/Restore Wizard opens displaying the Step 1: Select Action dialog box.
4. Click Backup this gateway to a storage device.
5. Click Next.
Backing Up and Restoring the Safe@Office Appliance Configuration
720 Check Point Safe@Office User Guide
The Safe@Office appliance creates the folder <MACAddress> on the USB flash
drive, where <MACAddress> is the appliance's MAC address, and writes the
following files to this folder:
• embeddedngx.cfg
• embeddedngx.p12
The Step 2: Backup Complete screen appears.
6. Click Finish.
You can now restore the configuration from the USB flash drive as needed. See
Restoring the Appliance Configuration from a USB Flash Drive on page 723.
Backing Up and Restoring the Safe@Office Appliance Configuration
Chapter 23: Maintenance 721
Restoring the Appliance Configuration
Importing the Appliance Configuration from Your Computer
To import the appliance configuration from your computer
1. Click Setup in the main menu, and click the Tools tab.
The Tools page appears.
2. Click Import.
The Import Settings page appears.
3. Do one of the following:
• In the Import Settings field, type the full path to the configuration file.
Or
Backing Up and Restoring the Safe@Office Appliance Configuration
722 Check Point Safe@Office User Guide
• Click Browse, and browse to the configuration file.
4. Click Upload.
A confirmation message appears.
5. Click OK.
The Safe@Office appliance settings are imported.
The Import Settings page displays the configuration file's content and the result of
implementing each configuration command.
Note: If the appliance's IP address changed as a result of the configuration import,
your computer may be disconnected from the network; therefore you may not be
able to see the results.

Backing Up and Restoring the Safe@Office Appliance Configuration
Chapter 23: Maintenance 723
Restoring the Appliance Configuration from a USB Flash Drive
To restore the appliance configuration from a USB flash drive
1. Connect a USB flash drive to one of your Safe@Office appliance's USB ports.
For information on locating the USB ports, see Introduction on page 1.
2. Click Setup in the main menu, and click the Tools tab.
The Tools page appears.
3. Click Backup/Restore.
The Backup/Restore Wizard opens displaying the Step 1: Select Action dialog box.
4. Click Restore this gateway from a storage device.
5. Click Next.
The Safe@Office appliance is restored from the <MACAddress> folder on the USB
flash drive, where <MACAddress> is the appliance's MAC address. This may take
some time.
Backing Up and Restoring the Safe@Office Appliance Configuration
724 Check Point Safe@Office User Guide
The Step 2: Restore Complete screen appears displaying the configuration file's content
and the result of implementing each configuration command.
Note: If the appliance's IP address changed as a result of the configuration import,
your computer may be disconnected from the network; therefore you may not be
able to see the results.
6. Click Finish.
Using Rapid Deployment
Chapter 23: Maintenance 725
Using Rapid Deployment
Safe@Office appliances are shipped with a specific firmware and group of settings that
represent the appliance's default state. When installing a new appliance, you can configure
different settings and install new firmware versions as needed; however, this can be time-
consuming. Rapid deployment avoids this hassle, by allowing you to load the following
settings from a USB flash drive during product initialization:
• The primary firmware
• The backup firmware
• The configuration file
• The default configuration file
The default configuration file contains settings that represent the desired appliance
default state. The settings in the default configuration file become the appliance's new
default settings and are retained even after a reset to defaults operation.
Important: The default configuration file cannot be cleared by performing a Reset to
Defaults operation. It can only be cleared by loading an empty default configuration
file.
• The certificate
Rapid deployment can be used to configure several appliances in succession. If multiple
appliances share a group of settings, you can use rapid deployment to configure each
appliance with both the shared settings and the appliance-specific settings, all in one
action. For example, before shipping appliances to your company’s branch offices, you can
quickly configure all of the appliances with the corporate security policy and VPN settings,
as well as with branch-specific settings.
Using Rapid Deployment
726 Check Point Safe@Office User Guide
Preparing the USB Flash Drive for Rapid Deployment
Before performing a rapid deployment, you must load the USB flash drive with the files
you want to install on the appliance(s).
To prepare the USB flash drive
1. For each appliance you want to deploy, create a folder named
<MACAddress>, where <MACAddress> is the appliance’s MAC address,
and the colons are replaced by underscores.
For example, if the appliance's MAC address is 00:11:22:33:44:55, the folder name
should be 00_11_22_33_44_55.
2. If you would like to deploy multiple appliances that share settings, create a
folder named deploy.
3. Prepare the files that you want to install on the appliances.
The files must be named according to the following table.
4. Add files containing settings that should be shared by all of the appliances to
the deploy folder.
5. For each appliance, add files containing settings that are specific to the
appliance to the folder named after the appliance's MAC address.
For example, if you want two Safe@Office appliances to share the same primary firmware
but to have different configuration files, you must prepare a single primary.firm file
and add it to the deploy folder. Then you must prepare two different
embeddedngx.cfg configuration files, and add one to each appliance's folder.
Table 146: Rapid Deployment File Names
This file... Should be named...
The primary firmware primary.firm / primary.img
The backup firmware secondary.firm / secondary.img
Using Rapid Deployment
Chapter 23: Maintenance 727
This file... Should be named...
The configuration file embeddedngx.cfg
The default configuration file preset.cfg
The certificate embeddedngx.p12
Performing a Rapid Deployment
You must perform the following procedure on each Safe@Office appliance you want to
deploy.
To perform a rapid deployment
1. Reset the Safe@Office appliance to its default settings.
See Resetting the Safe@Office Appliance to Defaults on page 728.
2. While the appliance is powering up, insert the USB flash drive into the
appliance’s USB port.
For information on locating the USB ports, see Introduction on page 1.
The following things happen:
• The PWR/SEC LED flashes quickly in green, signaling that rapid deployment
is in progress.
• The file results-<MACAddress>.log is created in the USB flash
drive's root folder, where <MACAddress> is the appliance's MAC address.
• If the deploy folder exists, the appliance loads shared settings from it. The
appliance then loads its private settings from the folder named after its MAC
address.
Note: If the appliance loads an updated firmware file, the appliance restarts
and then continues the rapid deployment process. Do not disconnect the USB
flash drive until the process is complete.
Resetting the Safe@Office Appliance to Defaults
728 Check Point Safe@Office User Guide
• If an error occurs during the rapid deployment process, the PWR/SEC LED
blinks quickly in red, the errors are logged to the Event Log, and rapid
deployment continues.
• When rapid deployment is complete, the PWR/SEC LED is a constant green.
3. To check the results of rapid deployment, in the USB flash drive's root folder,
open the file results-<MACAddress>.log.
Settings that loaded successfully are marked as "ok", and settings that failed to load
are marked as "failed".
Resetting the Safe@Office Appliance to Defaults
You can reset the Safe@Office appliance to its default settings. When you reset your
Safe@Office appliance, it reverts to the state it was originally in when you purchased it.
Warning: This operation erases all your settings and password information. You will
have to set a new password and reconfigure your Safe@Office appliance for Internet
connection. For information on performing these tasks, see Setting Up the
Safe@Office Appliance on page 67.
This operation also resets your appliance to its default Product Key. Therefore, if you
upgraded your license, you should save your Product Key before resetting to defaults.
You can view the installed Product Key by in the Safe@Office Licensing Wizard. For
information on accessing this wizard, see Upgrading Your License on page 685.
You can reset the Safe@Office appliance to defaults via the Web management interface
(software) or by manually pressing the Reset button (hardware) located at the back of the
Safe@Office appliance.
When resetting the appliance via the Safe@Office Portal, you can choose to keep the
current firmware or to revert to the firmware version that shipped with the Safe@Office
appliance. In contrast, using the Reset button automatically reverts the firmware version.
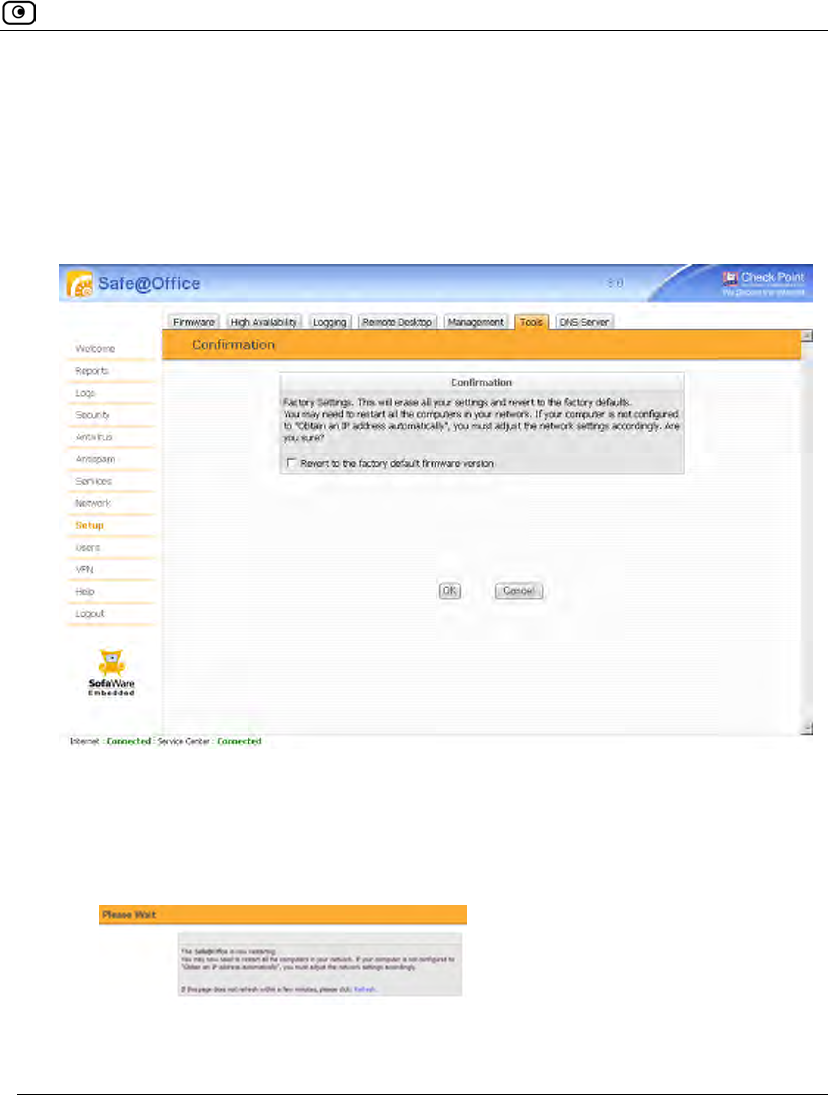
Resetting the Safe@Office Appliance to Defaults
Chapter 23: Maintenance 729
To reset the Safe@Office appliance to factory defaults via the Web interface
1. Click Setup in the main menu, and click the Tools tab.
The Tools page appears.
2. Click Factory Settings.
A confirmation message appears.
3. To revert to the firmware version that shipped with the appliance, select the
check box.
4. Click OK.
• The Please Wait screen appears.
• The Safe@Office appliance returns to its factory defaults.
Resetting the Safe@Office Appliance to Defaults
730 Check Point Safe@Office User Guide
• The Safe@Office appliance is restarted.
This may take a few minutes.
• The Login page appears.
To reset the Safe@Office appliance to factory defaults using the Reset button
1. Make sure the Safe@Office appliance is powered on.
2. Using a pointed object, press the RESET button on the back of the
Safe@Office appliance steadily for seven seconds and then release it.
3. Allow the Safe@Office appliance to boot-up until the system is ready.
For information on the appliance's front and rear panels, see the Getting to Know Your
Appliance section in Introduction on page 1.
Warning: If you choose to reset the Safe@Office appliance by disconnecting the power
cable and then reconnecting it, be sure to leave the Safe@Office appliance
disconnected for at least three seconds. Disconnecting and reconnecting the power
without waiting might cause permanent damage.

Running Diagnostics
Chapter 23: Maintenance 731
Running Diagnostics
You can view technical information about your Safe@Office appliance’s hardware,
firmware, license, network status, and Service Center.
This information is useful for troubleshooting. You can export it to an *.html file and send
it to technical support.
To view diagnostic information
1. Click Setup in the main menu, and click the Tools tab.
The Tools page appears.
2. Click Diagnostics.
Technical information about your Safe@Office appliance appears in a new window.
3. To save the displayed information to an *.html file:
a. Click Save.
A standard File Download dialog box appears.
b. Click Save.
The Save As dialog box appears.
c. Browse to a destination directory of your choice.
d. Type a name for the configuration file and click Save.
The *.html file is created and saved to the specified directory.
4. To refresh the contents of the window, click Refresh.
The contents are refreshed.
5. To close the window, click Close.
Rebooting the Safe@Office Appliance
732 Check Point Safe@Office User Guide
Rebooting the Safe@Office Appliance
If your Safe@Office appliance is not functioning properly, rebooting it may solve the
problem.
To reboot the Safe@Office appliance
1. Click Setup in the main menu, and click the Firmware tab.
The Firmware page appears.
2. Click Restart.
A confirmation message appears.
3. Click OK.
• The Please Wait screen appears.
• The Safe@Office appliance is restarted.
This may take a few minutes.
• The Login page appears.
Overview
Chapter 24: Using Network Printers 733
Chapter 24
This chapter describes how to set up and use network printers.
This chapter includes the following topics:
Overview ..................................................................................................733
Setting Up Network Printers.....................................................................734
Configuring Computers to Use Network Printers.....................................737
Viewing Network Printers........................................................................754
Changing Network Printer Ports...............................................................755
Resetting Network Printers.......................................................................756
Overview
Some Safe@Office models include a built-in print server, enabling you to connect USB-
based printers to the appliance and share them across the network.
Note: When using computers with a Windows 2000/XP/Vista operating system, the
Safe@Office appliance supports connecting up to four USB-based printers to the
appliance. When using computers with a MAC OS-X operating system, the
Safe@Office appliance supports connecting one printer.
The appliance automatically detects printers as they are plugged in, and they immediately
become available for printing. Usually, no special configuration is required on the
Safe@Office appliance.
Note: The Safe@Office print server supports printing via "all-in-one" printers.
Copying and scanning functions are not supported.
Using Network Printers
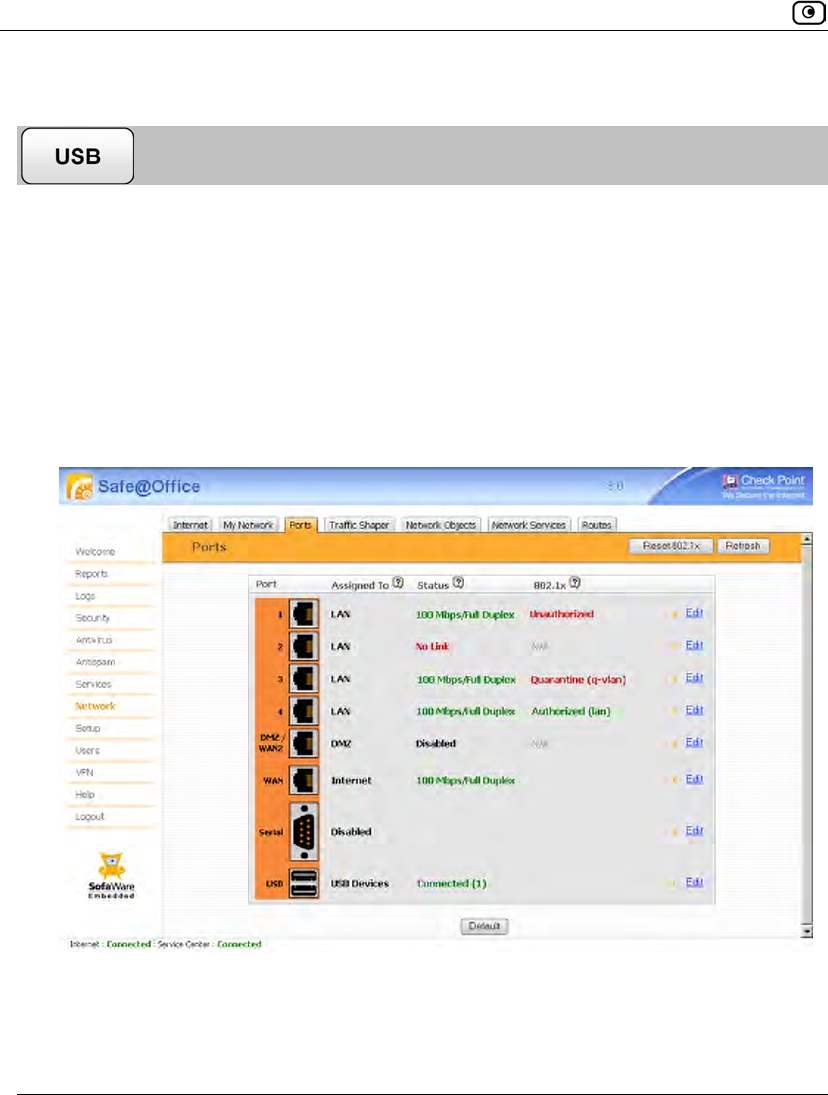
Setting Up Network Printers
734 Check Point Safe@Office User Guide
Setting Up Network Printers
To set up a network printer
1. Connect the network printer to the Safe@Office appliance.
See Connecting the Appliance to Network Printers on page 63.
2. Turn the printer on.
3. In the Safe@Office Portal, click Network in the main menu, and click the Ports
tab.
The Ports page appears.
4. Next to USB, click Edit.
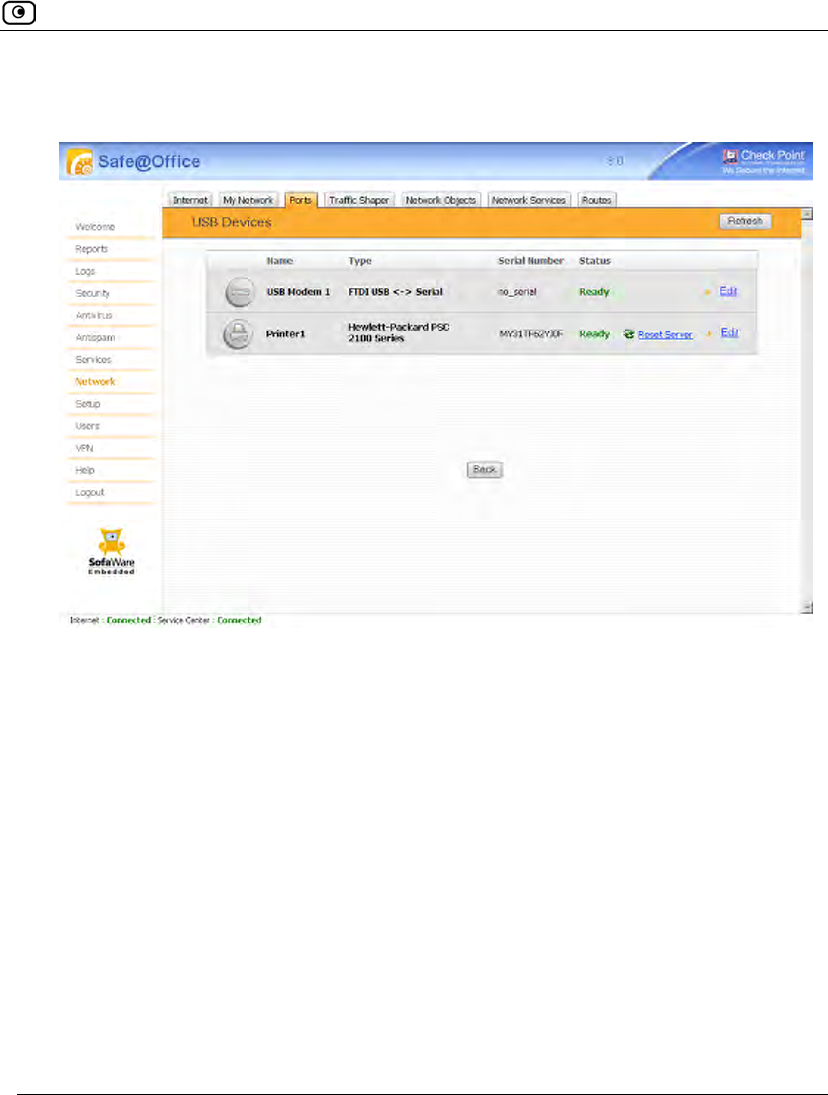
Setting Up Network Printers
Chapter 24: Using Network Printers 735
The USB Devices page appears. If the Safe@Office appliance detected the printer, the
printer is listed on the page.
If the printer is not listed, check that you connected the printer correctly, then click
Refresh to refresh the page.
5. Next to the printer, click Edit.
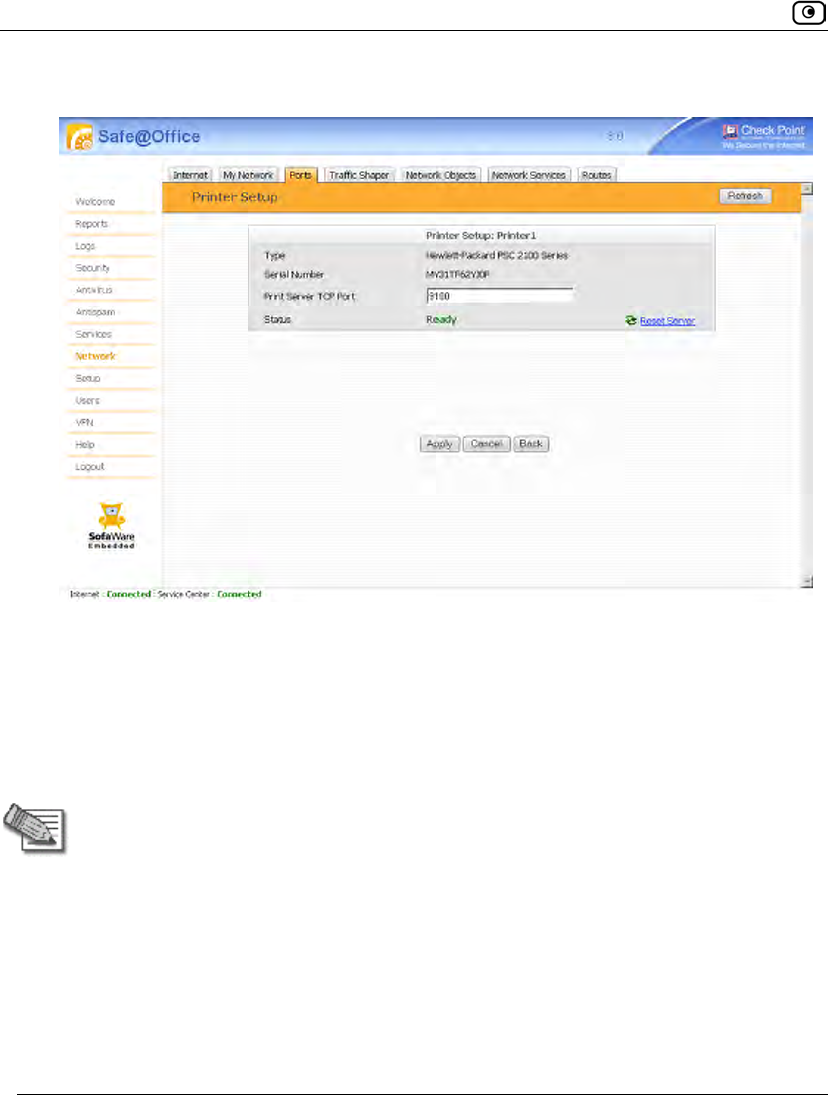
Setting Up Network Printers
736 Check Point Safe@Office User Guide
The Printer Setup page appears.
6. Write down the port number allocated to the printer.
The port number appears in the Printer Server TCP Port field. You will need this
number later, when configuring computers to use the network printer.
7. To change the port number, do the following:
a. Type the desired port number in the Printer Server TCP Port field.
Note: Printer port numbers may not overlap, and must be high ports.
b. Click Apply.
You may want to change the port number if, for example, the printer you are setting
up is intended to replace another printer. In this case, you should change the
replacement printer's port number to the old printer's port number, and you can skip
the next step.
8. Configure each computer from which you want to enable printing to the
network printer.

Configuring Computers to Use Network Printers
Chapter 24: Using Network Printers 737
See Configuring Computers to Use Network Printers on page 737.
Configuring Computers to Use Network Printers
Perform the relevant procedure on each computer from which you want to enable printing
via the Safe@Office print server to a network printer.
Windows Vista
This procedure is relevant for computers with a Windows Vista operating system.
To configure a computer to use a network printer
1. If the computer for which you want to enable printing is located on the WAN,
create an Allow rule for connections from the computer to This Gateway.
See Adding and Editing Rules on page 364.
2. Click Start > Control Panel.
Configuring Computers to Use Network Printers
738 Check Point Safe@Office User Guide
The Control Panel window opens.
3. Under Hardware and Sound, click Printer.
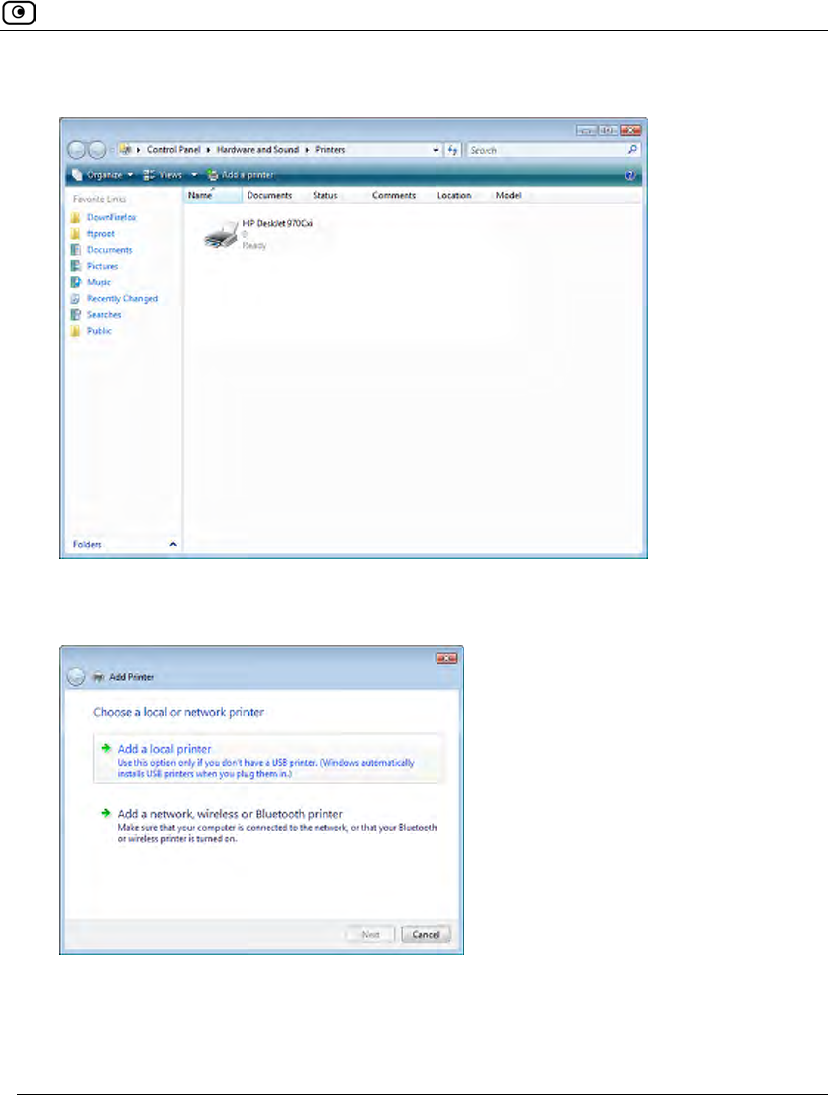
Configuring Computers to Use Network Printers
Chapter 24: Using Network Printers 739
The Printers screen appears.
4. Click Add a printer.
The Add Printer wizard opens displaying the Choose a local or network printer screen.
5. Click Add a local printer.
6. Click Next.
Configuring Computers to Use Network Printers
740 Check Point Safe@Office User Guide
The Choose a printer port dialog box appears.
7. Click Create a new port.
8. In the Type of port drop-down list, select Standard TCP/IP Port.
9. Click Next.
The Type a printer hostname or IP address dialog box appears.
10. In the Device type drop-down list, select Autodetect.
11. In the Hostname or IP address field, type the Safe@Office appliance's LAN IP
address, or "my.firewall".
You can find the LAN IP address in the Safe@Office Portal, under Network > My
Network.
Configuring Computers to Use Network Printers
Chapter 24: Using Network Printers 741
12. In the Port name field, type the port name.
13. Select the Query the printer and automatically select the driver to use check
box.
14. Click Next.
The following things happen:
• If Windows cannot identify your printer, the Additional Port Information
Required dialog box appears.
Do the following:
1) Click Custom.
2) Click Settings.
Configuring Computers to Use Network Printers
742 Check Point Safe@Office User Guide
The Configure Standard TCP/IP Port Monitor dialog box opens.
3) In the Protocol area, make sure that Raw is selected.
4) In the Port Number field, type the printer's port number, as shown in
the Printers page.
5) Click OK.
6) Click Next.
• The Install the printer driver dialog box displayed.
15. Do one of the following:
• Use the lists to select the printer's manufacturer and model.
Configuring Computers to Use Network Printers
Chapter 24: Using Network Printers 743
• If your printer does not appear in the lists, insert the CD that came with your
printer in the computer's CD-ROM drive, and click Have Disk.
16. Click Next.
17. Complete the remaining dialog boxes in the wizard as desired, and click
Finish.
The printer appears in the Printers and Faxes window.
18. Right-click the printer and click Properties in the popup menu.
The printer's Properties dialog box opens.
19. In the Ports tab, in the list box, select the port you added.
The port's name is IP_<LAN IP address>.
20. Click OK.
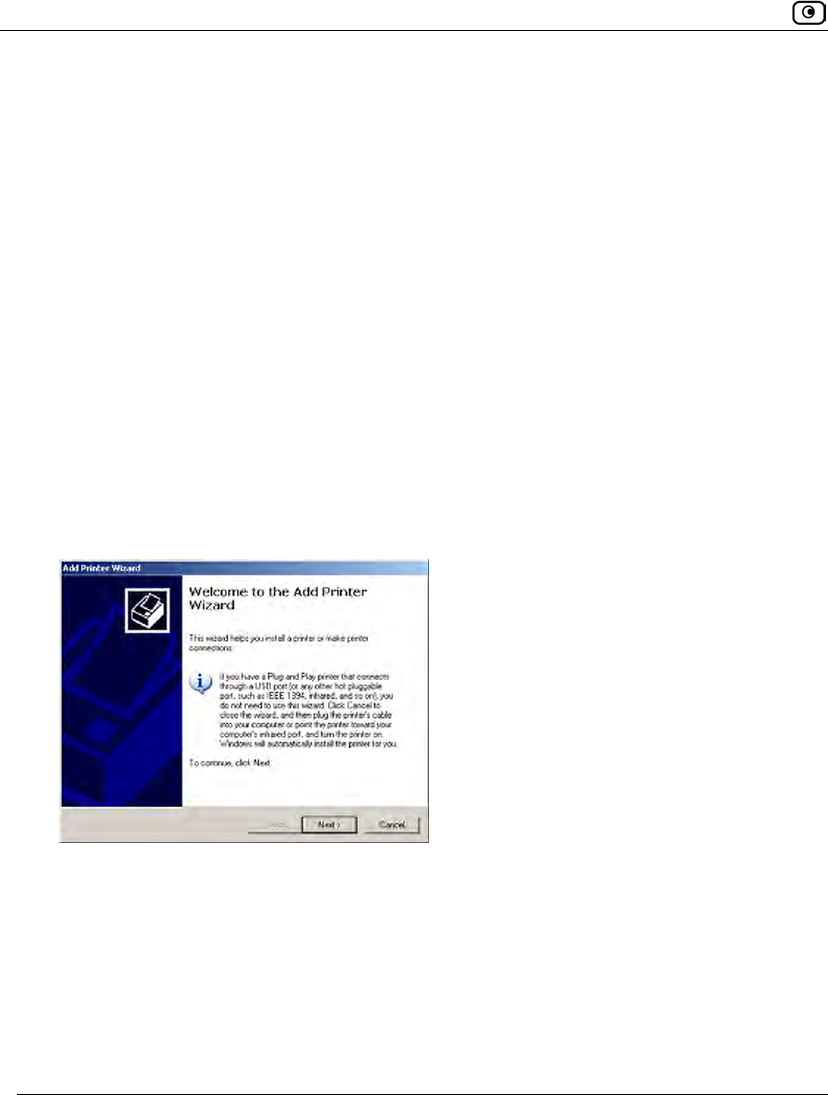
Configuring Computers to Use Network Printers
744 Check Point Safe@Office User Guide
Windows 2000/XP
This procedure is relevant for computers with a Windows 2000/XP operating system.
To configure a computer to use a network printer
1. If the computer for which you want to enable printing is located on the WAN,
create an Allow rule for connections from the computer to This Gateway.
See Adding and Editing Rules on page 364.
2. Click Start > Settings > Control Panel.
The Control Panel window opens.
3. Click Printers and Faxes.
The Printers and Faxes window opens.
4. Right-click in the window, and click Add Printer in the popup menu.
The Add Printer Wizard opens with the Welcome dialog box displayed.
5. Click Next.
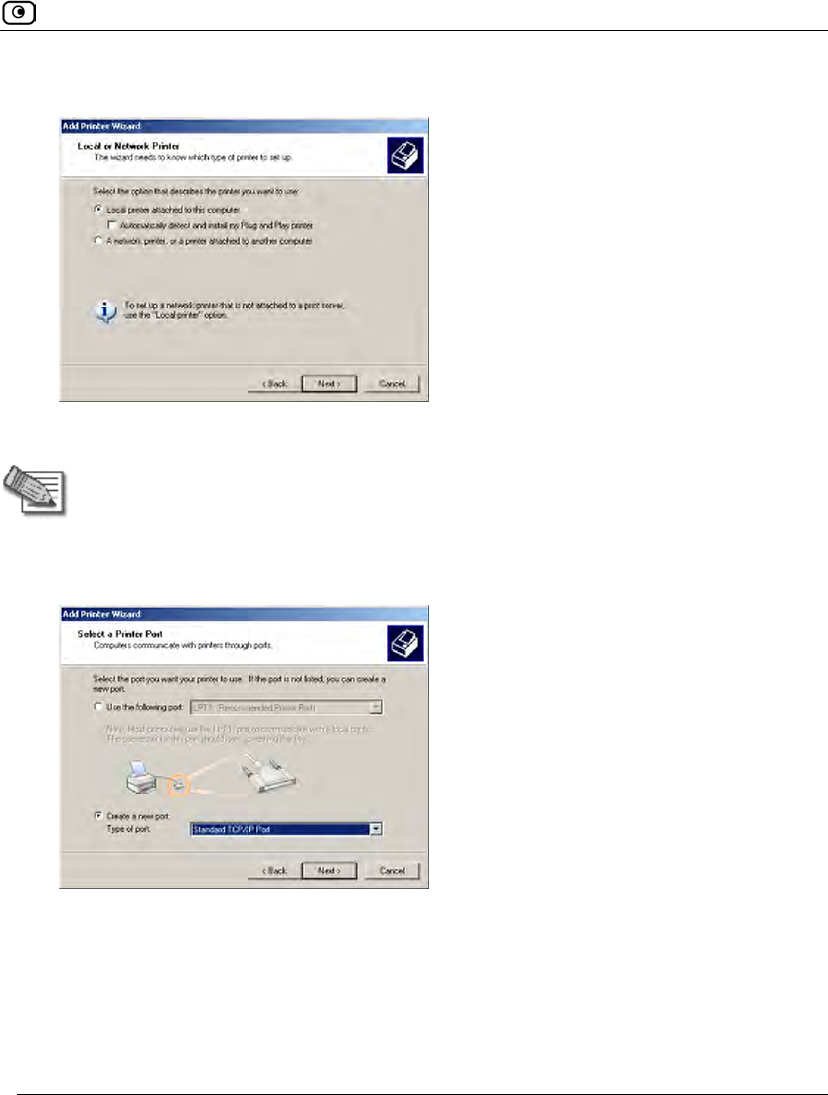
Configuring Computers to Use Network Printers
Chapter 24: Using Network Printers 745
The Local or Network Printer dialog box appears.
6. Click Local printer attached to this computer.
Note: Do not select the Automatically detect and install my Plug and Play printer check
box.
7. Click Next.
The Select a Printer Port dialog box appears.
8. Click Create a new port.
9. In the Type of port drop-down list, select Standard TCP/IP Port.
10. Click Next.
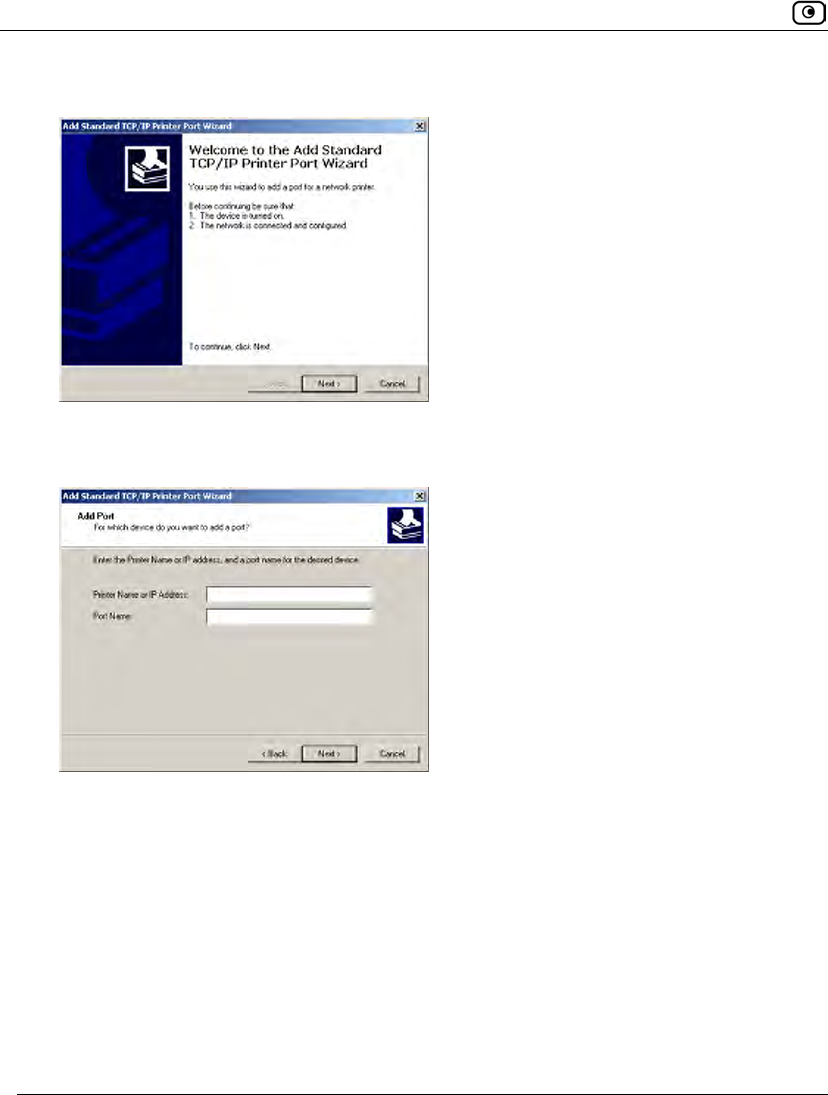
Configuring Computers to Use Network Printers
746 Check Point Safe@Office User Guide
The Add Standard TCP/IP Port Wizard opens with the Welcome dialog box displayed.
11. Click Next.
The Add Port dialog box appears.
12. In the Printer Name or IP Address field, type the Safe@Office appliance's LAN
IP address, or "my.firewall".
You can find the LAN IP address in the Safe@Office Portal, under Network > My
Network.
The Port Name field is filled in automatically.
13. Click Next.
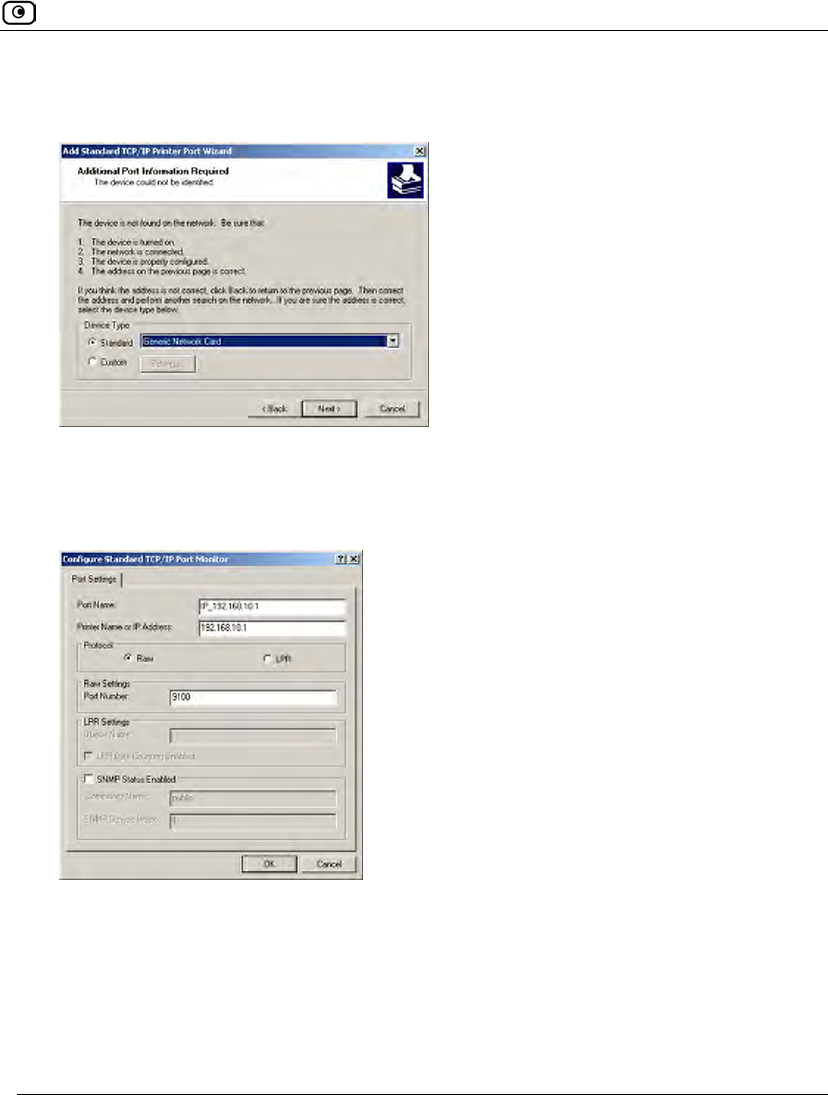
Configuring Computers to Use Network Printers
Chapter 24: Using Network Printers 747
The Add Standard TCP/IP Printer Port Wizard opens, with the Additional Port
Information Required dialog box displayed.
14. Click Custom.
15. Click Settings.
The Configure Standard TCP/IP Port Monitor dialog box opens.
16. In the Port Number field, type the printer's port number, as shown in the
Printers page.
17. In the Protocol area, make sure that Raw is selected.
18. Click OK.
The Add Standard TCP/IP Printer Port Wizard reappears.
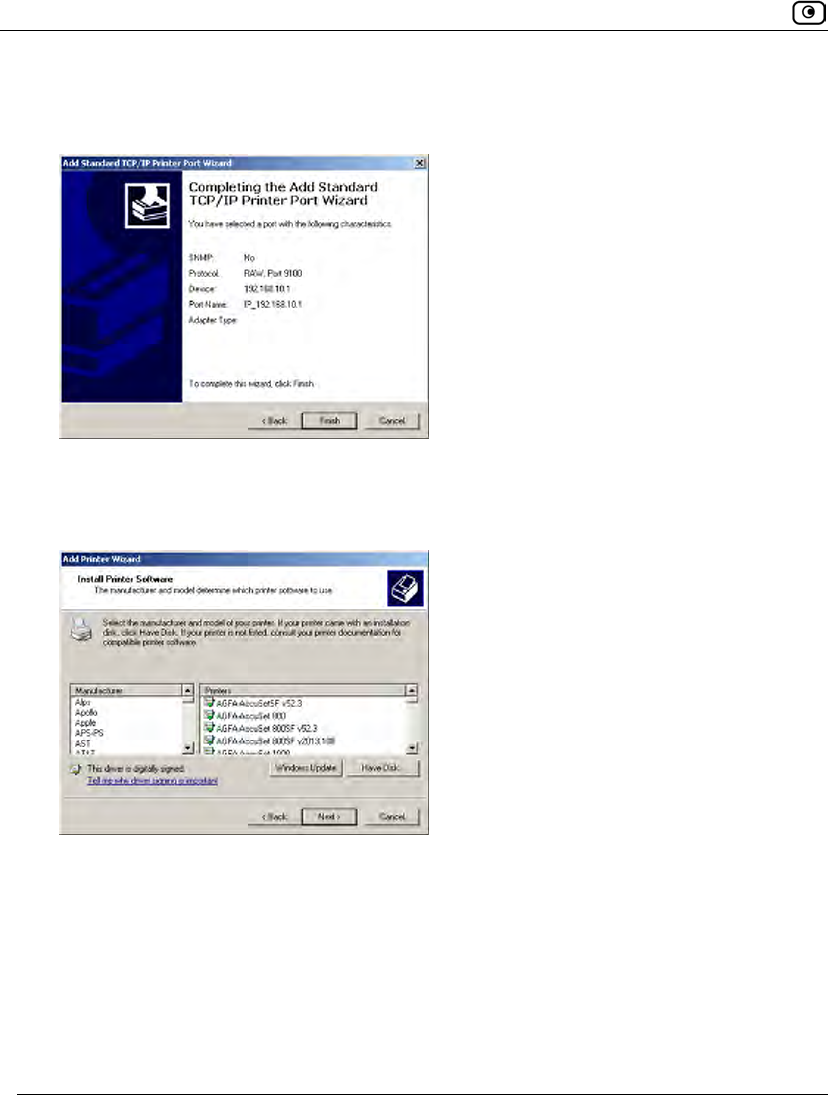
Configuring Computers to Use Network Printers
748 Check Point Safe@Office User Guide
19. Click Next.
The Completing the Add Standard TCP/IP Printer Port Wizard dialog box appears.
20. Click Finish.
The Add Printer Wizard reappears, with the Install Printer Software dialog box
displayed.
21. Do one of the following:
• Use the lists to select the printer's manufacturer and model.
• If your printer does not appear in the lists, insert the CD that came with your
printer in the computer's CD-ROM drive, and click Have Disk.
22. Click Next.
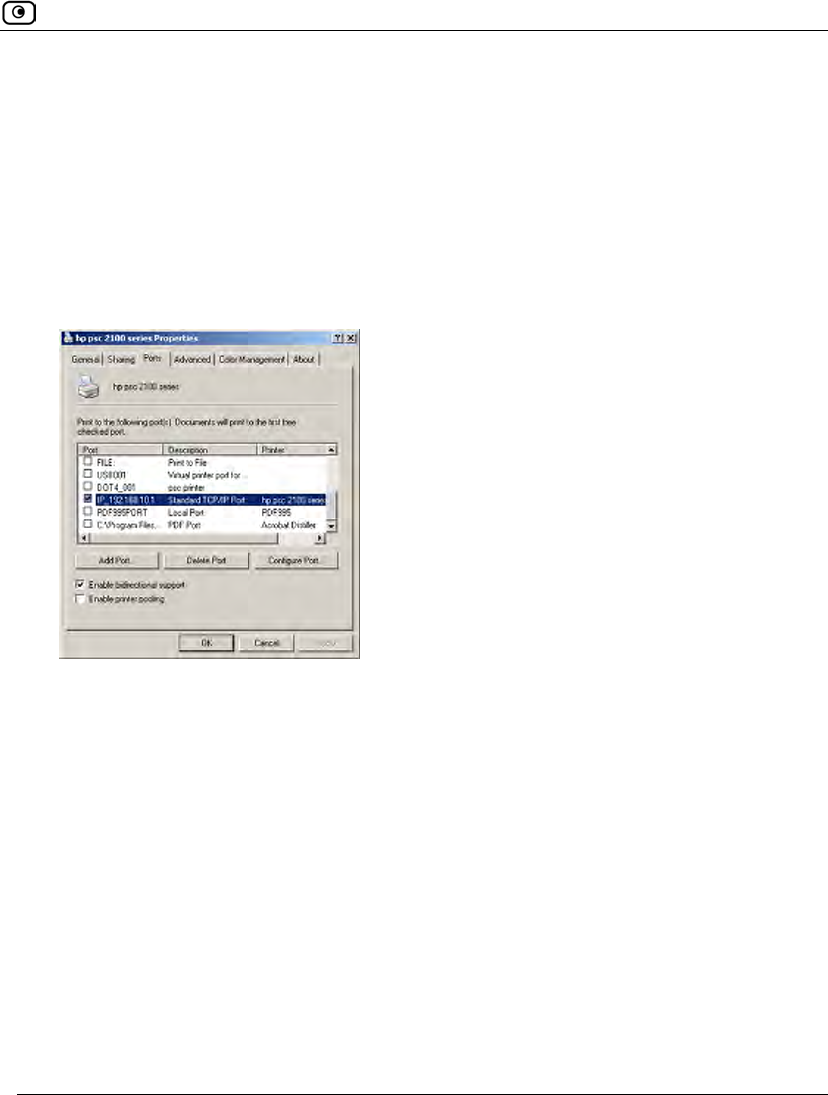
Configuring Computers to Use Network Printers
Chapter 24: Using Network Printers 749
23. Complete the remaining dialog boxes in the wizard as desired, and click
Finish.
The printer appears in the Printers and Faxes window.
24. Right-click the printer and click Properties in the popup menu.
The printer's Properties dialog box opens.
25. In the Ports tab, in the list box, select the port you added.
The port's name is IP_<LAN IP address>.
26. Click OK.
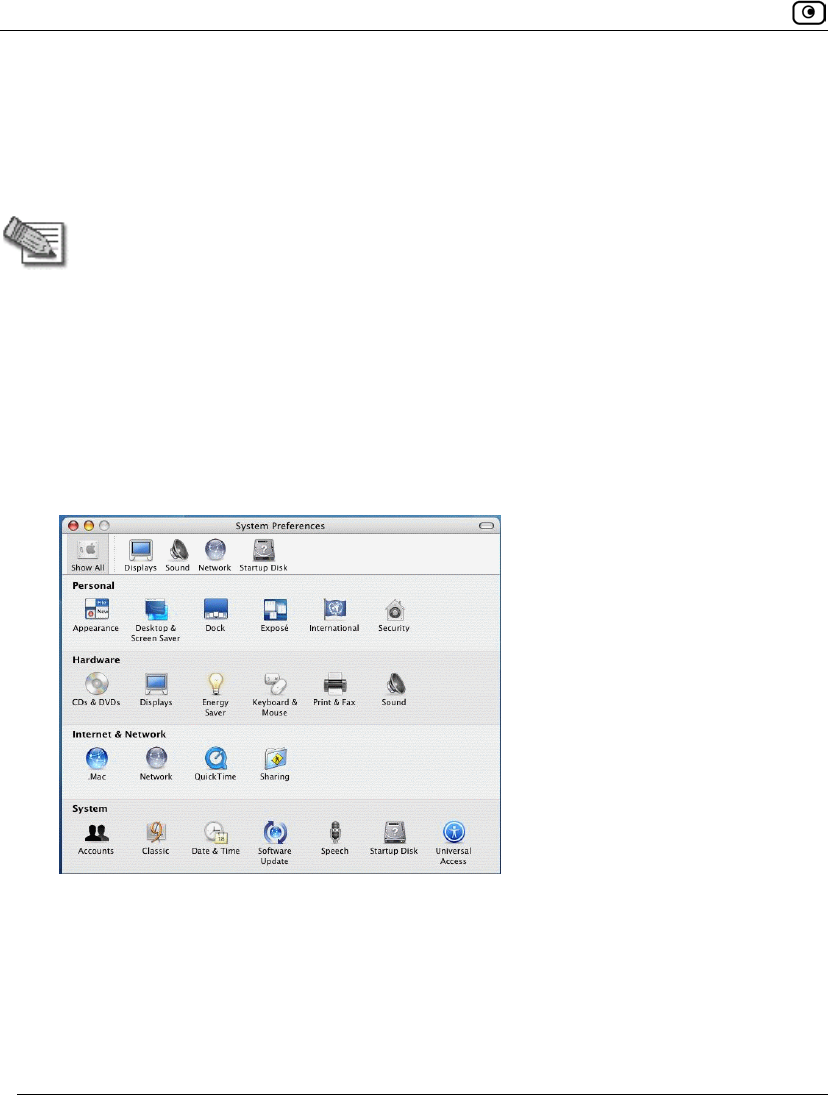
Configuring Computers to Use Network Printers
750 Check Point Safe@Office User Guide
MAC OS-X
This procedure is relevant for computers with the latest version of the MAC OS-X
operating system.
Note: This procedure may not apply to earlier MAC OS-X versions.
To configure a computer to use a network printer
1. If the computer for which you want to enable printing is located on the WAN,
create an Allow rule for connections from the computer to This Gateway.
See Adding and Editing Rules on page 364.
2. Choose Apple -> System Preferences.
The System Preferences window appears.
3. Click Show All to display all categories.
4. In the Hardware area, click Print & Fax.
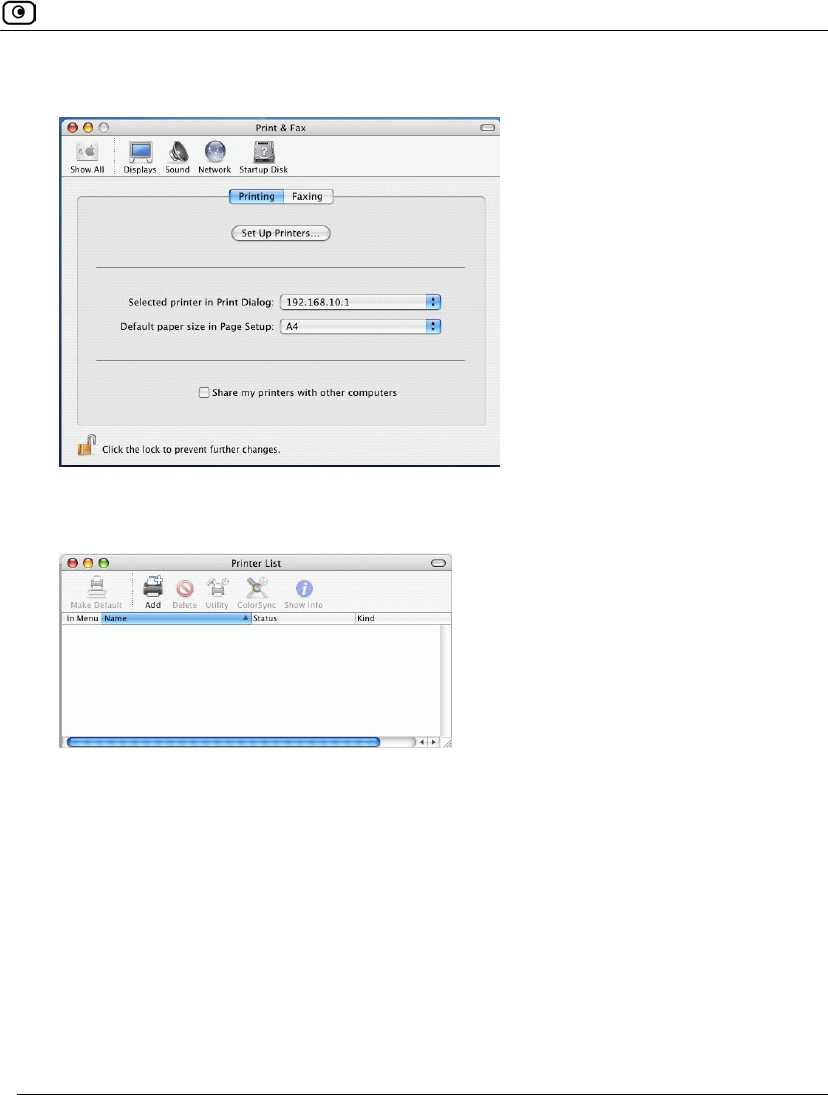
Configuring Computers to Use Network Printers
Chapter 24: Using Network Printers 751
The Print & Fax window appears.
5. In the Printing tab, click Set Up Printers.
The Printer List window appears.
6. Click Add.
Configuring Computers to Use Network Printers
752 Check Point Safe@Office User Guide
New fields appear.
7. In the first drop-down list, select IP Printing.
8. In the Printer Type drop-down list, select Socket/HP Jet Direct.
9. In the Printer Address field, type the Safe@Office appliance's LAN IP address,
or "my.firewall".
You can find the LAN IP address in the Safe@Office Portal, under Network > My
Network.
10. In the Queue Name field, type the name of the required printer queue.
For example, the printer queue name for HP printers is RAW.
11. In the Printer Model list, select the desired printer type.
Configuring Computers to Use Network Printers
Chapter 24: Using Network Printers 753
A list of models appears.
12. In the Model Name list, select the desired model.
13. Click Add.
The new printer appears in the Printer List window.
14. In the Printer List window, select the newly added printer, and click Make
Default.

Viewing Network Printers
754 Check Point Safe@Office User Guide
Viewing Network Printers
To view network printers
1. Click Network in the main menu, and click the Ports tab.
The Ports page appears.
2. Next to USB, click Edit.
The USB Devices page appears, displaying a list of connected printers.
For each printer, the model, serial number, and status is displayed.
A printer can have the following statuses:
• Initialize. The printer is initializing.
• Ready. The printer is ready.
• Not Ready. The printer is not ready. For example, it may be out of paper.
• Printing. The printer is processing a print job.
• Restarting. The printer server is restarting.
• Fail. An error occurred. See the Event Log for details (Viewing the Event Log
on page 339).
3. To refresh the display, click Refresh.
Changing Network Printer Ports
Chapter 24: Using Network Printers 755
Changing Network Printer Ports
When you set up a new network printer, the Safe@Office appliance automatically assigns
a port number to the printer. If you want to use a different port number, you can easily
change it, as described in Setting Up Network Printers on page 734.
However, you may sometimes need to change the port number after completing printer
setup. For example, you may want to replace a malfunctioning network printer, with
another existing network printer, without reconfiguring the client computers. To do this,
you must change the replacement printer's port number to the malfunctioning printer's port
number, as described below.
Note: Each printer port number must be different, and must be a high port.
To change a printer's port
1. Click Network in the main menu, and click the Ports tab.
The Ports page appears.
2. Next to USB, click Edit.
The USB Devices page appears, displaying a list of connected printers.
3. Next to the desired printer, click Edit.
The Printer Setup page appears.
4. In the printer's Printer Server TCP Port field, type the desired port number.
5. Click Apply.

Resetting Network Printers
756 Check Point Safe@Office User Guide
Resetting Network Printers
You can cause a network printer to restart the current print job, by resetting the network
printer. You may want to do this if the print job has stalled.
To reset a network printer
1. Click Network in the main menu, and click the Ports tab.
The Ports page appears.
2. Next to USB, click Edit.
The USB Devices page appears, displaying a list of connected printers.
3. Next to the desired printer, click Reset Server.
The network printer's current print job is restarted.
Connectivity
Chapter 25: Troubleshooting 757
Chapter 25
This chapter provides solutions to common problems you may encounter while using the
Safe@Office appliance.
Note: For information on troubleshooting wireless connectivity, see
Troubleshooting Wireless Connectivity on page 302.
This chapter includes the following topics:
Connectivity ............................................................................................ 757
Service Center and Upgrades................................................................... 761
Other Problems........................................................................................ 762
Connectivity
I cannot access the Internet. What should I do?
• Verify that the Safe@Office appliance is operating. If not, check the power
connection to the Safe@Office appliance.
• Check if the LED for the WAN port is green. If not, check the network cable to
the modem and make sure the modem is turned on.
• Check if the LED for the LAN port used by your computer is green. If not,
check if the network cable linking your computer to the Safe@Office appliance
is connected properly. Try replacing the cable or connecting it to a different
LAN port.
• Using your Web browser, go to http://my.firewall and see whether "Connected"
appears on the Status Bar. Make sure that your Safe@Office appliance network
settings are configured as per your ISP directions.
• Check your TCP/IP configuration according to Installing and Setting up the
Safe@Office Appliance on page 45.
• If Web Filtering or Email Filtering are on, try turning them off.
Troubleshooting

Connectivity
758 Check Point Safe@Office User Guide
• Check if you have defined firewall rules which block your Internet connectivity.
• Check with your ISP for possible service outage.
• Check whether you are exceeding the maximum number of computers allowed
by your license, by viewing the My Computers page.
I cannot access my DSL broadband connection. What should I do?
DSL equipment comes in two flavors: bridges (commonly known as DSL modems) and
routers. Some DSL equipment can be configured to work both ways.
• If you connect to your ISP using a PPPoE or PPTP dialer defined in your
operating system, your equipment is most likely configured as a DSL bridge.
Configure a PPPoE or PPTP type DSL connection.
• If you were not instructed to configure a dialer in your operating system, your
equipment is most likely configured as a DSL router. Configure a LAN
connection, even if you are using a DSL connection.
For instructions, see Configuring the Internet Connection on page 85.
I cannot access my Cable broadband connection. What should I do?
• Some cable ISPs require you to register the MAC address of the device behind
the cable modem. You may need to clone your Ethernet adapter MAC address
onto the Safe@Office appliance. For instructions, see Configuring the Internet
Connection on page 85.
• Some cable ISPs require using a hostname for the connection. Try reconfiguring
your Internet connection and specifying a hostname. For further information, see
Configuring the Internet Connection on page 85.
I cannot access my ADSL connection from an ADSL appliance. What should I do?
• Check that a micro-filter is used on all the phone sockets on the line (required in
most locations).
• Check that the DSL Standard setting configured for your appliance is compatible
with your service provider. You can view this setting in the Network > Internet
Setup page.
• Advanced ADSL configuration fine tuning options are available via the CLI. For
information, refer to the Embedded NGX CLI Reference Guide.
Connectivity
Chapter 25: Troubleshooting 759
I cannot access http://my.firewall or http://my.vpn. What should I do?
• Verify that the Safe@Office appliance is operating.
• Check if the LED for the LAN port used by your computer is green. If not,
check if the network cable linking your computer to the Safe@Office appliance
is connected properly.
• By default, unencrypted HTTP access is not allowed from the wireless LAN to
http://my.firewall or http://my.vpn. Therefore, if you are connecting from the
wireless LAN, try connecting to https://my.firewall instead.
• Try surfing to 192.168.10.1 instead of to my.firewall.
Note: 192.168.10 is the default value, and it may vary if you changed it in the My
Network page.
• Check your TCP/IP configuration according to Installing and Setting up the
Safe@Office Appliance on page 45.
• Restart your Safe@Office appliance and your broadband modem by
disconnecting the power and reconnecting after 5 seconds.
• If your Web browser is configured to use an HTTP proxy to access the
Internet, add my.firewall or my.vpn to your proxy exceptions list.
My network seems extremely slow. What should I do?
• The Ethernet cables may be faulty. For proper operation, the Safe@Office
appliance requires STP CAT5 (Shielded Twisted Pair Category 5) Ethernet
cables. Make sure that this specification is printed on your cables.
• Your Ethernet card may be faulty or incorrectly configured. Try replacing your
Ethernet card.
• There may be an IP address conflict in your network. Check that the TCP/IP
settings of all your computers are configured to obtain an IP address
automatically.
I changed the network settings to incorrect values and am unable to correct my error. What
should I do?
Reset the network to its default settings using the button on the back of the Safe@Office
appliance unit. See Resetting the Safe@Office Appliance to Defaults on page 728.

Connectivity
760 Check Point Safe@Office User Guide
I am using the Safe@Office appliance behind another NAT device, and I am having problems
with some applications. What should I do?
By default, the Safe@Office appliance performs Network Address Translation (NAT). It is
possible to use the Safe@Office appliance behind another device that performs NAT, such
as a DSL router or Wireless router, but the device will block all incoming connections
from reaching your Safe@Office appliance.
To fix this problem, do ONE of the following. (The solutions are listed in order of
preference.)
• Consider whether you really need the router. The Safe@Office appliance can be
used as a replacement for your router, unless you need it for some additional
functionality that it provides.
• If possible, disable NAT in the router. Refer to the router’s documentation for
instructions on how to do this.
• If the router has a “DMZ Computer” or “Exposed Host” option, set it to the
Safe@Office appliance’s external IP address.
• Open the following ports in the NAT device:
• UDP 9281/9282
• UDP 500
• UDP 2746
• TCP 256
• TCP 264
• ESP IP protocol 50
• TCP 981
I cannot receive audio or video calls through the Safe@Office appliance. What should I do?
To enable audio/video, you must configure an IP Telephony (H.323) virtual server. For
instructions, see Configuring Servers on page 357.
I run a public Web server at home but it cannot be accessed from the Internet. What should I
do?
Configure a virtual Web Server. For instructions, see Configuring Servers on page 357.

Service Center and Upgrades
Chapter 25: Troubleshooting 761
I cannot connect to the LAN network from the DMZ or primary WLAN network. What should I
do?
By default, connections from the DMZ or primary WLAN network to the LAN network
are blocked. To allow traffic from the DMZ or primary WLAN to the LAN, configure
appropriate firewall rules. For instructions, see Using Rules on page 360.
Service Center and Upgrades
I have exceeded my node limit. What does this mean? What should I do?
Your Product Key specifies a maximum number of nodes that you may connect to the
Safe@Office appliance.
The Safe@Office appliance tracks the cumulative number of nodes on the internal network
that have communicated through the firewall. When the Safe@Office appliance encounters
an IP address that exceeds the licensed node limit, the My Computers page displays a
warning message and marks nodes over the node limit in red. These nodes will not be able
to access the Internet through the Safe@Office appliance, but will be protected. The Event
Log page also warns you that you have exceeded the node limit.
To upgrade your Safe@Office appliance to support more nodes, purchase a new Product
Key. Contact your reseller for upgrade information.
While trying to connect to a Service Center, I received the message “The Service Center did
not respond”. What should I do?
• If you are using a Service Center other than the Check Point Service Center,
check that the Service Center IP address is typed correctly.
• The Safe@Office appliance connects to the Service Center using UDP ports
9281/9282. If the Safe@Office appliance is installed behind another firewall,
make sure that these ports are open.
I purchased an advanced Safe@Office model, but I only have the functionality of a simpler
Safe@Office model. What should I do?
Your have not installed your product key. For further information, see Upgrading Your
Software Product on page 685.

Other Problems
762 Check Point Safe@Office User Guide
Other Problems
I have forgotten my password. What should I do?
Reset your Safe@Office appliance to factory defaults using the Reset button as detailed in
Resetting the Safe@Office Appliance to Defaults on page 728.
Why are the date and time displayed incorrectly?
You can adjust the time on the Setup page's Tools tab. For information, see Setting the
Time on the Appliance on page 699.
I cannot use a certain network application. What should I do?
Look at the Event Log page. If it lists blocked attacks, do the following:
• Set the Safe@Office appliance's firewall level to Low and try again.
• If the application still does not work, set the computer on which you want to use
the application to be the exposed host.
For instructions, see Defining an Exposed Host.
When you have finished using the application, make sure to clear the exposed host setting,
otherwise your security might be compromised.
In the Safe@Office Portal, I do not see the pop-up windows that the guide describes. What
should I do?
Disable any pop-up blockers for http://my.firewall.

Technical Specifications
Chapter 26: Specifications 763
Chapter 26
This chapter includes the following topics:
Technical Specifications.......................................................................... 763
CE Declaration of Conformity................................................................. 770
Federal Communications Commission Radio Frequency Interference
Statement................................................................................................. 772
Technical Specifications
Check Point is committed to protecting the environment. Safe@Office unified threat
management appliances are compliant with the RoHS Directive, meeting the European
Union's strict restrictions on hazardous substances.
RoHS & WEEE Declaration and Certification
The Safe@Office appliance has been verified to comply with the following directives,
throughout the design, development, and supply chain stages:
• Directive of the European Parliament and of the Council, of 27 January 2003, on
the Restriction of the Use of Certain Hazardous Substances in Electrical and
Electronic Equipment (RoHS – 2002/95/EC)
• Directive of the European Parliament and of the Council, of 27 January 2003, on
Waste Electrical and Electronic Equipment (WEEE – 2002/96/CE)
For a copy of the original signed declaration (in full conformance with EN45014), contact
SofaWare technical support at www.sofaware.com/support.
Specifications

Technical Specifications
764 Check Point Safe@Office User Guide
Table 147: Safe@Office ADSL Models Attributes
Attribute Safe@Office 500 ADSL
SBXD-166LHGE-5
Safe@Office 500W ADSL
SBXWD-166LHGE-5
Physical Attributes
Dimensions
(width x height x depth)
200 x 33 x 122 mm
(7.87 x 1.3 x 4.8 inches)
200 x 33 x 130 mm
(7.87 x 1.3 x 5.12 inches)
(incl. antenna connectors)
Weight 660 g (1.46 lbs) 694 g (1.53 lbs)
Retail Box Dimensions
(width x height x depth)
290 x 250 x 80 mm
(11.42 x 9.84 x 3.15 inches)
290 x 250 x 80 mm
(11.42 x 9.84 x 3.15 inches)
5V Power Supply Unit
Power Supply Nominal
Input
In: 100~240VAC @ 0.5A
In: 100~240VAC @ 0.5A
Power Supply Nominal
Output
5V DC @ 3.3A
5V DC @ 3.3A
Max. Power
Consumption
8.5W
13.5W (including USB devices)
10.5W
15.5W (including USB devices)
Environmental
Conditions
Temperature:
Storage/Transport
-5ºC ~ 80º C -5ºC ~ 80ºC
Temperature: Operation 0ºC ~ 40ºC 0ºC ~ 40ºC

Technical Specifications
Chapter 26: Specifications 765
Humidity:
Storage/Operation
10 ~ 95% / 10 ~ 90%
(non-condensed)
10 ~ 95% / 10 ~ 90%
(non-condensed)
Applicable Standards
Safety cULus, CB, LVD cULus, CB, LVD
Quality ISO9001, ISO 14001, TL9000 ISO9001, ISO 14001, TL9000
EMC CE . FCC 15B.VCCI CE . FCC 15B.VCCI
Reliability EN 300 019 - 1, 2, 3 EN 300 019 - 1, 2, 3
Environment RoHS & WEEE RoHS & WEEE
ADSL Part 68.CS03 Part 68.CS03
RF N/A R&TTE .FCC15C, TELCO
Table 148: Safe@Office Non-ADSL Models Attributes
Attribute Safe@Office 500
SBX-166LHGE-5
Safe@Office 500W
SBXW-166LHGE-5
Physical Attributes
Dimensions
(width x height x depth)
200 x 33 x 122 mm
(7.87 x 1.3 x 4.8 inches)
200 x 33 x 130 mm
(7.87 x 1.3 x 5.12 inches)
(incl. antenna connectors)
Weight 580 g (1.28 lbs) 635 g (1.40 lbs)
Retail Box Dimensions
(width x height x depth)
290 x 250 x 80 mm
(11.42 x 9.84 x 3.15 inches)
290 x 250 x 80 mm
(11.42 x 9.84 x 3.15 inches)

Technical Specifications
766 Check Point Safe@Office User Guide
5V Power Supply Unit
Power Supply Nominal
Input
In: 100~240VAC @ 0.5A In: 100~240VAC @ 0.5A
Power Supply Nominal
Output
9VAC @ 1.5 A
OR:
12VDC @ 1.5 A
12VDC @ 1.5 A
Max. Power
Consumption
4.5W 6.5W
11.5W (including USB devices)
Environmental
Conditions
Temperature:
Storage/Transport
-5ºC ~ 80ºC -5ºC ~ 80ºC
Temperature: Operation 0ºC ~ 40ºC 0ºC ~ 40ºC
Humidity:
Storage/Operation
10 ~ 95% / 10 ~ 90%
(non-condensed)
10 ~ 95% / 10 ~ 90%
(non-condensed)
Applicable Standards
Safety cULus, CB, LVD cULus, CB, LVD
Quality ISO9001, ISO 14001, TL9000 ISO9001, ISO 14001, TL9000
EMC CE . FCC 15B.VCCI CE . FCC 15B.VCCI
Reliability EN 300 019 - 1, 2, 3 EN 300 019 - 1, 2, 3
Environment RoHS & WEEE RoHS & WEEE

Technical Specifications
Chapter 26: Specifications 767
MTBF (hours) 68,000 hours at 30ºC 68,000 hours at 30ºC
RF N/A R&TTE .FCC15C,TELCO
Table 149: Safe@Office Non-ADSL Models Attributes
Attribute Safe@Office 500
SBX-166LHGE-6
Safe@Office 500W
SBXW-166LHGE-6
Physical Attributes
Dimensions
(width x height x depth)
200 x 32 x 128 mm
(7.87 x 1.26 x 5.04 inches)
200 x 32 x 128 mm
(7.87 x 1.26 x 5.04 inches)
Weight 675 g (1.49 lbs) 685 g (1.51 lbs)
Retail Box Dimensions
(width x height x depth)
290 x 250 x 80 mm
(11.42 x 9.84 x 3.15 inches)
290 x 250 x 80 mm
(11.42 x 9.84 x 3.15 inches)
Retail box weight 1.36 kg (3 lbs) 1.38 kg (3.04 lbs)
5V Power Supply Unit
Power Supply Nominal
Input
100 to 240 Vac
50 to 60 Hz
100 to 240 Vac
50 to 60 Hz
Power Supply Nominal
Output
12VDC @ 1.5 A 12VDC @ 1.5 A
Max. Power
Consumption
15W 15W
20W (including USB devices)

Technical Specifications
768 Check Point Safe@Office User Guide
Environmental Conditions
Temperature:
Storage/Transport
-20ºC ~ 65ºC -20ºC ~ 65ºC
Temperature:
Operation
0ºC ~ 40ºC
0ºC ~ 40ºC
Humidity:
Storage/Operation
10% ~ 85%
(non-condensed)
10% ~ 85%
(non-condensed)
Applicable Standards
Safety EN 60950 EN 60950
Quality ISO 9001, 9002, 14001 ISO 9001, 9002, 14001
EMC FCC part 15B
VCCI V-3/V-4
FCC Part 15 B & C
AS/NZS 4268: 2003 A1
DGT
Reliability EN 300 019 - 1, 2, 3 EN 300 019 - 1, 2, 3
Environment RoHS & WEEE RoHS & WEEE
MTBF (hours) 68,000 68,000
RF N/A R&TTE .FCC15C, TELCO

Technical Specifications
Chapter 26: Specifications 769
Wireless Attributes
Table 150: Safe@Office Wireless Attributes
Attribute All Wireless Models
Operation Frequency 2.412-2.484 MHz
Transmission Power 79.4 mW
Modulation OFDM, DSSS, 64QAM, 16QAM, QPSK, BPSK, CCK, DQPSK,
DBPSK
WPA Authentication
Modes
EAP-TLS, EAP-TTLS, PEAP (EAP-GTC), PEAP (EAP-MSCHAP V2)

CE Declaration of Conformity
770 Check Point Safe@Office User Guide
CE Declaration of Conformity
SofaWare Technologies Ltd., 3 Hilazon St., Ramat-Gan Israel, hereby declares that this
equipment is in conformity with the essential requirements specified in Article 3.1 (a) and
3.1 (b) of:
• Directive 89/336/EEC (EMC Directive)
• Directive 73/23/EEC (Low Voltage Directive – LVD)
• Directive 99/05/EEC (Radio Equipment and Telecommunications Terminal
Equipment Directive)
In accordance with the following standards:
Table 151: Safe@Office Appliance Standards
Attribute Safe@Office 500
SBX-166LHGE-5
Safe@Office 500
SBX-166LHGE-6 /
Safe@Office 500W SBXW-
166LHGE-6
EMC EN 55022
EN 61000-3-2
EN 61000-3-3
EN 61000-4-2
EN 61000-4-3
EN 61000-4-4
EN 61000-4-5
EN 61000-4-6
EN 50081-1
EN 50082-1
EN 61000-6-1
EN 61000-6-3
EN 55022
EN 55024
EN 61000-3-2
EN 61000-3-3

CE Declaration of Conformity
Chapter 26: Specifications 771
Attribute Safe@Office 500
SBX-166LHGE-5
Safe@Office 500
SBX-166LHGE-6 /
Safe@Office 500W SBXW-
166LHGE-6
EN 61000-4-8
EN 61000-4-11
ENV50204
EN 61000-4-2
EN 61000-4-3
EN 61000-4-4
EN 61000-4-5
EN 61000-4-6
EN 61000-4-7
EN 61000-4-8
EN 61000-4-9
EN 61000-4-10
EN 61000-4-11
EN 61000-4-12
Safety EN 60950
IEC 60950
EN 60950
IEC 60950
The "CE" mark is affixed to this product to demonstrate conformance to the R&TTE
Directive 99/05/EEC (Radio Equipment and Telecommunications Terminal Equipment
Directive) and FCC Part 15 Class B.
The product has been tested in a typical configuration. For a copy of the Original Signed
Declaration (in full conformance with EN45014), please contact SofaWare at the above
address.

Federal Communications Commission Radio Frequency Interference Statement
772 Check Point Safe@Office User Guide
Federal Communications Commission Radio
Frequency Interference Statement
This equipment complies with the limits for a Class B digital device, pursuant to Part 15 of
the FCC Rules. These limits are designed to provide reasonable protection against harmful
interference when the equipment is operated in a commercial environment. This equipment
generates, uses, and can radiate radio frequency energy and, if not installed and used in
accordance with the instruction manual, may cause harmful interference to radio
communications.
Shielded cables must be used with this equipment to maintain compliance with FCC
regulations.
Any changes or modifications to this product not explicitly approved by the manufacturer
could void the user’s authority to operate the equipment and any assurances of Safety or
Performance, and could result in violation of Part 15 of the FCC Rules.
This device complies with Part 15 of the FCC Rules. Operation is subject to the following
two conditions: (1) this device may not cause harmful interference, and (2) this device
must accept any interference received, including interference that may cause undesired
operation.
This Class B digital apparatus complies with Canadian ICES-003.
FCC Radiation Exposure Statement for Wireless Models
This equipment complies with FCC radiation exposure limits set forth for an uncontrolled
environment. The antenna(s) used for this equipment must be installed to provide a
separation distance of at least eight inches (20 cm) from all persons. This equipment must
not be operated in conjunction with any other antenna.

Glossary of Terms
Glossary of Terms 773
A
ADSL Modem
A device connecting a computer to the
Internet via an existing phone line.
ADSL (Asymmetric Digital Subscriber
Line) modems offer a high-speed
'always-on' connection.
C
CA
The Certificate Authority (CA) issues
certificates to entities such as gateways,
users, or computers. The entity later
uses the certificate to identify itself and
provide verifiable information. For
instance, the certificate includes the
Distinguished Name (DN) (identifying
information) of the entity, as well as the
public key (information about itself),
and possibly the IP address.
After two entities exchange and validate
each other's certificates, they can begin
encrypting information between
themselves using the public keys in the
certificates.
Cable Modem
A device connecting a computer to the
Internet via the cable television
network. Cable modems offer a high-
speed 'always-on' connection.
Certificate Authority
The Certificate Authority (CA) issues
certificates to entities such as gateways,
users, or computers. The entity later
uses the certificate to identify itself and
provide verifiable information. For
instance, the certificate includes the
Distinguished Name (DN) (identifying
information) of the entity, as well as the
public key (information about itself),
and possibly the IP address.
After two entities exchange and validate
each other's certificates, they can begin
encrypting information between
themselves using the public keys in the
certificates.
Cracking
An activity in which someone breaks
into someone else's computer system,
bypasses passwords or licenses in
computer programs; or in other ways
intentionally breaches computer
security. The end result is that whatever
resides on the computer can be viewed
and sensitive data can be stolen without
anyone knowing about it. Sometimes,
tiny programs are 'planted' on the
computer that are designed to watch out
for, seize and then transmit to another
computer, specific types of data.
Glossary of Terms

Glossary of Terms
774 Check Point Safe@Office User Guide
D
DHCP
Any machine requires a unique IP
address to connect to the Internet using
Internet Protocol. Dynamic Host
Configuration Protocol (DHCP) is a
communications protocol that assigns
Internet Protocol (IP) addresses to
computers on the network.
DHCP uses the concept of a "lease" or
amount of time that a given IP address
will be valid for a computer.
DMZ
A DMZ (demilitarized zone) is an
internal network defined in addition to
the LAN network and protected by the
Safe@Office appliance.
DNS
The Domain Name System (DNS)
refers to the Internet domain names, or
easy-to-remember "handles", that are
translated into IP addresses.
An example of a Domain Name is
'www.sofaware.com'.
Domain Name System
Domain Name System. The Domain
Name System (DNS) refers to the
Internet domain names, or easy-to-
remember "handles", that are translated
into IP addresses.
An example of a Domain Name is
'www.sofaware.com'.
E
Exposed Host
An exposed host allows one computer
to be exposed to the Internet. An
example of using an exposed host
would be exposing a public server,
while preventing outside users from
getting direct access form this server
back to the private network.
F
Firmware
Software embedded in a device.
G
Gateway
A network point that acts as an entrance
to another network.
H
Hacking
An activity in which someone breaks
into someone else's computer system,
bypasses passwords or licenses in
computer programs; or in other ways
intentionally breaches computer
security. The end result is that whatever
resides on the computer can be viewed
and sensitive data can be stolen without
anyone knowing about it. Sometimes,
tiny programs are 'planted' on the
computer that are designed to watch out
for, seize and then transmit to another
computer, specific types of data.

Glossary of Terms
Glossary of Terms 775
HTTPS
Hypertext Transfer Protocol over Secure
Socket Layer, or HTTP over SSL.
A protocol for accessing a secure Web
server. It uses SSL as a sublayer under
the regular HTTP application. This
directs messages to a secure port
number rather than the default Web port
number, and uses a public key to
encrypt data
HTTPS is used to transfer confidential
user information.
Hub
A device with multiple ports,
connecting several PCs or network
devices on a network.
I
IP Address
An IP address is a 32-bit number that
identifies each computer sending or
receiving data packets across the
Internet. When you request an HTML
page or send e-mail, the Internet
Protocol part of TCP/IP includes your
IP address in the message and sends it
to the IP address that is obtained by
looking up the domain name in the
Uniform Resource Locator you
requested or in the e-mail address you're
sending a note to. At the other end, the
recipient can see the IP address of the
Web page requestor or the e-mail sender
and can respond by sending another
message using the IP address it
received.
IP Spoofing
A technique where an attacker attempts
to gain unauthorized access through a
false source address to make it appear as
though communications have originated
in a part of the network with higher
access privileges. For example, a packet
originating on the Internet may be
masquerading as a local packet with the
source IP address of an internal host.
The firewall can protect against IP
spoofing attacks by limiting network
access based on the gateway interface
from which data is being received.
IPSEC
IPSEC is the leading Virtual Private
Networking (VPN) standard. IPSEC
enables individuals or offices to
establish secure communication
channels ('tunnels') over the Internet.
ISP
An ISP (Internet service provider) is a
company that provides access to the
Internet and other related services.
L
LAN
A local area network (LAN) is a group
of computers and associated devices
that share a common communications
line and typically share the resources of
a single server within a small
geographic area.

Glossary of Terms
776 Check Point Safe@Office User Guide
M
MAC Address
The MAC (Media Access Control)
address is a computer's unique hardware
number. When connected to the Internet
from your computer, a mapping relates
your IP address to your computer's
physical (MAC) address on the LAN.
Mbps
Megabits per second. Measurement unit
for the rate of data transmission.
MTU
The Maximum Transmission Unit
(MTU) is a parameter that determines
the largest datagram than can be
transmitted by an IP interface (without
it needing to be broken down into
smaller units). The MTU should be
larger than the largest datagram you
wish to transmit un-fragmented. Note:
This only prevents fragmentation
locally. Some other link in the path may
have a smaller MTU - the datagram will
be fragmented at that point. Typical
values are 1500 bytes for an Ethernet
interface or 1452 for a PPP interface.
N
NAT
Network Address Translation (NAT) is
the translation or mapping of an IP
address to a different IP address. NAT
can be used to map several internal IP
addresses to a single IP address, thereby
sharing a single IP address assigned by
the ISP among several PCs.
Check Point FireWall-1's Stateful
Inspection Network Address Translation
(NAT) implementation supports
hundreds of pre-defined applications,
services, and protocols, more than any
other firewall vendor.
NetBIOS
NetBIOS is the networking protocol
used by DOS and Windows machines.
P
Packet
A packet is the basic unit of data that
flows from one source on the Internet to
another destination on the Internet.
When any file (e-mail message, HTML
file, GIF file etc.) is sent from one place
to another on the Internet, the file is
divided into "chunks" of an efficient
size for routing. Each of these packets is
separately numbered and includes the
Internet address of the destination. The
individual packets for a given file may
travel different routes through the
Internet. When they have all arrived,
they are reassembled into the original
file at the receiving end.
PPPoE
PPPoE (Point-to-Point Protocol over
Ethernet) enables connecting multiple
computer users on an Ethernet local area
network to a remote site or ISP, through
common customer premises equipment
(e.g. modem).

Glossary of Terms
Glossary of Terms 777
PPTP
The Point-to-Point Tunneling Protocol
(PPTP) allows extending a local
network by establishing private
“tunnels” over the Internet. This
protocol it is also used by some DSL
providers as an alternative for PPPoE.
R
RJ-45
The RJ-45 is a connector for digital
transmission over ordinary phone wire.
Router
A router is a device that determines the
next network point to which a packet
should be forwarded toward its
destination. The router is connected to
at least two networks.
S
Server
A server is a program (or host) that
awaits and requests from client
programs across the network. For
example, a Web server is the computer
program, running on a specific host, that
serves requested HTML pages or files.
Your browser is the client program, in
this case.
Stateful Inspection
Stateful Inspection was invented by
Check Point to provide the highest level
of security by examining every layer
within a packet, unlike other systems of
inspection. Stateful Inspection extracts
information required for security
decisions from all application layers and
retains this information in dynamic state
tables for evaluating subsequent
connection attempts. In other words, it
learns!
Subnet Mask
A 32-bit identifier indicating how the
network is split into subnets. The subnet
mask indicates which part of the IP
address is the host ID and which
indicates the subnet.
T
TCP
TCP (Transmission Control Protocol) is
a set of rules (protocol) used along with
the Internet Protocol (IP) to send data in
the form of message units between
computers over the Internet. While IP
takes care of handling the actual
delivery of the data, TCP takes care of
keeping track of the individual units of
data (called packets) that a message is
divided into for efficient routing
through the Internet.
For example, when an HTML file is
sent to you from a Web server, the
Transmission Control Protocol (TCP)
program layer in that server divides the
file into one or more packets, numbers
the packets, and then forwards them
individually to the IP program layer.
Although each packet has the same
destination IP address, it may get routed
differently through the network.

Glossary of Terms
778 Check Point Safe@Office User Guide
At the other end (the client program in
your computer), TCP reassembles the
individual packets and waits until they
have arrived to forward them to you as a
single file.
TCP/IP
TCP/IP (Transmission Control
Protocol/Internet Protocol) is the
underlying communication protocol of
the Internet.
U
UDP
UDP (User Datagram Protocol) is a
communications protocol that offers a
limited amount of service when
messages are exchanged between
computers in a network that uses the
Internet Protocol (IP). UDP is an
alternative to the Transmission Control
Protocol (TCP) and, together with IP, is
sometimes referred to as UDP/IP. Like
the Transmission Control Protocol,
UDP uses the Internet Protocol to
actually get a data unit (called a
datagram) from one computer to
another. Unlike TCP, however, UDP
does not provide the service of dividing
a message into packets (datagrams) and
reassembling it at the other end.
UDP is often used for applications such
as streaming data.
URL
A URL (Uniform Resource Locator) is
the address of a file (resource)
accessible on the Internet. The type of
resource depends on the Internet
application protocol. On the Web
(which uses the Hypertext Transfer
Protocol), an example of a URL is
'http://www.sofaware.com'.
V
VPN
A virtual private network (VPN) is a
private data network that makes use of
the public telecommunication
infrastructure, maintaining privacy
through the use of a tunneling protocol
and security procedures.
VPN tunnel
A secure connection between a Remote
Access VPN Client and a Remote
Access VPN Server.
W
WLAN
A WLAN is a wireless local area
network protected by the Safe@Office
appliance.

Index
Index 779
8
802.1x
configuring for a wireless network • 269
configuring for ports • 374
excluding network objects from • 185
A
Access Denied page
customizing • 543
account
configuring • 559
ADSL
configuring a direct connection • 85
ADSL modem
about • 773
antispam filtering solutions
about • 466
comparison of • 466
Email Antivirus • 521
VStream Antispam • 487
antivirus filtering solutions
about • 465
Email Antivirus • 521
solutions • 465
VStream Antivirus • 467
B
backup connection
configuring • 149
Block Known Ports • 448
Block List engine
adding senders • 502
configuring settings • 504
deleting senders • 504
enabling/disabling • 492
Block Port Overflow • 449
Blocked FTP Commands • 450
bridges
adding and editing • 224
adding connections to • 233
adding networks to • 228
deleting • 238
explained • 217
multiple • 222
using • 217
C
CA, explained • 620, 773
cable modem
configuring a connection • 85
explained • 773
Index

Index
780 Check Point Safe@Office User Guide
certificate
explained • 620
exporting • 629
exporting CA • 630
exporting device • 629
generating self-signed • 621
importing • 626
installing • 620
uninstalling • 628
Checksum Verification • 436
Cisco IOS DOS • 433
command line interface
controlling the appliance via • 673
Content Based Antispam engine
configuring • 497
enabling/disabling • 492
D
DDoS Attack • 425
DHCP
configuring • 158
connection • 94
explained • 773
options • 164
DHCP Server
enabling/disabling • 158
explained • 158
diagnostic tools
Packet Sniffer • 706
Ping • 702
Traceroute • 702
using • 702
WHOIS • 702
diagnostics
running • 731
dialup
connection • 125
RS232 modem • 137
USB modem • 141
direct ADSL connection • 97, 105
DMZ
configuring • 169
configuring High Availability for • 239
explained • 774
DNS • 149, 702, 774
Dynamic DNS • 9, 557
E
EAP authenticator
explained • 394
using with wired clients • 396
using with wireless clients • 395
workflows • 395
Email Antispam, see Email Filtering • 521
Email Antivirus, see Email Filtering • 521
Email Filtering

Index
Index 781
Email Antispam • 521
Email Antivirus • 521
enabling/disabling • 522
selecting protocols for • 523
snoozing • 525
temporarily disabling • 525
EoA
configuring a connection • 85
Event Log
viewing • 339
exposed host
defining a computer as • 357
explained • 774
F
File and Print Sharing • 453
firewall
about • 351
levels • 354
rule types • 362
setting security level • 354
technologies • 37
firewall rules
adding and editing • 364
deleting • 373
enabling/disabling • 372
enabling/disabling logging • 373
reordering • 372
types • 364
using • 360
firmware
explained • 774
updating • 545
updating by using Software Updates •
546
updating manually • 549
viewing status • 683
Flags • 443
FTP Bounce • 447
G
gateway hostname
configuring • 687
gateways
backup • 239
default • 199
explained • 774
ID • 557
master • 239
H
H.323 • 458
Header Rejection • 451
Hide NAT
enabling/disabling • 157
explained • 157
high availability

Index
782 Check Point Safe@Office User Guide
configuring • 239
explained • 239
Host Port Scan • 444
HTTPS
configuring • 691
explained • 774
using • 77
hub • 59, 149, 239, 757, 775
I
IGMP • 455
IKE traces
viewing • 634
installation
ADSL models • 60
cable type • 59
network • 59
non-ADSL models • 59
software requirements • 9
Instant Messengers • 461
internal DNS Server
about • 182
configuring • 182
internal VPN Server
configuring • 571
explained • 566
Internet connection
configuring • 85
configuring backup • 149
enabling/disabling • 148
establishing quick • 148
terminating • 149
troubleshooting • 757
viewing information • 145
Internet Setup
using • 102
Internet Wizard
using • 86
IP address
changing • 156
explained • 775
hiding • 157
IP Fragments • 429
IP Reputation engine
configuring • 507
enabling/disabling • 492
IPoA
configuring a connection • 112
ISP
explained • 775
L
L2TP VPN Clients
configuring • 574
L2TP VPN Server
about • 567

Index
Index 783
configuring • 572
LAN
cable • 59
configuring a connection • 85
configuring High Availability for • 239
explained • 775
ports • 59
LAND • 422
licenses
upgrading • 685
link configurations
modifying • 214
load balancing
about • 150
configuring • 150
login
initial • 71
regular • 74
logs
event logs • 339
exporting • 339
security logs • 343
viewing • 339
M
MAC address
explained • 775
Max Ping Size • 428
MTU
explained • 776
N
NAT rules
about • 386
adding and editing • 389
types • 387
using • 386
viewing and deleting • 393
NetBIOS
explained • 776
network
changing internal range of • 156
configuring • 153
configuring a DMZ • 169
configuring a virtual access point (VAP)
• 294
configuring a VLAN • 174
configuring DHCP options • 164
configuring high availability • 239
configuring the OfficeMode network •
172
configuring the WLAN • 263
enabling DHCP Server on • 158
enabling Hide NAT • 157
installation on • 59
managing • 153
objects • 185

Index
784 Check Point Safe@Office User Guide
Network Interface Monitor
viewing bridge statistics • 331
viewing general network statistics • 321
viewing Internet connection statistics •
322
viewing wired network statistics • 326
viewing wireless network statistics • 329
network objects
adding and editing • 187
using • 185
viewing and deleting • 195
Network Quota • 431
network service objects
adding and editing • 196
viewing and deleting • 198
node limit
viewing • 316
Non-TCP Flooding • 423
Null Payload • 435
O
OfficeMode
about • 172
configuring • 172
P
packet • 145, 199, 702, 775, 776
Packet Sanity • 426
Packet Sniffer
filter string syntax • 709
using • 706
password
changing • 639
setting up • 71
Peer to Peer • 459
Ping of Death • 421
Port-based VLAN
about • 174
adding and editing • 178
deleting • 181
ports
configuring 802.1x security scheme for •
374
managing • 205
modifying assignments • 212
modifying link configurations • 214
resetting to defaults • 215
viewing statuses • 206
PPPoA
configuring a connection • 85
PPPoE
connection • 85
explained • 776
PPTP
connection • 85
explained • 776
primary WLAN

Index
Index 785
configuring • 263
defined • 778
printers
changing ports • 755
configuring computers to use • 737
resetting • 756
setting up • 734
using • 733
viewing • 754
Q
QoS
classes • 251
explained • 251
QoS classes
adding and editing • 256
assigning services to • 360
deleting • 260
explained • 251
predefined • 254
restoring defaults • 261
R
RADIUS
configuring VSA • 657
explained • 650
using • 650
rapid deployment
about • 725
performing • 727
preparing for • 726
Remote Access VPN Clients
Remote Access VPN Clients • 561
Remote Access VPN Servers
configuring • 567
explained • 561
Remote Desktop
accessing a remote desktop • 669
configuring • 663
configuring the host computer • 666
using • 661
reports
active computers • 316
active connections • 318
network statistics • 321
node limit • 316
routing table • 334
Safe@Office appliance status • 305
traffic • 311
viewing • 305
wireless statistics • 329
routers • 149, 239, 702, 757, 777
RS232 dialup modem
setting up • 137
rules

Index
786 Check Point Safe@Office User Guide
firewall • 360
NAT • 386
VStream Antispam • 510
VStream Antivirus • 471
Web • 529
S
Safe Senders
adding • 518
deleting • 519
Safe@Office 500
front panel • 13
network requirements • 10
package contents • 10
rear panel • 11
Safe@Office 500 ADSL
front panel • 23
network requirements • 21
package contents • 20
rear panel • 21
Safe@Office 500 series
about • 1
features • 2
product family • 2
Safe@Office 500W
front panel • 18
network requirements • 15
package contents • 15
rear panel • 16
Safe@Office 500W ADSL
front panel • 28
network requirements • 26
package contents • 25
rear panel • 26
Safe@Office appliance
backing up • 717
cascading • 62
changing internal IP address of • 156
configuring Internet connection • 85
connecting to network printers • 63
controlling via the command line • 673
features • 2
firewall • 37
installing • 45
internal DNS server • 182
maintenance • 683
models • 2
mounting • 63
preparing for a wireless connection • 62
rapid deployment • 725
rebooting • 732
resetting to factory defaults • 728
restoring • 717
securing against theft • 65
security • 31

Index
Index 787
setting the time • 699
setting up • 67
status • 305
technical specifications • 763
Safe@Office appliance configuration
backing up to a USB flash drive • 719
exporting • 718
importing • 721
restoring from a USB flash drive • 723
Safe@Office Portal
elements • 79
initial • 71
logging in • 74
logging out • 619
remotely accessing • 77
using • 79
Secure HotSpot
customizing • 384
enabling/disabling • 382
quick guest users • 647
setting up • 381
using • 380
SecuRemote
explained • 566
installing • 573
SecuRemote Remote Access VPN Server
configuring • 569
explained • 561
security
about • 31
configuring port-based security • 374
configuring servers • 357
creating firewall rules • 360
defining a computer as an exposed host •
357
firewall • 354
Secure HotSpot • 380
SmartDefense • 410
Security Log
resetting • 343
viewing • 343
security policy
about • 351
default • 353
enforcement • 352
implementation • 352
planning • 352
setting up • 351
Sequence Verifier • 442
serial console
controlling appliance via • 676
using • 676
servers
configuring • 357
explained • 777

Index
788 Check Point Safe@Office User Guide
Service Center
connecting to • 551
disconnecting from • 559
refreshing a connection to • 558
service routing
explained • 199
services
Email Filtering • 521
software updates • 546
Web Filtering • 537
Setup Wizard • 71, 86
SIP • 457
Site-to-Site VPN gateways
explained • 561
PPPoE tunnels • 581
Small PMTU • 438
SmartDefense
categories • 419
configuring • 411
using • 410
SNMP
configuring • 694
explained • 694
software updates
checking for manually • 546
explained • 546
source routing
explained • 199
Spanning Tree Protocol
explained • 222
with WDS • 265
SSH
configuring • 679
explained • 679
Stateful Inspection
explained • 777
technology • 39
Static IP
configuring a connection • 93
Static NAT
explained • 185
using • 187
static routes
adding and editing • 200
explained • 199
using • 199
viewing and deleting • 204
viewing the routing table • 334
Status Monitor
viewing • 305
Strict TCP • 437
subnet masks
explained • 777
subscription services

Index
Index 789
explained • 551
starting • 551
viewing information • 557
Sweep Scan • 444
SynDefender • 440
Syslog logging
configuring • 689
explained • 689
T
Tag-based VLAN
about • 174
adding and editing • 180
deleting • 181
TCP
TCP, explained • 777
TCP/IP
setting up for MAC OS • 55
setting up for Windows XP/2000 • 50
Teardrop • 420
technical support
contacting • 30
Telstra
Telstra • 123
Traffic Monitor
configuring • 313
exporting reports • 315
using • 311
viewing reports • 312
traffic reports
exporting • 315
viewing • 312
Traffic Shaper
advanced • 251
enabling • 251
explained • 251
restoring defaults • 261
setting up • 253
simplified • 251
using • 251
troubleshooting • 757
U
UDP
explained • 778
URL
explained • 778
users
adding and editing • 643
adding quick guest HotSpot • 647
managing • 639
setting up remote VPN access for • 650
viewing and deleting • 649
V
Vendor-Specific Attribute

Index
790 Check Point Safe@Office User Guide
about • 650
configuring • 471
virtual access points (VAPs)
about • 174
adding and editing • 294
deleting • 181
VLAN
adding and editing • 177
configuring • 13
configuring port-based • 178
configuring tag-based • 180
configuring virtual access points • 294
deleting • 181
types • 174
VPN
explained • 561
Remote Access • 565
sites • 561
Site-to-Site • 563
tunnnels • 561
viewing IKE traces • 634
VPN Server
configuring • 567
SecuRemote internal • 566
types • 567
VPN sites
adding and editing • 581
deleting • 615
enabling/disabling • 615
logging in • 616
logging out • 619
types • 561
VPN tunnels
creation and closing of • 631
establishing • 616
explained • 778
viewing • 631
VStream Antispam
about • 487
configuring advanced settings • 520
configuring the Block List engine • 502
configuring the Content Based Antispam
engine • 497
configuring the IP Reputation engine •
507
configuring the Safe Sender list • 517
default policy • 492
enabling/disabling • 492
header marking • 491
how it works • 489
rules • 510
viewing statistics • 495
VStream Antispam rules
adding and editing • 512
deleting • 517

Index
Index 791
enabling/disabling • 516
reordering • 516
types • 511
VStream Antivirus
about • 467
configuring • 467
configuring advanced settings • 482
configuring policy • 471
default policy • 469
enabling/disabling • 469
rules • 473
updating • 486
viewing database information • 470
VStream Antivirus rules
adding and editing • 473
deleting • 481
enabling/disabling • 480
reordering • 480
types • 473
W
WAN
cable • 59
load balancing • 150
WDS
explained • 265
links • 265
WDS links
configuring • 298
explained • 265
Web content filtering solutions
about • 527
comparison of • 527
Web Filtering • 537
Web rules • 529
Web Filtering
customizing the Access Denied page •
543
enabling/disabling • 537
excluding network objects from • 185
resetting to defaults • 542
selecting categories for • 539
snoozing • 541
temporarily disabling • 541
Web rules
adding and editing • 530
customizing the Access Denied page •
543
enabling/disabling logging • 535
reordering • 535
using • 529
viewing and deleting • 536
Welchia • 432
WEP • 263, 269
wireless networks
troubleshooting connectivity • 302

Index
792 Check Point Safe@Office User Guide
viewing statistics for • 329
wireless protocols
supported • 269
wireless stations
viewing • 329
Worm Catcher • 452
X
XBox LIVE • 463
