Sony 7130501 Licensed portable User Manual P800 UM
Sony Mobile Communications Inc Licensed portable P800 UM
Sony >
Contents
- 1. Exhibit 8 User Manual Part 1
- 2. Exhibit 8 User Manual Part 2
- 3. Exhibit 8 New User Manual Part 1
- 4. Exhibit 8 New User Manual Part 2
Exhibit 8 User Manual Part 2

104
Preliminary
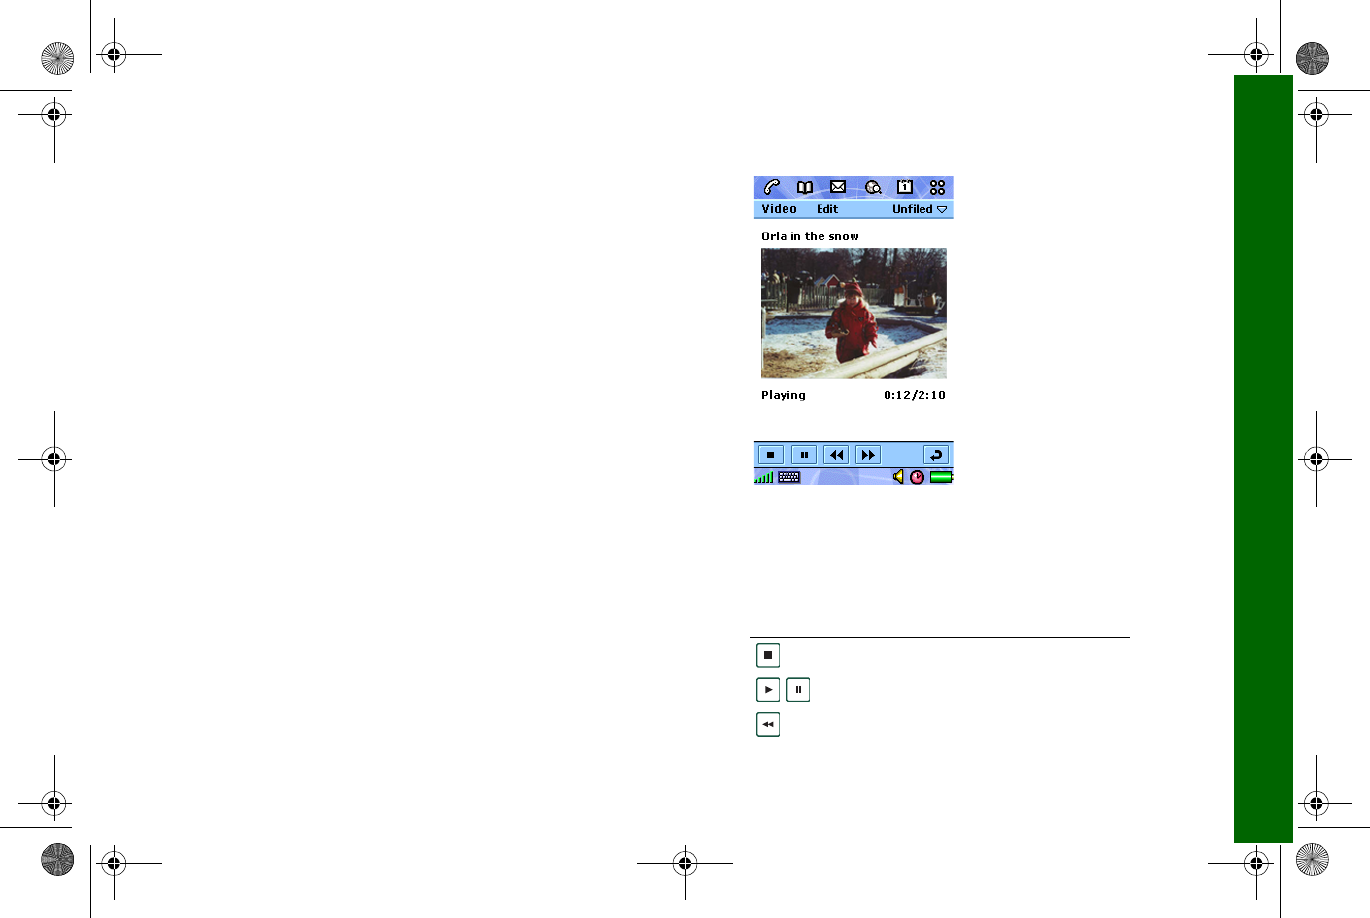
Video player
You can view video clips that you have saved in your
smartphone. The video clips can be downloaded in the
smartphone from an Internet site or transferred from a PC via
cable. It is also possible to send these video clips to other phones
or PC´s, via infrared communication, Bluetooth wireless
technology and multimedia messaging.
It is not necessary to download the video clips to be able to view
them. You can use the streaming function and view the video
clip from the Web site where it is located. The video clip is
played with only a short time delay.
The video player supports the MPEG-4 file format, e.g.
name.mp4.
List view
In the list view, you get an overview of all the MPEG-4 video
clips in your smartphone. You can search for specific video
clips, zoom the video clip names and sort them by name, date,
size or type. At the bottom of the screen you can see how many
video clips you have saved in your smartphone.
To view a video clip
1. Select
>
.
2. Tap a video clip in the list.
Display dump of List view
in Video player.
P800_UM.book Page 104 Thursday, July 11, 2002 10:58 AM
105
Video playerVideo playerVideo playerVideo player
Preliminary
Tip Use the
Find
function to locate a certain video clip, and the
Zoom
function to change the size of the screen fonts.
To sort the video clips
• Select
Edit >
choose how you want to sort the video clips in
the current folder.
Preferences
When you download a video clip to your smartphone, it is saved
in the download cache memory. When this memory is full you
have to empty it to be able to download new video clips to your
smartphone.
To clear the download cache
1. Select
Edit > Preferences
.
2. Select
Clear cache > Done
.
When you view a video clip from a Web site, using the
streaming function, a media buffer is used to provide a steady
flow of data. Increasing the size of the media buffer may
improve the play-back of the video clip.
To change the media buffer size
1. Select
Edit > Preferences
.
2. Tap
Custom setting >
move the slider left or right.
Detail view
In the detail view you can send, rename, delete or categorize
your video clips. Only the video clips saved in you smartphone
can be handled in the detail view. To handle a video clip saved
on a Sony Memory Stick, you first have to save it to your
smartphone.
Icon Function
Stop the track that is playing.
Play/Pause the highlighted track.
Rewind the current track.
OBS!
New image!!
P800_UM.book Page 105 Thursday, July 11, 2002 10:58 AM
106
Preliminary
To rename a video clip
1. Select
Video
>
Rename clip
.
2. Enter a video clip name
>
Done
.
Two or more video clips can not have the same name.
To send a video clip
1. Select the video clip you want to send.
2. Select
Video > Send as >
choose how you want to send it.
Tip Use the
Folder
function to organize all your video clips.
To copy the current video clip to another folder, select
Video >
Copy to
, then
select a folder from the list.
To view the video clip info
1. Select
Video > Clip info
.
To delete a video clip
1. Select the video clip you want to delete.
2. Select
Video > Delete clip
.
Saving video clips
When you play video clips that you have received via e-mail or
multimedia messaging, or that you have downloaded to your
smartphone from the Web, the viewer detail view is
automatically launched. From the viewer detail view you can
then save the video clip to your smartphone.
To save a video clip from another application
1. Select the video clip you want to save.
2. Select
Video > Save clip
.
3. Select what folder you want to save the video clip in
> Save
.
Forward the current track.
Takes you back to the previous view.
Icon Function
P800_UM.book Page 106 Thursday, July 11, 2002 10:58 AM

107
Online servicesOnline servicesOnline servicesOnline services
Online services
Online service is a customized service offered by a local
network operator.
Online services provides a mechanism which allows
applications that exist on the sim to interacate and operate with
the smartphone. It may provide services ranging from weather
forecasts to the latest information from the stock market.
The service is dependant on a special SIM card which supports
Online services.
Note Contact your operator to find out which services are
available for your account.
P800_UM.book Page 107 Thursday, July 11, 2002 10:58 AM
108
Preliminary
World clock
Sources (this section will be removed)
The following documents and resources have been used when
writing this chapter.
• QUARTZ DFRD Time UI Specification Rev 5 2001-03-27
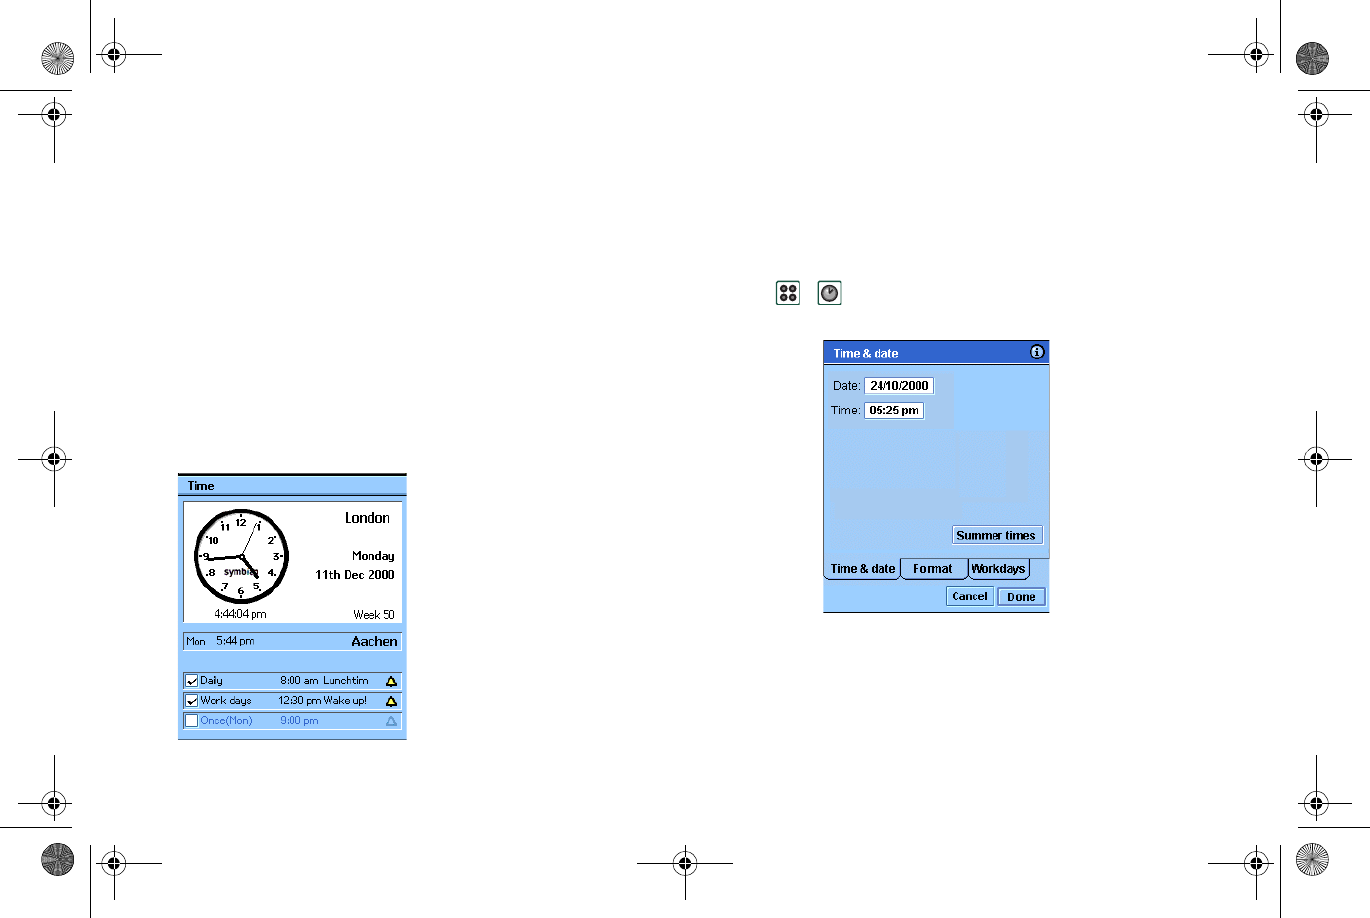
The time and date are always displayed in standby mode. You
can customize the display of times and dates throughout the
smartphone. You can set your current location and another
location of your choice. It is also possible to set three different
alarms.
Time and date
To set the current time and date
1. Select
>
.
2. Tap the clock to view the current time and date settings.
3. Tap the Date box, then tap the arrows to set the current year
and month. Then tap the current day.
4. Tap
Daylight saving time
, then tap the checkbox next to the
zone that currently has summer time
>
Done
. This is only
required if you are currently in a country with summer time.
Alarm slot
Other city
Current city
Current date
P800_UM.book Page 108 Thursday, July 11, 2002 10:58 AM
109
World clockWorld clockWorld clockWorld clock
Preliminary
5. Tap the time box, then tap the upper half of the hour or
minute box to increase the number displayed, or the lower
half to decrease the number.
6. Tap the
am
/
pm
box to switch between am and pm
>
. This
is only possible if you use the 12-hour time format.
7. Select
Done
.
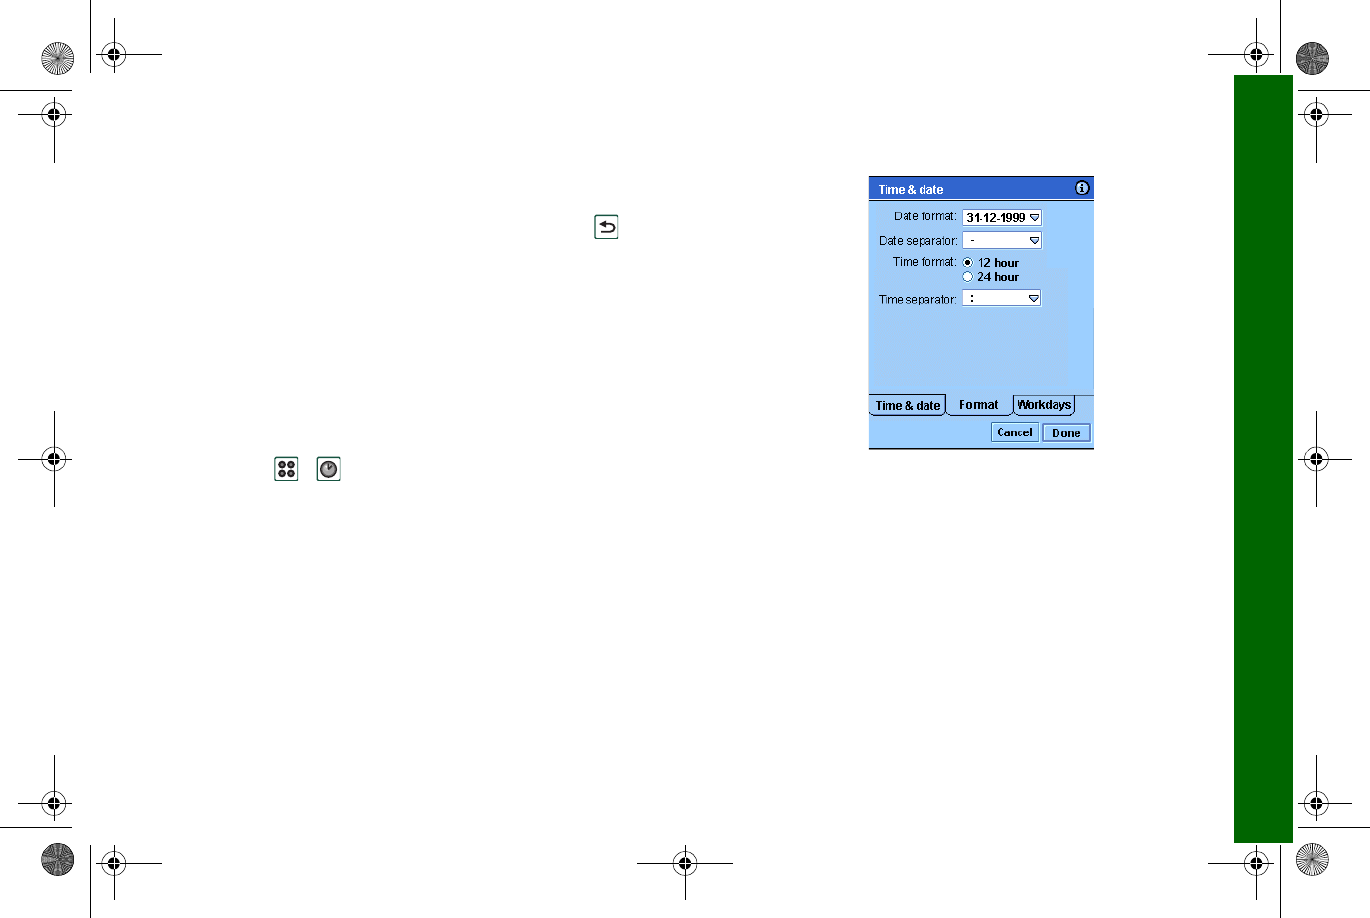
Format
You can specify how you want the time and date to be displayed
on the screen, and if you want to use the 12- or 24-hour time
format.
To set the time and date display format
1. Select
>
.
2. Tap the clock to view the current time and date settings.
3. Select
Format
.
4. Tap the Date format box
>
choose a format.
5. Tap the Date separator box
>
choose a separator.
6. Select a
Time format
.
7. Tap the Time separator box
>
choose a separator.
8. Select
Done
.
P800_UM.book Page 109 Thursday, July 11, 2002 10:58 AM
110
Preliminary
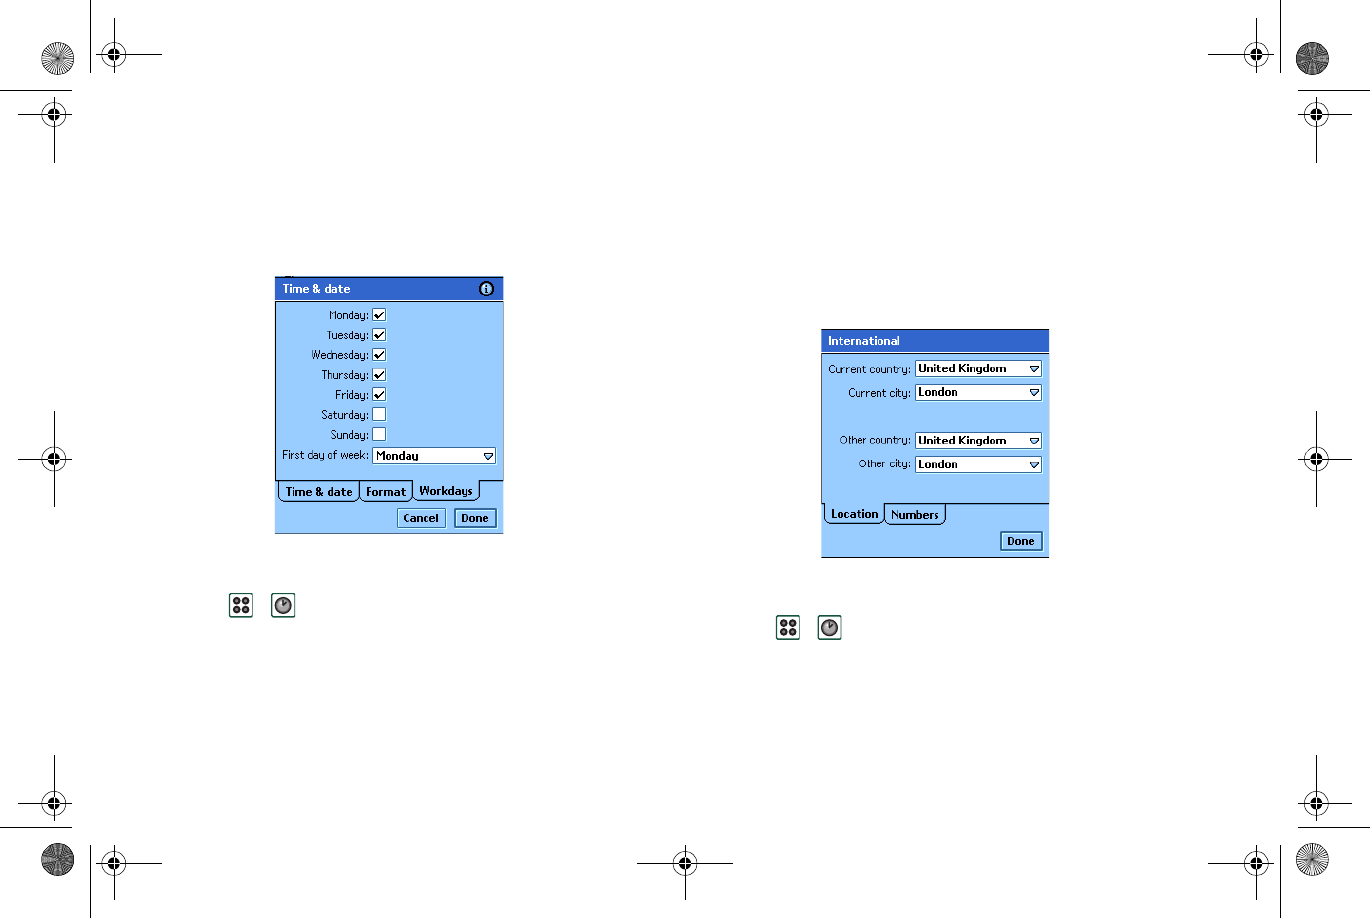
Workdays
You can specify what days you work, if, for example, you want
to set an alarm that sounds only on workdays. You can also
specify the first day of your week to customise the display of
both Week and Month views in Calendar.
To specify your workdays
1. Select
>
.
2. Tap the clock
>
“right arrow key icon” twice.
3. Tap the checkboxes next to the days you normally work.
4. Select
First day of week
>
choose a day.
5. Select
Done
.
Locations
Specify the country and city you are currently in. The city you
select will be displayed next to the clock in Time.
If you are away from home, for example travelling in another
country, it can be useful to know what the time is in your home
country as well as the country you are in. The city you select as
Other city will be displayed below the clock in Time.
To set the locations
1. Select
> .
2. Select
Time > Set location
.
3. Tap the Current country box
>
the country you are in at the
moment.
P800_UM.book Page 110 Thursday, July 11, 2002 10:58 AM
111
World clockWorld clockWorld clockWorld clock
Preliminary
4. Tap the Current city box
>
the city you are in at the moment.
If the city you are in is not listed, select the city closest to
you.
5. Tap the Other country box
>
choose a country.
6. Tap the Other city box
>
choose a city.
7. Select
Done
.
Numbers
You can choose how you want the measurements and numbers
in your smartphone to be displayed in all your applications.
Distances can be displayed using the imperial or the metric
system and different punctuation marks can be used as
separators.
To set the number details
1. Select
> .
2. Select
Time > Set location
.
3. Select
Numbers
.
4. Tap the distance boxes
>
choose imperial or metric.
5. Choose separators and Symbol position in the same way as in
4.
6. Select
Done
.
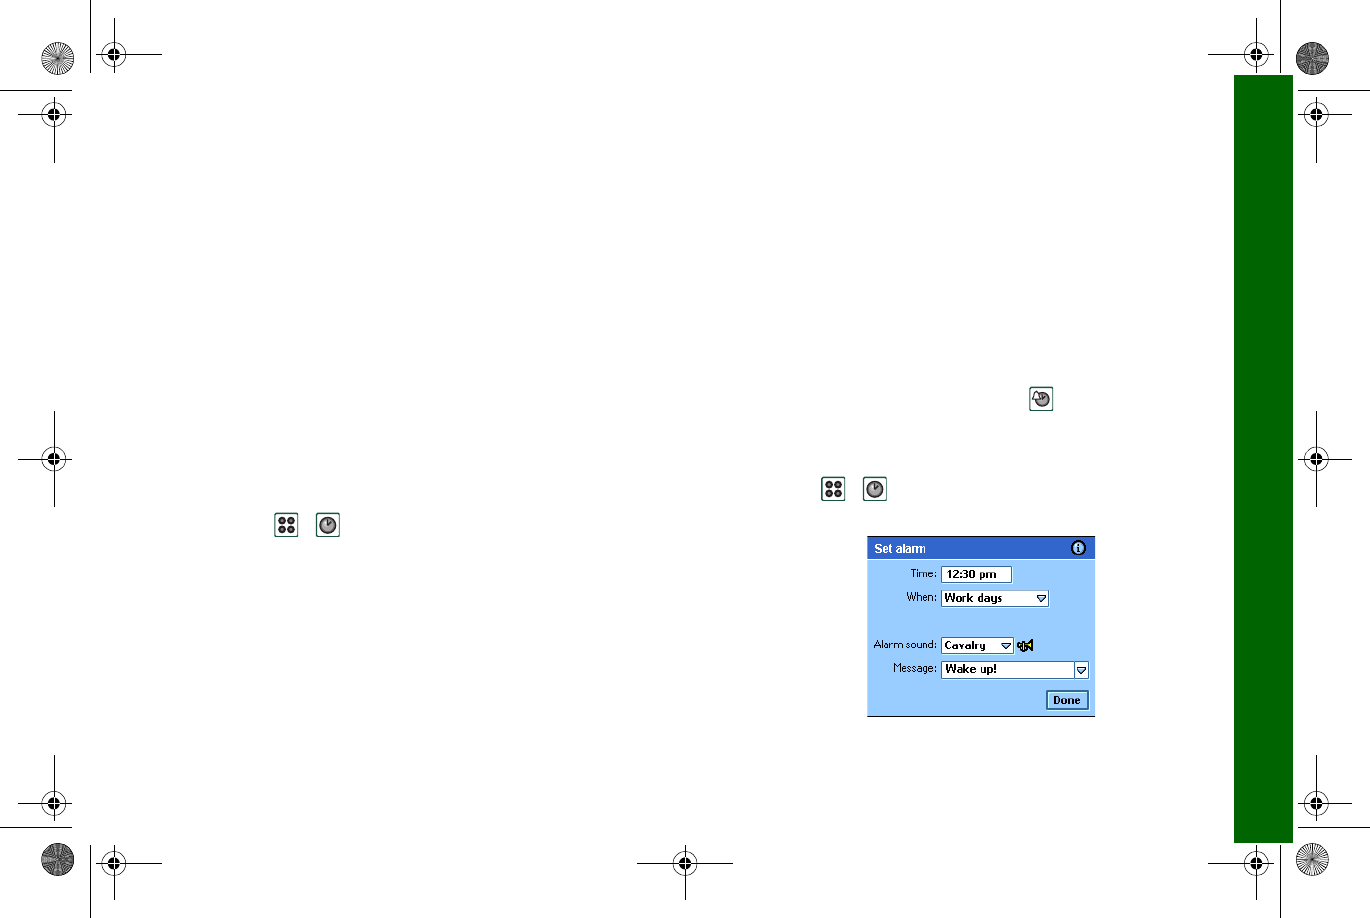
Alarms
You have the possibility to set up to three different alarms in
your smartphone. You can choose to activate one of the preset
alarms, or set a new alarm with your own definitions.
You can choose to set a silent alarm, where only a message is
displayed when it goes off, or you can set a sound alert. If you
are on the phone when an alarm is set to go off, the alarm will
not go off until you hang up.
To activate an existing alarm
• Tap the checkbox in the alarm slot. is displayed on the
status bar on the screen.
To set a new alarm
1. Select
>
.
2. Tap one of the alarm slots.
P800_UM.book Page 111 Thursday, July 11, 2002 10:58 AM

112
Preliminary
3. Select
Time >
choose at what time you want the alarm to go
off.
4. Select
When >
choose how often you want the alarm to go off:
–
Once
The alarm will go off at a time more than 24 hours
from now but within the next eight days.
–
Next 24 hours
Within the next 24 hours.
–
Daily
Every day at the specified time.
–
Weekly
Every week at the specified time.
–
Workdays
Every workday at the specified time.
5. Select
Alarm sound >
choose a sound.
6. Select
Message >
choose a preset message or write a new one.
7. Select
Done
.
8. Make sure the checkbox next to the alarm is selected.
When the alarm goes off, select
Snooze
to postpone the alarm for
five minutes or
Silence
to turn off the alarm sound. To turn off
the alarm completely, select
Done
.
P800_UM.book Page 112 Thursday, July 11, 2002 10:58 AM

113
CalculatorCalculatorCalculatorCalculator
Preliminary
Calculator
Sources (this section will be removed)
The following documents and resources have been used when
writing this chapter.
• QUARTS DFRD Calculator UI Specification Rev4
2001-03-09
• R380 user’s guide
The Calculator is a standard 10-digit calculator. You can add,
subtract, multiply, divide, calculate square root and percentage.
It also has a memory function.
To use the calculator
1. Select
>
.
2. Enter the calculations by tapping the digits.
All calculations, except percentage calculations, are performed
as they are entered, for example: 5+5x5=50, not 30.
Percentage calculations are performed backwards. To calculate,
for example, 10% of 50, enter 50x10%. The result is displayed
when you tap the % key.
Key functions
You can copy and paste values to and from other applications by
selecting
Calculator
>
Copy
or
Paste
.
Values stored in the memory are retained while using other
programs.
m+
Tap once to store an entered value in the memory.
If you already have entered a value in the memory, tap once
to add the value in the display to the value in the memory.
mr
Tap once to retrieve a value from the memory and enter it
into the display.
Tap twice to clear the memory.
m-
Tap once to subtract the entered value from the value in the
memory. The memory is adjusted but not displayed.
Tap once to delete the last digit you entered.
C
Tap once to reset the display to 0.
P800_UM.book Page 113 Thursday, July 11, 2002 10:58 AM
114
Personalizing your Personalizing your Personalizing your Personalizing your
Personalizing your smartphone
Editorial Comment: Illustrations to be redone in greyscale and
linked in by reference.
There are a number of ways you can give your smartphone a
personal touch and change its settings to suit your requirements.
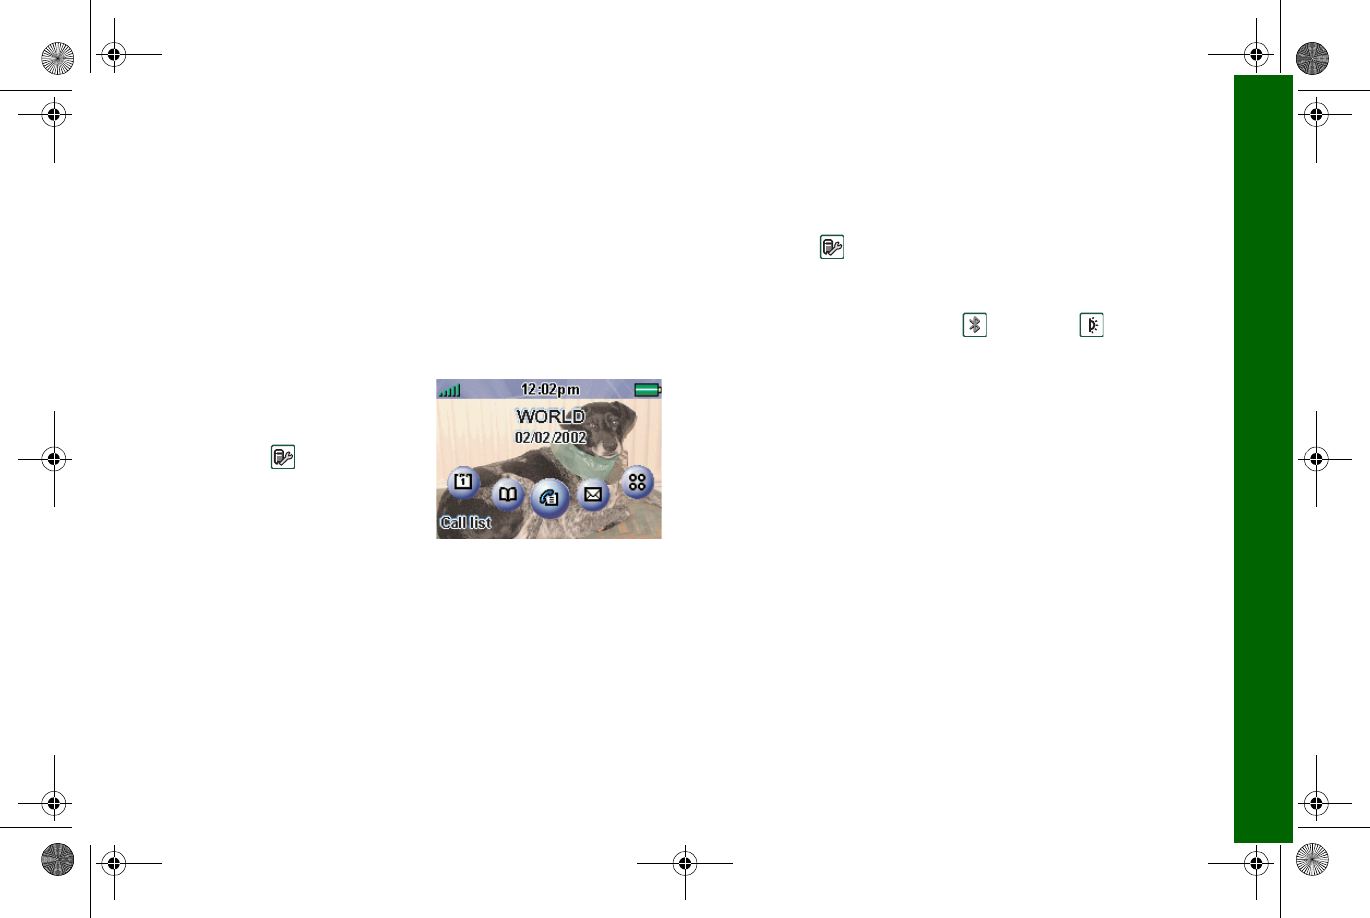
Changing your Application Shortcuts
The standby screen shown
when the flip is closed shows
five shortcuts to applications.
From the
Control panel
you
can change them, rearrange
them as you prefer, or even
hide them.if you wish. See
“Application shortcuts” on
page 25
Displaying the Area Code in the
Standby Screen
If your network operator provides CBS (Cell Broadcast
Services) with cell information you can set your smartphone to
display the area code below the network name in the standby
view. See “CBS tab” on page 129.
Setting a background picture
From the
Control panel
you can set a background picture
image for the standby screen. See “Display” on page 117
You can obtain suitable background picture files by
downloading, beaming using
Bluetooth
or
Infrared
or
transfer them from your PC.
Background picture images are 208 x 320 pixels and divided
into two parts: the upper part, 208 x 144 pixels, carries the
image seen in standby screen, the lower part can be set to a
colour or design to influence the light that shines through the
keys. The images can be JPEG, GIF, BMP, WBMP, MBM or
PNG format.
Setting a Screen Saver
You can set a 'screen saver' image to be displayed after a period
of inactivity. From the
Control panel
you can also switch this
facility on and off and select the delay period before the screen
saver is displayed. See “Display” on page 117. Key lock and
device lock may be used in combination with the screen saver.
When you press a button or touch the screen, you will be
prompted to activate keys and/or enter the device lock code.
P800_UM.book Page 114 Thursday, July 11, 2002 10:58 AM

115
Personalizing your Personalizing your Personalizing your Personalizing your
Preliminary
Image format is the same as for the background picture image.
Adding images to your Contacts
You can store a picture with
each entry in Contacts. See
“Managing contacts” on
page 54.
Pictures are easily taken using
the
CommuniCam
(see
“CommuniCam” on page 85,
though of course other images
can be used.
If your network operator provides a CLI (Calling Line Identity)
service, your smartphone can display the contact's picture
together with the other information when an incoming call is
received with a CLI matching that contact (not all numbers can
be displayed). The contact's picture is also displayed when
making a call.
To show the contact’s picture when receiving an incoming
call:
1. Select
Phone > Edit >Preferences > Incoming call picture
2. Select the
Show picture for incoming calls
check box.
3. Tap
Done
.
Ring signals
Your smartphone can play both iMelody format and polyphonic
ring signals (WAV, AU, AMR, and MIDI sound file formats).
You can add as many ring signals as desired, subject only to
available file space.
A ring signal may be selected for an entry in
Contacts
, so
that the caller can be identified by the ring signal that is played.
You can set a voice note recording as a ring signal. See “Using
voice notes as ring signals” on page 84. Choose between a
recording you have made yourself, and a recording you may
have downloaded, transferred from your PC, or received via
e-mail, EMS or MMS.
P800_UM.book Page 115 Thursday, July 11, 2002 10:58 AM
116
Preliminary
The recommended format for WAV files is PCM, 22,050 Hz, 8
bit, Mono, often called 'radio quality'. This format requires
approximately 22 kilobytes of space for each second duration.
Many PC audio applications support WAV.
Alarm tones and sound notification
You can choose different sounds for alarms and notifications in
these applications:
Master Reset
In the
Control panel
you can reset all the settings in your
smartphone to the way they were when you originally bought it.
See “Master reset” on page 124
for more details.
World clock
See“Alarms” on page 8
Calendar
Set a sound for reminder alerts, see “Customize the
calendar” on page 78)
Tasks
Set a sound for reminder alarms. See “Settings” on
page 82
Messages
Set a different sound for each type of message as
notification of a new message:
•SMS
•e-mail
• MMS
• Notice (BIO messages)
• Area information
•WAP Push
See “Messaging accounts” on page 124
P800_UM.book Page 116 Thursday, July 11, 2002 10:58 AM
117
Control panelControl panelControl panelControl panel
Control panel
The Control panel is the location for all the main settings on
your smartphone that are system wide and affect more than one
application. This is the main place to go to initially set up your
smartphone, and to change settings at any point thereafter. To
access it, select
Control Panel
in
Applications
To make the settings easier to find, they have been grouped into
three groups shown on separate tabs:
Device
,
Connections
and
General
:
To see a list of all control panel settings and the groups to which
they have been assigned, tap
Control panel > Set groups.
• To sort the list of settings by group name: at the top of the
list, tap
Group
.
• To change the group to which a setting is assigned: select the
name of the setting in the list.
The sections below, arranged in alphabetical order, describe the
settings available for each of the default items in the
Control
panel.
Bluetooth
Bluetooth uses radio waves to enable wireless connections
between your smartphone and other Bluetooth-enabled devices.
This method of linking works well at a range of up to 10 metres,
even if there is an obstruction between the two devices.
Device tab Connections tab General tab
Certificate Manager Bluetooth International
Display Cable Time & date
Flip closed shortcuts Infrared
Flip removed Internet accounts
Format disk IP security manager
Language Messaging accounts
Master reset Secure tokens
Storage manager WAP accounts
System sounds
Text input
User greeting
WIM management
P800_UM.book Page 117 Thursday, July 11, 2002 10:58 AM

118
Preliminary
Bluetooth
settings are shown on two tabs:
Tip You will probably find that the preset name of your
smartphone, and of devices you pair it with, are not very
meaningful or easily recognizable. It is a good idea to change
these names to something more useful. The name you choose for
your smartphone appears on any devices you pair it with.
To locate other Bluetooth-enabled devices in the vicinity:
1. Tap
Add
. The
Available Bluetooth devices
dialogue opens:
• All enabled devices that are discoverable within range are
shown with their name and icon. You can use
Show:
to restrict
the list to one category (only PC, for example).
• Paired devices that are within range are shown with regular
text.
• Non-paired devices that are within range are shown with
their names in italics.
• Devices that are within range but unknown are shown with a
preset name.
If a device you want to pair with your smartphone does not
appear in the list, check that:
• It is on and within range
• Bluetooth on the device is on and discoverable.
To pair a device to your smartphone:
1. Select the device in the
Available Bluetooth devices
list
2. If the device requires a passkey you will be asked to enter it.
3. Tap
Done
Note The other device (a PC, for example) may require that you
enter the same passkey in its own dialogue.
Devices
A list of all the Bluetooth-enabled devices that your
smartphone is paired (bonded) with.
• To change the name of a device, select the name in the
list.
• To remove a device from the list, select the name and
tap
Remove
.
Settings
• A “friendly” device name for your smartphone
Security-related settings:
• Its Bluetooth operation mode
• How it should act when receiving a beamed entry.
P800_UM.book Page 118 Thursday, July 11, 2002 10:58 AM
119
Control panelControl panelControl panelControl panel
Preliminary
Security
On the
Settings
tab you can set your smartphone to different
operation modes:
You can also set how your smartphone should act when
receiving beamed items:
Cable
Use
Cable
to set the cable connection mode and the connection
parameters used when communicating through your
smartphones cable port.
Tap
Control Panel > Connections
and select
Cable
to:
• Choose the cable connection mode: When connecting via
cable the smartphone must be set in PC connect mode or
Modem mode, see table below.
• Set the baud rate, parity, number of stop bits, character length
and type of flow control required for the connection When
connecting your smartphone via the desk stand to a USB port
on your PC, use the following (default) settings:
Tip You can set the cable connection mode when the flip is
closed by selecting
Applications
>
Connections
>
Icon
Cable.
Certificate manager
Digital certificates ensure that the web or WAP pages you visit,
or any software you install, really are created by the person you
expect.
On
All Bluetooth functionality from your smartphone
works. Your smartphone is connectable, paired
devices can access it.
Auto
All Bluetooth functionality from your smartphone
works. Your smartphone is not connectable.
Off
Bluetooth is turned off.
Discoverable
Other Bluetooth-enabled devices can find and
connect to your smartphone. To pair with another
device, your smartphone must be
Discoverable
Always receive
Receives the entry automatically.
Ask first
You will be shown a
Connection request
that you
can accept or reject.
Never receive
Rejects the item automatically.
PC connect mode Modem mode
• Synchronization
• Installation of software
• Backup and restore
• Smartphone as a modem
• Phone Book Manager (PC
software)
Baud rate
460800
Parity
None
Stop bits
1
Character length
1
Flow control
CTS/RTS
P800_UM.book Page 119 Thursday, July 11, 2002 10:58 AM

120
Preliminary
Certificates may be present on the pages that you view or the
software that you download. Your smartphone compares these
certificates with a set of certificates that is stored in
Certificate
manager
to ensure the authenticity of the page or software. If the
certificates do not match, your smartphone informs you, and
gives you the following choices:
• Prevent the page being loaded or the software being installed
• Continue at your own risk
The certificates on your smartphone have been created and
issued by an independent organisation to ensure their
authenticity.
Security information
Security information is displayed when
Certificate manager
cannot be sure of the origin of the page or software. For
example, security information will be displayed if:
• The certificate on a page has expired
• The identity of a software manufacturer cannot be verified
Security information is also displayed when a certificate on your
smartphone has:
• Expired
• Been revoked by the independent organisation that issued it.
Adding and removing certificates
Your smartphone handles certificates automatically so, most of
the time, you can browse the Internet securely without using
Certificate manager
. If you do need to add or remove a certificate,
you will usually be informed by your network operator or
system administrator. You should remove a certificate from
Certificate manager
if you are informed, or suspect, that:
• The certificate does not belong to the person who supplied it
• The certificate was issued incorrectly by the independent
organisation that created it
Type of certificate
The type can be either
Certificate Authority
or
User
.
•
Certificate Authority
certificates contains server details. This
type of certificate is handled by your smartphone when the
server only requires server authentication. This means that
your identity remains anonymous.
•
User
certificates contain your identity. This type of certificate
is used when the server asks for client authentication. The
client application requests you to identity yourself by
choosing a user certificate.
P800_UM.book Page 120 Thursday, July 11, 2002 10:58 AM

121
Control panelControl panelControl panelControl panel
Preliminary
Display
Use the
Display
settings to control the screen and power
functions of your smartphone.
Wallpaper
You can set a picture to be the background for the standby
screen. (See“Flip closed - overview” on page 22 for details on
the standby view.) Select
Browser
from the drop-down list to see
image files available on your smartphone. The picture you
selected last by browsing is shown as default in the list. Read
more about background picture images in “Personalizing your
smartphone” on page 110
Screen saver
You can set a screen saver image to be displayed after a period
of inactivity. You can also switch this facility on and off and
select a delay period of up to 15 minutes before the screen saver
is displayed. Read more about screensaver images in
“Personalizing your smartphone” on page 110
If you select the
Phone lock protected
check box the Device lock
will activate when the delay runs out. Read more about locks
and security in “Phone locks” on page 16.
Power save
You can set a power saver to switch of the screen after a period
of inactivity (2, 3, 5, 7, 10, 15, or 30 minutes). When the power
saver activates, the screen will be switched off.
If you set times for both screen saver and power saver the power
save setting will automatically be set higher.
Light
You can set the screen light settings for car use and handheld
use.
Lock
Tap
Lock
to activate the Screen saver immediately.If the
Phone
lock protected
check box has been selected this will also activate
the Device lock.
Auto
Light switches on when you tap the screen, press a key, or
receive an incoming call
On
Light is always on
Off
Light is always off
P800_UM.book Page 121 Thursday, July 11, 2002 10:58 AM
122
Preliminary
Calibrate
Occasionally you may find that you tap one object (for example
a button or menu option) but another is activated. Calibrating
the screen ensures that the correct object is activate. To restore
calibration to the factory settings, press the Jog Dial
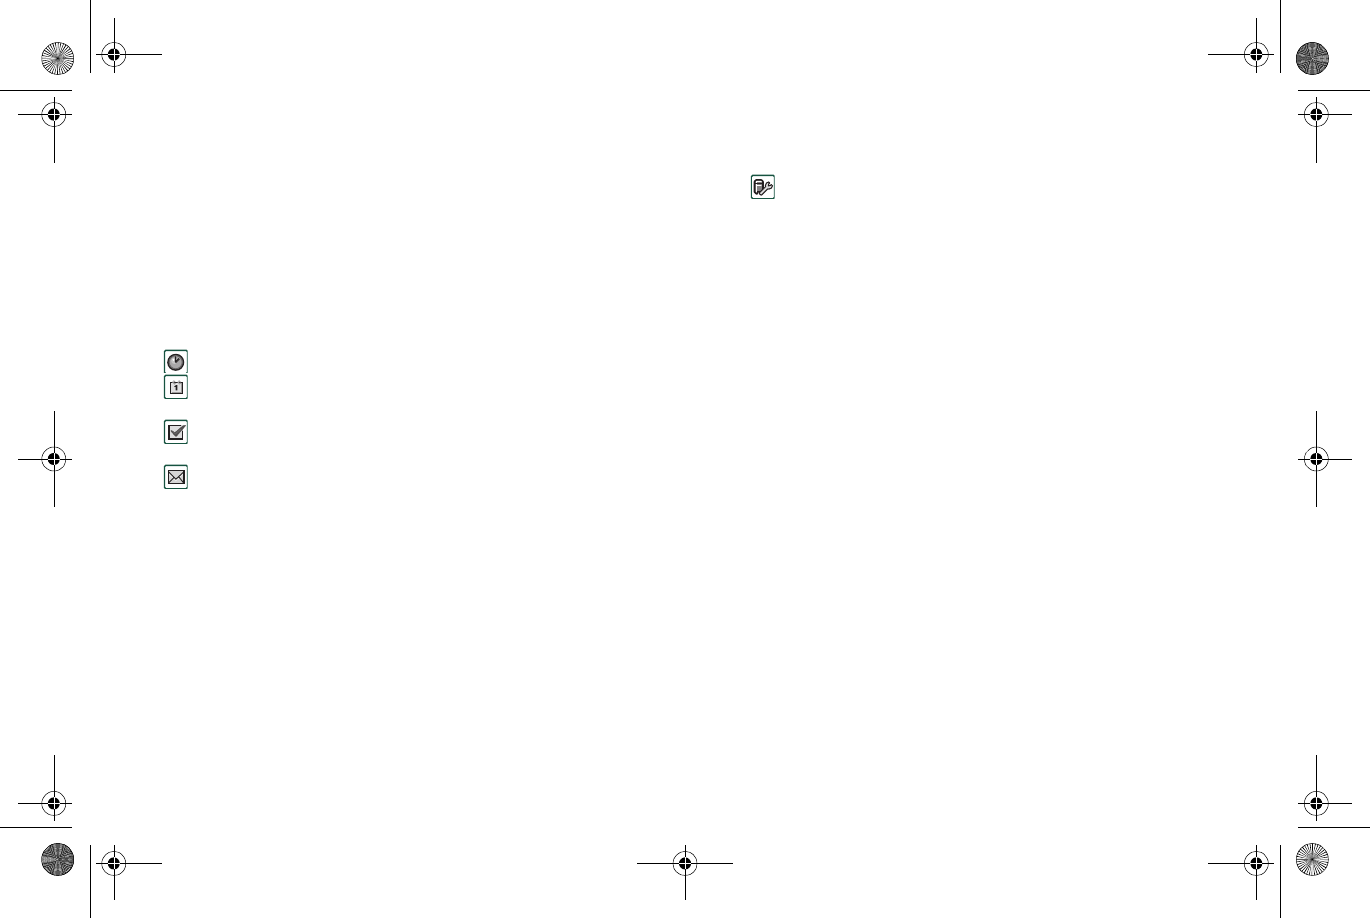
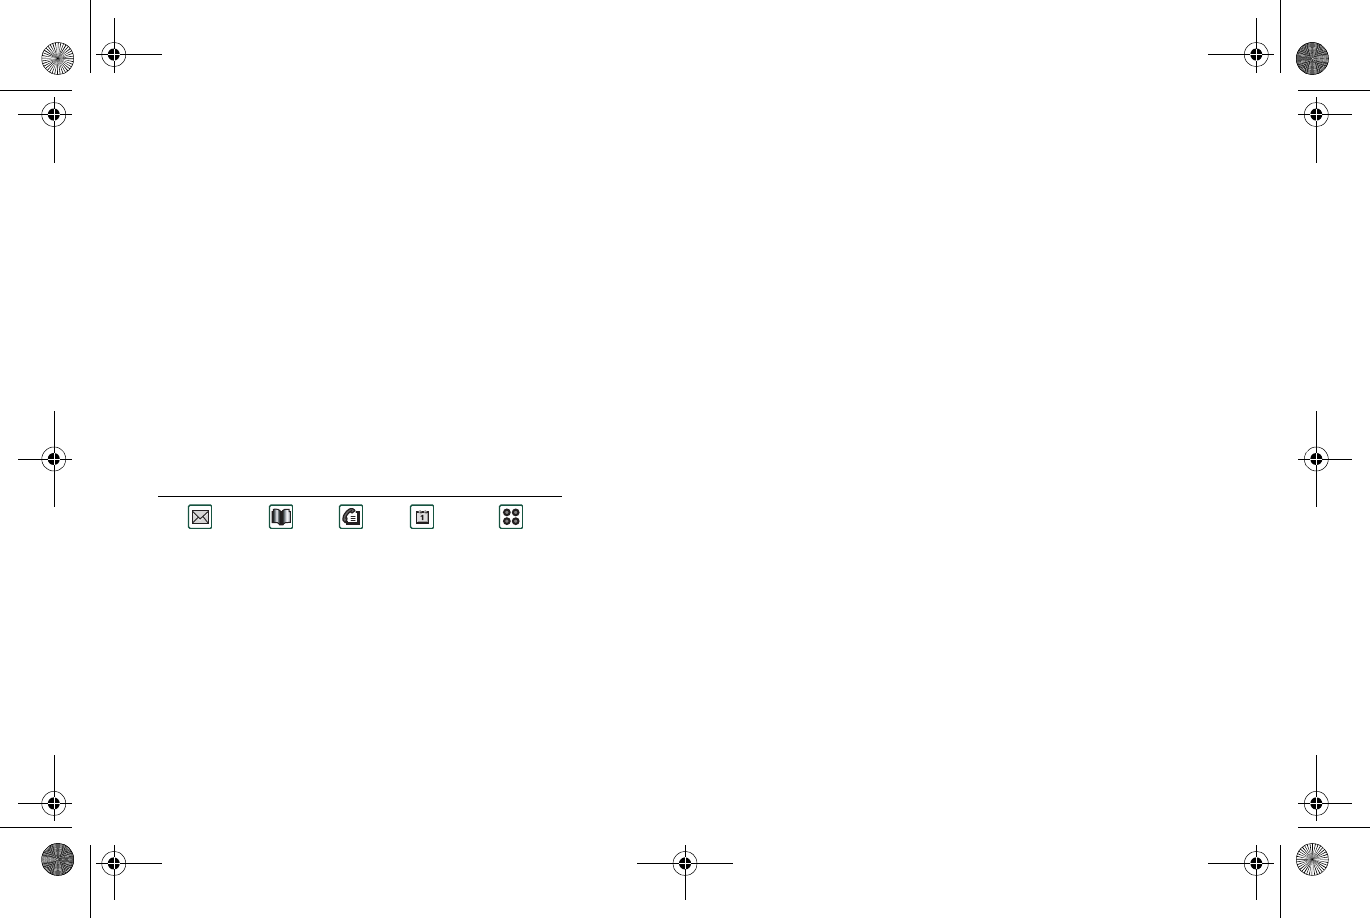
Flip closed shortcuts
Use this dialogue to configure the application shortcuts shown
in the Flip Closed
Standby
view, see “Standby view” on page 24.
You can change the five shortcuts shown. If you feel that the
shortcuts obscure your wallpaper you can choose to have them
hidden when you don’t need them. By default these shortcut
icons are displayed:
To change an application shortcut in the Standby view:
1. In the
Flip closed shortcuts
dialogue, select the icon you wish
to change. The name of the application is shown in the
Set
Application
pick list.
2. Choose the application you want to replace it with from the
list.
Your choices will remain, even after power is lost. On a master
reset, the default settings will be re-applied.
To hide the application shortcuts when your smartphone is
inactive:
1. Clear the
Shortcuts always displayed
check box. with the
caption.
Flip removed
When you use your smartphone with the hardware flip removed,
you can use the keys on the virtual flip instead. Use this setting
to turn it on or off (see “Virtual flip” on page 27).
Format disk
When you format a disk, you delete all the information on it,
including any applications that you've installed.
Your smartphone comes with one Sony Memory Stick Duo
which is displayed here. Any Sony Memory Stick Duo that you
install in your smartphone is also displayed.
You can rename a disk to give it a more meaningful name.
Infrared
Use this setting to control the state of the infrared
communications port of your smartphone. You can set it
On
,
Off
or
On for 10 minutes.
Read more about connecting to other devices
using infrared in “Connection via infrared port” on page 127
Messages Contacts Call list Calendar Applications
P800_UM.book Page 122 Thursday, July 11, 2002 10:58 AM
123
Control panelControl panelControl panelControl panel
Preliminary
International
Use these settings to set the locations shown in
World Clock,
as well the units for distances, numerical separators, and how
currency values should be shown.There are two tabs:
Locations
and
Numbers
On the Locations tab:
•Set
Current country
and
Current city
to your current location.
•Set
Other country
and
Other city
to an alternative location (for
example your home location if you are abroad).
If the city you want is not listed, select another city in the
desired time zone.
On the Numbers tab:
•Set
Long Distance
and
Short distance
to
Imperial
or
Metric
Long distances are those that are displayed in and are
measured in miles or kilometres. Short distances are those
that are measured in metres or and centimetres, or feet and
inches.
• Set the decimal separator and thousands separator you desire.
• For applications that use currency values you can set a
currency symbol and choose how the symbol should be
placed in relation to the symbol.
Internet accounts
You access the Internet using an Internet Service Provider (ISP),
who supplies you with account details including: a username, a
password, and the phone number or web site address that your
smartphone automatically uses to access the Internet. You need
to set up an Internet account before you can:
• Access web pages and download MMS messages
• Set up an e-mail account to send and receive e-mail
messages.
Tip A simple way of setting up an Internet account is to ask
your service provider to send you a message that contains the
required information to create an account automatically on your
smartphone.
There are three types of Internet account:
Dial-up account
:
.
With a dial-up account, you're charged for the
length of time that you're connected to the
Internet.
P800_UM.book Page 123 Thursday, July 11, 2002 10:58 AM

124
Preliminary
The dialogue has two tabs:
Accounts
and
Other.
Accounts tab
The Internet accounts dialogue lists all the Internet accounts that
have been set up on your smartphone.
You can add a
New
account to the list and
Edit
or
Delete
an
existing account
If you want to select an Internet account every time you connect
to the Internet select the
Show connection
dialogue check box.
This may be useful if you use different Internet accounts for
Internet
and
Messages
.
Whenever you connect to the Internet, your
Preferred
account is
the account that your smartphone prompts you to use.
To create a new Internet account:
1. On the
Accounts
tab, tap
New
.
2. Give the account a name. This will be the name shown in
your list of accounts. (In dialogs that appear while a
connection is being established the text
-GPRS
is
automatically added to names of GPRS accounts).
3. Choose the
Connection type.
for the type of account that you
want to create, GPRS or Dial-up.
4. Continue entering settings as required. These will differ
depending on the type of account: GPRS, dial-up or high-
speed dial-up:
High -speed dial-up
account
:
This is a special kind of dial-up account. With
a high-speed dial-up account, you're charged
for the length of time you're connected but you
can increase the connection speed so that
information is transferred faster. Billing rates
from your Internet Service Provider (ISP) may
increase as you increase the connection speed.
GPRS account
: With a GPRS account, you're charged for the
amount of information you view, download, or
send.
P800_UM.book Page 124 Thursday, July 11, 2002 10:58 AM
125
Control panelControl panelControl panelControl panel
Preliminary
New GPRS account
For some accounts you may need to make advanced settings.
Tap
Advanced
and enter settings on the tabs as described below:
GPRS Advanced settings tabs
Server User name and password
Normally, you do not have to enter a user name and
password when you connect to a GPRS account. However,
some service providers may require you to enter these
details.
Address
Enter the Internet address of your GPRS account. The
address is supplied by your service provider.
Log in
The settings on this tab deal with IP and DNS addresses.
IP and DNS addresses uniquely identify your Internet
Service Provider (ISP)'s computers, which your
smartphone uses to connect to the Internet. Your
smartphone can normally fetch these addresses
automatically from most ISPs.
If, after setting up an Internet account, you cannot connect
to the Internet and you suspect these addresses are
incorrect, ask your ISP for their IP and DNS addresses.
IP address types
There are four different types of IP addresses:
•
IPv4
: Consists of four 3-digit boxes and valid input is
between 000 and 256 in each box,
•
IPv6
: Consists of eight hexadecimal boxes and valid input
is between 0000 and FFFF.
•
IPv4
compatible
: Consists of six hexadecimal boxes and
four 3-digit boxes. The last hexadecimal box is prefilled
with 0:0:0:0. Only the four 3-digit boxes can be changed,
and the valid input is between 000 and 256.
•
IPv4
mapped
: Consists of six hexadecimal boxes and four
3-digit boxes. The last hexadecimal box is prefilled with
F:F:F:F. Only the four 3-digit boxes can be changed, and
the valid input is between 000 and 256.
Proxy
A proxy server is a computer that stores copies of web
pages so that they are retrieved faster than they would be
from their original location.
To use a proxy server: specify the proxy server address and
port number, which are available from your Internet
Service Provider (ISP).
If you use a proxy server, you can still specify a list of web
sites that are accessed from their original location. Enter
the Internet address of each web site on a separate line in
the list
Proxy exceptions
GPRS Advanced settings tabs
P800_UM.book Page 125 Thursday, July 11, 2002 10:58 AM
126
Preliminary
New dial-up or high-speed dial-up account
Your Internet Service Provider (ISP) supplies you with your
User
name
, your
Password
, and their
Phone number
, which your
smartphone dials to connect to the Internet. If you have a high-
speed dial-up account with your ISP you
Tip To avoid having to change the phone number when you
travel abroad: enter the international dialling prefix (for
example '+') and the appropriate country code for your ISP.
For some accounts you may also need to make advanced
settings.
Other
If your Internet Service Provider (ISP) supports Point to
Point Protocol (PPP) extensions, you can select the
Enable
PPP extensions
check box. PPP extensions allow your
smartphone to provide features such as encryption, which
increases the security of your Internet connection.
Your ISP may require Plain text authentication. If you
select the
Plain text authentication
check box, the security
of your connection will decrease during the connection
process. Once you are connected, the security of your
connection is restored.
QoS
Check with your mobile operator before changing any of
the QoS (Quality of Service) settings.
If your operator supports the use of
Header compression
,
tapping
On
can speed up your connection.
The settings
Delay
,
Reliability
,
Peak rate
, and
Mean Rate
are
all by default set to
Subscribed
, which means that your
operators default QoS (Quality of Service) values will
apply.
GPRS Advanced settings tabs
P800_UM.book Page 126 Thursday, July 11, 2002 10:58 AM
127
Control panelControl panelControl panelControl panel
Preliminary
Tap
Advanced
and enter settings on the tabs as described below
Dial-up and high-speed dial-up advanced settings tabs
Log in
The settings on this tab deal with IP and DNS
addresses. For an explanation of these settings, see
Log in
in the table GPRS Advanced settings tabs.
Script
As an alternative to entering your user name and
password to access the Internet you may need to use a
login script stored on your smartphone. Although
uncommon, scripts may be required by your Internet
Service Provider (ISP). Select the
Use login script
check box and enter the script text in the
Script editor
If you select the check box
Plain text authentication
(required by some ISPs), the security of your
connection will decrease during the connection
process. Once you are connected, the security of your
connection is restored.
Select the checkbox
Post connect terminal
if:
• The login script of the account that you are setting
up requires that you input certain information or
you will need to respond to prompts from the
Internet account.
• You are connecting to a dial-up account that uses
Secure Access generated by a separate smart card
or hard token.
Proxy
For an explanation of these settings, see
Proxy
in the
table GPRS Advanced settings tabs
Speed You can only increase the speed of your connection if
you have a high-speed dial-up account with your
Internet Service Provider (ISP).
Secure
To enable secure access for this Internet account you
must link it to a vendor-associated Secure Token in
this dialogue:
1. Select the vendor and token names of the Secure
Token that you want to link to this account from the
drop lists.
2. Select the Enable secure access check box.
To create or delete Secure Tokens on your
smartphone, tap
Control panel > Connections
>Secure tokens
.
Other
If your Internet Service Provider (ISP) supports Point
to Point Protocol (PPP) extensions, you can select the
Enable PPP extensions
check box. PPP extensions
allow your smartphone to provide features such as
encryption, which increases the security of your
Internet connection.
If the computer that you connect to supports call
back, it can break the Internet connection after you
have logged in and then call your smartphone back to
re-establish the connection. Call back saves you
money and increases security.
To enable call back:
1. Select the
Enable call back
check box.
2. In the
Call back type
list, choose whether you want
the ISP to call you back using the phone number
stored on the provider's server (
Use server number
)
or another phone number (
Use number below
).
Dial-up and high-speed dial-up advanced settings tabs
P800_UM.book Page 127 Thursday, July 11, 2002 10:58 AM

128
Preliminary
To
Edit
an Internet account:
1. On the
Accounts
tab, select the account in the list.
2. Tap
Edit
.
3. Change your settings as desired.
4. Tap
Done
.
Note If you change the
Connection type
all account data for that
account will be deleted.
To
Delete
an account:
1. On the
Accounts
tab, select the account in the list.
2. Tap
Delete
.
3. Tap
Done
.
Other tab
You can use the
Dial-up timeout
and
GPRS timeout
settings to set up
your smartphone to disconnect automatically from the Internet if
you're not using it. The connection is broken after the period you
specify has lapsed.
Preferred Mode (bearer preference)
Select
GPRS only
if you do not want to be disturbed by incoming
phone calls while browsing the web. All incoming voice (and
GSM data) calls are rejected.
When you have selected
GSM only
no GPRS data connection is
possible.
If you select
Automatic
your smartphone will let you answer
incoming GSM calls while having normal GPRS functionality.
A GPRS data connection will be interrupted by a voice call.
IP security manager
The IP security manager displays stored policies and only one
policy can be activated at a time.
There are two types of passwords needed:
•IP security password: is to be set when activating the very
first policy, that is, this password is only set once, but it is
possibly to change it later at any time by tapping Password
button.
•Activation password: is needed when a policy is activated
for the first time and the supplier of the policy gives this.
Language
Use this list of all languages stored on your smartphone to
change language. The highlighted entry is the language
presently in use.
Tip To conserve storage space only a limited set of languages is
loaded on your smartphone at delivery. You can use the P800
Change Language utility on the
PC suite for P800
CD to load and
delete languages.
P800_UM.book Page 128 Thursday, July 11, 2002 10:58 AM
129
Control panelControl panelControl panelControl panel
Preliminary
Master reset
Use
Master reset
to return your smartphone to the state it was in
when originally delivered.
Warning! All user data will be deleted and all settings will be
in your smartphone to the way they were when it was originally
delivered.
If you want to keep installed applications clear the
Delete user
installed applications
check box.
Messaging accounts
The
Messages
application can handle many different types
of messages, but you must first set up accounts and make
settings as described below.
The Messaging accounts dialogue has four tabs, one for each
type of messaging account:
Tip A simple way of setting up an e-mail or MMS account is to
ask your service provider to send you a message that contains
the required information to create an account automatically on
your smartphone.
Read more about the different types of messages in “Messages”
on page 57.
Email tab
The Email tab shows a list of the e-mail accounts on your
smartphone.You can add a
New
account to the list and
Edit
or
Delete
an existing account.
You can choose one of your e-mail accounts as
Preferred.
This
will be the e-mail account that your smartphone uses when you
use
Send as
to send an entry as e-mail directly from one of your
smartphone applications
To create a new e-mail account:
1. On the Email tab, tap
New
Email
You can have any number of e-mail accounts. To receive
and send e-mail, you must first set up an Internet account
(if one isn't already set up). See“Internet accounts” on
page 123
SMS
You can only have one SMS (Short Message Service)
account.These settings also apply to EMS (Extended
Message Service) messages.
MMS
You can only have one MMS (Multimedia Messaging
Service) account. To receive MMS WAP-based content
you must first set up an Internet account (if one isn't
already set up). See“Internet accounts” on page 123
CBS
You can only have one CBS (Cell Broadcast Services)
account. The number of Area Information channels that
you can subscribe to is limited by the space on your SIM.
P800_UM.book Page 129 Thursday, July 11, 2002 10:58 AM
130
Preliminary
2. On the
Basic
tab, enter the following settings:
3. On the
Inbox
tab, enter the following settings, as required:
4. On the
Outbox
tab:
Email account basic tab settings
Account name
This is the name you give to your email account.
Your name
This name appears on your outgoing e-mails.
Email address
Your Internet Service Provider (ISP) supplies you
with your email address
Connection type
You probably won't need to change the connection
type.
Internet account
Select one of your existing Internet accounts to
access your e-mails.
Email account Inbox tab settings
User name
Your Internet Service Provider (ISP) supplies you
with your user name, your password, and its
incoming server address, which identifies the
computer where your incoming e-mails are stored.
Incoming server
address
Password
To prevent others reading your e-mail: enter a
password.
Download
If you do not have much time to download your e-
mails, you can choose to receive just
Just headers
(the sender, subject, and date only) or set a size
limit (if an email is larger than the
Emails smaller
than
limit, only the headers are downloaded). You
can download the complete email later.
Schedule Tap
Schedule
to schedule an automatic download
of your incoming e-mails. E-mails that are waiting
in your
Outbox
will not be sent at the same time.
Email account Outbox tab settings
Outgoing server
address
Your Internet Service Provider (ISP) supplies you
with its Outgoing server address, which identifies
the computer from which your outgoing e-mails
are sent.
Use SMTP
authentication
Some SMTP servers might require authentication
also when sending e-mail. In that case, select the
check box
Use SMTP authentication
and enter your
User name
and
Password
.
Use IMAP login
information
If the SMTP server accepts using your IMAP login
information for authentication select the check box
Use IMAP login information
.
Email account Inbox tab settings
P800_UM.book Page 130 Thursday, July 11, 2002 10:58 AM
131
Control panelControl panelControl panelControl panel
Preliminary
5. On the
Advanced
tab:
To
edit
an e-mail account:
1. On the
Email
tab, select the account in the list.
2. Tap
Edit
.
3. Change your settings as desired.
4. Tap
Done
.
To
delete
an e-mail account:
1. On the
Email
tab, select the account in the list.
2. Tap
Delete
.
3. Tap
Done
.
SMS tab
Use these settings to set up SMS and EMS messaging:
Email account Advanced tab settings
Secure
connection
Your Internet Service Provider (ISP) will tell you
whether you can use either a
Secure connection
or
Secure password authentication
.
A secure connection means that all information
(including your username, password, and all
messages) is encrypted to maximise security while
you're connected to the Internet. In contrast, secure
password authentication means that only your
password is encrypted.
Secure
password
authentication
Outgoing mail
port
You probably won't need to change the
Outgoing
mail port
or
Incoming mail port
numbers.
Incoming mail
port
Use MIME
encoding
MIME encoding is a standard that allows non-
textual information (for example graphics) and
accented characters to be sent in emails.If you
should not wish to
Use MIME encoding
, clear the
check box.
Messaging accounts SMS tab settings
Service centre
address
The
Service centre address
is the phone number
where your SMS messages are stored. It is
normally imported from the SIM card but if that
fails, your network operator can provide you with
the service centre address.
Character Set
.Your network operator may also specify the
Character Set
.
Messages stored
for
You can set a time limit after which SMS messages
are deleted from the network by choosing a value
in the
Messages stored for
list.
P800_UM.book Page 131 Thursday, July 11, 2002 10:58 AM

132
Preliminary
Tip If you send and receive SMS messages in several countries,
you can avoid having to change the service centre address when
you travel abroad by entering the international dialling prefix
(for example '+') and the appropriate country code for your
network operator.
You can set the
Connection type
to one of the bearer types in the
list.
MMS tab
Use these settings to set up MMS messaging.:
Connection type
You can set the
Connection type
to one of the
bearer types in the list.
If your network operator uses the GPRS network,
you can choose whether to send and receive your
SMS messages using this network. GPRS is
generally cheaper than GSM, but in some locations
GPRS may not be available. In this case, selecting
GPRS preferred means that your smartphone will
try to use GPRS but, if that fails, GSM will be
used.
Extended
messaging
Clear the check box
Extended messaging
when
you do not want to use EMS functions when
composing your messages.
Smilies
Clear the check box
Smilies
if you want to use
only plain text smilies.
Messaging accounts SMS tab settings
Messaging accounts MMS tab settings
Service centre
address
The Service centre address is the phone number
where your MMS messages are stored and it's
normally imported from the SIM card but if that
fails, your network operator can provide you with
the service centre address.
WAP account
Specify which of your configured WAP accounts
you wish to use.
•WAP accounts are created in
Control panel >
General (tab) > WAP Accounts
Download
method
Select between Manual or Auto:
•
Manual
- only a notification will be sent to you
smartphone and you can decide whether or not to
download the full message.
•
Auto
- the full message is downloaded directly to
your smartphone
Download size
and
Less than
Set whether or not to have a size limit for
incoming messages:
•
No restrictions
- the size of the incoming
messages doesn't matter, all messages will be
received.
•
Less than
- messages smaller than the limit will
be received, bigger messages will be deflected.
P800_UM.book Page 132 Thursday, July 11, 2002 10:58 AM
133
Control panelControl panelControl panelControl panel
Preliminary
Advanced settings
Tap
Advanced
to make settings about how your smartphone will
send and receive MMS messages.
CBS tab
On the CBS tab you make settings related to CBS (Cell
Broadcast Services. CBS services include Area information and
Cell information. The availability of Cell Broadcast Services
(Cell and Area Information) is operator dependent.
MMS Advanced settings tabs
Send
The values you give these settings will be default for all
MMS messages that you send. You can of course choose
other values for an individual message in Messages
You can set the
Validity period
for your messages, that is,
how long they should be available to the receiver.
Maximum
is the default
You can give your messages a
Priority level
of
Low
,
Normal
(default) or
High
.
You can set a level of
Conformance
for the MMS
messages that you send to make sure that they will be
played back correctly on different products.
You can choose one of these levels:
• Standard - a warning message is displayed whenever you
add non-conformant objects to an MMS. You have the
option to send anyway.
• Strict - non-conformant messages or messages above
30K are not sent.
• None - non-conformant messages are sent.
Send
(cont.)
Select the check boxes to provide the function you want:
Hide number
prevents the sent message from showing your
number
Read report
requests a read notification from receivers of
your messages.
Delivery report
requests a delivery notification from
receivers of your messages.
Reply with history
includes the original with your reply.
Receive
These settings apply to MMS messages that you receive.
Select the check boxes to send a notification message to the
sender when a message is:
• Delivered to you:
Allow delivery notification
• Read by you:
Allow read notification
You can filter reception of incoming messages by message
class (
Advertisements
,
Personal
,
Automatic
,
Information
)
as well messages from senders listed in Contacts. Selecting
a check box will filter out messages of that category.
To receive MMS messages only from senders listed in your
Contacts, select all other check boxes and clear the check
box for
Contacts
MMS Advanced settings tabs
P800_UM.book Page 133 Thursday, July 11, 2002 10:58 AM

134
Preliminary
Cell information may be used to display the area code below the
network name in the flip closed standby view.
Area Information is a type of text message that is sent to all
subscribers in a certain network area, for example a local traffic
report.
To enable Cell information:
1. Select the Cell information check box
To turn Area Information on:
•Check the
Area Information
check box. Received messages
will be displayed and automatically stored in the
Area Info
Inbox
when dismissed.
The list shows all the channels that you have defined on your
smartphone. The check box for each channel shows if it is on
(checked, ready to receive messages) or off (cleared, not active):
To add a new channel:
1. Tap
New
.
2. Enter the number of the new channel in the New Channel
dialogue. Channel numbers can be from 0 to 999. If there are
too many channels defined
New
is disabled and you will see a
message: “Maximum channels on SIM”.
Channel numbering is operator dependent. Please consult
your network operator for information.
To turn a channel on or off:
1. Select the channel in the list and check the check box. To turn
it off clear the check box.
To delete a channel:
•Tap
Delete
. Since deleting a channel cannot be undone you
will be asked to confirm the delete. Deleting the channel will
also delete any stored Area Information messages for that
channel in your Area Info Inbox.
Alerts
Your smartphone can notify you when a new message arrives
with a different sound for each type of message that it can
receive.
To set up notification, tap
Alert.
If you check the
Display notification message
check box it will also
see a notification message.
For each type of message you can either:
• Select the
Default Melody
, or
• Select
Find Melody
to open the
Select audio
dialogue, where
you can browse through your folders to pick a melody from
those stored on your smartphone.
P800_UM.book Page 134 Thursday, July 11, 2002 10:58 AM
135
Control panelControl panelControl panelControl panel
Preliminary
Secure tokens
Your smartphone supports secure access systems from three
vendors. You manage secure access by using Secure Tokens.
Read more about secure access in “Secure Access” on page 19.
Each token is associated with one system and with one Internet
account (or none, when you use your smartphone as a Hard
Token). You can configure as many tokens as needed.
The
Secure tokens
dialogue shows a list of secure access
providers. Secure tokens relating to the provider's name are
listed under the name in an open tree structure.
Tap
Control panel > Connections > Secure tokens
to:
•To
Edit
,
Delete
, or
Create
a new token, or
•
Generate
a password
These options are only displayed as available when a Secure
token is highlighted, and greyed out when the vendors name is
highlighted. The sequence of dialogues they generate will be
vendor specific.
A token is associated with an Internet account through the
Internet settings for the account. See“Internet accounts” on
page 123
Many dialogue details when using secure access are vendor,
system and network specific. You should contact the
administrator of the network you wish to access to get the
correct information.
Storage manager
This dialogue helps you do housekeeping with the storage space
on your smartphone
The list shows the applications on your smartphone and the
space they occupy.
Removing information from applications
To remove information from an application: tap on an
application in the list. That application is displayed. Remove the
old or unwanted entries or information.
Here are some house cleaning tips for different applications:
• Remove any unwanted voice notes as even short ones occupy
a lot of space.
•In
Messages
, remove any old messages from your Inbox
or Sent folders.
•In
Tasks
, remove all completed entries by tapping
Tasks > Delete completed
in your list of entries.
• In
Calendar
, remove all entries in a specified time period
by tapping
Calendar > Remove entries
in your list of entries.
• Throughout your smartphone, use folders as you create and
receive information to speed up housekeeping later.
P800_UM.book Page 135 Thursday, July 11, 2002 10:58 AM
136
Preliminary
Removing unwanted general files
Tap
Files
to see a list of all stored general file types on your
smartphone. You can remove unwanted files and launch a
viewer for each file.
Uninstalling applications
If you uninstall an application you will have to reinstall the
application if you want to use it later.
To uninstall an entire application, tap
Uninstall
.
Note You cannot uninstall the applications that came with your
smartphone.
System sounds
To set the sounds given when you press a button on the keypad
or tap the screen in your smartphone tap
System sounds
.
You can choose between the following sounds:
Text input
There are several standard ways of entering text in your
smartphone. See“Entering text - Flip open” on page 15 and
“Entering text in flip closed mode” on page 26.
Use the settings on the
Primary
,
Alternative
and
Flip Closed
tabs to
set methods for entering text in your smartphone.
If you load other text input software, select it and adjust its
settings here.
Time & date
Adjusting the time and date here sets these throughout your
smartphone.
The dialogue has three tabs. You can set:
Note These settings are also available in the
World Clock
application.
Keypad
Tone
,
Click
or
Silent
Touch screen
Click
or
Silent
Primary
The method that you select here is activated
automatically when you need to enter text into your
smartphone.
Alternative
The method that you select here is activated if you
tap at the bottom of the screen.
Time & date
The current time and date. Here you can also switch
daylight savings time on or off for your location.
Format
Specify how you want the time and date to be displayed
on the screen.
Workdays
Specify the days in your working week
P800_UM.book Page 136 Thursday, July 11, 2002 10:58 AM
137
Control panelControl panelControl panelControl panel
Preliminary
Time & date tab
To set the current date:
1. On the
Time &date
tab, tap the date. A calendar view opens.
Tap the arrows to set the current year and month.
2. Tap the current date.
To set the current time:
1. On the
Time & date
tab, tap the time. Tap the upper half of the
hour or minute box to increase the number displayed, or the
lower half to decrease the number.
2. Tap the
am
/
pm
box
>
.
This is only possible if you use the 12-hour time format.
If the locations you have set under
Control panel >
International
are in a country that currently has summer time
(Daylight Savings Time), you can adjust the time and date.
To switch daylight savings time on:
1. On the
Time &date
tab, tap
Daylight saving,
select the check
boxes for the zones that currently have daylight savings time.
2. Tap
Done
.
Format tab
You can specify how you want the time and date to be displayed
on the screen, and if you want to use the 12-hour (am/pm) or 24-
hour time format.
To set the time and date display format:
1. Tap
Date format
and choose a format.
2. Tap
Date separator
> choose a separator.
3. Tap a
Time format
.
4. Tap
Time separator
choose a separator.
5. Tap
Done
.
Workdays tab
You can specify what days you work, if, for example, you want
to set an alarm that sounds only on workdays. You can also
specify the first day of your week to customise the display of
both Week and Month views in Calendar
To specify your workdays
1. Select the check boxes next to the days you normally work.
2. Tap
First day of week
and choose a day.
User greeting
Your smartphone can show a user greeting on the standby screen
when you turn it on. Use this dialogue to turn this function on or
off. You can define your own user greeting text (up to 32
characters). The default is
Sony Ericsson
.
P800_UM.book Page 137 Thursday, July 11, 2002 10:58 AM

138
Preliminary
WAP accounts
Use these settings to set up and manage WAP accounts
(sometimes called WAP profiles) on your smartphone.
WAP accounts are intended for MMS and for accessing the
Internet through a WAP gateway. (Such gateways make use of
proxy port 9200-9203.) All other proxy settings should be
included in your Internet accounts!
For security reasons, some WAP pages and services, for
example online banking, can only be accessed from a particular
WAP account.
The dialogue has two tabs:
Basic
and
Preferred.
Basic tab
The dialogue shows a list of all the WAP accounts on your
smartphone. You can add a
New
account to the list and
Edit
or
Delete
an existing account.
Note You access WAP pages through an Internet Service
Provider (ISP) so, when you create a WAP account, you must
choose one of your existing Internet accounts or first create a
new one.
To create a new WAP account:
1. Enter the name of the WAP account.
2. Select the Internet account you want to use.
3. If you are going to use a WAP gateway or a proxy, select the
Use proxy
check box.
4. Enter the
IP Address
of the gateway or proxy
5. Enter the
Port address
of the gateway or proxy.
For a WAP gateway use:
– 9201 for a normal connection
– 9203 for an encrypted secure connection.
• If the gateway/proxy requires
User name
and
Password
, which
is very unusual, fill in the last two fields in the dialogue.
Preferred tab
Select the check box to set a preferred WAP account. It will be
used when you use the
Open page
command in the
Internet
application and when a page is opened from another smartphone
application.
If you do not set a preferred WAP account, the preferred Internet
account will be used when connecting to the Internet.
WIM management
WIM (WAP Identity Module) is used for performing security
functions, especially to store and process information needed for
user identification and authentication. It is a tamper-resistant
store for private keys, certificates and other objects that may
require a PIN for access or modification.
P800_UM.book Page 138 Thursday, July 11, 2002 10:58 AM

139
Control panelControl panelControl panelControl panel
Preliminary
The
WIM management
dialogue consists of PIN choice list and a
WIM objects list.
You can select a PIN from the PIN choice list. The WIM objects
list changes content dynamically, displaying only the keys that
are protected by the selected PIN and also have an associated
certificate. Other keys that are protected by the selected PIN but
do not have an associated certificate are not shown in the WIM
object list. This is the case when WIM PIN (PIN-G) is selected.
Note This is the PIN to access the WIM. The PIN-G applies to
the whole WIM and any objects that do not have a different PIN,
that is, no specific objects on the WIM are linked to PIN-G.
You can change status of a PIN:
•Enable PIN: A PIN code that is enabled is requested for
authorisation of an operation. To proceed with the operation
you must enter the PIN code.
•Disable PIN: A PIN code that is disabled is not requested to
authorise an operation to proceed.
To change the PIN code:
1. Select the PIN you want to change from the choice list
2. Tap
Change PIN
.
If a PIN code has been blocked, you must unblock it before it
can be used again. Select the PIN and tap
Change PIN
.
P800_UM.book Page 139 Thursday, July 11, 2002 10:58 AM

140
Installing programsInstalling programsInstalling programsInstalling programs
Installing programs
Sources (this section will be removed)
The following documents and resources have been used when
writing this chapter.
• Linnea prototype 6.2, SW incr. 5, PA9
• Quartz Application Installer/Remover UI Spec, 2001-03-27
• Use Case Report for 3rd Party Installation, NKX/R-01:0256,
Rev A
• Linnea White Paper R1B, PA3
It is possible to install new programs, applications, in your
smartphone either from the PC or directly from the
smartphone.These applications can be obtained in several ways:
• from the Internet
• from a CD
• email attachment etc.
Programs can also be downloaded directly to your smartphone
from other devices, the internet or via email.
There are two types of installation files for programs:
• SIS (Symbian Standard Installation)
• MIDP JAR (Mobile Information Device Profile Java
Archive)
Note SIS and JAR files are install packages containing several
files.
This chapter also applies to other types of software to install, for
example, system components and add-ons.
PC Suite for P800
The PC Suite for P800 CD delivered with your smartphone
contains a set of useful programs to install programs and
manage your smartphone:
•Backup and Restore - Make safety copies of your data.
•File Manager - Transfer files (images, documents, music
etc.) between your smartphone and PC.
•Change Language - Change the system language in the
smartphone.
•Download Station - Install programs in the smartphone.
•Smartphone Monitor - Monitors the connection, runs
automatically.
P800_UM.book Page 140 Thursday, July 11, 2002 10:58 AM

141
Installing programsInstalling programsInstalling programsInstalling programs
Preliminary
Sync Station - Synchronizes data in PC and smartphone.
•Phone Book Manager - Edit SIM card from PC.
Refer to the online help for each specific program.
Installation
When inserting the CD in the PC a start menu is automatically
shown. Select language and then start the PC Suite for P800
Setup. Follow the instructions in the installation wizard.
By default the PC Suite for P800 is accessed from
Start menu >
Programs > Sony Ericsson > P800
The Setup program also can be used later to add or delete
components.
Installing programs in your
smartphone
Install file security
Installation files in SIS format are typically used for installation
of C++ or PersonalJava applications or other content into the
smartphone´s file system.The vendor who prepared the SIS file
decides where in the file system the various content of the SIS
file will be installed. This means that you need to decide if you
trust that the SIS file does not contain harmful content. If you
know for sure who produced the SIS file then you can take an
install decision based on what you know about that vendor. Your
smartphone supports cryptographic verification of vendor
identity.
During installation the smartphone verifies a digital signature
and certificate in the SIS file against a root certificate on the
phone. Successful verification means that you can trust who
produced the SIS file and that the content has not been modified
after it was created. If the SIS file does not contain a digital
signature you will be given a warning about the problem but you
can still decide to proceed with installation at own risk. In
general it is recommended that you install only from SIS files
where the vendor identity and file integrity can be verified.
P800_UM.book Page 141 Thursday, July 11, 2002 10:58 AM

142
Preliminary
MIDP applications run in a protected environment with no
access to sensitive information so no signatures are required for
MIDP JAR files.
From a PC
PC Suite for P800 must be installed in your PC and the
smartphone must be connected to the PC via cable, IR or
Bluetooth in order to install programs from PC.
Installing programs from PC
1. Connect your smartphone to the PC via cable, infrared or
Bluetooth. When connected, an icon is shown in the taskbar
on the PC.
2. Start the PC software
P800 Download Station
and select
application (.sis or .jar file) to install. It is also possible to
double-click a file in the file manager and make the P800
Download Station start automatically.
3. Confirm to install the application in the smartphone.
4. Select target drive (phone memory or Memory Stick).
Download to the smartphone begins.
5. Installation starts when download is complete.
6. Installation is complete.
From the smartphone
Program packages can also be downloaded to your
smartphone from the Internet or from Memory Stick. When
downloading a file from the Internet, the installation will start
automatically when the file is completely downloaded to your
smartphone. The procedure below describes installation of
program packages already in the smartphone but not yet
installed..
Installing programs in the smartphone
1. Tap
>
Applications > Install
.
2. Select software in the list.
3. Tap
Install.
If the software is certified, an information dialog
is shown with the name of the software, version and supplier.
Tap
Install
again.
4. Now, depending on the software, you can be prompted to
replace a previous installation, select language, memory
location and select other installation options.
5. Installation is complete. Tap
Done
.
Removing programs in your
smartphone
It is sometimes necessary to remove installed programs and user
data to free up memory.
P800_UM.book Page 142 Thursday, July 11, 2002 10:58 AM
143
Installing programsInstalling programsInstalling programsInstalling programs
Preliminary
Removing programs in the smartphone
1. Tap
>
Applications > Uninstall
and then select software to
remove.
2. Confirm selection.
3. Tap
Done
.
Warning! If you delete an application from your smartphone,
any copy on your PC (including backups) will be deleted the
next time you synchronize with your PC.
Tip See also
Master Reset
and
Storage Manager
in
Control Panel
for
more options regarding removal of programs and user data.
P800_UM.book Page 143 Thursday, July 11, 2002 10:58 AM

144
Connecting to other Connecting to other Connecting to other Connecting to other
Connecting to other devices
Sources (this section will be removed)
The following documents and resources have been used when
writing this chapter.
• Linnea prototype 6.2, SW incr. 5, PA9
• Linnea White Paper R1B, PA3
• Quartz Platform 6.2 UI Specification, 2001-10-01
• Use Case Report for 3rd Party Installation, NKX/R-01:0256,
Rev A
• UI Func Spec, Local Communication - Cable, IrDA, 20/155
17-CRH 162 02, Rev A
• UI Func Spec, Local Communication – Bluetooth, 21/155
17-CRH 162 02, Rev A
Your smartphone can be connected to other devices with similar
interfaces, such as PCs, other smartphones and PDAs.
The connection can be made via:
•Cable
• Infrared (IrDA)
•Bluetooth
Once it has been connected, you can perform various tasks,
depending on what type of connection you have choosen, such
as:
• Using a cordless headset (Bluetooth)
• Sending and receiving files via ( Infrared , Bluetooth) –
‘beaming’
• Making Backup/Restore and Synchronisation of your data
and file transfer. (Cable, Infrared and Bluetooth)
• Using the smartphone as a modem for Dial-Up Networking
(Cable, Infrared and Bluetooth)
P800_UM.book Page 144 Thursday, July 11, 2002 10:58 AM
145
Connecting to other Connecting to other Connecting to other Connecting to other
Preliminary
PC connectivity software
Your smartphone is delivered with a CD, PC Suite for P800.
This software must be installed in the PC you want to connect
to. See the chapter “Installing programs” on page 123 for more
information. You do not need to install the PC Suite for P800 if
you only want to perform beaming with the PC or use a cordless
headset.
Connection via cable
Put your smartphone in the desk stand and connect the cable to
an empty USB port on the PC. When connecting via cable the
smartphone must be set in PC connect mode or Modem mode,
see table below. The setting is made in
Control panel > Connections
> Cable
.
Serial settings
The default settings for normal use:
Connection via infrared port
When connecting via the infrared port, make sure that both
devices are placed within one metre from each other and that the
infrared ports have a free line of sight between them. The
infrared port on your smartphone is located on the left hand side,
next to the On/Off button.
PC connect mode Modem mode
• Synchronization
• Installation of software
• Backup and restore
• Smartphone as a modem
• Phone Book Manager (PC
software)
Baud rate: 460800
Parity: None
Stop bits: 1
Character length: 8
Flow control: CTSRTS
P800_UM.book Page 145 Thursday, July 11, 2002 10:58 AM

146
Preliminary
Activating the infrared port
The infrared port must be activated before communication can
begin, go to
Control panel > Connections > Infrared port
and set the
port state to
On
or
On for 10 minutes.
See the chapter “Control
panel” on page 5 for more information on infrared settings.
Connection via Bluetooth
You can connect your smartphone to other products equipped
with Bluetooth, for example PCs or other mobile phones, and
exchange data. Since Bluetooth is radio-based, transmitting and
receiving devices does not have to be in a free line of sight. This
means that your smartphone can stay in your pocket while
communicating. However, objects between transmitting and
receiving units might weaken the signal.
Connection to another device be made within a range of up to 10
metres. For all tasks, except beaming, it is necessary that you
first set up a permanent and trusted relationship between your
smartphone and the other device. This process is called pairing
(other documentation refer to it as bonding). The paired devices
are remembered by your smartphone also after you have turned
it off so you do not need to repeat the process for every
connection with those devices. The reason for pairing is to
simplify future connections and to make them secure – only
paired devices can connect to your smartphone.
Activating Bluetooth
Activate Bluetooth on your smartphone in
Control panel >
Connections > Bluetooth > Settings
.
Set
Operation mode
to
Auto
,
On
or
Discoverable
and set
Receiving items
to
Ask first
or
Always receive
.
See the chapter “Control panel” on page 5 for more information
on Bluetooth settings.
Pairing
To let your smartphone initiate pairing with another device
1. In
Control panel > Connections> Bluetooth > Settings
, set
Operation mode to
Discoverable
2. In
Control panel > Connections > Bluetooth > Add
. Your
smartphone searches for all devices in the vicinity and lists
them.
3. Select the device you want your smartphone to pair with and,
enter a passkey when asked for it. When the passkey is
accepted, the pairing process is complete, refer to the section
Passkeys below.
4. If you in the future want to allow a paired device connect to
your smartphone without you explicitly approving each
connection you should select
Control panel > Connections >
Bluetooth > Devices,
then select a device and set the checkbox
Allow to connect without confirmation
.
P800_UM.book Page 146 Thursday, July 11, 2002 10:58 AM

147
Connecting to other Connecting to other Connecting to other Connecting to other
Preliminary
To let another device initiate pairing with your smartphone
1. In
Control panel > Connections > Bluetooth > Settings
, set
Operation mode to
Discoverable
.
2. Follow the other device´s manual to initiate pairing.
3. When asked for a passkey, enter the same on both devices.
4. If you in the future want to allow a paired device connect to
your smartphone without you explicitly approving each
connection you should select
Control panel > Connections >
Bluetooth > Devices
select a device and set the checkbox
Allow
to connect without confirmation
.
To remove a paired device from your smartphone
Select a device in the list and tap
Remove
.
Passkeys
Passkeys ensure that the device you pair with really is the device
you think it is. A passkey is a set of numbers and/or letters (at
least four characters) that you agree to exchange with the owner
of the other device. Accessories like headsets often have a
default passkey, usually ‘0000’, see the specific user’s guide.
Transfer items with Send As
From many applications it is possible to transfer (and receive)
items like appointments, contacts and images to other users. The
transfer starts by entering the
Send as
menu in the specific
application.
Depending on the application and object you can choose
between the following transfer methods:
• Infrared
•Bluetooth
•SMS
•MMS
•Email
Note To be able to send or receive an item over infrared or
Bluetooth, these functions must be activated. See“Activating the
infrared port” on page 128 and “Activating Bluetooth” on
page 146
P800_UM.book Page 147 Thursday, July 11, 2002 10:58 AM

148
SynchronizationSynchronizationSynchronizationSynchronization
Synchronization
Sources (this section will be removed)
The following documents and resources have been used when
writing this chapter.
• Linnea prototype 6.2, SW incr. 5, PA9
• Linnea White Paper R1B, PA3
• Users manual R380s
• UI Func Spec, Local Communication - Cable, IrDA, 20/155
17-CRH 162 02, Rev A
• UI Func Spec, Local Communication – Bluetooth, 21/155
17-CRH 162 02, Rev A
• FS Synchronisation, 35/155 17-CRH 162 02 Uen, Rev A
• UI Design Spec. Local Communication, 38/196 05-CRH 162
02 Uen, Rev A
• Quartz DFRD Connectivity Specification, rev 4.00
• Use Case Report for Synchronise Data, NKX/R-01:0200,
Rev A
• Use Case Report for Backup, NKX/R-01:0278, Rev A
• Use Case Report for Restore, NKX/R-01:0279, Rev A
With PC Suite for P800 installed in your PC, your smartphone
can synchronize with the following PC applications, also called
Personal Information Managers (PIMs):
• Lotus® Organizer® 5 & 6
• Lotus® Notes® 4.6, 5.0
• Microsoft® Outlook® 98, 2000, 2002
Synchronization is divided into local and remote. Local
synchronization is performed directly to a connected PC while
remote synchronization is done over the air with a remote server
in, for example, a corporate network.
Local synchronization
P800_UM.book Page 148 Thursday, July 11, 2002 10:58 AM

149
SynchronizationSynchronizationSynchronizationSynchronization
Preliminary
Local synchronization is done with either cable, infrared or
Bluetooth, the functionality is the same.
The following items can be sychronized locally:
•Email
•Contacts
• Calendar
•Tasks
• Jotter notes
Configuration of PC software
Local synchronization is initiated from the PC and all settings
are made in the P800 SyncStation PC software. The easiest way
is to configure the PC software to automatically make a
synchronization every time your smartphone is connected. An
icon, Smartphone Monitor, is shown on the PC taskbar when
connected.
In the PC go to
Start menu > Programs > Sony Ericsson > P800 >
SyncStation
and select the items to synchronize and select manual
or automatic method. Refer the online help in P800 SyncStation
PC software for more information.
Performing a local synchronization
Making an automatic synchronization
1. Connect your smartphone via cable, infrared or Bluetooth.
2. Synchronization starts automatically.
Making a manual synchronization
1. Connect your smartphone via cable, infrared or Bluetooth.
2. In the PC, go to
Start menu > Programs > Sony Ericsson > P800 >
SyncStation
and start the synchronization. Alternatively, right
click on the SyncStation Monitor and select
Synchronize.
P800_UM.book Page 149 Thursday, July 11, 2002 10:58 AM
150
Preliminary
Remote synchronization
Remote synchronization takes place over the air using the
Internet and is the ideal way to keep the smartphone up to date.
Using GPRS, the smartphone can be continuously connected to
the remote synchronization server.
Synchronization services will be offered by mobile operators,
third-party service providers and as added capability to
corporate PIM applications.
The following items can be synchronized remotely:
•Email
•Contacts
• Calendar
•Tasks
Remote sync configuration
Enter
Remote Sync
in
Applications,
tap
Edit > Settings
and fill in
the following parameters:
• Server address
•Username
•Password
You might also need to fill in whether to use transport login
under the Protocol tab. Contact your corporate IT help desk or
your service provider for information on these parametres.
Performing a remote synchronization
Selecting items to synchronize
1. In Remote Sync, tap one item in the list you want to be
synchronized.
P800_UM.book Page 150 Thursday, July 11, 2002 10:58 AM

151
SynchronizationSynchronizationSynchronizationSynchronization
Preliminary
Editorial Comment:Picture not correct
2. Select
Enable task
checkbox.
3. Fill in
Task name
or leave default.
4. Fill in
Server database
(Contact your corporate IT help desk
or your service provider).
5. The item you selected to be synchronized is now above the
divider in the list. (Disabled items are below the divider).
6. Repeat for other items.
Making a remote synchronization
1. Open
Applications > Remote Sync ,
tap
the
Sync
button.
When ready, the
Task status
column show today´s date for all
successfully synchronized items.
Backing up data
You can use the
P800 Backup and Restore
PC software to back up
the contents stored in your smartphone to your computer.
Keeping backups of your smartphone´s contents on your
computer means that you have a separate copy of the contents of
the smartphone, which can be restored into the smartphone.
Backups should be done on a regular basis, a backup reminder
can be set.
See the online help for
P800 Backup and Restore
for more
information on how to use the program.
Preconditions
The PC Suite for P800 must be installed in the PC and the
smartphone must be connected to the PC via cable.
Note Backup and restore does not work via IR or Bluetooth
Performing a backup
To make a backup
1. Connect your smartphone to the PC via cable.
2. In the PC, go to
Start menu > Programs > Sony Ericsson > P800 >
P800 Backup and Restore
.
P800_UM.book Page 151 Thursday, July 11, 2002 10:58 AM

152
Preliminary
3. Select smartphone, several can be registered.
4. Start
Backup
and select media: smartphone and/or Memory
Stick.
Backup begins, the progress is shown in the smartphone.
5. Follow the instructions in the smartphone.
6. Backup is complete.
Restoring data
If you have lost data or accidentally deleted information in your
smartphone you can restore an earlier backup. A backup from a
certain memory type (phone memory or Memory Stick) can
only be restored to the same type.
To restore a backup
1. Connect your smartphone to the PC via cable.
2. Go to
Start menu > Programs > Sony Ericsson > P800 > P800
Backup and Restore
in the PC.
3. Select smartphone, several can be registered.
4. Select one of the backups in the list of previously saved
backups and click
Restore
.
Restore begins, the progress is shown in the smartphone.
5. Follow the instructions in the smartphone.
6. Restore is complete.
Warning! Everything in your smartphone will be overwritten
by the chosen backup. Once you have clicked Yes to start the
restore, you cannot cancel the procedure.
P800_UM.book Page 152 Thursday, July 11, 2002 10:58 AM

153
Getting started with Getting started with Getting started with Getting started with
Getting started with Internet and Messages
Introduction
Before you can use
Internet
and
Messages
to access the
Internet and send or receive messages you will need to make
some user-specific settings in the Control panel.
Service provider
You will need a service provider to connect your smartphone to
the network.The service provider could be:
• An internet service provider (ISP) which connects you to the
internet.
• An access point provided by your network operator.
• A private service provider such as your company or your
bank.
You will need to enter specific service provider details into your
smartphone to set up an Internet account. It can hold the details
of multiple service providers, for example, you may have
separate internet and corporate accounts.
Your network operator or retailer may have pre-installed
services, check with them.
Connection type
When your smartphone connects to a service provider, it will
use a GSM or GPRS network provided by a network operator.
Many network operators offer both GPRS and GSM services.
The connection type defines which network your account uses
to connect to the Internet. GPRS Internet accounts use the GPRS
network, and dial-up Internet accounts use the GSM network.
GPRS
If your network operator supports GPRS, a GPRS Internet
account allows you to:
• Remain permanently connected to the Internet without being
charged for connection time. With a GPRS account, you are
charged for the amount of information you view, download
or send when your are connected to the Internet.Check your
operator for details of your subscription.
• Avoid having to reconnect to the Internet if the connection is
broken.
Dial-up
For both dial-up and high-speed dial-up accounts, you are
charged for the length of time you are connected. If your
network operator supports them, you can increase your
connection speed (at a cost) by setting up a high-speed account.
P800_UM.book Page 153 Thursday, July 11, 2002 10:58 AM
154
Preliminary
Automatically set up service provider
and Messaging
The easiest way to set up your smartphone is automatically,
through your service provider.
For
Messages
settings your smartphone supports automatic
setup of:
• e-mail accounts
• MMS (Multimedia Messaging Service) settings.
Check your service provider’s web site for information or
contact their support desk and ask about automatic remote
configuration of ISP (Internet Service Provider) settings, e-mail
and MMS settings.
If remote configuration is possible, they will send you the auto
configuration messages required by SMS.
Settings valid for your network operator and one or more of
these services may also be available through the phone
configurator utility at www.sonyericsson.com
To check that your SMS messaging settings are correct:
1. Select
Control panel > Connections > Messaging accounts >
SMS
Accepting new Internet or Messages
settings
New configuration messages will appear in the
Auto setup
account
inbox of
Messages
(Configuration messages for e-
mail accounts will, however, be found in your
SMS
inbox.)
When an auto setup message appears, select it.
A dialogue with a brief text and operator message appears on the
display. You can accept the new settings or leave the message in
the inbox
.
If the name of the new account is the same as that of an existing
account you can choose to create a new account with the same
name or replace the existing account.
Warning! Never accept remote configuration messages if you
are not expecting them or are unsure where they have come
from.
Manually set up service provider
Alternatively to setting up an Internet account automatically,
you can enter the settings manually from
Internet
accounts
on the
Connections
tab of the
Control panel.
First collect all the information you will need. You can obtain
this information from your ISP (Internet Service Provider), or if
you are connecting to a corporate network, your IT Manager.
P800_UM.book Page 154 Thursday, July 11, 2002 10:58 AM
155
Getting started with Getting started with Getting started with Getting started with
Preliminary
All settings are described in “Internet accounts” on page 119.
To set up a new account follow the steps under “To create a new
Internet account:” on page 120
Manually set up Messages
Alternatively to setting up
Messages
automatically, you can enter
the settings for the messaging services you want to use yourself
from
Messaging
accounts
on the
Connections
tab of the
Control
panel
.
First collect all the information you will need. You can obtain
this information from the following sources:
• If your mobile operator offers an e-mail service you can get
the necessary details from them.
• Your internet service provider.
• Your IT Manager in the case of connecting to the corporate
network to access your work e-mail account.
• Your network operator in the case of SMS and CBS services.
The dialogue has four tabs, one for each type of messaging
service:
E-mail
The provider of your e-mail service, or for a corporate
account, your IT Manager. can provide you with the
necessary details.
All settings are described in “Email tab” on page 125.
To set up a new account follow the steps under “To create a
new e-mail account:” on page 125.
SMS
Short Message Service
The necessary settings are usually provided on your SIM
card.
All settings are described in “SMS tab” on page 126.
MMS
Multimedia Messaging Service
your MMS messaging provider will be able to provide you
with the necessary information.
Before you set up MMS messaging you need to set up an
Internet account in
Control panel > Internet accounts
and a
WAP account in
Control panel > WAP Accounts
All settings are described in “MMS tab” on page 127
CBS
Cell Broadcast Service: Area and Cell information
Your network operator will be able to inform you if these
services are available.
All settings are described in “CBS tab” on page 129
P800_UM.book Page 155 Thursday, July 11, 2002 10:58 AM

156
Preliminary
Setting up WAP accounts
A WAP account defines a service provider and gateway that
should be used when making a connection to WAP services. You
also need a WAP account when you use MMS (Multimedia
Messaging Service).
The WAP gateway sits between your smartphone and the WAP
site coding and decoding information. You can set up details of
more than one gateway if necessary, for example one for your
MMS messaging, one to access corporate data over WAP, and
another to access your bank's WAP service.
The easiest way to set up a WAP account on your smartphone is
automatically, through your service provider. Check your
service provider’s web site for information or contact their
support desk and ask about automatic setup.
Note You access WAP pages through an Internet Service
Provider (ISP) so, when you create a WAP account, you must
choose one of your existing Internet accounts or first create a
new one.
Manually set up a WAP account
Alternatively to setting up a WAP account automatically, you
can enter the settings manually from
WAP
Accounts
on the
Connections
tab of the
Control panel
.
First collect all the information you will need. You can obtain
this information from the WAP service provider, or if you are
connecting to a corporate network, your IT Manager.
All settings are described in “WAP accounts” on page 133.
To set up a new account follow the steps under “To create a new
WAP account:” on page 133
Using your smartphone as a modem
Your smartphone contains a complete GSM/GPRS modem, so
you can use it to connect your PC to the internet or corporate
intranet.Your smartphone appears to the laptop like a normal
modem.
P800_UM.book Page 156 Thursday, July 11, 2002 10:58 AM
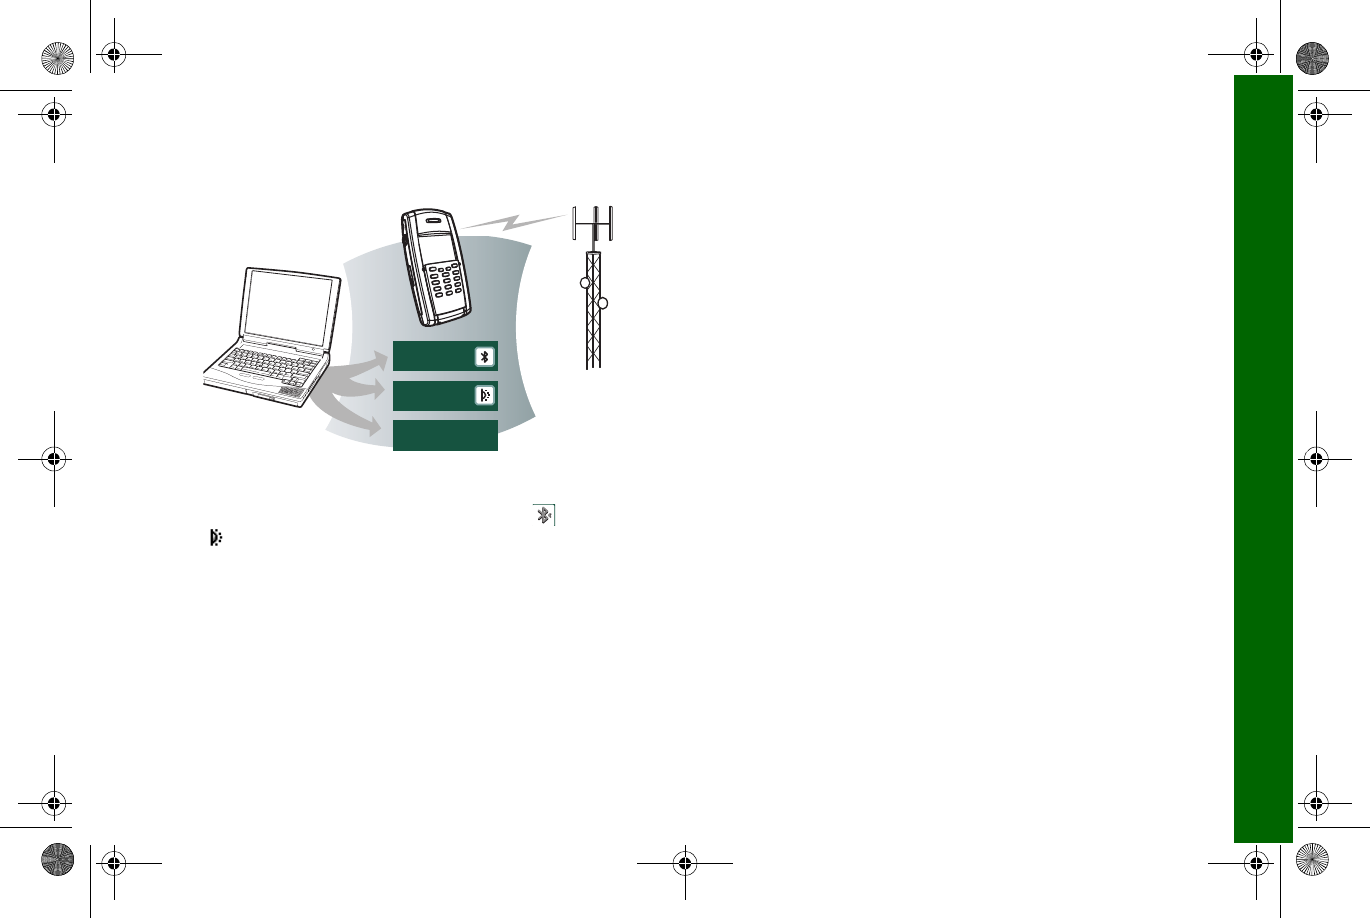
157
Getting started with Getting started with Getting started with Getting started with
Preliminary
You link the laptop to your smartphone using Bluetooth
infrared, or cable (USB or serial).The connection over
the air can be by any of the bearers that your smartphone
supports:
•GPRS
• HSCSD (High-speed Circuit Switched Data
• CSD (Circuit Switched Data).
A Windows modem driver file and a PC utility, the
Dial-Up
Networking Wizard
is provided on your
PC suite for P800
CD. The
wizard will help you configure DUN (Dial-Up Networking)
entries on your PC for GPRS and HSCSD connections.
Once paired with a Bluetooth-enabled laptop, your smartphone
is ready to make a connection to the Internet or corporate
network. Because Bluetooth is wire-free and requires no line-of-
sight alignment, you can place the laptop in a comfortable
position and let your smartphone remain in your pocket,
briefcase, or even be placed up to 10 metres away.
If you wish to use an infrared link the range is typically up to 1
metre. The two infrared 'eyes' must be kept in line of sight, at an
angle of no more than approximately 30 degrees.
The Dial-Up Networking Wizard
The wizard simplifies creating GPRS DUN connections by
setting the proper values in the PC DUN entry and linking the
entry to one of the GPRS configurations in your smartphone.
You can also view and modify the GPRS settings in the
smartphone.
For HSCSD DUN entries, it updates the modem settings such
that the specified data rate and type of bearer (ISDN / Analogue)
will be used when you make a DUN connection.
You can view or change the DUN entries created with the
wizard using the standard Windows DUN user interface.
The Dial-Up Networking Wizard software included in the
PC
suite for P800
must be installed in your PC and your smartphone
must be connected to the PC via cable, Infrared or Bluetooth.
Bluetooth
IrDA
P800
Cable
GPRS, HSCSD
or CSD
Personal
Computer
P800_UM.book Page 157 Thursday, July 11, 2002 10:58 AM

158
Preliminary
You should have any information on for example phone
numbers, name servers or domains that the server you wish to
connect to may require available.
To set up a GPRS or HSCSD (High-speed Circuit Switched
Data) connection using the Dial-Up Networking Wizard:
1. Start the
Dial-Up Networking Wizard
from the Sony Ericsson
folder of the Start menu on your PC.
2. Choose Create a new dial-up connection
3. Follow the instructions in the Wizard.
To edit a previously created DUN entry:
1. Start the
Dial-Up Networking Wizard
from the Sony Ericsson
folder of the Start menu on your PC.
2. Modify a dial-up connection.
3. Select the desired connection from the list.
4. Follow the instructions in the Wizard.
CSD connections
To set up a CSD (GSM Data) connection you will need to install
your smartphone as a modem manually.
To set up a Dial-Up entry for CSD:
1. On the PC, open the Control Panel
2. Choose to install a new modem.
3. Choose your smartphone as the modem.
4. Select the port where the smartphone is connected.
5. Confirm the selection. A new DUN connection has been
created.
Connecting
To connect using a DUN entry created by the wizard:
1. If you are connecting by cable, set your smartphone to
Modem
cable connection mode.
2. Use any conventional method to make a connection:
– Click the Desktop shortcut created by the wizard
– Select the entry from within the system DUN folder
– Run an application that has built-in support for using
DUN entries (for example a browser or e-mail client).
Secure Access
If you need access to a network that requires secure access
(often known as “strong authentication”), for example a
corporate intranet, your can set up the Internet account you use
to log in to that network to use secure access and generate the
required one-time password when you make the connection.
Your smartphone supports the following secure access systems:
P800_UM.book Page 158 Thursday, July 11, 2002 10:58 AM
159
Getting started with Getting started with Getting started with Getting started with
Preliminary
• SecureID from RSA
• DigiPass from Vasco
• SafeWord from Security Computing
If you have a separate device or application that requires one-
time passwords according to one of these systems you do not
need a separate hardware token generator. Your smartphone can
generate passwords that are not associated with an Internet
account.
You manage secure access in your smartphone using Secure
Tokens:
Each token is associated with one vendor/system and with one
Internet account (or none, when you use your smartphone as a
Hard Token). You can configure as many tokens as needed.
To edit, delete, create a new token, or generate a password, tap:
Control panel > Connections > Secure tokens
Internet Account Settings
A token is associated with an Internet account through the
Internet settings for the account:
To set up a Dial-up (CSD or High-speed CSD) account for
Secure access:
1. Tap
Control panel > Connections > Internet Accounts
2. Create a
New
or
Edit
an existing Dial-up account.
3. Tap
Advanced
.
4. On the
Secure
tab for the account select the
Enable secure
access
check box.
5. Select the appropriate
Vendor
and
Token
To set up a GPRS account for Secure access:
1. Tap
Control panel > Connections > Internet Accounts
2. Create a
New
or
Edit
an existing GPRS account.
3. Tap
Advanced
4. On the
Server
tab for the account select the
User name and
password required
check box.
5. Enter your
User name
if desired.If you leave it empty, you will
be asked to fill it in at connection time
6. Leave the
Password
box empty.
Connecting to an Internet account
For Dial-up accounts there are two possible ways to connect to a
secure access account, depending on if the login procedure uses
a script and the PCT (Post Connect Terminal) or not.
To connect to a dial-up account that does not require the PCT:
1. In the Login dialogue, enter your vendor specific login
information in the
PIN
box.
2. Tap
Done
, the one-time password is generated and passed to
the network invisibly.
P800_UM.book Page 159 Thursday, July 11, 2002 10:58 AM

160
Preliminary
To connect to a dial-up account using the PCT:
1. In the PCT tap
Generate
.
2. In the vendor-specific
Generate Passcode
dialogue, generate
the one-time password
3. Tap
Copy
.
4. Return to the PCT, tap
Paste
to enter the one-time password
in the script.
5. Tap
Done
To connect to a GPRS account:
1. In the Login dialogue, tap
Generate
.
2. Select the appropriate
Vendor
and
Token
3. In the vendor-specific
Generate Passcode
dialogue, generate
the one-time password
4. Tap
Copy
.
5. Return to the Login dialogue, enter your user name if
required and tap
Paste
to enter the one-time password in the
Pin
box.
6. Tap
Done
Tip Many dialogue details when using secure access are
vendor, system and network specific. You should contact the
administrator of the network you wish to access to get the
correct information.
P800_UM.book Page 160 Thursday, July 11, 2002 10:58 AM

161
Trouble shootingTrouble shootingTrouble shootingTrouble shooting
Trouble shooting
This chapter consists of an alphabetical selection of suggestions
for solving possible problems with your smartphone.
Blocked contact card provider
The SIM card is permanently blocked after the unblocking code
has been entered incorrectly ten times in a row. Contact your
network operator.
Card blocked unblock?
This message appears if the PIN code has been entered
incorrectly three times in a row.
To unblock the SIM card:
1. Press YES.
2. Enter your personal unblocking key (PUK) and press #.
Note Your PUK is provided by your network operator when you
purchase your SIM card.
Enter new PIN
appears in the display.
3. Enter your PIN code and press #. You can enter either your
current PIN code or a new one. Repeat new PIN appears in
the display.
4. Enter your PIN code again for confirmation and press #.
If you entered both your unblocking key and PIN code correctly,
the message
New PIN
appears in the display.
Alternative method for unblocking the SIM card
To unblock the SIM card, enter the following sequence:
* 0 5 * unblock key * new PIN * new PIN #
Display limitations
In all cases where numbers or characters exceed the available
display space, truncation or dots are used to compensate for this.
Numbers are truncated at the beginning, for example
...555666777
.
Characters are truncated at the end, for example
Methusel...
.
Emergency calls only
A network is within range but you are not allowed to use this
network. You may, however, call the emergency number 112.
P800_UM.book Page 161 Thursday, July 11, 2002 10:58 AM

162
Preliminary
Fax calls
Your smartphone does not support fax transmission. Even if
your operator subscription supports fax transmission, fax calls
are rejected. However they can be forwarded to another number
such as the office fax number, see “Divert calls” on page 74 for
more information.
Note Make sure potential fax callers do not try to send a fax to
your smartphone as they can experience a number of retries
before the fax transmission is stopped.
Indicator light
Blinks red
This indicates that the battery is running low and soon needs
recharging or replacing with a spare.
Note With Vehicle Hands Free (VHF) equipment, make sure
that the following are inserted or connected: your smartphone
and its holder, the fuse in the fuse holder, and/or the external
antenna.
Does not blink
If the indicator light at the top of your smartphone does not blink
and no network is displayed then there is not a network within
range. See ‘No network is displayed’.
Insert card
A SIM card has not been inserted into your smartphone. See
“The SIM card” on page 11 for instructions on inserting the
SIM card.
Key symbol
The keypad is locked to prevent unintentional key action.
Press followed by to unlock the keys.
Memory/Disk full
Due to memory limitations, your smartphone has no more space
available to save or store information.
Warning! Make sure regular backups are made with
Communications Suite to reduce the risk of lost or corrupted
information.
To free up memory, erase unused or old:
• Call logs.
•Contacts.
• Messages.
• Calendar To-dos or appointments.
• WAP history or bookmarks.
•Notepad notes.
P800_UM.book Page 162 Thursday, July 11, 2002 10:58 AM

163
Trouble shootingTrouble shootingTrouble shootingTrouble shooting
Preliminary
No network
This indicates that no network is within range. The reason for
this is either:
1. You are in an area that is not covered by a network.
2. The received signal is too weak, possibly because you are
being shielded from the signal. Move to obtain a sufficiently
strong signal. Check your display Signal strength indicator.
Phone locked
Phone locked is displayed followed by the prompt
Enter lock
code
.
Your smartphone is locked to prevent unauthorized use.
To unlock the smartphone:
• Enter your personal security code then press # (or YES).
PIN & unblocking PUK code
Contact your dealer if you have forgotten your PIN or
unblocking PUK code. The only way to unlock your smartphone
is by using your PIN or unblocking PUK code.
Tip Store PIN and unblocking PUK code information in a safe
place. For security reasons, it may take some time to unlock the
smartphone if this information is lost or misplaced.
Start problems
• Hand-held phone: Recharge or replace the battery.
• Vehicle hands free: Check that the smartphone is properly
inserted into the holder and check the fuse in the fuse holder:
which is connected to the battery cable.
Wrong PIN
The PIN code has been entered incorrectly. The message is
followed by the prompt
Enter PIN
.
Enter the PIN code correctly and press # (or YES).
Note If your PIN is entered incorrectly three times in a row, the
SIM card is blocked. You can unblock it by using your PUK.
P800_UM.book Page 163 Thursday, July 11, 2002 10:58 AM

164
Preliminary
Guidelines for safe and efficient use
Please read this information before using your mobile phone. Recommendations
• Always treat your product with care and keep it in a clean
and dust-free place.
• Do not expose your product to liquid or moisture or
humidity.
• Do not expose your product to extreme high or low
temperatures.
• Do not expose your product to open flames or lit tobacco
products.
• Do not drop, throw or try to bend your product.
• Do not paint your product.
• Turn your product off in places where posted notices instruct
you to do so and in places where mobile phones are
prohibited including aircraft and hospitals.
• Do not place your product or install wireless equipment in
the area above your car's air bag.
• Do not attempt to disassemble your product. Only Sony
Ericsson authorised personnel should perform service.
• If your mobile phone is equipped with infrared, never direct
the infrared ray at anyone's eye and make sure that it does not
disturb any other infrared units.
P800_UM.book Page 164 Thursday, July 11, 2002 10:58 AM

165
Guidelines for safe and Guidelines for safe and Guidelines for safe and Guidelines for safe and
Preliminary
Antenna
Only use an antenna that has been specifically designed by Sony
Ericsson for your mobile phone. Use of unauthorised or
modified antennas could damage your mobile phone and may
violate regulations, causing loss of performance and SAR levels
above the recommended limits (see below).
Efficient Use
Hold your mobile phone as you would any other phone. Do not
cover the top of the phone when in use, as this affects call
quality and may cause the phone to operate at a higher power
level than needed, thus shortening talk and standby times.
Radio Frequency (RF) Exposure and SAR
Your mobile phone is a low-power radio transmitter and
receiver. When it is turned on, it emits low levels of radio
frequency energy (also known as radio waves or radio frequency
fields).
Governments around the world have adopted comprehensive
international safety guidelines, developed by scientific
organizations, e.g. ICNIRP (International Commission on Non-
Ionizing Radiation Protection) and IEEE (The Institute of
Electrical and Electronics Engineers Inc.), through periodic and
thorough evaluation of scientific studies. These guidelines
establish permitted levels of radio wave exposure for the general
population. The levels include a safety margin designed to
assure the safety of all persons, regardless of age and health, and
to account for any variations in measurements.
Specific Absorption Rate (SAR) is the unit of measurement for
the amount of radio frequency energy absorbed by the body
when using a mobile phone. The SAR value is determined at the
highest certified power level in laboratory conditions, but the
actual SAR level of the mobile phone while operating can be
well below this value.
This is because the mobile phone is designed to use the
minimum power required to reach the network. Therefore, the
closer you are to a base station, the more likely it is that the
actual SAR level will decrease.
Variations in SAR below the radio frequency exposure
guidelines do not mean that there are variations in safety. While
there may be differences in SAR levels among various mobile
phones, all Sony Ericsson mobile phone models are designed to
meet the relevant guidelines for radio frequency exposure.
P800_UM.book Page 165 Thursday, July 11, 2002 10:58 AM

166
Preliminary
A separate leaflet with SAR information for this mobile phone
model is included with the material that comes with this mobile
phone. This information can also be found, together with more
information on radio frequency exposure and SAR, on
www.SonyEricsson.com/.
Driving
Please check if local laws/regulations restrict the use of mobile
phones while driving or require drivers to use handsfree
solutions. We recommend that you use only Ericsson or Sony
Ericsson handsfree solutions intended for use with your product.
Always give full attention to driving and pull off the road and
park before making or answering a call if driving conditions so
require.
Please note that because of possible interference to electronic
equipment, some vehicle manufacturers forbid the use of mobile
phones in their vehicles unless a handsfree kit with an external
antenna supports the installation.
Personal Medical Devices
Mobile phones may affect the operation of cardiac pacemakers
and other implanted equipment. Please avoid placing the mobile
phone over the pacemaker, e.g. in your breast pocket. When
using the mobile phone, place it at the ear opposite the
pacemaker. If a minimum distance of 15 cm (6 inches) is kept
between the mobile phone and the pacemaker, the risk of
interference is limited. If you have any reason to suspect that
interference is taking place, immediately turn off your mobile
phone. Contact your cardiologist for more information.
For other medical devices, please consult the manufacturer of
the device.
Children
DO NOT ALLOW CHILDREN TO PLAY WITH YOUR
MOBILE PHONE OR ITS ACCESSORIES. THEY COULD
HURT THEMSELVES OR OTHERS, OR COULD
ACCIDENTALLY DAMAGE THE MOBILE PHONE OR
ACCESSORY. YOUR MOBILE PHONE OR ITS
ACCESSORY MAY CONTAIN SMALL PARTS THAT
COULD BE DETACHED AND CREATE A CHOKING
HAZARD.
P800_UM.book Page 166 Thursday, July 11, 2002 10:58 AM

167
Guidelines for safe and Guidelines for safe and Guidelines for safe and Guidelines for safe and
Preliminary
Disposing of the Product
Your mobile phone should not be placed in municipal waste.
Please check local regulations for disposal of electronic
products.
Power Supply
Connect the AC power adapter only to designated power
sources as marked on the product. Make sure the cord is
positioned so that it will not be subjected to damage or stress. To
reduce risk of electric shock, unplug the unit from any power
source before attempting to clean it. The AC power adapter
must not be used outdoors or in damp areas. Never alter the cord
or plug. If the plug will not fit into the outlet, have a proper
outlet installed by a qualified electrician.
Emergency Calls
Mobile phones operate using radio signals, which cannot
guarantee connection under all conditions. Therefore you should
never rely solely upon any mobile phone for essential
communications (e.g. medical emergencies).
Emergency calls may not be possible on all cellular networks or
when certain network services and/or mobile phone features are
in use. Check with your local service provider.
Battery Information
We recommend that you charge the battery for 4 hours before
you use your mobile phone for the first time. The battery can
only be charged in temperatures between +5°C (+41°F) and
+45°C (+113°F).
A new battery or one that has not been used for a long time
could have reduced capacity the first few times it is used.
The talk and standby times depend on usage conditions and
network configurations when using the mobile phone. If the
mobile phone is used near a base station, less power is required
and talk and standby times are prolonged.
P800_UM.book Page 167 Thursday, July 11, 2002 10:58 AM
168
Preliminary
•Warning! May explode if disposed of in fire.
• Use only Ericsson or Sony Ericsson branded
original batteries and chargers intended for use
with your mobile phone. Other chargers may not
charge sufficiently or may produce excessive
heat. Using other batteries and chargers could be
dangerous.
• Do not expose the battery to extreme
temperatures, never above +60°C (+140°F). For
maximum battery capacity, use the battery in
room temperature.
• Do not expose the battery to liquid.
• Do not let the metal contacts on the battery touch
another metal object. This could short-circuit and
damage the battery.
• Do not disassemble or modify the battery.
• Turn off your mobile phone before removing the
battery.
• Use the battery for the intended purpose only.
• Keep out of children's reach.
• Do not allow the battery to be put into the mouth.
Battery electrolytes may be toxic if swallowed.
Disposing of the battery
The battery should never be placed in municipal
waste. Please check local regulations for disposal of
batteries or call your local Sony Ericsson Customer
Care Center for information.
Limited warranty
Sony Ericsson Mobile Communications AB, S-221 88 Lund,
Sweden, (Sony Ericsson), provides this Limited Warranty for
your mobile phone and original accessory delivered with your
mobile phone (hereinafter referred to as "Product").
Should your Product need warranty service, please return it to
the dealer from whom it was purchased, or contact your local
Sony Ericsson Customer Care Centre (national rates may apply)
or visit www.SonyEricsson.com/ to get further information.
Our warranty
Subject to the conditions of this Limited Warranty, Sony
Ericsson warrants this Product to be free from defects in design,
material and workmanship at the time of its original purchase by
a consumer, and for a subsequent period of one (1) year.
P800_UM.book Page 168 Thursday, July 11, 2002 10:58 AM

169
Guidelines for safe and Guidelines for safe and Guidelines for safe and Guidelines for safe and
Preliminary
What we will do
If, during the warranty period, this Product fails to operate under
normal use and service, due to defects in design, materials or
workmanship, Sony Ericsson authorised distributors or service
partners, in the country/region* where you purchased the
Product, will, at their option, either repair or replace the Product
in accordance with the terms and conditions stipulated herein.
Sony Ericsson and its service partners reserve the right to charge
a handling fee if a returned Product is found not to be under
warranty according to the conditions below.
Conditions
1. The warranty is valid only if the original proof of purchase
issued to the original purchaser by the dealer, specifying the
date of purchase and serial number**, is presented with the
Product to be repaired or replaced. Sony Ericsson reserves
the right to refuse warranty service if this information has
been removed or changed after the original purchase of the
Product from the dealer.
2. If Sony Ericsson repairs or replaces the Product, the repaired
or replaced Product shall be warranted for the remaining time
of the original warranty period or for ninety (90) days from
the date of repair, whichever is longer. Repair or replacement
may involve the use of functionally equivalent reconditioned
units. Replaced parts or components will become the
property of Sony Ericsson.
3. This warranty does not cover any failure of the Product due
to normal wear and tear, or due to misuse, including but not
limited to use in other than the normal and customary
manner, in accordance with the Sony Ericsson instructions
for use and maintenance of the Product. Nor does this
warranty cover any failure of the Product due to accident,
modification or adjustment, acts of God or damage resulting
from liquid.
4. Since the cellular system on which the Product is to operate
is provided by a carrier independent from Sony Ericsson,
Sony Ericsson will not be responsible for the operation,
availability, coverage, services or range of that system.
5. This warranty does not cover Product failures caused by
installations, modifications, or repair or opening of the
Product performed by a non-Sony Ericsson authorised
person.
6. The warranty does not cover Product failures which have
been caused by use of accessories or other peripheral devices
which are not Ericsson or Sony Ericsson branded original
accessories intended for use with the Product.
7. Tampering with any of the seals on the Product will void the
warranty.
P800_UM.book Page 169 Thursday, July 11, 2002 10:58 AM

170
Preliminary
8. THERE ARE NO EXPRESS WARRANTIES, WHETHER
WRITTEN OR ORAL, OTHER THAN THIS PRINTED
LIMITED WARRANTY. ALL IMPLIED WARRANTIES,
INCLUDING WITHOUT LIMITATION THE IMPLIED
WARRANTIES OF MERCHANTABILITY OR FITNESS
FOR A PARTICULAR PURPOSE, ARE LIMITED TO THE
DURATION OF THIS LIMITED WARRANTY. IN NO
EVENT SHALL SONY ERICSSON OR ITS LICENSORS
BE LIABLE FOR INCIDENTAL OR CONSEQUENTIAL
DAMAGES OF ANY NATURE WHATSOEVER,
INCLUDING BUT NOT LIMITED TO LOST PROFITS
OR COMMERCIAL LOSS, TO THE FULL EXTENT
THOSE DAMAGES CAN BE DISCLAIMED BY LAW.
Some countries/states do not allow the exclusion or limitation of
incidental or consequential damages, or limitation of the
duration of implied warranties, so the preceding limitations or
exclusions may not apply to you.
The warranty provided does not affect the consumer's statutory
rights under applicable legislation in force, nor the consumer's
rights against the dealer arising from their sales/ purchase
contract.
* European Union (EU)
If you have purchased your Product in an EU country you can
have your Product serviced, under the conditions set out above,
within the warranty period in any EU country where an identical
Product is sold by an authorised Sony Ericsson distributor. To
find out if your Product is sold in the EU country you are in,
please call the local Sony Ericsson Customer Care Centre.
Please observe that certain services may not be possible
elsewhere than in the country of original purchase, for example
due to the fact that your Product may have an interior or exterior
which is different from equivalent models sold in other EU
countries. It may not be possible to repair SIM-locked Products.
** In some countries/regions additional information is
requested. If so, this is clearly shown on the valid proof of
purchase.
P800_UM.book Page 170 Thursday, July 11, 2002 10:58 AM

171
Guidelines for safe and Guidelines for safe and Guidelines for safe and Guidelines for safe and
Preliminary
FCC Statement
Before a phone model is available for sale to the public, it must
be tested and certified to the FCC that it not exceed the limit
established by the government-adopted requirement for safe
exposure. The tests are performed in positions and locations (i.e.
at the ear and worn on the body) as required by the FCC for each
model. Body worm measurements are made while the phone is
in use and worn on the body with an Ericsson or Sony Ericsson
branded original accessory intended for use with the phone. The
design and composition of an accessory can affect the body
worn SAR (Specific Absorption Rate) levels for the phone.
Sony Ericsson has not measured, and make no representation
about, the body worn SAR levels when the phone is used with
non-Ericsson or non-Sony Ericsson branded original accessories
intended for use with the phone.
This device compiles with Part 15 of the FCC rules. Operation is
subject to the following two conditions: (1) This device may not
cause harmful interference, and (2) This device must accept any
interference received, including interface that may cause
undesired operation.
P800_UM.book Page 171 Thursday, July 11, 2002 10:58 AM

172
Preliminary
Terms and definitions
GPRS
General Packet Radio Services (GPRS) is a packet-based
wireless communication service that promises data rates from
56 up to 114 Kbps and continuous connection to the Internet for
mobile phone and computer users. The higher data rates will
allow users to take part in video conferences and interact with
multimedia Web sites and similar applications using mobile
handheld devices as well as notebook computers.
HSCSD
High-Speed Circuit-Switched Data (HSCSD) is circuit-switched
wireless data transmission for mobile users at data rates up to
38.4 Kbps, four times faster than the standard data rates of the
Global System for Mobile (GSM) communication standard in
1999.
Bluetooth
Bluetooth is a computing and telecommunications industry
specification that describes how mobile phones, computers, and
personal digital assistants (PDAs) can easily interconnect with
each other and with home and business phones and computers
using a short-range wireless connection.
IrDA
IrDA (Infrared Data Association) is an industry-sponsored
organization set up in 1993 to create international standards for
the hardware and software used in infrared communication
links. In this special form of radio transmission, a focused ray of
light in the infrared frequency spectrum, measured in terahertz,
or trillions of hertz (cycles per second), is modulated with
information and sent from a transmitter to a receiver over a
relatively short distance. Infrared radiation (IR) is the same
technology used to control a TV set with a remote control
USB
USB (Universal Serial Bus) is a plug-and-play interface
between a computer and add-on devices (such as audio players,
joysticks, keyboards, telephones, scanners, and printers). With
USB, a new device can be added to your computer without
having to add an adapter card or even having to turn the
computer off.
RS232
A communication port contact/port.
SMS
Short Message Service
P800_UM.book Page 172 Thursday, July 11, 2002 10:58 AM

173
Terms and definitionsTerms and definitionsTerms and definitionsTerms and definitions
Preliminary
SMS (Short Message Service) is a service for sending messages
of up to 160 characters (224 characters if using a 5-bit mode) to
mobile phones that use Global System for Mobile (GSM)
communication.
EMS
Enhanced Message Service is like SMS only it supports
pictures, melodies and formated text.
MMS
Multimedia Message Service supports photo quality pictures,
videos in MPEG format and sonds in WAV or MIDI format.
WAP
(Wireless Application Protocol) is a specification for a set of
communication protocols to standardize the way that wireless
devices, such as cellular telephones and radio transceivers, can
be used for Internet access, including e-mail, the World Wide
Web, newsgroups, and Internet Relay Chat (IRC).
SyncML
SyncML is a protocol for universal synchronization of remote
and local data. The protocol is sponsored by the SyncML
initiative, a group supported by Lotus, IBM and others, which
working to create a common protocol for synchronizing data
among workstations, network application servers and mobile
devices.
RSA
RSA is an Internet encryption and authentication system that
uses an algorithm. The RSA algorithm is the most commonly
used encryption and authentication algorithm and is included as
part of the Web browsers from Microsoft and Netscape. The
encryption system is owned by RSA Security. The company
licenses the algorithm technologies and also sells development
kits. The technologies are part of existing or proposed Web,
Internet, and computing standards.
Wav
A Wave file is an audio file format, created by Microsoft, that
has become a standard PC audio file format for everything from
system and game sounds to CD-quality audio. A Wave file is
identified by a file name extension of WAV (.wav).
CLI
A CLI is a Certified Lotus Instructor???
PIM
The SyncML specification is designed to ensure that any device
can synchronize PIM data with any other device. Microsoft said
SyncML support will be made available through third parties.
FC
Flip Closed
FO
P800_UM.book Page 173 Thursday, July 11, 2002 10:58 AM

174
Preliminary
Flip Open
MML
POP3
POP3 (Post Office Protocol 3) is a standard client/server
protocol for receiving e-mail. The e-mail is received and held
for you by your Internet server. Periodically, you (or your client
e-mail receiver) check your mail-box on the server and
download any mail.
IMAP4
Internet Message Access Protocol (the latest version is IMAP4)
is a standard client/server protocol for accessing e-mail from
your local server. The e-mail is received and held for you by
your Internet server. You (or your e-mail client) can view just
the heading and the sender of the letter and then decide whether
to download the mail.
MPEG4
The Moving Picture Experts Group, develops standards for
digital video and digital audio compression. It operates under
the auspices of the International Organization for
Standardization (ISO).
JPGis a graphic image file created by choosing from a range of
compression qualities (actually, from one of a suite of
compression algorithms). When you create a JPEG or convert
an image from another format to a JPEG, you are asked to
specify the quality of image you want. Since the highest quality
results in the largest file, you can make a trade-off between
image quality and file size. JPEG is an acronym for Joint
Photographic Experts Group, the committee that established the
baseline algorithms.
GIFThe GIF (it stands for Graphics Interchange Format) is one
of the two most common file formats for graphic images on the
World Wide Web. The other is the JPEG.
MP3(MPEG-1 Audio Layer-3) is a standard technology and
format for compression a sound sequence into a very small file
(about one-twelfth the size of the original file) while almost
preserving the original level of sound quality when it is played.
MIDIMIDI (Musical Instrument Digital Interface) is a protocol
designed for recording and playing back music on digital
synthesizers that is supported by many makes of personal
computer sound cards.
P800_UM.book Page 174 Thursday, July 11, 2002 10:58 AM

175
Terms and definitionsTerms and definitionsTerms and definitionsTerms and definitions
Preliminary
SMILSMIL (Synchronized Multimedia Integration Language),
is a language that allows Web site creators to be able to easily
define and synchronize multimedia elements (video, sound, still
images) for Web presentation and interaction. SMIL also lets the
"producer" store a media object in multiple versions, each with a
different bandwidth so that a lower-bandwidth version of a Web
page can be sent to users who need it.
URL(Uniform Resource Locator) is the address of a file
accessible on the Internet. The type of resource depends on the
Internet application protocol. Using the World Wide Web's
protocol, the Hypertext Transfer Protocol (HTTP) , the resource
can be an HTML page (like the one you're reading), an image
file, or a Java applet. The URL contains the name of the protocol
required to access the resource, a domain name that identifies a
specific computer, and a hierarchical description of a file
location on the computer. (e g http://www.mhrcc.org/kingston)
OTAOver The Air (OTA) (or Over-The-Air) is a standard for the
transmission and reception of application-related information in
a wireless communications system.
SIM-ATA SIM (Subscriber Identity Module) card will assist
operators in providing mobile commerce applications.
GSM
Global System for Mobile communication) is a digital mobile
telephone system. GSM uses a variation of time division
multiple access (TDMA) and is the most widely used of the
digital wireless telephone technologies. GSM digitizes and
compresses data, then sends it down a channel with two other
streams of user data, each in its own time slot. It operates at
either the 900 MHz or 1800 MHz frequency band.
PTD
MeT
HTML
Hypertext Markup Language is the set of markup symbols or
codes inserted in a file intended for display on a World Wide
Web browser page. The markup tells the Web browser how to
display a Web page's words and images for the user. Each
individual markup code is referred to as a tag. Some tags come
in pairs that indicate when some display effect is to begin and
when it is to end.
XML
XML (Extensible Markup Language) is a flexible way to create
common information formats and share both the format and the
data on the World Wide Web, intranets, and elsewhere. For
example, computer makers might agree on a standard or
common way to describe the information about a computer
product (processor speed, memory size, and so forth) and then
describe the product information format with XML.
P800_UM.book Page 175 Thursday, July 11, 2002 10:58 AM

176
Preliminary
XHTML
XHTML (Extensible Hypertext Markup Language) is "a
reformulation of HTML 4.0 as an application of the Extensible
Markup Language (XML)." For readers unacquainted with
either term, HTML is the set of codes (that's the "markup
language") that a writer puts into a document to make it
displayable on the World Wide Web.
WTLS
Wireless Transport Layer Security (WTLS) is the security level
for Wireless Application Protocol (WAP) applications. WTLS
was developed to address the problematic issues surrounding
mobile network devices - such as limited processing power and
memory capacity, and low bandwidth - and to provide adequate
authentication, data integrity, and privacy protection
mechanisms.
WIM
SWIM
PIN) A PIN is a personal identification number. PINs are
commonly assigned to bank customers for use with automatic
cash dispensers. They are also used, sometimes with a security
token, for individual access to computer networks or other
secure systems.
SIThe International System of Units (abbreviated "SI" from the
French version of the name) is a scientific method of expressing
the magnitudes or quantities of seven important natural
phenomena. This system was formerly called the meter-
kilogram-second (MKS) system.
SL
OTA
Over The Air (OTA) (or Over-The-Air) is a standard for the
transmission and reception of application-related information in
a wireless communications system.
BMP
Bitmap. A grahic picture where the are of the picture is divided
in a number of pixels. Each pixel represent a color.
PIM
CSD
P800_UM.book Page 176 Thursday, July 11, 2002 10:58 AM
177
Terms and definitionsTerms and definitionsTerms and definitionsTerms and definitions
Preliminary
P800_UM.book Page 177 Thursday, July 11, 2002 10:58 AM

178
Preliminary
P800_UM.book Page 178 Thursday, July 11, 2002 10:58 AM

179
Quick guide for common Quick guide for common Quick guide for common Quick guide for common
Quick guide for common tasks
[A table with simplified descriptions of the most common
actions]
P800_UM.book Page 179 Thursday, July 11, 2002 10:58 AM
180
Technical SpecificationsTechnical SpecificationsTechnical SpecificationsTechnical Specifications
Technical Specifications
General Battery Life
GPRS Maximum Data Rates (kbps)
Speed achieved depends on the Coding Scheme supported by the GSM
Network.
Product nameP800 Standard version, latin characterset) / P802
(Chinese version)
Size 117 x 59 x 27 mm
Weight 158 grams with battery and flip148 grams
with battery, flip removed.
System and power
class
E-GSM 900 Class 4GSM 1800 Class
1GSM 1900 Class 1
Antenna Built inv
Speech Coding HR, FR, EFR supported where available,
for high speech quality.
SIM Card Small plug-in card, 3V or 5V type
Operating System Symbian OS v7.0 Based on the 'UIQ'
design.
Processor ARM 9
User storage For settings, user data (e.g. images,
contacts, messages) and third party
applications:P800:12MbyteP802: 9Mbyte
(dictionary not activated)
Standard battery Talk Time:up to 13 hoursStandby time:
up to 400 hours
CS-1
9.05kbps
CS-2
13.4kbps
CS-3
15.6kbps
CS-4
21.4kbps
4
+
Rx 36.2 53.6 62.4 85.6
1 Tx 9.05 13.4 15.6 21.4
P800_UM.book Page 180 Thursday, July 11, 2002 10:58 AM
181
Technical SpecificationsTechnical SpecificationsTechnical SpecificationsTechnical Specifications
Preliminary
HSCSD Maximum Data Rates (kbps)
Screen
Keypad
• 16 hard plastic keys on hinged/removable flip
• Jog Dial, 4-way (up, down, towards, away) + select.
• Browser button to switch to integrated browser
• CommuniCam button - switches to camera viewfinder and acts as
shutter.
• On-Off button
9.6 kbps per timeslot 14.4kbps per
timeslot
2 + Rx 19.2 28.8
1 Tx 9.6 14.4
Display type TFT
Display size Flip closed: 208 x 144 pixels, 40 x 28
mmFlip open: 208 x 320 pixels, 40 x 61
mm
Pixel size 0.192 mm
Colour resolution 12-bit (4096 colours)
Screen surface Touch-sensitive, anti-reflective
Illumination Front-light
P800_UM.book Page 181 Thursday, July 11, 2002 10:58 AM

182
Preliminary
Input MMI Languages
Third Party Application Support
P800 (Standard version) P802 (Chinese version)
Flip
Closed
Numeric keypad on flip
Latin characters on
number
keys
Numeric keypad on flip
Stroke
Pinyin
Bopomofo
Flip Open Touch-screen
Natural character
recognition
On-screen virtual
keyboard
Touch-screen
Chinese character recognition
English character recognition
Numeric character
recognition
Stroke
Pinyin
Bopomofo
P800 (Standard
version)
P802 (Chinese version)
Languages loaded;
unwanted languages are
deleted upon
initialisation to free user
storage space.
Danish (DA),
Dutch (NL),
English UK,
English US,
Finnish (FI),
French (FR),
German (DE),
Greek (EL),
Italian (IT),
Latin American
English (R1),
Norwegian
(NO),
Portuguese (PT),
Spanish (ES),
Swedish (SV),
Turkish (TR)
Chinese (Simplified,
ZS)
Chinese (Traditional,
ZT)
Chinese (Hong Kong,
ZH)
English UK
SDKs C++
PersonalJavaTM
J2ME CLDC 1.0/MIDP
P800_UM.book Page 182 Thursday, July 11, 2002 10:58 AM

183
Technical SpecificationsTechnical SpecificationsTechnical SpecificationsTechnical Specifications
Preliminary
Load formats C++ or JavaTM applications in Symbian
SIS format.MIDP installation (JAR/
JAD) from Browser or connected PC
Security Support for signed applications
P800_UM.book Page 183 Thursday, July 11, 2002 10:58 AM

184
Preliminary
Telephony Personal Organiser
Integrated CommuniCam
Handsfree options: Built-in Office Speakerphone
Portable Handsfree
Bluetooth Headset (optional accessory)
Stereo Headset (optional accessory)
Picture Phone Book Picture of contact displayed when making
outgoing call
Picture of caller displayed when incoming
call
CLI matches entry in Contacts.
Personal ringtones Sound clips as personal ringtones.
Voice control Voice Dialling
Voice Answering
Magic Word activation
Up to 100 voice commands.
Other features: Support for calling cards
Access most applications whilst on a phone
call
Flight mode, enabling P800 to be used as a
PDA in locations where radio transmitters
must be switched off. GSM and Bluetooth
are switched off when in flight mode.
SIM-AT SIM Application Toolkit according to GSM
11.14
USSD Incoming and outgoing
Applications Contacts (Address Book)
Calendar (Diary)
Tasks ('To-Do' list)
Jotter (Text and 'ink' notes)
Voice Memo (Dictaphone)
World Clock
Calculator
(P802 only) English-Chinese-English Dictionary
(P802 only) Lunar Calendar
Image Size 640 x 480 pixels (VGA)
320 x 240 pixels (QVGA)
160 x 120 pixels (QQVGA)
Colour depth 24 bit (16.78 million colours)
Storage format JPEG/JFIF, 3 quality (compression) levels, user-
selectable.
Other features Delay timer
Brightness and Contrast settings
White Balance (4 pre-set values plus automatic)
Flicker-free setting (for fluorescent lighting)
Backlight mode (when there is light behind the
subject)
CommuniCam button switches to viewfinder and
acts as the shutter.
P800_UM.book Page 184 Thursday, July 11, 2002 10:58 AM

185
Technical SpecificationsTechnical SpecificationsTechnical SpecificationsTechnical Specifications
Preliminary
Image Viewer
Image Editor
Video Player
Audio Player
Messaging: SMS
Messaging: EMS
Messaging: MMS
Formats JPEG, BMP, GIF, MBM, PNG, WBMP
Sharing via IR, Bluetooth, MMS, E-Mail, PC file transfer
Usage The Image Editor is available when
composing MMS messages.
Functions Crop, Rotate, Rescale
Electronic ink
(draw on picture) Colour, pen size, eraser function
File Format .MP4 (MPEG4)
Streaming transport RTSP according to 3GPP
Video coding MPEG-4 Simple Visual Profile Level
0H263 Profile 0 Level 10H263 Profile
3 Level 10
Audio coding AMR; AAC
File Format .MP3, WAV, AU, G-MIDI and
AMR
Classes 0, 1 and 2
Bearer GSM and GPRS
Broadcast Basic & Extended channel
Concatenated up to 255 messages
Standards compliance 3GPP 23.040 Version 4
Supported objects Sounds, Melodies, Pictures, Animations
Image editor User may create and edit icons (16x16
and 32x32 pixels)
Image formats GIF, JPG, BMP, WBMP, PNG
Audio format AMR, WAV, iMelody
Presentation SMIL
Conformance 3GPP 23.140 V5.0
Nokia/Ericsson 'MMS Conformance
Document V2.0.0'
P800_UM.book Page 185 Thursday, July 11, 2002 10:58 AM

186
Preliminary
Messaging: E-Mail
Document Viewers
Integrated browser technical data
M-Services
Compliant with M-Services specification, Phase 1
Incoming mail server support POP3, IMAP4
Outgoing mail server support SMTP
Content coding MIME compliant
Attachment Viewers VCard, vCal, Document
viewers as below
Other features Automatic download of
messages over GPRS 'always
on' connection
On-board Microsoft® Word
Microsoft® Excel
Microsoft® Powerpoint®
Adobe® Acrobat® (PDF)
Supplied on CD-ROM Over 20 further formats
Markup Languages HTML 3.2 (excluding features not relevant
to a small screen device)WML
1.2.1WBXMLxHTML BasicxHTML
Mobile ProfilecHTML
WAP v er s ion 2. 0
Scripting Compiled WML scripts
Style sheets WCSS
Images WBMP, GIF (including animated), JPEG
Bearer GPRS, HSCSD, CSD
Security WTLS Class 1, 2, 3
TLS/SSL
Certificates Pre-install & downloadWTLS, X509
WIM WIM interface including SIM-WIM
(SWIM)
Bookmark import/exportIrDA, Bluetooth, SMS,
MMS, E-Mail
Bookmarks Yes, number only limited by available user
storage
Home Page Yes
Cache 15 - 120kbyte user-configurable; 30kbyte
default.
Clear cache function Yes
Hyperlinks Underlined in text
Image according to Style Sheet.
WAP Accounts
(WAP Profiles)
Yes. Integrated with bookmarks.
Quantity only limited by available user
storage.
OTA Support Ericsson/Nokia OTAWAP Forum
Provisioning
P800_UM.book Page 186 Thursday, July 11, 2002 10:58 AM

187
Technical SpecificationsTechnical SpecificationsTechnical SpecificationsTechnical Specifications
Preliminary
MeT
Compliant with MeT specification, version 1.0
P800_UM.book Page 187 Thursday, July 11, 2002 10:58 AM

188
Preliminary
User Customisation
Bluetooth Wireless Technology
Wallpaper
FC only
JPEG, GIF, BMP, WBMP
208 x 320 pixels wallpaper image size.
208 x 144 pixels visible area with flip
closed.
Screen saver FC and FOJPEG, GIF, BMP, WBMP
Animated GIF supported; note that
animation uses more power.
208 x 320 pixels FO image size
208 x 144 pixels visible area with flip
closed (same image as FO)
Ring tones
Alarm tones
iMelody
WAV, AU, AMR.
Recommended format for WAV files is
PCM, 22,050Hz, 8 bit, Mono, often
called 'radio quality'
Application selection Application available via FC on-screen
icons.
Applications available from
Application Picker in FO mode.
Bluetooth compatibility
statement
This product is manufactured to comply
with the Bluetooth spec. 1.1.
Coverage area Up to 10 metres (33 feet)
Bluetooth functions Generic Access Profile Serial Port Profile
Generic Object Exchange Profile
Dialup Networking Profile
Object Push Profile
Headset Profile
P800_UM.book Page 188 Thursday, July 11, 2002 10:58 AM

189
Technical SpecificationsTechnical SpecificationsTechnical SpecificationsTechnical Specifications
Preliminary
Infrared Transceiver
Remote Synchronisation
Local Synchronisation
PC Connectivity Solutions
• Drag-and-drop file transfer between the P800 and the PC. ^
(e.g. Word documents, JPEG images)
• Backup and Restore of user data and settings
• Load new application
• Change MMI Language
• Use P800 as wireless modem. Security
Data transmission rate Max speed between phone and IrDA
device (e.g. PC, another phone) SIR: up
to 115,200 bps
Data Contacts
Calendar
Tasks
Bearer HTTP
Protocol SyncML
Data Contacts
Calendar
Tasks
Jotter text notes
E-Mail
Bearer Bluetooth
IrDA
USB
Protocol SyncML
PC Applications
supported
Lotus Organizer 5 & 6
Lotus Notes 4.6 & 5.0
Microsoft® Outlook® 98, 2000,
2002
Data protection SIM PIN (at power on)Device Lock (at power on
and/or activated by screensaver)
Browser TLS, SSL, WTLS, Certificate handling
Third party
applications
Support for signed applications
Intranet Access SecureID® from RSA SecuritySafeWord from
Secure ComputingDigiPass from Vasco
P800_UM.book Page 189 Thursday, July 11, 2002 10:58 AM

190
Preliminary
Remote Configuration
Location Based Services
Mobile-assisted E-OTD positioning according to FCC E-911 Phase 2
Ericsson/Nokia OTA Settings
specification
WAP Account (Account name and
WAP Gateway information)
ISP Settings (Bearer information,
username, password)
Bookmark (name and
URL)SyncML settingsMMS
Settings
WAP Forum specifications WAP Account
ISP Settings
Bookmarks
Smart Messaging
Specification
ISP Settings
E-Mail account
P800_UM.book Page 190 Thursday, July 11, 2002 10:58 AM

191
Technical SpecificationsTechnical SpecificationsTechnical SpecificationsTechnical Specifications
Preliminary
P800_UM.book Page 191 Thursday, July 11, 2002 10:58 AM
192
Demo ApplicationDemo ApplicationDemo ApplicationDemo Application
Demo Application
The Demo application shows a slide show of some functions of
the smartphone:
• How to send and receive messages
• How to find a contact and make a call
• How to take a picture and send it
• How to personalize the phone and handle short-cuts
To start the Demo
1. Select the Applications icon
2. Select the demo icon
3. The demo is started
To sto p t he Demo
1. Any input will stop the demo. The demo is also stopped at:
– An incoming call
– An incoming SMS/EMS/MMS message
P800_UM.book Page 192 Thursday, July 11, 2002 10:58 AM

193
Demo ApplicationDemo ApplicationDemo ApplicationDemo Application
Preliminary
P800_UM.book Page 193 Thursday, July 11, 2002 10:58 AM

194
Document ViewerDocument ViewerDocument ViewerDocument Viewer
Document Viewer
Document viewer is an application used to view various types of
documents:
• Word processing documents
• Spreadsheets
•Drawings
• PDF documents
• Presentations
•Archives
Document viewer has two views in open mode:
Except from the list view, a document can also be opened from
another application, e.g. by selecting a appended document in an
e-mail.
The functions available differ depending on the document type.
General functions are similar between the document types and
are therefore described separately.
General functions
In all views there is a menu bar from where you can access some
of the functions. This section describes the functions that are
common for all document types.
List view An alphabetical list of files, for selecting a file to
view.
File view The contents of a file, for viewing and manipulating
the file.
P800_UM.book Page 194 Thursday, July 11, 2002 10:58 AM
195
Document ViewerDocument ViewerDocument ViewerDocument Viewer
Preliminary
List view
Detail view
To open a document from an e-mail
1. Select the document link.
2. The document viewer is started, showing the file view of the
document.
To save the docuent in the smartphone
1. Select
Document > Save
from the menu.
2. Select where to save the document and select
Save
.
To open a document from the list view
1. Select the Application launcher icon .
2. Select the Document viewer icon .
3. If required, change folder.
Menus Option Description
Viewer
Find file Search files with a name conatining a
specific text.
Edit
Sort by name Sort the file list by name.
Sort by size Sort the file list by file size.
Zoom Set zoom level, small, medium or
large.
Folders
All Show all files in the list.
Unfiled Show the files that is not in a folder.
Edit folders Categorize your files in folders (for
example business or personal).
Menus Option Description
Document
Rename Rename the document.
Send as Send a document as e-mail, MMS, IR
or Bluetooth.
Save (if opened
from another
application)
Save the document in the smartphone.
Delete Delete the active document.
Properties Show information on the active
document.
Edit
Copy to (if
opened from the
Document
viewer only)
Copy the document to another
location, for example memory stick in
the smartphone.
Zoom in Increase the view of the file.
Zoom out Decrease the view of the file.
Restore Restore to the original size.
Folders
Unfiled Show the contacts that is not in a
folder.
Edit folders Categorize your documents in folders
(for example business, personal etc.).
Menus Option Description
P800_UM.book Page 195 Thursday, July 11, 2002 10:58 AM
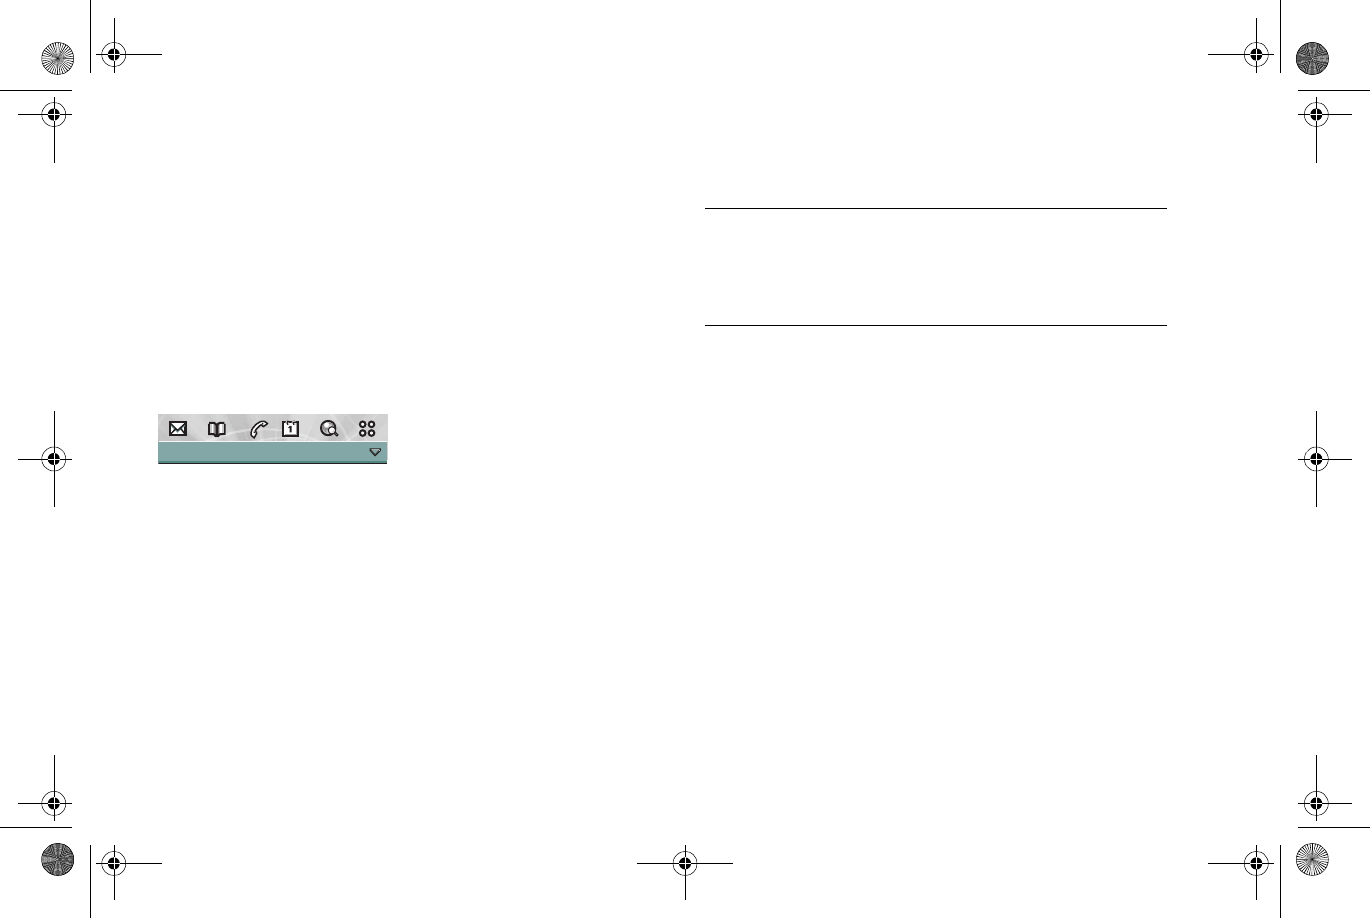
196
Preliminary
4. Scroll to the desired file and select the file name.
The document is shown in the File view.
To save the document to a different location
1. Select
Edit > Copy to
from the menu.
2. Select where to save the document and select
Save
.
Functions specific for different document
types
When a document is opened, the type is indicated by the name
of the first menu, for example
Spreadsheet
.
Detail view - Document
To copy text from the document
1. Select the text to be copied. To select all text in the
document, select
Edit > Select all.
2. Select
Edit > Copy.
3. The text is put into the clipboard and a message is displayed.
Spreadsheet Edit Unfiled
Menus Option Description
Document
Find Search the document for a specific
text.
Find next Search for the next occurence of the
search text.
Clear search hits Remove the search hits.
Edit
Copy Copy the selected text or elements of
the document.
Select all Select the contents of the entire
document.
Draft view Display the document as formatted text
without graphics, adapted to the
screen.
Normal view Display the document as formatted text
including graphics, adapted to the
screen.
Page view Display the document in print preview,
showing the complete layout.
P800_UM.book Page 196 Thursday, July 11, 2002 10:58 AM

197
Document ViewerDocument ViewerDocument ViewerDocument Viewer
Preliminary
To search for a text in the document
1. Select
Document > Find
from the menu.
2. Enter the text to search for.
3. Select find.
4. If required, select
Document > Find next.
5. To clear the highlighted search hits, select
Document > Clear
search hits.
To change the document view
1. To display the document as formatted text without pictures,
wrapped to the screen size, select
Edit > Draft view
.
2. To display the document as formatted text including pictures,
wrapped to the screen size, select
Edit > Normal view.
3. To display the complete layout of the document, select
Edit >
Page view.
P800_UM.book Page 197 Thursday, July 11, 2002 10:58 AM
198
Preliminary
Detail view - Spreadsheet
To copy text from the document
1. Select the text to be copied. To select all text in the
document, select
Edit > Select all.
2. Select
Edit > Copy.
3. The text is put into the clipboard and a message is displayed.
To search for a text in the document
1. Select
Document > Find
from the menu.
2. Enter the text to search for.
3. Select find.
4. If required, select
Document > Find next.
5. To clear the highlighted search hits, select
Document > Clear
search hits.
To change the document view
1. To display the document as formatted text without pictures,
wrapped to the screen size, select
Edit > Draft view
.
2. To display the document as formatted text including pictures,
wrapped to the screen size, select
Edit > Normal view.
3. To display the complete layout of the document, select
Edit >
Page view.
To show/hide the spreadsheet grid lines
1. Select
Edit > Show gridlines.
Menus Option Description
Spread-
sheet
Find Search the document for a specific
text.
Find next Search for the next occurence of the
search text.
Clear search hits Remove the search hits.
Edit
Copy Copy the selected text or elements of
the document.
Select all Select the contents of the entire
document.
Draft view Display the document as formatted text
without graphics, adapted to the
screen.
Normal view Display the document as formatted text
including graphics, adapted to the
screen.
Page view Display the document in print preview,
showing the complete layout.
Show gridlines Turn the gridlines on/off.
Next sheet Open the view of the next sheet in the
workbook.
Previous sheet Open the previous sheet in the
workbook.
P800_UM.book Page 198 Thursday, July 11, 2002 10:58 AM
199
Document ViewerDocument ViewerDocument ViewerDocument Viewer
Preliminary
To navigate in the workbook
1. To go to the next sheet in the workbook, select
Edit > Next
sheet
.
2. To go to the previous sheet in the workbook, select
Edit >
Previous sheet.
Detail view - Drawing
To search for a text in the document
1. Select
Document > Find
from the menu.
2. Enter the text to search for.
3. Select find.
4. If required, select
Document > Find next.
5. To clear the highlighted search hits, select
Document > Clear
search hits.
To navigate in a multi page drawing
1. To go to the next slide in the drawing, select
Edit > Next slide
.
2. To go to the previous slide in the drawing, select
Edit >
Previous slide.
Detail view - Archive
To extract documents from an archive
1. To open a file for viewing in the Document viewer, select the
file and select
Edit > Open.
2. To extract a file and save it in the selected folder, select
Edit >
Extract.
3. To extract all files in the archive and save them in the
selected folder, select
Edit > Extract all.
Menus Option Description
Drawing
Find Search the document for a specific
text.
Find next Search for the next occurence of the
search text.
Clear search hits Remove the search hits.
Edit
Next slide Open the view of the next slide in
multi page documents.
Previous slide Open the view of the previous slide in
multi page documents.
Menus Option Description
Edit
Open Open the selected file for viewing in a
Document viewer window.
Extract Extract the selected file to be saved in
a selected folder.
Extract all Extract all the archive files to be saved
in a selected folder.
Sort by Allow the user to view files in an
archive by name, date, or size.
Sort order Allow the user to view files in
ascending or descending order.
P800_UM.book Page 199 Thursday, July 11, 2002 10:58 AM

200
Preliminary
To change the archive sort order
1. To sort the documents by name, date or size, select
Edit > Sort
by
and select as desired.
2. To change between ascending and descending order, select
Edit > Sort order.
P800_UM.book Page 200 Thursday, July 11, 2002 10:58 AM

201
Document ViewerDocument ViewerDocument ViewerDocument Viewer
Preliminary
P800_UM.book Page 201 Thursday, July 11, 2002 10:58 AM

202
Preliminary
Video player
You can view video clips that you have saved in your
smartphone. The video clips can be downloaded in the
smartphone from an Internet site or transferred from a computer
via a cable. It is also possible to send these video clips to other
phones or pc´s, via infrared communication, Bluetooth wireless
technology and MMS.
The video player supports the MPEG4 file format.
To download a video
1.
To view a video clip
1. Select Applications > Video.
2.
To send a video clip
1.
To delete a video clip
1.
To rename a video clip
1.
1.
P800_UM.book Page 202 Thursday, July 11, 2002 10:58 AM

203
Preliminary
B
Battery
insertion 10
removal 11
P
Problem
card blocked 161
display 162
emergency calls only 161
fax calls 162
inset card displayed 162
memory/disk full 162
no indicator light 162
no network 163
phone locked 163
red indicator light 162
screen 162
security code 162
starting 163
wrong PIN displayed 163
S
Security
problems 162
P800_UM.book Page 203 Thursday, July 11, 2002 10:58 AM