Sony A3624021 Licensed transmitter User Manual
Sony Mobile Communications Inc Licensed transmitter
Sony >
Contents
- 1. 08 user guide part 1
- 2. 08 user guide part 2
08 user guide part 1
Manual for
Easy Search/Contents/
Precautions
Before Using the
Handset
Voice/
Videophone Calls
PushTalk
Phonebook
Security Settings
Camera
i-mode/i-motion/
i-Channel
Sound/Display/
Light Settings
Mail
i-
Index/Quick Manual
Character Entry
’08.1

NTT DoCoMo W-CDMA/GSM/GPRS System Mobile Phone
Thank you for your purchase of the new “FOMA SO905iCS” mobile phone.
For proper use of the FOMA SO905iCS, read this manual and each manual attached to other
optional devices carefully before and while you use the FOMA SO905iCS. For more information on
manuals, contact the inquiries on the backcover of this manual.
The FOMA SO905iCS is the efficient partner of yours. Please handle the FOMA SO905iCS with
care and use it regularly for a long time.
Before using the FOMA terminal

1
Information on Using the Manual and How to Look up in the Manual
This manual guides you through the operating instructions with step-by-step screen
examples for each operating procedure to ensure that you operate the FOMA terminal
properly.
2
A function, referred to as “Notify caller ID” here, can be searched in diverse ways as
follows.
Index (P.474)
Search by a function or service name known to you or a function name to be displayed on
the FOMA terminal’s display.
3
Easy Search/Contents/Precautions
4
Easy Search
You can search the function that you want to know with simple words.
Useful Functions for a Call
Sending your phone number or keeping it anonymous
...Notify caller ID (P.45)
Switching to videophone during a voice call ...............Chg. to videophone (P.54)
Putting a current call on hold ............................................Holding (P.68)
Adjusting the volume of a caller’s voice ......................Volume (P.112)
When Being Unable to Answer a Call
Putting an incoming call on hold .......................................On hold (P.68)
Informing of inability to talking on the phone ................Public mode (Drive mode) (P.69)
Public mode (Power off) (P.70)
Recording a message ......................................................Record message/
Videophone message
(P.72)
How to Customize the Melody and Indicator
Using a ring tone, etc. specific to individual callers ...........Des phone/mail tone/
Select phone/mail Illum. (P.97)
Changing a ring tone .........................................................Ring tone (P.109)
Adjusting the volume of the ring tone ...........................Ring volume (P.109)
Setting the vibrator to notify incoming calls and mail .........Vibrator (P.110)
Changing the color of the indicator ...............................Color (P.110)
Muting the keypad sound .................................................Keypad sound (P.111)
Muting the sound when canceling the Lock key ......Keyguard rel (P.111)
Setting the Manner mode .................................................Manner mode (P.115)
How to Customize the Display
Learning what the icons in the display represent ...............Use display (P.30)
Switching the menu display ...........................................Menu setting (P.33)
Changing the stand-by display .......................................Stand-by display (P.117)
Displaying the calendar in the stand-by display .................Stand-by display (P.118)
Changing the font size ......................................................Font size (P.127)
Easy Search/Contents/Precautions
5
Useful Functions for Mail
Sending Deco-mail ...........................................................
Compose and send Deco-mail
(P.204)
Sending an image ..............................................................File attachment (P.208)
Sorting received mail automatically .............................Sort inbox/Sort outbox (P.222)
Useful Functions for the Camera
Changing the recording size ...........................................Select size (P.158)
Performing the Panorama shoot .....................................Panorama (P.165)
Turning on/emitting the photo light/flash ........................Photo light (P.170)
Flash
(P.170)
Saving an image directly to the microSD memory card
...Select save to (P.173)
Displaying a recorded image .........................................My picture (P.286)
For Secure Operations of the FOMA Terminal
Locking the FOMA terminal from a remote
location in case you misplace it ............................................Omakase Lock

6
Easy Search/Contents/Precautions
Before using the FOMA terminal
Information on Using the Manual and How to Look up
in the Manual ............................................................. 1
Easy Search ............................................................... 4
Main Functions of the FOMA SO905iCS .................... 8
Making Full Use of SO905iCS ! ................................ 10
Safety Precautions (Observe Strictly) ....................... 12
Handling Precautions ............................................... 19
Intellectual Property Right ........................................ 22
Supplied and Optional Accessories .......................... 24
Before Using the Handset 25
Part names and functions, Open/close the FOMA terminal, Style, Use display, Select menu,
UIM, Attach and remove battery pack, Charge the FOMA terminal, Battery level, Power on/
off, Initial setting, Date/time, Notify caller ID, Own number
Voice/Videophone Calls 49
Place voice/videophone call, Change to videophone/voice call, Redial/Received record,
Chaku-moji, WORLD CALL, Receive voice/videophone call, Any key answer, Slide open
setting, Setting when folded, Public mode, Record message/Videophone message, Call
Chara-den, Videophone setting, and so on...
PushTalk 79
What is PushTalk?, Originate PushTalk call, Receive PushTalk call, Add to PushTalk
phonebook, Originate from the PushTalk phonebook, Delete a PushTalk phonebook entry,
PushTalk setting, and so on...
Phonebook 93
About phonebooks, Add to FOMA terminal phonebook, Add to UIM phonebook, Group
setting, Display phonebook, Search phonebook, Phonebook setting, Edit phonebook,
Delete phonebook, Memory status, 2-touch dial, Data Security Service, and so on...
Sound/Display/Light Settings 107
Incoming set, Set basic tone, Volume, Manner mode, Stand-by display, Animation, Call
display, Backlight, Menu setting, Kisekae setting, Kisekae menu, Font size, Select language,
and so on...
Security Settings 129
About security codes, Change code, UIM setting, Cancel the PIN lock, Lock all, Omakase
Lock, Self mode, Personal data lock, Key dial lock, Lock key, Record display, Secret display,
Mail security, Data security, Accept/Reject call, Denied no ID, Set ring start time, Reject
unknown, Data Security Service, and so on...
Camera 149
Record still images, Camera’s standard functions, Shoot mode, Record movies, Change the
camera settings, Adjust the camera, Set the camera operation, Bar code reader, and so on...
i-mode/i-motion/i-Channel 181
What is i-mode?, i-mode menu, Display sites, Change i-mode password, Internet
connection, Bookmark, Screen Memo, Acquire image, Download, i-mode setting, SSL
certificate, User certificate, What is i-motion?, Download i-motion, What is i-Channel?,
Display i-Channel, i-Channel setting, and so on...
Mail 201
What is i-mode mail?, Mail menu, Compose and send mail, Compose and send Deco-mail,
Template, File attachment, Save mail, Receive option, Check new message, Received/sent/
saved mail, Mail setting, MessageR/MessageF, What is Early Warning “Area Mail”?, Area
Mail setting, Compose and send SMS, and so on...
Contents

7
Easy Search/Contents/Precautions
i-
Easy Search/Contents/Precautions
8
Main Functions of the FOMA SO905iCS
“FOMA” is the name of NTT DoCoMo’s mobile service based on the W-CDMA
(Wideband Code Division Multiple Access) system, which has been approved as a
global standard of third generation (3G) wireless communication systems (IMT-2000
or International Mobile Telecommunications-2000).
It’s amazing because it’s i-mode
i-mode is an online service that enables you to take advantage of valuable
information from i-mode Menu sites (Program) and i-mode compatible sites.
This service also enables you to exchange e-mail with great ease.
i-mode mail/Deco-mail/Deco mail pict.
Besides the main body of text, you can attach up
to 10 files (JPEG, ToruCa, PDF, etc.) of up to 2M
bytes in total. The FOMA terminal also supports
Deco-mail and Deco-mail pictographs, allowing
you to create and send more impressive mail
by providing a diversity of expression, such as
changing font color and size and using effect of
background color on mail main body (P.202).
Mega i-
Easy Search/Contents/Precautions
9
Plus JOG
You can select the items quickly by scrolling the JOG
upward and downward. The JOG gives you more
convenient operations with the 4-way keys (P.28).
Stand-by books
There are eight unique preinstalled Flash contents
which display various information such as bits of
knowledge, general knowledge, and picture books
wave after wave every time when the stand-by
display appears.
You can set your favorite content selecting from
the [Preinstalled] folder in My picture of the Data
Box and enjoy it (P.118).
Quick deco. Mail Function
Fun Deco-mail is available with simple steps (P.206).
“POBox Pro 2.0” and Convenient Text Input
The FOMA terminal is provided with the prediction
conversion function “POBox Pro 2.0” (Predictive
Operation Based On eXample Pro 2.0). Pressing
allows you to move vertically and
horizontally in the “POBox Pro 2.0”, enabling
to select the target word. Also, switching tabs
allows you to enable the speedy selection of the
matching words list (P.379).
Multiaccess
You can use voice call and packet communication
simultaneously. You can receive i-mode mail even
when you are in a call and you can also make a
call while you are using i-mode (P.348).
High-Definition Wide VGA Liquid-Crystal Screen Display
A 2.7-inch high-resolution full wide liquid-crystal
screen display is employed. Not only you can
enjoy viewing websites, but also perform mail and
i-mode operations in the large screen comfortably.
Lifetime Calendar
The Lifetime Calendar allows you to display an
image, mail, Schedule, and Phonebook (birthday)
data directly from the Calendar and provides
you with more pleasant way of retrieving your
memories saved in the FOMA terminal (P.351).
Infrared Communication/Infrared Remote Control
You can exchange data with other FOMA terminals
using the infrared communication function. You can
also use the FOMA terminal to operate equipment
such as a TV that is provided with infrared remote
control. Moreover, the FOMA terminal supports
the high-speed infrared communication standard
IrSimple, allowing you to transfer high-quality images
to compatible devices at a high speed (P.323, 327).
Security Settings (P.129)
Omakase Lock
If you misplace the FOMA terminal, it can be
locked by your request. You can cancel the lock
as well. See the contact address at the backcover
of this manual for inquiries (P.136). Please note
that Omakase Lock is a paid service
Easy Search/Contents/Precautions
10
Making Full Use of SO905iCS !
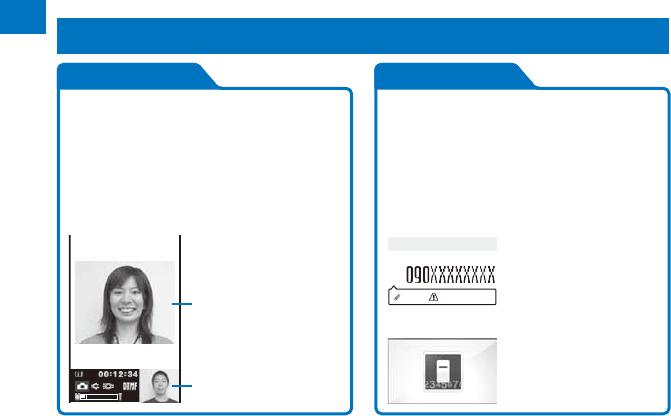
Videophone
You can have a face-to-face conversation
with a person in the distance. You can hear
the person’s voice from the speaker without
changing any settings, so you can start a
conversation soon. You can switch a call
to a videophone call during a voice call
without hanging up as well (P.50).
Image of a person
you are talking to
Your image
Chaku-moji
You can send a message that is displayed
in the recipient’s Incoming call display
while calling the recipient. The recipient
can know the purpose of the call or feelings
of the caller from a message even before
the recipient answers (P.58).
Chaku-moji

Easy Search/Contents/Precautions
11
Camera
The effective number of pixels: 5,110,000 and 3

12
Easy Search/Contents/Precautions
Safety Precautions
(Observe Strictly)
For safe and proper use of the FOMA terminal,
please read the “Safety Precautions” prior to
use. Keep the Manual in a safe place for future
reference.
ALWAYS observe the safety precautions
since they intend to prevent personal injury or
property damage.
13
Easy Search/Contents/Precautions
No
liquids
Do not get the FOMA terminal,
battery pack, or adapter wet.
If liquids such as water or pet urine
get into the device, it may cause
overheating, electric shock, fire,
malfunction, or injury. Be careful
where and how you use the device.
Do
Use the battery packs and adapters
(including chargers) specified for the
FOMA terminal by DoCoMo.
The use of products that are not
specified may cause the FOMA
terminal, battery pack, or other
device to leak, overheat, explode,
catch fire, or malfunction.
Battery Pack SO02, Desktop Holder
SO08, FOMA AC Adapter 01/02,
FOMA DC Adapter 01/02, FOMA
Portable Charging Adapter 01,
FOMA Dry Battery Adapter 01,
FOMA AC Adapter 01 for Global
use, FOMA USB Cable with Charge
Function 01
14
Easy Search/Contents/Precautions
Don’t
Do not keep in a place that is very
humid, dusty, or subject to high
temperature.
Doing so may cause malfunction.
Do
If children use the FOMA terminal,
parents or guardians should give
them the proper instructions for use.
Make sure that they use the FOMA
terminal as instructed.
Failure to do so may cause injury.
Do
Keep the FOMA terminal, battery
pack, adapter, and UIM out of the
reach of babies and infants.
Failure to do so may cause
accidental swallowing or injury.
Do
Be careful especially when you
use the FOMA terminal while it has
been continuously connected to the
adapter (including the charger) for a
long period of time.
If you continue using i-
15
Easy Search/Contents/Precautions
Prohibited acts such as mobile
phone usage on board an airplane
may be punished by law.
Do
Always keep the FOMA terminal
away from your ear when you talk
setting the hands-free function. Also,
when you play game or play back
music connecting the Earphone/
Microphone to the FOMA terminal,
adjust the volume adequately.
If the volume is too loud, it may
cause difficulty in hearing.
Moreover, if you barely hear the
surrounding sounds, it may cause
an accident.
Do
If you have a weak heart, set the
vibrator or ring volume carefully.
Failure to do so may affect your
heart.
Do
If you hear thunder while using the
FOMA terminal outdoors, power off
immediately, and take shelter in a
safe place.
Failure to do so may cause injury or
electric shock from the lightning.
Do
Power off the FOMA terminal near
electronic devices or equipment
operating on high precision control
or weak signals.
Failure to do so may interfere with
the operation of electronic devices
or equipment.
16
Easy Search/Contents/Precautions
Don’t
Do not place magnetized devices
near the FOMA terminal.
The strong magnetism may interfere
with the operation.
Don’t
If the display is mistakenly damaged
and when the liquid crystal is
broken, do not drink, absorb, or get
it on your skin.
If the liquid crystal gets on your eye
or mouth, rinse with clean running
water, and get medical treatment
immediately.
Also, if it gets on your skin or
clothes, use something such as
alcohol to wipe off and wash it with
soap in clear water.
Failure to do so may cause
blindness or injury on your skin.
Don’t
Do not bring your ear closer to the
speaker when the ring tone sounds
or melody is played back on the
FOMA terminal.
Doing so may cause difficulty in
hearing.
Do
In rare cases, using the FOMA
terminal may interfere with the
operation of electronic devices in
some types of vehicle.
If there is any interference, do not
use the FOMA terminal when driving
for safety reasons.
Do
The use of the FOMA terminal may
cause itching, rashes, eczema,
or other symptoms depending
on the user’s physical condition.
Immediately stop using and get
medical treatment in such a case.
Metals are used as listed below:
Where it
is used Material Surface treatment
Camera
ring
Nickel Chr ome plating
finish
Plus JOG Aluminum
base alloy
Anodized
aluminum finishing
Do
Be careful not to get your finger,
palm, or the strap caught in the
closed FOMA terminal when you
close and open it.
Failure to do so may cause injury or
damage.
Handling the Battery Pack

17
Easy Search/Contents/Precautions
Do
If the battery fluid gets into your
eyes, do not rub, rinse with clean
running water, and get medical
treatment immediately.
Failure to do so may cause
blindness.
WARNING
Don’t
If any abnormality caused by an
external shock, such as deformation
or damages by falling is found in the
battery pack, stop using the battery
pack immediately.
Failure to do so may cause the
battery pack to leak, overheat,
explode, or catch fire, or cause the
device to malfunction or catch fire.
Do
Stop charging if the FOMA terminal
is not charged within the specified
charging time.
Failure to do so may cause the
battery pack to leak, overheat,
explode, or catch fire.
Do
If the battery pack leaks or hears
an unusual odor, immediately stop
using and move it away from fire.
The leaking liquid may ignite fire,
catch fire, or explode.
Do
Be careful about your pet not to bite
the battery pack.
Failure to do so may cause the
battery pack to leak, overheat,
explode, or catch fire, or cause the
device to malfunction or catch fire.
CAUTION
Don’t
Do not dispose of the battery pack
together with other garbage.
The battery pack may become
the source of fire or environmental
destruction. Take the used battery
pack to our service counter
(DoCoMo shop, etc.) after insulating
it by affixing an adhesive tape
on the terminal of it or follow the
instructions of the local authorities
in charge of collecting used battery
packs.
Don’t
Do not charge the wet battery pack.
Doing so may cause the battery
pack to overheat, catch fire, or
explode.
Do
If the battery fluid gets on your skin
or clothes, immediately stop using
the battery pack and rinse with clean
running water thoroughly.
Failure to do so may cause injury on
your skin.
Handling the Adapter (including
the charger)
WARNING
Don’t
Do not use the adapter (including the
charger) if the cord of the adapter or
the power cord is damaged.
Doing so may cause electric shock,
overheating, or fire.
Don’t
Do not use the AC adapter or
desktop holder in a very humid or
steamy place such as bathroom.
Doing so may cause electric shock.
Don’t
The DC adapter is for use in vehicles
with a negative ground. Do not use it
in vehicles with a positive ground.
Doing so may cause fire.
Continued
18
Easy Search/Contents/Precautions
Don’t
Do not touch the FOMA terminal
and adapter (including the charger)
if you hear thunder.
Doing so may cause injury or
electric shock from the lightning.
Don’t
Do not short-circuit the charge
terminal of the charger while the
power plug is connected to the
power outlet or cigarette lighter
socket. Do not touch the charge
terminal with your hands, fingers, or
any part of your body.
Doing so may cause fire,
malfunction, electric shock, or injury.
Don’t
Place the charger or the desktop
holder on a stable platform while
charging. Do not cover or wrap the
charger or the desktop holder with a
cloth or bedding.
The FOMA terminal may fall off the
charger or heat up and cause fire or
malfunction.
Don’t
Do not place any heavy objects on
the cord of the adapter (including
the charger) or the power cord.
Doing so may cause electric shock
or fire.
No wet
hands
Do not touch the cord of the adapter
(including the charger) or the power
outlet with wet hands.
Doing so may cause electric shock.
Do
Use the adapter only on the
specified power supply and voltage.
Failure to do so may cause fire or
malfunction. Use the AC adapter
available overseas when you use
the phone overseas.
AC adapter: AC 100 V
DC adapter: DC 12 V/24 V
(exclusively used for vehicles
with a negative ground)
AC adapter available overseas:
AC 100 to 240 V
(Make sure to connect the
adapter to a household AC power
outlet.)
Do
If the fuse of the DC adapter is
blown, replace it with the specified
fuse.
The use of a fuse other than
specified one may cause fire or
malfunction. See the user’s manual
supplied with the adapter for the
specified fuse.
Do
Clean dust from the power plug.
Failure to do so may cause fire.
Do
When you connect the AC adapter
to the power outlet, make sure that
it does not come in contact with a
metal object such as a metal strap
and insert it firmly.
Failure to do so may cause electric
shock, short circuit, or fire.
Do
Hold the power plug, not the cord of
the adapter (including the charger)
or the power cord, when you remove
the adapter (including the charger)
from the power outlet or cigarette
lighter socket.
Pulling the cord may damage it and
cause electric shock or fire.
19
Easy Search/Contents/Precautions
Unplug
Remove the power plug from the
power outlet when not used for a
long period of time.
Failure to do so may cause electric
shock, fire, or malfunction.
Unplug
If liquid such as water gets into the
adapter, immediately remove it from
the power outlet or cigarette lighter
socket.
Failure to do so may cause electric
shock, smoking, or fire.
Unplug
Before cleaning, remove the power
plug from the power outlet or
cigarette lighter socket.
Failure to do so may cause electric
shock.
Handling the UIM
CAUTION
Do
Please be careful not to touch a cut
surface when you remove the UIM
(IC portion).
Failure to do so may damage your
hand or fingers.
Handling the FOMA Terminal Near
Electronic Medical Equipment

20
Easy Search/Contents/Precautions
Handling Precautions

21
Easy Search/Contents/Precautions

22
Easy Search/Contents/Precautions

23
Easy Search/Contents/Precautions
ˎ Windows Media® is either a registered trademark
or trademark of Microsoft Corporation in the United
States and/or other countries.
ˎ Napster is a registered trademark of Napster, LLC.
and/or its affiliates in the US and/or other countries.
ˎ Mascot Capsule® is a trademark of the HI
Corporation.
ˎ “PostPet” is a registered trademark of So-net
Entertainment Corporation.
ˎ POBox is a trademark of Sony Corporation.
ˎ “BestPic” is a registered trademark of Sony Ericsson
Mobile Communications AB.
ˎ “+JOG”, “Stand-by books”, “RealityMAX”, and
“Ericle” are trademarks or registered trademarks of
Sony Ericsson Mobile Communications Japan, Inc.
ˎ Java and Java-related trademarks are trademarks or
registered trademarks of the U.S. Sun Microsystems,
Inc. in the U.S. and other countries.
ˎ ImageStar is a registered trademark of Ainix
Corporation.
ˎ QR code is a registered trademark of Denso Wave
Inc.
ˎ IrSimple™, IrSS™, and IrSimpleShot™ are
trademarks of Infrared Data Association®.
ˎ Other system names and/or product names
mentioned in this manual are generally trademarks
or registered trademarks of their respective owners.
The trademark symbol ™ and registered trademark
symbol ® are omitted hereafter in this manual.

Easy Search/Contents/Precautions
24
Supplied and Optional Accessories

25
Before Using the
Handset
Part Names and Functions ........................................................................................ 26
Opening/Closing the FOMA Terminal ........................................................................ 29
About the Style .......................................................................................................... 29
Using the Displays ..................................................................................................... 30
Selecting the Menu .................................................................................................... 33
Using the UIM ............................................................................................................ 36
Attaching and Removing the Battery Pack ................................................................ 39
Charging the FOMA Terminal .................................................................................... 40
Checking the Battery Level ................................................................... <Battery level> 42
Powering On/Off ................................................................................... <Power on/off> 43
Setting the Basic Functions .................................................................. <Initial setting> 43
Setting the Date and Time ........................................................................ <Date/time> 44
Notifying the Recipient of Your Phone Number .................................. <Notify caller ID> 45
Checking Your Own Phone Number .....................................................<Own number> 45
Before Using the Handset
26
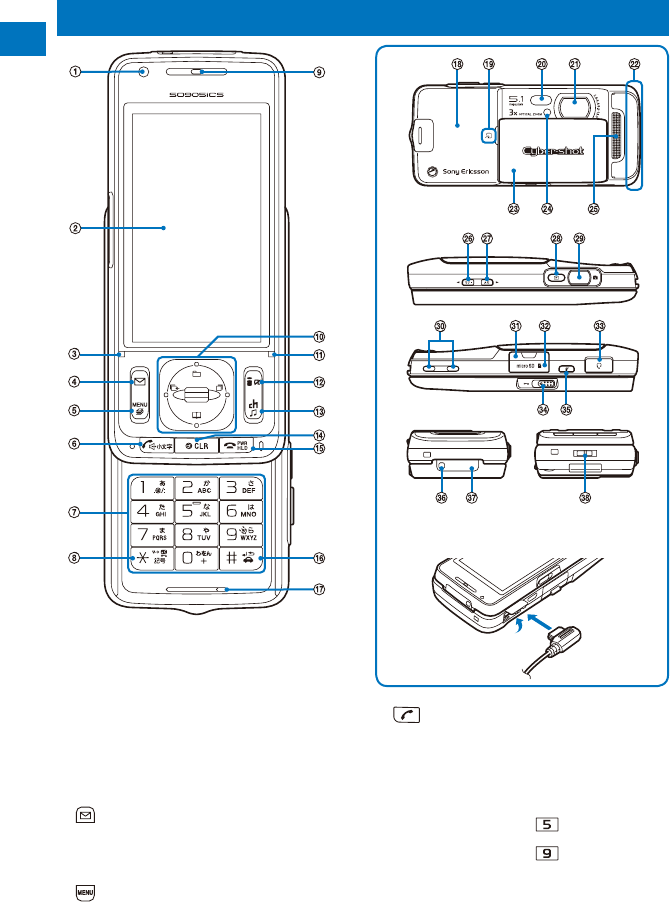
Part Names and Functions
ͦ In-Camera
Use to record a still image or movie (P.155, 167) or
send the image at your side during a videophone call
(P.50).
ͧ Display (P.30)
ͨ Charge Indicator/FeliCa Sign
Lights in red while charging the battery (P.41).
Lights in green during iC communication or when the
FOMA terminal comes within the communication range
with the reading device (P.251, 328).
ͩ Mail Key
In the stand-by display, press to display the Mail menu
(P.202) and press for over a second to perform the
Check new message (P.212, 227).
Press to select an item in the guide display (P.33).
ͪ MENU Key
Press to display the menu (P.33, 349).
ͫ Call/Hands-free Switch Key
Press to place a voice call or start talking on the phone
of a voice, videophone, or PushTalk call.
Press during a call to switch ON/OFF of the hands-free
function (P.53).
ͬ Keypad
Enter phone numbers or text (P.426).
In the stand-by display, press for over a second to
display the Reset display (P.372).
In the stand-by display, press for over a second to
check your current location (P.260).
Connecting the Flat-plug Earphone/
Microphone with Switch (optional)
Before Using the Handset
27
ͭ/IC Card Lock Key
In the stand-by display, press for over a second to lock
the IC card function or cancel the lock. To cancel the
lock, enter the Security code (P.258).
ͮ Earpiece
The caller’s voice is heard from here.
ͯ Plus JOG (P.28)
Ͱ Incoming Indicator
Flashes when receiving a call/mail. It flashes when there
is a missed call or new mail/unread message (P.126).
Flashes while obtaining the location information using
the GPS function (P.260).
ͱ i-mode/i-
Before Using the Handset
28
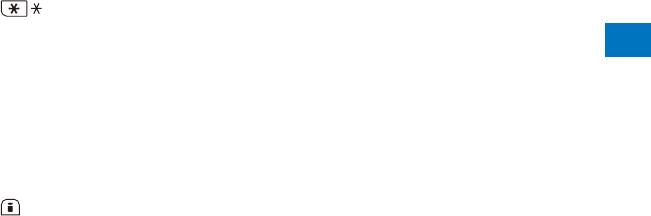
+JOG (Plus JOG)
Left
arrow key
Up
arrow key
Right
arrow key
Down arrow
key
JOG
Operation Symbols in
this manual Description
Up arrow
key
Move the cursor upward. Press for
over a second to move the cursor
continuously.
Press in the stand-by display to display
the Data Box.
Down
arrow key
Move the cursor downward. Press
for over a second to move the cursor
continuously.
Press in the stand-by display to display
the Phonebook.
Left arrow
key
Move the cursor to the left. Press for
over a second to move the cursor
continuously.
Or, press to return to the previous
display.
Press in the stand-by display to display
the Received record.
Right arrow
key
Move the cursor to the right. Press
for over a second to move the cursor
continuously.
Or, press to go to the next display.
Press in the stand-by display to display
the Redial record.
JOG
Set a selected item.
When you scroll it upward and
downward, the cursor moves upward
and downward.
If you keep scrolling it, the cursor keeps
moving.
In the stand-by display, when you
scroll it upward, the Data Box appears,
and when you scroll it downward, the
Phonebook appears.
You can set the action of it in the
matching words list while entering
words (P.381).
Before Using the Handset
29
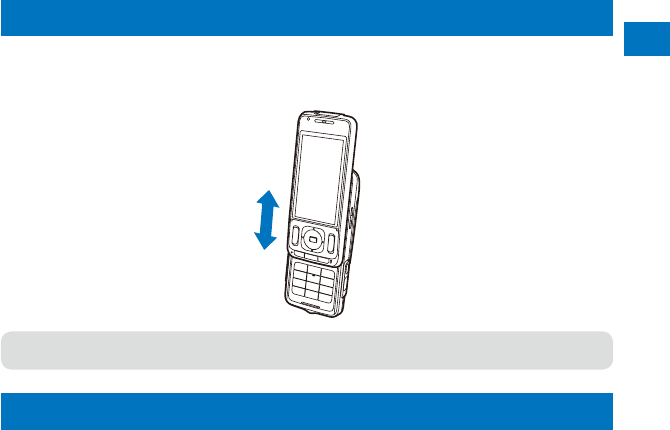
Opening/Closing the FOMA Terminal
When you open/close the FOMA terminal, hold the FOMA terminal in your hand.
To open the FOMA terminal, slide the front surface of the display side upward. To
close it, slide the front surface of the display side downward.
Before Using the Handset
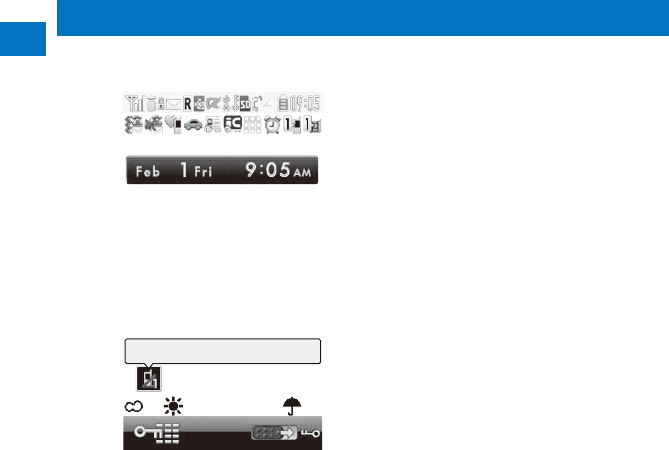
30
Using the Displays
ˎ For details on the icons in the Camera mode, see P.154.
ˎ The position of the clock in the display can be changed (P.118).

Before Using the Handset
31
Before Using the Handset
32
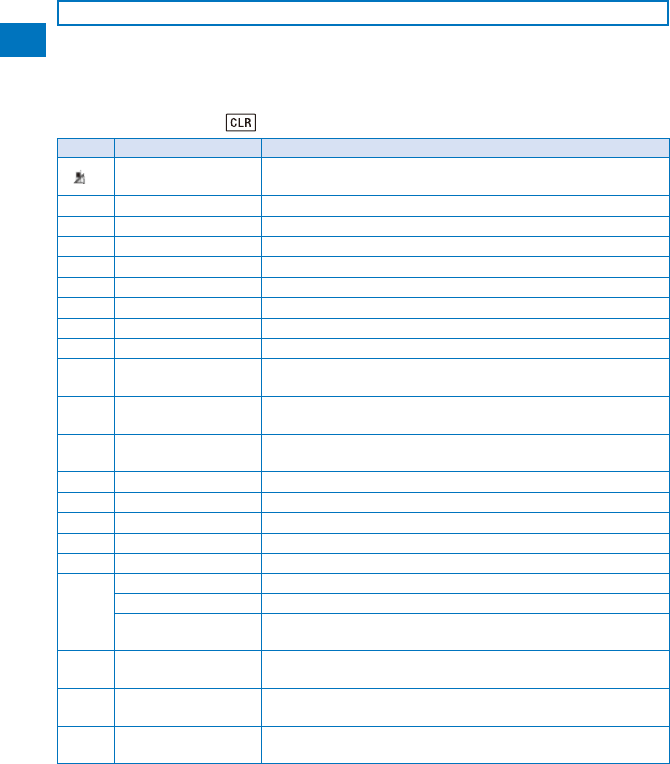
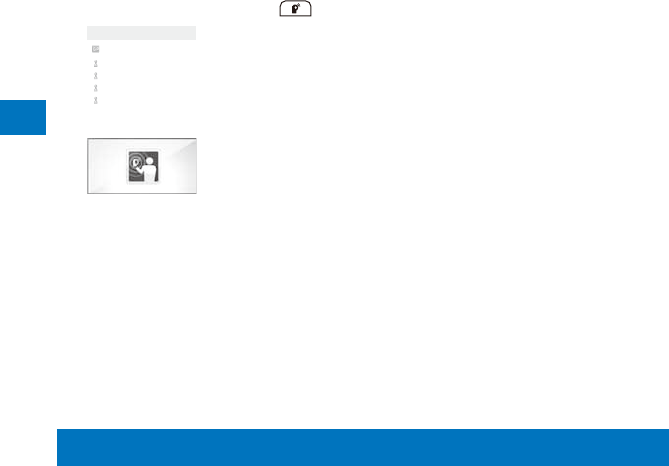
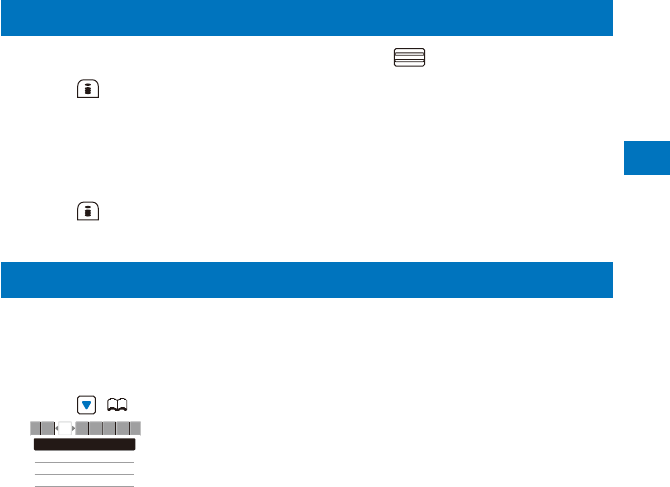
Notification Display
An icon is displayed in the notification display to alert you, for example, when you
cannot answer a call. The icon is displayed from the left in the order of the latest event.
Move the cursor to the icon to display the text information and select the icon to
check the notification information. The icon is turned off by checking the notification
information or pressing for over a second.
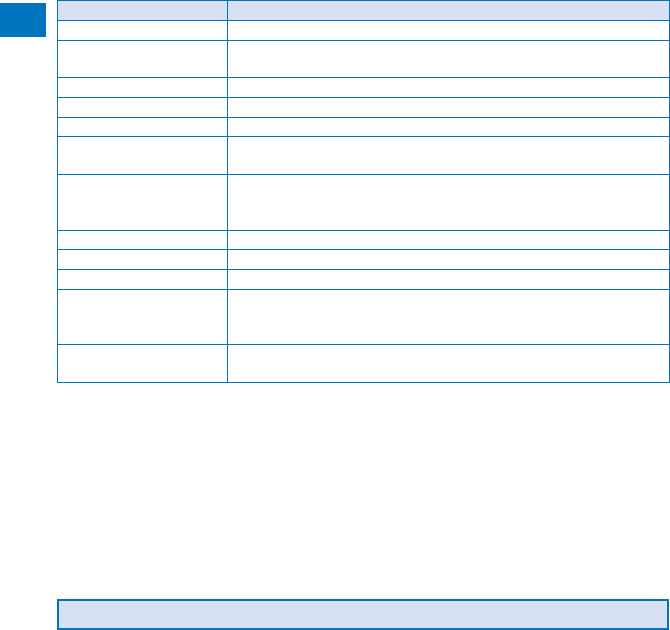
Icon Text information Description
Missed call X

Before Using the Handset
33
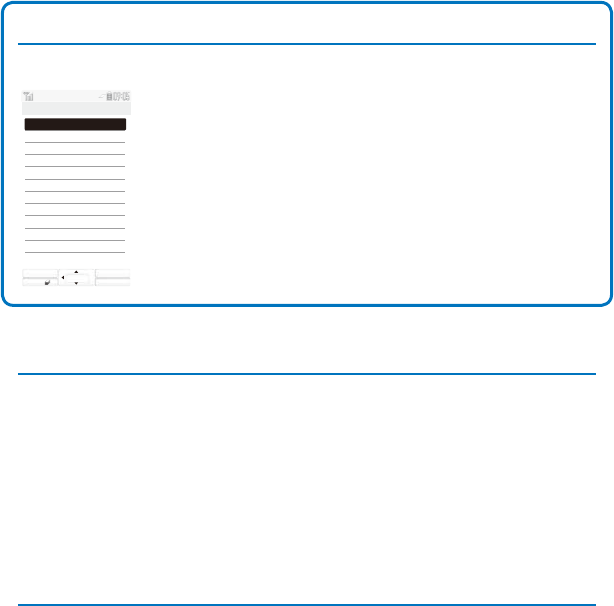
Guide Display
To utilize the FOMA terminal’s functions, use the 4-way keys (Up/Down/Left/Right
arrow keys), the JOG, the Mail key, the i-mode/i-
Before Using the Handset
34
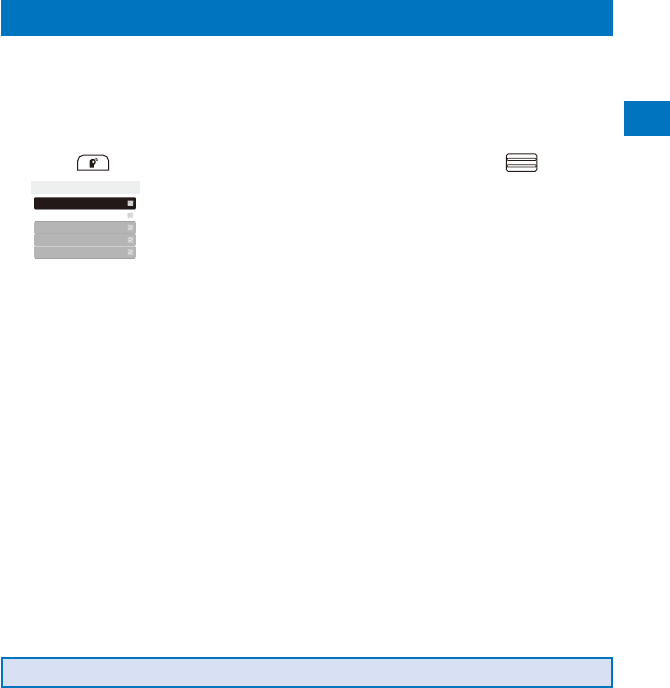
Kisekae menu
Menu name Description
My Selection Used to access My Selection.
Imaging Used to access Camera, Movie, easy BlogUp, Music slide show, and
Stand-by pictures.
i-mode Used to access an i-mode function.
Mail Used to access an i-mode mail and SMS functions.
i
Before Using the Handset
35
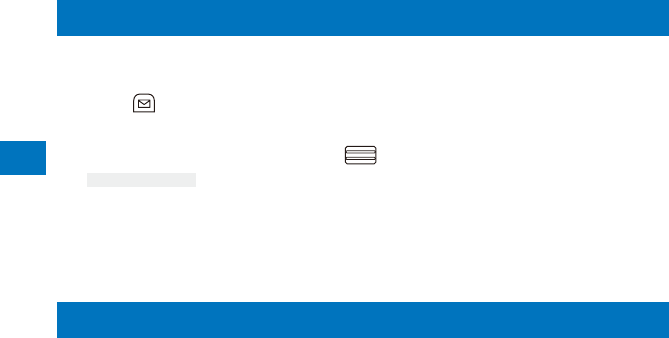
Selecting a Function from the Function Menu
The Function menu is a menu that plays an auxiliary role for each function.
Whenever the Function menu is available, [Func] appears in the guide display. Press
to display a list of available Function menus.
ˎ The contents of the Function menu vary depending on the functions and displays. For details,
see the description of operation for the individual option.
ˎ When the numbers and symbols are displayed in the Function menu, press a key on the
keypad to activate a function.

Before Using the Handset
36
Using the UIM
The UIM (FOMA card) records user information such as your phone number. Insert a
UIM in the FOMA terminal to use it.
Inserting/Removing the UIM
When inserting/removing the UIM (FOMA card), make sure to power off and close the
FOMA terminal, remove the battery pack, and perform the operation with the FOMA
terminal held with your hand.
ˎ If you insert the UIM forcibly, it may be damaged.

Before Using the Handset
37
About the Function for Restricting UIM Operation
The FOMA terminal provides a function for restricting UIM (FOMA card) operation in
order to protect your data and files. If you record a videophone message or download
files or data from sites or mail while the UIM is inserted in the FOMA terminal, the UIM
operation restriction function is automatically set for these data and files.
ˎ When you replace the UIM with another one or if you do not have a UIM inserted in the FOMA
terminal, you are unable to display or play back the data or files for which the UIM operation
restriction function is set or if they are sent using the infrared or iC communication or attached
to mail.
ˎ The target data for operation restriction is as follows:
- Image (including GIF animation, Flash, and Stamp&Frame) - Deco-mail pictograph
- Image downloaded from the Data Security Service Center - Movie/i-motion
- Downloaded Kisekae tool - Chara-den
- Chaku-Uta®/Chaku-Uta Full® -
Image inserted in a ToruCa(detail) card
- File attached to i-mode mail (excluding a ToruCa card) - Melody
- Message R/F attached file (melody/image) - PDF data
- Mail template (including target data for restriction) - Videophone message
- Image inserted in Deco-mail or a signature -
Movable contents-compatible data
- i-
Before Using the Handset
38
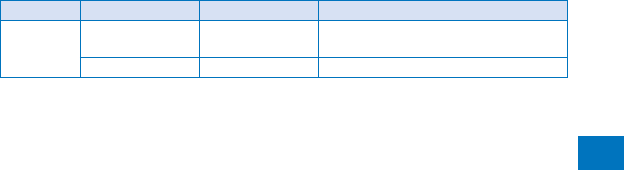
About the Differences in UIM Functions
A UIM (FOMA card) (blue) has the following functional differences from a UIM (green/
white).
Item UIM (blue) UIM (green/
white) Page
Number of digits that can be saved for a phone
number in the UIM phonebook
Maximum
20 digits
Maximum
26 digits
P.98
User certificate operation for using FirstPass Unavailable Available P.195
Use of WORLD WING service Unavailable Available P.38
Service Numbers (Use of [

Before Using the Handset
39
Attaching and Removing the Battery Pack
When attaching/removing the battery pack, make sure to power off and close the
FOMA terminal.
ˎ If you attach the battery pack forcibly, the terminal on the FOMA terminal may be damaged.
ˎ Holding too hard or attaching/removing the back cover in a manner other than described below
may damage it.

Before Using the Handset
40
Charging the FOMA Terminal
At the time of purchase, the battery pack is not fully charged. Make sure to fully
charge the battery pack before using the FOMA terminal for the first time.
About Charging the FOMA Terminal
ˎ For details, see the user’s manual of the FOMA AC Adapter 01/02 (optional), FOMA AC Adapter
01 for Global use (optional), or FOMA DC Adapter 01/02 (optional).
ˎ The FOMA AC Adapter 01 is only compatible with AC 100 V. The FOMA AC Adapter 02 and
FOMA AC Adapter 01 for Global use are compatible with AC 100 V to AC 240 V.
ˎ The shape of the AC adapter’s power plug is only for use with AC 100 V (domestic
specification). For using the AC adapter which is compatible with AC 100 V to AC 240 V
overseas, a plug adapter that fits the electrical outlets in the country you stay is needed. Do not
use an electrical transformer for overseas use to charge the FOMA terminal.
ˎ
Make sure to attach the battery pack in the FOMA terminal before connecting it to the optional AC Adapter,
Desktop Holder, or DC Adapter. If the battery pack is not attached, the FOMA terminal cannot be charged.
ˎ
If you use a function such as videophone, data communication, and i-
Before Using the Handset
41
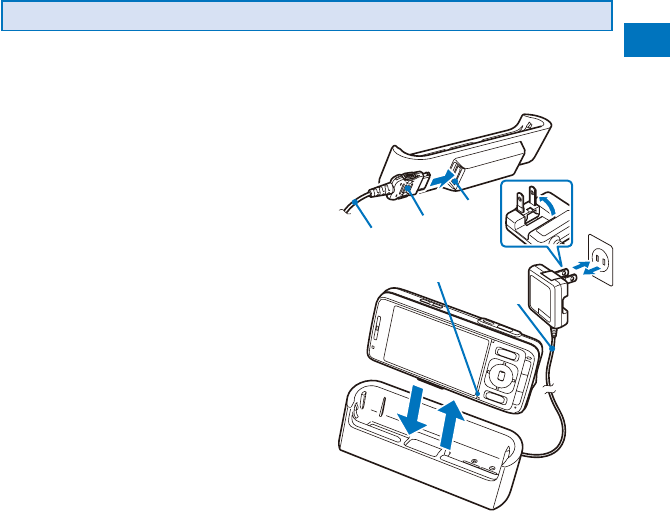
How to Charge the FOMA Terminal
Charge the battery pack using the optional Desktop Holder SO08 with the FOMA AC
Adapter 01/02 connected. Make sure to see the user’s manuals of the Desktop Holder
and AC Adapter. The battery pack cannot be charged alone.
1
5
2
3
4
Insert the connector
horizontally with
the engraved side
facing outside.
AC adapter
AC adapter
Terminal
Charge indicator
1 Insert the connector of the AC adapter
horizontally with the engraved side facing
outside into the terminal (the side labeled
“AC
Before Using the Handset
42

Before Using the Handset
43
Powering On/Off <Power on/off>
ˎ When you power on the FOMA terminal, the screen informing to execute the software update
automatically may appear (P.452).
1
Press (PWR) for over two seconds.
The FOMA terminal is powered on, the display and the keypad lights
are turned on, and an animation is displayed. After a while, the stand-by
display appears.
ˎ If you have set the PIN1 code setting to [ON], the PIN1 code input
screen appears. Enter the PIN1 code and press (OK) (P.131).
To power off
Press (PWR) for over two seconds.

Before Using the Handset
44
Setting the Date and Time <Date/time>
You can set the date and time either by automatically correcting the time based on
the time information obtained from the DoCoMo network or by manually setting the
time.
Example: Correcting the time automatically
1
From the Menu, select [Settings]

Before Using the Handset
45
Notifying the Recipient of Your Phone Number <Notify caller ID>
When placing a call, your phone number can be shown in the display of the
recipient’s phone you are calling.
ˎ The caller ID is important personal information. Carefully decide whether you notify a recipient
of your caller ID.
1
From the Menu, select [Settings]

Before Using the Handset
46
Before Using the Handset
47
3
Press and save each item at the Detail display.
Icon Settings
Select an image from My picture/i-motion of the Data Box or record one.
ˎ You can set the following files.
Category File format File size Image size
My picture GIF/JPEG Max. 100K bytes Max. [QVGA(240

49
Voice/Videophone Calls

Voice/Videophone Calls
50
What is Videophone?
You can use the videophone function between DoCoMo videophone compatible
terminals. You can use videophone to talk to the recipient/caller while looking at each
other’s image. You can send a still image, substitute image, or Chara-den character
instead of your own.
DoCoMo’s videophone complies with “3G-324M
Voice/Videophone Calls
51
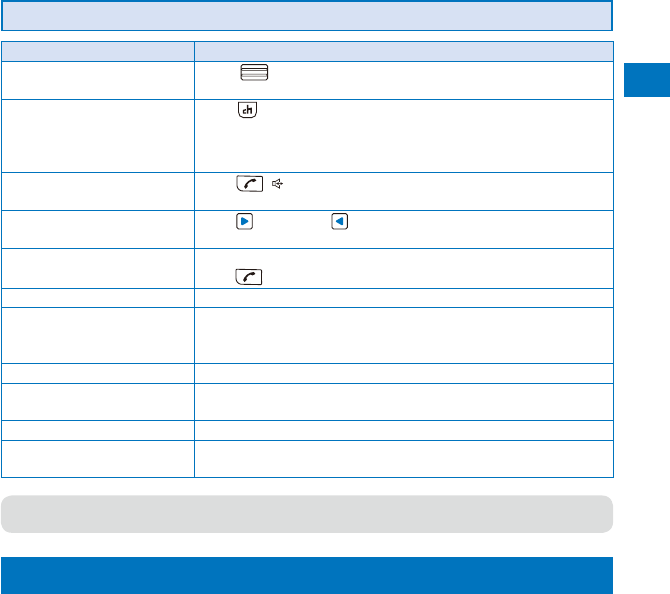
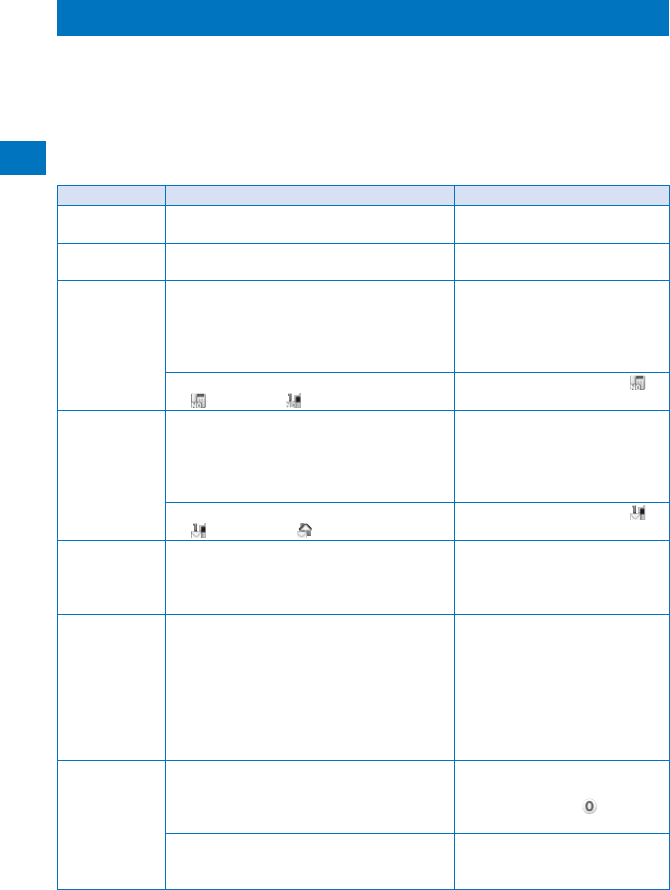
Operations during a Videophone Call
Operation Key operation
Switch between camera
image/substitute image
Press (MySide/Sub). Every time you press the key, the
display is switched between camera image/substitute image.
Switch cameras Press (In/Out). Every time you press the key, the camera is
switched between the In-/Out-camera.
You can also switch between the In-/Out-camera by opening/
closing the lens cover.
Switch ON/OFF of the hands-
free operation
Press ( ). Every time you press the key, the ON/OFF setting
is switched.
Zoom-in/-out image Press (Zoom in) / (Zoom out) when recording with the Out-
camera.
Put a call on hold From the Function menu, select [Holding]. To cancel this function,
press .
Switch the display From the Function menu, select [Display setting].
Switch the quality of the
outgoing image
From the Function menu, select [Visual preference]. When you
finish a call, the image quality set for the Visual preference of the
Videophone setting is restored.
Select a substitute image From the Function menu, select [Select sub image].
Switch ON/OFF of the photo
light
From the Function menu, select [Photo light] (when using the Out-
camera only).
Display your phone number From the Function menu, select [Own number].
Switch to a voice call From the Function menu, select [Chg. to voice call] (when placing
a videophone call only).
Voice/Videophone Calls
52
2
Press .
Voice/Videophone Calls
53
Voice/Videophone Calls
54
Entering a timer “T”
To dial an inside line number following an outside line number, enter “T (timer)” between the
outside and inside line numbers. After a preset interval in seconds, the inside line number
is dialed following the outside line number. An interval of about one second is added for
every timer (T) entry. You can enter “T” consecutively to make the interval longer.
1
Press for over a second in the phone number input display.
“T” is entered.
Entering a “+”
If you enter “+” at the beginning of a phone number when the Auto conversion of the
Int’l dial assist setting is set to [ON], a call is dialed by automatically adding the set
international access number (set to “009130010” at the time of purchase).
1
Press for over a second in the stand-by display.
“+” is entered.

Voice/Videophone Calls
55
Voice/Videophone Calls
56
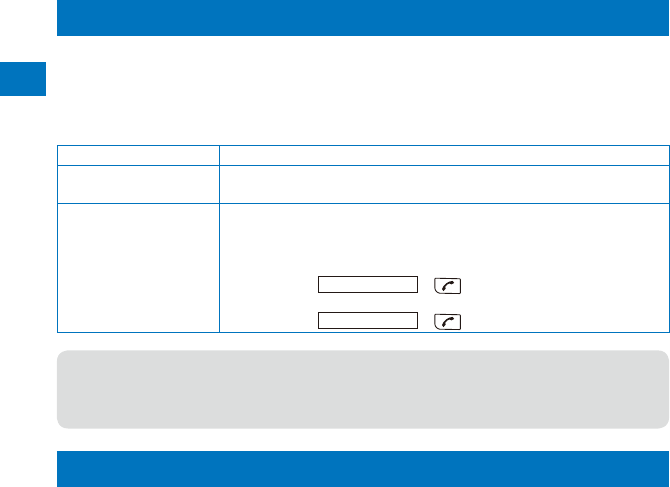
Example: Displaying the Redial record
1
Press ( ) in the stand-by display.
The Redial record display appears.
To display the Received record
Press ( ) in the stand-by display.
To display the Dial frequency record
Press in the Redial record display.
To display phone numbers
When saved in the Phonebook, the name and phone type of a recipient are displayed instead
of the phone number. Press to switch the display temporarily between names and phone
numbers. The display is not switched when a group name for a PushTalk call is displayed.
To place a voice call
Move the cursor to a call record and press .
To place a videophone call
Move the cursor to a call record and press (V.phone).
To originate a PushTalk call
Move the cursor to a call record and press .
To send mail
You can send mail to a person whose phone number and mail address are saved in the
Phonebook. Move the cursor to a call record and from the Function menu, select [Reply by
mail]
Voice/Videophone Calls
57
Displaying the Detailed Information of the Redial/Received Record
1
From the call record display, select a call record and press (Detail).
Redial record Received record
Voice/Videophone Calls
58
Setting the Chaku-moji <Chaku-moji>
When you place a voice or videophone call, you can send a message (Chaku-moji)
that is displayed in the recipient’s Incoming call display in order to notify the purpose
of the call even before this recipient answers.
Voice/Videophone Calls
59
2
Select the Chaku-moji display style and press .
The display style for Chaku-moji is set.
Placing a Call with a Chaku-moji Message
You can place a voice or videophone call together with a Chaku-moji message.
1
Enter a phone number in the stand-by display and press (Option).
The Call menu appears.
2
Select [Chaku-moji] and press .
Voice/Videophone Calls
60
Changing the Caller ID Setting ON/OFF for an Individual Call
<186/184>
You can choose whether to notify a recipient of your phone number (caller ID) every
time you place a call.
ˎ The caller ID is important personal information. Carefully decide whether you want to notify a
recipient of your caller ID.
You can use the following methods to notify or not notify your caller ID.
Presetting for all calls Use the Set Notification to set [Notify]/[Not notify] (P.45).
Setting in the Phonebook Add “186/184” to the recipient’s phone number when you save it in the
Phonebook (P.95).
Setting when you place
a call
Set [Call with ID]/[Call without ID] at the Caller ID of the Option call
display after dialing a recipient’s phone number (P.60).
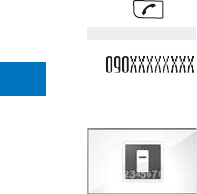
Enter “186/184” before dialing a recipient’s phone number (P.51).
To notify the caller ID
Press 186 + Phone number + .
Not to notify the caller ID
Press 184 + Phone number + .
Voice/Videophone Calls
61
2
Set each item.
3
Press (Call).
The call is dialed according to the set call condition.

Voice/Videophone Calls
62
Voice/Videophone Calls
63
2
Select [ON]/[OFF] at [Auto conversion].
[ON] : Automatically add the additional number you set for the Int’l prefix.
[OFF] : Do not automatically add the additional number.
3
Select [Int’l prefix] and press .
The Int’l prefix setting display appears.
4
Select an input field and press .
Voice/Videophone Calls
64
2
Select [ON]/[OFF] and press .
The Sub-address is set.
To place a call by specifying a sub-address
In the stand-by display, enter a phone number + + sub-address and press either
or (V.phone).

Voice/Videophone Calls
65

Voice/Videophone Calls
66
2
Press to hang up.

Voice/Videophone Calls
67
Pressing a Key on the Keypad to Receive a Call
<Any key answer>
You can set to answer a call by pressing a key on the keypad instead of pressing
when you receive a voice or PushTalk call.
1
From the Menu, select [Settings]

Voice/Videophone Calls
68

Voice/Videophone Calls
69
2
When ready to answer the call, press .
The On hold is canceled and you can talk.
Voice/Videophone Calls
70
Using the Public Mode (Power off) <Public mode (Power off)>
The Public mode (Power off) is an automated answering service which takes into
account the manners in highly public places. When the Public mode (Power off) is
set, the guidance is played back to inform the caller that you are unable to answer
the call because you are in a place where it is required to power off a mobile phone
(such as in hospitals, airplanes, and near priority seats in trains), provided that there
is an incoming call when the FOMA terminal is powered off, and then the call is
disconnected.
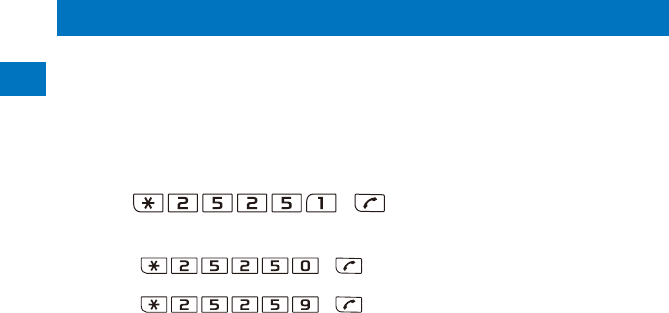
1
Press + .
The Public mode (Power off) is set. (No change appears on the stand-by display.)
To cancel the Public mode (Power off)
Press + .
To check the setting
Press + .
Voice/Videophone Calls
71
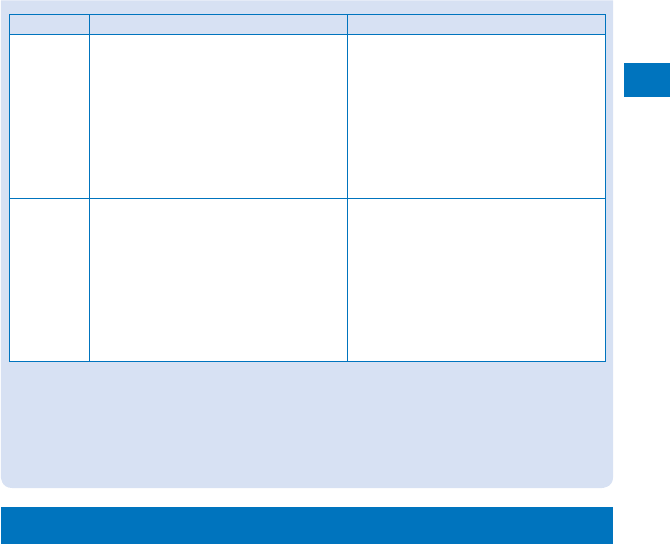
Service When a voice call is received When a videophone call is received
The
Nuisance
Call
Blocking
Service
ˎ After the guidance is played back
to inform the caller that the call is
not able to be connected, the call is
disconnected if the caller is saved as
a nuisance caller.
ˎ After the guidance for the Public
mode is played back, the call is
disconnected if the caller is not
saved as a nuisance caller.
ˎ After the video guidance is played
back to inform the caller that the call
is not able to be connected, the call
is disconnected if the caller is saved
as a nuisance caller.
ˎ After the video guidance for the
Public mode is played back, the call
is disconnected if the caller is not
saved as a nuisance caller.
The Caller
ID Display
Request
Service
ˎ After the caller ID request guidance is
played back, the call is disconnected
if the caller does not notify the phone
number.
ˎ After the guidance for the Public
mode is played back, the call is
disconnected if the caller notifies the
phone number.
ˎ After the video guidance for the
caller ID request is played back to
the caller, the call is disconnected if
the caller does not notify the phone
number.
ˎ After the video guidance for the
Public mode is played back to the
caller, the call is disconnected if the
caller notifies the phone number.
Voice/Videophone Calls
72
Recording Caller’s Messages When Unable to Answer Calls
<Record message/Videophone message>
When the Record message/Videophone message is set, the FOMA terminal can
record a caller’s message when you are unable to answer a call.
ˎ The FOMA terminal can record up to three record messages and videophone messages,
each for up to about 15 seconds. If three record messages have been recorded, the Record
message does not function. Similarly, when three videophone messages have been recorded,
the Videophone message does not function. Delete unnecessary record messages or
videophone messages.
ˎ When the Public mode (Drive mode) is set, the Record message/Videophone message dose
not operate.
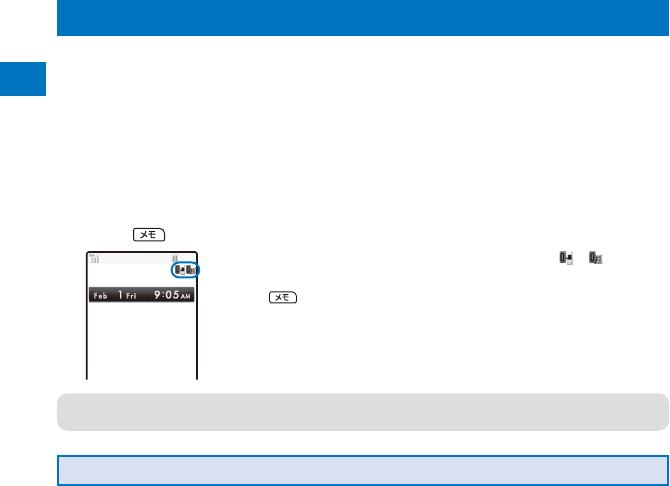
1
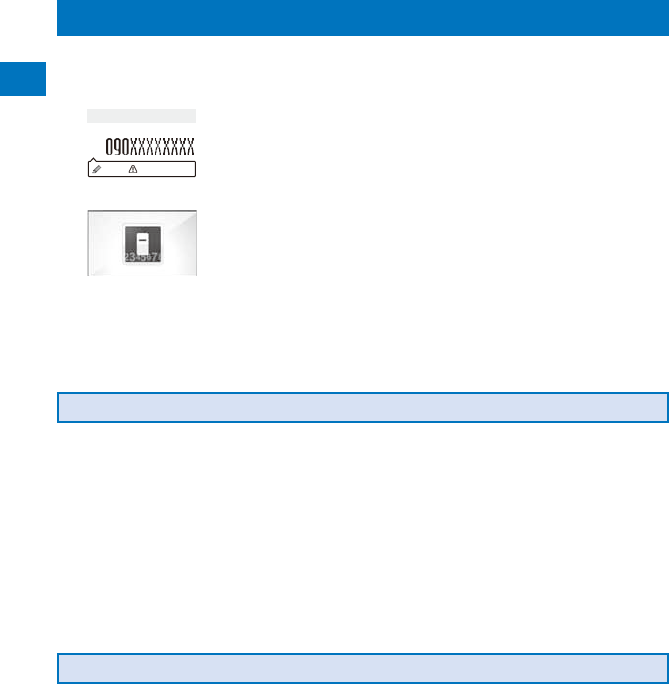
Press for over a second in the stand-by display.
The Record message/Videophone message is set and “ ”/“ ” appears.
To cancel the Record message/Videophone message
Press for over a second in the stand-by display. The Record
message/Videophone message is canceled.
Voice/Videophone Calls
73
Setting the Operation of the Record Message
1
Press in the stand-by display, select [Set rec msg], and press .
Voice/Videophone Calls
74
Recording a Caller’s Message When Unable to Answer a Call Just Receiving
<Quick record message>
You can start the Record message for temporary use when you receive a voice or
videophone call even if the Record message is [OFF].
ˎ If three record messages are recorded when the FOMA terminal receives a voice call, the
Quick record message function cannot be operated. Similarly, if three videophone messages
are recorded when it receives a videophone call, the Quick record message function cannot be
operated.
1
Press while receiving a call.
Voice/Videophone Calls
75
Deleting a Record Message/Videophone Message/Voice Memo
You can record up to three record messages, three videophone messages, and three
voice memos. Delete unnecessary record/videophone messages or voice memos.
Example: Deleting a record message
1
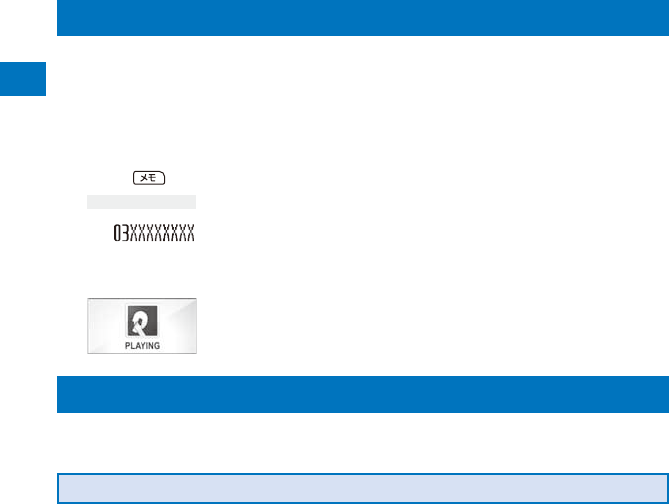
Press in the stand-by display, select [Play rec msg], and press .
To delete a videophone message
Press in the stand-by display and select [Play Vphone msg].
To delete a voice memo
Press in the stand-by display and select [Play voice memo].
To delete all record messages
From the Function menu, select [Delete all], enter the Security code, and select [Yes].
2
Select a record message and press (Func).
The Function menu appears.
3
Select [Delete one]
Voice/Videophone Calls
76
Setting the Videophone Operation <Videophone setting>
Setting the Display to Be Used in a Videophone Call
You can set the image to be displayed on the videophone images (Large) and (Small)
during a videophone call.
1
From the Menu, select [Settings]
Voice/Videophone Calls
77
Setting the Videophone Image Quality
You can set the quality of an image to be sent to the recipient.
1
From the Menu, select [Settings]
Voice/Videophone Calls
78
Setting How to Answer a Videophone Call during i-mode
You can set how to answer a videophone call received during i-mode or packet
communication, for example, sending or receiving mail.
1
From the Menu, select [Settings]

79
PushTalk
What is PushTalk? ..................................................................................................... 80
Originating a PushTalk Call ....................................................................................... 82
Adding a Member during PushTalk Communication .................................................. 83
Receiving a PushTalk Call ......................................................................................... 84
Saving Data in the PushTalk Phonebook .................................................................. 85
Originating a PushTalk Call Using the PushTalk Phonebook .................................... 87
Deleting a PushTalk Phonebook Entry ...................................................................... 88
Using the PushTalk Phonebook ...........................................................<PushTalkPlus> 89
Setting the PushTalk Operation .......................................................<PushTalk setting> 89
PushTalk
80
What is PushTalk?
You can communicate among several persons (up to five persons including yourself)
with a simple operation of pressing to display the PushTalk phonebook, selecting
recipients, and pressing . Every time you press (speak), you are charged for
PushTalk communication.
ˎ For more details on PushTalk or compatible models, see the DoCoMo’s website or “Mobile
Phone User’s Guide
PushTalk
81
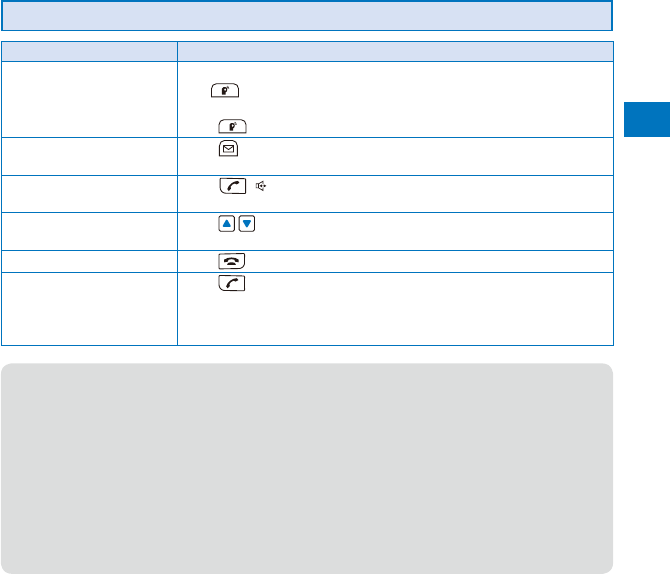
Operations during PushTalk Communication
Operation Key operation
Speak When the floor is open, you can speak only while you press and
hold .
While another member has the floor, you cannot get it even if you
press .
Add a member Press (Add). This operation is enabled only when you originate a
PushTalk call.
Switch ON/OFF of the
hands-free operation
Press ( ). Every time you press the key, the ON/OFF setting is
switched.
Adjust the volume of the
caller’s voice
Press .
Terminate a PushTalk call Press .
Receive a voice call Press (P.65).
If you receive a voice call, the PushTalk communication is terminated.
The operation for an incoming voice call while using PushTalk can be
customized (P.90).

PushTalk
82
Originating a PushTalk Call
ˎ You cannot originate a PushTalk call during a voice call, a videophone call, or data
communication, or while the B mode is set in 2in1.
ˎ If you originate a PushTalk call during i-mode communication, the i-mode communication is
terminated. Originating a PushTalk call while running i-
PushTalk
83
Originating a PushTalk Call from the Call Record
You can originate a PushTalk call using the Redial and Received records.
ˎ You cannot originate a PushTalk call using the call records of Number B when 2in1 is used.
Example: Originating a PushTalk call from the Received record
1
Press ( ) in the stand-by display.
The Received record display appears.
2
Select a received record and press .
When a PushTalk call is originated, the signal tone sounds.

PushTalk
84

PushTalk
85
Saving Data in the PushTalk Phonebook
You can save up to 1,000 members in the PushTalk phonebook.
Members you want to save in the PushTalk phonebook must be also saved in the
FOMA terminal phonebook. You can save only one phone number in the PushTalk
phonebook for each FOMA terminal phonebook entry. The name of a member
displayed in the PushTalk phonebook is diverted from that saved in the FOMA
terminal phonebook.
ˎ When 2in1 is set to the B mode, you cannot save data in the PushTalk phonebook.
ˎ When 2in1 is set to the Dual mode, you cannot save the phonebook data for which the
Phonebook 2in1 setting is set to [B] in the PushTalk phonebook.
ˎ When 2in1 is set to the A mode, the member for which the Phonebook 2in1 setting is set to [B]
is not displayed.
1
Press in the stand-by display and press (Func).
The Function menu appears.
2
Select [Create] and press .
The screen for selecting the saving method appears.
[View phonebook] : Select from the FOMA terminal phonebook.
[Direct input] : Save new data in the FOMA terminal phonebook and then save it in the
PushTalk phonebook.
ˎ Follow the same steps as in “Add to FOMA terminal phonebook” (P.95,
step 3 to 6).
3
Select [View phonebook] and press .
The FOMA terminal phonebook appears.
4
Select an entry
PushTalk
86
Saving a Group
1
Press in the stand-by display and press (Func).
The Function menu appears.
2
Select [Group setting] and press .
The Group setting display appears.
To display group numbers
When saved, group icons are displayed instead of group numbers. Press to switch
the display temporarily between group icons and group numbers.
3
Select a group and press .
PushTalk
87
Originating a PushTalk Call Using the PushTalk Phonebook
If you save persons as members in the PushTalk phonebook, you can originate a
PushTalk call to several persons.
ˎ When 2in1 is set to the B mode, you cannot use the PushTalk phonebook.
ˎ When 2in1 is set to the Dual mode, you cannot use members for which the Phonebook 2in1
setting is set to [B].
1
Press in the stand-by display, select a member, and press .
PushTalk
88
2
Select a group and press .
PushTalk
89
Using the PushTalk Phonebook <PushTalkPlus>
You can connect to the network and use the PushTalkPlus service (P.80).
ˎ To use the PushTalkPlus service, you must subscribe to this service.
1
Press in the stand-by display and press (Func).
The Function menu appears.
2
Select [NW connection]
PushTalk
90
Setting How to Answer a Voice Call during PushTalk Communication
You can set how to answer a voice call when you receive it during PushTalk
communication.
1
From the Menu, select [Settings]

PushTalk
91
Setting the Operation for the FOMA Terminal Being Closed during PushTalk Communication
You can end a call or switch a call to the hands-free operation by closing the FOMA
terminal during PushTalk communication. You can also continue the communication.
1
From the Menu, select [Settings]

93
Phonebook
Phonebooks the FOMA Terminal Can Use ................................................................ 94
Saving an Entry in the FOMA Terminal Phonebook
...
<Add to FOMA terminal phonebook>
95
Saving an Entry in the UIM Phonebook ................................. <Add to UIM phonebook> 98
Saving the Redial/Received Record in the Phonebook ............................................. 99
Saving a Group ..................................................................................<Group setting> 100
Displaying the Phonebook ....................................................................................... 101
Searching the Phonebook ......................................................... <Search phonebook> 102
Setting the Display of the Phonebook ....................................... <Phonebook setting> 102
Editing a Phonebook Entry .............................................................<Edit phonebook> 103
Deleting a Phonebook Entry ....................................................... <Delete phonebook> 103
Checking the Number of Entries Saved ...........................................<Memory status> 104
Dialing Quickly to Frequently Called Numbers .................................... <2-touch dial> 104
Storing (Restoring/Updating) the Phonebook at the Data Security Service Center
...
<Data Security Service>
105
Phonebook
94
Phonebooks the FOMA Terminal Can Use
The FOMA terminal is equipped with two types of phonebooks, the FOMA terminal
phonebook, which you can set up with various functions, and the UIM (FOMA card)
phonebook, which can be used with other FOMA terminals. Use either phonebook to
your convenience.
ˎ You can also use the PushTalk phonebook dedicated for PushTalk that can be created using
data saved in the FOMA terminal phonebook (P.85).
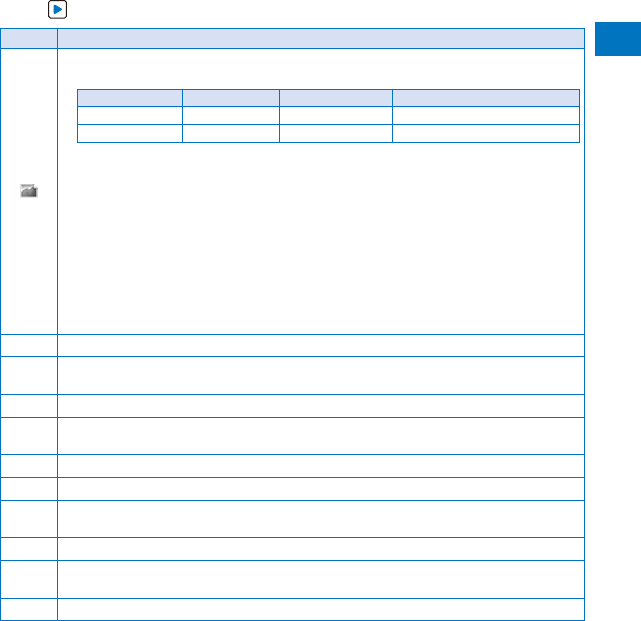
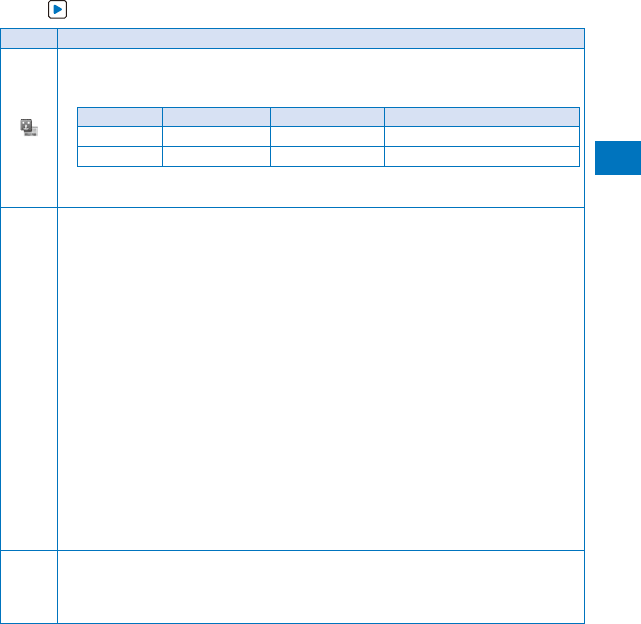
The table below shows the data you can save in each phonebook.
Data to be saved
FOMA terminal phonebook UIM phonebook
Number of data
entries
You can save up to 1,000 entries. You can save up to 50 entries.
Group You can sort entries in groups from Group 0
to 19.
You can sort entries in groups
from Group 0 to 10.
Phone number
to be saved
You can save up to three numbers for each
phonebook entry and a total of up to 3,000
numbers in the Phonebook.
You can save one number for each
phonebook entry in the PushTalk phonebook.
You can save one number for
each phonebook entry.
You can select from nine types of icons, such
as [ Public] and [ Mobile1].
You cannot select icons. “ ” is
saved automatically.
Mail address to
be saved
You can save up to three addresses for each
phonebook entry and a total of up to 3,000
addresses in the Phonebook.
You can also save one Secret code for each
address.
You can save one address for
each phonebook entry.
You can select from five types of icons, such
as [ Mobile1] and [ Home].
You cannot select icons. “ ” is
saved automatically.
Image to be
saved
You can save one Des call display and one
Des substitute image for each phonebook
entry. You can save up to 1,000 each of still
image and Chara-den files in the Phonebook.
You cannot save images.
Other data to be
saved
You can save one name, reading, memory
number, location information, postal code,
postal address, and birthday for each
phonebook entry.
You can also set one type of Des phone tone,
Des mail tone, Select phone Illum., Select
mail Illum., and Secret for each phonebook
entry.
You can save one name and
reading for each phonebook
entry.
Group to be
saved
You can save one group name and group
icon for each group.
You can save one group name for
each group. You cannot change
a group name with [

Phonebook
95
Continued
Phonebook
96
Icon Settings
When the recipient saves a Secret code in a mail address (phone number@
docomo.ne.jp), enter the Secret code. When sending mail, the Secret code is
automatically added.
ˎ When you save a mail address as “phone number + Secret code@docomo.
ne.jp” in the Phonebook, if you save a Secret code, you cannot send mail or
reply mail to this address. To avoid this problem, change the mail address to
“phone number@docomo.ne.jp” and save a Secret code.
ˎ The Secret code is masked by “
Phonebook
97
5
Press and save each item at the Setting display.
Icon Settings
Select the Des substitute image to be sent during a videophone call from My
picture/Chara-den of the Data Box.
ˎ You can set the following files.
Category File format File size Image size
My picture GIF/JPEG Max. 50K bytes Max. [QCIF(176
Phonebook
98
Saving an Entry in the UIM Phonebook <Add to UIM phonebook>
Up to 50 entries can be saved in the UIM (FOMA card) phonebook.
1
Press ( ) in the stand-by display and press (Create).
2
Select [UIM] and press .
Phonebook
99
Saving the Redial/Received Record in the Phonebook
A phone number saved in the record can be directly added to the Phonebook.
Example: Saving a received record in the FOMA terminal phonebook as a new entry
1
Press ( ) in the stand-by display.
To save a number from the redial record
Press ( ) in the stand-by display.
2
Select a received record and press (Save).
The screen for selecting where to save appears.
3
Select [Ordinary PB] and press .
The screen for selecting how to save to the Phonebook appears.
To save data in the PushTalk phonebook
Select [PushTalk PB]

Phonebook
100
Saving a Group <Group setting>
Up to 20 groups can be saved in the FOMA terminal phonebook, and up to 10 groups
can be saved in the UIM (FOMA card) phonebook.
ˎ You cannot change [
Phonebook
101
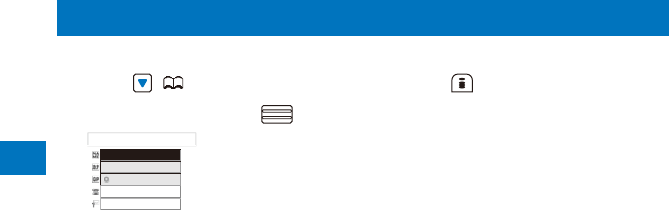
Displaying the Phonebook
You can use the Phonebook to perform various operations.
Example: Displaying the FOMA terminal phonebook
1
Press ( ) in the stand-by display.

Phonebook
102
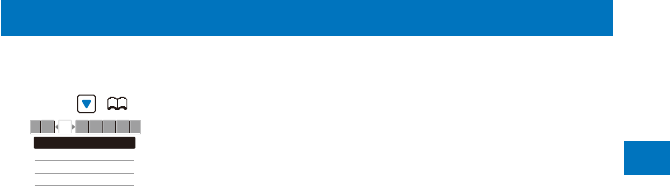
Searching the Phonebook <Search phonebook>
You can search the desired data of the Phonebook by entering a reading, memory
number, and phone number.
Example: Phonebook is ordered alphabetically
1
Press ( ) in the stand-by display.
2
Enter a reading.
Phonebook
103
Editing a Phonebook Entry <Edit phonebook>
1
From the Phonebook, select an entry and press .
2
Press (Edit).
The Edit phonebook display appears.
3
Edit each item.
ˎ Follow the same steps as in “Add to FOMA terminal phonebook” (P.95, step 3 to 5) or in
“Add to UIM phonebook” (P.98, step 3).
4
Press (Complete).
The edited data is saved in the Phonebook.
Deleting a Phonebook Entry <Delete phonebook>
You can delete Phonebook entries using three methods.
ˎ When the Phonebook is ordered by the phone number, [Delete one] and [Select&delete]
cannot be selected.
Example: Deleting an entry
1
Press ( ) in the stand-by display.
Phonebook
104
Checking the Number of Entries Saved <Memory status>
You can check the number of entries saved in the FOMA terminal phonebook and
UIM (FOMA card) phonebook and entries saved as Secret.
1
Press (Func) in the Phonebook.
The Function menu appears.
2
Select [Memory status] and press .
Phonebook
105
Storing (Restoring/Updating) the Phonebook at the Data Security Service Center
<Data Security Service>
You can use the Data Security Service to store the FOMA terminal phonebook at the
Data Security Service Center. You can update or restore the stored Phonebook by
connecting to the Data Security Service Center.
ˎ Data Security Service is a paid service that requires a subscription. For details on this service,
see the “Mobile Phone User’s Guide

107
Sound/Display/
Light Settings
Setting the Ring Tone/Image/Indicator Color for Incoming Call and Mail
....<Incoming set> 108

Sound/Display/Light Settings
108
Setting the Ring Tone/Image/Indicator Color for Incoming Call and Mail
<Incoming set>
You can set a ring tone, ring volume, incoming image, vibration pattern, and incoming
indicator color for each type of incoming transmission (voice, videophone, or PushTalk
call, or mail, etc.).
Example: Performing incoming mail settings
1
From the Menu, select [Settings]
Sound/Display/Light Settings
109
Continued
4
Select an image from the Data Box at [Received image].
ˎ You can set the following files.
Category File format File size Image size
My picture GIF/JPEG Max. 250K bytes Max. [Stand-by(480

Sound/Display/Light Settings
110
7
Set a vibration pattern at [Vibrator].

Sound/Display/Light Settings
111

Sound/Display/Light Settings
112
Adjusting the Volume of Caller’s Voice <Volume>
The volume of caller’s voice during a voice, videophone, or PushTalk call can be
adjusted in six levels from level 1 (smallest) to level 6 (largest).
1
From the Menu, select [Settings]

Sound/Display/Light Settings
113
Setting Whether to Prioritize the i-

Sound/Display/Light Settings
114
5
Select [ON]/[OFF] of the incoming indicator at [Color].
ˎ You can set the incoming indicator to the Position location and Location notice functions.
6
Press (Complete).
The sound volume level and incoming indicator ON/OFF settings to be applied when you use
the GPS function are set.
Setting the Poor Signal Quality Alert <Quality alarm>
You can set to inform you with alarm of the possibility of the call being disconnected
during a voice call due to the radio wave condition.
1
From the Menu, select [Settings]

Sound/Display/Light Settings
115
Changing the Ringing Sound <Melody Call>
You can change the ringing sound which a caller hears to a melody with sense of the
season or popular music, etc.
ˎ This service is a paid service that requires a subscription. For more details about this service,
see the “Mobile Phone User’s Guide

Sound/Display/Light Settings
116
Sound/Display/Light Settings
117
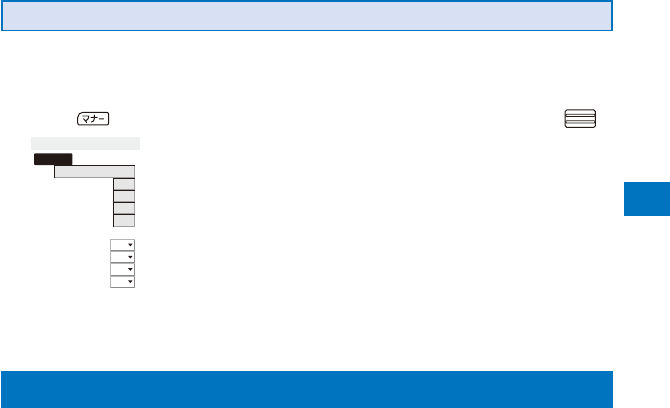
Changing the Original Manner
The operations of the Original manner can be customized. For the items you can set,
see “Functions of each mode” (P.116).
Example: Setting the battery alarm
1
Press in the stand-by display, select [Original manner], and press .

Sound/Display/Light Settings
118
To set the i-
Sound/Display/Light Settings
119
11 Press and select [ON]/[OFF] at [Soft key].
The Soft key is set.
Sound/Display/Light Settings
120
4
Select [Select folder] and press .
The screen for selecting a folder appears.
To restore the specified folder to the default setting
Move the cursor to the folder specified field, press (Reset), and select [Yes].
5
Select a folder from My picture of the Data Box at the folder specified field
and press .
ˎ Up to five folders can be specified.
6
Select [Yes]/[No] at [Update image].
The Stand-by pictures are set.

Sound/Display/Light Settings
121
Setting the Display for Incoming and Outgoing Calls
<Call display>
You can set whether the Des call display or the name saved in the Phonebook is displayed.
1
From the Menu, select [Settings]
Sound/Display/Light Settings
122
3
Set the display light brightness at [Adjust light].
Select from [1 to 5].
To reset to the default brightness
Press (Reset).
4
Select [ON]/[OFF] of the Keypad light at [Keypad light].
5
Select [Backlight always on] and press .

Sound/Display/Light Settings
123
Example: Setting an image as the icon for i-mode
1
From the Menu, select [Settings]

Sound/Display/Light Settings
124
Example: Setting a Kisekae tool
1
From the Menu, select [Settings]

Sound/Display/Light Settings
125
Resetting the Settings of the Display and Sound
You can reset the settings of the display and sound set by the Kisekae Tool to the
default settings.
1
From the Menu, select [Settings]

Sound/Display/Light Settings
126
Resetting the Operation History of the Kisekae Menu
Some Kisekae menus save the frequencies in use of menu items as an operation
history and change the menu items automatically. The Operation history can be
deleted.
1
From the Menu, select [Settings]
Sound/Display/Light Settings
127
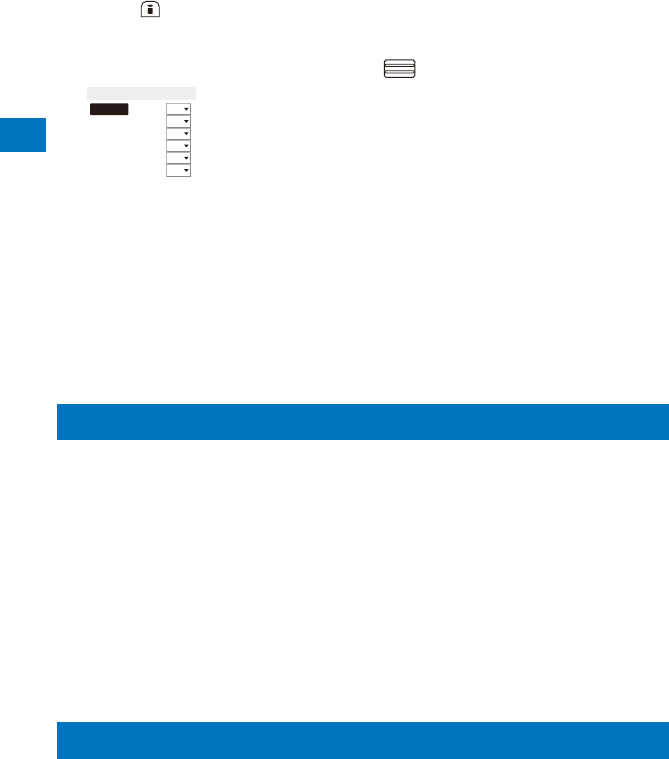
Setting the Font Size <Font size>
Setting the Font Size At Once
You can set the size of fonts to be used for displaying the Kisekae menu, Phonebook,
Call record, mail/SMS, and sites or for entering a word at once.
1
From the Menu, select [Settings]

Sound/Display/Light Settings
128

129
Security Settings
Security Settings
130
Security Codes Used on the FOMA Terminal
Some functions provided for convenient use of the FOMA terminal require the security
code to use them. Besides the Security code for operating the mobile phone, the
network security code necessary for the network services, i-mode password, etc.
are available. Make use of the FOMA terminal using an appropriate security code
according to the purpose.
Notes on the security codes
Security Settings
131
i-mode Password
The 4-digit “i-mode password” is required when saving/deleting My Menu or
subscribing/canceling message service or i-mode charged service, etc.
(There may be other passwords for the i-mode used by IP (information service
providers).)
The i-mode password is set to “0000” at the time of subscription. It can be changed
by yourself.
You can change the i-mode password using i-mode, by selecting [i Menu]

Security Settings
132
Changing the Security Code <Change code>
1
From the Menu, select [Settings]

Security Settings
133
Changing the PIN1 Code/PIN2 Code
ˎ To change the PIN1 code, set the PIN1 code setting to [ON].
Example: Changing the PIN1 code
1
From the Menu, select [Settings]
Security Settings
134
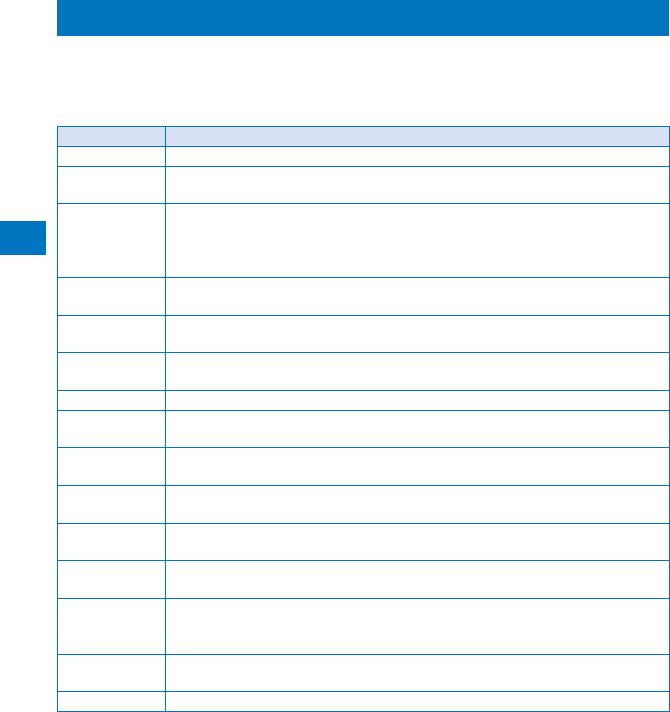
Various Locking Functions
The FOMA terminal offers many lock functions to assure safety operation, such as
preventing unauthorized use of the FOMA terminal, protecting the Phonebook from
being seen by others. You can use any mix of these functions depending on the
purpose.
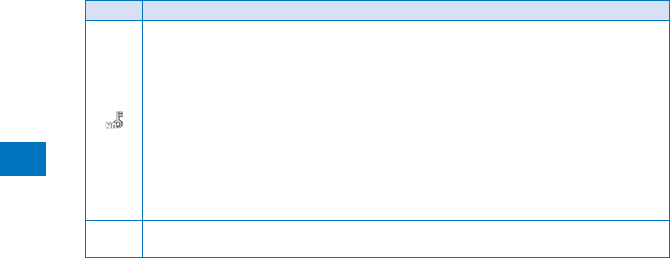
Functions Description
Lock all Prevent others from using the FOMA terminal (P.135).
Omakase Lock Lock the FOMA terminal to prevent others from using it. For example, this
service is useful when you lose or misplace the FOMA terminal (P.136).
Self mode Disable all functions that involve calls and communication, such as placing/
receiving a voice or videophone call, originating/receiving a PushTalk call,
sending/receiving mail, infrared communication, or the infrared remote control
(P.137).
Personal data
lock
Disable some functions to prevent others from viewing/editing your personal
information such as the Phonebook and Schedule data (P.137).
Key dial lock Disable the dial keys to prevent placing a voice/videophone call or originating a
PushTalk call (P.139).
Lock key Prevent the keypad from being accidentally pressed while carrying around the
FOMA terminal with the power on (P.140).
Record display Set the Redial, Dial frequency, and Received records not to be displayed (P.141).
Secret display Display/not display phonebook entries (PushTalk phonebook)/Own number/
schedules saved as Secret (P.141).
Mail security Set the FOMA terminal not to display the saved mail, Receive ranking, etc.
(P.142).
Data security Set the FOMA terminal not to display data in My picture or i-motion of the Data
Box (P.142).
Accept/Reject
call
Accept/reject a voice, videophone, or PushTalk call from a specific phone
number/group when it is received (P.143).
Denied no ID Set not to accept a voice, videophone, or PushTalk call without the caller’s
phone number (P.144).
Set ring start
time
Set a time interval before performing the receiving operation for a voice,
videophone, or PushTalk call from a caller who is not saved in the Phonebook
(P.145).
Reject unknown Reject a voice, videophone, or PushTalk call from a caller who is not saved in
the Phonebook (P.146).
IC card lock Lock the IC card to prevent others from using the IC card function (P.258).

Security Settings
135
Locking the Keypad to Prevent Unauthorized Use <Lock all>
You can set the Lock all to prevent others from using the FOMA terminal. When the
Lock all is set, you cannot perform any operation other than powering on/off the
FOMA terminal and answering a voice or videophone call.
1
From the Menu, select [Settings]

Security Settings
136
Using the Omakase Lock
Omakase Lock is a service that allows you to lock the FOMA terminal remotely if you
lose the FOMA terminal by requesting DoCoMo or using a procedure available on the
My DoCoMo website. Use this service to protect your important private information
and Osaifu-Keitai.
You can also request DoCoMo by a call, etc. to unlock the FOMA terminal.

Security Settings
137
Restricting Placing/Receiving Calls <Self mode>
You can disable all functions that involve calls or communication, such as placing/
receiving a voice or videophone call, originating/receiving a PushTalk call, and
sending/receiving mail. You cannot use infrared communication, infrared remote
control, and iC communication, either.
1
From the Menu, select [Settings]
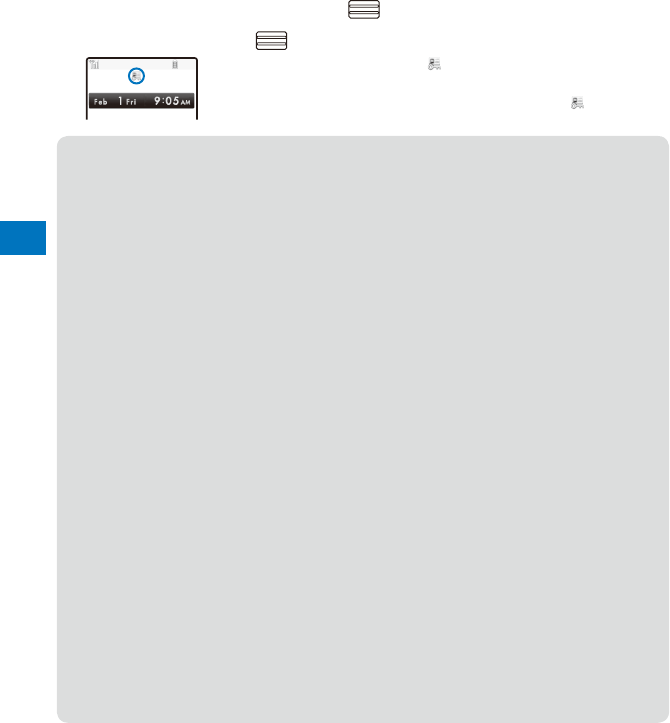
Security Settings
138
2
Enter the Security code and press (OK).
3
Select [ON] and press .
The Personal data lock is set and “ ” appears.
To cancel the Personal data lock
Select [OFF]. The Personal data lock is canceled and “ ” disappears.

Security Settings
139
Restricting Dialing from the Keypad <Key dial lock>
The keypad is locked to restrict placing a voice or videophone call or originating a
PushTalk call. To cancel the Key dial lock temporarily, enter the Security code.
ˎ When you set the Key dial lock, you cannot perform the following functions.
- Place a call using the keys on the keypad (excluding calls made by the 2-touch dial or using
the Flat-plug Earphone/Microphone with Switch) or [Call back] from i-mode mail
- Add a member during PushTalk communication using the keys on the keypad
- Place a call to a recipient who is not saved in the Phonebook using the Redial/Dial frequency/
Received record
- Send i-mode mail or SMS to a recipient who is not saved in the Phonebook
- Phone To (AV Phone To) or Mail To
- Save new data or edit/delete data in the Phonebook
- Operate the Phonebook stored in the microSD memory card
- Select the Phonebook attached to i-mode mail
- Save/edit/delete the Location notice or information of a party
- Send the Phonebook data using the infrared communication
1
From the Menu, select [Settings]
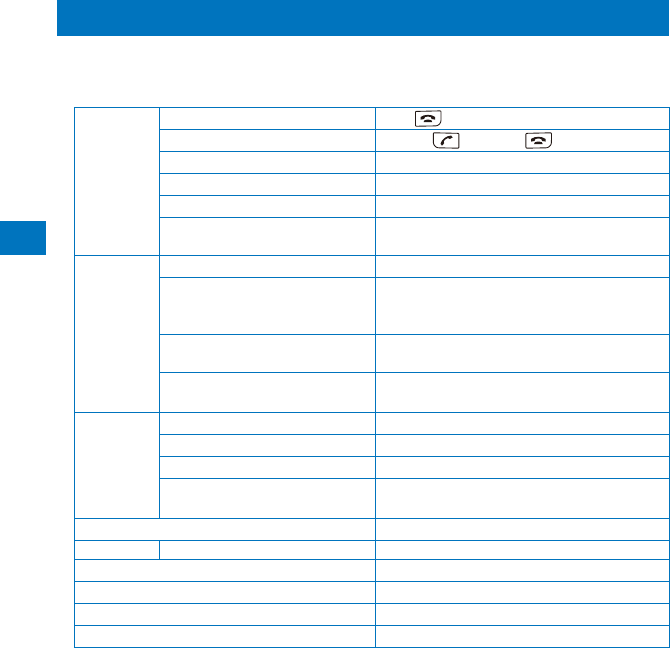
Security Settings
140
Locking the Keypad to Prevent an Accidental Use <Lock key>
While carrying around the FOMA terminal that is powered on, the keypad can be
locked to prevent from pressing the keypad accidentally.
ˎ The following operations are available while the Lock key is set.
Voice call While placing a call Stop ( )
While receiving a call Answer ( , On hold ( )
While a call is in progress
Security Settings
141
Setting the Lock Key by Opening/Closing the FOMA Terminal
<Slide lock>
You can set to lock the keypad by closing the FOMA terminal and cancel the lock by
opening it.
1
From the Menu, select [Settings]
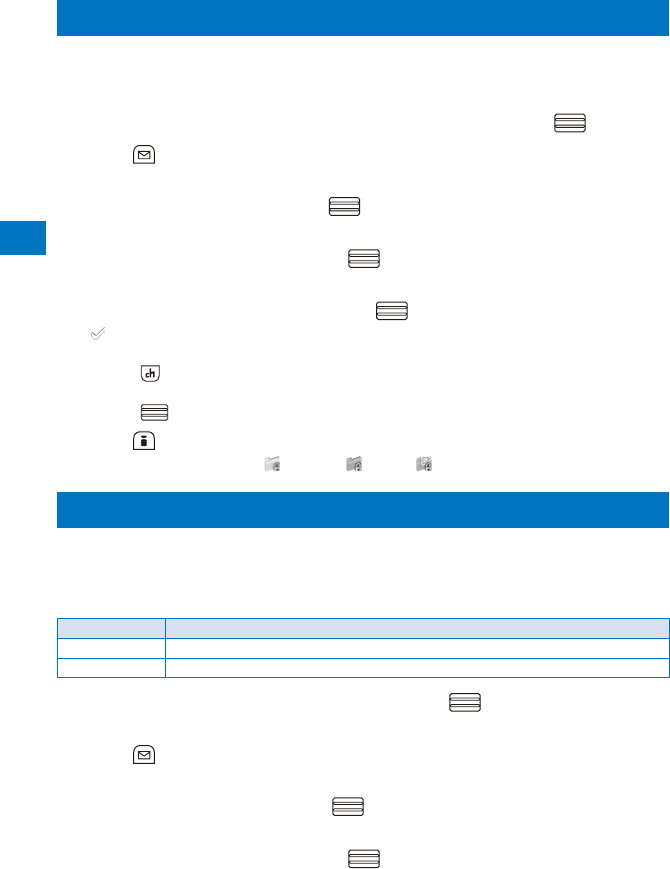
Security Settings
142
Protecting Mail from Unauthorized Access <Mail security>
You can set the FOMA terminal not to display the received/sent/saved mail by folder.
You can also use this function not to display the Receive/Send ranking and Sort
inbox/outbox. To cancel this function temporarily, enter the Security code.
1
From the Mail menu, select [Inbox]/[Outbox]/[Draft] and press .
2
Press (Func).
The Function menu appears.
3
Select [Mail security] and press .
The Security code screen appears.
4
Enter the Security code and press (OK).
The Mail security set display appears.
5
Select a folder to be locked and press .
“” appears.
To lock all folders
Press (Sel. all).
To unlock the selected folder
Press (Rel.).
6
Press (Complete).
The Mail security is set and “ ” (yellow)/“ ” (blue)/“ ” appears (P.215).
Protecting Data from Unauthorized Access <Data security>
You can set the FOMA terminal not to display data in My picture or i-motion of
the Data Box. You can select data not to display by folder. To cancel this function
temporarily, enter the Security code.
The Data security can be set for the following folders.
Category Folder
My picture i-mode, Camera, Data exchange, and User-created folder
i-motion i-mode, Camera, Data exchange, and User-created folder
1
From the Data Box, select a category and press .
The folder list appears.
2
Press (Func).
The Function menu appears.
3
Select [Data security] and press .
The Security code screen appears.
4
Enter the Security code and press (OK).
The screen for selecting a security folder appears.

Security Settings
143
5
Select a folder to be locked and press .
To lock all folders
Press (Sel. all).
To unlock the selected folder
Press (Rel.).
6
Press (Complete).
The screen for confirming the change of the security setting appears.
7
Select [Yes] and press .
The Data security is set.
Specifying Phone Numbers to Accept/Reject Calls
<Accept/Reject call>
You can set to accept/reject voice, videophone, or PushTalk calls only from specific
phone numbers. For the Accept/Reject calls, up to 20 phone numbers can be saved
(Phone No.).
You can also set to accept/reject calls only from specific groups in the FOMA terminal
phonebook. For the Accept/Reject calls, up to three groups can be saved (Group list).
This function is valid only when a caller sends the phone number. It is recommended
to set the Caller ID Display Request Service and the Denied no ID together with this
function.
ˎ SMS and i-mode mail can be received regardless of this function.
ˎ For an incoming PushTalk call, it is only to the caller’s phone number that the Accept/Reject
call setting is valid. The Accept/Reject setting does not work even if you set it to a member
other than the caller. When you make the Accept/Reject setting through the Group list, a call
is accepted/rejected if the caller of it belongs to the specified group in the FOMA terminal
phonebook.
ˎ When the Personal data lock is set, you cannot set the Accept/Reject calls.
Example: Setting [Accept]/[Reject] for calls from specified phone numbers
1
From the Menu, select [Settings]
Security Settings
144
4
Select [Phone No.] and press .

Security Settings
145
Muting the Ring Tone for Calls with No Phonebook Entry
<Set ring start time>
You can set a time interval before starting operation of the ring tone, incoming
indicator, and vibrator when you receive a voice, videophone, or PushTalk call from
a person/group who is not saved in the Phonebook. This function is also useful for
blocking a nuisance call such as from a malicious caller.
ˎ When the Reject unknown is set, you cannot set the Set ring start time.
1
From the Menu, select [Settings]

Security Settings
146
Rejecting Calls from Callers with No Phonebook Entry
<Reject unknown>
You can set to reject voice, videophone, or PushTalk calls from callers not saved in
the Phonebook. It is recommended that you set the Caller ID Display Request Service
together with this function.
ˎ SMS and i-mode mail can be received regardless of this function.
ˎ If you receive a call from a caller who is not saved in the Phonebook when the Reject unknown
is [ON], the call is not connected. The missed call notification icon appears and the call is
saved in the Received record.
ˎ When the Set ring start time or Personal data lock is set, you cannot set the Reject unknown.
1
From the Menu, select [Settings]

Security Settings
147
Using the Data Security Service <Data Security Service>
The Data Security Service is a service that allows you to store the Phonebook,
images, and mail (hereinafter referred to as “stored data”) saved in your FOMA
terminal at the Data Security Service Center.
Even if you lose the stored data, for example, if you accidentally lost the FOMA
terminal or it had a water-related trouble, you can restore the stored data at the
Center into a new FOMA terminal. Also, the phonebook data saved in both the FOMA
terminal and Data Security Service Center can be kept it latest automatically on a
regular basis. Furthermore, you can easily edit the stored data at the Data Security
Service Center by accessing the My DoCoMo website on your PC, and save the
edited stored data in the FOMA terminal.
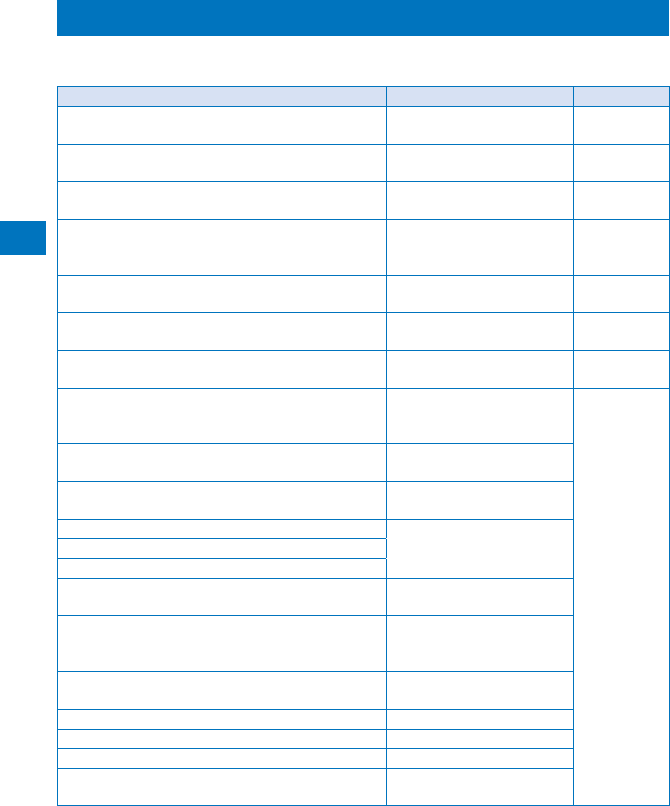
Security Settings
148
Other Measures “For Safety Operation”
The following functions and services are also available for safety operation besides
those described in this chapter.
Purpose Function name/Service name Page
Prevent others from using the IC card function
without consent.
IC card lock P.258
Do not receive a “nuisance call” such as a prank
call and malicious sales call.
Nuisance Call Blocking
Service
P.390
Do not receive a call without a caller ID. Caller ID Display Request
Service
P.391
Use the electronic authentication service to perform
secure and reliable data communication (available
only when accessing FirstPass-compatible sites).
FirstPass P.195
Update of the FOMA terminal software when it is
necessary.
SW Update P.452
Protect the FOMA terminal from data that could
cause trouble.
Scan function P.458
Choose to receive only necessary mail when
receiving i-mode mail.
Recv option setting P.211, 223
Register or check information about your or
someone’s condition using i-mode in the event of a
disaster.
i-mode Disaster Message
Board Service
See the
“Mobile Phone
User’s Guide
149
Camera
Before Using the Camera ........................................................................................ 150
Recording Still Images .................................................................... <Shoot by photo> 155
Using the Basic Functions of the Camera ................................................................ 157
Enjoying Various Recording Methods ...................................................<Shoot mode> 162
Recording Movies ................................................................................<Movie shoot> 167
Changing the Camera Settings ............................................................................... 168
Adjusting the Camera during Recording .................................................................. 171
Setting the Camera Operation ................................................................................. 173
Using the Bar Code Reader .......................................................... <Bar code reader> 179
About the Copyright
Objects, such as movies, still images, and sounds, recorded using the FOMA terminal and
productions on a site (program) or Internet site are prohibited by the copyright law from
reproduction, transformation, and compilation without consent of the copyright holders,
unless intended for personal use or any other purpose permitted by law. Also, using or
transformation of other person’s portrait or name without his or her permission may violate
the right of portrait. When you present recorded images or sounds over the internet, make
sure to be aware of the copyright law and right of portrait. Note that some performances,
shows, and exhibitions may not allow photography, movie shooting, or sound recording even
for personal use.
Please be considerate of the privacy of individuals around you when taking and sending
photos using camera-equipped mobile phones.
Camera
150
Before Using the Camera
You can record images by the FOMA terminal’s built-in camera, which you can send
by attaching to i-mode mail, posting on a blog, setting for the stand-by display, and
so on.
Also, when you save a recorded image into the microSD memory card, a reduced
image can be saved in the FOMA terminal at the same time (P.174, 315).
To use the microSD memory card, you need to obtain a microSD memory card
separately. If you do not have a microSD memory card, you can purchase one at a
home electric appliance store or other similar store (P.302).
ˎ The image recorded by the camera may differ from actual color or brightness of object.
About Using the Camera
Notes Before Using the Camera
ˎ Clear images cannot be obtained if the camera lens is stained with fingerprints or grease. Wipe
the camera with a soft clean cloth before recording an image.
ˎ Leaving the FOMA terminal in a place exposed to direct sunlight or high temperature for a long
period of time may deteriorate the image quality.
ˎ You cannot start the Camera mode when the battery level is very low. To use the camera,
charge the battery sufficiently.
ˎ The Camera mode may not be activated when the FOMA terminal is charged electrostatically.
Notes on Using the Camera
ˎ To prevent shaking, hold the FOMA terminal firmly or place it on a stable place and use the
Auto timer when recording.
ˎ When you try to record a strong light source directly, such as the sun or a lamp, the screen may
black out or the image on the screen may be distorted.
ˎ The camera is manufactured based on the leading edge technologies, and black and bright
points or lines may appear constantly in the display. Additionally, increased noise may appear
as white lines when recording in a low-light environment. These are not malfunctions.
ˎ When the battery level becomes very low in the Camera mode, the Camera mode is terminated.
About the Camera Mode
To use the camera, slide the lens cover to open in the stand-by display or menu
display. The Camera mode is activated, an image through the camera lens appears
in the display, and the Auto timer indicator is turned on.
To terminate the Camera mode, close the lens cover.
Camera
151
Continued
About Still Image/Movie
Item Still image Movie
File format JPEG (Exif format) MP4 (MobileMP4)
File name When saved to [Data Box]
YYYYMMDDhhmmss
ˎThe recorded year, month,
date, hour, minute, second is
displayed. For example, when a
still image is recorded at February
1, 2008, 18:02:10, it appears as
“20080201180210”.
ˎWhen using the Continuous mode, 00
to 03 is added after the year, month,
date, hour, minute, second, resulting
in a format like “20080201180210_00”.
When saved to [microSD]
DSC0nnnn
When saved to [Data Box]
YYYYMMDDhhmmss
ˎThe recorded year, month, date, hour,
minute, second is displayed. For
example, when a movie is recorded at
February 1, 2008, 18:02:10, it appears
as “20080201180210”.
When saved to [microSD]
MOLnnn
File number NNN-nnnn
ˎThe file number is displayed when
saved to [microSD]. You can reset the
file number (P.177).

Camera
152
About Recording Time of Movie
The recording time of movie that can be saved in the Data Box or microSD memory
card varies depending on the recorded image quality, Shoot mode, image size, file
size restriction settings as well as the recording conditions and object of shooting.

Camera
153
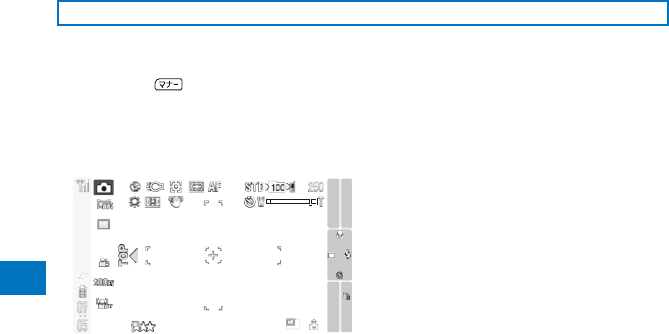
Camera
154
Icons in the Camera Mode
In the Camera mode display, the following icons appear depending on the settings
and functions selected.
ˎ You can use to switch the display of the icons and guide display (Standard, Key operation
guide display, or Display off). Even if you select “Display off”, related icons are displayed when
you perform any operations.
When recording a still image When recording a movie
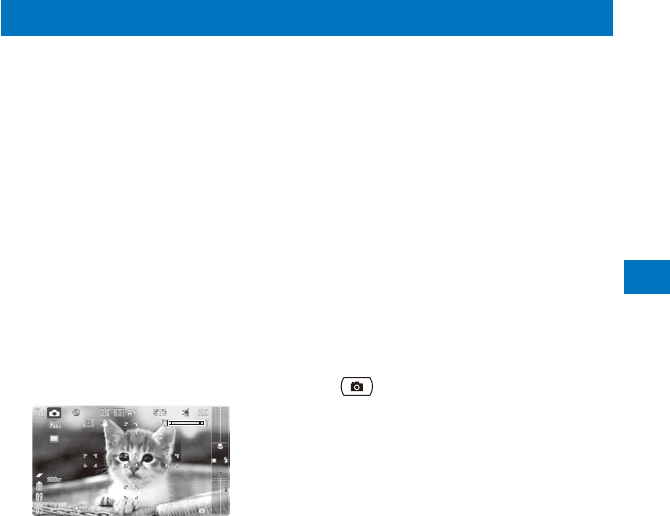
Camera
155
Recording Still Images <Shoot by photo>
When recording with the Out-camera, you can use the Auto Focus function to
focus on an object at the center of the display and record still images. When the
Auto orientation is set to [ON], the orientation of the FOMA terminal is automatically
recognized and record an image while recording.
ˎ The allowable distance for the Auto focus between the camera and an object is about 30 cm or
over using [Macro OFF], about 10 cm or over using [Macro mode], and about 3 cm to 18 cm
using [Super Macro mode].
ˎ You cannot use the Auto Focus when you set the Select scene to [Night scene]/[Low Light] for
recording still images.
ˎ If an image recoded when the Auto orientation is set to [ON] is attached to mail or posted on
a blog, depending on the recipient’s terminal or site where it is posted, the image may not be
displayed correctly facing the vertical/horizontal direction.
1
Slide the lens cover to open in the stand-by display.
The Camera mode is activated.
ˎ You can also activate the Camera mode by sliding the lens cover to open in the menu
display.
2
Point the camera at the object and press halfway down to focus on it.

Camera
156
4
Press (Save).
The still image is saved.
To attach to mail
Press (Func) for over a second. The still image is saved and the Edit mail display
appears. You can also attach an image to mail by selecting [ ] (Attach to mail) from the
Function menu.
To cancel a recorded image
Press and select [Yes].
To display a saved image
Press in the Camera mode display.
To add location information
From the Function menu, select [ ] (Location info)
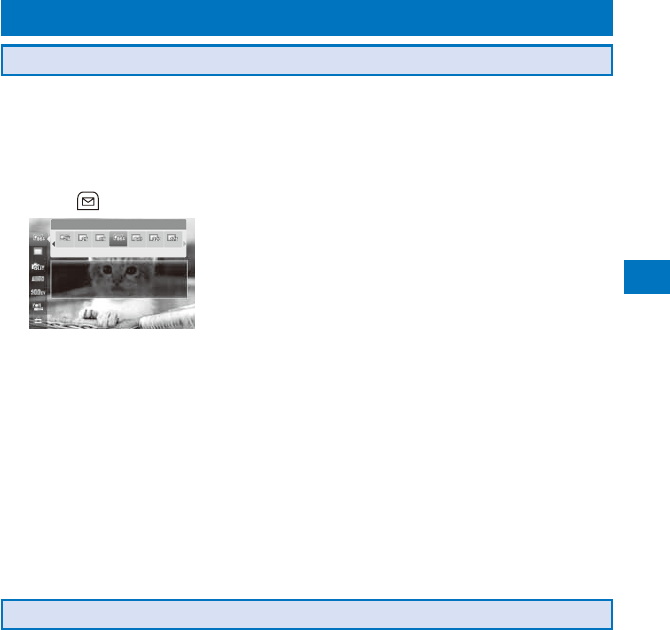
Camera
157
Using the Basic Functions of the Camera
Graphical Menu
You can set the camera basically using the Graphical menu.
In this manual, the icons of the operations selected from the Graphical menu are ones
set at the time of purchase.
ˎ Because the icons of the Graphical menu depend on the settings at the time, the displayed
icons on the Graphical menu may differ from this manual.
1
Press (Func) in the Camera mode display.
Camera
158
2
Press until the time you want to show or [OFF].
The Auto timer is set.

Camera
159
Switching the Camera Used for Recording
You can switch between the Out- and In-cameras for recording.
ˎ When the Shoot mode of the still image is set to [Best Pic™], [Continuous mode], [High
sensitivity], or [Panorama], you cannot switch the camera.
ˎ When the Shoot mode of the still image is set to [Shoot with frame] while the image size is set
to [Stby(480

Camera
160
Adjusting Zoom
You can adjust the zoom of an image while recording with the Out-camera. Up to
about 3x optical zoom can be used. When the zoom magnification is exceeded,
you can record an image using the digital zoom. Moreover, the Smart zoom function
does not degrade the quality of the image while recording even if the maximum
magnification of the optical zoom is exceeded. The maximum magnification of Smart
zoom changes depending on the settings of the image size or when the Shoot mode
is set to [High sensitivity]. The zoom magnifications which can be adjusted at each
image size are follows.
ˎ The maximum magnification is included 3x magnifications (9 levels) of the optical zoom.
When recording a still image
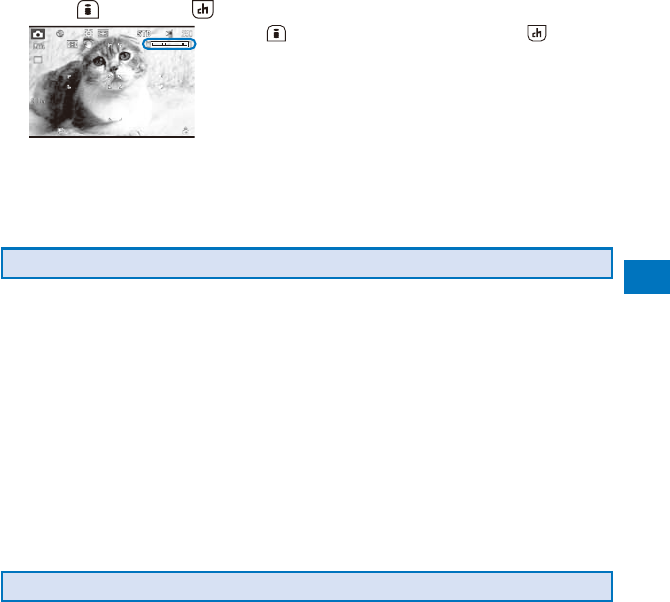
Camera
161
1
Press (Zoom(W))/ (Zoom(T)) in the Camera mode display.
ˎ Press (Zoom(W)) to increase the zoom and (Zoom(T))
to decrease it. When you press these keys for over a second,
an image is zoomed in/out continuously.
The zoom is adjusted and the current magnification is indicated
on the zoom bar.
ˎ If “

Camera
162
Enjoying Various Recording Methods <Shoot mode>
Recording a Still Image Using the BestPic™ Mode
Just by bringing an object into focus using the Auto Focus function and pressing the
shutter, you can record a total of nine continuous still images in a moment before and
after you press the shutter, from which you can select the best shot.
ˎ The image size of BestPic™ is [VGA(640
Camera
163
Recording Still Images in the Continuous Mode
You can record four still images continuously at an interval of about 0.2 seconds with
a single press of (Shoot) or .
ˎ The image size in the Continuous mode is [VGA(640
Camera
164
2
Select a frame size and press .
The Frame display appears.
3
Select a frame and press .
To check a frame
Move the cursor to a frame and press (Play).
4
Press (Close).
The Shoot mode is set to [Shoot with frame] and “ ” and the selected frame appear.
5
Point the camera at the object and press halfway.
The white-framed focusing window is used to adjust the focus. When the image comes into
focus, the confirmation sound is heard, and the focusing window turns green.
6
Press .
An image is recorded with the shutter sound and the screen for confirming whether to save
the image appears.
7
Press (Save).
The image is saved.
Recording an Image Using the High Sensitivity Mode
You can record an image beautifully by reducing the blurring of an object under low-
light condition or in a dark room without using the flash.
ˎ When the image is [2M(1632
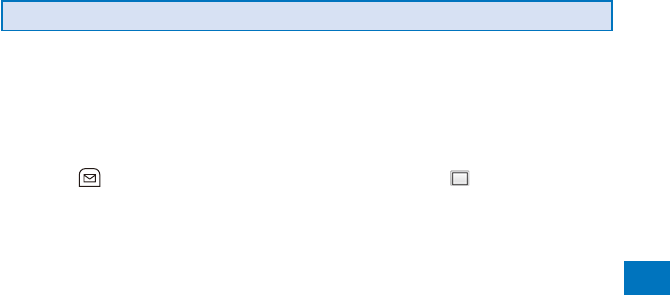
Camera
165
Recording a Panoramic Image
After you press the shutter, keep the camera in a horizontal position and move it to
record images serially, and connect to each other and save as a single image. You
can also record a panoramic image with a 360-degree field of view.
ˎ The Auto timer cannot be set.
ˎ When the Shoot mode is set to [Panorama], the Picture effect is changed to [OFF]. Also,
temporarily, the Flash is set to [OFF], and the Auto Focus and Face detection are set to [OFF].
1
Press (Func) in the Camera mode display, select [ ] (Shoot mode)

Camera
166
Enjoying Decorating Images Stylishly Using the Deco-Snap Mode
Using frames and stamps allows you to decorate images nicely.
ˎ For Out-camera recording, you can select an image size of [QCIF(144

Camera
167
To paste an image stamp
Select [ ]
Camera
168

Camera
169
3
Select [Multi AF]/[Spot AF] and press .
The Multi focus is set and the icon for the current Multi focus type appears.
Multi AF Spot AF
Setting the Effective Distance of the Auto Focus
You can set the effective distance of the Auto Focus function when you record still
images with the Out-camera.
1
Press (Func) in the Camera mode display, select [ ], and press .
2
Select [Shoot]
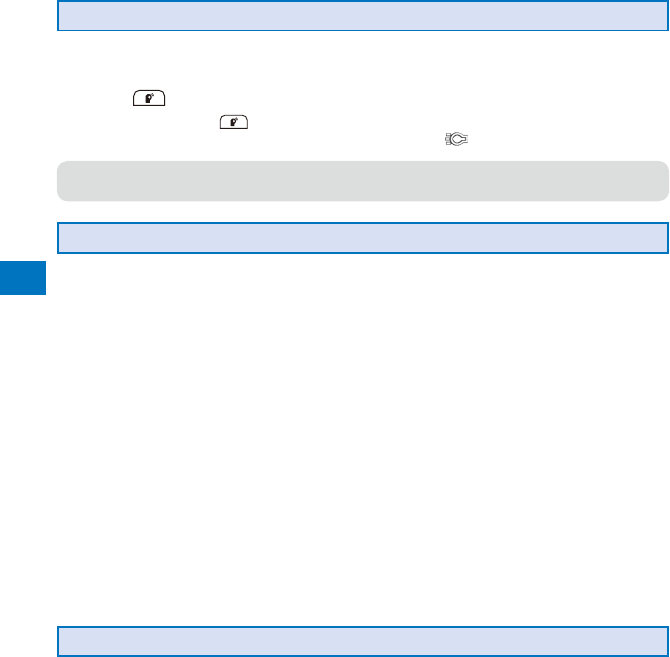
Camera
170
Turning on the Photo Light
The FOMA terminal’s built-in photo light can be used when recording with the Out-
camera in a dark place, etc.
1
Press in the Camera mode display.
Every time you press , the photo light is switched to [ON]/[OFF].
When switched to [ON], the photo light is turned on and “ ” appears.
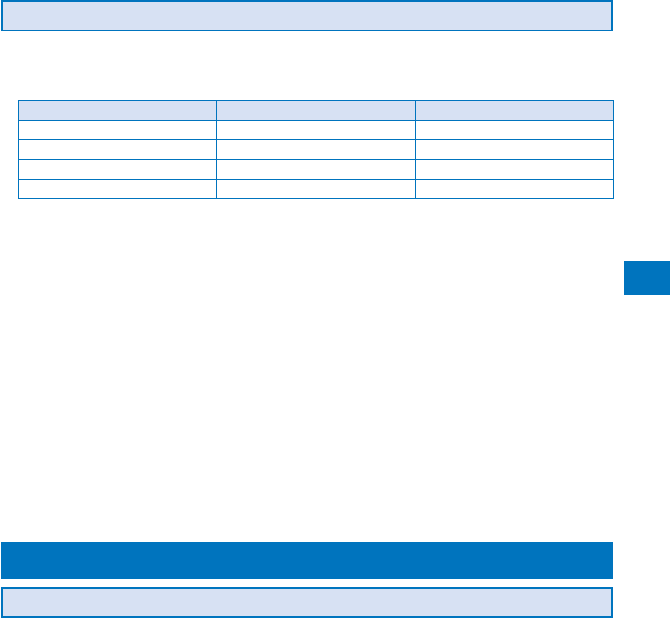
Camera
171
Setting Movies to Play Back on Another FOMA Terminal
You can set recorded movies to play back on another FOMA terminal.
ˎ When the Common replay mode is set to either [High quality] or [Long play], the settings of the
camera are changed, as follows.
Item High quality Long play
Image size [QCIF(176
Camera
172
3
Select a white balance type and press .
The White balance is set and the icon for the current white balance type appears.
ˎ No icon appears for [AUTO].
Fine Cloudy Fluorescent Bulb
Setting a Position for Automatic Adjustment of the Exposure
You can set what position on the screen to use as a reference for the image
brightness (EV) adjustment.
1
Press (Func) in the Camera mode display, select [ ], and press .
2
Select [Adjust]
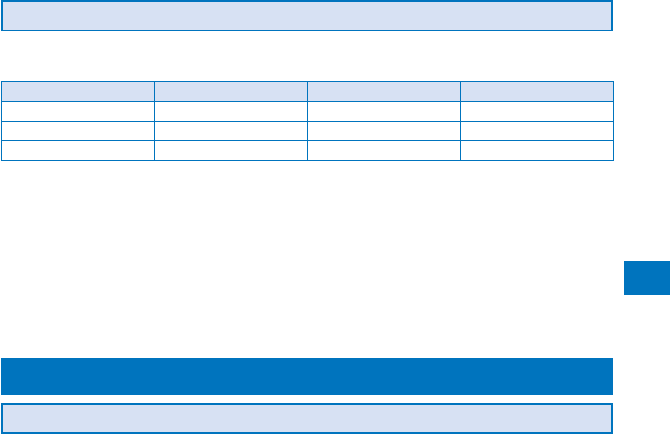
Camera
173
Restoring the Default Camera Settings
You can reset the camera settings to the default settings. The camera settings listed
below can be reset.
Item Default setting Item Default setting
Select scene AUTO Zoom magnification
Camera
174
Setting Whether Recorded Images Are Automatically Saved
You can set the save method of an image recorded.
1
Press (Func) in the Camera mode display, select [ ], and press .
2
Select [Set]

Camera
175
Movie
[Super fine] : Higher image quality mode. The file size is larger and the recording time is
shortest.
[Fine] : Image quality mode for smoother movement in movies.
[Standard] : Standard image quality mode.
[Economy] : Lowest image quality mode. The file size is smaller and the recording time is
longest.
3
Select the image quality and press .
The image quality is set and the icon for the current image quality appears.
Super fine (Movie only) Standard
Fine Economy
Setting Whether to Use the Digital Zoom
You can set whether to use the digital zoom when the maximum magnification of the
optical zoom exceeds while recording an image with the Out-camera.
1
Press (Func) in the Camera mode display, select [ ], and press .
2
Select [Set]

Camera
176
Changing the Shutter Sound
The shutter sound can be selected from three types when the Shoot mode for still
images is [Regular], [Best Pic™], [Shoot with frame], [High sensitivity] or, [Panorama].
ˎ The shutter sound volume is fixed and cannot be adjusted or muted. The shutter sound is
heard even if the Manner mode is set.
ˎ When the Shoot mode is set to [Deco-Snap], the current shutter sound is heard when
recording. You cannot set the shutter sound.
1
Press (Func) in the Camera mode display, select [ ], and press .
2
Select [Set]
Camera
177
Setting Whether to Add Location Information to an Image When Saving
You can add location information automatically to a recorded still image using the
GPS function.
1
Press (Func) in the Camera mode display, select [ ], and press .
2
Select [Set]
Camera
178
1
Press (Func) in the Camera mode display, select [ ], and press .
2
Select [Set]
Camera
179
4
Select a shoot mode and press .
The Shoot mode is set and the icon for the current shoot mode appears.
Image+Sound Image only Sound only
Using the Bar Code Reader <Bar code reader>
You can use the Out-camera to scan JAN or QR code. The scanned text data can be
used for Phone To (AV Phone To), Mail To, Web To and i-
Camera
180
2
Locate the JAN/QR code at the center of the display and press (Scan).

181
i-mode/i-motion/
i-Channel

182
i-mode/i-motion/i-Channel
What is i-mode?
i-mode allows you to use the i-mode
compatible FOMA terminal (hereinafter referred
to as i-mode terminal) to access various online
services such as site (program) connection,
Internet connection, and i-mode mail.
ˎ i-mode is a paid service that requires a subscription.
ˎ For details on i-mode, see the “Mobile Phone User’s
Guide

183
i-mode/i-motion/i-Channel
Displaying Sites
Various sites offered by IP (information service
providers) can be displayed (the subscription
is necessary for some sites).
1 From the i-mode menu, select [i Menu]

184
i-mode/i-motion/i-Channel
185
i-mode/i-motion/i-Channel
Displaying a Site URL
The URL of the currently displayed site can be
displayed.
1 While displaying a site, press (Func).
The Function menu appears.
2 Select [URL] and press .
The URL of the site is displayed.
To copy the URL
Press (Copy).
Sending a URL by Mail
The URL of the currently displayed site can be
sent by mail.
1 While displaying a site, press (Func).
The Function menu appears.
2 Select [Compose message] and press
.
The Edit mail display appears.
The site URL is already entered in the main body.
3 Compose mail and send it.
ˎ Follow the same steps as in “Compose and send
mail” (P.203, step 2 to 5).
Displaying a Site Correctly
If the display of the text is incorrect on a site,
you can reload the page after changing the
character code.
1 While displaying a site, press (Func).
The Function menu appears.
2 Select [Word translate]

186
i-mode/i-motion/i-Channel
187
i-mode/i-motion/i-Channel
Displaying Internet Sites
<Internet connection>
i-mode compatible Internet site can be
displayed from the i-mode terminal.
ˎ Sites that are not compatible with i-mode may not
be displayed correctly.
1 From the i-mode menu, select [Go to
location]
188
i-mode/i-motion/i-Channel
Displaying a Site
A site can be displayed using a bookmark.
1 From the i-mode menu, select [Bookmark]
and press .
A list of bookmark folders appears.
ˎ The following icons show the type of folder.
(Yellow) Preset folder
(Blue) User-created folder
2 Select a folder and press .
A list of bookmarks appears.
3 Select a bookmark and press (Cnct).
The FOMA terminal is connected to the site of the
selected bookmark.
To check the URL
Move the cursor to the bookmark and press
(Check).
To copy a bookmark URL
Move the cursor to the bookmark and press
(Check) and (Copy).
To change the title
Move the cursor to the bookmark and from the
Function menu, select [Edit title]. Enter the title
within 12 full-width or 24 half-width characters.
To display other site while displaying a site
From the Function menu, select [Bookmark]

189
i-mode/i-motion/i-Channel
3 Select [Move]
190
i-mode/i-motion/i-Channel
Protecting a Screen Memo
You can protect screen memos from being
overwritten. You can protect up to 50 screen
memos.
1 Select a screen memo from the screen
memo list and press (Func).
The Function menu appears.
To cancel the protection
Move the cursor to the protected screen memo
and press (Func).
2 Select [Protect ON/OFF]

191
i-mode/i-motion/i-Channel
Downloading Data from
Sites <Download>
You can download melodies, PDF data, Chara-
den, ToruCa cards, Deco-mail templates,
dictionaries, Kisekae Tool, mail (vMessage
format), and easy BlogUp service information
file from related sites.

192
i-mode/i-motion/i-Channel
193
i-mode/i-motion/i-Channel
Setting i-mode <i-mode setting>
Setting the Connection Timeout
The duration before disconnecting the FOMA
terminal automatically can be set when you
cannot send or receive data due to heavy
traffic at the i-mode center.
1 From the i-mode menu, select [i-mode
setting]
194
i-mode/i-motion/i-Channel
Setting Whether to Use the
Saved Data for Flash Movies
You can set whether to use the saved data
(P.185) when you play back a Flash movie
displayed on a site or saved in the Screen
Memo.
1 From the i-mode menu, select [i-mode
setting]

195
i-mode/i-motion/i-Channel
Setting the FirstPass
<User certificate>
You can issue and download the user
certificate from the FirstPass Center.
The user certificate certifies that you are a
FOMA subscriber. The downloaded user
certificate is saved on the green/white UIM
(FOMA card) and enables you to use FirstPass-
compatible sites.
ˎ You cannot use the user certificate using the blue
UIM.
ˎ To connect to the FirstPass Center, set the date and
time (P.44).
ˎ The screens and operation methods displayed by
the FirstPass Center may change.
ˎ While the FOMA terminal is connected to the
FirstPass Center, you cannot send/receive mail or
receive Message R/F.
ˎ The User certificate is not available overseas.
1 From the i-mode menu, select [i-mode
setting]

196
i-mode/i-motion/i-Channel
Changing the Host for
Certificate Issue <Select host>
197
i-mode/i-motion/i-Channel
Downloading an i-motion
from Sites <Download i-motion>
You can download i-motion from a site and
save it to the FOMA terminal.
ˎ You can save up to 150 i-motion, each up to 10M
bytes. The number of i-motion that can be saved
may decrease depending on the data to be saved.
1 While displaying a site, select an i-motion
and press .

198
i-mode/i-motion/i-Channel
What is i-Channel?
The i-Channel service provided by DoCoMo
or another IP (information service providers)
distributes news, weather, etc. as graphics-
based information to i-Channel-compatible
terminals.
You can run the latest information updates
in the stand-by display as Telop text by
automatically getting this information on a
regular basis. You can also display a list of
channels and view the channel you want by
pressing (P.198). The channel you select
from the channel list gives you access to rich
and detailed information.
i-Channel is a paid service that requires a
subscription. (To apply for the i-Channel
service, the subscription to i-mode is required.)
There are two types of channels: “Basic
channel” and “Favorite channel”. “Basic
channel” is provided by DoCoMo and is pre-
registered, and therefore you can use it from
the moment you start using the i-Channel
service. The packet communication charge
required for automatic updates of information
distributed for the “Basic channel” is free of
charge. IP (information service providers) other
than DoCoMo offers “Favorite channel” that you
can register and use according to your needs.
The packet communication charge required for
automatic updates of information distributed
for “Favorite channel” is not included in the
i-Channel service charge.
However, the packet communication charge
is required in addition to the i-Channel service
charge when you view detailed information of
“Basic channel” and “Favorite channel” from
the channel list.
Also, note that the packet communication
charge is required for automatic updates of
information distributed for “Basic channel”
during international roaming is not included in
the i-Channel service charge.
ˎ i-Channel is available only in Japanese.
ˎ For details on i-Channel, see the “Mobile Phone
User’s Guide