Sony A3880003 Licensed transmitter User Manual 08 user guide part 2
Sony Mobile Communications Inc Licensed transmitter 08 user guide part 2
Sony >
Contents
- 1. 08 user guide part 1
- 2. 08 user guide part 2
08 user guide part 2
251
Continued on next page
Data Display/Edit/Management
Managing the microSD Card
Formatting the microSD card enables you to use the
card on the FOMA terminal or check the usage
status.
Formatting the microSD card
zWhen the memory card is formatted, all the stored
data are deleted. Check if there is an important
data before formatting.
1Category screen (p.247)u (FUNC)
“microSD format”Enter your security
code“YES”
Checking the microSD card usage
status
You can display the amount of available space and
data stored on the microSD card.
zThe displayed memory capacity is smaller than the
memory capacity indicated on the microSD card.
zNumber of files that can be stored on the microSD
card→p.246
1Category screen (p.247)u (FUNC)
“microSD info”
Setting the USB Mode
<USB mode setting>
You can set the USB mode to use various functions
by connecting a PC and the FOMA terminal.
zUSB mode is categorized into “Communication
mode”, “microSD mode” and “MTP mode”.
1i“SETTINGS”“External
connection”“USB mode setting”
The “USB mode setting” screen appears.
2Select any item:
Communication mode……Uses the external
connector for packet communication, 64K data
communication or data exchange via cable
connection.
• “ ”: The FOMA USB Cable with Charge Function
01/02 is connected and data are ready to be
exchanged between the FOMA terminal and a PC
microSD mode……Uses the external connecter as
a reader/writer of the microSD card.
• “ ”: The FOMA USB Cable with Charge Function
01/02 is not connected
• “ ”: The FOMA USB Cable with Charge Function
01/02 is connected (You cannot transfer data
between the FOMA terminal and the microSD
card, display data in memory or format the
microSD card)
zTo check whether the i-motion or Chaku-Uta-Full® can
be moved, see “i-motion info” (p.233), “File property”
(p.274) or Icons (pp.227, 274).
* Make sure to format the microSD card on the
FOMA SO706i. You may not be able to use the
microSD card formatted on the other terminal
or PC.
N
zDo not remove the microSD card while formatting.
This may cause a malfunction to the FOMA terminal
or microSD card.
zData stored on the microSD card are not guaranteed if
formatting is interrupted.
N
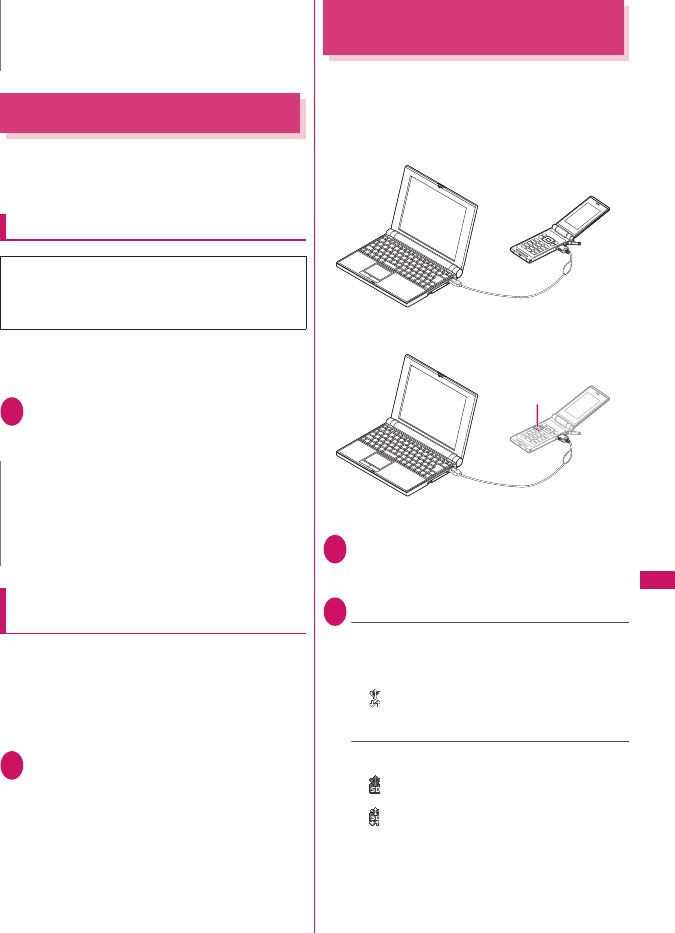
<Communication mode>
PC
PC
microSD card
FOMA terminal
FOMA USB Cable with Charge
Function 01/02 (optional)
FOMA USB Cable with Charge
Function 01/02 (optional)
<microSD mode/MTP mode>
252
Data Display/Edit/Management
MTP mode……Uses the external connector for
WMA data exchange.
• “ ”: The FOMA USB Cable with Charge Function
01/02 is not connected
• “ ”: The FOMA USB Cable with Charge Function
01/02 is connected
Using the FOMA Terminal as
a microSD Reader/Writer
You can connect the FOMA terminal to a PC with the
microSD card inserted and read/write the data in the
microSD card.
zTo use the FOMA terminal as a microSD reader/
writer, the following devices are required.
1USB mode setting screen (p.251)
“microSD mode”
When set to “microSD mode”, “ ” appears.
2Connect the FOMA terminal and a PC
with the FOMA USB Cable with Charge
Function 01/02
The “ ” icon is displayed.
The microSD card is displayed in My Computer
window on the PC as a storage memory
(external storage device).
To remove the FOMA USB Cable with Charge
Function 01/02 from the PC, follow the safe
removal procedure on each OS.
Setting How to Print Images
Stored on the microSD Card
<DPOF setting>
You can set DPOF (Digital Print Order Format) to the
images stored in the microSD card.
zDPOF is a format to print the images shot by digital
camera.
zWhen you save still images shot with the FOMA
terminal to a microSD card, and specify still images
to print, the number of sheets, etc., you can print
the images on a DPOF-compatible printer or in a
print service shop.
1Folder list screen (p.225)“microSD”
“Picture”Select a folder
u (FUNC)“DPOF setting”
■To use DPOF set One
Move the frame to the image you want to set on
the image list screen or select the image to
display the My picture screen. When you select
the My picture function menu, go to Step 3.
2Select the setting
DPOF set One……Sets the print settings for one
image.
DPOF set Choice……Selects images to set DPOF
settings. “About multiple-choice” →p.38
3“Print”Select any item:
Print Sheets……Enters the number of sheets (01 to
99) to print.
a date……Selects whether to stamp the date.
■To cancel the print setting of the selected
image
“Print OFF”
Item Description
Cable FOMA USB Cable with Charge Function
01/02 (optional)
PC PC with USB port (compliant with the
Universal Serial Bus Specification
Rev1.1/2.0) compatible with the FOMA
USB Cable with Charge Function 01/02
(optional)
Supported
OS
Windows 2000,
Windows XP, Windows Vista (Japanese
edition)
■Important
zEnsure that the FOMA terminal and PC are properly
connected. An improper connection could not only
prevent data exchange but also result in the loss of data.
zAttempting to exchange data when the FOMA
terminal’s battery level is low or empty could not only
prevent data exchange but also result in the loss of
data. Make sure that the FOMA terminal’s battery is
charged enough. Also, check the power of PC.
zDo not remove the FOMA USB Cable with Charge
Function 01/02 while copying the data from the PC to
the FOMA terminal (the center illumination lamp
flashes). This may prevent not only data exchange
but also result in the loss of data.
253
Continued on next page
Data Display/Edit/Management
■To cancel the print setting of all the stored
images
“All print OFF”
4o (Finish)
Working with Folders and
Files
You can add folders to each folder/microSD folder list
screen of the Data Box to organize the files.
■Movable contents folder
zFor Music, you can use the function menus “Add
folder”, “Edit folder name”, “Delete folder” and
“Memory info” of the following “ Folder list”
screen.
zFor i-motion, you can use the same function menus
as the following “ microSD folder list” screen.
Creating, editing and deleting folders
Folder list screen
Add folder……Enters a folder name to add a folder.
You can enter up to 10 double-byte or 20 single-byte
characters.
Edit folder name……Edits the folder name of the added
folder.
You can enter up to 10 double-byte or 20 single-byte
characters.
Add shortcut*1 →p.94
Delete folder……You can also delete a folder that stores
data.
• For Music, select the deleting method from “Delete this/
Delete selected/Delete all” after entering your security
code.
“About multiple-choice” →p.38
Delete all*2*3……Deletes all the stored data. Note that
the data saved in the secret folder are not deleted.
Edit playlist*4……Starts editing the playlist.
“Playing melodies in your preferred order”→p.242
Release playlist*4……Releases the playlist.
Memory info……Displays the amount of the stored data.
*1: It is only available in the Music.
*2: “Delete all image” appears for My picture, “Delete all” for
i-motion and Melody, and “Delete all doc.” for My document.
*3: Not available for Music, movable contents folder of Music
and Music&Video Channel.
*4: Available only when the playlist folder of Melody is
highlighted.
microSD folder list screen
(p.248)
Edit folder name*1……Edits the folder title.
You can enter up to 31 double-byte or 63 single-byte
characters. *2
Create folder*1……Enters a folder name to create a folder.
You can enter up to 31 double-byte or 63 single-byte
characters.*2
Delete folder……Deletes a folder.
Memory info……Displays the amount of the stored data.
*1: Not available for “Image Box” or “Decorate PI”.
*2: You can enter up to 10 double-byte or 20 single-byte
characters for i-motion movable contents folder or Melody.
N
zYou can set the DPOF setting up to 999 images.
However, you cannot print up to the specified number
depending on the printer.
zYou cannot set the DPOF settings for following
images:
• An image whose width or height exceeds 2,592 dots
• An image whose total number of dots exceeds
2,592 × 1,944 dots
• An image whose file size exceeds 2M bytes
• A progressive JPEG image whose width or height
exceeds 854 dots
• A progressive JPEG image whose total number of
dots exceeds 854 × 480 dots
zYou may not be able to set the DPOF setting when the
space is not enough on the microSD card.
zYou can check the number of sheets you set in “Image
info”.
N
<Add folder>
zThe maximum number of folders of the movable
contents folder is 65,535 and the maximum number of
files that can be stored in a folder is 65,535.
<Delete folder/Delete all image/Delete all>
zIf you try to use “Delete folder”, “Delete all image” or
“Delete all” to delete an image or movie that has been
set in a display, original animation or user icon of
Schedule, or if you use “Delete folder” or “Delete all” to
delete a melody that has been set as a ring tone or alarm
or set in a playlist or random melody, the corresponding
feature (display, etc.) changes as follows:
• The screens, ring tone and alarm settings are reset
to the default.
• The original animation, playlist and random melody
are canceled.
• The alarm notification screen for the schedule
switches to the screen on which you set “ ”.
254
Data Display/Edit/Management
When the memory is insufficient or
there are too many stored items
When you try to save the photographed still images,
movies or downloaded data, a message appears
asking whether to delete some unnecessary data to
save the new data. To save the new data, delete
unnecessary data.
1 Select “YES” on the message
■Not to save the data
“NO”
2 Select a folderSelect data to be
deleted
Some data co-use the storage area, select
which data is to be deleted before selecting a
folder.
3 o (Finish)“YES”
o (Finish) is not displayed until enough
memory is allocated to save the data.
Managing the Phonebook and
SMS on the FOMA Card
<UIM operation>
You can exchange phonebook or SMS data between
the FOMA terminal (Phone) and the FOMA card
(UIM). You can also delete SMS data or phonebook
entries stored on the FOMA terminal (Phone) or
FOMA card (UIM).
zYou cannot send/receive a voice/videophone call or
i-mode mail while copying or deleting data. Also,
you cannot activate other functions.
zYou cannot copy items that cannot be stored in the
UIM phonebook.
Items and number of entries that can be copied
→p.70
zYou can save the received SMS and sent SMS up
to 20 in total on the FOMA card (UIM).
Copying or deleting the phonebook
entry or SMS from the main menu
<Example: To copy the phonebook entry or SMS>
1i“LIFEKIT”“UIM operation”
Enter your security code
When you enter your security code, “ ”
appears and communication such as incoming
calls becomes unavailable. If you receive a call
or other communication before entering your
security code, the UIM operation ends.
2“Copy”
■To delete
“Delete”
3“Phone →UIM” or “UIM →Phone”
■To delete
“Phone” or “UIM”
4Select any item:
Phonebook……Searches and displays the
phonebook list screen.
How to search the phonebook→p.73
SMS……Selects the SMS data.
Inbox……Displays the Inbox list screen.
Outbox……Displays the Outbox list screen.
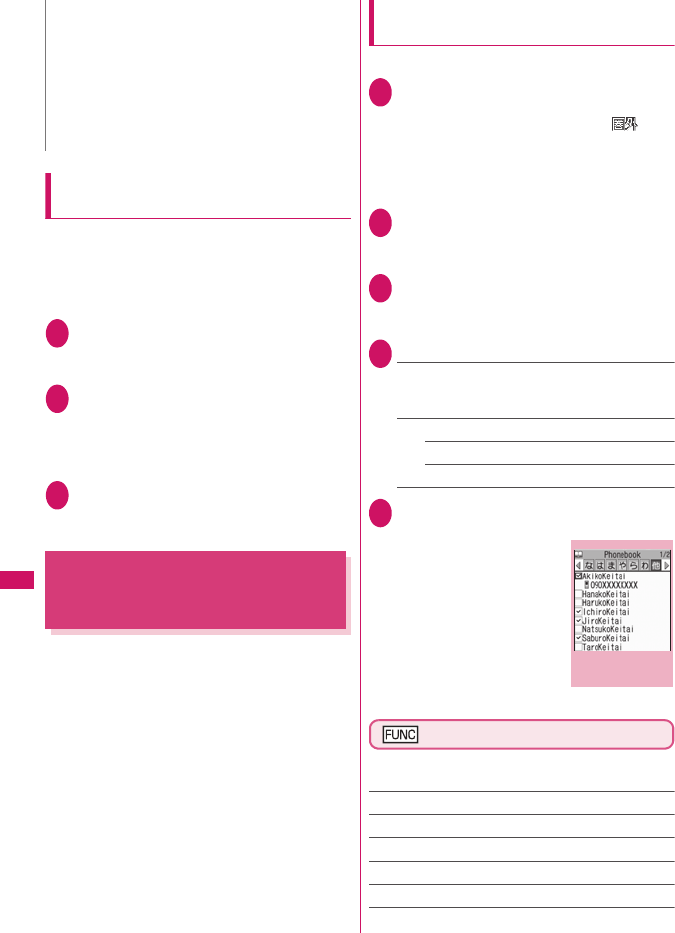
5Use b to select a checkbox (□)
o (Finish)“YES”
Select “YES” one more time
when you copy the
phonebook from the FOMA
terminal (Phone) to the
FOMA card (UIM).
UIM operation screen (p.254)
zFor the phonebook, available functions vary
depending on the selected tab, etc.
Start copy*1……Starts copying operation.
Start deletion*2……Starts deleting operation.
Select this……Selects the data.
Select all……Selects all the data.
Release this……Deselects the selected data.
Release all……Deselects all the data.
N
zWhen you attempt to access the data in the microSD
card while i-αppli saves data to the microSD card, a
message appears notifying that you cannot operate
the card.
<Create folder>
zYou cannot create folder in the “Image Box” or
“Decorate PI” on the FOMA terminal. You can create
these folders on a PC, etc.
UIM operation
EX. Phonebook
(Search all)
Function menu
p.254

255
Data Display/Edit/Management
Detail……Displays the data details.
*1: Available only with the copy screen.
*2: Available only with the delete screen.
Copying a phonebook entry from the
phonebook detail screen
1Phonebook detail screen (p.73)
u (FUNC)“Copy to UIM” or “Copy
from UIM”“YES”
The menu displayed when u (FUNC) is
pressed depends on where to save the
phonebook entry (to the FOMA terminal or the
FOMA card (UIM)).
Moving or copying SMS from the mail
screen
zYou can perform the UIM operation on the mail
screens from the function menus of received mail
list/detail screens and sent mails list/detail screens.
<Example: To move or copy received SMS on the
FOMA terminal to the FOMA card (UIM)>
1Received mail list screen (pp.170, 171)
Highlight SMS
2u (FUNC)“UIM operation”“Move
to UIM” or “Copy to UIM”“YES”
■To move or copy received SMS on the
FOMA card (UIM)
“Move from UIM” or “Copy from UIM”
Move or copy to the “Inbox” folder.
Infrared Data Exchange/iC
Communication
You can exchange the data such as phonebook
entries and received mails with other devices with the
Infrared data exchange or iC communication function.
zData exchange function of the FOMA terminal via
the Infrared data exchange/iC communication
conforms to the IrMC™1.1 standard. However, you
may not be able to forward data depending on the
other party’s device or the application even when
IrMC™1.1 is supported.
zYou can forward the data one by one or all data at
one time.
zYou can forward the data as shown in the Table 2
(p.256).
N
<Phonebook>
zCopying the phonebook from the FOMA terminal
(Phone) to the FOMA card (UIM) converts “katakana”
included in name and reading to double-byte. You can
copy up to 10 double-byte or 21 single-byte characters
for name and up to 12 double-byte or 25 single-byte
characters for reading, and remaining characters are
not copied.
zAs the number of phone numbers and e-mail addresses
that can be stored in a single phonebook entry on the
FOMA terminal (Phone) and FOMA card (UIM) is
different, the second and subsequent phone numbers/
e-mail addresses stored on the FOMA terminal (Phone)
cannot be copied to the FOMA card (UIM).
zAs the types of characters that can be used on the
FOMA terminal (Phone) and FOMA card (UIM) are
different, some characters may be converted to
spaces or other characters.
zPhonebook entries stored as secret data cannot be
copied using this function even when the FOMA terminal
is set to “Secret mode” or “Secret data only mode”.
zIf the same group names are set on the FOMA
terminal (Phone) and the FOMA card (UIM), the
phonebook group settings are retained. If there is no
group with the same name, the entries are stored in
“No Group”.
<SMS>
zCopying the sent SMS will also copy the SMS report
saved for the sent SMS. You cannot copy the SMS
report only.
zYou cannot protect SMS moved or copied to the
FOMA card (UIM). If you move or copy protected SMS
to the FOMA card (UIM), the protection is removed
from the SMS on the FOMA card (UIM). “Replied to”
or “Transferred” icon is also changed to “Read”.
zWhen an SMS for Number B of 2in1 is moved or
copied, it is saved as an SMS for Number A.
256
Data Display/Edit/Management
Note on forwarding data
zYou cannot forward data while Dial lock, Self mode,
Omakase Lock or Keypad lock is set. Also, you
cannot use the iC communication when IC card
lock is set.
zYou cannot receive the phonebook data while
Restrict dialing is set. However, you can send the
phonebook data which is set to “Restrict dialing”
and personal data of My Profile when sending the
phonebook data.
zYou may not be able to forward data depending on
the status of the other party’s device. Also,
depending on the model of the other party’s device,
it may not reflect the settings of the received mail or
bookmark folder tree, or it may not receive the
Deco-mail® correctly.
zThe FOMA terminal is set to Out of Area during the
data exchange, which means you cannot make/
receive a voice/videophone call or use i-mode,
i-mode mail, packet communication or 64K data
communication. Also, the FOMA terminal may
remain the status of Out of Area for a while after
the data exchange.
zIt may take time to exchange data depending on
the amount of data. Also, you may not be able to
receive data.
zThe progress bar indicates the number of sent
data. A large amount of data may slow down the
progress indicator or it may look different between
the parties even when the data are being
exchanged successfully.
Sent/received data
zThe data received on the FOMA terminal is saved
as shown in the Table 2 (p.256).
zThe FOMA terminal may not properly receive some
symbols or pictographs entered in mail or
phonebook.
zYou cannot send or receive:
• UIM phonebook, SMS
• Frame or stamp data (can be received only)
• Melody, still image, movie, i-motion and PDF
data with FOMA card security
• Data in the Secret folder
zYou cannot receive:
• Neither JPEG, GIF nor SWF Flash movie
• Movie other than MP4 or 3GP
• Still image, movie, i-motion, melody and PDF
data whose image size or file size exceeds the
capacity of the FOMA SO706i
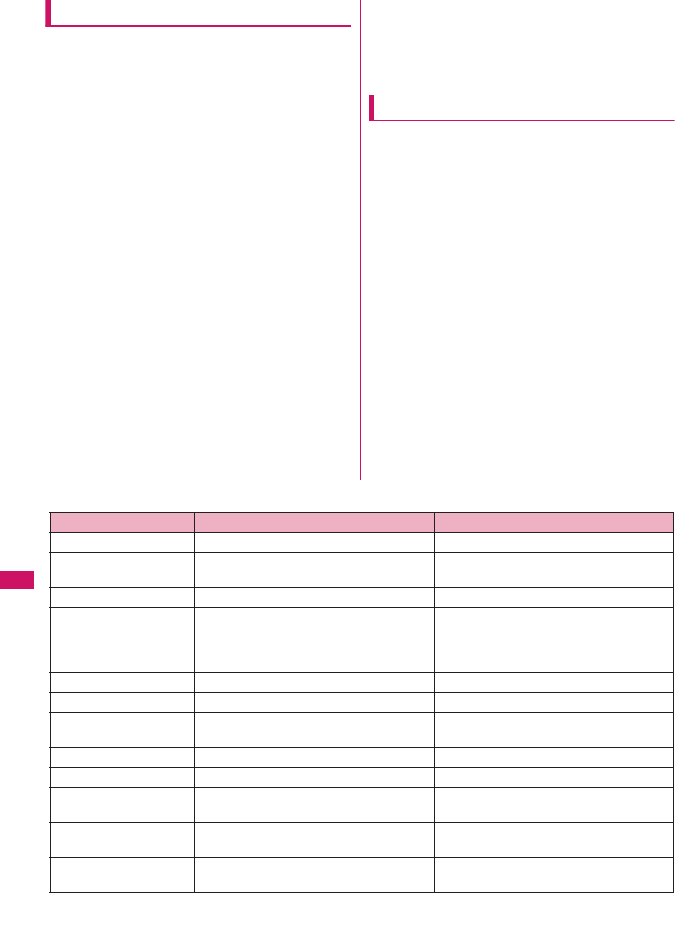
[Table 2] Where to store the forward and received data
Data Receive one Receive all
Still image, melody The first in the Inbox folder (Cannot send all at once)
Movie (i-motion), PDF
data
In date order in Inbox folder (Cannot send all at once)
ToruCa, ToruCa (detail) The first in the ToruCa folder Replaced with ToruCa of the sender
Phonebook, My Profile
The smallest memory number available between
“010” and “999” (If none of the numbers above is
available, it is saved under the smallest memory
number available between “000” and “009”)
Replaced with Phonebook of the sender
(My Profile data is sent, and the data
stored in “My Profile” (except for the phone
number) is replaced)
Schedule In the date order of the received schedules Replaced with Schedule of the sender
To Do list The first in the To Do list Replaced with To Do list of the sender
Received mail, Sent mail The Inbox/Outbox folder in the date order
of mails
Replaced with Outbox/Inbox of the sender
Draft mail The Draft box in the date order of mails Replaced with Draft of the sender
Text memo The first <Not recorded> Replaced with Text memo of the sender
Common phrases The first <Not recorded> Replaced with Common Phrases of the
sender
Own dictionary The first in the Own dictionary Replaced with Own dictionary of the
sender
Bookmark (i-mode, Full
Browser)
The first in the Bookmark folder Replaced with Bookmark of the sender
257
Data Display/Edit/Management
zYou can send/receive up to 9 double-byte or 18
single-byte characters for titles of still images,
movies, i-motion and PDF data, and up to 25
double-byte or 50 single-byte characters for titles of
Melody. If the length of the title exceeds the
maximum, the exceeding part is deleted.
zNote the following when you transfer the
phonebook data:
• The secret code cannot be forwarded.
• When you transfer one data of the phonebook
stored as the secret data, the secret setting is
canceled when transferred.
• The still images stored in the phonebook you
receive are stored in the Inbox folder of “My
picture”. However, if the amount of data exceeds
the storage limit of “My picture”, the exceeding
images are deleted and the phonebook is stored.
zNote the following when you transfer the mail data:
• Some phones may be unable to receive a part of
a subject.
• When receiving all the mails, the mails are
received after deleting all the mails and user-
created folders.
• If there is not enough space in the Inbox when
receiving one received mail, mails are deleted
automatically in the order of old received mails.
However, unread mails, protected received mails,
i-mode mails and SMS in the secret folder are
not deleted. It is recommended to protect mails
you want to keep.
• If there is not enough space in the Outbox when
receiving one sent mail, the oldest unprotected
sent mail in the Outbox is overwritten.
• When there is an attached file whose
downloading is not completed, the mail is sent
after the attached file is deleted.
• When the i-αppli launch information or mail-
linked i-αppli information is pasted into the mail,
the mail is sent after the pasted data is deleted.
When the data attached to the mail is set to “File
restricted”, the mail is also sent after the data is
deleted. Also, a still image may be deleted
depending on the file format. However, when
sending sent mails or draft mails, the data
received via cable connection or copied from the
microSD card are sent even when they are set to
“File restricted”.
• You cannot transfer the received mail folder and
sent mail folder of the mail-linked i-αppli. All the
mails in the folder are saved to the Inbox or
Outbox.
• The setting of “Color coding” set in the received
mail list screen or sent mail list screen cannot be
transferred.
• When using the Infrared data exchange, a mail
larger than 2M bytes may not be sent correctly.
zWhen original common phrases already fill in Folder
9 (“Original”) and fixed common phrases in Folder 1
to 8 have not changed since the time of purchase,
received common phrases will be stored in Folder 1
to 8, overwriting the fixed common phrases.
zThe data may not be saved in the same order
depending on the model of the sender when
transferring all bookmarks.
Session number
zTransferring all requires the session number to
authenticate the sender and recipient. Before
sending or receiving, the sender and recipient
should agree on a 4-digit number as the session
number and then both enter the same number.
Forwarding Data with Infrared
Data Exchange
<Infrared data exchange>
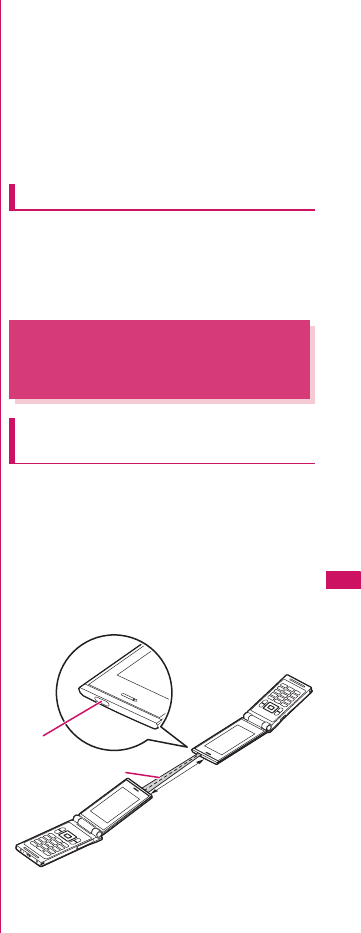
When you forward data by Infrared
data exchange
zPlace the devices so that the Infrared data ports are
aligned on the same level and facing each other.
zDo not move the devices until the confirmation
message about completing the exchange appears.
Also, do not place anything between the devices or
cover the Infrared data ports.
zThe devices may not communicate successfully if
they are placed in direct sunlight, directly under a
fluorescent light, or close to other infrared equipment.
Infrared data
port Within the range
of ±15°
Approx. 20cm
or less
258
Data Display/Edit/Management
Transferring one data at a time using
the Infrared data exchange
<Send/Receive Ir data>
You can exchange one data at a time with other
devices using the Infrared data exchange function.
●Sending one data
Select “Send Ir data” from the function menu of Data
list screen or detail screen. When you send the data
of JPEG, you can select High-speed Ir send (IrSS™).
<Example: To send one image>
1 My picture screen (p.226)u (FUNC)
“Send Ir data” or “IrSS”
■IrSS™
JPEG image can be also sent by o (IrSS).
2Set the receiving device ready to
receive
3 Direct the Infrared data port toward the
other part’s device“YES”
The data transmission starts.
When the data is sent, a notification message
about completing the exchange appears.
■To cancel sending
“NO”
■To exit during sending
o (Quit)
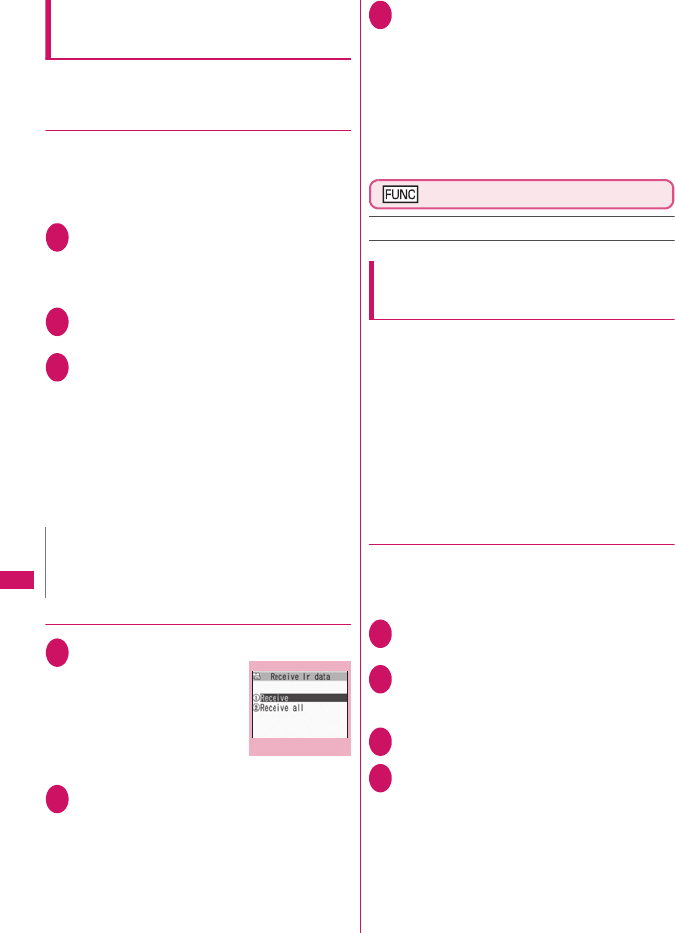
●Receiving one data
1 i“LIFEKIT”“Receive Ir data”
The “Receive Ir data”
screen appears.
2 “Receive”Direct the Infrared data
port toward the other party’s device
Receive data from the other party’s
device
The data reception starts.
3 “YES”
When the received data is saved, a notification
message about completing the save appears.
The received data is discarded if no operation is
performed for about 30 seconds after it is received.
■To exit during the receiving
o (Quit)
■When you do not save the received data
“NO”
Receive Ir data screen (p.258)
Add shortcut →p.94
Transferring all data at a time using
the Infrared data exchange
<Send/Receive all Ir data>
You can exchange all data at a time with other
devices using the Infrared data exchange function.
zWhen you receive all, all the data on the FOMA
terminal is overwritten by the received data and
stored data are deleted including protected mails
and secret data of the phonebook or schedule.
However, frames and secret data in the secret
folder are not deleted. Check if there is an
important data before receiving all the data.
zTransferring all may change the order of data on
the recipient.
●Sending all data at a time
Select “Send all Ir data” from the function menu of
Data list screen or detail screen.
<Example: To send all data stored in the phonebook>
1 Phonebook list screen (p.73)
u (FUNC)“Send all Ir data”
2 Enter your security codeEnter
session number
“Session number”→p.257
3Set the receiving device ready to receive
4 Set the receiving device ready to
receive“YES”
Transmission of all data starts.
When the data is sent, a notification message
about completing the exchange appears.
■To cancel sending all data
“NO”
■To exit during sending
o (Quit)
N
zWhen you select “IrSS”, the sender may be completed
correctly even though the other party cannot received
the data correctly.
Receive Ir data
Function menu
p.258

259
Data Display/Edit/Management
●Receiving all data at a time
1Receive Ir data screen (p.258)
“Receive all”
2Enter your security codeEnter
session number
“Session number”→p.257
3 Direct the Infrared data port toward the
other part’s device“YES”
■To cancel receiving all Ir data
“NO”
4Select “YES” when the overwrite
confirmation screen appears
■To cancel receiving all Ir data
“NO”
5Receive all data from other party’s device
All the data reception starts.
When the received data is saved, a notification
message appears indicating that the
communication is completed.
■To exit during the receiving
o (Quit)
Forwarding Data with iC
Communication
<iC Communication>
When transferring data using the iC
Communication
zPlace the FeliCa mark “e” on the FOMA terminal
(sender) over the FeliCa mark “e” on the FOMA
terminal (receiver).
zData transmission may not be smooth depending
on the FOMA terminal of the other party. Move
FOMA terminals so that the FeliCa marks “e” of
the sender and the receiver get close or distant, or
move them to the right, left, up and down.
Transferring one data at a time using
the iC communication
<iC transmission/Touch to receive data>
You can exchange one data at a time with other
devices using the iC communication function.
●Sending one data
Select “iC transmission” from the function menu of
Data list screen or detail screen.
<Example: To send one phonebook data>
1Phonebook detail screen (p.73)
u (FUNC)“iC transmission”
2Put the FeliCa mark “
e
” close to the
FeliCa mark “
e
” of the other party
“YES”
The data transmission starts.
When the data is sent, a notification message
about completing the exchange appears.
■To cancel sending
“NO”
■To exit during sending
o (Quit)
●Receiving one data
1Put the FeliCa mark “
e
” close to the
FeliCa mark “
e
” of the other party
Perform the operation to send the data
from the FOMA terminal of the other
party
The data reception starts and the progress bar
appears.
2“YES”
When the received data is saved, a notification
message about completing the save appears.
The received data is discarded if no operation is
performed for about 30 seconds after it is
received.
■To exit during the receiving
o (Quit)
■When you do not save the received data
“NO”

260
Data Display/Edit/Management
Transferring all data at a time using
the iC communication
<iC trans. all/Touch to receive all>
You can exchange all data at a time with other
devices using the iC communication function.
●Sending all data at a time
Select “iC trans. all” from the function menu of list
screen or detail screen of the data you want to send all.
<Example: To send all the phonebook data>
1Phonebook list screen (p.73)
u (FUNC)“iC trans. all”
2Enter your security codeEnter
session number
“Session number”→p.257
3Put the FeliCa mark “
e
” close to the
FeliCa mark “e” of the other party
“YES”
Transmission of all data starts.
When the data is sent, a notification message
appears indicating that the communication is
completed.
■To cancel sending all data
“NO”
■To exit during sending
o (Quit)
●Receiving all data at a time
1Put the FeliCa mark “
e
” close to the
FeliCa mark “
e
” of the other party
2Perform the data sending operation of
all data from the FOMA terminal of the
other party
3Enter your security codeEnter
session number
“Session number”→p.257
4Select “YES” when the overwrite
confirmation screen appears
The data reception starts and the progress bar
appears.
When the received data is saved, a notification
message appears indicating that the
communication is completed.
■To quit receiving data
“NO”
■To exit during the receiving
o (Quit)
Forwarding Data by Cable
Connection
<OBEX™ connection>
By connecting the FOMA terminal and your PC with
the FOMA USB Cable with Charge Function 01/02
(optional), you can exchange various data such as
phonebook entries or images.
zWhen you exchange data using the FOMA USB
Cable with Charge Function 01/02 (OBEX™
connection), you have to install “ドコモケータイ
datalink” (DOCOMO keitai datalink) (p.329) and
“FOMA通信設定ファイル” (FOMA Communication
Setting File) in the provided CD-ROM.
zFor details such as installing of the “ドコモケータ
イ datalink” (DOCOMO keitai datalink), refer to the
download page of the software. For details on data
exchange, refer to the help files of the software.
zFor details on installing “FOMA通信設定ファイル”
(FOMA Communication Setting File) and the
operational environment, refer to “PC Connection”
chapter and “Manual for PC Connection” (PDF
format) in the provided CD-ROM.
zSet “USB mode setting” to “Communication mode”
before transferring data.
Barring Phonebook Image
Forwarding
<Forwarding image>
When you use the Infrared data exchange, iC
communication, copying to microSD card function or
data exchange (OBEX™ connection) to transfer
phonebook data, you can prevent transferring still
images stored in the phonebook.
1i“LIFEKIT”“Forwarding image”
“OFF”
■To forward
“ON”
■Important
zEnsure that the FOMA terminal and PC are properly
connected. An improper connection could not only
prevent data exchange but also result in the loss of data.
zAttempting to exchange data when the FOMA
terminal’s battery level is low or empty could not only
prevent data exchange but also result in the loss of
data. Make sure that the FOMA terminal’s battery is
charged enough. Also, check the power of PC.
zAll the data on the FOMA terminal may be erased if
an error occurs while forwarding all from PC to the
FOMA terminal. Before forwarding all, check the
cable connection, the battery level of the FOMA
terminal and the power of PC.
261
Data Display/Edit/Management
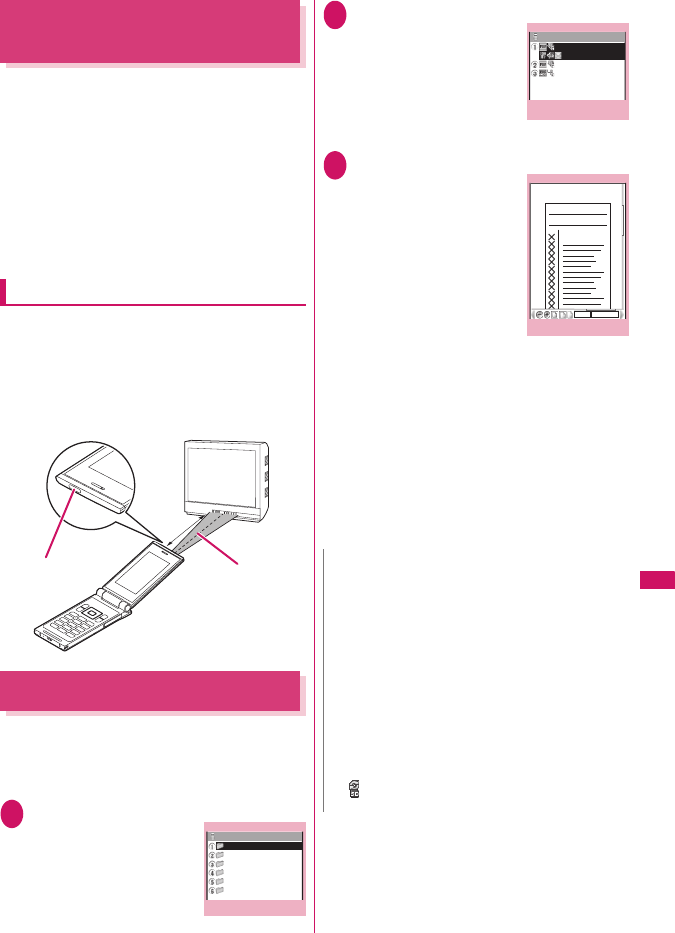
Using the Infrared Remote
Control Function
zTo use the remote controller function, download the
software according to the device you use (the key
operations of the remote controller vary depending
on the software).
z“Gガイド番組表リモコン ” (G-GUIDE program
guide remote control) is pre-installed at the time of
purchase.→p.194
zThe remote operation may not be possible
depending on the device.
zYou cannot use the Infrared Remote Control during
the Self mode.
Using remote control
zPoint the infrared data port of the FOMA
terminal directly at the remote control sensor on
the TV, etc. and operate the FOMA terminal as a
remote control. The remote control is effective
within about 4 meters away from the device.
This may vary depending on the ambient light
level.
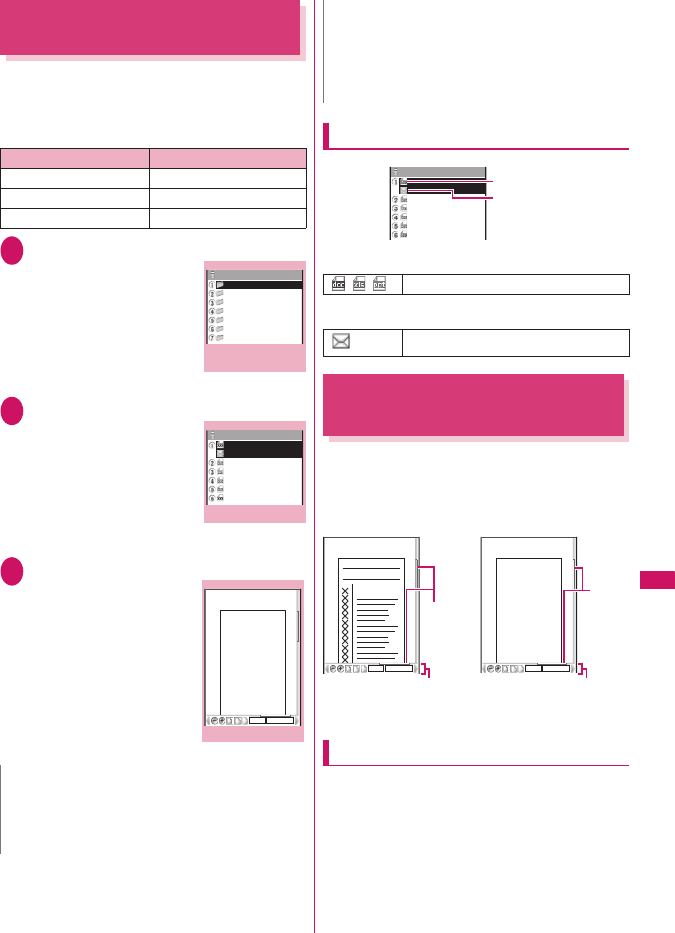
Viewing PDF Data
<My document>
Use PDF Viewer to view PDF documents
downloaded from sites and saved. You can also view
PDF documents stored on a microSD card.
zDownloading from sites→p.145
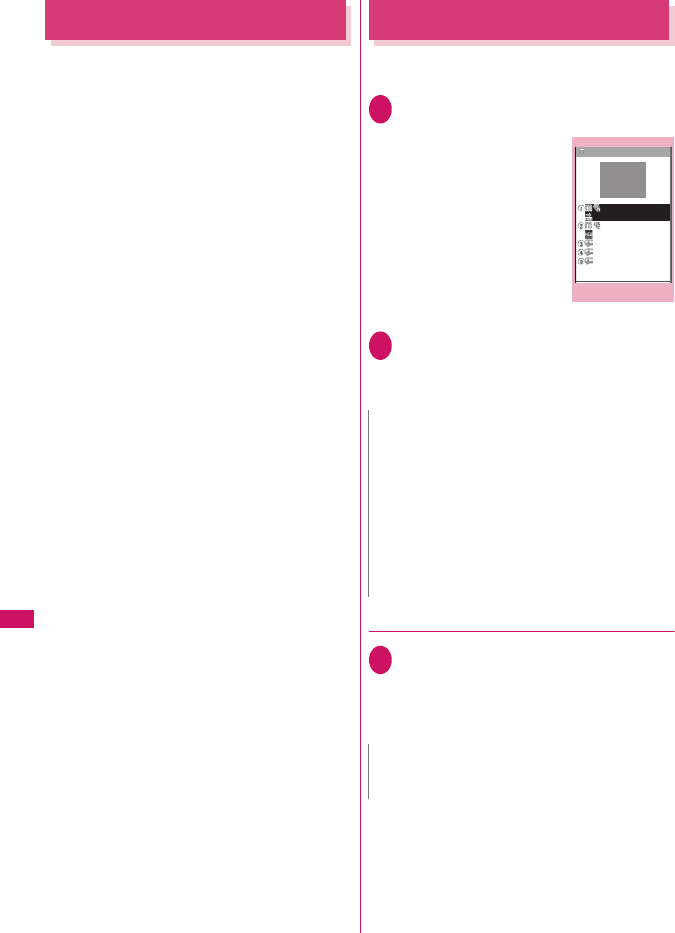
1i“DATA BOX”“My document”
The “Folder list” screen
appears.
2Select a folder
The “PDF list” screen
appears.
3Select a PDF document
The “PDF data” screen
appears.
■If the password entry
screen appears
Enter the password set to
the PDF data.
■If a message about
resuming the download
appears
You are attempting to open
a document, a part of which
has been downloaded by page. You can
additionally download the remaining pages later
on.→p.145
■If a message appears asking whether to
download all remaining data
You are attempting to open an incomplete PDF
document which has been downloaded partially
due to interruption at data acquisition, etc. You
have to download the remaining data
additionally.→p.145
Infrared data port
Within
about 4m
Within the range
of ±15°
Folder list
My document
Inbox
Invoice
Planning
Report
Reference
microSD
Function menu
p.253
N
zIt may take a long time to display some PDF data.
zA PDF data may not be properly displayed if it contain
formats unsupported by the PDF viewer or
complicated designs.
zWhile viewing a part of a PDF data which has been
downloaded by page, attempting to view a page that
has not been downloaded starts the download. You
can download the remaining pages at a time.→p.145
zTo transfer a PDF document from a PC to the microSD
card, use the specified folder tree/name.→p.244
A document cannot be displayed on the FOMA
terminal if the folder tree/name is different from the
specified format.
z“ ” flashes while viewing a PDF document stored on
the microSD card.
PDF list
Invoice
Quotation1
Quotation2
Invoice1
Function menu
p.26
2
PDF data
70% 5/10
××××××××
××××××××
×××××
Quotation 1
Function menu
p.265
262
Data Display/Edit/Management
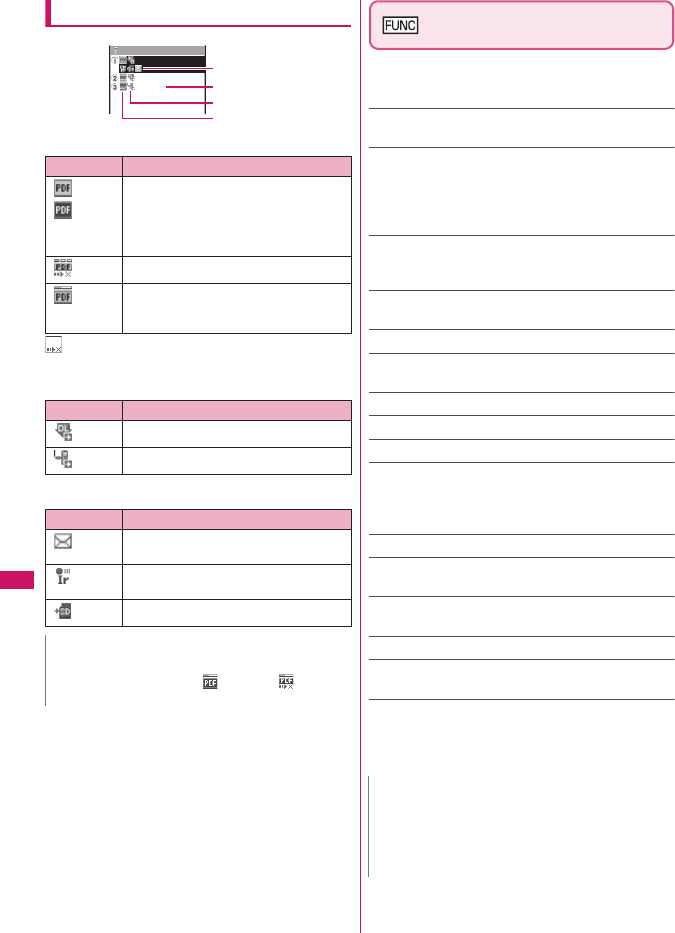
Guide to the PDF list
■PDF type icon
: File restricted data (data forwarding and copy to
microSD card are unavailable)
■Retrieval method icon
■Allowable operation icon
PDF list screen (p.261)/
Document list screen (p.263)
zThe usable functions vary according to the selected
folder, so the items displayed in the function menu
also vary.
Edit title……Edits the title. You can enter up to 9 double-
byte or 18 single-byte characters.
Display document……For PDF document, select the
page to display from “From the last”/“First page”/“i-mode
bookmark”.
For other documents, the contents are displayed from the
first page.
Document info……The file name of the PDF data/
document, the date and time it was saved, and other
information are displayed.
DL remaining data*1……“Downloading remaining PDF
data after downloading partially”→p.145
Add desktop icon*1*2→p.94
Compose message*3……Composes an i-mode
message with the PDF document/document attached.
iC transmission*1*2 →p.259
Send Ir data*1*2 →p.258
Copy to microSD*1*2→p.248
Move……Select “Move this”/“Move selected”/“Move all”,
then selects a destination folder and moves the PDF
document/document to another folder.
“About multiple-choice” →p.38
Memory info……Displays the capacity used, etc.
Sort*1*2……Sorts the PDF documents by the specified
criteria.
Delete……Select “Delete this”/“Delete selected”/“Delete
all”. “About multiple-choice”→p.38
Copy to phone*1*4 →p.249
Copy*4……“Copying the data to the different folder in the
microSD card”→p.250
*1 : Available only with the PDF data list screen.
*2 : Not usable on the list screen of the microSD card.
*3 : This function is unavailable when 2in1 mode is in B
mode.
*4 : Not usable on the PDF list screen of the FOMA terminal.
Icon Description
(Pale blue)
(blue)
All the pages have been downloaded
* The file size of the PDF document with
a blue icon exceeds 2M bytes, which
cannot be stored on the FOMA
terminal (Phone).
(Pale blue)
Partially downloaded by pages
(Pale blue)
Incomplete data which has been
downloaded partially (data forwarding
unavailable)
Icon Description
Downloaded from a site, etc.
Obtained from a microSD card, PC, etc.
Icon Description
Can be attached to an i-mode mail (2M
bytes or smaller)
Can be transferred via Infrared data
exchange and iC transmission
Can be copied to the microSD card
N
zA PDF document stored on a microSD card, which
appears with a blue icon “ ” (blue) or “ ” (blue),
cannot be viewed on the FOMA terminal.
Invoice
Quotation1
Quotation2
Invoice1
Allowable operation
PDF type
PDF data title
Retrieval method
N
<Sort>
z“By source” sorts in the following order.
①PDF documents downloaded from sites
②PDF documents acquired via the Infrared data
exchange or from a microSD card
263
Data Display/Edit/Management
Viewing Documents
<Document viewer>
Document viewer is available to view a document
attached to a mail message or stored on a microSD
card.
■Viewable document type
1i“DATA BOX”“Document viewer”
The “microSD folder list”
screen appears.
2Select a folder
The “Document list” screen
appears.
3Select a document
The “Document view”
screen appears.
Guide to the document list
■Document type icon
■Allowable operation icon
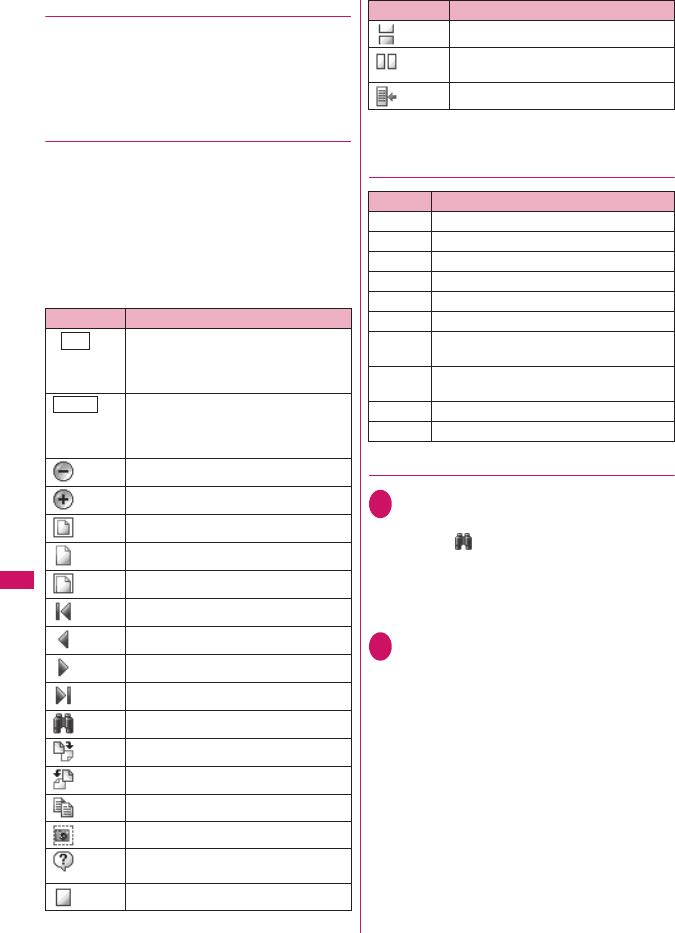
PDF Data Screen/Document
View Screen
On the PDF data screen and document view screen,
the scroll bar to check the position on the screen and
the tool bar for various screen operations are
displayed.
<PDF data screen> <Document view screen>
Operations on the screen
You can use the dial keys with assigned functions and
tool bar icons as well as the function menu to change
the display mode such as zoom in/out.
zYou can also set i-mode bookmarks and marks, or
clip and save a page on the PDF data screen.
Type Extension
Excel xls
Word doc
PowerPoint ppt
N
zIt may take long to display some documents.
zA document may not be properly displayed if it contain
formats unsupported by the Document viewer or
complicated designs.
microSD folder list
(Document)
microSD
Folder1
Folder2
Folder3
Folder4
Folder5
Folder6
Folder7
Function menu
p.253
Document list
Folder1
File1
File2
File3
File4
File5
File6
Function menu
p.262
Document view
Document
70% 5/10
Function menu
p.265
zTo transfer a document from a PC to the microSD
card, use the specified folder tree/name.→p.244
A document cannot be displayed on the FOMA
terminal if the folder tree/name is different from the
specified format.
Viewable document type
Can be attached to a mail
N
Folder1
File1
File2
File3
File4
File5
File6
Document type
Allowable operation
70% 5/10
××××××××
××××××××
×××××
Quotation 1
Tool bar
Scroll
bar
Document
70% 5/10
Scroll
bar
Tool bar
264
Data Display/Edit/Management
●Scrolling
■Use b to scroll
Press b in the direction you want to scroll.
■a (▲マナー ), s (▼メモ) to scroll
Press a (▲マナー ) to scroll up and s (▼メモ) to
scroll down.
●Guide to the tool bar
8: Switches view/close of the tool bar (scroll
bar)
o (Tool): Switch from the page operation to the
tool bar operation
o (Cancel): Switch from the tool bar operation to
the page operation
c: Switch of the icon display during the tool bar
operation
v: Icon selection during the tool bar operation
*: Available only with the PDF data screen.
●Useful keys on the PDF data/Document
view screen
●Searching for text
1PDF data screen (p.261)/Document
view screen (p.263)o (Tool)
Select “ ”Select the text entry box
Enter text to search for
You can enter up to 8 double-byte or 16 single-
byte characters. However, some special
characters may not be searched for.
2Select the checkbox (□) of the
conditiono (Search)
When the text is found, a page containing the
text appears.
Press w to search from the current position to
the beginning of the page under the same
condition.
Press q to search from the current position to
the end of the page under the same condition.
■To search in an Excel file
Select “Search in page” or “Search in file”.
“Search in page” searches in the currently
displayed sheet. “Search in file” searches in the
whole Excel document currently displayed.
Icon Description
The zoom factor appears. Specify a
zoom percentage to display pages in the
specified percentage.
d (Select)Enter a 4-digit number
The current page number appears.
Specify a page number to go to the
page.
d (Select)Enter a 4-digit number
Zooms out.
Zooms in.
Displays the entire page.
Displays a page at 100%.
Adjusts the page width to the display.
Displays the first page.
Displays the previous page.
Displays the next page.
Displays the last page.
Searches for text.
Rotates a page 90° clockwise.
Rotates a page 90° counterclockwise.
*Copies text.→p.308
*“Clipping a page”→p.266
Displays a description of an operation
assigned to a tool bar or a key.
*Displays a single page on the screen.
Zoom
Page
*Displays pages continuously.
*Displays the document in double-page
spread.
*Displays the Bookmark list screen.
Key Description
1Zooms out.
2Displays the entire page.
3Zooms in.
4Displays the previous page.
6Displays the next page.
7Searches for text. →p.264
8Switches view/close of the tool bar and the
scroll bar.
0Displays a description of an operation
assigned to a tool bar or a key.
qSearches next.
wSearches previous.
Icon Description

265
Continued on next page
Data Display/Edit/Management
●Using a bookmark to view a PDF
document
■To use a “bookmark” already set in a PDF
document
zIf bookmarks are already set in a PDF document,
follow the steps below to jump to the location
(page) where a bookmark is set.
1PDF data screen (p.261)o (Tool)
Select “ ”Select a bookmark you
want to view
The location (page) where the bookmark is set
appears.
If there is no bookmark in the PDF document, a
message appears notifying that no bookmark is
found.
If you press o ( ) at the bookmark with ,
other bookmarks under the bookmark appear.
■To use “i-mode bookmark”
zi-mode bookmark allows you to set a bookmark
anywhere you like so that you can immediately
jump to any page or location (up to 10 bookmarks
in one PDF document).
zTo jump to the location (page) where you set an
i-mode bookmark, follow the steps below:
1PDF data screen (p.261)u (FUNC)
“i-mode bookmark”Select an
i-mode bookmark you want to view
The location (page) appears in the same display
mode (zoom, etc.) as the one when you set the
bookmark.
■To add an i-mode bookmark
o (Add)“YES”Enter a title of the i-mode
bookmark
The current display mode (page, zoom, etc.) is
saved as an i-mode bookmark.
■To edit the title of an i-mode bookmark
u (FUNC)“Edit title”Enter a title
■To delete an i-mode bookmark
u (FUNC)“Delete”“YES”
■To delete all i-mode bookmarks set in a
PDF document
u (FUNC)“Delete all”Enter your security
code“YES”
PDF data screen (p.261)/
Document view screen (p.263)
Zoom out……Zooms out a page.
Zoom in……Zooms in a page.
View types……Select the display size of a page from
“Zoom to”/“Fit page”/“Actual size”/“Fit width”.
Go to……Select a page to display from “First page”/
“Previous page”/“Next page”/“Last page”/“Specified
page”.
Search*1……“Searching for text”→p.264
Page layout*2……Select the page display style from
“Single page”/“Continuous”/“ContinuousFacing”.
Display link*1*2……Select a URL, phone number or mail
address to access, make a call or compose an i-mode
message.
* The scroll and tool bars do not appear when you display
the link destination in the document. Press t to return
to the normal PDF data screen.
Hide tool/scr.bars ⇔Show tool/scr.bars……Hides/
shows the tool bar and scroll bar.
Rotate view……Select the direction to rotate the page
from “Clockwise”/“Counterclockwise”.
Bookmark*2……“Using a bookmark to view a PDF
document”→p.265
Copy*1*2……Copies text. →p.308
i-mode bookmark*2……“To use “i-mode bookmark””
→p.265
Mark*1*2……Adds/changes/deletes a mark. Up to 10
marks can be set.
Capture screen*1*2……“Clipping a page”→p.266
Compose message*1*3……Composes an i-mode
message with the PDF document/document attached.
Add desktop icon*1*2*4 →p.94
DL remaining data*1*2*4……“Downloading remaining
PDF data after downloading partially” →p.145
Save*1……Saves the currently displayed PDF document/
document.
Help……Displays a description of an operation assigned
to a tool bar or key.
Document property*1*2……Displays the document
properties.
End……Closes the current screen.
Document info*1……The file name of the PDF data/
document, the date and time it was saved, and other
information are displayed.
Bookmark
Bookmark1
Bookmark2
Bookmark3
Bookmark4
Bookmark5
70% 5/10
××××××××
××××××××
×××××
Quotation 1
266
Data Display/Edit/Management
Delete this*1……Deletes the currently displayed PDF
document/document.
*1 : May not be available when viewing PDF data or
documents attached in composing message or on a site.
*2 : Available only with the PDF data screen.
*3 : This function is unavailable when 2in1 mode is in B
mode.
*4 : Not usable for PDF documents on a microSD card.
●Clipping a page
You can clip a part of the PDF data screen and save
as a JPEG image.
1Display a page to clipo (Tool)
Select “ ”d (Set)“YES”Select
the destination folder
The clipped page is saved.
N
zAn image clipped out of a PDF document that is not
allowed to be output from the FOMA terminal cannot
be output from the FOMA terminal, e.g. attached to a
mail or copied to a microSD card.
zYou may not be able to clip an image if it is prohibited
to copy the PDF document.

267
Music&Video Channel/
Music Playback
■Music&Video Channel
Music&Video Channel .................................................................................................... 268
Setting Up Program ........................................................................................................ 268
Playing Program ............................................................................................................. 270
■Music
Downloading and saving Chaku-Uta-Full® from a Site ................................................... 272
Playing Music.................................................................................................................. 273
Using the Playlist ............................................................................................................ 275
Saving the WMA Data on the microSD Card.................................................................. 276
■Music Player
Using the Music Player ................................................................................ 277
zIn this manual, Chaku-Uta-Full® and Windows Media Audio (WMA) file are described as “Audio
data”.
zYou can play Windows Media Audio (WMA) file and Chaku-Uta-Full® that are protected by the
copyright protection function on the FOMA terminal.
zWhen downloading the music data from websites, carefully read the use condition (permission
and prohibition act, etc.).
zWindows Media Audio (WMA) file that is protected by the copyright protection function plays
with the specific information to your FOMA terminal. When the specific information in your
FOMA terminal is changed caused by malfunction, repair or model change, Windows Media
Audio (WMA) file saved before changing information may not be played.
In the above case, transfer WMA files from your PC after deleting all WMA data in the FOMA
terminal.
zNote that NTT DOCOMO accepts no liability whatsoever for handling of the copy control CD
(CCCD) and the music data that cannot be saved as a Windows Media Audio (WMA) file.
zYou can enjoy the music stored in the microSD card and the FOMA terminal (Phone) within
personal use. Take care not to infringe on the third party’s intellectual property right such as
copyright. Do not copy or move the music data in the microSD card and the FOMA terminal
(Phone) on a PC or other media.
Music Player
Handling the music data
268
Music&Video Channel/Music Playback
Music&Video Channel
Music&Video Channel is a service that a music
program of up to 1 hour is automatically distributed
during the night only by setting your favorite channel
in advance. You can also enjoy the movie programs in
high quality of up to 30 minutes. The program is
updated regularly and you can enjoy the distributed
program anytime such as during commuting time to
work or school.
■Notes on using Music&Video Channel
• Music&Video Channel is a pay service you need
subscription (you need to subscribe to i-mode and
Pake-Houdai/Pake-Houdai full beforehand).
• Some programs may charge you an information fee
besides the Music&Video Channel service charge.
• For details on Music&Video Channel, refer to
“Mobile Phone User’s Guide [i-mode] FOMA
version”.
• After you subscribe to the Music&Video Channel
service, when inserting the FOMA card to a
Music&Video Channel incompatible FOMA
terminal, you cannot use the service. Even in this
case, note that you would be charged the service
fee unless you unsubscribe from the Music&Video
Channel.
• You cannot set or download Music Channel during
international roaming*. Stop the distribution before
you go abroad. Restart the distribution service after
you come back. For details, refer to “Mobile Phone
User’s Guide [i-mode] FOMA version”.
* : Note that the packet communication charges for the
i-mode connection when you attempt to set or
download programs during international roaming.
■BGM play (Background play)
You can view i-mode sites or mails while playing a
Music&Video Channel program.→p.280
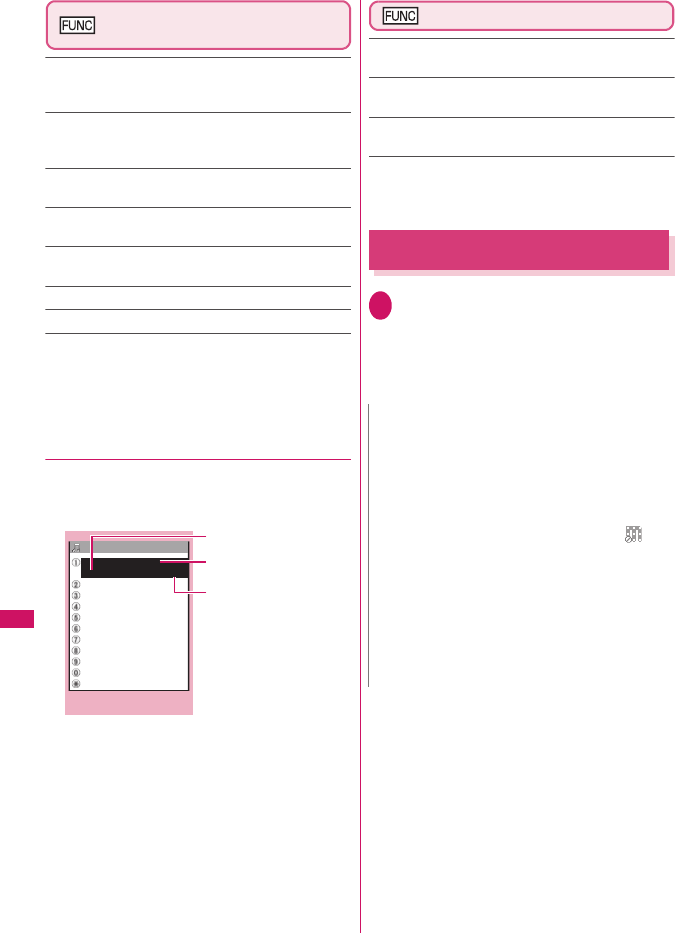
Setting Up Program
When you set a desired program beforehand, the
program data is automatically delivered at night.
1i“MUSIC”“Music&Video
Channel”
The “Music&Video Channel”
screen appears.
2“Set program”Follow on-screen
instructions
For details, refer to “Mobile Phone User’s Guide
[i-mode] FOMA version”.
●Checking/canceling the program setting
1Music&Video Channel screen (p.268)
“Set program”Follow on-screen
instructions
For details, refer to “Mobile Phone User’s Guide
[i-mode] FOMA version”.
N
zYou can set 2 program for Music Channel at a time.
zYou need to add a site providing Music&Video
Channel programs to My Menu (p.141) before setting
a program.
zWhen you have not subscribed to the Music&Video
Channel service, the message notifies you that the
service is not subscribed. When you select
“Music&Videoチャネルのお申し込みへ” (Subscribe to
the Music&Video Channel) on the screen, you can
subscribe to the Music&Video Channel service.
N
zResetting the program does not delete the added My
Menu.
Music&Video Channel
Music&Video ch
○○ランキング
Set program
Program list
About this service
○○ヒットチャート
Function menu
p.270
269
Music&Video Channel/Music Playback
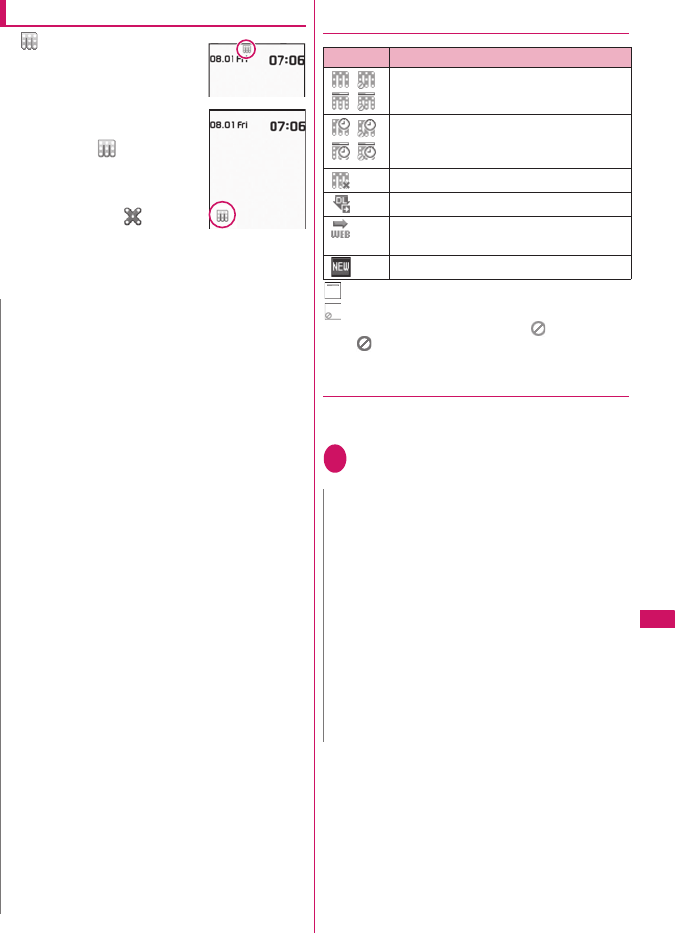
After setting up the program
z“ ” appears on the standby
screen 12 hours before the
downloading starts.
zThe program is automatically
downloaded at night, and the
shortcut icon “ ” indicating
Music&Video Channel is
updated appears after
successful downloading.
The shortcut icon “ ”
indicating Music&Video
Channel is not updated appears when the
downloading fails. In this case, you can download
the program manually.→p.269
●Guide to the icons on the Music&Video
Channel screen
: Partially downloaded program
: Program with playback restriction (the icon turns to
more light color overall, and then “ (gray)” turns to
“ (red)” when the playback count, period or limit
expires)
●Downloading a program manually
When the download of Music Channel is failed, you
can download the program manually.
1Music&Video Channel screen (p.268)
Select a program“YES”
N
zIf the communication is interrupted, the FOMA
terminal attempts to resume the downloading up to 5
times at 3-minute intervals.
zYou can save 2 program. When a new program is
downloaded, the previously downloaded program is
deleted and you cannot play it. Save the program to
the Data Box if you do not want to lose. →p.270
zYou cannot copy the downloaded program.
zYou cannot save the downloaded program to the
microSD card.
zSince downloading a program may take time, make
sure that the FOMA terminal is fully charged and used
in an area where the signal status is good.
zDownloading failure is caused by the following
reasons: “out of the service area”, “the terminal is
turned off”, “no sufficient battery”, or “combination of
Multitask/Multi access”, etc. In case that the
downloading is failed for those reasons, the FOMA
terminal will download the program at the next night.
When download is interrupted, the FOMA terminal
may not download the program.
zThe FOMA terminal cannot download a program
automatically when you insert a different FOMA card
or after you initialize the terminal. Set programs again
from the Music&Video Channel screen.
zWhen you eject the FOMA card from the FOMA
terminal that you set the program, and insert the card
into other Music&Video Channel compatible FOMA
terminal, the program is not downloaded
automatically. When you select “Set program” on the
Music&Video Channel screen, the FOMA terminal
updates its program settings automatically and the
program can be downloaded automatically.
zThe program data in the program folder may be
deleted when subscription to Music&Video Channel or
i-mode is canceled.
Icon Description
The normal program
The program corresponding to a
synchronized play with a broadcasting
wave
Program downloaded in failure
The program downloaded from sites
Program included information for site
access (URL)
The program which has not been played
N
zThe shortcut icon indicating that update of
Music&Video Channel is failed disappears once you
display the “Music&Video Channel” screen. You can
manually download a program that you failed to
download even if the shortcut icon disappears.
zWhen download is interrupted, the partly downloaded
program until the interruption can be saved. You can
operate the FOMA terminal to resume downloading for
the remaining data except during specific hours.
zYou cannot re-download a program whose playback
restrictions have expired. You cannot update until the
next distribution date.
zDuring certain hours of a day, you may not be able to
download a program manually.
270
Music&Video Channel/Music Playback
Music&Video Channel screen
(p.268)
Chapter list……Displays the list of title, artist and
playback time of each chapter.
Select a chapter to play it *1. “Chapter list”→p.270
Move program……Select a folder, and move the program
to the user-created folder of the Music&Video channel in
the Data Box*2.
Program info……Displays the program title, the play
count, time limit, or period.
Program image……Displays the images stored in the
program*3.
Connect to URL……Accesses the site using the Web To
function if the URL is included in the program.
Add shortcut →p.94
Delete……Deletes a program.
*1: You cannot select the chapter of which all of the data are
not downloaded.
*2: You can not move the partially downloaded program and
the program corresponding to a synchronized play with a
broadcasting wave.
*3: When an animation GIF image is stored, the animation is
played. You cannot save program images.
●Chapter list
Select “Chapter list” on the function menu of the
Music&Video Channel screen to display the chapter
list of the program.
Chapter list screen (p.270)
Chapter info……Displays the chapter title and the
playback time.
Chapter image……Displays the images stored in the
chapter*.
Connect to URL……Accesses the site using the Web To
function if the URL is included in the program.
* : When an animation GIF image is stored, the animation is
played. If the program is made up of i-motion, the image is
not displayed. Note that images stored in the chapters
cannot be saved.
Playing Program
1Music&Video Channel screen (p.268)
Select the program
The “Music Player” screen appears and the
music playback starts.
“Guide to Music Player” screen→p.277
“Operations on the Music Player” screen→p.278
TOP1−TITLE XXXXX
XXXX
4:00
TOP2−TITLE XXXXX
TOP3−TITLE XXXXX
TOP4−TITLE XXXXX
TOP5−TITLE XXXXX
TOP6−TITLE XXXXX
TOP7−TITLE XXXXX
TOP8−TITLE XXXXX
TOP9−TITLE XXXXX
TOP10−TITLE XXXXX
TOP11−TITLE XXXXX
MUS
I
C CHANNEL TOP11/2
Chapter list
Artist
Title
Playback time
Function menu
p.270
N
zWhen earphones are connected, the sound comes
only from the earphones regardless of the “Headset
usage setting”.
zWhen you select the program that you stop the
playback last time, the playback starts from the
beginning of the chapter where you stop the playback.
zSome programs have playback restrictions. “ ” is
displayed at the beginning of the title for the program
with restrictions on the play count, period or time limit.
The program restricted on the playback period cannot
be played before or after the period. If the battery pack
is removed from the FOMA terminal for a long period
of time, the date and time settings stored on the
FOMA terminal may be reset. In this case, the
program restricted on the playback period or time limit
cannot be played.
271
Music&Video Channel/Music Playback
●The program corresponding to a
synchronized play with a broadcasting
wave playback
When you play the program, you can play the same
content with a broadcasting wave by accepting the
synchronization that flows by the broadcasting wave.
zThe program must be downloaded beforehand.
zYou can play the program in the same way with a
usual program, but it cannot be played before or
after the playback period.
Playing the program in the Data Box
1i“DATA BOX”“Music&Video
Channel”
The “Folder list” screen
appears.
The Music&Video Channel
folder→p.224
2Select a folder
The “Program list (Preview)”
screen appears.
Guide to the program list
screens→p.271
3Select the program
The “Music Player” screen appears and the
program playback starts.
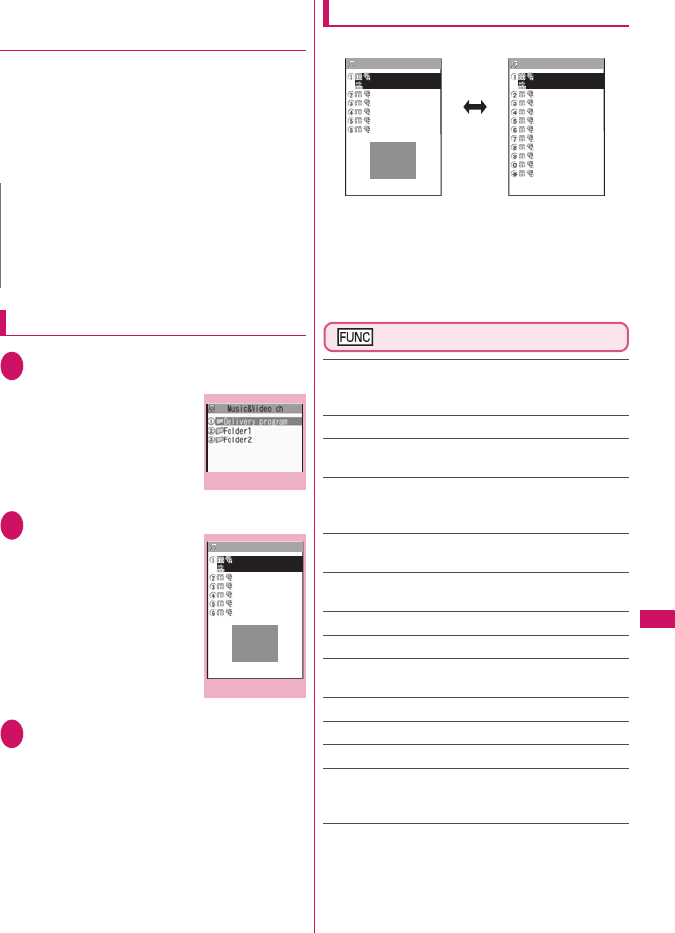
Guide to the Preview/List displays
zThe icon for the Program list screen→p.269
■Preview display
The screen lists 6 movies and a preview image from
the selected movie under the list.
■List display
11 programs are listed on the screen.
Program list screen (p.271)
Chapter list……Displays the list of title, artist and
playback time of each chapter.
Select a chapter to play it *1. “Chapter list”→p.270
Edit title……Edits the program title.
Move program*2……Select a folder, and move the
program to the user-created folder.
Move*3……Selects from “Move this/Move selected/Move
all” and moves the program to the other folder you select.
“About multiple-choice”→p.38
Program info……Displays the program title, the play
count, time limit, or period.
Program image……Displays the images stored in the
program. *4
Sort……Sorts programs by the specified criteria.
List setting……Specifies how to list the programs.
Connect to URL……Accesses the site using the Web To
function if the URL is included in the program.
Memory info……Displays the amount of the stored program.
Reset title……Resets the title to the default.
Delete*2……Deletes a program.
Delete*3……Selects the deleting method from “Delete
this/Delete selected/Delete all”.
“About multiple-choice”→p.38
*1: You cannot select the chapter of which all of the data are
not downloaded.
*2: Available only with the program folder.
*3: Available only with the user-created folder.
*4: When an animation GIF image is stored, the animation is
played. You cannot save program images.
N
zThe playback time is connected with the time setting
by the auto time adjust function, so that the playback
time cannot be changed even if you manually change
the time and date on the FOMA terminal.
zYou cannot play the partially downloaded program.
Folder list
Function menu
p.253
Program list (Preview)
○○ヒットチャート
○○ランキング
○○トップ10
ランキング○○
○○
Video
チャート
ドコモチャネル
1/2
Folder1
Function menu
p.271
○○ヒットチャート
○○ランキング
○○トップ10
ランキング○○
○○
Video
チャート
ドコモチャネル
1/2
○○ヒットチャート
○○ランキング
○○トップ10
ランキング○○
○○
Video
チャート
ドコモチャネル
ドコモランキング
○○チャート
Video
○○
○○ランキング
チャート○○
1/2
p (Disp SW)
Folder1 Folder1
Preview List
272
Music&Video Channel/Music Playback
Downloading and saving
Chaku-Uta-Full
®
from a Site
zYou can store up to 100 Chaku-Uta-Full® on the
FOMA terminal (the actual number of data to be
stored may be lower depending on the stored file
size of various data).
1Sites screen (p.136)Select Chaku-
Uta-Full®
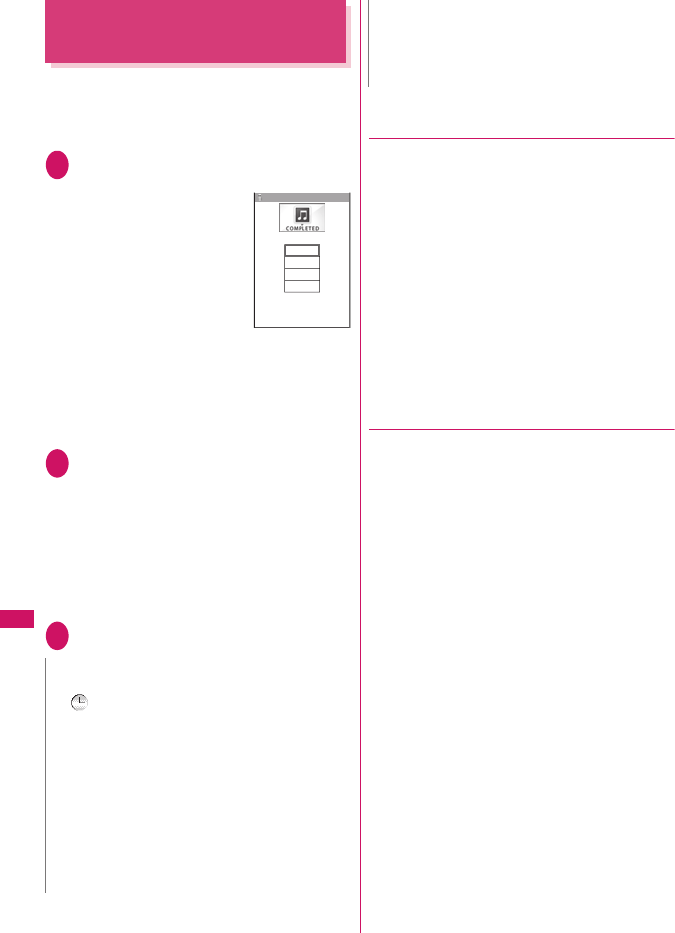
When data downloading is
completed, the “Data
acquisition” screen appears.
■To cancel downloading
t
■To play the downloaded
Chaku-Uta-Full®
“Play”
“Guide to Music Player”
screen→p.277
“Operations on the Music Player” screen→p.278
■To display information about Chaku-Uta-
Full®
“Property”
2“Save”“YES”
■When only a part of the data can be saved
When downloading is interrupted because of the
signal condition or when the downloading is
quitted, you may be able to save the downloaded
portion only. In such a case, you can save only
the downloaded portion.
■To cancel saving
“NO”
3Select a destination folder
●Downloading the remaining data of
partially downloaded Chaku-Uta-Full®
When you select Chaku-Uta-Full® which is
downloaded partially from the saved folder, a
confirmation message about downloading the
remaining data appears. Select “YES” to connect to
the site and download the remaining data.
When you download and save all data, the partially
saved data are deleted.
zIcons in the “Music list” screen indicates the data
downloading status.→p.273
zIf the playback period or limit of Chaku-Uta-Full®
which is partially downloaded is expired, you
cannot download the remaining data (except for
Uta-hodai tracks). You can delete the partially
saved data when downloading the data.
●
Updating playback restrictions for Uta-
hodai tracks
When you play a playlist or folder contains Uta-hodai
tracks whose playback restrictions have expired and
can be updated, a message to require the update of
the playback restrictions appears. Select “YES” to
connect to the site and update the playback
restrictions (packet communication charge apply).
When you select “NO”, you cannot play the data.
When there are two or more Uta-hodai tracks whose
playback restrictions can be updated, select an online
music distribution site you want to update.
zUta-hodai is music data that is allowed to play while
you subscribe to the service of a contents provider.
The playback period is specified by the license
information downloaded with the music data. Music
data whose playback period has expired can be
played back again by updating the license. The
license information may include playback extension
period in addition to the playback period. You can
play the music data without updating the playback
period during the playback extension period, but
the data cannot be played after the playback
extension period has elapsed.
If you download a music data without updating the
playback period, the music data cannot be played
until it is saved.
zThe packet communication charges for the update
of the playback period during international roaming
is not covered by Pake-Houdai or Pake-Houdai full.
N
zSome Chaku-Uta-Full® have the playback restrictions.
“ ” is displayed at the beginning of the title for the
Chaku-Uta-Full® with restrictions on the play count,
period or time limit. The Chaku-Uta-Full® restricted on
the playback period cannot be played before or after
the period.
zIf the battery pack is removed from the FOMA terminal
for a long period of time, the date and time settings
stored on the FOMA terminal may be reset. In this
case, Chaku-Uta-Full® restricted on the playback
period or time limit cannot be played.
zYou cannot download Chaku-Uta-Full® which exceeds
5M bytes or whose size is unknown.
Cool talk
Data acquisition
Play
Save
Property
Back
Data acquisition
zYou can save Chaku-Uta-Full® to the “Screen memo”
using “Add screen memo” on the function menu of the
data acquisition screen (p.272), then start playback
from the screen memo. →p.143
N
273
Continued on next page
Music&Video Channel/Music Playback
zWhen you perform the operation overseas, the time
limit may be expired before or after other than the
displayed period.
zIcons in the “Music list” screen indicates the status
of the playback restrictions.→p.273
zSince updating playback restrictions is performed
while connecting a site, packet communication
charges will apply.
zIt is recommended to initialize your FOMA terminal
when you exchange the FOMA card.
Playing Music
zYou can store music in a playlist and play your
favorite music in your favorite order. →p.275
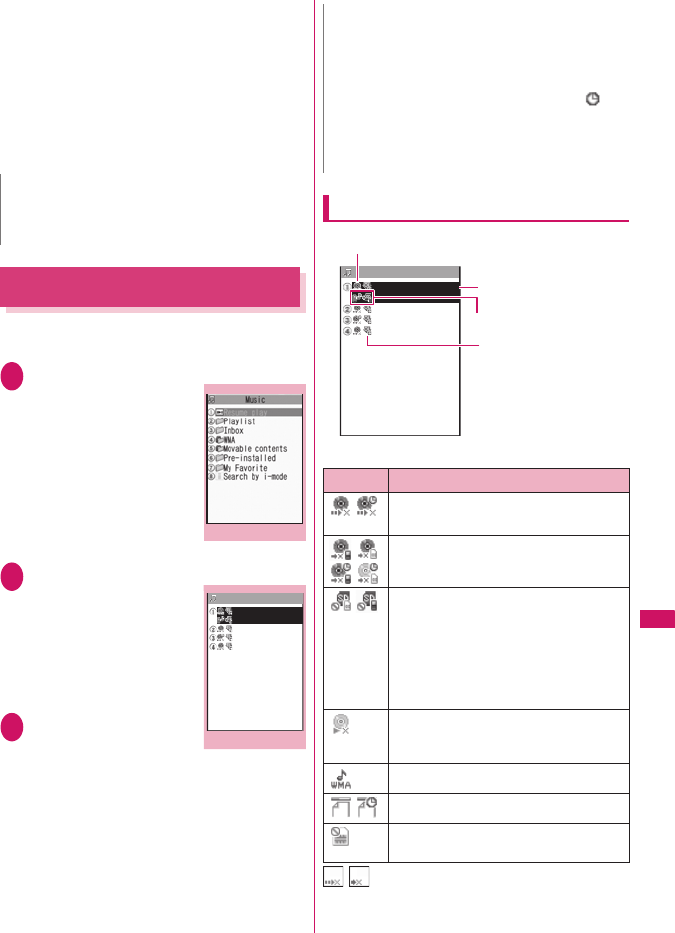
1i“DATA BOX”“Music”
The “Folder list” screen
appears.
2Select a folder
The “Music list” screen
appears.
“Guide to Music list”→p.273
■To search music by
i-mode
“Search by i-mode”
“YES”
3Select a music file
The “Music Player” screen
appears and the music
playback starts.
“Guide to Music Player” screen→p.277
“Operations on the Music Player” screen→p.278
■Chaku-Uta-Full® that is downloaded
partially
A confirmation message about downloading the
remaining data appears. Select “YES” to
download the remaining data.→p.272
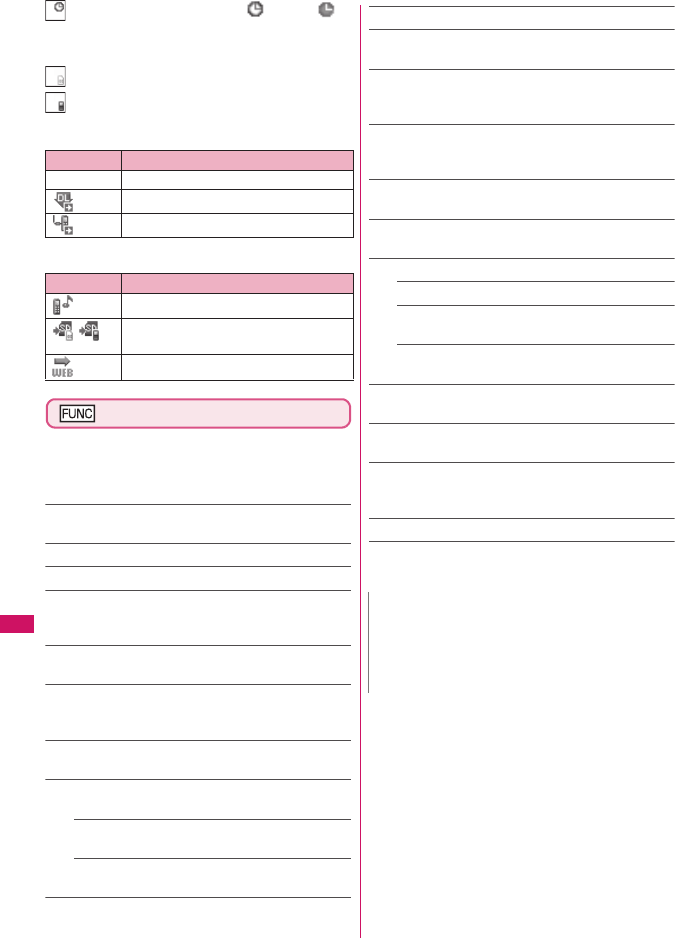
Guide to Music list
■File type icon
: Music with the file restriction
N
zWhen the Uta-hodai track which is set to the ring tone
or alarm tone is disabled to be played, the default
demo sound, ring tone or alarm tone is played.
Folder list
Function menu
p.253
Music list
My Favorite
DoCoMo theme − DoC
Train − DoCoMo
KeitaiTechno − DoC
Cool talk − DoCoMo
Function menu
p.274
N
zWhen earphones are connected, the sound comes
from the earphones even when manner mode is set. If
you disconnect earphones when manner mode is set,
the playback is paused.
zSome music files have playback restrictions. “ ” is
displayed at the beginning of the title for the music file
with restrictions on the play count, period or time limit.
The music files restricted on the playback period
cannot be played before or after the period.
Icon Description
Music stored on the FOMA terminal
(Phone)
Music stored on the microSD card and can
be moved to the FOMA terminal (Phone)
Music stored on the microSD card and
prohibited to be moved to the FOMA
terminal (Phone)
* Also displayed in the Playlist music list
screen of the FOMA terminal (Phone) when
the microSD card which contains the music
file stored in the playlist is not inserted to
the FOMA terminal.
Music that cannot be played or music with
playback restrictions which cannot be
updated
WMA music
Partially downloaded music
Music to which the FOMA card security
function applied
My Favorite
DoCoMo theme − DoC
Train − DoCoMo
KeitaiTechno − DoC
Cool talk − DoCoMo
Retrieval method icon
File type icon
Title - Artist
Allowable operation icon
274
Music&Video Channel/Music Playback
: Music with playback restriction (“ ” turns to “ ”
when the playback count, period or limit expires)
Playback restrictions of music with the pale blue icon
can be updated
: Playable only when the FOMA card being used was
also used to save the music
: Playable only when the model and FOMA card being
used were also used to save the music
■Retrieval method icon
■Allowable operation icon
Music list screen (p.273)
zThe available functions and items listed in the
function menu vary depending on the selected
folder. The items are also different when searching
or sorting.
Add to playlist……Adds the music to the end of the
playlist.
Create playlist→p.275
Move to microSD*1 →p.250
Move……Selects from “Move this/Move selected/Move
all” and moves the music to the other folder you select.
“About multiple-choice” →p.38
Edit information……Edits the title, artist name, album
name, etc.
Edit disp. title……Edits the title of music displayed on
the music list screen. You can enter up to 9 double-byte or
18 single-byte characters.
Reset info……Resets the information to the status when
the “Music information” was retrieved.
Select ring tone……Sets the music as a ring tone.
→p.82
Fullsong ring tone……Sets the whole music as a
ring tone.
Point ring tone……Selects the part of the song set
as a ring tone using v.
Search*1……Searches music in a selected criteria.
Sort*1……Sorts programs by the specified criteria.
List setting……Selects a music-list format from “List/
List+image”.
File property……Display a music file name, a file save
date and whether the music can be moved to the microSD
card.
Lyric……Displays the lyric of the music. If the lyrics
cannot be displayed on a single page, you can switch the
page with v.
Jacket image……Displays the jacket image of the music.
If there are two or more images, use v to switch images.
Memory info……Displays the amount of the stored
music.
Repeat setting
OFF (default)……Does not repeat the playback.
All repeat……Repeats the playback of all music in
the folder.
Single repeat……Repeats the playback of the
music which is highlighted.
Shuffle (default: OFF)……Sets ON/OFF of the shuffle
playback.
Connect to URL……Accesses the site using the Web To
function if the URL is included in the music.
Delete……Selects the deleting method from “Delete this/
Delete selected/Delete all”.
“About multiple-choice” →p.38
Move to Phone*2→p.250
*1: Unavailable in the music list screen of the movable
contents folder or WMA folder.
*2: Only available for the movable contents folder.
Icon Description
None Pre-installed music
Music downloaded from a site
Music downloaded from a PC
Icon Description
Music that can be set as a ring tone
Music that can be moved to the microSD
card
Music that can use the Web To function
N
<Move to microSD>
zTo check whether a Chaku-Uta-Full® can be moved,
select “File property” to see the music information.
Some Chaku-Uta-Full® are movable only among the
same model.
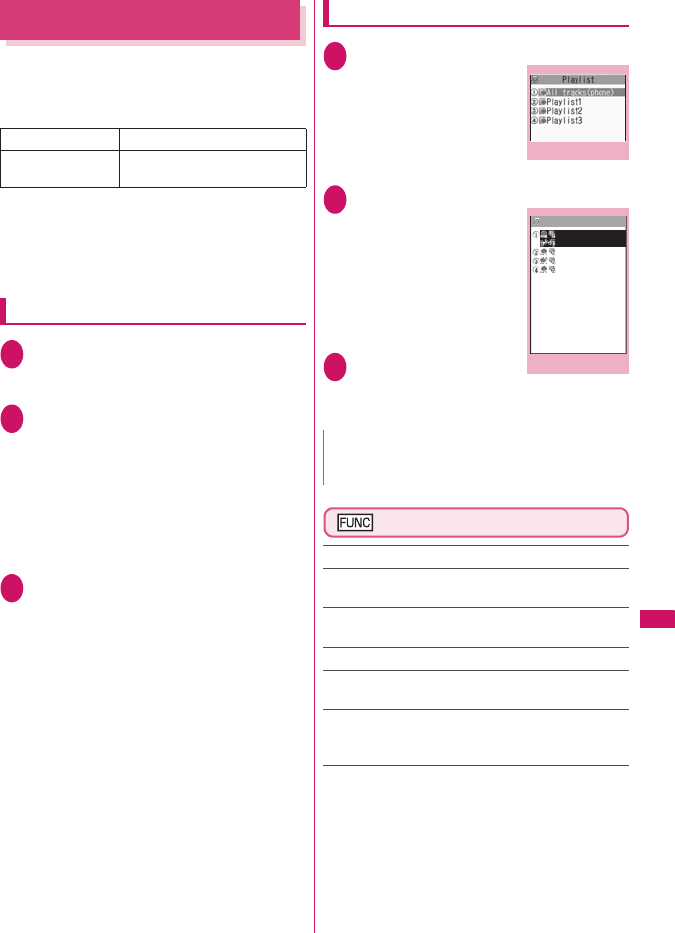
275
Music&Video Channel/Music Playback
Using the Playlist
You can store music in a playlist and play your favorite
music in your favorite order.
zThe number of tracks and playlists you can store on
the FOMA terminal (Phone) are as follows:
* : You can store up to 99 tracks for 1 playlist (except for a list
of all tracks).
zYou can store the music (Chaku-Uta-Full®) stored
on the FOMA terminal (Phone), the music (Chaku-
Uta-Full®) stored on the microSD card and WMA
data in the same playlist.
Creating a Playlist
1Playlist list screen (p.275)/Music list
screen (p.273)u (FUNC)“Create
playlist”
2Select a folderUse c to select
□(checkbox)o (Finish)
Multiple music can be stored to a playlist.
■Music list screen
Select “Set this”, “Set selected” or “Set all”
instead of selecting a folder. “About multiple-
choice”→p.38
When selecting “Set all”, stores all music files in
the music list screen to a playlist.
3Enter the playlist name
The playlist is created and the “Playlist music
list” screen appears.
■To start playback
d (Play)
Playing a Playlist
1Folder list screen (p.273)“Playlist”
The “Playlist list” screen
appears.
■To play the playlist
immediately
Highlight the playlist to
playo (Play)
2Select a playlist
The “Playlist music list”
screen appears.
■When “All tracks
(phone)” is selected
The playlist which contains
all music (playable music
files) stored on the FOMA
terminal (Phone) appears.
3d (Play)
The playback of the playlist
starts and the music are
played in the stored order.
Playlist list screen (p.275)
Create playlist→p.275
Edit playlist name……Edits the playlist name. You can
enter up to 128 double-byte or 256 single-byte characters.
Copy to playlist……Creates a copy of the playlist in the
playlist list.
Search……Searches music in a selected criteria.
Playlist info……Displays the playlist name, number of
tracks in the playlist and the playback time of the playlist.
Delete playlist……Selects the deleting method from
“Delete this/Delete selected/Delete all”.
“About multiple-choice” →p.38
Tracks Up to 100
Playlists*Up to 21 (including a list of all
tracks)
N
zWhen all music files stored on the playlist are deleted,
the playlist is also deleted.
Playlist list
Function menu
p.275
Playlist music list
Playlist1
DoCoMo theme − DoC
Train − DoCoMo
KeitaiTechno − DoC
Cool talk − DoCoMo
Function menu
p.276
276
Music&Video Channel/Music Playback
Playlist music list screen
(p.275)
Create playlist→p.275
Edit playlist
Sort playlist……Selects the position to move to and
rearranges the music.
Add music……Selects the playlist to move to and
add the music to the last of the other playlist.
“About multiple-choice”→p.38
Release settings……Selects from “Release this/
Release selected/Release all” to release the music
from the playlist.
“About multiple-choice”→p.38
Search……Searches music in a selected criteria.
Sort……Sorts music in the playlist in a selected criteria.
List setting……Select “List only” or “List w/ images”.
File property……Music file name and file save date and
time are displayed.
Lyric……Displays the lyric of the music. If the lyrics
cannot be displayed on a single page, you can switch the
page with v.
Jacket image……Displays the jacket image of the music.
If there are two or more images, use v to switch images.
Repeat setting
OFF (default)……Does not repeat the playback.
All repeat……Repeats the playback of all music in
the playlist.
Single repeat……Repeats the playback of the
playing (paused) music.
Shuffle (default: OFF)……Sets ON/OFF of the shuffle
playback.
Connect to URL……Access the site using the web to
function if the URL is included in the music.
Saving the WMA Data on the
microSD Card
“Windows Media Player” enables you to convert the
music CD data to WMA data and save it on the
microSD card.
zThe data format, number of playlists and tracks that
can be played on the FOMA terminal are as
follows:
* : Up to 999 music files can be stored on one playlist.
zWindows Media Player 10/11
Use Windows XP Service Pack 2 or a later version
to use Windows Media Player 10/11. Use Windows
Media Player 11 for Windows Vista. For how to
operate the software, refer to Windows Media
Player 10/11 help.
zIf you do not have a microSD card, you can
purchase one at your local electrical-appliance
store.
1Prepare the following
• PC which satisfies the operational
environment for “Windows Media Player”
• microSD card
2USB mode setting screen (p.251)
“MTP mode”
When set to “MTP mode”, “ ” appears.
3Connect the FOMA terminal and a PC
with the FOMA USB Cable with Charge
Function 01/02
“ ” appears when the microSD card is
inserted and the FOMA USB Cable with Charge
Function 01/02 is connected during the MTP
mode.
4Launch “Windows Media Player” on
the PC and convert the music data
such as music CD data to WMA format
It may take some time for “Windows Media
Player” to recognize the FOMA terminal.
5Transfer WMA data stored on the PC to
the microSD card
N
<Edit playlist>
zReleasing music from the playlist does not delete the
original data.
File format WMA9 (Windows Media Audio 9
Standard)
Bit rate 32 to 192 kbps
DRM Windows Media DRM10 for
Portable Devices
Tracks Up to 999
Playlists*Up to 100 (including a list of all
tracks)
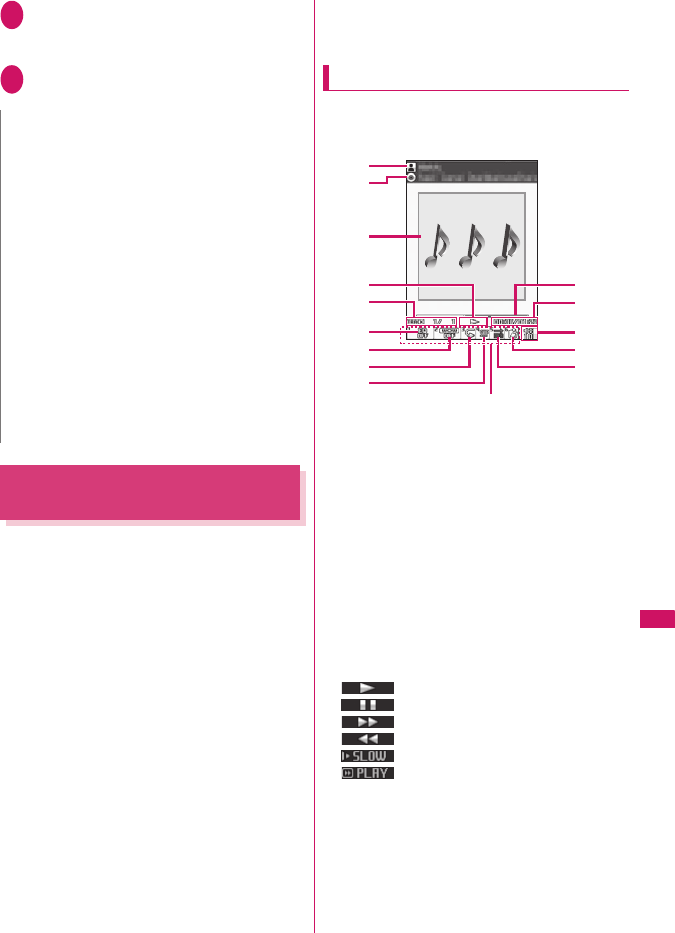
277
Continued on next page
Music&Video Channel/Music Playback
6Disconnect the FOMA USB Cable with
Charge Function 01/02 after the data
transfer
7Set the USB mode of the FOMA terminal
back to “Communication mode”
Using the Music Player
<Music Player>
Using the Music Player, you can play Chaku-Uta-
Full®, i-motion, the Music&Video Channel program
and music stored in the microSD card.
zBesides the pre-installed Chaku-Uta-Full®, you can
play the i-motion or Chaku-Uta-Full® downloaded
from i-mode sites, the Music&Video channel
program, or music data transferred from music CDs.
“Downloading i-motion”→p.152
“Downloading and saving Chaku-Uta-Full® from a
Site”→p.272
“Setting Up Program”→p.268
“Saving the WMA Data on the microSD Card”
→p.276
zYou can enjoy the stereo sound by connecting the
flat-plug stereo earphone set (optional). To connect
a flat-plug stereo earphone set to the FOMA
terminal, the Earphone Plug Adapter for External
connector terminal is required. →p.25
zWhen earphones are connected, the sound comes
only from the earphones regardless of the
“Headset usage setting”.
■BGM play (Background play)
You can use mails or display i-mode sites while
listening to music with the Music Player. →p.280
Guide to Music Player screen
zFunction menu for the Music Player screen→p.279
zIf setting to play i-motion on the Full screen,
i-motion is played on the landscape (full) screen.
①Artist name
Music: Artist name
Music&Video Channel : Program title
i-motion : Creator
②Title
Music : Title
Music&Video Channel : Chapter title and Artist
name
i-motion : Title
③Image/Movie
Music : Jacket image
Music&Video Channel : Chapter image or
Program movie
i-motion : Movie
④Playback status
: During playback
: During pause
: During fast forward
: During rewind
: Slow playback
: Fast playback
⑤Tra c k
Music : Playing track number/Total number of
tracks in the folder
Music&Video Channel : Playing chapter number/
Total number of chapters
i-motion : Playing file number/Total number of files
in the folder
N
zYou can also use the Napster® application to save the
music data.
• You can download the Napster® application from the
following webpage:
http://www.napster.jp/
• For detailed information on the Napster®
application, visit the following webpage:
http://www.napster.jp/support/
zWMA data moved to the microSD card in another
FOMA terminal may not be displayed/played on the
FOMA SO706i.
zWhen you use a microSD card to which WMA data
has been transferred in another FOMA terminal, it may
not be recognized by the PC even though you change
to MTP mode. In this case, perform “Delete all” in the
function menu for WMA folder list screen, or format the
microSD card (p.251). Note that the all data is deleted
when you format the microSD card.
zWMA data cannot be set as the ring tone.
①
③
⑤
④
②
⑩
⑪
⑥
⑦
⑧
⑨
⑫
⑬
⑭
⑮
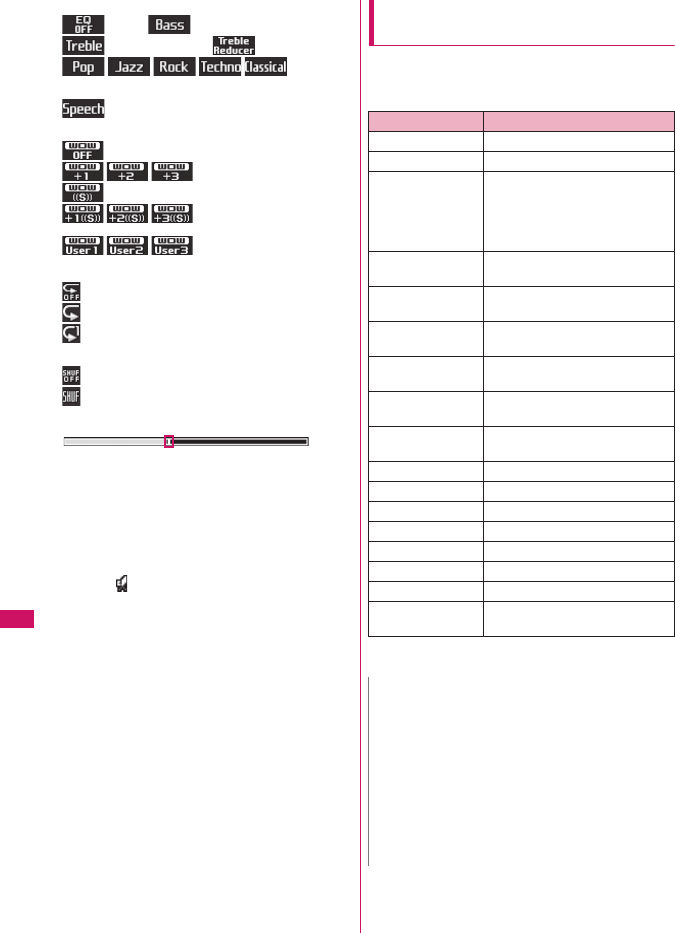
278
Music&Video Channel/Music Playback
⑥Sound quality (Equalizer)
: OFF : Bass amplified
: Treble amplified : Treble reduced
: Suitable
for each
genre
: Suitable for voice
⑦Sound effects (SRS_WOW)
: OFF
: Bass adjusted (+1 to +3)
: Surround
: Bass adjusted (+1 to +3)/
Surround
: User setting 1 to 3
⑧Repeat
: OFF
: All repeat
: Single repeat
⑨Shuffle
: OFF
: ON
⑩Playback position display
Displays the marker in the playback position
display (moving the marker with v and pressing
d (Play) during pause starts playback from the
position).
⑪Elapsed time (minutes: seconds)/Total playback
time (minutes: seconds)
⑫Volume (Level 0 to Level 20)
Displays in the Manner mode
⑬Select the music/file/chapter
Change the music/file/chapter to play
⑭Web To function available
Accesses the URL included in the music or
program.
⑮Setting menu→p.279
Operations on the Music Player
screen
zThe following operations may not work depending
on the type of music, the program of Music&Video
Channel and i-motion.
* : Plays the previous or next music regardless of the order in
the folder or playlist during shuffle playback.
Key operation Operation
dPauses/Resumes playback
cAdjusting the volume
hPlay from the beginning
Plays the previous music/chapter/
movie when pressed within 1
second from the beginning of the
music*
jPlay the next music/chapter/
movie*
h (1 second or
longer)
Rewind
j (1 second or
longer)
Fast forward
v during pause Moves the marker in the playback
position display
p
6Select the music/file/chapter to
play
q
wSwitches the image when multiple
images are stored
tEnds
oUses the setting menus→p.279
1Sets the Equalizer
2Sets the SRS_WOW
3Sets the Repeat
4ON/OFF for Shuffle
5Connect to URL
9Switch the screen mode between
Normal and Full screen
N
zThe volume can be selected between Level 0 and
Level 20 (default: Level 10), and the setting is retained
next time the i-motion is played.
zThe volume set for Music Player does not affect the
ring volumes set in “Ring volume”.
zOn the Music&Video Channel program, if some
playback operations are restricted, the operations are
not available (operation with v, mainly).
zRewind and Fast forward is unavailable depending on
the data.

279
Continued on next page
Music&Video Channel/Music Playback
●Using the setting menus
1During Play/Pause/Stopo (MENU)
The cursor moves to the setting menu.
“Guide to Music Player” screen→p.277
2Use v to select the function , then d
(Select)
You can also set the function using 1 to 6.
→p.278
Press t to return to the play/pause/stop.
●When a flat-plug stereo earphone set,
etc. is connected
You can use the switch to perform the following
operations:
Music Player screen (p.273)
zThere is some unavailable functions depending on
the type of music, the program of Music&Video
Channel and i-motion.
Action setting
Sound effect……Sets the sound quality and effect.
Equalizer (default: OFF)……Sets the sound
quality.
SRS_WOW (default: OFF)……Adds sound
effects (i-motion with sound effect can set
→p.226).
■To select the user setting
Highlight the user setting 1 to 3
o (Detail)Set with bd (Set)
Repeat setting
OFF……The FOMA terminal does not repeat
the playback.
All repeat……Repeats the playback of all
music in the folder.
Single repeat……Repeats the playback of the
playing (paused) music.
Shuffle……Turns the shuffle playback ON/OFF.
Screen setting……Sets how to display the player
screen.
Normal screen mode……Plays on the portrait
screen.
Full screen mode……Plays on the landscape
screen (Full screen).
Change skin……Sets the design of the Music
Player screen.
Set image disp.……Sets the display size of images
in the normal screen mode.
Normal……Displays the image in the actual
size.
Fit in display……Displays the image fit in the
screen regardless of the image size.
Set repeat play……Specifies whether to play files
continuously in the folder.
Play menu
Fast……Plays fast. Press o (Play) to return to
normal playback.
Slow……Plays slowly. Press o (Play) to return to
normal playback.
Position to play……Specifies the part of the music
moving the marker in the playback position display
with v and plays only the part of the music. This
function is not available depending on the music.
Chapter list……Displays the chapter list (p.270).
Select a chapter to play it.
Detail Info
File property……Displays a music file name, a file
save date and whether the music can be moved to
the microSD card.
i-motion info……Displays an i-motion file name, a
file save date and whether the i-motion can be
moved to the microSD card.
Chapter info……Displays the chapter title and the
playback time.
Lyric……Displays the lyric of the music. If the lyrics
cannot be displayed on a single page, you can
switch the page with v.
Jacket image……Switches the jacket image of the
playing music using v.
Chapter image……Displays the images/animations
stored in the played chapter.
Image……Displayed only on i-motion, but displayed
in gray and not available.
Switch operation Operation
Once Play/Pause each time you press
the switch
Twice in a row
during playback
Play the next music/chapter
Three times in a row
during playback
Play from the beginning
Plays the previous music/
chapter when pressed within 3
second from the beginning of
the music.
1 second or longer
during playback
Quits the Music Player
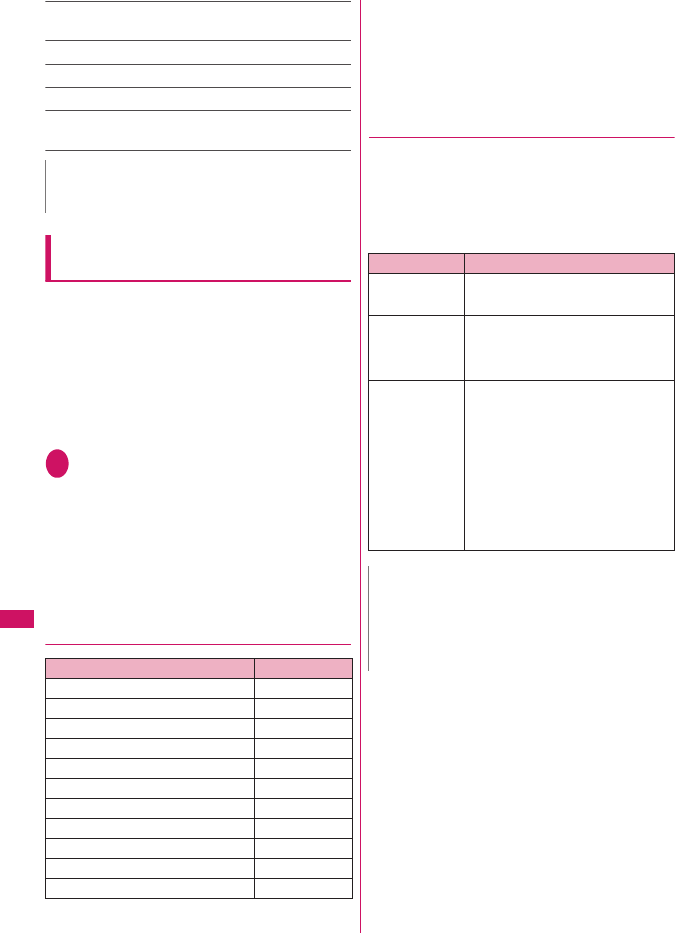
280
Music&Video Channel/Music Playback
Connect to URL……Accesses the site using the Web To
function if the URL is included.
Change music……Changes the track to play.
Select file……Changes the file to play.
Chapter list……Changes the chapter to play.
Help……Displays a description of an operation assigned
to a key.
Using Other Functions During Music
Playback
<Switch to BGM>
You can play the music and Music&Video Channel
program while using other functions.
zWhen you connect the flat-plug stereo earphone
set (optional) or the flat-plug earphone/microphone
with switch (optional), etc. to the FOMA terminal,
use the Earphone Plug Adapter for External
connector terminal. →p.25
zYou cannot use the BGM in the Music&Video
Channel programs of i-motion.
1Music Player screen (p.277)y
“Switch to BGM”
The standby screen appears and you can use
other functions.
■To quit the Music Player
“Quit music”/“Quit Music&Video ch”
■ To quit the BGM play
Change a task to the music group, and stop the Music
Player. →p.283
●Functions available during BGM play
○: Available △: Partially available ×: Unavailable
*1: When “Receiving setting” of mail is set to “Alarm
preferred”, the music playback pauses when receiving a
mail (even when set to “Operation preferred”, the music
playback pauses when receiving a mail while the standby
screen is displayed). When composing i-mode mail, some
functions such as “Activate camera” are not available.
*2: Activating i-αppli pauses playback.
●Playing when the FOMA terminal is
folded
The side key enables you to operate the Music Player
with the FOMA terminal folded.
zMusic tracks and Music&Video Channel programs
can be played with the FOMA terminal folded.
However, only music tracks can activate with the
FOMA terminal folded.
N
<Chapter image>
zImages stored in the chapters cannot be saved.
Function Availability
Voice/Videophone Calls ×
Mail ○*1
i-mode ○
i-αppli △*2
Data Box △
LifeKit △
Phonebook ○
Own data ○
Settings △
Service △
Osaifu-Keitai/ToruCa ○
Key operation Operation
a (▲マナー )
s (▼MUSIC)
■During playback or pause
Adjusting the volume
a (▲マナー )
(1 second or
longer)
■During playback or pause
Play from the beginning
Plays the previous music/chapter
when pressed continuously
s (▼MUSIC)
(1 second or
longer)
■During playback or pause
Play the next music/chapter
■While the Music Player is not
active (the standby screen is
displayed)
Activates the Music Player and plays
the music stopped at the last
playback
■During the BGM play (on the
standby screen)
Quits the Music Player
N
zYou cannot activate the Music Player by s ( ▼MUSIC)
during Manner mode (however, it is possible when
earphones, etc. are connected).
zWhen the battery is low, the Music Player with
s (▼MUSIC) is not activated.

281
Convenient Functions
Multi Access.................................................................................................. 282
Multitask............................................................................................................. 283
Assigning a Function to the FUNC Key ............................................ 284
Sorting the Main Menu ................................................................................................... 284
Using the Alarm Function ...................................................................................... 284
Managing Schedule.......................................................................................... 285
Adding To Do List Entries ................................................................................. 288
Setting the Alarm Mode ............................................................................... 289
Storing Your Own Name and Image ................................................................ 290
Recording Your and the Other Party’s Voice................................................. 292
Recording and Playing Alarm Tones and On Hold Tones ........................ 293
Checking Call Times and Charges .................................................................... 293
Setting the Upper Limit of Charge to Notify the Alarm..................... 294
Using the FOMA Terminal as Calculator.......................................................... 295
Composing Text Memo ................................................................................... 296
Using Dictionaries............................................................................................ 296
Using Conversation Help Useful Overseas........................................................ 298
Using an Earphone/Microphone with Switch ................... 298
Resetting the Function Settings................................................................. 299
Resetting to the Default Settings of the FOMA Terminal .................................... 300
Multi access
Multitask
Holding down ch-key
Alarm
Schedule
To D o li s t
Alarm setting
My Profile
Voice memo
Voice announce
Call data
Notice designate calls
Calculator
Text m e m o
Dictionary
Ta l k M a n
Earphone/microphone with switch
Reset settings
Initialize
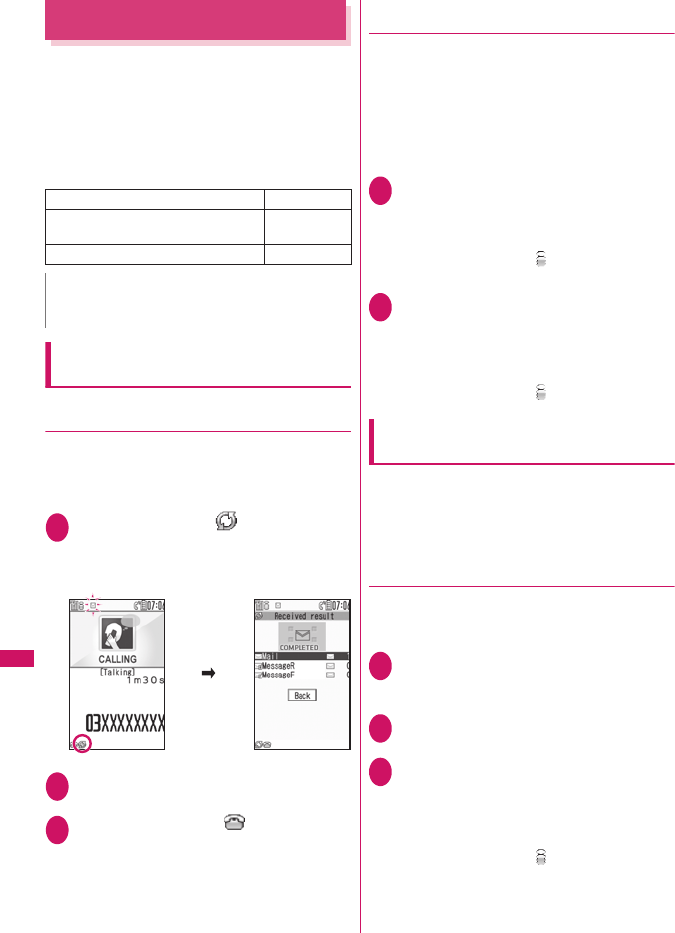
282
Convenient Functions
Multi Access
<Multi access>
Multi access is a function that allows the 3
communication lines such as voice calls, packet
communication and SMS to be conducted at the
same time.
“Multi Access Combination Patterns”→p.360
zThe FOMA terminal can use the 3 communication
lines listed below at a time.
When you receive a call during
communication
●Receiving an i-mode mail during a voice
call
When you receive an i-mode mail during a voice call,
the in-call screen remains displayed while receiving
the i-mode mail. You can then read the i-mode mail
without interrupting your call.
1i (MULTI)Select “ (Transmission)”
The reception result screen for the i-mode mail
appears.
Switching tasks→p.283
2Checking the i-mode mail
Reading i-mode mail→p.170
3i (MULTI)Select “ (Talking)”
The screen changes to the voice call screen.
●Receiving a voice call during i-mode or
packet communication
When you receive a voice call while using i-mode,
receiving or sending an i-mode mail or using packet
communication with the FOMA terminal and PC
connected, the voice call ringing screen appears and
you can answer the call without ending i-mode or
packet communication.
<Example: When a voice call arrives during i-mode>
1r
The In-call screen appears, and you can talk.
■To return to the i-mode screen without
answering the voice call
i (MULTI)Select “ (Browser)”
The caller hears ringing without a message.
2To end the call, press y
The call is ended and the i-mode screen
reappears.
■To return to the i-mode screen without
ending a voice call
i (MULTI)Select “ (Browser)”
To use other type of communication
while communicating
You can use another type of communication without
interrupting your current communications.
zTo switch screens during Multi access, select the
desired function on the task icon display area.
→p.283
●Making a voice call during i-mode
While connecting to i-mode or sending/receiving a
mail, you can make a voice call without ending
i-mode.
1During i-modei (MULTI) (1 second
or longer)
The standby screen appears.
2Make a voice call
Making voice calls→p.48
3To end the call, press y
The call is ended and the i-mode screen
reappears.
■To return to the i-mode screen without
ending a voice call
i (MULTI)Select “ (Browser)”
Voice call 1 line
Packet communication connected with
i-mode, i-αppli, i-mode mail and PC
1 line
SMS 1 line
N
zCommunication charges are applied for each of the
lines used during Multi access communication.
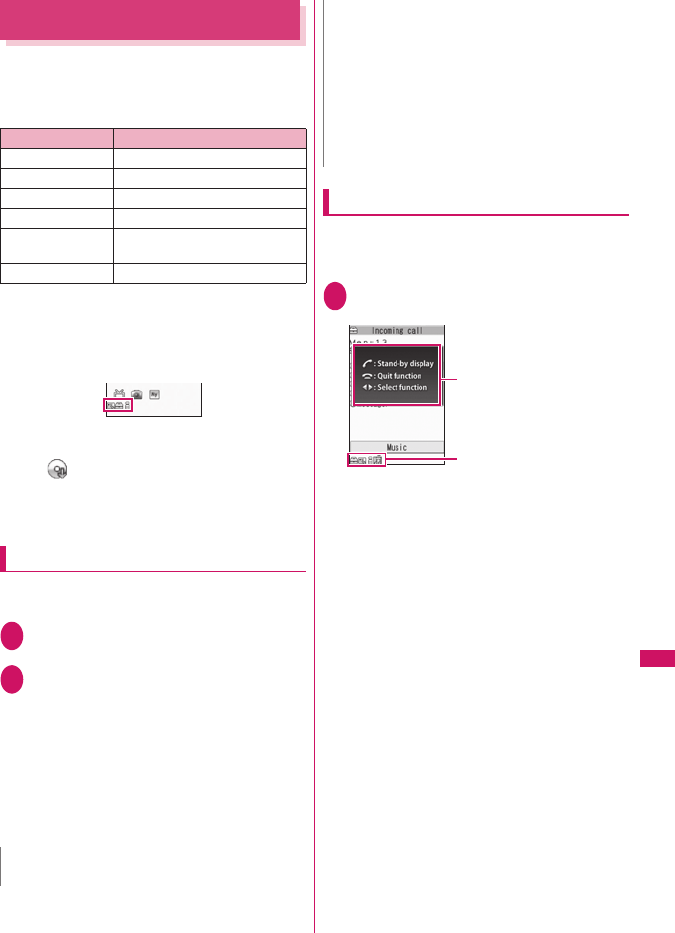
283
Convenient Functions
Multitask
<Multitask>
Multitask enables you to use multiple functions at the
same time. Up to 3 functions can be performed at
once, one from each of the Main menu groups shown
below (excluding 1Seg/Music group).
* : Multitask Combination Patterns→p.361
zThe icon of the running task is displayed on the
task icon display area during Multitask. When
multiple tasks are active, you can change tasks
using this icon.
zWhile receiving a Music&Video Channel program ,
1 function enters the operated mode and the task
icon “ ” appears.
zThe voice call charge continues to increase while
you are concurrently using another function during
a voice call.
Activating tasks (functions)
You can activate new task (function) without finishing
the current tasks.
1While using a taski (MULTI)
The “Task change” screen (p.283) appears.
2i (MENU)Select new task
■To access the Mail menu
u (MAIL)
■To access the i-mode menu
o (i-mode)
■To access the channel list
p (ch)
■To call a function assigned to p→p.284
p (ch) (1 second or longer)
Operations of the task change screen
When you are running multiple tasks, you can switch
them to change an active task or finish all tasks at the
same time.
1While using multiple taski (MULTI)
The “Task change” screen appears.
■To switch the task
Select the task icon to change
■To display the Main Menu
i (MENU)
■To Display the stand-by screen
r
The “Task changing” screen appears again
when you press i during the standby screen is
displayed.
* You can display the standby screen without displaying
the Task change screen by pressing i (1 second or
longer) during the task is activated.
■To end tasks
y “Quit selected” or “Quit all function”
Group Main menu item (task)
Mail group Mail
i-mode group i-mode
i-αppli group i-αppli
Settings group Settings, Service
Tool group Data Box, LifeKit, Phonebook,
Own data
1Seg/Music group MUSIC, 1Seg
N
zSome functions are activated as one of another group.
zIn the following cases, 1 task is added to compose a
mail while viewing another mail.
• Accessing the Mail menu to compose a mail
• Accessing the Mail menu to compose SMS
• Using Template to create a Deco-mail®
• Using Reply/Reply with quote/Forward for a
received mail
• Editing a sent mail
• Editing a draft mail
N
Operation guidance
Select these icons to
change the task.
Task change
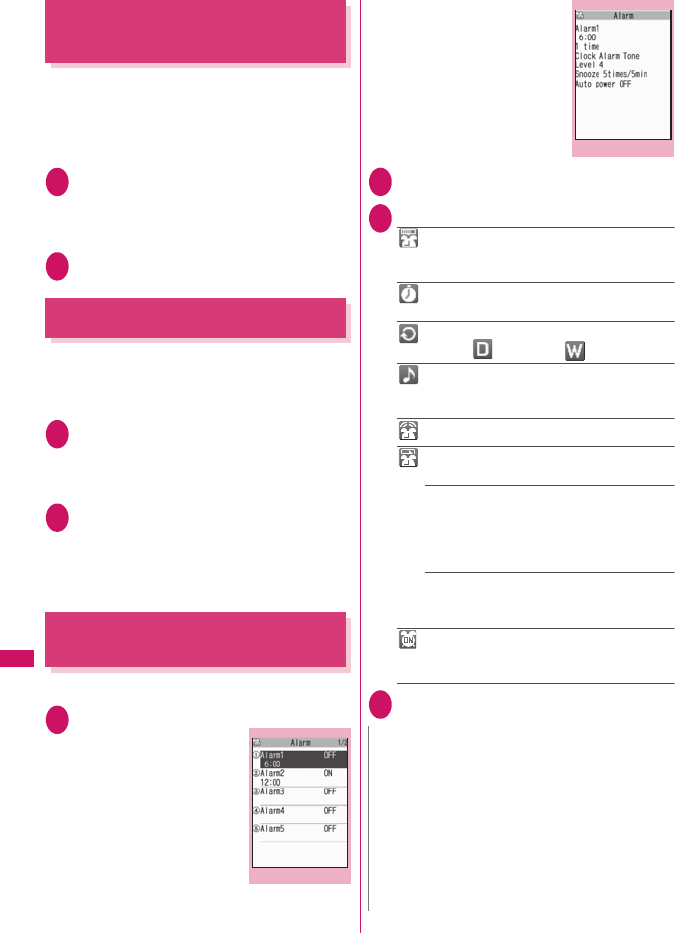
284
Convenient Functions
Assigning a Function to the
FUNC Key
<Holding down ch-key>
Change functions to call by pressing and holding p
while the standby screen or task change screen is
displayed.
zCamera, Schedule, Music Player, Music&Video
Channel and 1Seg can be assigned.
1i“SETTINGS”“Other settings”
“Holding down ch-key”
■To reset to default
u (FUNC)“Reset ch-key”
2Select a function to assign“YES”
Sorting the Main Menu
You can sort the menu that can be customized by
yourself. You can also place the sub item.
<To sort the first hierarchy menu>
1While the menu you can sort is
displayedHighlight the place to be
newly allocatedu (FUNC)“Manual-
sort”Select the menu
2“Replace”“OK”
■Selecting the sub item
“Select sub item”Select the menu
“Replace”“OK”
The menus are changed.
Using the Alarm Function
<Alarm>
zYou can store up to 10 alarms.
1i“LIFEKIT”“Alarm”
The “Alarm list” screen
appears.
■To switch ON/OFF with
the last settings
Highlight the setting item
p (ON/OFF)
“ON/OFF” switches each
time you press p.
■To check the previous
settings
Select the setting item
The “Alarm detail” screen
appears.
2Highlight the item to seto (Edit)
3Select any item:
Edit title……Enters the title of the alarm. You
can enter up to 6 double-byte or 12 single-byte
characters.
Time setting……Enters the time at which the
alarm will sound.
Repeat……Selects the alarm repetitions from
“1 time/Daily ( )/Select day ( )”.
Alarm tone……Selects the alarm tone from
clock alarm tone or folders of melody, i-motion,
music, etc.
Volume……Sets the alarm tone volume with c.
Snooze setting……Specifies whether a snooze
(repeating) alarm is set or not.
ON……Enter the number of times for ringing (01
to 10 times) and the ringing interval (01 to 10
minutes).
The alarm tone (about 1 minute) rings repeatedly
for the set number of times in the set interval.
OFF……Enter the ringing time (01 to 10 minutes).
Sounds the alarm tone continuously for the
specified time.
Auto power ON……Specifies whether the
FOMA terminal is automatically turned on or not
when the time for an alarm is reached.
4Set the respective itemso (Finish)
Alarm list
Function menu
p.285
N
zWhen the FOMA terminal is automatically turned on to
notify you of an alarm, if you set a melody, i-motion or
music downloaded from sites as alarm tone, the
“Clock Alarm Tone” is played.
zBefore entering an area such as an aircraft or hospital
where there is electronic equipment that uses
extremely precise control systems or very low signal
levels and the use of mobile phones is prohibited, set
the “Auto power ON” setting to “OFF” and then turn
the FOMA terminal off.
Alarm detail
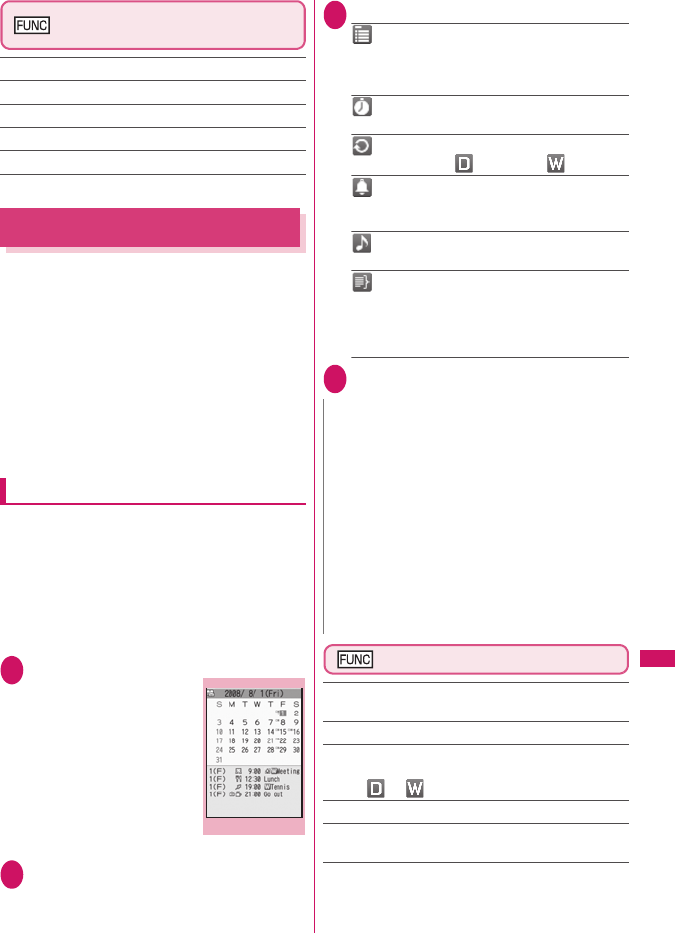
285
Continued on next page
Convenient Functions
Alarm list screen (p.284)/Alarm
detail screen (p.284)
Edit……Edits the alarm.
Display detail*……Displays the alarm contents.
Set this……Activates the alarm.
Release this……Disables one alarm.
Release all……Disables all set alarms.
* : Available only with the Alarm list screen.
Managing Schedule
<Schedule>
If you add an event to your schedule, an alarm tone
sounds at the specified date and time and the FOMA
terminal displays an animation and message notifying
you of the details stored for the event. You can also
add holidays and anniversaries. Stored scheduled
events and holidays can be quickly checked on the
FOMA terminal’s calendar. You can switch the
calendar display mode between 1-month and 1-week
to view the number or details of scheduled or To Do
list events for a given day.
zThe FOMA terminal supports from January 1, 2004
to December 31, 2037.
Adding schedule entries
You can organize your schedule in variety of ways,
such as storing regularly scheduled events such as
weekly meetings on a set day every week or setting
alarm tones and animations that match the scheduled
event.
zUp to 500 entries can be stored. You can also store
multiple scheduled events for a day.
zSchedule alarms →p.289
1i“LIFEKIT”“Schedule”
The “Schedule” screen
appears.
2o (New) “Schedule”
3Select any item:
Edit schedule……Enters the scheduled event
details and selects an icon. You can enter up to 256
double-byte or 512 single-byte characters. The entered
details are displayed during alarm notification.
Date setting……Sets the start/end date and
time for the scheduled event.
Repeat……Selects the schedule repetitions
from “1 time/Daily ( )/Select day ( )”.
Alarm……Specifies the alarm notification
settings used when the due date is reached from
“ON/ON/Set time (01 to 99 minutes) /OFF”.
Alarm tone……Selects the alarm tone from clock
alarm tone or folders of melody, i-motion, music, etc.
Edit summary……Enters the summary of the
scheduled event. You can enter up to 20 double-byte
or 40 single-byte characters.
The entered summary appears on the screen during
alarm notification.
4Set the respective itemso (Finish)
Schedule screen (p.285)
New……“Adding schedule entries”→p.285
“Adding holidays and anniversaries”→p.286
Weekly display ⇔Monthly display →p.286
Icon display……Selects an icon and displays scheduled
event, holiday or anniversary by icon. Repeating scheduled
events ( or ) are displayed as a single item.
User icon setting→p.286
Switch To Do list……Switches to the To Do list screen
(p.288).
No. of schedules……Displays the number of stored
schedule entries, holidays and anniversaries. In Secret
mode/Secret data only mode, you can also check the
number of records kept as the secret data.
Schedule
Function menu
p.285
N
zWhen set to “ON/Set time”, the alarm notification is
given only at the specified date and time before the
scheduled event. The alarm notification is not given at
the date and time set for the scheduled event.
zScheduled events can be stored to notify the alarm at the
same date and time only with the setting combination of
“Daily”/“Select day” and “1 time” (no repeats). In this case,
the scheduled event with the “1 time” setting has priority.
zIf the day of the week set as the starting time and the
day of the week set in the Repeat setting are different,
the day set in the Repeat setting has priority and the
scheduled event is added on the first specified day
after the starting time.
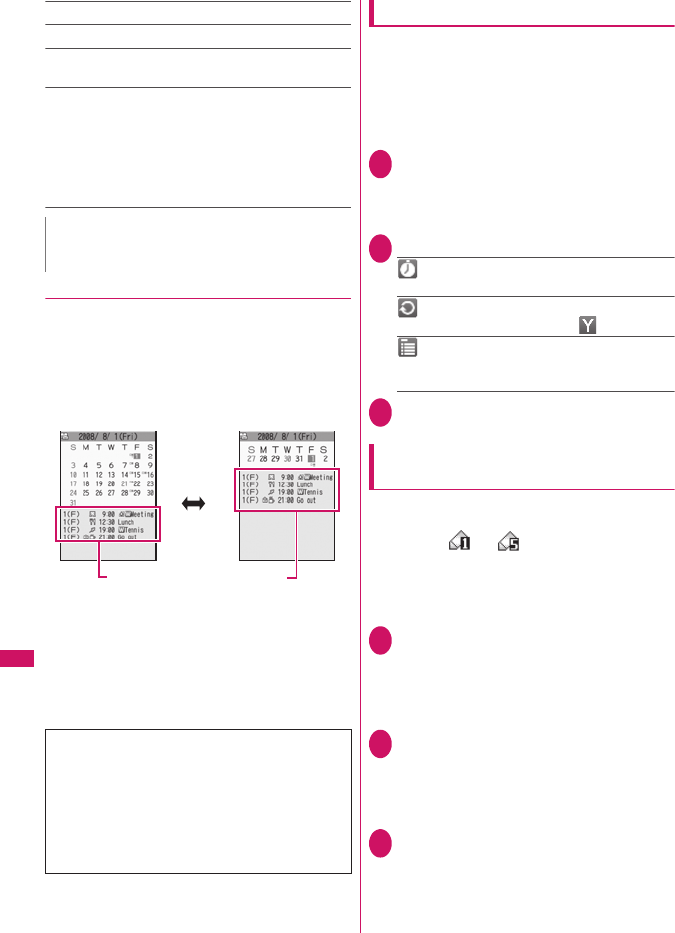
286
Convenient Functions
iC trans. all→p.260
Send all Ir data→p.258
Reset holiday……Resets the national public holidays to
default.
Delete……Selects the deleting method from “Delete
selected/Delete all/Delete past”.
“About multiple-choice” →p.38
• When “Delete past” is selected, all the entries before the
data with the cursor on the schedule screen are deleted.
• When “Delete all/Delete past” is selected, select the
item from “Schedule/Holiday/Anniversary/All”.
●Changing the Schedule display mode
The Schedule can be displayed either as “Monthly
display” or “Weekly display”. By pressing b to
highlight a particular date, you can check icons and
the number of scheduled events and To Do list stored
for the selected date.
zIn Monthly display, press a (▲マナー )/s (▼メモ)
to switch months.
Blue dates: Saturdays
Red dates: Sundays, public holidays and holidays
Pink dates: Anniversaries
_: Today
□: Scheduled event stored for the morning
■: Scheduled event stored for the afternoon
T: Stored To Do list
Adding holidays and anniversaries
zYou can store up to 100 holidays and anniversaries.
The national public holidays stored on the FOMA
terminal at the time of purchase are not included in
this number.
zYou can store only 1 holiday or anniversary per day.
<Example: To add a holiday>
1Schedule screen (p.285)o (New)
“Holiday”
■To add an anniversary
“Anniversary”
2Select any item:
Date setting……Enters the date of the added
holiday or anniversary.
Repeat……Selects the holiday or anniversary
repetitions from “1 time/Annually ( )”.
Edit holiday・Edit anniversary……Enters the
details of the holiday or anniversary. You can enter
up to 10 double-byte or 20 single-byte characters.
3Set the respective itemso (Finish)
Setting your favorite image as your
user icon
You can set an image or animation stored in My
picture as a user icon. Icons set as user icons are
displayed as “ ” to “ ” in the icon selection
display. When you set a user icon, the selected image
or animation is displayed when the alarm notification
is given.
zYou can store up to 5 user icons.
1Schedule screen (p.285)u (FUNC)
“User icon setting”Select an item to
store or change
■To clear all the user icon settings
“Release all”“YES”
2Select a folder
■To release the icon
“Release this”“YES”
To release the icon which is not stored in the
schedule, “YES” is not available.
3Select an image
The selected image is previewed, then the
screen returns to the user icon list after a while.
N
zSelecting “Holiday” or “All” of “Delete all” resets the
holidays to the default settings.
The public holidays are set in accordance with the
「国民の祝日に関する法律」(昭和23年法律第178
号)及びその改正法(平成 17年法律第 43 号までの
もの)(“The Public Holiday Law” (Law No. 178,
1948)) and the revised laws (up to Law No. 43, 2005).
The Spring and Autumnal Equinox Days are
determined by the government on February 1st in the
previous year and may differ (as of May, 2008).
Displays the date, day of the week,
icon, time and the set contents.
p (Disp SW)
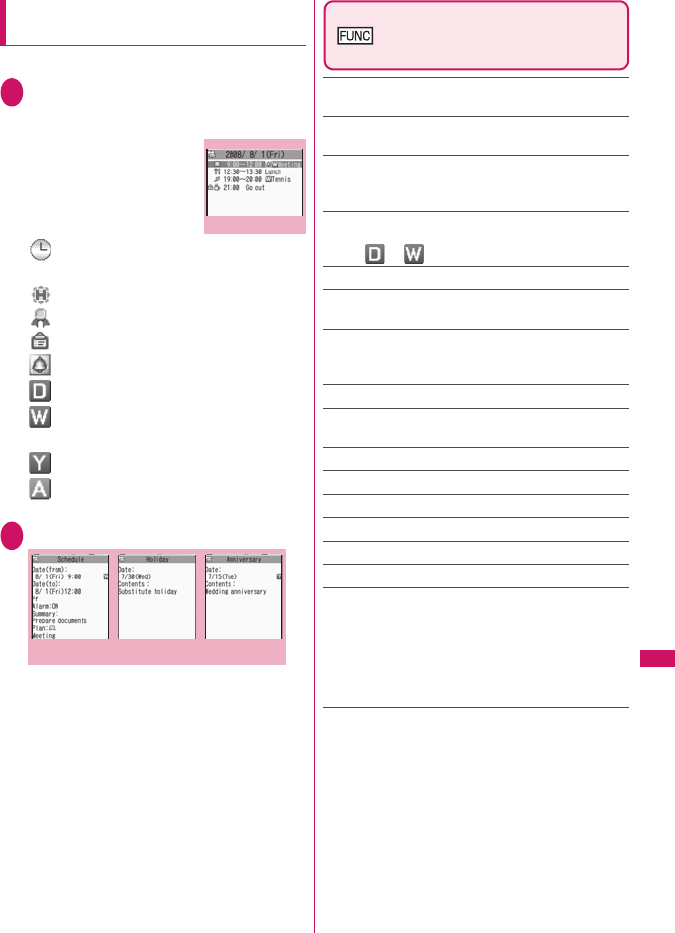
287
Convenient Functions
Checking scheduled event, holiday or
anniversary
You can check scheduled event, holiday or anniversary.
1Schedule screen (p.285)Select the
date on which the scheduled event,
holiday or anniversary is stored
The “Schedule list” screen
appears.
In the list display, the stored
contents and the settings
are described with the
following icons.
: Scheduled event
(Scheduled event icon is displayed)
: Holiday
: Anniversary
: To Do list
: Alarm
: Daily repeating event
: Weekly repeating event on a specified day
of the week
: Annual repeating event
: Scheduled event over a day (0:00 to
23:59)
2Select an item
Schedule list screen (p.287)/
Schedule/Holiday/Anniversary
detail screen (p.287)
New……“Adding schedule entries”→p.285
“Adding holidays and anniversaries”→p.286
Edit……Edits the scheduled event, holiday or
anniversary.
Copy……Copies scheduled event, holiday or anniversary.
When the copied entry has a repeat setting, the repeat
setting is released when the entry is pasted.
Icon display……Selects an icon and displays scheduled
event, holiday or anniversary by icon. Repeating scheduled
events ( or ) are displayed as a single item.
User icon setting→p.286
Switch To Do list……Switches to the To Do list screen
(p.288).
Release secret*1……Changes the data stored in the
Secret mode/Secret data only mode to the normal data.
→p.103
Compose message*1*2 →p.156
Attach to mail*1*2……Composes an i-mode mail with the
schedule attached.
Add shortcut→p.94
iC transmission*1→p.259
Send Ir data*1 →p.258
iC trans. all→p.260
Send all Ir data→p.258
Copy to microSD*1 →p.248
Delete……Selects the deleting method from “Delete this/
Delete selected/Delete all/Delete past”.
“About multiple-choice”→p.38
• When “Delete past” is selected, all the entries before
the displayed data are deleted.
• When “Delete all/Delete past” is selected, select the
item from “Schedule/Holiday/Anniversary/All”.
*1: Only available for Schedule
*2: Unavailable when 2in1 is set to B mode
Schedule list
Function menu
p.287
Schedule
detail screen
Schedule detail Holiday detail Anniversary
detail
Function menu
p.287
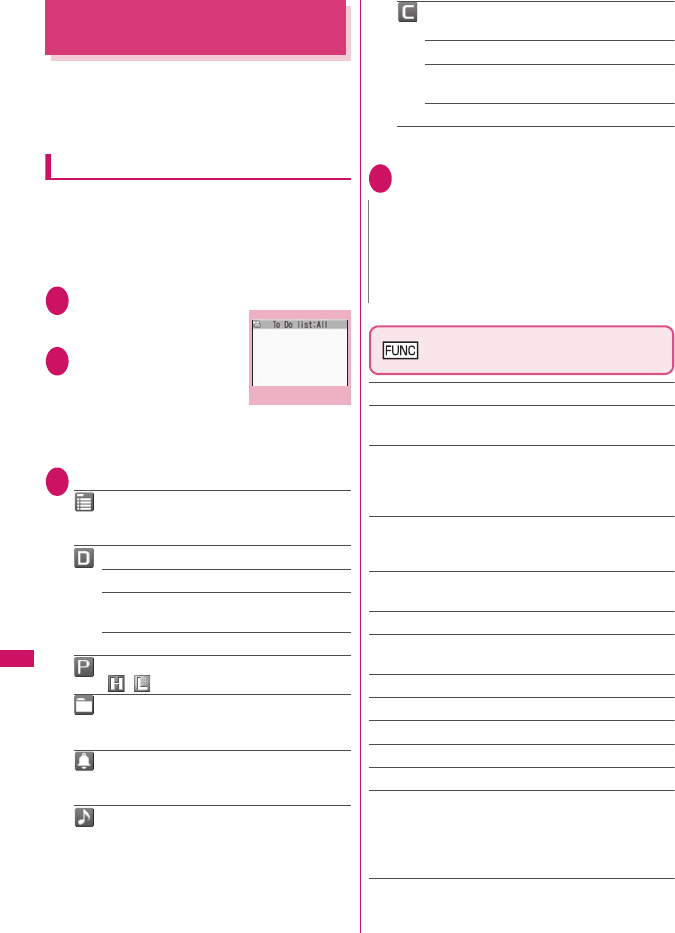
288
Convenient Functions
Adding To Do List Entries
<To Do list>
You can manage your schedule by adding events to
To Do list. You can also set alarms for events.
zYou can set from January 1, 2004 to December 31,
2037.
Adding/editing entries
zUp to 100 entries can be stored.
zYou must enter “Contents”. You cannot store an To
Do list entry with no “Contents”.
zTo Do list alarms→p.289
<Example: To add an entry>
1i“LIFEKIT”“To Do list”
The “To Do list” screen
appears.
2u (FUNC)“New”
■To edit an entry
u (FUNC)“Edit”
Function key o displays
(New) when no entry is
stored and (Edit) when any is stored.
3Select any item:
Edit To Do list……Enters the contents for the
entry. You can enter up to 100 double-byte or 200
single-byte characters.
Due date……Sets the due date for an entry.
Enter date……Enters the date and time.
Choose date……Selects a date from the
calendar, then enters the time.
No date……No due date is set.
Priority……Selects the priority for the entry
from “ / /None”.
Category……Selects a category of the entry
from “None/Personal/Holiday/Travel/Business/
Meeting”.
Alarm……Specifies the alarm notification
settings used when the due date is reached from
“ON/ON/Set time (01 to 99 min.) /OFF”.
Alarm tone……Selects the alarm tone from
clock alarm tone or folders of melody, i-motion,
music, etc.
Completion date*……Sets the completion date
for an entry.
Enter date……Enters the date.
Choose date……Selects a date from the
calendar.
No date……No completion date is set.
* : Available only when an existing stored entry with a
“Status” of “Completion” is edited.
4Set the respective itemso (Finish)
To Do list screen (p.288) /To Do
list detail screen (p.289)
New・Edit→p.288
Switch schedule……Switches to the schedule screen
(p.285).
Change status……Selects an entry status from “Plan/
Acceptance/Request/Provisional plan/Confirmation/
Denial/Completion/Substitution”.
When you select “Completion”, set the completion date.
Category display*1……Selects entries from “All/None/
Personal/Holiday/Travel/Business/Meeting”, and displays
them by category.
Sort/Filter*1……Sorts entries in a specified order or
displays only the specified events with the filter function.
Add shortcut*1 →p.94
Attach to mail*2……Composes an i-mode mail with the
entry attached.
iC transmission→p.259
Send Ir data→p.258
iC trans. all*1→p.260
Send all Ir data*1→p.258
Copy to microSD→p.248
Delete……Selects the deleting method from “Delete this/
Delete selected*1/Delete completed*1/Delete all*1”. “About
multiple-choice” →p.38
• When “Delete Completed” is selected, all the completed
entries are deleted.
*1: Available only for the To Do list screen
*2: Unavailable when 2in1 is set to B mode
To Do list
Function menu
p.288
N
zWhen set to “ON/Set time”, the alarm notification is
given only at the set time before the To Do list event
(01 to 99 minutes in advance). The alarm notification
is not given at the date and time set for the To Do list
event.
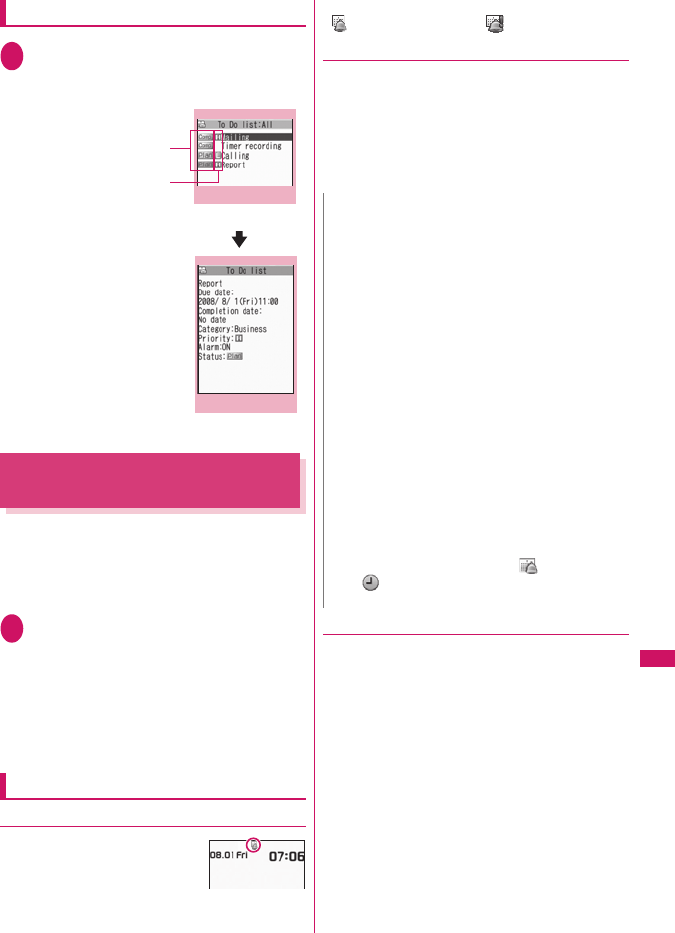
289
Continued on next page
Convenient Functions
Checking entries
1To Do list screen (p.288)Select an
entry
The “To Do list detail” screen appears.
Setting the Alarm Mode
<Alarm setting>
You can select either “Operation preferred” or “Alarm
preferred” as the alarm notification setting for “Alarm”,
“Schedule”, “To Do list” or “1Seg booking program”.
z1Seg timer recording alarm works according to
“Priority” set at the time of setting timer recording.
1i“SETTINGS”“Clock”“Alarm
setting”“Operation preferred” or
“Alarm preferred”
When set to “Operation preferred”, the alarm is
given only when the standby screen is displayed.
When set to “Alarm preferred”, the alarm is given
even when operating the FOMA terminal or
during talking.
Alarm notification actions
●When you set an alarm
After setting the alarm notification
in “Alarm”, “Schedule”, “To Do
list”, “1Seg booking program” and
“1Seg timer recording” the icon
appears on the standby screen.
■Icon display on the standby screen
“ ” appears and turns to “ ” on the specified day.
●When the specified time is reached
Alarm for each function is given as shown in the
Table 1 (p.290).
zWhen you set i-motion to the alarm, the FOMA
terminal notifies the alarm with the movie and the
voice (the animation during the alarm notification
may be changed depending on the icons and
categories you set).
●To stop the alarm tone
■Alarm
When the Snooze setting is set to “OFF”
Pressing any key stops the alarm tone and the
animation/i-motion. Pressing any key again emits the
release tone “pipip” and the display disappears.
When the Snooze setting is set to “ON”
Pressing any key stops the alarm tone and the
animation/i-motion, an alarm message “Snooze...”
appears, then the alarm is notified again in the set
ringing interval (minutes). Pressing y while
“Snooze...” appears emits the release tone “pipip” and
the snooze is canceled.
To Do list
Shows the priority.
Shows the entry status.
The blue icon turns into red
when the specified day has
elapsed.
To Do list detail
Function menu
p.288
Function menu
p.288
N
zThe volume of the “Schedule” and “To Do list” alarms
is determined by the “Phone” setting in “Ring volume”.
zThe volume for the Clock Alarm Tone during a call is
same as “Volume” setting level.
zThe alarm tone during a call is not played in Snooze
even when the Snooze setting is set to “ON”.
zEven if an i-motion is set in the “Alarm tone” setting,
the alarm is notified with the Clock Alarm tone and the
animation for the specified icon and category when
i-motion cannot be activated such as during a call.
zIllumination alarm works according to “Schedule/
Alarm” under “Illumination set” for “Alarm”,
“Schedule”, “1Seg booking program” and “1Seg timer
recording”, and “To Do” under “Illumination set” for “To
Do list”.
<Alarm notification priority sequence>
zIf “Alarm”, “Schedule”, “To Do list”, “1Seg booking
program” and “1Seg timer recording” alarms are set at
the same time, alarm priority is assigned as follows:
①Alarm ②1Seg timer recording ③To Do list
④Schedule ⑤1Seg booking program
If alarm notification is failed, the “ (Missed alarm)”
or “ (Missed program)” shortcut icon appears on
the standby screen.→ p.290
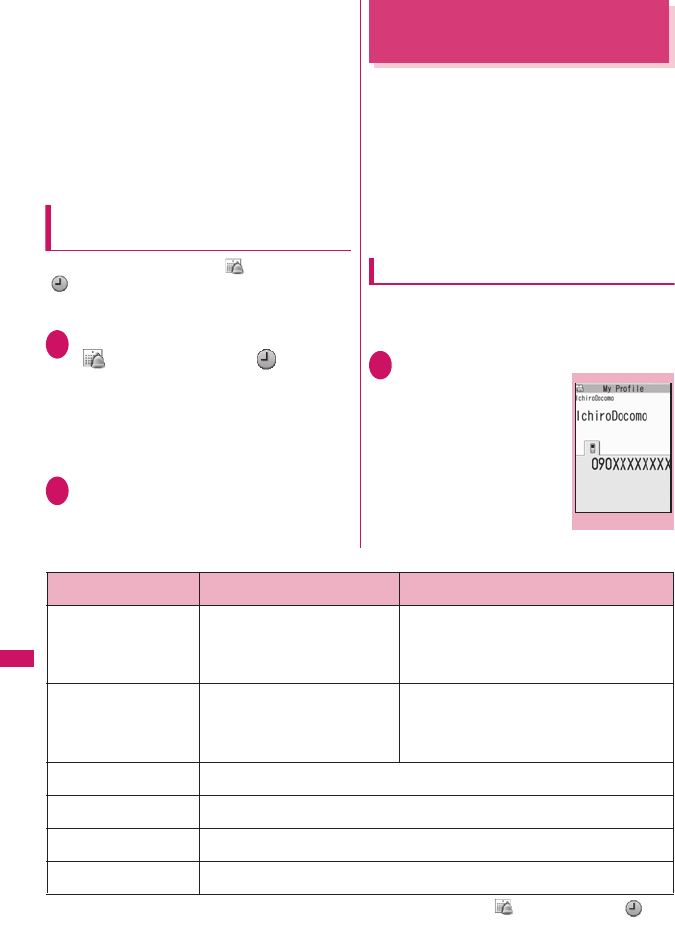
290
Convenient Functions
■Other alarm tones
Pressing any key stops the alarm tone, freezes the
animation or i-motion and the alarm message
remains displayed. Pressing any key again clears the
alarm message (When “Activate TV w/ alarm” is set
to “OFF” for 1Seg booking program). However, if you
press the side key when the FOMA terminal is folded,
the alarm notification display is not cleared.
■If you receive a call during alarm notification
Alarm notification stops and the FOMA terminal receives
the call. The “Alarm” Snooze setting is also canceled.
Checking alarm details when
notification fails
If the alarm notification fails, the “ (Missed alarm)” or
“ (Missed program)” shortcut icon appears on the
standby screen. You can check the details of the missed
alarm (Missed alarm info) from the shortcut icon.
1On the standby screendSelect
“ (Missed alarm)” or “ (Missed
program)”
The Missed alarm info appears.
■To clear the shortcut icon
t (1 second or longer)
Once you clear the shortcut icon, you can no
longer check the missed alarm information.
2Check the details
The standby screen reappears by pressing t,
and the shortcut icon disappears.
Storing Your Own Name and
Image
<My Profile>
You can store your own personal information such as
your name, home phone number and e-mail address.
Stored personal information provides the FOMA terminal
with a way of confirming that you are the owner and can
also be quoted in the Character entry (edit) screen.
zYou cannot change or delete the FOMA terminal’s
own phone number.
zItems other than Own number are stored on the FOMA
terminal. If you insert another FOMA card (UIM), the
data stored on the FOMA terminal are displayed.
Displaying My Profile
When this function is activated, it displays only your
name, the FOMA terminal’s own phone number and
the first e-mail address.
1i“LIFEKIT”“My Profile”
The “My Profile” screen
appears.
If you have stored your
personal data such as your
home phone number or
address, you can display all
the data by selecting
“Display all data” from the
function menu and entering
security code.
[Table 1] Alarm notification actions
* : Operations when “Alarm preferred” is set. When “Operation preferred” is set, the “ (Missed alarm)” or “
(Missed program)” shortcut icon appears on the standby screen.
Status Alarm Schedule/To Do list/1Seg booking program/
1Seg timer recording
On standby screen using
i-mode/sending or
receiving mail*
Notifies you the alarm with the
operation you set. Animations
appear on the display.
The alarm tone rings repeatedly about 5 minute.
Animations appear on the display. For 1Seg timer
recording, alarm sounds for about 2 seconds, one
minute before start time. A confirmation screen
appears, then the 1seg screen appears.
When Power is OFF The setting of “Auto power ON” is
applied. When you select “OFF” in
“Auto power ON”, the shortcut icon
does not appear after the FOMA
terminal is turned on.
The alarm is not notified. The shortcut icon does
not appear after the power is turned on. 1Seg
timer recording does not start if the power is off
about one minute before start time.
During a call*The alarm tone rings through the FOMA terminal earpiece. Animations appear on the
display.
Earphone/microphone is
connected
Alarm notification is the same as for the “Standby screen displayed”. The alarm tone
sounds from the earphone or speaker according to the “Headset usage setting”.
Dial lock/Omakase Lock is
set
The alarm is not notified. The shortcut icon appears after each lock is released. 1Seg
timer recording does not start if locks are not released about one minute before start time.
Original lock is set Alarm, Schedule and To Do list alarms do not work. The shortcut icons appear. 1Seg
booking program/1Seg timer recording alarms work.
My Profile
Function menu
p.291
291
Continued on next page
Convenient Functions
My Profile screen (p.290)
Edit→p.291
Display all data……Use v to check the details.
Copy name……Copies the name stored in My Profile.
The copied name can be pasted into input and other
screens.→p.308
Copy phone number*1……Copies the currently
displayed phone number. The copied phone number can
be pasted into input and other screens.→p.308
Attach to mail*2……Composes an i-mode mail with the
My Profile data attached.
iC transmission→p.259
Send Ir data→p.258
Copy to microSD→p.248
Big font⇔Standard font……Switches the character size
of the displayed name.→p.93
Check 2in1*3……Obtains information on Number B and
stores it in the My Profile screen of Number B.
Reset……Resets (deletes) My Profile except for your
Own number and restores the default settings set at the
time of purchase.
Delete phone No.*4……Deletes the currently displayed
phone number.
*1: Depending on the selected item, one of “Copy mail add./
Copy address/Copy birthday/Copy memorandums”
appears.
*2: Available only when displaying all data. Unavailable when
2in1 mode is in B mode.
*3: Available only while My Profile screen of Number B in
2in1 is displayed.
*4: Depending on the selected item, one of “Delete mail add./
Delete address/Delete birthday/Delete memorandums/
Delete image” appears.
Storing My Profile
1My Profile screen (p.290)o (Edit)
Enter your security code
2Select any item:
Edit name Last……Enters your last name. You
can enter up to 16 double-byte or 32 single-byte
characters which include kanji characters, hiragana,
katakana, alphabets, numbers, pictographs and
.
Edit reading Last……As the reading is entered
automatically when you enter your last name,
change it if necessary. You can enter up to 32
characters including single-byte katakana,
alphabets, numbers, symbols and reading of the first
name.
Edit name First……Enters your first name in
the same way as your last name.
Edit reading First……As the reading is entered
automatically when you enter your first name in the
same way as your last name, change it if necessary.
Edit phone number……Adds a phone number
other than the FOMA terminal’s own number and
selects an icon. You can enter up to 26 digits for the
phone number.
When you store a new phone number, the “ <Not
stored>” option appears in the My Profile edit
screen. Select this option to store an additional
phone number. Up to 3 phone numbers can be added.
Mail Address……Enters the e-mail address
and selects an icon. You can enter up to 50 single-
byte alphabets, numbers and symbols.
If the mail address is not stored, you can acquire the
set mail address from the i-mode Center
automatically by selecting “Acquire Automatically”
(the secret code is automatically retrieved when the
secret code is stored in the mail address).
Once you have stored the first e-mail address, the
“ <Not stored>” option appears on the My Profile
edit screen. Select this option to store an additional
e-mail address. Up to 3 mail addresses can be stored.
Edit address……Enters a zip code and
address (prefecture/city/street/apartment name).
Enter the 7 single-byte numbers for ZIP codes. You
can enter up to 50 double-byte or 100 single-byte
kanji characters, hiragana, katakana, alphabets,
numbers and pictographs for the address other than
the Zip code.
Enter birthday……Enters the contact’s birthday
(year, month and day).
Any year from 1800 to 2099 can be set.
N
zWhen 2in1 mode is in Dual mode, you can switch the
informaitno of Number A and Number B to press c in
the My profile screen.
zReset My Profile in B mode when you exchange the
FOMA card (UIM) while using 2in1. →p.291
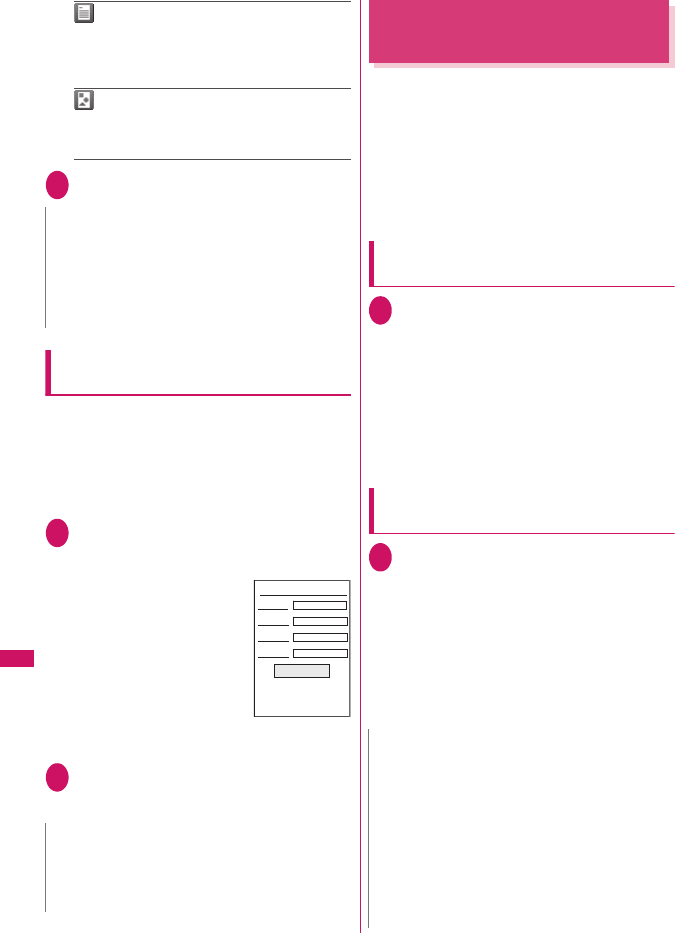
292
Convenient Functions
Edit memorandums……Enters a memo (short
note). You can enter up to 100 double-byte or 200
single-byte characters which include kanji
characters, hiragana, katakana, alphabets, numbers
and pictographs.
Set image……Shoots a still image with the
camera or select an image form My picture to display
it on the My Profile. Select “Release this” to release
the set still image.
3Set the respective itemso (Finish)
Quoting the personal information (My
Profile)
Storing personal information allows you to identify
your FOMA terminal and quote the stored information
on the Character entry (edit) screen or i-mode.
<Example: To quote personal data on the i-mode
site>
The items to select vary depending on the site.
1Display a site to quote the personal
informationSelect “Quote My
Profile”Enter your security code
The list of quotable items
appears.
■To select items to quote
Deselect checkboxes of
items not to be quoted with
c
■When the 2in1 is in Dual
mode
“My Profile A” or “My
Profile B”
2o (Finish)
The items to be quoted are entered
automatically.
Recording Your and the Other
Party’s Voice
<Voice memo>
There are 2 types of Voice memo. “Voice memo(in-call)”
allows you to record the other party’s voice during a voice
or videophone call. “Voice memo” allows you to record
your own voice while the standby screen is displayed.
zYou can record either 1 voice memo(in-call) or 1
voice memo, which overwrites the existing memo.
zYou can record voice up to about 20 seconds.
zFor information on playing and erasing recorded
voice memo→p.65
Recording the other party’s voice
during a call
1During a calls (▼メモ ) (1 second or
longer)
The FOMA terminal beeps and recording
begins. The FOMA terminal beeps 5 seconds
before the recording time (about 20 seconds)
ends. When recording ends, the FOMA terminal
gives a short double-beep and the “Recording”
display returns to the in-call screen.
■To stop recording in progress
d (Stop) or s (▼メモ) (1 second or longer)
Recording your own voice in standby
mode
1i“LIFEKIT”“Voice memo”
“YES”Record the voice memo
When the FOMA terminal beeps, begin speaking
into the mouthpiece. The FOMA terminal beeps 5
seconds before the recording time (about 20
seconds) ends. When recording ends, the terminal
gives a short double-beep and the “Recording”
screen changes back to the “LifeKit list” screen.
■To stop recording in progress
d (Stop)
N
zWhen you change your own e-mail address or store a
secret code, also change the mail address of this
function (it is not changed automatically).
zIf your birthday is stored, the illumination of Incoming
Call, etc. works in the birthday pattern and color on
birthday.
N
zWhen you quote a street address on the Text entry or
i-mode site, a space may be entered between items.
zWhen you quote the My Profile, the data except the
items entered automatically are not quoted.
Registration
Name
Address
Phone number
Quote My Profile
E−mail address
N
zWhen you receive a call, the “Alarm”, “Schedule”, “To
Do list”, “1Seg booking program” or “1Seg timer
recording” alarm is notified or operate other function
while recording a voice memo, the recording stops.
<Voice memo>
zYou cannot record voice while a videophone call is on
hold or while you are using a Function menu option.
zWhen 2in1 is in A mode or B mode and you record the
other party’s voice received at the unused number,
“★” does not appear on the Play/Erase msg. screen
and you cannot play the voice memo.

293
Continued on next page
Convenient Functions
Recording and Playing Alarm
Tones and On Hold Tones
<Voice announce>
You can record the voice and set it as original ring
tone or answer message.
zYou can make 2 voice recordings: “Voice announce
1” and “Voice announce 2”.
zYou can record voice up to about 15 seconds.
z“★” appears in the “Voice announce” screen when
“Voice announce” is recorded.
zVoice recordings made using this function can be
set in the following functions:
• Ring tone (voice call, videophone call, mail,
MessageR/F, Call setting w/o ID, Multi Number,
Number B of 2in1)
• Alarm tone (Alarm, Schedule, To Do list, Clock
Alarm Tone, 1Seg booking program, Notice
designate calls)
• On hold tone
• Answer message (Record message)
Recording voice
1i“LIFEKIT”“Voice announce”
Select an item“YES”Record the
voice
Speak into the mouthpiece.
The FOMA terminal beeps 5
seconds before the
recording time (about 15
seconds) ends. When
recording ends, the FOMA
terminal gives a short
double-beep and the
“Recording” screen returns to the previous
screen.
■To stop recording in progress
d (Stop)
Playing voice announce recordings
1i“LIFEKIT”“Voice announce”
Select an item
■To stop playback in progress
d (Stop)
Voice announce screen (p.293)
Record……Records voice.
Play……Plays the recorded voice.
Erase……Erases the recorded voice.
Checking Call Times and
Charges
<Call data>
You can check the previous or total call time/charge
for voice/videophone calls, etc.
zThe following items can be checked.
* : “Digital (AV)” for videophone calls and “Digital (UD)” for
64K data communication are displayed.
zWhen you switch between voice call and
videophone call, the total call time of voice and
videophone calls is displayed in the last duration
area, and the charges of voice and videophone calls
are displayed separately in the last charge area. The
displayed charge may differ from the actual charge.
zThe call time is displayed for both voice calls and
digital calls and communication (videophone calls
and 64K data communication). Times for both calls
made and received calls are counted.
zCharges are only displayed for dialed calls. However,
if you call at toll free number such as directory
assistance (104), “
¥
0” or “
¥
∗∗” is displayed.
zAs charges are accumulated on the FOMA card
(UIM), the accumulated charge (starting from
December 2004) is displayed on the Charge line
when you change your FOMA card (UIM).
* Charges are accumulated on FOMA cards (UIM) in
FOMA terminals released before the 901i series, but
they cannot be displayed.
zYou can reset displayed call times and charges.
N
zWhen you receive a call, the “Alarm”, “Schedule”, “To
Do list”, “1Seg booking program” or “1Seg timer
recording” alarm is notified or operate other function
while recording a voice, the recording stops.
Voice announce
Function menu
p.293
Item Displayed contents
Last call
duration
Displays the duration of the last call
Last call cost Displays the charge for the last call
(voice calls, videophone calls and 64K
data communication) *
Total calls
duration
Displays the total duration of all the
calls made since the last reset (voice
calls, videophone calls and 64K data
communication) *
Total calls
cost
Displays the total calls cost of all the
calls made since the last reset (voice
calls, videophone calls and 64K data
communication)
Total duration
reset
Displays the date and time of the last
call reset
Total cost
reset
Displays the date and time of the last
charge reset
294
Convenient Functions
zDisplayed call times and charges may differ from
the actual figures. Consumption tax is not included
in the call charges.
zIf you have subscribed to the 2in1, the total amount
of Number A/B appears as the Total calls duration
and Total calls cost.
1i“SETTINGS”“Call time/Charge”
“Call data”
Resetting the total call time and total
call charges
<Reset total>
You can reset the Total calls duration or Total calls
charge displayed in the “Call data” to zero.
1i“SETTINGS”“Call time/Charge”
“Reset total”Enter your security
codeSelect any item:
Reset total duration……Resets the accumulated
duration.
Reset total cost……Enters PIN2 code and resets
the accumulated charge.
PIN2 code→p.100
Resetting charges automatically
<Auto reset total cost>
You can set the FOMA terminal to reset the Total calls
cost displayed in “Call data” to zero automatically on
the 1st day every month, at 0:00.
1i“SETTINGS”“Call time/Charge”
“Auto reset total cost”Enter your
security code
2“Auto reset”“ON”Enter PIN2 code
PIN2 code →p.100
■Not to set Auto reset
“OFF”
Setting the Upper Limit of
Charge to Notify the Alarm
<Notice designate calls>
When accumulated charge displayed at “Call data”
exceeds the cost limit set in this function, you are
notified on the standby screen or with alarms.
zThe alarm notification works only once when the
accumulated charge exceeds the set cost limit.
zExceeding the limit does not prevent you from
making a call.
1i“SETTINGS”“Call time/Charge”
“Notice designate calls”Enter your
security code
2Select any item:
Cost limit setting……Sets the cost limit between
10 and 100,000 by 10 units.
Notify setting
Notify cost limit……Specifies whether to
notify the cost limit.
Alarm tone……Selects an alarm tone.
Vol ume……Sets the alarm tone volume
with c.
N
zIf the last or total voice or digital calls duration exceeds
“199h59m59s”, the call count returns to “0s”.
zThe time and charge of i-mode or packet
communication, and the charge of sending Chaku-
moji are not counted. To check i-mode communication
charges, see the “Mobile Phone User’s Guide [i-mode]
FOMA version”.
zThe time taken to pick up a call, or for the other party
to pick up a call, and the time for switching a voice call
and a videophone call are not counted.
zWhen the FOMA terminal is turned off, the duration
and charge for the last call reverts to “0s” and “
¥
∗∗”
respectively.
zTurning the FOMA terminal off does not affect the total
duration and charge.
zThe international call charge for WORLD CALL is
counted. For other international call services, the
charge is not counted.
N
zSetting Auto reset total cost to “ON” and changing the
month in “Set main time” resets the Total calls cost.
zThe Auto reset total cost is reset to “OFF” when:
• The FOMA terminal is turned on without the FOMA
card (UIM) inserted
•t is pressed on the PIN2 code input screen
which appears when the FOMA terminal is turned
on
• The PIN2 code is locked→p.100
• An error occurs on the FOMA card (UIM)
295
Convenient Functions
3Set the respective itemso (Finish)
●Alarm notification actions
After ending a call, the function
notifies you with the following
methods when accumulated
charges exceed the cost limit.
■When Notify cost limit is set
to “ON” and alarm tone is
set to other than “OFF”
When the accumulated charge exceeds the preset
cost limit, the alarm tone sounds for about 5 minutes
starting 3 seconds after finishing the call, and the
notification screen appears. To stop the alarm tone,
press any key. After the notification, pressing t or
y displays “ ” (Notice designate calls) shortcut
icon on the standby screen.
■When Notify cost limit is set to “ON” and alarm
tone is set to “OFF”
When the accumulated charge exceeds the preset
cost limit, “ ” (Call billing) shortcut icon appears on
the standby screen.
●Checking details of “ ” (Notice
designate calls)
The details of Notify cost limit is displayed by
selecting “ (Notice designate calls)” shortcut icon
on the standby screen.
1On the standby screendSelect
“ (Notice designate calls)”Enter
your security code
The details of “Notice designate calls” are
displayed.
2Check the detailsd (OK)
The standby screen reappears and “ ” (Notice
designate calls) disappears.
Using the FOMA Terminal as
Calculator
<Calculator>
You can use the FOMA terminal to perform 4 different
types of arithmetical calculations (addition,
subtraction, multiplication and division).
zThe number can be displayed up to 10 digits.
Below the decimal point, up to 9 digits can be
displayed.
zIf the result of a calculation exceeds 10 digits, “.E”
is displayed.
1i“LIFEKIT”“Calculator”
Calculate
■To calculate “23 + 57”
2
3 + 5 7
=
2
3
j
5
7
d
■To use negative
numbers in a
calculation
To calculate using negative
amounts, simply insert “-”
before the first digit.
− 2
3
+ 5 7 =
h
2
3
j
5
7
d
Calculator screen (p.295)
Add shortcut→p.94
N
zThe charges for i-mode or packet communication, and
the charges for sending Chaku-moji are not included
in this function. To check i-mode communication
charges, see the “Mobile Phone User’s Guide [i-mode]
FOMA version”.
8/ 1 7:06
¥
3000
Set−up cost limit
is exceeded
Cost limit
Date
N
zt ( or ) can be used in the following
cases.
• After pressing +,−,×,÷,=, is displayed.
You can start calculation from the beginning by
pressing t.
• While inputting numbers or decimal points, is
displayed. You can delete wrong numbers or
decimal points by pressing t.
Calculator
Function menu
p.295
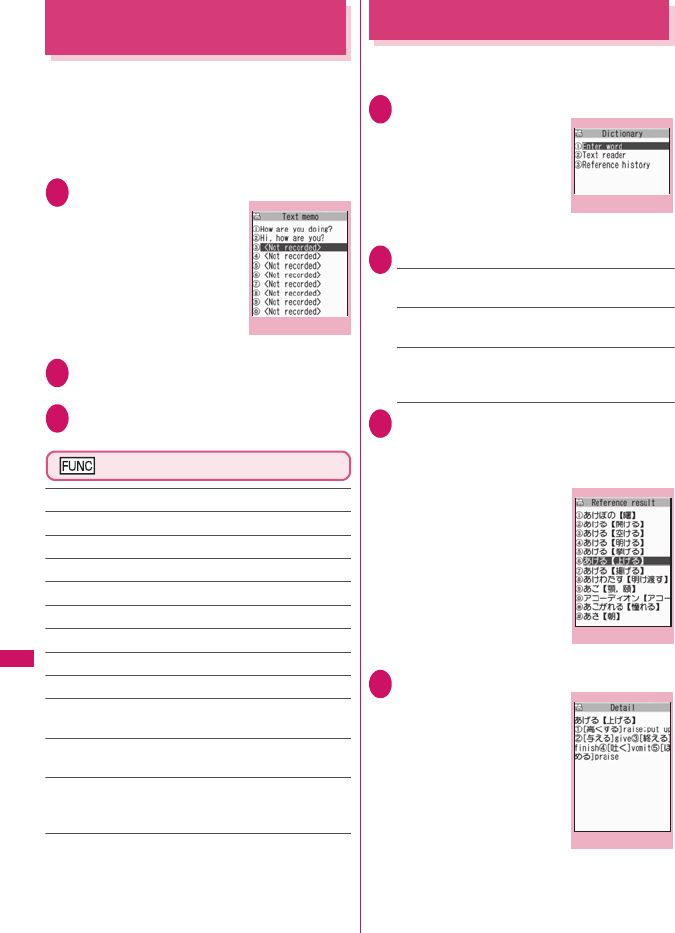
296
Convenient Functions
Composing Text Memo
<Text memo>
You can write short messages in the form of text
memos. You can paste a composed text memo into
your schedule or mail message.
zYou can store up to 10 text memos.
zYou can enter up to 256 double-byte or 512 single-
byte characters for a text memo.
1i“LIFEKIT”“Text memo”
The “Text memo” screen
appears.
2Highlight the item to store or change
o (Edit)
3Write the memo
Text memo screen (p.296)
Edit……Edits the text memo.
Compose message →p.156
Edit schedule→p.285
Add shortcut →p.94
iC transmission→p.259
Send Ir data→p.258
iC trans. all→p.260
Send all Ir data→p.258
Copy to microSD→p.248
Text memo info……Displays the creation date/time and
category.
Category……Selects a category to categorize from
“None/Personal/Holiday/Travel/Business/Meeting”.
Delete……Selects the deleting method from “Delete this/
Delete selected/Delete all”.
“About multiple-choice” →p.38
Using Dictionaries
<Dictionary>
zYou can use dictionaries from the function menu of
each text entry screen.→p.297
1i“LIFEKIT”“Dictionary”
The “Dictionary” screen
appears.
2Select any item:
Enter word……Enters a word. You can enter up to
32 double-byte or 64 single-byte characters.
Text reader……Enters a word from the Text reader.
→p.132
Reference history……Searches the dictionary
using the history of previously retrieved words.
“Using reference history” →p.297
3Select the dictionary type
The “Reference result (list)” screen appears.
When the searched word is not in the dictionary,
the cursor is placed at the similar word.
■To display the previous
or next list
Reference result (list)
screenv
4Select a word
The “Reference result
(detail)” screen appears.
■To display the previous
or next word
Reference result (detail)
screenv
Text memo
Function menu
p.296
Dictionary
Function menu
p.297
Reference result (list)
Function menu
p.297
Reference result (detail)
Function menu
p.297
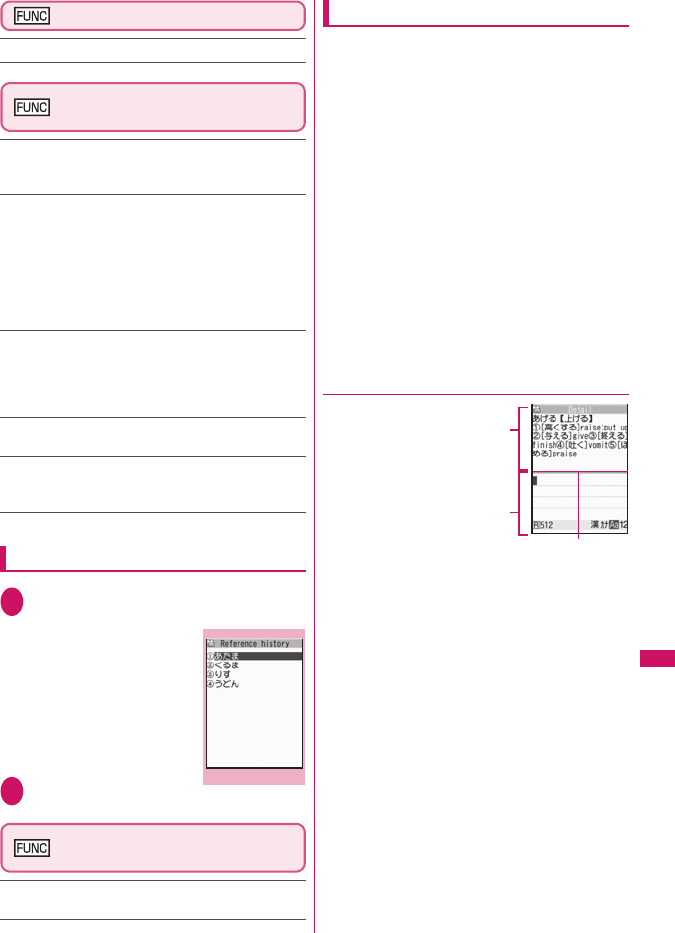
297
Convenient Functions
Dictionary screen (p.296)
Add shortcut →p.94
Reference result (list/detail)
screen (p.296)
Change window*……Switches the screen between
Reference result and Text edit (available only when it can
be switched).
Copy……Copies the word.
List screen: Copies the word in【 】of the reference result
for Japanese-English or Japanese dictionary,
and copies the word of the reference result for
English-Japanese dictionary
Detail screen: Copies the text by selecting the range.
The copied word can be pasted into text entry screens, etc.
→p.308
Search from detail*……Search for another word from the
reference result (detail) screen.
d (Start) on the first character of the stringUse
b to highlight to the end of the string and press
d (End)Select the dictionary typeSelect a word
Refer dic.……Searches for the retrieved word in another
dictionary.
Refer edit*……Edits text referring to the Reference result
(available only when Refer edit is available).
“Divided” screen→p.303
* : Available only for the reference result (detail) screen.
Using reference history
1Dictionary screen (p.296)“Reference
history”
The “Reference history”
screen appears.
2Select a word
Reference history screen
(p.297)
Delete this・Delete all……Deletes one or all reference
history (histories).
Using dictionaries from other functions
Select “Refer dic.” from the respective function menus
in the following screens:
• The text edit screen, mail detail screen or message
screen for i-mode mail
• Pages on sites and while a screen memo is displayed
■When activating a dictionary from the text edit
screen, mail detail screen or message screen
for i-mode mail
You can select “Enter word”, “Select area” or
“Reference history”.
Selecting “Select area” allows you to specify the
range of the words you want to look up.
■When you activate the dictionary from a site or
from a screen memo
You can select “Enter word”, “Site refer (enter)” or
“Reference history”.
Selecting “Site refer (enter)” allows you to enter the
word you want to look up while referring to a screen
memo or a page on a site.
●Guide to the dictionary reference screen
When you select “Refer
edit” or “Site refer (enter)”,
the display is split into top
and bottom halves.
Each time you select
“Change window” from the
function menu, the window
you can use switches
between ① and ②.
■When you selected “Refer edit” from the
Reference result (detail) screen
①Dictionary detail screen
②Text edit screen
③Separation line
To exit the dictionary, select “Quit dic.” from the
function menu or switch to window ① and press
o (End).
■When you selected “Site refer (enter)” from a
screen memo or a page on a site
①Site page or screen memo screen
②Search term entry screen
③Separation line
Enter the search term and press d (Set). The
dictionary selection display appears with the search
term entered.
Reference history
Function menu
p.297
1
2
3
298
Convenient Functions
Using Conversation Help
Useful Overseas
<TalkMan>
TalkMan offers content to see
conversation help useful overseas
by text and voice.
Select a language to see
translated text and check the
pronunciation.
zEnglish and Chinese conversations
are stored at the time of purchase
although the voice is not available.
Download voice-compatible content
including English, Chinese, French,
Spanish, German and Korean from “PlayNow” by
SO (The site is in Japanese):
“iMenu”“メニューリスト” (Menu List)“ケータイ
電話メーカー ” (Mobile phone manufacturer)
“PlayNow by SO”
Alternatively, scan the QR code on the right and
select the displayed URL to access the site.
Using an Earphone/
Microphone with Switch
<Earphone/microphone with switch>
You can make or receive a call by using a flat-plug
earphone/microphone with switch (optional).
zUse the Earphone Plug Adapter for External
connector terminal to connect a flat-plug stereo
earphone set (optional) or flat-plug earphone/
microphone with switch (optional) to the FOMA
terminal. →p.25
zThe tone of the switch operation for receiving or
ending the call sounds regardless of the “Keypad
sound” setting.
zDo not wrap the FOMA terminal with the cord of the
flat-plug earphone/microphone with switch. This
may interfere with signal reception. Also, if you
move the cord of the flat-plug earphone/
microphone with switch closer to the FOMA
terminal while talking, you may hear the noise.
zYou can make and receive a phone call with the
FOMA terminal folded.
Setting the switch operation
<Headset sw to dial>
You can specify whether to make a call when you
hold down the switch for 1 second or longer.
zYou can set phone numbers stored in the
phonebook of the FOMA terminal (Phone) to this
function.
1i“SETTINGS”“Dialing”
“Headset sw to dial”“Voice call” or
“OFF”
2Display a phone number you want to
set on the phonebook detail screen
d (Select)
Searching the phonebook→p.73
Selecting a microphone when an
earphone/microphone is connected
<Select microphone>
You can select the microphone to use when a flat-
plug earphone/microphone with switch (optional) is
connected from the microphone of the FOMA
terminal or the microphone of the earphone/
microphone.
1i“SETTINGS”“External
connection”“Select microphone”
“Internal microphone” or “External
microphone”
When you connect earphones without a
microphone, select “Internal microphone”.
©SCEI
N
zIf the phone number set in this function is not available
due to the 2in1 setting, you cannot dial using a flat-
plug earphone/microphone with switch.
N
zWhen “Select microphone” is set to “Internal
microphone”, the microphone sensitivity becomes the
same as the setting when handsfree is set to ON.
When an earphone/microphone is connected, you do
not need to talk with your mouth close to the
mouthpiece.
299
Convenient Functions
Using the switch to make calls
1Press the switch for 1 second or longer
on the standby screen
The FOMA terminal makes a call to a phone
number set at “Headset sw to dial”.
■To dial by entering a phone number
Enter a phone numberPress the switch for 1
second or longer
You can also make a phone call from the
phonebook, Redial/Dialed calls/Received calls.
2When you finish talking, hold down the
switch for 1 second or longer
The FOMA terminal emits a short double-beep
and ends the call.
Using the switch to accept calls
1While ringingPress the switch
The FOMA terminal emits a short beep and
answers the call.
2When you finish talking, hold down the
switch for 1 second or longer
The FOMA terminal emits a short double-beep
and ends the call.
Automatically receiving calls with an
earphone/microphone connected
<Auto answer setting>
When a flat-plug earphone/microphone with switch
(optional) is connected, this function allows you to
answer received calls automatically without pressing
the switch.
zYou cannot answer the call automatically during a
voice or videophone call.
1i“SETTINGS”“External
connection”“Auto answer setting”
“Phone” or “Videophone”“ON”
Enter the ring time (001 to 120 in 3
digits)
■To disable the setting
“OFF”
Resetting the Function
Settings
<Reset settings>
You can reset the FOMA terminal’s function settings
to the defaults set at the time of purchase.
zFor details on the functions that are reset, refer to
“Menu Function List” (p.340).
zWhen the FOMA terminal is connected to an
external device such as a PC, the setting of “USB
mode setting” is not reset to the default setting.
zTo reset the functions below to default, run Reset
settings in each function:
• i-mode settings (reset)→p.148
• Reset mail settings→p.178
• Reset Full Browser settings→p.221
1i“SETTINGS”“Other settings”
“Reset settings”Enter your security
code“YES”
N
zIf you have subscribed to the “Call Waiting”, you can
answer a call that comes in during another call by
pressing the switch on the flat-plug earphone/
microphone with switch. You can also switch calls by
pressing the switch for 1 second or longer. However,
pressing the switch does not end the current call.
zDo not repeatedly press and release the switch on the
flat-plug earphone/microphone. The FOMA terminal
may answer the call automatically.
N
zWhen answering a videophone call automatically, your
substitute image is displayed to the caller.
zConnecting an earphone/microphone with switch
while the FOMA terminal is ringing does not answer a
call automatically, but removing it while the terminal is
ringing answers a call automatically.
Do not mistake “Initialize” for “Reset settings”.
If you perform “Initialize”, you will lose all the data
you have stored. →p.300
N
z“3G/GSM setting” may not be reset to default
depending on the network condition.
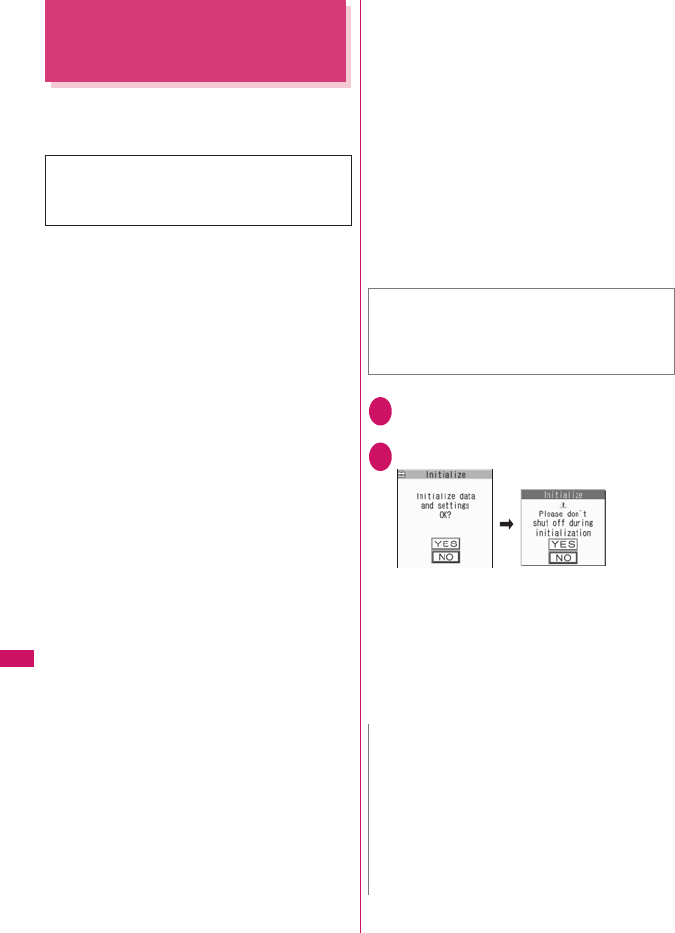
300
Convenient Functions
Resetting to the Default
Settings of the FOMA
Terminal
<Initialize>
This function deletes stored data and returns the
settings for the FOMA terminal’s functions to their
defaults set at the time of purchase.
zPre-installed data is not deleted.
zFor more information on the restored default
settings, see “Reset settings”.
z“Initialize” resets the functions reset by “Reset
settings” and the functions and data listed below to
their default settings set at the time of purchase.
*1: All data are initialized even if some data are not displayed
in 2in1 A mode or B mode.
*2: All the data of A mode/B mode is reset regardless of the
2in1 mode.
*3: Stored data, downloaded data, i-αppli, still images or
movies shot with the camera, etc.
zGroup names and folder names, etc. that you have
edited revert to their default names.
zThe secret data or data in Secret folder are also
deleted.
zEnsure that the battery is fully charged before
initializing the FOMA terminal. It may not be
possible to initialize the FOMA terminal if the
battery is low.
zDo not turn the FOMA terminal off while initializing.
zYou cannot use any other functions while the
FOMA terminal is being initialized. Also, you cannot
receive voice or videophone calls or mails.
1i“SETTINGS”“Other settings”
“Initialize”Enter your security code
2“YES”“YES”
Initialization begins.
Initialization may take several minutes.
When initialization ends, the FOMA terminal is
automatically restarted and displays the
Software Update descriptions.
■If initialization is not completed correctly
“OK” after turning the power on
The initialization starts again.
“Initialize” deletes all of your important data
including phonebook, mail, downloaded images or
melodies, i-αppli, PDF data, still images and
movies shot with the camera (even protected data).
• Mail data*1
• Mail folders*1
• Template*1
• i-mode settings
• URL history
• Additional service
• Multi Number
(Phone number setting)
• FOMA terminal (Phone)
Phonebook*2
• My Profile*1
• Software list
•i-αppli Auto-start set
•i-αppli action info
• Call data
• Kisekae Tool
• Pause dial
• Security code
• Learning record (Clear
learned under Character
input set)
•To Do list
• Schedule
• Play/Erase msg. (Record
message*1/Voice memo
(in-call)*1/Voice memo)
• Play/Erase VP msg.*1
• Exchanging history
(Data
security service)
• Data stored by the user*3
• The operating history for
the menu display setting
• Choku-Den*2
• The software updating
information
• Music play history
information
• Programs of the
Music&Video Channel
• Bookmark
• Screen memo
•Enter URL
• Go to location
• Chaku-moji sent
messages record
• Full Browser settings
• i-Channel setting
• Channel list
• Group setting*2
• Received calls*1
• Redial/Dialed calls*1
• Received address*1
• Sent address*1
• Mail member*1
• Own dictionary
• Download dictionary
• Text memo
• External IC card
information (IC card
authentic.)
• Voice announce
• Mail Setting*1
• Message
• Text reader
• Bar code reader
• Reference history of the
dictionary
•Chara-den
•TV link
• Channel list
• Booking program list/
Timer recording list
• (1seg) Display setting
• Recording result
• PDF data
• Deco-mail® pictographs
zPerforming “Initialize” restores your FOMA terminal
to the default settings.
It is recommended to back up the data stored on the
FOMA terminal by taking a note or using DOCOMO
keitai datalink (p.329) or the microSD card.
N
zWhen the FOMA terminal is initialized, the i-Channel
ticker is not displayed. The ticker is turned on again
automatically when the information is updated
automatically or when p is pressed to receive the
latest information.
zSettings of data communication which uses a PC are
not initialized.
zThe data of the Osaifu-Keitai i-αppli and the data on
the IC card are not deleted.

301
Character Entry
Character Entry............................................................................................................... 302
Entering Text Using 5-Touch ................................................................................ 304
Modifying/Storing Common Phrases ............................................. 308
Copying, Cutting and Pasting Text .................................................................................. 308
Entering Text Using Kuten Codes.................................................................. 309
Storing Frequently Used Words................................................................ 309
Resetting the Learning Record ................................................................... 310
Using Download Dictionaries............................................................. 310
Entering Text Using 2-Touch ................................................................................ 310
For the “Kuten code list”, refer to the PDF format “Kuten Code List” in the provided CD-ROM.
To view the PDF format “Kuten Code List”, Adobe® Reader® is required. If this software is not installed
on your PC, install the Adobe® Reader® in the CD-ROM. Refer to the “Adobe Reader ヘルプ” (Help of
the Adobe Reader) for details on how to use it.
5-touch
Store common phrases
Kuten code
Own dictionary
Clear learned
Download dictionary
2-touch
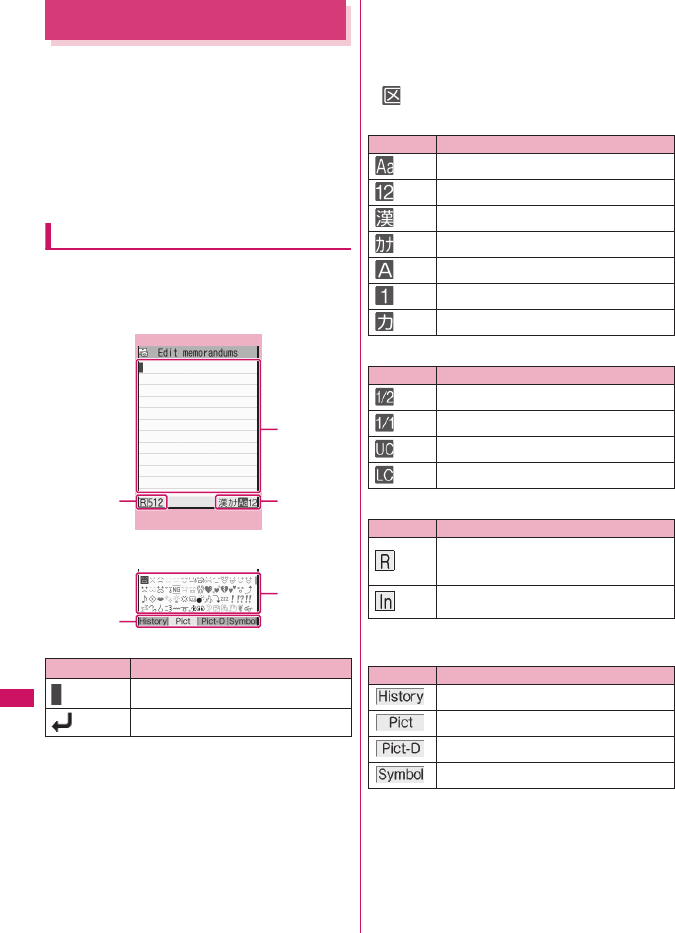
302
Character Entry
Character Entry
The FOMA terminal has 2 character entry mode:
“5-touch” and “2-touch”. This section explains the
character entry mainly using the “5-touch input”.
zRefer to the following sections for the settings,
characteristics and method of each character entry
mode.
“Setting the character entry mode”→ p.303
“Entering Text Using 5-Touch Input” →p.304
“Entering Text Using 2-Touch Input” →p.310
Character entry (edit) screen
The Character entry (edit) screen is made up of ①
text entry area, ② information display area, and ③ list
display area. The descriptions of icons displayed in
each area are as follows:
①Character entry area
②Information display area
②-1 Input mode display
Currently selected input mode highlights.
Displayed content varies depending on used input
method.
• also appears in Kuten mode.→p.309
5-touch
2-touch
②-2 Character count display
②-3 Pictograph/Symbol type display
Type of listed pictographs/symbols.
③List display area
List of pictographs/symbols, conversion candidates,
etc.
Icon Description
Cursor (Text entry position)
Line feed mark (Line break position)
Text entry (edit) screen
①
②
-1
③
②
-2
②
-3
Function menu
p.306
Display Input mode
Single-byte alphabet
Single-byte number
Kanji/Hiragana
Single-byte katakana
Double-byte alphabet
Double-byte number
Double-byte katakana
Display Input mode
Single-byte
Double-byte
Uppercase
Lowercase
Display Input mode
Number of remaining bytes that can be
entered (single-byte character: 1 byte,
double-byte character: 2 bytes)
Number of characters that have been
entered
Display Input mode
Pictograph/Symbol input history
Pictographs
Pictograph D
Symbols
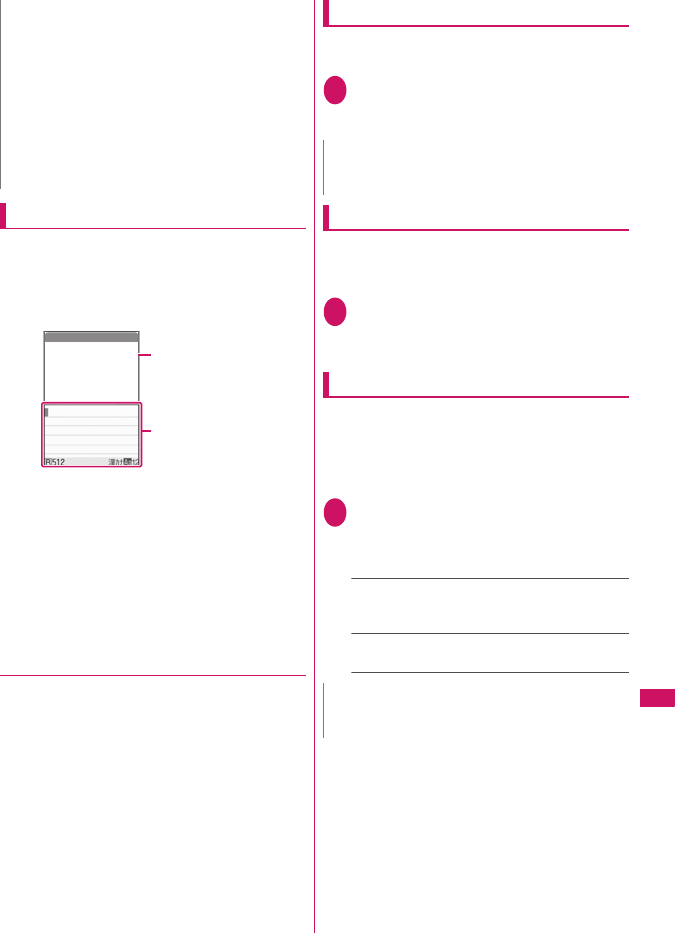
303
Character Entry
Divided screen
Some screens, such as that for storing schedule
entries while referring to the original message, are
split into 2 windows displaying the function operation
screen and the Character entry (edit) screen at the
same time.
zThe function operation screen and Character entry
(edit) screen are displayed at the same time in the
following cases:
• Adding schedule entries while referring to an
i-mode screen
• Entering words to search by activating
dictionaries from an i-mode screen
• Editing text while referring to the results of a
dictionary search
●Changing windows
When a function operation screen and the Character
entry (edit) screen are displayed at the same time,
select “Change window” from the function menu to
switch between screen.
Setting the character entry mode
You can set the character entry mode you use from 2
character entry modes (5-touch/2-touch).
1i“SETTINGS”“Other settings”
“Character input set”“Input mode”
Select input mode
Switching the character entry size
You can select the character size on the character
entry (edit) screen or Symbol/Pictograph entry screen
from 4 types of “Small/Standard/Large/X-large”.
1i“SETTINGS”“Other settings”
“Character input set”“CHG input
size”Select the input size
Setting the conversion method
Set the conversion method for Kanji/Hiragana input
mode.
zPrediction candidates are stored at the time of
purchase.
zUsing Prediction to input characters→p.304
1i“SETTINGS”“Other settings”
“Character input set”“Select
conversion”Select conversion
method
Prediction (default)……Predicts a word for an
entered character or following word for a selected
word.
User conversion……Converts the entire reading
after entered.
N
zEven in single-byte mode, double-byte characters are
entered in Kanji/Hiragana input mode.
zPictograph D is Deco-mail® pictograph that can only
be entered on the Compose message screen, Edit
header/signature screen or Edit Template screen.
zThe number of characters that have been entered
appears only in some functions, e.g. composing SMS.
zOn the i-mode Message or Edit Template screen, if
the number of characters that can be entered is
exceeded, “−” (minus) appears.
The new model will be on
sale from August 28, 20
08. Waiting for you to c
ome by.
Info
Operation screen for
the function
Character entry (edit)
screen
Saving schedule
referring from i-mode
N
zYou can change input modes using the function menu
while entering text.
N
zYou can change conversion methods using the
function menu while entering text.
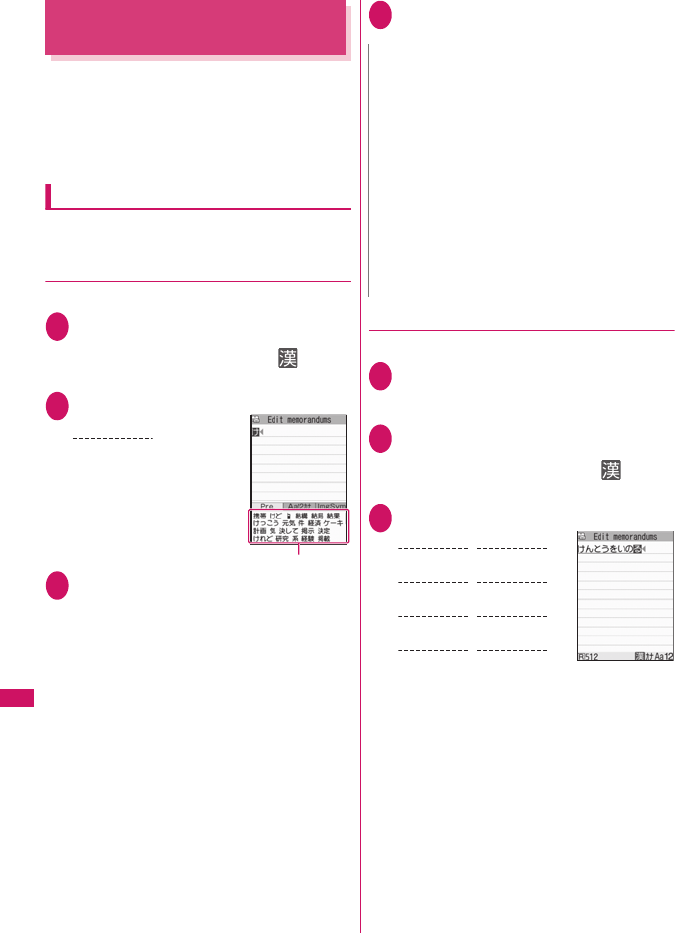
304
Character Entry
Entering Text Using 5-Touch
<5-touch>
You can enter 1 character by pressing a dial key for
several times. For example, to enter “う”, the third
character of the “あ column”, “あいうえお”, press
1 3 times.
zRefer to “Characters that can be entered using 5-touch
input” (p.350) for details on the character assignment.
Entering kanji/hiragana/katakana
Enter the readings in hiragana, then convert them into
the character such as kanji, hiragana or katakana.
●Using Prediction to enter text
<Example: To enter “ 携帯電話 ”>
1Character entry (edit) screen (p.302)
Set Kanji/Hiragana input mode
When “Kanji/Hiragana input mode ( )” is not
set, press o (Chrct) to switch the mode.
2Enter a part of the reading
“け” is entered in the text
entry area and predicted
candidates appear.
3gSelect a word
Select “携帯”
The selected words appears in the text entry
area. Next predicted candidates which follows
the selected word appears in the candidate list.
■When the candidates do not includes the
word you want to enter
t
Return to the reading entry. The predicted
candidates change as you continue entering the
reading.
■To convert temporarily
p (Convert)
User conversion list appears.→p.304
■To display alphanumeric-katakana candidate
list or image-symbol candidate list
u (tab) or o (tab)
Each candidate list appears.
■To confirm the hiragana
d (Set)
4gSelect next word
Select “電話”
●Using User conversion
<Example: To enter “ 健闘を祈る ”>
1Change the conversion method to
“User conversion”
“Setting the conversion method”→p.303
2Character entry (edit) screen (p.302)
Set Kanji/Hiragana input mode
When “Kanji/Hiragana input mode ( )” is not
set, press o (Chrct) to switch the mode.
3Enter hiragana
■If you press the wrong key
Press t to delete the character
■If you press a key too many times
q
The previous character assigned to that key
appears.
■When the next character to be entered is
assigned to the same key
j or wait for cursor to move automatically
Cursor moves and the following characters can
be entered. The wait time can be set from the
function menu.→p.306
■To confirm the hiragana
d (Set)
Predicted candidate list
2 4 times
け
N
zPictograph idioms appear in the candidate list
depending on the entered reading.
Pictograph idiom readings →p.355
zUse “Operation in item” to change operation modes to
select word from candidate list.→p.303
zConversion candidate list does not appear in the input
mode other than Kanji/Hiragana input mode.
zA word entered for once is added to the predicted
candidate by the learning function. You can delete the
added word by highlighting the word and pressing
t for 1 second or longer.
To delete all the learned predicted candidates, clear the
leaned records of the word prediction with “Clear
learned”.→p.310
2
4 times
0
3 times
4
5 times
けん
1
3 times
うと
0 twice 1 twice
5
5 times
をい
9
3 times
るの
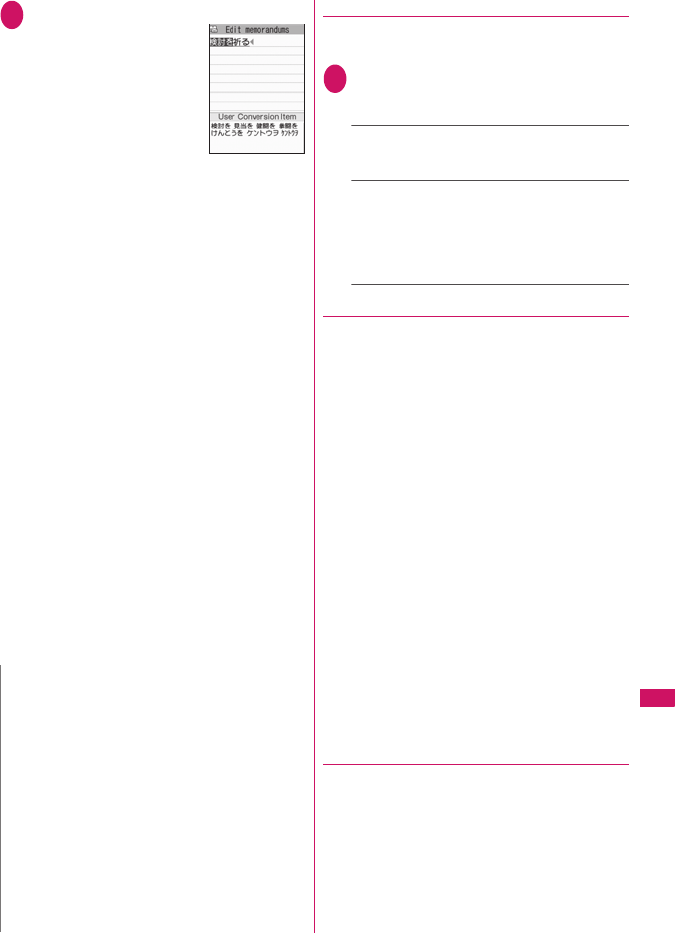
305
Continued on next page
Character Entry
4gConvert entered text
The first syllable converts and
highlights. The unconfirmed
text is underlined (_).
■If the conversion
candidate is the desired
kanji or katakana
d (Select)
The word is confirmed and
the next phrase is highlighted.
■If the conversion candidate is not the kanji
or katakana you want
gSelect word
Select a word from the User Conversion Item.
Hiragana and katakana are included in the User
Conversion Item.
If the readings in the conversion range consists
entirely of “あ”-level characters, numbers are
also included in the conversion candidates. For
example, entering 123 (あかさ) also
shows the conversion candidate “123”.
■To change the conversion range
Press v to change the conversion rangeg
Select word
Candidates listed in the User Conversion Item
change as the conversion range changes.
■To display the alphanumeric-katakana
conversion candidate list
to (Aa12カナ)
Aa12カナ Conversion Item of alphanumeric-
katakana candidates appears. For example,
pressing 23 (かさ) o (Aa12カナ) shows
the conversion candidates such as “AD”, “23” or
“カサ”.
For numbers of 2 to 4 digits which can be used as
date (ex. 10/19) or time (ex. 10:19), such date and
time are also displayed as conversion candidates.
●Changing selection methods
Select b method or c method to select word from
Prediction list or User Conversion Item.
1i“SETTINGS”“Other settings”
“Character input set”“Operation in
item”Select any item:
↑↓←→Key (default)……Use b to select word
from the displayed list. To change the conversion
range, press t then use v.
↑↓Key……Use c to select word from the
displayed list. Press g to highlight next candidate,
and f to highlight previous candidate. Press and
hold c for 1 second or longer to move between
candidate lines. To change the conversion range,
use v.
●The number of characters and scrolling
■The number of bytes remaining and the number
entered
The number of bytes that can be entered or characters
that have been entered on the Character entry (edit)
screen is counted according to the rules listed below.
• When the number of bytes is counted, each
double-byte character is counted as 2 bytes and
each single-byte character is counted as 1 byte.
• When the number of characters is counted, single-
byte/double-byte character, single-byte dakuten
“゛” and han-dakuten “゜” are counted as 1
character respectively.
In the Character entry (edit) screen, if the number of
characters that can be entered using the current
function is exceeded, the exceeding part appears in
gray. Use as an approximate guide to how many more
characters you can enter.
■Scrolling
In the Character entry (edit) screen, use c to scroll
up and down one line at a time, and s (▼メモ) and
a (▲マナー ) to scroll 1 page at a time.
In the conversion candidates list, you can also use
s (▼メモ) or a (▲マナー ) to scroll 1 page at a time.
●Data protection during text entry and
editing
When you are entering text in the Character entry
(edit) screen and the battery fails or you receive a
voice call, the entered text is stored and not cleared
from the screen.
■If the battery fails
If the low-voltage alarm sounds during text entry, the
Character entry (edit) screen is replaced by the
“Recharge battery” message screen. When this
happens, the entered text is automatically confirmed
N
zIf the User Conversion Item includes symbols,
pictographs or face marks, you can convert the text to
these symbols.
Refer to the following lists for the readings of symbols,
pictographs and face marks.
• “Symbols List”→p.352
• “Pictographs List”→p.353
• “Face Marks List” →p.358
zFor other text entry operations such as entering
symbols, pictographs, or inserting a space or a line-
feed, refer to “Useful keys to assist text entry” (p.306)
and “Function menu of the Character entry (edit)”
screen (p.306).
zYou can use kuten codes to enter kanji that cannot be
entered by conversion.→p.309
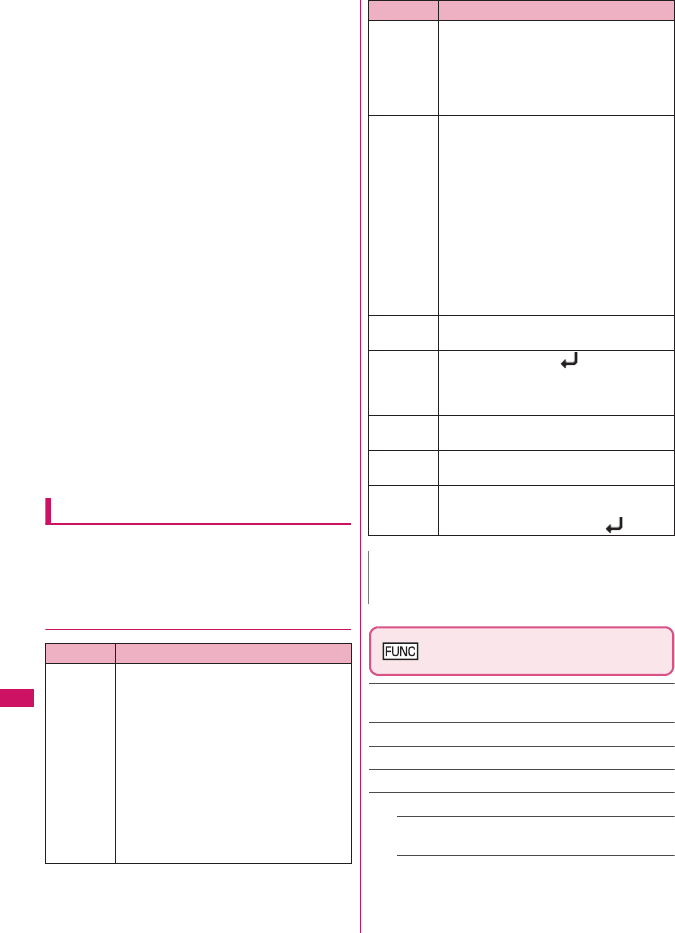
306
Character Entry
and saved so that you can continue entering the text
when you turn the FOMA terminal back on and
retrieve the function. However, in some functions, the
entered data is not saved. Also, unconfirmed text that
is being converted is not saved.
Re-editing the phonebook→p.71
■If you press y
If you press y while entering text, a message appears
asking whether to discard and exit text entry. However,
this message does not appear if no text is entered.
<To quit without saving the text>
Select “YES”. The previous screen or standby screen
reappears without saving the entered text.
You can also exit the text entry screen without saving
the entered text by pressing y.
<To continue entering text>
Select “NO”. The Character entry (edit) screen
reappears with the entered text still displayed.
You can also return to the Character entry (edit)
screen by pressing t.
■When you receive a voice call
If you receive a voice call while entering text, you can
answer the call without disturbing the text being
entered. When the call ends, the Character entry
(edit) screen reappears. You can use i (MULTI)
during a voice call to display the task switch screen
and return to the Character entry (edit) screen while
talking.→p.283
Other text entry functions
For the operations such as switching the character
entry mode on the Character entry (edit) screen or
entering symbols or pictographs, you can use useful
keys as well as the function menus.
●Useful keys to assist text entry
Character entry (edit) screen
(p.302)
Single-byte⇔Double-byte……Switches the single-byte/
double-byte modes.
Common phrases→p.307
Copy・Cut・Paste →p.308
Undo……Undo the previous operation.
Input method……Set input method.
Input mode (default: 5-touch)……Toggle 5-touch/
2-touch.
Auto cursor (default: 1(slow))……Set speed of auto
cursor movement (□ to I). Select “off” or “1” to “5”.
off: Does not move (remains □)
1: Slowest, 5: Fastest
Key Description
p (Pict/
Sym)
Enters pictographs or symbols
continuously.
The list changes as follows every pressing
p (Pict/Sym).
History→Pict→Pict-D*→Symbol
*: Only appears on the Compose
message screen, Edit header/Edit
signature screens and Edit Template
screen.
To end the continuous entry, press
u (Close) or t.
“Symbols list”→p.352
“Pictographs” →p.353
p (Pict/
Sym)
(1 second
or longer)
Displays the Pictgraph D (Deco-mail®
pictograph) entry screen which is
arranged by the categories.→p.157
*: Only available on the Compose
message screen, Edit header/signature
screen or Edit Template screen.
o (Chrct) zThe character mode switches each time
you press o (Chrct) in 5-touch mode.
Alphabetic (single-byte)→Numeric
(single-byte)→Kanji/Hiragana (double-
byte)→Katakana (single-byte)
* Use the function menu “Single-byte/
Double-byte” to switch “Single-byte”
and “Double-byte” in Katakana,
alphabets and numbers modes.
zDouble-byte and single-byte switches
each time you press o (A/AB) in 2-
touch mode.
Double-byte→Single-byte
wEnter Dakuten, Han-dakuten or punctua-
tion marks.
qzEnters a line feed “ ” and moves the
cursor to the next line.
zReturns to the previous reading in 5-
touch input mode. (Example: え→う)
rConvert entered character to uppercase/
lowercase. (Example: つ→っ , a→A)
0zPress repeatedly to enter a space.
zEnter a punctuation mark, etc.
zWhen the cursor is at the end of the text,
pressing j enters a space and pressing
g enters a line feed symbol “ ”.
N
<History>
zPreviously entered pictographs and symbols appear.
Key Description
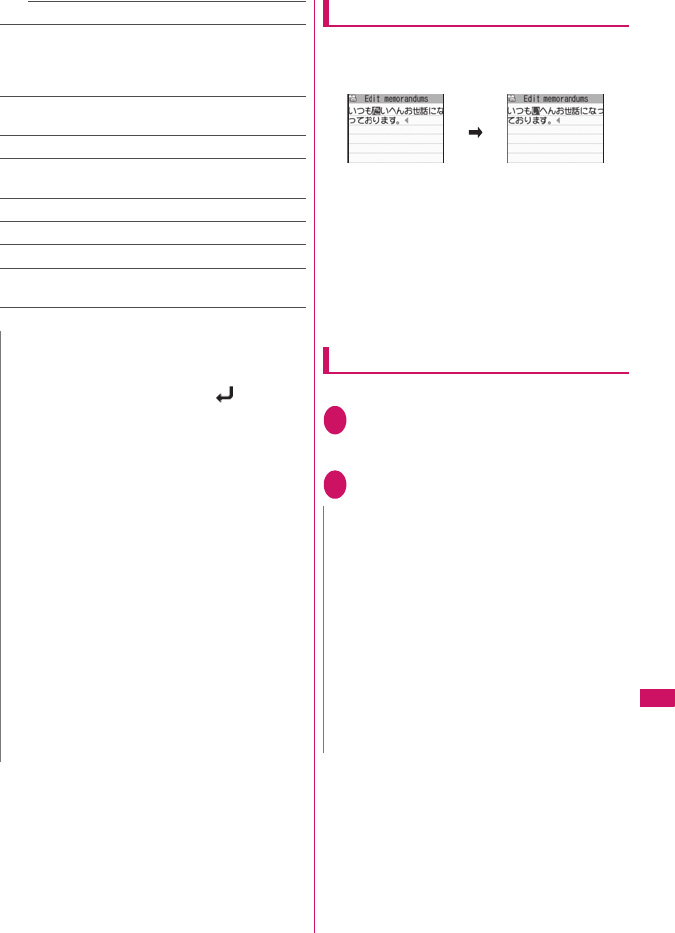
307
Character Entry
Select conv.→p.303
Quote phonebook……Searches for a phonebook entry
to quote from and selects an item to quote.
“About multiple-choice”→p.38
Searching the phonebook→p.73
Quote My Profile……Selects an item to quote. “About
multiple-choice” →p.38
Kuten code→p.309
Bar code reader……Quote data read by Bar code
reader.→p.129
Refer dictionary……Starts the dictionary.→p.296
Enter……Save edited text and exit text entry (edit).
Cancel……Exit text entry without saving edited text.
Change window*……Switches to the window on the
upper of the screen.→p.303
* : Appears only when the screen is divided.
Deleting text
Use b to move the cursor to the character you want
to delete and hold down t briefly (less than 1
second). The character under cursor is deleted.
■If you hold down t for 1 second or longer
Text under and following the cursor is deleted.
■When there is no character under cursor and in
the right side of cursor position
The character to the left of the cursor is deleted.
■If you hold down t for 1 second or longer
when there is no character under and following
the cursor
All the text is deleted.
Entering common phrases
zModifying/Storing Common Phrases→p.308
1Character entry (edit) screen (p.302)
u (FUNC)“Common phrases”
Select a folder
2Select a common phrased (Select)
N
zYou cannot switch the double-byte/single-byte modes
in “Kanji/Hiragana input mode”.
zYou can delete the line-feed symbol “ ” in the same
way as other characters.
zYou cannot enter double-byte symbols in the e-mail
address registration screen, i-mode mail address input
screen or URL input screen.
zIn the Character entry (edit) screens for specific items
such as postal codes, it may not be able to switch the
text entry mode.
<Undo>
zThe following operations can be undone:
• Enter text
• Enter common phrases →p.307
• Enter Pictographs/Symbols →p.306
• Enter Kuten code →p.309
• Cut & Paste →p.308
• Delete text→p.307
• Quote phonebook/My Profile→p.307
<Quote My Profile>
zWhen you quote an address information, a space may
be entered between each item.
zNTT DOCOMO accepts no liability whatsoever
regarding the problem caused by the incorrect input of
the owner information.
N
zCommon phrases can be used in the following
Character entry (edit) screens:
• Edit text memo
• i-mode mail subject/message
• i-mode mail headers/signatures/quotation marks
• Enter mail search subject
• Enter auto sort setting subject
• Common phrase folder/Editing common phrase
• Edit alarm title
• Refer dic. words input
• Edit To Do list
• Edit Wake-up message
• Edit i-mode text box
•Edit i-αppli text
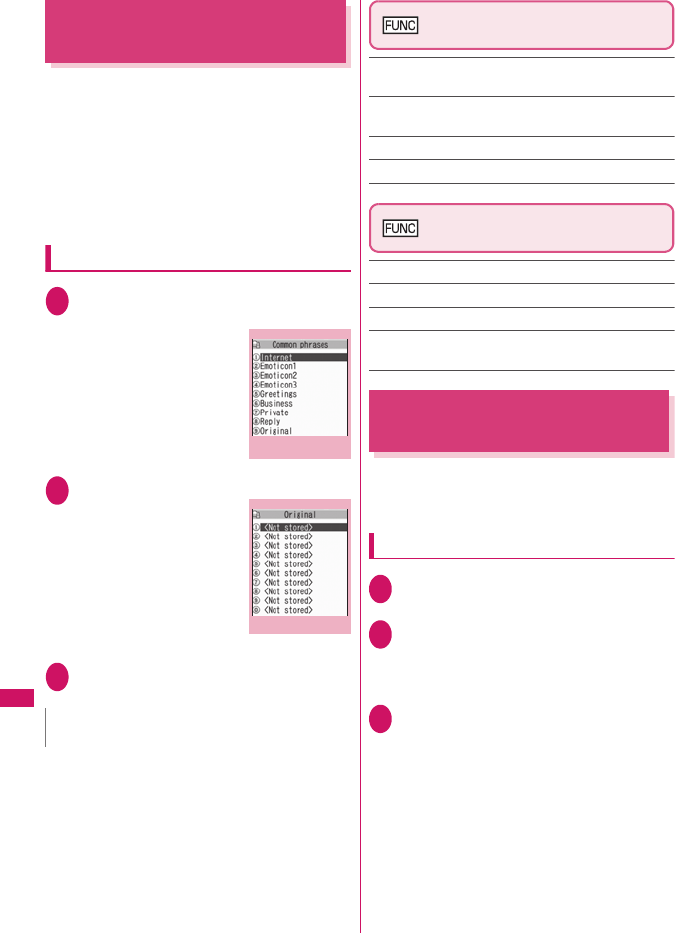
308
Character Entry
Modifying/Storing Common
Phrases
<Store common phrases>
You can store frequently used phrases as common
phrases in advance so that they can be retrieved
when entering text.
zUp to 10 original common phrases can be stored in
the “Original” folder.
zEach of the 8 category folders other than “Original”
contains 10 pre-installed common phrases.→p.359
zPre-installed common phrases can be edited.
zFolders can be renamed.
Composing a new common phrase
1i“OWN DATA”“Common
phrases”
The “Common phrase folder
list” screen appears.
2Select a folder
The “Common phrase list”
screen appears.
3Highlight “<Not stored>”o (Edit)
Enter the common phrase
Common phrase folder list
screen (p.308)
Edit folder name……Edits the folder name. You can
enter up to 10 double-byte or 20 single-byte characters.
Reset name……Resets the folder name to the default
folder name.
iC trans. all→p.260
Send all Ir data→p.258
Common phrase list screen
(p.308)
Edit……Edits the common phrase.
iC transmission→p.259
Send Ir data→p.258
Delete this・Delete all……Deletes one or all common
phrase(s).
Copying, Cutting and Pasting
Text
zOnly one item of copied or cut data can be stored.
Copying or cutting a new item overwrites the
previously stored text.
Copying (or cutting) text
1Character entry (edit) screen (p.302)
u (FUNC)“Copy” or “Cut”
2Move the cursor to the beginning of
the text to be copied or cutd (Start)
■To select all text
o (All)
3Move the cursor to the end of the text
to be copied or cutd (End)
The selected text is stored. You can store up to
5,000 double-byte characters or 10,000 single-
byte characters.
■If the text is cut
The selected text is deleted, but it is stored in the
FOMA terminal.
N
zYou can use pictographs in common phrases for mails.
Common phrase
folder list
Function menu
p.308
Common phrase list
Function menu
p.308
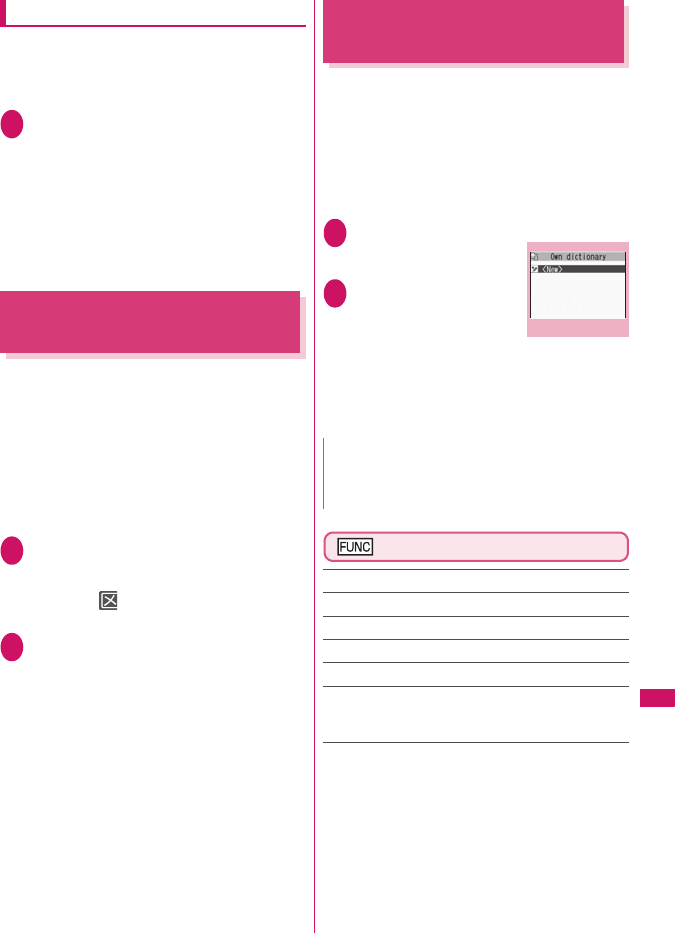
309
Character Entry
Pasting text
zOnce you have cut or copied text, you can paste
that text as many times as you like until you cut or
copy other text next time or turn the FOMA terminal
off.
1Character entry (edit) screen (p.302)
Move the cursor to the position to
pasteu (FUNC)“Paste”
■If the text to be pasted includes characters
that cannot be entered in the intended
Character entry (edit) screen
A message appears notifying you that the
characters will be replaced by spaces when the
text is pasted.
Entering Text Using Kuten
Codes
<Kuten code>
This function provides a way of entering kanji,
hiragana, katakana, symbols and alphanumeric
characters using 4-digit “kuten” codes.
zFor the Kuten code and the characters that can be
input using the Kuten code, refer to the PDF format
“Kuten Code List” in the provided CD-ROM.
zThe character or a symbol in the Kuten Code List
may be displayed differently on the screen.
<Example: To enter “ 慶” (kuten code 2336)>
1Character entry (edit) screen (p.302)
u (FUNC)“Kuten code”
The input mode changes to “Kuten code input
mode” and “ ” appears in the information
display area.
2Enter kuten code 2336
The character (“慶” in this example) for the
entered code appears and the FOMA terminal
reverts to the original input mode.
■If there is no corresponding character for
the entered kuten code
A space is entered.
Storing Frequently Used
Words
<Own dictionary>
You can store frequently used words in the own
dictionary under your preferred reading and recall
these words by entering and converting the reading in
the Character entry (edit) screen.
zOwn dictionary can store up to 100 words.
zEach Word can contain up to 10 double-byte or 20
single-byte characters. Readings can include up to
10 double-byte hiragana.
1i“OWN DATA”“Own dictionary”
The “Own dictionary” screen
appears.
2“<New>”Enter the
wordEnter the
reading
■To check the words
Selecting checking words
■To edit a word
Highlight the word you want to change
o (Edit)
Own dictionary screen (p.309)
Edit……Edits the stored word.
iC transmission→p.259
Send Ir data→p.258
iC trans. all→p.260
Send all Ir data→p.258
Delete……Selects the deleting method from “Delete this/
Delete selected/Delete all”.
“About multiple-choice”→p.38
N
zRegistered words can be entered using Prediction.
Some readings do not show candidates until
converted and entered.
Own dictionary
Function menu
p.309
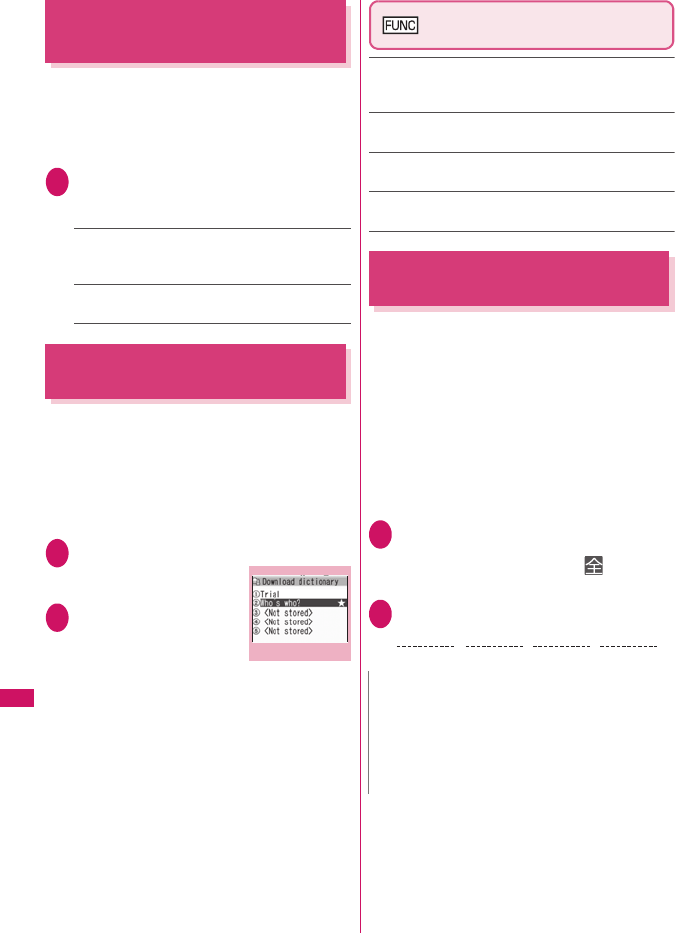
310
Character Entry
Resetting the Learning
Record
<Clear learned>
The learning record contains character strings that
were entered in the past and automatically stored as
candidates for character conversion. This procedure
resets the learning record to its default status at the
time of purchase.
1i“SETTINGS”“Other settings”
“Character input set”“Clear learned”
Enter your security code
Prediction/ImgSym.……Clears the learned records
stored using “Prediction”, “Pictograph”, “Face Mark”
and “Symbol”.
Kana/Kanji change……Clears the learned record
order for User conversion.
Using Download Dictionaries
<Download dictionary>
You can set the dictionaries downloaded from i-mode
sites, etc. for Prediction.
zThe FOMA terminal can store up to 5 download
dictionaries.
zThe dictionary is activated when downloaded.
zFor information on downloading dictionaries
→p.146
1i“OWN DATA”“DL dictionary”
The “Download dictionary”
screen appears.
2Select a dictionary
A star “★” appears next to
the active dictionary.
■To inactivate
Select a dictionary
marked with a star “★”.
The dictionary is inactivated and the star “ ★”
disappears.
Download dictionary screen
(p.310)
Edit title……Edits the title of the download dictionary. You
can enter up to 10 double-byte or 20 single-byte
characters.
Set dictionary……Activates or inactivates the download
dictionary.
Dictionary info……Displays information for the download
dictionary.
Delete this・Delete all……Deletes one or all download
dictionary (dictionaries).
Entering Text Using 2-Touch
<2-touch>
You can enter 1 character by pressing 2 dial keys.
For example, to enter “ う”, press 13 in
sequence as “う” is the third character of the “あ
column”, “あいうえお”.
zRefer to “Characters that can be entered using 2-
touch” (p.351) for details on the character
assignment.
zThe conversion method using Prediction/User
conversion is the same as that of 5-touch.
→p.304
<Example: To enter “ けんとう ”>
1Character entry (edit) screen (p.302)
Set to Double-byte input mode
When “Double-byte input mode ( )” is not set,
press o (A/AB) to switch the mode.
2Enter the hiragana
Download dictionary
Function menu
p.310
N
zw is also available to enter “Dakuten/Han-dakuten”
or to switch.
zr is also available to toggle “Uppercase/
Lowercase”.
zFunction menu “Single-byte/Double-byte” is also
available to toggle “Single-byte/Double-byte”.
24
け
45
と
03
ん
13
う
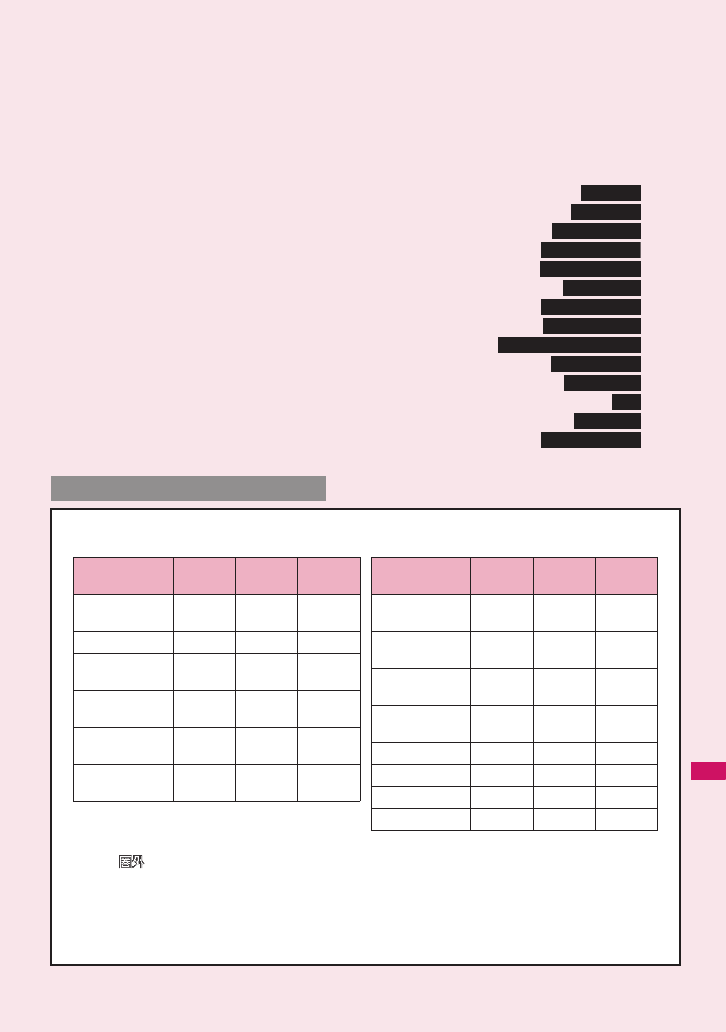
311
Network Services
Voice Mail Service ........................................................................................... 312
Call Waiting.................................................................................................... 313
Call Forwarding Service........................................................................... 314
Nuisance Call Blocking Service ............................................................. 315
Caller ID Request Service ..................................................................... 316
Dual Network Service ................................................................................. 316
English Guidance................................................................................... 316
Service Dialing Number ......................................................................... 317
Handling Calls Received During a Call ....................................... 317
Setting up Remote Control ...................................................................... 318
Multi Number.....................................................................................................
319
2in1 .......................................................................................................................... 320
OFFICEED ............................................................................................................ 324
Adding and Using Services ................................................................... 324
zYour FOMA terminal provides you with access to a range of useful DOCOMO network services. For
the outline and the details on the services, refer to the reference pages in the following table.
zFor the service used by connecting to the Network Service Center, you cannot operate the service
with “ ”.
zFor the application and questions, contact the inquiries number provided on the back of this manual.
zThis section explains the overview of the network services using the menus on the FOMA terminal.
For more details, see “Mobile Phone User’s Guide [Network services]”.
z“OFFICEED” is a fee-based service and requires a subscription. For details, visit DOCOMO Website
for corporates (http://www.docomo.biz/d/212/) (Japanese).
Voice Mail
Call Waiting
Call Forwarding
Nuisance Call Blk
Caller ID Request
Dual Network
English Guidance
Service Numbers
In-Call Function Selection
Remote Control
Multi Number
2in1
OFFICEED
Additional service
Available Network Services
Service name
Subscription
Monthly
usage fees
Ref. page
Voice Mail
Service
Required Charged p.312
Call Waiting Required Charged p.313
Call Forwarding
Service
Required Free p.314
Nuisance Call
Blocking
Not
required
Free p.315
Caller ID
Notification
Not
required
Free p.46
Caller ID
Request
Not
required
Free p.316
Public mode
(Driving mode)
Not
required
Free p.62
Public mode
(Power OFF)
Not
required
Free p.63
Dual Network
Service
Required Charged p.316
English
Guidance
Not
required
Free p.316
Multi Number Required Charged p.319
2in1 Required Charged p.320
OFFICEED Required Charged p.324
Melody call Required Charged p.84
Service name
Subscription
Monthly
usage fees
Ref. page
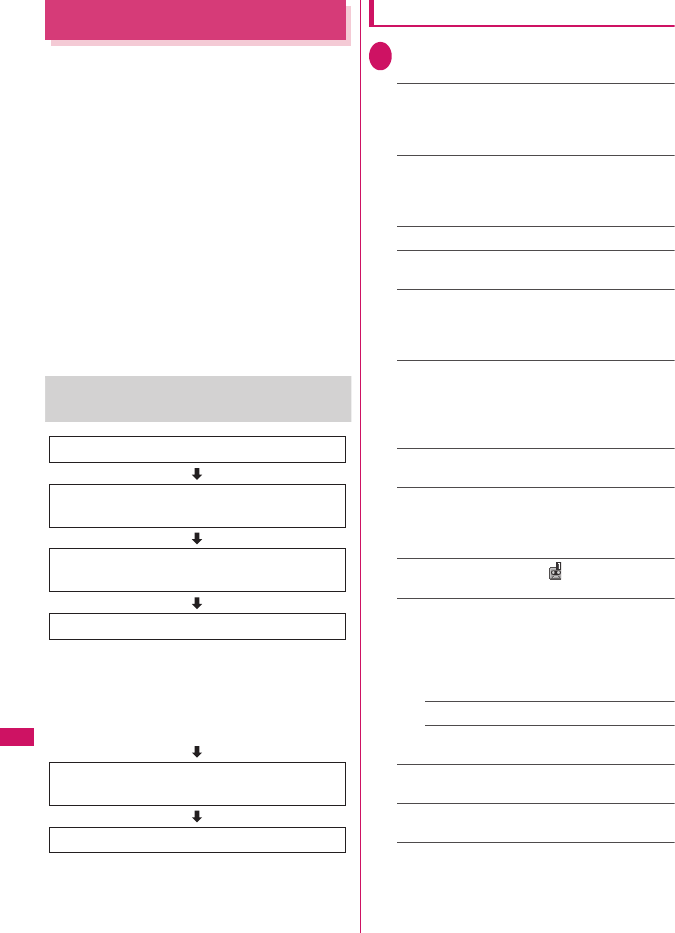
312
Network Services
Voice Mail Service
<Voice Mail>
When you are in the out of service area, when the
FOMA terminal is not turned on, or when you cannot
answer the call, this service plays an answer
message to the caller of the voice or videophone call
and stores the caller’s message on your behalf.
zTo give priority to voice mail when “Record
message” (p.64) is set at the same time, ensure
that the ring time set for voice mail is shorter than
the ring time set for “Record message”.
zWhen you do not answer the voice or videophone
call when the Voice mail service is set to “Activate”,
calls are logged in the “Received calls” record as
“Missed calls” record, and the “Missed call”
shortcut icon appears on the standby screen.
zThe message can be recorded up to 3 minutes for
1 message, up to 20 messages for each of the
voice and videophone calls, and stored up to 72
hours.
Basic flow of Voice mail service
operation
Using the Voice Mail service
1i“SERVICE”“Voice Mail”Select
any item:
Play messages*1……The FOMA terminal calls the
Voice mail service center.
Plays the recorded messages by following the audio
guidance.
Activate*1……Activates the Voice Mail service.
The ring time (000 to 120 seconds) can be set.
When set to 0 second, received calls are not
recorded in the “Received calls” record.
Deactivate*1……Deactivates the Voice mail service.
Set ring time……Changes the ring time only (000 to
120 seconds).
Check setting*1……Checks the current Voice mail
service settings.
• About the function menu of the displayed “Voice
Mail setting” screen.→p.313
Setting*1……Changes the Voice mail service
settings using audio guidance.
The FOMA terminal calls the Voice mail service
center.
Specify the settings by following the audio guidance.
Check messages……Checking whether there is a
recorded message.
Message notification*2……Emits the original
notification tone when the number of recorded
messages stored at the Voice mail service center
increases.
Erase icon……Clears the “ ” icon (Voice mail
icon) from the standby screen.
Activate notice call……When you receive a call
while the FOMA terminal is turned off or is out of the
service area, an SMS is sent to notify you of the
information about the call (date, time and the caller
ID) once you turn the FOMA terminal back on or
move back in to the service area.
All Calls……Notifies you of all received calls.
Calls with Caller ID……Notifies you of only
the calls with the caller ID.
Deactivate notice call……Deactivates the notice
call.
Notice call status……Checks the current Notice
call service settings.
*1: When 2in1 is set to Dual mode, the screen appears
to select Number A or Number B. However, the
selection screen appears for “Check setting” even in
B mode.
*2: Only for the recorded message of voice calls.
Voice Mail service activated
If the caller is in a hurry and wishes to leave a
message without listening to the Voice Mail
answering message, he or she can interrupt
the answering message and switch to message
recording mode immediately by pressing
q
.
Your FOMA terminal receives a voice/
videophone call
You cannot answer the call and it is
connected to the Voice Mail service center
The caller records a message
The Voice Mail service center notifies you that
you have a recorded message
You listen to the recorded message
313
Continued on next page
Network Services
Voice Mail setting screen
(p.312)
Activate・Deactivate……Activates or deactivates the
Voice mail service.
Set ring time……Changes the ring time.
Call Waiting
<Call Waiting>
When you receive a call while talking on a call, this
service notifies the call with a ring tone and you can
answer the newly received call by putting the current
call on hold. You can also put your current call on hold
and make a new call to someone else.
zTo use Call waiting, select “Answer” in “Incoming
Call Mng” (p.317) beforehand. If another setting is
selected, you will not be able to answer a voice call
received during another voice call even when Call
waiting is activated.
zYou can answer another call when you receive a
videophone call during a voice call or when you
receive a voice call or videophone call during a
videophone call if you activate Call waiting and set
“Incoming Call Mng” to “Answer”. In this case, you
have to end the current voice call or videophone
call (You cannot put the current call on hold).
→p.317
Using the Call Waiting
1i“SERVICE”“Call Waiting”
Select any item:
Activate・Deactivate……Activates or deactivates
the Call waiting service.
Check setting……Checks the current Call waiting
service settings.
Putting the current voice call on hold
to answer a new received voice call
1When you hear the double tones
(repeated soft double-beeps) during a
voice call, press r
Your first call is automatically put on hold and the
FOMA terminal answers the new voice call.
2Switch back to the first call
■To end the call with the second caller
y
r
This ends the call with the second caller and
returns you to your first call.
■To put the second caller on hold
r
This puts the second caller on hold and returns
you to your first call.
You can switch back and forth between the 2
calls by pressing r.
N
zTo change the Voice mail service setting for
videophone calls, make a voice call to “1412”.
zDTMF is not available if connected to Voice Mail with
Chara-den. Select “Send DTMF tone” from the
function menu to activate Send DTMF tone mode.
→p.50
<Check setting>
zWhen checking Number B setting for 2in1, only the
active or inactive information appears.
<Check messages>
zIf you have the recorded messages stored at the Voice
mail service center, the “ ” (voice mail icon) and
“ ” (“Voice mail” shortcut icon) appear on the
standby screen for the recorded messages of voice
calls. The recorded messages of videophone calls are
notified by SMS.
zThe number in the voice mail icon changes according
to the number of stored messages “ ”, “ ”, “ ”
... “ ” (10 messages or more).
The displayed number of Voice mail messages is the
number of new messages announced by the Voice
mail center. The number of stored messages is not
included.
zYou may not be able to use this function to check for
the message recorded after checking the message.
<Message notification>
zWhen 2in1 is set to A mode or B mode, the notification
tone does not sound when a message is recorded for
the unused number.
<Erase icon>
zClearing the icon does not delete the corresponding
recorded messages. The voice mail icon appears
again when you check for messages.
<Activate notice call>
zEven if you set the SMS Rejection setting, the FOMA
terminal receives the notification.
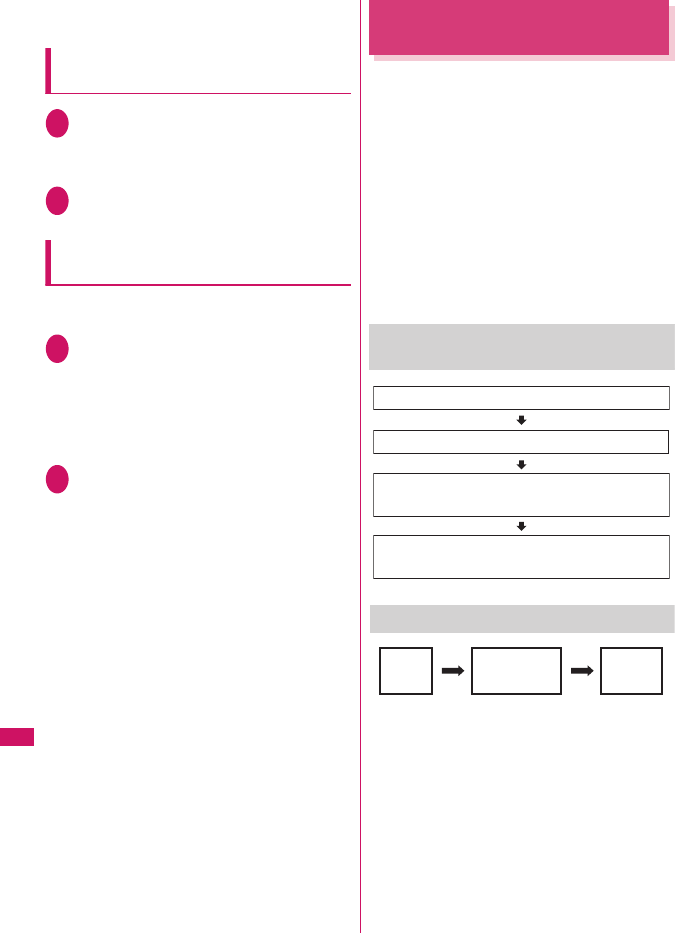
314
Network Services
■To end the voice call on hold
u (FUNC)“End held call”
Ending the current voice call to
answer another voice call
1When you hear the double tones
(repeated soft double-beeps), press
y
The first call is ended and the ring tone sounds.
2r
The FOMA terminal answers the new voice call.
Putting the current voice call on hold
to make a voice call to someone else
You can put your current voice call on hold and make
a new voice call to someone else.
1Dial another phone number during
your current callr
Your first call is automatically put on hold and the
FOMA terminal switches to the new call.
You can also make calls by searching the
phonebook.
Searching the phonebook→p.73
2Switch back to the first call
■
To end the new call
yr
This ends the new call and returns you to your
first call.
■To put the new call on hold
r
This puts the new call on hold and returns you to
your first call.
You can switch back and forth between the 2
calls by pressing r.
■To end the voice call on hold
u (FUNC)“End held call”
Call Forwarding Service
<Call Forwarding>
When you are in out of service area or when the
FOMA terminal is not turned on, or when you do not
answer the call within the set ringing time, this service
forwards the voice/videophone call.
zTo give priority to the Call forwarding service when
“Record message” (p.64) is set at the same time,
ensure that the ring time set for the Call forwarding
service is shorter than the ring time set for “Record
message”.
zWhen you do not answer the voice or videophone
call when the Call forwarding service is set to
“Activate”, calls are logged in the “Received calls”
record as “Missed calls” record, and the “Missed
call” shortcut icon appears on the standby screen.
Basic flow of Call forwarding service
operation
Call forwarding service call charges
Your FOMA terminal receives a voice
or videophone call
If you do not answer the voice or videophone call, it
is automatically forwarded to the specified number
Call Forwarding number registered
Call Forwarding service activated
Caller
Call Forwarding
service
subscriber
Forwarding
number
Charges paid
by the caller.
Charges paid by the Call
Forwarding service subscriber.
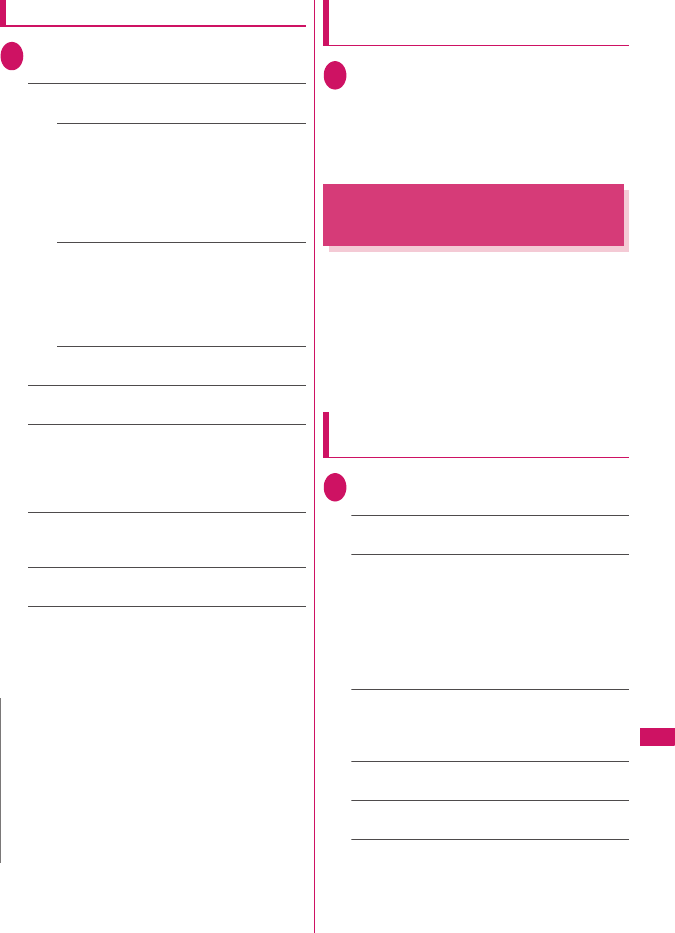
315
Network Services
Using the Call Forwarding service
1i“SERVICE”“Call Forwarding”
Select any item:
Activate*1……Set the forwarding number and the
ring time, then select “Activate”.
Register fwd number……Enter the forwarding
number.
Once you set the number, a star “★” appears
next to “Register fwd number”.
• You can use f or g to enter the number by
searching the phonebook.
How to search the phonebook→p.73
Set ring time……Enter the ring time (000 to
120 seconds).
Once you set the number, a star “★” appears
next to “Set ringing time”. When set to 0
second, received calls are not recorded in the
“Received calls” record.
Activate……Activates the Call forwarding
service.
Deactivate*1……Deactivates the Call forwarding
service.
Change forwarding No……Enter a phone number
to set a new forwarding number.
When you select “Change No.+Activate”, you can
also set the Call Forwarding Service to “Activate” at
the same time.
Fwd number busy*2……When the forwarding
number is busy, received calls are transferred to the
Voice mail service center.
Check setting*1……Checks the current Call
forwarding service settings.
*1: When 2in1 is set to Dual mode, the screen appears
to select Number A or Number B. However, the
selection screen appears for “Check setting” even in
B mode.
*2: The subscription to the “Voice Mail service” is
required.
Setting or canceling the call
forwarding guidance message
1On the standby screen
142
9
r
• Set the call forwarding guidance message by
following the audio guidance message.
• For more information, refer to the “Mobile
Phone User’s Guide [Network Services]”.
Nuisance Call Blocking
Service
<Nuisance Call Blk>
This service enables you to reject receiving
“Nuisance calls”. Once you store the number to
reject, calls from the number are automatically
rejected and answered by a message.
zThe ring tone does not sound even when you
receive a call from the number stored to reject.
Also, the call is not recorded in “Received calls”
record.
Using the Nuisance Call Blocking
service
1i“SERVICE”“Nuisance Call Blk”
Select any item:
Register Caller……Registers the number of the last
caller you answered as a barred numbers.
Register number……Registers the phone number
by using the dial keys or quoting from the phonebook
or Received calls record, etc.
• You can use f or g to enter the number by
searching the phonebook. Searching the
phonebook→p.73
• You can use h to search the Received calls
record and j to search the Redial record.
Delete last entry……Deletes the last registered
phone number. By repeating the same procedure,
you can delete the stored barred number one by one
from the last one.
Delete all entries……Deletes all the barred
numbers.
The number of entries……Checks the number of
call barring entries.
N
<Activate>
zWhen 2in1 is set to B mode, you cannot select
“Register fwd number” and “Set ring time”.
<Change forwarding number>
zWhen 2in1 is set to B mode, you cannot select
“Change No. + Activate”.
<Check setting>
zWhen checking Number B setting for 2in1, only
“Active” or “Inactive” appears.
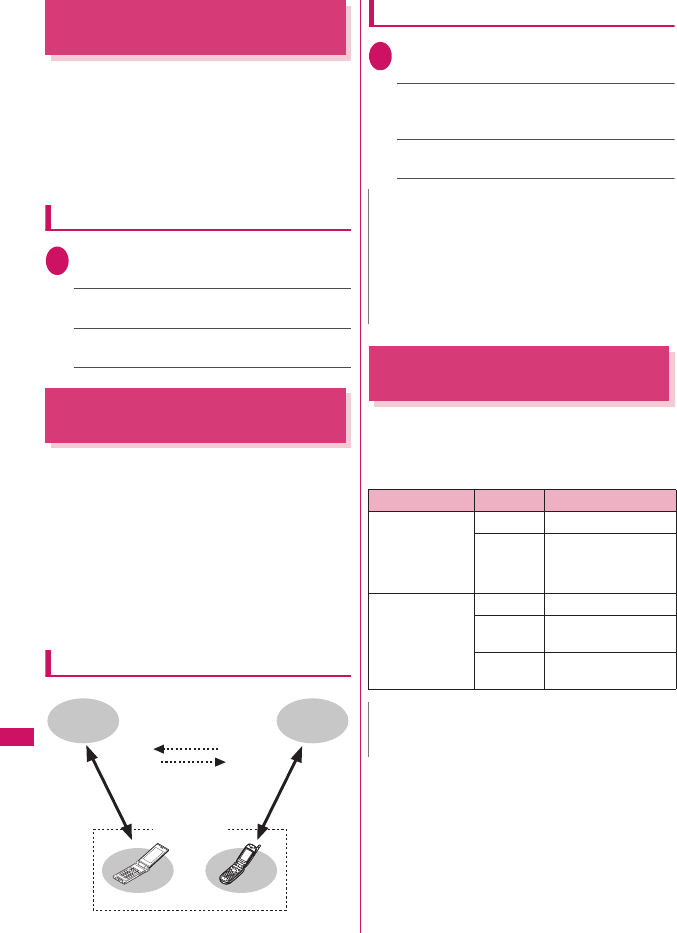
316
Network Services
Caller ID Request Service
<Caller ID Request>
When you receive a voice/videophone call from a caller
who do not provide his or her phone number (caller ID),
the call is answered by a message requesting the Caller
ID, then the call automatically ends.
zCalls rejected by the Caller ID request service are
not logged in the “Received calls” record and no
“Missed call” shortcut icon appears.
Using the Caller ID Request service
1i“SERVICE”“Caller ID Request”
Select any item:
Activate・Deactivate……Activates or deactivates
the Caller ID request service.
Check setting……Checks the current Caller ID
Request service settings.
Dual Network Service
<Dual Network>
This service enables you to use the mova terminal with
the phone number of your FOMA terminal. You can
switch between the FOMA network and the mova
network depending on the service area.
zYou cannot use the FOMA terminal and the mova
terminal at the same time.
zSwitch the Dual network service from the terminal
which is not using the service.
zFor details on how to access the service from a
mova terminal, refer to the “Mobile Phone User’s
Guide [Network Services]”.
Overview of Dual Network service
Using the Dual Network service
1i“SERVICE”“Dual Network”
Select any item:
Dual Network switching……The network security
code is required to switch.
Network security code→p.100
Check setting……Checks whether the FOMA
terminal can access the services or not.
English Guidance
<English Guidance>
You can set English as the language used in
guidance messages for setting network services such
as the “Voice Mail” service or the audio message
such as the out of area warnings.
*: Some services are not available.
・ Switching Dual Network
Service from the FOMA
terminal switches to the
FOMA network.
・ Switching Dual Network
Service from the mova
terminal switches to the
mova network.
Same phone
number
FOMA
network
mova
network*
FOMA terminal mova terminal
N
zIf you use Dual Network Service on the mova terminal
in Japan after using the FOMA terminal overseas, turn
on the FOMA terminal before use.
<Dual Network switching>
zTo switch networks, end communication from the
terminal that is currently able to access services
before making the switch.
Item Language Guidance
Outgoing
(including the
guidance for the
settings of the
network services)
Japanese Plays in Japanese.
English Plays in English.
Incoming
(guidance
messages played
to callers)
Japanese Plays in Japanese.
Japanese
+English
Plays in Japanese first
and then in English.
English+
Japanese
Plays in English first
and then in Japanese.
N
zCaller’s setting has priority over receiver’s setting
between DOCOMO’s handsets.
317
Network Services
Using the English Guidance
1i“SERVICE”“English Guidance”
Select any item:
Guidance setting……Selects the setting from the
following:
Outgoing+Incoming……Selects the language
for outgoing calls from “Japanese/English”,
then selects the language for incoming calls
from “Japanese/Japanese+English/
English+Japanese”.
Outgoing call……Selects the language only
for the outgoing calls from “Japanese/English”.
Incoming call……Selects the language only
for the incoming calls from “Japanese/
Japanese+English/English+Japanese”.
Check setting……Checks the current English
guidance settings.
Service Dialing Number
<Service Numbers>
You can make a call to the DOCOMO general help
desk and service counter for information on faults, etc.
zThe displayed items may be different or the items
are not displayed depending on the FOMA card
(UIM) you are using.
1i“SERVICE”“Service Numbers”
Select any item:
ドコモ故障問合せ……Calls the DOCOMO service
desk.
ドコモ総合案内・受付……Calls the DOCOMO
general information desk.
Handling Calls Received
During a Call
<In-Call Function Selection>
You can specify how to handle voice calls,
videophone calls and 64K data communication that
arrives during a call when you have subscribed to the
“Voice Mail”, “Call Forwarding” or “Call Waiting”
service.
zIf you have not subscribed to “Voice Mail”, “Call
Forwarding” or “Call Waiting” service, you cannot
answer the calls received during calls.
zTo use “Incoming Call Mng”, set “Set in-call arrival”
to “Active”.
Selecting how to handle incoming
calls during another call
<Incoming Call Mng>
1i
“SERVICE”
“Incoming Call Mng”
Select any item:
Voice Mail……Transfers voice or videophone calls
received during a call to the Voice mail service
center regardless of the “Call Waiting” and “Voice
Mail” service settings.
Call Forwarding……Transfers voice and
videophone calls received during a call to the
forwarding number regardless of the “Call Waiting”
and “Call Forwarding” service settings.
Call Rejection……Rejects voice and videophone
calls and 64K data communication received during a
call.
Answer……If “Call Waiting” is activated and a voice
call is received during another voice call, you can
use the “Call Waiting” service. If call waiting is not
activated or during a videophone call or 64K data
communication, the call can be handled in any of the
following ways:
• You can end the current voice or videophone call
or 64K data communication, and answer the
received voice or videophone call or 64K data
communication.
• You can use the function menu to manually handle
a voice call, videophone call or 64K data
communication received during a call. →p.318
• If “Voice Mail” service or “Call Forwarding” service
is activated, calls can be handled using these
service settings.
Set in-call arrival
Activates/deactivates the function setting selected in
“Incoming Call Mng” or checks the setting.
1i“SERVICE”“Set in-call arrival”
Select any item:
Activate……Activates the “Incoming Call Mng”
setting.
Deactivate……Deactivates the “Incoming Call Mng”
setting.
Check setting……Displays the current setting.
318
Network Services
Ending the current call or 64K data
communication to answer a received
call
●When the current call and incoming call
are the same type
<Example: To end the current voice call to answer an
incoming voice call>
1When you hear the double tones
(repeated soft double-beeps), press
y
This ends the current call and the FOMA
terminal starts ringing.
■For videophone or 64K data
communication
The ringing call screen appears.
y
2r
This accepts the incoming voice call.
■For 64K data communication
Receive the call on a PC
●When the current call and incoming call
are different types
If you receive a videophone call or 64K data
communication during a voice call, if you receive a
voice call or 64K data communication during a
videophone call, or if you receive a voice or
videophone call during 64K data communication, use
this procedure to end your current call or 64K data
communication to answer the incoming call.
<Example: To end the current videophone call to
answer an incoming voice call>
1You hear the double tones (repeated
soft double-beeps) and the voice call
ringing screen appears
When you receive a 64K data communication,
the double tones (repeated soft double-beeps)
do not sound.
2r
■For 64K data communication
yReceive the call on a PC
Manually rejecting calls or connecting
to the Call Forwarding or Voice Mail
service
<Example: When Set in-call arrival is set to “Activate”
and Incoming Call Mng is set to “Answer”>
1When you hear the double tones
(repeated soft double-beeps), press
u (FUNC)
2Select how to handle the received call
■To reject a received call
“Call Rejection”
■To forward a received call to the
forwarding number
“Call Forwarding”
■To transfer a call to the Voice mail service
center
“Voice Mail”
With any of the above procedures, you can
return to your first call.
Setting up Remote Control
<Remote Control>
You can operate the “Voice Mail” or “Call Forwarding
Service”, etc. from push-key-type ordinary phones,
payphones, DOCOMO mobile phones, etc.
zTo use the “Voice Mail” or “Call Forwarding” service
overseas, set Remote Control beforehand.
zFor details on operating network services from a
payphone, etc., refer to the “Mobile Phone User’s
Guide [Network Services]”.
1i“SERVICE”“Remote Control”
Select any item:
Activate・Deactivate……Activates or deactivates
the Remote control.
Check setting……Checks the current Remote
control settings.

319
Network Services
Multi Number
<Multi Number>
You can add and use the maximum of two additional
numbers (additional number 1 and additional number
2) other than the basic number as the phone numbers
of the FOMA terminal.
zCannot be used with 2in1 at the same time.
zThe name stored for the multi number (basic
number, additional number 1/2) respectively
appears on the screen when making or receiving a
call.
zWhen you make a call using the Redial/Received
calls record, the multi number used for making or
receiving a call at the last time is displayed and the
call is made from the number.
Using Multi Number
1i“SERVICE”“Multi Number”
Select any item:
Set Multi Number……Specifies the phone number
you use for ordinary calls.
Basic Number*……Sets to call from the
subscribed phone number (basic number).
Additional Number1・Additional Number2*
……Sets to call from the additional number.
Check setting……Checks the current Multi number
settings.
Number Setting……Registers the additional
number notified at the subscription of the Multi
number to the FOMA terminal.
Highlight the item to register (or change) the
additional numbero (Edit)Enter the name
Enter the additional number
You can enter up to 8 double-byte or 16 single-byte
characters for the name and you can enter up to 26
digits for the additional number.
• About the function menu of the “Multi Number
setting” screen which appears when “Phone
number record” is selected.→p.319
Select ring tone……Sets the ring tone for the
received calls to the additional number 1 and
additional number 2 respectively.→p.82
* : When the name is changed, registered name
appears respectively.
Multi Number setting screen
(p.319)
Edit……Edits the name in the basic number or the phone
number in the additional number.
Delete this……Deletes one name in the basic number or
one name and phone number in the additional number.
Delete all……Deletes all names in the basic number and
all names and phone numbers in the additional number.
Switching the phone number for each
call
You can switch the phone number each time you
make a call.
1Enter phone number screen (p.48)
u (FUNC)“Multi Number”Select
any item:
Basic Number*……Sets to call from the subscribed
phone number (basic number).
Additional Number1・Additional Number2*……
Sets to call from the additional number.
Cancel number……Cancels the setting, allowing
you to dial following “Set Multi Number” setting.
* : When the name is changed, registered name
appears respectively.
N
zIf you remove the FOMA card (UIM) or change to
other FOMA card (UIM), the multi number settings
data (names and phone numbers, etc) on the FOMA
terminal may be erased. In this case, saving the data
again.
<Number Setting>
zThe name appears when you make various settings of
the multi number function or when you select a phone
number to use for each call.
<Select ring tone>
zRefer to p.83 for the priority when the ring tone
settings are duplicated.
N
zYou can also switch the phone number from the
function menu of phonebook detail screen, detail
screen of Redial/Dialed calls/Received calls records,
etc.
N
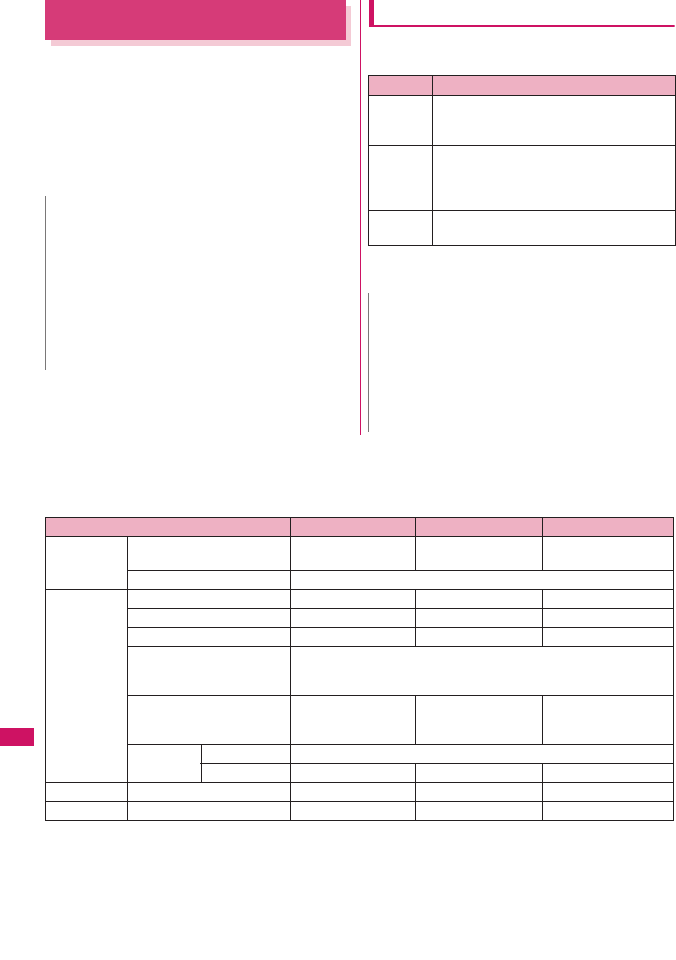
320
Network Services
2in1
<2in1>
You can separately use 2 phone numbers and 2 mail
addresses on your FOMA terminal as if you have 2
terminals.
zIn this function, your phone number and mail
address is called “Number A and Address A” and
the additional phone number and mail address is
“Number B and Address B”.
zCannot be used at the same time as Multi Number.
About Modes
In 2in1, modes can be set to “A mode”, “B mode” or
“Dual mode”.
zSee Table 1(p.320) for the details of available
services in each mode.
[Table 1] Services available for each mode
zOnly the functions with different operations depending on the mode are listed. (Those which operate in the
same way as A mode are omitted.)
N
zInformation of Number B and Address B can be
obtained with the following operation.
• Number B: Run “Check 2in1” from the function
menu in the My Profile screen for Number B→p.291
• Address B: Run “Acquire Automatically” for the mail
address when registering My Profile for Number B
→p.291
zFor details on 2in1, refer to “Mobile Phone User’s
Guide [2in1]”.
Mode Description
A mode You can dial with your phone number
(Number A), send i-mode mails with
Address A, or browse related data.
B mode You can dial with 2in1 phone number
(Number B), access to sites where WEB
mail is available with Address B, and
browse related data.
Dual
mode
The mode that supports both functions of A
and B mode.
N
zMail transmission for Address B is executed in the
specified WEB mail site.
zPacket communication in B mode is available while
subscribing to the i-mode service.
zSet A mode before you replace a FOMA card with the
subscription to 2in1 service to the FOMA card without
subscription.
Service A mode B mode Dual mode
Voice call/
Videophone
Dialing Number A Number B Selectable on making
a call*1
Receiving*2 All
Phonebook*3 Display*4 A: Common B: Common All
Name conversion*5 A: Common B: Common All
2in1 setting on a new entry A B A
Receives all data through
infrared data port/iC/
microSD card
Copies Phonebook 2in1 setting in the original source*6
Receives one data through
infrared data port/iC/
microSD card
AB A
FOMA Card
Phonebook
Copy to UIM Phonebook 2in1 setting is common
Copy to phone A B A
Redial Display Dials with Number A Dials with Number B All
Received calls
Display
Receives with Number A Receives with Number B
All
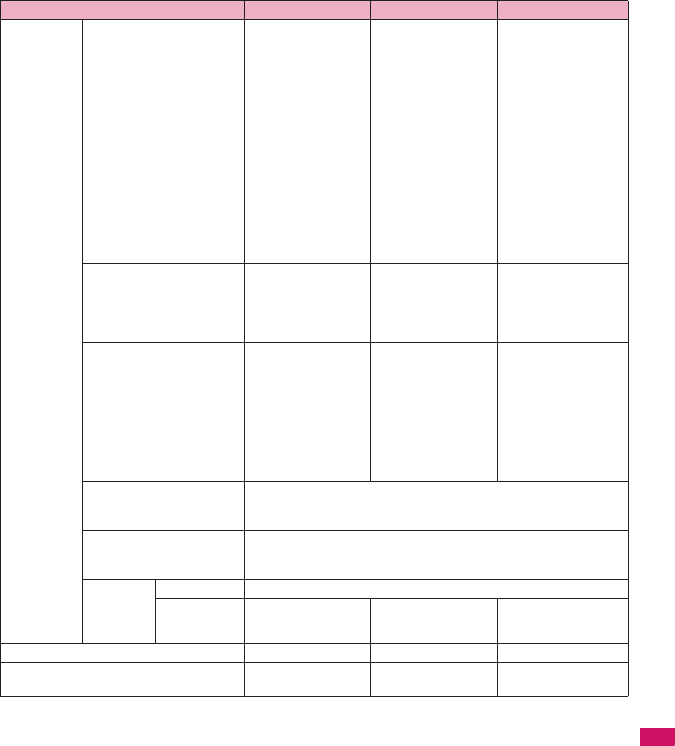
321
Network Services
Continued on next page
*1: When A or common setting phonebook is set, dialing is made with Number A, and Number B is applied with B
setting phonebook.
*2: The restrictions on the selected function is operated differently depending on the combination of settings as shown
below.
• A mode is for the specified phone number in the A or common setting phonebook.
• B mode is for the specified phone number in the B or common setting phonebook.
• Dual mode is for the specified phone number in all the phonebook.
However, when Restrict dialing is set, you cannot call the phone numbers that are not specified regardless of the
2in1 mode setting.
*3: Gives priority to Secret data when the data is saved as secret.
*4: In B mode, all phonebook entries in microSD card are displayed in a list. However the details are not displayed when
2in1 is set to A mode.
Although mails/SMS are also listed, the details are not displayed if the mail/SMS has been sent to Number A/
Address A.
Mail/
SMS
Display*4 Sent/received mails
with Address A
Sent/received SMS
with Number A
(FOMA terminal)
Received mails
(when “端末に保存
(Save to Phone)” is
selected on the WEB
mail site) or alert
mails for new
message/alarm to
Address B which are
saved in your FOMA
terminal
SMS received with
Number B
(WEB mail site)
Sent/received mails
with Address B
(FOMA terminal)
Sent/received mails
with Address A, and
received mails or alert
mails for new
message/alarm to
Address B which are
saved in your FOMA
terminal
Sent/received SMS
with Number A
SMS received with
Number B
(WEB mail site)
Sent/received mails
with Address B
Send (FOMA terminal)
Mails from Address A
SMS from Number A
(FOMA terminal)
Unavailable for
sending mails/SMS
(WEB mail site)
Mails with Address B
(FOMA terminal)
Mails from Address A*7
SMS from Number A
(WEB mail site)
Mails with Address B
Receive Mails to Address A/
SMS to Number A
(vibration)
Mails or alert mails for
new message/alarm
to Address B saved in
FOMA terminal, or
SMS with Number B
(no vibration)
Mails to Address A/
SMS to Number A
(no vibration)
Mails or alert mails
for new message/
alarm to Address B
saved in FOMA
terminal, or SMS with
Number B (vibration)
Mails to Address A/
SMS to Number A
(vibration)
Mails or alert mails for
new message/alarm
to Address B saved in
FOMA terminal, or
SMS with Number B
(vibration)
Receives all data through
infrared data port/iC/
microSD card
Copies the status in the original source.*6
Receives one data through
infrared data port/iC/
microSD card
A
FOMA
Card
(SMS
only)
Copy to UIM A
Copy to phone A Cannot be displayed A
i-αppli All available Available*8 Available*9
My Profile Number A and
Address A
Number B and
Address B
Number A/B
Address A/B
Service A mode B mode Dual mode
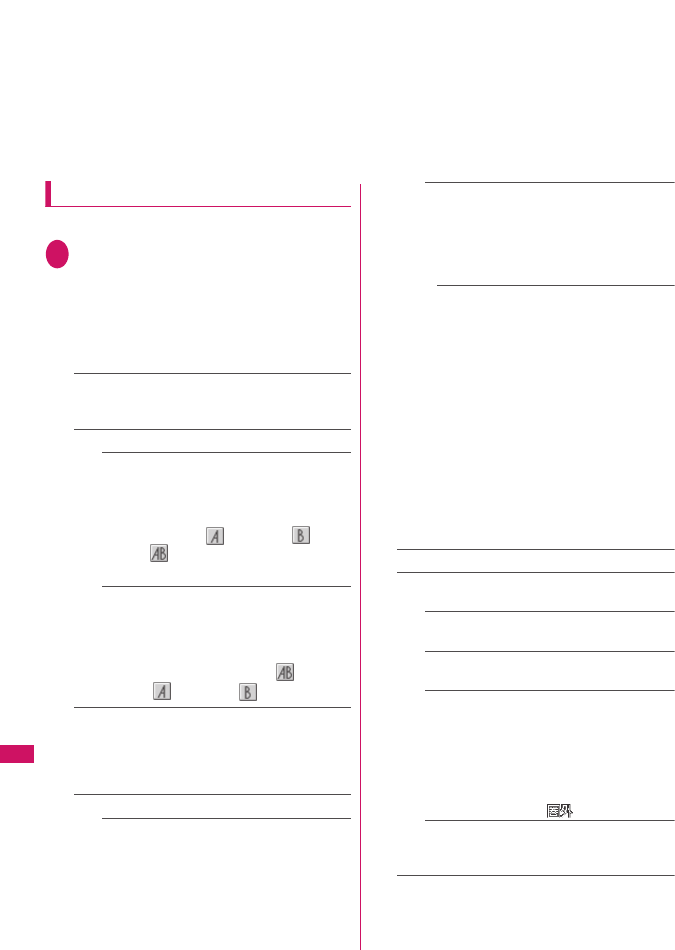
322
Network Services
*5: This function shows names which are checked against the name of data saved in phonebook with each number/
address and converted into that name, when phone numbers on dialing/incoming, numbers on sending/receiving or
addresses on sending/receiving are saved in phonebook.
*6: A is applied when the terminal of the sender does not support 2in1.
*7: The destination address is selectable from B setting phonebook when composing a new mail in Dual mode,
however, please note that the mail is sent from Address A. Note that if you forward a mail to Address B in Dual mode,
the mail is sent from Address A.
*8: Unavailable for each i-αppli standby screen, Mail-linked i-αppli and the i-αppli used with mail functions.
*9: Unavailable for i-αppli standby screen.
Using 2in1
Set 2in1 to ON and perform settings operations.
1i“SERVICE”“2in1 setting”Enter
your security code“YES”Select any
item:
■When 2in1 is set to ON
After entering the security code, 2in1 setting
screen appears without showing the screen to
confirm whether to set 2in1 to ON is not displayed.
Mode switching……Selects the 2in1 mode from “A
mode/B mode/Dual mode”.
“About Modes”→p.320
Phonebook 2in1 setting
Phonebook 2in1 setting……Highlight the
phonebook entry to set and press d (Switch)
to select the mode, then press o (Finish).
The mode switches as follows each time you
press d (Switch): (A mode)→(B
mode)→(Dual mode)
How to search the phonebook→p.73
Group 2in1 setting……Highlight the group to
set and press d (Switch) to select the mode,
then press o (Finish).
The mode switches as follows each time you
press d (Switch): no setting→ (Dual
mode)→(A mode)→(B mode)
Stand-by display……Sets the standby screen
displayed in B mode or Dual mode respectively.
→p.89
“★” appears for the changed item. To reset the
setting, press o (Release).
Set call/receive No.
Disp. call/receive No.……Sets to display the
information (name, phone number, mail
address, etc.) of “Number A (Address A)” and
“Number B (Address B)” in different font color
to distinguish when making/receiving a call.
Press o (Switch) to switch the color of the
pallet (16 colors or 256 colors).
Press p (Reset) to reset to the default setting.
Ringtone for Number B……Set the incoming
operation (ring tone, image, illumination,
vibration, answer message) performed when
receiving a voice call, videophone call or mail
(Ring tone, illumination and vibration can be
set in Mail (recv.)).
Voice call (recv.), V.phone (recv.), Mail
(recv.)……
• “Ring tone”: Go to Step 2 in “Changing the
Ring Tone” (p.82).
• “Image”: Go to Step 2 in “Changing the
Display” (p.88).
• “Illumination”: Go to Step that comes after
selecting “Incoming Call”, “Incoming
V.phone” or “Mail receiving” in Step 1 of
“Setting the Illumination Flashing” (p.92).
• “Vibrator”: Go to Step 2 in “Setting the
Vibration to Notify You of Incoming Calls”
(p.84).
• “Answer message”: Go to the subsequent
step after selecting “ON” in “Setting Record
message” (p.64).
2in1 function OFF……Sets 2in1 to OFF.
Rcv. avoid. setting……Restricts incoming calls for
Number A and Number B.
Change rcv. avoid.……Sets the Rcv. avoid.
setting for Number A and Number B.
Check rcv. avoid.……Checks the Rcv. avoid.
setting for Number A and Number B.
Mode link……Sets the linkage for changing
2in1 mode and Rcv. avoid. setting. Incoming
calls only for Number A are accepted in A
mode, incoming calls only for Number B are
accepted in B mode, and incoming calls for
both mode are accepted in Dual mode.
* When the function is activated, you cannot
switch the mode with “ ” displayed.
Rcv. avoid. (abroad)……Sets the Rcv. avoid.
setting overseas (when Mode link is active, the
Rcv. avoid. (abroad) is disabled).
323
Network Services
Switching phone numbers each time
when making a call
When 2in1 is set to ON and the mode is set to Dual
mode, phone numbers can be switched when making
a call.
zThis function is available only on the detail screen
of “Phonebook/Received calls/Dialed calls/Redial”.
<Example: To make a call using the phonebook>
1Phonebook detail screen (p.73)
u (FUNC)“Dial setting”“2in1/Multi
Num.”Select any item:
Number A……Allows calls to be made from Number
A.
Number B……Allows calls to be made from Number
B.
Cancel number……Releases the setting and allows
calls to made according to Phonebook 2in1 setting.
N
zWhen 2in1 is set to OFF, you can also perform “2in1
settings” by pressing 8 for 1 second or longer on
the standby screen.
<Mode switching>
zYou can also change mode by pressing 8 for 1
second or longer on the standby screen.
<Phonebook 2in1 setting>
zYou cannot set this function to UIM phonebook
entries.
zSelect “Display detail” from the function menu to
display “Phonebook detail” screen from “Phonebook
list” screen in this function.
<Standby display>
zWhen Change Mode is set to A mode, standby
screens are displayed according to “Display setting”.
zWhen set to the Kisekae Tool you downloaded, the
i-αppli standby screen or the random display, the
default screen appears even when “Same as Number
A” is set.
<Disp. call/receive No.>
zNames, phone numbers and mail addresses in the
screens below will be displayed in the set color.
• In-call screen
• Dialing/Receiving screen
• Redial/Dialed calls (list/detail)
• Received calls (list/detail)
•Sent
*/Received address record screen (list/detail)
• Chaku-moji Sent messages record screen
* : In B mode, the screen for sent addresses cannot be
displayed.
zThe setting for Number A/Number B (Address A/
Address B) applies to each screen even when 2in1 is
set to OFF.
<Ringtone for Number B>
zWhen making the same settings to Number A and
Address A, set each item as “Same as Number A”.
zWhen the ring tone settings are duplicated, the priority
applies.→p.83
When you receive a call without caller ID on Number
B, priority is given to the “Ringtone for Number B”
setting.
N
z“2in1/Multi Num.” in the function menu cannot be
selected when the mode is set to A mode or B mode.
zWhen the following operations are performed, the
phone number selection screen is displayed and the
phone number to use can be selected.
• When making calls by entering phone number in the
phone number entry screen
• When using services from the special number
registered in Additional service
• When “Dialing” from the function menu in Sent/
Received address list is selected
• When using the Phone to function
• When pressing the switch on the flat-plug earphone/
microphone with switch (optional) on the phone
number entry screen
zDialing or AT command dialing from an external device
uses Number A for A mode/Dual mode and Number B
for B mode.
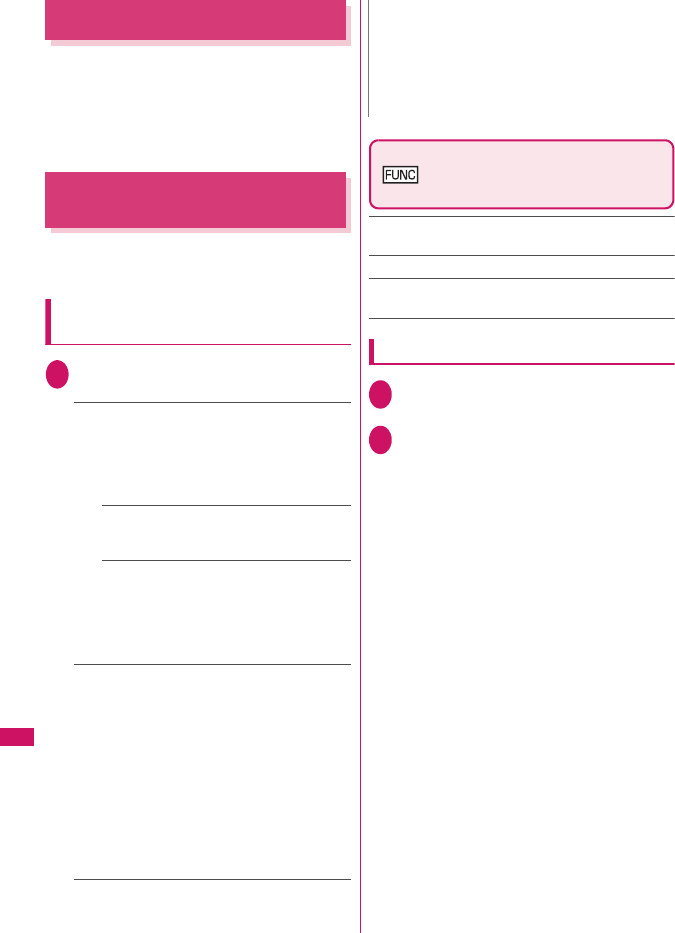
324
Network Services
OFFICEED
<OFFICEED>
“OFFICEED” is an in-group flat-rate service provided
by specified Inbuilding Mobile Communication System
(IMCS). A separate subscription is required to use the
service. For details, visit DOCOMO website for
corporates (http://www.docomo.biz/d/212/)
(Japanese).
Adding and Using Services
<Additional service>
When a new network service is added by DOCOMO,
you can add the service to the menu and use the
service.
Adding new services and response
messages
1i“SERVICE”“Additional service”
Select any item:
Additional service……Adds new services.
Highlight “<Not stored>”u (FUNC)“Add
new service”Enter the service nameSelect
any item:
You can enter up to 10 double-byte or 20 single-byte
characters for the service name.
Enter number……Uses the number to
connect.
You can enter up to 20 digits.
Enter USSD number……Uses the service
code to connect.
You can enter up to 40 digits.
• About the function menu of the “Additional
service” screen which appears when “Additional
service” is selected →p.324
Additional guidance……Registers the response
messages for the commands posted from the
network when using the added network service with
“USSD” (service code).
Highlight “<Not stored>”u (FUNC)“Add
new guidance”Enter the commandEnter the
response message name“YES”
You can enter up to 20 digits for the command and
you can enter up to 10 double-byte or 20 single-byte
characters for the response message.
• About the function menu of the “Additional
guidance” screen which appears when “Additional
guidance” is selected→p.324
Additional service screen
(p.324)/Additional guidance
screen (p.324)
Add new service・Add new guidance……Adds a
setting.
Edit……Changes the setting.
Delete this・Delete all……Deletes one or all additional
service(s) or additional guidance(s).
Using the newly added service
1i“SERVICE”“Additional service”
“Additional service”
2Select a serviceo (Send)
N
<Additional service>
zTo use the service, enter the “number” or “service
code” provided by DOCOMO. The “number” is the
number used to connect to the service center. The
“service code” (USSD) is the code used for notifying
the service center.

325
PC Connection
Data Communication ...................................................................................................... 326
Before Using ................................................................................................................... 327
Checking the Procedure ................................................................................................. 328
AT Commands ................................................................................................................ 329
CD-ROM ......................................................................................................................... 329
DOCOMO keitai datalink ................................................................................................ 329
For details on the data communication, refer to the “Manual for PC Connection” (PDF format) in
the provided CD-ROM or DOCOMO’s website.
To view the PDF-format “Manual for PC Connection ”, Adobe® Reader® is required. If this
software is not installed on your PC, install the Adobe® Reader® in the provided CD-ROM.
Refer to the “Adobe Reader ヘルプ” (Help of the Adobe Reader) for details on how to use it.
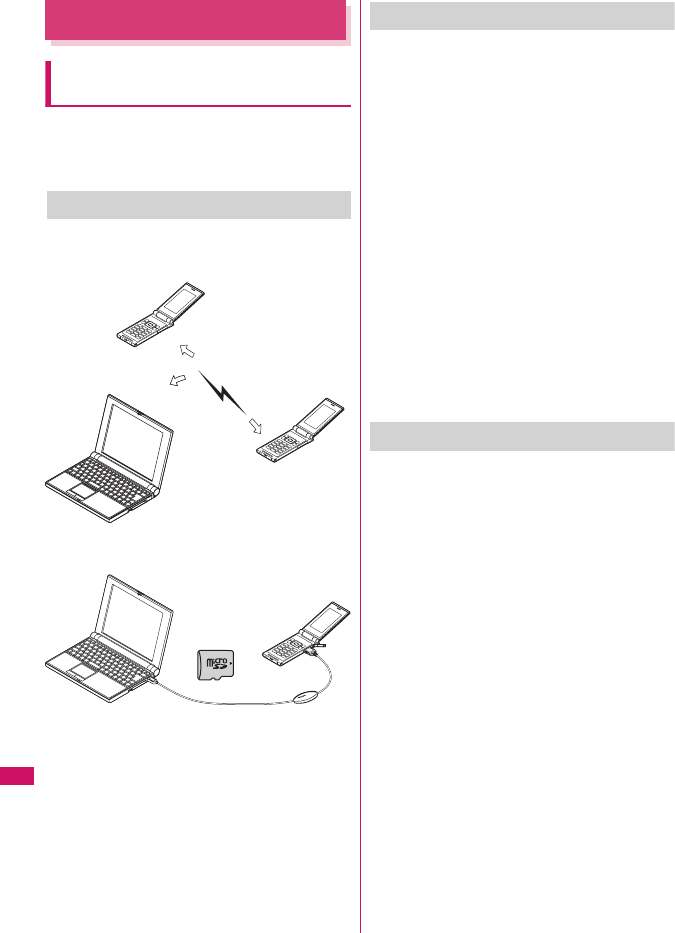
326
PC Connection
Data Communication
Data communication available on the
FOMA terminal
Available data communication between the FOMA
terminal and PCs is classified in 3 categories: data
exchange (OBEX™ connection), packet
communication and 64K data communication.
Data exchange (OBEX™ connection)
You can exchange data such as images, music,
phonebook and mail between the other FOMA
terminal or PC, etc.
Packet communication
Packet communication is charged according to
the amount of data sent and received*1, and the
data is received at the maximum speed of
3.6 Mbps*2 and sent at the maximum speed of
384 kbps.
You can also access a corporate LAN connected
to the FOMA network.
Use an access point that supports FOMA packet
communication, such as DOCOMO Internet
connection service “mopera U” or “mopera”.
Packet communication is performed via the
FOMA USB Cable with Charge Function 01/02
(optional) to a PC or via a dedicated cable
connection to a PDA.
*1: Note that the communication charge can become very
expensive when large files are sent and received.
*2: The communication speed is 384kbps at maximum for
both sending and receiving in the following cases:
• When you are outside the FOMA HIGH-SPEED area
• When you use access points for “mopera”
• When you use packet communication with
DOCOMO PDA “sigmarion Ⅲ” or “musea”
64K data communication
Regardless of the data amount, 64K data
communication is charged according to the length
of time the line is connected. *
Use an access point that supports FOMA 64K
data communication, such as DOCOMO Internet
connection service “mopera U” or “mopera”, or
ISDN synchronized 64K access point.
64K data communication is performed via the
FOMA USB Cable with Charge Function 01/02 to
a PC or via a dedicated cable connection to a
PDA.
• 64K data communication is not available for
overseas service.
• When performing packet communications
overseas, use the IP connection (the PPP
connection is not available for packet
communications).
* : Note that the communication charge can become very
expensive when the line is connected for a long time.
PC SO706i
PC
SO706i
Infrared data exchange
(p.257)
iC commu-
nication
(p.259)
FOMA USB Cable with Charge Function 01/02
microSD card (p.243)
DOCOMO keitai datalink (p.329)
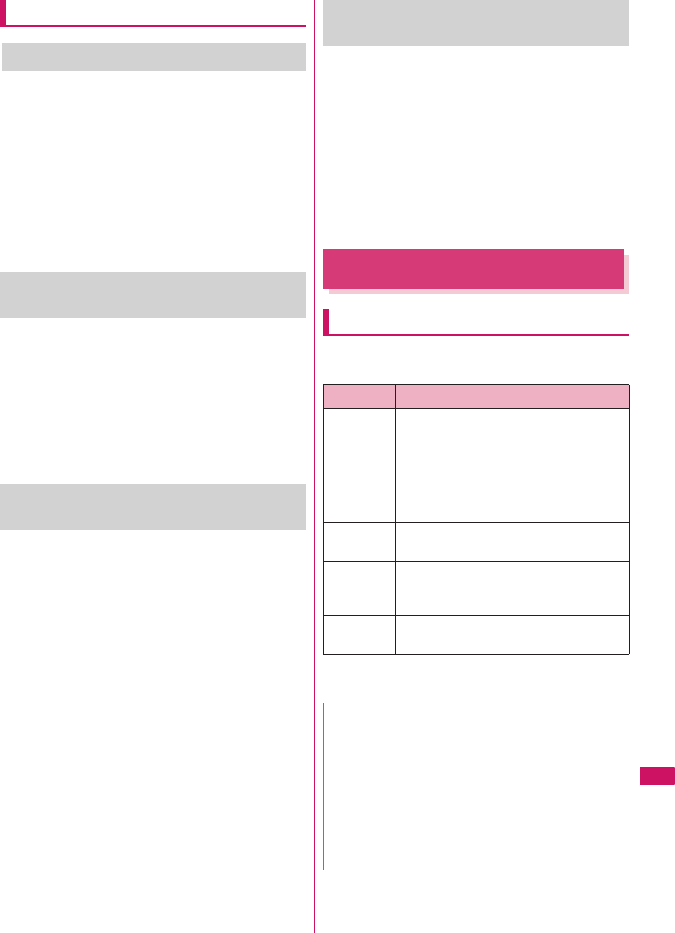
327
PC Connection
Notice before using
Internet service provider fees
In addition to FOMA service charges, you may
need to pay user fees to an Internet service
provider to use the Internet. These fees must be
paid directly to the Internet service provider in
addition to service fees of FOMA service. Contact
your Internet service provider for details.
DOCOMO Internet connection service “mopera
U” or “mopera” is available. “mopera U” is a pay
service for which you need to apply. “mopera” is a
free service for which you do not need to apply.
Setting an access point (e.g. Internet
service provider)
Packet communication and 64K data
communication use different access points. If you
are using packet communication, use an
applicable access point for it; if 64K data
communication, use an access point for FOMA
64K data communication or ISDN synchronized
64K.
• You cannot use DoPa access points.
User authorization when accessing
network
Some access points may require your user
authorization (ID and password) when
connecting. Use communication software (Dial-up
network) to enter your ID and password. ID and
password will be provided by your Internet service
provider or the network administrator. Contact the
Internet service provider or administrator for
details.
Access authorization when using a
browser
When using FirstPass compliant sites on your
PC’s browser, FirstPass (user certification) for
access authorization is required. Install the
FirstPass PC software from the CD-ROM
packaged provided with this product and conduct
the setting. For details, refer to “FirstPass
Manual” (PDF format) stored in the
“FirstPassPCSoft” folder included on the
CD-ROM. (The “FirstPass Manual” is in
Japanese.)
Before Using
Operational environment
The PC operation environment to use data
communication is as shown below:
*1: Operations after the OS upgrade are not covered by the
warranty.
*2: May differ depending on the PC’s system configuration.
Item Description
PC unit • PC/AT compatible model with CD-ROM
drive
• USBUSB port (compliant to Universal
Serial Bus Specification Rev1.1/2.0)
• Display resolution of 800 dots wide ×
600 dots high, High Color (65,536
colors) is recommended
OS*1 • Windows 2000, Windows XP, Windows
Vista (Japanese versions)
Required
memory
• Windows 2000: 64M bytes or more*2
• Windows XP: 128M bytes or more*2
• Windows Vista: 512M bytes or more*2
Hard disk
space
• 5M bytes or more*2
N
zYou can transmit data with the FOMA SO706i
connected to the DOCOMO PDA “musea” or
“sigmarionⅢ”. Update “musea” to connect them to the
FOMA SO706i. For how to update it and other details,
visit the DOCOMO website.
zThe FOMA SO706i is not compatible with Remote
Wakeup function.
zThe FOMA SO706i is not compatible with the FAX
communication.
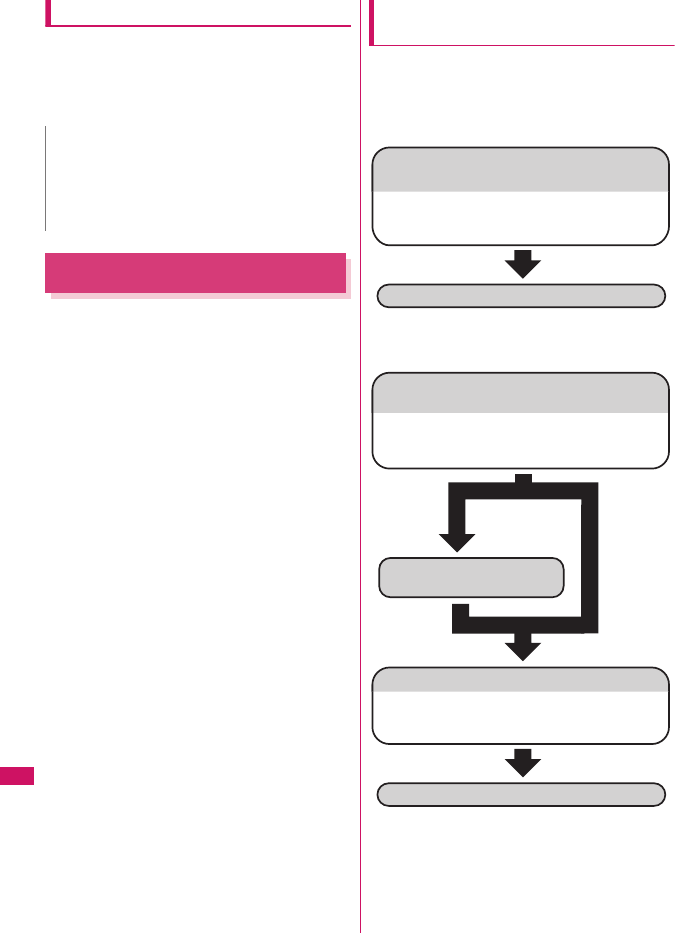
328
PC Connection
Required devices
The following hardware and software, in addition to
the FOMA terminal and a PC, are required.
• FOMA USB Cable with Charge Function 01/02
(optional) or FOMA USB Cable (optional)
• Bundled CD-ROM “CD-ROM for FOMA SO706i”
Checking the Procedure
In data communication, the connection is made
through a dial-up connection with Internet service
providers or LANs that support FOMA data
communication.
■
About the software provided in the provided “CD-
ROM for FOMA SO706i”
zThe CD-ROM contains the SO706i Communication
setting file (drivers), FOMA PC setting software and
FirstPass PC software.
zThe FOMA Communication setting file is software
(driver) required for connecting the FOMA terminal
with a PC via the FOMA USB Cable with Charge
Function 01/02 (optional) to carry out packet
communication, 64K data communication or data
transfer (OBEX™ connection). Installing the FOMA
Communication setting file embeds each driver into
Windows.
Using the FOMA PC setting software, you can
easily set up packet communication and 64K data
communication and create a dial-up connection.
Flow chart for completing the data
communication setup
■Data exchange (OBEX™ connection)
When you use the FOMA USB Cable with Charge
Function 01/02 (optional), you have to install “FOMA
通信設定ファイル” (FOMA Communication setting
file).
* Install DOCOMO keitai datalink (p.329) in addition.
■Packet communication/64K data
communication
* : To use Internet with the FOMA terminal and PC
connected, “mopera U” (separate subscription is required)
is useful, which supports broadband connection, etc.
Consider the plan in which you are charged only in a
month when you use the service. If you use “mopera” for
which you do not need a subscription, you can access
Internet immediately.
For more information, visit the DOCOMO website.
N
zPurchase the specified “FOMA USB Cable with
Charge Function 01/02” or “FOMA USB Cable”. The
USB cable for PC cannot be used because the shape
of the connector is different.
zUSB HUB may not function correctly.
Install FOMA Communication setting file in the
provided CD-ROM or download and install it from the
DOCOMO website
Data exchange
Download and Install the FOMA
Communication setting file
The set up procedures for packet communication,
64K data communication and set up without the
FOMA PC Setting Software are different.
Set up*
Connect/Disconnect
To set up the
access point
using the FOMA
PC Setting
Software
To set up the
access point
without
using the
FOMA PC
Setting
Software
Install the FOMA PC
Setting Software
Install FOMA Communication setting file in the
provided CD-ROM or download and install it from the
DOCOMO website
Download and Install the FOMA
Communication setting file
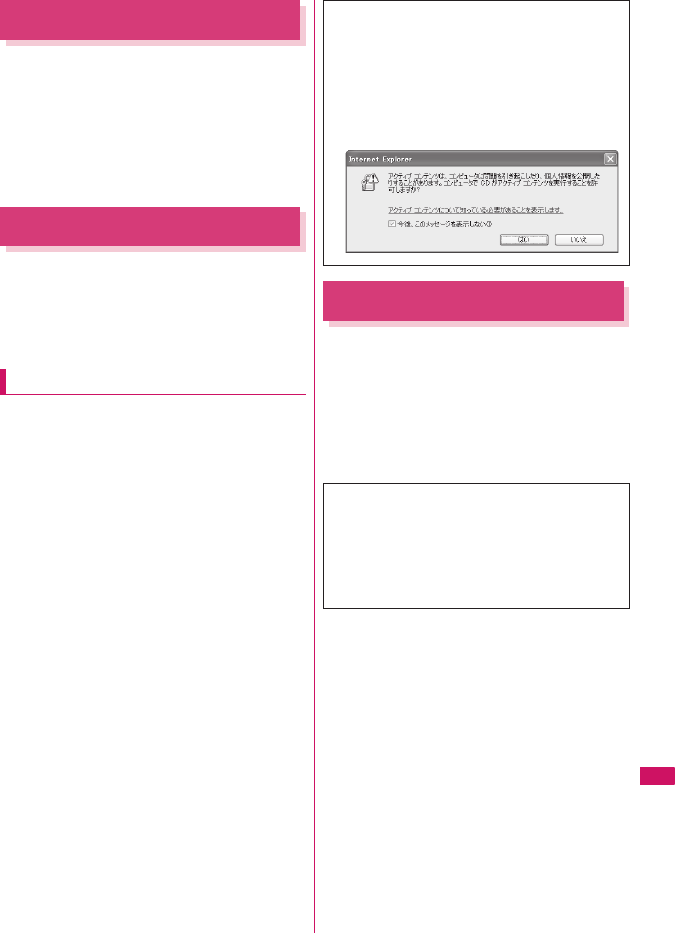
329
PC Connection
AT Commands
AT commands are commands for controlling modem,
etc. The FOMA terminal complies AT commands and
supports some enhanced commands and its own AT
commands.
For details on AT commands to set the FOMA
terminal functions from your PC, refer to the “Manual
for PC Connection” (PDF format) in the provided CD-
ROM.
CD-ROM
The provided CD-ROM contains the software for
using the data communication with the FOMA
terminal, “Manual for PC Connection” and “Kuten
Code List” (PDF). For details, refer to the provided
CD-ROM.
Supplied software/PDF
The provided CD-ROM contains the following
software/PDF:
• FOMA Communication setting file
• FOMA PC設定ソフト (FOMA PC setting software)
•FOMA バイトカウンタ (FOMA byte counter)
• Guide to DOCOMO keitai datalink
• Guide to i-mode.net notifier
• FirstPass PCソフト (FirstPass PC software)
• Guide to mopera U (mopera U start up tool/mopera
U connection & setting tool/FOMA byte counter/
mopera U requesting original data)
• Guide to Napster®
•“パソコン接続マニュアル”/“Manual for PC
Connection” (PDF)
•“区点コード一覧 ”/“Kuten Code List” (PDF)
• Declaration of Conformity (DoC)
• Adobe® Reader®
DOCOMO keitai datalink
“DOCOMO keitai datalink” (Japanese) is the software
which enables you to back up your “Phonebook”,
“Mail”, etc. on the FOMA terminal on a PC and edit
the data. This software is provided on the DOCOMO
website. For details and downloading, see the
following website. You can also access to the
following website from the provided CD-ROM.
http://datalink.nttdocomo.co.jp/ (Japanese)
The following warning screen may appear when
you insert the CD-ROM into a PC. This warning
is displayed according to the security setting of
the Internet Explorer and does not affect the
usage of the software. Click “はい ” (Yes).
* The screen is the example when Windows XP is
used. The displayed screen may be different
depending on the PC environment.
For details such as downloading method,
transferable data, operating environment of each
OS, installing method, operations and restrictions,
see the above website. As for the operations after
the installation, refer to the help files of the software.
You need “USB Cable (optional)” to use DOCOMO
keitai datalink.

331
Overseas Use
Overview of International Roaming (WORLD WING) ..................................................... 332
Available Services........................................................................................................... 333
Before Using the FOMA Terminal Overseas................................................................... 333
Making a Call Abroad ..................................................................................................... 335
Receiving a Call Abroad ................................................................................................. 336
Setting the Network Connection Switching Method................................. 336
Setting the Search Mode of the Operator .............................................. 336
Displaying the Roaming Operator’s Name...................................... 337
Commencing Roaming Guidance........................................................... 338
Setting to Bar Incoming Calls During Roaming ........................... 338
Network Services During Roaming............................................................... 338
3G/GSM setting
NW search mode
Display operator name
Roam. Guidance
Bar incoming when roam
Service(Int.)
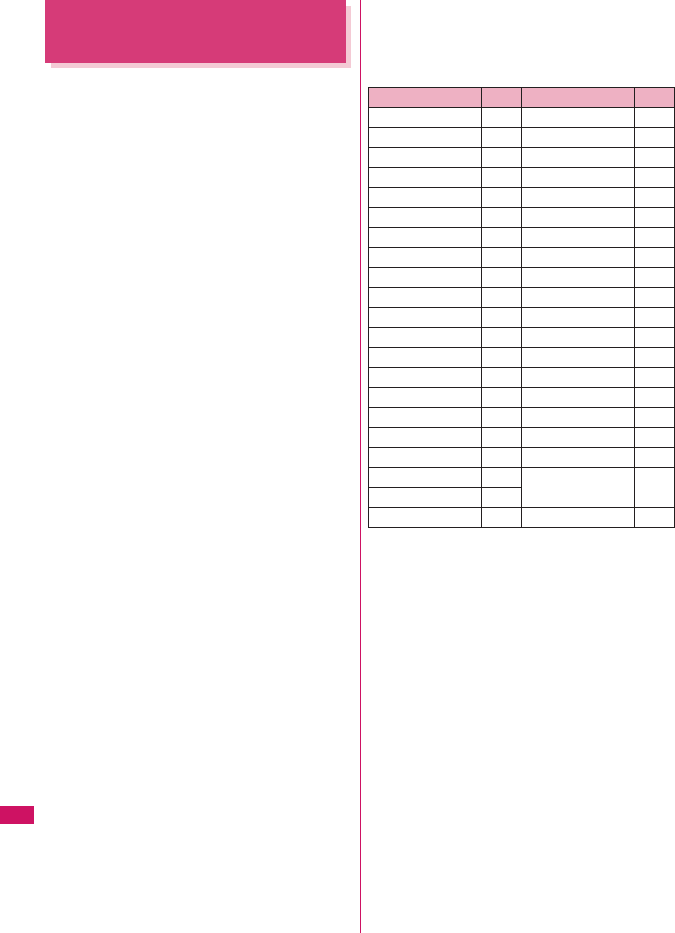
332
Overseas Use
Overview of International
Roaming (WORLD WING)
International roaming (WORLD WING) is a service
that allows you to make/receive calls or use i-mode
through the network of roaming service operator
overseas.
zYou can use the FOMA SO706i within the roaming
area of DOCOMO overseas. For details on the
service area and charge, see the DOCOMO
“International Services Website”.
zThere are 3 international networks: 3G network,
GPRS network and GSM network.
• 3G network is the 3rd generation mobile network
compliant with the 3GPP*1 global standard.
• The GPRS*2 network is a 2.5th-generation
mobile communication network enabling high-
speed packet communications by GPRS on the
GSM network.
• The GSM*3 network is a 2nd-generation digital-
type mobile communication network most
popular throughout the world.
*1: 3GPP (3rd Generation Partnership Project)
A regional standardization body established to develop
commonly applied technical specifications for 3rd-
generation mobile communications systems (IMT-2000).
*2: GPRS (General Packet Radio Service)
Implements high-speed GSM and facilitates data
communications including packet communications.
*3: GSM (Global System for Mobile Communications)
A 2nd-generation digital-type mobile communication
network most popular throughout the world.
■Country codes of main countries
Enter the following country codes when using
international call or setting “Country code” in “Int’l dial
assistance”.
(as of May, 2008)
* For other country codes and details, see the DOCOMO
“international Services Website”.
Area
Code
Area
Code
Australia 61 Korea 82
Austria 43 Macau 853
Belgium 32 Malaysia 60
Brazil 55 Maldives 960
Canada 1 New Caledonia 687
China 86 New Zealand 64
Czech 420 Norway 47
Egypt 20 Peru 51
Fiji 679 Philippines 63
Finland 358 Russia 7
France 33 Singapore 65
French Polynesia 689 Spain 34
Germany 49 Sweden 46
Greece 30 Switzerland 41
Holland 31 Taiwan 886
Hong Kong 852 Thailand 66
Hungary 36 Turkey 90
India 91 United Kingdom 44
Indonesia 62 United States of
America
1
Italy 39
Japan 81 Vietnam 84
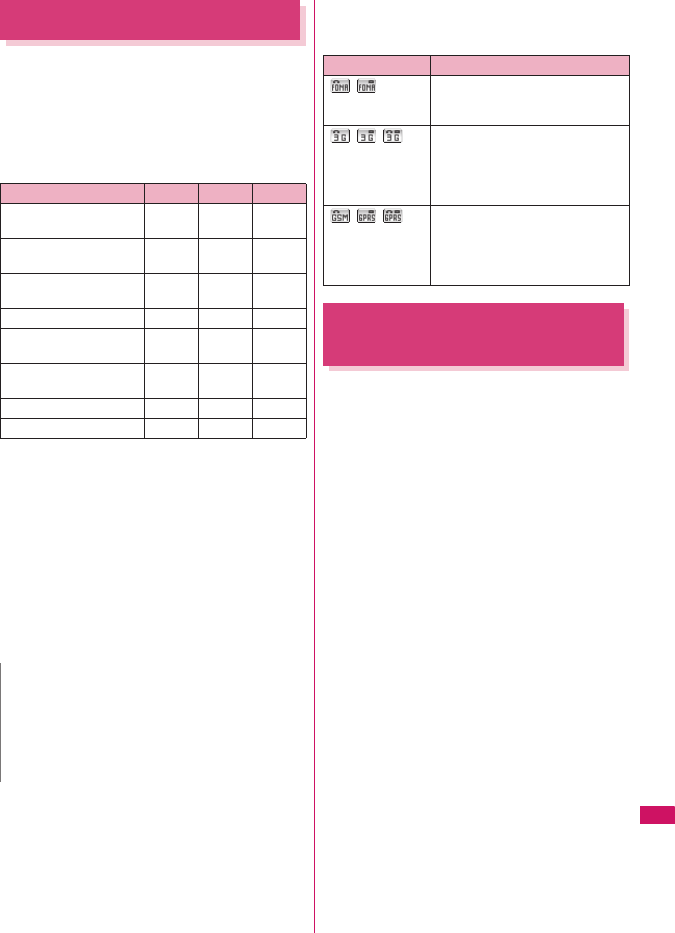
333
Continued on next page
Overseas Use
Available Services
zSome services may not be available depending on
the operator or area.
zFor details on communication services available
during international roaming, refer to the
international service guide such as “Mobile Phone
User’s Guide [World Services]”.
■Available communication services overseas
*1: Outgoing calls using Number B of 2in1 is not available
(when receive a call for Number B, some operators
cannot recognized to which number the call was made).
You cannot make a call from the additional number of
multi number.
*2: International videophone calls are available with users of
specific roaming operators overseas or FOMA terminals
in Japan.
*3: The automatic update will be automatically paused when
a roaming operator is connected. To resume the
i-Channel automatic update, it is required to set the
i-Channel setting again. However, you are charged for the
packet communication in addition to the monthly charge.
In addition, when you automatically update information on
“Basic Channel”, the packet communication charges will
apply.
■Displayed icons
A network in use and its status appear in the task icon
display area (p.27).
Before Using the FOMA
Terminal Overseas
zBefore using the FOMA terminal overseas, also
refer to the “Mobile Phone User’s Guide [Network
Services]” and “Mobile Phone User’s Guide [World
Services]”.
zFor the customers who have subscribed to the FOMA
service on September 1, 2005 or after, a separate
subscription is not necessary. However, customers
who declared that they did not require this service at
the FOMA service subscription or who unsubscribe
from this service need a separate subscription.
zFor the customers who have subscribed to the
FOMA service on August 31, 2005 or before
without subscribing to “WORLD WING”, a separate
subscription is necessary.
zTo use the international roaming service, the
FOMA card (other than blue) which is compatible
with WORLD WING must be inserted.
zThis service is not available in some payment plans.
zUsage charges for the overseas services are included
in your monthly bill of FOMA services. However, it
may be charged in subsequent month due to the
conditions of the roaming operator overseas.
zThe call charge in “Call data” includes both
incoming and outgoing calls. However, the
displayed call charge may differ from the actual
one, or “¥**” may be displayed.
■Battery pack charging
• Precautions for handling the AC adapter→p.19
“Handling the Adapter (including the Charger)”
• Charging with the AC adapter→p.41
“Charging”
Network
3G GPRS GSM
Make/Receive a voice
call
○*1○*1○*1
Make/Receive a
videophone call
○*1*2××
Use i-mode (including
Full Browser)
○○×
Receive MessageR ○○×
Send/Receive i-mode
mail
○○×
Packet communication
via PC
○○×
Send/Receive SMS ○○○
i-Channel ○*3○*3×
N
zDuring international roaming, you cannot receive
MessageF, receive Area Mail, send/receive Chaku-
moji, “Pattern data update” and “Set auto-update” of
Scanning function, update software, use 64K data
communication connected with a PC or ON in 2in1
setting.
Icon Meaning
/ Only dialing available/Only packet
transmission available, when using
the domestic FOMA network
/ / Only dialing available/Only packet
transmission available/Both dialing
and packet transmission available,
when using the overseas 3G
network
/ / Only dialing available/Only packet
transmission available/Both dialing
and packet transmission available,
when using the overseas GSM/
GPRS network
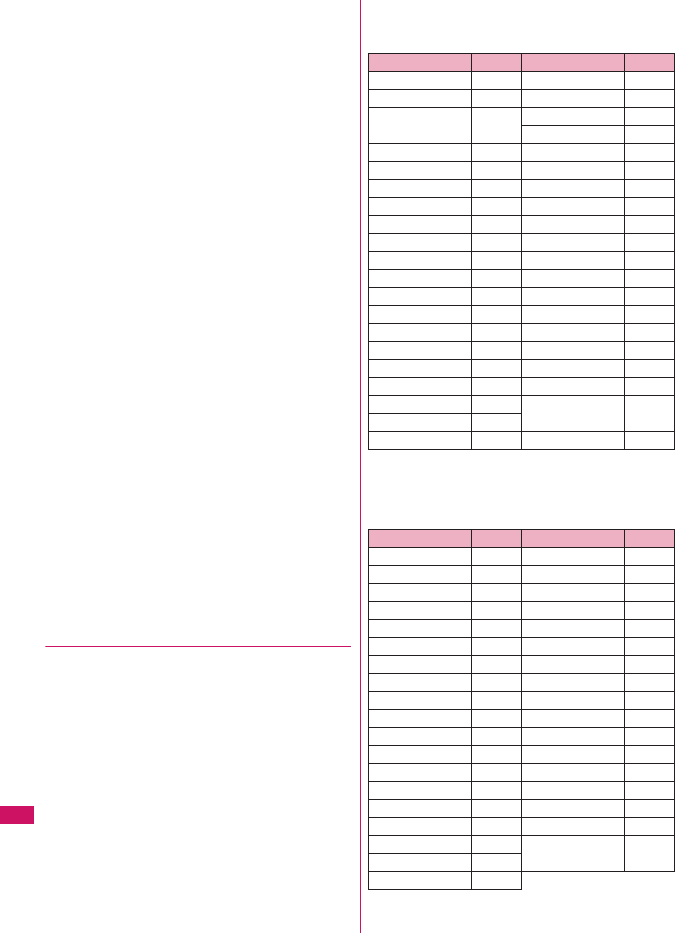
334
Overseas Use
■Viewing i-mode sites
To view i-mode sites from overseas, set “International
Settings” from “iMenu” beforehand.
• For details, refer to “Mobile Phone User’s Guide
[i-mode] FOMA version”.
■Network Services
You can also use network services such as the Voice
Mail service and Call Forwarding service if you have
subscribed to these network services.
zBefore using the network services overseas,
“Remote Control” (p.318) must be set to “Activate”.
zEven when the operation such as Activate or
Deactivate is available, the services may be
restricted or unavailable. For details, refer to the
“Mobile Phone User’s Guide [Network Services]”
and the international service guide such as “Mobile
Phone User’s Guide [World Services]”, etc.
■SMS
This service allows you to exchange text messages
with subscribers to overseas carriers other than
DOCOMO.
zTo send an SMS to a user of a roaming operator
overseas, enter “+” and the country code in front of
the phone number (when the phone number begins
with “0”, omit the first “0”).
You can also send SMS by entering “010”, the
country code, the other party’s phone number in
this order. (To reply to received SMS from
overseas, enter “010”.)
zWhen sending a SMS to a user of a roaming
operator overseas and a character contained in
SMS is not supported by the other party’s mobile
phone, the character may not be properly
displayed. See international service guides such as
“Mobile Phone User’s Guide [World Services]” for
details.
●Inquiries overseas
For inquiries overseas such as lost, stolen, charge
accumulation or malfunction, refer to “For lost, stolen,
accumulated amount settlement overseas” or “For
malfunction overseas” on the back cover of this
manual. Note that you are charged for the call and
communication even after the FOMA terminal is lost
or stolen.
zFor the latest information, see the DOCOMO
“International Services Website”.
■International call access code of main
countries (Table 1)
(as of March, 2008)
* Charges apply for calls made to Japan.
■International Prefix number for the universal
number (Table 2)
(As of March, 2008)
* Note that the universal numbers may not be available from
mobile phones, public phones or hotels.
Area Code Area Code
Australia 0011 Macau 00
Belgium 00 Malaysia 00
Brazil 0021/
0014
Monaco 00
New Zealand 00
Canada 011 Norway 00
China 00 Philippines 00
Czech 00 Poland 00
Denmark 00 Portugal 00
Finland 00 Russia 810
France 00 Singapore 001
Germany 00 Spain 00
Greece 00 Sweden 00
Holland 00 Switzerland 00
Hong Kong 001 Taiwan 002
Hungary 00 Thailand 001
India 00 Turkey 00
Indonesia 001
United Arab Emirates
00
Ireland 00 United Kingdom 00
Italy 00 United States of
America
011
Korea 001
Luxemburg 00 Vietnam 00
Area Code Area Code
Argentina 00 Korea 001
Australia 0011 Luxemburg 00
Austria 00 Malaysia 00
Belgium 00 New Zealand 00
Brazil 0021 Norway 00
Bulgaria 00 Peru 00
Canada 011 Philippines 00
China 00 Portugal 00
Colombia 009 Singapore 001
Denmark 00 South Africa 09
Finland 990 Spain 00
France 00 Sweden 00
Germany 00 Switzerland 00
Holland 00 Taiwan 00
Hong Kong 001 Thailand 001
Hungary 00 United Kingdom 00
Ireland 00 United States of
America
011
Israel 014
Italy 00
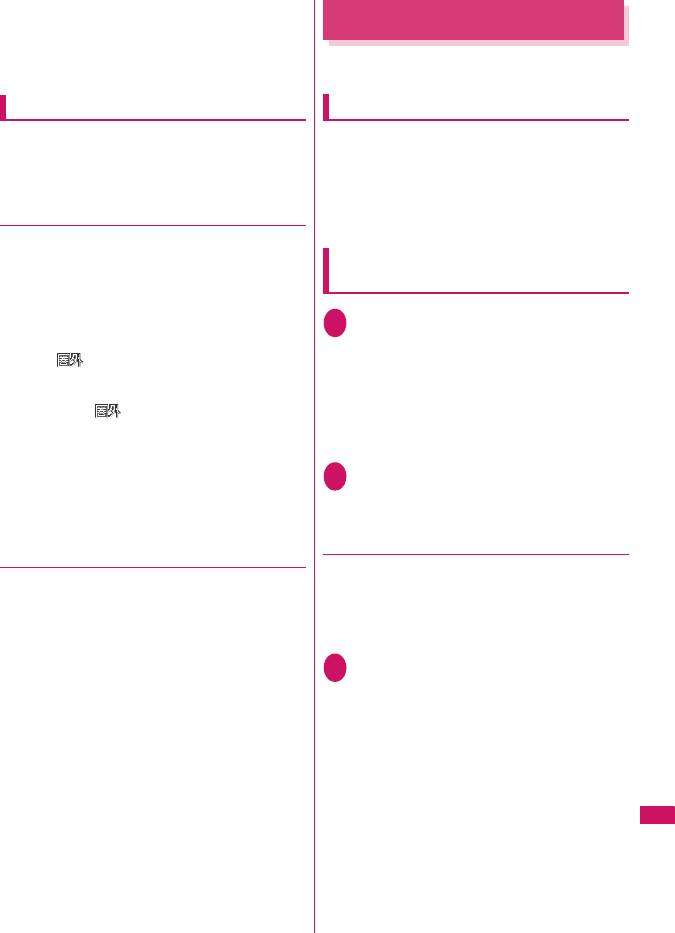
335
Overseas Use
* The universal numbers are available only in the above
countries.
* If you make a call from a hotel, the fees may be charged by
the hotel. Check with the hotel before using.
* From mobile phones, domestic charges apply in the
country.
Use in the local area
This FOMA SO706i is available in 3G, GPRS and
GSM roaming areas. When the FOMA terminal is
turned on after you arrive in the destination overseas,
a local roaming operator is automatically set.
●Display, date and time
While using the FOMA terminal overseas, the name
of the operator connected appears on the standby
screen.
z“Displaying the Roaming Operator’s Name” →p.337
zRegardless of “Set main time” setting, the received
address list are time stamped as the date and time
in Japan standard time.
zWhen “ ” remains on the screen, set “NW
search mode” to “Auto”. It may take some time to
search network just after turning on the FOMA
terminal and “ ” may appear while searching.
zIf the used network or operator does not notify the
caller ID, the caller ID does not appear on the
FOMA terminal screen and displays “Unknown” or
“withholding” even when the caller ID is notified.
The FOMA terminal screen also displays
“Unknown” even when “Caller ID Request Service”
is set.
●After returning to Japan
After returning to Japan and turning on the FOMA
terminal, the network will be automatically searched
and set to the FOMA network (DoCoMo).
“Setting the Search Mode of the Operator”→p.336
Making a Call Abroad
You can use the international roaming service to
make voice or videophone calls from abroad.
Making a local call abroad
To make a call, dial the phone number of the other
party’s ordinary phone or mobile phone as making a
call in Japan. →p.48
zThe “Int’l dial assistance” message may appear
when you use the phonebook to make a call. Select
“Original phone No.”.
Making a call to outside your
destination country (including Japan)
1On the standby screen, dial the
following; + (0 (1 second or longer))
→Country code→Area code (Long
distance code)→The other party’s
phone number
If the area code (long distance code) begins with
“0”, omit the first “0”. However, to call to ordinary
phones in Italy, “0” may be required.
2r (voice call)/o (V.phone)
●Making a call to a country stored in
“Country Code setting” in the “Int’l dial
assistance”
You can easily dial the number by storing the country
name and codes of a party you often call to “Int’l dial
assistance”.
zYou can also make an international call from the
phonebook, Redial or Dialed calls record.
1Enter the phone number of the other
partyu (FUNC)“Int’l call”Select
a countryr (voice call)/
o (V.phone)
“+” and “Country code” is prefixed and an
international call is made.
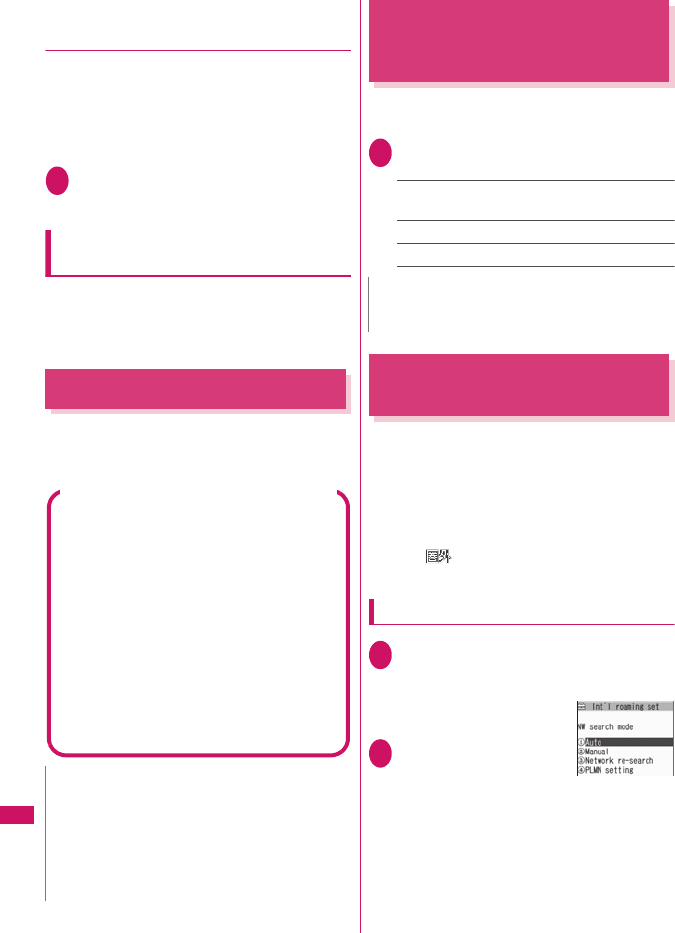
336
Overseas Use
●Making a call to a country set in “Auto
int’l call set.” under “Int’l dial
assistance”
zYou can also make an international call from the
phonebook, Redial or Dialed calls record.
zOnly available when the phone number begins with
“0”.
zSet “Auto int’l call set.” under “Int’l dial assistance”
to “ON”.
1Enter the phone number of the other
partyr (voice call)/o (V.phone)
“Dial”
Making a call to the overseas user of
WORLD WING
When the other party is using the international
roaming, make a call as an international call to Japan
(dial “81” (Japan) as the country code) even when the
other party is in the country you are staying.
Receiving a Call Abroad
You can use the international roaming service to
receive a call without changing the phone number.
→p.59
Setting the Network
Connection Switching
Method
<3G/GSM setting>
Set the method of switching the network accessed
overseas.
1i“SETTINGS”“Int’l roaming set”
“3G/GSM setting”Select any item:
AUTO……Automatically switches between the 3G
network and GSM/GPRS network.
3G……Fixes to the 3G network.
GSM/GPRS……Fixes to the GSM/GPRS network.
Setting the Search Mode of
the Operator
<NW search mode>
When you move out of the service area of the
operator you are using, the FOMA terminal is
reconnected to another operator’s network.
zThis function may not be set depending on the
conditions of radio waves or networks.
zAs of January 2008, no service provider other than
NTT DOCOMO can be selected in Japan.
zWhen “ ” appears when you return to Japan,
check that “NW search mode” is set to “Auto”.
Changing the operator manually
1i“SETTINGS”“Int’l roaming set”
“NW search mode”“Display ON” or
“Display OFF”
The “NW search mode”
screen appears.
2“Manual”Select an
operator
■To switch the operator
automatically
“Auto”
You can set an operator to be preferably
connected when searching the operator
automatically.→p.337
N
zWhen you receive a call while using international
roaming services, the call is sent to your usual mobile
phone number in Japan and then forwarded to your
travel destination no matter from which country the
call originates. The caller has to bear charges for calls
to Japan, and you have to bear incoming call charges
including international forwarding charges.
The other party’s procedure to make a call
■To have the other party make a call from
Japan to your destination country
To have the other party make a call from Japan to
your FOMA terminal in your destination country,
the other party only needs to dial the phone
number as in Japan.
090 (or 080)-XXXX-XXXX
■To have the other party make a call from
outside Japan to your destination country
The other party needs to dial the international
access code and “81” (country code of Japan) no
matter whether you are in Japan or overseas.
International access code-81-90 (or 80)-XXXX-
XXXX
N
zSet “AUTO” or set according to the network to be
accessed overseas.
NW search mode
337
Overseas Use
Re-searching for the network
<Network re-search>
zYou can re-search for a network then connect to the
network if “NW search mode” is set to “Auto” and
an operator could not be searched for, or if “NW
search mode” is set to “Manual” and you want to
change operators.
1NW search mode screen (p.336)
“Network re-search”Select an
operator
■When “NW search mode” is set to “Auto”
“Network re-search”
Setting an operator to be preferably
connected
You can set an operator to be preferably connected
when searching or re-searching the network
automatically.
zThe PLMN network list can store up to 20
operators.
zOperators designated by DOCOMO are stored to
the PLMN network list.
1NW search mode screen (p.336)
“PLMN setting”
The “PLMN setting” screen
appears. Operators are
listed in the priority order.
2Highlight the operator
whose priority is to be
changedu (FUNC)
“Change priority”
3Highlight the position
to move to
d (Select)
The selected operator moves to the position
above the highlighted item. Select “<last>” to
move to the end.
4o (Finish)“YES”
PLMN setting screen (p.337)
PLMN manual select……Enters and stores Country
code (Operator Code (MCC)) and Network code
(Operator Code (MNC)).
PLMN select……Selects and stores the operator from
the list.
Set VPLMN to PLMN……Stores the currently selected
operator.
Change priority→p.337
Delete……Selects the deleting method from “Delete this/
Delete selected/Delete all”.
“About multiple-choice”→p.38
Displaying the Roaming
Operator’s Name
<Display operator name>
You can set whether to display the name of the
currently connected operator on the display during
the international roaming.
1i“SETTINGS”“Int’l roaming set”
“Display operator name”“Display
ON” or “Display OFF”
PLMN setting
Function menu
p.337
N
zThe priority may not apply depending on the
conditions of radio waves or networks.
N
zEven when set to “Display ON”, the name of the
operator is not displayed when you are in Japan (in the
FOMA network).
zWhen “NW search mode” is set to “Manual” and the
FOMA terminal is in “ ” area, “select net” appears.
338
Overseas Use
Commencing Roaming
Guidance
<Roam. Guidance>
You can set the FOMA terminal to notify the other
party that you are roaming internationally when you
receive a voice call or videophone call during
international roaming.
zMake the setting in Japan.
1i“SERVICE”“Roam. Guidance”
Select any item:
Activate・Deactivate……Activates or deactivates
the roaming guidance.
Check setting……Checks the setting.
Setting to Bar Incoming Calls
During Roaming
<Bar incoming when roam>
zDepending on the operator overseas, the setting
may be unavailable.
1i“SERVICE”“Bar incoming when
roam”Select any item:
Activate……Selects from “Bar All incoming” (bars
all incoming calls) or “Data calls Barring” (bars
incoming videophone calls and 64K data
communications*)
The network security code (p.100) is required for the
setting.
Deactivate……Deactivates the barring of incoming
calls when roaming.
The network security code (p.100) is required for
deactivating.
Check setting……Checks the setting.
* : 64K data communication is not available on FOMA
SO706i during international roaming.
Network Services During
Roaming
<Service(Int.)>
zYou can use some network services such as “Voice
Mail” or “Call Forwarding” overseas.
zTo use “Voice Mail(Int.)” or “Call Forwarding(Int.)”,
the subscription to “Voice Mail” or “Call Forwarding”
is required beforehand. Also, “Remote Control”
must be set beforehand.
zYou cannot perform the setting when “ ” is
displayed.
zWhen you perform the operation overseas, you
must bear the international call charges of the
country you are staying.
zFor details on the network services, refer to the
“Mobile Phone User’s Guide [Network Services]”
and “Mobile Phone User’s Guide [World Services]”,
etc.
1i“SERVICE”“Service(Int.)”
Select any item:
Voice Mail(Int.)
Activate・Deactivate・Play messages・Set
ring time・Setting……Follow the audio
guidance to specify the setting.
Call Forwarding(Int.)
Activate・Deactivate・Setting……Follow the
audio guidance to specify the setting.
Roam. Guidance(Int.)……Specify the settings by
following the audio guidance.
Remote access(Int.)……Specify the settings by
following the audio guidance.
Caller ID req.(Int.)……Specify the settings by
following the audio guidance.
N
zEven when the guidance is not set, the other party
hears the ring tone set by the operator.
zThe caller may hear the guidance in a foreign
language depending on the conditions of the
operators overseas.

339
Appendix/External
Devices/Troubleshooting
Menu Function List ......................................................................................................... 340
Character Assignment to Dial Keys ................................................................................ 350
Symbols and Special Characters.................................................................................... 352
Pictographs .....................................................................................................................353
Face Marks ..................................................................................................................... 358
Common Phrases ........................................................................................................... 359
Multi Access Combination Patterns ................................................................................ 360
Multitask Combination Patterns ...................................................................................... 361
Services Available for the FOMA Terminal ..................................................................... 362
Options and Accessories ................................................................................................ 363
■Using the FOMA Terminal with External Devices
Movie Playing Software .................................................................................................. 363
■Troubleshooting
Malfunction Checklist...................................................................................................... 364
If Any Error Message Appears........................................................................................ 368
Warranty and After-Sales Service .................................................................................. 375
i-mode Malfunction Check Site ....................................................................................... 377
Updating Software .................................................................................. 377
Protecting the FOMA Terminal from Harmful Data ............................... 383
Specifications..................................................................................................................385
Number of Data that can be Stored/Registered/Protected on the FOMA Terminal ........ 386
Specific Absorption Rate of Mobile Phones, etc............................................................. 387
Export Administration Regulations ................................................................................. 394
Software Update
Scanning function
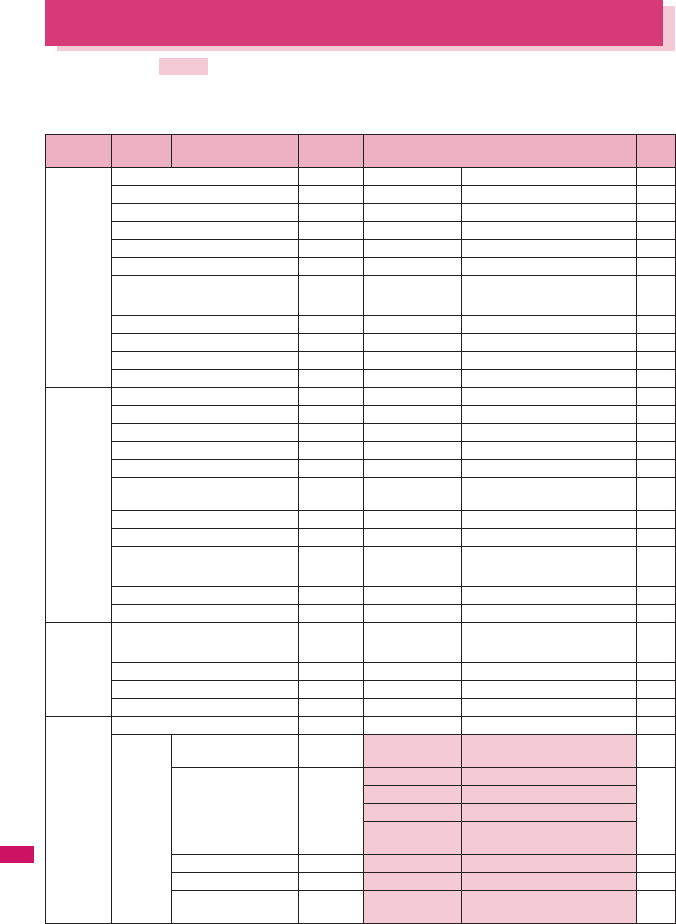
340
Appendix/External Devices/Troubleshooting
Menu Function List
zThe settings with are restored to the default settings by “Reset settings”.
zRefer to the Table 1 (p.348) for details of the reset settings of ① to ⑭ and other functions.
zThe key operation which uses menu numbers is available only when the main menu is set to “Standard
Menu”.→pp.32, 33
Main item Sub item Branch item
Menu No.
(Key operation)
Default setting Ref.
page
MAIL Inbox −−
p.170
Outbox −−
p.170
Draft −−
p.161
Compose message −−
p.156
WEB mail −−
p.157
Compose SMS −−
p.182
Check new messages u
(1 second or
longer)
−p.164
Receive option −−
p.164
Check new SMS −−
p.184
Te m p l a t e −−
p.159
Mail settings −−
p.178
I-MODE iMenu −−
p.136
Bookmark −−
p.142
Screen memo −−
p.143
URL history −−
p.138
Go to location −−
p.141
Full Browser −Specified URL
http://www.google.co.jp
p.218
i-Channel p−p.153
MessageR/F −−
p.180
Check new messages u
(1 second or
longer)
−p.164
Client certificate −−
p.150
i-mode settings −−
p.148
I-APPLI Software list o
(1 second or
longer)
−p.187
microSD −−
p.200
Auto-start set −−
p.197
i-αppli action info −−
p.189
SETTINGS
Kisekae Tool setting −−
p.97
Incoming
call
Ring volume i50 Phone to
MessageF
All Level 4 p.61
Select ring tone i13 Phone 着信音 1 p.82
Videophone 着信音 1
Mail 着信音 1
MessageR/
MessageF
着信音 1
Sound effect i64
Stereo&3D sound
ON p.84
Vibrator i54
Phone to MessageF
All OFF p.84
Manner mode set i20 Manner mode (Original
settings: Default→p.88)
p.86
341
Continued on next page
Appendix/External Devices/Troubleshooting
SETTINGS
Incoming
call
Disp. Phonebook image
−ON p.89
Answer setting i58 Any key answer p.60
Mail/Msg. ring time i68 Mail to
MessageF
All ON (Ring time: 5 seconds) p.85
Ring time(sec.) i90 Set mute
seconds
OFF
Mute seconds: 1 sec
(Set mute seconds is set to
“ON”)
p.114
Missed calls
display
Display
Info notice setting i65 In Japanese display: ボイス
(Voice)
(名前通知 (Name notification) :
OFF)
In English display: ON
p.64
Record message i55 OFF
Answer message: Japanese 1
(When Record message is set
to “ON”)
Ringing time: 13 seconds
(When Record message is set
to “ON”)
p.64
Disp. call/receive No. −White (phone color: Onyx Black)
Black (phone color: Pink Gold,
Platinum White)
p.90
Melody Call setting −−
p.84
Talk Noise reduction i76 ON p.58
Quality alarm i75 No tone p.85
Reconnect signal i77 No tone p.58
Set hold tone −On hold tone To n e 1 p.62
Setting when folded i18 End the call p.61
Dialing Pause dial i84 −p.57
Sub-address setting −ON p.58
Prefix setting −“WORLD CALL” (009130010)
User setting: Not recorded
p.57
Headset sw to dial −OFF p.298
Int’l dial assistance −Auto int’l call set. ON (automatically added) p.52
Country Code
setting
“
日本
” (Country code: 81)
22 country codes are already
stored.
IDD Prefix setting
“WORLD CALL” (009130010)
User setting: Not recorded
Videophone
Visual preference −Normal p.67
Select image −On hold Pre-installed p.67
Holding Pre-installed
Substitute image Chara-den ( ミッフィー )
Record message Pre-installed
Preparing Pre-installed
Voice m emo Pre-installed
Auto redial as voice −OFF p.67
Display setting −Main display Other side p.67
Ntfy switch-mode −Indication ON p.67
Hands-free switch −ON p.67
Main item Sub item Branch item
Menu No.
(Key operation)
Default setting Ref.
page
342
Appendix/External Devices/Troubleshooting
SETTINGS
Videophone
V-phone while packet −V-phone priority p.67
Display Display setting i56 Stand-by display Pink (phone color: Pink Gold),
White (phone color: Platinum
White), Black (phone color:
Onyx Black)
p.88
Wake-up display
ウェイクアップ
Message: Not stored
Dialing, V.phone
Dialing
発信中1 (phone color: Pink
Gold), 発信中2 (phone color:
Platinum White), 発信中3
(phone color: Onyx Black)
Calling, V.phone
Calling
着信中1 (phone color: Pink
Gold), 着信中2 (phone color:
Platinum White), 着信中3
(phone color: Onyx Black)
Mail sending メール送信中1 (phone color:
Pink Gold), メール送信中2
(phone color: Platinum White),
メール送信中3 (phone color:
Onyx Black)
Mail receiving メール受信中1 (phone color:
Pink Gold), メール受信中2
(phone color: Platinum White),
メール受信中3 (phone color:
Onyx Black)
Check new
messages
問合わせ中1 (phone color:
Pink Gold), 問合わせ中2
(phone color: Platinum White),
問合わせ中3 (phone color:
Onyx Black)
Mail rec’d result メール受信結果画面1 (phone
color: Pink Gold), メール受信結
果画面2 (phone color: Platinum
White), メール受信結果画面3
(phone color: Onyx Black)
Backlight i70 Lighting ON (lighting) + Saver (Light
time: 2 minutes)
p.90
Charging Standard
Area LCD+Keys
Brightness ON+Middle
Display design i86 Color pattern Red (phone color: Pink Gold),
White (phone color: Platinum
White), Black (phone color:
Onyx Black)
p.91
Icon pattern Battery icon/Antenna icon
Pattern 2 (phone color: Pink
Gold), Pattern 3 (phone color:
Platinum White), Pattern 4
(phone color: Onyx Black)
Soft key Pattern 1 (phone color: Pink
Gold), Pattern 2 (phone color:
Platinum White), Pattern 3
(phone color: Onyx Black)
Font i66 Font type Gothic p.93
Thickness Bold
Character size Standard
Main item Sub item Branch item
Menu No.
(Key operation)
Default setting Ref.
page
343
Continued on next page
Appendix/External Devices/Troubleshooting
SETTINGS
Display My shortcut i63 Standard (1Seg, Photo mode,
My selection)
p.94
Select language i15 Japanese p.45
My selection i52 Receive Ir data
Bar code reader
Alarm
Illumination set
Shield view
Dictionary
p.92
Menu display set i57 Menu display List p.91
Theme Lacy Pink (phone color: Pink
Gold), Plain White (phone color:
Platinum White), Seductive
Black (phone color: Onyx Black)
Memory focus ON
Reset menu op.
log
−
Viewer settings −9 images p.226
Icons description i36 −p.28
Icons setting −ON p.96
Shield view 2
(1 second or
longer)
OFF p.90
Mail ticker −Display sender p.216
Illumination set i93 Dialing ON p.92
Incoming Call Pattern: Flow
Color: Citrine orange
Incoming
V.phone
Pattern: Flow
Color: Citrine orange
Call light Pattern: OFF
Color: −
Mail receiving Pattern: Flow
Color: Light purple
Mail sending Pattern: Flow
Color: Pink tourmaline
Missed mail ON
Missed call ON
Open phone Pattern: Twins
Color: Pink tourmaline
Close phone Pattern: Twins
Color: Pink tourmaline
Power ON ON
Power OFF ON
Charging start Pattern: Slow Beat
Color: Pink tourmaline
Charging end Pattern: Slow Beat
Color: Pink tourmaline
To D o Pattern: Slide
Color: Pink tourmaline
Schedule/Alarm Pattern: Slide
Color: Pink tourmaline
Time cycle: 60 minutes
Time signal Pattern: Slide
Color: Pink tourmaline
Main item Sub item Branch item
Menu No.
(Key operation)
Default setting Ref.
page
344
Appendix/External Devices/Troubleshooting
SETTINGS
Illumination set i93 Exchanging data ON p.92
Play sound ON
Activate 1Seg ON
Call time/
Charge
Call data i61 −p.293
Notice designate calls −Cost limit setting Not set p.294
Notify cost limit OFF
Alarm tone Alarm Tone
Volume Level 4
Reset total i60 −p.294
Auto reset total cost −OFF p.294
Clock Set main time i31 Auto time adjust Auto p.46
Summer time OFF
Set sub clock −display method Auto p.46
Summer time OFF
Clock display i39 Style 12h clock (phone color: Pink
Gold, Platinum White), 24h
clock (phone color: Onyx Black)
p.93
Size Small (phone color: Pink Gold),
OFF (phone color: Platinum
White, Onyx Black)
Color Black (phone color: Pink Gold,
Platinum White), White (phone
color: Onyx Black)
Alarm setting −Alarm preferred p.289
Clock Alarm Tone set −Alarm Tone p.85
Auto power ON −Inactive p.45
Auto power OFF −Inactive
Lock/
Security
Lock −Dial lock Release p.101
−Original lock 1 to
3
Release p.106
Group and item settings
Data disp. Edit del.:
All selected
Dial/sending mail, Incoming/
Mail disp.: All deselected
IC card lock setting w
(1 second or
longer)
IC card lock OFF p.206
−IC lock (power-
off)
Maintain
Keypad lock −After folded OFF p.110
−Timer OFF
Self mode −Release p.115
Secret mode i40 Release p.103
Secret data only mode i41 Release
Reject unknown −Accept p.114
Call setting w/o ID i10 Unknown to User
unset
All Accept
Select ring tone: Same as
normal ring tone
Select calling disp.: Same as
normal display
p.114
Change security code i29 0000 (4 zeros) p.101
Main item Sub item Branch item
Menu No.
(Key operation)
Default setting Ref.
page
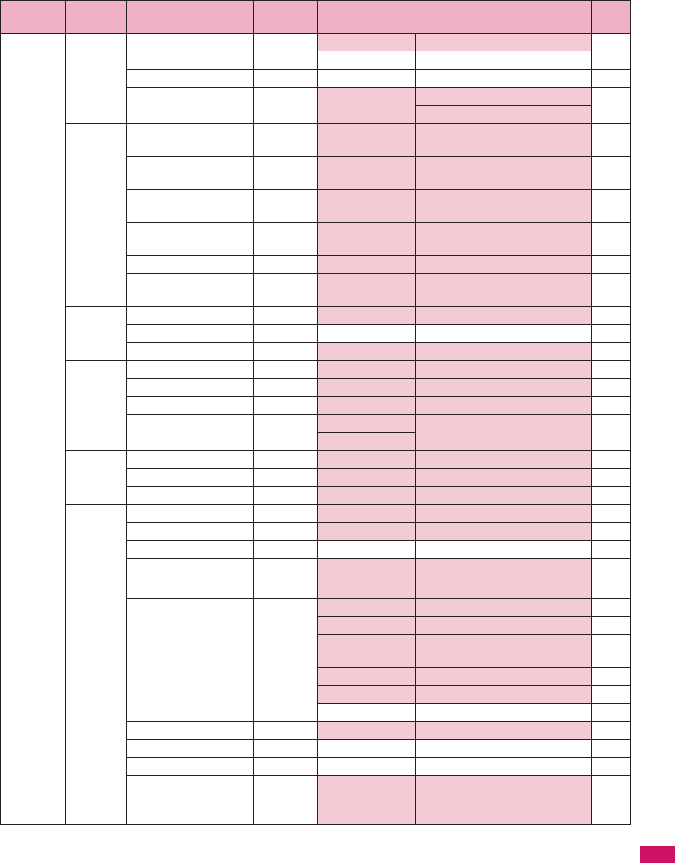
345
Continued on next page
Appendix/External Devices/Troubleshooting
SETTINGS
Lock/
Security
IC card authentic. −OFF p.111
Ext. IC card: Not set
PIN setting −−
p.101
Scanning function −Set scan Scan: ON p.383
Message scan: ON
i-mode
common
set
Set connection
timeout
−60 seconds p.149
Set check new
messages
−Mail to
MessageF
All checked p.179
Host selection i81 i-mode
User setting: Not recorded
p.149
SMS center selection −DoCoMo
User setting: Not recorded
p.184
Certificate −All Valid p.149
Certificate host −DoCoMo
User setting: Not recorded
p.151
i-αppli
settings
Disp. Software info −Not display p.186
End stand-by display −−
p.199
i-αppli vol. −Level 4 p.189
External
connection
USB mode setting −Communication mode p.251
Headset usage setting i51 Headset+speaker p.85
Select microphone −External microphone p.298
Auto answer setting i94 Phone OFF p.299
Videophone
Int’l
roaming
set
NW search mode −Auto p.336
3G/GSM setting −AUTO p.336
Display operator name −Display ON p.337
Other
settings
Keypad sound i30 ON p.85
Charge sound −ON p.85
Battery level i71 −p.44
Side key guard iw
(1 second or
longer)
OFF p.112
Character input set i35 Input mode 5-touch p.303
Auto cursor 1(Slow) p.306
Select
conversion
Prediction p.303
CHG input size Standard p.303
Operation in item ↑↓←→ Key p.305
Clear learned −p.310
Holding down ch-key −Camera p.284
Reset settings i23 −p.299
Initialize −−
p.300
Software Update −Set auto-update Auto-update
Date: Everyday
Time: 03:00
p.377
Main item Sub item Branch item
Menu No.
(Key operation)
Default setting Ref.
page
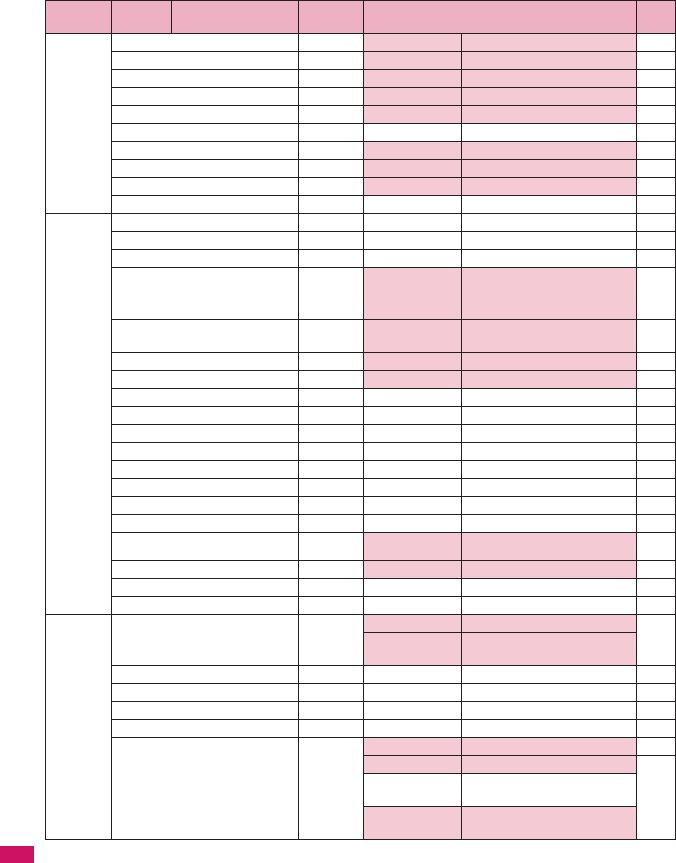
346
Appendix/External Devices/Troubleshooting
DATA BOX My picture i46 ①p.225
Music −② ⑤p.273
Music&Video Channel −③ ⑤p.271
i-motion −④ ⑤p.233
Melody i16 ⑥p.240
1Seg −−
p.235
My document −⑦p.261
Chara-den −⑧p.237
Kisekae Tool −⑨p.242
Document viewer −−
p.263
LIFEKIT Bar code reader −−
p.129
Receive Ir data i79 −p.258
microSD manager −−
p.247
Camera p
(1 second or
longer)
(default)
⑩p.123
p.126
Data security serv. −Sndg img in
Phonebook
OFF p.79
Schedule i45 ⑪p.285
Alarm i44 All OFF p.284
To Do list i95 −p.288
Text memo i42 −p.296
Calculator i85 −p.295
Play/Erase msg. s (▼メモ)−p.65
Play/Erase VP msg. −−
p.65
Voice memo* i43 −p.292
Voice announce i91 −p.293
UIM operation −−
p.254
My Profile i0 ⑫p.46
p.290
Forwarding image −ON p.260
Text reader −−
p.131
Dictionary −−
p.296
SERVICE Chaku-moji −Create message 5 messages pre-installed p.55
MSG display
settings
Calls with Caller ID
Caller ID Notification i17 −p.46
Voice Mail −−
p.312
Call Waiting −−
p.313
Call Forwarding −−
p.314
2in1 setting 8
(1 second or
longer)
OFF p.320
Mode switching Dual mode p.322
Phonebook 2in1
setting
−
Stand-by display Dual mode: White
B mode: Black
*: “Voice memo” may appear depending on the main menu type.
Main item Sub item Branch item
Menu No.
(Key operation)
Default setting Ref.
page
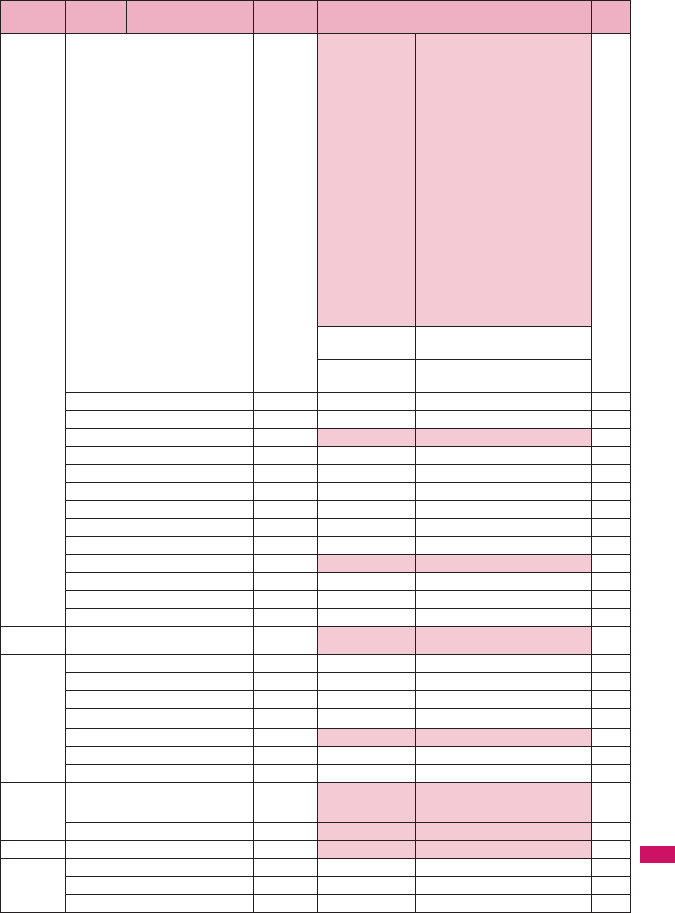
347
Continued on next page
Appendix/External Devices/Troubleshooting
SERVICE 2in1 setting 8
(1 second or
longer)
Set call/receive
No.
Disp. call/receive No.
Number A: White (phone
color: Onyx Black)/Black
(phone color: Pink Gold,
Platinum White)
Number B: Gray
Ringtone for Number B
Voice call (recv.)
Ring tone: 着信音 2
Other than above: Same as
Number A
V. phone (recv.)
Ring tone: 着信音 2
Other than above: Same as
Number A
Mail (recv.)
Ring tone: 着信音 2
Other than above: Same as
Number A
p.322
2in1 function
OFF
−
Rcv. avoid.
setting
−
Nuisance Call Blk −−
p.315
Caller ID Request −−
p.316
Incoming Call Mng −Answer p.317
Set in-call arrival −−
p.317
Remote Control −−
p.318
Dual Network −−
p.316
English Guidance −−
p.316
Additional service −−
p.324
Service Numbers −−
p.317
Multi Number −Select ring tone Same as normal ring tone p.319
Roam. Guidance −−
p.338
Bar incoming when roam −−
p.338
Service(Int.) −−
p.338
PHONEBOOK
Phonebook −⑬p.70
p.73
OWN DATA
Received calls i24 −p.53
Dialed calls −−
p.53
Mail member i97 −p.162
Choku-Den f−p.78
Common phrases i38 Default common phrases p.308
Own dictionary i82 −p.309
DL dictionary −−
p.310
MUSIC Music Player s (▼メモ )
(1 second or
longer)
② ⑤p.277
Music&Video Channel −③ ⑤p.268
1SEG −⑭p.207
OSAIFU-
KEITAI
IC card content −−
p.202
DCMX −−
p.195
To r u C a −−
p.204
Main item Sub item Branch item
Menu No.
(Key operation)
Default setting Ref.
page
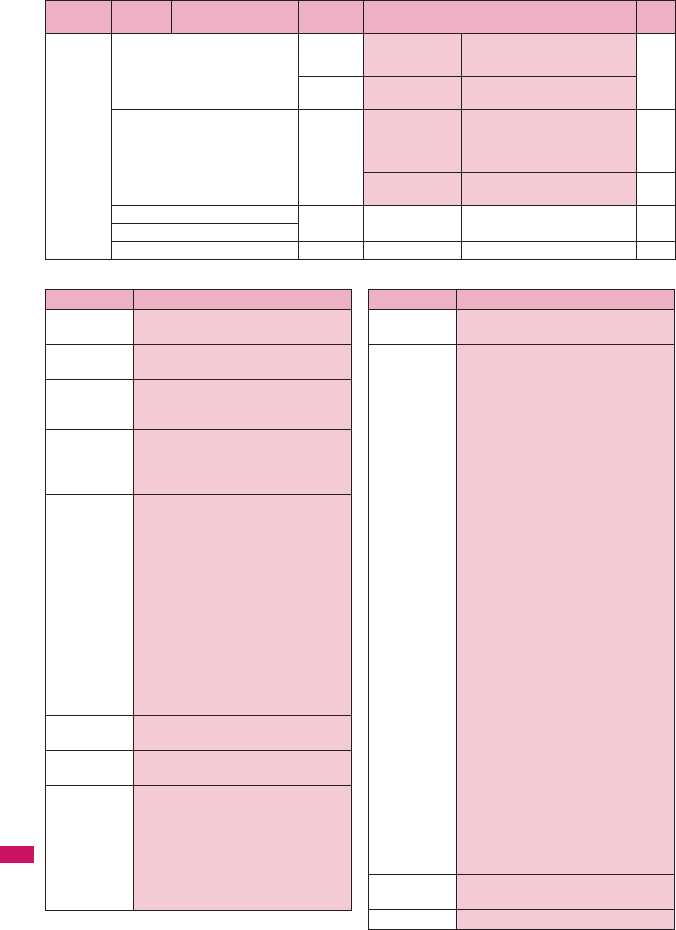
348
Appendix/External Devices/Troubleshooting
[Table 1] Other reset setting functions
OSAIFU-
KEITAI
IC card lock setting w
(1 second or
longer)
IC card lock OFF p.206
−IC lock(power-
off)
Maintain
Setting −ToruCa settings Receive from R/W: Accept
Repetition check: Yes
Auto reading setting: ON
Scroll: 1 line
p.206
IC card
Illumination
ON p.206
Check IC owner −−
p.203
Change IC owner
Search by i-mode −−−
Main item Sub item Branch item
Menu No.
(Key operation)
Default setting Ref.
page
Function Default setting
①My picture Sort: Chronological ↑
Set image disp.: Normal
②Music List setting: List
Resume play: No data
③
Music&Video
Channel
Sort: Chronological↑
List setting: List+image
Playback start position: Beginning
④i-motion Sort: Chronological ↑
List setting: List+image (FOMA
terminal), Name+image (microSD)
Playback start position: No data
⑤Music
Player
Sound effect
Equalizer: OFF
SRS_WOW: OFF
Repeat setting: OFF
Shuffle: OFF
Volume: Level 10
Screen setting: Normal screen mode
Set image disp.: Normal
Change skin:
Lacy Pink (phone color: Pink Gold),
Plain White (phone color: Platinum
White), Seductive Black (phone
color: Onyx Black)
Set repeat play: OFF
⑥Melody Sort: Chronological ↑
Set repeat play: OFF
⑦My
document
Sort: Chronological ↑
⑧Chara-den Substitute image: ミッフィー
Set image disp.: Fit in display
Rec. Chara-den: Photo mode
Select size: QCIF (176 × 144)
Movie type set: Video + voice
Storage setting (movie): Normal
Storage setting (image): Fine
File size setting: 2MB
⑨Kisekae
To o l
Sort: Chronological ↑
⑩Camera Movie mode
Select size: QCIF (176 × 144)
File size setting: 2MB
Quality setting: Normal
Camera Settings
Photo mode: Portrait
White balance: Auto
Flicker: Auto
Shutter sound: Sound 1
Select to save: Phone (Camera
folder)
Voice mode
Shutter sound: Sound 1
Select to save: Phone (Camera
folder)
Photo mode
Select size: Screen (240 × 427)
Quality setting: Super Fine
Camera Settings
Photo mode: Auto
White balance: Auto
Flicker: Auto
Shutter sound: Sound 1
Select to save: Phone (Camera
folder)
Movie mode/Photo mode
Auto timer: OFF (Delay time: 10
seconds)
Auto save set: OFF
File restriction: File unrestricted
Continuous mode→p.124
⑪Schedule Display: Monthly display
User icon setting: Not recorded
⑫My Profile Big font⇔Standard font: Standard font
Function Default setting
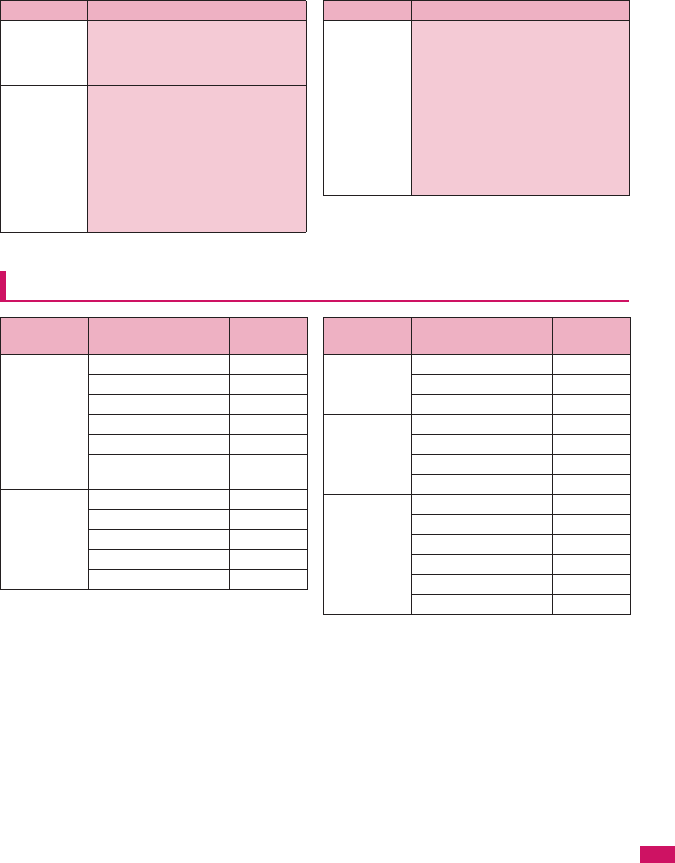
349
Appendix/External Devices/Troubleshooting
* : “Last one function” makes the FOMA terminal select the
function you select last time automatically when you
operate the FOMA terminal next time.
Simple Menu function list
⑬Phonebook Ring tone/Image: All OFF
Restrictions: All released
Set large font⇔Set normal font: Set
normal font
⑭1Seg User settings
Subtitles: ON(Wide:Bottom)
Rec. while low battery: ON
TV sound while closed: ON
ECO mode: OFF
Display light: Constant light
Data BC settings
Sound effect: ON
Icon show(Wide): Show always
Function Default setting
Other
functions
During a videophone call
Brightness of V.phone settings: 0
Display light: All time ON
Last one function*
Main menu: Data Box
Phonebook: Search all (Prefer)
Volume : Level 4
Manner mode: Released
Public mode (Driving mode):
Deactivated
Function Default setting
Main item Sub item/Branch
item Ref. page
Phone Phonebook p.73
Dialed calls p.53
Received calls p.53
Play/Erase msg. p.64
Add to phonebook p.70
My profile p.46,
p.290
Mail Inbox p.170
Outbox p.170
Draft p.161
Compose msg. p.156
Check new msg. p.164
i-mode iMenu p.136
Bookmark p.142
Screen memo p.143
Camera Photo mode p.123
Movie mode p.126
My picture p.225
i-motion p.233
Settings/Tools Incoming call p.82
Display p.89
Alarm clock p.284
Calculator p.295
Call time/Charge p.293
Voice Mail p.312
Main item Sub item/Branch
item Ref. page

350
Appendix/External Devices/Troubleshooting
Character Assignment to Dial Keys
Characters that can be entered using 5-touch input
• only appears in double-byte input mode.
• Red text only appears in single-byte input mode.
*1: “+” can be entered when you enter an SMS address by holding down the key for 1 second or longer.
*2: Dakuten/Handakuten change when pressed before entering Dakuten/Handakuten character.
*3: “゛” or “゜” appears at the beginning in single-byte input mode.
*4: Line feed “ ” is entered when pressed after text is set.
Assigned text changes in descending order when pressed before text is set.
Key Kanji/Hiragana input
mode Katakana input mode Alphabetic input mode Numeric input
mode
1あいうえお アイウエオ
. @ / :
- ~ 11
2かきくけこ カキクケコ ABCabc2 2
3さしすせそ サシスセソ DEFdef3 3
4たちつてと タチツテト GHIghi4 4
5なにぬねの ナニヌネノ JKLjkl5 5
6はひふへほ ハヒフヘホ MNOmno6 6
7まみむめも マミムメモ PQRSpqrs7 7
8やゆよ ヤユヨ TUVtuv8 8
9らりるれろ ラリルレロ WXYZwxyz9 9
0わをんゎSpace、。ー・
!?
ワヲン Space
ー・!?「」
Space!?− ,’;()”_ ~&
¥0
0+*1
w、。ー・゛゜!? *2 、。ー・゛゜!?「」
*2*3 !?−,’;()”_ ~&¥*
q―――― *4
#
ぁぃぅぇぉ ァィゥェォ ー ∼
ヵヶ
っッ
ゃゅょ ャュョ
ヮ
、。
∼
∼
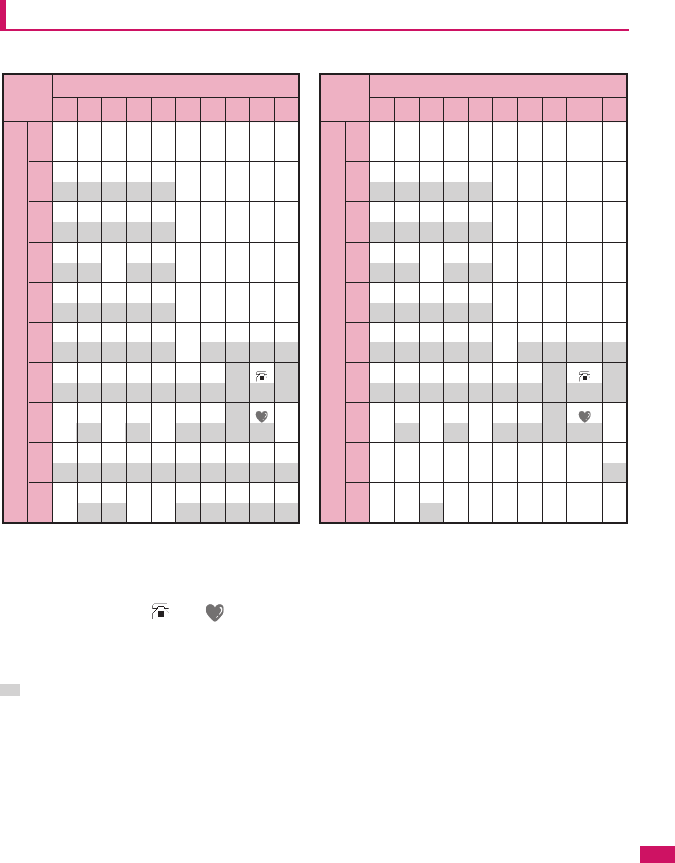
351
Appendix/External Devices/Troubleshooting
Allowable characters for 2-touch
• During reading input when you are storing entries in the UIM phonebook, Double-byte input mode becomes
katakana input.
*1: These can also be used only when pictograph input is possible, such as “Text memo” or storing “Common phrases”.
Note that these icons are always entered as double-byte characters. “Pictograph” is not available when you are
composing an SMS, but “ ” and “ ” can be entered.
*2: Pressing 80 switches between upper case input mode (top) and lower case input mode (bottom). You can also
enter upper case text and then change it to lower case by pressing r .
*3: In “Double-byte input mode”, dakuten “゛” and han-dakuten “°” are only displayed for characters with which
dakuten can be used. Dakuten entered with other characters appear as spaces.
: Spaces are entered.
1 あ い う え お A B C D E
ぁ ぃ ぅ ぇ ぉ a b c d e
2 か き く け こ F G H I J
f g h i j
3 さ し す せ そ K L M N O
k l m n o
4 た ち つ て と P Q R S T
っ p q r s t
5 な に ぬ ね の U V W X Y
u v w x y
6 は ひ ふ へ ほ Z ? ! ― /
z
7 ま み む め も ¥ &
*1
8 や ( ゆ ) よ * #
*1
*2
ゃ ゅ ょ
9 ら り る れ ろ 1 2 3 4 5
0 わ を ん
゛ ゜ 6 7 8 9 0
ゎ 、 。
Key 2nd key
1st
key
1234567890
1 ア イ ウ エ オ A
B
C
D
E
ァ ィ ゥ ェ ォ a
b
c
d
e
2 カ キ ク ケ コ F
G
H
I
J
f
g
h
i
j
3 サ シ ス セ ソ K
L
M
N
O
k
l
m
n
o
4 タ チ ツ テ ト P
Q
R
S
T
ッ p
q
r
s
t
5 ナ ニ ヌ ネ ノ U
V
W
X
Y
u
v
w
x
y
6 ハ ヒ フ ヘ ホ Z
?
!
-
/
z
7 マ ミ ム メ モ ¥
&
*1
8 ヤ ( ユ ) ヨ *
#
*1
*2
ャ ュ ョ
9 ラ リ ル レ ロ 1
2
3
4
5
@ / - _ :
.ne.jp .co.jp .ac.jp
0 ワ ヲ ン ゙ ゚ 6
7
8
9
0
~ ' ,
.
www.
.com
.html
http://
https://
2nd key
@docomo.
ne.jp
*3 *3
Key
1st
key
1234567890
■Double-byte input mode ■Single-byte input mode
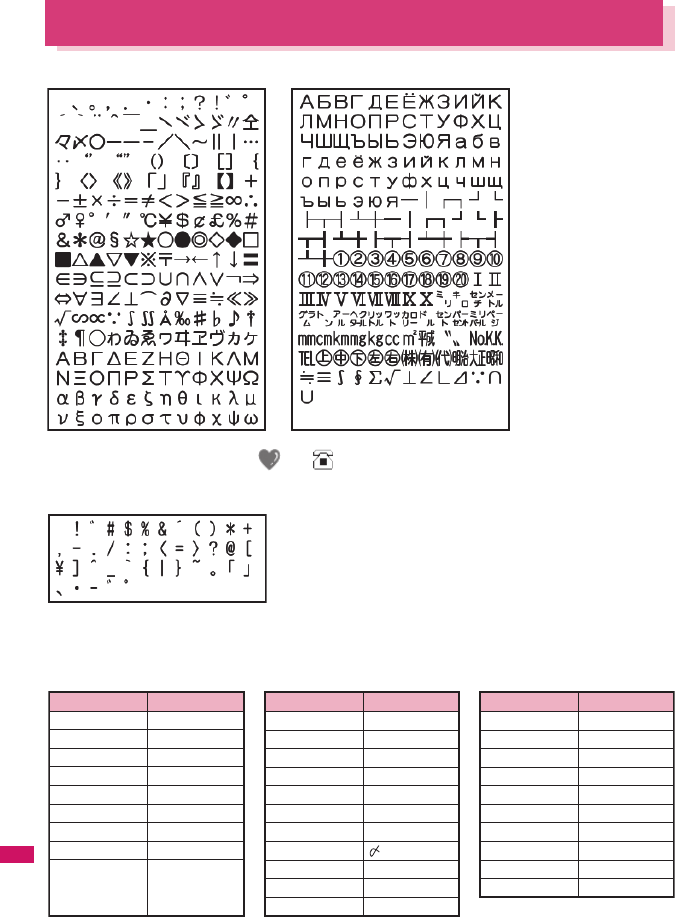
352
Appendix/External Devices/Troubleshooting
Symbols and Special Characters
■Double-byte symbols
■Single-byte symbols
■Symbols reading for conversion
Enter and convert “きごう”, and some symbols are displayed as conversion candidates. Entering reading as
follows enables conversion to the corresponding symbol:
* The space at the first character is a “Double-byte space”.
* When entering the message of SMS, and appear at the end of the list.
* The space at the first character is a “Single-byte space”.
Reading Symbol
あっと、あっとまーく
いこーる
えん
おす
おなじ
おなじく
おんぷ
かける
かっこ
@
=
¥
々
〃
♪
×
()
〔〕
[]
{}
〈〉
《》
「」
『』
【】
‘’
“”
()
〈〉
[]
{}
「」
Reading Symbol
から
こめ
ころん
こんま
さんかく
しゃせん
しかく
しめ
たす
どう
ぱーせんと
∼
※
:
,
△▲▽▼
/\
□■◇◆
+
ヽヾゝゞ〃々
%
Reading Symbol
ひく
ひしがた
ほし
まる
むげん
めす
やじるし
ゆうびん
るーと
わる
−
◇◆
☆★
○●◎
∞
♀
→←↑↓
〒
√
÷
♂
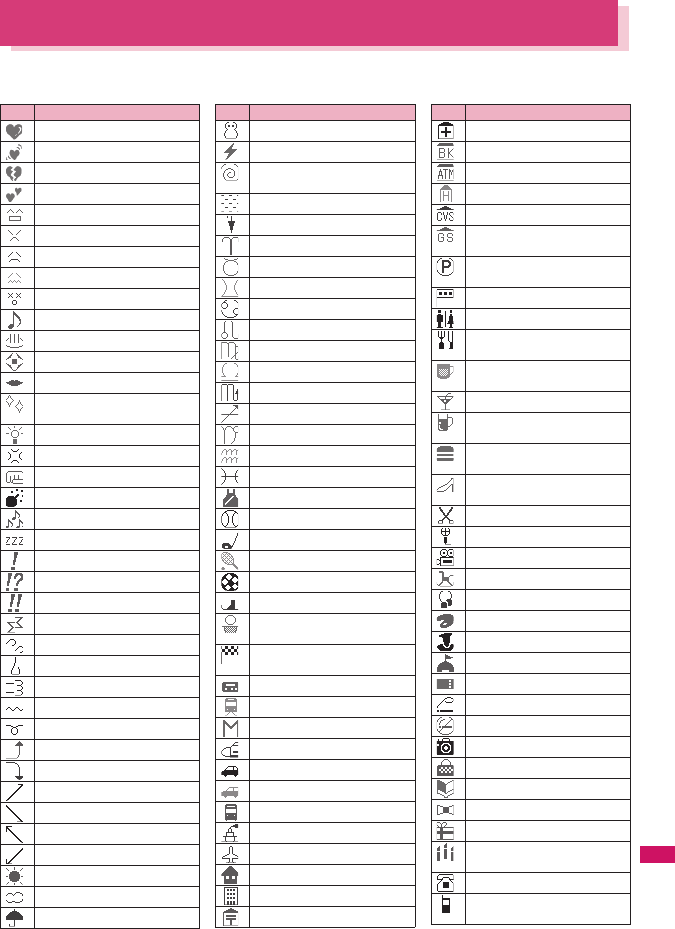
353
Continued on next page
Appendix/External Devices/Troubleshooting
Pictographs
■Pictographs
You can enter the pictographs by entering and converting the following readings.
Reading
はーと
はーと
しつれん・はーと
はーと
わーい・かお・うれしい
いかり・かお
がく・かお・かなしい
やだ・かお・かなしい
ふらふら・かお
るんるん・おんぷ
おんせん
かわいい・はな
きすまーく・きす・ちゅっ
ぴかぴか・あたらしい・きら・
ぴか
ひらめき・きら・ぴか
むかっ・いかり
ぱんち・いかり・て
ばくだん・ばくはつ・いかり
むーど・おんぷ
ね む い・す い み ん・ね る・ぐ ー
びっくり・おどろき
びっくり・おどろき
びっくり・おどろき
どんっ・しょうげき
あせあせ・あせ
あせ
だっしゅ・にげろ
ー
ー
ぐっど・やじるし・や・うえ
ばっど・やじるし・や・した
やじるし・うえ
やじるし・した
やじるし・うえ
やじるし・した
はれ・てんき・たいよう
くもり・てんき・くも
あめ・てんき・かさ
ゆき・てんき・ゆきだるま
かみなり・てんき・ぴか
たいふう・てんき・まる・ぐ
るぐる
きり・てんき
こさめ・てんき・かさ
おひつじざ・せいざ
おうしざ・せいざ
ふたござ・せいざ
かにざ・せいざ
ししざ・せいざ
おとめざ・せいざ
てんびんざ・せいざ
さそりざ・せいざ
いてざ・せいざ
やぎざ・せいざ
みずがめざ・せいざ
うおざ・せいざ
すぽーつ・ふく
やきゅう・すぽーつ・ぼーる
ごるふ・すぽーつ
てにす・すぽーつ
さっかー・すぽーつ・ぼーる
すきー・すぽーつ
ばすけっとぼーる・すぽー
つ・ばすけ・ばすけっと
もーたーすぽーつ・はた・ふ
らっぐ・えふわん
ぽけっとべる・ぽけべる・べる
でんしゃ・のりもの
ちかてつ・のりもの・めとろ
しんかんせん・のりもの
くるま・のりもの・せだん
くるま・のりもの・あーるぶい
ばす・のりもの
ふね・のりもの
ひこうき・のりもの
いえ・たてもの・うち
びる・たてもの・かいしゃ
ゆうびんきょく・ゆうびん
Reading
びょういん
ぎんこう・ばんく
えーてぃーえむ・ばんく
ほてる
こんびに
がそりんすたんど・がすすた
んど・がす
ちゅうしゃじょう・ぱーきん
ぐ・ぴー
しんごう
といれ・べんじょ
れすとらん・しょくじ・ごは
ん・めし
きっさてん・しょくじ・さて
ん・おちゃ
ばー・しょくじ・さけ・かんぱい
びーる・しょくじ・さけ・か
んぱい
ふぁーすとふーど・しょく
じ・はんばーがー
ぶてぃっく・くつ・ふく・は
いひーる
びよういん・はさみ・とこや
からおけ・まいく・うた
えいが・びでお
ゆうえんち
おんがく・きく・へっどほん
あーと・かいが
えんげき・しばい
いべんと
ちけっと・きっぷ
きつえん・たばこ
きんえん・たばこ
かめら・しゃしん
かばん・ばっぐ
ほん
りぼん
ぷれぜんと・おめでとう
ばーすでー・おめでとう・た
んじょうび
でんわ
けいたいでんわ・けいたい・
けーたい・でんわ
Reading
354
Appendix/External Devices/Troubleshooting
めも
てれび
げーむ
しーでぃー
はーと・とらんぷ
すぺーど・とらんぷ
だいや・とらんぷ
くらぶ・とらんぷ
め・みる・みて
みみ・きく
て・ぐー
て・ちょき
て・ぱー
あし・あしあと
くつ
めがね
くるまいす
しんげつ・つき・まる
はんつき・つき
はんつき・つき
みかづき・つき
まんげつ・つき・まる
いぬ・どうぶつ
ねこ・どうぶつ
りぞーと・よっと・ふね
くりすます・き
かちんこ・かっと・かんとく
ふくろ
ぺん・めも
ひとかげ
いす
よる・つき・おやすみ
えんど・おわり
とけい・じかん
でんわ・でんわばんごう
めーる・あどれす
ふぁっくす
あいもーど・あい
あいもーど・あい
めーる・てがみ・あどれす
どこも
Reading
どこもぽいんと・どこも
ゆうりょう・えん・かね
むりょう・ただ・ふりー
あいでぃー
ぱすわーど・かぎ
つぎ・りたーん
くりあ
さーち・しらべる・むしめが
ね
にゅー・にゅう・あたらしい
はた・ふらっぐ・いち
ふりーだいやる
しゃーぷ
いち・すうじ
に・すうじ
さん・すうじ
し・よん・すうじ
ご・すうじ
ろく・すうじ
なな・しち・すうじ
はち・すうじ
きゅう・く・すうじ
ぜろ・れい・すうじ
けってい・おーけー・おっ
けー
あいあぷり・あぷり
あいあぷり・あぷり
てぃーしゃつ・しゃつ・ふく
さいふ・かね・おかね
けしょう・くちべに
じーんず・ふく・ずぼん
すのぼ・すのーぼーど・す
ぽーつ
ちゃぺる・べる・かね
どあ・とびら
どるぶくろ・かね・おかね
ぱそこん・ぴーしー
らぶれたー・らぶめーる・て
がみ・めーる
れんち・しゅうり
えんぴつ・めも
おうかん・かんむり・おう
ゆびわ
すなどけい・じかん
Reading
じてんしゃ・のりもの・ちゃり
ゆのみ・おちゃ・ちゃ
うでどけい・とけい・じかん
かんがえる・かお・うーむ
ほっ・かお
ひやあせ・かお
ひやあせ・かお
いかり・かお・ぷー
ぼけー・かお
はーと・かお
おーけー・て・おっけー
あかんべ・かお・べー
うぃんく・かお
うれしい・かお・にこ
がまん・かお
ねこ・どうぶつ
なみだ・かお・なき
なみだ・かお・なき
えぬじー・だめ
くりっぷ・てんぷ
はしるひと・だっしゅ・はし
る・にげる
まるひ・ひみつ
りさいくる
きけん・ちゅうい
きんし
くうしつ・くうせき・くうしゃ・
あき
ごうかく
まんしつ・まん せ き・ま ん
しゃ・いっぱい
やじるし・や
やじるし・や
がっこう
なみ・うぇーぶ・うみ
ふじさん・やま
くろーばー・はな
さくらんぼ・はな・ちぇりー
ちゅーりっぷ・はな
ばなな・たべもの
りんご・たべもの
め・はな
Reading
355
Continued on next page
Appendix/External Devices/Troubleshooting
* Pictographs with no reading can be
entered only by Pictograph.
もみじ・はな
さくら・はな
おにぎり・おむすび・たべもの
しょーとけーき・けーき・たべもの
とっくり・おちょこ・さけ・
かんぱい
どんぶり・ごはん・たべもの・
しょくじ
Reading
ぱん・しょくじ・たべもの
かたつむり・どうぶつ
ひよこ・どうぶつ
ぺんぎん・どうぶつ
さかな・どうぶつ
うまい・たべる・かお
にやり・かお・わらい
Reading
うま・どうぶつ・けいば
ぶた・どうぶつ
わいんぐらす・わいん・さけ・
かんぱい
げっそり・さけび・むんく・
かお
Reading
■Pictograph idioms
In predicted conversion mode, some readings convert to pictograph idioms combining multiple pictographs.
Reading Idiom
おたんじょうびおめでとう/
はっぴーばーすでー
るんるん
わーい
るるるー
きゃぴきゃぴ
めろめろ
わくわく
はっぴー
うきうき
らぶらぶ
どきどき
やったー
だいすき
わおっ
がっかり
しくしく
しょんぼり
ぷんぷん
がーん
きらい
しょっく
つかれた
すやすや
おはよう
こんにちは
はろー
こんばんは
おやすみ
ばいばい
たのしみ
おつかれさま
ありがとう
ごめんね
がんばろう
ひさしぶり
げんき?
にんまり
らぶりー
すてき
うれしい
かなしい
おいしい
はやく
いそいでいる
ゆっくり
ほんとうにはやく
もうだっしゅ
つうきん
しはつ
しゅうでん
まんいんでんしゃ
どらいぶ
じゅうたい
がすけつ
かえる
だんしこう
じょしこう
だいがく
しょうがっこう
Reading Idiom
←
∼
凸
凸
凹
凸
356
Appendix/External Devices/Troubleshooting
てすとべんきょう
てすとはんい
もうべんきょうちゅう
がっこうがやすみ
しりょくけんさ
ざんぎょう
かえれない
じゅうようしょるい
きゅうりょうかっと
のんびり
きがえる
ひとりぐらし
やちん
ろくが
ゆめのなか
ばくすい
おふろにはいる
すかっ
さいこう
さいあく
ほんとうにつらい
おこったぞ
おこったぞ
げきど
きれそう
りょうかい
らじゃー
あそぼう
だいじょうぶ
よろしく
おねがい
おっけー
ほのぼの
わかった
あそびにいく
よっぱらう
ばかんす
ぱちんこ
でぃーじぇー
れすとらん
Reading Idiom
→ ←
中
凸
C←
Y
…
えすて
なんぱ
らいぶはうす
ごうこん
しんかんこんぱ
いけめん
いけめん
ひとめぼれ
としした
としうえ
こいのよかん
えんきょりれんあい
やきもち
ふたまた
えんをきる
けっこん
なやみちゅう
おんしんふつう
かっぷる
でーと
ちこく
まくどなるど
てをつなぐ
はなび
かんぱい
くりすます
えきまえ
とない
いどうじかん
くやしい
うるさい
びっくり
うらやましい
はれめ
まじで?
さみしい
たいへん
はらいた
なつばて
ふらふら
Reading Idiom
。
∼
中
∼
。
。
。
。
夏 ○
357
Appendix/External Devices/Troubleshooting
ごうきゅう
のみすぎ
めにくま
めーるそうしん
うれしめーる
うれしめーる
らぶめーる
はやめーる
りれーめーる
しーくれっとめーる
あつい
ひじょうにあつい
おおゆき
さむい
ありがとう
Reading Idiom
ごめんなさい
きいて
おしえて
みみよりじょうほう
おはよう
よろしく
ふぁいと
こんばんにゃ
こんばんわん
わんぎり
ながでんわ
こくさいでんわ
ときがたつ
おみやげ
Reading Idiom
?
∼
∼
∼
N
zWhen you send pictographs to the mobile phone other than i-mode terminal or a PC, they may not be displayed
correctly. Pictographs may not be displayed correctly depending on the model of the other party even when it is the
i-mode terminal.
358
Appendix/External Devices/Troubleshooting
Face Marks
■Face marks reading
You can enter the face marks by entering and converting the following readings. Also, all the following marks
are displayed as conversion candidates when you enter “かお” or “かおもじ” and press p (Convert) to
convert.
Reading Face mark
ありがと(う)
ばんざい
わーい
おーい
ぶい
ぎゃはは
あは
にこ
ちゅ
わくわく
ういんく
さよなら
がんば
ね
こまったもんだ
やだ
ぽりぽり
ひやあせ
あせあせ
びくっ
どき
え
めがてん
はてな
きらーん
しくしく
さよなら
いたた
えーん
なぜ
がーん
えへん
む
いかり
むか
こそこそ
じーっ
きこえない
ぶたー
こあら
いっぷく
ほし
ねてる
ねむい
ねむい
めも
うん
かんぱい
ども
がまん
こんにちは
いいな
うーん
てれる
しあわせ
なかよし
ごめん
いじいじ
いじわる
よろしく
こまった
へこむ
びっくり
だっしゅ
Reading Face mark Reading Face mark
359
Appendix/External Devices/Troubleshooting
Common Phrases
Category Common Phrase
①Internet ①.co.jp ⑥.go.jp
②.ne.jp ⑦@docomo.ne.jp
③.com ⑧http://
④.or.jp ⑨https://
⑤.ac.jp www.
②Emoticon1 ①⑥
②⑦
③⑧
④⑨
⑤
③Emoticon2 ①⑥
②⑦
③⑧
④⑨
⑤
④Emoticon3 ①⑥
②⑦
③⑧
④⑨
⑤
⑤Greetings ① おはようございます ⑥ お疲れさまでした
② おやすみなさい ⑦ お世話になっております
③ 昨日は、どうもありがとうございました ⑧ こんにちは
④ 行ってきます ⑨ こんばんは
⑤ いってらっしゃい よろしくお願い致します
⑥Business ① 直行します ⑥ 本日の会議は中止となりました
② 直帰します ⑦ 出欠をご連絡ください
③ 休暇をとります ⑧ 次の指示を待ってください
④ 半休します ⑨ 携帯の電源を切ります
⑤ 電車遅延のため、遅れます メールで連絡してください
⑦Private ① 遊びに行こう ⑥ 先に行きます
② 飲みにいきませんか? ⑦ 先に帰ります
③ 遅れます ⑧ 時間です
④ 変更します ⑨ 何してるの?
⑤ 中止です どこにいるの?
⑧Reply ①OKです ⑥ 今忙しい
②NGです ⑦ 後で連絡を入れます
③ ありがとう ⑧ 保留です
④ ごめんなさい ⑨ キャンセルです
⑤ 待ってて! 時間がありません
⑨Original
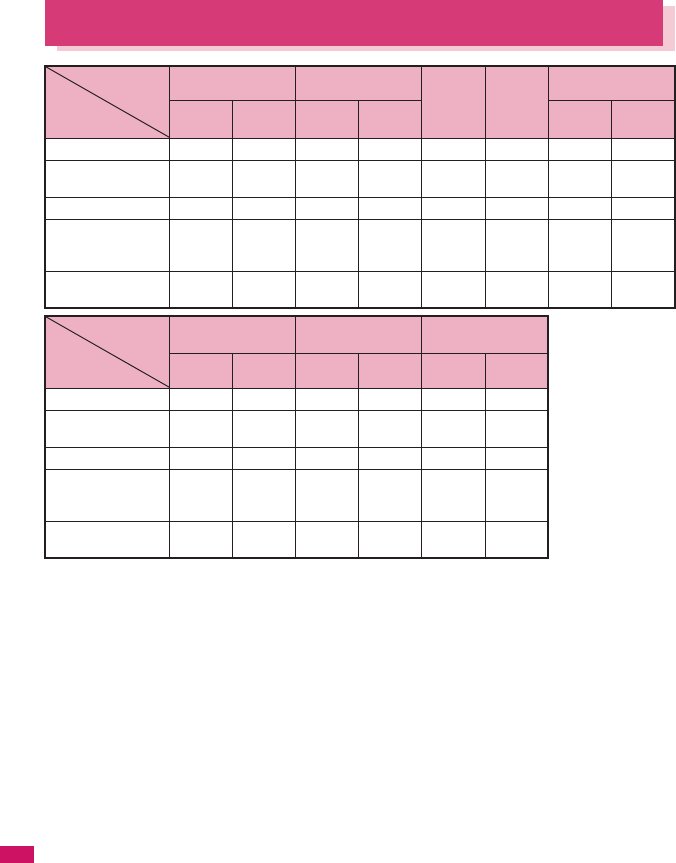
360
Appendix/External Devices/Troubleshooting
Multi Access Combination Patterns
○: Can be activated. ×: Cannot be activated. △: Can be activated depending on situation.
−: Functionally incompatible.
*1: Includes i-Channel site view and communication via Full Browser or ToruCa.
*2: If you have subscribed to “Call Waiting”, you can hold the current voice call to make another call.
*3: If you have subscribed to “Call Waiting”, you can hold the current voice call to answer an incoming call. If you have
subscribed to “Voice Mail” or “Call Forwarding”, you can end the current communication and then answer a new
incoming communication.→p.317
*4: If you have subscribed to “Call Waiting”, “Voice Mail” or “Call Forwarding”, you can end the current communication
and then answer a new incoming communication.→p.317
*5: Make a videophone call after disconnecting the current i-mode.
*6: If “V-phone while packet” is set to “V-phone priority”, answering an incoming videophone call disconnects i-mode
communication.
*7: You cannot communicate via i-αppli software.
*8: An i-mode mail, MessageR or MessageF is not received, but is stored in the i-mode Center. You can receive a stored
i-mode message, MessageR or MessageF by performing “Check new messages” after the current communication
ends.
*9: It is logged as a missed call.
Another
communication
Current condition
Voice call Videophone
Using
i-mode*1
Using
i-αppli
i-mode mail
Dialing
Incoming
call
Dialing
Incoming
call
Send Receive
During a voice call △*2 △*3 ×△
*4 ○×○○
During a videophone
call
×△
*4 −△
*4 ××××
*8
During i-mode*1 ○○△
*5 △*6 −○○○
During packet
communication with
a PC
○○×××△
*7 ××
*8
During 64K data
communication
×△
*4 ×△
*4 ××××
*8
Another
communication
Current condition
SMS Packet
communication
64K data
communication
Send Receive Send Receive Send Receive
During a voice call ○○○○×△
*4
During a videophone
call
×○××
*9 ×△
*4
During i-mode*1 ○○××××
During packet
communication with
a PC
○○−−××
During 64K data
communication
○○×××△
*4
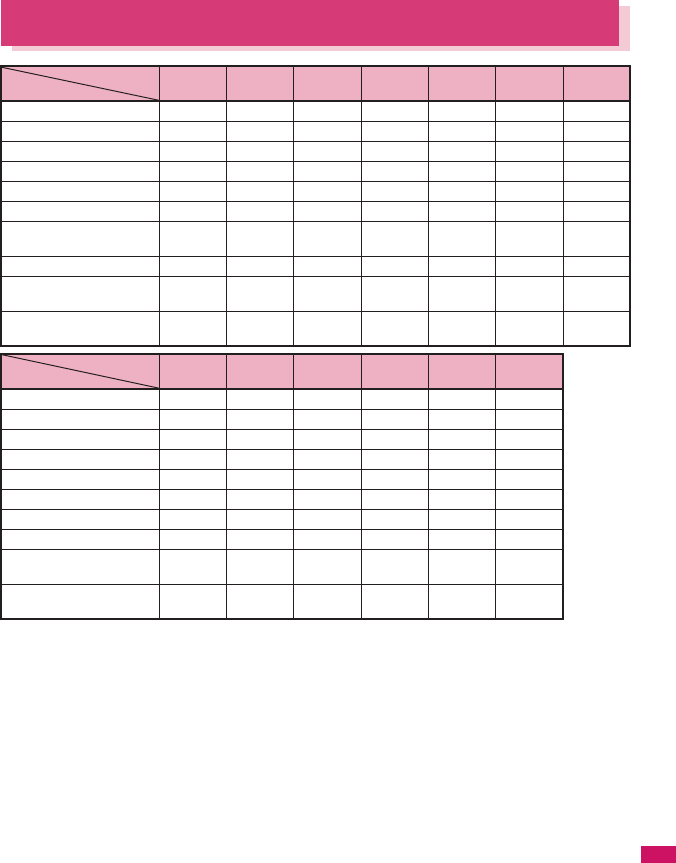
361
Continued on next page
Appendix/External Devices/Troubleshooting
Multitask Combination Patterns
○: Can be activated. ×: Cannot be activated.
*1 : The function is unavailable when “Receive Ir data”, “microSD manager” or “UIM operation” is selected.
*2 : “Compose message” and “Compose SMS” cannot be used simultaneously.
*3 : Read out mail function is not available during music playback. In addition, playing sounds such as melodies
attached to files is not possible.
*4 : It is not available while switching between a voice call and a videophone call.
*5 : i-motion, Chaku-Uta-Full® and Music&Video Channel cannot be downloaded.
*6 : Playing sounds such as melodies and i-motion is not possible during playback of Music Player.
*7 : “1Seg”/“Music&Video Channel”/“Music Player” is paused. May not be available during 1seg recording.
*8 : Some functions are unavailable.
*9 : Only “Pause dial”, “IC card lock setting” and “Keypad sound” are available.
*10 : Only “Ntfy switch-mode” is available.
*11 : Editing, storing and copying still images to microSD card, editing, forwarding and copying/moving movies to FOMA
terminal⇔microSD card, moving Chaku-Uta-Full® to FOMA terminal⇔microSD card are not available.
*12 : “Receive Ir data”, “microSD manager”, “Voice announce” and “UIM operation” are unavailable.
*13 : Only “Bar code reader”, “Camera”, “Data security serv.”, “Schedule”, “To Do list”, “Text memo”, “Calculator”, “Voice
memo”, “My Profile”, “Text reader” and “Dictionary” are available. However, only “Photo mode” and “Continuous
mode” are available in “Camera”.
Function
Current status
Mail
i-mode menu/
i-Channel list
i-αppli Settings Data Box
LifeKit
Service
Mail group activates ○*2 ○○○
*8 ○○
*12 ○*15
i-mode group activates ○×○○
*8 ○○
*12 ○*15
i-αppli group activates ○○
*5 ×○
*8 ○*11 ○*12 ○*15
Settings group activates ○○○×○○
*12 ×
Tools group activates*1 ○○○○
*8 ××○
*15
1seg/Music group ○*3 ○*6 ○*7 ○*8 ○*6 ○*8 ○*15
During a voice call ○*4 ○*4 ××
*4*9 ××
*4*13 ○*4*15
*16*17
During a videophone call ××××××
*4*14 ×
During packet
communication with a PC
○○
*22 ○○
*8 ○○
*12 ○*15
During 64K data
communication
○○
*22 ××
*9*10 ×○
*8 ○*15*16
*17
Function
Current status Phonebook
Own data MUSIC 1seg Osaifu-
Keitai
My
selection
Mail group activates ○*18 ○○○○
*8 ○
i-mode group activates ○*18 ○○○○
*8 ○
i-αppli group activates ○*18 ○○○○
*8 ○
Settings group activates ○*18 ○○○○
*8 ○
Tools group activates*1 ××○
*8 ○*8 ○*8 ○
1seg/Music group ○*18 ○××○
*8 ○
During a voice call ○*18 ○*4*19 ××
*4*21 ×*4*20 ○*4
During a videophone call ××××××
During packet
communication with a PC
○*18 ○××
*21 ○*8 ○
During 64K data
communication
○*18 ○*19 ××
*21 ×*20 ○
362
Appendix/External Devices/Troubleshooting
*14 : “Voice memo” is activated only by pressing s (▼メモ) for 1 second or longer. However, it is not available while
switching between a voice call and a videophone call.
*15 : “Chaku-moji” is unavailable. Some functions such as “Phonebook 2in1 setting” are not available depending on the
2in1 setting.
*16 : “Voice Mail” messages cannot be played. The Service Numbers (p.317) and special number (p.324) cannot be
dialed (but can be dialed using USSD).
*17 : “Caller ID Notification” and “2in1 setting” is unavailable.
*18 : “Restrictions” is unavailable.
*19 : “Common phrases”, “Own dictionary” and “Download dictionary” are unavailable.
*20 : Only “ToruCa”, “IC card lock setting” and “Search by i-mode” are available.
*21 : Only “Booking program list” and “Timer recording list” are available.
*22 : i-mode communications are not available.
Services Available for the FOMA Terminal
Available service Phone number
Directory assistance (pay: service charge + call charge)
* Unlisted phone numbers cannot be given.
(No area code) 104
Telegram (pay: telegram charge) (No area code) 115
Time (pay) (No area code) 117
Weather forecast (pay) Area code of an area you want to know + 177
Emergency call to the police (No area code) 110
Emergency call for a fire engine or an ambulance (No area code) 119
Emergency call for help with maritime accidents (No area code) 118
Emergency Message Recording System (pay) (No area code) 171
Collect call (pay: service charge + call charge) (No area code) 106
N
zWhen you use the Collect Call Service (106), the receiver will be billed for the call charge plus an additional service
charge of 90 yen (94.5 yen tax included) for each call. (as of May, 2008)
zWhen you use the Directory Assistance Service (104), you will be billed for the call charge plus an additional service
charge of 100 yen (105 yen tax included). A free service is available for persons with impaired vision or disability of
the arms or hands. For further details, call 116 (NTT inquiries) from ordinary phones. (as of May, 2008)
zThis FOMA terminal supports “緊急通報位置通知” (Emergency Location Report). When calling 110, 118 or 119
from the FOMA terminal, your current location (location information) is automatically notified to a concerned
organization such as police office.
The location information may not be correctly sent depending on your current location or the condition of the signal
reception.
If you dialed with “184” attached not to notify the caller information, your location information and caller ID is not
notified. However, when the concerned organization judges the information is necessary for protection of a human
life, your location information and caller ID may be acquired. Where and when to start the support of “緊急通報位置
通知” (Emergency Location Report), differ in every local organization.
zWhen calling 110, 119 or 118 from the FOMA terminal, first inform that you are calling from a mobile phone, give
your number, and state your location clearly so that the police or fire department can call you back. Also, do not
move around when making the call. Do not turn off the FOMA terminal immediately after ending the call, but leave it
turned on for another ten minutes or so, so that you can receive a call.
zDepending on the area you are calling from, you may not be connected with the nearest police or fire department. In
that case, call again from a public phone or land line.
zIf you are using a “Call Forwarding” service from a general phone and if a mobile phone is set as the forwarding
number, depending on the settings of the general phone or mobile phone, the caller may simply hear the ring tone
even when the mobile phone is busy with another call, out of range or turned off.
zOther services such as 116 (NTT inquiries), Dial Q2, message (Dengon) Dial, and Credit Call Service are not
available (However, Credit Call Service calls can be made from public or general subscriber phones to the FOMA
terminals).

363
Appendix/External Devices/Troubleshooting
Options and Accessories
By combining various options and accessories sold separately, your FOMA terminal can support a
wide range of applications to meet both your personal and professional needs. Note that some
products may not be available depending on the area you are in. For more information, contact an NTT
DOCOMO shop or service counter.
For details of options and accessories, refer to relevant User’s Manual.
• Earphone/Microphone with Switch P001*1/P002*1
• Stereo Earphone Set P001*1
• Flat-plug Earphone/Microphone with Switch P01/
P02*2
• Flat-plug Stereo Earphone Set P01*2
• Bone conduction microphone/receiver 01*2
• FOMA USB Cable*3
• FOMA AC Adapter 01/02*4
• FOMA Dry Battery Adapter 01
• Carry Case S 01
• FOMA USB Cable with Charge Function 01/02*3
• FOMA Portable Charging Adapter 01
• In-Car Hands-Free Kit 01*5
• FOMA In-Car Hands-Free Cable 01
• FOMA Indoor Booster Antenna*6
• FOMA Indoor Booster Antenna (Stand Type)*6
• In-Car Holder 01*7
• FOMA AC Adapter 01 for Global Use*4
• FOMA DC Adapter 01/02
• Desktop Holder SO11
• Battery Pack SO03
• Back Cover SO12
• Earphone Plug Adapter for External Connector
Terminal 01
• Earphone Plug Adapter P001
• Style-Up Panel SO03
*1: To connect to FOMA SO706i, the Earphone Plug Adapter P001 and Earphone Plug Adapter 01 for External
connector terminal 01 are required.
*2: To connect to FOMA SO706i, the Earphone Plug Adapter for External connector terminal is required.
*3: USB HUB may not function correctly.
*4: Charging with the AC adapter→pp.41, 42
*5: To connect/charge FOMA SO706i with USB, the FOMA In-car Hands-free Cable 01 is required.
*6: Use in Japan only.
*7: To attach FOMA SO706i to the In-Car Holder, attach to “5th position” shown as ② on the list of “In-Car Holder 01
Manual”.
Movie Playing Software
zTo play a movie (MP4-formatted file) on PC, install QuickTime Player (free) ver. 6.4 or later (or ver. 6.3 +
3GPP) of Apple Inc.
zDownload QuickTime from the following website:
http://www.apple.com/jp/quicktime/download/
• To download, you need PC to access Internet. You are charged for the Internet communication fee to
download the software.
• View the website above for more details on the environment, how to download or how to operate.
364
Appendix/External Devices/Troubleshooting
Malfunction Checklist
zCheck first whether the software update is
required. If it is required, update the software.
→p.377
zIn the following table, problems are written in red,
and points to check and reference pages are
written in black.
The FOMA terminal does not turn on (The FOMA
terminal cannot be used)
●Is the battery pack properly attached?→p.41
●Has the battery run out? →p.44
The animation shown on the right appears and an
alarm tone sounds
●The battery has run out.
Recharge the battery.→pp.41, 44
The “ ” icon appears and I cannot make a
call
●Are you out of range or is the reception poor?→p.44
Cannot access functions quickly by pressing the
keys pre-assigned to the menu numbers (p.340)
●Set the Theme of the main menu to “Standard Menu”.
→p.33
I cannot make a call by pressing the dial keys
●Is Original lock for “Keypad dial” under “Dial/sending
mail” set?→p.109
●Is Keypad lock set? →p.110
●Is Restrict dialing set?→p.112
I dialed a number and initiated a call, but all I hear
is a busy tone
●Did you start dialing before hearing the dial tone?
→p.48
●Did you forget to dial the area code?→p.48
●Is “Please wait” displayed?
I cannot receive calls. Or I cannot hear the ring
tone.
●Are any of the following functions set?
Restrictions→p.112
• Call rejection • Call acceptation
• Call forwarding • Voice Mail
Ring time(sec.)→p.114
• Set mute seconds
Reject unknown→p.114
Call setting w/o ID→p.114
• Unknown: Reject • Payphone: Reject
• User unset: Reject
●Is the FOMA terminal in Manner mode?→p.86
●Is the FOMA terminal in Public mode (Driving mode)?
→p.62
●Is Original lock for “Incoming call” under “Incoming/Mail
disp.” set?→p.109
●Is Self mode set? →p.115
●Is the start time of Voice Mail or Call Forwarding
service set to “0 second”?→pp.312, 315
●Is Caller ID Request set to Activate?→p.316
●Is mova valid with the Dual Network service?→p.316
●Is the ring volume set to “Silent”?→p.61
●Is “0 second” set as the ring time for Record message?
→p.65
Mail ring tones and alarm tones sound but no ring
tone sounds when receiving a call
●Is “Set mute seconds” under “Ring time(sec.)” set to
longer time (e.g. 99 seconds)? Set “Set mute seconds”
to shorter time.→p.114
The records of Dialed calls/Redial, Sent address
disappear automatically
●Is “Restrict dialing” under “Restrictions” set?→p.112
The ring tone sounding when receiving a voice
call or videophone call is different from what I
selected
●When the ring tone settings are duplicated, the priority
applies.→p.83
The image appearing when receiving a voice call
or videophone call is different from what I
selected
●When the image settings are duplicated, the priority
applies.→p.83
When receiving a voice call or videophone call,
the color or pattern of the illumination is different
from what I set up
●When the illumination settings are duplicated, the
priority sequence will be assigned.→p.93
It takes long to display or play a movie/i-motion or
a Chaku-Uta- Full®
●Is the movie/i-motion or the Chaku-Uta-Full® saved in
“Movable contents” folder?
It may take long to display or play the data saved in the
“Movable contents” folder.
Cannot copy or move a movie/i-motion or a
Chaku-Uta-Full® to microSD card
●Is the Chaku-Uta-Full® saved partially?→p.273
●Is the replay restriction (number of times, period, time
limit) of the movie/i-motion or the Chaku-Uta-Full®
invalid?→pp.226, 273
A PDF document is not properly displayed
●A PDF data may not be properly displayed if it contains
formats unsupported by the PDF viewer or complicated
designs.
It takes long to display a PDF document
●It may take long to display a large-sized PDF
document.
Cannot copy a PDF document to the FOMA
terminal
●Does the PDF file size exceed 2M bytes?→p.262
Recharge battery

365
Continued on next page
Appendix/External Devices/Troubleshooting
Cannot copy a PDF document to a microSD card
●Was the PDF document downloaded by page?→p.262
A document is not properly displayed
●A document may not be properly displayed if it contains
formats unsupported by Document viewer or
complicated designs.
It takes time to display a document
●It may take long to display a large-sized document.
The screen or ring tone for an incoming call or
message is the default setting
●Depending on the combination of receiving screen and
ring tone or the priority sequence, either the receiving
screen or ring tone may be restored to default.
●If setting i-motion or music as ring tone after setting a
Flash movie as receiving screen, a pre-installed image
may appear.
The ring tone sounding when receiving a
message is different from what I selected for the
mail address
●When the ring tone settings are duplicated, the priority
applies.→p.83
●If you have received two or more messages, the tone
set for the last received mail address sounds.→p.83
●If the format of the sender’s mail address is “(phone
number) @docomo.ne.jp”, save only that phone
number as a mail address and set a distinctive ring
tone for that mail address in Select ring tone under Mail
(recv.). →p.77
●Is the sender’s mail address (a mail address shown on
the received mail details screen) stored in the
phonebook correctly and did you set a distinctive ring
tone for that mail address in Select ring tone under Mail
(recv.)? →p.77
●If you receive an SMS, a distinctive ring tone set in Mail
(recv.) for the phone number in the phonebook sounds.
→p.83
An icon appears instead of image, i-motion,
music or Music&Video Channel
●The following icons indicate that the image, i-motion,
music or Music&Video Channel cannot be selected for
the function. Select another data.→pp.225, 233, 270,
273
Cannot view 1seg
●Out of digital terrestrial TV service area or in a weak
signal location?
●Is a FOMA card (UIM) inserted?
●Are channels set?→p.209
The color of the illumination flashing when
receiving a mail is different from what I selected
for the mail address
●When the illumination settings are duplicated, the
priority applies. →p.93
●If you receive two or more messages, the illumination
flashes following the settings of the illumination under
Mail (recv.) that is set to the last received mail address.
→p.92
●If the format of the sender’s mail address is “(phone
number) @docomo.ne.jp”, save only that phone
number as a mail address and set distinctive
illumination for that mail address in illumination under
Mail (recv.).→p.77
●Is the sender’s mail address (a mail address shown on
the received mail details screen) stored in the
phonebook correctly and did you set illumination for
that mail address in illumination under Mail (recv.)?
→p.77
●If you receive an SMS, distinctive illumination set in
illumination under Mail (recv.) for the phone number in
the phonebook flashes.→p.77
Cannot charge the FOMA terminal (the center
illumination of the FOMA terminal does not light)
●Is the battery pack properly attached to the FOMA
terminal?→p.41
●Is the adapter firmly plugged into the electrical socket
or cigarette lighter socket?→p.42
●Are the adapter and the FOMA terminal correctly
connected (is the AC adapter firmly connected to the
FOMA terminal or the desktop holder)?
Battery life is short
●Is the battery pack at the end of it’s life? The lifespan of
the battery pack may be shortened depending on
usage environment.→p.41
●Battery life will depend on how the FOMA terminal is
used.→p.42
The key does not sound when I press it
●Is “Keypad sound” set to “OFF”?→p.85
●Is the FOMA terminal in Manner mode?→p.86
I cannot use Any key answer to answer a voice
call or videophone call
●Is “Answer setting” set to “Quick silent” or “OFF”?
→p.60
●You cannot use Any key answer to answer a
videophone call.
The other party’s voice is difficult to hear during a
call
●Is the earpiece speaker properly placed against your
ear?→p.24
●Is anything (e.g. a sticker) obstructing the earpiece
speaker?
●Is anything obstructing the speaker in handsfree
mode?
●Did you change the “Volume” setting?
Change the setting so that you can hear the other party
clearly.→p.61
366
Appendix/External Devices/Troubleshooting
The other party’s voice is too loud during a call
●Did you change the “Volume” setting?
Change the setting so that you can hear the other party
clearly.→p.61
Pressing the side key does not operate the folded
FOMA terminal
●Is Keypad lock set? →p.110
●Is “Side key guard” set to “ON”?→p.112
Pressing s (▼メモ) does not check missed calls,
etc. when the FOMA terminal is folded
Pressing and holding down s (▼メモ) for 1
second or longer does not launch the Music
Player
●Is “Info notice setting” set to “OFF”?→p.64
●Is Keypad lock set? →p.110
●Is “Side key guard” set to “ON”?→p.112
The display is hard to see
●Is Brightness under Backlight set to “Dark”?→p.90
●Is “Shield view” set to “ON”?→p.90
The display light of the display or keypad does
not turn on
●Is Lighting under Backlight set to “OFF”?→p.90
●Press and hold 5 for 1 second or longer to turn the
backlight on or off.
Note that pressing and holding 5 for 1 second or
longer will turn off the backlight e.g. while composing a
message.
Receiving an incoming call immediately after
turning on the power displays the phone number
but does not display the name stored in the
phonebook
●The FOMA terminal may be reading the FOMA card
(UIM) immediately after turning on the power. The
phonebook function may not be available then.
It takes some time for the power to turn on after
pressing and holding y for 1 second or longer
●Data checking may take time (e.g. if the phonebook is
full of data).→p.76
Nothing appears on the display
●Is the FOMA terminal set to Power saver mode? Press
any key to cancel Power saver mode.→p.90
The FOMA terminal does not perform incoming
call operations (ring tone sounding, vibrator,
illumination flashing) when receiving a call
●The FOMA terminal does not perform incoming call
operations (ring tone sounding, vibrator, illumination
flashing) until the set time is reached, when receiving a
call from a phone number not stored in the phonebook
or from a caller who does not notify his/her caller ID
and if “Set mute seconds” under “Ring time(sec.)” is set
to “ON”.→p.114
Receiving an SMS does not display the sender’s
name stored in the phonebook
●Did you correctly store the sender’s phone number on
the phone number line ( ) of the phonebook?
→p.70
Mails are not automatically filtered
●If the sender’s mail address is “(Phone
number)@docomo.ne.jp”, save only the phone number
in the Auto-sort settings.→p.174
●If the sender’s mail address is not “(Phone number)
@docomo.ne.jp”, save the entire address including the
domain in the Auto-sort settings.→p.174
A message is not automatically received
●If you have set “Receive option setting” to “ON”, set it to
“OFF”.→pp.164, 178
Cannot install the FOMA communication setting
file (driver) or make data communication
●Is the USB mode setting set to “microSD mode” or
“MTP mode”? Set it to “Communication mode”.
→p.251
Data transmission is not performed
●Do you use USB HUB? USB HUB may not function
correctly.
PC cannot be connected in MTP mode.
●The microSD card which created on the other FOMA
terminal is not available.
i-mode, i-mode mail, i-αppli and i-Channel cannot
be connected
●Is “Host selection” set to something other than
“i-mode”?→p.149
●If you had started using the FOMA terminal before you
subscribed to i-mode, turn the FOMA terminal off and
then turn it back on.
The FOMA terminal does not perform receiving
message operations (ring tone sounding,
vibrator, illumination flashing) when receiving a
message
●Is “Mail/Msg. ring time” set to “OFF”?→p.85
●Is Original lock for “Disp. recv. mail/msg.” under
“Incoming/Mail disp.” set?→p.109
●Is “Receiving setting” set to “Operation preferred”?
→p.178
A sent message is not saved to the Outbox
●Is “Sort all” set to the folder of mail-linked i-αppli?
Highlight the folder of mail-linked i-αppli then select
“Open folder” from the function menu to confirm the
setting.→pp.171, 173
A received message is not saved to the Inbox,
and “ (white)” does not disappear
●Does “ ” appear on the folder of mail-linked i-αppli in
the Inbox? Or is “Sort all” set to the folder of mail-linked
i-αppli?
Highlight the folder of mail-linked i-αppli then select
“Open folder” from the function menu to confirm the
setting.→pp.171, 173
367
Appendix/External Devices/Troubleshooting
I was disconnected while sending a message,
then received an SMS
A message appears when I retry
●SMS interrupts communication and notifies you that a
large amount of data is being transferred within a given
time. Follow the contents of SMS and the displayed
message.
Images taken with camera are flickered
●When you take pictures indoors, flickering may appear
due to the effect of fluorescent lighting, etc. Changing
the “Flicker” setting may suppress flickering.→p.123
Still images or movies shot with camera look too
bright
●You may shoot them outside or in a bright place with
“Flicker” set to “Mode 1(50Hz)” or “Mode 2(60Hz)”.
Restore the “Flicker” setting to “Auto”.→p.123
Still images or movies look blurred
●Move the lens selector switch of the lens to the ●
position (standard lens) for normal shooting or to the
position (macro lens) to switch to the close-up
mode for close-up shooting.→p.118
●Set a mode suited to the scene being shot.→p.122
When I attempt to display the image or play for
demonstration or see a preview, “ ” appears
●“ ” may appear when the image data is corrupted.
The terminal operates slowly when any keypads
are pressed
●It may occur if a large amount of data is stored on the
FOMA terminal or if you exchange large data by using
the microSD reader/writer function.
Chance capture shooting shortens the shooting
time
●Chance capture shooting saves control data together
with movie data, which may shorten the shooting time.
Chokkan game cannot be used
●Is Original lock set to Camera?→p.106
■For overseas use
“ ” or “select net” does not disappear from
the screen, and international roaming service
cannot be used
●Are you out of international roaming service area or is
the reception poor?
●See the international service guide such as “Mobile
Phone User’s Guide [World Services]” to check if the
area or operator is available.
●Turn off the FOMA terminal then turn it back on the first
time you use the service after you move from Japan to
overseas.
●Launch “NW search mode” to search for a compatible
operator.→p.336
A voice call or videophone call cannot be
received
●Is “Bar incoming when roam” set to “Activate”?→p.338
●Is “V-phone while packet” set to something other than
“V-phone priority”? →p.67
●Videophone is not available while using GSM/GPRS
network.
The other party’s caller ID is not notified.
The notified caller ID is not the other party’s
The FOMA terminal does not perform operations
using phonebook data or Caller ID Notification
●If the used network or operator does not notify the
caller ID, the caller ID does not appear on the FOMA
terminal screen even when the caller ID is notified.
Depending on the used network or operator, the
notified caller ID may be different from the other party’s.
368
Appendix/External Devices/Troubleshooting
If Any Error Message Appears
zIn the following table, error messages are written in
red, and explanation/solution and reference pages
are written in black.
zError messages are described in alphabetical and
Kana order.
zNumbers in parentheses are codes used by the
i-mode Center as separators between transmitted
errors.
“ACMmax restriction cannot call”
●This message appears when the accumulated call
charges exceed the upper limit set in a FOMA card
(UIM) and a call cannot be made. Perform “Reset total
cost” to release the restriction.→p.294
“Activating BOX lock Cannot download”
●There is a lock on the inbox and outbox as a whole, or
on folders using mail-linked i-αppli, so mail-linked
i-αppli cannot be downloaded or upgraded. To
download or upgrade the mail-linked i-αppli, release
the Mail box lock.→p.112
“Activating BOX lock Unable to delete”
●There is a lock on the inbox and outbox as a whole, or
on folders using mail-linked i-αppli, so the mail-linked
i-αppli and the folders using them cannot be deleted.
To delete the mail-linked i-αppli and the folders using
them, release the Mail box lock.
If you delete only the mail-linked i-αppli, a message will
be displayed asking whether to delete the
corresponding mail folders dedicated to that i-αppli.
Select “NO”.→p.112
“Activating folder lock Cannot download”
●See “Activating BOX lock Cannot download” (p.368) for
the explanation and solution.
“Activating folder lock Unable to delete”
●See “Activating BOX lock Unable to delete” (p.368) for
the explanation and solution.
“Activating restrict dialing”
●This message appears when you attempt a prohibited
operation while Restrict dialing is set.→p.112
“Address is not valid (451)”
●Displayed when the mail has not been sent to the
specified address correctly.→p.156
“Attached file is deleted”
●This message appears when an i-mode message
received that you attempt to quote to send a reply has
any file attached. It is also displayed if you attempt to
forward an i-mode mail that has a file attached that is
prohibited from being attached to mail or output from
the FOMA terminal. The attached file is deleted when
you press d.
“Authentication canceled (401)”
●This message appears when the Cancel button is
pressed on the Authentication screen.
“Authentication type is not supported (401)”
●This message appears when authentication fails. Press
d to return to the original page.
“Cannot dial by Number B abroad Dial by Number
A”
●This message appears when the 2in1 mode is set to B
mode and you attempted to make a call while overseas.
Select OFF for “Caller ID Notification” to make calls
without caller ID with Number A.
“Cannot reset by this Ext. IC card”
●This message appears when you put the FeliCa mark
close to an unregistered contactless IC card during
user authentication with the IC card authentication
function.→p.111
“Cannot save attached file”
●This message appears when a mail is received with an
attached file that cannot be registered for Receive Ir
data, cable connection communication or copying from
microSD card.
“Cannot set this schedule”
●This message appears when you have attempted to
use “Copy & add this” on a schedule item with the
same date and time as an existing item, or if you have
received such a schedule item via infrared or iC
exchange or cable connection.
“Caution! This SMS includes Phone Nos. or
URLs. Be careful if you do not recognize the
sender.”
●This message appears when you set “Message scan”
under “Scanning function” to ON and attempt to open
SMS containing a phone number or URL. Check the
sender, then press d to display the text of the SMS.
→p.383
“Certificate is rejected (tampered)”
●This message appears when an altered SSL certificate
has been received. An SSL communication cannot be
established with this site.
●This message appears when an altered SSL/TLS
certificate has been received. An SSL/TLS
communication cannot be established with this site.
“Check new messages is set all OFF”
●New messages cannot be checked because none of
the items is selected in “Set check new messages”.
Select items to check in “Set check new messages”.
→p.179
“Connection failed”
●This message appears when the host settings are
incorrect. Set the host correctly, using “Host selection”
under i-mode common set. →p.149
●Connection to i-mode failed for some reason. Retry
connection.
●Set “Caller ID Notification” to “ON” and retry.→p.46
369
Continued on next page
Appendix/External Devices/Troubleshooting
“Connection failed (403)”
●Connection to the site failed for some reason. Retry
connection.
“Connection interrupted”
●i-mode connection was interrupted due to poor
reception. Move to a location where the reception is
good before using the i-mode service.→p.44
●If this message appears when the signal is strong and
the “ ” mark is displayed, the connected site is very
busy. Retry later.
“Continue using i-αppli and transmit data?”
●This message appears when you selected “NO” or
“Terminate i-αppli” in response to “The number of
i-αppli communications is large. Continue
communication?” Select “YES” to continue i-αppli
communication. Select “Terminate i-αppli” to stop using
the i-αppli.
“Current UIM is not registered as IC owner Unable
to delete”
“Current UIM is not registered as IC owner Unable
to download”
“Current UIM is not registered as IC owner Unable
to move”
“Current UIM is not registered as IC owner Unable
to run”
“Current UIM is not registered as IC owner Unable
to upgrade”
●This message appears when the inserted UIM does not
match the UIM information registered for FeliCa or you
tried to run Osaifu-Keitai i-αppli.
“Data in IC card is full Unable to download Delete
service?”
“Data in IC card is full Unable to move Delete
service?”
“Data in IC card is full Unable to run Delete
service?”
“Data in IC card is full Unable to upgrade Delete
service?”
●This message appears when Osaifu-Keitai i-αppli is
downloaded or moved from a microSD card but there is
not enough data capacity left on the IC card. Select
“YES” to display a list of the Osaifu-Keitai service
names already registered, the space (bytes) which
would be freed by deleting each service, and the size of
the capacity shortage. Select one or more services to
delete, then follow the messages to start an i-αppli to
delete them.
“Data is too long A part is deleted”
●The size of address, subject or text or more than one
data exceeds the maximum, and the Compose
message screen appears with the excess part deleted.
“Data is too long Please delete message”
●The combined double-byte character count for the main
text and quotation symbols in a reply-with-quote i-mode
mail exceeds 5,000 characters. Delete text to bring the
count to 5,000 double-byte characters or less.
“Data transmission is frequent Continue
transmission?”
●This message appears when the number of
communications when using an i-αppli becomes very
large within a certain period. Select “Yes” to carry on
i-αppli communication, or “No” to stop communication.
Select “Terminate i-αppli” to stop using the i-αppli.
“Data transmission is frequent Press CLR and
confirm data transmission”
●This message appears when the number of
communications from an i-αppli standby screen
becomes very large within a certain period. Press t
to select whether or not to permit communications from
the i-αppli standby display, or to close the i-αppli
standby display. →p.199
“Dial/Receive calls activating Original lock”
●This message appears when you have attempted a
prohibited operation while the original lock is applied to
“Dial/sending mail”.→p.109
“Download failed”
●This message appears when a download of a melody,
Chara-den or download dictionary suffered a
communication error or improper data.
“Editing now Unable to delete”
●This message appears when you attempt to delete a
mail message saved in Draft while it is being edited.
“Enter correct Network Security Code”
●This message appears when an incorrect network
security code was input for a function which requires
network security code entry. Enter the correct network
security code.→p.100
“Error in image Does not work correctly”
●This message appears when a Flash movie cannot be
played due to an error found in the data.
“Error Register forwarding number”
●This message appears when you have subscribed to
the Call Forwarding service and attempt to forward an
incoming call by selecting “Call Forwarding” from the
function menu without setting the forwarding number.
→p.314
“Failed to Copy all”
●Copying could not be complete, for some reason.
Replace with a different microSD card and try to copy
again.
“Failed to Copy this”
●Copying could not be completed, for some reason.
Replace with a different microSD card and try to copy
again.
“Failed to read”
●Copying could not be completed, for some reason.
Replace with a different microSD card and try to copy
again.

370
Appendix/External Devices/Troubleshooting
“Failed to retrieve channel information”
●This message appears when you display the channel
list screen for the first time after purchase or when you
attempt to display the channel list screen after resetting
the i-Channel, changing the i-Channel host URL,
initializing the FOMA terminal or exchanging the FOMA
card (UIM), and then if i-Channel information cannot be
obtained. Move to a location where “ ” is displayed,
then display the channel list screen again.→p.153
“Format microSD for your phone”
●There is an error such as a microSD card that has not
been initialized. Reformat the microSD card.→p.251
“Frame number of this page is not supported”
●The webpage cannot be displayed because the frame
count exceeds the maximum that can be displayed on
Full Browser or pixel browser.
“Function cannot operate any more”
●Close another function before continuing the operation.
“i-αppli stand-by display terminated due to
security error”
“Software terminated due to security error”
●This message appears when an i-αppli or i-αppli
standby screen (including i-αppli DX) was closed
because you attempted to perform an unauthorized
operation.→pp.189, 199
““i-αppli To” function is not set”
●This message appears when you attempted to start
software from a site, mail, Send Ir data, Bar code
reader, IC card, ToruCa or data broadcast, but the
software could not start because the specified software
has no association permission.→p.197
“Input error (205)”
●This message appears after you input and send data
from a site of Internet homepage. Press d to cancel
the input text or settings (The set or input content has
been sent, so this operation does not cancel the
transmission).
“Insert microSD”
●The microSD card is not inserted correctly, or may be
broken. Check that the microSD card is correctly
inserted into the FOMA terminal.→p.244
“Insert UIM”
●This message appears when the UIM is not inserted
correctly, or could be broken. Check that the FOMA
card is inserted correctly.→p.39
“Invalid address”
●The address contains a “,” and is invalid. Delete “,”.
●Mail cannot be replied to because the address of the
received mail exceeds 50 single-byte characters.
●SMS cannot be sent because the address includes
characters other than numerals, “#” and “*”. Delete
characters and spaces other than numerals, “#” and
“*”.
“Invalid UIM Auto-start failed”
●This message appears when an i-αppli that is restricted
by FOMA card security attempted to start
automatically. →p.39
“Invalid UIM Requested service not available”
●This message appears when you select and attempt to
run a shortcut icon for data that is protected by FOMA
card security.→p.39
●This message appears when you select and attempt to
run a screen memo or MessageR/F that is protected by
FOMA card security.→p.39
“Invalid UIM Requested software failed to start”
●This message appears when you specify and attempt
to start an i-αppli that is restricted by FOMA card
security.→p.39
“Invalid URL”
●This message appears when you entered a URL using
“Enter URL” or “Home URL”, but it began with
something other than “http://” or “https://”, or you
selected OK without any input. Enter the URL again.
→pp.141, 148, 218
“Is the ToruCa automatic reading function in a
mobile phone used through the reader/writer?”
●This message appears when you swiped the FeliCa
mark over a reader with “Auto reading setting” set to
“OFF”. Select “YES” to use the automatic reading
function.→p.206
“Memory full Cannot move”
●This message appears when you try to move data out
of a secret folder but the destination folder is full. Delete
data from the destination folder, then move the data
again.→p.104
“Memory No.:XXX Cannot overwrite”
●This message appears when you are not in Secret
mode or Secret data only mode, but you try to register
the same phone number as a secret data memory
number in the phonebook.→p.103
“Memory shortage”
●This message appears when the software cannot be
launched due to memory shortage.
●Operation is interrupted due to memory shortage. If
this message often appears, reboot handset.
“Memory shortage Quit”
●The process is interrupted due to memory shortage.
When you are composing an i-mode mail, the number
of tasks running and the combination of characters may
make it impossible to input as many as 5,000 double-
byte characters.
“Memory shortage Return to Full Browser menu”
●The process was interrupted due to memory shortage.
Press d to return to the Full Browser menu.
“Memory shortage Return to i-mode menu”
●The process is interrupted due to memory shortage.
Press d to return to the i-mode menu.
371
Continued on next page
Appendix/External Devices/Troubleshooting
“Message too long to add header”
●This message appears when the character count of the
text and header in total exceeds 5,000 double-byte
characters and the header cannot be added.
“Message too long to add header & signature”
●This message appears when you are forwarding
i-mode mail, but it was not possible to automatically
paste the header/signature because they would cause
the character count to exceed the limit of 5,000 double-
byte characters.
“Message too long to add signature”
●The signature cannot be pasted because the total of
main text and signature would exceed 5,000 double-
byte characters.
“No channel info”
●There is no channel information, and you cannot
compose a suggested message.
“No data”
●This message appears when there is no phonebook
entry that matches the search conditions when you
perform Phonebook search.
“No requested data Delete this shortcut icon?”
●This message appears when you select the shortcut
icon for data that has been deleted and attempt to start
it.
“No requested software”
●It is displayed when an i-αppli is started from mail,
Send Ir data function, Bar code reader, IC card or data
broadcast, and the relevant software is absent.
“No response”
●This message appears when the IC card authentication
function was used for user authentication, but
authentication timed out and failed.→p.111
“No response (408)”
●There was no response from the site, and
communication was cut off. Retry connection.
“No response Retry?”
(During infrared data exchange/iC exchange)
●The receiving terminal cannot be found/detected. If Ir
communication is used, make sure the Ir ports are
facing each other. If iC exchange is used, check the
FeliCa marks and place them together again. You can
select “YES”, then press d to try again. →pp.257, 259
“No Switch”
●This message appears when you cannot switch to a
videophone call during a voice call because the other
party is establishing a packet communication (including
i-mode). Check the other party’s status and retry.
→p.50
“Not correspond contents”
●The information acquired by the bar code reader
includes content not supported by this FOMA terminal,
so it cannot be recognized.
“おまかせロック設定中です ”
●Omakase lock is set. While Omakase Lock is set, all
key operations are locked except receiving a voice call/
videophone call and turning the power on/off.→p.102
“Other function active Cannot start”
“Other function active Cannot operate”
●This message appears when you attempt an
unavailable operation when another function is running.
“Out of service area”
●This message appears when you attempt to use an
i-mode service outside the service area, or where the
radio waves do not reach. Move to a place where “ ”
is displayed, then use the i-mode service.→p.44
“Page is not found (404)”
●The site is not found. It may not exist.
“Password is not correct (401)”
●This message appears when the authentication did not
go through on the “Authentication” or “Re-authentication”
screen. Select “YES” to retry authentication.
“Phone/UIM ID will be sent?”
●This may be displayed during viewing of an Internet
page or other site. Select “YES” to send your mobile
phone manufacturer number. Otherwise, select “NO”.
→p.137
“PIN1 code blocked”
●This message appears when powered on during PIN1
code lock. Press d to display the input screen for the
PIN lock release code, then enter the PIN lock release
code correctly to unlock.→p.100
“Please wait for a while”
●The voice line or packet communication device may be
malfunctioning. Otherwise, the voice line/packet
communication network may be congested. Attempt to
use a voice call, videophone call or i-mode later.
You can still make an emergency call (110, 119 and
118). However, you may not be connected depending
on the condition.
“Please wait for a while (packet)”
●The packet communication device may be
malfunctioning. Otherwise, the packet communication
network may be congested. Retry later.
“PUK code blocked”
●This message appears when you turn on the power and
attempt a UIM operation while the PUK code is locked.
Contact the DOCOMO service counter.→p.100
“Reading UIM Cannot start”
●This message appears when you attempt an operation
related to the UIM while it is being read. Please try
again later.
“Replace with a new one or check the disk”
●Run checkdisk on the microSD card.→p.247
372
Appendix/External Devices/Troubleshooting
“Replay period has expired”
●This message appears when you select and attempt to
run the shortcut icon for an i-motion which has finished
its play duration or play time limit.
“Replay period has expired Delete?”
●This message appears when you attempt to play an
i-motion or Chaku-Uta-Full® for which the playback
period has expired. Select “YES” to delete.
“Root certificate has expired Connect?”
●This message appears when the CN (name) of an SSL
certificate does not match. Select “YES” to connect.
Otherwise, select “NO”.
“Root certificate is not valid”
●This message appears when you receive an SSL/TLS
certificate with the “Certificate” set to “Invalid”. Check
the contents of the certificate, set the certificate to valid
and reconnect. →p.149
●This message appears when a certificate is received
that is rendered invalid by Certificate settings. Check
the content of the certificate, then set it as valid before
trying to reconnect.→p.149
“Security code is 4 to 8 digits”
“Wrong security code”
●This message appears when an incorrect security code
was input for a function which requires security code
entry. Enter the correct security code.→p.100
“Service is used by the previous software Unable
to download Delete a service?”
“Service is used by the previous software Unable
to move Delete a service?”
“Service is used by the previous software Unable
to update Delete a service?”
●When the same service has been already downloaded,
you cannot download, upgrade or move new service
from a microSD card unless you delete the existing
service. If you select “YES”, the service subject to
deletion is displayed. Delete the previously registered
service.
“Service not registered”
●The i-mode service is not available because you have
not subscribed to the service. A separate subscription
is required to use the service.
●If you had started using the FOMA terminal before you
subscribed to i-mode, turn the FOMA terminal off and
then turn it back on.
“Services are full Music of overwritten service is
unable to play Overwrite?”
●This message appears when a limit has been
exceeded on the number of music services which can
be registered (member services). Select “YES” to
overwrite service with the oldest playback time limit.
Music downloaded from the overwritten service can no
longer be played.
“Size of data is not supported”
“Size of this page is not supported”
●The size of the data downloaded from a website (via
i-mode, Full Browser) or Internet webpage exceeds the
maximum of one page. The download is interrupted,
and only the downloaded data is displayed.
●This message appears when the limit is exceeded
while downloading a melody, download dictionary or
Chara-den character.
“Software for this folder deleted Refer to Open
folder”
●The software cannot be launched because the mail-
linked i-αppli corresponding to the selected mail folder
is deleted. Select a message contained in the folder
from the function menu.→p.173
“Software is stopped because of an error”
●This message appears when software is running but
suffers an error that prevents it from functioning further.
“Some addresses is invalid”
●This message appears when you attempt to reply to
two or more addresses but not all addresses are valid.
“Some attached file will be deleted”
●A file is attached to the i-mode mail you are going to
forward that is prohibited from being attached to mail or
output from the FOMA terminal. Press d to delete the
file that is prohibited from being attached to mail or
output from the FOMA terminal.
“Some mails not sent (561)”
●Mail could not be sent correctly to some recipients.
“SSL session cannot be established”
●This message appears when it was not possible to
connect to a site or Internet page that uses SSL
communication. Retry connection.
“SSL session failed”
●This message appears when an authentication error
occurred during SSL communication, causing
interruption.
“SSL/TLS session failed”
●This message appears when an SSL communication is
interrupted due to an error occurring during
authentication for an SSL/TLS connection.
“Syntax error”
“Syntax error (XXX)”
●The received data contains an error and cannot be
displayed. The received data is discarded. A number
indicating the contents of an error may appear in
“XXX”.
“Talking now Cannot operate”
“Talking now Cannot start”
●This message appears when you attempt an operation
that is not possible while talking.→pp.283, 360, 361
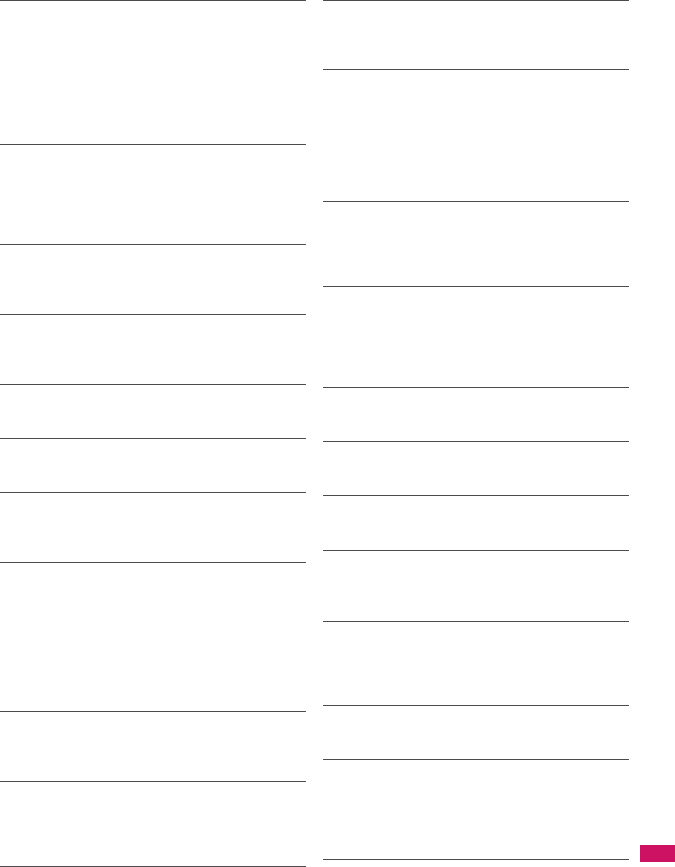
373
Continued on next page
Appendix/External Devices/Troubleshooting
“This certificate has expired Connect?”
●This message appears when an SSL server certificate
is received that has expired, or has not reached its
period of validity. Select “YES” to connect. Otherwise,
select “NO”.
●This message appears when you try to connect to a
site or Internet page that uses SSL communication, if
you have not made the “Set time” setting. Make the
“Set time” setting. →p.46
“This certificate is not valid for this URL
Connect?”
●The site requested a User Certificate, but the certificate
has expired. It may be possible to display the site by
selecting “YES”, but you are advised to download a
new User Certificate.→p.150
“This data can no longer be replayed”
●This message appears when you select and attempt to
run the shortcut icon for an i-motion which has finished
its number of plays.
“This data can no longer be replayed Delete?”
●This message appears when you attempt to play an
i-motion or Chaku-Uta-Full® which has finished its
number of plays. Select “YES” to delete.
“This data is not supported by this phone”
●This message appears when an i-motion could not be
acquired due to incompatible non-i-motion data.
“This data may not be replayed”
●This message appears when the format of the acquired
i-motion is not MP4 (Mobile MP4).
“This site is not certified Connect?”
●This message appears when an unsupported SSL
certificate is received. Select “YES” to connect.
Otherwise, select “NO”.
“This software contains an error”
“This software contains an error Unable to
download”
“This software contains an error Unable to move”
“This software contains an error Unable to
update”
●This message appears when the software cannot be
downloaded, updated or moved from a microSD card
because its data is inaccurate.
“This software is not supported by this phone”
●This message appears when the acquired software
cannot be downloaded or moved from a microSD card
because it is not compatible with this FOMA terminal.
“This UIM cannot be recognized”
●This message appears when a UIM that cannot be
used in this FOMA terminal may have been inserted.
Check that the right FOMA card (UIM) is inserted.
→p.39
“Time out”
●Accessing a site or sending a message was interrupted
because the time, which is set in “Set connection
timeout”, has elapsed. Retry later.→p.149
“Too much data was entered”
●Too many characters are entered, and the data cannot
be sent. Reduce the number of characters before trying
to resend.→p.139
“Unable to activate 1Seg Please activate after
resetting Self mode or moving to FOMA
coverage”
●1seg cannot be activated as 1seg viewing was
repeated when a communication could not be
established, e.g. in Self mode or out of service area.
Release Self mode or move into FOMA service area to
enable communication, and retry activation.
“Unable to download Data exceeds maximum size
(452)”
●This message appears when data being received
cannot be received because it exceeds the maximum
size.
“Unable to obtain data due to replay restriction
data error”
●The playback period of playback limit for a partially-
acquired Chaku-Uta-Full® has expired, so the
remaining data cannot be acquired. The partially saved
data will be deleted.
“Unable to receive”
●This message appears when you attempt to obtain
data and a data error or communication error occurs.
“Unable to retrieve the requested URL (504)”
●Connection to the site failed for some reason. Retry
connection.
“Unable to support this card”
●The FOMA terminal does not support this microSD
card. Use a compatible microSD card.→p.243
“Upper limit has been exceeded Connection
failed”
●The upper limit set for a Limit billing plan (Type Limit
and Family Wide Limit) is exceeded.
“URL address changed (301)”
●The URL has changed because the site has been
relocated. If the URL was registered as a bookmark,
shortcut icon or home URL, re-register it.
→pp.94, 142, 148, 221
“URL is too long to register”
●The URL exceeds 256 single-byte characters, so the
bookmark or URL cannot be registered.
“Usage is currently restricted Try again later”
●This message appears when an extremely high volume
of data communication occurred within a certain period
while using a flat-rate i-mode packet service.
Connection may become impossible for a period, so try
to use i-mode again later.
“Wrong password”
●This message appears when you enter a wrong
password on the password entry screen in viewing or
downloading a PDF document.→pp.145, 261

374
Appendix/External Devices/Troubleshooting
“You have no certificate Connect?”
●User Certificate has not been downloaded. It may be
possible to display the site by selecting “YES”, but for
some sites it may be impossible to continue.→p.150
“Your certificate has expired Connect?”
●This message appears when an SSL server certificate
out of the validity period has been received. Select
“YES” to connect. Otherwise, select “NO”.
●This message appears when there was a request for a
client certificate during connection to site of Internet
page that uses SSL communication.→p.138
“Your certificate is requested Send your
certificate?”
●The site has requested a User Certificate. Select “YES”
to send the User Certificate or “No” to avoid sending it.
““●▲■.ne.jp” 宛のメールが混み合っているため、
送信できません (555) Unable to send.
“●▲■.ne.jp” is not available temporarily.”
* Domain name indication differs according to the
recipient.
●The telephone lines are down or extremely busy.
Please try again later.

375
Continued on next page
Appendix/External Devices/Troubleshooting
Warranty and After-Sales Service
Warranty
zMake sure that the warranty card is included with your FOMA terminal at the time of purchase. Check the
contents, the information about “the shop or date of purchase”, etc. and keep the card in a safe place. If the
card does not contain necessary information, immediately contact the shop and request them to fill in the
card. The warranty period is one year from the date of purchase.
zThe whole or part of the product, including its accessories, is subject to improvement without notice.
zThe stored data such as phonebook entries may be altered or lost through the damage, repair or improper
use of the FOMA terminal. It is recommended to take notes of the stored data such as phonebook entries
just in case. Repairing the FOMA terminal cannot transfer most of the data downloaded via i-mode or i-αppli,
complying with the copyright law.
* With this FOMA terminal, you can save the data such as the phonebook, data used with i-motion or i-αppli
to the microSD card.
* With this FOMA terminal, you can keep the data such as the phonebook at the Data Security Center by
using the Data Security Service (a pay service you need subscription).
* If you have a PC, you can transfer and save the data such as phonebook entries to your PC by using the
DOCOMO keitai datalink (p.329) and the FOMA USB Cable with Charge Function 01/02 (Optional) or the
FOMA USB Cable (optional).
After-sales service
●If you have problems with your FOMA terminal
Before having your FOMA terminal repaired, see the “Malfunction Checklist” in this manual.
If you still have problems, call at the technical inquiries number described on the back of the manual.
●If, after contacting DOCOMO, you are informed that your FOMA terminal is in need of
repairs
Take your FOMA terminal to a designated repair shop. The repair shop is only open during business
hours. Remember to take your warranty card with you.
■During the warranty period
• The FOMA terminal will be repaired free of charge in accordance with our written warranty policy.
• Make sure to take the warranty card with you when having your FOMA terminal repaired. Even during the
warranty period, a charge will be made for the repair if you cannot show the warranty card or if the
malfunction or damage has resulted from improper use.
• Even during the warranty period, a charge will be made for the repair if the malfunction has resulted from the
use of devices or consumables that are not specified by NTT DOCOMO.
• A charge will be made for repairs in the event of damage to the LCD screen, connectors and similar
components after purchase.
■Repairs may not be possible in the following circumstances
• Repairs Inquiries detect water exposure (Example: the water exposure detection sticker detects water
exposure)
• Tests determine that corrosion has occurred due to water exposure, condensation, perspiration, etc. or the
circuit board has been damaged or altered (the external connector, liquid crystal, case, etc. has been
damaged)
* These cases are not covered by the warranty, and any repairs that may be possible will be carried out at the
subscriber’s expense.
■After the warranty period has expired
You can request to have your FOMA terminal repaired, although a charge will be made for the repair.

376
Appendix/External Devices/Troubleshooting
■Stock period of parts
Replacement parts (required for maintaining the functionality of the FOMA terminal) will be kept in stock
basically for minimum of 6 years following the termination of production. However, the FOMA terminal may not
be able to be repaired due to the lack of parts depending on the damaged parts. The repair may still be able to
be performed even after the stock period has expired. Call at the technical inquiries number described on the
back of the manual.
Memory dial (phonebook function) and downloaded
information
zIt is your responsibility to keep a separate record of all data stored on your FOMA terminal. NTT DOCOMO
disclaims any responsibility for alteration or loss of data.
zThe data you created, imported or downloaded may be modified or lost when you change the mobile phone
model or send the FOMA terminal to repair. NTT DOCOMO accepts no liability whatsoever for any
modification to or loss of such data. NTT DOCOMO may sent you a replacement of your FOMA terminal,
instead of renovation. The data which contains the images and ring tones downloaded to the FOMA
terminal, and the user created data are transferred to the replacement only when the FOMA terminal is
repaired (some contents can not be transferred. The data may not be transferred depending on the
damage).
* It may take time to transfer the data or the data may not be transferred depending on the amount of the
data stored on the FOMA terminal.
■Important
zDo not attempt to adapt the FOMA terminal or its accessories by yourself.
• Doing so may cause fire, injury or malfunction.
• Repairs to modified devices will be accepted on the condition that the customer agrees to the said modifications
being restored to their original condition. You may be rejected depending on the modification.
The following may be regarded as modifications:
• Labels etc. affixed to the screen or keys.
• Decorations to the FOMA terminal involving the use of adhesives.
• Replacement of the exterior etc. of the terminal with non-DOCOMO components.
• Even during the warranty period, a charge will be made for the repair if the malfunction or damage has resulted
from adaptation.
zDo not peel off the model name seal attached to the FOMA terminal.
The model name seal plays the part of the certificate verifying that the FOMA terminal complies with the technical
standard. If the seal cannot be confirmed because it has been peeled off or replaced, the conformity to the
technical standard cannot be judged, and then the repair may be unable to be accepted.
zThe settings of the functions or the information about total call time may be cleared (reset) due to the damage,
repair or improper use of the FOMA terminal. In this case, specify the settings again.
zMagnetic components are used for the following part of the FOMA terminal. A cash card (ATM card, bank card),
etc. which is easily affected by magnetism, may become unusable if it is kept close to the components:
Down-right of q
zIf your FOMA terminal gets wet or moist, immediately turn it off, remove the battery pack, and take the FOMA
terminal to the repair shop as soon as possible. Note that the FOMA terminal may be unable to be repaired
depending on the condition.
377
Continued on next page
Appendix/External Devices/Troubleshooting
i-mode Malfunction Check Site
You can check if sending/receiving mails, downloading images/melodies or other operations are
normally performed on the FOMA terminal by yourself.
zConnecting to “i-mode Malfunction Check Site” (Japanese)
•p“iMenu”“お知らせ”“サービス・機能”“iモード”“iモード故障診断 ”
QR code for connecting to the site
zPacket communication charge is not charged for the i-mode malfunction check site.
* Charges apply when accessing from overseas.
zTest items vary depending on the FOMA terminal models. Also, the test items are subject to change.
zTo check the operation with each test item, read the notes on the site carefully before performing test.
zWhen connecting to the i-mode malfunction check site or testing the mail sending, information specific to
your FOMA terminal (model, mail address, etc.) is automatically sent to the server (i-mode malfunction
check server). The information sent to DOCOMO is not used for any other purpose than i-mode malfunction
checking.
zWhen there seems to be a malfunction as a result of the checking, contact the inquiries number provided on
the back of this manual.
Updating Software <Software Update>
Check whether it is necessary to update software on the FOMA terminal. Download and update the
software via packet communication if necessary.
You will be notified of the update in the DOCOMO website or in “お知らせ” (News) of iMenu.
zA charge will not be made for the packet communication to update the software.
zThere are 3 ways to update: “Auto-update”, “Now update” and “Reserved update”.
Auto-update: The new software is downloaded automatically and overwritten at the preset time.
Now update: Updates immediately.
Reserved update: Updates automatically on the date and time you specified.
zYou can update the software if the i-mode host is set as the user defined host.
zUpdating the software (downloading and installing) may take some time.
zWhen you update the software, an SSL connection is established with the server (the software update
server managed by NTT DOCOMO). Validate the certificate beforehand (default: Valid. Setting procedure
→p.149).
zBefore updating the software, charge the battery to the full.
Top Test menu

378
Appendix/External Devices/Troubleshooting
zIt is recommended that you perform software updates when the handset is stationary and in a location with
good signal quality (three bars for the antenna icon).
* If the reception becomes poor and then the download is interrupted, try to update again in a place where
the reception is good.
zUpdating the software with the “PIN1 code entry set” set to “ON” displays the PIN1 code entry screen in the
automatic restart after installing the software. You cannot make or receive a call or use other communication
functions if you do not enter the correct PIN1 code.
zYou cannot download the update software:
When the reservation time comes while the other function is used, downloading starts after finishing the
function (cannot start depending on functions)
zYou cannot rewrite the updated software:
If the auto-update rewriting fails, rewriting again at the Set auto-update time (next day or one week later).
zCalls, communications and other functions are not available while software is being updated. However, voice
calls can be answered while downloading.
zIf the software has already been updated, “No update is needed Please continue to use as before” is
displayed when you check for new software updates.
zAfter updating the software, the displayed i-mode Center storage status icon disappears. Also, if the receive
option is set to “ON” and mail is received while updating the software, the mail notification screen may not be
displayed after the software has been updated.
zWhen you update the software, information specific to your FOMA terminal (model, manufacturer number,
etc.) is automatically sent to the server (the server for software updates managed by NTT DOCOMO). The
information sent to NTT DOCOMO is not used for any other purpose than updating the software.
zIf the update fails, the message “Rewrite failed” will appear and all operations will become unavailable. In
this case, please seek advice at a repair counter designated by DOCOMO.
• When the FOMA card (UIM) is not inserted
• When PIN lock is set
• When date and time are not set
• When the Self mode is set
• When packet dialing is restricted
• During 64K data communication
• When the FOMA card (UIM) is invalid
• When PIN Unlock Code (PUK Code) is locked
• When Omakase Lock is set
• When “ ” is displayed
• While using mova terminal with Dual Network service
• During international roaming
• When Omakase Lock is set • While other functions are running
N
zDo not remove the battery pack while updating the software. Doing so may cause the update to fail.
zIt is possible to perform software updates while keeping your Phonebook entries, camera images, downloaded data
and other data saved on the FOMA terminal intact. However, note that in some cases data cannot be protected
depending on the condition of your FOMA terminal (malfunction, damage, water exposure, etc.). It is recommended
that you back up important data. (It may not be possible to back up some data such as downloaded data.)
zIn case of Now update or Reserved update, when the software update is completed without operation for
confirmation, you will see the shortcut icon “ ” (Update complete) on the standby screen. Select “ ” and enter
the security code to see the detail results of the update.
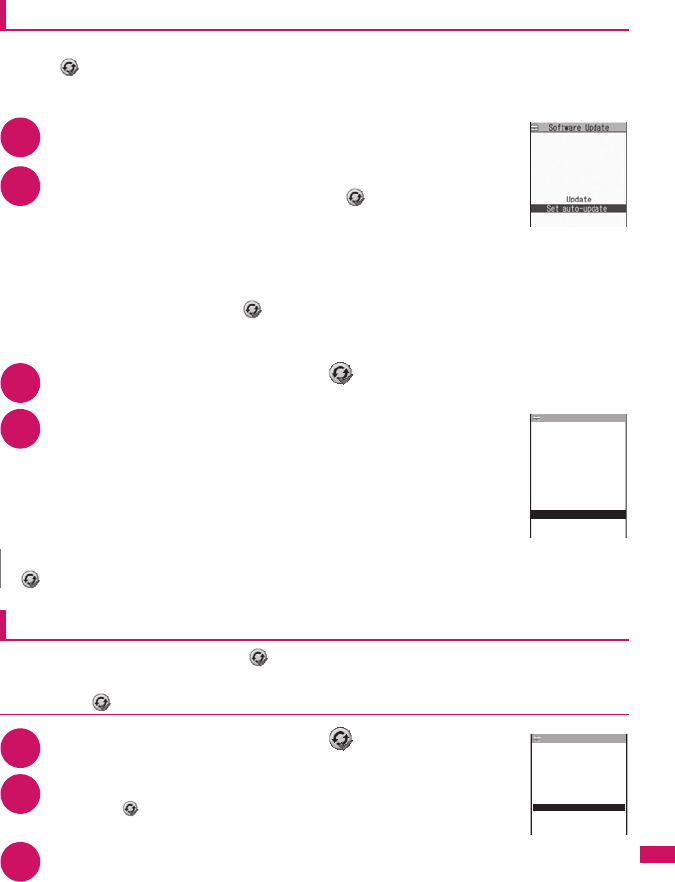
379
Continued on next page
Appendix/External Devices/Troubleshooting
Performing Software Update automatically <Auto-update>
The new software is downloaded automatically and rewritten at the preset time. When rewriting is
possible, (Rewrite) is displayed on the standby screen. You can check the time of the update and
change the time, or perform immediate rewrite.
zThe default setting is “Auto-update” (date: unspecified, time: 03:00).
1i“SETTINGS”“Other settings”“Software Update”
Enter your security code
2“Set auto-update”“Auto-update”o (set)
The new software is automatically downloaded, and (Rewrite) is displayed on
the standby screen.
■To change the date and time for updates
Select and set “Date” or “Time”o (set)
■To set for notification of updates only
Select “Only notification”o (set)
If a software update is necessary, (Update) is displayed on the standby screen.
■To leave auto-update set to off
Select “Disable”o (set)“Yes”
3On the standby screendSelect “ ”
4“OK”
Updating begins at the scheduled time.→p.381
■To change the time of the update
Select “Change” and set timeo (set)
■To perform the software update immediately
“Now rewrite”Enter your security code
Proceed to step 2 in “Updating software immediately” (p.380).
Running Software Update
To run Software Update, you can select (Update) that appears on the standby screen or from the
menu screen.
●Selecting (Update) to perform Software Update
1On the standby screendSelect “ ”
2“YES”
■To delete without running Software update
“NO”“YES”
3Enter your security code
N
z (Update notification icon) appears when there is a notification from DOCOMO or if update is failed.
Software Update
function list
Software update
scheduled for 03:00
Make sure battery is
fully charged beforehand
All functions will be
unavailable during the
update Update will not
start if other function
is running
OK
Change
Now rewrite
Software Update
No
Check for update?
Yes
Software Update
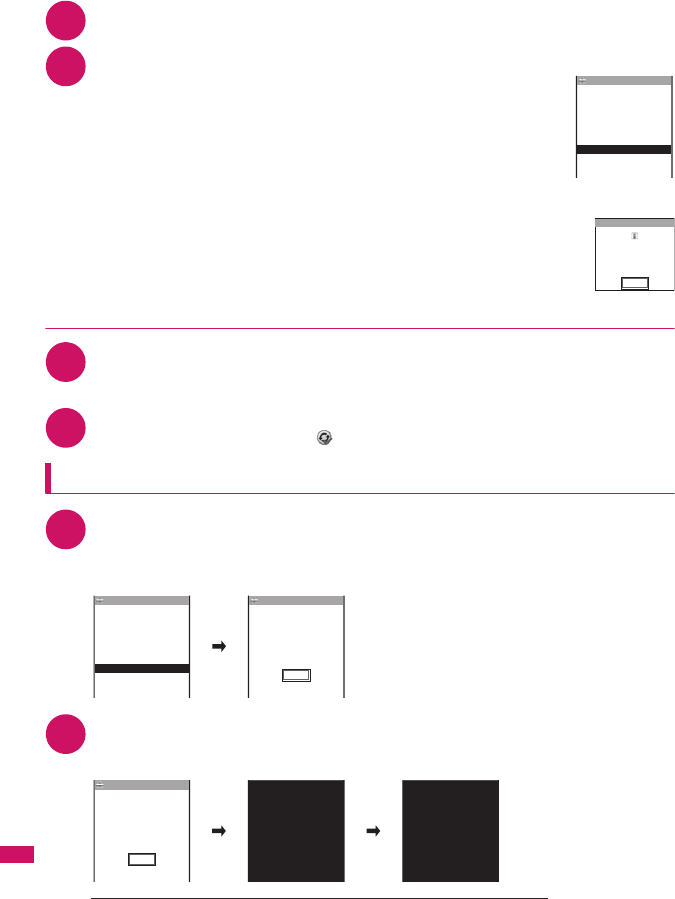
380
Appendix/External Devices/Troubleshooting
4Check whether software update is required
Now it is required to send the FOMA terminal-specific information to the server.
5The check result appears
■When “Update is needed” appears
Select “Now update” or “Reserve”
Select “Now update” to update the software immediately. →p.380
Select “Reserve” to update on the set time.→p.381
■When “No update is needed” appears
“OK”
Continue using the FOMA terminal as there is no need to update the software.
●Running Software Update from the menu
1i“SETTINGS”“Other settings”“Software Update”Enter your security
code
The Software update function list screen appears.
2“Update”
Proceed to step 4 (p.380) in “Selecting (Update) to perform Software Update”.
Updating software immediately <Now update>
1Check result screen (p.380)“Now update”Select “OK” when “Start
download Notice” is displayed
Downloading starts immediately.
Download starts after a while, even if you do not select “OK”.
2When the download ends and “Starting to rewrite” appears, select “OK”
The software starts rewriting.
Rewrite starts after a while, even if you do not select “OK”. It may take time to start rewriting.
All keys are disabled during software rewriting. You cannot stop rewriting either.
Check result
Reserve
Cancel
Update is needed
Software Update
Now update
Software Update
No update is
needed
Please continue
to use as before
OK
Reserve
Cancel
Update is needed
Software Update
Now update OK
Start download Notice:
No functions are
available except
receive calls
Software Update
OK
Rewriting
〉〉〉〉〉.....
書換え中
再起動します
書換え完了しました
Ready to reload
Rewriting is complete
Software Update
Ready to rewrite?

381
Continued on next page
Appendix/External Devices/Troubleshooting
When the software is rewritten, the FOMA terminal will reload automatically.
After reloading, the message “Software update is complete” is displayed, select “OK” (not display for
the Auto-update). Software update is completed.
Selecting the reservation date and time to update software
<Reserved update>
If it takes a long time to download or when the server is busy, you can select the time to startup
Software update by communicating with the server beforehand.
<Example: To reserve at 7:30 AM on August 16 (Saturday)>
1Check result screen (p.380)
“Reserve”Select the date and time
■If there is no date and time you do want to reserve
“Others”→p.382
2Check the selected date and time“YES”
“OK”
The software update is reserved.
■To change the date and/or time
“NO”
●At the scheduled time
The screen on the left appears and the FOMA terminal starts the software update
automatically, 5 seconds later. Charge the battery fully, put the FOMA terminal at a
location with strong radio wave reception and display the standby screen before
the reservation time. The rest of operation is same as “Updating software
immediately <Now update>” (p.380).
N
zIf you stop downloading before the download is completed, the data that has been downloaded until then is deleted.
zEven if the power is switched off during rewriting, it resumes when power is restored.
zOnce you start downloading, the update starts automatically with no need of selecting any item such as menu.
zThe screen on the right may be displayed if the server is busy.
In this case, select “Reserve” to perform the reserved update.
Software Update
Software update
is complete
OK
Reserve
Server is busy
Software Update
Reserve
Update is needed
Software Update
Now update
Cancel
day and time
Select your preferred
8/16(Sat)12:55
8/17(Sun) 5:12
Others
8/16(Sat)18:23
Software Update
8/16(Sat) 2:30
8/16(Sat) 4:18
8/16(Sat) 7:30
1/1
YES
NO
OK
Software Update
8/16(Sat) 7:30?
Reserve for
Software Update
Reserved for
8/16(Sat) 7:30
OK
Software update:
Ready to update?
Software Update
382
Appendix/External Devices/Troubleshooting
●If you select “Others”
You can select the desired date and period of time after communicating with the server if you select
“Others” at step 1 in p.381.
1Select a desired date
In the date selection display, you will see the update availability represented as
shown below:
○: Available
△: Almost full
None : Full
2Select an hour
In the time selection display, you will see the update availability represented as
shown below:
○: Available
△: Almost full
×: Full
Select the period of time to display the candidates for the reservation time by
communicating with the server again.
3Confirm the software update date and time
If you check the selected date and time and select “YES”, you will communicate
with the server again.
The software update is reserved.
●Checking/Changing/Canceling the reservation date and time
<Example: To cancel the reservation after checking it>
1i“SETTINGS”“Other settings”“Software Update”Enter your security
code“Update”
2“Cancel”
■To accept the reservation date and time
“OK”
■To change the reservation date and time
“Change”
Once information specific to your FOMA terminal has been sent to the server,
follow the procedure used when “Others” is selected.→p.382
N
zThe reservation time for the software update will be based on the server’s time.
zWhen the reservation time for the software update is the same as the alarm notification time, priority is assigned to
the software update.
zWhen the reservation time comes while the other function is used, updating starts after finishing the function.
zIf you perform “Initialize” after the reservation procedure is complete, the software update does not start at the
scheduled time. Reschedule the time for update.
SMTWTFS
Select preferred day
[
2008/ 8/17(Sun)
]
Available
Software Update
2
345678
1
9
10 11 12 13 14 15
18
25
19 20 21 22
26 27
17
24
31
16
23
28 29 30
1/3
time−slot
Select your preferred
2:00 − 2:59
○
3:00 − 3:59
○
1:00 − 1:59
△
5:00 − 5:59
△
6:00 − 6:59
×
7:00 − 7:59
△
4:00 − 4:59
△
Software Update
0:00 − 0:59
○
YES
NO
Software Update
8/17(Sun) 0:23?
Reserve for
Cancel
OK
Already reserved for
8/23(Sat) 7:30
Software Update
Change
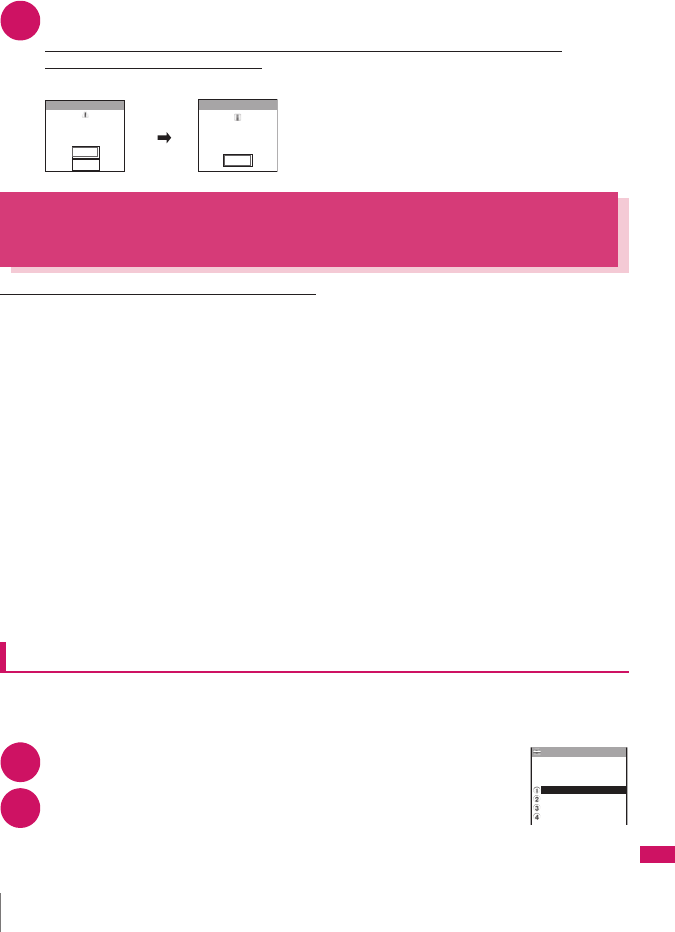
383
Appendix/External Devices/Troubleshooting
3When you see the message “Cancel this reservation?”, select “YES”
At this point, information specific to your FOMA terminal is sent to the server.
NTT DOCOMO will never disclose or forward your FOMA terminal information (model and
manufacturer number) to a third party.
After the message “The reservation is canceled” is displayed, select “OK”. The reservation is canceled.
Protecting the FOMA Terminal from Harmful
Data <Scanning function>
First, update the pattern data for the latest data.
When the FOMA terminal is downloading external files or programs from sites or i-mode mail, this
function scans the data and deletes any data or cancels program activation where the data or the
program could cause a fault.
zPattern data is used for the check. Update the pattern data when it is upgraded because a problem has been
detected.→p.384
zThe Scanning function prevents the data that causes some fault from invading your FOMA terminal when
viewing sites and websites or receiving mail. If the pattern data that fixes the error is not installed on your
FOMA terminal or if the pattern data that fixes the fault does not exist, the Scanning function cannot prevent
the error from occurring.
zThe pattern data varies depending on the model of the FOMA terminal. As a matter of convenience, NTT
DOCOMO may discontinue to distribute the pattern data for the model if three years have passed since it is
first released.
zSet the date (year, month and day) correctly on the FOMA terminal.
zWhen the FOMA terminal is updating automatically or when you update the pattern data, information
specific to your FOMA terminal (model, manufacturer number, etc.) is automatically sent to the server
(scanning function server managed by NTT DOCOMO). NTT DOCOMO will not use that information for any
purpose other than scanning function.
zUpdate of pattern data will be interrupted if a voice call is received or the FOMA terminal moves out of the
service area while updating the pattern data.
Setting the scanning function <Set scan>
When the Scanning function is set to “ON”, data and programs are automatically checked when they
are executed.
When the message scan is set to “ON”, the message body of SMS is automatically checked.
1i“SETTINGS”“Lock/Security”“Scanning function”
The “Scanning function” screen appears.
2“Set scan”“Scan” or “Message scan”“ON”
■If a message appears asking whether to change the settings
“YES”
* If you enable the Scanning function and it detects potentially harmful data, the event is displayed using one of
5 warning levels.→p.384
N
zThe Voice mail notification is not checked even when “Message scan” is set to “ON”.
YES
NO
OK
Software Update
Cancel
this reservation? The reservation
is canceled
Software Update
Scanning function
Set auto−update
Scanning function
Set scan
Version
Lock/Security
Update
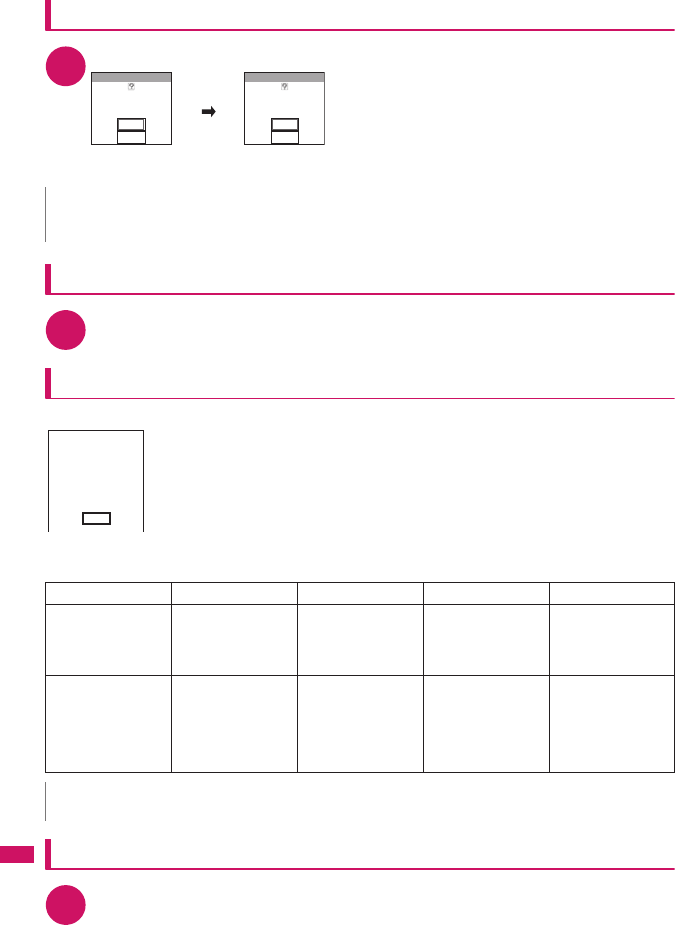
384
Appendix/External Devices/Troubleshooting
Updating pattern data <Pattern data update>
1Scanning function screen (p.383)“Update”“YES”“YES”
* If no pattern data update is required, the “Pattern definitions are up-to-date” message appears. Continue
using your current pattern data.
Updating pattern data automatically <Set auto-update>
1Scanning function screen (p.383)“Set auto-update”“ON”“YES”“YES”
The scanning results display
■Displaying problems detected by scanning
A list of up to 5 problems detected by the Scanning function is displayed, starting with
the highest-level problem. If 6 or more problems were detected, the names of the 6th
and subsequent problems are omitted.
The rest of the problem elements (sixth and later), of which names are omitted, are
displayed as follows:
1 to 9998: The remaining count is displayed as it is.
9999 or more: “Other:9999” is displayed regardless of the count.
■Results of scanning
Checking the pattern data version <Version>
1Scanning function screen (p.383)“Version”
N
zYou cannot update the pattern data when the update information is notified from the network, when other function is
activated, or during i-mode communication, packet communication or international roaming.
Warning level 0 Warning level 1 Warning level 2 Warning level 3 Warning level 4
d (Set)…Continues
the operation. d (Cancel)…Stops
and cancels the
operation.
o (Continue)…
Continues the
operation.
d (Set)…Stops and
cancels the operation. o (Delete)…Deletes
the data and cancels
the operation.
d (Back)…Stops
and cancels the
operation.
d (Set)…Deletes the
data and cancels the
operation.
N
zA message other than the above may appear depending on the condition.
YES
NO
YES
NO
Update
definitions?
Update pattern
Update
your terminal ID?
Ready to send
Following problems
were detected
Problem element1
Problem element2
Problem element3
Problem element4
Problem element5
Other:xxxx
Return
Operation may not
run properly
Operation may not
run properly
Cancel operation?
Operation may not
run properly
Canceling operation
Operation may not
run properly
Delete data?
Operation may not
run properly
Deleting data
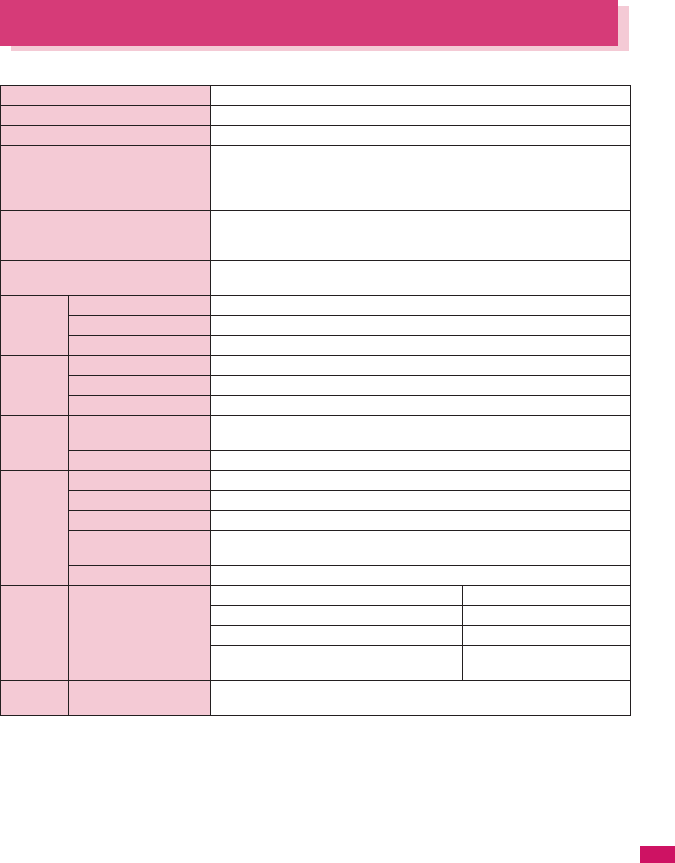
385
Continued on next page
Appendix/External Devices/Troubleshooting
Specifications
■Phone
*1: To switch networks, use “3G/GSM setting” (p.336).
*2: Select size=SubQCIF (128 × 96) Quality (Quality setting)=Fine (in case of File size=10KB)
*3: Varies depending on image size.
*4: Record time for 1 item under the following conditions.
<Phone>
Select size=SubQCIF (128 × 96) Quality setting=Normal File size=2MB Movie type set=Normal
<microSD card (64M bytes)>
Select size=SubQCIF (128 × 96) Quality setting=Normal File size=Long time Movie type set=Normal
*5: File type=AAC format
*6: Background play supported
*7: Up to 10M bytes of Chaku-Uta® can be separately saved to the Secret folder.
*8: Shared with images, i-motion, PDF data and Screen memo
Model name FOMA SO706i
Size Height 105 mm × Width 49 mm × Thickness 13.4 mm (When folded)
Weight Approx. 98 g (Battery pack attached)
Continuous standby time FOMA/3G Stationary (“Auto”*1): Approx. 580 hrs.
In transit (“3G”*1): Approx. 430 hrs.
In transit (“Auto”*1): Approx. 360 hrs.
GSM Stationary (“Auto”*1): Approx. 290 hrs.
Continuous talk time FOMA/3G Voice communications: Approx. 220 min.
Videophone: Approx. 100 min.
GSM Voice communications: Approx. 190 min.
Charging time AC Adapter: Approx. 120 min.
DC Adapter: Approx. 120 min.
Color LCD Type Display: TFT 262,144 colors
Size Display: Approx. 2.8 inches
Pixels Display: 102,480 pixels (240 × 427 dots)
Imaging
device
Ty p e C M O S
Size 1/4 inches
Effective pixels Approx. 2.0 mill. pixels
Camera Maximum recorded
pixels
Approx. 1.9 mill. pixels
Digital zoom Up to approx. 4.6 ×
Record Still image Approx. 1,000 photos*2
Continuous mode 4 to 20*3
Still image file type JPEG
Movie record time Save to Phone: Approx. 276 sec.*4
Save to microSD card (64M bytes): Approx. 90 min.*4
Movie file type MP4
Music
playback
Continuous playback
time
i-motion Approx. 930 min.*5
Chaku-Uta-Full®Approx. 1,300 min.*5*6
Windows Media Audio (WMA) file Approx. 1,400 min.*6
Music&Video Channel Approx. 1,500 min. (Audio)*6
Approx. 350 min. (Movie)
Memory Chaku-Uta®・Chaku-
Uta-Full®
Approx. 70M bytes*7*8
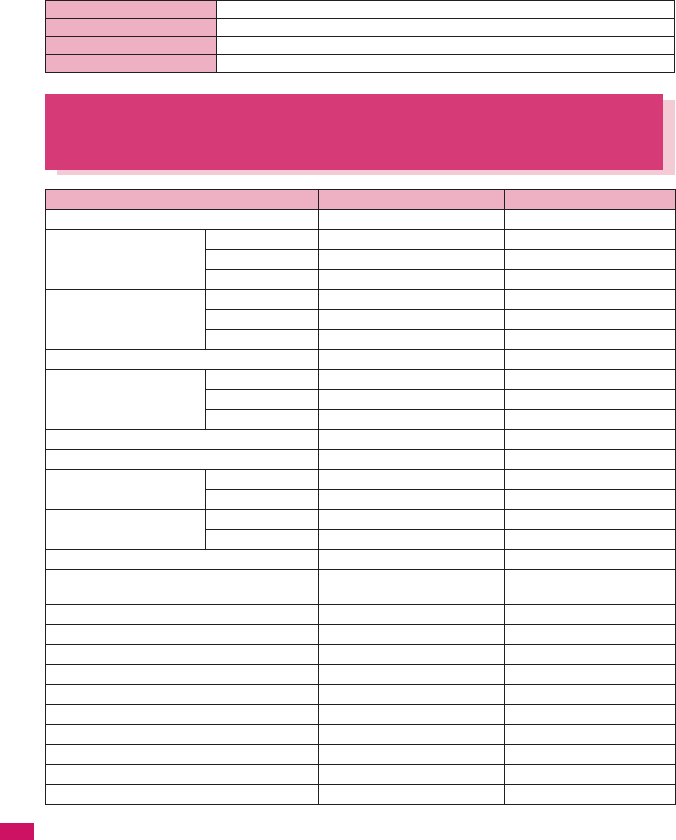
386
Appendix/External Devices/Troubleshooting
■Battery pack
Number of Data that can be Stored/
Registered/Protected on the FOMA Terminal
*1: Up to 50 phonebooks can be stored on the FOMA card (UIM).
*2: Actual storable, registerable or protectable counts may be decreased depending on the data size.
*3: Up to 20 more received or sent SMS messages can be additionally stored on the FOMA card (UIM). →p.254
*4: Up to 100 items can be additionally stored on the secret folder.
*5: Pre-installed data are included.
*6: Up to 10 items can be additionally stored or registered on the secret folder.
Product name Battery Pack S003
Battery type Lithium-ion
Nominal voltage 3.8V DC
Nominal size 770mAh
Item Store/Register Protect
Phonebook 1,000 max.*1 −
1Seg TV link 50 −
Booking program 100 −
Timer recording 100 −
Schedule Schedule 500 −
Holiday 100 −
Anniversary 100 −
To Do list 100 −
Mail
(SMS + i-mode)
Received mail 1,000 max.*2*3*4 500 max.*2
Sent mail 500 max.*2*3*4 250 max.*2
Draft mail 50 max.*2 −
Area Mail 100 max.*2 −
Template 500 max.*2*5 −
Message MessageR 100 max.*2 50 max.*2
MessageF 100 max.*2 50 max.*2
Bookmark i-mode 100*6 −
Full Browser 100*6 −
Screen memo 100 max.*2 50 max.*2
i-αppli 200 max.*2
(5 for mail-linked i-αppli)
−
ToruCa 100 max.*2 −
Still image 1,000 max.*2*4 −
Movie/i-motion 100 max.*2*6 −
Still images recorded with 1seg 100 max.*2 −
Chara-den 10*5 −
Melody 200 max.*2 −
Kisekae Tool 100 max.*2*5 −
PDF data 400 max.*2*5 −
Music&Video Channel 30 max.*2 −
Music 100 max.*2 −

387
Continued on next page
Appendix/External Devices/Troubleshooting
Specific Absorption Rate of Mobile Phones,
etc.
★Mobile Phone GSM/GPRS 900/1800/1900 & UMTS JP/EU
Specific Absorption Rate (SAR) of Mobile Phones
This model phone FOMA SO706i meets the MIC’s*1 technical regulation for exposure to radio waves.
The technical regulation established permitted levels of radio frequency energy, based on standards
that were developed by independent scientific organizations through periodic and thorough evaluation
of scientific studies. The regulation employs a unit of measurement known as the Specific Absorption
Rate, or SAR. The SAR limit is 2 watts/kilogram (W/kg)*2 averaged over ten grams of tissue. The limit
includes a substantial safety margin designed to assure the safety of all persons, regardless of age
and health. The value of the limit is equal to the international guidelines recommended by ICNIRP*3.
All phone models should be confirmed to comply with the regulation, before they are available for sale
to the public. The highest SAR value for this model phone FOMA SO706i is 0.739 W/kg. It was taken
by the Telecom Engineering Center (TELEC), a Registered Certification Agency on the Radio Law.
The test for SAR was conducted in accordance with the MIC testing procedure using standard
operating positions with the phone transmitting at its highest permitted power level in all tested
frequency bands. While there may be differences between the SAR levels of various phones and at
various positions, they all meet the MIC’s technical regulation. Although the SAR is determined at the
highest certified power level, the actual SAR of the phone during operation can be well below the
maximum value.
For further information about SAR, please see the following websites:
World Health Organization (WHO): http://www.who.int/peh-emf/
ICNIRP: http://www.icnirp.de/
MIC: http://www.tele.soumu.go.jp/e/ele/body/index.htm
TELEC: http://www.telec.or.jp/ENG/Index_e.htm
NTT DOCOMO: http://www.nttdocomo.co.jp/english/product/
Sony Ericsson Mobile Communications Japan, Inc.: http://www.SonyEricsson.co.jp/product/SAR/
(Japanese)
Association of Radio Industries and Businesses: http://www.arib-emf.org/index.html (Japanese)
*1: Ministry of Internet Affairs and Communications
*2: The technical regulation is provided in Article 14-2 of the Ministry Ordinance Regulating Radio Equipment.
*3: International Commission on Non-lonizing Radiation Protection
Radio Wave Exposure and Specific Absorption Rate (SAR)
Information
●United States
THIS PHONE MODEL HAS BEEN CERTIFIED IN COMPLIANCE WITH THE GOVERNMENT’S
REQUIREMENTS FOR EXPOSURE TO RADIO WAVES.
The SO706i mobile phones have been designed to comply with applicable safety requirements for
exposure to radio waves. Your wireless phone is a radio transmitter and receiver. It is designed to not
exceed the limits* of exposure to radio frequency (RF) energy set by governmental authorities. These
limits establish permitted levels of RF energy for the general population. The guidelines are based on
standards that were developed by international scientific organizations through periodic and thorough
evaluation of scientific studies. The standards include a safety margin designed to assure the safety of
all individuals, regardless of age and health.

388
Appendix/External Devices/Troubleshooting
The radio wave exposure guidelines employ a unit of measurement known as the Specific Absorption
Rate (SAR). Tests for SAR are conducted using standardized methods with the phone transmitting at
its highest certified power level in all used frequency bands. While there may be differences between
the SAR levels of various phone models, they are all designed to meet the relevant guidelines for
exposure to radio waves. For more information on SAR, please refer to the safe and efficient use
chapter in the User Guide.
The highest SAR value as reported to the authorities for this phone model when tested for use by the
ear is 0.92 W/kg*, and when worn on the body is 0.55 W/kg* for speech and 0.56 W/kg* for data calls.
Body worn measurements are made while the phone is in use and worn on the body with a Sony
Ericsson accessory supplied with or designated for use with this phone. It is therefore recommended
that only Ericsson and Sony Ericsson original accessories be used in conjunction with Sony Ericsson
phones.
**Before a phone model is available for sale to the public in the US, it must be tested and certified by
the Federal Communications Commission (FCC) that it does not exceed the limit established by the
government-adopted requirement for safe exposure*. The tests are performed in positions and
locations (i.e., by the ear and worn on the body) as required by the FCC for each model. The FCC has
granted an Equipment Authorization for this phone model with all reported SAR levels evaluated as in
compliance with the FCC RF exposure guidelines. While there may be differences between the SAR
levels of various phones, all mobile phones granted an FCC equipment authorization meet the
government requirement for safe exposure. SAR information on this phone model is on file at the FCC
and can be found under the Display Grant section of http://www.fcc. gov/oet/ea after searching on FCC
ID PY7A3880003. Additional information on SAR can be found on the Cellular Telecommunications &
Internet Association (CTIA) website at http://www.ctia.org/.
* In the United States, the SAR limit for mobile phones used by the public is 1.6 watts/kilogram (W/kg)
averaged over one gram of tissue. The standard incorporates a margin of safety to give additional
protection for the public and to account for any variations in measurements.
**This paragraph is only applicable to authorities and customers in the United States.
●Europe
This mobile phone model SO706i has been designed to comply with applicable safety requirements for
exposure to radio waves. These requirements are based on scientific guidelines that include safety
margins designed to assure the safety of all persons, regardless of age and health.
The radio wave exposure guidelines employ a unit of measurement known as the Specific Absorption
Rate, or SAR.Tests for SAR are conducted using standardized methods with the phone transmitting at
its highest certified power level in all used frequency bands.
While there may be differences between the SAR levels of various phone models, they are all designed
to meet the relevant guidelines for exposure to radio waves.
For more information on SAR, please refer to the safety chapter in the User’s Guide.
SAR data information for residents in countries that have adopted the SAR limit recommended by the
International Commission of Non-lonizing Radiation Protection (ICNIRP), which is 2 W/kg averaged
over ten (10) gram of tissue (for example European Union, Japan, Brazil and New Zealand):
The highest SAR value for this model phone tested by Sony Ericsson for use at the ear is 1.05 W/kg
(10g).
389
Continued on next page
Appendix/External Devices/Troubleshooting
Radio Frequency (RF) Exposure and SAR
Your mobile phone is a low-power radio transmitter and receiver.
When it is turned on, it emits low levels of radio frequency energy (also known as radio waves or radio
frequency fields).
Governments around the world have adopted comprehensive international safety guidelines,
developed by scientific organizations, e.g. ICNIRP (International Commission on Non-Ionizing
Radiation Protection) and IEEE (The Institute of Electrical and Electronics Engineers Inc.), through
periodic and thorough evaluation of scientific studies. These guidelines establish permitted levels of
radio wave exposure for the general population. The levels include a safety margin designed to assure
the safety of all persons, regardless of age and health, and to account for any variations in
measurements.
Specific Absorption Rate (SAR) is the unit of measurement for the amount of radio frequency energy
absorbed by the body when using a mobile phone. The SAR value is determined at the highest
certified power level in laboratory conditions, but the actual SAR level of the mobile phone while
operating can be well below this value. This is because the mobile phone is designed to use the
minimum power required to reach the network.
Variations in SAR below the radio frequency exposure guidelines do not mean that there are variations
in safety. While there may be differences in SAR levels among mobile phones, all Sony Ericsson
mobile phone models are designed to meet radio frequency exposure guidelines.
Before a phone model is available for sale to the public, it must be tested and certified to the FCC that
it does not exceed the limit established by the government-adopted requirement for safe exposure. The
tests are performed in positions and locations (that is, at the ear and worn on the body) as required by
the FCC for each model. For body worn operation, this phone has been tested and meets FCC RF
exposure guidelines when the handset is positioned a minimum of 15 mm from the body without any
metal parts in the vicinity of the phone or when used with the original Sony Ericsson body worn
accessory intended for this phone. Use of other accessories may not ensure compliance with FCC RF
exposure guidelines.
SAR information for this mobile phone model is included with the material that comes with this mobile
phone. This information can also be found, together with more information on radio frequency
exposure and SAR, on: www.sonyericsson.com
Guidelines for Safe and Efficient Use
Please read this information before using your mobile phone.
These instructions are intended for your safety. Please follow these guidelines. If the product has been
subject to any of the conditions listed below or you have any doubt as to its proper function make sure
you have the product checked by a certified service partner before charging or using it. Failure to do so
might entail a risk of product malfunction or even a potential hazard to your health.
Recommendations for safe use of product (mobile phone, battery, charger and other accessories)
□Always treat your product with care and keep it in a clean and dust-free place.
□Warning! May explode if disposed of in fire.
□Do not expose your product to liquid or moisture or humidity.
□Do not expose your product to extremely high or low temperatures. Do not expose the battery to
temperatures above +35°C (+95°F).
□Do not expose your product to open flames or lit tobacco products.
□Do not drop, throw or try to bend your product.

390
Appendix/External Devices/Troubleshooting
□Do not paint your product.
□Do not attempt to disassemble or modify your product.
□Do not close your product with an object inserted between keypad and display if you have a
clamshell phone; this may damage your product.
□Do not use your product near medical equipment without requesting permission from your treating
physician or authorized medical staff.
□Do not use your product when in, or around aircraft, or areas showing the sign “turn off two-way
radio”.
□Do not use your product in an area where a potentially explosive atmosphere exists.
□Do not place your product or install wireless equipment in the area above an air bag in your car.
□Caution: Cracked or broken displays may create sharp edges or splinters that could be harmful upon
contact.
CHILDREN
KEEP OUT OF CHILDRENS REACH. DO NOT ALLOW CHILDREN TO PLAY WITH YOUR MOBILE
PHONE OR ITS ACCESSORIES. THEY COULD HURT THEMSELVES OR OTHERS, OR COULD
ACCIDENTALLY DAMAGE THE MOBILE PHONE OR ACCESSORY. YOUR MOBILE PHONE OR ITS
ACCESSORY MAY CONTAIN SMALL PARTS THAT COULD BECOME DETACHED AND CREATE A
CHOKING HAZARD.
Power supply (Charger)
Connect the AC power adapter only to designated power sources as marked on the product. Make
sure the cord is positioned so that it will not be subjected to damage or stress. To reduce risk of electric
shock, unplug the unit from any power source before attempting to clean it. The AC power adapter
must not be used outdoors or in damp areas. Never alter the cord or plug.
Battery
We recommend that you fully charge the battery before you use your mobile phone for the first time. A
new battery or one that has not been used for a long time could have reduced capacity the first few
times it is used. The battery should only be charged in temperatures between +5°C (+41°F) and +35°C
(+95°F).
Use only original batteries intended for use with your mobile phone. Using other batteries and chargers
could be dangerous.
Talk and standby times depend on several different conditions such as signal strength, operating
temperature, application usage patterns, features selected and voice or data transmissions when the
mobile phone is being used.
Turn off your mobile phone before removing the battery. Do not put the battery into your mouth. Battery
electrolytes may be toxic if swallowed. Do not let the metal contacts on the battery touch another metal
object. Doing this could short-circuit and damage the battery. Use the battery for the intended purpose
only.
Personal medical devices
Mobile phones may affect the operation of pacemakers and other implanted equipment. Please avoid
placing the mobile phone over the pacemaker, e.g. in your breast pocket. When using the mobile
phone, use it at the ear on the opposite side of the body to the pacemaker. If a minimum distance of 22
cm (8.7 inches) is kept between the mobile phone and the pacemaker, the risk of interference is
limited. If you have any reason to suspect that interference is taking place, immediately turn off your
mobile phone. Contact your medical doctor for more information.
For other medical devices, please consult your physician and the manufacturer of the device.

391
Continued on next page
Appendix/External Devices/Troubleshooting
Driving
Please check if local laws and regulations restrict the use of mobile phones while driving or require
drivers to use handsfree solutions.
For the use of mobile phones in the vehicle, please follow instructions from vehicle manufacturers.
Always pay full attention to driving and pull off the road and park before making or answering a call if
driving conditions so require.
Emergency calls
Mobile phones operate using radio signals, which cannot guarantee connection in all conditions. You
should therefore never rely solely upon any mobile phone for essential communications (e.g. medical
emergencies).
Emergency calls may not be possible in all areas, on all cellular networks, or when certain network
services and/or mobile phone features are in use. Check with your local service provider.
Efficient use
Hold your mobile phone as you would any other phone. Do not cover the hinge area when the phone is
in use, as this affects call quality and may cause the phone to operate at a higher power level than
needed, thus shortening talk and standby times.
Disposal of old electrical and electronic equipment
This symbol indicates that all electrical and electronic equipment included shall not be treated as
household waste. Instead it shall be left at the appropriate collection point for recycling of electrical and
electronic equipment. By ensuring this product is disposed of correctly, you will help prevent potential
negative consequences for the environment and human health, which could otherwise be caused by
inappropriate waste handling of this product. The recycling of materials will help to conserve natural
resources. For more detailed information about recycling this product, please contact your local city
office, your household waste disposal service or the shop where you purchased the product.
Disposing of the battery
Please check local regulations for disposal of batteries or call your local Sony Ericsson Call Center for
information.
The battery should never be placed in municipal waste. Use a battery disposal facility if available.
Memory Card
If your product comes complete with a removable memory card, it is generally compatible with the
handset purchased but may not be compatible with other devices or the capabilities of their memory
cards. Check other devices for compatibility before purchase or use. If your product is equipped with a
memory card reader, check memory card compatibility before purchase or use.
Memory cards are generally formatted prior to shipping. To reformat the memory card, use a
compatible device. Do not use the standard operating system format when formatting the memory card
on a PC. For details, refer to the operating instructions of the device or contact customer support.
WARNING:
If your device requires an adapter for insertion into the handset or another device, do not insert the
card directly without the required adapter.

392
Appendix/External Devices/Troubleshooting
Precautions on Memory Card Use
□Do not expose the memory card to moisture.
□Do not touch terminal connections with your hand or any metal object.
□Do not strike, bend, or drop the memory card.
□Do not attempt to disassemble or modify the memory card.
□Do not use or store the memory card in humid or corrosive locations or in excessive heat such as a
closed car in summer, in direct sunlight or near a heater, etc.
□Do not press or bend the end of the memory card adapter with excessive force.
□Do not let dirt, dust, or foreign objects get into the insert port of any memory card adapter.
□Check you have inserted the memory card correctly.
□Insert the memory card as far as it will go into any memory card adapter needed. The memory card
may not operate properly unless fully inserted.
□We recommend that you make a backup copy of important data. We are not responsible for any loss
or damage to content you store on the memory card.
□Recorded data may be damaged or lost when you remove the memory card or memory card
adapter, turn off the power while formatting, reading or writing data, or use the memory card in
locations subject to static electricity or high electrical field emissions.
Protection of personal information
To safeguard your privacy and prevent information being accessible to a third party, you should erase
all personal data before selling or disposing of the product. To delete personal data, perform a master
reset, remove the memory card or format the media memory. DELETION OF MATERIAL FROM THE
PHONE AND MEDIA MEMORIES DOES NOT ENSURE THAT SAID INFORMATION CANNOT BE
RECOVERED BY A SUBSEQUENT USER. DOCOMO/SONY ERICSSON DOES NOT WARRANT
AGAINST A SUBSEQUENT USER OF THE DEVICE ACCESSING YOUR INFORMATION AND
DOES NOT ASSUME ANY RESPONSIBILITY FOR SUBSEQUENT DISCLOSURE OF SAID
INFORMATION EVEN IF A MASTER RESET AND A MEDIA MEMORY FORMAT HAS BEEN
PERFORMED. If you are concerned about such potential disclosure retain your device or secure its
permanent destruction.
Accessories
DOCOMO recommends use of DOCOMO’s original accessories for safe and efficient use of its
products. Use of third-party accessories may decrease performance or pose a risk to your health or
safety.
LOUDNESS WARNING:
Please adjust the audio volume cautiously when using third-party audio accessories to avoid volume
levels that may be harmful to your hearing. DOCOMO does not test use of third-party audio
accessories with this mobile phone. DOCOMO recommends using only DOCOMO’s original audio
accessories.

393
Appendix/External Devices/Troubleshooting
FCC Statement for the USA
This device complies with Part 15 of the FCC rules. Operation is subject to the
following two conditions:
(1) This device may not cause harmful interference, and
(2) This device must accept any interference received, including interference that
may cause undesired operation.
Any change or modification not expressly approved by Sony Ericsson may void the user’s authority to
operate the equipment.
This equipment has been tested and found to comply with the limits for a Class B digital device,
pursuant to Part 15 of the FCC Rules. These limits are designed to provide reasonable protection
against harmful interference in a residential installation. This equipment generates, uses and can
radiate radio frequency energy and, if not installed and used in accordance with the instructions, may
cause harmful interference to radio communications. However, there is no guarantee that interference
will not occur in a particular installation.
If this equipment does cause harmful interference to radio or television reception, which can be
determined by turning the equipment off and on, the user is encouraged to try to correct the
interference by one or more of the following measures:
-- Reorient or relocate the receiving antenna.
-- Increase the separation between the equipment and receiver.
-- Connect the equipment into an outlet on a circuit different from that to which the receiver is
connected.
-- Consult the dealer or an experienced radio/TV technician for help.
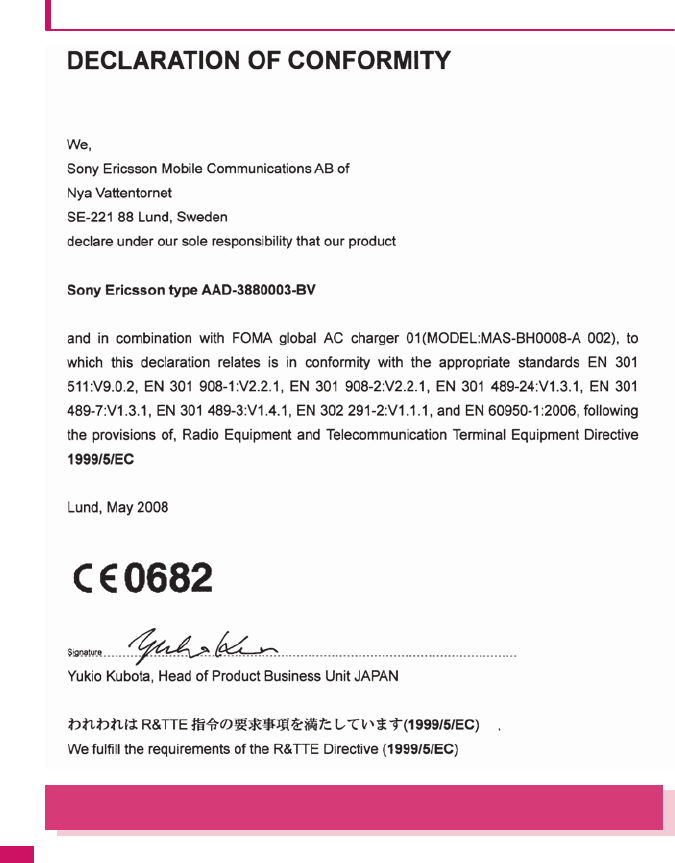
394
Appendix/External Devices/Troubleshooting
Declaration of Conformity for SO706i
Export Administration Regulations
This product and its accessories may be subject to the Japan Export Administration Regulations (the
“Foreign Exchange and Foreign Trade Law” and its related regulations). When exporting this product
and its accessories, take the required steps at your expense and under your responsibility. For more
details, contact the Ministry of Economy, Trade and Industry (METI).

395
Index/Quick Manual
Index ............................................................................................................................... 396
Quick Manual .................................................................................................................. 408
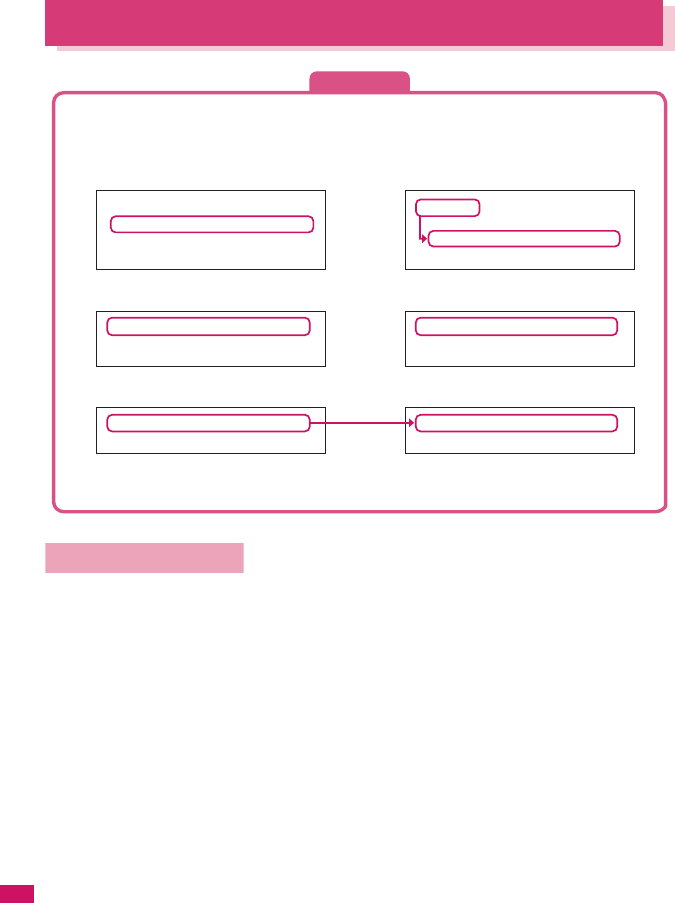
396
Index/Quick Manual
Alphabetical/Numerical/Kana
K
A
A mode (2in1) . . . . . . . . . . . . . . .320
AC adapter. . . . . . . . . . . . . . . . . . .42
Accessories/Options . . . . . . . . . .363
A-Continuous mode . . . . . . . . . . .124
Activating 1seg. . . . . . . . . . . . . . .210
Add bookmark . . . . . . . . . . . . . . .142
Add shortcut icon . . . . . . . . . . . . . .95
Add to phonebook . . . . . . . . . . . .140
Adding a new word (Own dictionary)
. .309
Adding “186”/“184”. . . . . . . . . . . . .56
Additional service (network services)
. .324
Address→Mail address
Adjusting the volume . . . . . . . . . . .61
i-αppli vol. . . . . . . . . . . . . . . . . .189
Ring tone . . . . . . . . . . . . . . . . . .61
Volume . . . . . . . . . . . . . . . . . . . .61
After returning to Japan . . . . . . . .335
After-sales service . . . . . . . . . . . .375
Alarm details (check). . . . . . . . . . 290
Alarm notification
Priority . . . . . . . . . . . . . . . . . . . 289
Reconnection. . . . . . . . . . . . . . . 58
Signal quality . . . . . . . . . . . . . . . 85
Alarm notification actions . . 290, 295
Alarm setting . . . . . . . . . . . . . . . . 289
Alarm tone
pre-installed . . . . . . . . . . . . . . . . 82
stop . . . . . . . . . . . . . . . . . . . . . 289
Alarm (Timer) . . . . . . . . . . . . . . . 284
Animation (create). . . . . . . . . . . . 230
Animation (playback). . . . . . . . . . 231
Answer hold. . . . . . . . . . . . . . . . . . 62
Answer setting. . . . . . . . . . . . . . . . 60
Any key answer . . . . . . . . . . . . . . . 60
Area Mail (Early warning) . . . . . . 181
Area Mail setting . . . . . . . . . . . . . 182
Area Mail (Storage capacity). . . . 386
AT Commands. . . . . . . . . . . . . . . 329
Attach file
Download selectively . . . . . . . . 166
Save . . . . . . . . . . . . . . . . . . . . 166
Send . . . . . . . . . . . . . . . . . . . . 160
Auto answer setting . . . . . . . . . . 299
Auto Decomail-picture (download)
. . 146
Auto power ON/OFF . . . . . . . . . . . 45
Auto receive (Mail/Message) . . . 162
Auto redial as voice . . . . . . . . . . . 67
Auto replay (i-motion) . . . . . . . . . 152
Auto reset total cost . . . . . . . . . . 294
Auto save set (Movie) . . . . . . . . . 127
Auto save set (Still image) . . . . . 123
Auto timer . . . . . . . . . . . . . . . . . . 128
Auto-display setting . . . . . . . . . . 148
Auto-sort settings (Mail) . . . . . . . 174
Auto-start set (i-αppli) . . . . . . . . . 197
Auto-start time (i-αppli) . . . . . . . . 197
Auto-update (Software Update)
. . . 379
AV Phone To function . . . . . . . . . 147
Available services overseas . . . . 333
Index
Answer hold. . . . . . . . . . . . . . . . . . . . . . 62
. . . . . . . . . . . . . . . . . . . . 60
Answer setting
Any key answer . . . . . . . . . . . . . . . . . . . 60
Initialize → Reset
Intellectual property right. . . . . . . . . . . . 20
Holding (during incoming call, talking)
. . . .62
Holiday (check) . . . . . . . . . . . . . . . . . . .287
Home URL (i-mode) . . . . . . . . . . . . . . .148
Restriction
Dial lock/Omakase Lock . . . . . . . . . .101
IC card lock setting . . . . . . . . . . . . . .206
Keypad lock . . . . . . . . . . . . . . . . . . .110
Reset
Auto reset total cost . . . . . . . . . . . . . 294
Keypad light setting . . . . . . . . . . . . . . . . 90
Keypad lock. . . . . . . . . . . . . . . . . . . . . 110
Keypad sound . . . . . . . . . . . . . . . . . . . . 85
Index search
<Example 1: To set the keypad lock to “ON”>
<Example 2: When you cannot answer a received call immediately>
<Example 3: When the keyword is described by another term>
zThis index has the function as an alphabetical list of contents. Not only can you find the words in this
manual, but you can also the words that summarizes content of description. Try to search for another
keyword if the words that wants to know is not collected.
z“Function menu” index comes after “Alphabetical/Numerical/Kana” index. When you search the item
of function menu (p.37), use this index.

397
Index/Quick Manual
K
B
B mode (2in1). . . . . . . . . . . . . . . 320
Background play. . . . . . . . . . . . . 280
Backlight. . . . . . . . . . . . . . . . . . . . 90
Bar code reader . . . . . . . . . . . . . 129
Bar incoming when roam (Overseas)
. . 338
Basic channel (i-Channel) . . . . . 153
Basic operation . . . . . . . . . . . . . . 34
Battery
Attaching/removing the battery pack
. . 41
Battery pack life . . . . . . . . . . . . 41
Charging the FOMA terminal . . 41
Checking battery level. . . . . . . . 44
Low-voltage alarm . . . . . . . . . . 44
Power saver mode . . . . . . . . . . 90
Usage time . . . . . . . . . . . . . . . . 42
Blocking noise (Noise reduction)
. . 58
Booking program
G-GUIDE EPG Remote Control
. . 194
1seg . . . . . . . . . . . . . . . . . . . . 214
Bookmark. . . . . . . . . . . . . . . . . . 142
Copy from microSD to Phone
. . 249
Copy from Phone to microSD
. . 248
PIM data display . . . . . . . . . . . 247
Saving the attached file . . . . . 167
Send attach file. . . . . . . . . . . . 160
Storage capacity. . . . . . . . . . . 386
Brightness
Camera . . . . . . . . . . . . . . . . . . 123
My picture . . . . . . . . . . . . . . . . 232
Videophone. . . . . . . . . . . . . . . . 50
Brightness (Edit image) . . . . . . . 232
K
C
CA certificate . . . . . . . . . . . . . . . 138
Cable connection (USB). . . . . . . 260
Cache. . . . . . . . . . . . . . . . . . . . . 139
Calculator . . . . . . . . . . . . . . . . . . 295
Calendar (standby screen). . . . . . 89
Call acceptation (Restrictions) . . 112
Call charge (setting the upper limit)
. . 294
Call Forwarding . . . . . . . . . . . . . 314
Call forwarding (Restrictions) . . . 112
Call Forwarding(Int.). . . . . . . . . . 338
Call rejection (Restrictions) . . . . 112
Call setting w/o ID . . . . . . . . . . . 114
Call Waiting . . . . . . . . . . . . . . . . 313
Caller ID Notification
Basic setting . . . . . . . . . . . . . . . 46
Caller ID Request. . . . . . . . . . . . 316
Caller ID req. (Int.) . . . . . . . . . . . 338
Camera
Activate . . . . . . . . . . . . . . . . . .118
Guide to the shooting screen
. . . 121
How to use the camera . . . . . . 118
Key operation . . . . . . . . . . . . . .121
Notes on using . . . . . . . . . . . . .118
Shooting settings . . . . . . . . . . .128
When using the microSD card
. . . 119
Canceling operation. . . . . . . . . . . .35
case conversion. . . . . . . . . . . . . .306
CD-ROM for FOMA SO706i . . . .329
Chaku-moji . . . . . . . . . . . . . . . . . .55
Chaku-Uta-Full®
Acquire. . . . . . . . . . . . . . . . . . .272
Move among Phone/microSD
. . .250
Play . . . . . . . . . . . . . . . . . . . . .273
Pre-installed data . . . . . . . . . . . .82
Save . . . . . . . . . . . . . . . . . . . . .272
Chance capture . . . . . . . . . . . . . .128
Change i-mode Password . . . . . .141
Change rcv. type (mail) . . . . . . . .157
Change security code . . . . . . . . .101
Change size (Edit image) . . . . . .232
Change skin. . . . . . . . . . . . . . . . .279
Changing menu icon . . . . . . . . . . .91
Changing the certificate host. . . .151
Changing the main menu . . . . . . .33
Changing the Ring Tone . . . . . . . .84
Changing window (Entering text
divided screen) . . . . . . . . . . . . . .303
Channel list (i-Channel). . . . . . . .153
Channel setting (One-Seg) . . . . . 209
Chapter list . . . . . . . . . . . . . . . . .270
Character
Changing the conversion range
. .305
Common phrases. . . . . . . . . . .307
Convert. . . . . . . . . . . . . . . . . . .305
Copy. . . . . . . . . . . . . . . . . . . . .308
Cut . . . . . . . . . . . . . . . . . . . . . .308
Delete. . . . . . . . . . . . . . . . . . . .307
Kuten code . . . . . . . . . . . . . . . .309
Line feed . . . . . . . . . . . . . . . . .306
Paste . . . . . . . . . . . . . . . . . . . .309
Pict/Sym continuous entry . . . .306
Single-byte/Double-byte . . . . . .306
Switching upper/lower case . . .306
Type/thickness/size . . . . . . . . . .93
Character assignment (5-touch/2-touch)
. . .350
Character entry . . . . . . . . . . . . . .301
Clear learned . . . . . . . . . . . . . .310
Download dictionary setting . . . 310
2-touch . . . . . . . . . . . . . . . . . . .310
5-touch. . . . . . . . . . . . . . . . . . . 304
Character entry (edit) screen . . . 302
Character input mode (5-touch/2-touch)
. . . 303
Character stamp (Edit image) . . . 232
Chara-den
Display. . . . . . . . . . . . . . . . . . . 237
Download. . . . . . . . . . . . . . . . . 146
For videophone . . . . . . . . . . . . . 66
Guide to the Chara-den list . . . 237
Operation. . . . . . . . . . . . . . . . . 238
Shooting . . . . . . . . . . . . . . . . . 239
Storage capacity . . . . . . . . . . . 386
What is Chara-den?. . . . . . . . . 237
Chara-den setting . . . . . . . . . . . . . 50
Chara-den settings priority . . . . . . 71
Charge (setting the upper limit). . 294
Charge sound . . . . . . . . . . . . . . . . 85
Charging the FOMA terminal . . . . 41
Check i-mode settings . . . . . . . . 148
Check new messages
Mail/Message . . . . . . . . . . . . . 164
Set . . . . . . . . . . . . . . . . . . . . . . 179
Check new SMS . . . . . . . . . . . . . 184
Confirm Settings
Restrictions . . . . . . . . . . . . . . . 113
Ring tone/Image . . . . . . . . . . . . 78
Checking an address list. . . . . . . 177
Checking call times and charges
. . 293
Checking the i-
α
ppli information
. . 189
Checking the i-motion details . . . 152
CHG camera-mode. . . . . . . . . . . 122
Choku-Den . . . . . . . . . . . . . . . . . . 78
Clear learned (Character entry)
. . . 310
Client certificate . . . . . . . . . . . . . 138
Clock Alarm Tone set . . . . . . . . . . 85
Clock display . . . . . . . . . . . . . . . . . 93
Clock display setting (indicator display)
. . . 92
Clock setting . . . . . . . . . . . . . . . . . 45
Close-up mode . . . . . . . . . . . . . . 118
CLR (t) key . . . . . . . . . . . . . . . 35
Column search (Phonebook) . . . . 74
Common phrases . . . . . . . . . . . . 359
Communication mode . . . . . . . . . 251
Component names and functions
. . 24
Composite image (4 images) . . . 230
Continuous mode . . . . . . . . . . . . 124
Continuous standby time . . . . . . . 42
Continuous talk time . . . . . . . . . . . 42
Convert readings to kanji . . . . . . 305
Cookie settings . . . . . . . . . . . . . . 222
Copy
Character. . . . . . . . . . . . . . . . . 308

398
Index/Quick Manual
From microSD to Phone . . . . . .249
From Phone to microSD . . . . . .248
To the different folder in the microSD
. . .250
Copy to microSD
Images, etc. . . . . . . . . . . . . . . .249
Phonebook, etc. (PIM data) . . .248
Copy to Phone
Images, etc. . . . . . . . . . . . . . . .250
Phonebook, etc. (PIM data) . . .249
Copy to the FOMA terminal
Images, etc. . . . . . . . . . . . . . . .250
Phonebook, etc. (PIM data) . . .249
Copyright . . . . . . . . . . . . . . . . . . . .20
Correct backlight (Edit image) . . .232
Cost limit setting. . . . . . . . . . . . . .294
Country code . . . . . . . . . . . . . . . .332
Cut (Text) . . . . . . . . . . . . . . . . . . .308
K
D
Data Box
Folder structure . . . . . . . . . . . .224
Folder (create/delete/edit) . . . .253
Data broadcast. . . . . . . . . . . . . . .212
Data Communication . . . . . . . . . .325
Data exchange (OBEX™ connection)
. . .326
Data security serv. . . . . . . . . . . . .115
Image . . . . . . . . . . . . . . . . . . . .229
Mail. . . . . . . . . . . . . . . . . . . . . .176
Phonebook . . . . . . . . . . . . . . . . .79
Datalink software
→
DOCOMO keitai datalink
Date setting . . . . . . . . . . . . . . . . . .45
DC adapter. . . . . . . . . . . . . . . . . . .42
Deco-mail
Compose/send . . . . . . . . . . . . .158
Compose/send (Template) . . . .159
Decomail-picture (download) . . . .146
Decorate PI . . . . . . . . . . . . . . . . .157
Delete
Bookmark . . . . . . . . . . . . . . . . .143
Channel list. . . . . . . . . . . . . . . .210
Character . . . . . . . . . . . . . . . . .307
Chara-den. . . . . . . . . . . . . . . . .238
Cookie (Full Browser). . . . . . . .222
Delete all bookmarks . . . . . . . .142
Delete all images (own data) . .253
Delete all mails (read/received/sent)
. .173
Delete all melodies (own data)
. .253
Delete all movies (own data) . .253
Document . . . . . . . . . . . . . . . . .262
Document viewer . . . . . . .262, 266
Download dictionary . . . . . . . . .310
Folder (microSD) . . . . . . . . . . .253
Folder (Phone) . . . . . . . . . . . . . 253
i-αppli . . . . . . . . . . . . . . . . . . . . 188
Image. . . . . . . . . . . . . . . . . . . . 229
Kisekae Tool. . . . . . . . . . . . . . . 243
Mail . . . . . . . . . . . . . . . . . 175, 176
Melody . . . . . . . . . . . . . . . . . . . 242
Message . . . . . . . . . . . . . . . . . 180
Movie/i-motion . . . . . . . . . . . . . 234
Music . . . . . . . . . . . . . . . . . . . . 274
Music&Video Channel . . . . . . . 270
Own dictionary . . . . . . . . . . . . . 309
PDF data . . . . . . . . . . . . . . . . . 262
Phonebook (detail screen). . . . . 76
Phonebook (list screen) . . . . . . . 74
Playlist (music). . . . . . . . . . . . . 275
Received calls . . . . . . . . . . . . . . 54
Record message/Voice memo/VP message
. . . 66
Redial/Dialed calls . . . . . . . . . . . 54
Screen memo . . . . . . . . . . . . . 144
shortcut icon . . . . . . . . . . . . . . . 96
Storage area . . . . . . . . . . . . . . 215
Template . . . . . . . . . . . . . . . . . 160
Text memo . . . . . . . . . . . . . . . . 296
To Do list . . . . . . . . . . . . . . . . . 288
ToruCa . . . . . . . . . . . . . . . . . . . 205
URL history . . . . . . . . . . . . . . . 142
Video . . . . . . . . . . . . . . . . . . . . 236
Voice . . . . . . . . . . . . . . . . . . . . 293
1seg (Booking program/Timer recording)
. . 215
Delete receiver . . . . . . . . . . . . . . 157
Description (Operation procedure)
. . 36
Desktop holder . . . . . . . . . . . . . . . 43
Dial lock. . . . . . . . . . . . . . . . . . . . 102
Dialed calls . . . . . . . . . . . . . . . . . . 53
Dictionary . . . . . . . . . . . . . . . . . . 296
Dictionary setting (Download dictionary)
. . . 310
Dictionary (download) . . . . . . . . . 146
Digital broadcasting. . . . . . . . . . . 208
Display
Backlight . . . . . . . . . . . . . . . . . . 90
Color pattern/background . . . . . 91
Font . . . . . . . . . . . . . . . . . . . . . . 93
How to view the display . . . . . . . 27
Shield view. . . . . . . . . . . . . . . . . 90
Display design . . . . . . . . . . . . . . . . 91
Display during dialing/receiving calls
. . . 88
Display during dialing/receiving
videophone calls . . . . . . . . . . . . . . 88
Display during mail/message checking
. . . 88
Display operator name (Overseas)
. . 337
Display setting . . . . . . . . . . . . . 67, 88
Display when the FOMA terminal is turned on
. . 88
Display while receiving a call . . . . 59
Displaying menu . . . . . . . . . . . . . . 91
Displaying SSL pages. . . . . . . . . 138
Disp. call/receive No. . . . . . . . . . . 90
Disp. phonebook image . . . . . . . . 89
Disp. Software info (i-αppli). . . . . 186
DOCOMO CA certificate. . . . . . . 138
DOCOMO keitai datalink . . . . . . 329
Document viewer . . . . . . . . . . . . 263
Display. . . . . . . . . . . . . . . . . . . 263
Guide to the document list . . . 263
Operation. . . . . . . . . . . . . . . . . 263
Scroll . . . . . . . . . . . . . . . . . . . . 264
Searching for text . . . . . . . . . . 264
Double-byte . . . . . . . . . . . . . . . . 306
Download
Chaku-Uta-Full® . . . . . . . . . . . 272
Chara-den . . . . . . . . . . . . . . . . 146
Charged contents . . . . . . . . . . 144
Client certificate. . . . . . . . . . . . 150
Decomail®-picture . . . . . . . . . . 146
Dictionary . . . . . . . . . . . . . . . . 146
i-αppli . . . . . . . . . . . . . . . . . . . 186
Image . . . . . . . . . . . . . . . . . . . 144
i-melody. . . . . . . . . . . . . . . . . . 145
i-motion . . . . . . . . . . . . . . . . . . 152
Kisekae Tool . . . . . . . . . . . . . . 146
PDF data . . . . . . . . . . . . . . . . . 145
Template . . . . . . . . . . . . . . . . . 146
ToruCa. . . . . . . . . . . . . . . . . . . 146
Download dictionary setting . . . . 310
Downloading charged contents
. . . 144
Downloading remaining data
Chaku-Uta-Full® . . . . . . . . . . . 272
i-motion . . . . . . . . . . . . . . . . . . 233
Kisekae Tool . . . . . . . . . . . . . . 242
Downloading the program. . . . . . 269
DPOF setting . . . . . . . . . . . . . . . 252
Driving mode→Public mode
Dual mode (2in1) . . . . . . . . . . . . 320
Dual Network . . . . . . . . . . . . . . . 316
K
E
Early warning “Area Mail” . . . . . . 181
Earphone/microphone with switch
. . 298
Earpiece volume adjustment . . . . 61
Earthquake early warning. . . . . . 181
Easy search . . . . . . . . . . . . . . . . . . 4
Edit
Draft mail. . . . . . . . . . . . . . . . . 161
Image . . . . . . . . . . . . . . . . . . . 231
Movie/i-motion. . . . . . . . . . . . . 235

399
Index/Quick Manual
Phonebook . . . . . . . . . . . . . . . . 76
Edit file name
Image . . . . . . . . . . . . . . . . . . . 228
Melody . . . . . . . . . . . . . . . . . . 241
Movie/i-motion . . . . . . . . . . . . 234
Edit image . . . . . . . . . . . . . . . . . 231
Edit title
Bar code reader . . . . . . . . . . . 130
Bookmark . . . . . . . . . . . . . . . . 143
Chara-den. . . . . . . . . . . . . . . . 238
Document . . . . . . . . . . . . . . . . 262
Download dictionary . . . . . . . . 310
Image . . . . . . . . . . . . . . . . . . . 228
Melody . . . . . . . . . . . . . . . . . . 241
microSD . . . . . . . . . . . . . . . . . 248
Movie/i-motion . . . . . . . . . . . . 233
Music&Video Channel . . . . . . 271
Original animation. . . . . . . . . . 231
PDF data. . . . . . . . . . . . . . . . . 262
Screen memo . . . . . . . . . . . . . 144
Shortcut icon. . . . . . . . . . . . . . . 95
Template . . . . . . . . . . . . . . . . . 160
Video. . . . . . . . . . . . . . . . . . . . 236
Edit (Mail) . . . . . . . . . . . . . . . . . . 176
English display . . . . . . . . . . . . . . . 45
English Guidance. . . . . . . . . . . . 316
Entering a mail address from the
address list. . . . . . . . . . . . . . . . . 156
Entering a mail address from the
phonebook . . . . . . . . . . . . . . . . . 156
Entering common phrases . . . . . 307
Entering numbers. . . . . . . . . . . . . 35
Entering security code . . . . . . . . . 35
Enter/add an address. . . . . . . . . 156
Erase/play memo (voice/movie) . . 65
Error message list . . . . . . . . . . . 368
Export administration regulations
. . 394
K
F
Face marks list . . . . . . . . . . . . . . 358
Favorite channel (i-Channel) . . . 153
FeliCa. . . . . . . . . . . . . . . . . . . . . 202
FeliCa mark (e)
Acquire ToruCa . . . . . . . . . . . . 204
IC card authentication. . . . . . . 111
iC communication . . . . . . . . . . 259
Osaifu-Keitai . . . . . . . . . . . . . . 203
File attached mail. . . . . . . . . . . . 160
File restriction. . . . . . . . . . . . . . . 228
File size . . . . . . . . . . . . . . . . . . . 122
Filter function
Mail . . . . . . . . . . . . . . . . . . . . . 175
Message. . . . . . . . . . . . . . . . . .180
To Do list . . . . . . . . . . . . . . . . .288
ToruCa . . . . . . . . . . . . . . . . . . .205
FirstPass setting . . . . . . . . . . . . .150
Flash movie . . . . . . . . . . . . . . . . .140
Folder lock . . . . . . . . . . . . . . . . . .112
Folder (create/delete/edit)
Bookmark. . . . . . . . . . . . . . . . .142
Data Box . . . . . . . . . . . . . . . . .253
Mail. . . . . . . . . . . . . . . . . . . . . .173
microSD . . . . . . . . . . . . . . . . . .253
FOMA card (UIM)
Add to phonebook . . . . . . . . . . .70
Functional differences . . . . . . . . 40
Insert/remove . . . . . . . . . . . . . . .39
Managing SMS. . . . . . . . . . . . .254
Managing the phonebook entry
. . .254
Manufacturer number. . . . . . . . 137
Operational restriction function
. . . 39
Security code . . . . . . . . . . . . . .100
Setting for replacing . . . . . . . . . .40
Font . . . . . . . . . . . . . . . . . . . . . . . .93
Font size
CHG input size. . . . . . . . . . . . .303
Font . . . . . . . . . . . . . . . . . . . . . .93
Font size (i-mode) . . . . . . . . . .148
Font size (Mail). . . . . . . . . . . . .178
Phonebook (Big font/Standard font)
. . .74
Ticker size setting (i-Channel)
. .154
Format (microSD) . . . . . . . . . . . .251
Forward (Mail) . . . . . . . . . . . . . . .165
Forwarding image . . . . . . . . . . . .260
Frame (Edit image) . . . . . . . . . . .232
Framed photography . . . . . . . . . .126
Full Browser. . . . . . . . . . . . . . . . .217
How to view the screen . . . . . .218
Operations on the screen. . . . .219
Full Browser settings . . . . . . . . . .221
Function display. . . . . . . . . . . . . . .32
Function menu. . . . . . . . . . . . . . . .37
K
G
Go to location . . . . . . . . . . . . . . .141
GPRS network. . . . . . . . . . . . . . .332
Group search (Phonebook) . . . . . . 74
GSM network. . . . . . . . . . . . . . . .332
Guide to screens
Document view. . . . . . . . . . . . .263
Full Browser . . . . . . . . . . . . . . .218
Music Player. . . . . . . . . . . . . . .277
PDF data . . . . . . . . . . . . . . . . .262
Rec. Chara-den . . . . . . . . . . . .239
Shooting . . . . . . . . . . . . . . . . . 121
ToruCa display. . . . . . . . . . . . . 204
Videophone . . . . . . . . . . . . . . . . 49
1seg. . . . . . . . . . . . . . . . . . . . . 210
Guide to the PDF list. . . . . . . . . . 262
Guide to the shooting screen (camera)
. . 121
K
H
Handling with care . . . . . . . . . . . . 18
Hands-free switch (videophone) . . 67
Hands-free (switch during a call)
. . . 52
Header/Signature . . . . . . . . . . . . 179
Headset sw to dial. . . . . . . . . . . . 298
Headset usage setting . . . . . . . . . 85
High-speed Ir send (IrSS) . . . . . . 258
Holding (during incoming call, talking)
. . 62
Holiday (check) . . . . . . . . . . . . . . 287
Home URL (i-mode) . . . . . . . . . . 148
Host selection (i-mode). . . . . . . . 149
How to refer to this manual . . . . . . . 2
How to use the function keys . . . . 32
How to view the main menu . . . . . 29
K
I
i-αppli . . . . . . . . . . . . . . . . . . . . . 185
Adjusting the volume . . . . . . . . 189
Auto-start set . . . . . . . . . . . . . . 197
Auto-start time . . . . . . . . . . . . . 197
Checking the security error history
. . . 189
Delete . . . . . . . . . . . . . . . . . . . 188
Download. . . . . . . . . . . . . . . . . 186
Installed software. . . . . . . . . . . 190
Launch (from a site/mail). . . . . 197
Storage capacity . . . . . . . . . . . 386
Upgrade. . . . . . . . . . . . . . . . . . 199
i-αppli info
Launch/quit . . . . . . . . . . . . . . . 187
Mail-linked i-αppli. . . . . . . . . . . 186
What is an i-αppli?. . . . . . . . . . 186
i-αppli stand-by screen
End stand-by info. . . . . . . . . . . 199
Release . . . . . . . . . . . . . . . . . . 199
Set . . . . . . . . . . . . . . . . . . . . . . 198
IC card authentic. . . . . . . . . . . . . 111
IC card lock setting . . . . . . . . . . . 206
iC communication . . . . . . . . . . . . 259
FeliCa mark (e) . . . . . . . . . . 259
Send/Receive all data . . . . . . . 260
Send/receive one data. . . . . . . 259
IC lock (power-off). . . . . . . . . . . . 206
iC Transfer Service . . . . . . . . . . . 202
iC trans. all (iC communication)
. . . 260

400
Index/Quick Manual
i-Channel setting . . . . . . . . . . . . .154
Icon description
Activate 1seg screen . . . . . . . .210
Display . . . . . . . . . . . . . . . . . . . .27
Document viewer . . . . . . . . . . .263
i-αppli . . . . . . . . . . . . . . . . . . . .189
Image . . . . . . . . . . . . . . . . . . . .139
Image/movie. . . . . . . . . . . . . . .226
Kisekae Tool . . . . . . . . . . . . . . .243
Mail detail screen . . . . . . . . . . .172
Mail folder list screen . . . . . . . .171
Mail list screen . . . . . . . . . . . . .171
Melody . . . . . . . . . . . . . . . . . . .241
MessageR/F screens . . . . . . . .180
Music . . . . . . . . . . . . . . . . . . . .273
Music&Video Channel screen
. . .269
My shortcut (paste). . . . . . . . . . .94
My shortcut (providing information)
. .94
Overseas use . . . . . . . . . . . . . .333
PDF data . . . . . . . . . . . . . . . . .262
Received calls/missed calls . . . .53
Redial/Dialed calls . . . . . . . . . . .53
Ring tone/Image . . . . . . . . . . . . .77
Shooting menu . . . . . . . . . . . . .122
Shooting screen (camera) . . . .121
Text entry (edit) screen. . . . . . .302
Tool bar (Document view). . . . .263
Tool bar (PDF data) . . . . . . . . .264
TV link list . . . . . . . . . . . . . . . . .213
Vibrator. . . . . . . . . . . . . . . . . . . .84
Video player . . . . . . . . . . . . . . .236
Videophone screen. . . . . . . . . . .49
Icon operation
Icons setting . . . . . . . . . . . . . . . .96
My shortcut icon . . . . . . . . . . . . .95
Icons setting. . . . . . . . . . . . . . . . . .96
Illumination flash (shooting) . . . . .119
Illumination priority. . . . . . . . . . . . .93
Illumination set. . . . . . . . . . . . . . . .92
Illumination (for missed call/new mail)
. .64
Image
Copy from microSD to Phone. .250
Copy from Phone to microSD. .249
Delete . . . . . . . . . . . . . . . . . . . .229
Display (microSD). . . . . . . . . . .248
Display (Phone) . . . . . . . . . . . .225
Download . . . . . . . . . . . . . . . . .144
Edit . . . . . . . . . . . . . . . . . . . . . .231
Move. . . . . . . . . . . . . . . . . . . . .228
Save (from site/message). . . . .144
Saving the attached file . . . . . .167
Send attach file. . . . . . . . . . . . .160
Shooting. . . . . . . . . . . . . . . . . . 123
Size . . . . . . . . . . . . . . . . . . . . . 119
Storage capacity . . . . . . . . . . . 386
Switching list display mode . . . 226
Titles and file names . . . . . . . . 228
Image display in the picture list . . . 35
Image effect (Edit image) . . . . . . 231
Image priority . . . . . . . . . . . . . . . . 83
Image stamp (Edit image) . . . . . . 232
i-melody (download) . . . . . . . . . . 145
iMenu. . . . . . . . . . . . . . . . . . . . . . 136
i-mode host . . . . . . . . . . . . . . . . . 149
i-mode info
Displaying SSL pages . . . . . . . 138
Image display. . . . . . . . . . . . . . 139
Jumping to previous/next pages
. . 139
Operations for viewing sites . . . 139
Scroll function . . . . . . . . . . . . . 139
Start/exit. . . . . . . . . . . . . . . . . . 136
Viewing the iMenu screen . . . . 136
What is i-mode?. . . . . . . . . . . . 136
i-mode mail →mail
i-mode malfunction check . . . . . . 377
i-mode menu . . . . . . . . . . . . . . . . 136
i-mode password . . . . . . . . . . . . . 100
i-mode settings . . . . . . . . . . . . . . 148
i-mode settings (reset). . . . . . . . . 148
i-motion
Automatic replay . . . . . . . . . . . 152
Copy from microSD to Phone
. . . 250
Copy from Phone to microSD
. . . 249
Delete . . . . . . . . . . . . . . . . . . . 234
Download. . . . . . . . . . . . . . . . . 152
Edit. . . . . . . . . . . . . . . . . . . . . . 235
Folder (create/delete/edit) . . . . 253
Move . . . . . . . . . . . . . . . . . . . . 234
Move among Phone/microSD
. . 250
Playback (microSD) . . . . . . . . . 248
Playback (Phone). . . . . . . . . . . 233
Save (from site) . . . . . . . . . . . . 152
Saving the attached file . . . . . . 167
Send attach file . . . . . . . . . . . . 160
Storage capacity . . . . . . . . . . . 386
Trimming (Edit i-motion) . . . . . . 235
What is i-motion? . . . . . . . . . . . 151
Inbox . . . . . . . . . . . . . . . . . . . . . . 170
In-Call Function Selection . . . . . . 317
In-car Hands-free . . . . . . . . . . . . . 59
Incoming Call Mng . . . . . . . . . . . 317
Indicator display (setting) . . . . . . . 92
Info notice setting . . . . . . . . . . . . . 64
Infrared data exchange. . . . . . . . 257
High-speed Ir send (IrSS™) . . 258
Infrared data port. . . . . . . . . . . 257
Send/Receive all Ir data . . . . . 258
Send/receive Ir data . . . . . . . . 258
Infrared remote control . . . . . . . . 261
Initial setting . . . . . . . . . . . . . . . . . 45
Initialize. . . . . . . . . . . . . . . . . . . . 300
Initialize→Reset
Intellectual property right . . . . . . . 20
International Access Code . . . . . 334
International calls . . . . . . . . . . . . . 51
International ID Code . . . . . . . . . 334
International roaming . . . . . . . . . 332
Internet connection. . . . . . . . . . . 141
Interval/number for shooting
(continuous mode) . . . . . . . . . . . 125
Int’l dial assistance . . . . . . . . . . . . 52
ISP connection . . . . . . . . . . . . . . 149
K
J
JAN code . . . . . . . . . . . . . . . . . . 129
K
K
Key operation
Holding down. . . . . . . . . . . . . . . 26
How to use the function keys . . 32
Key names and functions . . . . . 24
Short cut key function . . . . . . . . 30
Key (Character assignment) . . . . 350
Keypad light setting . . . . . . . . . . . 90
Keypad lock . . . . . . . . . . . . . . . . 110
Kisekae Tool
Download . . . . . . . . . . . . . . . . 146
Manage . . . . . . . . . . . . . . . . . . 242
Set. . . . . . . . . . . . . . . . . . . . . . . 97
Storage capacity . . . . . . . . . . . 386
Kuten code . . . . . . . . . . . . . . . . . 309
Kuten code list
→
Refer to the provided CD-ROM
K
L
Large Menu. . . . . . . . . . . . . . . . . . 33
Launching i-αppli from a mail . . . 198
Launching i-αppli from a site . . . 198
Launching i-
α
ppli from Data broadcast
. . 198
Launching i-αppli from IC card . . 198
Launching i-αppli from ToruCa . . 198
Launching i-αppli with Infrared
data exchange . . . . . . . . . . . . . . 198
Launching i-αppli with the Bar
code reader . . . . . . . . . . . . . . . . 198
Lens selector switch . . . . . . . . . . 118

401
Index/Quick Manual
Light setting (backlight) . . . . . . . . 90
Line feed. . . . . . . . . . . . . . . . . . . 306
Location information. . . . . . . . . . 148
Lock function
Call setting w/o ID. . . . . . . . . . 114
Dial lock/Omakase Lock . . . . . 101
IC card authentic. . . . . . . . . . . 111
IC card lock setting . . . . . . . . . 206
Keypad lock . . . . . . . . . . . . . . 110
Mail box lock/Folder lock. . . . . 112
Original lock . . . . . . . . . . . . . . 106
Reject unknown . . . . . . . . . . . 114
Restrictions . . . . . . . . . . . . . . . 112
Ring time (sec.). . . . . . . . . . . . 114
Secret (data only) mode . . . . . 103
Secret folder . . . . . . . . . . . . . . 104
Self mode . . . . . . . . . . . . . . . . 115
Side key guard . . . . . . . . . . . . 112
Lower case. . . . . . . . . . . . . . . . . 306
K
M
Macro lens . . . . . . . . . . . . . . . . . 118
Mail address
Search (Phonebook). . . . . . . . . 74
Store (receiver’s/sender’s address)
. . 166
Mail address storing. . . . . . . . . . 166
Mail box lock. . . . . . . . . . . . . . . . 112
Mail info
Changing the list screen display mode
. . . 170
Changing the mail character size
. . 170
Compose/send . . . . . . . . . . . . 156
Displaying mail menu . . . . . . . 156
Guide to the folder list screens
. . 171
Guide to the mail detail screens
. . 172
Guide to the mail list screens
. . 171
Mail display (Mail box) . . . . . . 170
Read out mail . . . . . . . . . . . . . 168
Viewing new i-mode mail . . . . 163
What is i-mode Mail? . . . . . . . 156
When you receive a message
. . 162
Mail message (send/receive)
Auto receive mail . . . . . . . . . . 162
Edit . . . . . . . . . . . . . . . . . . . . . 176
Forward. . . . . . . . . . . . . . . . . . 165
Receive option . . . . . . . . . . . . 164
Reply. . . . . . . . . . . . . . . . . . . . 165
Resend . . . . . . . . . . . . . . . . . . 176
Send (from a site/mail) . . . . . . 147
Sending draft i-mode mail. . . . 161
View (new message). . . . . . . . 163
Mail settings
Auto-sort settings . . . . . . . . . . 174
Check settings . . . . . . . . . . . . .178
Display during sending/receiving mails
. . . 88
Mail box lock/Folder lock . . . . .112
Mail Setting . . . . . . . . . . . . . . .178
Mail/Msg. ring time. . . . . . . . . . .85
Reset mail settings. . . . . . . . . .178
Set check new messages. . . . .179
Mail To function . . . . . . . . . . . . . .147
Mail (compose)
Change rcv. type . . . . . . . . . . .157
Delete receiver . . . . . . . . . . . . .157
Entering an address from Mail member
. . . 156
Saving i-mode mail. . . . . . . . . .161
Send attach file . . . . . . . . . . . .160
Mail (manage)
Copy from microSD to Phone
. . .249
Copy from Phone to microSD
. . .248
Delete. . . . . . . . . . . . . . . .175, 176
Display (Inbox) . . . . . . . . . . . . .170
Folder (create/delete/edit) . . . .173
Move (among folders) . . .175, 176
No. of messages . . . . . . . 173, 175
PIM data display. . . . . . . . . . . .247
Protect ON/OFF . . . . . . . .175, 176
Saving the attached file . . . . . .166
Search . . . . . . . . . . . . . . . . . . .175
Storage capacity . . . . . . . . . . .386
Storing addresses in mail members
. .162
View (unread mail) . . . . . . . . . .163
Mail (Ring tone)
Adjusting the volume . . . . . . . . .61
Priority . . . . . . . . . . . . . . . . . . . .83
Ring time . . . . . . . . . . . . . . . . . .85
Select . . . . . . . . . . . . . . . . . . . . .82
Mail-linked i-αppli. . . . . . . . . . . . .186
Main menu change . . . . . . . . . . . .91
Main menu (sort) . . . . . . . . . . . . .284
Making phone calls . . . . . . . . . . . .48
Chaku-moji . . . . . . . . . . . . . . . . .55
Choku-Den. . . . . . . . . . . . . . . . .79
Dialing . . . . . . . . . . . . . . . . . . . .48
Earphone/microphone with switch
. .299
From site/mail. . . . . . . . . . . . . .147
International calls . . . . . . . . . . . .51
Overseas Use . . . . . . . . . . . . .335
Phonebook. . . . . . . . . . . . . . . . .73
Received calls . . . . . . . . . . . . . .53
Redial/Dialed calls . . . . . . . . . . .53
Two-touch dialing . . . . . . . . . . . .79
Malfunction check (i-mode) . . . . .377
Malfunction checklist . . . . . . . . . .364
Manner mode . . . . . . . . . . . . . . . .86
Manner mode set . . . . . . . . . . . . . 86
Manner mode when earphones are connected
. . . 87
Marker stamp (Edit image) . . . . . 232
Marking a checkbox . . . . . . . . . . . 38
M-Continuous mode . . . . . . . . . . 124
Melody
Copy from microSD to Phone
. . 250
Copy from Phone to microSD
. . 249
Delete . . . . . . . . . . . . . . . . . . . 242
Download. . . . . . . . . . . . . . . . . 145
Folder (create/delete/edit) . . . . 253
Move . . . . . . . . . . . . . . . . . . . . 242
Operations during playback. . . 241
Playback (microSD). . . . . . . . . 248
Playback (Phone) . . . . . . . . . . 240
Playlist . . . . . . . . . . . . . . . . . . . 242
Pre-installed data. . . . . . . . . . . . 82
Save (from site) . . . . . . . . . . . . 145
Saving the attached file . . . . . . 166
Send attach file . . . . . . . . . . . . 160
Storage capacity . . . . . . . . . . . 386
Titles and file names . . . . . . . . 241
Melody Call setting . . . . . . . . . . . . 84
Melody linkage (vibrator). . . . . . . . 84
Memory card→microSD
Memory info
Booking list . . . . . . . . . . . . . . . 215
Chara-den list . . . . . . . . . . . . . 238
Document list. . . . . . . . . . . . . . 262
Image list . . . . . . . . . . . . . . . . . 228
Melody list . . . . . . . . . . . . . . . . 241
Movie list . . . . . . . . . . . . . . . . . 234
Movie mode. . . . . . . . . . . . . . . 127
PDF list . . . . . . . . . . . . . . . . . . 262
Still image/continuous mode . . 123
Video list . . . . . . . . . . . . . . . . . 236
Memory No. search (Phonebook)
. . 74
Menu display set . . . . . . . . . . . . . . 91
Menu function list . . . . . . . . . . . . 340
Menu numbers for function display
. . . 32
Menu operation description. . . . . . 36
Message
Auto receive mail . . . . . . . . . . . 162
Delete . . . . . . . . . . . . . . . . . . . 180
No. of messages . . . . . . . . . . . 180
Protect ON/OFF. . . . . . . . . . . . 180
Set check new messages . . . . 179
Storage capacity . . . . . . . . . . . 386
View (read/new message) . . . . 180
Message display (Mail settings)
. . 178
Message info
Icon description . . . . . . . . . . . . 180

402
Index/Quick Manual
When you receive a message
. . .179
Message list display . . . . . . . . . . .148
Message (Ring tone)
Adjusting the volume . . . . . . . . .61
Ring time . . . . . . . . . . . . . . . . . .85
Select . . . . . . . . . . . . . . . . . . . . .82
microSD
Data that can be copied . . . . . .246
Displaying images, etc.. . . . . . .248
Displaying phonebook ,etc. (PIM data)
. .247
Folder structure . . . . . . . . . . . .244
Folder (create/delete/edit) . . . .253
Format . . . . . . . . . . . . . . . . . . .251
Handling with care . . . . . . . . . .243
Insert/remove . . . . . . . . . . . . . .244
Storage capacity. . . . . . . . . . . .246
microSD card→microSD
microSD data (i-αppli) . . . . . . . . .200
microSD manager . . . . . . . . . . . .247
microSD mode . . . . . . . . . . . . . . .251
microSD reader/writer . . . . . . . . .252
microSD software. . . . . . . . . . . . .199
Missed call
Check . . . . . . . . . . . . . . . . . . . . .64
Checking the number of missed calls
. . .53
Illumination information. . . . . . . .64
Record . . . . . . . . . . . . . . . . . . . .53
Setting the notification tone . . . .64
Missed calls display . . . . . . . . . . .114
Mobile phone manufacturer number
. . .137
Movable contents. . . . . . . . . . . . .250
Move (among folders)
Bookmark . . . . . . . . . . . . . . . . .143
Image . . . . . . . . . . . . . . . . . . . .228
Mail. . . . . . . . . . . . . . . . . .175, 176
Melody . . . . . . . . . . . . . . . . . . .242
Movie/i-motion . . . . . . . . . . . . .234
Music . . . . . . . . . . . . . . . . . . . .274
ToruCa . . . . . . . . . . . . . . . . . . .205
Move (among Phone/microSD)
Chaku-Uta-Full®. . . . . . . . . . . .250
Movie/i-motion . . . . . . . . . . . . .250
Movie
Copy from microSD to Phone. .250
Copy from Phone to microSD. .249
Delete . . . . . . . . . . . . . . . . . . . .234
Edit . . . . . . . . . . . . . . . . . . . . . .235
Move. . . . . . . . . . . . . . . . . . . . .234
Move among Phone/microSD. .250
Movie playing software (for PC)
. . .363
Playback (microSD) . . . . . . . . .248
Playback (Phone) . . . . . . . . . . .233
Playlist . . . . . . . . . . . . . . . . . . . 234
Send attach file . . . . . . . . . . . . 160
Shooting. . . . . . . . . . . . . . . . . . 126
Shooting time. . . . . . . . . . . . . . 120
Storage capacity . . . . . . . . . . . 386
Titles and file names . . . . . . . . 228
Movie mode. . . . . . . . . . . . . . . . . 126
MTP mode. . . . . . . . . . . . . . . . . . 252
Multi access . . . . . . . . . . . . . . . . 282
Multi access combination patterns
. . 360
Multi Number. . . . . . . . . . . . . . . . 319
Multi window . . . . . . . . . . . . . . . . 140
Multiple-choice . . . . . . . . . . . . . . . 38
Multitask . . . . . . . . . . . . . . . . . . . 283
Music Player . . . . . . . . . . . . . . . . 277
Guide to Music Player screen
. . 277
Operations during playback . . . 278
Play . . . . . . . . . . . . . . . . . . . . . 273
Playlist . . . . . . . . . . . . . . . . . . . 275
Music&Video Channel. . . . . . . . . 268
Music&Video Channel (Storage capacity)
. . 386
My document. . . . . . . . . . . . . . . . 261
My Menu . . . . . . . . . . . . . . . . . . . 141
My picture
Display . . . . . . . . . . . . . . . . . . . 225
Folder (create/delete/edit) . . . . 253
My Profile
Checking your own phone number
. . . 46
Display . . . . . . . . . . . . . . . . . . . 290
Send attach file . . . . . . . . . . . . 160
Store . . . . . . . . . . . . . . . . . . . . 291
My select . . . . . . . . . . . . . . . . . . . . 92
My select display. . . . . . . . . . . . . . 31
K
N
Name search (Phonebook) . . . . . . 74
Network re-search (Overseas) . . 337
Network security code. . . . . . . . . 100
Network services. . . . . . . . . . . . . 311
Additional service. . . . . . . . . . . 324
Call Forwarding . . . . . . . . . . . . 314
Call Forwarding(Int.) . . . . . . . . 338
Call Waiting . . . . . . . . . . . . . . . 313
Caller ID Request . . . . . . . . . . 316
Caller ID req. (Int.) . . . . . . . . . . 338
Dual Network . . . . . . . . . . . . . . 316
English Guidance. . . . . . . . . . . 316
Multi Number . . . . . . . . . . . . . . 319
Nuisance Call Blk. . . . . . . . . . . 315
OFFICEED. . . . . . . . . . . . . . . . 324
Remote access(Int.). . . . . . . . . 338
Remote Control . . . . . . . . . . . . 318
Roam. Guidance (Int.). . . . . . . 338
Service Numbers. . . . . . . . . . . 317
Voice Mail . . . . . . . . . . . . . . . . 312
Voice Mail(Int.). . . . . . . . . . . . . 338
2in1 . . . . . . . . . . . . . . . . . . . . . 320
New mail
Display. . . . . . . . . . . . . . . . . . . 163
Illumination information . . . . . . . 64
Setting the notification tone. . . . 64
Noise reduction. . . . . . . . . . . . . . . 58
Notes on shooting. . . . . . . . . . . . 118
Notice designate calls. . . . . . . . . 294
Notification tone
Charging . . . . . . . . . . . . . . . . . . 85
Key . . . . . . . . . . . . . . . . . . . . . . 85
Missed call/new mail . . . . . . . . . 64
Notify Caller ID . . . . . . . . . . . . . . . 56
Calling with “186”/“184” added
. . . 56
Setting for each dial. . . . . . . . . . 56
Now update (Software update). . 380
No. of messages
Mail . . . . . . . . . . . . . . . . . 173, 175
Message . . . . . . . . . . . . . . . . . 180
Screen memo . . . . . . . . . . . . . 144
Template . . . . . . . . . . . . . . . . . 160
Ntfy switch-mode . . . . . . . . . . . . . 67
Nuisance Call Blk . . . . . . . . . . . . 315
Nuisance Call Blocking priority . . 116
Number of data that can be protected
. . 386
Number/Address A (2in1) . . . . . . 320
Number/Address B (2in1) . . . . . . 320
NW search mode (Overseas) . . . 336
K
O
OBEX™ connection . . . . . . 260, 326
OFFICEED . . . . . . . . . . . . . . . . . 324
Omakase Lock . . . . . . . . . . . . . . 102
Online timer recording
(Gガイド番組表リモコン) . . . . . 194
Open tab setting (i-mode). . . . . . 148
Operation description in this manual
. . . 36
Operation descriptions . . . . . . . . . 36
Operation for incoming calls when
the Public mode is set. . . . . . . . . . 63
Operations during playback
Melody. . . . . . . . . . . . . . . . . . . 241
Music Player . . . . . . . . . . . . . . 278
Video player . . . . . . . . . . . . . . 237
Optional equipment . . . . . . . . . . . 22
Options/Accessories. . . . . . . . . . 363
Original animation (playback) . . . 231
Original animations (create) . . . . 230

403
Index/Quick Manual
Original lock . . . . . . . . . . . . . . . . 106
Original manner mode . . . . . . . . . 88
Osaifu-Keitai. . . . . . . . . . . . . . . . 202
IC card lock setting . . . . . . . . . 206
Read/write data. . . . . . . . . . . . 202
Using Osaifu-Keitai . . . . . . . . . 203
Osaifu-Keitai i-αppli . . . . . . . . . . 202
Outbox . . . . . . . . . . . . . . . . . . . . 170
Own dictionary . . . . . . . . . . . . . . 309
K
P
Packet communication . . . . . . . . 326
Page display
Bookmark . . . . . . . . . . . . . . . . 142
From site/mail . . . . . . . . . . . . . 147
i-Channel . . . . . . . . . . . . . . . . 153
i-mode site . . . . . . . . . . . . . . . 136
Multi window . . . . . . . . . . . . . . 140
My Menu. . . . . . . . . . . . . . . . . 141
Screen memo . . . . . . . . . . . . . 143
URL history . . . . . . . . . . . 138, 141
Website. . . . . . . . . . . . . . . . . . 141
Website designed for PC . . . . 218
Password change (i-mode). . . . . 141
Paste (Text) . . . . . . . . . . . . . . . . 309
Pasting desktop icons . . . . . . . . . 95
Pattern data update . . . . . . . . . . 384
Pause dial. . . . . . . . . . . . . . . . . . . 57
PC Connection. . . . . . . . . . . . . . 325
PDF data . . . . . . . . . . . . . . . . . . 261
Clipping a page. . . . . . . . . . . . 266
Display . . . . . . . . . . . . . . . . . . 261
Download . . . . . . . . . . . . . . . . 145
i-mode bookmark . . . . . . . . . . 265
Operation . . . . . . . . . . . . . . . . 263
Save . . . . . . . . . . . . . . . . . . . . 145
Scroll. . . . . . . . . . . . . . . . . . . . 264
Searching for text . . . . . . . . . . 264
Phone call (Ring tone)
Adjusting the volume . . . . . . . . 61
Priority . . . . . . . . . . . . . . . . . . . 83
Select . . . . . . . . . . . . . . . . . . . . 82
Phone number
Check (your own) . . . . . . . . . . . 46
Re-entering phone numbers . . . 48
Search (Phonebook). . . . . . . . . 74
Phone number notification . . . . . . 46
Phone To function . . . . . . . . . . . 147
Phonebook. . . . . . . . . . . . . . . . . . 69
Add entries (from other screens)
. . 72
Add entries (Phone, UIM) . . . . . 70
Call acceptation . . . . . . . . . . . 112
Call forwarding (Restrictions)
. . .112
Call rejection . . . . . . . . . . . . . .112
Compose message . . . . . . . . .157
Copy from microSD to Phone
. . .249
Copy from Phone to microSD
. . .248
Delete (detail screen). . . . . . . . .76
Delete (list screen) . . . . . . . . . . .74
Difference between phone and UIM
. . .70
Edit. . . . . . . . . . . . . . . . . . . . . . .76
List screen (Tab display). . . . . . .73
No. of phonebooks . . . . . . . . . . .76
PIM data display. . . . . . . . . . . .247
Reject unknown . . . . . . . . . . . .114
Renaming group name. . . . . . . .72
Restrict dialing . . . . . . . . . . . . .112
Ring tone/Image. . . . . . . . . . . . .77
Saving the attached file . . . . . .167
Search . . . . . . . . . . . . . . . . . . . .73
Secret code setting . . . . . . . . . .75
Secret data. . . . . . . . . . . . . . . .103
Send attach file . . . . . . . . . . . .160
Storage capacity . . . . . . . . . . .386
Stored data. . . . . . . . . . . . . . . . .70
Storing data from sites . . . . . . .140
Voice mail (Restrictions). . . . . .112
Photo mode . . . . . . . . . . . . .122, 123
Pictographs list . . . . . . . . . . . . . .353
Pict/Sym continuous entry . . . . . .306
Picture→Image
Picture . . . . . . . . . . . . . . . . . . . . .226
PIN code (PIN1/PIN2) . . . . . . . . .100
PIN setting. . . . . . . . . . . . . . . . . .101
Play
Recorded memo/voice memo . .65
Video player . . . . . . . . . . . . . . .235
Voice . . . . . . . . . . . . . . . . . . . .293
Playlist . . . . . . . . . . . . . . . . . . . . .275
Play/erase recorded messages . . . 65
Play/erase voice memo . . . . . . . . .65
PLMN setting (Overseas) . . . . . .337
Portrait right . . . . . . . . . . . . . . . . . .20
Power saver mode . . . . . . . . . . . . .90
Precautions . . . . . . . . . . . . . . . . . .12
Prefer attachment . . . . . . . . . . . .178
Prefix . . . . . . . . . . . . . . . . . . . . . . .57
Pre-installed data
Chaku-Uta-Full®. . . . . . . . . . . . .82
i-αppli software. . . . . . . . . . . . .190
Ring tone/melody/alarm . . . . . . . 82
拡大メニュー
(Kisekae Tool)
. . . . 97
Preview screen . . . . . . . . . . . . . .233
Preview (SMS). . . . . . . . . . . . . . .183
Print setting (microSD) . . . . . . . . 252
Priority of functions
Alarm notification. . . . . . . . . . . 289
Chara-den setting . . . . . . . . . . . 71
Illumination . . . . . . . . . . . . . . . . 93
Nuisance call blocking functions
. . 116
Ring tone/Image . . . . . . . . . . . . 83
Standby screen . . . . . . . . . . . . . 89
Vibrator . . . . . . . . . . . . . . . . . . . 84
Program playback (Music&Video Channel)
. . . 270
Program setting (Music&Video Channel)
. . 268
Protect
Mail . . . . . . . . . . . . . . . . . 175, 176
Message . . . . . . . . . . . . . . . . . 180
Screen memo . . . . . . . . . . . . . 144
Public mode (Driving mode) . . . . . 62
Public mode (Power OFF). . . . . . . 63
K
Q
QR code . . . . . . . . . . . . . . . . . . . 129
Quality alarm. . . . . . . . . . . . . . . . . 85
Quality setting (camera) . . . . . . . 122
Quick Info setting . . . . . . . . . . . . 216
Quick Manual . . . . . . . . . . . . . . . 408
Quick message . . . . . . . . . . . . . . . 65
Quick silent . . . . . . . . . . . . . . . . . . 60
Quotation mark . . . . . . . . . . . . . . 179
Quote My Profile . . . . . . . . . . . . . 307
K
R
Reading out alarm contents . . . . 290
Reading out rules . . . . . . . . . . . . 168
Reading search (Phonebook) . . . . 74
Receive option (Mail) . . . . . . . . . 164
Received address list . . . . . . . . . 177
Received calls. . . . . . . . . . . . . . . . 53
Receiving display (set) . . . . . . . . . 88
Receiving operation (Public mode)
. . . 63
Receiving phone calls. . . . . . . . . . 59
Receiving phone calls (Earphone/
microphone with switch) . . . . . . . 299
Receiving phone calls (Overseas)
. . 336
Receiving setting (Mail). . . . . . . . 178
Reception level (Signal strength)
. . . 44
Reconnect signal . . . . . . . . . . . . . 58
Record
Voice . . . . . . . . . . . . . . . . . . . . 293
Voice memo. . . . . . . . . . . . . . . 292
Record message setting . . . . . . . . 65
Redial . . . . . . . . . . . . . . . . . . . . . . 53
Referer setting . . . . . . . . . . . . . . 222
Refresh skin tone (Edit image) . . 232

404
Index/Quick Manual
Registered trademark . . . . . . . . . .20
Registering a channel list. . . . . . .209
Reject unknown . . . . . . . . . . . . . .114
Release
Dial lock . . . . . . . . . . . . . . . . . .102
i-αppli stand-by screen . . . . . . .199
Mail protect. . . . . . . . . . . .175, 176
Manner mode . . . . . . . . . . . . . . .86
Message protection . . . . . . . . .180
PIN lock . . . . . . . . . . . . . . . . . .101
Protect for screen memo . . . . .144
Public mode (Driving mode) . . . .62
Public mode (Power OFF) . . . . .63
Restrictions. . . . . . . . . . . . . . . .112
Secret code . . . . . . . . . . . . . . . .75
Secret data . . . . . . . . . . . . . . . .103
Secret (data only) mode . . . . . .103
Vibrator. . . . . . . . . . . . . . . . . . . .84
Release PIN lock . . . . . . . . . . . . .101
Releasing Keypad lock temporarily
. . .110
Remaining data acquisition
Chaku-Uta-Full®. . . . . . . . . . . .272
i-motion. . . . . . . . . . . . . . . . . . .233
Kisekae Tool . . . . . . . . . . . . . . .242
PDF data . . . . . . . . . . . . . . . . .145
Remote access(Int.). . . . . . . . . . .338
Remote control function. . . . . . . .261
Remote Control (Network service)
. .318
Renaming groups (phonebook) . . .72
Reply with quote (Mail) . . . . . . . .165
Reply (Mail) . . . . . . . . . . . . . . . . .165
Resend (Mail). . . . . . . . . . . . . . . .176
Reserved update (Software update)
. . .381
Reset
Auto reset total cost . . . . . . . . .294
Clear learned . . . . . . . . . . . . . .310
i-mode settings (reset) . . . . . . .148
Initialize. . . . . . . . . . . . . . . . . . .300
My profile . . . . . . . . . . . . . . . . .291
My shortcut. . . . . . . . . . . . . . . . .96
Reset channel setting. . . . . . . .215
Reset (Full Browser). . . . . . . . .221
Reset i-Channel . . . . . . . . . . . .154
Reset mail settings . . . . . . . . . .178
Reset menu op. log . . . . . . . . . .91
Reset My select . . . . . . . . . . . . .92
Reset settings. . . . . . . . . . . . . .299
Reset total . . . . . . . . . . . . . . . .294
Reset TV setting. . . . . . . . . . . .215
Reset channel setting . . . . . . . . .215
Reset desktop . . . . . . . . . . . . . . . .96
Reset i-Channel . . . . . . . . . . . . . .154
Reset menu op. log . . . . . . . . . . . . 91
Reset settings . . . . . . . . . . . . . . . 299
Reset total (call time/charge). . . . 294
Restrict dialing. . . . . . . . . . . . . . . 112
Restrict dialing (Restrictions) . . . 112
Restriction
Dial lock/Omakase Lock . . . . . 101
IC card lock setting . . . . . . . . . 206
Keypad lock . . . . . . . . . . . . . . . 110
Original lock . . . . . . . . . . . . . . . 106
Restrict dialing . . . . . . . . . . . . . 112
Self mode. . . . . . . . . . . . . . . . . 115
Side key guard. . . . . . . . . . . . . 112
Restrictions . . . . . . . . . . . . . . . . . 112
Restrictions (release) . . . . . . . . . 112
Retouch (Edit image) . . . . . . . . . 231
Ring time (sec.) . . . . . . . . . . . . . . 114
Ring tone
Adjusting the volume . . . . . . . . . 61
Increasing (Step) . . . . . . . . . . . . 61
Pre-installed data. . . . . . . . . . . . 82
Priority . . . . . . . . . . . . . . . . . . . . 83
Ring time (mail/message) . . . . . 85
Silent . . . . . . . . . . . . . . . . . . . . . 61
Ring tone/Image . . . . . . . . . . . . . . 77
Ring tone/Image (Check settings)
. . 78
Roam. Guidance (Int.). . . . . . . . . 338
Rotate (Edit image) . . . . . . . . . . . 232
K
S
SAR (Specific absorption rate) . . 387
Save address . . . . . . . . . . . . . . . 166
Save image . . . . . . . . . . . . . . . . . 167
Save i-motion . . . . . . . . . . . . . . . 167
Saving movies . . . . . . . . . . . . . . . 119
Saving still images. . . . . . . . . . . . 119
Scanning function . . . . . . . . . . . . 383
Schedule . . . . . . . . . . . . . . . . . . . 285
Adding holidays and anniversaries
. . . 286
Alarm notification actions. . . . . 290
Check. . . . . . . . . . . . . . . . . . . . 287
Clock Alarm Tone set. . . . . . . . . 85
Copy from microSD to Phone
. . . 249
Copy from Phone to microSD
. . . 248
Display mode (monthly/weekly)
. . 286
PIM data display . . . . . . . . . . . 247
Saving the attached file . . . . . . 167
Secret data . . . . . . . . . . . . . . . 103
Send attach file . . . . . . . . . . . . 160
Storage capacity . . . . . . . . . . . 386
Store . . . . . . . . . . . . . . . . . . . . 285
User icon setting . . . . . . . . . . . 286
Screen memo . . . . . . . . . . . . . . . 143
Scroll function
Document viewer. . . . . . . . . . . 264
i-mode . . . . . . . . . . . . . . . . . . . 139
PDF data . . . . . . . . . . . . . . . . . 264
Scroll function (i-mode). . . . . . . . 139
Scroll setting (i-mode). . . . . . . . . 148
Scroll setting (Mail) . . . . . . . . . . . 178
Search all (Phonebook) . . . . . . . . 74
Search column (Phonebook) . . . . 74
Search group (Phoneboook). . . . . 74
Search (Phonebook). . . . . . . . . . . 73
Searching menu items . . . . . . . . . 31
Secret code setting. . . . . . . . . . . . 75
Secret data . . . . . . . . . . . . . . . . . 103
Secret data releasing . . . . . . . . . 103
Secret folder . . . . . . . . . . . . . . . . 104
Secret folder function . . . . . . . . . 105
Secret (data only) mode . . . . . . . 103
Secret (data only) mode releasing
. . 103
Security code . . . . . . . . . . . . . . . 100
Change . . . . . . . . . . . . . . . . . . 101
Entry method. . . . . . . . . . . . . . . 35
Security codes for the FOMA terminal
. . 100
Security error history (i-αppli) . . . 189
Security scan→Scanning function
Select image. . . . . . . . . . . . . . . . . 67
Select language . . . . . . . . . . . . . . 45
Select microphone . . . . . . . . . . . 298
Select ring tone. . . . . . . . . . . . . . . 82
Select size . . . . . . . . . . . . . . . . . 122
Select to save . . . . . . . . . . . 123, 127
Selecting items with dial keys. . . . 34
Selecting multiple items . . . . . . . . 38
Selecting ON/OFF . . . . . . . . . . . . 34
Selecting the menu. . . . . . . . . . . . 29
Selecting the shooting menu . . . 122
Selecting YES/NO . . . . . . . . . . . . 34
Self mode . . . . . . . . . . . . . . . . . . 115
Send DTMF tone . . . . . . . . . . . . . 50
Sending all data (Infrared data exchange)
. . . 258
Sending one data (iC communication)
. . 259
Sending one data (Infrared data exchange)
. . 258
Sending push signals . . . . . . . . . . 57
Sending the manufacturer number (i-mode)
. . 137
Sent address list . . . . . . . . . . . . . 177
Sent/received data (data exchange)
. . 256
Service Numbers . . . . . . . . . . . . 317
Services available for the FOMA terminal
. . 362
Service(Int.) . . . . . . . . . . . . . . . . 338
Session number (data exchange)
. . 257
Set auto-update (Pattern data) . . 384

405
Index/Quick Manual
Set connection timeout (i-mode)
. . 149
Set hold tone . . . . . . . . . . . . . . . . 62
Set i-αppli To . . . . . . . . . . . . . . . 197
Set image disp. (i-mode) . . . . . . 148
Set in-call arrival. . . . . . . . . . . . . 317
Set main time . . . . . . . . . . . . . . . . 46
Set mute seconds . . . . . . . . . . . 114
Set sub clock . . . . . . . . . . . . . . . . 46
Set time . . . . . . . . . . . . . . . . . . . . 45
Setting backlight. . . . . . . . . . . . . . 90
Setting the clock display (standby screen)
. . 93
Setting when folded . . . . . . . . . . . 61
Shield view . . . . . . . . . . . . . . . . . . 90
Shooting
Compose message. . . . . . . . . 126
Continuous mode . . . . . . . . . . 124
Movie . . . . . . . . . . . . . . . . . . . 126
Still image . . . . . . . . . . . . . . . . 123
Shooting indicator (Flashing) . . . 119
Shooting menu icons . . . . . . . . . 122
Shooting settings . . . . . . . . . . . . 128
Short cut key function. . . . . . . . . . 30
Short message→SMS
Shot image (display). . . . . . . . . . 225
Side key guard . . . . . . . . . . . . . . 112
Signal strength (Reception level)
. . 44
Silent (Erase)
Recorded memo/voice memo . . 65
Ring volume . . . . . . . . . . . . . . . 61
Voice announce . . . . . . . . . . . 293
Simple Menu . . . . . . . . . . . . . . . . 33
Simple Menu function list . . . . . . 349
Single-byte . . . . . . . . . . . . . . . . . 306
SMS
Compose/send . . . . . . . . . . . . 182
Copy from microSD to Phone
. . 249
Copy from Phone to microSD
. . 248
Preview (sent mail) . . . . . . . . . 183
Receive. . . . . . . . . . . . . . . . . . 183
SMS center selection . . . . . . . . . 184
SMS input char. . . . . . . . . . . . . . 183
SMS report req. . . . . . . . . . . . . . 183
SMS settings . . . . . . . . . . . . . . . 178
SMS valid. per. . . . . . . . . . . . . . . 183
Software
DOCOMO keitai datalink . . . . 329
Software key→Function key
Software Update . . . . . . . . . . . . 377
Sort→Sort function, Filter function
Sort function
Document . . . . . . . . . . . . . . . . 262
Image . . . . . . . . . . . . . . . . . . . 228
Mail. . . . . . . . . . . . . . . . . . . . . .175
Melody . . . . . . . . . . . . . . . . . . .242
Message. . . . . . . . . . . . . . . . . .180
Movie/i-motion . . . . . . . . . . . . .234
Music . . . . . . . . . . . . . . . . . . . .274
PDF data . . . . . . . . . . . . . . . . .262
Phonebook. . . . . . . . . . . . . . . . .74
Template. . . . . . . . . . . . . . . . . .160
To Do list . . . . . . . . . . . . . . . . .288
ToruCa . . . . . . . . . . . . . . . . . . .205
Sound effect . . . . . . . . . . . . . . . . .84
Sound effect (i-mode) . . . . . . . . .148
Specific absorption rate (SAR) . . 387
Specifications . . . . . . . . . . . . . . .385
Standard lens . . . . . . . . . . . . . . .118
Standard type i-motion . . . . . . . .151
Standby screen
Display setting . . . . . . . . . . . . . .89
Priority . . . . . . . . . . . . . . . . . . . .89
Return to the standby screen. . .35
Standby screen (i-αppli) . . . . . . .198
Start attachment (auto) (Mail settings)
. .178
Start attachment (auto) (Message)
. . . 148
Still image
Copy from microSD to Phone
. . .250
Copy from Phone to microSD
. . .249
Display (microSD) . . . . . . . . . .248
Display (Phone) . . . . . . . . . . . .225
Edit. . . . . . . . . . . . . . . . . . . . . .231
Shooting. . . . . . . . . . . . . . . . . .123
Storage capacity . . . . . . . . . . .119
Storage capacity for music data
. . .386
Storage capacity for screen memo
. . . 386
Storage capacity (respective data)
. . . 386
Store common phrases . . . . . . . .308
Storing phone number/mail
address on sites . . . . . . . . . . . . .140
Storing receiver’s address (Mail address)
. . . . 166
Storing WMA data . . . . . . . . . . . .276
Storing/displaying personal data
. .290
Streaming type i-motion. . . . . . . .151
Style-Up® panel. . . . . . . . . . . . . . . .9
Sub-address setting. . . . . . . . . . . .58
Super silent . . . . . . . . . . . . . . . . . .86
Switch to BGM. . . . . . . . . . . . . . .280
Switching pages . . . . . . . . . . . . . .34
Switching screens (Text entry
divided screen) . . . . . . . . . . . . . .303
Switching the network . . . . . . . . .336
Symbols list . . . . . . . . . . . . . . . . .352
K
T
Tab display setting. . . . . . . . 148, 221
Te m p l a t e
Download. . . . . . . . . . . . . . . . . 146
No. of messages . . . . . . . . . . . 160
Storage capacity . . . . . . . . . . . 386
Text memo. . . . . . . . . . . . . . . . . . 296
Text reader . . . . . . . . . . . . . . . . . 131
Theme change . . . . . . . . . . . . . . . 91
Ticker . . . . . . . . . . . . . . . . . . . . . 153
Ticker color setting . . . . . . . . . . . 154
Ticker display setting. . . . . . . . . . 154
Ticker speed setting . . . . . . . . . . 154
Time signal (Indicator display) . . . 92
Timer (Alarm) . . . . . . . . . . . . . . . 284
Title list (Image) . . . . . . . . . . . . . 226
Title list (Movie). . . . . . . . . . . . . . 233
TLS . . . . . . . . . . . . . . . . . . . . . . . 218
To Do list . . . . . . . . . . . . . . . . . . . 288
Alarm notification actions . . . . 290
Check . . . . . . . . . . . . . . . . . . . 289
Clock Alarm Tone set. . . . . . . . . 85
Copy from microSD to Phone
. . 249
Copy from Phone to microSD
. . 248
Storage capacity . . . . . . . . . . . 386
Store . . . . . . . . . . . . . . . . . . . . 288
To n e
Charge sound . . . . . . . . . . . . . . 85
Keypad sound . . . . . . . . . . . . . . 85
Missed calls/New mail . . . . . . . . 64
ToruCa . . . . . . . . . . . . . . . . . . . . 203
Acquire . . . . . . . . . . . . . . . . . . 204
Copy from microSD to Phone
. . 250
Copy from Phone to microSD
. . 249
Display. . . . . . . . . . . . . . . . . . . 204
Display (microSD) . . . . . . . . . . 248
Download. . . . . . . . . . . . . . . . . 146
Guide to the screen . . . . . . . . . 204
Saving the attached file . . . . . . 167
Send attach file . . . . . . . . . . . . 160
Set . . . . . . . . . . . . . . . . . . . . . . 206
Storage capacity . . . . . . . . . . . 386
ToruCa viewer . . . . . . . . . . . . . . . 204
Trademark . . . . . . . . . . . . . . . . . . . 20
Trimming (Edit image). . . . . . . . . 232
Turning the FOMA terminal on/off
. . 44
TV link. . . . . . . . . . . . . . . . . . . . . 213
TV remote control . . . . . . . . . . . . 261
Two-touch dialing . . . . . . . . . . . . . 79

406
Index/Quick Manual
K
U
UIM→FOMA card
UIM operation . . . . . . . . . . . . . . .254
Universal Number International ID Code
. . .334
Updating playback restrictions (Uta-hodai)
. .272
Updating Software . . . . . . . . . . . .377
Upgrade (i-αppli) . . . . . . . . . . . . .199
Upper case. . . . . . . . . . . . . . . . . .306
URL entry. . . . . . . . . . . . . . . . . . .141
URL history . . . . . . . . . . . . .138, 141
USB cable connection . . . . . . . . .260
USB mode setting . . . . . . . . . . . .251
Use phone information (i-mode)
. . .149
Using SSL Certificates. . . . . . . . .149
K
V
Version (Pattern data) . . . . . . . . .384
Vibrator . . . . . . . . . . . . . . . . . . . . .84
Vibrator priority . . . . . . . . . . . . . . .84
Video
Delete . . . . . . . . . . . . . . . . . . . .236
Play. . . . . . . . . . . . . . . . . . . . . .235
Video player. . . . . . . . . . . . . . . . .235
Videophone
Answer mode during i-mode. . . .67
Auto redial as voice . . . . . . . . . .67
Chara-den setting. . . . . . . . . . . .50
External devices . . . . . . . . . . . . .68
Hands-free switch. . . . . . . . . . . .67
How to view the screen . . . . . . .49
Making videophone calls . . . . . .48
Play/erase recorded messages
. . .65
Receiving . . . . . . . . . . . . . . . . . .59
Select image. . . . . . . . . . . . . . . .67
Using Chara-den . . . . . . . . . . . .66
Visual preference . . . . . . . . . . . .67
When a call is not connected . . .50
Videophone (Ring tone)
Adjusting the volume . . . . . . . . .61
Select . . . . . . . . . . . . . . . . . . . . .82
Videophone/voice phone switch (Caller)
. .50
Videophone/voice phone switch (Receiver)
. .60
View style
How to view the screen
(One-Seg). . . . . . . . . . . . . . . . .210
How to view the screen
(Video player) . . . . . . . . . . . . . .236
Operation (One-Seg) . . . . . . . .211
Operation (Video player). . . . . .237
Viewer settings. . . . . . . . . . . . . . .226
Viewing sites
Bookmark. . . . . . . . . . . . . . . . . 142
From site/mail . . . . . . . . . . . . . 147
Full Browser. . . . . . . . . . . . . . . 218
i-Channel . . . . . . . . . . . . . . . . . 153
i-mode . . . . . . . . . . . . . . . . . . . 136
Multi window . . . . . . . . . . . . . . 140
My Menu . . . . . . . . . . . . . . . . . 141
Screen memo . . . . . . . . . . . . . 143
URL history . . . . . . . . . . . 138, 141
Voice announce. . . . . . . . . . . . . . 293
Voice clock . . . . . . . . . . . . . . . . . . 64
Voice Mail . . . . . . . . . . . . . . . . . . 312
Voice mail (Restrictions) . . . . . . . 112
Voice Mail(Int.). . . . . . . . . . . . . . . 338
Voice memo. . . . . . . . . . . . . . . . . 292
Voice memo(in-call). . . . . . . . . . . 292
Voice mode . . . . . . . . . . . . . . . . . 128
Voice monitor. . . . . . . . . . . . . . . . . 64
Voice/videophone switch (Caller)
. . . 50
Voice/videophone switch (Receiver)
. . 60
V-phone while packet . . . . . . . . . . 67
K
W
Wake-up display setting . . . . . . . . 88
Warranty and after-sales service
. . 375
WEB Mail . . . . . . . . . . . . . . . . . . 157
Web To function. . . . . . . . . . . . . . 147
Website . . . . . . . . . . . . . . . . . . . . 141
What is Area Mail? . . . . . . . . . . . 181
What is i-Channel? . . . . . . . . . . . 153
When the shooting is interrupted
. . 119
White balance . . . . . . . . . . . . . . . 123
Word prediction . . . . . . . . . . . . . . 303
WORLD CALL. . . . . . . . . . . . . . . . 51
WORLD WING . . . . . . . . . . . 40, 332
K
Z
Zoom adjustment . . . . . . . . . . . . 128
K
Numerical
1seg . . . . . . . . . . . . . . . . . . . . . . 207
Alarm notification actions. . . . . 290
Channel list . . . . . . . . . . . . . . . 209
Channel setting . . . . . . . . . . . . 209
Data broadcast . . . . . . . . . . . . 212
G-GUIDE EPG Remote Control
. . 212
Guide to the 1seg screen. . . . . 210
Play a recording. . . . . . . . . . . . 235
Program guide i-αppli. . . . . . . . 212
Record . . . . . . . . . . . . . . . . . . . 213
Timer activation/recording . . . . 214
TV link . . . . . . . . . . . . . . . . . . . 213
User settings . . . . . . . . . . . . . . 215
Watch . . . . . . . . . . . . . . . . . . . 210
1seg viewing time (battery) . . . . 42
2in1. . . . . . . . . . . . . . . . . . . . . . . 320
2-touch (Character assignment)
. . 351
2-touch (Character entry) . . . . . . 310
3G network . . . . . . . . . . . . . . . . . 332
3G/GSM setting . . . . . . . . . . . . . 336
4 images composite (Edit image)
. 230
5-touch (Character assignment)
. . 350
5-touch (Character entry) . . . . . . 304
64K data communication . . . . . . 326
K
Kana
iアプリバンキング. . . . . . . . . . 196
iD設定アプリ . . . . . . . . . . . . . . . 195
拡大メニュー (Kisekae Tool) . . . . 97
圏外 (out-of-service area). . . . . . . 44
Gガイド番組表リモコン. . . . . . . 194
地図アプリ (Map i-αppli) . . . . . . 190
DCMXクレジットアプリ . . . . . . 195
デコ絵つくーる
(deco-e maker)
. . 190
ドコモテレビ電話ソフト (DOCOMO
Videophone Software) . . . . . . . . . 68
はじめてのおつかい for SO . . . . 190
FOMA通信環境確認アプリ. . . . . 196
楽オク出品アプリ2 (Rakuten Auction
application 2) . . . . . . . . . . . . . . . 196
Function menu
Alarm
Detail . . . . . . . . . . . . . . . . . . . . 285
List. . . . . . . . . . . . . . . . . . . . . . 285
Bar code reader
Reading data detail . . . . . . . . . 130
Reading data list . . . . . . . . . . . 130
Scanning . . . . . . . . . . . . . . . . . 130
Bookmark
Folder list. . . . . . . . . . . . . . . . . 142
List. . . . . . . . . . . . . . . . . . . . . . 143
Calculator . . . . . . . . . . . . . . . . . . 295
Channel list. . . . . . . . . . . . . . . . . 154
Character entry (edit) . . . . . . . . . 306
Chara-den
List. . . . . . . . . . . . . . . . . . . . . . 238
Player . . . . . . . . . . . . . . . . . . . 238
Shooting . . . . . . . . . . . . . . . . . 240
Choku-Den . . . . . . . . . . . . . . . . . . 79
Common phrases
Folder list. . . . . . . . . . . . . . . . . 308

407
Index/Quick Manual
List . . . . . . . . . . . . . . . . . . . . . 308
Continuous mode
Checking. . . . . . . . . . . . . . . . . 125
Detail checking . . . . . . . . . . . . 125
Shooting . . . . . . . . . . . . . . . . . 123
Country Code setting . . . . . . . . . . 52
Create message list . . . . . . . . . . . 56
Data Box
Folder list . . . . . . . . . . . . . . . . 253
Deco-mail
Template list . . . . . . . . . . . . . . 160
Template preview . . . . . . . . . . 160
Dialed calls. . . . . . . . . . . . . . . . . . 54
Dictionary
Dictionary . . . . . . . . . . . . . . . . 297
Reference history . . . . . . . . . . 297
Reference result (list/detail) . . 297
Document
Document view . . . . . . . . . . . . 265
PDF list . . . . . . . . . . . . . . . . . . 262
Download dictionary. . . . . . . . . . 310
Draft mail list . . . . . . . . . . . . . . . 162
Exchanging history. . . . . . . . . . . . 80
Full Browser . . . . . . . . . . . . . . . . 220
i-αppli
End stand-by info . . . . . . . . . . 199
IC card content . . . . . . . . . . . . 188
microSD data list. . . . . . . . . . . 200
microSD software list . . . . . . . 199
Security error history . . . . . . . 190
Software list . . . . . . . . . . . . . . 188
IC card authentic. . . . . . . . . . . . . 111
IDD Prefix setting . . . . . . . . . . . . . 58
i-motion
Data acquisition . . . . . . . . . . . 152
Kisekae Tool
Contents checking . . . . . . . . . . 98
Package list. . . . . . . . . . . . . . . 243
Set list . . . . . . . . . . . . . . . . . . . . 98
Mail
Address (list/detail) . . . . . . . . . 177
Detail. . . . . . . . . . . . . . . . . . . . 176
Folder list . . . . . . . . . . . . . . . . 173
List . . . . . . . . . . . . . . . . . . . . . 175
Message . . . . . . . . . . . . . . . . . 158
New mail . . . . . . . . . . . . . . . . . 157
Unread mail list . . . . . . . . . . . . 175
Mail member
Detail. . . . . . . . . . . . . . . . . . . . 162
List . . . . . . . . . . . . . . . . . . . . . 162
Melody
List . . . . . . . . . . . . . . . . . . . . . 241
Melody . . . . . . . . . . . . . . . . . . .241
Message
Detail . . . . . . . . . . . . . . . . . . . .181
List . . . . . . . . . . . . . . . . . . . . . .180
microSD
Categories . . . . . . . . . . . . . . . .247
Data detail . . . . . . . . . . . . . . . .248
Data list . . . . . . . . . . . . . . . . . .248
File list . . . . . . . . . . . . . . . . . . .248
Folder list . . . . . . . . . . . . . . . . .253
Movie
List . . . . . . . . . . . . . . . . . . . . . .233
Playlist folder list. . . . . . . . . . . .235
Movie mode
Checking . . . . . . . . . . . . . . . . .127
Shooting. . . . . . . . . . . . . . . . . .127
Music Player
Music list . . . . . . . . . . . . . . . . .274
Player . . . . . . . . . . . . . . . . . . . .279
Playlist list. . . . . . . . . . . . . . . . .275
Playlist music list . . . . . . . . . . .276
Music&Video Channel
Chapter list . . . . . . . . . . . . . . . .270
Music&Video Channel . . . . . . .270
Program list . . . . . . . . . . . . . . .271
My picture
Image list . . . . . . . . . . . . . . . . .228
My picture. . . . . . . . . . . . . . . . .228
My Profile. . . . . . . . . . . . . . . . . . .291
My select . . . . . . . . . . . . . . . . . . . .92
Network services
Additional guidance . . . . . . . . .324
Additional service. . . . . . . . . . .324
Multi Number setting . . . . . . . .319
Voice Mail setting . . . . . . . . . . .313
New SMS. . . . . . . . . . . . . . . . . . .183
One-Seg
Booking program list . . . . . . . .215
Channel info . . . . . . . . . . . . . . .210
Channel list . . . . . . . . . . . . . . .210
One-Seg. . . . . . . . . . . . . . . . . .211
Timer recording list. . . . . . . . . .215
TV link list. . . . . . . . . . . . . . . . .213
Original animation
List . . . . . . . . . . . . . . . . . . . . . .231
Player . . . . . . . . . . . . . . . . . . . .231
Original lock
Category list . . . . . . . . . . . . . . .110
Function list . . . . . . . . . . . . . . .110
Group list . . . . . . . . . . . . . . . . .110
Original theme . . . . . . . . . . . . . . . .92
Own dictionary. . . . . . . . . . . . . . .309
Pause dial . . . . . . . . . . . . . . . . . . . 57
PDF
Data list . . . . . . . . . . . . . . . . . . 262
PDF data . . . . . . . . . . . . . . . . . 265
Phonebook
Detail . . . . . . . . . . . . . . . . . . . . . 75
Group setting. . . . . . . . . . . . . . . 72
List . . . . . . . . . . . . . . . . . . . . . . . 74
Photo mode
Checking . . . . . . . . . . . . . . . . . 124
Shooting . . . . . . . . . . . . . . . . . 123
Play/Erase msg. (voice/video). . . . 66
PLMN setting . . . . . . . . . . . . . . . 337
Prefix setting . . . . . . . . . . . . . . . . . 58
Receive Ir data . . . . . . . . . . . . . . 258
Received calls. . . . . . . . . . . . . . . . 54
Redial . . . . . . . . . . . . . . . . . . . . . . 54
Restrictions . . . . . . . . . . . . . . . . . 113
Schedule
List . . . . . . . . . . . . . . . . . . . . . . 287
Schedule . . . . . . . . . . . . . . . . . 285
Schedule/Holiday/Anniversary detail
. . . 287
Screen memo
Detail . . . . . . . . . . . . . . . . . . . . 144
List . . . . . . . . . . . . . . . . . . . . . . 144
Shortcut icon
My shortcut (Theme/Detail) . . . . 95
Shortcut . . . . . . . . . . . . . . . . . . . 95
Site
Sites. . . . . . . . . . . . . . . . . . . . . 137
URL history . . . . . . . . . . . . . . . 138
URL list . . . . . . . . . . . . . . . . . . 142
Text memo. . . . . . . . . . . . . . . . . . 296
Text reader
Reading data (list/detail) . . . . . 133
Text reader. . . . . . . . . . . . . . . . 133
To Do list
Detail . . . . . . . . . . . . . . . . . . . . 288
To Do list . . . . . . . . . . . . . . . . . 288
To r u C a
Display. . . . . . . . . . . . . . . . . . . 205
Folder list . . . . . . . . . . . . . . . . . 205
List . . . . . . . . . . . . . . . . . . . . . . 205
UIM operation . . . . . . . . . . . . . . . 254
Video player
Video list . . . . . . . . . . . . . . . . . 236
Video playback . . . . . . . . . . . . 237
Voice announce . . . . . . . . . . . . . 293
Voice/Videophone Calls
Enter phone number . . . . . . . . . 49
In-call. . . . . . . . . . . . . . . . . . . . . 49
Ringing . . . . . . . . . . . . . . . . . . . 60
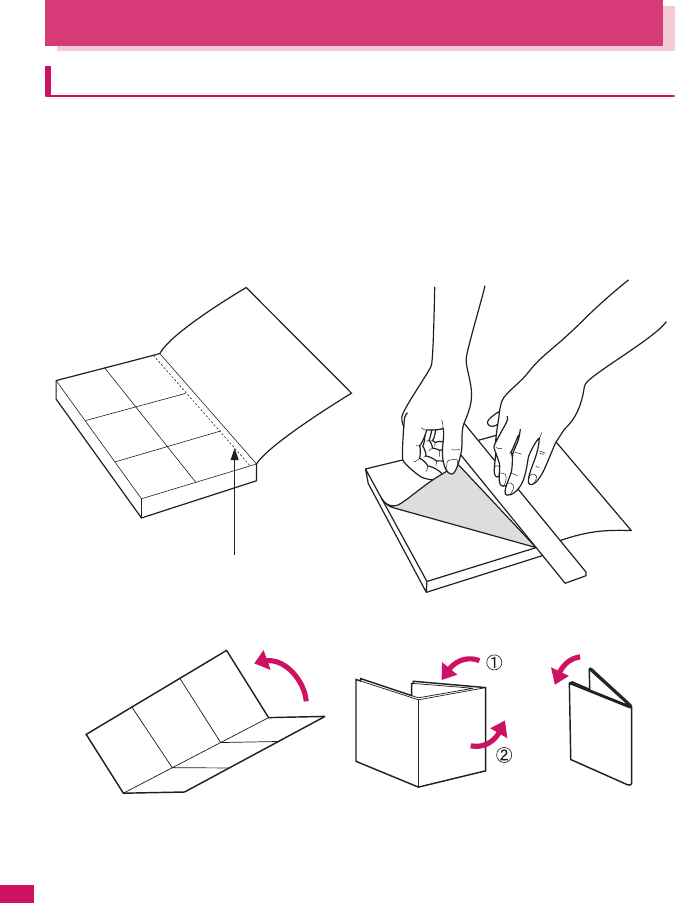
408
Index/Quick Manual
Quick Manual
How to use the Quick Manual
The Quick Manual describes basic operations and displays of the FOMA terminal.
To use the Quick Manual embedded in this manual, cut the sheets along the cutting line and fold them
as described below. Take the Quick Manual (For Overseas Use) when using international roaming
(WORLD WING) abroad.
■How to cut
Cut the Quick Manual sheets along the cutting line.
Use a ruler to cut along the cutting line as described below.
Detach one page at a time so that you do not tear other pages.
* Take care not to hurt yourself when cutting with scissors, etc.
■How to fold
Fold the Quick Manual along with the folding line as described below so that the front cover comes to the front.
Cut here
Cover
Cover
Cover
Cutting line
Quick Manual
○
For Inquiries <DOCOMO Information Center>
For DOCOMO mobile phone:
(No prefix) 151 (toll free) (only in Japanese)
* You cannot call this number from an ordinary (landline) phone.
From an ordinary (landline) phone:
0120-005-250
(toll free) (in English)
* Can be called from mobile phones and PHSs.
●
Check the phone number carefully before calling.
○For Technical Inquiries
For DOCOMO mobile phone:
(No prefix) 113 (toll free) (only in Japanese)
* You cannot call this number from an ordinary (landline) phone.
From an ordinary (landline) phone:
0120-800-000 (only in Japanese)
* Can be called from mobile phones and PHSs.
●
Check the phone number carefully before calling.
●
For details, check the “Service station list” provided with the FOMA terminal.
Add to phonebook
i➜“PHONEBOOK”➜u (FUNC)➜“Add to
phonebook”
●To add data from the received calls record
On the Standby screen➜h➜Received calls record
entry➜u (FUNC) ➜ “Add to phonebook”
●To add data from the redial
On the Standby screen➜j➜Select the redial➜
u (FUNC) ➜ “Add to phonebook”
Select the destination➜Enter a name➜Check the
reading of the name➜d (Set)
Select items and enter them
■Group (00 to 19, No Group)
<Not stored>➜Select a group
■Phone number (up to 4)
<Not stored>➜Enter phone number➜Select an icon
1
2
3
■Mail address (up to 3)
<Not stored>➜Enter mail address➜Select an icon
■Address
<Not stored>➜Enter zip code➜Enter address
■Birthday
<Not stored>➜Enter birthday
■Memorandums
<Not stored>➜Enter memorandums
■Image
<Not stored>➜Select the photo mode or image
■Chara-den
<Not stored>➜Select Chara-den
■Memory number (000 to 999)
➜Enter memory number
o (Finish)
Only name, reading, group, phone number and mail
address can be stored to the FOMA card (UIM).
Edit/delete phonebook data
■Edit the phonebook data
Display the phonebook detail screen➜u (FUNC)➜
“Edit Phonebook”➜Edit the items if necessary➜
o (Finish)➜“YES” (For the FOMA card (UIM), press
o (Finish) and select “Overwrite”➜“YES”)
■Delete phonebook data
Display the phonebook list screen➜u (FUNC)➜
“Delete data”➜“Delete this”➜“YES” (Select “YES” again
depending on the phonebook)
4 Character entry
■Character entry (edit) screen
Character entry area
List area
Information display area
■Switch text entry mode
u (FUNC)➜“Input method”➜“Input mode”
■Enter dakuten, han-dakuten
w (one time or more)
■Enter “、” or “。”
q (one time or more)
■Change input modes
p (Chrct) (one time or more, Selected mode highlights)
●Single-byte
→→→
●Double-byte
→→→
2
4
1
5
3
Cutting line
■Enter pictograph and symbol continuously
p (Pict/Sym)➜Select pictograph or symbol➜
u (Close) or t after entering
■Clear character
Use b to move the cursor onto the character to clear
➜t
■Enter space
0 (one time or more)
j (Only when the cursor is at the end of the text)
■Insert a line feed
q
g (Only when the cursor is at the end of the text)
■Switch the upper case/lower case of entered text
r
Enter “携帯” on Text memo
■Character entry (edit) screen
i➜“LIFEKIT”➜“Text memo”➜o (Edit)➜ o (Chrct)
(one time or more)➜Switch to “Kanji/hiragana input
mode”➜
■Character conversion
g➜b➜Select “携帯” from the candidates
け➜2 4 times, い➜1 twice,
た➜4 once, い➜1 twice
Camera
■Shoot still image
i➜“LIFEKIT”➜“Camera”➜“Photo mode”➜
d (Record)➜d (Save)
■Continuous mode
i➜“LIFEKIT”➜“Camera”➜“Photo mode”➜u (FUNC)
➜“CHG camera-mode”➜“Continuous mode”➜“Auto” or
“Manual”➜d (Cont. /Record)➜u (FUNC)➜Select
saving method
■Movie mode
i➜“LIFEKIT”➜“Camera”➜“Movie mode”➜
d (Record)➜d (Stop)➜d (Save)
1seg
■Registering the channel list
i➜“1SEG”➜“Channel setting”➜“Select area”➜Select
area➜Select prefecture
■Switching channel lists
i➜“1SEG”➜“Channel list”➜Select channel list
■Viewing 1seg
i➜“1SEG”➜“Active 1Seg”
■Recording 1seg
On the 1Seg screen, press o (1 second or longer)➜o
Display still image/movie/play melody
■Displaying a still image
i➜“DATA BOX”➜“My picture”➜Select folder➜Select
still image
■Playing a movie
i➜“DATA BOX”➜“i-motion”➜Select folder➜Select
movie
■Playing a melody
i➜“DATA BOX”➜“Melody”➜Select folder➜Select
melody
Using the Music Player
■Playing the Music
i➜“DATA BOX”➜“Music”➜Select folder➜Select
music
Making/receiving videophone call
■Make a videophone call
Enter the phone number➜o (V.phone)➜ y after
talking
■Receiving a videophone call
When the ring tone sounds and the illumination flashes,
press r➜y after talking
■During a call
o: Switches handsfree on/off
d (Change): Switches between substitute image and
camera image
10 11
9
78
6

Cutting line
i-mode mail
Composing/sending i-mode mail
■Compose message screen
u➜“Compose message”
■Enter an address
“”➜Enter an address
■Enter a subject
“”➜Enter a subject
Recipient
Subject
Message
■Enter the message body
“”➜Enter the message body
■Sending the mail
o (Send)➜“OK”
Attaching files
■Attaching an image, i-motion, melody, PDF,
document, ToruCa, or other data
Display the new mail screen➜p (Att.)➜Select an item
➜Select a folder➜Select data
■Attaching phonebook
Display the new mail screen➜p (Att.)➜“Phonebook”➜
“Phone”➜Search a phonebook➜Select a phonebook
■Attaching My Profile
Display the new mail screen ➜p (Att.)➜“My Profile” ➜
Enter your security code ➜d (Set)
■Attaching schedule
Display the new mail screen ➜p (Att.)➜“Schedule” ➜
Select an item ➜ Select the data ➜d (Select)
■Attaching bookmark
Display the new mail screen ➜p (Att.)➜“Bookmark”➜
Select an item ➜ Select a folder ➜ Select the data ➜
d (Select)
Receiving i-mode mail
“ ” flashes➜Received results screen appears➜
Select “ ”
Other mail functions
■Replying mail
Display the mail to reply➜o (Reply) ➜“”➜
Enter message➜o (Send) ➜“OK”
■Forwarding mail
Display the mail to forward ➜u (FUNC) ➜“Forward”➜
“”➜Enter a mail address➜o (Send)➜“OK”
Check new messages
u (1 second or longer)
Menu function list
Main item Sub item Branch item
MAIL Inbox
Outbox
Draft
Compose message
WEB mail
Compose SMS
Check new messages
Receive option
Check new SMS
Template
Mail settings
I-MODE iMenu
Bookmark
Screen memo
Main item Sub item Branch item
I-MODE URL history
Go to location
Full Browser
i-Channel
Message R/F
Check new messages
Client certificate
i-mode settings
I-APPLI Software list
microSD
Auto-start set
i-αppli action info
SETTINGS Kisekae Tool setting
Incoming call Ring volume
Select ring tone
Sound effect
Vibrator
16 17
15
13 14
12
Cutting line
Main item Sub item Branch item
SETTINGS Incoming call Manner mode set
Disp. Phonebook image
Answer setting
Mail/Msg. ring time
Ring time(sec.)
Info notice setting
Record message
Disp. call/receive No.
Melody Call setting
Talk Noise reduction
Quality alarm
Reconnect signal
Set hold tone
Setting when folded
Dialing Pause dial
Sub-address setting
Prefix setting
Main item Sub item Branch item
SETTINGS Dialing Headset sw to dial
Int’l dial assistance
Videophone Visual preference
Select image
Auto redial as voice
Display setting
Ntfy switch-mode
Hands-free switch
V-phone while packet
Display Display setting
Backlight
Display design
Font
My shortcut
Select language
My selection
Menu display set
Main item Sub item Branch item
SETTINGS Display Viewer settings
Icons description
Icons setting
Shield view
Mail ticker
Illumination setting
Call time/Charge Call data
Notice designate calls
Reset total
Auto reset total cost
Clock Set main time
Set sub clock
Clock display
Alarm setting
Clock Alarm Tone set
Auto power ON
Auto power OFF
Lock/
Security
Lock Dial lock
Original lock
IC card lock setting
Keypad lock
Self mode
Main item Sub item Branch item
SETTINGS Lock/
Security
Secret mode
Secret data only mode
Reject unknown
Call setting w/o ID
Change security code
IC card authentic.
PIN setting
Scanning function
i-mode common set Set connection timeout
Set check new messages
Host selection
SMS center selection
Certificate
Certificate host
i-αppli settings Disp. Software info
End stand-by display
i-αppli vol.
Main item Sub item Branch item
SETTINGS External connection USB mode setting
Headset usage setting
Select microphone
Auto answer setting
Int’l roaming set NW search mode
3G/GSM setting
Display operator name
Other settings Keypad sound
Charge sound
Battery level
Side key guard
Character input set
Holding down ch-key
Reset settings
Initialize
Software Update
Main item Sub item Branch item
DATA BOX My picture
Music
Music&Video Channel
i-motion
Melody
1Seg
My document
Chara-den
Kisekae Tool
Document viewer
LIFEKIT Bar code reader
Receive Ir data
microSD manager
Camera
Data security serv.
Schedule
Alarm
To Do list
22 23
21
19 20
18
Cutting line
Main item Sub item Branch item
LIFEKIT Text memo
Calculator
Play/Erase msg.
Play/Erase VP msg.
Voice memo
Voice announce
UIM operation
My Profile
Forwarding image
Text reader
Dictionary
SERVICE Chaku-moji
Caller ID Notification
Voice Mail
Call Waiting
Call Forwarding
2in1 setting
Nuisance Call Blk
Main item Sub item Branch item
SERVICE Caller ID Request
Incoming Call Mng
Set in-call arrival
Remote Control
Dual Network
English Guidance
Additional service
Service Numbers
Multi Number
Roam. Guidance
Bar incoming when roam
Service(Int.)
PHONEBOOK Phonebook
OWN DATA Received calls
Dialed calls
Mail member
Choku-Den
<Other functions>
●Manner mode : a (▲マナー ) (1 second or longer) (Set/release with each press)
●Public mode
(Driving mode) : q (1 second or longer) (Set/release with each press)
Main item Sub item Branch item
OWN DATA Common phrases
Own dictionary
DL dictionary
MUSIC Music Player
Music&Video Channel
1SEG
OSAIFU-
KEITAI
IC card content
DCMX
ToruCa
IC card lock setting
Setting
Check IC owner
Change IC owner
Search by i-mode
Network services
Voice Mail Service
■Activate
i➜“SERVICE”➜“Voice Mail”➜“Activate”➜“YES”➜
“YES”➜Enter “Ringing time (seconds)”
■Deactivate
i➜“SERVICE”➜“Voice Mail”➜“Deactivate”➜“YES”
■Play messages
i➜“SERVICE”➜“Voice Mail”➜“Play messages”➜
“YES”➜Follow the voice guidance
Call Waiting
■Activate
i➜“SERVICE”➜“Call Waiting”➜“Activate”➜“YES”
■Deactivate
i➜“SERVICE”➜“Call Waiting”➜“Deactivate”➜“YES”
■Answering another incoming call
Press r to switch to incoming call
To switch the calls, press r.
Call Forwarding Service
■Activate
i➜“SERVICE”➜“Call Forwarding”➜“Activate”➜Set a
forwarding number and the ring time, then select
“Activate”➜“YES”
■Deactivate
i➜“SERVICE”➜“Call Forwarding”➜“Deactivate”➜
“YES”
Caller ID Request
■Activate
i➜“SERVICE”➜“Caller ID Request”➜“Activate”➜
“YES”➜“OK”
■Deactivate
i➜“SERVICE”➜“Caller ID Request”➜“Deactivate”➜
“YES”➜“OK”
28 29
27
25 26
24
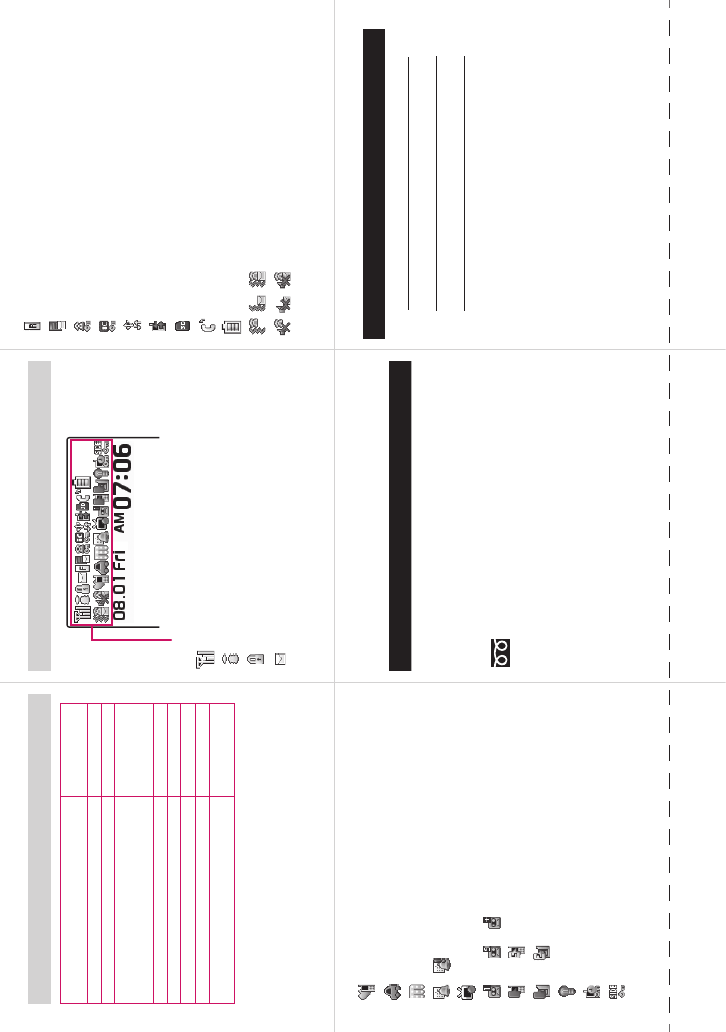
Cutting line
Services available for the FOMA terminal
*1: Unlisted phone numbers cannot be given.
*2: An emergency call to the local fire station or police station may not
be connected in some areas. In that case, call again from a public
phone or land line.
Directory assistance
(charged: service charge + call charge)*1
(No area code) 104
Telegram (pay: telegram charge)
(No area code) 115
Time (pay)
(No area code) 117
Weather forecast (pay)
Area code of an area
you want to know +
177
Emergency call to the police*2
(No area code) 110
Emergency call for a fire engine or an ambulance*2
(No area code) 119
Emergency call for help with maritime accidents
(No area code) 118
Emergency Message Recording System (pay)
(No area code) 171
Collect call
(charged: service charge + call charge)
(No area code) 106
Main icons
: Signal strength
: i-mode in progress
: SSL-compatible page displayed
: Unread mail
Icon display area
: Unread Message R
: Mail kept at the i-mode Center
: When Dial lock is set
: When IC card lock is set
: Communication mode set (USB cable connected)
: Ir data exchange in progress
: microSD card inserted
: During a voice call
: Battery level
: Vibrator is set
: “Ring volume” is set to “Silent”
: Manner mode is set
: Public mode (Driving mode) is set
: Music&Video Channel reservation is set
/ : Alarm is set
: 1seg timer recording in progress
to , : Voice mail message
to : Record message is set
to : Record message (Record VP message) is set
: Backlight is set to “OFF”
: Keypad lock is set/ready
: Side key guard is set to “ON”
<Contact for lost, etc>
Omakase Lock
• Omakase Lock is a pay service. If you subscribe to the service at the
same time with the subscription of suspending the service or while
the service is suspended, no charge applies.
Set/Release Omakase Lock
0120-524-360
24 hours available (only in Japanese)
* Omakase Lock can be set/released from the My docomo site on a
PC, etc.
Other contacts
<Contact: >
<Contact: >
<Contact: >
* Check the phone number carefully before dialing.
34 35
33
31 32
30
Cutting line
Quick Manual (For Overseas Use)
○For lost, stolen, charge accumulation, etc. overseas
<DOCOMO Information Center> (24 hours) (Only in Japanese)
●For DOCOMO mobile phone
-81-3-5366-3114* (toll free)
* When you make a call from an ordinary phone, etc., the call charge applies.
* When calling from the SO706i, dial +81-3-5366-3114 (press and hold the “0” key
for 1 second or longer to enter “+”).
●For ordinary phone, etc. <Universal Number>
-800-0120-0151*
* Local call charge may apply in the country you are staying.
* Refer to p.9 for the International call access code of main countries (Table 1) and
p.10 for the International Prefix number for the universal number (Table 2).
International call
access code of the
country (Table 1)
International Prefix number for
the universal number (Table 2)
○For malfunctions overseas
<Network Technical Support and Operation Center> (24 hours)
●For DOCOMO mobile phone
-81-3-6718-1414* (toll free)
* When you make a call from an ordinary phone, etc., the call charge applies.
* When calling from the SO706i, dial +81-3-6718-1414 (press and hold the “0” key
for 1 second or longer to enter “+”).
●For ordinary phone, etc. <Universal Number>
-800-5931-8600*
* Local call charge may apply in the country you are staying.
* Refer to p.9 for the International call access code of main countries (Table 1) and
p.10 for the International Prefix number for the universal number (Table 2).
International call
access code of the
country (Table 1)
International Prefix number for
the universal number (Table 2)
Before traveling
i-mode settings
■Setting in Japan
o➜“iMenu”➜“English”➜“Options”➜“International Settings”
➜“i-mode services Settings”➜“Yes”➜Enter i-mode password
➜“Select”
■Setting abroad
o➜“iMenu”➜“English”➜“International Settings”➜“i-mode
services Settings”➜“Yes”➜Enter i-mode password➜“Select”
Remote Control
■Setting in Japan
i➜“SERVICE”➜“Remote Control”➜“Activate”➜“YES”
■Setting abroad
i➜“SERVICE”➜“Service(Int.)”➜“Remote access (Int.)”➜
“YES”➜Follow the audio guidance
Setting time adjustment
i➜“SETTINGS”➜“Clock”➜“Set main time”➜“Auto time
adjust”➜Select “Auto” in “Auto time” and “Auto time difference”
Setting sub clock display
i➜“SETTINGS”➜“Clock”➜“Set sub clock”➜“display
method”➜“Auto”
Available Services Overseas
• Voice/videophone calls • i-mode mail
• i-mode (including Full Browser) • Sending/Receiving SMS
• i-Channel • MessageR
• Packet communication via PC
*Some services may not be available depending on the network
or operator.
Setting Network Switching Method
i➜“SETTINGS”➜“Int’l roaming set”➜“3G/GSM setting”➜
“AUTO”, “3G” or “GSM/GPRS”
Setting the Search Mode of the Operator
■Switching the operator automatically or manually
i➜“SETTINGS”➜“Int’l roaming set”➜“NW search mode”➜
“Auto” or “Manual”
When set to “Manual”, select an operator.
■Re-searching the connectable operator
i➜“SETTINGS”➜“Int’l roaming set”➜“NW search mode”➜
“Network re-search”
When set to “Manual”, select an operator.
Setting an operator to be preferably connected
i➜“SETTINGS”➜“Int’l roaming set”➜“NW search mode”➜
“PLMN setting”➜Highlight the operator to change the priority➜
u (FUNC)➜“Change priority”➜Highlight the destination➜
d (Select)➜o (Finish)➜“YES”
Setting operator name display
i➜“SETTINGS”➜“Int’l roaming set”➜“Display operator name”
➜“Display ON” or “Display OFF”
■Display on the screen
The name of the currently connected
operator appears on the task icon
display area.
After returning to Japan
When you returned to Japan and turn on the FOMA terminal, the network
will be automatically searched and set to the FOMA network (DOCOMO).
“Setting the Search Mode of the Operator”→p.4
Making a Call
Making a call to outside your destination country (including Japan)
■
Making a call to a country registered in “Int’l dial assistance”
Dial the other party’s phone number➜u (FUNC)➜“Int’l call”
➜Select a country➜r or o (V. phone)
■Making a call by dialing from the country code
On the standby screen, dial + (0 (1 second or longer)) ➜
Country code➜Area code (Long distance code)➜The other
party’s phone number➜r or o (V. phone)
XXXXX
Connecting operator’s name
45
3
12
Cutting line
Making a local call abroad
Dial the other party’s phone number➜r or o (V.phone)
Receiving a call
When you receive a voice/videophone call, press r
Network services
Before using the network services overseas, you have to set
“Remote Control”.
Roam. Guidance
• Make the setting in Japan.
i➜“SERVICE”➜“Roam. Guidance”➜“Activate” or
“Deactivate”➜“YES”
Bar incoming when roam
• Depending on the operator overseas, the setting may be unavailable.
i
➜
“SERVICE”
➜
“Bar incoming when roam”
➜
“Activate” or “Deactivate”
When set to “Activate”, select the setting from “Bar All incoming” or
“Data calls Barring”
➜
“YES”
➜
Enter your network security code
Voice Mail (Int.)
i➜“SERVICE”➜“Service(Int.)”➜“Voice Mail(Int.)”➜Select the
service➜“YES”➜Follow the audio guidance
Call Forwarding (Int.)
i➜“SERVICE”➜“Service(Int.)”➜“Call Forwarding (Int.)”➜
Select the service➜“YES”➜Follow the audio guidance
Roam. Guidance (Int.)
i➜“SERVICE”➜“Service(Int.)”➜“Roam. Guidance (Int.)”➜
“YES”➜Follow the audio guidance
Remote access (Int.)
i➜“SERVICE”➜“Service(Int.)”➜“Remote access (Int.)”➜
“YES”➜Follow the audio guidance
Caller ID req. (Int.)
i➜“SERVICE”➜“Service(Int.)”➜“Caller ID req. (Int.)”➜“YES”
➜Follow the audio guidance
Country codes of major countries
Enter the following country codes when using international call
or setting “Int’l dial assistance”.
(As of May, 2008)
* For other country codes and details, see the DOCOMO “International
Services Website”.
Area
Code
Area
Code
Area
Code
Australia 61 Holland 31 Peru 51
Austria 43 Hong Kong 852 Philippines 63
Belgium 32 Hungary 36 Russia 7
Brazil 55 India 91 Singapore 65
Canada 1 Indonesia 62 Spain 34
China 86 Italy 39 Sweden 46
Czech 420 Japan 81 Switzerland 41
Egypt 20 Korea 82 Taiwan 886
Fiji 679 Macau 853 Thailand 66
Finland 358 Malaysia 60 Turkey 90
France
33 Maldives 960 United Kingdom 44
French
Polynesia
689
New Caledonia
687 United States of
America
1
Germany 49
New Zealand
64
Greece 30 Norway 47 Vietnam 84
International call access code of main countries (Table 1)
(As of March, 2008)
* For the latest information, see the DOCOMO “International Services
Website”.
Area Code Area Code Area Code
Australia 0011 Hungary 00 Portugal 00
Belgium 00 India 00 Russia 810
Brazil 0021/
0014
Indonesia 001 Singapore 001
Ireland 00 Spain 00
Canada 011 Italy 00 Sweden 00
China 00 Korea 001 Switzerland 00
Czech 00 Luxemburg 00 Taiwan 002
Denmark 00 Macau 00 Thailand 001
Finland 00 Malaysia 00 Turkey 00
France 00 Monaco 00
United Arab Emirates
00
Germany 00
New Zealand
00 United Kingdom 00
Greece 00
Norway
00 United States of
America
011
Holland 00
Philippines
00
Hong Kong 001 Poland 00 Vietnam 00
International Prefix number for the universal number (Table 2)
(As of March, 2008)
* Note that the universal numbers may not be available from mobile
phones, public phones or hotels.
* For the latest information, see the DOCOMO “International Services
Website”.
Area Code Area Code Area Code
Argentina 00 Holland 00 Portugal 00
Australia 0011 Hong Kong 001 Singapore 001
Austria 00 Hungary 00 South Africa 09
Belgium 00 Ireland 00 Spain 00
Brazil 0021 Israel 014 Sweden 00
Bulgar 00 Italy 00 Switzerland 00
Canada 011 Korea 001 Taiwan 00
China 00 Luxemburg 00 Thailand 001
Colombia 009 Malaysia 00 United Kingdom 00
Denmark 00 New Zealand 00 United States of
America
011
Finland 990 Norway 00
France 00 Peru 00
Germany 00 Philippines 00
Inquiries
For inquiries overseas such as lost, stolen, charge accumulation
or malfunction, refer to “For lost, stolen, charge accumulation,
etc. overseas” on the front cover of the Quick Manual (For
Overseas Use) or “For malfunctions overseas” in p.1.
• When dialing to the inquiries numbers, “International call
access code (Table 1)” or “International Prefix number for the
universal number (Table 2)” assigned to your destination
country is required. For details, refer to the “Mobile Phone
User’s Guide [World Services]”.
* Note that the universal numbers may not be available from mobile
phones, public phones or hotels.
10 11
9
78
6

Using your FOMA Terminal Politely
When using your FOMA terminal, do not forget to consider the feelings of people around you.
Turn off your FOMA terminal when you are:
■In a place where it is prohibited to use a mobile phone.
It is prohibited to use a mobile phone in some places. Turn off your FOMA terminal in:
・An airplane ・A hospital
* There is not only a person in a ward who uses medical electrical equipment.Turn off your FOMA terminal even
in a lobby or waiting room.
■Driving
The penalty shall be imposed on use of a handset held in your hand while driving.
* If you are obliged to receive a call, tell the other to call back later in handsfree mode and stop the car at a secure
location for dialing.
■In a crowded place such as rush-hour train, where somebody nearby may be using an implantable cardiac
pacemaker or implantable cardioverter-defibrillator
Radio waves may affect the operation of implantable cardiac pacemakers or implantable
cardioverter-defibrillators.
■In a public place such as theater, cinema, or museum
Using the FOMA terminal in a public place, where you need to be quiet, annoys people around you.
Mind where you use your FOMA terminal and the loudness of your voice or the ring tone
■If you use your FOMA terminal in a quiet place such as restaurant or hotel lobby, mind the loudness of
your voice is, etc.
■Take care not to disturb other people when you use your FOMA terminal in a public place.
Respect privacy
Please be considerate of the privacy of individuals around you when taking and sending photos using
camera-equipped mobile phones.
These functions enable you to be well-mannered
Your FOMA terminal is equipped with useful functions not to answer an incoming call or to mute the sounds
of the FOMA terminal.
This manual is bound in consideration of recycling. When this manual becomes unnecessary, we
appreciate your cooperation of taking this manual out to the collection or recycling.
Access DOCOMO e-site for procedures to change your address or billing plan and for request of
information materials.
iMenu ⇒ 料金&お申込・設定 (Charges & Applications/Setting) ⇒ 各種手続き (ドコモe
サイト) (Application procedure (DOCOMO e-site))
My docomo (http://www.mydocomo.com/) ⇒ 各種手続き (ドコモeサイト ) (Application
procedure (DOCOMO e-site))
* You will need your “network ID” to access e-site from i-mode.
* No packet communication charges are incurred when accessing e-site from i-mode. Accessing from overseas will incur
charges.
* You will need your “docomo ID/password” to access e-site from PC.
* If you do not have or you have forgotten your “network ID” or “docomo ID/password”, contact the DOCOMO information
Center listed on the back cover of this manual.
* DOCOMO e-site may not be available depending upon the content of your subscription.
* You may not be able to access e-site services due to system maintenance, etc.
[Manner mode/Original manner mode]→p.86
Manner mode mutes the sounds of the FOMA terminal such as the keypad sounds and the ring tone. You can
customize Manner mode by changing the settings of the Record message function, vibrator or ring tone (Original
manner mode). However, neither Manner mode nor Original manner mode can mute the shutter sound of the
camera.
[Public mode (Driving mode/Power OFF)] →pp.62, 63
The FOMA terminal announces to the caller that you cannot answer the call because you are driving, or you are
in the place you have to refrain from calling or you have to turn off the mobile phone.
[Vibrator]→p.84
The FOMA terminal vibrates to notify you of an incoming call.
[Record message]→p.64
When you cannot answer a call, the caller can leave a message.
You can also use optional services such as the Voice Mail service (p.312) and Call Forwarding service (p.314).
From i-mode
Packet communication charges free
From PC
FOMA® SO706i
NAME:
PHONE NUMBER:
MAIL ADDRESS:
ISSUE DATE:
‘08.7
INSTRUCTION MANUAL
’08.7
Manufacturer: Sony Ericsson Mobile Communications Japan, Inc.
Sales: NTT DOCOMO, Inc.
●Please confirm the phone number before you dial.
●For application procedure, repairs and after-sales service, call inquiries above or contact your local DOCOMO shop
on DOCOMO website or i-mode site.
DOCOMO website: http://www.nttdocomo.co.jp/english/ i-mode site: iMenu ⇒ お知らせ (Information) ⇒ ドコモショップ
(DOCOMO shop) (Japanese)
INSTRUCTION MANUAL
FOMA® SO706i
(In English)
General Inquiries
<DOCOMO Information Center>
*Can be called from mobile phones and PHSs.
(In Japanese only)
*Can only be called from DOCOMO mobile phones.
0120-005-250 (toll free)
(No prefix) 151 (toll free)
Repairs
(In Japanese only)
(No prefix) 113 (toll free)
*Can only be called from DOCOMO mobile phones.
(In Japanese only)
0120-800-000 (toll free)
*Can be called from mobile phones and PHSs.
DOCOMO mobile phone
-81-3-5366-3114*(toll free)
*Calling from the fixed phone will be charged according to
the call rate for Japan.
*
If you use SO706i, you should dial the number +81-3-5366-3114
(to dial “+”, press the “0” key for over a second).
Fixed phone
<Universal number>
-800-0120-0151 *
* You may be charged according to the call rate for the
country where you are staying.
* See p.334 for International call access code of main
countries (Table 1) and International Prefix number for the
universal number (Table 2) in this manual.
Lost or theft of FOMA terminal, or payment of cumulative cost overseas
If your FOMA terminal has been damaged overseas, bring it to a repair counter designated by DOCOMO after
●If your FOMA terminal is lost or stolen overseas, take procedure to suspend the subscription immediately.
●
returning to Japan.
International call access number
of the country you stay (Table 1)
Universal number international
prefix (Table 2)
<DOCOMO Information Center> (available 24 hours a day)
Failures encountered overseas
DOCOMO mobile phone
-81-3-6718-1414*(toll free)
*Calling from the fixed phone will be charged according to
the call rate for Japan.
*
If you use SO706i, you should dial the number +81-3-6718-1414
(to dial “+”, press the “0” key for over a second).
Fixed phone
<Universal number>
-800-5931-8600 *
* You may be charged according to the call rate for the
country where you are staying.
* See p.334 for International call access code of main
countries (Table 1) and International Prefix number for the
universal number (Table 2) in this manual.
International call access number
of the country you stay (Table 1)
Universal number international
prefix (Table 2)
<Network Technical Support and Operation Center> (available 24 hours a day)
’08.7 (1st Edition)
MDT-000091-EAA0
Easy Search/Contents/Precautions
Before Using the Handset
Voice/Videophone Calls
Phonebook
Sound/Screen/Light Settings
Security Settings
Camera
i-mode/i-motion/i-Channel
Mail
i-αppli
Osaifu-Keitai/ToruCa
Full Browser
1seg
Data Display/Edit/Management
Music&Video Channel/
Music Playback
Convenient Functions
Character Entry
Network Services
PC Connection
Overseas Use
Appendix/External Devices/
Troubleshooting
Index/Quick Manual
Utilizing recycled papers
This manual is printed using
an ink based on soy bean oil.
To prevent damage to the environment,
bring used battery packs to an NTT
DOCOMO service counter, an NTT
DOCOMO agent or a recycle center.
Don’t forget your cellular phone ...
or your manners!
○When using your mobile phone in public, don’t forget to show common courtesy
and consideration for others around you.
KDIC 2484 SO706i (英文1版) H1H4