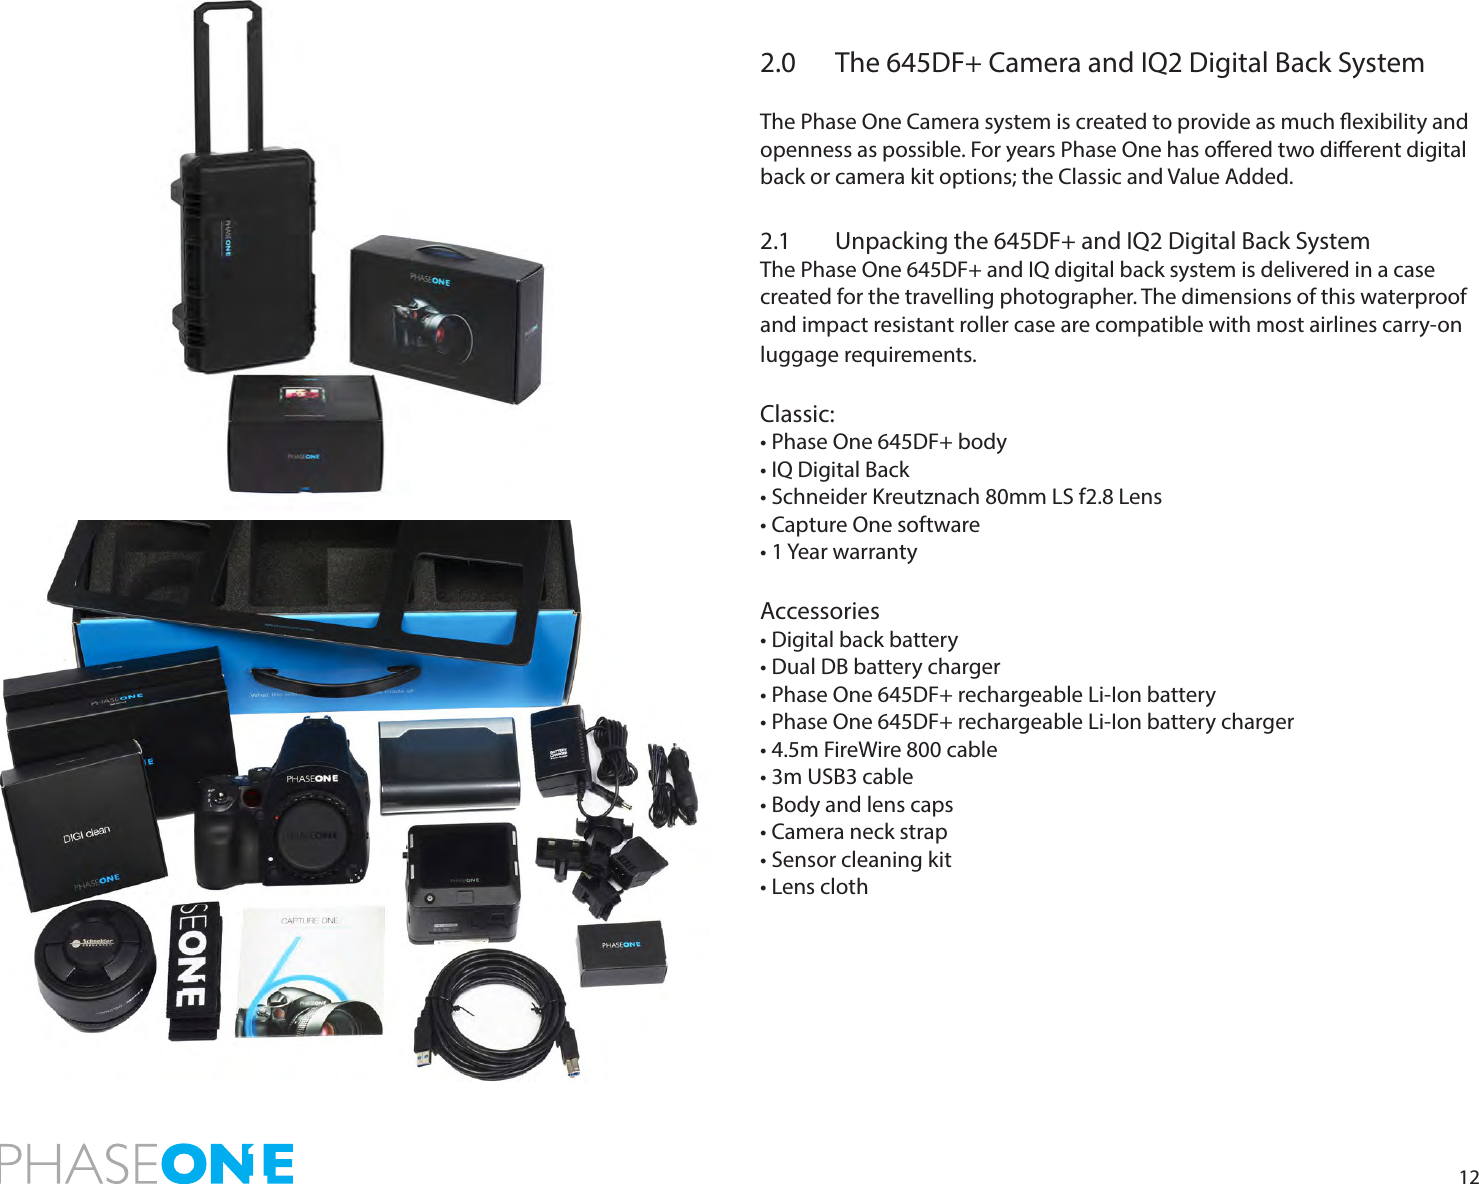
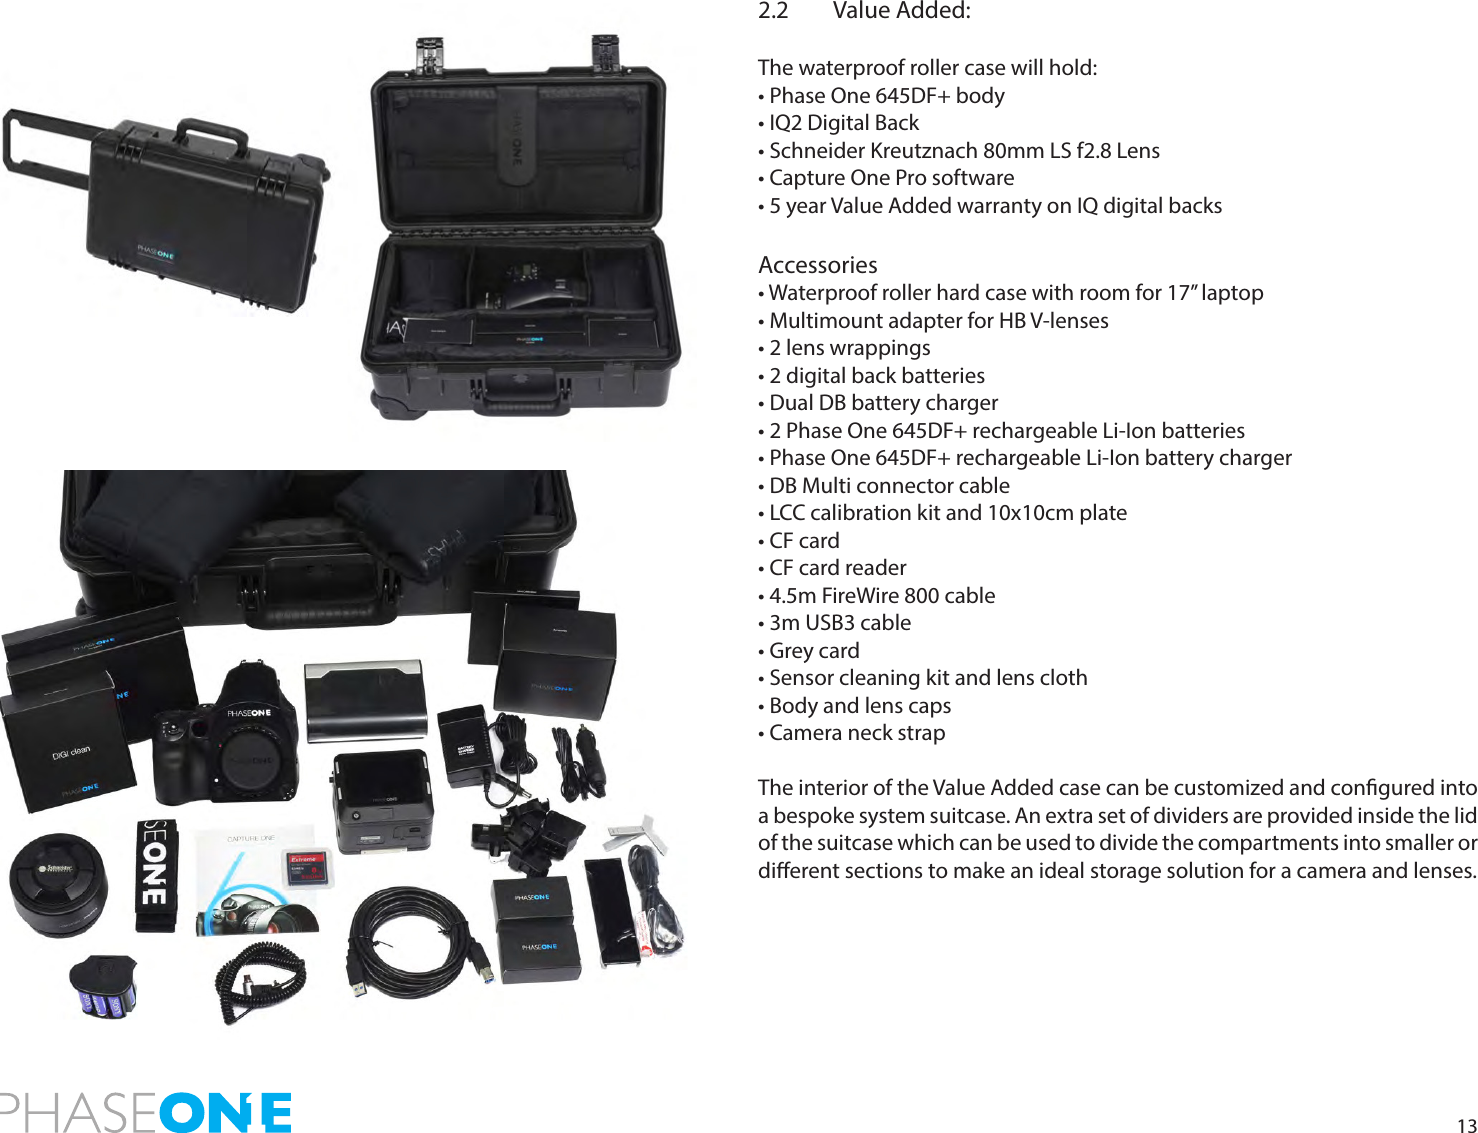
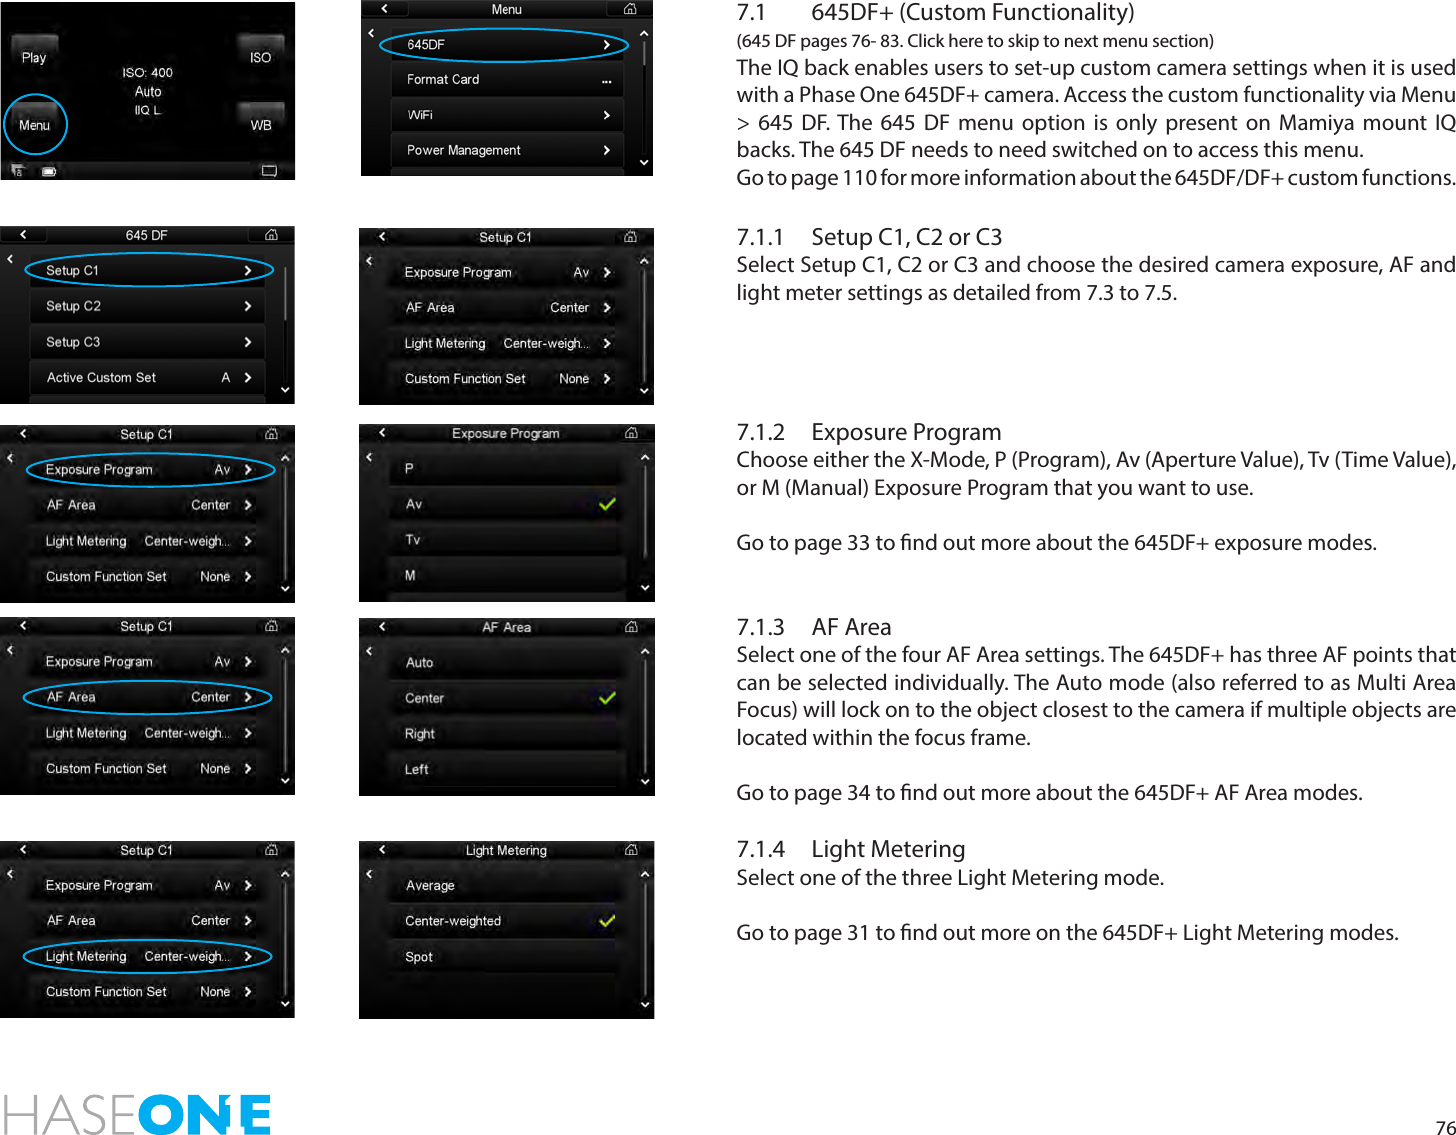
SparkLAN Communications WUBR507N 802.11abgn Wireless USB Module User Manual Phase One 645 DF and IQ Digital Back Users Guide
SparkLAN Communications, Inc. 802.11abgn Wireless USB Module Phase One 645 DF and IQ Digital Back Users Guide
Contents
UserMan_1


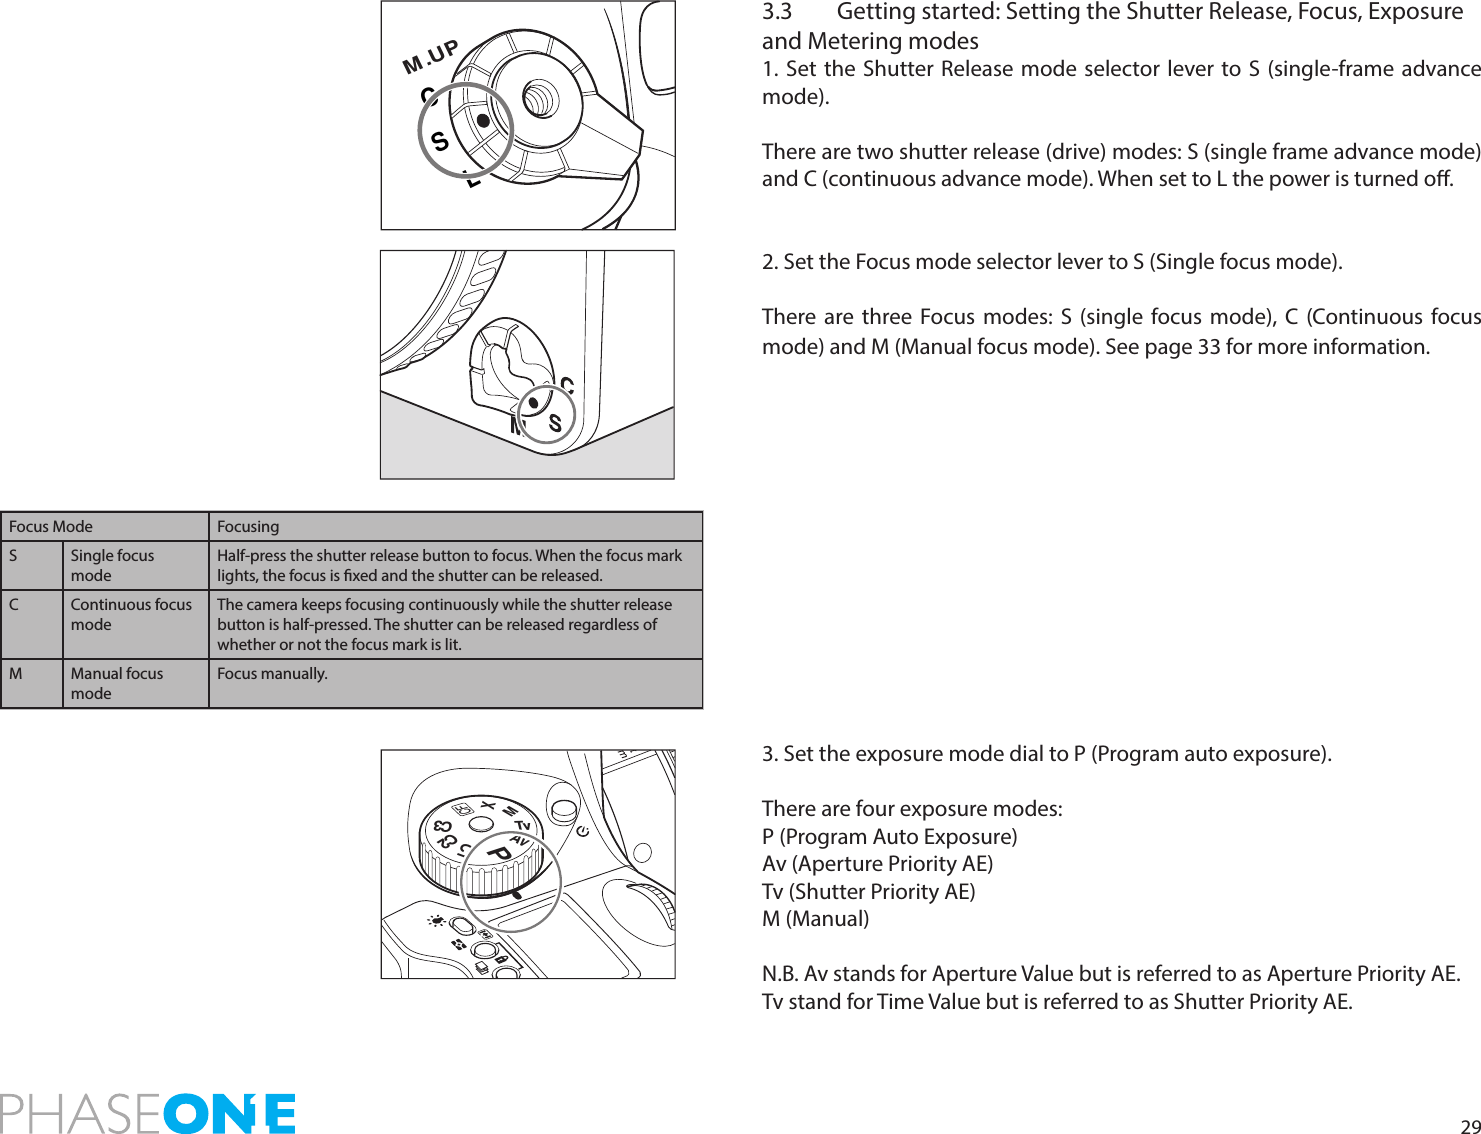
![182.7 Attach and Remove a Lens1. Remove the front body cap in the same way that you would remove a lens; push the lens release button [A] backward and then turn the front body cap or the lens itself counter clockwise and lift out. 2. Align the white alignment dot of the lens [B] (on the shiny ange) with the camera’s white dot [C]. Mount the lens and rotate it clockwise until it clicks into place. 3. To remove the front lens cap, squeeze the shiny sections together and lift out. (See image far left). To remove rear lens cap turn it counterclockwise.Remove a LensWhile sliding the lens release button[A] back, rotate the lens counter clockwise until it stops, and lift it o. After removing the lens from the camera body, protect both ends by attaching the caps.N.B. Oil, dust, ngerprints or water on the electronic contacts could result in malfunction or corrosion. Wipe such impurities o with a clean piece of cloth. Do not tap the distance ring or other rotating parts when attaching the lens. When installing a lens, do not press the lens release button.MF80mm1:28AF2222111144ftmA80mm1:28MFAF114422222005ftmCB80mm1:28MFAF11114422222005A111144222220ftm](https://usermanual.wiki/SparkLAN-Communications/WUBR507N.UserMan-1/User-Guide-2001877-Page-18.png)
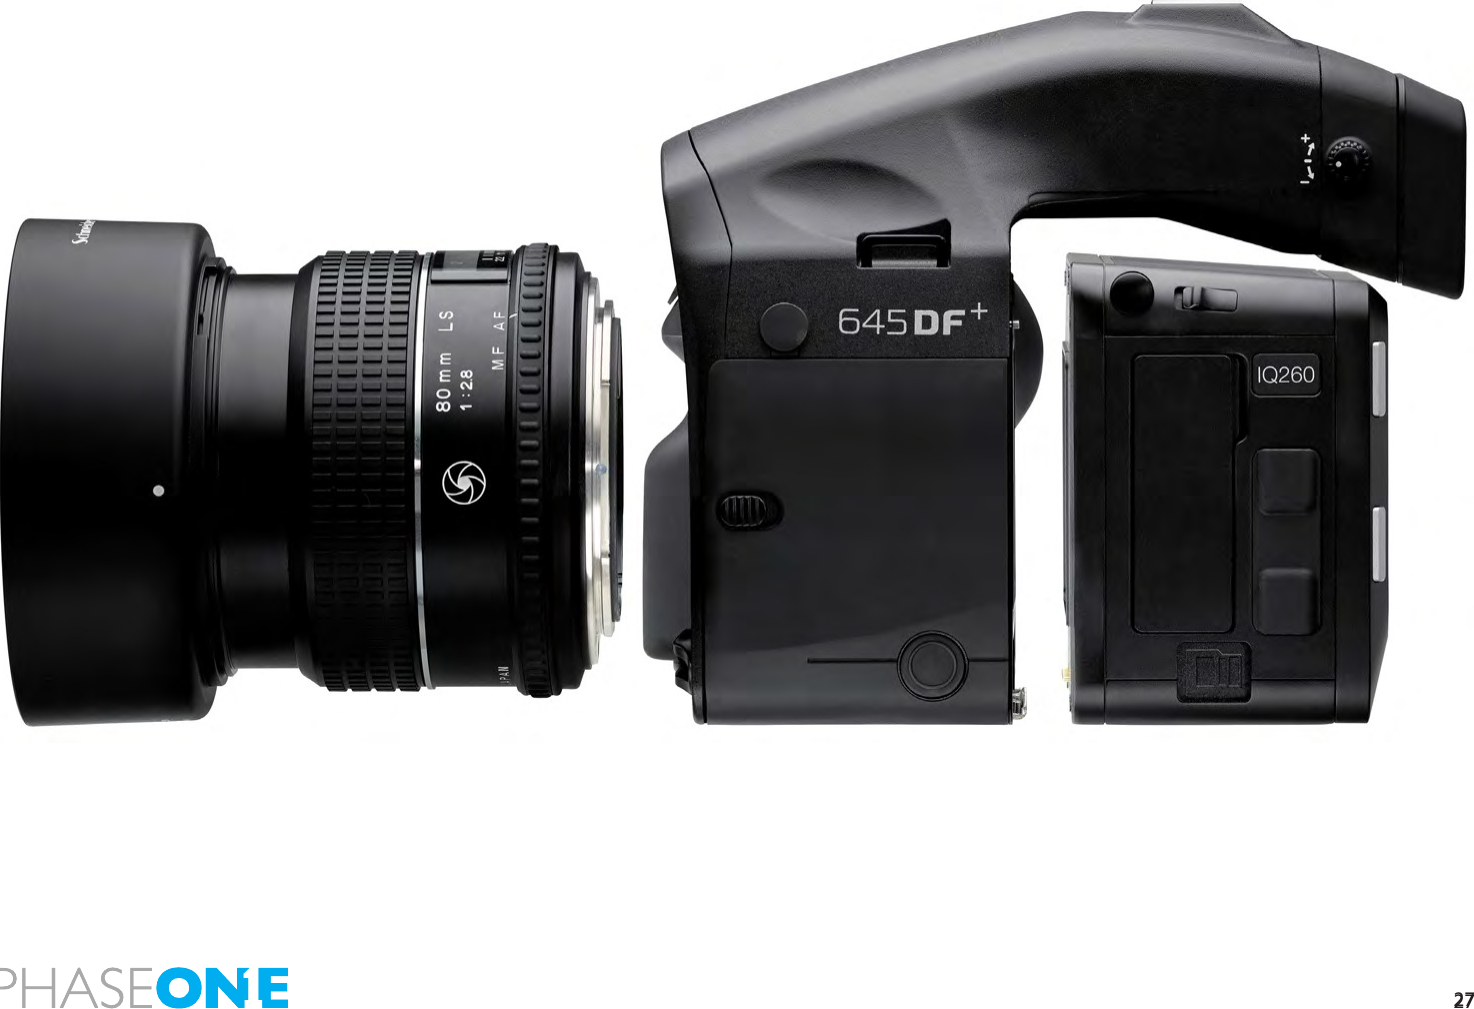
![202.9 Attaching the IQ2 BackThe IQ back is fully integrated with the camera body and functions as a part of the whole camera system. Ensure that the Phase One 645DF+ camera mirror is up and the shutter is open when no digital back is attached. When attaching the IQ back to the camera body the shutter will close and the mirror come down. First remove the cover on the IQ back and 645DF+ camera. Next, slide forward the lever [1] and push in button [2], and ensure that the bottom part of the IQ back is placed correctly in the lower locking mechanism on the back of the camera body before the upper locking mechanism is pressed together. Failure to do this can cause an error with the camera body where the shutter will continuously open and close. If this occurs, remove the IQ back. Make sure the camera body is powered and press button while mounting the digital back. Please be aware that the shutter should be in the correct starting position (shutter open). If this is not the case, attach and remove the IQ back again to make sure that the camera body gets in the correct starting position. Remove the IQ back by sliding forward the lever [1], pushing in button [2], and by gently pulling away the top of the back rst. Be careful with the contacts and protective glass on the back. Your IQ back should always be protected by its plate when it is not attached to the camera.12](https://usermanual.wiki/SparkLAN-Communications/WUBR507N.UserMan-1/User-Guide-2001877-Page-20.png)
![313.4 Measuring Light – Exposure Metering1. Press button [A] to adjust the exposure metering mode. There are three dierent exposure metering mode options that are displayed sequentially when either the front or rear dial is turned. Select an appropriate exposure mode. Your chosen exposure metering mode is displayed as an icon on the camera’s LCD screen. 2. Press the SET button [B] or exposure metering mode button [A] to enter the setting.Exposure WarningsUsers are warned when shooting subjects that are too bright or too dark with an inappropriate exposure setting. At such times, when the correct exposure cannot be obtained, users will be alerted by the numeric exposure display that will ash on the external LCD or on the display inside the viewnder. Warnings that the exposure is outside the metering range• Program AE (P) The shutter speed and f-number blink.• Aperture priority AE (Av) The shutter speed blinks.• Shutter priority AE (Tv) The f-number blinks.• Manual mode (M) The exposure metering value dierence is displayed.Average/spot auto exposure meteringExposure metering is performed after automatically selecting average/spot exposure metering.• Depending on the subject conditions, center-weighted average/spot exposure metering is selected automatically, and the correct exposure is measured.• Spot exposure metering is automatically selected when the brightness of the spot exposure metering range becomes darker than the brightness of the entire screen.• If there is very little dierence between the spot exposure metering value and center-weighted average exposure metering value, the correct exposure level is obtained as the intermediate value.Center-weighted average/spot exposure meteringThe average brightness of the entire screen is measured, emphasizing the center of the screen.Center spot exposure meteringThe brightness of an area equivalent to 7.6% at screen center is measured, and the exposure is determined. The circle at screen center serves as a general guideline. This mode is suited to measuring subjects with strong contrasts or measuring only screen portions.Viewer display PAvTvMXCFC1C2C3PAvTvMXCFC1C2C3AB](https://usermanual.wiki/SparkLAN-Communications/WUBR507N.UserMan-1/User-Guide-2001877-Page-31.png)
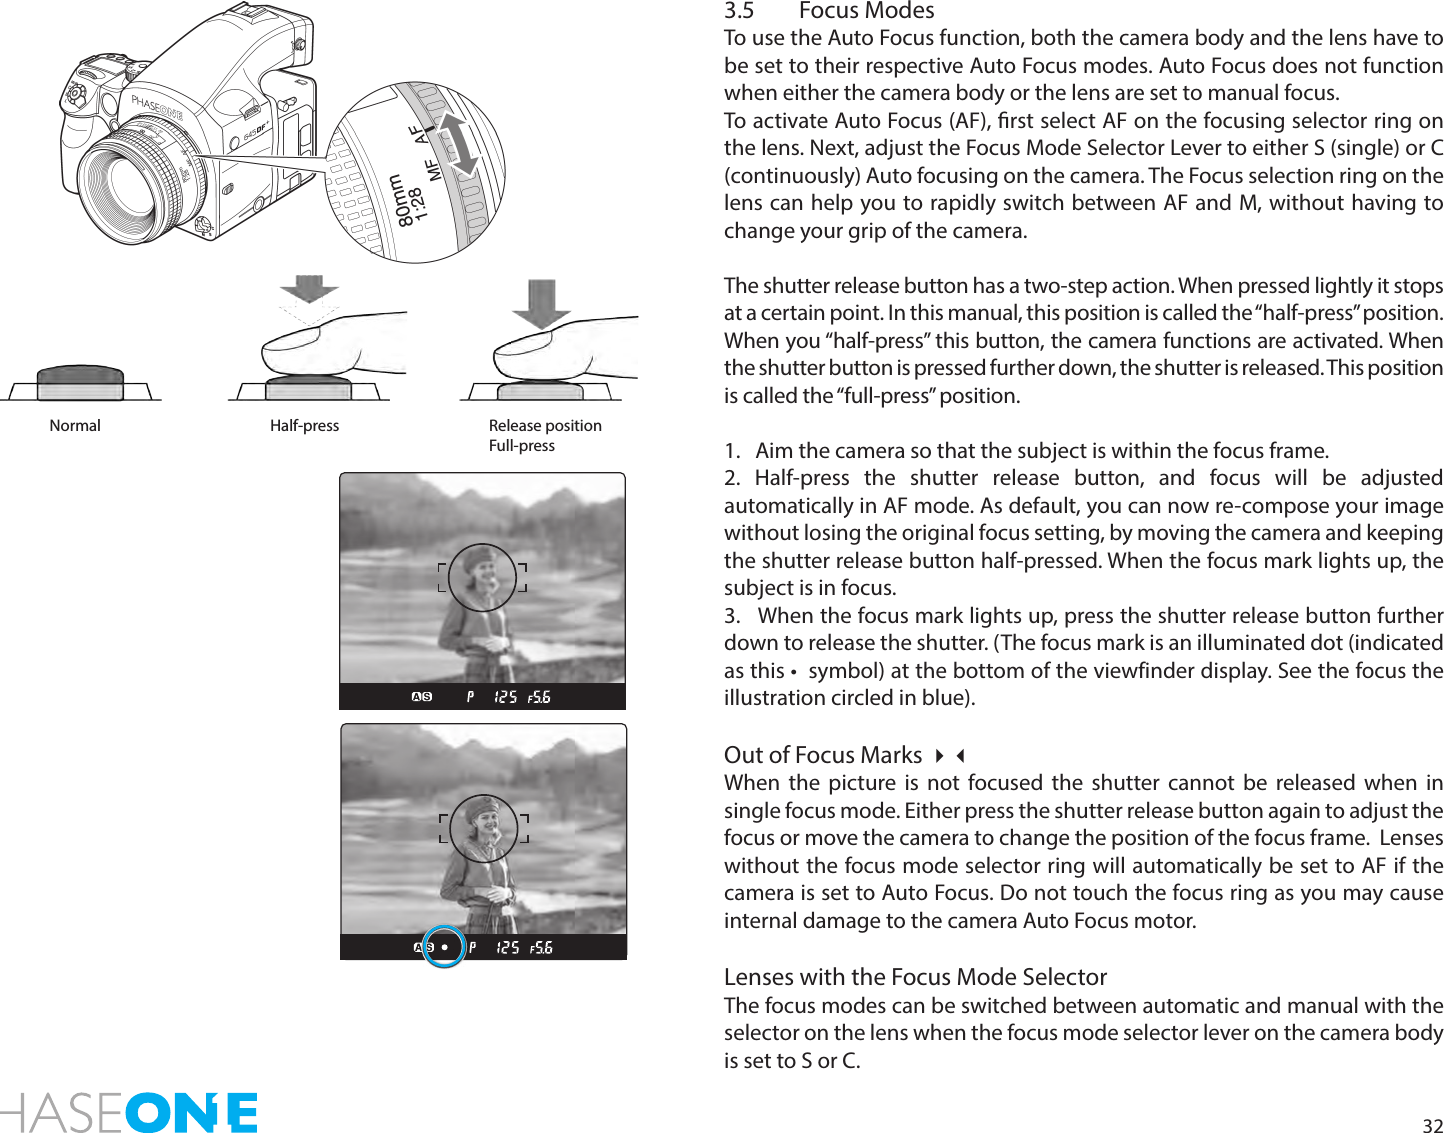
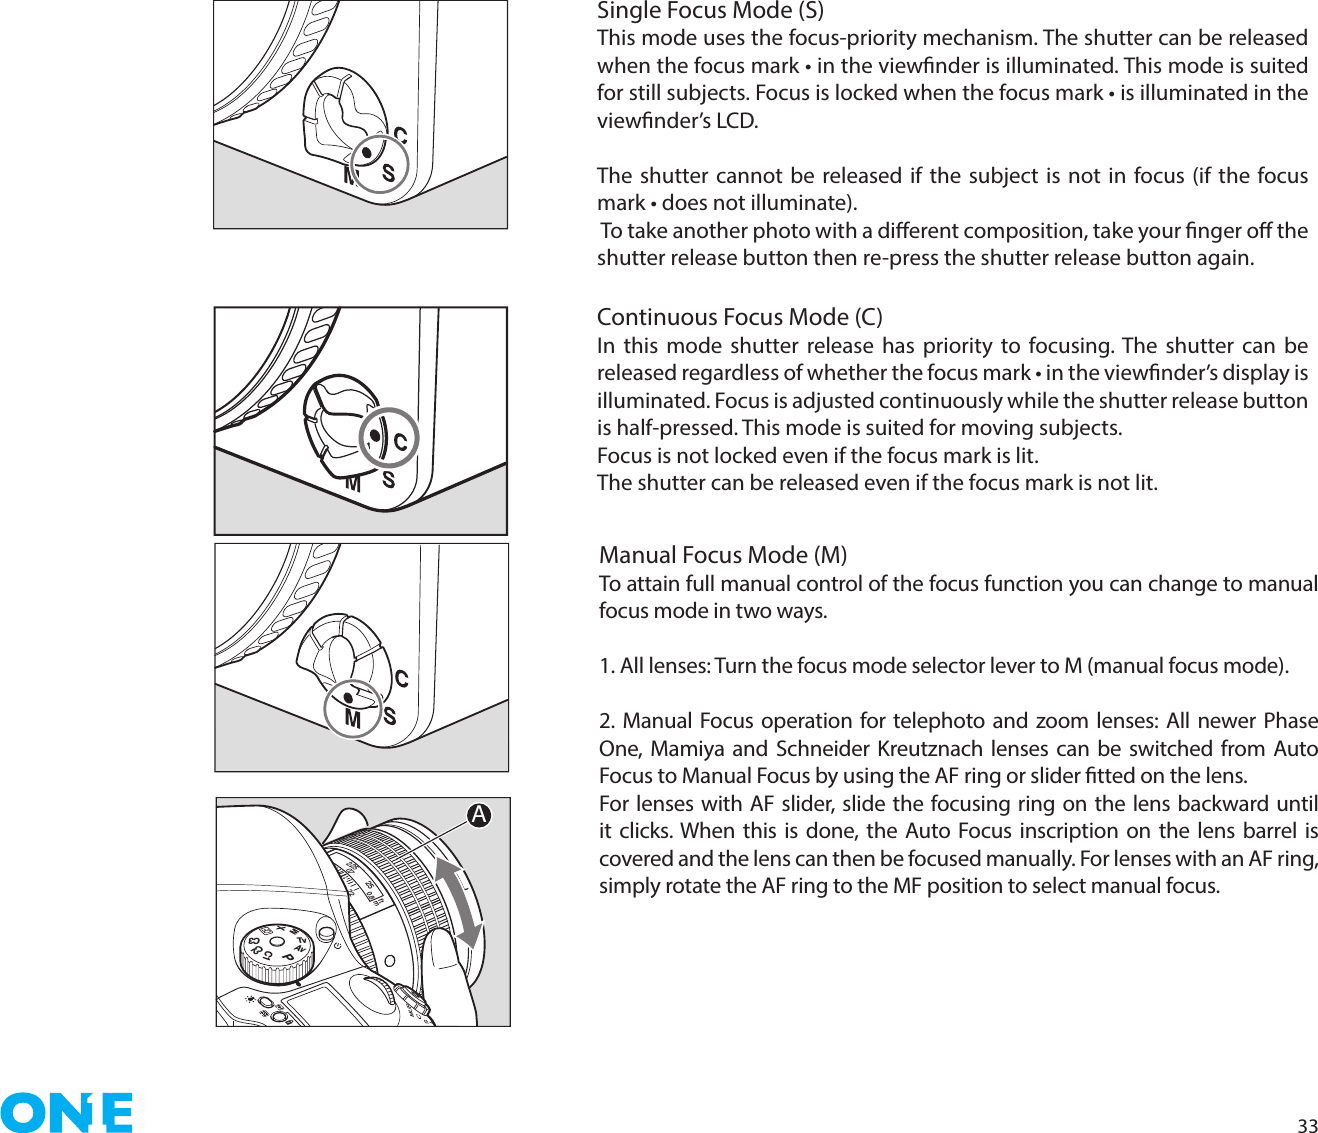
![343.6 Focus AreasYou can select the focus area that best suits the kind of pictures you intend to take. Push and hold the focus selection button [A] for at least one second; then turn the front or rear dial to select the appropriate focus area. The selected focus area can be seen on the main LCD panel. When the preferred focus mark is selected, press the SET [B] button or the focus point selector button [A] to exit the setting. Multi Area FocusWhen selecting multi area focus, the focus points are positioned in the viewnder according to the illustration shown to the left.If multiple objects are located within the focus frame, the camera will lock on to the object closest to the camera. Spot Focus AreaWhen spot focus is selected, the camera will lock on to objects positioned in the center of the viewnder. The camera will focus on the center mark in the focus frame [ O ] in the viewnder.Manual Focus Mode (M)To attain full manual control of the focus function you can change to manual focus mode in two ways.1. All lenses: Turn the focus mode selector lever to M (manual focus mode). 2. Manual Focus operation for telephoto and zoom lenses: All newer Phase One, Mamiya and Schneider Kreutznach lenses can be switched from Auto Focus to Manual Focus by using the AF ring or slider tted on the lens.For lenses with AF slider, slide the focusing ring on the lens backward until it clicks. When this is done, the Auto Focus inscription on the lens barrel is covered and the lens can then be focused manually. For lenses with an AF ring, simply rotate the AF ring to the MF position to select manual focus. Adjust the FocusTurn the lens focusing ring until the subject is in focus. When correct focus has been achieved, the focus mark in the viewnder will light up.Focus point selection markLeft AF area Right AF areaCenter AF areaMulti area focus Spot focus areaInside the view-nderPAvTvMXCFC1C2C322252.250.70.8ftmAPAvTvMXCFC1C2C3AB](https://usermanual.wiki/SparkLAN-Communications/WUBR507N.UserMan-1/User-Guide-2001877-Page-34.png)
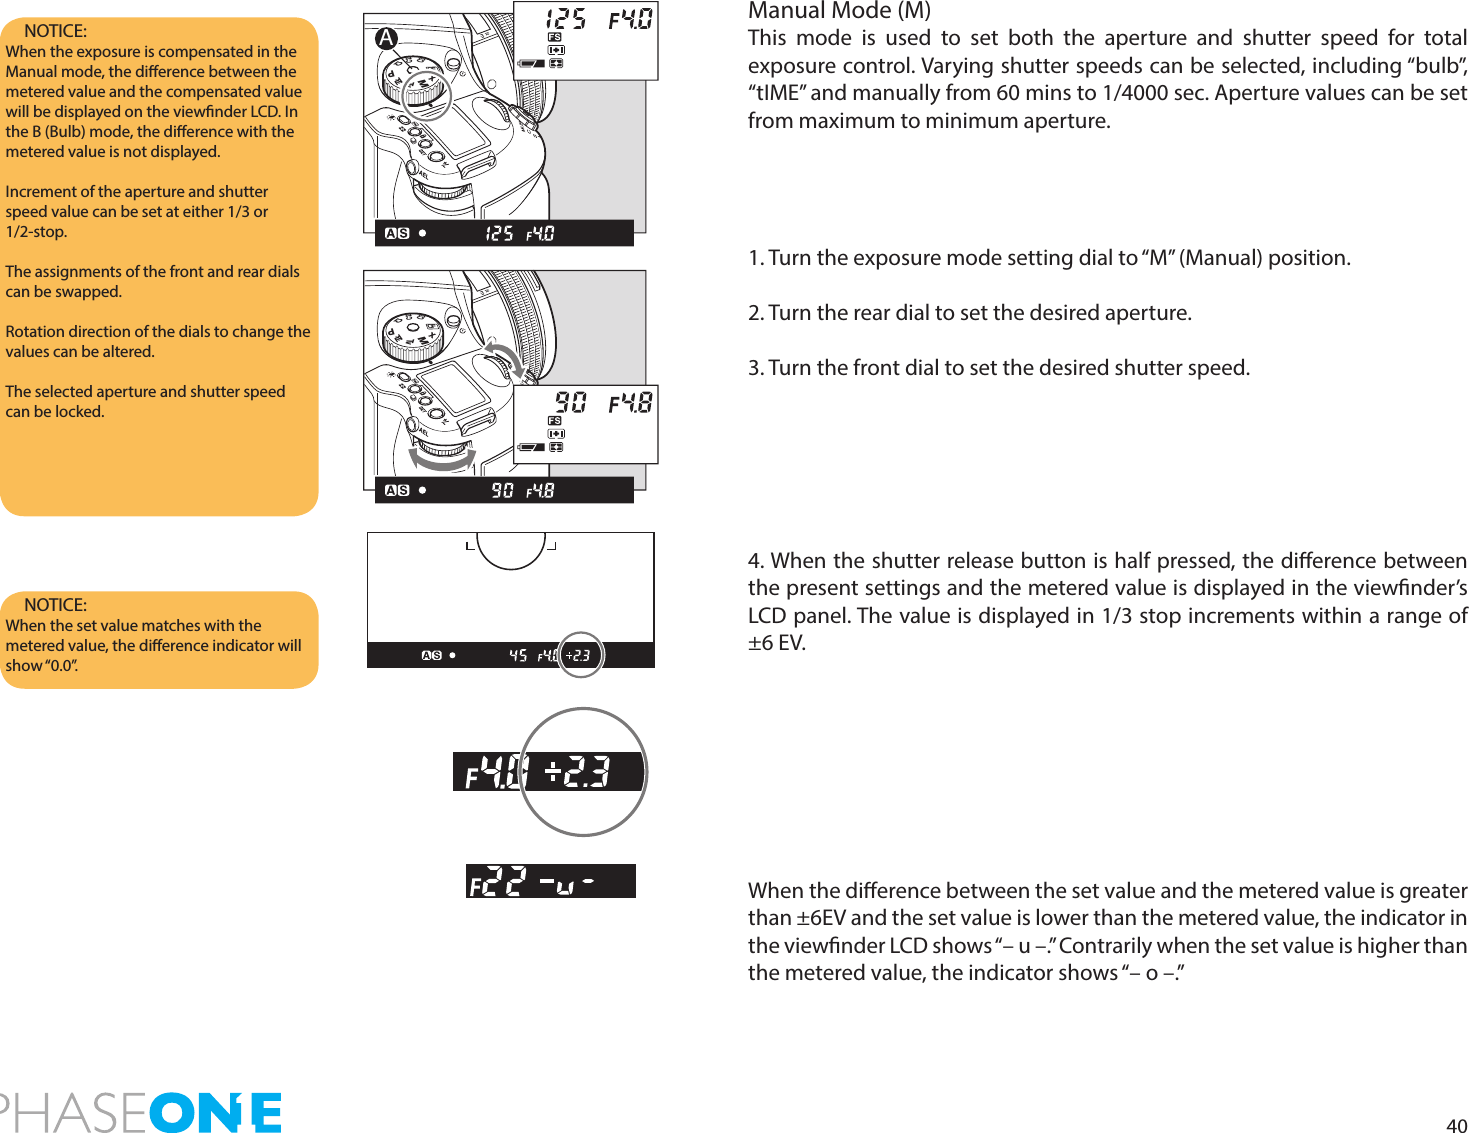
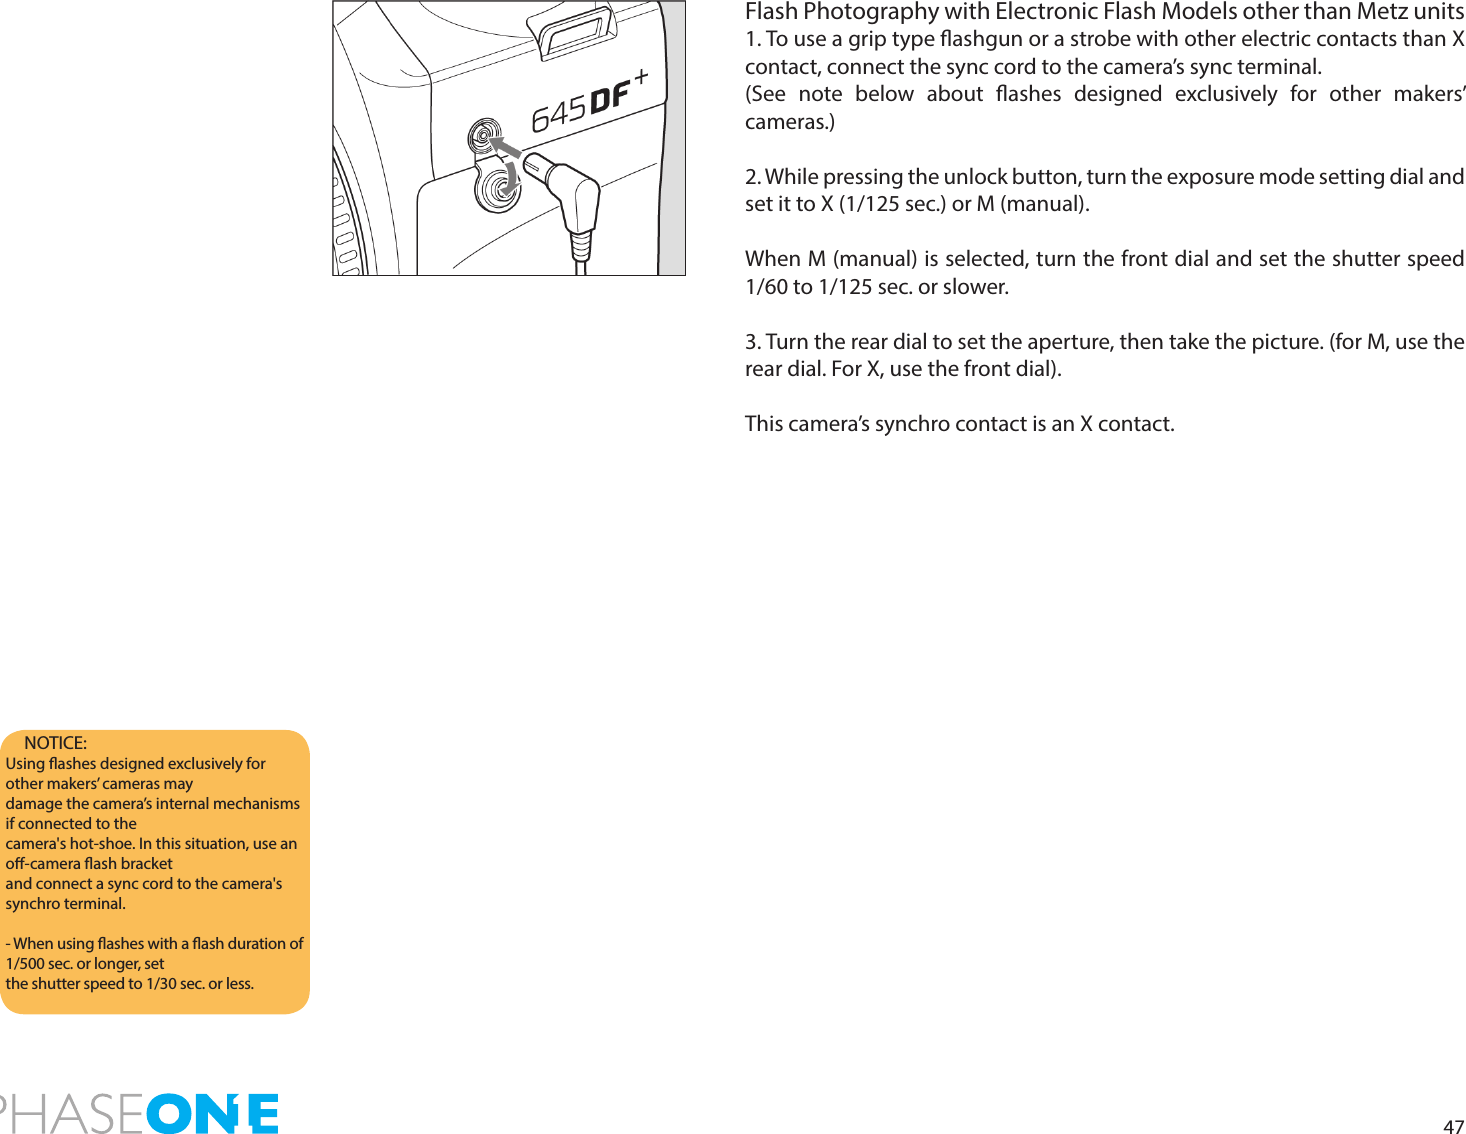
![41One-push Shift FunctionWhen the dierence between the set value and metered value is displayed on the viewnder LCD in the Manual “M” mode, press the AEL button for approx. 1 second and the camera will automatically adjust the shutter speed to achieve the correct exposure based on the set aperture value.While the dierence[B] between the set value[A] and the metered value is displayed on the viewnder LCD, press the AEL button[C] for approximately one second. The camera changes the shutter speed to an appropriate level. Auto Mode MechanismA leaf shutter’s working range is from 1/800 sec. to 1 second. To achieve other speeds (1/4000-1/800 sec., 1-60sec.., bulb) use the focal plane shutter.Synchro Mode (X)Select this mode when a ash is used. Choose “X” and the shutter speed will be xed at 1/125 second for synchronization.NOTICE: The aperture level can be selected for the parameter to shift. NOTICE: Photography using the leaf shutter or focal plane shutter can be selected in customs settings NOTICE: The selected aperture value can be locked.When 1/800 sec. shutter speeds can not be achieved even though the leaf shutter lens is attached, try another exposure mode.A BPAvTvMXCFC1C2C3CPTvAvMXCFC1C2C3APAvTvMXCFC1C2C3](https://usermanual.wiki/SparkLAN-Communications/WUBR507N.UserMan-1/User-Guide-2001877-Page-41.png)
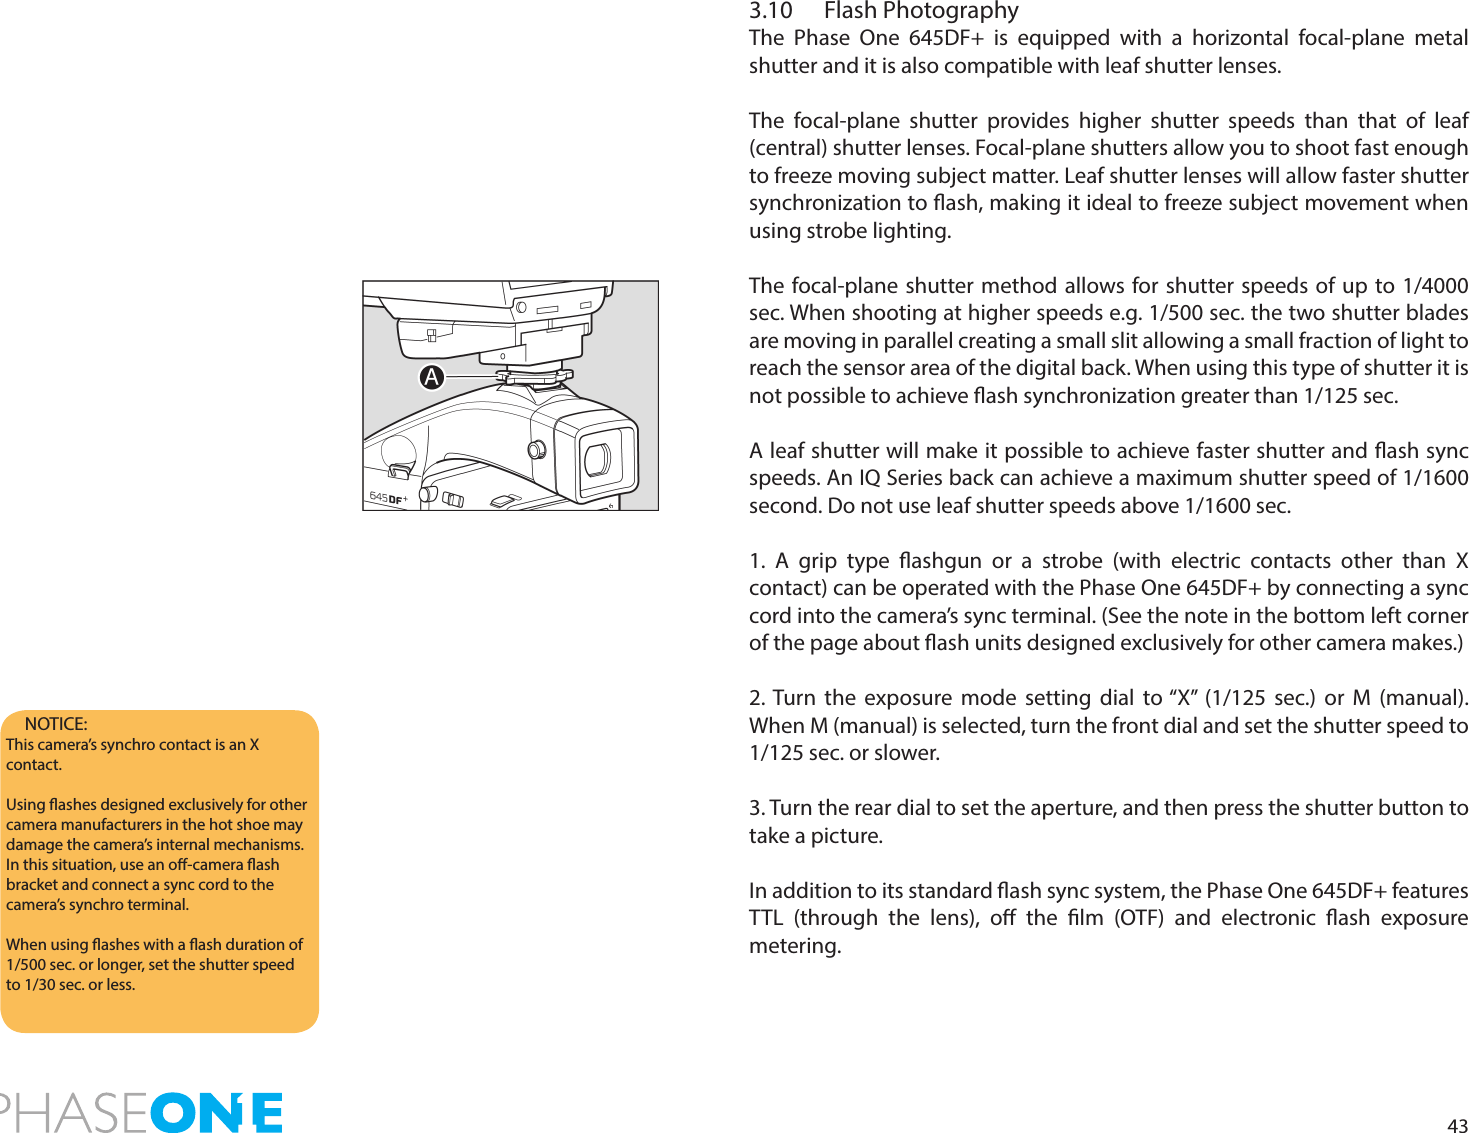
![44Phase One 645DF+ features TTL (Through The Lens), OTF (O The Film) and electronic ash exposure metering. A ash sensor located inside the camera body reads the ash light reected o the surface of the CCD at the moment of exposure. The sensor is connected via the Phase One 645DF+’s dedicated hot-shoe to a shoe or handle-mount style Metz ash unit via the Metz SCA 3952 TTL Adapter. Maximum ash speed is 1/125 sec. when the focal plane shutter is used, making daytime synchronization possible. The ISO of the ash is automatically set through the TTL connection from the camera’s lm magazine; any adjustment to this is instantly recognized after the setting is locked and the shutter release is half-pressed. To utilize the TTL ash feature with all TTL-operable Metz ash units, a Metz SCA 3952 module is required. Please see the chart for capability and/or additional adapters that may be necessary.The resulting ash exposure automation determines correct ash exposure and automatically adjusts the output of the ash. It also automatically corrects for exposure compensation normally required when using lters, close-up bellows or extension tubes.1. Mount the SCA3952 adapter onto the Metz ash, insert fully into the camera’s hot shoe, and then tighten with the locking knob[A].2. Set the exposure mode, and then check the shutter speed and aperture.Type of ash SCA3952 Module ConverterMetz 44 MZ-2 shoe-mount xMetz 54 MZ-3 shoe-mount xMetz 45 CL-3 & 4 Digital Handle-mount x SCA 3045Metz 60 CT-4 Handle-mount x SCA 3000Metz 70 MZ-5 & 4 Handle-mount xAdapterMetz Flash UnitFor more info on Metz, contact the local Metz dealer or www.metz.de Charging completed indicator in viewnderWhen charging of the ash is completed, a charging completed ash icon will illuminate in the viewnders display panelAutomatic setting of ash synchronizing speedWhen exposure mode is set at “AV”or “P”, the shutter speed will be automatically set to 1/60 to 1/125 sec. when charging of the ash is completed.When exposure mode is at “TV” or “M” and the shutter speed is faster than 1/125 sec., the shutter speed will be automatically set to 1/125 sec.Flash conrmation The ash charge mark ashes after the shutter is released to indicate that the ash was emitted properlyAuto zoom control The power zoom reector is linked to the lens focal length(excluding the Metz 32Z-2)Auto AF assist beam When the focus mode is set to “S”, the autofocus assist beam is emitted automatically in low light. (excluding the Metz 32Z-2)Display of ash range (distance) Displayed on the ash’s liquid crystal display panel. (Metz 32MZ-3 and Metz 32Z-2)Data transfer The lm sensitivity data, exposure compensation data and aperture data are sent from the camera to the ash.Metz 3952 functions](https://usermanual.wiki/SparkLAN-Communications/WUBR507N.UserMan-1/User-Guide-2001877-Page-44.png)

![463.11 Flash Compensation SettingsBy combining a Metz ash and the SCA3952 adapter, the camera adjusts for ash. It can be adjusted within ±3EV in increments of 1/3 steps.1. Turn on the PowerInstall the SCA3952 adapter on the Metz ash, and attach it to the camera. Lock the ash in place using the locking knob on the ash shoe. Turn the shutter release mode selector lever to the S or C position, and turn ON the ash power switch.2. When the ash charge conrmation lamp lights, press the set button [A] . The icon is displayed on the main LCD panel.3. Turn the front or rear dial to select the ash compensation value.External LCD Panel (normal display)4. When the shutter button is half-pressed, the display appears on the external LCD, and appears on the LCD inside the viewnder with a + compensation, or appears with a – compensation.Viewnder LCD Readouts - If the ash-charge mark is not displayed, the ash compensation button [A] cannot be used.- Keep pressing the set button to activate the ash compensation mode. You can check the exposure compensation value.- If you turn the shutter release mode selector lever to the L (power OFF) position, the compensation value will be cancelled.PAvTvMXCFC1C2C3APAvTvMXCFC1C2C3 ](https://usermanual.wiki/SparkLAN-Communications/WUBR507N.UserMan-1/User-Guide-2001877-Page-46.png)

![847.2 Format CardSelect Format Card to erase all data on a memory card. Memory card formatting is done in either FAT 16 or FAT 32 depending on card size. (IQ2 backs support CompactFlash cards formatted in both FAT 16 and FAT 32). 7.3 WiFiAll IQ2 digital backs can connect wirelessly with an iOS device like an iPad® or iPhone®. Before you start, download and install Capture Pilot on your iOS device from the Apple App Store.There are two primary ways to connect your IQ2 digital back to an iOS device: direct for a range of up to 8m/25ft or via a router for a range up to 30m/100ft.Connect directly using Adhoc mode 1. Go to Menu>WiFi>Mode and tap the Adhoc option. This will publish a network with default name “PhaseOne[seial number]”2. From the iPad®/iPhone®: General>WiFi>Connect to network: “PhaseOne[seial number]”3. Start Capture Pilot and select the “PhaseOne[serial number]” under Local ServersN.B In the iPad Wi-Fi settings use the Icon to unfold the network settings of the IQ2 network – then switch on the “Auto-Join” to ensure that theconnection will always reconnect if it looses connection.](https://usermanual.wiki/SparkLAN-Communications/WUBR507N.UserMan-1/User-Guide-2001877-Page-84.png)
![85Setting up your IQ2 to connect via Router1. Turn on WiFi: Menu>WiFi>Mode>On2. Select network: Menu>WiFi>Select Network3. Type user name and password as prompted from the network.Connecting Capture Pilot to your IQ2 when using router:1. From General>WiFi: Select same network as selected on IQ22. Open Capture Pilot.3. Select “PhaseOne[seial number]” under Local Servers in Capture PilotTo reset all WiFi settings, including all network settings and pin code use: Menu>Restore to DefaultOn the IQ260 you can change the hostname, set a pin code or select a specic network channel under: Menu>WiFi >SettingsN.B. Only basic ASCII (i.e. basic English) characters are supported when working wirelessly with host names, user names and passwords.](https://usermanual.wiki/SparkLAN-Communications/WUBR507N.UserMan-1/User-Guide-2001877-Page-85.png)