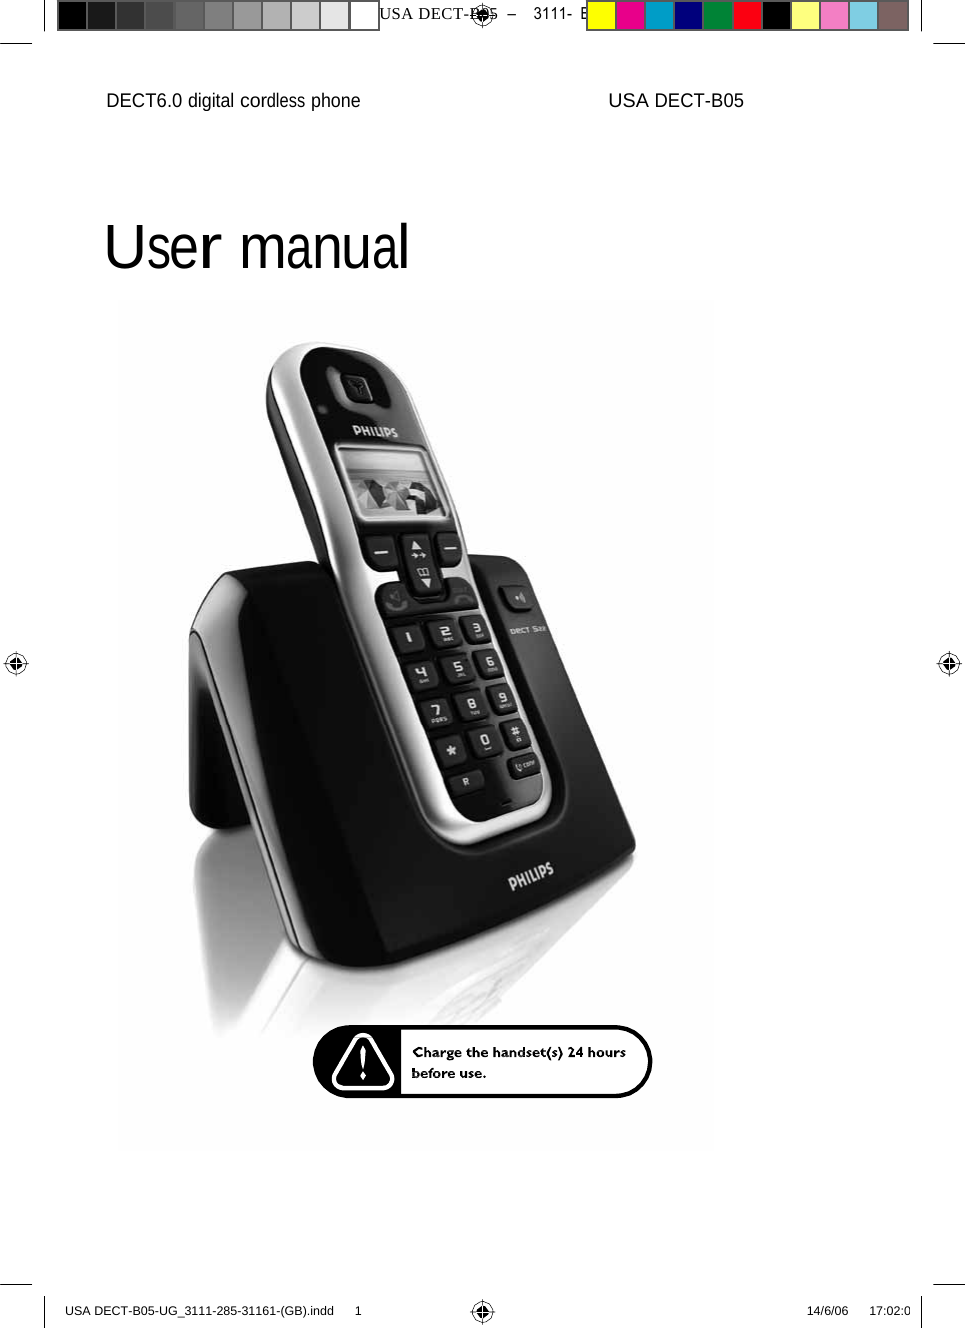
Sun Communications USADECT-B05 US DECT PHONE - BASE User Manual
SunCorp Communications Limited US DECT PHONE - BASE
UserManual.wiki
>
Sun Communications
>
USADECT B05 User Manual
USERS MANUAL
Navigation menu
Upload a User Manual
Namespaces
Wiki Guide
HTML
PDF
Info
Views
User Manual
Discussion / Help
Navigation
![7471 – hilips DEB) –1 14.06.06CT522–3111-285-31161-NamesENNames . ... . . . . ... . Add entry. . ... . Copy Phonebook. . ... . Memory Status. . ... . Delete PhonebookView anddial phonebookentries1 Press in standby mode to open the phonebook. If there are entries stored they are listed in alphabetical order. 2 Scroll or to browse the phonebook. TIP Instead of scrolling ortobrowsethe phonebookentries,you can press the numeric key corresponding to the first letter of the entry you wish to locate. For example, pressing will show the entries starting with A. Pressing again will show the entries starting with B, etc… 3 Press to dial the displayedentry.Ortoviewdetailsofaphonebookentry, press Options then Select to choose Show Details. 4 Press to return to standby. Add entry in the phonebookYou can store up to 50 entries. Each entry must included a name and number. 1 Press Names. 2 Scroll to Add Entry and press Select. 3 Enter the name (see next page). Press OK. 4 Enter the number. Press Save. 5 If you wish, scroll or to select the ringer melody. Press Select.The display shows [Entry] Saved. Ringer melody You can choose a different ringer melody for different numbers. For example, assign one melody for friends and family and another for work.When the phone rings, you will have an audible indication of who is calling. Please note This feature requires asubscription to a Caller Line Identification (CLI) service. 6 Press to return to standby.19522-UG_3111-285-31161-(GB).indd 19 14/6/06 17:02:2](https://usermanual.wiki/Sun-Communications/USADECT-B05/User-Guide-679087-Page-19.png)
![7471 – hilips DEB) –1 14.06.06CT522–3111-285-31161-EN NamesText andnumber entry For example, to enter the name ‘Paul’: Press once to enter P, press onceto enter A, press twice to enter U, then press three times to enter L. If you make a mistake, press Clear to delete the last character. Names can be up to 12 characters and numbers up to 24 digits.The number of available characters/digits remaining is shown at the top right of the display. When entering a name, the first character is automatically given as an upper case letter with the rest of the name in lower case lettering. Press to switch between upper and lower case, the Abc icon indicates the current letter case. Edit phonebook entry1 Press in standby mode. 2 Scroll or to the entry and press Options. 3 Scroll or to Edit Entry and press Select. Press Clear to delete current name. Enter the new name then press OK. 4 Press Clear to delete current number. Enter the new number then press Save5 Scroll or to select the ringer melody. Press Select. 6 The display shows [Entry] Saved. Press to return to standby. Change ringtone for anentryRingtoneYou can choose a different ringer melody for different numbers. For example, assign one melody for friends and family and another for work.When the phone rings, you will have an audible indication of who is calling. Please note This feature requires asubscription to a Caller Line Identification (CLI) service. 201 Press in standby mode.2 Scroll or to the entry and press Options. 3 Scroll or to Edit Entry and press Select. 4 Press OK then Select to display the list of melodies. 5 Scroll or to the ringtone you want and press Select to save the changes. The display shows [Entry] Saved. 6 Press to return to standby. 522-UG_3111-285-31161-(GB).indd 20 14/6/06 17:02:2](https://usermanual.wiki/Sun-Communications/USADECT-B05/User-Guide-679087-Page-20.png)
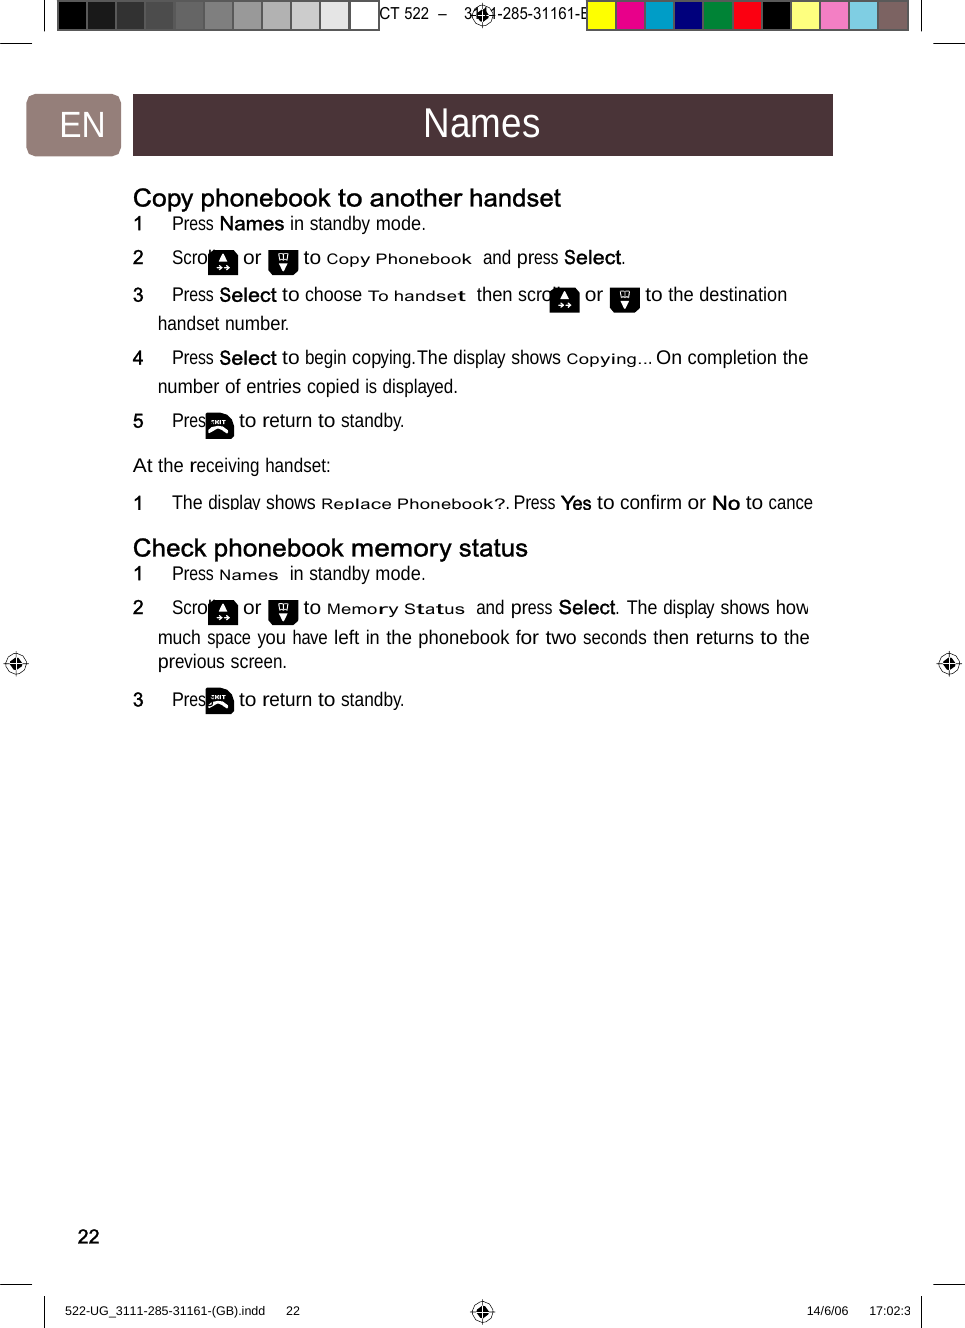
![7471 – hilips DEB) –1 14.06.06CT522–3111-285-31161-NamesENDelete phonebook entry1 Press in standby mode. 2 Scroll or to the entry and press Options. 3 Scroll to Delete Entry and press Select.The display shows Delete [Entry] ?. 4 Press Yes to confirm or No to cancel.The display shows [Entry] Deleted. 5 Press to return to standby. Delete allphonebookentries1 Press Names. 2 Scroll to Delete Phonebook and press Select.The display shows Delete All Entries?. 3 Press Yes to confirm or No to cancel.The display shows All Entries Deleted. 4 Press to return to standby. Copying phonebook entriesWhen copying phonebook entries,theotherhandsetmustberegisteredto the same base as your handset. If the other handset does not belong to the DECT 522/527 range, this function may not be available. Copy entry to anotherhandset1 Press in standby mode. 2 Scroll or to the entry and press Options. 3 Scroll to Copy Entry and press Select. 4 To Handset is highlighted. Press Select. 5 Scroll or to the destination handset number and press Select.The display shows Copying [Entry] and the entry is copied. Once copied, the display shows [Entry] Copied. 6 Select another entry to becopiedorpresstoreturntostandby. If the receiving handset memoryisfull,itdisplaysPhonebook Memory Full!. The sending handset displays Copying Unsuccessful!. 21522-UG_3111-285-31161-(GB).indd 21 14/6/06 17:02:2](https://usermanual.wiki/Sun-Communications/USADECT-B05/User-Guide-679087-Page-21.png)
![7471 – hilips DEB) –1 14.06.06CT522–3111-285-31161-NetworkServicesENNetworkServices .......Show. . .....EditEntry. . .....DeleteEntry. . .....DeleteAllStore a network servicenumberStore up to 10 of your most important or useful network service numbers, for example helplines, directory services, voicemail service etc. 1 Press Menu, scroll or to Network Services and press Select. 2 Scroll or to an empty space and press Options. 3 Scroll to Edit Entry and press Select. 4 Enter the name and press Save. 5 Enter the number and press Save 6 Press to return to standby. View anddial a networkservicenumber1 Press Menu, scroll or to Network Services and press Select. 2 Scroll or to the entry and press Options. 3 Press Select to choose Show Details. 4 Press Dial to call the number. If the number is a prefix, you can enter the rest othe number or add an entry from the phonebook. Or pressto return to standby. Edit a network servicenumber1 Press Menu, scroll or to Network Services and press Select.2 Scroll or to the entry and press Options. 3 Scroll to Edit Entry and press Select. 4 Edit the name, press Save. 5 Edit the number, press Save.The display shows [Entry] Saved. 6 Press to return to standby. 23522-UG_3111-285-31161-(GB).indd 23 14/6/06 17:02:3](https://usermanual.wiki/Sun-Communications/USADECT-B05/User-Guide-679087-Page-23.png)
![7471 – hilips DEB) –1 14.06.06CT522–3111-285-31161-EN NetworkServicesDelete anetwork servicenumber1 Press Menu, scroll or to Network Services and press Select. 2 Scroll or to the entry and press Options. 3 Scroll to Delete and press Select.The display shows Delete [Entry] ?. 4 Press Yes to confirm or No to cancel.The display shows [Entry] Deleted. 5 Press to return to standby. Delete allnetwork servicenumber1 Press Menu, scroll or to Network Services and press Select. 2 Press Options, scroll to Delete All Entries and press Select.The display shows Delete All Entries?. 3 Press Yes to confirm or No to cancel.The display shows All Entries Deleted4 Press to return to standby. 24522-UG_3111-285-31161-(GB).indd 24 14/6/06 17:02:3](https://usermanual.wiki/Sun-Communications/USADECT-B05/User-Guide-679087-Page-24.png)
![7471 – hilips DEB) –1 14.06.06CT522–3111-285-31161-EN CallLog4 To viewfurther details aboutthecall,pressOptionsthenSelecttochoosShow Details. Or, to dial the number displayed, press . 5 Press to return to standby. Save a number from thecalllogtothephonebook1 Press Menu and scroll or to Call Log and press Select. 2 Scroll or to the log you want: Missed Calls, Received Calls or Dialled Calls and press Select. 3 Scroll or to the entry you want and press Options. 4 Scroll or to Save Number andpressSelect. The SaveNumber option will notbeavailableifthenumberisalreadystored in the phonebook. If the phonebook is full when Save Number is selected, the display will show Phonebook Memory Full and returns to the previous screen. 5 Enter aname for the entryandpressOK.Thenumberisdisplayed.Ifyou need to edit the number, press Clear to delete incorrect digits. 6 Press Save and scroll or to select a ringer melody. Press Select to confirm. The display shows [Entry] Saved. 7 Press to return to standby. Delete acall log entry1 Press Menu and scroll or to Call Log and press Select. 2 Scroll or to the log you want: Missed Calls, Received Calls or Dialled Calls and press Select. 3 Scroll or to the entry you want and press Options 4 Scroll to Delete Call and press Select.The display shows Call Deleted. 5 Press to return to standby. 26522-UG_3111-285-31161-(GB).indd 26 14/6/06 17:02:3](https://usermanual.wiki/Sun-Communications/USADECT-B05/User-Guide-679087-Page-26.png)
![7471 – hilips DEB) –1 14.06.06CT522–3111-285-31161-CallLogENDelete all entries in acalllogYou can delete all entries in any one of the individual call logs or all entries in the entire call log. 1 Press Menu and scroll or to Call Log and press Select. 2 Scroll to Delete Calls and press Select. 3 Scroll or to the log you want: Missed Calls, Received Calls, Dialled Calls or All Calls and press Select. 4 Press Yes to confirm or No to cancel.The display shows All Calls Deleted. 5 Press to return to standby. Accessthe rediallist1 Press from standby andscrollortoviewtheentries.Save a redial list entrytophonebook1 Press from standby and scroll or to the entry you want to save. 2 Press Options and scroll or to Save Number and press Select. 3 Enter a name for the entry and press OK.The number is displayed. If you need to edit the number, press Clear to delete incorrect digits. 4 Press Save and scroll or to select a ringer melody. Press Select to confirm. The display shows [Entry] Saved. 5 Press to return to standby. Delete anumber fromrediallist1 Press from standby and scroll or to the number. 2 Press Options. Scroll or to Delete Calls and press Select.Delete the redial list 1 Press from standby. 2 Press Options. Scroll or to Delete All and press Select.3 Press Yes to confirm or No to cancel. 4 Press to return to standby. 27522-UG_3111-285-31161-(GB).indd 27 14/6/06 17:02:3](https://usermanual.wiki/Sun-Communications/USADECT-B05/User-Guide-679087-Page-27.png)