Sungjin Techwin MHF-R330BT BLUETOOTH REARVIEW MIRROR HANDS-FREE CAR KIT User Manual 2 of 2
Sungjin Techwin Co., Ltd. BLUETOOTH REARVIEW MIRROR HANDS-FREE CAR KIT Users Manual 2 of 2
Contents
- 1. Users Manual 1 of 2
- 2. Users Manual 2 of 2
Users Manual 2 of 2
Installation on the HandsFree KitInstallation on the HandsFree Kit
Bluetooth HandsFree Car Kit
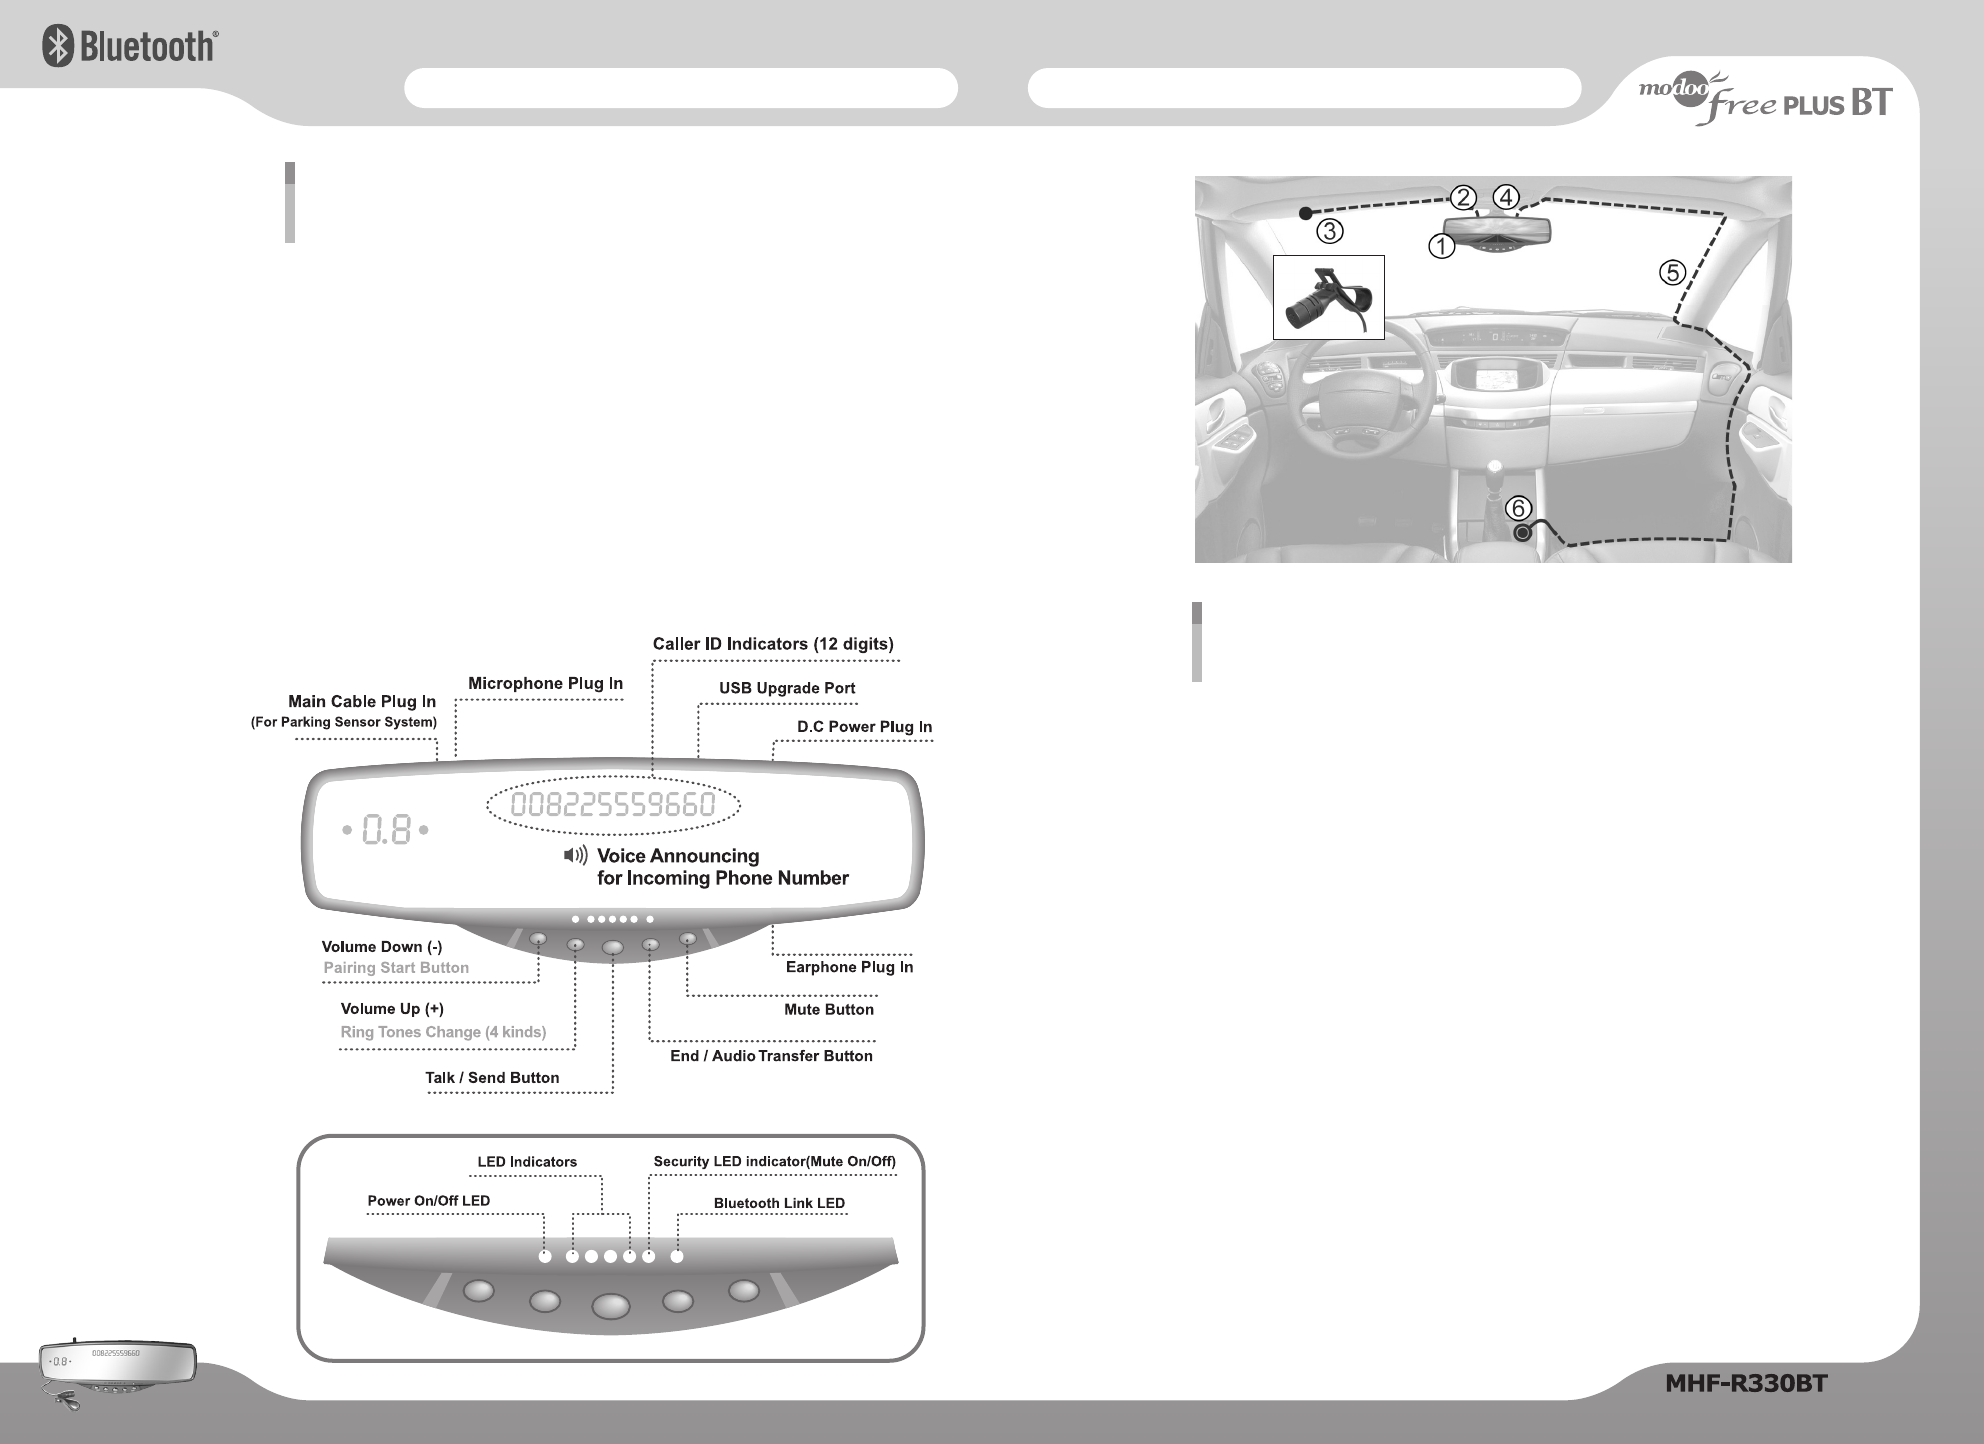
①On the back of the MHF-R330BT unit you will see two pairs of clips. Place the bottom pair
of clips on the underside of your existing rearview mirror. Lift the unit so that the bottom
clips extend allowing the top clips to be fixed in position on top of your Rearview mirror
and securely hold the handsfree unit in place. Adjust the fitted unit to your preference for
clear rear vision.
②Select a suitable position for the microphone depending on your vehicle type, this should
be placed close to the users head - the driver’s sun visor is normally adequate.
“It is highly recommended to have the front of the microphone (side with more holes)
directly facing the operator for the best voice pickup.” The microphone can be placed
either back or front of the visor by detaching, rotating and re-attaching microphone holder
to correct side of the microphone.
③Clip a microphone on the driver’s sun visor recommended to keep a distance of the
microphone from the MHF-R330BT unit as long as possible.
④Insert the power jack of the power adapter cable (4M).
⑤Connect the Power Adapter Cable into its respective socket on the MHF-R330BT unit.
⑥The power lead should be secured and hidden into the vehicles interior using the seals or
joins around the windscreen and door “A-Frame” and under your dashboard. Ensure that
you leave yourself enough cable to be able to connect to your cigarette lighter socket.
Note : Please ensure that the microphone and power cable do not interfere with the safe
operation of your vehicle.
Installation guide
67
Part description (Bluetooth handsfree car kit)
D.C Power Input - Connect to the cigarette lighter
USB Upgrade Port - For firmware upgrade
Speaker - The back side
Caller ID Indicators - 12 digits (phone with handsfree profile required)
LED Indicators - 4 LEDs - Light on (during handsfree use)
Bluetooth Link LED - Light twinkling (Pairing mode)
Light on (Bluetooth mode)
VOL ▲▲/ ▼▼- For adjusting the loudspeaker volume up / down
- Also used during the initial set up and pairing process
SEND - Controls ‘Answer & Talk’, ‘Redial’, ‘Voice Dialling’ and ‘Pairing re-activation’
END - ‘End’, ‘Reject’ and ‘Audio transfer’
MUTE - Switches OFF built-in loudspeaker allowing private conversation when
optional earphone. (not included)
EAR - Earphone plug in
Installation on the HandsFree KitInstallation on the HandsFree Kit
89
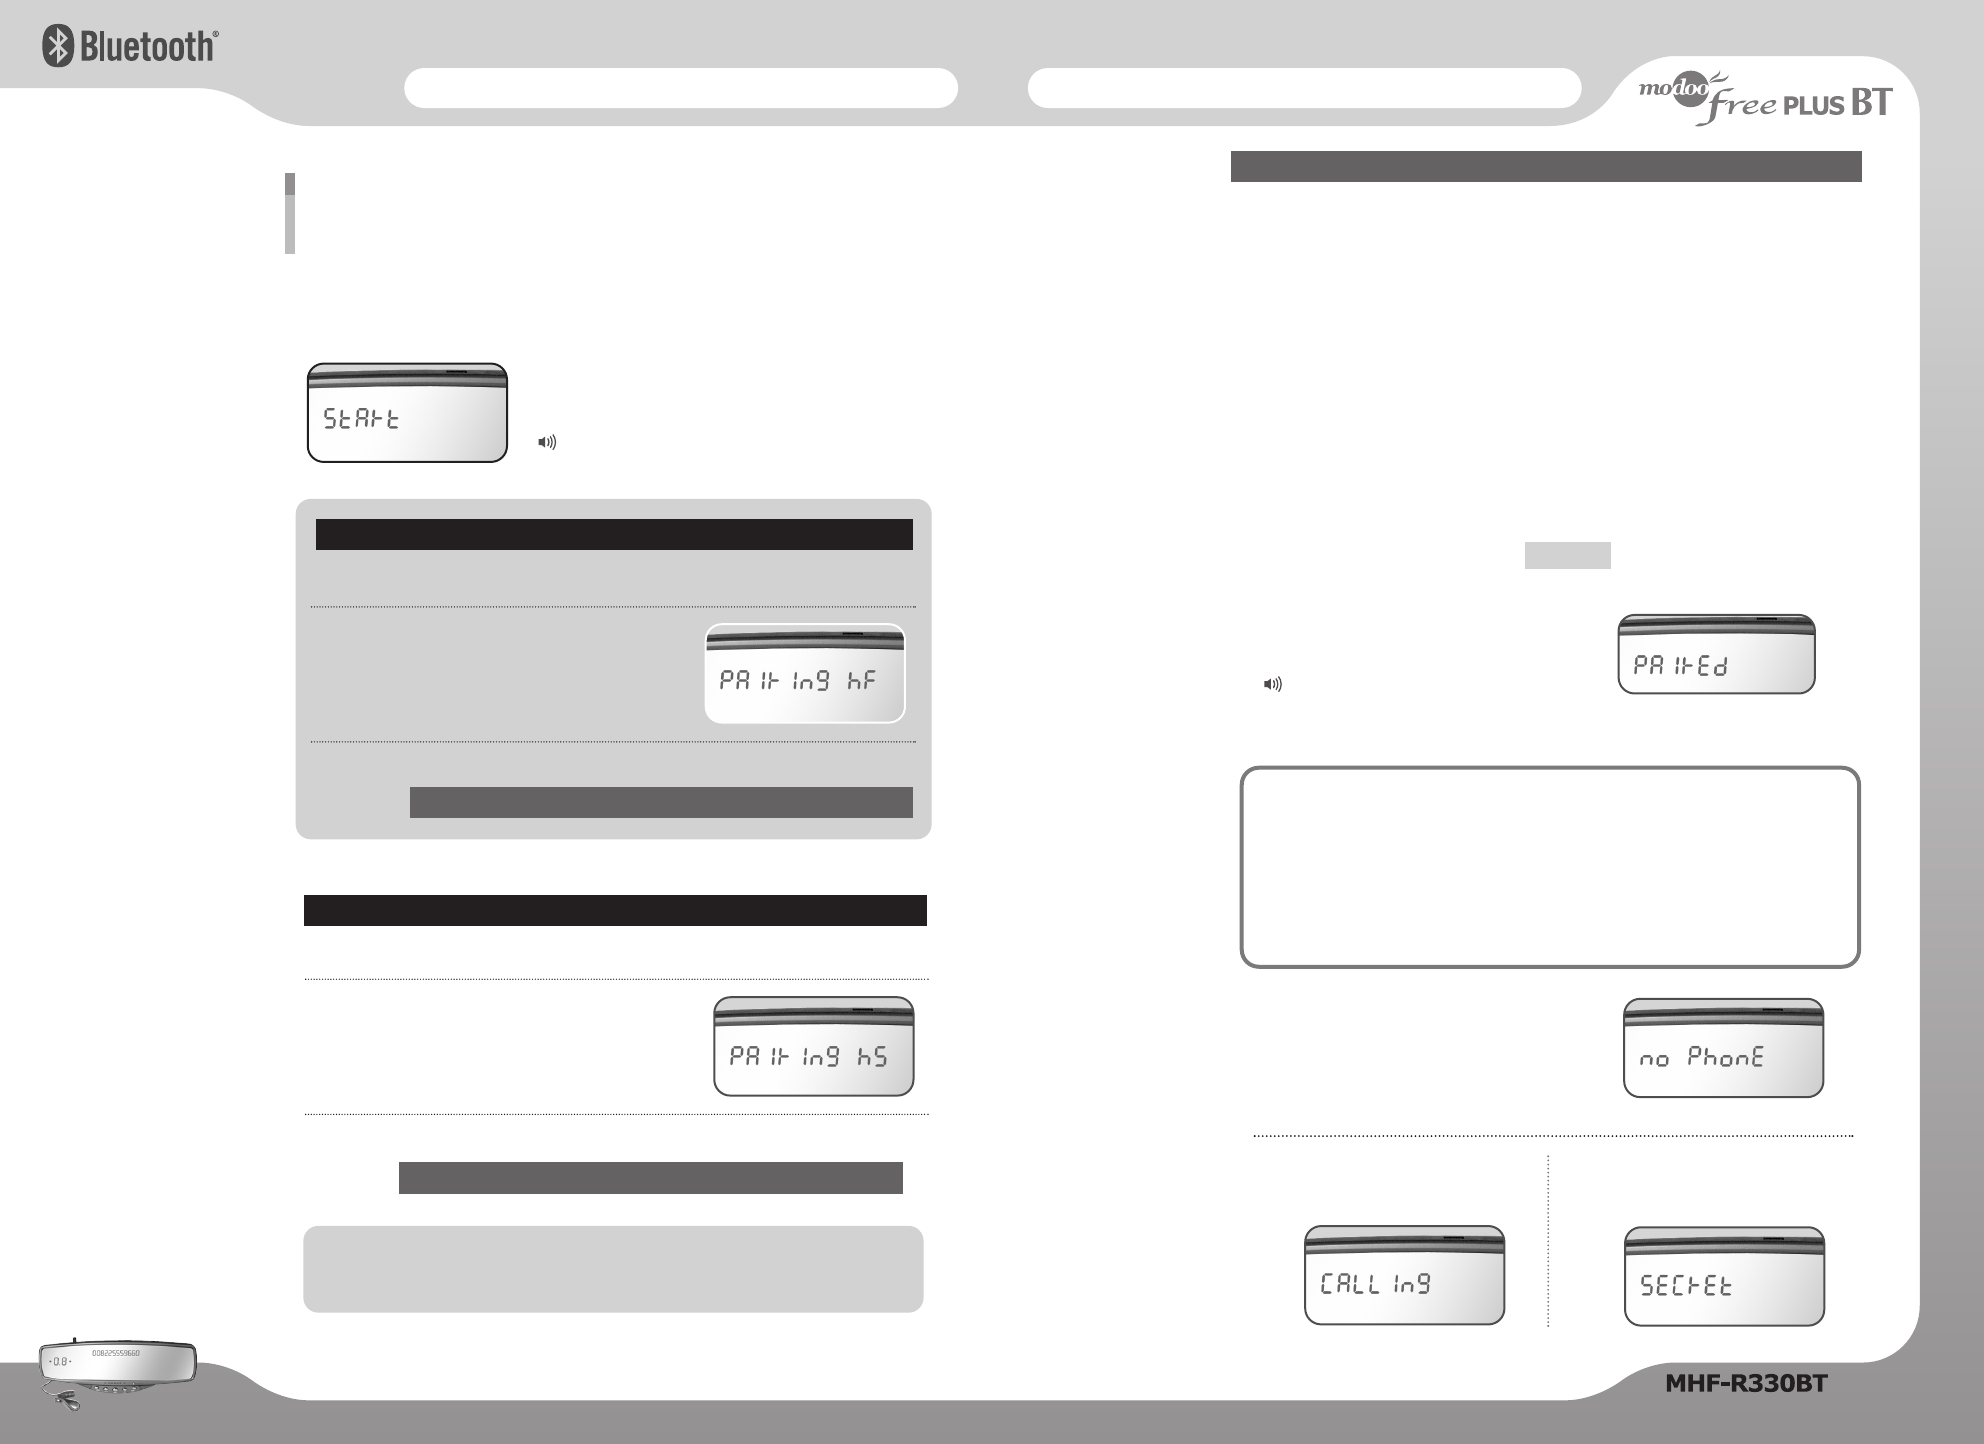
Power On : It appears start on the mirror.
2. You will hear a beep tone.
The HandsFree unit is now ready to be paired
for the first time.
It appears Pairing HF on the mirror.
3. For the next procedure, Go to the next page to follow the instruction of ;
The MHF-R330BT supports both HandsFree and Headset Profiles. The default profile is
HandsFree. Follow the pairing instructions for the first use, after that the unit will pair
automatically.
1.
When the power is on, press the “VOL ▲▲” button for 3 seconds.
Pairing your Bluetooth cellular phone with
the MHF-R330BT
Pairing in “HandsFree” mode
2. You will hear a second beep tone, which shows
the unit is ready to be paired for the first time.
It appears Pairing HS on the mirror.
The “Headset” mode does not support
‘Caller ID’, ‘Voice Dialling’ and ‘Reject Call’
1. After the above 1~2, then press the “VOL ▲▲” button for 3 seconds again.
Pairing in “Headset” mode
Cellular phone pairing mode (Next page)
3. For the next procedure, Go to the next page to follow the instruction of ;
Voice : “Power On”
Go to
Cellular phone pairing mode (Next page)
Go to
1. Browse your cellular phone menu and find the connectivity and / or Bluetooth
connection section.
2. Select the “search for” a new HandsFree device function and allow the phone to find
the MHF-R330BT.
Note : Each cellular phone type has distinct phone menu so you may need to refer to
your manufacture’s instructions for the correct procedure on how to “connect
a new Bluetooth device”.
3. The Bluetooth code for the MHF-R330BT should appear on your cellular phone
screen.
4. Press the “connect” with the HandsFree option on your cellular phone.
Note : Please return to the pairing instructions if the Bluetooth code does not appear
on the cellular phone screen. The green LED light should flash during pairing.
5. The cellular phone should prompt for a pin code.
Insert the MHF-R330BT pin code :
6. The cellular phone should confirm that it has established a new paired connection.
7. Close the menu. The pairing is now completed.
Note : The green LED light illuminates after successful pairing.
Please adjust the volume to your preference by using the volume keys.
Cellular phone pairing mode
No Bluetooth connection :
No Phone on the mirror.
Send call :
Calling on the mirror.
●ModooFree Plus BT can be stored up to 4 different phones.
●The earliest phone number will be removed when the memory is full.
● The Pairing Priority will be given to the last paired cellular phone.
●If you want to change the pairing priority, try to connect ModooFree
Plus BT from the cellular phone.
Pairing can be stored up to 4 cellular phones.
It appears Paired on the Mirror.
1 2 3 4
Voice : “Connected”
Press “SEND” button
in order to reactive Bluetooth pairing link.
MUTE :
Secret on the mirror.
Installation on the HandsFree KitInstallation on the HandsFree Kit
Double click “SEND” button connecting to the
second call.
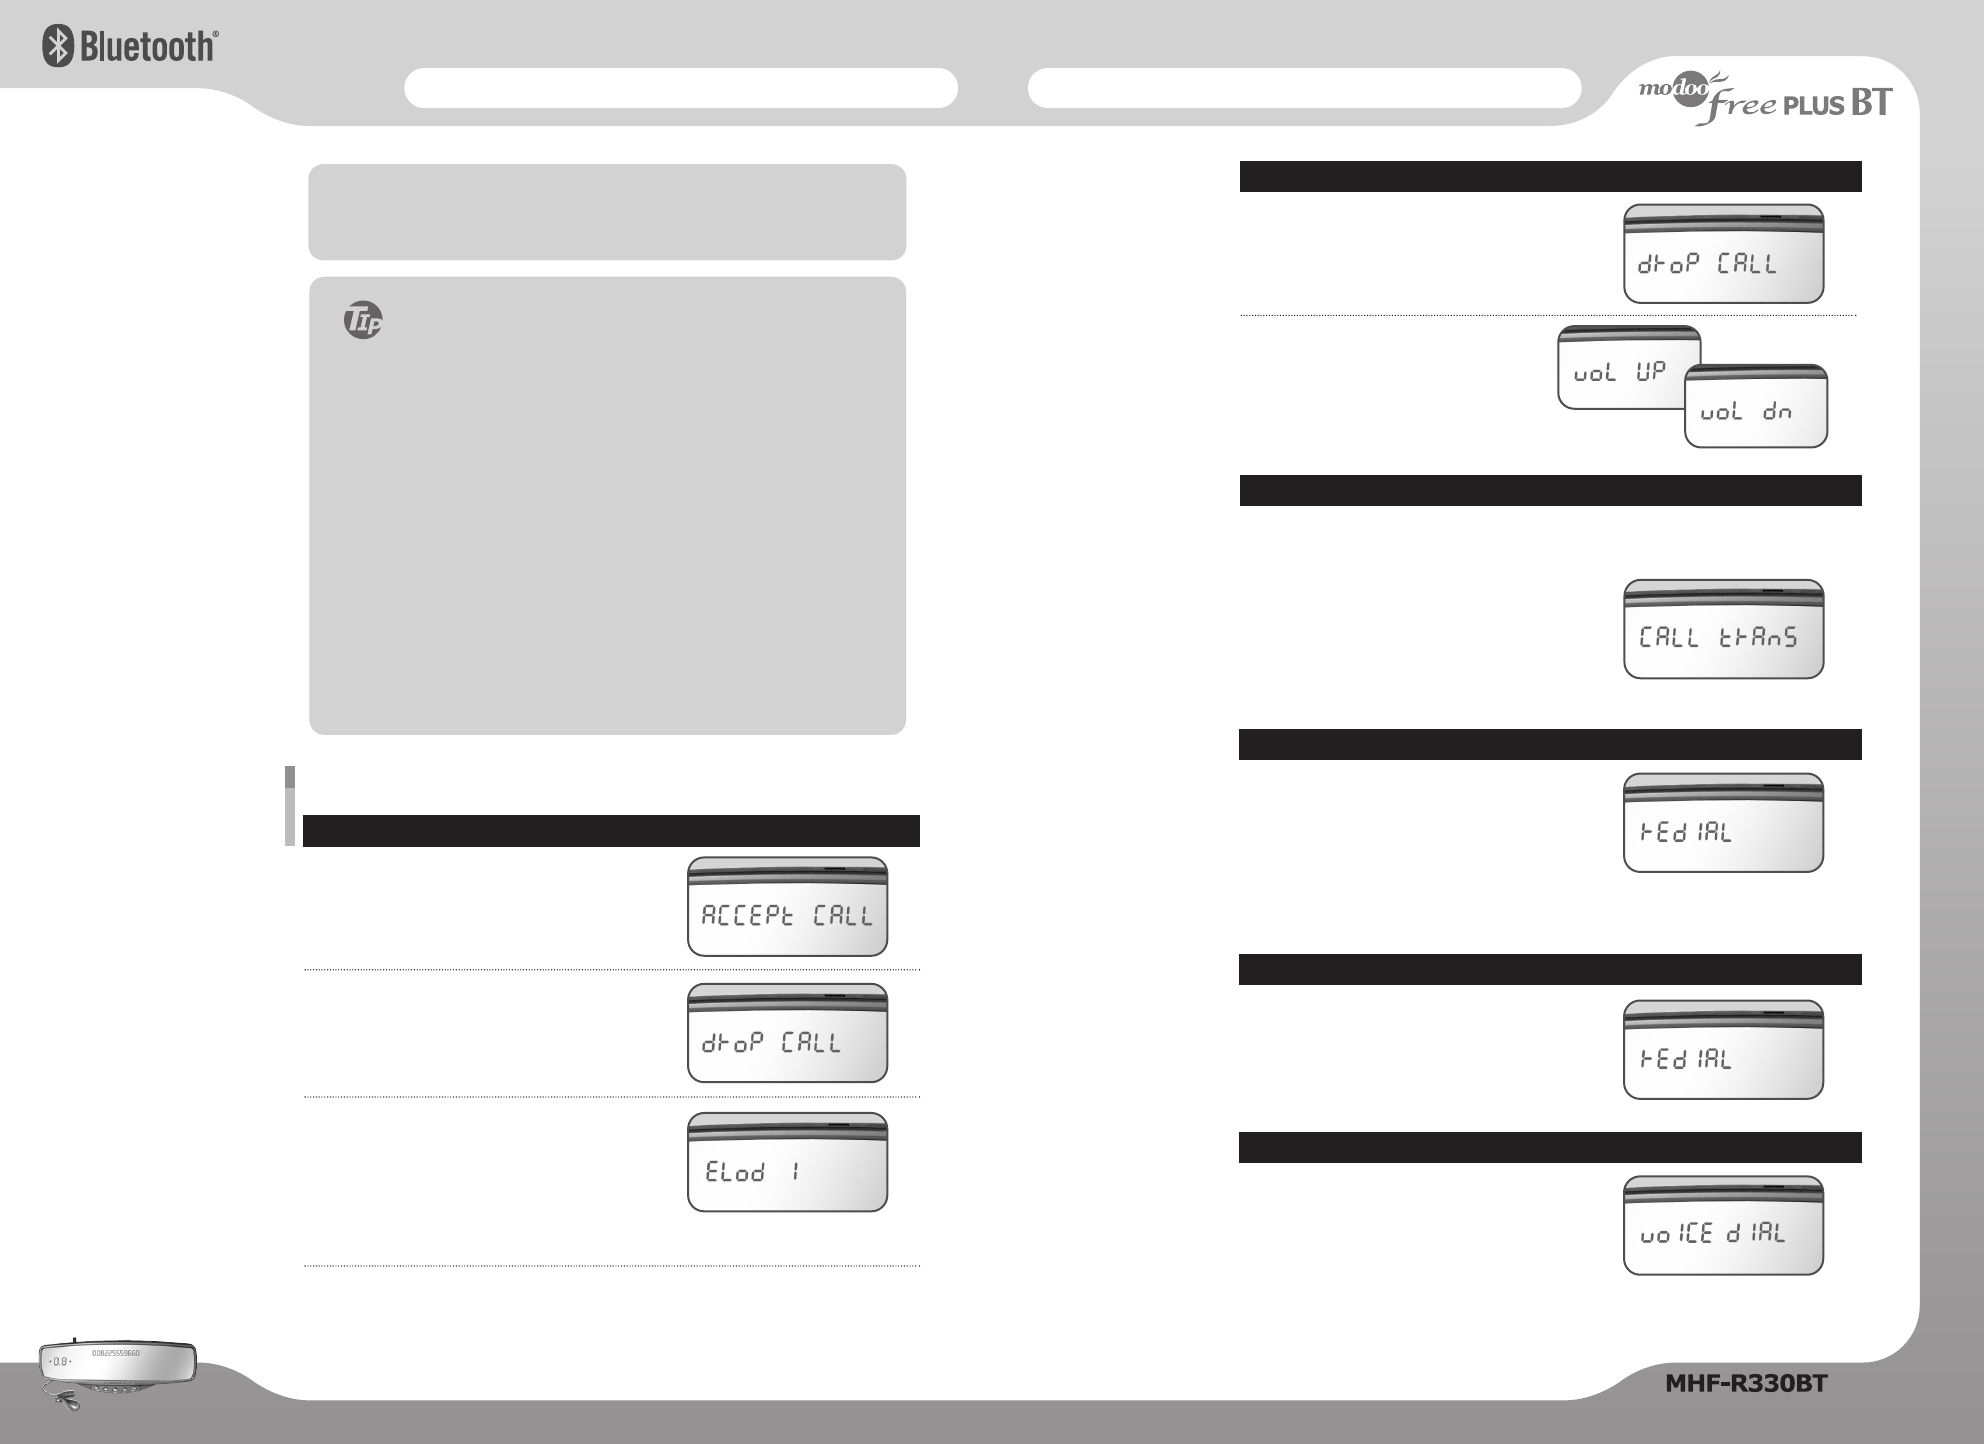
It appears Redial on the mirror.
Note : This function only works if you have a call
waiting option with your carrier and also
another call is actually waiting to be answered.
Call waiting
Press “SEND” button
It appears Redial on the mirror.
Note : This function only works
if phone has “last number redial” feature.
Last number dialling during idle
Press and hold “SEND” button (for 2 seconds)
It appears Voice Dial on the mirror.
Announce name after a beep.
Note : Voice dialling is possible only if your cellular
phone has a voice dialling capability. Each cellular phone type has distinct
phone menu so you may need to refer to your manufacture’s instructions.
Voice Dialling during idle
The audio transfer function is for switching the call from the HandsFree unit to the
cellular phone for a private conversation without disconnecting the call.
Switching from HandsFree to cellular phone :
Press and hold “END” button (for 3 seconds)
Switching back to HandsFree :
Press and hold “END” button (for 3 seconds)
It appears Call Trans on the mirror.
Audio transfer
10
11
NOTE : Once the Bluetooth pairing is completed between your cellular
phone and MHF-R330BT, the both units will be automatically
recognized on its pairing whenever turn on the key in your car.
To accept call
press “SEND” button
It appears Accept Call on the mirror.
When the handsfree is ringing with incoming call
To reject call
press “END” button
It appears Drop Call on the mirror.
To change handsfree ring tone
( 3 Ring Sound Options + 1 Voice )
press and hold “VOL ▼▼” button for 5 seconds.
Display will show Elod 1, 2, 3. or O.
Set to your chosen option by repeating same procedure.
To end call
press “END” button
It appears Drop Call on the mirror.
During conversation
To control volume
press “VOL ▲▲” / “VOL ▼▼” button
It appears Vol Up or Vol Dn(down)
on the mirror.
Using the MHF-R330BT as a HandsFree Device
Useful Tips for Bluetooth Connection
1.
Should your cellphone battery be at low charge,
the Bluetooth connection may occasionally be lost.
To maintain good connectivity ensure that your phone
battery is adequately charged.
2. In case of failure of Bluetooth pairing
1) Delete item in paired list on your Bluetooth phone
2) Reset both phone and handsfree by switching off /on
3) Reset pairing as per procedure
3. Connection not established after pairing
Manually connect from the paired phone
i.e. My paired devices MHF-R330BT Connect
4. How to establish re-connection after pairing
Press "SEND" button briefly
Press and hold "END" button for 5 seconds
The handsfree unit will re-connect automatically thereafter.
※※No voice announcement from the handsfree
Set cellular phone profile to Vibration / Silent mode.
Installation on the Parking Sensors
Installation on the Parking Sensors
This manual is intended to explain the safe and correct use of the product.
Please read this manual carefully before use.
Installation on the HandsFree Kit
HandsFree Call (Send Call) in the Car
Press phone number on the cellular phone, and press “SEND” button of
HandsFree.
Note : If there is no sound on the loudspeaker of HandsFree unit, press and hold
“END” button for 3 seconds. Then, it will switch from Cellular Phone to Hands
Free.
Private conversation option:
The operator can plug an earphone (not included) in to the earphone jack of the
MHF-R330BT for a private conversation.
Note : For your own safety, it is highly recommended that the vehicle is parked in
the safe place when plugging in the earphone.
Re-activation of Bluetooth Link after Pairing
Press “SEND” button.
( If Bluetooth Link LED is turned off, press “SEND” button
in order to reactivate the Bluetooth pairing link )
Please note ;
It is possible that the MHF-R330BT buttons might not operated as per this
operation guide if your Bluetooth phone has an unusual Bluetooth program.
In this case, please reset both MHF-R330BT and cellular Phone.
Specification (HandsFree Car Kit)
Input power
Normal Current
Maximum Current
Fuse
Speaker
Microphone
Noise Suppression
Echo Suppression
Operating temperature range
Supported Profiles
Power Class
Carrier Frequency
Built in Flash memory
Compatibility
Full duplex operation with noise & echo suppression
Bluetooth specification: v1.2 compliant
10 ~ 16V DC
> 50mA
> 500mA
250V / 2A
Max. 2W
Directional microphone -52dB
Up to 18dB
Up to 42dB
- 30°C ~ + 80°C
Handsfree Profile, Headset Profile
2dBm Max (Class 2)
2400MHz ~ 2483.5MHz
8M bit
This unit is compatible with most Bluetooth
equipped cellular phones including Motorola,
Sony Ericsson and Nokia, Samsung, LG, Etc.
(Most Bluetooth enabled phones)
Product Overview
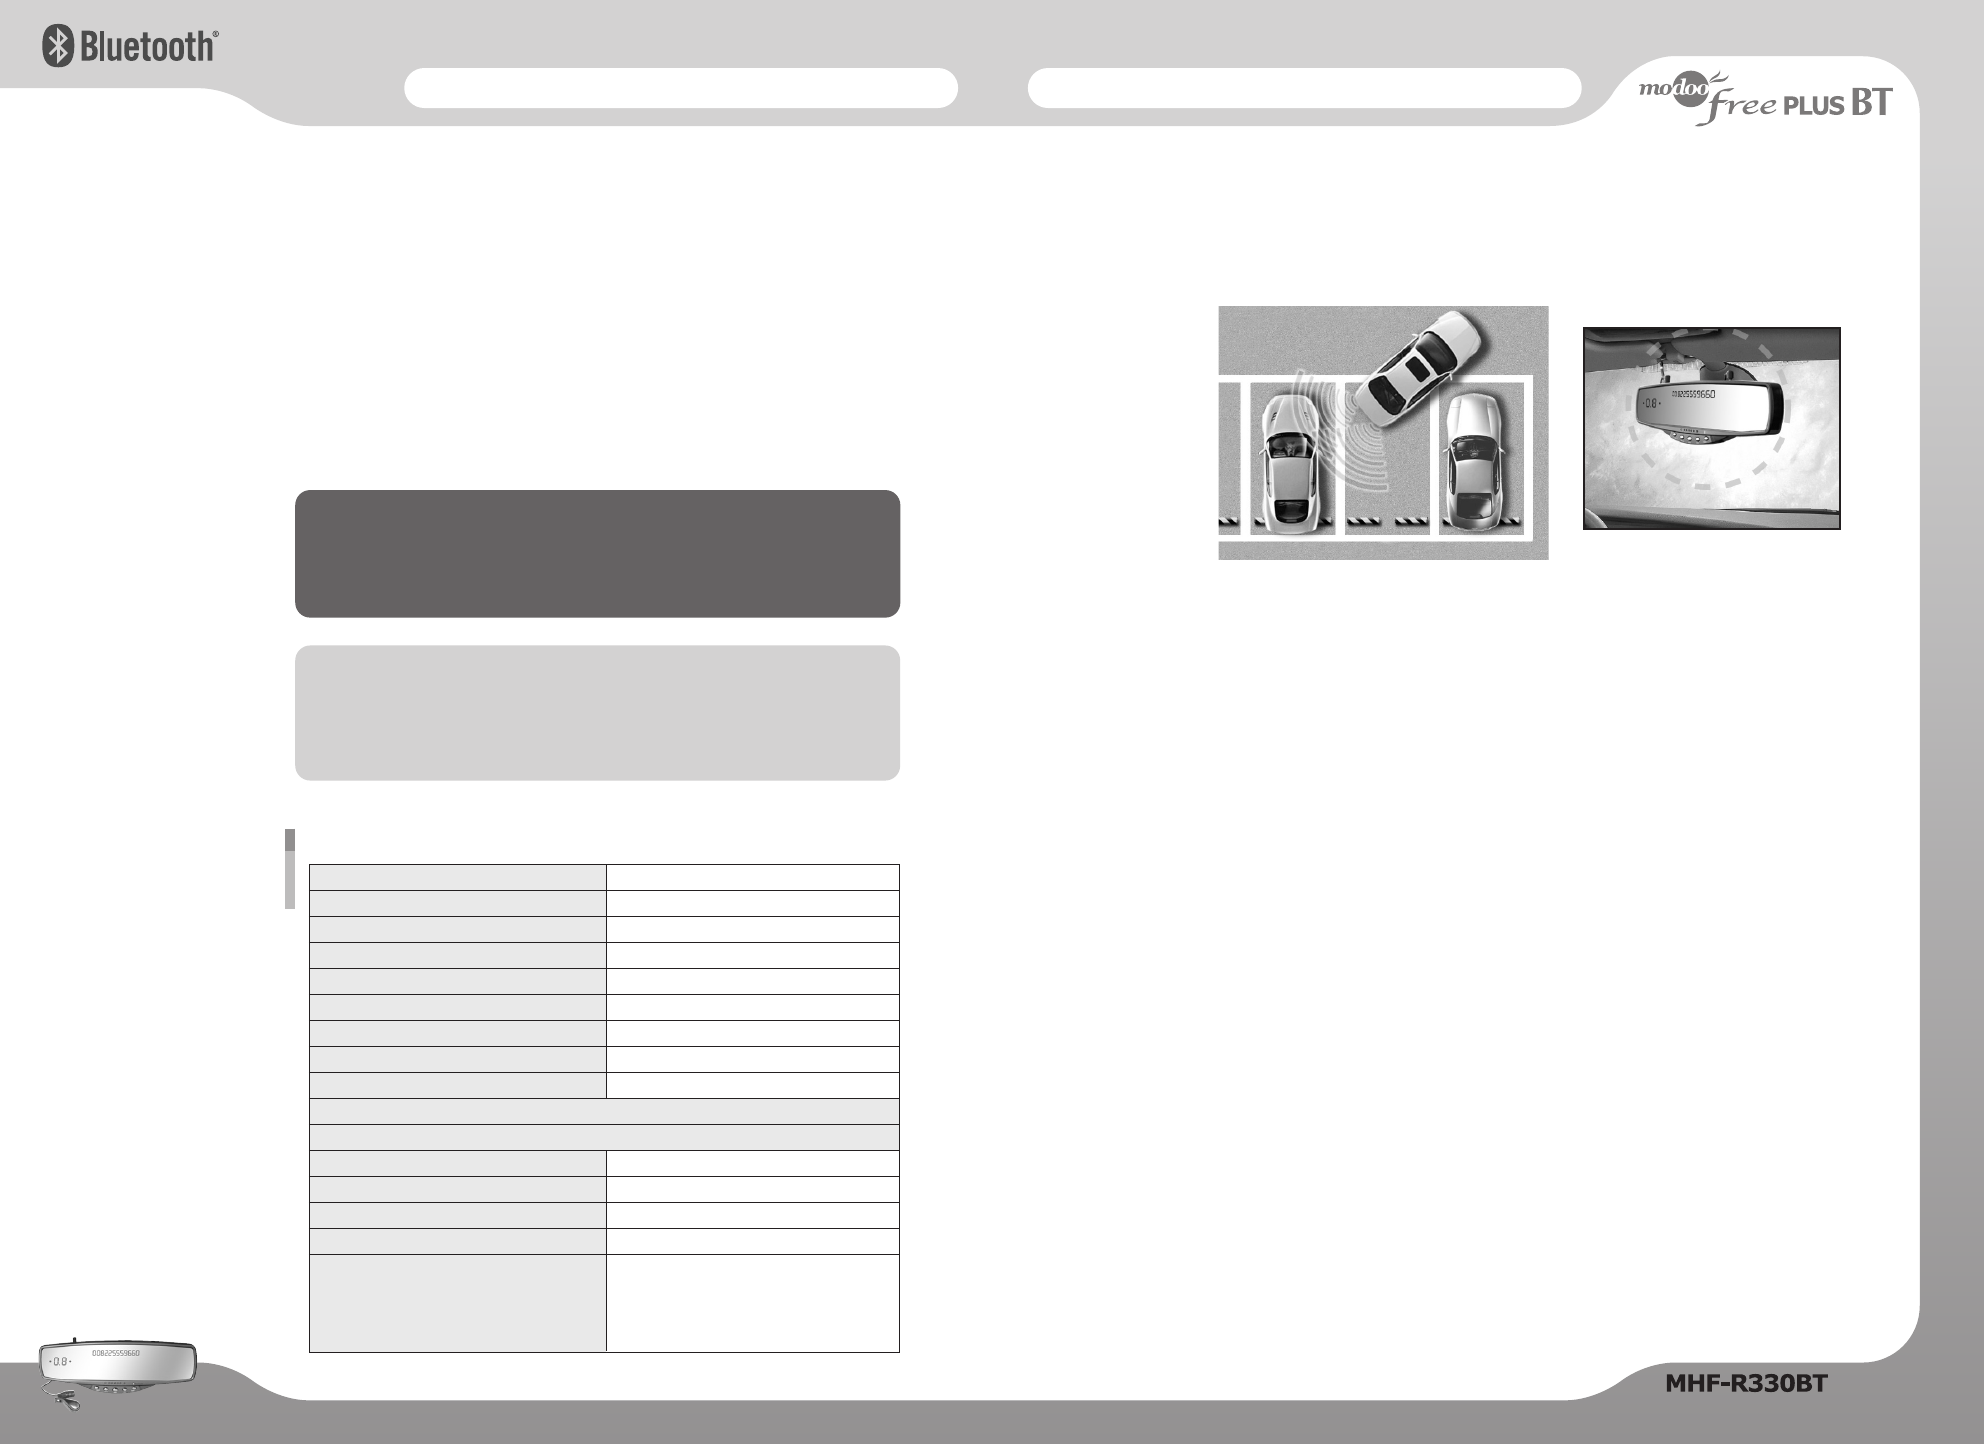
The Parking Sensor helps the driver view the rear of the vehicle. It helps prevent collisions and
accidents during any backward movement of the vehicle. If there is an obstacle at the rear of the
car, the alarm inside the vehicle displays the distance to the obstacle and generates a signal
proportional to it.
Features of the Product
- Enables safe backward movement by detecting obstacles in the rear.
- Insures a safe distance in the event of snow, rain, frost or fog.
- Insures a safe distance between an obstacle and the rear of the vehicle while parking and stopping.
- Easily installed and semi-permanent.
- Good design which matches the vehicle (Attach Type sensors).
- Displays the distance to the obstacle from the back of the vehicle while backing-up within 0.4m.
- Informs the driver of the proximity of obstacles on the left and right sides of the vehicle.
- Generates a four-level alarm signal depending on the distance to the obstacle.
Method of Operation
The Parking Sensor beeps and the distance meter displays as "0.0" as soon as you engage the
reverse gear. An alarm is generated if an obstacle is detected within the first-level detection area
(within 1.6m), and the distance meter displays the distance to the obstacle. The alarm changes
as the obstacle approaches the second-level (within 1.0m) and third-level (within 0.6m)
detectionarea. When the obstacle is within 0.4m, a continuous alarm is generated. If the driver
does not hear the alarm due to noise or weak hearing ability, the distance meter and the
left/right lamps indicate the proximity of the obstacle.
With a built-in Parking Sensors by ultrasonic sensors inside the rear mirror, while backing the
vehicle, the sensor senses the distance from the right, left, rear and indicates the distance via
LED digits (0.4m~1.6m) & left & right and also by four stages of warning signals(beep sounds)
which helps the driver while backing the vehicle.
12 13
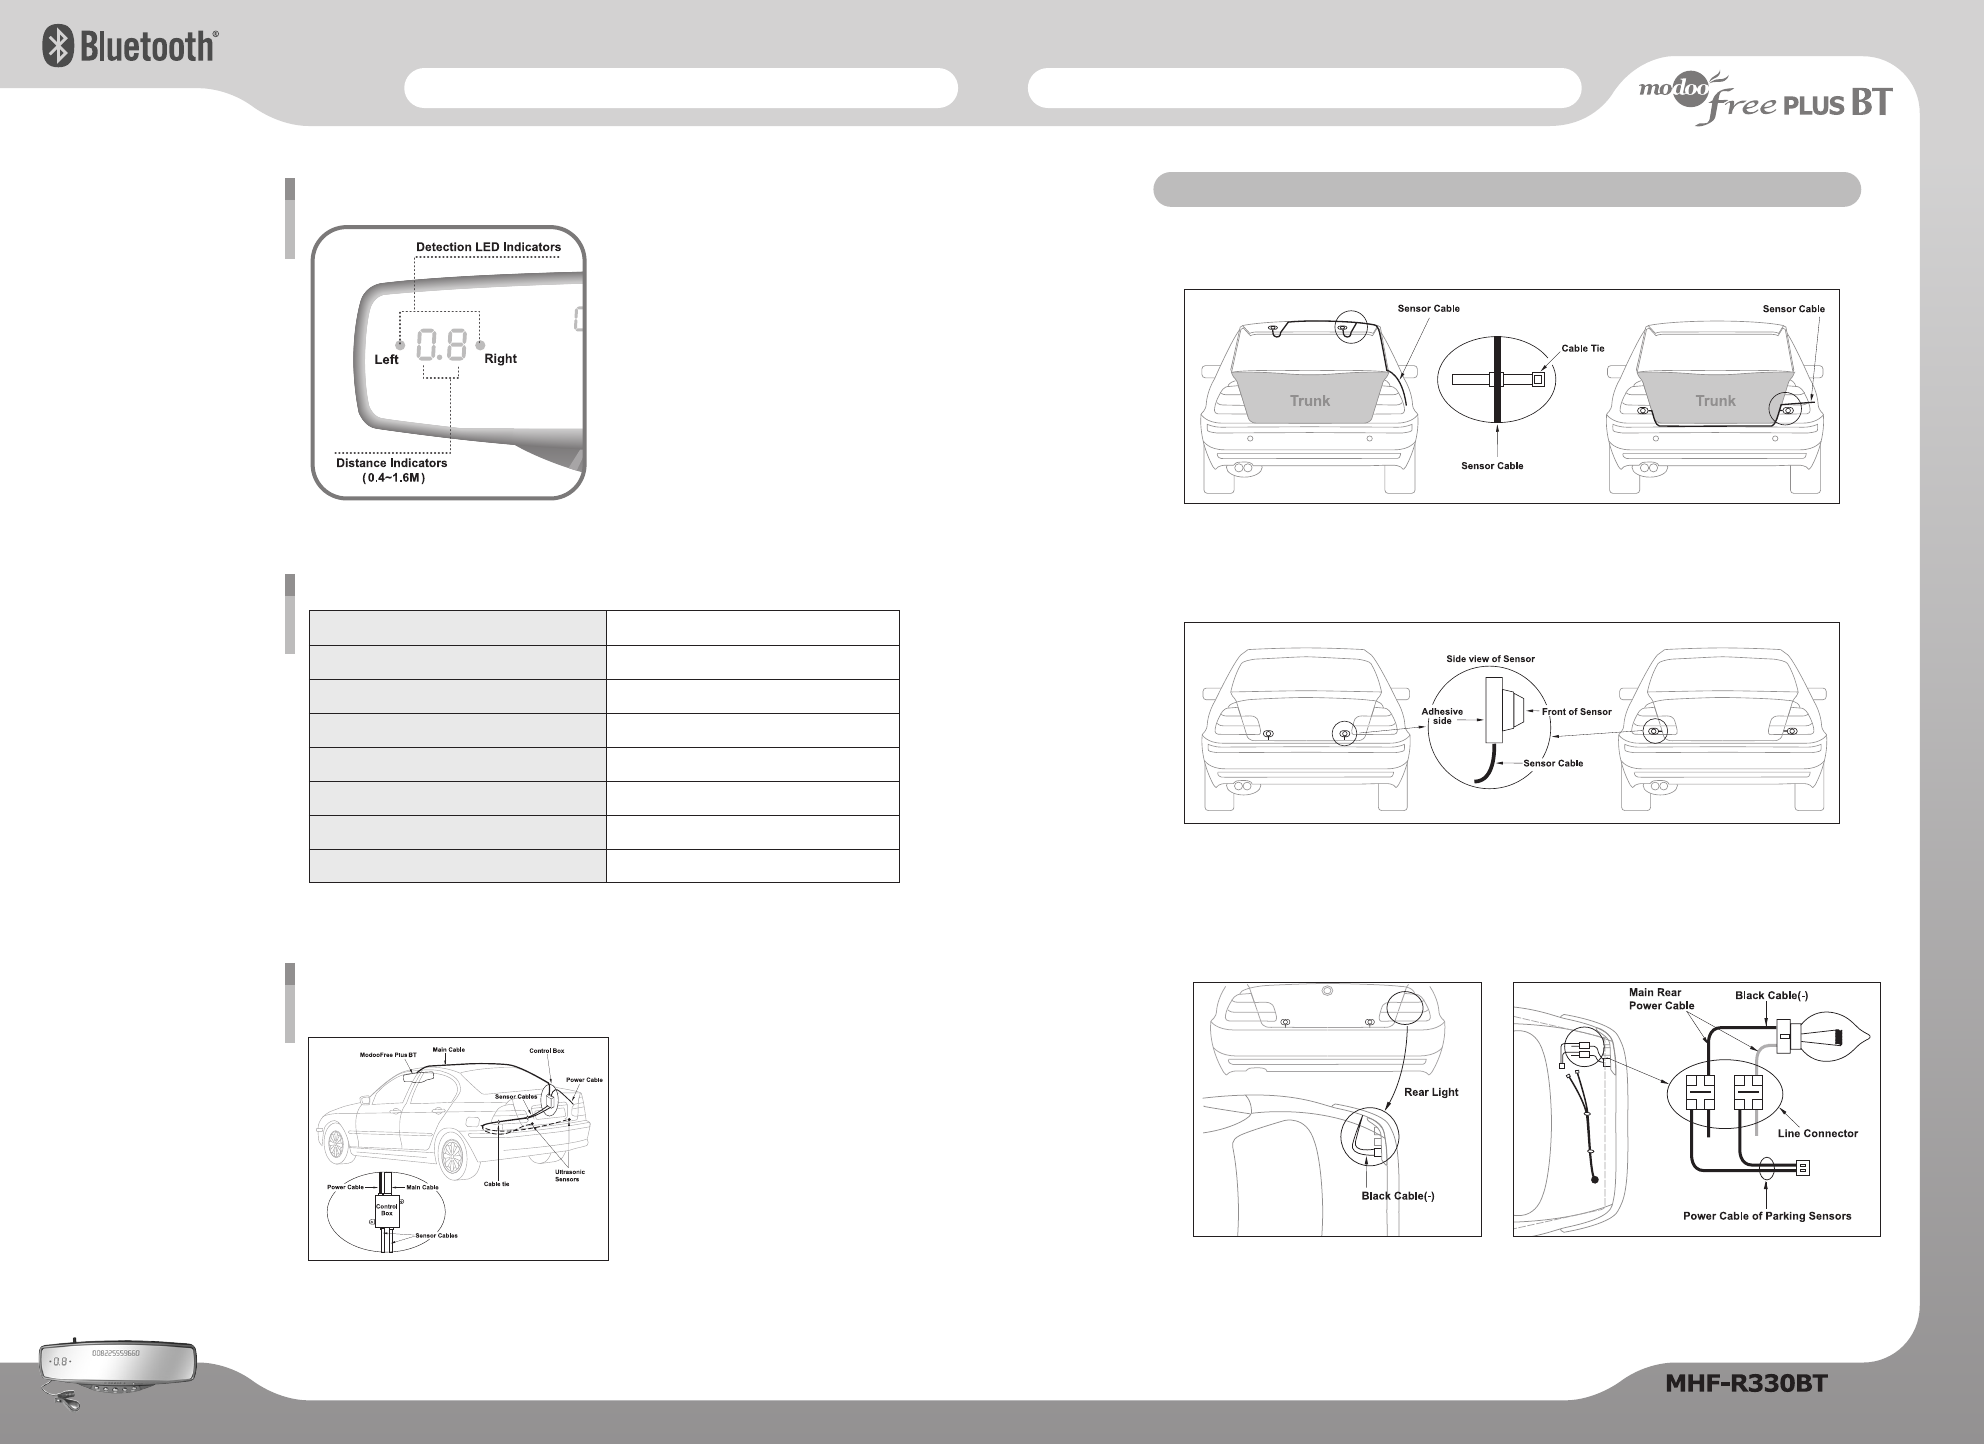
Installation on the Parking SensorsInstallation on the Parking Sensors
Car Installation
▶▶
Installation of Sensors
Connecting the parking system
to the ModooFree Plus BT.
- Install the control box at the left and right
sides of the rear seat beyond the reach of
passengers' hands.
- Pull the main cable out of the windshield or
pedal and connect it to the control box.
- Connect the sensor cable and the power
cable to the control box.
- Use the cable-tie to organize the loose cables.
Installation Method
※Caution : The sensor may be positioned upside down.
Apply the Two-sided tape to the sensor attachment. Attach the sensor to the trunk or rear
lights at about 50~80cm(20"~32") (normally 60cm(23.5")) from the center of the car.
Installed Exterior of the Attach-Type Sensors (two ways)
After attaching the sensor, attach the mount to the trunk and fix the sensor cable with the
cable tie. Then, pull the sensor cable to one side of the trunk and put it in the control box.
Organizing the Sensor Cable (two ways)
Product Installation
Connect the power cable.
Generally, black cables are (-) in vehicles. In the case of the ModooFree Plus BT Cable, do not
peel off the cable covering - connect it using a line connector.
※Caution : Beware of the (±) polarity.
Connecting the Power Cable
Part description (Parking sensor kit)
Detection LED Indicators
- Left (●) and Right (●)
Distance Indicators
- Distance via LED digits (0.4M ~ 1.6M)
Specification (Parking Sensors)
Input power
Ejection Molding Material
Detection
Ultrasonic Frequency
Operating Temperature
Length of Main Cable
Length of Sensor Cables
Length of Power Cable
12V~24V DC (Free Voltage)
ABS
Ultrasonic Sensors
40KHZ
- 20。C ~ + 65。C
7m
3m
3m
14 15
Installation on the Parking SensorsInstallation on the Parking Sensors
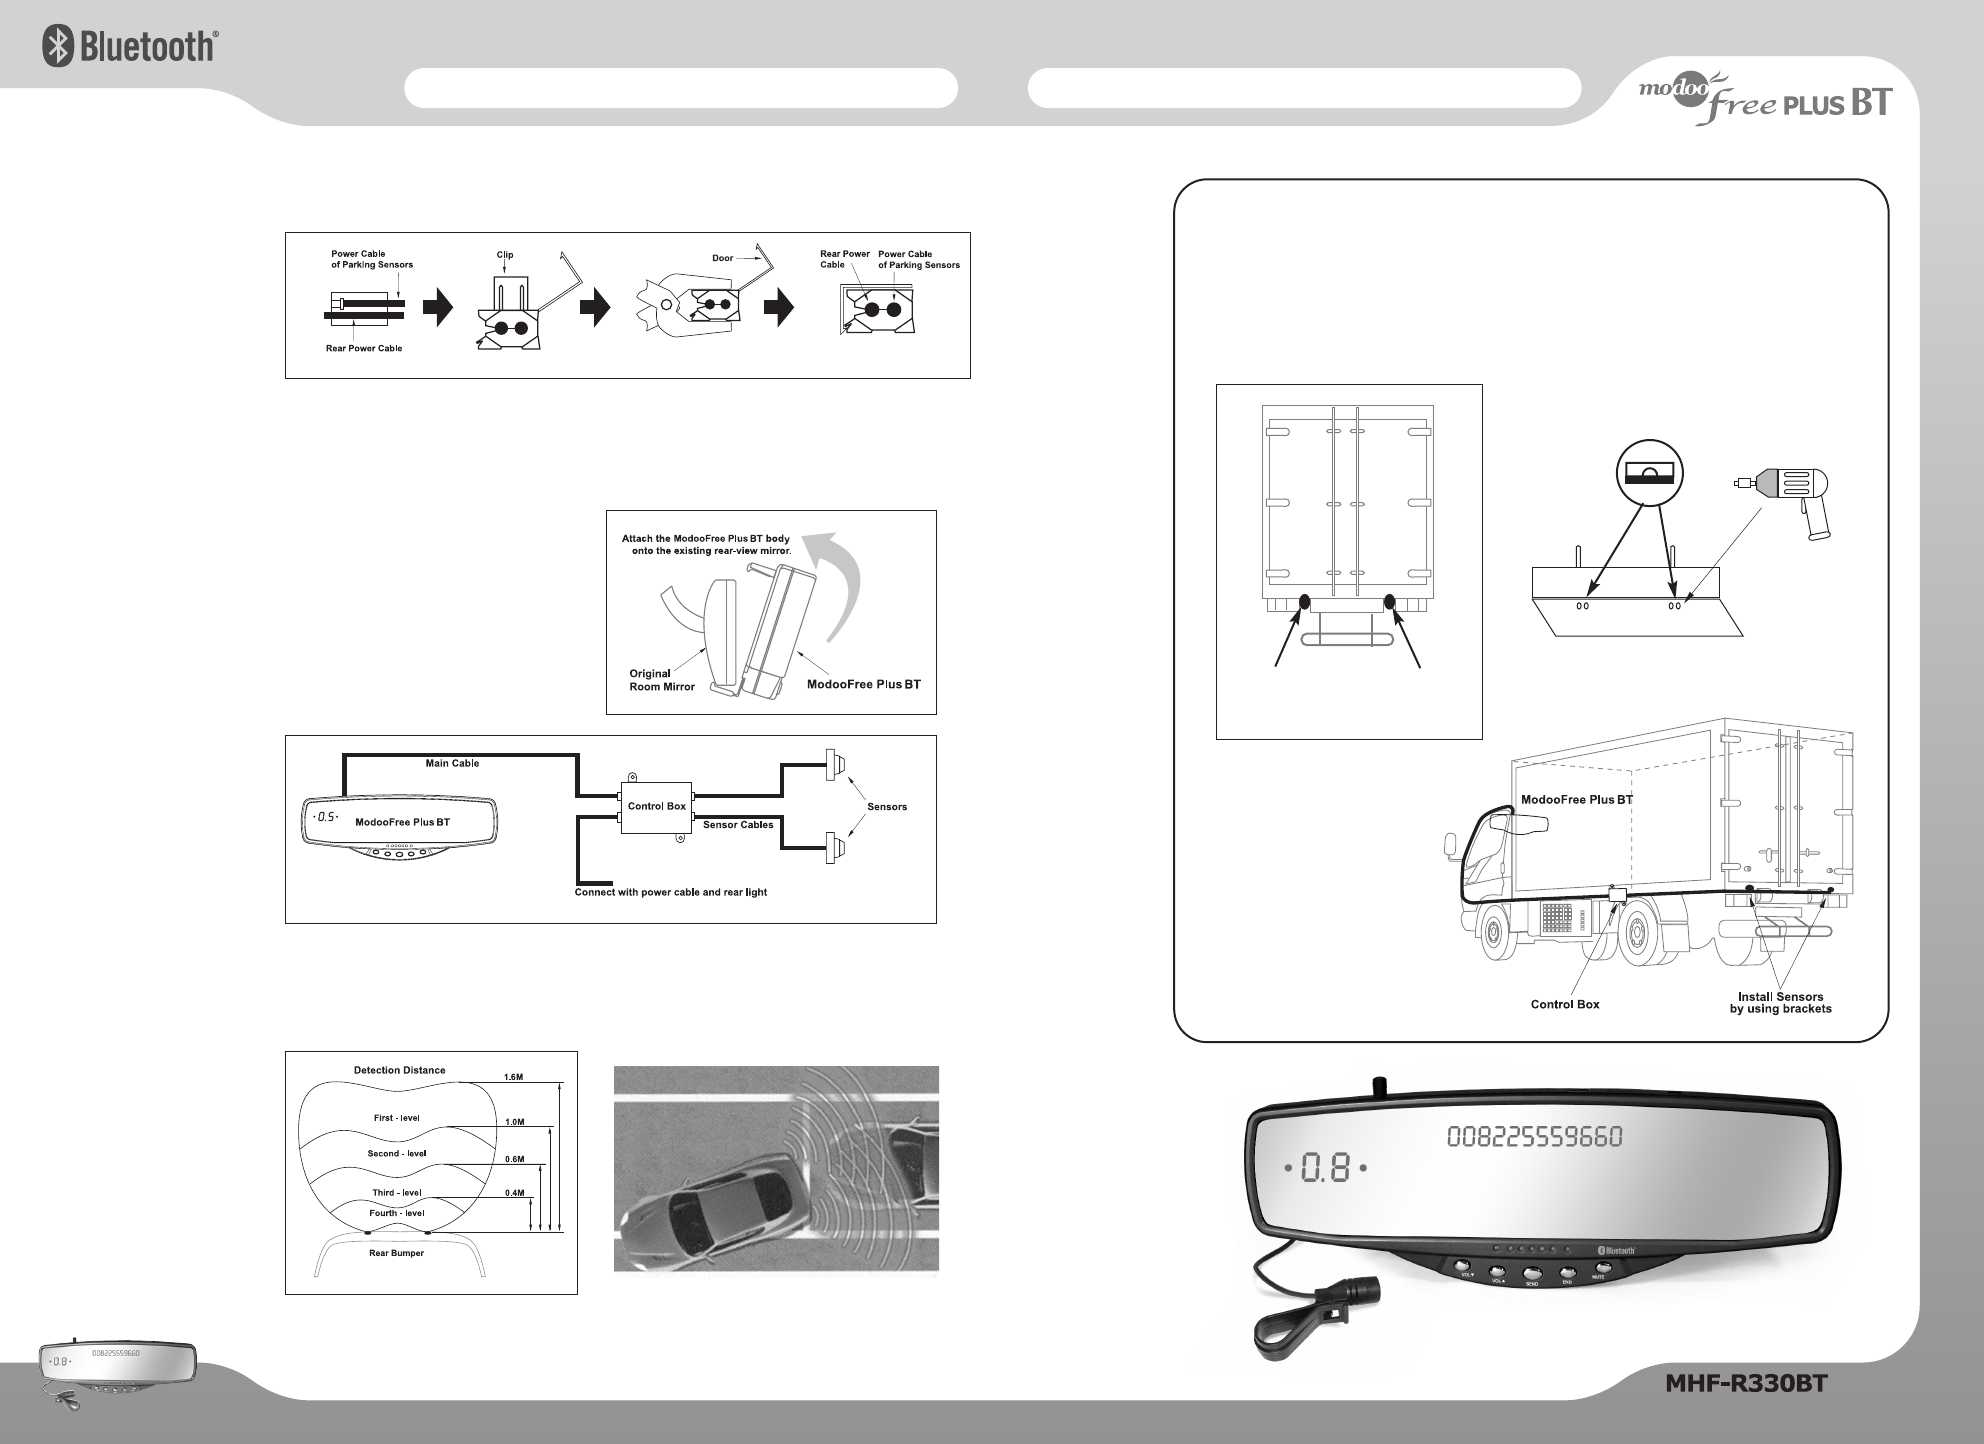
Detection distance
- It is better to arrange the cables along the left side of the frame (by the driver's seat).
- Make certain that water cannot contact the sensor while driving.
- The main cable should be long enough to compensate for the contours of the driver's seat.
- The main cable should be kept away from the engine, if possible.
The sensor horn should always be in a horizontal
position.
Bracket Attachment
※※Attaching to Other Types of Vehicles (For trucks and tow trucks)
Bore two holes on the left and right sides with
a drill, so that the bracket can be fixed with
screws.
Attach at the center for a 1-ton
truck, and at the rear gutter
for a larger truck.
Attach the ModooFree Plus BT body onto
the existing rearview mirror.
Fix the connector at the parking sensor
plug of the ModooFree Plus BT.
Fix the connector with the control box label at one side
of the alarm cable (7m) to the control box connector.
Attaching the Main Unit
ⓑⓑPut up the power cable in the line connecter as “ⓐⓐ”
ⓒⓒPress the clip with a long nose plier.
ⓓⓓClose the door of line connector.
Use of the Line Connector
ⓐⓐⓑⓑⓒⓒ
ⓓⓓ
Attach the sensor to the rear
light using a bracket.
16 17
ModooFree Plus BT ; MHF-R330BT
Bluetooth Parking Sensors HandsFree Car Kit
▶▶
Bluetooth HandsFree Car Kit
No indication from unit?
There is a chance the power cable plug is not correctly seated in the cigar/utility jack socket for
proper connection. Remove and reinsert to ensure good fitting and connection.
Problem during pairing?
Repeat pairing process according to the pairing section
Still experiencing problem?
Turn off the cellular phone and separate the battery from the cellular phone for approximately five
seconds (In some instances, this action clears up any potential bugs built up in the cellular phone
software that can hinder proper pairing.) Repeat pairing process as per previous pairing instructions.
Too loud?
Adjust the volume to your preferred sound level by pressing the relevant volume switch.
Each type of Bluetooth cellular phone has different function buttons, though
highly unusual, it may be possible that the functions operate differently with
your specific phone model.
Callers are complaining about hearing noise?
Check that the microphone is secured firmly in place and is not creating vibration and noise. Also
check and adjust microphone accordingly to ensure that it is facing towards to the user’s face.
▶▶
Parking Sensors Kit
The sensor does not work while engaged in "Reverse".
- Check to see if the power cable is connected to the rear light.
- Check to see if the power cable and the alarm cable are connected to the alarm.
The sensor does not detect obstacles. Only (0.0) is displayed.
- Check to see if the sensor cable and alarm cable are connected.
- Check to see if the alarm cable is connected to the alarm.
- Check to see if the sensor is obstructed by dirt.
- Check to see if any sensor is detected with the earth.
Troubleshooting
- Do not expose this unit under humid environment.
- Do not drop this unit.
- Do not disassemble this unit.
- Do not press two buttons at once. This action may cause a sudden Bluetooth disconnection.
- Do not clean the unit with any chemical or water.
- Keep this unit away from fire and dust.
- For safety reasons, please keep your phone conversation short, do not make any notes or read
documents. It is highly recommended to park the vehicle in the safe place before continuing the
conversation. Using a cellular phone while driving can potentially create a distraction for the
driver which may increase the likelihood of an accident.
- Please adjust direction of the mirror to ensure good rearview vision for safe driving.
- Use the third-level alarm only when the obstacle is located in a straight line from the vehicle.
- Attach the sensor level with the ground surface.
- Keep water away from the alarm (ModooFree Plus BT).
- Thin rods or objects, objects with a high tint angle, and sound-absorbing objects cannot be detected.
- Beware that the power cable or sensor cable may be cut if excessive force is used during installation.
- The area just under and to the right and left ends of the rear bumper cannot be detected.
Safety precautions
SungJin Techwin Co., Ltd. warrants to purchaser that for a period of one (1) year after the date of
purchase (the “Warranty Period”) of any SungJin Techwin Co., Ltd. Product by Purchaser, the product
will substantially conform to SungJin Techwin Co., Ltd. published specifications for the product on the
date of purchaser’s purchase of the product, subject to the terms herein. Purchaser shall notify SungJin
Techwin Co., Ltd. of any non-conformance during the warranty period and obtain a written return
material authorization (“RMA”) from SungJin Techwin Co., Ltd. for the nonconforming product and return
the nonconforming product to SungJin Techwin Co., Ltd., freight prepaid with a statement describing the
nonconformity. SungJin Techwin Co., Ltd. exclusive obligation with respect to nonconforming product
shall be, at SungJin Techwin Co., Ltd.’s option and expense, to repair or replace such returned item. The
foregoing is purchaser’s sole and exclusive remedy for breach of warranty by SungJin Techwin Co., Ltd.’s
with respect to the product. The warranty set forth above shall not apply to any product, which has not
been properly used or handled in accordance with the instructions supplied by SungJin Techwin Co., Ltd.
In addition, SungJin Techwin Co., Ltd.’s warranty is void if the product has been repaired, altered,
damaged by the faulty installation, misuse, abuse, or which the product defect is attributable to any
failure or damage which is beyond the reasonable control of SungJin Techwin Co., Ltd. This warranty
applies only to new SungJin Techwin Co., Ltd. products purchased from authorized retail sellers only.
The foregoing warranties are the sole warranties, express or implied, given by SungJin Techwin Co., Ltd.
in connection with the product, and SungJin Techwin Co., Ltd. disclaims all other warranties, including
warranties of merchantability, fitness for a particular purpose and no infringement of third party rights.
SungJin Techwin Co., Ltd. shall not be liable for any special, incidental or consequential damages in
connection with the product, even if SungJin Techwin Co., Ltd. has been advised of the possibility of such
damages. The liability of SungJin Techwin Co., Ltd. hereunder for all claims shall not exceed the amount
paid by purchaser to SungJin Techwin Co., Ltd. for the product sold rise to SungJin Techwin Co., Ltd.’s
liability.
Warranty
Memo
18 19