THINKWARE F770 THINKWARE DASH CAM User Manual Part 3
THINKWARE CORPORATION THINKWARE DASH CAM Part 3
Contents
- 1. User Manual
- 2. User Manual Part 1
- 3. User Manual Part 2
- 4. User Manual Part 3
User Manual Part 3
28
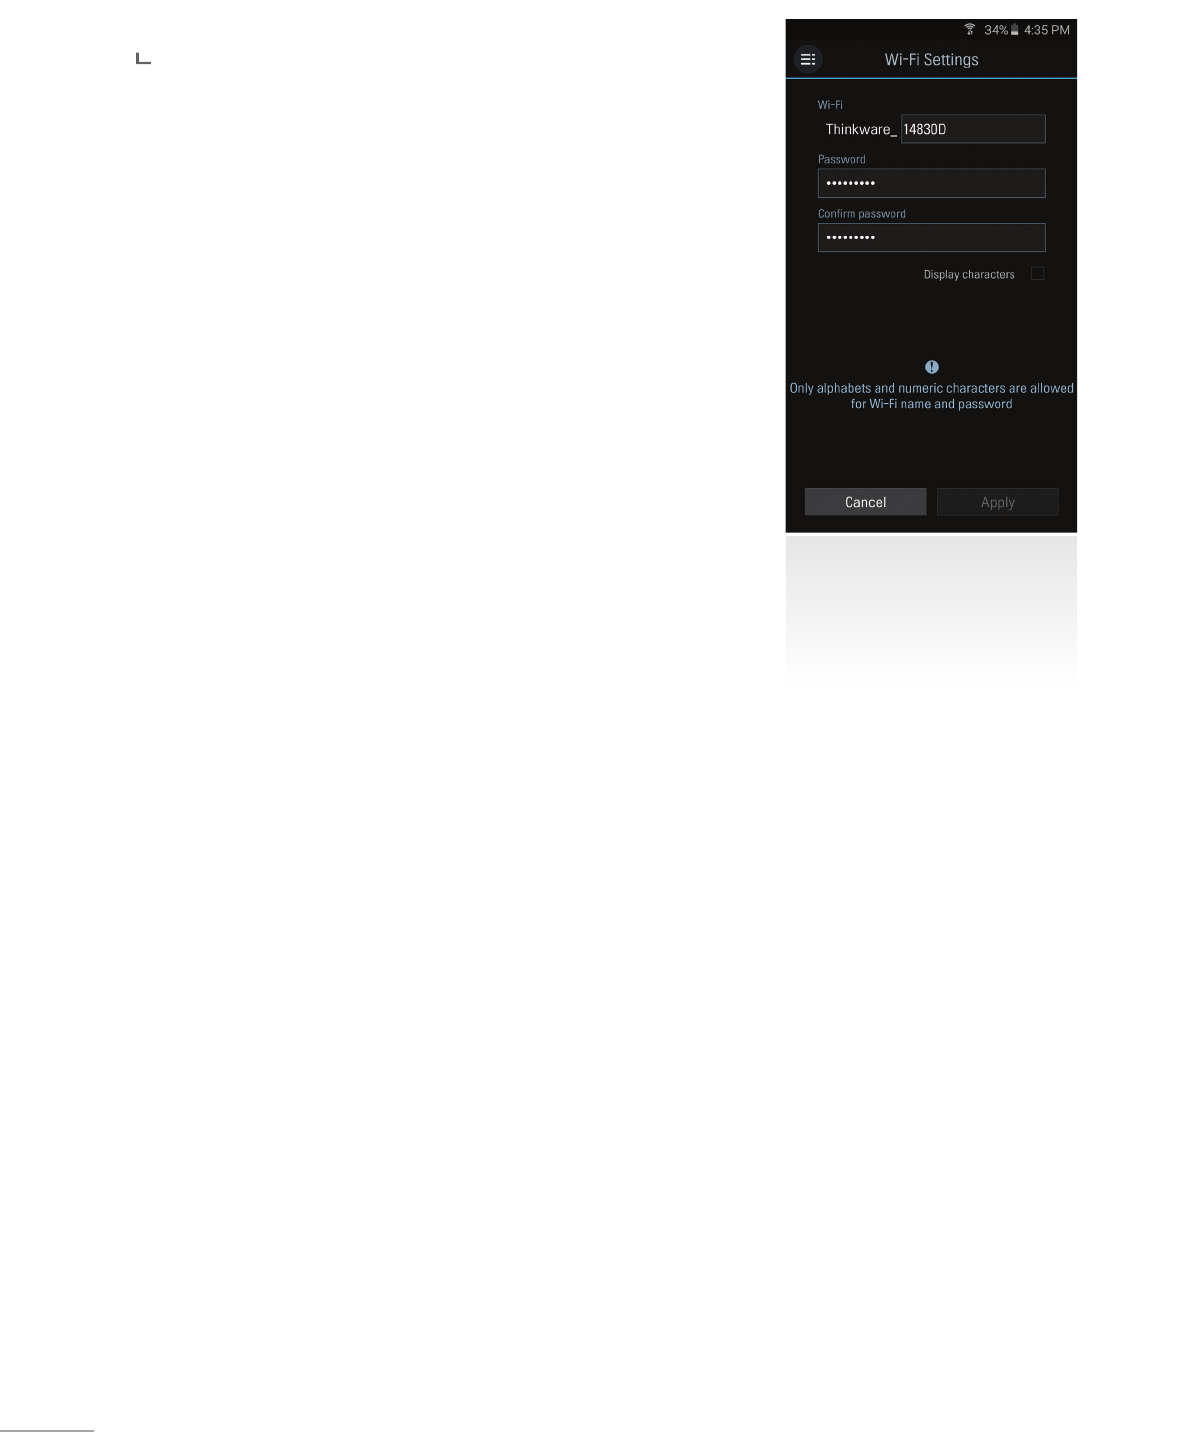
3-2-5. Settings > Wi-Fi Settings
Wi-Fi Settings
Sets the Wi-Fi name and/or password
3-2-6. Information
App Information : Displays current version and latest available version
Dash cam information : Displays dash cam information
GPS Information : Displays GPS information and provides GPS reset option
29
PC Viewer Software
04
Front Rear
MicroSD card
Removing MicroSD card
4. PC Viewer Software
4-1. Thinkware Dash Cam PC Viewer
Thinkware Dash Cam PC Viewer for Windows/MacOS is provided which can be used to watch videos recorded
with the dash cam. The video les recorded by the dash cam are in one minute segments and the PC viewer
allows the user to watch these segments in single continuous video.
The setup le for the Thinkware Dash Cam PC Viewer is included in the MicroSD card within the package.
Please check THINKWARE homepage(www.thinkware.com) for the latest Dash Cam PC Viewer application.
4-1-1. Thinkware Dash Cam PC Viewer Software
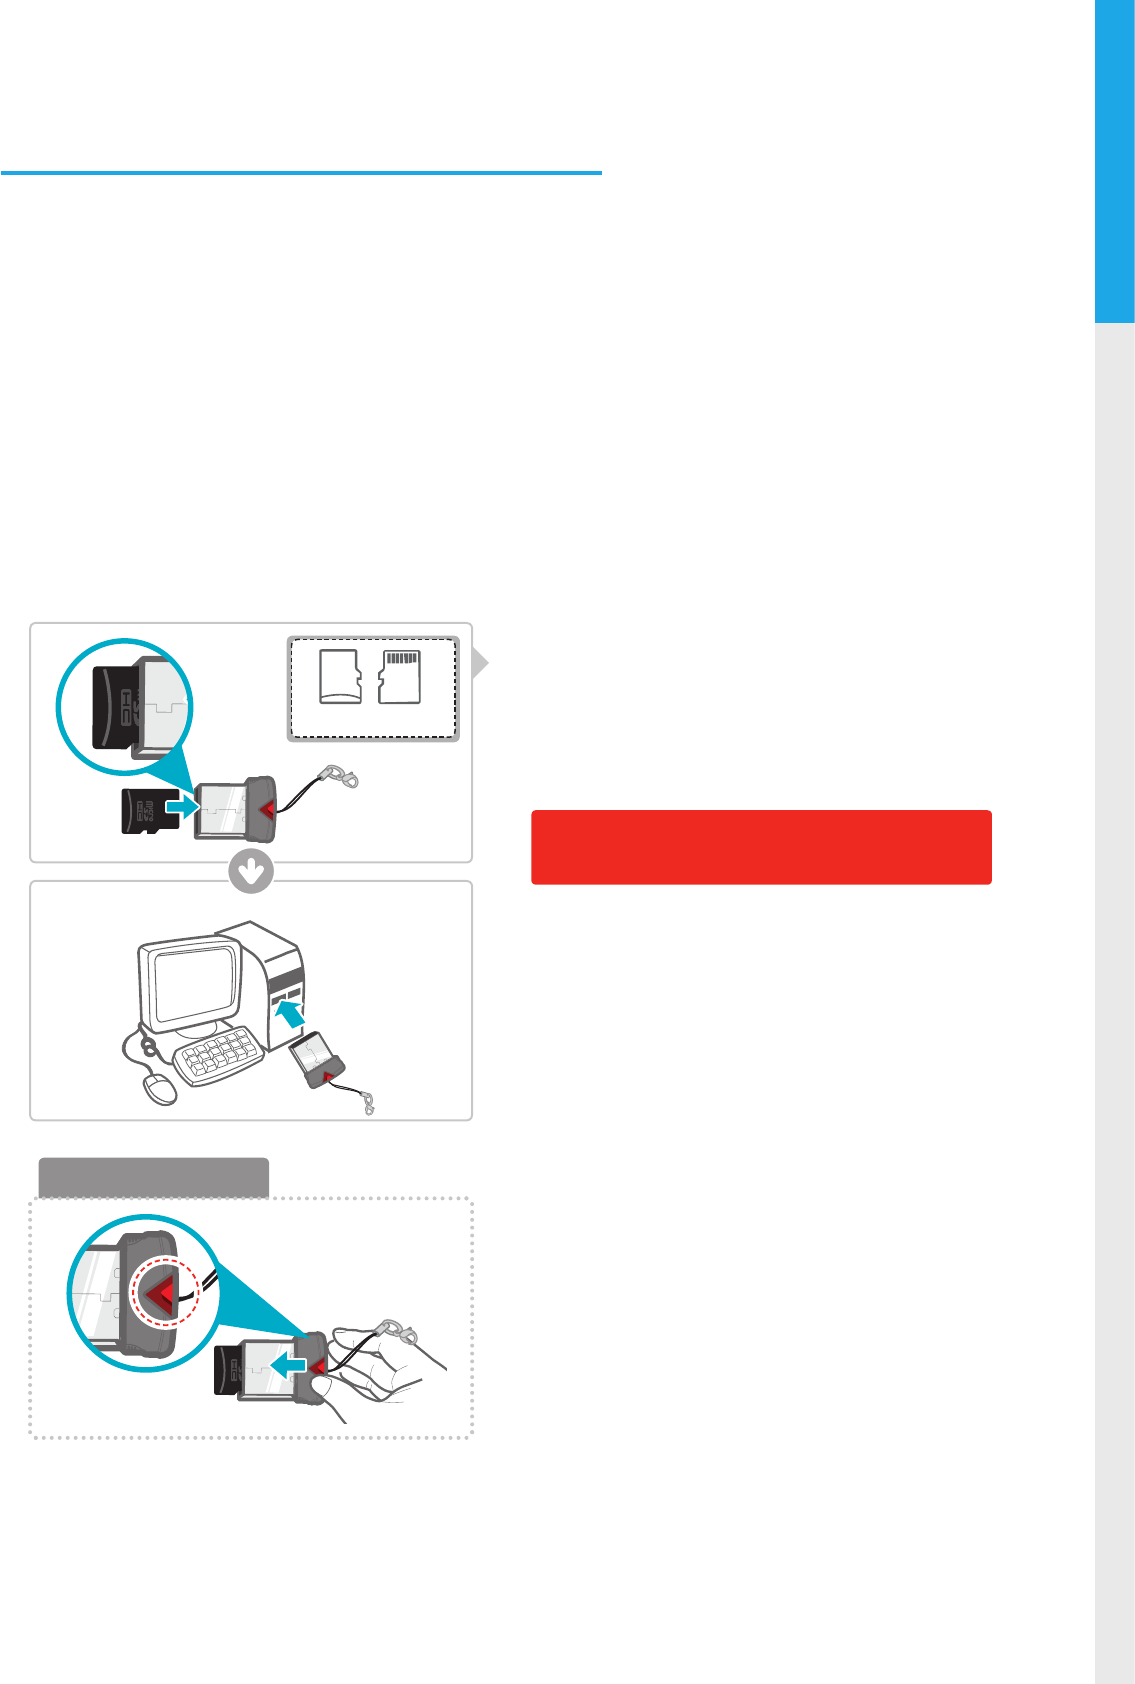
①
Insert the MicroSD card into the USB MicroSD card
reader (included in the package) with front side
facing up as shown in the illustration.
②
Connect the USB MicroSD card reader to the PC.
Ensure that the USB card reader is correctly
oriented when inserting it into the USB drive
30
4-1-2. Installing Thinkware Dash Cam PC Viewer
Windows
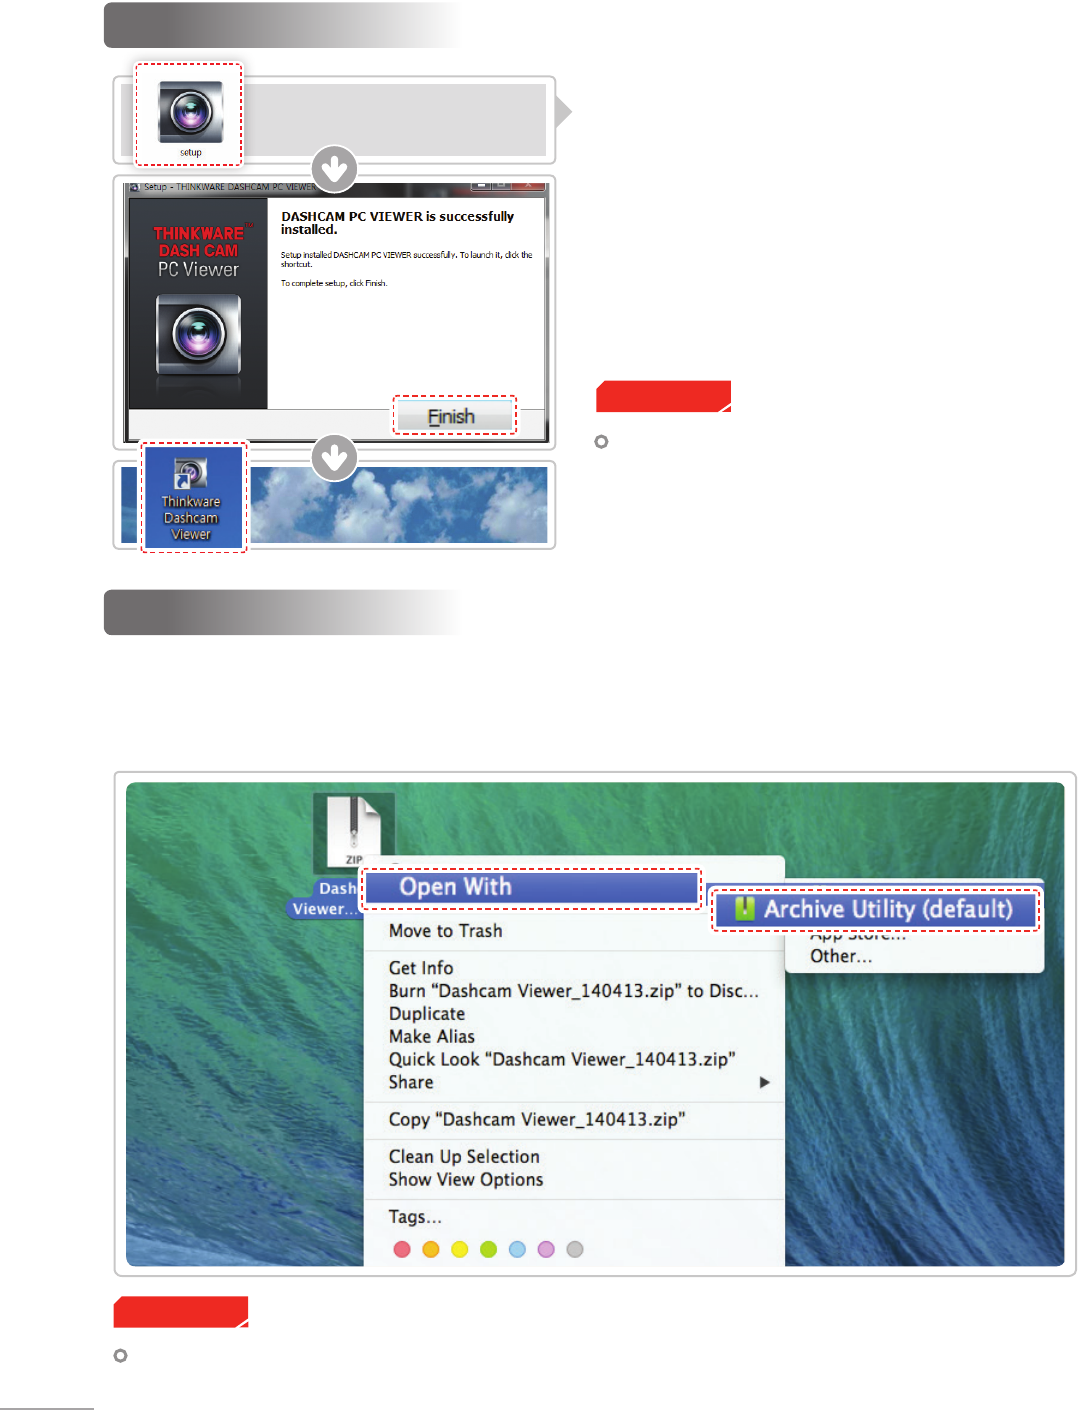
①
Double-click the Thinkware Dash Cam PC Viewer
setup le saved in the MicroSD card to initiate
program installation.
②
Double-click the application icon once PC Viewer
installation completes and the application main
screen will then appear.
MAC
Cautions
System requirements : MAC OS X 10.8 Mountain Lion or later (OS X 10.9 Mavericks, OS X 10.10 Yosemite)
Cautions
System requirements : Windows XP SP3 (32bit),
Windows 7 (32/64bit), Windows 8.x (32/64bit)
①
Move the le named “Dashcam Viewer.zip” stored in the MicroSD card to the desktop.
②
Right click on the mouse and select “Open With” > “Archive Utility” to launch the Thinkware Dash cam
PC viewer application.
31
PC Viewer Software
04
Cautions
The MicroSD card will not be recognized by the software until it has been initialized in the dash cam.
It is recommended that the user record at least one video clip on the MicroSD card with the dash cam
unit before accessing the Thinkware Dash Cam PC Viewer.
4-1-3. Select the Device Drive for FA700
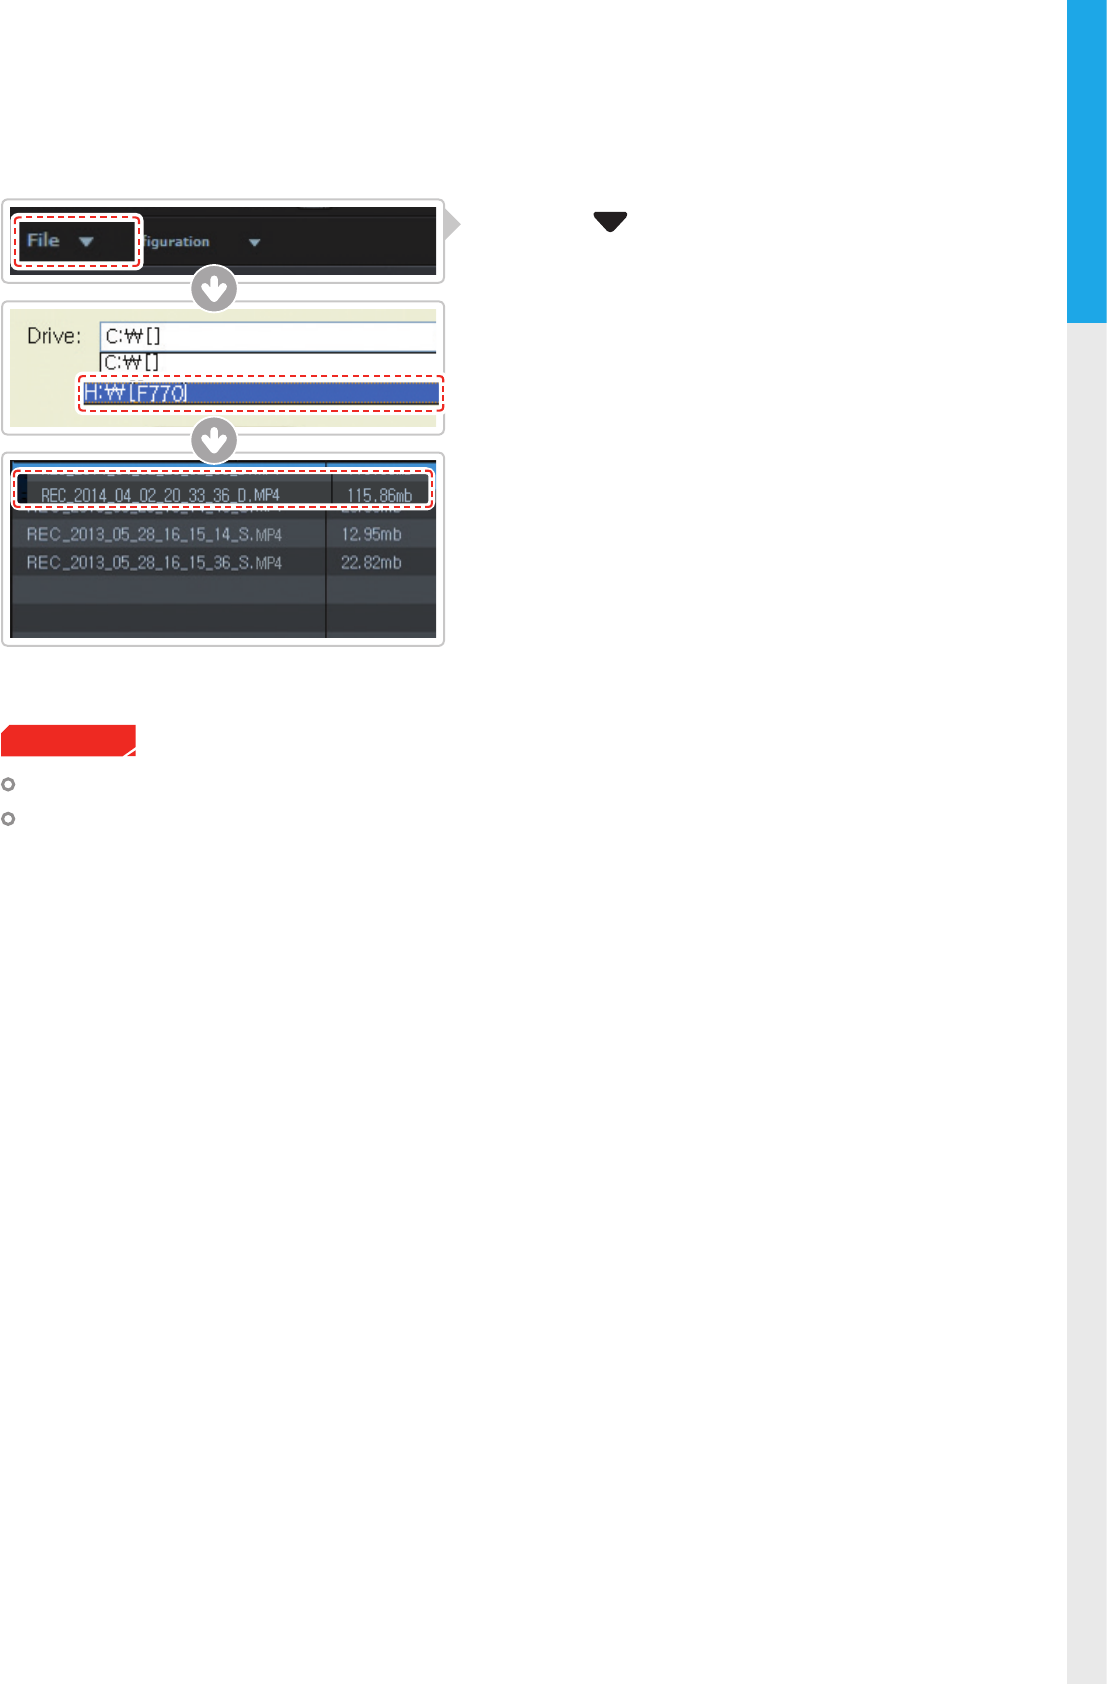
①
Click File from menu and select the drive for
the portable storage drive for the connected
MicroSD card.
②
Select any le from the list to load entire video play-
list in the memory card.
32
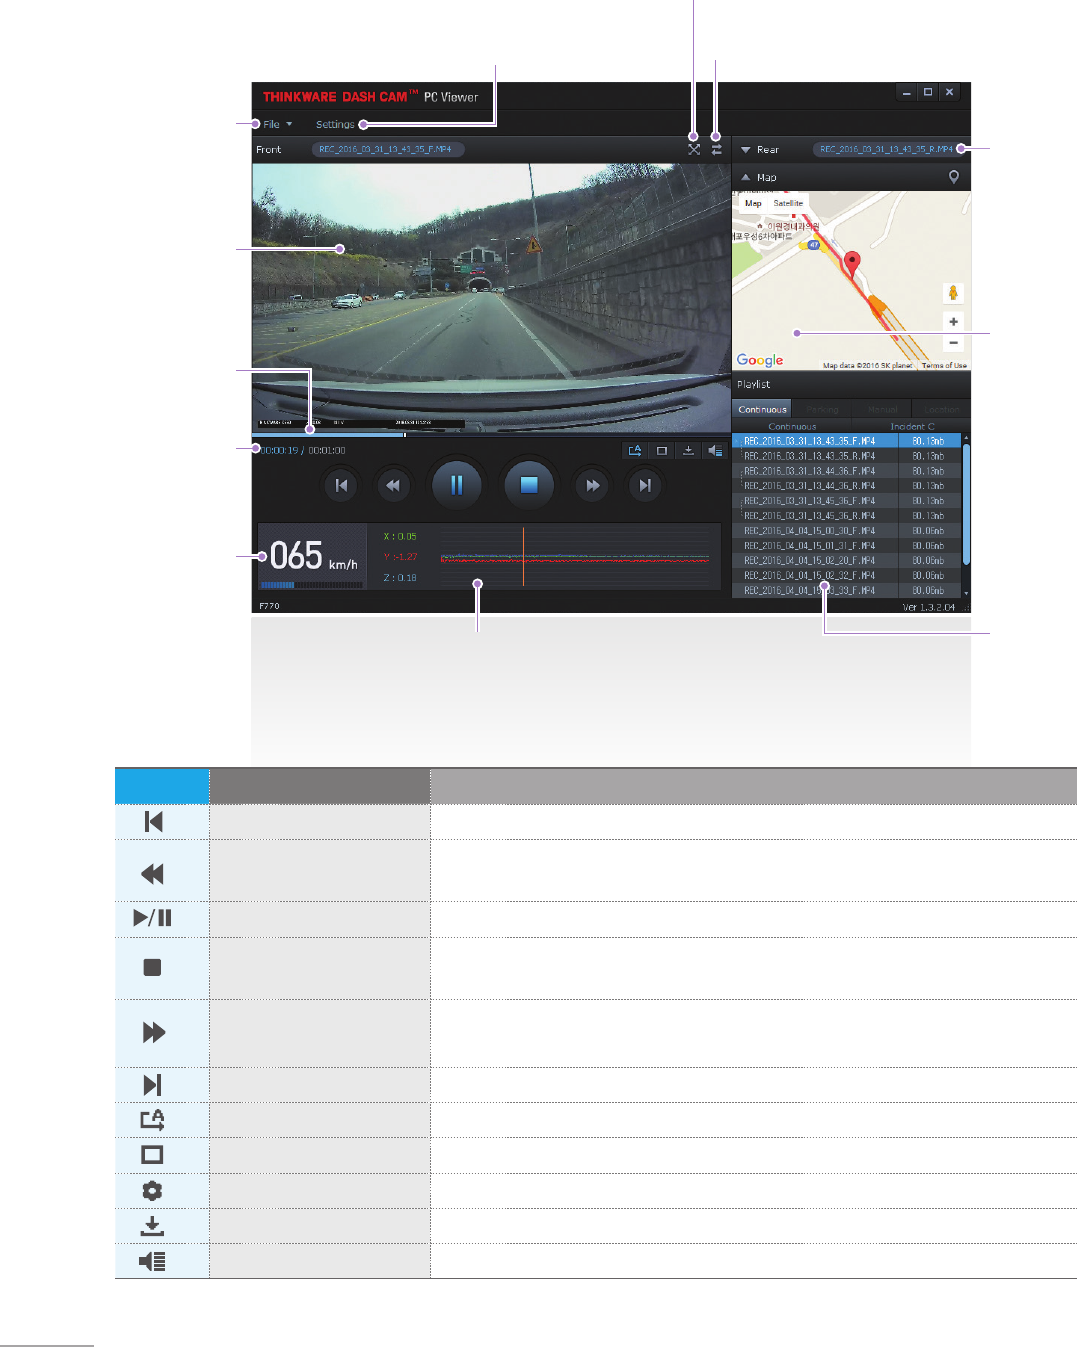
Rear View
(Enabled only if
MicroSD card
contains video
captured using rear
view camera)
Dash Cam Setting / Information
Full Screen
Switch between Front/Rear View
File Open
Viewing Screen
Playback
Progress
Current Playing Time/
Total Playing Time
Driving Speed
Impact Sensor Value
Map
Checks the location
of the recorded
video (Enabled only
if video is captured
while connected
using GPS antenna
(optional in some
models) and must
also be connected
to the Internet)
Playlist
4-1-4. Thinkware Dash Cam PC Viewer Overview
No. Name Description
Play Previous Plays the previous le before the current le
Rewind by 10 Sec Rewinds the current le being played by 10 seconds
(If selected, it continues to rewind by 10 seconds)
Play/Pause Plays the recorded le / temporarily pauses playback
Stop Stops the le being played. The playback status resets to the starting point of
the video.
Fast-forward by 10 Sec Fast-forwards the current le being played by 10 seconds
(If selected, it continues to fast-forward by 10 seconds)
Play Next Plays the next le after the current le
Auto Play Automatically loops the video back to beginning once the end has reached
Zoom Sets the video expansion ratio (0.5x / 1.0x / 1.5x / 2.0x)
Screen Setting Sets brightness/speed of the video
Save Saves the video in play
Volume Sets the volume of the playback
33
PC Viewer Software
04
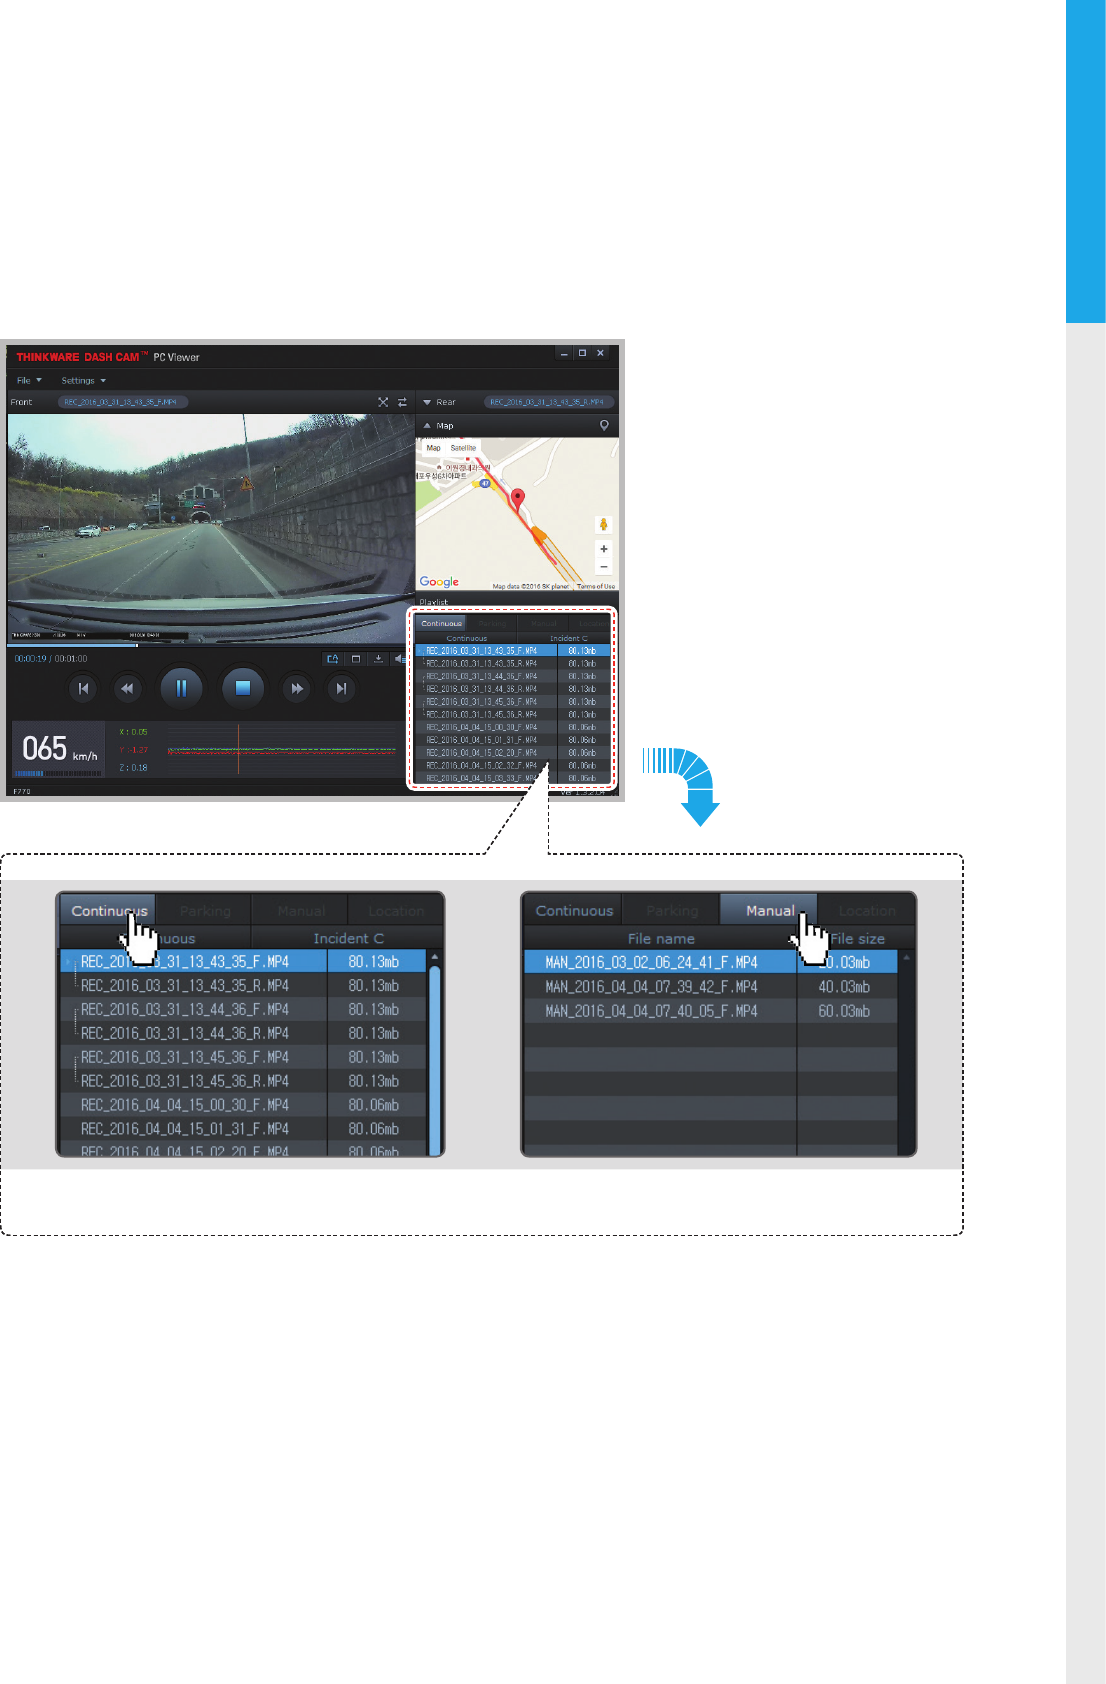
4-1-5. View Video Playlist
Select appropriate folder (Continuous Recording, Incident Recording, Manual Recording, Parking Motion,
Parking Incident) to see the playlist for each recording mode.
Continuous Recording Playlist Manual Recording Playlist

34
5. Device Information
5-1. Specications
The specications of this product may change without prior notice for product improvements.
Item Standard Note
Model FA700
Size/weight 110 x 60.41 x 31.75 mm / 131g
4.33 x 2.37 x 1.25 inches / 0.28lbs
Capacity MicroSD card (UHS-I) 16/32/64GB
Recording mode
Continuous Recording Mode Records in 1 minute segment
Incident Recording Mode
Manual Recording Mode
Parking Surveillance Mode
Optional hardwiring cable and installation
are required for continuous supply of
power when vehicle ignition is o.
Audio Recording Press Voice Recording Button to turn the
audio recording on or o
Camera 2.19 Megapixel, 1/2.9" CMOS Same for rear camera
Viewing angle Approximately 140° (diagonally) Same for rear camera
Video Full HD (1920 x 1080/H.264/extension MP4) Same for rear camera
Frame rate 1 channel (Front view) : up to 30 fps Same for rear camera
Audio PCM (Pulse code modulation)
Acceleration sensor 3-axis acceleration sensor (3D, ±3G) Adjustable impact sensitivity (5 levels)
Rear camera Support V-IN port Optional accessory that requires separate
purchase.
GPS Embedded GPS Supports Road safety Warning System
(ADAS)
Input power source DC 12/24V Rear view camera: 3.3V DC
Current consumption 2CH: 3.5W/1CH: 2.5W (mean) Based on fully charged super capacitor
Auxiliary power unit Super Capacitor
Security LED Panoramic white LED
Notication LED 3-color LED 2 rear LEDs
Hardware status
notication LED
Wi-Fi receiver, GPS receiver,
operation status 2 rear LEDs
Warning sound Embedded speaker Voice (buzzer sound) guidance
Operation/
Storage Temperature
-10°C to 60°C/ -20°C to 70°C
14°F to 140°F/ -4°F to 158°F
Connection Interface 1 x V-IN port