Tait TEL0051 Mobile Transceiver User Manual T2040
Tait Limited Mobile Transceiver T2040
UserManual.wiki
>
Tait
>
TEL0051 User Manual
>
Operators Manual T2040
Contents
1.
Manual and Installation Guide
2.
Installation Guide T2000
3.
Operators Manual T2020
4.
Operators Manual T2040
Operators Manual T2040
Navigation menu
Upload a User Manual
Namespaces
Wiki Guide
HTML
PDF
Info
Views
User Manual
Discussion / Help
Navigation


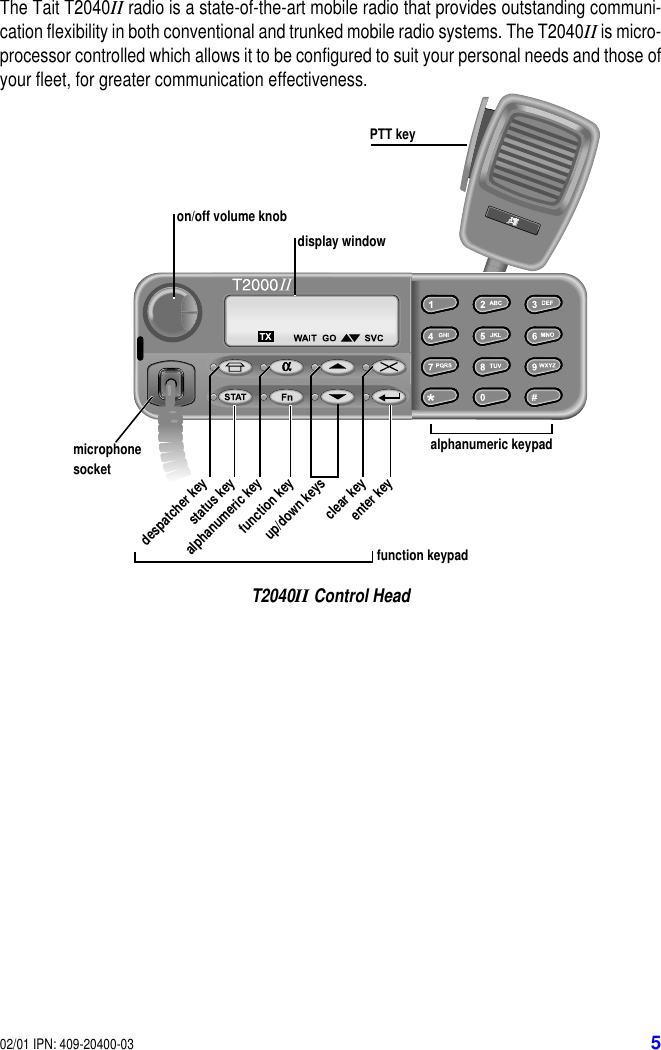
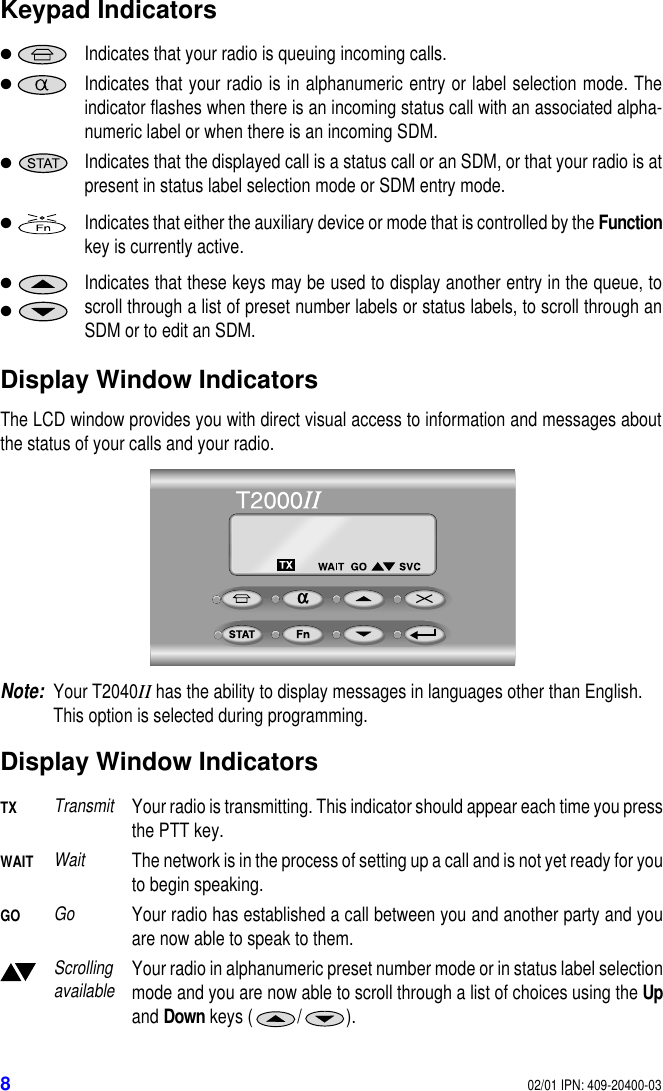
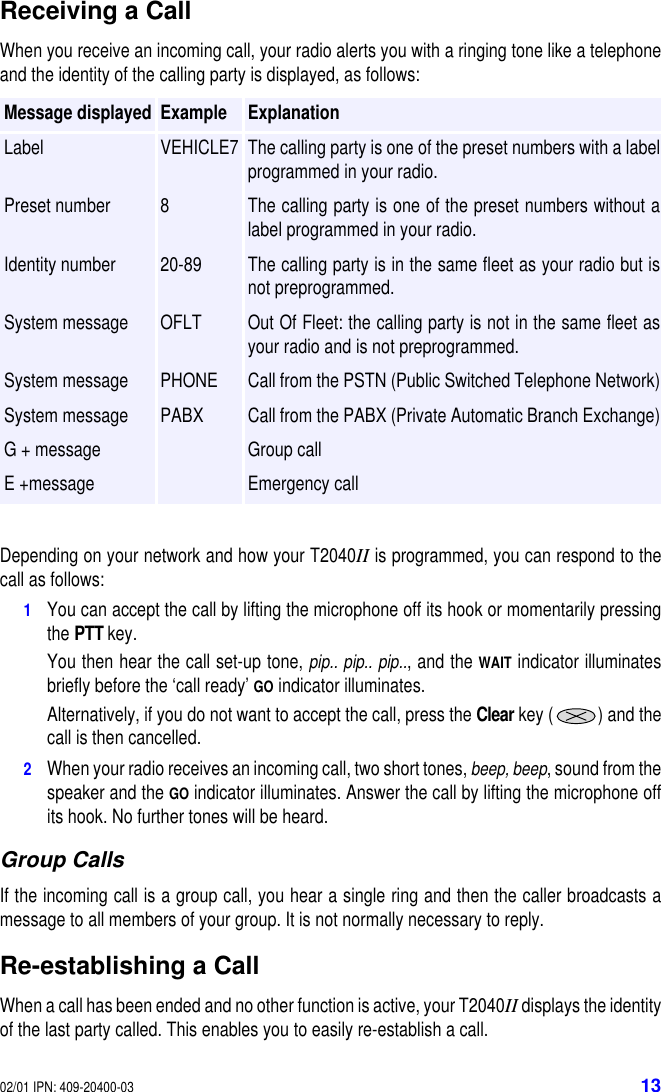
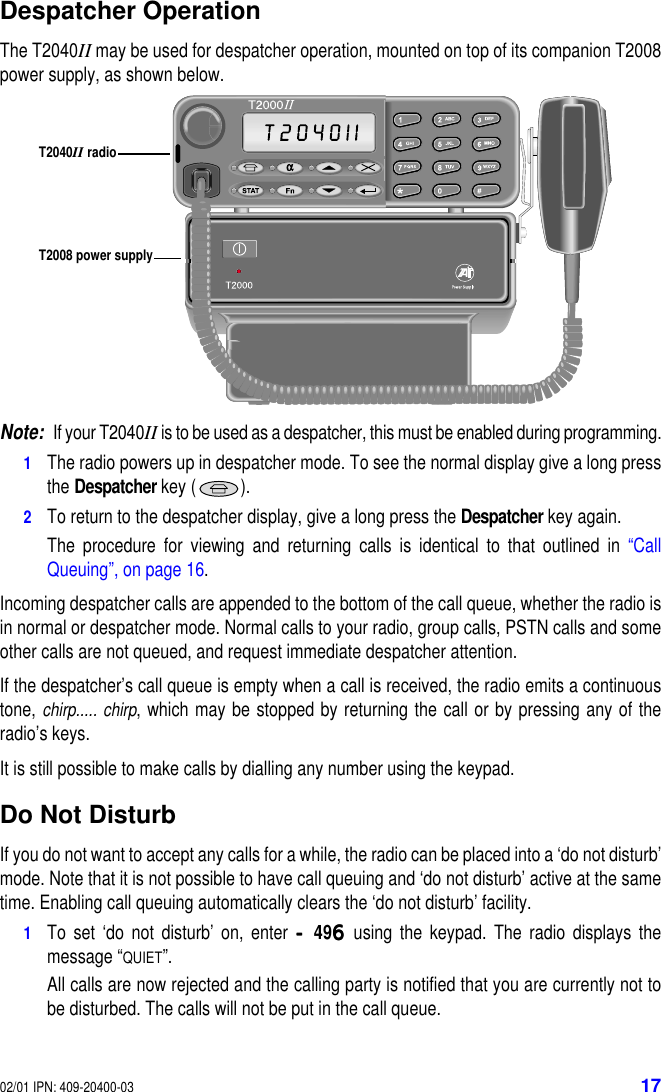
![02/01 IPN: 409-20400-03 7T2040II Controls and IndicatorsThe T2040II control head includes the following keys and indicators:Keypad FunctionsThe keypad functions are as follows:DespatcherShort press: accesses a preset number (usually your basedespatcher). This is a one touch dialling key.Long press: if call queuing is enabled, this changes the mode ofoperation between call queuing and normal mode.Long press: if the radio is in despatcher mode, this changes thedisplay from call queuing to normal mode.StatusShort press: used to send status calls using alphanumeric labelmode, and to select preprogrammed status messages to indicateyour own present status (such as “EN ROUTE” or “AT LUNCH”).Long press: used to access short data message (SDM) entrymode.Alphanumeric Used to scroll and select or enter alphanumeric labels associatedwith preset numbers preprogrammed into your radio. It can alsobe used to view an alphanumeric status label of an incomingstatus call and to enter and view SDMs.FunctionLong press: toggles the level of the confidence tones from normalto quiet. At each press, the radio sounds a sample tone at the newlevel.Short press: may function as a one touch dialling key or it mayactivate or disable an auxiliary device, such as a scrambler or anexternal alert unit (e.g. car horn).Up / Down Used to scroll through entries in the call queue, or a list of presetnumber labels or status labels. Also used to scroll through anSDM or to edit an SDM.Clear Used to end calls, and to clear ‘call back’ numbers in the queueand the ‘do not disturb’ facility. It also operates automatically aftera period of inactivity determined by the network, or when you putthe microphone back on hook.Enter Used to initiate a call and to select items. Star/Hash Used at the end of dialling sequences and for special operations.0 to 9[ABC] to [WXYZ] Used for dialling and for entering alphanumeric data for labels,when the indicator beside the Alphanumeric key is illuminated.](https://usermanual.wiki/Tait/TEL0051.Operators-Manual-T2040/User-Guide-134982-Page-9.png)