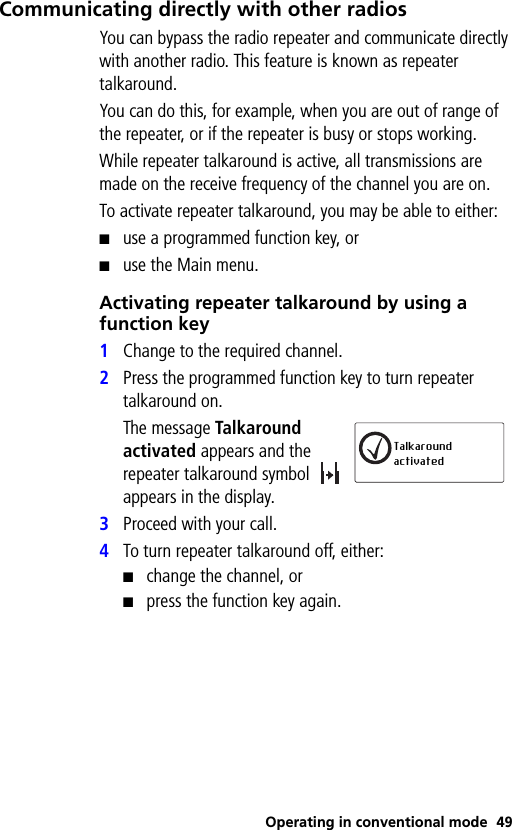
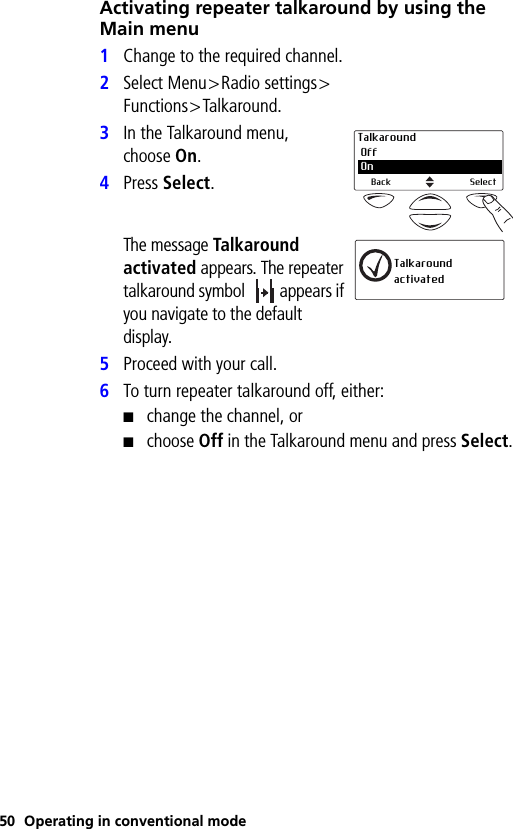
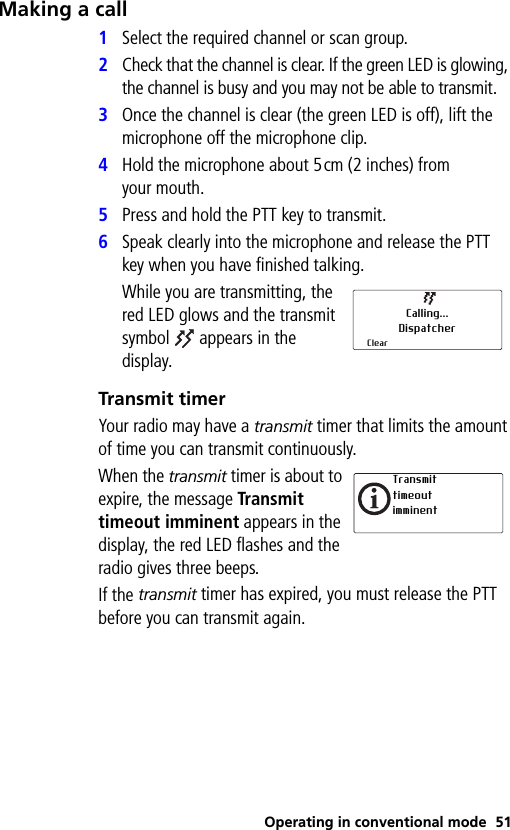
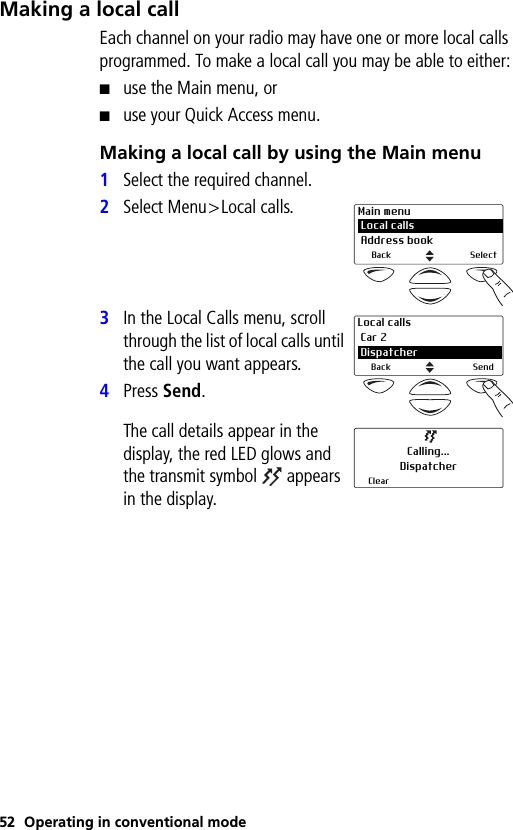
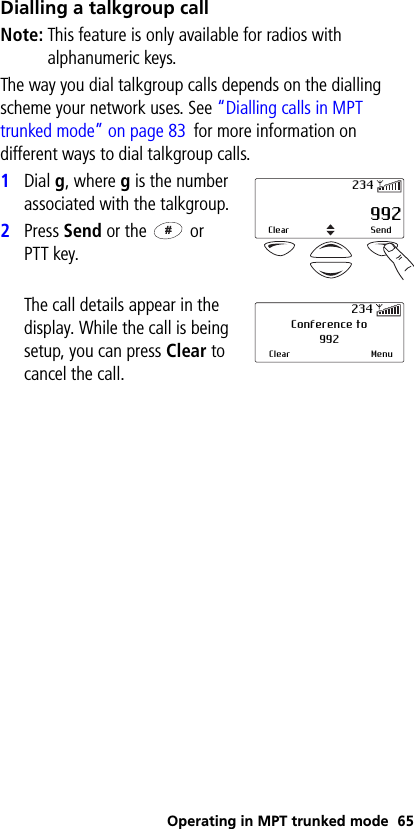
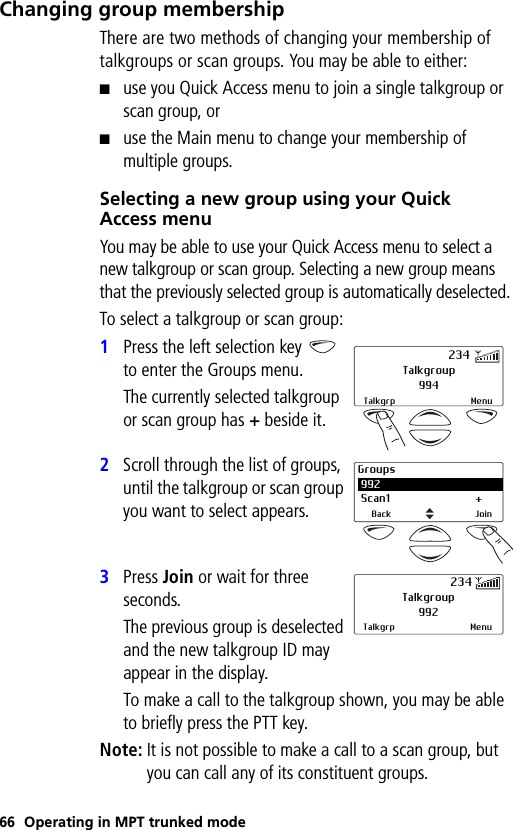
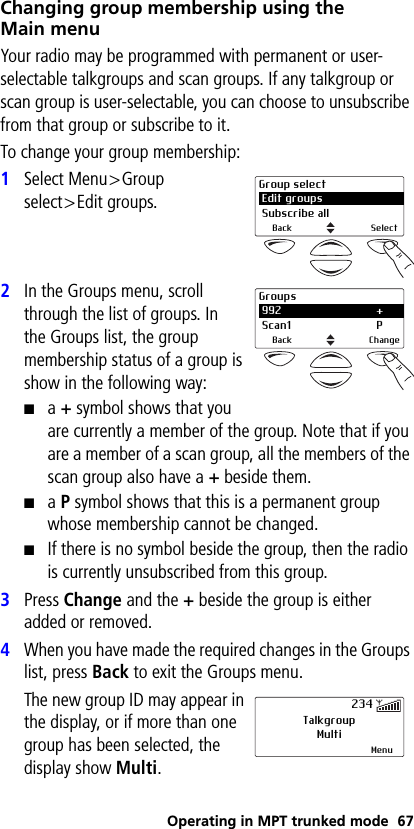
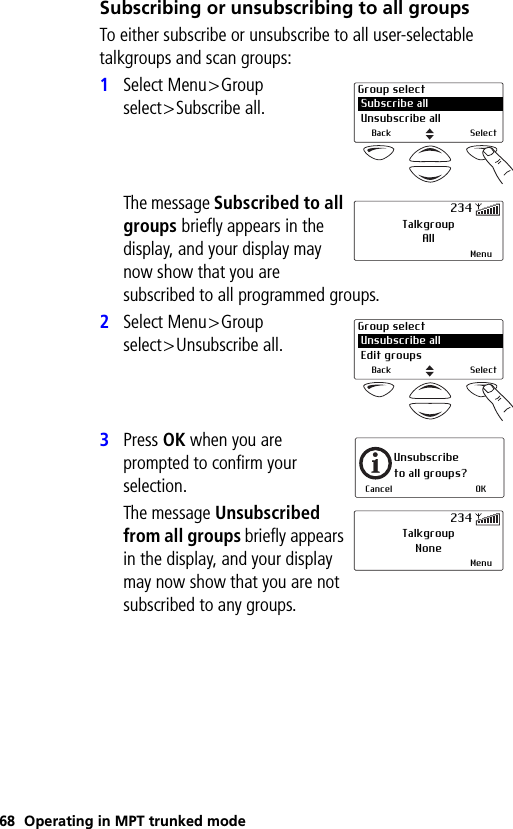
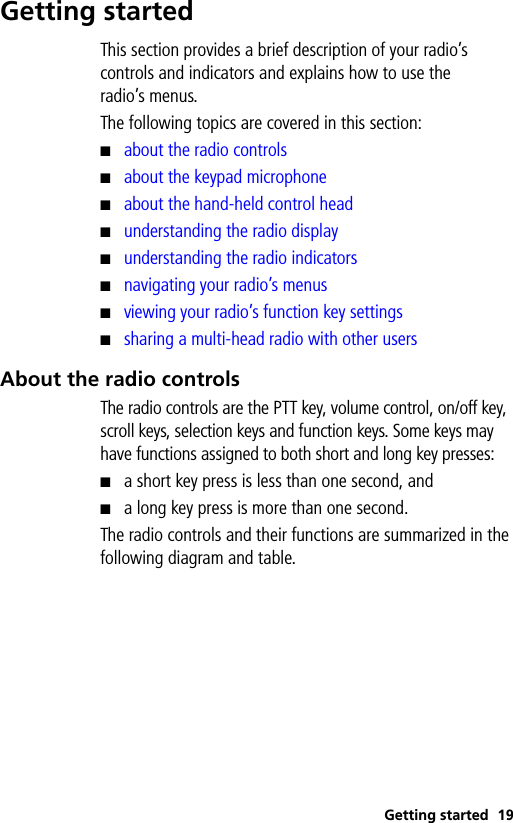
Tait TMAC0C Mobile Transceiver User Manual TM8200 user s guide
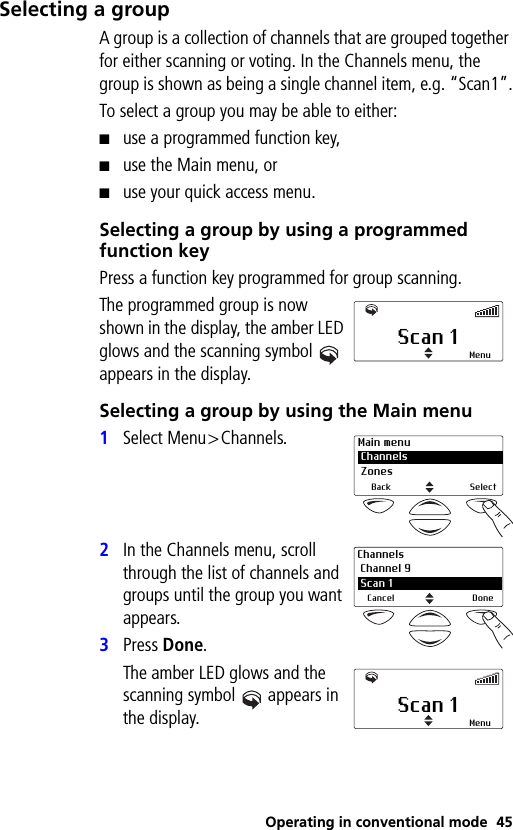
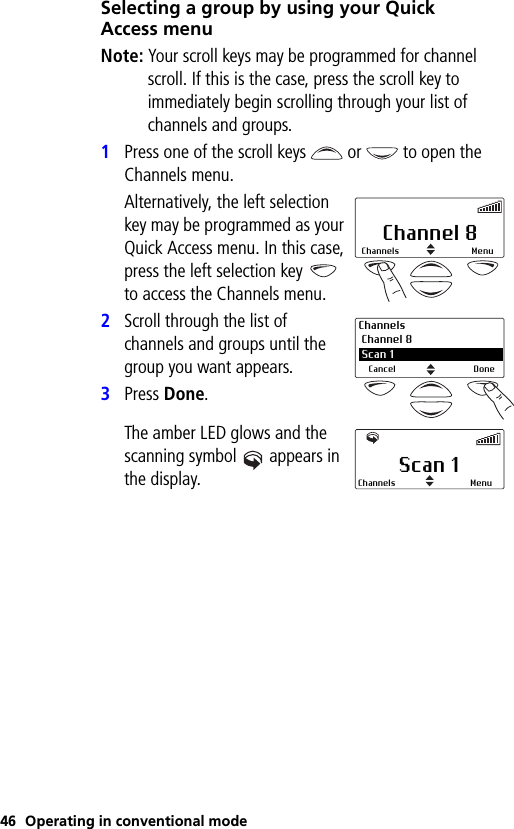
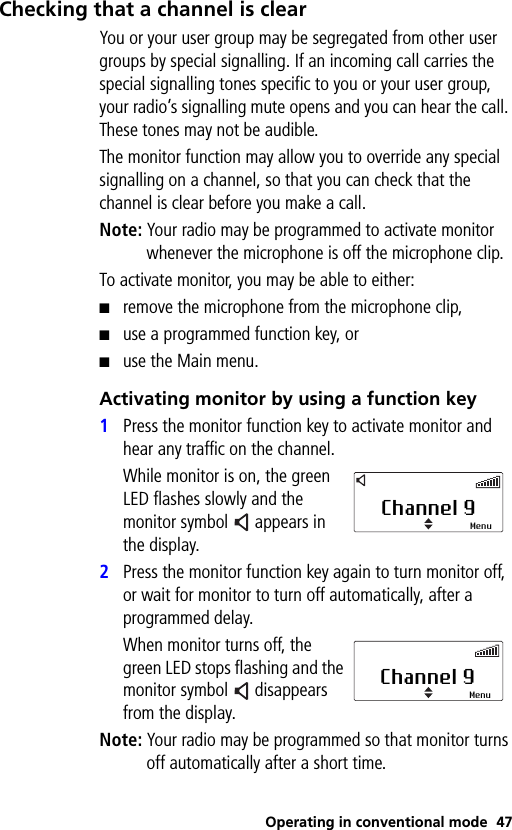
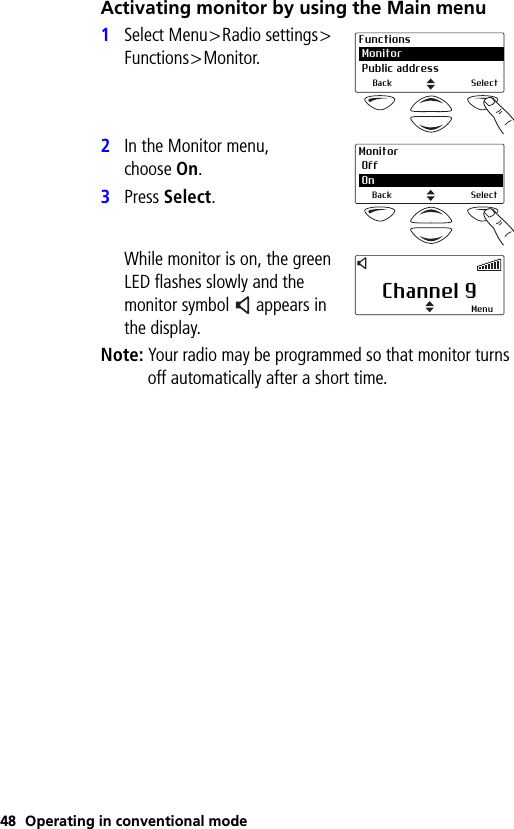
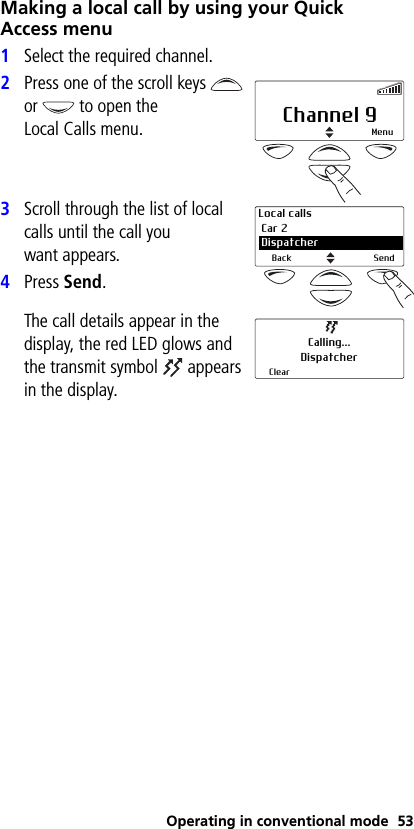
Tait Limited Mobile Transceiver TM8200 user s guide
UserManual.wiki
>
Tait
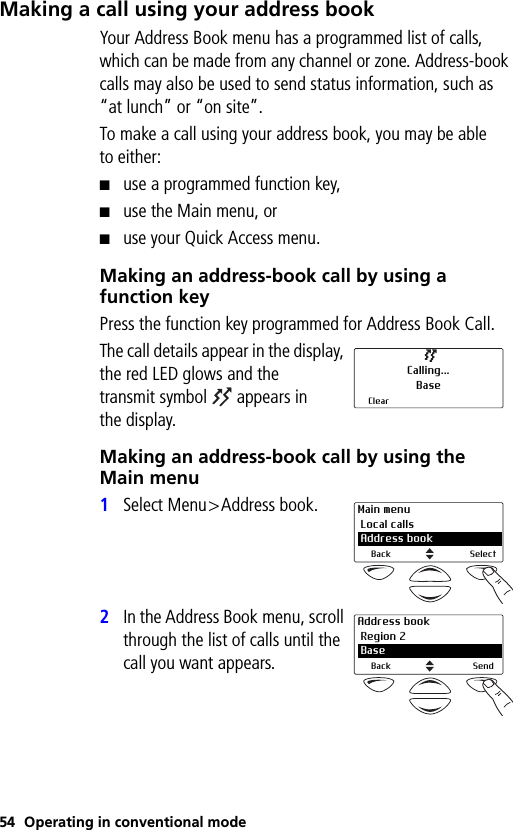
>
TMAC0C User Manual
Exhibit D Users Manual per 2 1033 c3
Navigation menu
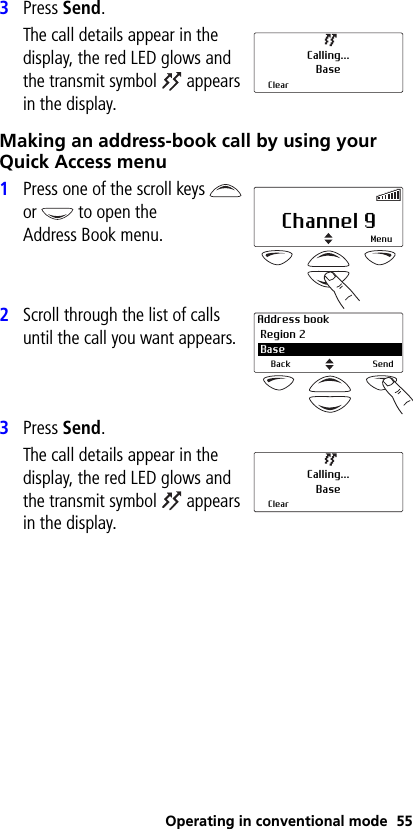
Upload a User Manual
Namespaces
Wiki Guide
HTML
PDF
Info
Views
User Manual
Discussion / Help
Navigation

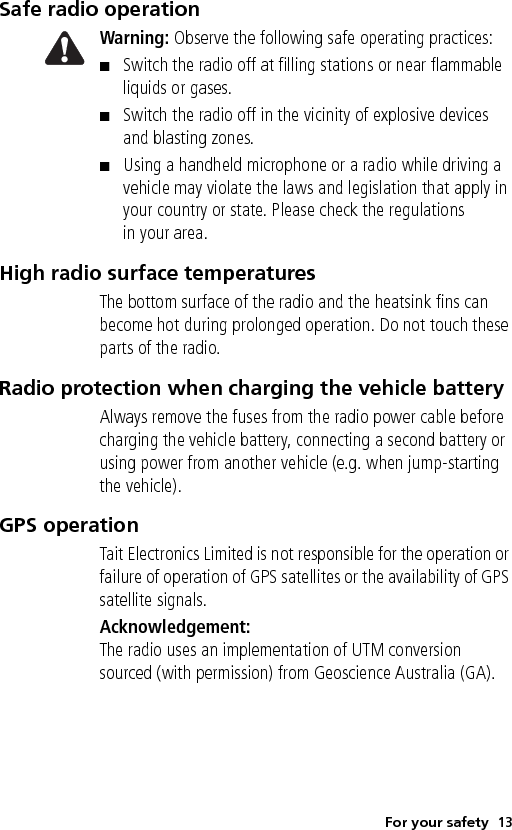
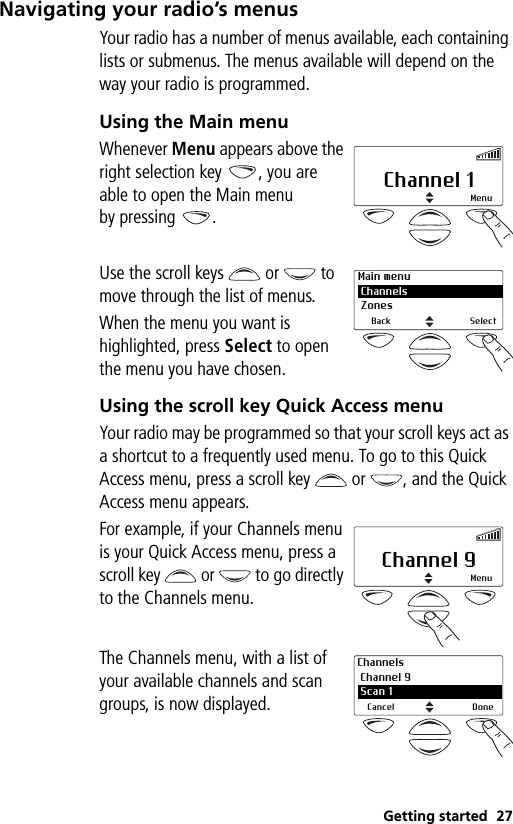


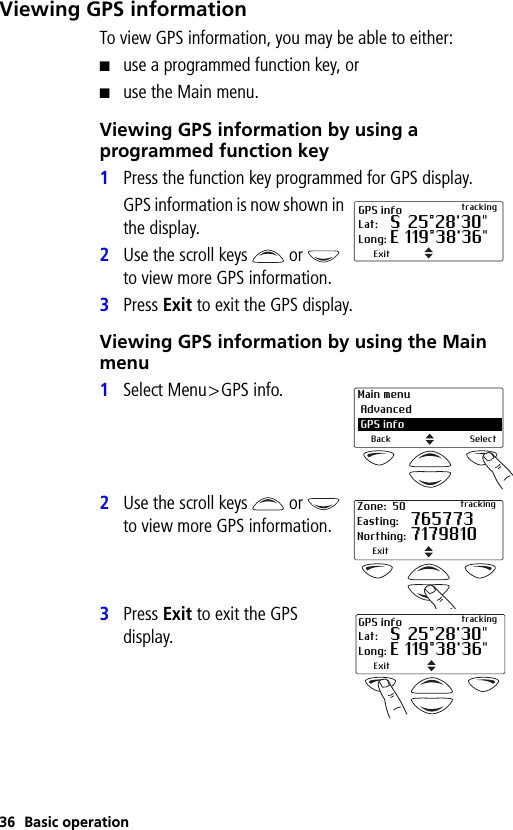
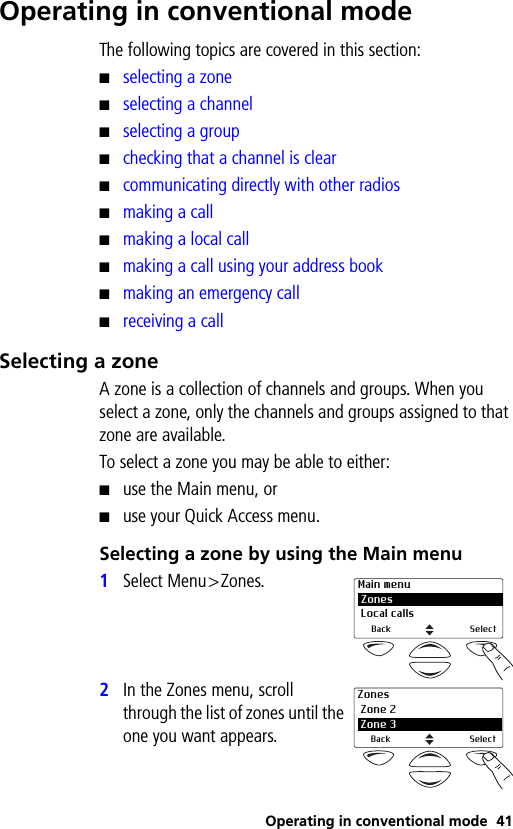
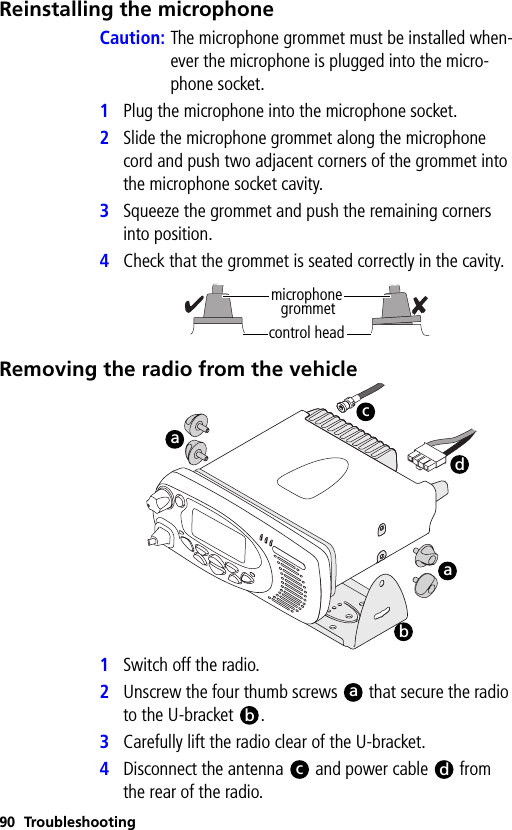
![Basic operation 35About GPS informationYour radio may be connected to a GPS (global positioning system) receiver, and programmed (see the note below) so you can view GPS information such as latitude and longitude, true course, speed, and coordinated universal time. Your radio may also be programmed to display UTM (universal transverse mercator) information such as the UTM zone, and northing and easting coordinates.Note: GPS information on the radio display is not a standard feature. Before being programmed, it must be purchased and enabled on the radio via the Software Feature Enabler. Contact Tait Electronics Limited for more information.About GPS status informationWhile viewing GPS information, GPS status information appears at the top right of the display.The status information you see on a hand-held control head may differ to that on a standard control head. In the following section, status information for a hand-held control head is shown in brackets [ ].The following GPS status information may appear in the display:■Tracking [trk]: the GPS receiver is communicating with asatellite.■Lost cnx [no cnx]: the radio has lost serial communications with the GPS receiver.■Stored [no fix]: GPS receiver is having trouble connecting to a satellite and the radio is displaying stored information that may not be current.GPS info trackingLat: S 25°28'30"Long: E 119°38'36"Exitstatus information](https://usermanual.wiki/Tait/TMAC0C/User-Guide-1377733-Page-35.png)