Telecommunication Laboratories Chunghwa Telecom CHTS200202 HARDWARE SECURE MODULE User Manual SafGuard200 user guide for FCC
Telecommunication Laboratories , Chunghwa Telecom Co., Ltd HARDWARE SECURE MODULE SafGuard200 user guide for FCC
Contents
- 1. USERS MANUAL 1
- 2. USERS MANUAL 2
USERS MANUAL 2
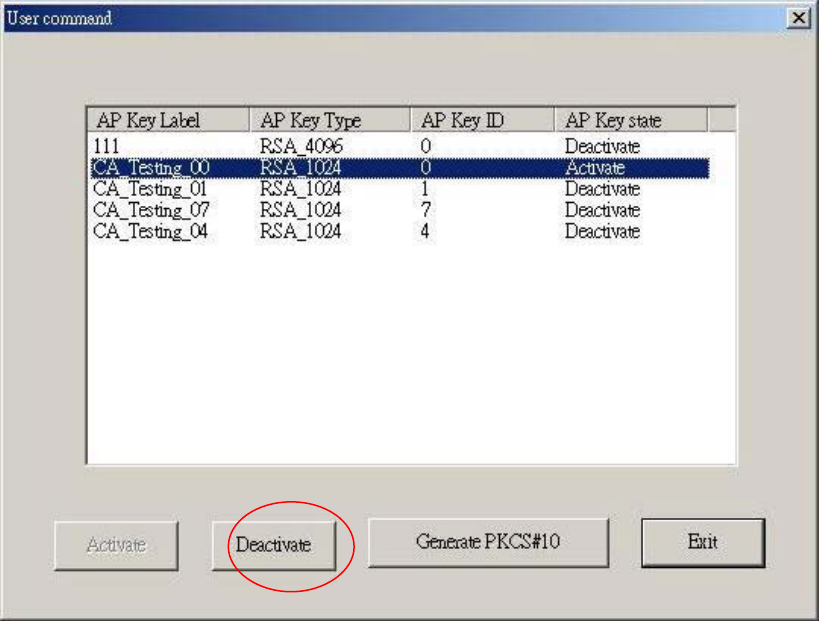
Fig. 4-32 Deactivate an APKey(User Logout)
4.2.7.3. Produce PKCS10 Request File
Selecting the AP Key from the List to produce its PKCS10 request
file, then pressȜproduce PKCS10 request fileȝǶ
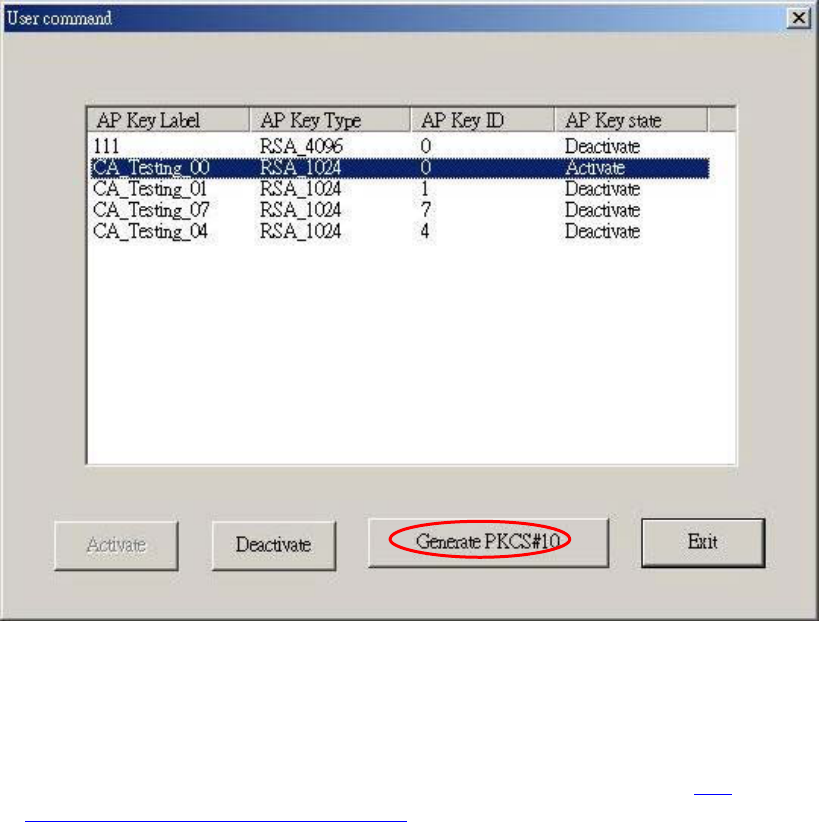
Figure 4-33 Produce PKCS10 Request File
4.2.8 Enable or Disable Key (UNIX_LIKE)
You need toexecute the SafGuard200service program (Reference5.2
Solaris/Linux driver installation manual), then the UNIX KeyManagement
Toolcan be executed.
The execute file of UNIX KeyManagement Tool is KeyMng which has two
operation mode.
1. KeyMng –wǺFrame/Win mode
In this mode, the program can be operated by using the key (ʅ
ʆʇʈ), or directly press “1”, ”2” ,”3”…and so on.
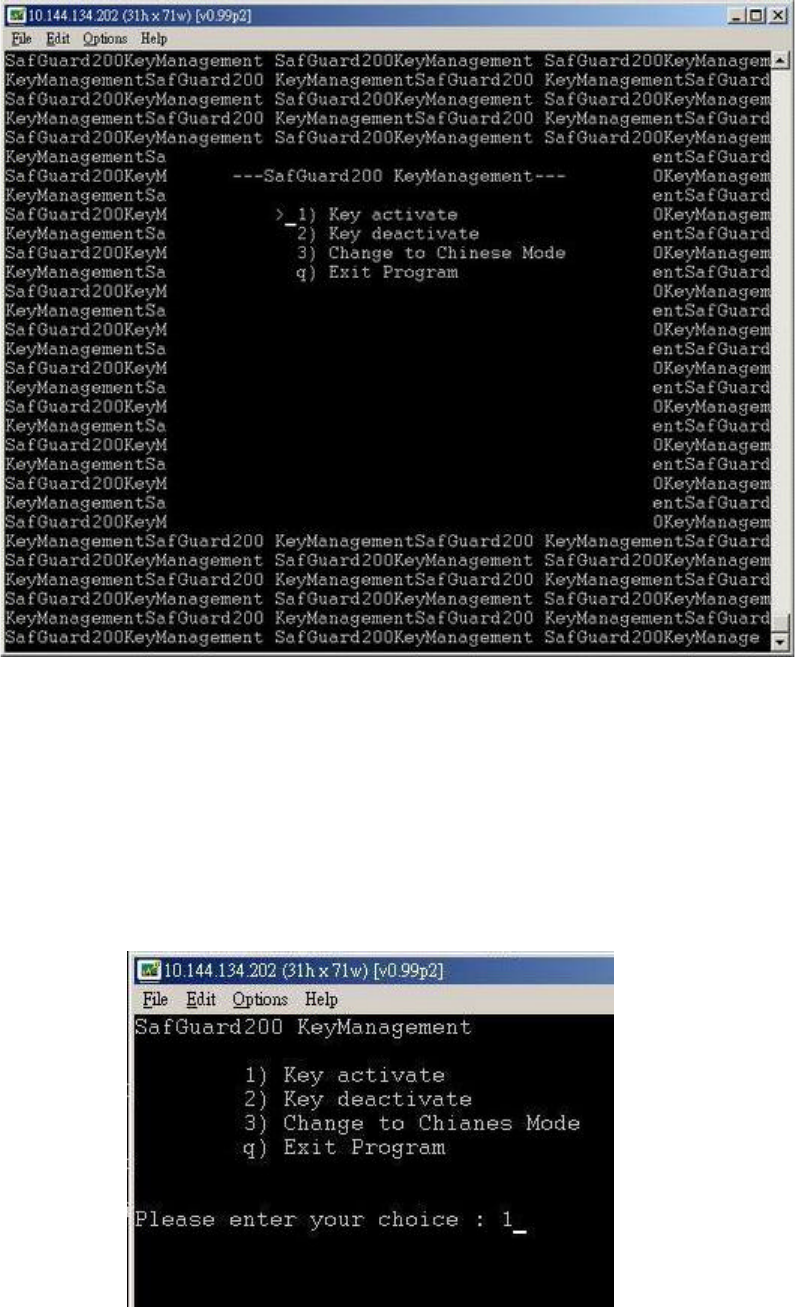
Fig. 4-34 The screen of Frame Mode operation
2. KeyMng –cǺCommand line mode
In this mode its operatoion is like mode 1, and the only
difference is that mode 2 can not be operated by using the key (ʅ
ʆʇʈ)
Figure 4-35 the screen of Command mode operation
The screen of UNIX KeyManagement Tool is explained by Command
mode.
4.2.8.1 Enable Key
1. Selecting 1)Enable Key on the main screen (Reference
Figure 4-35)Ƕ
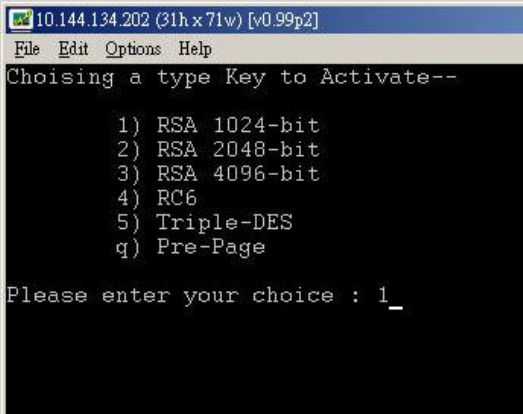
2. Selecting the type of the key you want to enable
Fig. 4-36 Selecting the type of key
3. Selecting the key you want to enable, and displaying the key
information according to .ini file. You need to make sure that
apkfile.ini file has been updated.

Fig. 4-37 Enable Key
4.2.8.2 Disable Key
In this section, disable key is also called key Logout
1. Selecting 2)Key Logout (Reference Figure 4-35)Ƕ
2. Selecting the type of the key, reference Figure 4-36Ƕ
3. Selecting the key
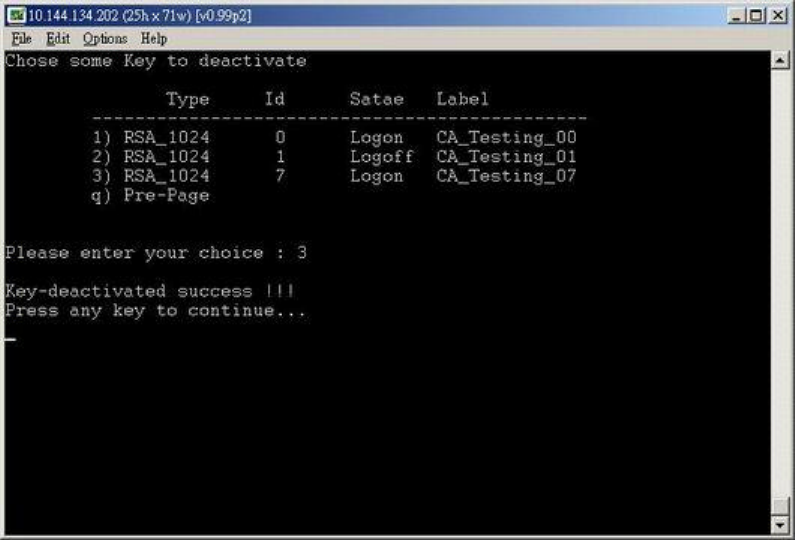
Fig. 4-38 Key Logout
5. SafGuard200 Installation
5.1 Installation of Windows2000 Driver
5.1.1 Installation
First, install SafGuard200 driver and key management tool to Win2000Ǻ
The program for SafGuard200 driver
Hsm_Server.exe: Win2000 Service program, SafGuard200 driver
The program for Key management:
KeyManage.exe: Key Management Tool
Findptrs.avi: pictures for key management program
BfiveUcs.dll ᆶMfc42.dll: Programs used for dynamic linking
Execute the Hsm_Server.exe in the installation directory
Fig. 5-1 The screen for executing Hsm_Service.exe
Jotubmmjoh!tfswjdf!qsphsbn!!Ǻ!
jotubmmjoh!TbgHvbse311!tfswjdf!qsphsbnt!!
Jotubmmjoh!boe!fobcmf!tfswjdf!qsphsbnǺ!!
Jotubmmjoh!tfswjdf!qsphsbn!jo!uif!tztufn!boe!fyfdvuf!uif!tfswjdf!
qsphsbn/!
Fobcmf!TbgHvbse311!tfswjdf!qsphsbn!Ǻ!!
Fyfdvuf!tfswjdf!qsphsbn!
Sfnpwf!Tfswjdf!qsphsbn!!!!!!!Ǻ!!
Sfnpwf!uif!tfswjdf!qsphsbn!gspn!uif!tztufn/!
Shut down service program Ǻ
Shut down the service program!
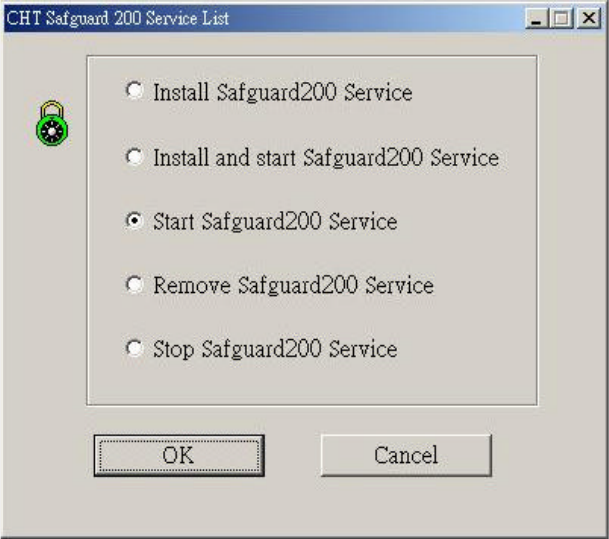
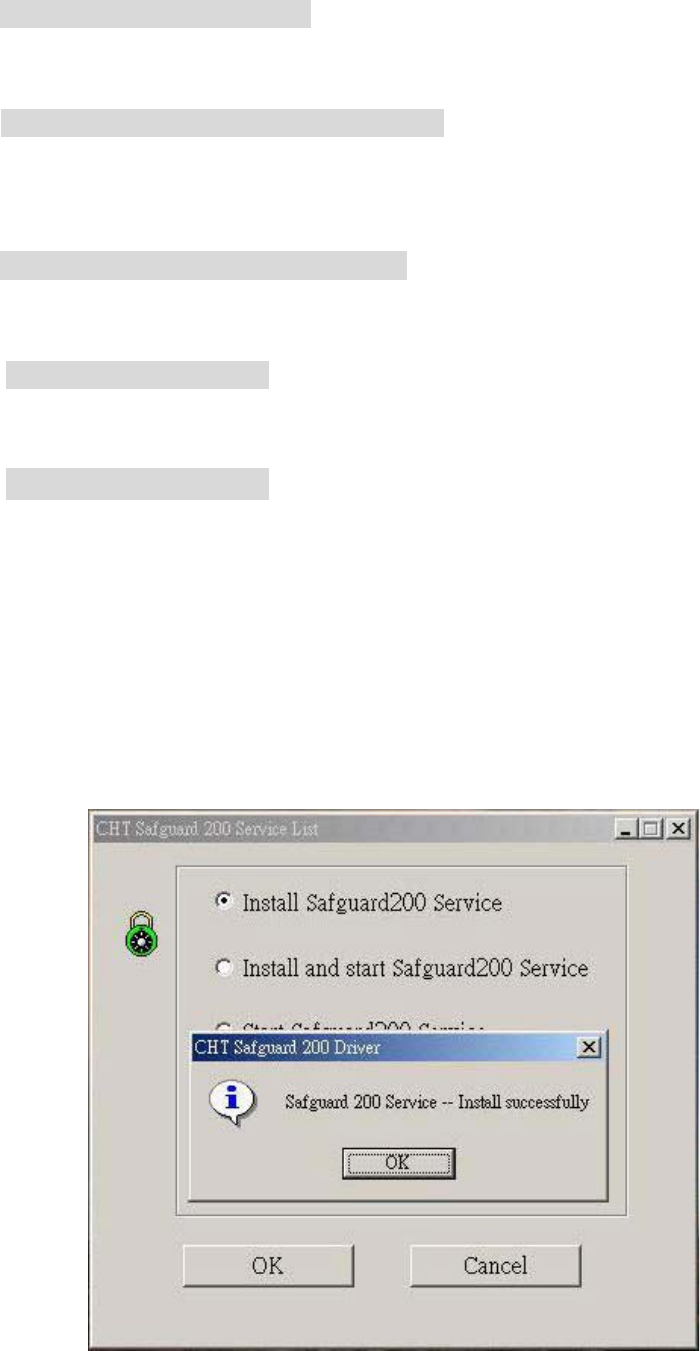
After executing Hsm_Server.exe, click [Installing SafGuard200 service
program] or [Installing and enable SafGuard200 service program], then press ok
button, as shown in the following Figure. If you click[Installing and
enableSafeGuard200 service program], the service program will be executed after
installion.
Fig. 5-2 The screen of installing service program
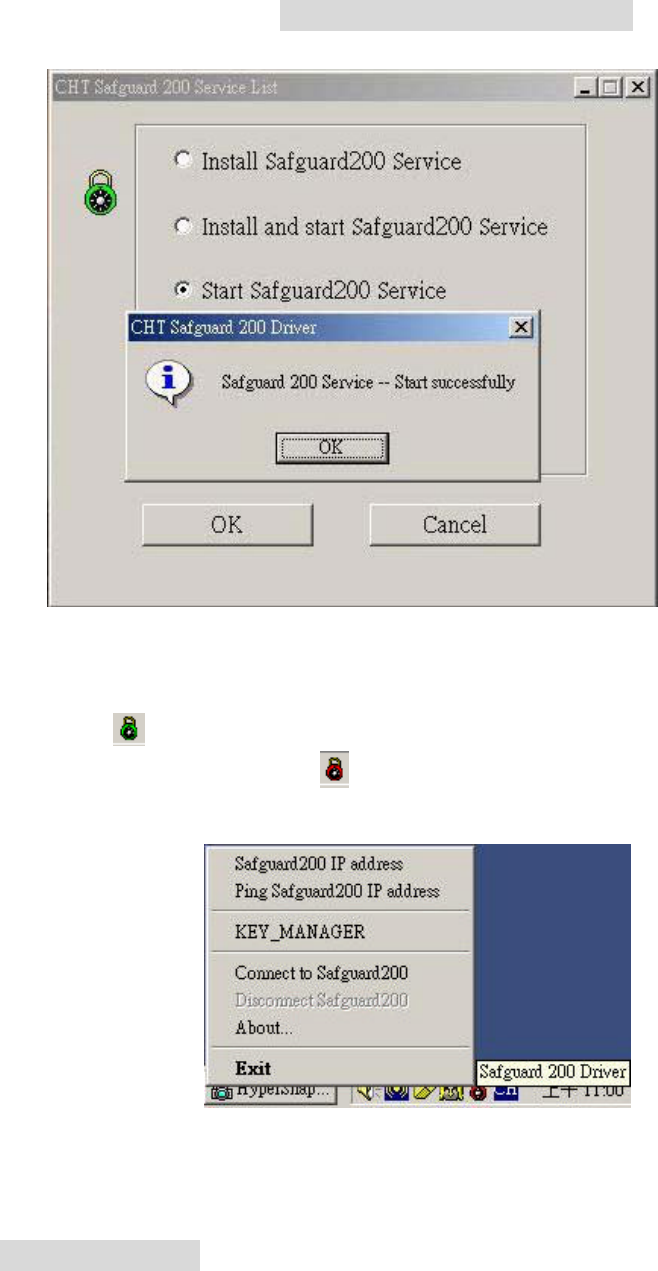
5.1.2 Enable Service Program
After installition, click [EnableSafGuard200 service program] , then click ok
button, the service program can be enabled.
Gjh/6.4!Uif!tdsffo!pg!fobcmf!uif!tfswjdf!qsphsbn
After completing all previous tasks, you can find the icon of running
HSM_Server at right bottom corner of Win2000. If the color of this icon is
green, like , it means that the SafGuard200 has been connected, otherwise the
color of the icon will be red like . At this point, you can press right button of
the mouse to quit HSM_Server. Its function as shown in the following
Fig. 5-4 The Screen fo enabling HSM_Server
Function details:
SafGuard IP Address : Displaying theGroup name and IP address of SafGuard200
as shown in the followingǺ
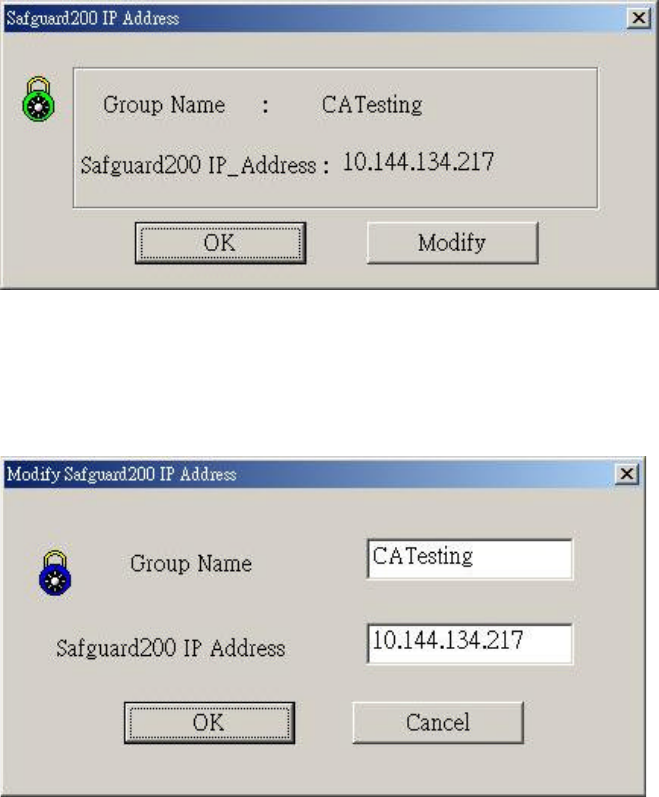
Fig. 5-5 SafGuard IP Address
The modifyingbutton can only be used when the SafGuard200 is disconnected.
The screen is given as the following:
Fig. 5-6 Modifying the SafGuard200 IP Address

Ping HSM_IP : Executing ping program as the following
Fig. 5-7 Ping HSM_IP
KEY_MANAGER : Executing Key_Managerprogram
Figure 5-8 KeyManager
Connecting SafGuard200 : connecting to SafGuard200
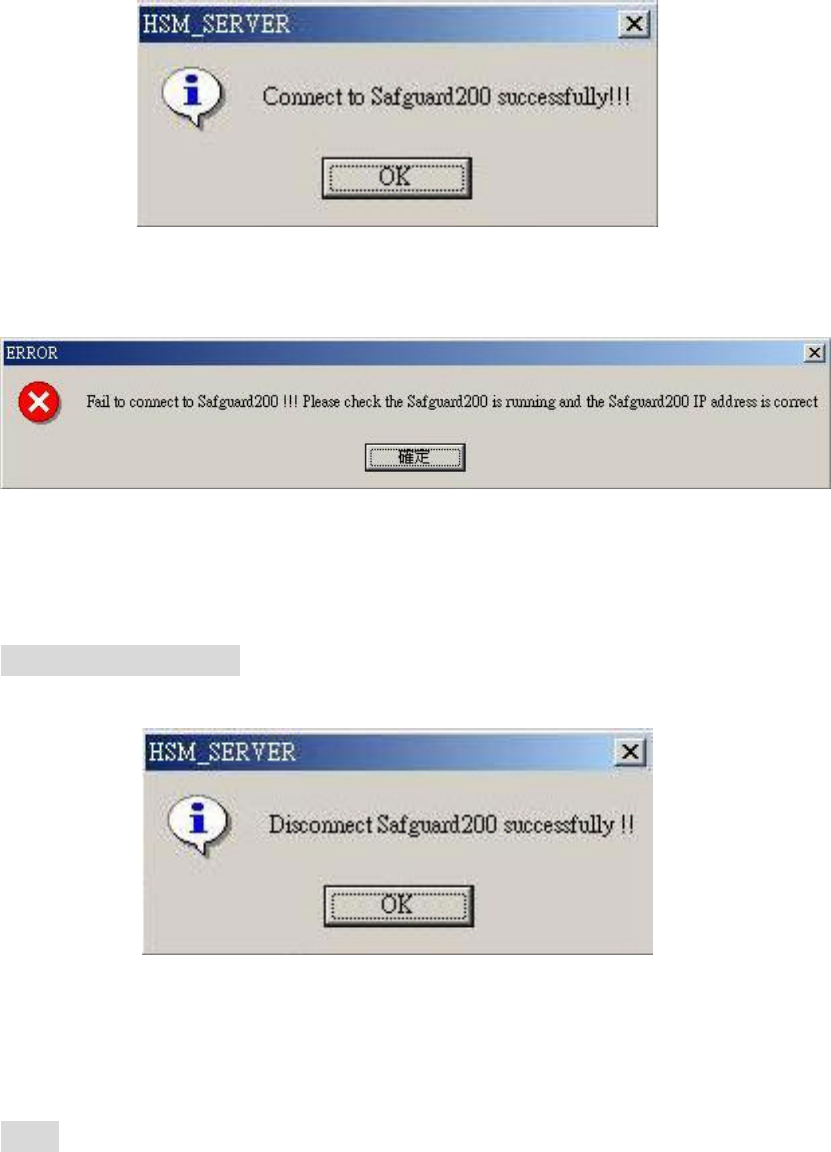
Fig. 5-9 Connecting Successfully
Fig. 5-10 Connecting fail
Disconnect SafGuard200 : disconnecting SafGuard200
Fig. 5-11 Disconnecting Successfully
About : Displaying the version and date of HSM_Sever program
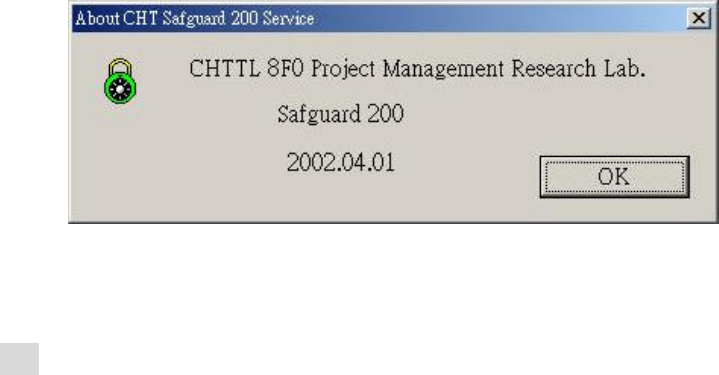
Figure 5-12 About
Eixt : Quit the HSM_Server program.

5.1.3 Remove Service Program
(1)
Executing HSM_Server.exe in the installing directory, click [Remove
service program] and then click ok button. the service program, HSM_Server,
will be removed from the system.
Fig. 5-13 The screen of removing service program
(2) Bgufs!sfnpwf!bmm!gjmf!jo!uif!jotubmmjoh!ejsfdupsz-!uif!pqfsbujpo!
pg!sfnpwjoh!jt!dpnqmfufe/
5.2 Installation of Solaris/Linux driver
(1) First copy the SafGuard200 drivre to UNIX-like system, includingǺ
1. HSMDriver.sh (batch file, start/stop command file)
2. server (main program)
3. SafeGuardStop (stoping running executing file)
4. safeguard.ini ( information about SafGuard200)
Safeguard.ini need to be replaced by safeguard.ini generatred by previous
key management tool.
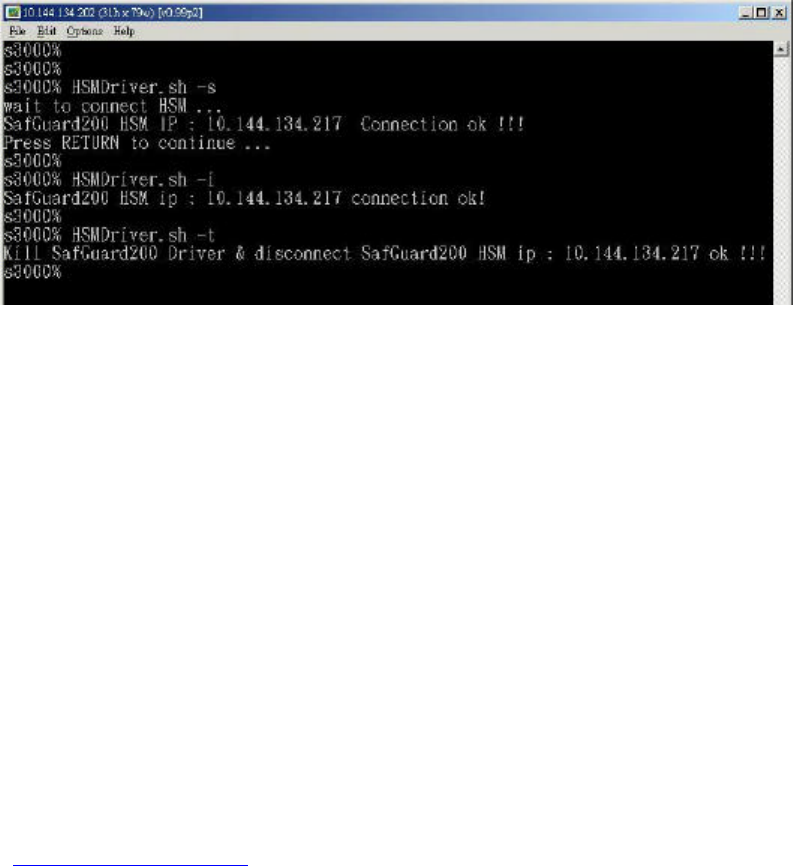
(2) Exectuing in the installation directory
HSMDriver.sh –s : Start SafGarud200 driver program
HSMDriver.sh –stop SafGurad200 driver program
HSMDriver.sh –i : check the state of connecting
betwenSafGuard200 ad driver.
Fig. 5-14 The service program on UNIX-Like system
5.3 Active_Ap_Key_file Directory
The Active_Ap_Key_file directory is used to store parameters for enabling
key, the file name is assigned as the following
AP_UseKey_ (the type of the Key: RSA_1024o r RSA_4096 )_(store in
SafGuard200).iniǶTherefore, if AP_KEY is RSA4096, and it is stored at location
1 of SafGuard200, then its parameter file name is AP_UseKey_RSA_4096_1.ini.
Besides Ǵthis file will be fail whenever the hardware is reset. So you need to
check the parameter file and make sure it is the latest version. ( Please copy the
parameter file to your AP directory.
Note : this directory can be created only after the key management tool has
beenexecuted. About how to enable the keys, please reference to manual
4.2key management tool
5.4 The Directory PubKey_file
PubKey_file: the directory for storing public key
Pubkey_file\*.inf sub publickey info
Pubkey_file\*_CertReq.PKCS10 PKCS10 Certification Request
Pubkey_file\*_CertReqSign.b64 B64 encoded PKCS10 Certification
Request file (with digital signature)
Pubkey_file\*_CertReqSign.PKCS10 PKCS10 Certification Request with
digital signature
Pubkey_file\*_dn.hex The necessary DN hex values to
enable CA
Table 5-1 Filesabout public keys
Note * represents the name of AP_KEY
Note : This directory can be created only when KeyManagerTool has been
executed. About the way to generation please reference to manual 4.2Key
management functionǶ
6. The Installation And Operation Of The
Auditing Server
6.1 Installation
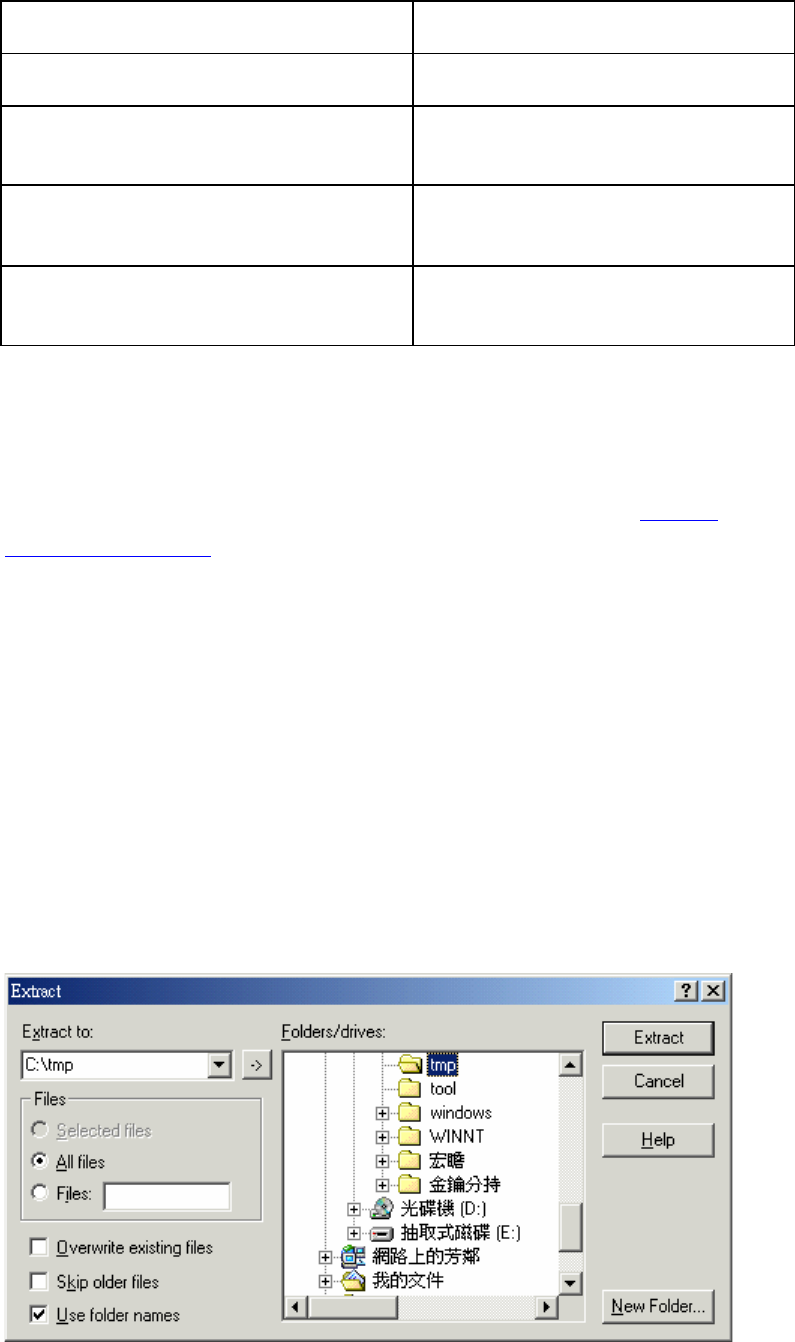
6.1.1 Step 1. :
Decompress the AuditingServer.zip file into a temporary directory, eg. C:\TMPǶ
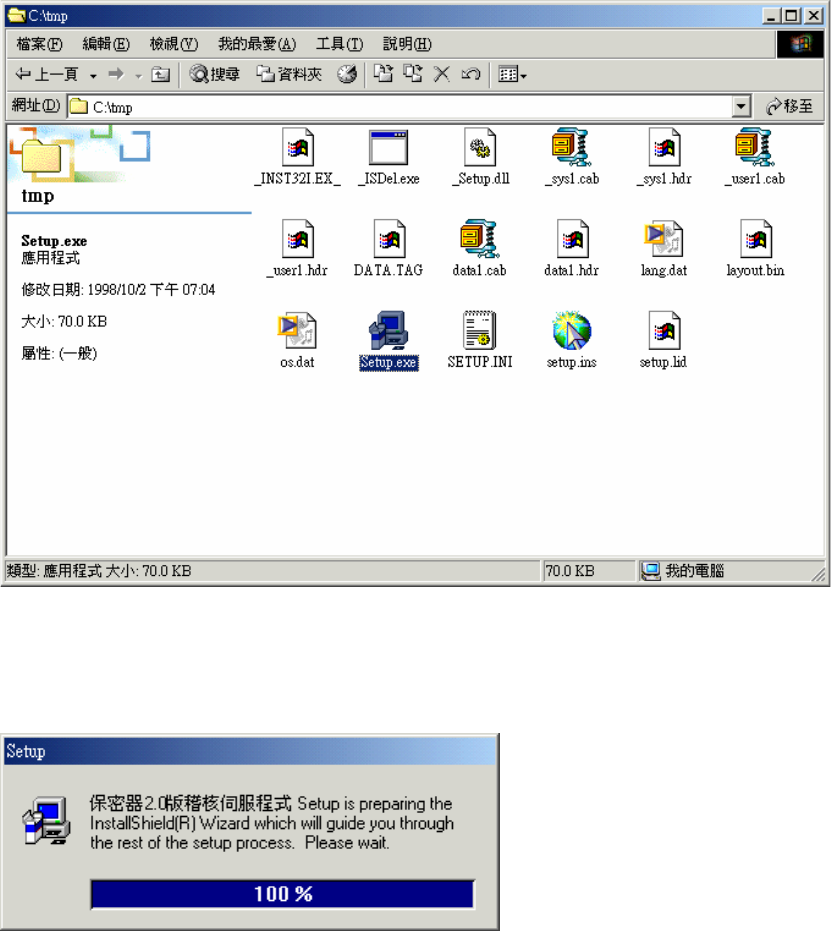
6.1.2 Step 2. :
Change to the directory containing the decompressed files, and double click
Setup.exe to start the installation procedure.
6.1.3 Step 3. :
Follow the prompts and instructions of Setup.exe to install Auditing ServerǶ
6.2 Activation
6.2.1 Step 1. :
Click the ”Start” button of Windows and from the “Program” menu, select the
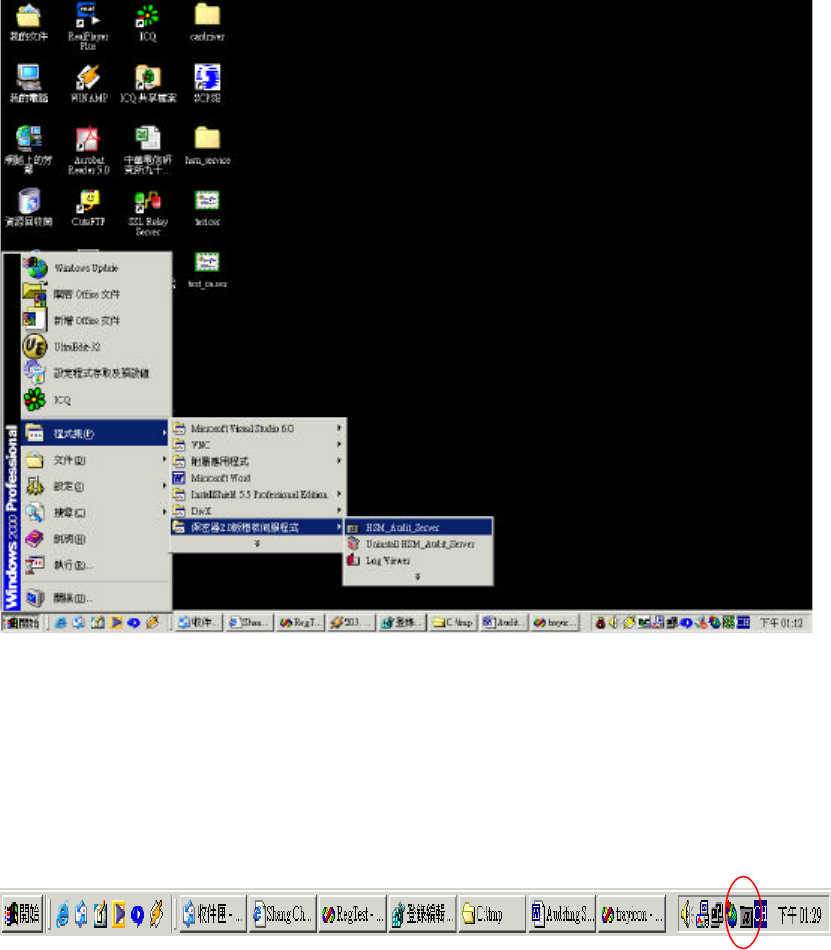
“HSM_Audit_Server “ item in the “Secure Hardware 2.0 Auditing Server” group
to activate the Auditing Server.
6.2.2 Step 2. :
After the activation, an icon of the Auditing Server located on the right- lower
corner of Windows task bar can be seen.
This represents that the Auditing Server has been successfully activated and is
running well.
6.3 Install As A Service
Click the ”Start” button of Windows and from the “Program” menu, select
the ”service” item inside the ”Install HSM_Audit_Server as a Service” of the
“Secure Hardware 2.0 Auditing Server” group, this installs the Auditing Server as

a service of Windows. Thereafter the Auditing Server will be activated each time
Windows boots.
If an immediate activation of the Auditing Server is required, click “Run
HSM_Audit_Server Service” item in the same group.
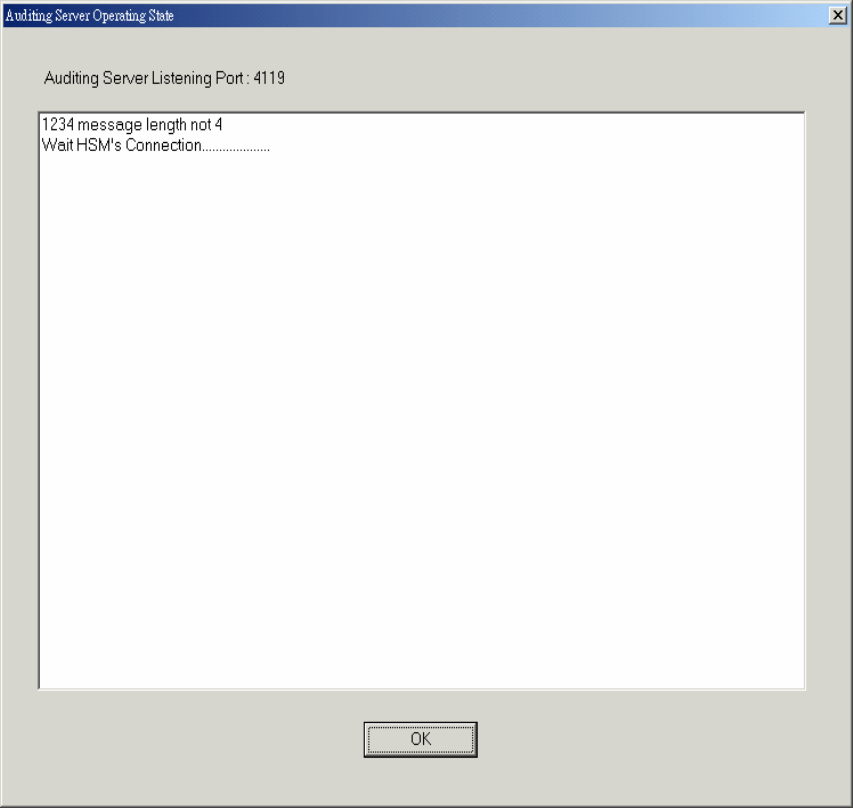
6.4 Show The Status Of the Auditing Server
1. When there is no Secure Hardware connected with the Auditing Server, the
icon located on the right-lower corner of Windows is gray. The icon turns green
while there is any Secure Hardware connection. Locate the mouse cursor above
the icon, and the IP address of the connected Secure Hardware will be displayed
accordingly.
2. Double click the icon, or click the right button of the mouse on the icon and
select ”Show Operating State”, the Operating state information between Secure
Hardware and Auditing Server will be shown.
3. On the icon click the right button of the mouse and select ” Connected HSM
IP” to display the IP address of the connected Secure Hardware.
4. On the icon click the right button of the mouse and select ” LogViewer” to
activate LogViewer and review the auditing logs. This can also be achieved by
clicking the ”Start” button of Windows, and from the “Program” menu select
the ”Logviewer” item in the “Secure Hardware 2.0 Auditing Server” group.
6.5 Stop The Auditing Server
On the icon click the right button of the mouse and select ”Exit” to stop the
Auditing Server.
6.6 Stop And Remove The Auditing Server Service
Click the ”Start” button of Windows, and from the “Program” menu select ”Stop
HSM_Audit_Server Service” item in the “Secure Hardware 2.0 Auditing Server”
group to stop the Auditing Server Service. Select ”Remove HSM_Audit_Server
Service” item in the same group to remove the Auditing Server Service.
6.7 Uninstall The Auditing Server
Click the ”Start” button of Windows, and from the “Program” menu
select ”Uninstall HSM_Audit_Server” item in the “Secure Hardware 2.0 Auditing
Server” group to uninstall the Auditing Server.
-TL Proprietary-
52
7. The Log Viewer
7.1 System Requirements
Hardware RequirementǺ
x86 PCǴ 256MB RAM or above
Operation SystemǺ
MS Windows NT 4.0 or later.
7.2 Operation
7.2.1 Start The Log Viewer
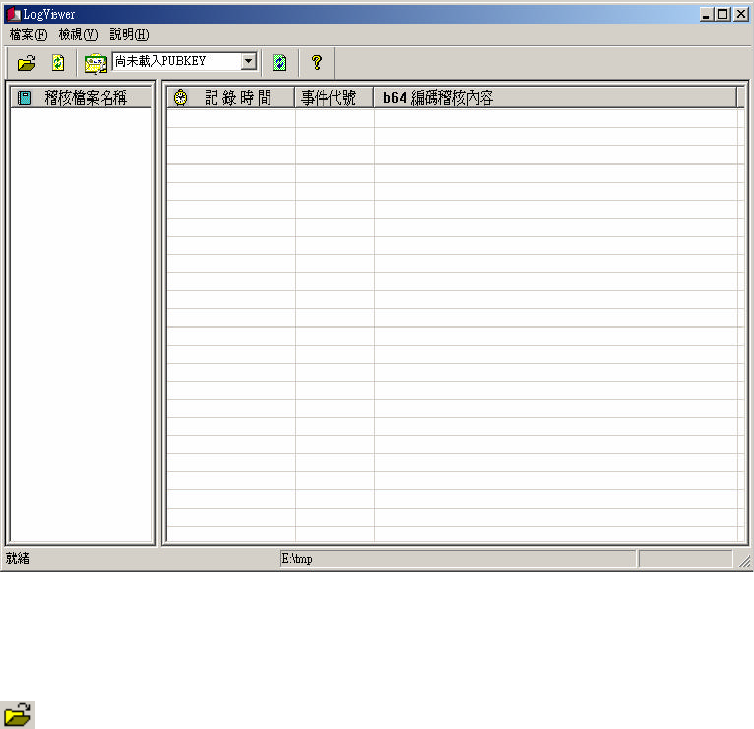
Execute LogViewer.exe and a Windows menu is shown as the following picture
depicts.
Fig. 7.1 LogViewer.exe
7.2.2 Function Description
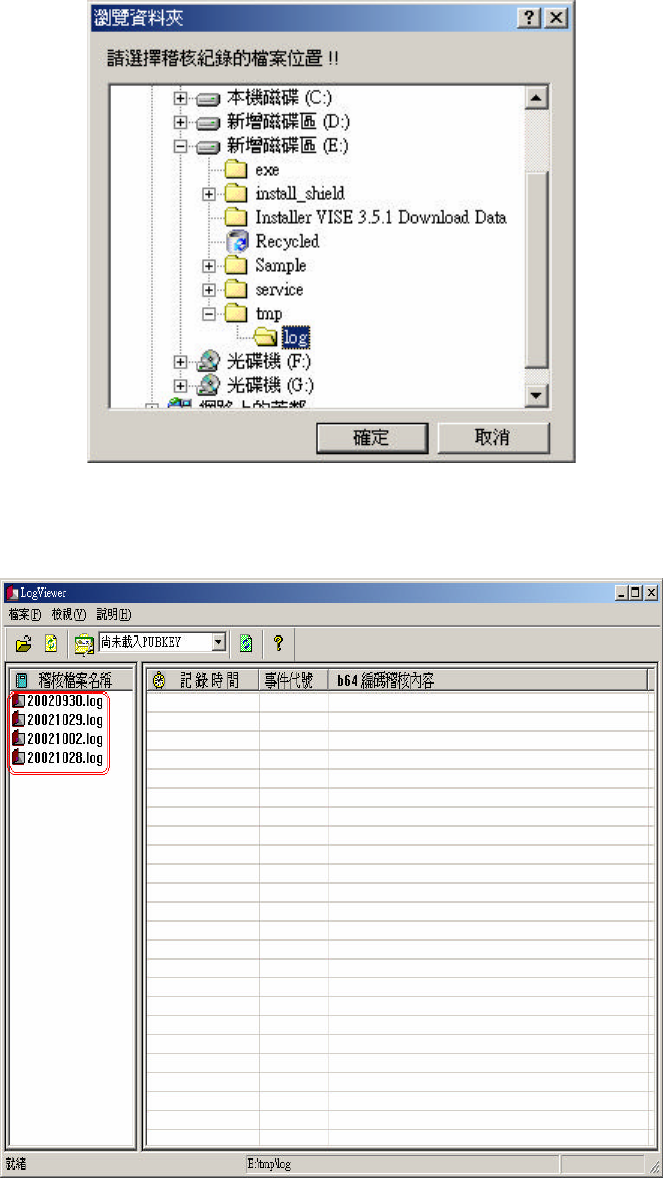
Open a directory to store the audit files:
-TL Proprietary-
53
Select a proper directory that can store the audit files, as the following picture depicts:
Fig. 7.2 Open a directory to store the audit files
And the audit files under that directory will be shown as the following picture depicts.
Fig. 7.3 Showing audit files
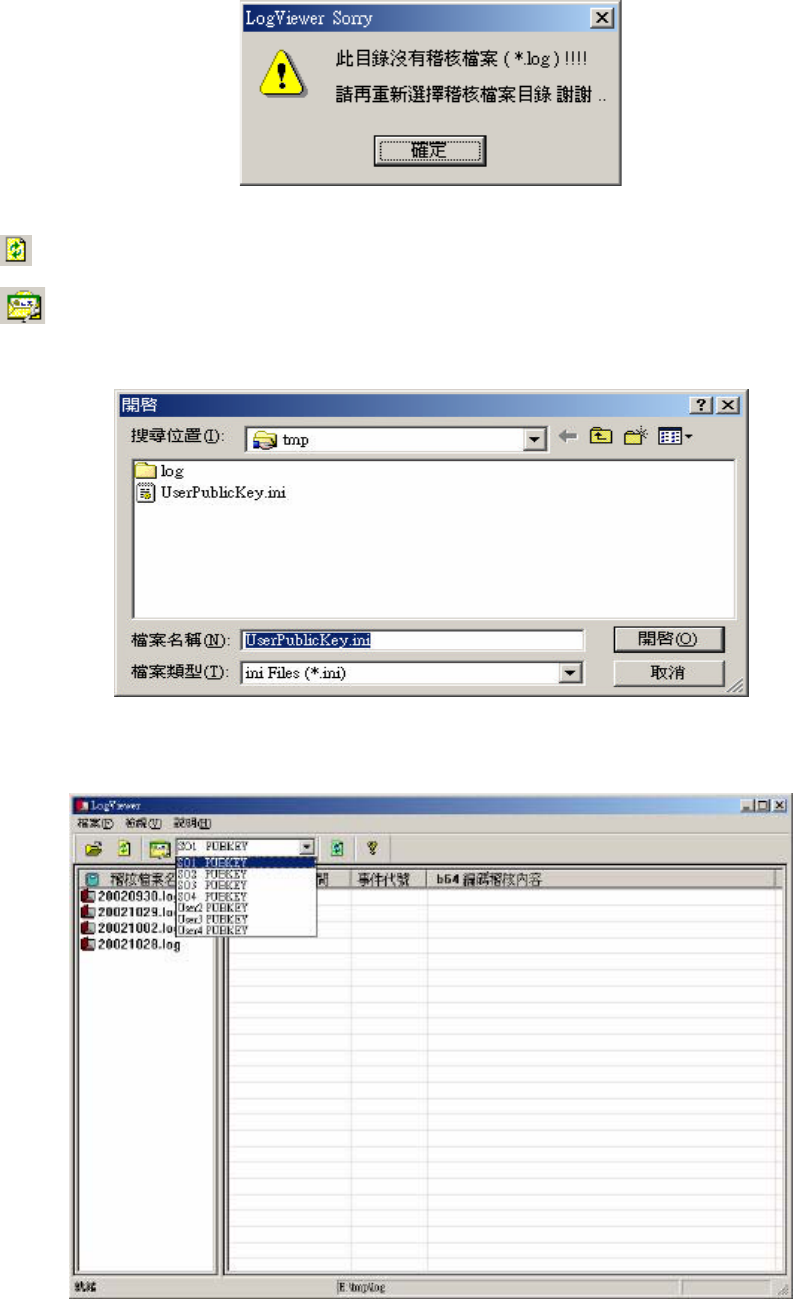
If there is no audit file under the selected directory, a warning message is shown as the
following picture depicts.
-TL Proprietary-
54
Fig . 7.4 No audit file is found under that directory
Refresh the auditing directory.
Read the information of the Public Key:
Select the secure hardware SO and the user’s public key files.
Fig. 7.5 Select the secure hardware SO and the user’s public key files
Fig. 7.6 List the secure hardware SO and the user’s public key
-TL Proprietary-
55
Reload the content of Audit files:
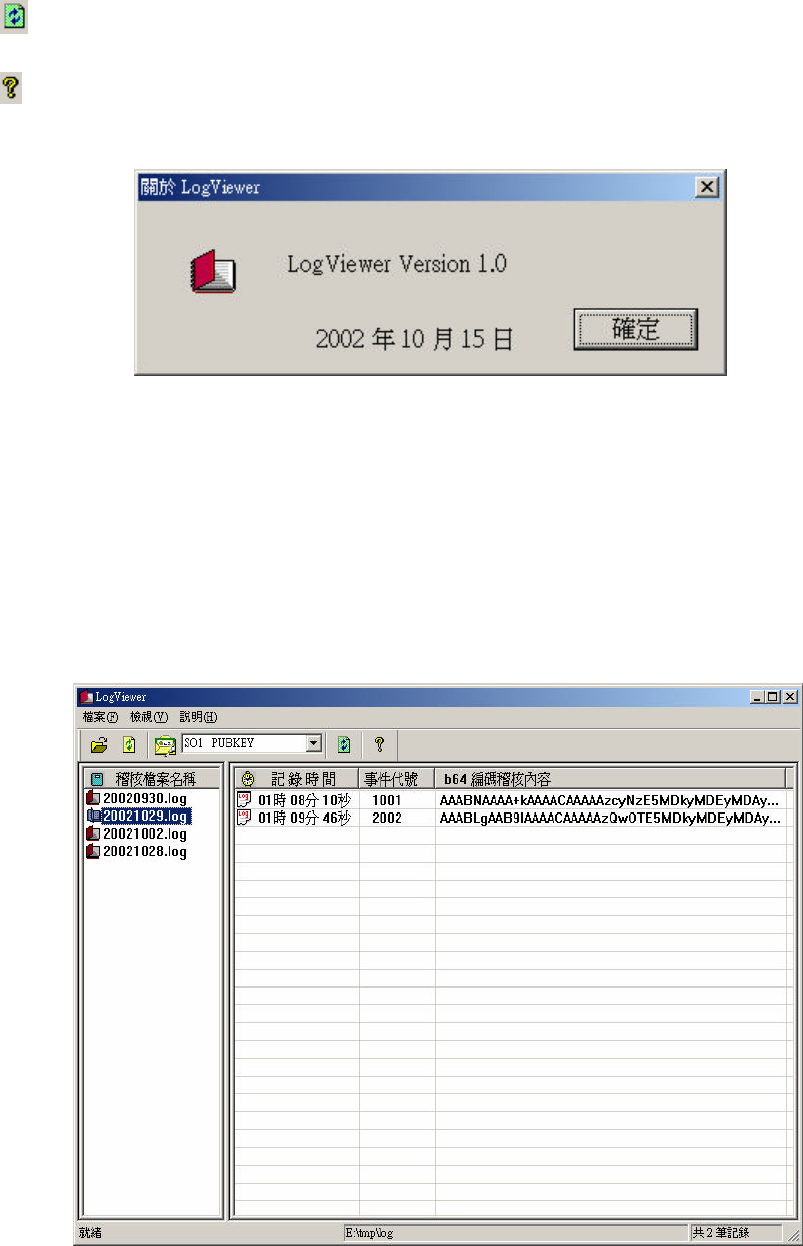
About:
LogViewer Copyright information.
Fig. 7.7 LogViewer Copyright information
7.3 View The Log
7.3.1 Select The Audit File To View:
Select the audit file of interest with the mouse, as the following picture depicts.
Gjh/!8/9!Select the audit file to view
-TL Proprietary-
56
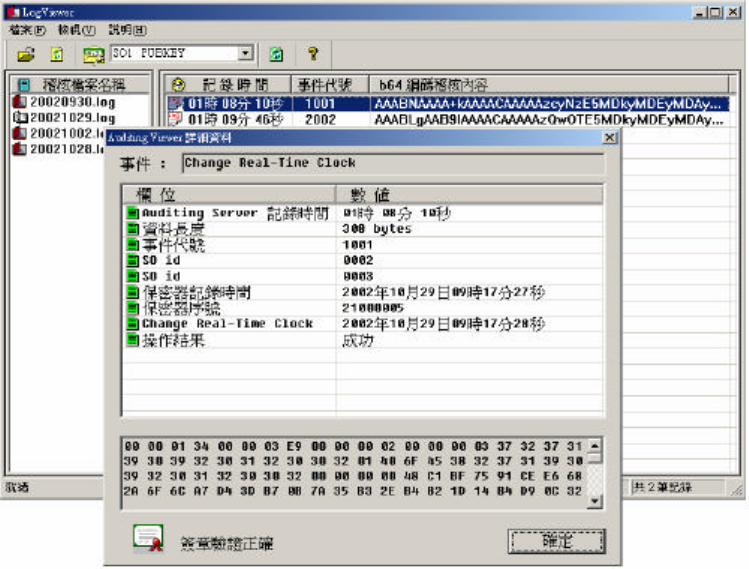
7.3.2 View The Detailed Record:
Click on the selected audit record to view the detailed information, as the
following picture depicts.
Gjh/!8/:!View!the!detailed!record
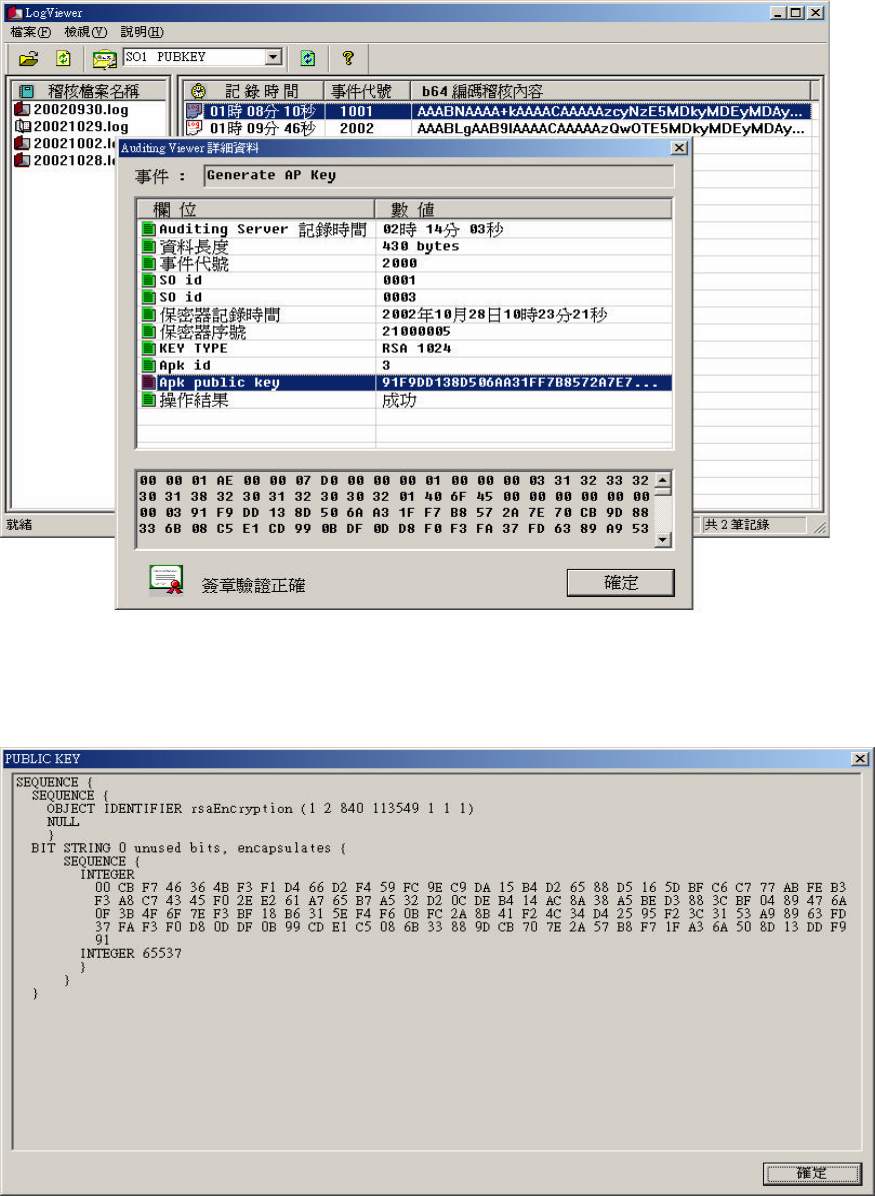
7.3.3 Display the Apk public key:
Select the Apk public key from the detailed record menu, and the key value is
shown as the following picture depicts.
-TL Proprietary-
57
Gjh/!8/21!Display the Apk public key
Click on the Apk public key to view its value, as the following picture depicts.
Gjh/8/22!Apk public key

-TL Proprietary-
58
7.4 The Event Code Of Audit Records
Table 7.1 The data type and length of auditing records
Label Type Length (byte)
Length Int 4
Event ID Int 4
Audit Time Char 14
HSM serial number Int 4
HSM IP address Char 4
Audit flag Int 4
Audit server IP Char 4
Audit server Port Int 4
SO ID Int (0-3) 4
SO public key Char 128
User ID Int (4-12) 4
User Public Key Char 128
User Count Int 4
AP key type Int 4
AP key ID Int 4
AP key ACL Char 45
Ap key public key Char 128,256,512
Hash (MK) Char 20
HK public key Char 128
Result Int 4
Signature Char 128
Table 7.2 Initial states of audit events
Event Event
code
Data
Configure Real- Time Clock 0001 Length+ Event ID+ Audit Time+
HSM serial number+ Result
Generate Master Key 0002 Length+ Event ID+ Audit Time+
HSM serial number+ Hash(MK)+
Result
Import Master Key 0003 Length+ Event ID+ Audit Time+
HSM serial number+ Hash(MK)+
Result
Create Security Officer key 0004 Length+ Event ID+ Audit Time+
HSM serial number+ SO ID+ Result
Import Security Officer key 0005 Length+ Event ID+ Audit Time+
HSM serial number+ SO ID+ SO
public key+ Result
Generate Hardware key 0006 Length+ Event ID+ Audit Time+
HSM serial number+ HK public key+

-TL Proprietary-
59
Result
Configure HSM IP, Audit
flag, Audit server IP & port
0007 Length+ Event ID+ Audit Time+
HSM IP+ HSM serial number+ Audit
flag+ Audit IP+ Audit Port+ Result
Since there’s no operator ID for the initial state, the events on table 7.2 just send the event
code and data to the audit server, no signature attached.
Table 7.3 operational state audit events
Event Event
code
Data
Configure Real- Time Clock 0001 Length+ Event ID+ Audit Time+
HSM serial number+ Result
Generate Master Key 0002 Length+ Event ID+ Audit Time+
HSM serial number+ Hash(MK)+
Result
Import Master Key 0003 Length+ Event ID+ Audit Time+
HSM serial number+ Hash(MK)+
Result
Create Security Officer key 0004 Length+ Event ID+ Audit Time+
HSM serial number+ SO ID+ Result
Import Security Officer key 0005 Length+ Event ID+ Audit Time+
HSM serial number+ SO ID+ SO
public key+ Result
Generate Hardware key 0006 Length+ Event ID+ Audit Time+
HSM serial number+ HK public key+
Result
Configure HSM IP, Audit
flag, Audit server IP & port
0007 Length+ Event ID+ Audit Time+
HSM IP+ HSM serial number+ Audit
flag+ Audit IP+ Audit Port+ Result
Set Network Configuration 1000 Length+ Event ID+ SO ID+ SO ID+
Audit Time+ HSM serial number+
HSM IP+ HSM Port+ Result+
Signature (so id 1)+ Signature (so id
2)
Change Real- Time Clock 1001 Length+ Event ID+ SO ID+ SO ID+
Audit Time+ HSM serial number+
Change Time+ Result+ Signature (so
id 1)+ Signature (so id 2)
Create SO 1002 Lengt h+ Event ID+ SO ID+ SO ID+
Audit Time+ HSM serial number+
Create SO ID+ Result+ Signature (so
id 1)+ Signature (so id 2)
Generate Hardare key 1004 Length+ Event ID+ SO ID+ SO ID+
Audit Time+ HSM serial number+
HK public key+ Result+ Signature
(so id 1)+ Signature (so id 2)
Create User 1006 Length+ Event ID+ SO ID+ SO ID+
Audit Time+ HSM serial number+

-TL Proprietary-
60
User ID+ User Public key+ Result+
Signature (so id 1)+ Signature (so id
2)
Import User key 1007 Length+ Event ID+ SO ID+ SO ID+
Audit Time+ HSM serial number+
Import User ID+ User Public Key+
Result+ Signature (so id 1)+
Signature (so id 2)
Erase ALL AP key 1008 Length+ Event ID+ SO ID+ SO ID+
Audit Time+ HSM serial number+
Result+ Signature (so id 1)+
Signature (so id 2)
Switch to Initialization state
& Erase ALL keys
1009 Length+ Event ID+ SO ID+ SO ID+
Audit Time+ HSM serial number+
Result+ Signature (so id 1)+
Signature (so id 2)
Generate AP Key 2000 Length+ Event ID+ SO ID+ SO ID+
Audit Time+ HSM serial number+
AP Key Type+ AP Key ID+ AP Key
Public Key+ Result+ Signature (so id
1)+ Signature (so id 2)
Import AP key 2001 Length+ Event ID+ SO ID+ SO ID+
Audit Time+ HSM serial number+
AP Key Type+ AP Key ID+ Import
APK Public key+ Result+ Signature
(so id 1)+ Signature (so id 2)
Delete AP Key 2002 Length+ Event ID+ SO ID+ SO ID+
Audit Time+ HSM serial number+
AP Key Type+ AP Key ID+ Result+
Signature (so id 1)+ Signature (so id
2)
Backup APK shares onto IC
Card
2003 Length+ Event ID+ SO ID+ SO ID+
Audit Time+ HSM serial number+
AP Key Type+ AP Key ID+ Result+
Signature (so id 1)+ Signature (so id
2)
Set APK ACL 2004 Length+ Event ID+ SO ID+ SO ID+
Audit Time+ HSM serial number+
AP Key Type+ AP Key ID+ ACL+
Result+ Signature (so id 1)+
Signature (so id 2)
Set APK active (User) 2005 Length+ Event ID+ User Count+
User ID…. + Audit Time+ HSM
serial number+ AP Key Type+ AP
Key ID+ Result+ Signature (user id
1…. )
The events on table 7.3 require HSM to compute a SHA1 hash of the data (from Event ID to
Result), and then use the operator’s private key to sign the hash.