Telefield 2-5255D 1.9GHz DECT 2 Lines Corded and Cordless Phone User Manual 1
Telefield Ltd. 1.9GHz DECT 2 Lines Corded and Cordless Phone 1
UserManual.wiki
>
Telefield
>
2 5255D User Manual
User Manual
Navigation menu
Upload a User Manual
Namespaces
Wiki Guide
HTML
PDF
Info
Views
User Manual
Discussion / Help
Navigation
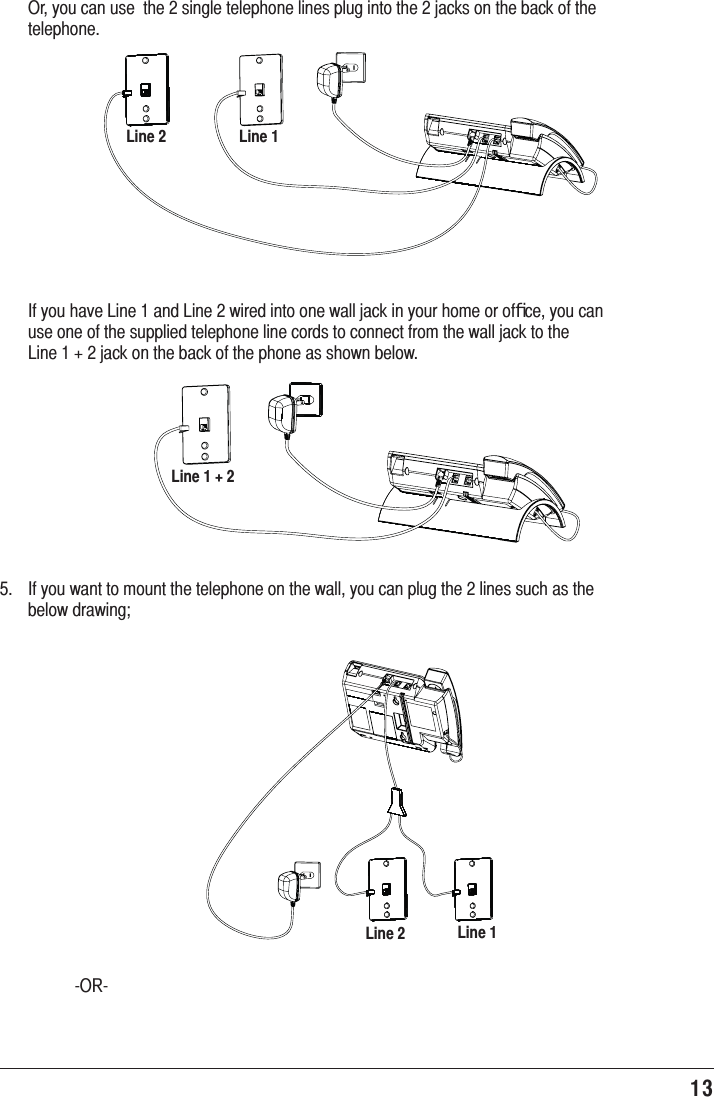
![12 Base Station7KHSKRQHPD\EHFRQQHFWHGWRWZROLQH5-&ZDOOMDFNVWRDFFRPPRGDWHDOOWZROLQHV &KRRVHDQDUHDQHDUDQHOHFWULFDORXWOHWDQGDWHOHSKRQHZDOOMDFN5-&DQGSODFH\RXUFRUGOHVVWHOHSKRQHRQDOHYHOVXUIDFHVXFKDVDGHVNWRSRUWDEOHWRSRU\RXPD\PRXQWLWRQWKHZDOO ,QVWDOO$$$VL]HDONDOLQHEDWWHULHVQRWLQFOXGHGIRUEDFNXSSRZHULQWKHHYHQWRIDSRZHUIDLOXUHf ,QVHUWDflDWKHDGVFUHZGULYHURU VLPLODUREMHFWLQWRWKHEDWWHU\GRRUODWFKDQGJHQWO\SU\XSZDUGWRUHOHDVHWKHEDWWHU\GRRUIURPWKHEDVHf ,QVHUWWKHEDWWHULHVLQVLGHWKHEDWWHU\FRPSDUWPHQWDVVKRZQRQWKHGLDJUDPf 6QDSWKHEDWWHU\FRPSDUWPHQWGRRUEDFNLQWRSODFHNOTE: If the low battery icon appears in the display, you need to replace the batteries. It is important that you replace them as soon as possible to maintain unit operation when electrical power is off. As a precaution, you may want to write down any stored information you do not want erased.IMPORTANT: If you are not going to use the telephone for more than 30 days, remove the batteries because they can leak and damage the unit. 3OXJWKHSRZHUVXSSO\FRUGLQWRWKHSRZHUMDFNRQWKHEDFNRIWKHEDVHDQGWKHRWKHUHQGLQWRDQHOHFWULFDORXWOHWCAUTION: To reduce risk of personal injury, fire, or damage use only the T-2757 (base) power adaptor listed in the user’s guide. This power adaptor is intended to be correctly orientated in a vertical or floor mount position. &RQQHFWWKHWHOHSKRQHOLQHFRUGV ,I\RXKDYHVLQJOHOLQHZDOOMDFNVLQVWDOOHGLQ\RXUKRPHRURIfiFH\RXFDQXVHDGDSWRUVFRXSOHUVQRWLQFOXGHGWRFRPELQHWKHVLQJOHWHOHSKRQHOLQHVLQWRGXDOOLQHV7KHDGDSWRUFRXSOHUPD\ORRNVLPLODUWRWKHRQHSLFWXUHGKHUHDQGFDQEHSXUFKDVHGIURP\RXUORFDOWHOHSKRQHSURGXFWVUHWDLOHULine 1Line 2](https://usermanual.wiki/Telefield/2-5255D/User-Guide-2435681-Page-12.png)