The Genie a Division of Overhead Door GL2T Remote Control Transmitter For Garage Door Opener Operation User Manual Exhibit D Users Manual per 2 1033 b3
The Genie Company a Division of Overhead Door Corporation Remote Control Transmitter For Garage Door Opener Operation Exhibit D Users Manual per 2 1033 b3
Exhibit D Users Manual per 2 1033 b3
1. Slowly press and release the remote
button of your choice two times.
The opener LEDs will ash and go
o, indicating you have successfully
programmed your remote.
2. Press and release the same button a third time and door will
open or close.
NOTE: It is possible to press the remote button too quickly or lightly. If
the LEDs do not go OFF, press the remote button several more times to
achieve conrmation.
1
LED Flashlight Remote
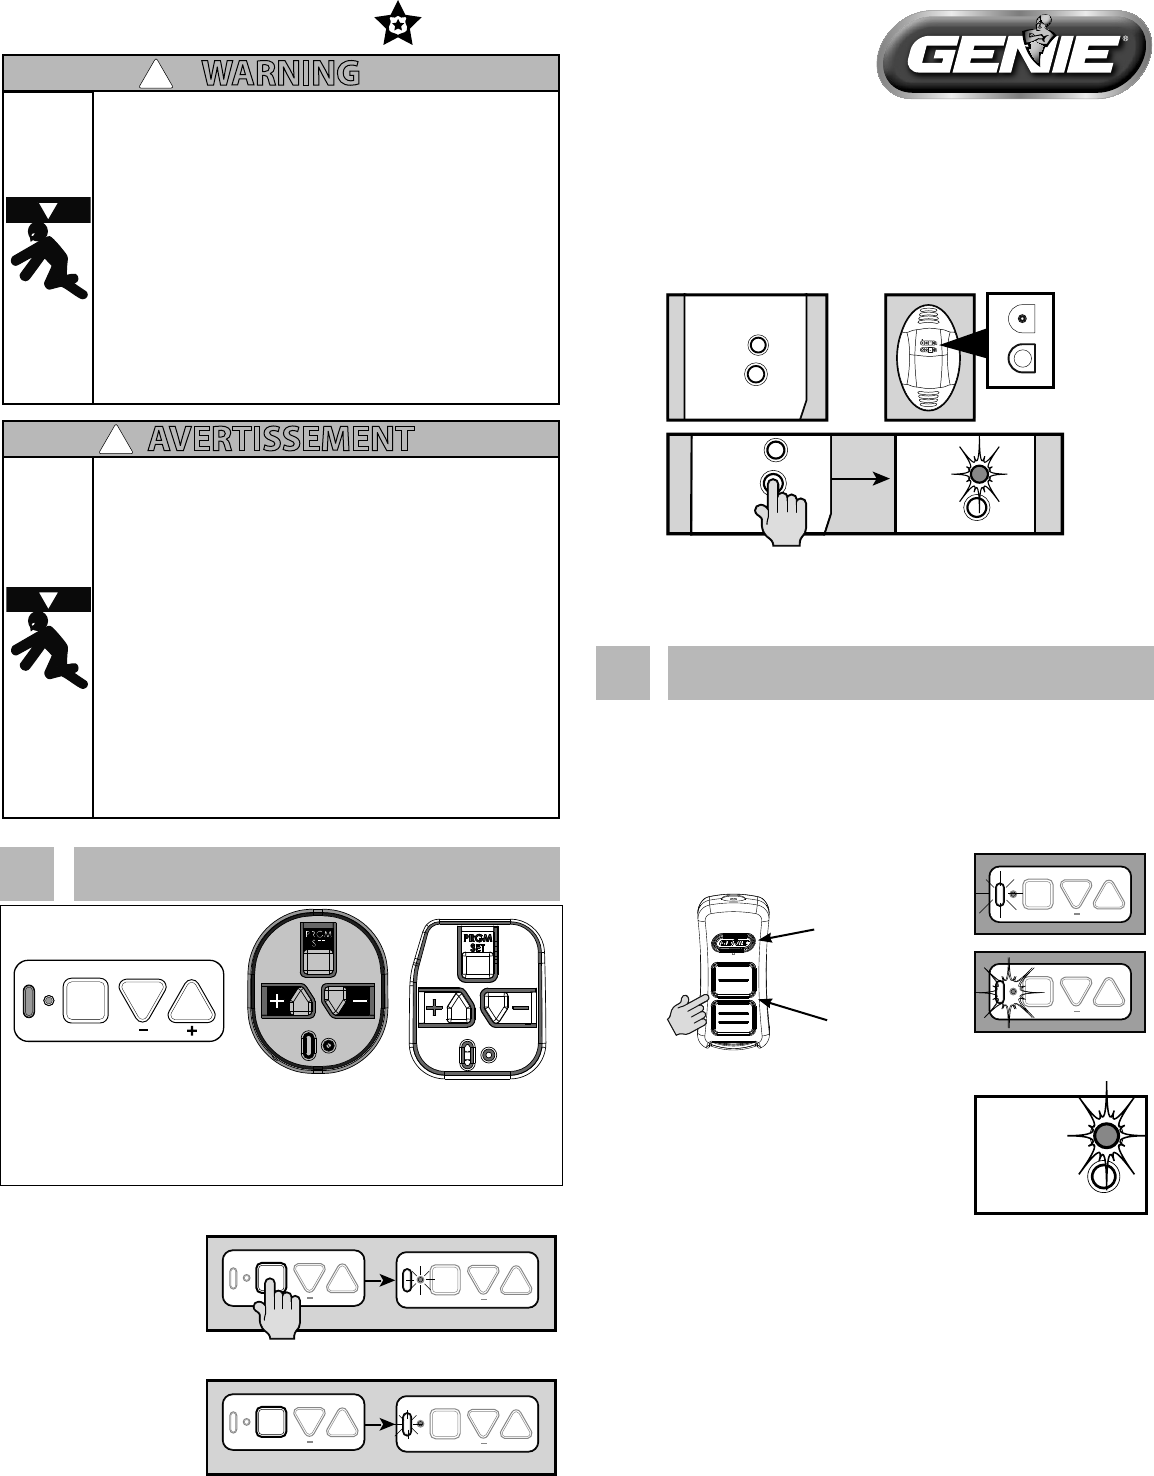
Putting Opener into Programming Mode
New Genie® Openers
1. Press and hold the
program button
until the round LED
turns blue, then
release.
PROGRAM
SET +
PROGRAM
SET +
PROGRAM
SET +
PROGRAM
SET +
2. The round LED will
go out and the
long LED will begin
ashing purple.
Proceed to step 2 or see alternate programming (top right)
-OR-
Genie® openers and external receivers
manufactured between 1995 to 2011
RADIO
SIGNAL
LEARN
CODE CODE
LEARN
SET
SET
OPEN
FORCE
CLOSECODE
LEARN LIMITMANUAL
or
RADIO
SIGNAL
LEARN
CODE
RADIO
SIGNAL
LEARN
CODE
1. Press & release Learn Code button once. The red LED will
begin to ash.
Proceed to step 2
2Programming a Remote to the Opener
NOTE: Once in programming mode, you will have approximately 30
seconds to perform this step.
Note: While programing remote buttons, stand at least 5 feet away
from the opener. This ensures you have proper communication
between the remote and the opener.
PROGRAM
SET +
PROGRAM
SET +
111222501234, 11/2016
Need part number
PRGM
SET
TYPE 1
TYPE 2 TYPE 3
There are 3 types of programming button pads. Type 1 is shown
in these steps. All buttons perform the same function and
programming is the same for all types shown above.
Place operator into programming mode: TYPE 1-2-3
RADIO
SIGNAL
LEARN
CODE
- OR -
Place operator into programming mode:
WARNING
!
MOVING DOOR CAN CAUSE SERIOUS
INJURY OR DEATH.
•DO NOT install transmitter unless the door operator’s safety
device works as required by the door operator’s manual.
•Wall Console must be mounted in sight of door, at least 5 feet
above oor and clear of moving door parts.
•Keep people clear of opening while door is moving.
•DO NOT allow children to play with the transmitter or door
operator.
If safety reverse does not work properly:
•Close door then disconnect opener using the manual release
handle.
•DO NOT use transmitter or door operator.
•Refer to Door and Door Opener Owner’s Manuals before
attempting any repairs.
AVERTISSEMENT
!
DÉMÉNAGEMENT PORTE PEUT CAUSER DES
BLESSURES GRAVES OU LA MORT.
•NE PAS installer le transmetteur à moins que le dispositif de
sécurité de l’opérateur de porte ne fonctionne comme l’exige le
manuel d’utilisation de la porte.
•Console murale doit être monté en vue de la porte d’au moins 5
pieds au-dessus-de-chaussée et claire des pièces mobiles de la
porte.
•Garder les personnes clair de l’ouverture lorsque la porte est en
mouvement.
•Ne pas laisser les enfants jouer le premier match à distance ou la
porte.
Si la sécurité inverse ne fonctionne pas correctement:
•Fermer la porte, puis débranchez moteur à l’aide de la poignée de
déverrouillage manuel.
•Ne pas utiliser d’ouverture à distance ou la porte.
•Reportez-vous à la porte et ouvre-porte de propriétaires manuels
avant de tenter toute réparation.
Remote
Buttons
Flashlight
Button
New Genie® Openers
1. Press and hold the
program button until the
round LED turns blue,
then release.
2. Press and hold the Up(+) Down (-) buttons
at the same time, until the both LEDs ash
blue and go OFF.
Genie® openers and external receivers manufactured between
1995 to 2011.
•ToeraseallremotedevicesfromallothertypesofGenie®openers,
Press and hold the Learn Code Button until the LED stops blinking.
Start at section 1 to reprogram your remotes.
NOTE: Clearing remote control memory from the power head will
clear ALL programmed remotes and wireless keypads. Your opener will
no longer recognize any signal from any remote device, including a
missing remote device.
3Lost or Stolen Remote/Erasing all Remotes
PROGRAM
SET +
PROGRAM
SET +
PROGRAM
SET +
FCC Part 15.21 Statement:
Changes or modications not expressly approved by the party responsible
for compliance could void the user’s authority to operate the equipment.
FCC / IC Statement:
This device complies with FCC Part 15 and Industry Canada licence-exempt
RSS standard(s). Operation is subject to the following two conditions: (1) this
device may not cause harmful interference, and (2) this device must accept
any interference received, including interference that may cause undesired
operation of the device.
Le présent appareil est conforme aux CNR d’Industrie Canada applicables
aux appareils radio exempts de licence. L’exploitation est autorisée aux deux
conditions suivantes : (1) l’appareil ne doit pas produire de brouillage, et (2)
l’utilisateur de l’appareil doit accepter tout brouillage radioélectrique subi,
même si le brouillage est susceptible d’en compromettre le fonctionnement.
Replace the Battery
Replace remote battery with 1-AAA battery.
1. Press down on top of battery door and slide back o of remote.
2. Match battery polarity symbols inside battery housing and
replace battery.
3. Align cover and snap case closed.
For additional help or information, please visit our
website at www.GenieCompany.com, contact our
Customer Care group at 1-800-35-Genie, or write to us
directly at:
GMI Holdings INC. d/b/a The Genie Company
One Door Drive, PO Box 67
Mount Hope, Ohio 44660
AAA
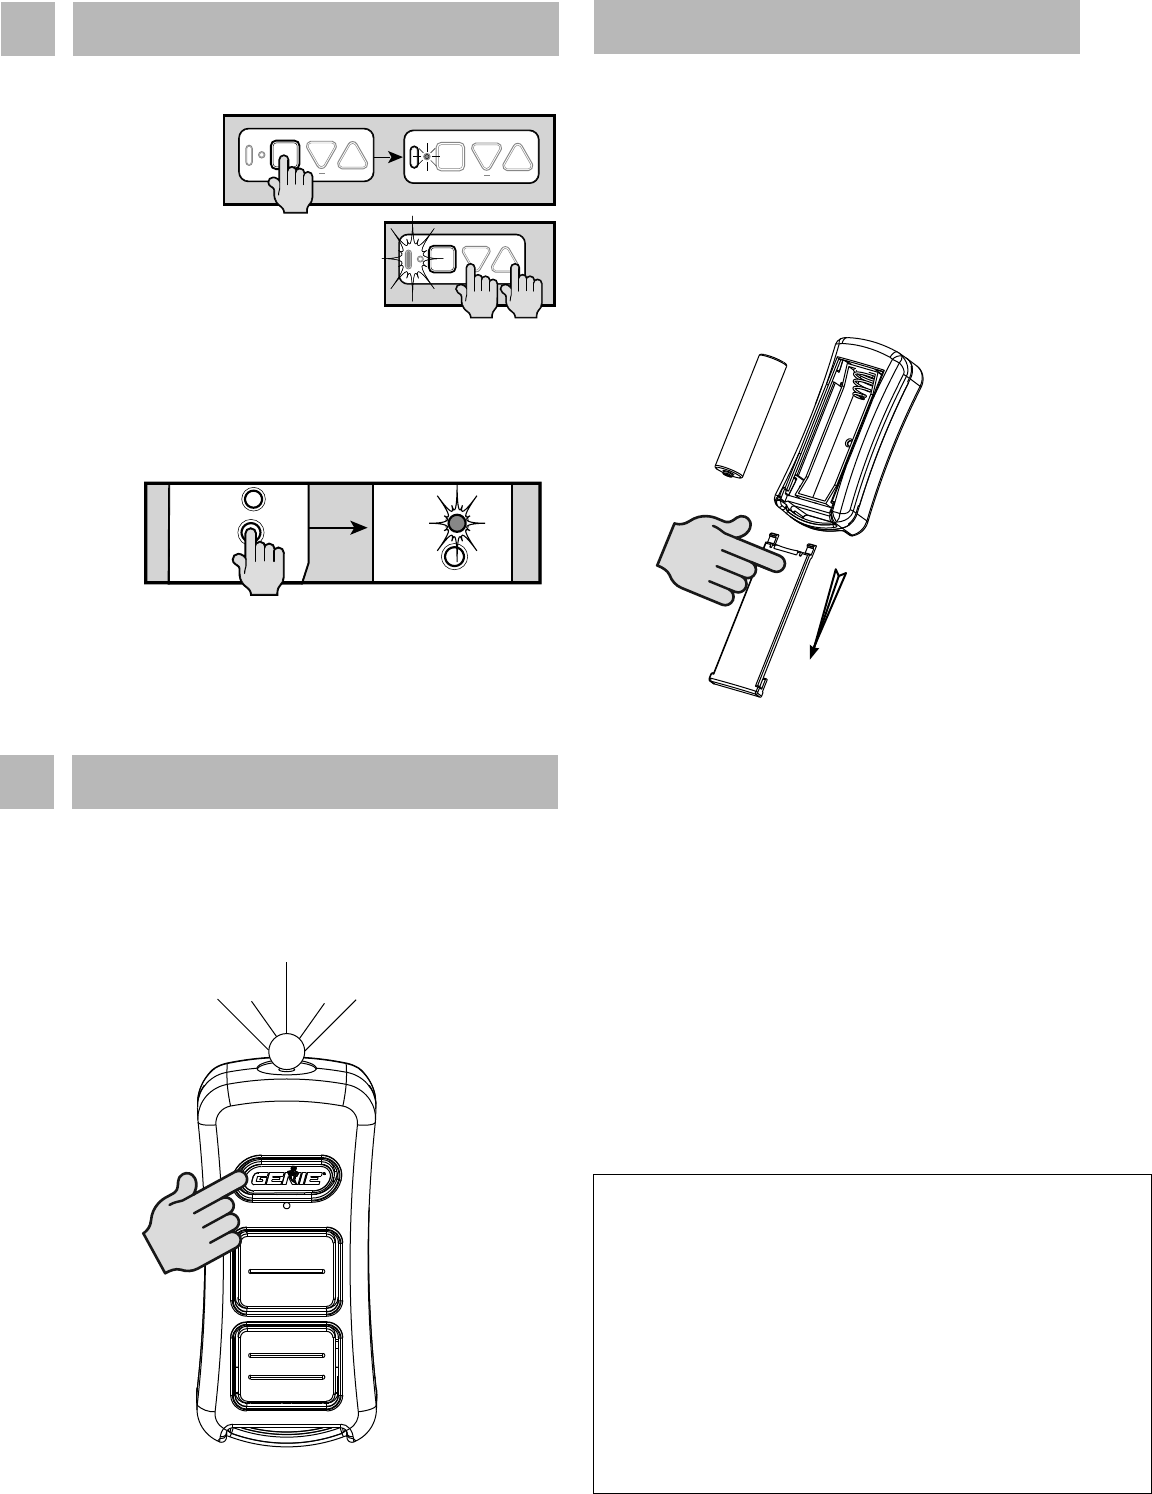
Press the LED Flashlight button once.
LED Flashlight will operate until button is pressed again or when 4
minutes have passed. After 4 minutes the LED will ash indicating
that light will turn o automatically.
4Using the LED Flashlight
RADIO
SIGNAL
LEARN
CODE
RADIO
SIGNAL
LEARN
CODE
©2016 GMI Holdings, Inc. DBA The Genie Company
-OR-
This pertains to all button pad TYPES shown in section 1