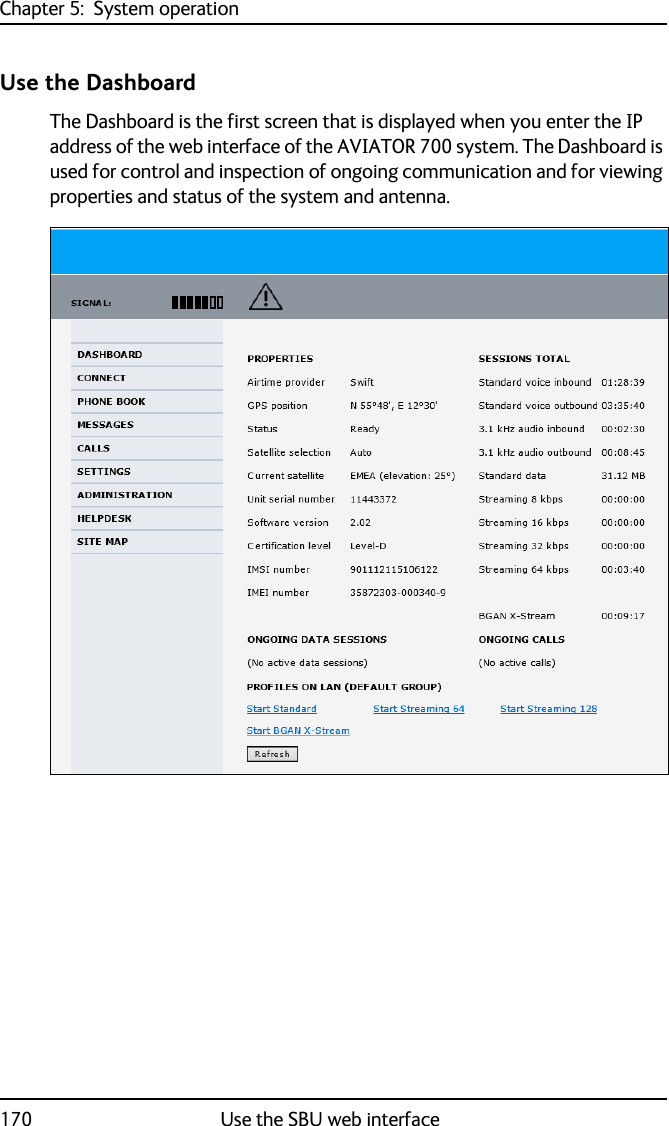
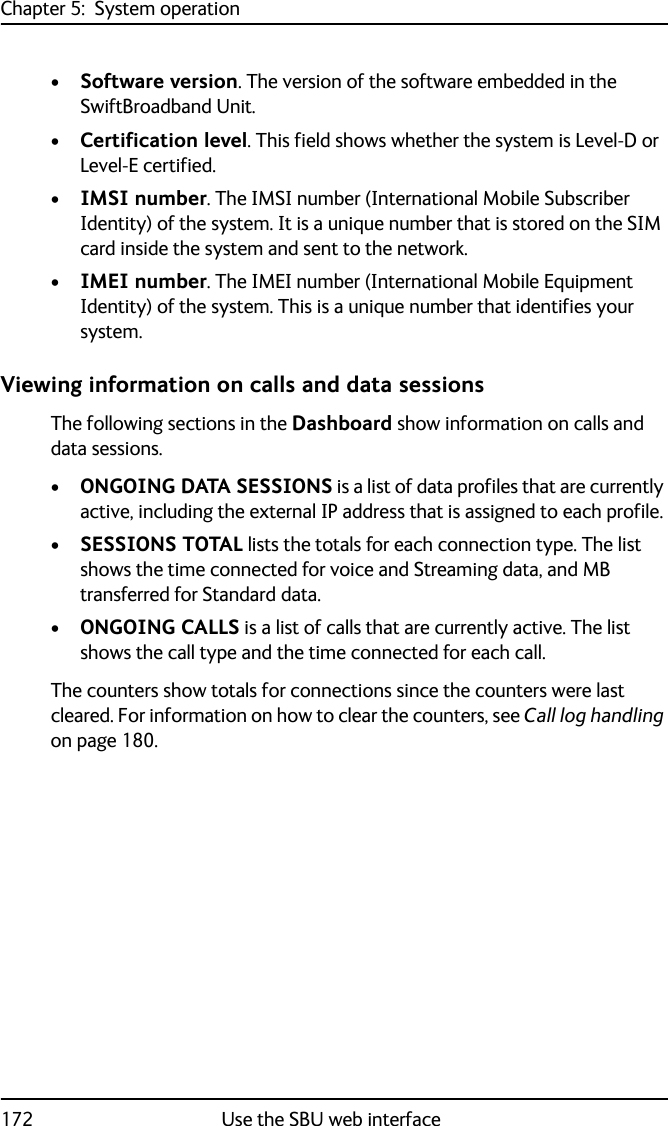
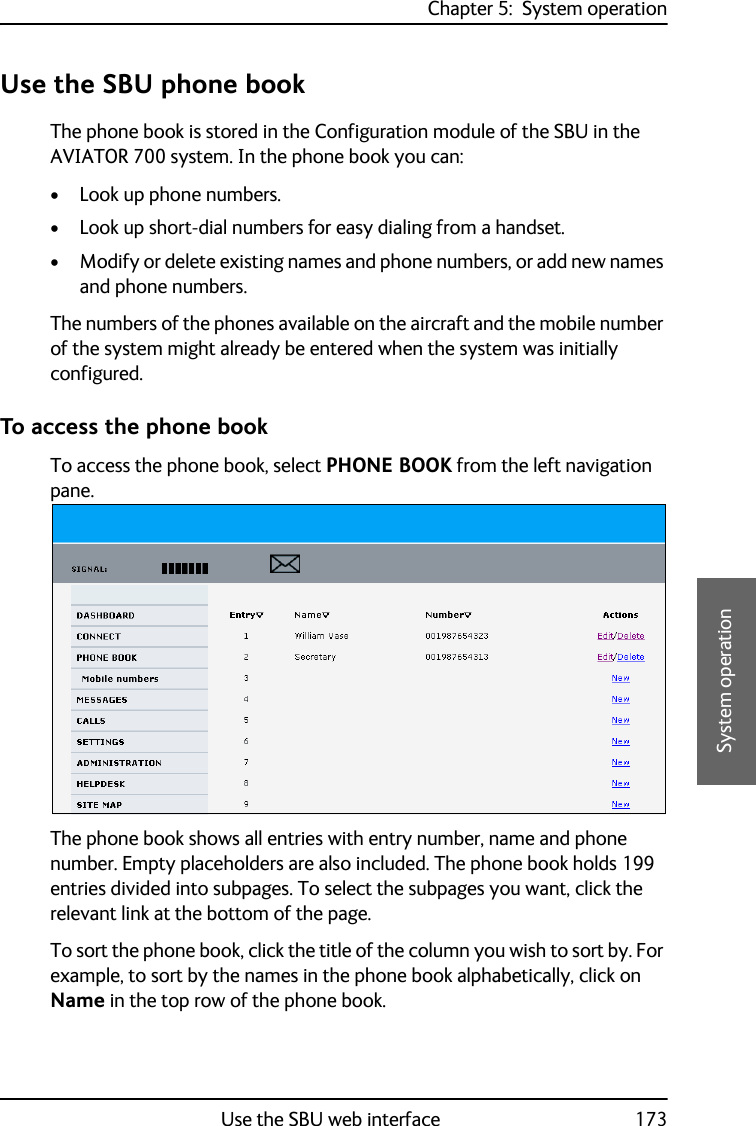
Thrane and Thrane A S AVIATOR700 Satellite transceiver for Inmarsat Swift Broadband service User Manual AeroSB UserManual98 130578
Thrane & Thrane A/S Satellite transceiver for Inmarsat Swift Broadband service AeroSB UserManual98 130578
Contents
- 1. Installation Manual
- 2. Users Manual
Users Manual
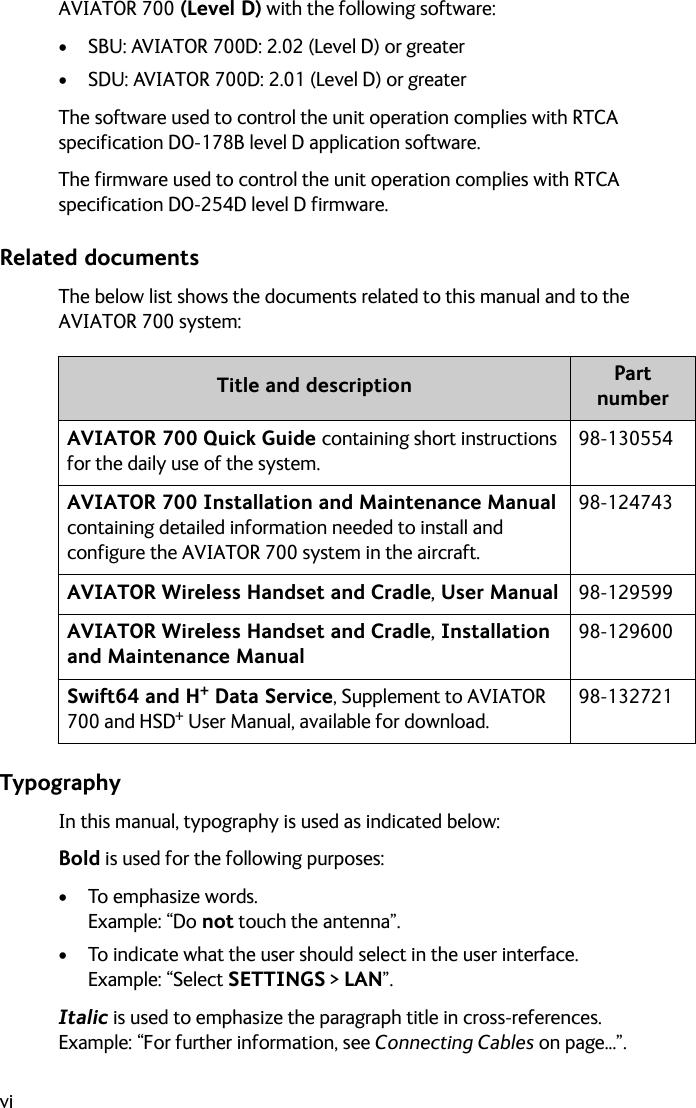
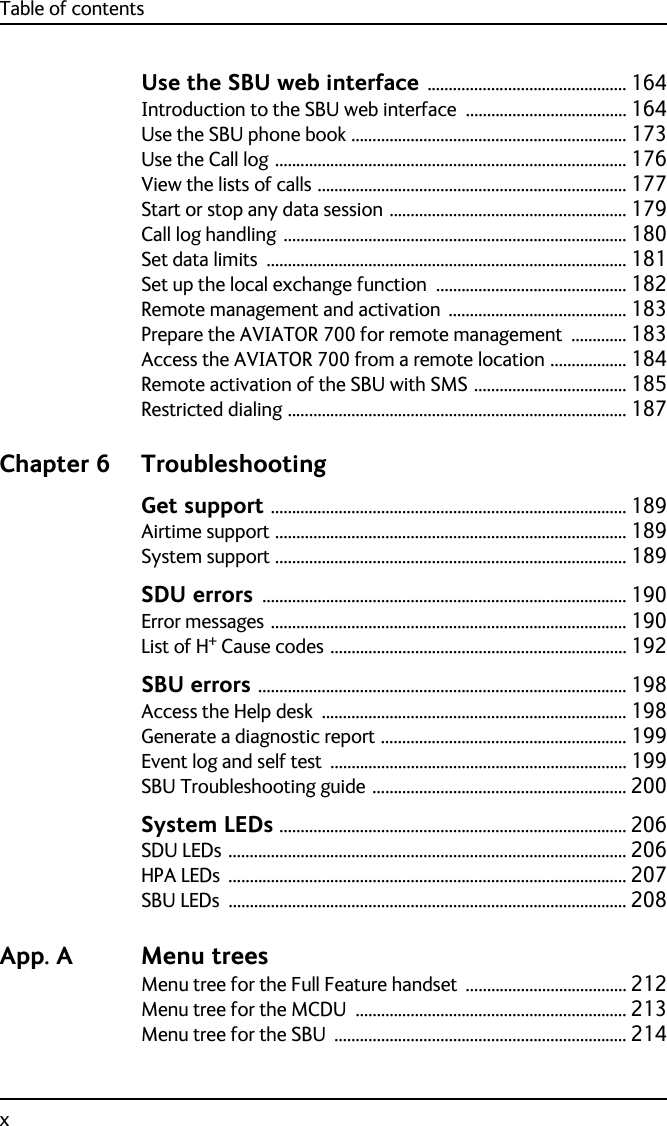

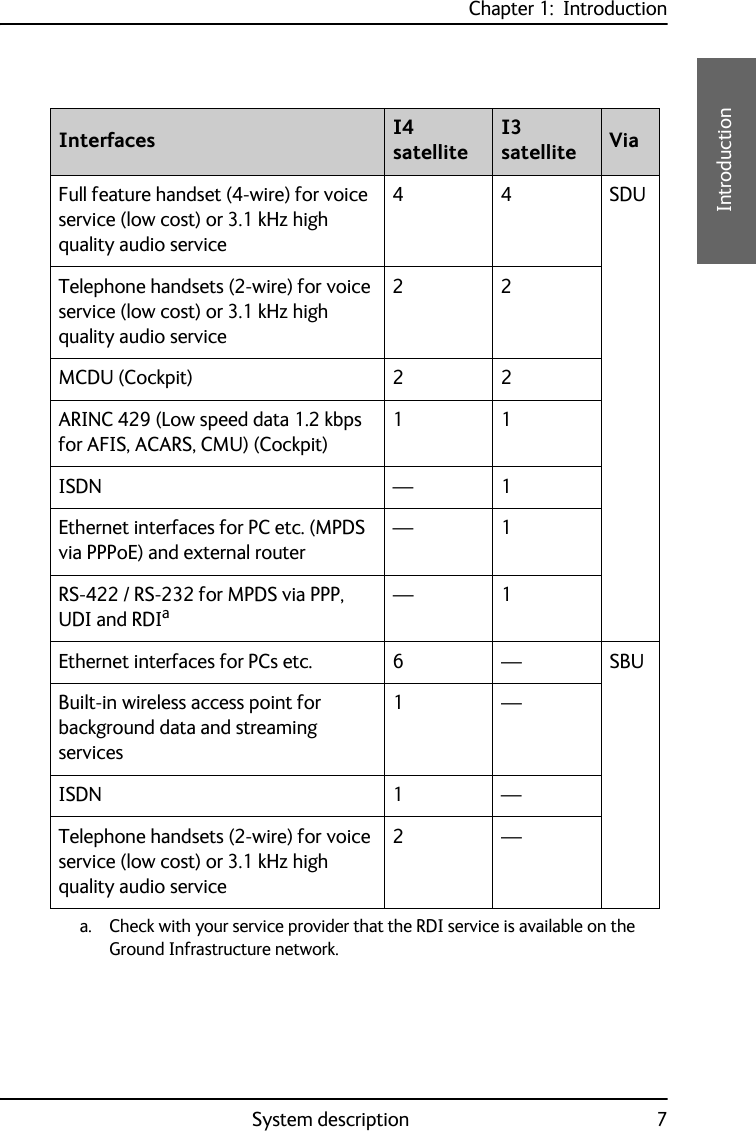


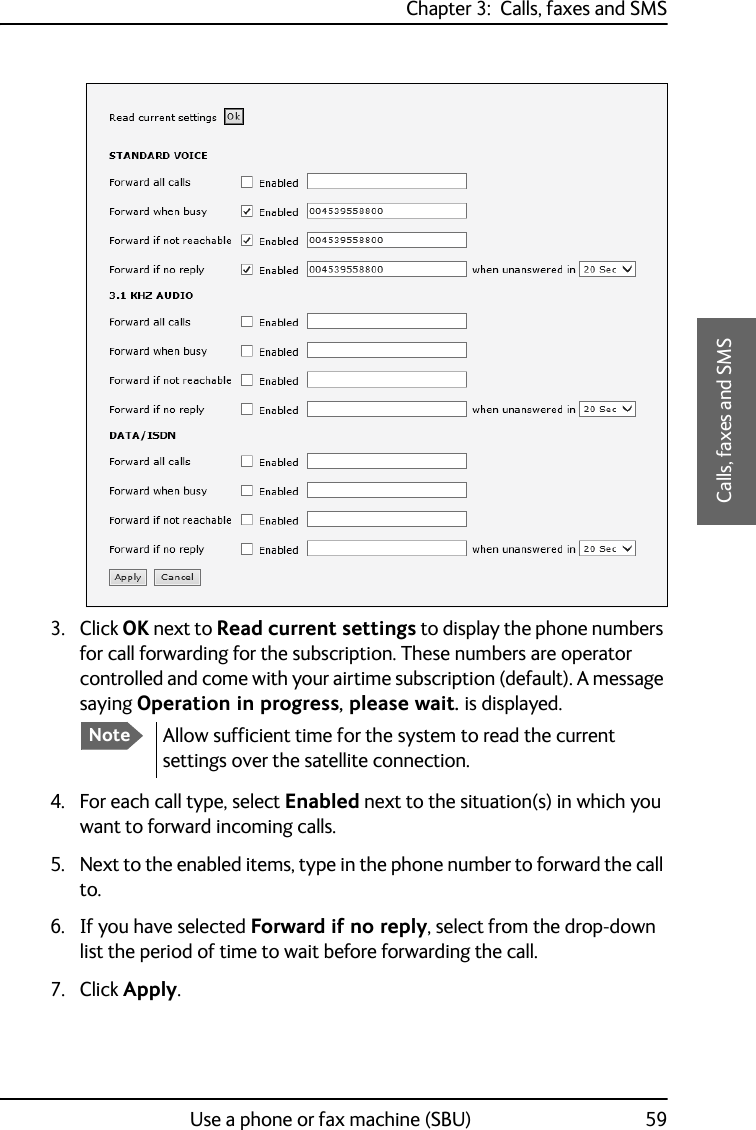
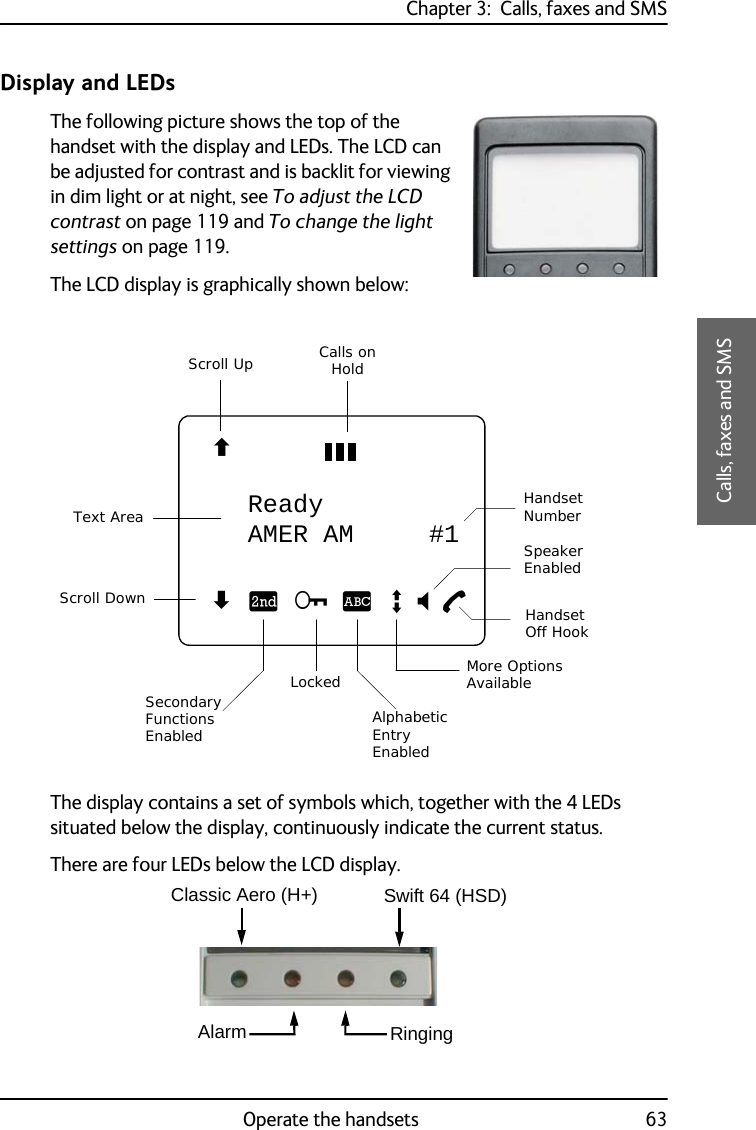
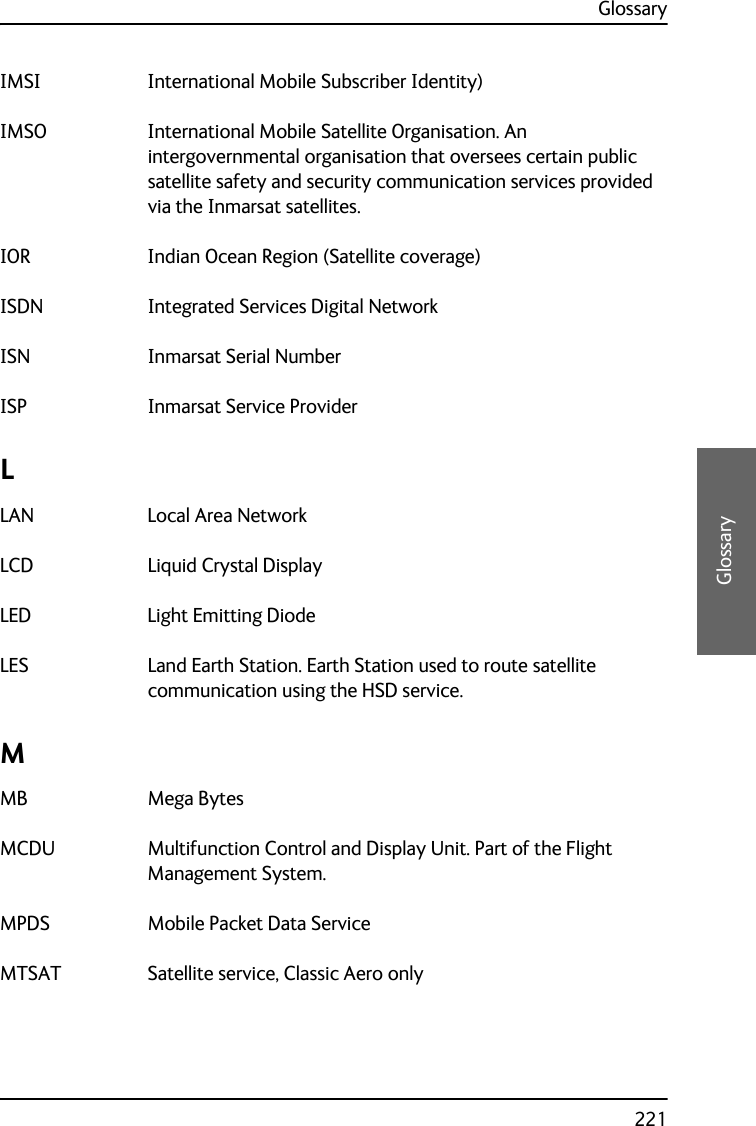
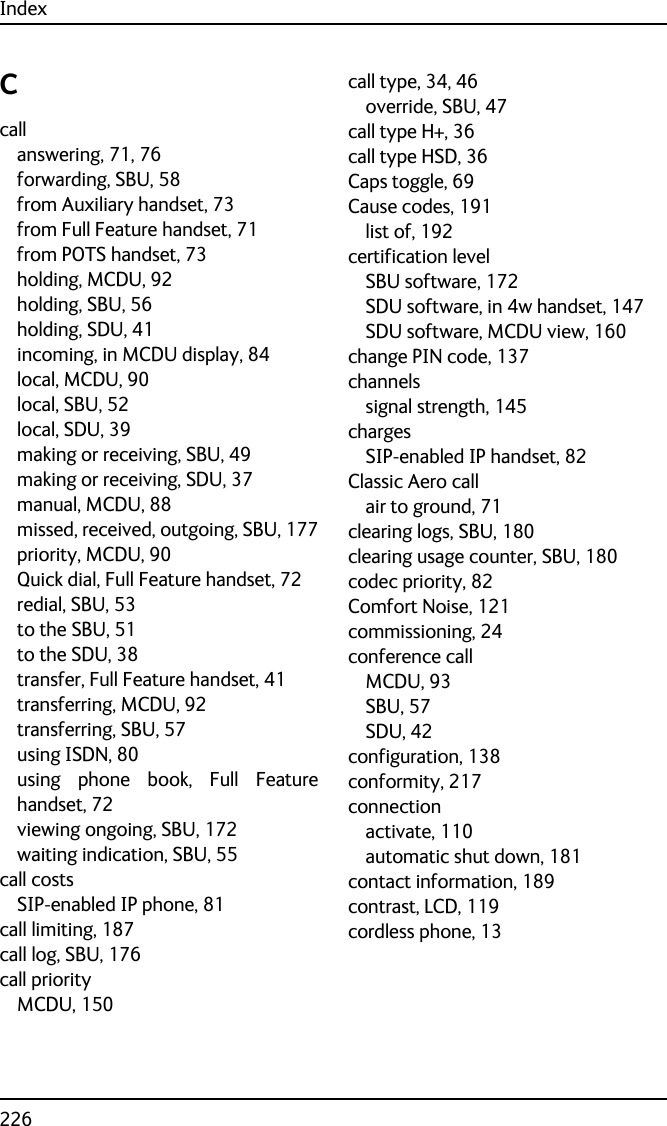
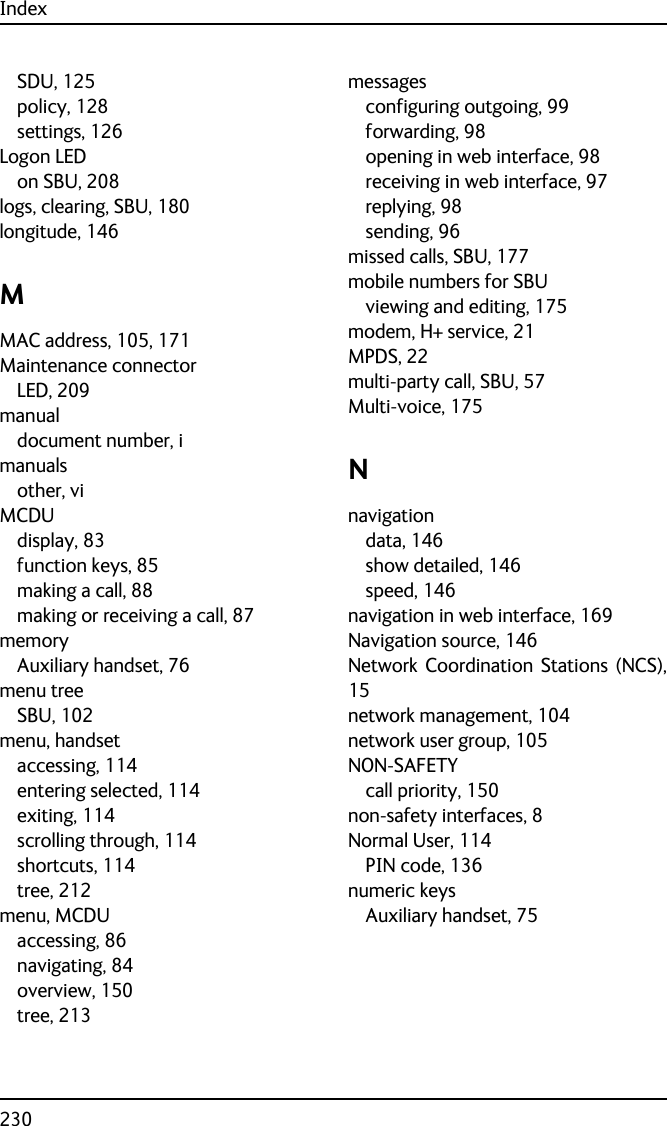
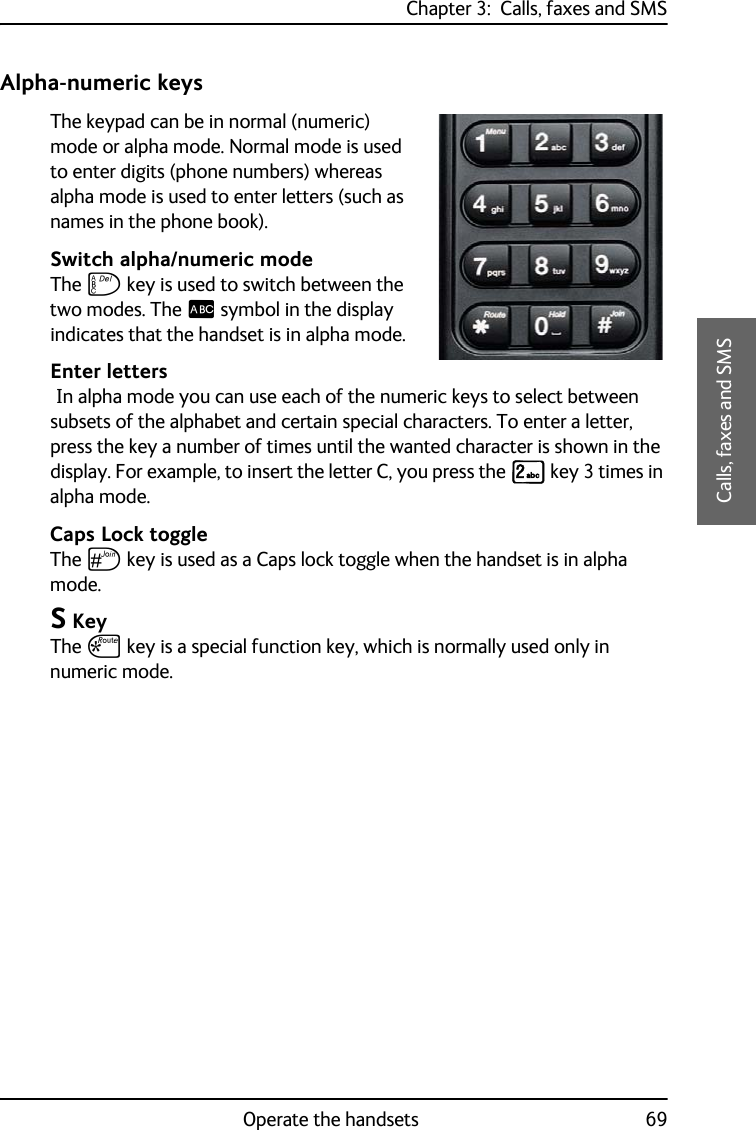
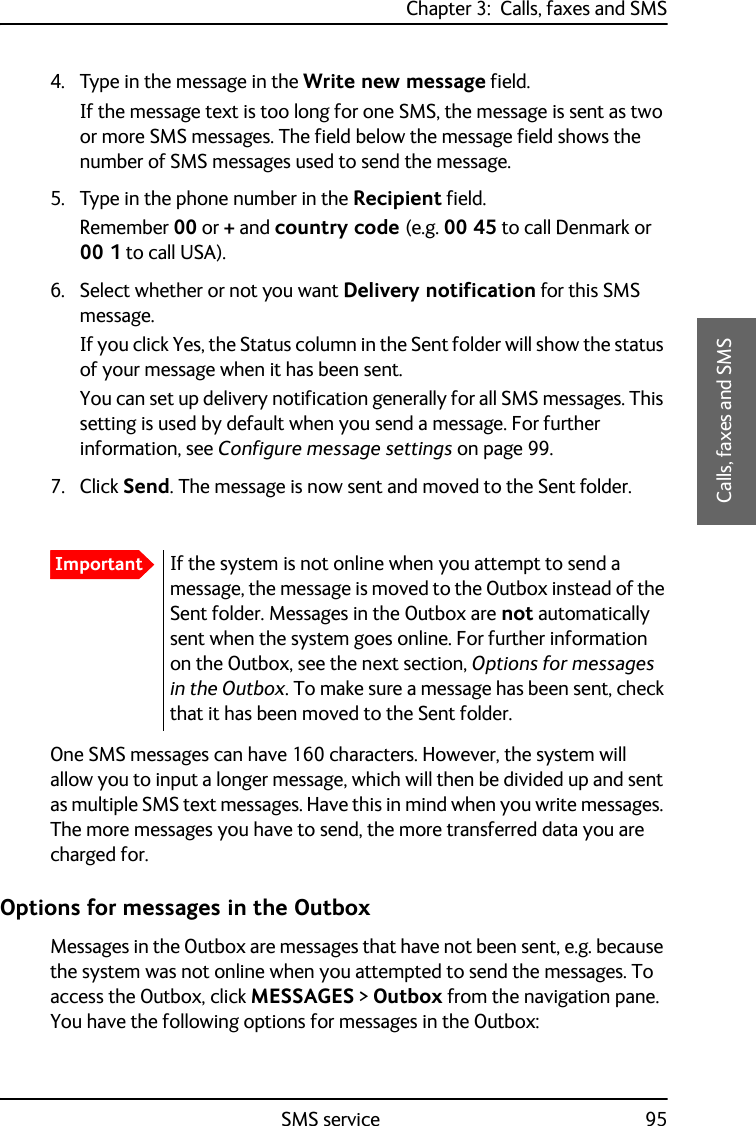
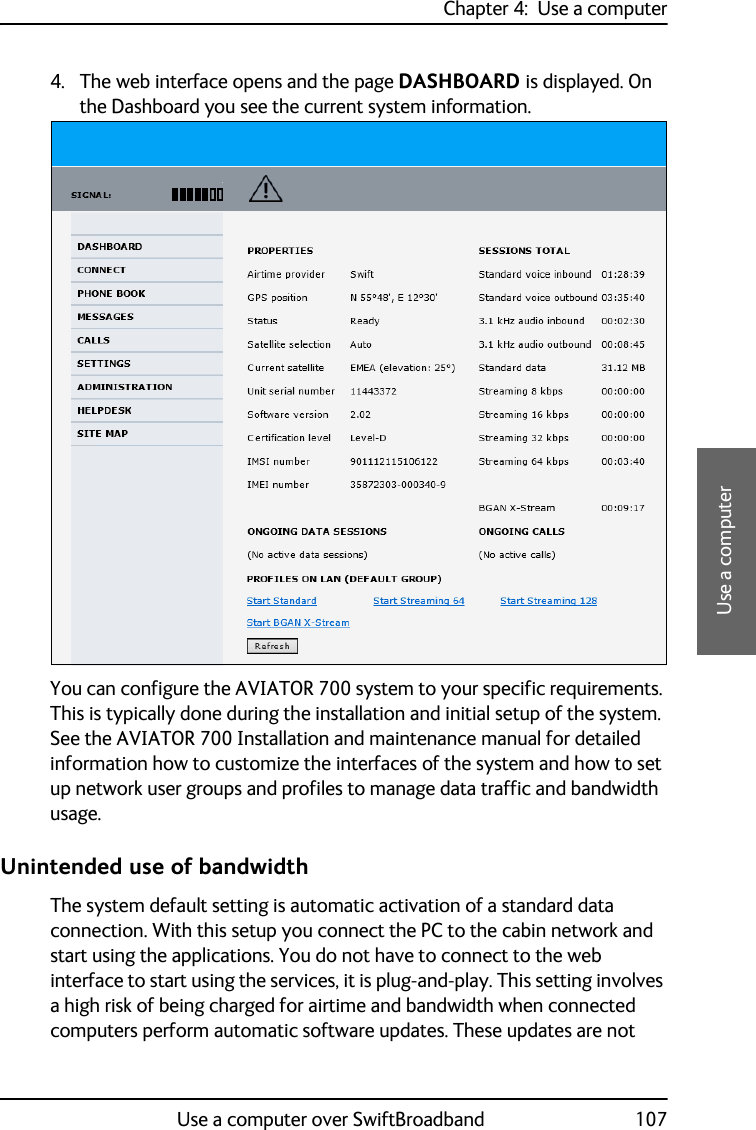
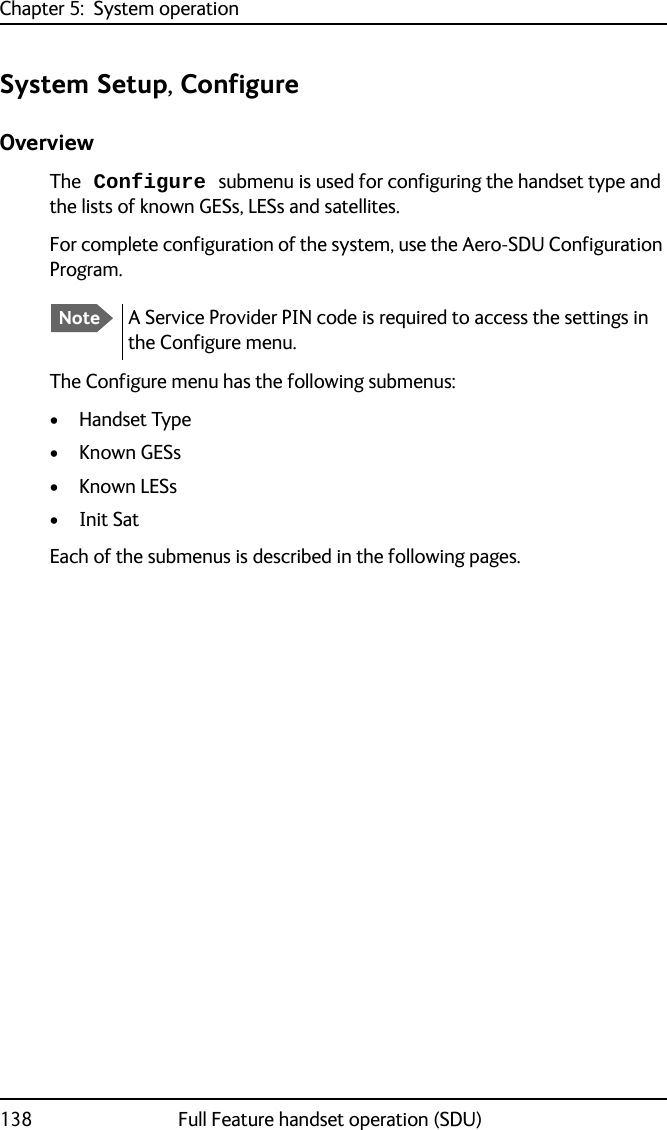
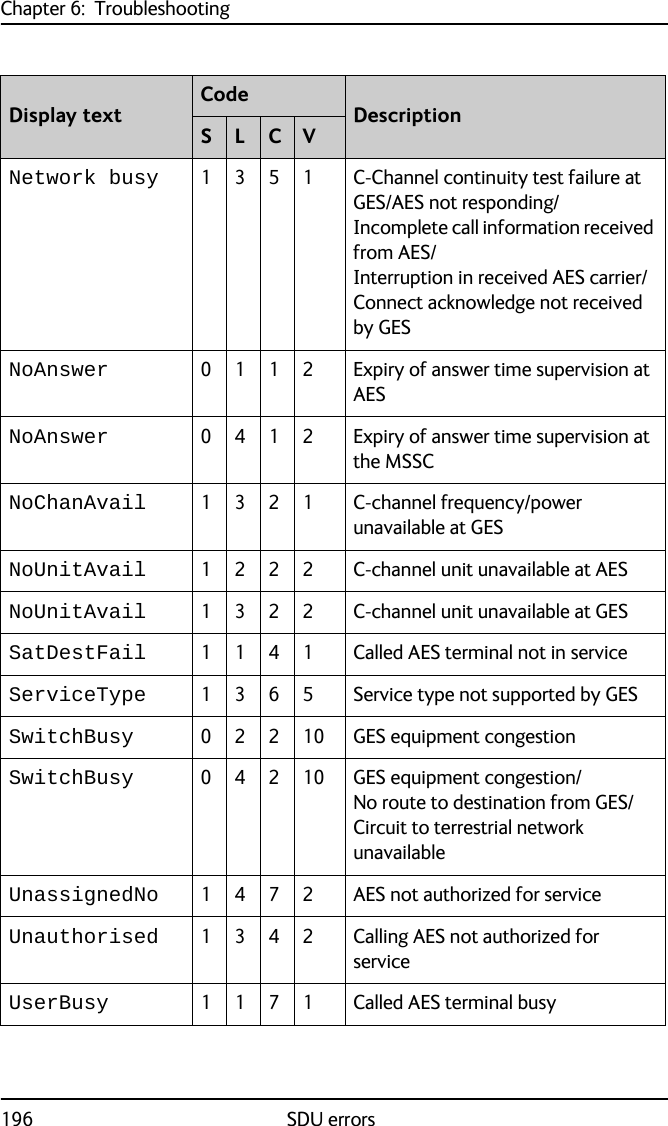
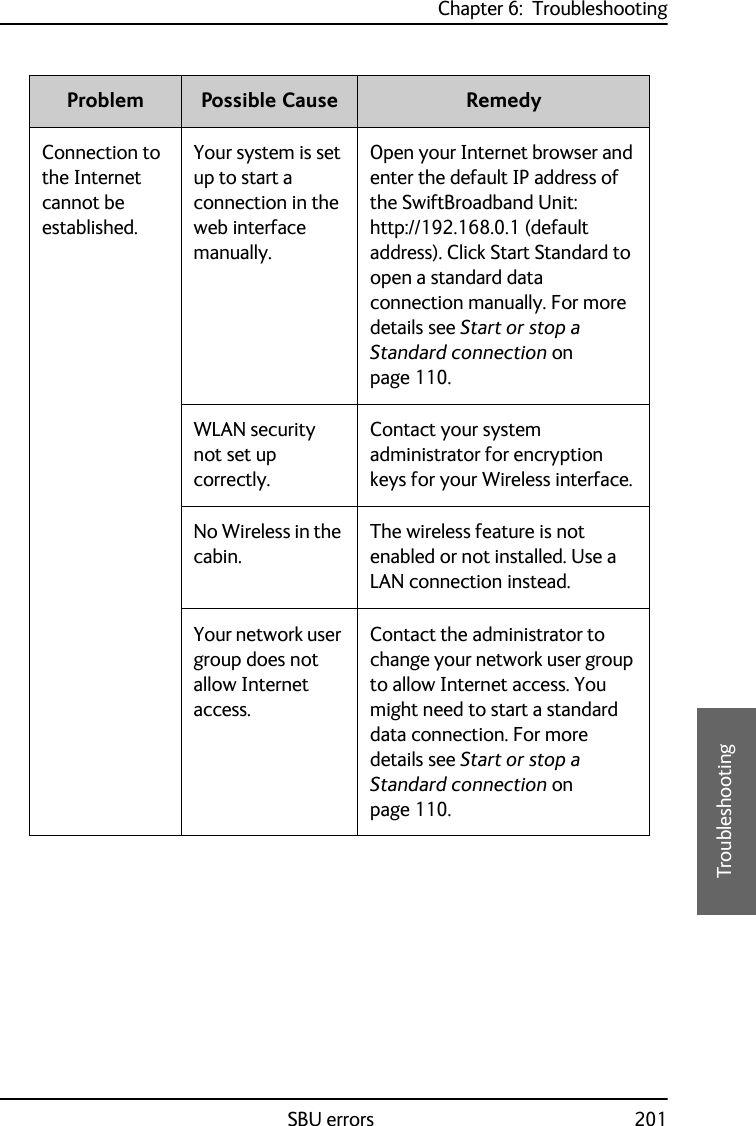
![Chapter 3: Calls, faxes and SMS64 Operate the handsets•Classic Aero (H+) LED (GREEN): The H+ LED indicates that the system is logged on to H+ services.•Alarm LED (RED): The Alarm LED illuminates when the system detects a fatal or essential fault. An error code is also shown in the display.•Ringing LED (AMBER): The Ringing LED flashes when the handset is ringing. When a connection is established the LED is turned off.•Swift64 LED (GREEN): The Swift64 LED indicates that the system is logged on to Swift64 services. Note that this LED is not lit when the system is logged on to an I4 satellite providing SwiftBroadband services.Display symbolsThe below list shows the meaning of each of the various symbols, that may appear in the display. Symbol MeaningYMore menu entries above.Calls on hold. Each bar represents a call on hold. In this example there are 3 calls on hold.ZMore menu entries below.]The G key has been pressed. The 2nd function will be used for the next key pressed. ^A valid PIN code is required to use the terminal._The keypad is in alpha mode. Alpha mode is used to enter letters (for example names in the phone book).Note: This symbol does not indicate capital letters. The U key is used to toggle the Caps lock function. `The value in a menu must be selected between certain predefined values by means of the B and E keys.](https://usermanual.wiki/Thrane-and-Thrane-A-S/AVIATOR700.Users-Manual/User-Guide-4022335-Page-77.png)


![Appendix C: Conformity218 FCCturning the equipment off and on, the user is encouraged to try to correct the interference by one or more of the following measures:• Reorient or relocate the receiving antenna.• Increase the separation between the equipment and receiver.• Connect the equipment into an outlet on a circuit different from that to which the receiver is connected.• Consult the dealer or an experienced radio/TV technician for help.ICES-003This device complies with Industry Canada licence-exempt RSS standard(s). Operation is subject to the following two conditions:(1) this device may not cause interference, and(2) this device must accept any interference, including interference that may cause undesired operation of the device.Le présent appareil est conforme aux CNR d'Industrie Canada applicables aux appareils radio exempts de licence. L'exploitation est autorisée aux deux conditions suivantes:(1) l'appareil ne doit pas produire de brouillage, et(2) l'utilisateur de l'appareil doit accepter tout brouillage radioélectrique subi, même si le brouillage est susceptible d'en compromettre le fonctionnement.NOTICE: This Class [B] digital apparatus complies with Canadian ICES-003.Cet appareil numérique de la classe [B] est conforme à la norme NMB-003 du Canada.](https://usermanual.wiki/Thrane-and-Thrane-A-S/AVIATOR700.Users-Manual/User-Guide-4022335-Page-231.png)