Transtek Medical Electronics LS401-E01 DIGITAL PEDOMETER User Manual
Guangdong Transtek Medical Electronics Co.,Ltd DIGITAL PEDOMETER Users Manual
User Manual

LS401-E
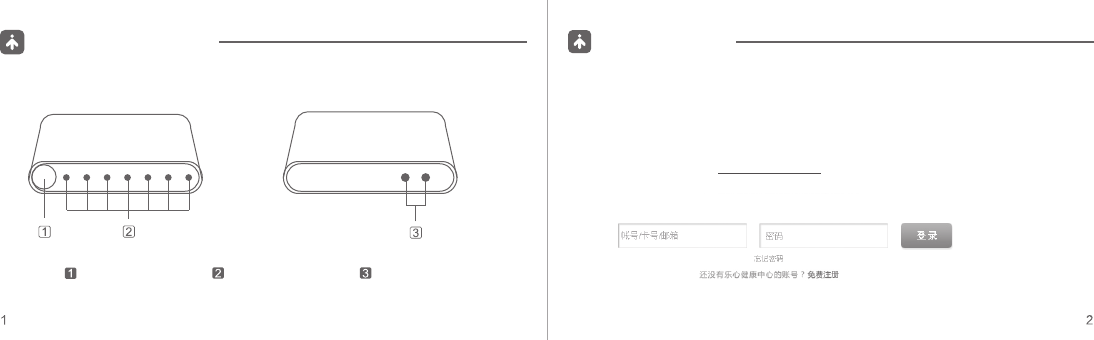
Button Indicator light Charging dot
Product structure Before using
1 Install the bridge. Please refer to the bridge instruction manual.
(If already install the bridge, skip the steps.)
2 Register the account and add the members.
1) Please enter into www.lifesense.com, make the free account.
(If already have the account please skip the steps.)
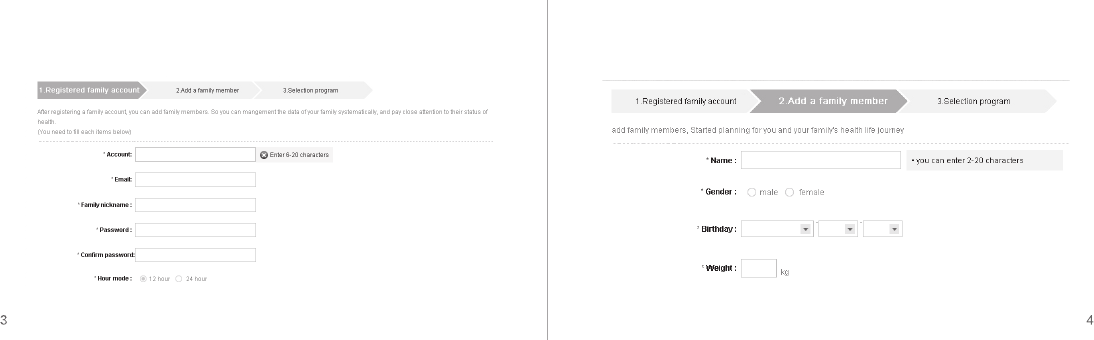
2) Register the family account. 3) RAdd a family member.
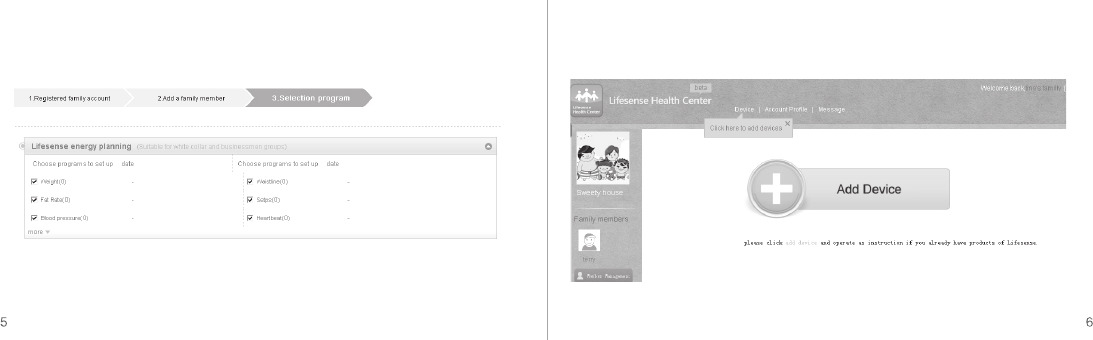
4) Select program. 3 Add the device.
1) Click the device and add the device.
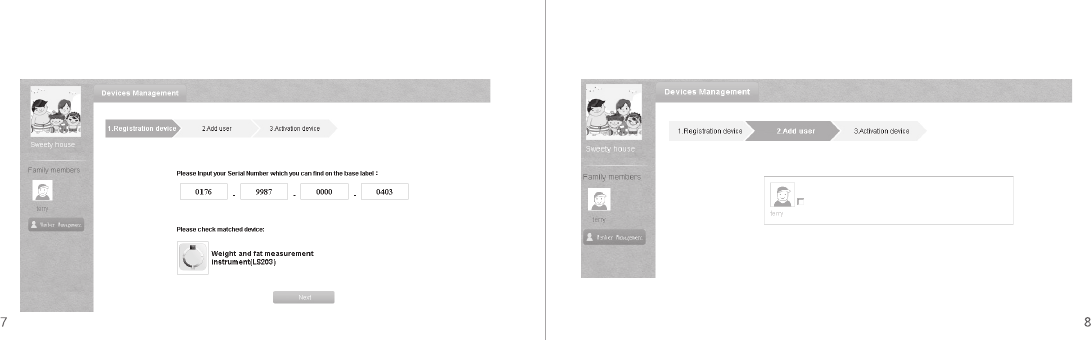
2) Input the serial No. 3) Add the user.
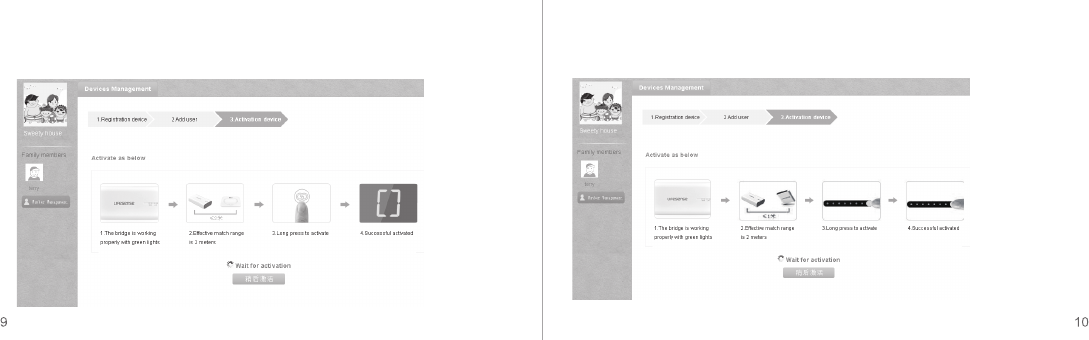
4) Activate the device. 5) wait for activation.
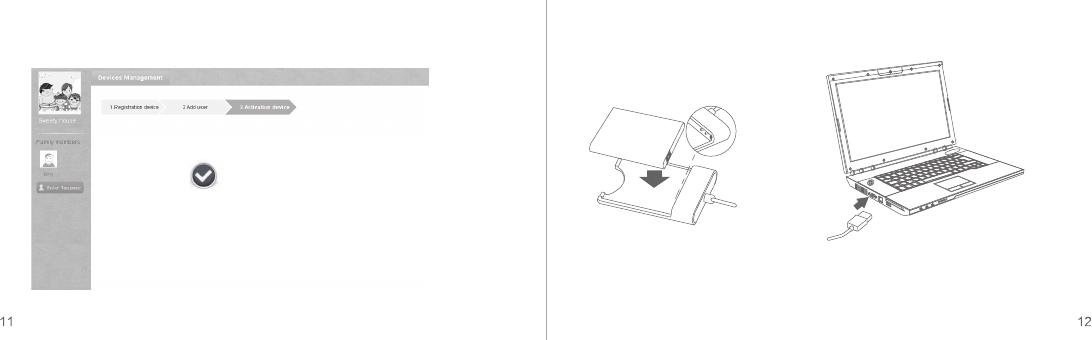
5) Successfully add.
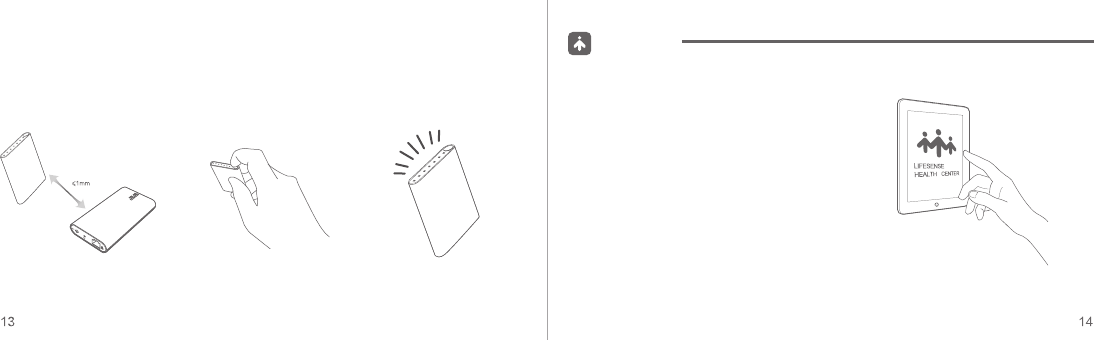
1) Put the pedometer into the
charging plate.
2) Charging with the usb cable linked to the
pc. It finishes in around 1.5 hours, and
shows all the indicator lights.
4 Battery charging.
Successfully add!
The page will be automatically closed in 3 second
1) Device should be less than
1 meter away from the bridge.
2) Long press the button
for 5 sec.
3) Successfully activated after
it shows you 6 green
indicator lights.
5 Product’s activation.
1 Measurement and data sending.
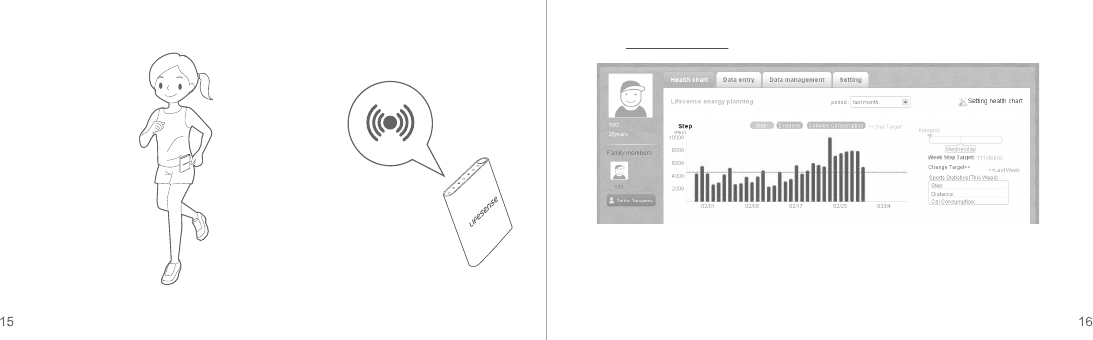
1) Log in health care center
and set a week target.
Usage
4 Go to www.lifesense.com to check how many step you finished.
Attention: if you change an user, please long press activation button.
2 Measure your step
wherever you want.
3 Automatically transmit the
data to the server when the
pedometer is close enough
to the bridge.
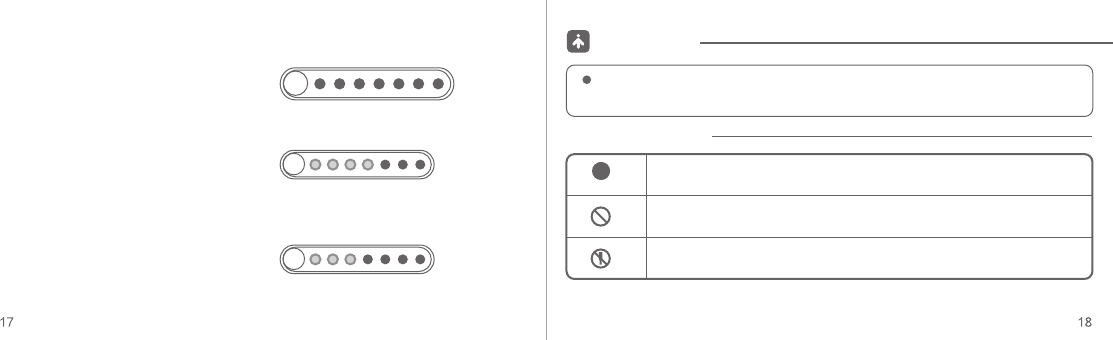
Cautions
1) Daily target check
Press the button, how many lights you see
means how fulfill how many day’s task.
2) Weekly target check
Press the button after you see the green
lights, then you will see orange lights,
how many of them you see means how
many week task you finish.
3) Power Inquires
Press the button when it shows the
orange indication light. How many red
lights you see means how much power
the blood pressure monitor has.
4 orange lights are on and the fifth
is flickering, it means you finish 4/7
for the weekly task.
(all green lights show, it means you
finish the daily task.)
it shows 3 red light, that means,
you have 3/7 battery left.
5 Target and battery margin check.
In order to avoid others being hurt by the product and extend its lifetime, please obey
the following cautions.
Symbol Meaning
General Indication
Forbiden
don't disassemble
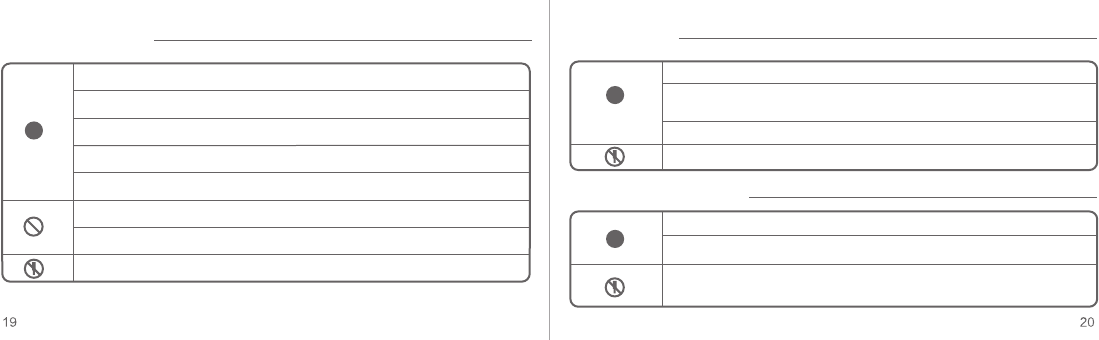
About recharging About usage
Product maintenance
After recharging 2-3 times, the performance can be perfect Please take the pedometer as mentioned
Don’t use the pedometer where it is in strong radiation
which would influence the accuracy
Data can be saved for 30 days before transmitted
Please don’t disassemble the product if you are not professional
Put the product where it is dry and cool
Put the product on a level table when you don’t use it
Don’t disassemble the product after you abandon it,
and obey city’s rule of environment
Battery duration: 13 days
During charging, it’s normal if the product is a little fever
Charging within 0-40 celsius degree
All green lights shows if it finishes charging
The recharger is only for LS401-E pedometre
Don’t store the recharger in a hot or wet place
Don’t disassemble the product yourself
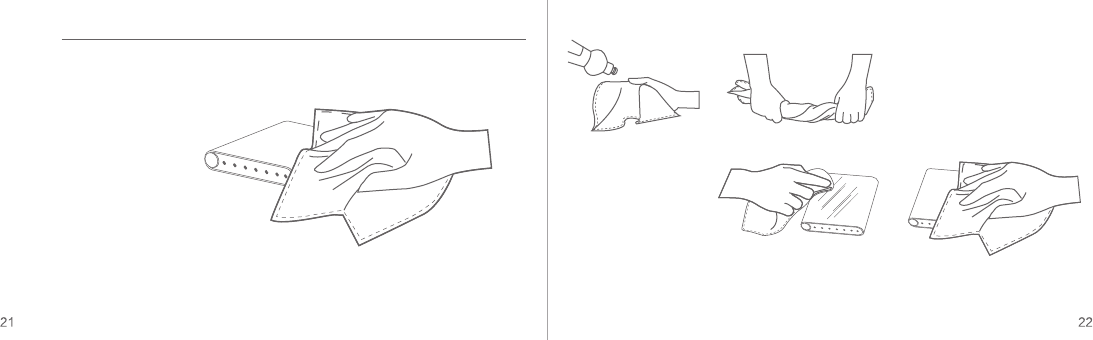
1 Use tissue to clean the dirt on
the pedometer.
2 Dry the pedometer after clean it with soaped wiping.
Clean

Cautions
Phenomenon
No indicator light
Fail activation
Reason
Low battery
interference
No account
Activate too many products
at the same time
Weak signal to the server
Methods
Recharging
Keep closer to the bridge
Fail data uploading
Product can not
be recharged
Fail display on weekly
target and led
Out of transmitting range
Increasing steps are less than 100
Network error
Sync the pedometer with the server
Manually input the data
Error of usb plug
Wrongly put the pedometer
into the charger base
Make it more than 100
Move the products towards to
the bridge. Data can be transmitted
in 30m without barrier.
Check network status
Log on the health care system
Change usb plug
Re- put it as instruction
Check connection between
the bridge and pedometer
Log on www.lifesense.com
for setting
Do it one by one
Check network status

Product Specification
Items
Product Name
Voltage
Recharging
Display
Steps
Calories
Battery grade
Battery releasing
Content
DC 5.0V, standard usb plug
7 led lights
0-99999 steps, division 1 step
0- 9999.9k calories, division 0.1k calories
1-7 grade, division: 1 grade
≥500 times
45mAh Lipolymer battery
Battery life
Data capacity
Transmitting range
Dimension
13 days once recharging
Data of 30 days
30 meters (in open place)
60x44.7x11.3mm
Pedometer LS401-E
Working Condition
Storage and
Transportation Condition
Temperature: 0~40℃;Humidity:≤90% RH
Temperature: -20-60℃;Humidity:≤90% RH
This device complies with Part 15 of the FCC Rules. Operation is subject to the following two
conditions: (1) this device may not cause harmful interference, and (2) this device must accept any
interference received, including interference that may cause undesired operation.
Caution: The user is cautioned that changes or modifications not expressly approved by the
party responsible for compliance could void the user's authority to operate the equipment.
Note: This equipment has been tested and found to comply with the limits for a Class B digital
device, pursuant to part 15 of the FCC Rules. These limits are designed to provide reasonable
protection against harmful interference in a residential installation. This equipment generates,
uses and can radiate radio frequency energy and, if not installed and used in accordance with
the instructions, may cause harmful interference to radio communications. However, there is
no guarantee that interference will not occur in a particular installation. If this equipment does
cause harmful interference to radio or television reception, which can be determined by turning
the equipment off and on, the user is encouraged to try to correct the interference by one or
more of the following measures:
—Reorient or relocate the receiving antenna.
—Increase the separation between the equipment and receiver.
27 28
—Connect the equipment into an outlet on a circuit different from that to which the receiver is
connected.
—Consult the dealer or an experienced radio/TV technician for help.