Traxxas LP TRX1018 Traxxas Link wireless module User Manual 2
Traxxas LP Traxxas Link wireless module Users Manual 2
Contents
Users Manual-2
10 • TRAXXAS
GoPro® Camera and
accessories not included
CAPTURING VIDEO
Film Mode
The transmitter will always power up in Film Mode. Film Mode is the
easiest to fly
(s
ee “Controlling Āton” on page 7 for flight control instructions).
Install the included landing gear and fixed camera mount to the Āton;
then, use your GoPro® or other action camera and accessories (not
included)* to capture aerial video.
IMPORTANT: Consult local laws and ordinances before installing and
operating any type of photograph-capable or video recording device on
this model.
WARNING: To prevent radio interference and loss of control, always
disable Wi-Fi on your GoPro® or other action camera (if so equipped)
BEFORE flying the Āton.
WARNING: Some GoPro® cameras, specifically the Hero 3 and Hero
4 series with LCD screen, are known to produce radio frequency
emissions that could interfere with Aton’s ability to acquire GPS
satellite communications. The Āton is equipped with shielding to help
protect it from these radio frequency emissions. Use caution with
these cameras and test in a safe area to be sure Āton is acquiring GPS
satellites and setting a Return to Home location when these cameras
are attached, powered on, and recording video. DO NOT operate Āton
with these cameras if you are not connected to GPS (four green LEDs on
the Status Bar).
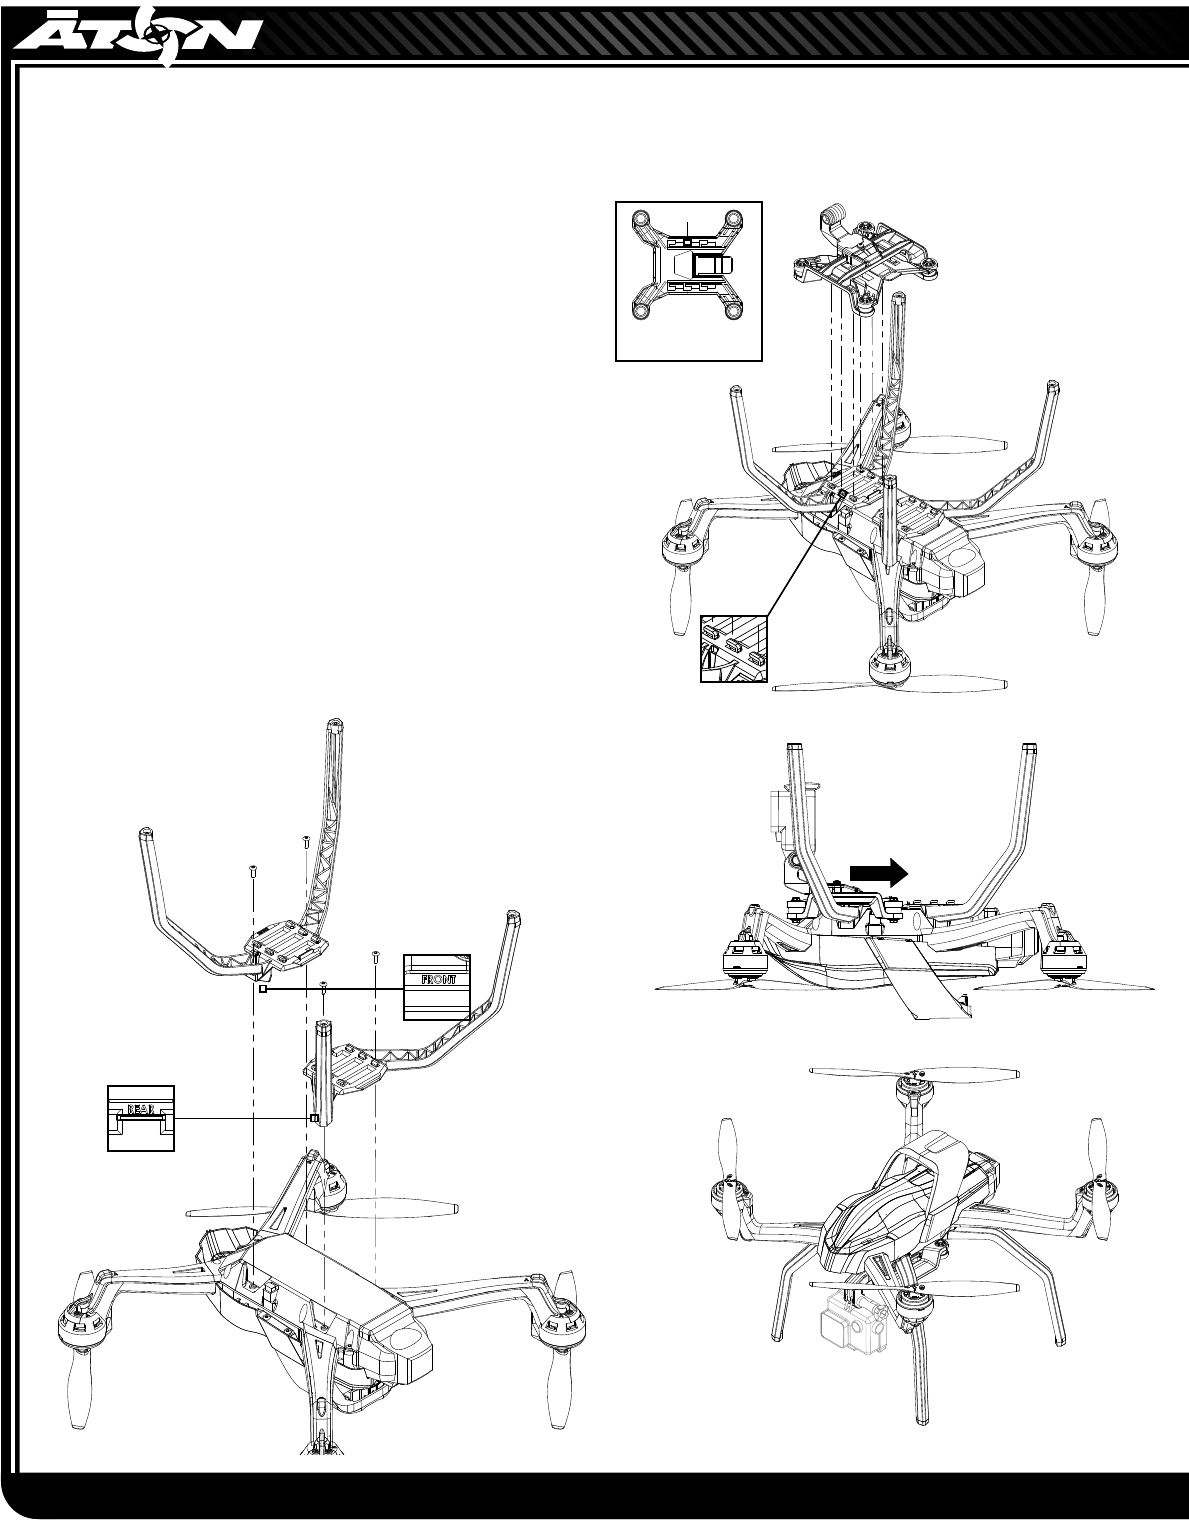
1. LANDING GEAR INSTALLATION
Use the included 2.6x8mm screws to mount the front and rear landing gear
to the helicopter.
2. CAMERA BRACKET INSTALLATION
Attach the fixed camera mount to the front landing gear by aligning the
tabs. Slide the mount toward the rear of the helicopter until the tabs
snap into place.
Bottom View
of Camera Bracket
Tabs
Tabs
FINAL ASSEMBLY