Universal Electronics 8881-R Insignia cTV RF Remote 2010 User Manual DANA COMBINED NS 32E859A11
Universal Electronics Inc Insignia cTV RF Remote 2010 DANA COMBINED NS 32E859A11
User Manual
14
www.insi
g
nia
p
roducts.com
Getting Started NS-32E859A11/NS-42E859A11
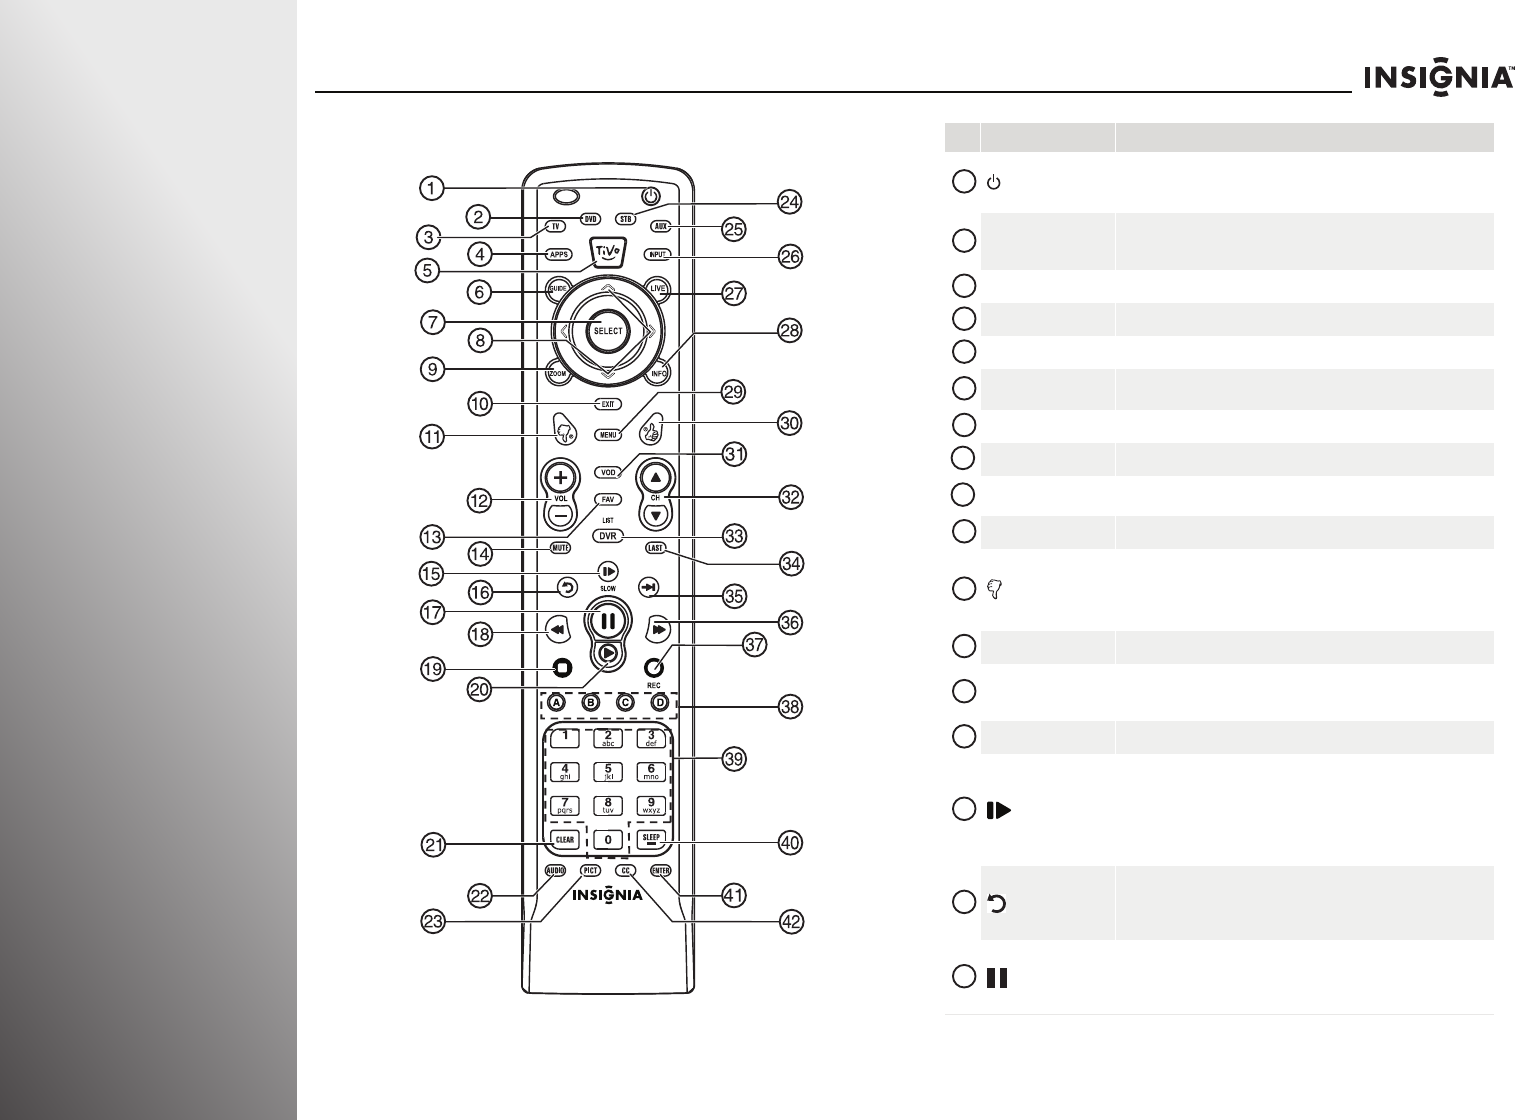
Remote control # Button Description
(power)
Press to turn on your TV. Press again to put your TV in standby mode.
When your TV is in standby mode, power still flows through it. To
completely disconnect power, unplug the power cord.
DVD
Press to control a DVD player. You must program the remote control
before this button works. For more information, see “Programming your
universal Insignia remote control” on page 27.
TV Press to put the remote in TV mode.
APPS Press to open the Apps screen in the on-screen menu.
TiVo Press to open the on-screen menu.
GUIDE Press to open the program guide. For more information, see “Displaying
additional information” on page 35.
SELECT Press to confirm selections or changes.
S T W XPress to move left, right, up, or down in on-screen menus.
ZOOM Press to select the aspect ratio. For more information, see “Adjusting the
video settings” on page 40.
EXIT Press to close the on-screen menu.
(thumbs down)
Press to decrease the thumbs rating by 1 thumb.
In the channel list, press to remove a highlighted channel from the
favorite list.
In the on-screen keyboard, press to switch to lowercase letters.
VOL+/VOL– Press to increase or decrease the volume.
FAV
Press to open the favorite channel list. For more information, see
“Setting up the channel and favorite channel lists” on page 63 and
“Viewing a favorite channel” on page 64.
MUTE Press to mute the sound. Press again to restore the sound.
/SLOW
Press to enter slow motion playback in TV VOD mode (watching Netflix
and CinemaNow) or when using a DVD player, Blu-ray player, or DVR. For
more information, see “Programming your universal Insignia remote
control” on page 27.
Press to turn the video window on or off. For more information, see
“Turning the video window on or off” on page 43.
(replay)
Press to jump back eight seconds in TV VOD mode (watching Netflix and
CinemaNow) or when using a DVD player, Blu-ray player, or DVR. For
more information, see “Programming your universal Insignia remote
control” on page 27.
(pause)
Press to pause playback in TV VOD mode (watching Netflix and
CinemaNow) or when using a DVD player, Blu-ray player, or DVR. For
more information, see “Programming your universal Insignia remote
control” on page 27.
1
2
3
4
5
6
7
8
9
10
11
12
13
14
15
16
17
www.insi
g
nia
p
roducts.com
15
NS-32E859A11/NS-42E859A11 Getting Started
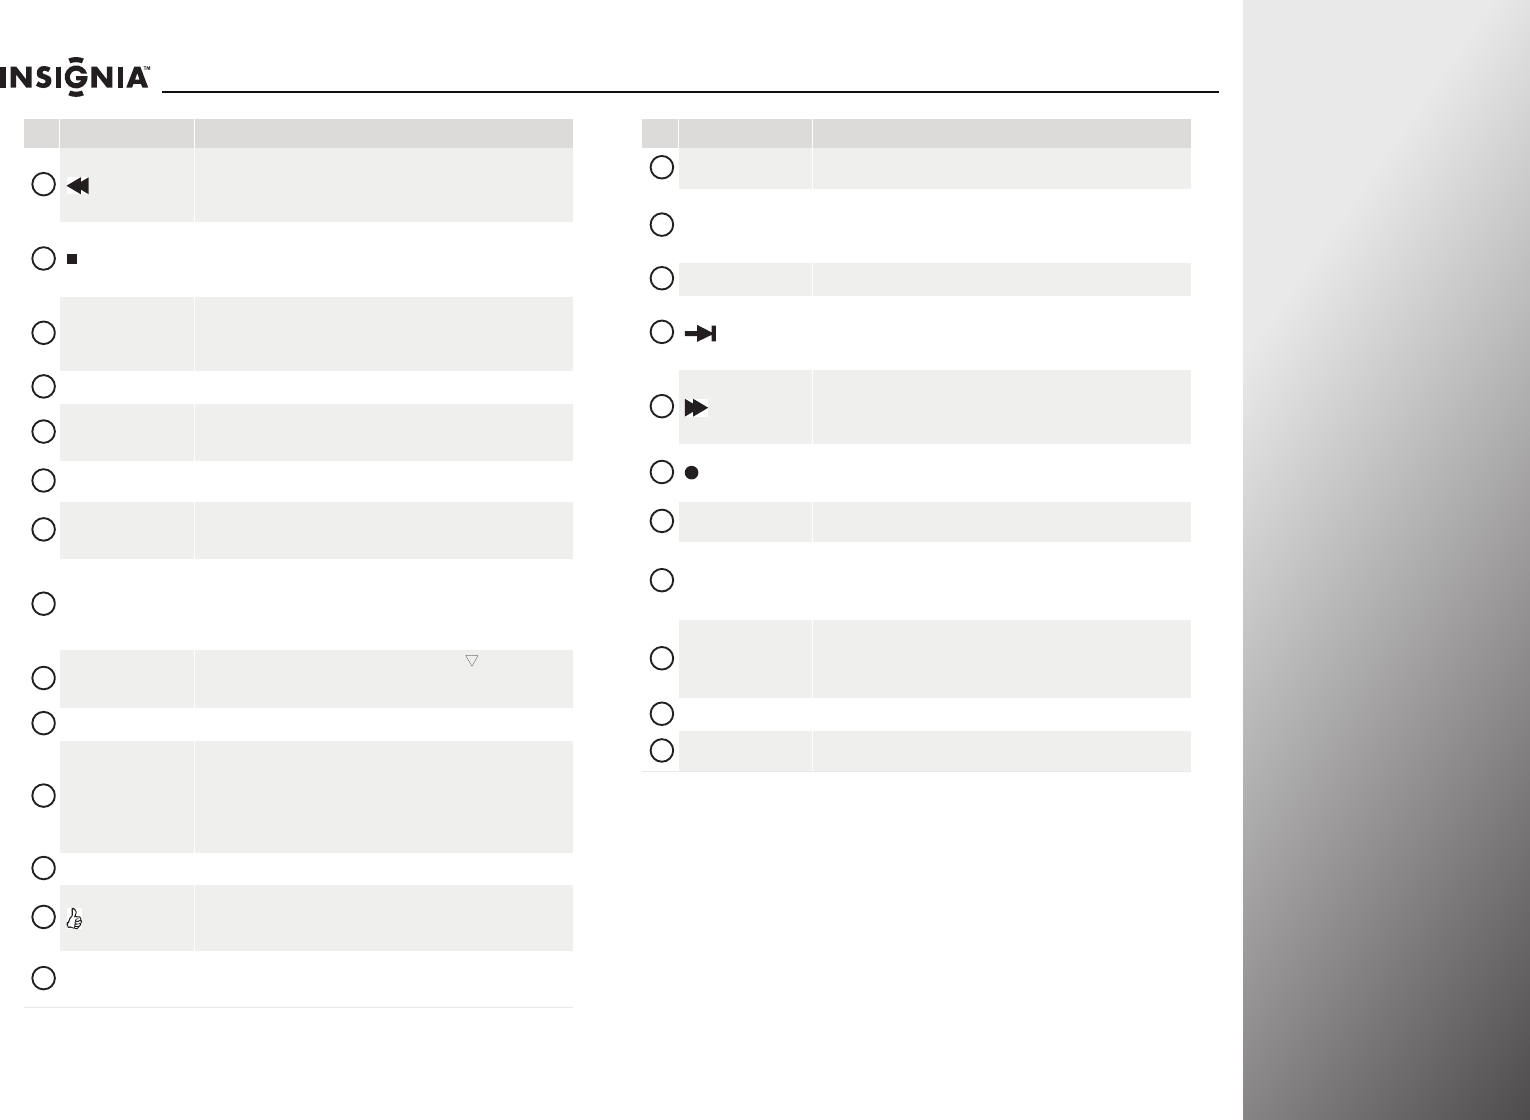
(fast-reverse)
Press to fast-reverse in TV VOD mode (watching Netflix and CinemaNow)
or when using a DVD player, Blu-ray player, or DVR. For more
information, see “Programming your universal Insignia remote control”
on page 27.
(stop)
Press to stop playback in TV VOD mode (watching Netflix and
CinemaNow) or when using a DVD player, Blu-ray player, or DVR. For
more information, see “Programming your universal Insignia remote
control” on page 27.
X (play)
Press to start playback in TV VOD mode (watching Netflix and
CinemaNow) or when using a DVD player, Blu-ray player, or DVR. For
more information, see “Programming your universal Insignia remote
control” on page 27.
CLEAR Press to clear character input in the on-screen keyboard.
AUDIO
Press to select Audyssey Dynamic Volume, SRS TruSurround HD, Audio
Only, Treble, Bass, or Balance. For more information, see “Manually
adjusting audio settings” on page 44.
PICT Press to adjust the video settings. For more information, see “Adjusting
the video settings” on page 40.
STB
Press to control a set-top box. You must program the remote control
before this button works. For more information, see “Programming your
universal Insignia remote control” on page 27.
AUX
Press to control auxiliary devices, such as amplifiers or receivers. You
must program the remote control before this button works. You need to
program the remote control to control connected devices. For more
information, see “Programming your universal Insignia remote control”
on page 27.
INPUT
Press to open the input source list, then press S or T to cycle through
the available input sources. For more information, see “Selecting the
video input source” on page 33.
LIVE In menu mode, press to return to full-screen video TV mode.
INFO
Press to display TV status information, such as the channel number,
channel name (if available), or signal source. For more information, see
“Displaying additional information” on page 35.
In the channel list, press to rename the highlighted channel. For more
information, see “Setting up the channel and favorite channel lists” on
page 63.
MENU Press to open the on-screen menu.
(thumbs up)
Press to increase the thumbs rating by 1 thumb.
In the channel list, press to add a highlighted channel to the favorite list.
In the on-screen keyboard, press to switch to uppercase letters.
VOD
Press to access the VOD (video on demand) on-screen menu to watch
video services offered through your connected TV, such as Netflix,
CinemaNow, etc.
# Button Description
18
19
20
21
22
23
24
25
26
27
28
29
30
31
CHS/CHTPress to change channels. For more information, see “Selecting a
channel” on page 34.
LIST/DVR
Press to see the list of all the recorded programs in a DVR/STB that is set
up with your remote control. You need to program the remote control to
control connected devices. For more information, see “Programming
your universal Insignia remote control” on page 27.
LAST Press to go to the last viewed channel in TV mode.
(advance)
Press to jump forward to the next segment in TV VOD mode (watching
Netflix and CinemaNow) or when using a DVD player, Blu-ray player, or
DVR. For more information, see “Programming your universal Insignia
remote control” on page 27.
(fast-forward)
Press to fast-forward in TV VOD mode (watching Netflix and
CinemaNow) or when using a DVD player, Blu-ray player, or DVR. For
more information, see “Programming your universal Insignia remote
control” on page 27.
(record)
In DVR mode, press to record a program. You need to program the
remote control to record from the DVR. For more information, see
“Programming your universal Insignia remote control” on page 27.
A B C D Provides an enhanced interface for attached device (such as a DVR),
Internet applications, and TiVi search features.
Numbers
Press to enter channel numbers, the parental control password, or
characters.
When programming the remote control, press to enter device and
programming codes.
SLEEP/—
Press to enter a digital sub-channel number in Live TV mode.
In other modes, press to set the sleep timer. You can select Cancel, 5,
10, 15, 30, 60, 90 minutes and 2, 3, 4 hours. For more information, see
“Setting the sleep timer” on page 76.
ENTER Press to confirm selections or changes.
CC Press to turn closed captioning on or off. For more information, see
“Using closed captioning” on page 71.
# Button Description
32
33
34
35
36
37
38
39
40
41
42
16
www.insi
g
nia
p
roducts.com
Getting Started NS-32E859A11/NS-42E859A11
Using the remote control
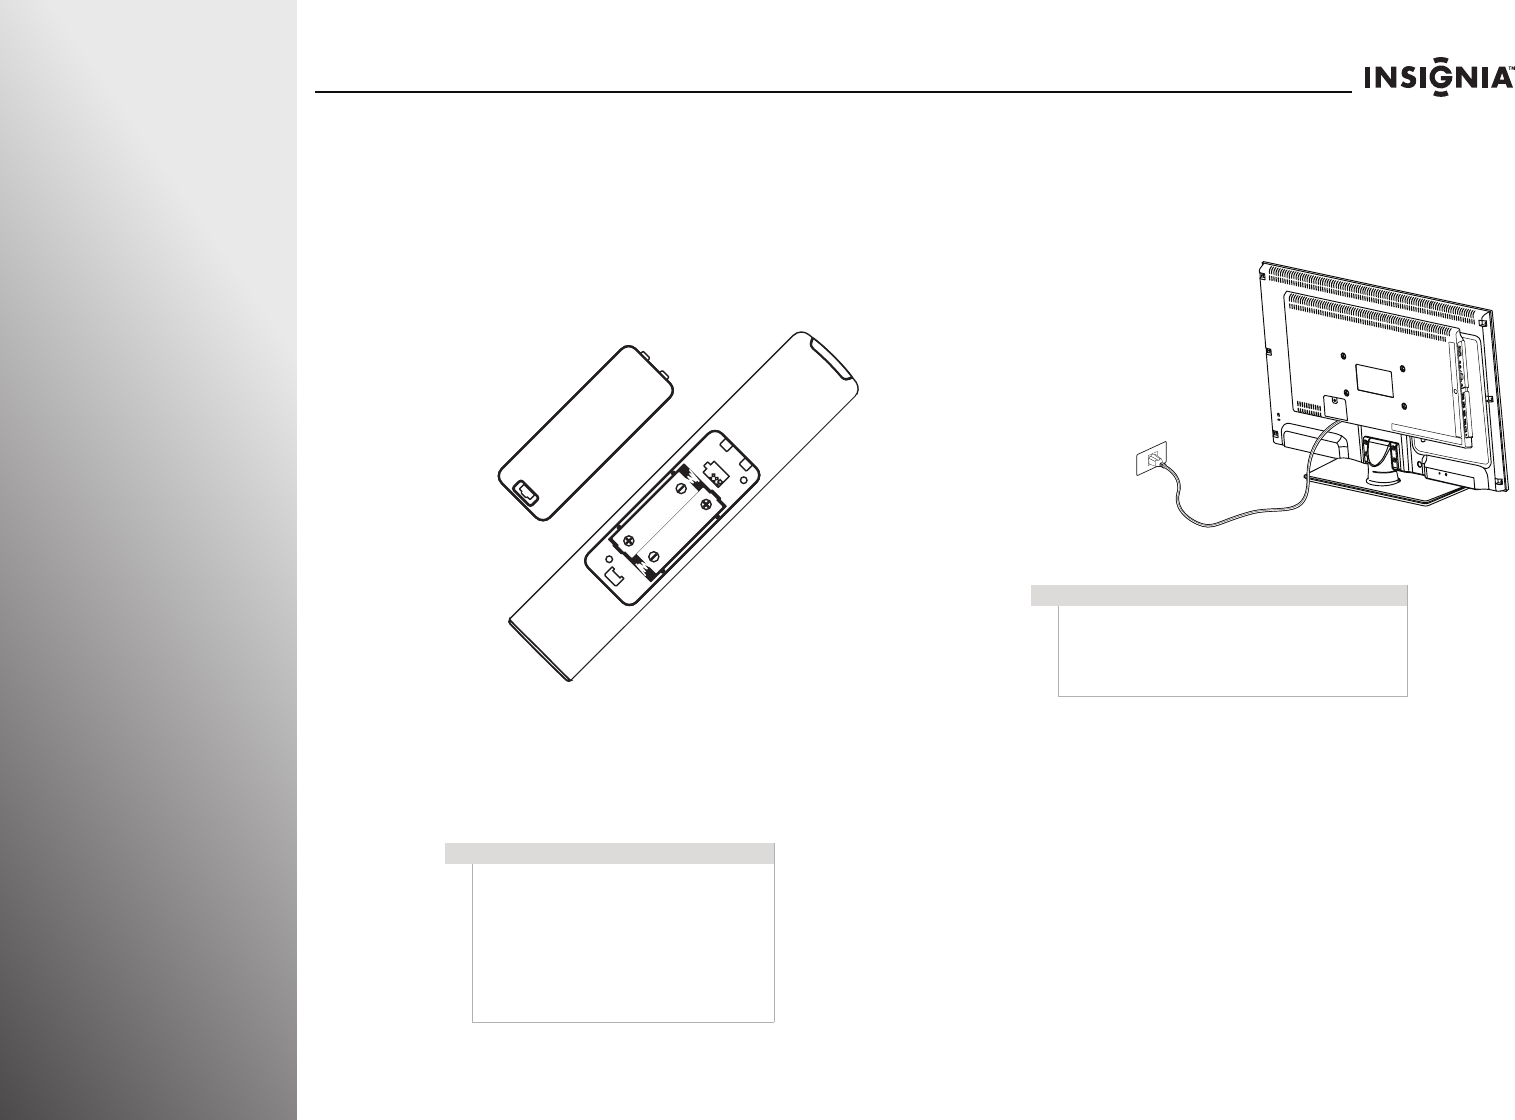
Installing the remote control batteries
To install the remote control batteries:
1While pressing the release button on the battery
compartment cover on the back of the remote, lift the
cover off the remote.
2Insert two AA batteries into the battery compartment.
Make sure that you match the + and – symbols on the
batteries with the + and – symbols in the battery
compartment.
3Replace the battery cover.
Making connections
Connecting the power
To connect the power:
• Plug the
power cord on
back of your
TV into a
power outlet.
Cautions
• Batteries should not be exposed to
excessive heat, such as sunshine, heat
registers, or fire.
• Battery chemicals can cause a rash. If the
batteries leak, clean the battery
compartment with a cloth. If chemicals
touch your skin, wash immediately.
• Make sure that batteries are disposed of
correctly. Do not burn or incinerate.
Cautions
• Make sure that you use the correct type of
power. See the label on your TV.
• If you do not intend to use your TV for an
extended period of time, unplug the power
cord from the power outlet.
www.insi
g
nia
p
roducts.com
25
NS-32E859A11/NS-42E859A11 Getting Started
Turning on your TV for the
first time
Per Dana’s instructions, the graphics and text in this section
were based on comments for the QSG. Please verify if additional
changes need to be made.
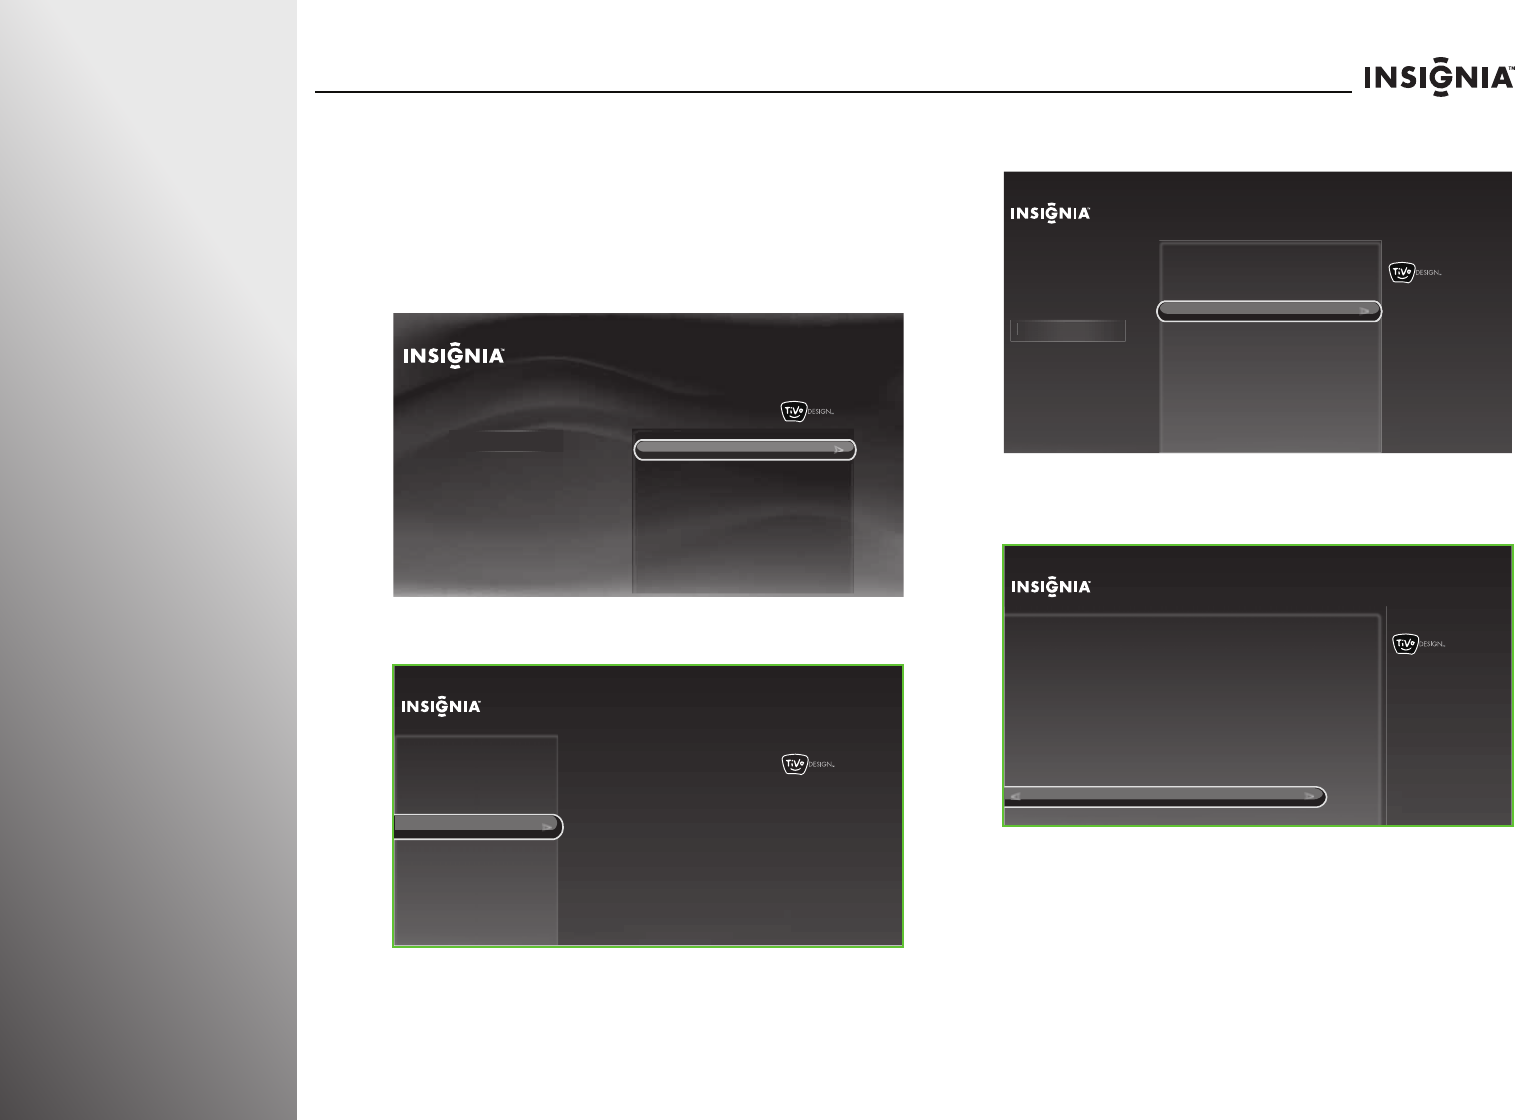
The first time you turn on your TV, the Setup Wizard opens. The
Setup Wizard guides you through setting up basic settings. You
can skip these settings or press EXIT, MENU, or LIVE on your
remote control to exit the wizard (except when a software
update is in progress).
To set up your TV:
1Make sure that you have:
• Installed the remote control batteries. (See page 16 for
details).
• Connected an antenna, cable TV, or satellite TV. (See
page 17 for details.)
• Connected to your home network, if available. (See
page 24 for details).
• Connected the power cord. (See page 16 for details.)
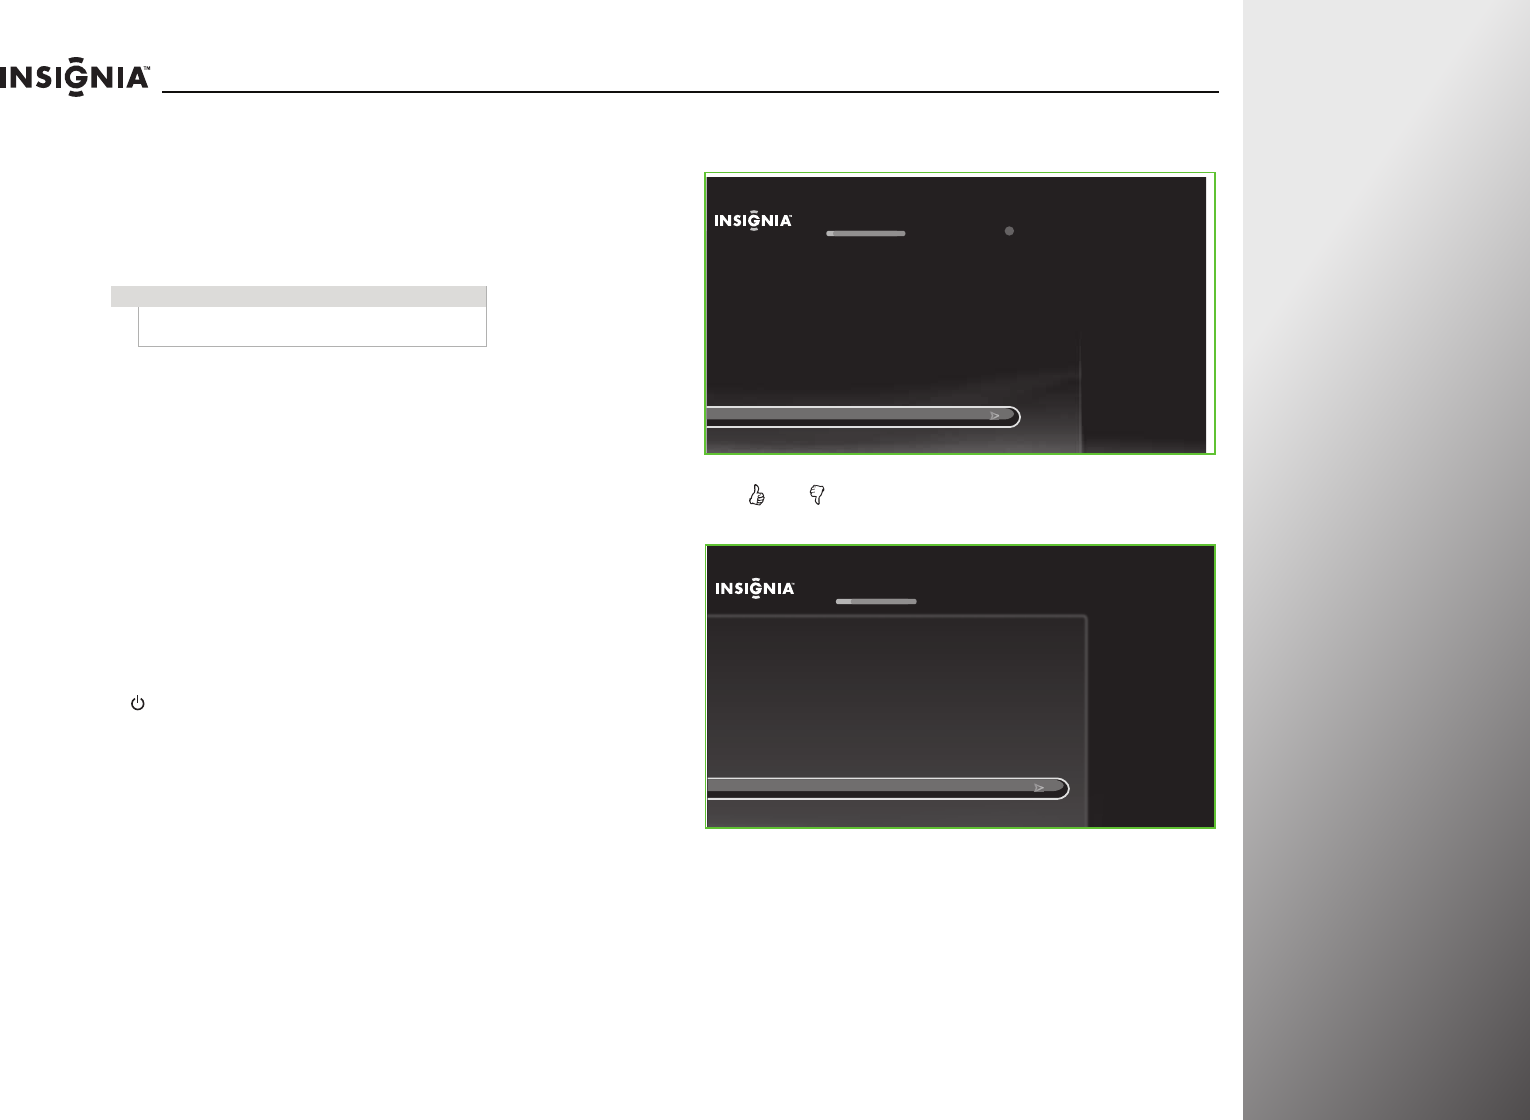
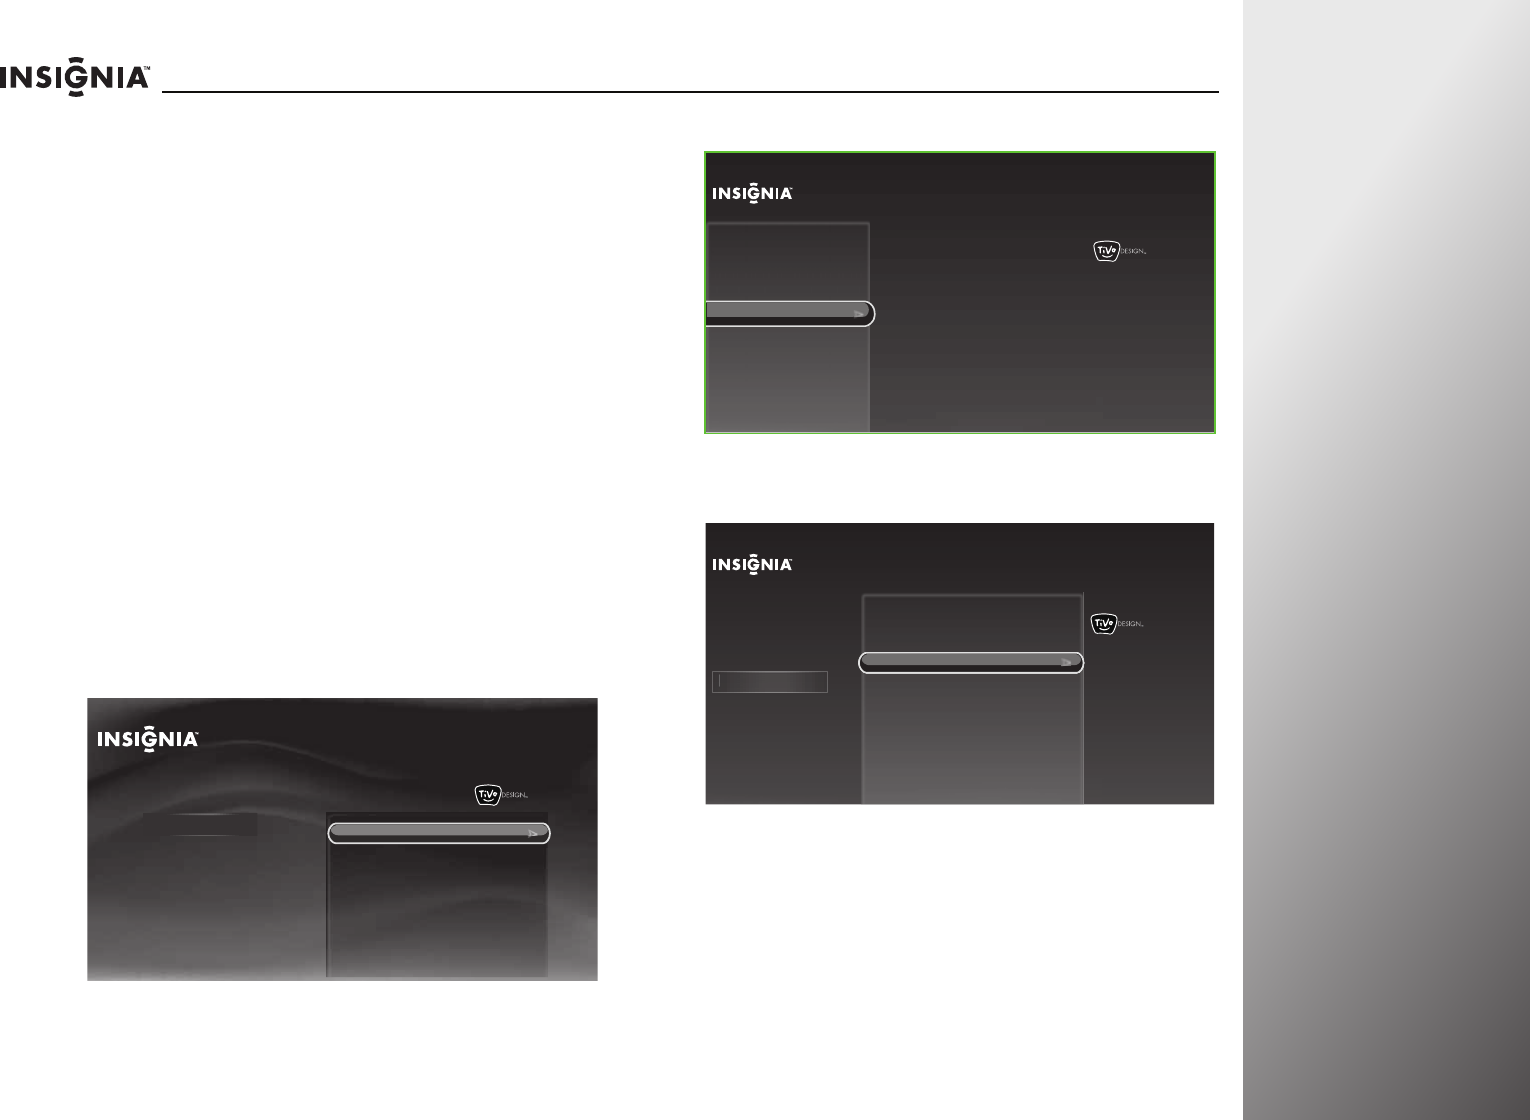
2Press (power) to turn on your TV. The Welcome screen
opens.
3Press S or T to highlight Set up this TV, then press SELECT.
The Remote Control Connection screen opens.
4Press and on your remote control to pair the remote
control.
Note
Unless otherwise noted, all tasks in this section are
based on using the remote control.
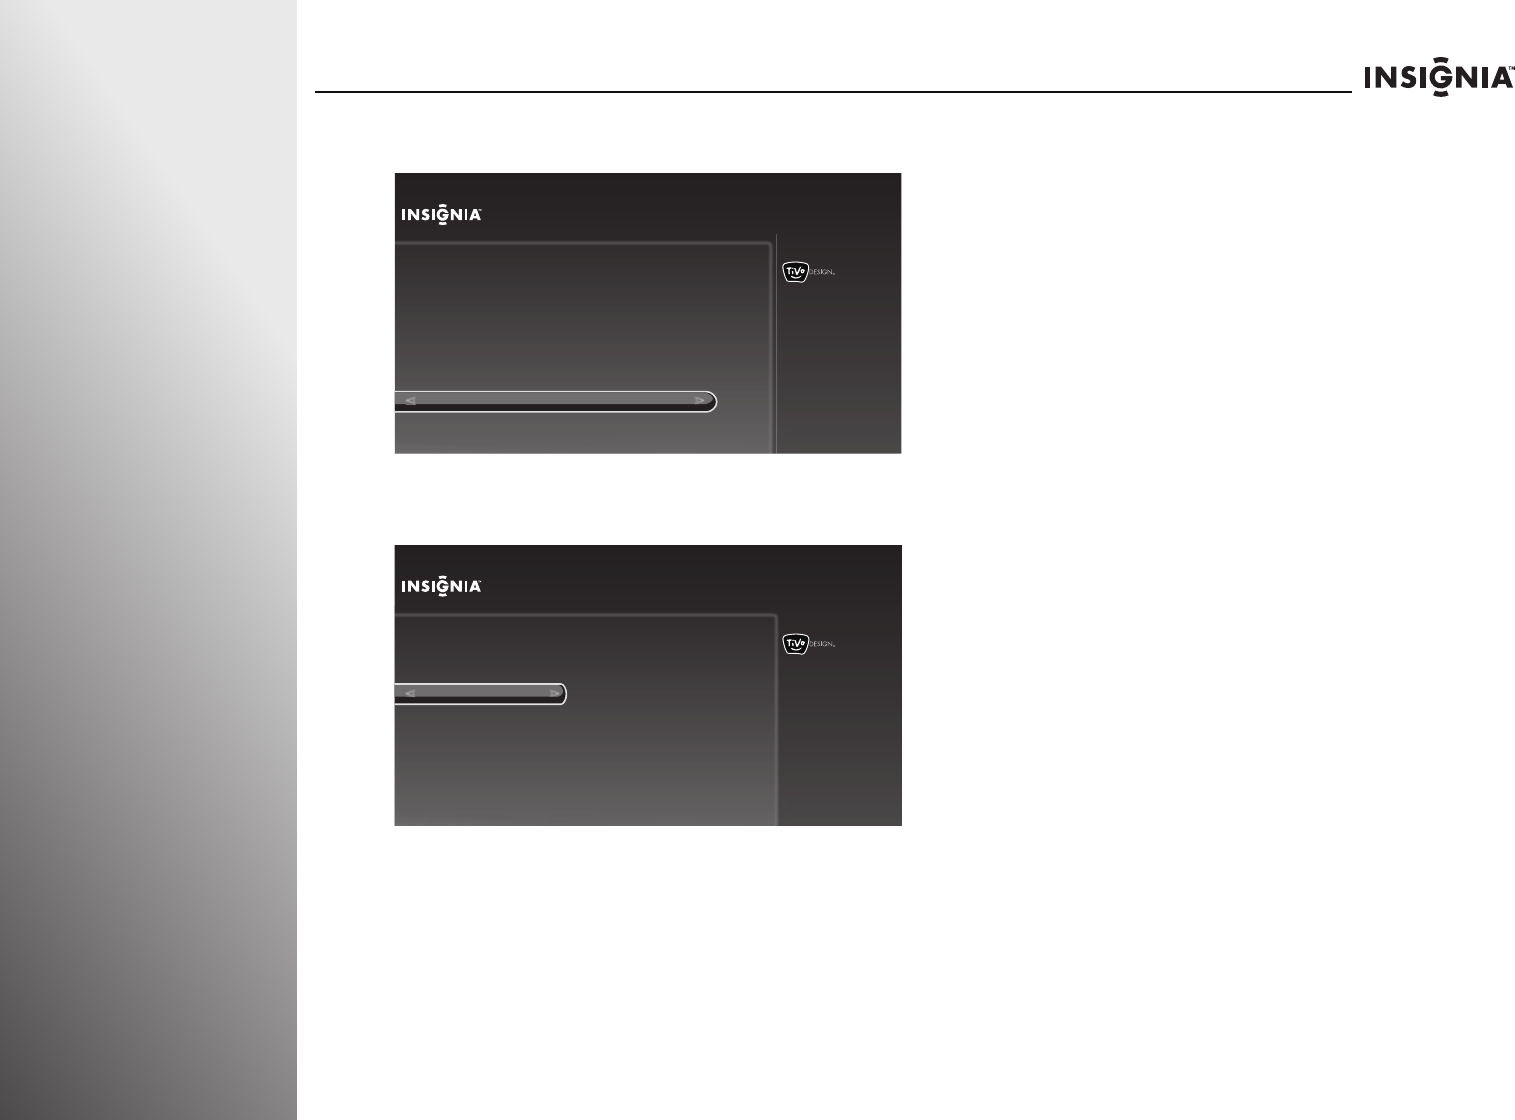
Welcome
Set up this TV
Skip for now
You are about to begin Guided Setup, which prepares the Insignia HD
TV for your use. This typically takes less than 10 minutes.
(If you skip Guided Setup now, you can set it up later by pressing TIVO
and choosing Settings > Help > Reset this TV > Repeat Guided
Setup.)
for retail mode
A
Remote Control Connection
Cancel (use IR instead)
To set up your remote control to use RF (radio frequency) to
communicate with your TV, hold down the THUMBS UP and
THUMBS DOWN buttons at the same time for 5 seconds. This will
mean you won’t need to point the remote control directly at the TV.
H
old down the THUMBS UP and THUMBS DOWN buttons for 5 seconds
26
www.insi
g
nia
p
roducts.com
Getting Started NS-32E859A11/NS-42E859A11
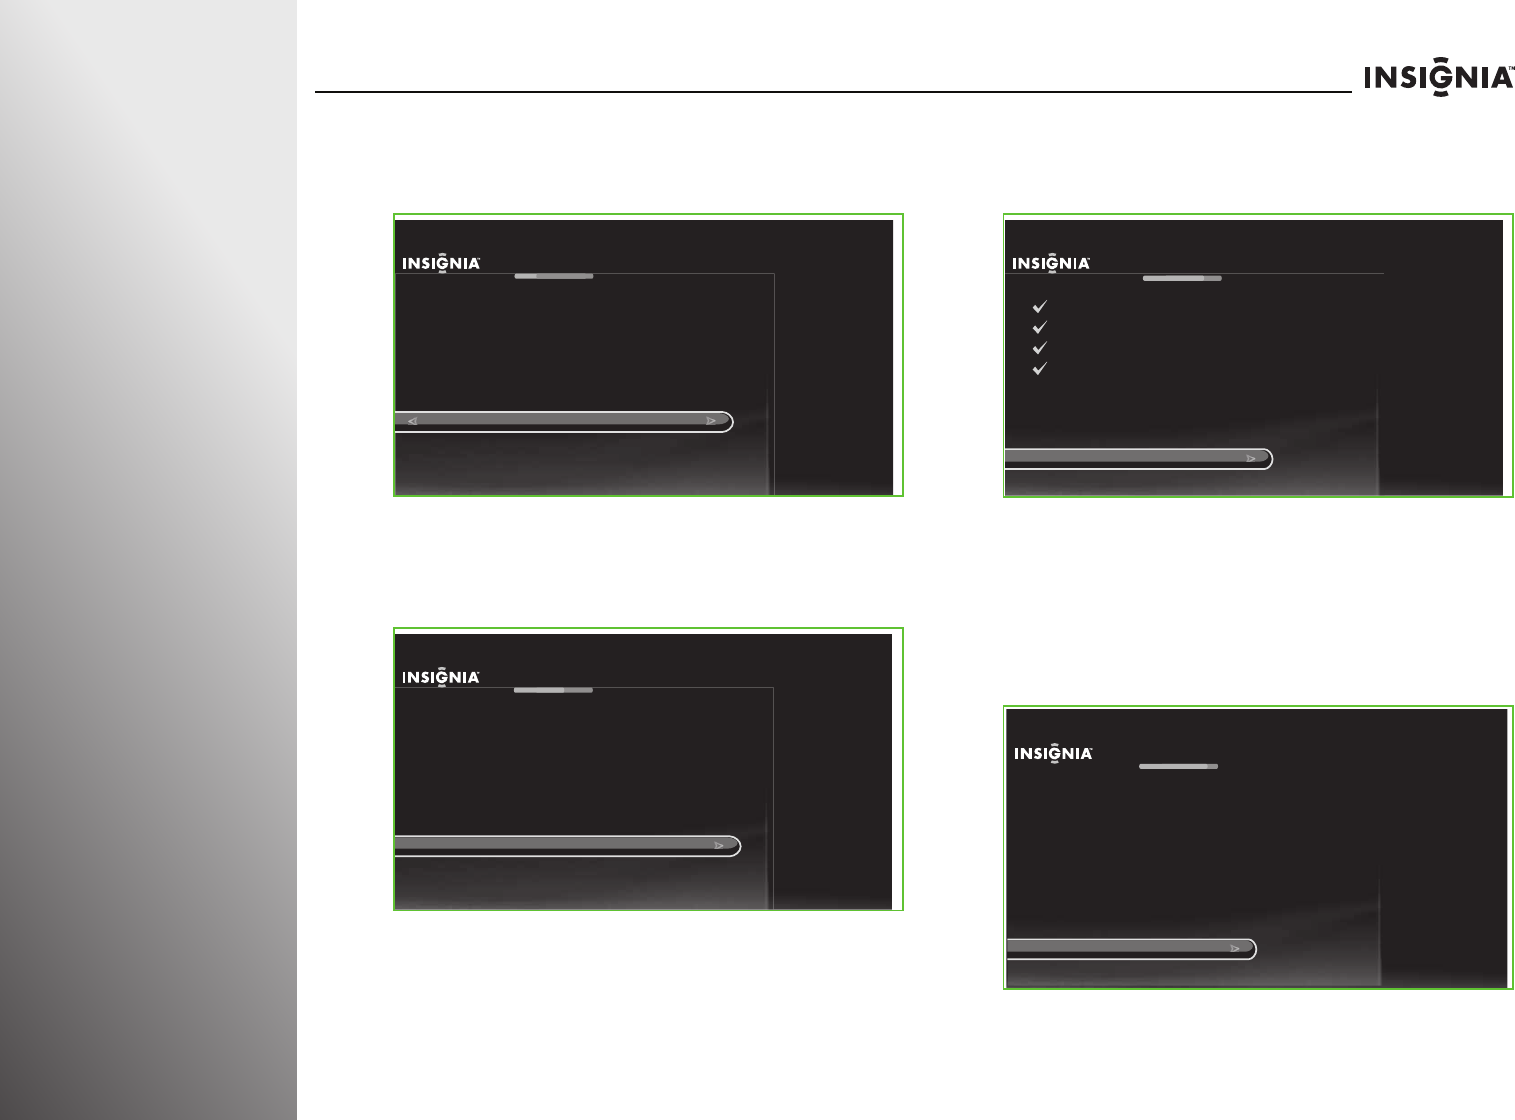
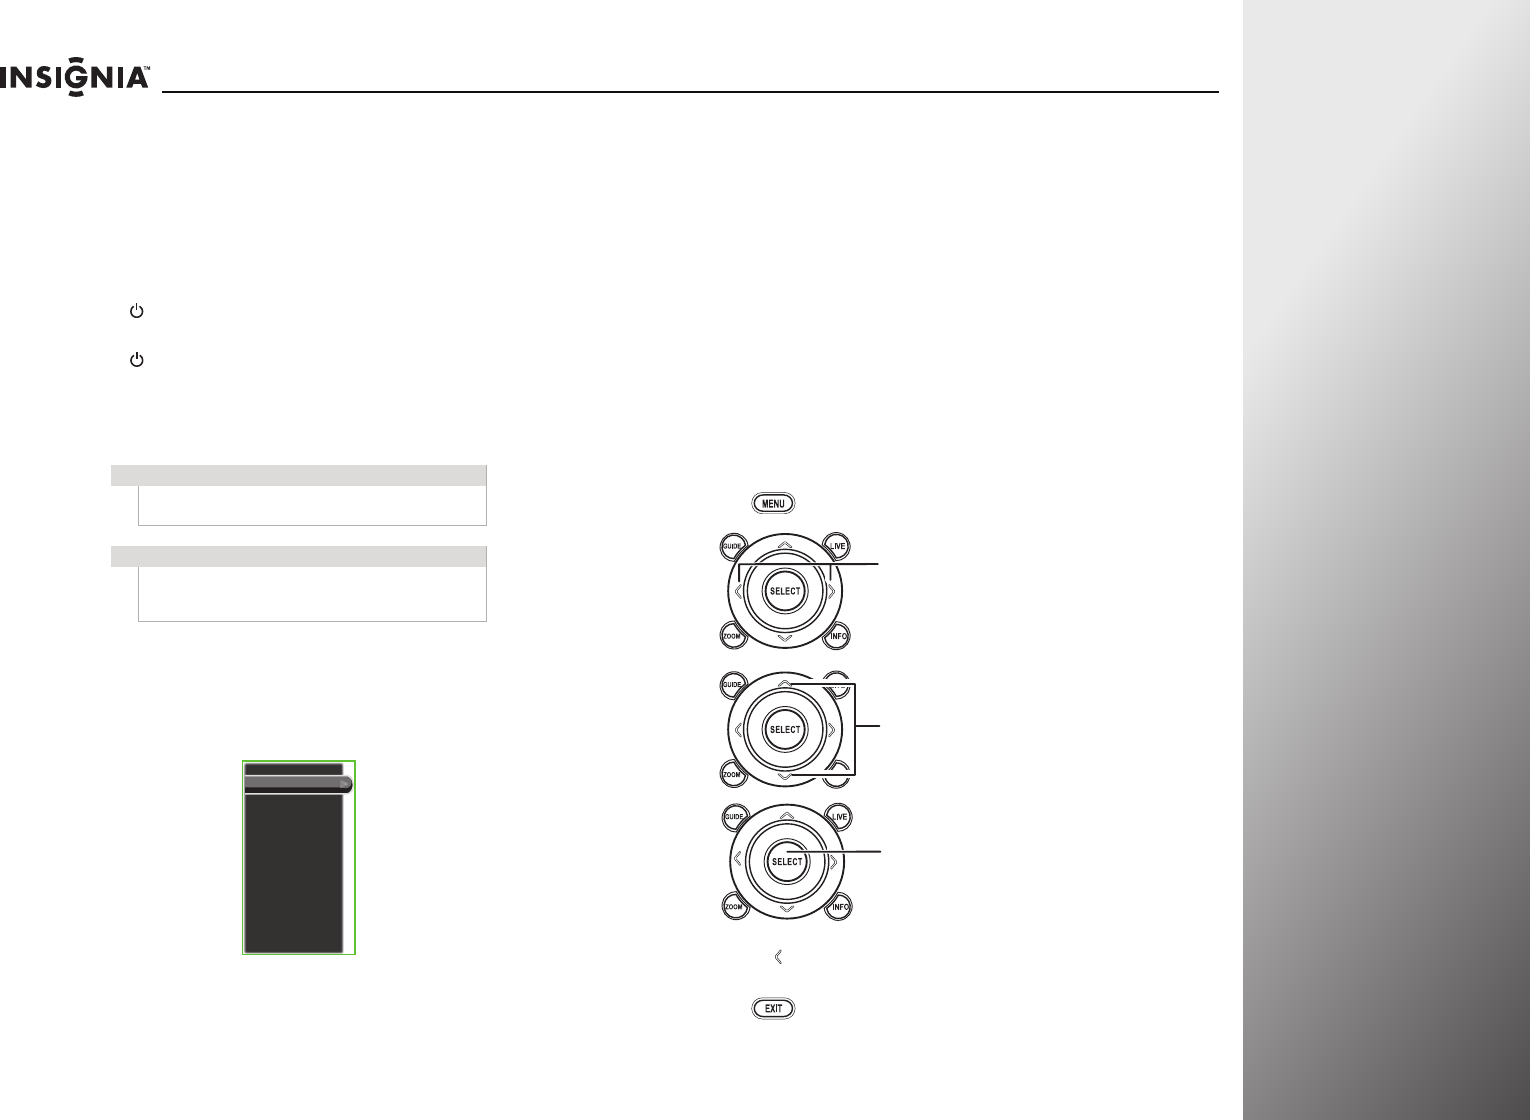
5The Network Setup screen opens. Press S or T to highlight
your network connection type, then press SELECT and
follow the on-screen instructions to set up your network
and run the network speed test.
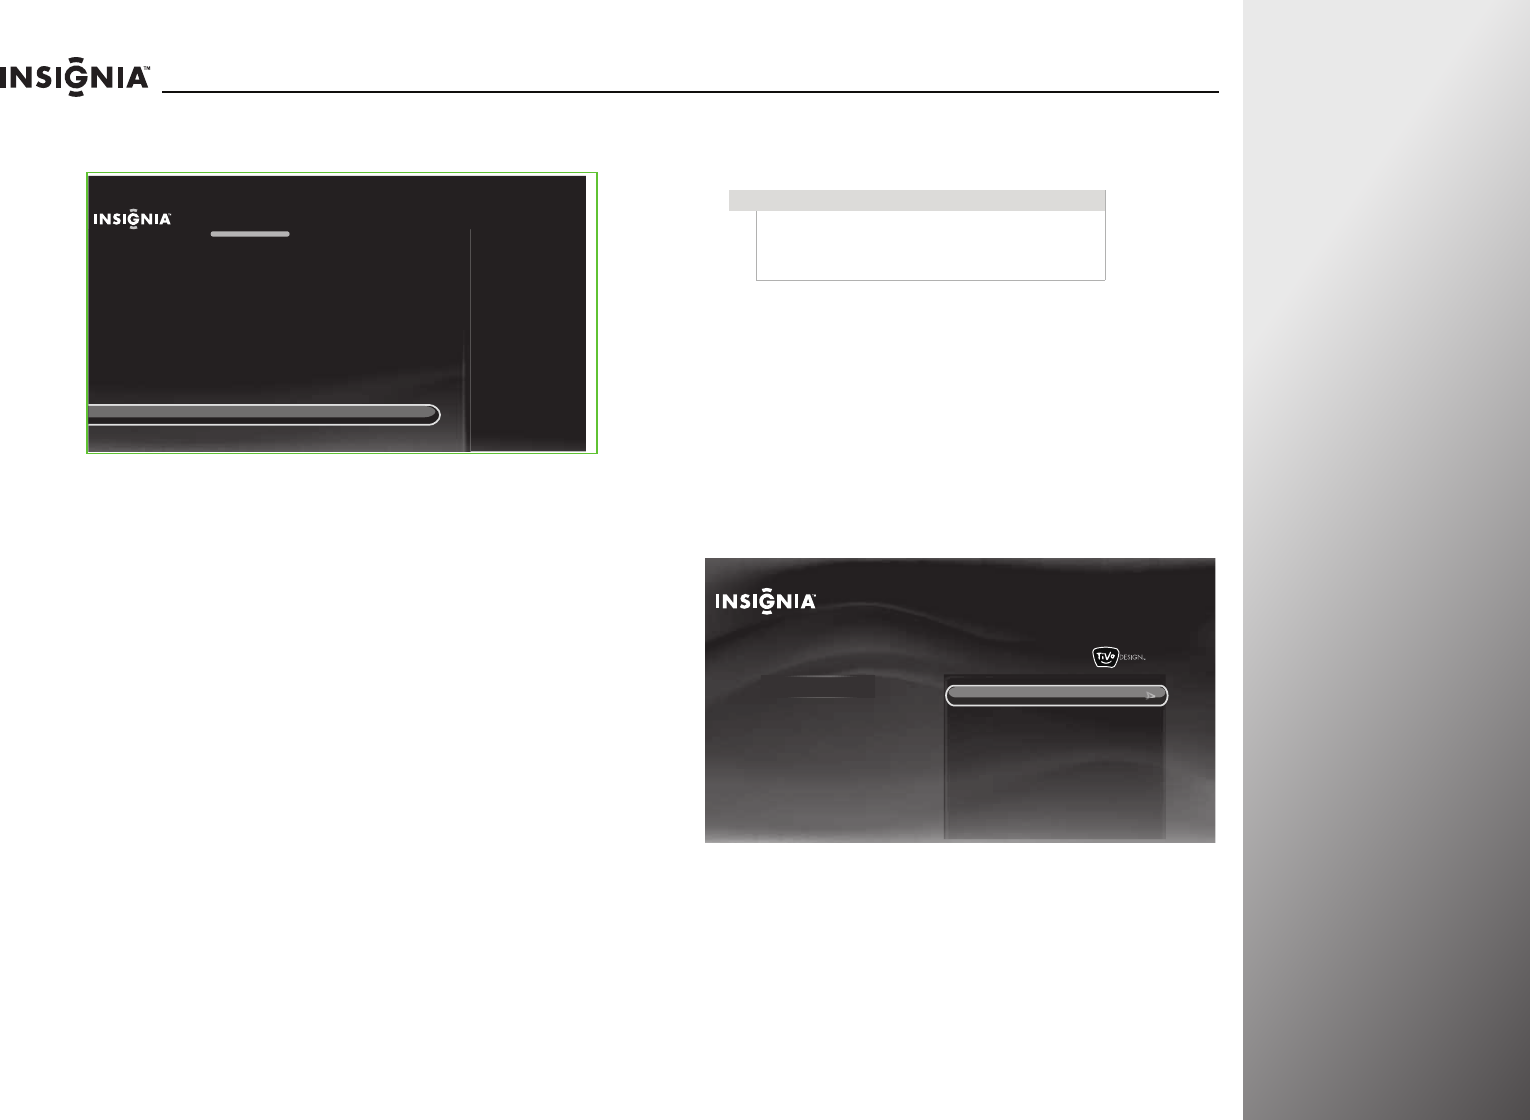
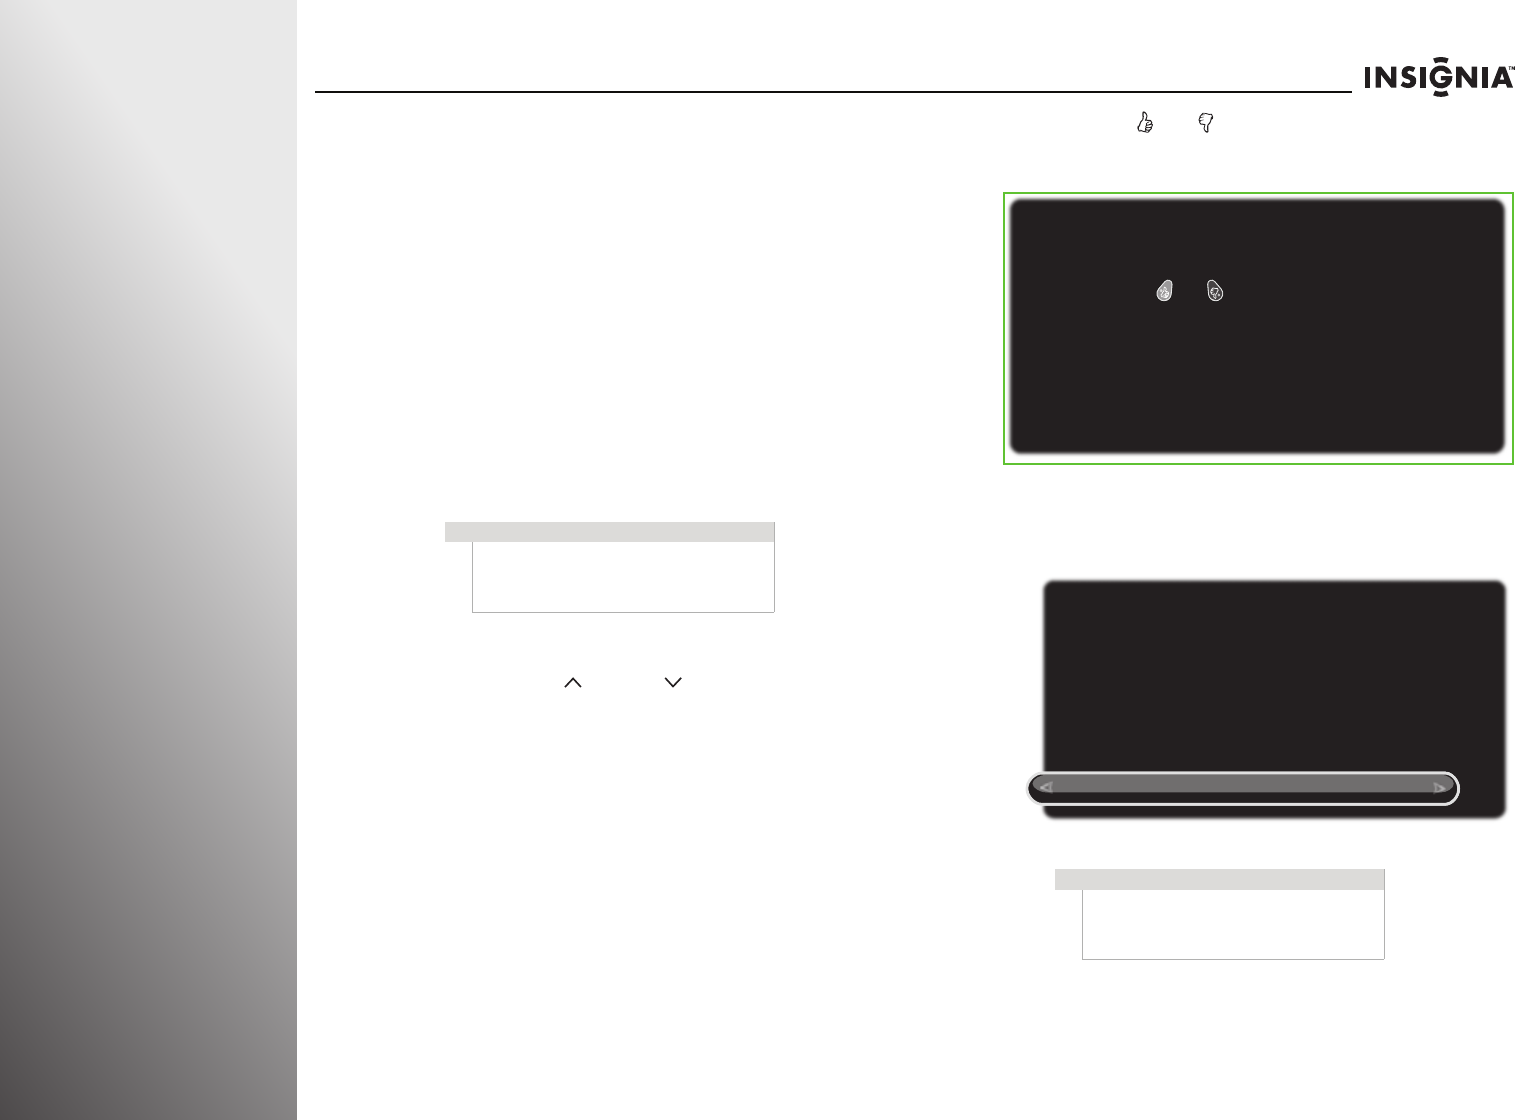
6The Setup Channels screen opens. Press S or T to highlight
your signal type, then press S or T to start the channel
scan. If you use a cable or satellite TV box, you do not need
to scan for channels.
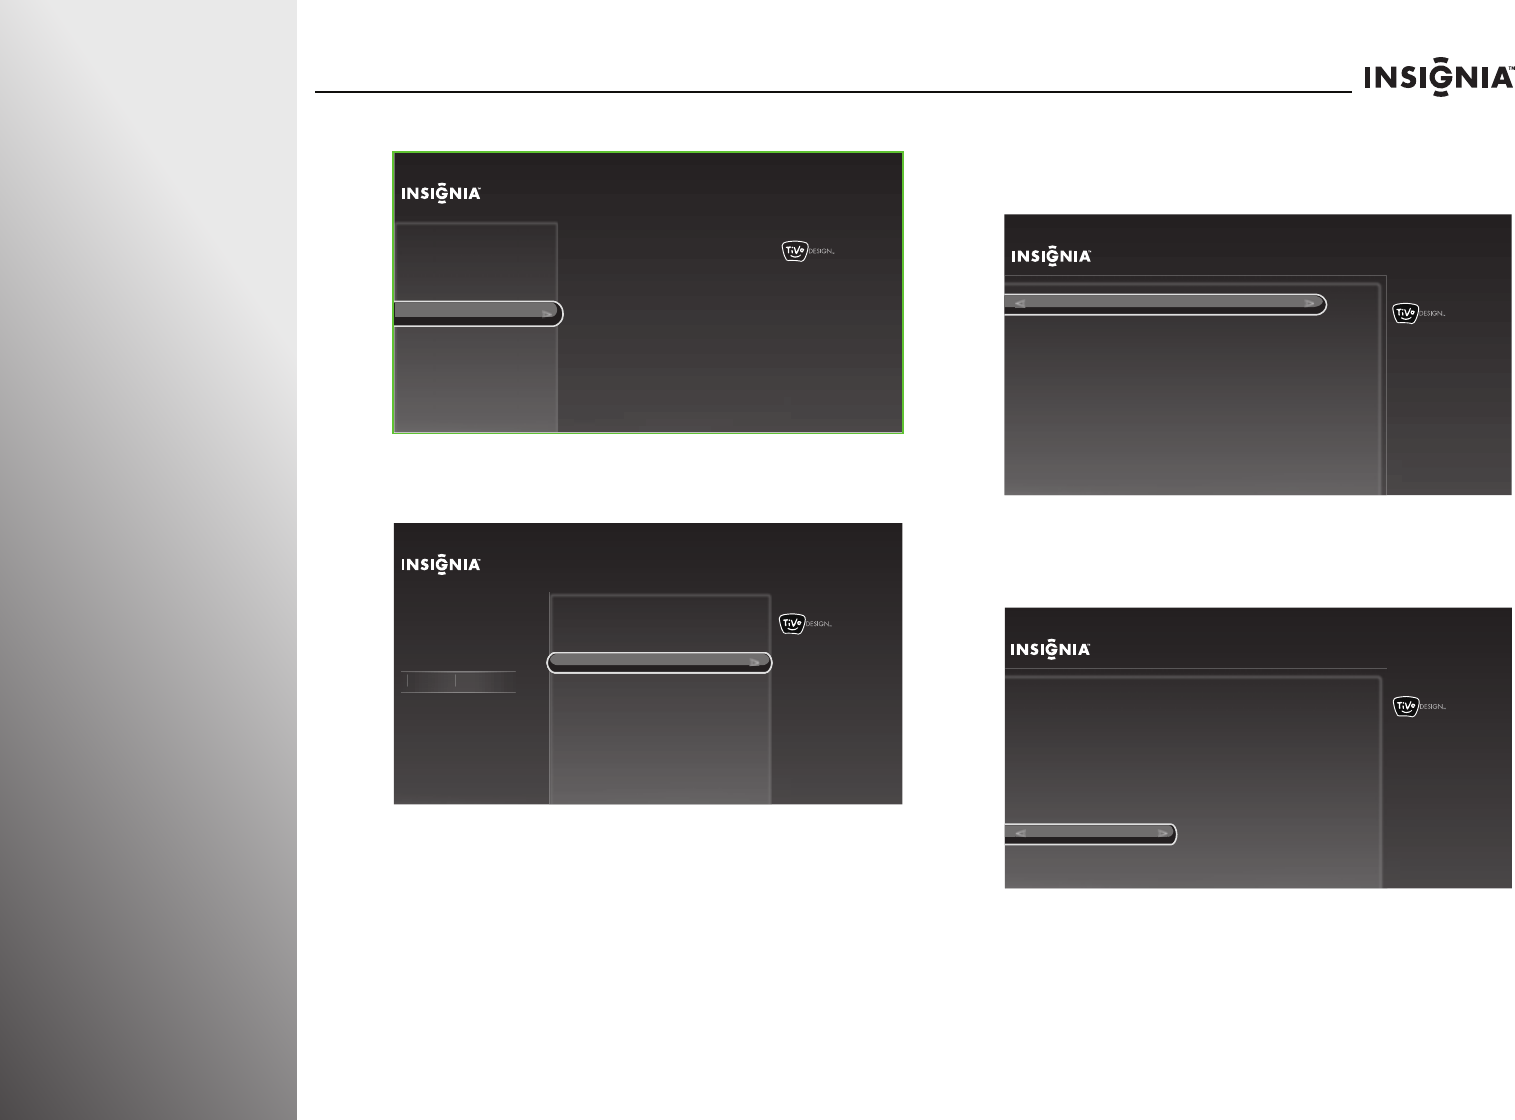
7If you connected to a network in Step 5 and a software
update is available, the Update in Progress screen opens.
Follow the on-screen instructions to install the software
update.
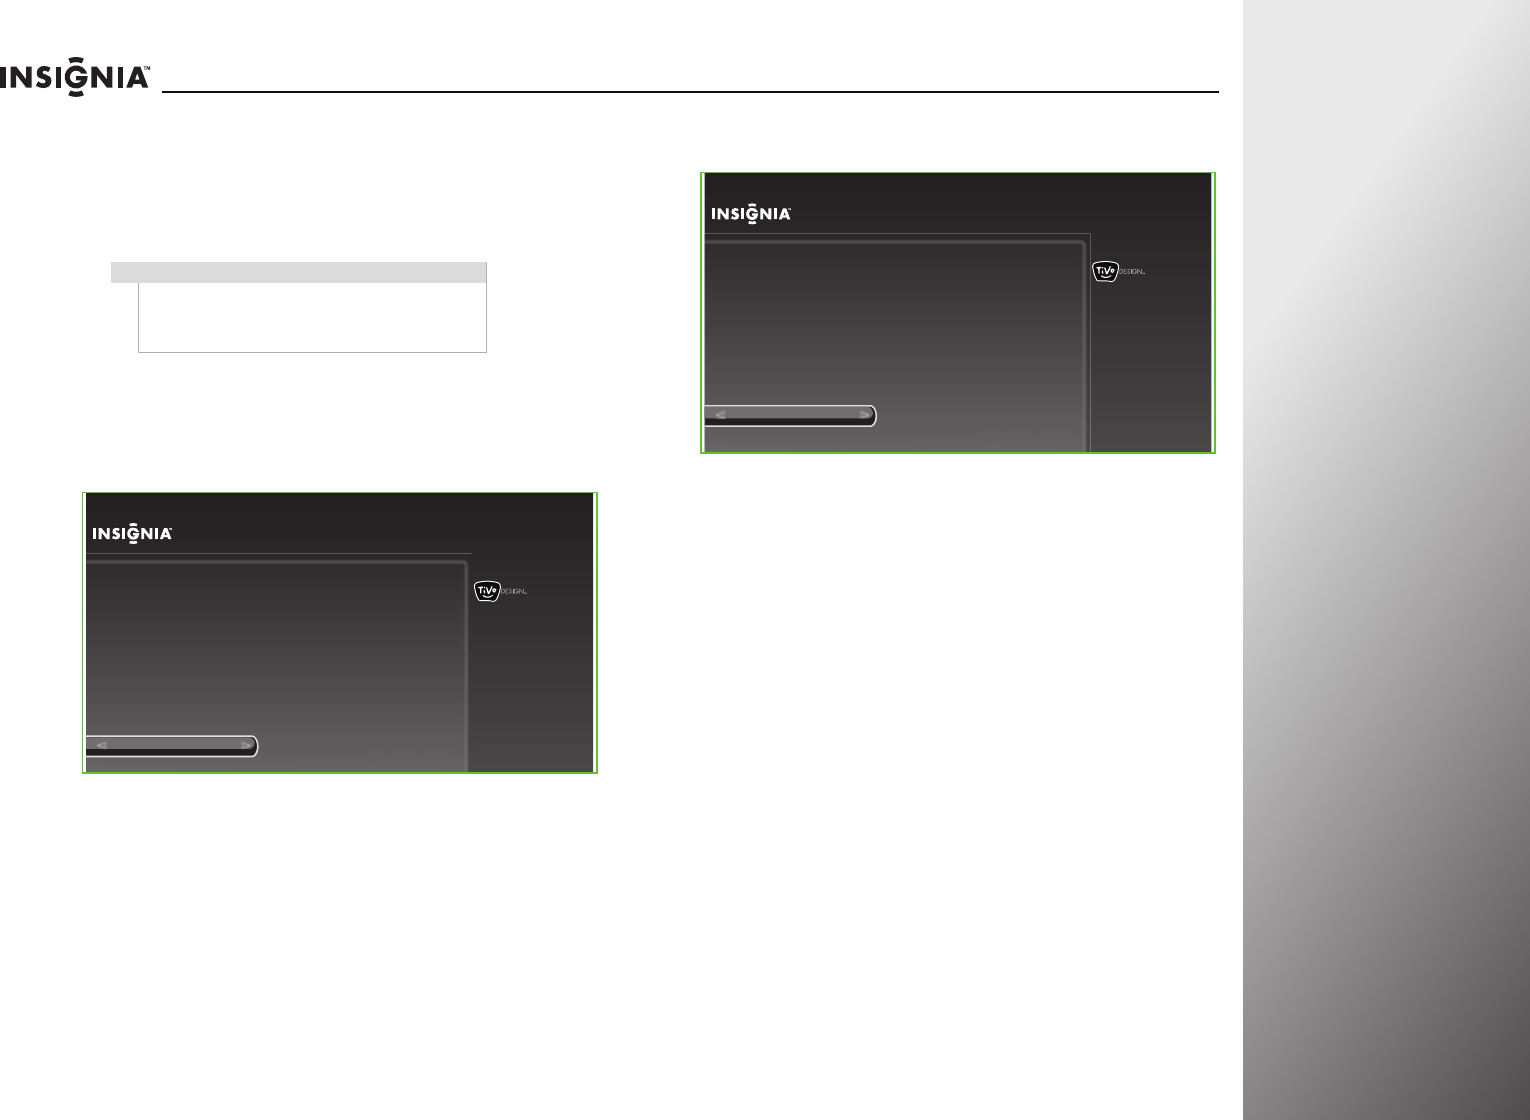
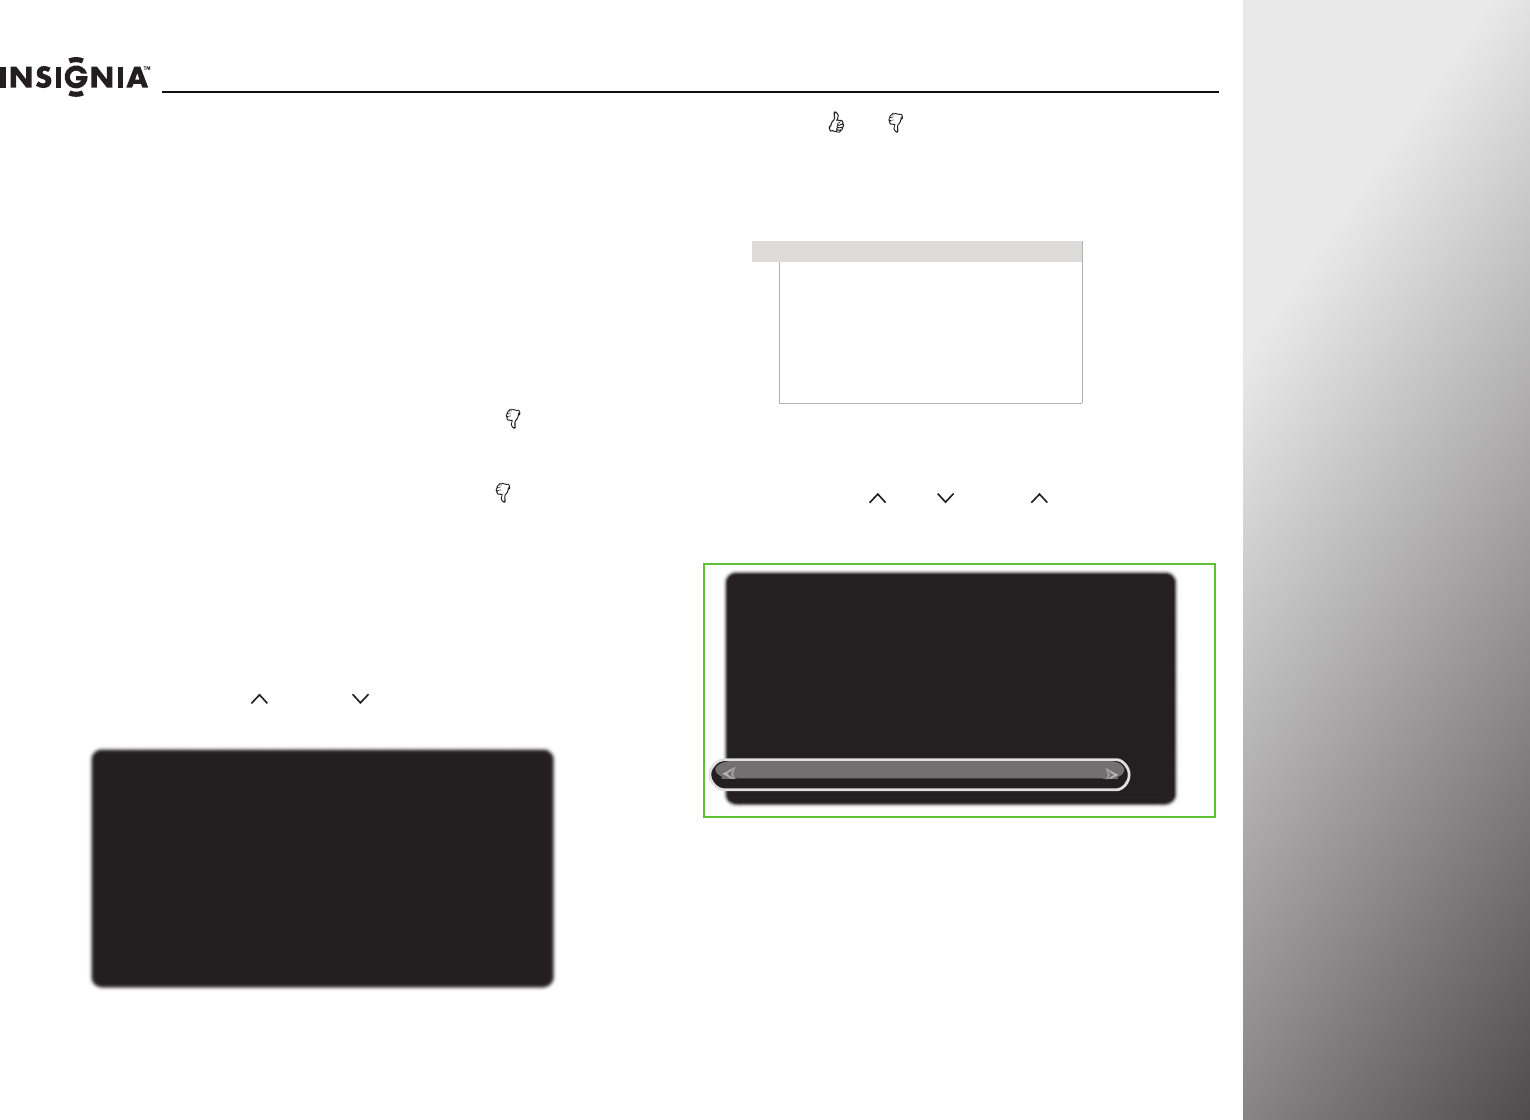
8The Date and Time Setup screen opens. Press S or T to
highlight Use this date and time, then press SELECT.
OR
Press S or T to highlight Set date and time manually,
then press S or T and follow the on-screen instructions to
set your time zone, daylight saving option, and date and
time. The Congratulations screen opens.
Network Setup
Set up wireless network
Use wired Ethernet instead
Skip this step, I don’t have a network
You are about to set up this TV to use your home network.
If you have a wired network, please plug an Ethernet cable into the
TV.
If you have a wireless network, DO NOT plug an Ethernet cable into
the TV.
Set Up Channels
Antenna
Cable
Skip this step, don’t scan for channels
Your TV works with either cable or antenna channels. Select the TV
signal you have connected to this TV. The TV will then begin scanning
for channels, which may take up to 30 minutes.
Note: If you have cable, only scan for channels if you do NOT use a
cable box. If you have a cable box (or satellite box), that box already
has information about your channels, and you can skip this step.
Update In Progress
Please wait...
Preparing
Connecting
Getting info
Disconnecting
Loading info
(Done)
(Done)
(Done)
(Done)
(38% complete)
Date and Time Setup
Use this date and time
Set date and time manually
The current date and time are:
12/12/2010 at 10:00 PM Eastern Standard Time
If the date and time are not correct, you may manually set them.
www.insi
g
nia
p
roducts.com
27
NS-32E859A11/NS-42E859A11 Getting Started
9The Congratulations screen opens. Press TiVo to enjoy your
new TV.
10 If you skipped the channel scan in Step 6 because you are
using a cable or satellite TV box, select the video input
source for your TV. See “Selecting the video input source” on
page 33.
Programming your universal Insignia remote
control
Programming the mode buttons
In R3 comments, Dana said to add “DVR” in the following
paragraph. Vendor says to remove it. Please advise.
You can program the mode buttons on your TV remote control
(DVD, STB, DVR, or AUX) to control the corresponding device
using your TV remote control.
To program the mode buttons:
1Press TiVo. The Home screen opens. Press S or T to select
Settings, then press X or SELECT.
2Press S or T to highlight Settings, then press X or SELECT.
Congratulations!
Press TIVO to continue
You TV is now set up.
Press TIVO at any time to access the TV’s menu and On Demand shows.
Press LIVE at any time to watch television.
Enjoy your new TV!
Note
To use the on-screen setup for your remote control,
the remote control must be in RF mode. For more
information, see “Setting up your Z-Wave remote
control” on page 102.
10:00pm
Home
Settings
Connect to the Internet Settings
Parental Controls
Check for updates
Account & system info
Help
Sleep timer
28
www.insi
g
nia
p
roducts.com
Getting Started NS-32E859A11/NS-42E859A11
3Press S or T to highlight Devices, then press X or SELECT.
4Press S or T to highlight Remote control setup, then press
X or SELECT.
5Press S or T to highlight the mode button on your remote
control that you want to program (DVD, STB, DVR, or AUX),
then press X or SELECT. In R3 comments, Dana said to add
DVR. Vendor says to delet it. Please advise.
6Press S or T to highlight the device you want to control
with the button you are programming, then press X or
SELECT and follow the on-screen instructions.
10:00 PM
Settings
Audio
Channels & providers
Network
Recommendations
Video
Appearance
Input sensor
Remote control setup
TV power On
Reset device settings
INlink HDMI control
Devices
10:00 PM
Settings
Audio
Channels & providers
Devices
Network
Recommendations
Video
Appearance INlink HDMI control
D
evice
s
Set up the remote control to
control the devices that you use
with this TV, like your cable box,
DVR, or DVD player.
Input sensor
Remote control setup
TV power on
Reset device settings
10:00 PM
Remote Control Setup
DVD button
STB button
AUX button
Power button
Volume button
Backlight
Reset all remote settings
Set up the DVD button on your
remote to control your device.
10:00pm
Step 1: Select Device
DVD
VCR
Select the device you would like to control when you press the DVD
button on the remote controls.
Remote Control Setup (DVD button)
www.insi
g
nia
p
roducts.com
29
NS-32E859A11/NS-42E859A11 Getting Started
7Repeatedly press X to highlight the list of brands, press S or
T to highlight the brand of your device, then press SELECT.
Vendor said to move the following note to follow step 8. But
this note applies to brands as well as models. So it seems
that is should stay with the step it first applies to. Please
advise.
8Repeatedly press X to highlight the list of models, press S or
T to highlight the model number of your device, then press
SELECT.
9Follow the on-screen instruction to test the remote control
on the device.
10 Press S or T to highlight Yes, continue, then press SELECT.
The following screen opens.
11 Press S or T to highlight the input jack you want to assign to
this button, then press SELECT. When you press the mode
button, your TV switches to the input source you selected
for the device.
If you do not want to switch to the input source you selected
for the device when you press the mode button, select
I don’t want to automatically switch inputs, then press
SELECT.
Note
You can narrow down the brand or model number
list by entering the first one or two letters or numbers
of your device brand and model number using the
on-screen keyboard.
10:00pm
Step 4: Test Setup
Start test
Now we will test to see if the remote can control your DVD (or other
device).
1. Turn ON the DVD (or other device).
2. Point the remote at the DVD (or other device).
3. The remote will try to turn the device OFF.
Remote Control Setup (DVD button)
10:00pm
Step 4: Test Setup
Yes, continue
No
Did the device turn OFF ?
To confirm that the remote fully controls the DVD (or other device),
turn ON the device and then try the following buttons on the remote control:
1. Play
2. Stop
Does the remote reliably control the device?
Remote Control Setup (DVD button)

30
www.insi
g
nia
p
roducts.com
Getting Started NS-32E859A11/NS-42E859A11
We changed the following graphic based on Dana’s
comments. Vendor wants move HDMI1 up to the first item
in the list and highlight it. Then move Component to just
above VGA. Please advise if additional changes need to be
made.
12 Press SELECT to select OK and exit the remote control
setup.
Programming the button lock
You can use the button lock to assign the power and volume
controls to the device you select, regardless of the operating
mode. For example, if you lock the volume to your DVD player,
then go to TV mode and press a volume button on your
remote, the volume will change on the DVD player instead of
on your TV.
To program the button lock:
1Press TiVo. The Home screen opens. Press S or T to select
Settings, then press X or SELECT.
2Press S or T to highlight Settings, then press X or SELECT.
10:00pm
Step 5: Select Input
Component [Component]
HDMI 1 [HDMI 1]
HDMI 2 [HDMI 2]
HDMI 3 [HDMI 3]
HDMI 4 [HDMI 4]
VGA [VGA]
I don’t want to automatically switch inputs
If the DVD (or other device) is connected to one of the inputs of this TV,
the TV will automatically change to that input when you press the DVD
button on the remote control.
Remote Control Setup (DVD button)
10:00 PM
Setup Complete!
OK
Remote Control Setup (DVD button)
The DVD button on your remote is now successfully set up to control the
DVD (or other device) connected to HDMI 1 [HDMI 1] on this TV.
Note
Before you program the button lock, you need to
program the mode buttons. For more information,
see “Programming the mode buttons” on page 27.
10:00pm
Home
Settings
Connect to the Internet Settings
Parental Controls
Check for updates
Account & system info
Help
Sleep timer

www.insi
g
nia
p
roducts.com
31
NS-32E859A11/NS-42E859A11 Getting Started
3Press S or T to highlight Devices, then press X or SELECT.
4Press S or T to highlight Remote control setup, then press
X or SELECT.
5Press S or T to highlight the button on your remote control
that you want to lock (power or volume), then press X or
SELECT.
6Press S or T to highlight the device you want the locked
button to control, then press X or SELECT to return to the
Remote Control Setup menu or previous screen.
10:00 PM
Settings
Audio
Channels & providers
Network
Recommendations
Video
Appearance
Input sensor
Remote control setup
TV power On
Reset device settings
INlink HDMI control
Devices
10:00 PM
Settings
Audio
Channels & providers
Devices
Network
Recommendations
Video
Appearance INlink HDMI control
D
evice
s
Set up the remote control to
control the devices that you use
with this TV, like your cable box,
DVR, or DVD player.
Input sensor
Remote control setup
TV power on
Reset device settings
Note
You can assign more than one device for the power
button to control (TV is the default selected).
Highlight Use these settings, then press SELECT
after adding the devices.
10:00 PM
Remote control setup
DVD button
STB button
AUX button
Power button
Volume button
Backlight
Reset all remote settings
Set up the power button on the
remote to control your devices.
Current Settings:
AUX, DVD
10:00pm
Setup Power Button
Use these settings
AUX
Set-top box
DVD
Remote Control Setup
Choose all of the devices you want to turn on and off when you press
the power button on the remote control while it is in TV mode.
32
www.insi
g
nia
p
roducts.com
Getting Started NS-32E859A11/NS-42E859A11
Resetting all the remote settings
You can reset the remote control to the factory defaults. This
will clear all the programming and button lock settings.
To reset all the remote settings:
1Press TiVo. The Home screen opens. Press S or T to select
Settings, then press X or SELECT.
2Press S or T to highlight Settings, then press X or SELECT.
3Press S or T to highlight Devices, then press X or SELECT.
4Press S or T to highlight Remote control setup, then press
X or SELECT.
5Press S or T to highlight Reset all remote settings, then
press X or SELECT.
6Press S or T to highlight Yes, reset all remote settings,
then press SELECT.
Vendor said to add step 7, but it is the same as step 6. Is this
correct?
7Press S or T to highlight Yes, reset all remote settings,
then press SELECT.
10:00pm
Home
Settings
Connect to the Internet Settings
Parental Controls
Check for updates
Account & system info
Help
Sleep timer
10:00 PM
Settings
Audio
Channels & providers
Network
Recommendations
Video
Appearance
Input sensor
Remote control setup
TV power On
Reset device settings
INlink HDMI control
Devices
10:00 PM
Settings
Audio
Channels & providers
Devices
Network
Recommendations
Video
Appearance INlink HDMI control
D
evice
s
Set up the remote control to
control the devices that you use
with this TV, like your cable box,
DVR, or DVD player.
Input sensor
Remote control setup
TV power on
Reset device settings
10:00 PM
Remote Control Setup
DVD button
STB button
AUX button
Power button
Volume button
Backlight
Reset all remote settings
Resets the entire
remote settings
to factory defaults.
www.insi
g
nia
p
roducts.com
33
NS-32E859A11/NS-42E859A11 Getting Started
Understanding the basics
Turning your TV on or off
To turn your TV on and off:
1Make sure that the power cord is already connected to a
power outlet.
2Press (power) to turn on your TV. The power indicator LED
turns blue.
3Press (power) again to turn off your TV. Your TV enters
Standby mode and the power indicator turns red or purple,
depending on the TV power on mode you select. For more
information, see “Setting the TV power on mode” on
page 89.
Selecting the video input source
To select the video input source:
1Turn on your TV, then press INPUT on the remote control.
The input source list opens.
2Press S or T to highlight a video input source, then press
SELECT. You can select:
• TV
• HDMI 1
• HDMI 2
• HDMI 3
• HDMI 4
•Component/Composite (to select a component or
composite device)
• VGA
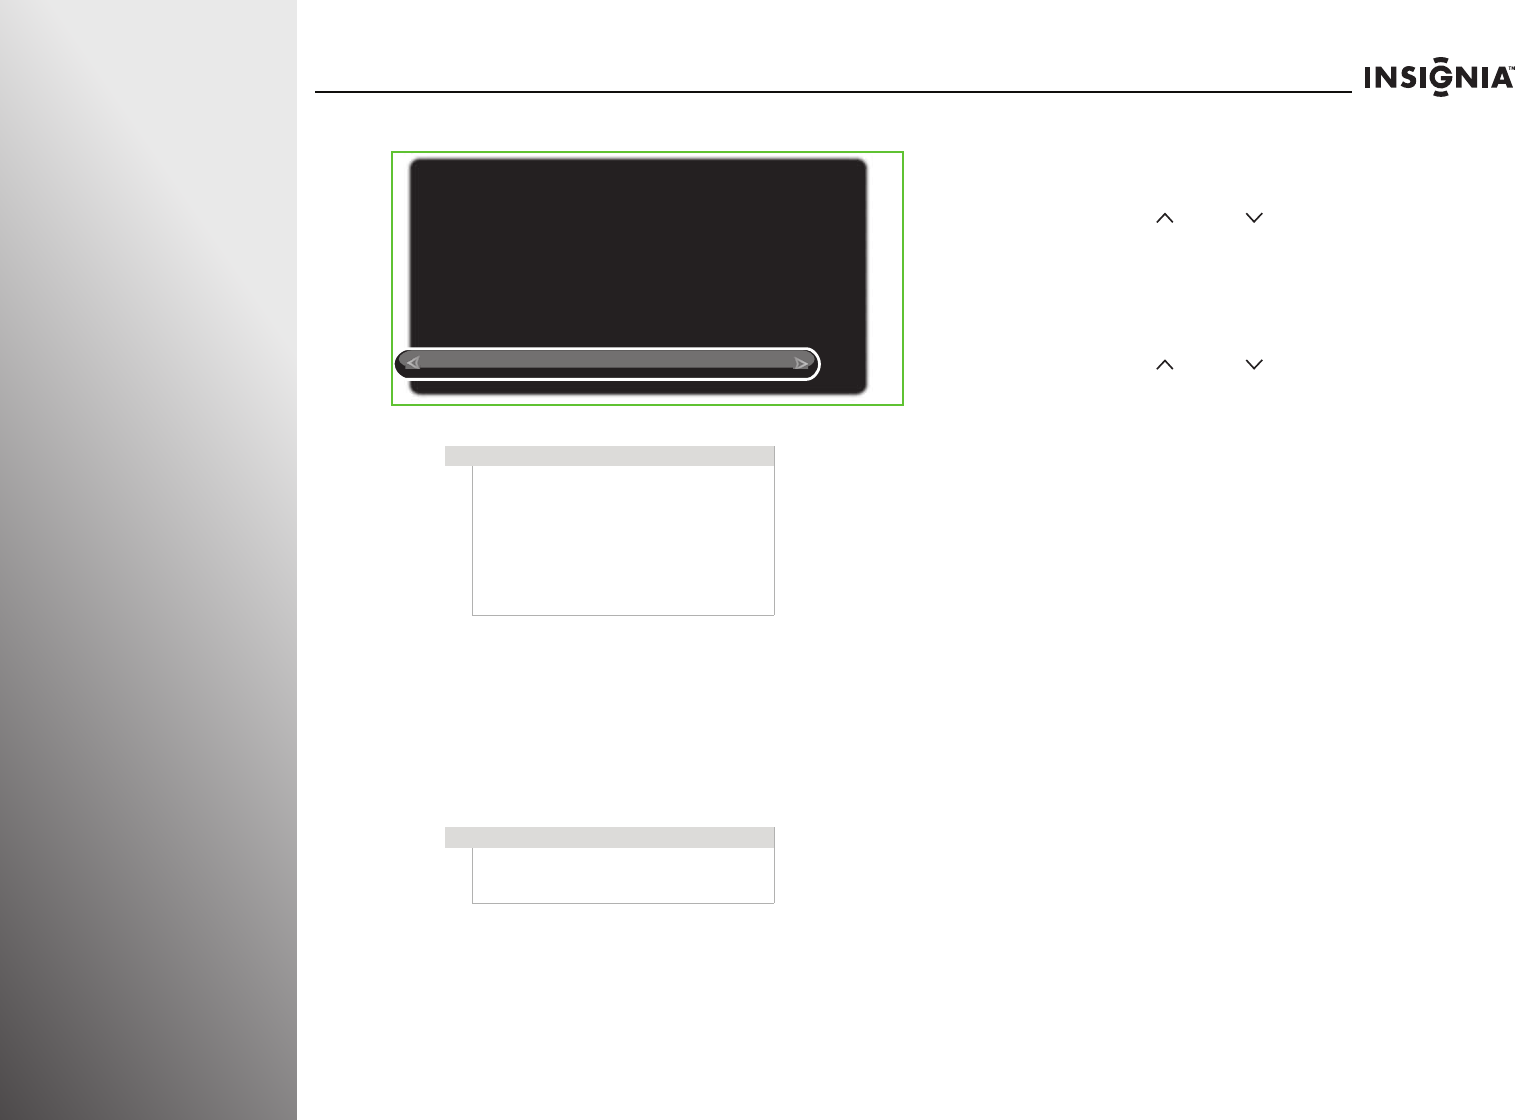
Navigating menus and using the on-screen
keyboard
Navigating the menus
Warning
When your TV is off, power still flows into it. To
disconnect power, unplug the power cord.
Note
If your TV does not detect a signal and you do not
press any buttons for several minutes, your TV goes
into Standby mode automatically.
Component/
Composite
HDMI 1
HDMI 2
HDMI 3
HDMI 4
VGA
TV
Press to open the menu.
Press X to move the cursor on the
screen, adjust a selected item, or
enter a setting.
Press W to move the cursor on the
screen, adjust a selected item, or
return to the previous screen.
Press to select menu items.
Press to confirm your selections or
enter a sub-menu.
Press to return to the previous
screen.
Press to close the menu.
Did you know?
Insignia has a variety of
high-quality speaker
systems for your new TV.

34
www.insi
g
nia
p
roducts.com
Getting Started NS-32E859A11/NS-42E859A11
Using the on-screen keyboard
The keyboard screen lets you create custom labels (names) for
input sources or channels.
To use the on-screen keyboard:
• Press STW or X to highlight a character, then press
SELECT to enter the character in the text entry area.
• Highlight CLR, then press SELECT to clear the text entry
area.
• Highlight DEL, then press SELECT to delete one character
to the left of the cursor in the text entry area.
• Highlight SPC, then press SELECT to add one space to the
right of the cursor in the text entry area.
• Highlight ABC, then press SELECT to change all keyboard
characters to uppercase. The ABC key changes to abc.
• Highlight abc, then press SELECT to change all keyboard
characters to lowercase.The abc key changes to ABC.
• Highlight SYM, then press SELECT to replace the
characters with symbols. The SYM key changes to ABC or
abc, depending on the character mode you were in
before you entered symbol mode.
To use the remote control shortcuts:
• Press on your remote control to add one space to the
right of the cursor in the text entry area.
• Press on your remote control to delete one character
to the left of the cursor in the text entry area.
• Press on your remote control to switch to ABC mode.
• Press on your remote control to switch to abc mode.
• Press number buttons on your remote control to enter
numbers in the text entry area.
Selecting a channel
To select a channel:
• Press CHS or CHT to go to the next higher or lower
channel in the channel list.
• Press the number buttons to enter the channel number
you want, then wait for the channel to change or press
SELECT to immediately change the channel.
• To select a digital sub-channel, press the number buttons
to select the main digital channel, press — (dash), then
press the number button for the sub-channel. Wait for the
channel to change, or press SELECT to immediately
change the channel. For example, to tune to channel 5-1,
press 5, — (dash), then 1.
• Press LAST to go to the last viewed channel.
• Press FAV to open the favorite channel list, press S or T to
highlight a channel, then press SELECT.
10:00 PM
Name HDMI 4
SpaceShortcuts: Delete Uppercase Lowercase Enter numbers
Enter a name for the input and then press RIGHT to choose Done entering name.
HD TV__
Done entering name
Cancel
Note
If a list has more than one page, press S
or T to scroll through the pages.

www.insi
g
nia
p
roducts.com
35
NS-32E859A11/NS-42E859A11 Getting Started
Adjusting the volume
To adjust the volume:
• Press VOL+ or VOL– to increase or decrease the volume.
• Press MUTE to turn off the sound. Press MUTE again to
turn the sound back on.
Displaying additional information
To view channel information:
• Press INFO to view an information banner. The information
banner shows the current program information such as
channel number, video input source, and resolution.
•Digital channel information—Displays the channel
number, station name, channel label, broadcast
program name, TV rating, signal type, audio
information, resolution, CC mode, current time, and
current program start and end times.
•Analog channel information—Displays channel
number, channel label (if available), signal type, audio
information, and resolution.
• Press GUIDE to show the digital program guide, which
may list available programs, program times, and program
summaries, depending on the information provided by the
broadcaster.
102
www.insi
g
nia
p
roducts.com
Appendix NS-32E859A11/NS-42E859A11
Setting up your Z-Wave
remote control
Per Dana, no additional changes should be made to the
Z-Wave remote control section.
The remote control that came with your TV is different from a
traditional IR remote control. Using Z-Wave technology, your
remote control allows RF communication with your TV. You do
not have to point the remote control toward the remote
control sensor on the front of your TV.
Adding your remote control to the TV
Z-Wave network
To turn on the RF communication between your TV and the
remote control, you have to add the remote control to the
Z-Wave network first.
To add your remote control to your TV Z-Wave network
(TV as Primary Controllor):
1Press and hold VOL and VOL on the front of your TV at
the same time. The Set up a New Remote Control screen
opens.
2Press and hold and on the remote control for about
five seconds. The Remote Control Setup Complete screen
opens and the remote control LED blinks four times.
3Press SELECT to complete the setup. You can now use the
RF communication between the remote control and your
TV.
Note
The remote control’s basic command is set to
Simple AV Control command class. It is used
to control an AV device in a Z-Wave network
which is used for IR remote replacement.
Note
To add other Z-Wave devices to your TV
Z-Wave network, perform Step 1 above, then
follow the instructions in the user manual of
that device to complete the setup.
Set up a New Remote Control
Hold down the and buttons at the same
time for 5 seconds to set up your new remote control
to work with this TV.
Press any button on the TV to cancel.
Remote Control Setup Complete
OK
The TV now recognizes your new remote control.
www.insi
g
nia
p
roducts.com
103
NS-32E859A11/NS-42E859A11 Appendix
Toggling between IR and RF communication
Once your remote control is added to the TV ZWave network,
you can use Z-Wave RF communication to control your TV.
However, you can also switch to IR communication, which
requires you to point the remote control toward the remote
control sensor when you try to control your TV.
RF communication with your TV does not require you to point
the remote control toward the remote control sensor on the
front of your TV. Also your remote control and TV can talk to
each other which will help with setting up your Insignia
Universal remote to work with other home theater devices.
To toggle between IR and RF communication:
• If you are using RF communication, press and hold and
EXIT at the same time. The remote control switches to IR
mode and the LED blinks four times.
• If you are using IR communication, press and hold and EXIT
at the same time. The remote control switches to RF mode
and the LED blinks twice.
Removing your remote control from the TV
Z-Wave network
To remove your remote control from the TV Z-Wave
network (TV as Primary Controllor):
1Press and hold VOL and VOL on the front of your TV at
the same time. The Remove a Z-WAVE Device screen opens.
2Press and hold and on the remote control for about five
seconds. The Z-Wave Device Removed screen opens.
3Press SELECT to complete the removal. The remote control
is removed from the TV Z-Wave network, and RF
communication is not available.
Resetting your TV Z-Wave network
To reset your TV Z-Wave network:
1Press and hold VOL , VOL , and CH on the front of
your TV at the same time. The Reset Z-Wave Network? screen
opens.
2Press S or T to highlight Reset Z-Wave Network, then press
SELECT.
Remove a Z-WAVE Device?
Press any button on the TV to cancel.
Go to your Z-Wave device and follow the instructions to
remove it from your Z-Wave network.
Note
• To enable RF communication, you have
to add the remote control to the Z-Wave
network again.
• To remove other Z-Wave devices from
your TV ZWave network, perform Step 1
above, then follow the instructions in
the user manual of that device to
complete the removal.
Reset Z-Wave Network?
Cancel
Reset Z-Wave Network
Warning: this will reset your Z-Wave network, and any
devices you wish to use will need to be added again.
104
www.insi
g
nia
p
roducts.com
Appendix NS-32E859A11/NS-42E859A11
3Press SELECT to complete the reset.
Managing other Z-Wave network (other
Z-Wave device as Primary Controller)
Your TV can be operated in another Z-Wave network with
Z-Wave certified devices from other manufacturers or other
applications. The different listening nodes within the network
can act as repeaters regardless of vendor.
To add your TV to other Z-Wave network:
• Refer to the user manual of the Z-Wave device (Primary
Controller) for programming information.
• When the Z-Wave device is in programming (setup)
mode, press CH and CH on the TV at the same time
to add your TV to the Z-Wave network.
To remove your TV from other Z-Wave network:
• Refer to the user manual of the Z-Wave device (Primary
Controller) for programming information.
• When the Z-Wave device is in programming (setup)
mode, press CH and CH on the TV at the same time
to remove your TV the Z-Wave network.
Z-Wave Terminology
Primary Controller—This is the main device used to set up
and control your Z-Wave network. There can only be one
primary controller, and it must be used to add or delete
devices. A primary controller can be a portable device like a
hand-held remote control, a static controller (permanently
installed and never moved), a Z-Wave enabled PC, or a Z-Wave
enabled Ethernet router/bridge.
Secondary Controller—The Z-Wave network supports
multiple controllers so you can use additional Z-Wave remotes
throughout the home. If the secondary controller is the same
brand and model as the primary, it will have all of the same
capabilities as the primary with one exception; the secondary
controller can not be used to add or delete devices.
Home Control Network—Your controllers and every Z-Wave
device you have added with the primary controller are linked
together into a wireless network. Each device in your network
has a unique address assigned to it and cannot be activated by
your neighbor’s Z-Wave controller.
Node/Device—Node is the technical term used to describe a
Z-Wave device in your home control network. The terms
“Node” and “Device” both refer to an individual Z-Wave
enabled device and are interchangeable within context of
instructions.
Notes on Z-Wave network management
• Adding a node or device can also be referred to as including
a node or device. Removing a node or device can also be
referred to as excluding or deleting a node or device.
Note
After resetting your TV Z-Wave network, to
use your remote control, you have to switch
to IR communication or add the remote
control to the TV Z-Wave network again to
enable RF communication.
For more information, see “Toggling between
IR and RF communication” on page 103 or
“Adding your remote control to the TV
Z-Wave network” on page 102.
Note
To setup your Z-Wave network with other
devices, refer to the user manual of the
devices for more information.
Z-Wave Network Reset
OK
Your Z-Wave network has been successfully reset. Any
devices you wish to use on the Z-Wave network must
be added again.
www.insi
g
nia
p
roducts.com
105
NS-32E859A11/NS-42E859A11 Appendix
• Every Z-Wave enabled device acts as a signal repeater and
multiple devices result in more possible transmission
routes which helps eliminate “RF dead-spots.”
Advanced remote control
programming
Programming a learned button
Your remote control includes a learning feature that lets you
add functions that are unique to your home entertainment
devices (such as VCR tracking up or down). However, there are
some considerations to keep in mind:
• Your original remote controls must be in working order for
learning to work correctly.
• Learned buttons are mode-specific, so each button can store a
unique function for each mode.
• Do not use the mode buttons or TiVo button.
• Certain device functions are not learnable, including
multi-frequency types, some high-frequency functions, and
other unusual formats.
• When setting up learned buttons, avoid high levels of
ambient light such as natural sunlight or energy efficient
fluorescent lights.
To program a learned button:
1Press and hold the A and D buttons at the same time until
the LED blinks twice, then release.
2Enter 9 7 5. The LED blinks twice.
3Press the mode button you want to learn functions on, then
press the button on the Insignia remote you want to
program.
4Place your Insignia remote control head-to-head (about 2"
apart) from your original remote control (the one that came
with the device).
5On the original remote, press and hold the button to be
learned. Continue holding the button on the original remote
until the Insignia’s LED blinks twice.
6Repeat Step 3 through 5 to program another button. After
you have completed programming all the buttons you want,
press and hold SELECT until the LED blinks twice to save all
data learned.
Deleting a single learned button
This process returns the button to its original programming for
the mode you select. You can also delete learned programming
by teaching a different function to the button (see
“Programming a learned button” on page 105).
To delete a single learned button:
1Press and hold the A and D buttons at the same time until
the LED blinks twice, then release.
2Enter 9 7 6. The LED blinks twice.
Note
To use the on-screen setup for your remote control,
the remote control must be in RF mode. For more
information, see “Setting up your Z-Wave remote
control” on page 102.
Note
Have your original remote controls handy before
programming learning.
Notes
• If more than 10 seconds pass between button
presses, the remote control exits programming.
• If the LED displays one long flash instead,
replace the batteries. If the remote control
continues to display one long flash, the remote
control cannot learn a new button.
Notes
• If more than 10 seconds pass between button
presses, the remote control exits programming.
• If the LED displays one long flash instead,
replace the batteries. If the remote control
continues to display one long flash, the remote
control cannot learn a new button.
106
www.insi
g
nia
p
roducts.com
Appendix NS-32E859A11/NS-42E859A11
3Press the mode button that you want to remove the
learned button from, then press the button containing the
learned function to be deleted, twice. The LED blinks twice
and programming ends.
Deleting all learned buttons in a specific
mode
To delete all learned buttons in a specific mode:
1Press and hold the A and D buttons at the same time until
the LED blinks twice, then release.
2Enter 9 7 6. The LED blinks twice.
In a previous review, Dana said to add “DVR” in the
following step. Vendor wants to delete it. Please advise.
3Press the mode button twice (for example, DVD, STB, DVR,
or AUX) to clear all the learned buttons for that mode. The
LED blinks twice and programming ends.
Programming macros
Your can program any button (except the TiVo button) on your
remote control with a macro function. Each button can be set
up to perform a pre-programmed set of sequential button
presses with the press of a single button. You can use a macro
to control a home theater operation, to set a favorite channel,
or for other functions you want to control with one button
press. Each macro button can hold up to 32 button presses.
You can program two types of macros:
• Mode-independent—Works in any mode.
• Mode-dependent—Works in a specific mode.
To program a mode-independent macro:
1Press and hold the A and D buttons at the same time until
the LED blinks twice, then release.
2Enter 9 9 5. The LED blinks twice.
3Press the button you want to assign to a macro.
4Enter the series of commands you want the macro to
execute (up to 32 commands).
5Press and hold SELECT until the red LED blinks twice, then
release.
When you press the preset macro button, the remote sends
the series of commands you have entered, regardless of
what mode you are in. For example, you could program a
macro button to turn on both your TV and cable box and
select a particular channel.
To program a mode-dependent macro:
1Press the device mode button (DVD, STB, DVR, or AUX).
2Press and hold the A and D buttons at the same time until
the LED blinks twice, then release.
3Enter 9 7 8. The LED blinks twice.
4Press the button you want to assign to a macro.
5Enter the series of commands you want the macro to
execute (up to 32 commands).
6Press and hold SELECT until the red LED blinks twice, then
release.
When you press the macro button, the remote sends the
series of commands you have entered, but only if you are in
the mode you selected in Step 1. For example, you could
program the macro button to turn on both your TV and
cable box and select a particular channel, but only if you
are in TV mode. If you are in DVD mode, this button does
not execute the macro you set up in TV mode.
Notes
• If more than 10 seconds pass between button
presses, the remote control exits programming.
• If the LED displays one long flash instead,
replace the batteries. If the remote control
continues to display one long flash, the remote
control cannot learn a new button.
Note
Programming a new macro over an existing one
erases the original macro.
Note
To clear the macro, repeat Steps 1 through 5, but do
not enter a series of commands at Step 4.
Note
To clear the macro, repeat Steps 1 through 6, but do
not enter a series of commands at Step 4.
www.insi
g
nia
p
roducts.com
107
NS-32E859A11/NS-42E859A11 Appendix
Controlling the remote
control backlight
Your remote control has a backlight that can turn on when you
press a button. You can set the amount of time your want the
backlight to stay on before it automatically turns off.
Turning the remote control backlight on or
off
To turn your remote control backlight on or off:
1Press and hold the A and D buttons at the same time until
the power LED blinks twice, then release.
2Enter 9 7 2. If you are turning on the remote control
backlight, the power LED blinks twice. If you are turning off
the remote control backlight, the power LED blinks four
times.
Setting the remote control backlight delay
To set the remote control backlight delay:
1Press TiVo. The Home screen opens. Press S or T to select
Settings, then press X or SELECT.
2Press S or T to highlight Settings, then press X or SELECT.
3Press S or T to highlight Devices, then press X or SELECT.
4Press S or T to highlight Remote control setup, then press
X or SELECT.
10:00pm
Home
Settings
Connect to the Internet Settings
Parental Controls
Check for updates
Account & system info
Help
Sleep timer
10:00 PM
Settings
Audio
Channels & providers
Network
Recommendations
Video
Appearance
Input sensor
Remote control setup
TV power On
Reset device settings
INlink HDMI control
Devices
10:00 PM
Settings
Audio
Channels & providers
Devices
Network
Recommendations
Video
Appearance INlink HDMI control
D
evice
s
Set up the remote control to
control the devices that you use
with this TV, like your cable box,
DVR, or DVD player.
Input sensor
Remote control setup
TV power on
Reset device settings
108
www.insi
g
nia
p
roducts.com
Appendix NS-32E859A11/NS-42E859A11
5Press S or T to highlight Backlight, then press X or
SELECT. Dana said not to change the following graphic.
6Press S or T to highlight the amount of time you want the
backlight to stay on, then press X or SELECT.
10:00 PM
Remote control setup
DVD button
STB button
AUX button
Power button
Volume button
Channel buttons
Backlight
Reset all remote settings
Set the delay before the
backlight on the remote
control automatically turns off.
Current Settings:
3 seconds
10:00 PM
Setup Backlight
3 seconds
2 seconds
1 seconds
4 seconds
5 seconds
6 seconds
7 seconds
8 seconds
9 seconds
10 seconds
Remote Control Setup
Set the dealy before the backlight on the remote control automatically turns off.

109
Legal Notices
Legal notices . . . . . . . . . . . . . . . . . . . . . . . . . . . . . . . . . . . . . . . . . . . . . . . . . . . . . . . . 110
Two-year limited warranty . . . . . . . . . . . . . . . . . . . . . . . . . . . . . . . . . . . . . . . . . . . 113
110
www.insi
g
nia
p
roducts.com
Legal Notices NS-32E859A11/NS-42E859A11
Legal notices
FCC Part 15
This device complies with Part 15 of the FCC Rules. Operation of this product is subject
to the following two conditions: (1) this device may not cause harmful interference,
and (2) this device must accept any interference received, including interference that
may cause undesired operation.
This equipment has been tested and found to comply within the limits for a class B
digital device, pursuant to Part 15 of the FCC Rules. These limits are designed to
provide reasonable protection against harmful interference in a residential
installation. This equipment generates, uses, and can radiate radio frequency energy
and, if not installed and used in accordance with the instructions, may cause harmful
interference to radio communications. However, there is no guarantee that
interference will not occur in a particular installation. If this equipment does cause
harmful interference to radio or television reception, which can be determined by
turning the equipment off and on, the user is encouraged to try to correct the
interference by one or more of the following measures:
• Reorient or relocate the receiving antenna.
• Increase the separation between the equipment and receiver.
• Connect the equipment into an outlet on a circuit different from that to which
the receiver is connected.
• Consult the dealer or an experienced radio/TV technician for help.
FCC ID Number Remote: MG38881-R
FCC ID Number TV: (working on getting this)
Model Number: NS-32E859A11 & NS-42E859A11
FCC warning
Changes or modifications not expressly approved by the party responsible for
compliance with the FCC Rules could void the user’s authority to operate this
equipment.
DHHS and FDA safety certification
• This product is made and tested to meet safety standards of the FCC,
requirements and compliance with safety performance of the U.S. Department
of Health and Human Services, and also with FDA Radiation Performance
Standards 21 CFR Subchapter J.
RSS 310 statement
To reduce potential radio interference to other users, the antenna type and its gain
should be so chosen that the equivalent isotropically radiated power (e.i.r.p.) is not
more than that permitted for successful communication.
Per Dana, need to add the open source information. She is
currently working with the Legal department to implement.
HDMI
HDMI, the HDMI logo, and High-Definition Multimedia
Interface are trademarks or registered trademarks of
HDMI Licensing LLC.
Audyssey
Audyssey Dynamic Volume™
Energy Star
To meet Energy Star requirements, keep TV settings at the
factory default settings.
SRS TruSurround HD
is a trademark of SRS Labs, Inc. TruSurround HD technology is
incorporated under license from SRS Labs, Inc.
SRS TruSurround HD™ creates an immersive, feature-rich
surround sound experience from two speakers, complete with
rich bass, high frequency detail and clear dialog.
Disclaimer
This Insignia product may contain content and/or services that belong to a third party.
Such third party content and/or service may only be used in compliance with the
terms and conditions that govern such use. Unless expressly authorized by the
applicable third party's terms of use, you may not modify, copy, republish, upload,
post, transmit, translate, sell, create derivative works, exploit, or distribute in any
manner or medium any third party content or service displayed through the Insignia
product.
All third party content or service is provided "as is." Third party content or service may
be terminated or interrupted at any time. Insignia has no control over the networks
and transmission facilities that third party content and services are transmitted
through. Any question or request regarding third party content or services should be
made directly to the applicable third party. INSIGNIA EXPRESSLY DISCLAIMS ANY
RESPONSIBILITY OR LIABILITY FOR ANY AVAILABILITY, INTERRUPTION OR SUSPENSION
OF ANY THIRD PARTY CONTENT OR SERVICE MADE AVAILABLE THROUGH THE
INSIGNIA PRODUCT. INSIGNIA DOES NOT WARRANT OR MAKE ANY REPRESENTATION,
WHETHER EXPRESS OR IMPLIED, ABOUT THE SUBSTANCE, QUALITY, FUNCTIONALITY,
ACCURACY, VALIDITY, TIMELINESS, SUITABILITY, AVAILABILITY, COMPLETENESS,
FITNESS FOR A PARTICULAR PURPOSE, MERCHANTABILITY OR ANY OTHER
REPRESENTATION ABOUT SUCH CONTENT OR SERVICES. INSIGNIA EXPRESSLY
DISCLAIMS ANY AND ALL IMPLIED WARRANTIES, INCLUDING BUT NOT LIMITED TO,
WARRANTIES OF MERCHANTABILITY OR FITNESS FOR A PARTICULAR PURPOSE.
UNDER NO CIRCUMSTANCES, INCLUDING NEGLIGENCE, SHALL INSIGNIA BE LIABLE,
WHETHER IN CONTRACT OR TORT, FOR ANY DIRECT, INDIRECT, INCIDENTAL, SPECIAL
OR CONSEQUENTIAL DAMAGES, ATTORNEY FEES, COSTS, EXPENSES, OR ANY OTHER
DAMAGES ARISING OUT OF OR IN CONNECTION WITH THE USE OF ANY THIRD PARTY
CONTENT OR SERVICES, EVEN IF ADVISED OF THE POSSIBILITY OF SUCH DAMAGES.
End User License agreement
Please proivde the text of this agreement
PUBLIC LICENSE
This product contains software that is subject to the GNU Public License Version 2
(GPL2). You can obtain a copy of the GPL License from
http://www.gnu.org/licenses/old-licenses/gpl-2.0.html.
DYNAMIC VOLUME