VIAMICHELIN PN3X003 gps navigation mobile device with a bluetooth conn User Manual USERS MANUAL
VIAMICHELIN gps navigation mobile device with a bluetooth conn USERS MANUAL
Contents
- 1. USERS MANUAL
- 2. USERS MANUAL 2
- 3. USERS MANUAL 3
USERS MANUAL


CONTENTS
1. INTRODUCTION ......................................................................................................................................................................................6
2. INSTALLATION IN THE VEHICLE...........................................................................................................................................7
2.1. BUTTON AND SOCKETS.............................................................................................................................................................................................. 7
2.2. INSTALLING THE HARDWARE IN A VEHICLE ......................................................................................................................................8
2.3. INSTALLING THE SOFTWARE PRE-RECORDED ON THE SD CARD ................................................................................8
2.4. ACTIVATING THE GPS ...............................................................................................................................................................................................10
3. NAVIGATING .......................................................................................................................................................................................... 11
3.1. DESTINATION .....................................................................................................................................................................................................................11
3.1.1. Address ................................................................................................................................................................................................................................11
3.1.1.1. Zip Code .................................................................................................................................................................................................................12
3.1.1.2. Town and State .............................................................................................................................................................................................13
3.1.2. POI ............................................................................................................................................................................................................................................14
3.1.2.1. Town ..........................................................................................................................................................................................................................15
3.1.2.2. GPS Position - Departure Point or Arrival Point .......................................................................................................17
3.1.3. Select on Map ..............................................................................................................................................................................................................17
3.1.4. My ViaMichelin ..........................................................................................................................................................................................................18
3.1.4.1. My Favorites or Personal Folders ...............................................................................................................................................18
3.1.4.2. My POIs ...................................................................................................................................................................................................................18
3.1.5. History ..................................................................................................................................................................................................................................18
3.1.6. GPS Coordinates .......................................................................................................................................................................................................19
3.2. FREE NAVIGATION .......................................................................................................................................................................................................19
3.3. LAST ROUTE .........................................................................................................................................................................................................................19
4. PLAN YOUR JOURNEY ................................................................................................................................................................ 20
4.1. PLAN A ROUTE .................................................................................................................................................................................................................20
4.1.1. Address ................................................................................................................................................................................................................................20
4.1.2. POI ............................................................................................................................................................................................................................................20
4.1.3. Select on Map ..............................................................................................................................................................................................................21
4.1.4. My ViaMichelin ..........................................................................................................................................................................................................21
4.1.5. History ..................................................................................................................................................................................................................................21
4.1.6. GPS Coordinates .......................................................................................................................................................................................................21
4.1.7. Mode .....................................................................................................................................................................................................................................22
4.1.8. Type of Route ..............................................................................................................................................................................................................22
4.1.9. Tolls .........................................................................................................................................................................................................................................22
4.2. DISPLAY A MAP ...............................................................................................................................................................................................................22
4.2.1. Map Options .................................................................................................................................................................................................................22
4.2.1.1. Search .......................................................................................................................................................................................................................23
4.2.1.2. Save the Position of the Location Marker .......................................................................................................................23
4.2.1.3. Telephone ............................................................................................................................................................................................................23
4.2.1.4. Display ......................................................................................................................................................................................................................24
4.2.1.5. Center .......................................................................................................................................................................................................................25
4.2.2. Route Actions ..............................................................................................................................................................................................................26
4.2.2.1. Add a Stage .......................................................................................................................................................................................................26
4.2.2.2. Delete Route .....................................................................................................................................................................................................26
1

4.2.2.3. Display / Hide Driving Directions ...............................................................................................................................................27
4.2.2.4. Route Summary / Display a Map ................................................................................................................................................27
4.2.2.5. Navigation ...........................................................................................................................................................................................................27
4.3. SEARCH FOR A POI ......................................................................................................................................................................................................28
4.3.1. GPS Position, Departure Point or Arrival Point .....................................................................................................................28
5. MY VIAMICHELIN .............................................................................................................................................................................. 29
5.1. MY Favorites .......................................................................................................................................................................................................................29
5.1.1. Routes .........................................................................................................................................................................................................................................30
5.1.1.1. Start ............................................................................................................................................................................................................................30
5.1.1.2. Rename ...................................................................................................................................................................................................................30
5.1.1.3. Delete .......................................................................................................................................................................................................................30
5.1.2. Addresses ..........................................................................................................................................................................................................................30
5.1.2.1. Search Near GPS Position ...............................................................................................................................................................................30
5.1.2.2. Find POI ..................................................................................................................................................................................................................31
5.1.2.3. Add a POI .............................................................................................................................................................................................................31
5.1.2.4. Display on Map ON / OFF ...................................................................................................................................................................31
5.1.2.5. Turn off / Turn on Warner ................................................................................................................................................................31
5.1.3. Hotels ....................................................................................................................................................................................................................................31
5.1.4. Restaurants .....................................................................................................................................................................................................................32
5.1.5. Tourism ...............................................................................................................................................................................................................................32
5.2. MY POIs ....................................................................................................................................................................................................................................32
5.3. ACTIONS ...................................................................................................................................................................................................................................32
6. SETTINGS .................................................................................................................................................................................................... 33
6.1. GENERAL .................................................................................................................................................................................................................................33
6.1.1. Language ..........................................................................................................................................................................................................................33
6.1.2. Units .......................................................................................................................................................................................................................................34
6.1.3. Configure Keyboard .............................................................................................................................................................................................34
6.1.4. Hardware ..........................................................................................................................................................................................................................34
6.1.4.1. Battery Power Status ...............................................................................................................................................................................34
6.1.4.2. Time ............................................................................................................................................................................................................................35
6.1.4.3. Brightness .............................................................................................................................................................................................................35
6.1.5. Night Mode ....................................................................................................................................................................................................................35
6.1.6. About ....................................................................................................................................................................................................................................35
6.2. NAVIGATION .......................................................................................................................................................................................................................36
6.2.1. Route Settings .............................................................................................................................................................................................................36
6.2.2. GPS ...........................................................................................................................................................................................................................................37
6.2.3. Sound ....................................................................................................................................................................................................................................37
6.3. TELEPHONE ...........................................................................................................................................................................................................................38
6.3.1. Activate Bluetooth® ............................................................................................................................................................................................38
6.3.2. Connect Telephone ...............................................................................................................................................................................................38
6.3.3. Telephone Sound ....................................................................................................................................................................................................39
6.4. MAP ..............................................................................................................................................................................................................................................39
6.4.1. Change Map ..................................................................................................................................................................................................................39
6.4.2. Display POIs ....................................................................................................................................................................................................................40
6.4.3. Delete POIs .....................................................................................................................................................................................................................40
6.4.4. Display My ViaMichelin ....................................................................................................................................................................................40
2

6.5. ALERTS .......................................................................................................................................................................................................................................41
6.5.1. Speed Alerts ..................................................................................................................................................................................................................41
6.5.2. POI Warner .....................................................................................................................................................................................................................41
6.5.3. My ViaMichelin Warning ................................................................................................................................................................................42
6.5.4. Turn Off / Turn On Speed Camera Warner ................................................................................................................................42
6.5.5. Warning Sound ..........................................................................................................................................................................................................42
7. NAVIGATION SCREENS............................................................................................................................................................... 43
7.1. MIXED SCREEN .................................................................................................................................................................................................................43
7.2. MAP SCREEN .......................................................................................................................................................................................................................43
7.2.1. Distance Remaining ..............................................................................................................................................................................................44
7.2.2. Time Remaining ........................................................................................................................................................................................................44
7.2.3. Arrival Time ...................................................................................................................................................................................................................44
7.2.4. Time ........................................................................................................................................................................................................................................44
7.2.5. Speed .....................................................................................................................................................................................................................................44
7.2.6. Direction ............................................................................................................................................................................................................................44
7.3. SCHEMATIC SCREEN ...................................................................................................................................................................................................44
7.4. FREE NAVIGATION .......................................................................................................................................................................................................45
7.5. ROUTE SUMMARY ........................................................................................................................................................................................................46
7.6. TELEPHONE ...........................................................................................................................................................................................................................46
7.7. SOUND .......................................................................................................................................................................................................................................46
7.8. OPTIONS ...................................................................................................................................................................................................................................46
7.9. DISPLAY ....................................................................................................................................................................................................................................47
7.9.1. Screen ...................................................................................................................................................................................................................................47
7.9.2. Night Mode / Day Mode ..................................................................................................................................................................................47
7.9.3. 2D View / 3D View .................................................................................................................................................................................................48
7.9.4. Display POIs ....................................................................................................................................................................................................................48
7.9.5. Display My ViaMichelin ....................................................................................................................................................................................48
7.9.6. Auto Zoom On / Off .............................................................................................................................................................................................48
8. SYMBOLS AND COLORS USED FOR THE MAPS............................................................................................ 49
9. THE VIAMICHELIN POIs .............................................................................................................................................................. 50
9.1. HOW TO LOOK UP A POI DESCRIPTION ...............................................................................................................................................50
9.2. MICHELIN® GREEN GUIDE SYMBOLS ......................................................................................................................................................51
10. NOTES AND TIPS .......................................................................................................................................................................... 52
11. VIAMICHELIN NAVIGATION SD CARD ................................................................................................................ 54
11.1. CONTENT OF THE EXTRA MEMORY CARD (SD CARD) ........................................................................................................54
11.2. INSTALLING THE SD CARD ...................................................................................................................................................................................54
12. VIAMICHELIN NAVIGATION DVD-ROM ............................................................................................................. 55
12.1. DVD-ROM CONTENTS ...............................................................................................................................................................................................55
12.2. INSTALLING THE DVD-ROM ...............................................................................................................................................................................55
12.2.1. Installing the Microsoft ActiveSync Program .....................................................................................................................56
12.2.2. Installing the Drivers in Windows 2000 ...................................................................................................................................60
12.2.3. Installing the Drivers in Windows XP .........................................................................................................................................63
12.2.4. Installing and Activating Your ViaMichelin Navigation Software on the PC ................................66
12.3. ADDING SOFTWARE ...................................................................................................................................................................................................71
12.4. REPAIRING THE SOFTWARE ...............................................................................................................................................................................73
12.5. DELETING THE SOFTWARE ..................................................................................................................................................................................73
3

13. CONTENT MANAGER............................................................................................................................................................... 75
13.1. MY VIAMICHELIN ..........................................................................................................................................................................................................76
13.1.1. Create a New Folder ......................................................................................................................................................................................76
13.1.2. Change an Existing Personal Folder .............................................................................................................................................77
13.1.3. Delete a Personal Folder ...........................................................................................................................................................................78
13.1.4. Change an Address Name .......................................................................................................................................................................78
13.1.5. Delete an Address .............................................................................................................................................................................................78
13.1.6. My ViaMichelin Online ................................................................................................................................................................................79
13.1.7. www.ViaMichelin.com .................................................................................................................................................................................81
13.1.8. Export .............................................................................................................................................................................................................................81
13.2. POI MANAGER ..................................................................................................................................................................................................................83
13.2.1. Michelin POIs ..........................................................................................................................................................................................................83
13.2.2. Thematic POIs ........................................................................................................................................................................................................84
13.2.3. How to Add a “*.poi” File ......................................................................................................................................................................84
13.2.3.1. Directly From the Website ................................................................................................................................................................84
13.2.3.2. From a Saved File ........................................................................................................................................................................................84
13.2.4. How to add a ViaMichelin “*.xvm” File ..................................................................................................................................84
13.2.4.1. Directly From the ViaMichelin Website .............................................................................................................................85
13.2.4.2. From a Saved File ........................................................................................................................................................................................85
13.2.5. How to Add an “*.asc” File ...................................................................................................................................................................86
13.2.5.1. Create an “*.asc” File ............................................................................................................................................................................88
13.2.5.2. Creating a New Icon ................................................................................................................................................................................88
13.3. SYNCHRONIZE ...................................................................................................................................................................................................................88
13.4. TROUBLESHOOTING ...................................................................................................................................................................................................90
13.4.1. FAQ and Updates ..............................................................................................................................................................................................91
13.4.2. User Manual ............................................................................................................................................................................................................91
13.4.3. Restore SD .................................................................................................................................................................................................................91
13.4.4. Restore PND .............................................................................................................................................................................................................92
13.4.5. About ..............................................................................................................................................................................................................................92
14. TECHNICAL INFORMATION .............................................................................................................................................. 93
14.1. PC CONFIGURATION FOR INSTALLING THE DVD-ROM........................................................................................................93
14.2. VIAMICHELIN NAVIGATION X-970 TECHNICAL INFORMATION .................................................................................93
15. WHAT TO DO IF… ..................................................................................................................................................................... 94
16. USER RIGHTS AND WARRANTIES ............................................................................................................................. 96
16.1. SOFTWARE LICENSING AGREEMENT ........................................................................................................................................................96
16.1.1. Software Covered .............................................................................................................................................................................................96
16.1.2. License ............................................................................................................................................................................................................................96
16.1.3. Intellectual Property Rights ...................................................................................................................................................................96
16.1.4. Restrictions on Use ...........................................................................................................................................................................................96
16.1.5. Term .................................................................................................................................................................................................................................97
16.1.6. Severability ...............................................................................................................................................................................................................97
16.1.7. Governing Law and Jurisdiction .......................................................................................................................................................97
16.2. WARRANTY ..........................................................................................................................................................................................................................97
16.2.1. Hardware ....................................................................................................................................................................................................................97
16.2.2. Software ......................................................................................................................................................................................................................97
4

16.2.3. Limit on the Warranty .................................................................................................................................................................................97
16.2.4. Remedies .....................................................................................................................................................................................................................98
16.2.5. Implementation of the Warranty ...................................................................................................................................................98
16.2.6. Exclusions from the Warranty .............................................................................................................................................................98
16.2.7. Limitation of Responsibility and Liability ...............................................................................................................................98
16.2.8. Severability ...............................................................................................................................................................................................................98
16.2.9. Governing Law and Jurisdiction .......................................................................................................................................................98
5

1_Introduction
Thank you for choosing the ViaMichelin Navigation X-970 to accompany you and help you during your travels.
The ViaMichelin Navigation X-970 is ergonomically designed to be as intuitive as possible. This manual nevertheless
contains precise instructions, together with tips and advice, for each of the many functions that the device offers.
They are intended to help you to get the best out of your ViaMichelin Navigation X-970 device.
This PND (Personal Navigation Device) is fitted with a touch screen for better ergonomics.
The package you have purchased contains:
• 1 ViaMichelin Navigation X-970
• 2 Car mounting systems for windshield or dashboard use
• 1 Cigarette lighter cable
• 1 USB cable
• 1 Power adapter
• 1 SD card with USA and Canada already loaded
• 1 ViaMichelin Navigation DVD-ROM
• 1 Installation diagram
• QuickStart manual
Before installing the ViaMichelin Navigation X-970 mobile device in your car, we recommend that you familiarize
yourself with how the system operates.
When you first operate your ViaMichelin Navigation X-970, please connect it to the cigarette lighter socket or to
your (switched on) PC using the USB cable or the power adapter supplied with your unit for about four hours. You
may notice that the indicator light in the top left-hand corner of your ViaMichelin Navigation X-970 changes color
according to the battery power level:
• Indicator Light is Red: the ViaMichelin PND is charging or run down.
• Indicator Light is Green: the ViaMichelin PND is charged.
The ViaMichelin Navigation X-970 has a battery life of approximately 3 hours. This battery life depends on how the
device is used. For example the sound volume and screen brightness as well as using the “hands-free” function on
your PND may considerably reduce this battery life.
You will find other helpful information and updates to this manual on the dedicated Navigation website:
http://www.ViaMichelin.com
> GPS Navigation > Support
6

2_Installation in the vehicle
2.1 Button and sockets
You will find the visual presentation of the various elements making up your ViaMichelin Navigation
X-970 on the installation diagram.
• On the top: On/Off button To switch the device on or off.
• On the left side: SD card reader For SD cards with a storage capacity of up to 2 GB.
• Under the device: Audio socket Use this 3.5 mm jack to connect an earphone for audible alarms.
Mini-USB port To connect your ViaMichelin Navigation X-970 to your PC using
the USB cable provided.
Power connector To connect the cigarette lighter cable supplied with your device
or a power adapter.
• Mounting system
connection socket This socket provides the connection between the parts in the car mounting system
and the device. It is also used to connect the antenna to receive
traffic information (an option that will be available via a separate
accessory at a later date).
• At the back of your device:
Antenna socket This socket is not currently used.
Reset In certain situations, it may be necessary to reset the PND; to
reset the device (soft or hard reset), see the information in the
table in chapter 15.
• On the car mounting system (below):
Mic socket This socket is not currently used.
TMC socket This socket is not currently used.
Power connector Used to connect the cigarette lighter cable and the power adapter
supplied with your ViaMichelin Navigation X-970.
Comments:
The power adapter contains the transformer used to supply and recharge the battery in your device. It must be
installed near your PND and be accessible so that you can disconnect the device easily.
Disconnect the power adapter first before disconnecting the PND cable.
7
2.2 Installing the hardware in a vehicle
• To benefit from better mounting if necessary, unscrew the suction pad slightly from the support.
• Install the mounting system on the windsheild by applying pressure to the suction pad and then turning the screw
clockwise.
• Start your vehicle.
• Connect the cigarette-lighter cable to your ViaMichelin Navigation X-970 mounting system (socket on the right-
hand side) and then to your vehicle’s cigarette-lighter socket.
• Mount your ViaMichelin Navigation X-970 by sliding it onto the mounting system as shown on the installation
diagram provided.
• Turn on your ViaMichelin Navigation X-970 and plan your journey.
FOR YOUR SAFETY:
- Make sure you position the mounting system in a place where it will not obstruct visibility or
interfere with driving the vehicle.
- Make sure you position the cigarette lighter cable in a place where it will not obstruct visibility or
interfere with driving the vehicle.
- Make sure you plan your destination when the vehicle is stationary. We strongly recommend that
you not operate the device while driving.
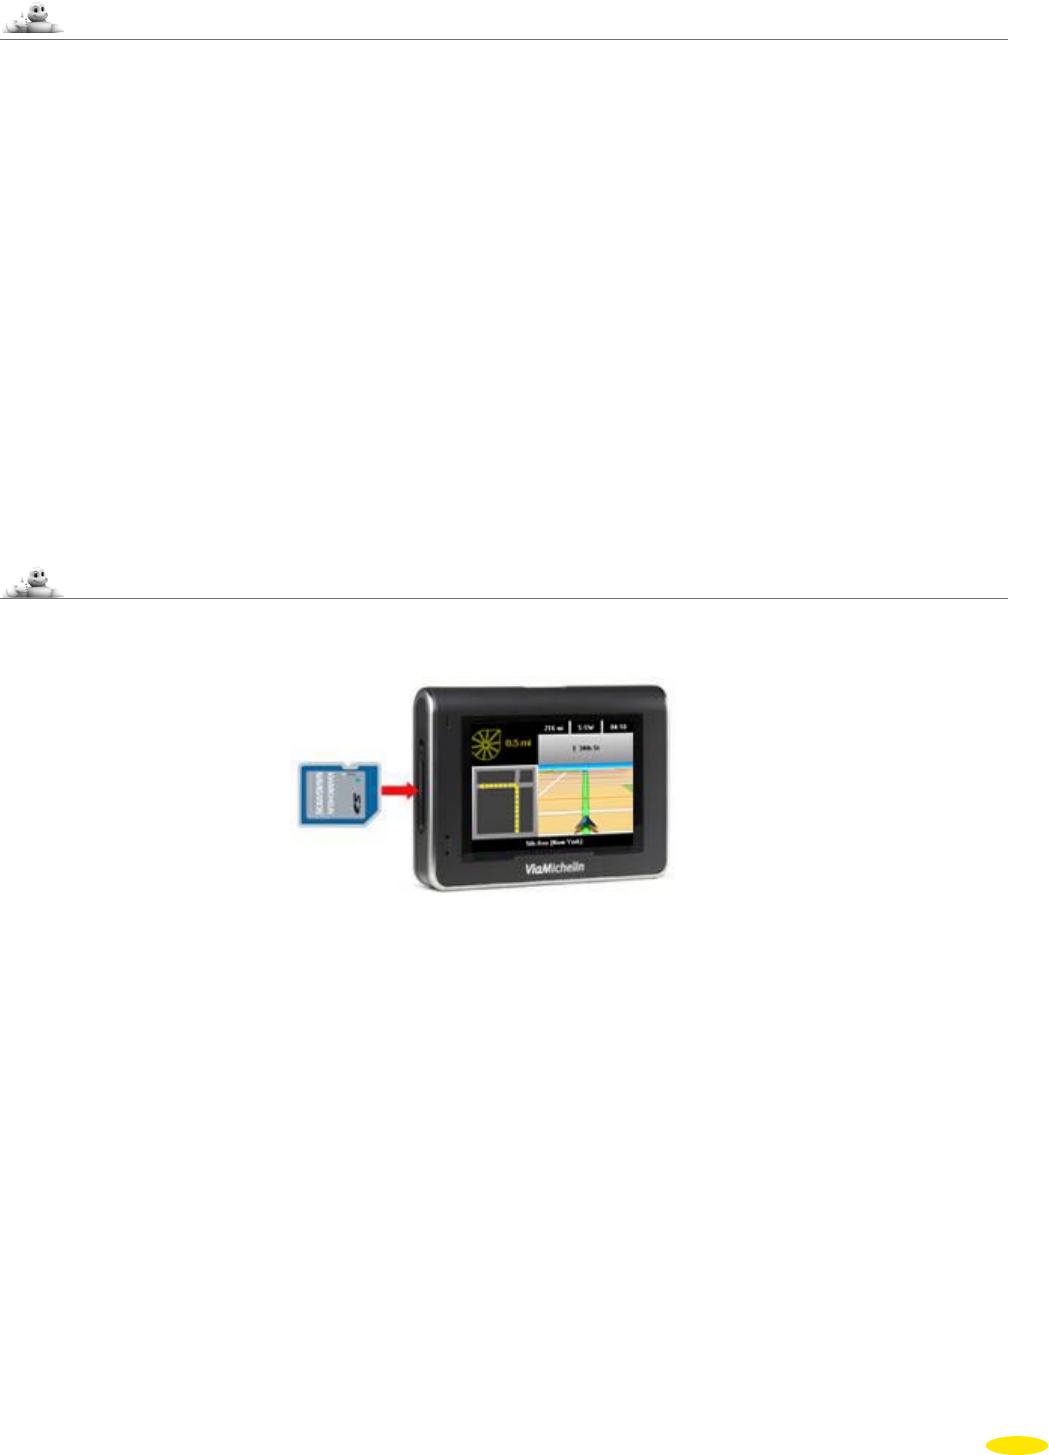
2.3 Installing the software pre-recorded on the SD card
ViaMichelin Navigation is a “Plug & Drive” solution: simply install the SD memory card provided on the left side of your
PND. The card must be fully inserted face up in the direction of the blue arrow as shown in the illustration below:
To remove the SD card from the device, press on the side of the SD card and release. The SD card will then be
ejected from the device.
Then follow the installation instructions displayed on your screen:
• Select the language for the menus
• Configure keyboard
• Select the voice guidance language
When choosing the voice guidance language, you may select a traditional pre-recorded voice (6 languages
available: American English, English, French, German, Italian, Spanish) or voice synthesis (6 languages
available: American English, English, French, German, Italian and Spanish) which will guide you with
instructions concerning road names, directions, road signs or traffic information messages.
• Voice guidance settings
• Select the distance unit
• Select map display
• Time display format
• Set the time
8
•
To select the setting you want, click on the arrows to the left or right of the different choices
then click
on the arrow at the bottom of the screen to move to the next setting or go back to the previous setting
to modify it. After installing the software on your PND you can change the selected settings from the different
menus in the “Settings” menu.
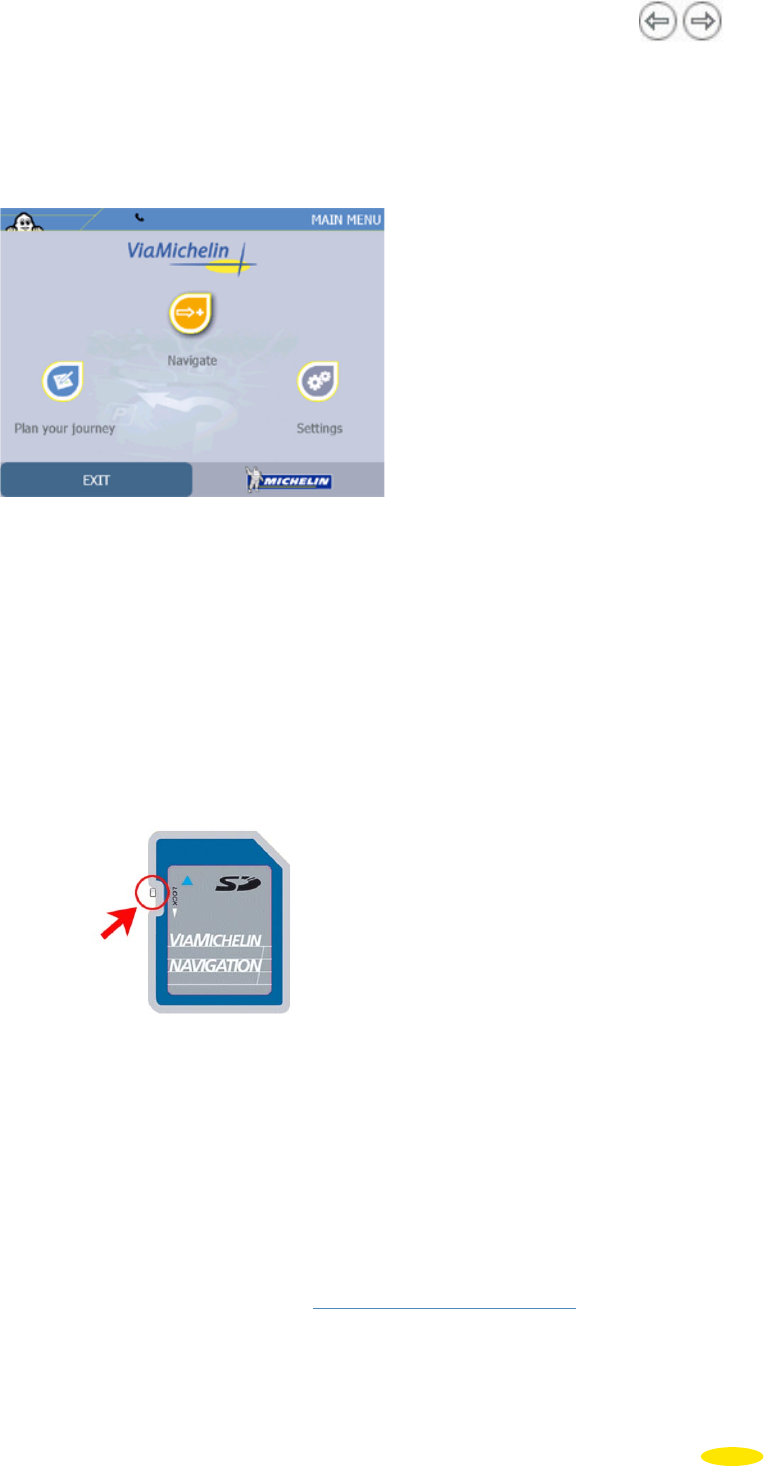
Once the SD card programs are installed you reach the legal disclaimer screen. After clicking the “I Accept” button
you reach the Main Menu. The following chapters explain how to use it:
Your ViaMichelin X-970 Navigation is now ready to guide you!
Comments:
• If you switch on your ViaMichelin Navigation X-970 without first inserting an SD card, a demonstration
mode will run automatically after 90 seconds. To stop the demonstration, simply insert the supplied SD card
into the slot provided. You will then be able to start using your product.
• Make sure that your SD card is not locked: safety in the “lock” position, this may impair the operation of
the ViaMichelin Navigation software. (In this position, the contents of your SD card are protected but the
software will not be able to save settings required for the software to run properly).
• Use only the SD card supplied with your ViaMichelin Navigation X-970. Do not use it in other devices (digital
cameras, PDA, MP3, etc.).
• Do not change its content without using the ViaMichelin “Content Manager” program.
• Your SD card contains the data needed to activate the DVD-ROM provided. To avoid any problems with your
SD card, we strongly recommend that you activate the DVD-ROM provided in your pack before using your
ViaMichelin Navigation X-970.
You can then install the PC application “Content Manager” which will allow you not only to use the advanced
functions provided by ViaMichelin Navigation X-970, such as the new “My ViaMichelin” to transfer your personal
data to your mobile device directly from the ViaMichelin web site: http://www.ViaMichelin.com to export points
of interest (POI) and to manage the map sets, but also to restore the initial content of your SD card if necessary (see
Chapter 13 – Content Manager).
9
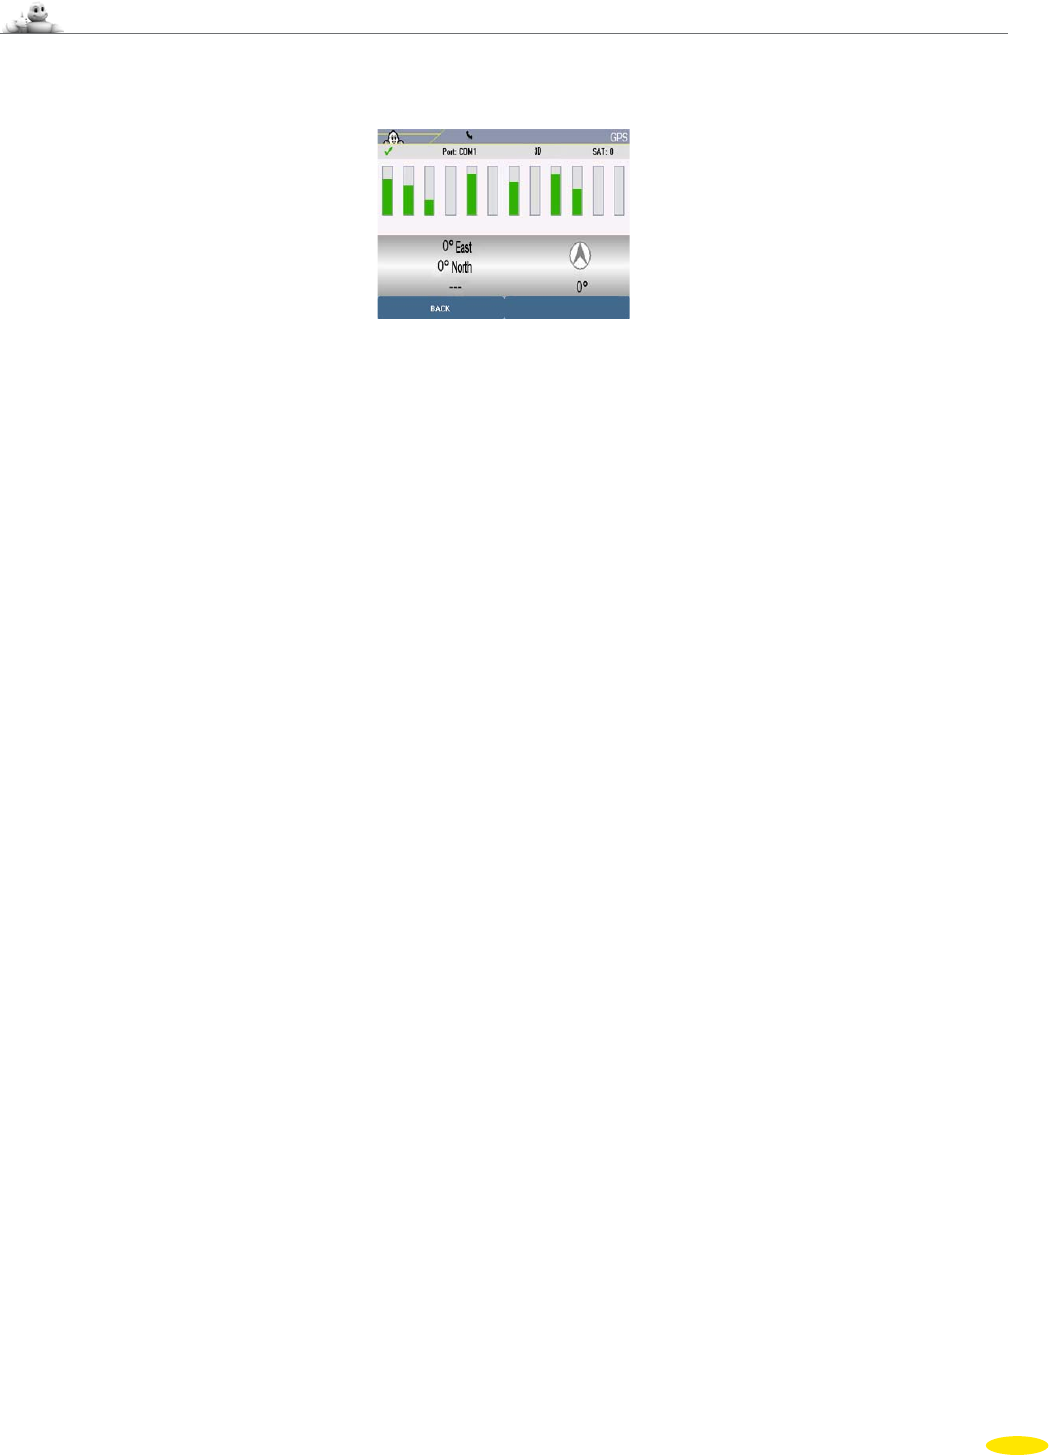
2.4 Activating the GPS
• After connecting your ViaMichelin Navigation X-970 and installing the software on the SD card, go to the Main
Menu, and click Settings / Navigation / GPS. This will take you directly to the page presenting GPS reception:
When using your ViaMichelin Navigation X-970 for the first time, we recommend you to do so in an open space in
order to ensure the best possible satellite reception. Activating the GPS system for the first time can take several
minutes, depending on the surroundings and the quality of the GPS signals.
Similarly, when setting off on a calculated route, you need to start moving so that the system can determine the
direction and speed of the vehicle and suggest a route corresponding to your traffic direction.
Detailed instructions for installing and using the GPS are given in Chapter 6.2.2 of this manual.
10
3_Navigating
• From the Main Menu, click on the “Navigate” button.
You can choose your navigation by one of 3 search methods:
•
Destination to calculate a route quickly by simply indicating the destination you want.
•
Free navigation if you simply want to display your position on the screen.
•
Last route to use the calculation of the last route followed again.
• Click the navigation of your choice.
• Click on “Back” to return to the previous screen or on “Settings” to access the settings screens
(For more information, see Chapter 6)
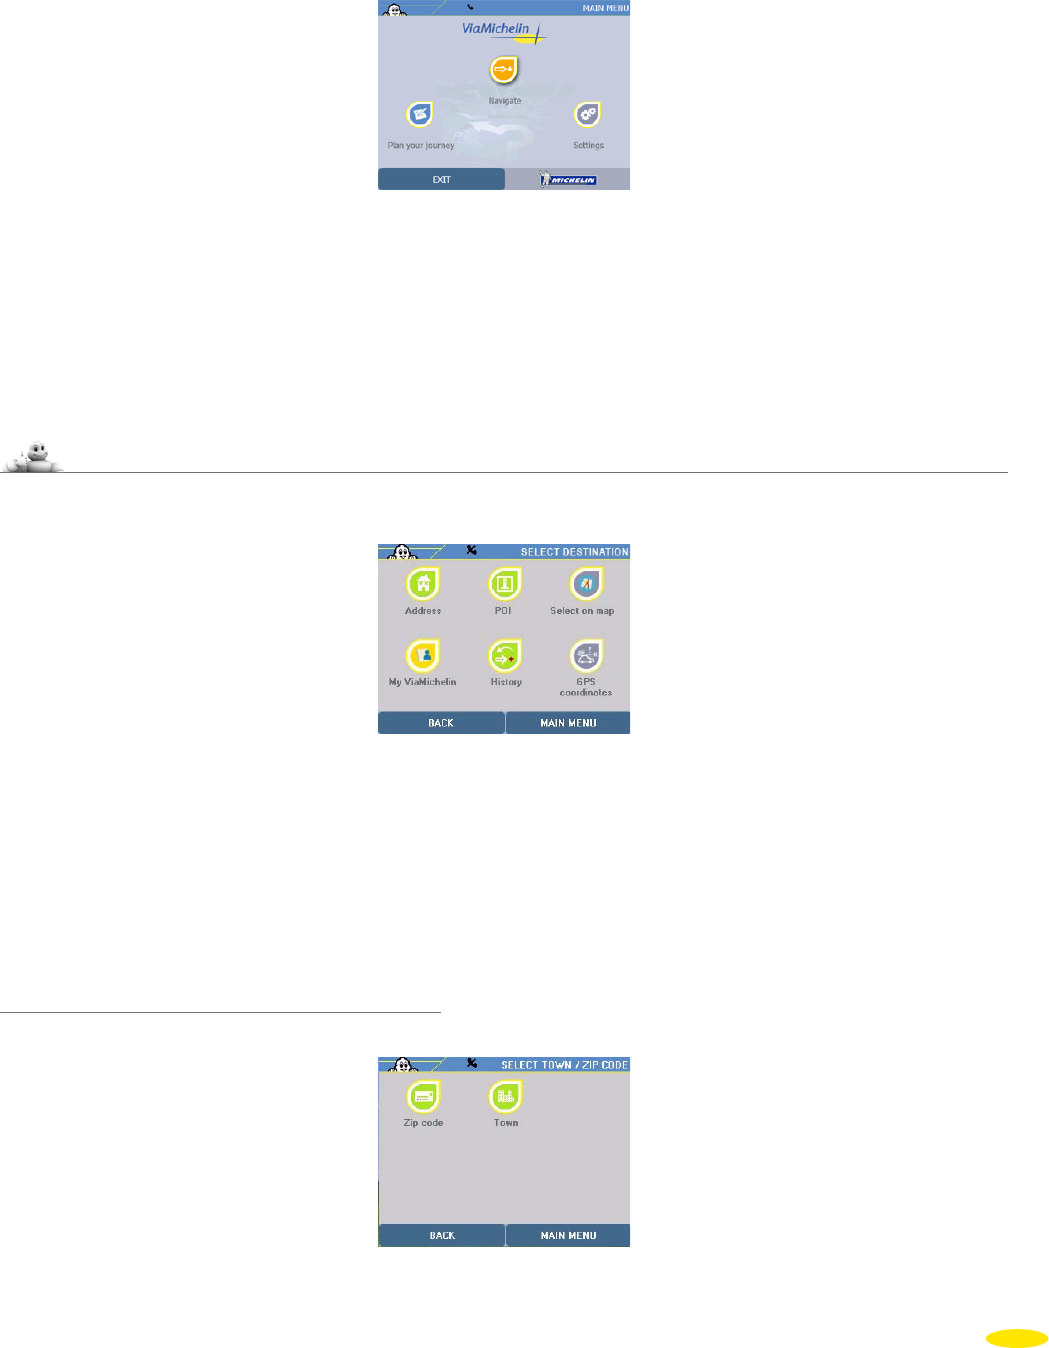
3.1 Destination
• Click “Destination”.
You can choose your destination by one of 6 search methods:
• towards an Address
• towards a POI (Point Of Interest)
• by Selecting a place directly on the map
• in My ViaMichelin for your saved addresses
• in the History of the last 15 journeys made
• by indicating GPS coordinates
3.1.1 Address
• Click “Address”.
You can then search either by “Zip Code” or “Town”.
11
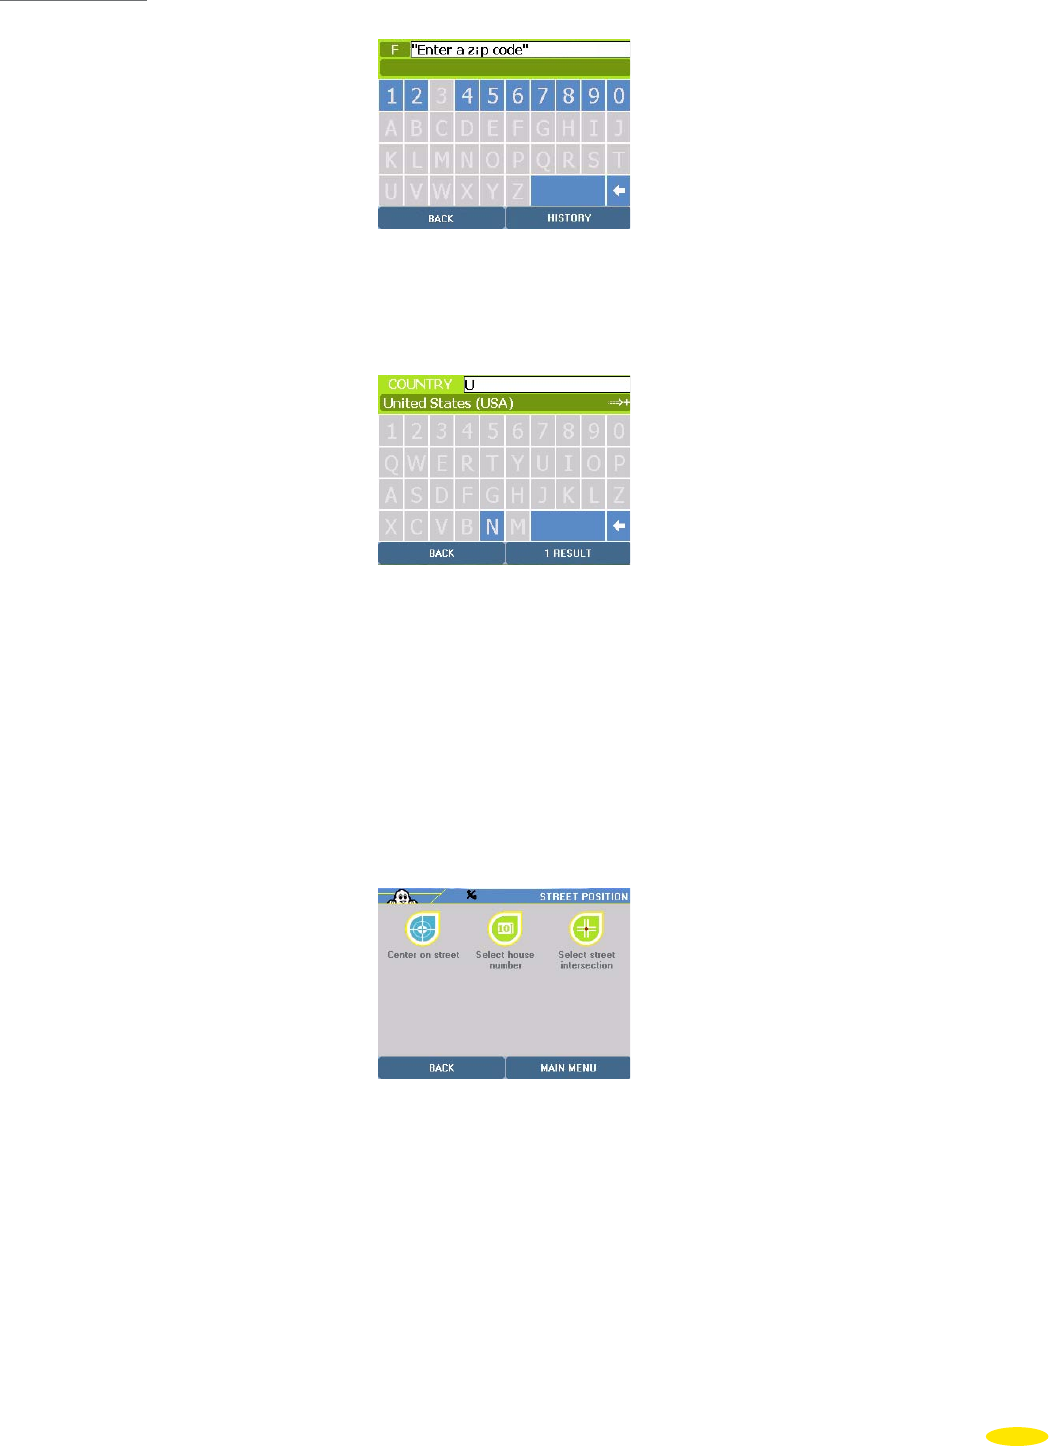
3.1.1.1 Zip code
• Click “Zip Code”.
Comment:
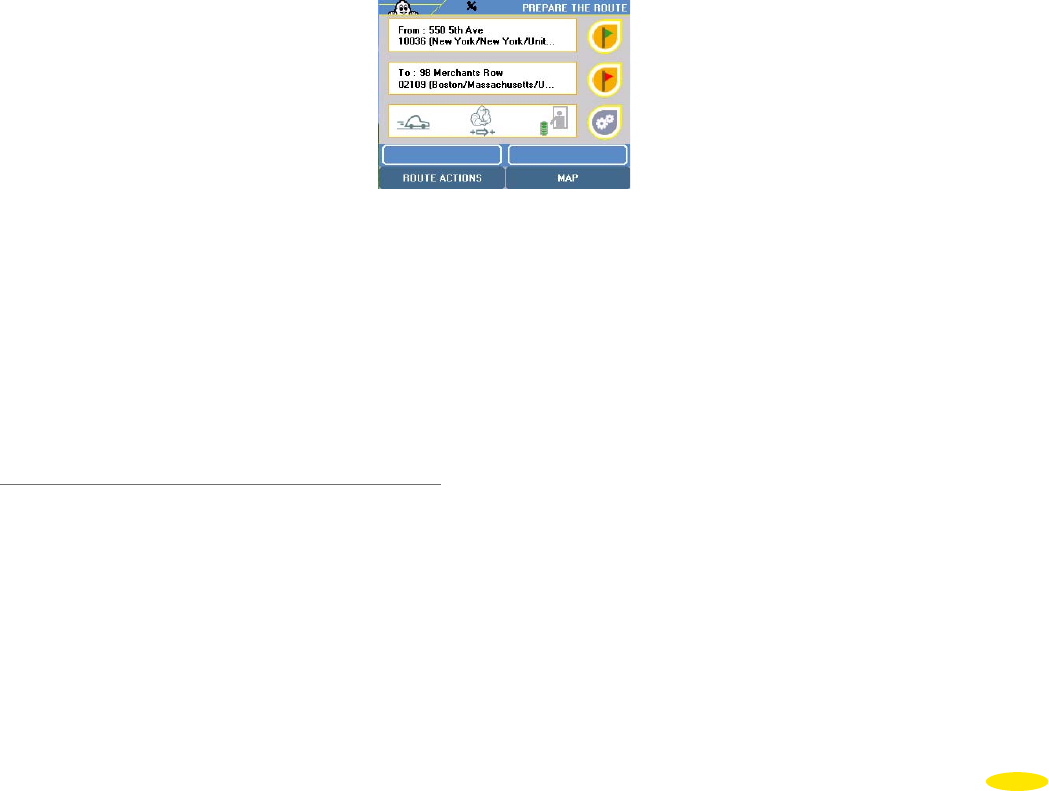
When using your ViaMichelin Navigation X-970 system for the first time, you must select the country for the
search. Type the beginning of the country name, ViaMichelin Navigation will automatically complete your
search, then click the result button.
• You can either click the country given in the line at the top of your screen or click “X results” to select the country
you want from the list shown.
• In case of error or to change the country in which you will be searching for the next addresses, simply click the
button on the top left of the screen showing the country identification selected and select another country.
• Click “History” if you want to go directly to the last 15 zip codes searched or click “Back” to return to the previous
screen.
• Enter the zip code you want by clicking the relevant numbers.
As you indicate zip codes the system suggests a search result; click the result bar or the “X Results” button: on the
list displayed, click the zip code you want.
• Click “Town Center” if you want to position the destination point in the center of the town indicated or click
“Back” to return to the previous screen.
• Enter the name of the street you are loOKing for by clicking the letters of your choice from those displayed
corresponding to the different selections known to the system.
• Click the result bar or the “X Results” button: click the street you want from the list displayed.
• Click “Change” on the results screen if you want to change your search criteria, or click “Main Menu” to take you
back directly to the system home page.
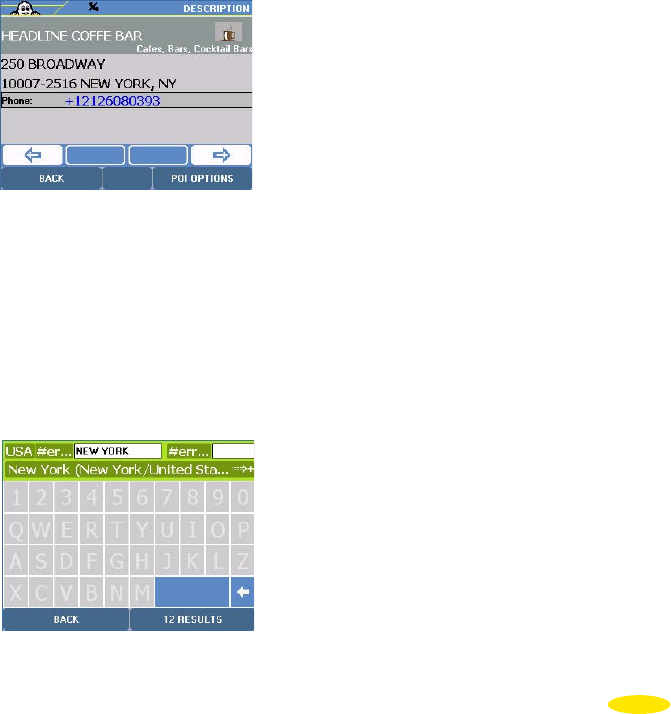
•
Then click the positioning you want:
Center on street if you want to position the arrival point in the geographical center of the selected street.
Select house number if you want to specify the house number.
Select street intersection if you want to position the arrival point at an intersection with another street.
12

1. Center on street
• Click “Center on Street”.
You go directly to the “Route Summary” screen summarizing the settings used to calculate your route; the
departure point is the position established by the GPS.
2. Select House Number
• Click “Select House Number”.
• Click “Display All” if you want to display the list of house numbers known to the system in the selected street or
click “Back” to return to the previous screen.
• Enter the house number to search for.
• Click “Search”.
Comment:
If the system does not recognize the number entered, it displays the list of closest known numbers. Click the
number closest to the one you want, or click “Change” if you want to search for a different house number.You
then return to the “Select House Number” screen. Click “Main Menu” to go back to the system home page.
If there is no vehicle access to the house number you entered (pedestrian road, private road, etc.) the message
“Address not accessible by road – nearest location has been found” is displayed. Click “OK” to automatically
position your arrival point as close as possible to your desired destination point.
This brings you to the “Route Summary” screen summarizing the settings used to calculate your route.
3. Select Street Intersection
• Click “Select Street Intersection”.
• Click “Display All” to obtain the list of streets that intersect the street indicated or click “Back” to return to the
previous screen.
• Enter the name of the street that intersects your destination street.
• Click “Search”.
Comment:
If there are several streets that meet your criteria, a list of street names is displayed. Click the direction arrows
to view all the streets found and click the street you want.
• Click “Change” if you want to change your search criteria, or click “Main Menu” to take you back directly to the
system home page. You then return to the “Street intersection” screen.
This brings you to the “Current route” screen summarizing the settings used to calculate your route.
(For the action to take on this screen, see paragraph 3.1.1.2.).
3.1.1.2 Town and State
• Click “Town”.
• Click “History” if you want to use an address from one of the last 15 routes already calculated or “Back” to go
back to the previous page.
13
• Enter the name of the destination town by clicking the letters of your choice from those displayed corresponding
to the different selections known to the system.
• Click the result bar or “X Results” to select the suggested result or see the list of towns corresponding to the
instructions entered. If necessary, click on the direction arrows to view all the towns found.
• Click the town of your choice.
• The system will automatically search for the state. If you want to change the state, click on the code corresponding
to the state at the top right of the screen.
• Click “Change” if you want to change your search criteria, or click “Main Menu” to take you back directly to the
system home page. This will bring you back to the search town page.
• Click “Town Center” if you want to position the arrival point on the geographical center of the destination town
or click “Back” if you want to return to the previous screen.
• Enter the name of the destination street by clicking the letters or numbers of your choice from those displayed
corresponding to the different selections known to the system.
• Click the result bar or “X Results” to select the suggested result or see the list of streets corresponding to the
instructions entered. If necessary, click on the direction arrows to view all the streets found.
• Click on the street you want.
• Click “Change” if you want to change your search criteria, or click “Main Menu” to take you back directly to the
system home page. This will bring you back to the destination street name screen.
• Then click the positioning you want:
Center on street if you want to position the arrival point in the geographical center of the selected street.
Select house number if you want to specify the house number.
Select street intersection if you want to position the arrival point at an intersection with another street.
For more information, see paragraph 3.1.1.1.
This brings you to the “Route Summary” screen summarizing the settings used to calculate your route.
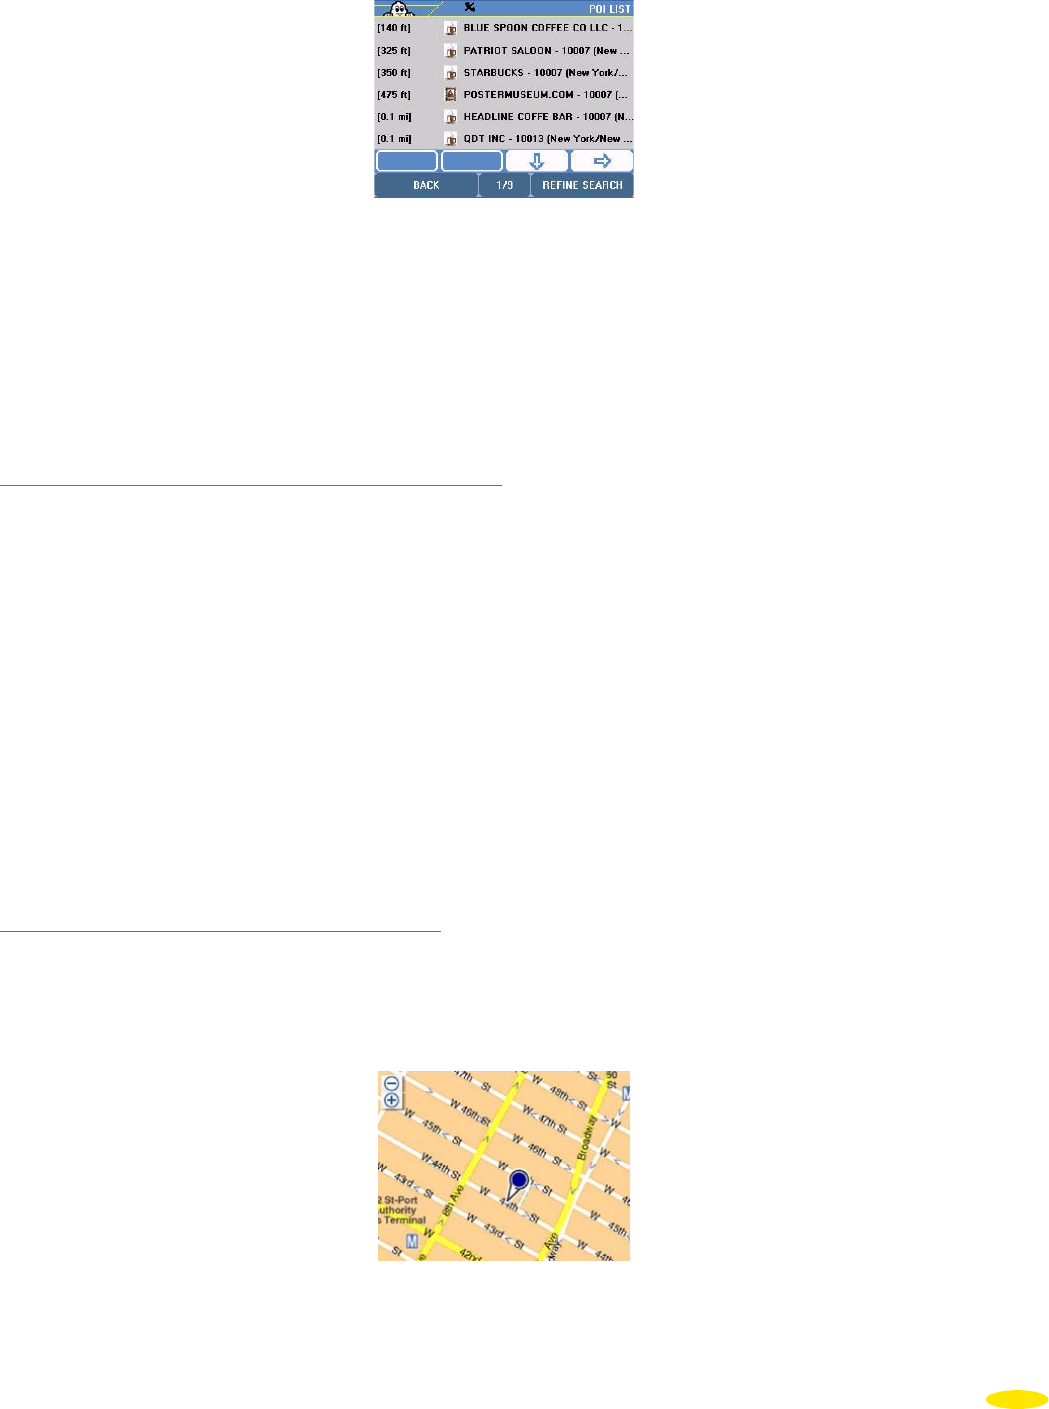
• Click one of the right-hand buttons to change one of the criteria.
• Click “Route Actions” if you want to add one or more stages to the journey to be calculated, display the map of
the calculated route, etc.
• Click “Navigation” to start calculating the route.
The Navigation screen is displayed once the route has been calculated. Start driving so that the system determines
the direction you are following when you set out. The voice guidance system will give you directions to your
destination.
3.1.2 POI
• Click “POI”.
The term “POI” (Point Of Interest) represents any geocoded site that may be interesting. The ViaMichelin
Navigation X-970 includes an exclusive collection of thousands of points of interest taken from the Michelin
Green Guide—and a selection of practical addresses (food stores, accommodation, gas stations,etc.). An
exclusive feature of the POIs extracted from the Michelin Green guide and of the practical POIs, is that they
include a full description and can be selected using a multikey search process.This means that your ViaMichelin
Navigation X-970 offers you all the comprehensiveness of a standard guidebook, an essential addition to your
navigation system.
14

In the Main Menu, click Navigate, Destination, then POI, select the category of POI you want and thenselect the
details required.
• Click the direction arrows to display all POI categories. Some POI icons are associated with symbols indicating
possible links to warning setting (map display and/or alarm signal).
• Click the POI category you want.
• You can now select the place you are looking for using 4 criteria:
Town to look for a selected POI in the town you choose.
GPS Position to find a POI near the position established by the GPS.
Departure Point to look for a POI near your departure point.
Arrival Point to look for a POI near your arrival point.
3.1.2.1 Town
• Click “Town”.
You can then search either by:
• “Zip code”.
• or “Town”.
1. Zip code
For more information, see paragraph 3.1.1.1.
The list of POIs found is displayed in descending order of distance—in a straight line—from the place indicated.
• Click “Refine” to narrow the search by indicating new search criteria or “Back” to go back to the previous screen:
Name Search to find a POI using its name.
Search Near to find a POI near a certain location.
Keyword Search to find a POI using a keyword.
1.1. Name Search
• Click “Name Search”.
• Click “Display All” to see the list of POIs known to the system, or click “Back” to return to the previous page.
• Or enter the name of the POI you want.
• Click “Search” to start the search. The list displayed takes the word you entered into account.
• Click the direction arrows to view all the POIs then on the POI of your choice
• Click “New search” if you want to go back to the search screen.
15
1.2. Criteria Search
• Click “Criteria Search”.
• Select the settings you want by taking the direction arrows or the information to select from the list displayed:
Green Guide:
Categories
Tourist attractions
• Click “Search” to start the search. The list displayed takes your selected criteria into account, or click “Back” to
return to the previous screen.
• Click the direction arrows to view all the POIs then on the POI of your choice.
• Click “New search” if you want to go back to the search screen.
1.3. Keyword Search
Comment:
This type of search is only valid for certain categories of POI, like Michelin Green Guide POIs.
• Click “Keyword Search”.
• Enter a word to designate the POI you want or click “Display All” for a list of the POIs known to the system.
• Click “Search” to start the search. The list displayed takes the word you entered into account.
• If there is no POI meeting your search criteria, the system displays the message “No address matches your
request. Please try a new search.” Click “OK” to return to the previous screen.
•
Click the direction arrows to view all the POIs, then click the POI of your choice.
• Click “New search” if you want to go back to the search screen.
• Click the POI you want.
This will take you to the POI description page (for more details on POI description information and use, see Chapter 9).
• Click “OK” to confirm the POI as your destination, or click “Back” if you want to return to the previous screen.
This brings you to the “Route Summary” screen summarizing the settings used to calculate your route.
(For the action to take on this screen, see paragraph 3.1.1.2.).
2. Town
• Click “Town”.
For more information, see paragraph 3.1.1.2.
16
• Click the town of your choice.
• Click “Change” to change your search criteria, or click “Main Menu” to take you back to the system home page.
• Click direction arrows to view all POIs found, classified in order of increasing distance from the place indicated.
• Click the POI you want.
This will take you to the POI description page
(For more details on POI description information and use, see Chapter 9).
• Click “OK” to confirm the POI as your destination, or click “Back” if want to return to the previous screen.
This brings you to the “Route Summary” screen summarizing the settings used to calculate your route.
(For the action to take on this screen, see paragraph 3.1.1.2.).
3.1.2.2 GPS Position - Departure Point or Arrival Point
• Click “GPS position” - “Departure Point” or “Arrival Point”.
• Click the direction arrows to view all the POIs found, classified in order of increasing distance—in a straight
line—from the place indicated.
• Click the POI you want.
• Click “Refine Search” to go to the advanced search screens, or click “Back” to return to the previous screen.
You can now specify your search by:
• Name Search for more information, see paragraph 3.1.2.1.
•
Criteria Search for more information, see paragraph 3.1.2.1.
•
Keyword Search for more information, see paragraph 3.1.2.1.
This brings you to the POI description page (see Chapter 10).
• Click “OK” to confirm the POI as your destination, or click “Back” if want to return to the previous screen.
This brings you to the “Route Summary” screen summarizing the settings used to calculate your route.
(For the action to take on this screen, see paragraph 3.1.1.2.).
3.1.3 Select on Map
• Click “Select on Map”.
Zoom in and move the map to position the location marker (blue circle in the center of the screen) on the location
you want:
• to zoom in: click “-” or “+” in the bar at the top of the screen to gradually zoom in on the map, or click the bar to
move it directly to the desired zoom level or click the cursor to move it to the desired zoom level. The map system
offered on your ViaMichelin Navigation X-970 includes 14 zoom levels.
17
• To move the map: place the stylus on the map and move it in the direction you want.
• Click “Destination OK” to confirm the location or “Back” to return to the previous screen.
This brings you to the “Route Summary” screen summarizing the settings used to calculate your route.
(For the action to take on this screen, see paragraph 3.1.1.2.).
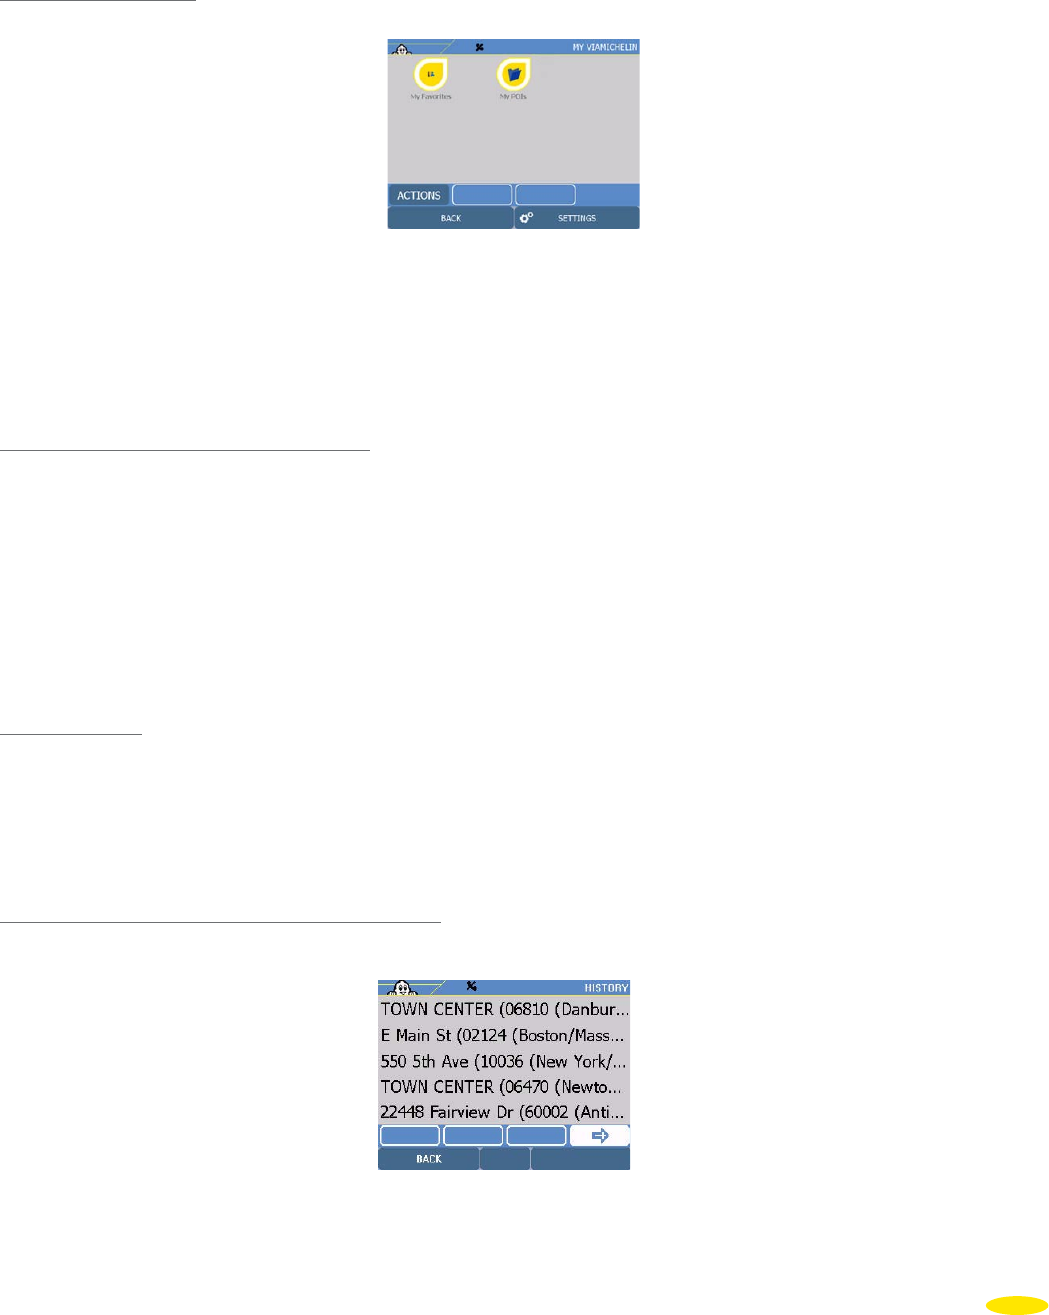
3.1.4 My ViaMichelin
Click “My ViaMichelin”.
You can select:
•
My Favorites to find a POI in the list of the ones you have already saved directly on the PND or the ones you
have imported from your “My ViaMichelin” account on the ViaMichelin web site.
• My POIs to select a POI from a ViaMichelin partner brand or from an “asc” file transfer.
• Personal folders these are files that you have created that have exactly the same presentation as
“My Favorites”.
3.1.4.1 My Favorites or Personal Folders
A small “eye” displayed on the side of the icon indicates that the “My Favorites” or the personal folder selected
will be displayed on the screen and the signposting triangle indicates that an alarm signal will be activated when
passing near a POI from “My Favorites” or the associated personal folder.
• Click “My Favorites”
• Click the POI you want. They are presented by category and in the order in which they were entered.
This brings you to the “Route Summary” screen summarizing the settings used to calculate your route.
(For the action to take on this screen, see paragraph 3.1.1.2.).
3.1.4.2 My POIs
• Click “My POIs”.
• Click the POI folder you want, then the POI you want.
This brings you to the “Route Summary” screen summarizing the settings used to calculate your route.
(For the action to take on this screen, see paragraph 3.1.1.2.).
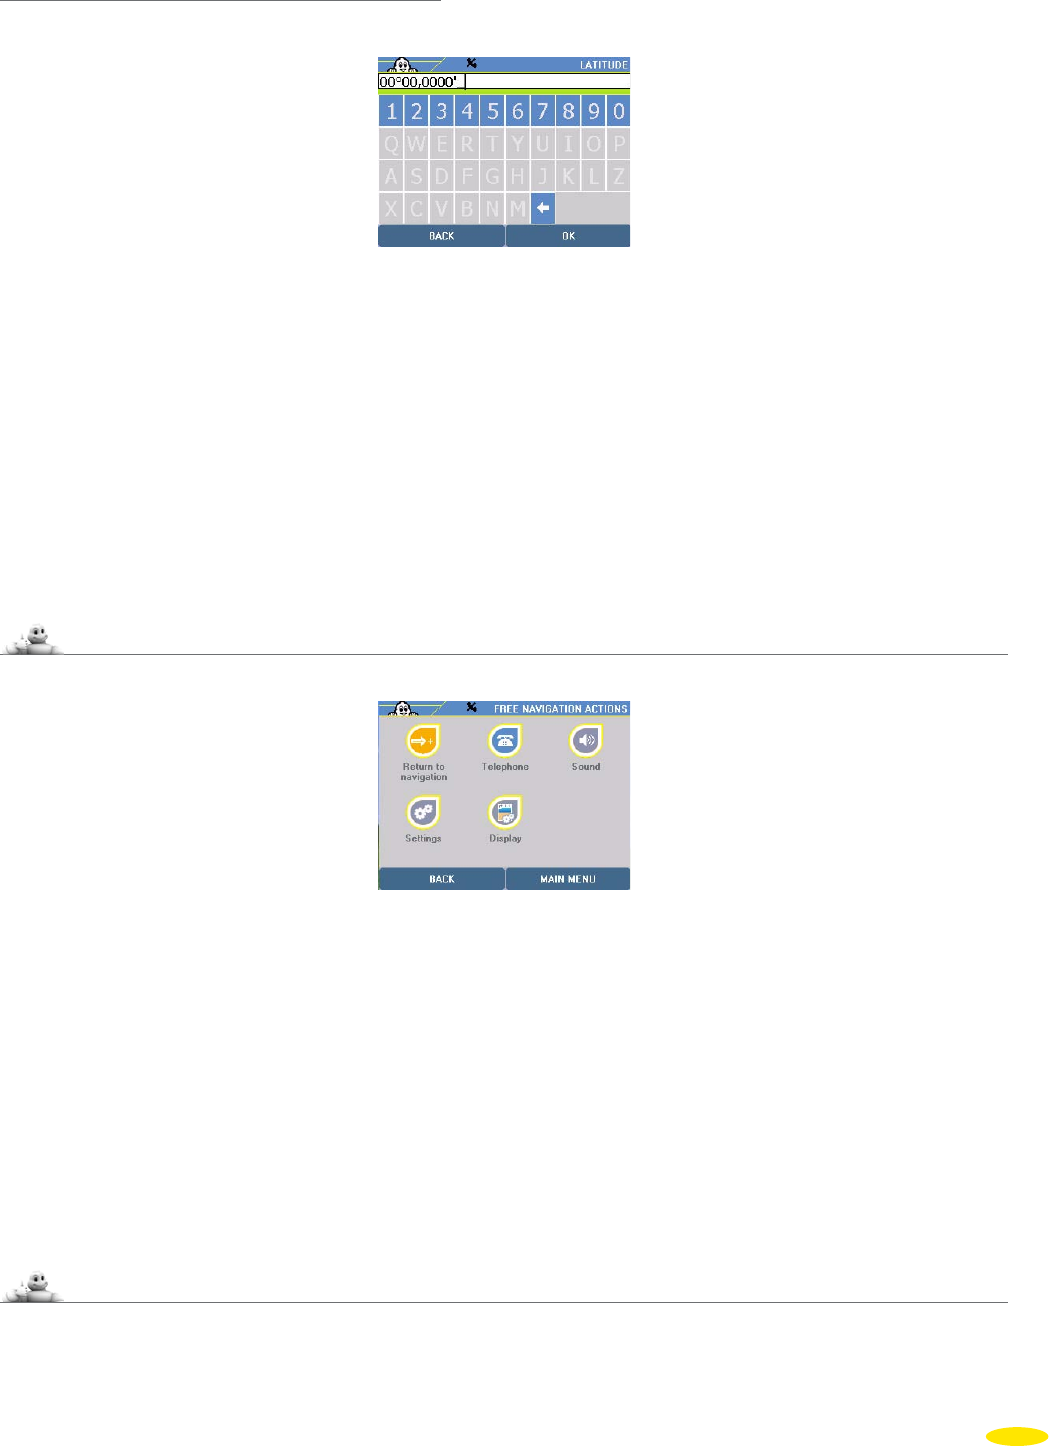
3.1.5 History
Click “History”.
A list of the last 15 destinations is displayed. Click the address you want or click “Back” to return to the previous screen.
This brings you to the “Route Summary” screen summarizing the settings used to calculate your route.
(For the action to take on this screen, see paragraph 3.1.1.2.).
18
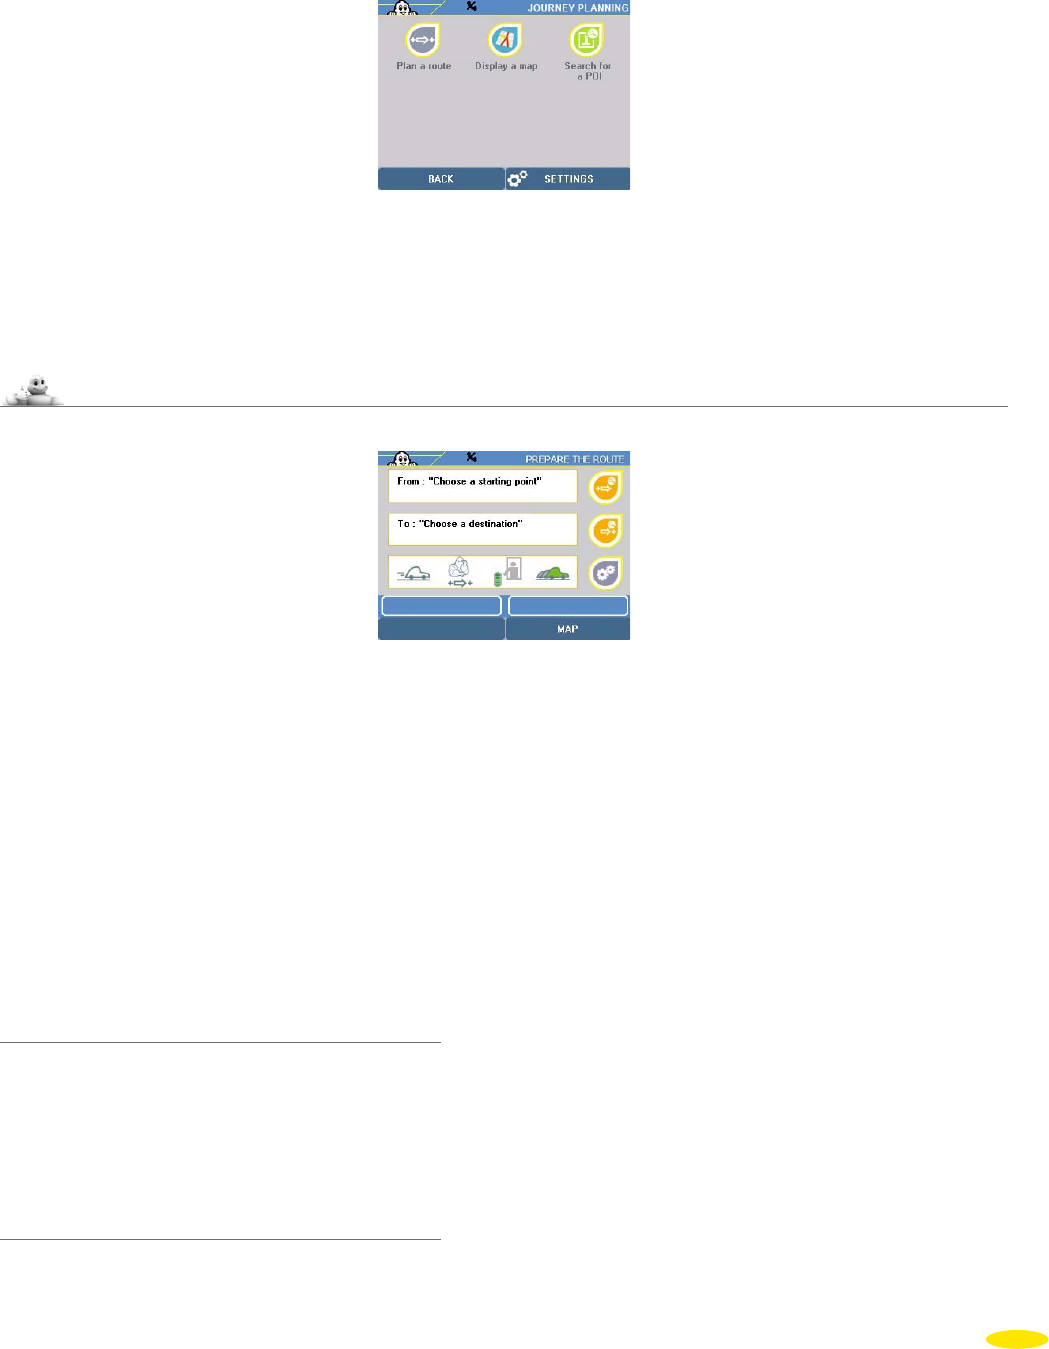
3.1.6 GPS Coordinates
Click “GPS Coordinates”.
Enter the latitude (N / S) in degrees, minutes and hundredths of minutes and then select N (North) or S (South) to
specify the direction.
Click “OK” to confirm or click “Back” to return to the previous screen.
Enter the longitude (E / W) in degrees, minutes and hundredths of minutes and then select E (East) or W (West) to
specify the direction.
Click “OK” to confirm or click “Back” to return to the previous screen.
If the system displays the message “The place selected must be less than 25 km from a road”: click “OK” to return
to the screens for entering the latitude and longitude.
This brings you to the “Route Summary” screen summarizing the settings used to calculate your route.
(For the action to take on this screen, see paragraph 3.1.1.2.).
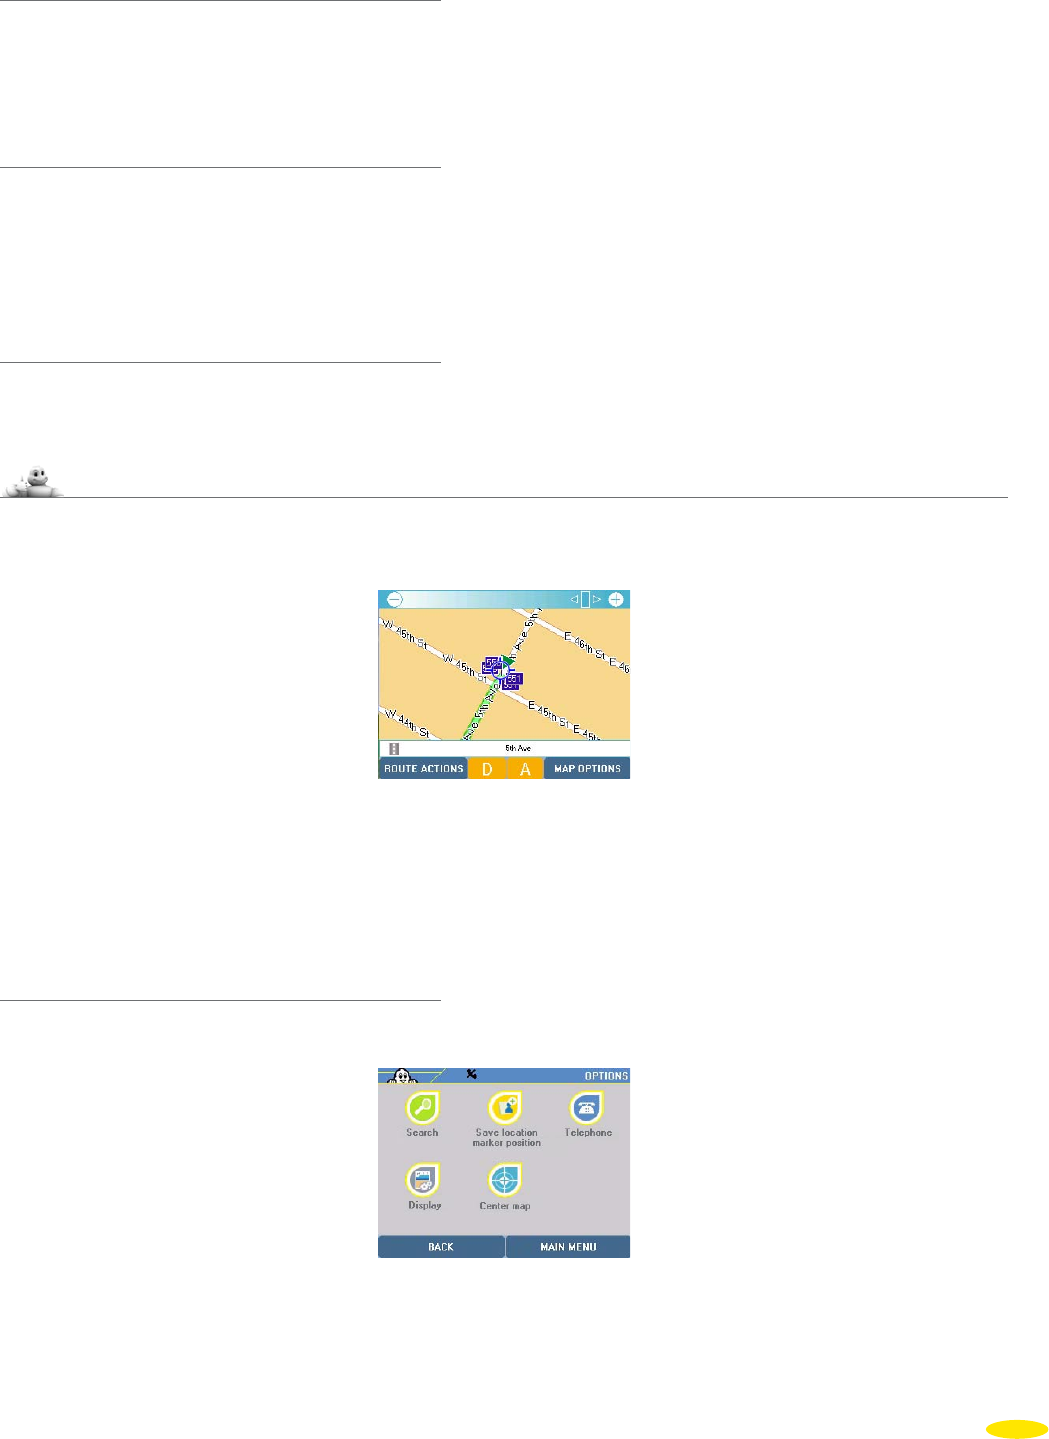
3.2 Free Navigation
Click “Free Navigation” and start driving.
Click “Main menu” to take you back directly to the system home page or click “Navigation Actions” to access the
Free Navigation settings:
You can then choose between:
Return to Navigation to go back to the map and continue free navigation
Telephone to access telephone options
Sound to access sound settings
Settings to define warning settings and save the GPS position
Display to access the display settings
(For more information, see paragraph 7.4.)
3.3 Last route
This option takes you directly to the navigation screen to follow the last route calculated, including the stages you
previously saved. For more details, read Chapter 10 - Notes and Tips.
19
4_Plan Your Journey
In the Main Menu, click “Plan your journey”.
You can then plan your journey by one of 3 methods:
Plan a Route to specify a departure and arrival point
Display a Map to select your departure and arrival points directly on the map
Search for a POI to plan a route to or from a POI
4.1 Plan a Route
Click “Plan a Route”.
You access a screen identical to “Route Summary”, where you must indicate the departure and arrival point instructions.
To do this, click on the icons at the bottom of the screen. The first orange icon at the top right is the departure point. The
second orange icon as the arrival point and the last blue icon on the right is the route settings icon.
Clicking on the button opposite the departure point or the arrival point gives you six choices for selecting them:
towards an Address
towards a POI
by Selecting a place directly on the map
in My ViaMichelin
in the History of the last 15 journeys made
by indicating GPS coordinates
4.1.1 Address
Click “Address”.
You can then search either by:
“Zip code” (For more information, see paragraph 3.1.1.1.
“Town” (For more information, see paragraph 3.1.1.2.
4.1.2 POI
Click “POI”.
Click the POI category you want.
20

You can then search according to 4 criteria:
Town to search for a POI in the town you choose (For more information, see paragraph 3.1.2.1).
GPS Position to find a POI near the position - in a straight line—established by the GPS
(For more information, see paragraph 3.1.2.2).
Departure to select a POI near the arrival point (For more information, see paragraph 3.1.2.2).
Destination to select a POI near the arrival point (For more information, see paragraph 3.1.2.2).
4.1.3 Select on Map
Click “Select on Map”.
(For more information, see paragraph 3.1.3.).
4.1.4 My ViaMichelin
Select the departure or arrival point from:
My Favorites / My Personal Folders in one of the predefined categories:
• Addresses
• Hotels
• Restaurants
• Tourism
• My POIs
(For more information, see paragraph 3.1.4.).
To save a route from the “Plan Your Journey” menu:
• Select a departure point and destination in the route preparation screen
• Click the “Route Actions” button at the bottom left of the screen:
• Select the “Save” option to add it to “My ViaMichelin”
• Select the personal folder in which you want to save it, then fill in the choice of name.
Once you have saved a route, it is possible to find it again to view it on a map or to change it by adding stages, for
example. To do this:
• Click “Routes” from “My Favorites” or another personal folder.
• The next screen presents the routes saved in this folder to you; choose one of these routes.
4.1.5 History
Click “History”.
The list of the last 15 destinations is displayed. Click the address you want or click “Back” to return to the
previous screen.
(For more information, see paragraph 3.1.5.)
4.1.6 GPS Coordinates
Click “GPS Coordinates”.
(For more information, see paragraph 3.1.6.)
Click on the route settings button to access the tables directly. Use these to change the 4 route calculation
criteria.
21
4.1.7 Mode
Here you have the choice between 3 navigation modes:
Car to calculate routes that can be taken by car.
Pedestrian
to calculate the journey ignoring one-way streets and using pedestrian streets.
Bicycle to calculate routes suitable for this mode of transport.
4.1.8 Type of route
Here you have the choice between 3 types of route:
Recommended “Recommended” routes are designed to favour comfort and safety while offering a good
compromise between time and distance.
The quickest
“The quickest” route offers the best journey time by giving priority to major networks.
The shortest “The shortest” route optimises distance.
4.1.9 Tolls
You can either “Authorise” routes with toll roads to be calculated or “Avoid” them. The calculation will then search
for a journey that avoids toll roads, but without making the route too much longer.
4.2 Display a Map
Click “Display a Map”. The system displays the map, centerd either on the location marker, the system’s GPS
position, or on the last route worked out, etc. depending on the last operation performed when this function
was used.
You can now access the following menus:
Map Options to access different search and display options.
Route Actions to access the screens to prepare a route (only accessible if the system has already
calculated a route).
Main Menu to go back directly to the system home page if no route has been calculated.
4.2.1 Map Options
Click “Map Options”.
You can now do the following:
Search Save the position of the location marker
Telephone Display
Center
22

4.2.1.1 Search
Click “Search”.
You can select one of 6 search modes:
Address For more information, go to paragraphs 4.1.1.
POI For more information, go to paragraphs 4.1.2.
Select on Map For more information, go to paragraphs 4.1.3.
My ViaMichelin For more information, go to paragraphs 4.1.4.
History For more information, go to paragraphs 4.1.5.
GPS Coordinates For more information, go to paragraphs 4.1.6.
4.2.1.2 Save the position of the location marker
Click “Save the position of the location marker”.
You can then save this location in:
My Favorites / My personal folders (in one of the predefined categories).
My POIs
Click the category in which you want to save the position established by the location marker.
Enter the name you want to give to your saved address.
Click “OK” to save the address or click “Cancel” to go back to the map.
4.2.1.3 Telephone
Click “Telephone”.
You can select one of 4 telephony options:
Dial
Call Log
Quick Dial
Telephone Options
Comment:
To use the telephone options, you must have established the Bluetooth connection between your ViaMichelin
Navigation X-970 and your phone. (For more information, see paragraph 6.3.)
1. Dial
Click “Dial”.
Enter the digits of the telephone number you want to dial.
Click “Call” to call the party or click “Back” if you want to return to the previous screen.
If you have not established the Bluetooth connection between your ViaMichelin Navigation X-970 and the
telephone, the system displays the message “Connection failed”. Click “OK” to return to the previous screen.
Otherwise the message displayed is “Call in progress … xxxxxxxx”.
Click “Hang Up” or click the red telephone icon to end the call or click “Back” to return to the previous screen.
2. Call Log
Click “Call Log”.
• Click the telephone beside the number selected to automatically redial your party.
23
3. Quick Dial
Click “Quick Dial”.
Click “Add” to add one of the five numbers from the Quick Dial list.
Enter a name.
Click “OK” to save the name you entered or click “Back” to return to the previous screen.
Enter the associated telephone number.
Click “OK” to save the name you entered or click “Back” to return to the previous screen.
Click your party’s name to access the following options:
Call to call the party’s number
Change to change the name or the number saved
Delete to delete the name and telephone number from the list of 5 quick dial numbers.
Simply click the option to carry out the task.
Comment:
This lets you save the number “911”, for example, which is the U.S. emergency number.
4. Telephone Options
Click “Telephone Option”.
You can select 3 options:
Activate/Deactivate Bluetooth to establish or cut off the Bluetooth connection.
(For more information, see paragraph 6.3.1.)
Connect Telephone to associate one or more phones with your ViaMichelin Navigation X-970.
(For more information, see paragraph 6.3.2.)
Telephone Sound to adjust the telephone volume and ring tone on the speaker located in the
base of the device. (For more information, see paragraph 6.3.3.)
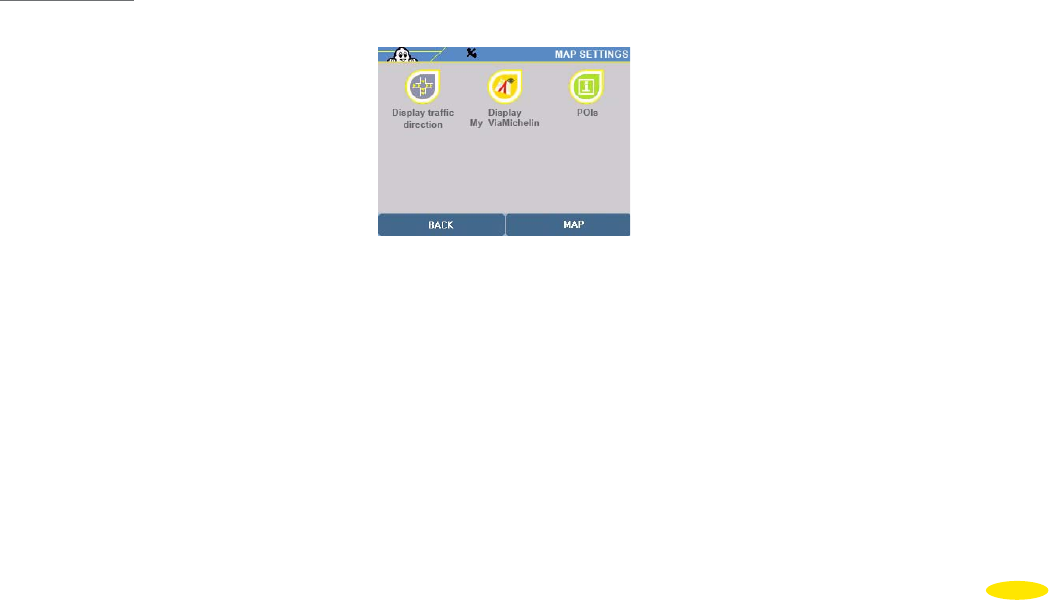
4.2.1.4 Display
Click “Display”.
You can select 3 options:
Display traffic direction / display street names
Display My ViaMichelin
Display POIs
1. Display traffic direction/street names
Click “Display Traffic Direction”
The system displays the maps with symbols showing the direction of traffic on the streets:
•
> or < indicates the traffic direction in a one-way street.
• o indicates a street where a section is not accessible to cars (pedestrian streets, private roads,
no through roads, etc.)
24

The name of the street where the location marker is positioned and the number of the section selected on the map
are always displayed at the bottom of the screen.
Click “Display Street Names”: the system displays the maps again with the street names.
2. Display My ViaMichelin
• Click “Display My ViaMichelin”.
• Tick the boxes beside the saved address categories you want to see on the map.
• Click “Select/Unselect all” to see all or none of the categories of saved addresses.
• Click “More criteria” to display the lists of categories present in the “My Favorites” or “My POIs” options to select
them individually.
• Click “Select all”/”Unselect all” to select or unselect all the boxes.
3. Display POIs
Click “Display POIs”.
Tick the boxes beside the POI categories you want to see on the map. Some categories of POI contain submenus
that can be displayed independently. Click “More criteria” to access these subcategories.
E.g.: If the “Green Guide” category is selected, all 7 POI subcategories will be displayed. But it is possible to select
only certain subcategories—e.g. Museums—to limit the number of POIs displayed on the map.
• Click “Unselect all” if you don’t want to display any of the POI categories.
Comment:
This lets you save the number “911”, for example, which is the U.S. emergency number.In navigation, displaying
a very large number of POIs may call on the device’s resources and reduce the smoothness of the dynamic
display. You are therefore recommended to display the POIs you need for the route calculated.
For more details, read paragraph “10 - Notes and Tips”.
4.2.1.5 Center
You can only access this option if a route has been calculated.
Click “Center”.
25
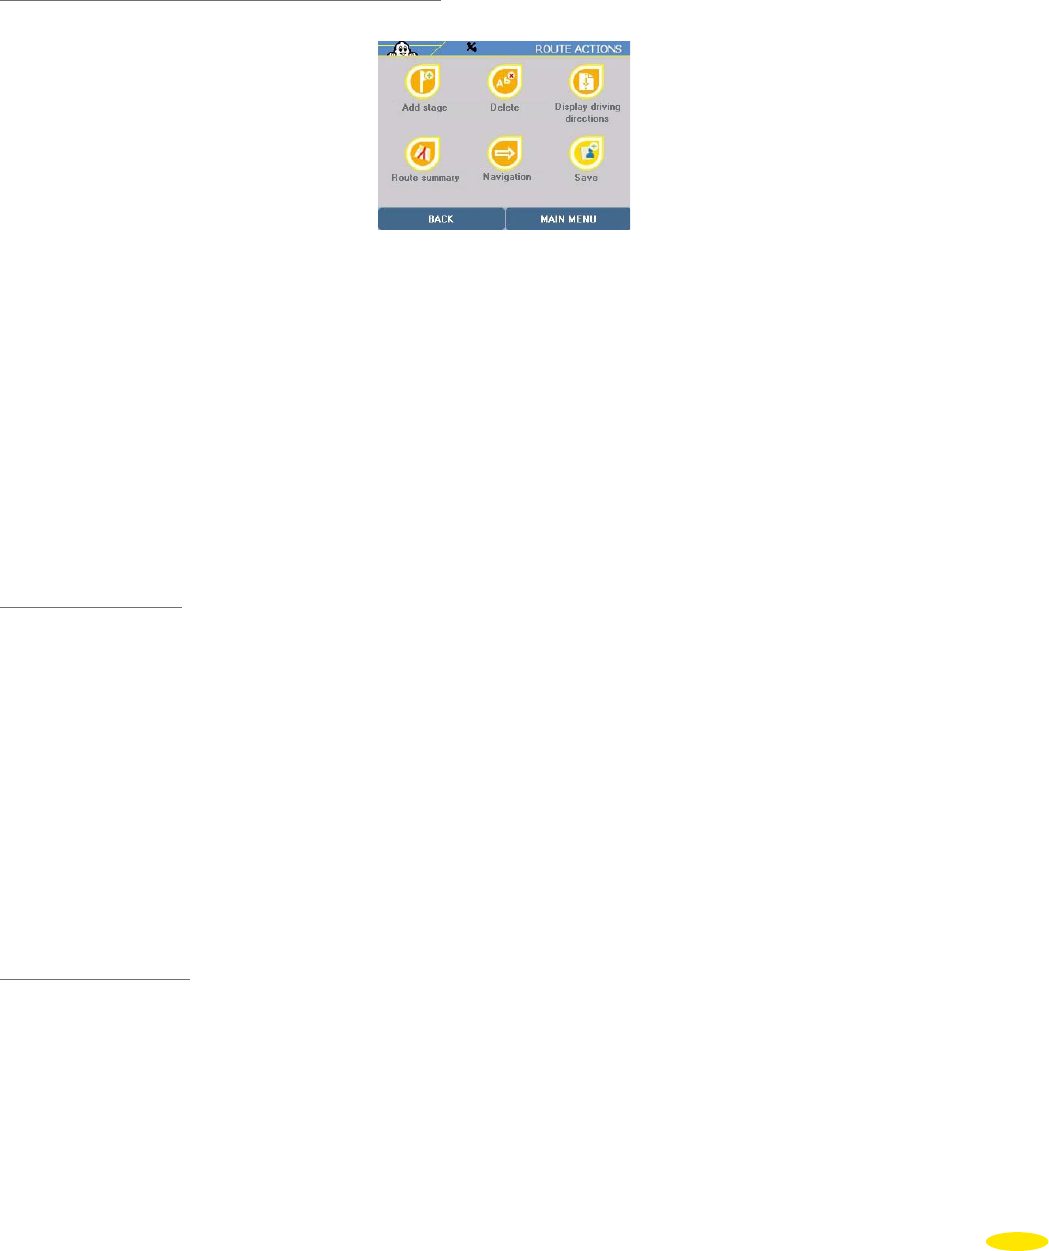
You can ask to center the map:
On your departure point to position the location marker on your departure point.
On your arrival point to position the location marker on your arrival point.
On the route to display the map with a zoom level calculated automatically by the system to allow
you to view the whole of the route highlighted in green.
4.2.2 Route Actions
Click “Route Actions”.
You can now do one of 6 operations:
Add a Stage
to select one or more intermediate stages in the calculated route.
Delete Route to delete the last route calculated.
Display Driving Directions
to display the interactive driving directions.
Route Summary /
Display a Map to return to the “Route Actions” screen and the route setting summary,
or to display the route map.
Navigation to activate navigation.
Save To save the route calculated in “My ViaMichelin” in the “My Favorites” option.
4.2.2.1 Add a Stage
Click “Add a Stage”.
You can add a stage by specifying it using one of 6 search modes:
Address For more information, go to paragraphs 4.1.1.
POI For more information, go to paragraphs 4.1.2.
Select on Map For more information, go to paragraphs 4.1.3.
My ViaMichelin For more information, go to paragraphs 4.1.4.
History For more information, go to paragraphs 4.1.5.
GPS Coordinates For more information, go to paragraphs 4.1.6.
On the map, you will see a small purple flag to symbolise the stage.
4.2.2.2 Delete Route
Click “Delete Route” to delete the last route calculated. The system will display the map with the location marker
placed on the last position you selected.
Comment:
Deleting a route deletes the displayed map route but does not delete the “History” departure and
arrival points.
26
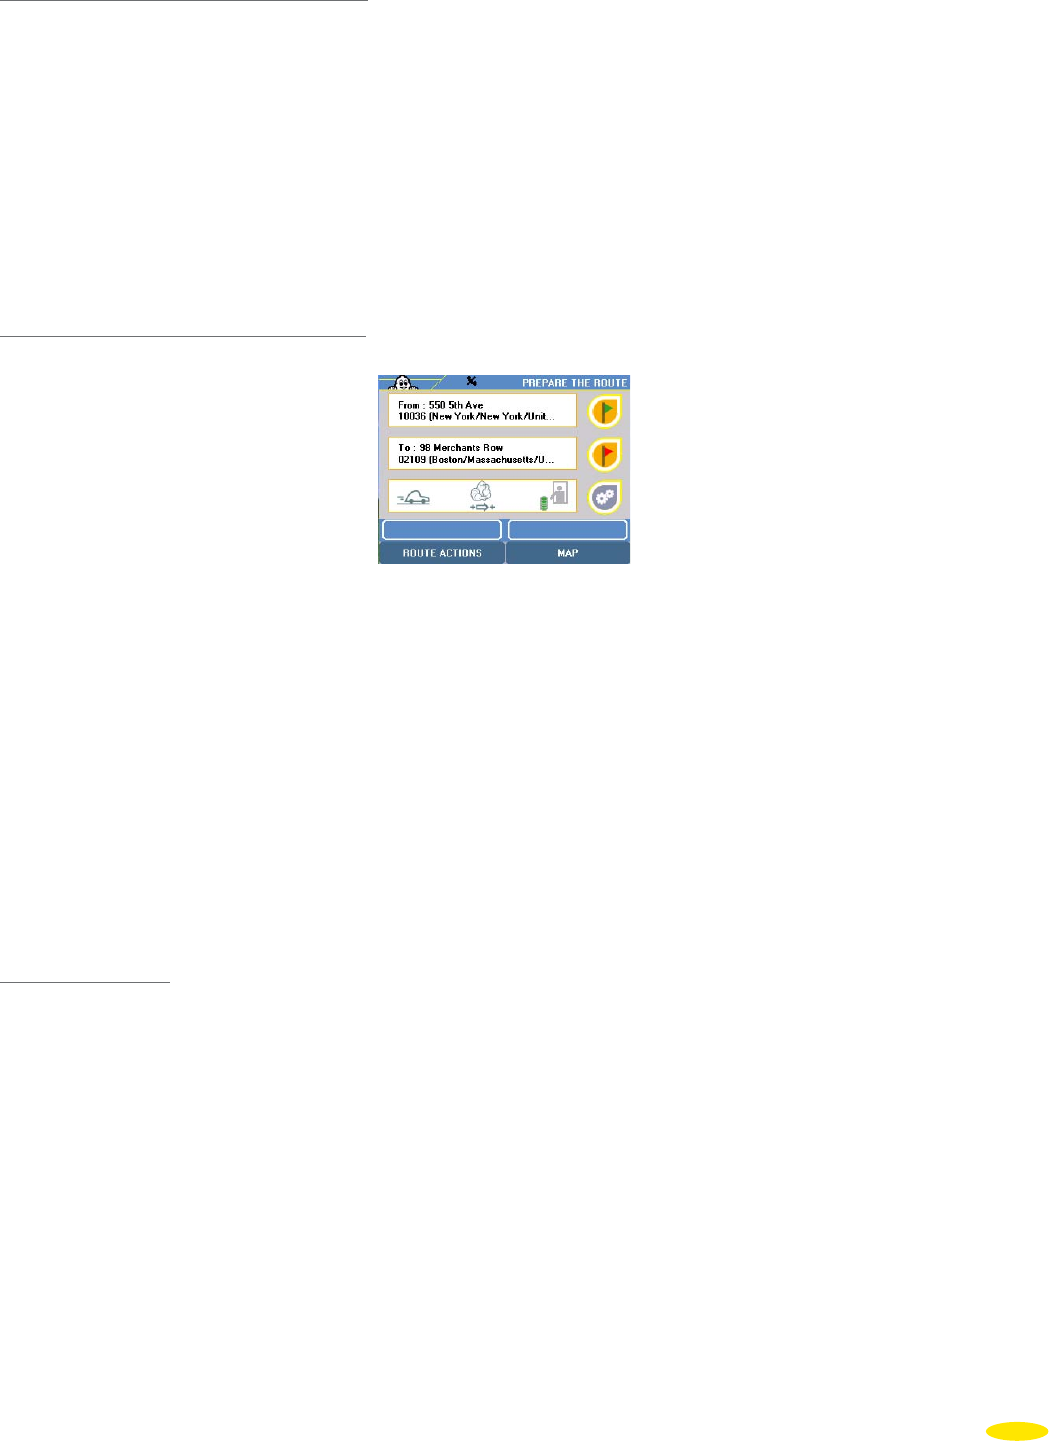
4.2.2.3 Display / Hide Driving Directions
Use this function to split the part of the screen used to display the map so that there is an area above the map
showing:
The distance covered
The total journey time
The change of direction instructions
• Click “Display/Hide Driving Instructions” to display or hide the driving instructions above the map.
• Click the direction arrows to the right of the driving instructions for changes of direction and to automatically
display the map on the place cited.
4.2.2.4 Route Summary / Display a Map
Click “Route Summary”.
• Click one of the icons displayed on the right of the screen to change the settings of the last route calculated.
• Click “Map” to display the route map or “Route Actions” to return to the corresponding screen: the “Route
Summary” screen is then replaced by “Display a map”, which lets you display the route map directly.
When preparing a route, some functions are available when you click a place icon:
Delete deletes the selected place. If the route has only one departure and arrival point, this function
will not be accessible.
Change lets you change the place.
Save lets you save the selected place directly in “My Favorites” or “My POIs”.
Move up lets you switch a place to the previous stage of the route.
Move down lets you switch a place to the next stage of the route.
4.2.2.5 Navigation
Click “Navigation”.
You now have a choice of 2 menus:
Navigation to start GPS-guided navigation.
Navigation Demo to simulate navigation on the route calculated.
1. Navigation
Click “Navigation”.
• Click one of the icons displayed on the right of the “Current route” screen to change the settings of the last route
calculated.
• Click “Navigation” to start GPS-guided navigation or on “Route actions” to go to the corresponding contextual
screen.
27

2. Navigation Demo
This function simulates navigation on the planned route by simulating reception from 7 satellites and a speed
based on the table of average speeds for the type of road.
• Click “Navigation Demo”.
• Click one of the icons displayed on the right of the “Current route” screen to change the settings of the last route
calculated.
• Click “Navigation” to start GPS-guided navigation or on “Route actions” to go to the corresponding contextual
screen.
The navigation screen is identical to the one displayed during a journey. Clicking on the screen will take you to the
navigation settings. (For more information, see Chapter 6.2)
4.3 Search for a POI
• Click “Search for a POI”.
• Click the POI category you want. You can use the direction arrows to view the whole list of POI categories available
on your system.
You then have 4 search options:
Address to find a saved address.
GPS Position to find a saved address near the position established by the GPS.
Departure Point to select a saved address near your departure point.
Arrival Point to select a saved address near your arrival point.
For more information, see paragraph 3.1.2 and following paragraphs.
• Click the POI you want. They are classified in order of decreasing proximity—in a straight line—to the point
selected. (For more information on POI presentation, see paragraph 9.1.2.)
4.3.1 GPS Position, Departure Point or Arrival Point
• Click “GPS Position”, “Departure Point” or “Arrival Point”.
The screen displays a list of POIs classified in order of decreasing proximity – in a straight line – to the GPS
position.
• Click the POI you want.
• Click on “Refine” if you want to run a search. (For more information, see paragraph 3.1.2.1.).
For more details, read section 10_Notes and Tips.
28

5_My ViaMichelin
• In the Main Menu, click “My ViaMichelin”.
You can select one of the following choices:
•
My Favorites/Personal folder to find and locate an address saved in “My Favorites” or a personal folder.
•
My POIs to find and locate a POI saved in this option.
•
Actions
lets you display and be alerted about POIs of the folders of your choice.
Comments:
• Your “Personal folders” are generated with the same sub-folders as the “My Favorites” folder. If you have
created “Personal folders” the explanations given below for the “My Favorites” folder will let you perform
the operations you want.
• The “My ViaMichelin” includes at least the two folders: “My Favorites” and “My POIs”. You can add to the
content of “My Favorites” directly from your GPS or by exporting data from the ViaMichelin web site.
• You can add to the “My POIs” by downloading “*.asc” files from web sites and exporting them to your GPS
using the “Content Manager” application.
• An unlimited number of personal folders can be created in the “My ViaMichelin” option from your personal
“My ViaMichelin” space on the web site or from the “Content Manager” program only. You can then add
to their content either from the web site or directly from you GPS.
5.1 My Favorites
“My Favorites” is a unique file, which is located in the “My ViaMichelin” menu by default. This cannot be deleted
or renamed. You can save all your favorite addresses and routes that you use regularly in this folder.
• Click “My Favorites”.
You can select one of 5 menus:
•
Routes to save your favorite routes or ones from the ViaMichelin web site.
•
Addresses to save the address coordinates of your choice.
•
Hotels to save your favorite hotels or ones from the ViaMichelin web site.
•
Restaurants to save your favorite restaurants or ones from the ViaMichelin web site.
•
Tourism to save your favorite tourist sites or ones from the ViaMichelin web site.
The ViaMichelin web site can be accessed at:
http://www.ViaMichelin.com
29

5.1.1 Routes
This category offers you all the routes saved directly from your GPS or exported from the ViaMichelin web site. This
folder is empty if you have not saved any routes.
• Click “Route”.
5.1.1.1 Start
• Click “Start”.
The summary screen shows you the saved route with departure point, arrival point and any stages selected. You
can view your route on a map, add or delete stages or change departure or arrival points.
5.1.1.2 Rename
• Click “Rename”. You can then rename your saved route.
5.1.1.3 Delete
Click “Delete”. This will permanently delete the route in the My ViaMichelin folder.
5.1.2 Addresses
• Click “Address”.
You can now perform the following operations:
• Search near GPS position
• Search for a POI
• Add a POI
• Display on map ON
• Warning ON
5.1.2.1 Search near GPS position
• Click “Search near GPS position”.
30

5.1.2.2 Find POI
• Click “Find POI” (for more information, see paragraph 3.1.2).
5.1.2.3 Add a POI
• Click “Add a POI”.
You can search either by:
• Address
• POI
• Select on map
• My ViaMichelin
• History
• GPS Coordinates
Once you have saved your address, select the folder in which you want to save it, then click “OK”. This address is
then added to your “My ViaMichelin” folder.
5.1.2.4 Display on map ON/OFF
• Click “Display on map ON/OFF”.
The POIs of the selected folder will or will not be displayed on the map. When a directory’s POIs must be displayed
on the map, a small eye is displayed next to the folder in question.
5.1.2.5 Turn off / Turn on Warner
• Click “Warner ON/OFF”.
The POIs of the selected folder will or will not be indicated by an alarm signal when passing near them. When you
decide to spot POIs from a folder when passing near them, a small signposting triangle is displayed next to the
name of the folder concerned.
5.1.3 Hotels
• Click “Hotels”: you will find the same functionalities as in the “Addresses” option (§ 5.1.2).
31
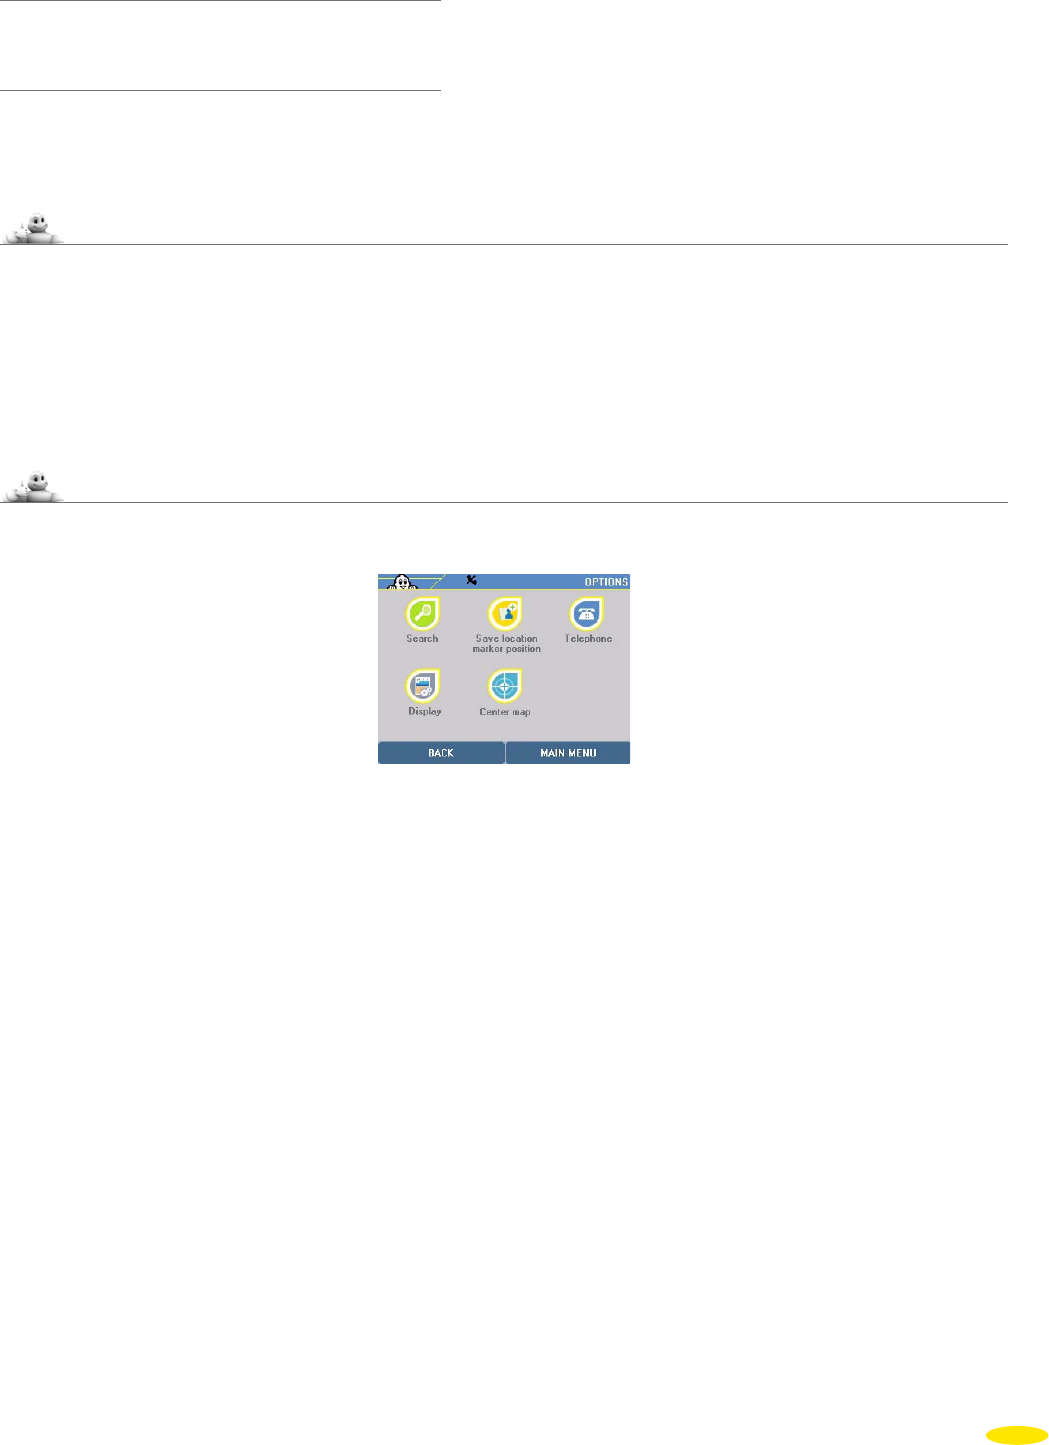
5.1.4 Restaurants
• Click “Restaurants”: you will find the same functionalities as in the “Addresses” option (§ 5.1.2).
5.1.5 Tourism
• Click “Tourism”: you will find the same functionalities as in the “Addresses” option (§ 5.1.2).
5.2 My POIs
• Click “My POIs”.
This folder groups together all the “*.asc” POIs downloaded from web sites using the “Content Manager”
application. (For more information, see paragraph 13.3.5). They are presented as categories.
When this folder contains “*.asc” files you can access the following actions by clicking a POI category.
5.3 Actions
• Click the “ACTIONS” button.
You can then:
• Display on map ON/OFF to display or not display the POI contents:
• Turn off / Turn on warner to switch an audible warning when passing near a content POI when passing near
it on or off:
– in “My ViaMichelin” (Actions in the My ViaMichelin screen)
– in a “My Favorites”, “Personal Folder” or “My POIs” folder (Actions in a particular Folder)
– in one of the 5 categories of a file (Actions in a particular category)
To switch “Display on map ON/OFF” or “Warner ON/OFF”:
• Select “My Favorites” or the folder you want.
• Click “Actions”.
• Click “Display on map ON/OFF” or “Warner ON/OFF”.
• Click “Back”.
When the “My Favorites” POIs or POIs from a personal folder must be displayed on the map, a small eye is
displayed next to the folder in question.
When you want to use an alarm signal to spot POIs from “My Favorites” or a personal folder when passing near
them, a small signposting triangle is displayed next to the name of the personal folder concerned.
32
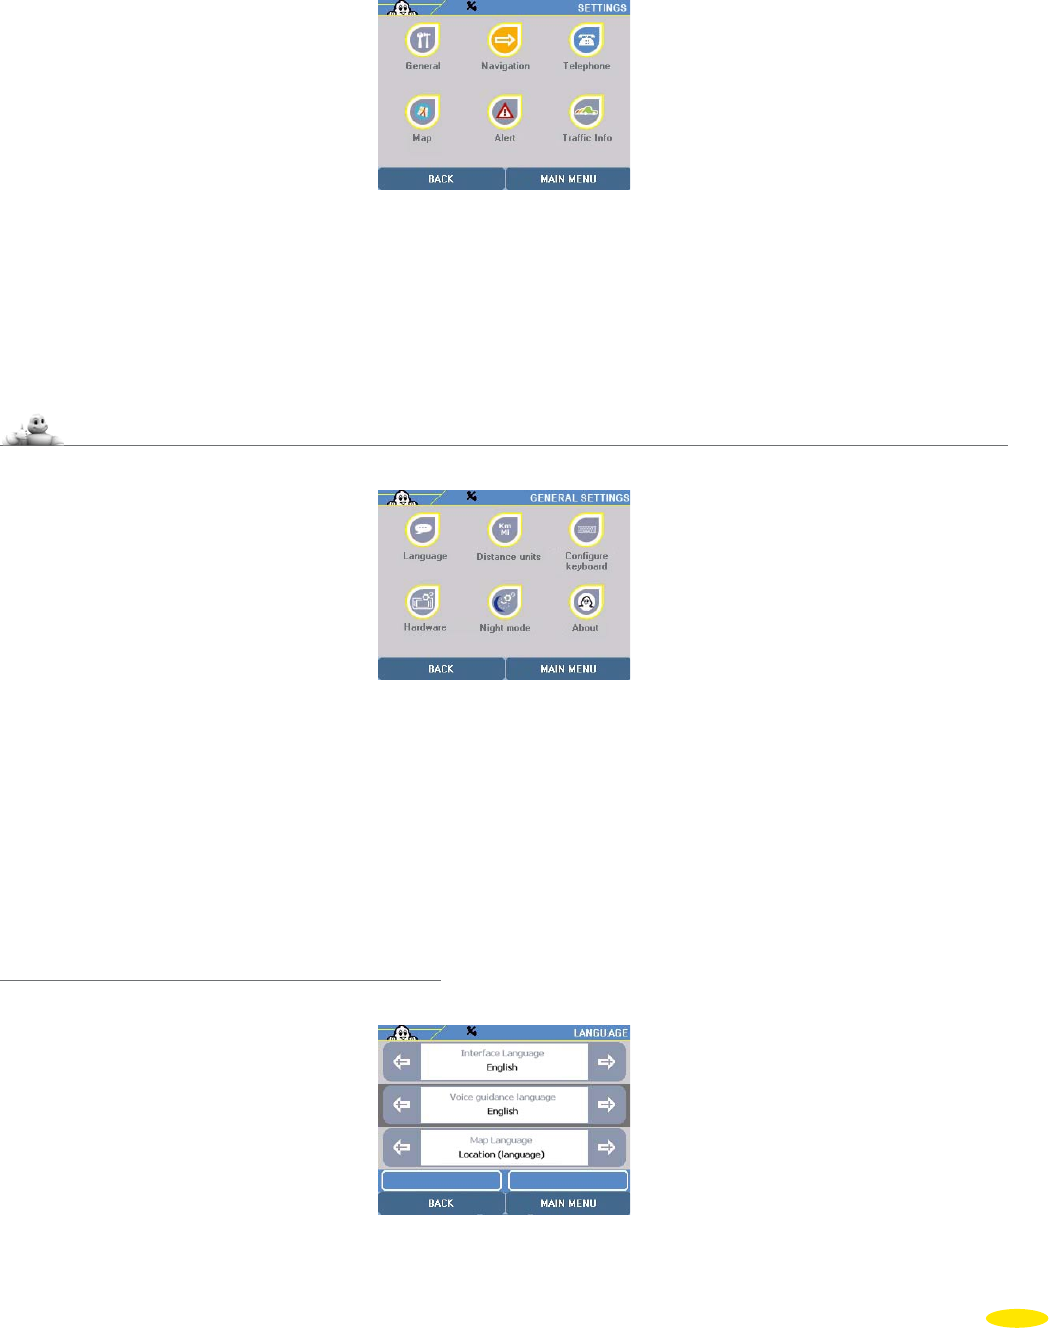
6_Settings
In the “Main Menu” click “Settings”.
This takes you into the settings or information menus:
• General to find out or change system settings.
• Navigation to change navigation settings.
• Telephone to access telephony settings • Map to change or delete a map.
• Alert to change warning settings for POIs, saved addresses or vehicle speed.
6.1 General
• Click “General”.
This takes you into the settings or information menus:
• Language to adjust the language settings for the menus, voice guidance and the map.
• Units to select Km or Miles.
•
Configure keyboard
to choose the type of keyboard displayed on the search screens.
• Hardware to change the system settings.
• Night Mode to adapt the screen to the exterior conditions.
• About to find out about the system and map version.
6.1.1 Language
• Click “Language”.
33
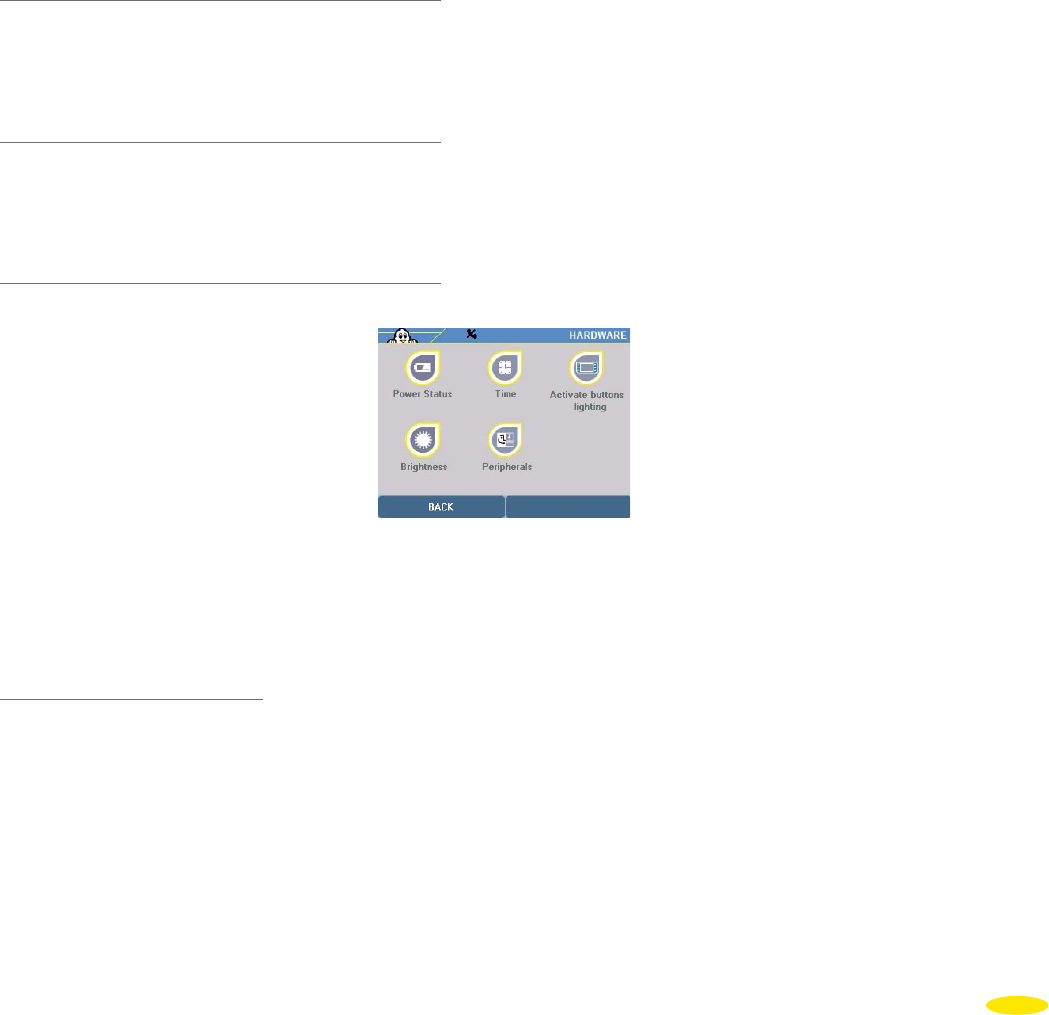
You use this option to set:
• The Interface Language: this is the language in which the menus are displayed. The available languages are:
French, German, Italian, Polish, Portuguese, Spanish, Czech, Dutch and English.
• The Voice Guidance Language: this is the language used in voice messages during Navigation. Here you have the
choice between 15 different languages: French, English, German, Spanish, Italian, Dutch, Portuguese, Flemish,
Norwegian, Swedish, Danish, Finnish, Polish, Czech and American English.
• The Map Language: this is the local language the maps are displayed in (town names, street names, etc.): French
in France, Danish in Denmark, etc. In countries with several official languages (Switzerland, Belgium, etc.), this
function lets you switch from one language to another. You will then need to search for towns, streets, etc. in
the selected language. Your available choices are: French, German, Italian, Spanish, Dutch, Swedish, Catalan,
Basque, Galician and local.
• Click the left and right arrows to select your language.
Or
•
Click the language in your chosen menu to display a list of available languages; then click the language you want.
• Click the up or down arrow to scroll through the whole list.
6.1.2 Units
• Click “Units”.
•
Click the left and right arrows to select the distance unit you want to use to calculate routes and to display distances
on the Navigation screen. You can select: km (kilometres) or miles (1 mile = 1.609 km).
6.1.3 Configure Keyboard
• Click “Configure Keyboard”.
• Click the left and right arrows to choose the keyboard type displayed on the search screens. Azerty (French
system), ABC (alphanumeric) or qwerty (English system).
6.1.4 Hardware
• Click “Hardware”.
You can now access the following screens:
Power Status to check the battery charge.
Time to change the system time.
Brightness to change the screen brightness.
6.1.4.1 Battery Power Status
This screen gives the percentage of “Battery remaining” or, if the PND is connected, the screen displays the message:
“Charging… 100%”.
• Click “Power Status” to display the battery charge.
When ViaMichelin Navigation is removed from its mounting system, disconnected from the PC or from the
electrical supply, a small icon in the top bar at the top of the screen gives the level of battery charge.
Comment:
• Warning: There is a risk of explosion if the battery is replaced by a battery of an incorrect type.
• Dispose of used batteries in compliance with existing law in your country.
34
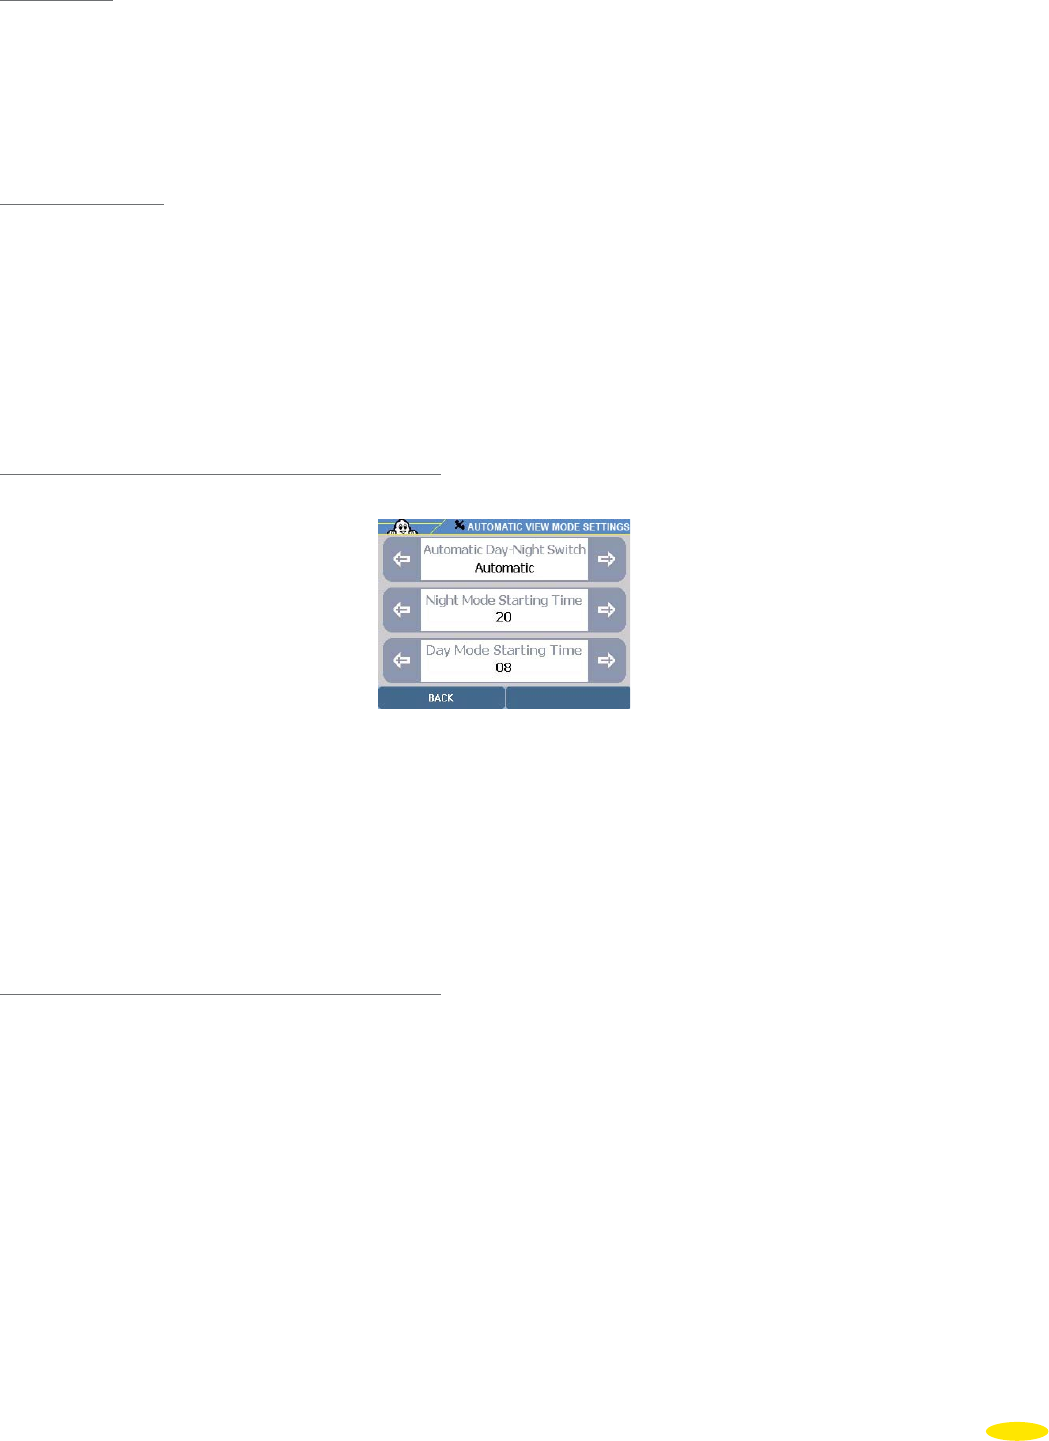
6.1.4.2 Time
•
Click “Time”.
•
By clicking on the left and right arrows, you can change the hours, minutes and time display system
(24-hour clock or the Anglo-American AM/PM system) on your ViaMichelin Navigation X-970.
Or
•
Click the option to access the list and select the setting you want.
6.1.4.3 Brightness
•
Click “Brightness”.
•
Click the bar to move the cursor to the desired level or click the cursor and move it to the brightness level you
want for the screen.
Comment:
When ViaMichelin Navigation X-970 is used autonomously, the screen becoming less bright allows the
autonomy of the device to be extended.
6.1.5 Night Mode
•
Click “Night Mode”.
•
Click the direction arrows or the information to select “Night Mode” from the list displayed: The screen becomes
less bright and the map colors change to make the display more comfortable for night driving.
•
Click the direction arrows or the information to select “Day Mode” from the list displayed: The screen brightens
and the map colors change to give the ViaMichelin Navigation X-970 display maximum visibility in full daylight.
•
Click the direction arrows or the information to select “Automatic” from the list displayed:You can set the start
and end time for switching from day mode to night mode in the automatic night mode adjustment screen. To
do this click the direction arrows or click the time you want from the list displayed. By default the switch to night
mode is at 8.00 pm and the switch to day mode is at 8.00 am.
•
Click on “Back” to return to the previous screen.
6.1.6 About
This screen tells you which version of the software is installed in your ViaMichelin Navigation X-970 and the
different copyrights and map years for the maps and POIs in use.
•
Click “About”.
•
Click the direction arrows to scroll through this information.
ViaMichelin Navigation 6.6.0 (Build 42)
Version ROM 1.0101.0409 – Apr 3 2007
Cartography 2006.4
Cartography © ViaMichelin 2007
Digital Data © NAVTEQ 2006
The Data for areas of Canada includes
information taken with permission
35

from Canadian authorities, including:
© Her Majesty the Queen in Right of Canada,
© Queen’s Printer for Ontario,
© Canada Post Corporation,
GeoBase® Postal code information
© United States Postal Service 2006
Points of interest include materials from infoUSA © infoUSA 2006
Hot spots © Jiwire Inc. ® 2006
RealSpeak ® Text-to-Speech Software
© 2006 Nuance Communications, Inc.
Guide © Michelin 2007
ViaMichelin Navigation Software © ViaMichelin 2007
• Click “Back” to return to the previous screen or click “Main Menu” to go to the system home page.
6.2 Navigation
•
Click “Navigation”.
Use this screen to access menus to change some of the navigation settings:
Route Settings to select the settings for calculating routes.
• GPS
to display the GPS satellite signal reception and give the position coordinates evaluated by the GPS.
•
Sound to set the volume for the messages and signals transmitted by your ViaMichelin Navigation X-970.
6.2.1 Route Settings
•
Click “Route Settings”.
There are 4 criteria for route settings:
• Mode Car / Pedestrian / Bicycle
• Type of route Recommended / Quickest / Shortest
(For more information, see paragraph 4.1.8.)
• Tolls Authorize / Avoid
• Traffic options ON / OFF
• Click the left or right arrows to display the setting you want. The settings are on once you select them.
• Click “Back” to return to the previous screen or click “Main Menu” to take you back directly to the system
home page.
36

6.2.2 GPS
• Click “GPS”.
This brings you to the screen that tells you the GPS reception status; on this screen:
The green “V” means that GPS is activated.
“NO Fix / FIX: 2D/FIX: 3D” indicates better signal reception, and therefore more accurate positioning.
“SAT”: indicates the number of satellites used to calculate your position.
The vertical bars show the satellites detected:
• grey the device is receiving satellite signals but cannot use them to establish your position.
• green the device is using the satellite signals to calculate your position.
• The numbers under the vertical bars give the number of the American satellite.
Coordinates: longitude and latitude calculated by the system.
Direction arrow: shows the direction of travel between 2 position calculations by the GPS.
• Click on “Back” to return to the previous screen.
Comment:
The ViaMichelin Navigation X-970 is fitted with an SiRF Star III type GPS, the latest generation of GPS, which
works even in poor reception conditions.
After selecting a destination and before the navigation instructions show your route, the GPS must have three
pieces of information to calculate the route: the position, direction of travel and speed. You may consult the GPS
screen on your mobile device to follow the GPS signal acquisition.
The time the GPS takes to acquire this information varies depending on how much time has elapsed since the
device was last used:
• your ViaMichelin Navigation X-970 has not been switched on for more than 24 hours (“cold start”): in this
case the time needed to acquire satellite signals may be quite long (10-15 minutes), and the message “Satellite
detection. This may take several minutes” is displayed on the navigation screen.
• your ViaMichelin Navigation X-970 has not been switched on for more than 4 hours (“warm start”): GPS reception
may take several minutes (5 minutes) and the message “Satellite signal acquisition in progress” is displayed on
the navigation screen.
• you switch on your ViaMichelin Navigation X-970 after switching it off a few minutes ago (“hot start”): satellite
reception is almost immediate and navigation can continue.
GPS acquisition time also varies depending on the surroundings:
• athermic windscreens: if your vehicle is equipped with an athermic windscreen, GPS reception may be
slower.
• car park/tunnel/building: satellite signals do not travel through walls, so you will not receive a GPS signal if your
device is in a building, car park, tunnel, etc.
• urban “canyoning”: reception will be slower in urban areas if buildings are high, streets narrow or there
are a lot of trees. Go to an open space to improve reception.
• weather conditions: in poor weather (heavy snow, etc.), GPS reception may take slightly longer.
When using ViaMichelin Navigation X-970 for the first time, we advise you to do so in an open space in order to
ensure the best possible satellite reception. Activating the GPS system for the first time can take several minutes,
depending on the surroundings and the quality of the GPS signals.
6.2.3 Sound
• Click “Sound”.
• Click the left or right arrows to select the setting you want: “Sound” and “Sound Setting”.
37

You can use the “Sound” settings to switch sound messages on or off and to select a different volume for each
“Sound setting”:
General to select maximum volume on alert messages.
Voice instructions for voice guidance during Navigation.
POI Alert to tell you when you are near a POI.
Speed Warner warns the driver when s/he exceeds the speed limit set for the particular type of road.
Telephone for the telephone volume
Telephone Ring Tone to adjust the telephone ring tone volume.
• Click the volume bar to move the cursor to the desired level (to the left = minimum volume, to the right = maximum
volume) or click the cursor and move it to the volume level you want. Use the “Test” button to check the sound level.
6.3 Telephone
• Click “Telephone”.
You can now access the following 3 options:
• Activate / Deactivate Bluetooth
• Connect Telephone
• Telephone Sound
6.3.1 Activate Bluetooth®
• Click “Activate Bluetooth” to enable the Bluetooth connection between your ViaMichelin Navigation X-970 and
your phone.
Comment:
If the Bluetooth option on your ViaMichelin Navigation X-970 is not activated, the “Connect Telephone” and
“Telephone Sound” icons will be shaded and not enabled.
• Click “Deactivate Bluetooth” to disable the Bluetooth connection between your ViaMichelin Navigation X-970
and your phone.
Comment:
If you click “Deactivate Bluetooth” when there is an active Bluetooth connection with a telephone, the
message, “Deactivation of Bluetooth will lead to disconnection of the telephone currently connected.
Do you want to continue with this operation?” is displayed. Click “Yes” if you want to actually deactivate
Bluetooth, otherwise click “No”.
6.3.2 Connect Telephone
• After you activate the Bluetooth connection, click “Connect Telephone”.
• Activate Bluetooth on your mobile phone.
• Click “Add” to start detection of Bluetooth® devices by your ViaMichelin Navigation X-970.
• Click the name of your phone.
• When the system displays the message, “If your phone requires a code, please enter 1 2 3 4”, click “OK”.
• If your phone requires a PIN code to work with “ViaMichelin”, enter “1 2 3 4” and confirm.
• When you see the message displayed on your ViaMichelin Navigation X-970, “Pairing successful. Do you now
want to connect this phone to make it your default phone?”, click “Yes” if you want the selected phone to be
your default phone, otherwise click “No”.
• Confirm the audio connection with “ViaMichelin” on your phone.
• When the message “Connection successful” appears on your ViaMichelin Navigation X-970, click “OK”.
• Click “Back” to return to the previous screen or click one of the buttons on ViaMichelin Navigation to directly
access the function you want.
38
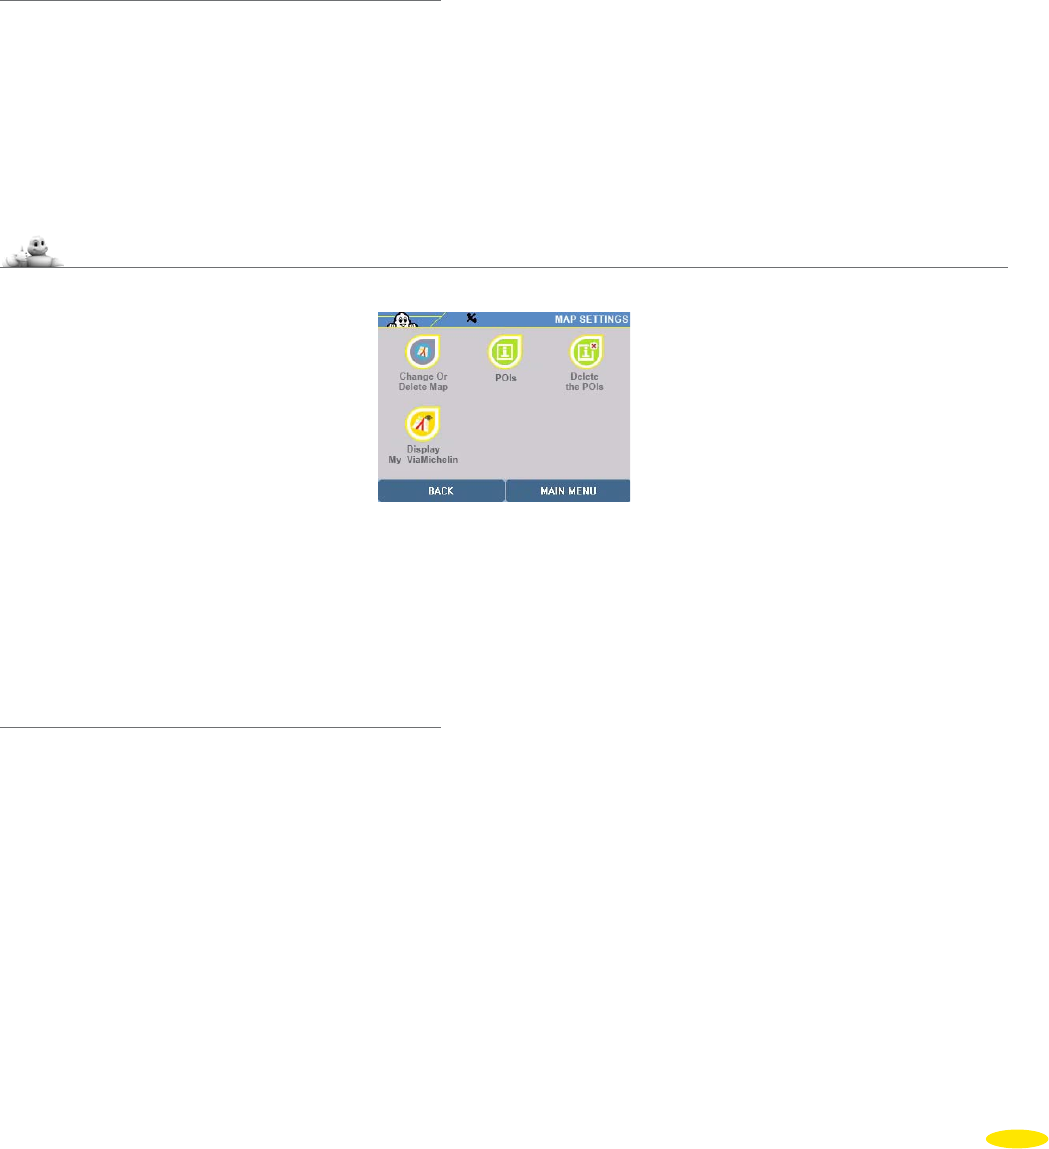
To delete a phone from the list of paired phones, display the page and click the telephone you want to delete
from the list.
You can then:
• Disconnect to cut off the Bluetooth connection
• Delete to delete the phone from the list of devices recognised by your ViaMichelin Navigation X-970.
Comment:
When a phone has been connected to ViaMichelin Navigation X-970T, a small phone will be shown in the top
bar. If not, the icon is crossed out.
6.3.3 Telephone Sound
• Click “Telephone Sound”.
You can change the volume for:
• Telephone Sound
• Telephone Ring Tone
• Click the volume bar to move the cursor to the desired level or click the cursor and move it to the volume level
you want.
6.4 Map
• Click “Map”.
This takes you into the settings or information menus:
• Change or Delete Map to change the displayed map or delete a map from the SD card.
• POIs to select the categories of POI displayed on the map.
• Delete POIs to delete POI categories from your PND.
• Display My ViaMichelin to access the My Favorites and My POIs options.
6.4.1 Change or Delete Map
• Click “Change or Delete Map”.
You can then:
• Change Map to display another map from the SD card.
• Delete Map to delete one of the maps saved on the SD card.
• Click “Change Map” or “Delete Map”.
The SD card supplied with your ViaMichelin Navigation X-970 comes with these map systems:
Country.fdp [Storage Card] this is the map of the country indicated.
Hawaii.fdp [Storage Card] this is the map of the Hawaiian Islands.
NorthAmerica.FDP [Storage Card] this is the map for the United States and Canada.
• Click the map file you want. The message “Are you sure you want to change the map?” or “Are you sure you want
to delete this map? ” appears.
• Click “Yes” to confirm your choice or “No” to return to the list.
39

• Click “Main Menu” to return to the previous screen or click “Back” to go to the previous screen.
You may subsequently restore the maps deleted from a PC using the “Content Manager” programme.
6.4.2 Display POIs
Use this option to select the POIs that will be displayed on the map (given the right zoom level).
• Click “POIs”.
Some POI categories can be detailed and displayed separately in one of the subcategories provided. Click “More
details” to access a list of these subcategories.
Example: If the “Health services” category is selected, all 4 POI subcategories will be displayed. But, it is possible to
select only certain subcategories – e.g. Dentist / Doctor / Pharmacy / Hospital-Clinic – to limit the number of POIs
subsequently displayed on the screen.
• Tick the POI category boxes that you want to see displayed on the map (given the right zoom level).
• Click “Deselect all” to display none of the POI categories.
Comment:
In navigation, displaying a very large number of POIs may call on the device’s resources and reduce the fluidity of
the dynamic display. You are therefore recommended to display the POIs you need for the route calculated.
6.4.3 Delete POIs
Use this option to delete some POI categories from the SD card. The system also deletes the POIs in the deleted
categories and will no longer display them.
• Click “Delete POIs”.
• Click the POI category you want to delete.
• When the system displays the message “Are you sure you want to delete this POI?”, click “No” if you do not want
to delete the selected POI category and go back to the “Map Option” screen, or “Yes” to confirm deletion of the
selected POI category.
• Click on the direction arrows to view all the available POI categories presented or on “Back” to return to the
previous screen.
You may subsequently restore the POIs deleted from a PC using the “Content Manager” program.
6.4.4 Display My ViaMichelin
This option allows you to select the categories of saved addresses that will be displayed on the map.
• Click “My ViaMichelin”.
40

You can now choose to display your POIs from the options:
• My Favorites / My personal folders
• Addresses
• Hotels
• Restaurants
• Tourism
• My POIs
• Click “More details” to access the subcategories.
• Click “Deselect all” to display no POI category.
6.5 Alerts
• Click “Alert”.
You can change the following options:
• Speed Alert use this option to set the speed beyond which the warning signal will
sound, depending on the 4 road categories programmed in the system.
• POI Warner emits an audible warning when passing near a POI.
• My ViaMichelin warning emits an audible warning when passing near a saved address.
• Radar off use to turn off the warning when passing near a fixed speed camera POI
• Warning Sound use to set the sounds for the various warners.
6.5.1 Speed Alert
• Click “Speed alert”.
• Click the left or right direction arrows to select the setting you want, depending on the type of road selected, or
click the speed to select the desired speed from the list.
• Click on “On”/”Off” at the bottom right of the screen to switch this function on and off.
The default speeds in the “Speed alert” table are:
Highways 130 km/h 80 Mph
Expressways 110 km/h 70 Mph
Roads 90 km/h 55 Mph
Towns 50 km/h 30 Mph
The range of speed limit settings for the type of road is between 30 kph and 180 kph or between 25 mph and 110mph.
This function takes account of the type of road given in the map database without adding more detail about the
surroundings or special features of a section.
For example:
A highway may be limited to 55 mph on some sections instead of 70 mph by default. When the map database
identifies an “expressway” it will not indicate the section limited to 55 mph. A “road”, on the other hand, may have
the same speed limit as an expressway in some places. The Speed Warner will then indicate excess speed although
the traffic regulations authorize this speed.
“Speed alerts” should therefore be used for information, but as with all navigation information supplied by your
ViaMichelin Navigation X-970, this information is subject to traffic regulations.
6.5.2 POI Warner
• Click “POI Warner”.
• Tick the boxes by the POI categories for which you want to trigger an audible signal when they are nearby:
• Click “More details” if you want to break your selection down into subcategories of POIs.
• Click “Deselect All” to switch off warners on all POI categories.
Activating a “POI Warner” for a POI category leads to POIs of this category being displayed.
41

6.5.3 My ViaMichelin Warning
• Click “My ViaMichelin Warning”.
• Tick the boxes by the categories of saved addresses for which you want to trigger an audible signal when they are
nearby:
• Click “More details” if you want to break your selection down into subcategories of POIs.
• Click “Select all” to tick the option to display all the icons for all categories of saved addresses, or click “Deselect
all” if you want none to be displayed.
6.5.4 Radar Off / On
• Click “Radar off” to turn off the audible signal when passing near a fixed speed camera located by ViaMichelin.
• Click “Radar on” to have two audible signals when passing near a fixed speed camera located by ViaMichelin: the
first sounds 30 seconds before you reach the location and the second at 10 seconds away.
6.5.5 Warning Sound
• Click “Warning Sound”.
You can then set warning sounds by category:
• Speed Warner warns the driver when s/he exceeds the speed limit set by type of route.
• POI Warner to tell you when you are near a POI.
• Speed Camera Warner to tell you when you are near a fixed speed camera POI.
• Saved Address Alert to tell you when you are near a saved address.
• Click on the up or down arrows to turn warnings “ON” or “OFF”.
42
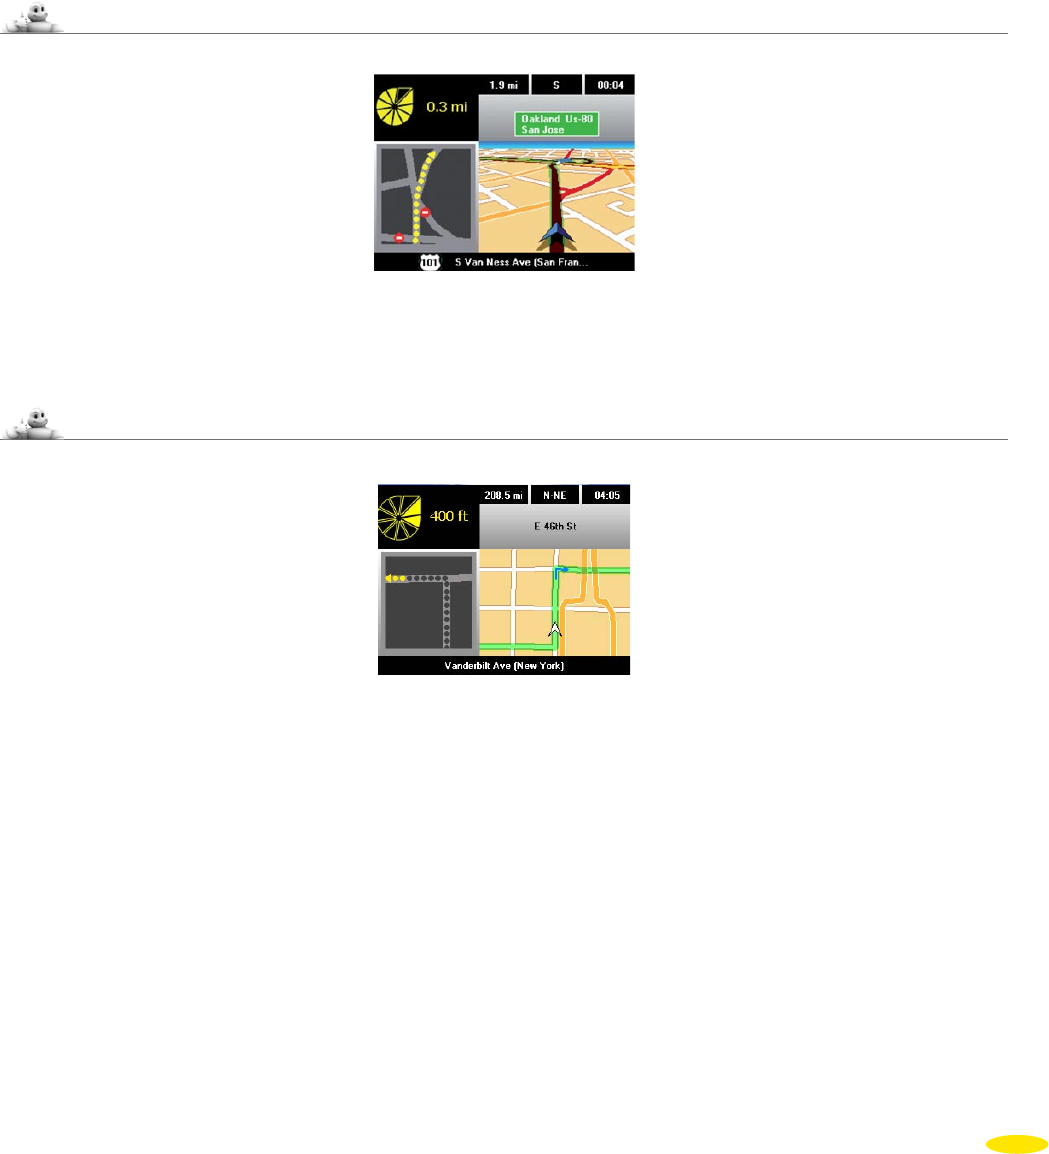
7_Navigation Screens
There are three aspects to the Navigation Screen:
• a map screen this is a standard 2D or 3D navigation screen.
• a schematic screen this gives a diagram of the route to be taken next time you change direction.
• a mixed screen the screen is split to display the standard screen on the right and the schematic screen on
the left.
• To change the screen, click in the navigation area of the screen you want to expand it over the full screen or return
to the mixed screen.
7.1 Mixed Screen
The mixed screen displays the graphic navigation screen on the right and on the left the indicator showing the
distance to the next change of direction as well as the schematic screen navigation map.
7.2 Map Screen
Above the map:
Three top fields are available to show, depending on the setting:
• Distance Remaining
• Time Remaining
• Arrival Time
• Time
• Speed
• Direction
• To choose which information to show, click one of the three top positions, and then click the position you want
to change. Then select the indicator you want.
Under the map:
• On the left the number of satellites used by the GPS for determining the position.
• In the middle the name of the street you are on.
43
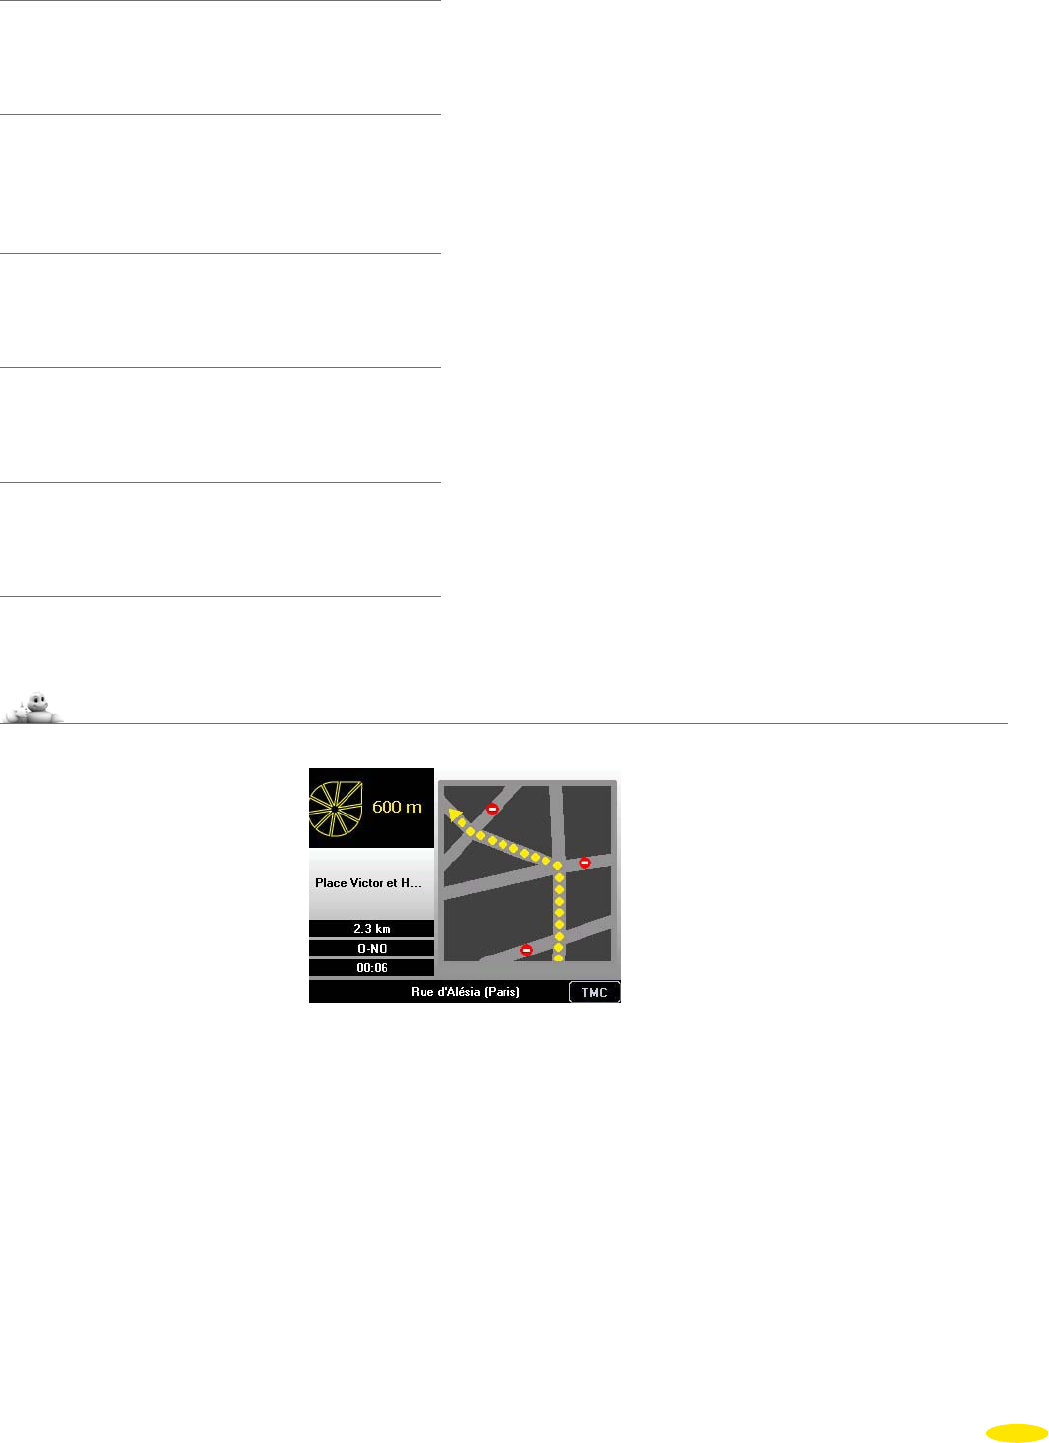
7.2.1 Distance Remaining
This is the distance remaining to the arrival point, given in kilometers or miles depending on the distance unit
selected.
7.2.2 Time Remaining
This is the time remaining until arrival. This time is assessed on the basis of the distance remaining and the average
speeds set in your ViaMichelin Navigation X-970, excluding any stops or breaks (strongly recommended for safety
reasons).
7.2.3 Arrival Time
This is the time of arrival calculated on the basis of the journey distance and time assessed by the system, excluding
any stops or breaks (strongly recommended for safety reasons).
7.2.4 Time
This is the local time based on the time entered when the program was installed in your ViaMichelin Navigation
X-970.
7.2.5 Speed
This is the speed computed by the GPS between 2 position calculations, expressed in kph or mph depending on
the distance units selected.
7.2.6 Direction
This is the current direction of travel based on the 16-point compass dial:
7.3 Schematic Screen
On the left, from top to bottom:
• The indicator showing the distance remaining to the next change of direction.
• The next route.
• Three fields that can be set up (For more information, read the comments in paragraph 7.2.).
On the right-hand side:
• the map of the next change of direction with a dotted line that progressively disappears according to distance to
the change of direction and vehicle position.
On the bar at the bottom of the screen:
• On the left the number of satellites used by the GPS for determining the position.
• In the middle the name of the street you are on.
44
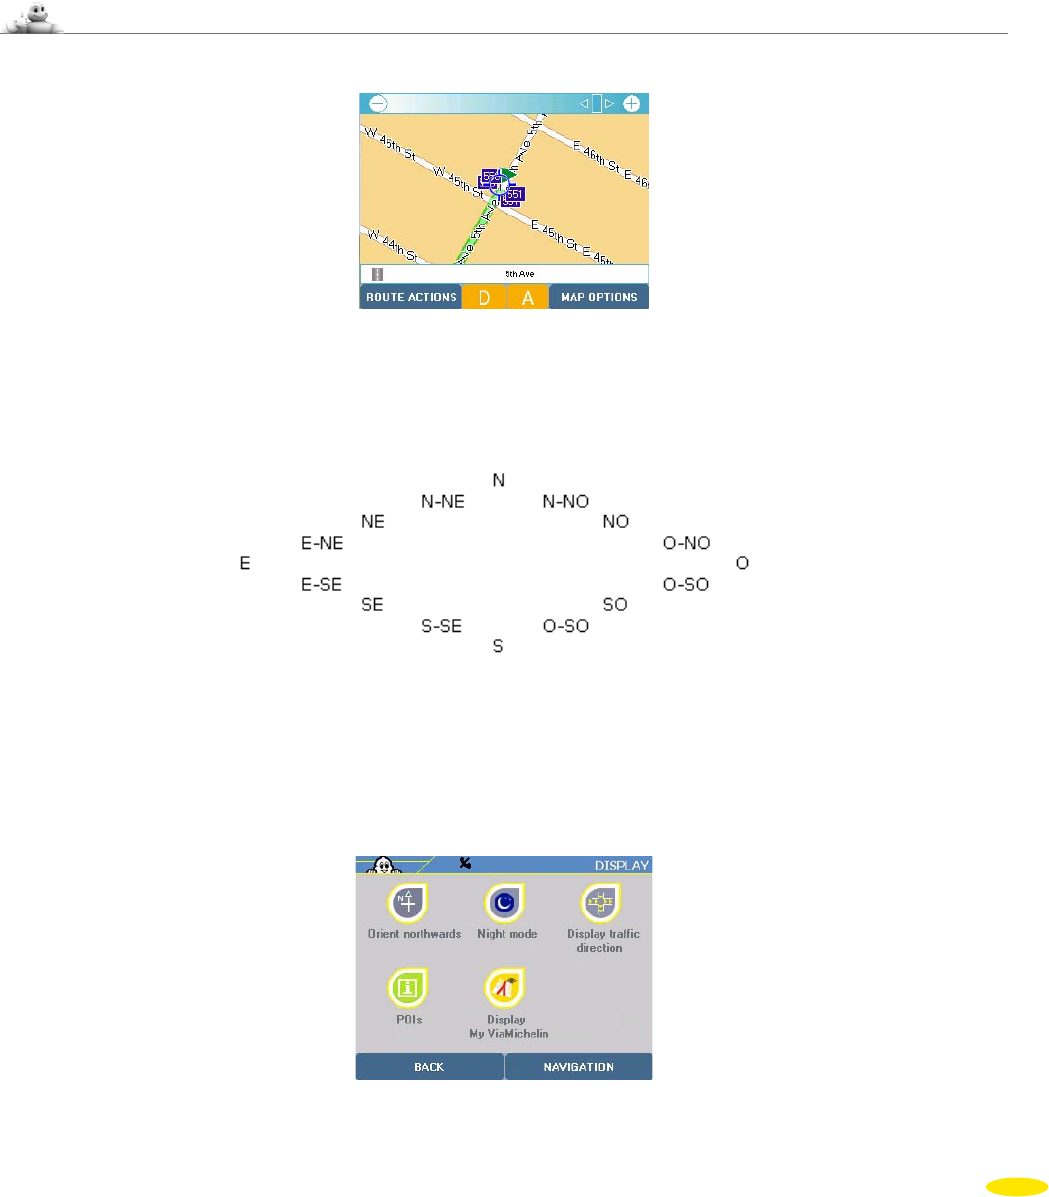
Click the navigation screen to access 6 options:
• Free Navigation to go to free navigation.
• Route Summary to change a route planning criterion.
• Telephone to access telephone options.
• Sound to switch off messages and navigation warnings.
• Settings to access navigation options.
• Display to change the screen display settings.
7.4 Free Navigation
Click “Free Navigation”.
The map is displayed and the location marker becomes an arrow to show the vehicle’s position and direction of
travel.
• Click “Navigation Actions” if you want to access navigation options and settings or click “Main Menu” to take you
back directly to the system home page.
You can select the following options:
• Back to Navigation to return to the navigation screen
• Telephone to access telephon settings (For more information, see paragraph 6.3.)
• Sound to access the sound settings screen (For more information, see paragraph 6.2.3.)
• Options
to access “Warnings” and “Save the GPS position” (For more information, see paragraph 6.5)
• Display to change the screen display settings:
• Orient Northwards / Orient in the direction of traffic to determine the direction of the map when navigating.
45
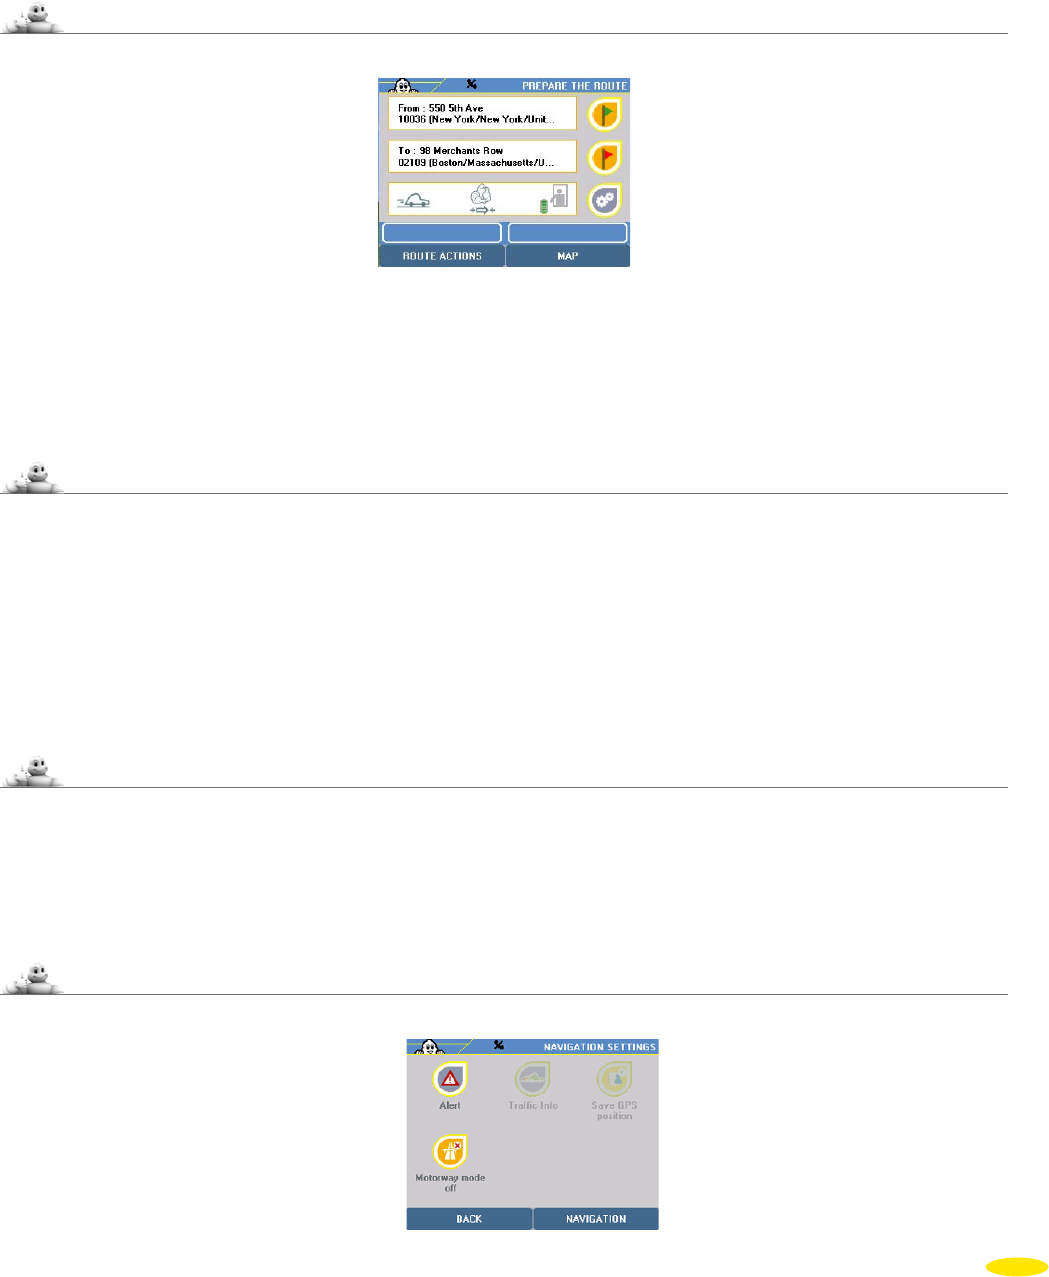
• Night Mode for more information, see paragraph 6.1.5
• Display Traffic Direction/
Display Street Names
for more information, see paragraph 4.2.1.4
• POIs for more information, see paragraph 6.4.2
• Display My Viamichelin
for more information, see paragraph 6.4.4
7.5 Route Summary
• Click “Route Summary”.
This brings you to the screen summarizing the information selected to calculate the route. Clicking one of the icons
on the right of the screen lets you change your choice of criteria for new instructions.
For more details, read paragraph “10 - Notes and Tips”.
7.6 Telephone
• Click “Telephone”.
You can now access the following options:
• Dial for more information, see paragraph 4.2.1.3.1
• Call Log for more information, see paragraph 4.2.1.3.2
• Quick Dial for more information, see paragraph 4.2.1.3.3
• Telephone Options for more information, see paragraph 4.2.1.3.4
7.7 Sound
• Click “Sound”.
This brings you to the sound settings screen (For more information, see paragraphs 6.2.3. and 6.2.5).
7.8 Options
• Click “Options”.
46

You can access the following options:
• Warners to access warning settings screens (For more information, see paragraphs 6.2.3 and 6.2.5).
• Turn Off / Turn On
Motorway Mode When the “Motorway Mode” is on, when the vehicle takes a motorway or major road and
no change of direction is programmed within the next 50 kilometres, the navigation screen
switches automatically to 2D map mode after displaying the message “Next instruction
in xxx km. Turn On Motorway Mode”. The voice instructions are then turned off until the
next change of direction.
For more details, read paragraph “10 - Notes and Tips”.
7.9 Display
• Click “Display”.
You can select the display settings for navigation:
• Screen to select the type of navigation screen.
•
Night Mode / Day Mode
to adapt the screen brightness level to the situation.
• 2D View / 3D View to select the type of display for the navigation screen.
• POIs to display POIs (Points Of Interest)
• Display My ViaMichelin to adjust the settings for displaying saved addresses.
• Auto Zoom Off/On to fix or automatically adjust the zoom level on the navigation screen when
changing direction.
7.9.1 Screen
• Click “Screen”.
You can choose between:
• Schematic Screen for more information, see paragraph 7.3
• Map Screen for more information, see paragraph 7.2
• Mixed Screen for more information, see paragraph 7.1
The screen you select will fill the full screen area.
If you select the schematic screen, you must click the map to go back to the mixed navigation screen first of all, then
click a second time to take you to the settings screens.
7.9.2 Night Mode / Day Mode
• Click “Night Mode” to change the screen brightness for night driving (for more information, see paragraph 6.1.5)
• Click “Day Mode” to change the screen brightness for daytime driving (for more information, see paragraph 6.1.5)
47
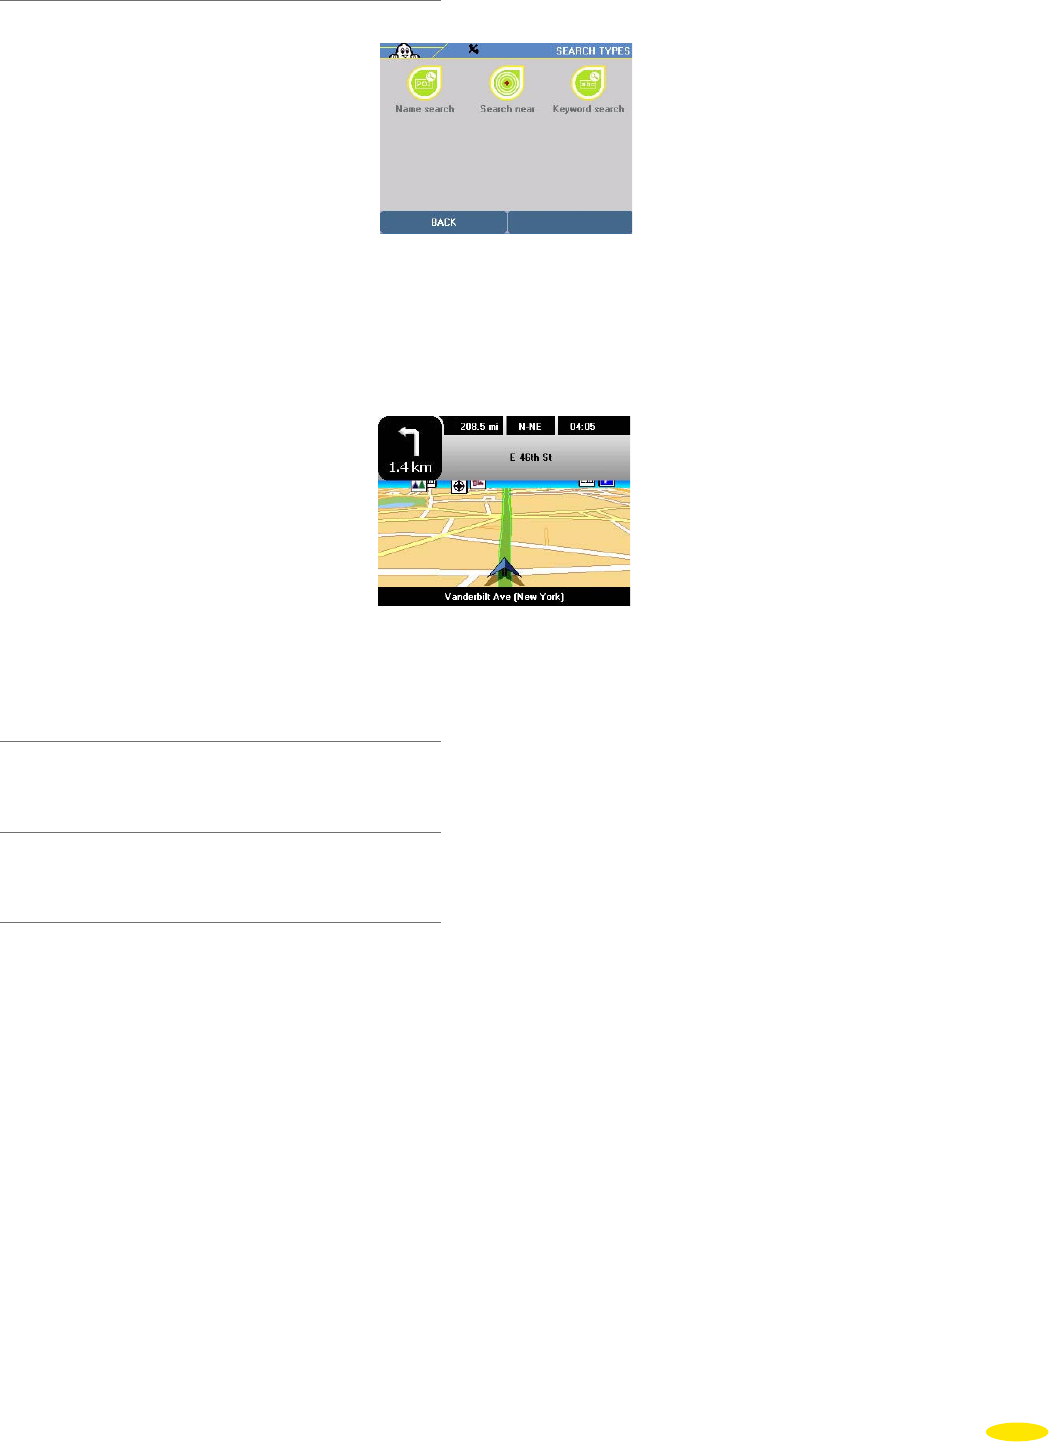
7.9.3 2D View/3D View
• Click “2D View”.
The maps displayed during navigation are shown in 2D (2 dimensions) like a paper map. In free navigation the
direction of navigation can be either towards the top of the screen or to the north (for more information, see
paragraph 7.4).
• Click “3D View”.
The maps displayed during navigation are shown in 3D, (3 dimensions) i.e. with spatial representation. 3D
navigation cannot be enabled when using free navigation.
7.9.4 Display POIs
For more information, see paragraph 6.3.2.
7.9.5 Display My ViaMichelin
For more information, see paragraph 6.3.4.
7.9.6 Auto Zoom On/Off:
• Click “Auto Zoom Off” if you want the map shown during Navigation to stay at the same zoom level whatever
map is displayed.
• Click “Auto Zoom On” if you want the map displayed during Navigation to zoom automatically to show the next
change of direction in greater detail.
After you click the selected option, the system automatically returns to the navigation screen.
For more details, read section “10_Notes and Tips”.
48