VTech Telecommunications 80-6292-00 Cordless Phone with Instant Messaging User Manual II
VTech Telecommunications Ltd Cordless Phone with Instant Messaging Users Manual II
Contents
- 1. Users Manual I
- 2. Users Manual II
Users Manual II
www.vtechphones.com
39
Telephone settings
Record sound clips
You can record your own sound clip which can be used as a ringer using either
the microphone or audio cable. When using the microphone, the sound clip
will be recorded through the handset’s microphone. When using the audio
ECDNGVJGUQWPFENKRYKNNDGTGEQTFGFVJTQWIJVJGJGCFUGVLCEM
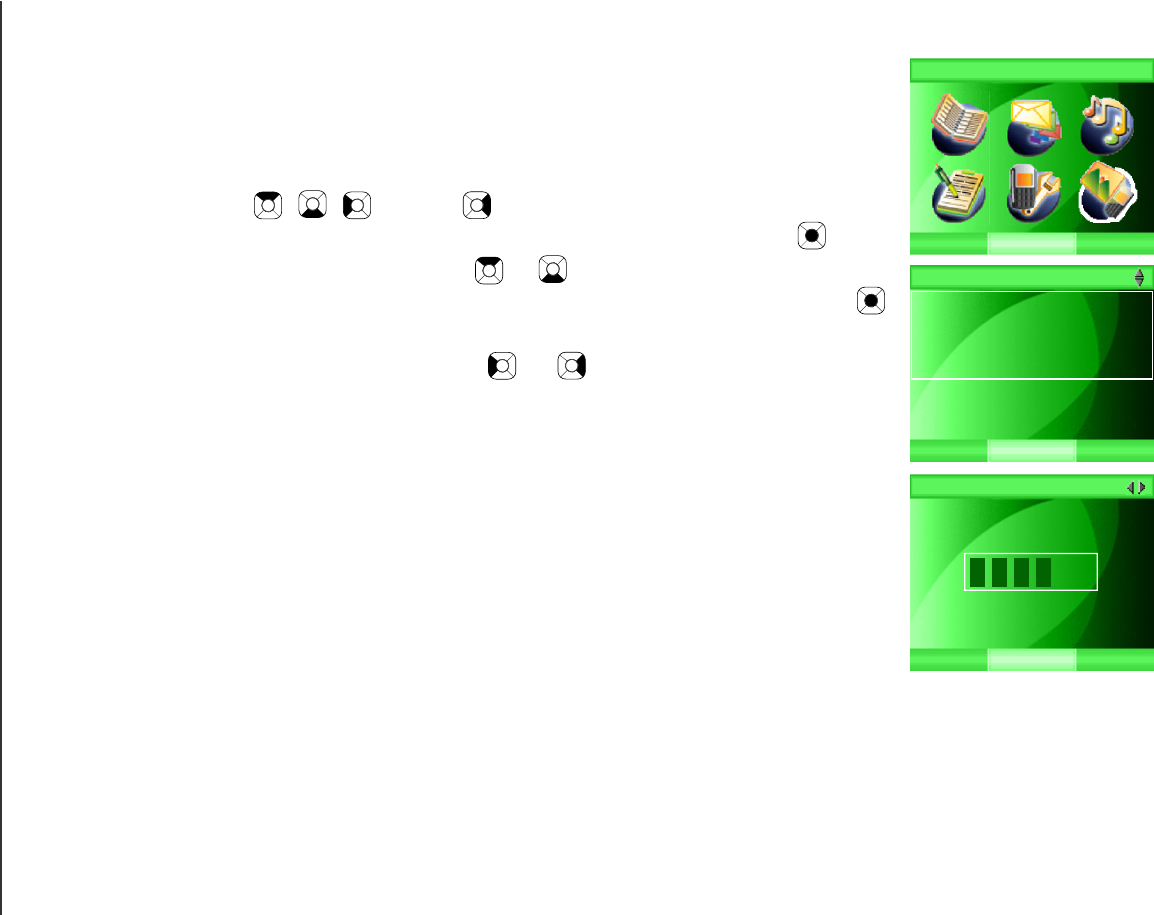
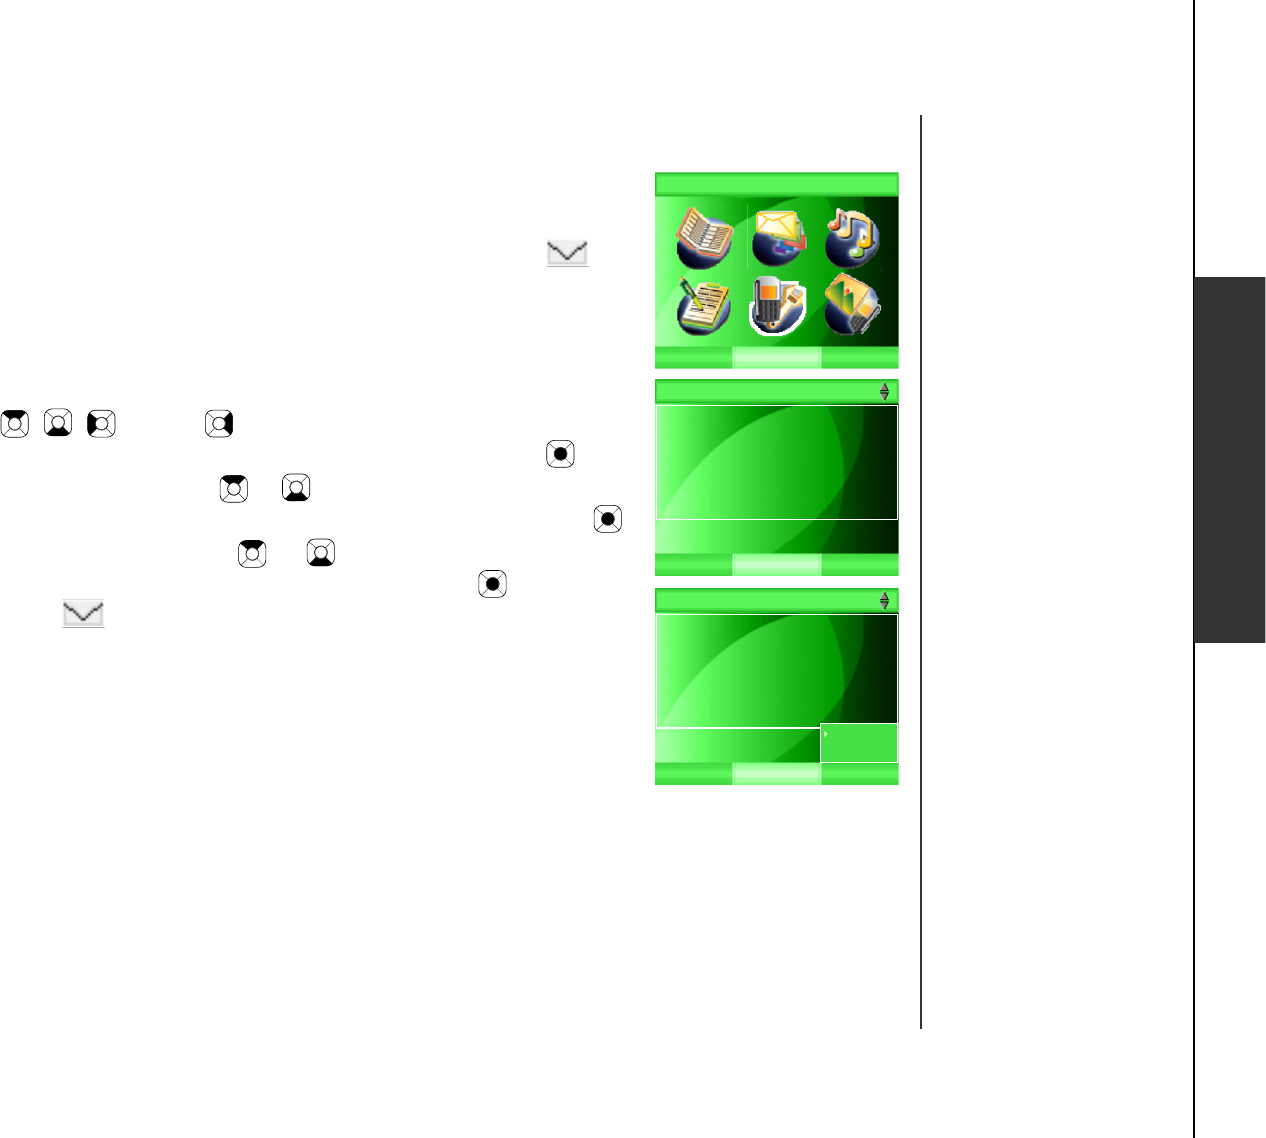
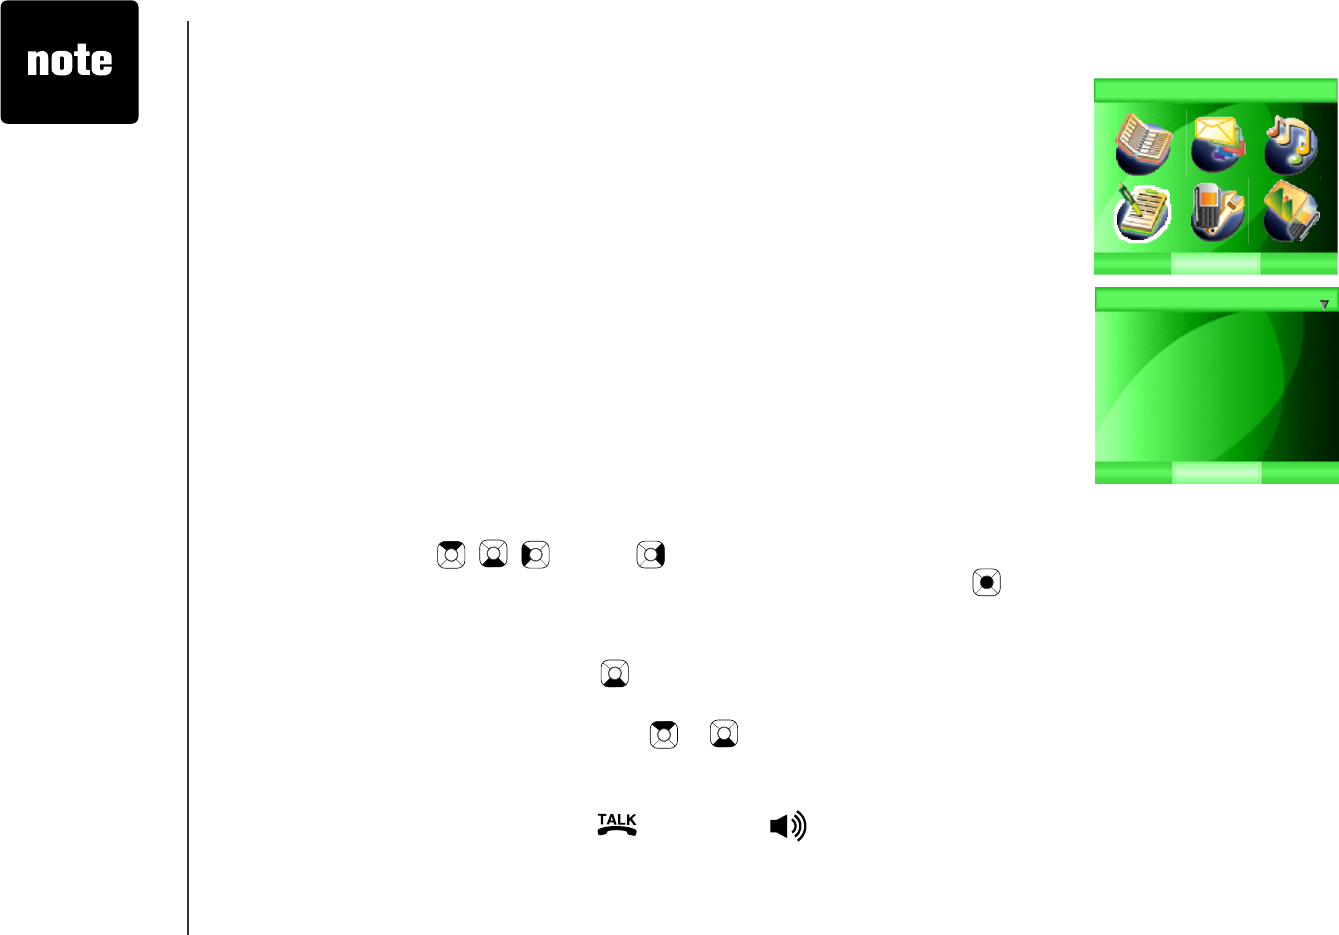
To record sound clip using microphone:
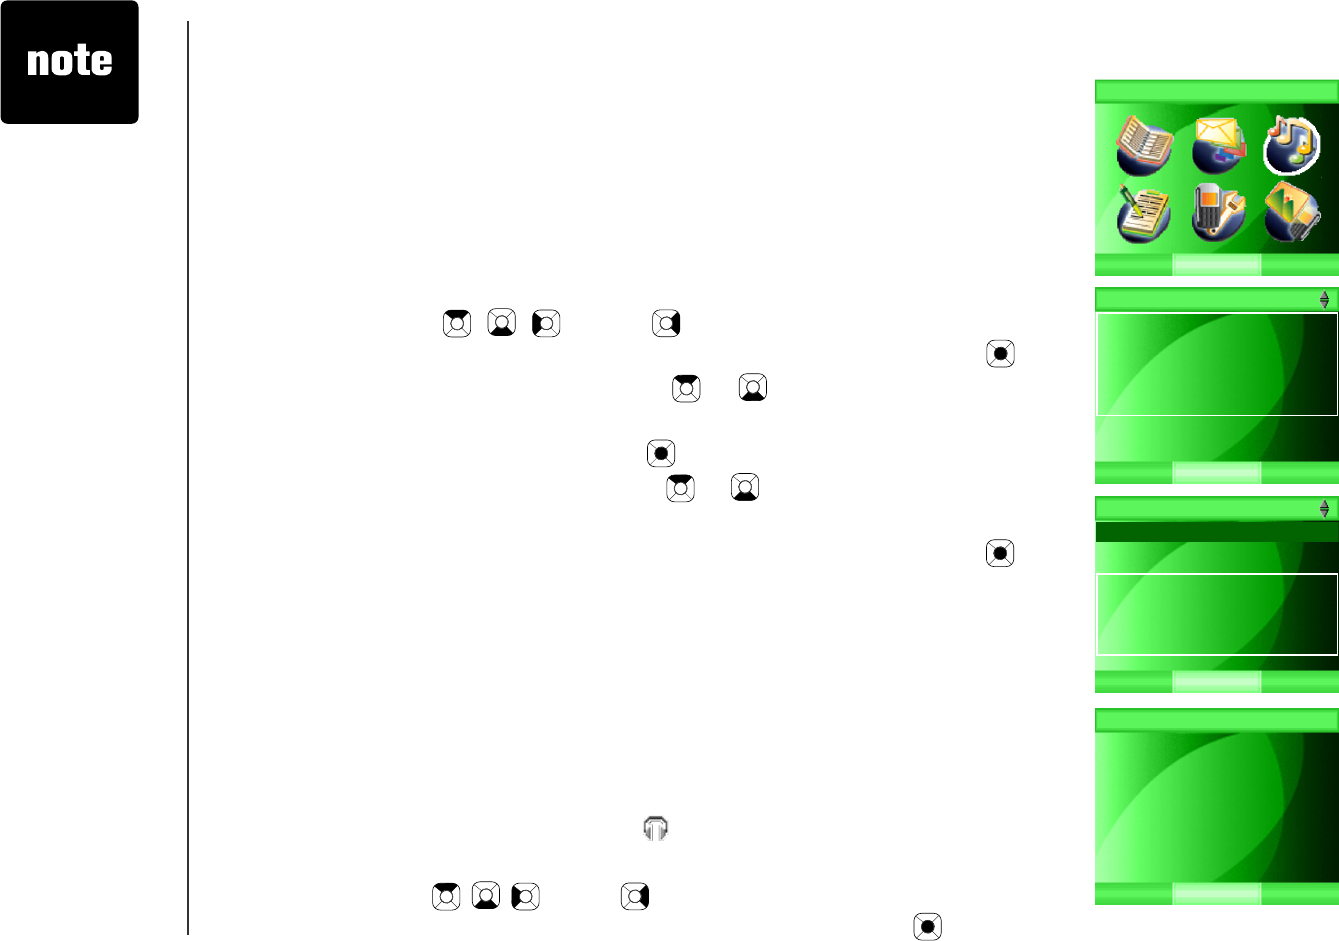
Step 1: Press the MENU softkey from the idle screen.
Step 2: Press the , , and/or NavKeys to choose Ringer, then
press the SELECT softkey or the center NavKey/SELECT/.
Step 3: Press the up or down NavKey or to choose Record Sound
Clip, then press the SELECT softkey or
the center NavKey/SELECT/.
Step 4: Press the up or down NavKey or to choose Using
Microphone.
Step 5: Press the SELECT softkey or the center NavKey/SELECT/. The
screen will display Record after the tone temporarily and a recording
tone will be sounded.
(Proceed to Step 6 on the next page)
-OR-
To record a sound clip using an audio cable:
5VGR 7UKPIVJGCWFKQECDN GRTQXKFGF RNWIQPGGPFKPVQVJGLCEMQPVJG
UKFGQ HVJ GJCPFUG VDGPGCV JVJ GUOCN NTWDDG TƀCRCP FRNW IVJ G
other end into an audio port on your computer.
Step 2: Press the MENU softkey from the idle screen.
Step 3: Press the , , and/or NavKeys to choose Ringer then press
the SELECT softkey or the center NavKey/SELECT/.
Using the
telephone when
recording will
end the recording
procedure.
You can exit
the recording
procedure
anytime by
pressing OFF.
The screen
will display
Recording
discarded and
the sound clip will
not be saved.
•
•
SELECT
Ringer
BACK
BACK SELECT
Ringer
Play Sound Clips
Ringer Melody
Ringer Volume
Record Sound Clip
BACK
Using Microphone
Using Audio Cab le
Remaining record time:
2:54
Record Sound Clip
SELECT
Record after the tone
Record Sound Clip

www.vtechphones.com 40
Telephone settings
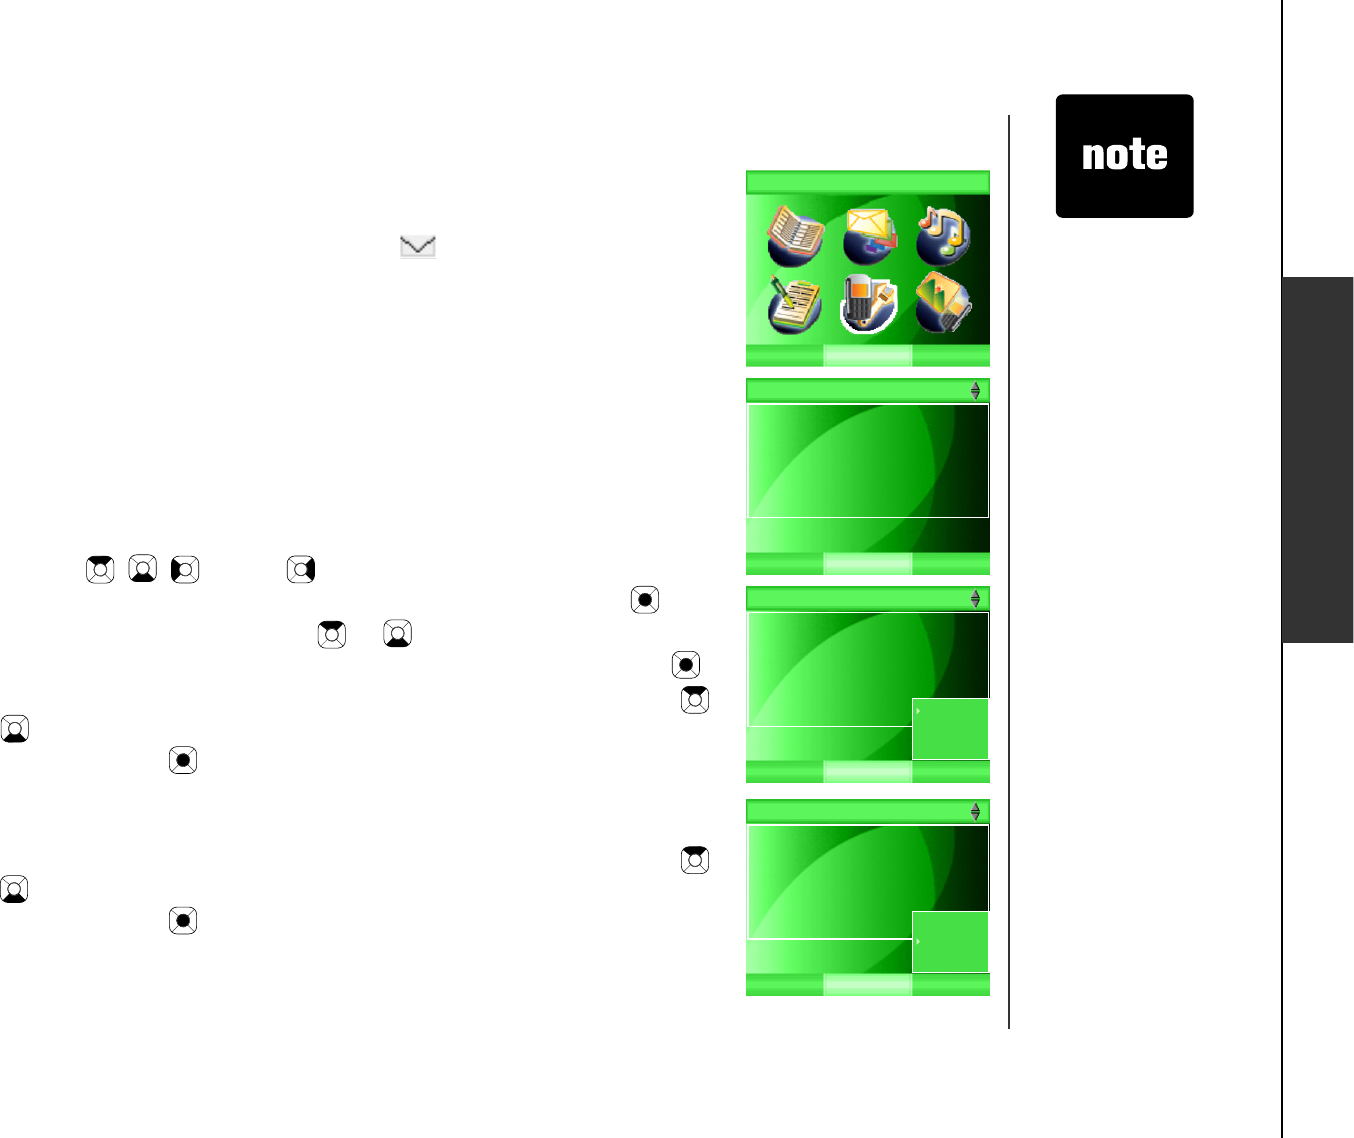
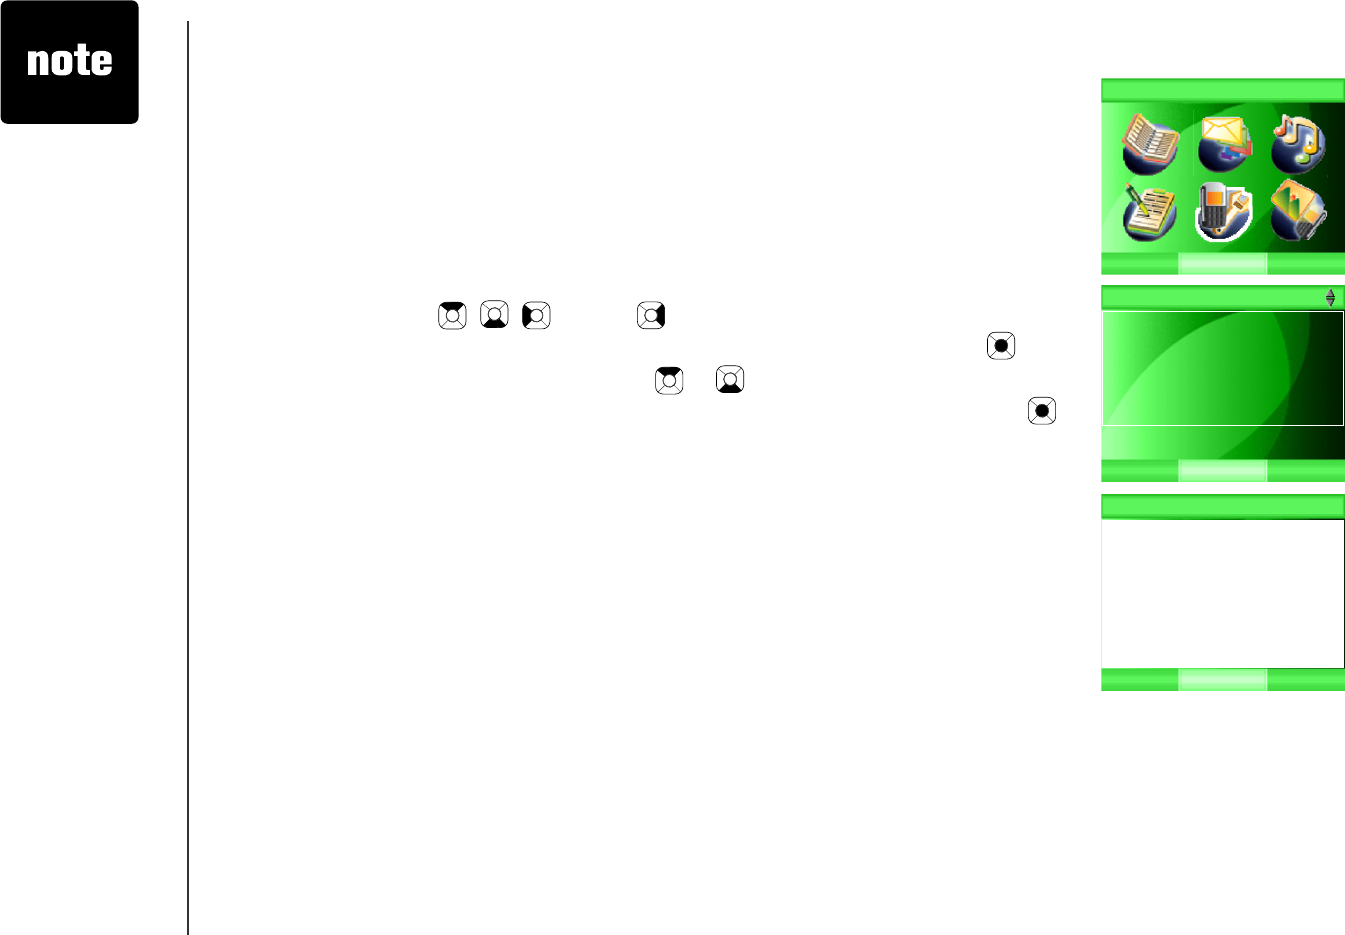
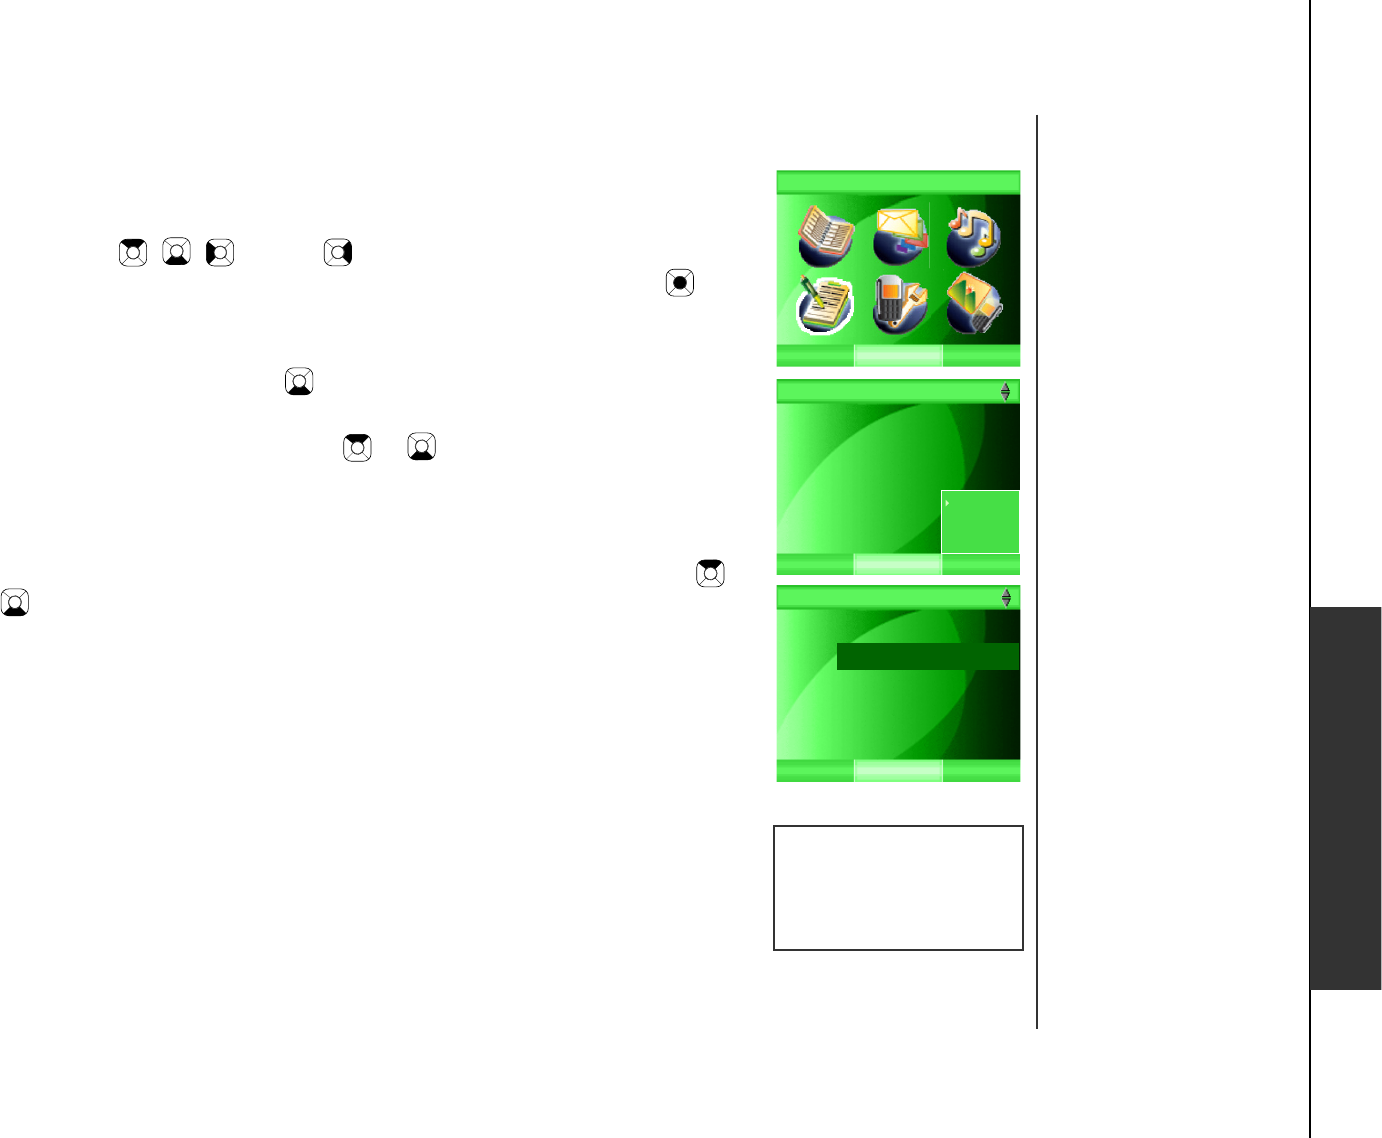
To record a sound clip using audio cable:
Step 3: Press the up or down NavKey or to choose Record Sound
Clip, then press the SELECT softkey or
the center NavKey/SELECT/.
Step 4: Press the up or down NavKey or to choose Using Audio Cable.
Press the SELECT softkey or the center NavKey/SELECT/. The
screen will display Insert Audio Cable into headset jack. Press
RECORD to start.
Step 5: Press the RECORD softkey to start recording.
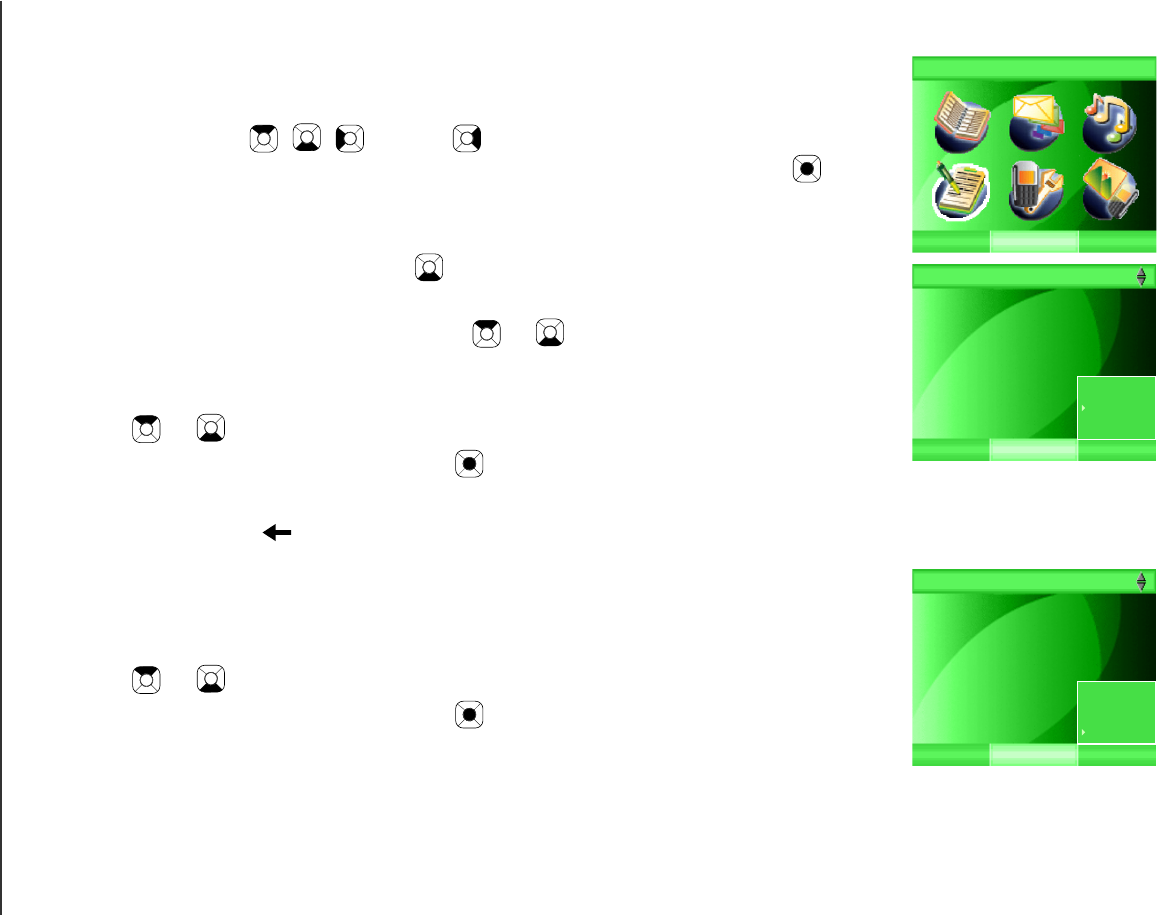
Step 6: The screen will then display Recording... to indicate the recording
is in progress.
Step 7: Press the STOP softkey to stop recording or the telephone will stop
recording automatically when it has exceeded its recording time for
a single sound clip and Recording completed will be displayed on
the screen.
Step 8: Press the PLAY softkey to playback the sound clip recorded.
Step 9: Press the SAVE softkey to save the sound clip. Use the dial pad
to enter the name of the sound clip in the box and press the SAVE
softkey. The screen will display Sound clip saved.
Step 10: Press OFF to discard the sound clip.
Step 11: It will then return to the Record Sound Clip screen and the remaining
record time will be shown.
Step 12: The recorded sound clip will be displayed at the bottom of the list
on the Play Sound Clips screen.
Telephone settings
BACK
Using Microphone
Using Audio Cable
Remaining record time:
2:54
Record Sound Clip
SELECT
Record Sound Clip
Insert audio cable
into headset jack.
Press RECORD to start.
RECORD
Record Sound Clip
Recording completed
SAVE PLAY
Record Sound Clip
SAVE
Enter Clip Name
Morning
www.vtechphones.com
41
Telephone settings
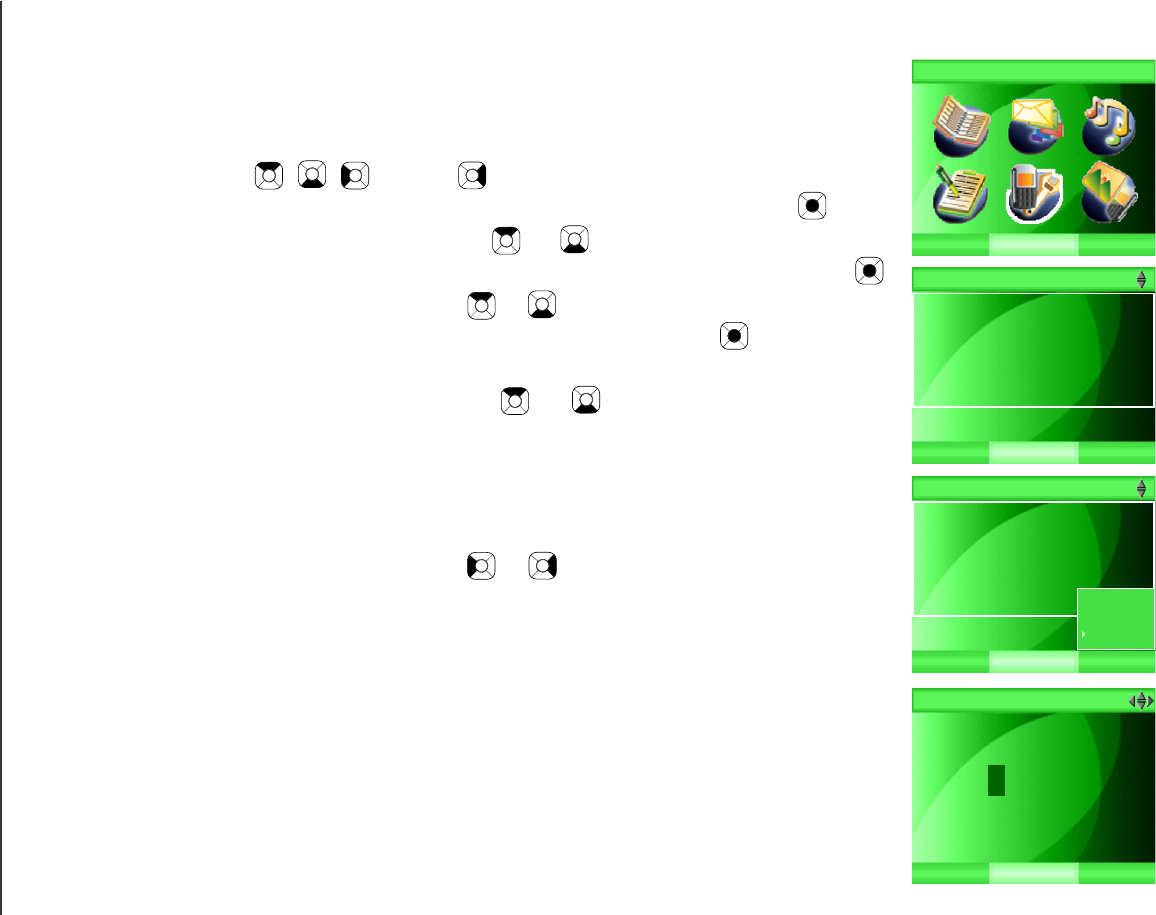
Ringer melody
In this menu, you can listen to the ring melodies and set different ring melodies
for the standard and VoIP incoming calls.
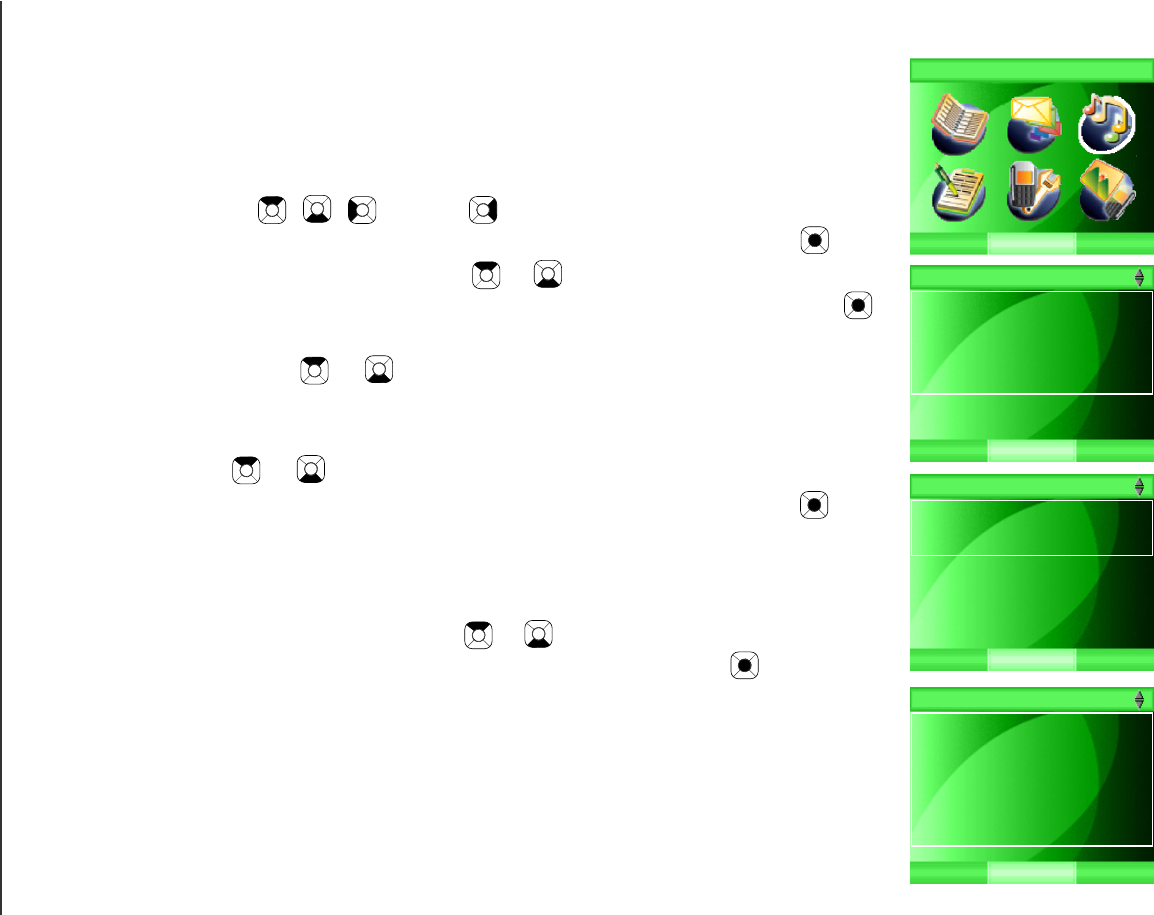
Step 1: Press the MENU softkey from the idle screen.
Step 2: Press the , , and/or NavKeys to choose Ringer then
press the SELECT softkey or the center NavKey/SELECT/.
Step 3: Press the up or down NavKey or to choose a Ringer Melody,
then press the SELECT softkey or
the center NavKey/SELECT/ .
Step 4: To set ringer melody for standard incoming calls, press the up or
down NavKey or to choose PSTN Ringer Melody.
-OR-
To set ringer melody for VoIP incoming calls, press the up or down
NavKey or to choose VoIP Ringer Melody.
Step 5: Press the SELECT softkey or the center NavKey/SELECT/.
Step 6: A list of ring melodies will be shown. The selected melody has a
check beside it and the melody currently playing is shown in larger/
bold text.
Step 7: Press the up or down NavKey or to choose a melody and press
the SELECT softkey or the center NavKey/SELECT/VQEQPſTO
The screen will display Choice saved.
SELECT
Ringer
BACK
BACK SELECT
Ringer
Play Sound Clips
Ringer Melody
Ringer Volume
Record Sound Clip
BACK SELECT
PSTN Ringer Melody
VoIP Ringer Melody
Ringer Melody
BACK SELECT
PSTN Ringer Melody
√ Melody 1
Melody 2
Melody 3
Melody 4
Riff Rock
Change Up!
www.vtechphones.com 42
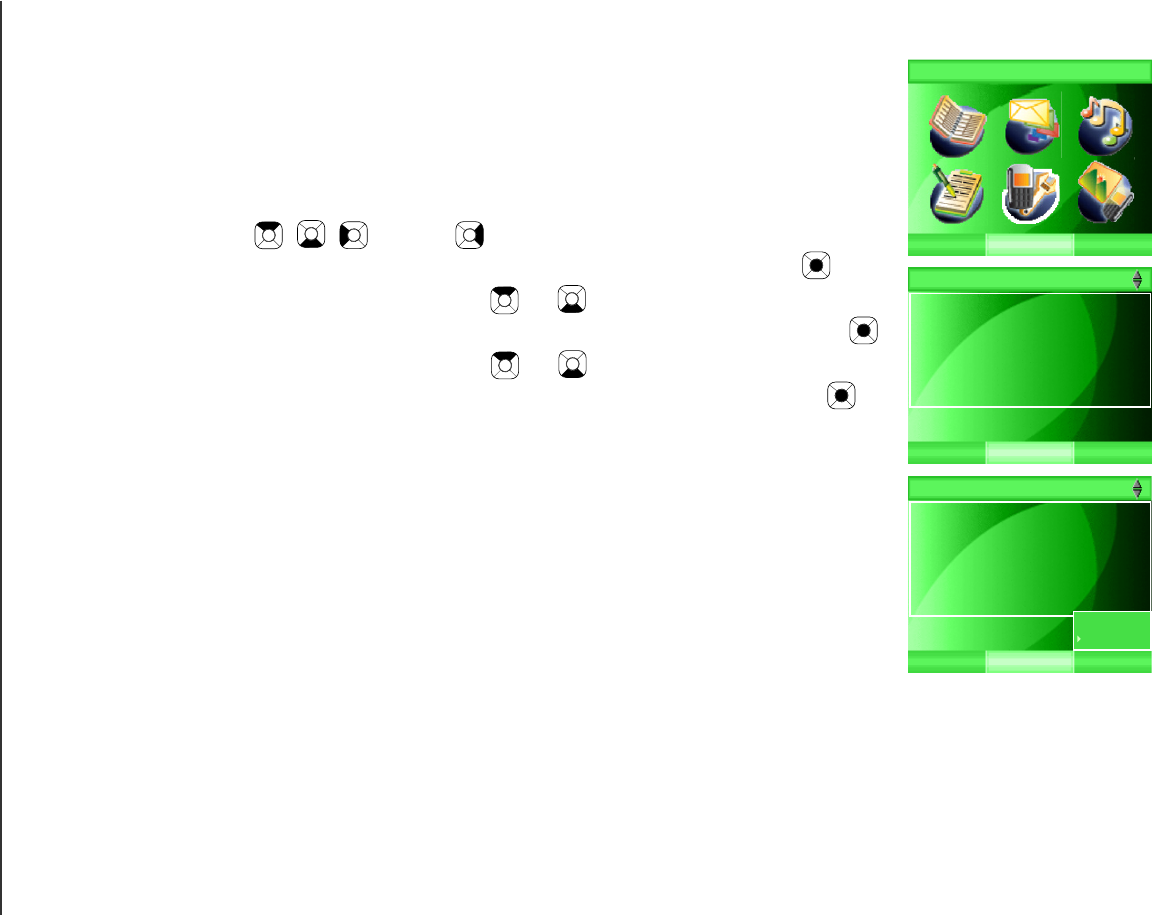
Telephone settings
Telephone settings
Ringer volume
6QCFLWUVVJGJCPFUGVTKPIGTXQNWOG
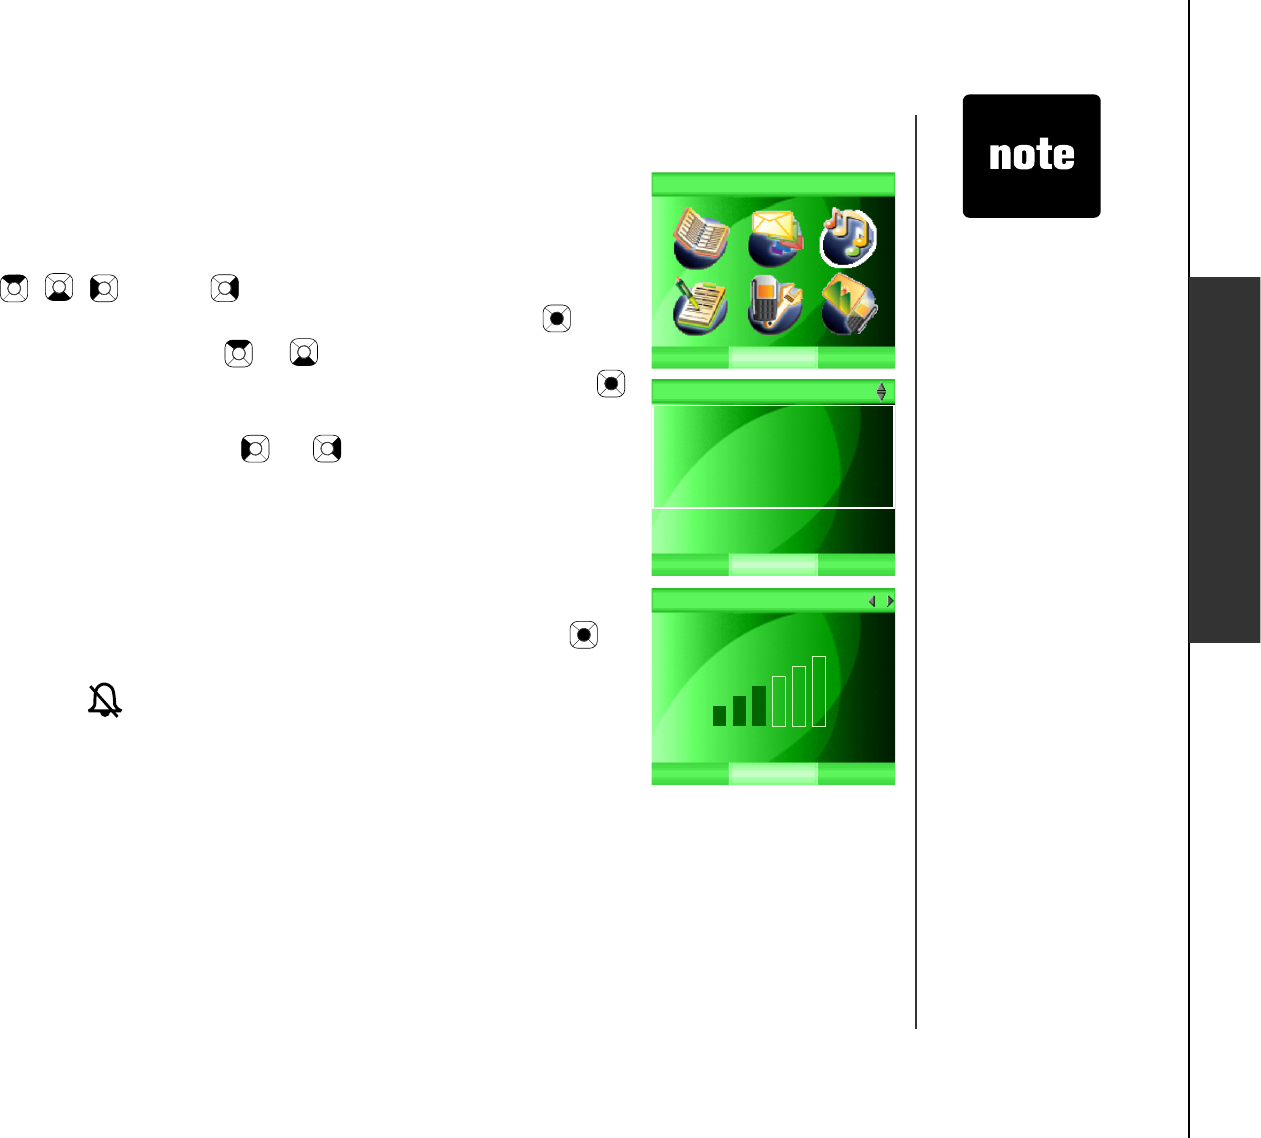
Step 1 : Press th e MENU softk ey from th e idle sc reen.
Step 2 : Press th e , , a nd/or N a v K eys to c h oose R ing er, th en
press th e S EL EC T softk ey or th e c enter N a v K ey/S EL EC T/.
Step 3 : Press th e u p or dow n N a v K ey or to c h oose R ing er V o lu m e,
th en press th e S EL EC T softk ey or th e c enter N a v K ey/S EL EC T/.
T h e c u rrent ring er v olu me w ill b e pla yed.
Step 4 : Press th e left or rig h t N a v K ey or to inc rea se or dec rea se
th e v olu me. T h e v olu me lev el w ill b e sh ow n on th e sc reen w h en
CFLWUVKPI#UCORNGQHVJGXQNWOGNGXGNYKNNDGRNC[GFCVVJGUCOG
time. W h en th e ring er v olu me is set to off (no h ig h lig h ted v olu me
b a r is sh ow n on th e sc reen), no sa mple v olu me w ill b e pla yed a nd
R ing er O ff w ill b e displa yed on th e sc reen.
Step 5 : Press th e S EL EC T softk ey or th e c enter N a v K ey/S EL EC T/. A
EQPſTOCVKQPVQPGYKNNDGUQWPFGF
Step 6 : T h e ring er off ic on w ill b e displa yed w h ile in th e ma in idle sc reen
if th e ring er v olu me is set to off.
Press th e B a c k
softk ey a t a nytime
to retu rn to th e
prev iou s sc reen.
T h e ring er v olu me
is th e sa me for
sta nda rd a nd
V oIP c a lls.
•
•
SELECT
R in g er
B ACK
BACK SELECT
Ringer
Play Sound Clips
Ringer Melody
Ringer Volume
Record Sound Clip
Ringer Volume
BACK SELECT
www.vtechphones.com
43
Telephone settings
D isplay
F rom this menu you can change the wallpaper, color scheme and L C D
brightness of the telephone.
W allpapers
The handset is preset with a background picture (wallpaper) that will be
displayed when the handset is in the idle screen. To choose a different
wallpaper:
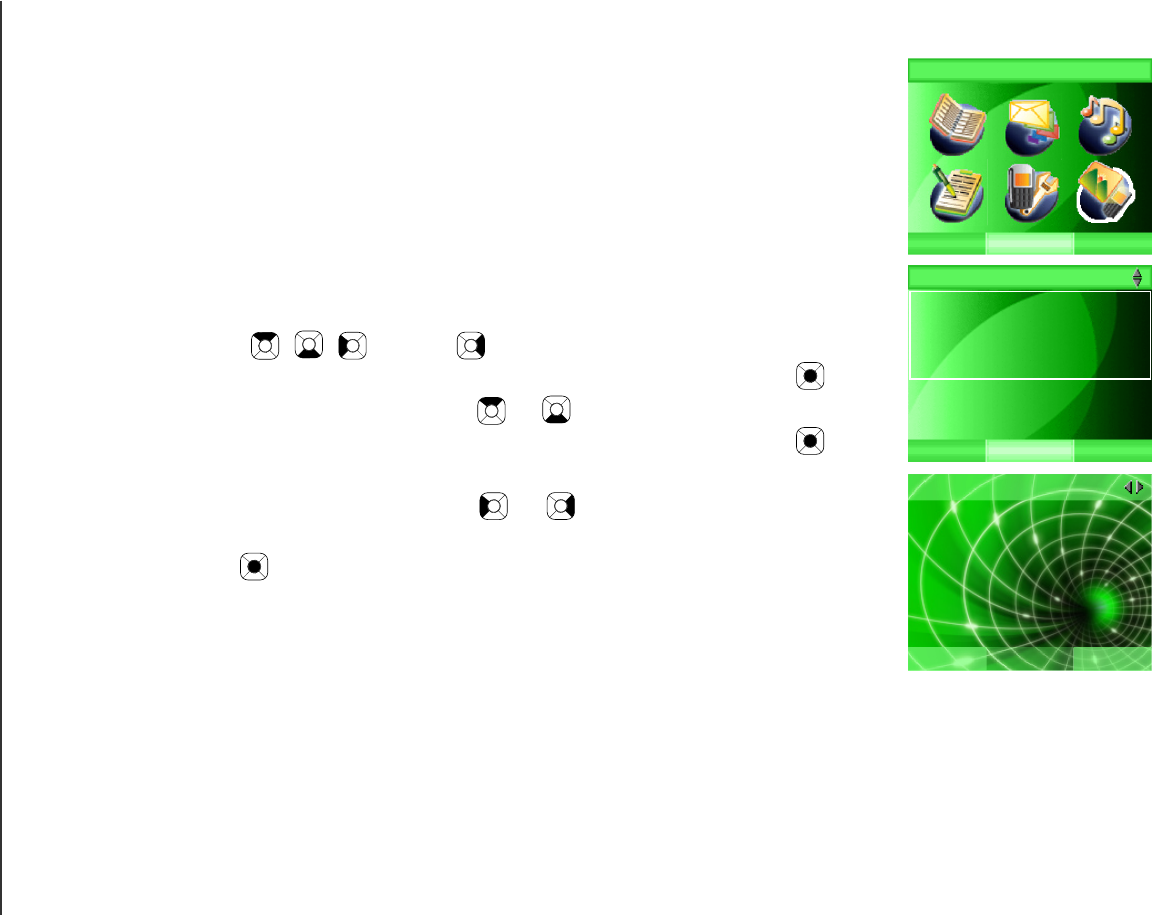
Step 1: Press the MENU softkey on the main idle screen.
Step 2: Press the , , and/or NavKeys to choose D isplay, then
press the SELECT softkey or the center NavKey/SELECT/.
Step 3: Press the up or down NavKey or to choose W allpaper, then
press the SELECT softkey or the center NavKey/SELECT/. The
current wallpaper will be displayed.
Step 4: Press the left or right NavKey or to scroll through the list of
wallpaper then press the SELECT softkey or the center NavKey/
SELECT/ to set the selected picture as wallpaper.
Step 6: Press the Back softkey to return to the previous screen, or press
OFF to return to the idle screen. The selected wallpaper will be
displayed on the idle screen.
SELECT
Display
BACK
BACK SELECT
W allpaper
Color Scheme
LCD Brightness
Display
Wallpaper
BACK SELECT

www.vtechphones.com 44
Telephone settings
Telephone settings
Color Scheme
The color of the handset screen can be changed to different color schemes.
To set the color themes:
Step 1: Press the MENU softkey on the main idle screen.
Step 2: Press the , , and/or NavKeys to choose Display then
press the SELECT softkey or the center NavKey/SELECT/.
Step 3: Press the up or down NavKey or to choose Color Scheme,
then press the SELECT softkey or
the center NavKey/SELECT/ .
A list of color schemes will be shown.
Step 4: Press the up or down NavKey or to scroll through the color
schemes and the highlighted color scheme will be shown on the
screen accordingly.
Step 5: Press the SELECT softkey or the center NavKey/SELECT/ to
EQPſTOCP FVJ GUGNGEVG FEQNQ TUEJGO GYKN ND GFKURNC[G FQPVJ G
handset.
SELECT
Display
BACK
BACK SELECT
Wallpaper
Color Scheme
LCD Brightness
Display
BACK SELECT
Color Scheme
Color Scheme 1
Color Scheme 2
Color Scheme 3
Color Scheme 4
Color Scheme 5
www.vtechphones.com
45
Telephone settings
LCD Brightness
6JGDTKIJVPGU UQHJCPFUGVŏ UUETGG PECPDGCFLWUVG FVQUWKVFKHHGTGP VNKIJVKP I
conditions. To change the LCD brightness of the handset screen:
Step 1: Press the MENU softkey from the idle screen.
Step 2: Press the , , and/or NavKeys to choose Display, then
press the SELECT softkey or the center NavKey/SELECT/.
Step 3: Press the up or down NavKey or to choose LCD Brightness,
then press the SELECT softkey or the center NavKey/SELECT/.
The current level of LCD brightness will be shown on the screen.
Step 4: Press the left or right NavKey or VQCFLWU VVJ GNGXGNQH.%&
brightness. The level of LCD brightness will be shown when
CFLWUVKPI
Step 5: Press the SELECTUQHVMG[VQEQPſTOCPFVJGNGXGNQH.%&DTKIJVPGUU
will be displayed on the screen.
SELECT
Display
BACK
BACK SELECT
Wallpaper
Color Scheme
LCD Brightness
Display
BACK SELECT
LCD Brightness
www.vtechphones.com 46
Telephone settings
Telephone settings
Settings
From this menu you can change the clock setting and key tone of the
telephone. Y ou can remove the VM WI indicator manually if it is on while
there is no voicemail message. Y ou can also reset the telephone setting to
the default value.
Clock setting
The telephone clock is set by default to synchroniz e with the clock of
your personal computer. Y ou can allow the clock to be set manually or
automatically if you subscribe to the caller ID service provided by your local
telephone company (refer to Caller ID operation on page 7 2).
To synchroniz e the telephone clock with the computer/caller ID:
Step 1: Press the MENU softkey from the idle screen.
Step 2: Press the , , and/or NavKeys to choose Settings then
press the SELECT softkey or the center NavKey/SELECT/.
Step 3: Press the up or down NavKey or to choose Clock Setting,
then press the SELECT softkey or
the center NavKey/SELECT/ .
Step 4: To synchroniz e with computer, press the up or down NavKey
or to choose P C and press the SELECT softkey or the center
NavKey/SELECT/. The telephone clock will be synchroniz ed with
the personal computer automatically.
-OR-
To synchroniz e with caller ID, press the up or down NavKey
or to choose CID and press the SELECT softkey or the center
NavKey/SELECT/. The telephone clock will be synchroniz ed with
VJGECNNGT+&CHVGTVJGſTUVKPEQOKPIECNNYKVJECNNGT+&KPHQTOCVKQP
Invalid time input
(e.g. 27 :7 6) using
the dial pad will
be ignored by
the system and
it will return to its
previous setting
after the time is
saved.
O nly the 12 hour
clock format of
time is accepted
in the clock
setting.
•
•
SELECT
Settings
BACK
BACK SELECT
Clock Setting
IM Alert Tone
Clear Voice Mail
Default Settings
Key Tone
Settings
BACK SELECT
Clock Setting
IM Alert Tone
Clear Voice Mail
Default Settings
Key Tone
Settings
CID
PC
Manual
BACK SELECT
Clock Setting
IM Alert Tone
Clear Voice Mail
Default Settings
Key Tone
Settings
CID
PC
Manual
www.vtechphones.com
47
Telephone settings
Clock setting
To set the clock manually:
Step 1: Press the MENU softkey from the idle screen.
Step 2: Press the , , and/or NavKeys to choose Settings, then
press the SELECT softkey or the center NavKey/SELECT/.
Step 3: Press the up or down NavKey or to choose Clock Setting,
then press the SELECT softkey or the center NavKey/SELECT/.
Step 4: Press the up or down NavKey or to choose Manual, then press
the SELECT softkey or the center NavKey/SELECT/. The current
time will be displayed.
Step 5: Press the up or down NavKey or V QCFLWU VVJ GPWODG TD [
KPETGOGPVUQHYJKNGVJGſGNFKUJKIJNKIJVGF
-OR-
U se the dial pad (see Chart of characters on page 35) to enter the
time directly.
Step 6: Press the left or right NavKey or to move the cursor to the nex t
ſGNF
Step 7: R epeat the Step 4 -5 until the time is correct. Press the SA VE softkey
VQEQPſTO
SELECT
Settings
BACK
BACK SELECT
Clock Setting
IM Alert Tone
Clear Voice Mail
Default Settings
Key Tone
Settings
BACK SELECT
Clock Setting
IM Alert Tone
Clear Voice Mail
Default Settings
Key Tone
Settings
CID
PC
Manual
BACK SAVE
07:11 PM
Manual Clock Input

www.vtechphones.com 48
Telephone settings
Telephone settings
K ey tone
Key tone is off by default. When the key tone is on, the handset will beep with
each key press. To change the key tone setting:
Step 1: Press the MENU softkey from the idle screen.
Step 2: Press the , , and/or NavKeys to choose Settings, then
press the SELECT softkey or the center NavKey/SELECT/.
Step 3: Press the up or down NavKey or to choose K ey Tone, then
press the SELECT softkey or the center NavKey/SELECT/.
Step 4: Press the up or down NavKey or to choose On or Off, and
press the SELECT softkey or the center NavKey/SELECT/ to
EQPſTO
SELECT
Settings
BACK
BACK SELECT
Clock Setting
IM Alert Tone
Clear Voice Mail
Default Settings
Key Tone
Settings
BACK SELECT
Clock Setting
IM Alert Tone
Clear Voice Mail
Default Settings
Key Tone
Settings
On
Off
www.vtechphones.com
49
Telephone settings
IM alert tone
IM alert tone is off by default. When the IM alert tone is on, the handset will
beep while there is an incoming instant message. To change the IM alert
tone setting:
Step 1: Press the MENU softkey from the idle screen.
Step 2: Press the , , and/or NavKeys to choose Settings, then
press the SELECT softkey or the center NavKey/SELECT/.
Step 3: Press the up or down NavKey or to choose IM Alert Tone,
then press the SELECT softkey or
the center NavKey/SELECT/ .
Step 4: Press the up or down NavKey or to choose On or Off, and
press the SELECT softkey or the center NavKey/SELECT/ to
EQPſTO
SELECT
Settings
BACK
BACK SELECT
Clock Setting
IM Alert Tone
Clear Voice Mail
Default Settings
Key Tone
Settings
BACK SELECT
Clock Setting
IM Alert Tone
Clear Voice Mail
Default Settings
Key Tone
Settings
On
Off
www.vtechphones.com 50
Telephone settings
Telephone settings
Clear voice mail
If you subscribe to the voicemail service provided by your local telephone
company and you have a new voicemail message, the VMWI icon will
be displayed on the screen. Please contact your local telephone company
for more information about voicemail service. To manually remove the VMWI
indication:
Step 1: Press the MENU softkey from the idle screen.
Step 2: Press the , , and/or NavKeys to choose Settings then
press the SELECT softkey or the center NavKey/SELECT/.
Step 3: Press the up or down NavKey or to choose Clear Voice Mail,
then press the SELECT softkey or
the center NavKey/SELECT/ .
Step 4: Press the up or down NavKey or to choose Y es and press
the SELECT softkey or the center NavKey/SELECT/VQEQPſTO
The VMWI icon will disappear on the idle screen. Press the No
softkey to return to the previous screen.
Clearing the VMWI only turns off the indicator; it does not delete the voicemail
message(s). Use this feature when the telephone indicates there is voicemail
when you have none, or you have accessed your voicemail from a different
telephone line (while away from home). If there actually is a new voicemail
message, your local telephone company will continue to send the signal which
turns the indicator back on.
SELECT
Settings
BACK
BACK SELECT
Clock Setting
IM Alert Tone
Clear Voice Mail
Default Settings
Key Tone
Settings
BACK SELECT
Clock Setting
IM Alert Tone
Clear Voice Mail
Default Settings
Key Tone
Settings
Yes
No
www.vtechphones.com
51
Telephone settings
Default setting
Telephone settings including handset volume, headset volume, speakerphone
volume, ringer volume, melody for standard calls, melody for VoIP calls, key
tone, wallpaper, color scheme, LCD brightness, clock setting, real time clock,
VMWI and redial records can be reset to the default values in this menu. To
reset the telephone settings:
Step 1: Press the MENU softkey from the idle screen.
Step 2: Press the , , and/or NavKeys to choose Settings, then
press the SELECT softkey or the center NavKey/SELECT/.
Step 3: Press the up or down NavKey or to choose Default Settings,
then press the SELECT softkey or
the center NavKey/SELECT/ .
Step 4: The screen will display Are you sure you want to restore the
d efault settings?
Step : Press the YesUQHVMG [VQEQPſT OCP FVJ GVGNGRJQP GUGVVKPI UYKN N
be reset to the default values listed in Default setting tab le on the
next page. Press the No softkey to cancel.
Registration
information,
directory and call
log entries will
not be deleted
when the default
settings are
restored.
•
SELECT
Settings
BACK
BACK SELECT
Clock Setting
IM Alert Tone
Clear Voice Mail
Default Settings
Key Tone
Settings
Handset will be
deregistered.
Are you sure?
YES NO
Default Settings
Are you sure you
want to restore the
default settings ?

www.vtechphones.com 52
Telephone settings
Default setting table
Parameter Default values
H andset volume Level 3
H eadset volume Level 2
Speakerphone volume Level 5
Ringer volume Level 6
Melody for standard call Melody # 1
Melody for VoIP call Melody # 2
Key tone OFF
IM alert tone OFF
Wallpaper
Color scheme Color scheme 1
LCD brightness Level 4
Clock setting Synchronize with PC
Real time clock 12:00 AM
VMWI Cleared
Redial records Cleared
Telephone settings
www.vtechphones.com
53
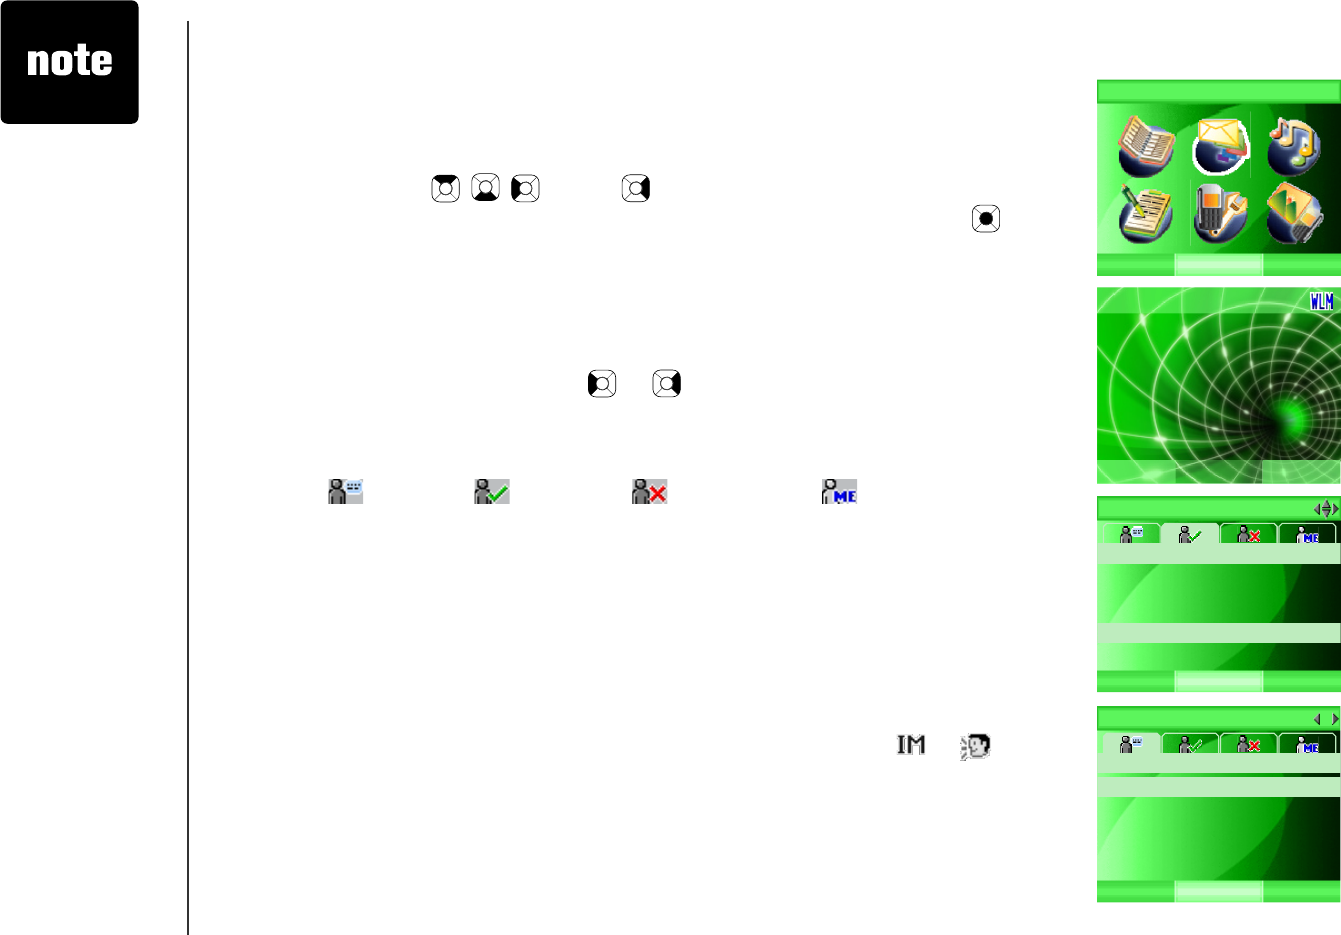
Messenger
This menu allows you to send instant messages to the people on your IM
buddy list. To access the messenger:
Step 1: Press the MENU softkey from the idle screen.
Step 2: Press the , , and/or NavKeys to choose Messenger, then
press the SELECT softkey or
the center NavKey/SELECT/ .
-OR-
Press the MSNG R softkey to access the messenger directly while
in the idle screen.
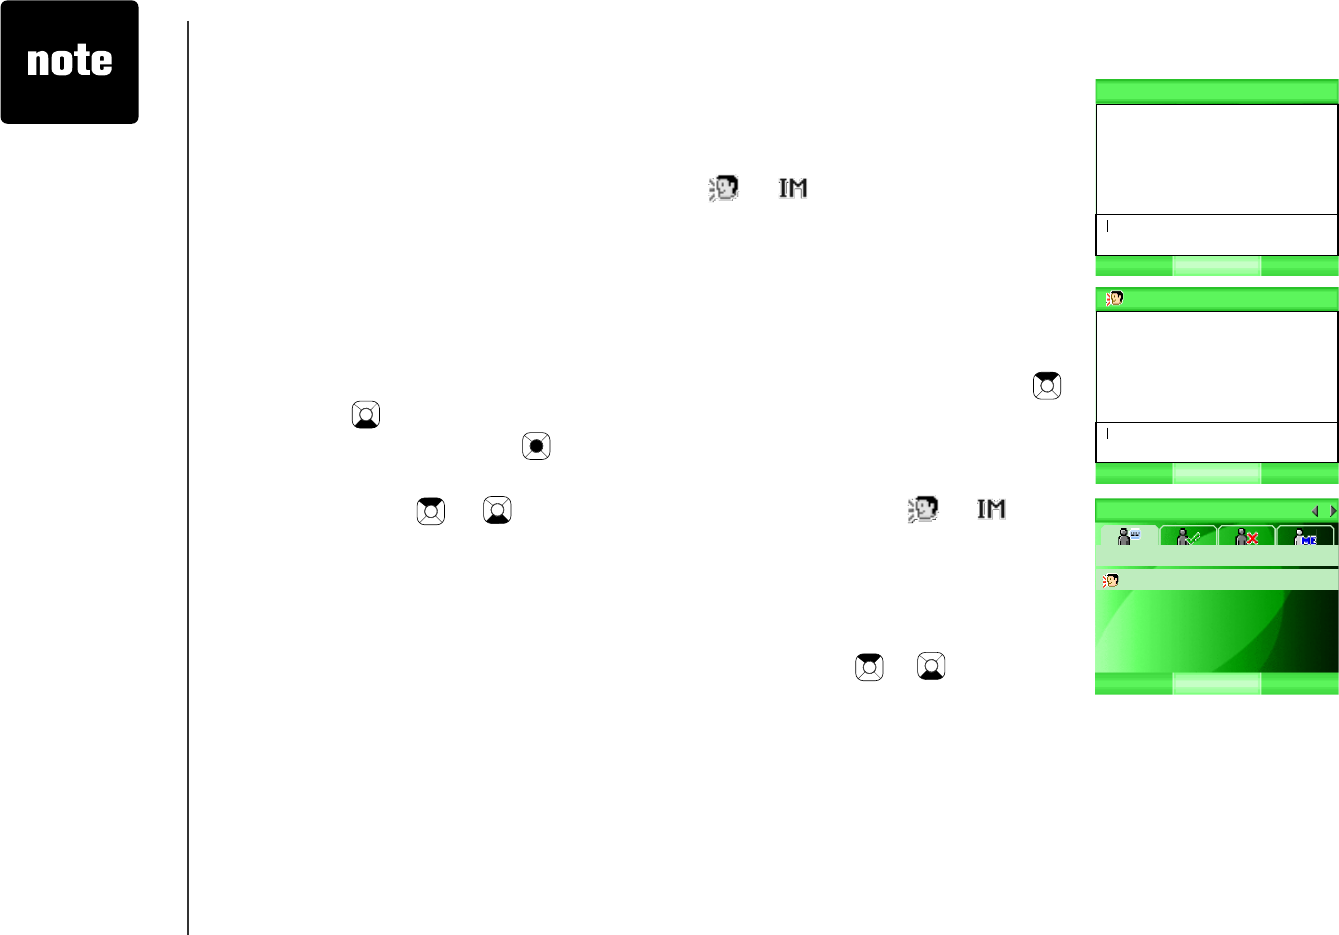
Step 3: The buddy status window will be displayed on the screen. Press
the left or right NavKey or to choose from different tabs.
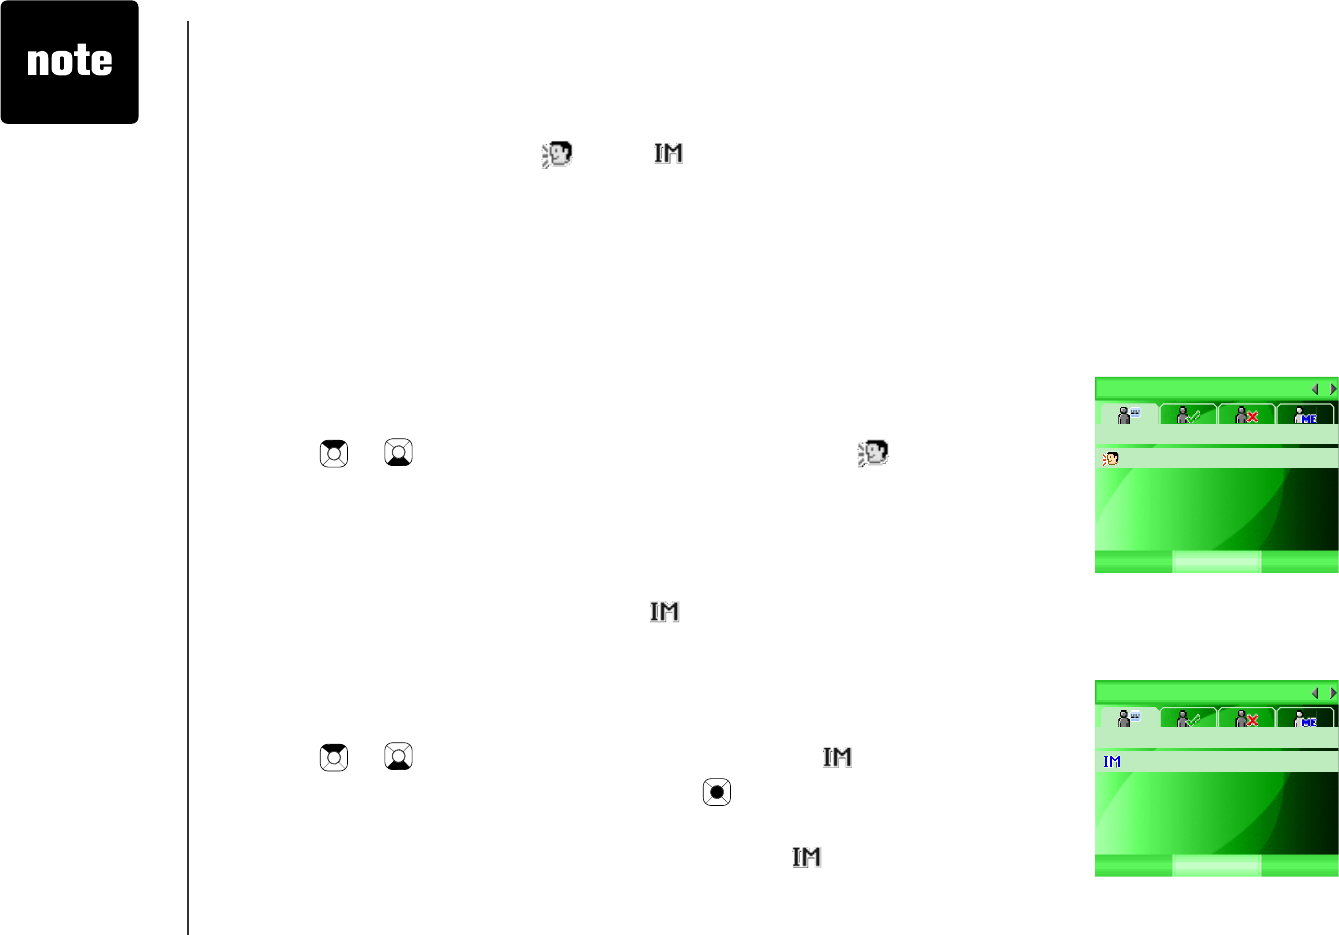
Buddy status window
B uddy status window has been divided into four tabs including ACTIVE CH AT
WINDOW , ONLINE , OFFLINE and STATUS . The buddy names
are displayed alphabetically.
For those buddies with Internet voice req uests or unread message, their name
will be put at the top of the list in the active chat window.
Active chat window
While there is an incoming or outgoing instant message or voice req uest from
or to a buddy, the name of the buddy will be shown in this window. If there is
an unread message or an Internet voice connection req uest, or will be
shown in front of the name of the buddy respectively.
All the buddies in this window should also be in the ONLINE window.
SELECT
Messenger
BACK
7:15 PM
MENU
MSNGR
Shirley
ONLINE
OPTIONSCHAT
Jane Doe
Joe
Mary
Susan Smith
The name
associated with
VJGRTQſNG[QWCTG
logged into will
show in the title
bar.
The ONLINE tab
will be displayed
by default after
you login to the
messenger. If
there is a chat
activity, the
ACTIVE CH AT
WINDOW tab will
be displayed after
logging in.
•
•
Shirley
ACTIVE CHAT WINDOW
Susan Smith
CLOSECHAT
www.vtechphones.com 54
Messenger
Messenger
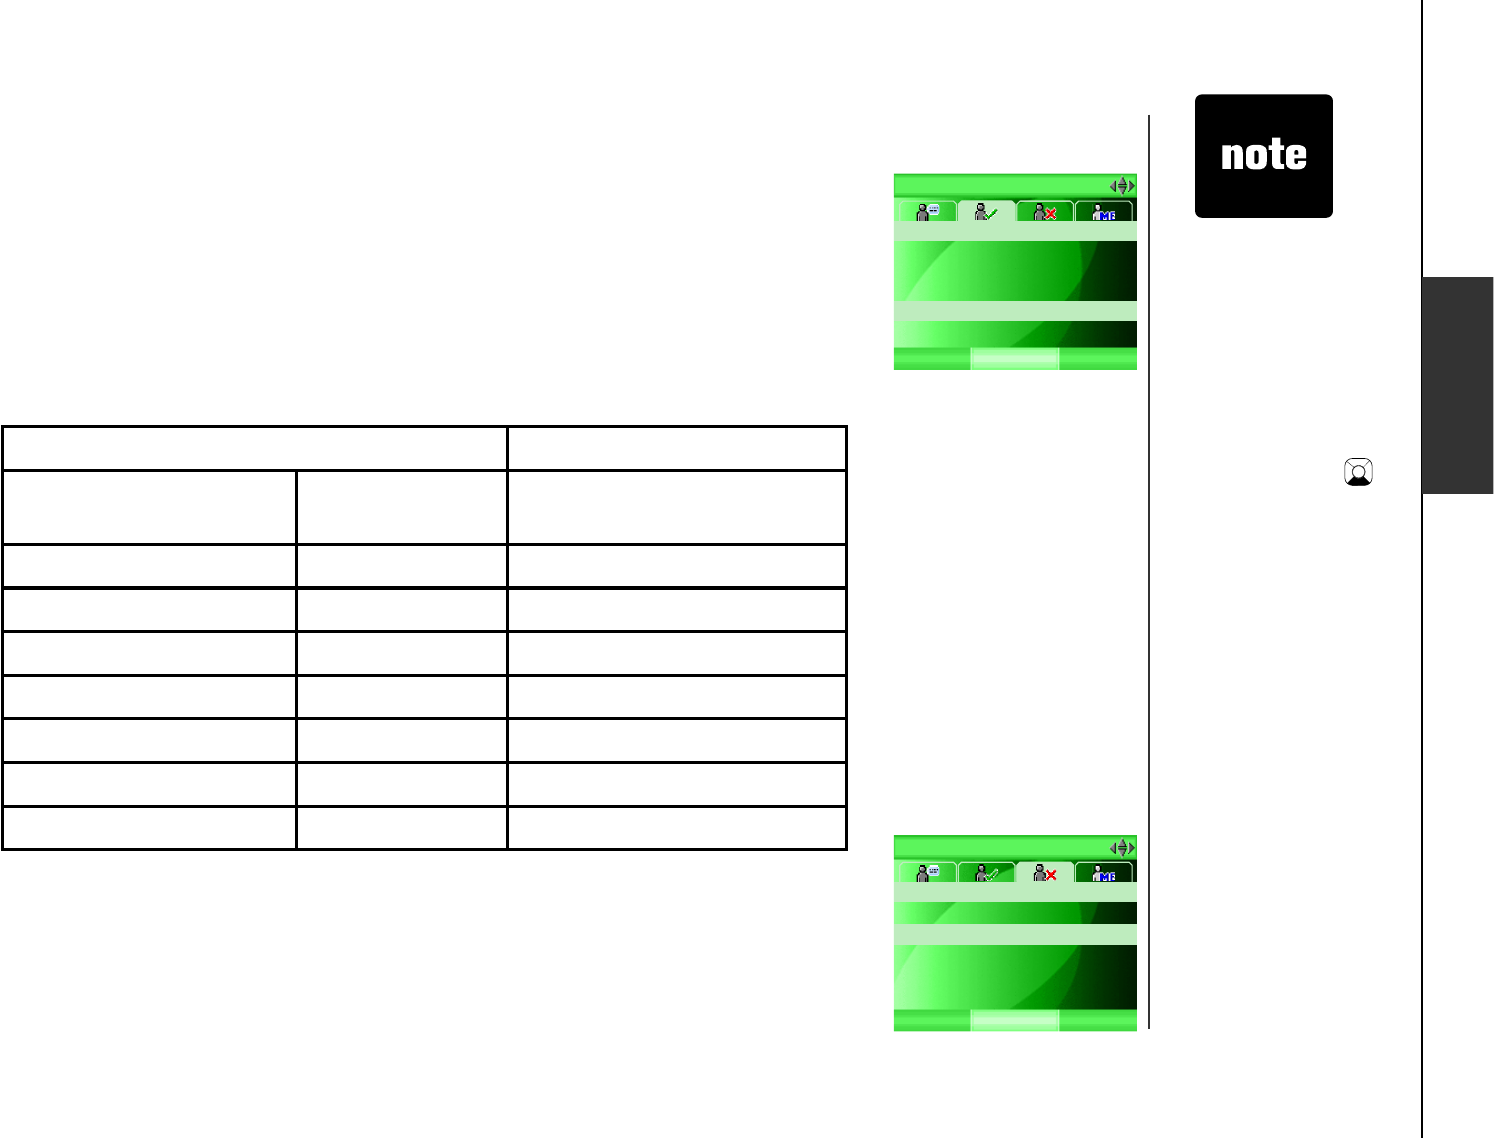
Online
A list of active (on-line) buddies will be displayed in this window. Instant
messages (IM) and Internet voice requests (VoIP) can only be made to
buddies currently in the active (online) list.
The status will be shown in front of the buddy name. The wording used for
online status and the display of the status in PC and IS6110 phone are similar
but not the same. See the below table for details.
Setting
PC IS6110 phone Display of the status in
IS6110 phone
Online Online
Busy Busy [Busy]
Be right back Be Back [Idle]
Away Away [Idle]
In a call / On the phone Onphone [Idle]
Out to lunch To Lunch [Idle]
#RRGCTQHƀKPG Invisible [Idle]
1HƀKPG
#NNQHVJGQHƀKPGDWFFKGUCPFDWFFKGUYJQJCXGUKIPGFKPVQOGUUGPIGTYKVJ
#RRGCTQHƀKPG status will be displayed in this window. IM and VoIP requests
ECPPQVDGUGPVVQCDWFF[YKVJQHƀKPGUVCVWU
If the online
buddy list is too
long, only part
of the list can
be shown. The
rest of the list
can be viewed
by pressing the
down NavKey
to scroll through
the list.
The messenger
screen will
disappear from
the screen
automatically
while you try
to make a call
or press OFF
when in the
messenger, but
the messenger
still runs in the
background.
•
•
Shirley
ONLINE
OPTIONSCHAT
Jane Doe
Joe
Mary
Susan Smith
Shirley
OFFLINE
OPTIONS
Annie
David
John Ryan
Peter
www.vtechphones.com
55
Messenger
Active status
While there is an Internet voice connection (VoIP) request or unread instant
message (IM) from a buddy, or the icon will be shown in front of the
name of the buddy and the buddy will also appear in the ACTIVE CHAT
WINDOW. If the buddy sends out both IM and VoIP request, both icons will
be shown in front of the name of the buddy.
While in idle mode, the icon(s) will also be shown on the screen and a beep
tone will sound to remind you there is an unread IM or VoIP request. Press
the MSNGR softkey to access the messenger directly.
To accept the Internet voice connection (VoIP) req uest:
Step 1: While in ACTIVE CHAT WINDOW tab, press the up or down NavKey
or to highlight the desired buddy with the icon.
Step 2: Press the ACCEPT softkey to accept the request or press the
DECLINE softkey to refuse the request.
If the incoming VoIP request is not answered and the buddy cancels the
request, the system will send a new message on behalf of the buddy to notify
you that the VoIP call was ended and icon will be shown in front of the
buddy name on the screen instead.
Reviewing unread instant messages:
Step 1: While in ACTIVE CHAT WINDOW tab, press the up or down NavKey
or to choose a desired buddy with the icon.
Step 2: Press the center NavKey/SELECT/ or the CHAT softkey to review
the message.
If you receive an instant message while on a call, the icon will be displayed
but there will be no audio alert. To check the message, end the call and go
to the contact list
If there are
more than one
VoIP requests
coming in, only
VJGſTUVTGSWGUV
will be accepted.
The remaining
request(s) will
DGTGLGEVGF
automatically.
•
Shirley
ACTIVE CHAT WINDOW
Susan Smith
CLOSECHAT
Shirley
ACTIVE CHAT WINDOW
Susan Smith
CLOSECHAT
www.vtechphones.com 56
Messenger
Messenger
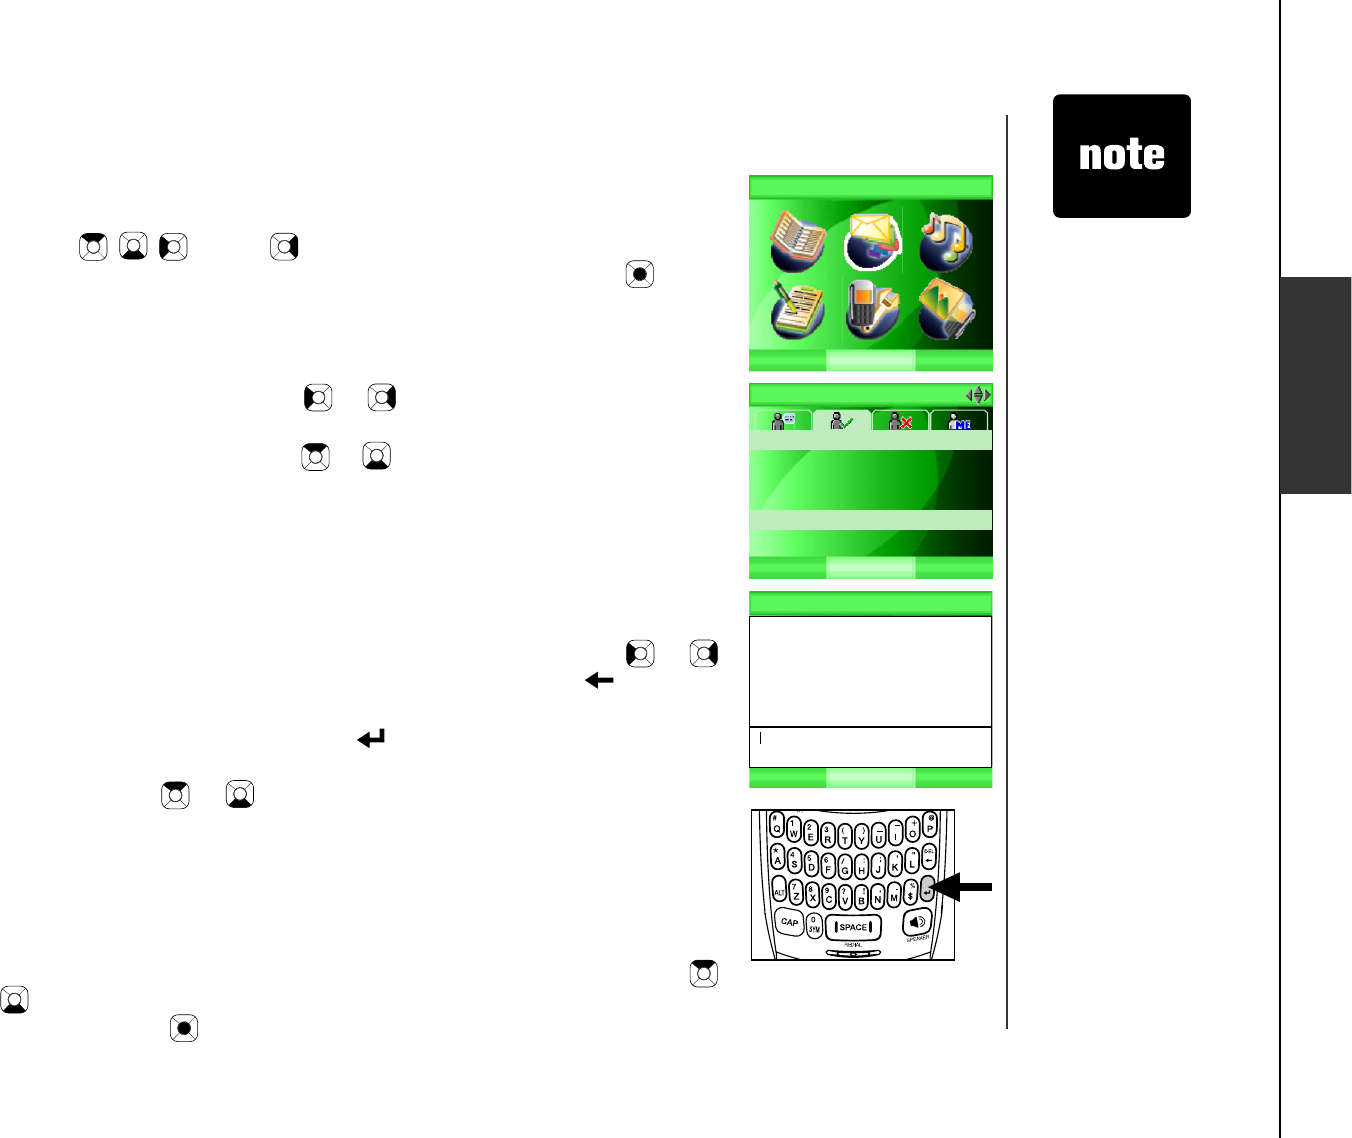
Send out instant messages
Step 1: Press the MENU softkey from the idle screen.
Step 2: Press the , , and/or NavKeys to choose Messenger, then
press the SELECT softkey or
the center NavKey/SELECT/ .
-OR-
Press the MSNGR softkey to access the messenger directly while
in the idle screen.
Step 3: Press the left or right NavKey or to choose either ONLINE or
ACTIVE CHAT WINDOW tab.
Step 4: Press the up or down NavKey or to choose the desired buddy,
and press the CHAT softkey. A chat window of the selected buddy
will be displayed. There is an input box at the bottom of the chat
window.
Step 5: Use the dial pad to enter the message in the input box. Press ALT to
change to numeric input mode, or press CAP to alternate between
uppercase or lowercase. The name of the person you are talking to
will be shown in the title bar. Press the left or right NavKey or
to move the cursor to the desired place and press DEL to delete
text.
Step 6: After entering the message, press to send out the message and
the sent message will be shown in the chat window. Press the up
or down NavKey or to review the chat history.
Step 7: To return to the buddy list without ending your chat, press the
BUDDIES softkey. To return to an active chat, press the up or
down NavKey to choose the desired buddy, and press the CHAT
softkey.
-OR-
Press the OPTIONS softkey, and press the up or down NavKey
or to choose Close. Press the SELECT softkey or the center
NavKey/SELECT/.
When there is
an incoming or
outgoing instant
message from
or to the buddy,
the name of the
buddy will be
added in the
ACTIVE CHAT
WINDOW on the
buddy list.
•
SELECT
Messenger
BACK
Shirley
ONLINE
OPTIONSCHAT
Jane Doe
Joe
Mary
Susan Smith
> Hi
Susan Smith >
Hello!
Susan Smith
BUDDIES OPTIONS
www.vtechphones.com
57
Messenger
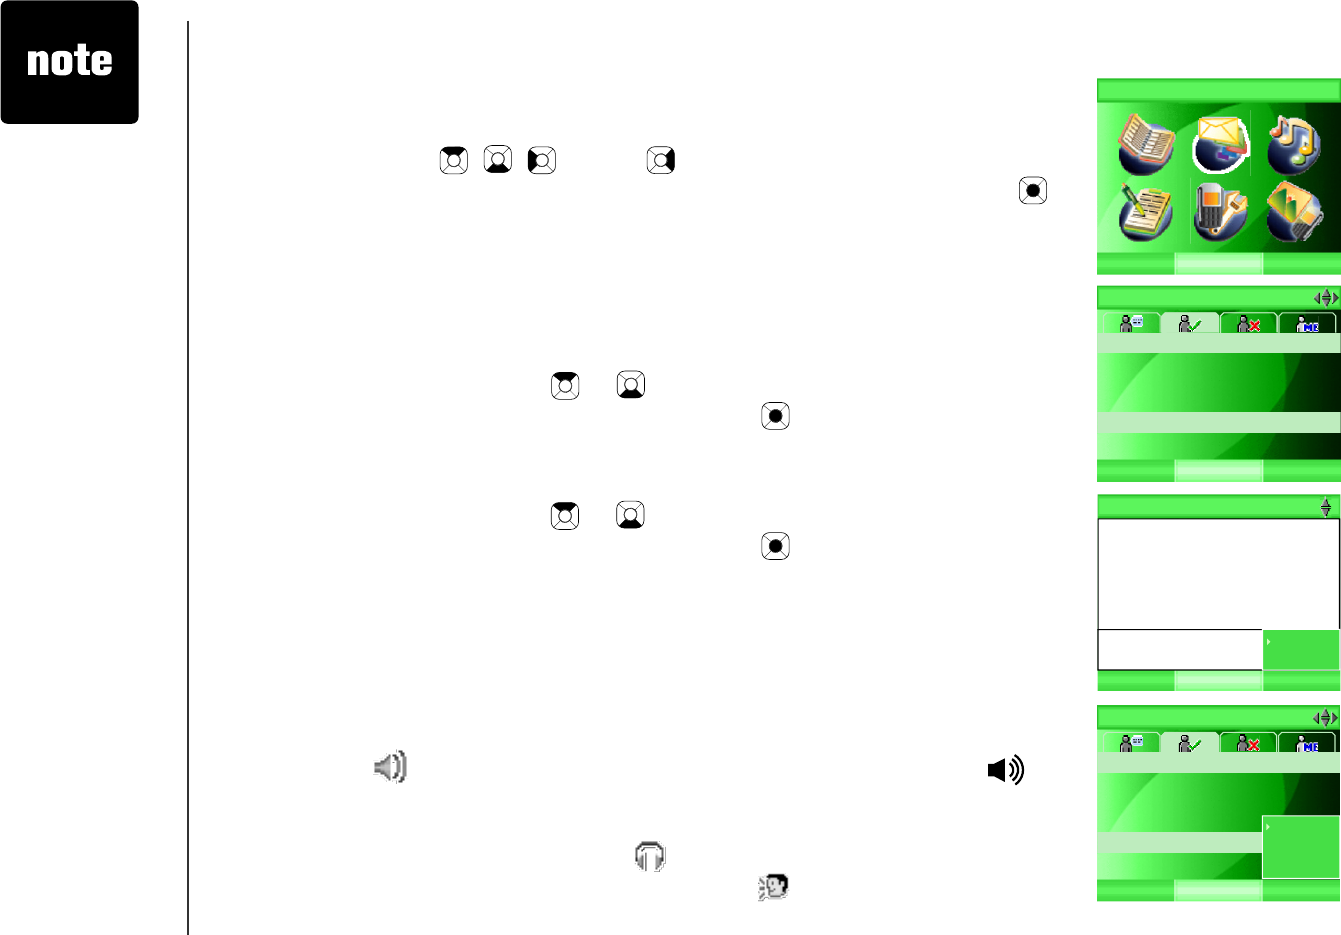
Send a VoIP request
Step 1: Press the MENU softkey from the idle screen.
Step 2: Press the , , and/or NavKeys to choose Messenger,
then press the SELECT softkey or
the center NavKey/SELECT/ .
-OR-
Press the MSNGR softkey to access the messenger directly while
in the idle screen.
Step 3: + Step 4: Press the CHAT softkey. A chat window of the selected
buddy will be displayed. Press the OPTIONS softkey and press the
up or down NavKey or to choose VoIP. Press the SELECT
softkey or the center NavKey/SELECT/.
-OR-
While in ONLINE tab, press the OPTIONS softkey and press the
up or down NavKey or to choose VoIP. Press the SELECT
softkey or the center NavKey/SELECT/.
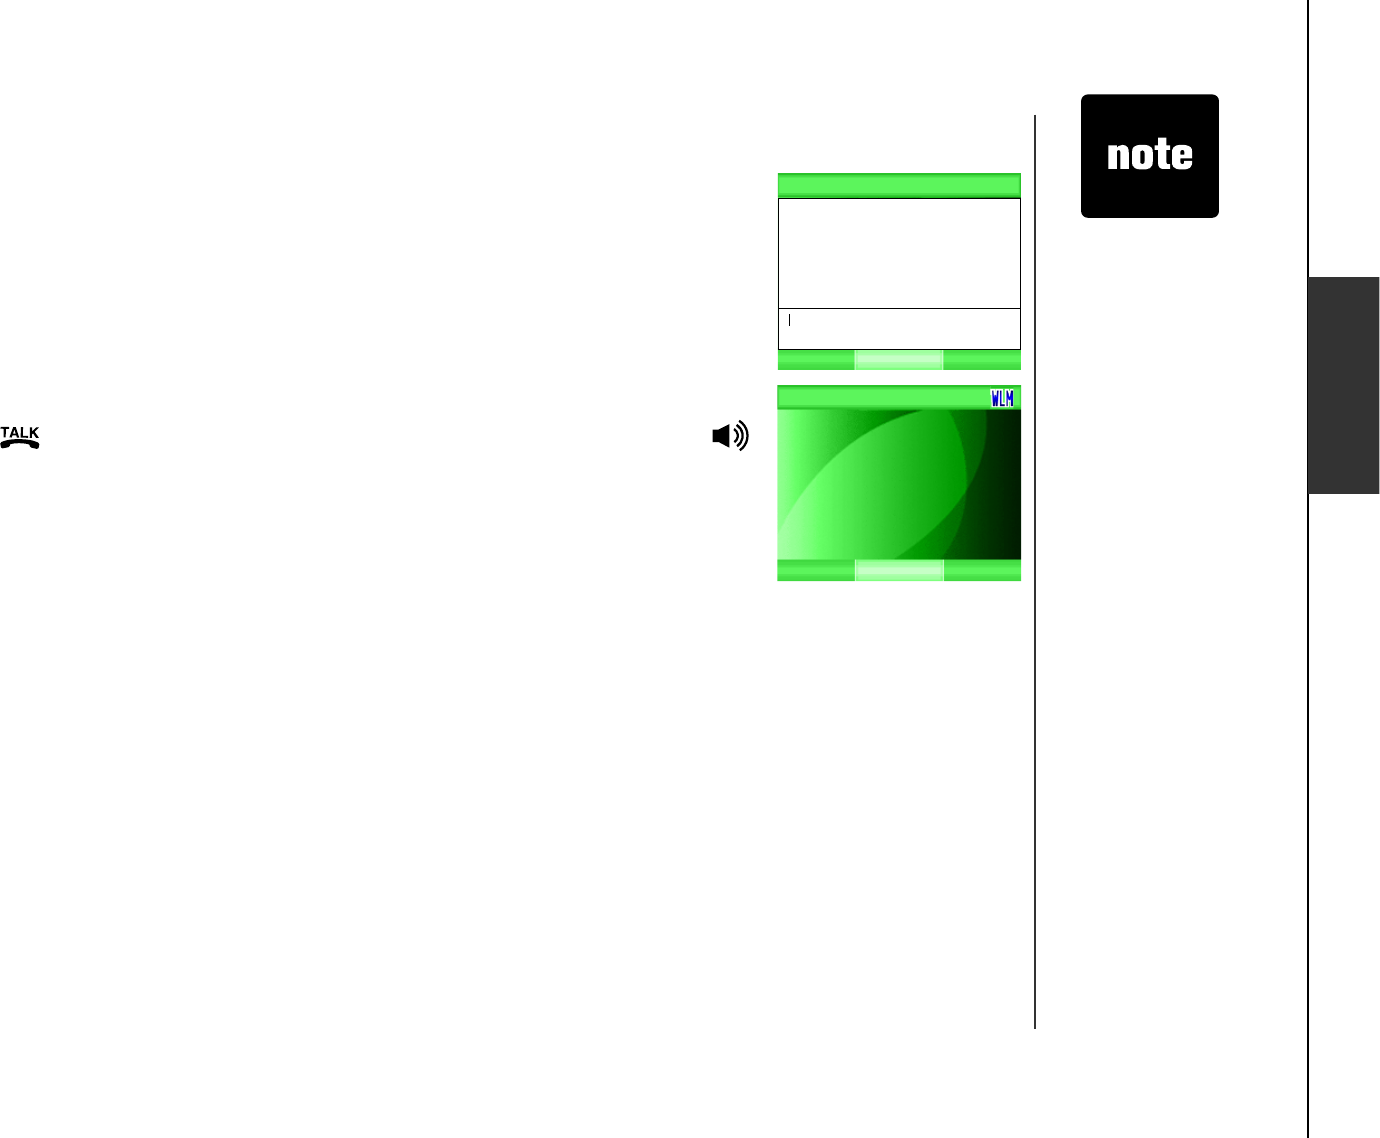
Step 5: The chat window will display > Calling (name of the buddy). At this
time, you are still able to send out or receive messages. If you want
to cancel the VoIP request, press the CANCEL softkey and > Call
cancelled will be displayed in the chat window.
Step 6: The chat window will display > Call accepted when the buddy
accepts your VoIP request. The speakerphone is used by default
and is shown in the center of the softkey bar. Press to
alternate between the speakerphone and handset mode. If a
headset is plugged into the telephone, it will change to headset
mode automatically and the icon will be displayed in the center
of the softkey bar. A VoIP request icon will also be shown next
to the name of the buddy.
Only the buddies
in the ACTIVE
CHAT WINDOW
or ONLINE
section can
receive VoIP
requests.
•
SELECT
Messenger
BACK
Shirley
ONLINE
OPTIONSCHAT
Jane Doe
Joe
Mary
Susan Smith
> Hi
Susan Smith
BACK SELECT
VoIP
Close
Shirley
ONLINE
SELECTBACK
Jane Doe
Joe
Mary
Susan Smith
VoIP
Info
History
www.vtechphones.com 58
Messenger
Messenger
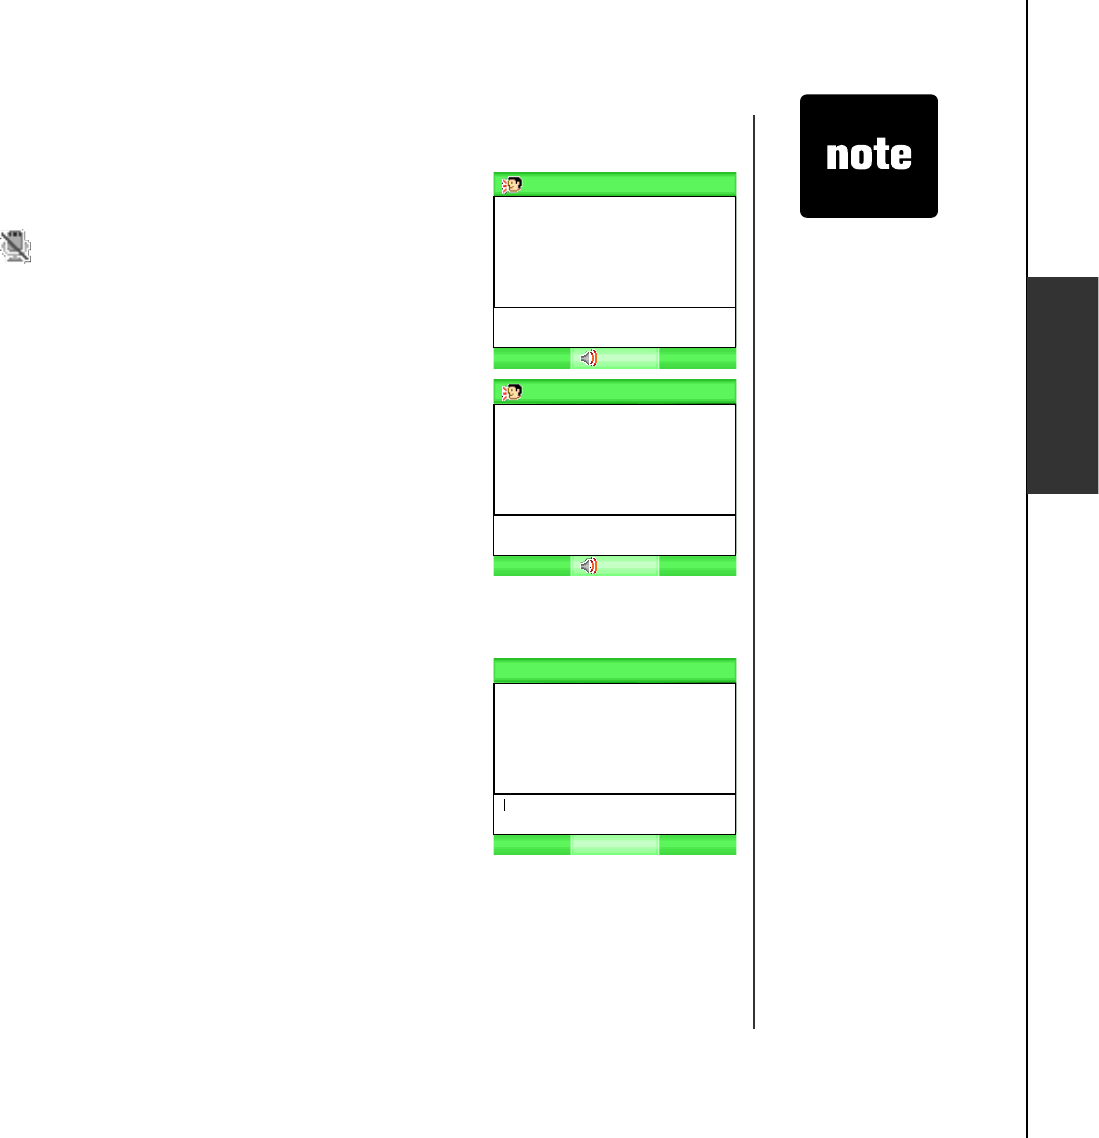
Send a VoIP request
Step 7: To mute the microphone during a conversation, press the MUTE
softkey and the mute icon will be shown in the center of the softkey
bar. Press the UNMUTE softkey to resume normal conversation.
Step 8: To end the VoIP conversation, press the CANCEL softkey. The chat
window will display >Call ended when either you or your buddy
decline.
Step 9: Press the BUDDIES softkey to return to the buddy list.
Accept an incoming instant voice request
Step 1: While in the chat window, a VoIP request message will be displayed
(e.g. Incoming call) when there is an incoming Internet voice
connection (VoIP) request from the same buddy.
Step 2: Press the ACCEPT softkey to accept the request and >Call
answered will be displayed in the chat window. Press the DECLINE
softkey to decline the request and >Call declined will be displayed
in the chat window.
During a VoIP
conversation, you
can still send out
or receive instant
messages.
•
> Hi
> Calling Susan Smith
Susan Smith
MUTE CANCEL
> Hi
> Calling Susan Smith
> Call accepted
Susan Smith
MUTE CANCEL
> Incoming call
> Call answered
Susan Smith
BUDDIES OPTIONS
www.vtechphones.com
59
Messenger
VoIP/IM request from buddy outside the current buddy
chat window
Step 1: While in the chat window, if there is an incoming VoIP or IM request
from a different buddy, a blinking or icon and the name of
the buddy will be displayed at the top of the screen to replace the
current buddy name. The incoming buddy name will only appear for
a few seconds and then return to the name of the current buddy.
Step 2: Press the BUDDIES softkey.
-OR-
Press the OPTIONS softkey, and press the up or down NavKey
or to choose Close. Press the SELECT softkey or the center
NavKey/SELECT/.
Step 3: The buddy status window will be displayed. Press the up or down
NavKey or to choose the desired buddy with or icon
in the ACTIVE CHAT WINDOW.
Step 4: While a buddy with VoIP request is highlighted, press the ACCEPT
softkey to accept the request and >Call accepted will be displayed
in a new chat window. Press the DECLINE softkey to decline the
request. You may press the up or down NavKey or to choose
the previous buddy in the ACTIVE CHAT WINDOW and press the
CHAT softkey to return to the previous chat window.
For details on
how to access the
chat window, see
Step 1 -4 of Send
out instant
messages on
page 56.
If there are
multiple VoIP
requests from
different buddies,
QPN[VJGſTUV
request will be
shown.
If there are
multiple IM
requests from
different buddies,
only the last
request will be
shown.
•
•
•
> Hi
Susan Smith >
Hello!
Susan Smith
BUDDIES OPTIONS
> Hi
Susan Smith >
Hello!
Mary
BUDDIES OPTIONS
Shirley
ACTIVE CHAT WINDOW
Mary
CLOSECHAT
www.vtechphones.com 60
Messenger
Messenger
Incoming standard call while using IM in messenger
While in the chat window, if there is an incoming standard telephone call,
the messenger screen will disappear. The telephone will ring and the screen
will display Incoming call. If you subscribe to caller ID from your telephone
EQORCP[OQTGURGEKſEKPHQTOCVKQPQHVJGECNNGTUWEJCUVJGPCOGCP F
telephone number will be displayed. If the incoming telephone number
matches one of the entries in the directory, the information of the entry will
be shown.
Press /FLASH or the ANSWER softkey to answer the call. Press
if you want to answer using the speakerphone. After you answer the call,
the name of the buddy will be removed from the ACTIVE CHAT WINDOW
in the messenger.
•
While in the chat
window, if there
are incoming
standard call and
VoIP request at
the same time,
only the incoming
standard call will
be displayed on
the screen, the
VoIP request
will be declined
automatically. But
if the standard
call is answered
before the VoIP
request is ended
by the buddy, the
VoIP requests will
be displayed.
•
> Hi
Susan Smith >
Hello!
Susan Smith
BUDDIES OPTIONS
IGNORE
ANSWER
Incoming
Call

www.vtechphones.com
61
Messenger
Incoming standard call while using VoIP in messenger
If there is an incoming standard call while you are on a VoIP call, the phone
will not ring through the speaker. There will be an audio alert heard to alert
you of the new VoIP call.
The screen will display Incoming call. If you subscribe to caller ID from your
VGNGRJQPGEQORCP[OQTGURGEKſEKPHQTOCVKQPQPVJGECNNGTUWEJCUPCOG
and telephone number will be displayed. If the incoming telephone number
matches one of the entries in the directory, the information of that entry will
be shown on the screen.
Press /FLASH or the ANSWER softkey to answer the call. Press
if you want to answer using the speakerphone. The VoIP call will be
dropped automatically
Press the IGNORE softkey or OFF to drop the standard telephone call
and return to the VoIP call.
If the incoming call is not answered, it will return to the VoIP call after the
end of the ringing.
•
•
•
> Call answered
Mary
BUDDIES OPTIONS
IGNORE
ANSWER
Incoming
Call

www.vtechphones.com 62
Messenger
Messenger
Incoming Internet voice call (VoIP) while idle
While in the idle screen and there is an incoming VoIP call, the handset will
TKPIſXGVKOGUCPFVJGUETGGPYKNNFKURNC[VJGPCOGQHVJGECNNGT
Press the ACCEPT softkey or to accept the call.
Press the MUTE softkey or OFF to mute the ringer.
+HVJG8Q+2ECNNKUPQVCPUYGTGFCHVGTſ XGTKPIUVJG8Q+2TGSWGUVYKNND G
dropped automatically.
Incoming Internet voice call (VoIP) while on a standard
call
While on a call and there is an incoming VoIP call, the name of the buddy will
be displayed on the screen. The phone alert will not ring through the speaker.
There will be an audio alert heard to alert you of the new VoIP call.
During an incoming VoIP call, the current standard call is still on. Press
OFF to end the standard call.
Press the ANSWER softkey to answer the VoIP call and the standard call
will end automatically.
Press the IGNORE softkey to ignore the VoIP call. The standard call will
be returned.
If VoIP call is not answered, the call will continue until the call is declined or
ended by the buddy.
The VoIP call will be declined if you try to make a call.
•
•
•
•
•
ACCEPT MUTE
Susan Smith
is calling
ANSWER IGNORE
Susan Smith
is calling
Press “ANSWER” to answer
IV call and end phone call.

www.vtechphones.com
63
Simultaneous incoming standard call and VoIP call while
on a standard call
8Q+2ECNNTGSWGUVEQOGUſTUV
While on a call and there is an incoming VoIP call, the name of the caller
will be displayed on the screen with an audio alert on the handset. If, at the
same time, there is a standard call coming in, the VoIP call will be declined
automatically and the caller ID of the standard call will be displayed on the
screen with an audio alert on the handset. Press /FLASH to answer the
incoming call and put the current call on hold.
5VCPFCT FECNNEQOGUſTUV
While on a call and there is a incoming call, the caller ID of the standard
call will be displayed on the screen for ten seconds with an audio alert on
the handset. If a VoIP call is coming in at the same time while the caller
ID information is still shown on the screen, the VoIP call will be declined
automatically and the caller will receive a notice.
If the VoIP request comes in after the caller ID display has disappeared, the
name of the caller will be displayed on the screen. Press the ANSWER softkey
to accept the request or press the IGNORE softkey to ignore the request.
For details on
how access
buddy status
window, see Step
1-2 of Send
out instant
messages on
page 56.
•
Messenger
ANSWER IGNORE
Susan Smith
is calling
Press “ANSWER” to answer
IV call and end phone call.
John Smith
555-1212
Feb 14
12:35 PM

www.vtechphones.com 64
Messenger
Multiple incoming Internet voice calls (VoIP) while on a
standard call
9JKNGQPCECNNCPFOWNVKRNG8Q+2TGSWGUVUCTGEQOKPIKPQPN[VJGſTUV8Q+2
request will be accepted and displayed on the screen with an audio alert on the
handset. The rest of the VoIP requests will be declined automatically. Press the
ANSWER softkey to accept the request or press the IGNORE softkey to ignore
VJGTGSWGUV+HPQCEVKQPKUVCMGPVQYCTFVJGſTUV8Q+2TGSWGUVVJGTGSWGUVYKNN
timeout automatically and it will then return to the standard call.
View buddy history
Both the current and previous sessions of chat history for the selected buddy
can be retrieved. The date and time of the history will be shown as well. All
the chat history is stored in your computer for up to six months.
Step 1: While in the buddy status window, press the left or right NavKey
or to choose either ONLINE or OFFLINE tab, press the up or
down NavKey or to choose the desired buddy.
Step 2: Press the OPTIONS softkey. Press the up or down NavKey or
to choose History, and press the SELECT softkey or
the center NavKey/SELECT/. A history of the selected caller will
be displayed.
Step 3: Press the up or down NavKey or to scroll through the
history.
Messenger
Shirley
ONLINE
SELECTBACK
Jane Doe
Joe
Mary
Susan Smith
VoIP
Info
History
07-27-2007 11:57
Shirley>
I will. But when shall we meet?
07-27-2007 11:59
Billy>
Me too. Let’s meet at 42nd St. at 2 pm.
07-27-2007 12:00
Shirley>
OK!
BUDDY HISTORY
BACK DELETE
ANSWER IGNORE
Susan Smith
is calling
Press “ANSWER” to answer
IV call and end phone call.
www.vtechphones.com
65
Delete buddy history
Step 1: Repeat Step 1-2 of View buddy history on page 64.
Step 2: Press the DELETE softkey. All the chat history of the selected
buddy will be removed.
View buddy information
From this menu you can access email information for your buddies.
Step 1: Repeat Step 1 of View buddy history on page 64.
Step 2: Press the OPTIONS softkey. Press the up or down NavKey or
to choose Info, and press the SELECT softkey or the center
NavKey/SELECT/. The email address of the selected buddy will
be displayed.
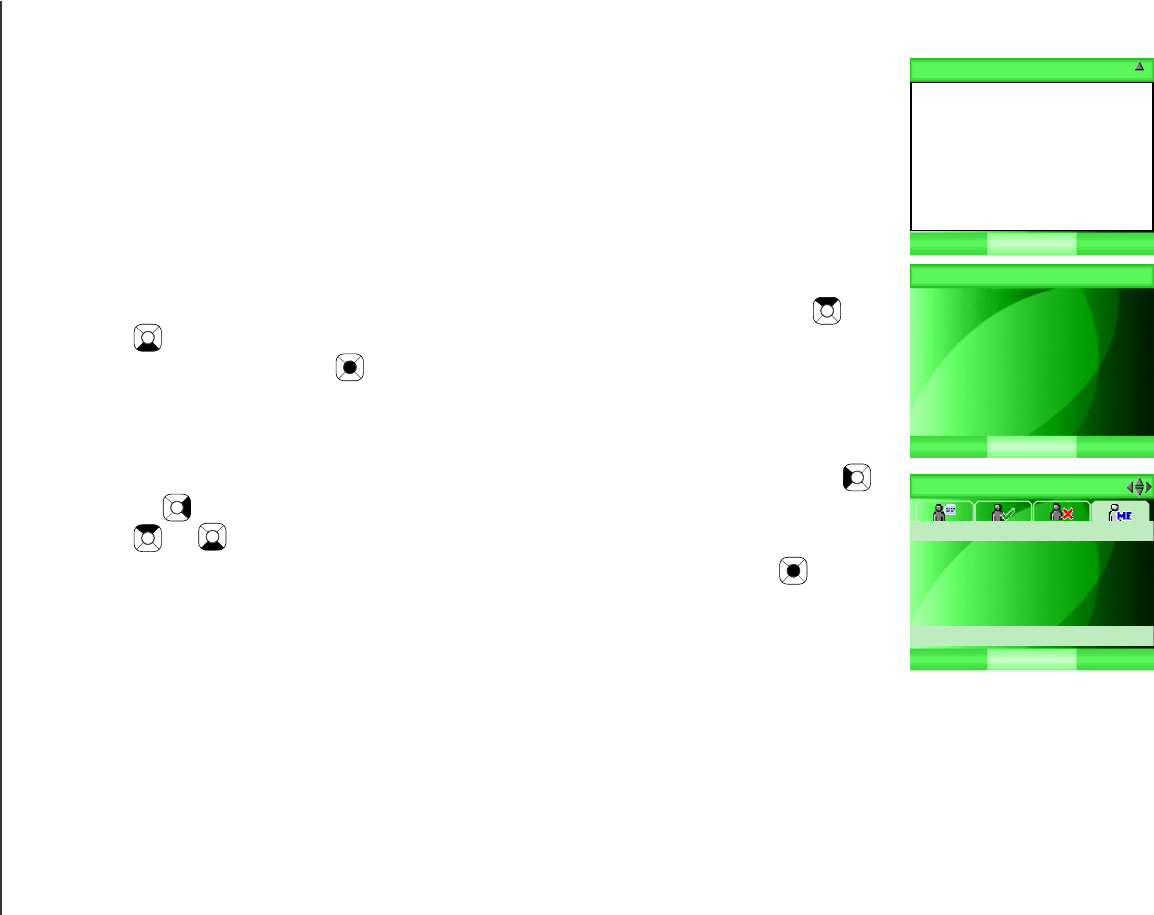
Choose your IM status
Step 1: While in the buddy status window, press the left or right NavKey
or to choose either STATUS tab, press the up or down NavKey
or to choose your status.
Step 3: Press the SELECT softkey or the center NavKey/SELECT/. Your
status will be shown at the top of the buddy status window. See
Online on page 54 for details of status display.
Sign out instant messenger
Step 1: Repeat Step 1 of Choose your IM status above (page 65).
Step 2: Press the SIGN OUT softkey.
Messenger
07-27-2007 11:57
Shirley>
I will. But when shall we meet?
07-27-2007 11:59
Billy>
Me too. Let’s meet at 42nd St. at 2 pm.
07-27-2007 12:00
Shirley>
OK!
BUDDY HISTORY
BACK DELETE
BACK
BUDDY INFORMATION
Display Name
Login Name
Susan Smith
susan_ smith@ hotmail.com
Shirley
STATUS
SELECTSIGN OUT
Be Back
Away
Onphone
To Lunch
Online

www.vtechphones.com 66
Telephone operation
Telephone operation
Making calls on the Home line
To make a regular telephone call, press /FLASHEQPſTO[QWJGCTC
dial tone, then dial the number.
-OR-
To use the speakerphone, press then dial the number.
6QRTGFKCNRTGXKGYPWODGTUDGHQTGFKCNKPIGPVGTVJGPWODGTUſTUV+H[QW
make a mistake while entering the numbers, press DEL to backspace
and delete number(s).
After entering the number, press /FLASH.
-OR-
6QRTGFKCNVJGPWUGVJGURGCMGTRJQPG FKCNVJGPWODGTUſTUVVJGPRTGUU
.
While you are on a call, the screen displays the elapsed time of the call (in
minutes and seconds) and the telephone number dialed.
Line In Use will be displayed if the telephone line is in use by a parallel set.
Receiving calls on the Home line
When the telephone is ringing, press /FLASH or the ANSWER
softkey to answer the call. Press if you want to answer using the
speakerphone.
After you answer the call, the screen displays the elapsed time of the call. If
you subscribe to caller ID service, see page 72 for caller ID information.
If the incoming telephone number matches one of the entries in the directory,
the information on the entry will be shown on the screen.
•
•
•
•
•
•
Messenge MenuShift-L
Line In Use
7:15 PM
MENU
MSNGR
MUTE
ANSWER
Incoming
Call
www.vtechphones.com
67
Telephone operation
• When the
telephone is
ringing, press
the OFF or
MUTE softkey to
disable the ringer
temporarily and
the ringer off icon
will be shown
on the screen.
The ringer
function will
resume with the
next call.
Options Mute
Ending calls on the Home line
While on a call, press OFF to end the call. After a call ends, the screen will
show Ended and the length of the call in hours, minutes and seconds.
Speakerphone operation
The speakerphone provides you a hands-free option while on a call. During
a call, press to alternate between speakerphone and normal handset
use. The speakerphone icon will be shown in the center of the softkey
bar while the speakerphone is in use.
Mute
The mute function is used to silence the microphone during a conversation.
You will be able to hear the caller, but the caller will not be able to hear you
until you press the UNMUTE softkey to resume the conversation. When you
hang up, this feature will be canceled.
To mute/unmute the microphone:
During a call, press the MUTE softkey to mute the microphone and the mute
icon will be shown in the center of the softkey bar. Press the UNMUTE
softkey to resume normal conversation.
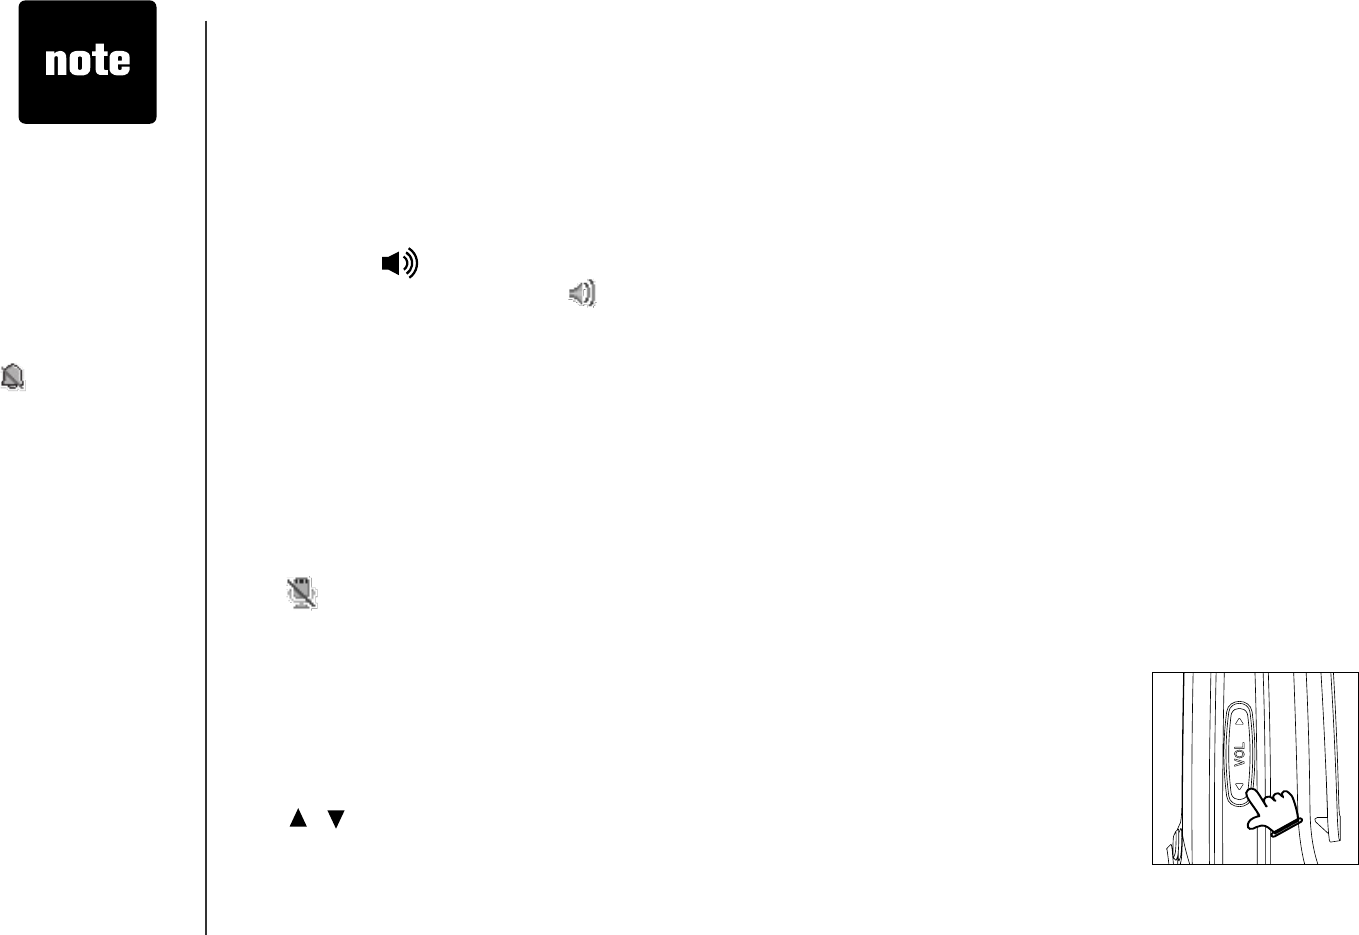
Volume
;QWEC PCFLWU VVJGNKUVGPKP IXQNWO GHTQOVJ GJCPFUG VQTJGCFUGVURGCMG T
volume during a call.
While on a call using the handset, headset or speakerphone, press
VOL / VQCFLWUVVJGNKUVGPKPIXQNWOGCPFCXQNWOGDCTYKNNDGFKURNC[GF
on the screen.
#HVGTCFLWUVKPIVJGXQNWOGVJGXQNWOGDCTYKNNDGFKURNC[GFHQTCHGYUGEQPFU
and the volume level will be saved automatically.
www.vtechphones.com 68
Telephone operation
Telephone operation
The volume
settings of the
handset, headset
or speakerphone
are stored
separately, so
changing one
of them will not
affect the others.
•
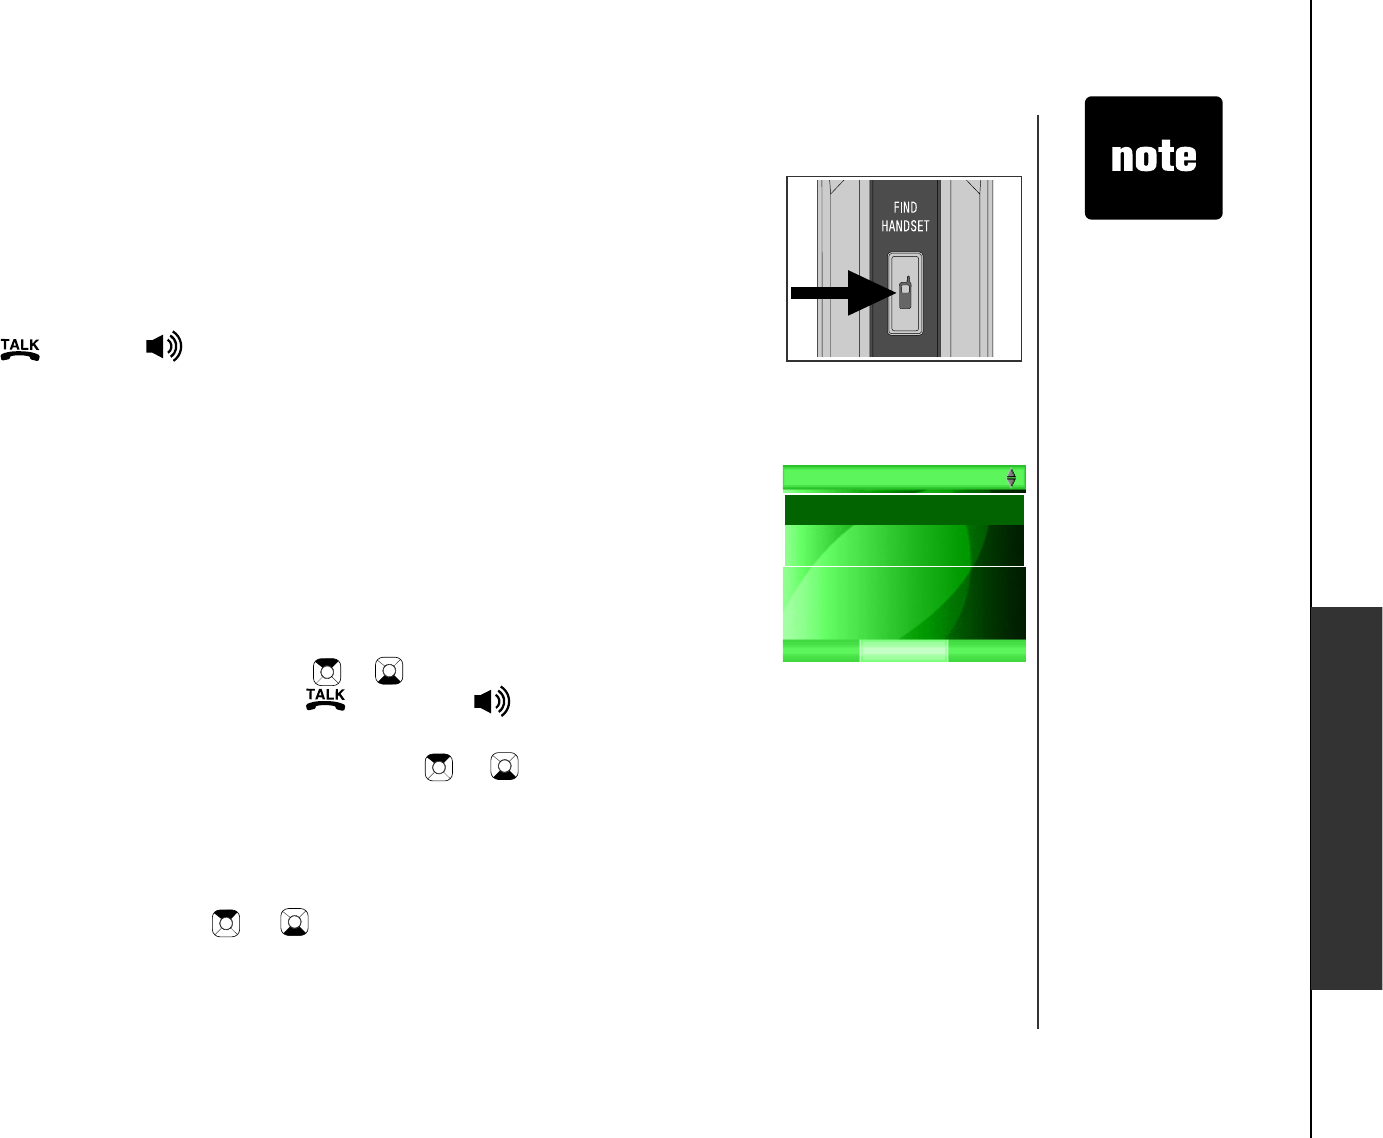
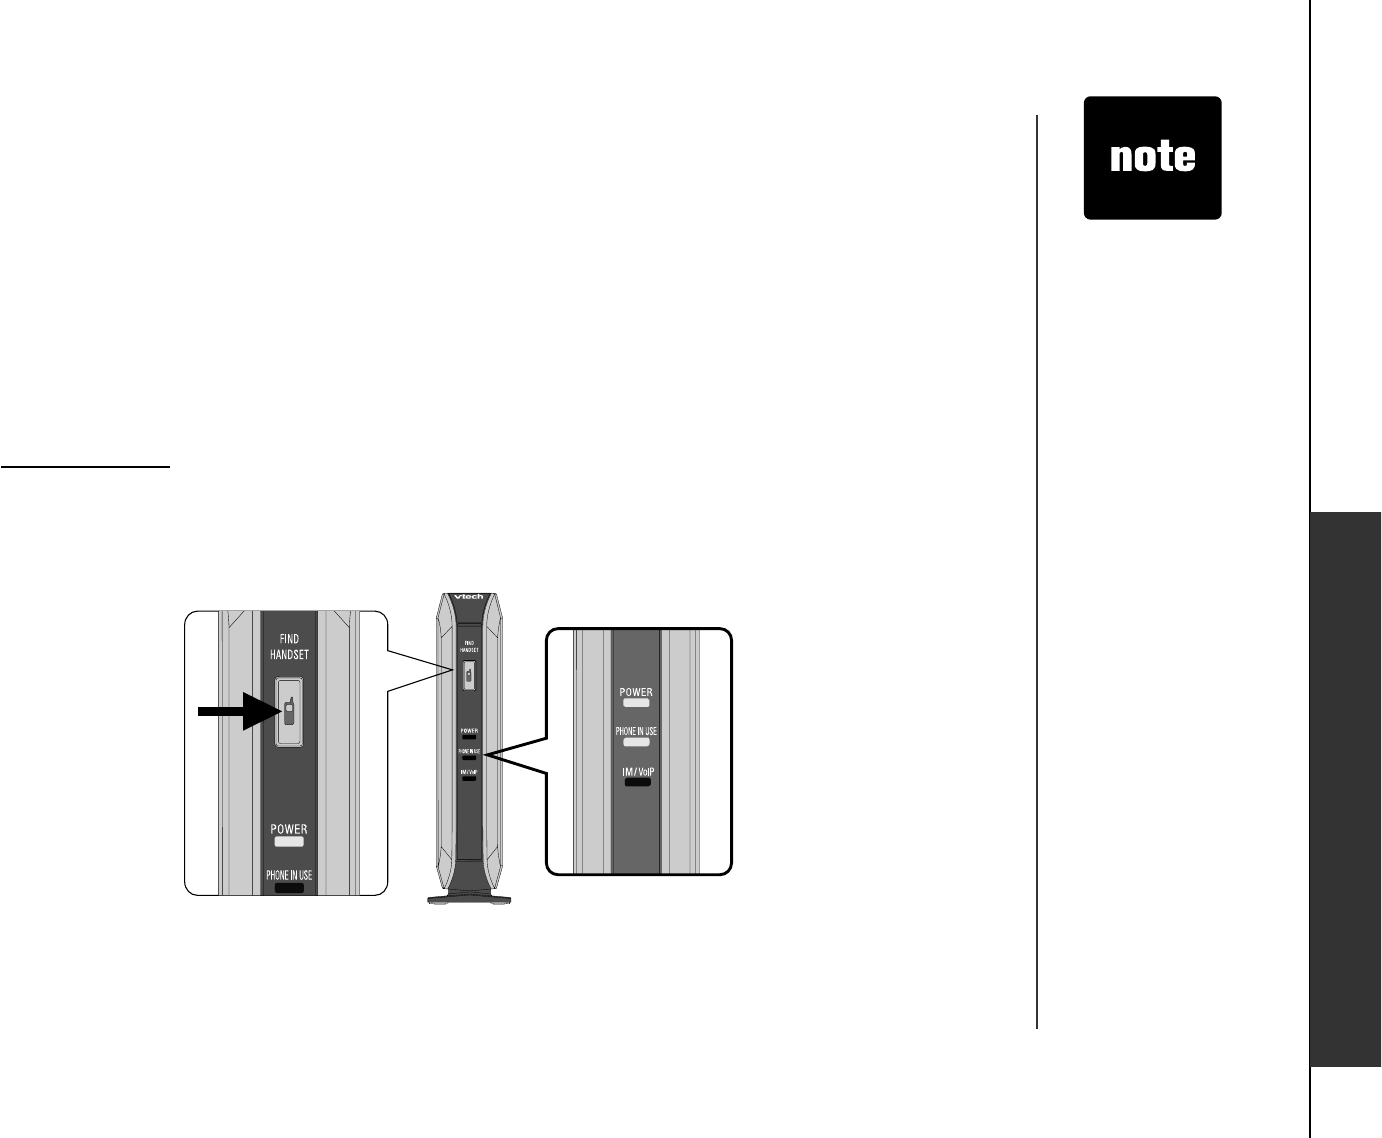
Find handset
This feature allows the telephone base to page the handset.
Press FIND HANDSET on the telephone base, and the handset will ring
and the screen will display PAGING.
To stop paging, press FIND HANDSET again on the telephone base, or
press /FLASH, , OFF, or the STOP softkey on the handset.
To mute the sound of paging , press the MUTE softkey on the handset.
Redial
6JGVGNGRJQPGECPUVQTGVJGſXGOQUVTGEGPVN[FKCNGFPWODGTUKPCTGFKCNNKUV
+HVJGTGCTGOQTGVJCPſXGECNNUVJGQNFGUVGPVT[KUFGNGVGFVQOCMGTQQOHQT
the new call. E ntries are displayed in order from the oldest to the most recent
entry. The most recently called number will be highlighted. You can review or
redial calls on the redial list, or save the numbers into the directory.
To review and dial a redial entry, press SPACE/REDIAL on the handset
and press the up or down NavKey or to review the entries or choose
a number you wish to dial. Press /FLASH or to make the call.
To save a redial entry into the directory, press SPACE/REDIAL on the
handset and press the up or down NavKey or to choose a desired
entry to save into the directory. Press the SAVE softkey and you will be
directed to the directory screen, see Step 3 in Edit a directory entry
section on page 70 for details.
To delete a redial entry, press SPACE/REDIAL on the handset and press
the up or down NavKey or to choose the desired entry to delete.
Press the DELETE softkey.
•
•
•
•
•
•
DELETE
SAVE
800-268-5275
62-2222
Redial
www.vtechphones.com
69
Telephone operation
Directory
Directory is a phonebook for storing names and telephone numbers. It can store
up to 50 entries, with each entry consisting of up to 32 digits and 16 characters.
A distinct picture and ringer melody can be assigned to each entry.
Entries are sorted alphabetically, and names beginning with numbers are listed
ſTUV#PCNRJCDGVKEC NUGCTEJECPDGFQPGCHVGTGPVGTKPIVJGFKTGEVQT[
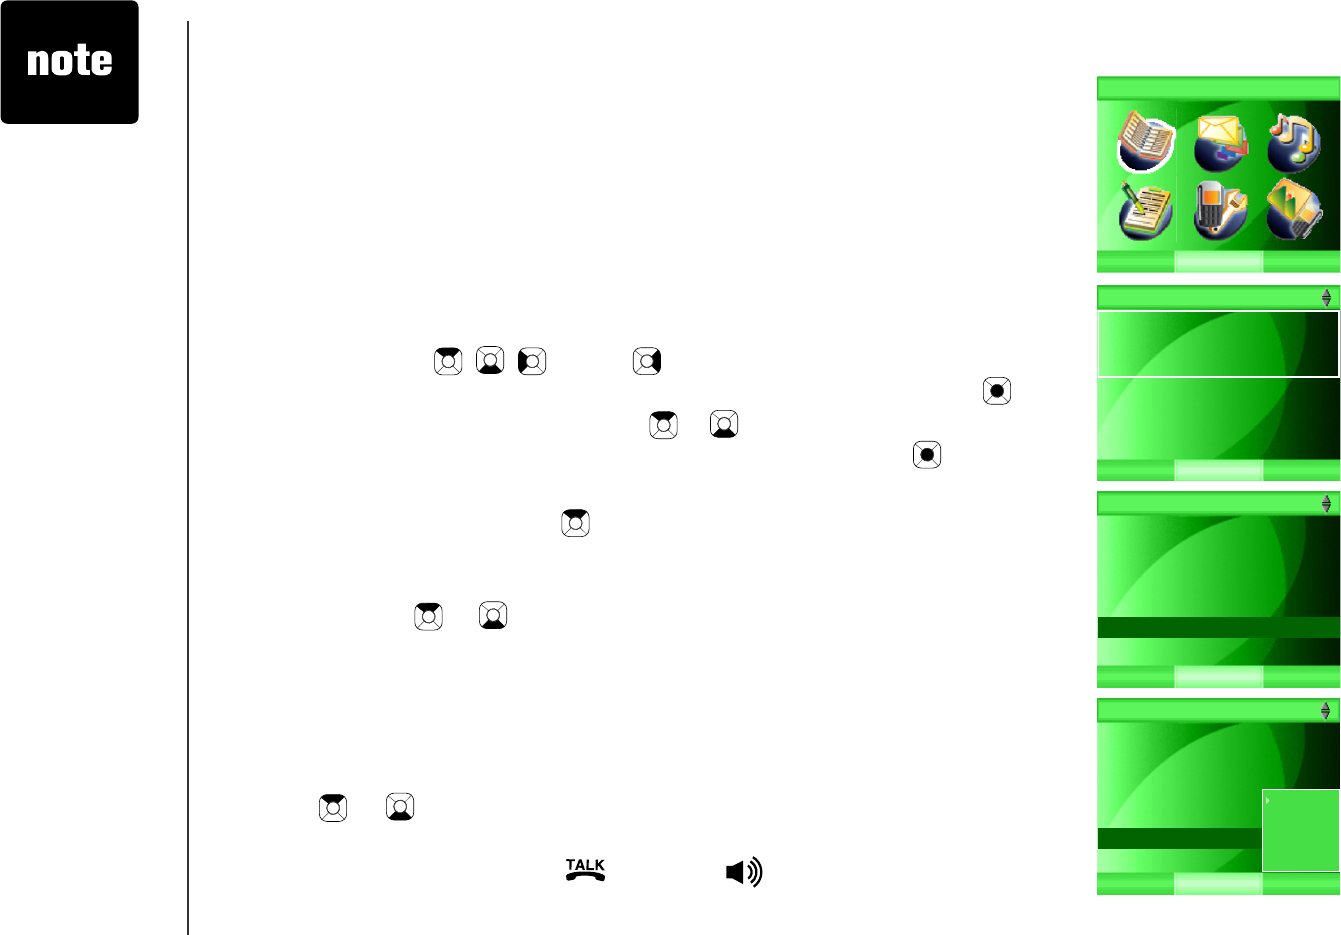
Search and review a directory entry
Step 1: Press the MENU softkey from the idle screen.
Step 2: Press the , , and/or NavKeys to choose Directory, then
press the SELECT softkey or the center NavKey/SELECT/.
Step 3: Press the up or down NavKey or to choose Search, then press
the SELECT softkey or the center NavKey/SELECT/.
-OR-
Press the up NavKey to access the directory directly while in the
main idle screen.
Step 4: A list of directory listings will be displayed. Press the up or down
NavKey or to choose the desired entry to review.
-OR-
Press the dial pad (A-ZV QUVCT VCSWKE MPCO GUGCTE JVQſP FVJ G
FGUKTGFGPVT[6JGUETGGPYKNNJKIJNKIJVVJGſTUVPCOGDGIKPPKPIYKVJ
the letter associated with that key.
Step 5: Press the OPTIONS softkey and press the up or down NavKey
or to choose View. The details of the entry including name,
telephone number, picture and ringer will be displayed.
Step 6: To dial the entry, press /FLASH or while the entry is highlighted
to review the details of the entry.
Press OFF to
return to the idle
screen.
While there is
an incoming
call or making a
call, the editing
of the directory
will be cancelled
automatically.
•
•
SELECT
Directory
BACK
Directory
BACK SELECT
Search
Add
Directory
BACK OPTIONS
Joe Wong
Susan Smith
Mary Chan
John Smith
Jane Doe
Directory
BACK OPTIONS
Joe Wong
Susan Smith
Mary Chan
John Smith
Jane Doe
View
Edit
Delete
Delete All
www.vtechphones.com 70
Telephone operation
Telephone operation
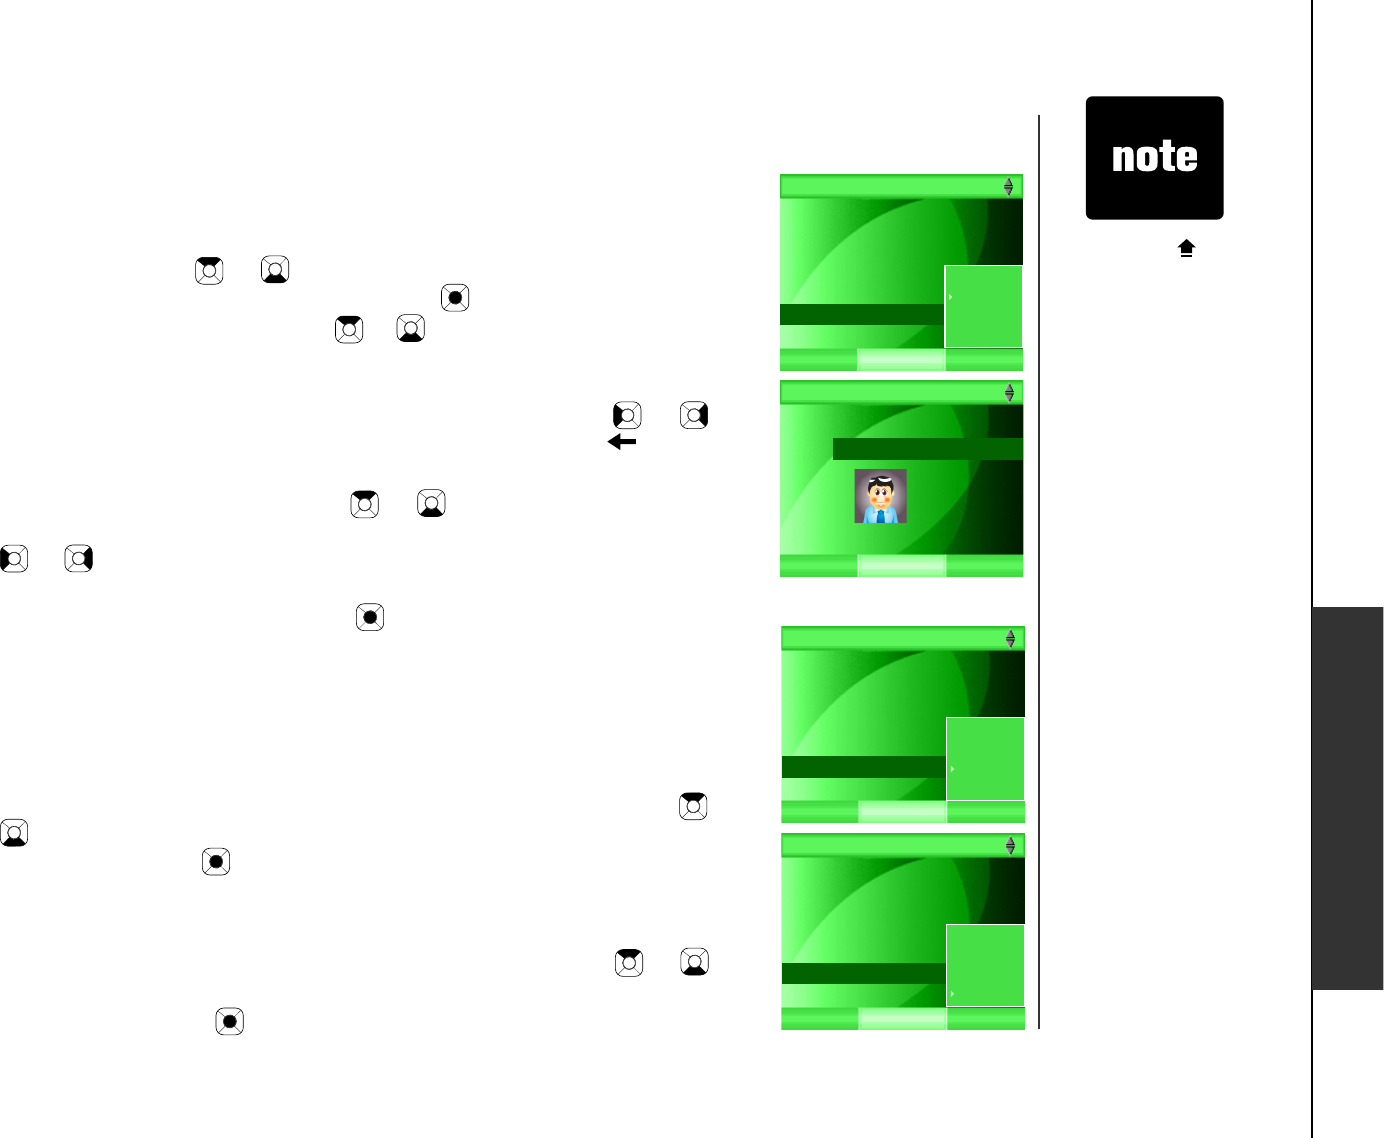
Edit a directory entry
Step 1: Repeat Step 1-4 or Step 1-5 of Search and review a directory
entry on page 69 and press the OPTIONS softkey. Press the up
or down NavKey or to choose Edit and press the SELECT
softkey or the center NavKey/SELECT/VQEQPſTO
Step 2: Press the up or down NavKey or VQJKIJNKIJVVJGFGUKTGFſGNF
to edit.
Step 3: Use the dial pad (see Chart of characters on page 35) to edit
the name and number. Press the left or right NavKey or to
move the cursor to the desired location and press DEL to delete
character(s).
Step 4: Press the up or down NavKey or to movGVQVJGPGZVſGNF
While editing the picture or ringer, press the left or right NavKey
or to choose one of the available options.
Step 5: After all the settings have been entered, press the SAVE softkey
or the center NavKey/SELECT/VQEQPſTO CPFVJGUETGGPYKNN
display Saved. Press the Back softkey to return to the previous
screen.
Delete a directory entry
Step 1: Repeat Step 1-4 or Step 1-5 of Search and review a directory
entry on page 69.
Step 2: Press the OPTIONS softkey. Press the up or down NavKey or
to choose Delete, and press the SELECT softkey or the center
NavKey/SELECT/VQEQPſTO
Delete all directory entries
Repeat Step 1-3 or of Search and review a directory entry on page 69.
Press the OPTIONS softkey and press the up or down NavKey or to
choose Delete All, and press the SELECT softkey or
the center NavKey/SELECT/VQEQPſTO
Pressing or
CAP in the text
entry mode to
alternate between
lowercase,
uppercase and
numeric modes.
The sub-display
bar will display
the mode which
is activated.
For details,
see Entering
characters on
page 33.
Pressing SYM in
text entry mode
will generate a
chart of different
symbols. Use the
navigation key to
scroll though the
options and press
the SELECT
softkey to insert
the symbol.
•
•
Directory
BACK OPTIONS
Joe Wong
Susan Smith
Mary Chan
John Smith
Jane Doe
View
Edit
Delete
Delete All
BACK SAVE
Name: Jane Doe
Num: 555-1234
Picture:
Ringer: Melody 1
Directory
Directory
BACK OPTIONS
Joe Wong
Susan Smith
Mary Chan
John Smith
Jane Doe
View
Edit
Delete
Delete All
Directory
BACK OPTIONS
Joe Wong
Susan Smith
Mary Chan
John Smith
Jane Doe
View
Edit
Delete
Delete All
www.vtechphones.com
71
Telephone operation
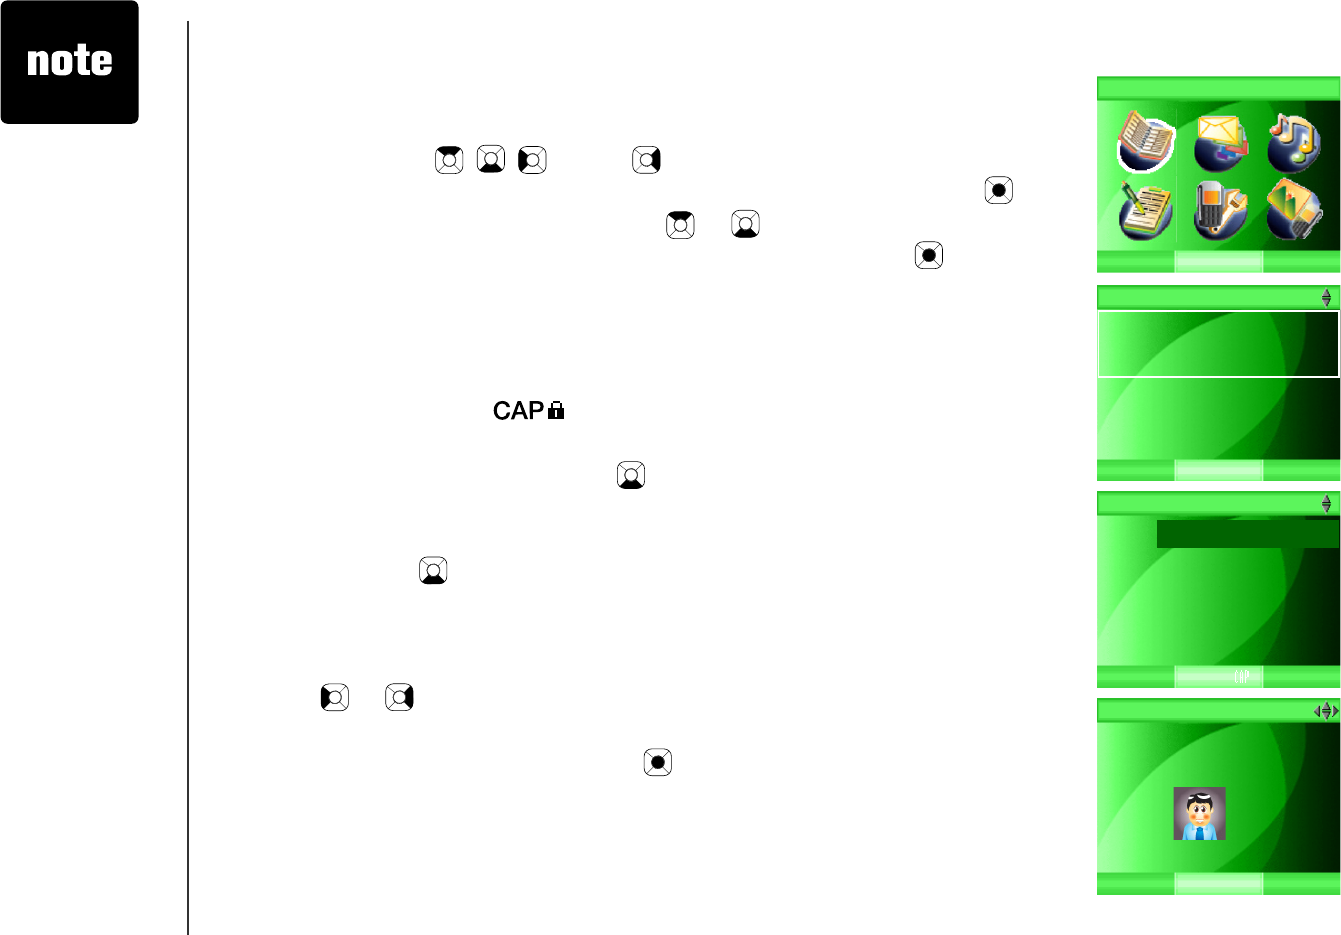
Add a new entry in the directory
Step 1: Press the MENU softkey from the idle screen.
Step 2: Press the , , and/or NavKeys to choose Directory, then
press the SELECT softkey or the center NavKey/SELECT/.
Step 3: Press the up or down NavKey or to choose Add, then press
the SELECT softkey or the center NavKey/SELECT/.
Step 4: A blank directory will be displayed and the name will be highlighted.
Use the dial pad to enter the name (see Chart of characters on
page 35). When you enter a name, the handset will automatically
FKURNC[VJGſTUVEJCTCEVG TQHGCE JYQTFKPVJGWRRGTECUG &QWDN G
click CAP until is shown in the center of the softkey bar and
the subsequent characters will be in the uppercase.
Step 5: Press the down NavKey to move down to enter the number
ſGNF
Step 6: Use the dial pad to enter the telephone number. Press the down
NavKey to move down to set the picture and ringer, or press
the SAVE softkey to save the entry with no picture and the default
ringer.
Step 7: While setting either the picture or ringer, press the left or right NavKey
or to scroll through the available options.
Step 8: After all the settings are entered, press the SAVE softkey or
the center NavKey/SELECT/.
Press the BACK
softkey anytime
to return to the
previous screen
without saving.
•
SELECT
Directory
BACK
Directory
BACK SELECT
Search
Add
Directory
BACK
Name: <Enter name>
Num: <Enter number>
Picture: Empty
Ringer: PSTN Ringer Melody
Directory
BACK SAVE
Name: Jane Doe
Num: 555-1234
Picture:
Ringer: PSTN Ringer Melody

www.vtechphones.com 72
Telephone operation
Caller ID operation
Caller ID with call waiting
This product can be used with regular caller ID service, or this product’s other features can be used
without subscribing to either caller ID or combined caller ID with call waiting service. There are fees
for caller ID services, and they may not be available in all areas.
Depending on your service, you may see the caller’s number or the caller’s name and number. This
product can provide information only if both you and the caller are in areas offering caller ID service
and if both telephone companies use compatible equipment. The time and date are sent by the
telephone company along with the call information.
This product has a caller ID function with call waiting feature which works with service from your local
telephone company.
Caller ID with call waiting lets you see the name and telephone number of the caller before answering
the telephone, even when on another call.
It may be necessary to change your telephone service to use this feature. Contact your telephone
company if:
You have both caller ID and call waiting, but as separate services (you may need combined
service).
You have only caller ID service, or only call waiting service.
You do not have any caller ID or call waiting services.
•
•
•
Telephone operation
www.vtechphones.com
73
• Due to regional
service
differences, caller
ID information
may not be
available for
every incoming
call. In addition,
the callers may
intentionally block
their name and/or
telephone number.
A corresponding
picture will be
displayed on the
call log record
if the record
matches the one
in the directory.
Press the Back
softkey to return
to the previous
screen, or press
OFF to return to
the idle screen.
•
•
Call log
The IS6110 telephone has call logs and can hold a maximum of 50 missed
call records, with each entry consisting up to 24 digits and 16 characters.
Entries are displayed in order from the most recent entry to the earliest
entry. When the memory is full, the earliest entry is deleted to make room
for new call information.
If you subscribe to caller ID from your telephone company, then the missed
ECNNTGEQTFUYKNNFKURNC[OQTGURGEKſEKPHQTOCVKQPQHVJGECNNGTUUWEJCUVJGKT
name and telephone number; otherwise, the telephone will only record the
date and time the call comes in.
Missed call records are the calls that were not answered (including missed
call waiting records). If you have un-reviewed calls and the handset is not in
use, X Missed Call(s) will be display on the screen.
To review and dial the numbers directly from the call logs:
Step 1: Press the MENU softkey from the idle screen.
Step 2: Press the , , and/or NavKeys to choose Call log, then
press the SELECT softkey or the center NavKey/SELECT/. The
ſTUVECNNNQITGEQTFYKNNDGFKURNC[GF
-OR-
Press the down NavKey to access the call log directly while in
the main idle screen.
Step 3: Press the up or down NavKey or to scroll through the records.
If the entry has not been reviewed, NEW will be displayed at the
top left corner of the screen.
Step 4: To dial the record, press /FLASH, or . If you want to change
the telephone number format (e.g. 7, 8, 10 or 11 digits) before
dialing, see Make call log entries ready to dial or store on page
74.
Telephone operation
SELECT
Call log
BACK
BACK
Peter Ryan
555-1234
AUG 25 12:24PM
Call Log
OPTIONS
www.vtechphones.com 74
Telephone operation
Save call log entry to the directory
Step 1: Press the MENU softkey from the idle screen.
Step 2: Press the , , and/or NavKeys to choose Call log, then
press the SELECT softkey or the center NavKey/SELECT/. The
ſTUVECNNNQITGEQTFYKNNDGFKURNC[GF
-OR-
Press the down NavKey to access the call log directly while in
the idle screen.
Step 3: Press the up or down NavKey or to choose the desired entry
to save in the directory. If you want to change the telephone number
format (e.g. 7, 8, 10 or 11 digits) before saving, see Make call log
entries ready to dial or store below.
Step 4: Press the OPTIONS softkey and press the up or down NavKey or
to choose Save. The directory edit menu will be displayed. See
Step 3 in Edit a directory entry section on page 70 for details.
Make call log entries ready to dial or store
Although the call log entries you receive have ten digits (the area plus the
seven-digit number) in some areas, you may need to dial only the seven digits,
or a 1 plus the seven digits, or a 1 plus the area code plus the seven digits.
You can change the number of digits that you dial or save in the call log.
While reviewing the call log, press # repeatedly to display these dialing options
for local and long distance numbers before dialing or saving the telephone
number. See an example at right.
If the telephone number has either seven or ten digits, and you want to dial
it out as an international call, pressing 1 will also allow the system to add a 1
in front of the telephone number automatically.
595-5911
1-595-5911
800-595-5911
1-800-595-5911
Telephone operation
SELECT
Call log
BACK
BACK
Peter Ryan
555-1234
AUG 25 12:24PM
Call Log
OPTIONS
Save
Delete
Delete All
Directory
BACK SAVE
Name: Peter Ryan
Num: 555-1234
Picture: Empty
Ringer: PSTN Ringer Melody
www.vtechphones.com
75
Delete call log entry
Step 1: Press the MENU softkey from the idle screen.
Step 2: Press the , , and/or NavKeys to choose Call log, then
press the SELECT softkey or the center NavKey/SELECT/. The
ſTUVECNNNQITGEQTFYKNNDGFKURNC[GF
-OR-
Press the down NavKey to access the call log directly while in
the main idle screen.
Step 3: Press the up or down NavKey or to choose the desired entry
to delete.
Step 4: Press the OPTIONS softkey and then press the up or down NavKey
or to choose Delete. Press the SELECT softkey or
the center NavKey/SELECT/.
-OR-
Press DEL .
Delete all call log entries
Step 1: Repeat Step 1-2 of Delete call log entry above.
Step 2: Press the OPTIONS softkey, and then press the up or down NavKey
or to choose Delete All. Press the SELECT softkey or
the center NavKey/SELECT/.
Telephone operation
SELECT
Call log
BACK
BACK
Peter Ryan
555-1234
AUG 25 12:24PM
Call Log
OPTIONS
Save
Delete
Delete All
BACK
Peter Ryan
555-1234
AUG 25 12:24PM
Call Log
OPTIONS
Save
Delete
Delete All

www.vtechphones.com 76
Handset screen display message
Handset screen display message
Low battery The battery is low.
Fail to connect to messenger The handset cannot connect to the messenger.
Fail to connect to Home line The handset cannot make a standard call or answer an incoming
call.
Directory empty The directory is empty.
Call log empty The call log is empty.
Redial empty The redial record is empty
Directory full The directory is full.
Duplicate number Try to save an entry with a number which has already been saved
in the record.
Saved A record is saved in the directory.
Not available The handset cannot connect to the telephone base while it try to use
the function of the telephone base.
Maximum duration recorded The recording is stop as the maximum of recording time has been
exceeded.
Buddy list empty! There is no buddy in the buddy list.
Sound clip full The memory is already full while you try to record a new sound
clip.
Sound clip deleted The sound clip is deleted.
Record after the tone Recording will start after the tone.
Recording deleted Recording is terminated by the user.

www.vtechphones.com
77
Recording completed Recording is completed.
Record Aborted Recording is aborted by external event such as ringing or paging.
Place in charger Put the handset into the charger while the battery is low.
Registration success Registration to the telephone base is successful.
Registration fail Registration to the telephone base is not successful.
Charging... The handset is charging.
Not registered The handset is not registered to the telephone base.
USB disconnected! There is no USB connection between the telephone base and the
computer.
Transmission error! There is a transmission problem while you try to send out a
message.
Password error! The password is wrong.
Sign in error! There is a problem to sign in.
Handset screen display message
www.vtechphones.com 78
Registration and de-registration
Registration and de-registration
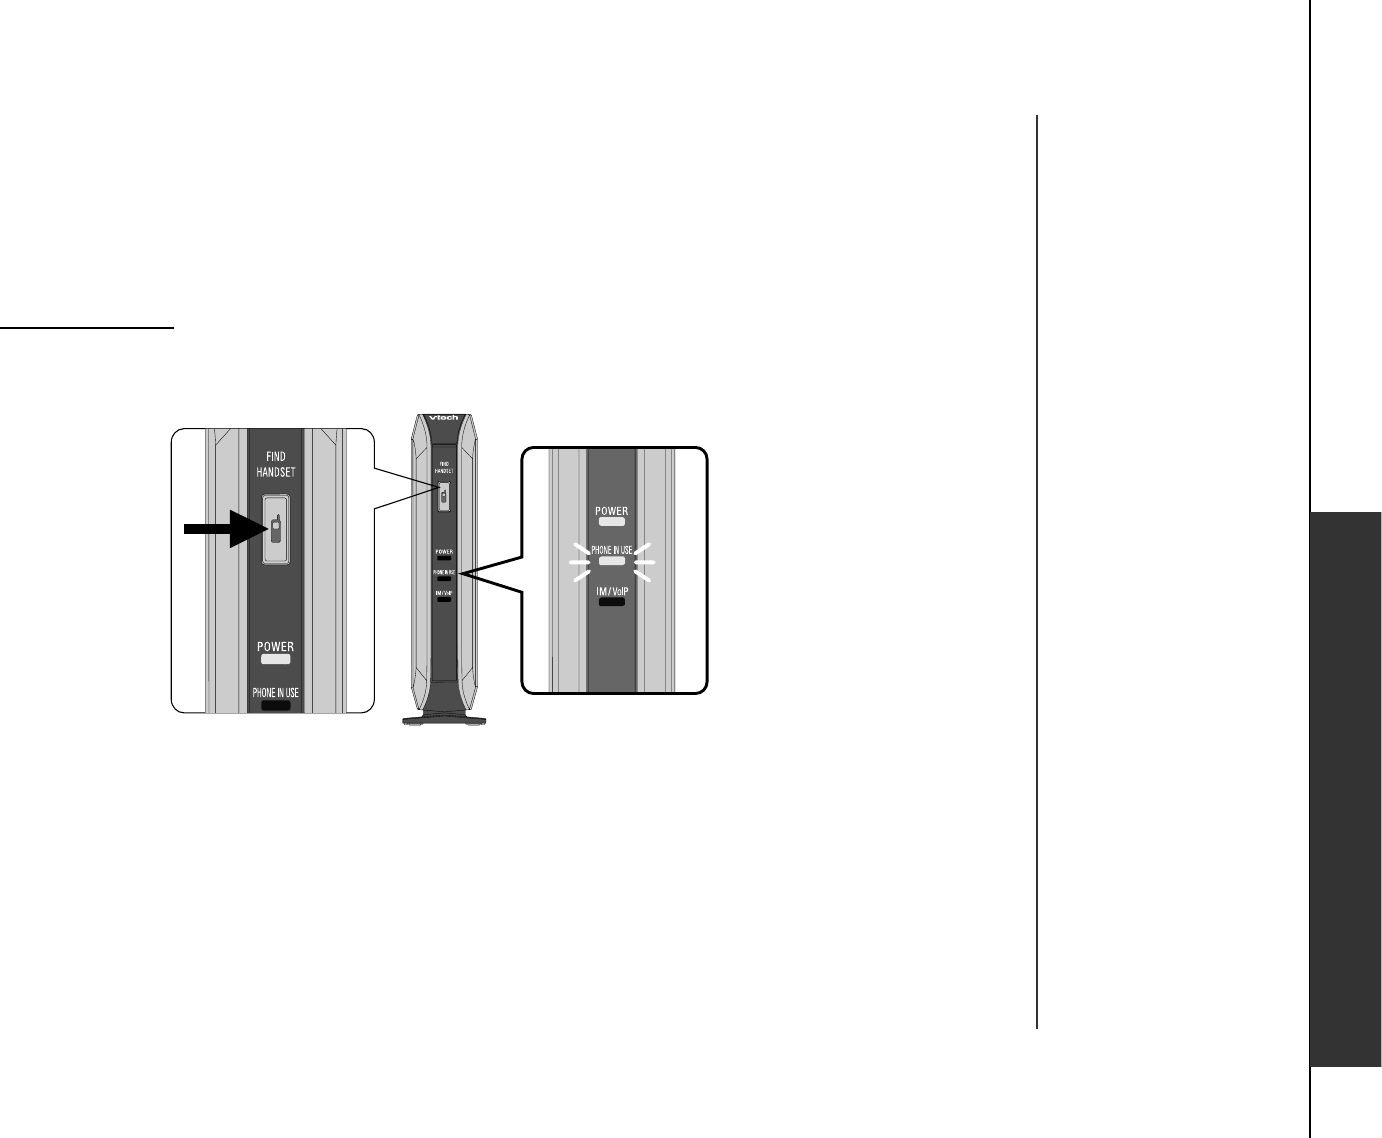
Registration of handset
The handset which comes with the telephone base is automatically registered to the telephone base
after completing the procedures in Telephone base installation on page 7. However, if the screen
displays NOT REGISTERED after power up of the telephone base or if you are replacing a handset,
you have to register the handset to the telephone base manually.
To register the handset:
Step 1: Put the handset on the telephone charger, and it will display Press FIND HANDSET 4
seconds on the screen after a while.
Step 2: Press and hold FIND HANDSET on the telephone base until the PHONE IN USE light is on
(2-8 seconds). This indicates the telephone base is in registration mode.
A maximum of
two handsets
can be registered
to the same
telephone base at
the same time.
The registration
process will be
canceled when
a parallel set or
call activities (e.g.
making a call
and reviewing of
directory or call
log) is detected.
The PHONE IN
USE light will be
turned off when
the registration
is complete or
time-out.
•
•
•

www.vtechphones.com
79
If the telephone
base already has
eight handsets
registered to it,
existing handsets
should be de-
registered in
order for new
handsets to be
registered.
•
Registration of handset
Step 3: The handset will register to the telephone base automatically while the telephone base is
in registration mode. The registration process usually take less than 90 seconds. When the
registration process is complete, the handset will display HS REGISTERED and a beep
tone will sounded.
Step 4: If the registration is not successful, the handset will display NOT REGISTERED, then it
should be placed on the charger again to start the registration process again.
Registration and de-registration
www.vtechphones.com 80
Registration and de-registration
De-registration of handset
This menu allows you to de-register the handset from the telephone base. To de-register the
handset:
Step 1: Press and hold FIND HANDSET on the telephone base until the PHONE IN USE light is
blinking (10-15 seconds), and then release FIND HANDSET.
Step 2: Press FIND HANDSETCICKP#NNVJGJCPFUGVUYKNNDGFGTGIKUVGTG FCPFCEQPſTOCVKQ P
beep will sound. The PHONE IN USE light on the telephone base will be off and NOT
REGISTERED will be displayed on the handset’s screen.
Registration and de-registration

www.vtechphones.com
81
Troubleshooting
Problem Suggestion
My telephone does not
work at all.
Make sure the battery is installed and charged correctly (see pages 4 to 6). For optimum daily
performance, return the cordless handset to the handset charger after use.
Make sure the handset charger power adapter is securely plugged into an outlet not controlled
by a wall switch.
/CMGUWT GVJ GVGNGRJQP GNKP GEQT FK URNWIIG FſTON [KPV QVJ GVGNGRJQP GDCUG VJ GJCPFUG V
EJCTIGTRQYGTCFCRVGTCPFVJGOQFWNCTYCNNLCEM
Unplug the unit’s electrical power. Wait for approximately 15 seconds, then plug it back in. Allow
up to one minute for the cordless handset and telephone base to synchronize.
Charge the battery in the cordless handset for at least 16 hours.
Remove and re-insert the battery. If that still does not work, it may be necessary to purchase
a new battery.
&KUEQPPGE VVJGJCPFUGVEJCTIGTHTQOVJGOQFWNCTLCEMCPFRNWIKPCYQTMKPIVGNGRJQPG+HVJKU
telephone does not work, the problem is probably in the wiring or the local service. Call the
local telephone company.
•
•
•
•
•
•
•
Low battery icon is
displayed on screen.
Place the handset in the handset charger for recharging.
Remove and re-install the battery and use it normally until fully discharged, then recharge the
handset on the handset charger for 16 hours.
If the above measures do not correct the problem, the battery may need to be replaced.
•
•
•
+H[QWJCXGFKHſEWNV [QRGTCVKPI[QWTVGNGRJQPGRNGCUGVT[VJGUWIIGUVKQPUDGNQY(QT%WUVQOGT5GTXKEGXKUKVQWTYGDUKVGCV
www.vtechphones.com, or call VTech Communications at 1 (800) 595-9511; in Canada, visit our website at www.vtechcanada.
com, or call VTech Telecommunications Canada Ltd. at 1 (800) 267-7377.

www.vtechphones.com 82
Appendix
Problem Suggestion
The battery does not
charge in the handset
or the handset battery
does not accept charge.
Make sure the handset is placed in the charger correctly. The CHARGE light on handset
charger should be on.
Remove and re-insert the battery. If that still does not work, it may be necessary to purchase
a new battery. Please refer to the Install handset battery section (see page 4) of this user’s
manual.
The telephone might be malfunctioning. Please refer to the Warranty section (see page 90)
of this user’s manual for further instruction.
•
•
•
The POWER indicator
on the telephone base
is off.
Clean the charging contacts on telephone base each month using a pencil eraser or a dry
non-abrasive fabric.
Make sure the power adapter and telephone line cords are plugged in correctly and
securely.
Unplug the telephone base power adapter. Wait for 15 seconds before plugging it back in. Allow
up to one minute for the cordless handset and telephone base to reset.
The telephone might be malfunctioning. Please refer to the Warranty section (see page 90)
of this user’s manual for further instruction.
•
•
•
•
Troubleshooting

www.vtechphones.com
83
Troubleshooting
Problem Suggestion
The CHARGE
Indicator on the
handset charger is
ƀCUJKPI
This is a signal that there is no electrical contact between the battery and the handset
charger.
Ensure the connector of the battery is securely plugged into the handset and place the handset
in the handset charger for charging.
•
•
There is no dial tone. First, try all the above suggestions.
Move the cordless handset closer to the telephone base. It might be out of range.
The telephone line cord might be malfunctioning. Try installing a new telephone line cord.
&KUEQPPGE VVJGVGNGRJQP GDCUGHTQOVJGVGNGRJQP GLCE MCPFEQPPGE VCFKHHGTGP VVGNGRJQPG
If there is no dial tone on the telephone either, the problem is in your wiring or local service.
Contact your local telephone company.
•
•
•
•
The telephone does not
ring when there is an
incoming call.
Make sure the ringer is on. (See page 42 for handset).
Make sure the telephone line cord and power adapter are plugged in properly (see page 7).
The cordless handset may be too far from the telephone base. Move it closer to the telephone
base.
There may be too many extension phones on the telephone line to allow all of them to ring
simultaneously. Try unplugging some of them.
If the other telephones in your home are having the same problem, the problem is in the wiring
or local service. Contact the local telephone company (charges may apply).
Other electronic products can cause interference to your cordless telephone. Try installing your
telephone as far away as possible from the following electronic devices: wireless routers, radios,
radio towers, pager towers, cellular telephones, digital telephones, intercoms, room monitors,
televisions, VCRs, personal computers, kitchen appliances, and other cordless telephones.
•
•
•
•
•
•

www.vtechphones.com 84
Appendix
Troubleshooting
Problem Suggestion
6GUVCYQTMKPIVGNGRJQP GCVVJGVGNGRJQP GLCEM+HCPQVJGTVGNGRJQP GJCUVJGUCOGRTQDNGO
VJGRTQDNG OKUK PVJ GVGNGRJQP GLCEM %QPVCE V[QWTNQEC NVGNGRJQP GEQORCP [EJCTIG UOC[
apply).
The telephone line cord might be malfunctioning. Try installing a new telephone line cord.
Re-install the battery and place the cordless handset in the handset charger.
Wait for the cordless handset to synchronize with the telephone base. To be safe, allow up to
one minute for this to take place.
•
•
•
•
I cannot dial out. First, try all the above suggestions.
Make sure there is a dial tone before dialing. It is normal if the cordless handset takes a
second or two to synchronize with the telephone base before producing a dial tone. Wait an
extra second before dialing.
If the other telephones in your home are having the same problem, the problem is in the wiring
or local service. Contact your local telephone company (charges may apply).
Eliminate any background noise. Noise from a television, radio, or other appliances may cause
VJGVGNGRJQP GVQPQVFKCNQWVRTQRGTN[+H[QWECPPQVGNKOKPCV GVJGDCEMITQWP FPQKUGſTUVVT[
muting the cordless handset before dialing, or dialing from another room in your home with
less background noise.
•
•
•

www.vtechphones.com
85
Troubleshooting
Problem Suggestion
There is noise
or interference
during a telephone
conversation.
My calls fade out or
cut in and out when I
am using the cordless
handset.
The handset may be out of range. Move it closer to the telephone base.
Appliances or other cordless telephones plugged into the same circuit as the telephone base
can cause interference. Try moving the appliance or telephone base to another outlet.
Other electronic products can cause interference to your cordless telephone. Try installing
your telephone as far away as possible from the following electronic devices: wireless routers,
radios, radio towers, pager towers, cellular telephones, digital telephones, intercoms, room
monitors, televisions, VCRs, personal computers, kitchen appliances, wireless routers, and
other cordless telephones.
Microwave ovens operate on the same frequency as your telephone. It is normal to experience
static on your telephone while the microwave oven is operating. Do not install this telephone
in the same outlet or near a microwave oven.
If your telephone is plugged in with a modem or a surge protector, plug the telephone (or
modem/surge protector) into a different location. If this solves the problem, re-locate your
telephone or modem farther apart from each other, or use a different surge protector.
6JGNC[QWVQH[QWTJQO GQTQHſE GOKIJ VD GNKOKVKP IVJ GQRGTCVKP ITCPIG 6T[KPIOQXKP IVJ G
telephone base to another location, preferably a higher location for better reception.
&KUEQPPGE VVJGVGNGRJQPGDCUGHTQOVJGOQFWNCTLCEMCPFRNWIKPCEQTFGFVGNGRJQPG+HECNNU
are still not clear, the problem is probably in the wiring or local service. Contact your local
service company (charges may apply).
If the other telephones in your home are having the same problem, the problem is in the wiring
or local service. Contact the local telephone company (charges may apply).
&Q[QWJCXG&5.UGTXKEG!+H[GU[QWPGGFVQJCXGC&5.ſNVGTKPUVCNNGFCVGXGT[VGNGRJQPGLCEM
VJCVJCUCVGNGRJQPGEQPPGEVGFVQKV%QPVCEV[QWT&5.UGTXKE GRTQXKFGTHQTſNVGTKPHQTOCVKQP
•
•
•
•
•
•
•
•
•

www.vtechphones.com 86
Appendix
Troubleshooting
Problem Suggestion
I hear other calls when
using the telephone.
&KUEQPPGE VVJGVGNGRJQPGDCUGHTQOVJGVGNGRJQPGLCEM2NWIKPCFKHHGTGP VVGNGRJQPG+H[QW
still hear other calls, the problem is probably in the wiring or local service. Call your local
telephone company.
•
I hear noise in the
cordless handset, and
none of the keys or
buttons work.
Make sure the telephone line cord is plugged in securely.•
My caller ID features are
not working properly.
Caller ID is a subscription service. You must subscribe to this service from your local telephone
company for this feature to work on your telephone.
The caller may not be calling from an area which supports caller ID.
Both you and the caller’s telephone companies must use equipment which are compatible
with caller ID service.
+H[QWUWDUETKDGVQ&5.UGTXKEGKPUVCNNC&5.ſNVGTVQVJGVGNGRJQPGNKPGDGVYGGPVJGVGNGRJQPG
DCUGCPFVJGVGNGRJQPGNKPGLCEM%QPVCEV[QWT&5.UGTXKE GRTQXKFGTHQTſNVGTKPHQTOCVKQP
•
•
•
•
The system does
not receive caller ID
or the system does
not display caller ID
during call waiting.
Make sure you subscribe to caller ID with call waiting features services provided by the local
telephone company.
The caller may not be calling from an area which supports caller ID.
Both you and the caller’s telephone companies must use equipment which are compatible
with caller ID service.
+H[QWUWDUETKDGVQ&5.UGTXKEGKPUVCNNC&5.ſNVGTVQVJGVGNGRJQPGNKPGDGVYGGPVJGVGNGRJQPG
DCUGCPFVJGVGNGRJQPGNKPGLCEM%QPVCEV[QWT&5.UGTXKE GRTQXKFGTHQTſNVGTKPHQTOCVKQP
•
•
•
•

www.vtechphones.com
87
Troubleshooting
Problem Suggestion
My cordless handset
beeps and is not
performing normally.
Make sure the power cord is securely plugged into the telephone base. Plug the unit into a
different working electrical outlet not controlled by a wall switch.
Move the cordless handset closer to the telephone base. It may be out of range.
Reset the telephone base by unplugging the unit’s electrical power. Wait for 15 seconds and
plug it back in again. Allow up to one minute for the cordless handset and the telephone base
to synchronize.
Other electronic products can cause interference to your cordless telephone. Try installing
your telephone as far away from these electronic devices as possible: wireless routers, radios,
radio towers, pager towers, cellular telephones, intercoms, room monitors, televisions, personal
computers, kitchen appliances and other cordless telephones.
•
•
•
•
Common cure for
electronic equipment.
If the unit is not responding normally, trying putting the cordless handset in the telephone base
or the charger. If it does not seem to respond, try the following (in the order listed):
Disconnect the power to the telephone base.
Disconnect the battery on the cordless handset.
Wait a few minutes before connecting power to the telephone base.
Re-install the battery and place the cordless handset into the handset charger.
Wait for the cordless handset to synchronize its connection with the telephone base. To be
safe, allow up to one minute for this to take place.
•
•
•
•
•
•
How can I get
replacement parts for
my IS6110?
If you need a replacement, call VTech Communications, Inc. at 1 (800) 595-9511 in the United
States. In Canada, go to www.vtechcanada.com or call 1 (800) 267-7377.
•

www.vtechphones.com 88
Appendix
Troubleshooting
Problem Suggestion
The USB light on the
telephone base is off.
The USB light on the telephone base will be on only when the IS6110 phone software is started
on the computer. First, make sure the USB cable is securely plugged into the telephone base
and the computer, then launch the IS6110 phone software on the computer.
•

www.vtechphones.com
89
Operating range
This cordless telephone operates with the maximum power allowed by the Federal Communications Commission (FCC). Even so, this handset and telephone base can communicate over only a
EGTVCKPFKUVCPEGYJKEJECPXCT[YKVJVJGNQECVKQPUQHVJGVGNGRJQPGDCUGCPFJCPFUGVVJGYGCVJGTCPFVJGNC[QWVQH[QWTJQOGQTQHſEG
When the handset is out of range, the handset will display Searching. The user can access the handset directory, and certain parts of the menu system, i.e. handset setting and registration, but not
the time setting and base setting. Not possible will be displayed if access is tried.
If there is a call while the handset is out of range, it might not ring, or if it does ring, the call might not connect well when you press . Move closer to the telephone base, then press to answer the
call.
If the handset moves out of range during a telephone conversation, there might be interference.
To improve reception, move closer to the base.
Maintenance
Taking care of your telephone
Your cordless telephone contains sophisticated electronic parts, so it must be treated with care.
Avoid rough treatment
Place the handset down gently. Save the original packing materials to protect your telephone if you ever need to ship it.
Avoid water
Your telephone can be damaged if it gets wet. Do not use the handset outdoors in the rain, or handle it with wet hands. Do not install your telephone base near a sink, bathtub or shower.
Electrical storms
Electrical storms can sometimes cause power surges harmful to electronic equipment. For your own safety, use caution when using electric appliances during storms.
Cleaning your telephone
Your telephone has a durable plastic casing that should retain its luster for many years. Clean it only with a soft cloth slightly dampened with water or a mild soap. Do not use excess water or
cleaning solvents of any kind.
4GOGODGTVJCVGNGEVTKECNCRRNKCPEGUECPECWUGUGTKQWUKPLWT[KHWUGFYJGP[QWCTGYGVQTUVCPFKPIKPYCVGT+H[QWTVGNGRJQPGDCUGUJQWNFHCNNKPVQYCVGT&10164'64+'8'+6706+.;1770-
PLUG THE POWER CORD AND TELEPHONE LINE CORDS FROM THE WALL. Then pull the unit out by the unplugged cords.

www.vtechphones.com 90
Appendix
About cordless telephones
•Privacy: the same features that make a cordless telephone convenient create some limitations. Telephone calls are transmitted between the base and the cordless handset by radio waves, so
there is a possibility that your cordless telephone conversations could be intercepted by radio receiving equipment within range of the cordless handset. For this reason, you should not think
of cordless telephone conversations as being as private as those on corded telephones.
•Electrical Power: The telephone base of this cordless telephone must be connected to a working electrical outlet. The electrical outlet should not be controlled by a wall switch. Calls cannot
be made from the cordless handset if the telephone base is unplugged or switched off, or if the electrical power is interrupted.
•Potential TV Interference: Some cordless telephones operate at frequencies that may cause interference to televisions and VCRs. To minimize or prevent such interference, do not place
the telephone base of the cordless telephone near or on top of a TV or VCR. If interference is experienced, moving the cordless telephone father away from the TV or VCR will often reduce or
eliminate the interference. (Applies to 25 channel cordless telephones only).
•Rechargeable Battery(ies): This product contains either Nickel-Cadmium or Nickel-Metal Hydride rechargeable battery(ies). Exercise care in handling battery(ies) in order not to create a
short circuit between the battery and conducting material such as rings, bracelets, and keys. The battery or conductor may overheat and cause harm. Observe proper polarity between the
battery and the battery charger.
Nickel-Metal Hydride Rechargeable Battery(ies): Dispose of these battery(ies) in a safe manner. Do not burn or puncture. Like other battery(ies) of this type, if burned or punctured, they
EQWN FTGNGCU GECWUVK EOCVGTKC NYJKEJEQWN FECWUGKPLWT[
•
Warranty
What does this limited warranty cover?
The manufacturer of this VTech Product warrants to the holder of a valid proof of purchase (“Consumer” or “you”) that the Product and all accessories provided in the sales package (“Product”)
are free from defects in material and workmanship, pursuant to the following terms and conditions, when installed and used normally and in accordance with the Product operating instructions.
This limited warranty extends only to the Consumer for Products purchased and used in the United States of America and Canada.
What will VTech do if the Product is not free from defects in materials and workmanship during the limited warranty period (“ Materially Defective Product” )?
During the limited warranty period, VTech’s authorized service representative will repair or replace at VTech’s option, without charge, a Materially Defective Product. If we repair the Product, we
may use new or refurbished replacement parts. If we choose to replace the Product, we may replace it with a new or refurbished Product of the same or similar design. We will retain defective
parts, modules, or equipment. Repair or replacement of the Product, at VTech’s option, is your exclusive remedy. VTech will return repaired or replacement Products to you in working condition.
You should expect the repair or replacement to take approximately 30 days.
How long is the limited warranty period?
The limited warranty period for the Product extends for ONE (1) YEAR from the date of purchase. If VTech repairs or replaces a Materially Defective Product under the terms of this limited warranty,
this limited warranty also applies to repaired or replacement Product for a period of either (a) 90 days from the date the repaired or replacement Product is shipped to you or (b) the time remaining
on the original one-year warranty; whichever is longer.
What is not covered by this limited warranty?
This limited warranty does not cover:
2TQFWE VVJCVJCUDGGPUWDLGEVG FVQOKUWUGCEEKFGPV UJKRRKP IQTQVJGTRJ[UKEC NFCOCIGKORTQRG TKPUVCNNCVKQP CDPQTOC NQRGTCVKQ PQTJCPFNKPI PGINGEV KPWPFCVKQP ſTGYCVGTQTQVJGTNKSWK F
intrusion; or
2TQFWE VVJCVJCUDGGPFCOCIG FFWGVQTGRCKTCNVGTCVKQ PQTOQFKſECVKQ PD[CP[QPGQVJGTVJCPCPCWVJQTK\G FUGTXKE GTGRTGUGPVCVKX GQH86GEJQT
3. Product to the extent that the problem experienced is caused by signal conditions, network reliability, or cable or antenna systems; or
4. Product to the extent that the problem is caused by use with non-VTech accessories; or
5. Product whose warranty/quality stickers, Product serial numbers plates or electronic serial numbers have been removed, altered or rendered illegible; or
6. Product purchased, used, serviced, or shipped for repair from outside the United States of America or Canada, or used for commercial or institutional purposes (including but not limited to
Products used for rental purposes); or
7. Product returned without valid proof of purchase (see item 2 below); or
www.vtechphones.com
91
Warranty
%JCTIG UHQTKPUVCNNCVKQ PQTUGVWRCFLWUVOGP VQHEWUVQOG TEQPVTQNU CPFKPUVCNNCVKQ PQTTGRCKTQHU[UVGOUQWVUKF GVJGWPKV
How d o you g et wa rra nty serv ic e?
To ob tain warranty serv ic e in the U nited S tates of A meric a, p lease c all 1-8 0 0 -5 9 5 -9 5 11; In C anada, p lease dial 1 (8 0 0 ) 2 6 7 -7 3 7 7 . N OTE: B efore c alling for serv ic e, p lease rev iew the user’s manual
- a c hec k of the P roduc t c ontrols and features may sav e you a serv ic e c all.
Ex c ep t as p rov ided b y ap p lic ab le law, you assume the risk of loss or damage during transit and transp ortation and are resp onsib le for deliv ery or handling c harges inc urred in the transp ort of
the P roduc t(s) to the serv ic e loc ation. V Tec h will return rep aired or rep lac ed P roduc t under this limited warranty to you, transp ortation, deliv ery or handling c harges p rep aid. V Tec h assumes
no risk for damage or loss of the P roduc t in transit. If the P roduc t failure is not c ov ered b y this limited warranty, or p roof of p urc hase does not meet the terms of this limited warranty, V Tec h will
notify you and will req uest that you authoriz e the c ost of rep air p rior to any further rep air ac tiv ity. Y ou must p ay for the c ost of rep air and return ship p ing c osts for the rep air of P roduc ts that are
not c ov ered b y this limited warranty.
W ha t m ust you return with the P rod uc t to g et wa rra nty serv ic e?
4GVWTPVJGGPVKTGQTKIKPC NRCEMCI GCPFEQPVGPV UKPENWFKP IVJG2TQFWE VVQVJG86GEJUGTXKE GNQECVKQ PCNQPIYKVJCFGUETKRVKQ PQHVJGOCNHWPEVKQ PQTFKHſEWNV[ CPF
2 . Inc lude “v alid p roof of p urc hase” (sales rec eip t) identifying the P roduc t p urc hased (P roduc t model) and the date of p urc hase or rec eip t; and
3 . P rov ide your name, c omp lete and c orrec t mailing address, and telep hone numb er.
O ther L im ita tions
This warranty is the c omp lete and ex c lusiv e agreement b etween you and V Tec h. It sup ersedes all other written or oral c ommunic ations related to this P roduc t. V Tec h p rov ides no other warranties
HQTVJKU2TQFWEV 6JGYCTTCPV [GZENWUKXGN [FGUETKDG UCNNQH86GEJŏUTGURQPUKDKNKVKG UTGICTFKP IVJG2TQFWEV 6JGTGCTGPQQVJGTGZRTGU UYCTTCPVKGU 0QQPGKUCWVJQTK\G FVQOCMGOQFKſECVKQP UVQ
VJKUNKOKVG FYCTTCPV [CPF[QWUJQWN FPQVTGN[QPCP[UWEJOQFKſECVKQP
5VCVG2TQXKPEKC N.CY4KIJVU 6JKUYCTTCPV [IKXGU[QWURGEKſ ENGIC NTKIJVU CPF[QWOC[CNUQJCXGQVJG TTKIJVU YJKEJXCT[HTQOUVCV GVQUVCVGQTRTQXKPE GVQRTQXKPEG
.KOKVCVKQPU +ORNKG FYCTTCPVKGU KPENWFKP IVJQU GQHſVPGU UHQTCRCTVKEWNC TRWTRQU GCP FOGTEJCPVCDKNKV [CPWPYTKVVG PYCTTCPV [VJC VVJG2TQFWE VKUſVHQTQTFKPCT [WUGCTGNKOKVG FVQQP G[GCTHTQ O
date of p urc hase. S ome states/p rov inc es do not allow limitations on how long an imp lied warranty lasts, so the ab ov e limitation may not ap p ly to you. In no ev ent shall V Tec h b e liab le for any
KPFKTGEV URGEKCN KPEKFGPVCN EQPUGSWGPVKCN QTUKOKNCTFCOCIG UKPENWFKPI DWVPQVNKOKVGFVQNQUVRTQſV UQTTGXGPWGKPCDKNKV [VQWUGVJG2TQFWE VQTQVJGTCUUQEKCVG FGSWKROGPV VJGEQUVQHUWDUVKVWV G
eq uip ment, and c laims b y third p arties) resulting from the use of this P roduc t. S ome states/p rov inc es do not allow the ex c lusion or limitation of inc idental or c onseq uential damages, so the ab ov e
limitation or ex c lusion may not ap p ly to you.
P lea se reta in your orig ina l sa les rec eip t a s p roof of p urc ha se.

www.vtechphones.com 92
Appendix
Important safety instructions
9JGPWUKP I[QWTVGNGRJQP GGSWKROGPV DCUK EUCHGV[RTGECWVKQP UUJQWN FCNYC[UDGHQNNQYG FVQTGFWE GVJGTKUMQHſTGGNGEVTK EUJQE MCPFKPLWT[ KPENWFKP IVJGHQNNQYKPI
1. R ead and understand all instructions.
2. F ollow all warnings and instructions marked on the product.
3. Unplug this product from the wall outlet before cleaning. D o not use liquid or aerosol cleaners. Use a damp cloth for cleaning.
4 . D o not use this product near water (for example, near a bathtub, kitchen sink, or swimming pool).
5. D o not place this product on an unstable table, shelf, stand or other unstable surface.
6. Slots and openings in the back or bottom of the telephone base and handset are provided for ventilation. To protect them from overheating, these openings must not be
blocked by placing the product on a soft surface such as a bed, sofa or rug. This product should never be placed near or over a radiator or heat register. This product should
not be placed in any area where proper ventilation is not provided.
7. This product should be operated only from the type of power source indicated on the marking label. If you are not sure of the type of power supply in your home, consult your
dealer or local power company.
8. D o not allow anything to rest on the power cord. D o not install this product where the cord may be walked on.
0GXGTRWUJQDLGEV UQHCP[MKPFKPVQVJKURTQFWE VVJTQWI JUNQVUKPVJGDCUGQTJCPFUG VCUVJG[OC[VQWEJFCPIGTQW UXQNVCI GRQKPVUQTUJQT VQWVRCTVUVJCVEQWNFTGUWN VKPCTKUM
QHſTGQTGNGEVTK EUJQEM 0GXGTURKN NNKSWKFQHCP[MKPFQPVJGRTQFWEV
10. To reduce the risk of electric shock, do not disassemble this product, but take it to an authorized service facility. Opening or removing parts of the base or handset other than
URGEKſG FCEEGU UFQQT UOC[GZRQU G[QWVQFCPIGTQW UXQNVCIG UQTQVJG TTKUMU+PEQTTGE VTGCUUGODNKP IECPECWUGGNGEVTK EUJQE MYJGPVJGRTQFWE VKUUWDUGSWGPVN [WUGF
&QPQVQXGTNQC FYCNNQWVNGV UCPFGZVGPUKQ PEQTF UCUVJKUECPTGUWN VKPVJGTKUMQHſTGQTGNGEVTK EUJQEM
12. Unplug this product from the wall outlet and refer servicing to an authorized service facility under the following conditions:
A. W hen the power supply cord or plug is damaged or frayed.
B. If liquid has been spilled onto the product.
C. If the product has been exposed to rain or water.
& +HVJGRTQFWE VFQGUPQVQRGTCV GPQTOCNN [D[HQNNQYKP IVJGQRGTCVKP IKPUVTWEVKQPU #FLWUVQPN[VJQU GEQPVTQN UVJCVCTGEQXGTG FD[VJGQRGTCVKQ PKPUVTWEVKQPU CUKORTQRG T
CFLWUVOGP VQHQVJGTEQPVTQN UOC[TGUWNVKPFCOCIGCPFQHVG PTGSWKTG UGZVGPUKX GYQTMD[CPCWVJQTK\G FVGEJPKEKC PVQTGUVQTGVJGRTQFWE VVQPQTOC NQRGTCVKQP
E. If the product has been dropped and the base and/or handset has been damaged.
F . If the product exhibits a distinct change in performance.
13. Avoid using a telephone (other than cordless) during an electrical storm. There is a remote risk of electric shock from lightning.
14 . D o not use the telephone to report a gas leak in the vicinity of the leak.
15. Only put the handset of your telephone next to your ear when it is in normal talk mode.
6JKURQYGTWPK VKUKPVGPFG FVQDGEQTTGEVN [QTKGPVG FKPCXGTVKEC NQTƀQQ TOQWPVRQUKVKQP 6JGRTQPI UCTGPQVFGUKIPG FVQJQN FVJGRNWIKPRNCE GKHKVKURNWIIG FKPVQCEGKNKPI
under-the-table or cabinet outlet.
SAVE THESE INSTRUCTIONS
www.vtechphones.com
93
FCC, ACTA and IC regulations
FCC Part 15
This equipment has been tested and found to comply with the requirements for a Class B digital device under Part 15 of the Federal Communications Commission (FCC) rules. These requirements
are intended to provide reasonable protection against harmful interference in a residential installation. This equipment generates, uses and can radiate radio frequency energy and, if not installed and
used in accordance with the instructions, may cause harmful interference to radio communications. However, there is no guarantee that interference will not occur in a particular installation. If this
equipment does cause harmful interference to radio or television reception, which can be determined
by turning the equipment off and on, the user is encouraged to try to correct the interference by one or more of the following measures:
Reorient or relocate the receiving antenna.
Increase the separation between the equipment and receiver.
Connect the equipment into an outlet on a circuit different from that to which the receiver is connected.
Consult the dealer or an experienced radio/TV technician for help.
%JCPIGUQTOQFKſECVKQPUVQVJKUGSWKROGPVPQVGZRTGUUN[CRRTQXGFD[VJGRCTV[TGURQPUKDNGHQTEQORNKCPEGEQWNFXQKFVJGWUGTŏUCWVJQTKV[VQQRGTCVGVJGGSWKROGPV
6JKUFGXKEGEQORNKGUYKVJ2CTVQHVJG(%%4WNGU1RGTCVKQPKUUWDLGEVVQVJGHQNNQYKPIVYQEQPFKVKQPUVJKUFGXKEGOC[PQVECWUGJCTOHWNKPVGTHGTGPEGCPFVJKUFGXKEGOWUVCEEGRVCP[
interference received, including interference that may cause undesired operation. Privacy of communications may not be ensured when using this telephone.
To ensure safety of users, the FCC has established criteria for the amount of radio frequency energy that can be safely absorbed by a user or bystander according to the intended usage of the
product. This product has been tested and found to comply with the FCC criteria. The handset may be safely held against the ear of the user. The telephone base shall be installed and used such
that parts of the user’s body other than the hands are maintained at a distance of approximately 20 cm (8 inches) or more. If you choose to use a clipping device, please make sure to only use the
supplied VTech belt clip.
This Class B digital apparatus complies with Canadian ICES-003.
USB cable included in this package must be used with this equipment to ensure compliance with the Class B FCC limits.
FCC Part 68 and ACTA
This equipment complies with Part 68 of the FCC rules and with technical requirements adopted by the Administrative Council for Terminal Attachments (ACTA). The label on the back or bottom of
VJKUGSWKROGPVEQPVCKPUCOQPIQVJGTVJKPIUCRTQFWEVKFGPVKſGTKPVJGHQTOCV75###'36::::6JKUKFGPVKſGTOWUVDGRTQXKFGFVQ[QWTNQECNVGNGRJQPGEQORCP[WRQPTGSWGUV
6JGRNWICPFLCEMWUGFVQEQPPGEVVJKUGSWKROGPVVQRTGOKUGUYKTKPICPFVJGVGNGRJQPGPGVYQTMOWUVEQORN[YKVJCRRNKECDNG2CTVTWNGUCPFVGEJPKECNTGSWKTGOGPVUCFQRVGFD[#%6##EQORNKCPV
VGNGRJQPGEQTFCPFOQFWNCTRNWIKURTQXKFGFYKVJVJKURTQFWEV+VKUFGUKIPGFVQDGEQPPGEVGFVQCEQORCVKDNGOQFWNCTLCEMVJCVKUCNUQEQORNKCPV#P4,LCEMUJQWNFPQTOCNN[DGWUGFHQTEQPPGEV-
KPIVQCUKPINGNKPGCPFCP4,LCEMHQTVYQNKPGU5GG+PUVCNNCVKQP+PUVTWEVKQPUKPVJGWUGTŏUOCPWCN
The Ringer Equivalence Number (REN) is used to determine how many devices you may connect to your telephone line and still have them ring when you are called. The REN for this product is
GPEQFGFCUVJGVJCPFVJEJCTCEVGTUHQNNQYKPIVJG75KPVJGRTQFWEVKFGPVKſGTGIKHKUVJG4'0KU+POQUVDWVPQVCNNCTGCUVJGUWOQHCNN4'0UUJQWNFDGſXGQTNGUU(QTOQTG
information, please contact your local telephone company.
This equipment may not be used with Party Lines. If you have specially wired alarm dialing equipment connected to your telephone line, ensure the connection of this equipment does not disable
[QWTCNCTOGSWKROGPV+H[QWJCXGSWGUVKQPUCDQWVYJCVYKNNFKUCDNGCNCTOGSWKROGPVEQPUWNV[QWTVGNGRJQPGEQORCP[QTCSWCNKſGFKPUVCNNGT
+HVJKUGSWKROGPVKUOCNHWPEVKQPKPIKVOWUVDGWPRNWIIGFHTQOVJGOQFWNCTLCEMWPVKNVJGRTQDNGOJCUDGGPEQTTGEVGF4GRCKTUVQVJKUVGNGRJQPGGSWKROGPVECPQPN[DGOCFGD[VJGOCPWHCEVWTGTQTKVU
authorized agents. For repair procedures, follow the instructions outlined under the Limited Warranty.
•
•
•
•

www.vtechphones.com 94
Appendix
FCC, ACTA and IC regulations
The RBRC® Seal on the nickel-metal-hydride battery indicates that VTech Communications, Inc. is voluntarily participating in an industry program to collect
and recycle these batteries at the end of their useful lives, when taken out of service within the United States and Canada.
The RBRC® program provides a convenient alternative to placing used nickel-metal-hydride batteries into the trash or municipal waste, which may be illegal
in your area.
VTech’s participation in RBRC® makes it easy for you to drop off the spent battery at local retailers participating in the RBRC® program or at authorized VTech
product service centers. Please call 1-800-8-BATTERYTM for information on Ni-MH battery recycling and disposal bans/restrictions in your area. VTech’s
involvement in this program is part of its commitment to protecting our environment and conserving natural resources.
RBRC® is a registered trademark of Rechargeable Battery Recycling Corporation.
The RB RC® Seal
If this equipment is causing harm to the telephone network, the telephone company may temporarily discontinue your telephone service. The telephone company is required to notify you before inter-
TWRVKPIUGTXKEG+HCFXCPEGPQVKEGKUPQVRTCEVKECN[QWYKNNDGPQVKſGFCUUQQPCURQUUKDNG;QWYKNNDGIKXGPVJGQRRQTVWPKV[VQEQTTGEVVJGRTQDNGOCPFVJGVGNGRJQPGEQORCP[KUTGSWKTGFVQKPHQTO[QW
QH[QWTTKIJVVQſNGCEQORNCKPVYKVJVJG(%%;QWTVGNGRJQPGEQORCP[OC[OCMGEJCPIGUKPKVUHCEKNKVKGUGSWKROGPVQRGTCVKQPQTRTQEGFWTGUVJCVEQWNFCHHGEVVJGRTQRGTHWPEVKQPKPIQHVJKURTQFWEV
The telephone company is required to notify you if such changes are planned.
If this product is equipped with a corded or cordless handset, it is hearing aid compatible.
+HVJKURTQFWEVJCUOGOQT[FKCNKPINQECVKQPU[QWOC[EJQQUGVQUVQTGGOGTIGPE[VGNGRJQPGPWODGTUGIRQNKEGſTGOGFKECNKPVJGUGNQECVKQPU+H[QWFQUVQTGQTVGUVGOGTIGPE[PWODGTURNGCUG
4GOCKPQPVJGNKPGCPFDTKGƀ[GZRNCKPVJGTGCUQPHQTVJGECNNDGHQTGJCPIKPIWR
Perform such activities in off-peak hours, such as early morning or late evening.
Industry Canada
1RGTCVKQPKUUWDLGEVVQVJGHQNNQYKPIVYQEQPFKVKQPUVJKUFGXKEGOC[PQVECWUGJCTOHWNKPVGTHGTGPEGCPFVJKUFGXKEGOWUVCEEGRVCP[KPVGTHGTGPEGKPENWFKPIKPVGTHGTGPEGVJCVOC[ECWUG
undesired operation.
6JGVGTOŎŏ+%ŎŏDGHQTGVJGEGTVKſECVKQPTGIKUVTCVKQPPWODGTQPN[UKIPKſGUVJCVVJG+PFWUVT[%CPCFCVGEJPKECNURGEKſECVKQPUYGTGOGV
The Ringer Equivalence Number (REN) for this terminal equipment is 0.2. The REN is an indication of the maximum number of devices allowed to be connected to a telephone interface. The termina-
VKQPQPCPKPVGTHCEGOC[EQPUKUVQHCP[EQODKPCVKQPQHFGXKEGUUWDLGEVQPN[VQVJGTGSWKTGOGPVVJCVVJGUWOQHVJG4'0UQHCNNVJGFGXKEGUFQGUPQVGZEGGFſXG
6JKURTQFWEVOGGVUVJGCRRNKECDNG+PFWUVT[%CPCFCVGEJPKECNURGEKſECVKQPU
•
•

www.vtechphones.com
95
6GEJPKECNURGEKſECVKQPU
Frequency control Crystal controlled
PLL synthesizer
Transmit frequency Handset: 1921.536 - 1928.448 MHz
Telephone base: 1921.536 - 1928.448 MHz
Receive frequency Handset: 1922.470 - 1929.312 MHz
Telephone base: 1922.470 - 1929.312 MHz
Channels 5
Nominal effective range Maximum power allowed by FCC and IC. Actual operating range may vary according
to environmental conditions at the time of use.
Size Handset: 141.0mm X 63.0mm X 28.8mm
Telephone base: 151.5mm X 115mm X 40.2mm
Charger: 89.5mm X 93.0mm X 105.0mm
Weight Handset: 153.0 grams (including battery)
Telephone base: 174.6 grams
Charger: 121.6 grams
Power requirements Handset: 2 cells AAA 750mAh NiMH battery
Telephone base: DC 6V @ 300mA
Charger: DC 6V @ 200mA
Memory Directory: 50 memory locations; up to 32 digits, 16 characters per location.
Call log: 50 memory locations.

www.vtechphones.com 96
Index
A
About cordless telephones 90
About tab of the IS6110 phone
software 22
Accept an incoming instant voice
request 58
Active chat window 53
Active status 55
Add a new entry in the directory 71
B
Basic navigation 33
Before you begin 1
Belt clip 28
Belt clip & headset (optional) 28
Buddy status window 53
C
Caller ID operation 72
Caller ID with call waiting 72
Call log 73
Charge handset battery 5
Chart of characters 35
Choose your IM status 65
Clear voice mail 50
Clock setting 46
Color Scheme 44
D
De-registration of handset 80
Default setting 51
Default setting table 52
Delete a directory entry 70
Delete all call log entries 75
Delete all directory entries 70
Delete buddy history 65
Delete call log entry 75
Directory 69
Display 43
E
Edit a directory entry 70
Ending calls on the Home line 67
Entering characters 33
F
FCC, ACTA and IC regulations 93
Find handset 68
G
Getting to know the IS6110 29
H
Handset charger installation 3
Handset layout 31
Handset screen display message 76
Handset status icons 32
Headset 28
I
IM alert tone 49
Important safety instructions 92
Incoming Internet voice call (VoIP)
while idle 62
Incoming Internet voice call (VoIP)
while on a standard call 62
Incoming standard call while using IM
in messenger 60
Incoming standard call while using
VoIP in messenger 61
Index 96
Installation 3
Install handset battery 4
Install IS6110 phone software 11
Install MSN Messenger/AIM
software 8
K
Key tone 48
L
LCD Brightness 45
Log into the IS6110 phone
software 23
www.vtechphones.com
97
Index
M
Maintenance 89
Make call log entries ready to dial or
store 74
Making calls on the Home line 66
Messenger 53
Minimum requirements 1
Multiple incoming Internet voice calls
(VoIP) while on a standard call 64
Mute 67
O
1HƀKPG 4
Online 54
Operating range 89
P
Parts checklist 2
Play or delete sound clips 38
R
Receiving calls on the Home line 66
Record sound clips 39
Redial 68
Registration and de-registration 78
Registration of handset 78
Reviewing unread instant
messages: 55
Ringer 38
Ringer melody 41
Ringer volume 42
Running the IS6110 phone
software 19
Running the IS6110 phone
software 26
S
Save call log entry to the
directory 74
Search and review a directory
entry 69
Send a VoIP request 57
Send out instant messages 56
Settings 46
Settings for running the IS6110
software: 21
Settings of the IS6110 phone
software 20
Sign out instant messenger 65
Simultaneous incoming standard call
and VoIP call while on a standard
call 63
Softkeys 33
Speakerphone operation 67
5VCPFCTFECNNEQOGUſTUV 3
Status lights on the telephone
base 30
Symbol table 37
T
6GEJPKECNURGEKſECVKQP U 5
Telephone base installation 7
Telephone base layout 29
Telephone operation 66
Telephone settings 38
Text entry tips 34
The RBRC® Seal 94
To accept the Internet voice
connection (VoIP) request: 55
To login on the computer: 23
To login on using the handset: 25
To record a sound clip using an audio
cable: 39
To record sound clip using
microphone: 39
To set the clock manually: 47
To setup/change the messenger
account: 21
To synchronize the telephone clock
with the computer/caller ID: 46
Troubleshooting 81

www.vtechphones.com 98
Index
U
Using the handset 33
V
View buddy history 64
View buddy information 65
VoIP/IM request from buddy outside the current buddy chat window 59
8Q+2ECNNTGSWGUVEQOGUſTUV 3
Volume 67
W
Wallpapers 43
Warranty 90

Info
VTECH TELECOMMUNICATIONS LTD.
A member of THE VTECH GROUP OF COMPANIES.
Distributed in the U.S.A. by VTech Communications, Inc., Beaverton, Oregon
Distributed in Canada by VTech Telecommunications Canada, Ltd., Richmond, B.C.
Copyright © 2007 for VTECH TELECOMMUNICATIONS LTD.
Printed in China.
Version 1

User’s manual
www.vtechphones.com
Model: IS6110