VTech Telecommunications 80-6563-00 1.9GHz CORDLESS PHONE User Manual
VTech Telecommunications Ltd 1.9GHz CORDLESS PHONE
UserManual.wiki
>
VTech Telecommunications
>
80-6563-00 User Manual
>
Users Manual 2
Contents
1.
Users Manual 1
2.
Users Manual 2
Users Manual 2
Navigation menu
Upload a User Manual
Namespaces
Wiki Guide
HTML
PDF
Info
Views
User Manual
Discussion / Help
Navigation
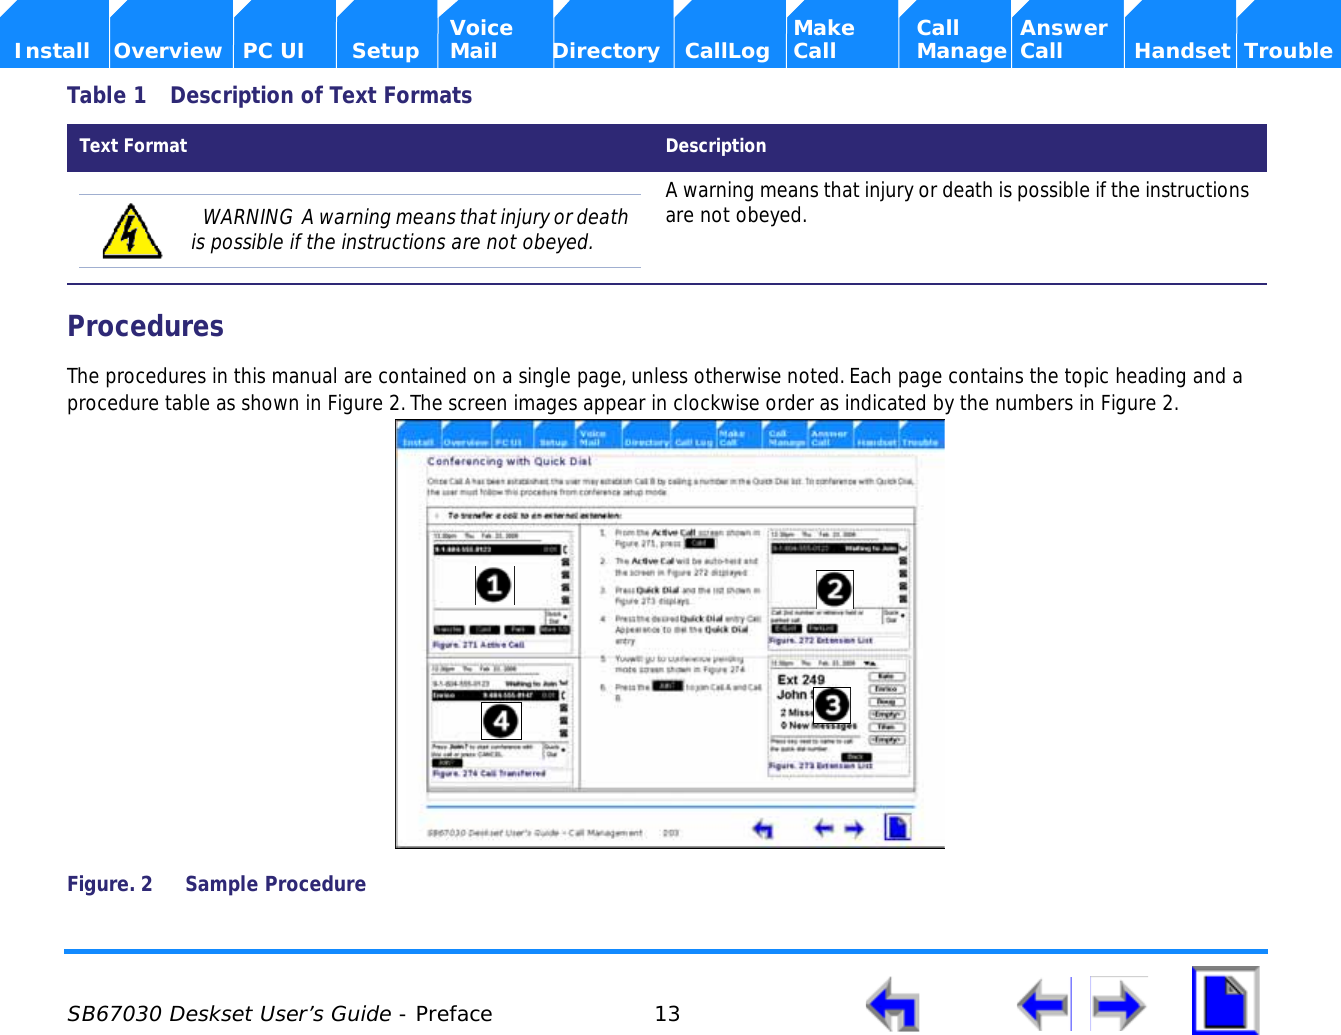
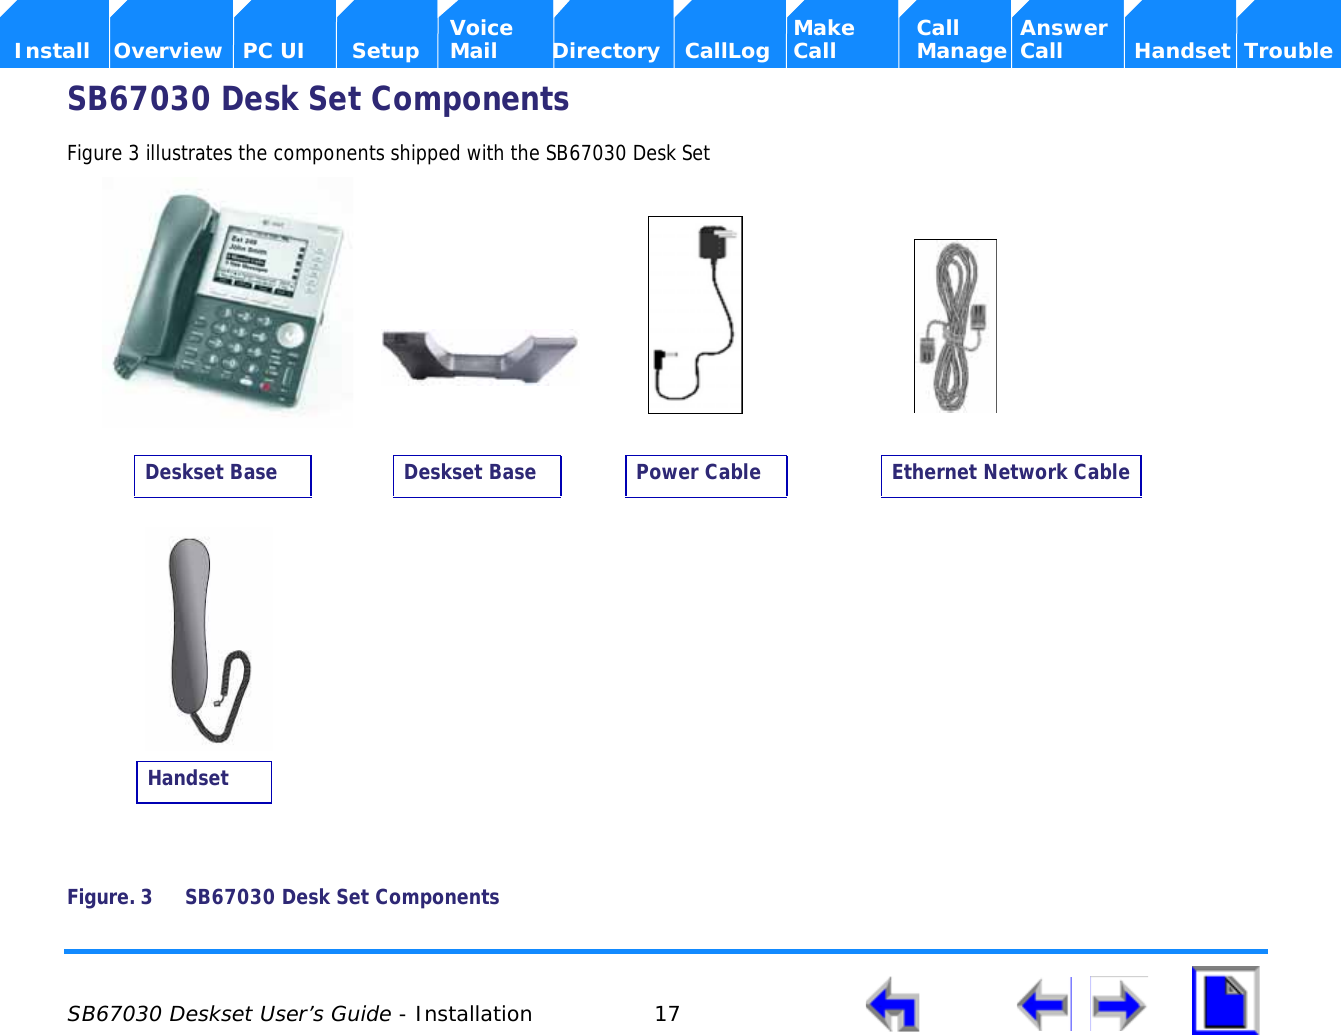

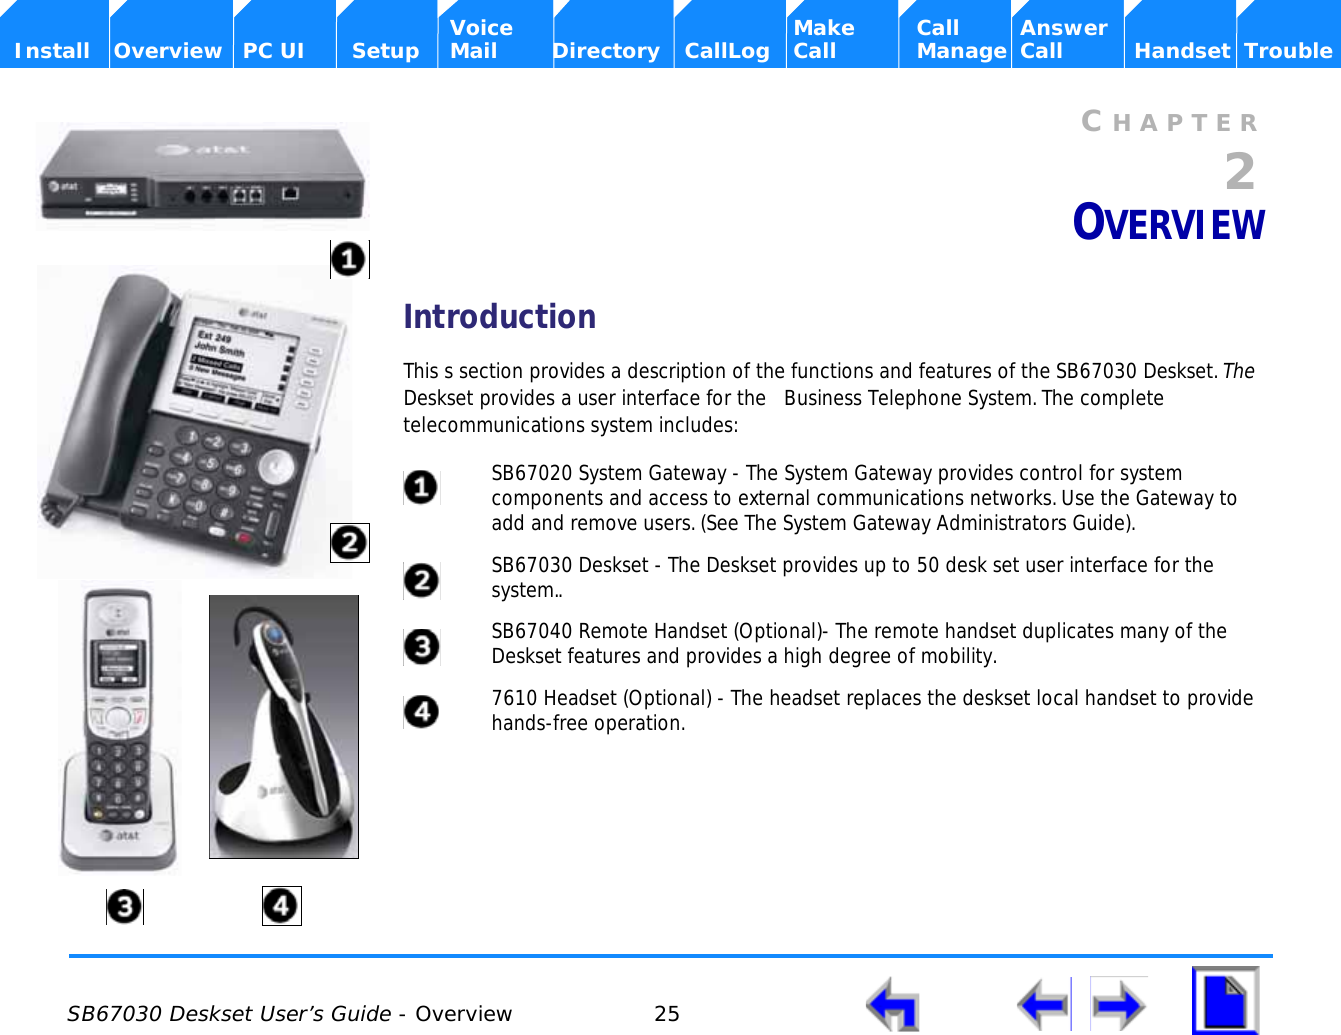

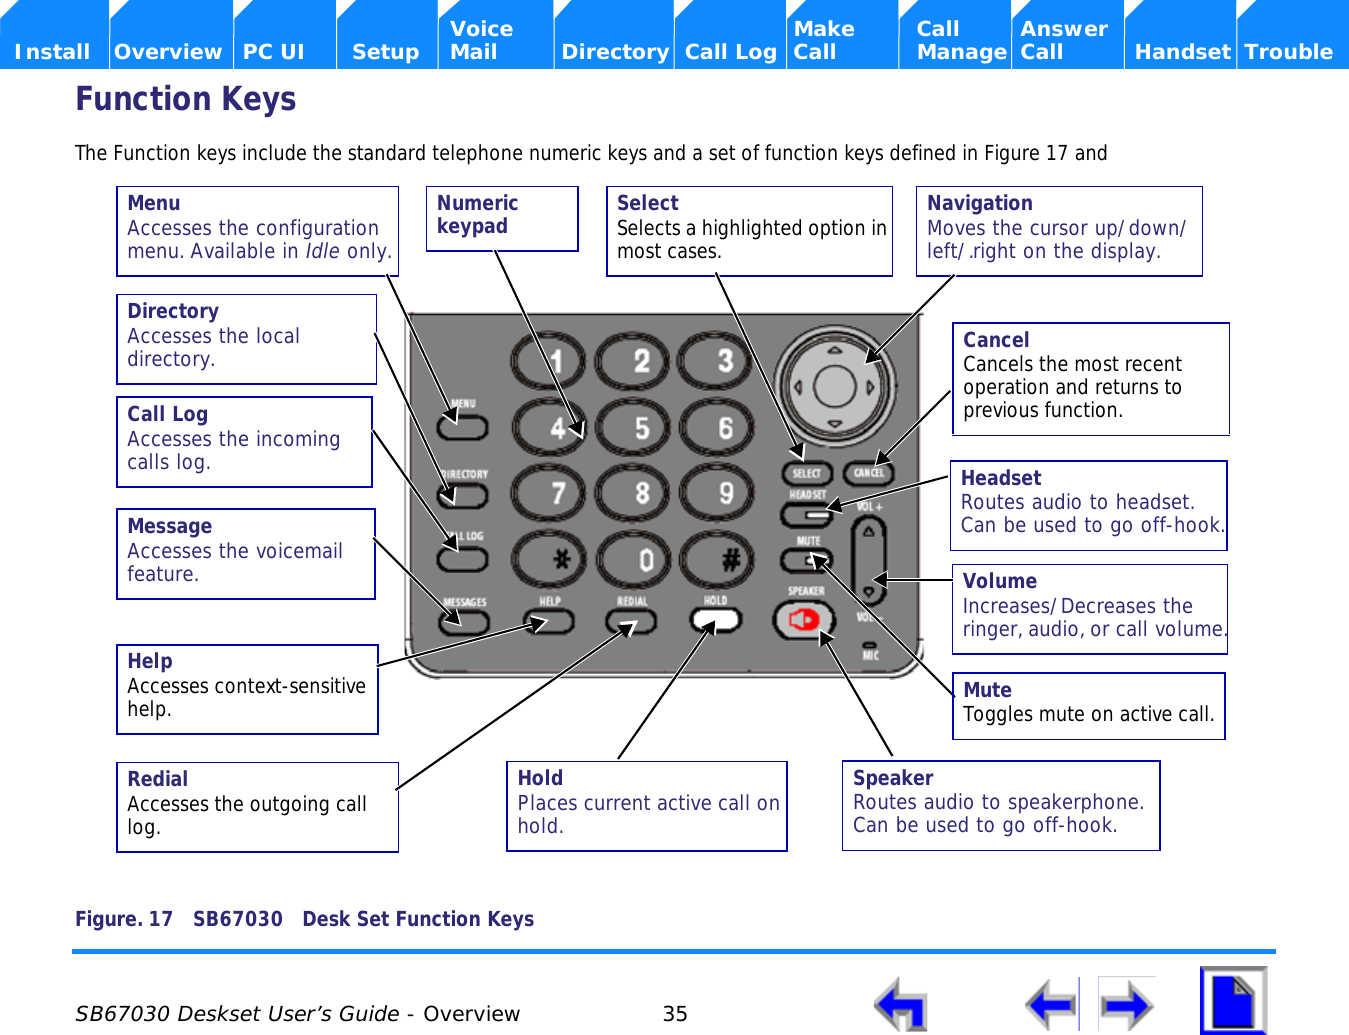
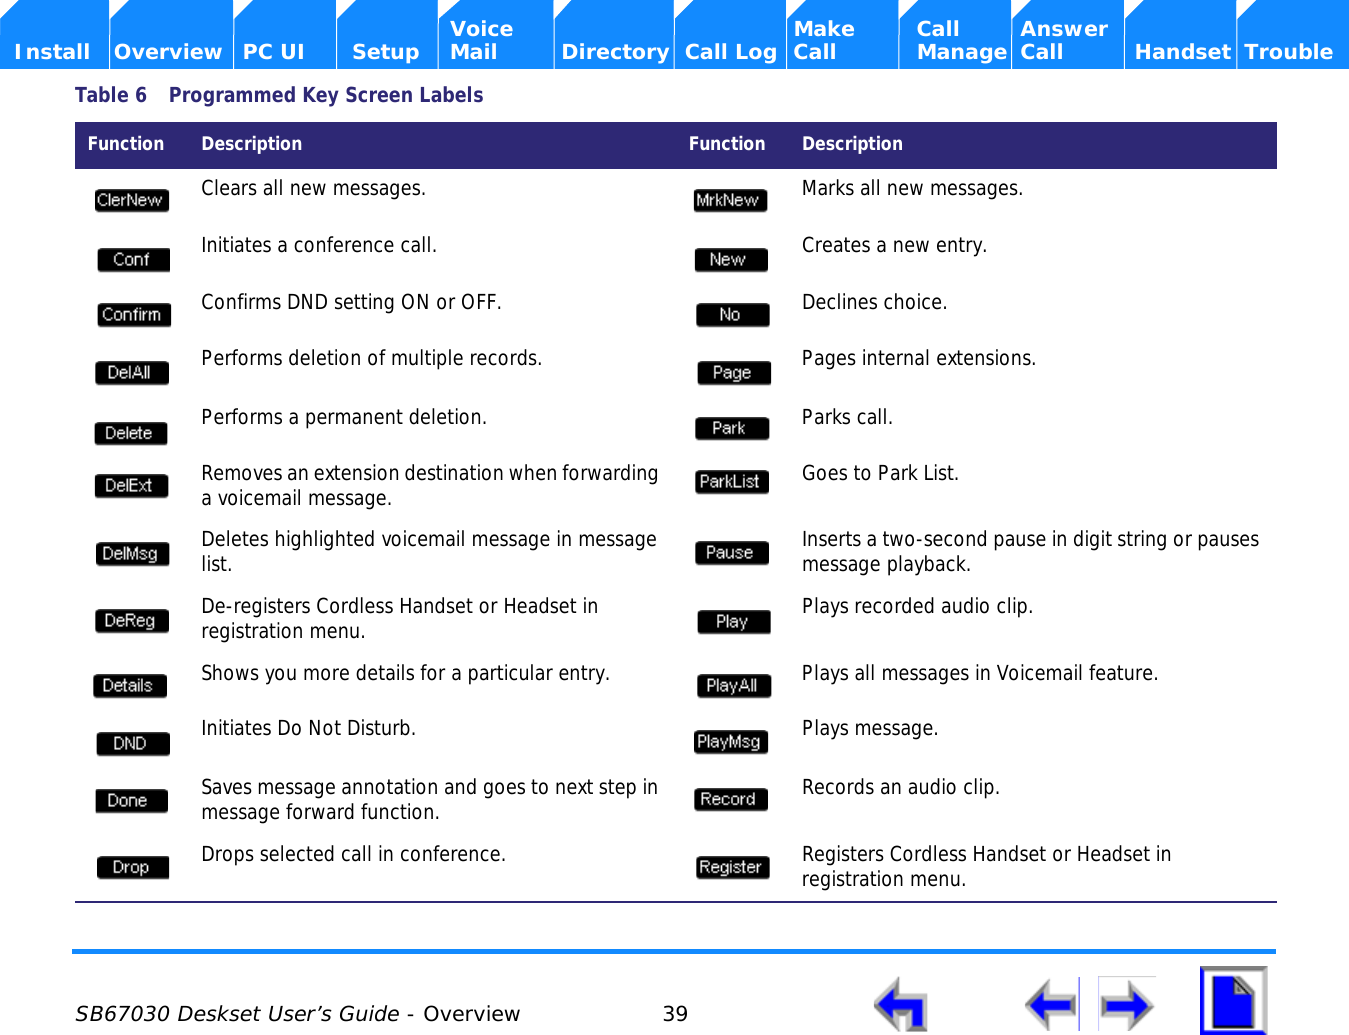
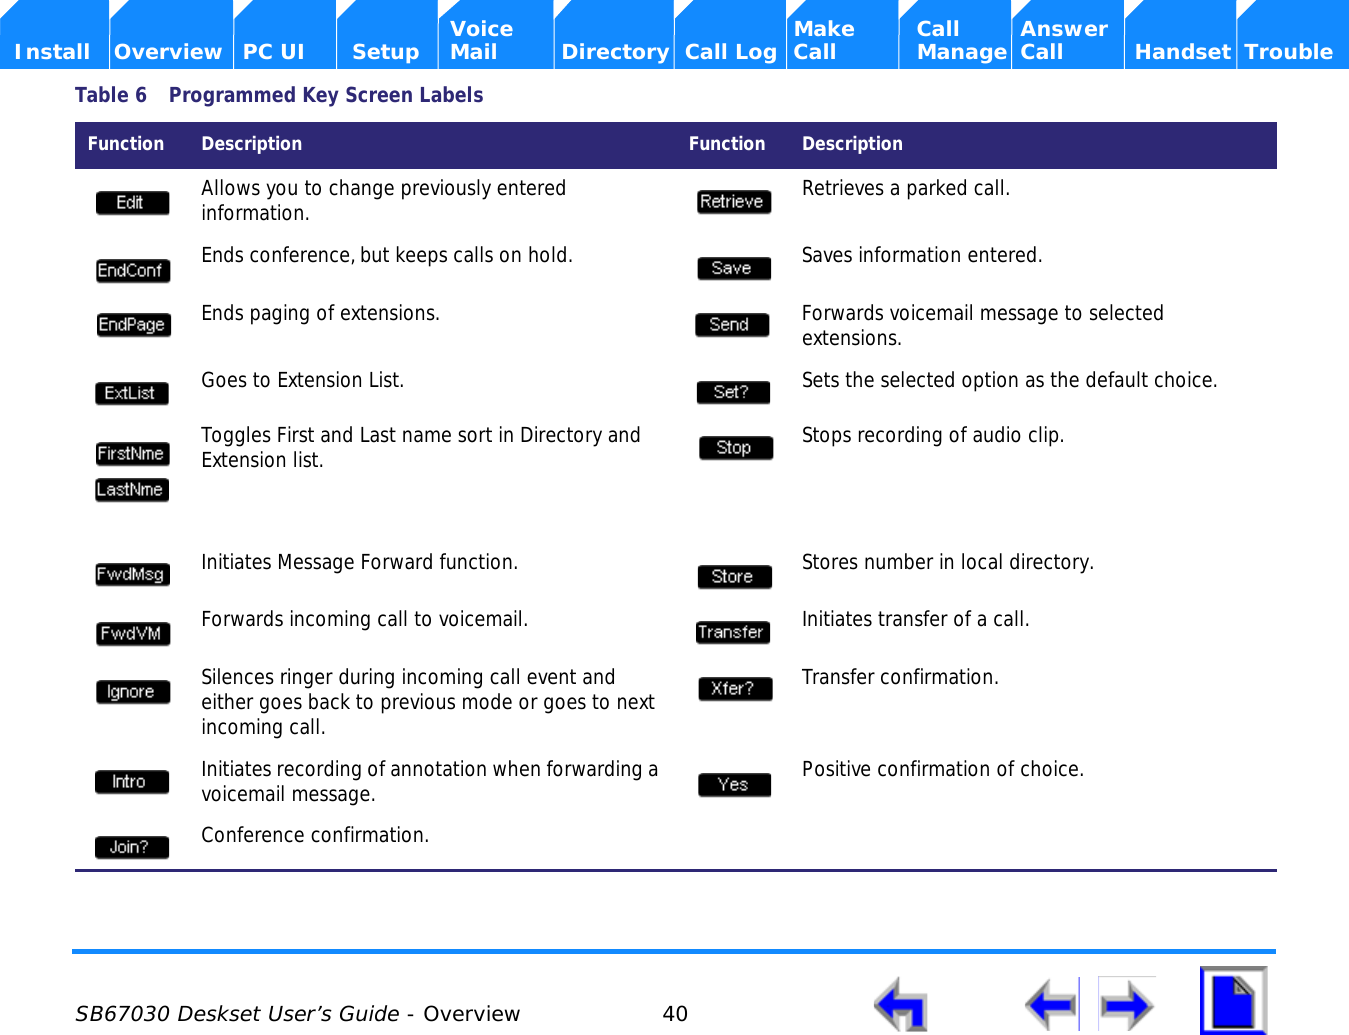
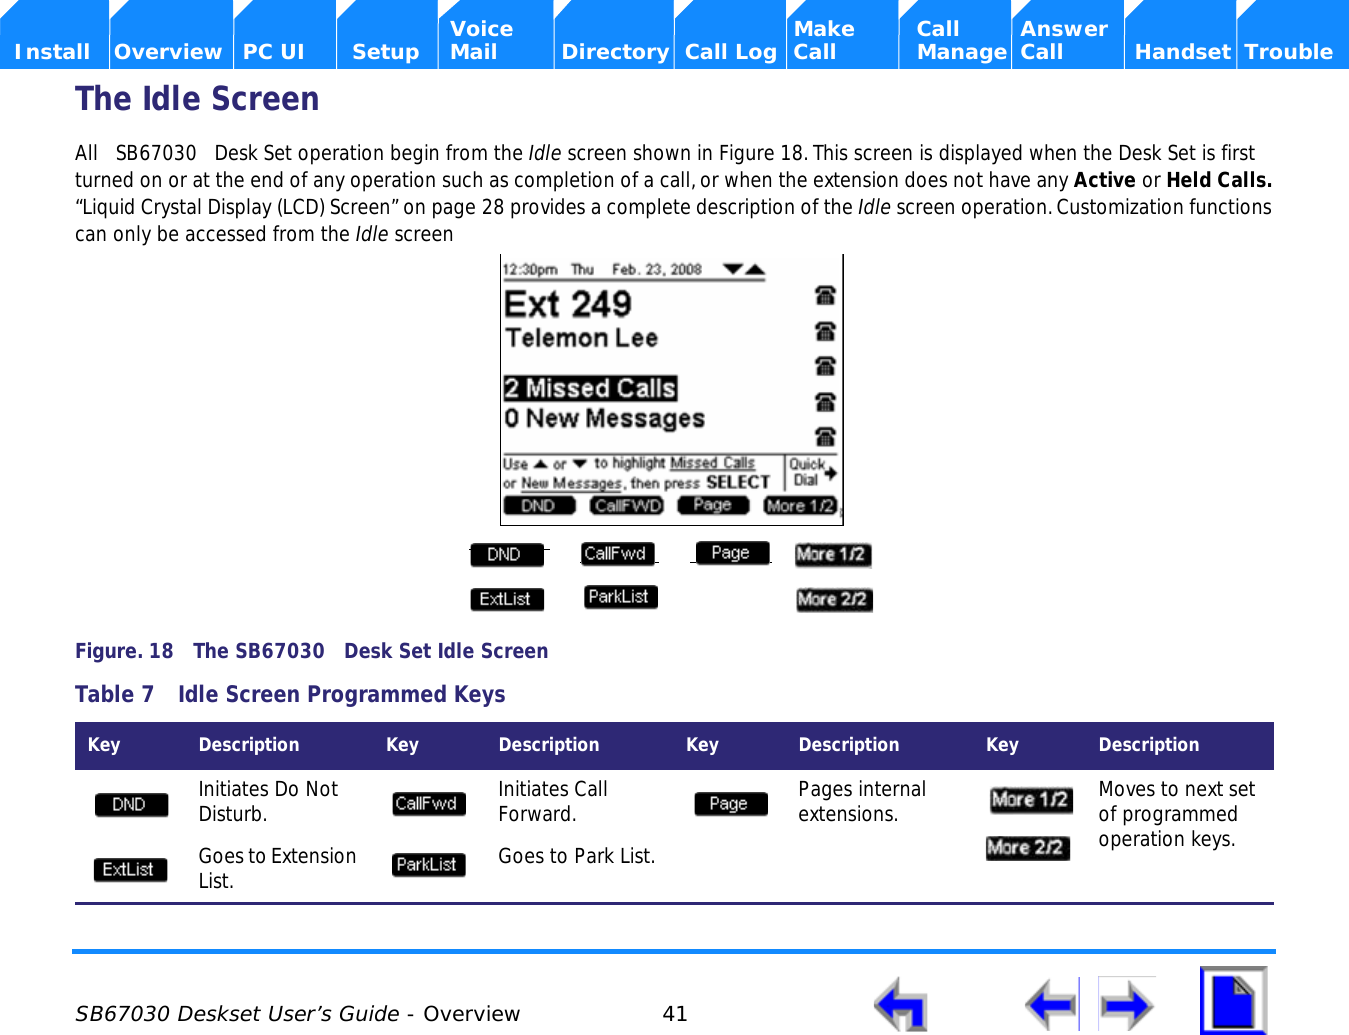
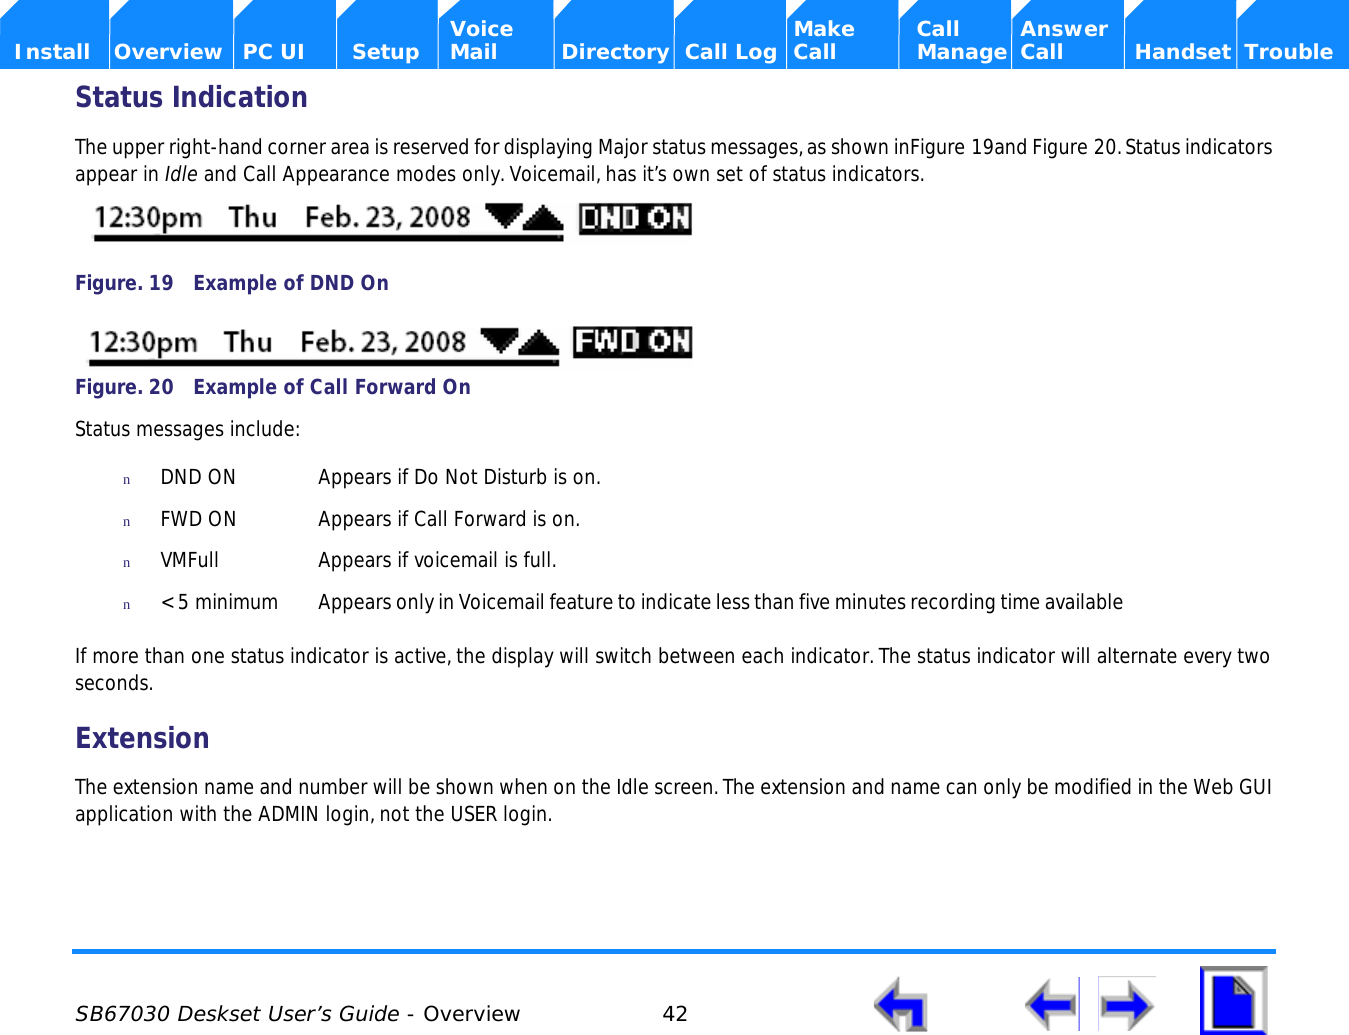
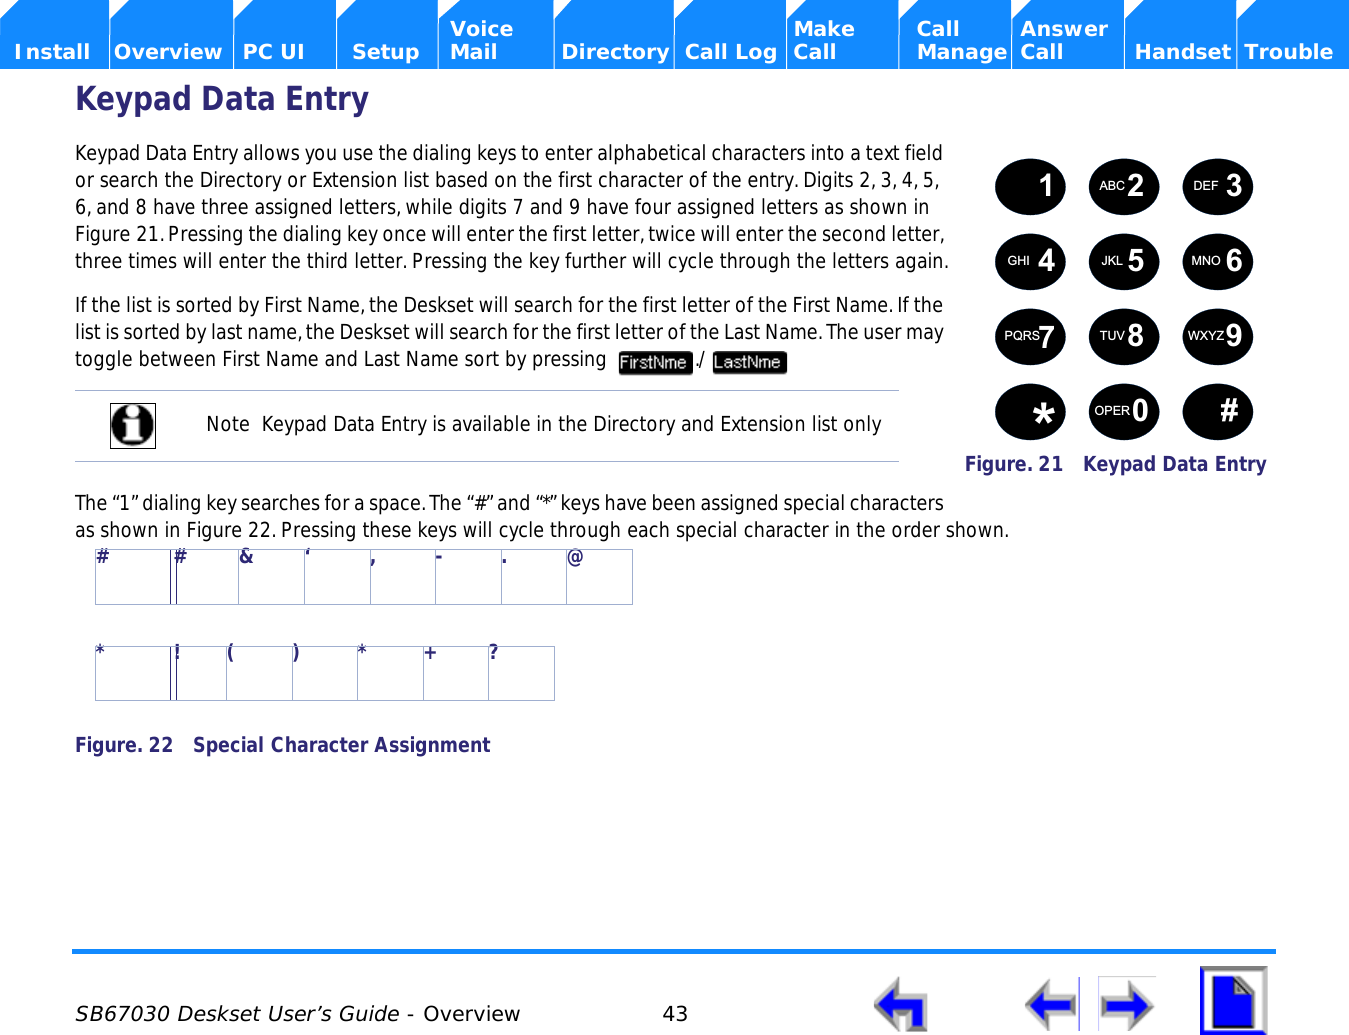
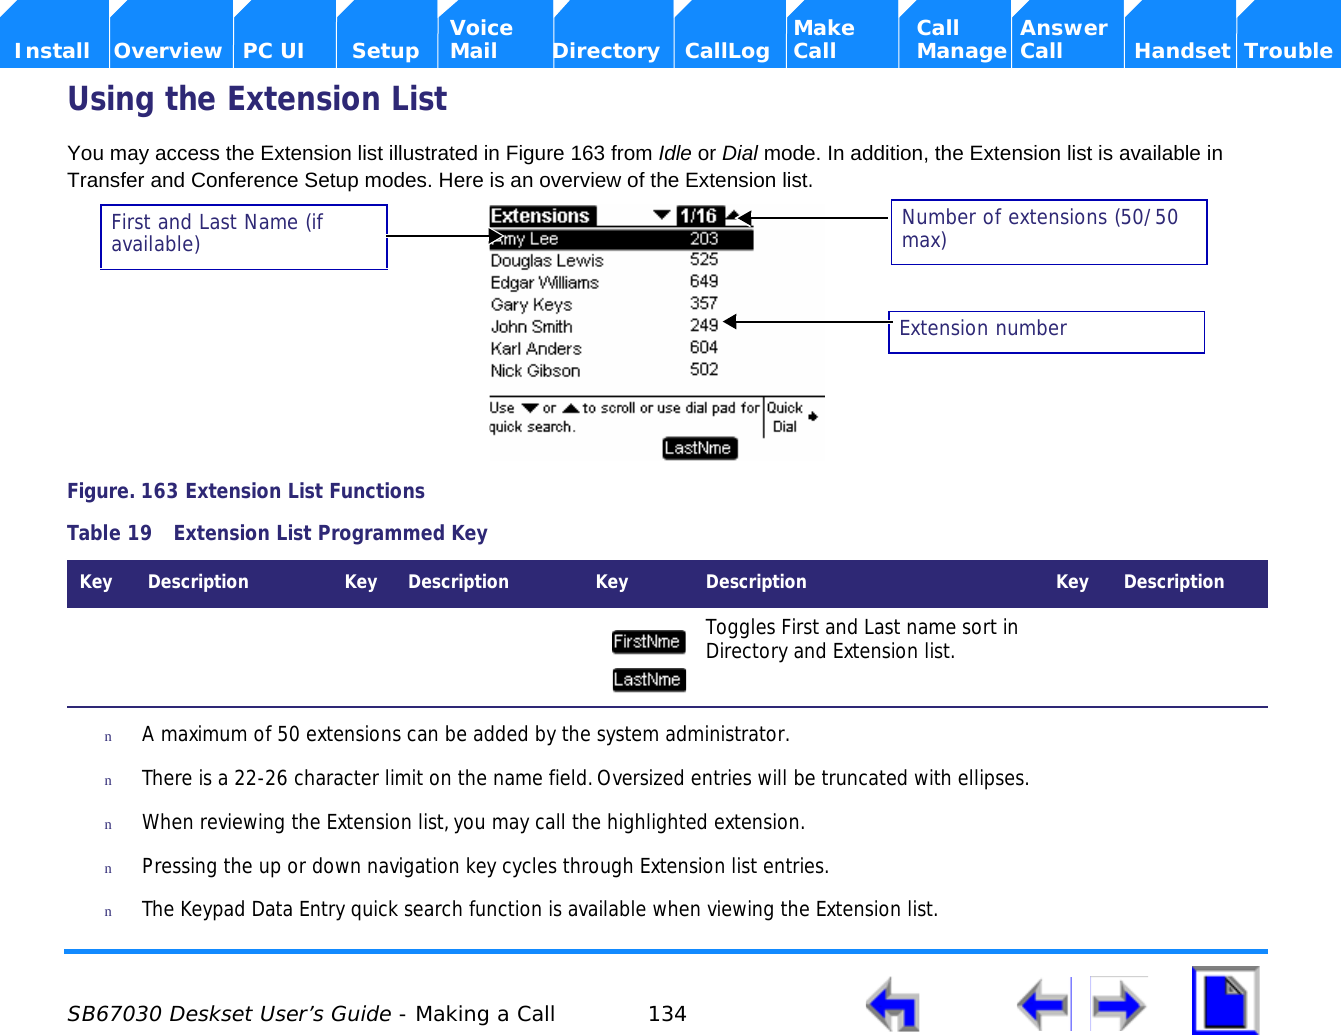
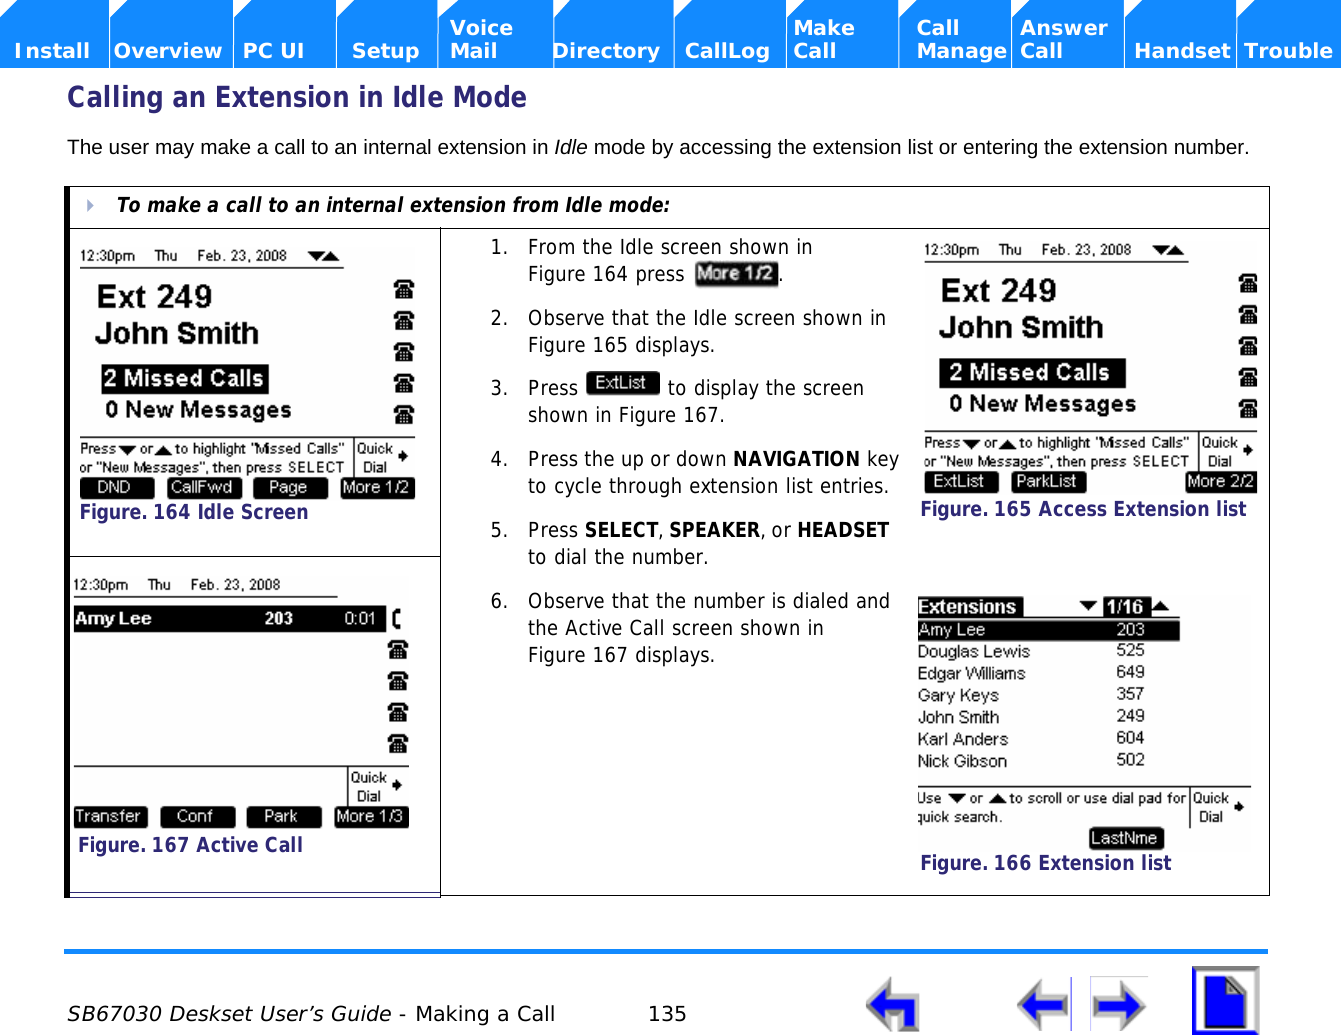
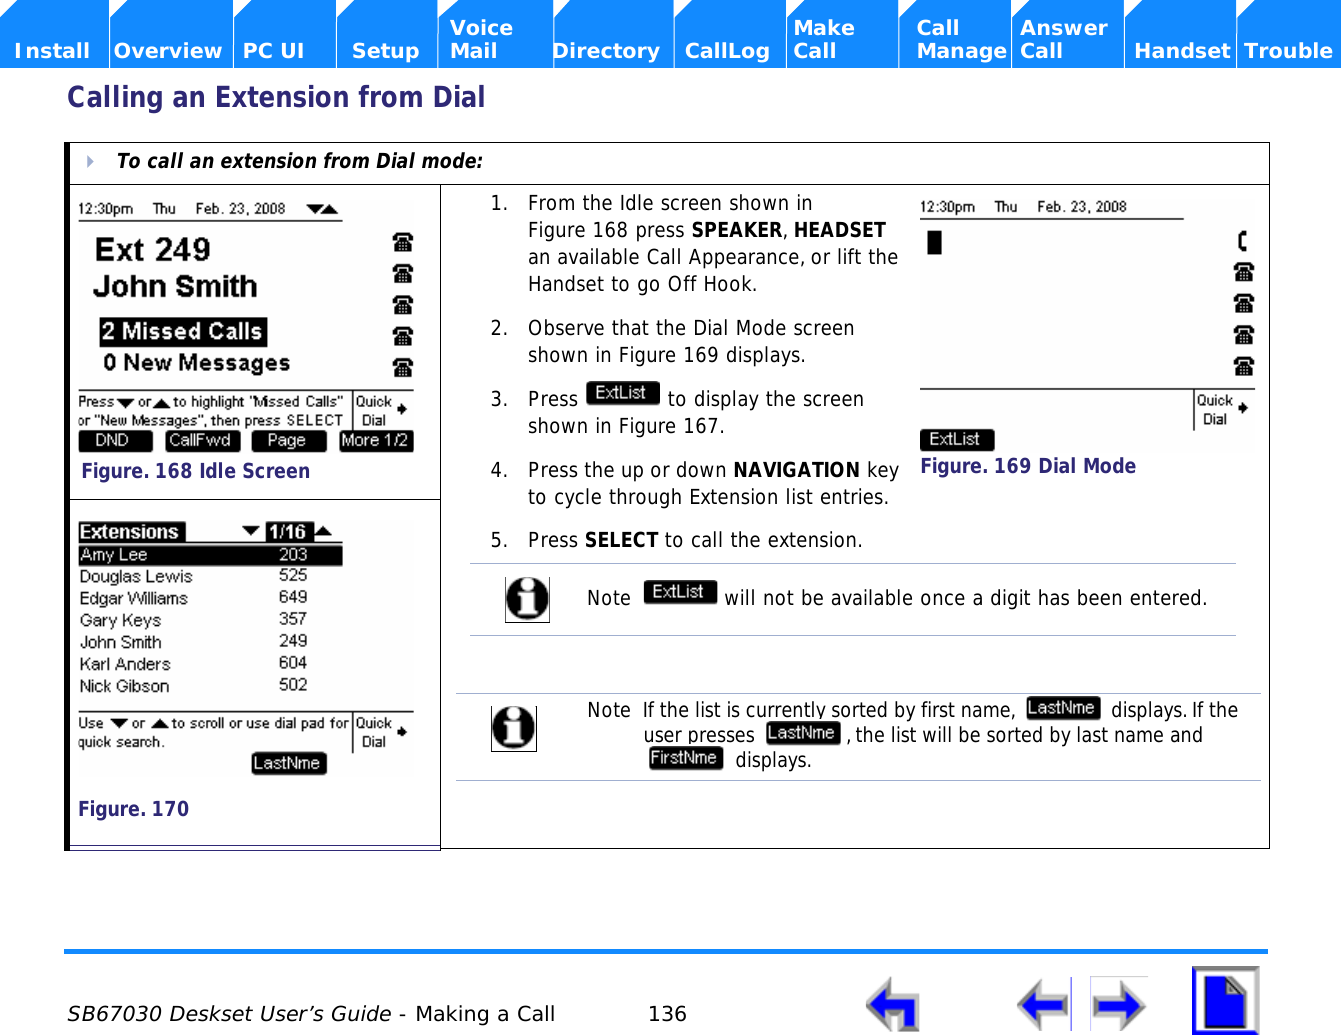
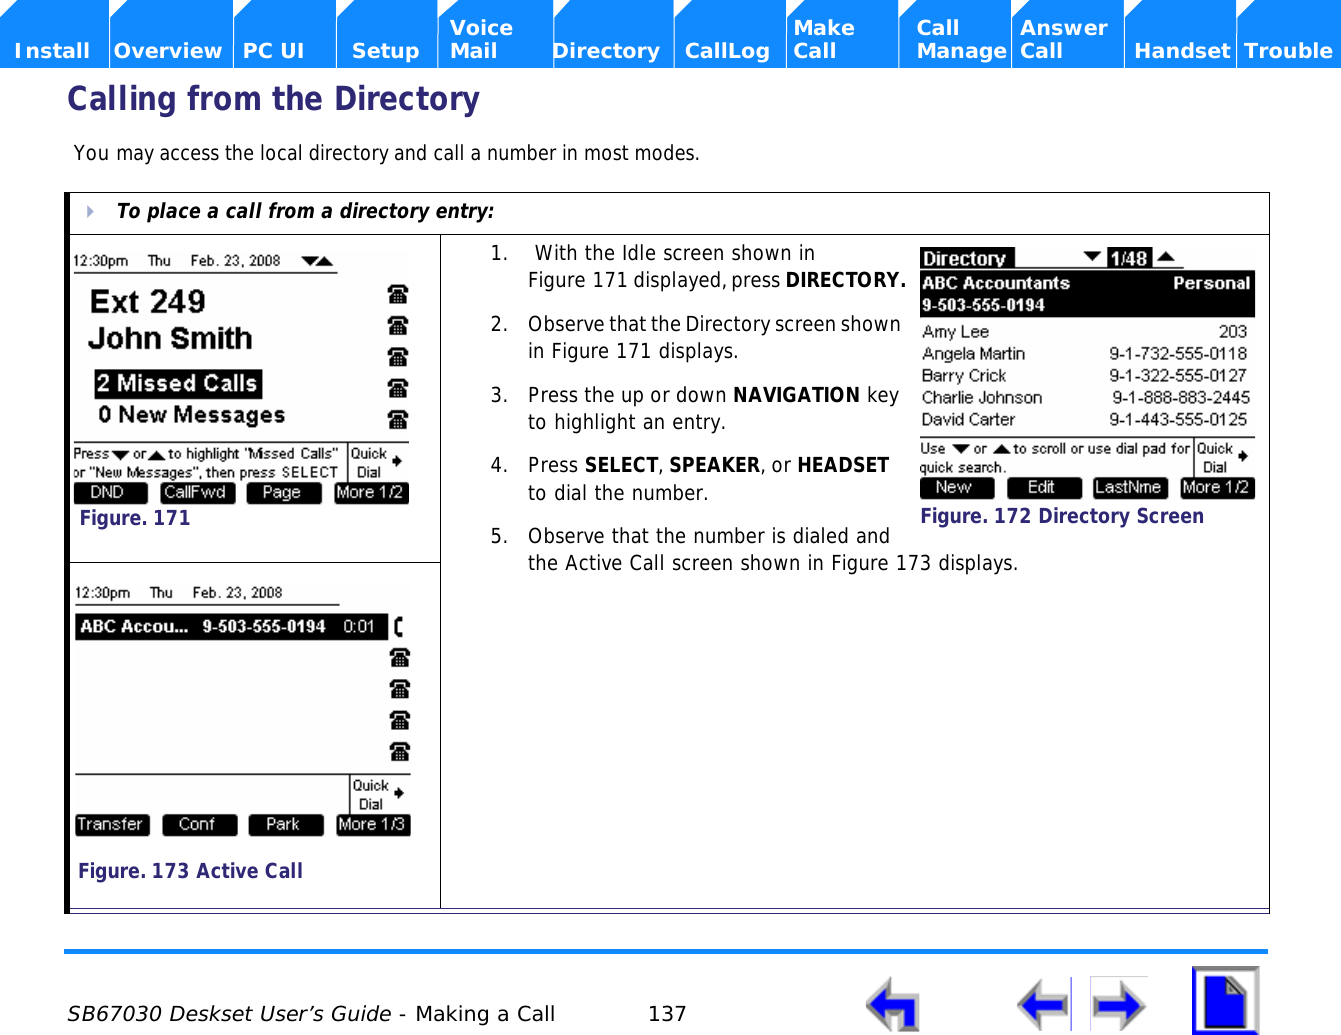
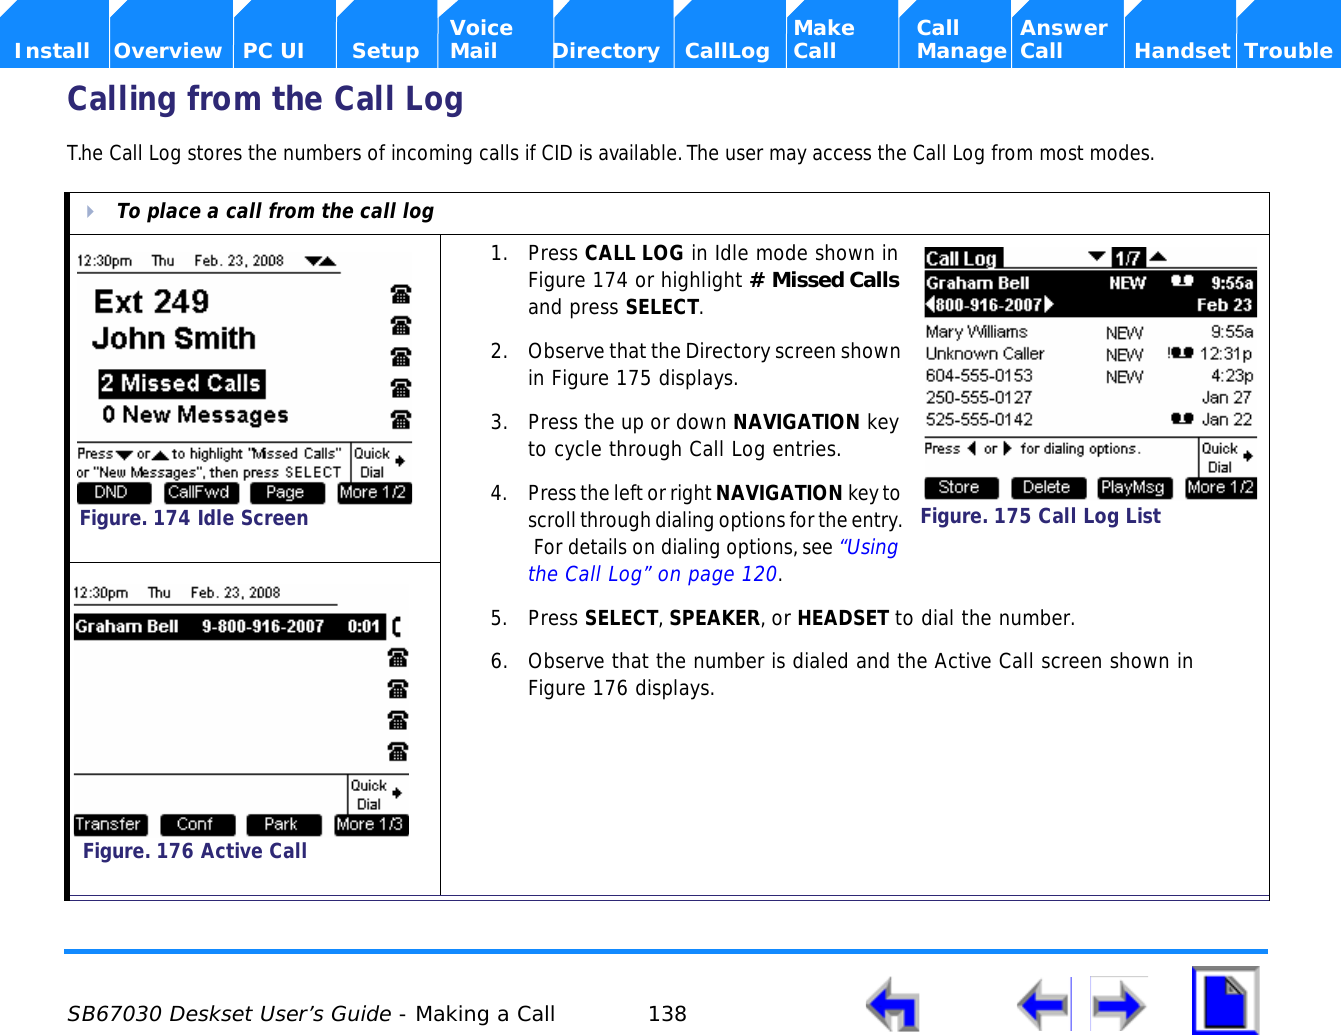
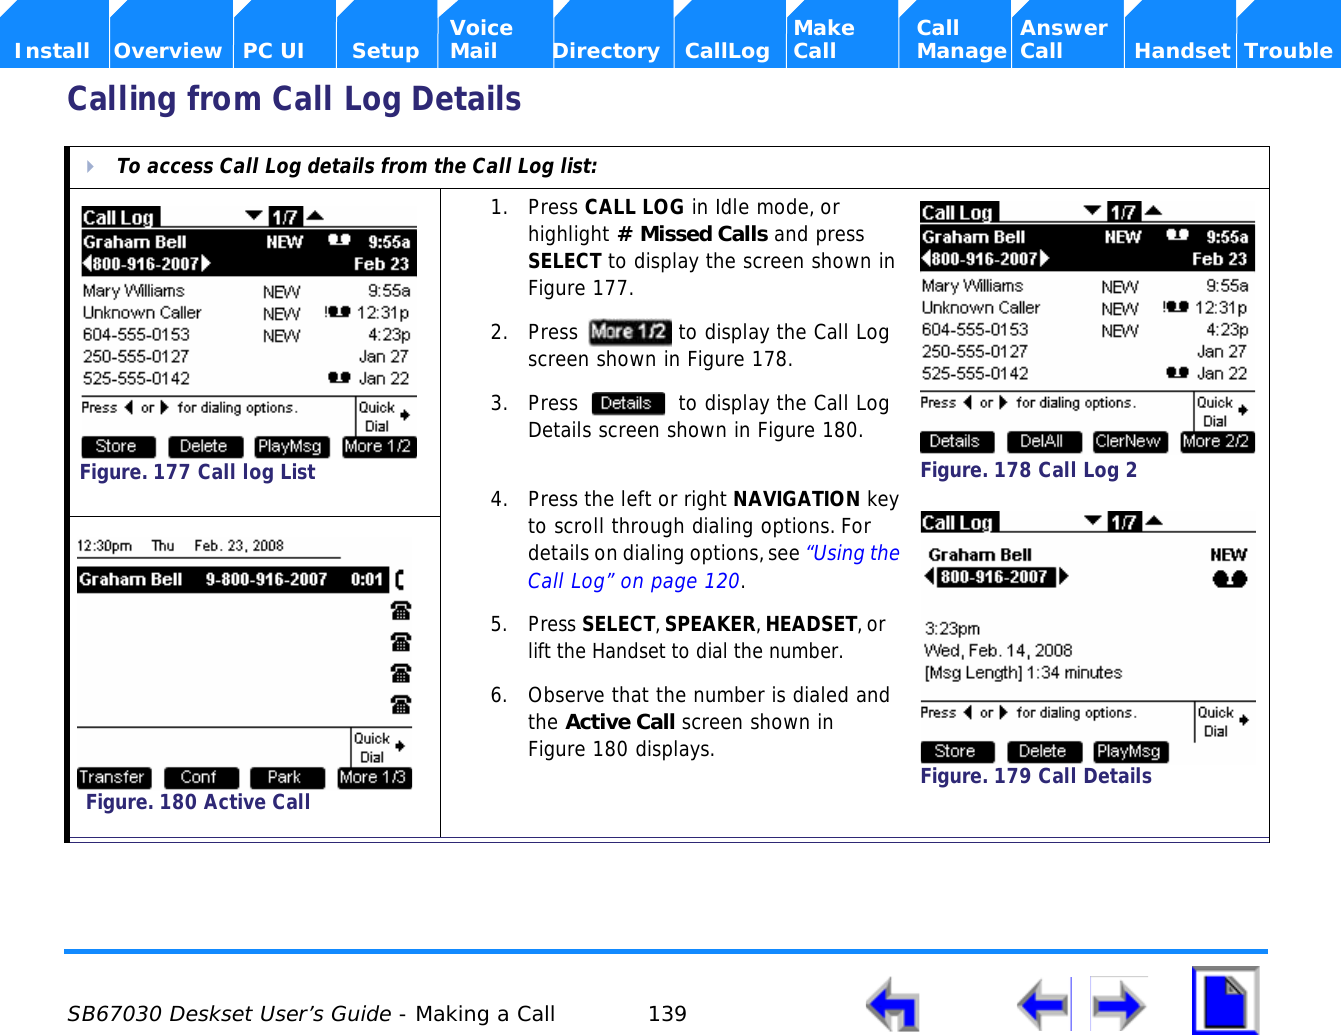
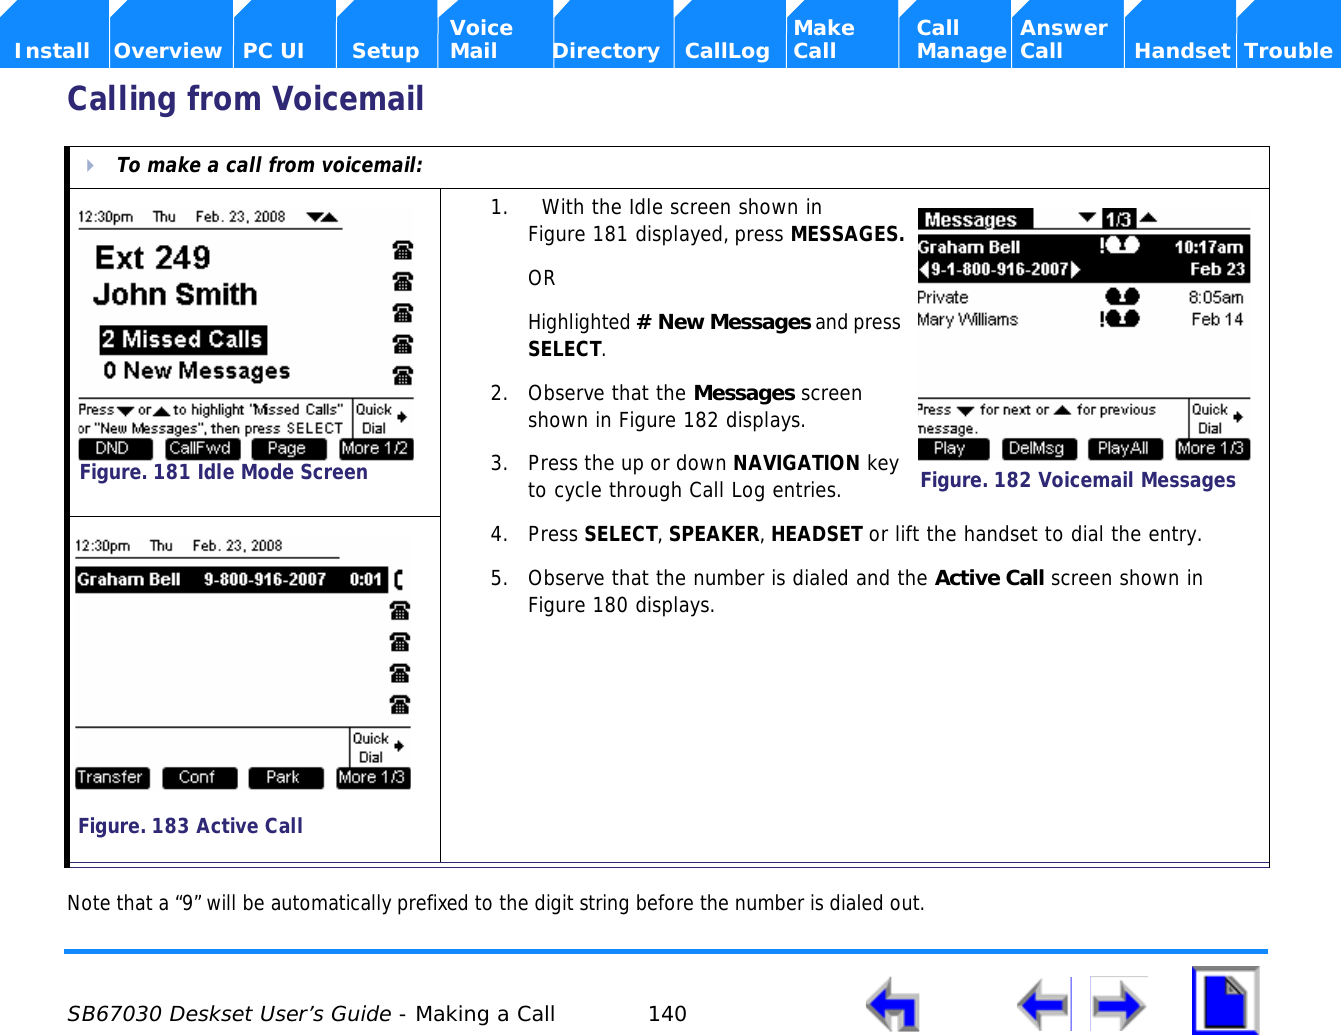
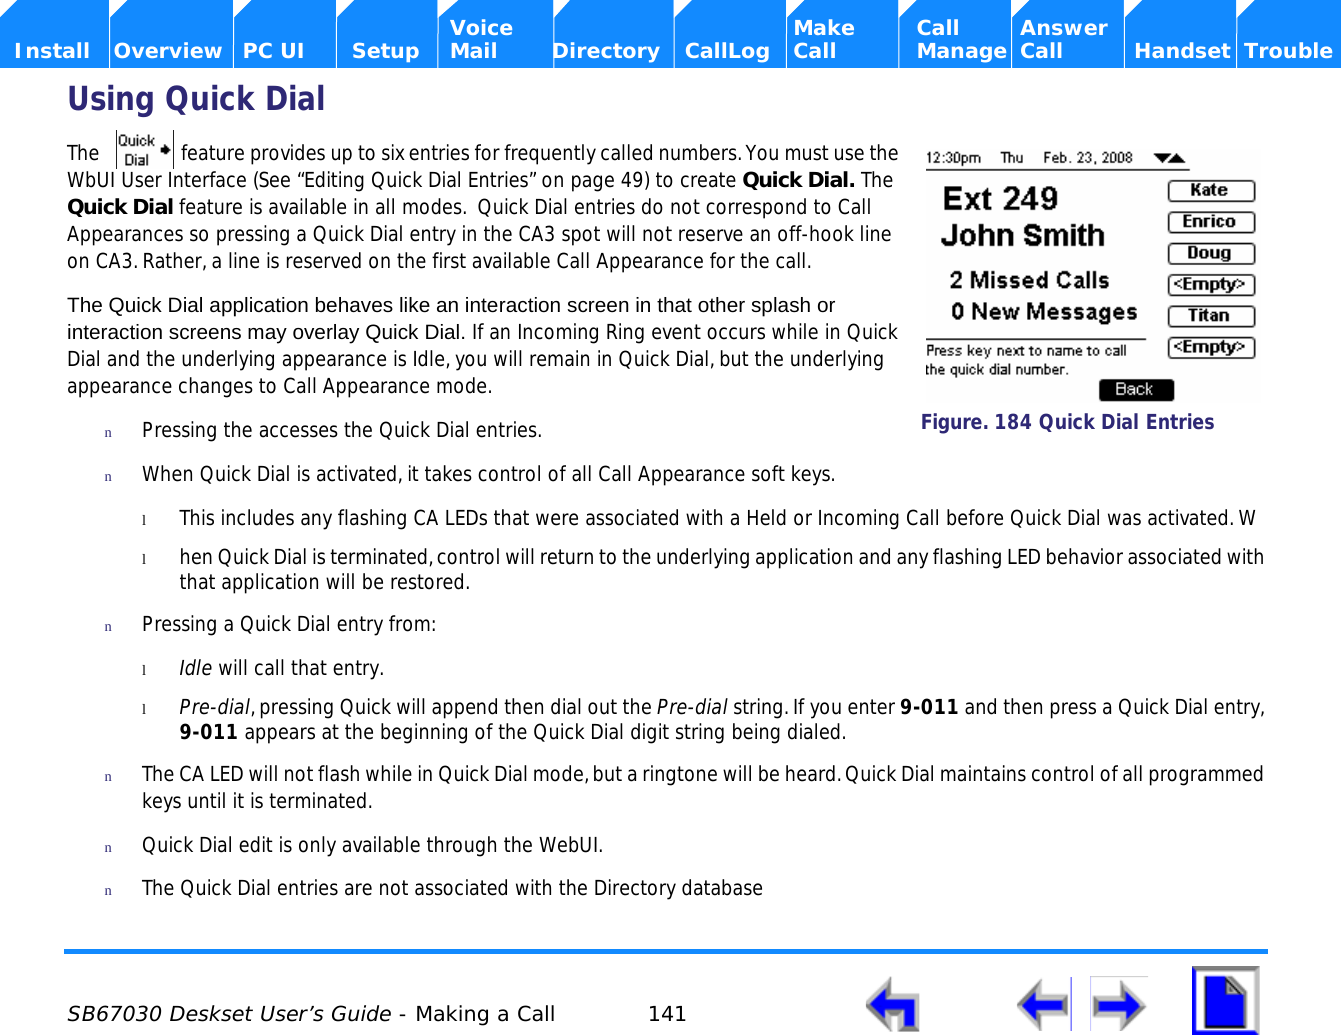
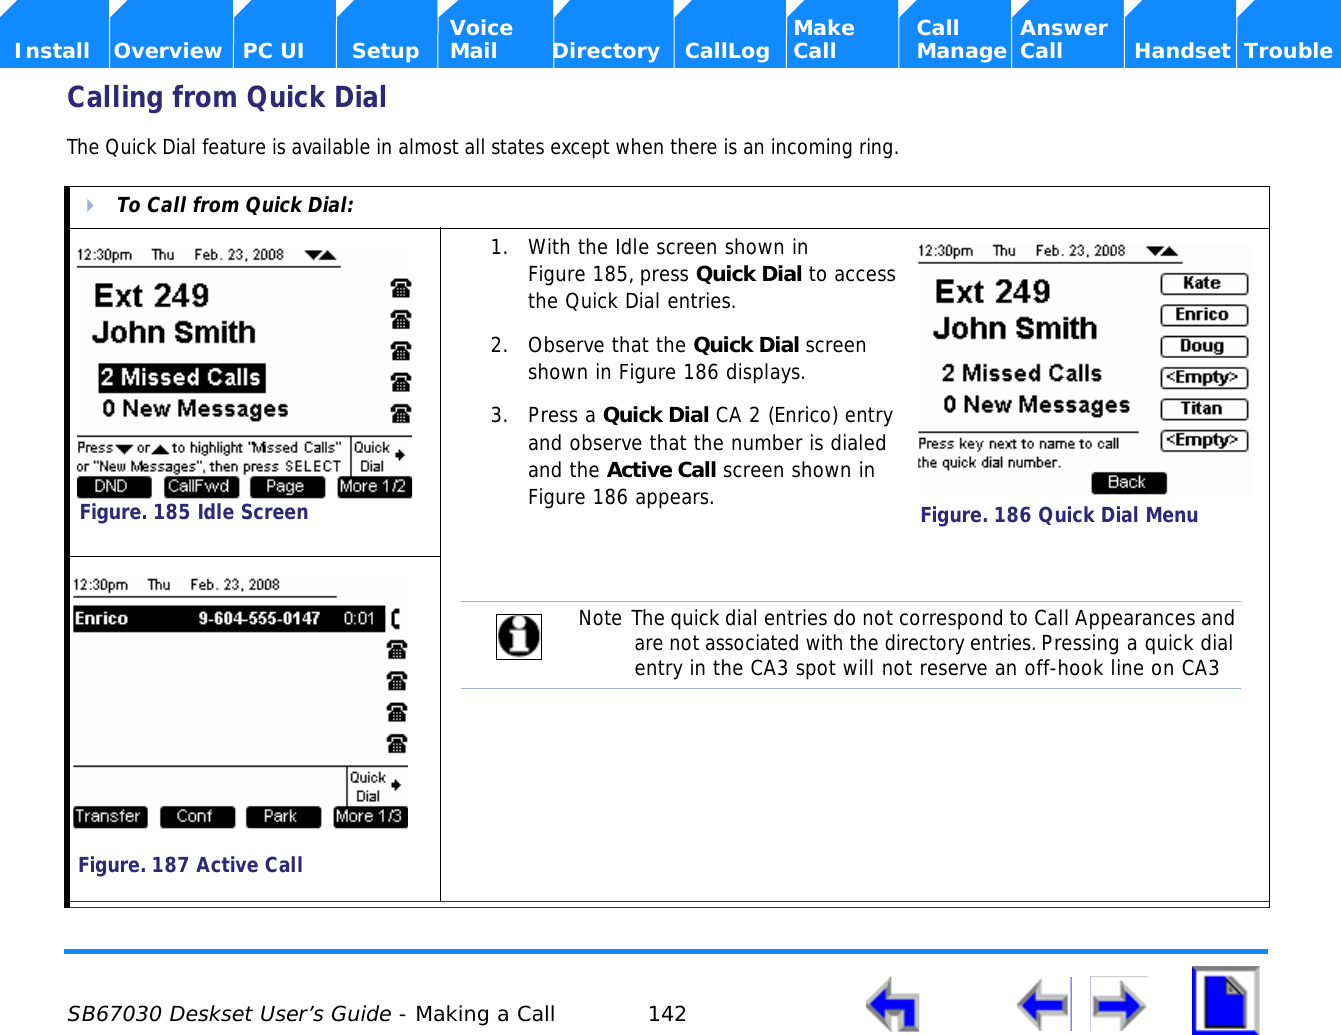
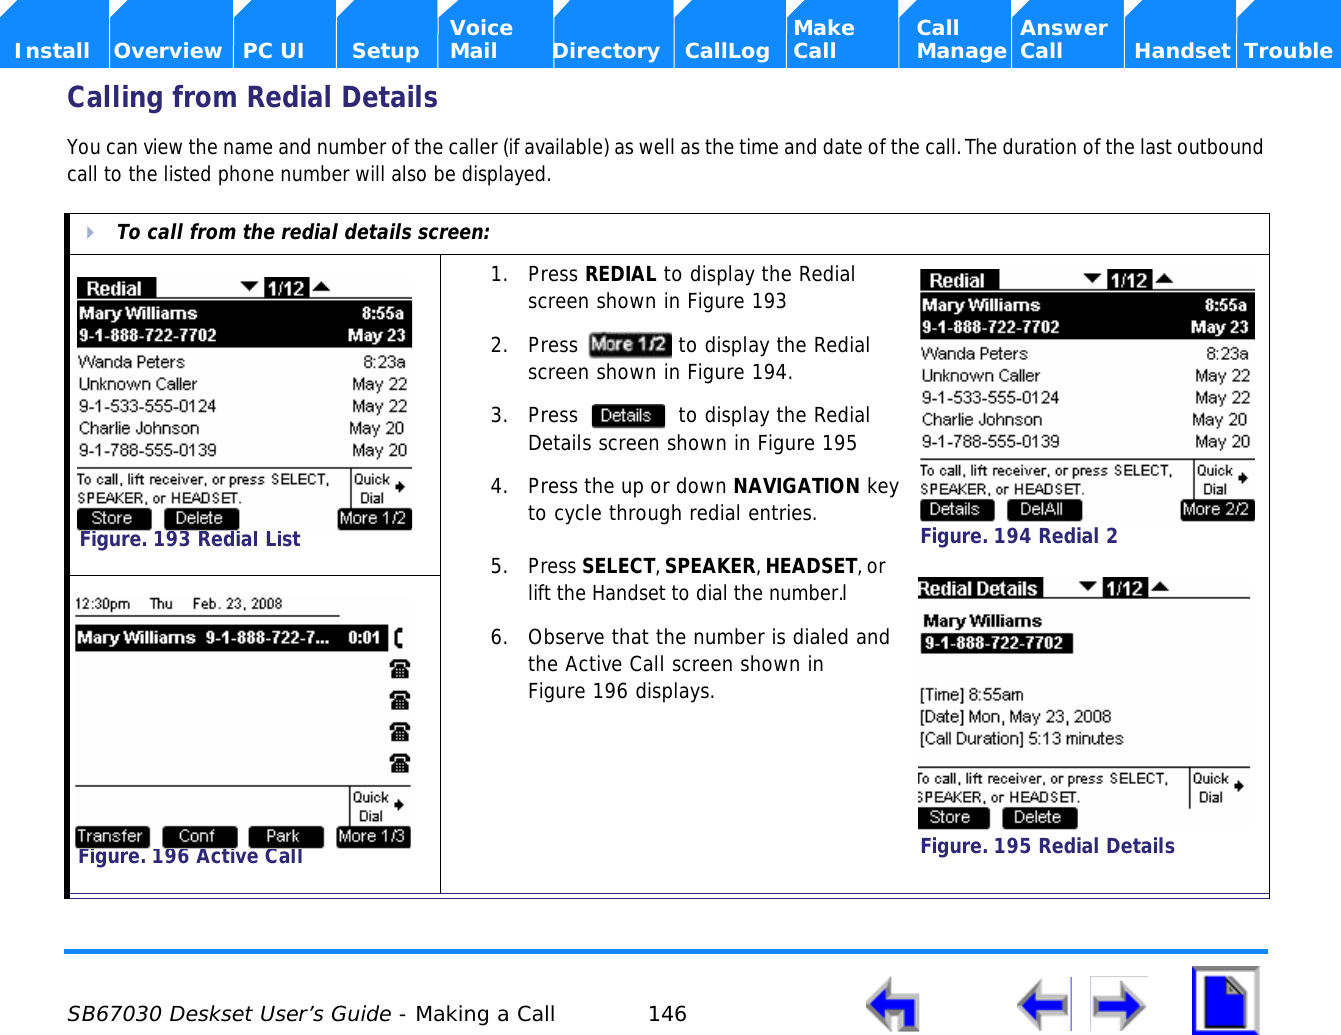
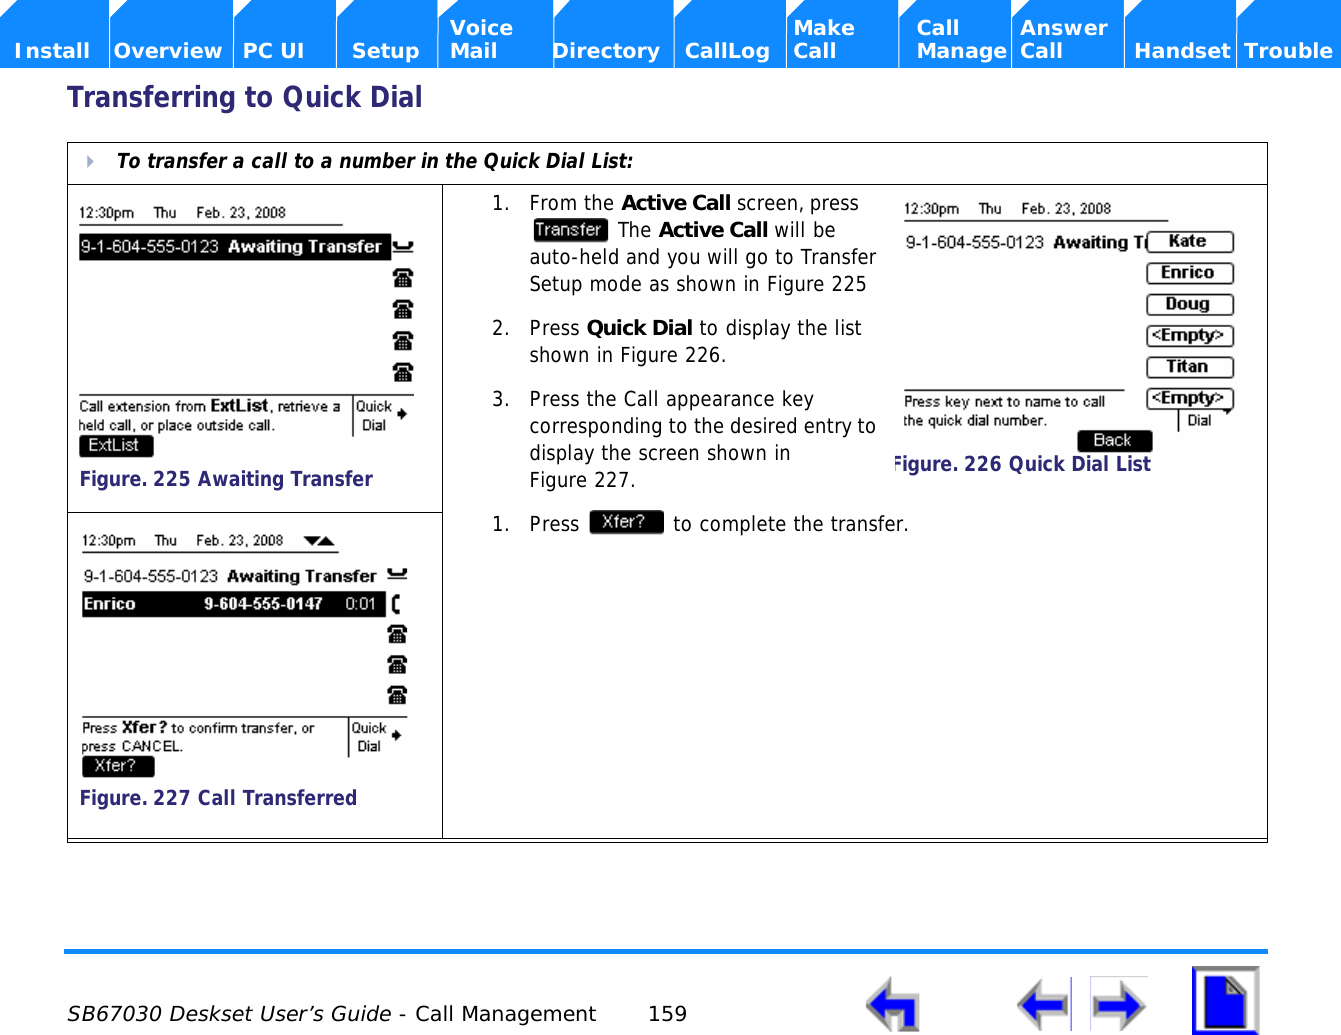
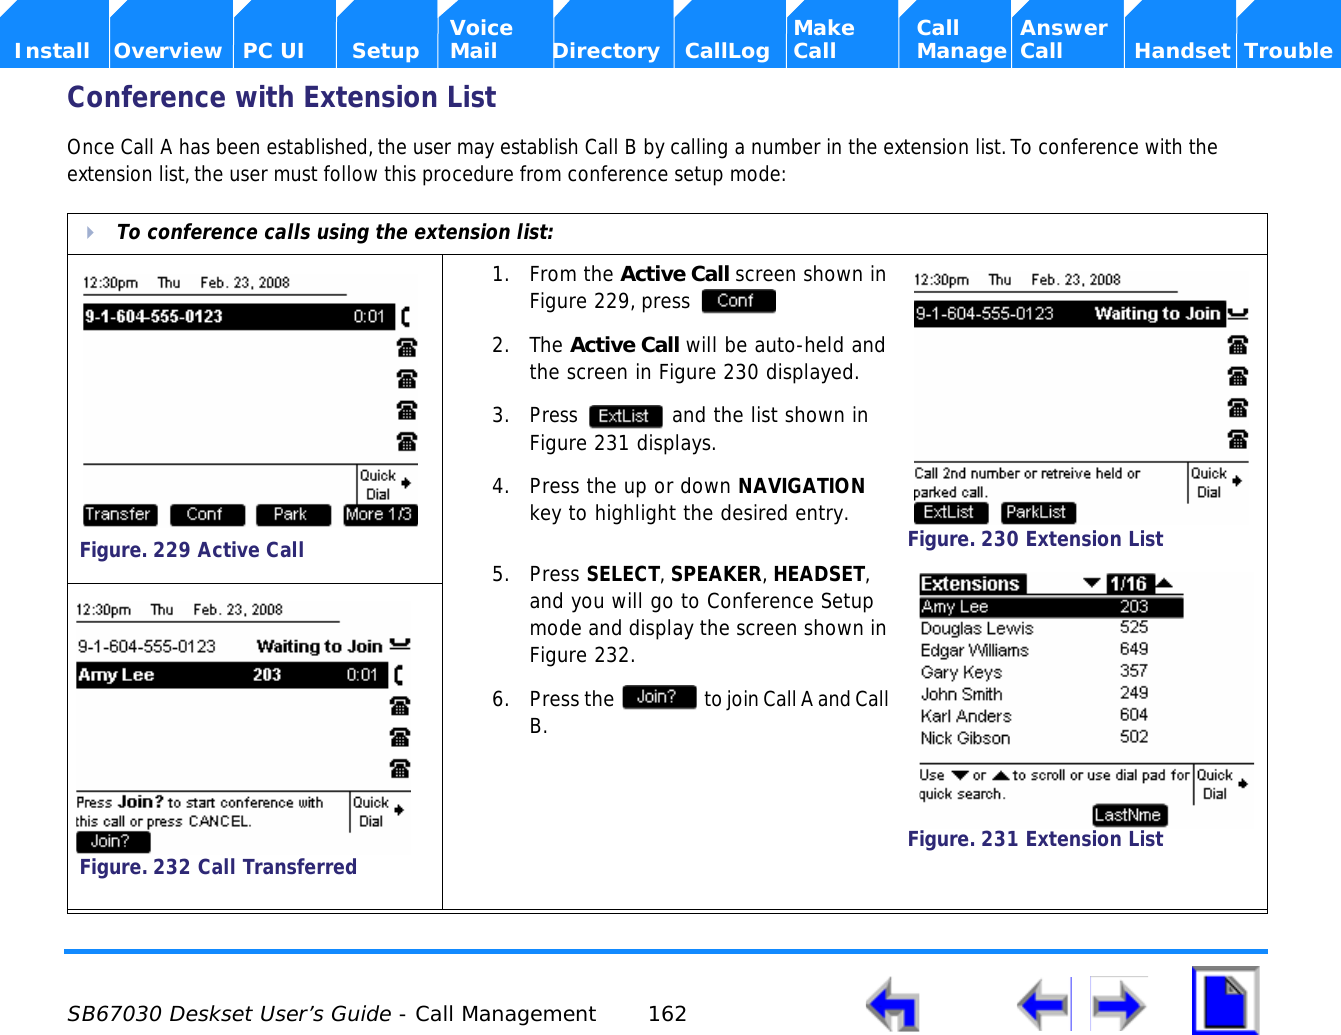
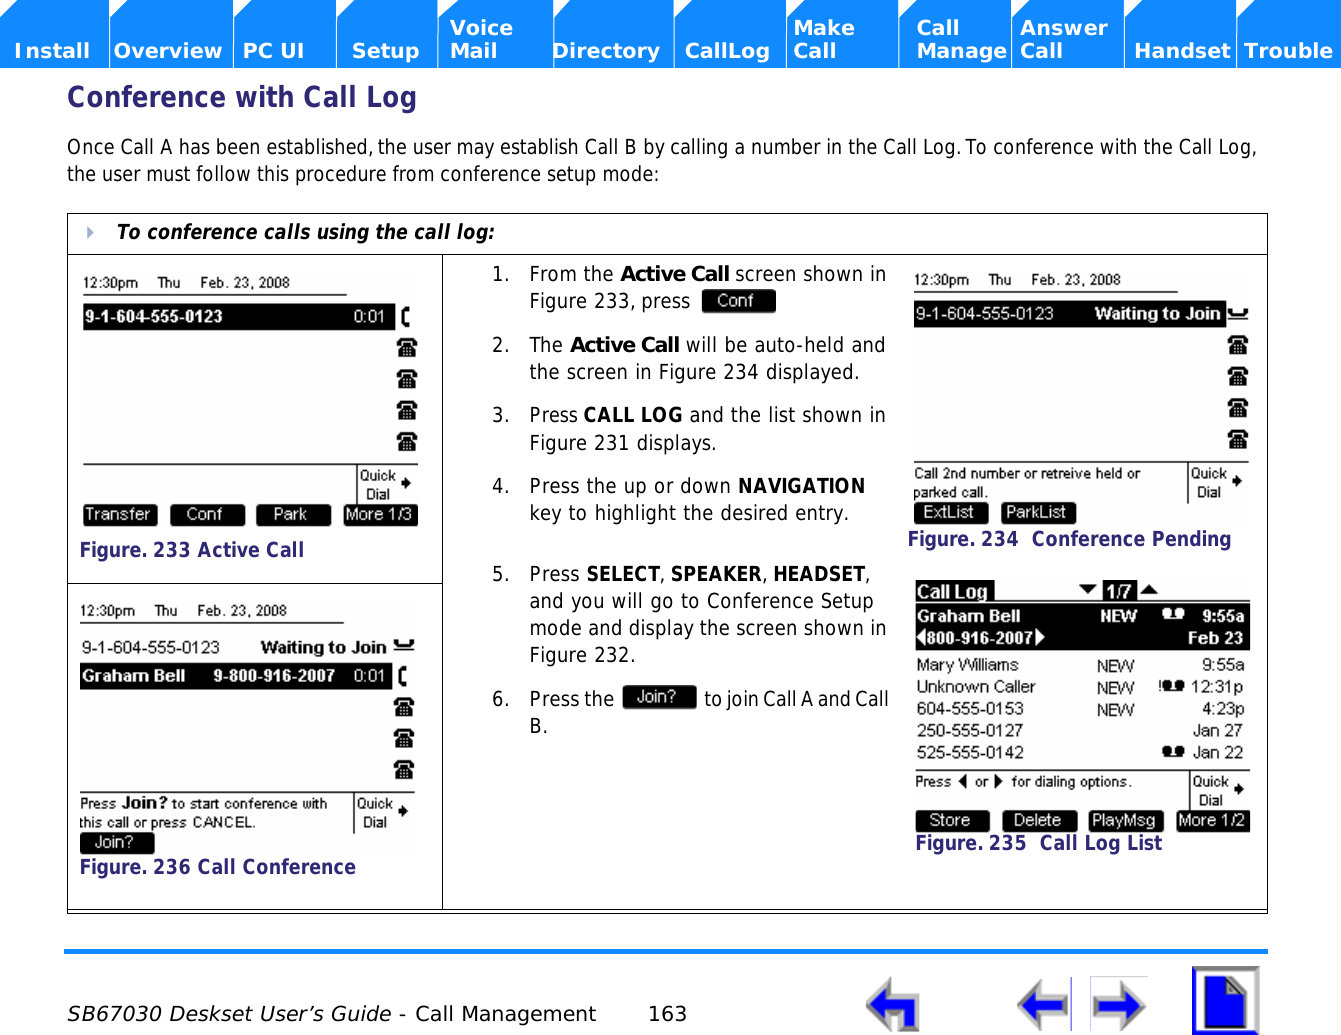
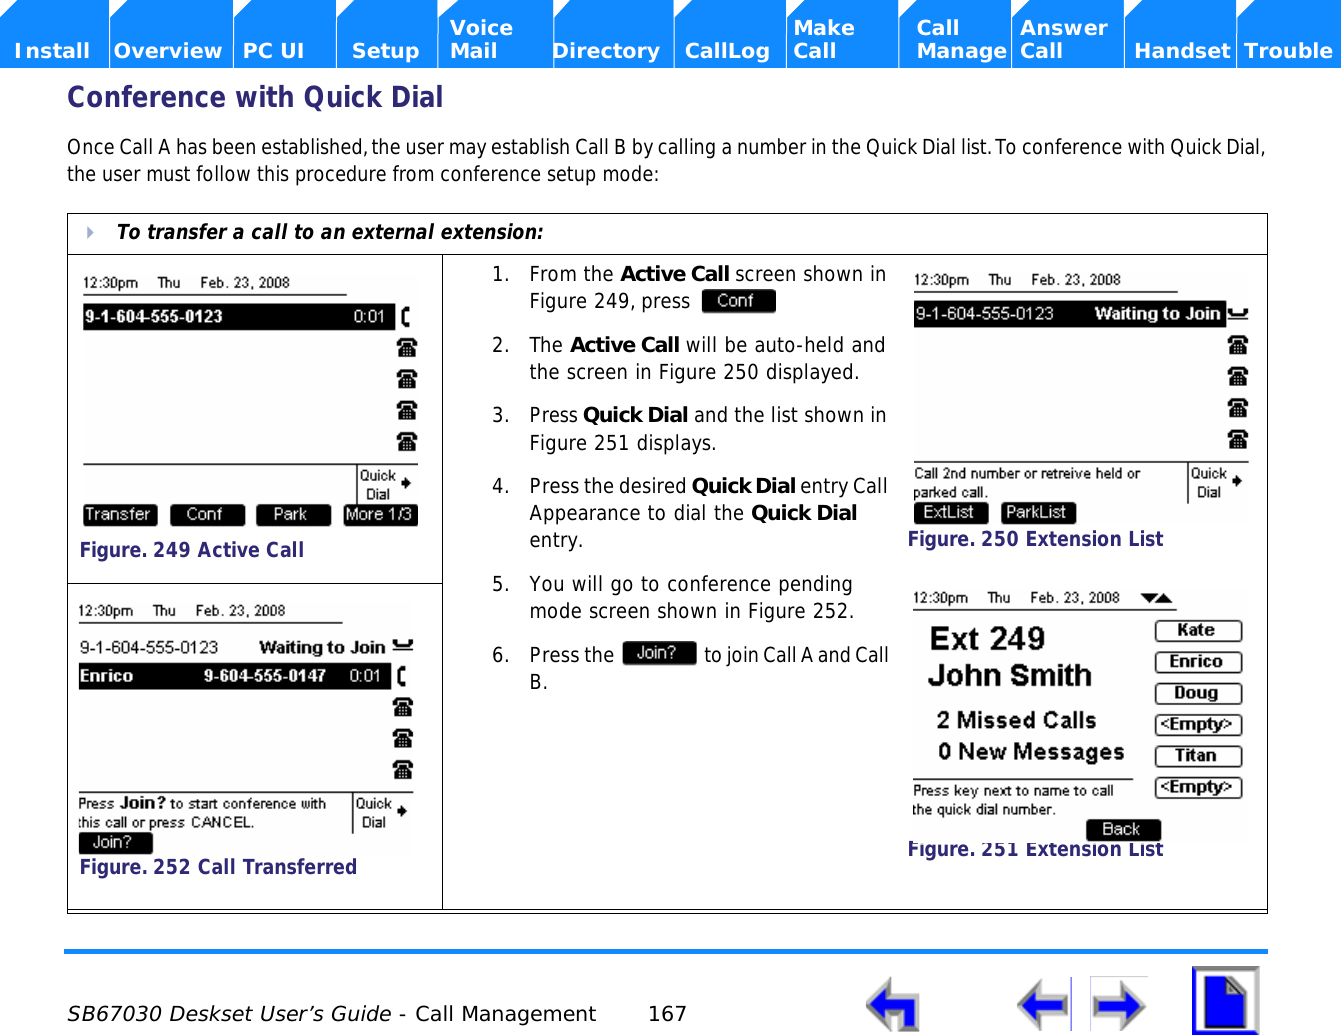
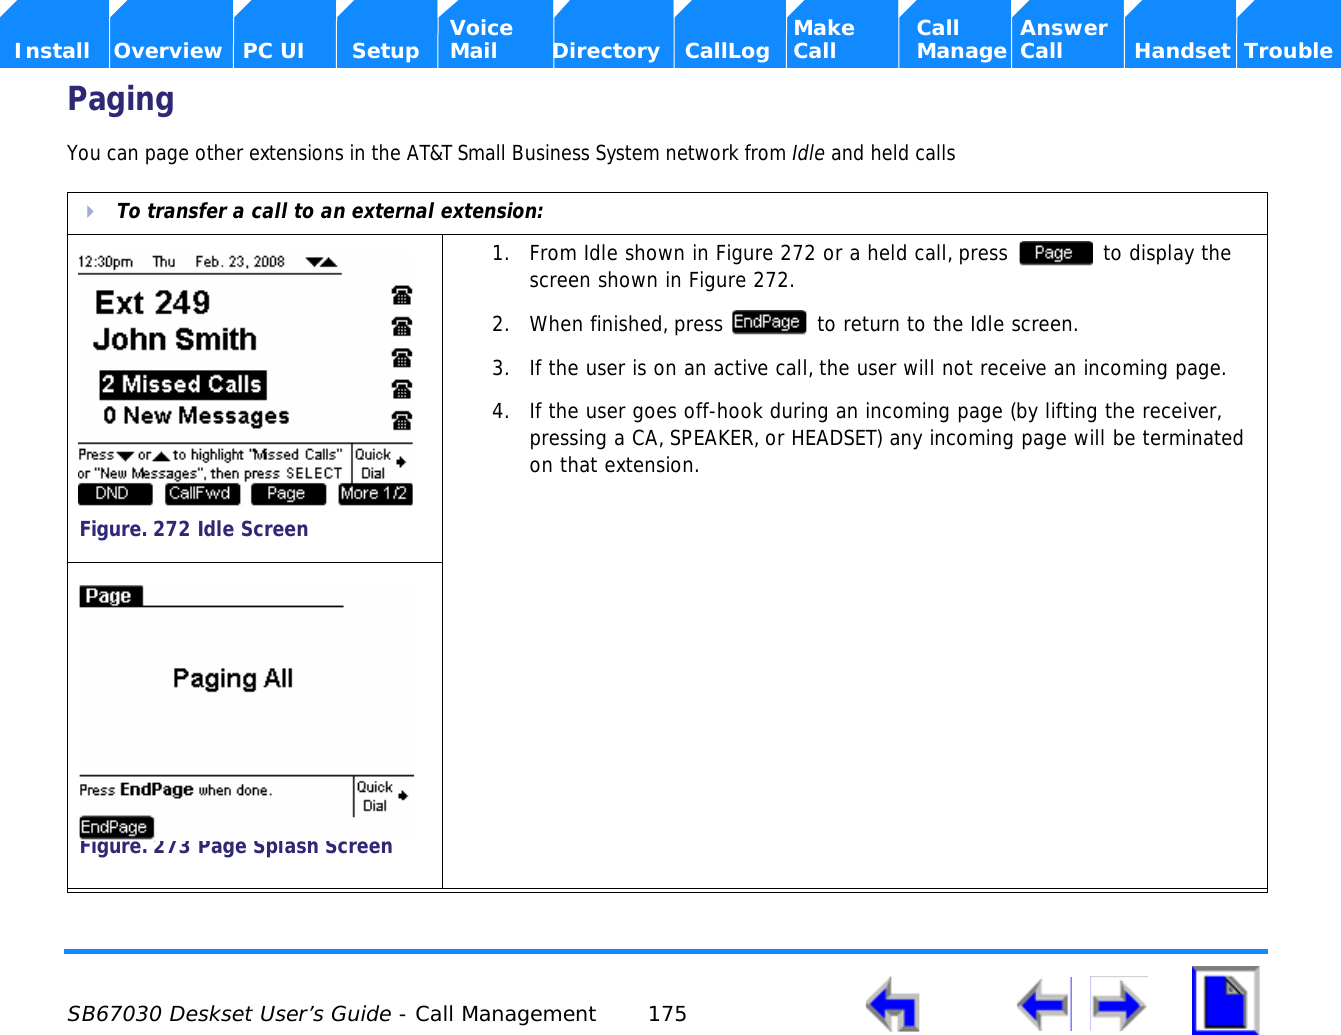
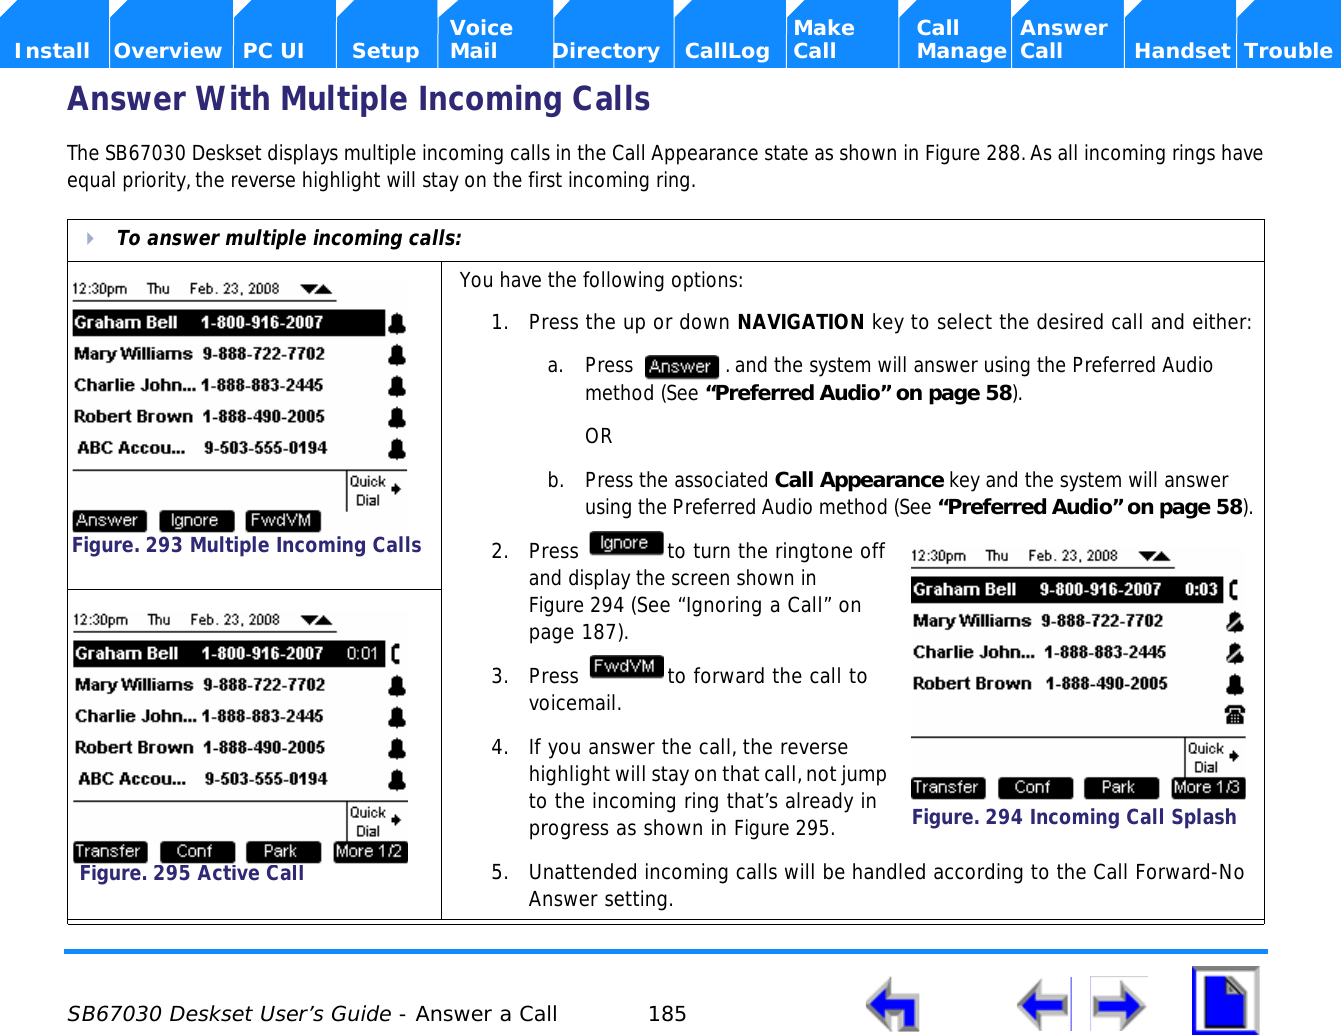
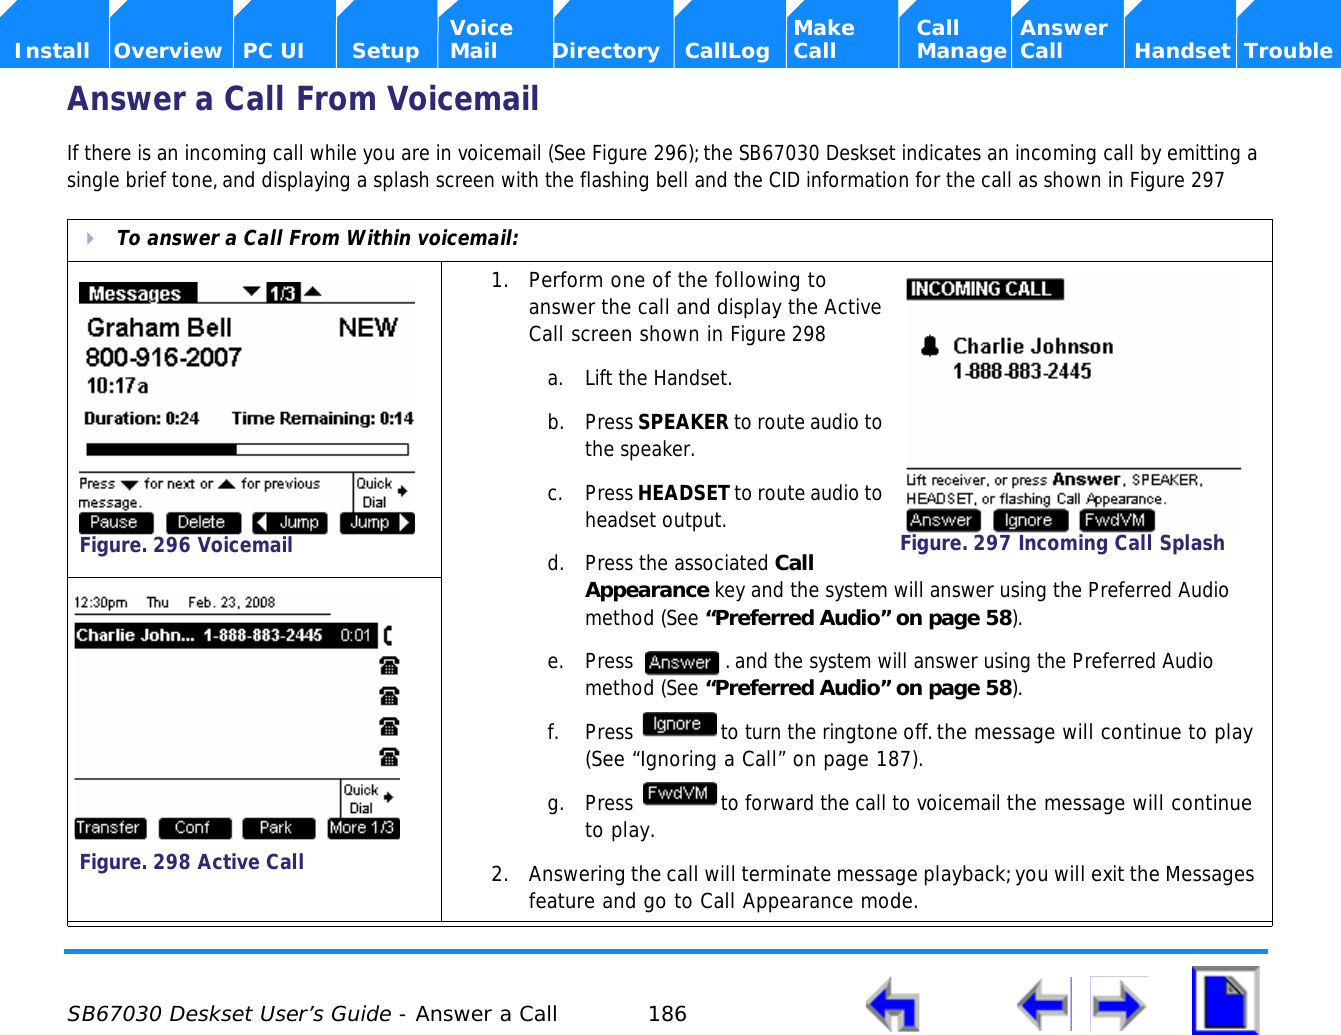
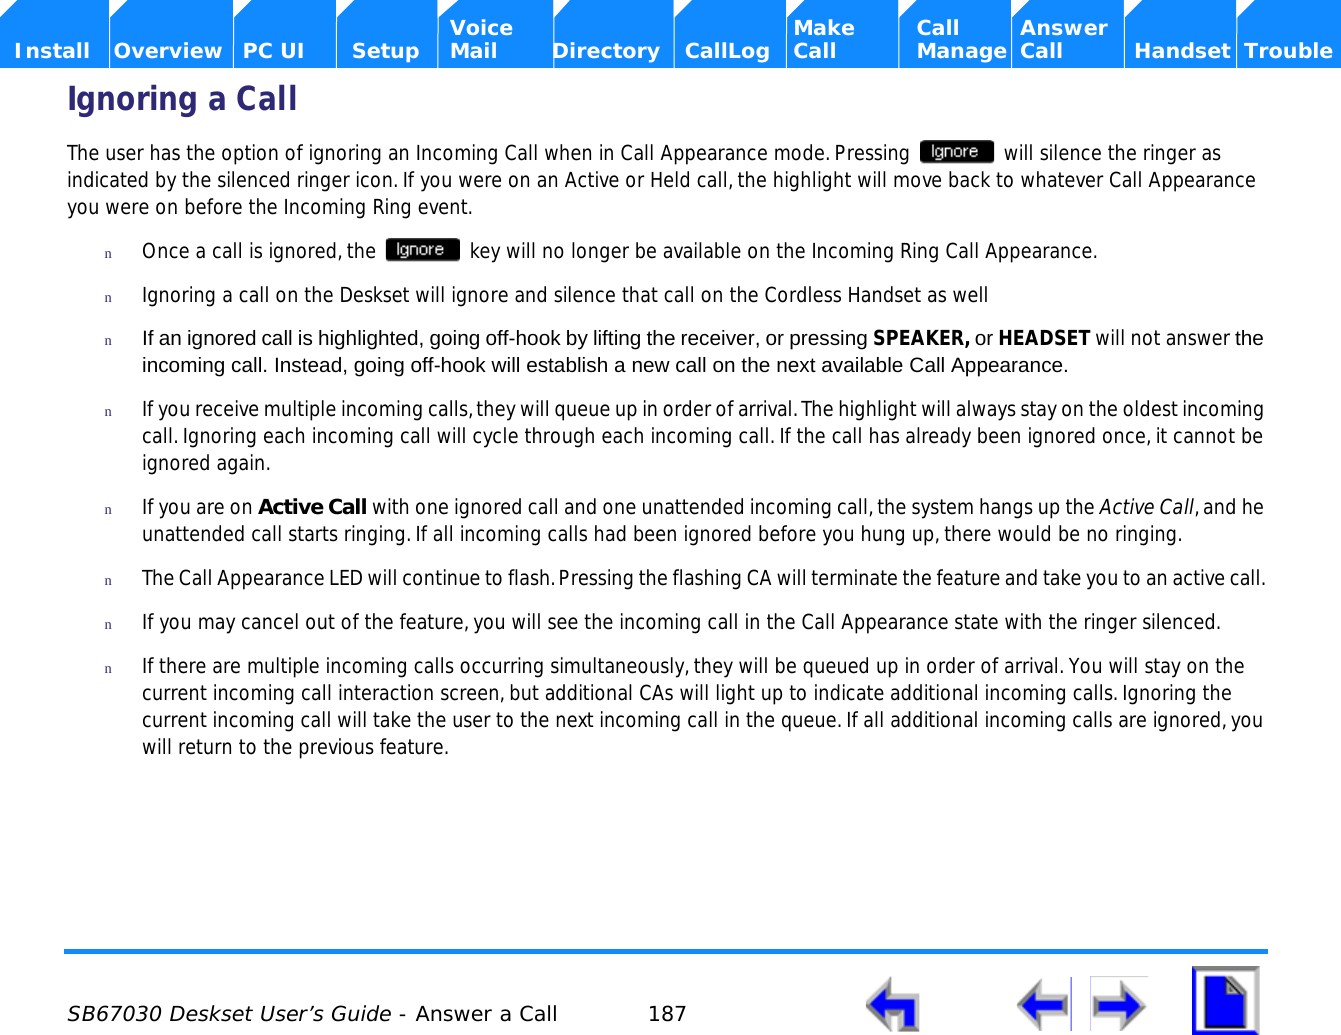
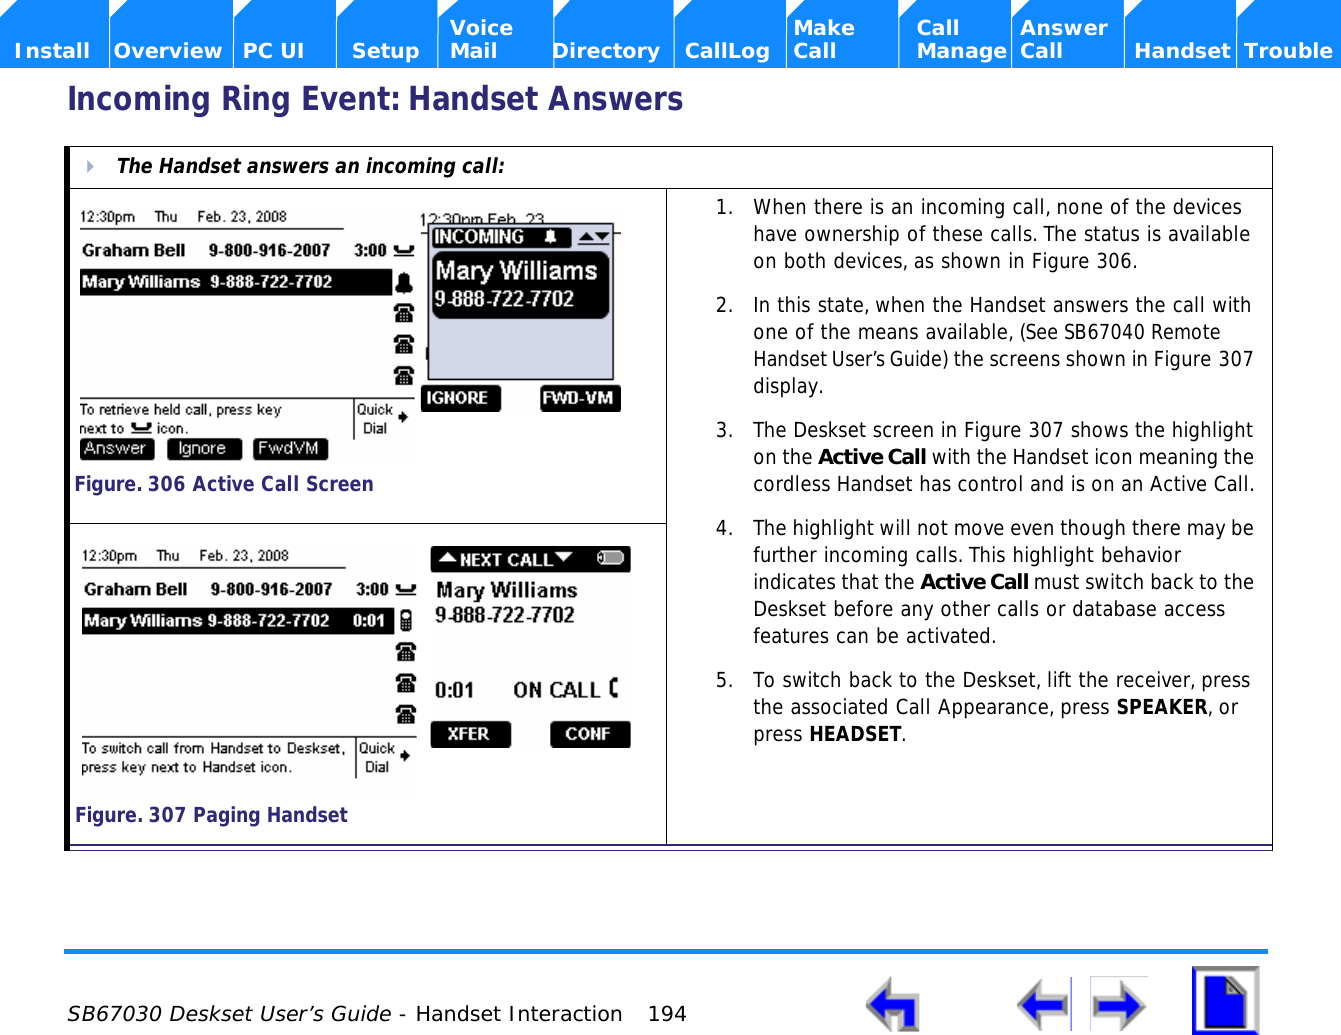
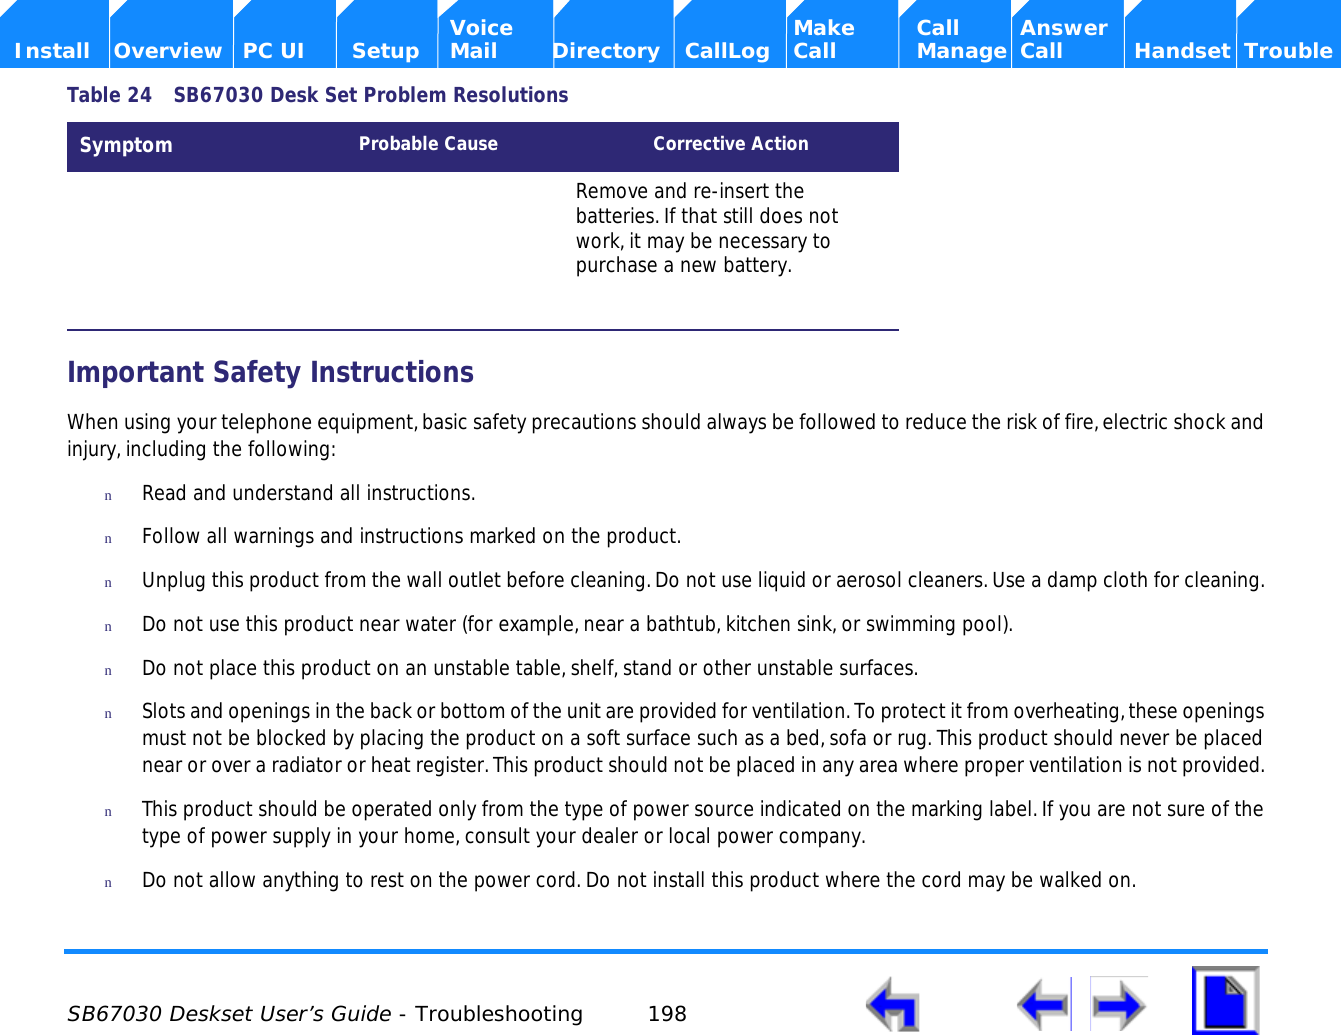
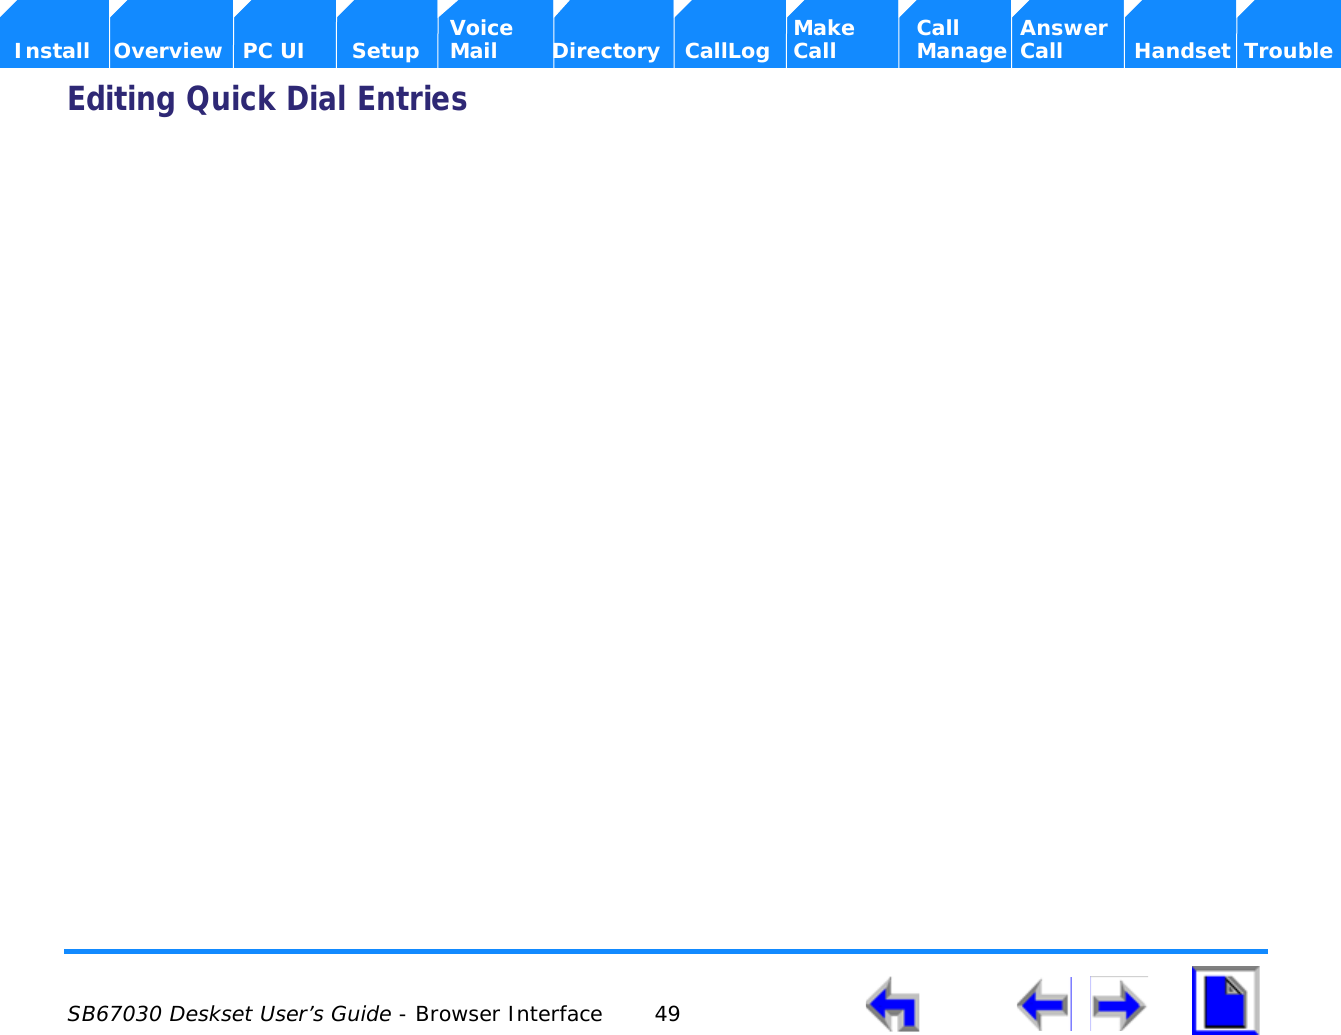
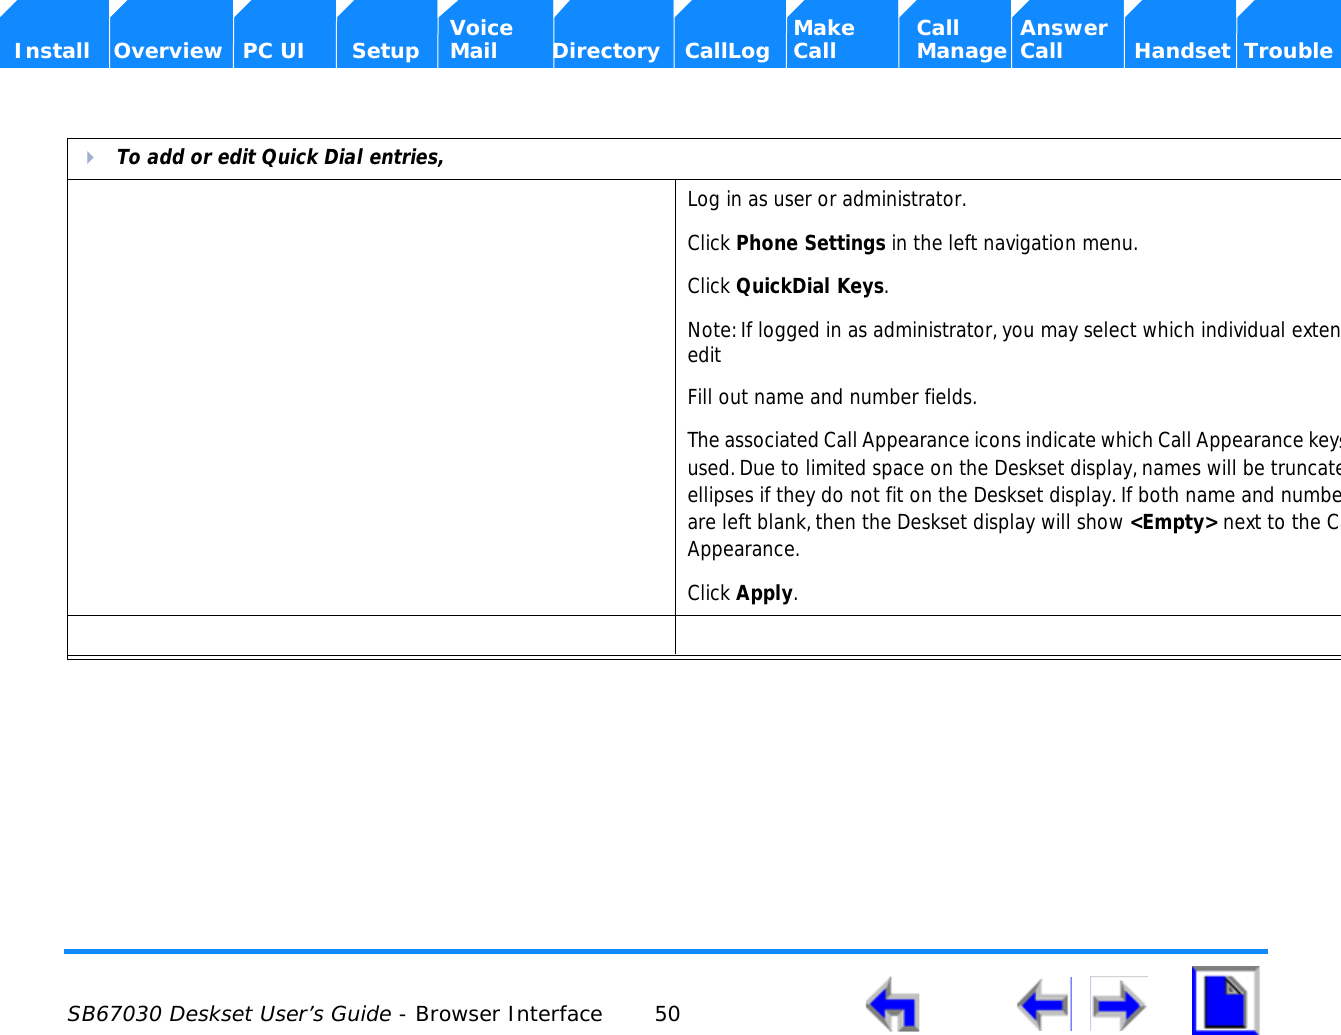
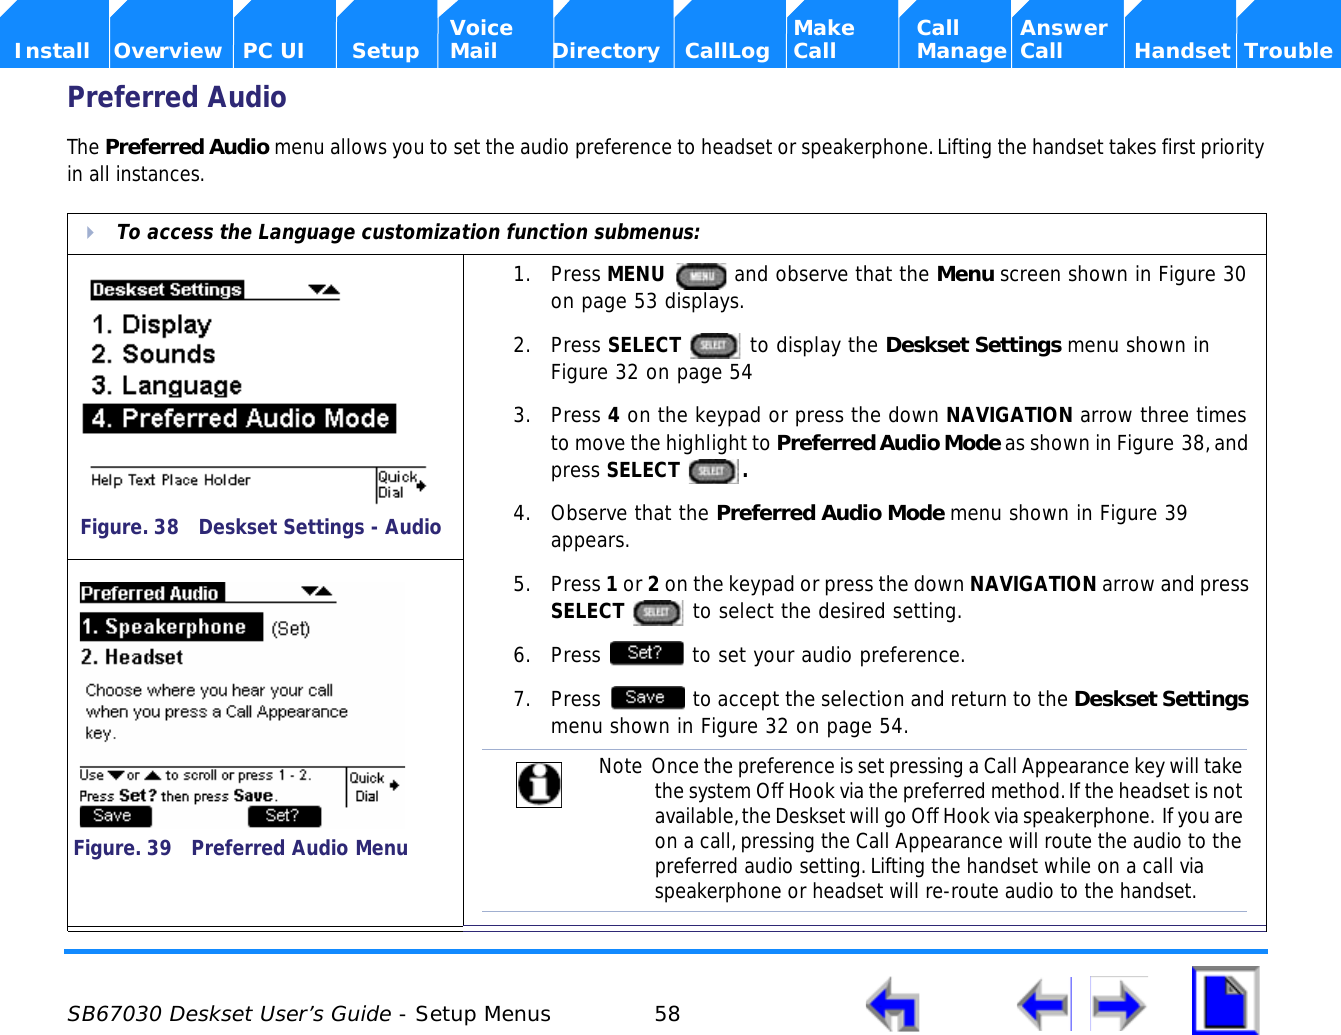
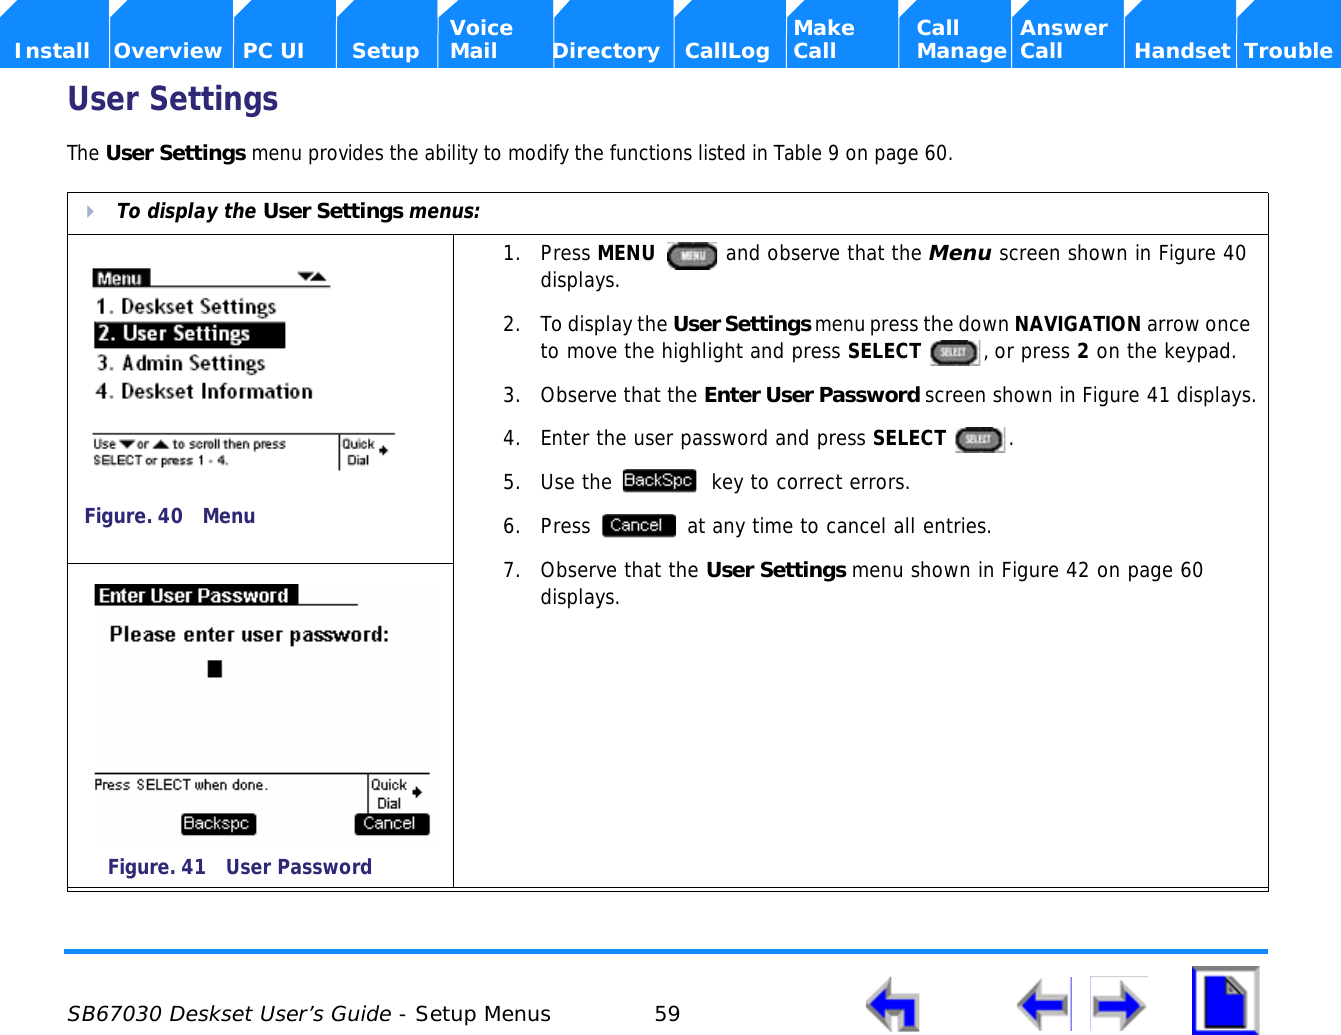
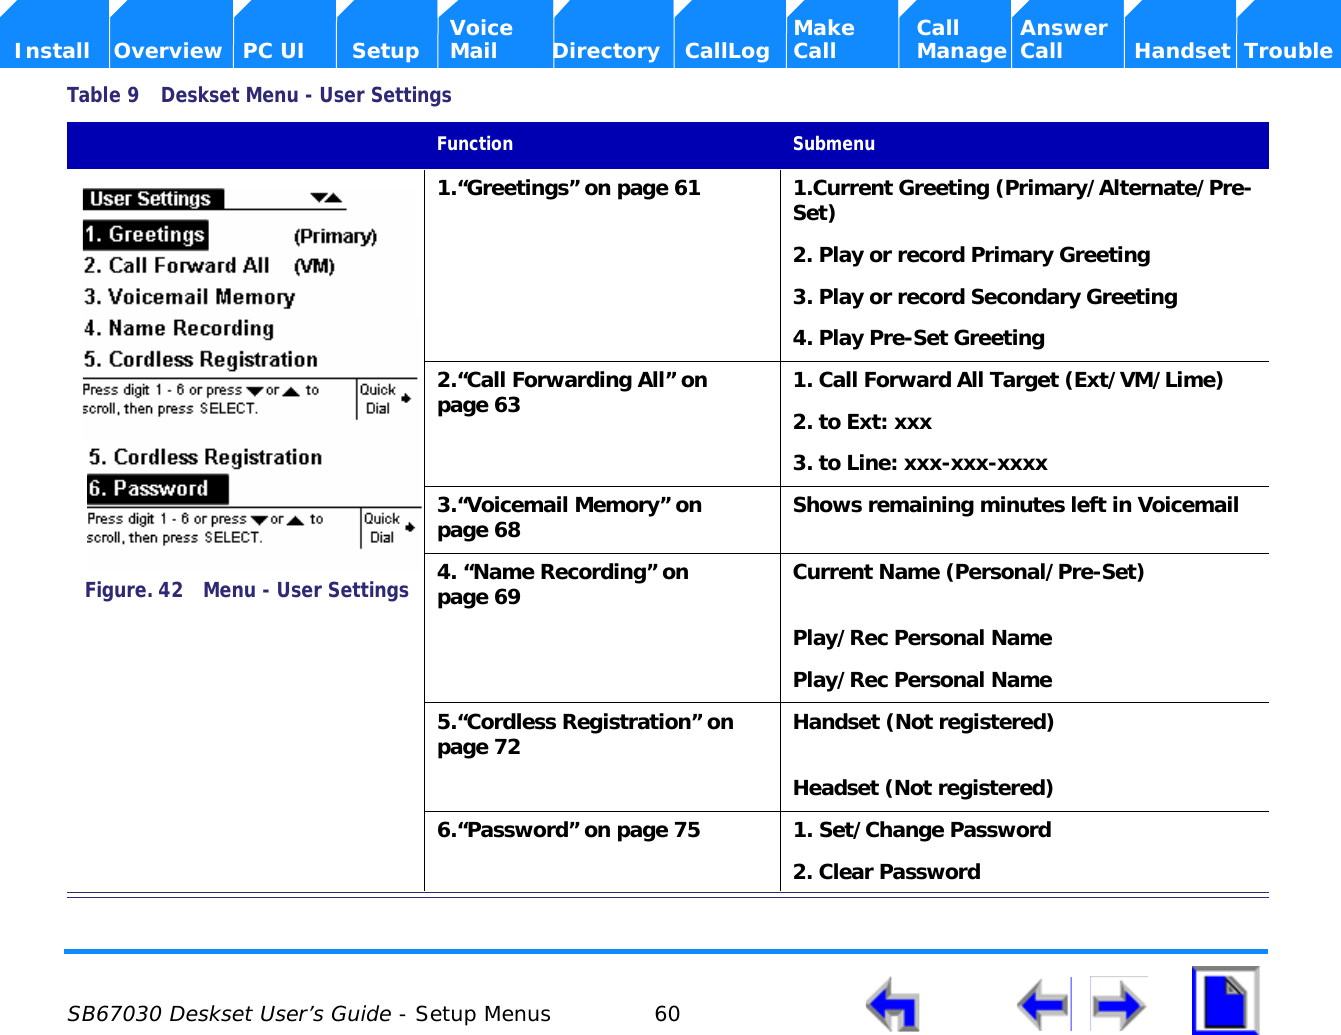
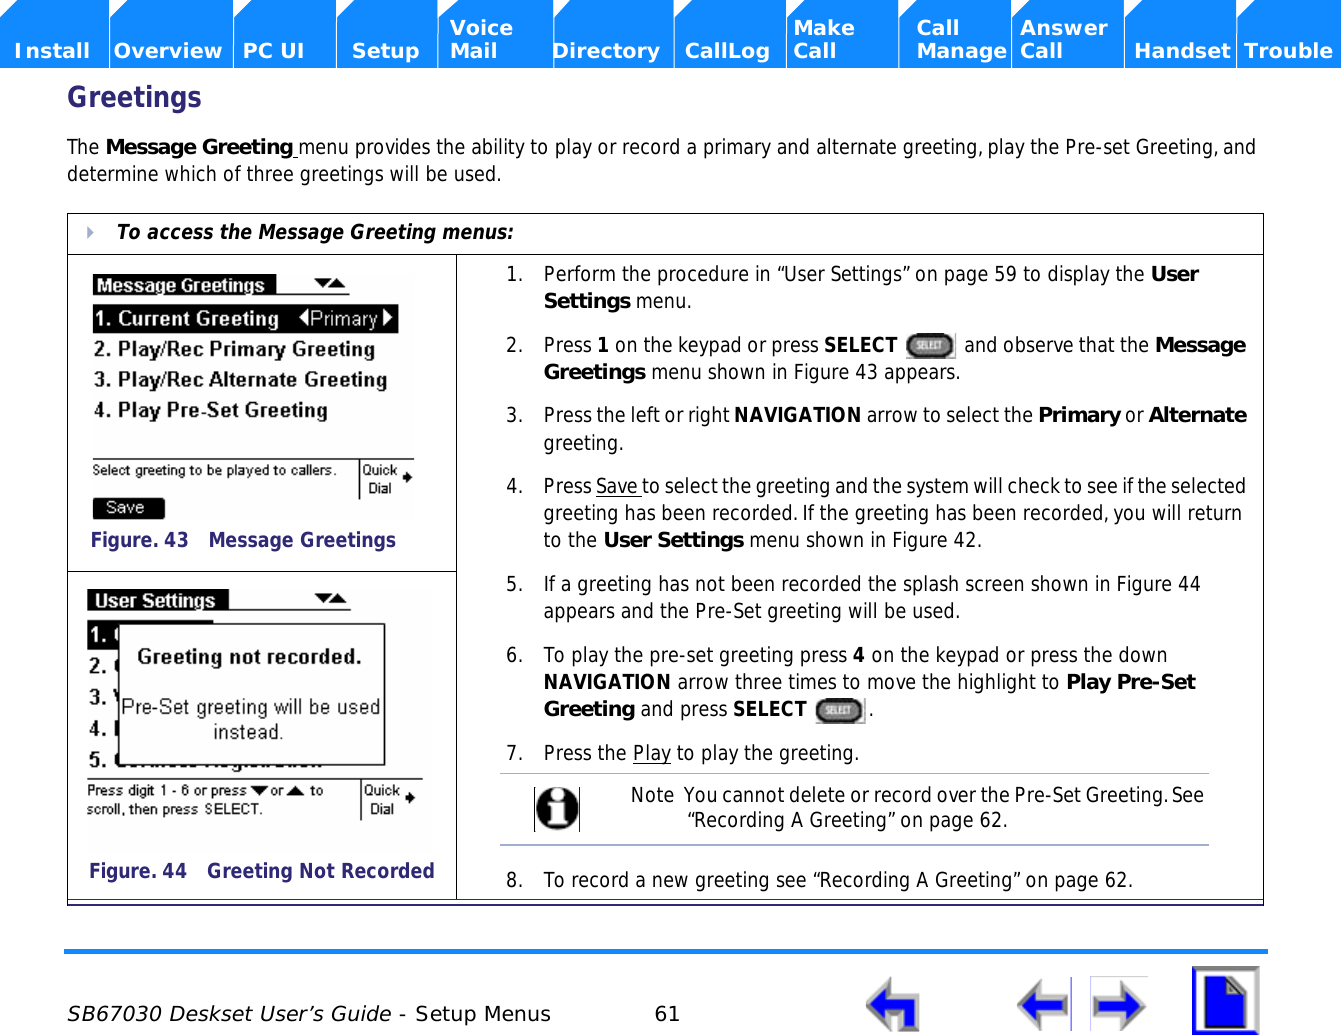
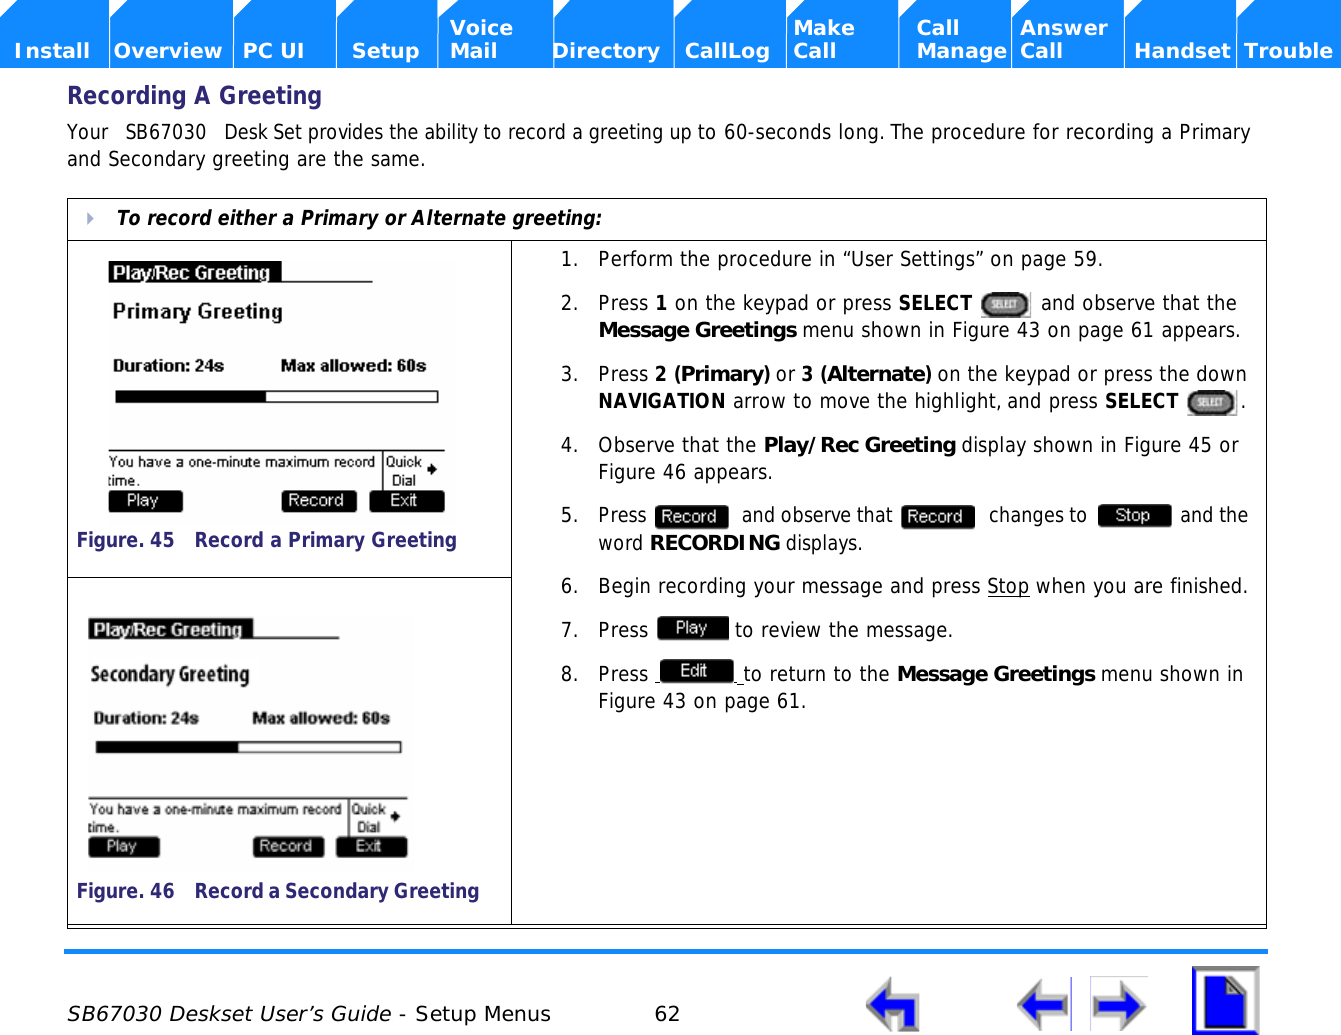
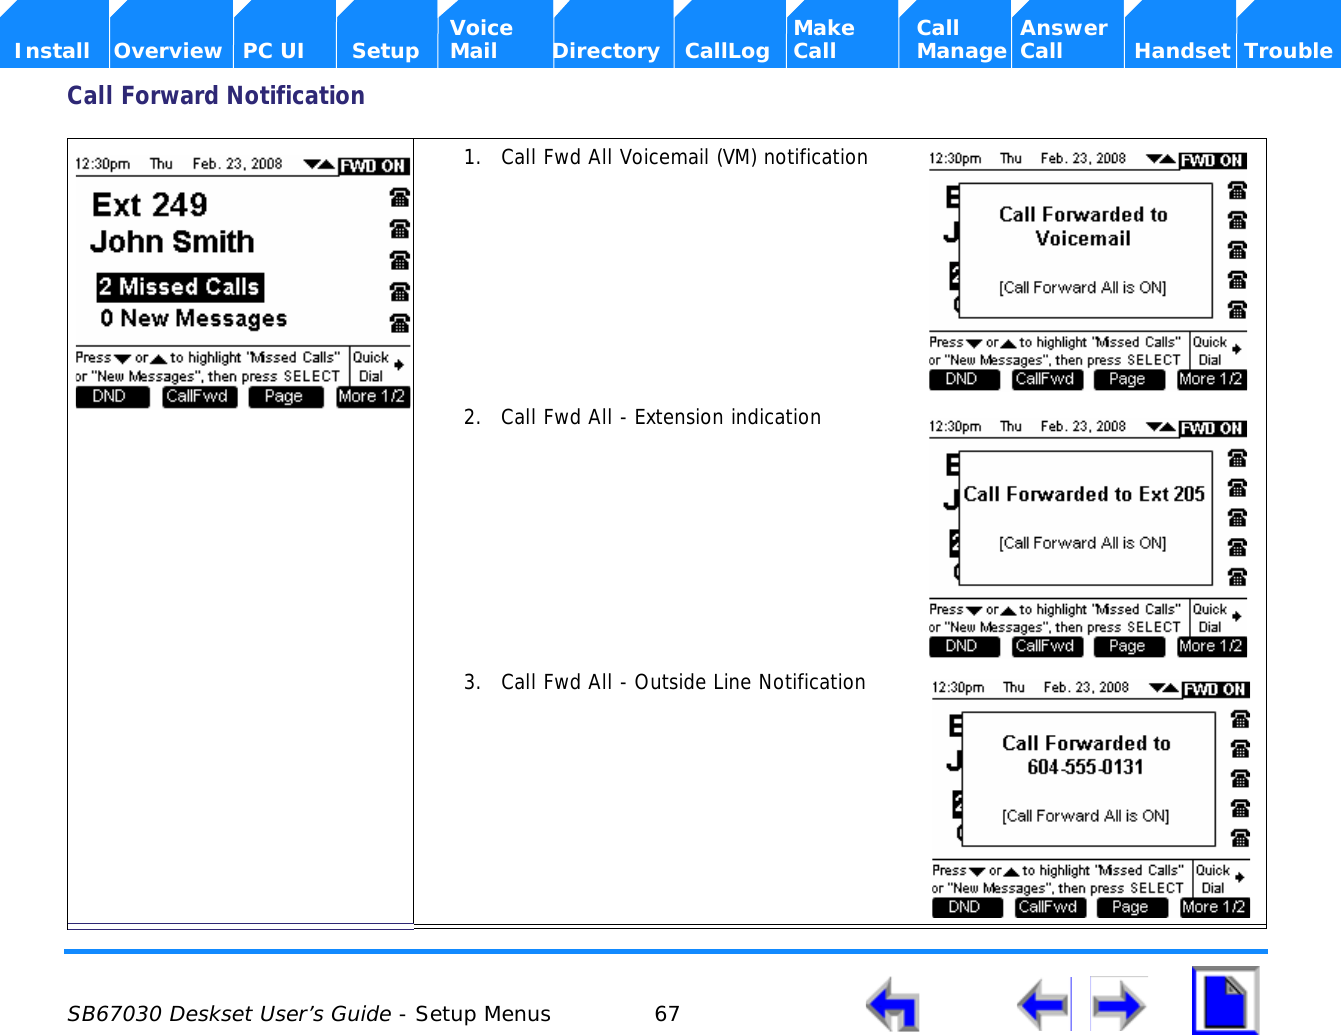
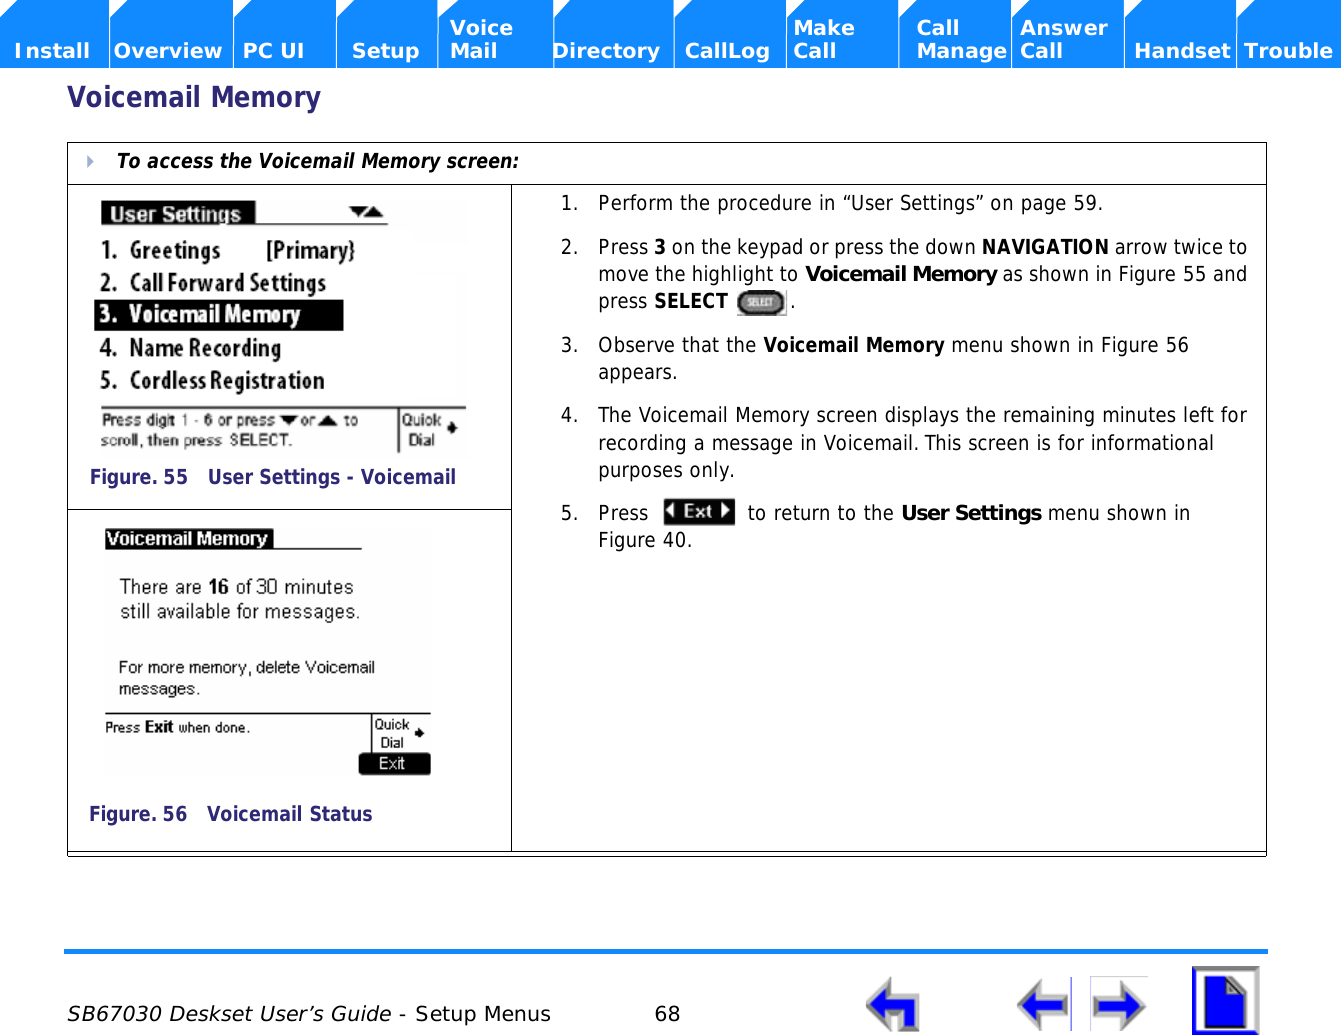
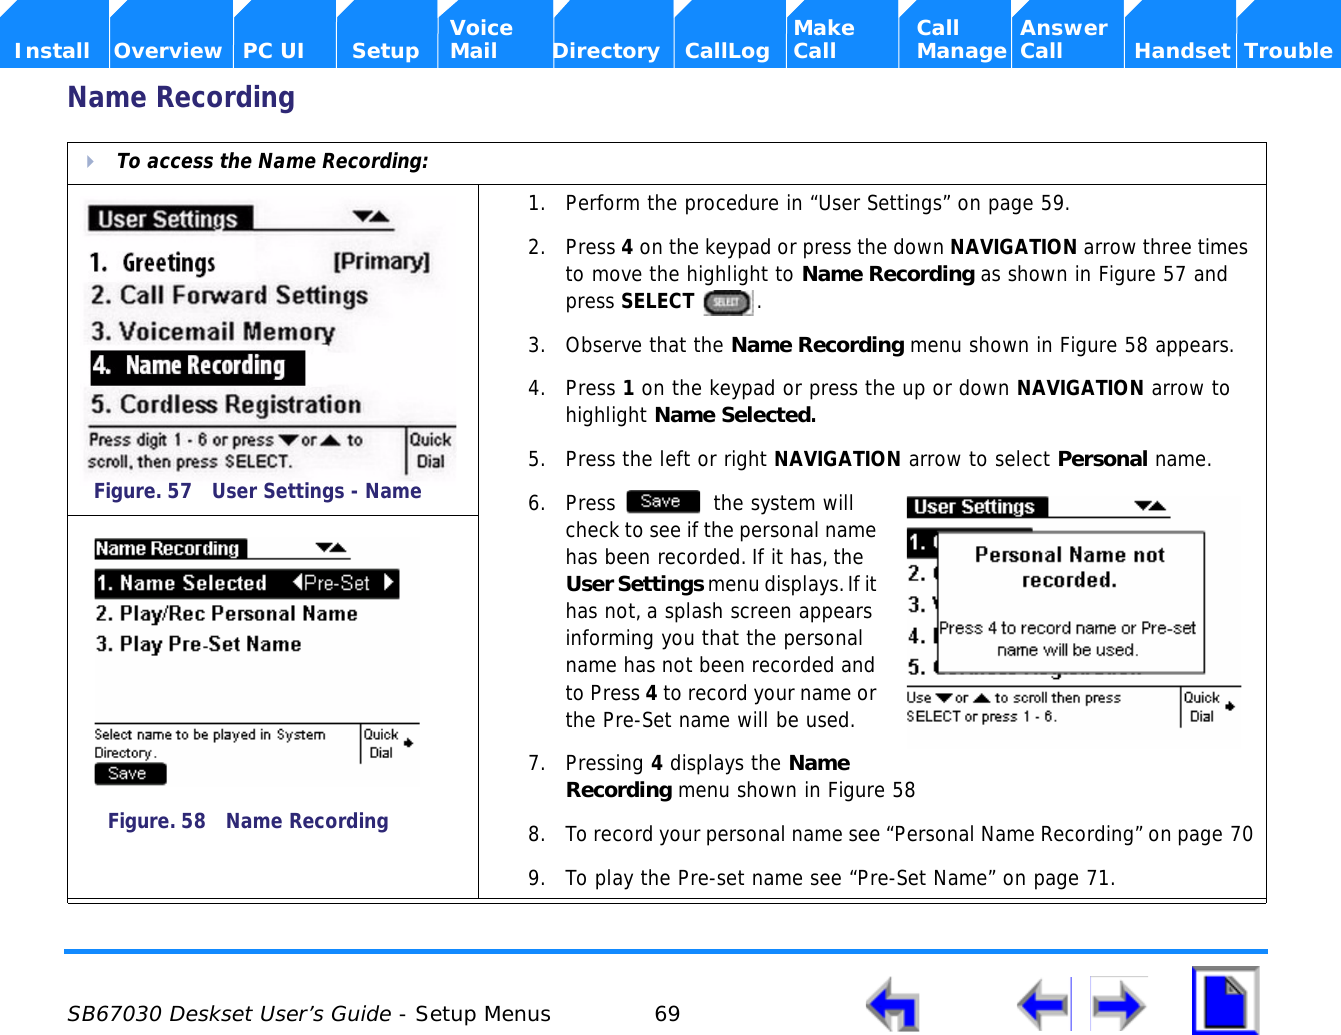
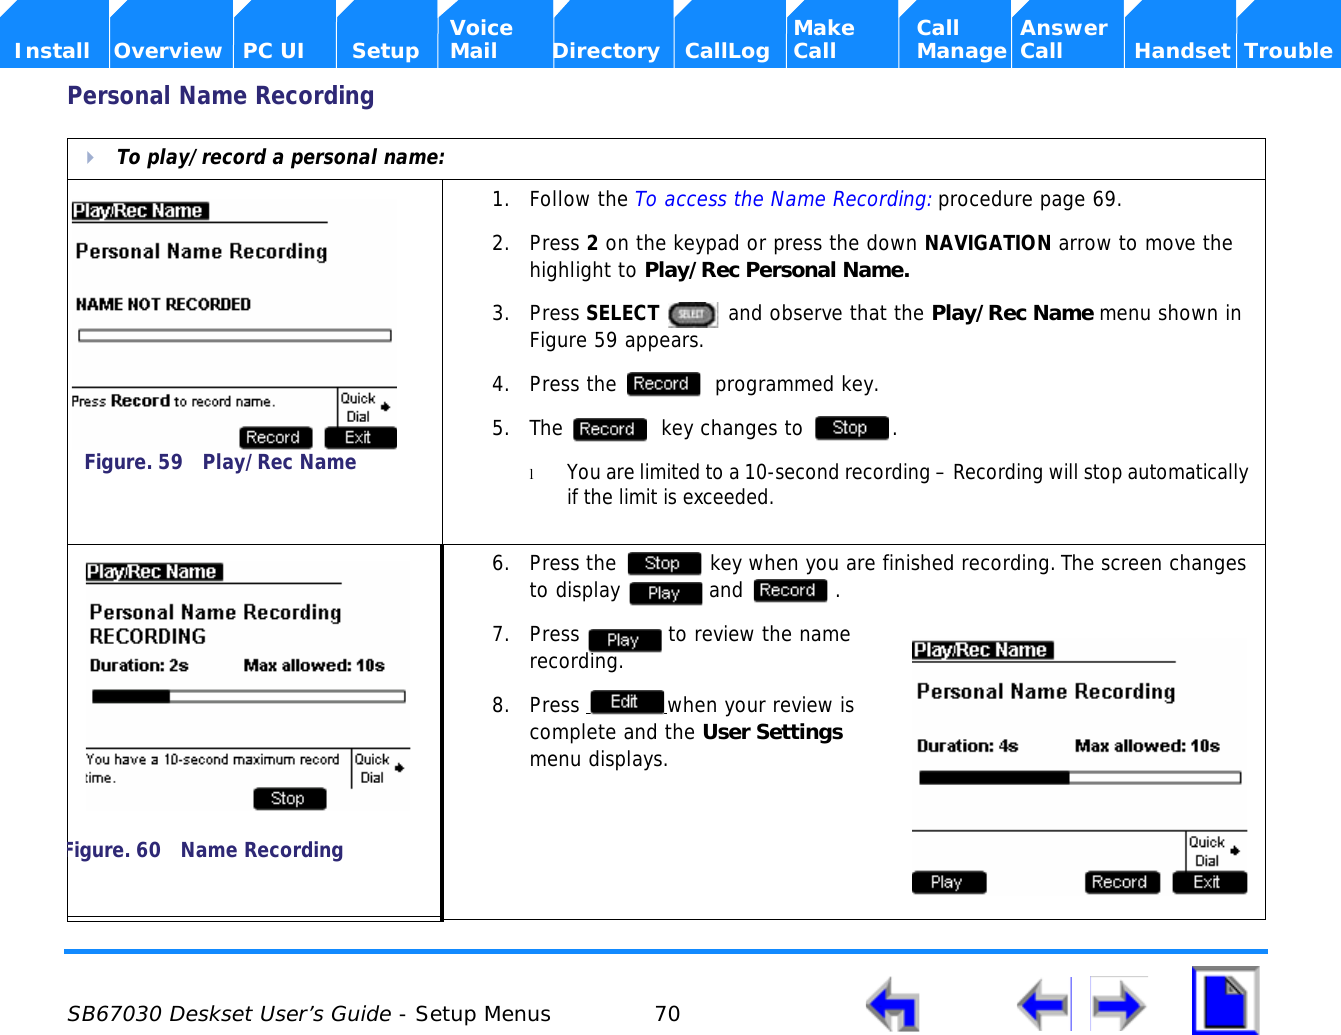
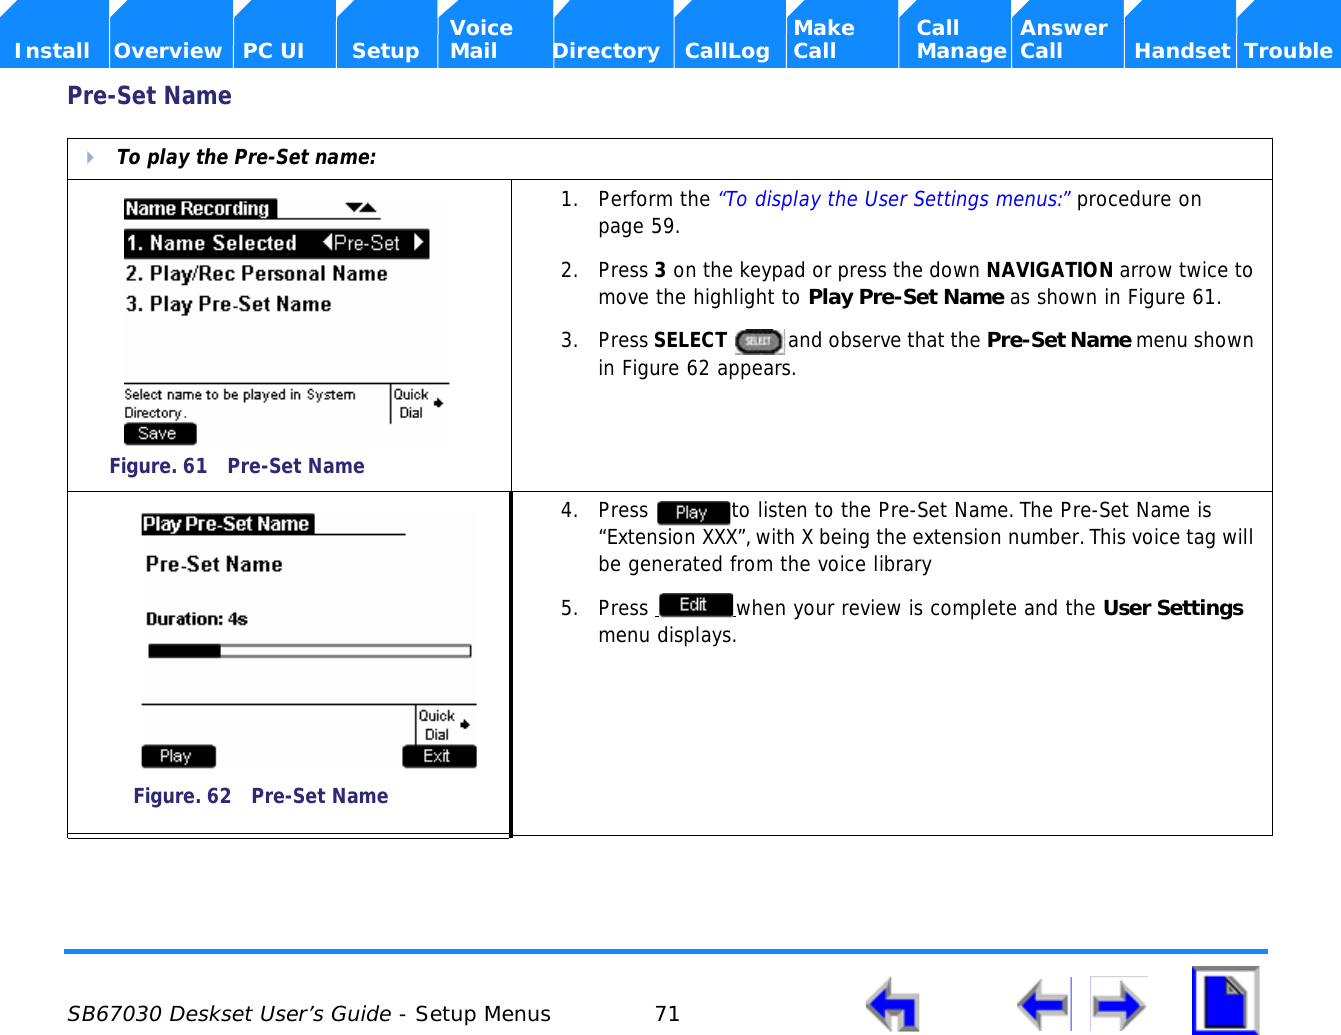
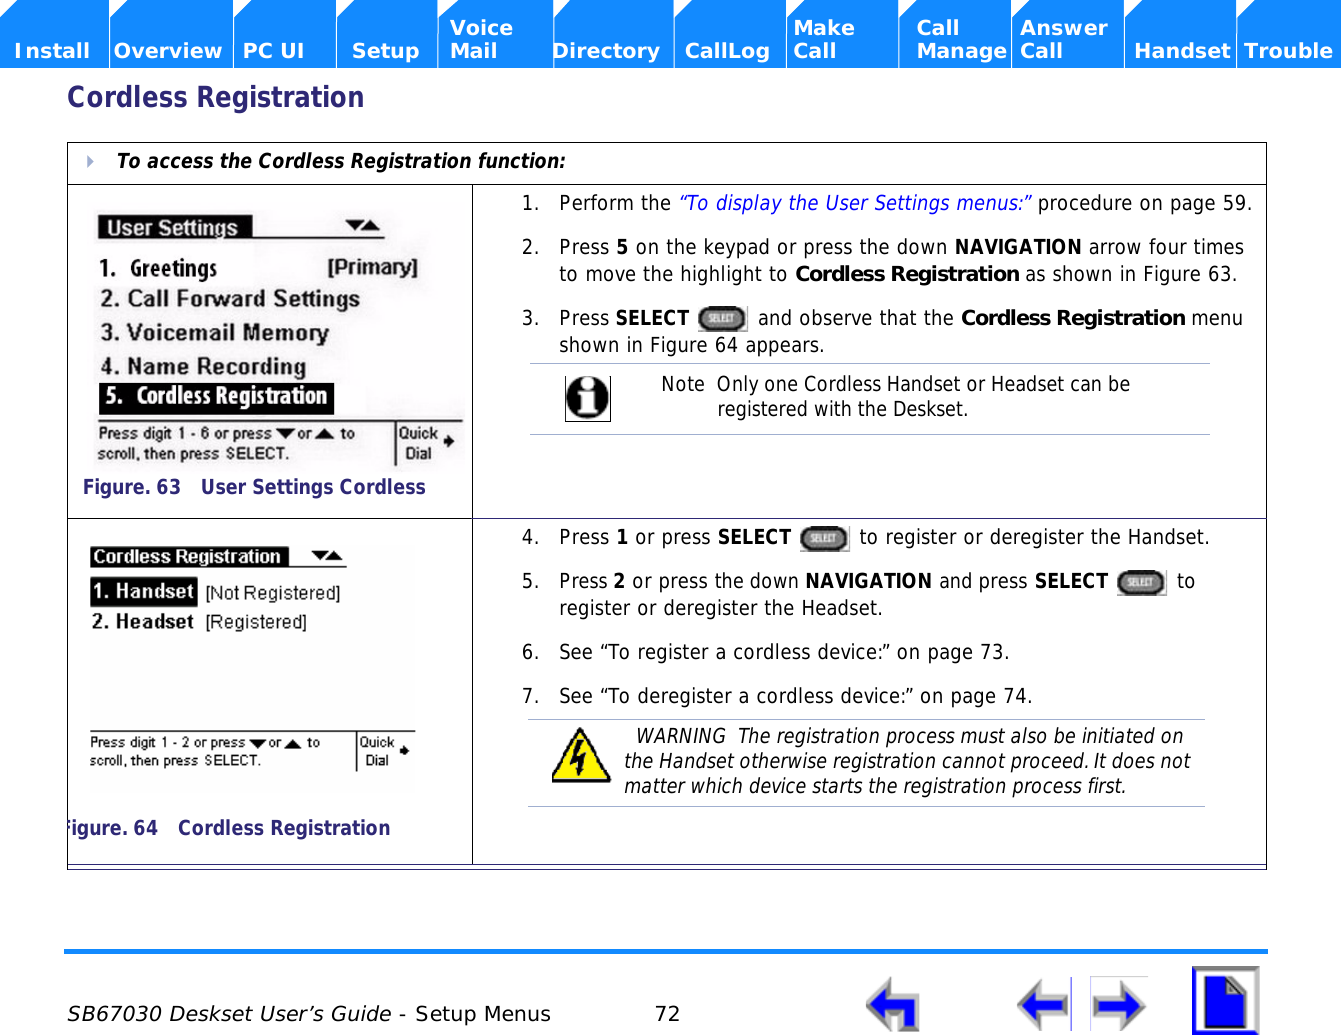
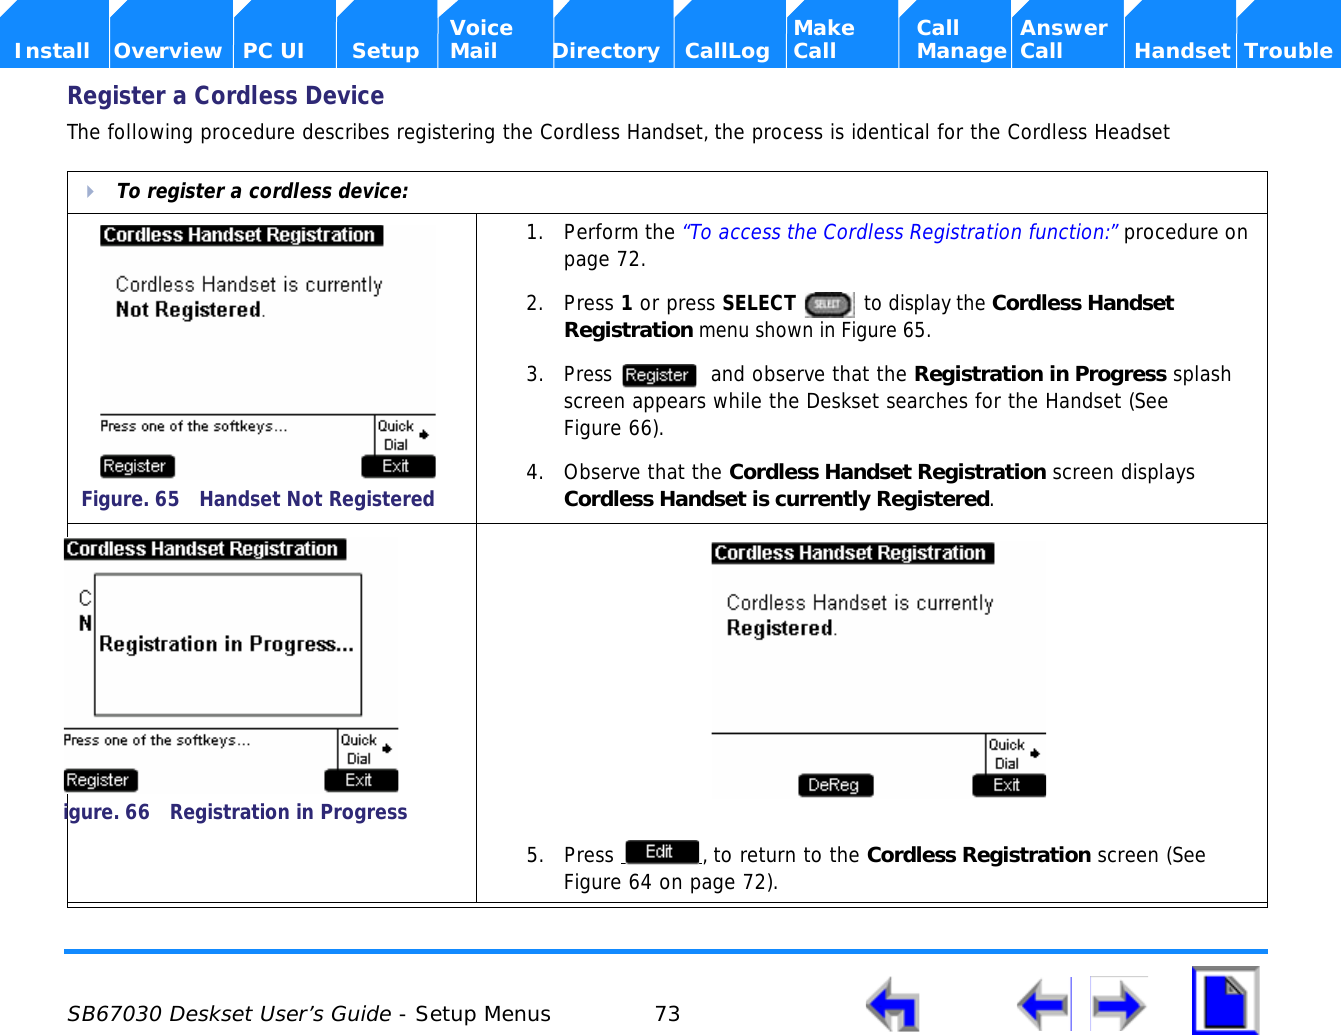
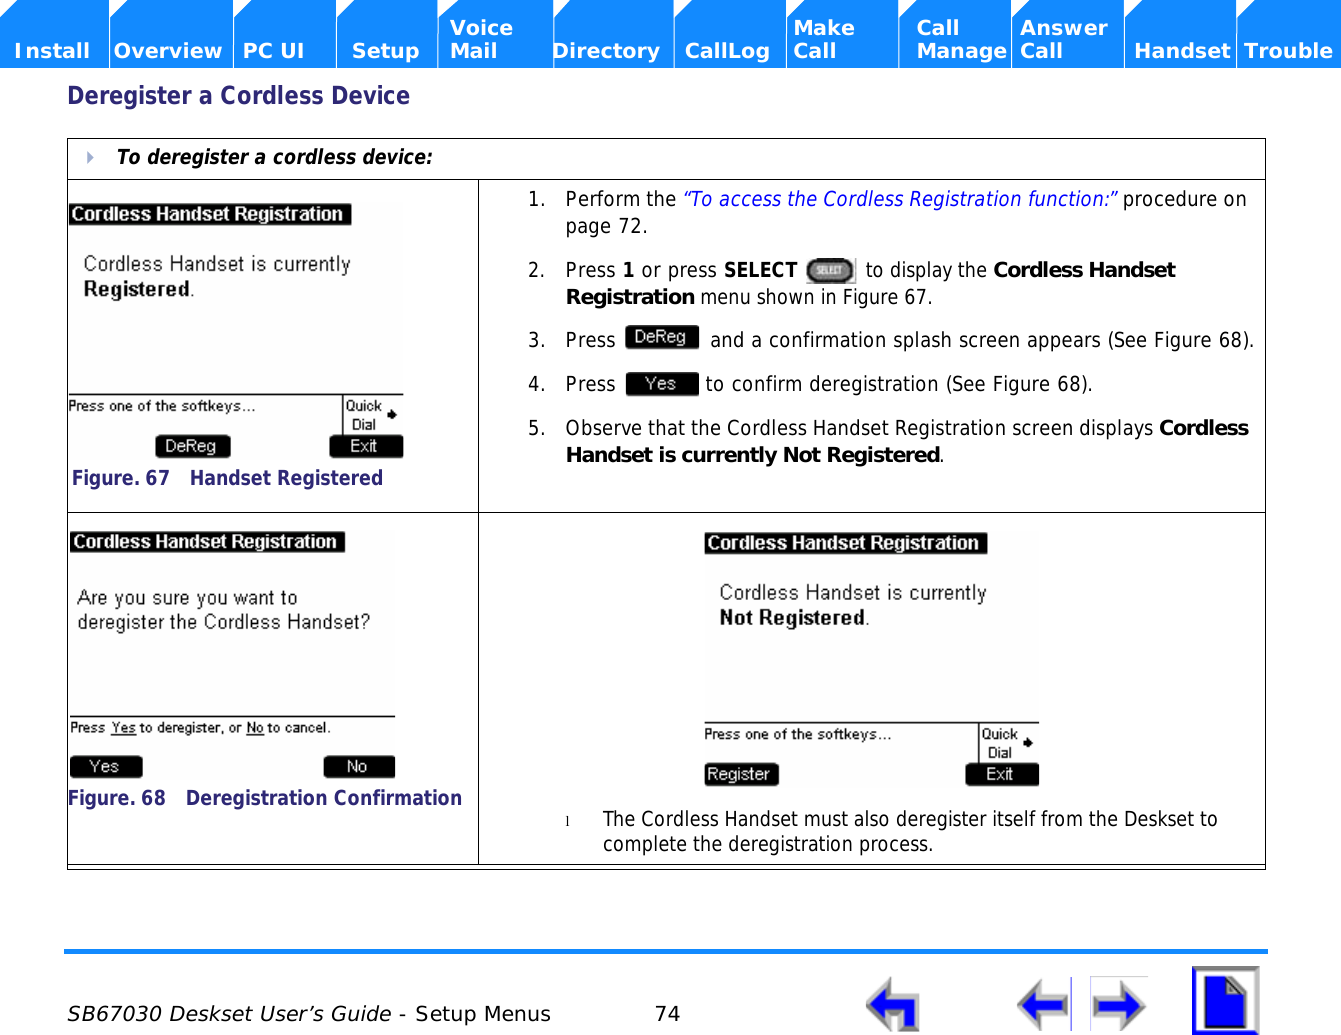
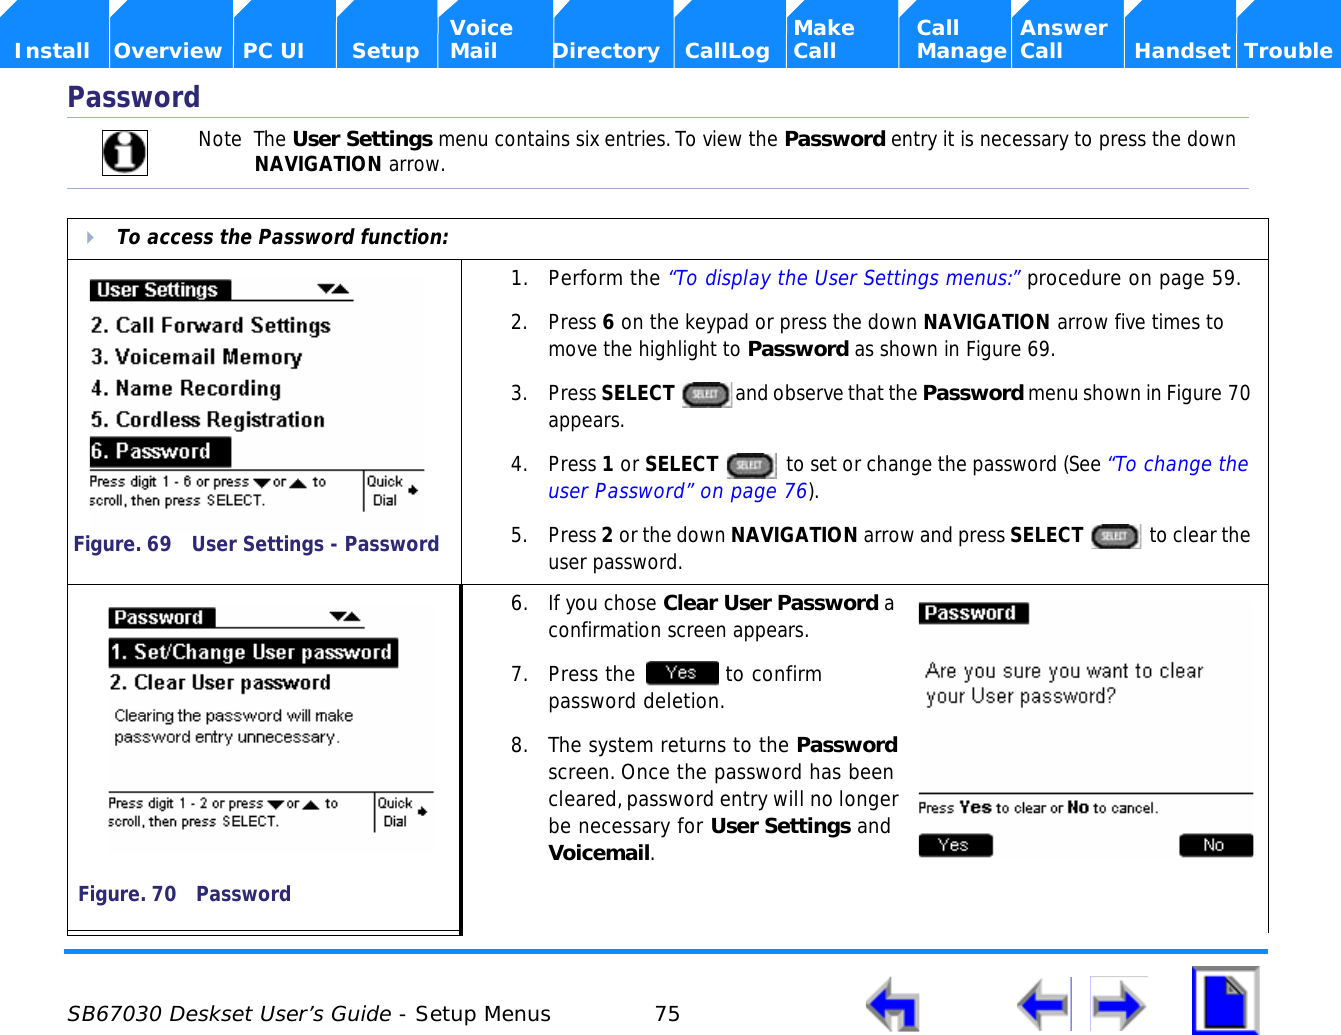
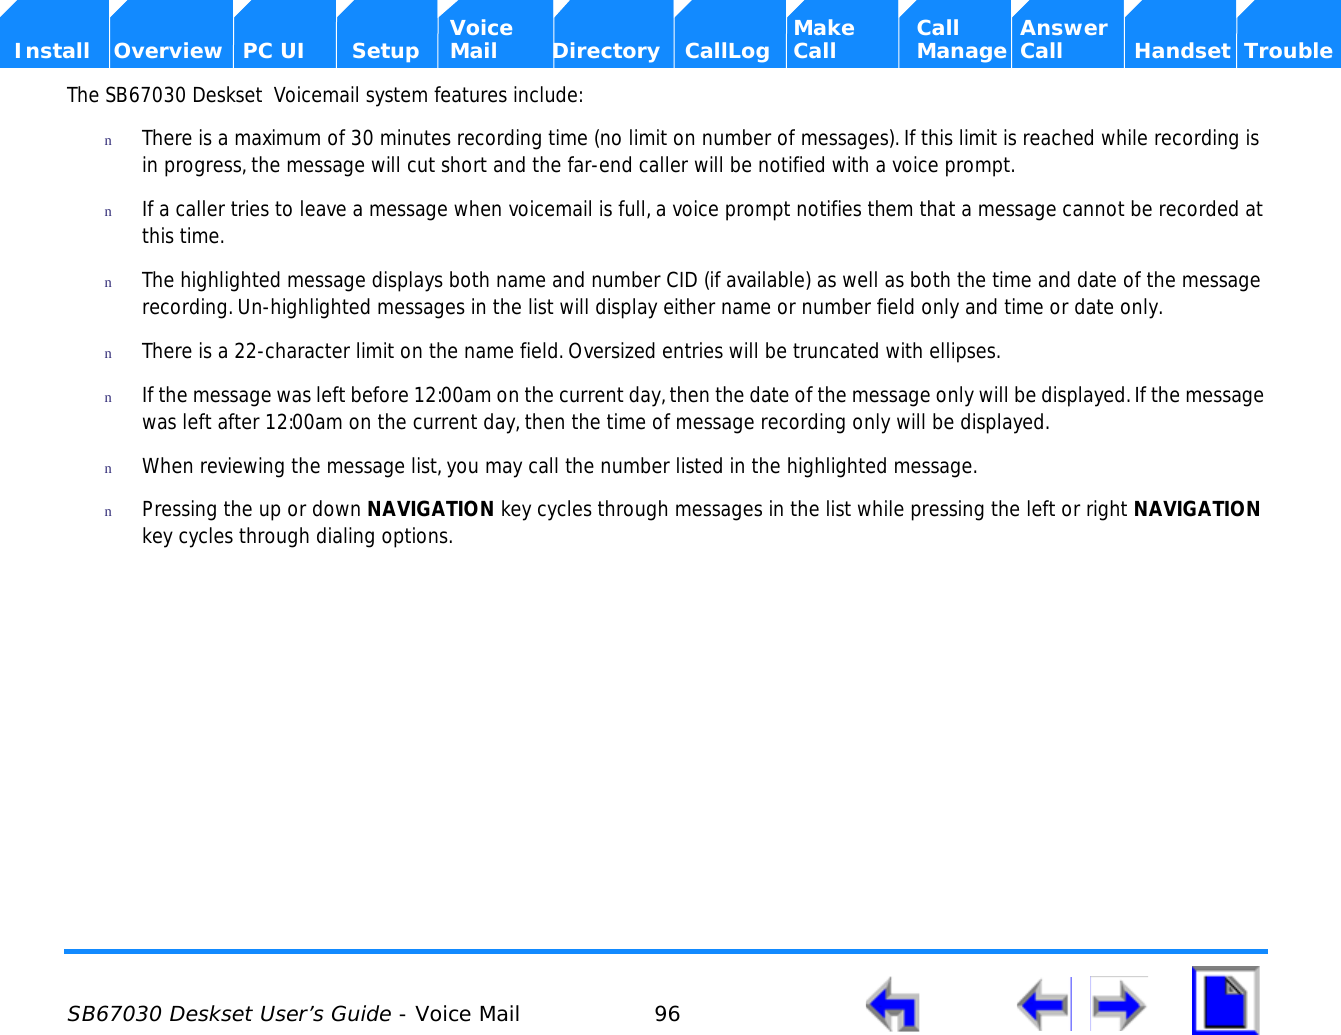
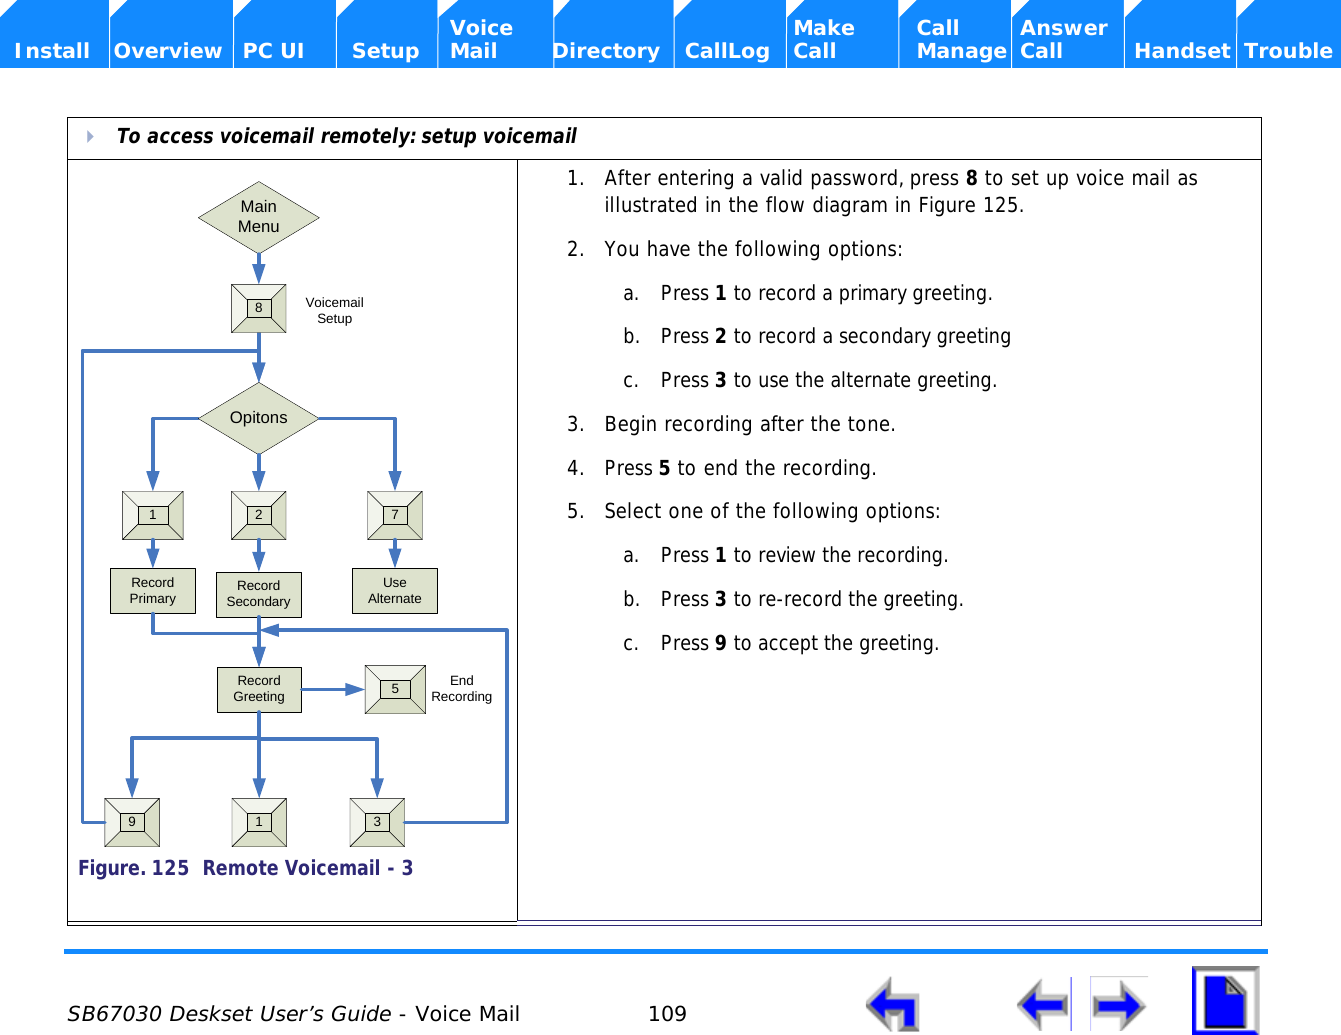
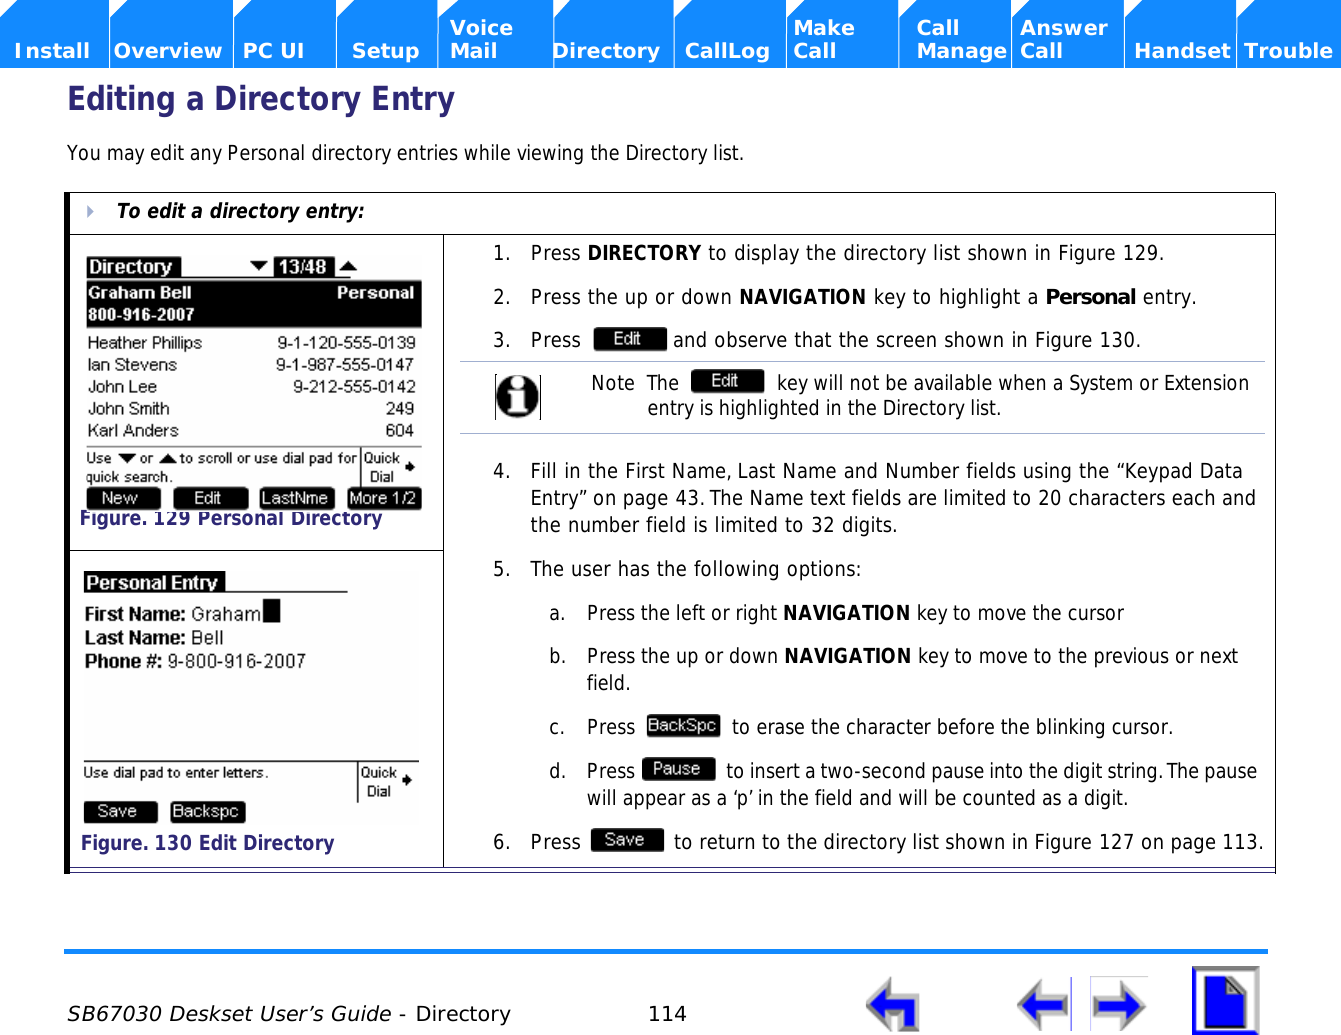
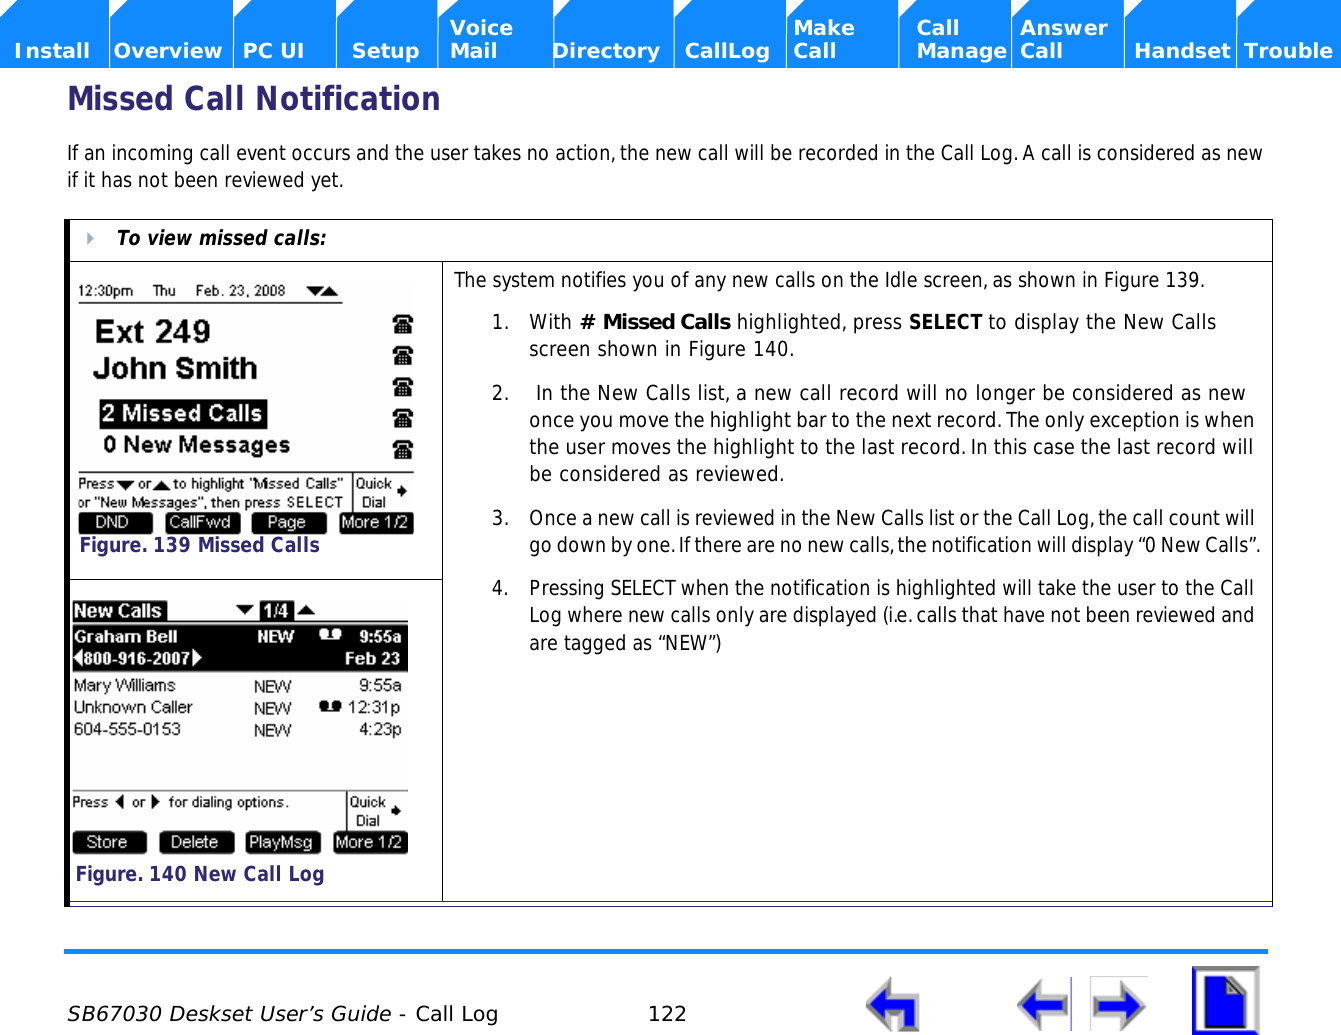
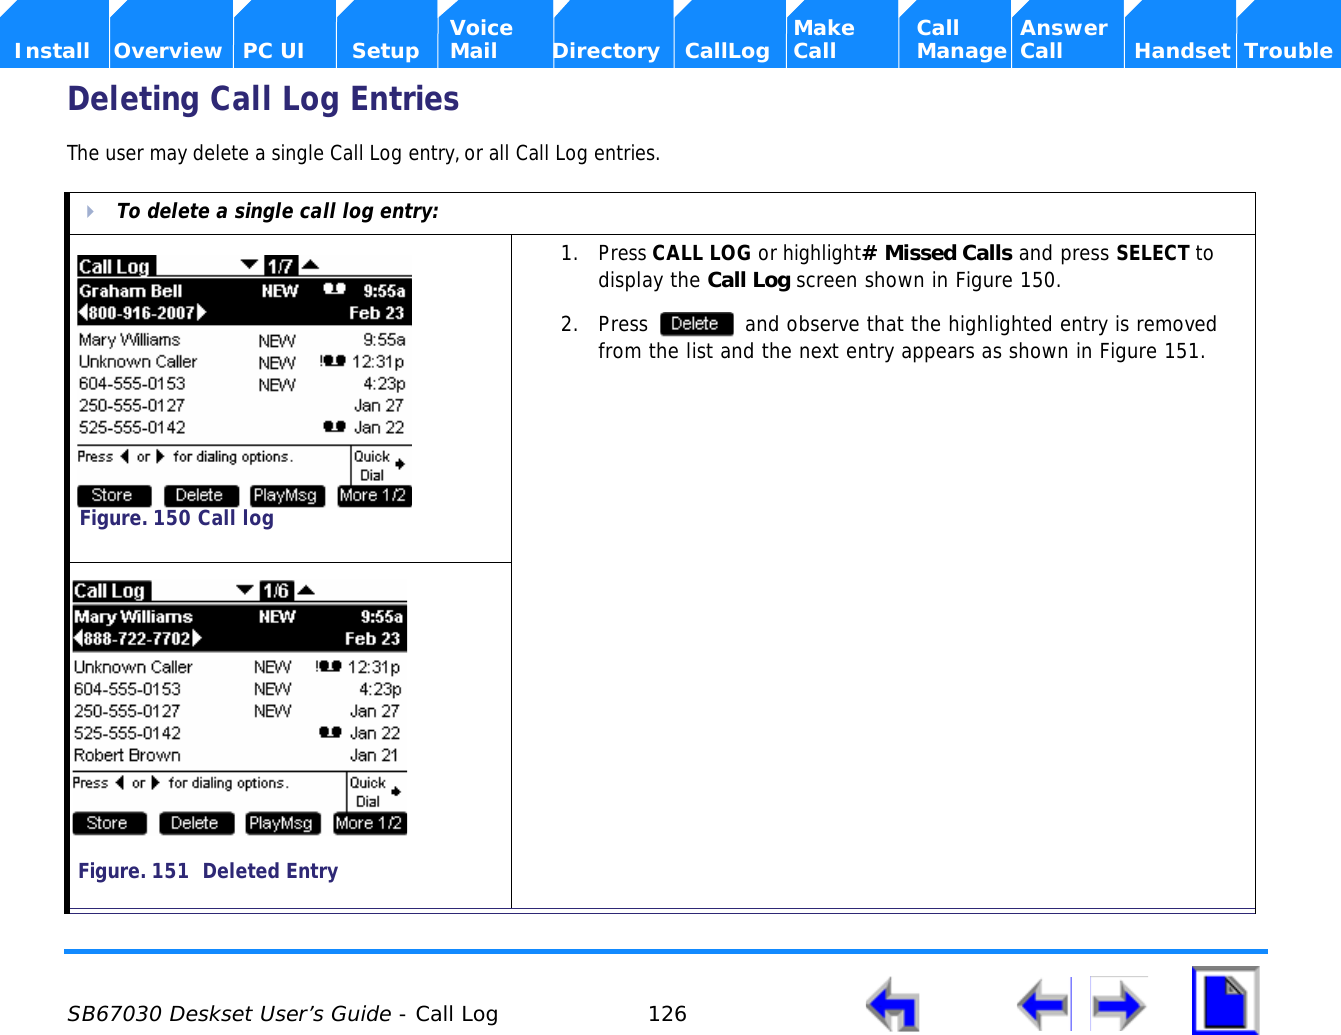
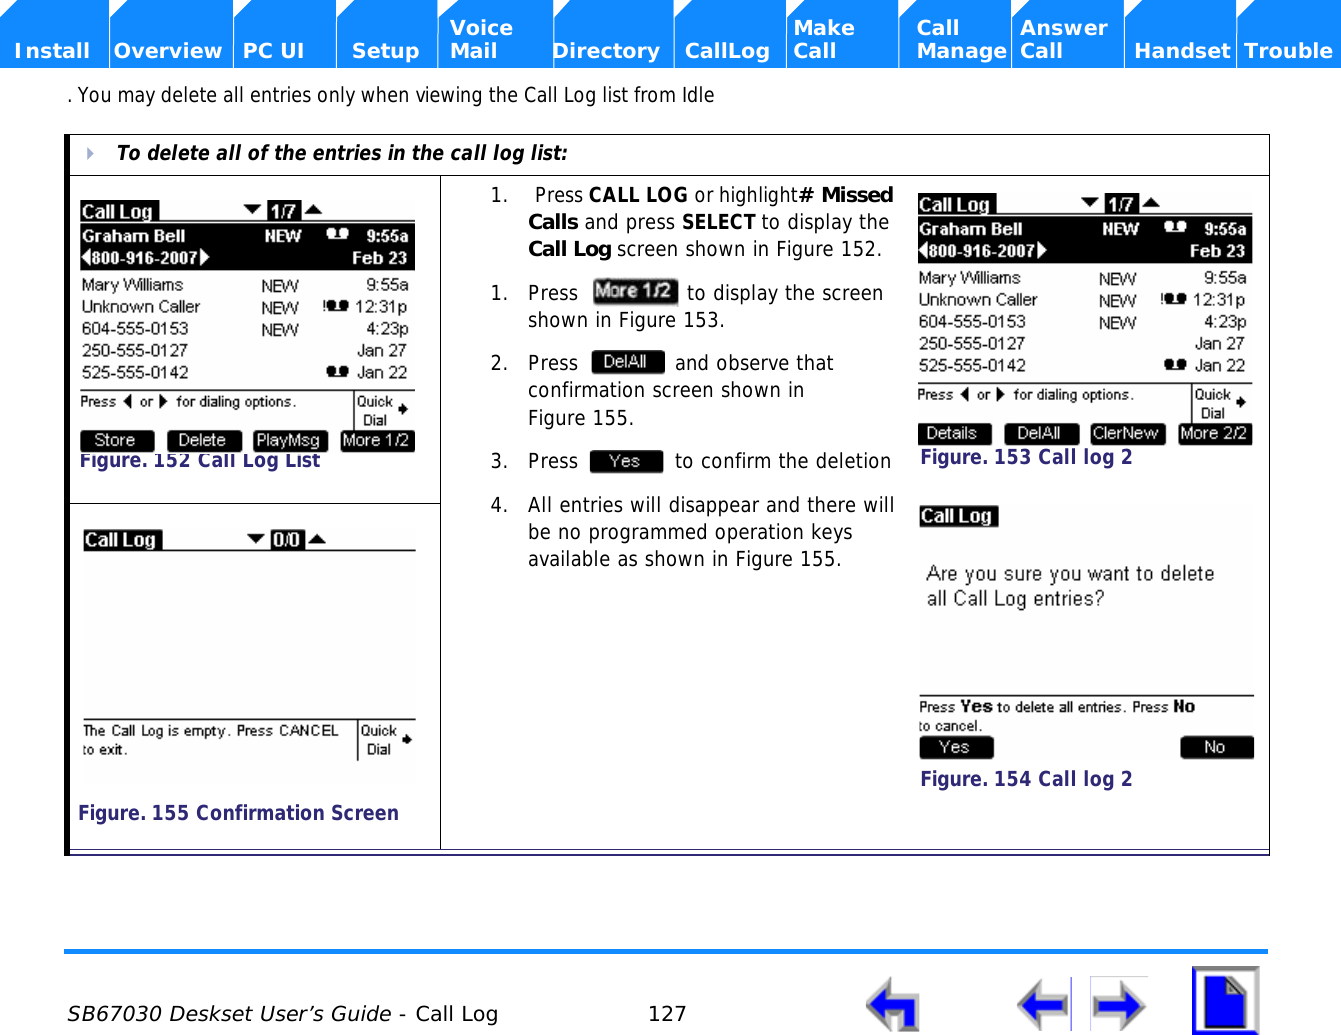
![Voice Make Call Answer Install Overview PC UI Setup Mail Directory Call Log Call Manage Call Handset Trouble SB67030 Deskset User’s Guide - Overview 44 Search RulesTo search for a list entry:1. Press DIRECTORY to display the directory list.2. Press a dialling key in the Directory list cause the SB67030 Desk Set to search for either an exact match or the closest match as follows:lIf you press K [Press 5 twice] and an exact match is found, the highlight bar moves to that entry as shown in Figure 23. The highlighted entry appears at the top of the display regardless of its relative position within the list unless it falls in the bottom six entries of the list. If the entry falls in the bottom six, the highlighted entry will appear in its correct relative position.lIf you press L [Press 5 three times] and the SB67030 Deskset cannot find an exact match, the highlight bar will move to the entry with the closest alphabetical match as shown in Figure 24. The highlighted entry will appear in the middle of the display regardless of its relative position within the list unless it falls in the top or bottom three of the list. If the entry falls in the top or bottom three, the highlighted entry will appear in its correct relative position. Figure. 23 Exact MatchFigure. 24 Closest Match](https://usermanual.wiki/VTech-Telecommunications/80-6563-00.Users-Manual-2/User-Guide-1109336-Page-44.png)

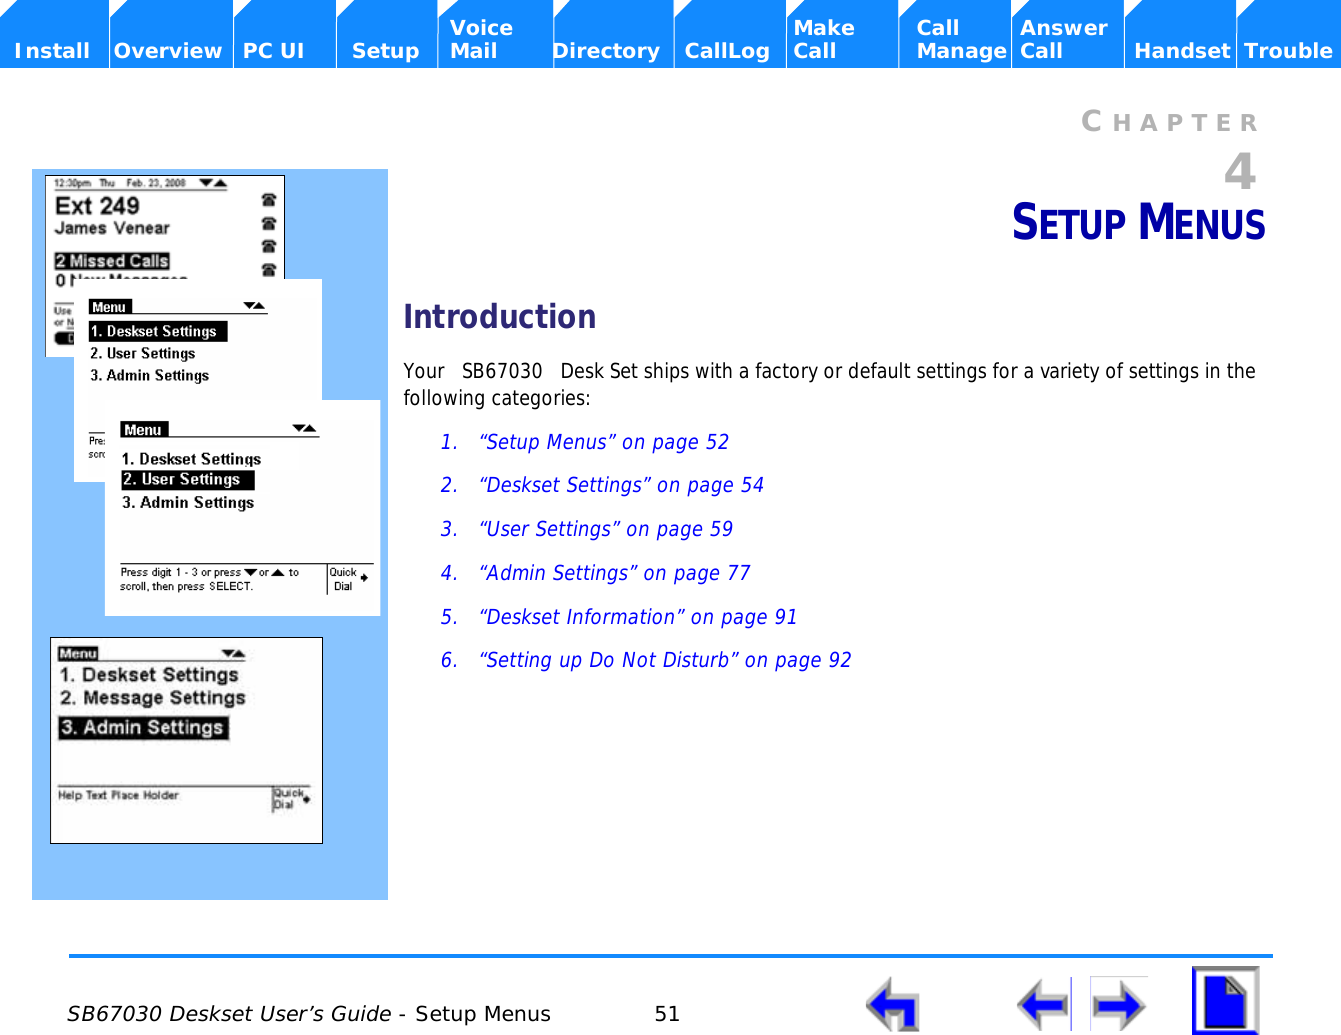
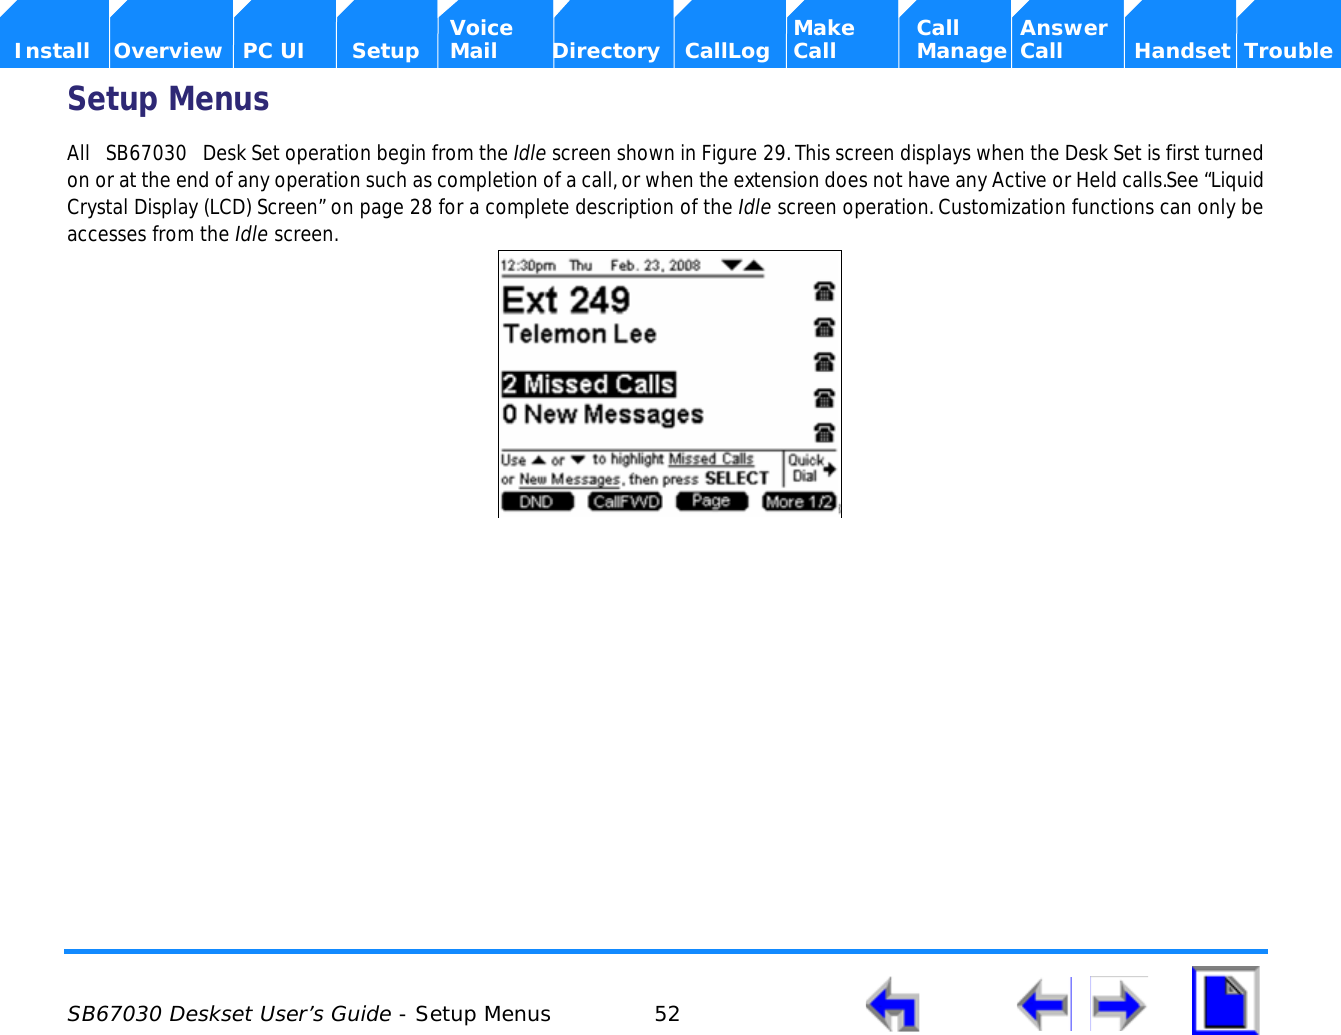
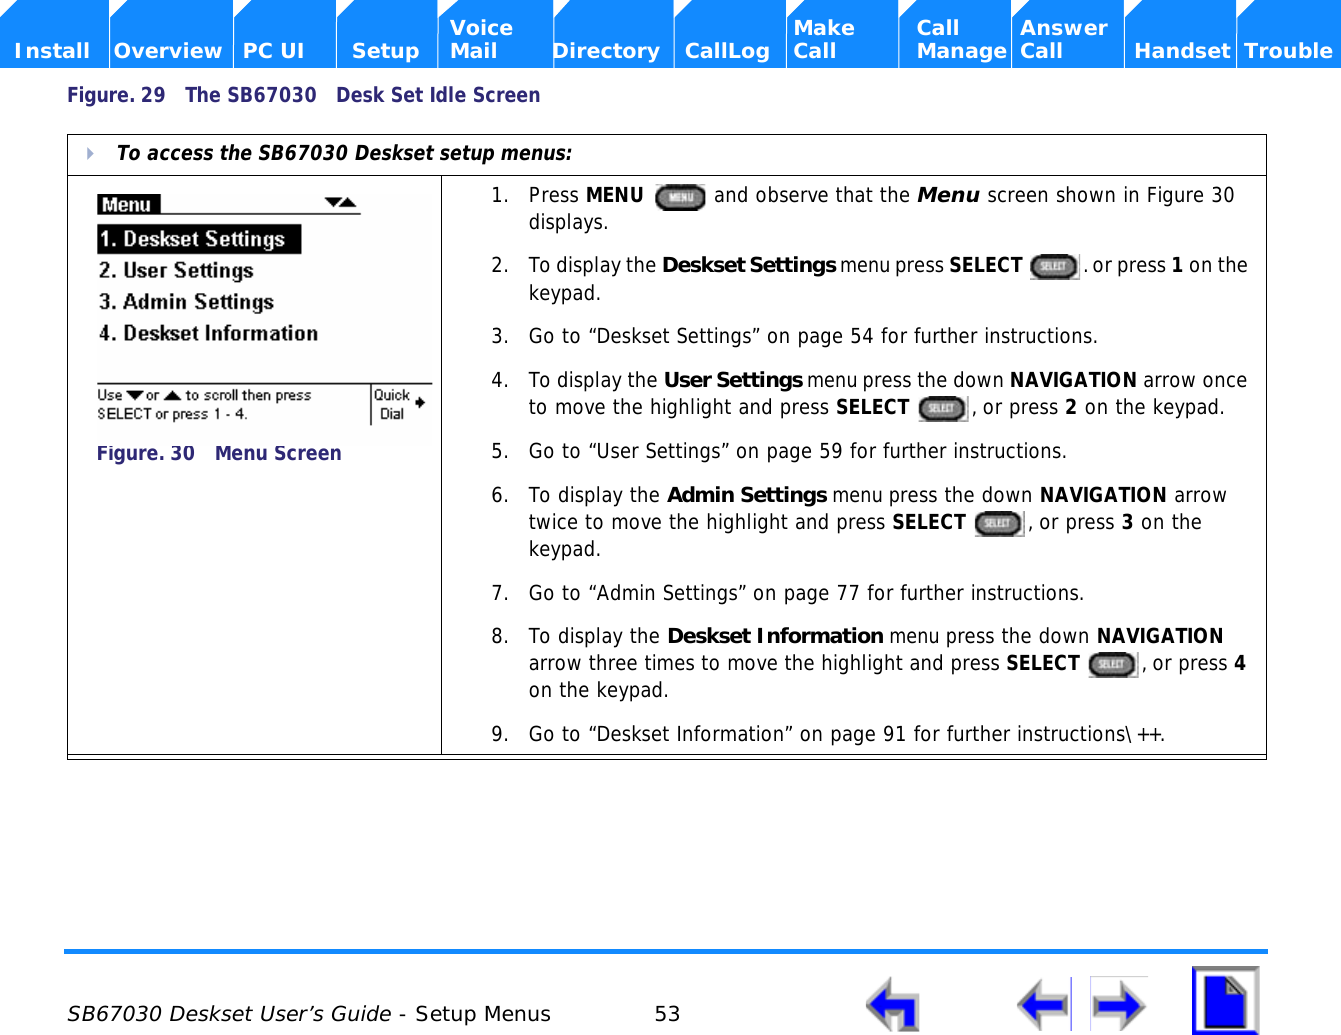
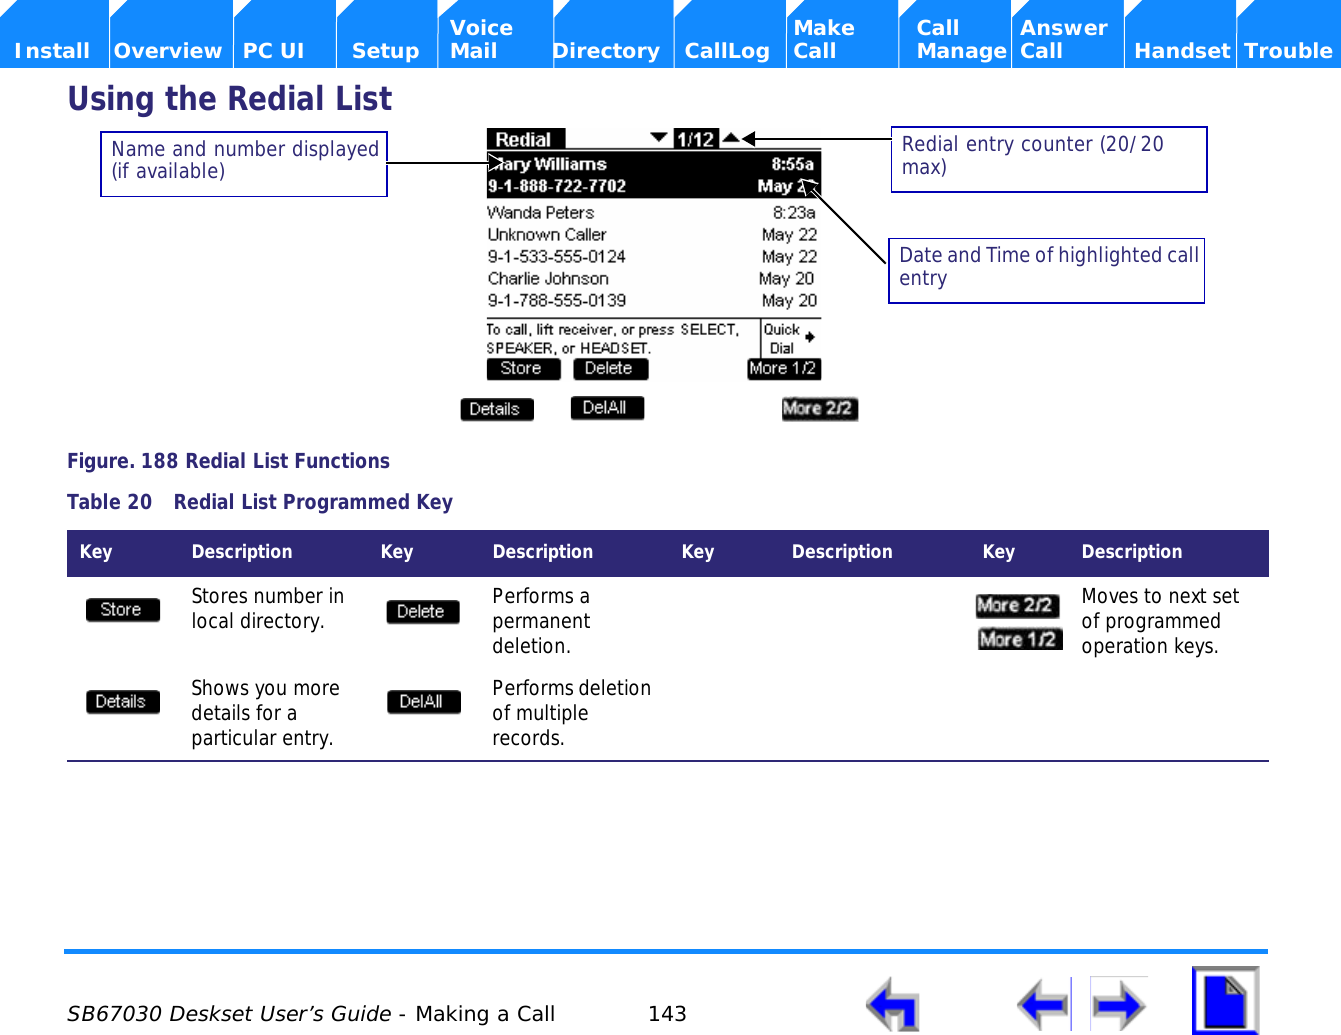
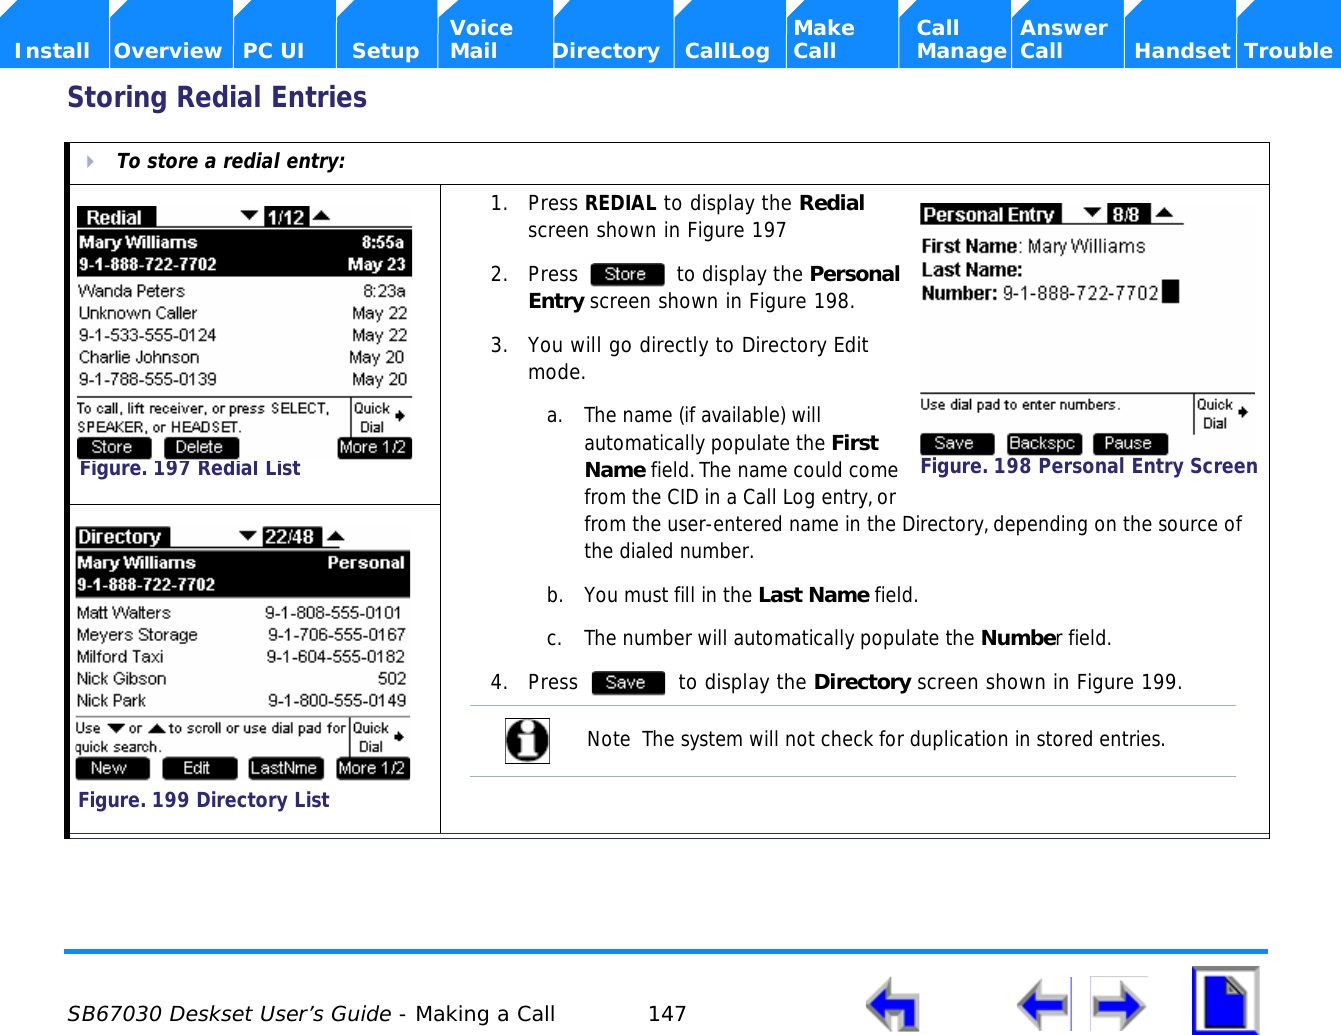
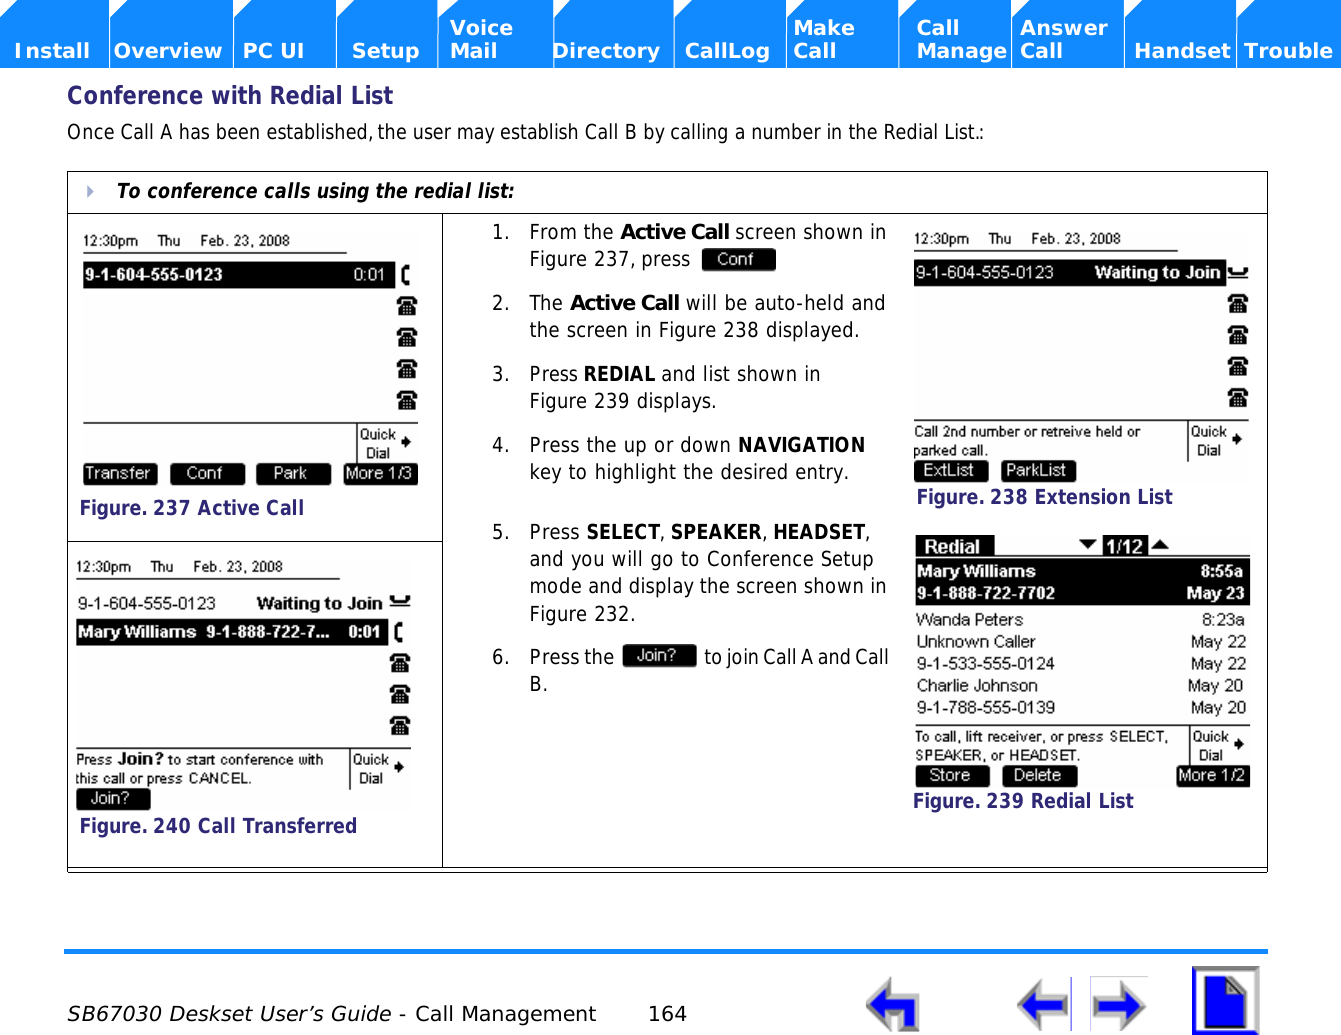
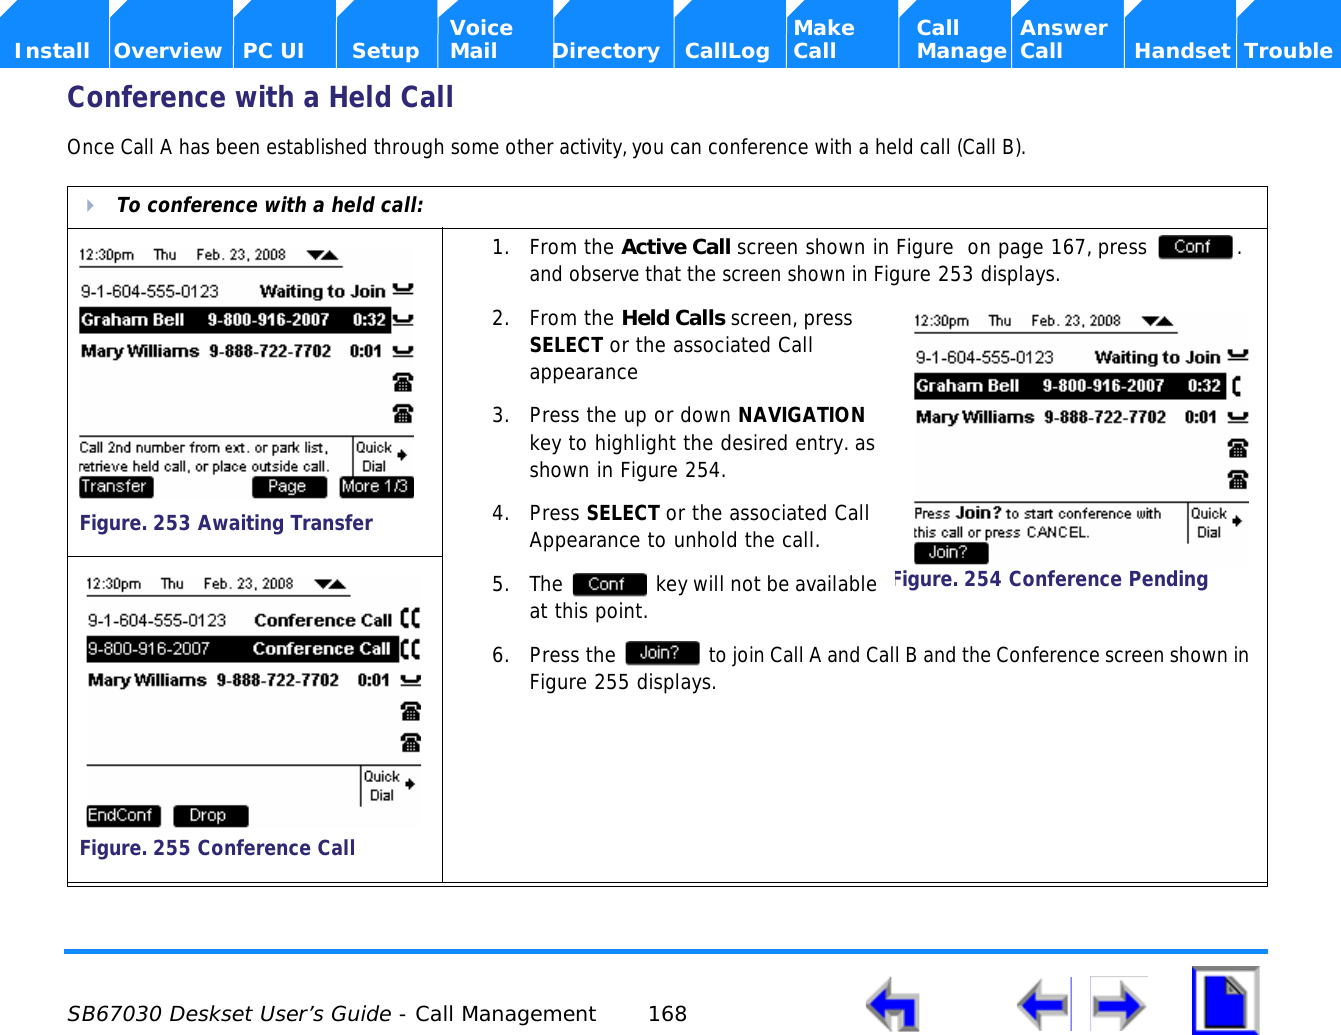
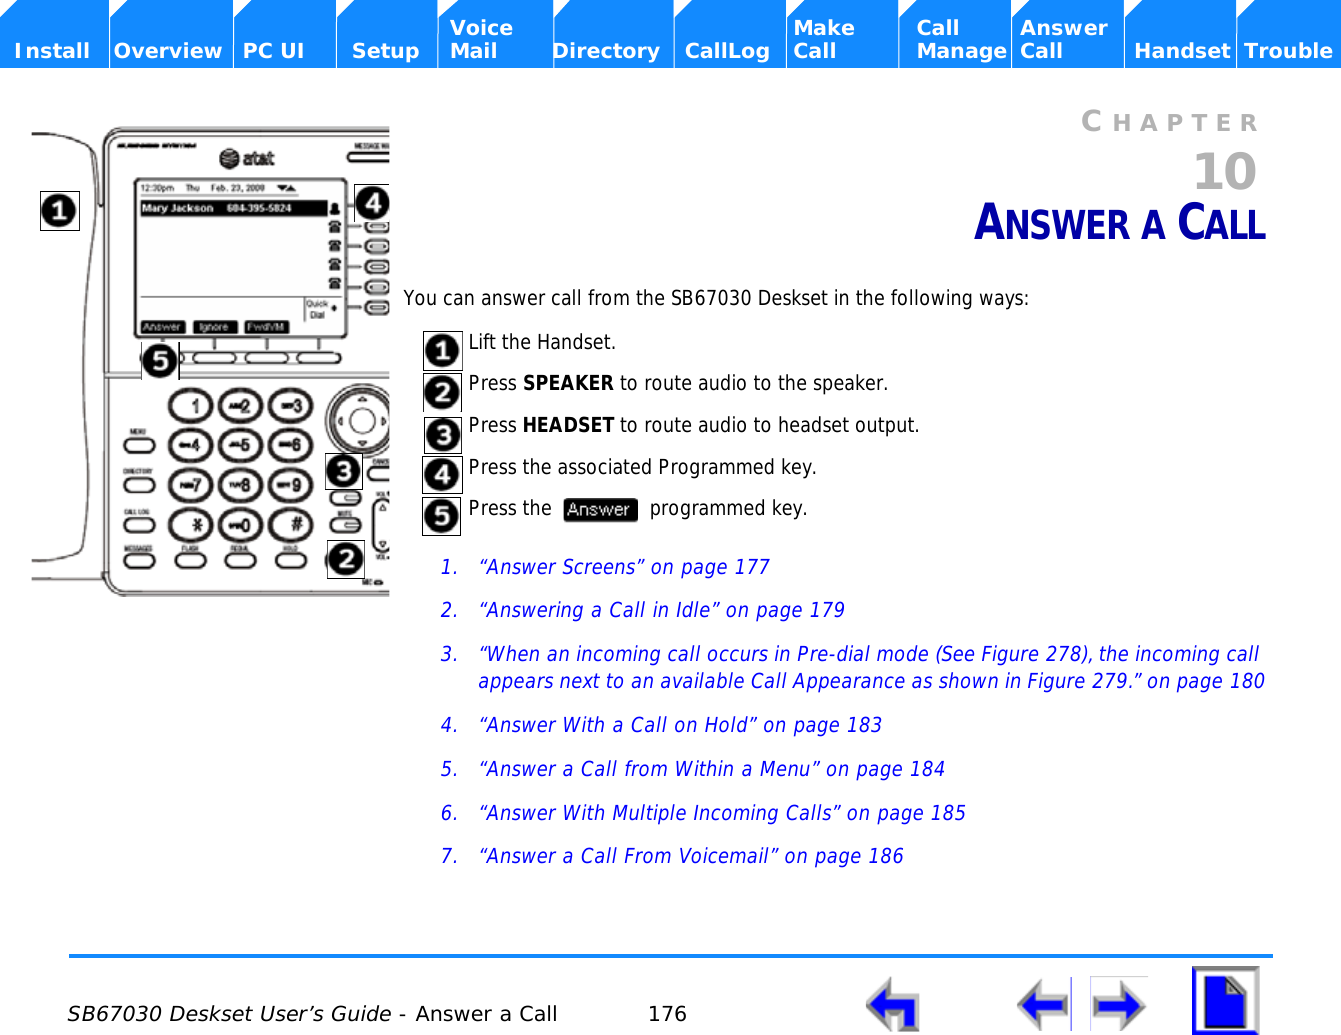
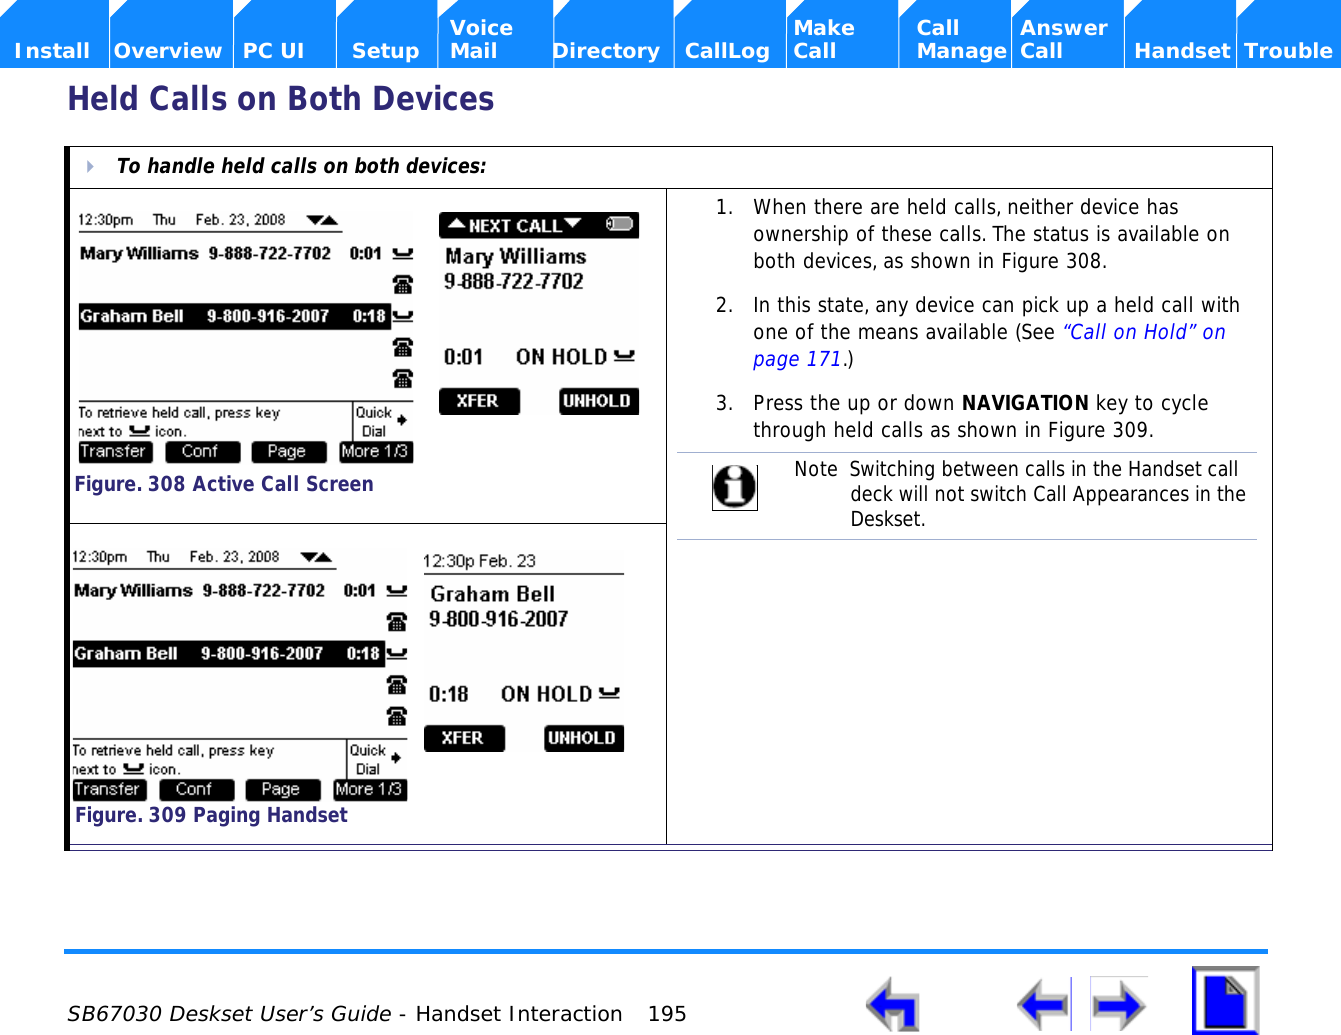
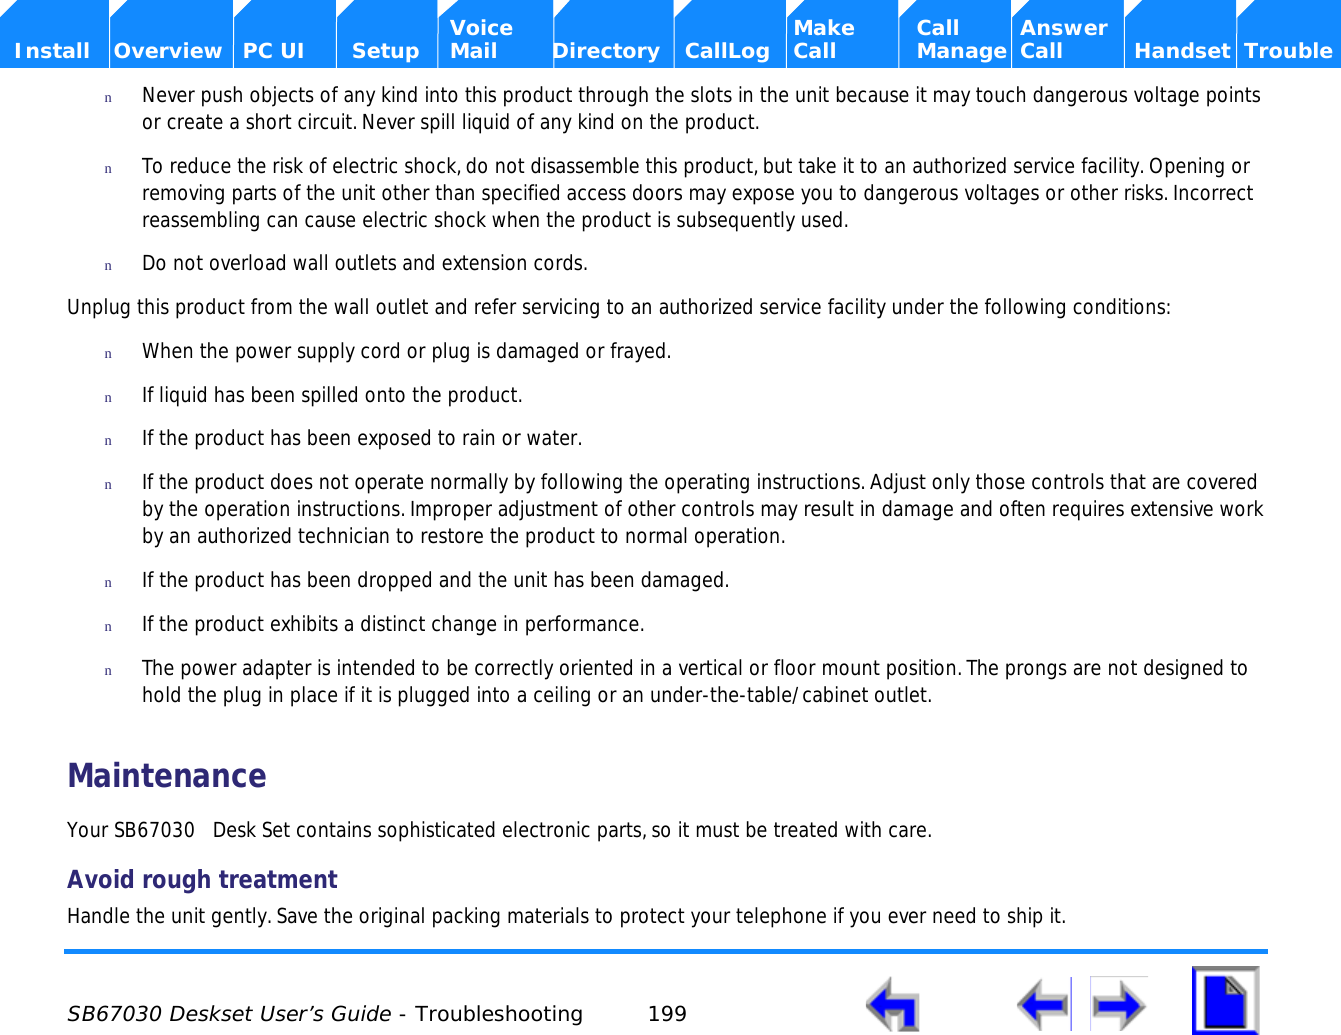
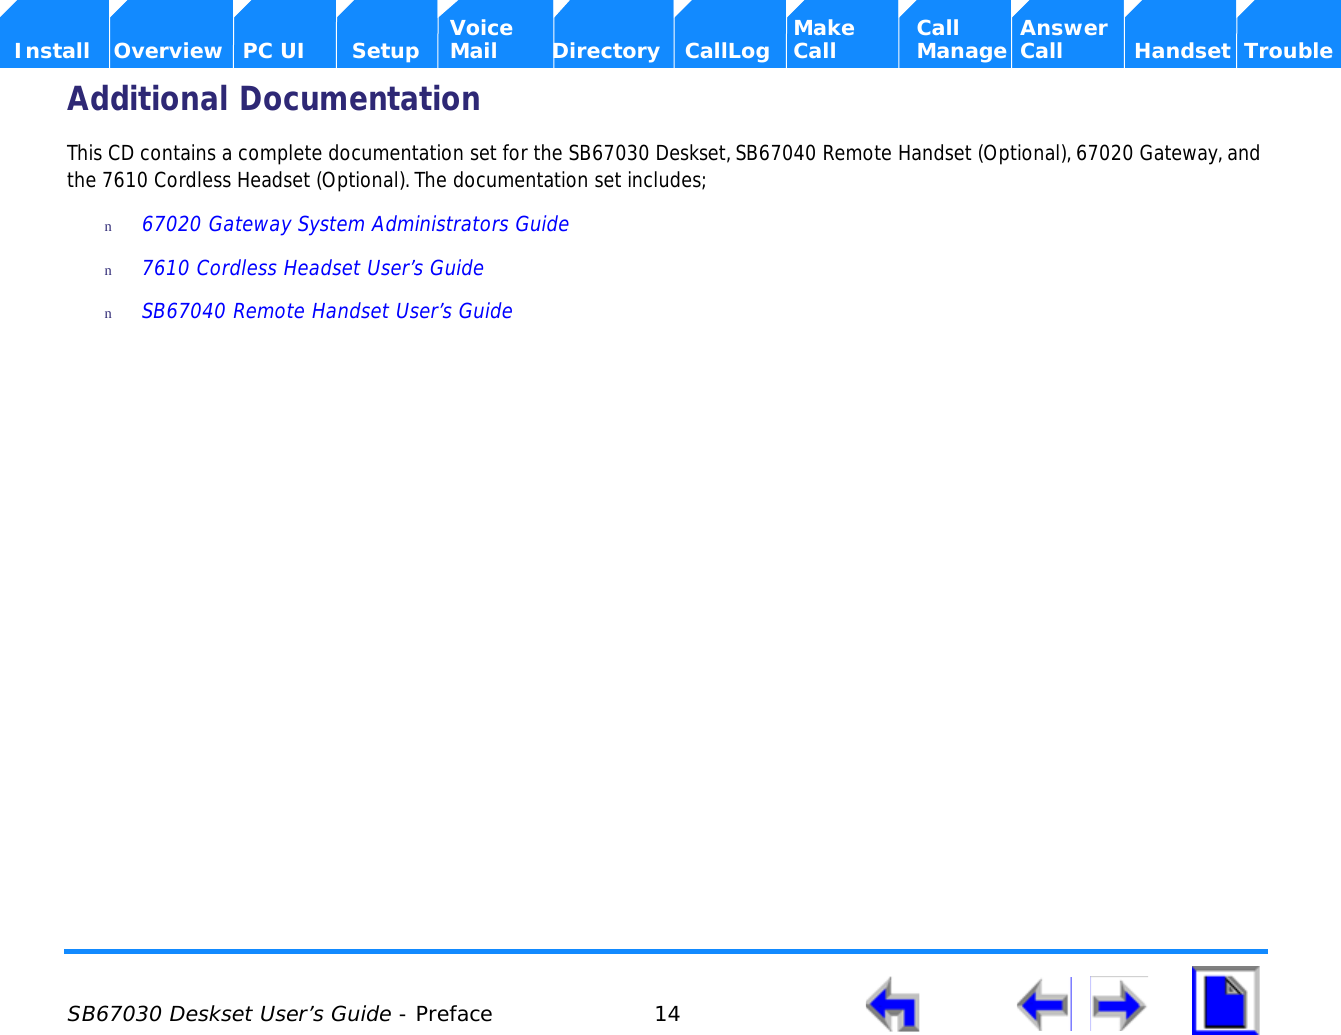
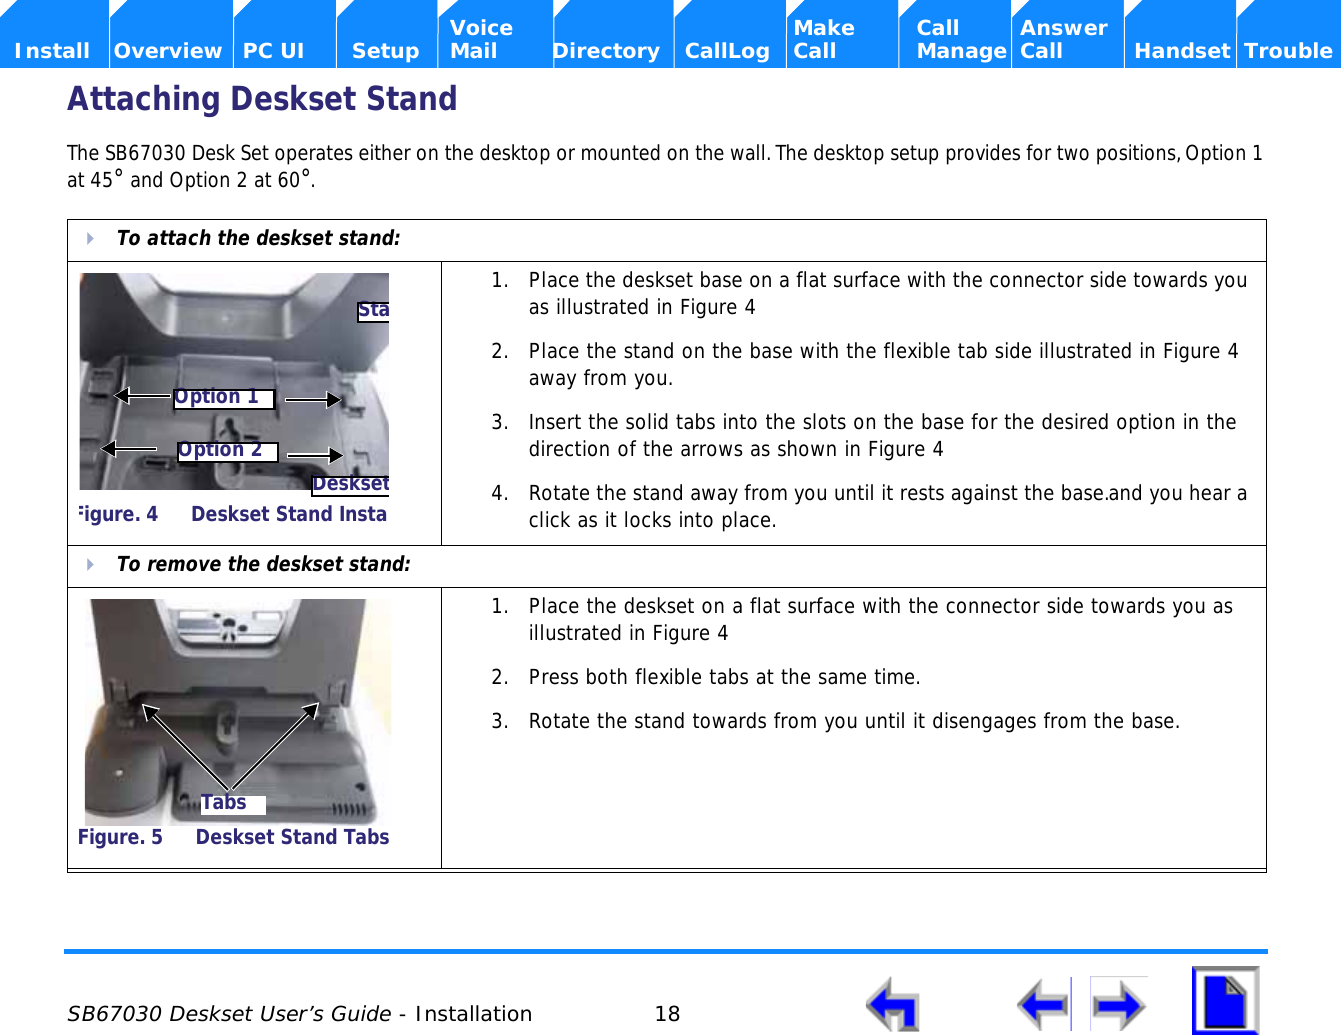
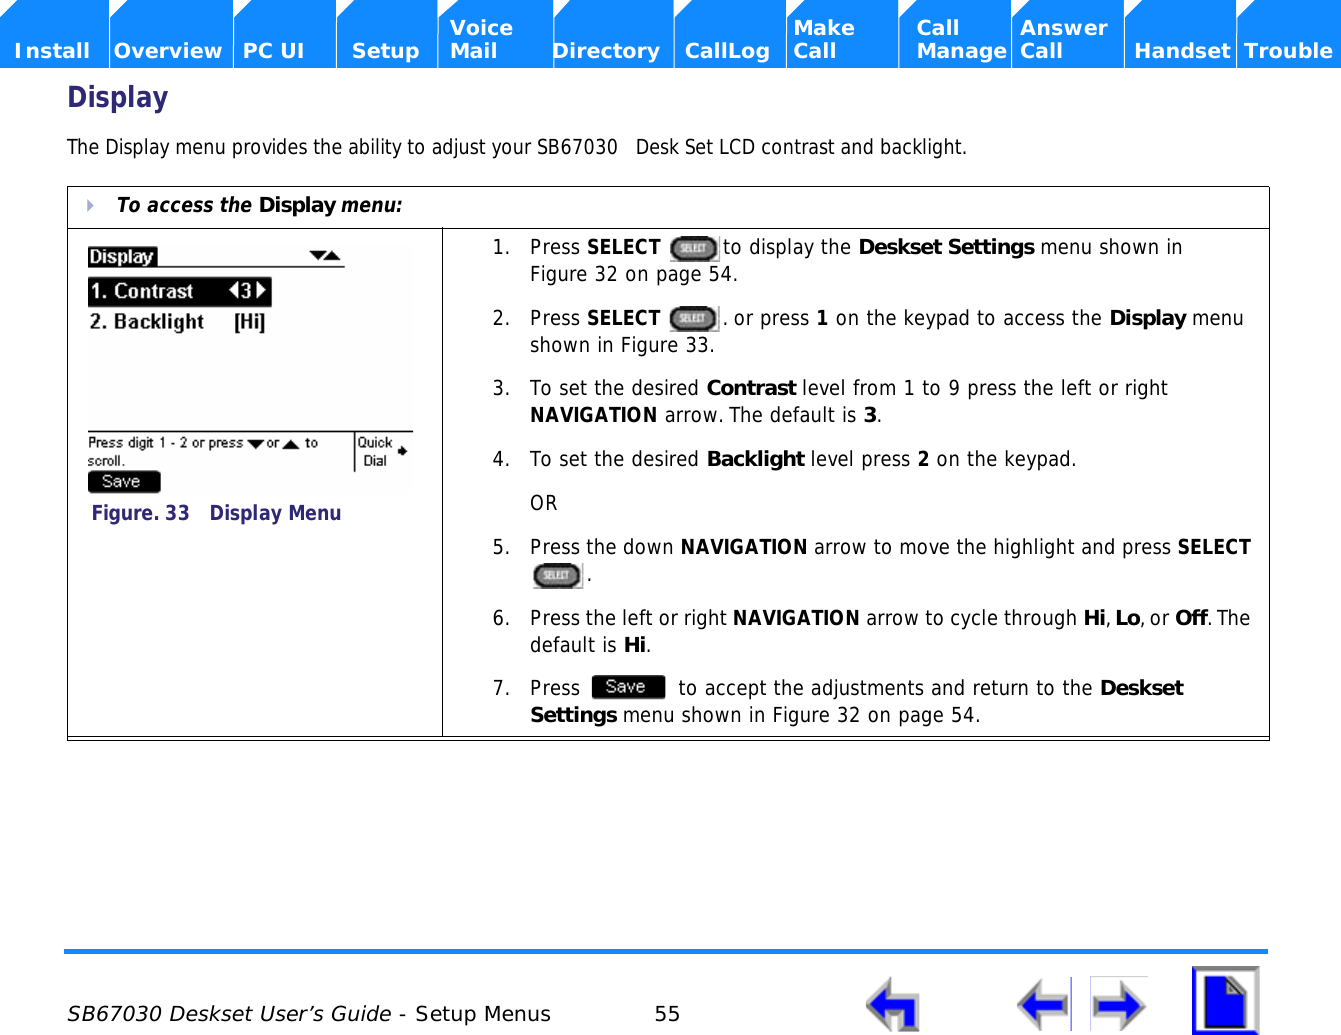
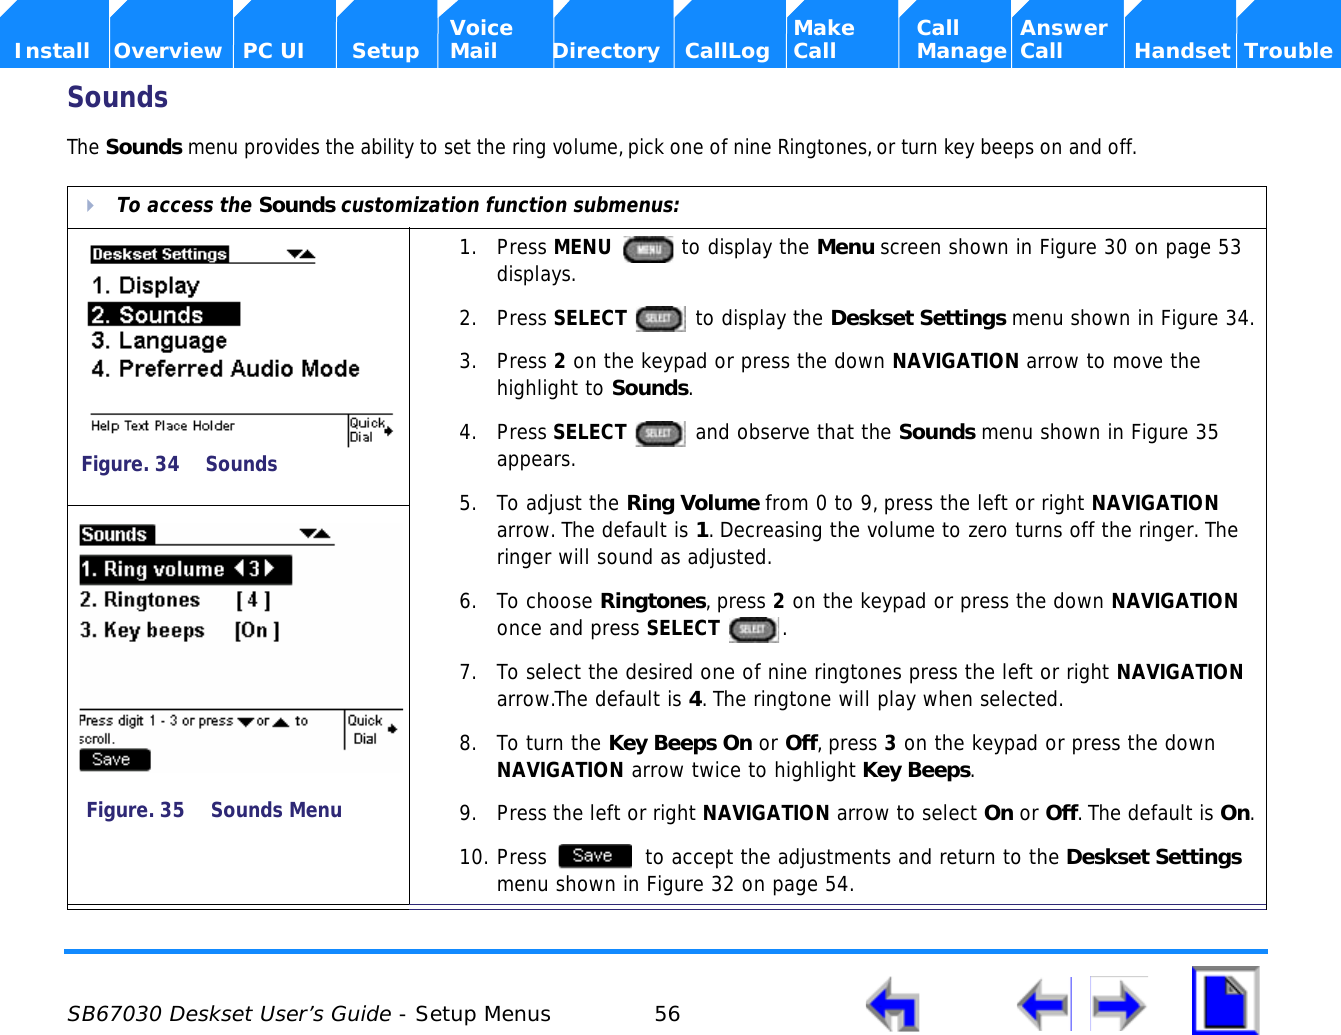
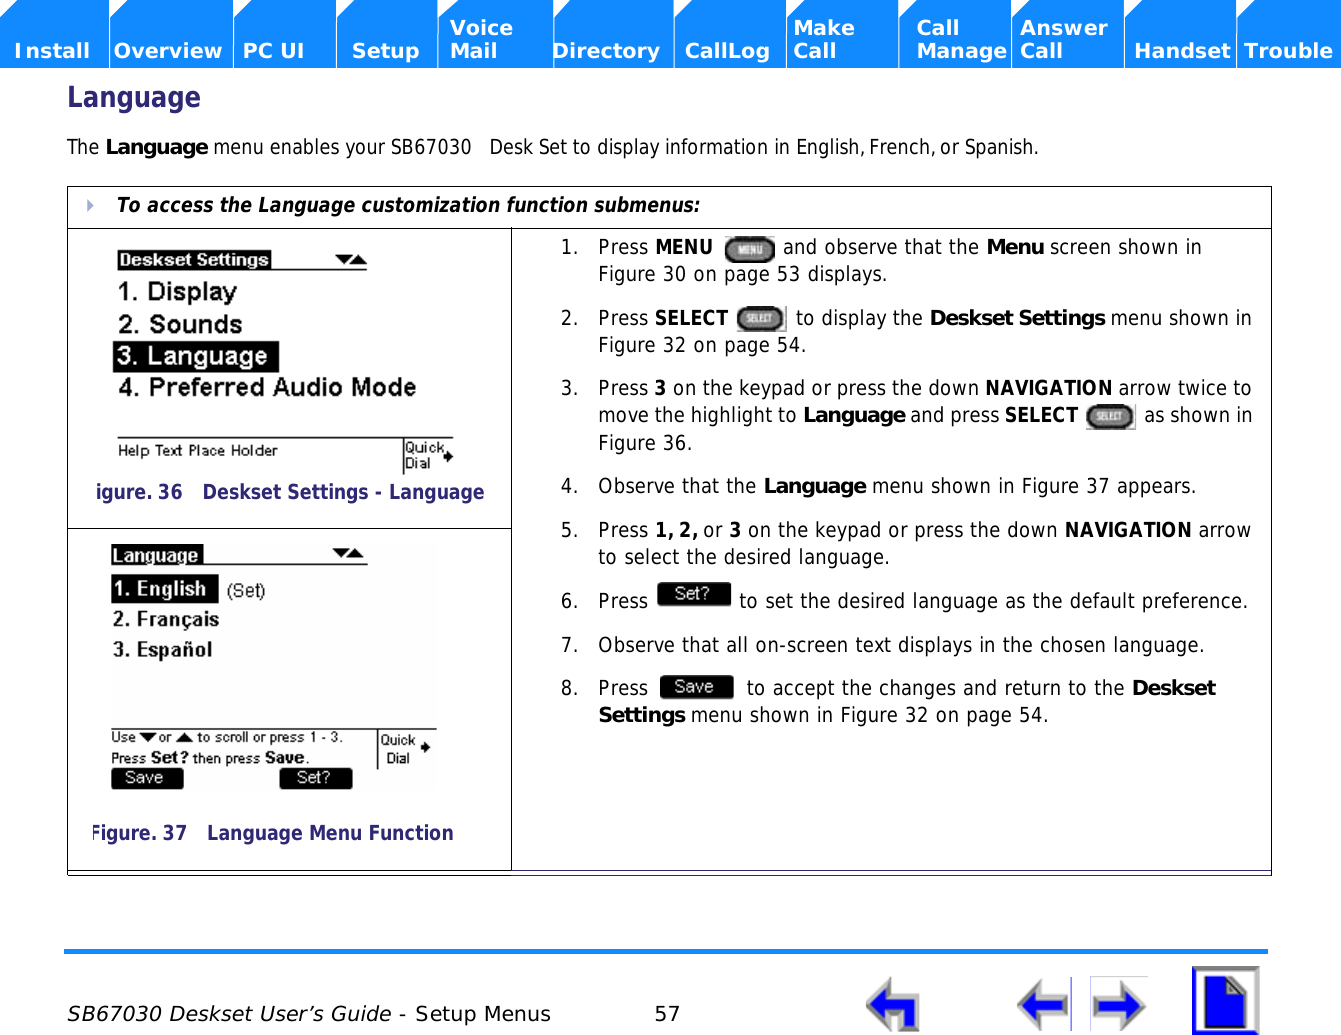
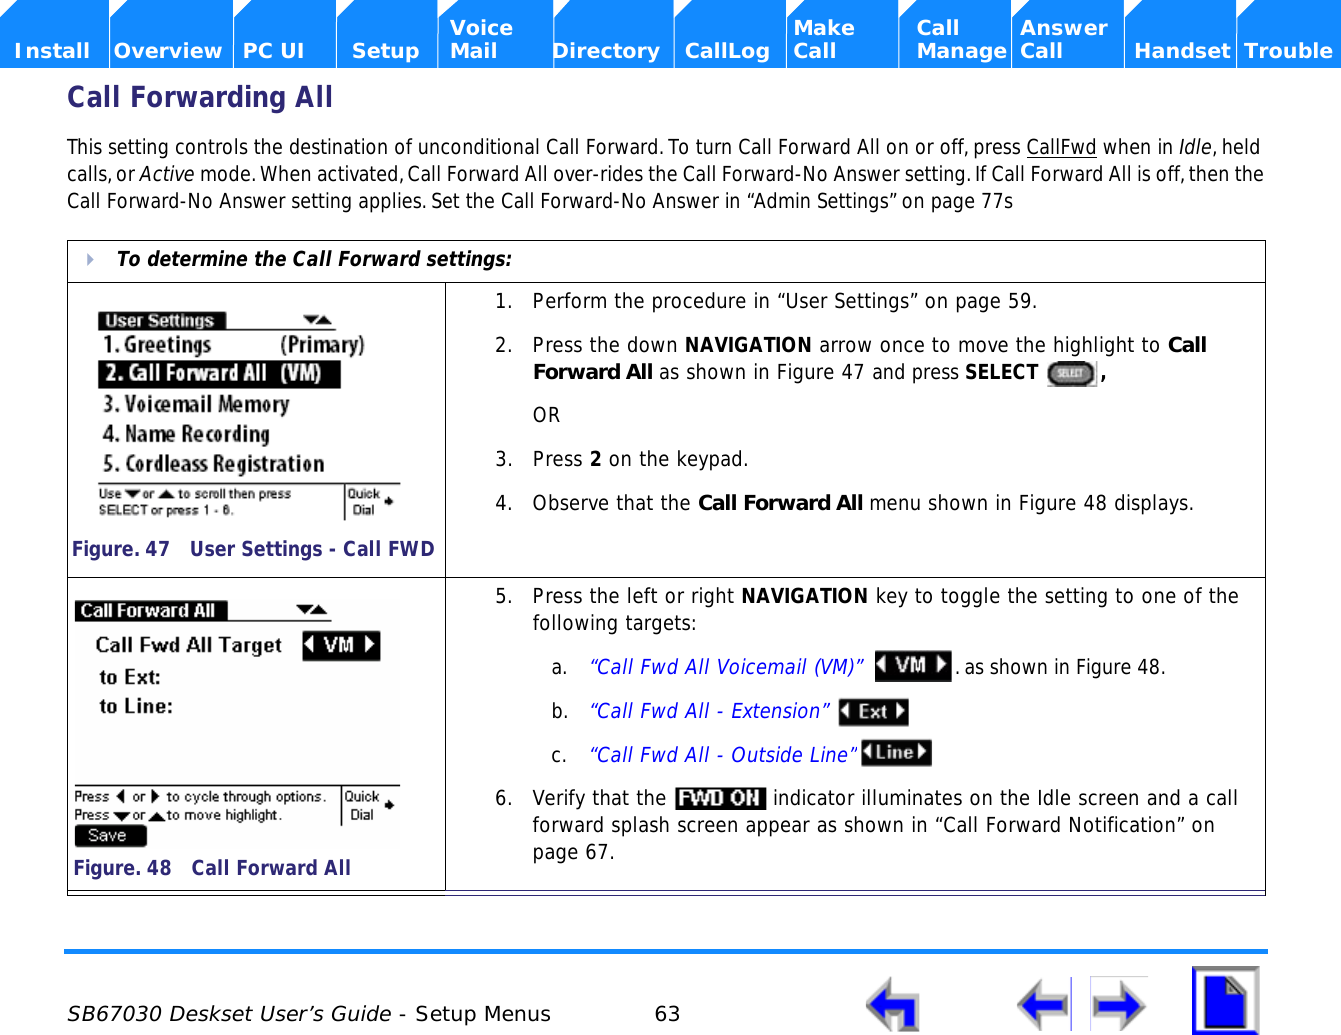
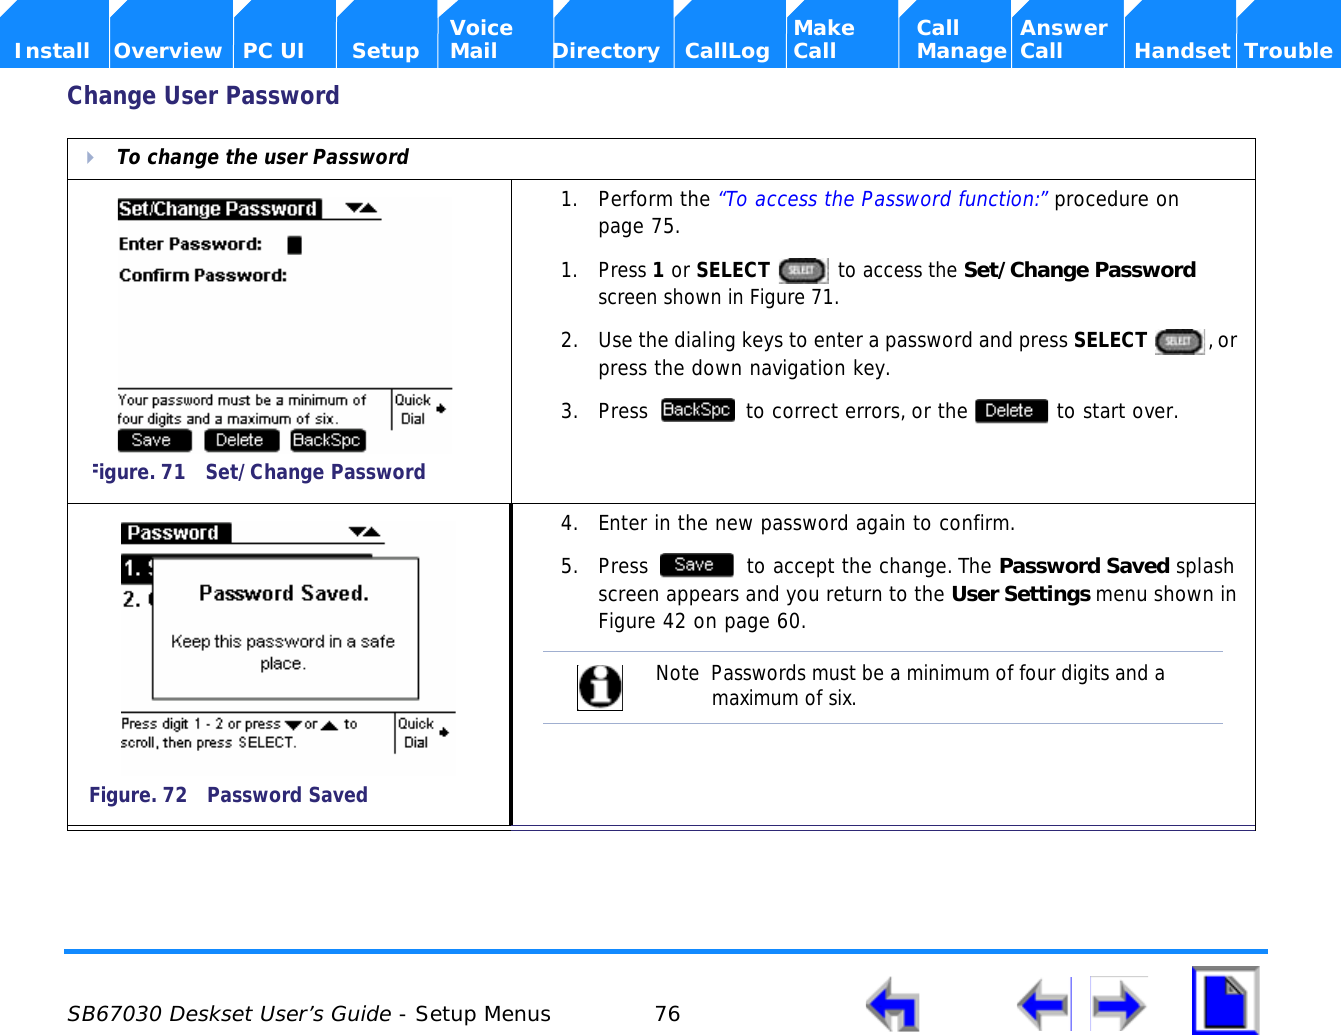
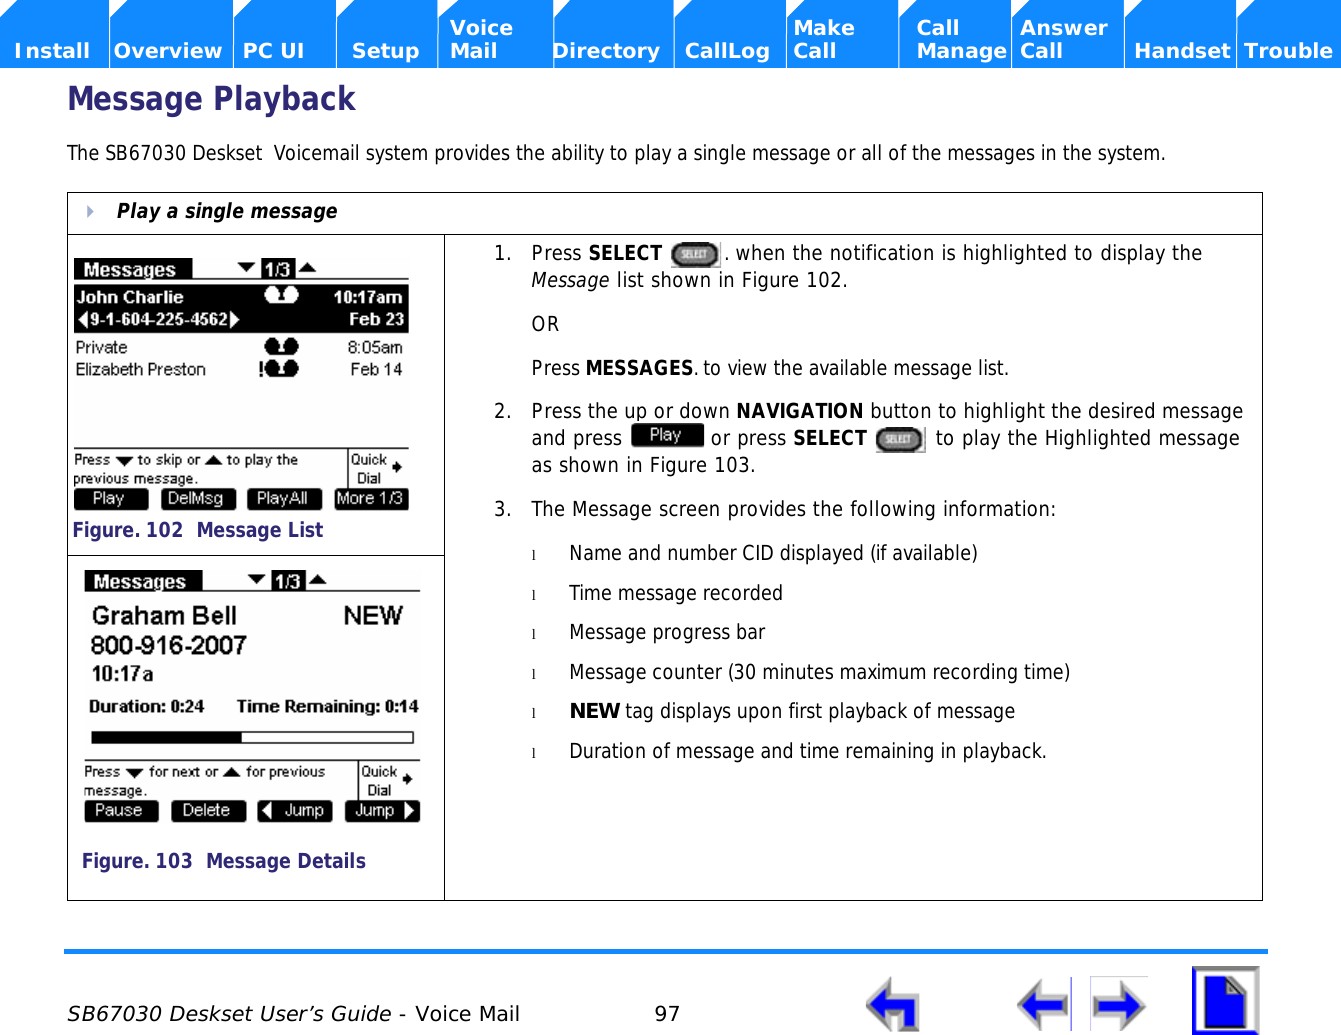
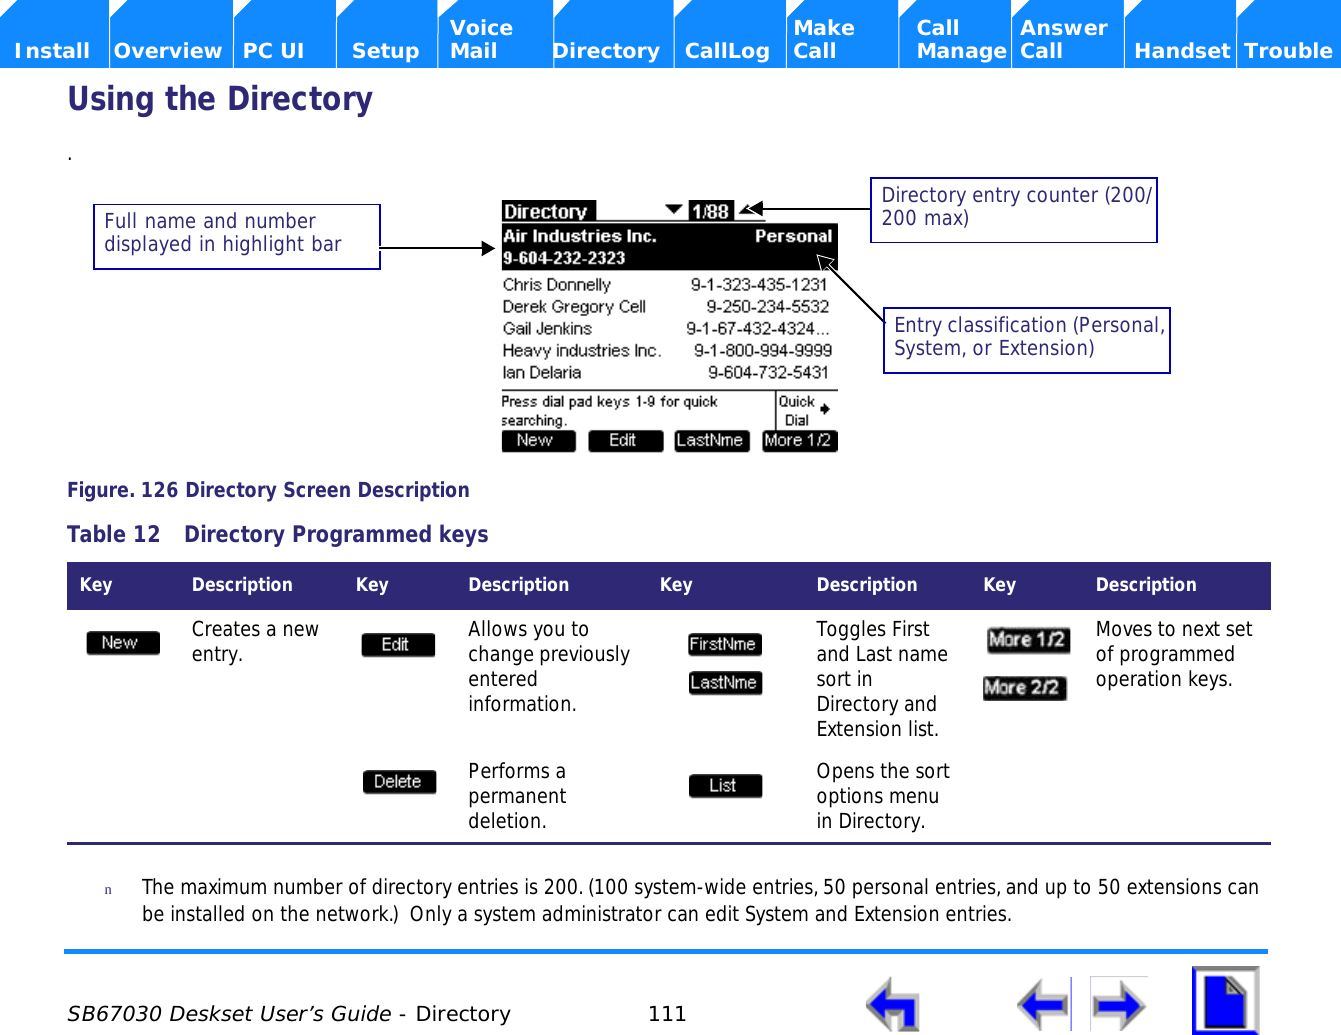
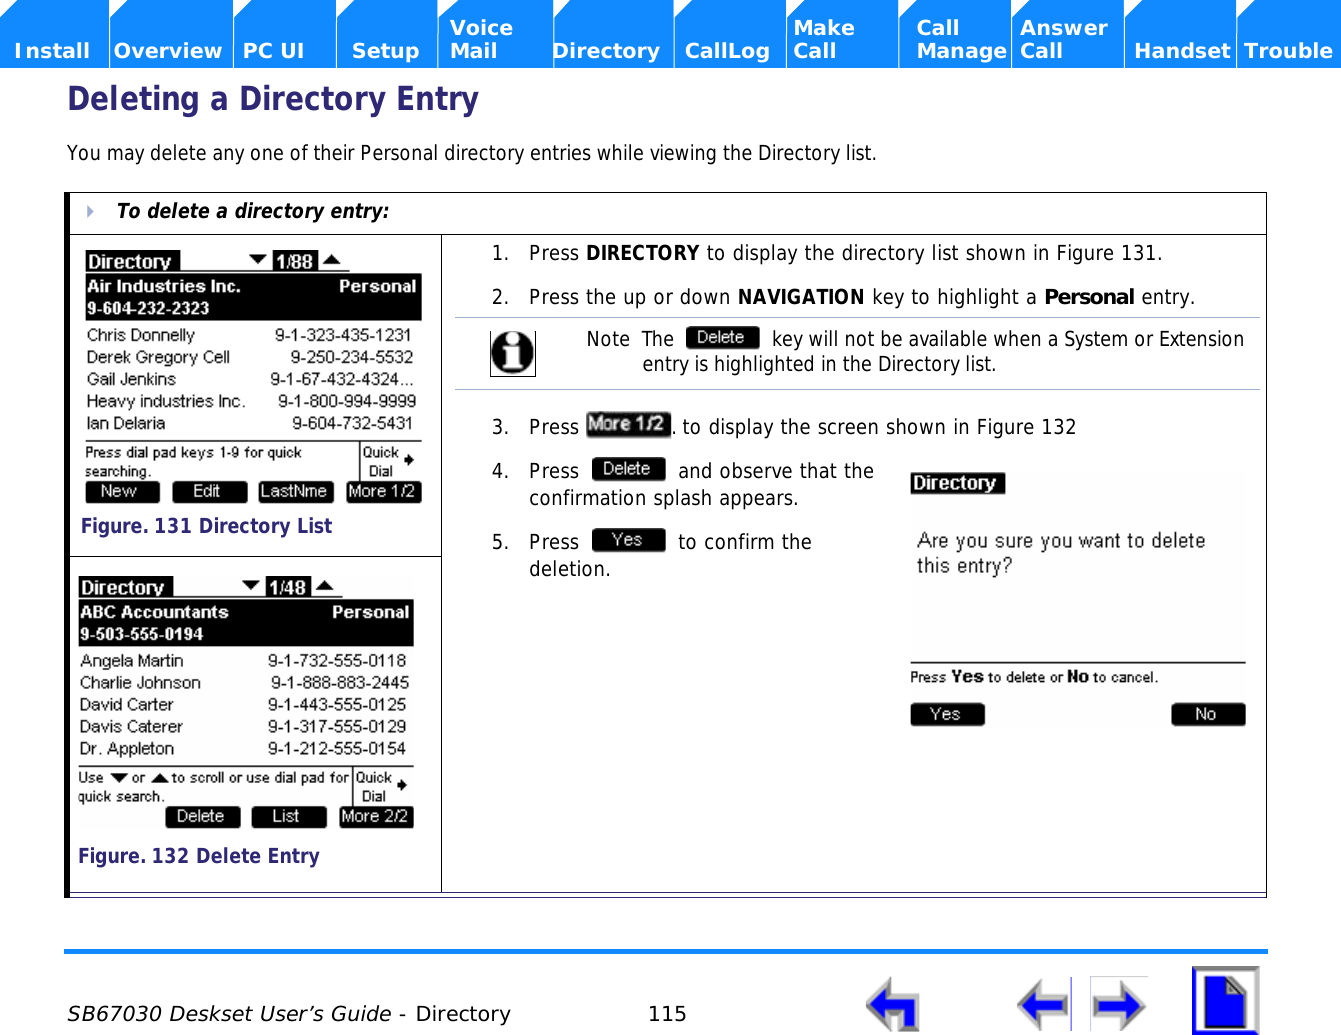
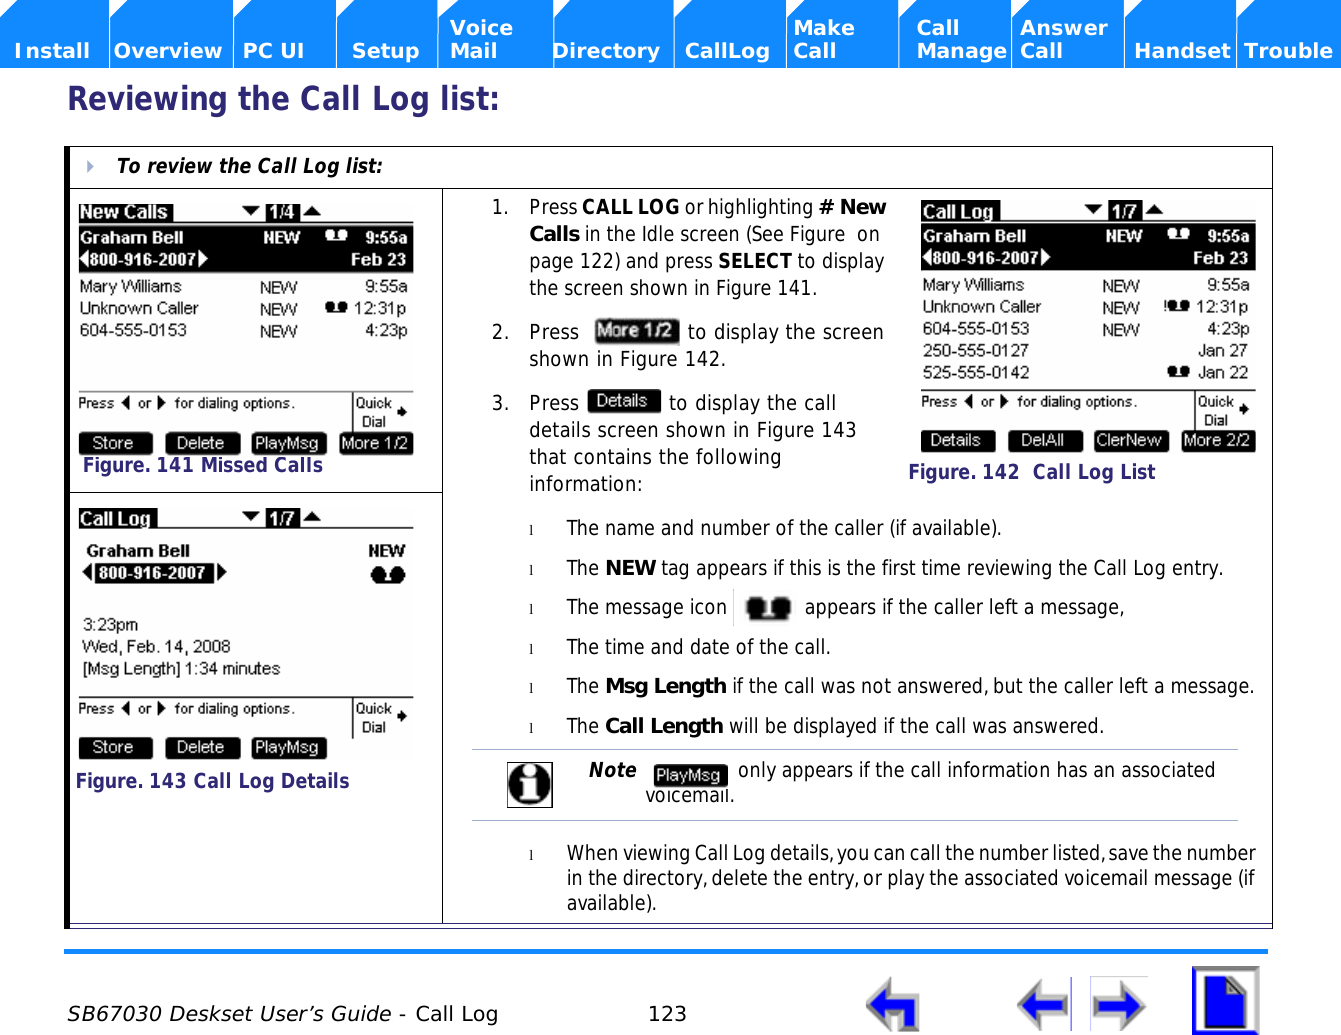
![SB67030 Deskset User’s Guide - Setup Menus 54 Voice Make Call Answer Install Overview PC UI Setup Mail Directory CallLog Call Manage Call Handset TroubleDeskset SettingsThe Deskset Settings menu provides access to the four functions and the related submenus listed in Table 8.To display the Deskset Settings men:1. Press MENU and observe that the Menu screen shown in Figure 30 on page 53 displays.2. To display the Deskset Settings menu shown in Figure 32 press SELECT . or press 1 on the keypad.Table 8 Deskset Settings Menu StructureFunction Submenu1. “Display” on page 55 1. Contrast [1-9]2. Backlight Hi/Lo/Off]2. “Sounds” on page 56 1. Ring Volume [0-8]2. Ringtones [1-9]3. Key Beeps [On-Off]3. “Language” on page 57 1. English (Preset)2. Francais3. Espanol4. “Preferred Audio” on page 58 1. Speakerphone (Set)2. HeadsetFigure. 32 Menu - Deskset Settings](https://usermanual.wiki/VTech-Telecommunications/80-6563-00.Users-Manual-2/User-Guide-1109336-Page-54.png)
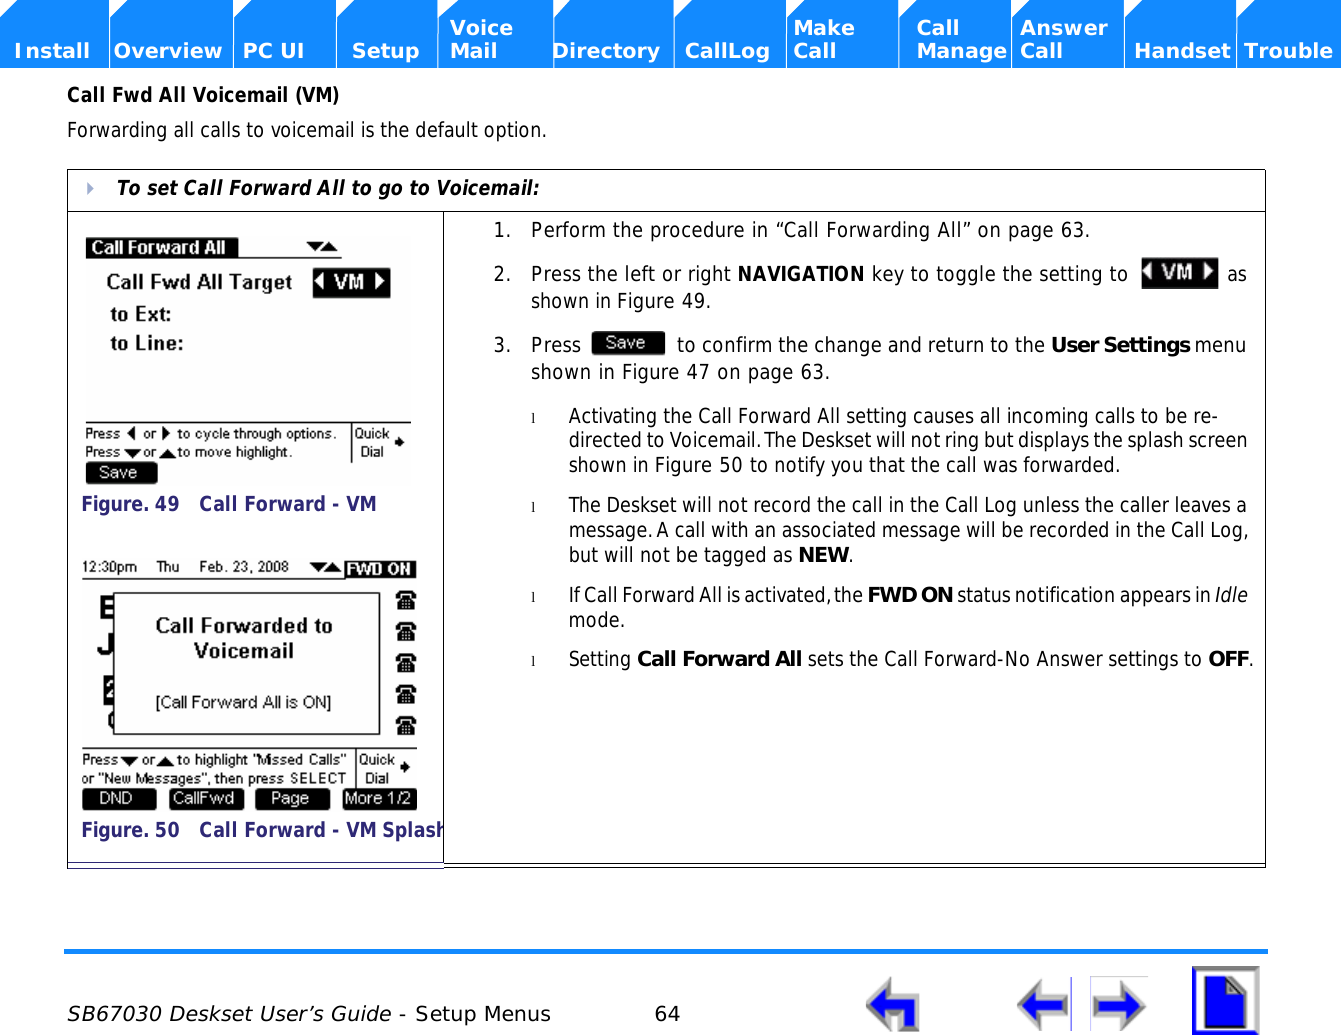

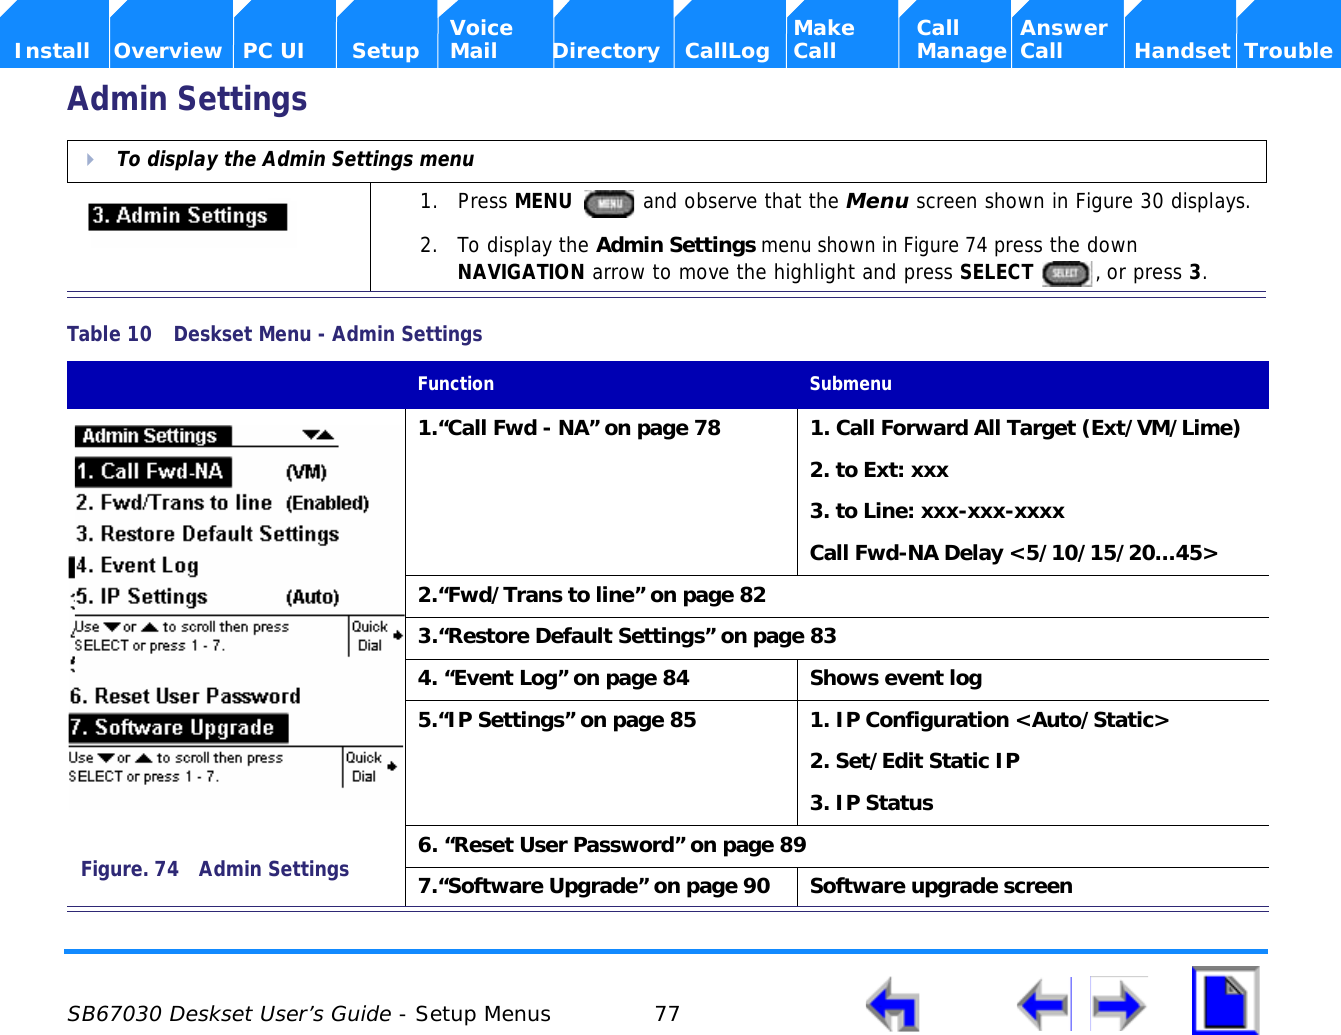

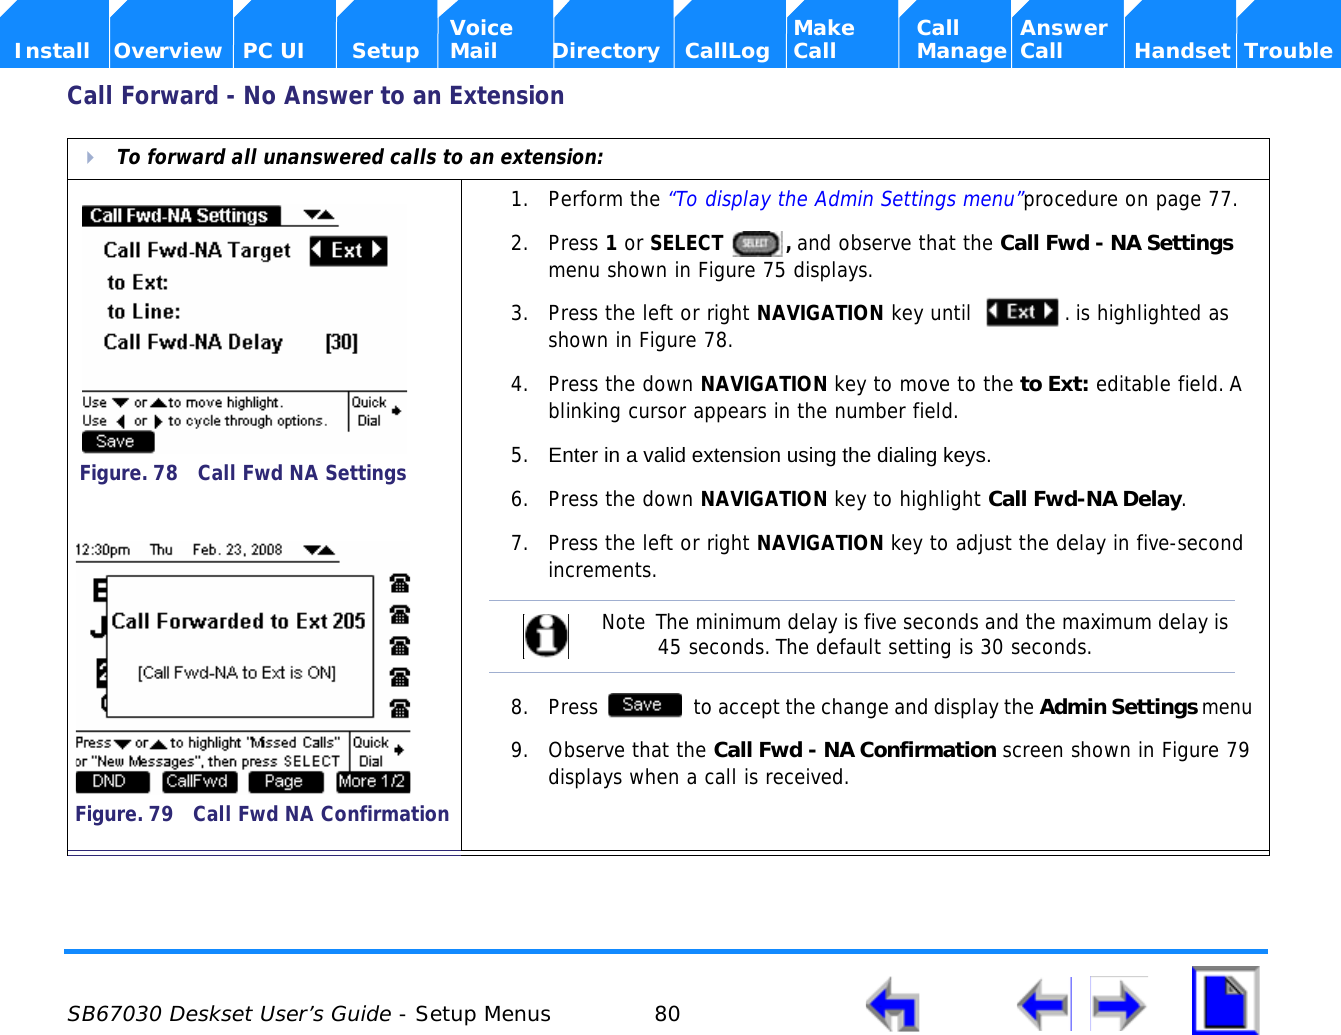
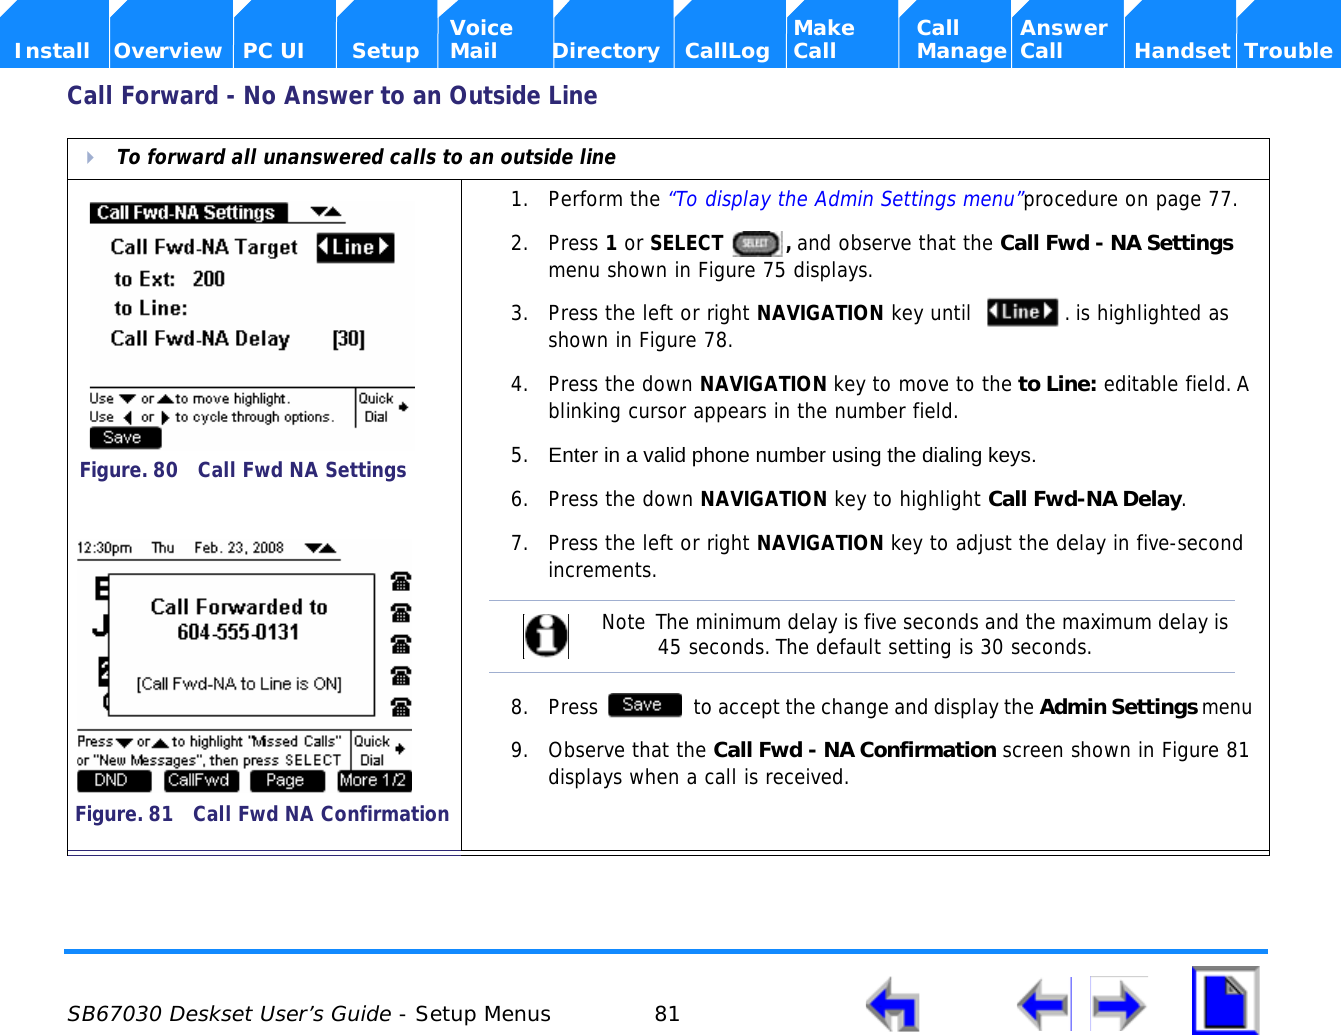
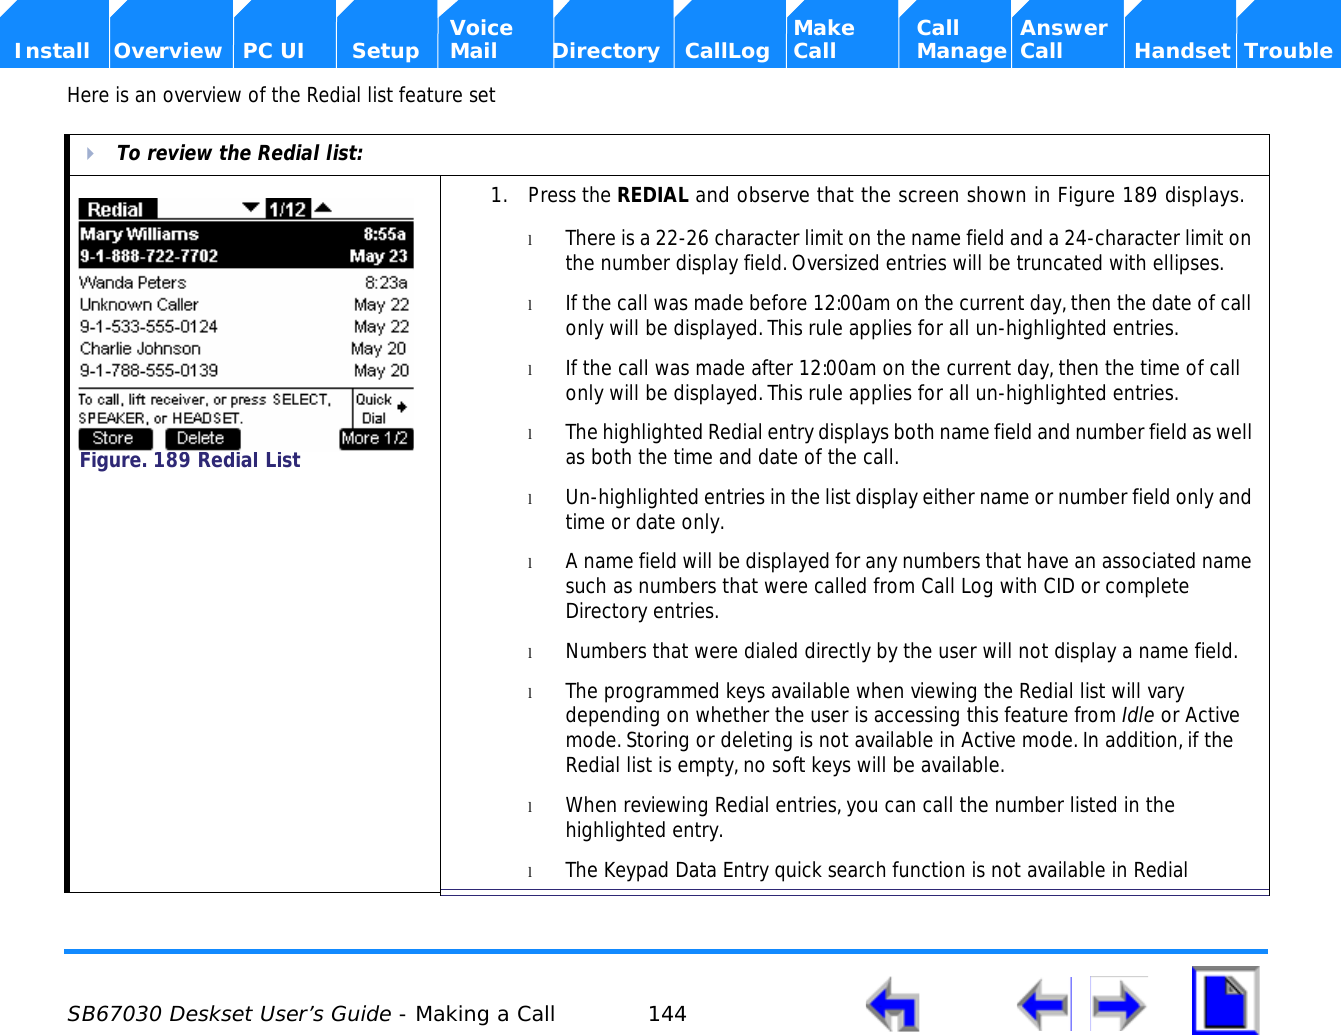
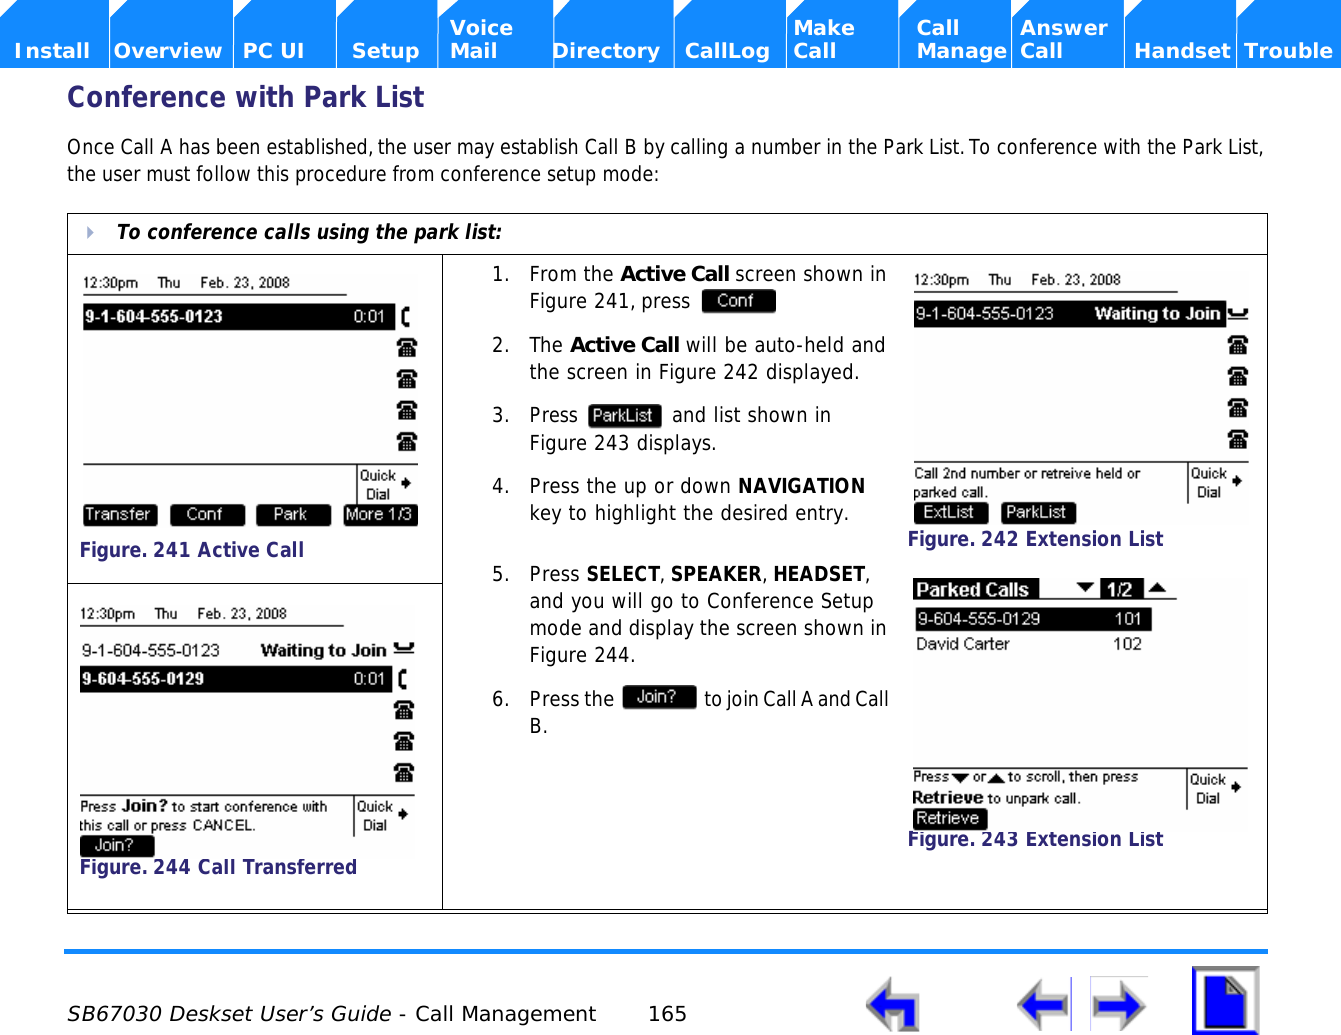
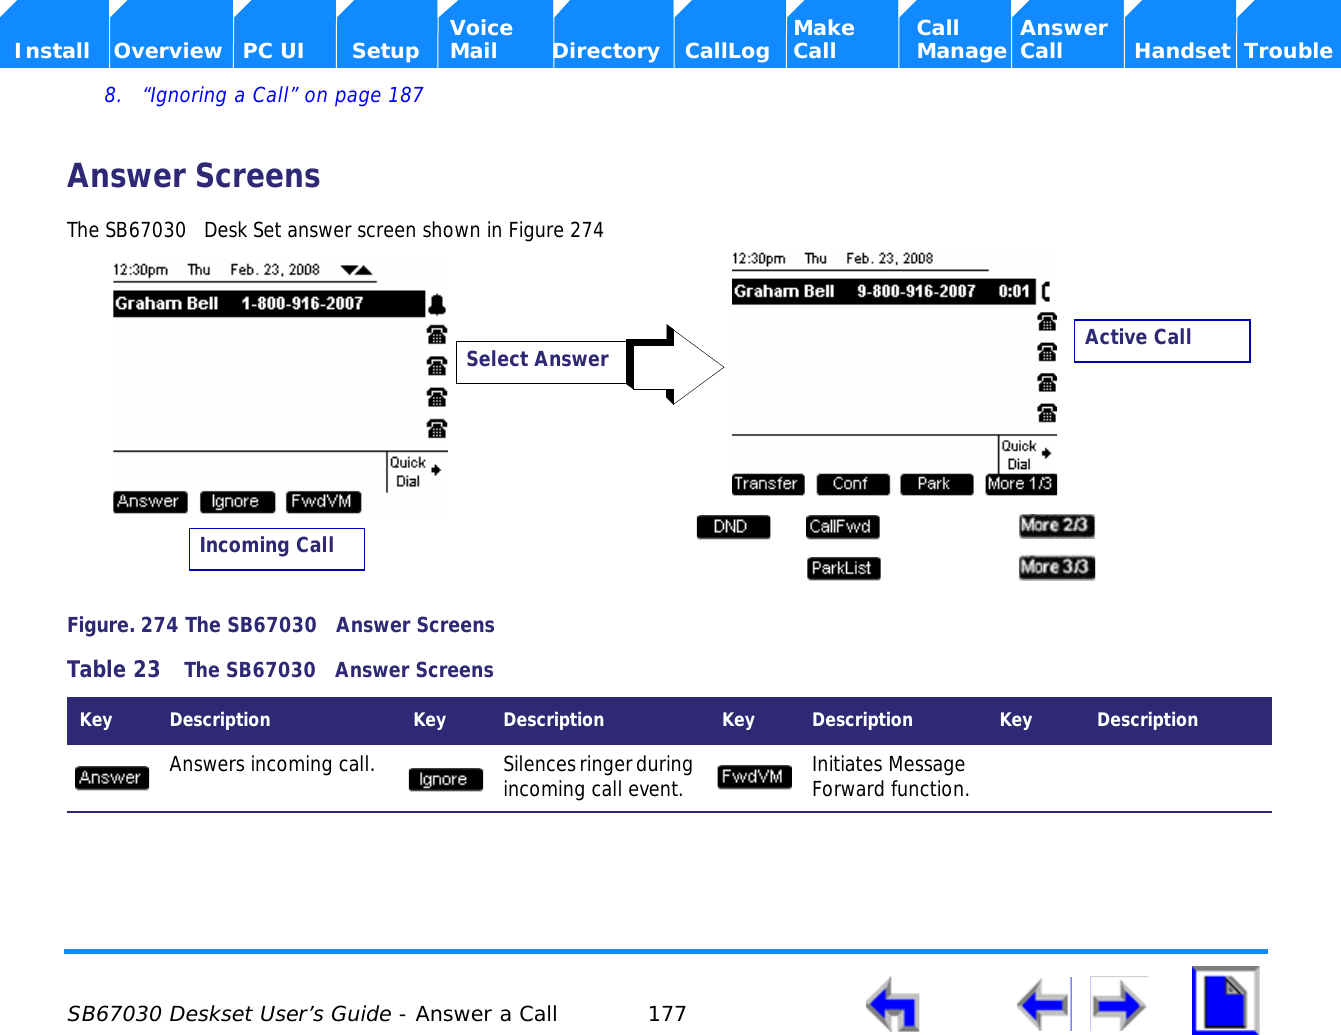
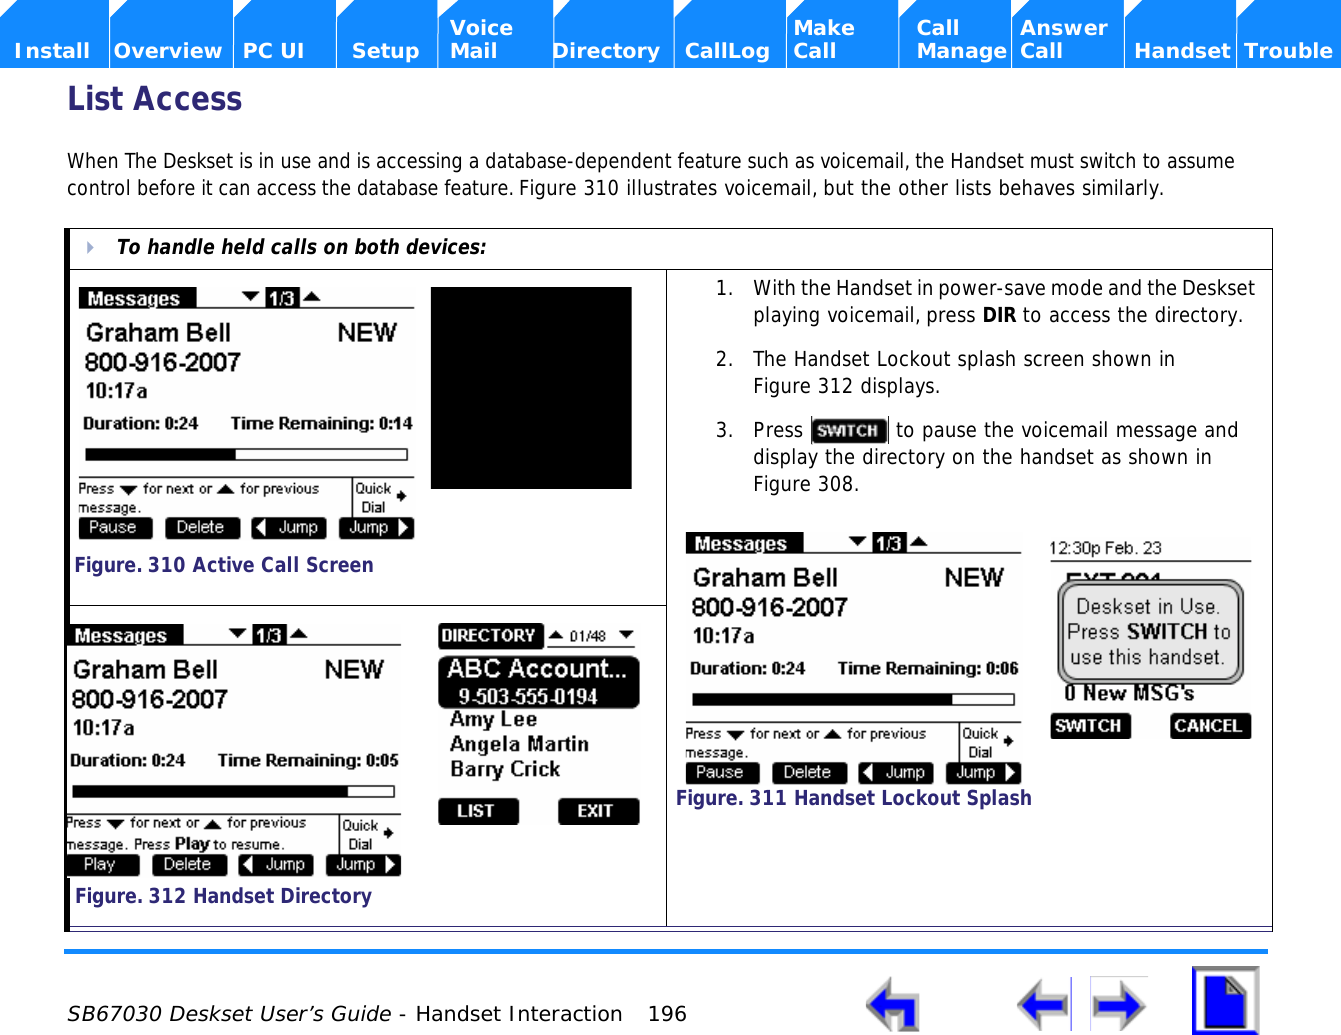
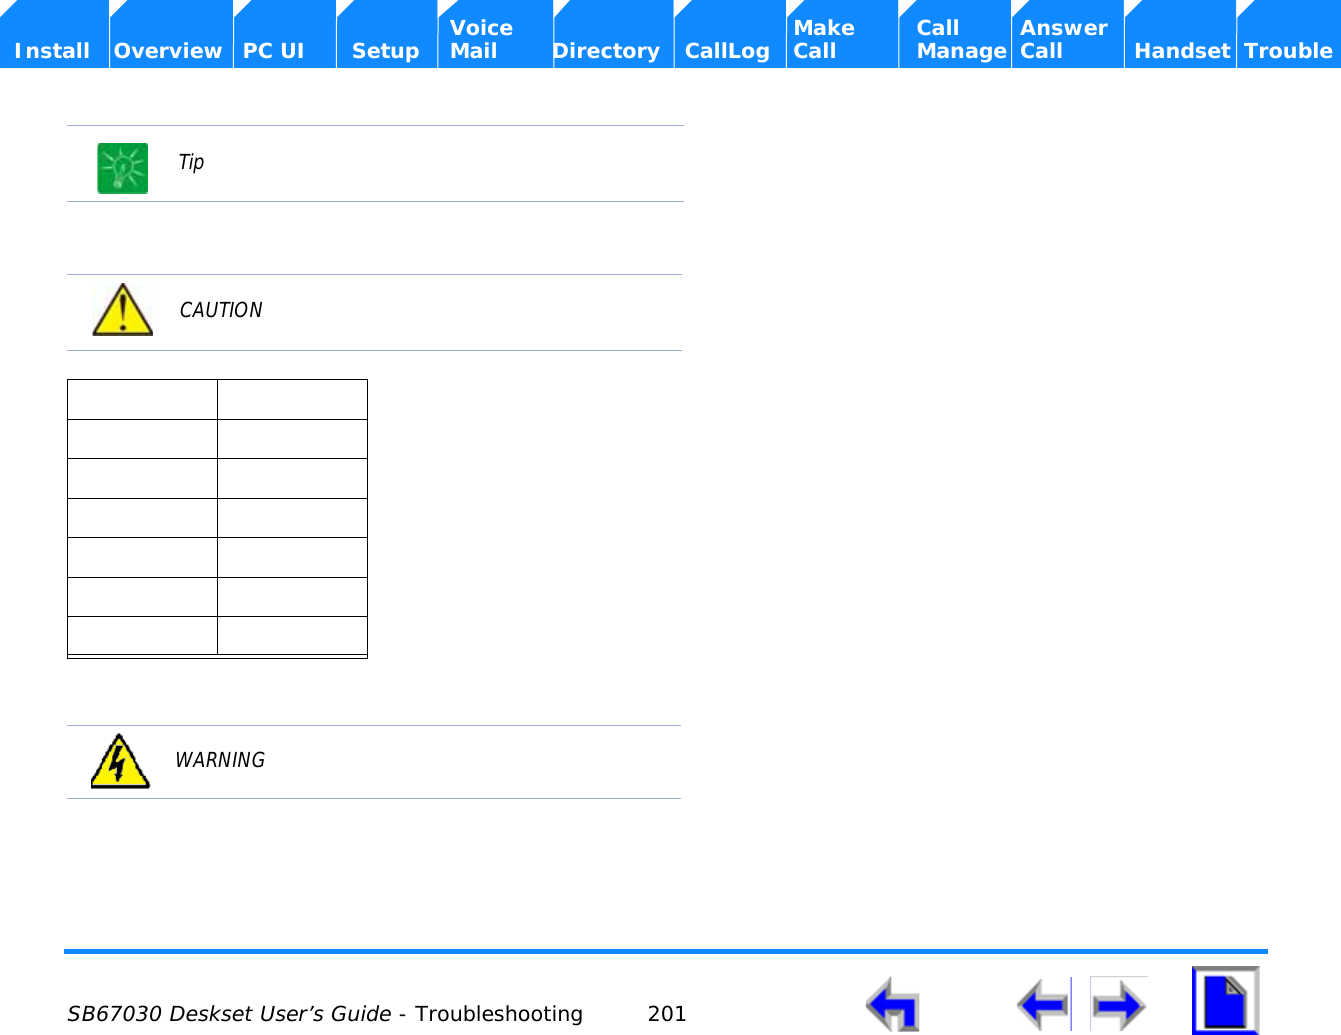
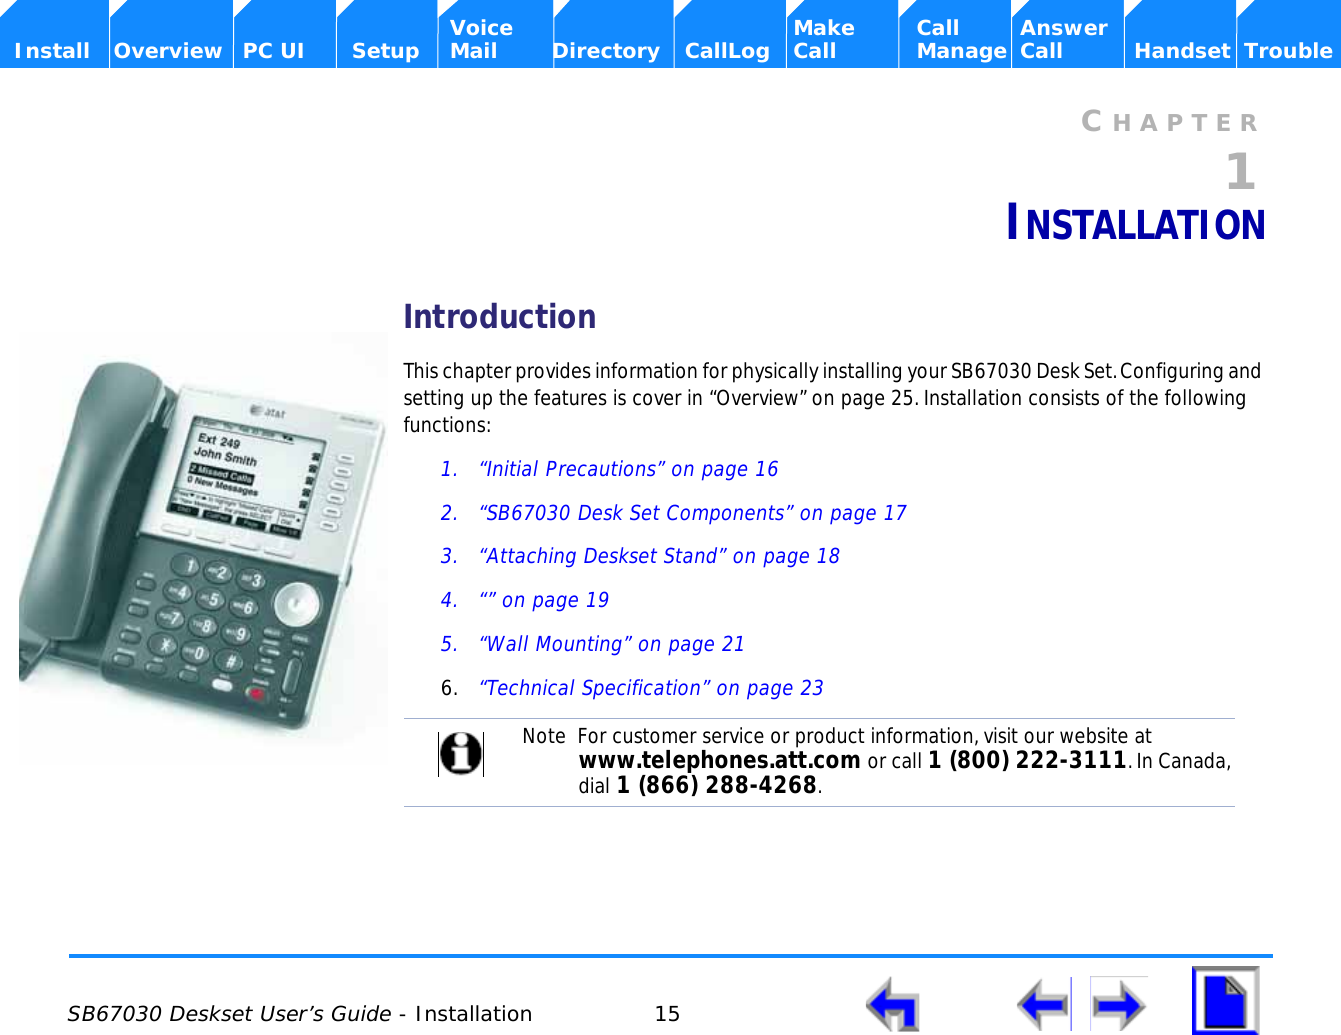
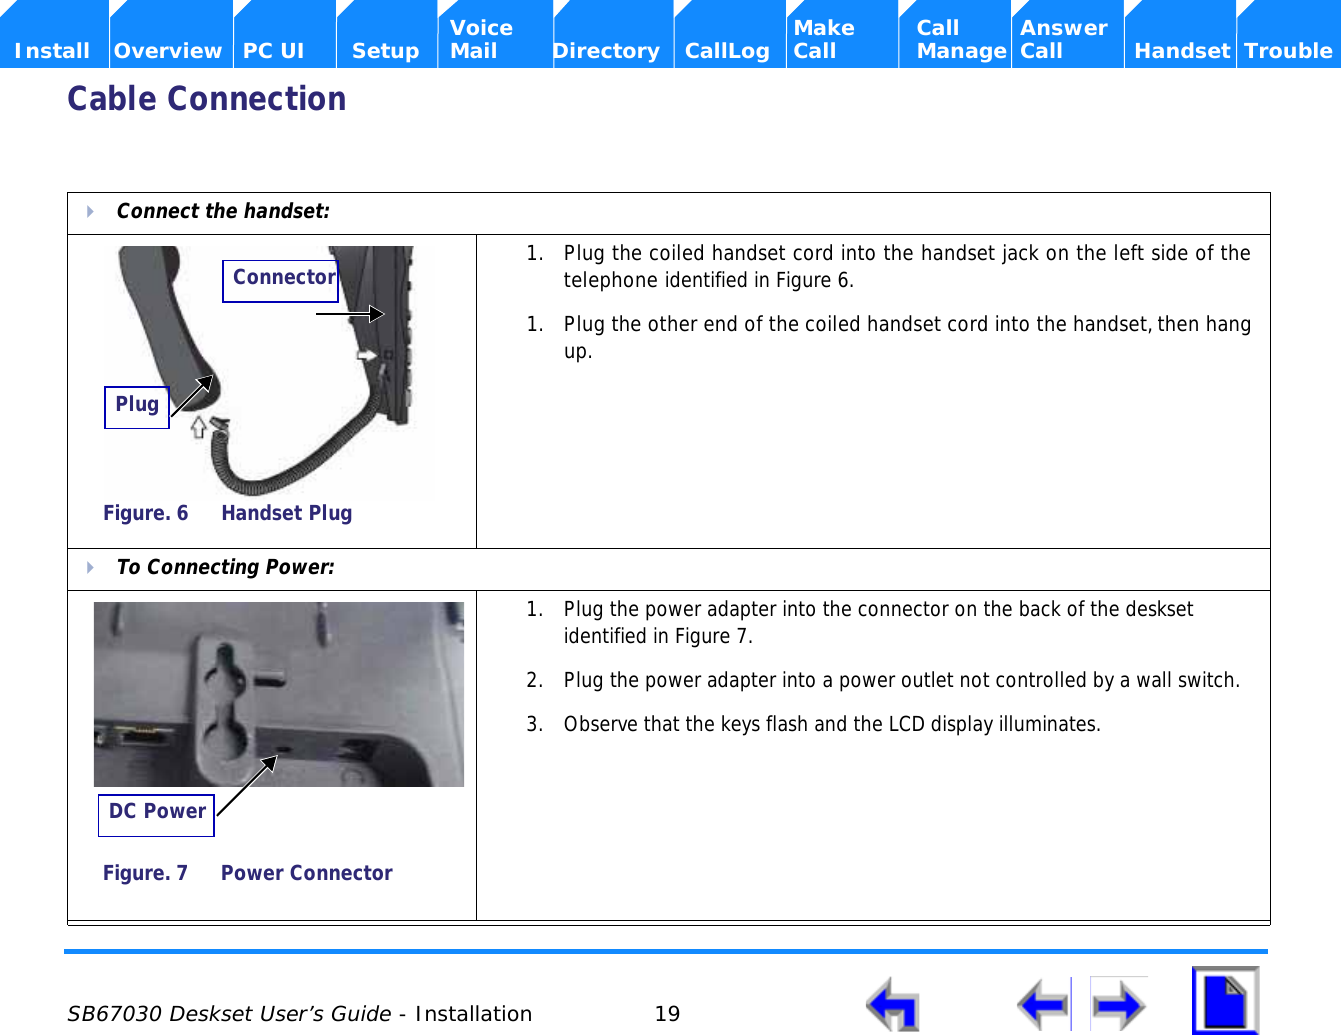
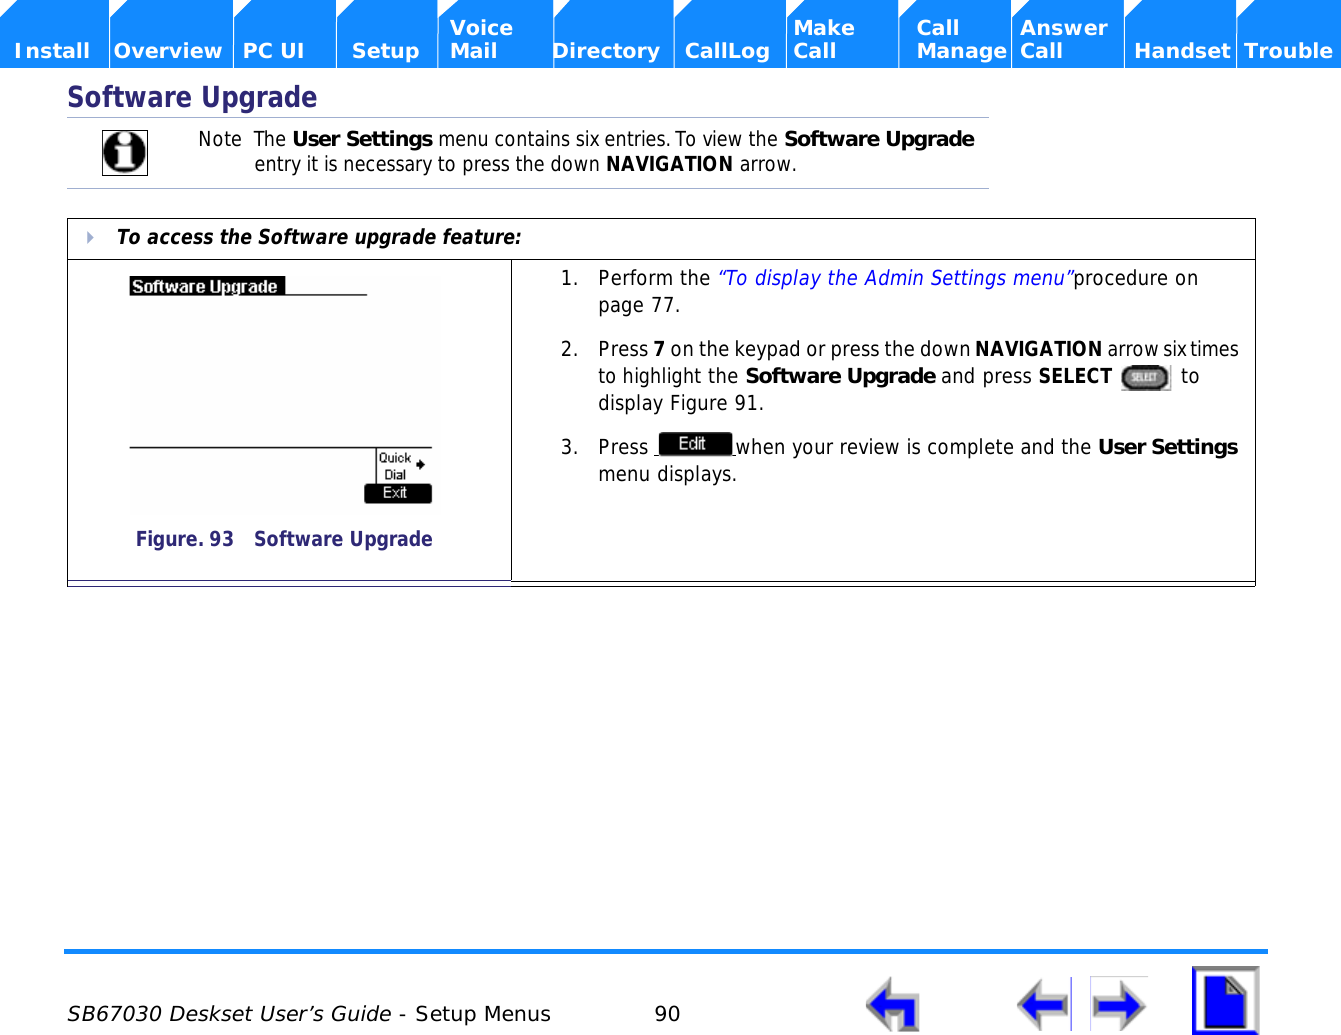
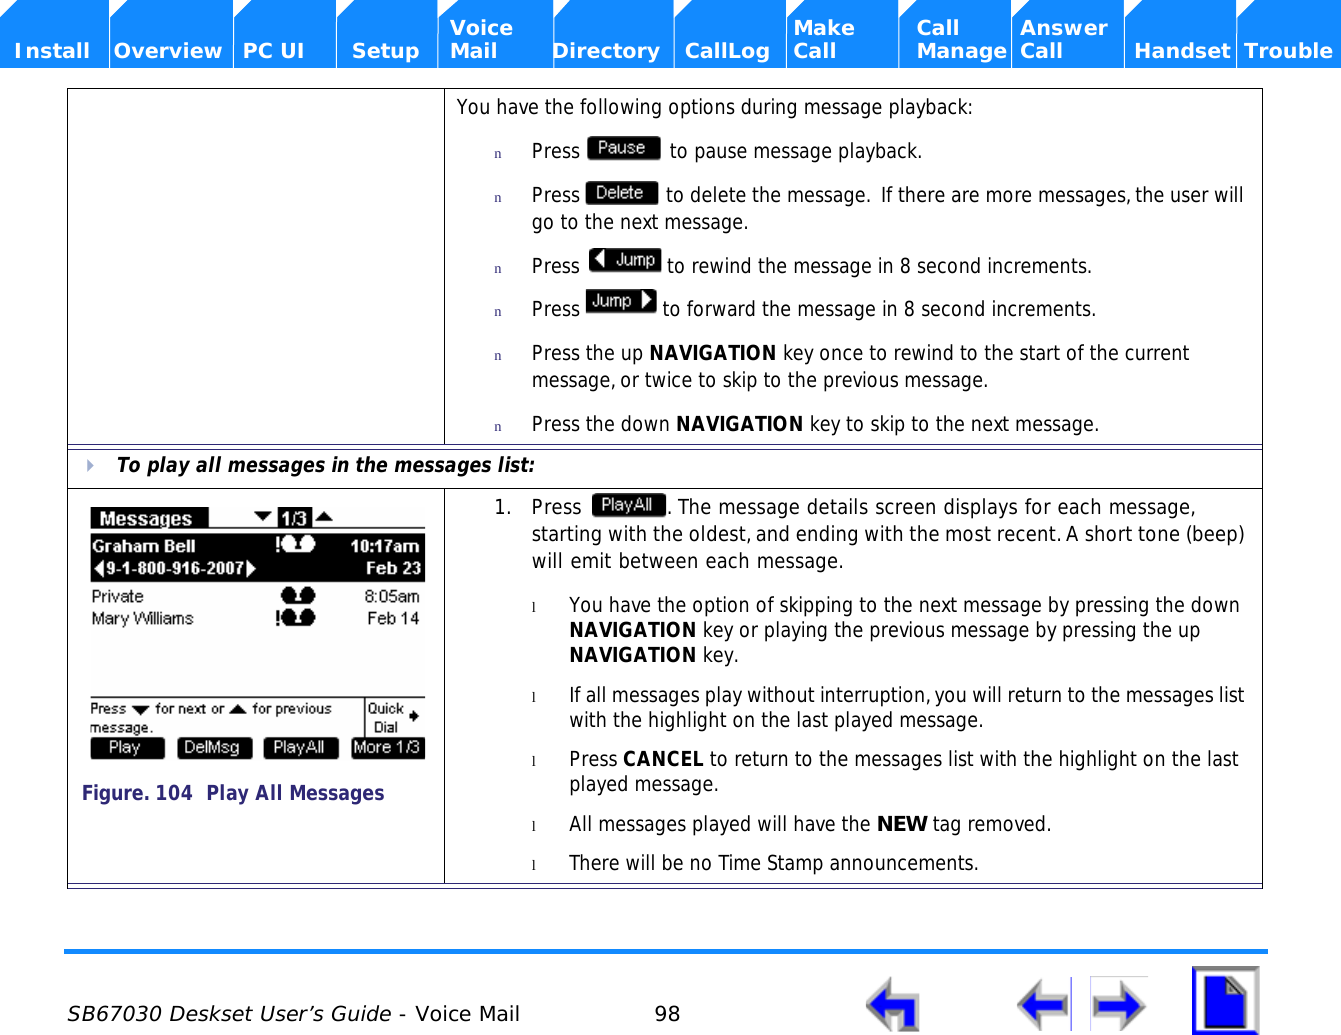
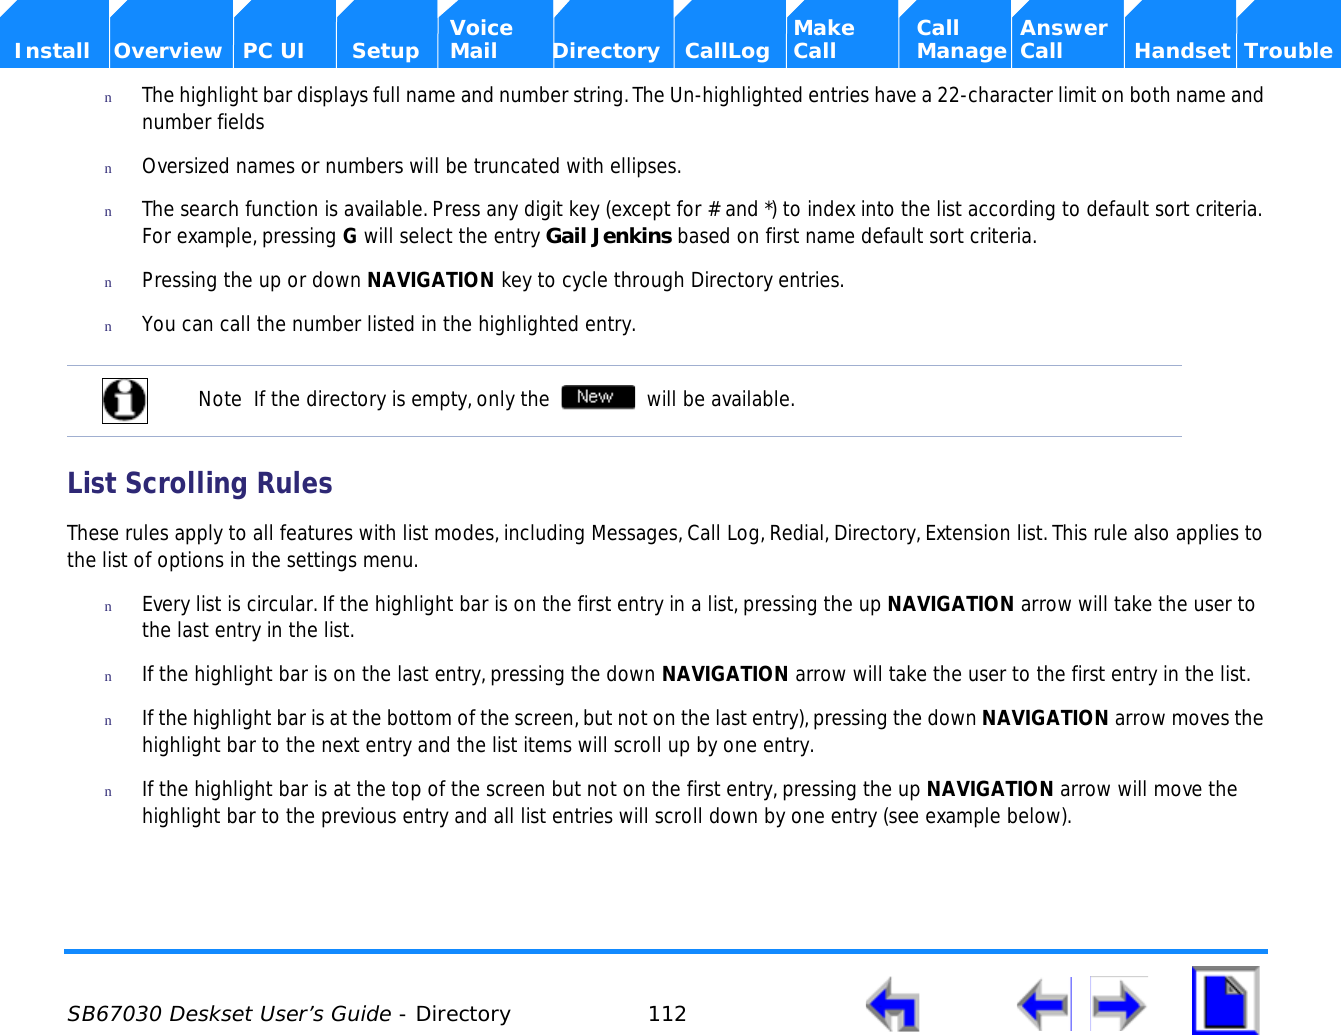
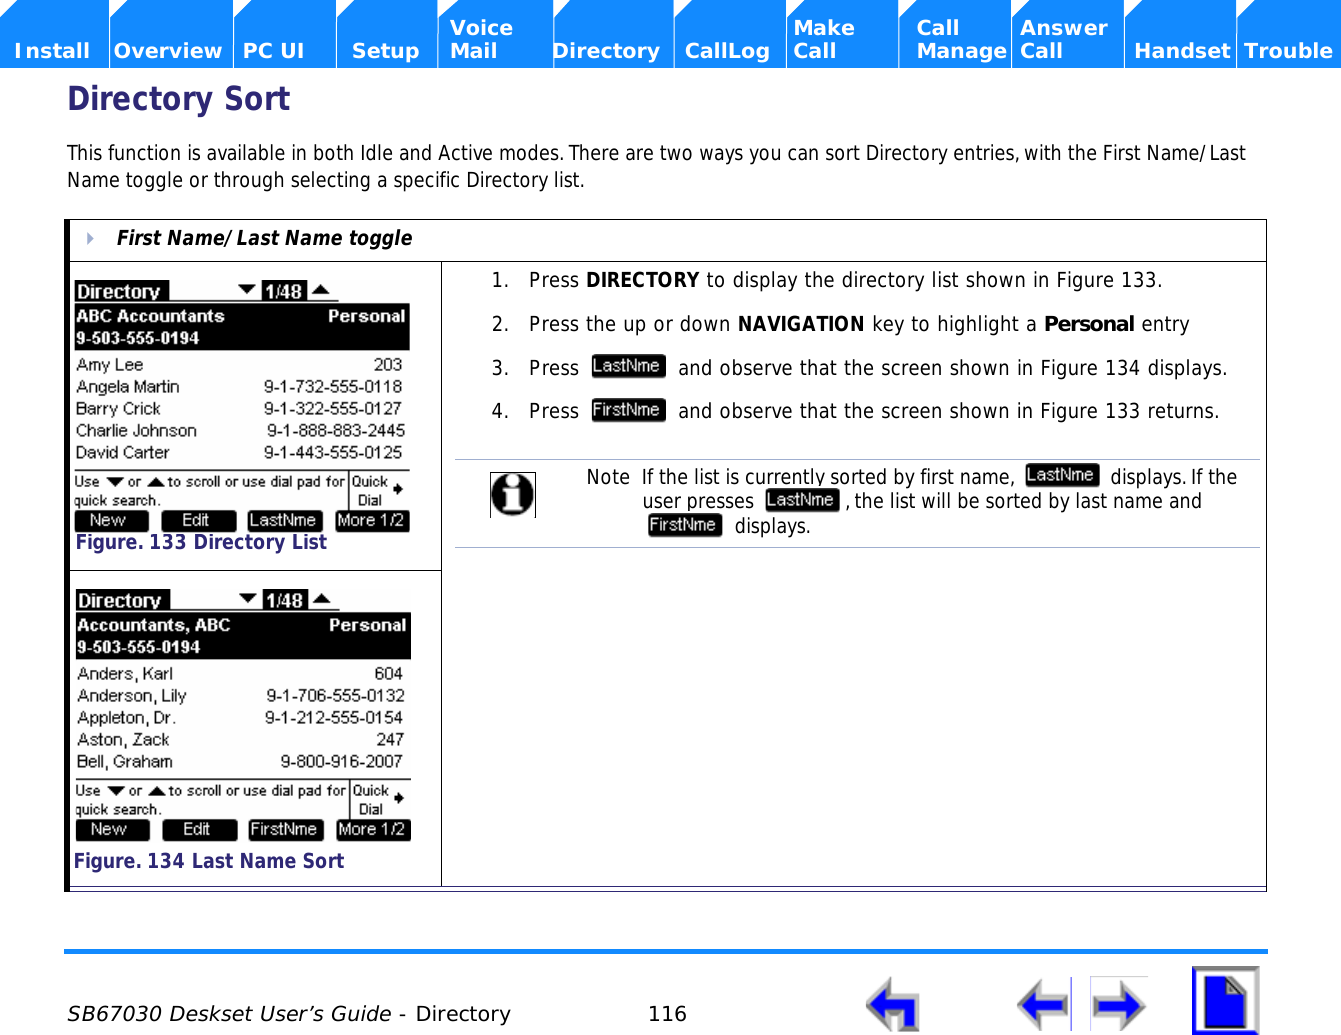
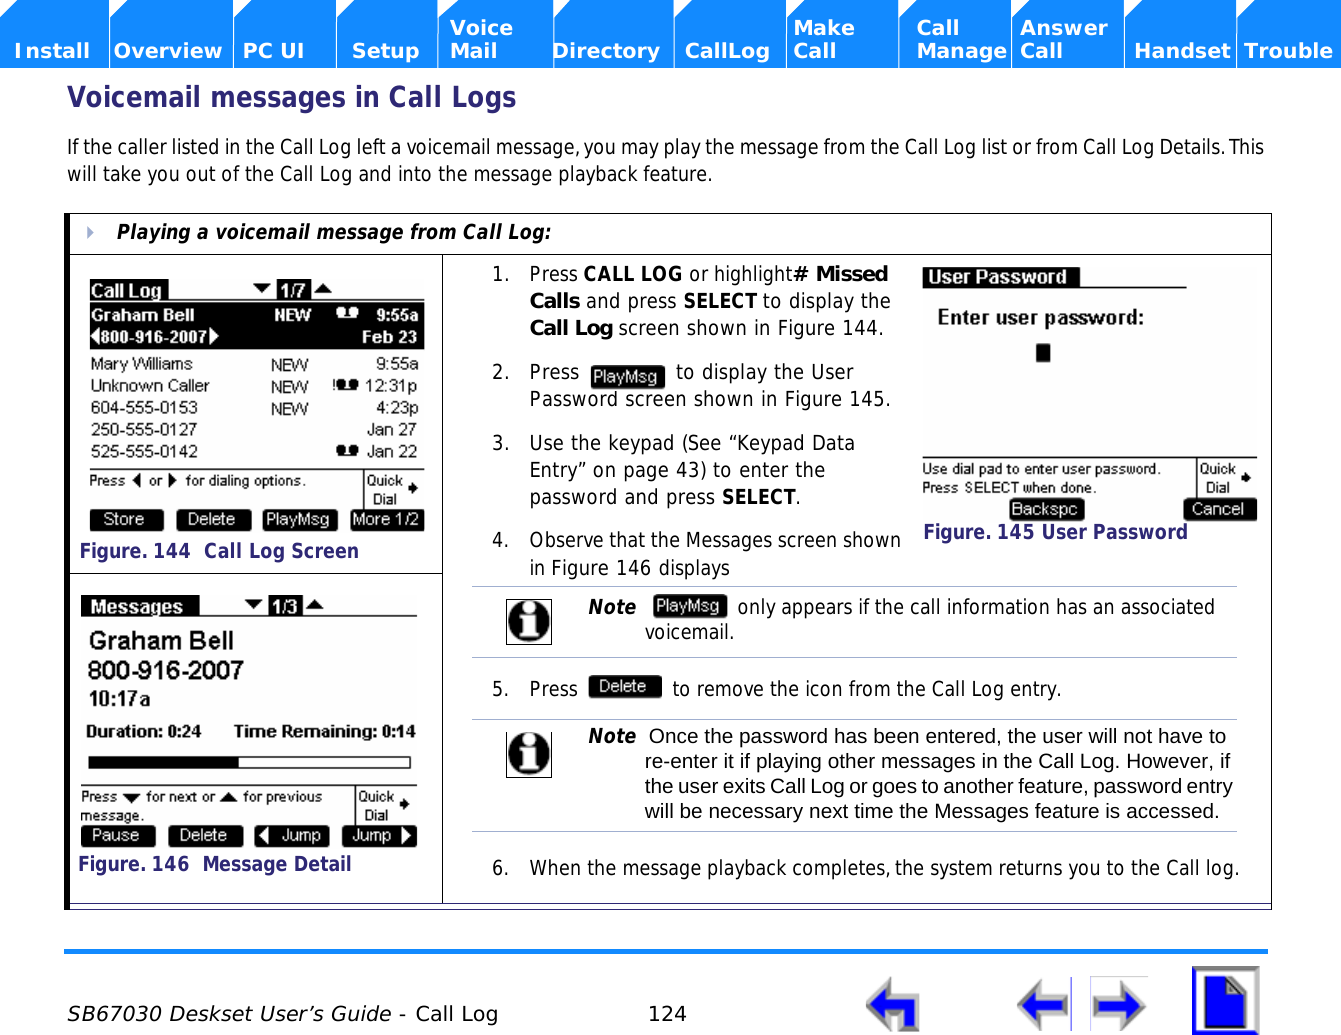
![SB67030 Deskset User’s Guide - Setup Menus 82 Voice Make Call Answer Install Overview PC UI Setup Mail Directory CallLog Call Manage Call Handset TroubleFwd/Trans to lineThe system administrator may enable or disable the ability to forward or transfer a call to an outside line. This function is enabled by default. Disabling this function will prohibit the user from sending a call to an outside line via the Gateway.To toggle the Forward/Transfer to an outside line:1. Perform the “To display the Admin Settings menu”procedure on page 77. 2. Press 2 on the keypad. or press the down NAVIGATION arrow to move the highlight to Fwd/Trans to Line and press SELECT ,3. Observe that the Fwd/Trans to line menu shown in Figure 82 displays. 4. Press the left or right navigation key to toggle the setting from [Enabled] to [Disabled]. as shown in Figure 83.5. Press to accept the changes and return to the Admin Settings menu shown in Figure 74 on page 77.Figure. 82 Fwd/Trans to lineFigure. 83 Toggle Fwd/Trans](https://usermanual.wiki/VTech-Telecommunications/80-6563-00.Users-Manual-2/User-Guide-1109336-Page-82.png)
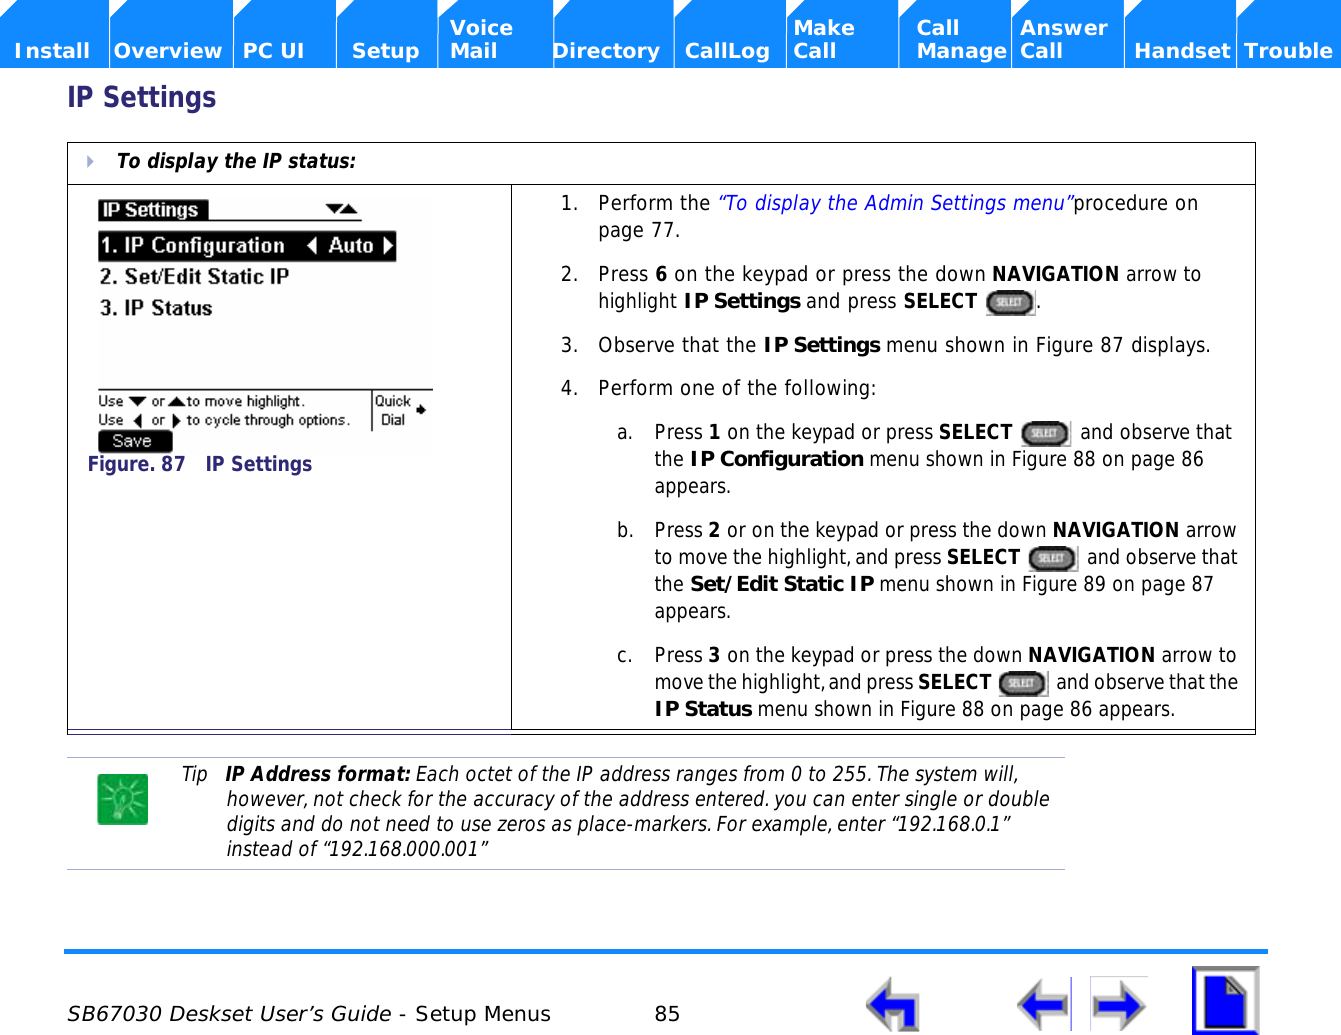
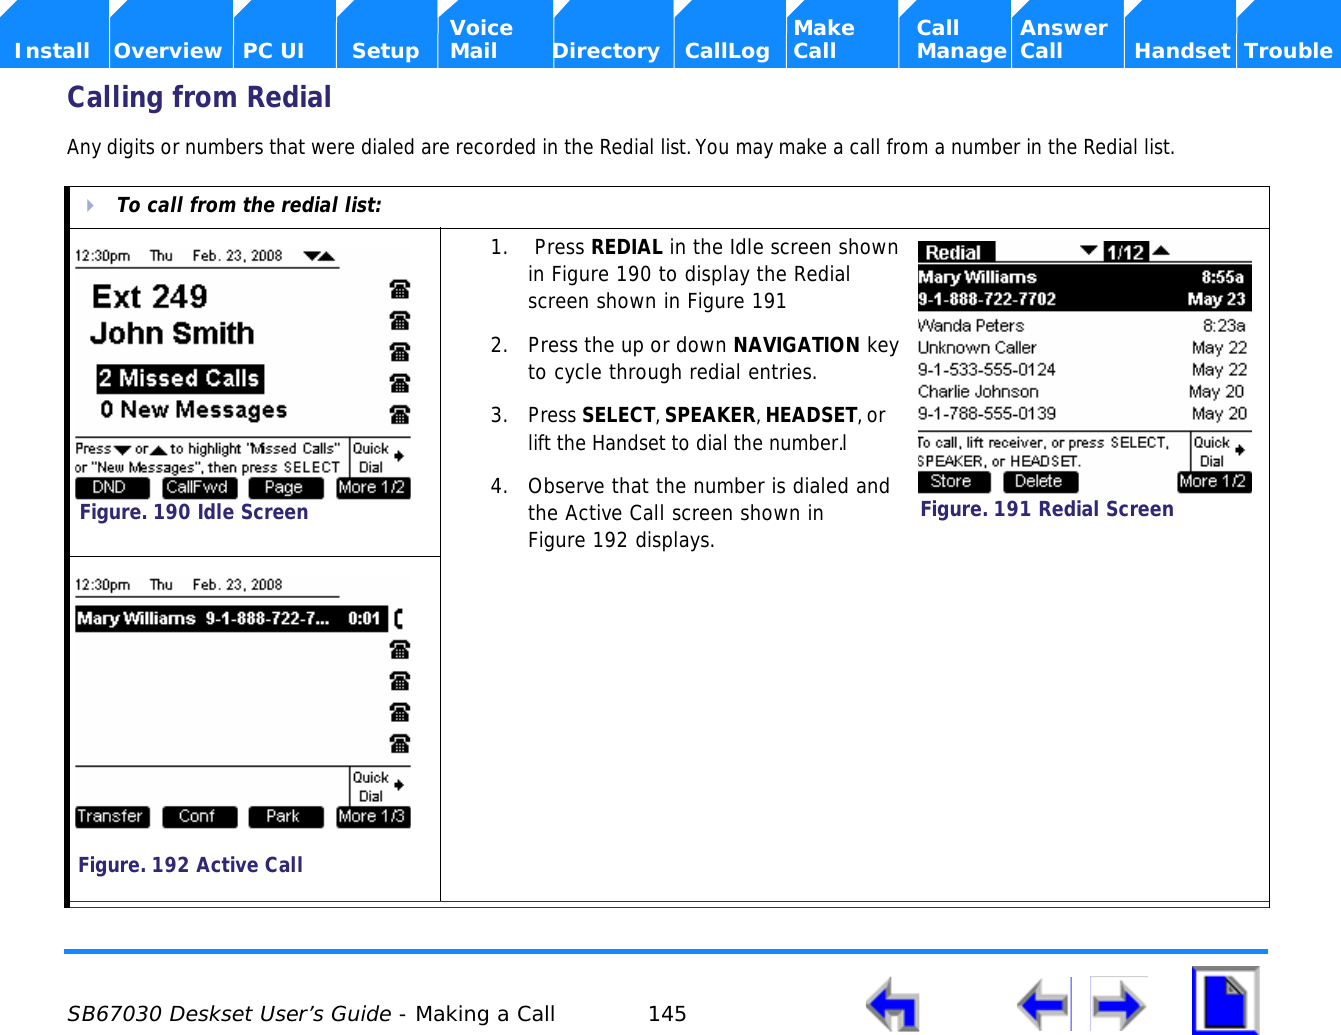
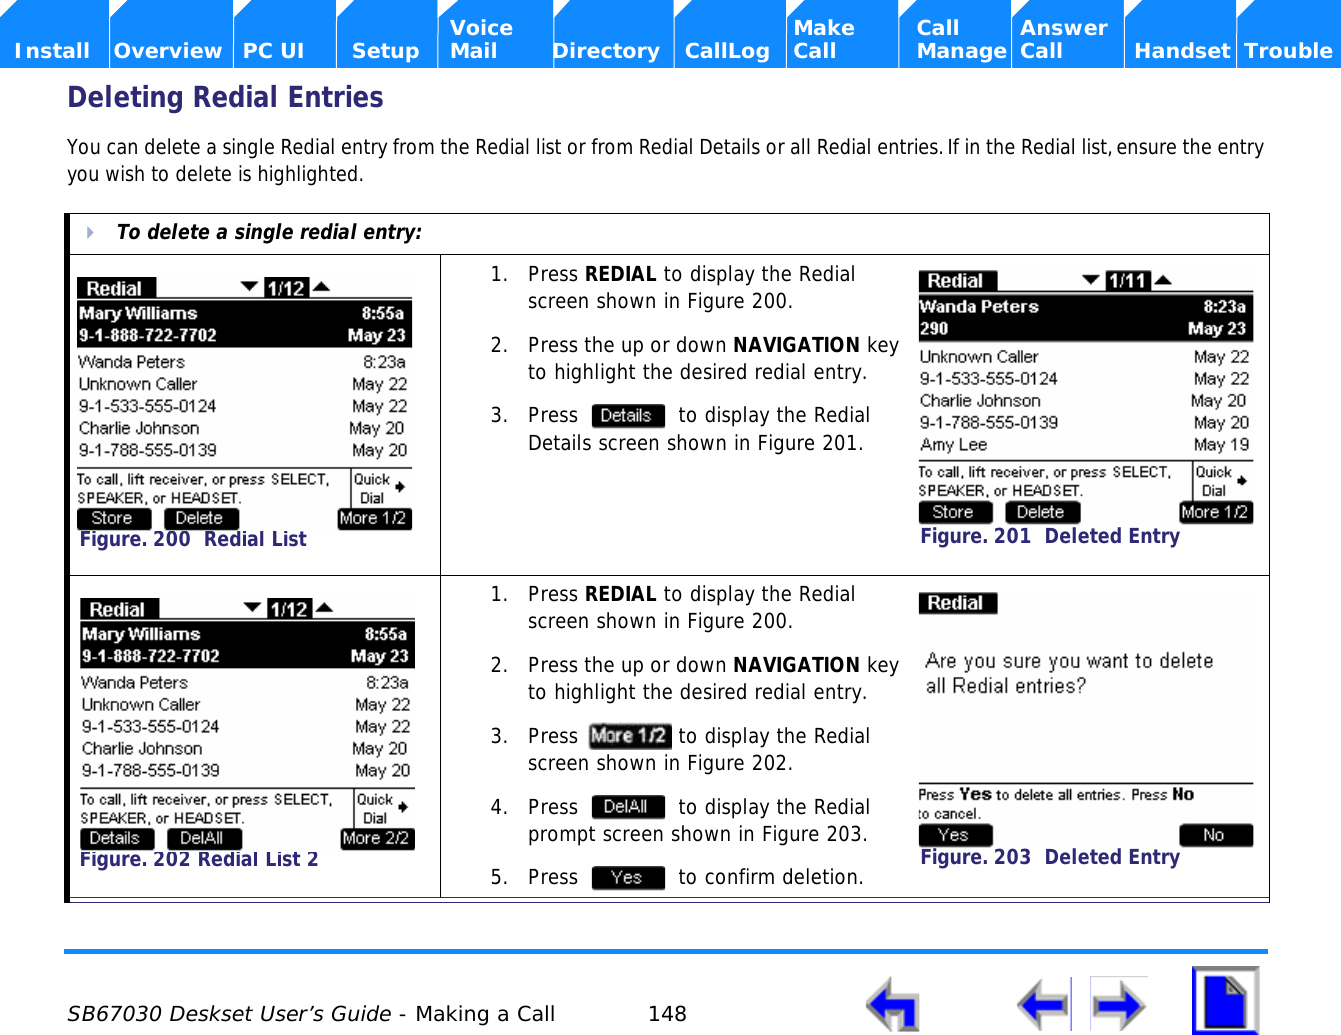
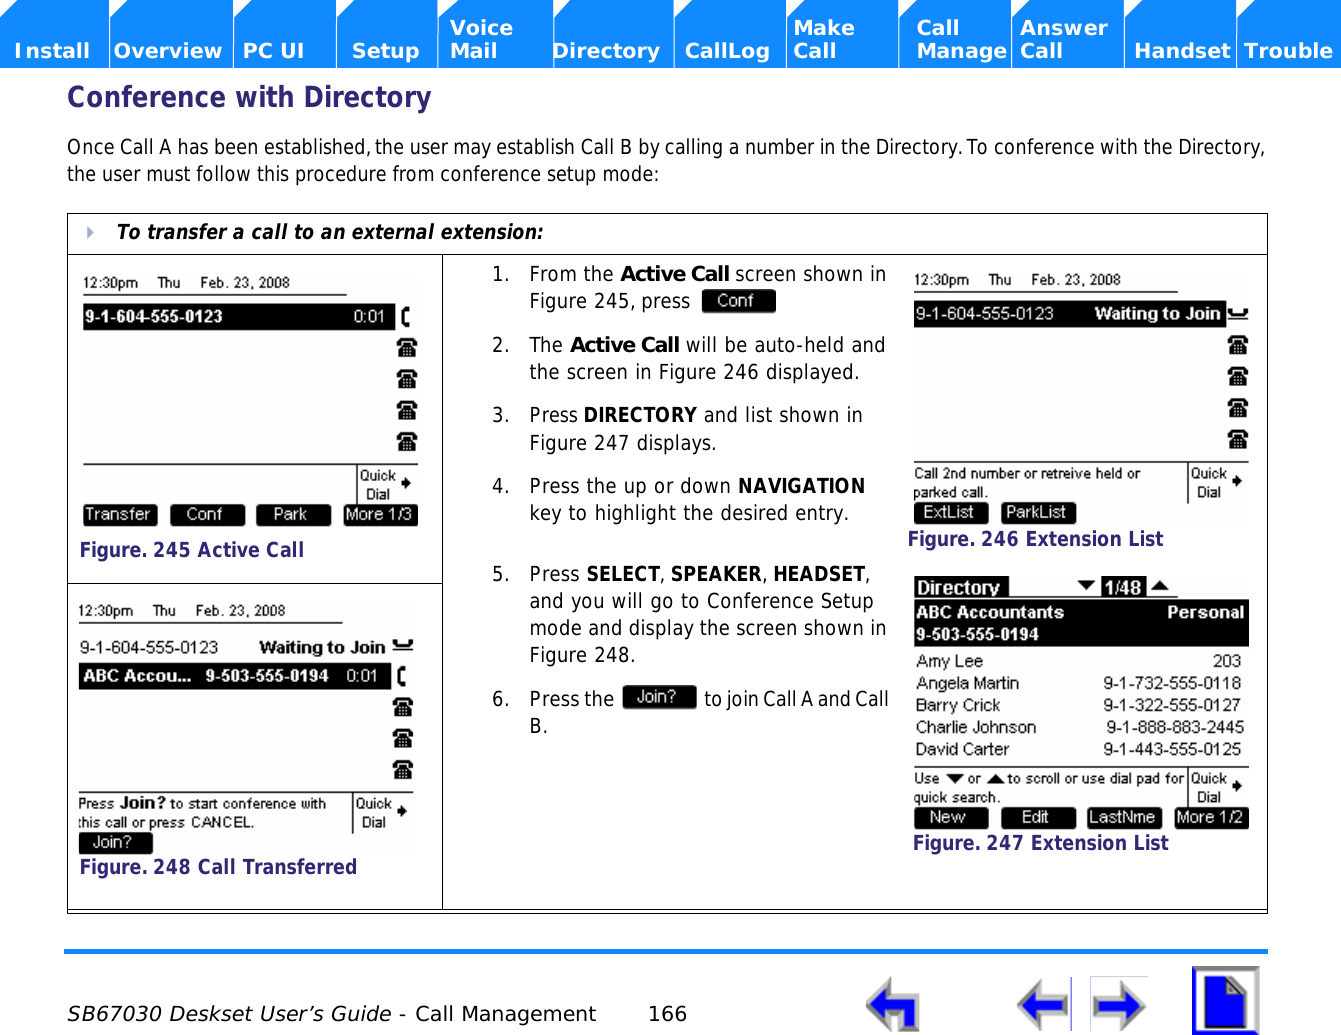
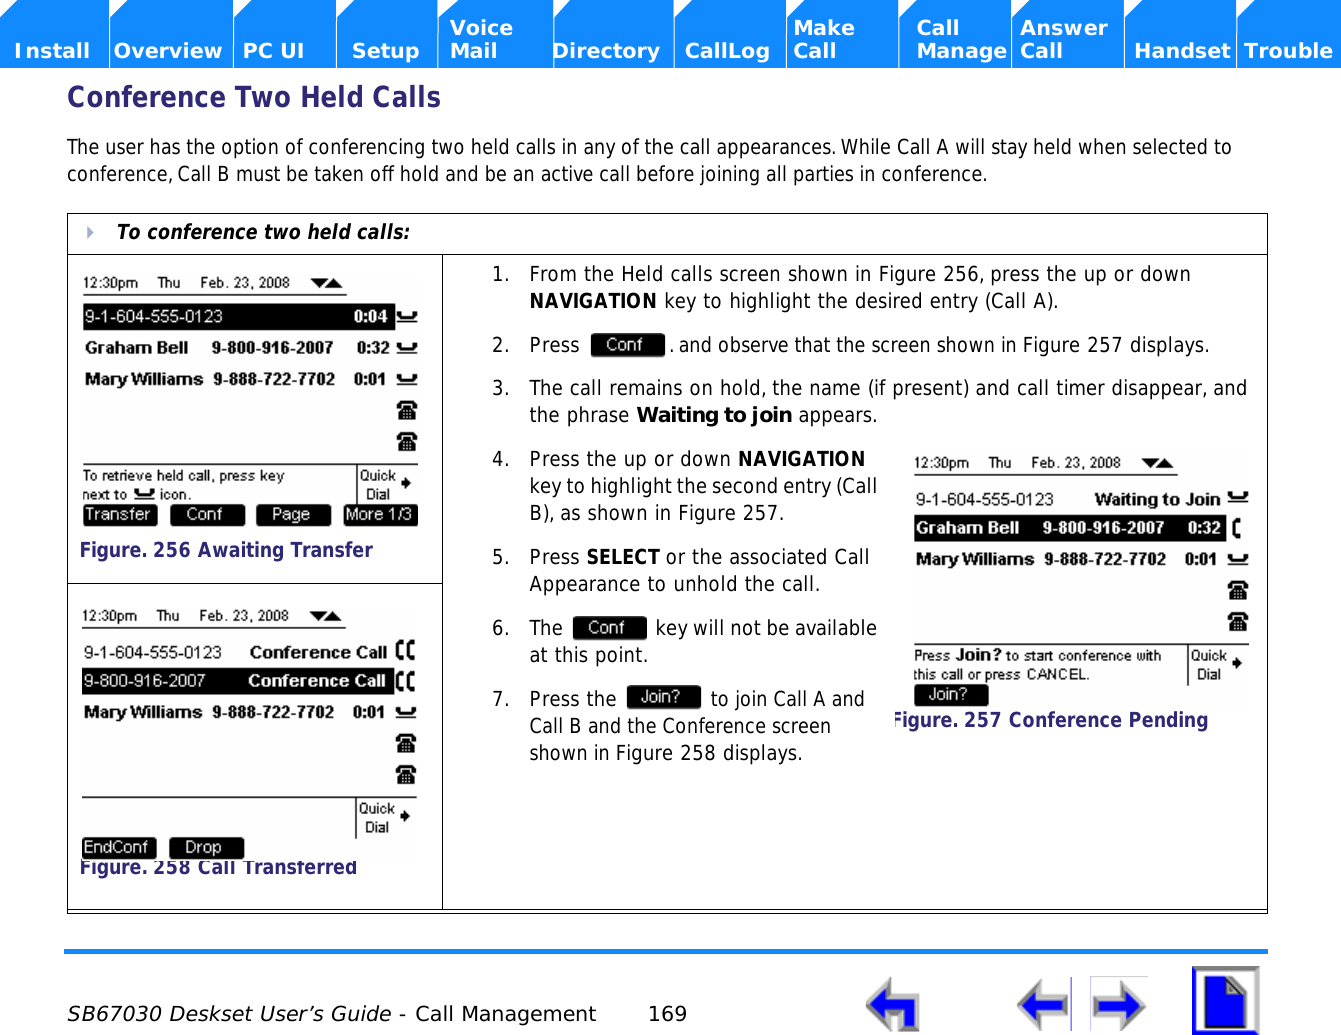
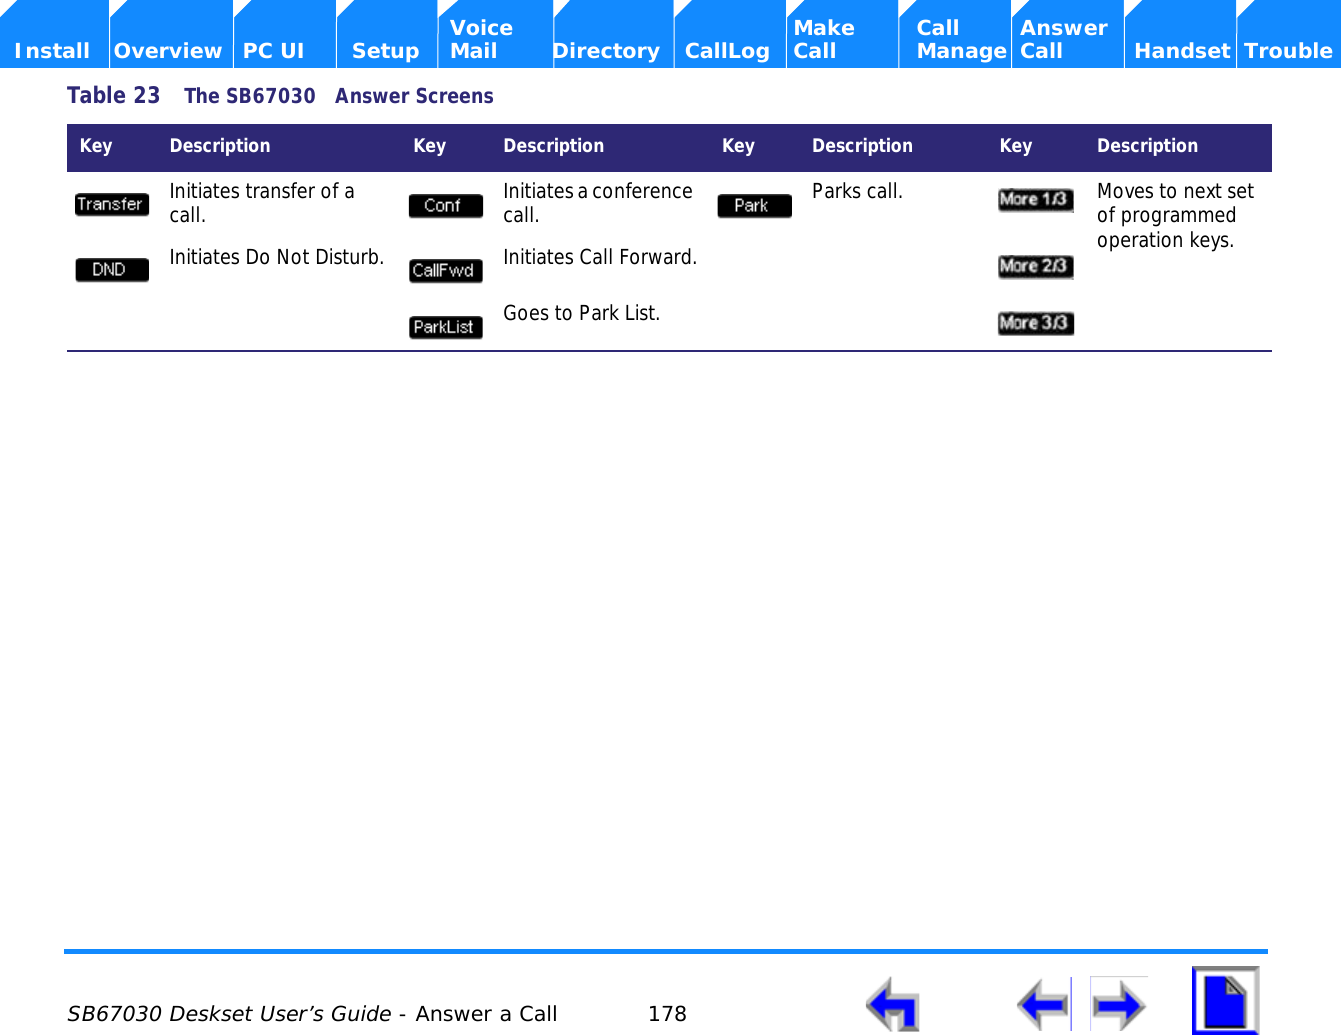
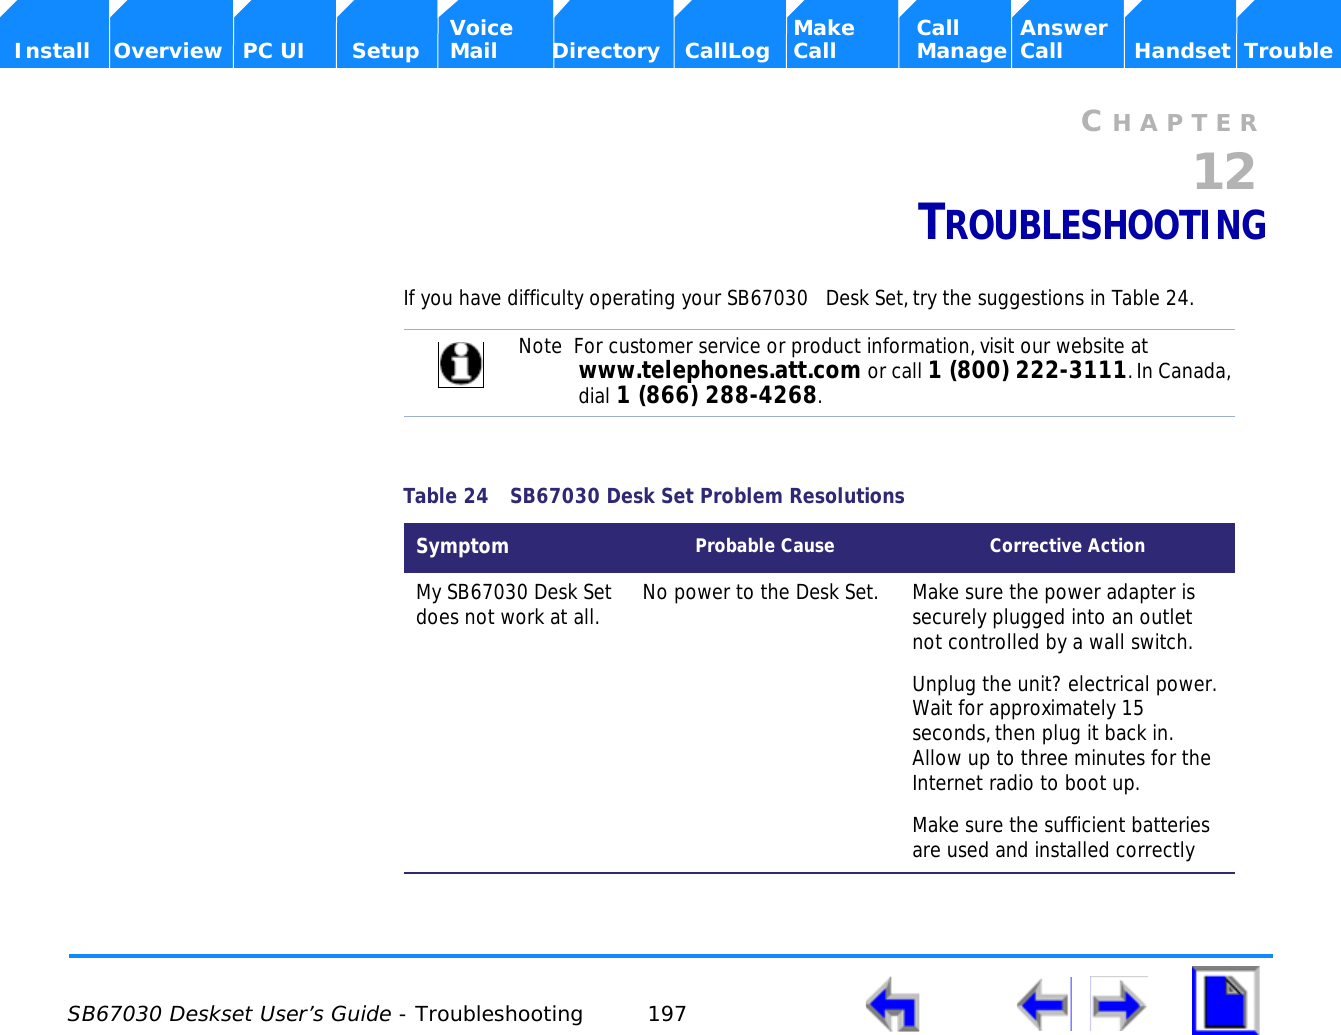
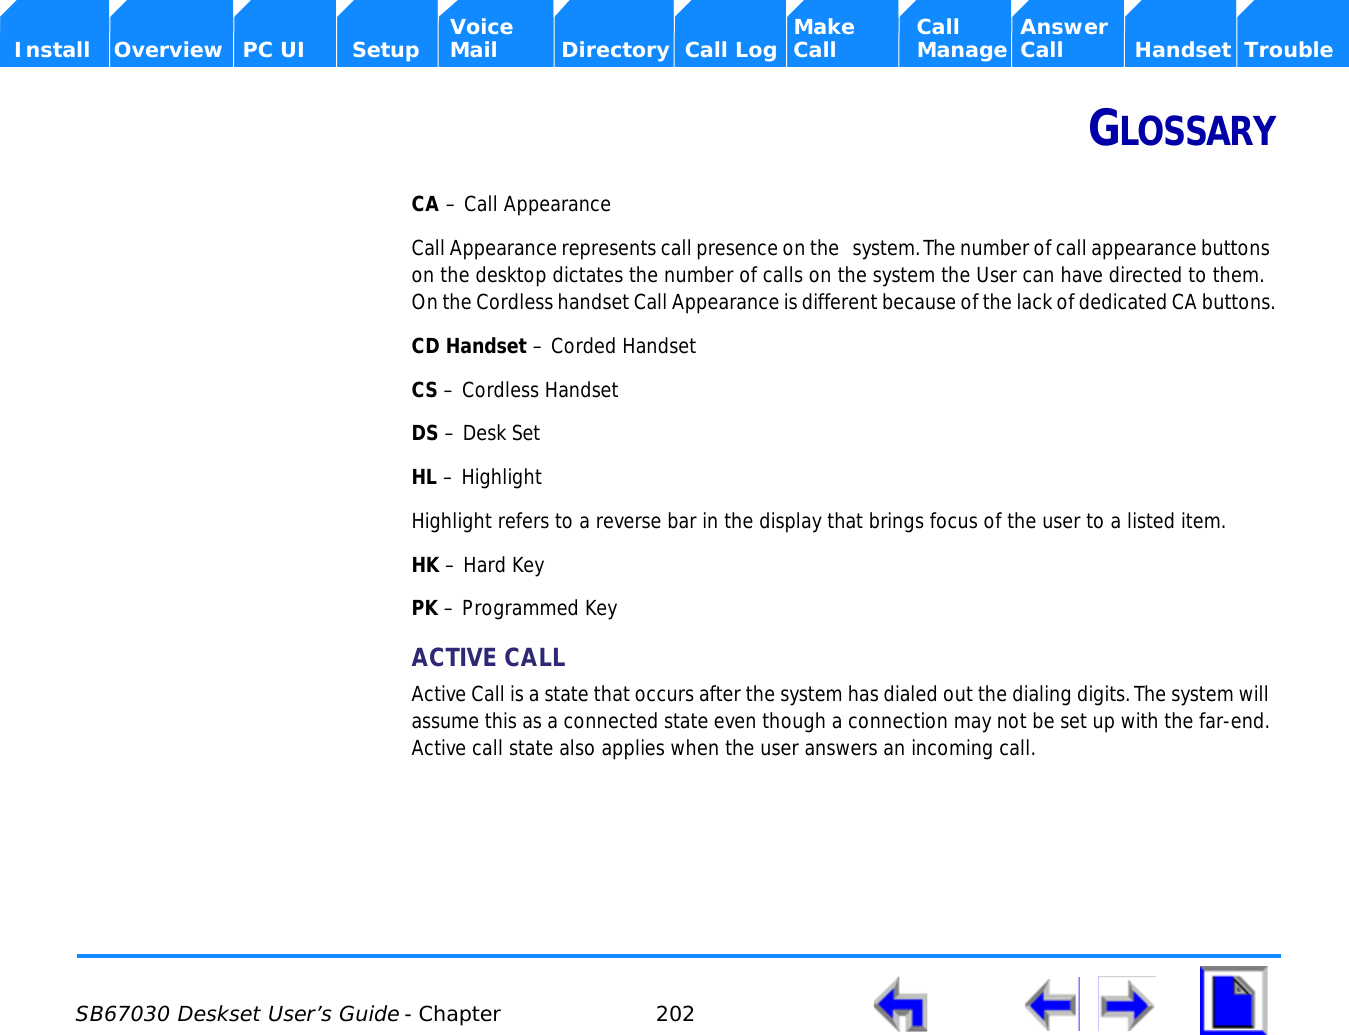
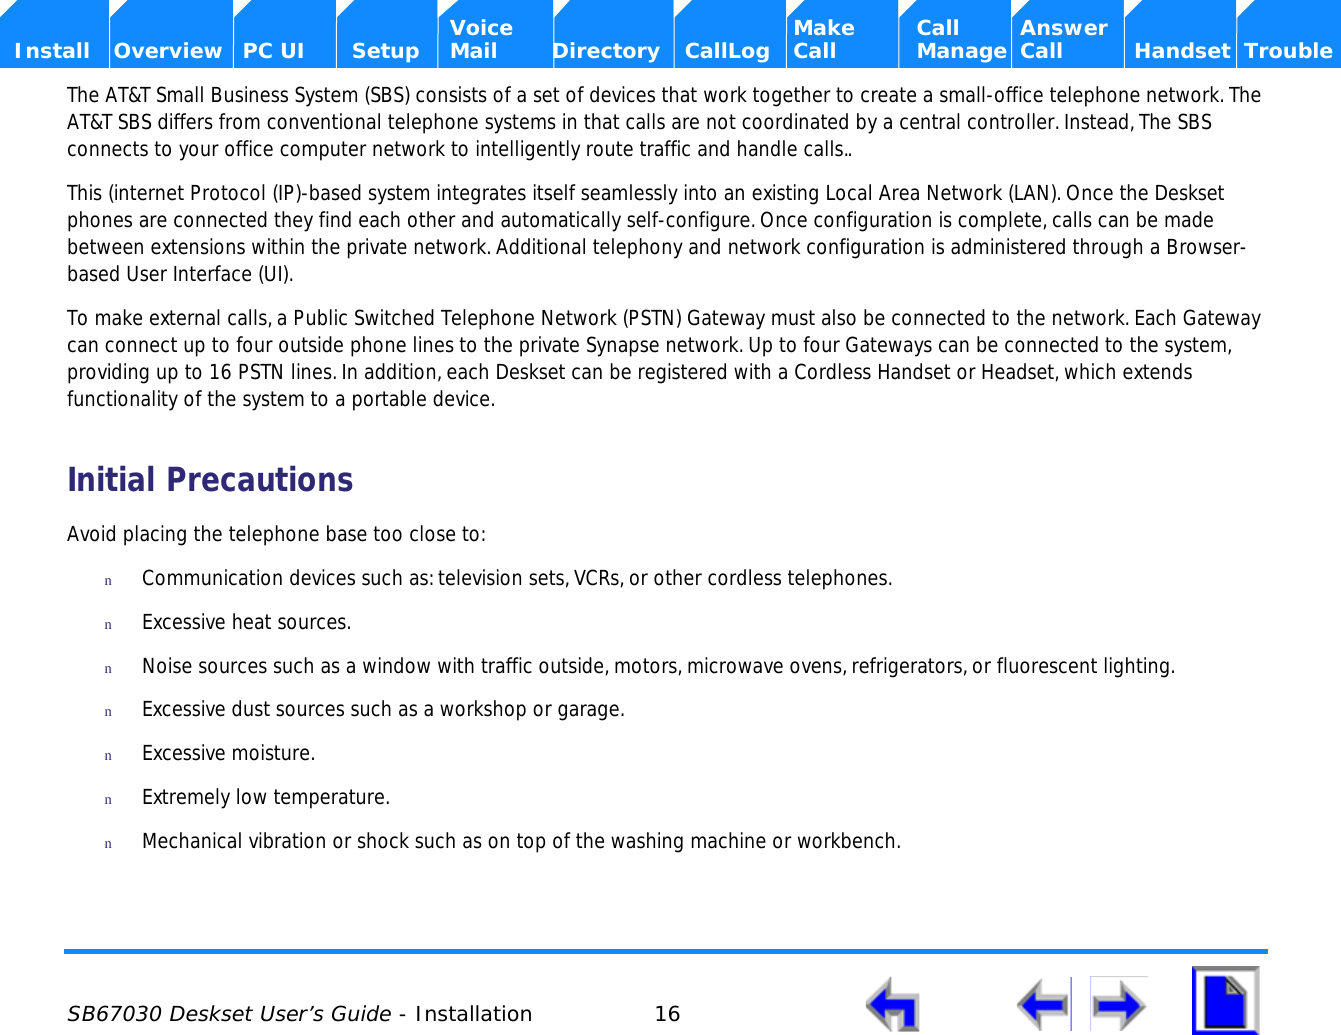
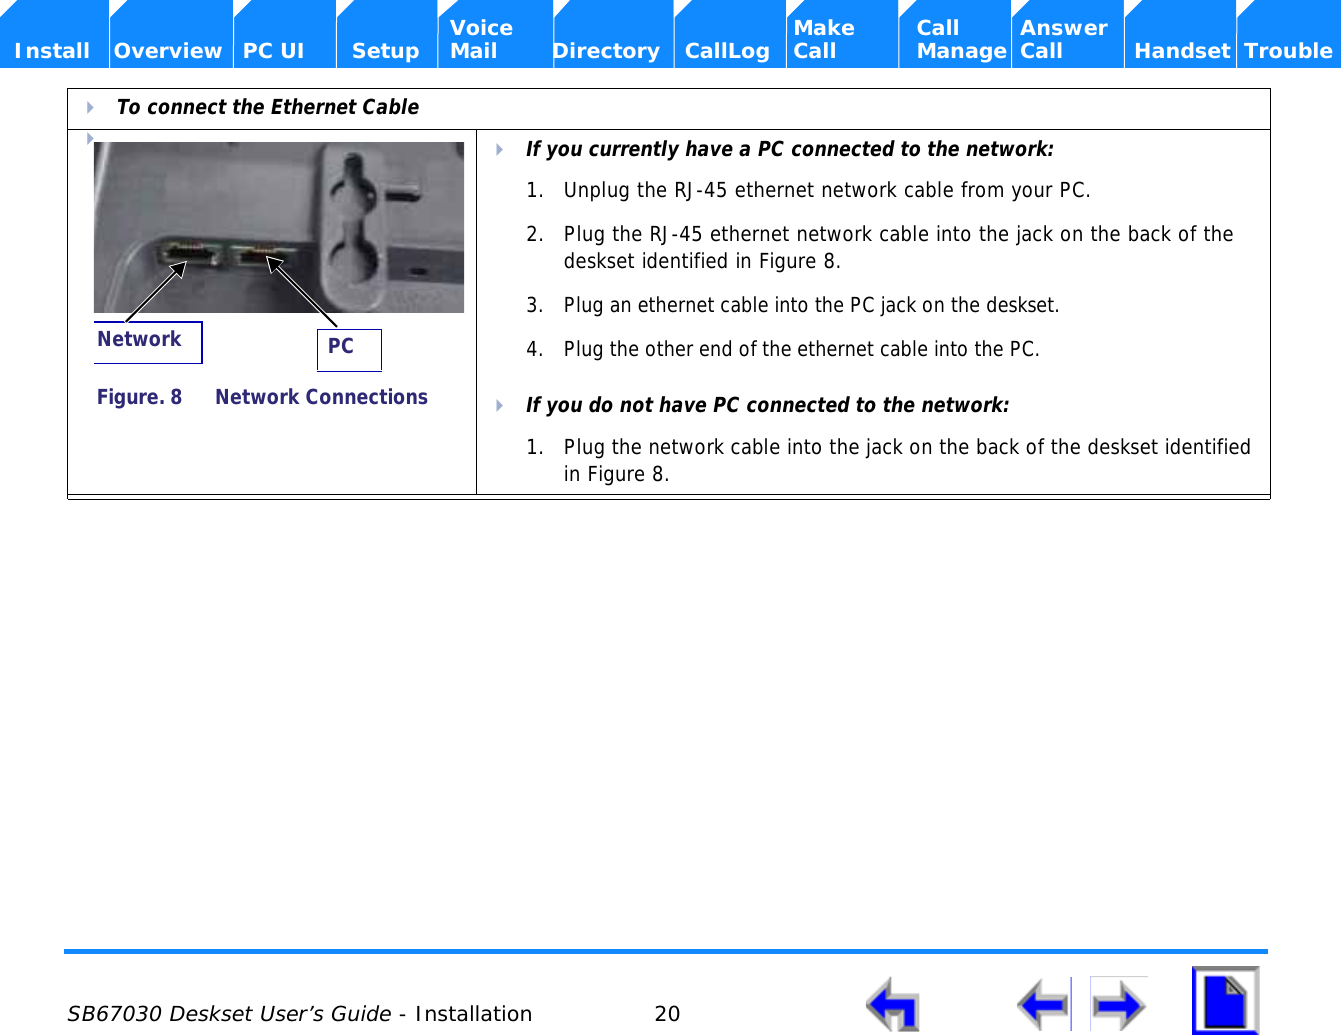
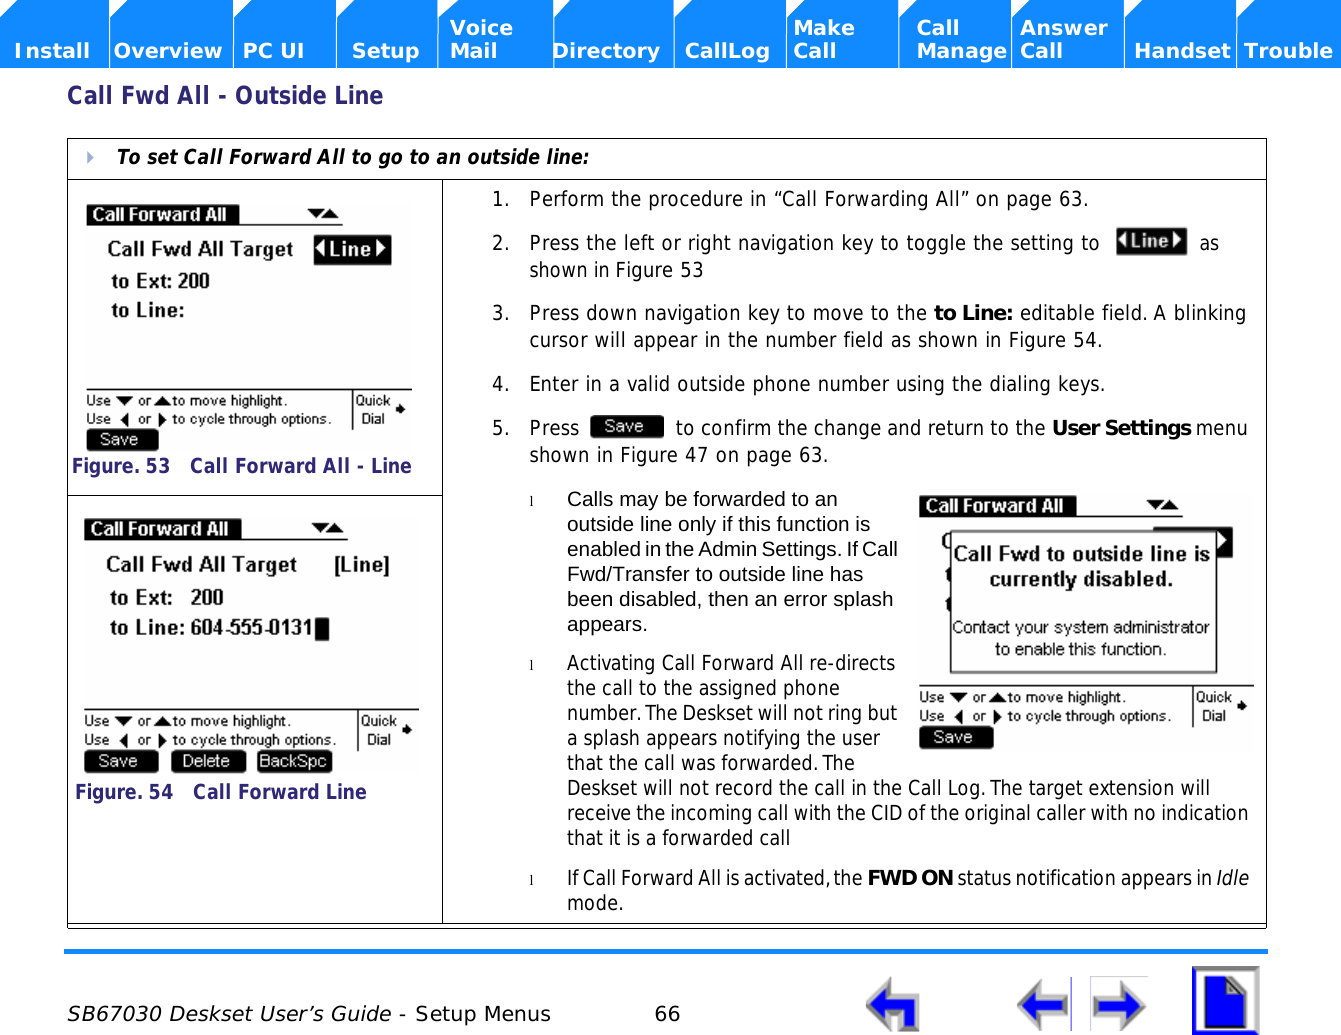
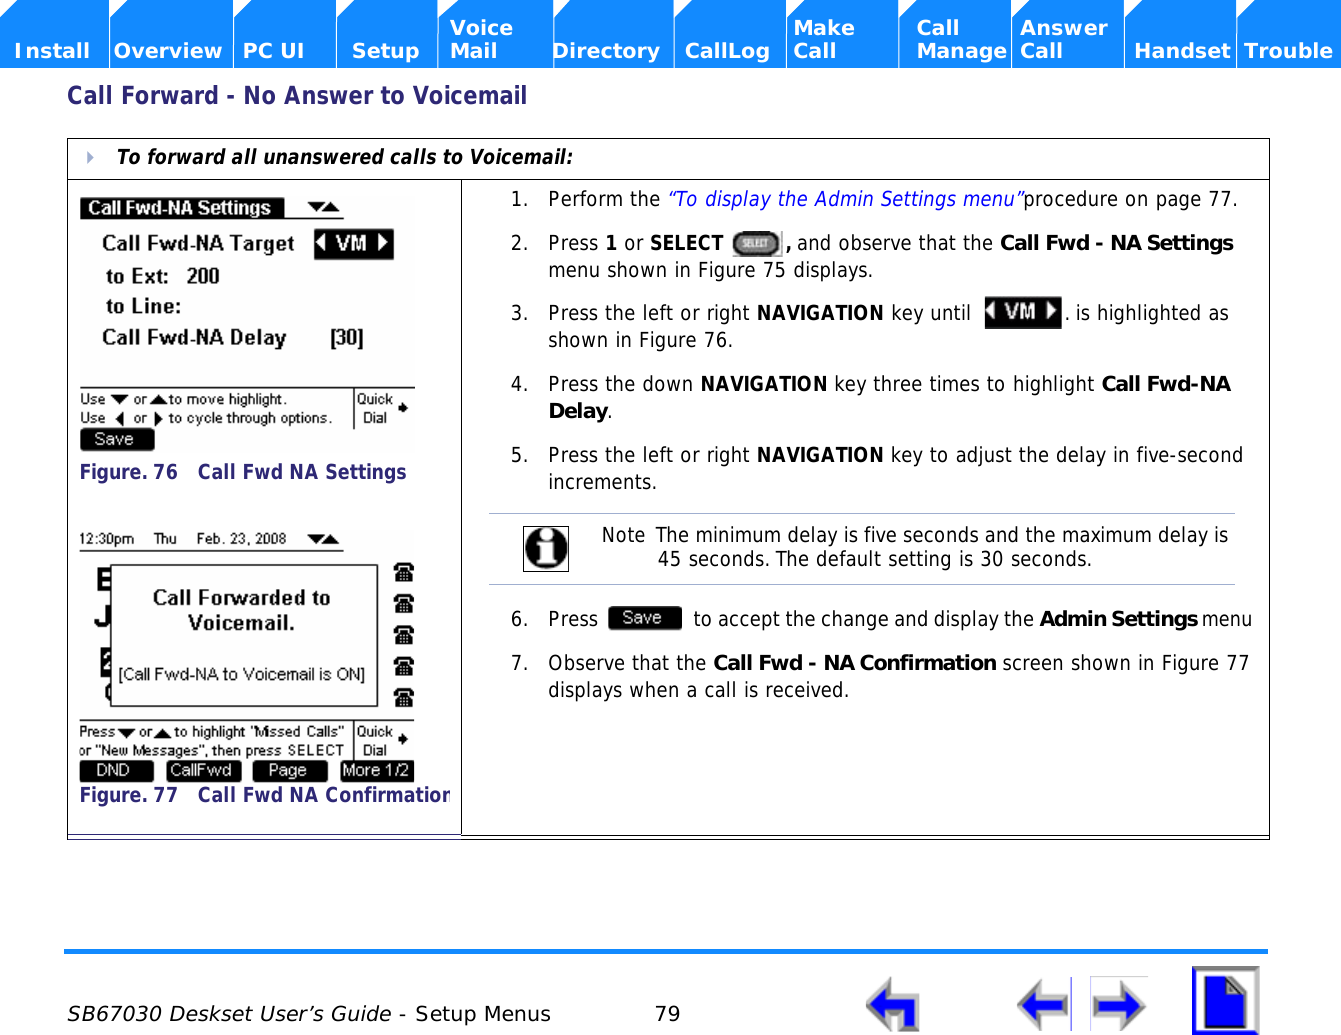
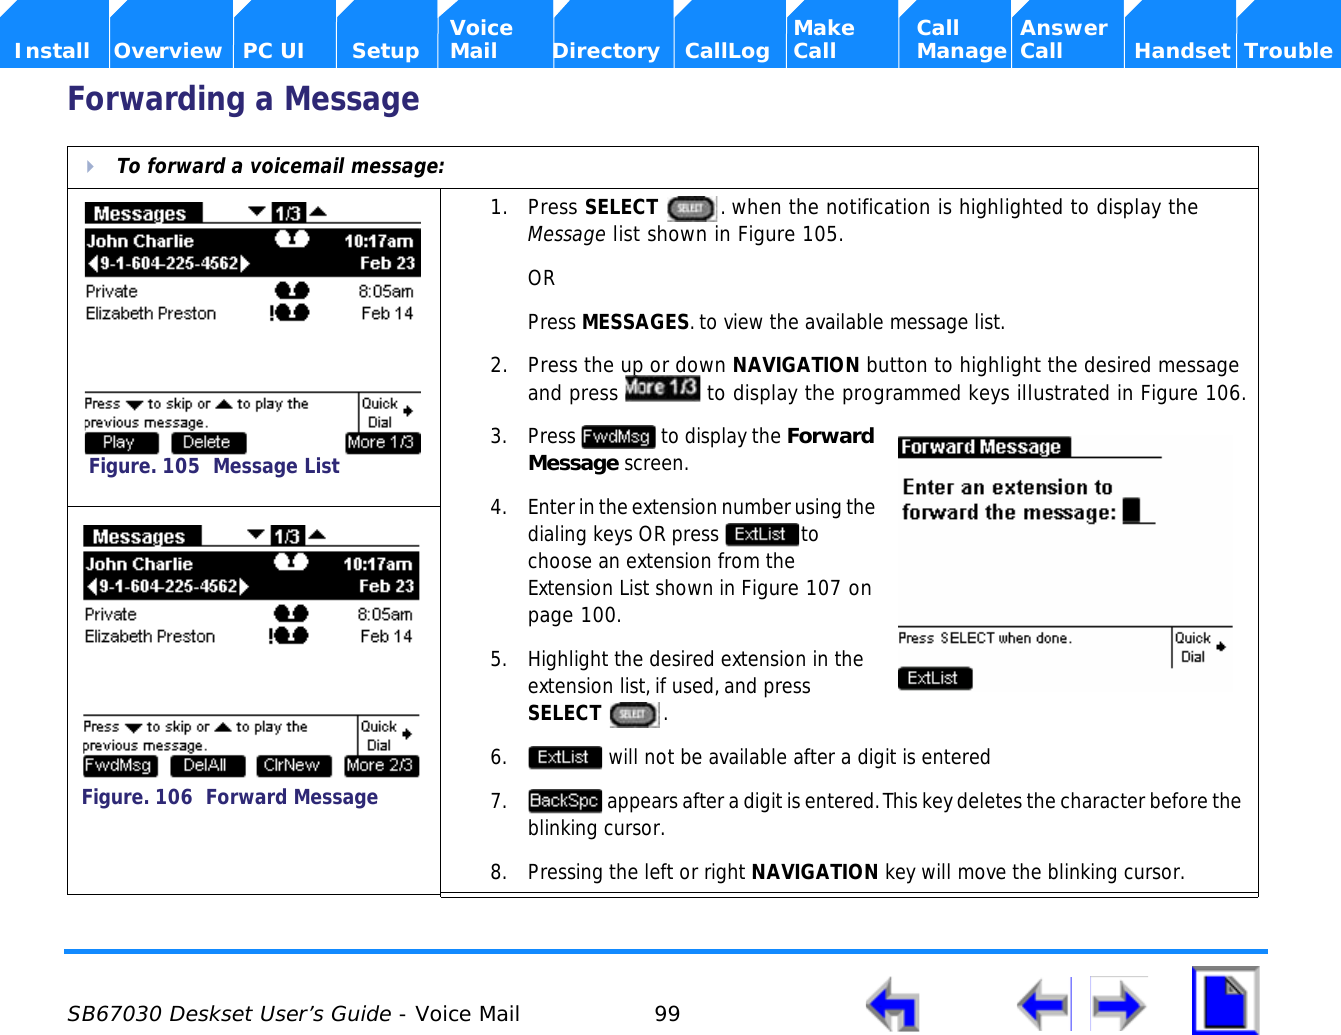
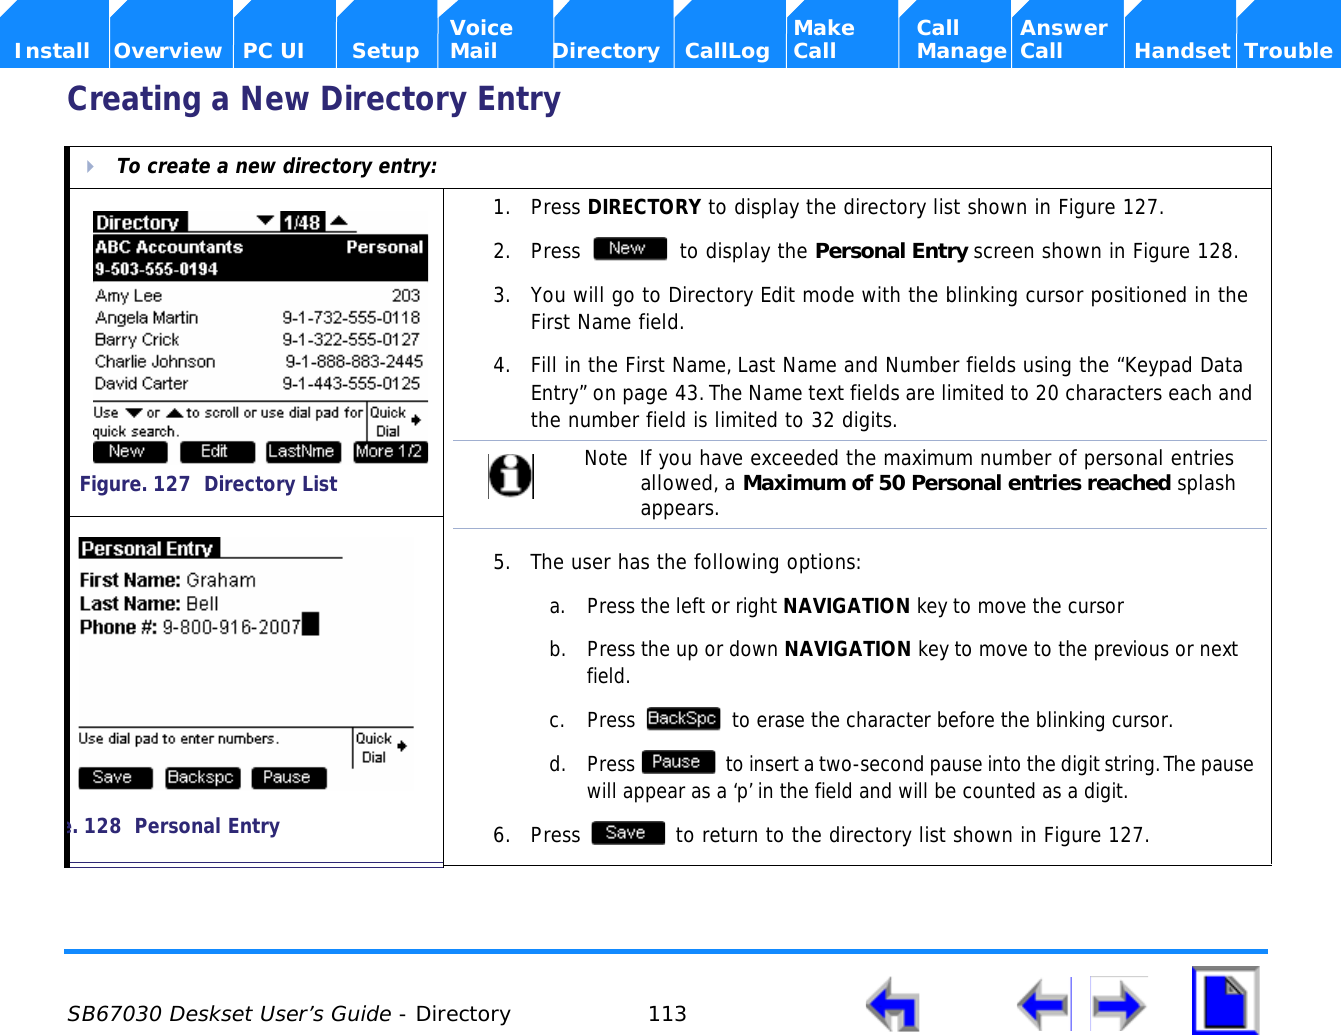
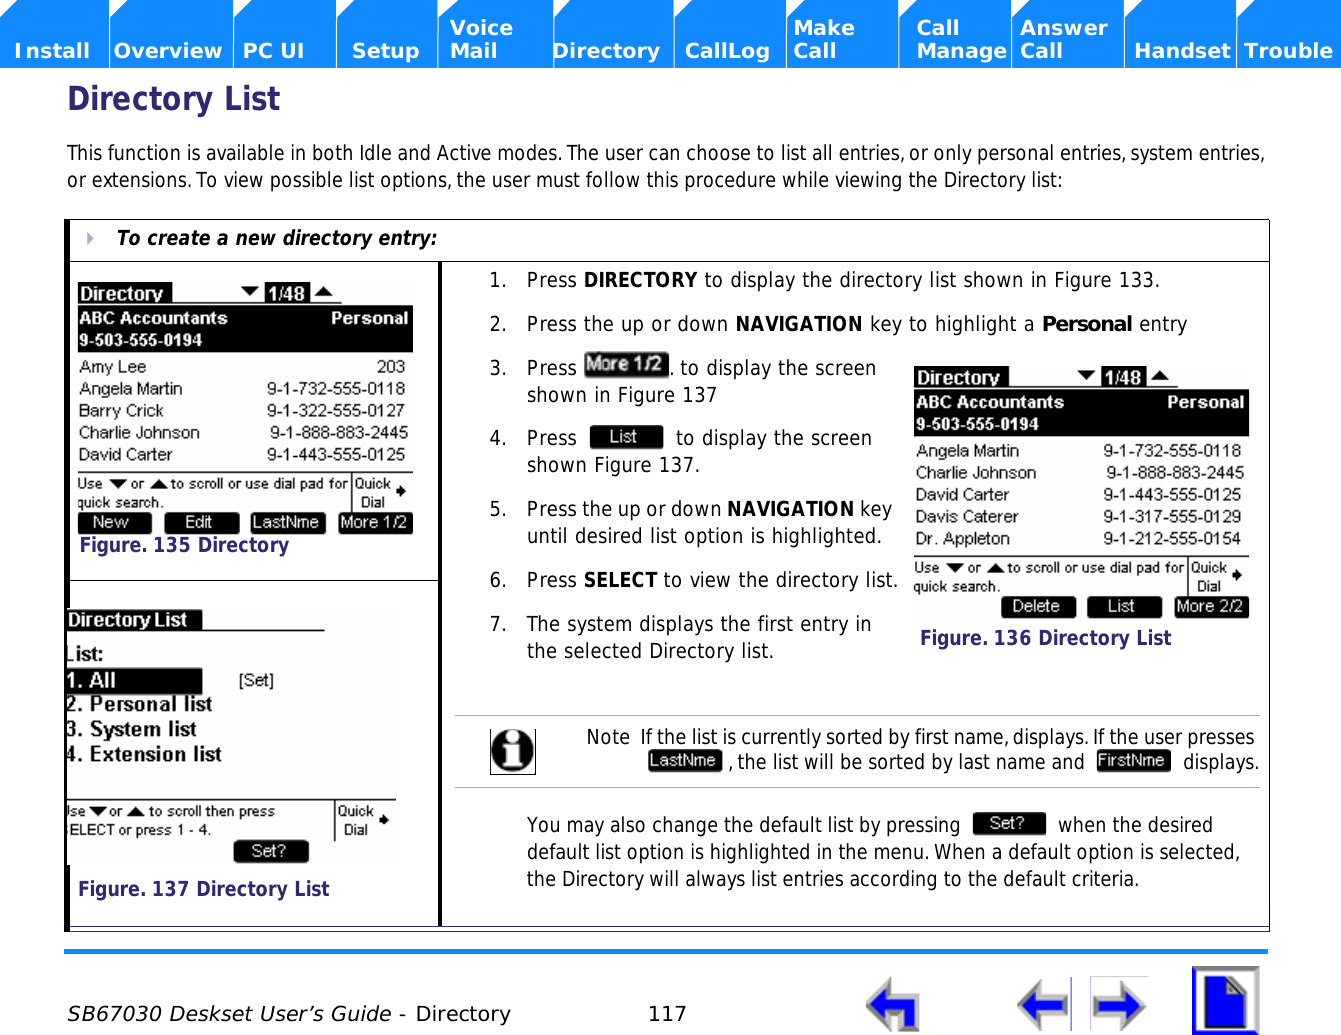
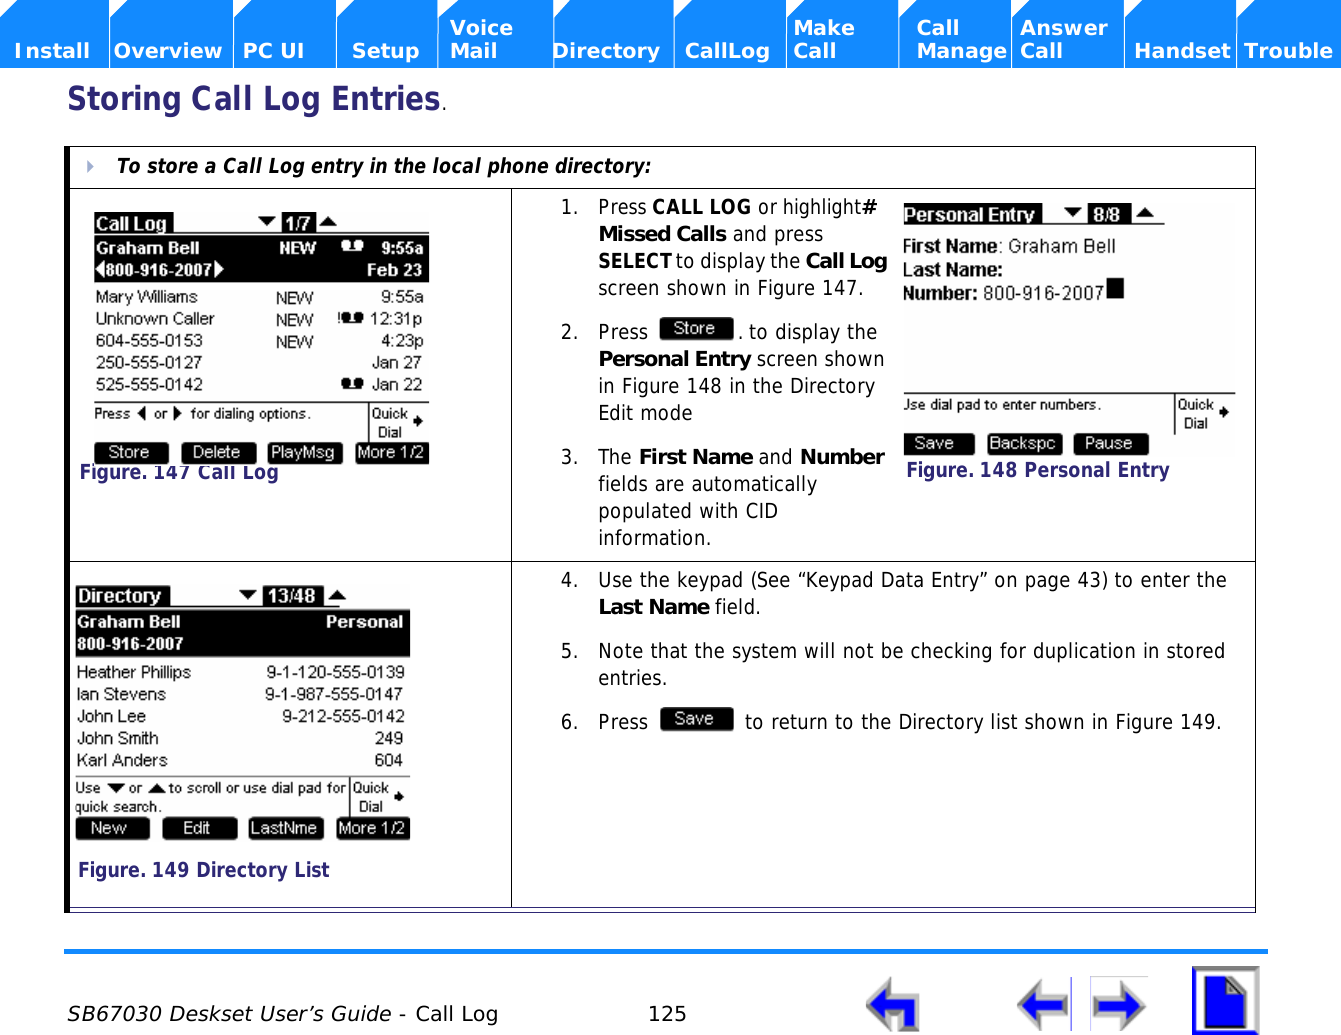
![SB67030 Deskset User’s Guide - Setup Menus 86 Voice Make Call Answer Install Overview PC UI Setup Mail Directory CallLog Call Manage Call Handset TroubleIP ConfigurationTo access the IP Configuration menu and edit the IP Address:1. Perform the “To display the Admin Settings menu”procedure on page 77. 2. Press 6 on the keypad or press the down NAVIGATION arrow to highlight IP Settings and press SELECT .3. Observe that the IP Settings menu shown in Figure 87 on page 85 displays.4. Press the left or right NAVIGATION arrow to toggle between [Auto] and [Static].5. Press to accept the changes and return to the Admin Settings menu shown in Figure 74 on page 77.Figure. 88 IP Configuration](https://usermanual.wiki/VTech-Telecommunications/80-6563-00.Users-Manual-2/User-Guide-1109336-Page-86.png)

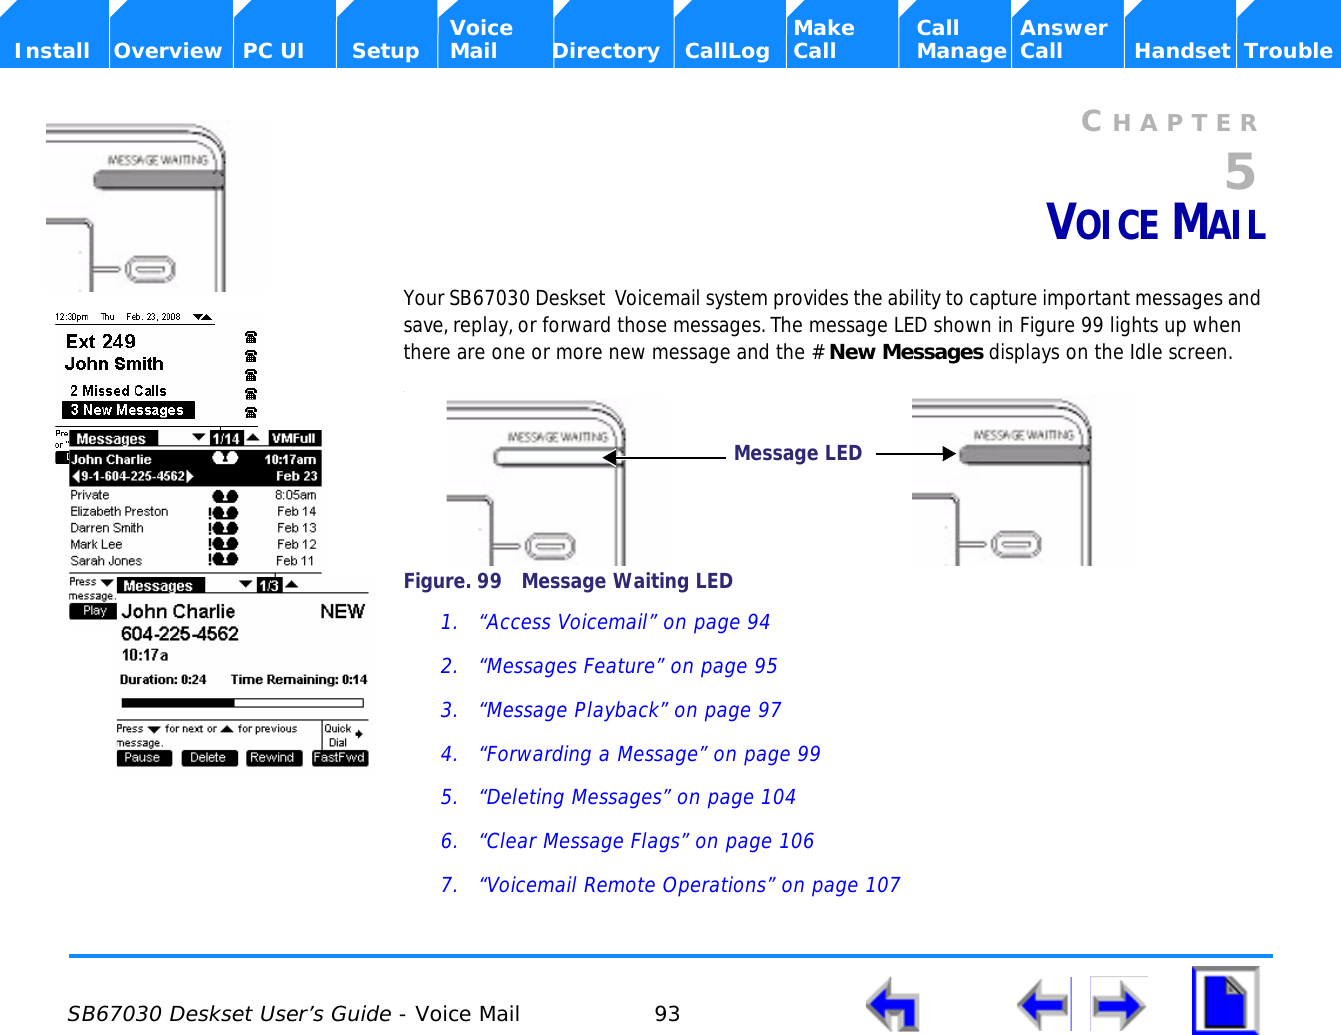
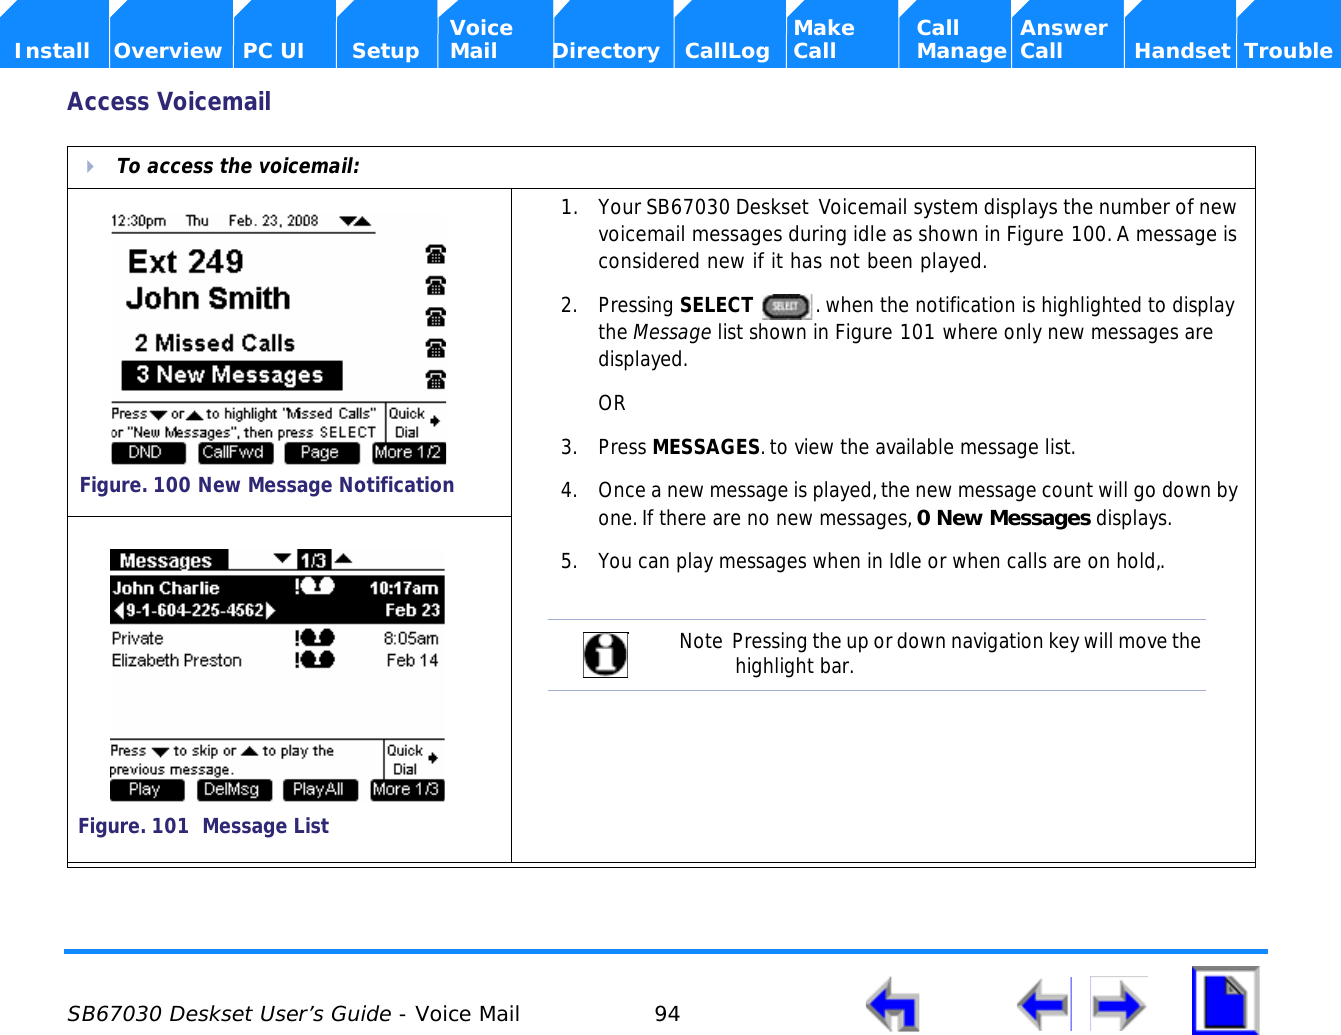
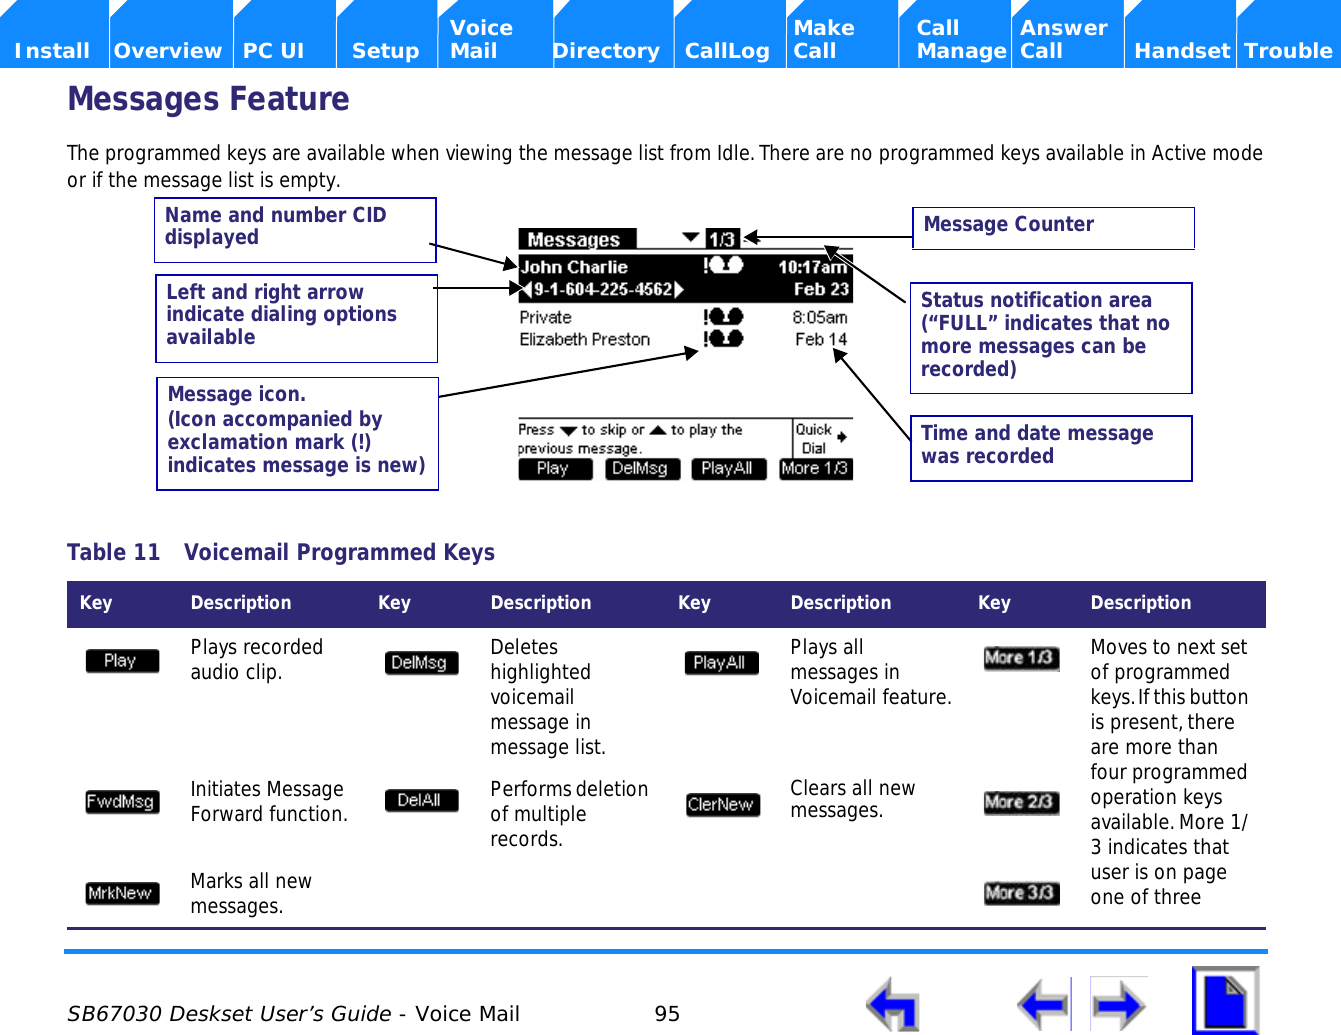
![SB67030 Deskset User’s Guide - Setup Menus 92 Voice Make Call Answer Install Overview PC UI Setup Mail Directory CallLog Call Manage Call Handset TroubleSetting up Do Not DisturbTo enable or disable DND:1. From the Idle screen shown in Figure 96, press .2. Observe that the DND Settings screen shown in Figure 98 displays.3. Press the left or right NAVIGATION key to set DND - Do Not Disturb [ON] to enable. or DND - Do Not Disturb [OFF] to disable.4. Press to save changes.5. DND ON will now disappear or appear in the top right of the display as shown in Figure 97.6. Press to return to Idle at any time.Figure. 96 Idle Screengure. 97 DND SettingsFigure. 98 DND Set](https://usermanual.wiki/VTech-Telecommunications/80-6563-00.Users-Manual-2/User-Guide-1109336-Page-92.png)


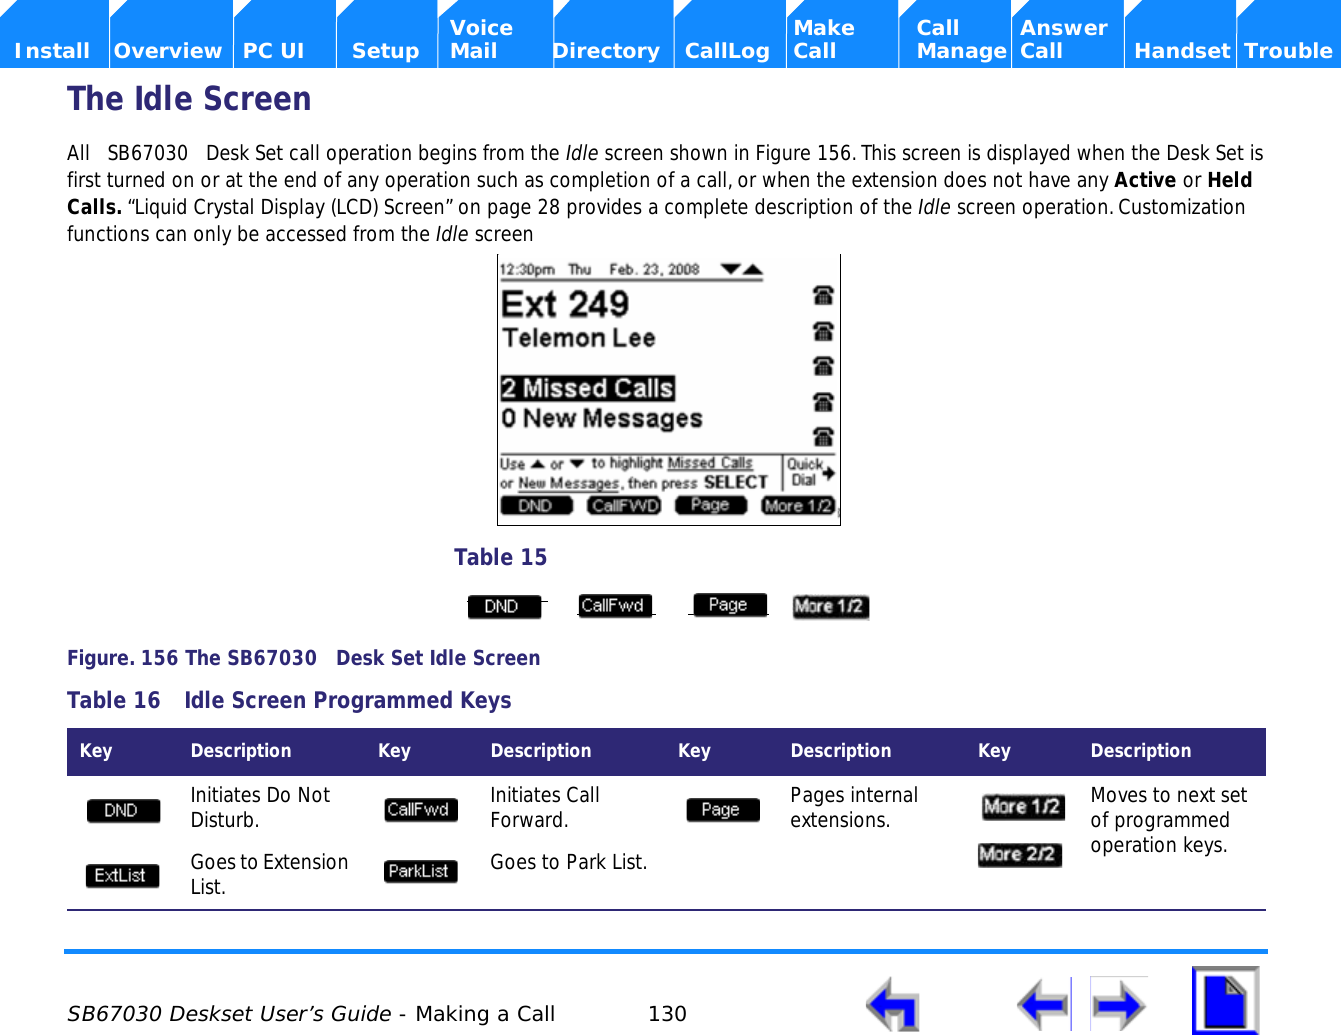
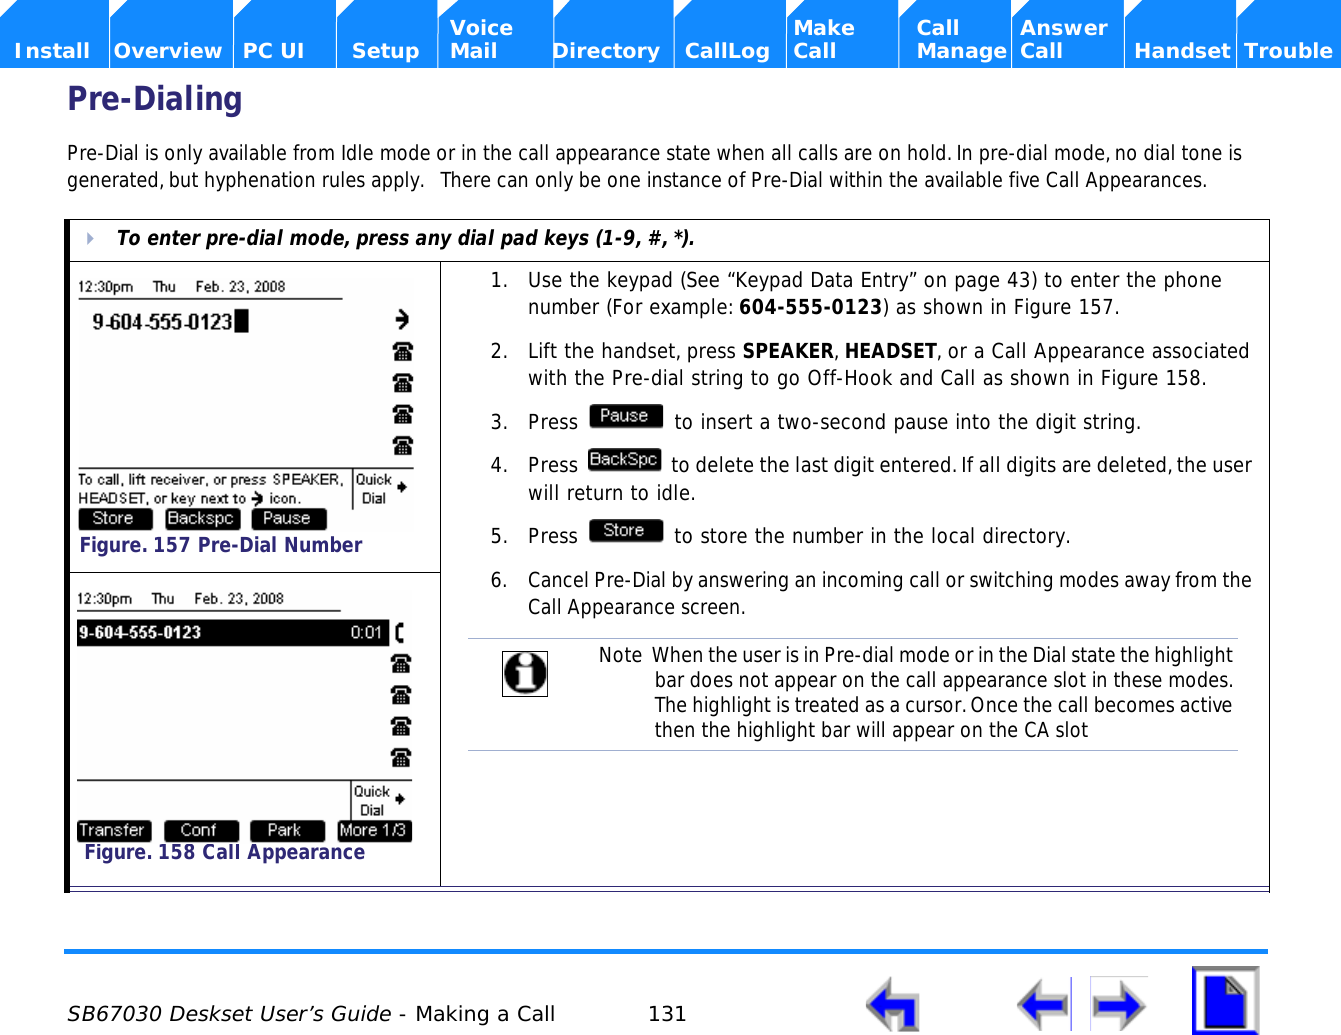
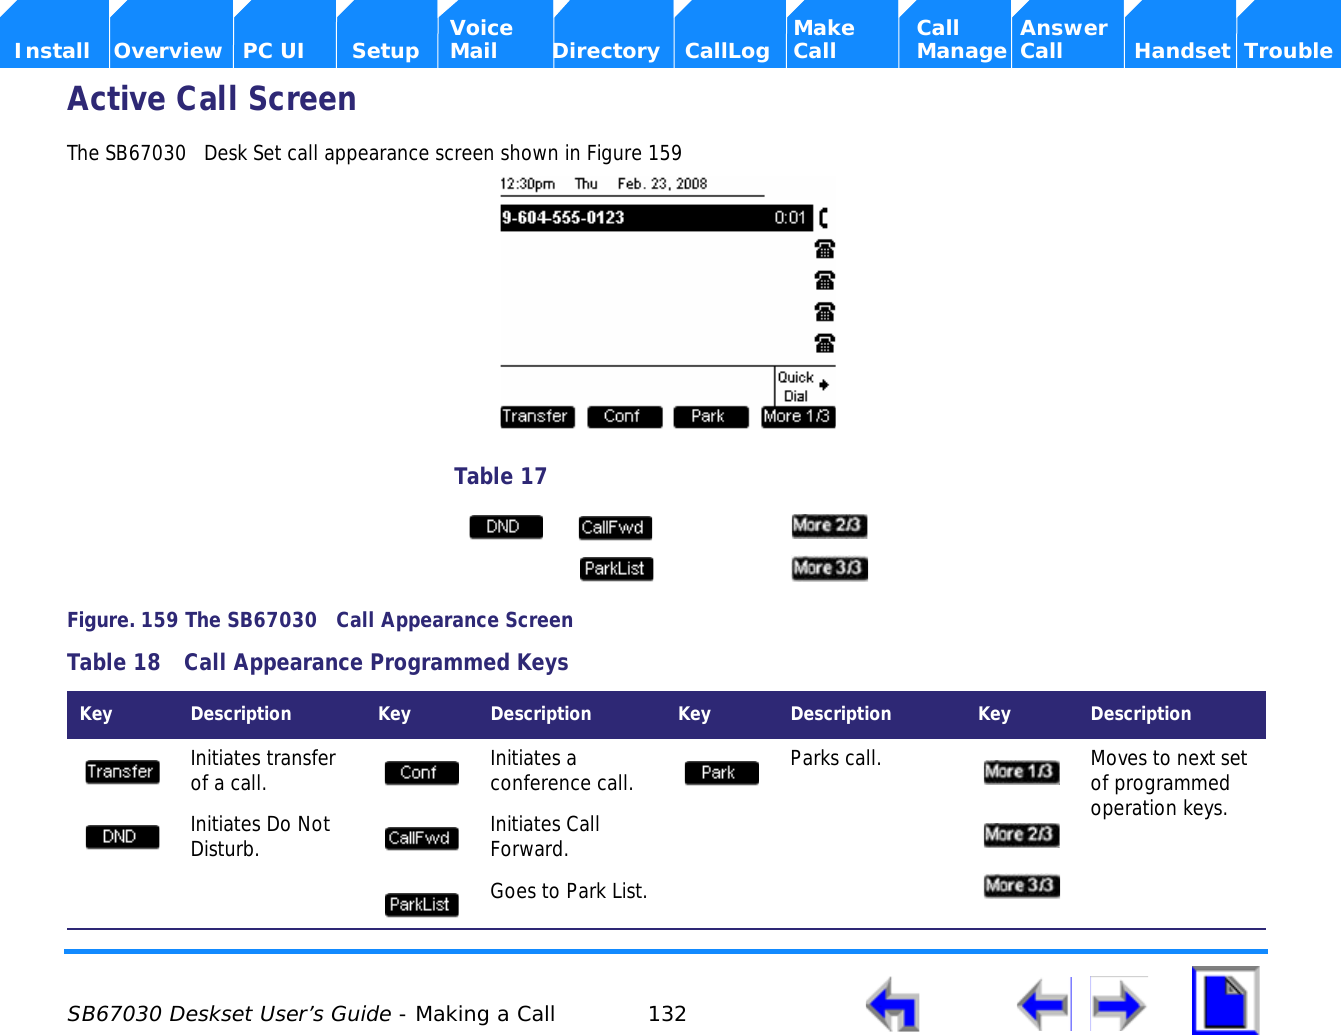
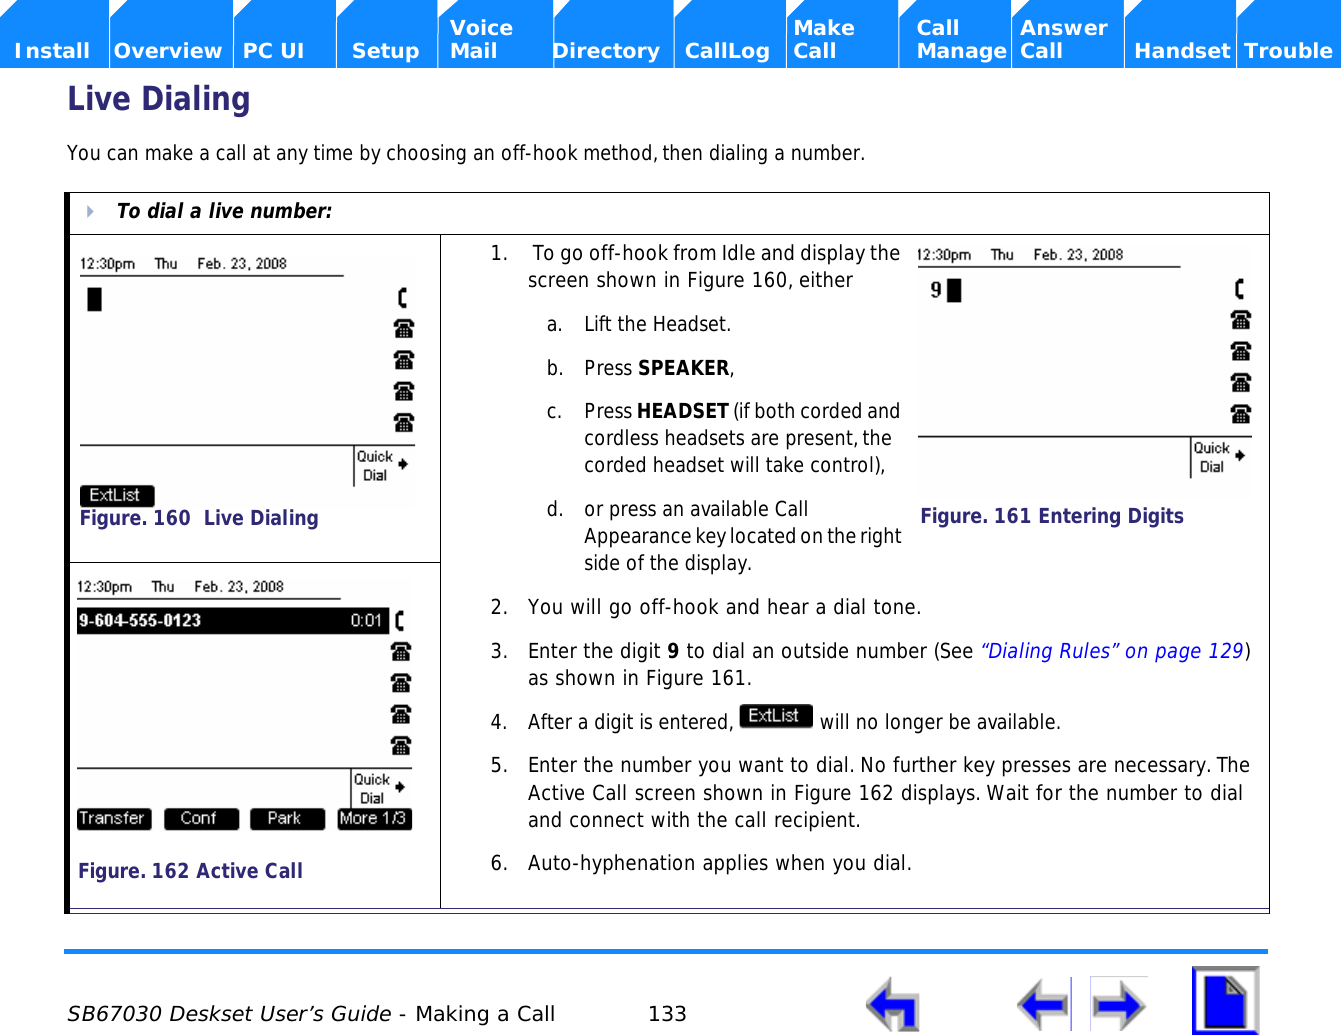
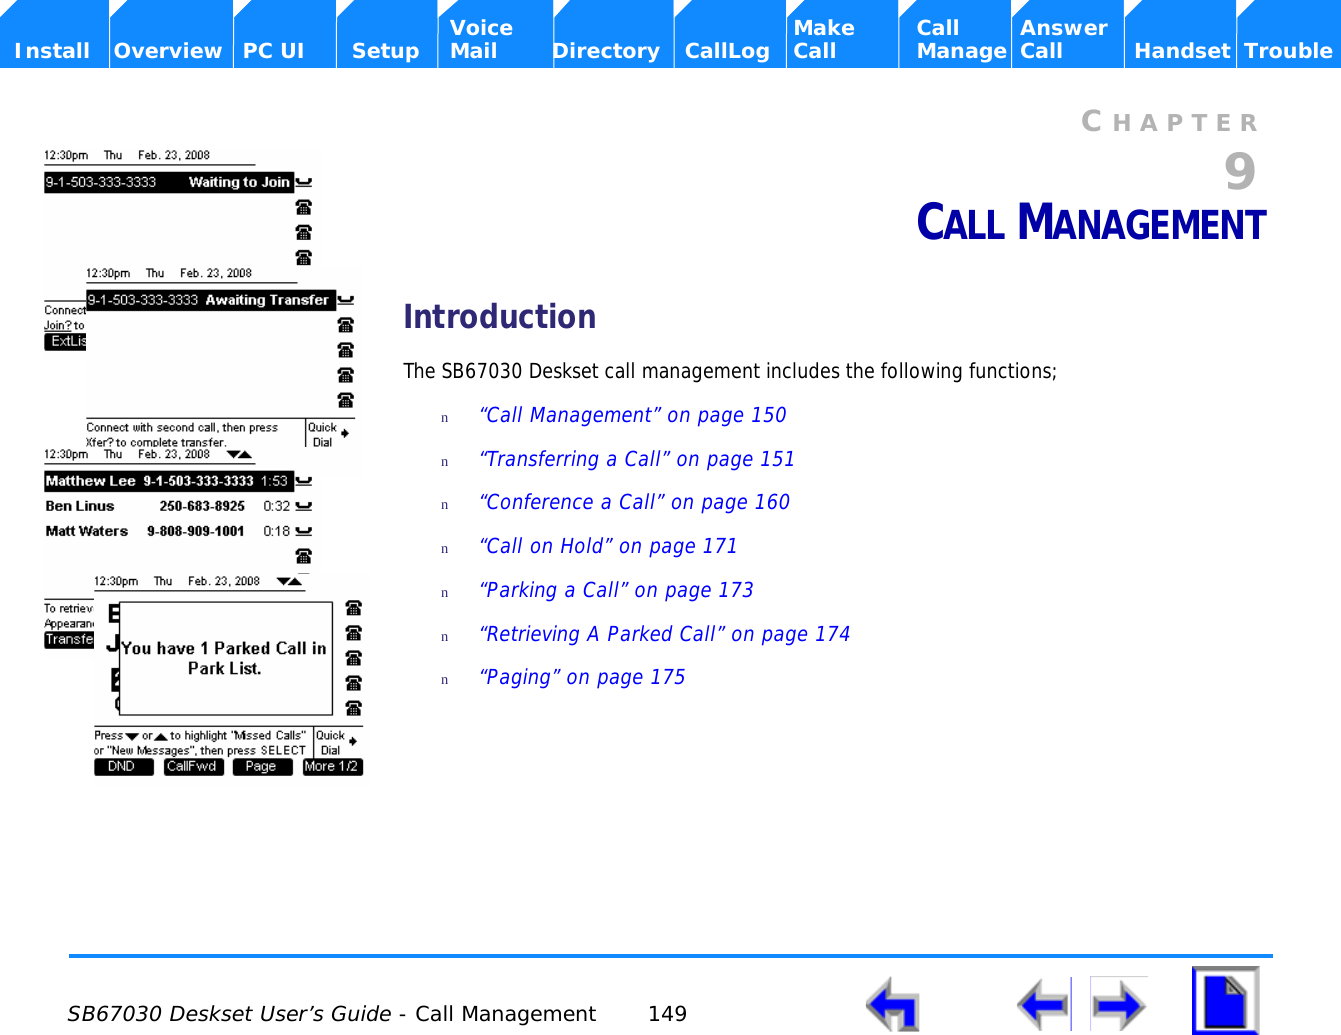
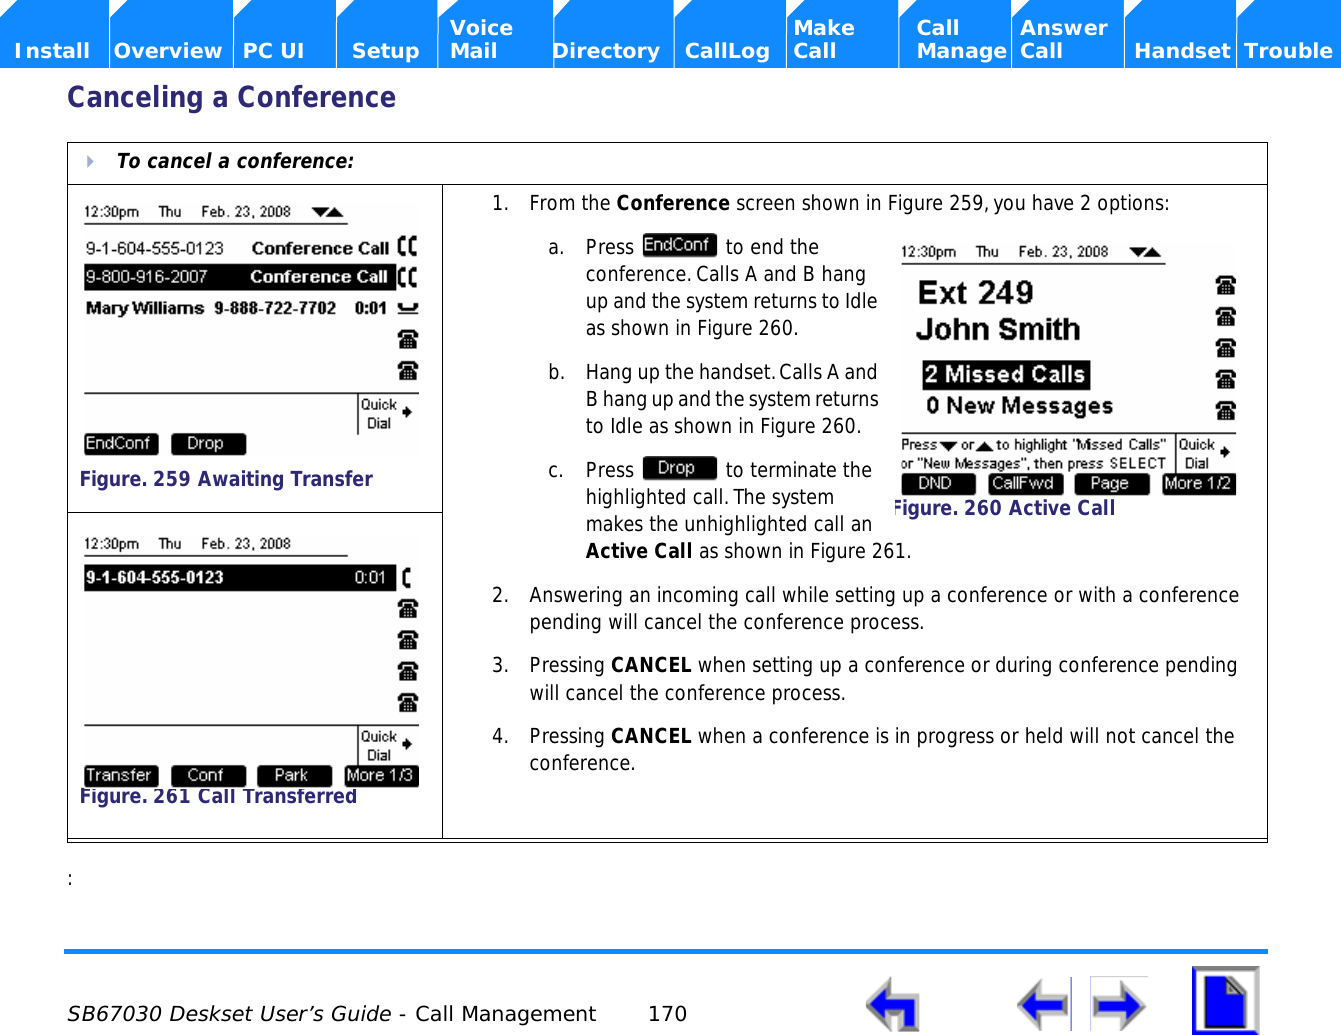
![SB67030 Deskset User’s Guide - Making a Call 129 Voice Make Call Answer Install Overview PC UI Setup Mail Directory CallLog Call Manage Call Handset TroubleDialing RulesThe dialing rules determine when the system connects to the call destination. Once a rule applies, the system will determine that the digits are valid and dial them to the outside phone line. There are five types of calls that are identified by the dialing rules:Table 14 Call Identified by Dialing RulesCall Type Dialing Rule Description1 External call (PSTN call) 9 [0,2-8]or91[0,2-9]or99[0,2-9]or991[0,2-9]nAny number starting with the external access code (9), EXCEPT 911 (see emergency call below). nAny additional digits dialed after the call type is determined will be passed to the gateway (i.e. - the dial plan will NOT wait for a full number to be dialed - it will only wait until it is determined that PSTN dialing is required).For example, entering the digit 9 will not pass this digit to the PSTN gateway. However, entering 9-4 will prompt the system to pass the digit 4 to the gateway..2 Intercom call (extension number) [2-7]xx A 3-digit number with the 1st digit in the range 2~7. Makes a call to an extension in the local network.3 Operator call 0 This is a special case of an intercom call, establishing a connection to the designated operator extension (e.g. 203) by simply dialing 0.4 Parked call 1xx This is a special case of the intercom call and is used to directly access parked calls - defined by a 3 digit number with a leading 1.5 Emergency call 911 or 9911 Emergency services can be accessed either by dialing 911, or 9-911 (where the leading 9 is used to access an external line).](https://usermanual.wiki/VTech-Telecommunications/80-6563-00.Users-Manual-2/User-Guide-1109336-Page-129.png)