VTech Telecommunications 80-6684-01 1.9GHz CORDLESS PHONE User Manual 5
VTech Telecommunications Ltd 1.9GHz CORDLESS PHONE Users Manual 5
Contents
Users Manual 5
13
Getting started
Installation options
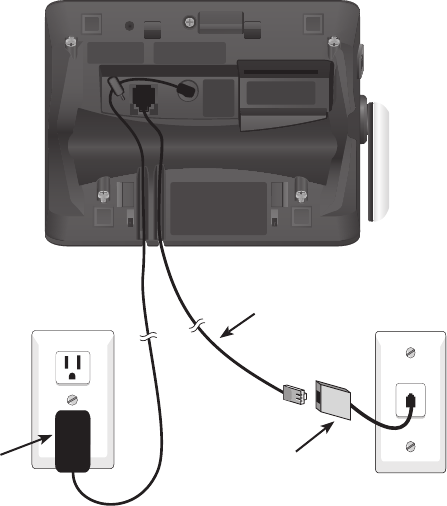
4. Plug the telephone line cord into a telephone wall jack, and plug the power
adapter cord into a power outlet not controlled by a wall switch. Place the
cords in the bracket channels.
Power
adapter DSL filter (not included),
required if you have DSL
high-speed Internet service.
Telephone
line cord
14
Getting started
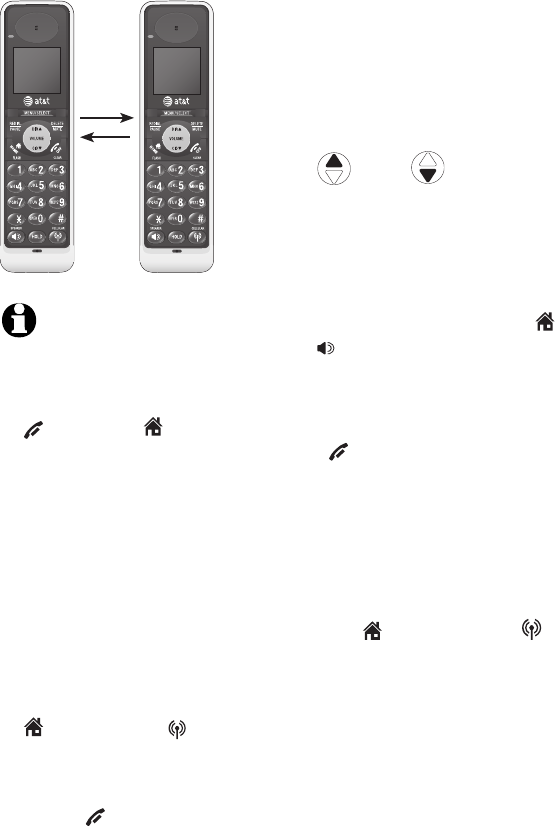
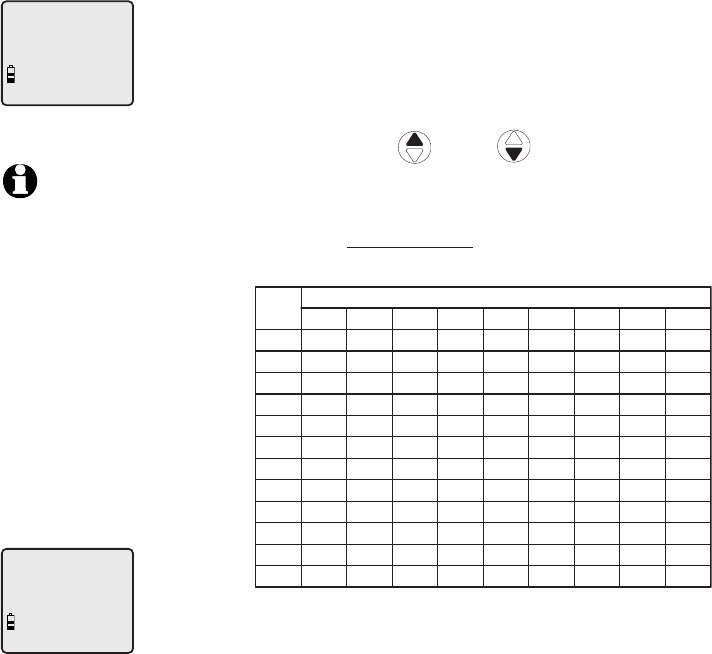
Expansion handset and cordless headset
Your new AT&T TL92278/TL92378/TL92328 telephone system canTL92278/TL92378/TL92328 telephone system can telephone system can
accommodate up to 12 devices (AT&T TL90078 expansion handset and/or
AT&T TL7600 cordless headset). You can add new handsets (AT&T TL90078
purchased separately) or cordless headset (AT&T TL7600 purchasedpurchased
separately) to your telephone system but each device must be registered) to your telephone system but each device must be registered
with the telephone base before use. A maximum of two cordless headsets
can be registered with the telephone base. To register a new handset, see
page XX.
The handsets provided with the TL92278 come pre-registered as HANDSET
1 and HANDSET 2. You can register additional devices from either of the
following combinations, 1) ten additional handsets, 2) nine additional handsets
and one cordless headset, or 3) eight additional handsets and two cordless
headsets. Additional handsets will be assigned numbers in the order they
are registered (HANDSET 3, HANDSET 4, HANDSET 5 and so on); additional
headsets will be assigned numbers in the order they are registered (HEADSET
1 with blue indicator light; HEADSET 2 with orange indicator light.)
The handsets provided with the TL92378/TL92328 come pre-registered as
HANDSET 1, HANDSET 2 and HANDSET 3. You can register from either of
the following combinations, 1) nine additional handsets, 2) eight additional
handsets and one cordless headset, or 3) seven additional handsets and
two cordless headsets. Additional handsets will be assigned numbers in the
order they are registered (HANDSET 4, HANDSET 5, HANDSET 6 and so on);
additional headsets will be assigned numbers in the order they are registered
(HEADSET 1 with blue indicator light; HEADSET 2 with orange indicator light.)
15
Getting started
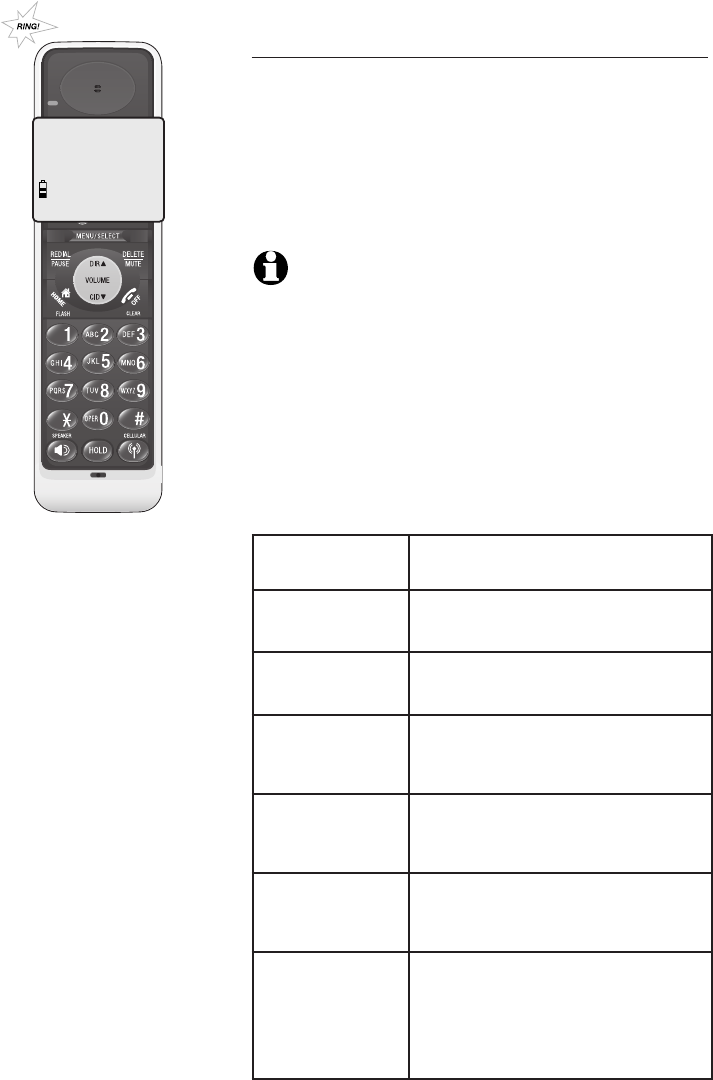
Adding and registering handsets (optional)
Handsets purchased (AT&T TL90078) separately
need to be registered to the telephone base before
use. When first purchased, all expansion handsets
will show NOT REGISTERED on the screen. The new
handset(s) may need to be charged for five minutes
before registering to the telephone base.
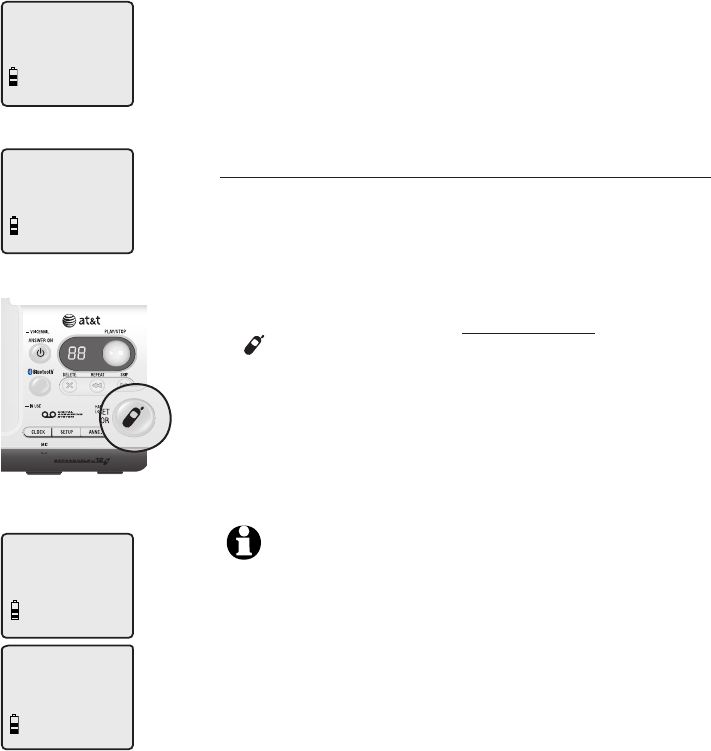
To register a handset to your telephone base
1. Place the unregistered handset into the telephone
base. If PRESS HNDST LOC 4 SEC ON BASE does
not appear on the handset screen after a few
seconds, remove the handset and place it in the
telephone base again.
2. On the telephone base, press and hold
HANDSET LOCATOR for about four seconds
(until the red IN USE light on the telephone base
turns on) and then release the button. The handset
will show PLEASE WAIT... and it will take about 10
seconds to complete the registration. The handset
will show HS X REGISTERED and will beep if the
registration is successful.
NOTES:
1. If the registration is not successful, the display will show NOT
REGISTERED. To reset the handset, remove the handset from the
telephone base and place it back in. Try the registration process
again.
2. You cannot register a handset if any other system handset is in
use.
PRESS HNDST LOC
4 SEC ON BASE
PLEASE WAIT...
HS X REGISTERED
NOT REGISTERED

16
Getting started
Replacing a handset
You may need to de-register your handsets if:
You have twelve registered handsets and need to replace a new unit.
-OR-
You wish to change the designated handset number of your registered
handsets.
You must first de-register ALL the handsets, and then re-register each handset
you wish to use.
Please read carefully through all the instructions on this page before
beginning the de-registration process.
To de-register all handsets
1. Press and hold HANDSET LOCATOR on the telephone base for about 10
seconds (until the IN USE light turns on and starts to flash), then release
the HANDSET LOCATOR button.
2. Immediately press and release HANDSET LOCATOR again. You must
press HANDSET LOCATOR while the IN USE light is still flashing. (The
light flashes for about seven seconds. If the light stops flashing, pick up the
handset and place it back into the telephone base, then start again with
step one above.)
3. The handset(s) will show CONNECTING... and it will take about 10 seconds
to complete the de-registration process. ALL handsets will show NOT
REGISTERED if de-registration was successful.
4. To re-register the handset(s) to the telephone base, follow the registration
instructions on pages 14-15.
NOTES:
1. If the de-registration process was not successful, you may need to reset the system and try again.
To reset: pick up the handset and press the HOME/FLASH button, then press the OFF/CLEAR
button and place the handset back into the telephone base. You may also reset by unplugging the
power from the telephone base and plugging it back in.
2. You cannot de-register the handset(s) if any other system handset is in use.
3. You will need to reset the system clock after de-registering handset(s), refer to pages 42-43 for
details.
Bluetooth
17
Introducing Bluetooth
Your new AT&T TL92278/TL92378/TL92328 telephone system with BluetoothTL92278/TL92378/TL92328 telephone system with Bluetoothtelephone system with Bluetooth
wireless technology has the following features:
• Pair a Bluetooth enabled cell phone with the telephone base. Pair a Bluetooth enabled cell phone with the telephone base.
• Connect a cell phone to make and receive Connect a cell phone to make and receive CELLULAR calls. Only one cell
phone can be paired and connected on a call at a time.
• Make and receive calls using your cell phone plan while utilizing the ease Make and receive calls using your cell phone plan while utilizing the ease
and comfort of your home telephone system.
IMPORTANT INFORMATION
• Refer to your cell phone user's manual for more information about itsRefer to your cell phone user's manual for more information about its
Bluetooth function.
• Operate your Bluetooth device within 12 feet from the telephone base.
Bluetooth technology operates best within a short range. Keeping within 12
feet will maintain the connection quality of the Bluetooth device with themaintain the connection quality of the Bluetooth device with the
telephone base.
• Make sure that your cellular phone has sufficient signal strength. You mayMake sure that your cellular phone has sufficient signal strength. You may
need to move the cellular phone and telephone base to a location where
the cellular signal strength may be stronger.
• Charge your Bluetooth cell phone while it is connected to the telephoneCharge your Bluetooth cell phone while it is connected to the telephone
base because your cell phone's battery will discharge faster while it is
connected wirelessly to the telephone base.
• Monitor your cell phone's usage because airtime is deducted from yourMonitor your cell phone's usage because airtime is deducted from your
cellular plan for the duration of CELLULAR calls.
Refer to the Bluetooth Setup section (page 22) to learn how to set up your
Bluetooth device. Refer to the Telephone operation section (page 55) on how
to operate your Bluetooth devices with your new AT&T telephone system with
Bluetooth wireless technology. Refer to the Troubleshooting section (page
94) if you experience difficulty using the telephone system.
Bluetooth
18
Glossary of terms
Below are some terms used in this user’s manual to help you become familiar
with using your Bluetooth devices and your new AT&T telephone system.
Bluetooth cell phone - Refers to a mobile Bluetooth enabled cellular
telephone.
CELLULAR line - The communications service provided through your
Bluetooth enabled cellular telephone.
HOME line - Your conventional telephone land line.Your conventional telephone land line.
Connected - A Bluetooth device can only be used when it is connected to
the telephone base.
Paired Devices - Once a Bluetooth device has been paired with the
telephone base, it will be stored in the telephone base. Only one Bluetooth
cellular phone can be paired with the telephone base.
Pairing - This refers to the process of Bluetooth device registering device
information with each other. The telephone base must be paired with a
Bluetooth cellular phone before the Bluetooth device can be used. Depending
on the manufacturer, this is also referred to as Bonding.
PIN - By default, the PIN is 0000 for the telephone base and for most
Bluetooth devices. PIN information must be exchanged between Bluetooth
devices before they can be used. This is also known as a Passkey or Passcode.
Bluetooth
19
Bluetooth Setup
To use a Bluetooth enabled cellular phone with
you telephone, you must first pair and connect
your Bluetooth cellular phone with the telephone
base.
Before you begin, make sure that your Bluetooth-
enabled cellular phone is not connected to any
other Bluetooth device. Refer to your cellular
phone's user's manual to learn how to search for
or add new Bluetooth devices.
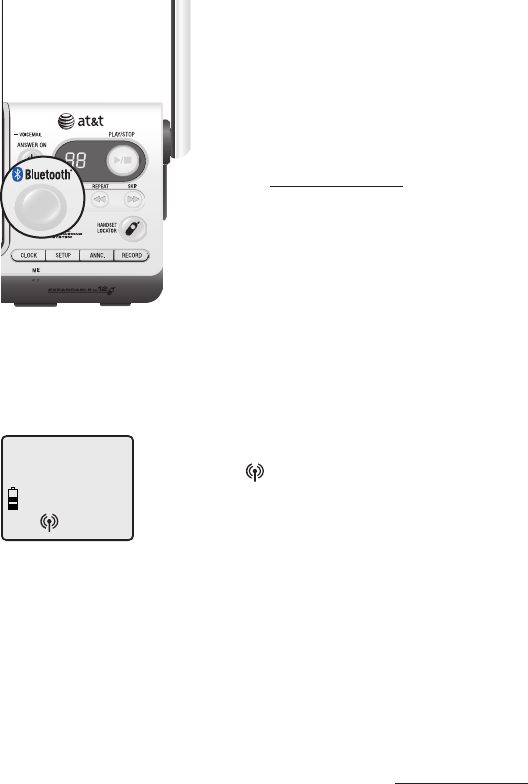
To pair and connect a cellular phone:
1. Press and hold the BLUETOOTH button on the
telephone base until it is flashing. The Bluetooth
feature will be activated.
2. Using your cellular phone, turn on the Bluetooth
feature and search for a new device.
3. Once your cellular phone has found the AT&T
DECT 6.0 telephone base, select it.
4. Using your cellular phone, enter the PIN of the
telephone base (the default PIN is 0000) to
continue the pairing process.
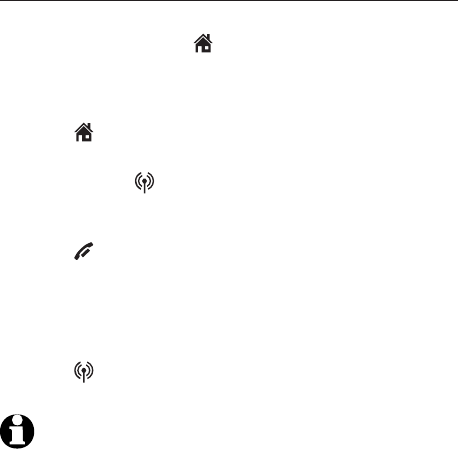
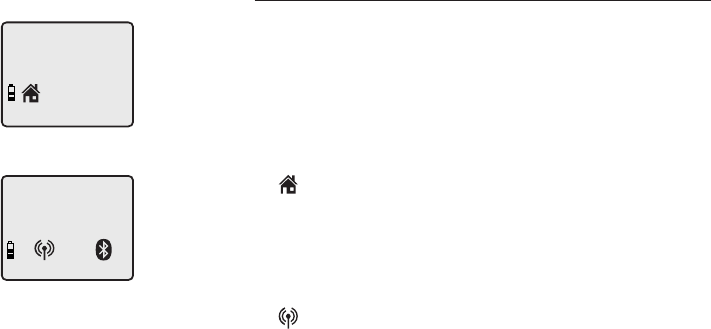
When a device is successfully connected, the
status icon will display on the handset screen
display, and the light of the BLUETOOTH button on
the telephone base will be on steadily.
Once your have paired a device with the telephone
base, the pairing information will be stored in
the telephone base. However, if the paired device
becomes disconnected, the telephone base will not
automatically search and re-connect to that device.
To re-connect a paired device, start again with step
one above.
If you want to pair and connect a new device
when there is already a connected device on the
telephone base, press and hold the BLUETOOTH
button on the telephone base until it is flashing,
then start with step two above. If you do not pair
a new device within two minutes, the BLUETOOTH
light on the telephone base will be turned off and
the system will return to idle.
HANDSET 1
20
CALL LOG
>
DIRECTORY
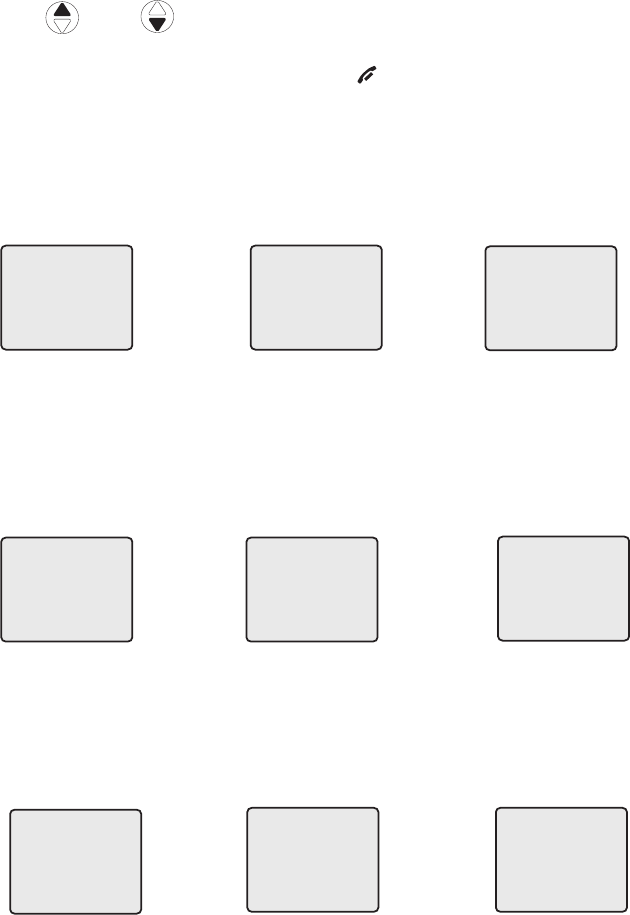
Getting started
Handset main menu
To enter the main menu:
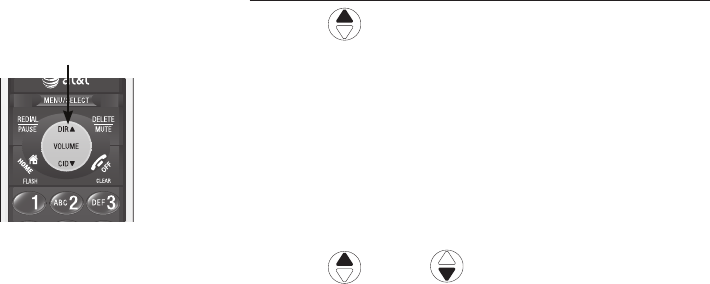
1. Press Press MENU/SELECT when the handset is in idle mode.
2. Press DIR / CID to select a handset feature menu, then press
MENU/SELECT to enter that menu.
To return to the idle mode, press and hold OFF/CLEAR.
DIRECTORY allows you
to store and search for
names and numbers
(page 21).
INTERCOM allows you
to intercom with other
handset.
RINGER TONE allows
you to set the ringer
for the HOME and
CELLULAR lines (page
XX).
RINGER VOLUME
allows you to set the
ringer volume (page
12).
KEY TONE allows you
to turn the keypad
tones on or off.
CLR VOICE MAIL
allows you to turn
off the new voicemail
indication.
HOME AREA CODE
allows you to set your
home area code
(page 13).
LANGUAGE allows you
to set your handset
display language
(page 11).
CALL LOG allows you
to view caller ID history
(page 21).
>
CALL LOG
INTERCOM
>
INTERCOM
RINGER VOLUME
>
RINGER VOLUME
RINGER TONE
>
RINGER TONE
KEY TONE
>
KEY TONE
LANGUAGE
>
LANGUAGE
CLR VOICE MAIL
>
CLR VOICE MAIL
HOME AREA CODE
>
HOME AREA CODE
DIRECTORY
21
Handset settings
Handset settings
Using the feature menu, you can customize many
of the telephone’s settings.
1. Press MENU/SELECT when in idle mode (when
the phone is not in use) to enter the feature
menu.
2. Use DIR / CID to scroll to the feature
to be changed. When scrolling through the
menu, the top menu item is always highlighted
with a > symbol.
3. Press MENU/SELECT to select the highlighted
item.
NOTE:
Press OFF/CLEAR to cancel an operation, back
up to the previous menu or exit the menu display. Press
and hold OFF/CLEAR to return to idle mode.
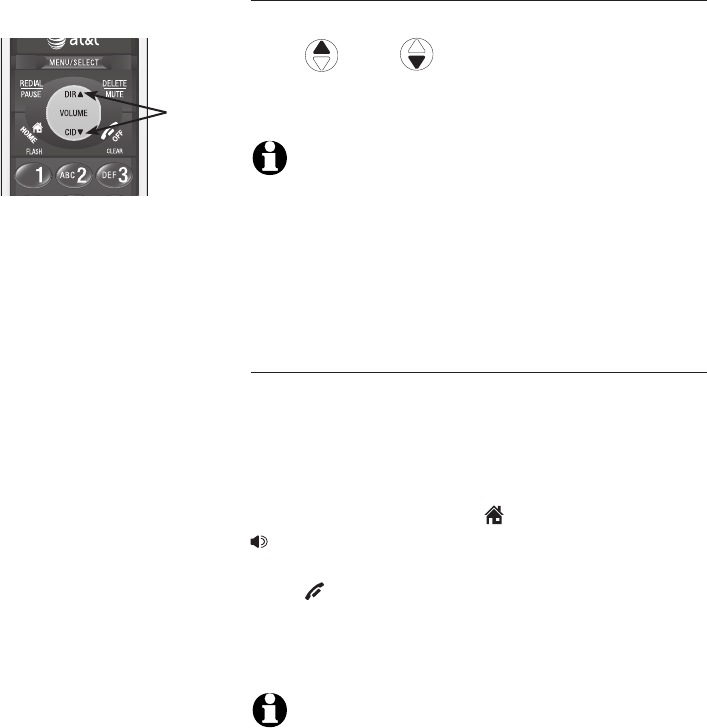
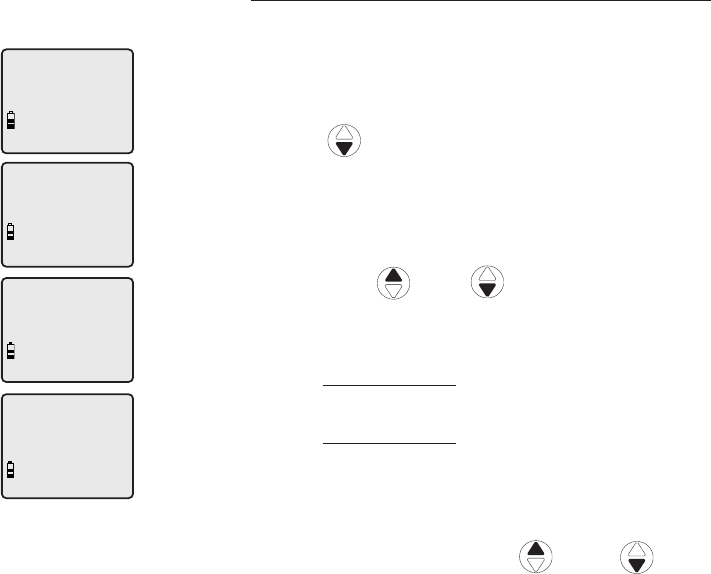
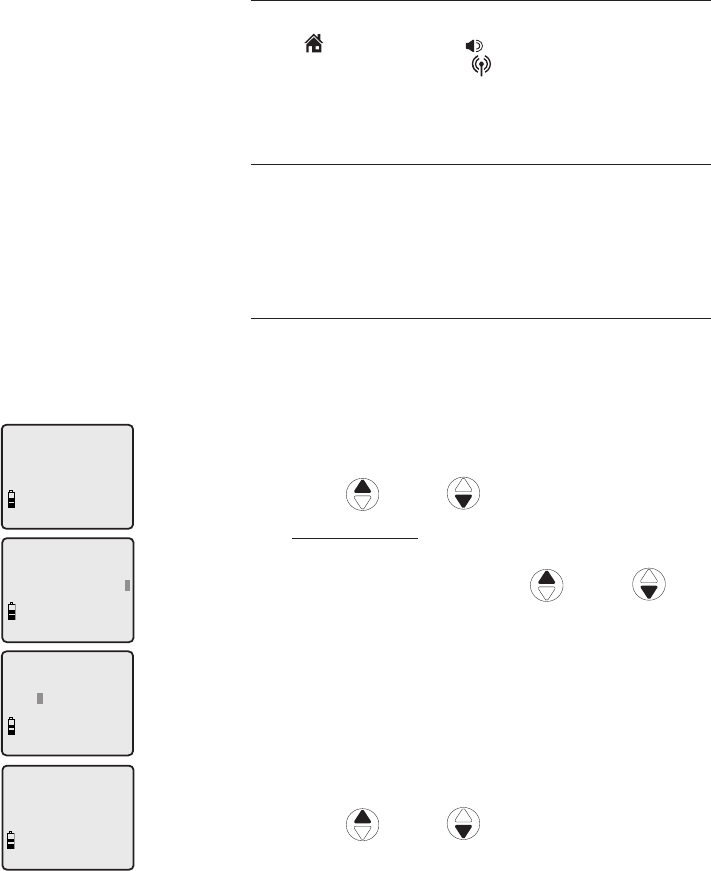
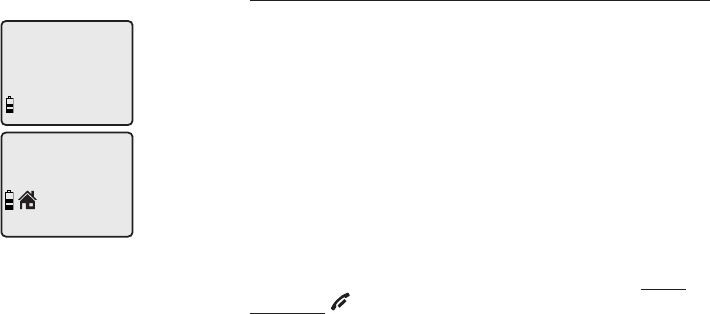
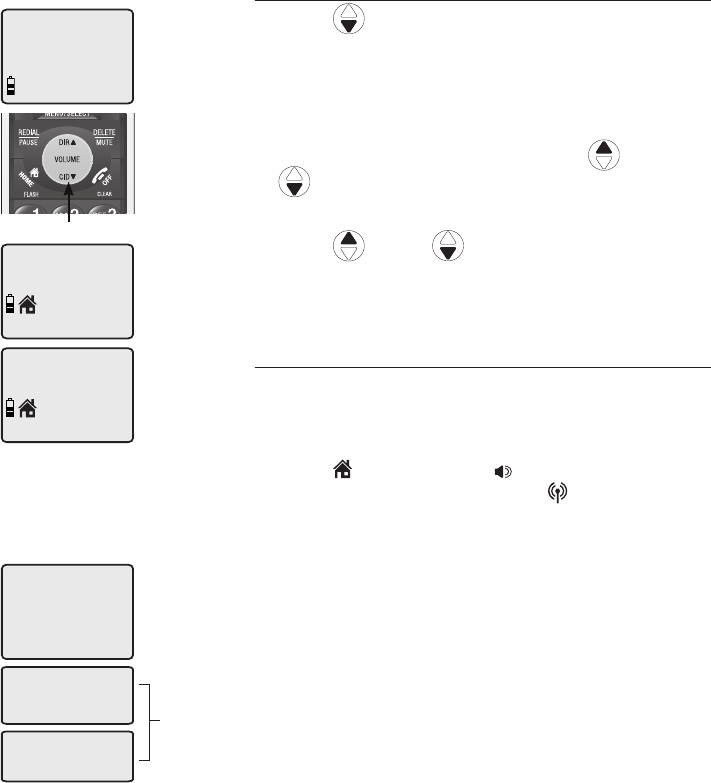
Ringer volume
Using this menu, you can set the ringer volume
level (1-6), or turn the ringer off. When the ringer
is turned off, will appear on the handset screen.
The volume setting will apply to both HOME and
CELLULAR calls.
To adjust the RINGER VOLUME:
1. Press MENU/SELECT when in idle mode to enter
the feature menu.
2.
Use DIR / CID to scroll to >RINGER
VOLUME, then press MENU/SELECT.
3. Press DIR / CID to sample each volume
level.
4. Press MENU/SELECT to save your preference and
return to the feature menu.
NOTE: The ringer volume also determines the ringer
volume of intercom calls (pages 27-28) and the paging
tone for the handset locator feature (page 23). If the
handset ringer volume is set to off, that handset is
silenced for all incoming calls and paging.
>
DIRECTORY
CALL LOG
>
RINGER VOLUME
RINGER TONE
>
DIRECTORY
CALL LOG
RINGER VOLUME
22
Handset settings
Handset settings
Ringer tone
You can select different ringer tones for the HOME
and CELLULAR calls. You may choose one of 10
ringer tones.
To choose a ringer tone for the HOME line:
1. Press MENU/SELECT when in idle mode to enter
the feature menu.
2. Use DIR / CID to scroll to >RINGER
TONE,
then press MENU/SELECT.
3. Press MENU/SELECT to select HOME TONE.
4. Press
DIR / CID
to get to the next ringer
tone and to hear a sample of it.
5. Press MENU/SELECT to save your preference and
return to the feature menu.
To choose a ringer tone for the CELLULAR line:
1. Press MENU/SELECT when in idle mode to enter
the feature menu.
2. Use DIR / CID to scroll to >RINGER
TONE,
then press MENU/SELECT.
3. Press
DIR / CID
to
scroll to
CELLULAR
TONE, then press MENU/SELECT.
4. Press
DIR / CID
to get to the next ringer
tone and to hear a sample of it.
5. Press MENU/SELECT to save your preference and
return to the feature menu.
RINGER TONE
1
>
DIRECTORY
CALL LOG
>
RINGER TONE
KEY TONE
>
HOME TONE
CELLULAR TONE
RINGER TONE
1
>
DIRECTORY
CALL LOG
>
RINGER TONE
KEY TONE
>
CELLULAR TONE
HOME TONE
23
Handset settings
Handset settings
Key tone
The handset is factory programmed to beep with
each key press. If you turn off the KEY TONE,
there will be no beeps when keys are pressed.
To turn the KEY TONE on or off:
1. Press MENU/SELECT when in idle mode to enter
the feature menu.
2. Use
DIR / CID
to scroll to >KEY TONE,
then press MENU/SELECT.
3. Press
DIR / CID
to select ON or OFF.
4. Press MENU/SELECT to save your preference
and return to the feature menu.
Language
In this menu, you can select the language used for
all screen displays.
To select a language:
1. Press MENU/SELECT when in idle mode to enter
the feature menu.
2. Use
DIR / CID
to scroll to
>LANGUAGE, then press MENU/SELECT.
3. Press
DIR / CID
to select ENGLISH,
FRANCAIS or ESPANOL.
4. Press MENU/SELECT to save your preference and
return to the feature menu.
LANGUAGE
ENGLISH
>
DIRECTORY
CALL LOG
>
LANGUAGE
CLR VOICE MAIL
KEY TONE
ON
>
DIRECTORY
CALL LOG
>
KEY TONE
LANGUAGE
24
Handset settings
Handset settings
Visual message waiting (voicemail) indicator
If you subscribe to a voicemail service offered
by your local telephone company, the voicemail
waiting indicator feature will provide visual
indication when you have new voicemail
messages. The VOICEMAIL light on the telephone
base will flash, and NEW VOICE MAIL and the
icon will appear on the handset screen(s).
NOTES:
1. This feature does not indicate new answering system
messages recorded on your phone.
2. For more information about the difference between your
answering system and voicemail, see page 41.
To clear voice mail indication
Use this feature when the telephone indicates there
is new voicemail but there is none (for example,
when you have accessed your voicemail from a
different telephone line while away from home). This
feature only turns off the displayed NEW VOICE
MAIL message, icon and VOICEMAIL light; it
does not delete your voicemail message(s). If there
actually are new voicemail messages, your local
telephone company will continue to send the signal
to activate the visual message waiting indicator.
To manually turn off the new voicemail indicator:
1. Press MENU/SELECT when in idle mode to enter
the feature menu.
2. Use
DIR / CID
to scroll to
>CLR VOICE MAIL, then press MENU/SELECT.
3. Press MENU/SELECT again to turn the voicemail
indication off, or press OFF/CLEAR to cancel the
procedure.
>
DIRECTORY
CALL LOG
>
CLR VOICE MAIL
HOME AREA CODE
TURN OFF
INDICATOR?
NOTES:
1. Telephone company
voicemail may alert you
to new messages with
stutter (broken) dial tone.
Contact your telephone
company for more details.
2. For information about
using your voicemail
service contact your
telephone company for
assistance.
25
Handset settings
Handset settings
Home area code
If you dial seven digits to make a local call (no
area code required), program your area code
into the telephone as the home area code. After
setting, if you receive a call from within your
home area code, the screen will display the seven
digits of the telephone number.
1. Press MENU/SELECT in the idle mode to enter
the handset main menu.
2. Use
DIR / CID
to scroll to
>HOME AREA CODE, then press MENU/SELECT.
3. Press the dial pad keys to enter a three-digit
home area code. Press DELETE/MUTE to delete
digit while entering.
4. Press MENU/SELECT to save and return to the
main menu.
NOTE: If, in the future, your telephone service provider
requires you to dial 10 digits to make a local call (area
code + phone number), press DELETE/MUTE to delete all
digits in the home area code setting menu, that will
restore the home area code to its default setting as ---.
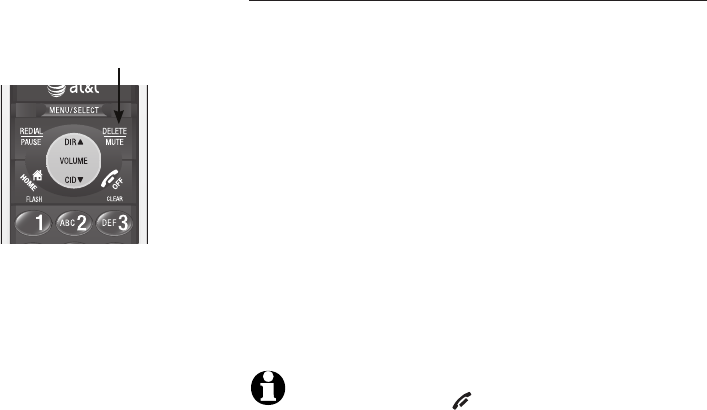
Temporary ringer silencing
Press OFF/CLEAR or DELETE/MUTE while the
telephone is ringing to silence the ringer temporarily.
This will silence the ringer without disconnecting the
call. The next incoming call will ring normally at the
preset volume.
NOTE: Each handset will ring when there is an incoming
call unless the ringer volume is turned off. Pressing
OFF/CLEAR or DELETE/MUTE on one handset will only
silence the ringer of that particular handset.
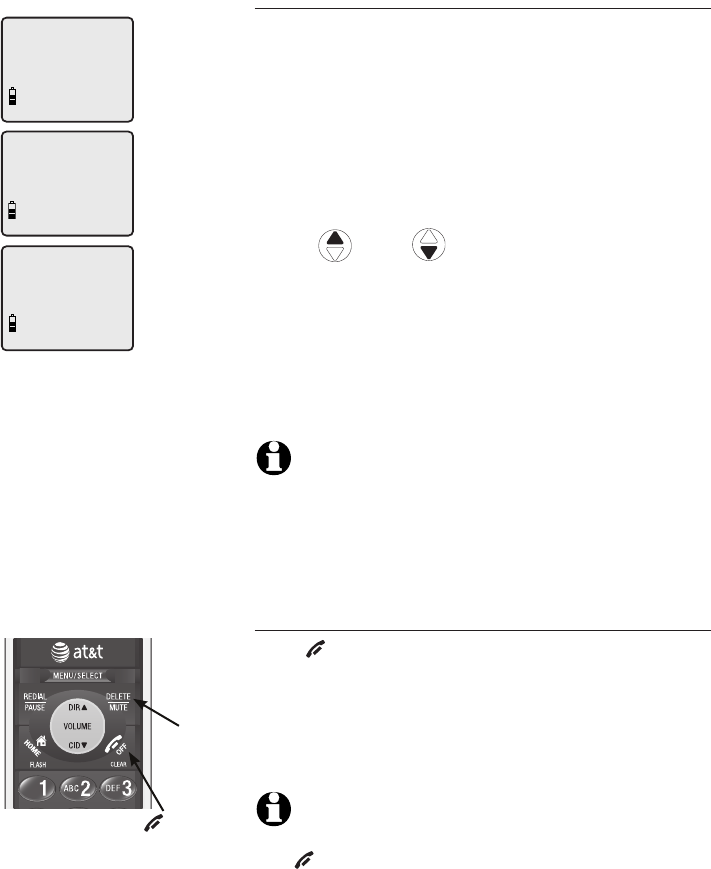
OFF/CLEAR
DELETE/MUTE
>
DIRECTORY
CALL LOG
>
HOME AREA CODE
DIRECTORY
HOME AREA CODE
---
26
Telephone operation
Handset operation
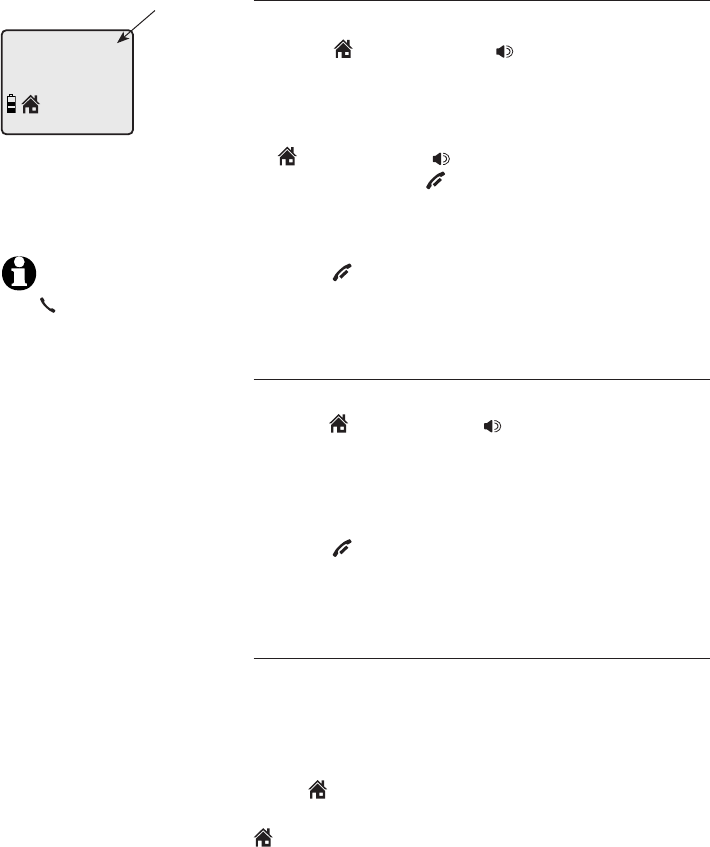
Making a HOME call
To make a HOME call:
• Press HOME/FLASH or SPEAKER, then enter
the telephone number.
-OR-
• Enter the telephone number, then press
HOME/FLASH or SPEAKER. Press
DELETE/MUTE or OFF/CLEAR to make
corrections when entering the phone number.
To end a HOME call:
• Press OFF/CLEAR or return the handset to the
telephone base or charger.
Answering a HOME call
To answer a HOME call:
• Press HOME/FLASH or SPEAKER.
–OR–
• Press any dial pad key (0-9, * or #).
To end a HOME call:
• Press OFF/CLEAR or return the handset to the
telephone base or charger.
Call waiting on the HOME line
If you subscribe to call waiting service with your
local telephone service provider, you will hear a
beep if someone calls while you are already on a
call.
Press HOME/FLASH to put your current call on
hold and take the new call. You can press
HOME/FLASH at any time to switch back and
forth between calls.
NOTE:
Pressing
HOME/FLASH to
access services from
your local telephone
service provider will
not affect the
elapsed time.
HOME 00:00:30
Elapsed
time
27
Telephone operation
Handset operation
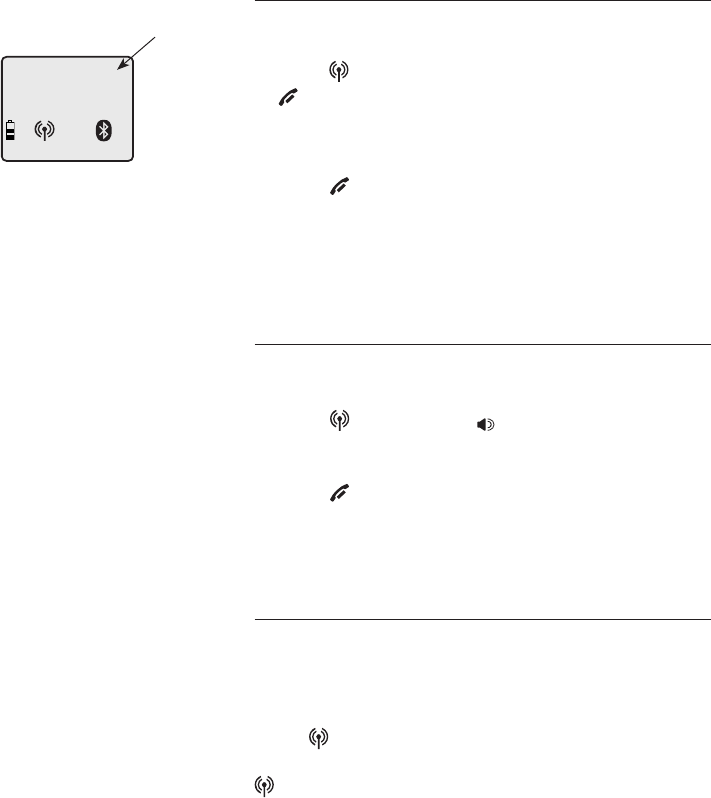
Receive a CELLULAR call while on a HOME call
While on a HOME call and there is an incoming
CELLULAR call, CELLULAR on the handset will
flash and you will hear a short beep.
To answer the incoming CELLULAR call:
• Press CELLULAR on the handset. The HOME
call will automatically be placed on hold and
HOME/FLASH will start flashing.
To end the CELLULAR call:
• Press OFF/CANCEL on the handset. The HOME
line will still be on hold. HOME LINE HELD will
appear on the screen display.
To resume the HOME call already on hold:
• Press HOME/FLASH on the handset.
NOTE: If you have voice mail service active on your
cellular phone, and you do not answer the incoming
CELLULAR call, the call will be answered by your
cellular phone's voice mail. Contact your cellular service
provider for more information about voice mail service.
28
Telephone operation
Handset operation
Making a CELLULAR call
To make a CELLULAR call:
• Enter the telephone number (pre-dial mode), then
press CELLULAR. Press DELETE/MUTE or
OFF/CLEAR to make corrections when entering
the phone number.
To end a CELLULAR call:
• Press OFF/CLEAR or return the handset to the
telephone base or charger.
The screen displays the elapsed time as you talk
(in hours, minutes and seconds).
Answering a CELLULAR call
To answer a CELLULAR call:
To answer a CELLULAR call:
• Press CELLULAR or SPEAKER.
To end a CELLULAR call:
• Press OFF/CLEAR or return the handset to the
telephone base or charger.
Call waiting on the CELLULAR line
If you subscribe to call waiting service provided by
your cellular service provider, you will hear one or
more beeps if you have an incoming CELLULAR
call while already on a call.
Press CELLULAR to put your current call on
hold and take the new call. You can press
CELLULAR at any time to switch back and forth
between calls.
CELL 00:00:30
Elapsed
time
29
Telephone operation
Handset operation
Receive a HOME call while on a CELLULAR call
While on a CELLULAR call and there is an
incoming HOME call, HOME/FLASH will flash on
the handset and you will hear a short beep.
To answer the incoming HOME call:
• Press HOME/FLASH on the handset. The
CELLULAR line call will automatically be placed
on hold and CELLULAR will start flashing.
To end the HOME call:
• Press OFF/CANCEL on the handset. The
CELLULAR line will still be on hold. CELL LINE
HELD will appear on the display.
To resume the CELLULAR call on hold:
• Press CELLULAR on the handset.
NOTE: If the answering system is on and you do not
answer an incoming HOME call while on the CELLULAR
line, the incoming HOME line call will be answered by
the answering system.
30
Telephone operation
Handset operation
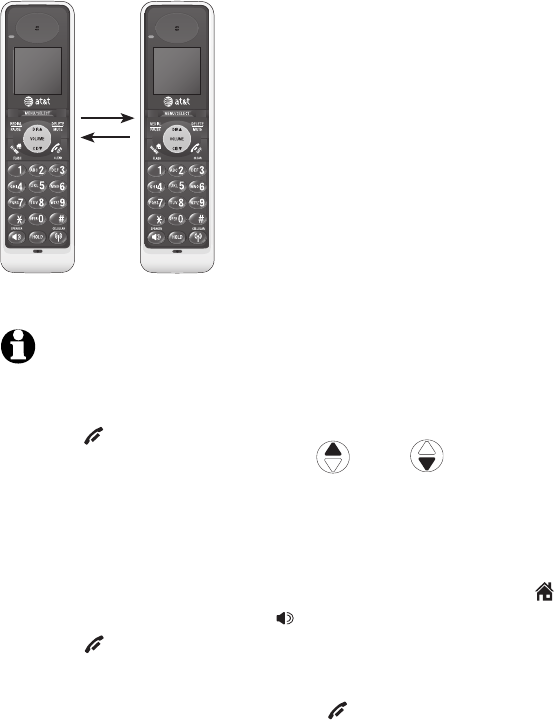
Handset speakerphone
During a call, you can press SPEAKER to alternate
between hands-free speakerphone and normal
handset use. Press OFF/CLEAR to hang up.
NOTE: Speakerphone will be disable if the handset is in
low battery mode. However, if the handset enters low
battery mode while you are using the speakerphone, the
call will remain in speakerphone mode until you hang
up.
Last number redial
To view the five most recently dialed numbers:
• Press REDIAL/PAUSE to display the most recently
called number (up to 30 digits).
• Press DIR / CID or REDIAL/PAUSE
repeatedly to view up to five recently called
numbers.
The handset will beep twice at the beginning and at
the end of the list.
Press OFF/CLEAR to exit.
To redial a number:
• Press HOME/FLASH or SPEAKER to dial the
displayed number from the HOME line.
-OR-
• Press CELLULAR to dial the displayed number
from the CELLULAR line.
-OR-
• Press HOME/FLASH or SPEAKER, then
REDIAL/PAUSE to call the most recently called
number (up to 30 digits).
While reviewing the redial memory, press
DELETE/MUTE to delete the displayed number.
REDIAL
888-883-2445
HOME
00:00:30
Elapsed
time

31
Telephone operation
Handset operation
Handset locator
The handset locator feature is useful if you misplace
a handset(s).
To start the paging tone:
• Press HANDSET LOCATOR at the telephone
base. This starts the paging tone on the handset(s)
for 60 seconds.
NOTE: When paging, if you press OFF/CLEAR or
DELETE/MUTE on a handset, the ringer of the handset will be
silent but the handset locator feature will not be cancelled.
To stop the paging tone:
• Press HOME/FLASH, SPEAKER, or any dial pad
key (0-9, *, or #) on the handset(s),
–OR–
• Press HANDSET LOCATOR on the telephone
base.
NOTE: The handset ringer volume also determines the level
of the paging tone. If the handset ringer volume level is set
to off, that handset will be silent for all calls and paging
(page 16).
**PAGING**
32
Telephone operation
Options while on calls
Volume control
To adjust the listening volume on a handset:
Press DIR / CID to adjust the listeningto adjust the listening
volume when on a call. Each press of the button
increases or decreases the volume level.
NOTES:
1. All volume settings (normal handset and speakerphone) are
independent.
2. When the volume reaches the minimum or maximum setting,
you will hear two beeps.
Multiple handset use (conference call)
You can conference with another system handset
while you are either on a HOME or CELLULAR
call. However, you cannot conference between a
HOME call and CELLULAR call.
If a handset is already on a call and you would
like to join the call, press HOME/FLASH or
SPEAKER on another system handset. A
maximun of four handsets can be used on a call.
Press OFF/CLEAR or place the handset in the
telephone base or charger to end the call. The
call will not be terminated until all handsets hang
up.
NOTE: Only two system handsets can be used at the
same time on an outside call.
33
Telephone operation
Options while on calls
Mute
The mute function allows you to turn off the
microphone. You can hear the caller, but the caller
will not be able to hear you.
To mute a call:
• Press DELETE/MUTE to turn off the microphone.
When mute is on, the handset screen will show
MUTED for a few seconds and the MUTE icon
will be shown until mute is turned off.
To un-mute a call:
• Press DELETE/MUTE again and resume speaking.
When mute is turned off, MICROPHONE ON
will display temporarily on the handset screen.
NOTE: You cannot press OFF/CLEAR to exit redial, directory
or caller ID history without ending the call.
DELETE/MUTE
34
Telephone operation
Options while on calls
Hold
You can place a HOME or CELLULAR call on hold,
if the call is not retrieved in one minute, it will be
disconnected.
To place a HOME call on hold:
• Press the HOLD key on the handset. HOME
LINE HELD will appear on the display and the
HOME/FLASH will flash. Press the HOLD key
again to resume the HOME call.
To place a CELLULAR call on hold:
• Press the HOLD key on the handset. CELL LINE
HELD will appear on the display and the
CELLULAR will also flash. Press the HOLD
key again to resume the CELLULAR call.
HOME LINE HELD
CELL LINE HELD
35
Telephone operation
�hain dialing
This feature allows you to initiate a dialing
sequence from numbers stored in the directory,
caller ID history or redial list while you are on a
call.
Chain dialing can be useful if you wish to access
numbers other than phone numbers (such as bank
account information or access codes) from the
directory, caller ID history or redial list.
Directory
1. Press MENU/SELECT twice.
2. Press
DIR / CID
to scroll to the desired
number.
3. Press MENU/SELECT to dial the displayed
number.
Caller ID history (call log)
1. Press MENU/SELECT.
2. Press
DIR / CID
to scroll to >CALL
LOG.
3. Press
DIR / CID
to scroll to the desired
number.
4. Press MENU/SELECT to dial the displayed
number.
Last number redial
Press REDIAL/PAUSE to display and dial the
most recently dialed number. If you press
REDIAL/PAUSE again within two seconds, the
number will not be dialed.
NOTES:
1. You cannot edit a
directory entry while you
are on a call.
For more
details about the directory,
see page 34.
2.
You cannot copy a caller ID
entry into the directory while
you are on a call. For more
details about the caller ID
history, see page 40.
3. While on a call, only
the most recently called
number can be reviewed,
and erasing the entry is
not allowed. For more
details about the redial
memory, see page 22.
36
Telephone operation
Intercom
Use the intercom feature for conversations between
handsets.
You can buy additional accessory handsets
(model AT&T TL90078) for this telephone base.
Up to 12 handsets can be registered to the
telephone base.
The first nine handsets that you register will be
named Handsets 1-9. Use the handset number to
intercom and transfer calls.
Although the names for handsets 10-12 will
appear in their displays as 10-12, when you
intercom or transfer to one of them, you must
use *0 for Handset 10, *1 for handset 11, and *2
for Handset 12.
Model TL92278 (without additional handset
registered)
1. Press MENU/SELECT when in idle mode to enter
the feature menu.
2. Use
DIR / CID
to scroll to >INTERCOM,
then press MENU/SELECT.
3. The screen will show CALLING OTHER HANDSET.
The called handset will ring, and its screen will
show OTHER HANDSET IS CALLING.
4. On the ringing handset, press HOME/FLASH, INT,
SPEAKER, or any dial pad key (0-9, * or #) to
answer the intercom call.
To end the intercom call:
• Press OFF/CLEAR on either handset.
-OR-
• Place either handset in the charger or telephone
base.
NOTES:
1. Before the intercom call
is answered, you can
cancel the intercom call by
pressing OFF/CLEAR on
the calling handset.
2. If the called handset is
not answered within 100
seconds, or if it is in the
directory or caller ID history
mode, or on a call, or out of
range, the calling handset
will show the message
UNABLE TO CALL TRY
AGAIN.
3. Pressing OFF/CLEAR
or DELETE/MUTE will
temporarily silence the
intercom ringer.
37
Telephone operation
Intercom
Model TL92278 (with additional handset
registered)/TL92378/TL92328
1. Press MENU/SELECT when in idle mode to enter
the feature menu.
2. Use
DIR / CID
to scroll to >INTERCOM,
then press MENU/SELECT. The screen will show
INTERCOM TO:.
3. Enter the handset number 1-9 or, for handsets
10, 11 and 12, enter *0, *1 or *2, respectively.
The display will show CALLING HANDSET X, with
X being the handset number. The called handset
will ring, and its screen will show HANDSET X IS
CALLING.
4. On the ringing handset, press HOME/FLASH, INT,
SPEAKER, or any dial pad key (0-9, * or #) to
answer the intercom call.
To end the intercom call:
• Press OFF/CLEAR on either handset.
-OR-
• Place either handset in the charger or telephone
base.
NOTES:
1. Before the intercom call
is answered, you can
cancel the intercom call by
pressing OFF/CLEAR on
the calling handset.
2. If the called handset is
not answered within 100
seconds, or if it is in the
directory or caller ID history
mode, or on a call, or out of
range, the calling handset
will show the message
UNABLE TO CALL TRY
AGAIN.
3. Pressing OFF/CLEAR
or DELETE/MUTE will
temporarily silence the
intercom ringer.
38
Telephone operation
�all transfer using intercom
Use the intercom feature to transfer an outside call
to another system handset.
Model TL92218 (without additional handset
registered)
1. When on an outside call, press MENU/SELECT
when in idle mode to enter the feature menu.
2. Use
DIR / CID
to scroll to >TRANSFER,
then press MENU/SELECT. The outside call is
automatically placed on hold. The transferring
handset’s screen will show CALLING OTHER
HANDSET. The called handset will ring, and its
screen will show OTHER HANDSET IS CALLING.
2. On the ringing handset, press HOME/FLASH,
INT, SPEAKER, or any dial pad key (0-9, * or
#) to answer the intercom call. You can now
talk without the outside caller hearing the
conversation.
3. Press OFF/CLEAR on the transferring handset
or place it in the telephone base or handset
charger to complete the transfer. The transferring
handset’s screen will show CALL TRANSFERED
and the other handset will automatically be
connected to the outside call.
-OR-
Press the HOME/FLASH or CELLULAR key
(depending on which call is being transferred) on
the called handset to let both parties conference
with the external line.
NOTES:
1. Before the intercom call is
answered, you can cancel
the transfer and return to
the outside call by pressing
OFF/CLEAR or
HOME/FLASH.
2. If the called handset does
not answer the intercom
call within 100 seconds,
is in directory or caller ID
history mode or is or out
of range, the transferring
handset will show
UNABLE TO CALL TRY
AGAIN on its screen and
will automatically return
to the outside call.
3. You can end the intercom
call and return to the
outside call by pressing
HOME/FLASH or
CELLULAR key (depending
on which call is being
transferred) on the
originating handset, or
pressing OFF/CLEAR on
the destination handset.
39
Telephone operation
�all transfer using intercom
Model TL92278 (with additional handset
registered)/ TL92378/TL92328
1. When on an outside call, press MENU/SELECT
when in idle mode to enter the feature menu.
2. Use DIR / CID to scroll to >TRANSFER,
then press MENU/SELECT. The screen will show
INTERCOM TO:.
3. Enter the handset number 1-9 or, for handsets
10, 11 and 12, enter *0, *1 or *2, respectively.
The display will show CALLING HANDSET X,
with X being the handset number. The called
handset will ring, and its screen will show
HANDSET X IS CALLING.
4. On the ringing handset, press HOME/FLASH,
INT, SPEAKER, or any dial pad key (0-9, * or
#) to answer the intercom call. You can now
talk without the outside caller hearing the
conversation.
5. Press OFF/CLEAR on the transferring
handset or place it in the telephone base or
handset charger to complete the transfer. The
transferring handset’s screen will show CALL
TRANSFERED and the other handset will
automatically be connected to the outside call.
-OR-
Press the HOME/FLASH or CELLULAR key
(depending on which call is being transferred)
on the destination handset to let both parties
conference with the external line.
NOTES:
1. Before the intercom call is
answered, you can cancel
the transfer and return to
the outside call by pressing
OFF/CLEAR or
HOME/FLASH.
2. If the called handset does
not answer the intercom
call within 100 seconds,
is in directory or caller ID
history mode or is or out
of range, the transferring
handset will show UNABLE
TO CALL TRY AGAIN
on its screen and will
automatically return to the
outside call.
3. You can end the intercom
call and return to the
outside call by pressing
HOME/FLASH or
CELLULAR key
(depending on which call
is being transferred) on
the originating handset, or
pressing OFF/CLEAR on
the destination handset.
40
Directory
Robert Brown
888-883-2445
About the directory
Shared directory
The directory is stored in the telephone base, and
is shared by all handsets. Changes made to the
directory on any one handset will apply to all.
NOTE: Only one handset can review the directory at a
time. If another handset attempts to enter the directory,
the screen will display NOT AVAILABLE AT THIS TIME.
Capacity
The directory can store up to 50 entries, with a
maximum of 15 alphanumeric characters (including
spaces) for the names and 30 digits for the
telephone numbers. A convenient search feature
can help you find and dial numbers quickly (page
35).
If there are already 50 entries, the screen will
display LIST FULL. You will not be able to store a
new number until an existing one is deleted.
Exiting the directory
Press OFF/CLEAR to cancel an operation, back
up to the previous menu, or exit the menu display.
Press and hold OFF/CLEAR to return to the idle
mode.
If you pause for too long while creating or
reviewing an entry, the procedure will time out
and you will have to begin again.
41
Directory
�reating directory entries
To create a new directory entry
1. Press MENU/SELECT when in idle mode to enter
the feature menu.
2. Press MENU/SELECT again to enter
>DIRECTORY menu.
3. Press
CID
to highlight STORE.
4. Press MENU/SELECT.
5. Enter the telephone number when prompted.
• Use the dial pad to enter up to 30 digits.
– Press
DIR / CID
to move the
cursor to the right or left.
– Press DELETE/MUTE to erase digits.
– Press and hold DELETE/MUTE to erase all
digits.
– Press and hold REDIAL/PAUSE to enter a
three-second dialing pause.
-OR-
• Copy a number from redial by pressing
REDIAL/PAUSE then press
DIR or CID
to locate the number to copy. Press
MENU/SELECT to copy the number.
6. Press MENU/SELECT to save the number in the
display.
The display will show ALREADY SAVED if the
number is already in the directory. The same
number cannot be saved twice.
>
DIRECTORY
CALL LOG
>
STORE
REVIEW
>
REVIEW
STORE
ENTER NUMBER
888-883-2445_
42
Directory
�reating directory entries
7. Enter the name when prompted.
• Use the dial pad to enter a name (up to
15 characters). Each time a key is pressed,
the character on that key will be displayed.
Additional key presses will produce other
characters on that key. See the chart below.
– Press– PressPress DIR or CID to move the
cursor to the right or left.
– Press DELETE/MUTE to erase letters.
– Press and hold DELETE/MUTE to erase all
letters.
Dial
Key
1
1 2 3 4 5 6 7 8 9
1 # ‘ , - . &
A B C 2 a b c
D E F 3 d e f
G H I 4 g h i
J K L 5 j k l
M N O 6 m n o
P Q R S 7 p q r s
T U V 8 t u v
W X Y Z 9 w x y z
0
* ? ! / ( ) @
space
Characters by number of key presses
2
3
4
5
6
7
8
9
0
*
#
8. Press MENU/SELECT to store your new directory
entry. The name and the telephone number will
then be shown on the screen. To change them
later, see page 36.
ENTER NAME
Robert Brown_
Robert Brown
888-883-2445
NOTE: The first letter
of every word will be
capitalized. The
remaining letters in a
word begin with
lower case letters
shown in the chart to
the right.
43
Directory
Directory review
To review directory entries
1. Press DIR when in idle mode to display the
first entry in the directory. DIRECTORY EMPTY
will be displayed if there are no directory
entries.
-OR-
You can also display the first entry in the
directory by pressing MENU/SELECT twice,
then pressing MENU/SELECT again to choose
>REVIEW.
2. Press DIR or CID to browse through
the directory. Entries will be displayed
alphabetically by the first letter in the name.
DIR

44
Directory
Directory search
To search by name
1. Press DIR when in idle mode to display the
first listing in the directory. DIRECTORY EMPTY
will be displayed if there are no directory
entries.
2. When a name entry is displayed, press the dial
pad keys (2-9) to start a name search.
The directory will display the first name
beginning with the first letter associated with
the dial pad key if there is an entry in the
directory that begins with that letter.
3. To see other names that start with the letters
on the same dial pad key, keep pressing the
key. The names will be shown in alphabetical
order.
For example, if you have the names Jennifer,
Jessie, Kevin and Linda in your directory:
• If you press 5 (JKL) once, you will see Jennifer.
• If you press 5 (JKL) twice, you will see Jessie.
• If you press 5 (JKL) three times, you will see
Kevin.
• If you press 5 (JKL) four times, you will see
Linda.
• If you press 5 (JKL) five times, you will see
Jennifer again.
NOTES:
1. If there is no name matching the first letter of the key you
press, you will see a name that matches the second letter of
the key.
2. If you press a key (2-9) and no name starts with the letters
on that key, the directory will show the entry that matches
the next letter in the directory.
DIR
45
Directory
To dial, delete or edit entries
To dial, delete or edit a directory entry (name
and number), the entry must be displayed on the
handset. Use the directory search or review (pages
34-35) to display an entry.
Display dial
To dial a displayed number from the directory,
press HOME/FLASH or SPEAKER to dial from
the HOME line; or press CELLULAR to dial from
the CELLULAR line.
To delete an entry
When a directory entry is displayed, press
DELETE/MUTE to delete the displayed entry from
the directory. Once deleted, an entry cannot be
retrieved.
To edit an entry
When a directory entry is displayed:
1. Press MENU/SELECT to modify the entry. You
will be prompted to EDIT NUMBER.
Press the dial pad keys to add digits.
• Press DELETE/MUTE to erase digits.
• Press
DIR or CID
to move the cursor.
Press and hold REDIAL/PAUSE to add a three-
second pause if desired.
• Press REDIAL/PAUSE, then DIR or CID
to scroll to a previously dialed number. Press
MENU/
SELECT
to add the redial number to the
entry.
2. Press MENU/SELECT. You will be prompted toYou will be prompted to
EDIT NAME.
Press the dial pad keys to add characters
(page 33).
Press DELETE/MUTE to erase characters.
Press
DIR or CID
to move the cursor.
3. Press MENU/SELECT to confirm.
•
•
•
•
•
Andrew
888-490-2005
EDIT NUMBER
888-883-2445
EDIT NAME
Andy
Andy
888-883-2445

46
Caller ID
�aller ID operation
This product supports caller ID services provided
by most local telephone service companies.
Depending on your service subscription, you may
see the caller’s number, or the caller’s name and
number which are sent by the telephone company
after the first or second ring. Caller ID allows you
to see the name, number, date and time of the
incoming callers on the HOME and CELLULAR
lines.
Caller ID with call waiting lets you see the name
and telephone number of the caller before
answering the telephone, even when on another
call. In addition, the time and date are sent by
the telephone and cellular service provider along
with the caller ID information. These services
are available only if both you and the caller are
in areas offering caller ID service, and if both
telephone companies use compatible equipment.
Contact your local telephone company and
cellular service provider if:
• You have both caller ID and call waiting, but as
separate services (you may need to combine
these services).
• You have only caller ID service, or only call
waiting service.
• You don’t subscribe to any caller ID or call
waiting services.
You can use this product with regular caller
ID service, or you can use this product’s other
features without subscribing to either caller ID or
combined caller ID with call waiting service.
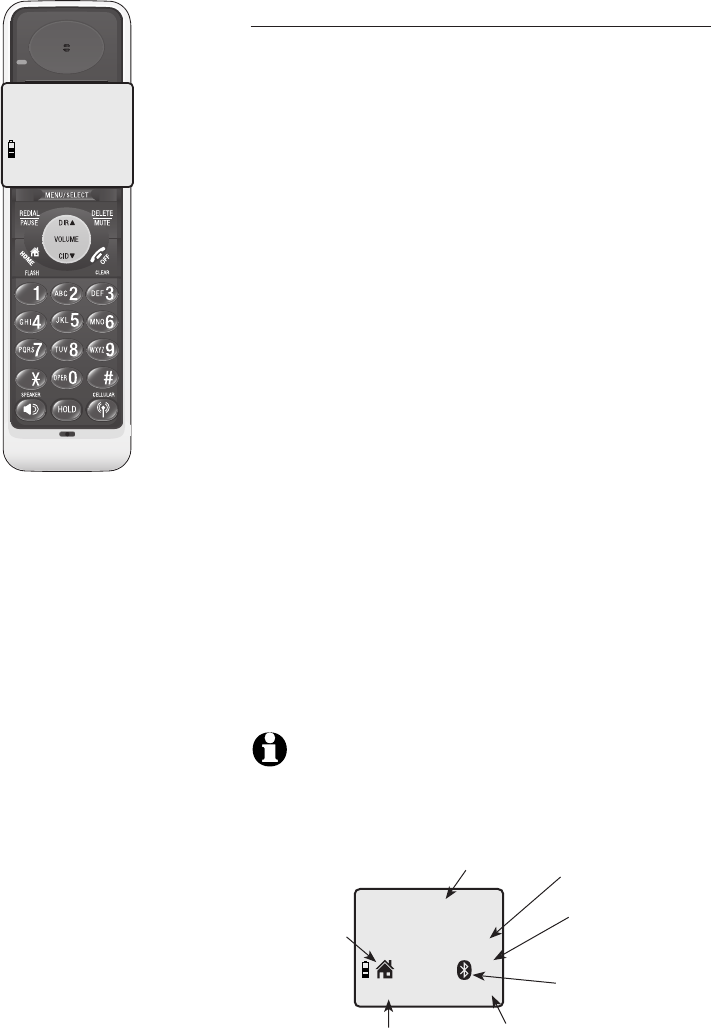
CHRISTINE SMITH
888-722-7702
NEW
10:01 11/23
AM
NOTE: You can use
this product with
regular caller ID
service, or you can use
this product’s other
features without
subscribing to either
caller ID or combined
caller ID with call
waiting service.
47
Caller ID
�aller ID operation
Caller ID history information
If you subscribe to caller ID services, provided by
your local telephone company and/or cellular
service provider, The caller ID history storesThe caller ID history stores
information about the last 50 incoming calls forfor
both the HOME and CELLULAR lines.
Although the call log records the caller ID
information of both lines, CELLULAR line call
log entries only provide the incoming telephone
number. The time and date of the call will appear
in the call log entry if only the time is set. The
Bluetooth name of the cellular phone will also
appear. However, if the number on the incoming
CELLULAR call matches a number in the directory,
the name will be retrieved from the matched
directory entry.
Review the caller ID history to find out who called,
to easily return the call, or to copy the caller’s
name and number into your directory.
The phone deletes the earliest entry when the log
is full to make room for new calls.
If you answer a call before the information
appears on the screen, it will not be saved in the
caller ID history.
The caller ID history is stored in the telephone
base, and is shared by all handsets. Changes made
on any one handset will be reflected in all.
NOTE: Only one handset can review the caller ID history
at a time. If another handset attempts to enter the
directory or caller ID history, it will display NOT
AVAILABLE AT THIS TIME.
CHRISTINE SMITH
888-722-7702
NEW
10:01 11/23
AM
Caller’s name Caller’s number
Appears when the
call is missed and
un-reviewed
Time of call Date of call
CHRISTINE SMITH
888-722-7702
NEW
10:01AM 11/23
Incoming
HOME call
Incoming
CELLULAR call
48
Caller ID
�aller ID operation
Memory match
If the incoming telephone number exactly matches
a telephone number in your directory, the name that
appears on the screen will match the corresponding
name in your directory.
For example, if Christine Smith calls, her name will
appear as Chris if this is how you entered it into
your directory.
NOTE: The number shown by your caller ID will be in the
format sent by the phone company. The phone company
usually delivers ten-digit phone numbers (area code plus
phone number). If the telephone number of the caller
does not exactly match a number in your directory, the
name will appear as it is delivered by the phone
company. For example if the phone company includes the
area code and the directory number does not, the name
will appear as delivered by the phone company.
There are also occasions when other information
or no information is displayed for various resaons:
On-screen
messsage
Reason
PRIVATE
NUMBER
The caller's number has been set
as private.
PRIVATE
NAME
The caller's name has been set
as private.
PRIVATE
CALLER
Caller's name and telephone
number are not revealed at
caller's request.
UNKNOWN
NUMBER
Your local telephone company is
unable to determine the caller's
number.
UNKNOWN
NAME
Your local telephone company is
unable to determine the caller's
name.
UNKNOWN
CALLER
Your local telephone company is
unable to determine the caller's
name and telephone number.
Calls from other countries may
also generate this message.
Chris
888-722-7702
NEW
10:01AM 11/23
49
Caller ID
HANDSET 1
6 MISSED CALLS
�aller ID operation
Missed (new) calls indicator
When a handset is in idle mode and has calls that
have not been reviewed, its screen will show XX
MISSED CALLS.
All entries which have not been reviewed will be
counted as missed calls when the phone is idle. Each
time an entry in the caller ID history marked NEW is
reviewed, the number of missed calls decreases by
one.
If you have too many missed calls and you do not
want to review them one by one, but you still want
to keep them in the caller ID history, you can press
and hold OFF/CLEAR for four seconds when the
handset is idle. All the entries in the caller ID history
will be considered old (have been reviewed), and the
missed calls counter is reset to 0.
Robert Brown
888-883-2445
NEW
10:31
AM
11/23
50
Caller ID
HANDSET 1
6 MISSED CALLS
Charlie Johnson
800-222-3111
NEW
10:21
AM
11/23
Robert Brown
888-883-2445
NEW
10:31
AM
11/23
883-2445
888-883-2445
1-888-883-2445
1-883-2445
The various dialing options are:
To review the caller ID history
To review the caller ID history
1. Press CID to review the caller ID history in
reverse chronological order starting with the
most recent call.
-OR-
You can also review the caller ID history by
pressing MENU/SELECT, and using
DIR or
CID
to scroll to >CALL LOG, then press
MENU/SELECT.
2. Press
DIR or CID
to scroll through the
list as shown on the left.
To dial from the caller ID history
While reviewing an entry in the caller ID history:
• To dial a displayed number from the caller ID
history.
Press HOME/FLASH or SPEAKER to dial
from the HOME line; or press CELLULAR to
dial from the CELLULAR line.
-OR-
• Press # repeatedly to display different dialing
options for local and long distance numbers
before dialing or saving the telephone number
in the directory. See the example on the left.
You may also press 1 repeatedly to add or
remove a 1 in front of the telephone number
before dialing or saving the telephone number
in the directory. See the examples on the left.
When the number displayed is in the correct
format for dialing, following the above step to
dial the number.
CID
883-2445
1-883-2445
888-883-2445
1-888-883-2445
Press #
Press 1

51
Caller ID
To review the caller ID history
Other options
• Press DELETE/MUTE to delete the displayed
entry from the caller ID history.
• With an entry from the caller ID history is
displayed, press and hold DELETE/MUTE to
delete all entries from the caller ID history.
When the screen displays DELETE ALL CALLS?
press MENU/SELECT to clear the caller ID
history of all entries, or press OFF/CLEAR to
exit and leave all entries in the caller ID history
intact.
• Press MENU/SELECT to copy the entry into
your directory. You can edit the name and the
number (page 36).
• Press OFF/CLEAR to exit the caller ID history.
NOTES:
1. You may need to change how a caller ID number will be
dialed if the entry is not displayed in the correct format.
Caller ID numbers may appear with an area code which may
not be required for local calls, or without a 1 which may be
needed for long distance calls.
2. If neither the name nor number is provided, UNABLE TO SAVE
will be displayed.

52
Answering system
About the answering system
Answering system and voicemail
Your telephone has both a digital answering
system and voicemail indication. Voicemail is
offered by your telephone service provider (fees
may apply). Your telephone’s answering system
and voicemail indication are independent features,
and each alerts you to new messages differently.
For more information on the voicemail indicators
see page 19. To listen to your voicemail, you
typically dial an access number provided by your
telephone company, followed by a security code
or PIN. To listen to messages recorded on your
digital answering system, press PLAY/STOP
button on the telephone base.
If you subscribe to caller ID/call waiting service
through your telephone service provider, you
can use your telephone answering system and
voicemail together. Set your answering system
to answer calls at least two rings earlier than
your voicemail is set to answer. For example, set
your voicemail to answer calls after six rings and
set you answering system to answer after four
rings. Some voicemail providers may program the
delay before answering calls in seconds instead
of rings; in this case allow six seconds per ring
when determining the appropriate setting. By
doing this, if you are on a call, or if the answering
system is busy recording a message and you
receive another call, the second caller can leave a
voicemail message.