VTech Telecommunications 80-6292-00 Cordless Phone with Instant Messaging User Manual II
VTech Telecommunications Ltd Cordless Phone with Instant Messaging Users Manual II
UserManual.wiki
>
VTech Telecommunications
>
80-6292-00 User Manual
>
Users Manual II
Contents
1.
Users Manual I
2.
Users Manual II
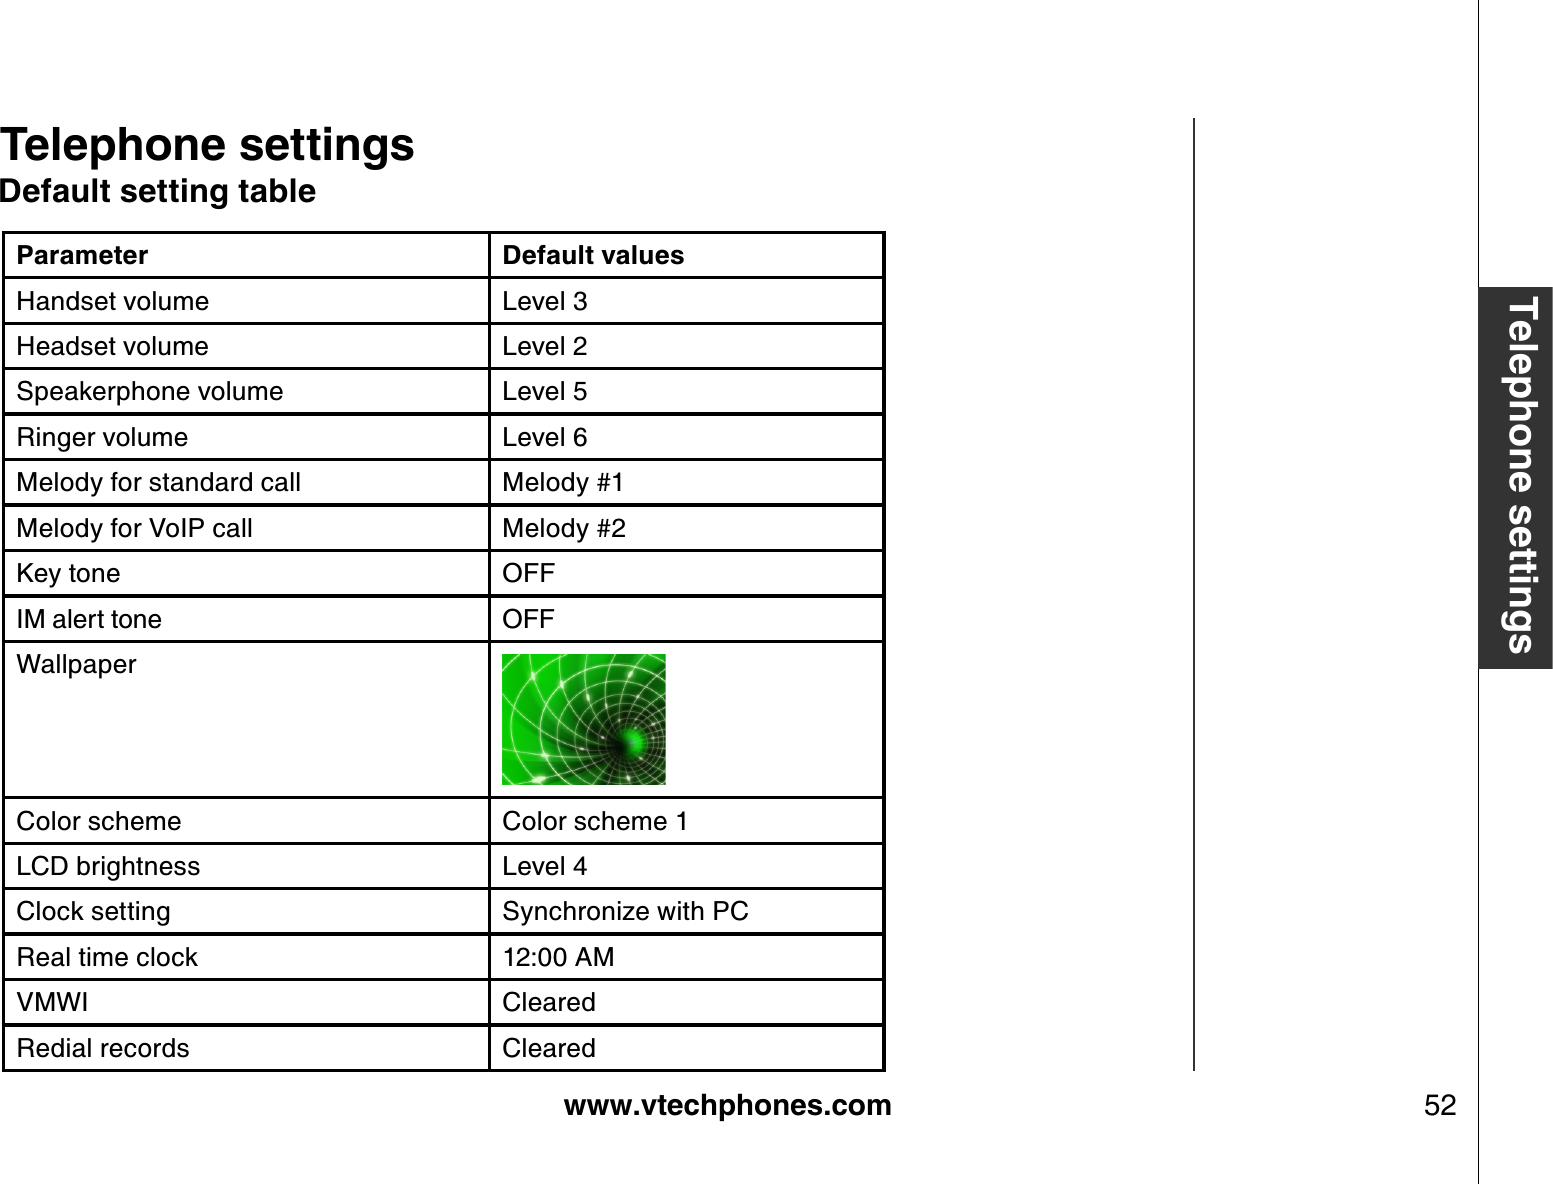
Users Manual II
Navigation menu
Upload a User Manual
Namespaces
Wiki Guide
HTML
PDF
Info
Views
User Manual
Discussion / Help
Navigation
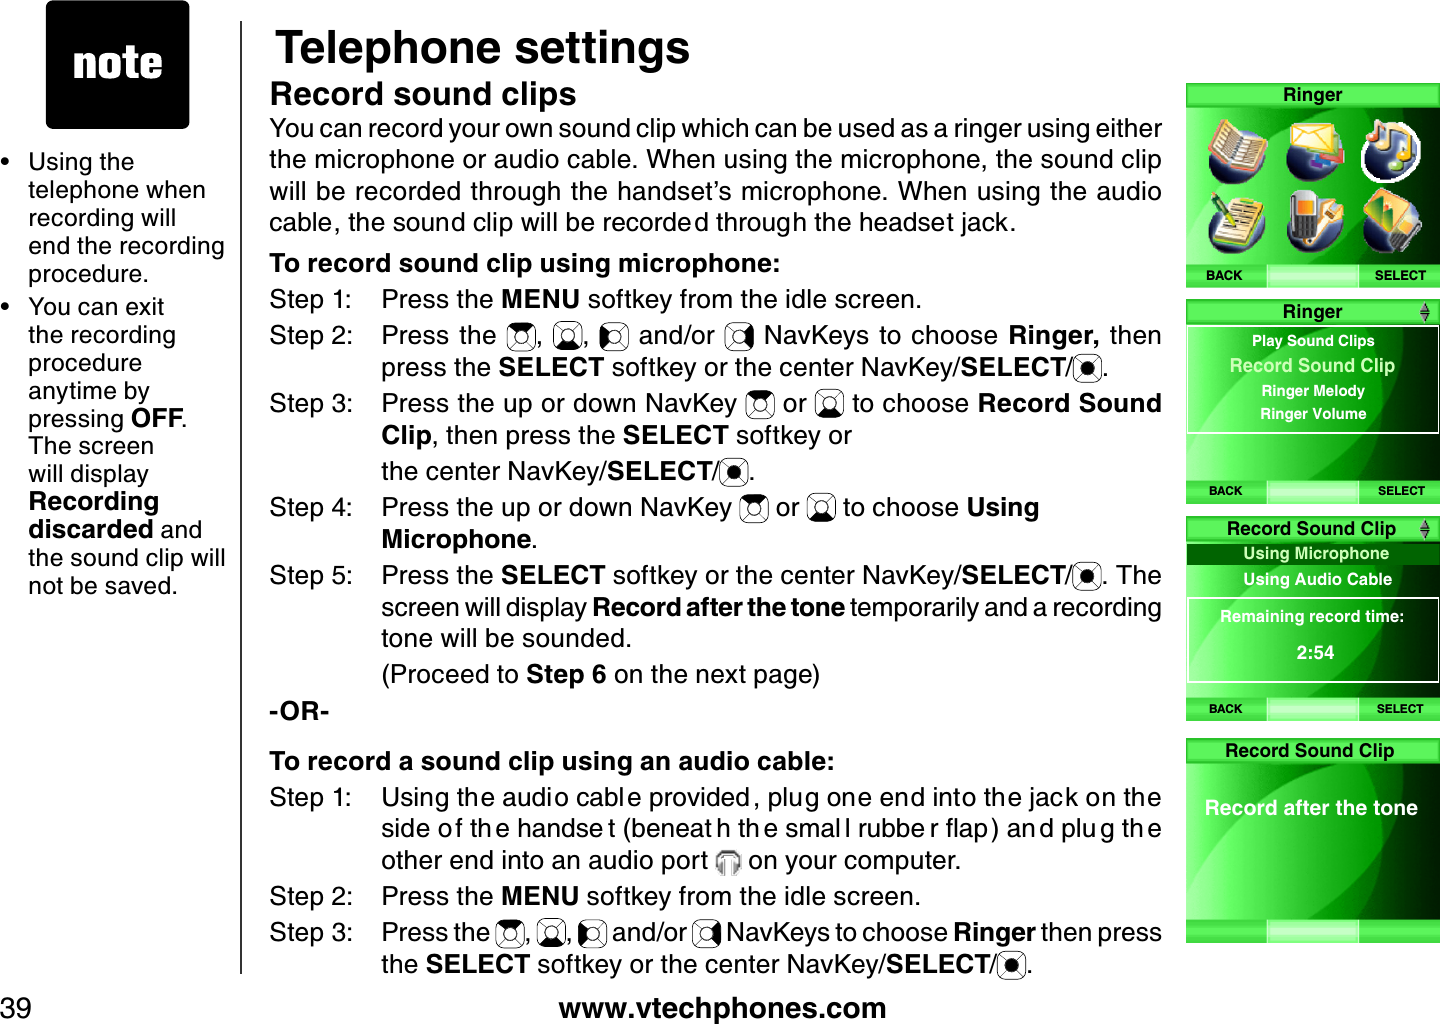
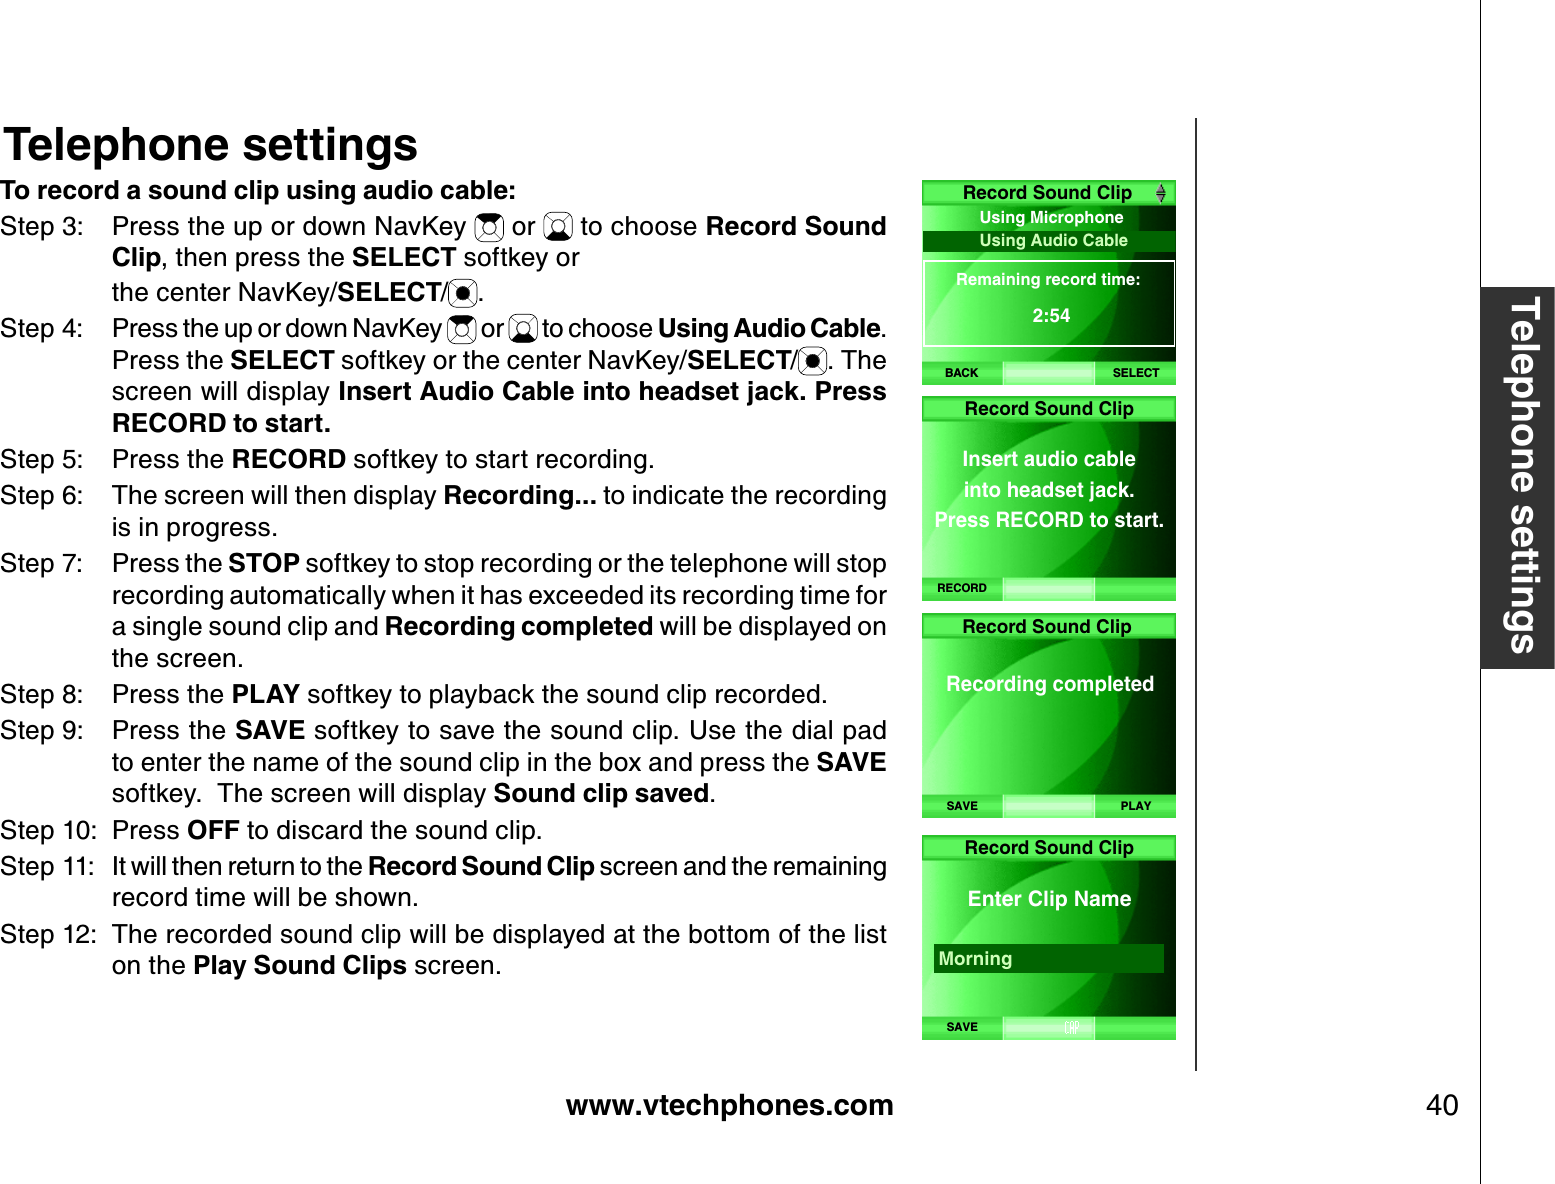
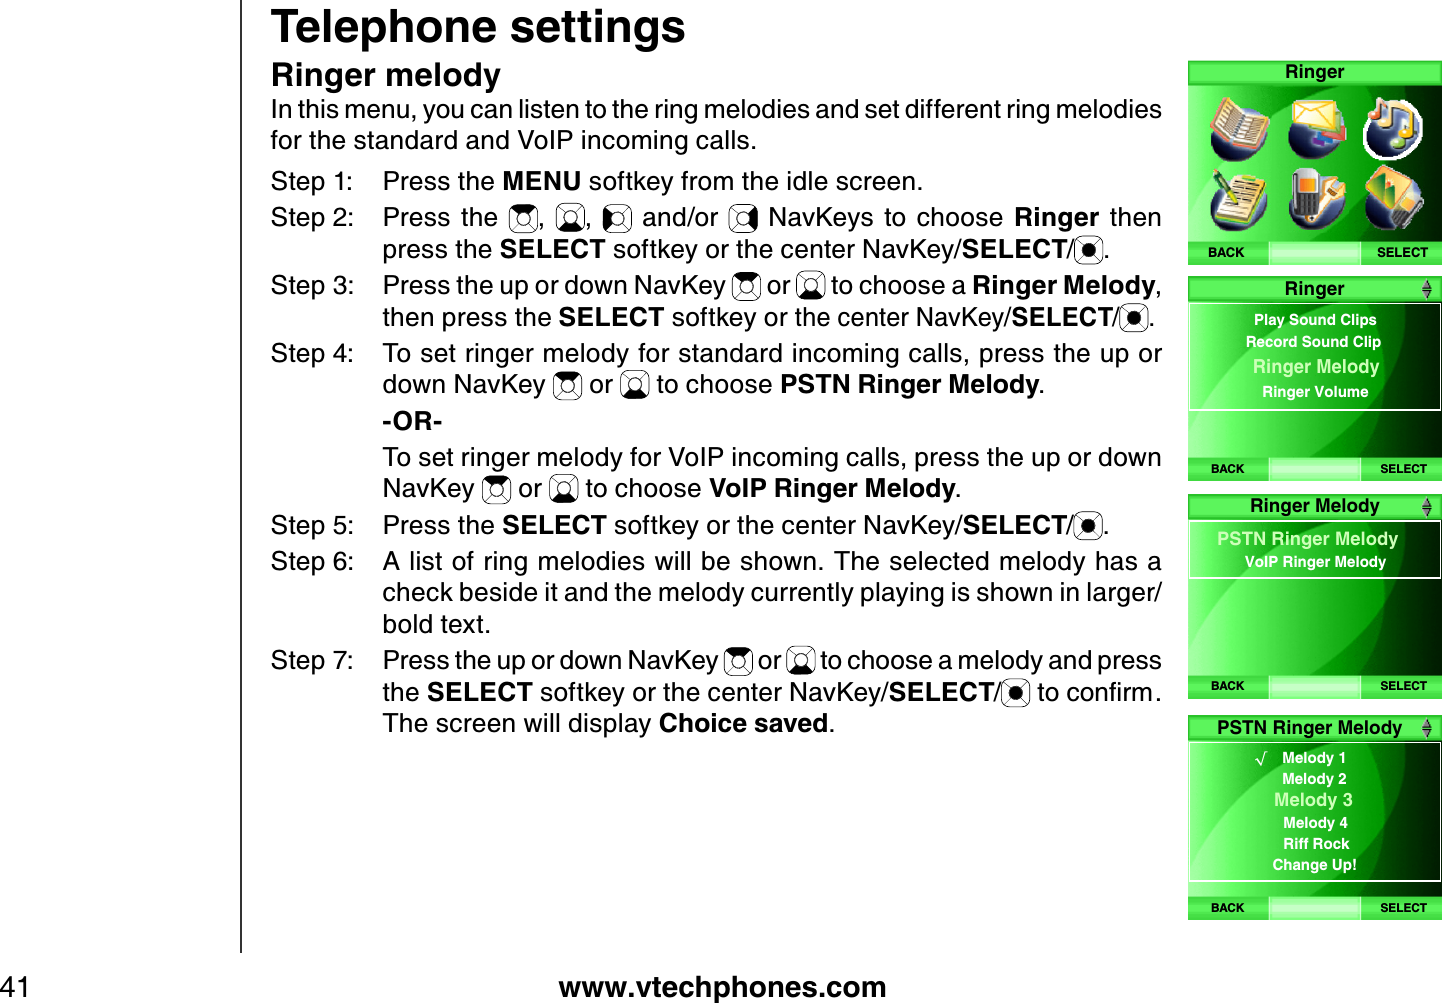
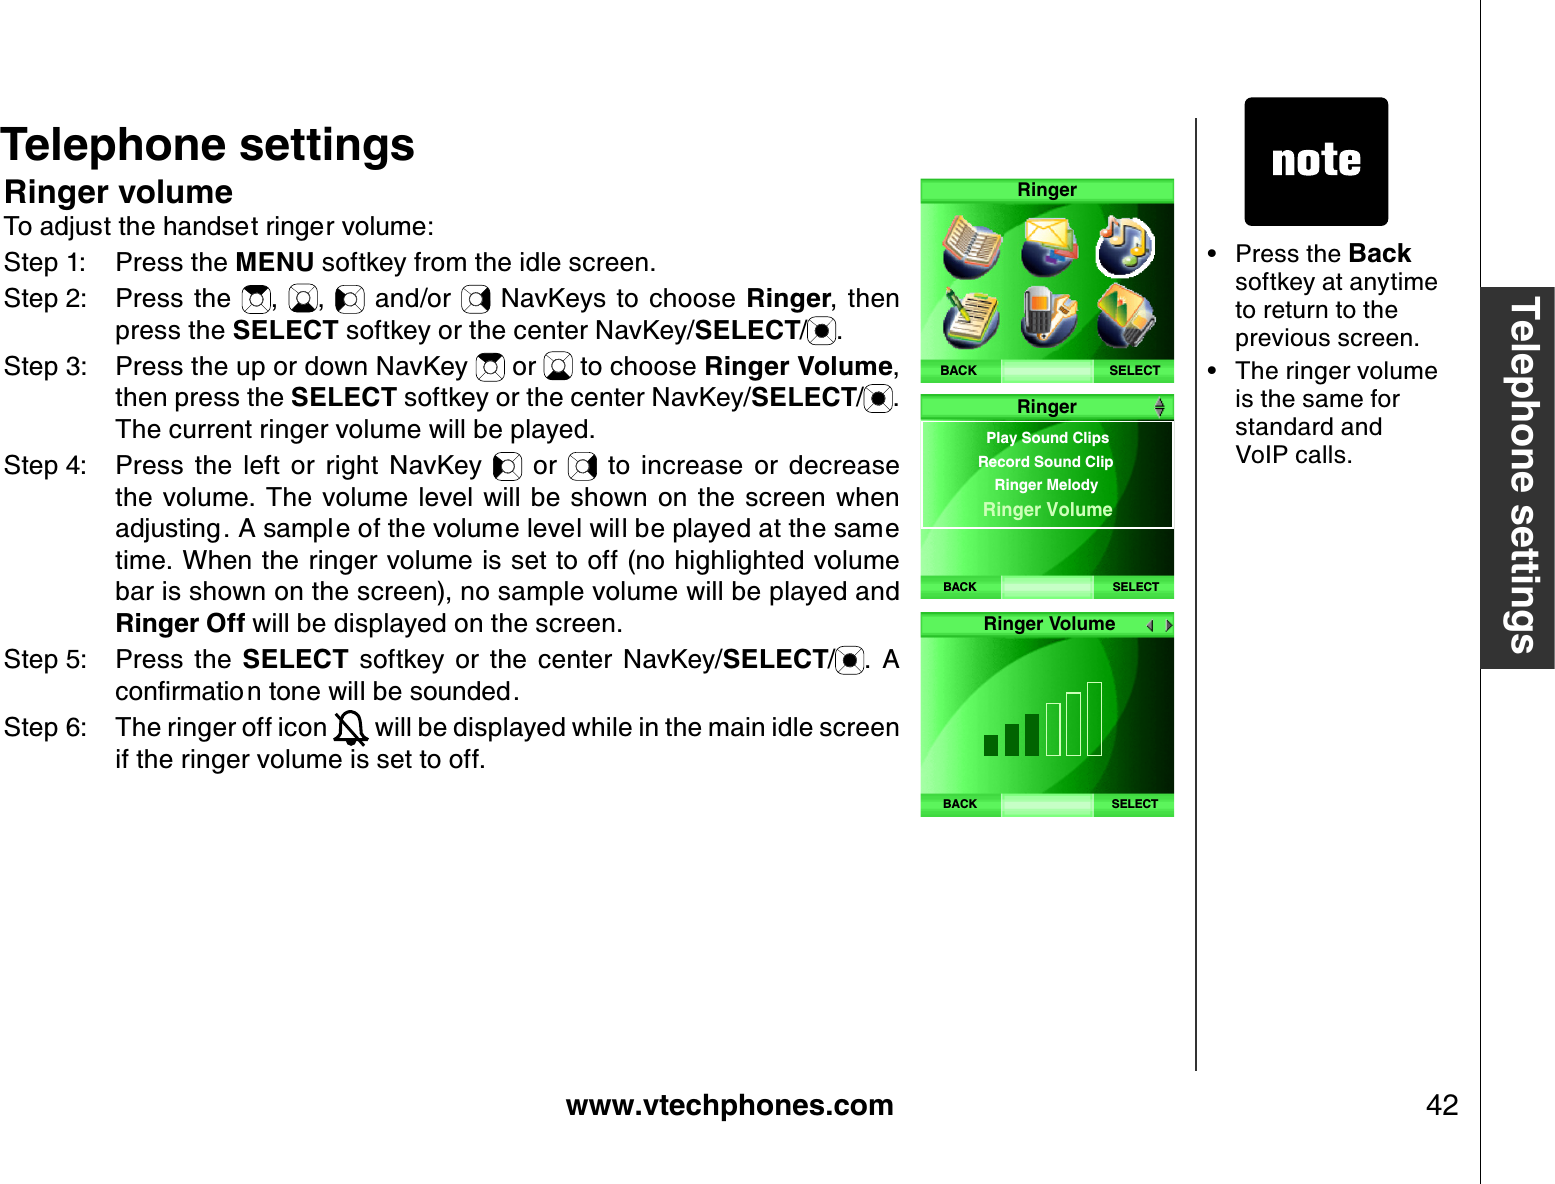
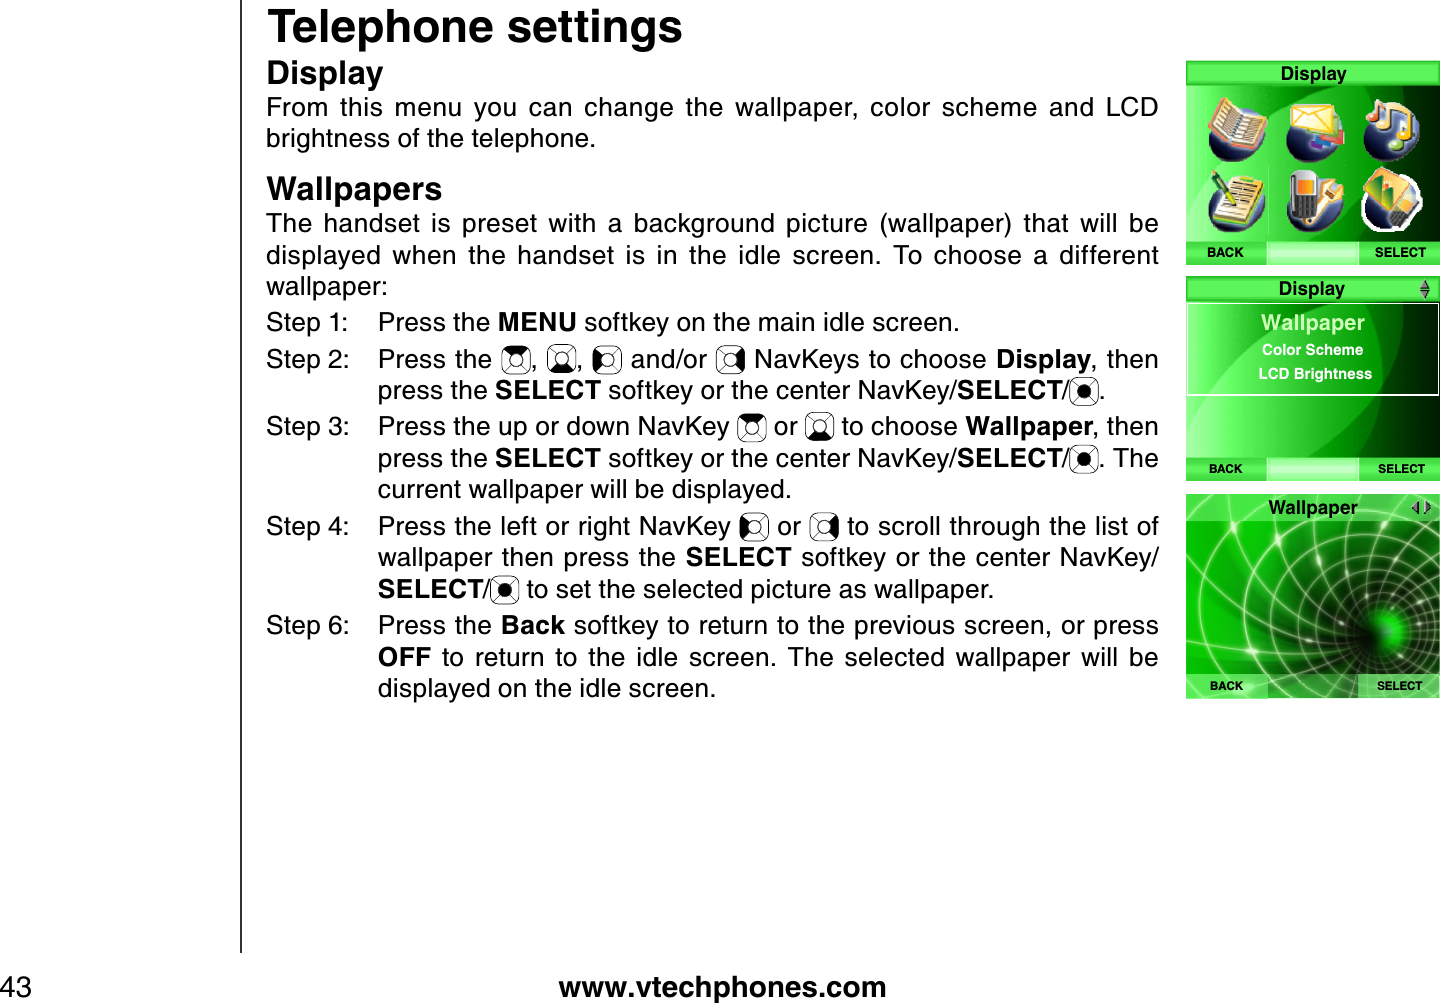
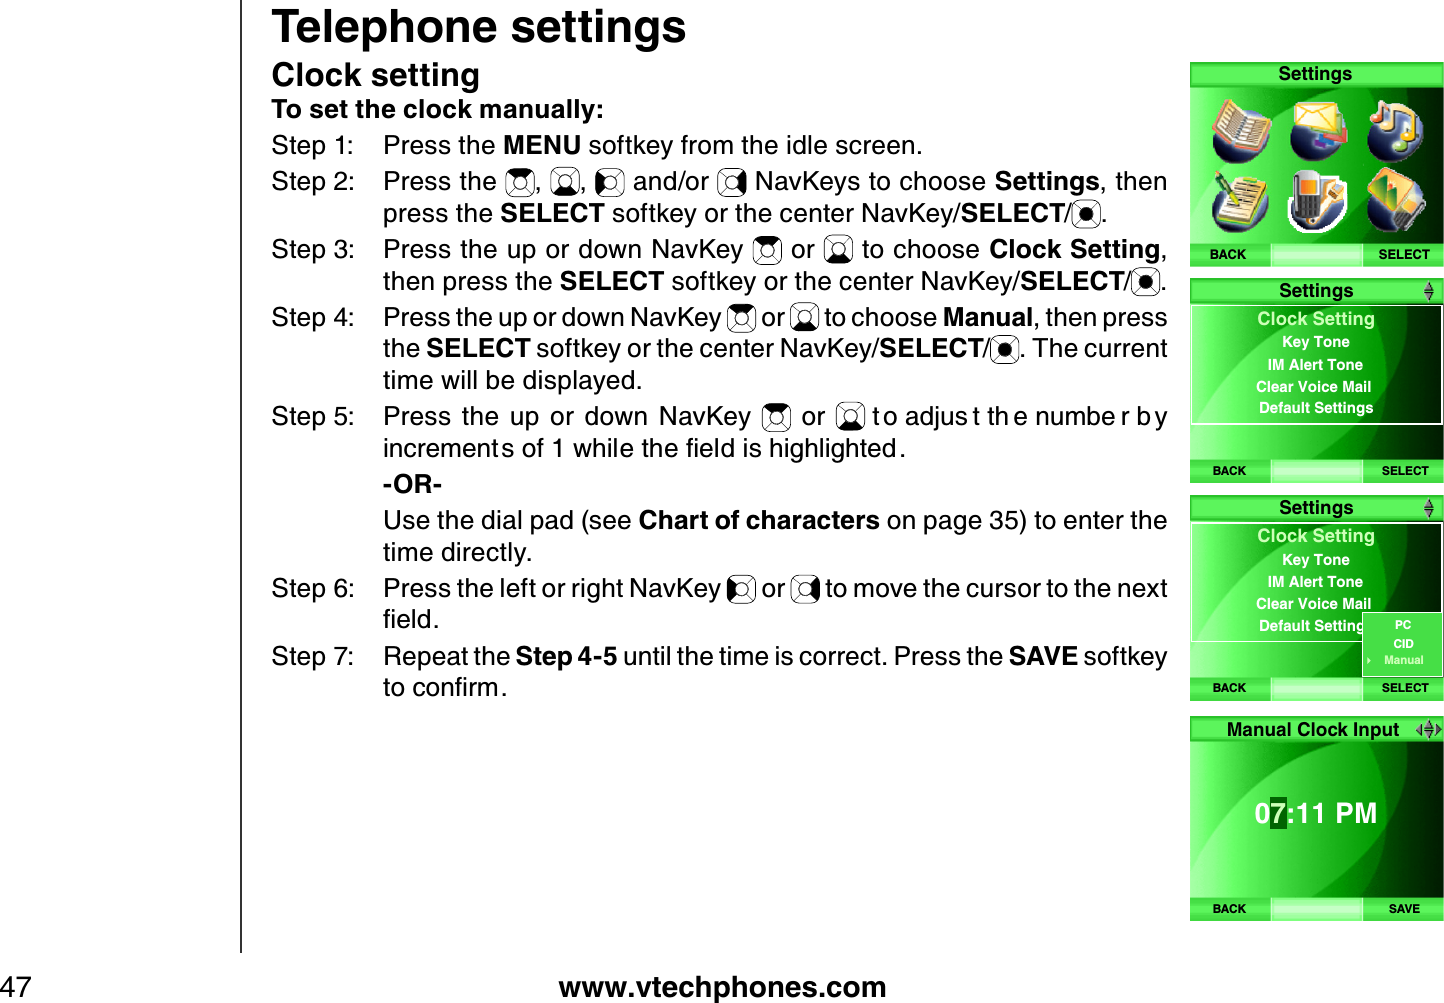

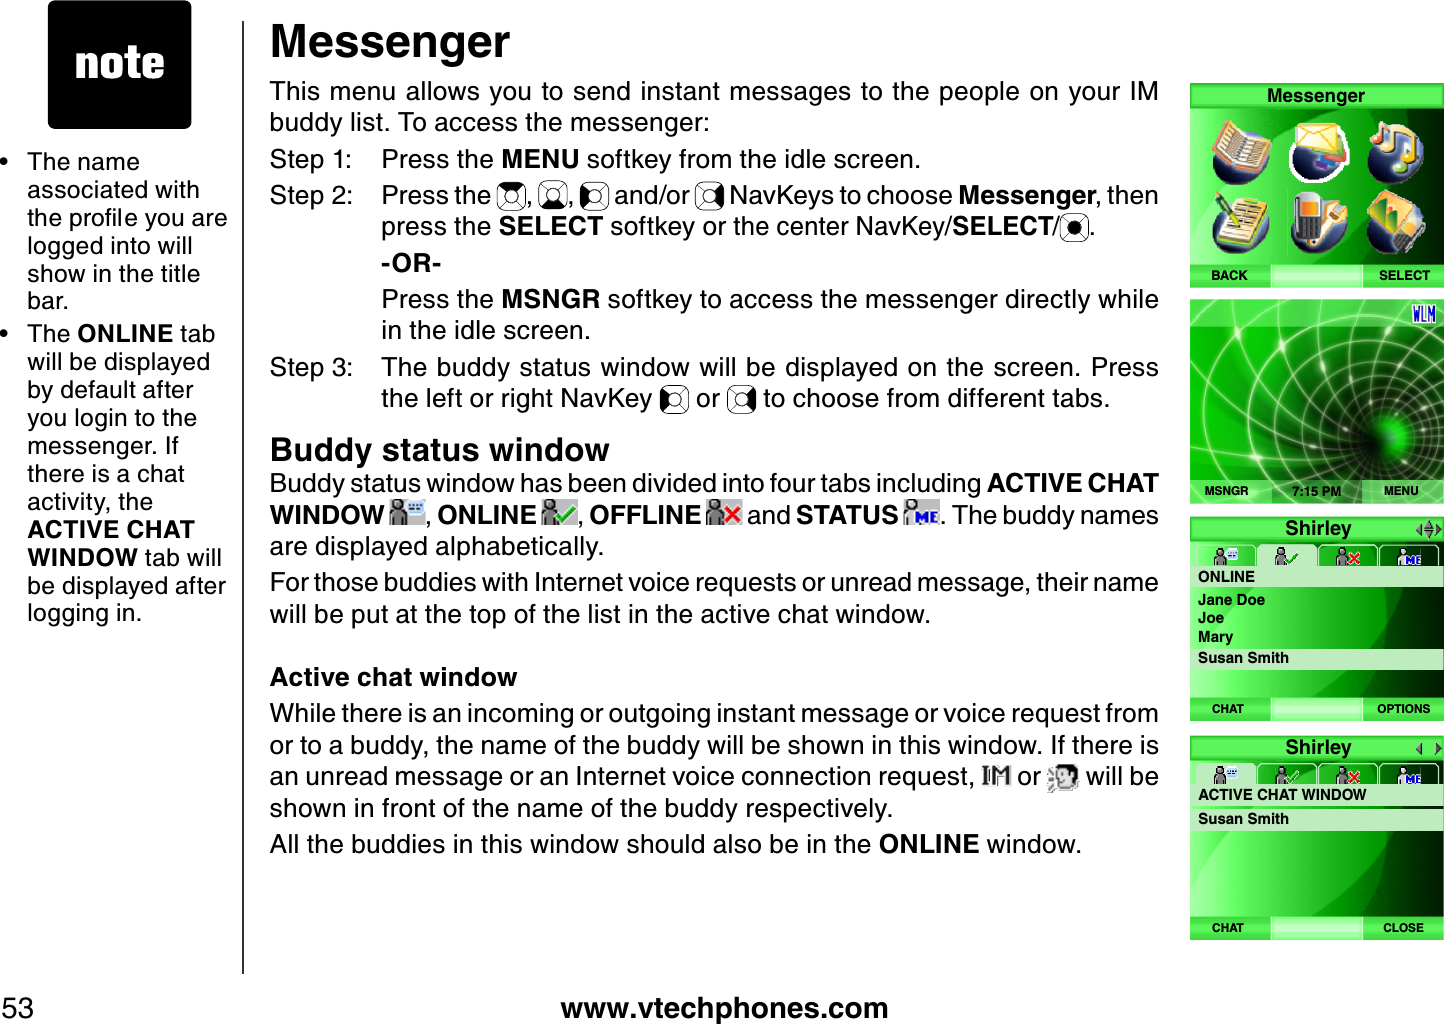
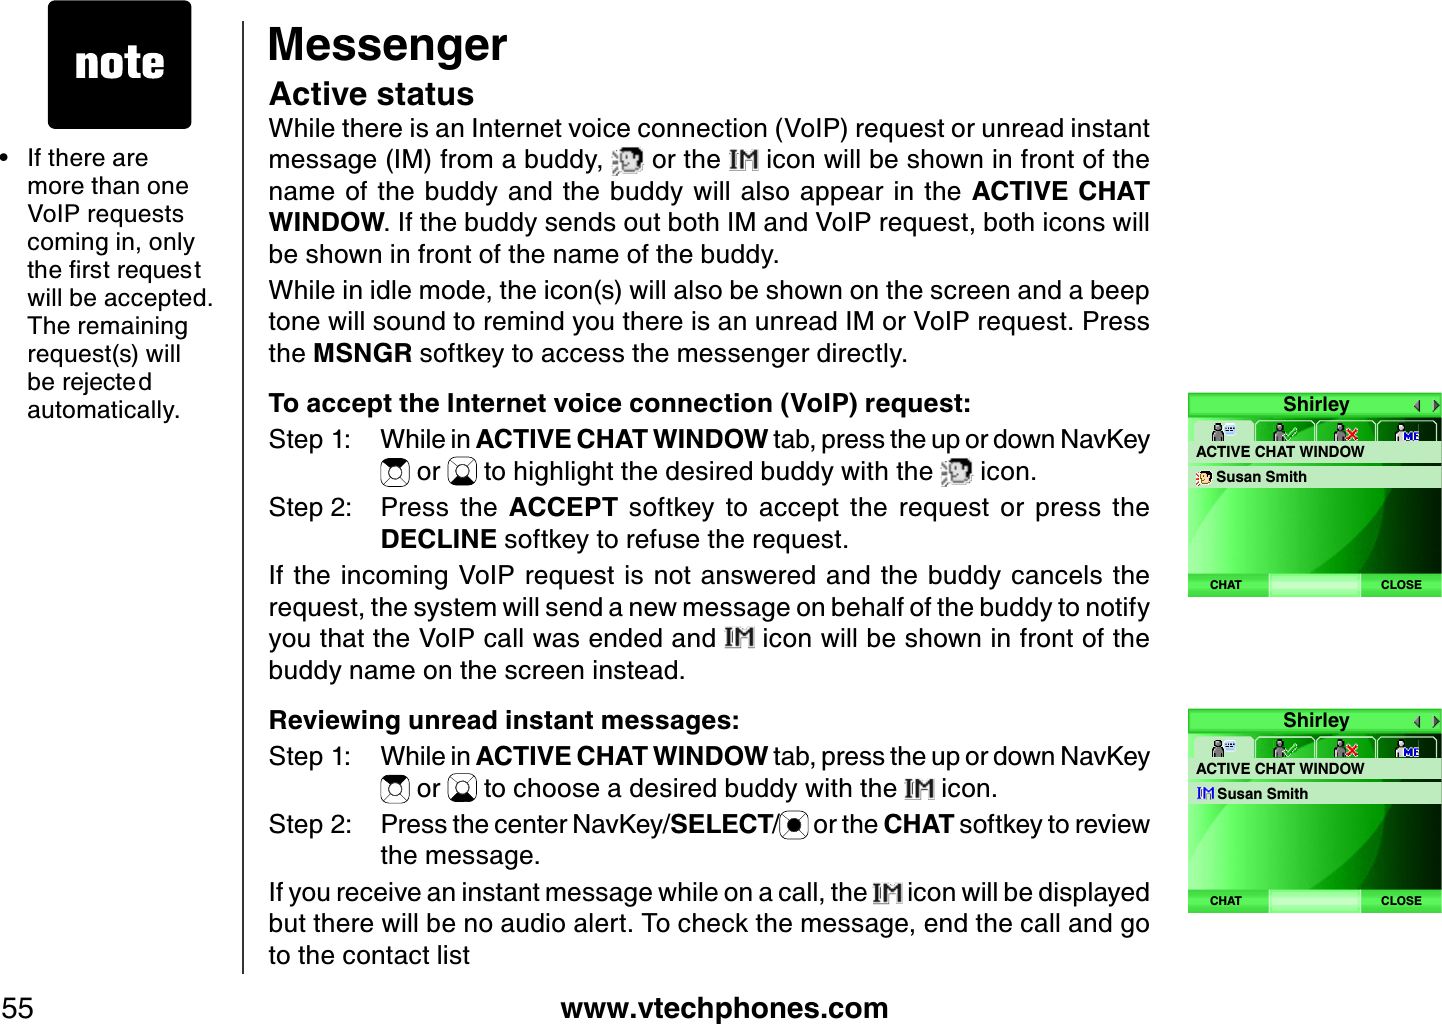
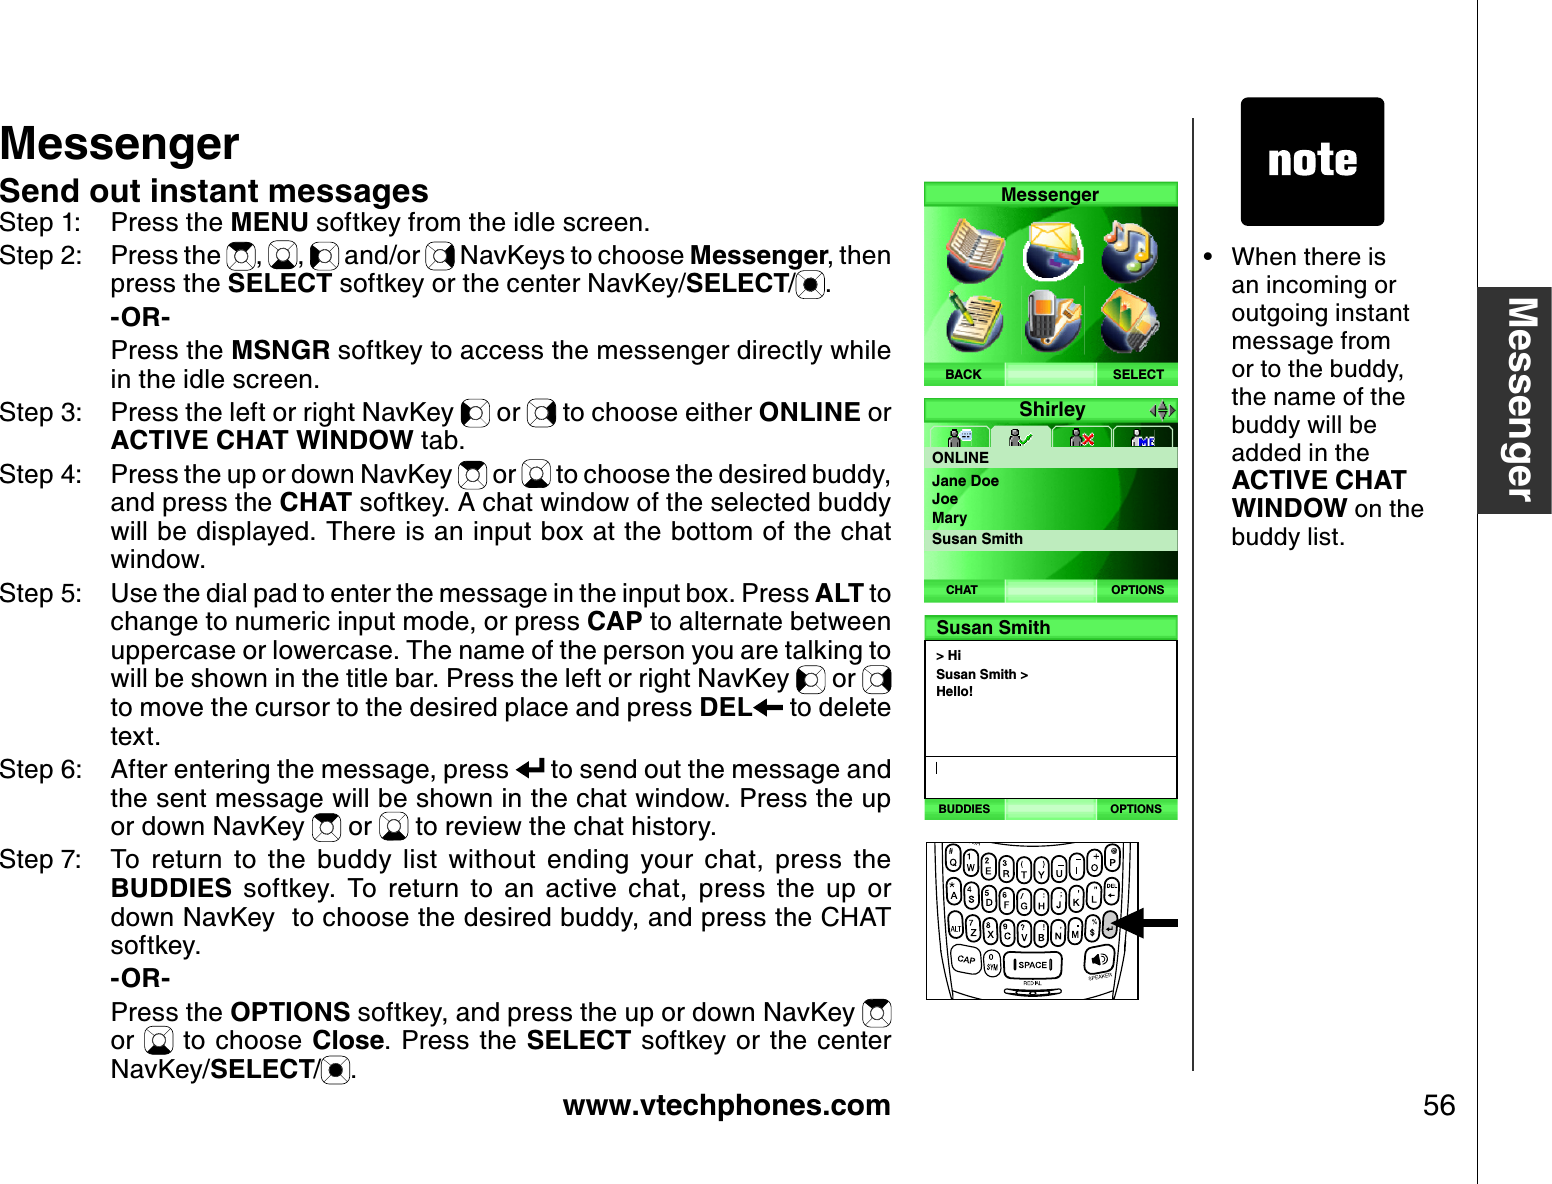
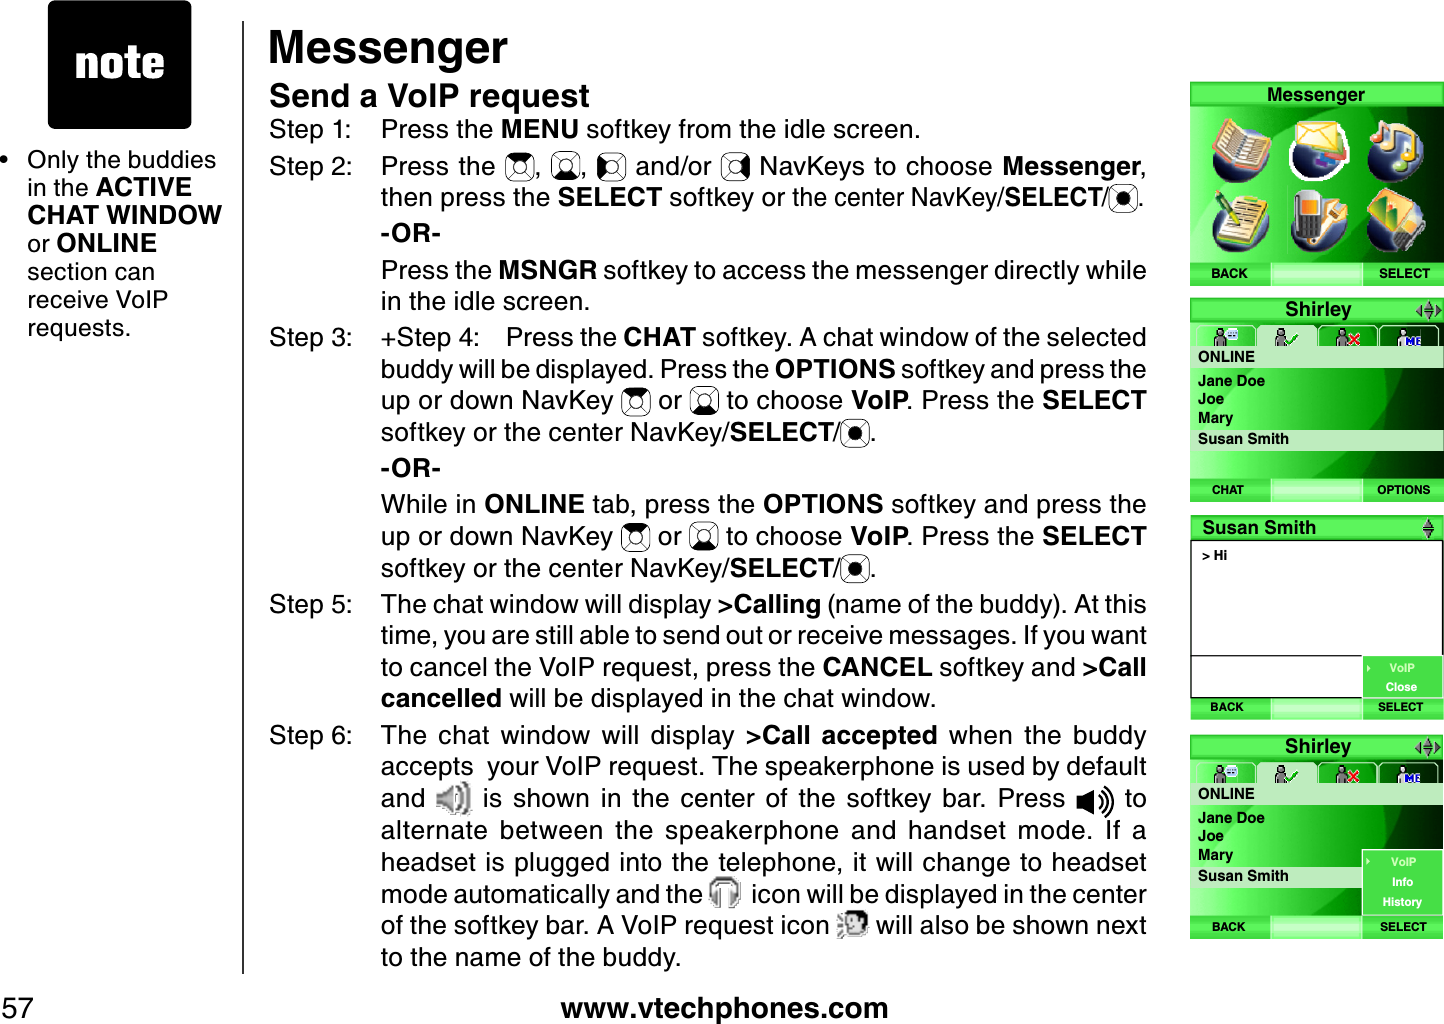
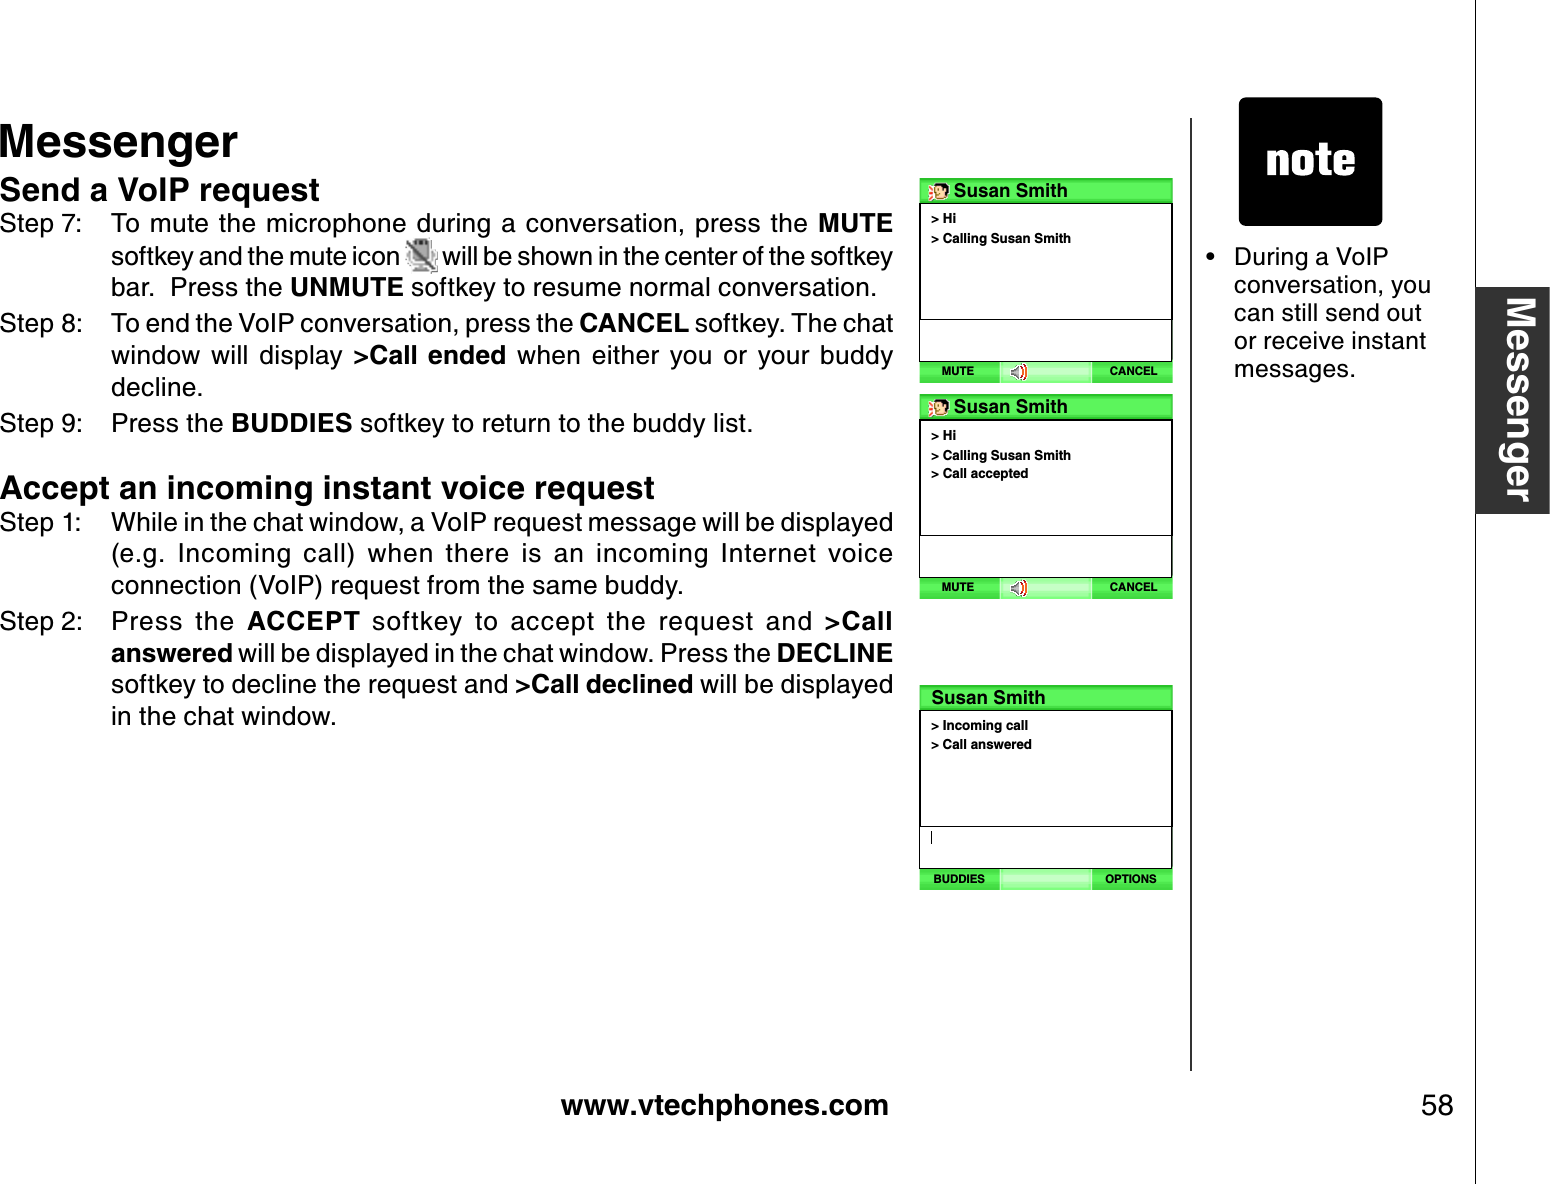
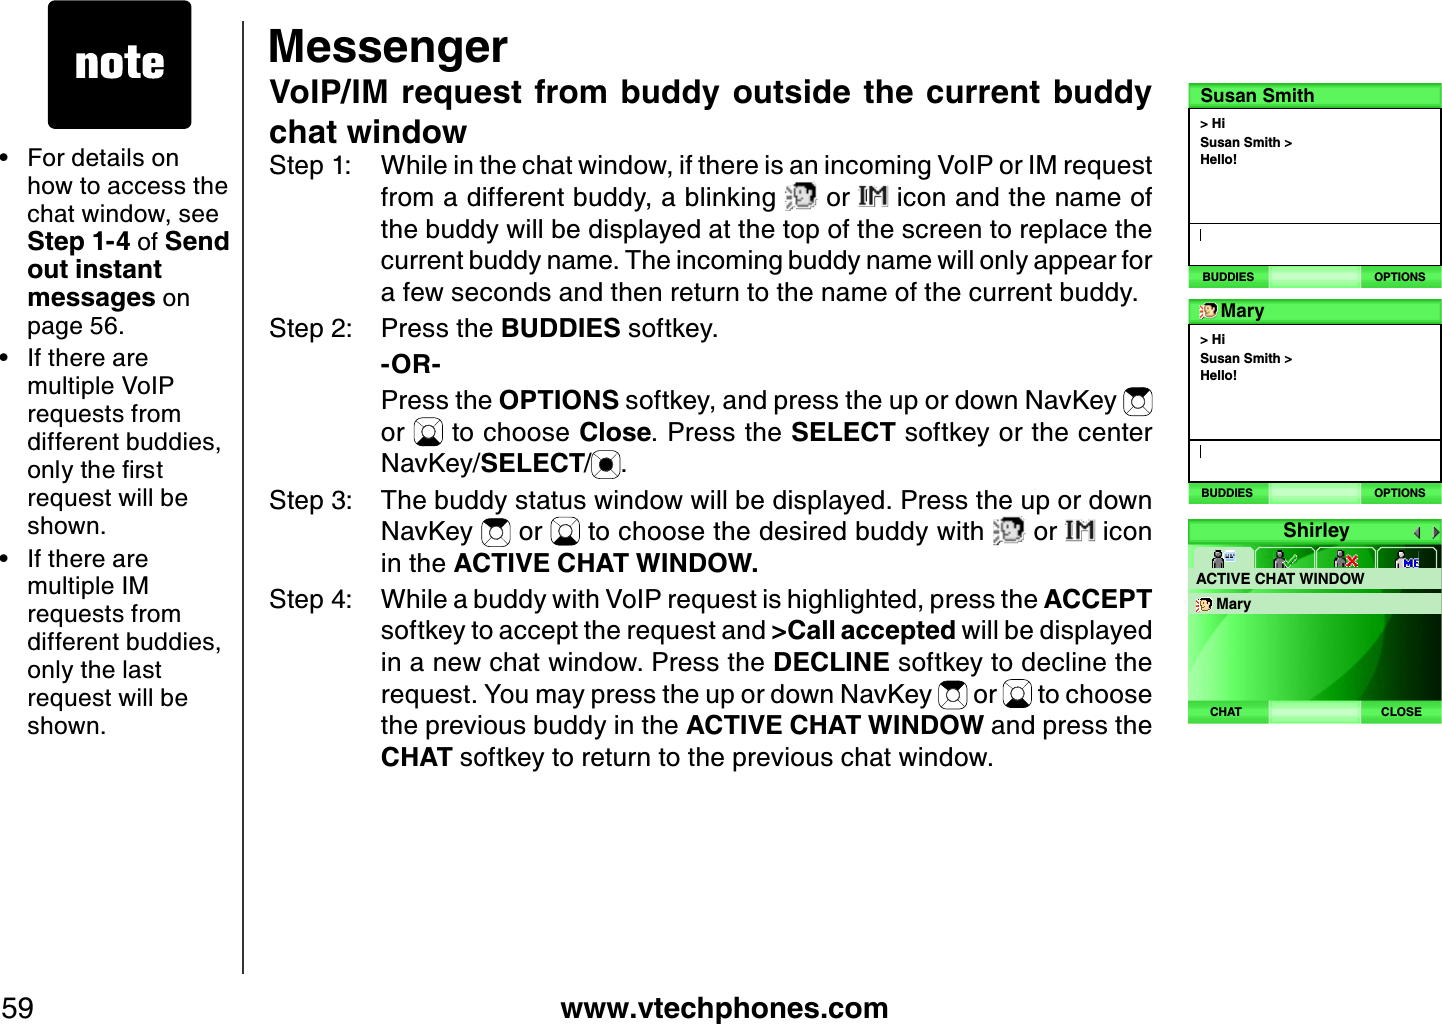
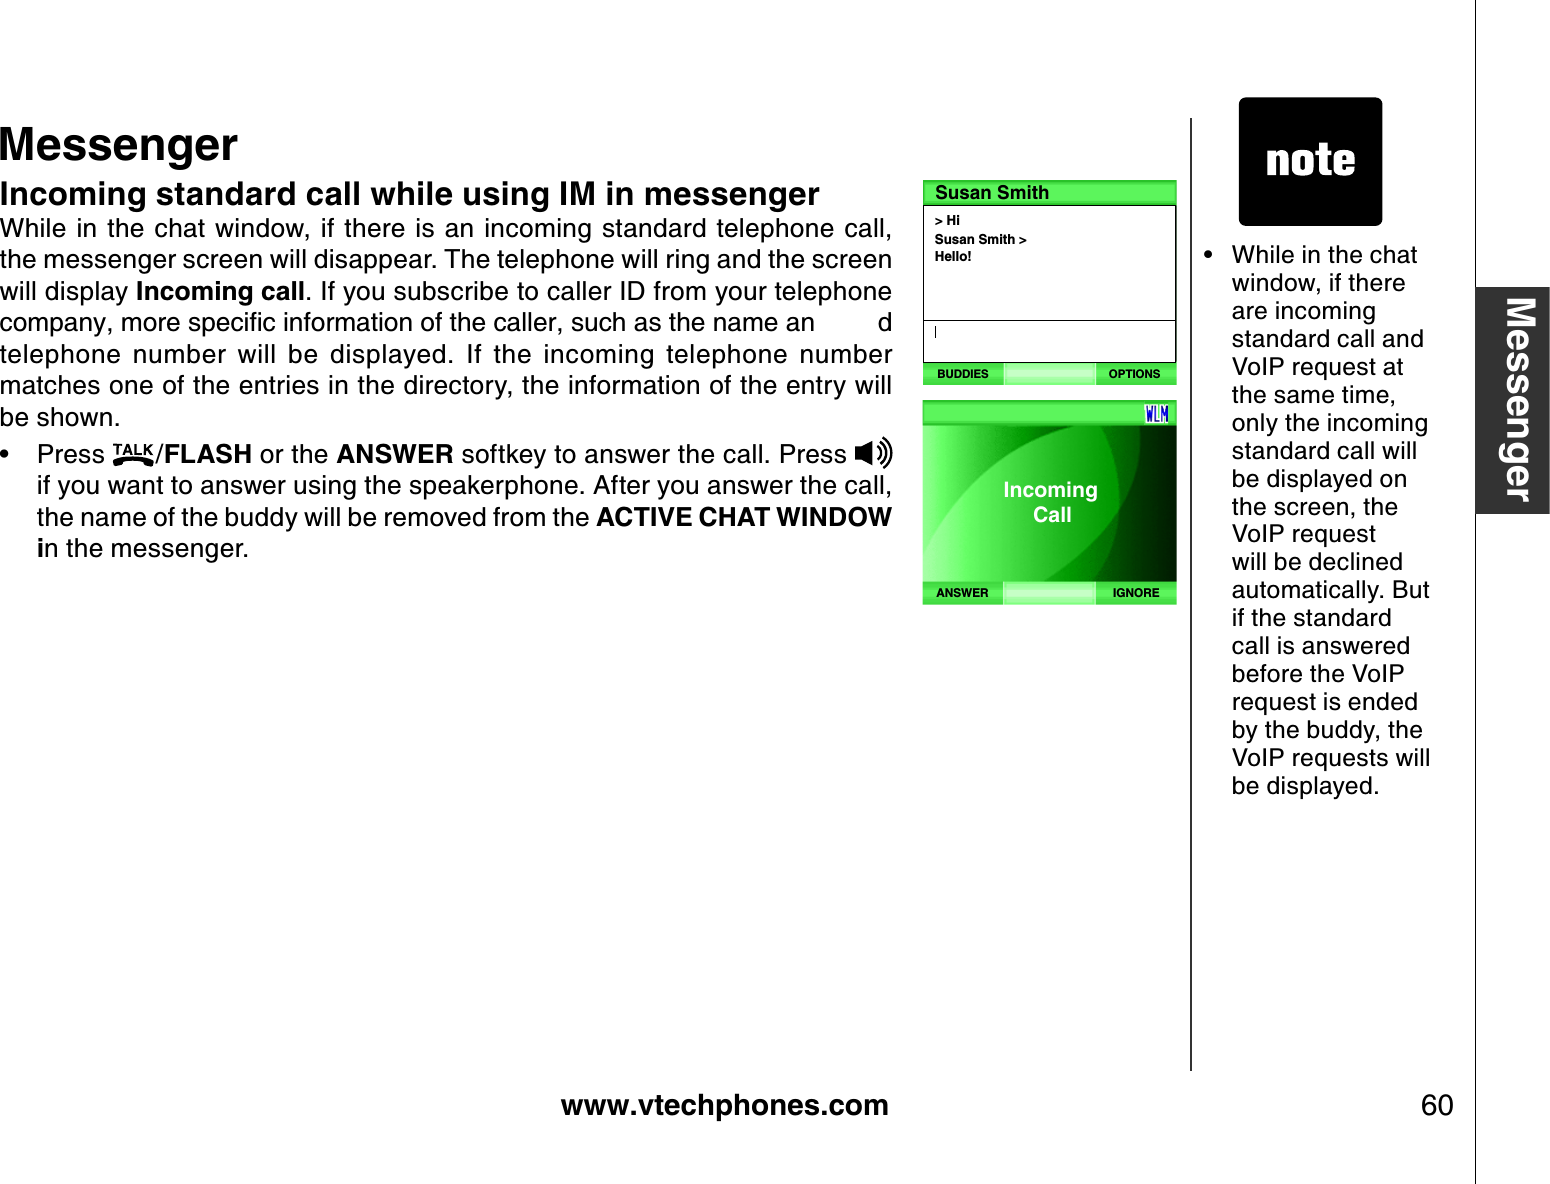
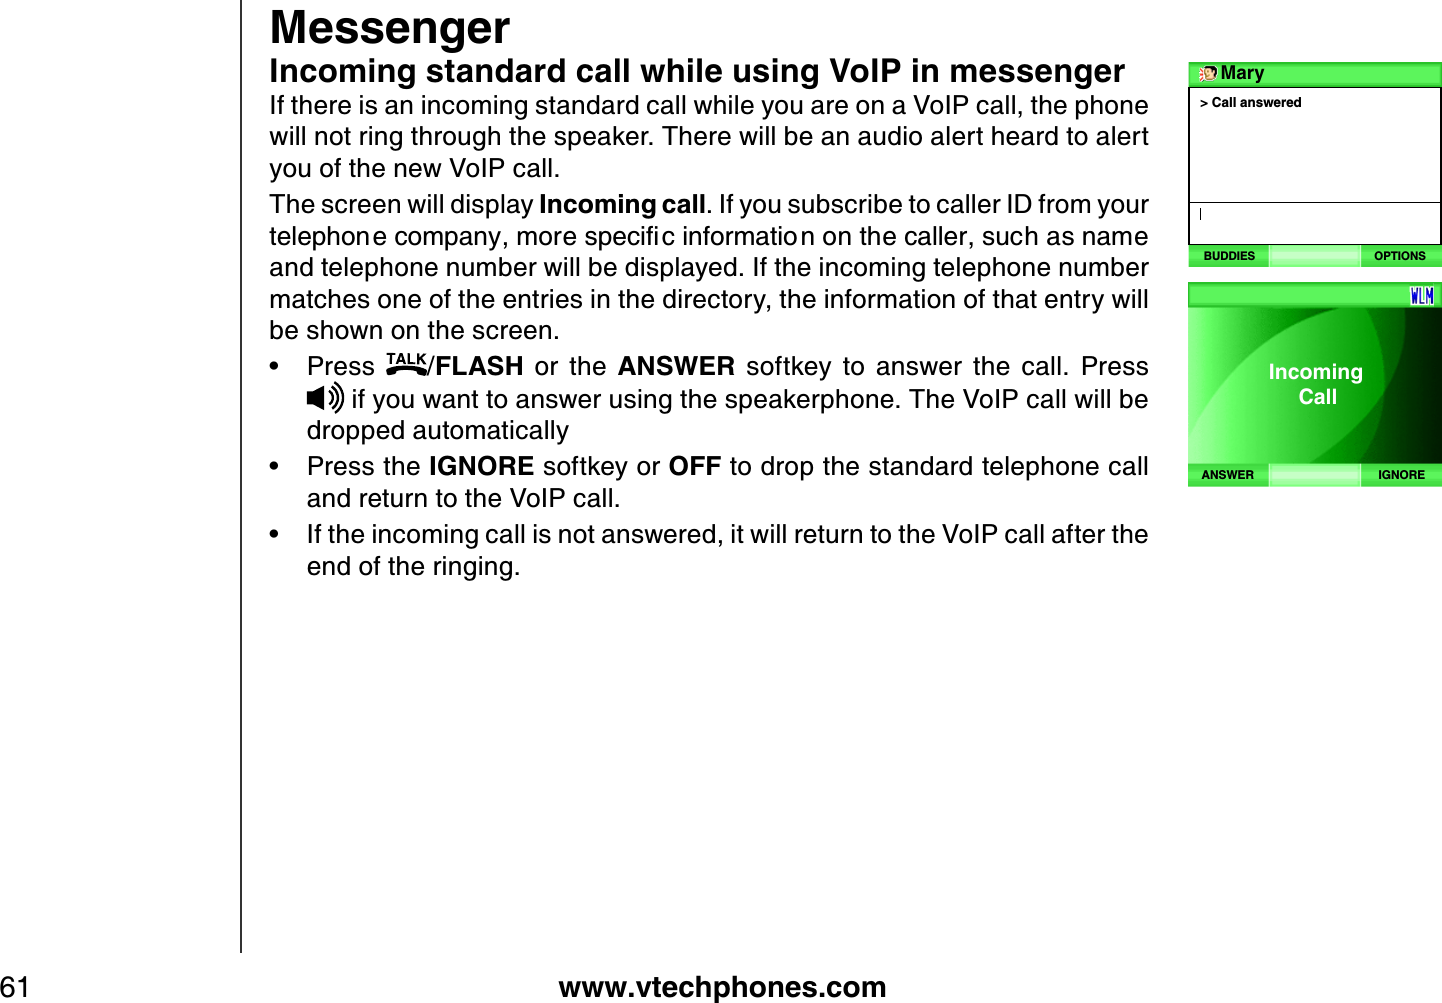
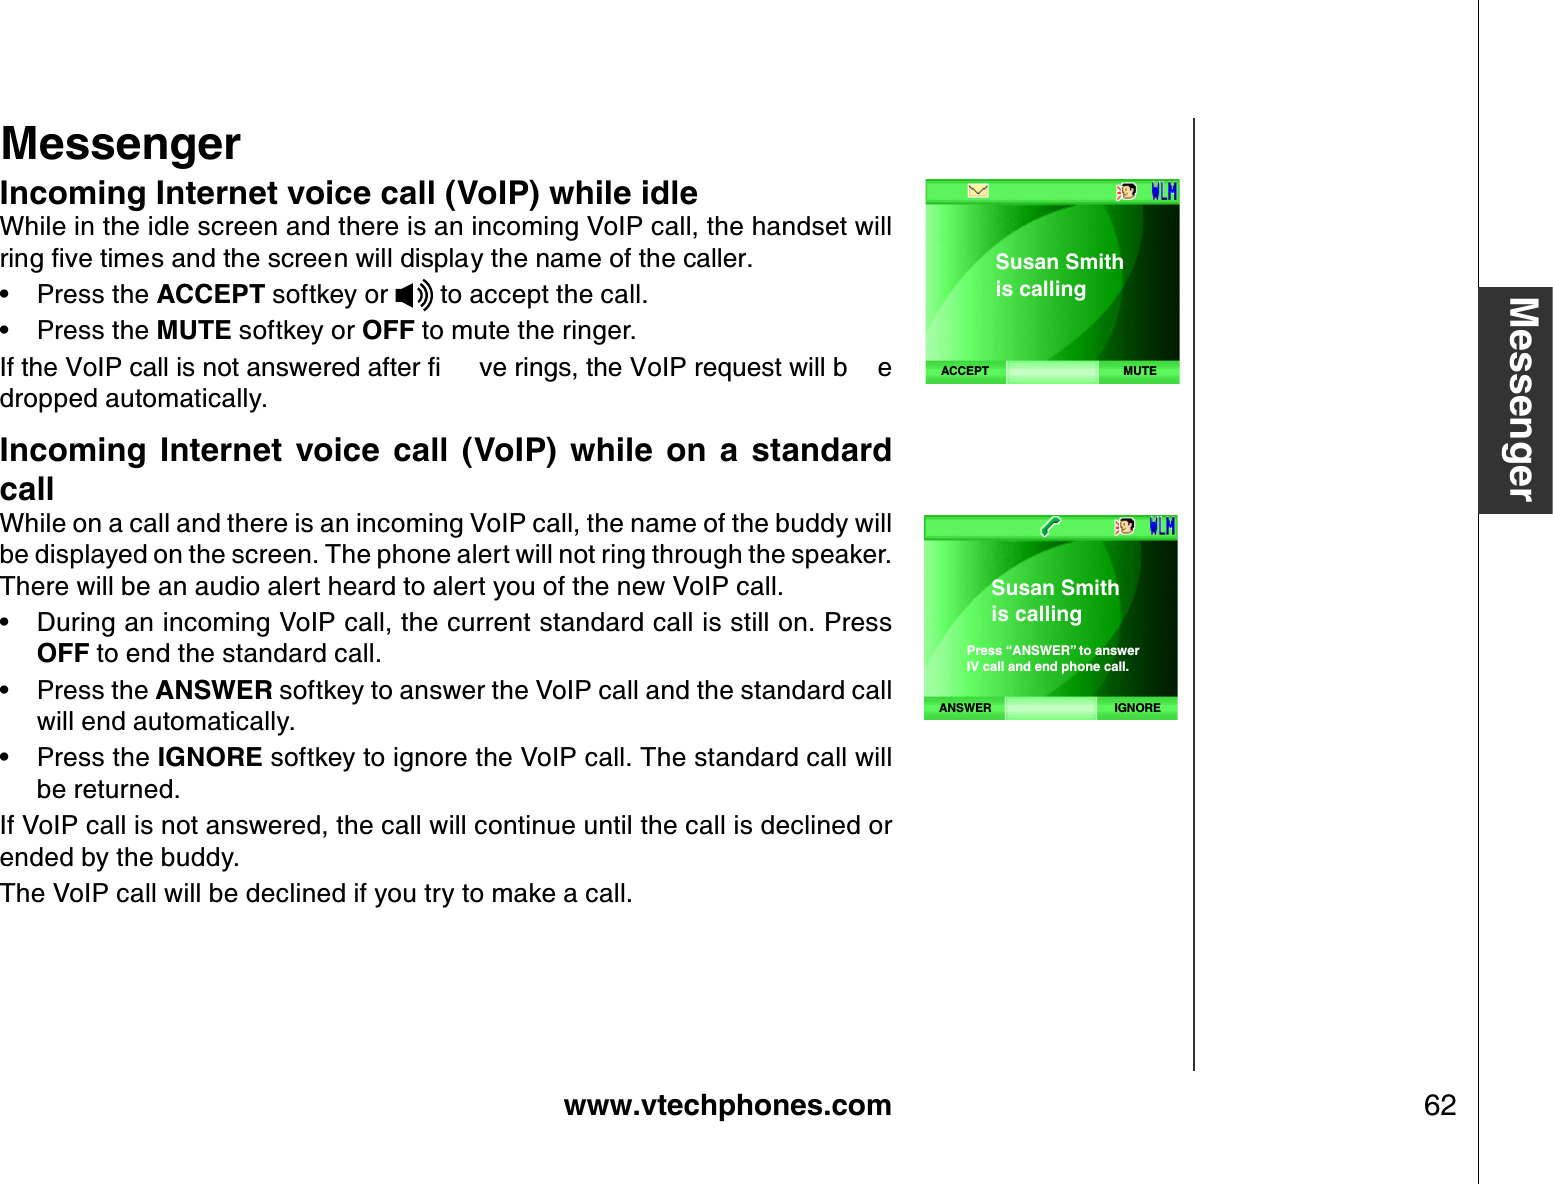
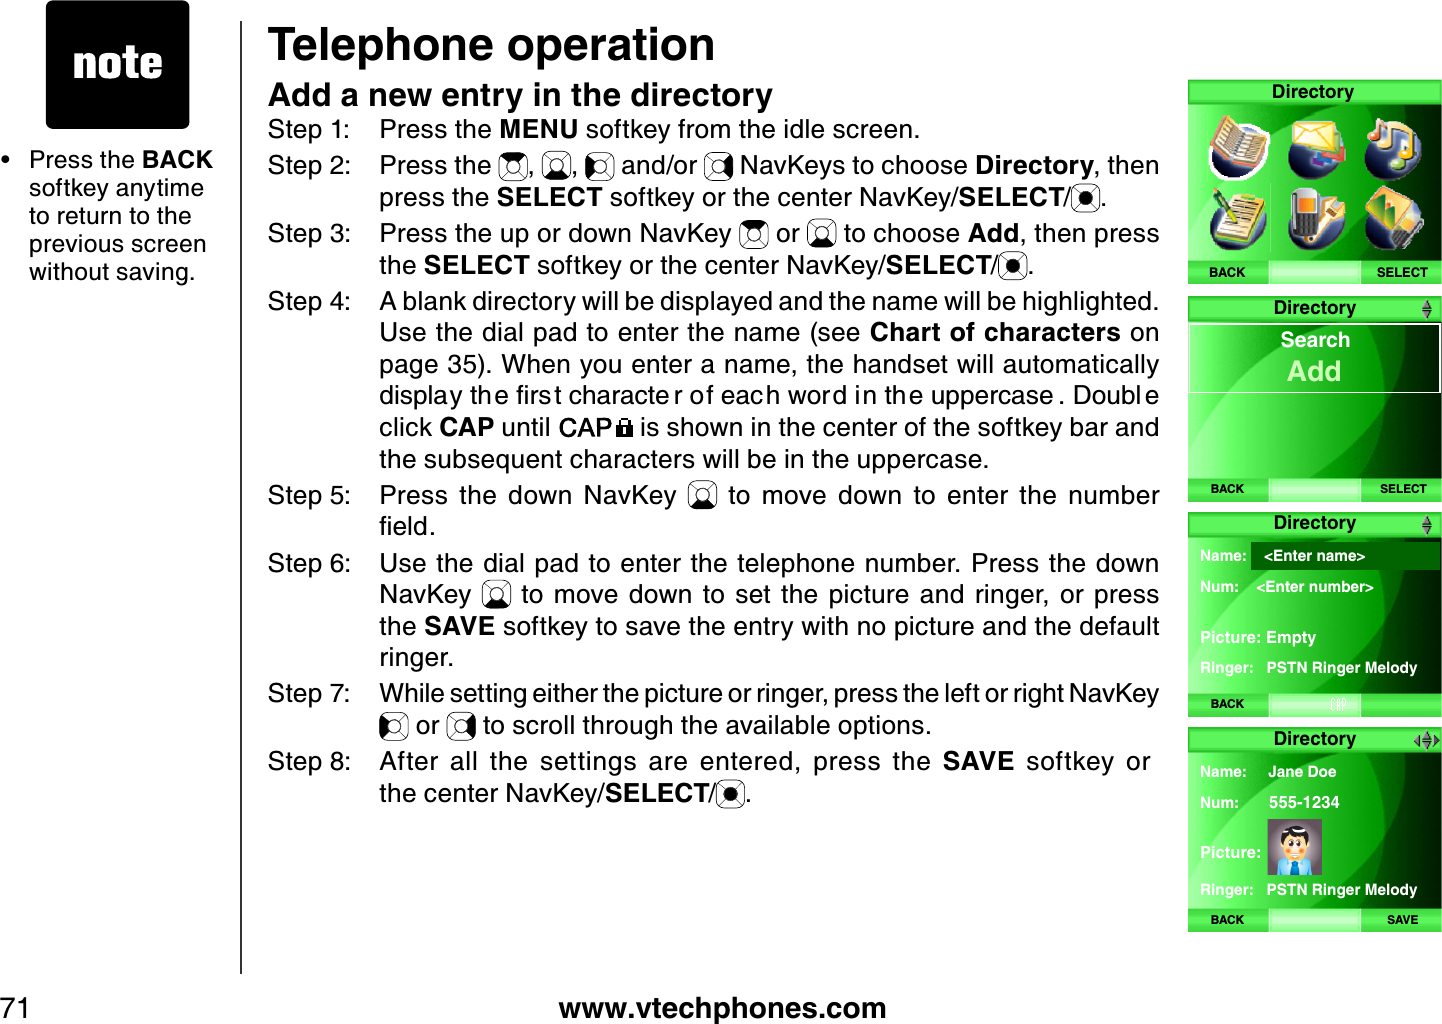
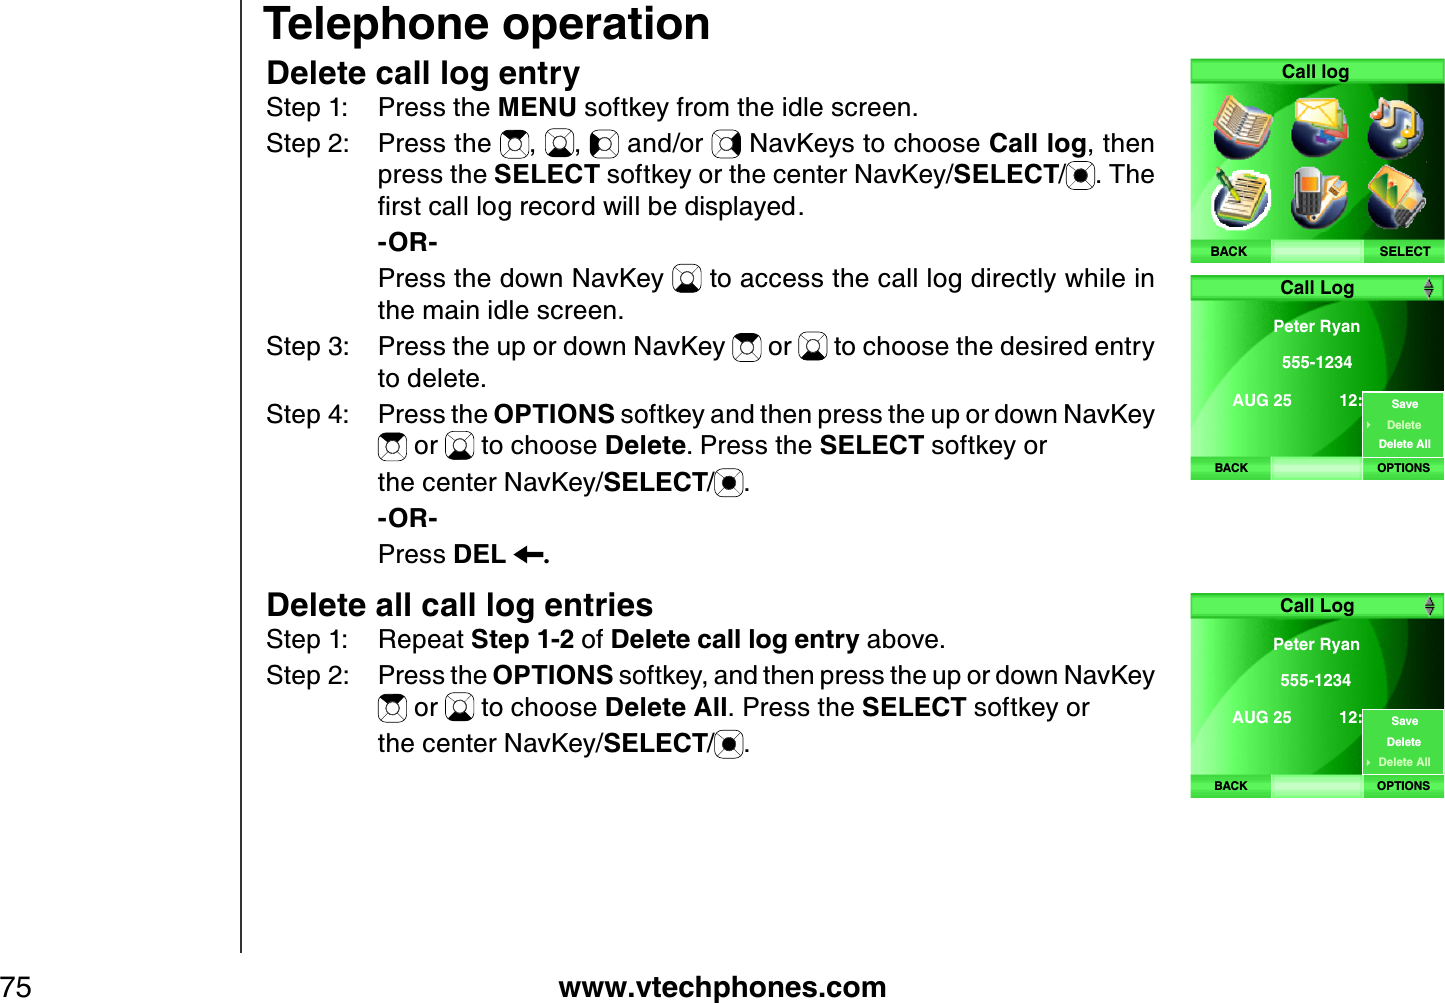
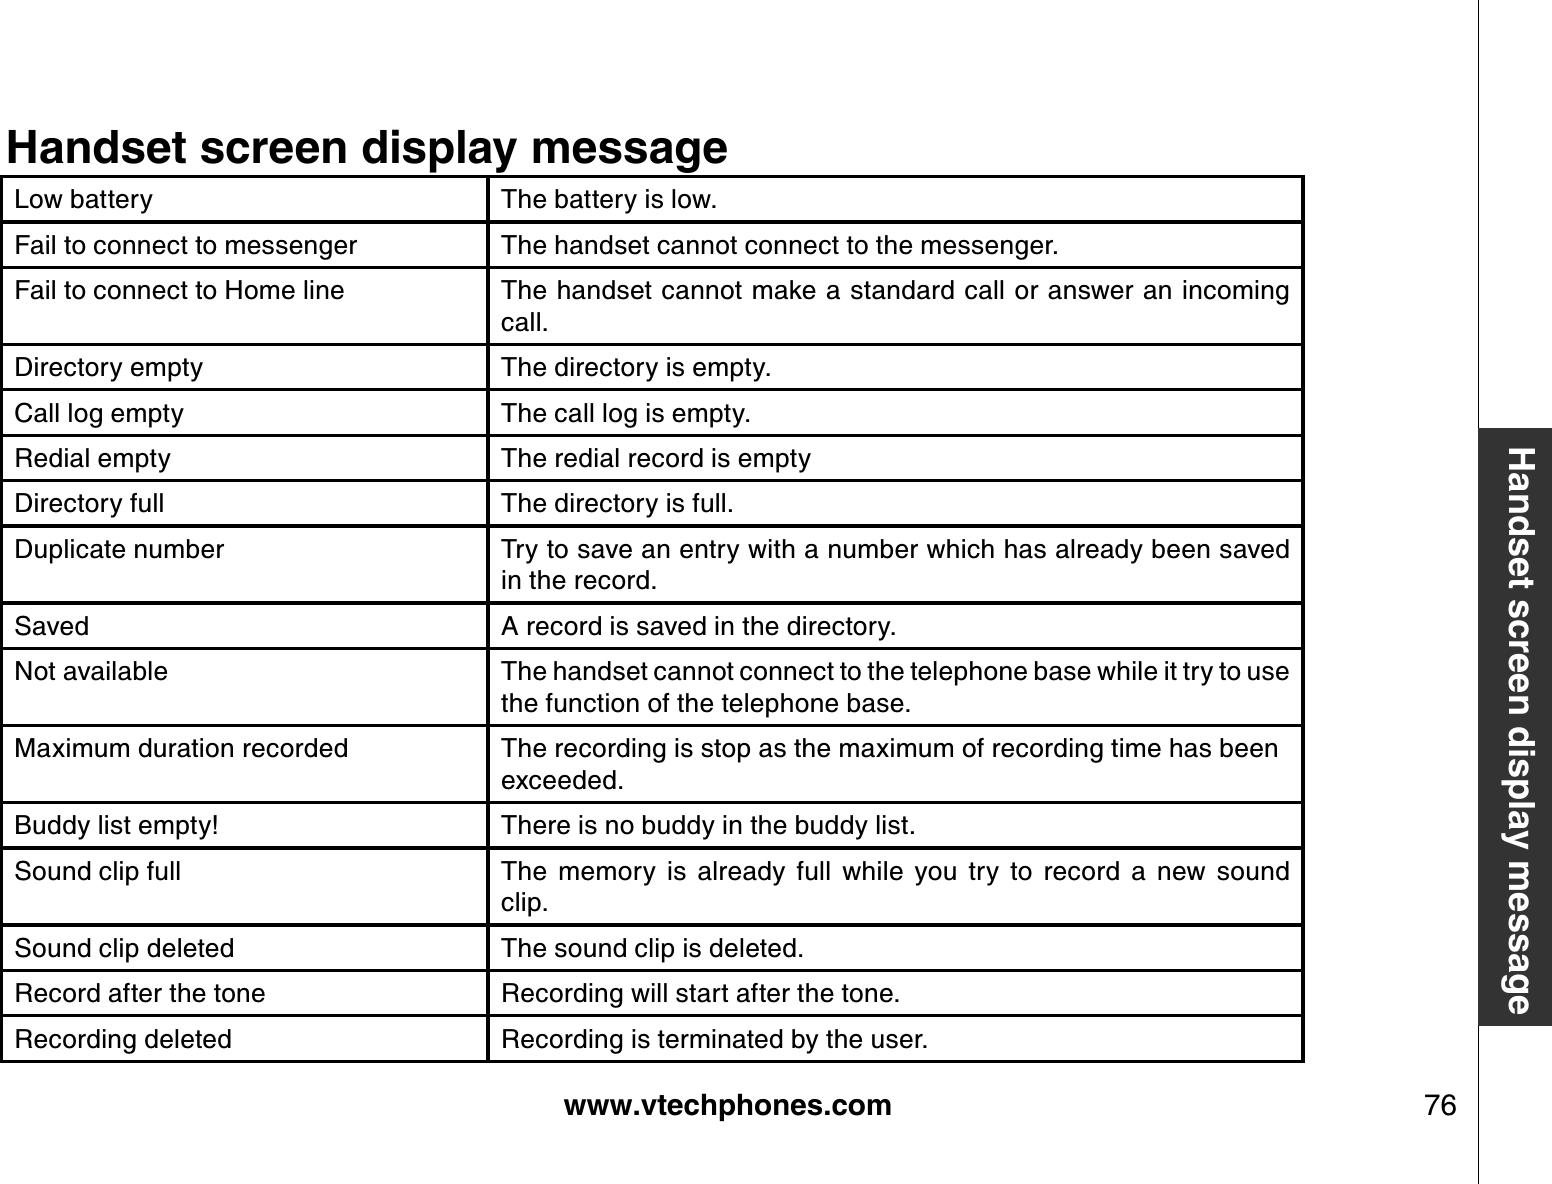
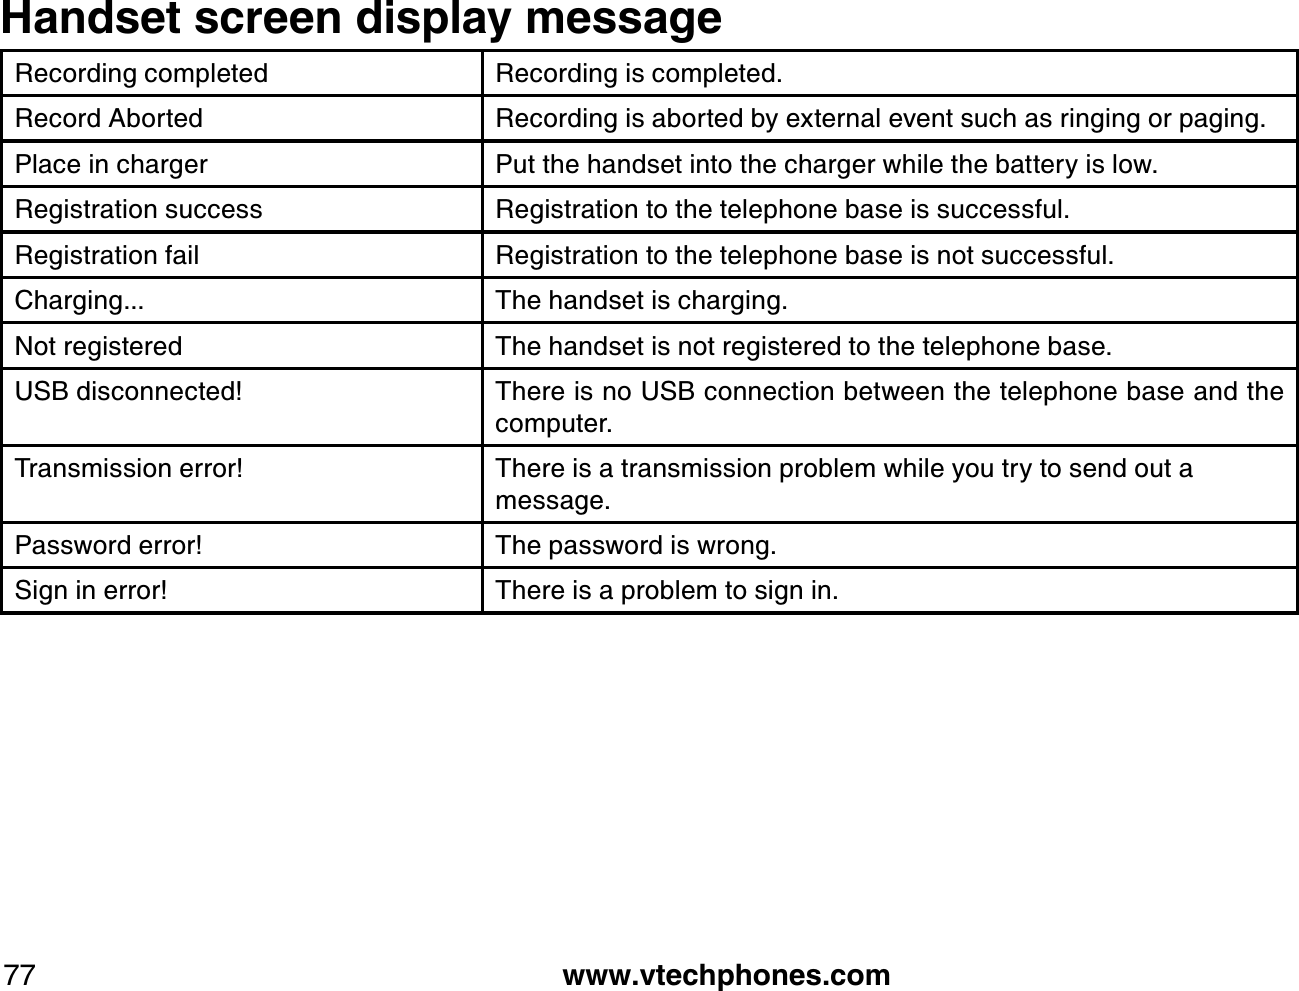
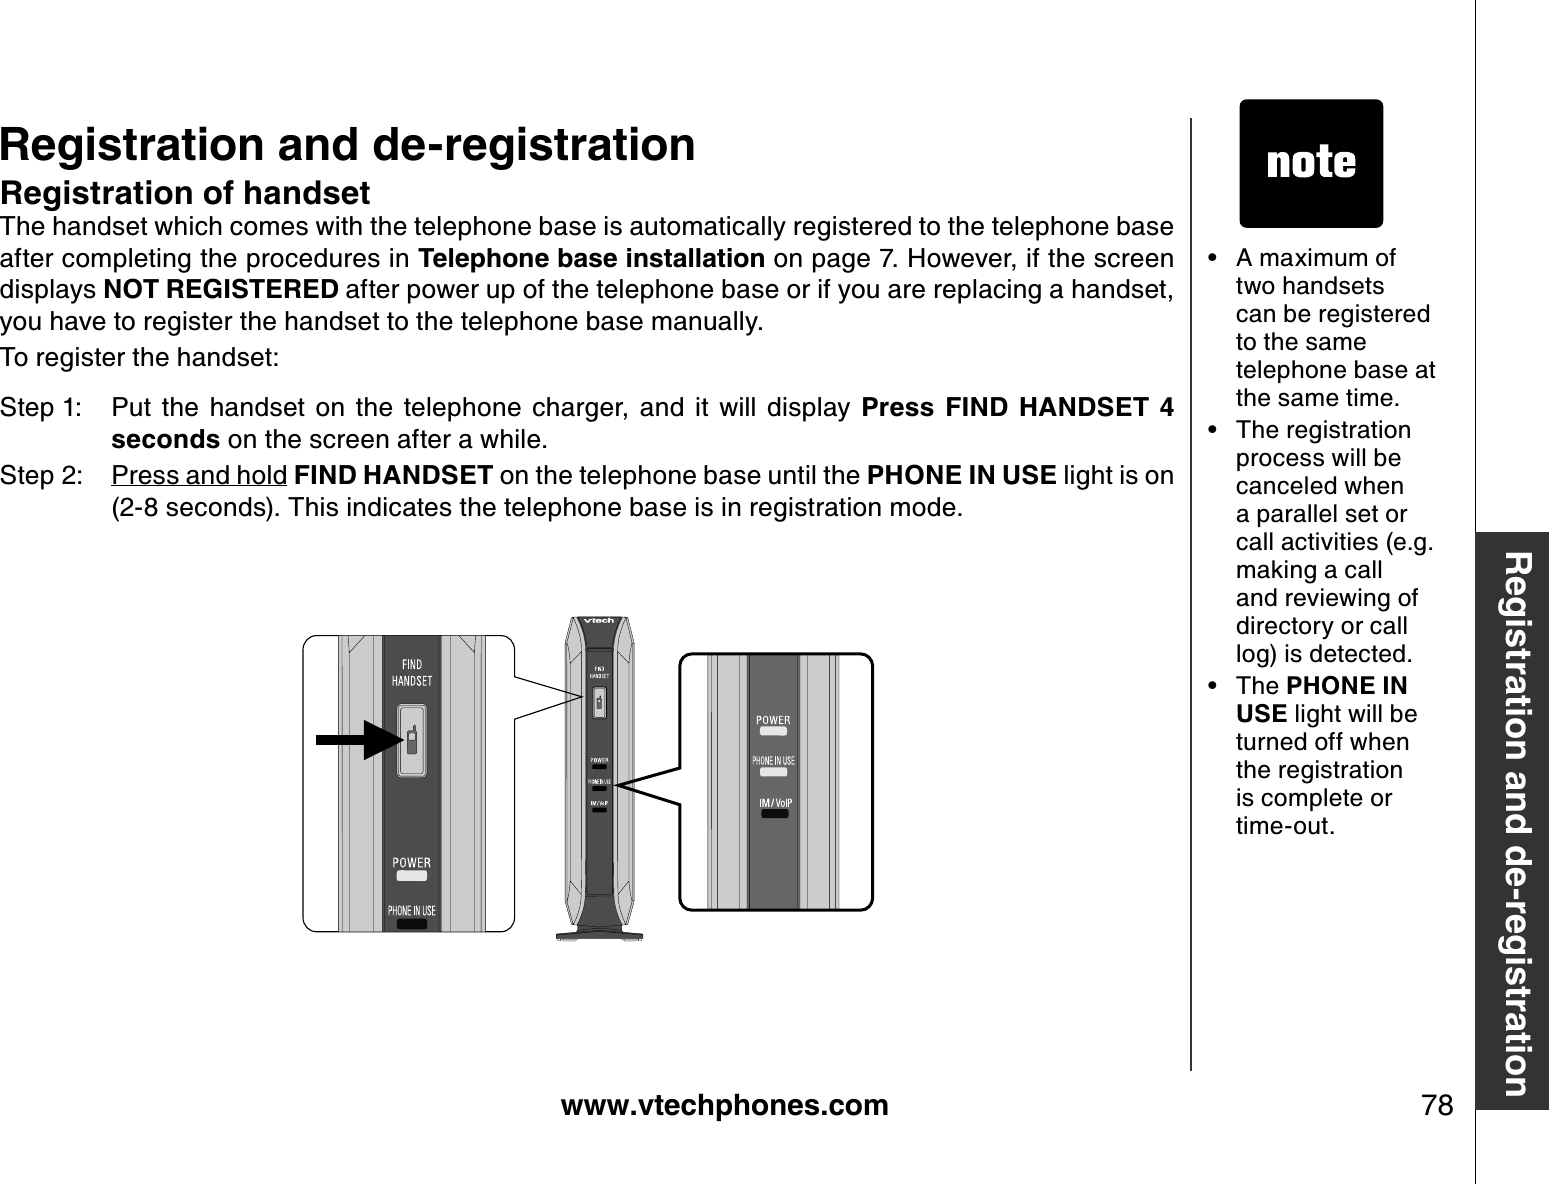
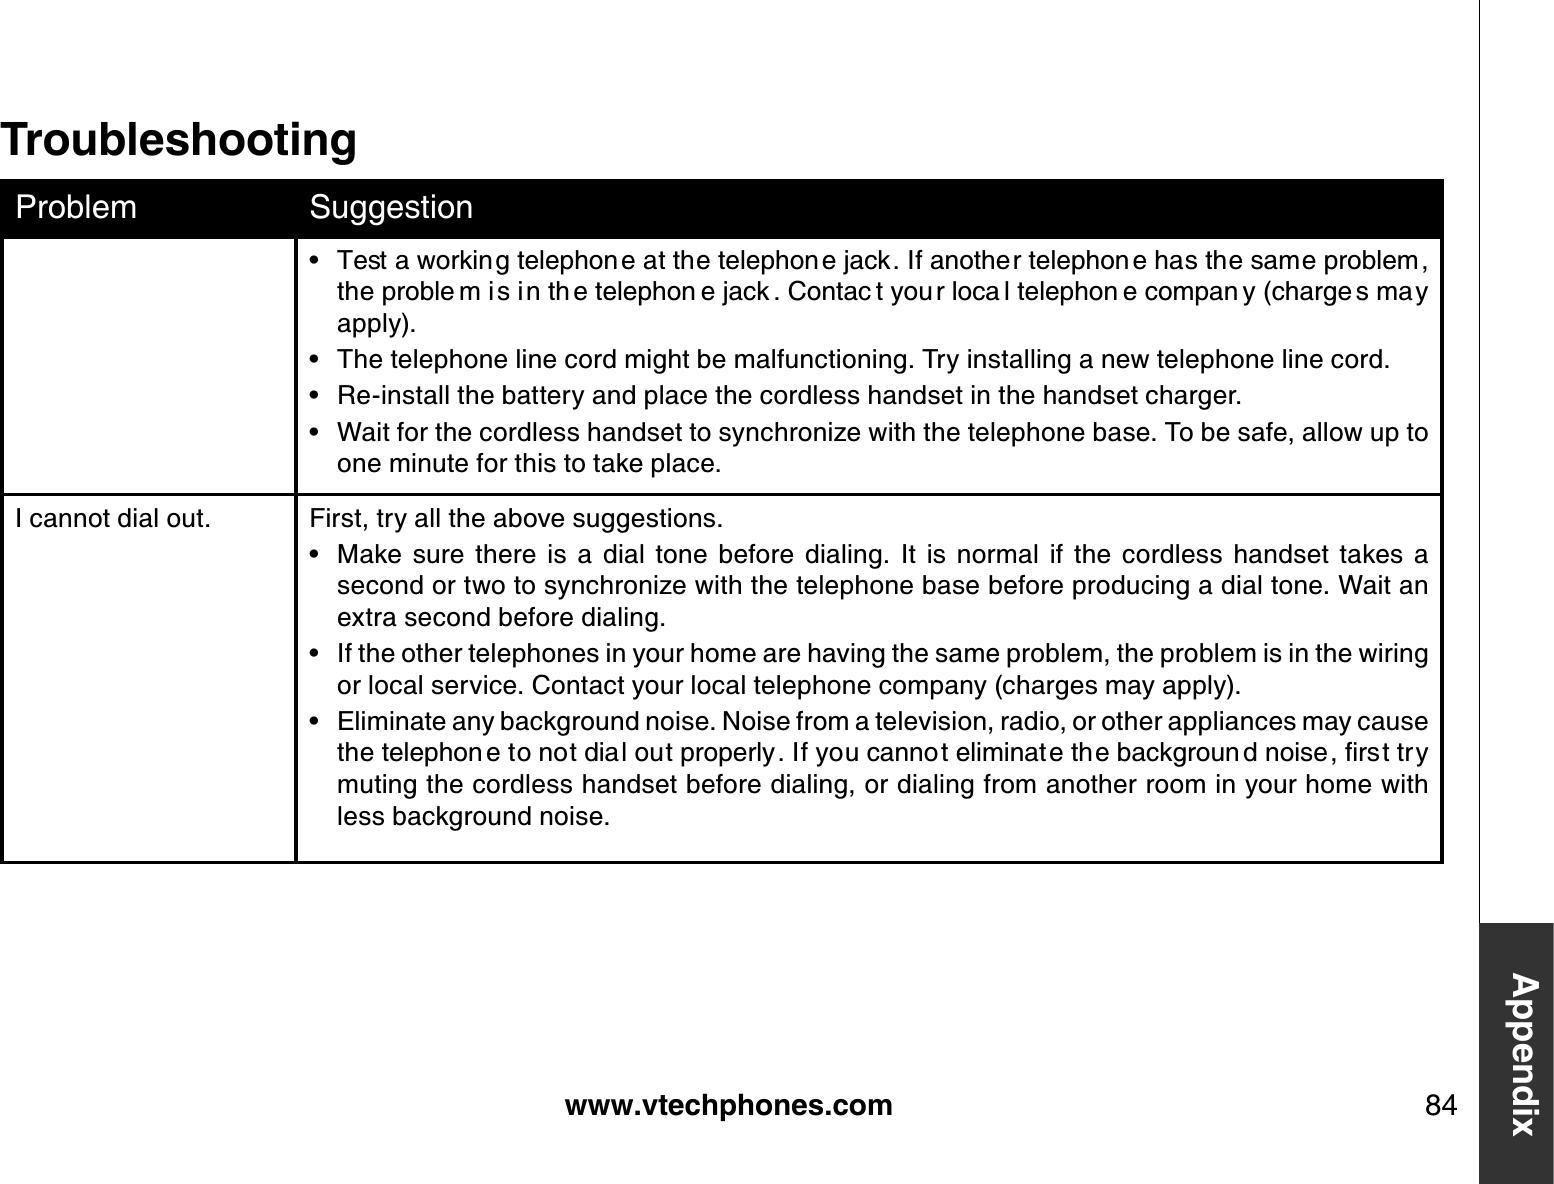
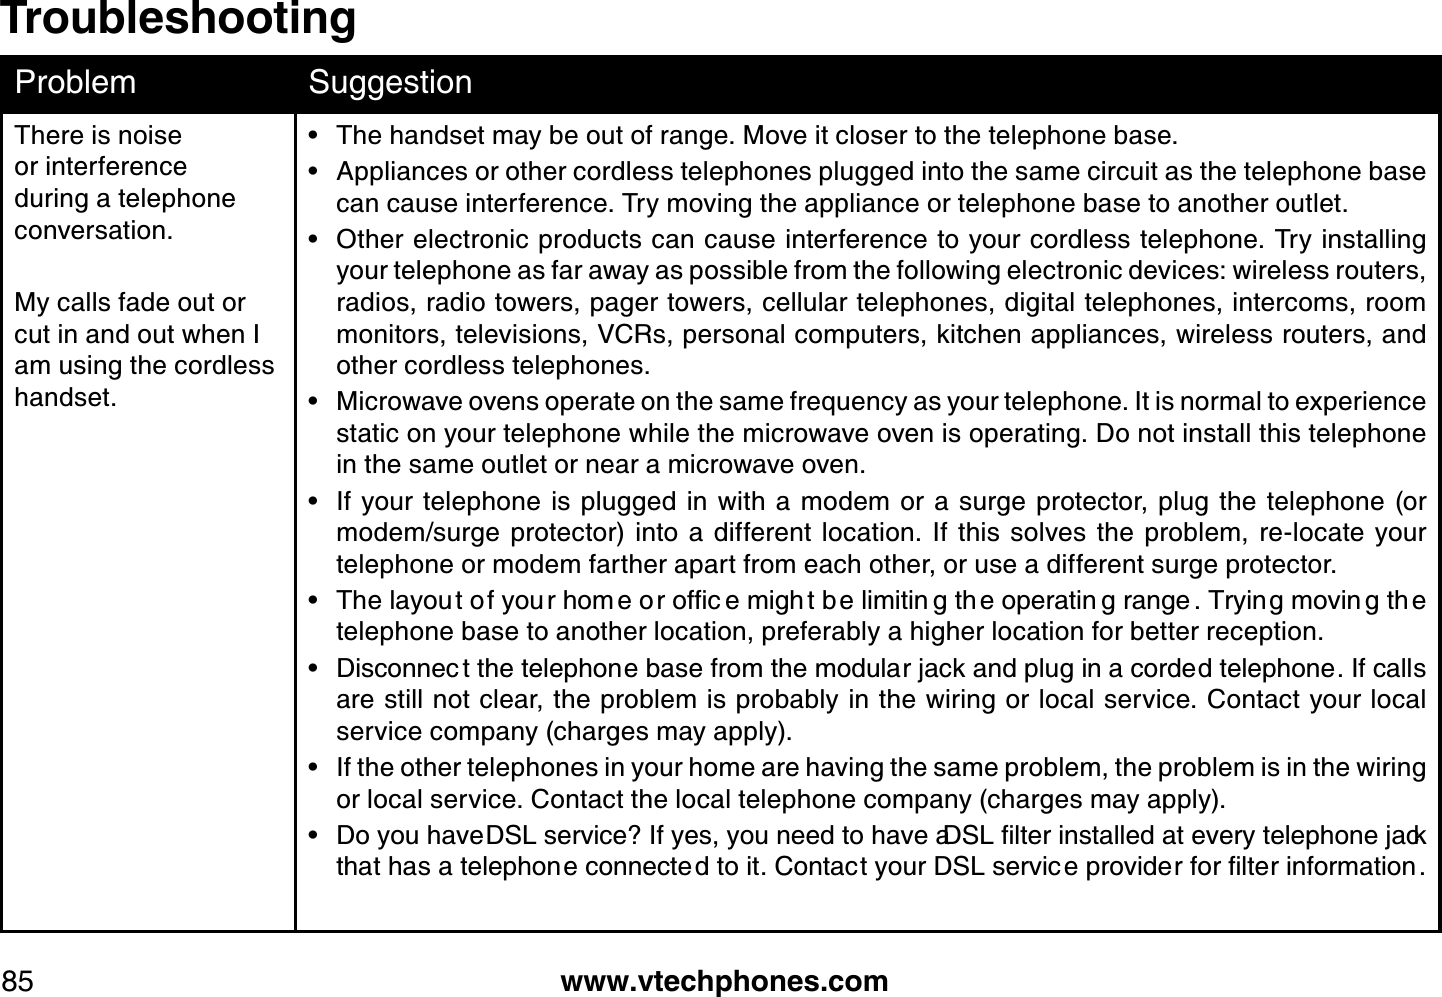
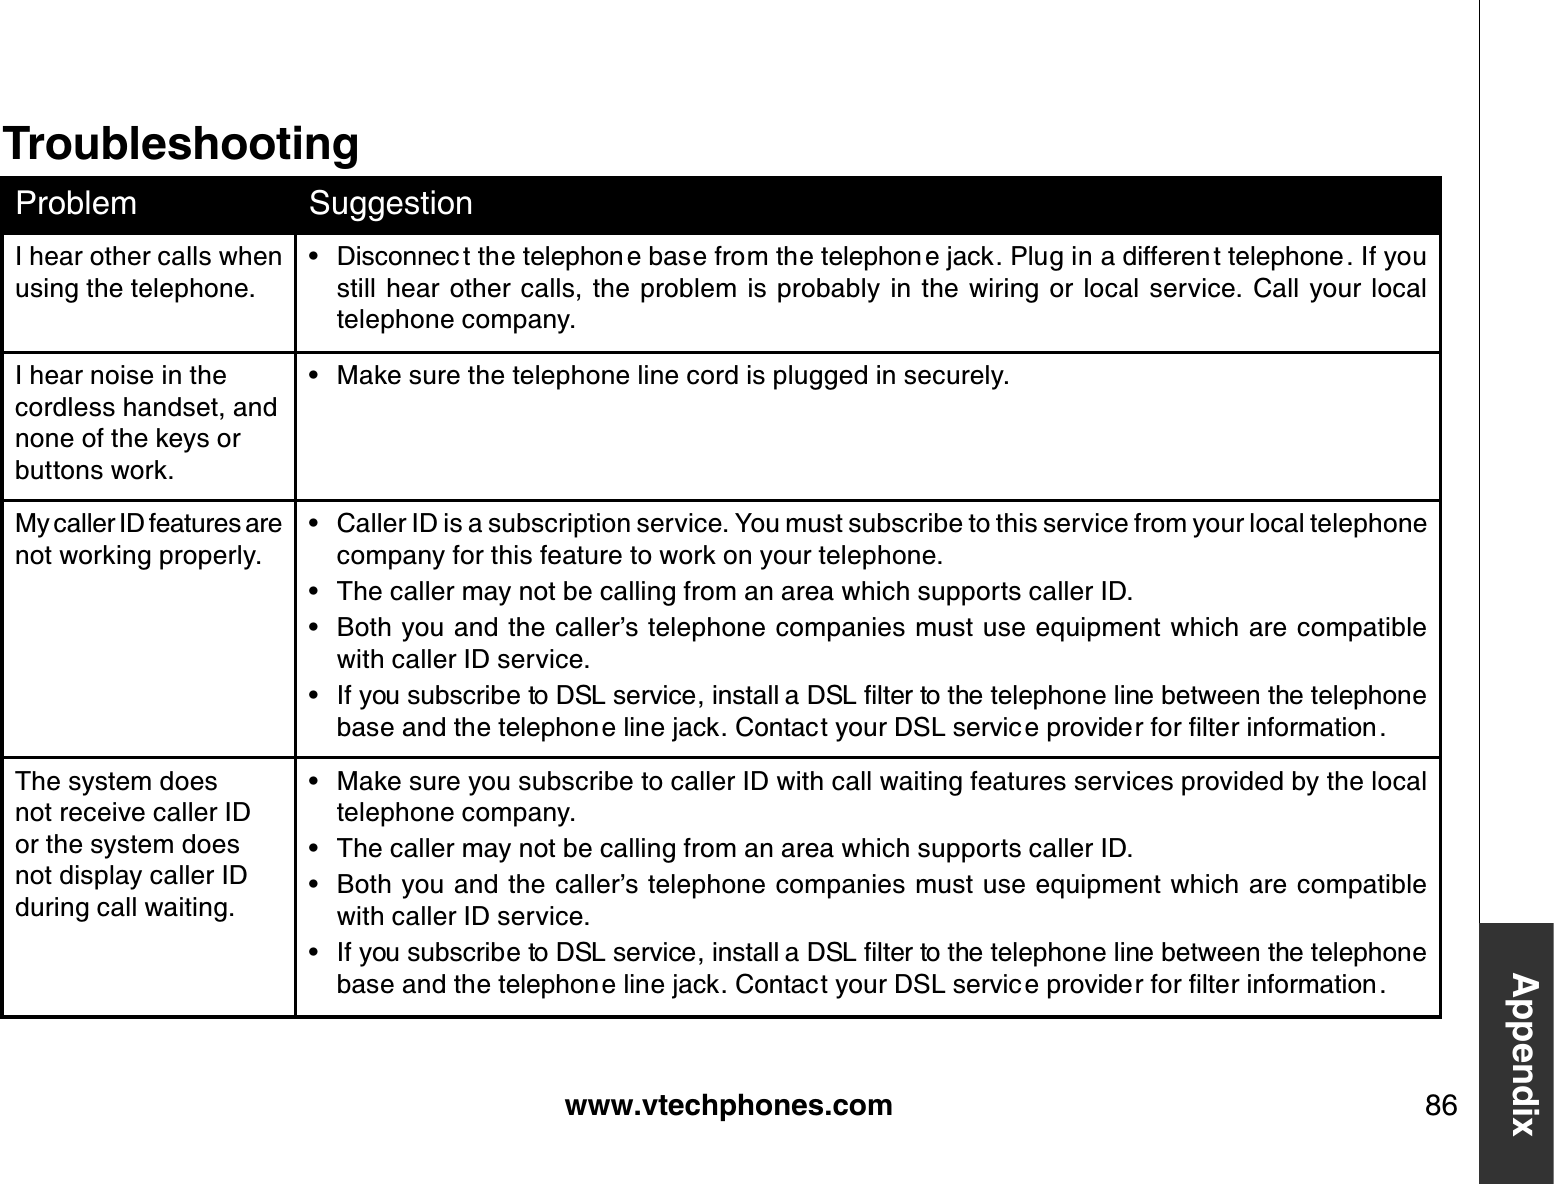
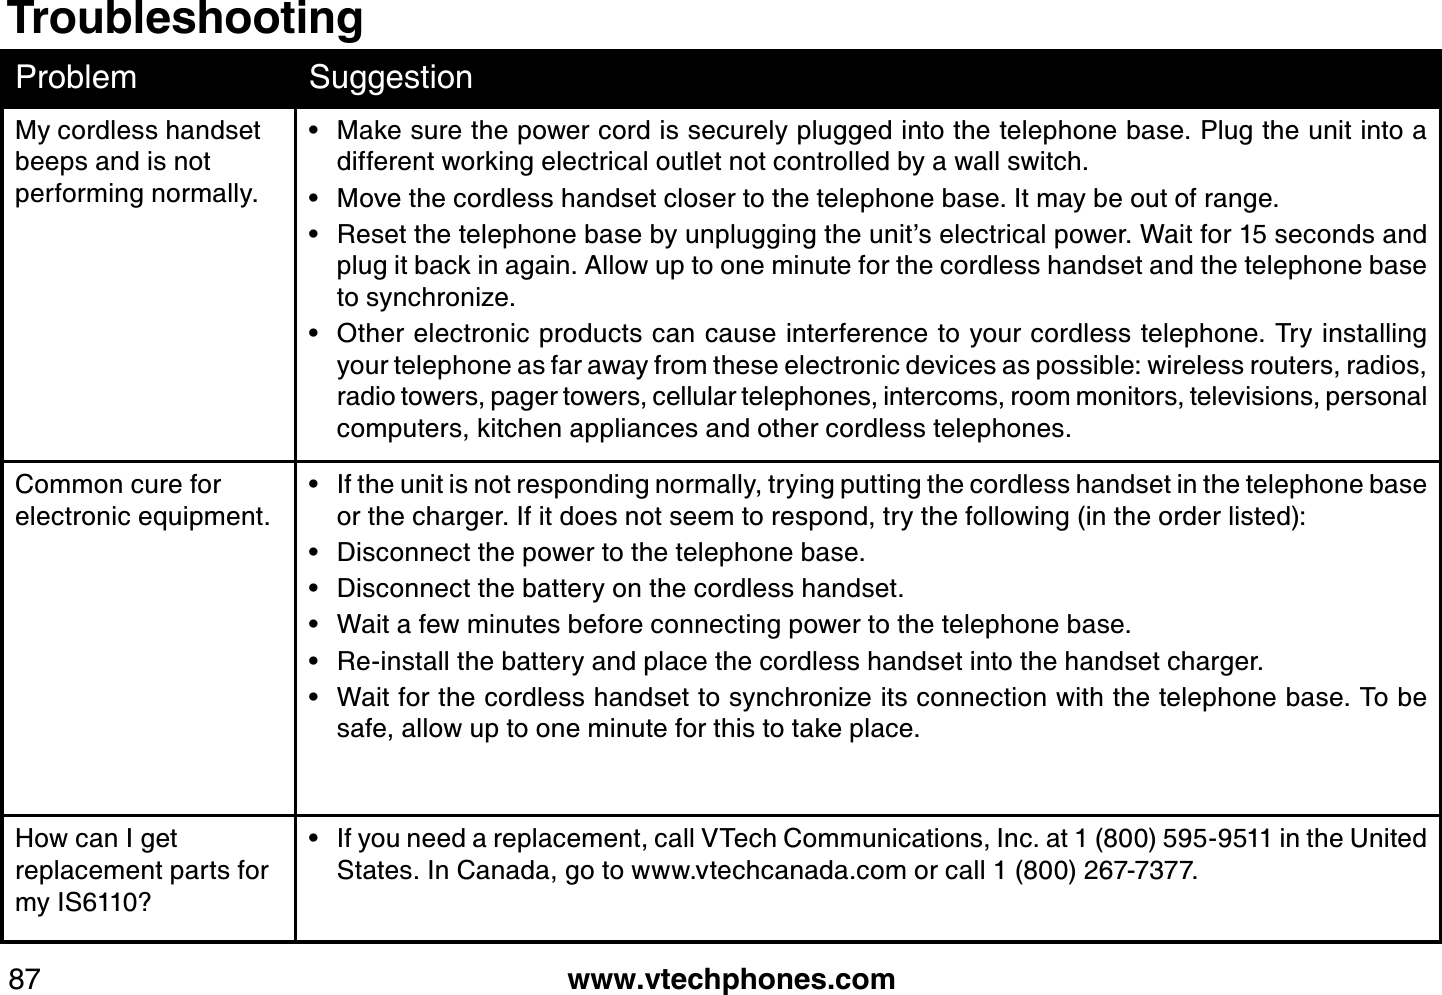
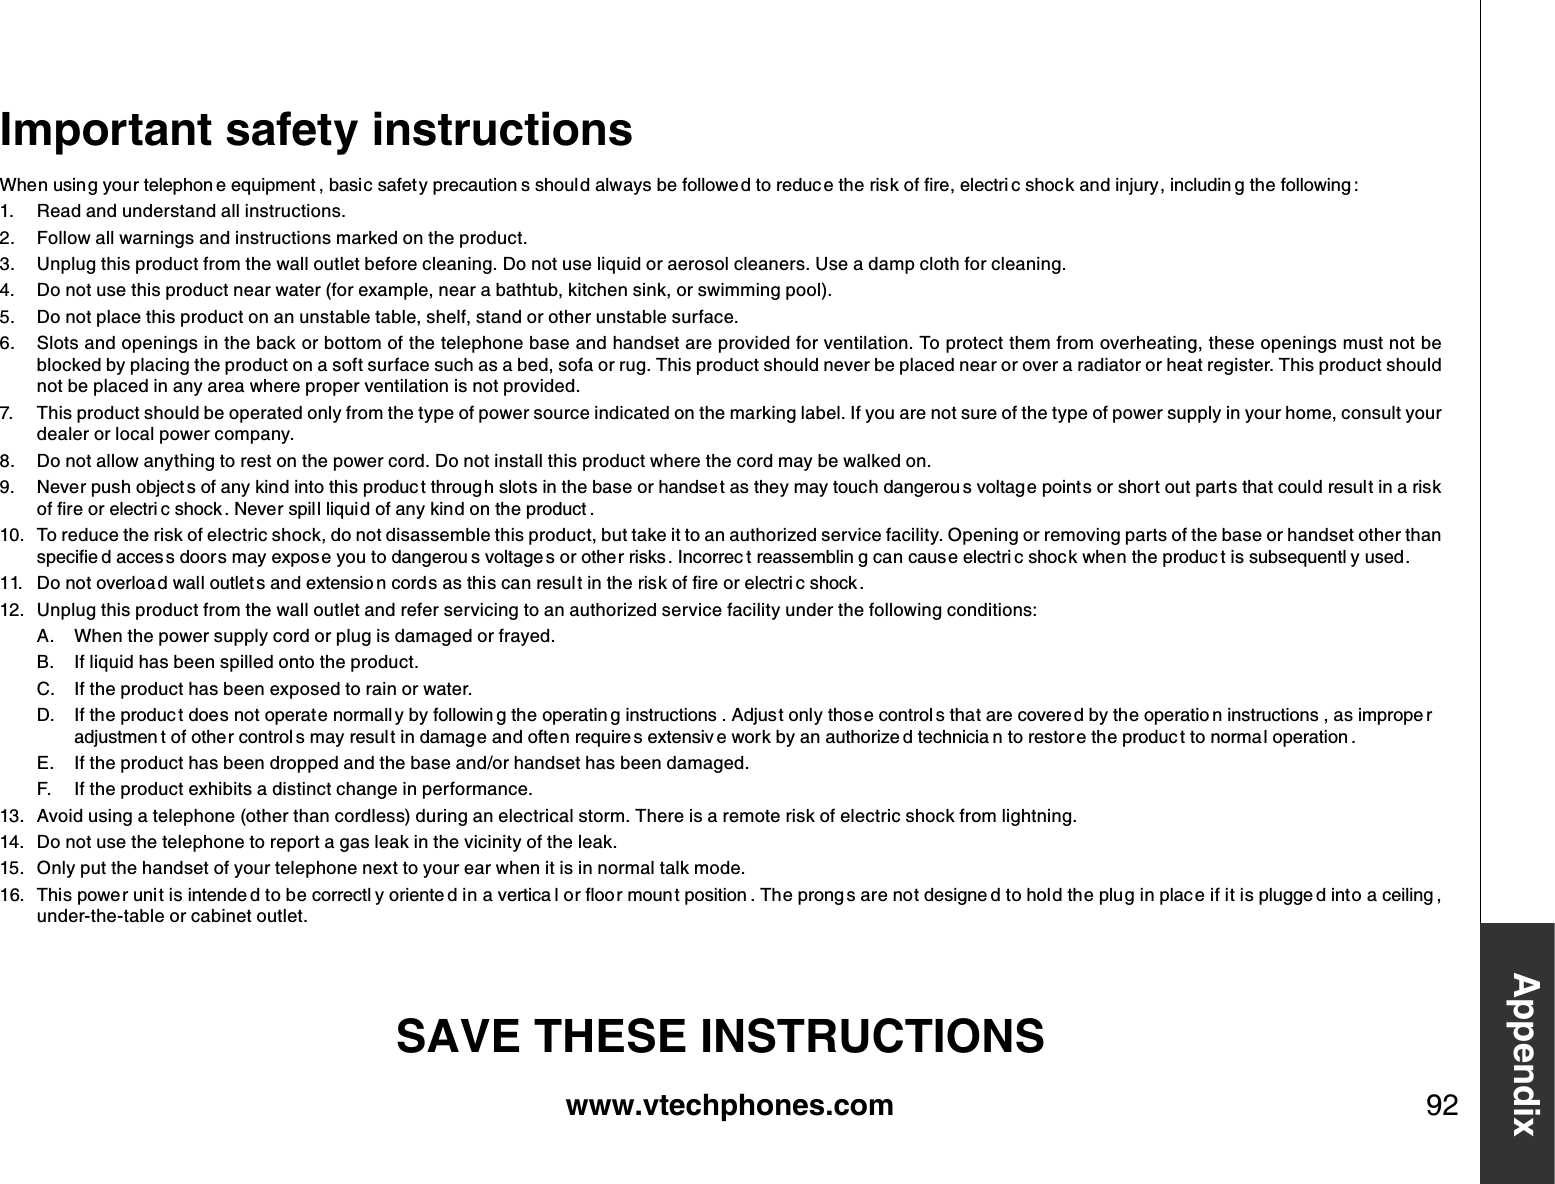
![www.vtechphones.com 54MessengerMessengerOnlineA list of active (on-line) buddies will be displayed in this window. Instant messages (IM) and Internet voice requests (VoIP) can only be made to buddies currently in the active (online) list.The status will be shown in front of the buddy name. The wording used for online status and the display of the status in PC and IS6110 phone are similar but not the same. See the below table for details.SettingPC IS6110 phone Display of the status in IS6110 phoneOnline OnlineBusy Busy [Busy]Be right back Be Back [Idle]Away Away [Idle]In a call / On the phone Onphone [Idle]Out to lunch To Lunch [Idle]#RRGCTQHƀKPG Invisible [Idle]1HƀKPG#NNQHVJGQHƀKPGDWFFKGUCPFDWFFKGUYJQJCXGUKIPGFKPVQOGUUGPIGTYKVJ#RRGCTQHƀKPG status will be displayed in this window. IM and VoIP requests ECPPQVDGUGPVVQCDWFF[YKVJQHƀKPGUVCVWUIf the online buddy list is too long, only part of the list can be shown. The rest of the list can be viewed by pressing the down NavKey to scroll through the list.The messenger screen will disappear from the screen automatically while you try to make a call or press OFFwhen in the messenger, but the messenger still runs in the background.••ShirleyONLINEOPTIONSCHATJane DoeJoeMarySusan SmithShirleyOFFLINEOPTIONSAnnieDavidJohn RyanPeter](https://usermanual.wiki/VTech-Telecommunications/80-6292-00.Users-Manual-II/User-Guide-867357-Page-16.png)