WINIA Electronics DPN4274NH 42 Inches Plasma Display Panel User Manual 4
Dongbu Daewoo Electronics Corporation 42 Inches Plasma Display Panel 4
Contents
- 1. User Manual 1
- 2. User Manual 2
- 3. User Manual 3
- 4. User Manual 4
User Manual 4
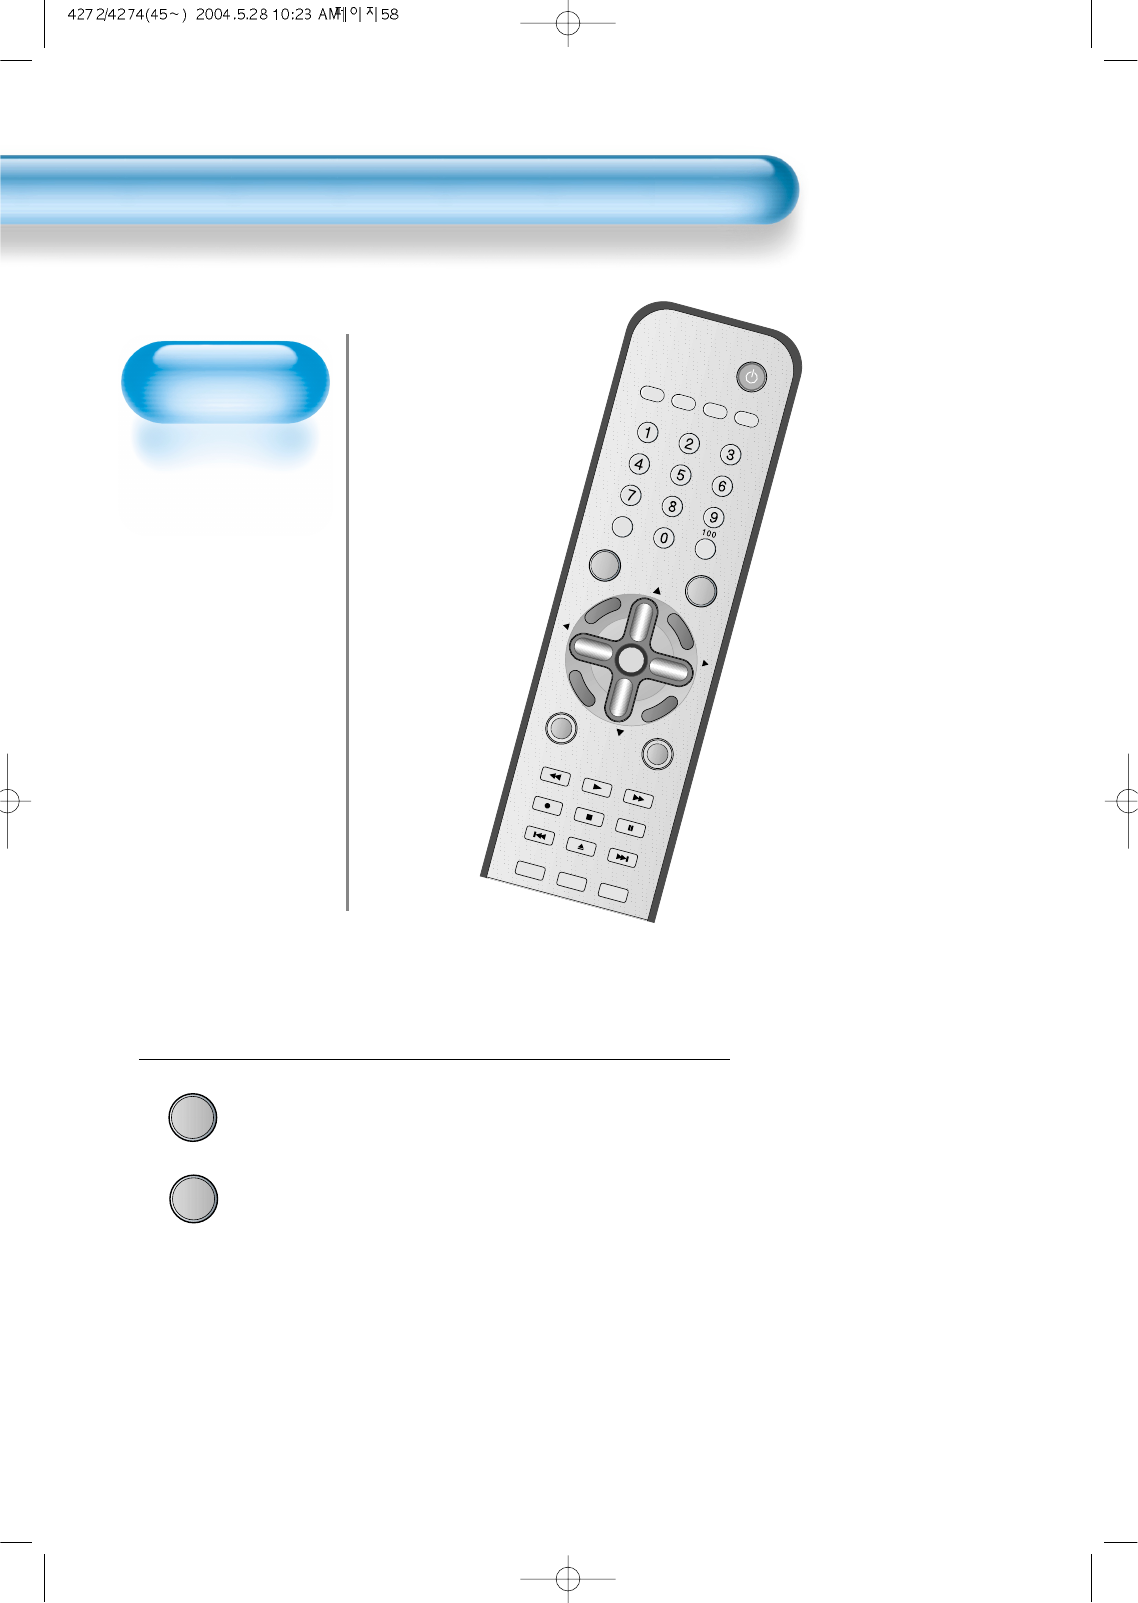
Customizing
Picture
• You can adjust the
color tone and
brightness to your
preference.
Customizing Picture
46
VIDEO/
DVD SATTV CATV
DISPLAY
MULTIMEDIATV/VIDEO
CH
CH
V
O
L
V
O
L
Z
O
O
M
+
Z
O
O
M
-
MENU
P
R
E
V
C
H
S
C
R
E
E
N
S
I
Z
E
MUTE CAPTION
F.F/SLOW
PLAYF.R/SLOW
REC STOP PAUSE
PREV
OPEN/CLOSE
NEXT
PICTURE
MODE SOUND
MODE STILL
POWER
MTS ADD/
ERASE SLEEP
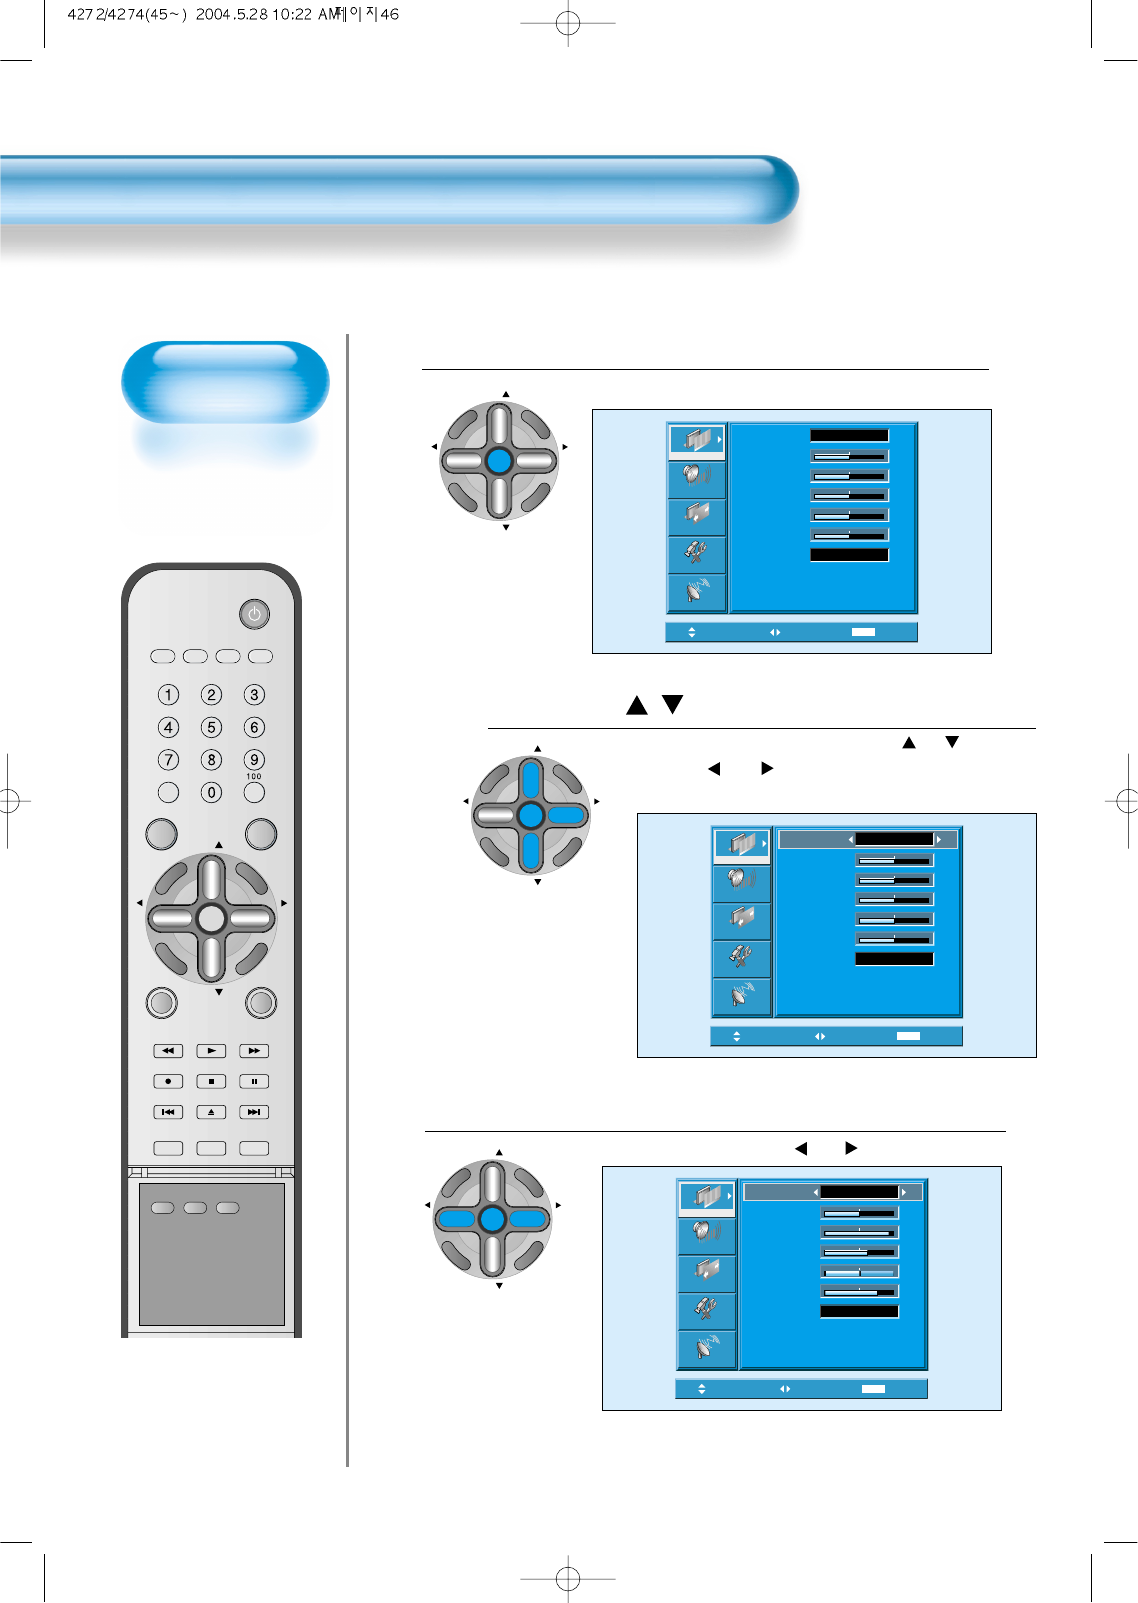
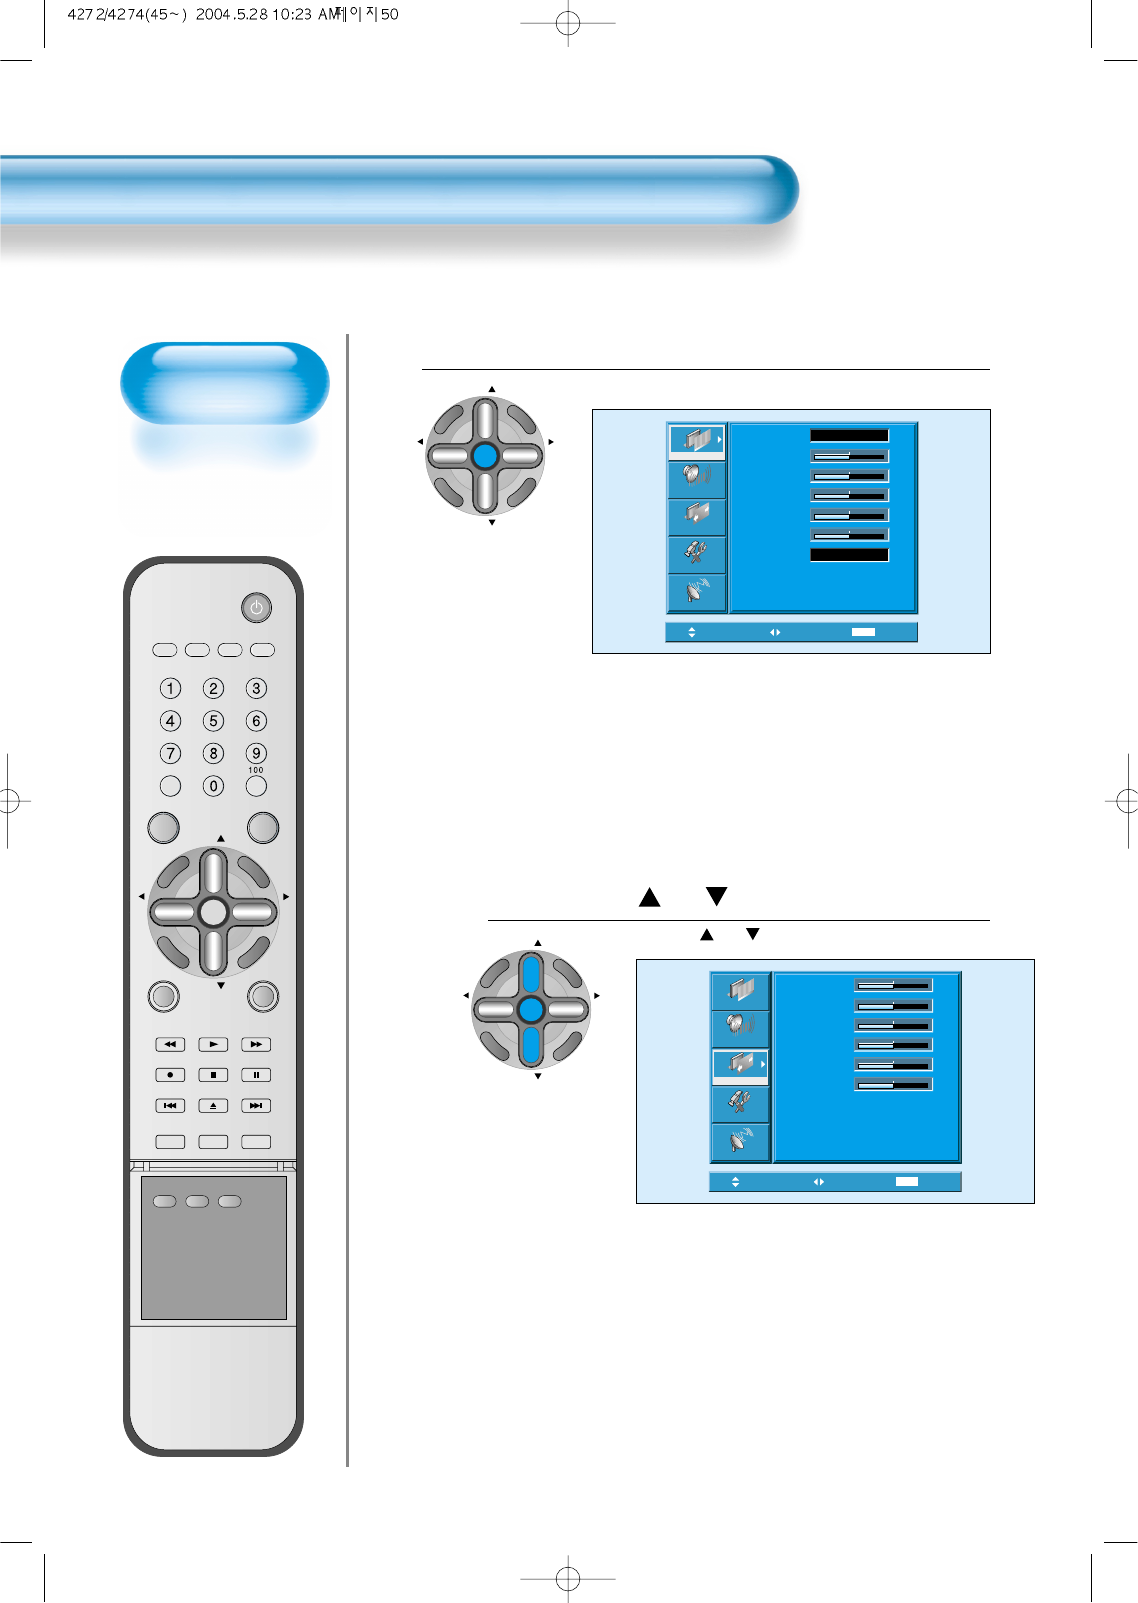
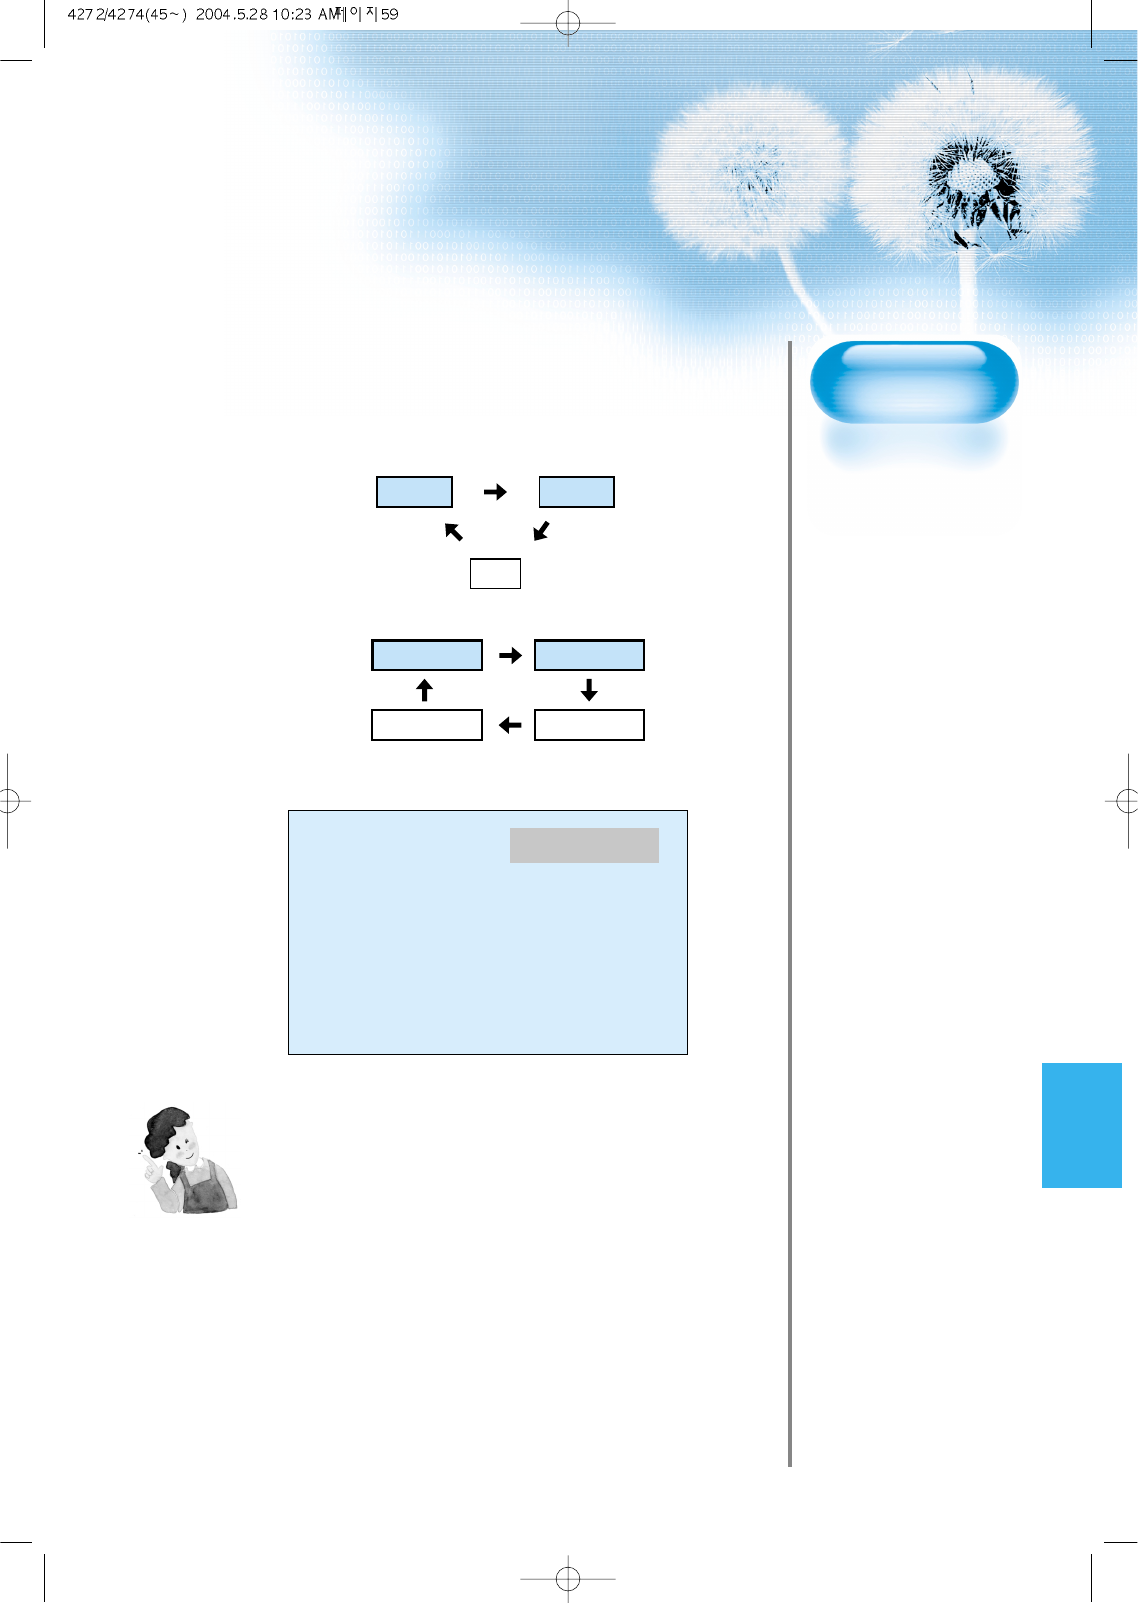
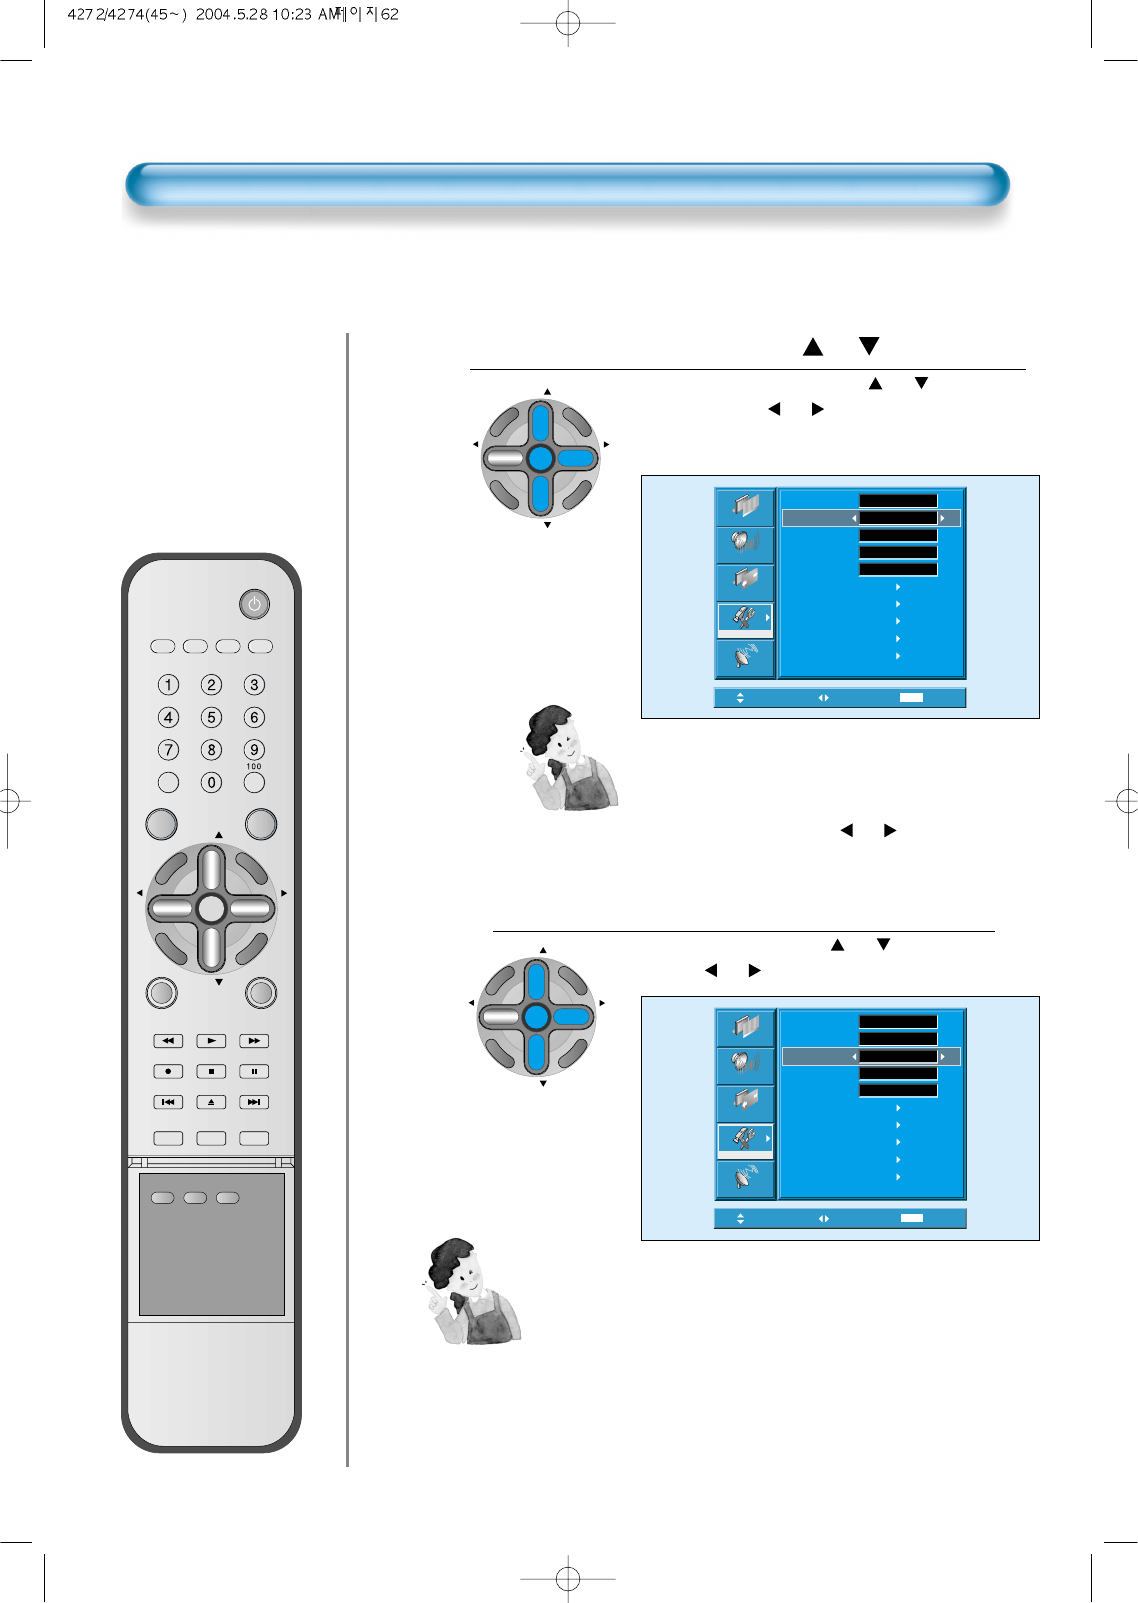
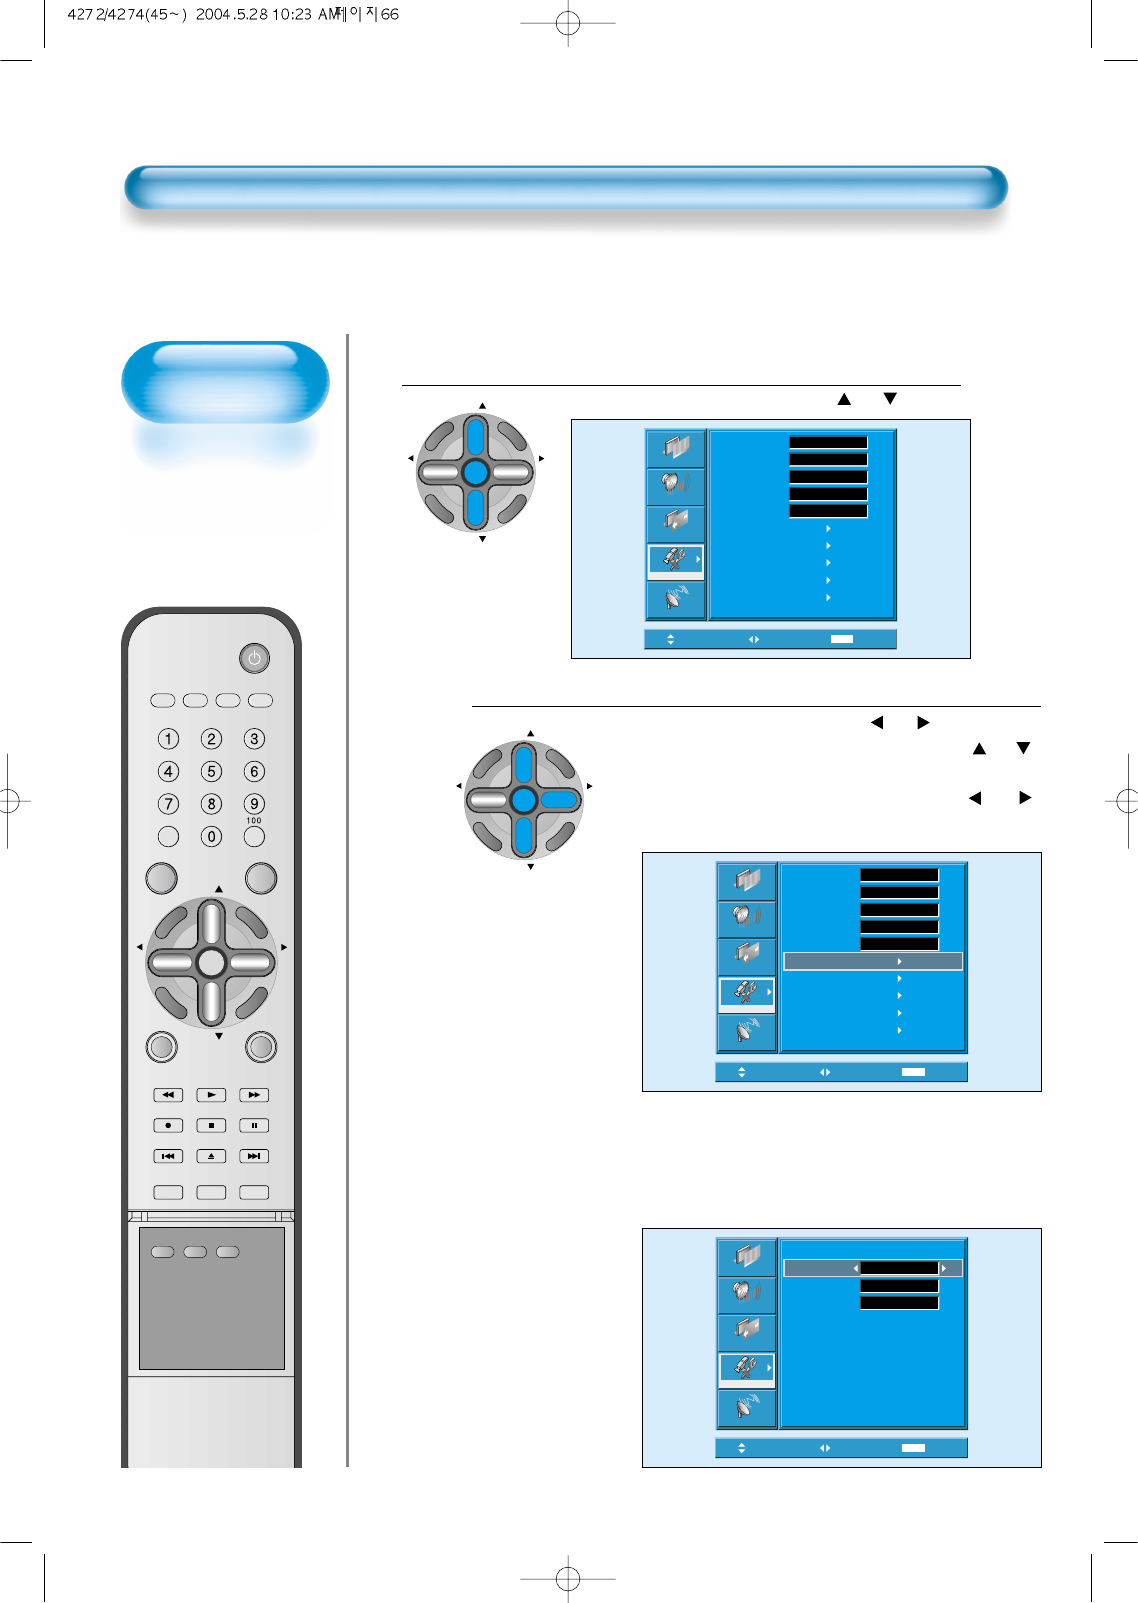
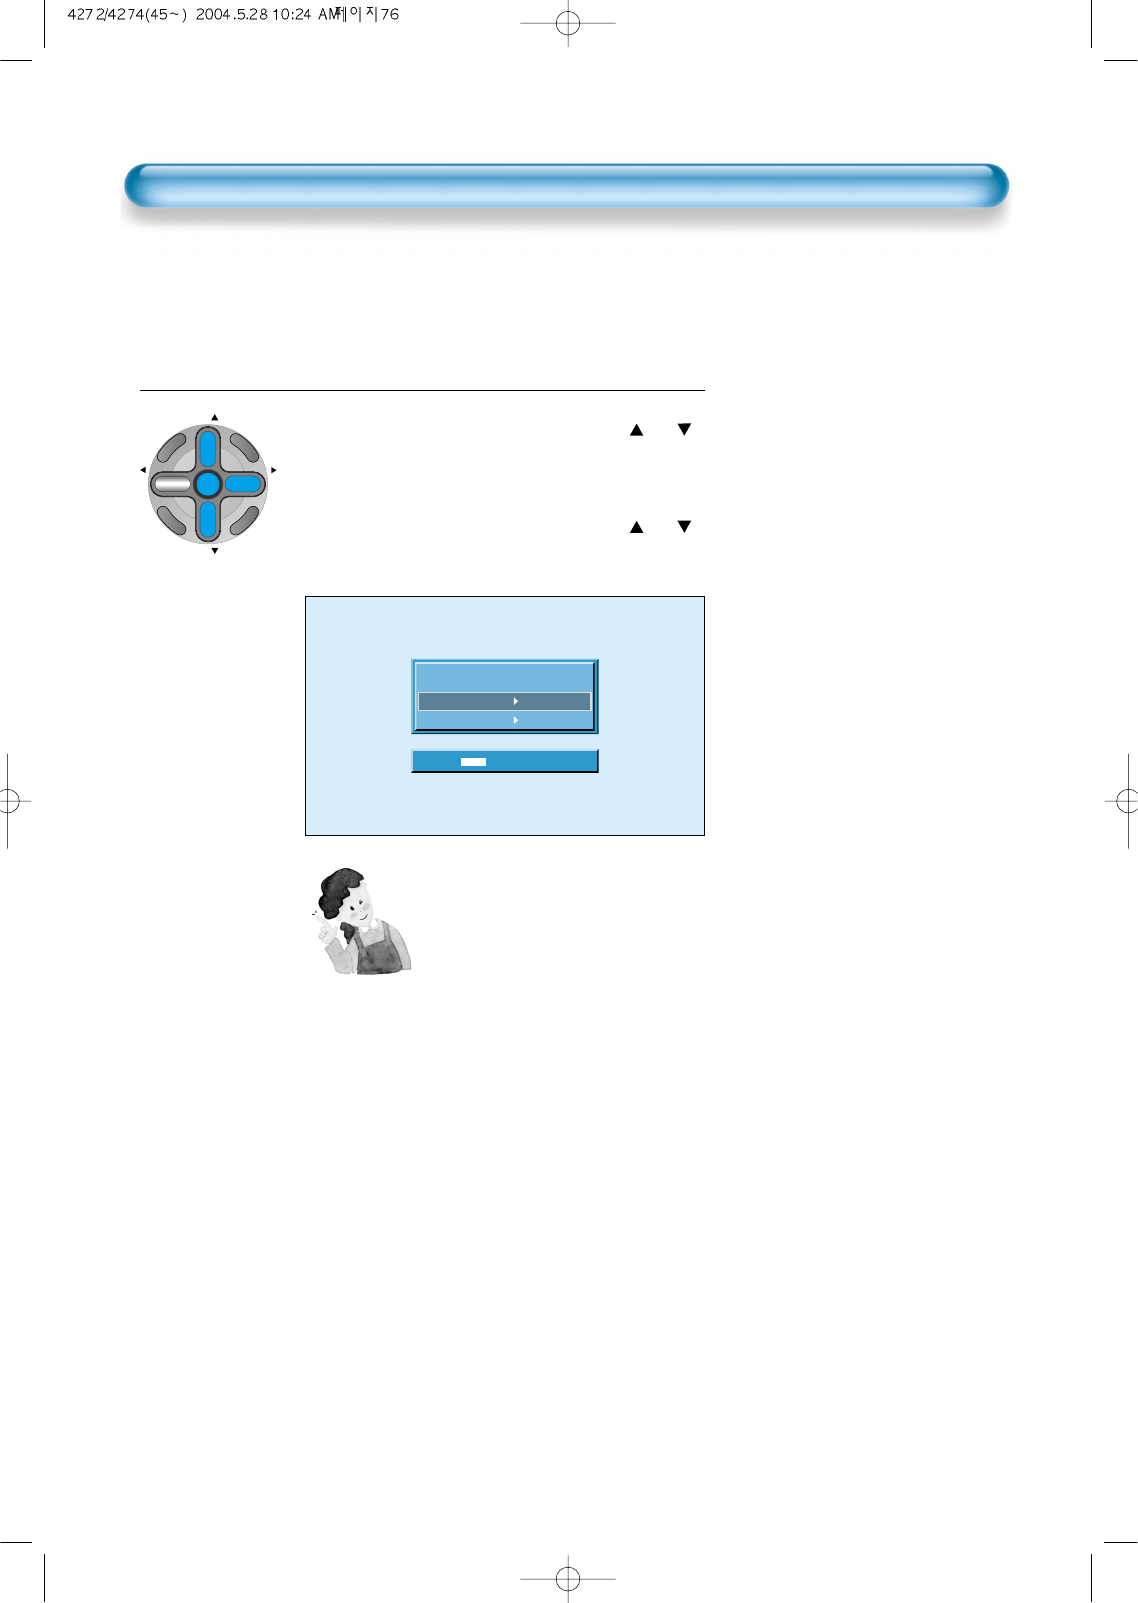
Press the / Button.
• After selecting [Picture] by by pressing “CH ” button,
press the “VOL ”button. Then the sub menu of
[Picture] will be displayed.
Select the Custom Mode.
• Select “User” by pressing the “VOL ”button.
3
Press the MENU Button.
• The MENU shown below will display on the screen.
1
2
Move Adjust MENU Exit
Normal
31
31
31
31
31
Picture
Screen
Sound
Function
Channel
Mode
Brightness
Contrast
Color
Tint
Sharpness
Color Temp.
Normal
Move Adjust MENU Exit
Normal
30
60
40
32
48
Picture
Screen
Sound
Function
Channel
Mode
Brightness
Contrast
Color
Tint
Sharpness
Color Temp.
User
CH
CH
V
O
L
V
O
L
Z
O
O
M
+
Z
O
O
M
-
MENU
P
R
E
V
C
H
S
C
R
E
E
N
S
I
Z
E
Move Select MENU Exit
Mode
Brightness
Contrast
Color
Tint
Sharpness
Color Temp.
Normal
Normal
31
31
31
31
31
Picture
Screen
Sound
Function
Channel
CH
CH
V
O
L
V
O
L
Z
O
O
M
+
Z
O
O
M
-
MENU
P
R
E
V
C
H
S
C
R
E
E
N
S
I
Z
E
CH
CH
V
O
L
V
O
L
Z
O
O
M
+
Z
O
O
M
-
MENU
P
R
E
V
C
H
S
C
R
E
E
N
S
I
Z
E
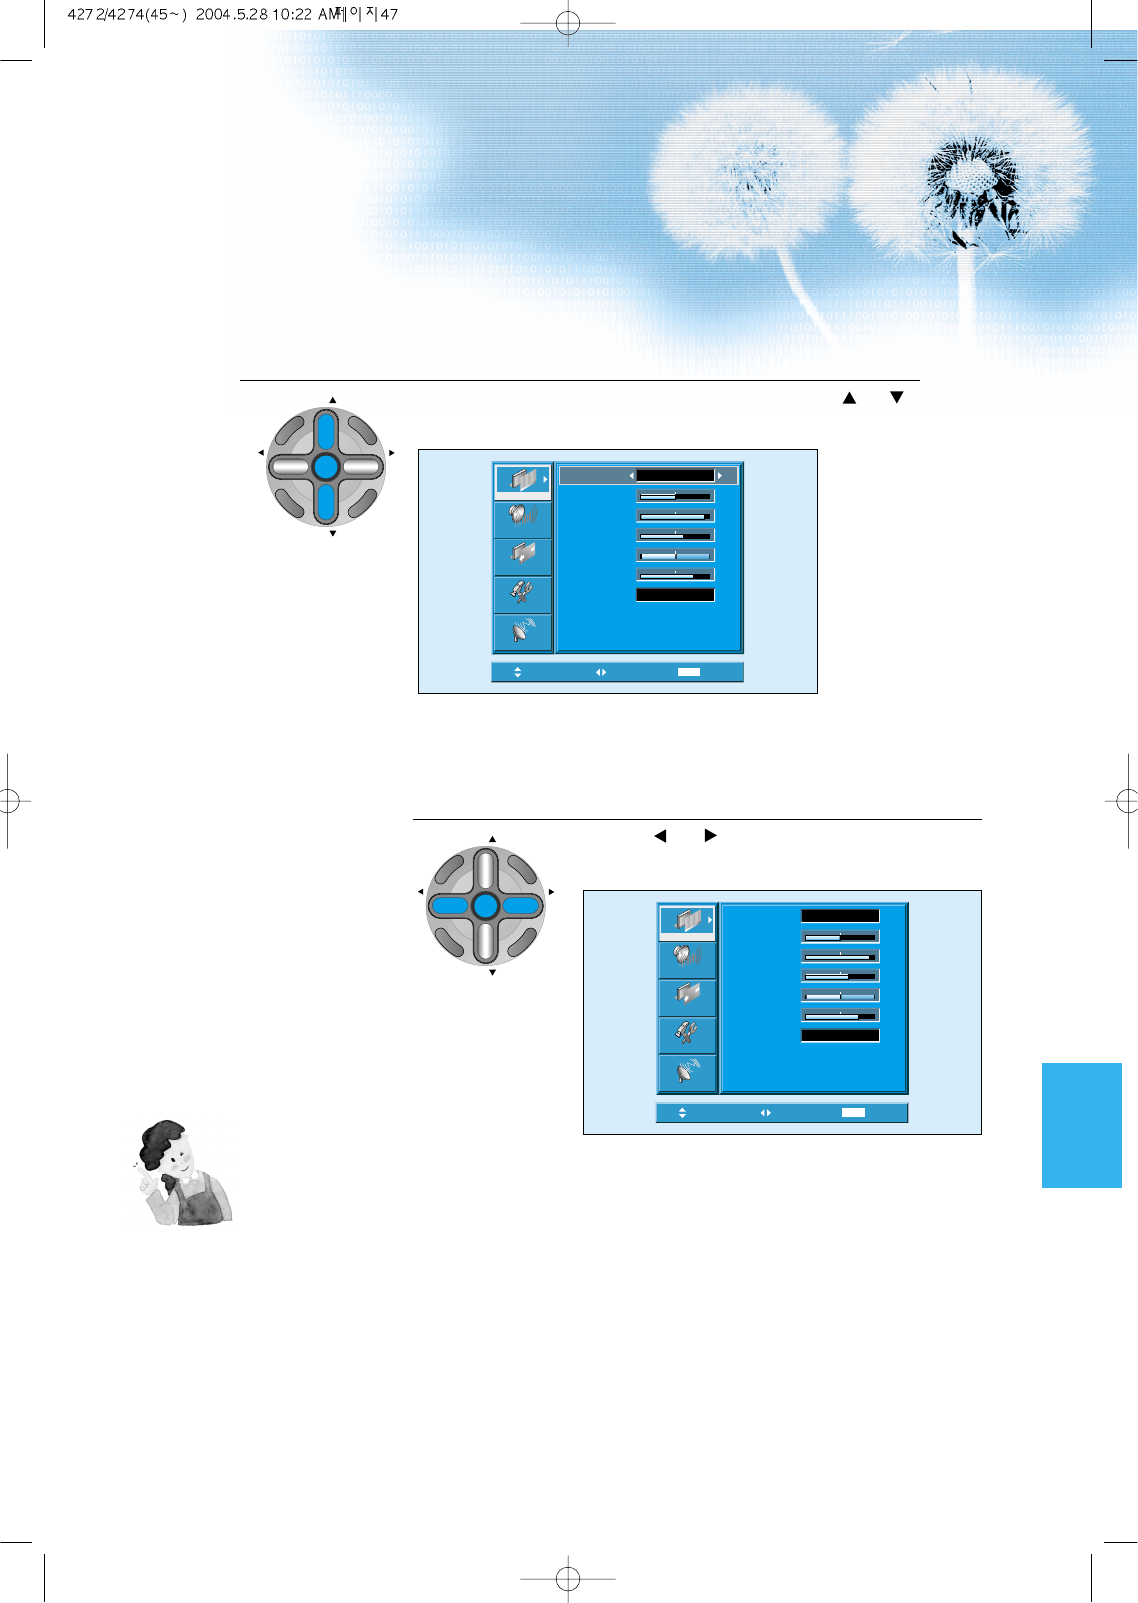
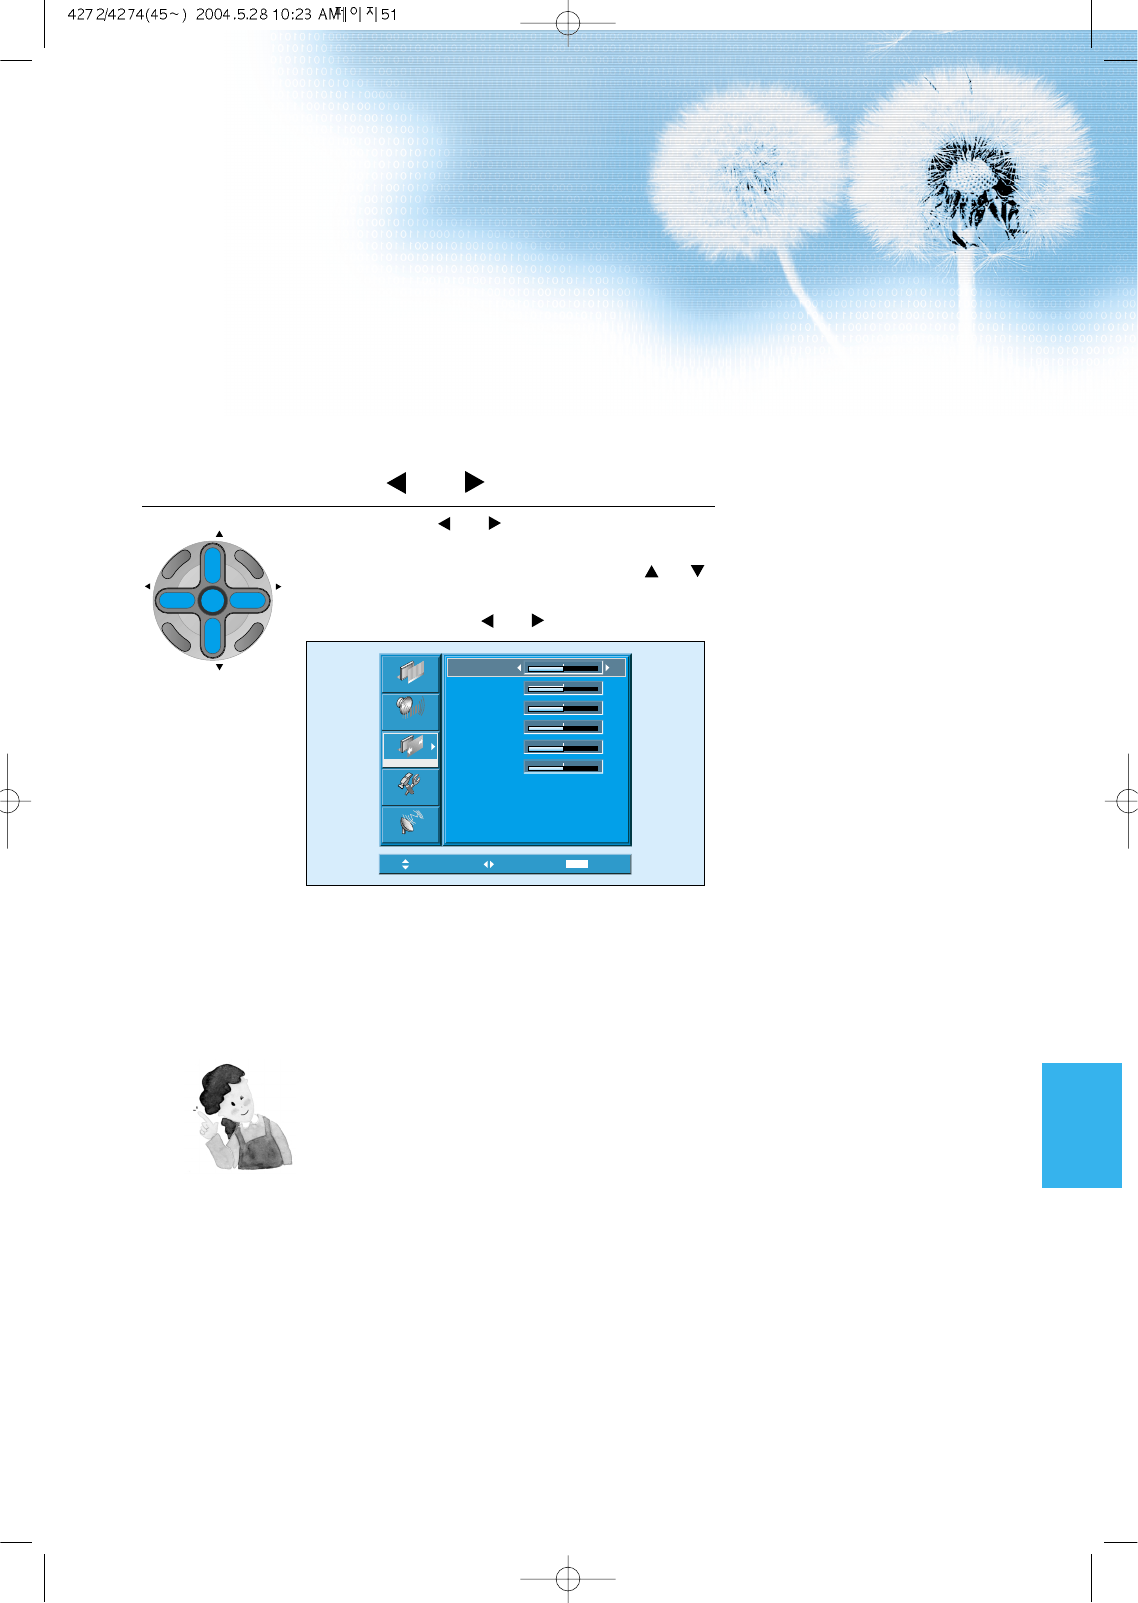
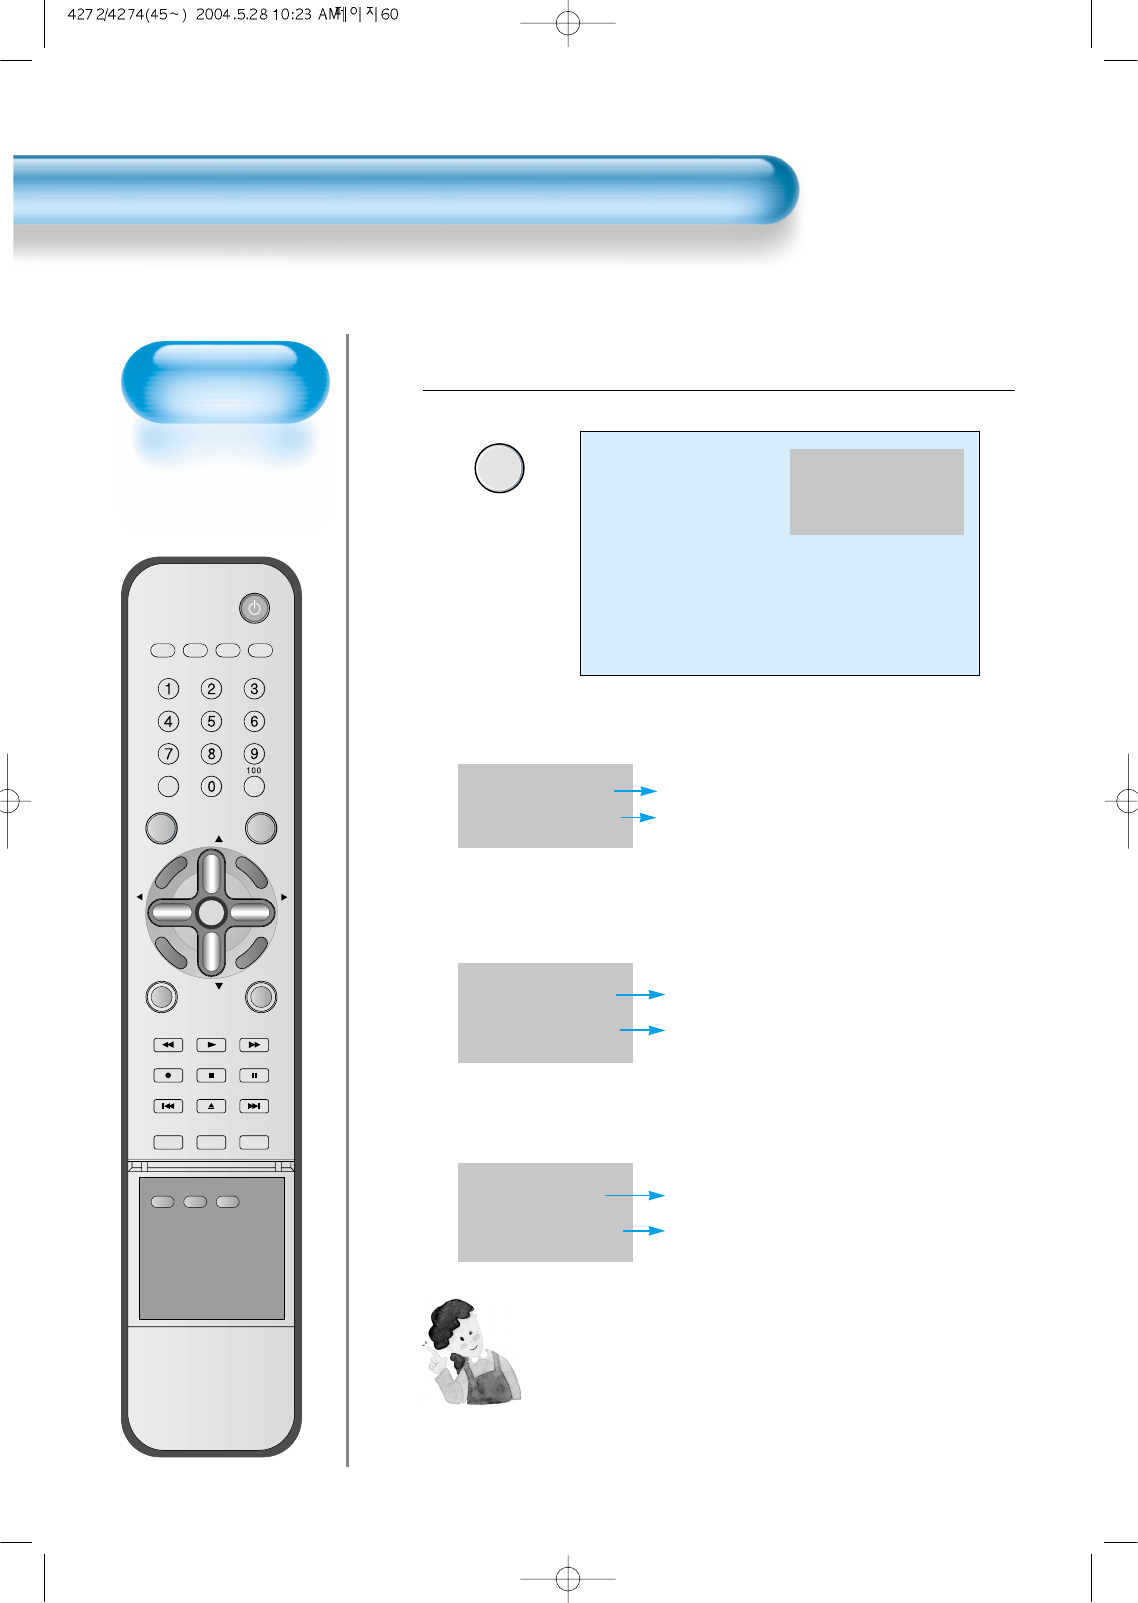
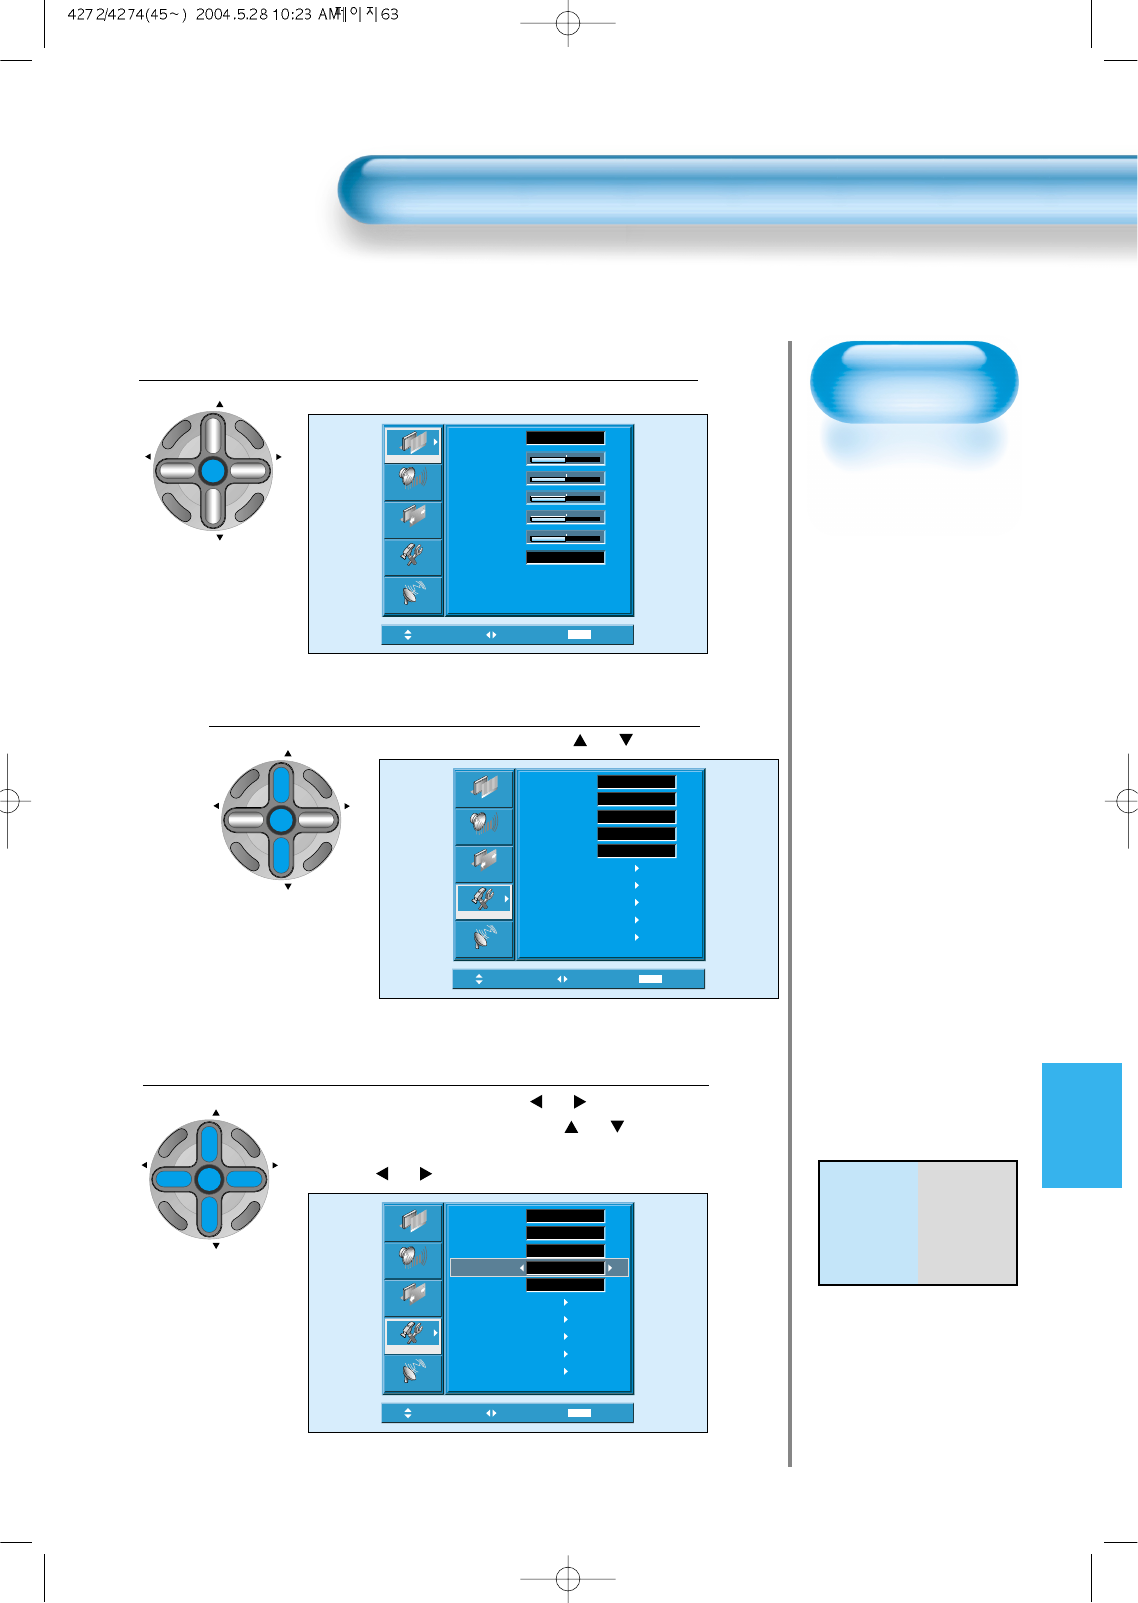
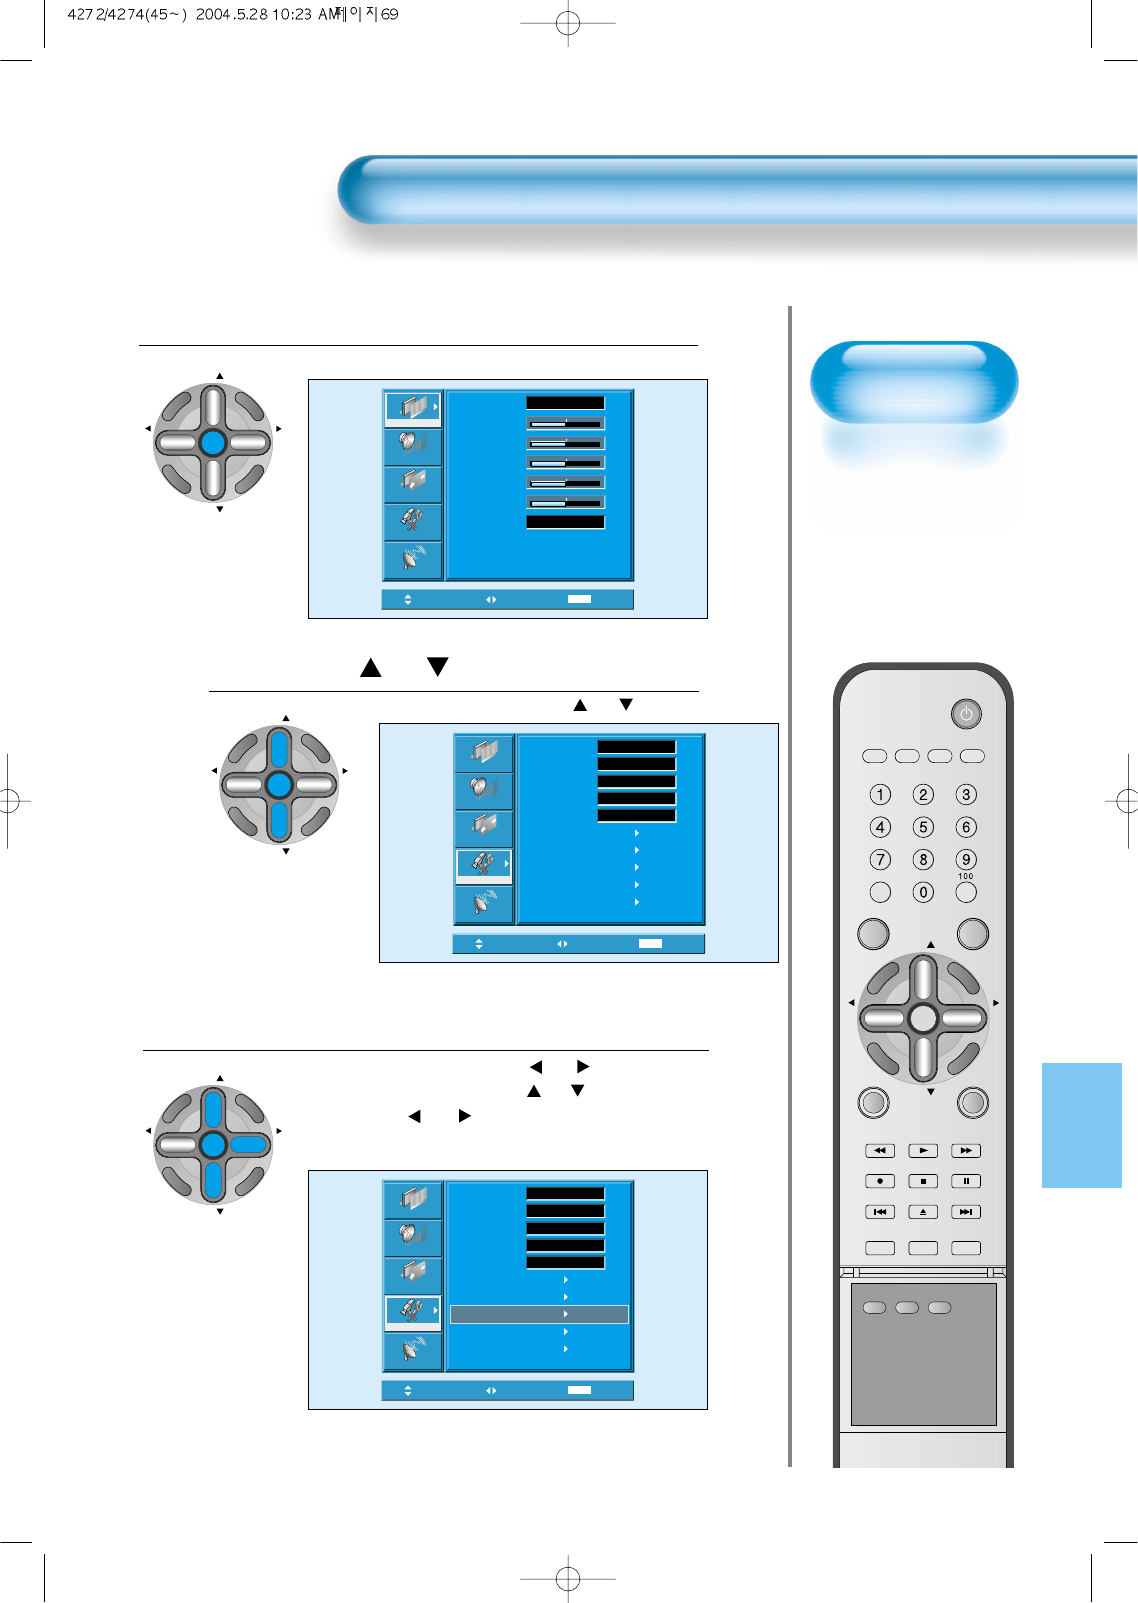
Select User Mode Adjustments
Picture Condition Adjustments
• Press the “VOL ”buttons to adjust the picture at your
preference.
4
5
Move Adjust MENU Exit
Normal
30
60
40
32
48
Picture
Screen
Sound
Function
Channel
Mode
Brightness
Contrast
Color
Tint
Sharpness
Color Temp.
User
Move Select MENU Exit
Normal
30
60
40
32
48
Picture
Screen
Sound
Function
Channel
Mode
Brightness
Contrast
Color
Tint
Sharpness
Color Temp.
User
47
• While you are in [Picture Mode – User], press the “CH ”
buttons to select a specific adjustment item.
NOTES:
1) While you are in the PC or DVI INPUT mode, you can only
adjust brightness, contrast, sharpness and color temperature.
2) When you adjust Brightness, Contrast, Color and Tint in DTV
mode or adjust Brightness and Contrast in PC or DVI mode,
the picture is adjusted finely.
3) The adjusted values are memorized in each mode separately.
4) The Tint control is used only when the input signal is NTSC
If input signal is NTSC, Tint control is displayed in picture
menu.
5) Selecting the Color Temperature makes the mood normal,
warm or cold.
CH
CH
V
O
L
V
O
L
Z
O
O
M
+
Z
O
O
M
-
MENU
P
R
E
V
C
H
S
C
R
E
E
N
S
I
Z
E
CH
CH
V
O
L
V
O
L
Z
O
O
M
+
Z
O
O
M
-
MENU
P
R
E
V
C
H
S
C
R
E
E
N
S
I
Z
E
Adjusting
Screen Size
• You can adjust
screen size or
aspect ratio as
desired.
Adjusting Screen Size
48
VIDEO/
DVD SATTV CATV
DISPLAY
MULTIMEDIATV/VIDEO
CH
CH
V
O
L
V
O
L
Z
O
O
M
+
Z
O
O
M
-
MENU
P
R
E
V
C
H
S
C
R
E
E
N
S
I
Z
E
MUTE CAPTION
F.F/SLOW
PLAYF.R/SLOW
REC STOP PAUSE
PREV
OPEN/CLOSE
NEXT
PICTURE
MODE SOUND
MODE STILL
POWER
MTS ADD/
ERASE SLEEP
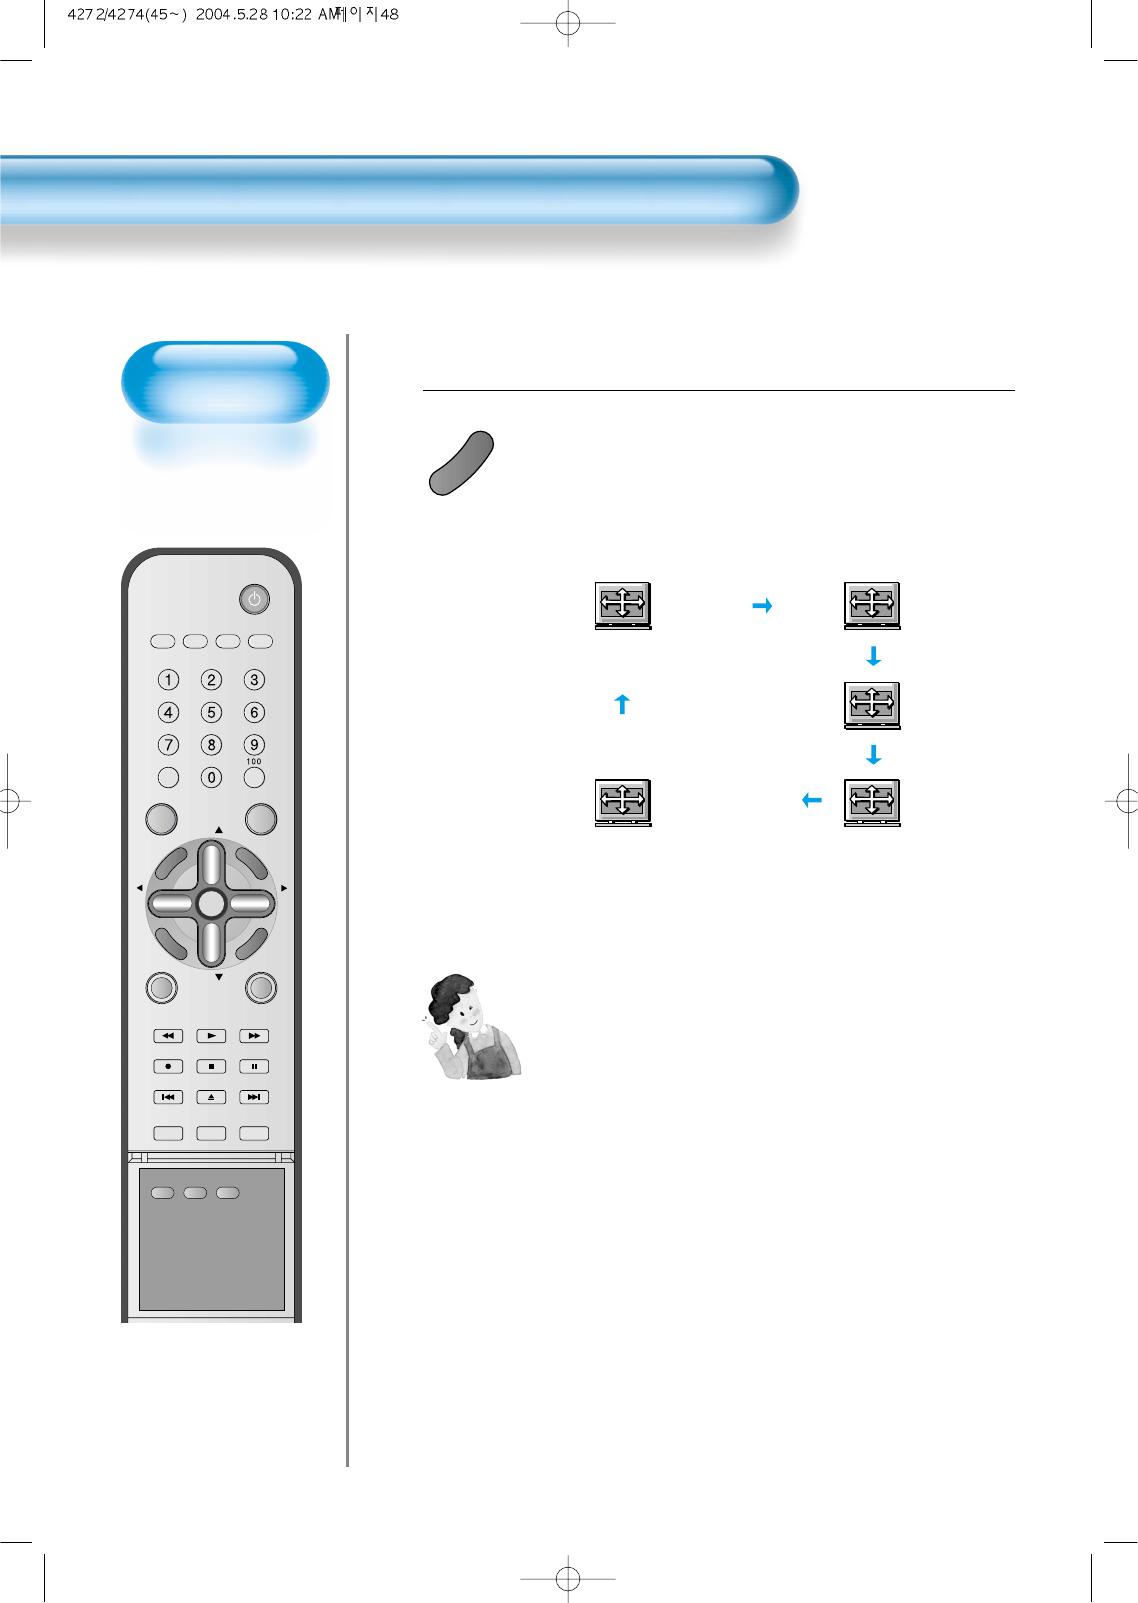
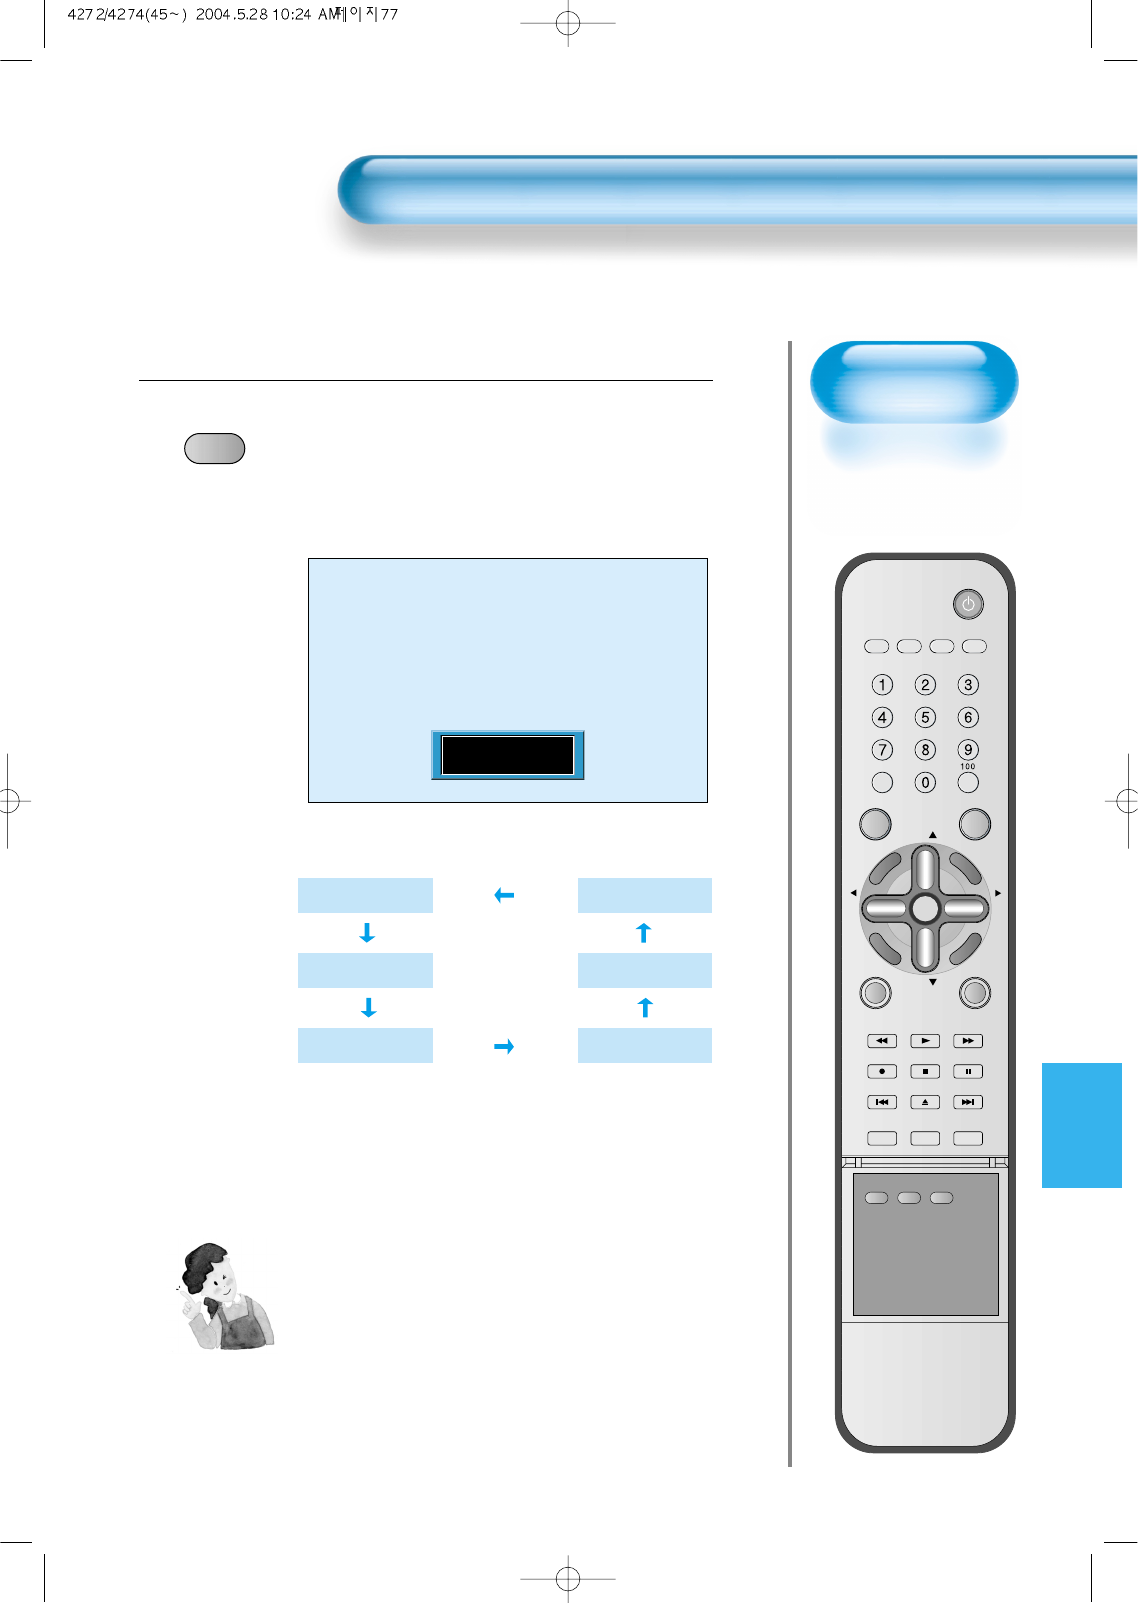
Press the “SCREEN SIZE” Button.
• Each time you press the “SCREEN SIZE” button on the Remote
Control, a different “SCREEN SIZE” appears. The sequence
used is as follows:
• The current screen size will be displayed on the screen.
1
S
C
R
E
E
N
S
I
Z
E
Panorama
Enlarge LB
16:9
Normal
Enlarge LBS
NOTES:
1) When the INPUT SIGNAL is DTV [in Component 1 or
Component 2], only the aspect ratios of 16:9 and 4:3(Normal)
are available.
Eg) If input signal is 16:9, PDP displays in 16:9 mode.
2) The digital broadcasting (720p, 1080i) is fixed at the aspect
ratio of 16:9.
3) Displaying a picture in a normal mode (4:3) for a long time
may cause phosphor of the PDP to be burned. So avoid
displaying a picture in 4:3 screen size for a long time.
4) 16:9 : Theater-like 16:9 picture formats
Panorama : 16:9 picture formats with panorama effect
Normal : Displays pictures of original picture size.
Enlarge LB : Enlarges the screen as to fill the black part of
up and down.
Enlarge LBS : Enlarges the screen, and shifts up as to see
the subtitles in case you are watching video
with subtitles.
49
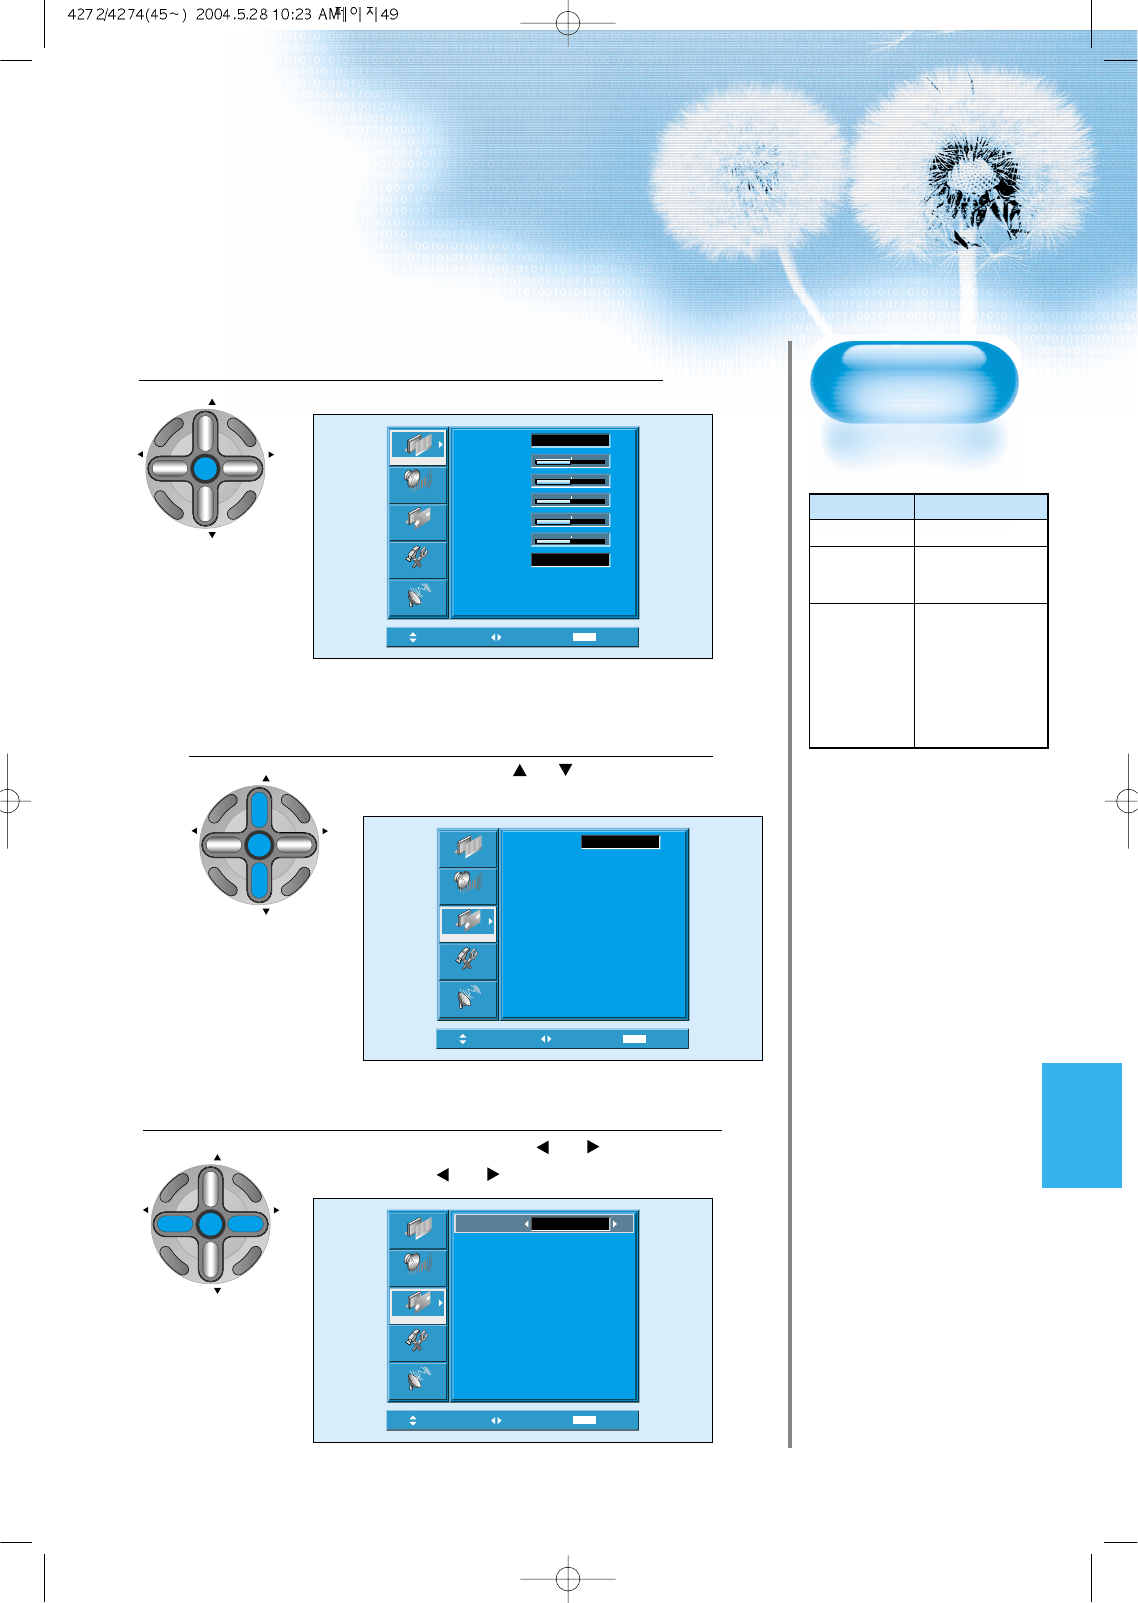
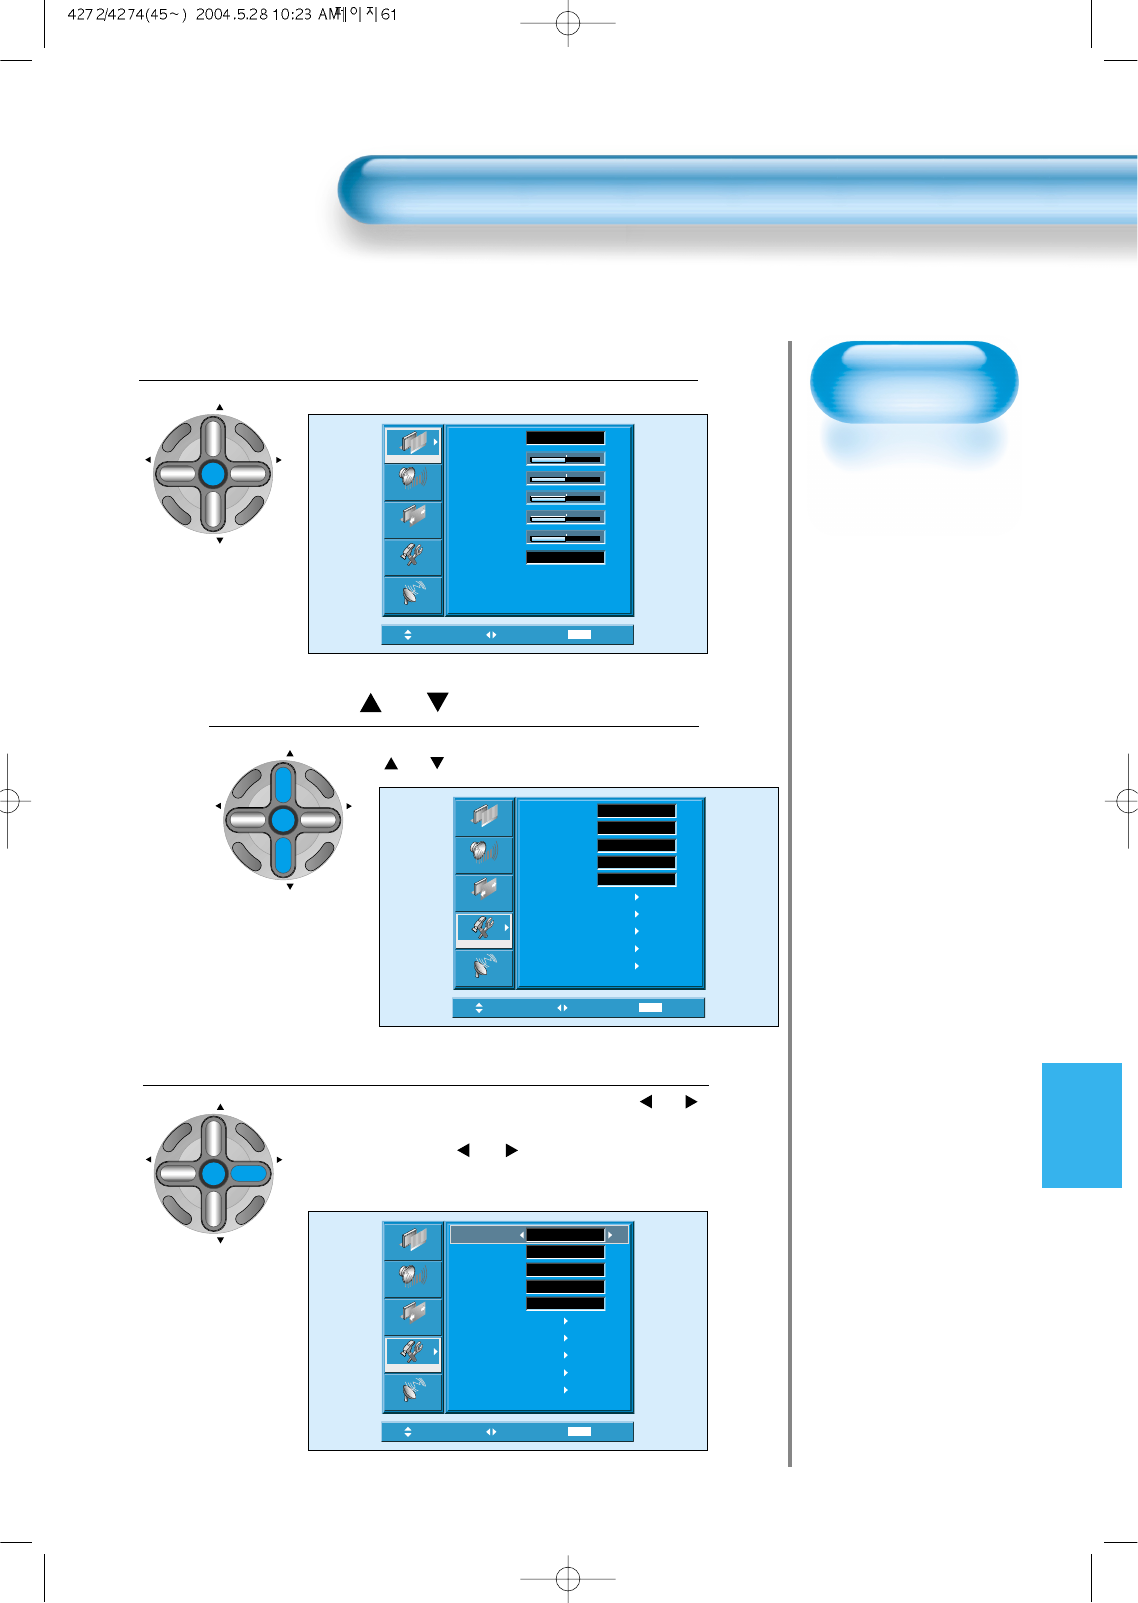
Press the MENU Button.
• Press the [MENU] button on the Remote Control.
Select [Screen].
• Press the Channel “CH ” button to select
[Screen].
Select the [Screen Size].
• Enter the sub menu by pressing “VOL ”button.
• Press the Volume “VOL ”buttons to select [Screen Size].
3
1
2
Adjusting from
MENU Screen
Move Select MENU Exit
Mode
Brightness
Contrast
Color
Tint
Sharpness
Color Temp.
Normal
Normal
31
31
31
31
31
Picture
Screen
Sound
Function
Channel
Move Select MENU Exit
Mode 16 : 9
Picture
Screen
Sound
Function
Channel
Move Adjust MENU Exit
Picture
Screen
Sound
Function
Channel
Mode Normal
CH
CH
V
O
L
V
O
L
Z
O
O
M
+
Z
O
O
M
-
MENU
P
R
E
V
C
H
S
C
R
E
E
N
S
I
Z
E
CH
CH
V
O
L
V
O
L
Z
O
O
M
+
Z
O
O
M
-
MENU
P
R
E
V
C
H
S
C
R
E
E
N
S
I
Z
E
CH
CH
V
O
L
V
O
L
Z
O
O
M
+
Z
O
O
M
-
MENU
P
R
E
V
C
H
S
C
R
E
E
N
S
I
Z
E
• Available Screen Mode
Input Available Mode
PC,DVI None
Component 16:9, Normal
(480p or above)
Video 16:9,
Component Panorama,
(480i)
Normal,
Enlarge LB,
Enlarge LBS
Adjusting Screen
Position and Size
• You can adjust the
screen position and
size as desired.
VIDEO/
DVD SATTV CATV
DISPLAY
MULTIMEDIATV/VIDEO
CH
CH
V
O
L
V
O
L
Z
O
O
M
+
Z
O
O
M
-
MENU
P
R
E
V
C
H
S
C
R
E
E
N
S
I
Z
E
MUTE CAPTION
F.F/SLOW
PLAYF.R/SLOW
REC STOP PAUSE
PREV
OPEN/CLOSE
NEXT
PICTURE
MODE SOUND
MODE STILL
POWER
MTS ADD/
ERASE SLEEP
Press the MENU Button.
• The MENU screen as shown below will appear.
Press the “ CH ” button.
• Press the “CH ”button to select [Screen].
1
2
Move Select MENU Exit
Picture
Screen
Sound
Function
Channel
H. Size
V. Size
H. Position
V. Position
Phase
Frequency
32
32
32
32
32
32
50
Move Select MENU Exit
Mode
Brightness
Contrast
Color
Tint
Sharpness
Color Temp.
Normal
Normal
31
31
31
31
31
Picture
Screen
Sound
Function
Channel
Adjusting Screen Position and Size
CH
CH
V
O
L
V
O
L
Z
O
O
M
+
Z
O
O
M
-
MENU
P
R
E
V
C
H
S
C
R
E
E
N
S
I
Z
E
CH
CH
V
O
L
V
O
L
Z
O
O
M
+
Z
O
O
M
-
MENU
P
R
E
V
C
H
S
C
R
E
E
N
S
I
Z
E
51
Press the Volume “ VOL ”button.
• Press the Volume “VOL ”button to enter the sub menu
of [Screen].
• While you are in [Screen] mode, press the “CH ”
button to select a desired item, and then, adjust the
value by pressing the “VOL ”.
3
Move Adjust MENU Exit
Picture
Screen
Sound
Function
Channel
H. Size
V. Size
H. Position
V. Position
Phase
Frequency
32
32
32
32
32
32
NOTES:
1) Horizontal/Vertical size and position values can be adjusted only in the
[PC] input mode and in the [DVI] input mode, only Horizontal/Vertical size
are available.
2) H. Size: As the value increases, the screen width increases
3) V. Size: As the value increases, the screen height increases.
4) H. Position: As the value increases, the screen moves to the right.
5) V. Position: As the value increases, the screen mores up.
6) Phase: When there is jitter or blurring of the image, adjust this value.
7) Frequency: When there is jitter or blurring of the image, adjust this value.
CH
CH
V
O
L
V
O
L
Z
O
O
M
+
Z
O
O
M
-
MENU
P
R
E
V
C
H
S
C
R
E
E
N
S
I
Z
E
VIDEO/
DVD SATTV CATV
DISPLAY
MULTIMEDIATV/VIDEO
CH
CH
V
O
L
V
O
L
Z
O
O
M
+
Z
O
O
M
-
MENU
P
R
E
V
C
H
S
C
R
E
E
N
S
I
Z
E
MUTE CAPTION
F.F/SLOW
PLAYF.R/SLOW
REC STOP PAUSE
PREV
OPEN/CLOSE
NEXT
PICTURE
MODE SOUND
MODE STILL
POWER
MTS ADD/
ERASE SLEEP
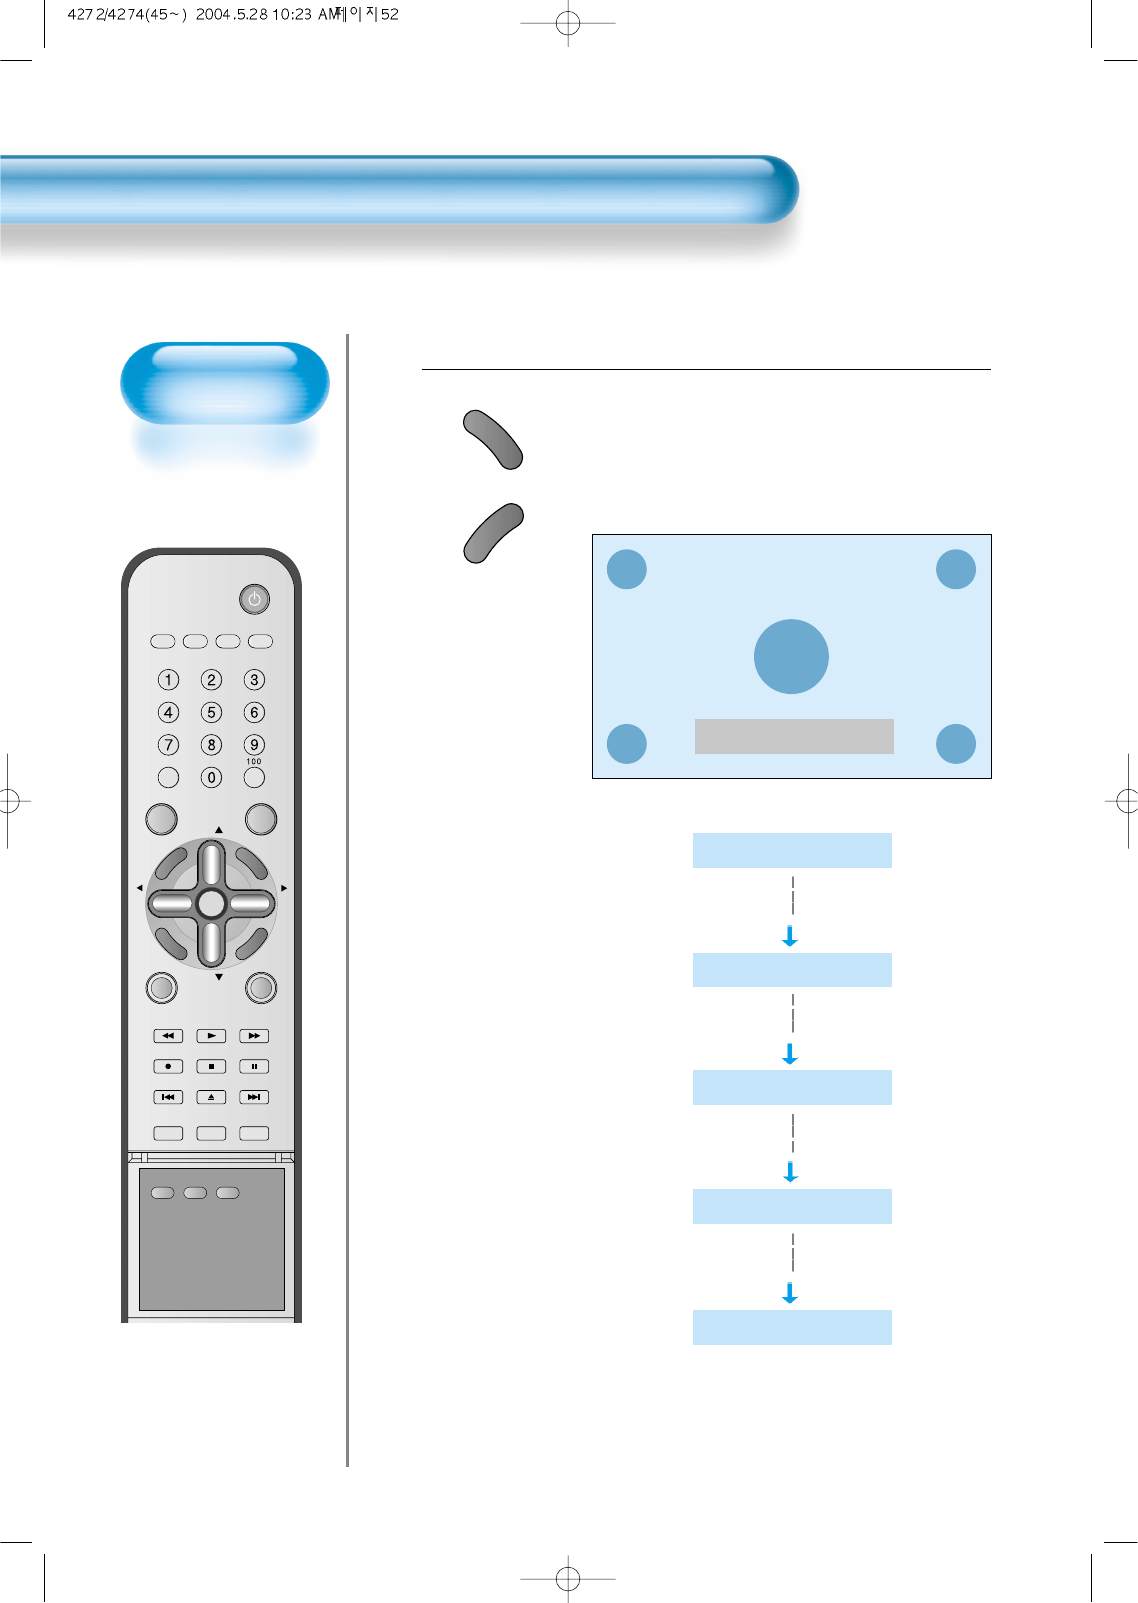
Press the “ZOOM+” Button.
• Press the “ZOOM+” button to show currently selected
screen size.
• Each time you press the “ZOOM+” button, the screen size
will increase stepwise in 0 ~ 20 scale.
• To reduce the screen size, press the “ZOOM-” button.
1
52
Enlarging
Screen Size
• You can view
enlarged size of the
screen with this
function
Enlarging Screen Size
Zoom 0
Z
O
O
M
+
Z
O
O
M
-
Zoom 0
Zoom 5
Zoom 10
Zoom 15
Zoom 20
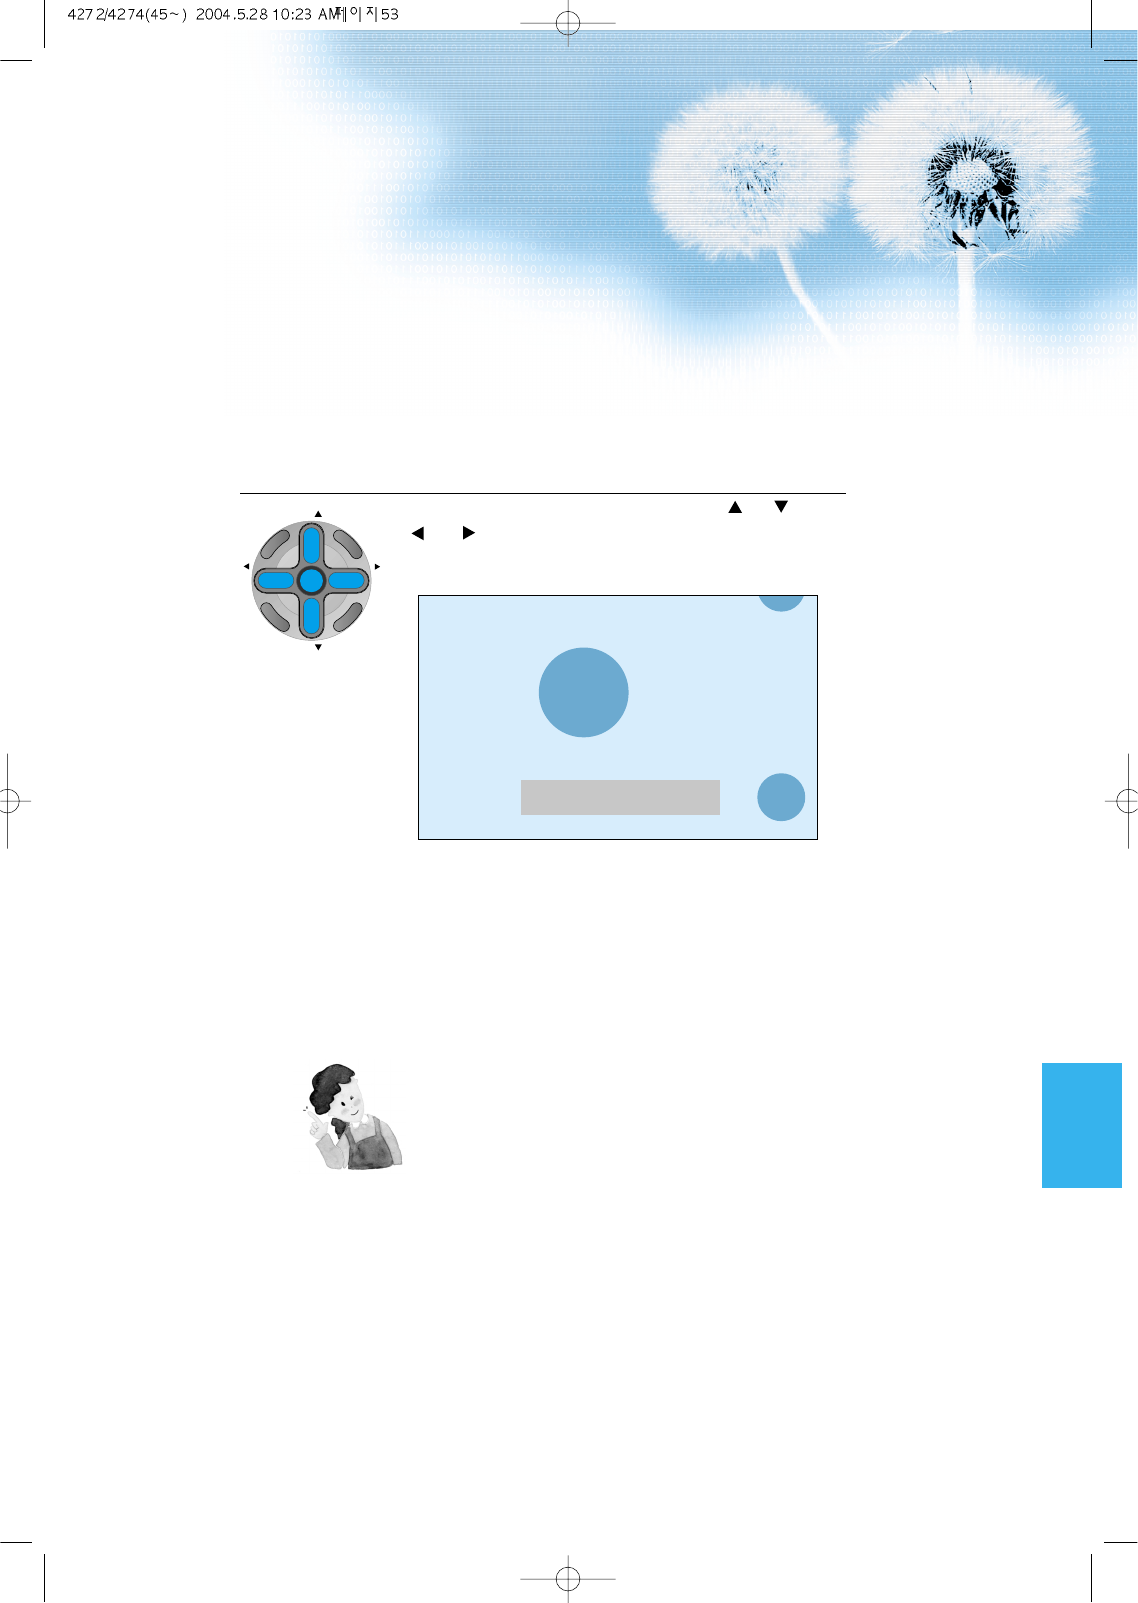
Move the Screen Position.
• While you are in the ‘Zoom’ mode, press the “CH ”and
“VOL ” buttons to move screen stepwise up/down and
left/right, respectively.
2
53
NOTES:
1) When the screen is enlarged, the pixel of the screen can
become thick and dim.
2) When only subtitle of zoom level remains, you can scroll the
image.
If subtitle of zoom level disappears, press zoom key, and
scroll the image.
3) You can enlarge the screen in freeze mode.
Zoom 6
CH
CH
V
O
L
V
O
L
Z
O
O
M
+
Z
O
O
M
-
MENU
P
R
E
V
C
H
S
C
R
E
E
N
S
I
Z
E
VIDEO/
DVD SATTV CATV
DISPLAY
MULTIMEDIATV/VIDEO
CH
CH
V
O
L
V
O
L
Z
O
O
M
+
Z
O
O
M
-
MENU
P
R
E
V
C
H
S
C
R
E
E
N
S
I
Z
E
MUTE CAPTION
F.F/SLOW
PLAYF.R/SLOW
REC STOP PAUSE
PREV
OPEN/CLOSE
NEXT
PICTURE
MODE SOUND
MODE STILL
POWER
MTS ADD/
ERASE SLEEP
Press the “STILL” Button.
• If you wish to freeze a picture, press the “STILL” button.
You can still hear the sound.
• Press “STILL” button to cancel the “STILL” function.
• To view the enlarged images, press the “ZOOM+” button.
1
STILL
54
Watching a
Still Image
• You can view still
images with this
function. However,
displaying the same
images such as still
images for a long
time may cause
image sticking.
Watching a STILL Image
NOTES:
1) Displaying the same images such as still images for a long
time may cause image sticking (after-image lagging).
2) In this case, such “image sticking” may become less
noticeable if moving images are later displayed for a long
time.
3) However, an image sticking may become a permanent one,
damaging the Plasma Display; therefore, avoid displaying
the same images for a long time.
4) Use the function [ISM], while displaying still images for a long
period of time to minimize this effect.
Still
Zoom 7
Move the Screen Position.
• While you are in “Still” mode, press the “CH ”and
“VOL ”button to move screen stepwise up/down
and left/right.
2
CH
CH
V
O
L
V
O
L
Z
O
O
M
+
Z
O
O
M
-
MENU
P
R
E
V
C
H
S
C
R
E
E
N
S
I
Z
E
Adjusting Auto
Sound Mode
• Enjoy various sound
modes by selecting
your favorite Sound
Mode depending on
the kinds of moving
pictures.
Adjusting Auto Sound Mode
55
VIDEO/
DVD SATTV CATV
DISPLAY
MULTIMEDIATV/VIDEO
CH
CH
V
O
L
V
O
L
Z
O
O
M
+
Z
O
O
M
-
MENU
P
R
E
V
C
H
S
C
R
E
E
N
S
I
Z
E
MUTE CAPTION
F.F/SLOW
PLAYF.R/SLOW
REC STOP PAUSE
PREV
OPEN/CLOSE
NEXT
PICTURE
MODE SOUND
MODE STILL
POWER
MTS ADD/
ERASE SLEEP
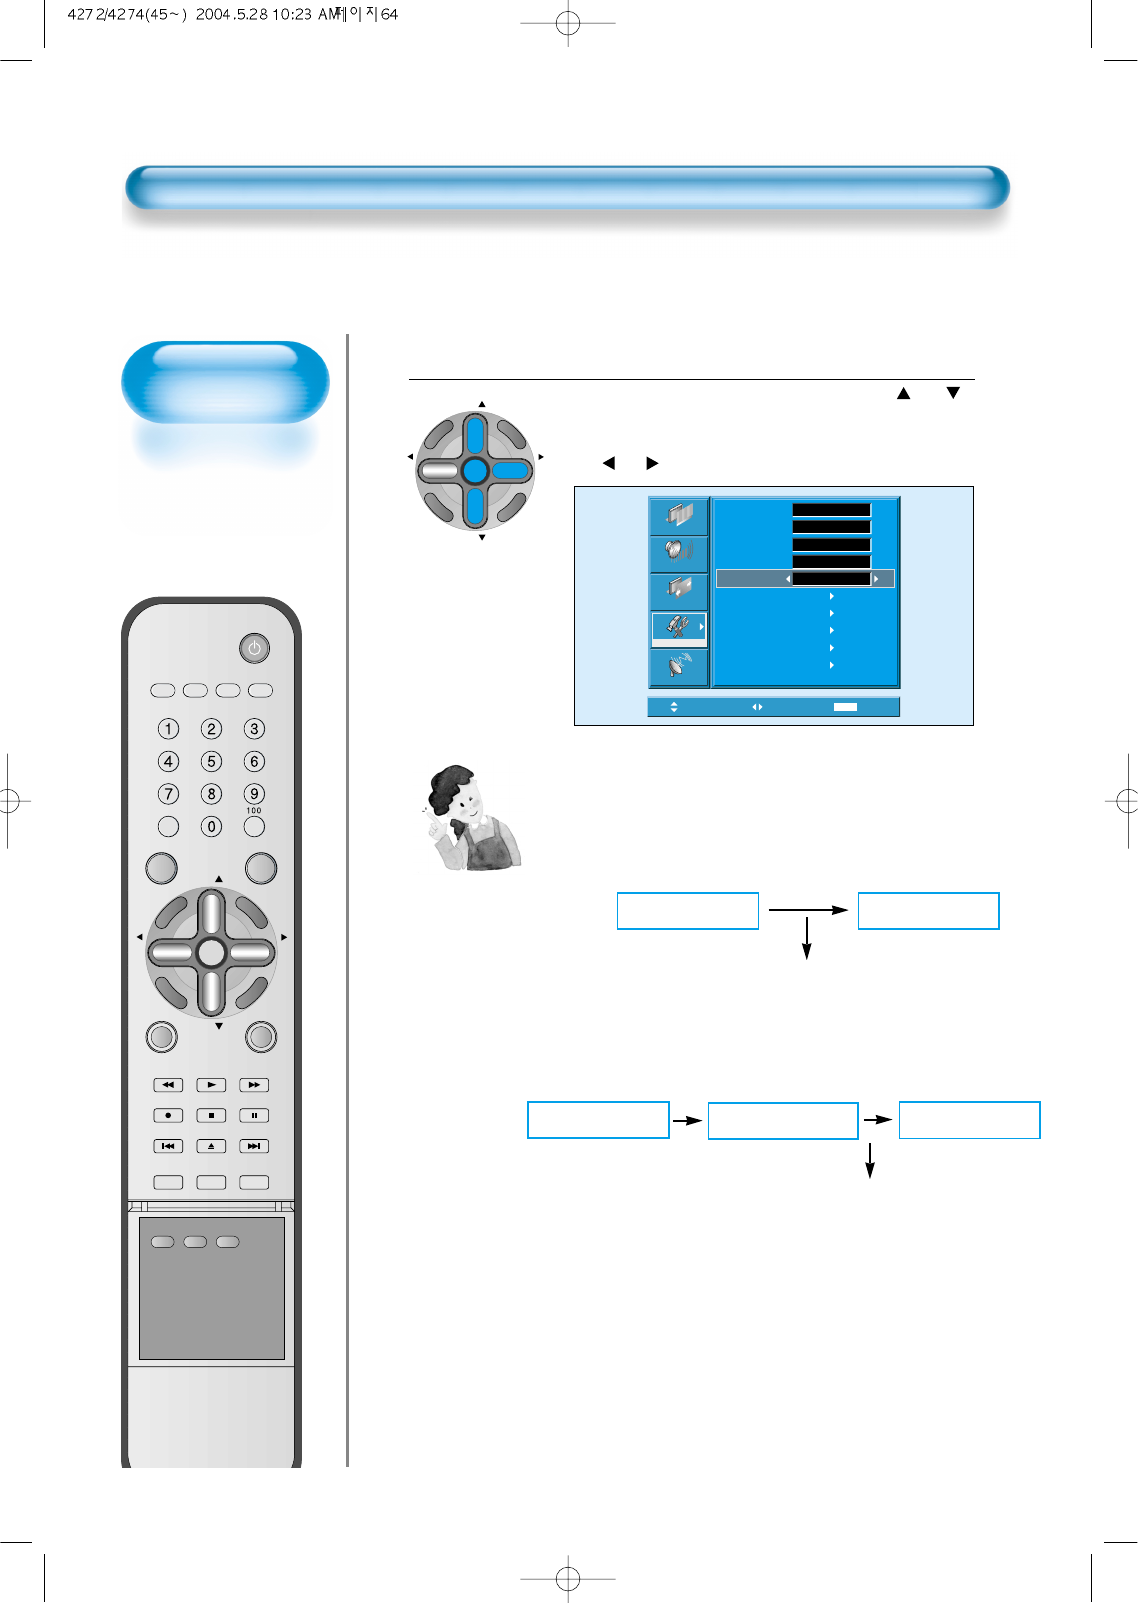
Select "SOUND MODE".
SOUND
MODE
• Press the "SOUND MODE" on the
Remote Control.
• Current sound mode will be
displayed.
Every Press of the Button Changes Modes.
SOUND
MODE
• Each time you press the button, a
different sound mode appears.
The sequence used is as follows:
* Normal : Suitable for watching any motion picture
* Movie : Select this mode to simulate being at a movie theater
* Music : Ideal for listening to music
* News : Allows human voice to be heard more clearly
* User : Allows the user to adjust as desired.
MENU will Disappear.
• After selecting a desired sound mode, on-
screen menu will disappear in about 2~3
seconds.
• Normal, Movie, Music and News Modes
are factory preset values.
If you want to customize the sound modes
at your preference, refer to the following
page.
3
1
2
Normal Movie
Music UserNews
Customizing
Sound Mode
• This feature allows
the user to adjust at
his preference.
Customizing Sound Mode
56
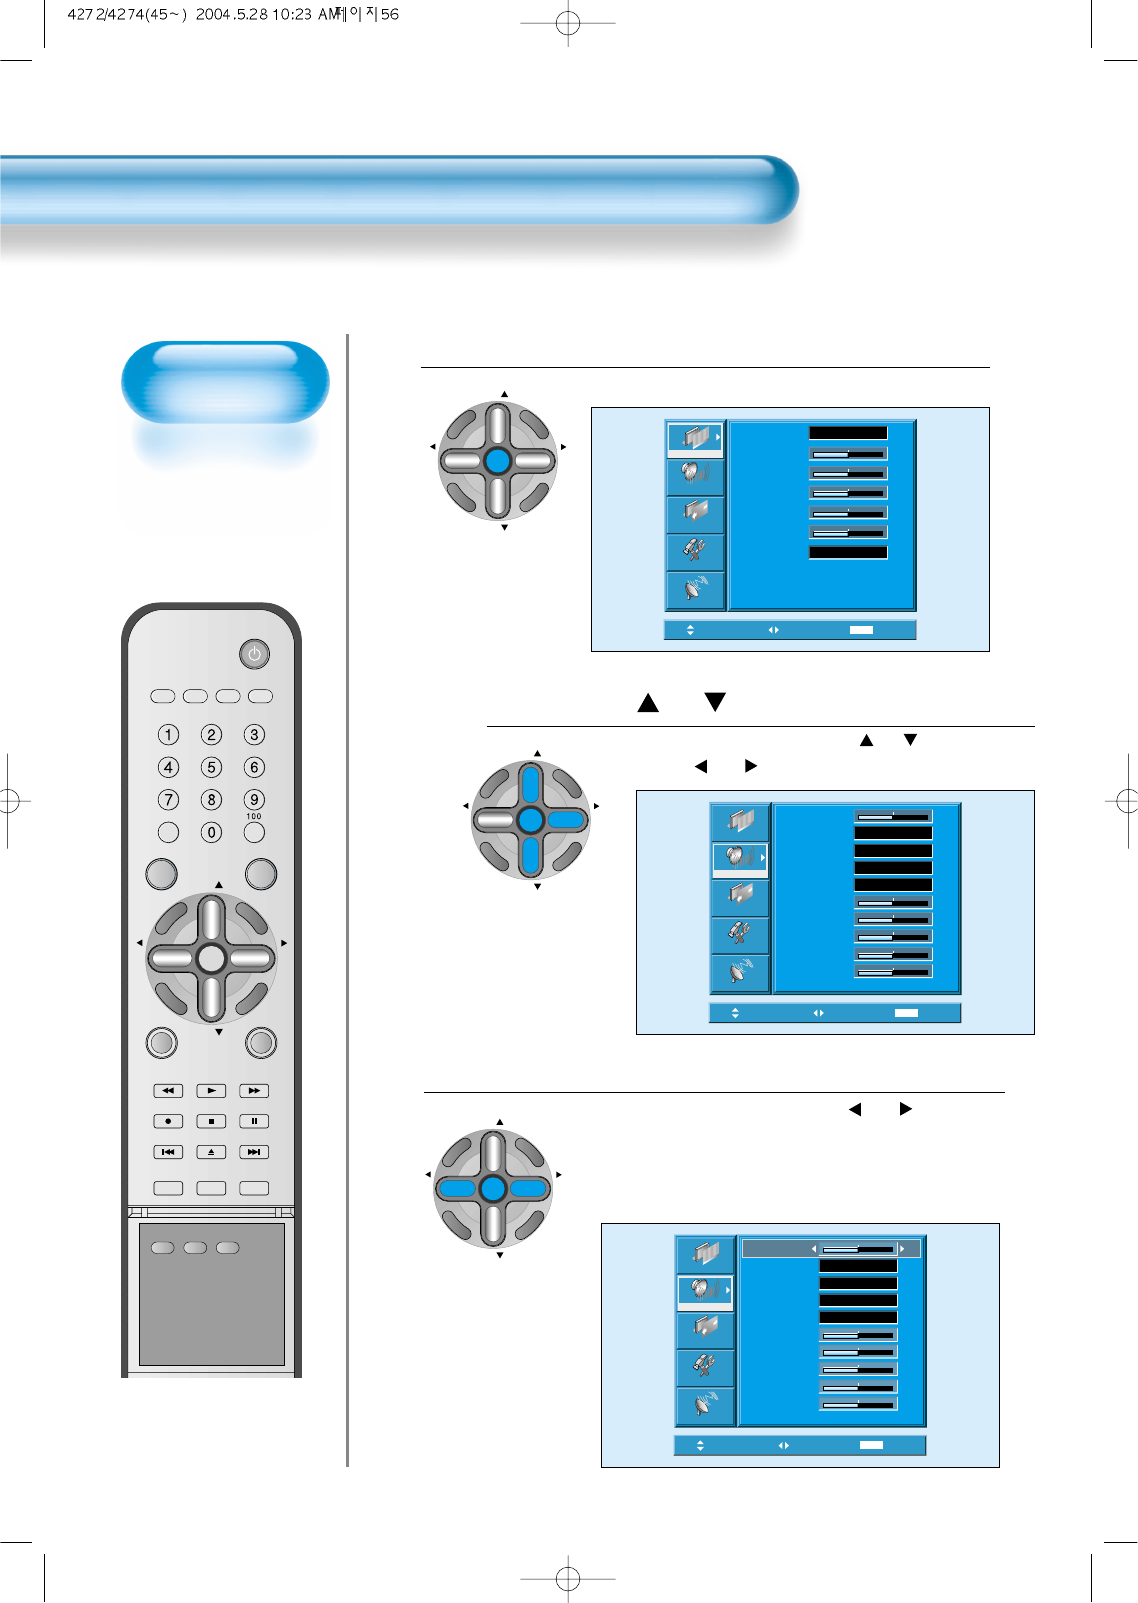
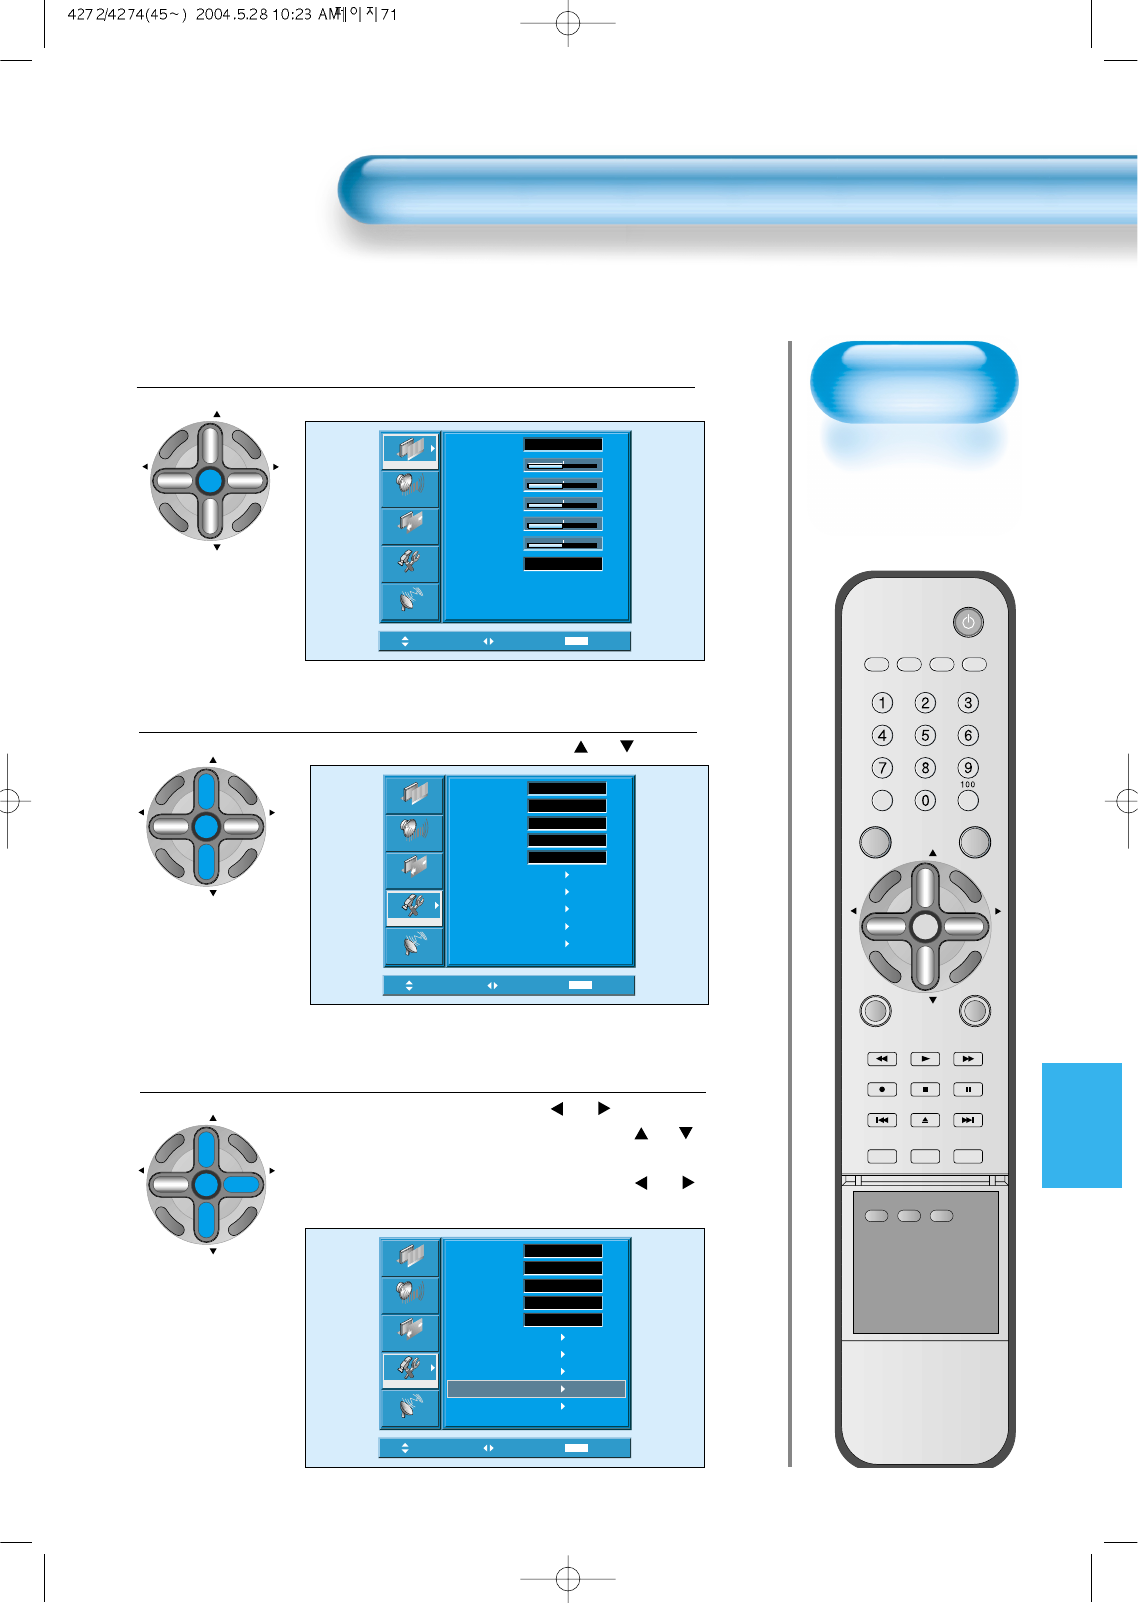
Press the “ CH ” button.
• Select [Sound] by pressing the “CH ” button, then
press the “VOL ”button to display the following.
Select SOUND BALANCE.
• Select Sound [Balance] by the “VOL ” button,
then adjust it.
• Sound Balance Function adjusts sound balance of left and
right speaker.
3
Press the MENU Button.
• The MENU Screen as below will be displayed.
1
2
Move Select MENU Exit
Balance
Effect
MTS
AVC
Mode
120Hz
500Hz
1.5kHz
5kHz
10kHz
Off
Mono
Off
Normal
0
0
0
0
0
0
Picture
Screen
Sound
Function
Channel
Move Adjust MENU Exit
Off
Mono
Off
Normal
0
0
0
0
0
Picture
Screen
Sound
Function
Channel
Balance
Effect
MTS
AVC
Mode
120Hz
500Hz
1.5kHz
5kHz
10kHz
0
CH
CH
V
O
L
V
O
L
Z
O
O
M
+
Z
O
O
M
-
MENU
P
R
E
V
C
H
S
C
R
E
E
N
S
I
Z
E
Move Select MENU Exit
Mode
Brightness
Contrast
Color
Tint
Sharpness
Color Temp.
Normal
Normal
31
31
31
31
31
Picture
Screen
Sound
Function
Channel
VIDEO/
DVD SATTV CATV
DISPLAY
MULTIMEDIATV/VIDEO
CH
CH
V
O
L
V
O
L
Z
O
O
M
+
Z
O
O
M
-
MENU
P
R
E
V
C
H
S
C
R
E
E
N
S
I
Z
E
MUTE CAPTION
F.F/SLOW
PLAYF.R/SLOW
REC STOP PAUSE
PREV
OPEN/CLOSE
NEXT
PICTURE
MODE SOUND
MODE STILL
POWER
MTS ADD/
ERASE SLEEP
CH
CH
V
O
L
V
O
L
Z
O
O
M
+
Z
O
O
M
-
MENU
P
R
E
V
C
H
S
C
R
E
E
N
S
I
Z
E
CH
CH
V
O
L
V
O
L
Z
O
O
M
+
Z
O
O
M
-
MENU
P
R
E
V
C
H
S
C
R
E
E
N
S
I
Z
E
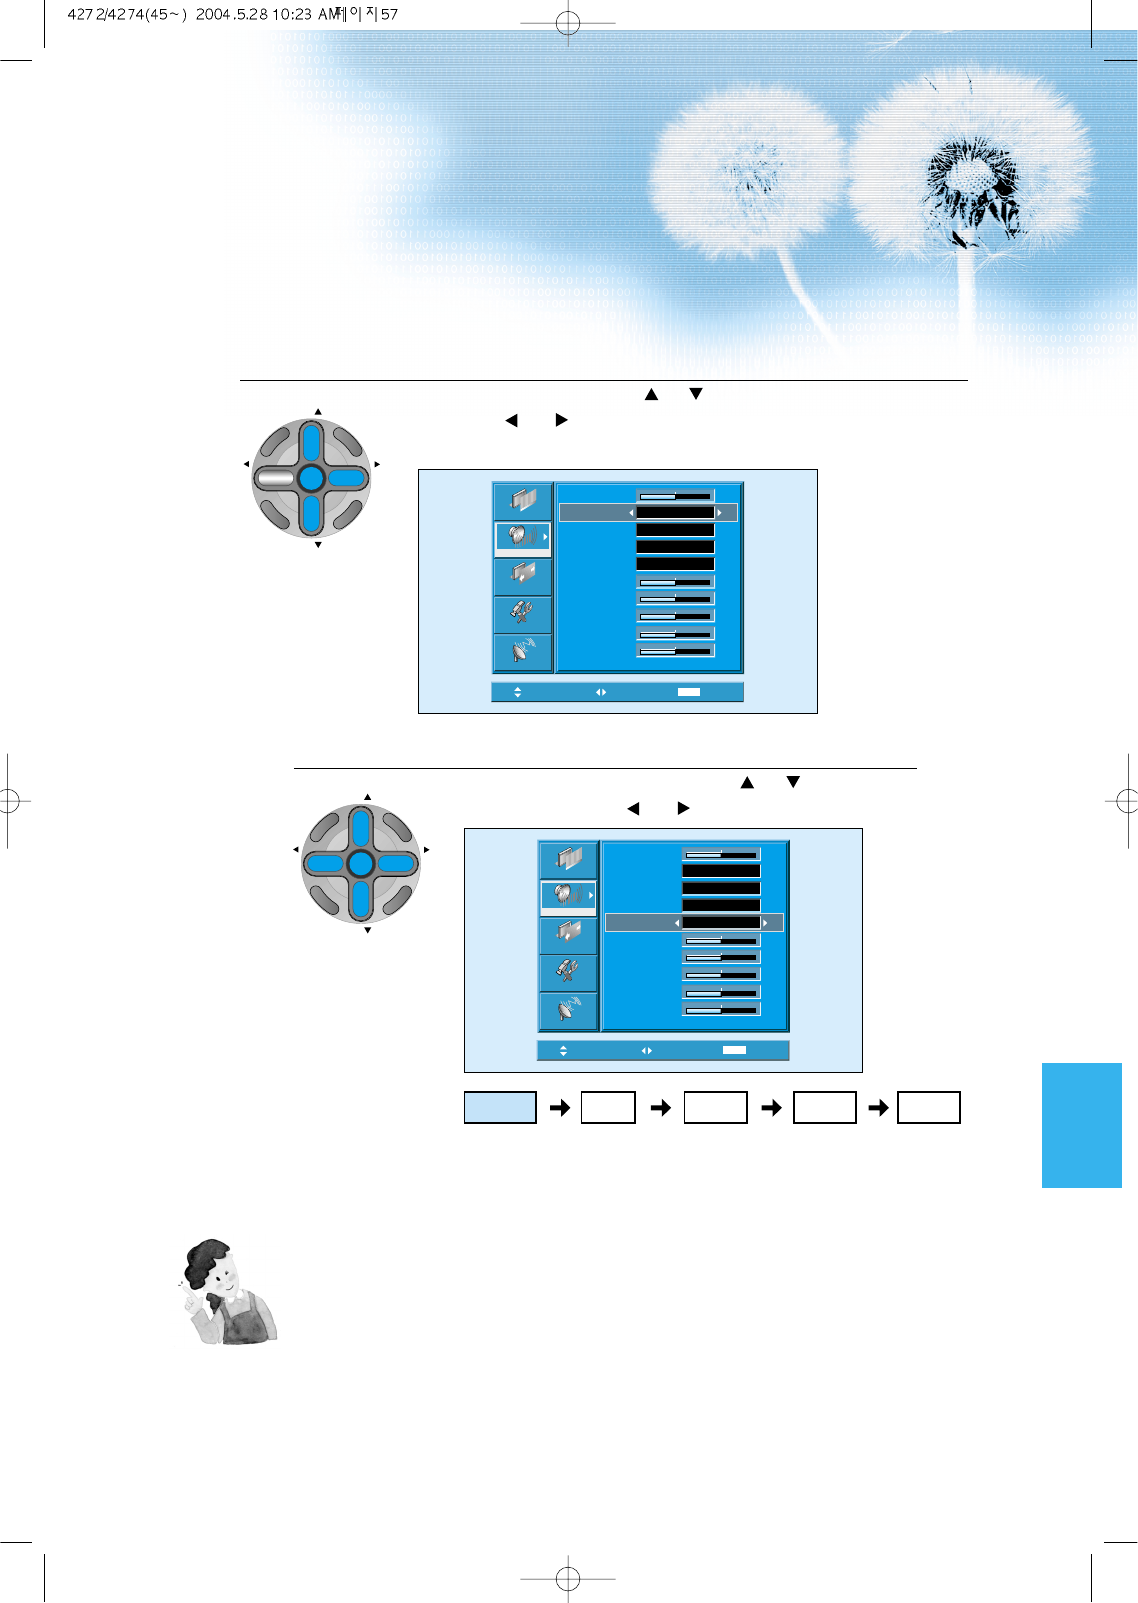
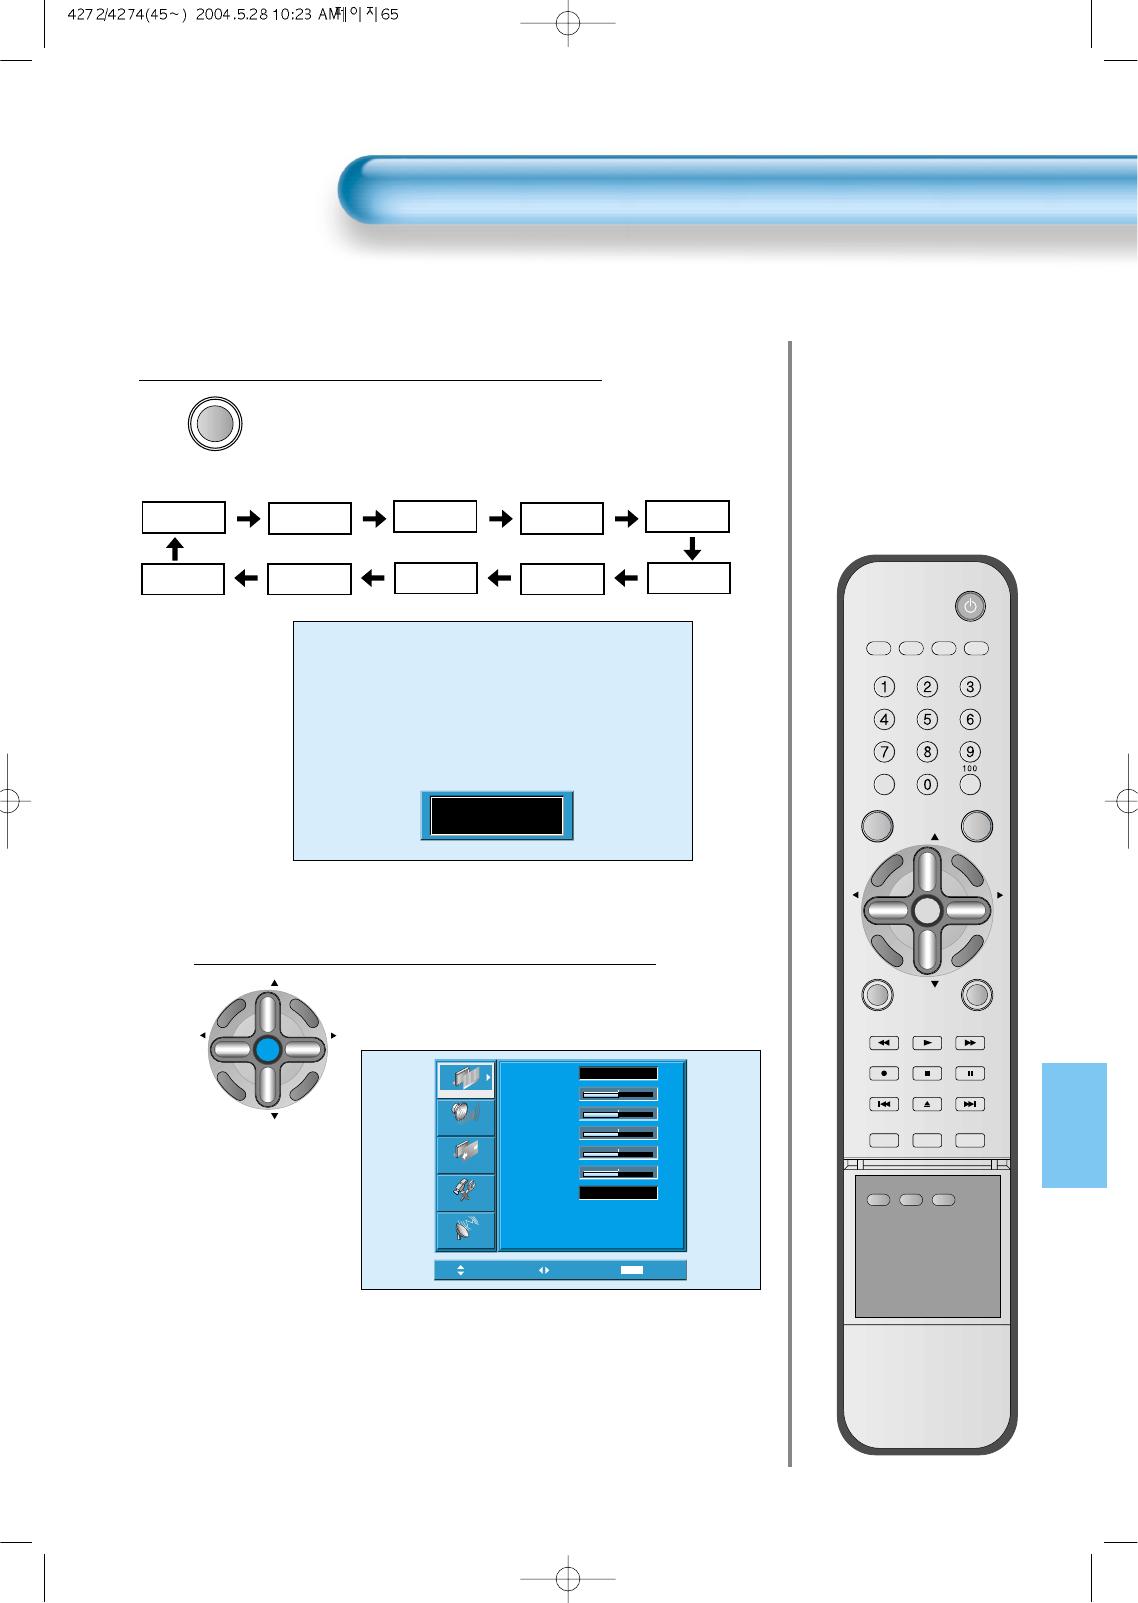
Select the Effect Mode.
• Select [Effect] by pressing the “CH ” buttons, then select ON/OFF by
pressing the “VOL ”button.
• [Effect]: Used to emphasize stereo effect.
Select the Sound Mode.
4
5
Move Adjust MENU Exit
Mono
Off
Normal
0
0
0
0
0
Picture
Screen
Sound
Function
Channel
Balance
Effect
MTS
AVC
Mode
120Hz
500Hz
1.5kHz
5kHz
10kHz
0
Off
Move Adjust MENU Exit
Mono
Off
0
0
0
0
0
Picture
Screen
Sound
Function
Channel
Balance
Effect
MTS
AVC
Mode
120Hz
500Hz
1.5kHz
5kHz
10kHz
0
Off
Normal
57
• Select the Sound Mode by pressing the “CH ”button, then
adjust it by pressing the “VOL ”button.
* Normal : Suitable for watching any motion picture
* Movie : Select this mode to simulate being at a movie
theater
* Music : Suitable for listening to music
* News : Allows human voice to be heard more clearly
* User : Allows the user to adjust as desired.
NOTES:
1) Custom Mode : Used as an Equalizer with which the user can adjust the sound frequency as desired.
2) If you modify the sound frequency in auto Sound Mode (News, Movie, Music, etc.), it is automatically switched
to the User Mode.
3) Low frequency is emphasized as the frequency is lowered to 120 Hz, and high frequency as raised to 10 KHz.
4) If you make connection to the Left Audio Input as input is MONO you can hear from both speakers.
5) MTS function : This function allows you to select the language and stereo sound while broadcasting.
6) AVC function : Because the sound sources have different volume level, this function automatically adjusts
volume to a suitable level
CH
CH
V
O
L
V
O
L
Z
O
O
M
+
Z
O
O
M
-
MENU
P
R
E
V
C
H
S
C
R
E
E
N
S
I
Z
E
CH
CH
V
O
L
V
O
L
Z
O
O
M
+
Z
O
O
M
-
MENU
P
R
E
V
C
H
S
C
R
E
E
N
S
I
Z
E
Normal Movie
Music UserNews
Selecting INPUT SIGNAL
58
Press the INPUT SELECT Button.
MULTIMEDIA
TV/VIDEO
• Press the “TV/VIDEO” and “MULTIMEDIA” button on the
Remote Control or the PDP Display to select desired
input signal.
• Each time you press the “TV/VIDEO” and “MULTIMEDIA”
button, a different screen mode appears. The sequence used is
as follows:
1
VIDEO/
DVD SAT
TVCATV
DISPLAY
MULTIMEDIA
TV/VIDEO
CH
CH
V
O
L
V
O
L
Z
O
O
M
+
Z
O
O
M
-
MENU
P
R
E
V
C
H
S
C
R
E
E
N
S
I
Z
E
MUTE CAPTION
F.F/SLOW
PLAY
F.R/SLOW
RECSTOPPAUSE
PREV
OPEN/CLOSE
NEXT
PICTURE
MODESOUND
MODESTILL
POWER
MTS ADD/
ERASE SL
INPUT SIGNAL
• Used to select
INPUT signal of
external device
connected to the
PDP.
59
NOTES:
1) If an external device is not connected or INPUT signal is not
applied, Warning Message (“No Signal”) would be displayed.
2) In this case, check if external device is connected and/or
terminal connection is properly done.
3) Also, you can select input using [INPUT SELECT] button in
the keypad of the pdp set.
The used sequence is as follows:
Video1 -> Video2 -> TV -> PC -> DVI -> Component1 ->
Component2 -> Video1
Component 1
Component1
PC
DVI
Component2
Video1 Video2
TV
•“
MULTIMEDIA””
button
•“
TV/VIDEO””
button
Checking the
Current Input Signal
• Used to check the
INPUT signal mode,
resolution,
frequency(video
only), etc. of the
current screen.
Checking the Current Input Signal
60
Press the “DISPLAY” Button.
DISPLAY
• Press the “DISPLAY” button on the Remote Control.
1
VIDEO/
DVD SATTV CATV
DISPLAY
MULTIMEDIATV/VIDEO
CH
CH
V
O
L
V
O
L
Z
O
O
M
+
Z
O
O
M
-
MENU
P
R
E
V
C
H
S
C
R
E
E
N
S
I
Z
E
MUTE CAPTION
F.F/SLOW
PLAYF.R/SLOW
REC STOP PAUSE
PREV
OPEN/CLOSE
NEXT
PICTURE
MODE SOUND
MODE STILL
POWER
MTS ADD/
ERASE SLEEP
Component 1
1920 x 1080
1. If you watch Digital Broadcasts:
Displays which input terminal is used, and indicates the input signal mode.
Indicates the horizontal and vertical resolution of the current INPUT signal.
Component 1
1920 x 1080
2. If you watch DVD image:
Displays which input terminal is used, and indicates the signal mode.
Indicates the horizontal and vertical resolution of the current INPUT signal.
Component 2
720 x 480
3. If you watch VCR image:
Displays which input terminal is used, and indicates the signal mode.
Indicates the mode and frequency of the current INPUT signal.
Video 1
NTSC 60 Hz
NOTES:
1) DAEWOO PLASMA can receive NTSC, PAL, SECAM, etc.
2) “1920 x 1080” displayed in the INPUT signal does not indicate
the resolution of the monitor. The displayed resolution is sent
by Digital Broadcasting Receiver.
Selecting
Languages
• Used to select
transparent of
MENU background
and language used
in MENU.
Press the MENU Button.
CH
CH
V
O
L
V
O
L
Z
O
O
M
+
Z
O
O
M
-
MENU
P
R
E
V
C
H
S
C
R
E
E
N
S
I
Z
E
• The MENU screen will be displayed as below.
Press the “ CH ” Button.
• Select [Features] by Pressing the
“CH ” button.
Select the menu Background.
• Select the MENU [Background] by pressing the “VOL ”
button.
• Every press of the “VOL ” button while you are in
the[Background] would switch between Transparent and
Opaque.
3
1
2
MENU Background, Language and Key pad Lock Setting
6161
Move Select MENU Exit
Mode
Brightness
Contrast
Color
Tint
Sharpness
Color Temp.
Normal
Normal
31
31
31
31
31
Picture
Screen
Sound
Function
Channel
Move Adjust MENU Exit
English
Off
Normal
Off
Picture
Screen
Sound
Function
Channel
Background
Language
Keypad Lock
Enhancer
Auto Power
Closed Caption
Time Setting
ISM
Parental Lock
Initialize
Opaque
Move Select MENU Exit
Background
Language
Keypad Lock
Enhancer
Auto Power
Closed Caption
Time Setting
ISM
Parental Lock
Initialize
English
Opaque
Off
Normal
Off
Picture
Screen
Sound
Function
Channel
CH
CH
V
O
L
V
O
L
Z
O
O
M
+
Z
O
O
M
-
MENU
P
R
E
V
C
H
S
C
R
E
E
N
S
I
Z
E
CH
CH
V
O
L
V
O
L
Z
O
O
M
+
Z
O
O
M
-
MENU
P
R
E
V
C
H
S
C
R
E
E
N
S
I
Z
E
VIDEO/
DVD SATTV CATV
DISPLAY
MULTIMEDIATV/VIDEO
CH
CH
V
O
L
V
O
L
Z
O
O
M
+
Z
O
O
M
-
MENU
P
R
E
V
C
H
S
C
R
E
E
N
S
I
Z
E
MUTE CAPTION
F.F/SLOW
PLAYF.R/SLOW
REC STOP PAUSE
PREV
OPEN/CLOSE
NEXT
PICTURE
MODE SOUND
MODE STILL
POWER
MTS ADD/
ERASE SLEEP
MENU Background, Language and Key pad Lock Setting
Select LANGUAGE by using the “ CH ” Button.
• Select LANGUAGE by using the “CH ”button.
• Every press of the
“VOL ”
button while you are in the
[LANGUAGE] mode would cycle through the different
languages.
Keypad Lock Setting
• Select [Keypad Lock] by the “CH ”buttons, then
press the
“VOL ”
button to set Keypad Lock ON.
4
5
Move Adjust MENU Exit
Normal
Off
Picture
Screen
Sound
Function
Channel
Background
Language
Keypad Lock
Enhancer
Auto Power
Closed Caption
Time Setting
ISM
Parental Lock
Initialize
Opaque
English
Off
62
Move Adjust MENU Exit
Off
Normal
Off
Picture
Screen
Sound
Function
Channel
Background
Language
Keypad Lock
Enhancer
Auto Power
Closed Caption
Time Setting
ISM
Parental Lock
Initialize
Opaque
English
Keypad Lock
1) When [Keypad Lock] is set to ON, You can prevent the use of the TV
set without the remote control.
2) If Keypad Lock is set to On, pdp can be turned on only using the
remote controller.
CH
CH
V
O
L
V
O
L
Z
O
O
M
+
Z
O
O
M
-
MENU
P
R
E
V
C
H
S
C
R
E
E
N
S
I
Z
E
CH
CH
V
O
L
V
O
L
Z
O
O
M
+
Z
O
O
M
-
MENU
P
R
E
V
C
H
S
C
R
E
E
N
S
I
Z
E
NOTES:
*When Power is turned ON first time, ‘SELECT
LANGUAGE’ Mode will be displayed, then, select a
desired language by using
“VOL ”
button. (Displayed
only once)
63
Enhancer
Demo
• When [Enhancer] is
set to Demo mode,
Half of screen is
[Enhancer] ON and
the other half is
[Enhancer] OFF.
• When [Enhancer] is
set to Normal mode,
entire Screen is
[Enhancer] ON.
Press the MENU Button.
CH
CH
V
O
L
V
O
L
Z
O
O
M
+
Z
O
O
M
-
MENU
P
R
E
V
C
H
S
C
R
E
E
N
S
I
Z
E
• The MENU screen will be displayed as below.
Select Features
• Select [Features] by the “CH ” button.
Enhancer Demo Setting
• Enter the sub menu by using the
“VOL ”
button.
• Select the [Enhancer] by pressing the “CH ” button.
• You can select [Enhancer] Demo and Normal mode by
using the
“VOL ”
button.
3
1
2
Enhancer Demo and Auto Power Setting
Move Select MENU Exit
Mode
Brightness
Contrast
Color
Tint
Sharpness
Color Temp.
Normal
Normal
31
31
31
31
31
Picture
Screen
Sound
Function
Channel
Move Adjust MENU Exit
Off
Picture
Screen
Sound
Function
Channel
Background
Language
Keypad Lock
Enhancer
Auto Power
Closed Caption
Time Setting
ISM
Parental Lock
Initialize
Opaque
English
Off
Normal
Move Select MENU Exit
Background
Language
Keypad Lock
Enhancer
Auto Power
Closed Caption
Time Setting
ISM
Parental Lock
Initialize
English
Opaque
Off
Normal
Off
Picture
Screen
Sound
Function
Channel
CH
CH
V
O
L
V
O
L
Z
O
O
M
+
Z
O
O
M
-
MENU
P
R
E
V
C
H
S
C
R
E
E
N
S
I
Z
E
CH
CH
V
O
L
V
O
L
Z
O
O
M
+
Z
O
O
M
-
MENU
P
R
E
V
C
H
S
C
R
E
E
N
S
I
Z
E
*Enhancer Demo Mode
Enhancer Enhancer
Normal Demo
POWER/STANDBY
Indicator
Front panel LED lights
• When the AC power
is on : Green.
• When the AC power
is in the standby
mode : Red.
64
Enhancer Demo and Auto Power Setting
Auto Power Setting
• Select the [Auto Power] by pressing the “CH ”
button.
• You can select [Auto Power] ON and OFF mode by using
the
“VOL ”
button.
4
Move Adjust MENU Exit
Picture
Screen
Sound
Function
Channel
Background
Language
Keypad Lock
Enhancer
Auto Power
Closed Caption
Time Setting
ISM
Parental Lock
Initialize
Opaque
English
Off
Normal
Off
CH
CH
V
O
L
V
O
L
Z
O
O
M
+
Z
O
O
M
-
MENU
P
R
E
V
C
H
S
C
R
E
E
N
S
I
Z
E
Auto Power
1) ON : When the AC power is ON, the TV will turned on automatically
without pressing the power button on the remote control.
2) OFF : When the AC power is ON, the TV will turned on by pressing
the power button on the remote control or the keypad of front
panel.
AC POWER ON PDP SET ON
Automatically
AC POWER ON PDP SET ON
With the remote control or
the keypad of front panel.
STANDBY MODE
VIDEO/
DVD SATTV CATV
DISPLAY
MULTIMEDIATV/VIDEO
CH
CH
V
O
L
V
O
L
Z
O
O
M
+
Z
O
O
M
-
MENU
P
R
E
V
C
H
S
C
R
E
E
N
S
I
Z
E
MUTE CAPTION
F.F/SLOW
PLAYF.R/SLOW
REC STOP PAUSE
PREV
OPEN/CLOSE
NEXT
PICTURE
MODE SOUND
MODE STILL
POWER
MTS ADD/
ERASE SLEEP
Auto Power Setting
CAPTION
• Press the “CAPTION” button on the Remote
Control.
• Whenever pressing the “CAPTION” button,
caption mode is changed as follow.
Closed Caption Setting in the Menu.
CH
CH
V
O
L
V
O
L
Z
O
O
M
+
Z
O
O
M
-
MENU
P
R
E
V
C
H
S
C
R
E
E
N
S
I
Z
E
• Press the Menu Button.
• The MENU screen will be displayed as
below.
1
2
Closed Caption Setting
65
Move Select MENU Exit
Mode
Brightness
Contrast
Color
Tint
Sharpness
Color Temp.
Normal
Normal
31
31
31
31
31
Picture
Screen
Sound
Function
Channel
CC2
Text3
CC1 CC4
CC3
Off
Text4 Text1
Text2
XDS
Off
VIDEO/
DVD SATTV CATV
DISPLAY
MULTIMEDIATV/VIDEO
CH
CH
V
O
L
V
O
L
Z
O
O
M
+
Z
O
O
M
-
MENU
P
R
E
V
C
H
S
C
R
E
E
N
S
I
Z
E
MUTE CAPTION
F.F/SLOW
PLAYF.R/SLOW
REC STOP PAUSE
PREV
OPEN/CLOSE
NEXT
PICTURE
MODE SOUND
MODE STILL
POWER
MTS ADD/
ERASE SLEEP
Caption Box
Setting
• Black : Background of
the caption box is
black.
• Transparent :
Background of the
caption box is
Transparent.
66
Closed Caption Setting
Select Features
CH
CH
V
O
L
V
O
L
Z
O
O
M
+
Z
O
O
M
-
MENU
P
R
E
V
C
H
S
C
R
E
E
N
S
I
Z
E
• Select [Features] by pressing the “CH ” button.
Select Closed Caption
• Enter the sub menu by using the “VOL ”button.
• Select the [Closed Caption] by pressing the “CH ”
button.
•You can select [Closed Caption] by using the
“VOL ”
button.
3
4
Move Select MENU Exit
Background
Language
Keypad Lock
Enhancer
Auto Power
Closed Caption
Time Setting
ISM
Parental Lock
Initialize
English
Opaque
Off
Normal
Off
Picture
Screen
Sound
Function
Channel
Move Select MENU Exit
Picture
Screen
Sound
Function
Channel
Background
Language
Keypad Lock
Enhancer
Auto Power
Closed Caption
Time Setting
ISM
Parental Lock
Initialize
Opaque
English
Off
Normal
Off
CH
CH
V
O
L
V
O
L
Z
O
O
M
+
Z
O
O
M
-
MENU
P
R
E
V
C
H
S
C
R
E
E
N
S
I
Z
E
• Caption Mode (Off -> CC1 -> CC2 -> CC3 ->
CC4 -> Text1 -> Text2 -> Text3 -> Text4 ->
XDS -> Off) and Caption Box (Back and
Transparent) can be set.
Move Adjust MENU Exit
Picture
Screen
Sound
Function
Channel
Closed Caption
Caption Mode
Caption Box
CC on Mute
Off
Black
Off
VIDEO/
DVD SATTV CATV
DISPLAY
MULTIMEDIATV/VIDEO
CH
CH
V
O
L
V
O
L
Z
O
O
M
+
Z
O
O
M
-
MENU
P
R
E
V
C
H
S
C
R
E
E
N
S
I
Z
E
MUTE CAPTION
F.F/SLOW
PLAYF.R/SLOW
REC STOP PAUSE
PREV
OPEN/CLOSE
NEXT
PICTURE
MODE SOUND
MODE STILL
POWER
MTS ADD/
ERASE SLEEP

Press the MENU Button.
CH
CH
V
O
L
V
O
L
Z
O
O
M
+
Z
O
O
M
-
MENU
P
R
E
V
C
H
S
C
R
E
E
N
S
I
Z
E
• The MENU screen will be displayed as below.
Select Features
CH
CH
V
O
L
V
O
L
Z
O
O
M
+
Z
O
O
M
-
MENU
P
R
E
V
C
H
S
C
R
E
E
N
S
I
Z
E
• Select [Features] by the “/”
button.
Select Time Setting
CH
CH
V
O
L
V
O
L
Z
O
O
M
+
Z
O
O
M
-
MENU
P
R
E
V
C
H
S
C
R
E
E
N
S
I
Z
E
• Enter the sub menu by using the “VOL ”button.
• Select the [Time setting] by pressing the “/” button.
•You can select [Time setting] by using the “VOL ”
button.
3
1
2
Time Setting
67
Move Select MENU Exit
Mode
Brightness
Contrast
Color
Tint
Sharpness
Color Temp.
Normal
Normal
31
31
31
31
31
Picture
Screen
Sound
Function
Channel
Move Select MENU Exit
Background
Language
Keypad Lock
Enhancer
Auto Power
Closed Caption
Time Setting
ISM
Parental Lock
Initialize
English
Opaque
Off
Normal
Off
Picture
Screen
Sound
Function
Channel
Move Select MENU Exit
Picture
Screen
Sound
Function
Channel
Background
Language
Keypad Lock
Enhancer
Auto Power
Closed Caption
Time Setting
ISM
Parental Lock
Initialize
Opaque
English
Off
Normal
Off
VIDEO/
DVD SATTV CATV
DISPLAY
MULTIMEDIATV/VIDEO
CH
CH
V
O
L
V
O
L
Z
O
O
M
+
Z
O
O
M
-
MENU
P
R
E
V
C
H
S
C
R
E
E
N
S
I
Z
E
MUTE CAPTION
F.F/SLOW
PLAYF.R/SLOW
REC STOP PAUSE
PREV
OPEN/CLOSE
NEXT
PICTURE
MODE SOUND
MODE STILL
POWER
MTS ADD/
ERASE SLEEP

Time Setting
• The “Current time”
must be set up ahead
of setting up other time
memories.
68
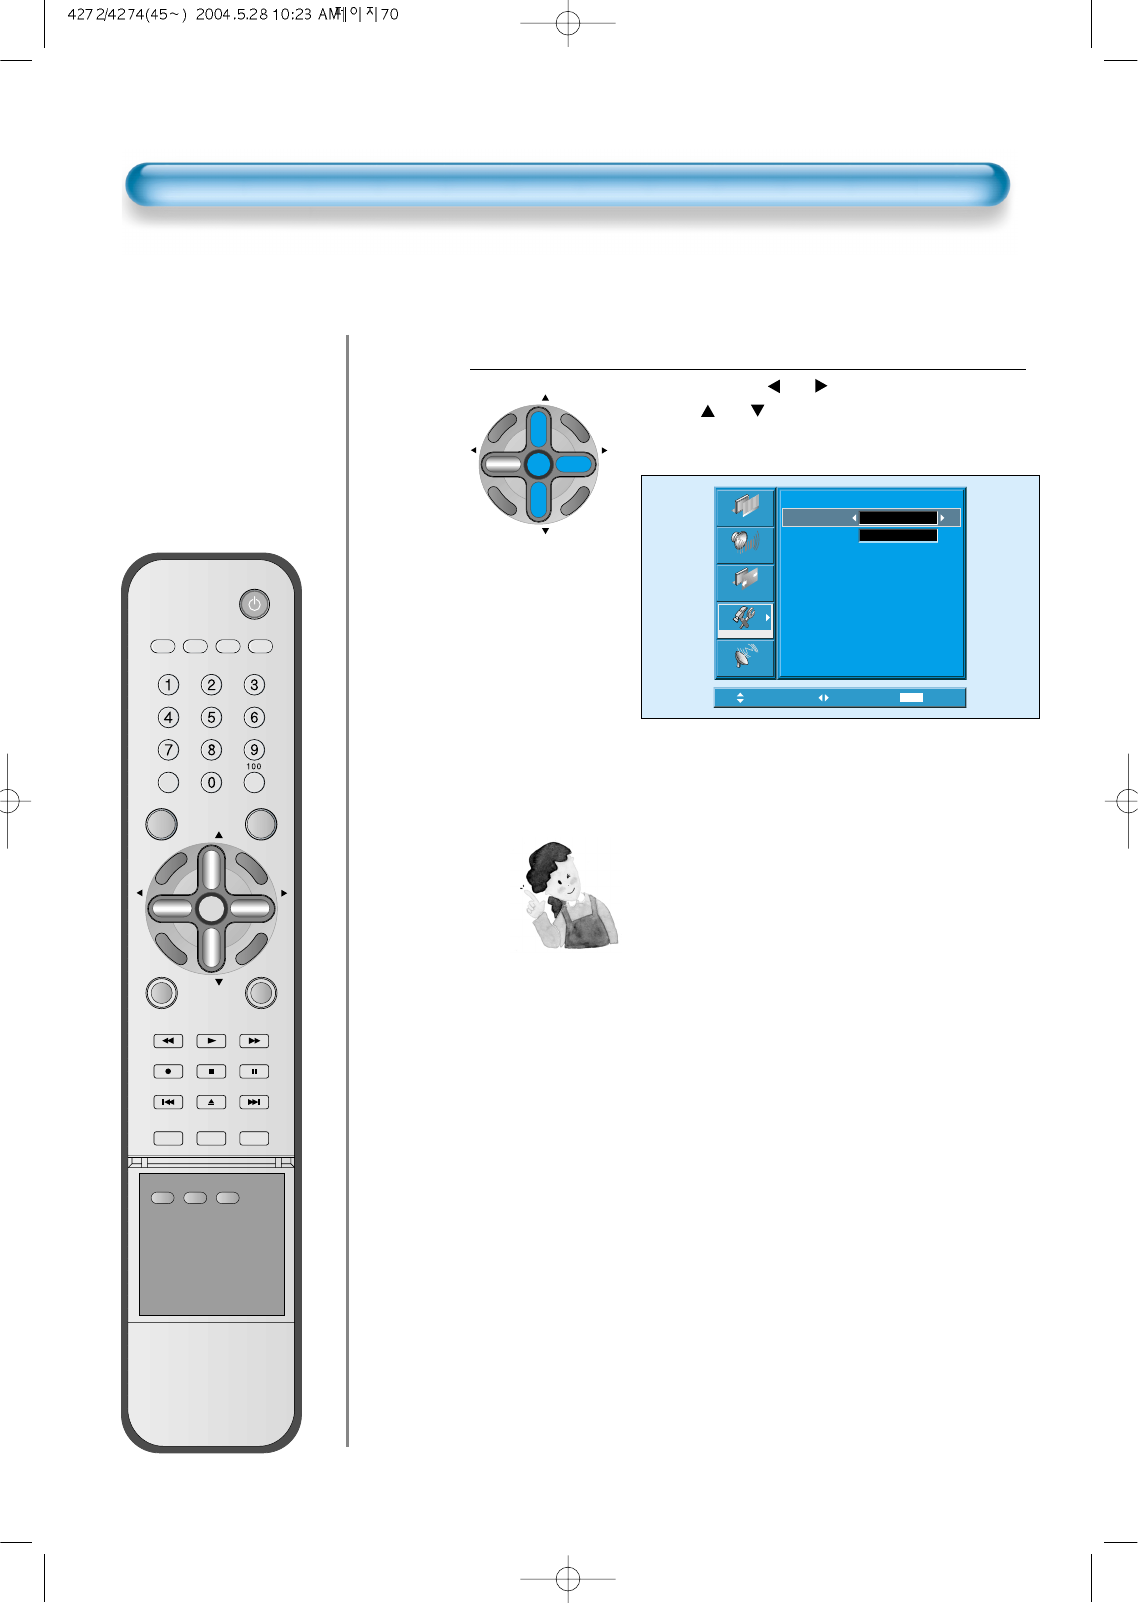
Time Setting
Off-Time and Wake Time setting
• Select Functions by pressing the
“CH ”
button.
First, set [Clock]- current time, and then You can
setup off-time and wake time.
4
Move Select MENU Exit
Picture
Screen
Sound
Function
Channel
Time Setting
Clock
Off Timer
Off Time
Wake Timer
Wake Time
Wake Ch.
Wake Vol.
AM 11 : 50
Off
Off
19
2
AM 12 : 00
AM 12 : 00
CH
CH
V
O
L
V
O
L
Z
O
O
M
+
Z
O
O
M
-
MENU
P
R
E
V
C
H
S
C
R
E
E
N
S
I
Z
E
Time Setting Functions
1) This time memory function automatically turns the
TV set “On” of “Off”at a desired time. Once set up,
this function works every day unless the set time is
canceled or the TV set is unplugged. Therefore, this
function could be used for a “Get up” alarm (Morning
Call) by setting up the time for “On” in the morning.
VIDEO/
DVD SATTV CATV
DISPLAY
MULTIMEDIATV/VIDEO
CH
CH
V
O
L
V
O
L
Z
O
O
M
+
Z
O
O
M
-
MENU
P
R
E
V
C
H
S
C
R
E
E
N
S
I
Z
E
MUTE CAPTION
F.F/SLOW
PLAYF.R/SLOW
REC STOP PAUSE
PREV
OPEN/CLOSE
NEXT
PICTURE
MODE SOUND
MODE STILL
POWER
MTS ADD/
ERASE SLEEP
ISM
• Image sticking
minimization.
• Displaying a still
image like PC input
for a long time
causes part image
sticking in the panel
• The ISM function
minimize this effect.
Image Sticking Minimization(ISM)
69
Press the MENU Button.
CH
CH
V
O
L
V
O
L
Z
O
O
M
+
Z
O
O
M
-
MENU
P
R
E
V
C
H
S
C
R
E
E
N
S
I
Z
E
• The MENU screen will be displayed as below.
Press the “ CH ” Button.
• Select [Features] by the “CH ” button.
Select ISM.
• Enter the sub menu by using the “VOL ” button.
• Select the [ISM] by pressing the “CH ”button.
• Press of the
“VOL ”
button while you are in the
ISM.
3
1
2
Move Select MENU Exit
Mode
Brightness
Contrast
Color
Tint
Sharpness
Color Temp.
Normal
Normal
31
31
31
31
31
Picture
Screen
Sound
Function
Channel
Move Select MENU Exit
Picture
Screen
Sound
Function
Channel
Background
Language
Keypad Lock
Enhancer
Auto Power
Closed Caption
Time Setting
ISM
Parental Lock
Initialize
Opaque
English
Off
Normal
Off
Move Select MENU Exit
Background
Language
Keypad Lock
Enhancer
Auto Power
Closed Caption
Time Setting
ISM
Parental Lock
Initialize
English
Opaque
Off
Normal
Off
Picture
Screen
Sound
Function
Channel
CH
CH
V
O
L
V
O
L
Z
O
O
M
+
Z
O
O
M
-
MENU
P
R
E
V
C
H
S
C
R
E
E
N
S
I
Z
E
CH
CH
V
O
L
V
O
L
Z
O
O
M
+
Z
O
O
M
-
MENU
P
R
E
V
C
H
S
C
R
E
E
N
S
I
Z
E
VIDEO/
DVD SATTV CATV
DISPLAY
MULTIMEDIATV/VIDEO
CH
CH
V
O
L
V
O
L
Z
O
O
M
+
Z
O
O
M
-
MENU
P
R
E
V
C
H
S
C
R
E
E
N
S
I
Z
E
MUTE CAPTION
F.F/SLOW
PLAYF.R/SLOW
REC STOP PAUSE
PREV
OPEN/CLOSE
NEXT
PICTURE
MODE SOUND
MODE STILL
POWER
MTS ADD/
ERASE SLEEP
70
Image Sticking Minimization(ISM)
Select Functions.
• Every press of the “VOL ”button after select function
by the “CH ”button would switch between
ON/OFF.
4
Move Adjust MENU Exit
Picture
Screen
Sound
Function
Channel
ISM
Pixel Shift
Low Bright Off
Off
CH
CH
V
O
L
V
O
L
Z
O
O
M
+
Z
O
O
M
-
MENU
P
R
E
V
C
H
S
C
R
E
E
N
S
I
Z
E
NOTES:
*
Pixel Shift : The whole screen shifts up/down,
left/right at 10sec interval to minimize
image sticking.
*
Low Bright : When displaying a stand picture or
a fixed pattern for a long time,
brightness level decreases to
minimize image sticking.
Return to the original brightness
level if picture change or mode off.
VIDEO/
DVD SATTV CATV
DISPLAY
MULTIMEDIATV/VIDEO
CH
CH
V
O
L
V
O
L
Z
O
O
M
+
Z
O
O
M
-
MENU
P
R
E
V
C
H
S
C
R
E
E
N
S
I
Z
E
MUTE CAPTION
F.F/SLOW
PLAYF.R/SLOW
REC STOP PAUSE
PREV
OPEN/CLOSE
NEXT
PICTURE
MODE SOUND
MODE STILL
POWER
MTS ADD/
ERASE SLEEP
Parental Lock
• When “Parental
Lock” is on, the
locked channels are
not available on the
screen.
Parental Lock Setting
71
Press the MENU Button.
CH
CH
V
O
L
V
O
L
Z
O
O
M
+
Z
O
O
M
-
MENU
P
R
E
V
C
H
S
C
R
E
E
N
S
I
Z
E
• The MENU screen will be displayed as below.
Select Features
• Select [Features] by pressing the “CH ” button.
Select the Parental Lock
• Enter the sub menu by using the
“VOL ”
button.
• Select the [Parental Lock] by pressing the “CH ”
button.
•You can select [Parental Lock] by using the
“VOL ”
button.
3
1
2
Move Select MENU Exit
Mode
Brightness
Contrast
Color
Tint
Sharpness
Color Temp.
Normal
Normal
31
31
31
31
31
Picture
Screen
Sound
Function
Channel
Move Select MENU Exit
Picture
Screen
Sound
Function
Channel
Background
Language
Keypad Lock
Enhancer
Auto Power
Closed Caption
Time Setting
ISM
Parental Lock
Initialize
Opaque
English
Off
Normal
Off
Move Select MENU Exit
Background
Language
Keypad Lock
Enhancer
Auto Power
Closed Caption
Time Setting
ISM
Parental Lock
Initialize
English
Opaque
Off
Normal
Off
Picture
Screen
Sound
Function
Channel
CH
CH
V
O
L
V
O
L
Z
O
O
M
+
Z
O
O
M
-
MENU
P
R
E
V
C
H
S
C
R
E
E
N
S
I
Z
E
CH
CH
V
O
L
V
O
L
Z
O
O
M
+
Z
O
O
M
-
MENU
P
R
E
V
C
H
S
C
R
E
E
N
S
I
Z
E
VIDEO/
DVD SATTV CATV
DISPLAY
MULTIMEDIATV/VIDEO
CH
CH
V
O
L
V
O
L
Z
O
O
M
+
Z
O
O
M
-
MENU
P
R
E
V
C
H
S
C
R
E
E
N
S
I
Z
E
MUTE CAPTION
F.F/SLOW
PLAYF.R/SLOW
REC STOP PAUSE
PREV
OPEN/CLOSE
NEXT
PICTURE
MODE SOUND
MODE STILL
POWER
MTS ADD/
ERASE SLEEP
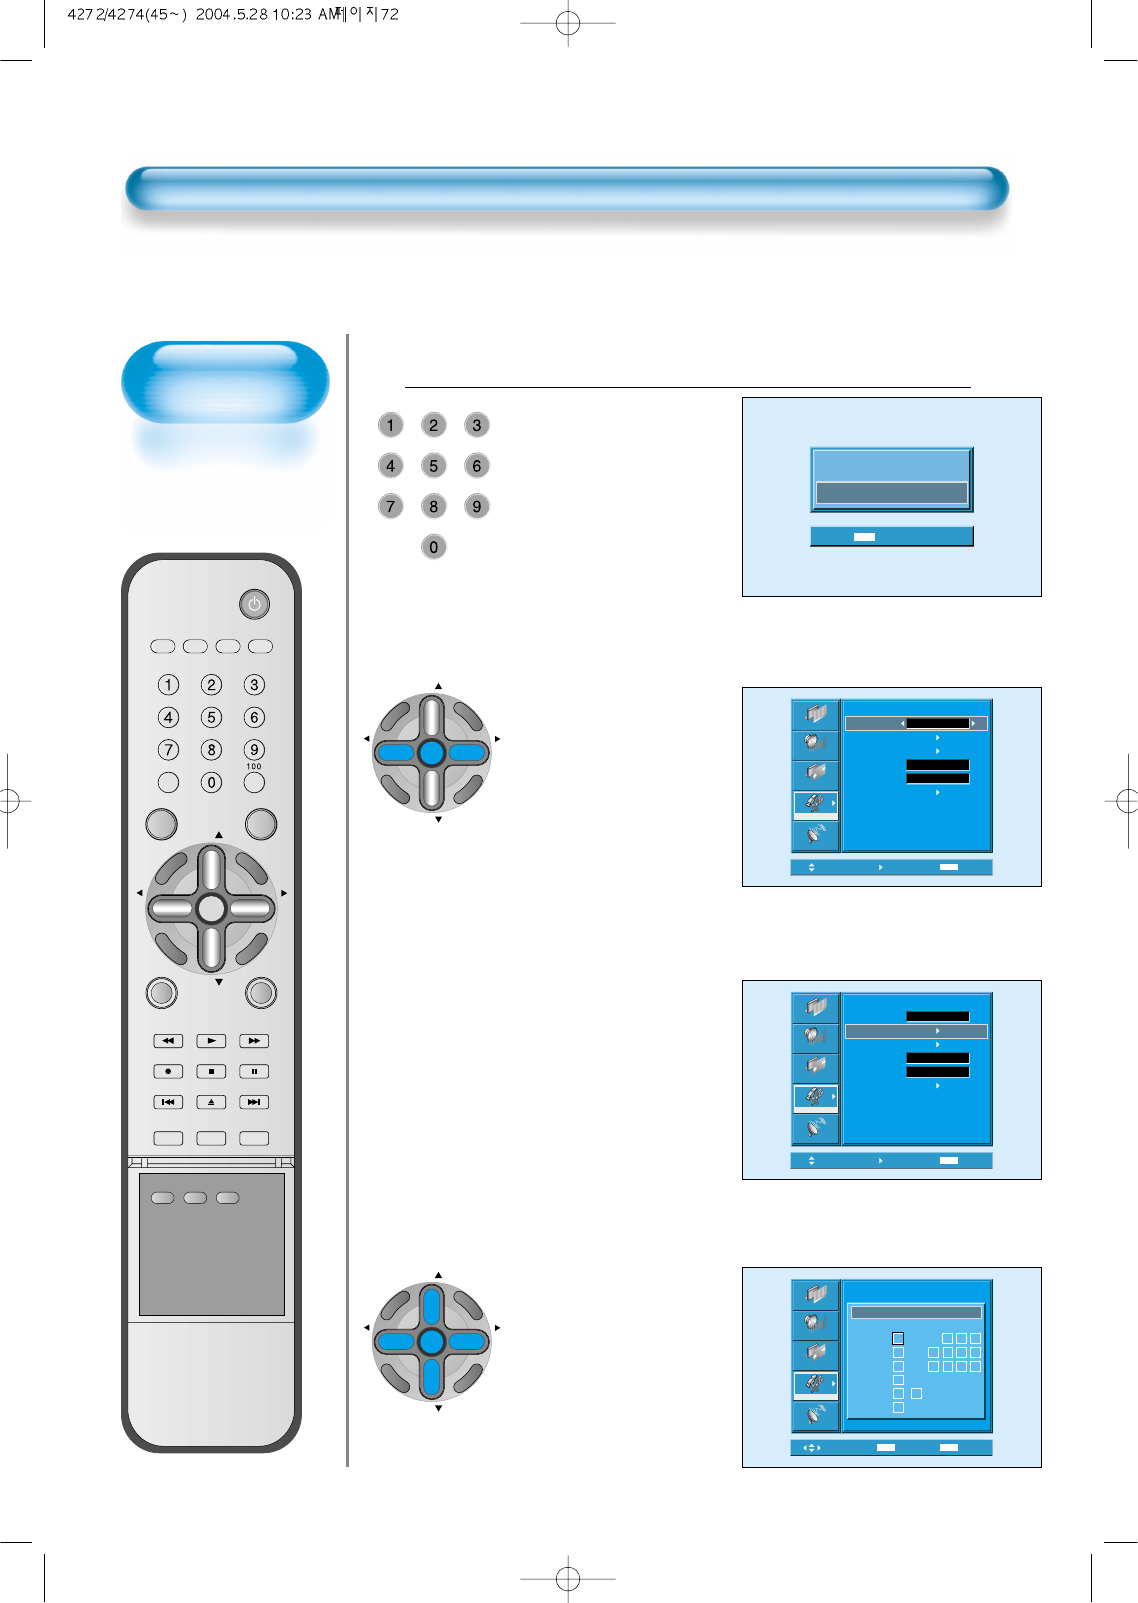
72
Parental Lock Setting
Press “Password”.
• Press Password by
using number 0~9.
Caution) If using your
password,
remember it.
It is needed
for continuous
use of this
function
hereafter.
On – Off of the
Parental Control is
repeated whenever
pressing the “◀VOL▶”
button.
4
Eenter Password
_ _ _ _
MENU Exit
Move Adjust MENU Exit
Picture
Screen
Sound
Function
Channel
Parental Control
Parental Lock
TV GuidLines
Movie Retings
No Ratings
Ext. Sources
Change Password
Unblock
Off
Block
Move Select MENU Exit
Picture
Screen
Sound
Function
Channel
Parental Control
Parental Lock
TV GuidLines
Movie Retings
No Ratings
Ext. Sources
Change Password
Unblock
Off
Block
Move Select MENUMETE Exit
Picture
Screen
Sound
Function
Channel
Rating
MA
14
PG
G
Y7
Y
TV GuidLines
All FV D L S V
Parental Control
• A guideline of TV is
setup in all the TV
programs including
sports, news.
• The “▼CH▲” button
selects items and the
“◀VOL▶” button sets
up or cancels each
item.
CH
CH
V
O
L
V
O
L
Z
O
O
M
+
Z
O
O
M
-
MENU
P
R
E
V
C
H
S
C
R
E
E
N
S
I
Z
E
CH
CH
V
O
L
V
O
L
Z
O
O
M
+
Z
O
O
M
-
MENU
P
R
E
V
C
H
S
C
R
E
E
N
S
I
Z
E
VIDEO/
DVD SATTV CATV
DISPLAY
MULTIMEDIATV/VIDEO
CH
CH
V
O
L
V
O
L
Z
O
O
M
+
Z
O
O
M
-
MENU
P
R
E
V
C
H
S
C
R
E
E
N
S
I
Z
E
MUTE CAPTION
F.F/SLOW
PLAYF.R/SLOW
REC STOP PAUSE
PREV
OPEN/CLOSE
NEXT
PICTURE
MODE SOUND
MODE STILL
POWER
MTS ADD/
ERASE SLEEP
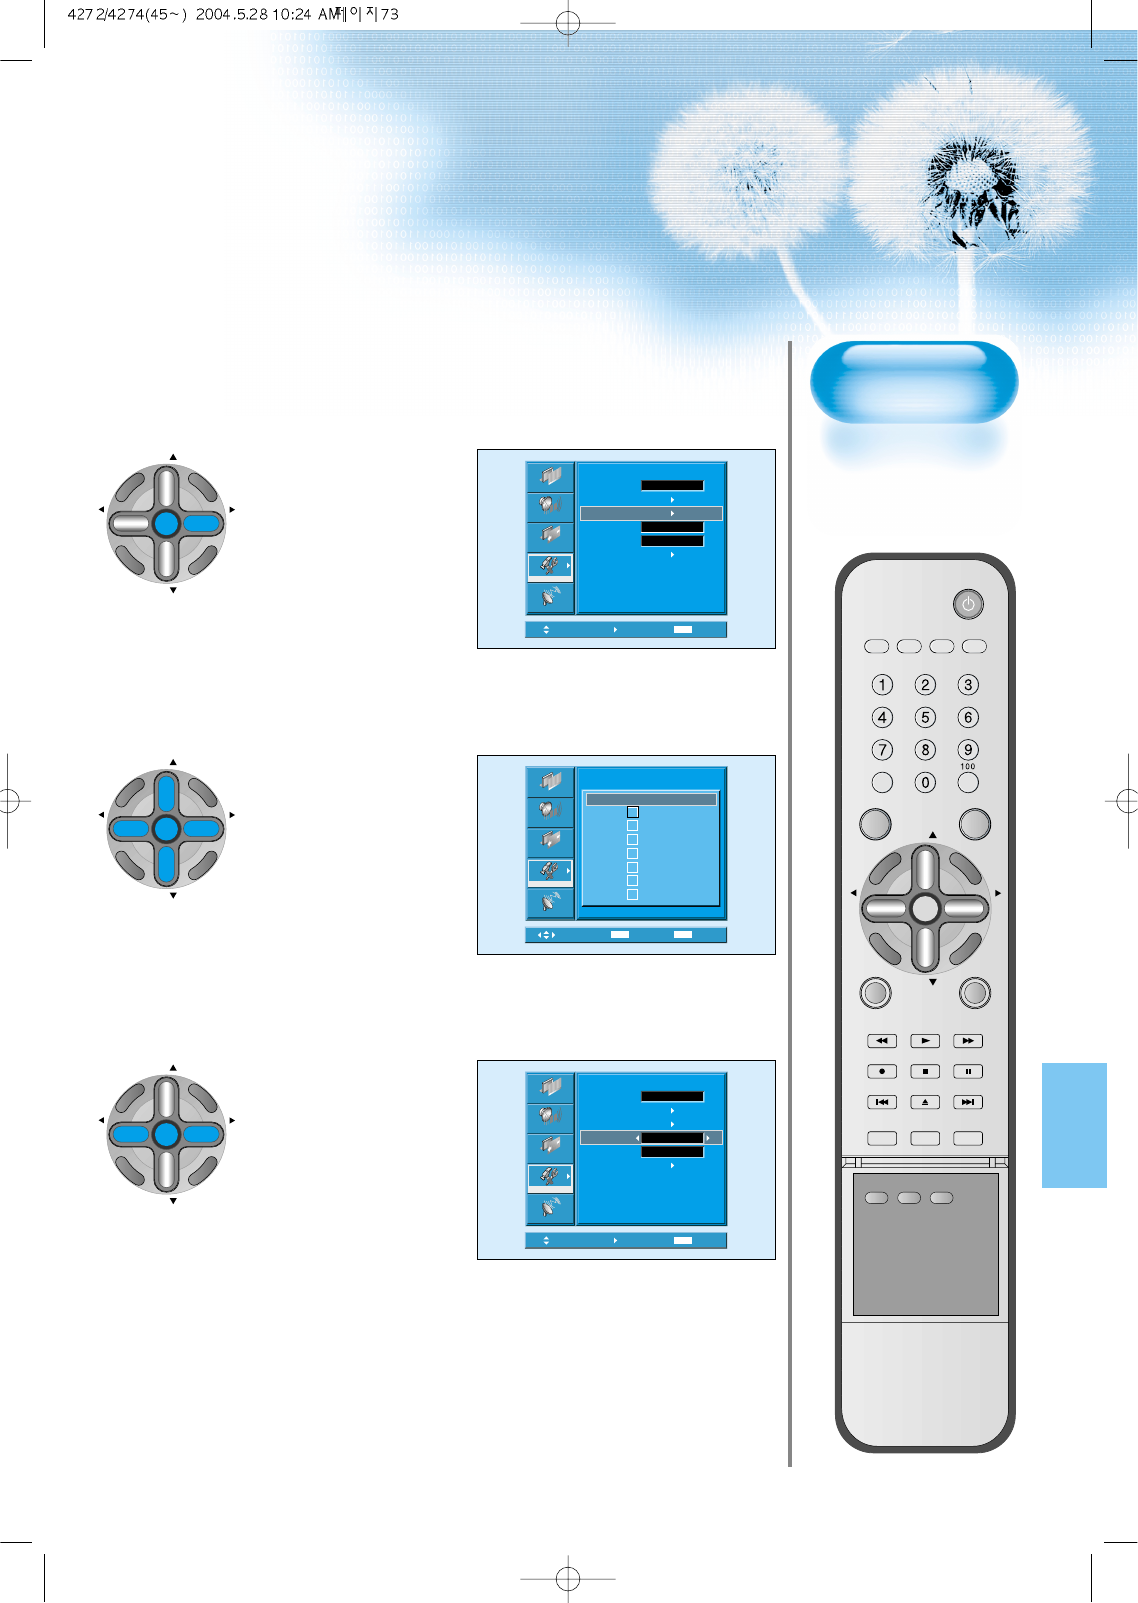
73
Move Select MENU Exit
Picture
Screen
Sound
Function
Channel
Parental Control
Parental Lock
TV GuidLines
Movie Retings
No Ratings
Ext. Sources
Change Password
Unblock
Off
Block
• Rating of movie is setup
even in movie, videotape
and other media objects
including TV program.
CH
CH
V
O
L
V
O
L
Z
O
O
M
+
Z
O
O
M
-
MENU
P
R
E
V
C
H
S
C
R
E
E
N
S
I
Z
E
Move Select MENUMETE Exit
Picture
Screen
Sound
Function
Channel
X
NC-17
R
PG-13
PG
G
NR
Movie Ratings
Parental Control
• The “▼CH▲” button
selects items and the “◀
VOL▶” button sets up or
cancels each item.
CH
CH
V
O
L
V
O
L
Z
O
O
M
+
Z
O
O
M
-
MENU
P
R
E
V
C
H
S
C
R
E
E
N
S
I
Z
E
Move Adjust MENU Exit
Picture
Screen
Sound
Function
Channel
Parental Control
Parental Lock
TV GuidLines
Movie Retings
No Ratings
Ext. Sources
Change Password
Unblock
Off
Block
• Interrupts program without
rating.
• Interrupts program of the input
terminal for the outside video
(video 1, 2,)
• Sets up the Unblock or the
Block with the “◀VOL▶”
button.
CH
CH
V
O
L
V
O
L
Z
O
O
M
+
Z
O
O
M
-
MENU
P
R
E
V
C
H
S
C
R
E
E
N
S
I
Z
E
VIDEO/
DVD SATTV CATV
DISPLAY
MULTIMEDIATV/VIDEO
CH
CH
V
O
L
V
O
L
Z
O
O
M
+
Z
O
O
M
-
MENU
P
R
E
V
C
H
S
C
R
E
E
N
S
I
Z
E
MUTE CAPTION
F.F/SLOW
PLAYF.R/SLOW
REC STOP PAUSE
PREV
OPEN/CLOSE
NEXT
PICTURE
MODE SOUND
MODE STILL
POWER
MTS ADD/
ERASE SLEEP
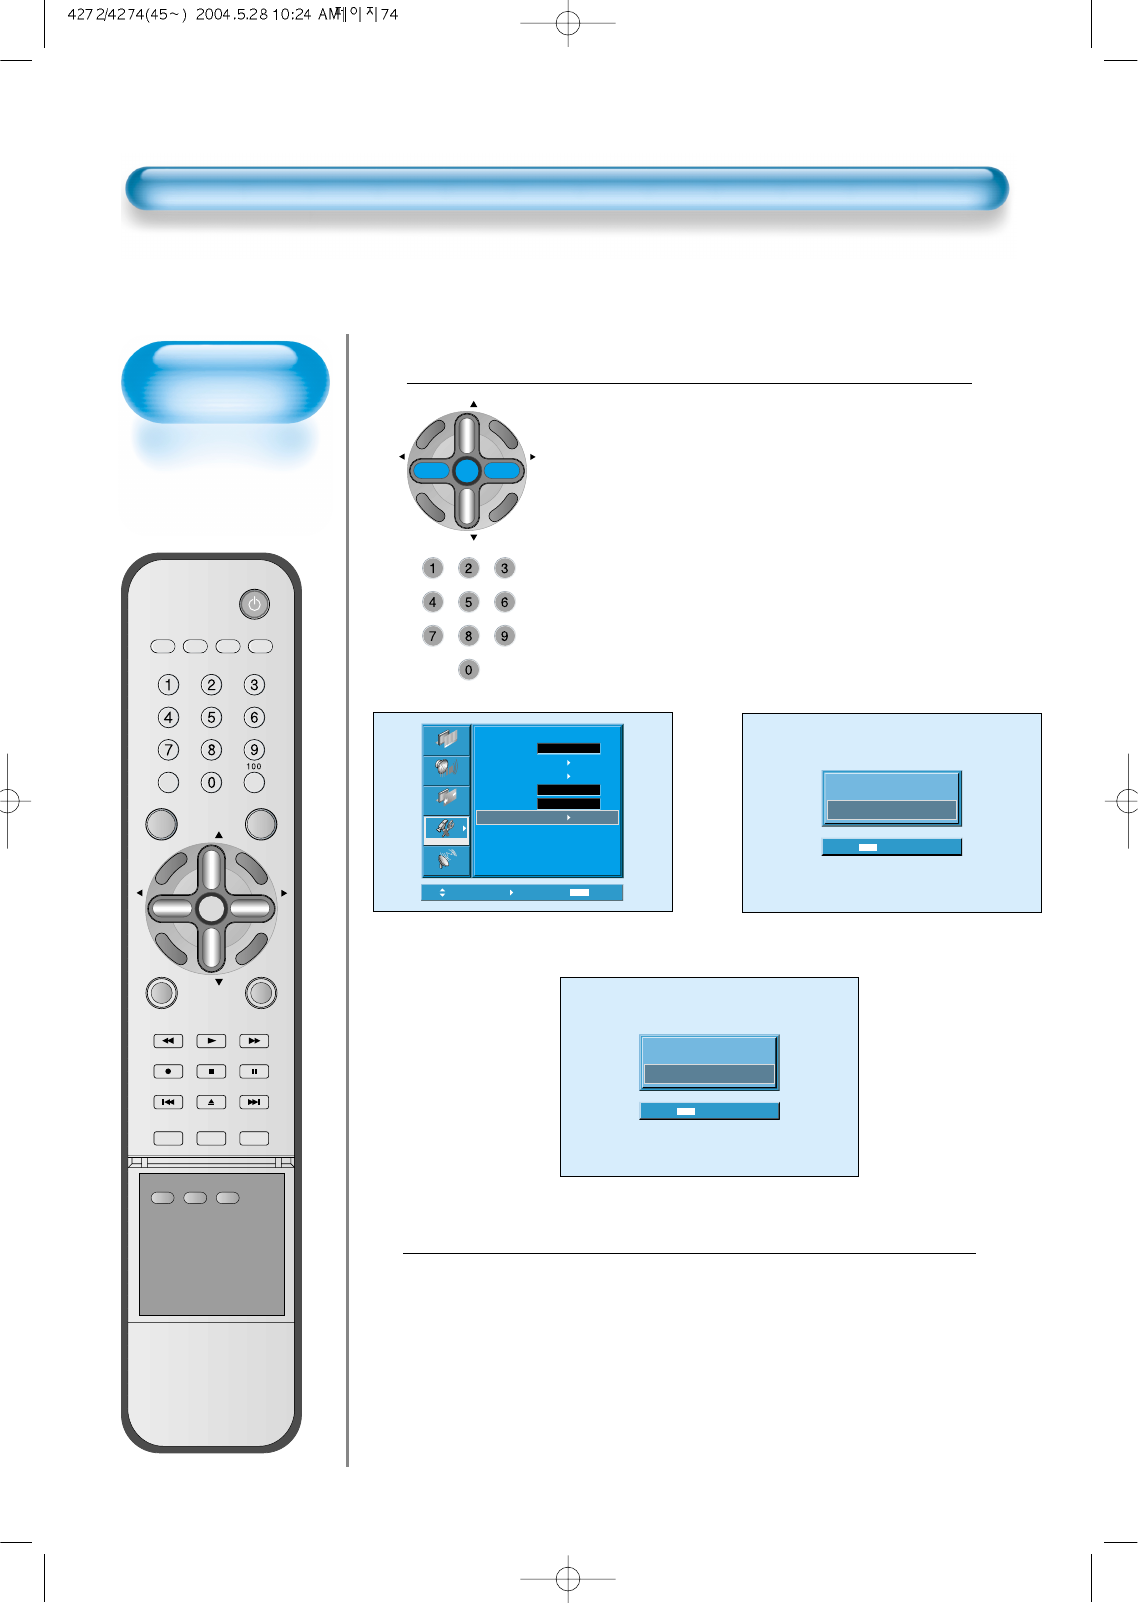
74
Parental Lock Setting
“Change Password”.
• In the initial purchase of TV set, password is
set to blank.
In continuous use of Parental Control, you
need to change your password.
• If pressing the “◀VOL▶” button after
selecting password, the second screen of
below drawing appears. Here, newly enter
your unique password by using number of 0
through 9. Enter your password in the same
manner once again.
5
CH
CH
V
O
L
V
O
L
Z
O
O
M
+
Z
O
O
M
-
MENU
P
R
E
V
C
H
S
C
R
E
E
N
S
I
Z
E
New Password
_ _ _ _
MENU Exit
Move Select MENU Exit
Picture
Screen
Sound
Function
Channel
Parental Control
Parental Lock
TV GuidLines
Movie Retings
No Ratings
Ext. Sources
Change Password
Unblock
Off
Block
Repeat Password
_ _ _ _
MENU Exit
Exit from the “Parental Control” menu.
• The main menu appears if pressing the menu
button once.
• The OSD of the menu disappears if pressing
the menu button until it disappears.
6
VIDEO/
DVD SATTV CATV
DISPLAY
MULTIMEDIATV/VIDEO
CH
CH
V
O
L
V
O
L
Z
O
O
M
+
Z
O
O
M
-
MENU
P
R
E
V
C
H
S
C
R
E
E
N
S
I
Z
E
MUTE CAPTION
F.F/SLOW
PLAYF.R/SLOW
REC STOP PAUSE
PREV
OPEN/CLOSE
NEXT
PICTURE
MODE SOUND
MODE STILL
POWER
MTS ADD/
ERASE SLEEP
75
Back to
Initialization
• You can restore the
values of the
adjustment setting
made in the MENU
to factory settings.
Initialize Setting
Press the MENU Button.
CH
CH
V
O
L
V
O
L
Z
O
O
M
+
Z
O
O
M
-
MENU
P
R
E
V
C
H
S
C
R
E
E
N
S
I
Z
E
• The MENU screen will be displayed as below.
Select Features
• Select [Features] by the “CH ” button.
1
2
Move Select MENU Exit
Mode
Brightness
Contrast
Color
Tint
Sharpness
Color Temp.
Normal
Normal
31
31
31
31
31
Picture
Screen
Sound
Function
Channel
Move Select MENU Exit
Background
Language
Keypad Lock
Enhancer
Auto Power
Closed Caption
Time Setting
ISM
Parental Lock
Initialize
English
Opaque
Off
Normal
Off
Picture
Screen
Sound
Function
Channel
CH
CH
V
O
L
V
O
L
Z
O
O
M
+
Z
O
O
M
-
MENU
P
R
E
V
C
H
S
C
R
E
E
N
S
I
Z
E
VIDEO/
DVD SATTV CATV
DISPLAY
MULTIMEDIATV/VIDEO
CH
CH
V
O
L
V
O
L
Z
O
O
M
+
Z
O
O
M
-
MENU
P
R
E
V
C
H
S
C
R
E
E
N
S
I
Z
E
MUTE CAPTION
F.F/SLOW
PLAYF.R/SLOW
REC STOP PAUSE
PREV
OPEN/CLOSE
NEXT
PICTURE
MODE SOUND
MODE STILL
POWER
MTS ADD/
ERASE SLEEP
76
When [INITIALIZATION] is completed:
1) When [INITIALIZATION] is completed, those values that have been
set in the User Mode of [SCREEN MODE] and [SOUND MODE] will
be returned to the factory preset values.
2) Once initialized, you can not undo.
3) The items in the [SCREEN] Menu in PC or DVI INPUT are also
initialized (i.e., H. Size, V. Size, H. Position, V. Position, Phase,
Frequency, etc.)
4) Language, volume, OSD background, input mode are not initialized.
INITIALIZATION
• Enter the sub menu by using the
“◀VOL▶”
button.
• Select the [Initialize] by pressing the “CH ”
button, then press the
“◀VOL▶”
button.
•A confirmation message will be displayed.
•To perform initialization, press the “
VOL▶”
button
after selecting [YES] by pressing the “CH ”
button.
•To return to MENU, press "MENU" button.
3
Are you Sure?
MENU Exit
No
Yes
CH
CH
V
O
L
V
O
L
Z
O
O
M
+
Z
O
O
M
-
MENU
P
R
E
V
C
H
S
C
R
E
E
N
S
I
Z
E
Initialize Setting
77
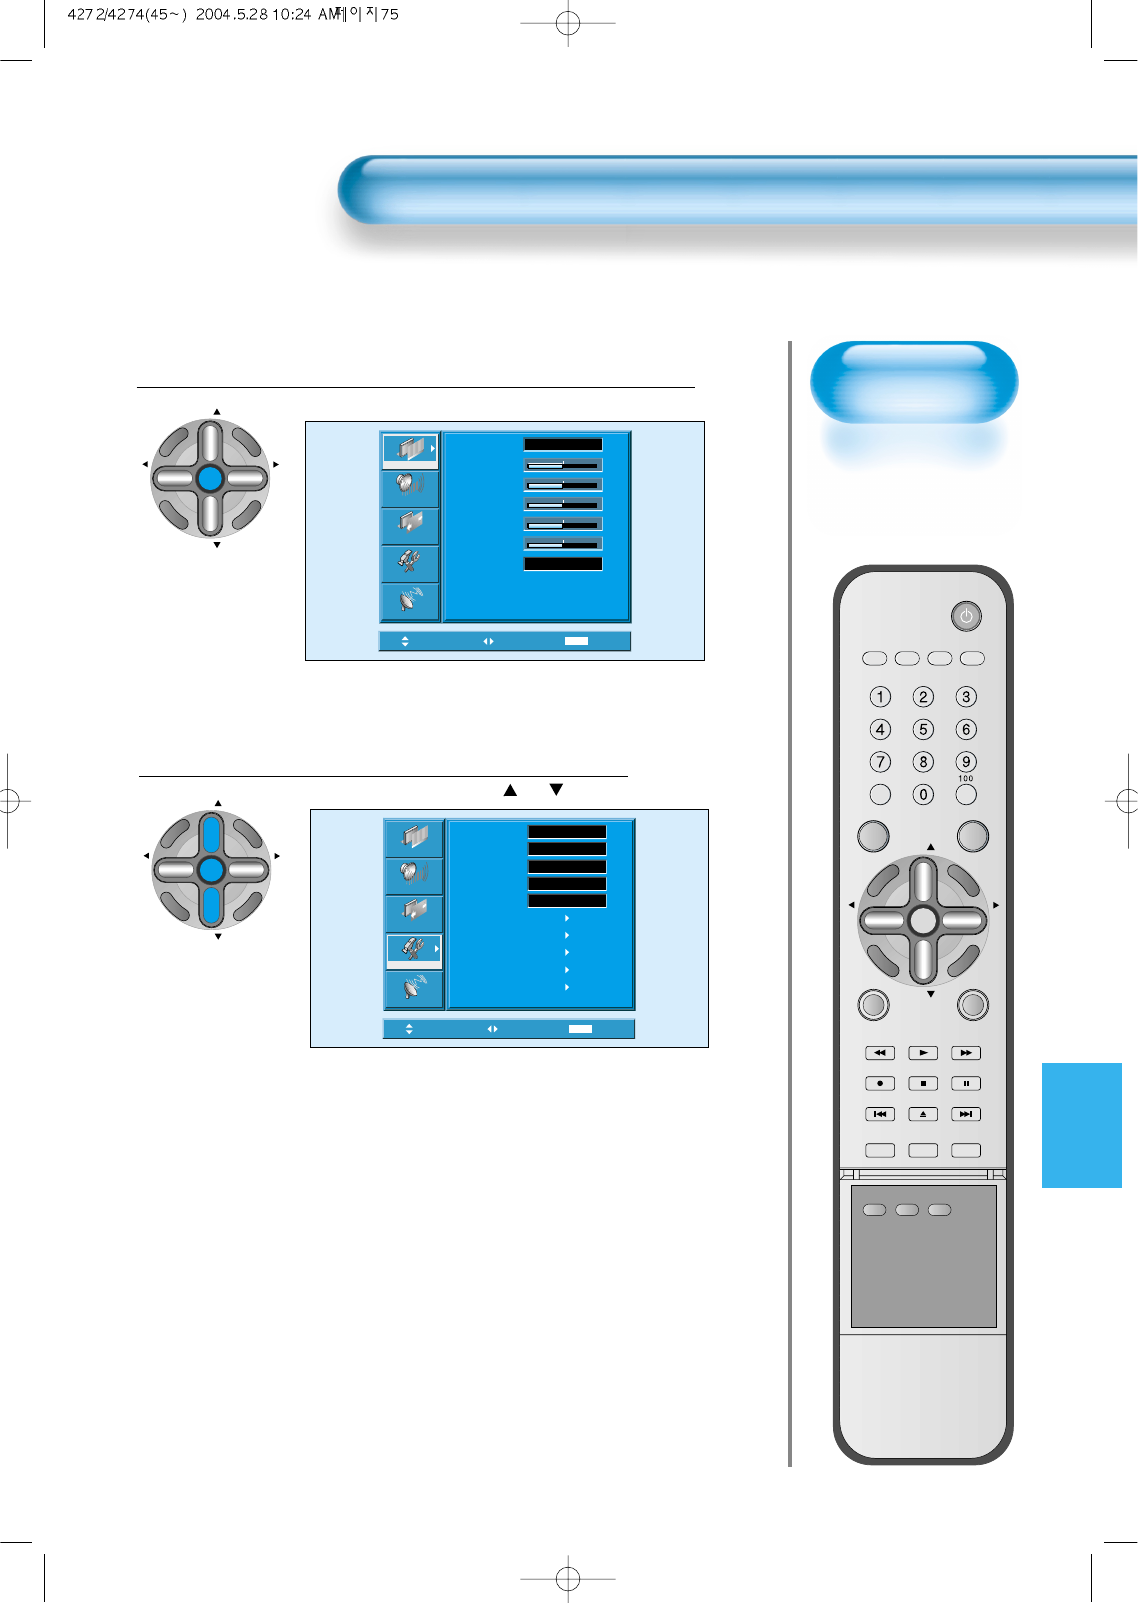
Setting
Sleep Timer
• SLEEP TIMER turns
the PDP off after a
preset time.
Press the “SLEEP” Button.
SLEEP
• Press the “SLEEP” button on the Remote Control.
• Pressing the “SLEEP” button first time will display the
current setting for SLEEP TIMER.
• To cancel the SLEEP TIMER, press the “SLEEP” button
to select ‘OFF’.
1
Setting Sleep Timer
NOTES:
1) On-screen information disappears if you do not
take any action for about two seconds after
pressing the SLEEP button.
2) If you turn the PDP off after setting SLEEP, the
setting is erased.
Sleep Off
Sleep off
Sleep 15
Sleep 30
Sleep 120
Sleep 90
Sleep 60
VIDEO/
DVD SATTV CATV
DISPLAY
MULTIMEDIATV/VIDEO
CH
CH
V
O
L
V
O
L
Z
O
O
M
+
Z
O
O
M
-
MENU
P
R
E
V
C
H
S
C
R
E
E
N
S
I
Z
E
MUTE CAPTION
F.F/SLOW
PLAYF.R/SLOW
REC STOP PAUSE
PREV
OPEN/CLOSE
NEXT
PICTURE
MODE SOUND
MODE STILL
POWER
MTS ADD/
ERASE SLEEP
Before Requesting Service
78
Before Requesting for Service
St
yo
mm
ps
C
h
e
c
k
s
A
c
t
i
o
n
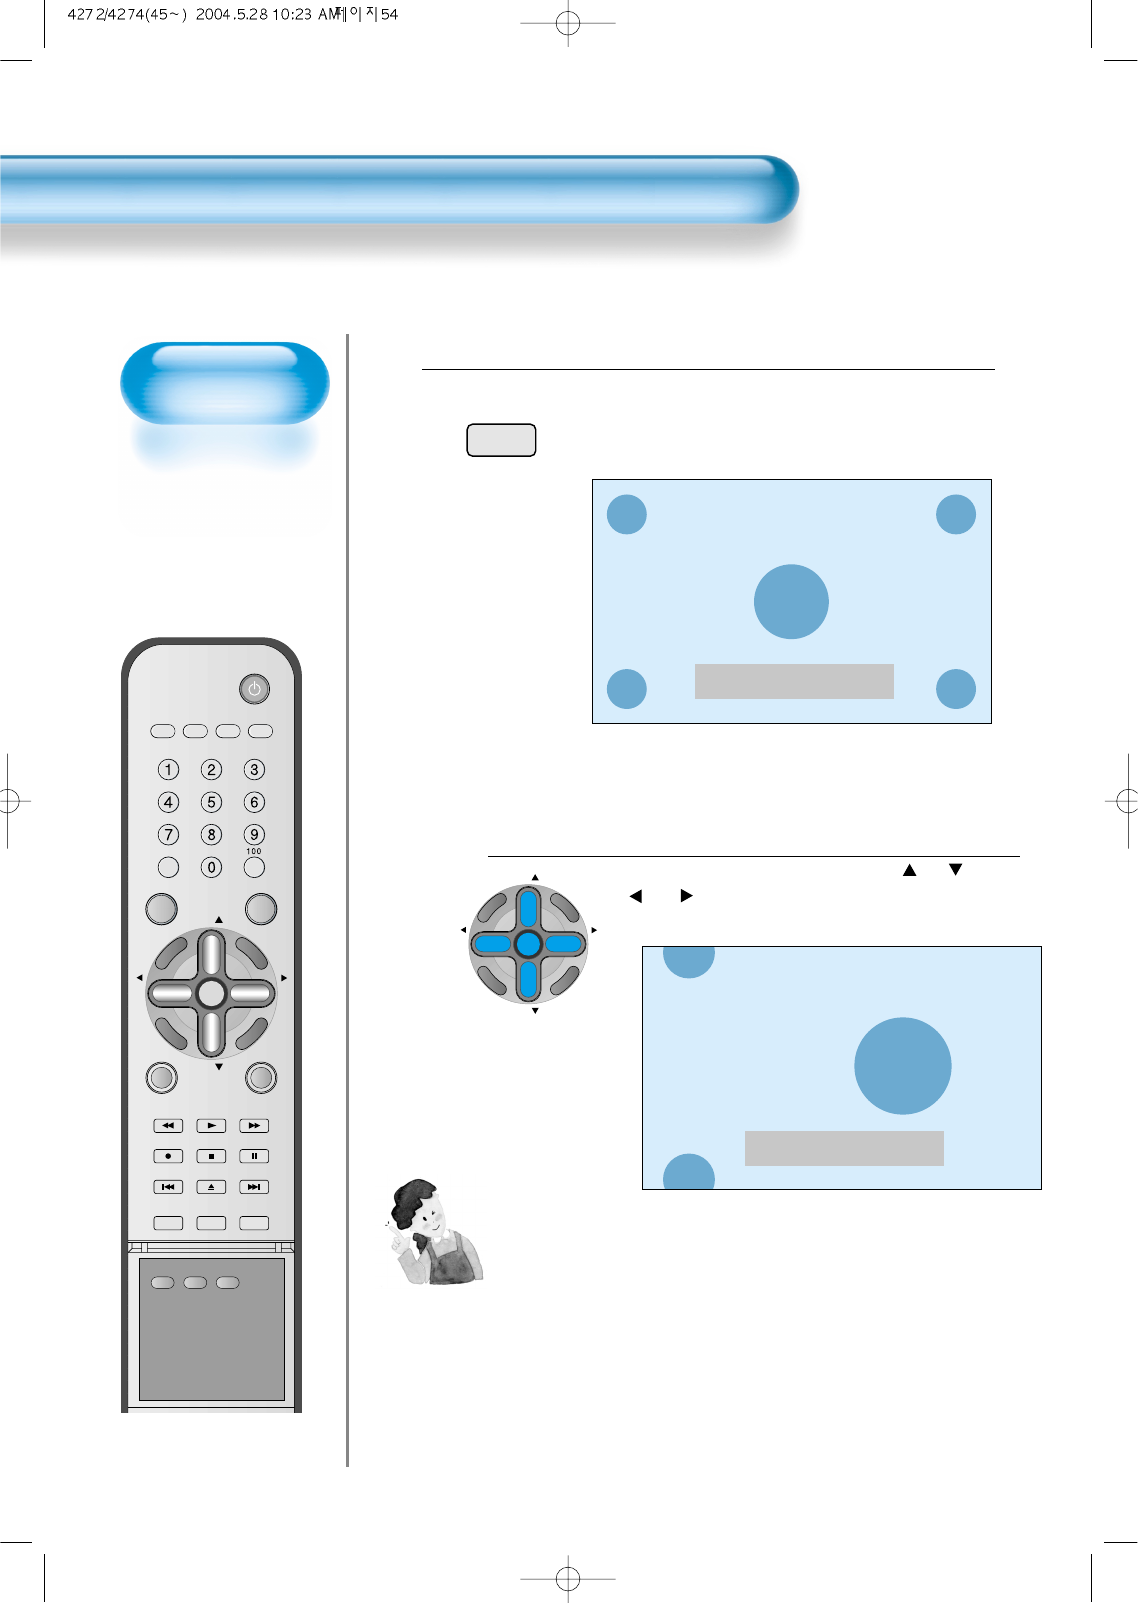
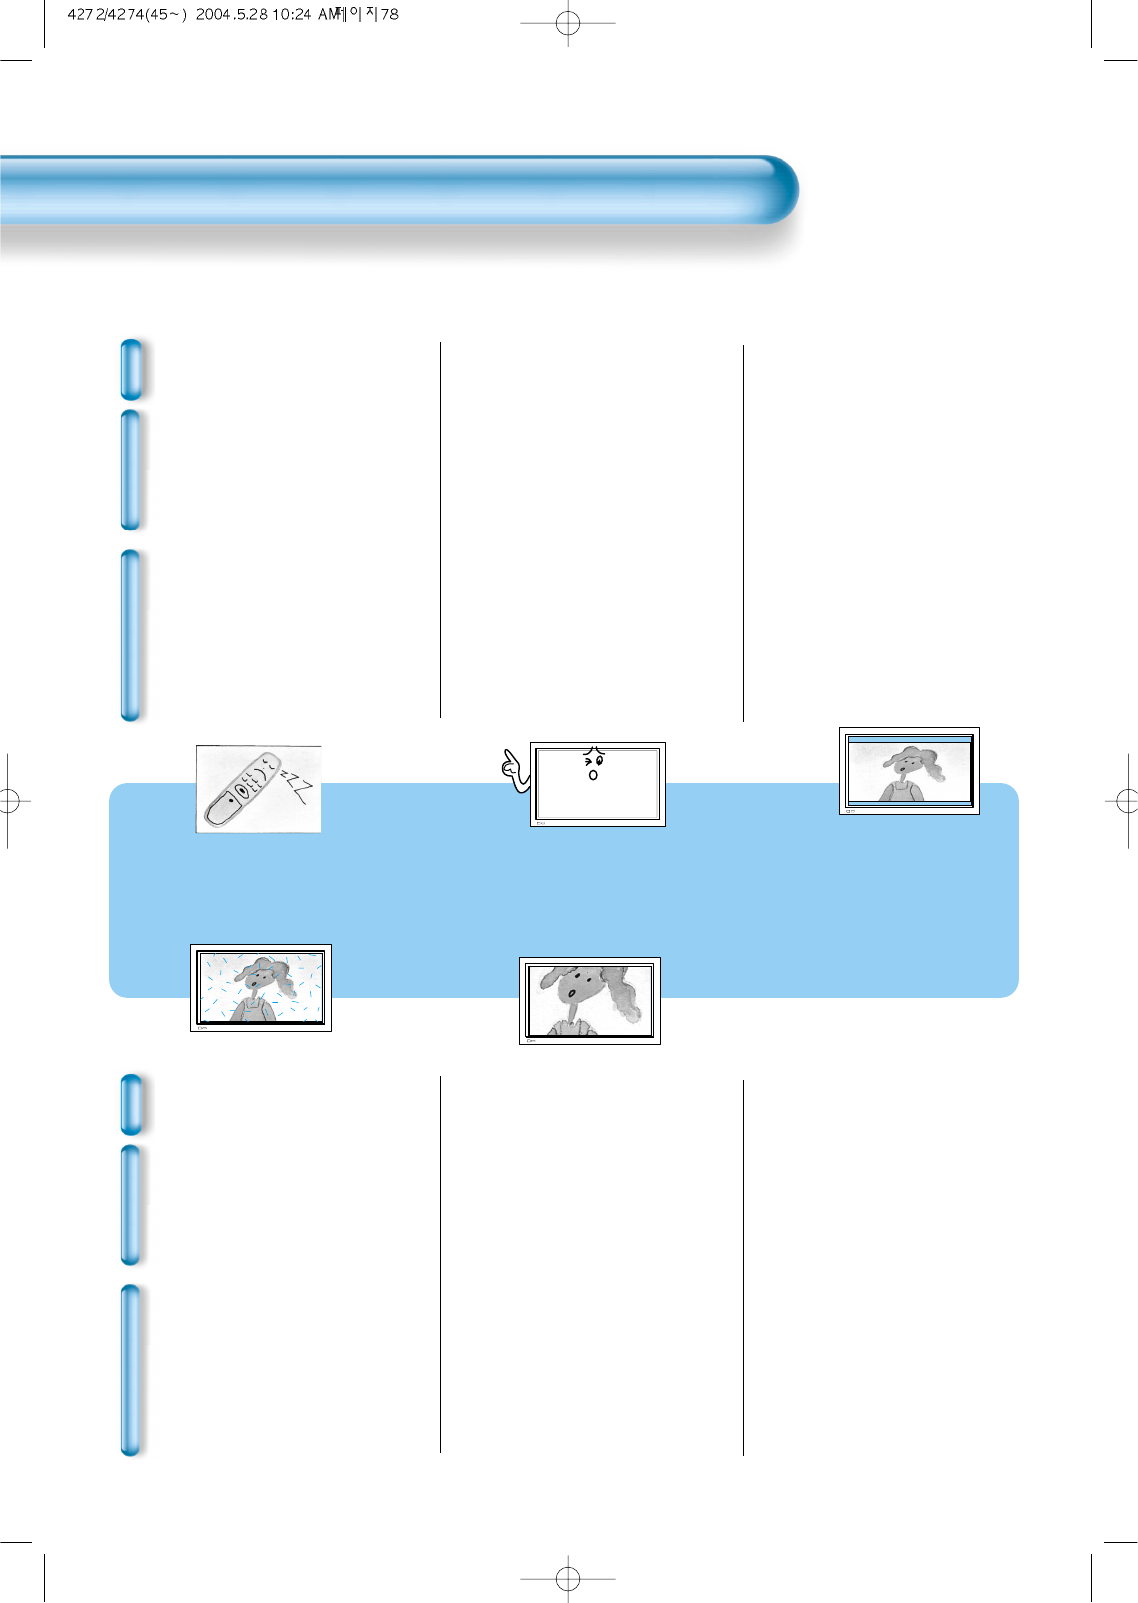
• There are empty spots at the top
and the bottom area of the screen.
• Check if the screen size of an image
is wider than 16:9 aspect ratio
(theater screen size).
• When video screen is wider than
16:9 aspect ratio, you may see dark
areas at the top and the bottom of
the screen.
• The Display makes a snapping
sound.
• Check if the pictures and sound are
normal.
• This sound is produced due to
variations in room temperature.
• This sound does not indicate that the
Display has a problem if the pictures
and sound can be viewed and heard
properly.
• Remote control does not
function properly.
• Check for any obstacle between the
Remote Control and the Display.
• Check for dead batteries and
incorrect battery orientation.
• Check if the Remote Control is the
right one.
• Remove any obstacle between the
Remote Control and the Display.
• Replace batteries and use the correct
polarity (+) or (-) of the batteries.
• Use the correct Remote Control
proper to the model.
St
yo
mm
ps
C
h
e
c
k
s
A
c
t
i
o
n
• Screen size is suddenly
changed.
• The screen size of a video image
may not be matched to the size of
the dark initial screen.
• Check by using other video tape.
• There are spots on the screen
or screen rolls.
• Check if your product is affected by
any interference from automobiles,
high-voltage transmission lines, neon
signs or other potential sources.
Before requesting for service, check the following points once again.
79
SPECIFICATIONS
In the event that the product has been submerged in the water
in rainy season:
Immediately wash it with clean water, and dry it in a shadow place,
then call for service from the nearest Daewoo Service Center.
Never plug the Power Cord since there is risk of electric shock and
damage of the product.
*
Appearance and specifications of this product are subject to change for improving the product without prior notice.
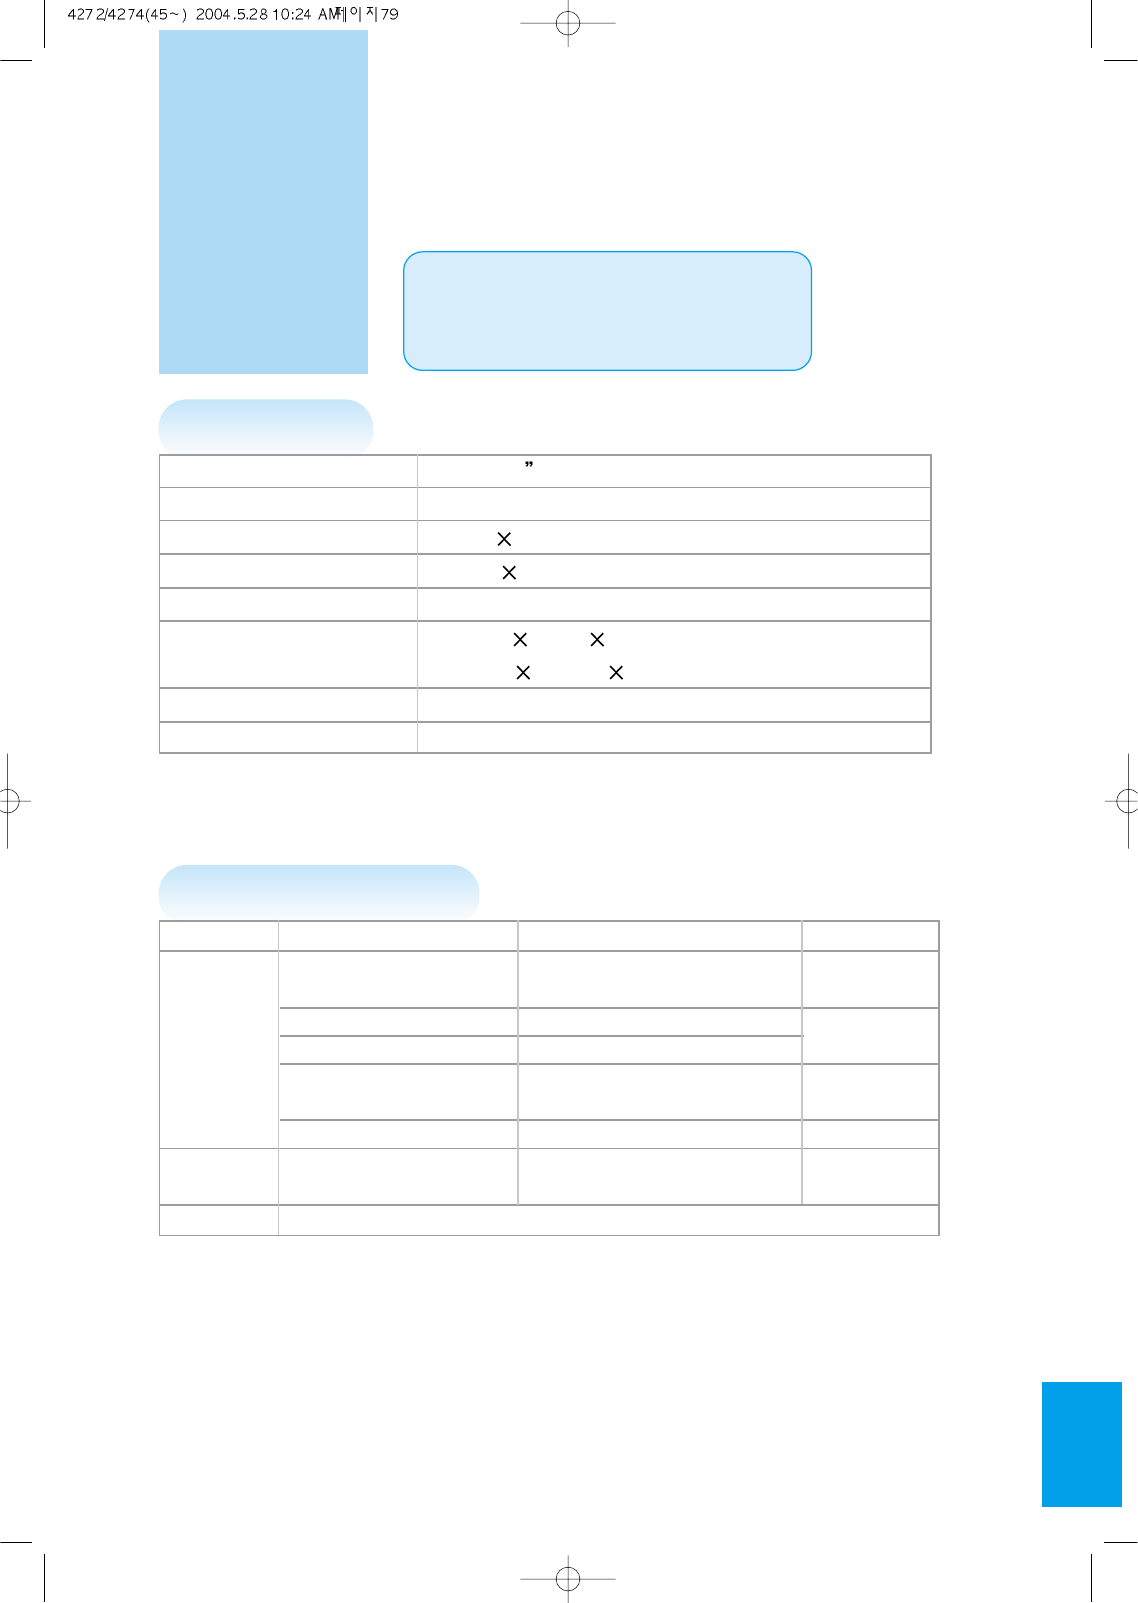
DISPLAY UNIT
INPUT/OUTPUT TERMINAL
INPUT/OUTPUT ITEMS VIDEO AUDIO
COMPONENT INPUT DTV/DVD ONLY (LEFT/RIGHT)
(Y, Pb/Cb, Pr/Cr), 2 sets 2 sets
VIDEO INPUT two RCA jacks (LEFT/RIGHT)
EXTERNAL S-VIDEO INPUT two 4 pin Mini DIN jack 2 sets
INPUT Computer(PC) one 15 pin D-sub jack (LEFT/RIGHT)
one DVI-D(Digital only) jack 2 set each
RF INPUT
EXTERNAL VIDEO OUTPUT one RCA jack
OUTPUT (LEFT/RIGHT) 1 set
AUDIO OUTPUT SPEAKER OUTPUT(sold separately) 20W (two 10W)
Diagonal Size 106cm (42 )
Screen Aspect Ratio 16 : 9
Display Resolution 853(H) 480(V) dots
Pixel Pitch 1.08(H) 1.08(V) mm
Video Signal
NTSC, PAL, SECAM, PAL-M/N, NTSC4.43
Dimension 1044(W) 631(H) 89(D)mm
41.10(W) 24.84(H) 3.50(D)inch
Weight 30 kg (66.14Lbs)
Power Requirement AC 100-240V~, 50/60Hz