WOOSIM SYSTEMS PORTI-P40 Mobile Printer User Manual
Woosim System Inc. Mobile Printer Users Manual
UserManual.wiki
>
WOOSIM SYSTEMS
>
PORTI P40 User Manual
Users Manual
Navigation menu
Upload a User Manual
Namespaces
Wiki Guide
HTML
PDF
Info
Views
User Manual
Discussion / Help
Navigation
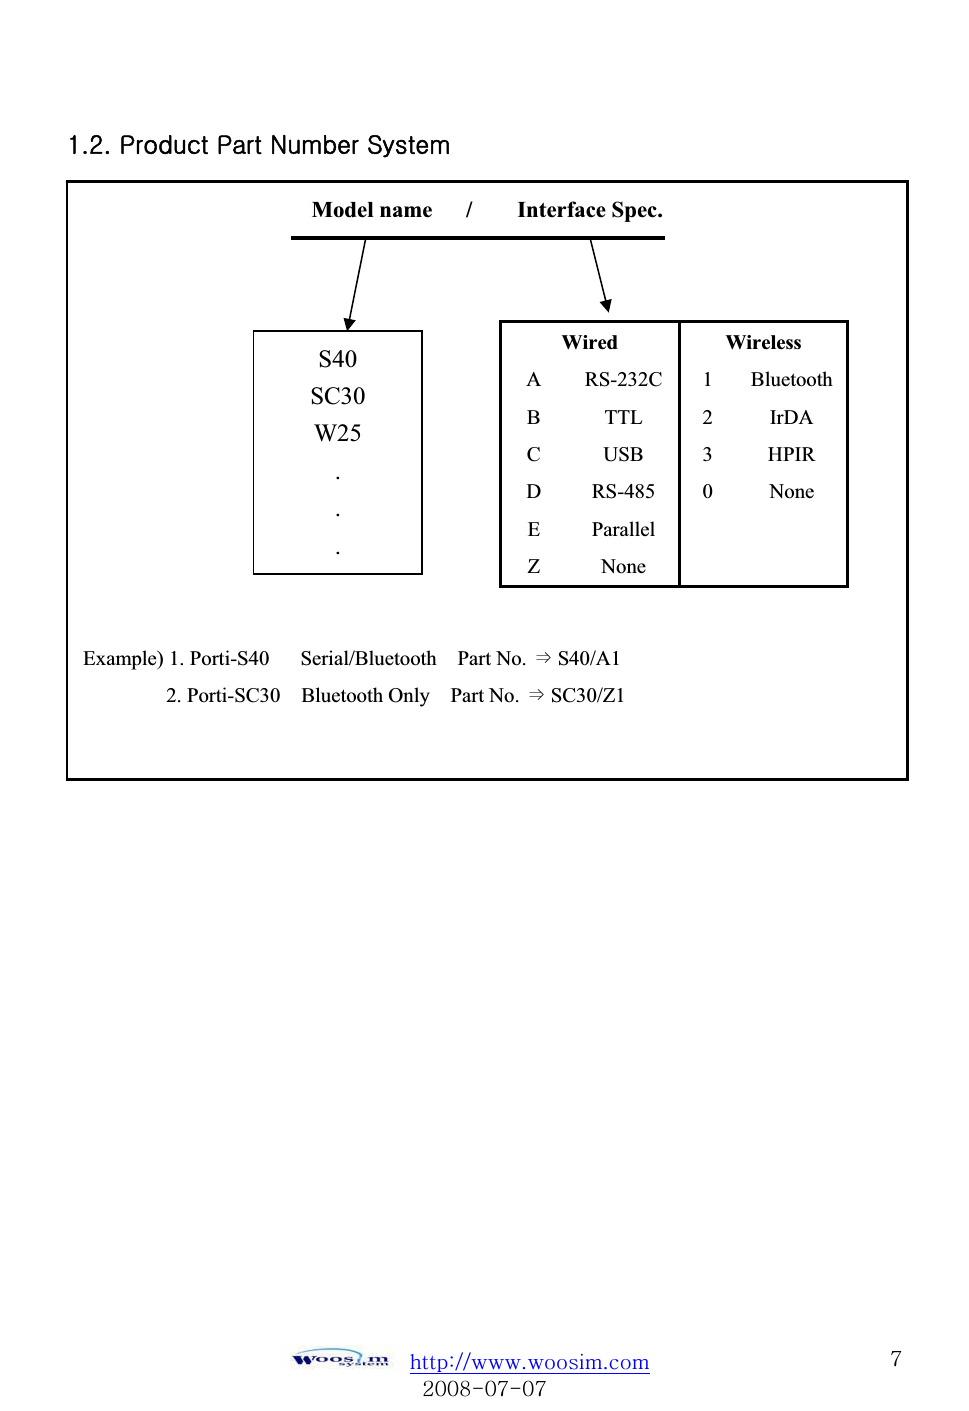
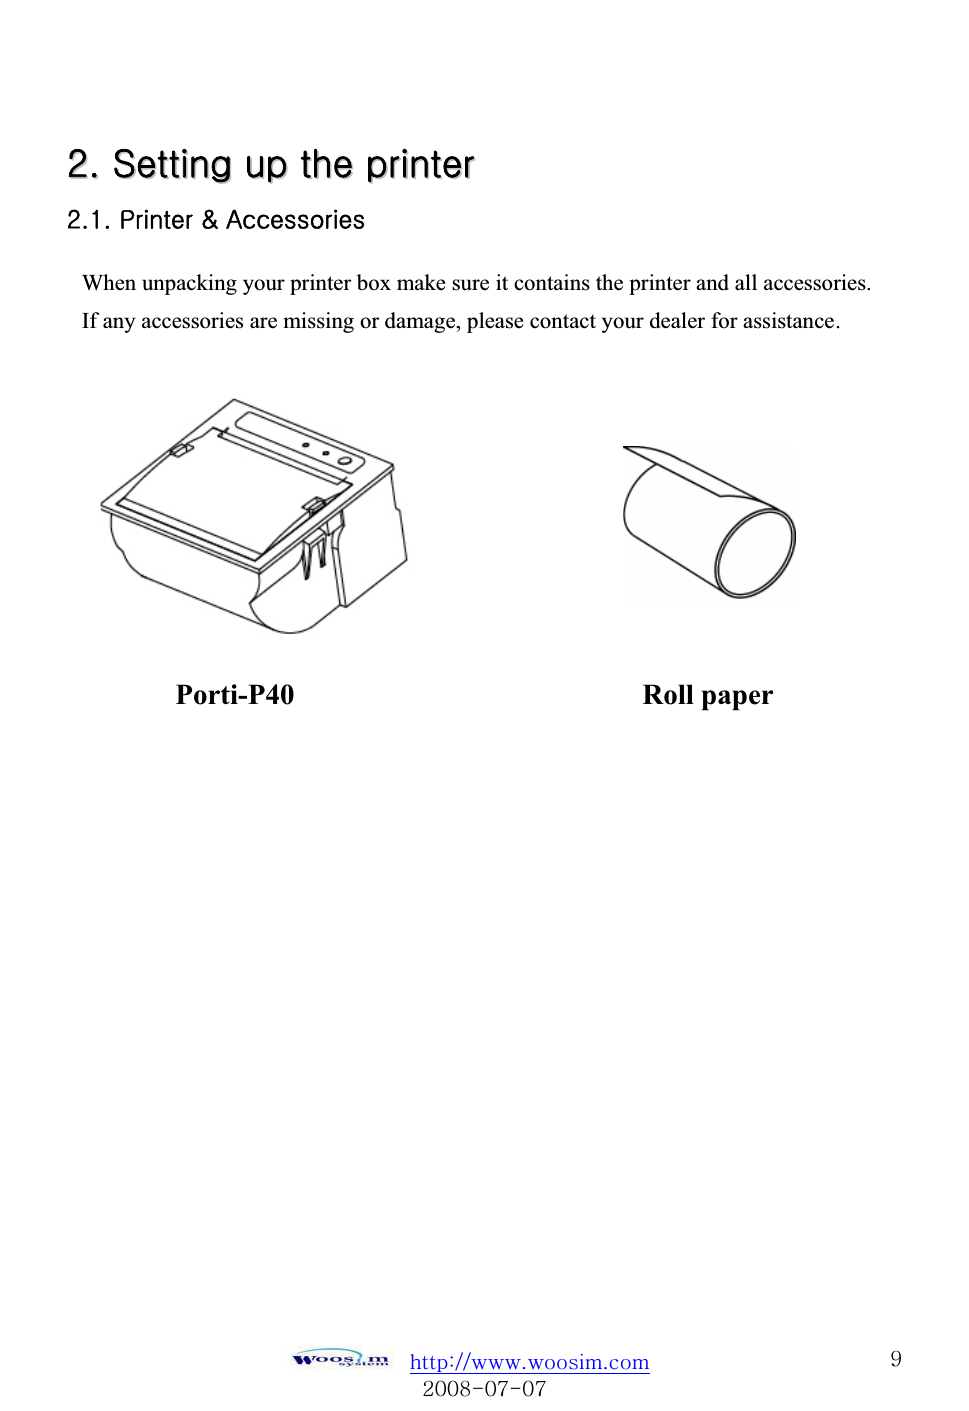
![GaVVUUGYWW_TW^TW^G]XXUUGGvvGGXUXUGtGGGGGGGGGGGGGGGGGGGGGGGGGGGGGGGGPORTI–PG G OGPGGGOGGGPGGOGGGPGGG Model name Interface None : Serial(UART or TTL) Size of roll paper 40 : 57mm wide, 40 Ø Power None : DC 9V GGGGGGGGGGGGGGGGGGGGGGGGGGGGGGGGGGGGGGGGGGGGGGGGGGGGGGGGGGGGGGGGGGGGG](https://usermanual.wiki/WOOSIM-SYSTEMS/PORTI-P40/User-Guide-980784-Page-6.png)
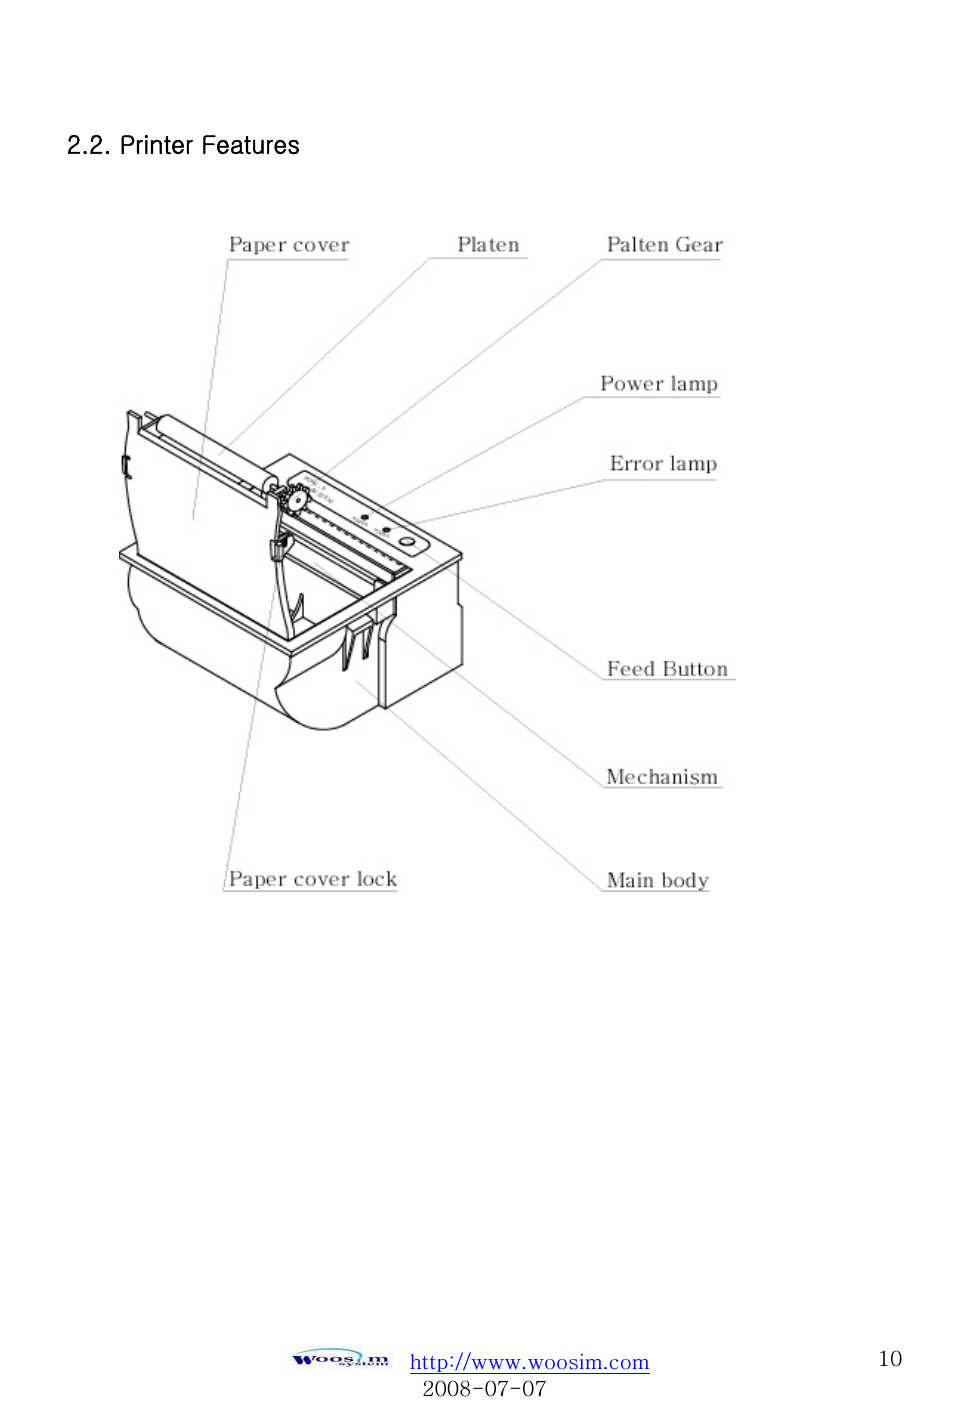
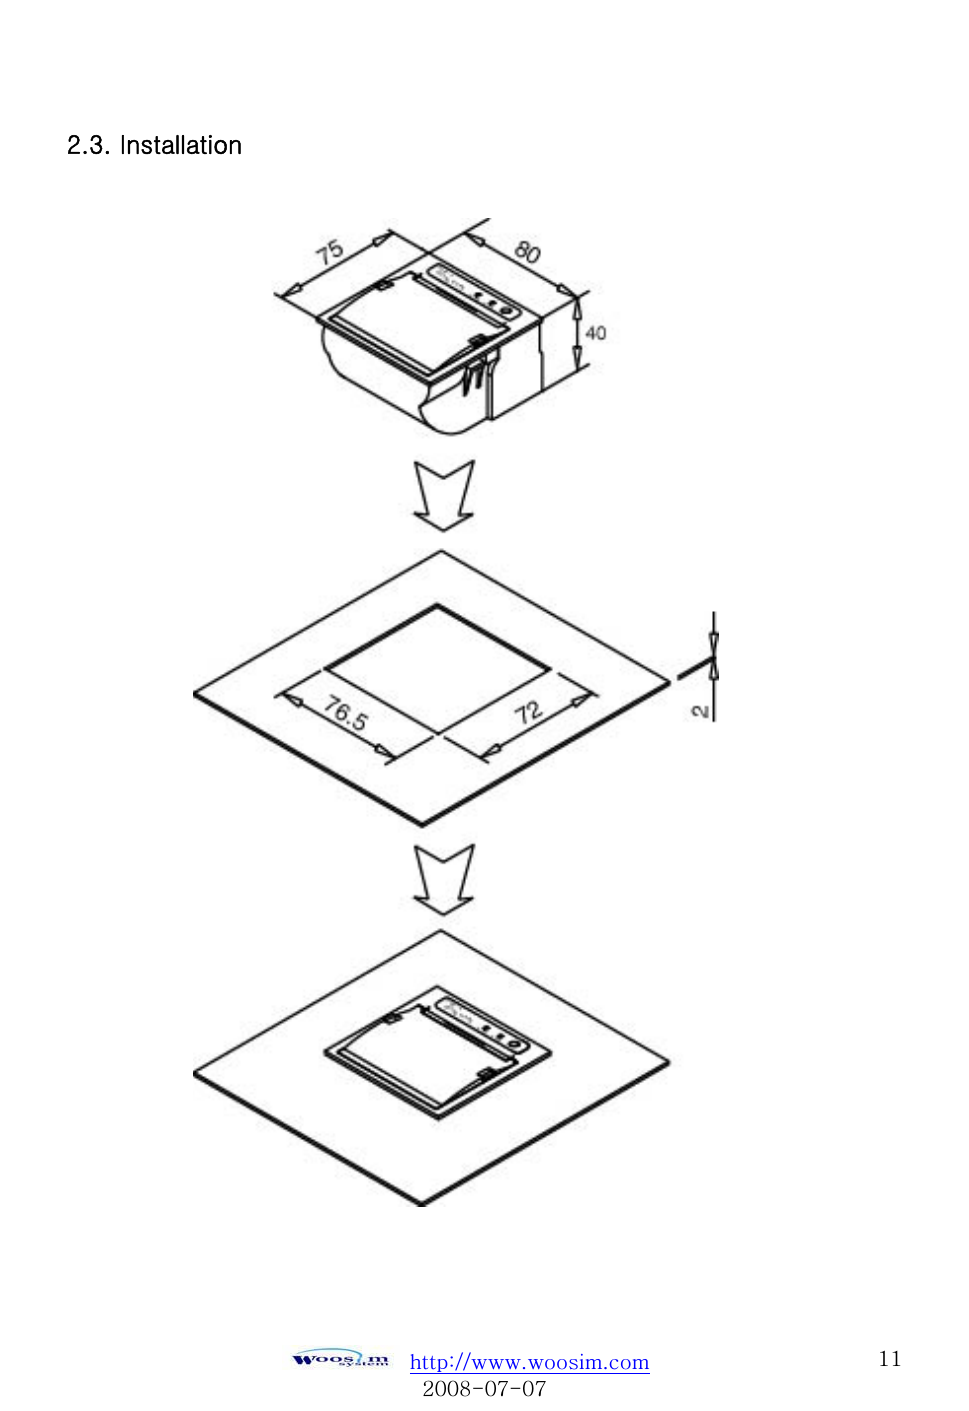
![GaVVUUGYWW_TW^TW^G_XUZUGzGGGGGGGGGGGGGGGGGGGGGGGGGGGGGGGGItem SpecificationPrinting method Direct thermal line printing Characters per line 42cpl Character size Eng. : 9*24dots, 12*24dots Kor. : 16*24dots, [24*24dots] Resolution 203dpi, 8dots/mm Print width 2-inch (48mm, 384dots) Printing speed 50mm/sec Dimensions 80 * 75 * 40 mm (include PCB ) Weight 153g (including roll paper ) Interface Serial(UART, TTL) Paper supplied Thermal roll paper (57mm wide, 40ø) Barcode supplied PDF417(2-dimension), Code128, Code39, I2/5, Code93 UPC, EAN(KAN, JAN), CODABAR Receive buffer size 10K bytes NotePrinting speed may be slower, depending on the data transmission speed and the combination of control commands. Input Power 9VDC, Standby 60mA and Max 3A (Standard model) Temperature -10°C ~ 40°C (operating) -10°C ~ 70°C (storage) Environment conditions Humidity 30% - 80% (operating) 10% - 90% (storage) Mechanical 37,000,000 lines MCBF (Mean Cycle Between failure) Head Approximately 50 Km](https://usermanual.wiki/WOOSIM-SYSTEMS/PORTI-P40/User-Guide-980784-Page-8.png)


![GaVVUUGYWW_TW^TW^GX]GGGGGGGGGGGGGGGGGGGGGGGGGGGGGGGGGGTABLE 1 GGPOWER Lamp (Green)ERROR Lamp (Red)Option1UART Communication Port 12Protocol UART 19600 bps 219200 bps 338400 bps 457600 bps Baud Rate 25115200 bps 17 Data bit Data Bit 328 Data bit 1No Parity 2Even Parity Parity Bit 43Odd Parity 11 Stop Bit Stop Bit 522 Stop Bit 1Density Low 2Density Medium Density 63Density High 1No use Mark 72Use1Low2Medium1 3Medium2 Sensor 84High](https://usermanual.wiki/WOOSIM-SYSTEMS/PORTI-P40/User-Guide-980784-Page-16.png)
![GaVVUUGYWW_TW^TW^GX^GG YU]UGwGGGGGGGGGGGGGGGGGGGGGGGGGGGGGGGGThe following specifications are requested for Power supply. INPUT : DC 9V / Max 3A Avoid using power supply which its power capacity of power current is extremely high. GG](https://usermanual.wiki/WOOSIM-SYSTEMS/PORTI-P40/User-Guide-980784-Page-17.png)