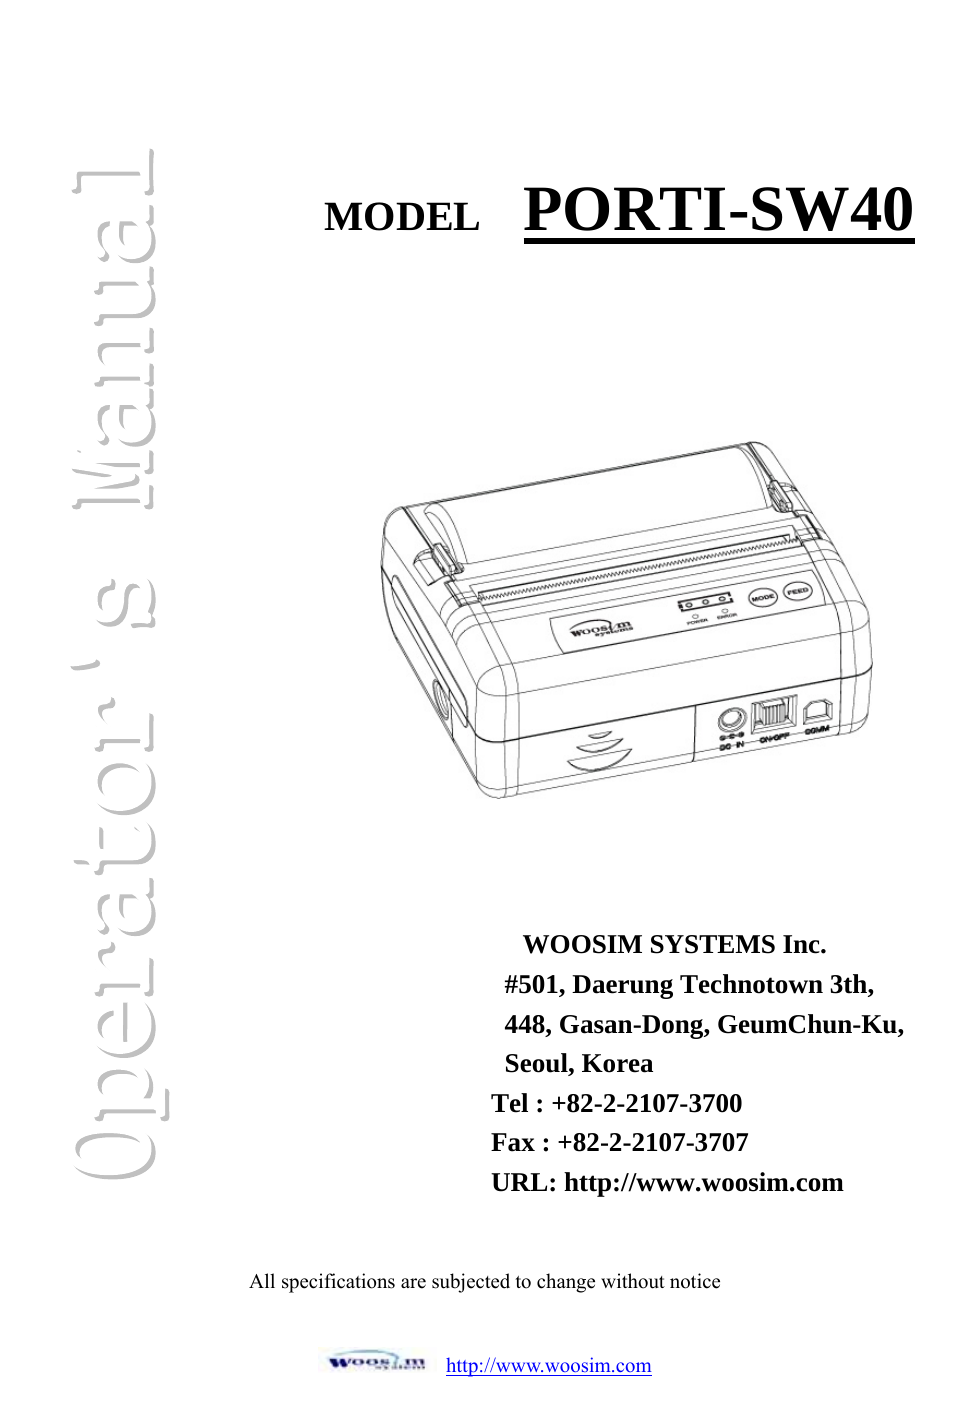
WOOSIM SYSTEMS PORTI-SW40 Digital Transmission System User Manual Operator Manual Porti SW40
Woosim System Inc. Digital Transmission System Operator Manual Porti SW40
UserManual.wiki
>
WOOSIM SYSTEMS
>
PORTI SW40 User Manual
Users Manual
Navigation menu
Upload a User Manual
Namespaces
Wiki Guide
HTML
PDF
Info
Views
User Manual
Discussion / Help
Navigation

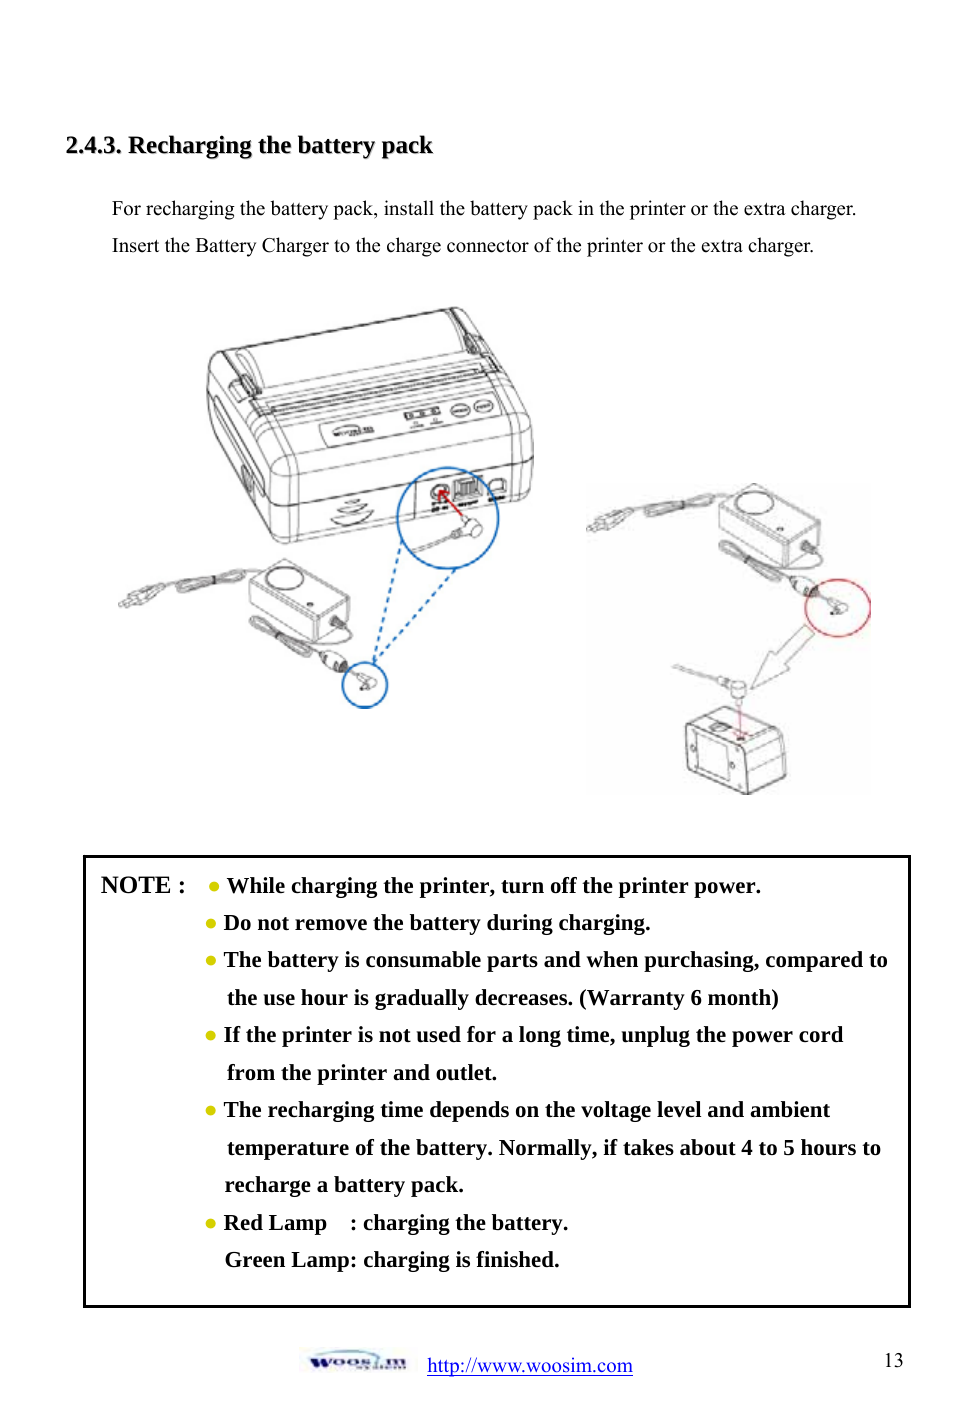
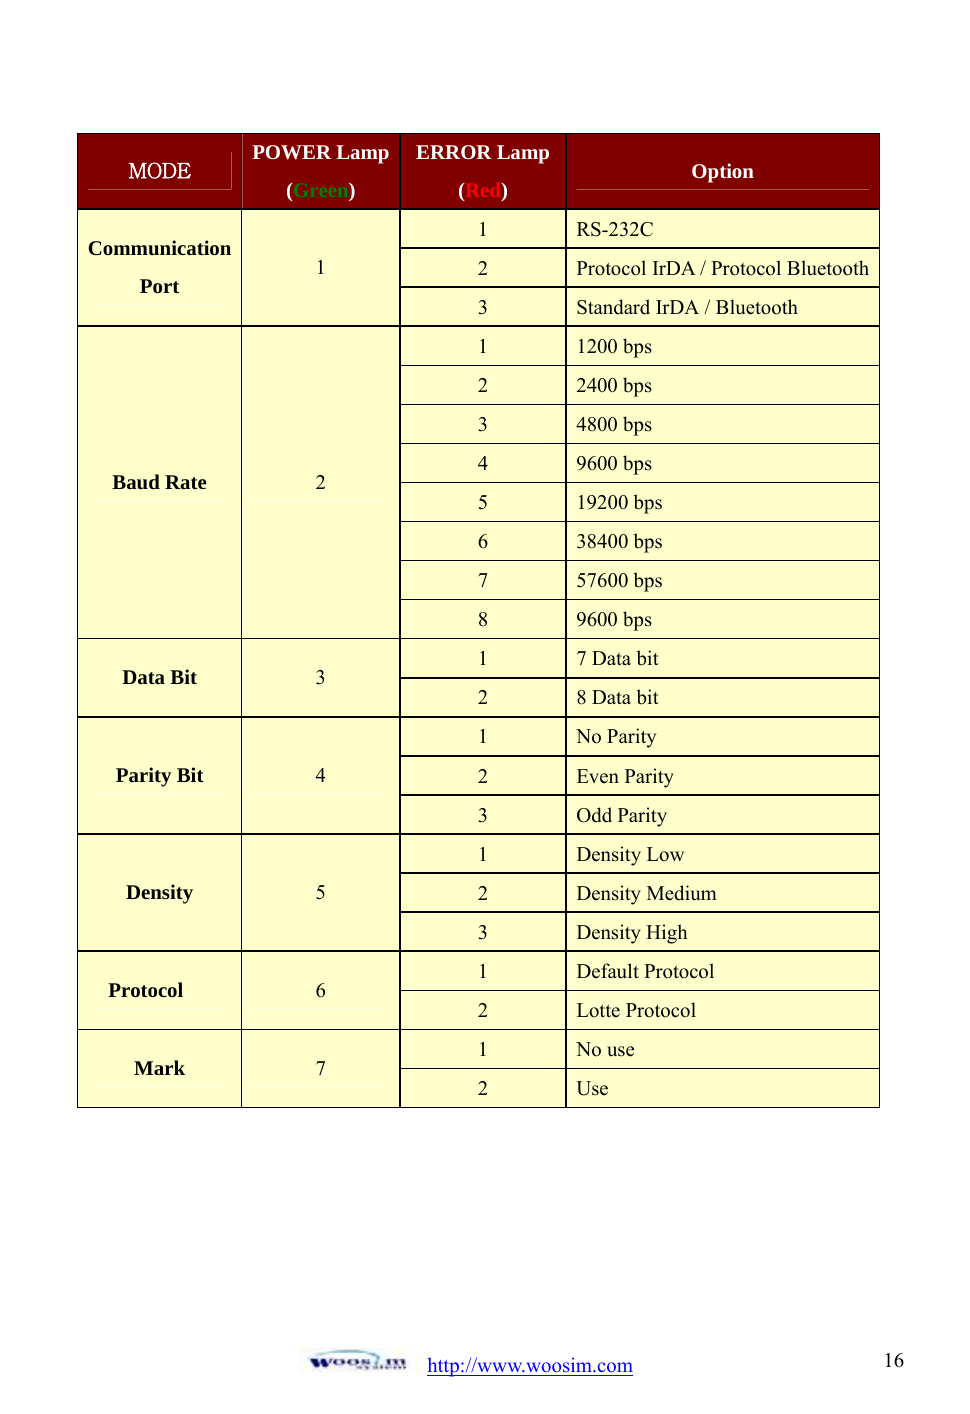
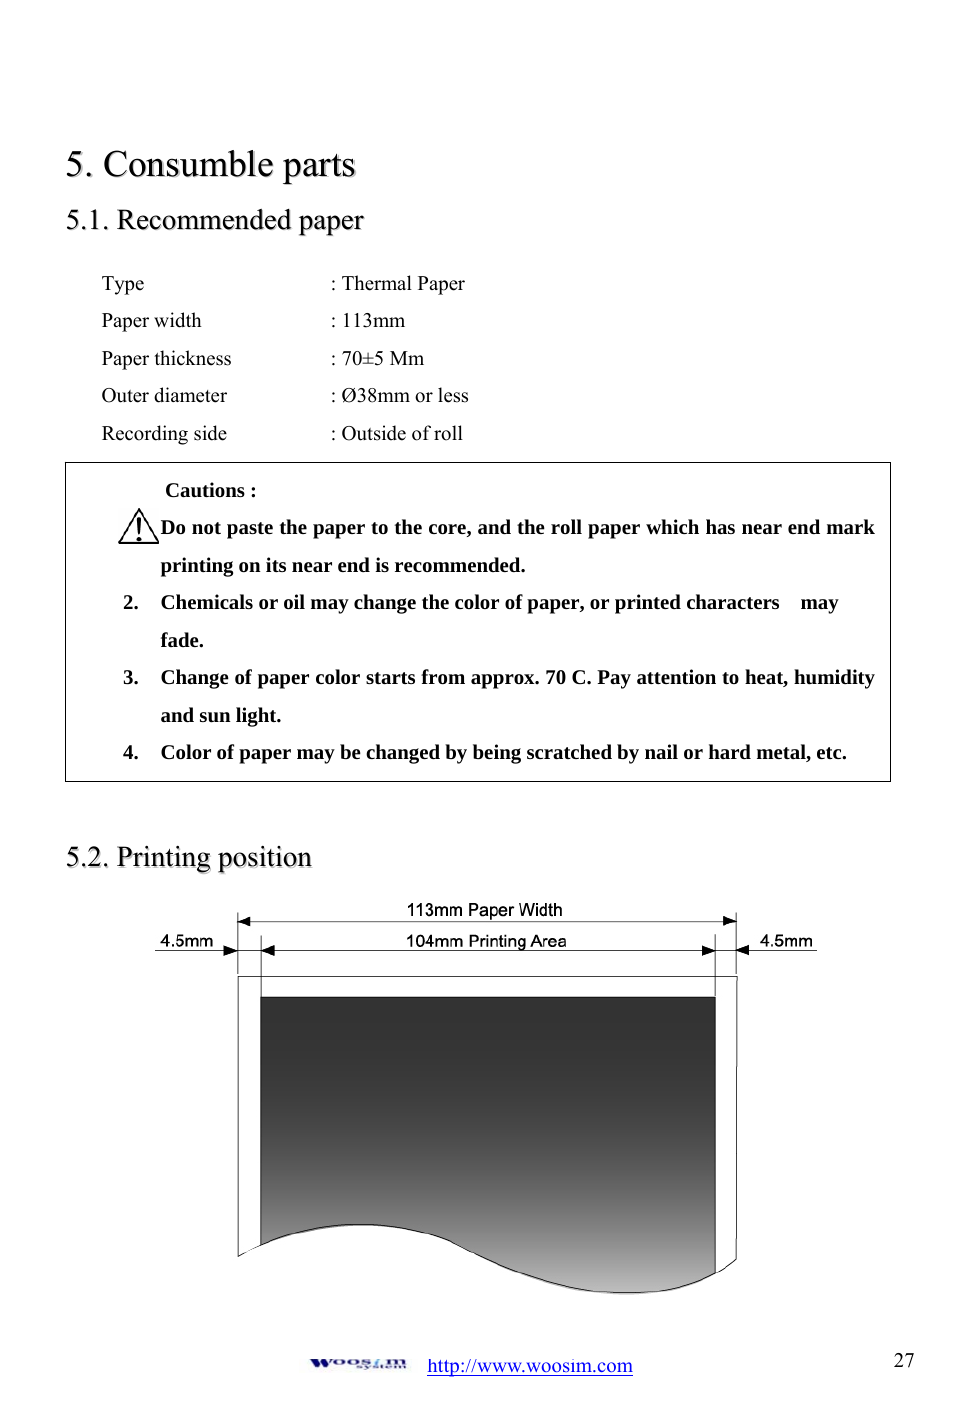
![http://www.woosim.com 811..33..SSppeecciiffiiccaattiioonnssItem Specification Printing method Direct thermal line printing Characters per line 64cplCharacter size Eng. : 9*24dots, 12*24dots Kor. : 16*24dots, [24*24dots] Resolution 203dpi, 8dots/mm Print width 3-inch (72mm, 576dots) Printing speed 40mm / sec Dimensions 107.5 * 88.5 * 45 mm Weight 360g (Including battery & roll paper) Interface RS-232C or TTL / Bluetooth Paper supplied Thermal roll paper (80mm wide, 38ø) Barcode supplied PDF417(2-dimension), Code128, Code39, I2/5, Code93 UPC, EAN, KAN, JAN, CODABAR Receive buffer size 10K bytes Note Printing speed may be slower, depending on the data transmission speed and the combination of control commands. Battery Rechargeable 7.4V DC, 1400mAh(Li-ion) Battery duration 1 hour continuous printing Battery Charger Input (100~250VAC, 50~60Hz) Output(8.4VDC/0.8A), 4hours full charge time Temperature -10¶C ~ 40¶C (operating) -10¶C ~ 70¶C (storage) EnvironmentConditions Humidity 30% - 80% (operating) 10% - 90% (storage) Mechanical 37,000,000 lines MCBF (Mean Cycle Between failure) Head Approximately 50 Km](https://usermanual.wiki/WOOSIM-SYSTEMS/PORTI-SW40/User-Guide-869110-Page-8.png)