WOOSIM SYSTEMS WSP-R242 Mobile Printer User Manual
Woosim System Inc. Mobile Printer
UserManual.wiki
>
WOOSIM SYSTEMS
>
WSP R242 User Manual
User Manual
Navigation menu
Upload a User Manual
Namespaces
Wiki Guide
HTML
PDF
Info
Views
User Manual
Discussion / Help
Navigation
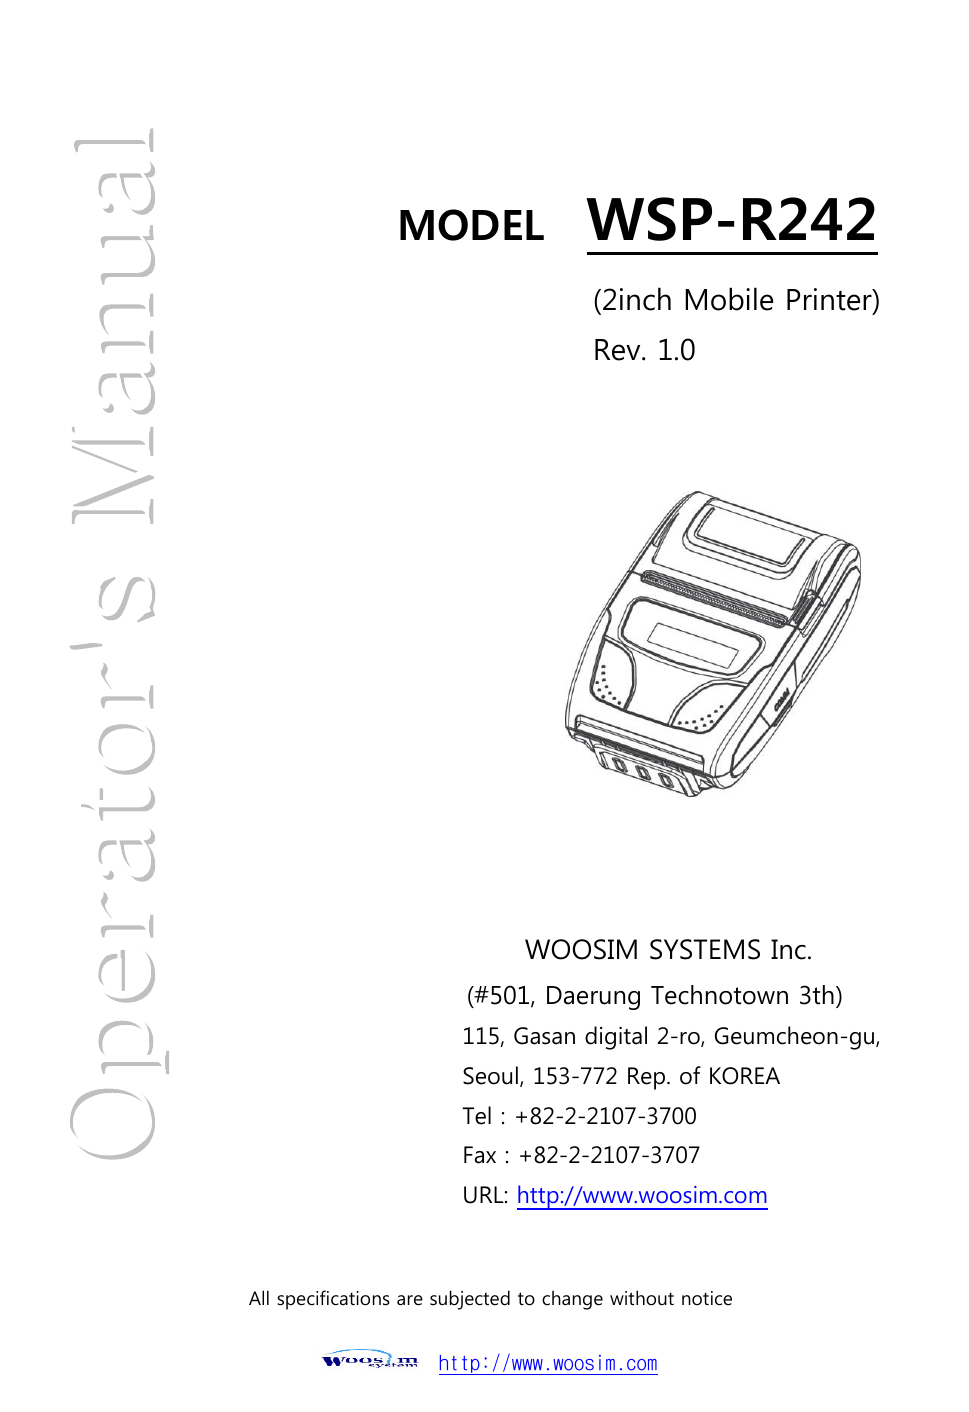
![WSP-R242 Rev. 1.0 http://www.woosim.com 3 Introduction The WSP-R242 is the ideal solution for Mobile banking system , Retail, point of sales, Credit card Transaction, other traveling and mobile computing etc. The general features of WSP-R242 printer are as follows: Compact size (79.2 x 123 x 45.6mm) Light weight(231g) for true mobility Very silent printing thru direct thermal printing method High speed (100mm/sec, MAX) High resolution(203dpi : 8dots/mm). USB, Bluetooth Ver3.0 interface Support Graphic LCD(128×32dots) with Blue LED Backlight Support Magnetic Stripe Reader [option] Support Smart Card Reader [option] Support text and graphic printing Easier paper roll loading by CLAMSHELL design One touch paper cover Printer door open & Paper-out sensor Easier maintenance with self-diagnostic. In field programming – Update Firmware, Download Fonts and Logos Microsoft Windows XP/VISTA/7/8/CE, Linux, Android compatible. Flow control : Software (XON/XOFF) ※ Hardware flow control not supported in printer. Agency Approvals](https://usermanual.wiki/WOOSIM-SYSTEMS/WSP-R242/User-Guide-2797772-Page-3.png)
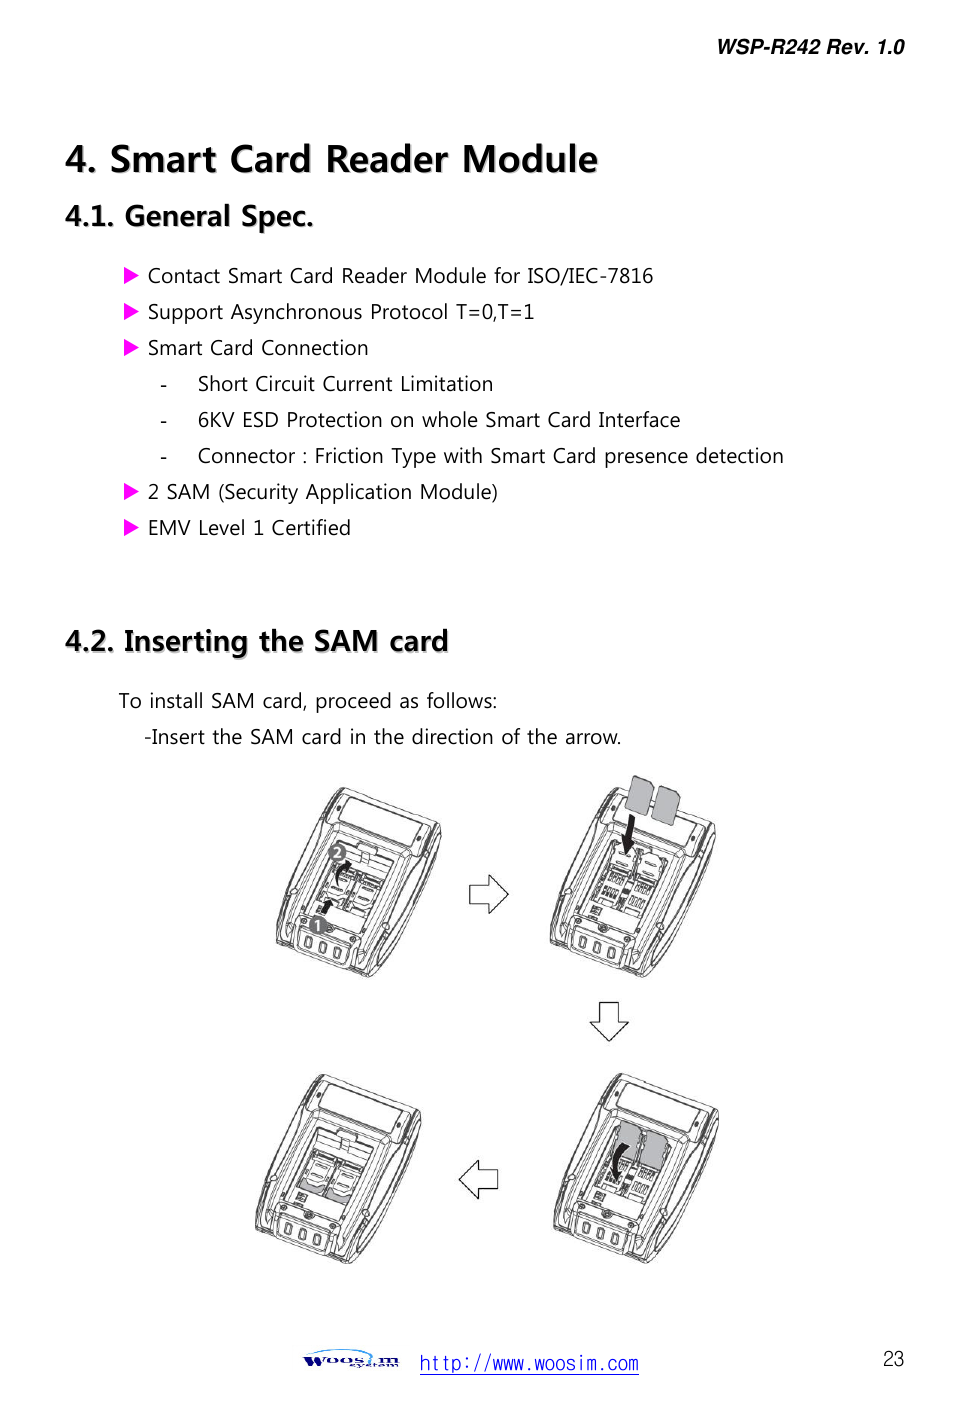
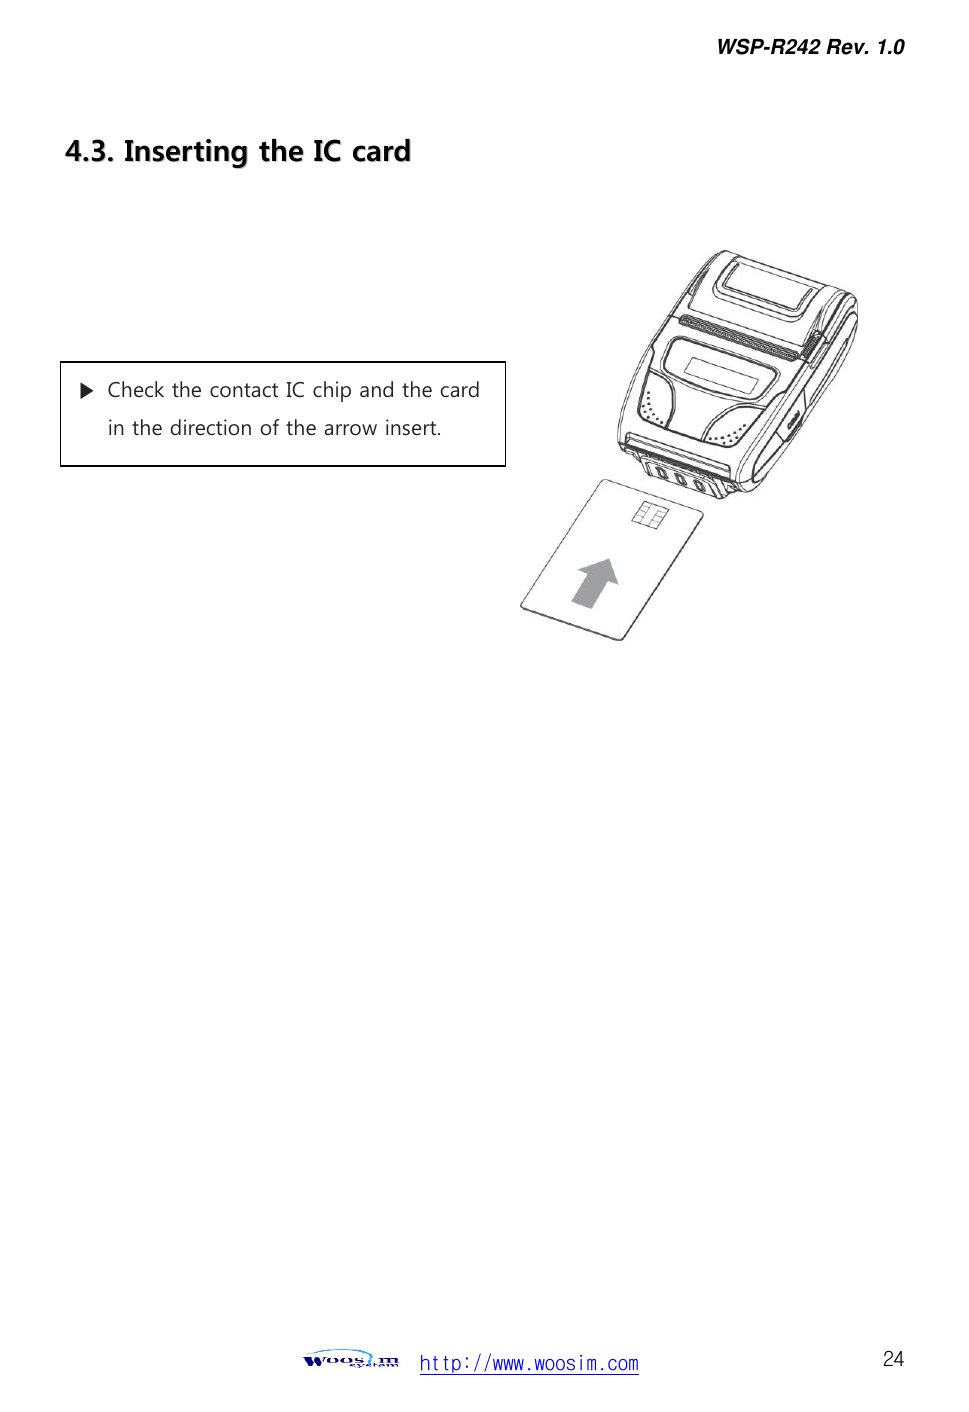
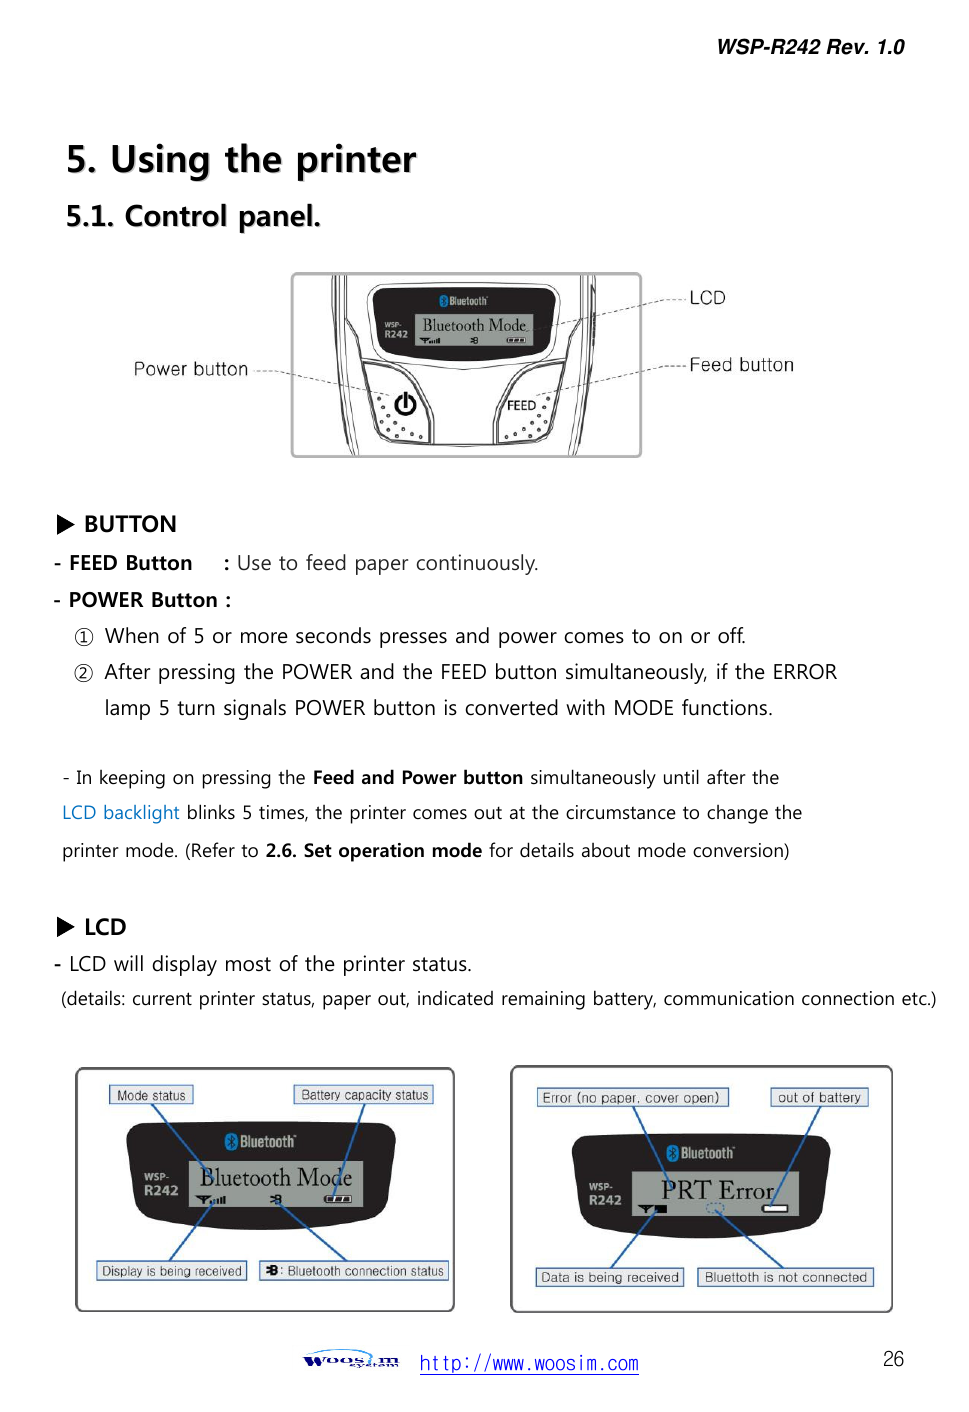
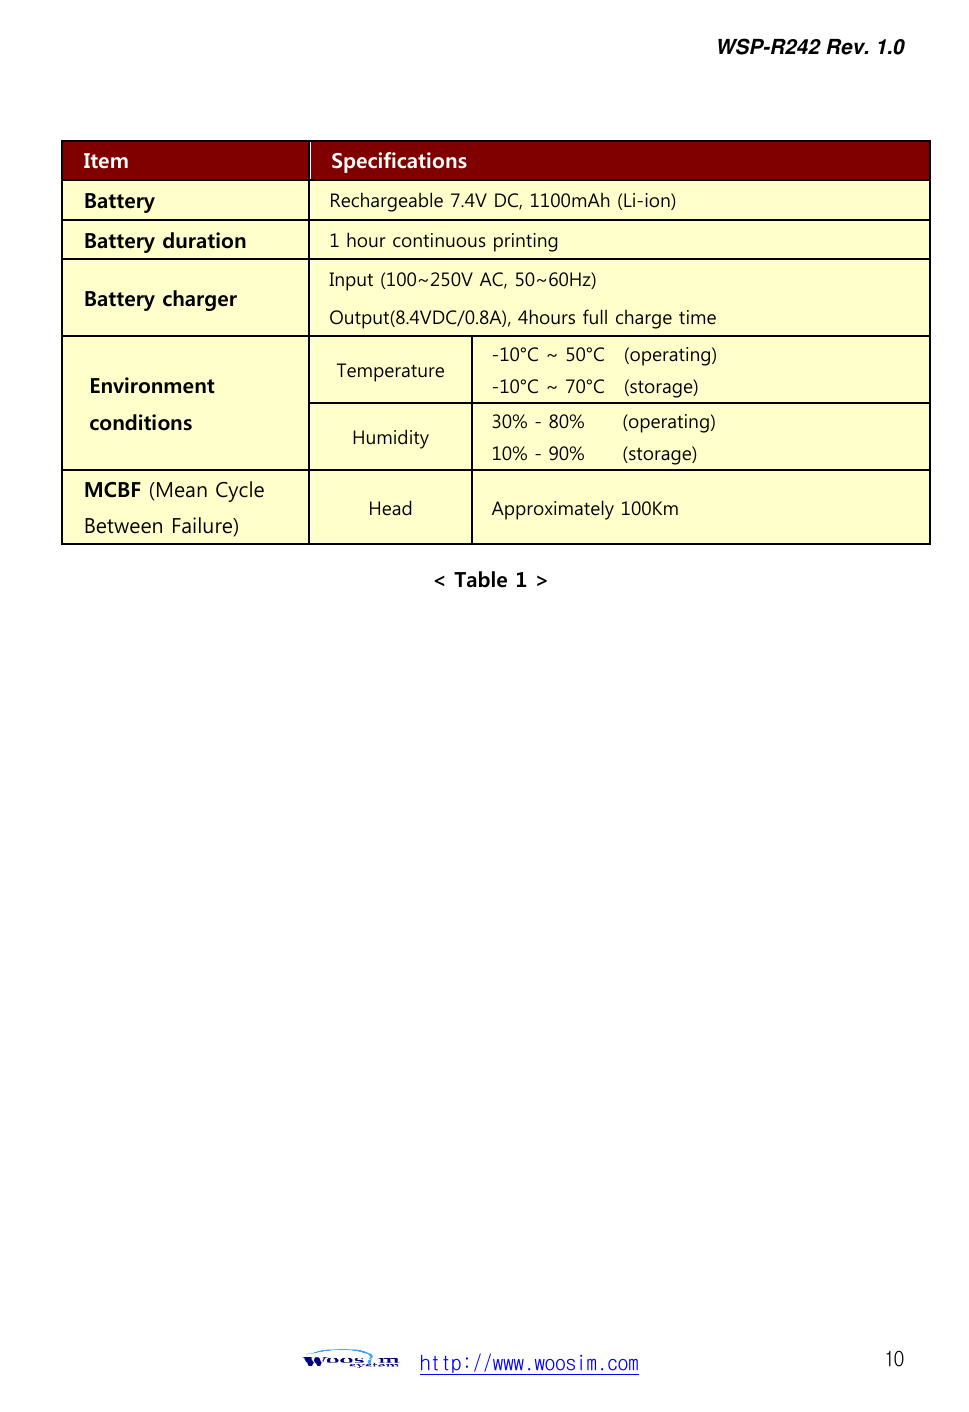
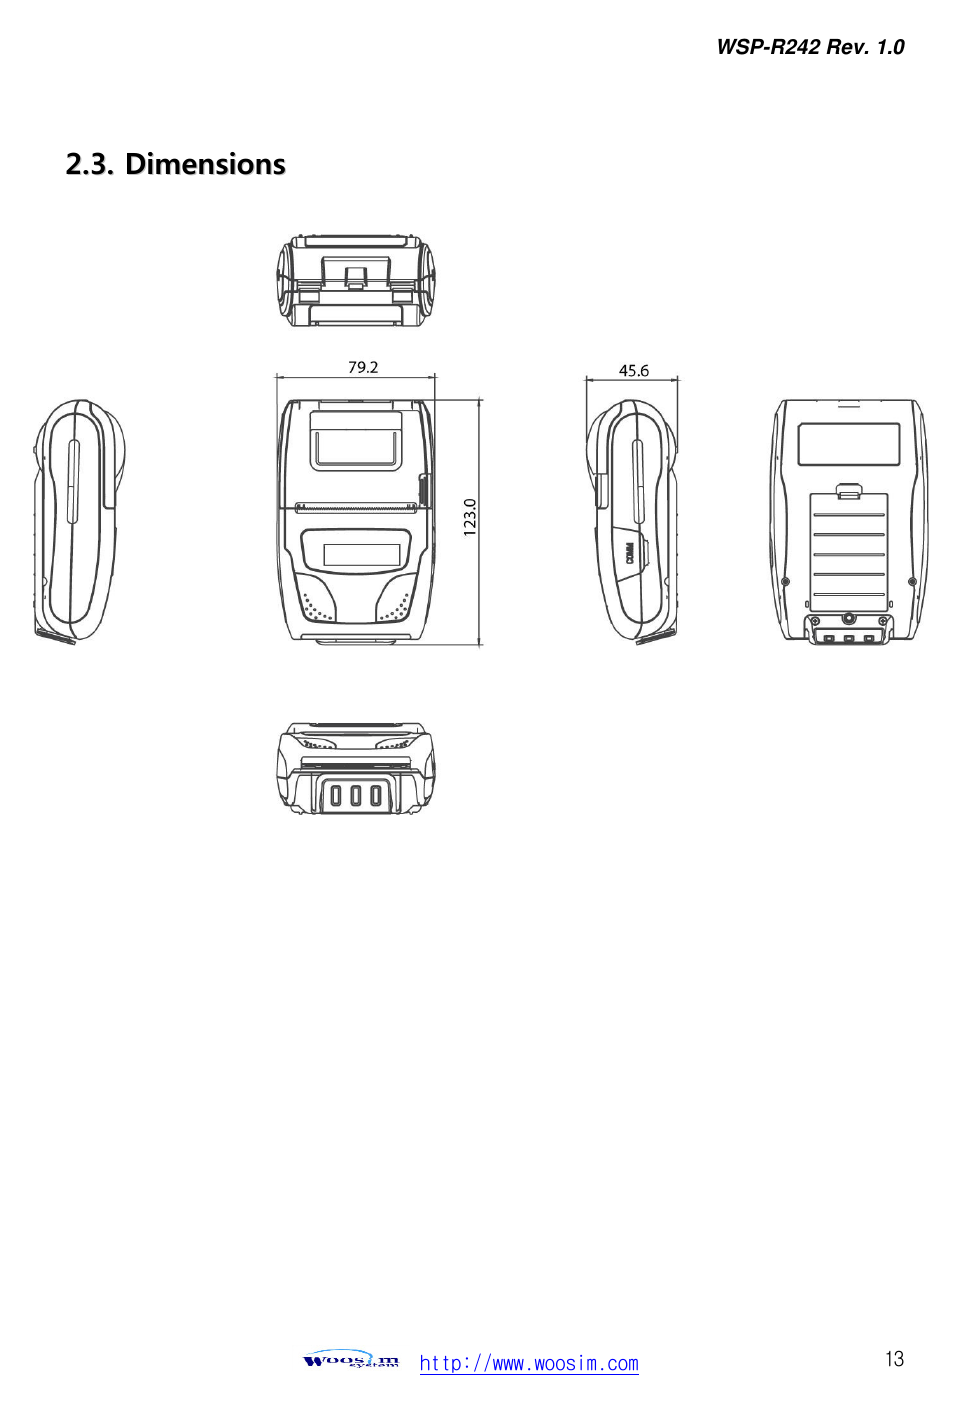
![WSP-R242 Rev. 1.0 http://www.woosim.com 9 11..33.. SSppeecciiffiiccaattiioonnss.. Item Specifications Print method Direct thermal line printing Character size - Font Size A: 12X24 / Font Size B : 9X24 / Font Size C : 8X16 - KOR : 24X24(16X24) / CHN, JPN : 24X24 Characters per line - Font A : 32cpl / Font B : 42cpl / Font C : 48cpl - KOR : 16cpl(24) / CHN, JPN : 16cpl Optional Characters Alphanumeric:95, Extended Graphics:128X50 pages, International:10, Simplified/Traditional Chinese, Japanese, Korean Resolution 203dpi, 8dots/mm Print width 2-inch (48mm, 384dots) Print speed 100mm / sec (MAX) Dimension 79.2 x 123 x 45.6mm Weight (w/o paper) 231g Interface USB, Bluetooth Ver3.0 Paper roll Thermal roll paper (58mm wide, 40ø) Barcodes 1-dimension : UPC-A, UPC-E, EAN-8, EAN-13, CODE-39, CODE-93, CODE-128, ITF, CODABAR 2-dimension : PDF417, Micro PDF417, Truncated PDF417, QR-CODE, DATA Matrix, Maxicode Etc :GS1 databar Driver Microsoft Windows XP/VISTA/7/8/CE, Linux, Android compatible H/W Spec MCU : RX-32bit, RAM : 128M bit, FLASH : 64M bit Receive buffer size 1M bytes Sensor Support Cover open, Paper, Label LCD 128×32 Dots FSTN (Blue LED Backlight) MSR Triple tracks (1&2&3 Tracks Reading) *Supports 3DES & AES encryption Smart Card Reader [option] ISO 7816 Compliant [EMV level 1 Certified] / T=0, T=1 support / 2 SAM (Security Application Module) (Continue… )](https://usermanual.wiki/WOOSIM-SYSTEMS/WSP-R242/User-Guide-2797772-Page-9.png)
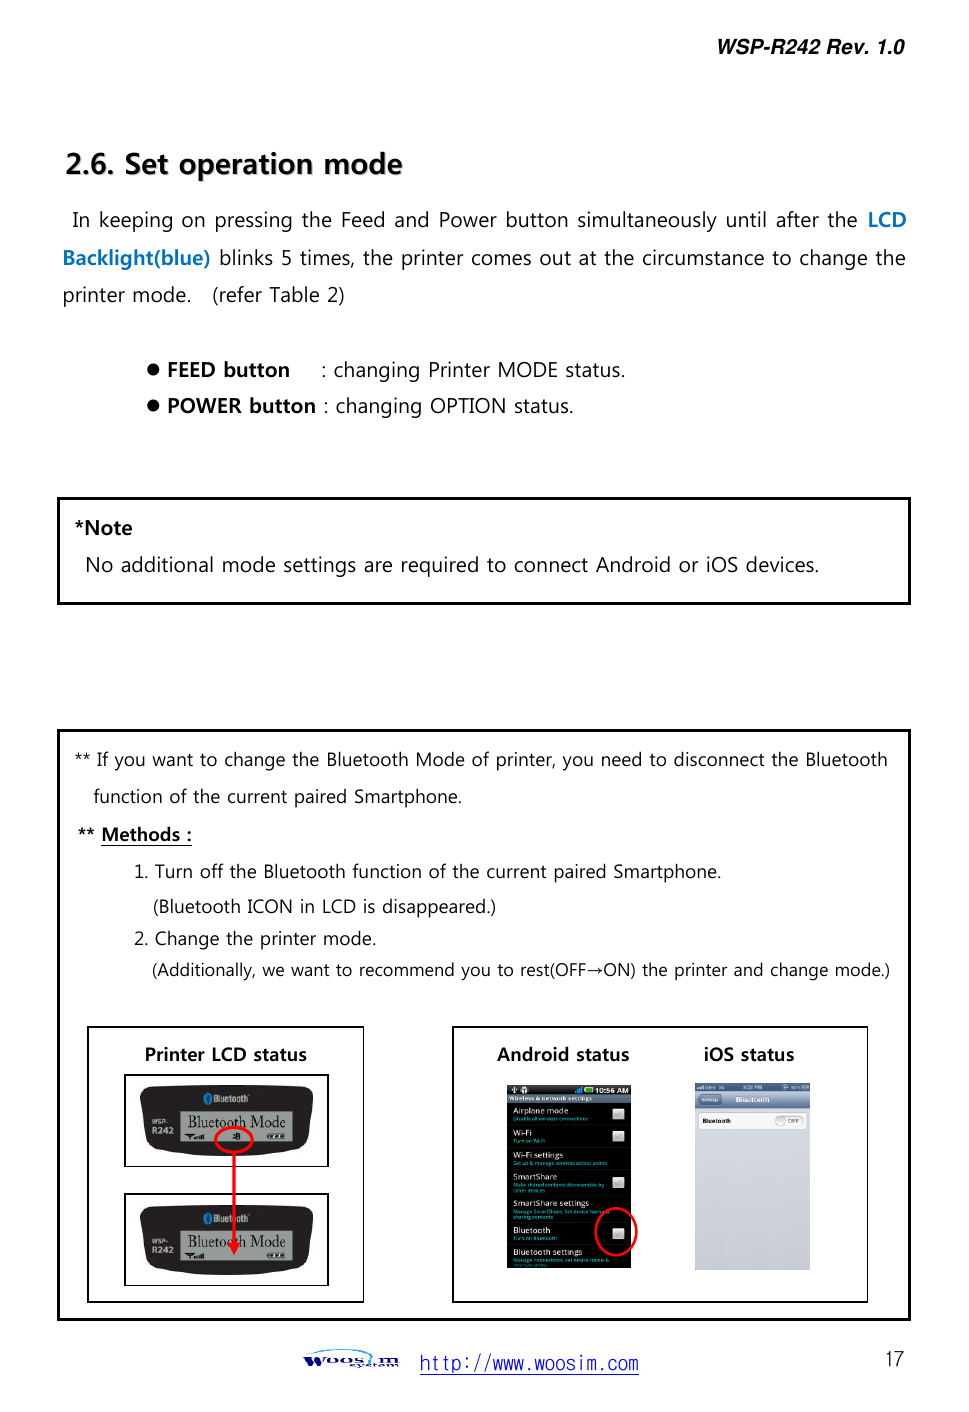
![WSP-R242 Rev. 1.0 http://www.woosim.com 18 [Example] The defaults of the printer are : USB / Density Low / Mark No Use / Sensor High / PWDN 5 min slp If a user wants to modify the defaults with Bluetooth / Density High / Mark Use / Sensor Low / PWDN No Use Press FEED & POWER Button during the LCD backlight flickers 5 times. You will see present COMMUNICATION mode in the LCD. (USB) Press the POWER Button twice. And then, interface mode has set to Bluetooth mode. When you press FEED button once. You will see present DENSITY mode in the LCD. (Density low) Press POWER Button twice. And then the density has set to Density high. When you press FEED button once. You will see present MARK mode in the LCD. (No Use) Press POWER Button once. And then the mark has set to Mark Use. When you press FEED button once. You will see present SENSOR mode in the LCD. (High) Press POWER Button once. And then the sensor has set to Sensor Low. When you press FEED button once. You will see present PWDN mode in the LCD. (5 min slp) Press POWER Button six times. And then the Power down has set to PWDN No Use. If all the mode have set, press the POWER Button and the FEED Button at the same time. After then release the buttons at the same time. Bluetooth / Density High / Mark Use / Sensor Low / PWDN No Use](https://usermanual.wiki/WOOSIM-SYSTEMS/WSP-R242/User-Guide-2797772-Page-18.png)