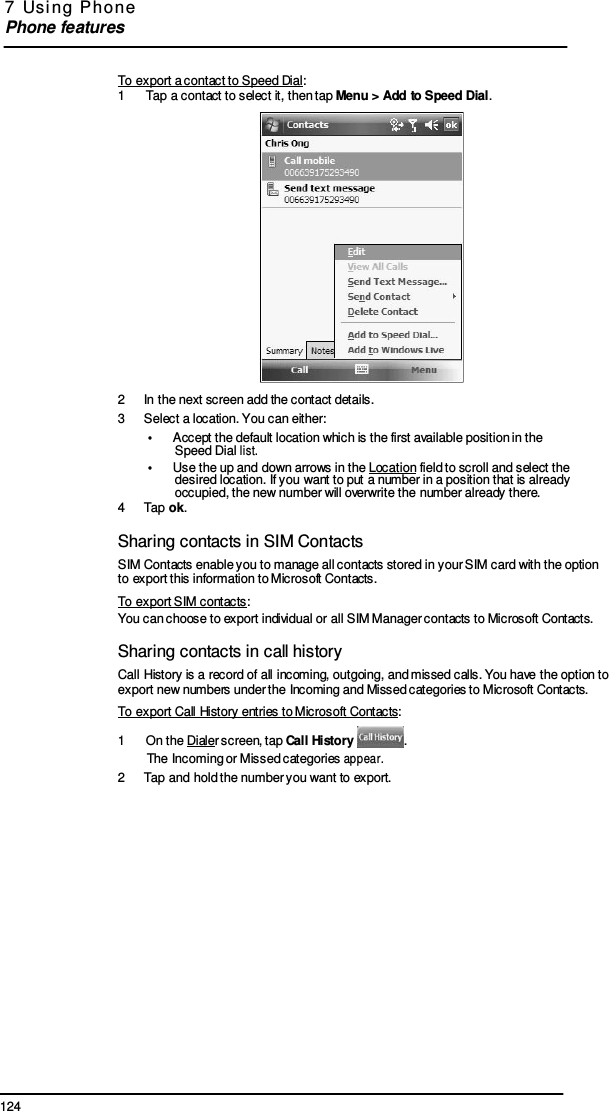
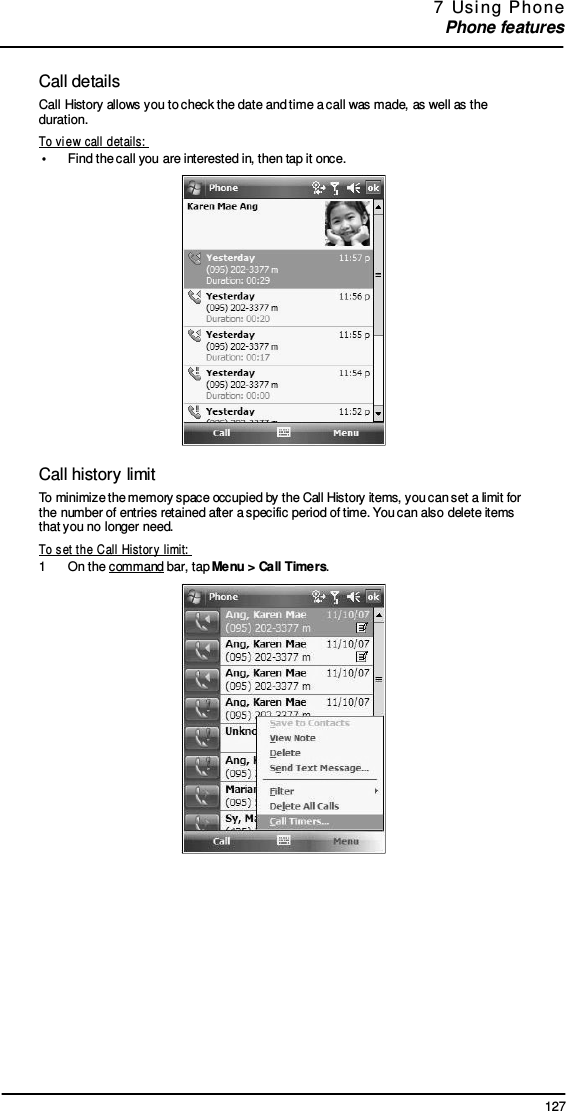
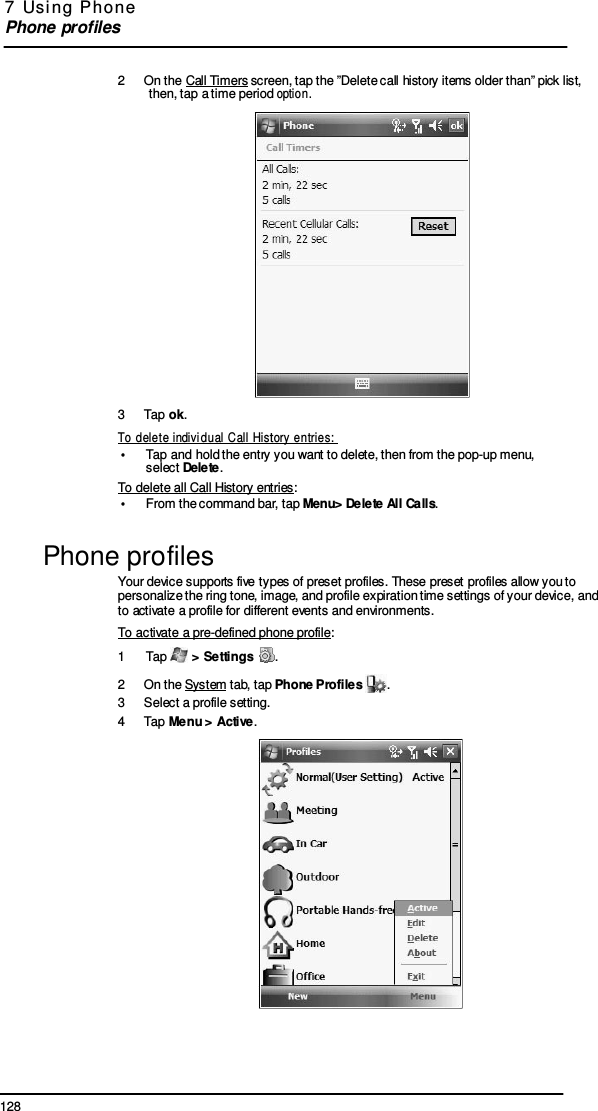
Wistron N7SP510 GSM/WCDMA cellular phone w/BT User Manual SP510 UG EN WIN6 20090317
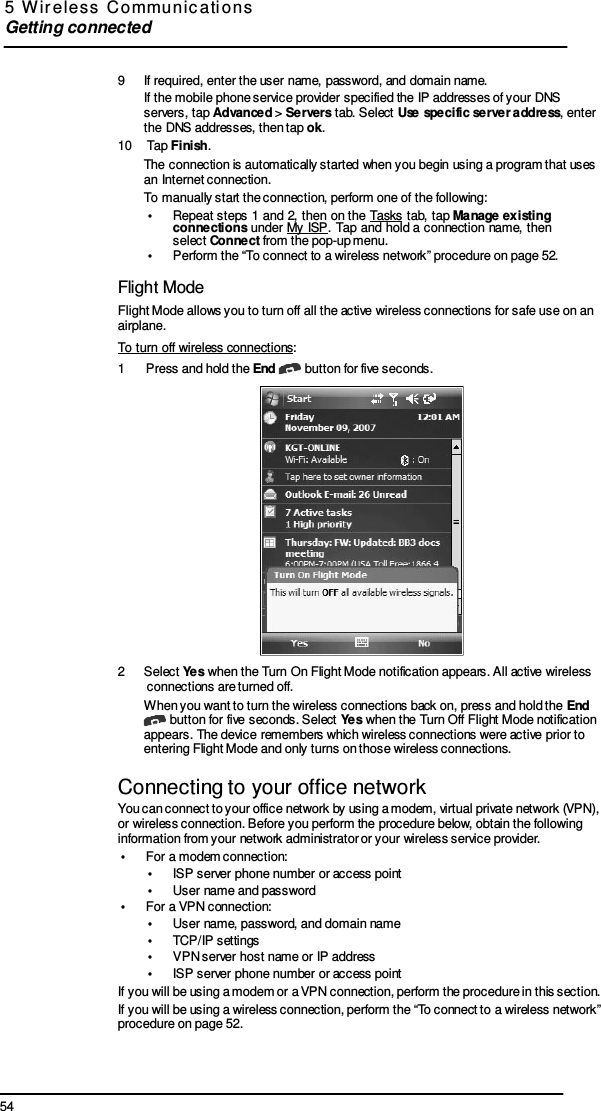
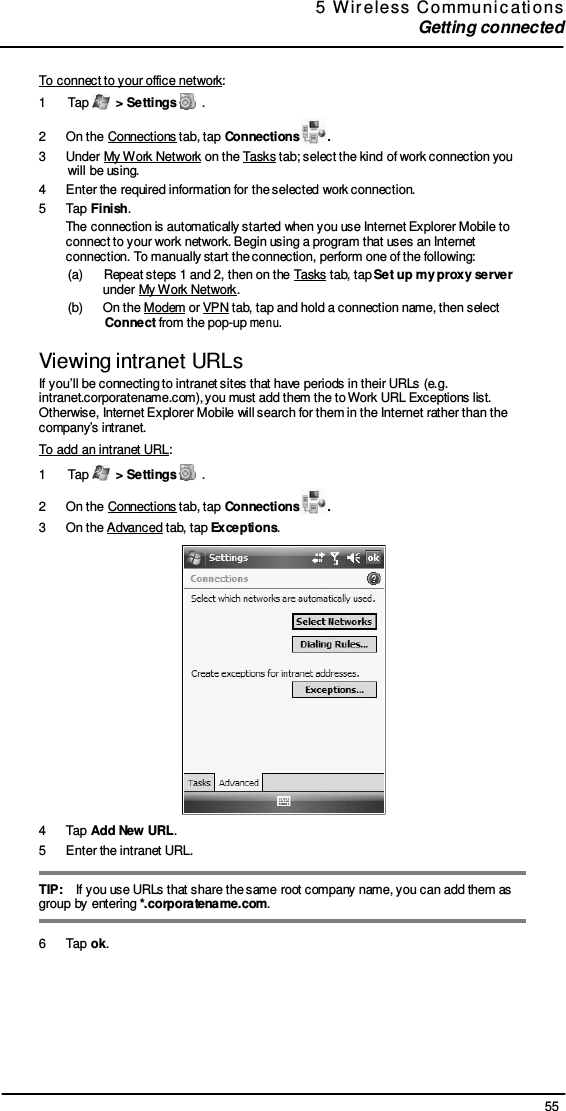
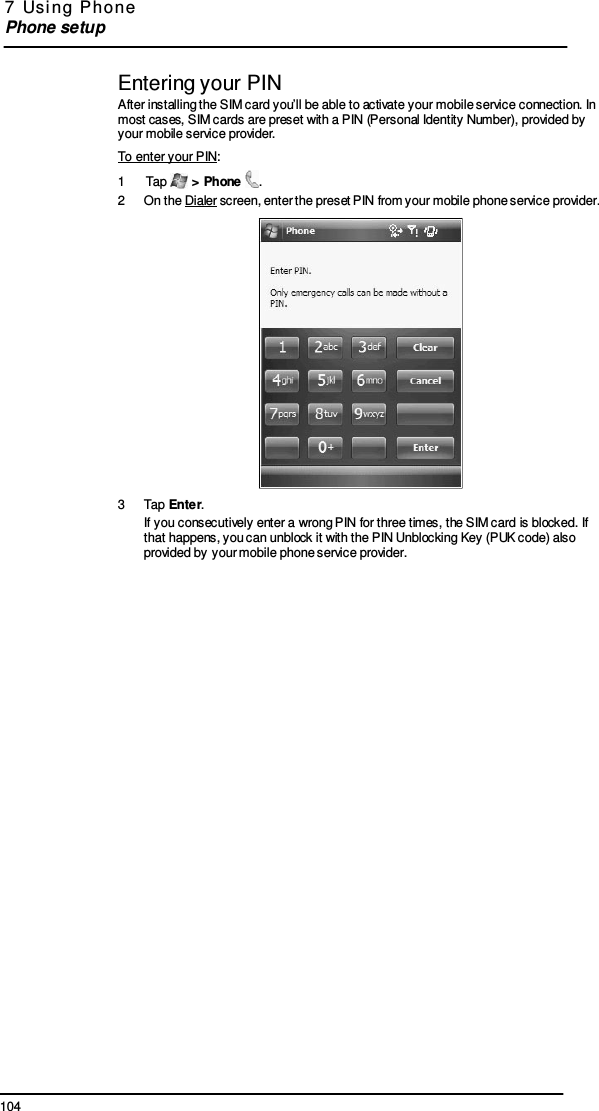
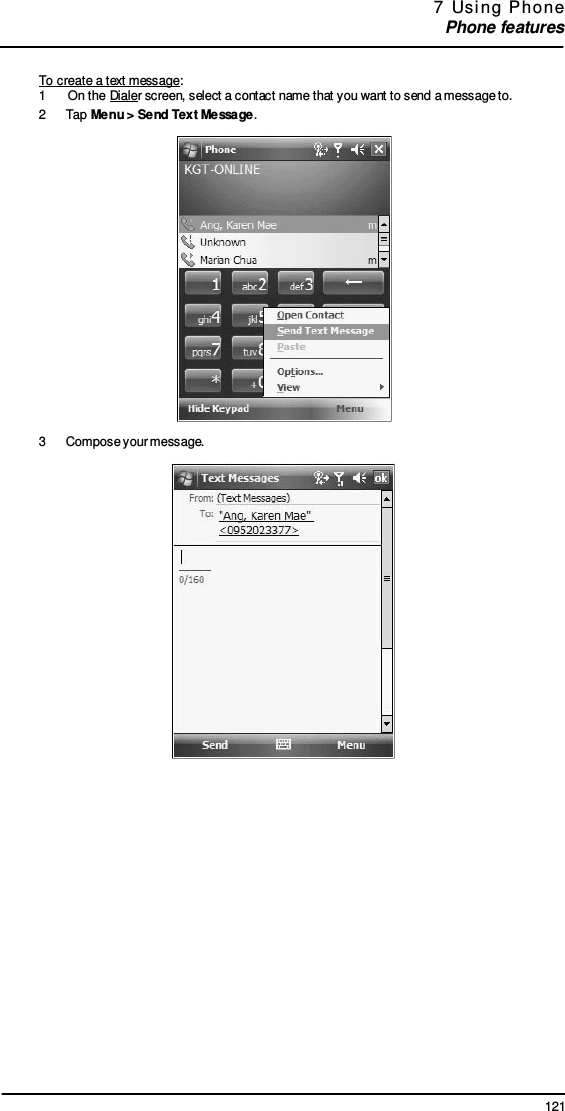
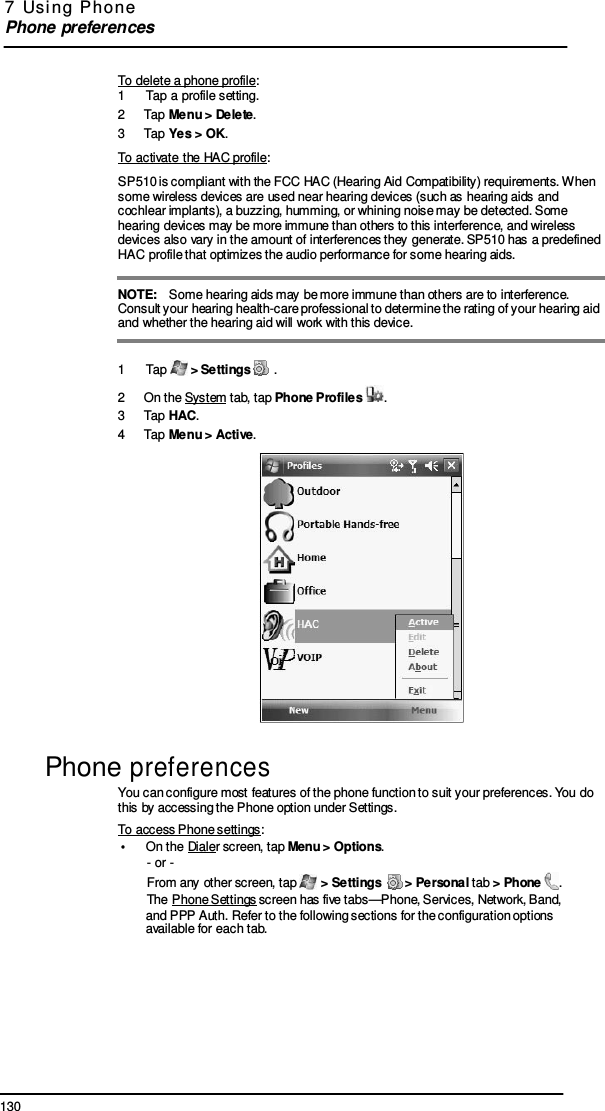
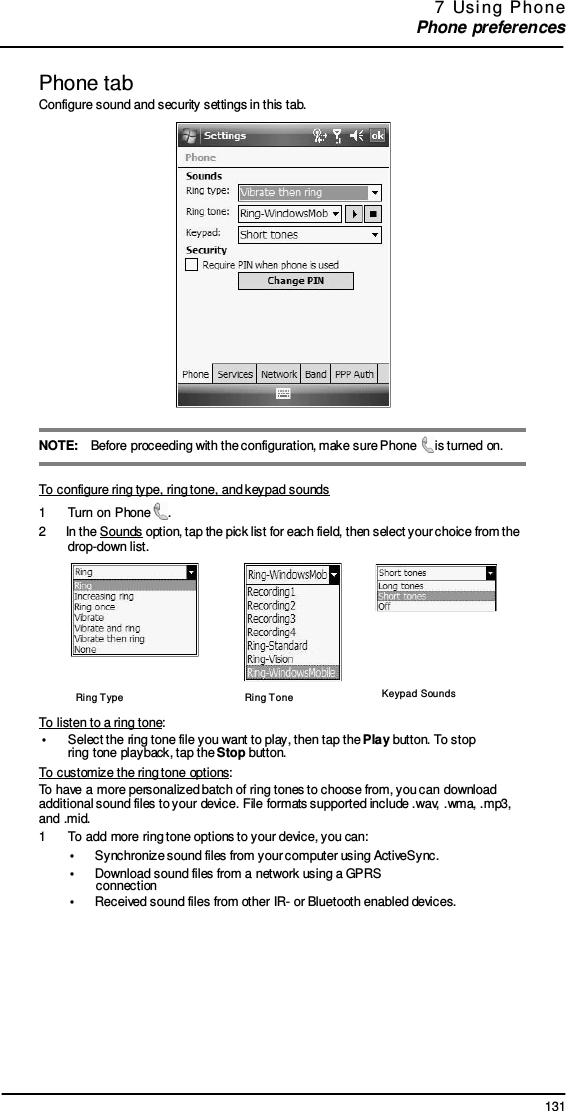
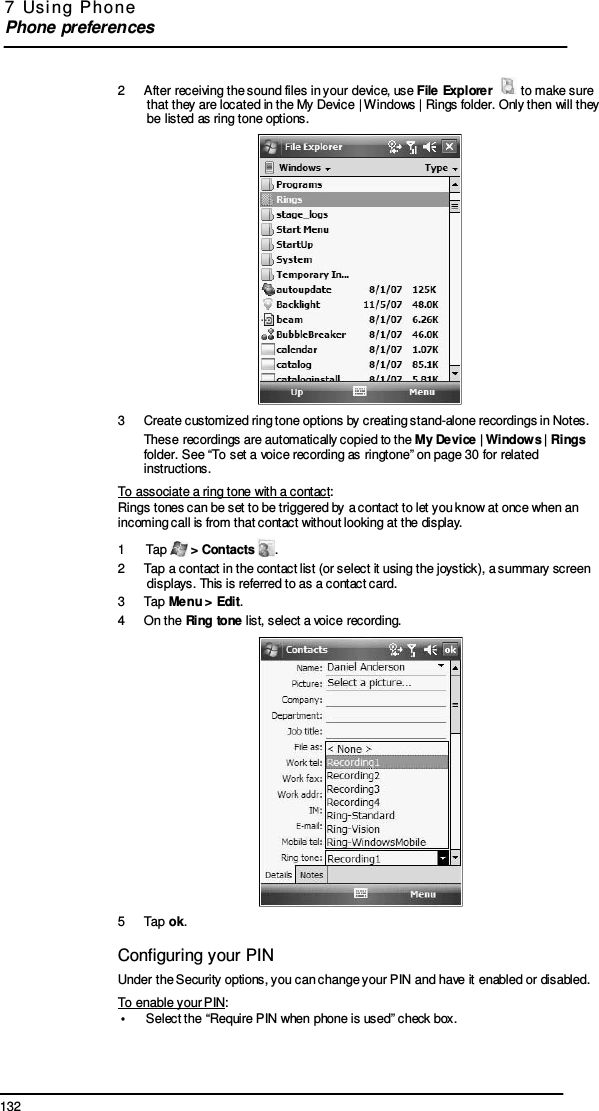
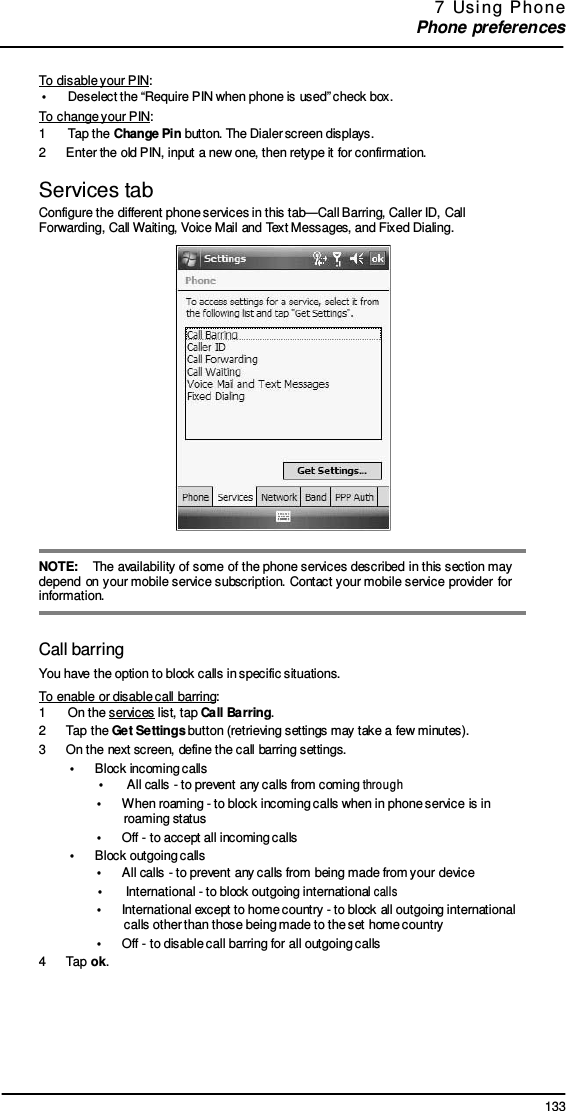
Wistron Corporation GSM/WCDMA cellular phone w/BT SP510 UG EN WIN6 20090317
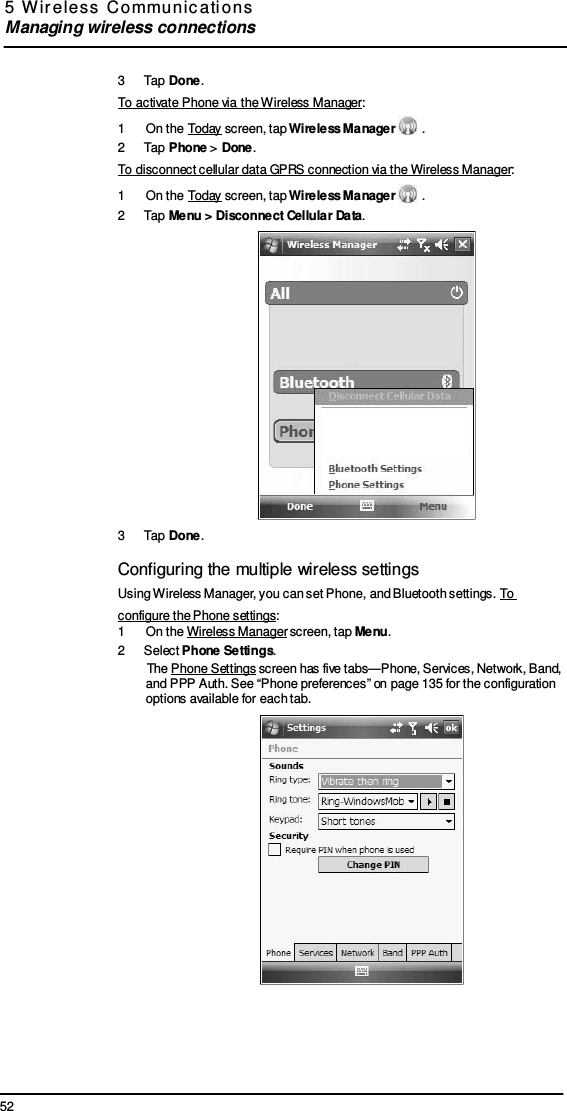
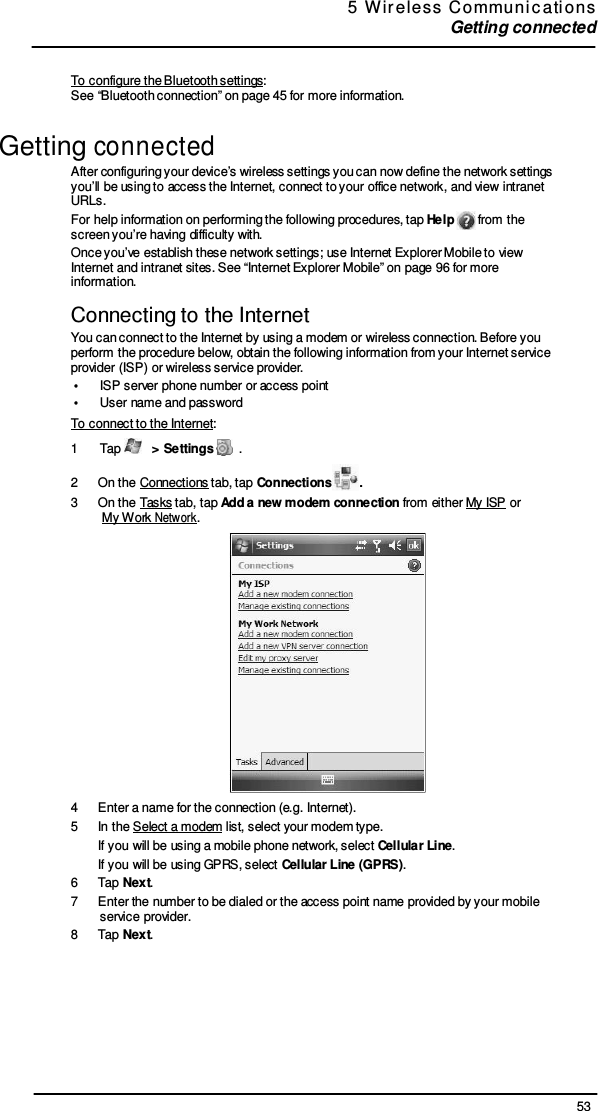
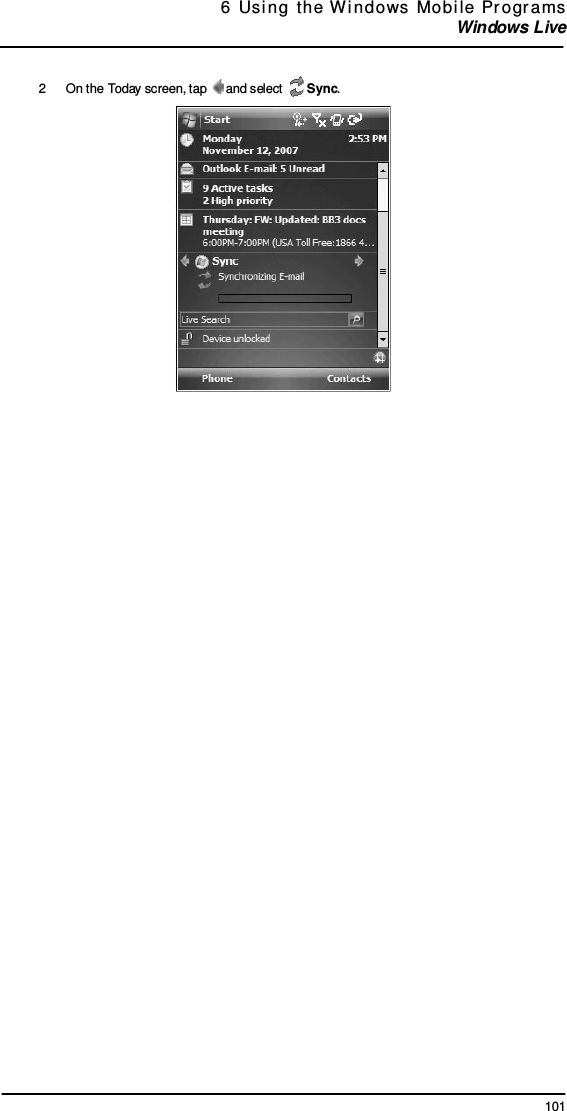
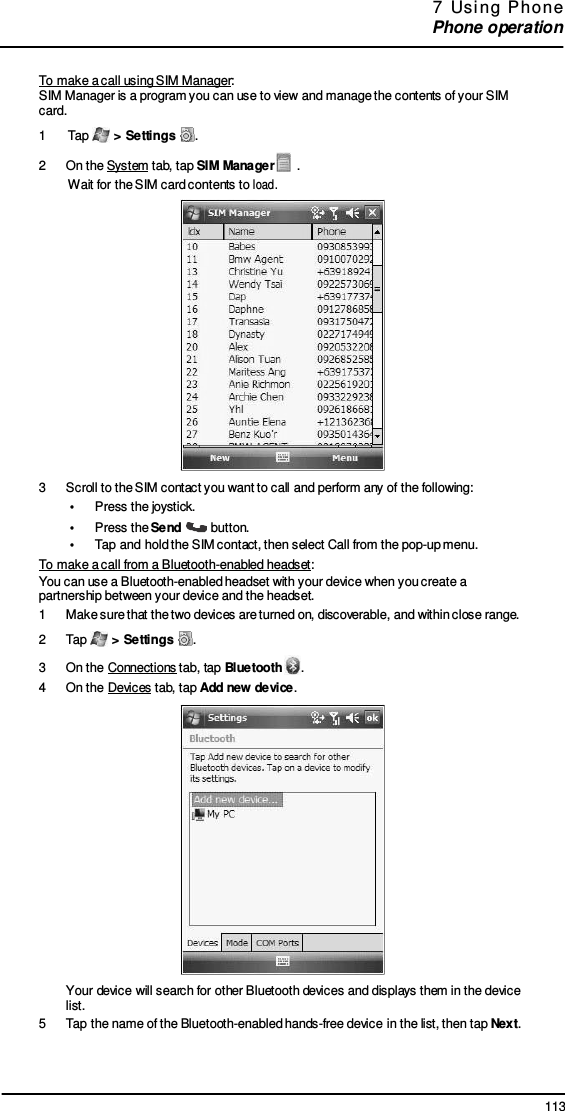
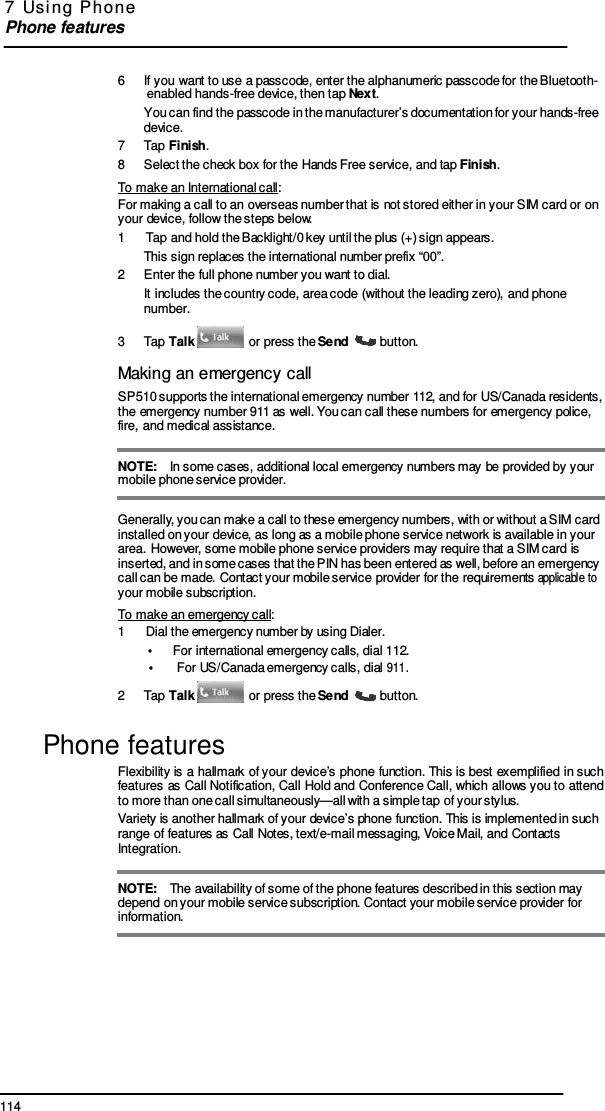
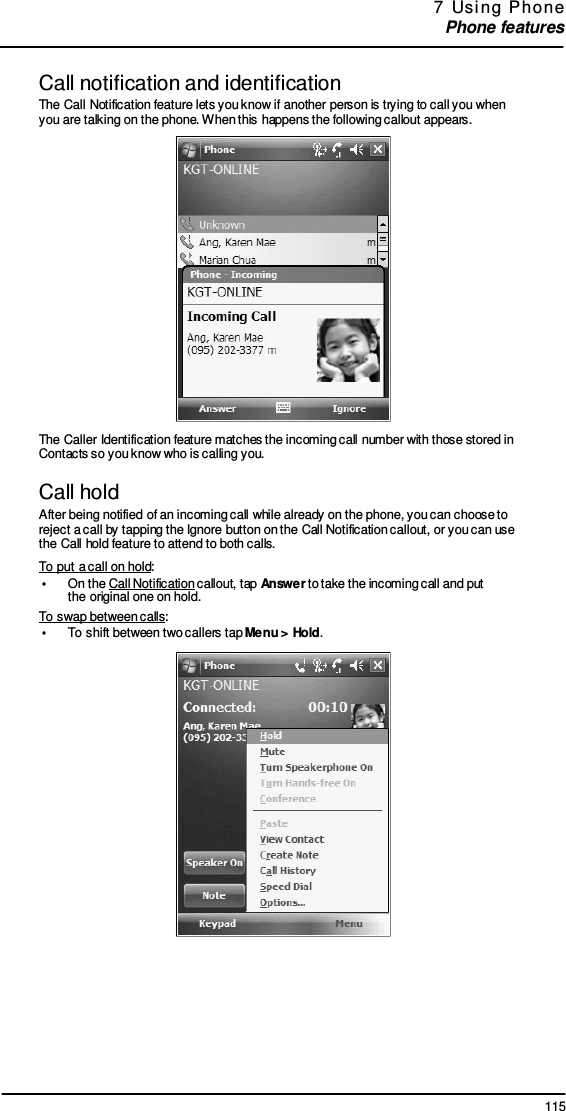
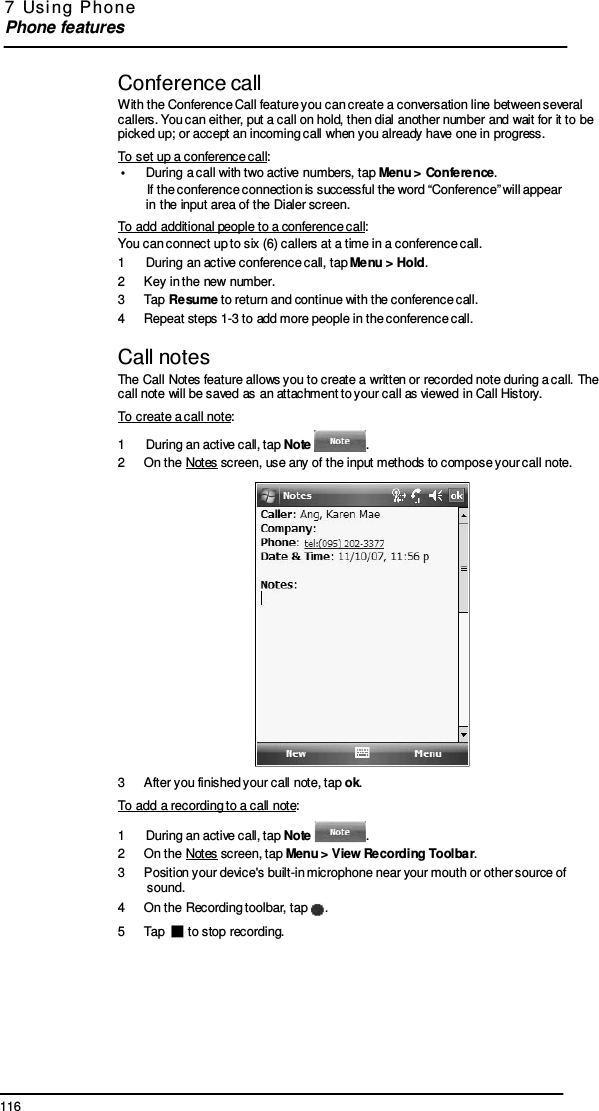
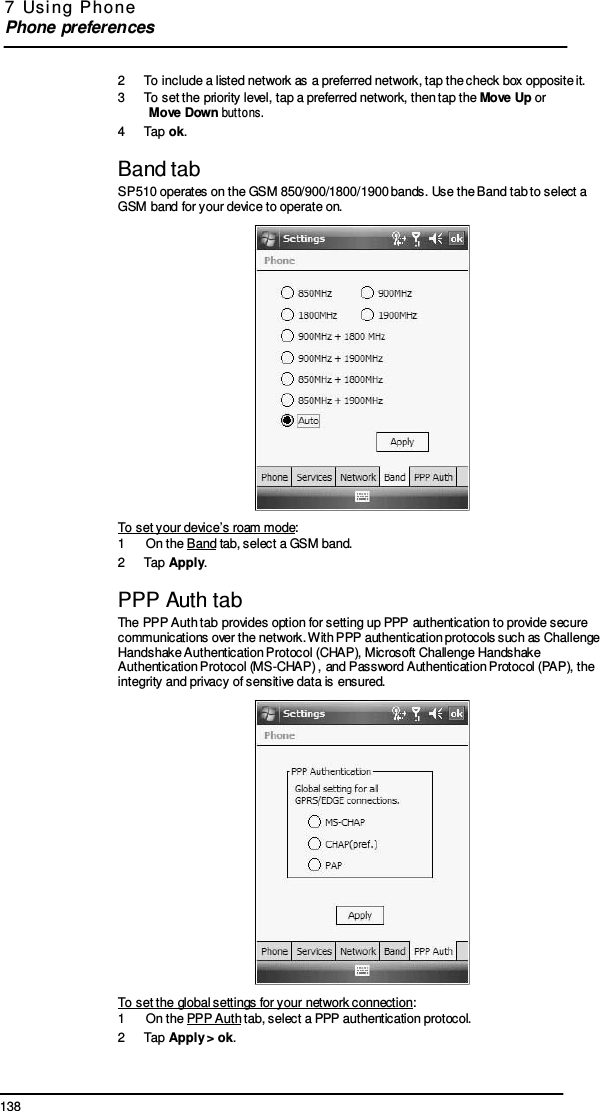
UserManual.wiki
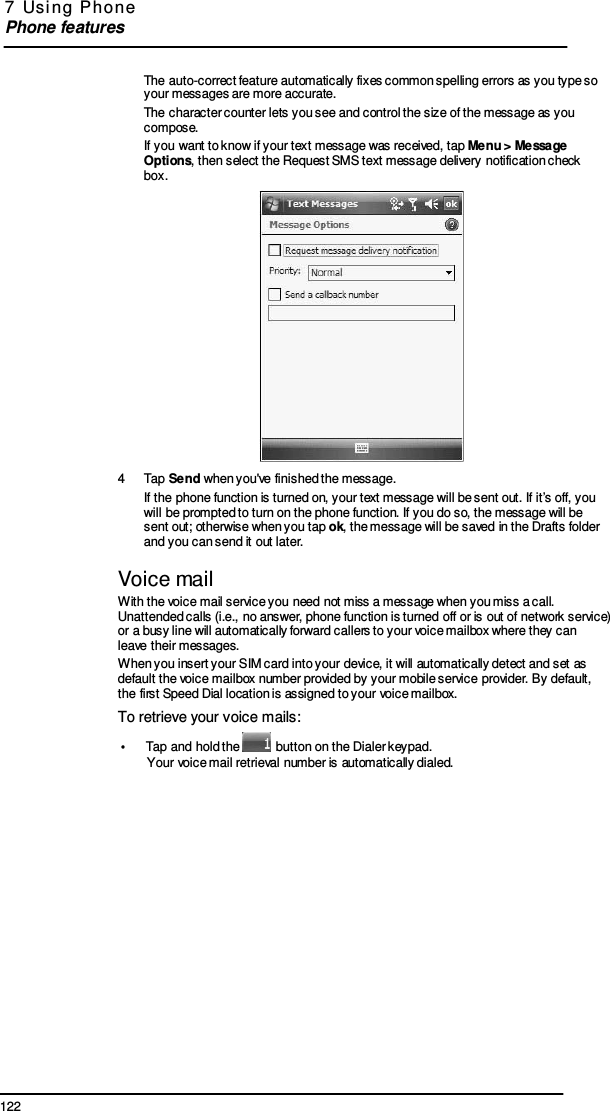
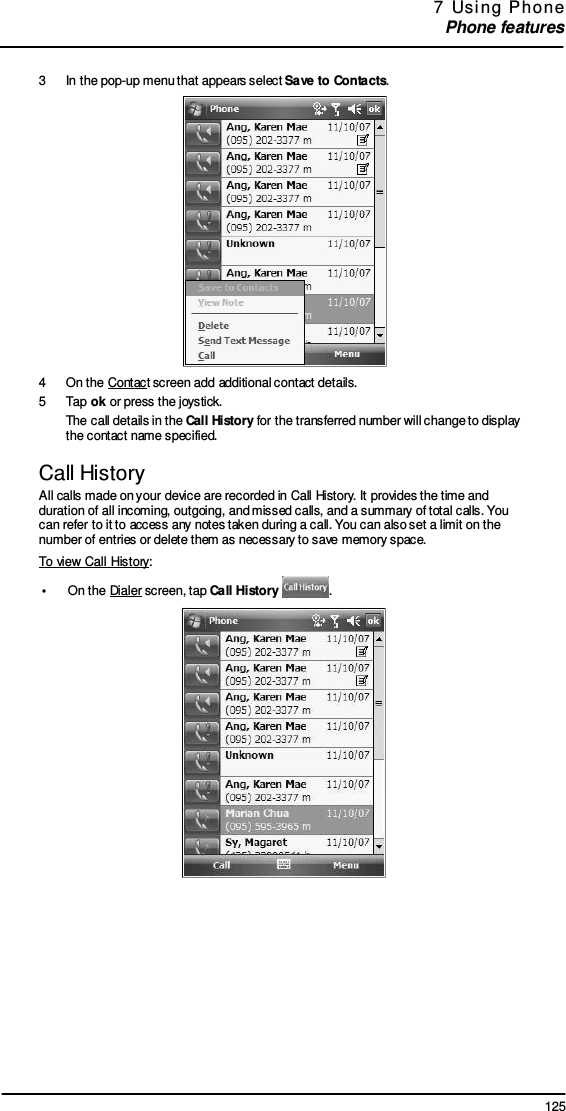
>
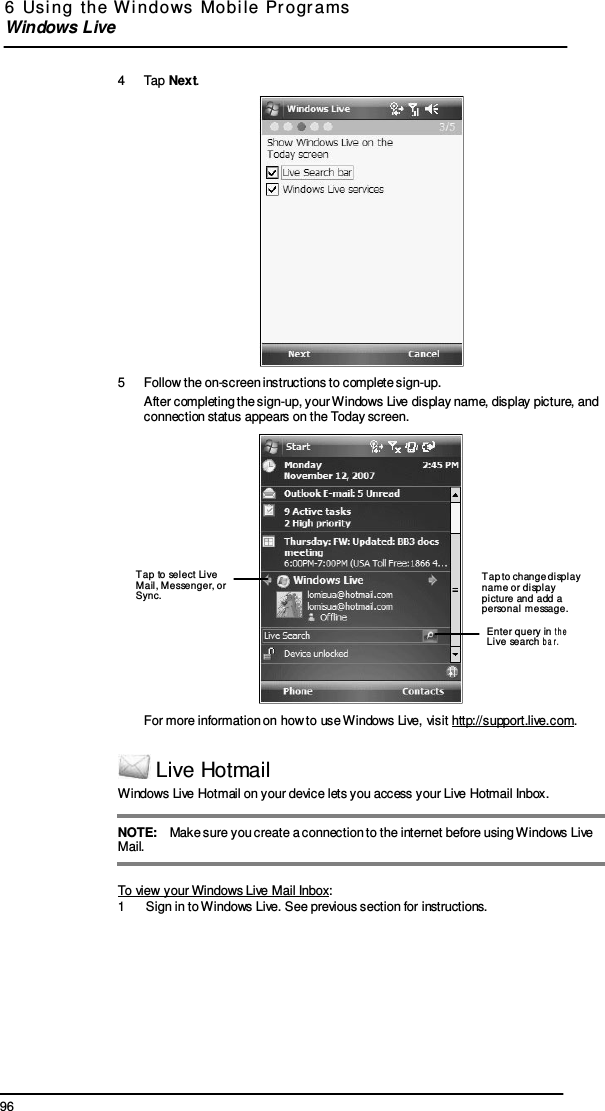
Wistron
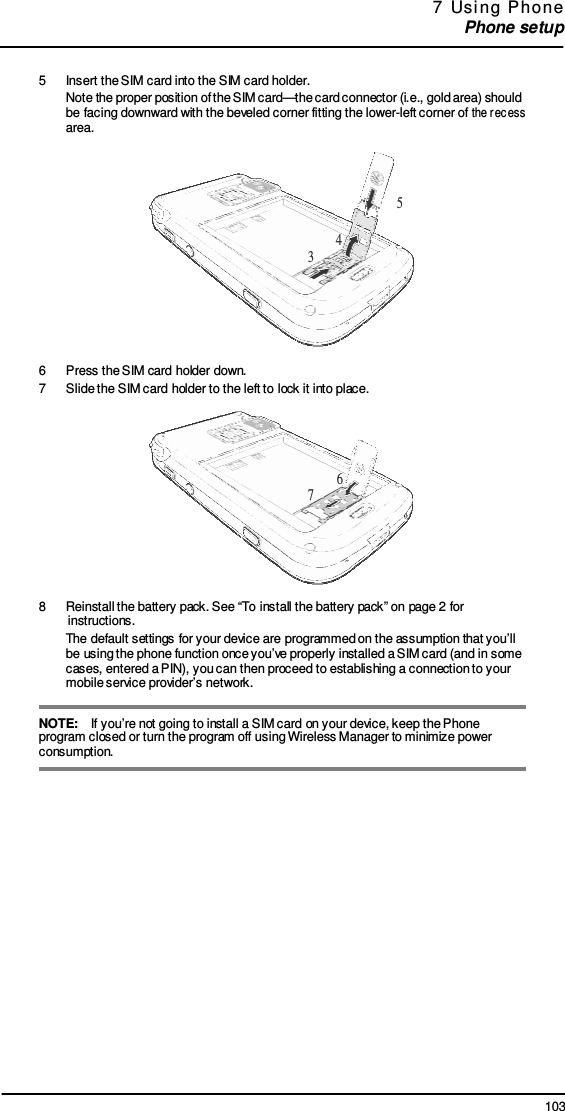
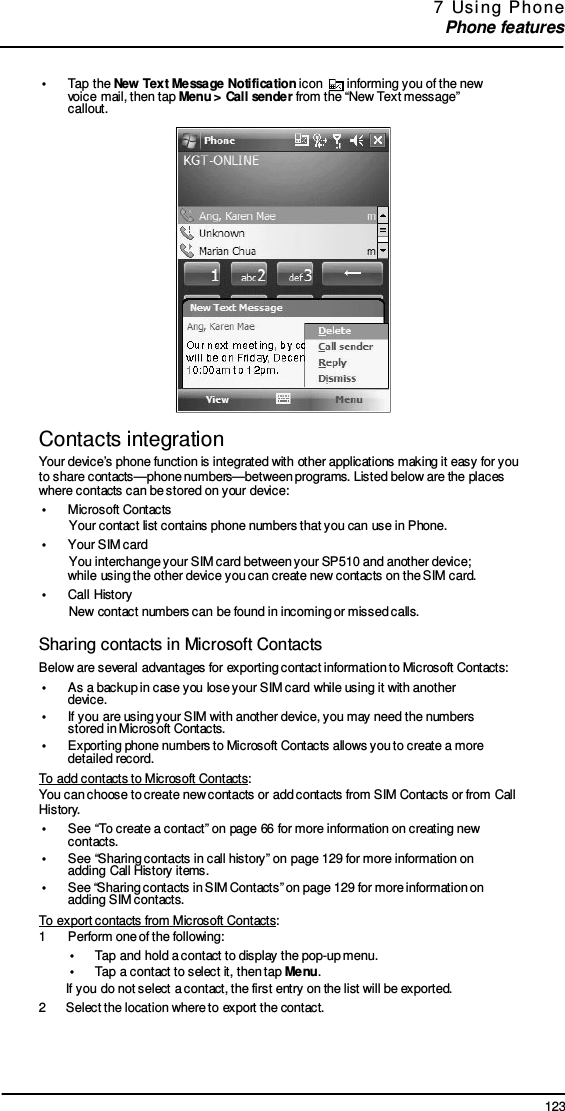
>
N7SP510 User Manual
>
Manual 1
Contents
1.
Manual 1
2.
Manual 2
Manual 1
Navigation menu
Upload a User Manual
Namespaces
Wiki Guide
HTML
PDF
Info
Views
User Manual
Discussion / Help
Navigation


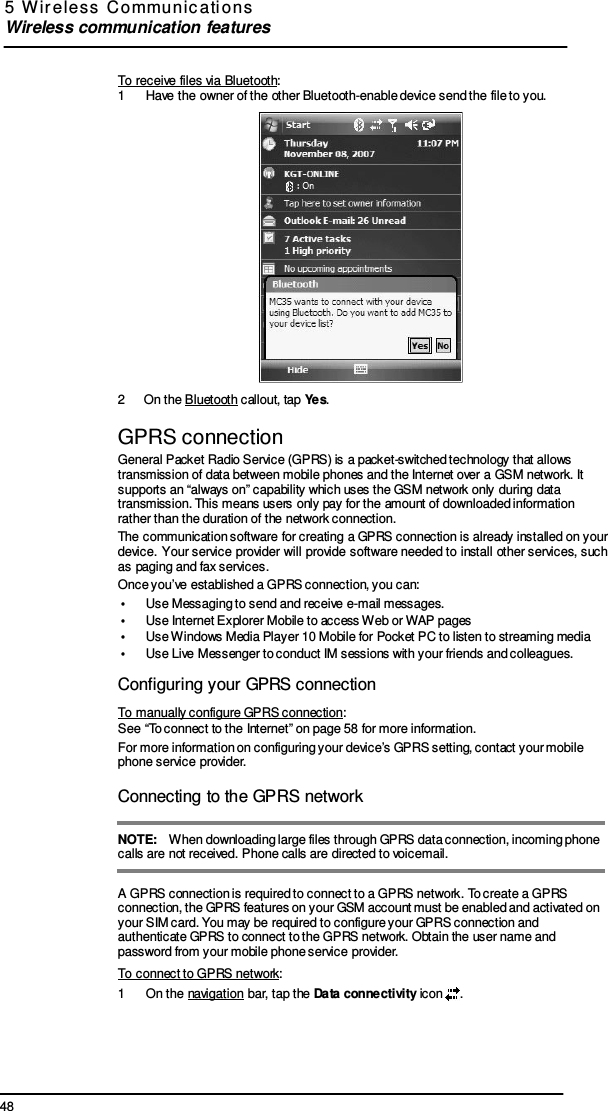
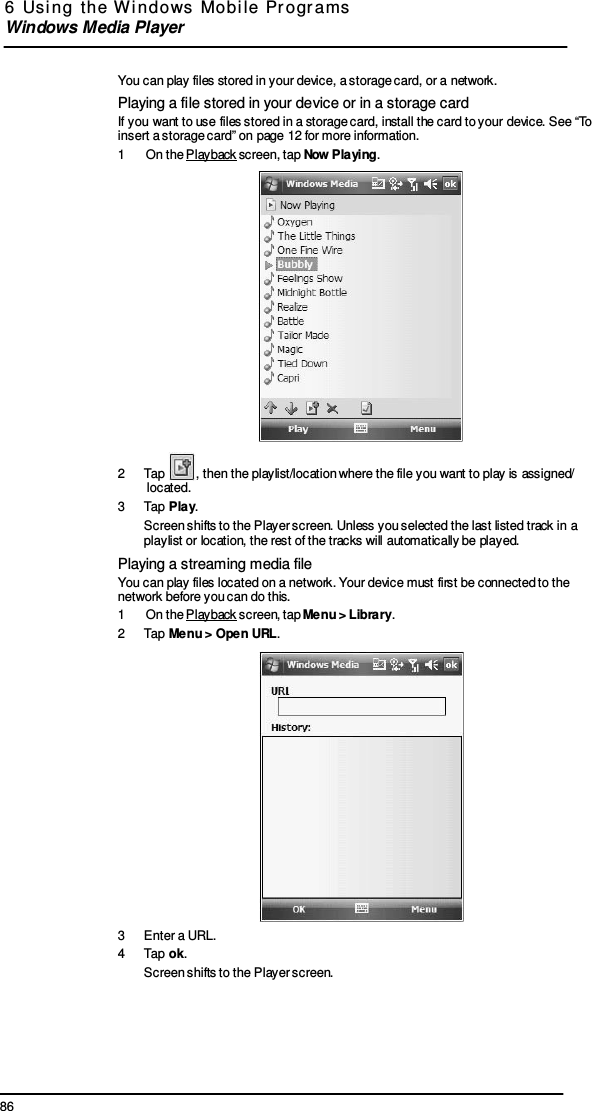
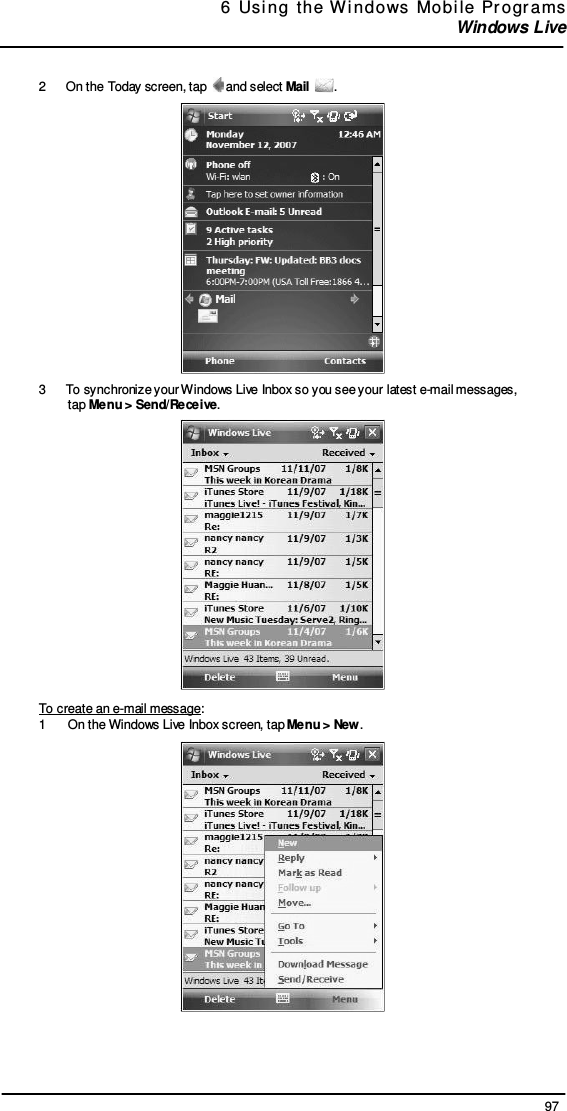
![47 5 Wir eless Communi c ati o n s Wireless communication features 7 On the Bluetooth screen, tap the COM Ports tab, then tap New Outgoing Port. 8 Select the device you want to add, then tap Next. 9 Select a numbered COM port from the list. 10 Select “Secure Connection” option to designate the COM port for Bluetooth partnership. 11 Tap Finish, then tap ok. Exchanging files using Bluetooth IMPORTANT: Ensure that the two devices have Bluetooth turned on, discoverable, and within close range. To send files via Bluetooth: 1 Switch to the program where you created the item you want to send and locate the item in the list. 2 Tap and hold the item, then tap Beam [type of item] on the pop-up menu. 3 Tap the device that you want to send the file to.](https://usermanual.wiki/Wistron/N7SP510.Manual-1/User-Guide-1090993-Page-59.png)