Wistron N7SP510 GSM/WCDMA cellular phone w/BT User Manual SP510 UG EN WIN6 20090317
Wistron Corporation GSM/WCDMA cellular phone w/BT SP510 UG EN WIN6 20090317
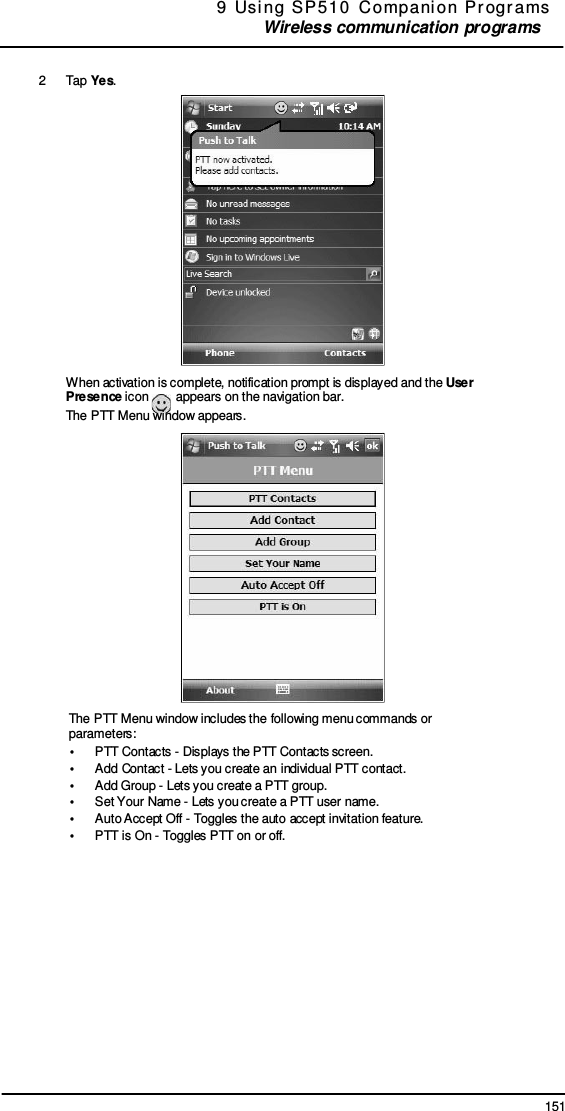
UserManual.wiki
>
Wistron
>
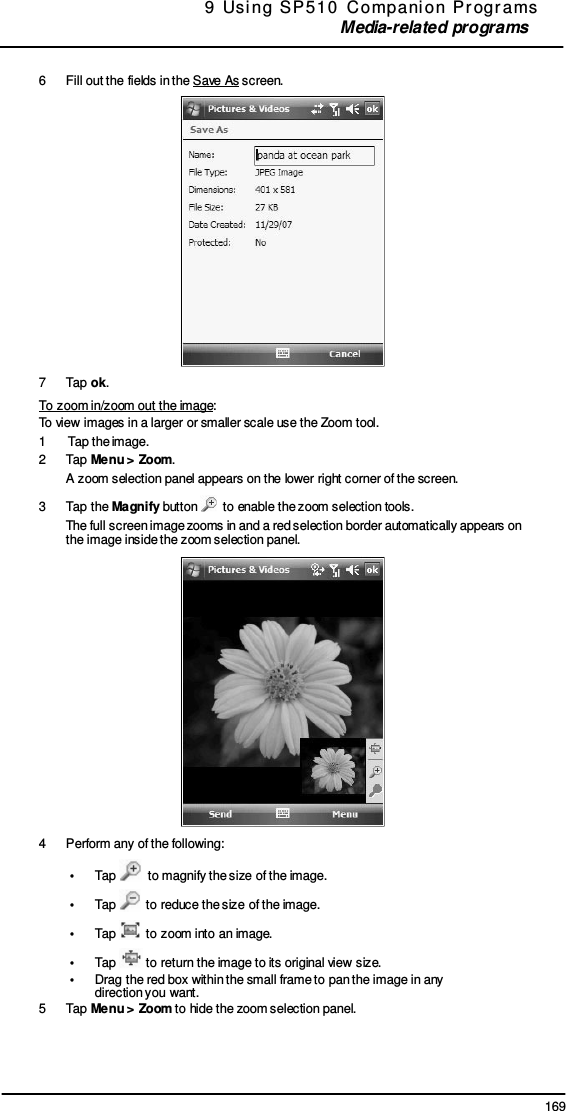
N7SP510 User Manual
>
Manual 2
Contents
1.
Manual 1
2.
Manual 2
Manual 2
Navigation menu
Upload a User Manual
Namespaces
Wiki Guide
HTML
PDF
Info
Views
User Manual
Discussion / Help
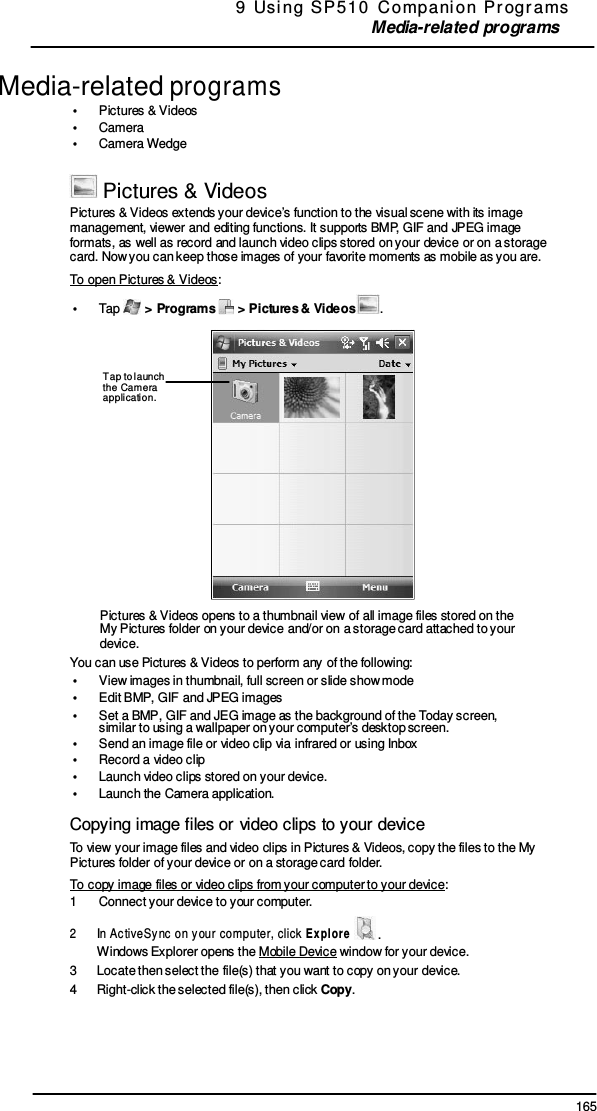
Navigation

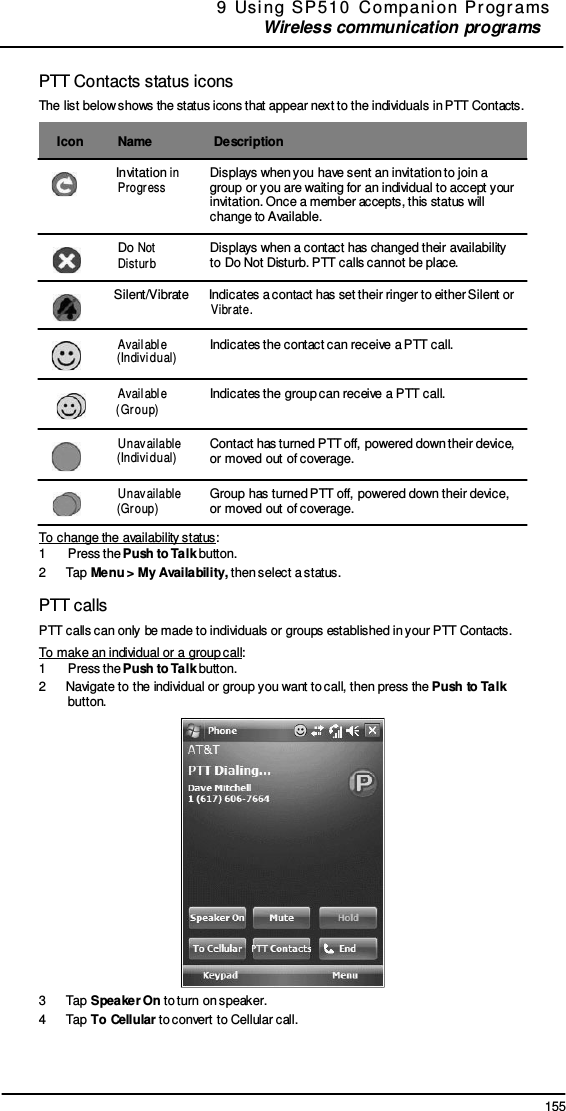
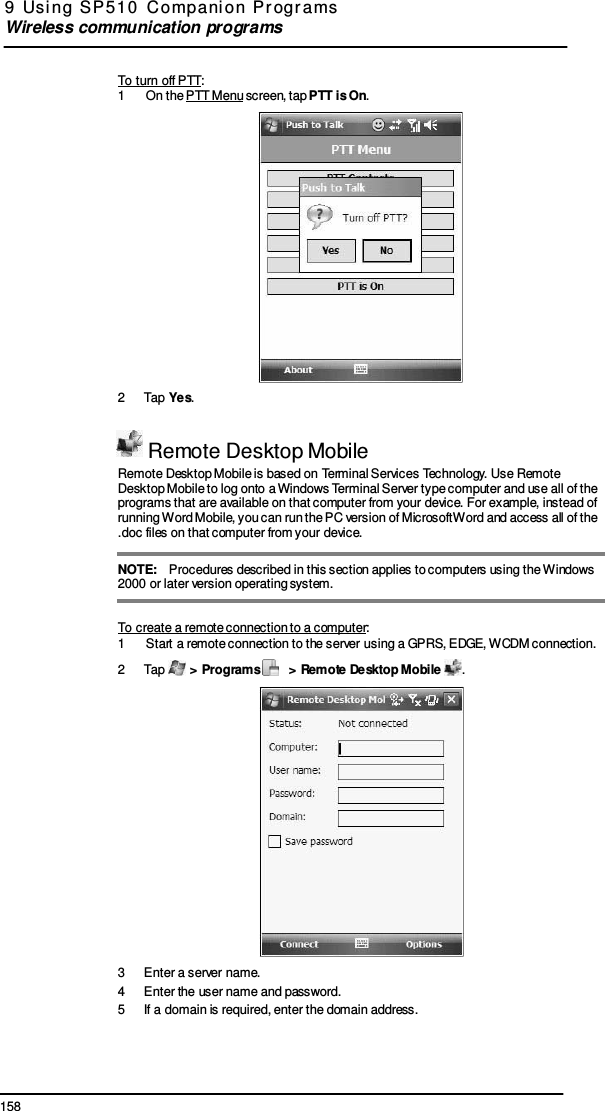
![159 9 Usi ng SP 510 C ompani on Pr ogr ams Wireless communication programs 6 Tap Connect. Once connected to the server, the computer’s screen may more than fill your device’s screen. If scroll bars are displayed on the server’s screen, you will see more than one set of scroll bars on your device—one to scroll information on the computer, and the other one to scroll the Remote Desktop Mobile screen. To ensure you are scrolling the PC window contents, use the five directional buttons at the bottom of the screen. 7 For more information on Remote Desktop Mobile, tap > Help . To improve display performance: Display performance is improved by decreasing the time it takes for the screen to be refreshed on the PC. 1 On your PC, select Start > Settings > Control Panel. 2 Double-click Display. 3 On the Appearance tab, click Effect. 4 Clear the “Use the following transition effects for menus and tool tips” check box. 5 Click Apply, then OK. To improve browser performance: The performance of Internet Explorer on your PC is improved by decreasing the time it takes for Web pages to be refreshed. 1 In Internet Explorer on your PC, select Tools > Internet Options > Advanced tab. 2 Under Browsing, clear the “Use smooth scrolling” check box. 3 Click Apply, then OK. To disconnect and end a session: 1 In the Remote Desktop Client PC window, click Start > Shut Down. 2 On the Shut Down Windows dialog box, click Log Off [user name]. 3 Click OK. NOTE: If the network administrator has configured Remote Desktop Client to reconnect to disconnected sessions, you will be reconnected to this session the next time you connect to this server.](https://usermanual.wiki/Wistron/N7SP510.Manual-2/User-Guide-1090994-Page-20.png)