XTC Motorsports XTC5000 Digital Satellite Receiver User Manual Microsoft PowerPoint XTC5000
XTC Motorsports Inc. Digital Satellite Receiver Microsoft PowerPoint XTC5000
Contents
- 1. Users Manual Part I
- 2. Users Manual Part II
- 3. Users Manual Part III
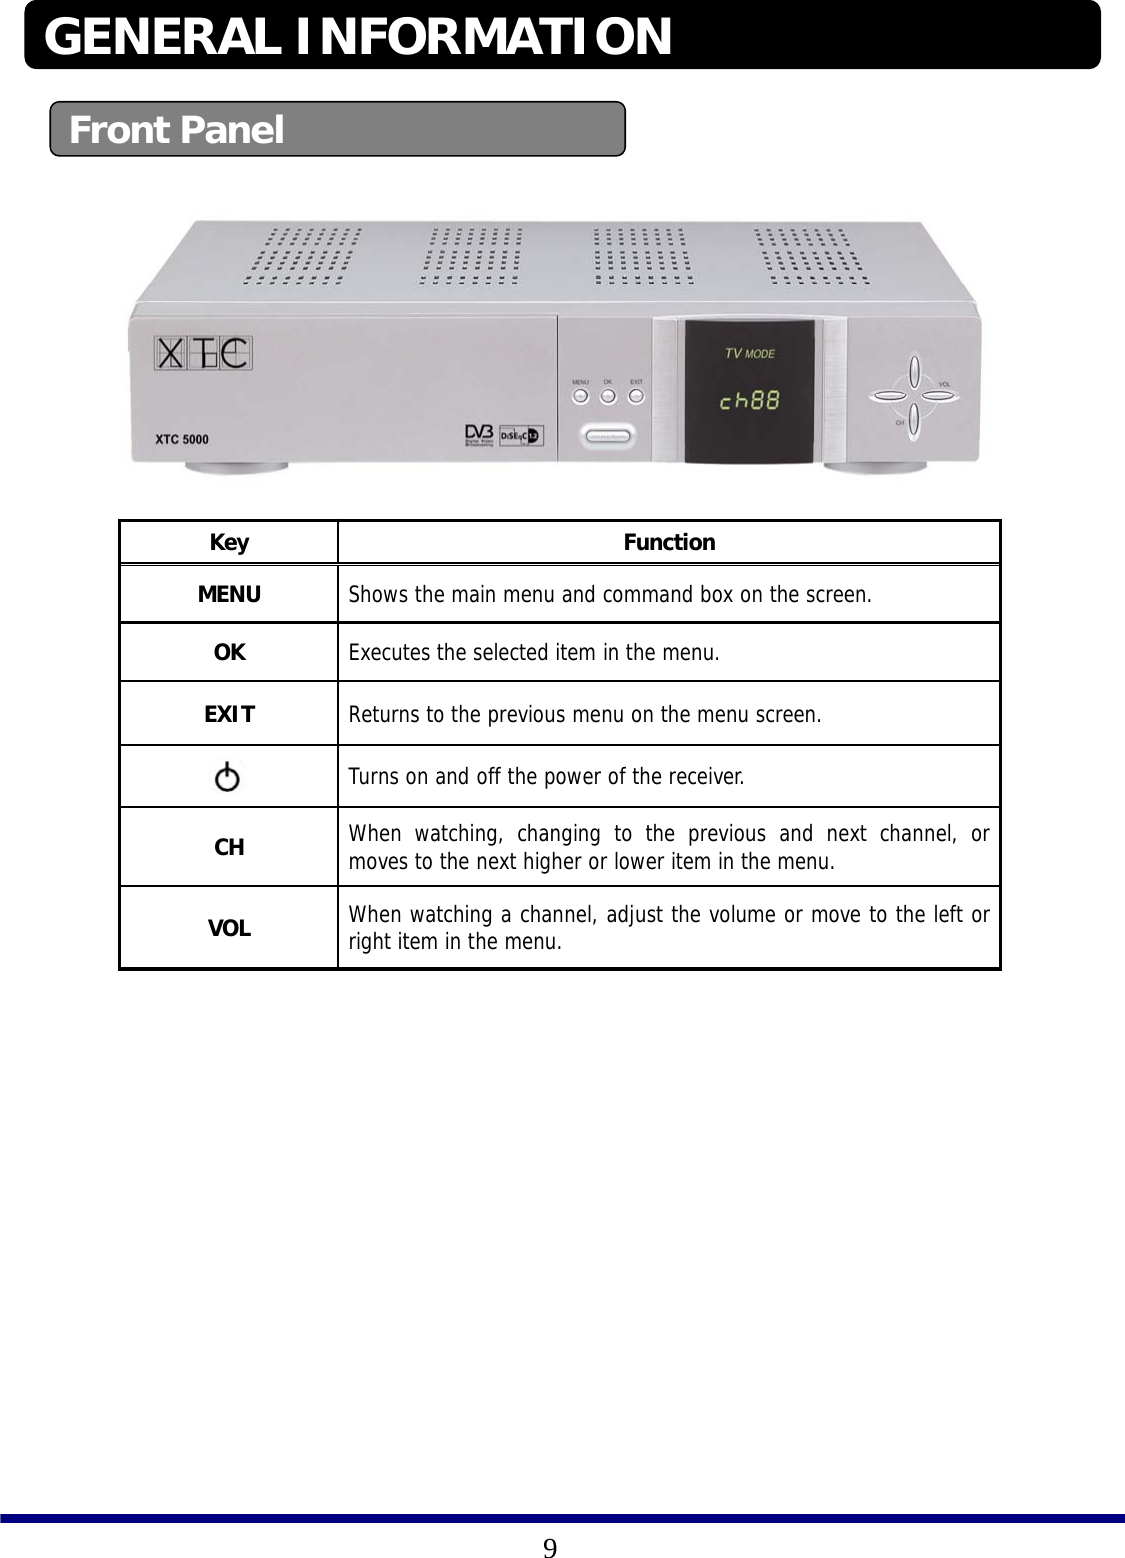
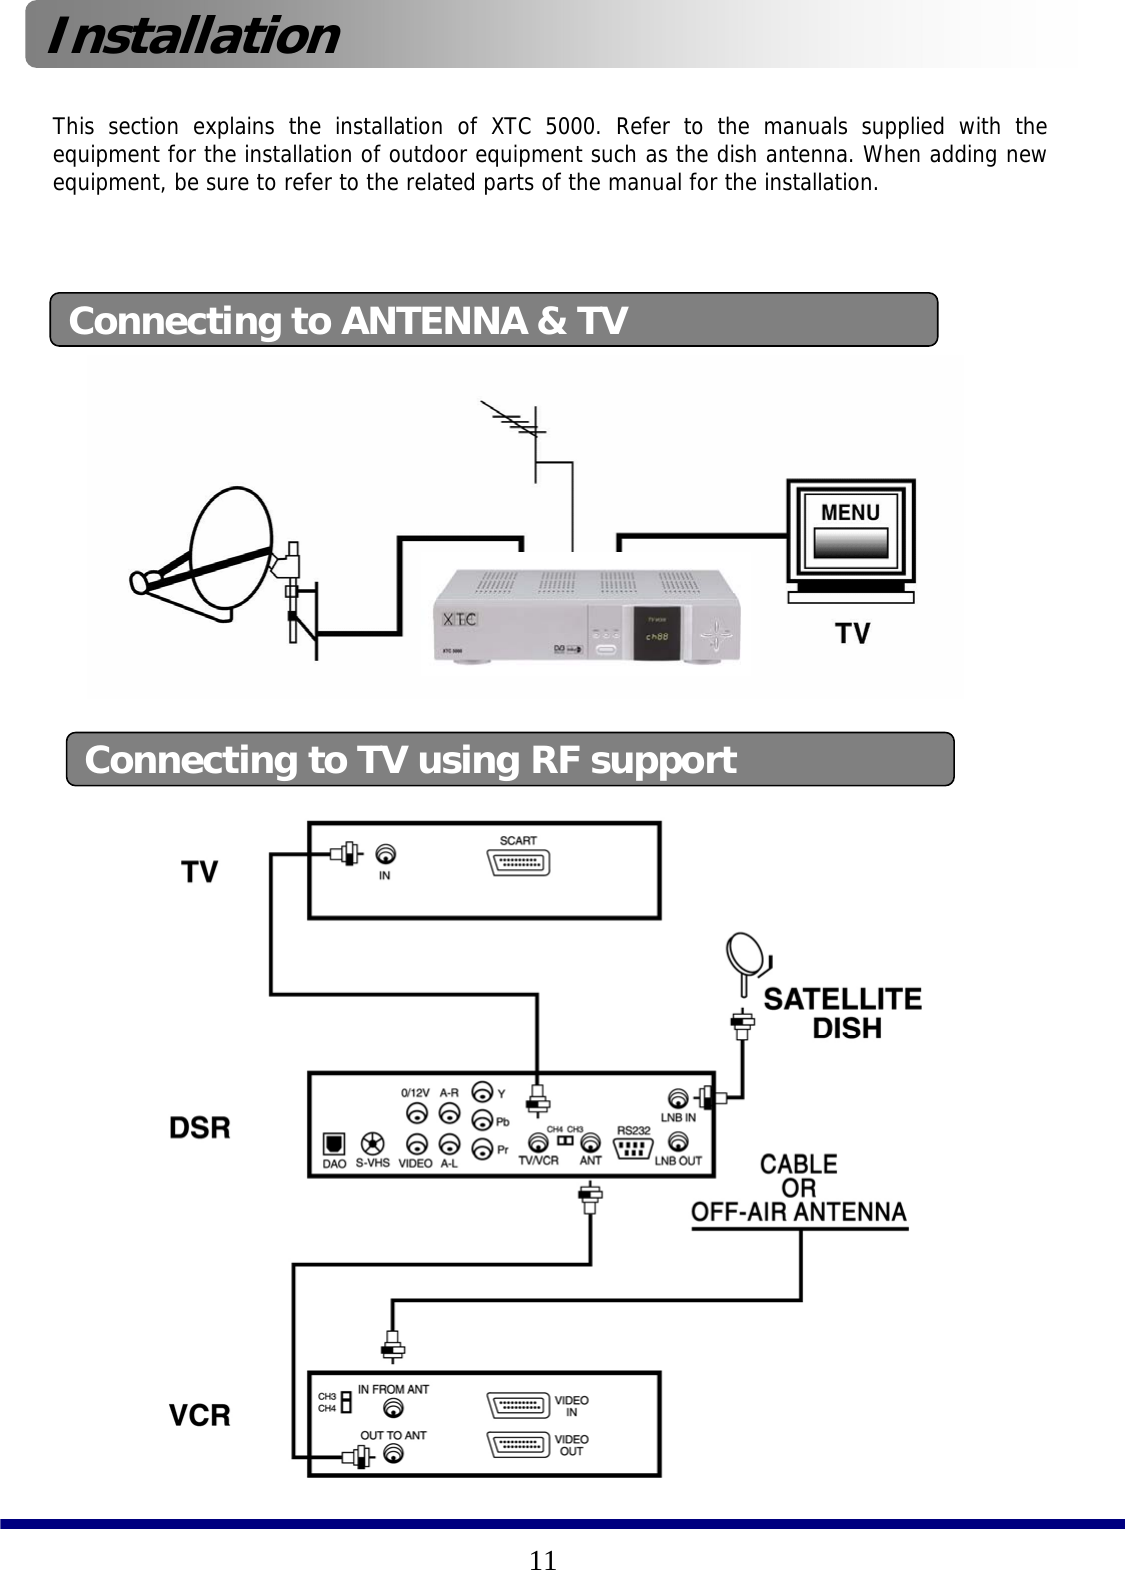
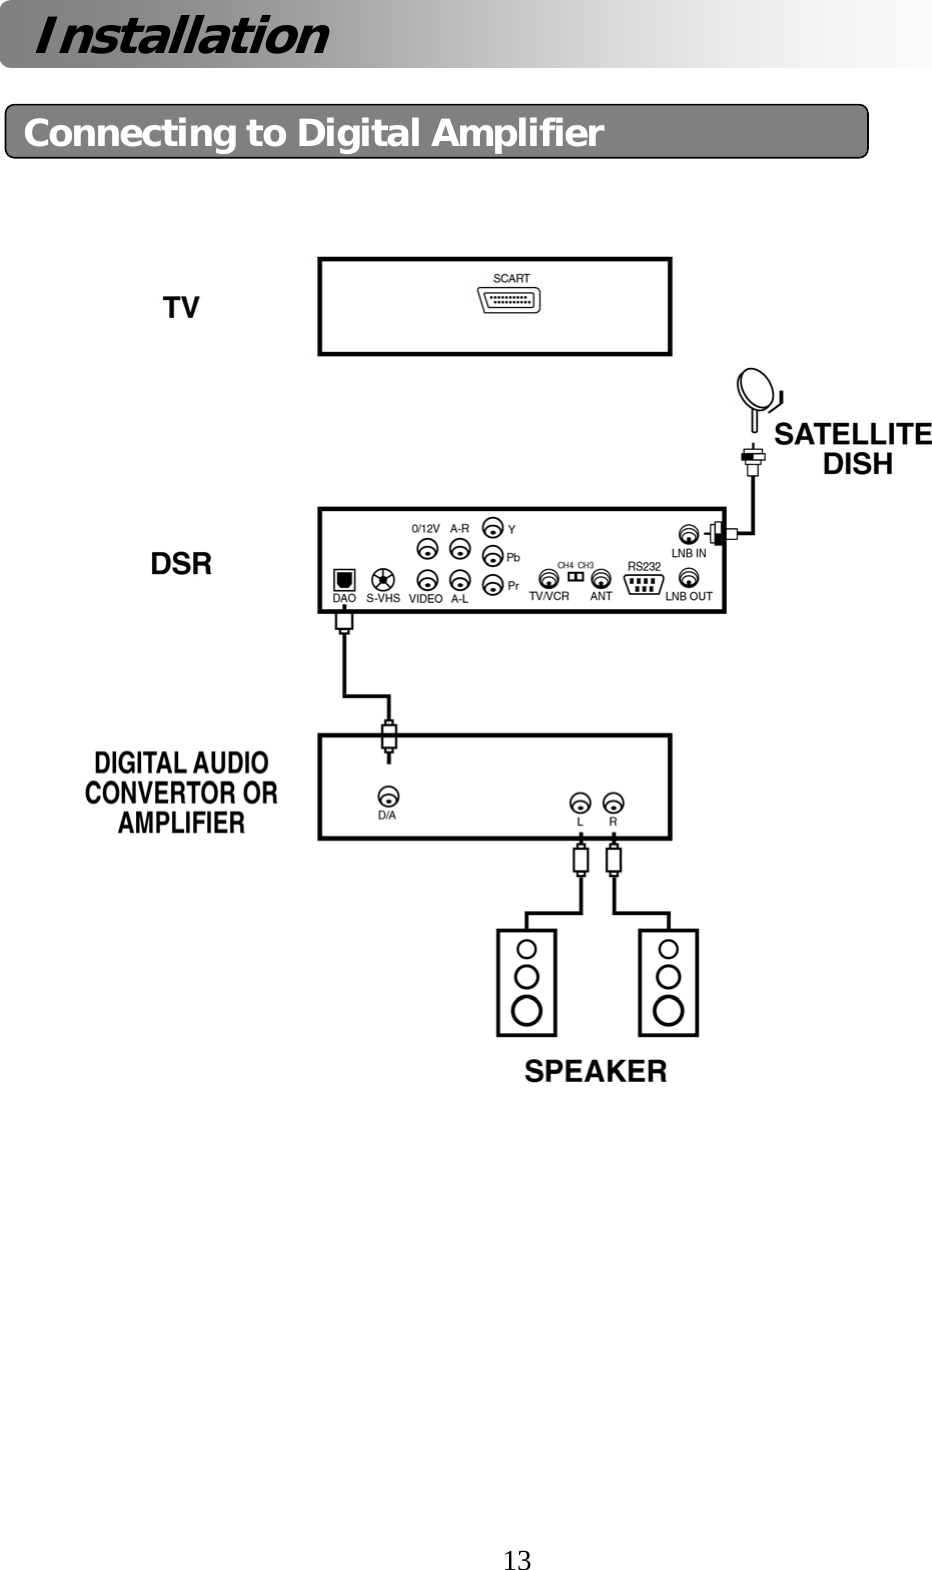
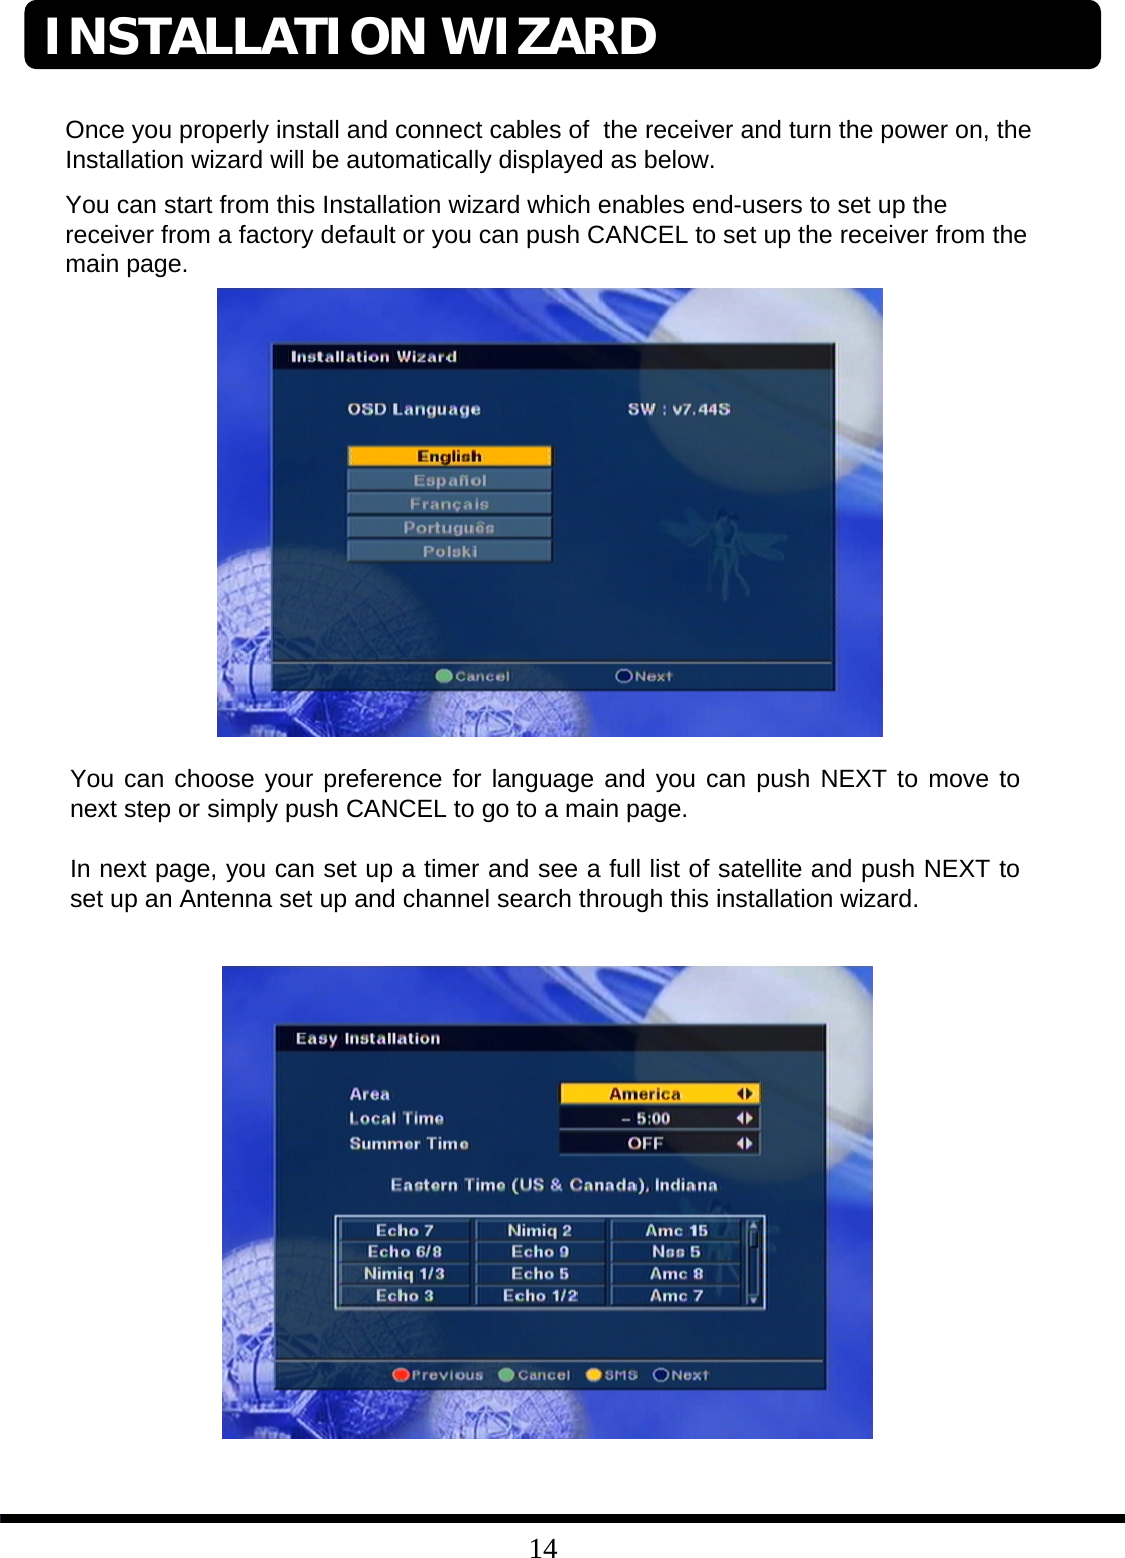
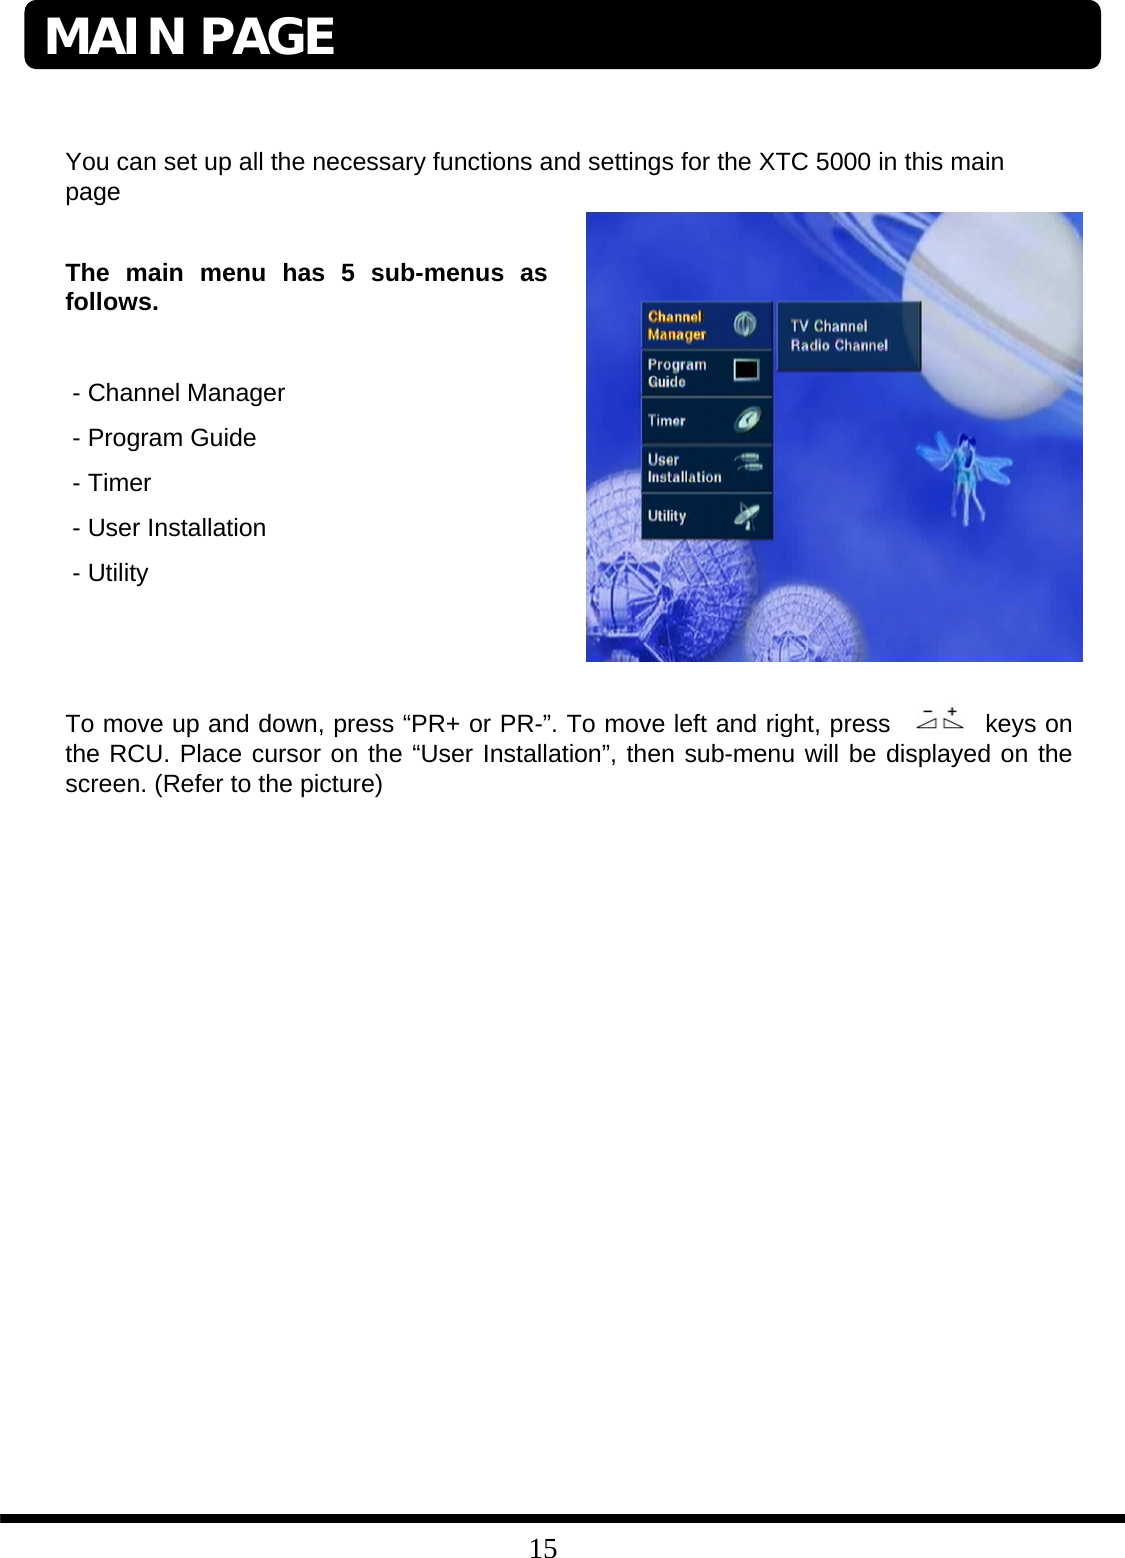
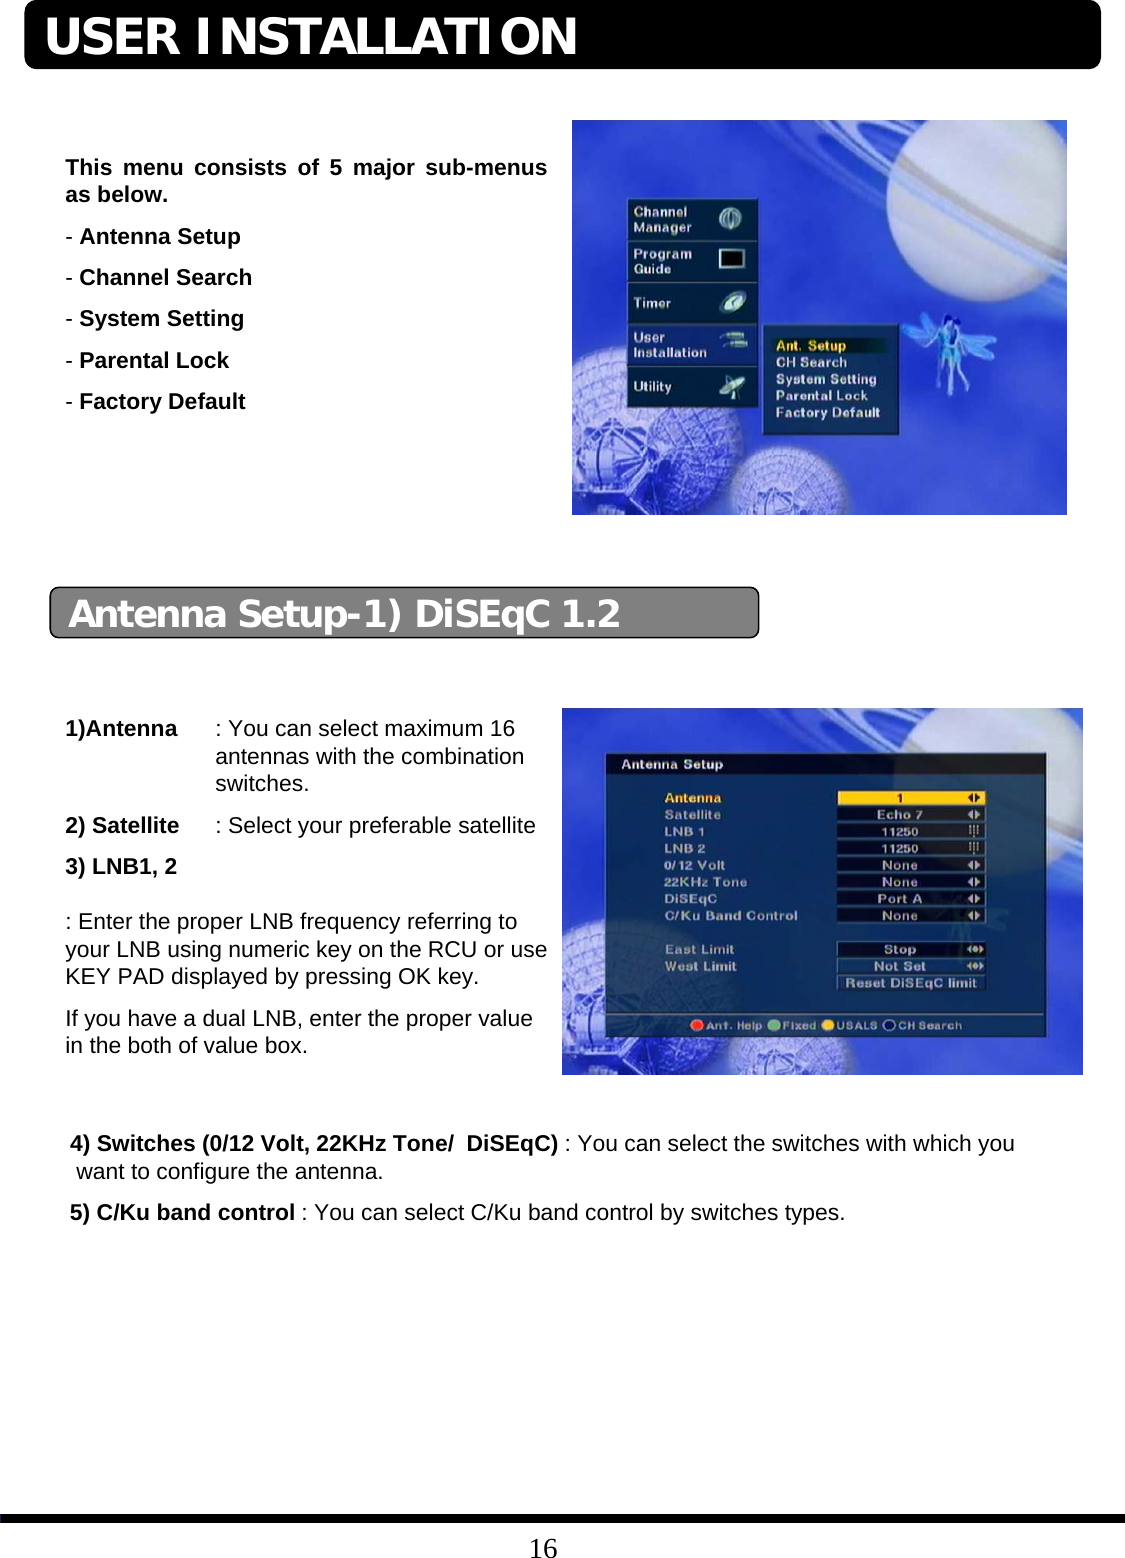
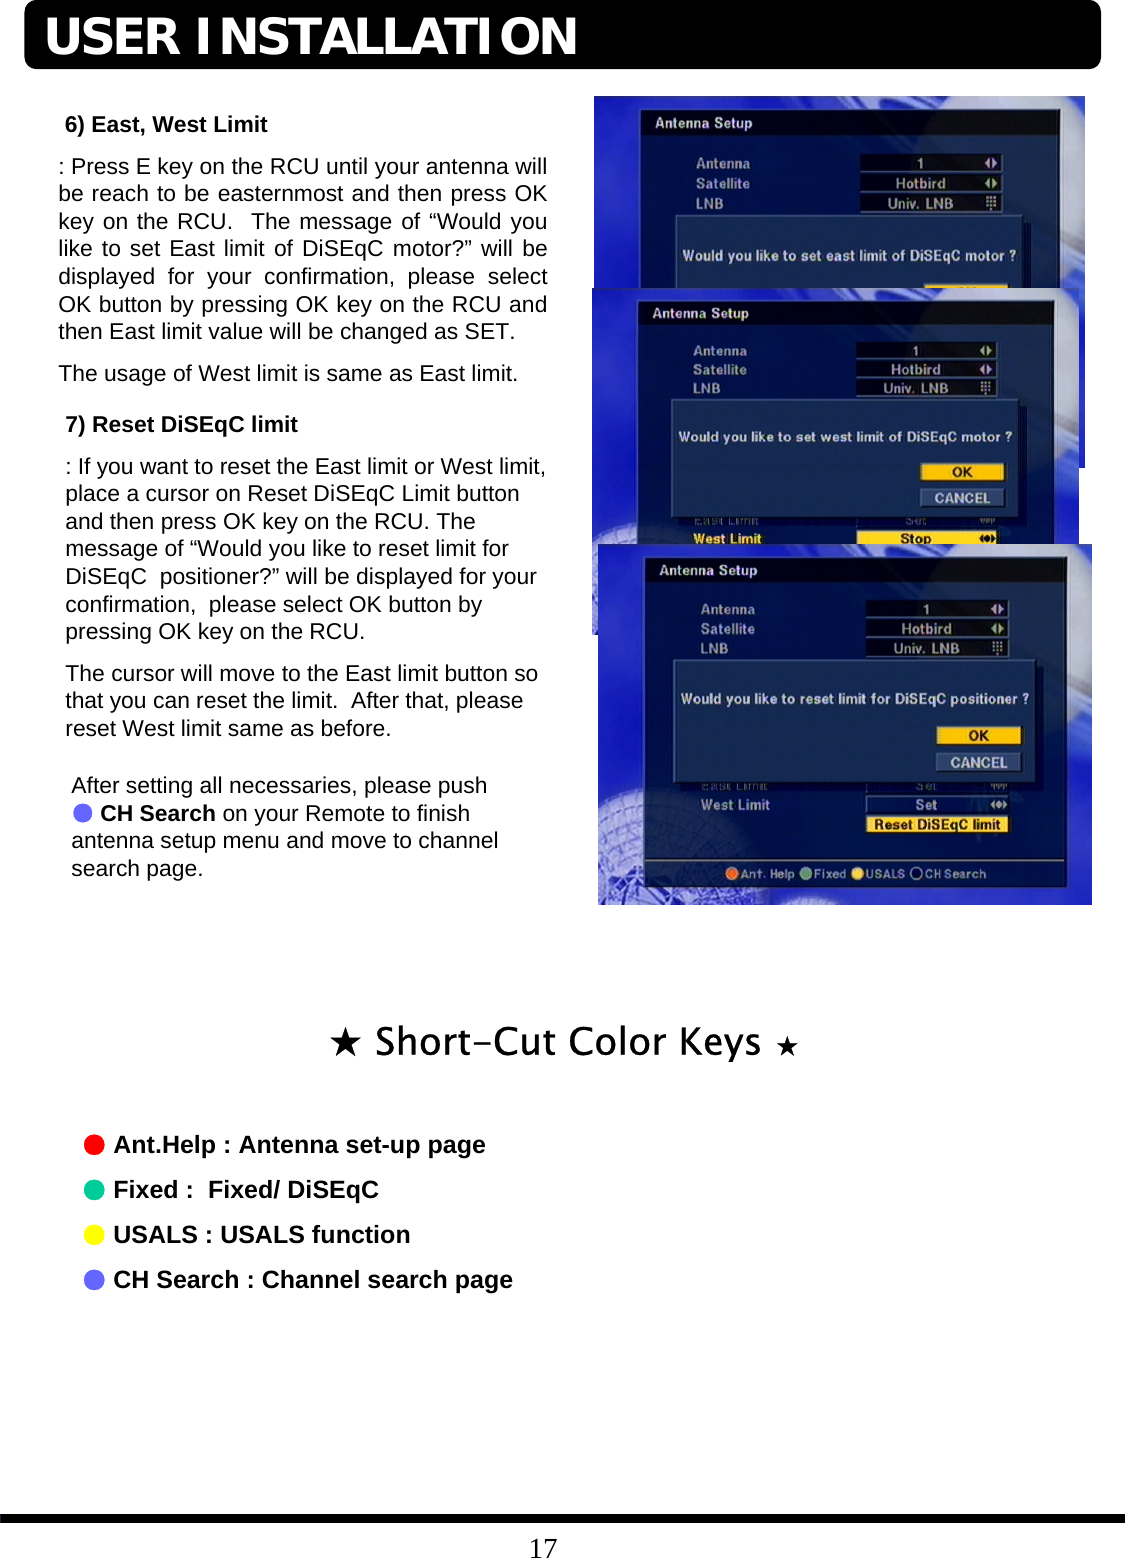
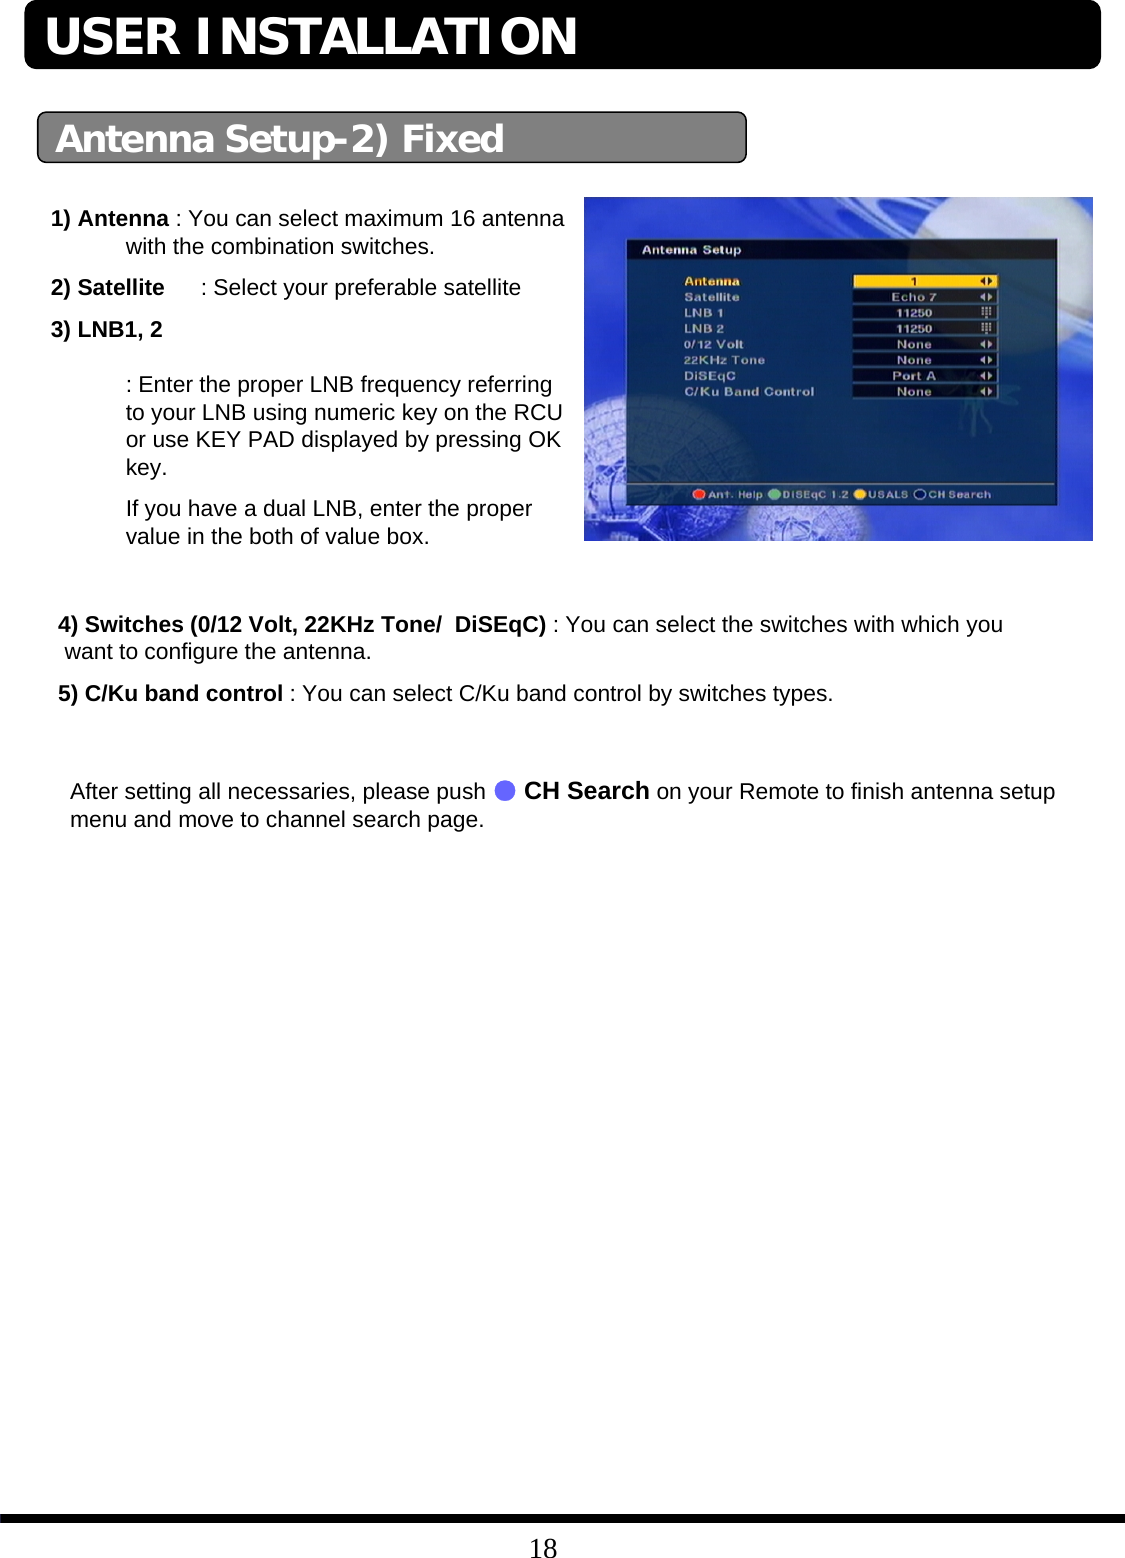
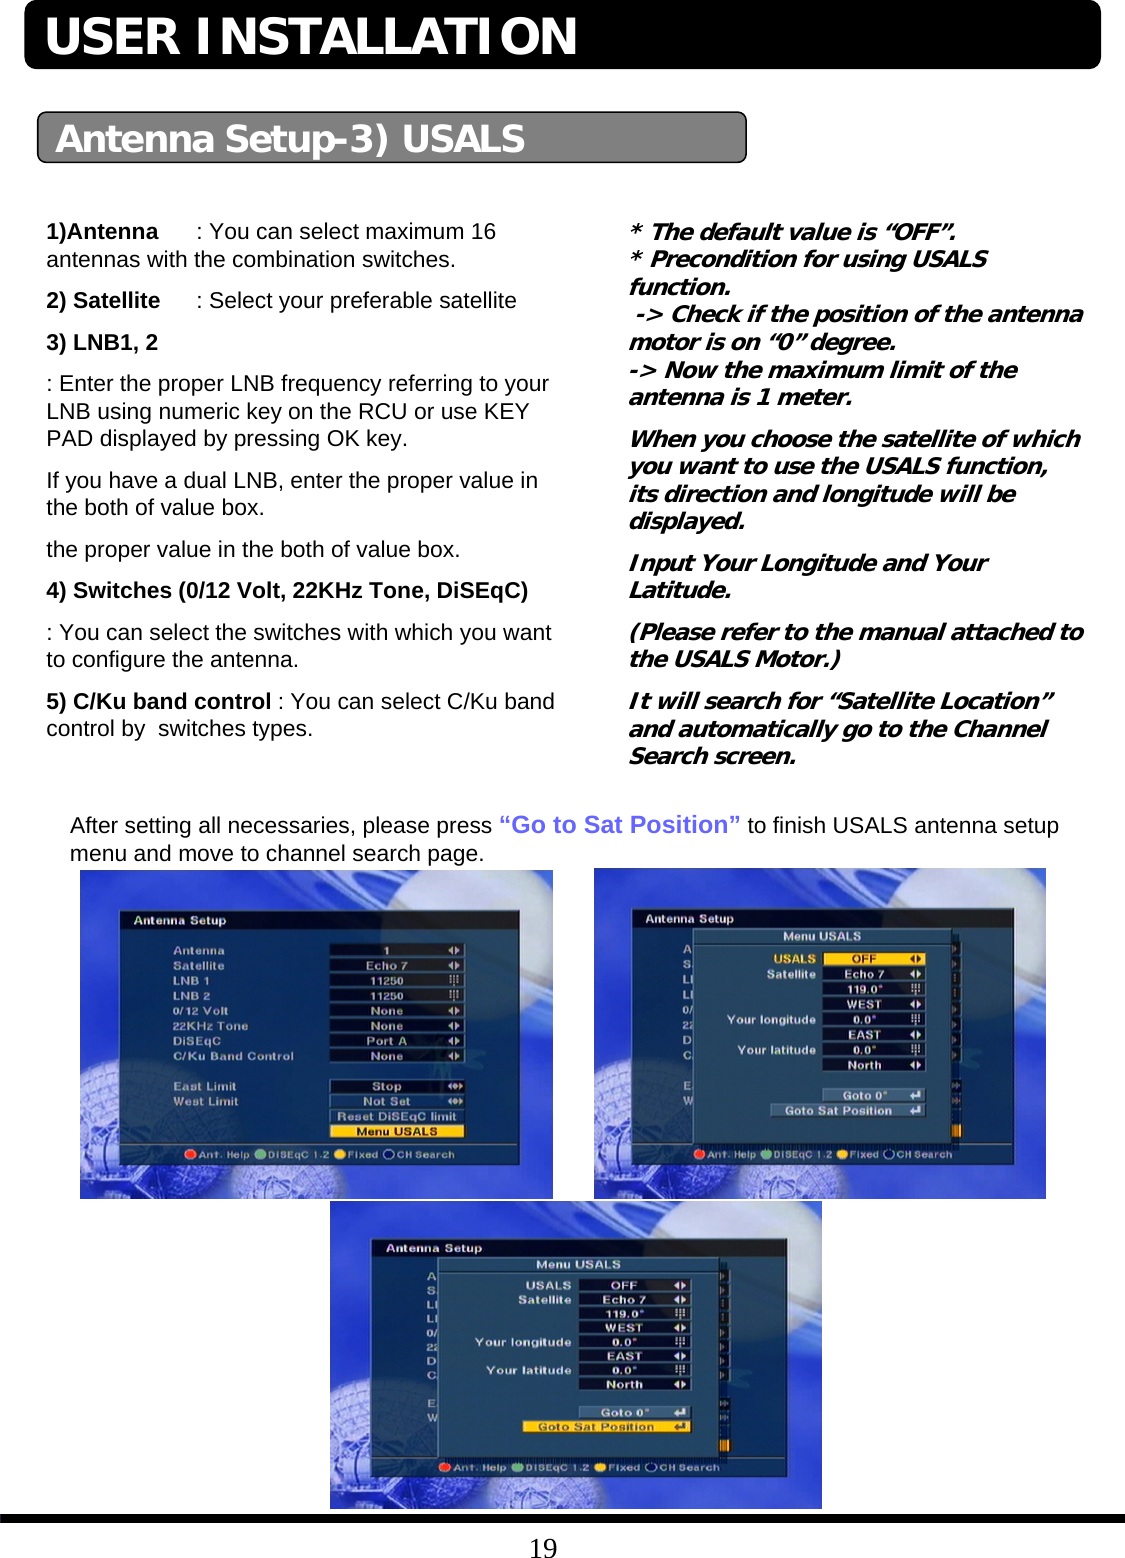
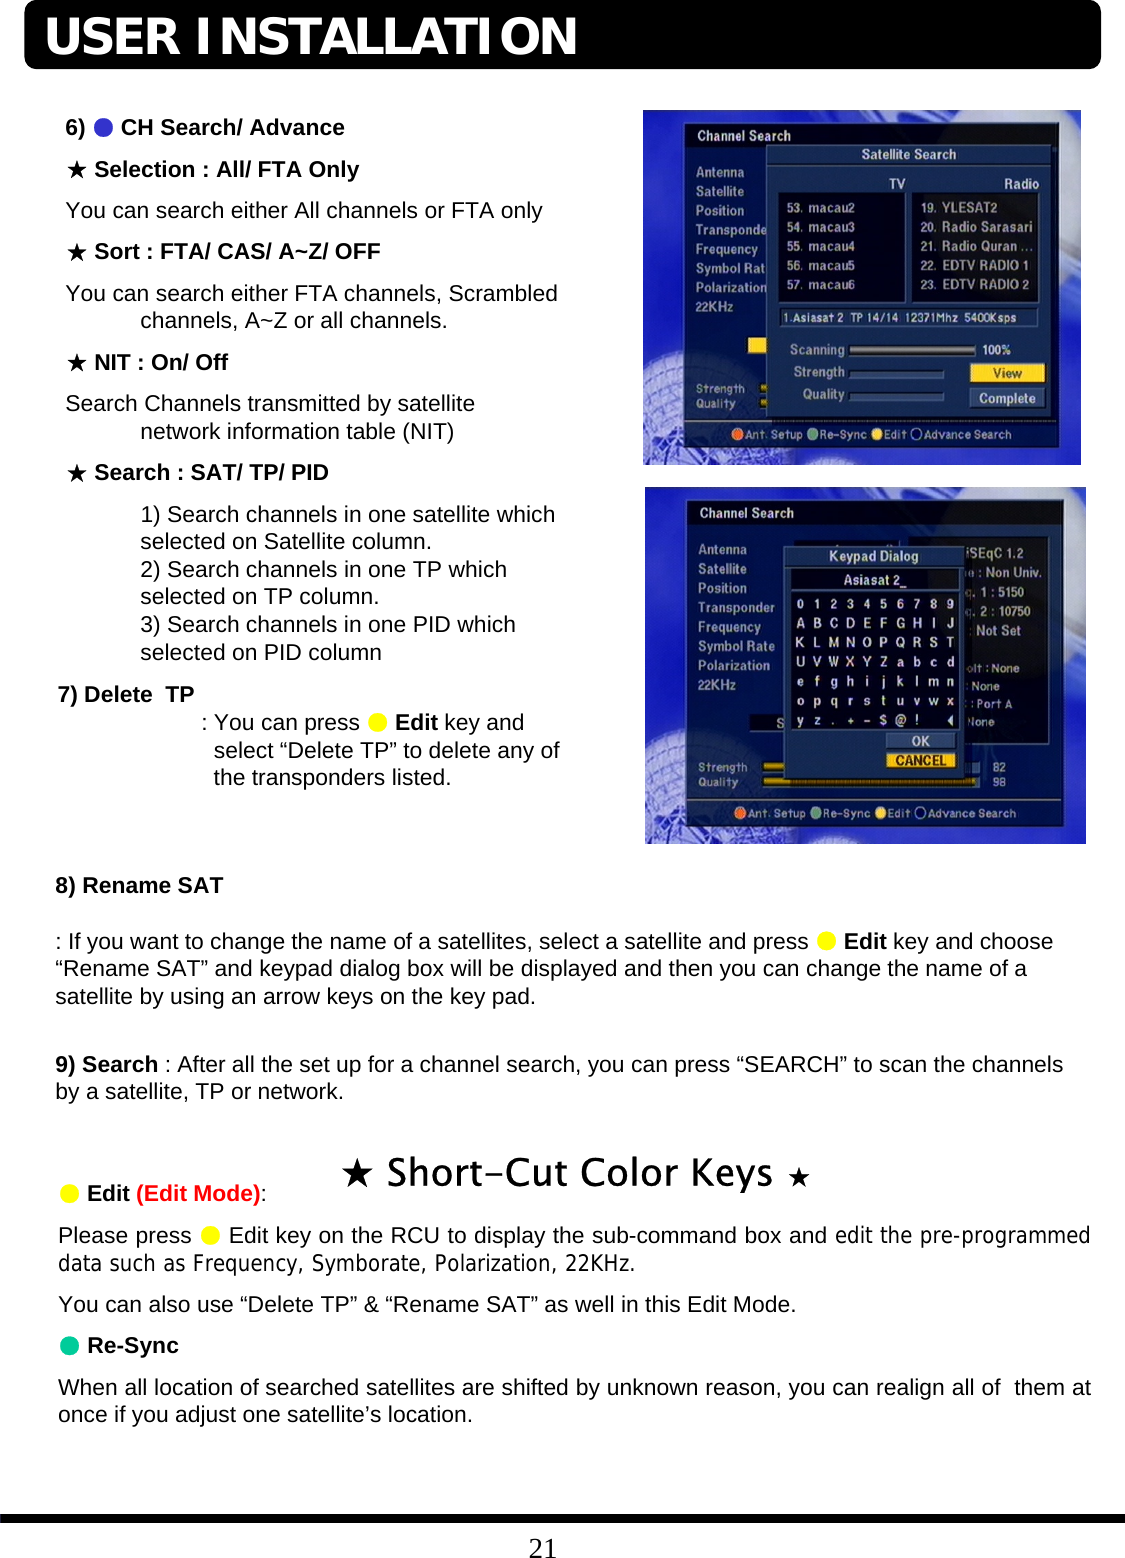
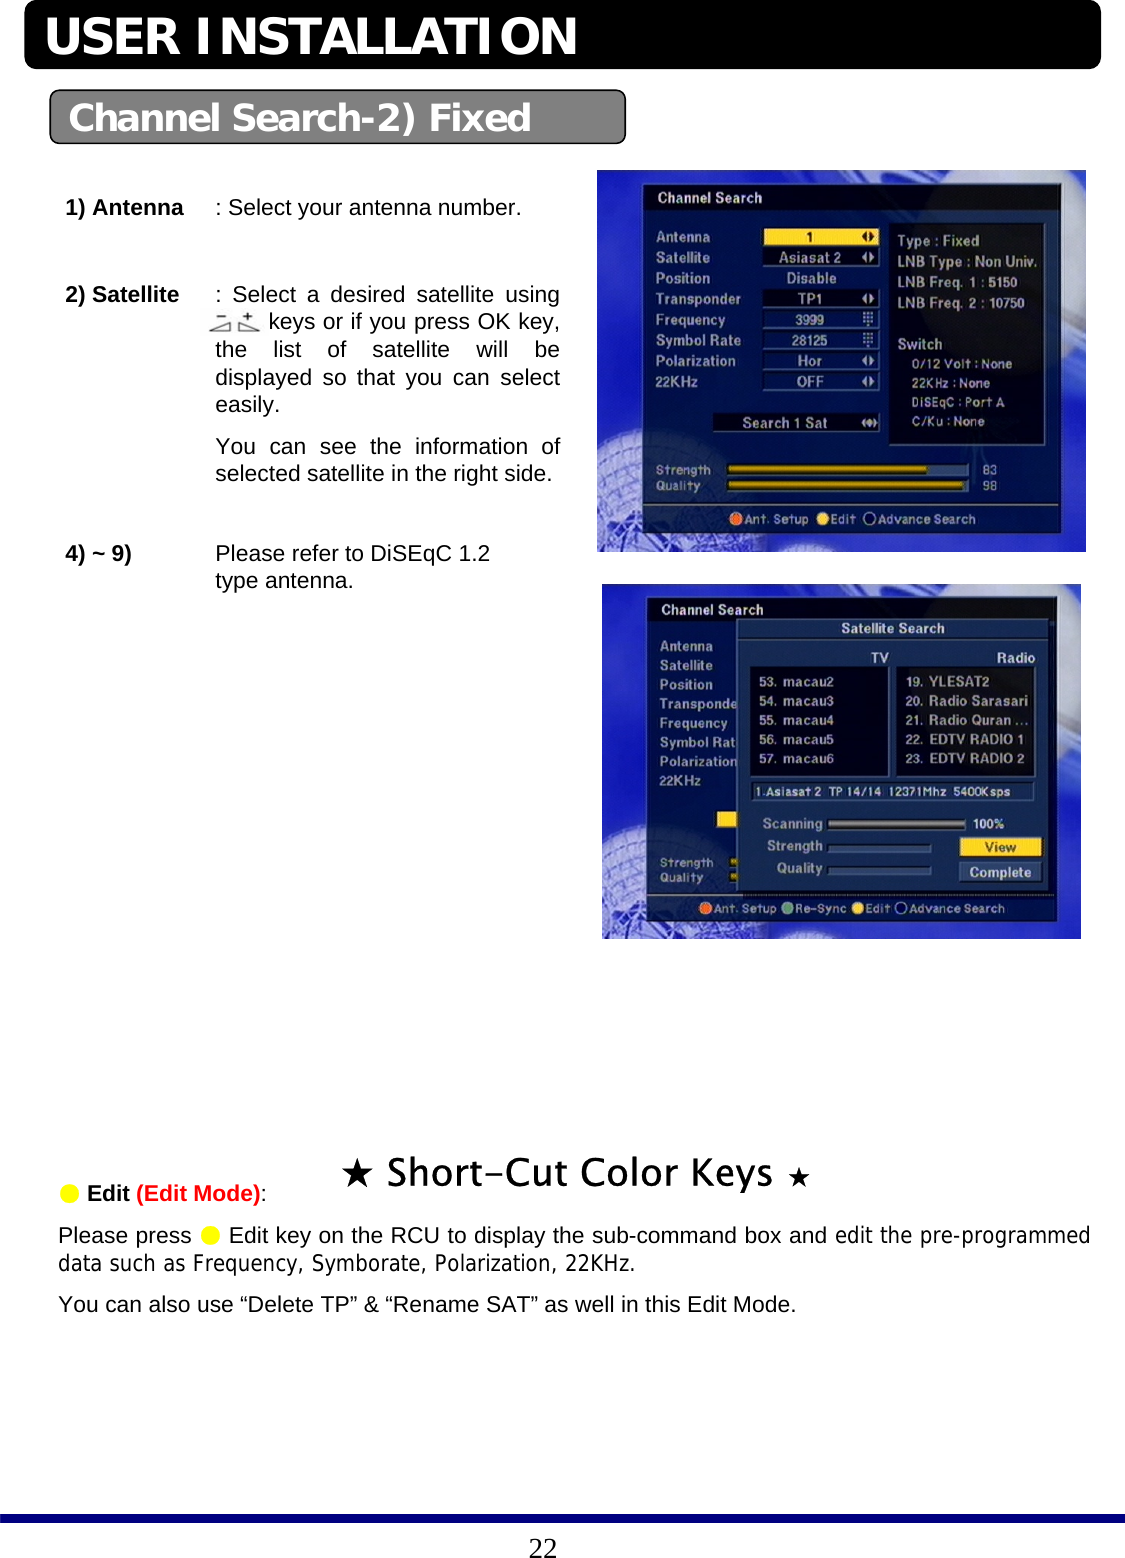
Users Manual Part I