YDI Wireless LUC2400E Rooftop Fixed Direct Sequence Transmission System User Manual ORiNOCO PC Card User s Guide
YDI Wireless Rooftop Fixed Direct Sequence Transmission System ORiNOCO PC Card User s Guide
Contents
- 1. Lucent Manual
- 2. Users and Operators Manual
- 3. users manual
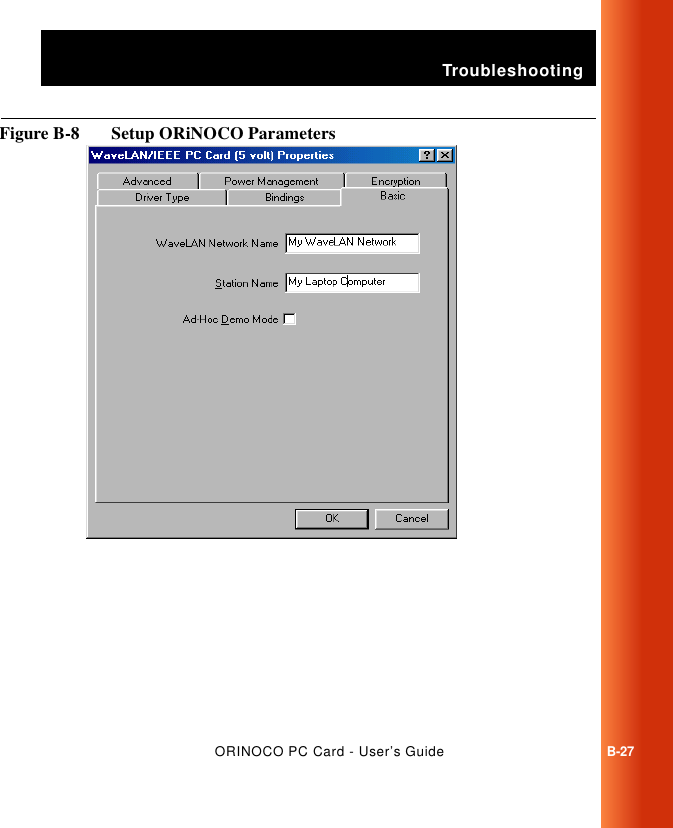
Lucent Manual


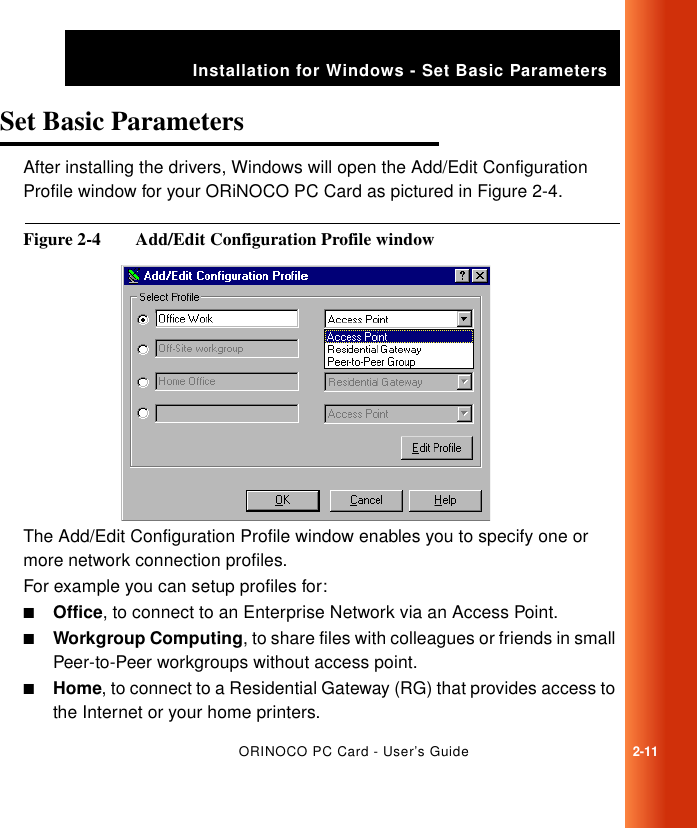


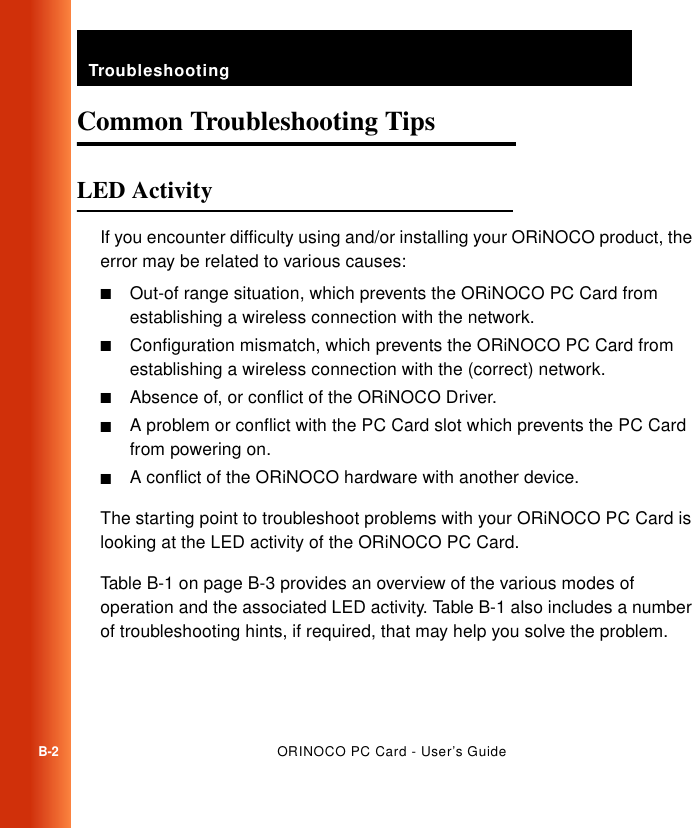


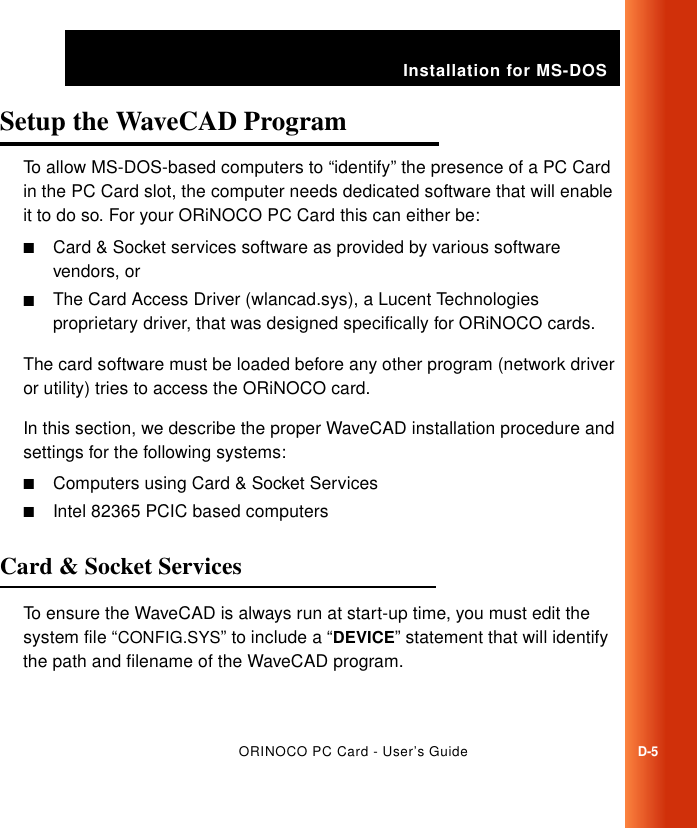
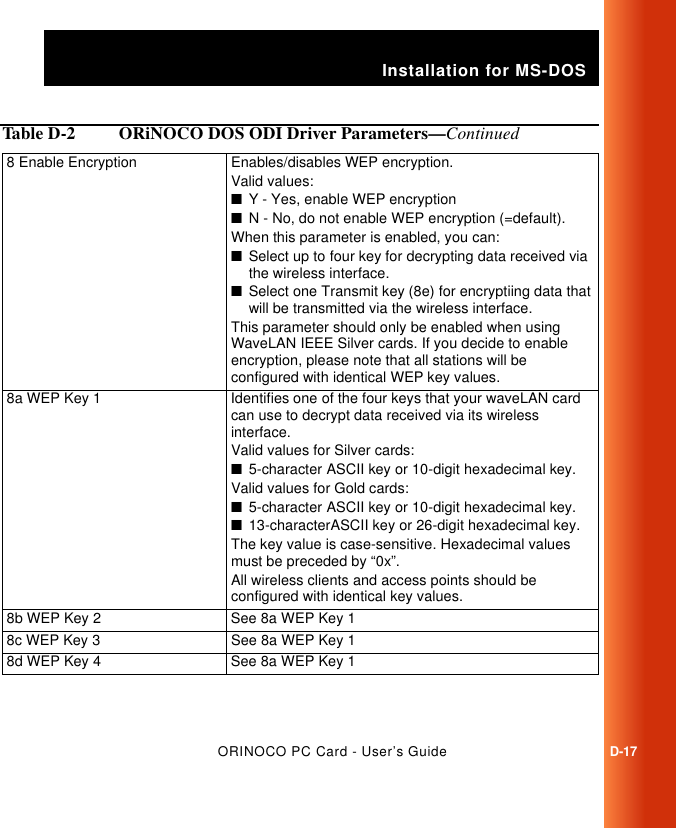
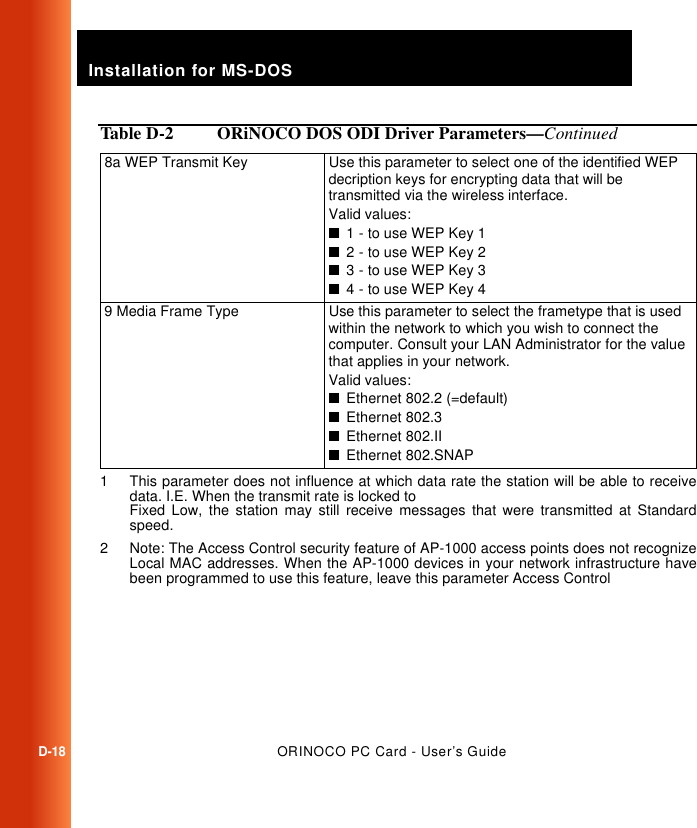
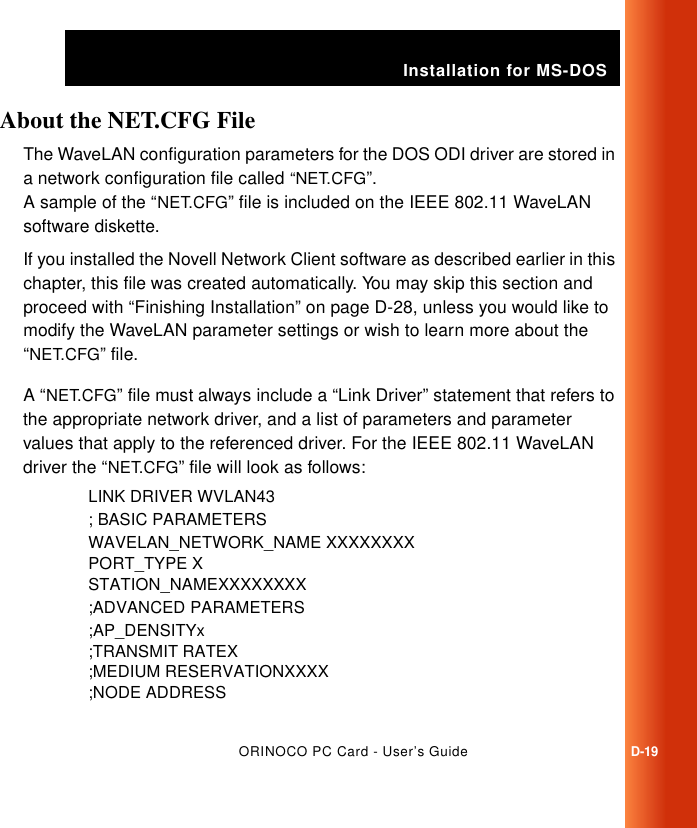
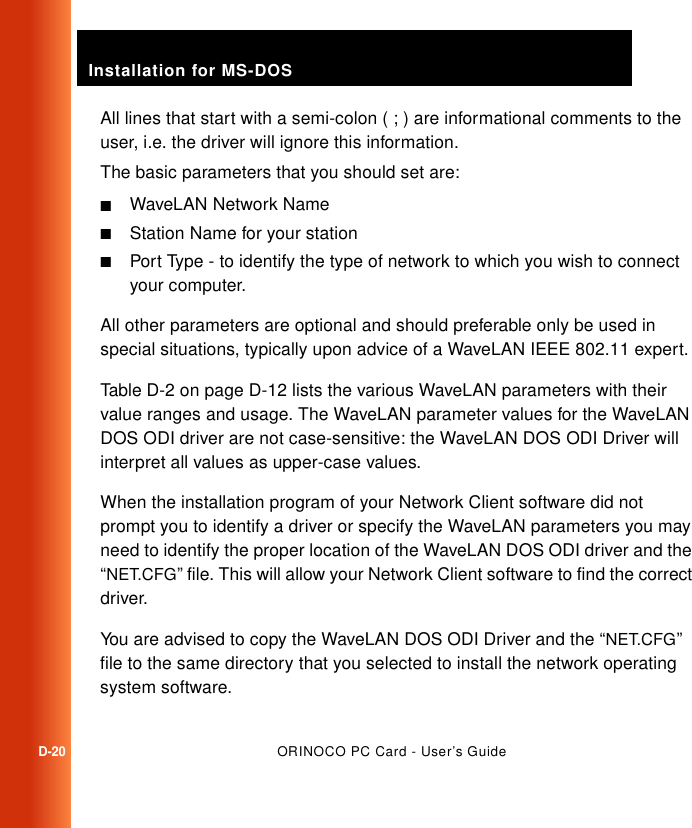
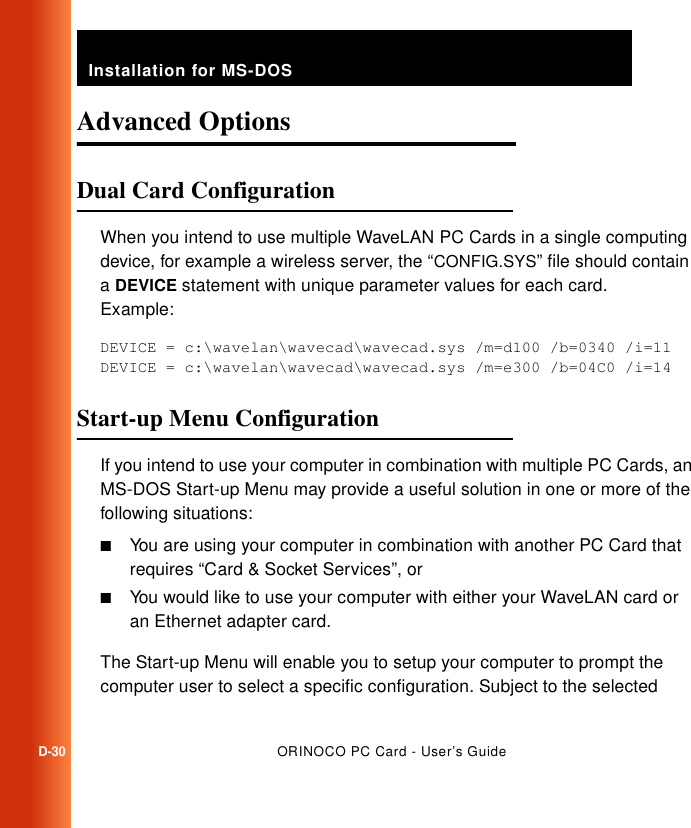
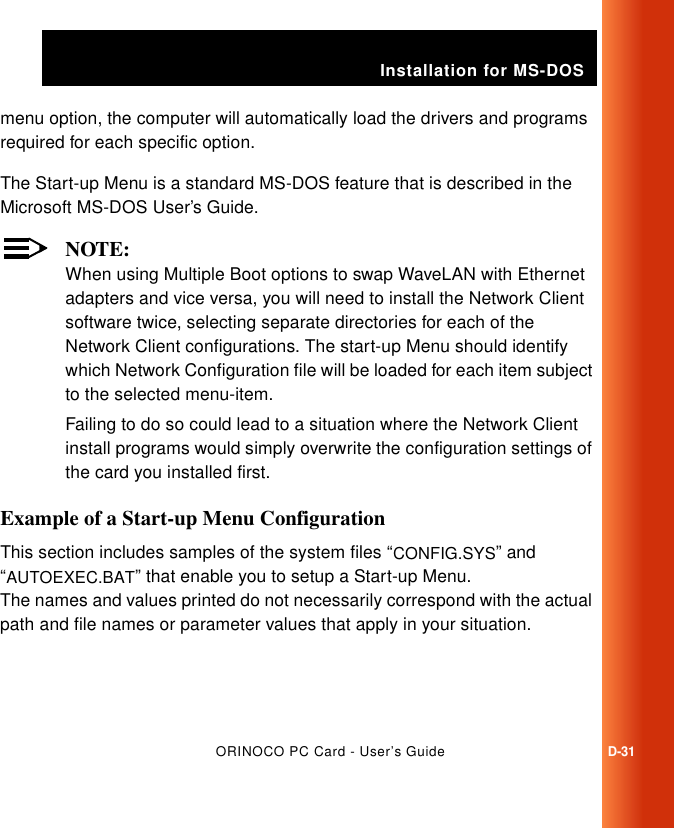
![Installation for MS-DOSD-6ORINOCO PC Card - User’s GuideExample DOS commands:c:\edit c:\config.sysThe format of the device line is as follows:DEVICE = [path name]wvlancad.sysWhen for example your device line looks as follows:DEVICE = c:\wavelan\wavecad\wvlancad.sysWith Card & Socket Services, you do not need to set any parameters (Memory, IRQ, I/O Port) in the “DEVICE” statements. However, if you would like to overrride the default settings, follow the directions for “Intel 82365 PCIC” on page D-6, using Table D-1 on page D-8 to identify valid parameter values that can be included in the wvlancad.sys “DEVICE” statement.Intel 82365 PCIC DFor Intel 82365 PCIC based computers, you must start the ORiNOCO Card Access Driver (“wvlancad.sys”) before any other program (network driver or utility) can access the ORiNOCO card. To ensure the WaveCAD is always run at start-up time, you must edit the system file “CONFIG.SYS” to include a “DEVICE” statement that will identify the:■Path and file name of the wvlancad.sys program](https://usermanual.wiki/YDI-Wireless/LUC2400E.Lucent-Manual/User-Guide-130421-Page-123.png)
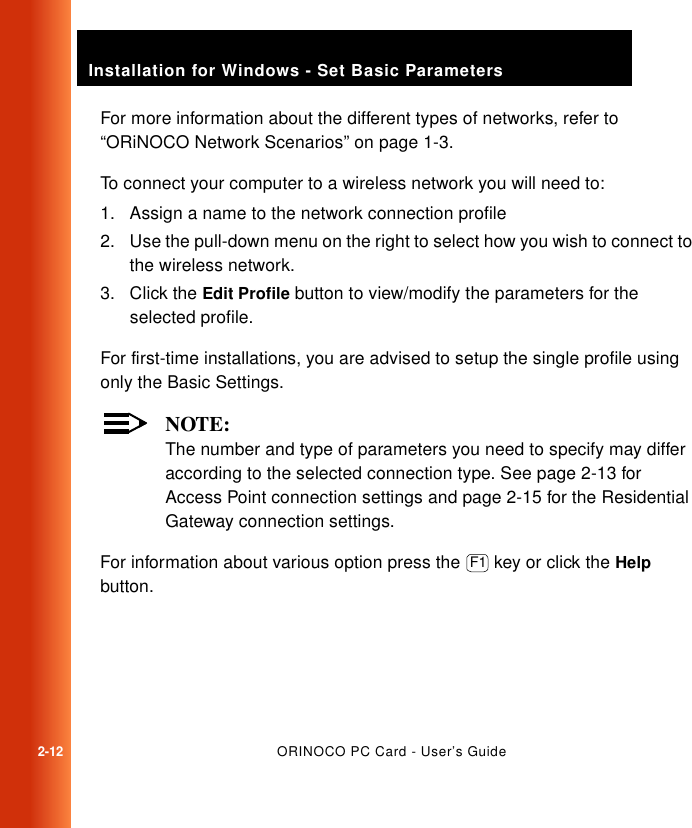
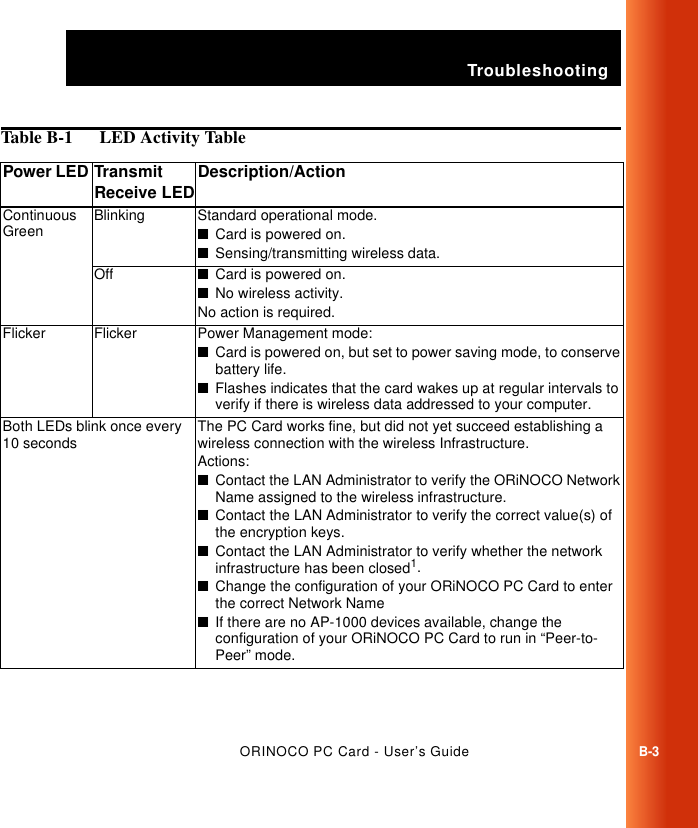
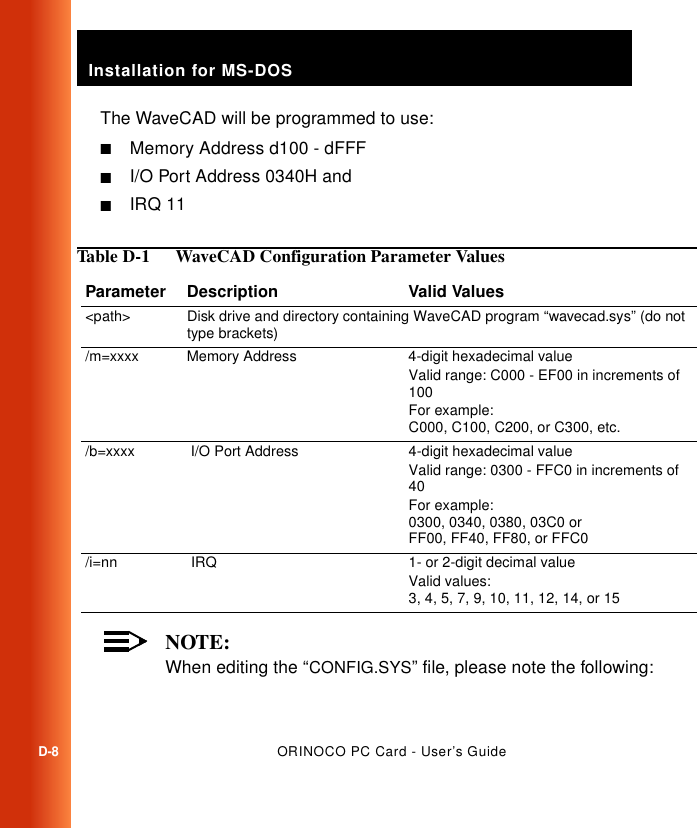
![Installation for MS-DOSORINOCO PC Card - User’s GuideD-7■Memory Address of the ORiNOCO card■I/O Port Address of the ORiNOCO card■Interrupt Request Line number (IRQ) of the ORiNOCO card.Use Table D-1 on page D-8 to identify valid parameter values that can be included in the wvlancad.sys “DEVICE” statement.In order for your card to function properly, you will need to verify whether the values that you select to include in the “DEVICE” statement are not already used by another device that has been installed in your computer. Consult your LAN Administrator or a computer expert to determine an available Memory Address, I/O Port Address and IRQ value that you can use to install the WaveCAD driver.Alternatively you can use the Microsoft Diagnostics program (“MSD.EXE”) to determine the available values. For more information about Microsoft diagnostics, please refer to the documentation that came with your MS-DOS operating system. You can use any MS-DOS line editor to edit the “CONFIG.SYS” file. The format of the device line is as follows:DEVICE = [path name]wvlancad.sys /m=xxxx /b=xxxx /i=nnFor example, if your device line looks as follows:DEVICE = c:\wavelan\wavecad\wvlancad.sys /m=d100 /b=0340 /i=11](https://usermanual.wiki/YDI-Wireless/LUC2400E.Lucent-Manual/User-Guide-130421-Page-124.png)
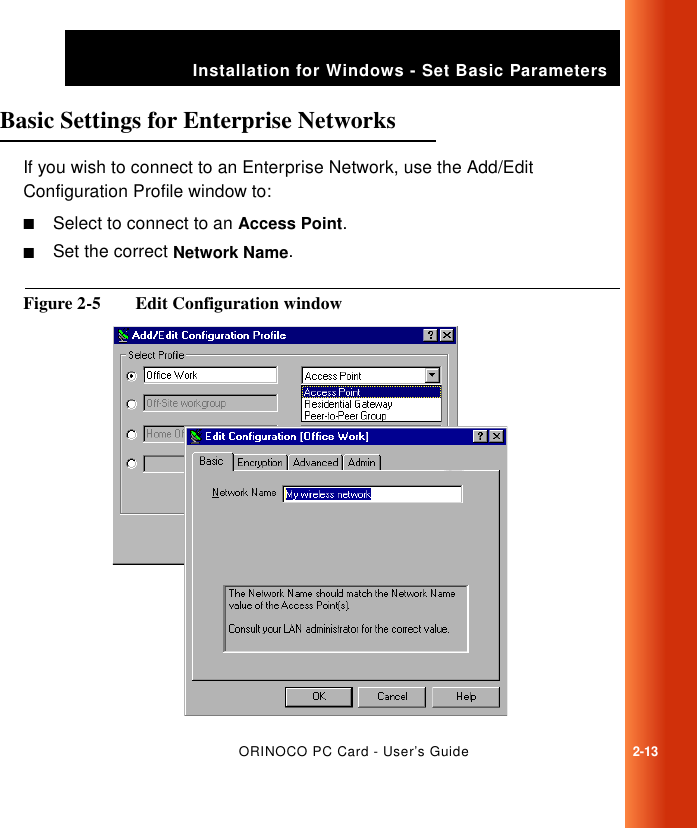
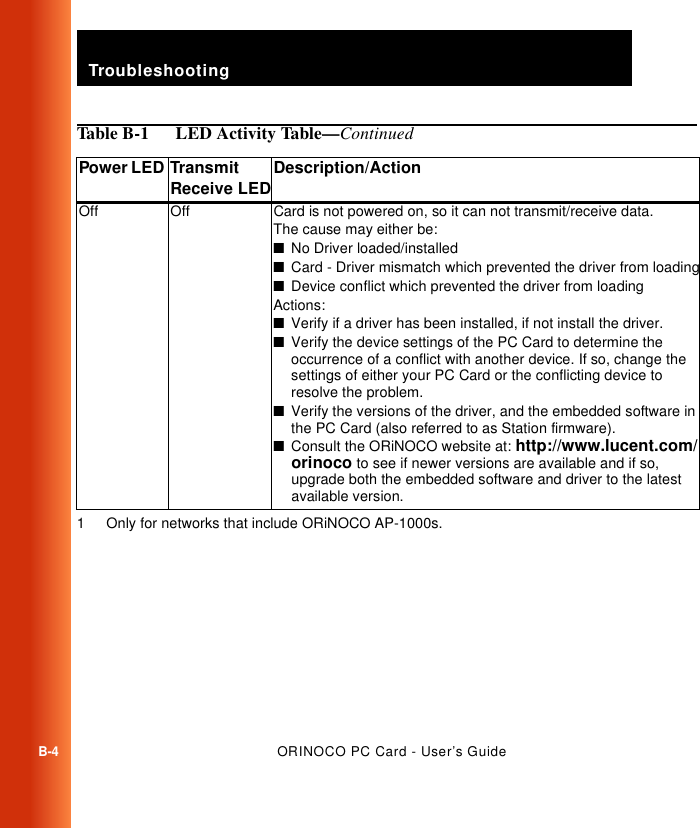
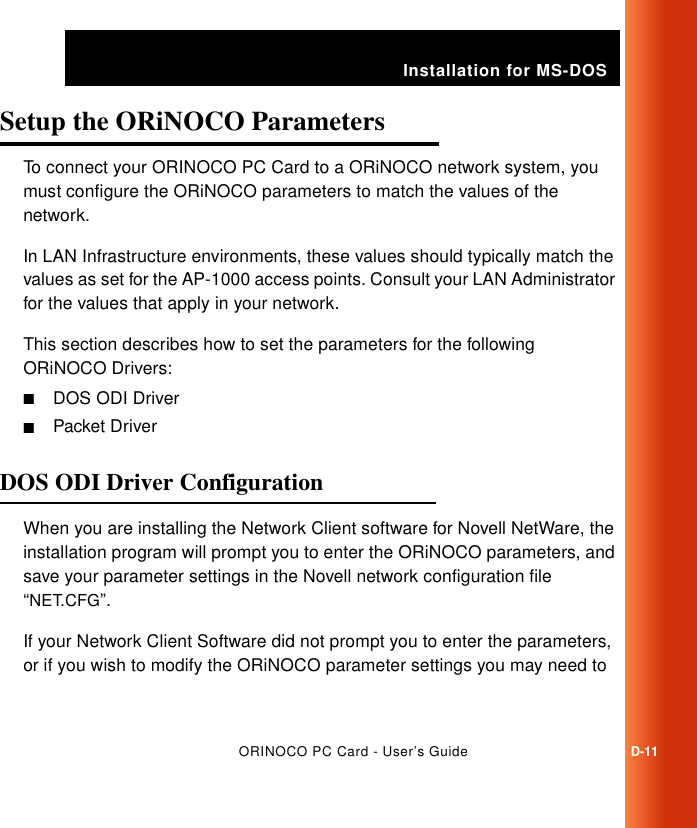
![Installation for MS-DOSORINOCO PC Card - User’s GuideD-9— Remove any other PCMCIA-related “DEVICE” statement from the “CONFIG.SYS” file. When for example the “CONFIG.SYS” file includes “DEVICE” statements for “Card Services” or “Socket Services” you must remove these statements. Consult the documentation that came with your computer or other PCMCIA device to help you to identify these statements.— When your computer has a memory manager program installed, for example “EMM386.EXE”, you must exclude the Memory Address space that you assigned to the WaveCAD program in the previous step (see page D-7).To exclude the Memory Space address, you must add an exclude parameter to “DEVICE” statement that activates the memory manager program.For example, if your computer uses the “EMM386.EXE” memory manager program, your “DEVICE” statement could look as follows:DEVICE=c:\dos\emm386.exe noems x=d100-d1ff— When your computer runs Microsoft Windows 3.x, you must also edit the Windows “SYSTEM.INI” to protect the Memory Address space that you assigned to the WaveCAD program in the previous step (see page D-7). You can use any ASCII text editor, such as Windows Notepad to edit the “SYSTEM.INI” file and add the following statement to the section “386Enh”:Example: = [386Enh] ... EMMExclude=D100-D1FF](https://usermanual.wiki/YDI-Wireless/LUC2400E.Lucent-Manual/User-Guide-130421-Page-126.png)

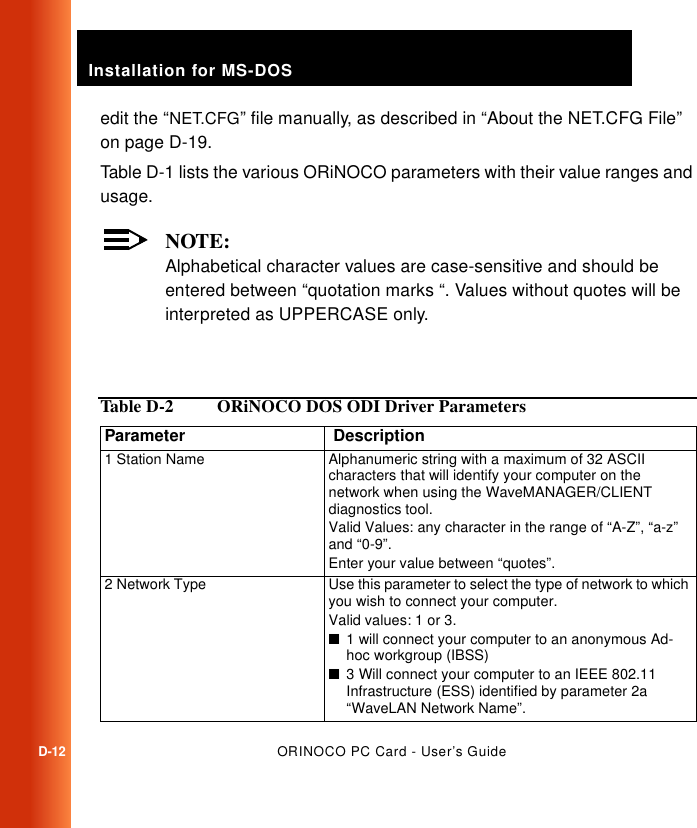

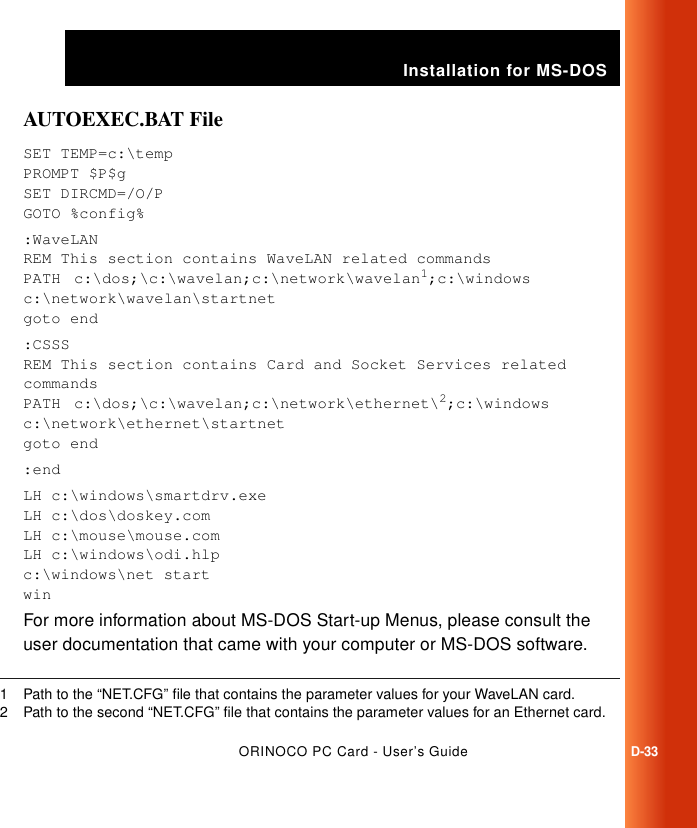
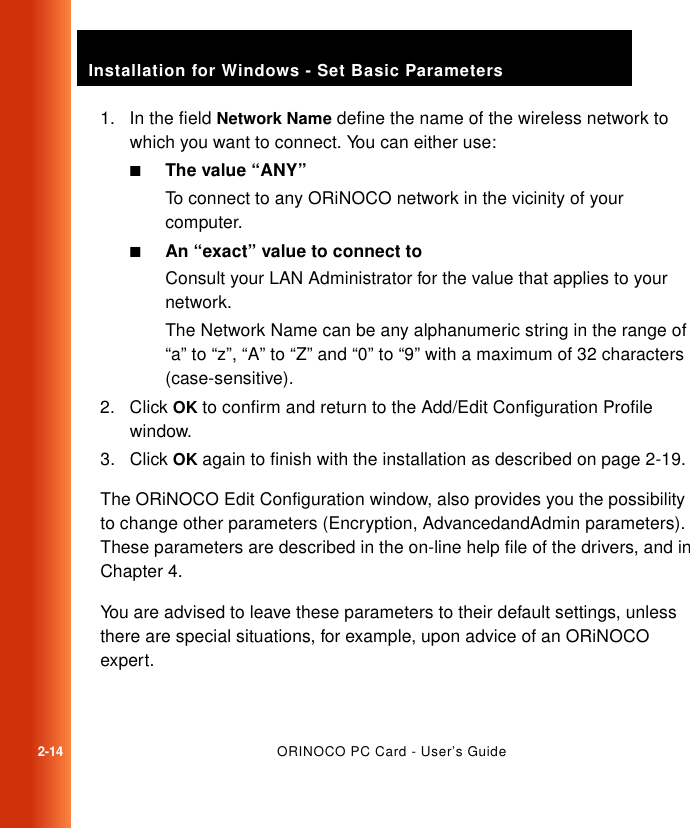
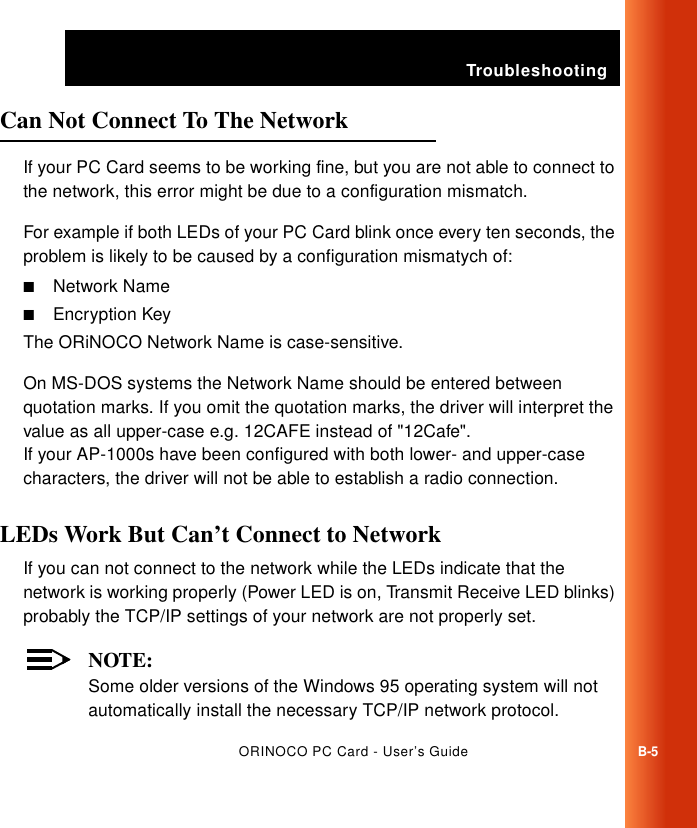
![Installation for MS-DOSD-32ORINOCO PC Card - User’s GuideCONFIG.SYS File[MENU]menuitem=WaveLANmenuitem=CSSS[COMMON]DEVICE=c:\dos\himem.sysDEVICE=c:\dos\emm386.exe noems x=xxxx-xxxx1DEVICE=c:\dos\setver.exe[WaveLAN]REM This menu item will enable WaveLAN Card Access Driver DEVICE = c:\wavelan\wavecad\wvlancad.sys /m=xxxx /b=xxxx /i=xx2[CSSS]REM This menu item will enable Card and Socket ServicesDEVICE=c:\csss\socksvce.exe3DEVICE=c:\csss\cardsvce.exe[COMMON]DEVICE=c:\windows\ifshlp.sys1 See page D-212 See “Intel 82365 PCIC” on page D-63 The program path and file names should match the actual path and file names of your Card Services and Socket Services (CS&SS) software.](https://usermanual.wiki/YDI-Wireless/LUC2400E.Lucent-Manual/User-Guide-130421-Page-149.png)