Yaesu Musen 20445X20 AMATEUR RADIO WITH SCANNING RECEIVER User Manual 3
Yaesu Musen Co., Ltd. AMATEUR RADIO WITH SCANNING RECEIVER 3
UserManual.wiki
>
Yaesu Musen
>
20445X20 User Manual
>
User Manual 3
Contents
1.
USERS MANUAL
2.
User Manual 1
3.
User Manual 2
4.
User Manual 3
5.
User Manual 4
6.
User Manual 5
7.
User Manual 6
8.
User Manual 7
9.
User Manual 8
User Manual 3
Navigation menu
Upload a User Manual
Namespaces
Wiki Guide
HTML
PDF
Info
Views
User Manual
Discussion / Help
Navigation

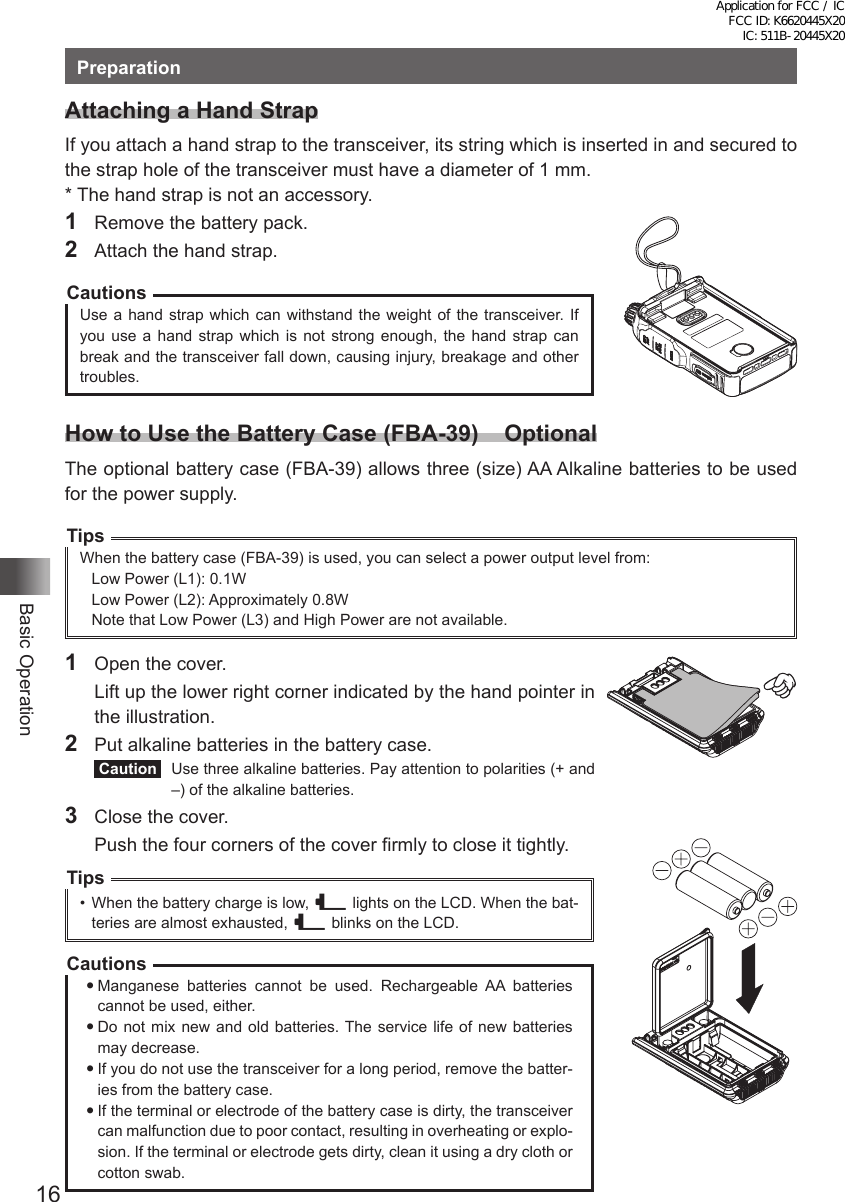
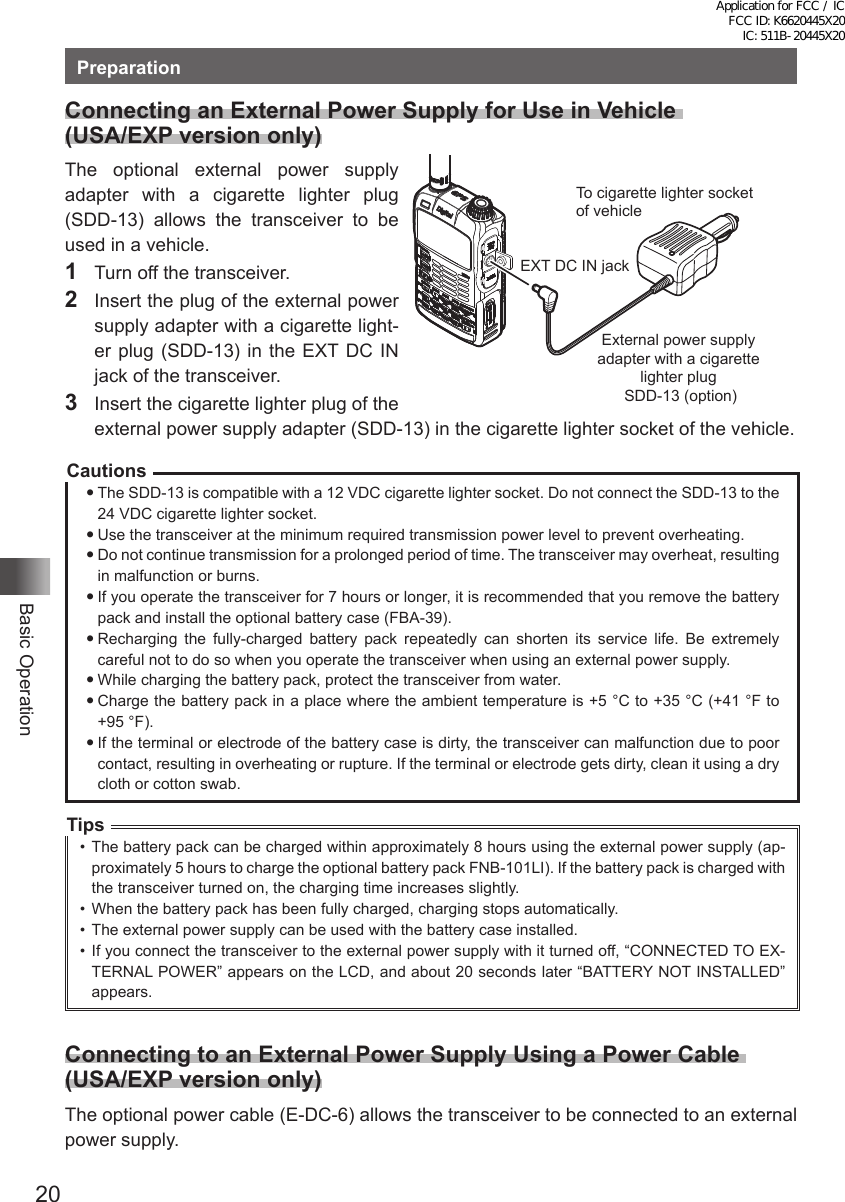
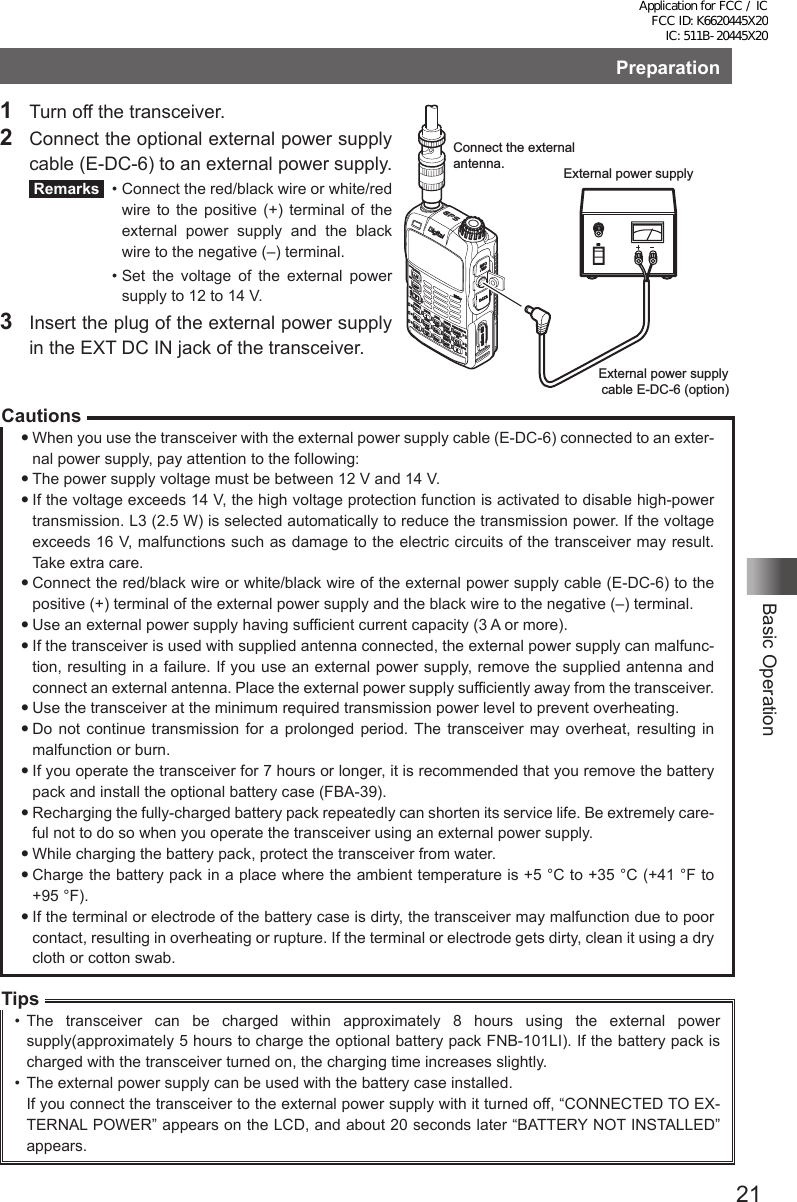
![24Basic OperationUsing a microSD memory cardFormatting a microSD memory cardFormat a new microSD memory card following the steps below before use.CautionFormatting a microSD memory card erases all data saved to it. If you are going to format the microSD memory card you are using, be sure to check the data saved to it before formatting.1 Press and hold M over 1 second.2 Turn O to select [10 SD CARD].3 Press H.4 Turn O to select [4 FORMAT].5 Press H. [OK?] appears on the LCD. Tip To cancel formatting, select [Cancel].6 Press H. S (sicon) on the LCD blinks and formatting starts. When formatting is completed, a beep sound is emitted and [Completed] appears on the LCD.Blinking while formatting is in progressApplication for FCC / IC FCC ID: K6620445X20 IC: 511B-20445X20](https://usermanual.wiki/Yaesu-Musen/20445X20.User-Manual-3/User-Guide-2766367-Page-10.png)
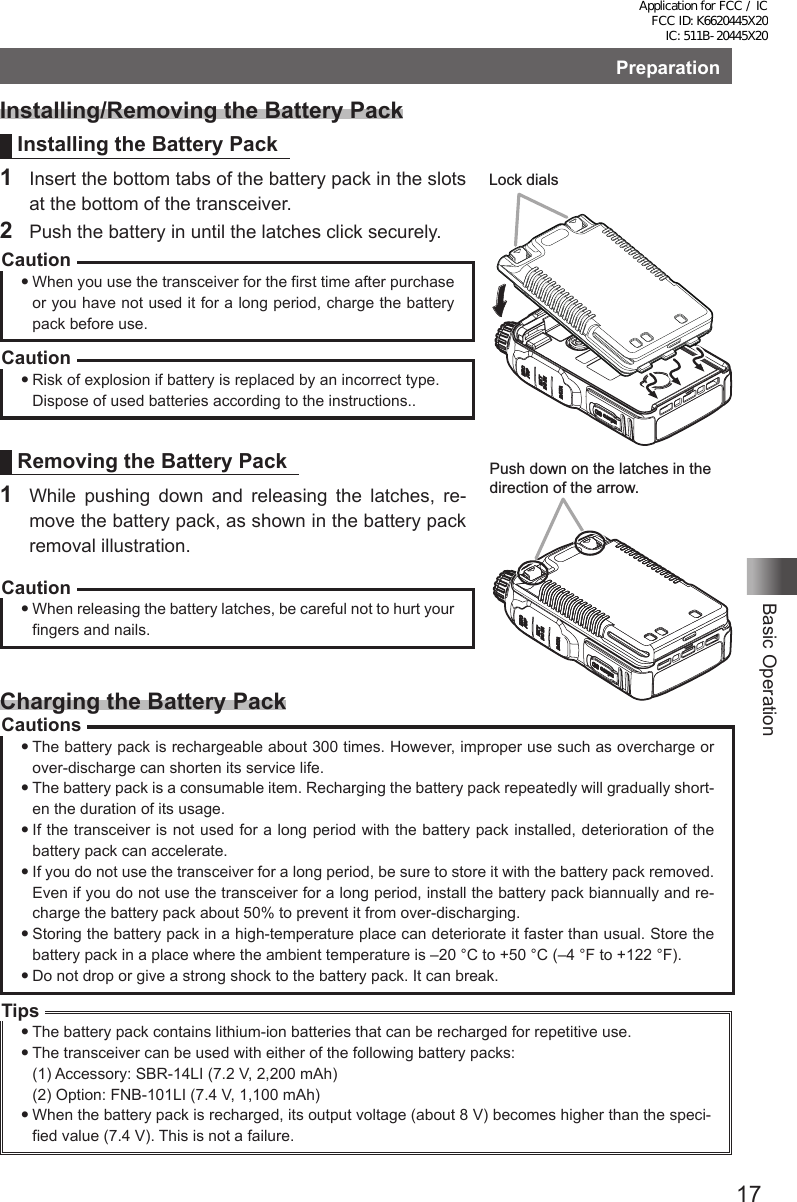
![25Basic OperationPerforming CommunicationTry communication using the transceiver in the analog communication mode. Follow the procedure below:Turn on the transceiverAdjust the Volume LevelSelect an Operating BandSelect a Frequency BandTurn in to a FrequencyPerform CommunicationTurning on the Transceiver1 Press and hold P over 1 second.2 The callsign input screen appears. The callsign input screen appears when the transceiver is turned on for the first time after purchase. The next time, the frequency screen will appear after the opening screen.3 Input a callsign for your transceiver. Input the callsign with the ten key.4 Press p. The callsign is set and two frequencies (A-band and B-band frequency) appear at the same time. Supplement Factory settings are: A-band (upper): 144.000 MHz B-band (lower): 430.000 MHz Tips You can change the information such as the power supply voltage and the opening message displayed at power-on. For example, press and hold M over 1 second to enter the Set mode and then select [1 DISPLAY] → [9 OPENING MESSAGE] to change the opening message. In addition, you can set the transceiver to display the reception frequency immediately without displaying the opening message (See page 107).Application for FCC / IC FCC ID: K6620445X20 IC: 511B-20445X20](https://usermanual.wiki/Yaesu-Musen/20445X20.User-Manual-3/User-Guide-2766367-Page-11.png)