Yamaha TSXB15A Desktop Audio System User Manual TSX B15
Yamaha Corporation Desktop Audio System TSX B15
UserManual.wiki
>
Yamaha
>
TSXB15A User Manual
TempConfidential_TSXB15-User Manual
Navigation menu
Upload a User Manual
Namespaces
Wiki Guide
HTML
PDF
Info
Views
User Manual
Discussion / Help
Navigation
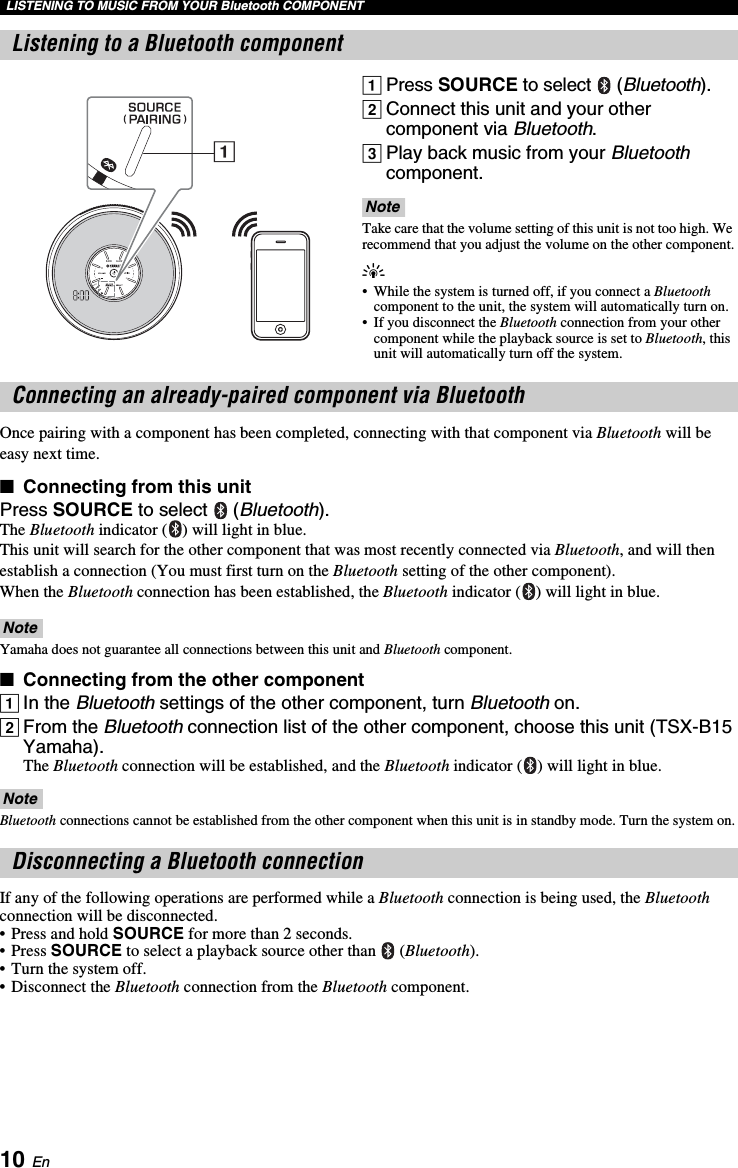
![LISTENING TO MUSIC FROM YOUR Bluetooth COMPONENT9 EnEn■If using an iPhone/iPad/iPod touch■If using other than an iPhone/iPad/iPod touchAPress and hold SOURCE for more than 2 seconds to enter paring mode.• Pairing mode lasts for 5 minutes.• In paring mode, the Bluetooth indicator ( ) will light in orange and blue alternately.BPerform Bluetooth pairing on the other component.For details, refer to the owner’s manual of the other component.CFrom the Bluetooth connection list of the other component, choose this unit (TSX-B15 Yamaha).When pairing has been completed, the Bluetooth indicator ( ) will light in blue.yIf you are prompted for a passkey, enter the numerals “0000”.APress and hold SOURCE for more than 2 seconds to enter paring mode.• Pairing mode lasts for 5 minutes.• In paring mode, the Bluetooth indicator ( ) will light in orange and blue alternately.BOn your iPhone/iPad/iPod touch, turn [Settings] [Bluetooth] on.The Bluetooth connection list will appear in [Devices].(This procedure or display may differ depending on the type of your iPhone/iPad/iPod touch.)CFrom the Bluetooth connection list of the other component, choose this unit (TSX-B15 Yamaha).When pairing has been completed, your iPhone/iPad/iPod touch will indicate “Connected”.The Bluetooth indicator () will light in blue.ABluetooth indicator ( )](https://usermanual.wiki/Yamaha/TSXB15A/User-Guide-2338230-Page-15.png)