ZMODO Technology H2404 Breeze User Manual 1
ZMODO Technology Shenzhen Corp. Ltd. Breeze 1
Users Manual
SD-H2404-A REV-A00
Size:90*130mm
3
467
2
Front Side Back Side
1
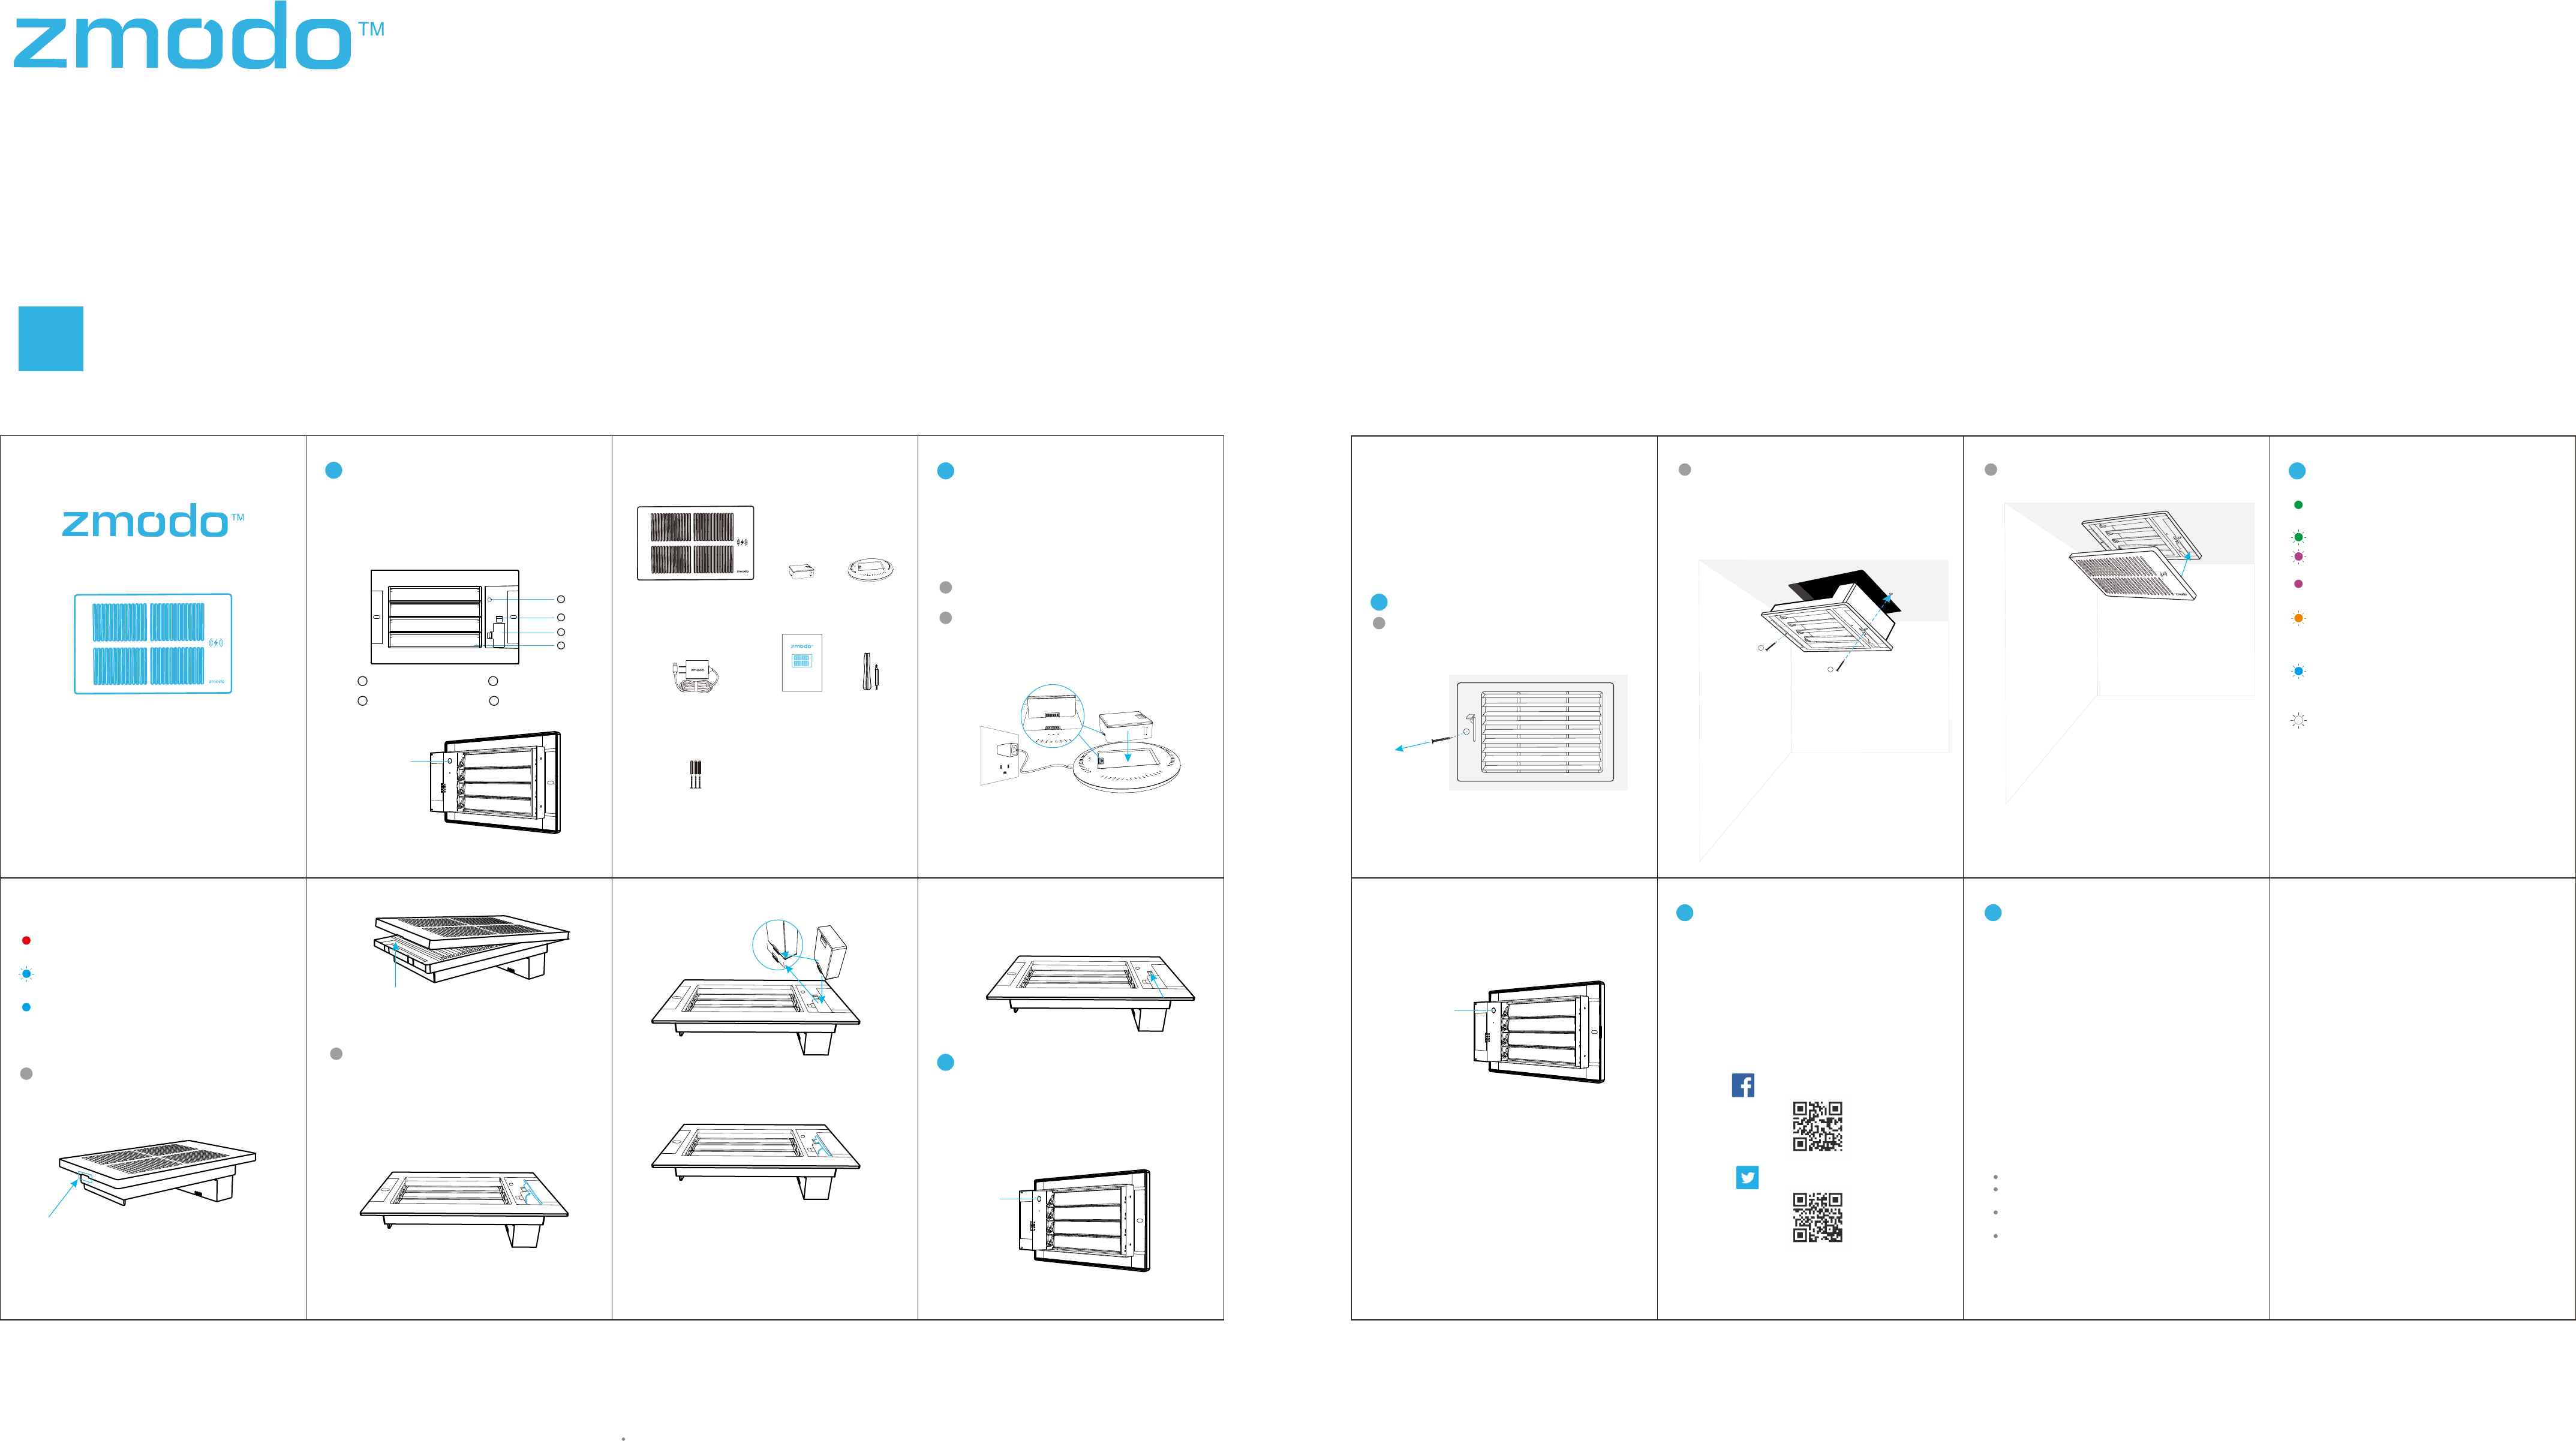
1Getting to know your Smart Vent
8 10 11
12
Smart Vent
Controller
Power
Adapter
Plug in the charging pad to a power outlet using the
included USB power adapter.
2
Smart Vent is powered on by the included rechargeable
battery. Before you configure the Smart Vent, please make
sure the battery is fully charged.
You will be able to view the battery status from the Zmodo
app when the Smart Vent is in use.
Place the rechargeable battery onto the charging pad.
Refer to the status light on the Charging Pad to make sure
the rechargeable battery is properly placed and charging.
5
Zmodo Smart Vent is designed to work with Zmodo Tune
and Room Sensor to make each room have the exactly
temperature as you like. It helps to delivery the comforts
to each room and also reduce the energy cost by
regulating each room’s temperature.
Charge the battery:
Note:Align the battery with the grooves on the charging pad.
1
2
Charging Pad Status Light Definitions
Solid Red
The charging pad is powered on.
Blinking Blue
The battery is charging.
Solid Blue
The battery is fully charged.
Insert the battery to the Smart Vent
Remove the magnetic faceplate. Please open the
faceplace of Smart Vent from the side which you can find a
2 cm length slot and then remove it.
1
Rechargeable
Battery(2)
Charging
Pad
Preparations before configuring:
What’s in the box:
4Install the Zmodo Smart Vent
Remove the existing floor, wall, or ceiling vent where you
want to install your Smart Vent.
1
Insert your Smart Vent in place of your old vent, and mark
the appropriate holes. Drill two holes slightly smaller than
the wall anchors and use a hammer to gently insert the
anchors into the wall. Fasten the two screws through the
holes on the Smart Vent bracket and into the anchors as
shown.
2
Pantone 306C
Android is a trademark of Google Inc. Google Play is a trademark of Google
Inc. Apple, the Apple logo, and iPhone are trademarks of Apple Inc.,
registered in the U.S. and other countries. Apple Store is a service mark of
Apple Inc.
Having difficulty?
Follow us on Twitter @Zmodo
Scan the QR-code below!
Like us on Facebook.com/Zmodo
Scan the QR-code below!
www.zmodo.com/support
You can use the Live Chat function in Zmodo app if you
have any technical problems.
Please follow the steps below:
Access the “Me” page in the bottom right corner of the
Zmodo app and select “Zmodo Support”.
For more instructions, troubleshooting, support, and other
resources, please visit:
6Support
REV-A00
Note:If you want to take out the battery from Smart Vent to recharge, open
the battery cover by pressing down on the tab, and then pull up the tab as
shown, the battery will pop up a little so that you can take it out.
3Mobile Setup
Open the Zmodo App, access your Tune's Device Settings
page, and choose the "Accessories" option. Select the +
Add Accessory option and follow the on-screen instructions.
When the app prompts you to press a button, please press
the button at the back of the Smart Vent as shown to pair it
with your Tune.
Once you see the status light shows solid purple, Smart
Vent is successfully paired with Tune.
If you have paired multiple Smart Vent with Tune, please
make sure to add each Smart Vent to Tune or to
corresponding Room Sensor. For more information, please
see the "How to add each Smart Vent to corresponding
Room Sensor?" FAQ on the Zmodo Support Page.
Put the faceplate back to the Smart Vent securely.
3Status Light Definition
5
Solid Green
The battery is properly installed.
Solid Purple
Smart Vent is successfully paired with Tune.
Status Light Battery Cover
1
2
3
4
BatteryPopupTab Fan Blade
Screwdriver
Quick Start Guide
Smart Vent
Quick Start
Guide
Quick Start Guide
Smart Vent
Insert the battery. Open the battery cover by
pressing down on the tab as shown. Insert the
battery, making sure that the battery contacts are
properly aligned, press the battery down to make
sure is been properly placed and then close the
battery cover. Once the battery is installed, the
status light on the Smart Vent will be solid green.
2
1
2
3
4
Pair and Reset Button
Anchors & Screws(3)
Press here
9
1
2
Flashing Green & Flashing Purple
Smart Vent is trying to pairing with Tune, it will flashing
green twice and then flashing Purple.
Flashing Orange
When HVAC is set in heating mode, the status light will
flashing Orange for around 5 seconds, then off.
Flashing Blue
When HVAC is set in cooling mode, the status light will
flashing blue for around 5 seconds, then off.
Flashing White
When HVAC is set in fan only mode, the status light
will flashing white for around 5 seconds, then off.
If you were unable to pair Smart Vent with Tune, please try
to reset Smart Vent and try again, please hold the button
at the back of Smart Vent as shown for over 3 seconds to
reset it.
Press here
This equipment has been tested and found to comply with
the limits for a Class B digital device, pursuant to Part 15
of the FCC Rules. These limits are designed to provide
reasonable protection against harmful interference in a
residential installation. This equipment generates, uses
and can radiate radio frequency energy and, if not
installed and used in accordance with the instructions,
may cause harmful interference to radio communications.
However, there is no guarantee that interference will not
occur in a particular installation.
13 14
7Federal Communications Commission
(FCC) Compliance
If this equipment does cause harmful interference to radio
or television reception, which can be determined by
turning the equipment off and on, the user is encouraged
to try to correct the interference by one or more of the
following measures:
Reorient or relocate the receiving antenna.
Increase the separation between the equipment and
receiver.
Connect the equipment into an outlet on a circuit different
from that to which the receiver is connected.
Consult the dealer or an experienced radio/TV technician
for help.
Changes or modifications not expressly approved by the
party responsible for compliance could void the user's
authority to operate the equipment.