Zebra Technologies MC32N0 Mobile Computer User Manual MC32N0 User Guide with Android v5 1 1
Zebra Technologies Corporation Mobile Computer MC32N0 User Guide with Android v5 1 1
UserManual.wiki
>
Zebra Technologies
>
MC32N0 User Manual
>
User Manual rev 101-146.pdf
Contents
1.
User Manual.pdf
2.
User manual
3.
User Manual (statements) rev.pdf
4.
User Manual rev 1-50.pdf
5.
User Manual rev 51-100.pdf
6.
User Manual rev 101-146.pdf
User Manual rev 101-146.pdf
Navigation menu
Upload a User Manual
Namespaces
Wiki Guide
HTML
PDF
Info
Views
User Manual
Discussion / Help
Navigation
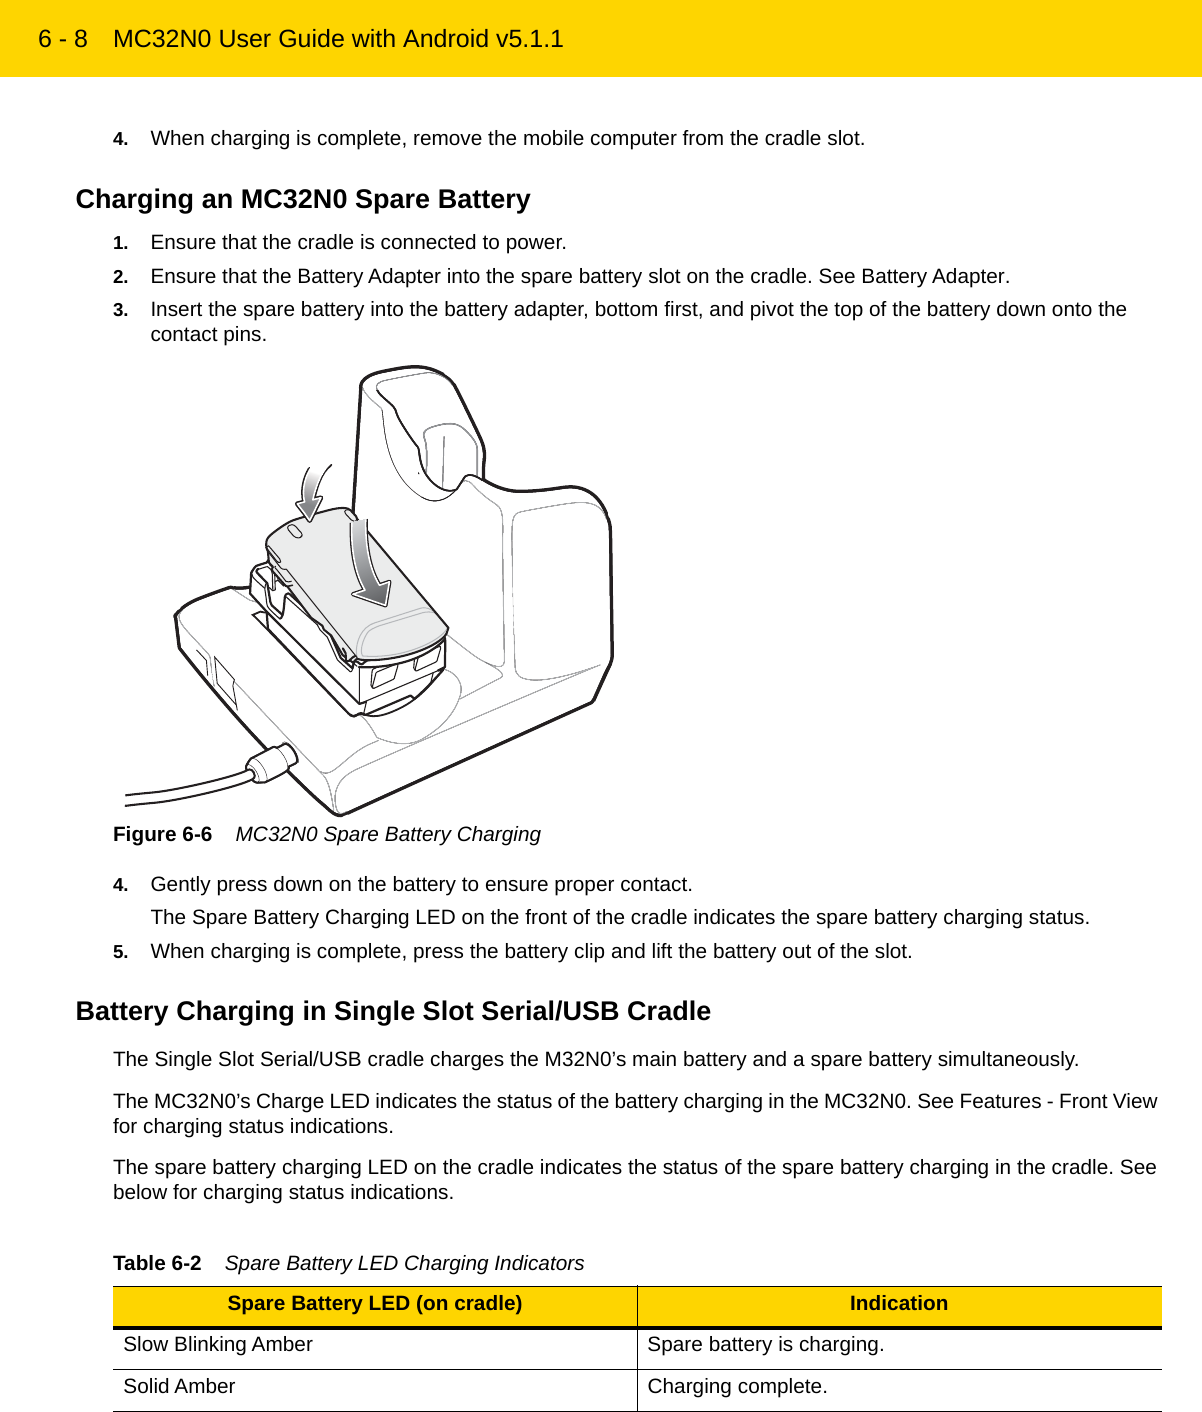


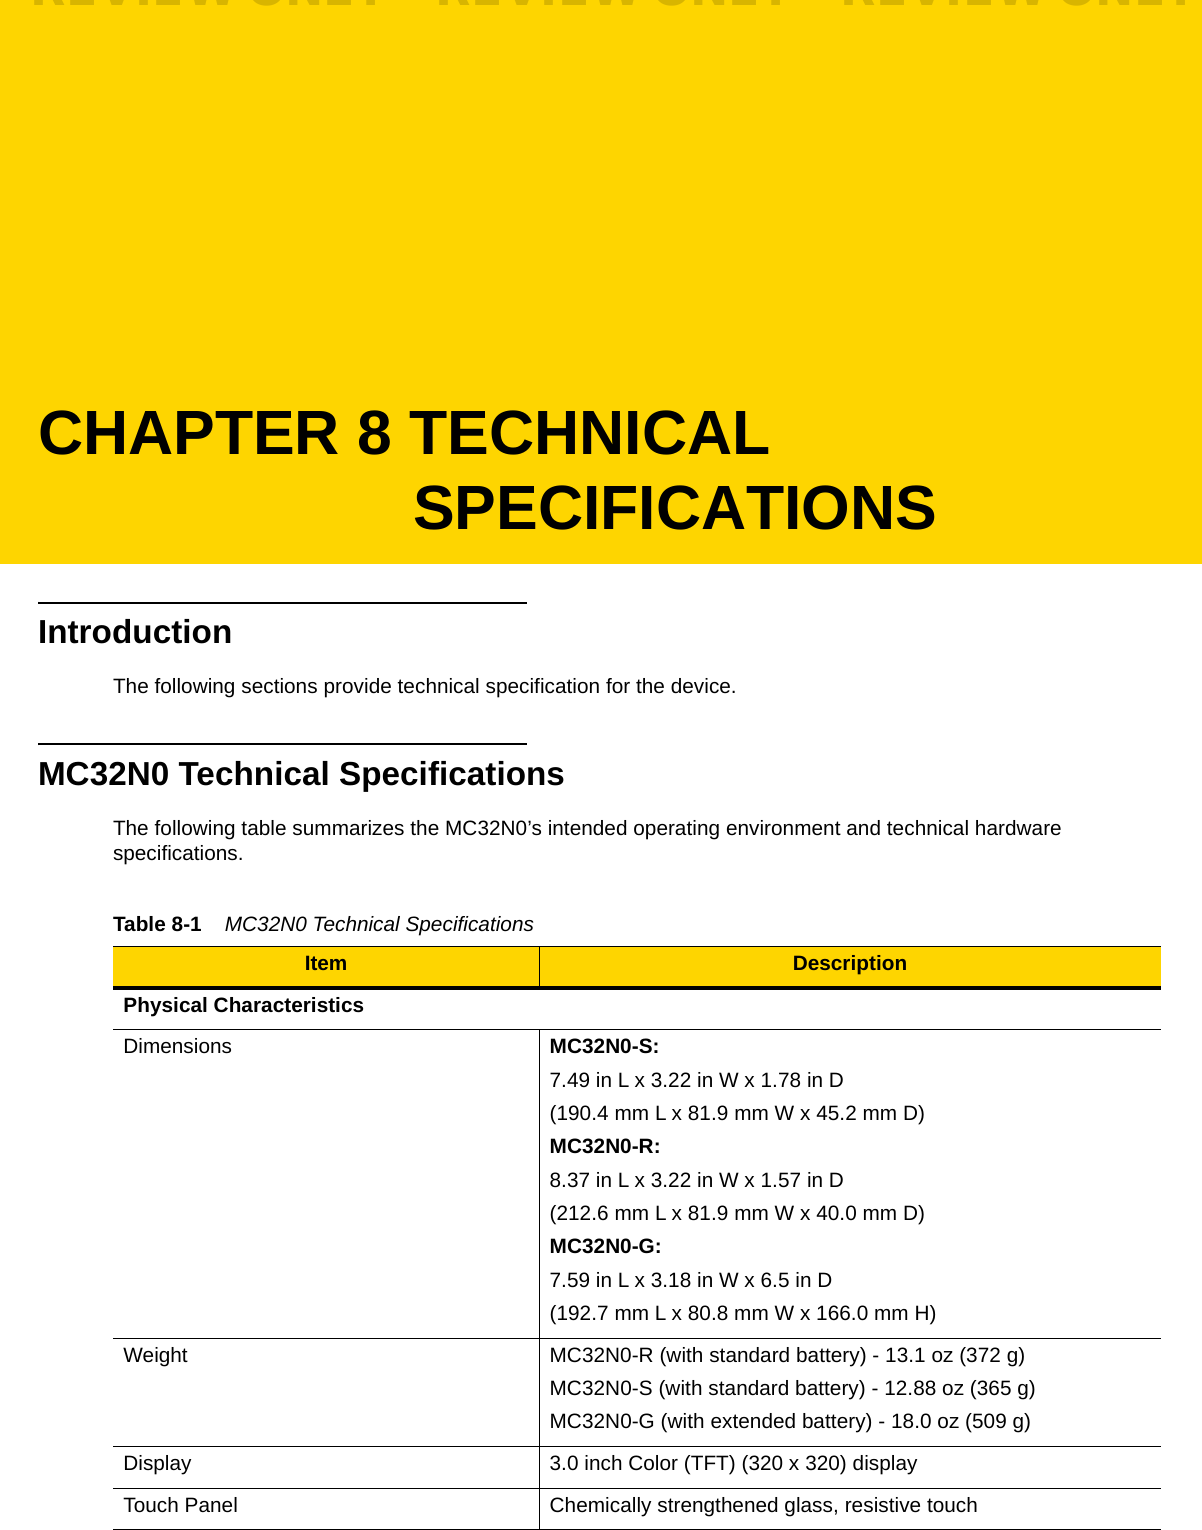
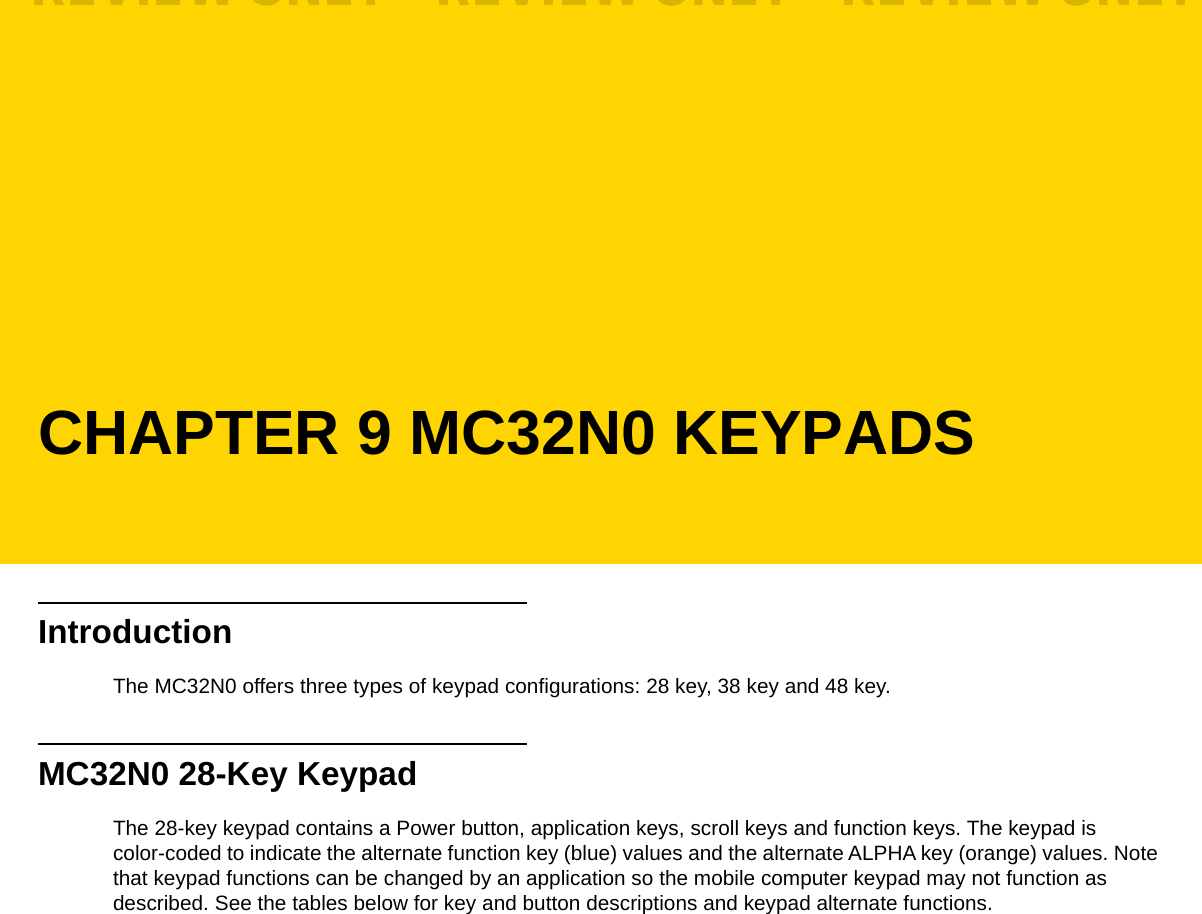

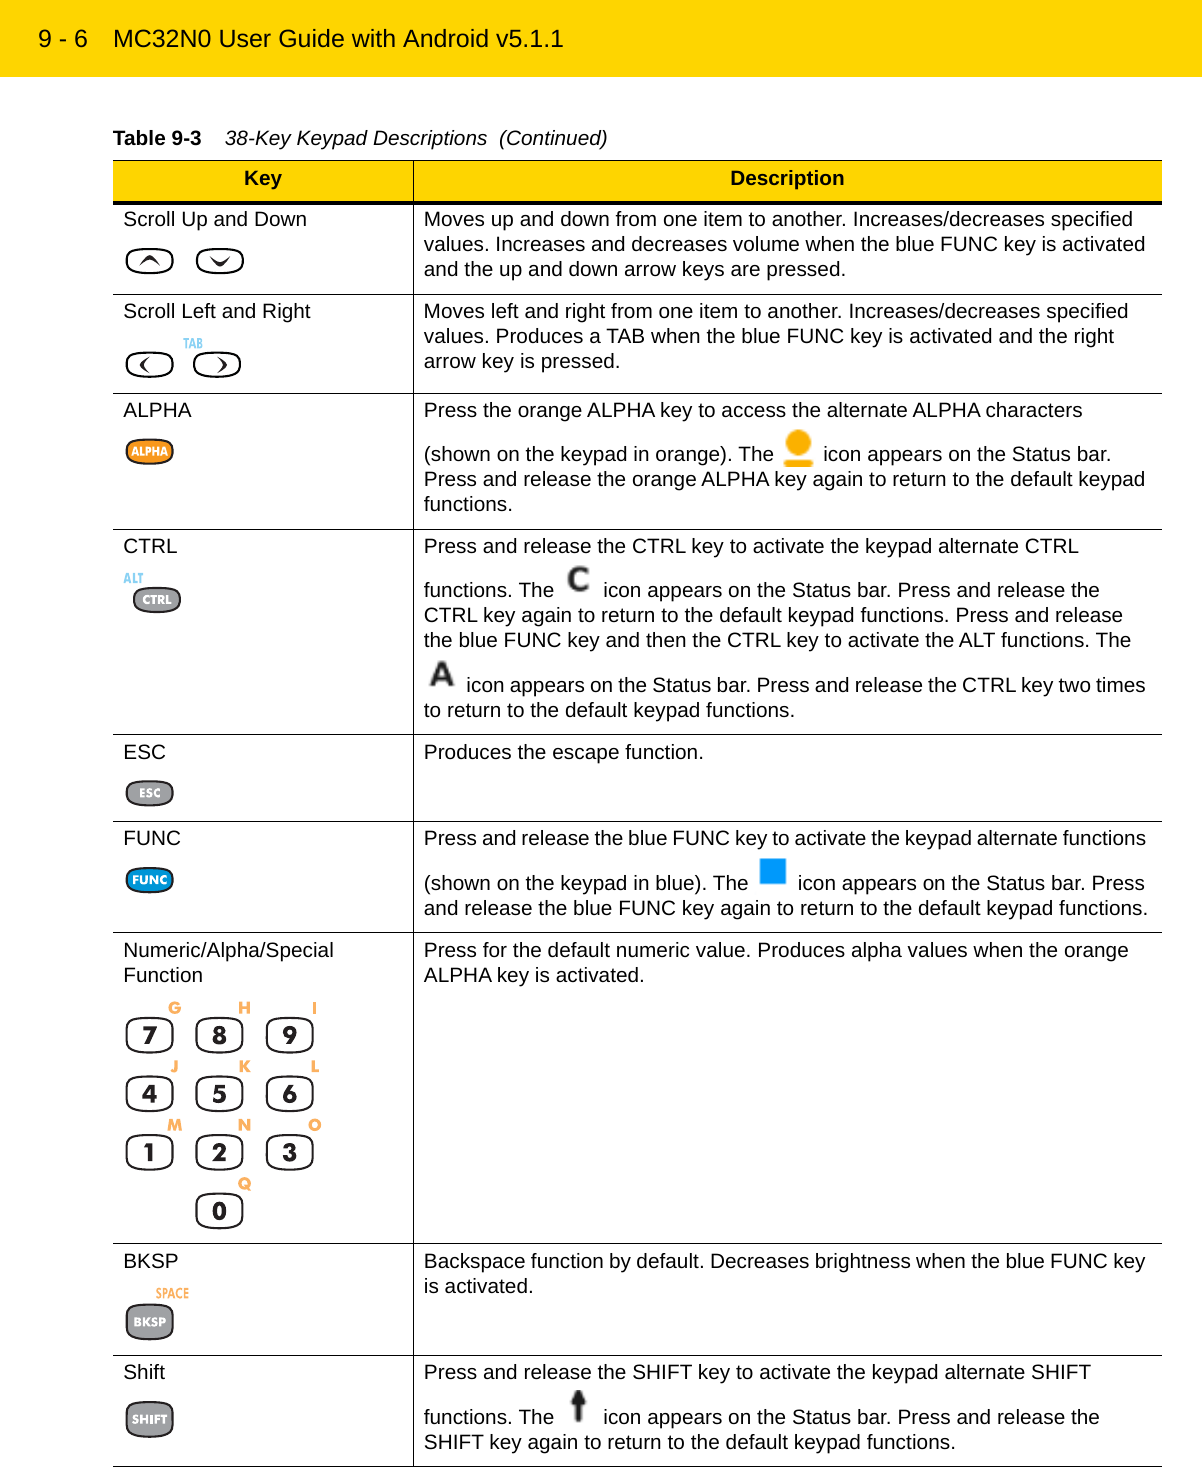
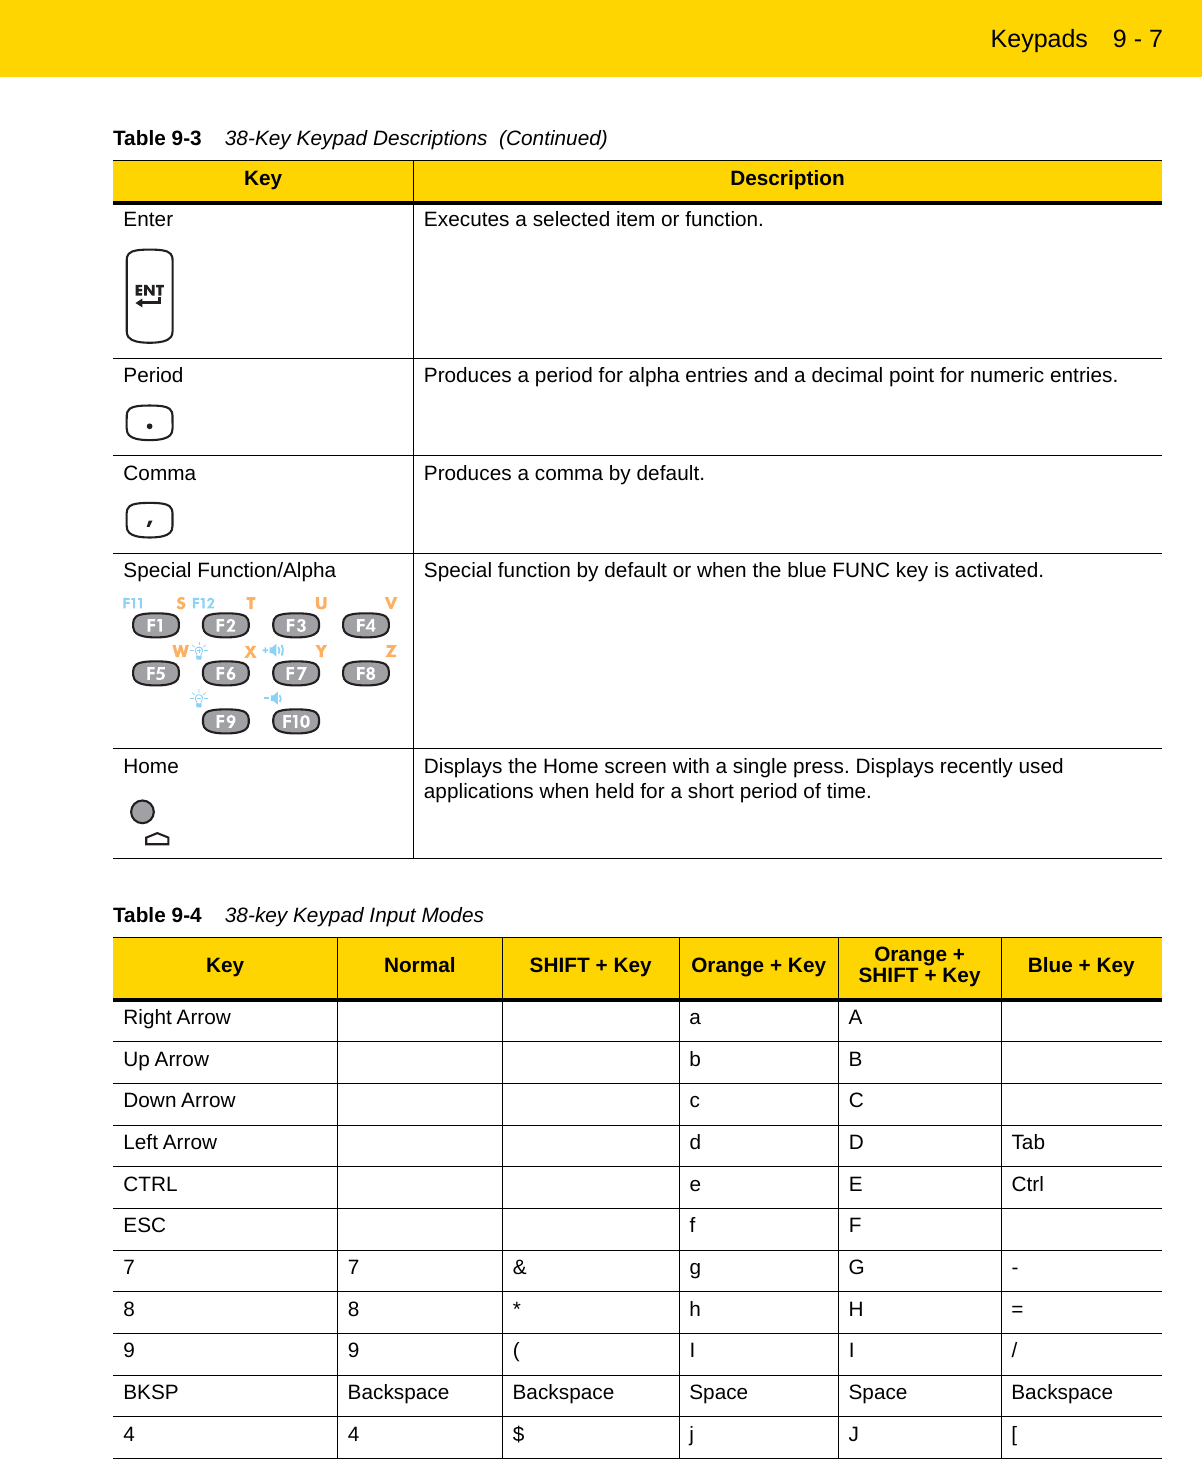
![9 - 8 MC32N0 User Guide with Android v5.1.1MC32N0 48-Key KeypadThe 48-key keypad contains a Power button, application keys, scroll keys and function keys. The keypad is color-coded to indicate the alternate function key (blue) values. Note, that keypad functions can be changed by an application so the mobile computer keypad may not function as described. The tables below provide key and button descriptions and keypad alternate functions.55%kK]66^lL;11!mM‘22@nN‘33#oO\,,<pP,00)qQ0..>rR-F1 s S F11F2 t T F12F3 u U F13F4 v V F14F5 w WF6 x X Increase BrightnessF7 y Y Increase VolumeF8 z ZF9 Decrease BrightnessF10 * Decrease VolumeNOTE An application can change the key functions. The keypad may not function exactly as described.Table 9-4 38-key Keypad Input Modes (Continued)Key Normal SHIFT + Key Orange + Key Orange + SHIFT + Key Blue + KeyREVIEW ONLY - REVIEW ONLY - REVIEW ONLY REVIEW ONLY - REVIEW ONLY - REVIEW ONLY](https://usermanual.wiki/Zebra-Technologies/MC32N0.User-Manual-rev-101-146-pdf/User-Guide-3375075-Page-40.png)