Zebra Technologies RFID-R402-2 Thermal Printer with RFID Capability User Manual Part 2

Zebra Technologies Corporation Thermal Printer with RFID Capability Users Manual Part 2

Users Manual Part 2

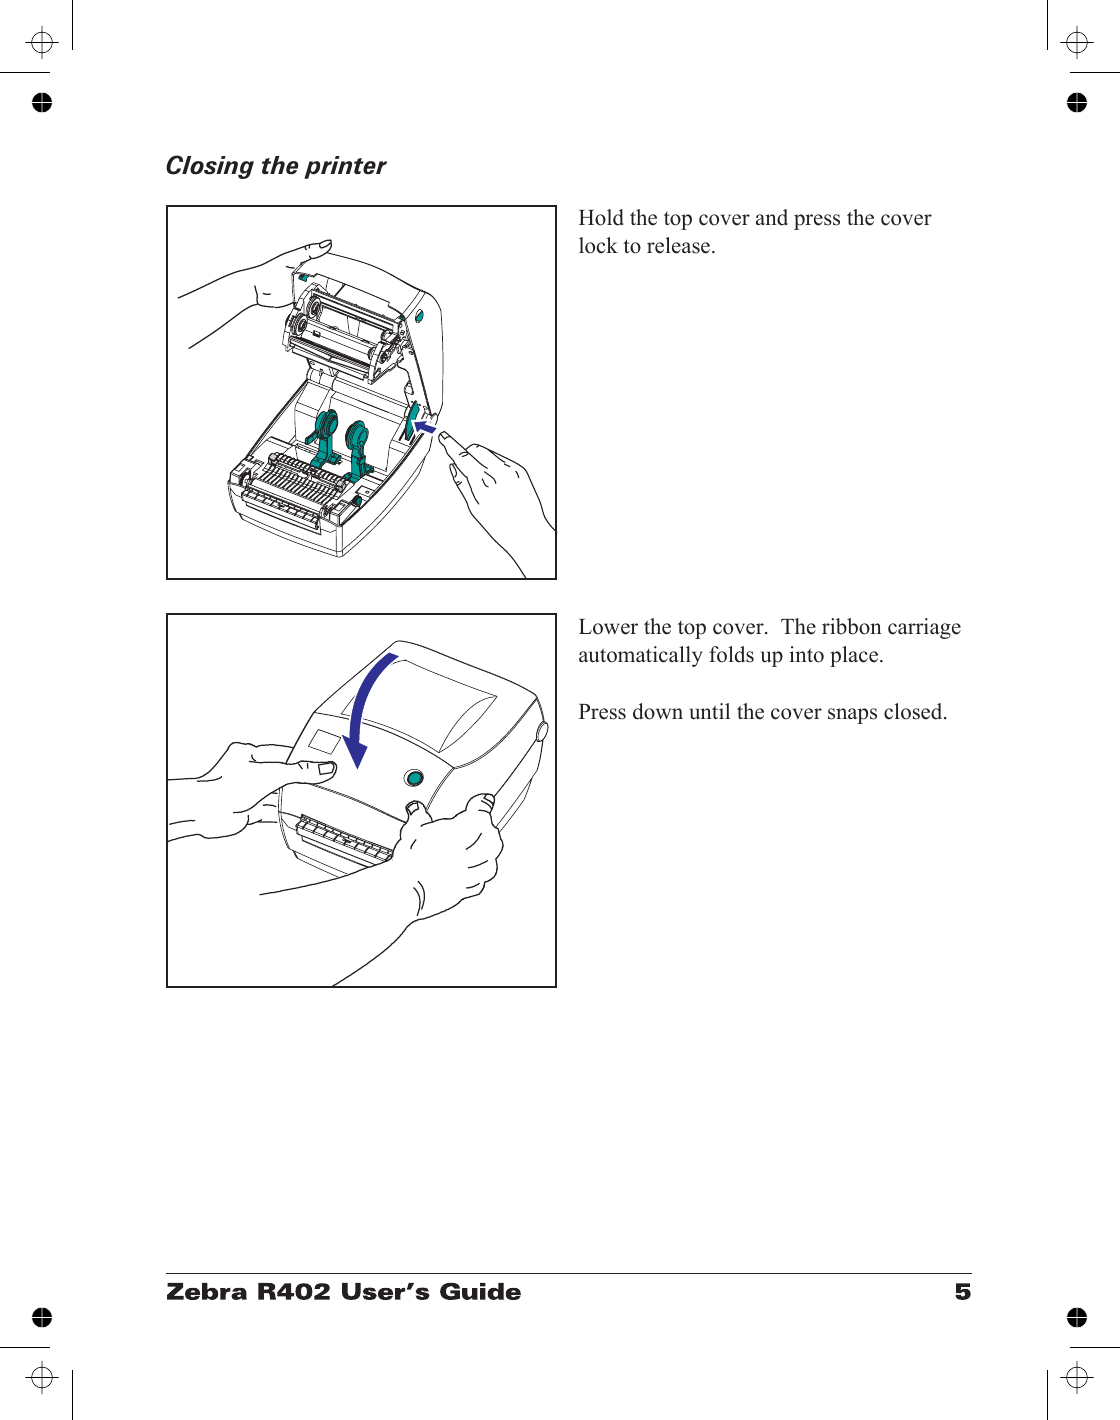
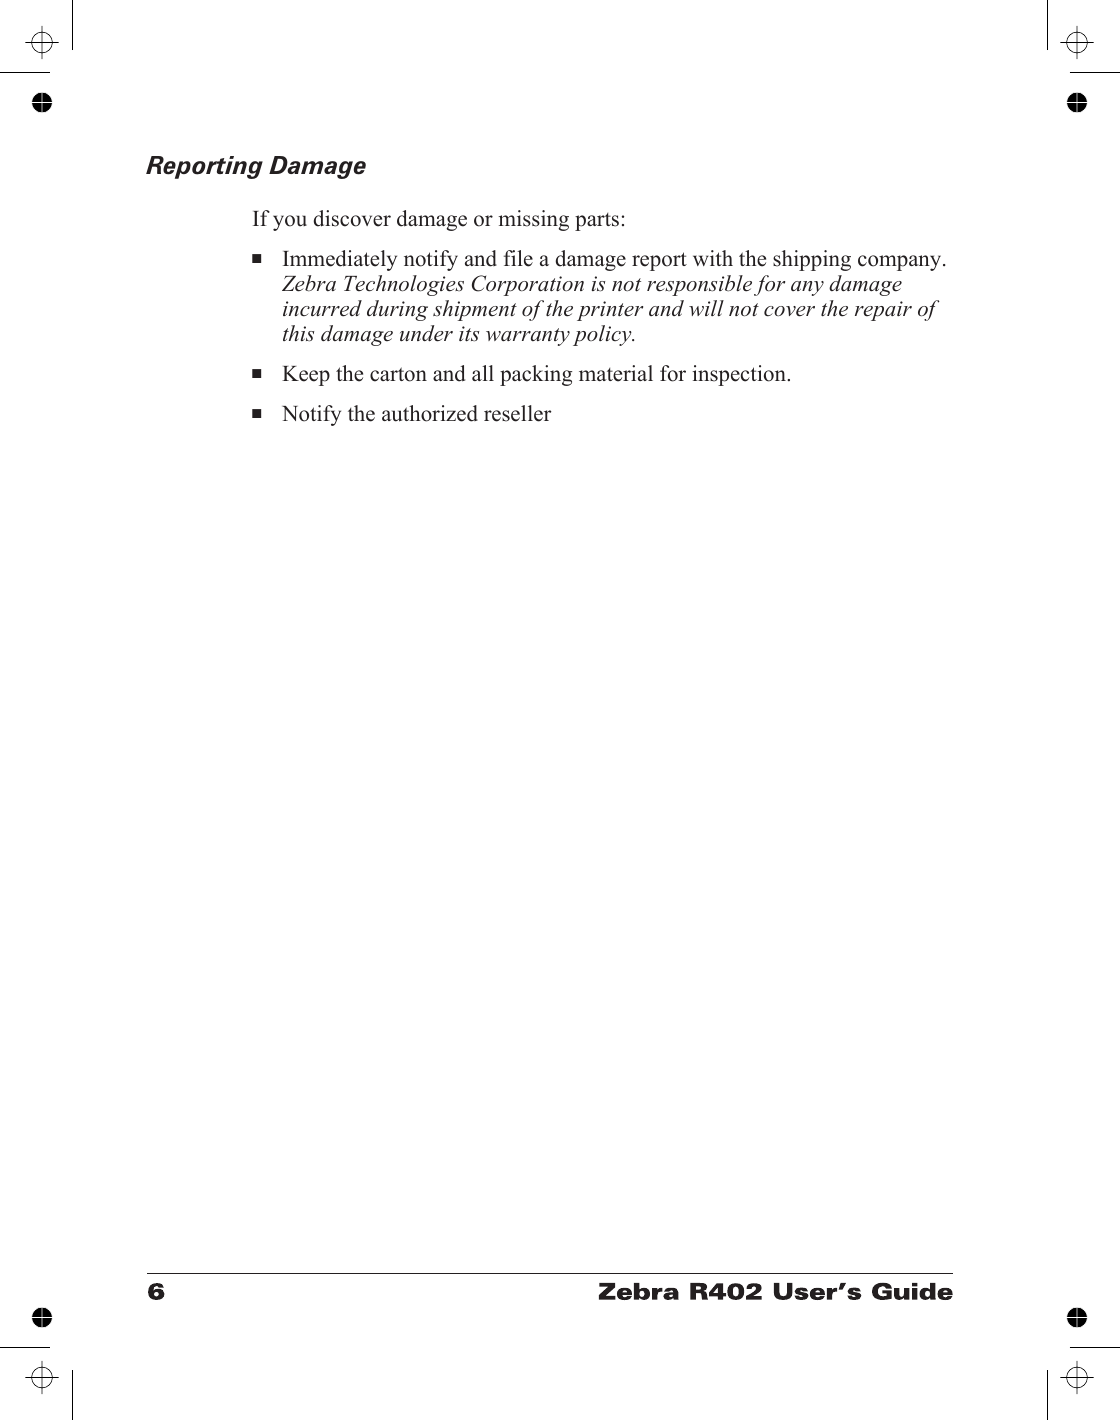
Closing the printerHold the top cover and press the coverlock to release.Lower the top cover.  The ribbon carriageautomatically folds up into place.Press down until the cover snaps closed.
Reporting DamageIf you discover damage or missing parts:■Immediately notify and file a damage report with the shipping company.Zebra Technologies Corporation is not responsible for any damageincurred during shipment of the printer and will not cover the repair ofthis damage under its warranty policy.■Keep the carton and all packing material for inspection.■Notify the authorized reseller
Getting StartedThis section describes how to set up your printer for the first time and usethe most common operating procedures for loading media in tear-off modeand loading ribbon.Modes of PrintingYou can operate this printer in two different modes:  tear-off or peel-off.■Standard tear-off mode allows you to tear off each label (or a strip oflabels) after it is printed.■In optional peel-off mode, the backing material is peeled away from thelabel as it is printed.  After this label is removed, the next one is printed.The printer typically uses roll media, but you can use fan-fold media aswell.For procedures to use optional modes and features, refer to the UsingOptions section.
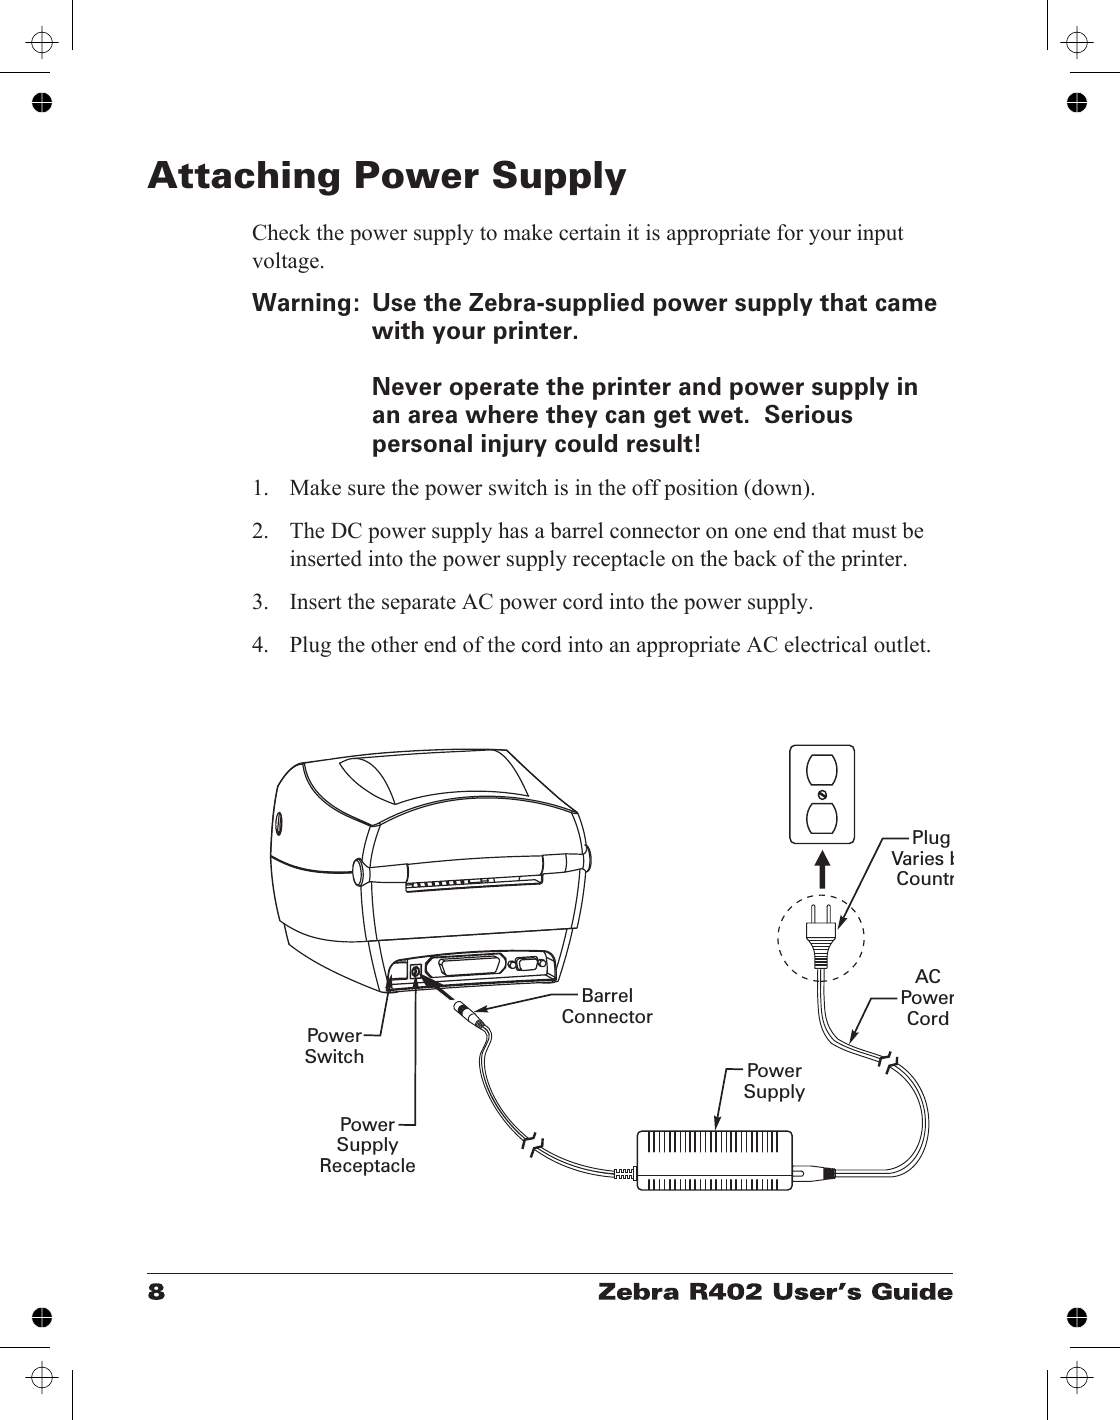
Attaching Power SupplyCheck the power supply to make certain it is appropriate for your inputvoltage.Warning: Use the Zebra-supplied power supply that camewith your printer.Never operate the printer and power supply inan area where they can get wet.  Seriouspersonal injury could result!1. Make sure the power switch is in the off position (down).2. The DC power supply has a barrel connector on one end that must beinserted into the power supply receptacle on the back of the printer.3. Insert the separate AC power cord into the power supply.4. Plug the other end of the cord into an appropriate AC electrical outlet.PlugVaries bCountrACPowerCordPowerSupplyPowerSwitchPowerSupplyReceptacleBarrelConnector
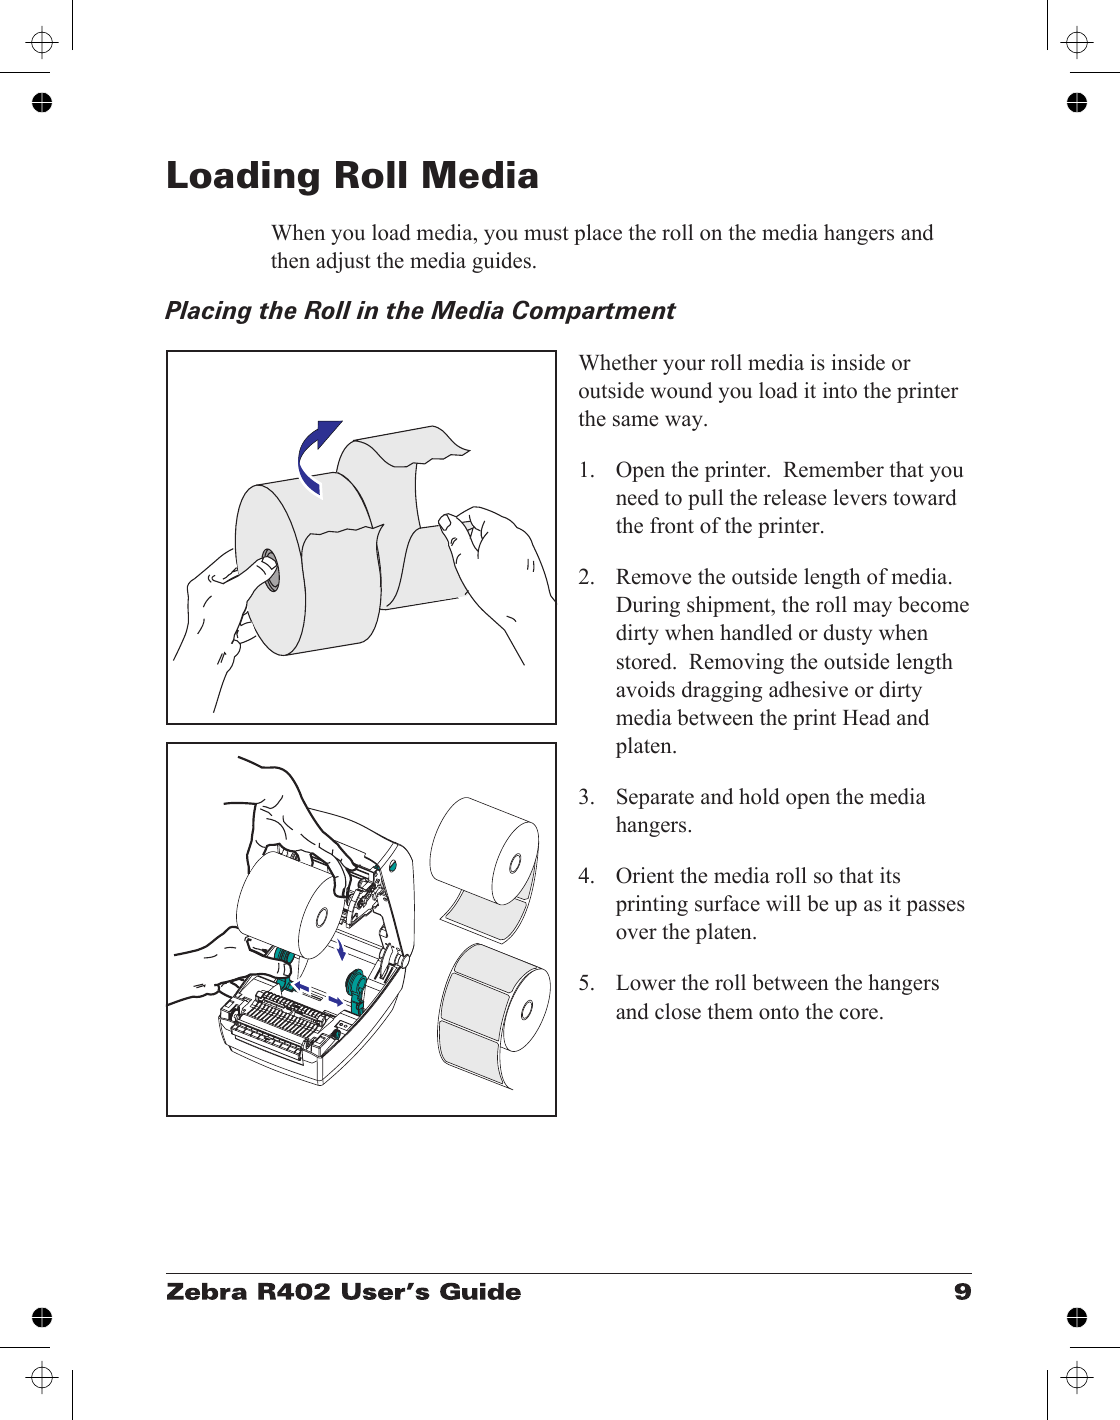
Loading Roll MediaWhen you load media, you must place the roll on the media hangers andthen adjust the media guides.Placing the Roll in the Media CompartmentWhether your roll media is inside oroutside wound you load it into the printerthe same way.1. Open the printer.  Remember that youneed to pull the release levers towardthe front of the printer.2. Remove the outside length of media.During shipment, the roll may becomedirty when handled or dusty whenstored.  Removing the outside lengthavoids dragging adhesive or dirtymedia between the print Head andplaten.3. Separate and hold open the mediahangers.4. Orient the media roll so that itsprinting surface will be up as it passesover the platen.5. Lower the roll between the hangersand close them onto the core.
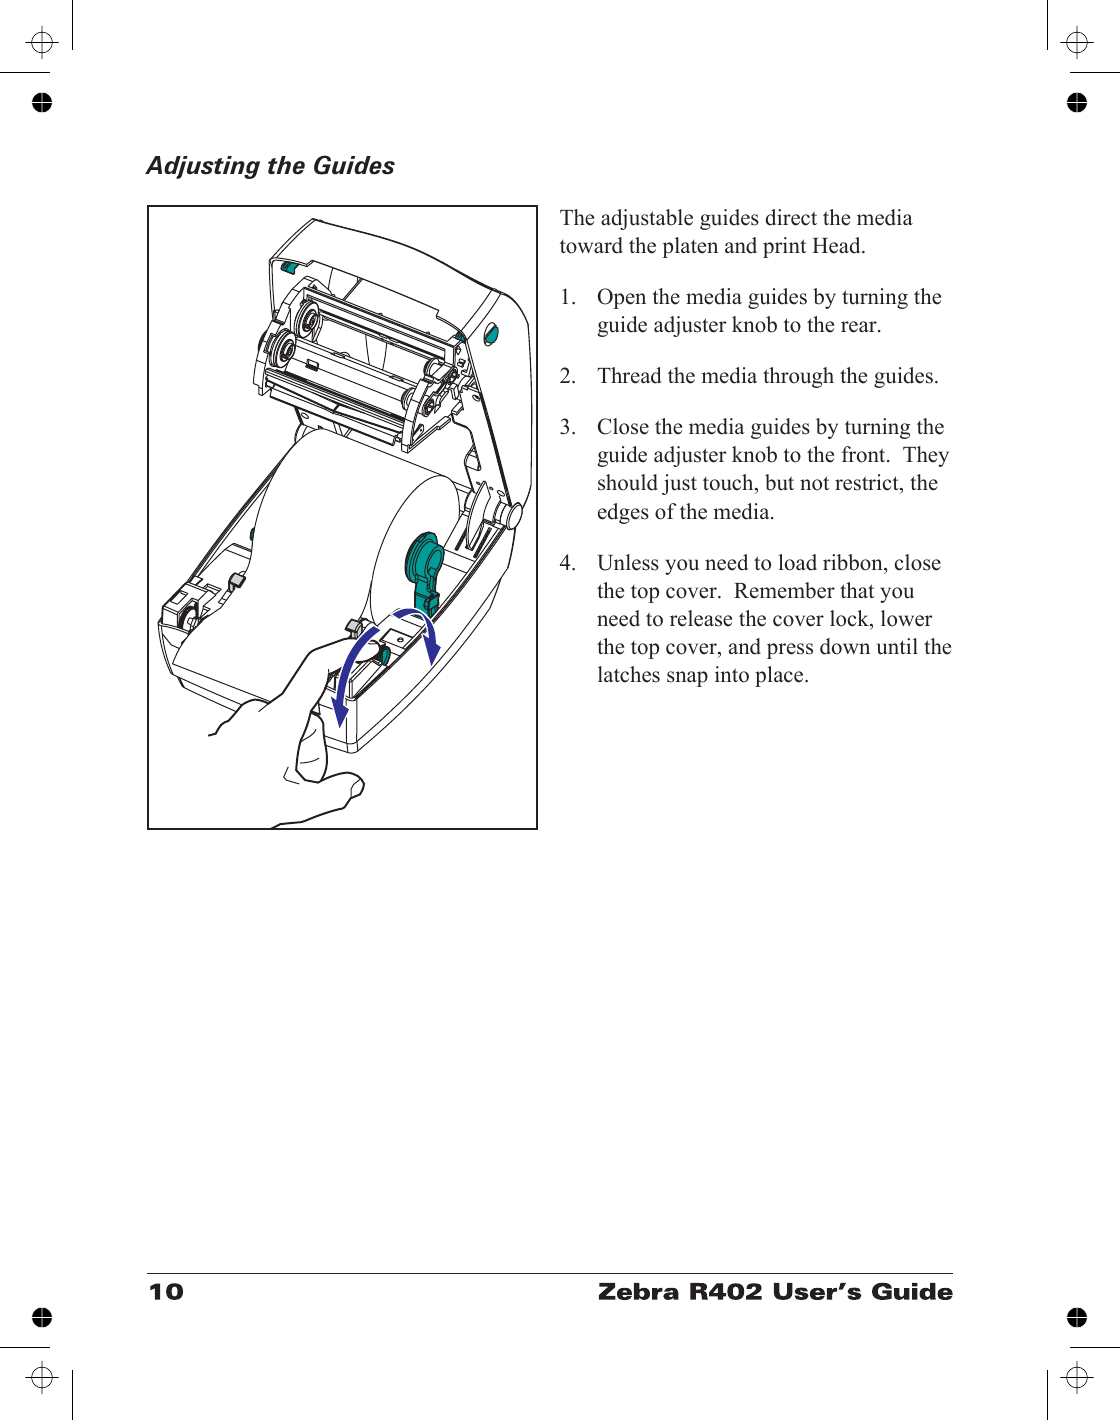
Adjusting the GuidesThe adjustable guides direct the mediatoward the platen and print Head.1. Open the media guides by turning theguide adjuster knob to the rear.2. Thread the media through the guides.3. Close the media guides by turning theguide adjuster knob to the front.  Theyshould just touch, but not restrict, theedges of the media.4. Unless you need to load ribbon, closethe top cover.  Remember that youneed to release the cover lock, lowerthe top cover, and press down until thelatches snap into place.
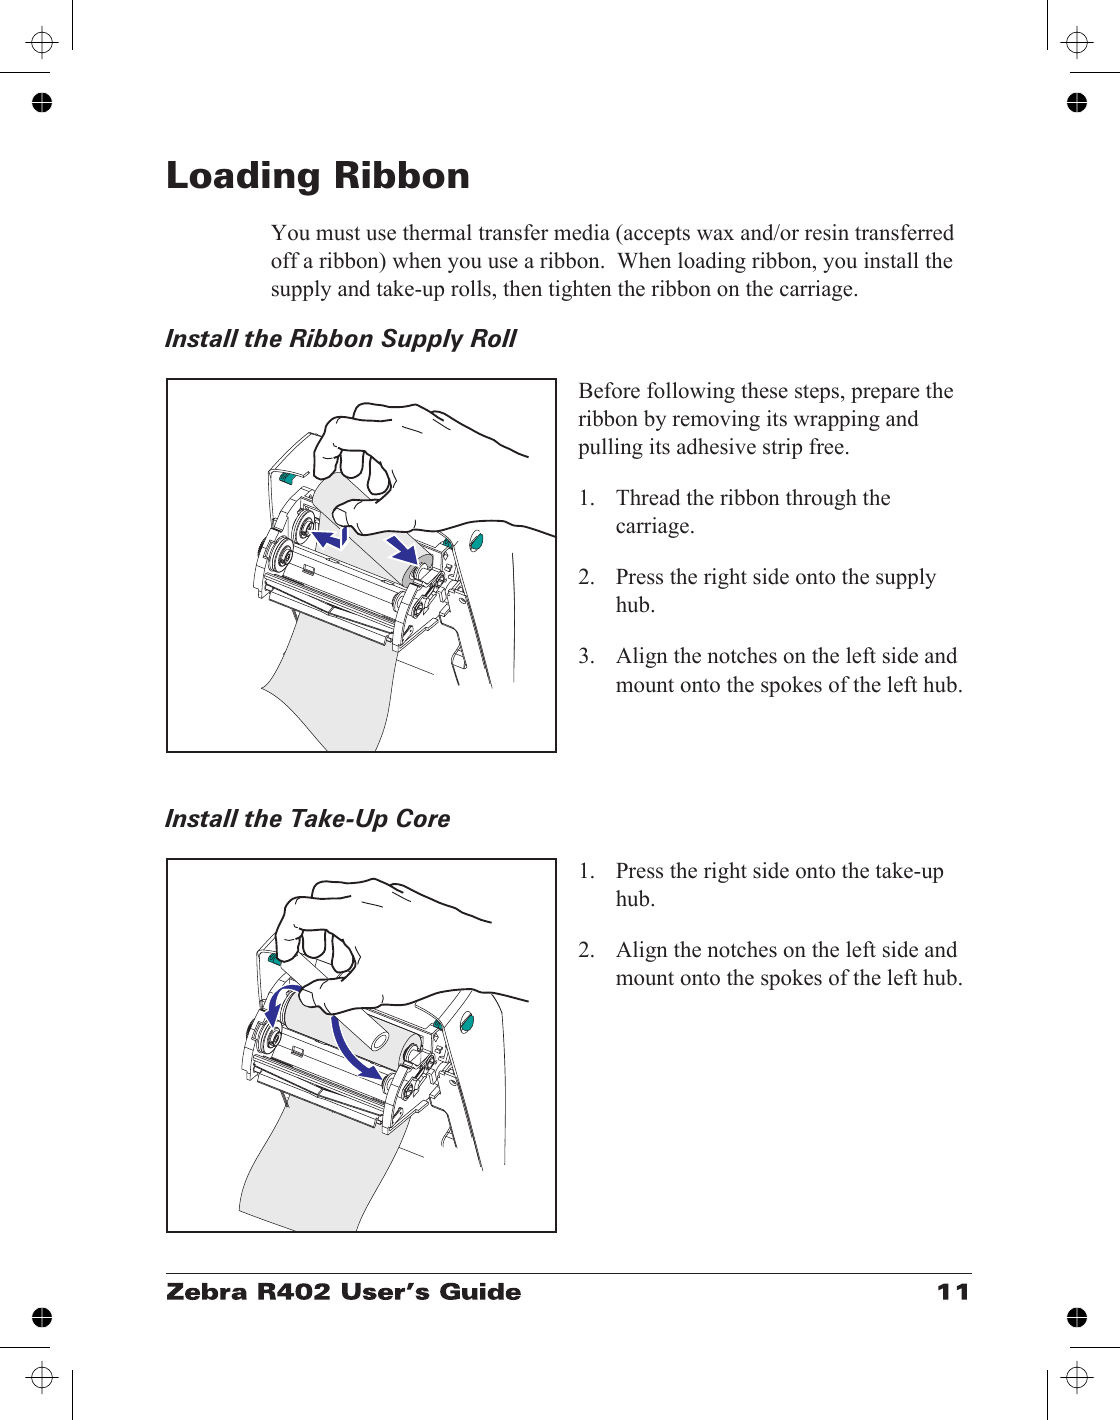
Loading RibbonYou must use thermal transfer media (accepts wax and/or resin transferredoff a ribbon) when you use a ribbon.  When loading ribbon, you install thesupply and take-up rolls, then tighten the ribbon on the carriage.Install the Ribbon Supply RollBefore following these steps, prepare theribbon by removing its wrapping andpulling its adhesive strip free.1. Thread the ribbon through thecarriage.2. Press the right side onto the supplyhub.3. Align the notches on the left side andmount onto the spokes of the left hub.Install the Take-Up Core1. Press the right side onto the take-uphub.2. Align the notches on the left side andmount onto the spokes of the left hub.
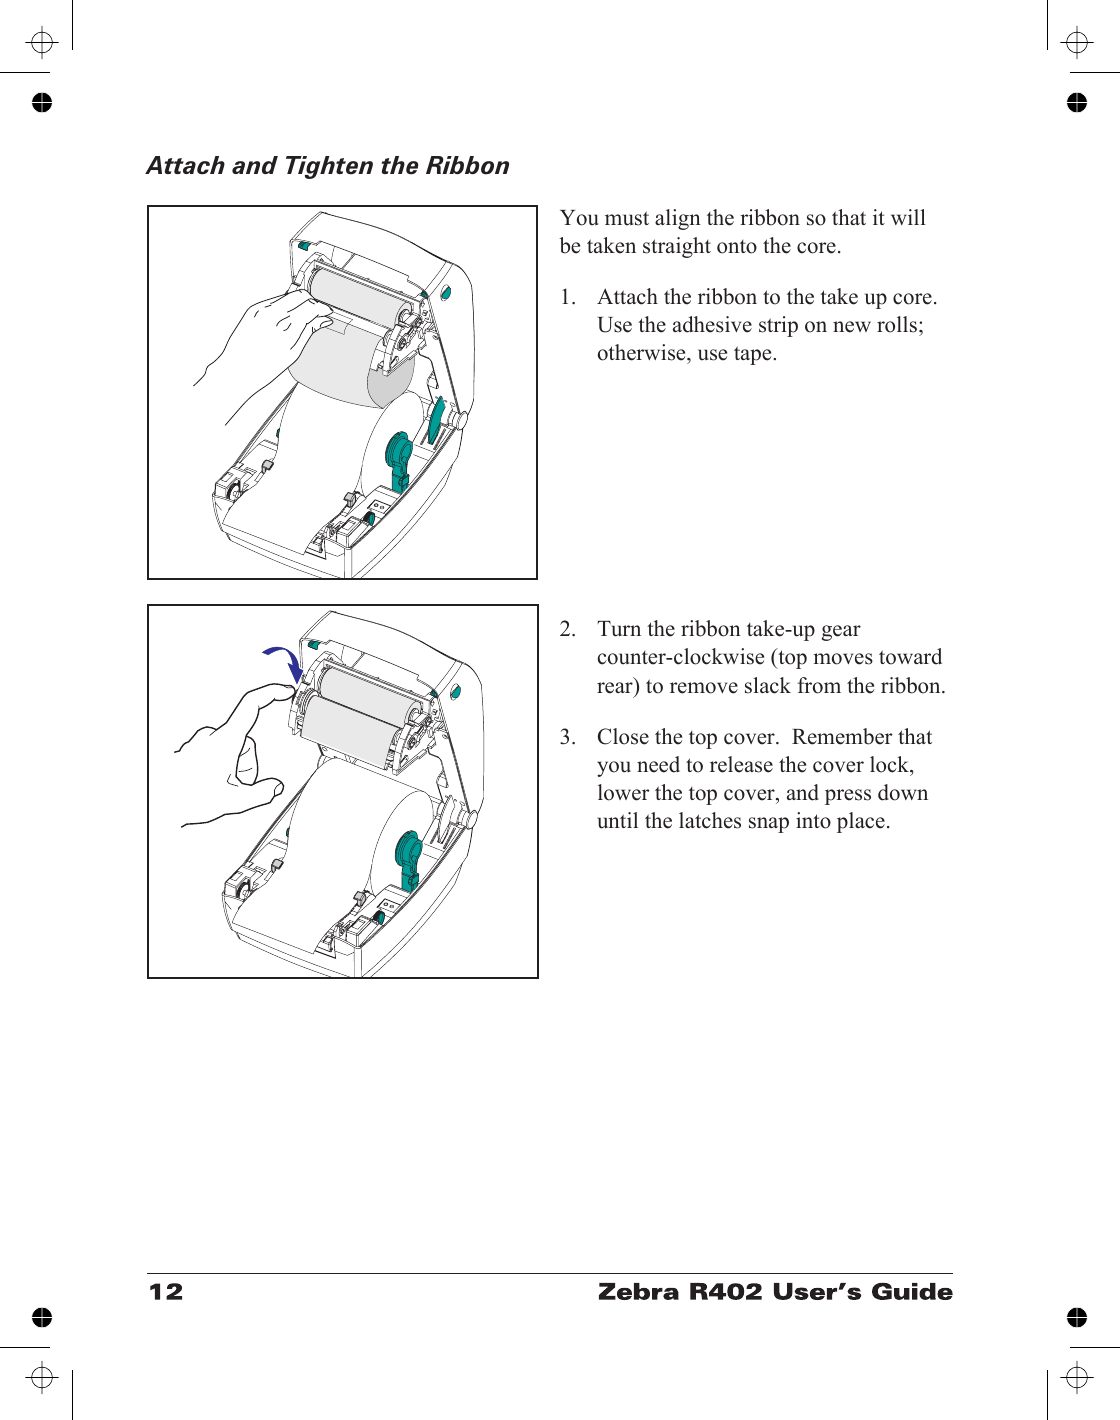
Attach and Tighten the RibbonYou must align the ribbon so that it willbe taken straight onto the core.1. Attach the ribbon to the take up core.Use the adhesive strip on new rolls;otherwise, use tape.2. Turn the ribbon take-up gearcounter-clockwise (top moves towardrear) to remove slack from the ribbon.3. Close the top cover.  Remember thatyou need to release the cover lock,lower the top cover, and press downuntil the latches snap into place.
Auto CalibrationNOTE: If you are using pre-printed labels, pre-printed label backing, orcontinuous media, see “Manual Calibration” on page .An auto calibration is performed when the printer is turned on (if media isloaded) or after a media error is cleared.  When it is auto calibrating, theprinter sets the sensor levels for, and determines the length of, the label youare using.If the status light flashes red, refer to “Manual Calibration” on page .

Navigation menu