Zebra Technologies RFID-R402-2 Thermal Printer with RFID Capability User Manual Part 3
Zebra Technologies Corporation Thermal Printer with RFID Capability Users Manual Part 3
Contents
- 1. Users Manual Part 1
- 2. Users Manual Part 2
- 3. Users Manual Part 3
- 4. Revised Pages for Users Manual 042402
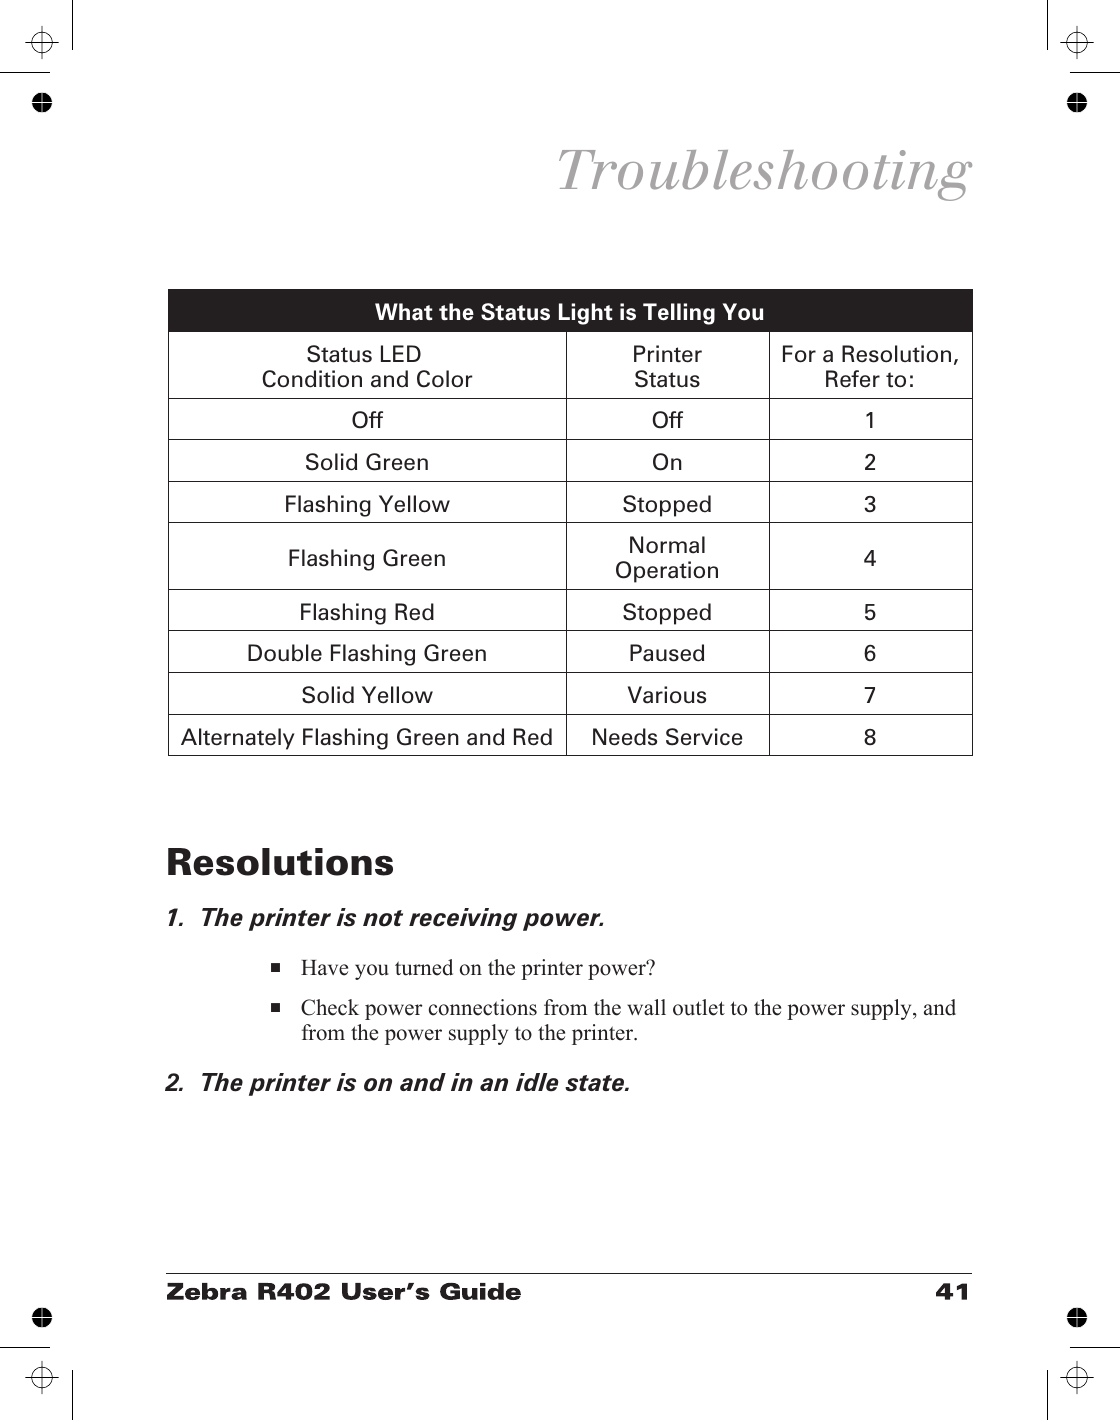
Users Manual Part 3
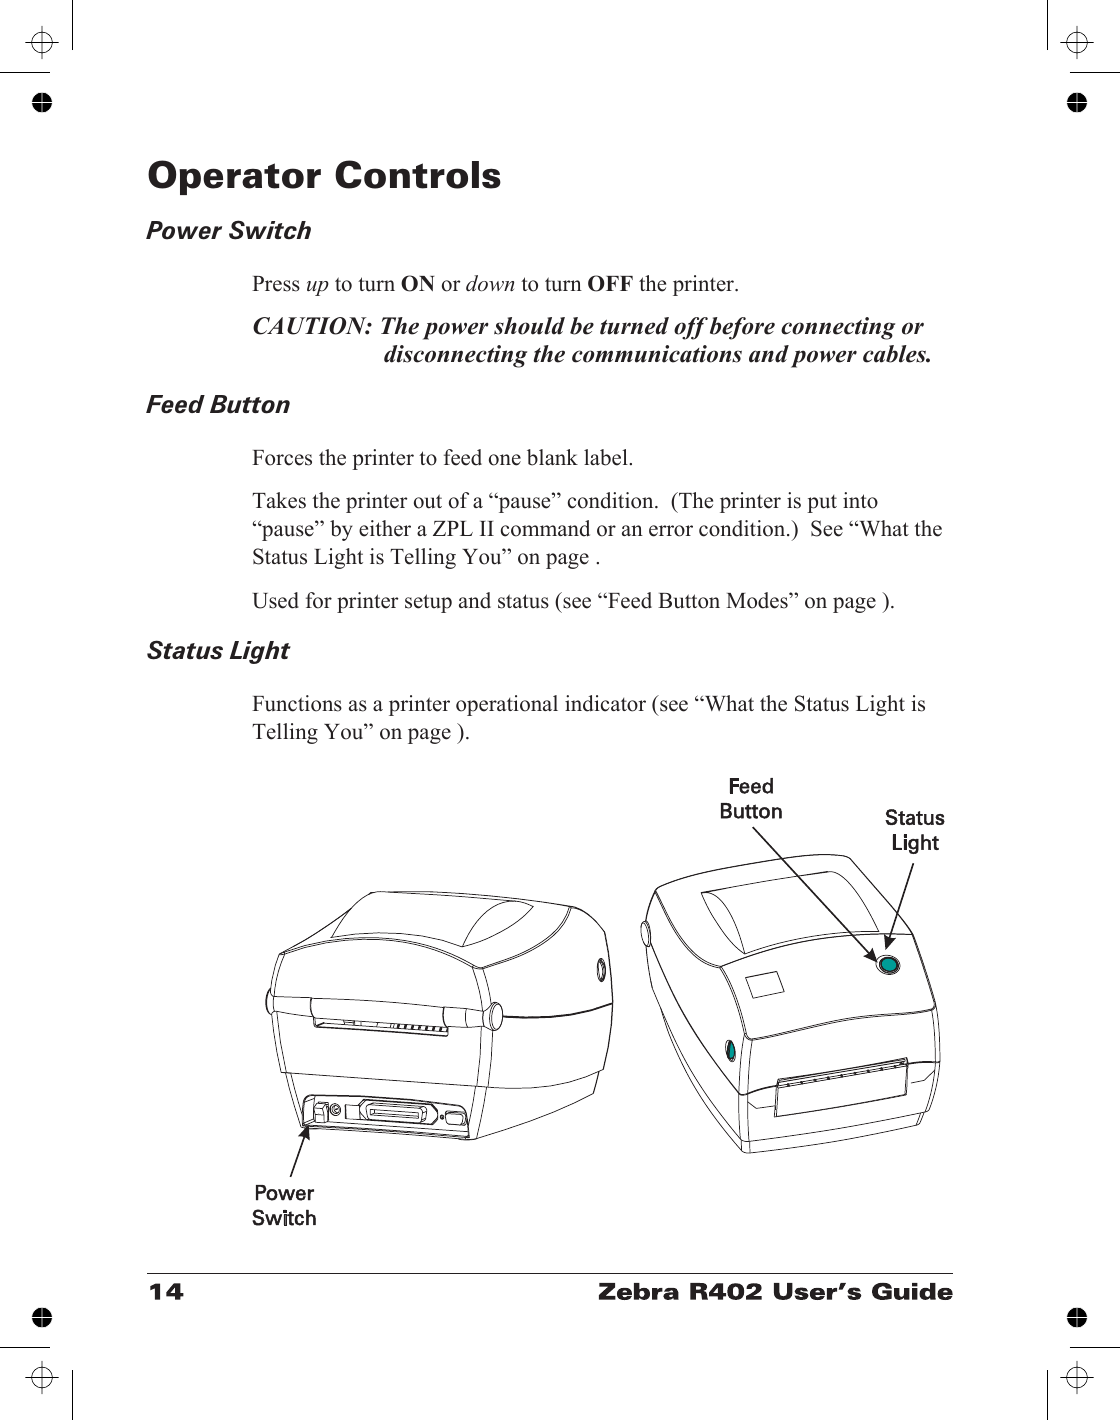
![Hooking Up the Printer and ComputerThis printer comes with a bidirectional parallel data interface. You mustsupply the required interface cable for your application.CAUTIONS:Keep the power switch in the OFF position whenattaching the interface cable.The power supply barrel connector must be insertedinto the power supply receptacle on the back of theprinter before connecting or disconnecting the com-munications cables.This printer complies with FCC “Rules and Regula-tions,” Part 15, for Class B Equipment, using fullyshielded six-foot data cables. Use of longer cables orunshielded cables may increase radiated emissionsabove the Class B limits.Parallel Interface RequirementsThe required cable (IEEE 1284-compliant is recommended) must have astandard 36-pin parallel connector on one end, which is plugged into theparallel port located on the back of the printer. The other end of the parallelinterface cable connects to the printer connector at the host computer.For pinout information, refer to page .Interface Cable RequirementsData cables must be of fully shielded construction and fitted with metal ormetalized connector shells. Shielded cables and connectors are required toprevent radiation and reception of electrical noise.To minimize electrical noise pickup in the cable:Keep data cables as short as possible (6’ [1.83 m] recommended).Do not tightly bundle the data cables with power cords.Do not tie the data cables to power wire conduits.](https://usermanual.wiki/Zebra-Technologies/RFID-R402-2.Users-Manual-Part-3/User-Guide-238848-Page-3.png)