Zebra Technologies ZXP-LM 13.56MHz RFID Laminator User Manual Osprey Lam UM RevA
Zebra Technologies Corporation 13.56MHz RFID Laminator Osprey Lam UM RevA
Contents
- 1. Users Manual Part 1 of 4
- 2. Users Manual Part 2 of 4
- 3. Users Manual Part 3 of 4
- 4. Users Manual Part 4 of 4
Users Manual Part 1 of 4

P1013772-001 Rev. A ( Draft 1 )
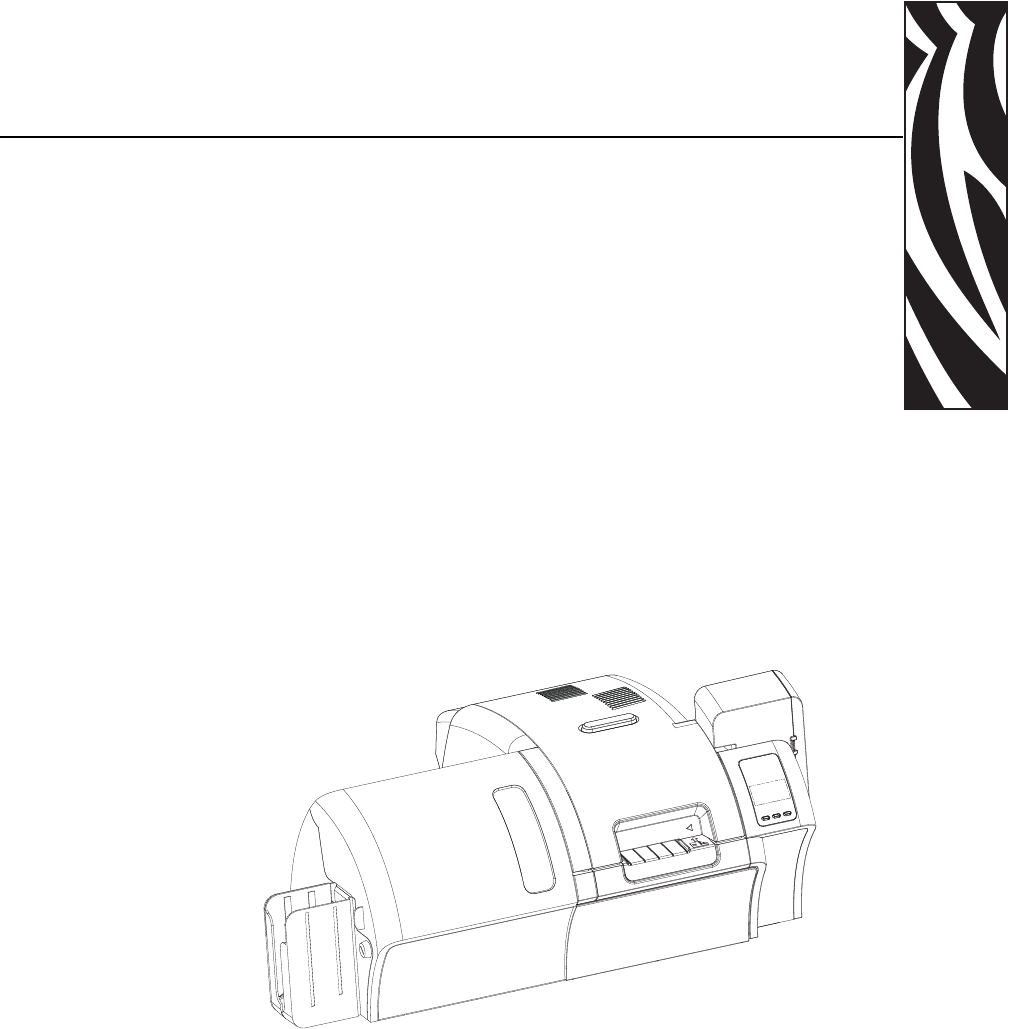
Zebra® ZXP Series 8™
Card Printer
with Laminator
User’s Manual
Draft - July 1, 2009
Cove
r

Copyright Notice
© 2009 ZIH Corp.
This document contains information proprietary to Zebra Technologies Corporation. This
document and the information contained within is Copyrighted by Zebra Technologies
Corporation and may not be duplicated in full or in part by any person without written
approval from Zebra.
While every effort has been made to keep the information contained within current and
accurate as of the date of publication, no guarantee is given that the document is error-free or
that it is accurate with regard to any specification. Zebra Technologies Corporation reserves
the right to make changes, for the purpose of product improvement, at any time.
Trademarks
ZXP Series 8 is a trademark and Zebra is a registered trademark of Zebra Technologies
Corporation. Windows is a registered trademark of Microsoft Corporation in the United States
and other countries. All other trademarks or registered trademarks are marks of their
respective holders.
Product Disposal
Product Disposal Information • Do not dispose of this product in unsorted municipal
waste. This product is recyclable, and should be recycled according to your local
standards. For more information, please see our web site at:
http://www.zebra.com/environment

P1013772-001 Rev. A ( Draft 1 ) Zebra ZXP Series 8 Card Printer User’s Manual iii
Contents
1 • Introduction. . . . . . . . . . . . . . . . . . . . . . . . . . . . . . . . . . . . . . . . . . . . . . . 1
Printer Features. . . . . . . . . . . . . . . . . . . . . . . . . . . . . . . . . . . . . . . . . . . . . . . . . 2
Controls, Connectors, and Indicators . . . . . . . . . . . . . . . . . . . . . . . . . . . . . . . . 3
Icons . . . . . . . . . . . . . . . . . . . . . . . . . . . . . . . . . . . . . . . . . . . . . . . . . . . . . . . . . 4
Zebra Supplies . . . . . . . . . . . . . . . . . . . . . . . . . . . . . . . . . . . . . . . . . . . . . . . . . 4
2 • Installation and Setup. . . . . . . . . . . . . . . . . . . . . . . . . . . . . . . . . . . . . . . 5
General Information. . . . . . . . . . . . . . . . . . . . . . . . . . . . . . . . . . . . . . . . . . . . . . 5
Unpacking the Printer . . . . . . . . . . . . . . . . . . . . . . . . . . . . . . . . . . . . . . . . . . . . 6
Installing the Card Hoppers. . . . . . . . . . . . . . . . . . . . . . . . . . . . . . . . . . . . . . . . 8
Loading Cards. . . . . . . . . . . . . . . . . . . . . . . . . . . . . . . . . . . . . . . . . . . . . . . . . . 9
Opening the Printer Door . . . . . . . . . . . . . . . . . . . . . . . . . . . . . . . . . . . . . . . . 10
Installing the Cleaning Cartridge . . . . . . . . . . . . . . . . . . . . . . . . . . . . . . . . . . . 11
Installing the Cleaning Roller. . . . . . . . . . . . . . . . . . . . . . . . . . . . . . . . . . . . . . 12
Loading the Transfer Film . . . . . . . . . . . . . . . . . . . . . . . . . . . . . . . . . . . . . . . . 13
Loading a Print Ribbon . . . . . . . . . . . . . . . . . . . . . . . . . . . . . . . . . . . . . . . . . . 15
Loading the Laminate . . . . . . . . . . . . . . . . . . . . . . . . . . . . . . . . . . . . . . . . . . . 17
Connecting Power. . . . . . . . . . . . . . . . . . . . . . . . . . . . . . . . . . . . . . . . . . . . . . 23
Connecting the Printer to your Computer . . . . . . . . . . . . . . . . . . . . . . . . . . . . 24
Installing the Windows Printer Driver . . . . . . . . . . . . . . . . . . . . . . . . . . . . . . . 26
3 • Operation. . . . . . . . . . . . . . . . . . . . . . . . . . . . . . . . . . . . . . . . . . . . . . . . 37
Introduction . . . . . . . . . . . . . . . . . . . . . . . . . . . . . . . . . . . . . . . . . . . . . . . . . . . 37
Card Type Selection . . . . . . . . . . . . . . . . . . . . . . . . . . . . . . . . . . . . . . . . . . . . 38
Printing a Sample Card . . . . . . . . . . . . . . . . . . . . . . . . . . . . . . . . . . . . . . . . . . 39
Manual Card Feed. . . . . . . . . . . . . . . . . . . . . . . . . . . . . . . . . . . . . . . . . . . . . . 40
Operator Control Panel (OCP) . . . . . . . . . . . . . . . . . . . . . . . . . . . . . . . . . . . . 42
Ethernet Indicators -- Detail. . . . . . . . . . . . . . . . . . . . . . . . . . . . . . . . . . . . . . . 49

iv Zebra ZXP Series 8 Card Printer User’s Manual P1013772-001 Rev. A ( Draft 1 )
Contents
4 • Printer Settings and Adjustments . . . . . . . . . . . . . . . . . . . . . . . . . . . . 51
Introduction . . . . . . . . . . . . . . . . . . . . . . . . . . . . . . . . . . . . . . . . . . . . . . . . . . . 51
Properties . . . . . . . . . . . . . . . . . . . . . . . . . . . . . . . . . . . . . . . . . . . . . . . . . . . . 52
Printing Preferences . . . . . . . . . . . . . . . . . . . . . . . . . . . . . . . . . . . . . . . . . . . . 59
5 • ZXP Series Toolbox. . . . . . . . . . . . . . . . . . . . . . . . . . . . . . . . . . . . . . . . 65
Introduction . . . . . . . . . . . . . . . . . . . . . . . . . . . . . . . . . . . . . . . . . . . . . . . . . . . 65
ZXP Series Toolbox Access . . . . . . . . . . . . . . . . . . . . . . . . . . . . . . . . . . . . . . 66
Printer Configuration . . . . . . . . . . . . . . . . . . . . . . . . . . . . . . . . . . . . . . . . . . . . 67
Print Test Card. . . . . . . . . . . . . . . . . . . . . . . . . . . . . . . . . . . . . . . . . . . . . . . . . 76
Technology . . . . . . . . . . . . . . . . . . . . . . . . . . . . . . . . . . . . . . . . . . . . . . . . . . . 77
Advanced Security . . . . . . . . . . . . . . . . . . . . . . . . . . . . . . . . . . . . . . . . . . . . . 79
Print Viewer. . . . . . . . . . . . . . . . . . . . . . . . . . . . . . . . . . . . . . . . . . . . . . . . . . . 82
6 • Cleaning. . . . . . . . . . . . . . . . . . . . . . . . . . . . . . . . . . . . . . . . . . . . . . . . . 83
Cleaning the Printer. . . . . . . . . . . . . . . . . . . . . . . . . . . . . . . . . . . . . . . . . . . . . 83
Cleaning the Printhead . . . . . . . . . . . . . . . . . . . . . . . . . . . . . . . . . . . . . . . . . . 87
Card Cleaning Cartridge . . . . . . . . . . . . . . . . . . . . . . . . . . . . . . . . . . . . . . . . . 88
Cleaning Roller . . . . . . . . . . . . . . . . . . . . . . . . . . . . . . . . . . . . . . . . . . . . . . . . 88
7 • Troubleshooting . . . . . . . . . . . . . . . . . . . . . . . . . . . . . . . . . . . . . . . . . . 89
OCP Error Messages . . . . . . . . . . . . . . . . . . . . . . . . . . . . . . . . . . . . . . . . . . . 90
OCP Test Card Images . . . . . . . . . . . . . . . . . . . . . . . . . . . . . . . . . . . . . . . . . . 93
Test Card Descriptions . . . . . . . . . . . . . . . . . . . . . . . . . . . . . . . . . . . . . . . . . . 94
Ethernet Issues . . . . . . . . . . . . . . . . . . . . . . . . . . . . . . . . . . . . . . . . . . . . . . . . 95
8 • Technical Specifications . . . . . . . . . . . . . . . . . . . . . . . . . . . . . . . . . . . 97
Standard Features. . . . . . . . . . . . . . . . . . . . . . . . . . . . . . . . . . . . . . . . . . . . . . 97
Specifications . . . . . . . . . . . . . . . . . . . . . . . . . . . . . . . . . . . . . . . . . . . . . . . . . 98
Declarations of Conformity . . . . . . . . . . . . . . . . . . . . . . . . . . . . . . . . . . . . . . 101
Appendix A • Printer Configurations . . . . . . . . . . . . . . . . . . . . . . . . . . . 103
Appendix B • Connecting to a Network . . . . . . . . . . . . . . . . . . . . . . . . . 105
Appendix C • Magnetic Card Encoder . . . . . . . . . . . . . . . . . . . . . . . . . . 107
Appendix D • Smart Card Options . . . . . . . . . . . . . . . . . . . . . . . . . . . . . .111
Appendix E • Packing the Printer for Shipment . . . . . . . . . . . . . . . . . . .117
Appendix F • Worldwide Support . . . . . . . . . . . . . . . . . . . . . . . . . . . . . . .119
P1013772-001 Rev. A ( Draft 1 ) Zebra ZXP Series 8 Card Printer User’s Manual 1
1
Introduction
This manual contains installation and operation information for the Zebra ZXP Series 8 Card
Printer manufactured by Zebra Technologies Corporation.
The Zebra ZXP Series 8 card printers use reverse transfer printing technology to create photo-
quality and over-the-edge images on plastic identification cards. Zebra’s reverse transfer
printers provide fast throughput and a range of encoding options for a variety of markets
and applications.
The difference between the Z83 and the Z84 is that the Z83 has a single-sided laminator (i.e., it
lays down and seals a laminating film on the top surface of the printed card), while the Z84 has
a dual-sided laminator (i.e., it lays down and seals laminating film on both surfaces of the
printed card).
References in this document that refer to either or both of the models will be in the form of
“the printer” or “the Z83/Z84 Printer”; references that are specific to one or the other will be in
the form of “the Z83 Printer” or “the Z84 Printer.”
2 Zebra ZXP Series 8 Card Printer User’s Manual P1013772-001 Rev. A ( Draft 1 )
Introduction
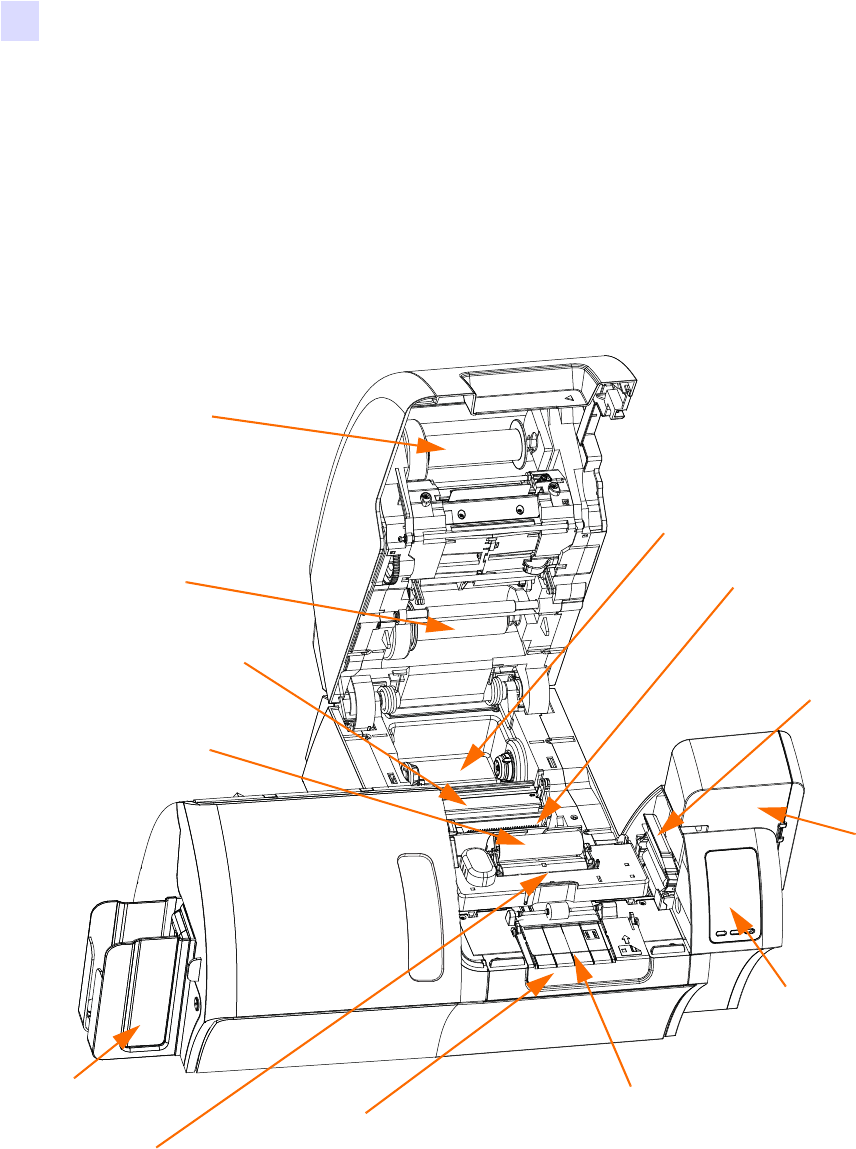
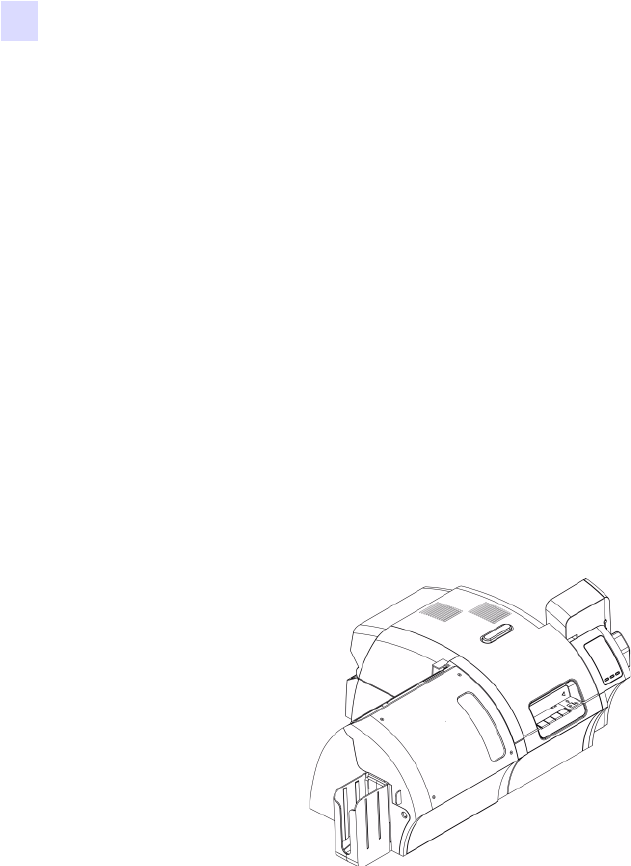
Components
Components
Printer
The following figure shows components of the Printer.
Output Hopper
Input
Hopper
Operator Control
Panel (OCP)
Card Cleaning
Cartridge
Card Cleaning
Roller
Printhead
Print Ribbon Supply (behind
cleaning roller)
Print Ribbon Take-Up
Transfer Film
Supply
Transfer Film
Take-Up
Single Card Feed Slot
Door (shown open)
Reject Bin
(underneath input feed tray)
Mag Encoder (optional)
behind idler roller
assembly door
Introduction
Components
P1013772-001 Rev. A ( Draft 1 ) Zebra ZXP Series 8 Card Printer User’s Manual 3
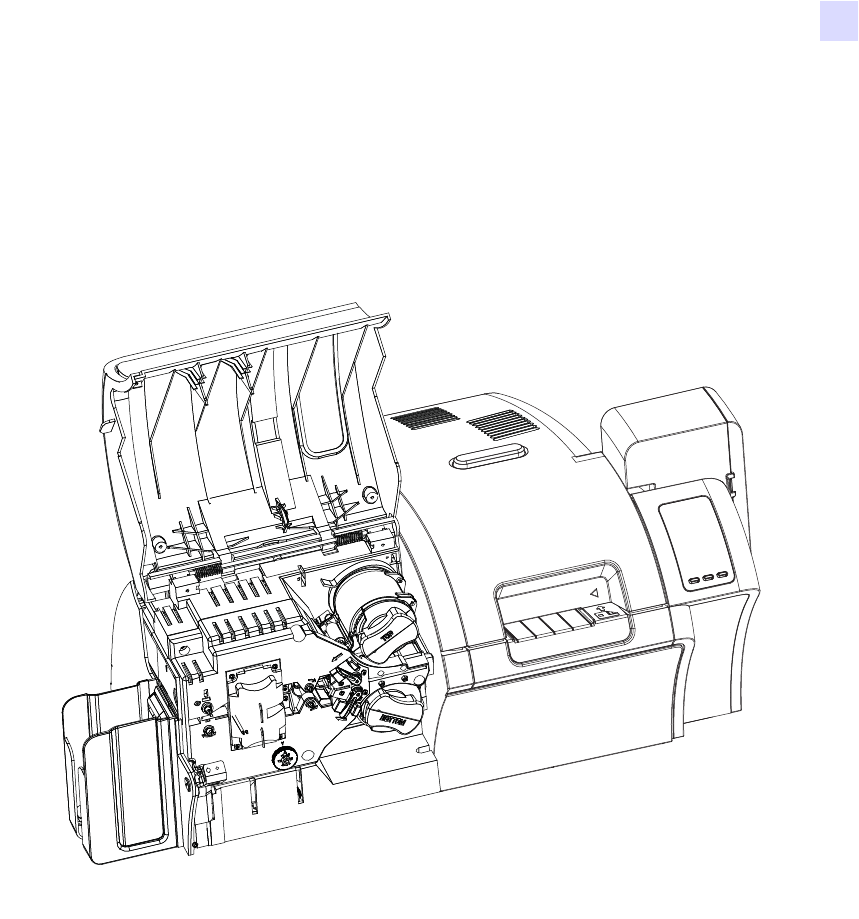
Laminator
The following figure shows components of the Laminator.
Door (shown open)
4 Zebra ZXP Series 8 Card Printer User’s Manual P1013772-001 Rev. A ( Draft 1 )
Introduction
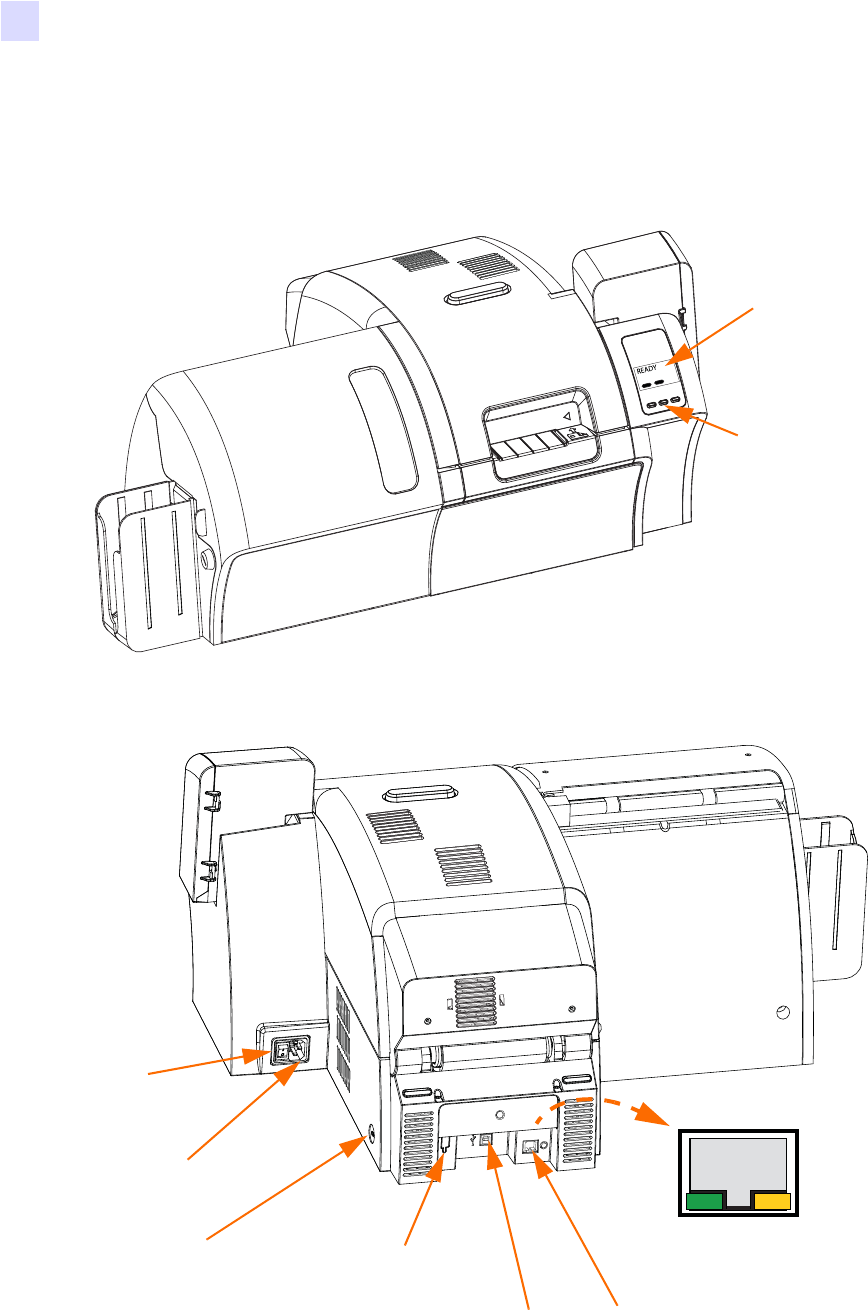
Controls, Connectors, and Indicators
Controls, Connectors, and Indicators
Your printer has an LCD Display Panel and three Panel Buttons on the front and a power
connector, power switch, and interface connector(s) on the rear panel.
OCP Display
OCP Buttons
Power
Switch
Power
Connector
Ethernet
Connector
USB
Connector
Optional DB-9
Connector location
for Smart Card
Contact Station
Security
Cable Slot
Ethernet
Connector
Link/Activity Link Speed
LED LED
Introduction
Icons
P1013772-001 Rev. A ( Draft 1 ) Zebra ZXP Series 8 Card Printer User’s Manual 5
Icons
Throughout this manual, different icons highlight important information, as follows:
Zebra Supplies
Genuine Zebra supplies meet stringent quality standards and are recommended for optimal
printing quality and proper printer performance. The ZXP Series 8 printer is designed to
work only with Zebra True Colours® i Series™ Ribbons and True Colours™ i Series™
Transfer Film.
Note • Indicates information that emphasizes or supplements important points of the
main text.
Important • Advises you of information that is essential to complete a task, or points out the
importance of specific information in the text.
Provides an example or scenario to demonstrate or clarify a section of text.
Electrostatic Discharge Caution • Warns you of the potential for electrostatic discharge.
Electric Shock Caution • Warns you of a potential electric shock situation.
Hot Surface • Warns you of a situation where excessive heat could cause a burn.
Caution • Advises you that failure to take or avoid a specific action could result in
physical harm to you, or could result in physical damage to the hardware.
6 Zebra ZXP Series 8 Card Printer User’s Manual P1013772-001 Rev. A ( Draft 1 )

P1013772-001 Rev. A ( Draft 1 ) Zebra ZXP Series 8 Card Printer User’s Manual 5
2
Installation and Setup
General Information
This section will guide you through the installation and setup of your Card Printer. This
consists of the following procedures, which should be performed in the order presented.
• Unpacking the Printer. . . . . . . . . . . . . . . . . . . . . . . . . . . . . . . . . . . . . . . . . . . 6
• Installing the Card Hoppers . . . . . . . . . . . . . . . . . . . . . . . . . . . . . . . . . . . . . . 8
• Loading Cards . . . . . . . . . . . . . . . . . . . . . . . . . . . . . . . . . . . . . . . . . . . . . . . . 9
• Opening the Printer Door. . . . . . . . . . . . . . . . . . . . . . . . . . . . . . . . . . . . . . . 10
• Installing the Cleaning Cartridge . . . . . . . . . . . . . . . . . . . . . . . . . . . . . . . . . 11
• Installing the Cleaning Roller . . . . . . . . . . . . . . . . . . . . . . . . . . . . . . . . . . . 12
• Loading the Transfer Film . . . . . . . . . . . . . . . . . . . . . . . . . . . . . . . . . . . . . . 13
• Loading a Print Ribbon . . . . . . . . . . . . . . . . . . . . . . . . . . . . . . . . . . . . . . . . 15
• Connecting Power . . . . . . . . . . . . . . . . . . . . . . . . . . . . . . . . . . . . . . . . . . . . 27
• Connecting the Printer to your Computer . . . . . . . . . . . . . . . . . . . . . . . . . . 28
• Installing the Windows Printer Driver . . . . . . . . . . . . . . . . . . . . . . . . . . . . . 30
The procedure to be followed for Packing the Printer for Shipment is given at the end of
this section.
6 Zebra ZXP Series 8 Card Printer User’s Manual P1013772-001 Rev. A ( Draft 1 )
Installation and Setup
Unpacking the Printer
Unpacking the Printer
Step 1. Inspect the shipping container to ensure that no damage has occurred during
shipment. If any damage is apparent, file a claim with the shipper.
Step 2. Open the shipping container.
Step 3. Remove the packing material and accessories from around the top of the Printer.
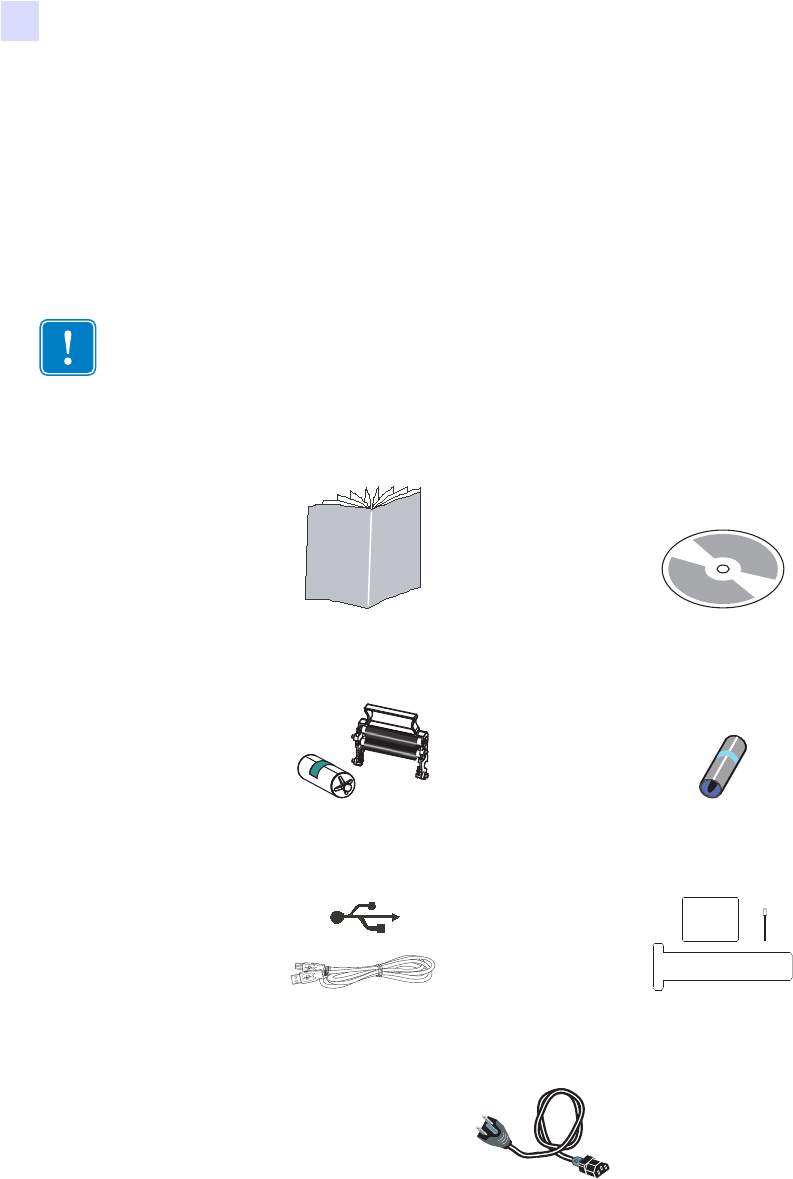
Step 4. Make sure the following items are included with your Printer:
If any items are missing, please contact your dealer. To reorder, please refer to
Appendix F of this manual.
Important • Save all the packing material and the shipping carton in case the Printer needs to
be moved or shipped. If the original material is lost or damaged, a replacement Shipping Kit
can be ordered from Zebra.
Quick Start Guide CD-ROM with InstallWizard
Cleaning Cartridge Cleaning Roller
USB Cable Cleaning Kit
Power Cable
USB

Installation and Setup
Unpacking the Printer
P1013772-001 Rev. A ( Draft 1 ) Zebra ZXP Series 8 Card Printer User’s Manual 7
Step 5. Lift the Printer out of the carton by holding it with both hands.
Step 6. Place the Printer in a location that meets the following requirements:
• A reasonably dust- and dirt-free environment.
• Flat surface at least 27 in (686 mm) x 28 in (711 mm) that can support the
weight of the Printer; additional space preferred. Allow a 4-inch clearance,
minimum, on all sides.
• Vertical clearance at least 32 in (813 mm).
• Temperature within the range of 59° to 95°F (15° to 35°C).
• Relative Humidity 20 to 80% inclusive, non-condensing.
• AC power accessible.
Step 7. Remove the protective plastic bag from the Printer.
Caution • The Printer weighs approximately 27.5 lbs (12.5 kg).
8 Zebra ZXP Series 8 Card Printer User’s Manual P1013772-001 Rev. A ( Draft 1 )
Installation and Setup
Installing the Card Hoppers
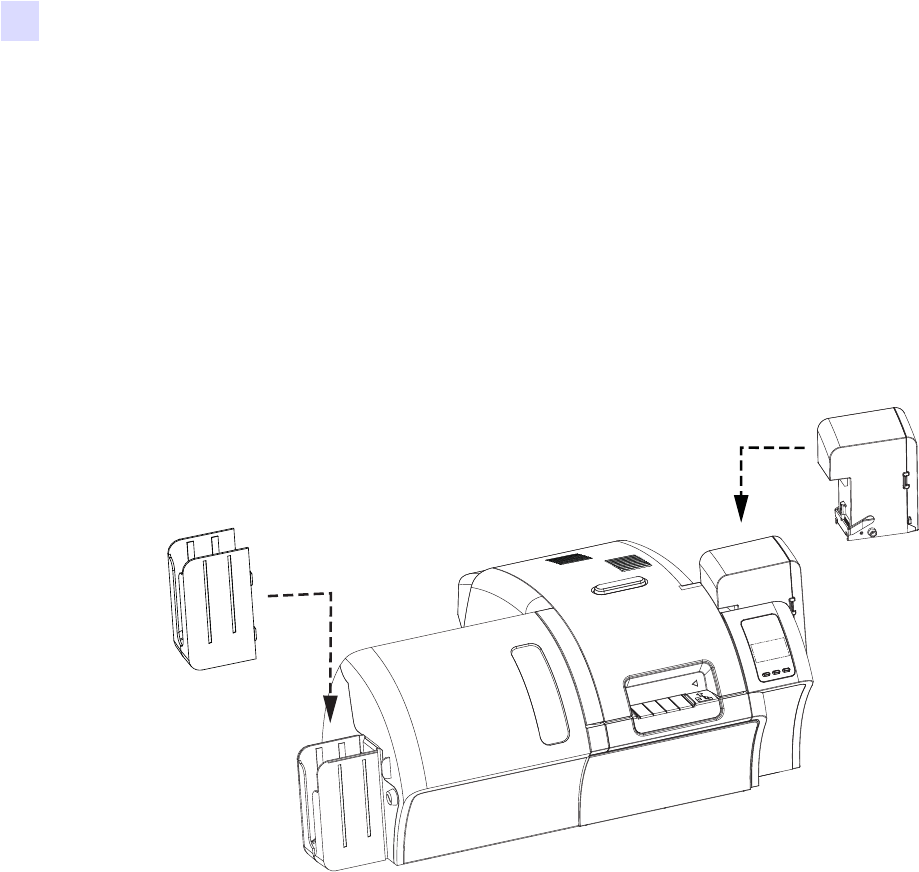
Installing the Card Hoppers
Input Hopper
The Input Hopper is positioned on the right side of the Printer and holds the cards to
be printed.
Step 1. Install the Input Hopper by sliding the hopper into the receptacle on the right side
of the Printer.
Step 2. Ensure that the Input Hopper locks securely in place.
Output Hopper
The Output Hopper is positioned on the left side of the Printer and receives the printed cards.
Step 1. Install the Output Hopper by inserting the four tabs on the right side of the hopper
into the four slots on the left side of the Printer.
Step 2. Ensure that the Output Hopper locks securely in place.
Installation and Setup
Loading Cards
P1013772-001 Rev. A ( Draft 1 ) Zebra ZXP Series 8 Card Printer User’s Manual 9
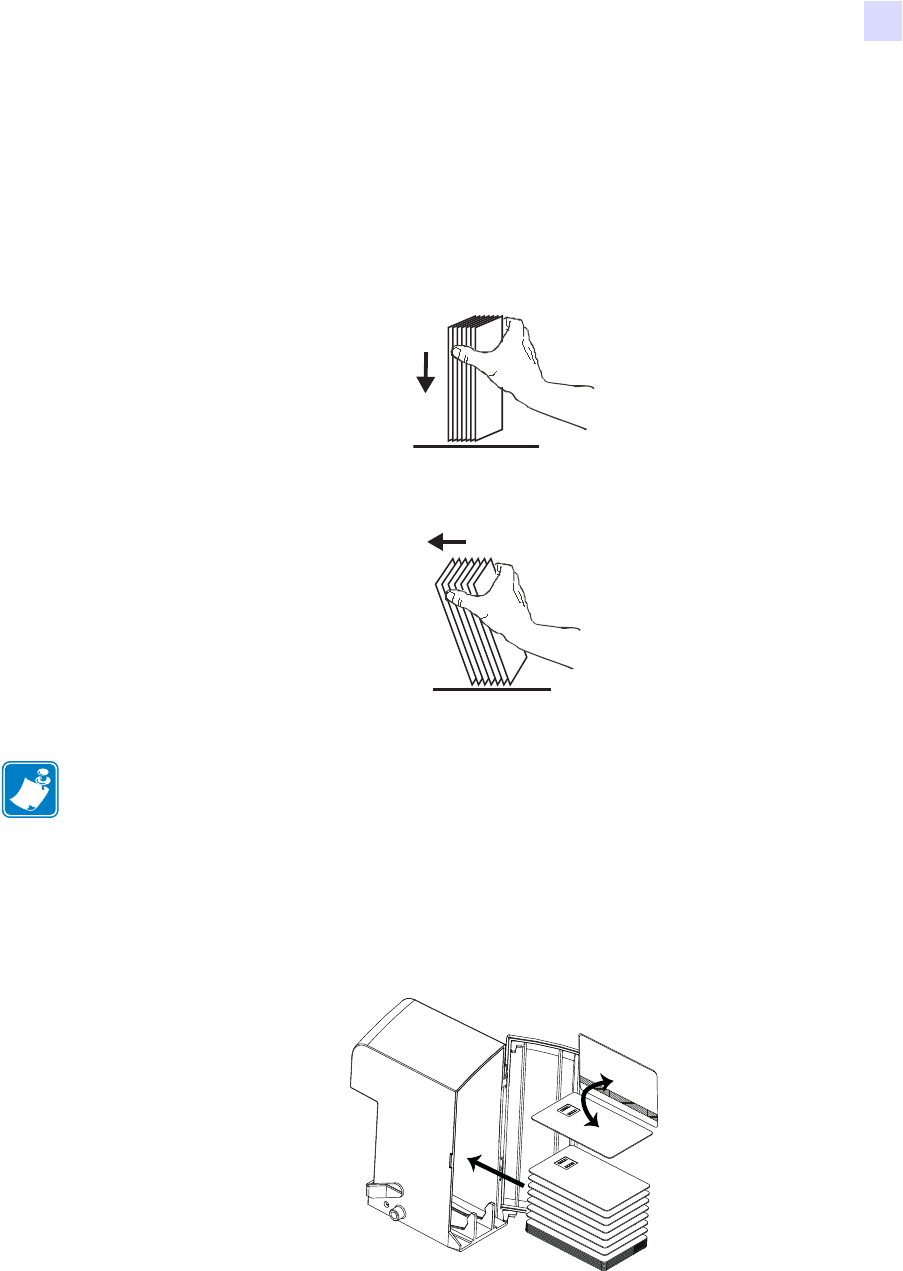
Loading Cards
Step 1. Open the Input Hopper Door.
Step 2. Remove the wrapping from the card deck.
Step 3. Holding the card deck by the sides, hold it vertically against a flat surface such as a
desktop. If the deck is too thick for your hand to hold it comfortably, use about half a
deck at a time.
Step 4. Push the stack back and forth to an angle of about 45° from vertical, so as to separate
all of the cards.
Step 5. Restore the card stack to its original squared-off condition.
Step 6. Place the cards in the Input Hopper in the correct orientation as shown. Ensure that
the cards are seated flat on the bottom of the hopper.
Step 7. Close the Input Hopper Door.
Note • Static charges and edge burrs from the card die-cutting process can render individual
cards stuck together with significant adhesion force. These cards must be physically separated
from each other before inserting into the feeder; if not separated, feeding or printing problems
may occur.
10 Zebra ZXP Series 8 Card Printer User’s Manual P1013772-001 Rev. A ( Draft 1 )
Installation and Setup
Opening the Printer Door
Opening the Printer Door
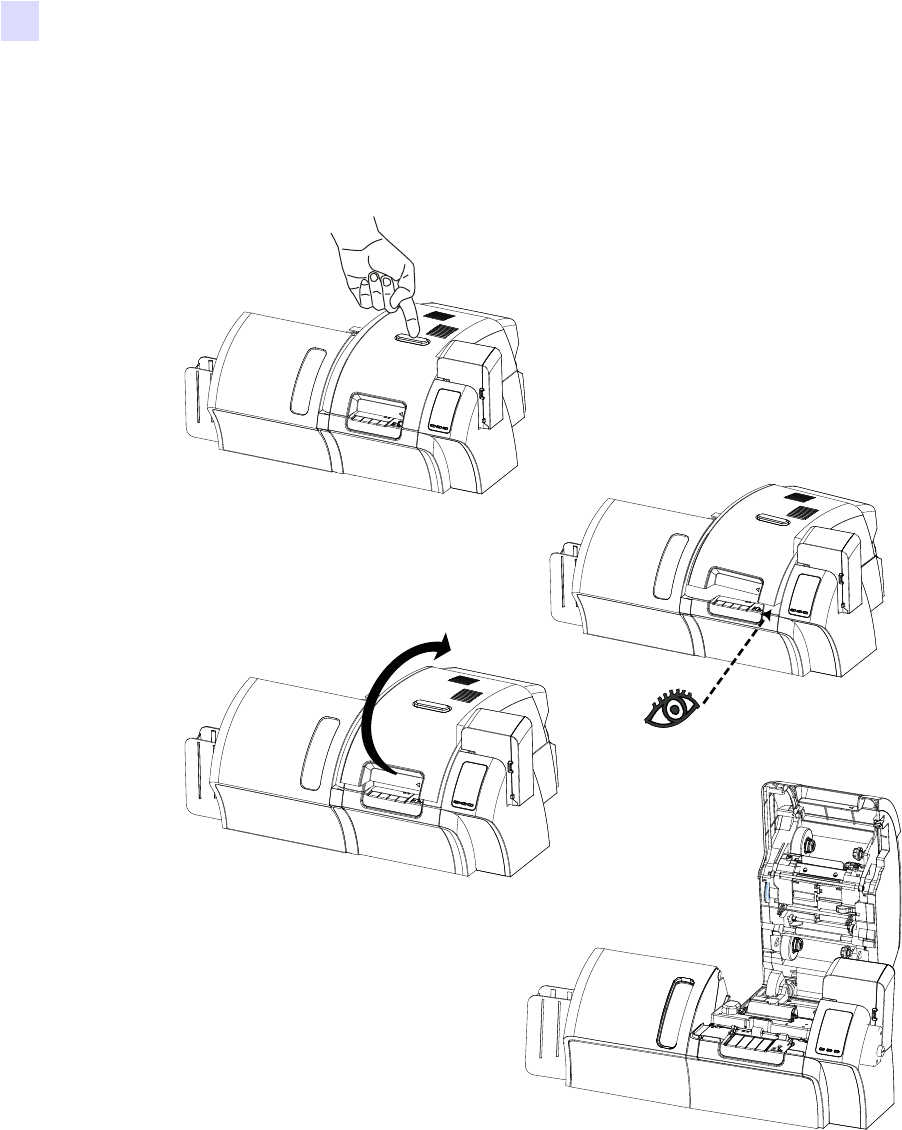
Step 1. Press the Door Release button on the top of the Printer.
Step 2. Observe that the Door releases and pops up approximately half an inch.
Step 3. Grasp the Door at the bottom front.
Step 4. Lift the Door to its upright position. It will remain in that position.
Installation and Setup
Installing the Cleaning Cartridge
P1013772-001 Rev. A ( Draft 1 ) Zebra ZXP Series 8 Card Printer User’s Manual 11
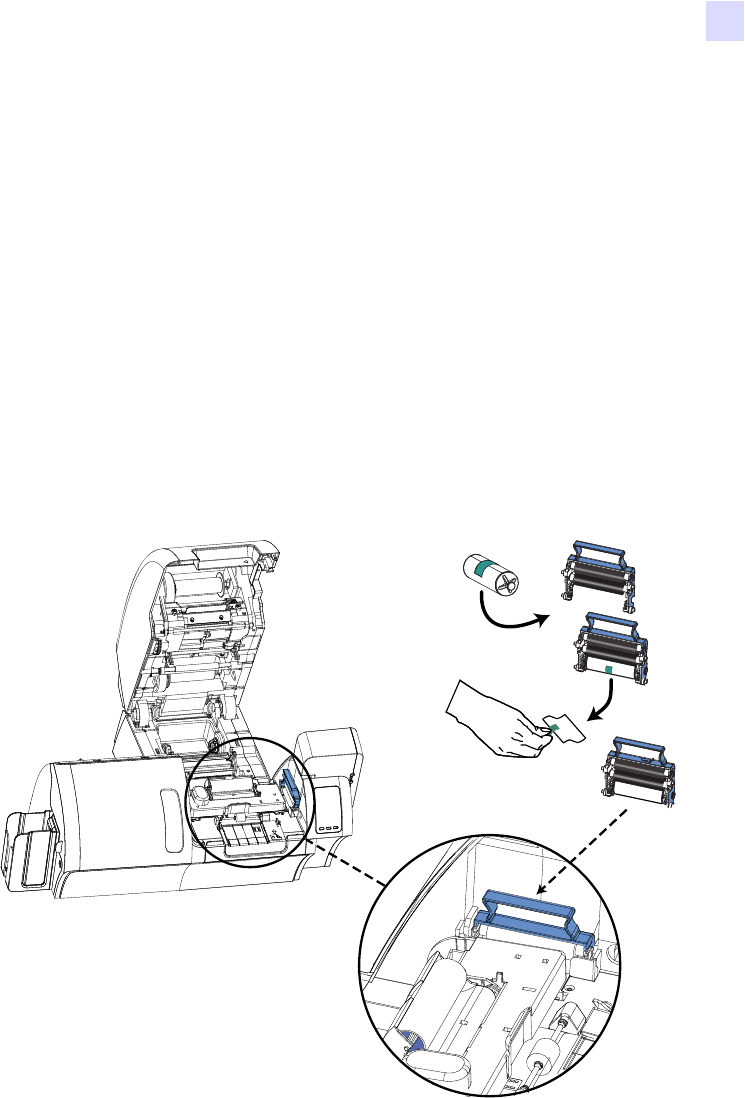
Installing the Cleaning Cartridge
The Cleaning Cartridge cleans the cards entering the Printer from the Input Hopper. The
Cleaning Cartridge consists of a Cartridge Frame and an Adhesive Roller, which are
packed together.
Step 1. Remove the Cartridge Frame and the Adhesive Roller from their packaging.
Step 2. Insert the Adhesive Roller into the Cartridge Frame. To avoid contamination, always
hold the frame and the roller by the ends.
Step 3. Peel the protective wrapper from the Adhesive Roller.
Step 4. Open the Printer Door by pressing the Door Release button on the top of the Printer.
Step 5. Locate the area where the Cleaning Cartridge will be installed (adjacent to the Input
Hopper); circled below.
Step 6. Hold the Cleaning Cartridge by the extended handle.
Step 7. With the cartridge at about a 30° angle (pointing downward), insert the lip of the
cartridge into the slot, until the cartridge seats against the back wall.
Step 8. Press the front of the cartridge down until it seats all the way down and latches with
an audible click.
Step 9. Close the Printer’s Door.
12 Zebra ZXP Series 8 Card Printer User’s Manual P1013772-001 Rev. A ( Draft 1 )
Installation and Setup
Installing the Cleaning Roller
Installing the Cleaning Roller
The Cleaning Roller cleans the cards entering the Printer from either the Input Hopper or the
Single-Feed Input.
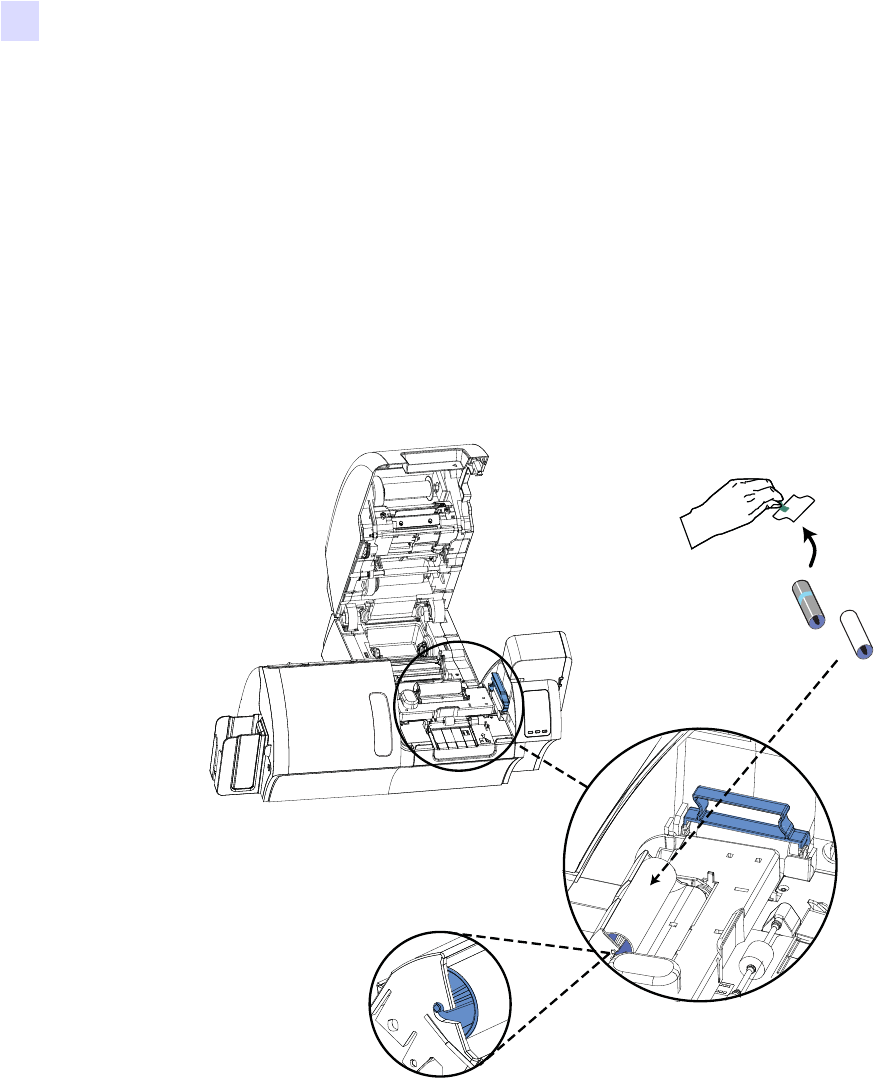
Step 1. Remove the Cleaning Roller from its packaging. To avoid contamination, always
hold the roller by the ends.
Step 2. Peel the protective wrapper from the Cleaning Roller.
Step 3. Open the Printer Door by pressing the Door Release button on the top of the Printer.
Step 4. Locate the area where the Cleaning Roller will be installed; circled below.
Step 5. Hold the Cleaning Roller by the ends.
Step 6. Position the ends of the Cleaning Roller in the slots. Push down until the roller fully
seats and latches.
Step 7. Close the Printer’s Door.
Installation and Setup
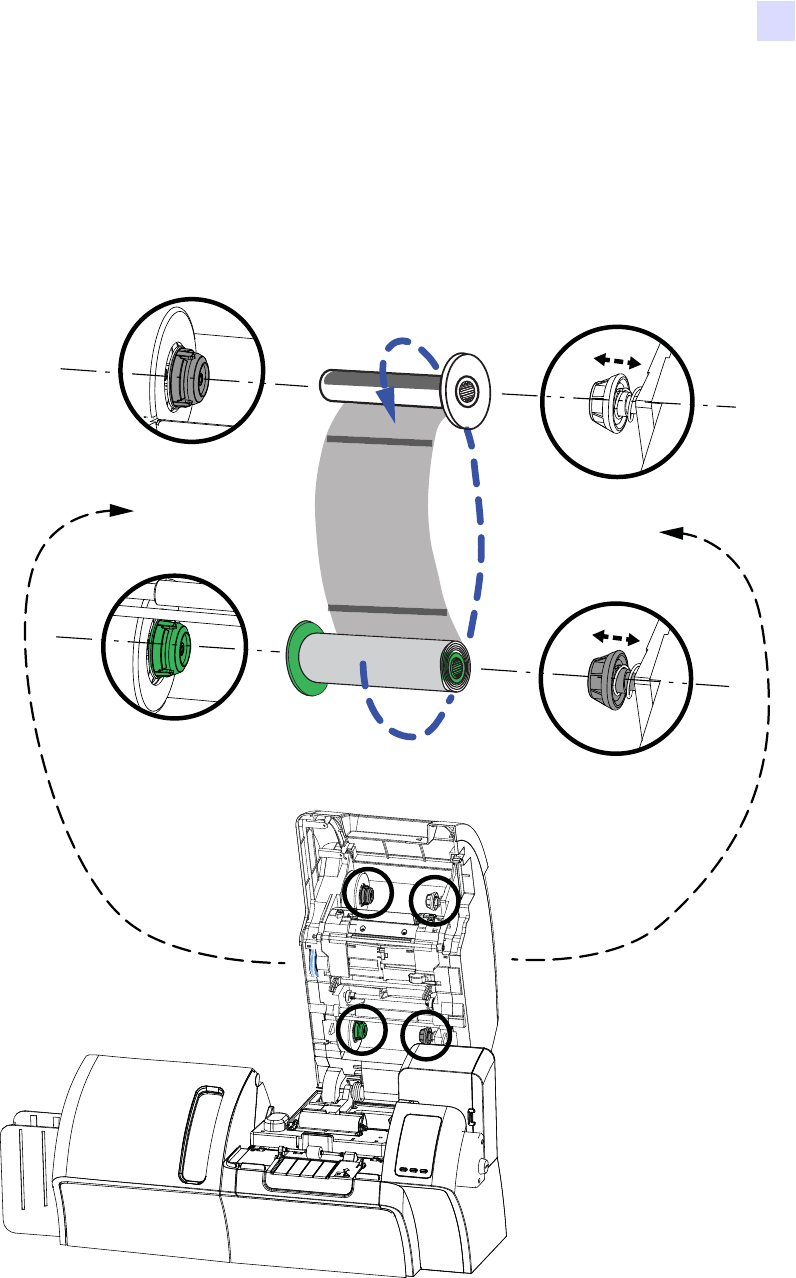
Loading the Transfer Film
P1013772-001 Rev. A ( Draft 1 ) Zebra ZXP Series 8 Card Printer User’s Manual 13
Loading the Transfer Film
The ZXP Series 8 printer is designed to work only with Zebra True Colours™ i Series™
Transfer Film for near photographic print resolution and over-the-edge printing.
Step 1. Locate the transfer film supply spindles and the transfer film take-up spindles.
Step 2. Unroll about one foot from the full roll of transfer film (supply spool), and wind it
(2 wraps) onto the empty take-up spool.
Supply Spool
GREEN
Take-up Spool
WHITE
Take-up Spindle
GRAY
Supply Spindle
GRAY
Take-up Spindle
WHITE
Supply Spindle
GREEN
Flange
Flange