ZyXEL Communications NWA1123AC 802.11 a/b/g/n/ac Dual-Radio Ceiling Mount PoE Access Point User Manual Book
ZyXEL Communications Corporation 802.11 a/b/g/n/ac Dual-Radio Ceiling Mount PoE Access Point Book
Contents
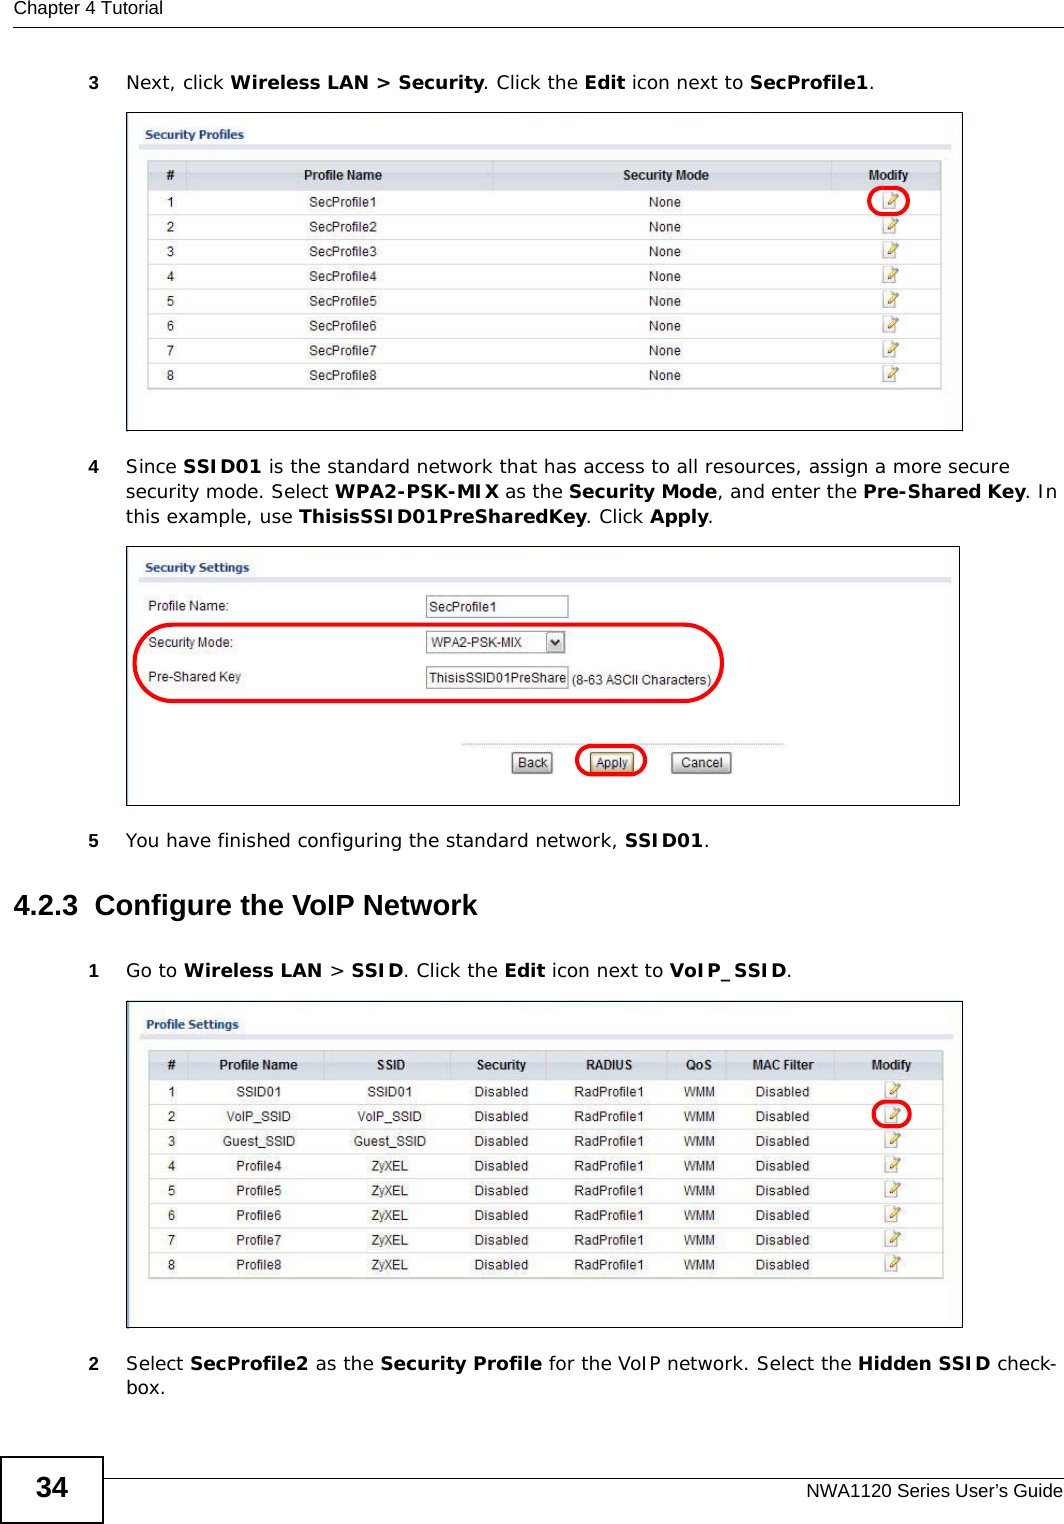
- 1. User Manual Part 1.pdf
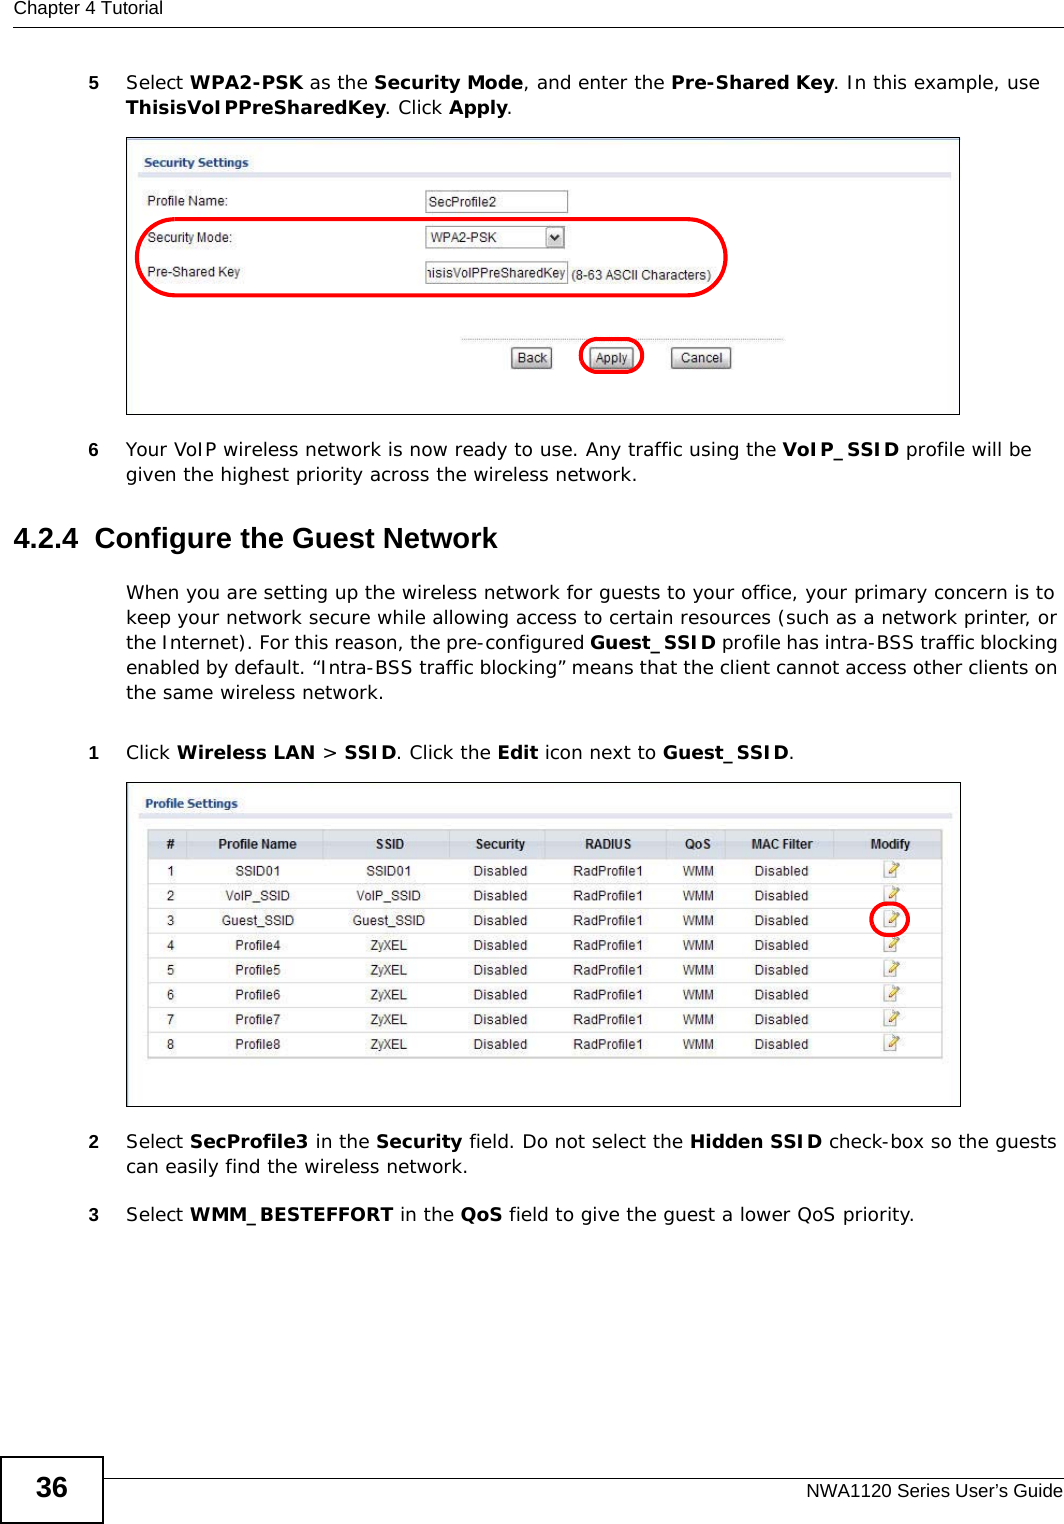
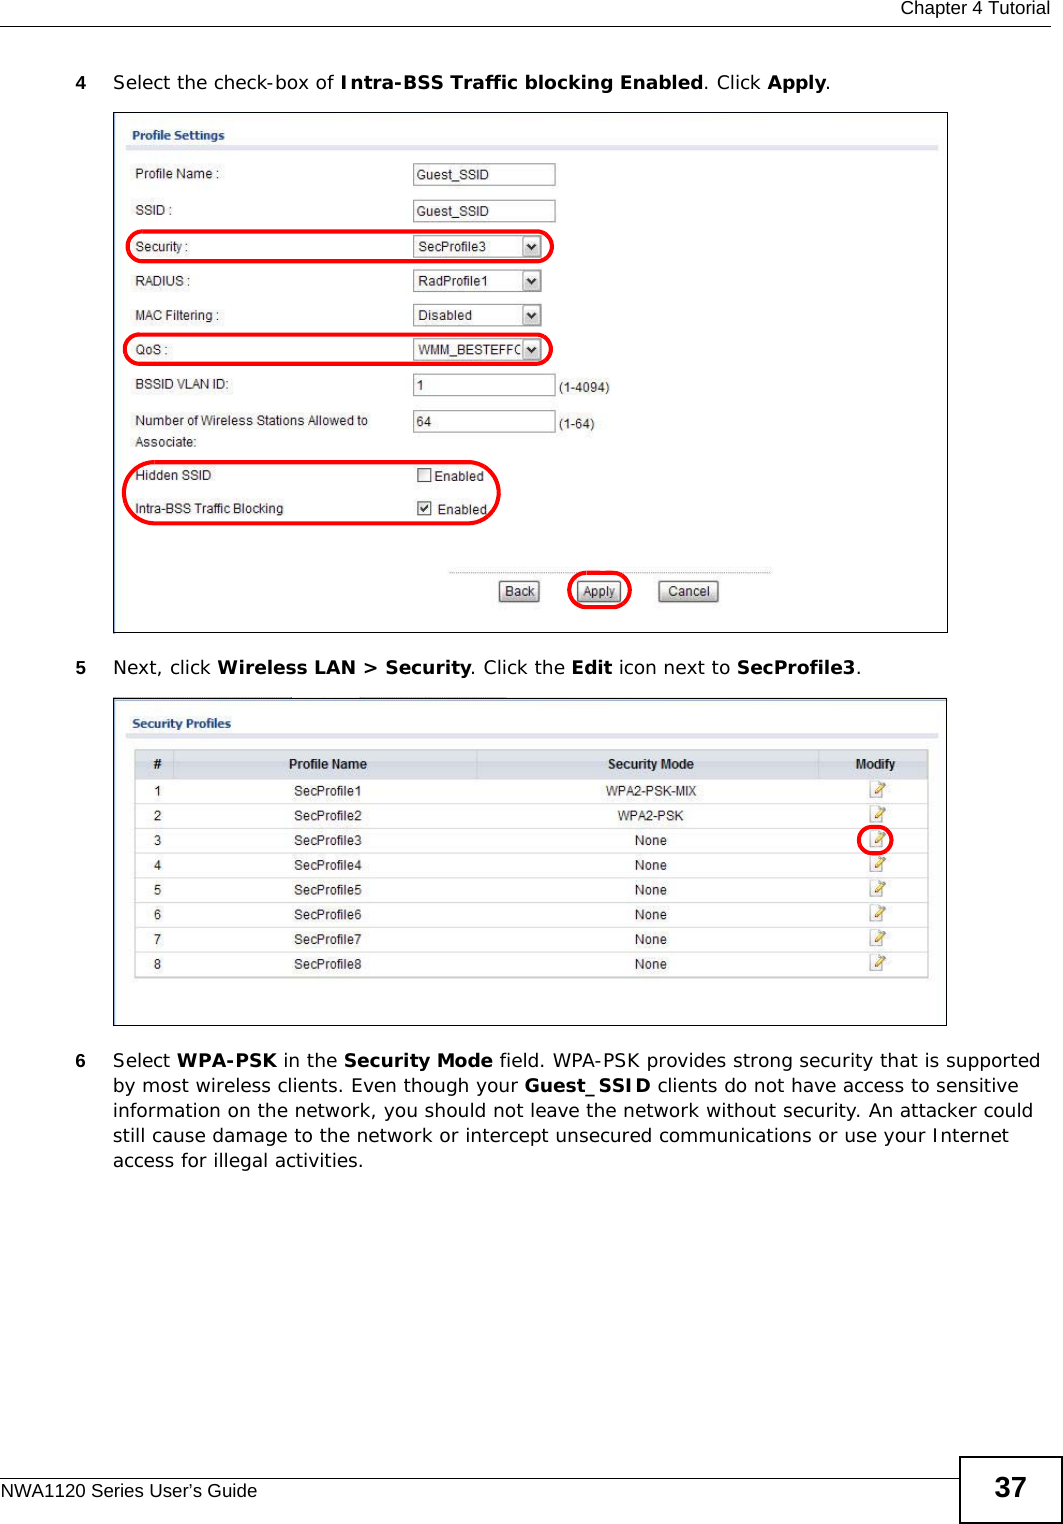
- 2. User Manual Part 2.pdf
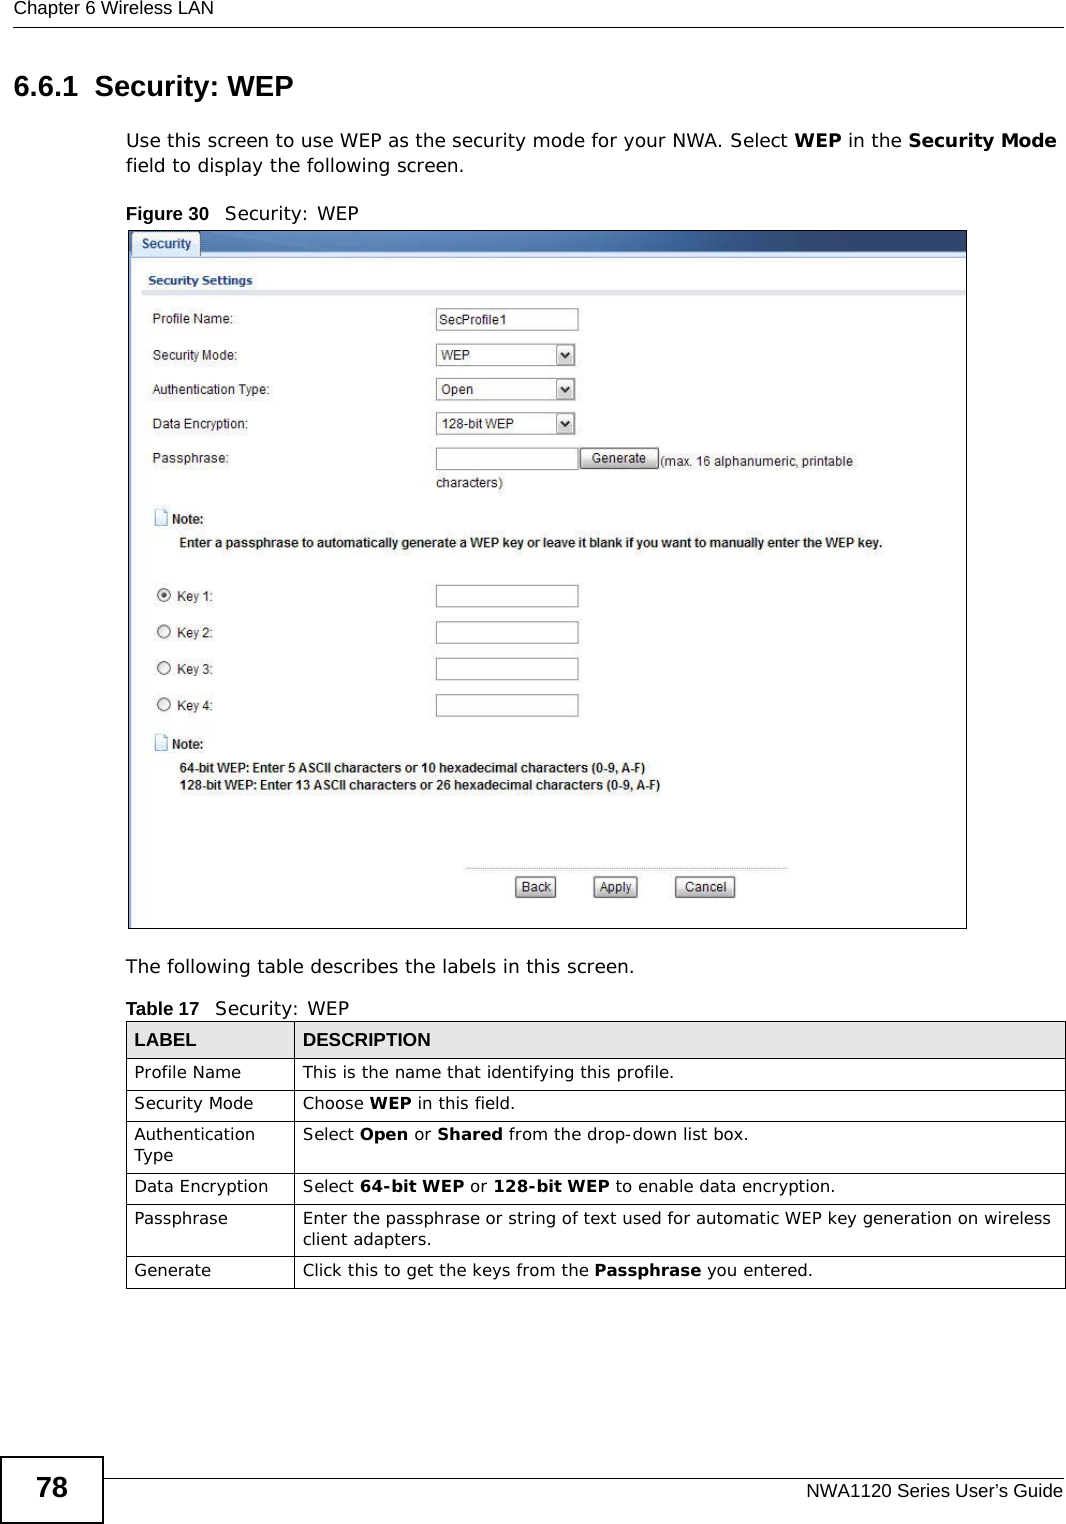
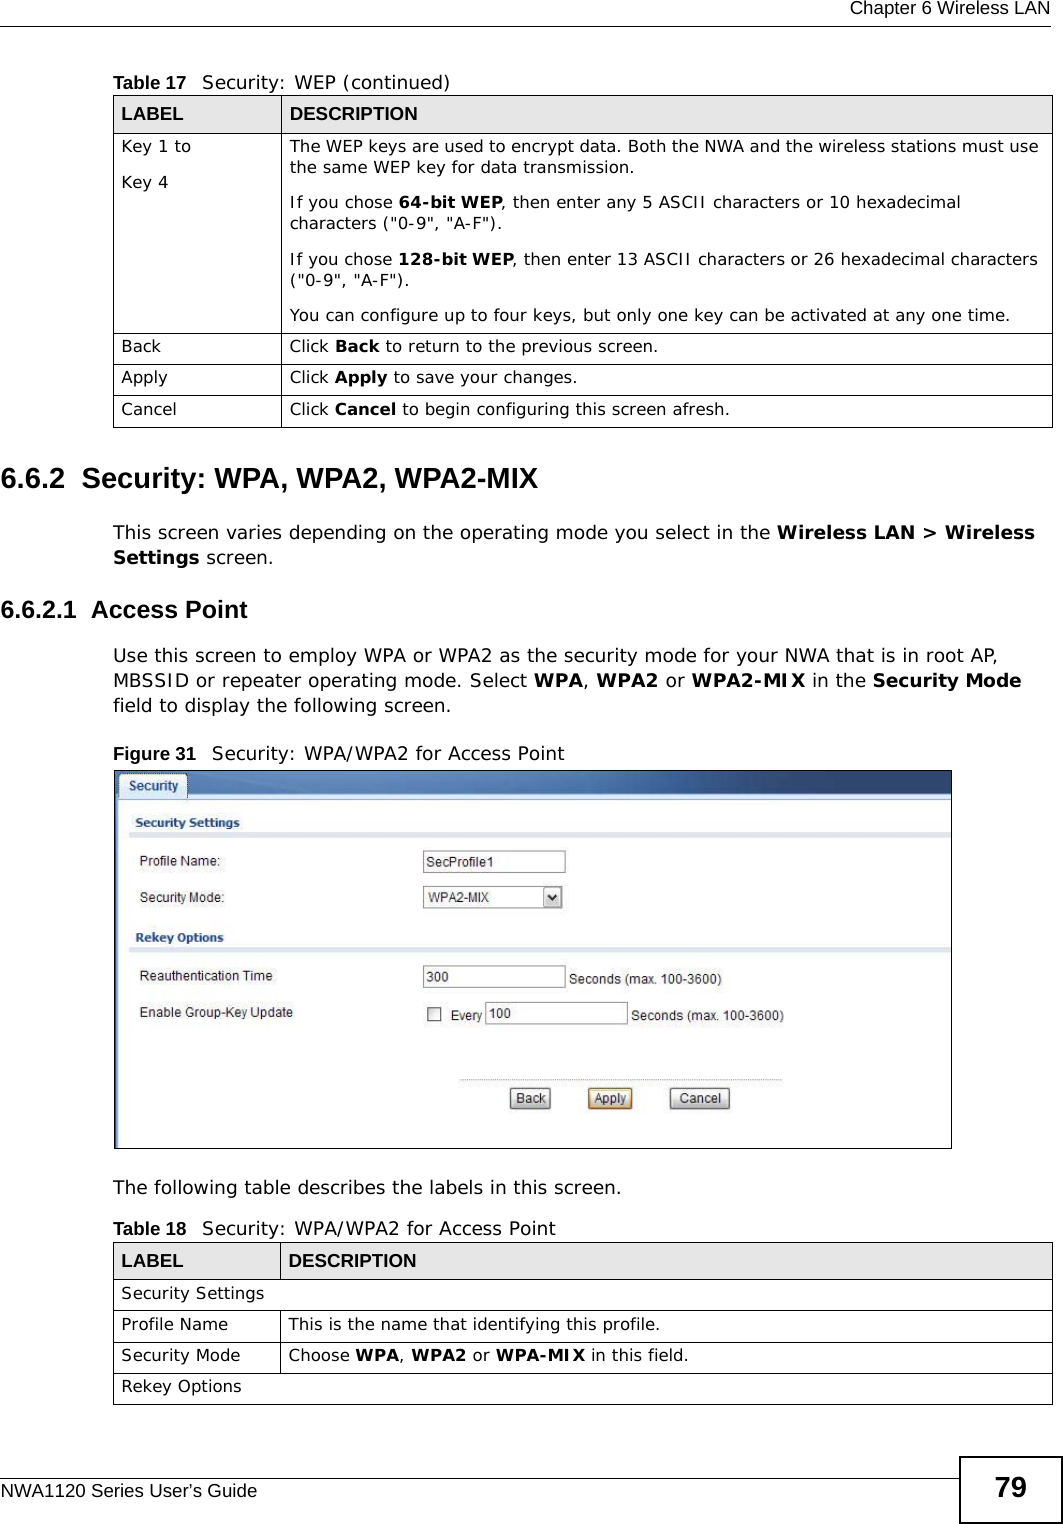
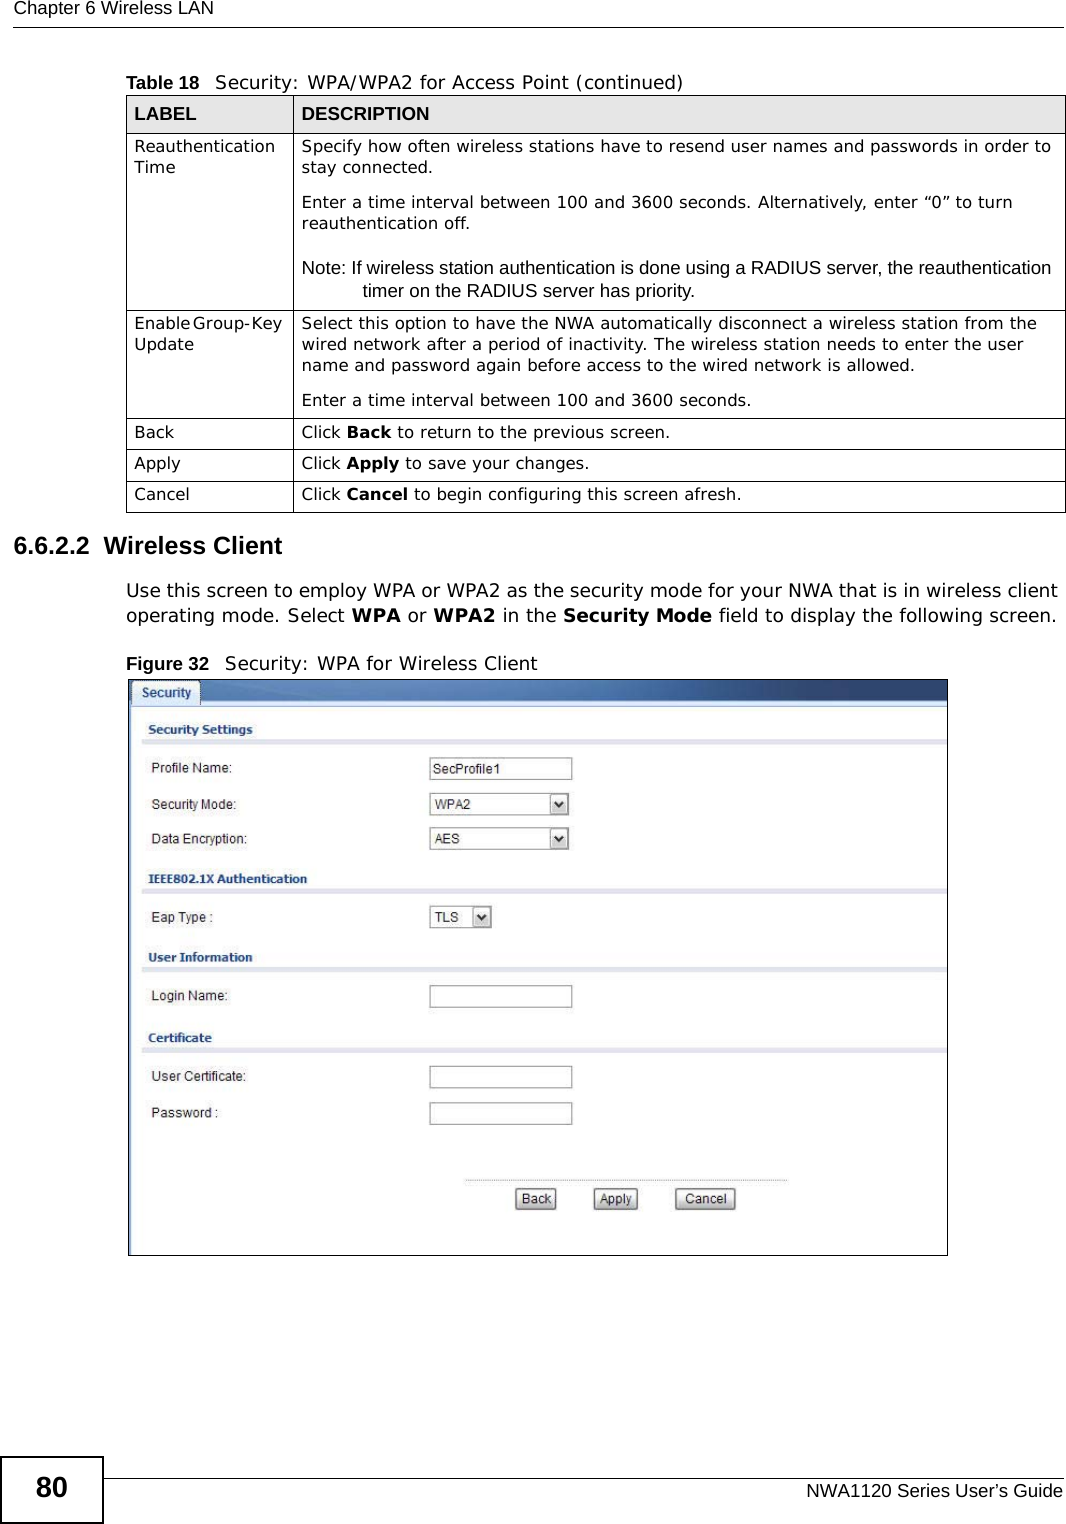
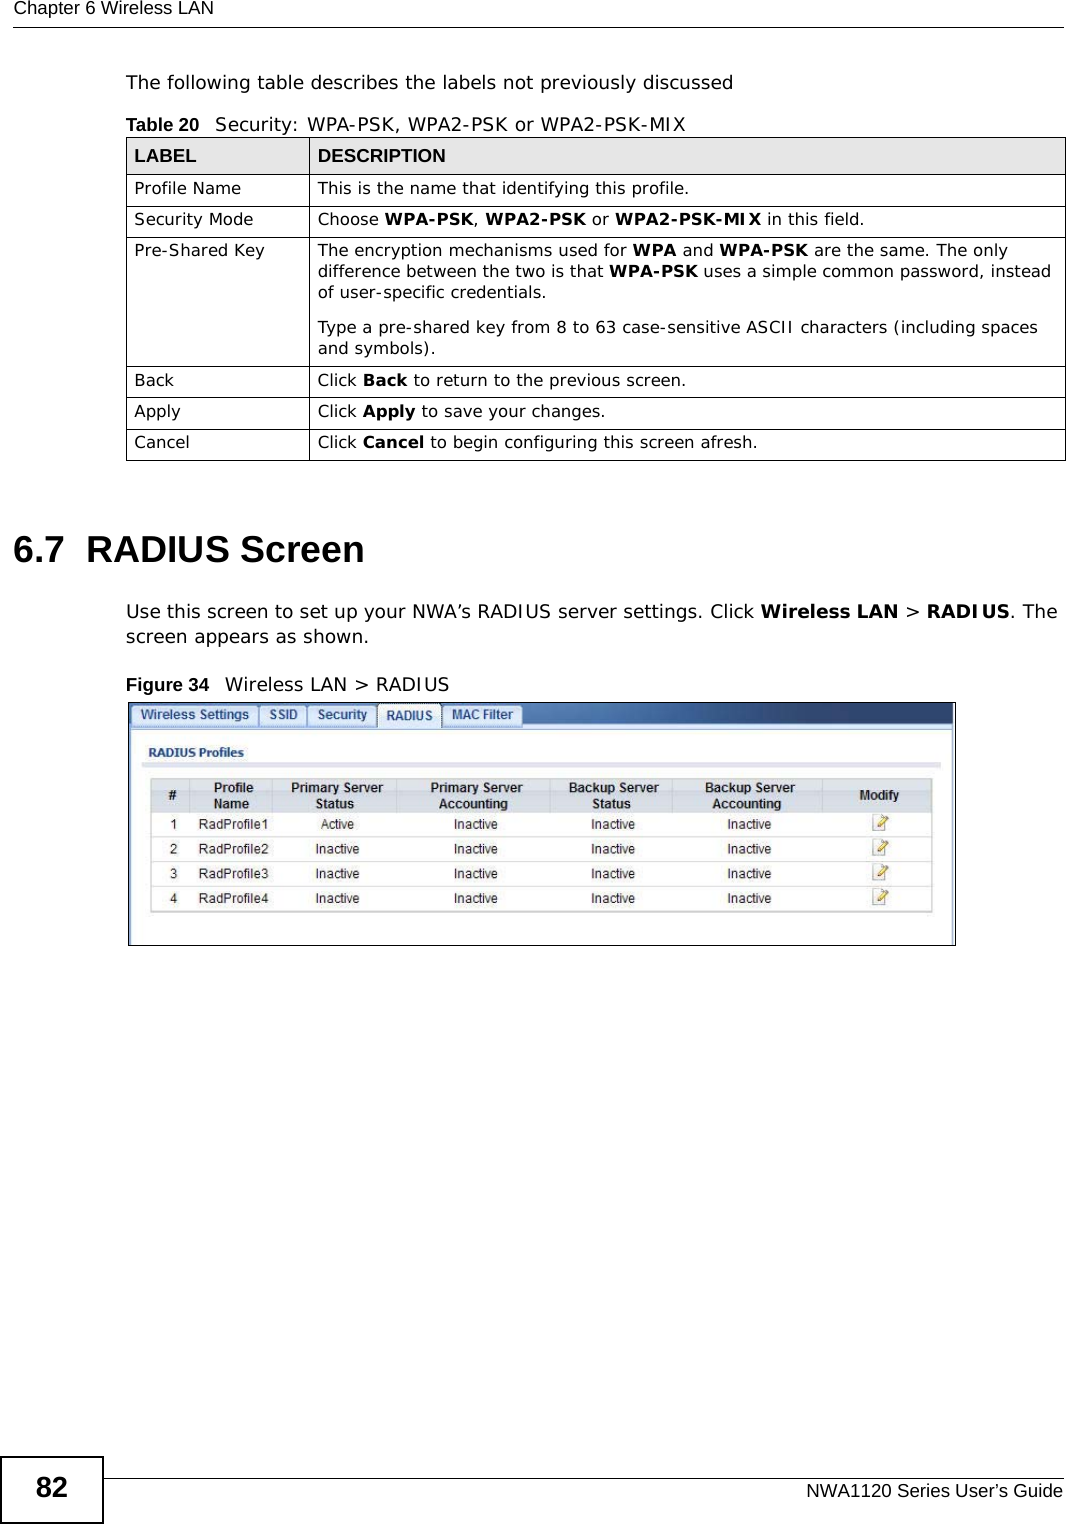
User Manual Part 1.pdf


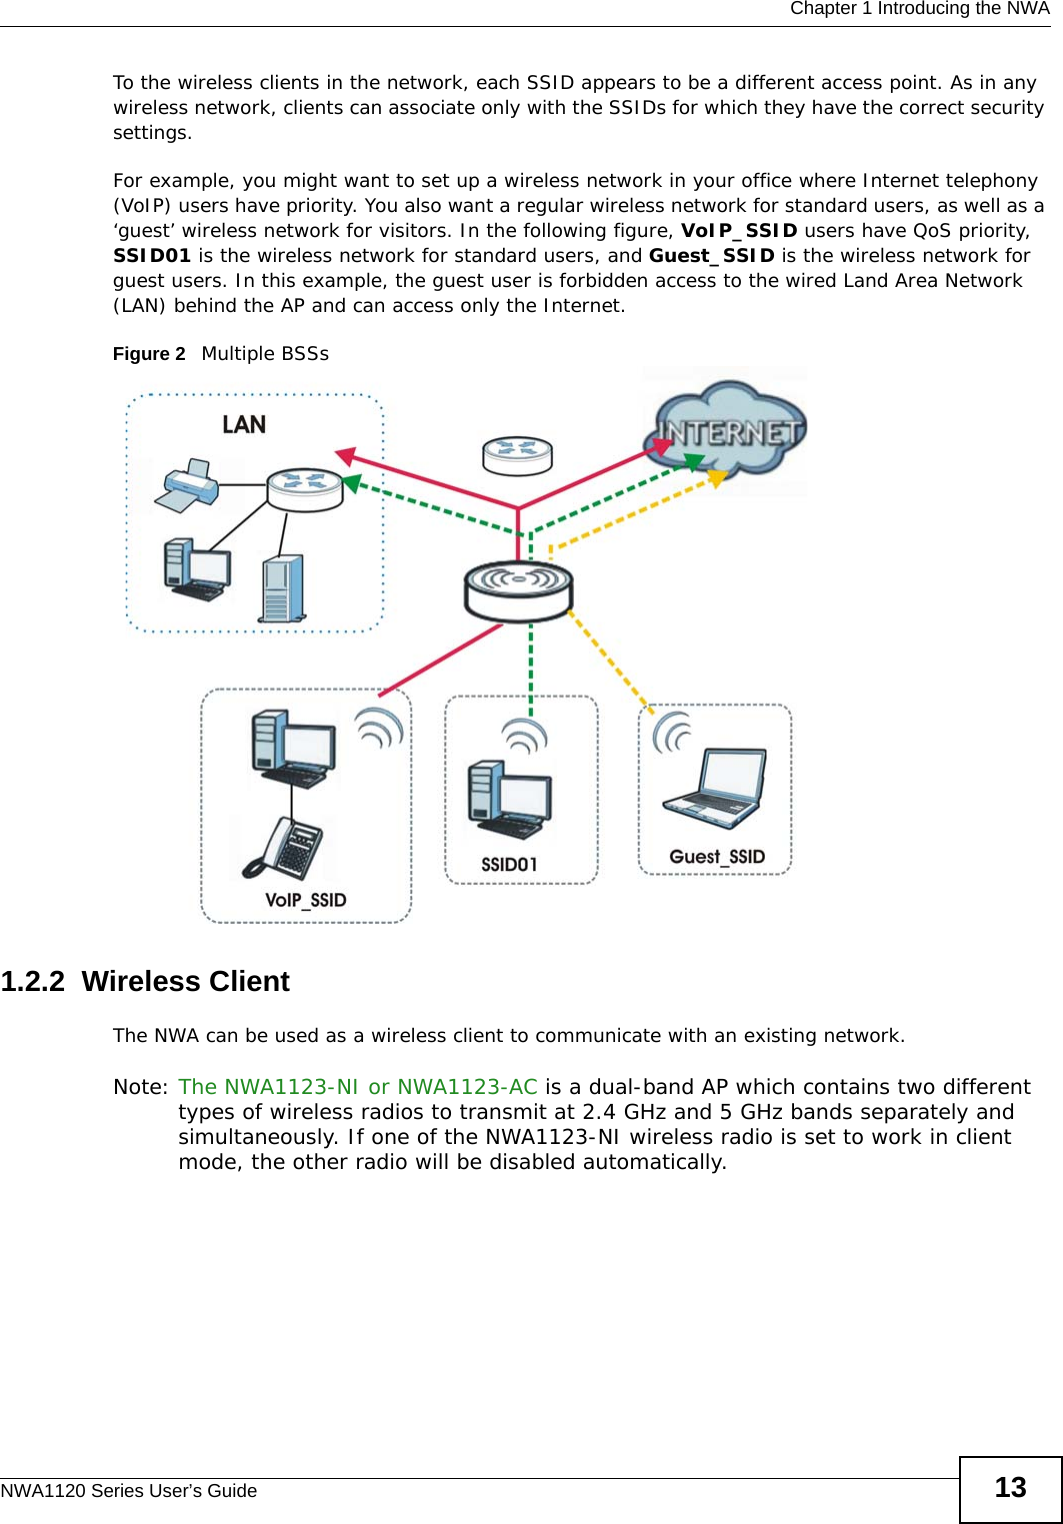
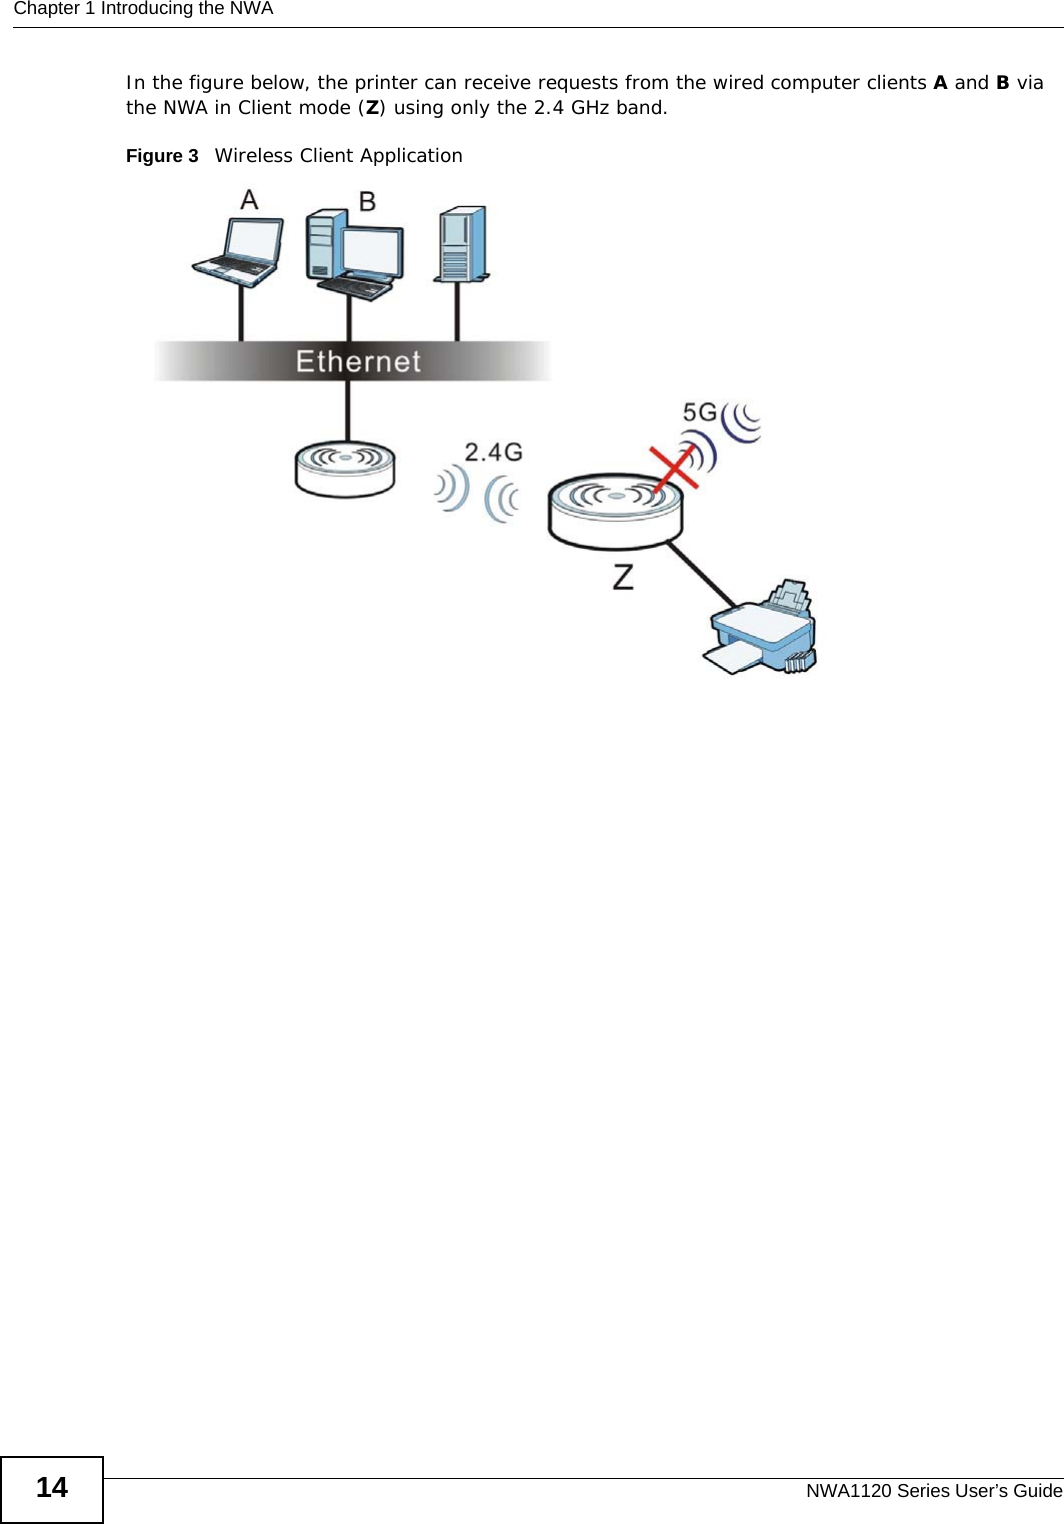
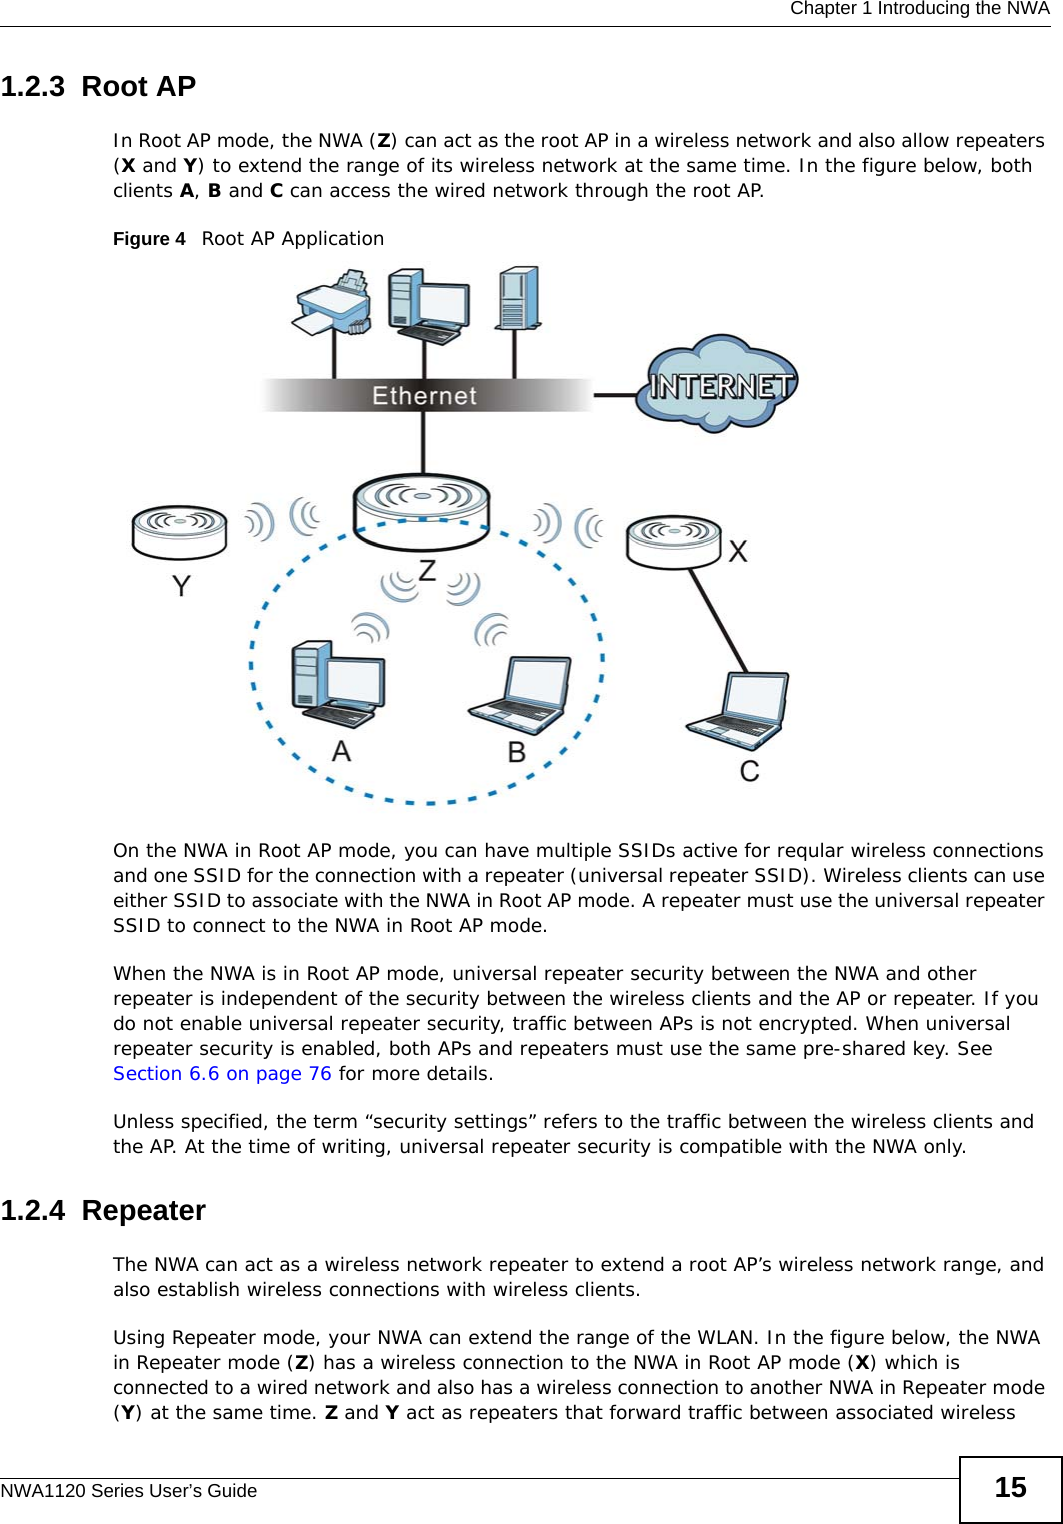
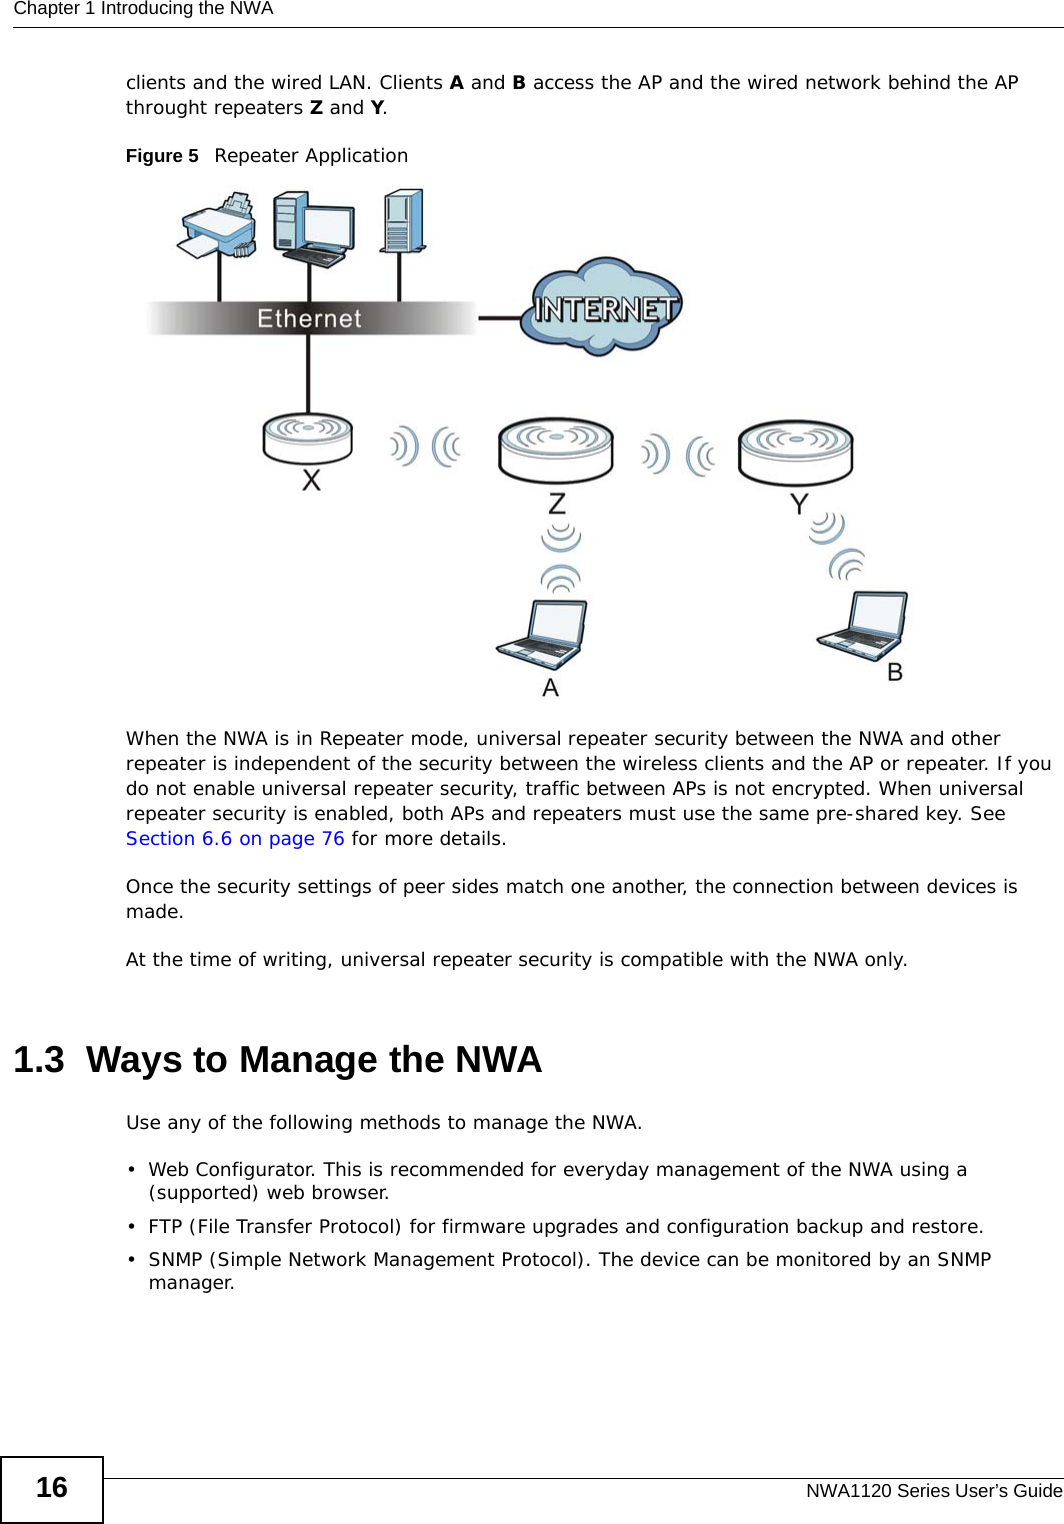
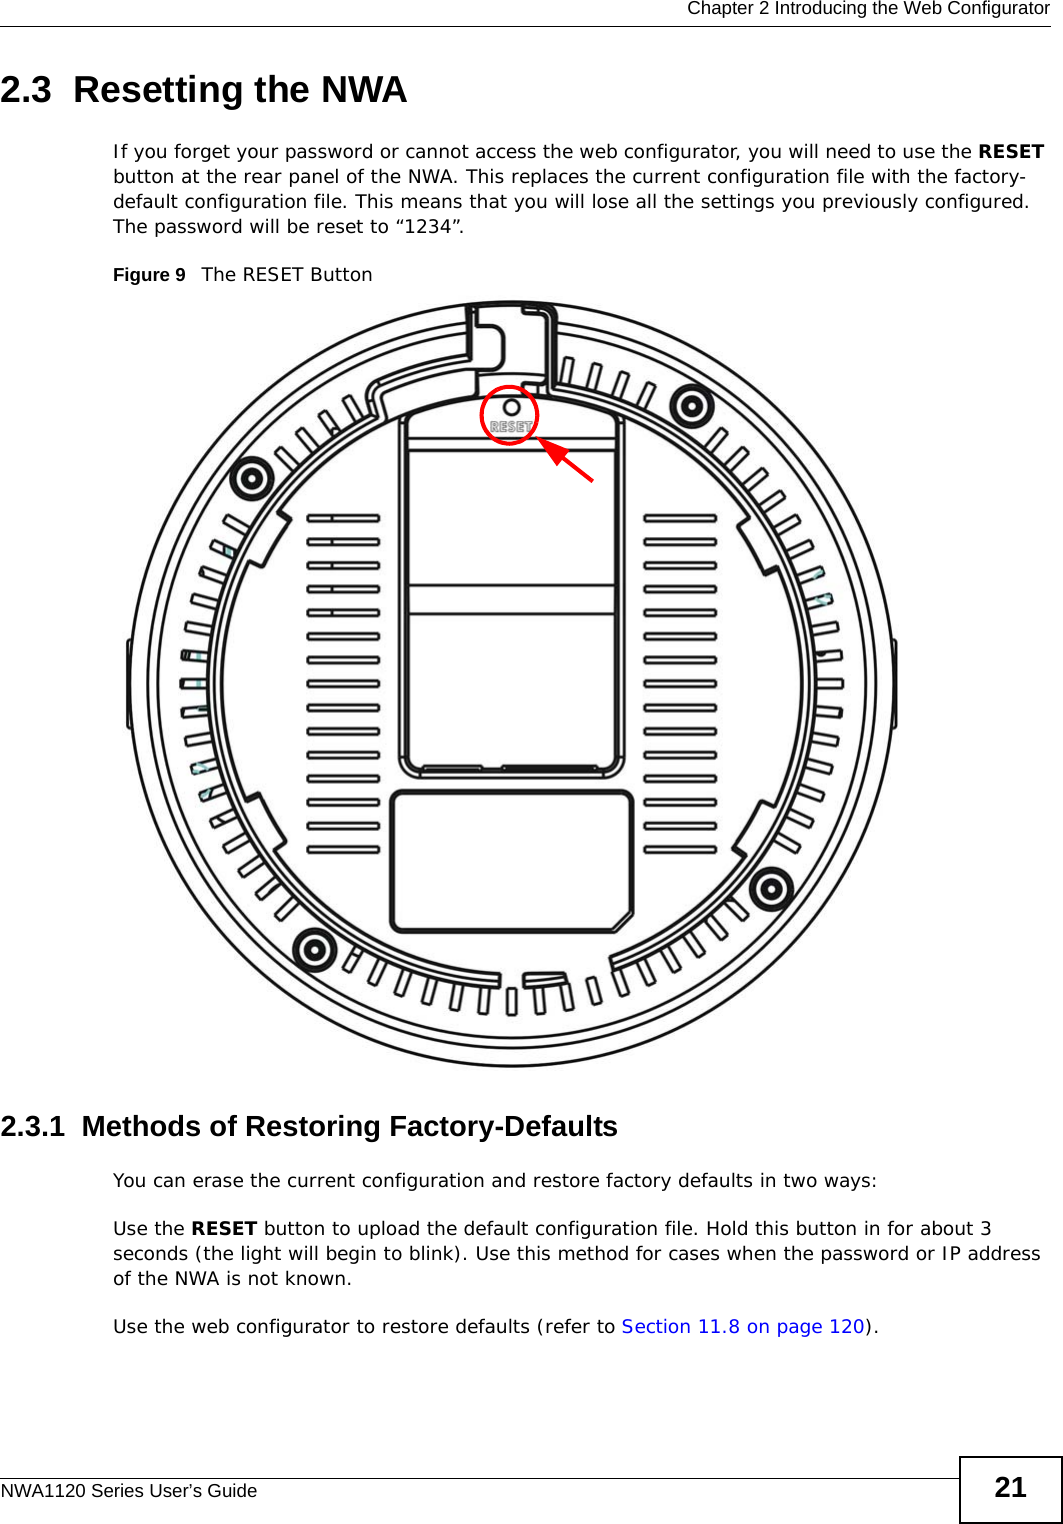
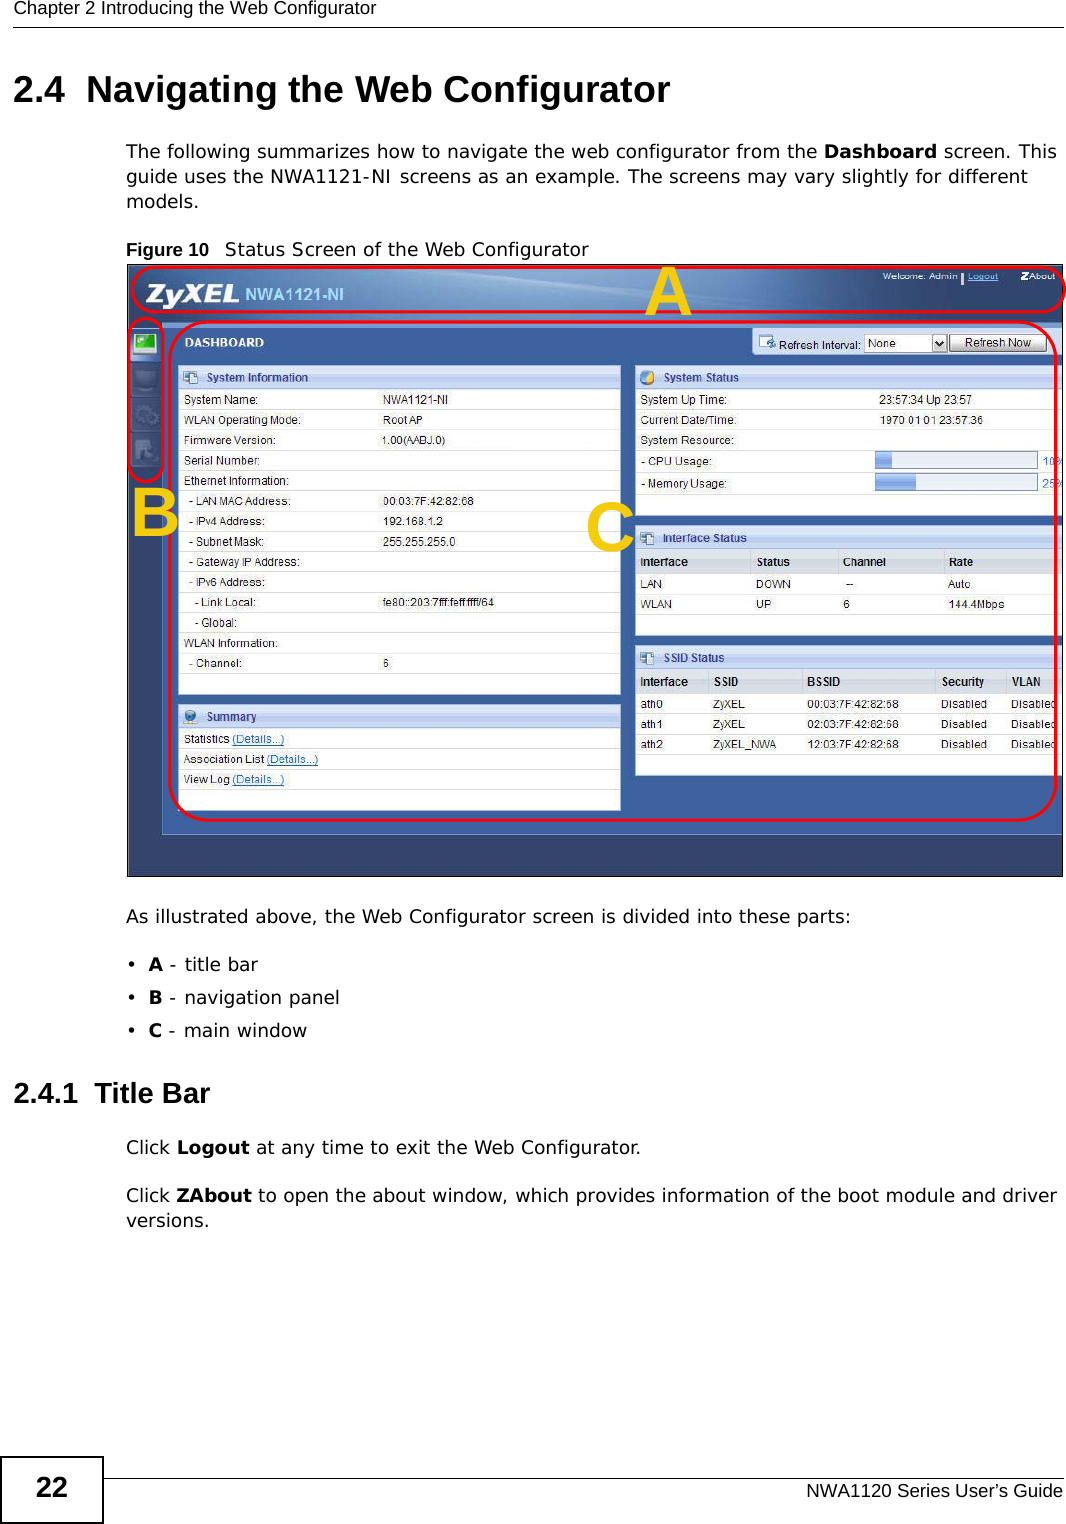
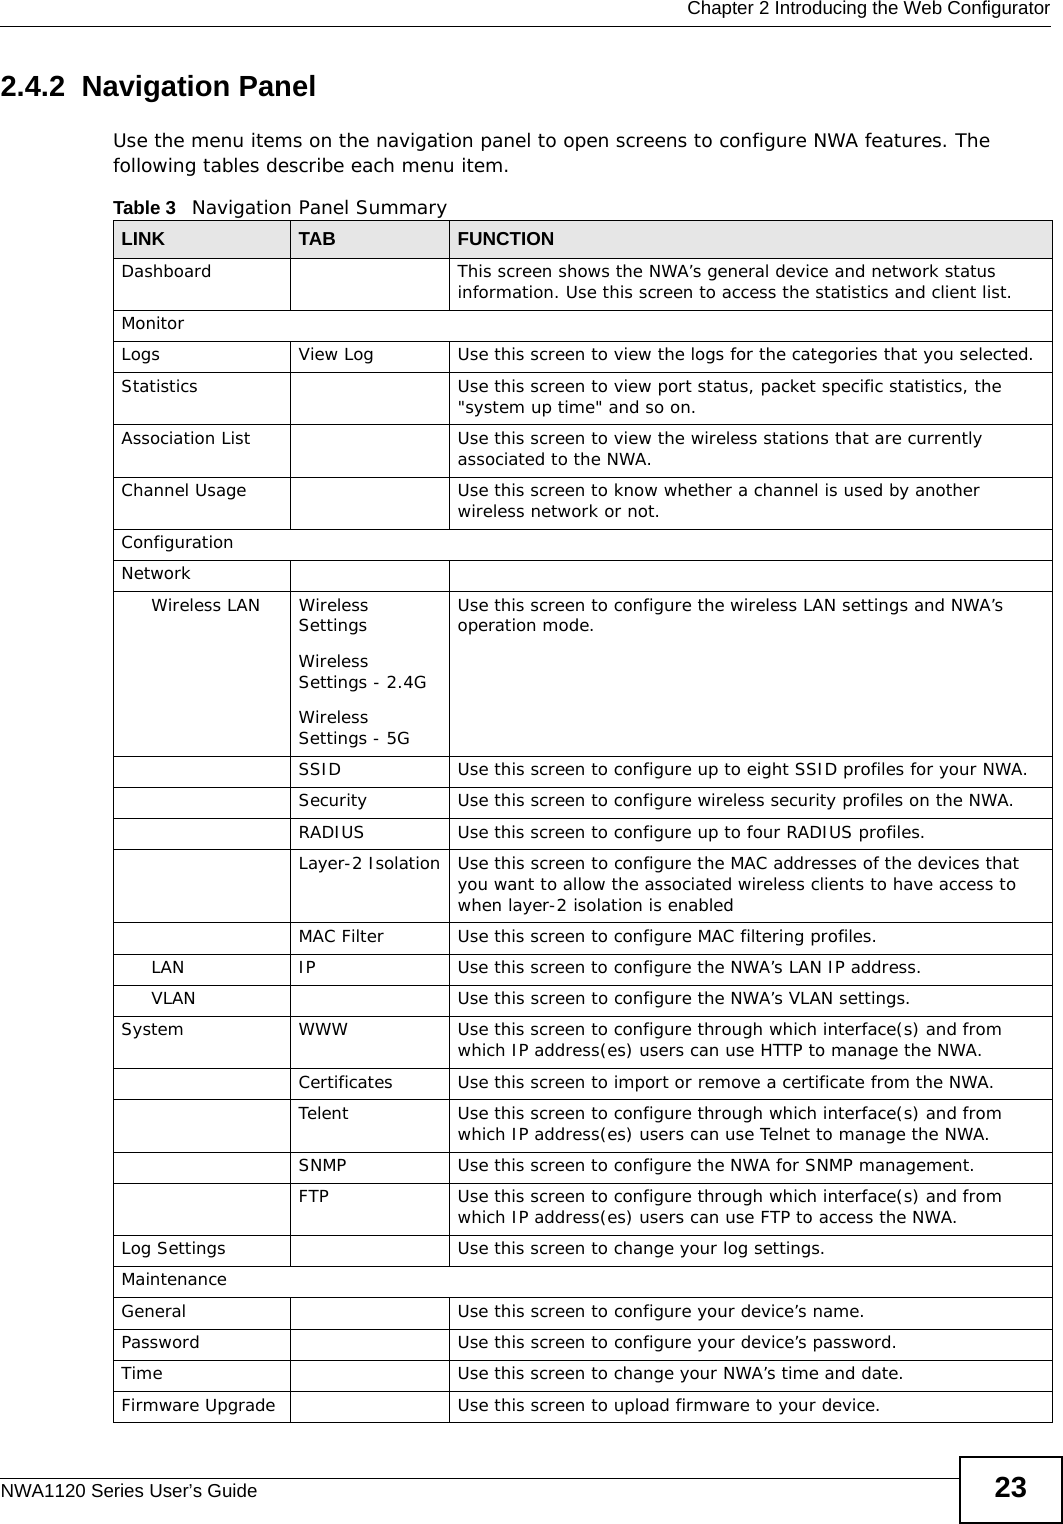
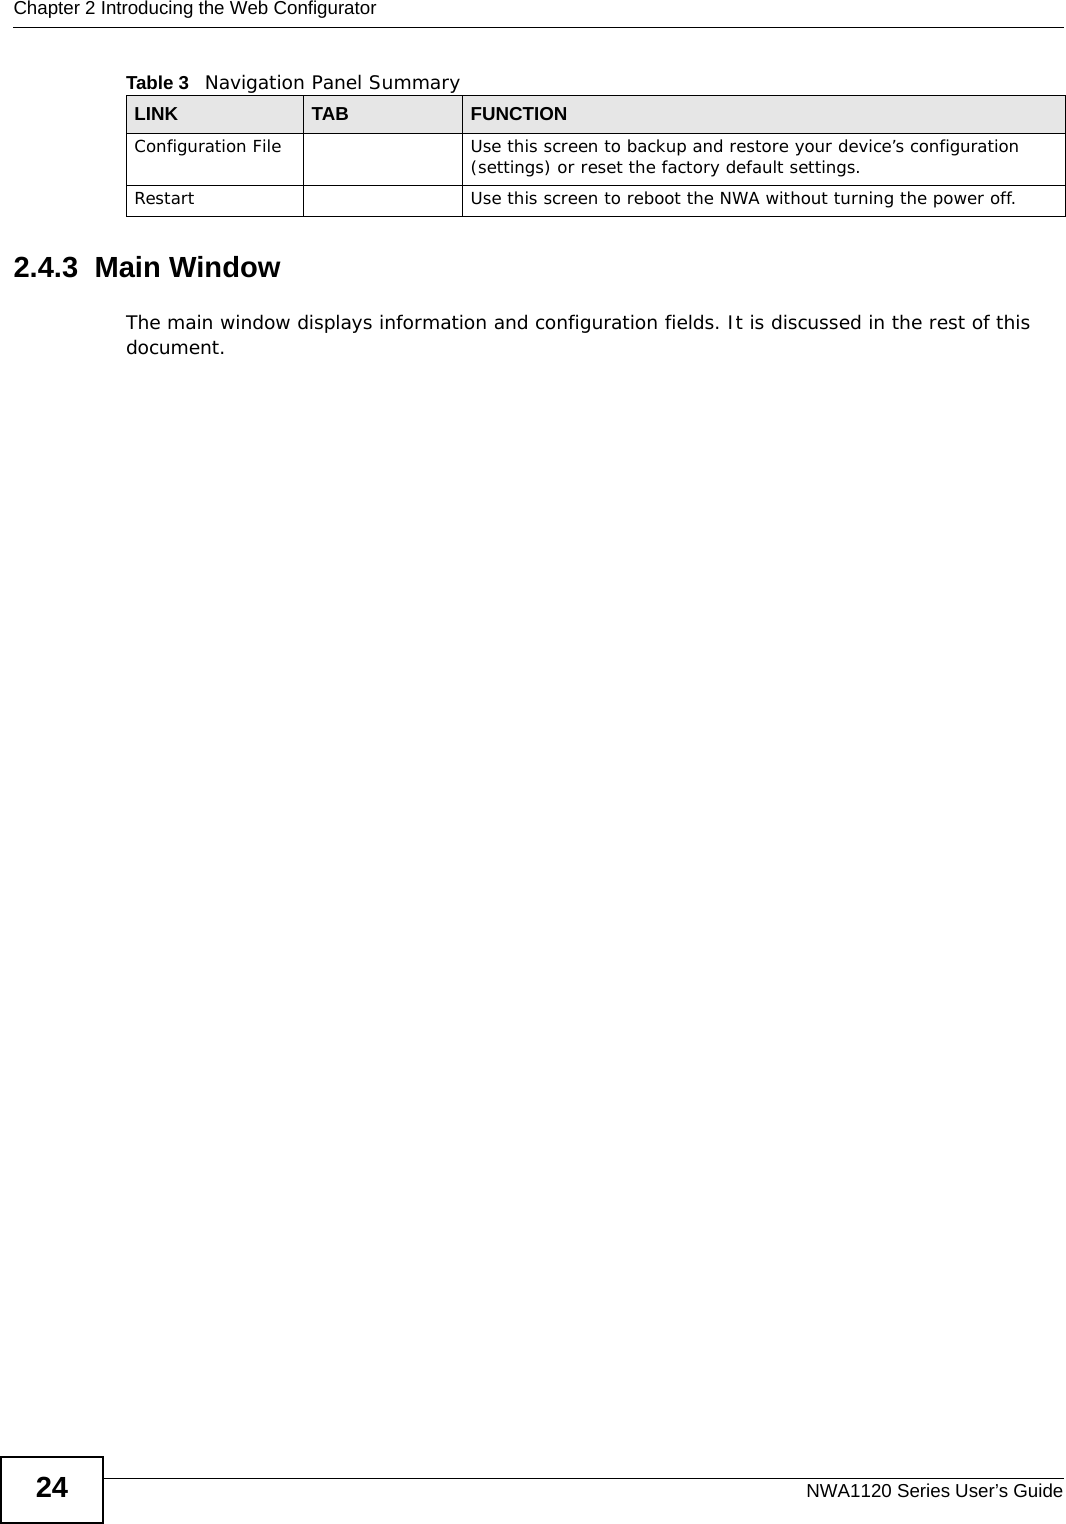


![Chapter 12 TroubleshootingNWA1120 Series User’s Guide 125Advanced Suggestions• Try to access the NWA using another service, such as Telnet. If you can access the NWA, check the remote management settings to find out why the NWA does not respond to HTTP. • If your computer is connected wirelessly, use a computer that is connected to a LAN/Ethernet port.I can see the Login screen, but I cannot log in to the NWA.1Make sure you have entered the user name and password correctly. The default user name is admin and default password is 1234. This fields are case-sensitive, so make sure [Caps Lock] is not on.2Disconnect and re-connect the power adaptor or cord to the NWA.3If this does not work, you have to reset the device to its factory defaults. See Section 2.3 on page 21.I cannot use FTP to upload new firmware. See the troubleshooting suggestions for I cannot see or access the Login screen in the web configurator. Ignore the suggestions about your browser.12.3 Internet AccessI cannot access the Internet through the NWA.1Check the hardware connections, and make sure the LEDs are behaving as expected. See the Quick Start Guide and Section 12.1 on page 123.2Make sure your NWA is connected to a networking device that provides Internet access.3Make sure your computer is set to obtain a dynamic IP address or has an IP address which is in the same subnet as the broadband modem or router.4If you are trying to access the Internet wirelessly, make sure the wireless settings on the wireless client are the same as the settings on the AP.5Disconnect all the cables from your device, and follow the directions in the Quick Start Guide again.6If the problem continues, contact your ISP.](https://usermanual.wiki/ZyXEL-Communications/NWA1123AC.User-Manual-Part-1-pdf/User-Guide-2123422-Page-125.png)