Adobe FrameMaker_User_Guide Frame Maker 8.0 User Guide Framemaker 8 En
User Manual: adobe FrameMaker - 8.0 - User Guide Free User Guide for Adobe FrameMaker Software, Manual
Open the PDF directly: View PDF ![]() .
.
Page Count: 835 [warning: Documents this large are best viewed by clicking the View PDF Link!]
- Contents
- Chapter 1: Getting started
- Chapter 2: FrameMaker basics
- Chapter 3: Unicode support
- Chapter 4: FrameMaker tables
- About tables
- Inserting tables
- Converting between text and tables
- Copying, moving, and removing tables
- Changing the look of tables
- Positioning tables on a page
- Adjusting rows and columns
- Sorting columns and rows
- Rotating cells and tables
- Controlling page breaks in tables
- Positioning and autonumbering text within cells
- Working with ruling and shading
- Redefining (updating) table formats
- Renaming and deleting table formats
- Creating table formats
- Working with tables in structured documents
- Inserting structured tables
- Filling in structured tables with text and graphics
- Copying, moving, and removing structured tables
- Applying different formats to structured tables
- Positioning structured tables on a page
- Adjusting rows and columns in structured tables
- Rotating cells and tables in structured documents
- Chapter 5: Cross-references and footnotes
- Inserting cross-references
- Working with cross-reference markers
- Displaying the source of a cross-reference
- Editing cross-references
- Creating cross-reference formats
- Using building blocks for source information
- Editing cross-reference formats
- Maintaining cross-references
- Resolving cross-references
- Working with footnotes
- Changing footnote formats
- Working with endnotes
- Working with cross-references in structured documents
- Inserting element-based cross-references in structured documents
- Working with ID values in structured documents
- Resolving cross-references in structured documents
- Working with footnotes in structured documents
- Working with endnotes in structured documents
- Chapter 6: Variables and equations
- About variables
- Inserting variables
- Editing variables
- Deleting variables
- Converting variables to text
- Updating system variables on body or reference pages
- Importing variable definitions
- Changing variable definitions
- Creating variables for running headers and footers
- Working with variables in structured documents
- About Equations
- Using the Equations palette
- Inserting math elements
- Creating equations in structured documents using elements
- Chapter 7: Filter By Attribute
- Chapter 8: Conditional text
- Chapter 9: Graphics and anchored frames
- Chapter 10: Color
- Chapter 11: Page layout and templates
- About page layout
- Changing the basic page layout of a document
- Creating and editing custom master pages
- Aligning text across columns
- About multiflow documents
- Working with reference pages
- About Templates
- Using templates
- Creating templates
- Organizing templates in a folder
- Creating templates for generated files
- Creating templates to change conditional text settings
- Changing templates for blank paper and text files
- Importing and updating formats
- About import and update settings
- Chapter 12: Tables of contents and indexes
- About Tables of Contents
- About generated files
- Preparing the sources for TOCs and other generated lists
- Generating TOCs and other lists
- Updating and editing TOCs and lists
- Troubleshooting TOCs and lists
- Embedding TOCs in a document
- About indexes
- Adding index markers
- Generating indexes
- Updating and editing indexes
- Creating a master TOC or index for several books
- Troubleshooting indexes
- Adding custom marker types
- Adding titles and other static text to lists and indexes
- Formatting lists and indexes
- Changing the sort order of indexes
- Working with group titles in indexes
- Working with TOCs in structured documents
- Generating TOCs and other lists in structured documents
- Updating and editing lists in structured documents
- Adding index marker elements in structured documents
- Formatting lists and indexes in structured documents
- Troubleshooting TOCs and lists in structured documents
- Embedding TOCs in structured documents
- Chapter 13: Books
- About book files
- Building books
- Working with files in a book window
- Determining how documents and pages are numbered
- Inserting numbering in your documents
- Changing the format of files in a book
- Using book-wide commands
- Updating books
- Comparing books
- Troubleshooting books
- About structured book files
- Generating and updating structured books
- Working with book structure
- Chapter 14: Revision management
- Chapter 15: Managing files using WebDAV
- Chapter 16: Importing, linking, and exporting
- About importing files into FrameMaker
- Choosing the right method for importing and linking
- Using Copy and Paste
- Using the Import command to import text
- Using the Import command to import graphics
- Using drag and drop (Windows)
- Using OLE (Windows)
- Using graphic insets (UNIX)
- Exporting text and graphics
- Importing text into structured documents
- Inserting imported graphic elements into structured documents
- Using the File Import feature
- Importing SWF files into FrameMaker documents (Windows)
- Importing three-dimensional objects into FrameMaker documents (Windows)
- Chapter 17: Hypertext and view-only documents
- About online systems
- Preparing areas for becoming active
- Inserting hypertext commands
- Creating hypertext links
- Creating button matrices
- Creating pop-up menus
- Creating alert messages
- Creating ways to start or open
- Creating ways to close or exit
- Testing and troubleshooting hypertext documents
- Adding hypertext links to generated files
- Working in view-only documents and books
- Working with FluidView format
- Inserting hypertext command elements in structured documents
- Chapter 18: HTML, XML, and Adobe PDF conversion
- Chapter 19: Processing XML
- Chapter 20: UNIX macros and utilities
- Chapter 21: Creating accessible documents (Windows)
- Chapter 22: Structured authoring using DITA
- Chapter 23: Adobe Technical Communication Suite features in Adobe FrameMaker
- Appendix A: Typing in dialog boxes
- Appendix B: Keyboard shortcuts
- Index
- Numerics
- A
- abandoning changes 25
- about
- about CSS
- absolute pathnames for imported files 508
- absolute tab stops 72
- accent marks
- accepting
- accessibility
- activating
- Active paragraph tag in generated files 550
- Add Fractions command 271
- adding
- attribute values 46
- background text to master pages 379, 384
- brackets ([ ]) around matrices in equations 256
- change bars 482
- change bars in composite documents 485
- corners to objects 341
- documents to book files 463
- elements 34
- elements to empty documents 35
- footers to pages 384
- handles to objects 341
- headers to pages 384
- items to lists of expressions in equations 246
- marker types 440
- operands in equations 254
- pages automatically 71
- pages, blank, at ends of documents 382
- pages, disconnected 401
- paragraph formats to Paragraph Catalog 138
- points on freehand curves 341
- rows and columns to matrices in equations 254
- sides to objects 341
- table formats to Table Catalog 185
- table rows and columns 170, 197
- table titles 160, 191
- text columns 387
- text frames 388
- text to entries in generated lists and indexes 447
- vertices to polygons and polylines 341
- words from Thesaurus 95
- words to personal or document dictionary 87, 93
- Addition commands for equations 271
- addition operators in equations 247
- adjacent text columns
- Adobe
- Adobe help 2
- Adobe Illustrator, importing files 504
- Adobe Labs 3
- Alert hypertext commands 534, 543
- algebra, matrix 270
- aligning
- cells in equation matrices 266
- colors (registration) 371
- equations 264
- equations with text baselines 251
- graphics 331
- horizontal list items in equations 265
- in-line graphics 347
- lines in multiline equations 265
- numbers on decimal 113
- objects 331
- objects with ruler markings 311
- page numbers in generated lists and indexes 448
- paragraphs within indents 112
- rubi text 118
- tab stops with ruler markings 114
- table column borders to grid 172
- tables 167
- text at left, right, center 112
- text at tab stops 113
- text in adjacent columns 394
- text in headers and footers 386
- text line objects 332
- text vertically in table cells 179
- text with bottom of column 395
- vertical list items in equations 265
- alphabetic groups in indexes 451
- alphabetic numbering style
- <$alphabetics> building block in special text flow for indexes 443
- alphanumeric characters in equations 244, 245
- AM or PM in system variables 233
- ampersands (&), converting to HTML 570
- anchor symbols 8
- anchored frame elements (structured) 362
- anchored frames
- anchor symbol for (structured) 361
- and unanchored graphic frames, compared 322
- changing settings of 359
- conditional 303
- copying, cutting, and pasting 360
- creating 346
- cropping 349
- cropping contents of 359
- deleting 360
- drawing properties of 359
- editing 359
- editing contents of, in rotated text frames 359
- equations in 285
- equations in structured documents 282
- floating 349
- for boilerplate graphics 407
- full-width 350
- graphics not moving with 359
- HTML conversion and 557
- importing graphics into 519
- in multicolumn layouts 350
- in run-in heads 348
- in structured documents 361
- in structured table cells 192
- inserting elements for 362
- introduction 345
- moving 360
- moving, into text column 353
- paragraph formats for 412
- paragraph spacing and 116
- placing graphics in 358
- placing, in table cells 161
- positioning, at insertion point 347
- positioning, at top corner of paragraph 354
- positioning, between/outside columns 350
- positioning, in margin 354
- positioning, in text column 348
- preparing for tagged PDF 360
- relationship to other elements 361
- repositioning 360
- resizing 359
- resizing, by shrinkwrapping and unwrapping 251, 348
- rotating tables in 175
- running text around 354
- searching for 76
- selecting 358, 363
- selecting (structured) 363
- straddling columns with 350
- symbol for 8
- tagged PDF 360
- text in 357
- text in, obscuring 348
- types of 322
- angle brackets (< >)
- angles
- ANSI encoding, saving files using 26
- antonyms, looking up, in Thesaurus 94
- apostrophes (’) 73
- app directory 650
- AppleScript scripts, hypertext command to start 545
- application programs, hypertext commands to start 544
- applications
- Apply Rule command 279
- applying
- a filter 292
- character formats 102
- character formats globally 106
- character formats to characters with certain tags 106
- colors 366
- condition tags 303
- flow tags 400
- formats to text 102
- master pages to body pages 388, 392
- master pages to elements (structured) 407
- master pages to paragraph tags 392
- no master page to body pages 392
- paragraph default font to text 103
- paragraph formats 102
- paragraph formats globally 106
- paragraph formats to paragraphs with certain tags 106
- Table Designer properties 165
- table formats 166
- Arabic numerals
- architecture
- arcs
- arrow pointer 316
- arrowhead line ends
- arrowhead pointers, when dragging elements 43, 44
- art, clip 404, 407
- articles, PDF 577
- As Is property settings
- ASCII encoding, saving files using 26
- ASCIITemplate file 415
- assigning
- asterisks (*)
- asymmetrical page layouts 383
- atom math element type 257
- attraction, object (gravity) 333
- <$attribute> building block
- attribute display options
- attribute values
- attributes
- author indexes 420
- .auto filename extension 23, 27
- autoconnecting 400
- autolevel in HTML mappings 562
- automatic backup on save 27
- automatic hyphenation 119
- automatic letter spacing 116
- automatic save 27
- automatic spell-check correction 87
- autonumbering 125
- based on section numbers 131
- bullet symbols in 128
- chapters 471
- character formats in 128, 129
- examples of 131
- figures 131
- footnotes 213
- HTML mappings for 561, 563, 567
- in cross-references 206
- in generated lists 445
- in indexes 445
- in outlines 131
- in running headers and footers 235
- in tables 180
- in templates 411
- Japanese 133
- resetting 133
- suppressing display of 130
- volumes 471
- <$autorange> building block in special text flows for indexes 443
- autosave files 23, 27
- .avi files
- axis, flipping objects around 336
- B
- back, sending objects to 331
- background graphics on master pages 379
- background text frames
- background text frames (untagged)
- background, white text on dark (reverse text) 325
- backslashes (\)
- backup files 27
- backward compatibility
- balancing text across columns 394
- baseline quotes, typing, in dialog boxes 678, 679
- baselines, text
- batch operations, fmbatch and 630
- beginning of line, finding 80
- beginning of paragraph or word, finding 80
- beginning position
- benefits
- bitmaps, capturing 630
- black
- blank pages
- blank paper documents
- finding
- body pages
- adding new, automatically 71
- adding new, disconnected 401
- adding text frames on 388
- applying master pages to 388
- applying no master page to 392
- deleting disconnected 401
- displaying 384
- layout overrides on 387
- preventing from creating 400
- rotating 390
- text flows on 398
- updating master pages with changes to 388
- updating, with master page changes 388
- body-text areas, side heads and 122
- boilerplate graphics 404, 407
- book building described 462
- Book Error Log 475
- .book filename extension 25
- book files
- adding files to 463, 476
- adding metadata to 465
- Book Error Log 475
- chapter numbering 469
- closing 467
- closing all files in 467
- comparing 474
- converting, to HTML 572
- creating 462, 476
- cross-references to chapter numbers in 471
- defined 462
- deleting files in 466
- fmbatch and 630
- generating files in 473, 477
- importing element definitions into 479
- importing formats into 472, 481
- introduction 462
- master table of contents or index for several 436
- naming 476
- numbering 468
- opening files in 465
- page count, showing total in 471
- planning templates for files in 410
- printing 467
- problems with 475
- rearranging files in 466
- removing files from 466
- removing inherited information from 481
- renaming 466, 476
- renaming documents in 466, 477
- saving 24, 466, 476
- saving all files in 467
- searching book documents 77
- spell-checking multiple documents 85
- structure of 478
- updating 473, 477
- updating formats in 472
- updating, with fmbatch 634
- validating 480
- volume numbering 469
- Book format 25
- book windows 465
- BOOK-COMPONENT element tag
- BookHeadings reference page, for HTML mappings 572
- BookHTML reference page, for HTML mappings 572
- bookmarks, PDF 577
- bookmarks, PDF (structured) 583
- boolean expressions
- borders
- bottom of column, positioning anchored frame at 348
- boxes, gray, as graphic image placeholders 510
- boxing paragraphs 121
- braces ({ }) in equations 248
- brackets ([ ])
- breve characters (˘), typing, in dialog boxes 679
- bringing objects to front 331
- broken line in Structure View 52
- bubbles. See element bubbles
- building
- building blocks
- bullet symbols (.)
- bulleted lists 128
- butt cap for lines 321
- Button Matrix hypertext command 535, 540
- buttons
- bypassing text frames in text flow 402
- C
- calculus symbols in equations
- callouts
- canceling
- cap style
- capabilities
- capitalization
- captions 327, 358
- capturing screen images 630
- caret characters (^)
- Cascading Style Sheets 69
- cascading style sheets
- cascading stylesheets 561
- case-sensitivity
- catalog formats, working with format rules 139
- cells in equation matrices, aligning 266
- cells, table
- adding 197
- aligning text in 179
- anchoring tables in 161
- centering text vertically in 179
- changing height of 173
- color in 366
- combining (straddling) 173
- copying or moving 191
- copying, cutting, and pasting 159
- formatting 160
- formatting of structure 187
- indenting paragraphs in 178
- inserting tables into 161
- margins in 178
- moving between 158
- numbering 180
- placing graphics in 161, 192
- placing tables in 193
- removing 198
- resizing 171
- rotating 176, 199
- ruling lines around 180
- saving, as paragraphs 26
- selecting 158, 190
- selecting contents of 189
- shading of 180, 182
- straddling 173, 198
- text in, positioning 178
- typing in 158
- unstraddling 173
- cent signs (¢), converting, to HTML 570
- center tab stops 113
- centering
- change bars
- changing
- changing elements to other types 40
- changing found items
- <$chapnum> building block
- chapter numbers in books
- Character Catalog 101
- character count 487
- Character Designer 105
- character formats 101, 139
- adding change bars by using 483
- applying 102
- applying, globally 106
- applying, to characters with certain tags 106
- As Is property settings in 106
- changing with Find/Change command 84
- copying and pasting 104
- creating, for format overrides 558
- defining hypertext active area with 530
- deleting 137
- designing, for templates 411
- duplicating 415
- finding 80
- for text callouts 412
- for text line objects 324
- format overrides and 107
- HTML mappings for 563
- importing and updating 415
- importing and updating, with fmbatch 634
- in autonumbering 128, 129
- in cross-reference format definitions 205, 207
- in equations 267
- in generated lists 443
- in index entries 431, 443
- in index entries (structured) 457
- in variable definitions 231
- removing, from text by restoring paragraph’s default font 103
- updating 134, 136
- updating, in hidden conditional text 308
- character sets
- character spacing 109
- character tags
- characters
- check boxes, dim or dashed 106
- checking documents in, out 495
- child elements
- choice attributes 48
- choice functions in equations
- chotai 110
- Chouon character, in Japanese sorting 449
- circles, drawing 314
- classified information 236
- clearing
- clip art 404, 407
- Clipboard
- clipping graphic frame contents 359
- Close Window hypertext commands 535, 546
- closing
- CMYK color model
- collated copies, printing 28
- colons (:) in index entries 428, 429
- colons (:) in index entries (structured) 457
- color
- color definitions, importing and updating 415
- color libraries 365
- color map, switching 630
- color model 364
- color monitors, colors on 364
- color scheme, accessibility 639
- color separations 371
- colors
- applying 366
- CMYK 364
- Crayon 365
- creating 368
- deleting 369
- DIC 365
- displaying views of 370
- editing definitions of 368
- FOCOLTONE 365
- for table ruling 181
- for table shading 182
- for text 108, 366
- Greys 365
- HLS 364
- hue 364
- in equations 268
- in table cells 366
- inconsistent settings for, in books 475
- invisible 370
- libraries of 365
- lightness 364
- mixing 368
- models for 364
- MUNSELL 365
- naming custom 368
- of change bars 366
- of objects 319, 366
- online 366
- Online color library 558
- PANTONE 366
- printing 371
- printing extra plates for 373
- printing, as black 29
- removing gap between, when printing 371
- RGB 364
- saturation 364
- tints of 366
- TOYO 366
- TRUMATCH 366
- wheels of 364
- column-by-column conversion of tables to paragraphs 163
- columns, equation matrix
- columns, table
- adding 170, 198
- copying and pasting widths of 172
- copying, cutting, and pasting 171
- default paragraph formats for 160
- equal widths of 172
- moving 171
- numbering down 180
- removing 198
- replacing 171
- resizing 171, 192
- ruling lines in 180
- selecting 159, 190
- selecting in 158
- shading in 180, 182
- sorting 174
- straddling cells in 173, 198
- columns, text
- adding 387
- aligning text in adjacent 394
- aligning text with bottom of 395
- balancing text in 394
- changing page size, effect on 380
- cross-referencing, newsletter style 403
- feathering text to bottom of 395
- gap between, changing 382, 387
- gap between, in new documents 20
- newsletter style 398, 399
- number of, changing 382, 387
- number of, in new documents 20
- resizing 382, 387
- space between, changing 382, 387
- space between, in new documents 20
- straddling 169, 350
- synchronizing text baselines in 396
- tables straddling 195
- combined fonts 110
- combining
- commands
- communities 3
- comparing books 474
- comparing documents 484
- compatibility preferences, network and platform 31
- components
- composite documents
- composite pages, printing 371
- compound words, hyphenating 93
- condensing characters 110
- condition indicators 297
- condition tags 296
- applying 303
- classified information, indicating with 236
- copying and pasting 304
- creating 300
- deleting 301
- displaying, in running headers and footers 236
- editing 300
- finding 82
- generating lists and indexes of 420
- importing and updating 415
- importing and updating, with fmbatch 634
- in composite documents 484
- in text insets 307
- keyboard shortcuts for applying 304
- removing, from text 305
- conditional documents
- changing view of 306
- comparing 485
- conventions for 298
- cross-references to 304
- editing 307
- editing contents of 309
- graphics in 298
- inconsistent settings in 475
- introduction 296
- multiple authors, guidelines 299
- planning 298
- tagging strategy 299
- templates for 299, 414
- variable definitions in 299
- versions in, displaying all 306
- versions in, saving 308
- working in 305
- conditional text 296
- anchored frames as 303
- converting, to unconditional text 305
- cross-references as 303
- deleting 307
- elements as 309
- finding 82, 308
- footnotes as 303
- hiding 306
- importing and updating settings for 415
- importing and updating settings for, with fmbatch 634
- in text insets 307
- items allowed in 303
- markers as 303
- punctuation in 299
- showing 306
- spell-checking 308
- table rows as 303
- tables as 303
- text spaces in 299
- variables as 303
- conditional text and XML
- <$condtag> building block 236
- configuring
- connecting
- conref element
- consecutive spaces 73
- constraining
- container elements 33
- content referencing for reuse 649
- content rules 32
- contents of elements
- context labels in scroll lists 220
- context labels in scroll lists (structured) 455, 584
- context-sensitive format rules 140
- continuation columns in newsletters 403
- continuation text in table titles and headings 160, 228
- continuation text in tables 192
- control points 341
- conventions
- Convert to Table command 38, 40
- converting
- between view-only and editable documents 551
- black to white in bitmaps 636
- conditional text to unconditional text 305
- cross-references to text 204
- imported graphic images to monochrome 637
- imported text to tables 162
- tables to paragraphs of text 163
- text insets to editable text 507
- text to tables 162
- to FluidView format 553
- to PDF 575
- variables to text 230
- white to black in bitmaps 636
- copying
- copying and pasting
- anchored frames 360
- character formats 104
- condition tags 304
- cross-references 204
- drawing properties 320
- in equations 252
- objects 329
- objects into graphic frames 358
- paragraph formats 104
- table cell 159
- table column widths 172
- table rows and columns 171
- tables 164
- text 75
- text frames 388
- to import graphics and text 502
- variables 229
- copyright symbols (©), converting, to HTML 570
- corner radius of rounded rectangles 340
- corners, object, adding or removing 341
- correcting errors in structure 55
- count, page
- counters, autonumbering 126, 129
- counting words and characters 487
- crashes, opening documents after 23
- Crayon color library 365
- creating
- anchored frames 346
- book files 462, 476
- character formats for format overrides 558
- colors 368
- condition tags 300
- cross-reference formats 205
- DITA concept 658
- DITA map 656
- DITA reference 659
- DITA task 659
- DITA topic 658
- documents 19, 20
- documents, composite 484
- documents, generated hypertext 547
- documents, hypertex 528
- documents, summary 484
- equations 240
- footers 384
- generated lists 421
- graphic insets 514
- headers 384
- HTML macros 568
- hypertext links 536
- indexes 432
- Japanese and Western combined fonts 110
- links to URLs 558
- macro files 627
- macros 625
- master pages 389
- math elements 257
- page headers and footers 384
- paragraph formats 138
- paragraph formats for format overrides 558
- reference frames 405
- reference pages 405
- rotated page layouts 390
- run-in heads 125
- side heads 122
- straddle paragraphs 122, 124
- tab stops 113
- table formats 185
- table ruling styles 181
- tables of contents 421
- user variables 231
- creation date variables 228, 232
- crimping curved objects 342
- crop marks, printing 28
- cropping
- crossed I-beam pointer 324
- Cross-Platform pop-up menu 31
- cross-reference formats 205
- cross-references
- as hypertext active areas 539
- as hypertext active areas in editable documents 547
- attributes for 218
- autonumbering in 206
- between text frames, newsletter style 403
- changing source of 204
- chapter numbers in, for books 471
- conditional 303
- converting, to text 204
- copying, cutting, and pasting 204
- deleting 204
- displaying sources of 203
- editing 204
- filenames in 206
- finding 76
- finding sources of 203
- formatting text in 205, 207
- generating lists and indexes of 210, 420, 421
- ID attributes for 34, 218
- in index entries 430, 439
- inserting elements for 219
- inserting, to paragraphs 201
- inserting, to specific spots within paragraphs 203
- maintaining 208
- markers for 203
- moving 204
- paragraph tags in 206
- selecting 204
- source information in 217
- sources for 217
- structured documents 217
- suppressing automatic updating of 23, 209
- tables of contents using (structured) 460
- to conditional documents 304
- to endnotes 216
- to footnotes 212, 225
- to text insets 202
- types of, compared 201
- updating 209
- updating, with fmbatch 634
- cross-references in XML
- CSS
- .css filename extension 561
- <$curpagenum> building block 228
- current date, system variables for
- current drawing properties 318, 320
- current macros, clearing 628
- current page number, system variable for
- current paragraph and insertion point 71
- cursor shapes, customizing 639
- curvature
- curved objects
- custom documents, creating 20
- Custom file 415
- customer support 2
- customizing
- cutouts
- cutting and pasting
- D
- daggers († ‡)
- daiji autonumbering 134
- dashed line styles 319, 321
- dashes
- date building blocks 233
- dates, system variables for 228, 232
- day building blocks 233
- DCS graphic files, printing 373
- decimal places in equations 276
- decimal tab stops 113
- default
- default attribute values 46
- default element tags
- default font
- default font properties in paragraphs 108
- <Default Para Font> building block
- <Default Para Font> building block in index entries (structured) 457
- default properties
- <$defaulttitle> building block in HTML macros 569
- degree symbols (°), converting, to HTML 570
- deleting
- a filter 293
- anchored frames 360
- blank pages at ends of documents 382
- character formats 137
- color definitions 369
- condition tags 301
- conditional text 307
- cross-reference formats 208
- cross-references 204
- custom master pages 392
- equations 253
- files from book files 466
- footnotes 212
- found items 84
- graphics 329
- hypertext commands 533
- index entries 436
- macros 628
- marker types 440
- markers 436
- master pages, custom 392
- math element definitions 260
- math elements from equations 253
- objects 329
- pages 76
- pages from ends of documents 382
- pages, disconnected 401
- paragraph formats 137
- reference pages 405
- rows or columns from matrix in equations 256
- tab stops 113
- table formats 185
- table ruling styles 182
- tables 164
- variables 230
- delimiters in equations 248
- derivatives in equations 249
- descendant elements
- deselecting
- Designate Dummy command 279
- Desktop Color Separation files, printing 373
- determinants in equation matrices 276
- diacritical marks in equations
- diagonal lines, drawing 313
- dialog boxes
- DIC Color Guide 365
- dictionaries
- dictionary-style running headers and footers 237
- dieresis, Y, typing, in dialog boxes 678, 680
- dim check boxes 106
- disable
- disabling
- disconnected body pages, adding or deleting 401
- disconnecting text frames 402
- discretionary hyphens 119
- display equations
- display resolution (imported graphic scaling) 511
- display units
- displaying
- body pages 384
- catalog format properties in Character or Paragraph Designer 105
- catalog format properties in Table Designer 166
- Character Catalog 103
- color views 370
- condition indicators 306
- conditional text 306
- cross-references, sources of 203
- Equations palette 240, 283
- filenames for imported graphics 510
- grid lines 311
- master pages 383
- Paragraph Catalog 103
- reference pages 405
- Table Designer 165
- Tools palette 310
- Distribute commands for equations 273
- distributing objects 333
- DITA 647
- DITA concept
- DITA file
- DITA map
- dita map 664
- DITA maps
- DITA options
- DITA reference
- DITA references
- DITA support of FrameMaker
- DITA task
- DITA topic
- DITA topics
- ditamap file
- Division commands for equations 274
- division operators in equations 247
- division signs (/), typing, in dialog boxes 678, 679
- document dictionary 85
- Document format 25
- document properties, importing 415
- document structure
- Document Structuring Convention 376
- document window
- document windows
- documents
- adding elements to contents in 35
- adding elements to empty 35
- adding metadata to 27
- adding, to book files 463
- canceling changes in 25
- closing 32
- closing, hypertext commands for 546
- creating 19, 20
- creating hypertext 528
- deleting, from book files 466
- editable, activating hypertext links in 547
- editing structure of 39
- exporting, as e-mail attachments 515
- importing formats into 415
- importing formats into, with fmbatch 634
- MML 68
- numbering 468
- opening in earlier FrameMaker versions 23
- page count of, in headers/footers 385
- page numbers in 385
- printing 28
- printing, with fmbatch 633
- printing, with fmprint 636
- rearranging, in book files 466
- removing all elements from 45
- renaming, in book files 466, 477
- reverting to last-saved 25
- saving 24
- saving, automatically 27
- testing templates for 413
- typing in 71
- validating 52
- view-only 551
- wrapping elements throughout 38
- documents with 3D objects
- documents with SWF files
- dollar signs ($)
- dot characters (˙), typing, in dialog boxes 679
- dotless i characters (ı), typing, in dialog boxes 679
- dots in equations 246
- dots per inch 511
- dots, leader line 115
- dotted line styles 319, 321
- double-sided documents
- downloading fonts
- downloads 2
- dpi 511
- dragging (drag and drop)
- draw order (object stacking, back to front) 331
- drawing objects 312, 323
- arcs 314
- Bezier (freehand) curves 314
- circles 314
- diagonal lines 313
- drop shadows 331
- ellipses 314
- freehand curves 314
- lines 313
- ovals 314
- polygons 313
- polylines 313
- rectangles 314
- rounded rectangles 314
- several, of same type 315
- splines (freehand curves) 314
- squares 314
- text frames 324
- text frames on body or master pages 388
- text lines 324
- unanchored graphic frames 343
- unanchored graphic frames on reference pages 406
- with snap grid on 311
- drawing properties 318
- drivers, printer 28
- drop cap 354
- drop shadows 331
- DSC 376
- dumps, capturing screen 630
- duplicating
- E
- EDD
- edge gap between objects 333
- editing
- anchored frame contents, when rotated 359
- anchored frames 359
- attribute values 46
- color definitions 368
- condition tags 300
- conditional documents 307, 309
- cross-reference formats 208
- cross-references 204
- custom math element definitions 260
- dictionaries 92
- elements 39
- elements, in book files 478
- equations 252
- equations, rotated 252
- footnotes 211
- graphic insets 514
- HTML macros 568
- hypertext commands 533
- index entries 435
- Japanese and Western combined fonts 110
- marker text 436
- OLE objects 513
- table ruling styles 181
- tables 158, 170
- text 75
- variable definitions 232
- variables 229
- editors, graphic inset 514
- element
- element boundaries
- element bubbles
- Element Catalog
- element definitions
- element tags
- element-based cross-references 217
- elements
- adding 34
- adding to document with contents 35
- adding to documents 34
- assigning attribute values for 46
- assigning master pages 407
- at invalid locations 52, 55
- attributes for 34
- changing to other types 40
- classes of 33
- copying 43
- editing 39
- empty 33
- finding and changing 49
- for rubi text 99
- for tables and table parts 186
- hierarchy 140
- in conditional documents 309
- inserting 36
- merging two or more 41
- missing required 52, 55
- moving 42
- placing insertion point between 96
- removing 45, 51
- replacing with other elements 45
- selecting 97
- splitting in two 41
- undefined in document 52
- unwrapping contents of 42
- using in structured documents 32
- valid contents for 32
- wrapping 37
- <$elempagenum> building block
- <$elemparanum> building block
- <$elemparanum> building blocks
- <$elemparanumonly> building block
- <$elemparanumonly> building blocks
- <$elemtag> building block
- <$elemtext> building block
- <$elemtextonly> building block
- ellipses (...)
- em dashes (-)
- em spaces
- e-mail, exporting documents in 515
- embedding
- embedding tables of contents in structured documents 460
- empty angle brackets in autonumber formats 130
- empty container elements 33
- empty text boxes 106
- emulsion 375
- emulsion setting, plate imaging 375
- en dashes (-)
- en spaces
- enabling
- encodings, text 26
- endnotes
- end-of-flow symbols (§)
- end-of-paragraph symbols (¶)
- endpoints of arcs 342
- <$endrange> index marker building block 430
- <$endrange> index marker building block (structured) 457
- ends of lines, finding 80
- ends of words, finding 80
- Enter Rule command 278
- entering text 71
- environment variables in hypertext commands 535, 546
- EPS files
- equal distance between objects 333
- equal signs in equations 248
- equation objects
- equations
- aligning 264
- aligning, with text baseline 251
- changing matrices in 255
- color in 268, 366
- commands for evaluating 269
- copying, cutting, and pasting in 252
- creating 240
- decimal places in 276
- defining custom math elements for 257
- deleting 253
- display 240, 241, 284
- editing 252
- editing rotated 252
- elements in structured documents 282
- evaluating 269
- expressions in 244
- floating-point numbers in 276
- fonts for 267
- fonts in 285
- formatting of 283
- importing and updating properties of 415
- importing and updating properties of, with fmbatch 634
- in anchored frames 240, 285
- in existing graphic frames 242
- Infinity in 276
- in-line 240, 283
- inserting elements for 283
- inserting math elements in 243
- introduction 239
- line breaks in 263
- lists of 245
- mathematical syntax in 244
- moving 243
- multiline, aligning lines in 265
- NaN in 276
- placing insertion point in 252
- positioning 243, 330
- question mark prompt in 241
- removing delimiters from 253
- replacing part of 253
- rotating 338
- running text around 328
- scope of operation in 244
- selecting in 252
- shrinkwrapping 285
- shrinkwrapping and unwrapping 251
- shrinkwrapping in structured documents 284
- toggling format in 254
- transforming 269
- types of 282
- Equations palette
- error messages
- errors in structure
- EUC encoding, saving files using 26
- Euro currency symbol 72
- Evaluate commands for equations 276
- evaluating
- evaluating equations 269
- even page count in documents 382
- example
- exiting
- Expand commands for equations 281
- expanding characters 110
- exponents in equations
- exporting
- Extensible Metadata Platform (XMP) 27, 465
- external xref
- F
- Factor commands for equations 272
- factorials in equations
- feathering text in columns 395
- features
- figures
- file display options 9
- file formats
- File Info command 27
- file information
- file locking 22, 31
- file translation errors 31
- <$filename> building block
- filename compatibility 31
- filename extensions
- filename system variables 228
- filenames
- files
- fill patterns 318
- fill percentage for table shading 182
- filter
- filter by attribute
- filters
- finding
- anchored frames 76
- and changing 83
- and deleting 84
- attributes and values 49
- beginning of line 80
- beginning of paragraph 80
- beginning of word 80
- canceling search 79
- canceling searches 50
- capitalization and 78
- change bars 484
- character formats 80
- character tags 76
- Clipboard contents 81
- conditional text 82
- cross-references 76, 210
- cross-references, sources of 203
- elements 49
- end of flow 80
- end of line 80
- end of paragraph 80
- end of word 80
- errors in structure 51
- footnotes 76
- forced returns 80
- graphic files imported by reference 510
- graphics 77
- hyphens, automatic 76, 89
- index markers 435
- items on master pages 83
- keyboard shortcuts for 82
- markers or marker text 81
- missing source entries in generated lists 425
- names of math elements 260
- next occurrence of item 50
- nontext items 76
- paragraph tags 76
- publishers 76
- searching generally 76
- source entries in generated files (structured) 455
- special characters 79
- subscribers 76
- symbols 79
- tables 76
- tabs 80
- text 76
- text edits 489
- text insets, sources of 507
- text marked as changed 484
- text subscribers 76
- text with particular character format 81
- throughout a book 77
- unresolved cross-references 222
- variables 76
- whole words 78
- wildcards for 79
- first page
- first-line indent 111
- first-line synchronization limit 396
- fixed line spacing for text 116
- fixed-width spaces, using 72
- Flash content
- flipping graphic objects 336
- floating anchored frames 349
- floating table position 168
- floating-point numbers in equations 275
- florin symbols (ƒ), typing, in dialog boxes 678, 679
- flow symbols (§)
- flow tags
- flows. See text flows
- FluidView format 553
- .fm filename extension 25
- fmbatch utility 630
- case-sensitivity of commands for 632
- closing files 635
- commands list 632
- echoing commands 631
- executing UNIX commands 635
- exiting 635
- generating files 634
- importing and updating formats 634
- opening files 632
- printing files 633
- printing messages to standard error output 631
- saving files 633
- starting 631
- updating cross-references 634
- verifying FrameMaker is running 632
- fmcopy utility 636
- $FMDOCDIR and $FMDOCNAME environment variables in hypertext commands 546
- fminvert utility 636
- fmMacros and fmMacrosLog files 627, 628
- fmprint utility 636
- FOCOLTONE Colour System 365
- folders
- font properties 107
- fonts
- footers, page
- footing rows in multipage tables 160
- footnotes
- See also endnotes
- changing text of 224
- conditional 303
- creating 211
- cross-references to 212, 225
- deleting 212
- editing 211
- finding 76
- full-width 215
- in multicolumn layouts 215
- in structured documents 223
- inserting 211
- inserting elements for 224
- keeping, together with footnote references 212
- numbering styles 214
- properties of 213, 224
- selecting in structured documents 224
- several references to on 225
- several references to one 212
- forced returns
- format overrides
- format rule overrides
- format rules 139
- formats
- formatting
- formatting bar 104
- formatting of generated files (structured) 458
- formatting of text
- formatting using attribute values 34
- fraction signs (/), typing, in dialog boxes 678, 679
- fractions, combining 271
- FrameImage file format, saving imported graphics in 31
- FrameMaker
- FrameMaker 8
- FrameMaker books
- FrameMaker document
- FrameMaker documents
- FrameMaker file
- FrameMath reference pages 259
- frames. See anchored frames
- freehand curves 314
- front, bringing objects to 331
- <$fullfilename> building block
- full-width anchored frames 350
- full-width footnotes 215
- full-width paragraphs 122, 124
- full-width tables 169
- functions in equations 250
- G
- general settings, PDF 576
- generated files in books
- generated hypertext documents 547
- generated lists
- adding or removing paragraph tags 423
- adding text to entries in 447
- adding, to book files 421, 463
- aligning page numbers in 448
- and indexes, compared 418
- autonumbering in 445
- of condition tags 301
- creating 421
- editing 423
- editing entries in (structured) 455, 456
- embedding in documents 426
- entries in, tracing back to source 424
- extra entries in 425
- extra entries in (structured) 459
- finding sources for (structured) 455
- formatting 441
- formatting of (structured) 458
- formatting, problems with 426
- formatting, problems with (structured) 460
- generating 421
- hypertext links in 422, 547
- hypertext links in (structured) 455
- incomplete entries in (structured) 459
- leader dots in 448
- line breaks in 425
- line breaks in (structured) 460
- master, for several books 436
- missing entries in 425
- missing entries in (structured) 459
- of condition tags 420, 421
- of cross-references 210, 420, 421
- of figures 445
- of fonts 420, 421
- of imported graphics 420, 421
- of publishers 420, 421
- of references 420, 421
- of subscribers 420, 421
- of text insets 420
- preparing source documents for 420
- preparing, documents for (structured) 453
- rearranging information in 448
- special text flows in 442
- split entries in 425
- static text in 441
- tabs in 448
- templates for 414, 441
- templates for (structured) 458
- titles for 441
- titles for, disappearing 426
- titles for, disappearing (structured) 460
- troubleshooting 425
- troubleshooting (structured) 459
- updating 423
- updating, with fmbatch 634
- generating
- generating a FrameMaker document 664
- GIF files, in HTML documents 571
- glossaries, running headers and footers for 237
- gradients in equations 249
- graphic frames
- graphic insets
- graphics
- aligning 331
- aligning, with snap grid 311
- as hypertext active areas 531
- as hypertext button matrices 540
- autonumbering figures and 131
- background, on master pages 379
- boilerplate 404, 407
- bringing, to front 331
- capturing screen images 630
- color of 319, 366
- conditional, in anchored frames 303
- connecting, by using gravity 333
- constraining movement of 329, 330
- copying, cutting, and pasting 329
- cropping 343
- defined 310
- deleting 329
- deselecting 318
- distributing 333
- draw order of (object stacking, back to front) 331
- drawing borders around 315
- drawing properties of 318
- editing and arranging 329
- elements for, types of 345
- flipping 336
- grouping and ungrouping 335
- handles 315
- in conditional documents 298
- in HTML documents 571
- in paragraph formats 121
- in table cells 192
- inspecting position of 344
- joining 335
- making touch 334
- masking 343
- measuring 344
- moving 330
- moving, into graphic frames 358
- moving, to back or front 331
- moving, with text 345
- overlapping 331, 371
- overprinting 371
- path of 312
- placing, in graphic frames 358
- placing, in table cells 161
- printing 28
- properties of 318
- reference frames containing 406
- repeating, on pages 379
- reshaping 338
- resizing 338
- rotating 337
- rotating, by flipping 336
- rotating, snap rotate interval for 311
- rounding corners of rectangles 340
- scaling 338
- selection 315
- sending, to back 331
- smoothing and unsmoothing 338
- stacking 331
- standardizing, for templates 411
- symmetrical 336
- tables for 327
- text in 323
- titles for 327, 358
- transparent 319
- trapping 373
- grave characters (`), typing, in dialog boxes 678, 679
- gravity, connecting objects by using 333
- gray box in place of imported images 510
- gray check boxes 106
- Greek letters
- Greys color library 365
- grids 311
- grouping objects 335
- GroupTitles paragraph tag in indexes 451
- guilsingl characters (‹ ›), typing, in dialog boxes 678, 679
- H
- halftone screen settings 375
- handles
- handling
- hanging indent 111
- headers, page 384
- heading rows in multipage tables 160
- Headings reference page, for HTML mappings 565
- heads, text
- height
- heitai 110
- hidden cross-reference markers in conditional text 304
- hiding
- hierarchy of object grouping 335
- highest-level element
- history
- HLS color model 364
- hole, in Structure View
- horizontal (landscape) page orientation in new documents 20
- horizontal distribution of objects 333
- horizontal lines
- horizontal lists of expressions in equations 245
- horizontal movement, constraining objects to 329, 330
- horizontal scaling of text 110
- hours in system variables 232
- HTML documents
- character set in 570
- converting to 560, 572
- creating several, from one document 562
- creating, from book file 572
- export issues 557
- graphics in 571
- hypertext links in 536, 556
- imagemaps in 560
- preparing for conversion to 557
- preserving formatting in 561
- simulating table of contents for 573
- special characters in 570
- stylesheets for 561
- tables in 574
- templates for converting to 412
- titles of 571
- troubleshooting 574
- HTML elements
- .html filename extension 560
- HTML macros 568
- HTML mappings
- autolevel, for headings 562
- automatic 560
- editing, on reference pages 565, 571
- for autonumbering 561, 563, 567
- for character formats 563
- for cross-reference formats 564
- for headings 561, 565
- for lists 563, 567
- for paragraph formats 563
- for special characters 570
- for text heads 561
- importing from another document 574
- tables for 565
- templates containing 558
- HTML reference page, for HTML mappings 570, 571
- hue, color 364
- Hungarian umlaut characters (˝), typing, in dialog boxes 678, 679
- hyperbolic functions in equations 250
- hypertext active areas 529
- hypertext buttons 531
- hypertext commands
- activating, in editable documents 547
- case-sensitivity of 533, 537
- converting, to HTML 536, 556
- converting, to PDF 536
- deleting 533
- editing 533
- environment variables in 535, 546
- filenames in 535
- for closing view-only documents 546
- for controlling generated hypertext documents 550
- for creating alerts 543
- for creating button matrices 540
- for creating pop-up menus 541
- for executing UNIX commands 545
- for exiting 546
- for linking to previous location in stack 540
- for linking to specific pages 538
- for linking to specific topics 537, 538
- for linking to URLs 558
- for matrix cells 540
- for opening files from other applications 544
- for opening new, unnamed document 539
- for quitting 546
- for resizing document window 538
- for retracing steps 540
- for sending messages to another application 544
- for starting another application 544
- for starting AppleScript scripts 545
- inserting 532
- markers for 532
- pathnames in 535
- summary of 534
- syntax for 535
- testing 547
- troubleshooting tips for 548
- hypertext documents
- as part of online systems 551
- converting, to PDF documents 575
- creating 528
- deactivating cross-references in 539
- display commands for 550
- displaying, in separate windows 537, 553
- generating lists or indexes as 547
- making view-only or editable 551
- online systems described 528
- planning 529
- retracing steps in 552
- testing 547
- troubleshooting tips for 548
- hypertext icons 531
- hypertext links
- adding to generated files 548
- converting, to HTML hypertext commands 556
- creating 536
- cross-references as 539
- in generated lists 422, 547
- in generated lists (structured) 455
- in indexes 433, 434, 547
- in summary documents 484, 547
- inserting command elements for 555
- missing, in pop-up menus 548
- to specific pages 538
- using, in editable documents 547
- hypertext markers 532
- hypertext stack
- HypertextLinks flow tag 551
- hyphenated compound words, adding to personal dictionary 93
- hyphenation
- hyphens (-) 119
- I
- I-beam pointer
- icons, hypertext 531
- ID attributes
- ID Reference attributes 48
- IgnoreChars paragraph tag, in indexes 449
- illustrations, software, capturing 630
- Illustrator
- imagemaps, HTML, setting up links for 560
- imaging settings for plates 375
- imperial era and imperial year in system variables 233
- imported graphics
- assigning color to 366
- converting, to monochrome 637
- creating links to 512
- cropping parts of 343
- displaying filenames of 510
- dots-per-inch setting for 511
- generating lists and indexes of 420, 421
- graphic insets 514
- gray box in place of 510
- HTML conversion and 571
- in conditional documents 298
- inserting elements for 518
- into structured documents 518
- inverting black and white 636
- masking parts of 343
- missing 510
- opening documents without updating 23
- pathnames of 508
- positioning 509
- replacing 508
- resizing 511
- running text around 328
- saving, in FrameImage format 31
- scaling 511
- SVG files 509
- updating 502
- importing 69
- importing and updating
- importing formats
- importing graphics
- See also imported graphics
- Adobe Illustrator files 504
- and resolution 511
- as graphic insets 514
- by copying 501
- by dragging 511
- by embedding 512
- by linking 512
- by reference 501
- by reference, compared to linking 512
- inserting elements when 518
- into graphic frames 358
- into structed documents 518
- into structured table cells 192
- methods 501
- platform-specific methods 519
- SVG files 509
- with Clipboard 502
- with Import command 508
- importing movies 510, 512
- importing PDF files 506
- importing sound 512
- importing text
- by copying 501
- by dragging 511
- by embedding 512
- by linking 512
- by reference 501
- by reference, compared to linking 512
- file types allowed 20
- into structured documents 516
- into tables 162, 503
- methods 501
- retaining structure and format when 517
- sources for imported text 516
- with Clipboard 502
- with Import command 502
- in scroll lists 220
- in scroll lists (structured) 455, 584
- inches, abbreviation for
- indenting
- index entries
- “See” and “See also” in 430, 439
- See also indexes
- adding text to 447
- autonumbers in 445
- character formats in 431, 443
- character formats in (structured) 457
- cross-reference form of 430, 439
- deleting 436
- editing 435
- finding markers for 435
- formatting 431, 441
- kanji, sort order of 432
- leader dots in 448
- letter-by-letter sort order of 449
- line breaks in 439
- page numbers in, aligning 448
- page numbers in, removing 430, 439
- page numbers in, separators for 446
- page ranges in 430
- page ranges in, problems with 437
- question marks, double (??), in 437
- several, in one marker 429
- sort order of 431, 449
- sort order of, problems with 438
- subentries in 429
- synonyms in 430
- syntax and punctuation of (structured) 457
- tabs in 448
- tracing, back to source 435
- word-by-word sort order of 449
- index entries (structured) 457
- indexes
- adding, to book files 432, 463
- aligning page numbers in 448
- alphabet groupings in 451
- and generated lists, compared 418
- author 420
- creating 432
- formatting 441
- formatting of (structured) 458
- formatting, problems with 439
- generating 432
- group titles in 451
- headers and footers for 237
- hypertext links in 433, 434, 547
- inserting marker elements for 457
- master, for several books 436
- of condition tags 420, 432
- of cross-references 420, 432
- of fonts 420, 432
- of imported graphics 420, 432
- of publishers 420, 432
- of references 420, 432
- of subscribers 420, 432
- of text insets 420, 432
- preparing documents for (structured) 456
- special text flows in 441
- static text in 441
- subject 420
- templates for 414, 441
- templates for (structured) 458
- thumbtabs in 549
- titles for 441
- titles for, disappearing 439
- troubleshooting 437
- updating 434
- updating, from template 441
- updating, with fmbatch 634
- indexterms
- Infinity in equations 276
- infix math element type 257
- inherited information, removing from books 481
- initial structure for tables 187
- in-line equations 240
- in-line graphics 345, 347
- inserting
- an xref in a DITA file 661
- conref element 660
- cross-references to paragraphs 201
- cross-references to specific spots within paragraphs 203
- footnotes 211
- graphics in table cells 161
- hypertext commands 532
- markers for hypertext commands 532
- markers for lists of markers 421
- markers for spot cross- references 203
- PDF files 506
- SWF files into FrameMaker documents 522
- tables 158
- tables in table cells 161
- topicref element 660
- variables 228, 385
- inserting anchored frame elements in (structured) 362
- inserting elements 36
- insertion point
- insertion point in text 71
- inset editors for graphic insets 514
- installation 1
- integer attributes 48
- integrals in equations 247, 249
- integrated
- integrating 3D objects
- internal xref
- intersecting lines
- intersections in equations 247
- introduction
- invalid attributes
- invalid contents, elements with
- invalid elements
- invalid locations, elements at
- inverse (reverse) text 325
- inverting bitmaps 636
- invisible colors 370
- ISO Latin-1 encoding, saving files using 26
- Isolate Term command 281
- items in scroll lists (structured) 454
- J
- K
- <$kana> building block in special text flow for indexes 443
- kanji
- keeping together
- kerning
- key combinations
- keyboard shortcuts
- See also online Help; Quick Reference Card
- for applying condition tags 304
- for changing element types 40
- for changing to FluidView format 554
- for Find/Change command 82
- for inserting elements 37
- for inserting variables 229
- for removing condition tags 306
- for special characters 72
- for toggling side heads 554
- for wrapping elements 38
- macros and 625, 626
- knockouts in color separations 371
- kumihan rules
- kumihan rules, importing
- L
- landscape (horizontal) page orientation in new documents 20
- languages
- large math element type 257
- last page
- <$lastpagenum> building block 228
- last-saved version, reverting to 25
- .lck filename extension 22
- leader dots, tab 115
- learning words when spell- checking 87
- legends 327, 358
- letter groups in indexes 451
- letter spacing in justified text 117
- letter-by-letter index sort order 449
- libraries, color 365
- library of clip art 404, 407
- ligatures 109
- lightness, color 364
- limits in equations 249
- line breaks, equation 263
- line breaks, in generated lists (structured) 460
- line breaks, text 119
- line cap styles 321
- line screens, halftone 375
- line spacing 115
- lines of text
- lines, graphic
- links
- Linotronic typesetters 376
- lists
- lists of expressions in equations 245
- lock file (.lck) 22
- log file for macros 628
- logarithms in equations 250
- logic symbols in equations 247
- logical structure, defined 581
- Long Division command 274
- M
- Macintosh encoding, saving files in 26
- macros
- main dictionary 85
- managed documents
- managed files, uploading changes to 497
- manual equation alignment point symbols (|) 8, 266
- manual feed, when printing 29
- manual hyphenation 119
- margins
- marker building blocks 236
- marker lists
- marker text
- markers
- as conditional text 303, 304
- defining types of 440
- deleting 436
- entering text in, without typing (structured) 458
- finding 81
- highlighting, in view-only documents 539
- inserting, for hypertext commands 532
- inserting, for lists of markers 421
- inserting, for spot cross- references 203
- selecting 436
- symbol for 8
- symbol for (structured) 454, 458
- types of (structured) 454, 457
- marks, crop and registration 28
- master indexes for several books 436
- master pages
- adding background text to 384
- adding template text frames on 388
- assigning, to body pages 388, 392
- assigning, to elements 407
- assigning, to paragraph tags 392
- background objects 379
- creating 389
- creating custom 389
- creating rotated 390
- deleting custom 392
- displaying 383
- effect on body pages 379
- hypertext active areas on 531
- importing and updating 415
- importing and updating, with fmbatch 634
- introduction 378
- multiflow documents and 397
- none assigned to body page 392
- overriding layout of, on body pages 387
- planning 410
- renaming 391
- reordering 390
- system variables on 228, 385
- updating body pages with changes to 388
- updating, with body page changes 388
- master table of contents for several books 436
- math definitions
- math element definitions
- math elements
- adding operands to 254
- alphanumeric characters 244, 245
- braces ({ }) 248
- brackets ([ ]) 248
- calculus symbols 247, 249
- character formats for 267
- choice functions 247
- copying, cutting, and pasting 252
- custom, creating 257
- custom, inserting 251
- deleting, from equations 253
- delimiters 248
- derivatives 249
- diacritical marks 246
- differentials 249
- dots 246
- equal signs 248
- exponents 247
- finding names of 260
- functions 250
- gradients 249
- Greek letters 246
- inserting 243
- integrals 247, 249
- intersections 247
- limits 249
- logic symbols 247
- matrices 250
- micropositioning 260
- operators 247
- parentheses 248
- positioning 260
- primes 246
- products 247
- radicals 247
- relations 248
- replacing 253
- roots 247
- spacing around 262, 268
- straight quotation marks in strings 245
- strings 245
- subscripts 247
- summations 247
- sums 254
- superscripts 247
- toggling formats for 254
- types of 257
- unions 247
- math equations. See equations
- math fonts, installing 268
- Mathematical Pi font in equations 268
- matrices in equations 250
- matrices of buttons, creating hypertext active areas in 540
- Matrix commands for equations 270
- measurement units
- measuring objects and distances 344
- menus
- merging elements into one 41
- Message Client hypertext command 535, 544
- message URL 539
- messages, hypertext alert 543
- metadata
- micropositioning math elements 260
- Microsoft Windows encoding, saving files in 26
- Microsoft Word, opening files from 20
- MIF
- MIF 7.0 file format
- MIF file
- MIF file format
- MIF files 23
- minutes in system variables 232
- mirror images
- missing attribute values 52
- missing entries in generated lists 425
- missing entries in generated lists (structured) 459
- missing fonts 21, 31
- missing imported graphics 510
- missing index entries 437
- missing links in hypertext pop-up menus 548
- missing required elements
- missing text insets 507
- mixing colors 368
- MML file format 68
- MML files, opening as text 68
- models, color 364
- modification date, system variables for 228, 232
- modifying
- monitors
- monochrome, converting images to 637
- months in system variables 233
- movement, constraining 329, 330
- movies
- moving
- anchored frames 360
- anchored frames into text column 353
- between table cells 158
- cross-references 204
- elements 42
- elements one level 43
- equations 243
- graphics 330
- header/footer text frames 385
- in documents, view-only (navigating) 552
- insertion point in equations 252
- insertion point in text 71
- master pages 390
- objects 330
- objects into graphic frames 358
- objects to back or front 331
- objects with text 345
- structured tables 194
- table cells and contents 191
- table rows or columns 171
- tables 164
- text 75
- variables 229
- multibyte characters 487
- multicolumn layouts
- multiflow documents
- multilingual documents, parallel text flows for 397
- multimedia files
- multipage tables
- multiplication operators in equations 247
- Multiply commands for equations 272
- MUNSELL System colors 365
- N
- named destinations, PDF 578
- naming
- NaN (Not a Number) in equations 276
- navigating
- negative exponents, removing, from equations 274
- negative images, printing 375
- nesting
- networks, compatibility across 31
- new features 3
- newsletters
- NewTemplate file 415
- next page
- next paragraph
- <$nextsubdoc> building block in HTML macros 569
- NoName element tag
- nonbreaking hyphens
- nonbreaking hyphens, typing 119
- nonbreaking spaces
- nonprinting items
- nontext items, finding 76
- <$nopage> index marker building block 430
- <$nopage> index marker building block (structured) 457
- nudging elements one level 43
- Number Crunch command 275
- numbering
- numbers
- numeric spaces, typing 73
- numeric underlining 108
- <$numerics> building block in special text flow for indexes 443
- O
- object (gravity), attraction 333
- object elements
- object movement, constraining 330
- object path 312
- Object Selection tool 316
- object stacking, back to front (draw order) 331
- <$ObjectId> hypertext building block 550
- objects
- <$ObjectType> hypertext building block 550
- odd page count in documents 382
- Offset from Left option 387
- Offset from Top option 387
- offsets
- ogonek characters (˛), typing, in dialog boxes 679
- OLE objects
- Online color library 366, 558
- Open Document hypertext commands 534, 537
- Open Prepress Interface 376
- opening
- opening and saving
- opening documents 20
- after crashes or power failures 23
- displaying file translation errors when 31
- faster 23
- file formats recognized when 20
- from book window 465
- from other applications, hypertext commands for 544
- in book files 479
- in use 22
- lock files and 22
- MIF and MML files 20, 68
- new unnamed, hypertext command for 539
- SGML, XML, MIF, and MML files as text 68
- special cases when 21
- substituting fonts when 21, 31
- text files 22
- updating references when 23
- view-only, in new window 553
- with fmbatch 632
- with unknown file type 21
- operands, adding, in equations 254
- operators
- OPI 376
- optimizing documents for PDF file size 579
- options
- order of index entries 431, 449
- Order Sum commands for equations 271
- orientation, page
- orphan lines in paragraphs 120
- orphan rows in tables 177
- Other Rewrites commands for equations 279
- outlines, autonumbering 131
- ovals, drawing 314
- overflows, text frame 325, 400
- overlapping objects 331
- overlapping text frames, causes of 392
- overprinting objects 371, 372
- overrides, format 107
- overrides, layout
- overrides. See format overrides; format rule overrides
- overriding
- oyamoji and rubi text 118
- P
- page breaks
- page count
- page layout
- basic, in templates 410
- changing 380
- column layout, changing 382
- column layout, in new documents 20
- custom 387
- custom master pages and 389
- double-sided 381
- headers and footers for 384
- HTML conversion and 556
- importing and updating 415
- importing and updating, with fmbatch 634
- introduction 377
- overriding 387
- page size 380
- portrait or landscape 20
- rotated 390
- single-sided 381
- symmetrical and asymmetrical 382
- thumbnails of 29
- page margins
- page numbers
- page ranges in index entries
- page side, first
- page size
- <$pagenum> building block
- <$pagenumonly> hypertext building block 550
- pages
- adding headers and footers to 384
- adding, automatically 71
- adding, disconnected 401
- autoconnect and 400
- blank, adding or deleting at ends of documents 382
- blank, preventing from printing 29, 375
- breaks between 120
- changing pagination 381
- counting, in books 471
- counting, in documents 385
- custom layout for 387
- deleting 76
- deleting, disconnected 401
- deleting, from ends of documents 382
- double-sided, printing 28
- orientation of, changing 380
- orientation of, in new documents 20
- positioning tables on 195
- preventing creation of 400
- ranges of, in index entries 430, 437
- rotating 390
- thumbnails, printing 29
- pagination
- pair kerning 109
- PANTONE libraries 366
- paper size 30
- Paragraph Catalog 101
- paragraph cross-references 201
- paragraph default font, applying to text 103
- paragraph default properties, applying to text 103
- Paragraph Designer 105
- paragraph formats 101, 139
- applied to structured table 187
- applying 102
- applying, globally 106
- applying, to paragraphs with certain tags 106
- copying and pasting 104
- creating 138
- creating, for format overrides 558
- deleting 137
- designing, for templates 411
- duplicating 415
- for anchored frames 412
- for footnotes 213
- for table text 160
- for text callouts 412
- graphics used in 121
- HTML mappings for 563
- importing and updating 415
- importing and updating, with fmbatch 634
- in generated lists 443
- in indexes 443
- properties in 107
- reference frames used in 404
- specifying, for next paragraph 121
- table cell margins and 178
- updating 134, 136
- updating, in hidden conditional text 308
- vertical alignment in table cells and 179
- paragraph symbols (¶)
- paragraph tags
- paragraphs
- aligning 112
- autonumbering 125
- boxing 121
- bulleted lists and 128
- centering 112
- change bars and 482
- converting into table text 162, 503
- current 71
- finding beginning/end of 80
- full-width 122, 124
- graphic lines above and below 121
- in running headers and footers 235
- indenting 111
- indenting, in table cells 178
- justifying 111
- justifying, automatic letter spacing and 117
- keeping lines together in 120
- keeping, together on page 120
- language for spell-checking and hyphenation 89
- line spacing within 115
- lines above and below 121
- lists, autonumbered 125
- marking all, for rechecking 88
- next, paragraph format for 121
- rules above and below 121
- run-in heads 122, 125
- selecting 75
- side heads 122, 554
- space between, when feathering 395
- start position of 120
- straddle 122, 124
- tab stops in 113
- word spacing in 116
- parallel text flows, setting up 397
- <$paranum> building blocks
- <$paratag> building block
- <$paratext> building block
- <$parentdoc> building block in HTML macros 569
- parentheses () in equations 248
- pasting. See copying; moving
- path, object 312
- pathnames, file location
- PDF documents
- converting to 575
- hypertext links in 536
- importing pages into document 506
- optimizing for file size 579
- preparing anchoraged frames for 361
- reducing file size 579
- saving 575
- setting up articles for 577
- setting up bookmarks for 577
- setting up bookmarks for (structured) 583
- specifying settings without saving as PDF 580
- PDF format 25
- PDF job options 584
- pen patterns 318
- per thousand signs (‰), typing, in dialog boxes 678, 679
- personal dictionary 85
- PICT format
- placing insertion point
- platforms, compatibility across 31
- platforms, locking files across 22, 31
- PM or AM in system variables 233
- PNG files, in HTML documents 571
- pointers
- points
- polygons
- polylines
- polynomials, arranging 271
- pop-up menus, hypertext 535, 541
- portrait (vertical) page orientation in new documents 20
- positioning
- postfix math element type 258
- PostScript files
- power failures, opening documents after 23
- powers in equations, evaluating 280
- preferences
- prefix math element type 258
- preventing
- preview
- preview mode 490
- previous location in hypertext stack 540
- previous page
- <$prevsubdoc> building block in HTML macros 569
- primes in equations 246
- Print to File 468
- printer drivers, Windows 28
- printing
- books 467
- changing settings for 28
- colors 371
- colors as black 29
- composite color pages 371
- cross-references updated when 208
- customizing 28
- dashed lines 320
- DCS graphic files 373
- documents 28
- documents with 3D objects 526
- documents with SWF files 524
- FluidView documents 554
- fmbatch messages 631
- fmprint and 636
- from book window 467
- halftones 375
- limitations on Windows platform 365
- negative or mirror images 375
- pages, in books 467
- PostScript files 30
- RGB conversion on Windows platform 365
- rotated PICT images, problems with 337
- skipping blank pages when 29, 375
- to files 30
- to typesetters 376
- with fmbatch 633
- processing filters
- processing XML
- products in equations 247
- programs, application, hypertext commands to start 544
- projecting cap for lines 321
- proportional spaces 72
- ps_prolog file 29, 375
- publishers
- publishing
- pull-quote, creating 402
- punctuation
- Q
- R
- radicals in equations 247
- radius of rounded rectangle corners 340
- ranges, page, in index entries
- rasterfiles, capturing 630
- read-only attributes 46, 222
- real attributes 48
- rearranging master pages 390
- recording macros 625
- recover files 23
- rectangles
- redrawing the screen 230, 330
- reducing
- reference frames 406
- reference pages 404
- boilerplate graphics on 404, 407
- importing and updating 415
- importing and updating, in books 472
- importing and updating, with fmbatch 634
- math element definitions on 259
- special text flows on (structured) 459
- special text flows on, for generated hypertext documents 549
- special text flows on, for generated lists and indexes 441
- special text flows on, for HTML conversion 565, 571
- unanchored graphic frames on 406
- registering
- registration marks, printing 28
- regular polygons 315
- rehyphenating documents 90
- rejecting
- related words, Thesaurus lookup of 94
- relations in equations 248
- relative pathnames for imported files 508
- relative tab stops 72
- <$relfilename> hypertext building block 550
- remembering missing font names 21, 31
- Remove Division commands for equations 274
- Remove Negative Powers, commands for equations 275
- removing
- See also deleting
- all elements in flow 45
- attribute values 47
- braces ({ }) from equations 253
- brackets ([ ]) from equations 253
- brackets ([ ]) from matrices in equations 256
- change bars 484
- character formats from text by restoring paragraph’s default font 103
- condition tags from text 305
- contents but not elements 45
- corners from objects 341
- custom table ruling 181
- custom table shading 183
- delimiters from equations 253
- documents from book files 466
- elements and contents 45
- elements but not contents 45
- entries from generated lists (structured) 456
- format overrides 134, 136, 183
- format rule overrides 141
- found elements 51
- gap between printed colors 371
- handles from objects 341
- inherited information from books 481
- layout overrides 388
- layout overrides when importing formats 415
- negative exponents from equations 274
- page numbers from index entries 430, 439
- parentheses from equations 253
- points from freehand curves 341
- sides from polygons and polylines 341
- structured tables 194
- table rows and columns 198
- table titles 160, 191
- text frames from text flows 402
- undefined attributes 49, 56
- vertices from polygons and polylines 341
- renaming
- reordering master pages 390
- repeating graphics 379
- repeating macros 629
- repeating tab stops 114
- replacing
- reproduction quality printing (printing resolution) 28
- requirements 1
- resetting
- reshaping objects 338
- resizing
- anchored frames 359
- anchored frames, by shrinkwrapping and unwrapping 251, 348
- bitmaps 511
- document window automatically, hypertext command for 538
- header/footer text frames 385
- imported graphics 511
- objects 338
- table cells and columns 171
- table rows 173, 198
- text frames 338, 382, 387
- text line objects 338
- text lines vs. text frames 323, 339
- resolution
- resolving unresolved cross- references 209
- resources
- restoring last-saved version 25
- retracing jumps in hypertext documents 552
- Return key, pressing to insert elements 37
- reverse text 325
- Revert to Saved Book 466
- reverting to last-saved version 25
- revision management
- revisions, indicating with change bars 482
- RGB color model 364
- Roman and Japanese fonts combined 110
- Roman numerals
- roots in equations 247
- Rotate Page command 391
- rotating
- round cap for lines 321
- rounded rectangles
- row-by-row conversion of tables to paragraphs 163
- rows, equation matrix
- rows, table
- adding 170, 197
- conditional 303
- conditional, finding 82
- converting text to 162
- copying, cutting, and pasting 171
- height of 173
- keeping, together on page 177
- minimum number of, on page 177
- moving 171
- numbering across 180
- removing 198
- replacing 171
- resizing 173, 198
- ruling lines in 180
- selecting 159, 190
- shading in 180, 182
- sorting 174
- start position of 177
- straddling cells in 173
- RTF, saving documents in 25
- rubi text
- ruler markings
- rules
- Rules commands for equations 278
- ruling lines above and below paragraphs 121
- ruling lines in tables 180
- Ruling properties 181
- run-in heads 122, 125
- Running H/F system variables 228
- running headers and footers 234, 386
- running text around objects
- S
- saturation, color 364
- saving
- all files in book 467
- automatically 27
- book files 466, 476
- conditional document versions 308
- document with filters as a .fm file 292
- document with filters as a .mif file 292
- document with text edits as XML 489
- documents 24
- documents with SWF files as PDF 523
- documents with SWF files as XML 524
- documents with text edits 491
- files with fmbatch 633
- FrameMaker document with filters by attribute as an XML file 292
- FrameMaker documents as MIF files 515
- FrameMaker documents containing 3D objects 525
- macros in file 627
- PDF files 575
- structured documents as PDF 583
- table cells as paragraphs 26
- saving Flash content
- scaling
- schema with XML 622
- scope of operation in equations 244
- screen angles, halftone 375
- screen images, capturing 630
- screen readers, testing files in 640
- screen redraw 330
- screen resolution (imported graphic scaling) 511
- script math element type 258
- scrolling
- searching
- seconds in system variables 232
- See Also (HTML macro for cross- references) 564
- “See” and “See also” index entries 430, 439
- selecting
- anchored frames 358
- anchored frames (structured) 363
- contents of elements 98
- cross-references 204
- elements 98
- equations 252
- footnotes in structured documents 224
- hypertext markers 533
- in equations 252
- in Structure View 98
- in tables 158
- in view-only documents 553
- markers 436
- Object Selection tool and 316
- objects 315
- paragraphs 75
- Smart Selection tool and 316
- structured table parts 190
- structured tables 194
- tables 164
- text 75, 97
- text, in structured tables 189
- words 75
- selection borders 317
- selection handles
- selection tools 315
- semicolons (;) in index entries 429
- semicolons (;) in index entries (structured) 457
- sending objects to back 331
- separator frames, footnote 214
- Separators paragraph tag, in indexes 446
- Series label (autonumber counters) 125
- setting
- setting up on-screen keyboard
- SGML
- SGML files
- SGML, preparing for export to
- shading
- shadows, drop 331
- sheet numbering in tables 160, 228
- shell environment variables in hypertext commands 535, 546
- Shift-JIS encoding, saving files using 26
- shortcuts. See keyboard shortcuts
- Show All Digits command 276
- Show Element Context command 140
- Show/Hide settings, conditional text, inconsistent 475
- shrinkwrapping
- side heads 122, 123, 215
- sides of objects, adding or removing 341
- sign function in equations 250
- Simplify commands for equations 279
- <$singlepage> index marker building block 428
- <$singlepage> index marker building block (structured) 457
- single-sided documents
- site dictionary 85, 92
- size
- Smart Quotes 73
- Smart Selection tool 316
- Smart Spaces 73
- smoothing and unsmoothing objects 338
- snap rotate interval 311
- software
- software illustrations, capturing 630
- Solaris platform
- sort order, index 431, 449
- sorting tables 174
- SortOrder paragraph tag, in indexes 449
- sound files, embedding 512
- spaces, text
- spacing
- above and below tables 167
- above side heads 124
- around math elements 262, 268
- between characters 109, 116
- between columns, changing 382, 387
- between columns, in new documents 20
- between letters, automatic 116
- between lines of text 115
- between objects, measuring 344
- between objects, setting 333
- between side heads and body text 123
- between tables and titles 160
- between text columns 20, 382, 387
- between words 116
- feathering text and 395
- in Japanese fonts 109, 117
- pair kerning 109
- when synchronizing text baselines 396
- special characters
- special text flows on reference pages
- special text flows on reference pages (structured) 459
- Specify Named Destination hypertext command 534, 537
- spell-checking
- canceling 87
- capitalization of text when 87
- changing options for 88
- clearing automatic corrections when 88
- conditional text 308
- correcting words automatically when 87
- current page 86
- documents with different languages 89
- hyphenated compound words 93
- hyphenation and 89
- languages for 89
- learning words when 87
- marking all paragraphs for rechecking 88
- specific text 86
- subscript and superscript text 86
- text insets 87
- text to ignore when 89
- throughout book 85
- typing errors 85
- vertically kerned text 86
- splitting
- spot colors 374
- spot cross-references 202, 203
- spread
- spreads, double-sided 381
- squares, drawing 314
- squeezing punctuation 118
- stacking objects 331
- start angles
- start of paragraph, finding 80
- start of word, finding 80
- start positions
- starting
- <$startrange> index marker building block 430
- <$startrange> index marker building block (structured) 457
- status bar
- steps, retracing, in view-only documents 552
- straddles
- streams (autonumber counters) 129
- stretching characters 110
- string attributes 48
- strings in equations 245
- structure errors. See errors in structure
- Structure View
- structured book
- structured books
- structured documents
- adding index marker elements in 456
- anchored frames in 361
- creating equations using elements 283
- cross-reference formats in 218
- cross-references in 217
- editing elements in conditional 309
- elements in 32
- embedding tables of contents in 460
- endnotes in 225
- entering text in 99
- equation elements in 282
- filling anchored frames in 363
- finding list entry sources 455
- footnotes in 223
- formating lists, indexes 458
- formatting text in 139
- generating tables of contents in 454
- graphic elements in 345
- ID and ID Reference attributes in 218
- importing graphics into 518
- inserting element-based cross- references in 219
- inserting hypertext commands into 555
- inserting multiple references to footnotes 225
- list entries, editing and deleting 456
- marker lists in 453
- providing your ID values in 222
- removing format rule overrides in 140
- resolving cross-references in 222
- rotating cells and tables in 199
- saving as Adobe PDF 583
- selecting in window 97
- tables of contents in 453
- troubleshooting lists in 459
- valid variables in 238
- variables in 237
- working with ID values in 221
- working with tables in 186
- working with text in 95
- structured tables
- See also tables
- adding ‘continuation’ text to 192
- adding or removing titles 191
- adding, removing rows and columns in 197
- adjusting rows and columns in 197
- applying different formats to 194
- copying or moving 194
- copying, moving, removing 194
- elements 186
- elements for 186
- filling in with text, graphics 189
- in tables 193
- inserting elements for 187
- invalid elements 188
- nesting tables in 193
- placing graphics in cells 192
- positioning on pages 195
- removing 194
- rotating 200
- running text around 196
- selecting 194
- straddling and unstraddling cells in 198
- straddling columns 195
- subentries in index entries 429
- subject indexes 420
- submenus, hypertext pop-up 542
- subscribers
- subscript text
- substituting fonts when opening documents 21, 31
- substitution in equations
- subtraction operators in equations 247
- summary documents
- summations in equations 247
- superscript text
- support 2
- suppress hyphenation symbols 8
- suppressing
- SVG files, importing 509
- SWF files
- symbols
- <$symbols> building block in special text flow for indexes 443
- symmetrical objects 336
- symmetrical page layouts 382
- synchronizing text baselines along grid 396
- synonyms
- syntax
- system crash, file recovery after 23
- system variables
- systems, color 364
- T
- tab leader dots 115
- tab stops 113
- tabbed text
- table anchor symbols 8, 168
- Table Catalog
- Table Continuation system variable 160, 228
- Table Designer
- Table Designer, adding table titles using 191
- table formats
- adding, to Table Catalog 185
- applying 166, 184, 194
- choosing, for new tables 158
- creating 185
- defined 157
- deleting 185
- displaying properties of, in Table Designer 166
- duplicating 415
- HTML conversion and 574
- importing and updating 415
- importing and updating, with fmbatch 634
- overrides of 164
- overrides of, removing 183
- properties of 157, 167, 176
- removing overrides, when importing formats 415
- renaming 185
- structure 187
- updating 183
- table of contents
- table of contents.See tables of contents/
- table parts
- table ruling styles 181
- Table Sheet system variable 160, 228
- table tags, finding 76
- table titles
- tables
- See also structured tables
- adding rows and columns 170
- aligning, within indents 167
- anchor symbol for 188
- anchor symbols for 8
- autonumbering in 180
- boxing paragraphs within 121
- cell margins in 178
- centering text vertically in cells of 179
- color of ruling lines in 181
- color of text in 366
- combining 171
- conditional 303
- continuation text in 192
- continuation text in, for titles and headings 160, 228
- converting text to 162
- converting, to HTML 574
- converting, to text 163
- copying rows and columns 171
- copying, cutting, and pasting 164
- customizing 157
- default paragraph formats for 160
- default structure for, when wrapping 39
- deleting 164
- displaying ruling and shading settings of 183
- editing 158
- elements for 186
- finding 76
- floating 168
- footnotes in 211
- for figures or graphics 327
- formatting multiple tables 184
- formatting of 187
- full-width 169
- gap between titles and 160
- graphics in 192
- HTML mapping 565
- importing text files into 162, 503
- in multicolumn layouts 169
- in tables 161
- indenting 167
- inserting new empty 158
- inserting, in table cells 161
- introduction 157
- moving 164
- moving rows and columns 171
- multipage, setting up 160
- orphan rows in 177
- page breaks in 176
- parts of 186
- placing graphics in cells of 161
- positioning 167
- properties affecting 157
- relationship to other elements 188
- resizing columns 171
- rotating 175
- row height 173
- ruling lines in 180
- running text around 170
- searching for 76
- selecting 164, 190
- selecting in 158
- shading in 180, 182
- sheet numbering in 160, 228
- sorting 174
- space above and below 167
- splitting 171
- start position for 168
- straddling cells 173
- straddling text columns 169
- structured documents and 186
- tabs in 158
- titles of 160, 191
- titles of, autonumbering, based on section numbers 131
- typing text in 158
- vertical alignment of text in 179
- tables of contents
- tabs
- Tag area
- tagged PDF 578, 581
- tags, metadata 27, 465
- tall pages (portrait) in new documents 20
- template components
- template text frames (tagged) 379
- templates
- and page layout 377
- autonumbering in 411
- creating 410
- described 19
- designing 409
- folders for 413
- fonts in 411
- for blank paper 414
- for book files 410
- for conditional documents 299, 414
- for generated files (structured) 458
- for generated lists 414, 441
- for HTML documents 412
- for indexes 414, 441
- for mapping to HTML elements 558
- for text files 414
- importing formats from 415
- introduction 409
- organizing 413
- standard 19
- testing 413
- Templates folder 19, 413
- testing high-contrast viewing 640
- testing tagged PDF documents 640
- text
- added automatically with elements 35
- adding change bars to 482
- aligning 112
- aligning, at tab stops 113
- aligning, in multicolumn documents 394
- anchored frames obscuring 348
- applying character and paragraph formats to 102
- autonumbering with 125
- background 379
- balancing, across columns 394
- callouts 323
- Character Catalog formats for 101
- continuation, in table titles and headings 160, 228
- continuation, in tables 192
- converting cross-references to 204
- converting variables to 230
- converting, to table 162
- copying, cutting, and pasting 75
- deselecting 75
- drawing tools for 323
- duplicating, by dragging 75
- editing 75
- feathering 395
- flowing, around graphics 328, 354
- flowing, around tables 170
- formatting, in cross- references 205, 207
- formatting, in variables 231
- formatting, with formatting bar 104
- hypertext active areas in 530
- importing into structured documents 516
- in anchored frames 357
- in footnotes 224
- in graphics 323
- in structured tables 189
- in table cells, positioning 178
- inserting strings 245
- insertion point in 95
- justifying 111
- letter spacing within 109, 116
- moving 75
- numeric underlining of 108
- orphan lines of 120
- pair kerning 109
- Paragraph Catalog formats for 102
- pasting 75
- pasting objects into 329
- quick-copying 75
- reverse (white on dark background) 325
- rubi, entering 76
- rubi, properties of 118
- running around tables 196
- running, around graphics 328, 354
- running, around tables 170
- selecting 75, 97
- static, in generated lists and indexes 441
- static, in HTML documents 571
- synchronizing baselines of 396
- typing, in dialog boxes 677
- typing, in documents 71
- typing, in rotated text frames 391
- typing, in table cells 158
- vertical alignment of, in table cells 179
- widow lines 120
- wildcard searches for 79
- text boxes, empty 106
- text edits
- .text filename extension 25
- text files
- text flows 380
- about special, in indexes and lists 442
- balancing text in, across columns 394
- bypassing text frames in 402
- combining 401
- controlling 400
- editing for lists and indexes 443
- feathering 395
- in multiflow documents 397
- multiple nonparallel 398, 399
- on body pages 398
- overflowing 325, 400
- parallel 397
- removing all elements from 45
- removing text frames from 402
- side-head areas and 123
- special, on reference pages (structured) 459
- splitting text frames into 402
- synchronizing baselines in 396
- tracking 403
- text frames
- adding 324
- adding, on body and master pages 388
- aligning text with bottom of 395
- and anchored frame positions 347
- and other frame types, compared 322
- and text line objects, compared 323
- assigning color to 319, 366
- balancing text across columns in 394
- bypassing, in flow 402
- changing page size, effect on 380
- color of 366
- connecting 388, 401
- cross-referencing 403
- disconnecting 402
- drawing properties of 318
- feathering text in 395
- gutters for, changing 382
- gutters for, in new documents 20
- header and footer 384
- in table cells 193, 197, 200
- margins for, changing 382, 387
- margins for, in new documents 20
- number of columns in, changing 382
- number of columns in, in new documents 20
- overflowing 325, 400
- overlapping, causes of 392
- removing, from text flows 402
- resizing 338, 382, 387
- reverse text in 325
- rotating 337
- rotating tables in 176
- selecting 316, 317
- side heads in 122
- splitting 402
- synchronizing text baselines in 396
- unrotating 338
- unsplitting 403
- text insets 502
- as tables of contents (structured) 461
- conditional text in 307
- converting, to editable text 507
- cross-reference formats in 208
- cross-references to 202
- described 516
- generating lists and indexes of 420
- importing, from formatted text files 502
- importing, from unformatted text files 503
- missing, locating sources of 507
- pathnames for 508
- replacing 502
- spell-checking 87
- unresolved, locating sources of 507
- updating options for 23, 503
- variables in 232
- text line objects
- aligning 332
- and text frames, compared 323
- changing character format of 324
- color of 319, 366
- condensing or expanding 110
- creating 324
- drawing properties of 318
- for math elements 259
- moving 329
- resizing 338
- reverse text and 326
- running text around 328
- scaling, horizontally 110
- selecting 316, 317
- spell-checking and hyphenation language of 89
- stretching 110
- Text Only format 26
- text snippets
- text symbols
- Thesaurus 94
- thin spaces
- thumbnail images, printing 29, 376
- thumbtabs, adding to an index 549
- TIFF files, printing color separations for 372, 373
- time
- tints 366
- titles
- TOCs. See also tables of contents/
- toggling format of math elements 254
- tombo crop marks, printing 28
- Tools palette
- top of column/page
- topic-oriented authoring
- topicref element
- TOYO Color Finder 366
- tracking
- tracking changes
- tracking mode 490
- tracking text edits
- trademark symbols
- transforming equations 269
- translation errors, file 31
- transparent objects 319
- transposing rows and columns in matrices 270
- trapping objects 373
- triangle insertion point in Structure View 96
- triggers, macro 625, 626
- trigonometric functions in equations 250
- troubleshooting
- TRUMATCH 4-Color Selector 366
- tsume font properties 109
- turning off
- turning on
- two-sided pages, printing 28
- txttmplt file 415
- type
- typesetters, printing to 376
- typing
- abbreviation for inches 73
- bullets 72
- dashes 72
- hyphens 119
- quotation marks 73
- rubi text 76
- spaces 72
- special characters 72
- special characters in dialog boxes 677
- tabbed text 71
- text 71
- text in dialog boxes 677
- text in rotated text frames 391
- text in structured documents 99
- text in table cells 158
- text, in structured tables 189
- typing errors, correcting with Spelling Checker 85
- U
- umlaut, Hungarian, characters (˝), typing, in dialog boxes 678, 679
- unanchored graphic frames
- unanchored graphics
- unavailable fonts 21, 31
- unconditional text, restoring, by removing condition tags 305
- unconnected body pages 401
- undefined attributes
- undefined elements
- understanding 647
- ungrouping
- Unicode characters
- unicode support
- unions in equations 247
- unique ID attributes. See ID attributes
- Universal Greek font in equations 268
- universal resource locators, creating links to 558
- UNIX commands
- UNIX encoding, saving files in 26
- UNIX macros and utilities 625
- UNIX utilities 630
- UNIX version of FrameMaker
- unresolved cross-references
- unresolved text insets
- unrotating graphic objects 338
- unsmoothing and smoothing objects 338
- unstraddling
- unstraddling table cells 173
- unsymmetrical page layouts 383
- unwrapping contents of elements 42
- unwrapping equations in anchored frames 251
- Update Column Layout command 388
- updating
- body pages with master page changes 388
- book files 473, 477
- books with fmbatch 634
- character formats 134, 136
- character formats in hidden conditional text 308
- cross-references manually 209
- cross-references when printing 208
- cross-references with fmbatch 634
- cross-references, suppressing automatic 23, 209
- DITA maps 663
- DITA references 663
- DITA topics 663
- documents from template 415
- formats from another document 415
- formats from another document with fmbatch 634
- formats in books 472
- generated files in book files 473
- generated files with fmbatch 634
- generated lists 423
- generated lists from template 441
- generated lists with fmbatch 634
- graphics imported by reference 23, 502
- imported template formats and 415
- indexes 434
- indexes from template 441
- indexes with fmbatch 634
- linked objects 513
- master pages with body page changes 388
- paragraph formats 134, 136
- paragraph formats in hidden conditional text 308
- system variables (structured) 238
- table formats 183
- templates for 415
- text insets, options for 23, 503
- variables 230
- URLs, creating links to 558
- user communities 3
- user variables 237
- using
- using DITA in FrameMaker 8 656
- Using Filters online manual 25
- utilities, UNIX 630
- V
- validating
- validity
- <$variable> building block in HTML macros 569
- variable definitions
- variables
- See also system variables; user variables
- as conditional text 303
- changing definitions of 232
- converting, to text 230
- copying, cutting, and pasting 229
- deleting 230
- editing 229
- environment, in hypertext commands 535, 546
- finding 76
- for continuation text in tables 192
- for dates 228, 232
- for filenames 228
- for page numbers 228
- for running headers and footers 234
- for tables 160, 228
- for time 228, 232
- formatting text in 231
- importing and updating 415
- importing and updating, with fmbatch 634
- importing definitions 231
- in background text frames 385
- in conditional documents 299
- in equations, changing font of 267
- in text insets 232
- inserting 74, 228, 385
- introduction 226
- moving 229
- replacing 229
- system, default definitions of 228
- UNIX environment, in hypertext commands 535
- updating 230
- user, creating 231
- using conditional text or 299
- variable-width Japanese text (tsume) 109
- vertical (portrait) page orientation in new documents 20
- vertical alignment of text in table cells 179
- vertical bar characters (|)
- vertical distribution of objects 333
- vertical division bar math element type 258
- vertical kerning, spell-checking text with 86
- vertical lines, drawing 313
- vertical lists of expressions in equations 245
- vertical movement, constraining objects to 329, 330
- vertices
- video files
- view only files 25
- View Only format 555
- view settings
- view-only documents
- view-only documents, books 551
- views
- <$volnum> building block
- 228
- volume numbers
- W
- .wav files, embedding 512
- WebDAV
- adding documents to the server 494
- checking documents out and in 495
- editing a managed document 496
- getting started 493
- importing a file from a server 497
- managed documents 492
- managing document links 498
- managing link updates 499
- managing links 498
- opening documents from WebDAV 495
- remote file management 492
- revert to server version 497
- saving a managed document 496
- saving documents on WebDAV 495
- sccessing other files on a WebDAV server 497
- server requirements 493
- setting preferences 493
- understanding 492
- updating all open documents 497
- Upload to Server command 497
- workgroup management 492
- workgroup server configuration 493
- Web-safe colors 366, 558
- weight, font 108
- welcome screen 5
- Western and Japanese fonts, combined 110
- Western crop marks 28
- what’s new 3
- wheels, color 364
- white cutout (reverse text) 325
- white, converting to black in bitmap 636
- wide pages (landscape) in new documents 20
- widow lines in paragraphs 120
- width
- wildcards
- Windows
- word count 487
- word-by-word index sort order 449
- words
- workflow management
- workgroup management
- workspace
- wrapping
- wrapping elements 37
- X
- Y

ADOBE FRAMEMAKER 8
USER GUIDE
© 2007 Adobe Systems Incorporated. All rights reserved.
Adobe® FrameMaker® 8 User Guide for Windows® and UNIX®.
If this guide is distributed with software that includes an end-user agreement, this guide, as well as the software described in it, is furnished under license and may be used or
copied only in accordance with the terms of such license. Except as permitted by any such license, no part of this guide may be reproduced, stored in a retrieval system, or trans-
mitted, in any form or by any means, electronic, mechanical, recording, or otherwise, without the prior written permission of Adobe Systems Incorporated. Please note that the
content in this guide is protected under copyright law even if it is not distributed with software that includes an end-user license agreement.
The content of this guide is furnished for informational use only, is subject to change without notice, and should not be construed as a commitment by Adobe Systems Incorpo-
rated. Adobe Systems Incorporated assumes no responsibility or liability for any errors or inaccuracies that may appear in the informational content contained in this guide.
Please remember that existing artwork or images that you may want to include in your project may be protected under copyright law. The unauthorized incorporation of such
material into your new work could be a violation of the rights of the copyright owner. Please be sure to obtain any permission required from the copyright owner.
Any references to company names in sample templates are for demonstration purposes only and are not intended to refer to any actual organization.
Adobe, the Adobe logo, Acrobat, Distiller, Flash, FrameMaker, Illustrator, PageMaker, Photoshop, PostScript, Reader, Garamond, Kozuka Mincho, Kozuka Gothic, MinionPro,
and MyriadPro are trademarks of Adobe Systems Incorporated.
Microsoft, Windows, and Windows Vista are either registered trademarks or trademarks of Microsoft Corporation in the United States and/or other countries. Solaris is a
trademark or registered trademark of Sun Microsystems, Inc. in the United States and other countries. UNIX is a trademark in the United States and other countries, licensed
exclusively through X/Open Company, Ltd. SVG is a trademark of the World Wide Web Consortium; marks of the W3C are registered and held by its host institutions MIT,
INRIA, and Keio. All other trademarks are the property of their respective owners.
This product contains either BISAFE and/or TIPEM software by RSA Data Security, Inc.
This product contains color data and/or the Licensed Trademark of The Focoltone Colour System.
PANTONE® Colors displayed in the software application or in the user documentation may not match PANTONE-identified standards. Consult current PANTONE Color Publi-
cations for accurate color. PANTONE® and other Pantone, Inc. trademarks are property of Pantone, Inc. © Pantone, Inc. 2003. Pantone, Inc. is the copyright owner of color data
and/or software which are licensed to Adobe Systems Incorporated to distribute for use only in combination with Adobe FrameMaker. PANTONE Color Data and/or Software
shall not be copied onto another disk or into memory unless as part of the execution of Adobe FrameMaker software.
Software is produced under Dainippon Ink and Chemicals Inc.'s copyrights of color-data-base derived from Sample Books.
This product contains ImageStream® Graphics and Presentation Filters Copyright ©1991-1996 Inso Corporation and/or Outside In® Viewer Technology ©1992-1996 Inso Corpo-
ration. All Rights Reserved.
This product includes software developed by the Apache Software Foundation (http://www.apache.org/).
Certain Spelling portions of this product is based on Proximity Linguistic Technology. ©Copyright 1990 Merriam-Webster Inc. ©Copyright 1990 All rights reserved. Proximity
Technology A Division of Franklin Electronic Publishers, Inc. Burlington, New Jersey USA. ©Copyright 2003 Franklin Electronic Publishers Inc.©Copyright 2003 All rights
reserved. Proximity Technology A Division of Franklin Electronic Publishers, Inc. Burlington, New Jersey USA. Legal Supplement ©Copyright 1990/1994 Merriam-Webster
Inc./Franklin Electronic Publishers Inc. ©Copyright 1994 All rights reserved. Proximity Technology A Division of Franklin Electronic Publishers, Inc. Burlington, New Jersey
USA. ©Copyright 1990/1994 Merriam-Webster Inc./Franklin Electronic Publishers Inc. ©Copyright 1997All rights reserved. Proximity Technology A Division of Franklin
Electronic Publishers, Inc. Burlington, New Jersey USA ©Copyright 1990 Merriam-Webster Inc. ©Copyright 1993 All rights reserved. Proximity Technology A Division of
Franklin Electronic Publishers, Inc. Burlington, New Jersey USA. ©Copyright 2004 Franklin Electronic Publishers Inc. ©Copyright 2004 All rights reserved. Proximity
Technology A Division of Franklin Electronic Publishers, Inc. Burlington, New Jersey USA. ©Copyright 1991 Dr. Lluis de Yzaguirre I Maura ©Copyright 1991 All rights reserved.
Proximity Technology A Division of Franklin Electronic Publishers, Inc. Burlington, New Jersey USA. ©Copyright 1990 Munksgaard International Publishers Ltd. ©Copyright
1990 All rights reserved. Proximity Technology A Division of Franklin Electronic Publishers, Inc. Burlington, New Jersey USA. ©Copyright 1990 Van Dale Lexicografie bv
©Copyright 1990 All rights reserved. Proximity Technology A Division of Franklin Electronic Publishers, Inc. Burlington, New Jersey USA. ©Copyright 1995 Van Dale
Lexicografie bv ©Copyright 1996 All rights reserved. Proximity Technology A Division of Franklin Electronic Publishers, Inc. Burlington, New Jersey USA. ©Copyright 1990
IDE a.s. ©Copyright 1990 All rights reserved. Proximity Technology A Division of Franklin Electronic Publishers, Inc. Burlington, New Jersey USA. ©Copyright 1992
Hachette/Franklin Electronic Publishers Inc. ©Copyright 2004 All rights reserved. Proximity Technology A Division of Franklin Electronic Publishers, Inc. Burlington, New
Jersey USA. ©Copyright 1991 Text & Satz Datentechnik ©Copyright 1991 All rights reserved. Proximity Technology A Division of Franklin Electronic Publishers, Inc. Burlington,
New Jersey USA. ©Copyright 2004 Bertelsmann Lexikon Verlag ©Copyright 2004 All rights reserved. Proximity Technology A Division of Franklin Electronic Publishers, Inc.
Burlington, New Jersey USA. ©Copyright 2004 MorphoLogic Inc. ©Copyright 2004 All rights reserved. Proximity Technology A Division of Franklin Electronic Publishers, Inc.
Burlington, New Jersey USA. ©Copyright 1990 William Collins Sons & Co. Ltd. ©Copyright 1990 All rights reserved. Proximity Technology A Division of Franklin Electronic
Publishers, Inc. Burlington, New Jersey USA. ©Copyright 1993-95 Russicon Company Ltd. ©Copyright 1995 All rights reserved. Proximity Technology A Division of Franklin
Electronic Publishers, Inc. Burlington, New Jersey USA. ©Copyright 2004 IDE a.s. ©Copyright 2004 All rights reserved. Proximity Technology A Division of Franklin Electronic
Publishers, Inc. Burlington, New Jersey USA. The Hyphenation portion of this product is based on Proximity Linguistic Technology. ©Copyright 2003 Franklin Electronic
Publishers Inc.©Copyright 2003 All rights reserved. Proximity Technology A Division of Franklin Electronic Publishers, Inc. Burlington, New Jersey USA. ©Copyright 1984
William Collins Sons & Co. Ltd. ©Copyright 1988 All rights reserved. Proximity Technology A Division of Franklin Electronic Publishers, Inc. Burlington, New Jersey USA.
©Copyright 1990 Munksgaard International Publishers Ltd. ©Copyright 1990 All rights reserved. Proximity Technology A Division of Franklin Electronic Publishers, Inc.
Burlington, New Jersey USA. ©Copyright 1997 Van Dale Lexicografie bv ©Copyright 1997 All rights reserved. Proximity Technology A Division of Franklin Electronic
Publishers, Inc. Burlington, New Jersey USA. ©Copyright 1984 Editions Fernand Nathan ©Copyright 1989 All rights reserved. Proximity Technology A Division of Franklin
Electronic Publishers, Inc. Burlington, New Jersey USA. ©Copyright 1983 S Fischer Verlag ©Copyright 1997 All rights reserved. Proximity Technology A Division of Franklin
Electronic Publishers, Inc. Burlington, New Jersey USA. ©Copyright 1989 Zanichelli ©Copyright 1989 All rights reserved. Proximity Technology A Division of Franklin
Electronic Publishers, Inc. Burlington, New Jersey USA. ©Copyright 1989 IDE a.s. ©Copyright 1989 All rights reserved. Proximity Technology A Division of Franklin Electronic
Publishers, Inc. Burlington, New Jersey USA. ©Copyright 1990 Espasa-Calpe ©Copyright 1990 All rights reserved. Proximity Technology A Division of Franklin Electronic
Publishers, Inc. Burlington, New Jersey USA. ©Copyright 1989 C.A. Stromberg AB. ©Copyright 1989 All rights reserved. Proximity Technology A Division of Franklin Electronic
Publishers, Inc. Burlington, New Jersey USA.
Portions of Adobe Acrobat include technology used under license from Autonomy, and are copyrighted.
Adobe Systems Incorporated, 345 Park Avenue, San Jose, California 95110, USA.
Notice to U.S. government end users. The software and documentation are “Commercial Items,” as that term is defined at 48 C.F.R. §2.101, consisting of “Commercial Computer
Software” and “Commercial Computer Software Documentation,” as such terms are used in 48 C.F.R. §12.212 or 48 C.F.R. §227.7202, as applicable. Consistent with 48 C.F.R.
§12.212 or 48 C.F.R. §§227.7202-1 through 227.7202-4, as applicable, the Commercial Computer Software and Commercial Computer Software Documentation are being
licensed to U.S. Government end users (a) only as Commercial items and (b) with only those rights as are granted to all other end users pursuant to the terms and conditions
herein. Unpublished-rights reserved under the copyright laws of the United States. For U.S. Government End Users, Adobe agrees to comply with all applicable equal opportunity
laws including, if appropriate, the provisions of Executive Order 11246, as amended, Section 402 of the Vietnam Era Veterans Readjustment Assistance Act of 1974 (38 USC 4212),
and Section 503 of the Rehabilitation Act of 1973, as amended, and the regulations at 41 CFR Parts 60-1 through 60-60, 60-250, and 60-741. The affirmative action clause and
regulations contained in the preceding sentence shall be incorporated by reference.
iii
Contents
Chapter 1: Getting started
Installation . . . . . . . . . . . . . . . . . . . . . . . . . . . . . . . . . . . . . . . . . . . . . . . . . . . . . . . . . . . . . . . . . . . . . . . . . . . . . . . 1
Adobe Help . . . . . . . . . . . . . . . . . . . . . . . . . . . . . . . . . . . . . . . . . . . . . . . . . . . . . . . . . . . . . . . . . . . . . . . . . . . . . . . 2
What's new . . . . . . . . . . . . . . . . . . . . . . . . . . . . . . . . . . . . . . . . . . . . . . . . . . . . . . . . . . . . . . . . . . . . . . . . . . . . . . . 3
Chapter 2: FrameMaker basics
The Welcome Screen . . . . . . . . . . . . . . . . . . . . . . . . . . . . . . . . . . . . . . . . . . . . . . . . . . . . . . . . . . . . . . . . . . . . . . 5
About the workspace . . . . . . . . . . . . . . . . . . . . . . . . . . . . . . . . . . . . . . . . . . . . . . . . . . . . . . . . . . . . . . . . . . . . . 5
Understanding the structured workspace . . . . . . . . . . . . . . . . . . . . . . . . . . . . . . . . . . . . . . . . . . . . . . . . . 12
Working with unstructured FrameMaker documents . . . . . . . . . . . . . . . . . . . . . . . . . . . . . . . . . . . . . . 19
Working with structured FrameMaker documents . . . . . . . . . . . . . . . . . . . . . . . . . . . . . . . . . . . . . . . . . 32
About structured documents . . . . . . . . . . . . . . . . . . . . . . . . . . . . . . . . . . . . . . . . . . . . . . . . . . . . . . . . . . . . . 56
Working with XML documents . . . . . . . . . . . . . . . . . . . . . . . . . . . . . . . . . . . . . . . . . . . . . . . . . . . . . . . . . . . 68
Word processing . . . . . . . . . . . . . . . . . . . . . . . . . . . . . . . . . . . . . . . . . . . . . . . . . . . . . . . . . . . . . . . . . . . . . . . . . 71
Text formatting . . . . . . . . . . . . . . . . . . . . . . . . . . . . . . . . . . . . . . . . . . . . . . . . . . . . . . . . . . . . . . . . . . . . . . . . . 101
Multiple Undo/Redo . . . . . . . . . . . . . . . . . . . . . . . . . . . . . . . . . . . . . . . . . . . . . . . . . . . . . . . . . . . . . . . . . . . . 141
Chapter 3: Unicode support
About Unicode support . . . . . . . . . . . . . . . . . . . . . . . . . . . . . . . . . . . . . . . . . . . . . . . . . . . . . . . . . . . . . . . . . 152
FrameMaker features supporting Unicode content . . . . . . . . . . . . . . . . . . . . . . . . . . . . . . . . . . . . . . . 153
Setting up your computer and keyboard to work with multiple languages . . . . . . . . . . . . . . . . 155
Chapter 4: FrameMaker tables
About tables . . . . . . . . . . . . . . . . . . . . . . . . . . . . . . . . . . . . . . . . . . . . . . . . . . . . . . . . . . . . . . . . . . . . . . . . . . . . 157
Inserting tables . . . . . . . . . . . . . . . . . . . . . . . . . . . . . . . . . . . . . . . . . . . . . . . . . . . . . . . . . . . . . . . . . . . . . . . . . 158
Converting between text and tables . . . . . . . . . . . . . . . . . . . . . . . . . . . . . . . . . . . . . . . . . . . . . . . . . . . . . 162
Copying, moving, and removing tables . . . . . . . . . . . . . . . . . . . . . . . . . . . . . . . . . . . . . . . . . . . . . . . . . . 164
Changing the look of tables . . . . . . . . . . . . . . . . . . . . . . . . . . . . . . . . . . . . . . . . . . . . . . . . . . . . . . . . . . . . . 164
Positioning tables on a page . . . . . . . . . . . . . . . . . . . . . . . . . . . . . . . . . . . . . . . . . . . . . . . . . . . . . . . . . . . . 167
Adjusting rows and columns . . . . . . . . . . . . . . . . . . . . . . . . . . . . . . . . . . . . . . . . . . . . . . . . . . . . . . . . . . . . 170
Sorting columns and rows . . . . . . . . . . . . . . . . . . . . . . . . . . . . . . . . . . . . . . . . . . . . . . . . . . . . . . . . . . . . . . . 174
Rotating cells and tables . . . . . . . . . . . . . . . . . . . . . . . . . . . . . . . . . . . . . . . . . . . . . . . . . . . . . . . . . . . . . . . . 175
Controlling page breaks in tables . . . . . . . . . . . . . . . . . . . . . . . . . . . . . . . . . . . . . . . . . . . . . . . . . . . . . . . . 176
Positioning and autonumbering text within cells . . . . . . . . . . . . . . . . . . . . . . . . . . . . . . . . . . . . . . . . .178
Working with ruling and shading . . . . . . . . . . . . . . . . . . . . . . . . . . . . . . . . . . . . . . . . . . . . . . . . . . . . . . . . 180
Redefining (updating) table formats . . . . . . . . . . . . . . . . . . . . . . . . . . . . . . . . . . . . . . . . . . . . . . . . . . . . . 183
Renaming and deleting table formats . . . . . . . . . . . . . . . . . . . . . . . . . . . . . . . . . . . . . . . . . . . . . . . . . . . 185
Creating table formats . . . . . . . . . . . . . . . . . . . . . . . . . . . . . . . . . . . . . . . . . . . . . . . . . . . . . . . . . . . . . . . . . . 185
Working with tables in structured documents . . . . . . . . . . . . . . . . . . . . . . . . . . . . . . . . . . . . . . . . . . . . 186
Inserting structured tables . . . . . . . . . . . . . . . . . . . . . . . . . . . . . . . . . . . . . . . . . . . . . . . . . . . . . . . . . . . . . . 187
Filling in structured tables with text and graphics . . . . . . . . . . . . . . . . . . . . . . . . . . . . . . . . . . . . . . . . 189
Copying, moving, and removing structured tables . . . . . . . . . . . . . . . . . . . . . . . . . . . . . . . . . . . . . . . 194
iv
Applying different formats to structured tables . . . . . . . . . . . . . . . . . . . . . . . . . . . . . . . . . . . . . . . . . . 194
Positioning structured tables on a page . . . . . . . . . . . . . . . . . . . . . . . . . . . . . . . . . . . . . . . . . . . . . . . . . . 195
Adjusting rows and columns in structured tables . . . . . . . . . . . . . . . . . . . . . . . . . . . . . . . . . . . . . . . . 197
Rotating cells and tables in structured documents . . . . . . . . . . . . . . . . . . . . . . . . . . . . . . . . . . . . . . . 199
Chapter 5: Cross-references and footnotes
Inserting cross-references . . . . . . . . . . . . . . . . . . . . . . . . . . . . . . . . . . . . . . . . . . . . . . . . . . . . . . . . . . . . . . . 201
Working with cross-reference markers . . . . . . . . . . . . . . . . . . . . . . . . . . . . . . . . . . . . . . . . . . . . . . . . . . . 203
Displaying the source of a cross-reference . . . . . . . . . . . . . . . . . . . . . . . . . . . . . . . . . . . . . . . . . . . . . . . 203
Editing cross-references . . . . . . . . . . . . . . . . . . . . . . . . . . . . . . . . . . . . . . . . . . . . . . . . . . . . . . . . . . . . . . . . . 204
Creating cross-reference formats . . . . . . . . . . . . . . . . . . . . . . . . . . . . . . . . . . . . . . . . . . . . . . . . . . . . . . . . 205
Using building blocks for source information . . . . . . . . . . . . . . . . . . . . . . . . . . . . . . . . . . . . . . . . . . . . 206
Editing cross-reference formats . . . . . . . . . . . . . . . . . . . . . . . . . . . . . . . . . . . . . . . . . . . . . . . . . . . . . . . . . . 208
Maintaining cross-references . . . . . . . . . . . . . . . . . . . . . . . . . . . . . . . . . . . . . . . . . . . . . . . . . . . . . . . . . . . . 208
Resolving cross-references . . . . . . . . . . . . . . . . . . . . . . . . . . . . . . . . . . . . . . . . . . . . . . . . . . . . . . . . . . . . . . 209
Working with footnotes . . . . . . . . . . . . . . . . . . . . . . . . . . . . . . . . . . . . . . . . . . . . . . . . . . . . . . . . . . . . . . . . . 211
Changing footnote formats . . . . . . . . . . . . . . . . . . . . . . . . . . . . . . . . . . . . . . . . . . . . . . . . . . . . . . . . . . . . . 213
Working with endnotes . . . . . . . . . . . . . . . . . . . . . . . . . . . . . . . . . . . . . . . . . . . . . . . . . . . . . . . . . . . . . . . . . 216
Working with cross-references in structured documents . . . . . . . . . . . . . . . . . . . . . . . . . . . . . . . . . . 217
Inserting element-based cross-references in structured documents . . . . . . . . . . . . . . . . . . . . . . 219
Working with ID values in structured documents . . . . . . . . . . . . . . . . . . . . . . . . . . . . . . . . . . . . . . . . . 221
Resolving cross-references in structured documents . . . . . . . . . . . . . . . . . . . . . . . . . . . . . . . . . . . . . 222
Working with footnotes in structured documents . . . . . . . . . . . . . . . . . . . . . . . . . . . . . . . . . . . . . . . . 223
Working with endnotes in structured documents . . . . . . . . . . . . . . . . . . . . . . . . . . . . . . . . . . . . . . . . 225
Chapter 6: Variables and equations
About variables . . . . . . . . . . . . . . . . . . . . . . . . . . . . . . . . . . . . . . . . . . . . . . . . . . . . . . . . . . . . . . . . . . . . . . . . . 226
Inserting variables . . . . . . . . . . . . . . . . . . . . . . . . . . . . . . . . . . . . . . . . . . . . . . . . . . . . . . . . . . . . . . . . . . . . . . 228
Editing variables . . . . . . . . . . . . . . . . . . . . . . . . . . . . . . . . . . . . . . . . . . . . . . . . . . . . . . . . . . . . . . . . . . . . . . . . 229
Deleting variables . . . . . . . . . . . . . . . . . . . . . . . . . . . . . . . . . . . . . . . . . . . . . . . . . . . . . . . . . . . . . . . . . . . . . . . 230
Converting variables to text . . . . . . . . . . . . . . . . . . . . . . . . . . . . . . . . . . . . . . . . . . . . . . . . . . . . . . . . . . . . . 230
Updating system variables on body or reference pages . . . . . . . . . . . . . . . . . . . . . . . . . . . . . . . . . . 230
Importing variable definitions . . . . . . . . . . . . . . . . . . . . . . . . . . . . . . . . . . . . . . . . . . . . . . . . . . . . . . . . . . . 231
Changing variable definitions . . . . . . . . . . . . . . . . . . . . . . . . . . . . . . . . . . . . . . . . . . . . . . . . . . . . . . . . . . . 232
Creating variables for running headers and footers . . . . . . . . . . . . . . . . . . . . . . . . . . . . . . . . . . . . . . . 234
Working with variables in structured documents . . . . . . . . . . . . . . . . . . . . . . . . . . . . . . . . . . . . . . . . . 237
About Equations . . . . . . . . . . . . . . . . . . . . . . . . . . . . . . . . . . . . . . . . . . . . . . . . . . . . . . . . . . . . . . . . . . . . . . . . 239
Using the Equations palette . . . . . . . . . . . . . . . . . . . . . . . . . . . . . . . . . . . . . . . . . . . . . . . . . . . . . . . . . . . . . 239
Inserting math elements . . . . . . . . . . . . . . . . . . . . . . . . . . . . . . . . . . . . . . . . . . . . . . . . . . . . . . . . . . . . . . . . 243
Creating equations in structured documents using elements . . . . . . . . . . . . . . . . . . . . . . . . . . . . . 283
Chapter 7: Filter By Attribute
About Filter By Attribute . . . . . . . . . . . . . . . . . . . . . . . . . . . . . . . . . . . . . . . . . . . . . . . . . . . . . . . . . . . . . . . . 286
Build a filter . . . . . . . . . . . . . . . . . . . . . . . . . . . . . . . . . . . . . . . . . . . . . . . . . . . . . . . . . . . . . . . . . . . . . . . . . . . . . 287
Apply a filter . . . . . . . . . . . . . . . . . . . . . . . . . . . . . . . . . . . . . . . . . . . . . . . . . . . . . . . . . . . . . . . . . . . . . . . . . . . . 292
Save a document after applying a filter . . . . . . . . . . . . . . . . . . . . . . . . . . . . . . . . . . . . . . . . . . . . . . . . . . 292
v
Modify a filter . . . . . . . . . . . . . . . . . . . . . . . . . . . . . . . . . . . . . . . . . . . . . . . . . . . . . . . . . . . . . . . . . . . . . . . . . . . 293
Delete a filter . . . . . . . . . . . . . . . . . . . . . . . . . . . . . . . . . . . . . . . . . . . . . . . . . . . . . . . . . . . . . . . . . . . . . . . . . . . 293
Additional information . . . . . . . . . . . . . . . . . . . . . . . . . . . . . . . . . . . . . . . . . . . . . . . . . . . . . . . . . . . . . . . . . . 293
Chapter 8: Conditional text
About conditional text . . . . . . . . . . . . . . . . . . . . . . . . . . . . . . . . . . . . . . . . . . . . . . . . . . . . . . . . . . . . . . . . . . 296
Planning conditional documents . . . . . . . . . . . . . . . . . . . . . . . . . . . . . . . . . . . . . . . . . . . . . . . . . . . . . . . . 298
Creating, changing, and deleting condition tags . . . . . . . . . . . . . . . . . . . . . . . . . . . . . . . . . . . . . . . . .299
Using Boolean expressions to generate conditional output . . . . . . . . . . . . . . . . . . . . . . . . . . . . . . . 302
Applying and removing condition tags . . . . . . . . . . . . . . . . . . . . . . . . . . . . . . . . . . . . . . . . . . . . . . . . . . 303
Working in conditional documents . . . . . . . . . . . . . . . . . . . . . . . . . . . . . . . . . . . . . . . . . . . . . . . . . . . . . . 305
Editing elements in conditional structured documents . . . . . . . . . . . . . . . . . . . . . . . . . . . . . . . . . . . 309
Chapter 9: Graphics and anchored frames
About Graphics . . . . . . . . . . . . . . . . . . . . . . . . . . . . . . . . . . . . . . . . . . . . . . . . . . . . . . . . . . . . . . . . . . . . . . . . . 310
Using the drawing tools . . . . . . . . . . . . . . . . . . . . . . . . . . . . . . . . . . . . . . . . . . . . . . . . . . . . . . . . . . . . . . . . . 313
About graphic elements in structured documents . . . . . . . . . . . . . . . . . . . . . . . . . . . . . . . . . . . . . . . 345
About Anchored Frames . . . . . . . . . . . . . . . . . . . . . . . . . . . . . . . . . . . . . . . . . . . . . . . . . . . . . . . . . . . . . . . . 345
Creating anchored frames . . . . . . . . . . . . . . . . . . . . . . . . . . . . . . . . . . . . . . . . . . . . . . . . . . . . . . . . . . . . . . . 346
Editing anchored frames . . . . . . . . . . . . . . . . . . . . . . . . . . . . . . . . . . . . . . . . . . . . . . . . . . . . . . . . . . . . . . . . 359
Preparing anchored frames for tagged PDF . . . . . . . . . . . . . . . . . . . . . . . . . . . . . . . . . . . . . . . . . . . . . . 360
Anchored frames in structured documents . . . . . . . . . . . . . . . . . . . . . . . . . . . . . . . . . . . . . . . . . . . . . . 361
Chapter 10: Color
About Color . . . . . . . . . . . . . . . . . . . . . . . . . . . . . . . . . . . . . . . . . . . . . . . . . . . . . . . . . . . . . . . . . . . . . . . . . . . . 364
Color models . . . . . . . . . . . . . . . . . . . . . . . . . . . . . . . . . . . . . . . . . . . . . . . . . . . . . . . . . . . . . . . . . . . . . . . . . . . 364
Planning to use color . . . . . . . . . . . . . . . . . . . . . . . . . . . . . . . . . . . . . . . . . . . . . . . . . . . . . . . . . . . . . . . . . . . . 364
Using color libraries . . . . . . . . . . . . . . . . . . . . . . . . . . . . . . . . . . . . . . . . . . . . . . . . . . . . . . . . . . . . . . . . . . . . . 365
Applying colors and tints . . . . . . . . . . . . . . . . . . . . . . . . . . . . . . . . . . . . . . . . . . . . . . . . . . . . . . . . . . . . . . . . 366
Defining and modifying colors and tints . . . . . . . . . . . . . . . . . . . . . . . . . . . . . . . . . . . . . . . . . . . . . . . . . 368
Viewing colors . . . . . . . . . . . . . . . . . . . . . . . . . . . . . . . . . . . . . . . . . . . . . . . . . . . . . . . . . . . . . . . . . . . . . . . . . . 370
Printing color documents . . . . . . . . . . . . . . . . . . . . . . . . . . . . . . . . . . . . . . . . . . . . . . . . . . . . . . . . . . . . . . . 371
Postprocessing color documents . . . . . . . . . . . . . . . . . . . . . . . . . . . . . . . . . . . . . . . . . . . . . . . . . . . . . . . . 376
Printing to typesetters (Windows) . . . . . . . . . . . . . . . . . . . . . . . . . . . . . . . . . . . . . . . . . . . . . . . . . . . . . . . 376
Chapter 11: Page layout and templates
About page layout . . . . . . . . . . . . . . . . . . . . . . . . . . . . . . . . . . . . . . . . . . . . . . . . . . . . . . . . . . . . . . . . . . . . . . 377
Changing the basic page layout of a document . . . . . . . . . . . . . . . . . . . . . . . . . . . . . . . . . . . . . . . . . .380
Creating and editing custom master pages . . . . . . . . . . . . . . . . . . . . . . . . . . . . . . . . . . . . . . . . . . . . . . 389
Aligning text across columns . . . . . . . . . . . . . . . . . . . . . . . . . . . . . . . . . . . . . . . . . . . . . . . . . . . . . . . . . . . . 394
About multiflow documents . . . . . . . . . . . . . . . . . . . . . . . . . . . . . . . . . . . . . . . . . . . . . . . . . . . . . . . . . . . . 397
Working with reference pages . . . . . . . . . . . . . . . . . . . . . . . . . . . . . . . . . . . . . . . . . . . . . . . . . . . . . . . . . . . 404
About Templates . . . . . . . . . . . . . . . . . . . . . . . . . . . . . . . . . . . . . . . . . . . . . . . . . . . . . . . . . . . . . . . . . . . . . . . . 408
Using templates . . . . . . . . . . . . . . . . . . . . . . . . . . . . . . . . . . . . . . . . . . . . . . . . . . . . . . . . . . . . . . . . . . . . . . . . 409
Creating templates . . . . . . . . . . . . . . . . . . . . . . . . . . . . . . . . . . . . . . . . . . . . . . . . . . . . . . . . . . . . . . . . . . . . . . 410
Organizing templates in a folder . . . . . . . . . . . . . . . . . . . . . . . . . . . . . . . . . . . . . . . . . . . . . . . . . . . . . . . . . 413
Creating templates for generated files . . . . . . . . . . . . . . . . . . . . . . . . . . . . . . . . . . . . . . . . . . . . . . . . . . . 414
vi
Creating templates to change conditional text settings . . . . . . . . . . . . . . . . . . . . . . . . . . . . . . . . . . 414
Changing templates for blank paper and text files . . . . . . . . . . . . . . . . . . . . . . . . . . . . . . . . . . . . . . . 414
Importing and updating formats . . . . . . . . . . . . . . . . . . . . . . . . . . . . . . . . . . . . . . . . . . . . . . . . . . . . . . . . 415
About import and update settings . . . . . . . . . . . . . . . . . . . . . . . . . . . . . . . . . . . . . . . . . . . . . . . . . . . . . . 416
Chapter 12: Tables of contents and indexes
About Tables of Contents . . . . . . . . . . . . . . . . . . . . . . . . . . . . . . . . . . . . . . . . . . . . . . . . . . . . . . . . . . . . . . . 418
About generated files . . . . . . . . . . . . . . . . . . . . . . . . . . . . . . . . . . . . . . . . . . . . . . . . . . . . . . . . . . . . . . . . . . . 418
Preparing the sources for TOCs and other generated lists . . . . . . . . . . . . . . . . . . . . . . . . . . . . . . . . . 420
Generating TOCs and other lists . . . . . . . . . . . . . . . . . . . . . . . . . . . . . . . . . . . . . . . . . . . . . . . . . . . . . . . . . 421
Updating and editing TOCs and lists . . . . . . . . . . . . . . . . . . . . . . . . . . . . . . . . . . . . . . . . . . . . . . . . . . . . . 423
Troubleshooting TOCs and lists . . . . . . . . . . . . . . . . . . . . . . . . . . . . . . . . . . . . . . . . . . . . . . . . . . . . . . . . . . 425
Embedding TOCs in a document . . . . . . . . . . . . . . . . . . . . . . . . . . . . . . . . . . . . . . . . . . . . . . . . . . . . . . . . 426
About indexes . . . . . . . . . . . . . . . . . . . . . . . . . . . . . . . . . . . . . . . . . . . . . . . . . . . . . . . . . . . . . . . . . . . . . . . . . . 427
Adding index markers . . . . . . . . . . . . . . . . . . . . . . . . . . . . . . . . . . . . . . . . . . . . . . . . . . . . . . . . . . . . . . . . . . . 428
Generating indexes . . . . . . . . . . . . . . . . . . . . . . . . . . . . . . . . . . . . . . . . . . . . . . . . . . . . . . . . . . . . . . . . . . . . . 432
Updating and editing indexes . . . . . . . . . . . . . . . . . . . . . . . . . . . . . . . . . . . . . . . . . . . . . . . . . . . . . . . . . . . 434
Creating a master TOC or index for several books . . . . . . . . . . . . . . . . . . . . . . . . . . . . . . . . . . . . . . . .436
Troubleshooting indexes . . . . . . . . . . . . . . . . . . . . . . . . . . . . . . . . . . . . . . . . . . . . . . . . . . . . . . . . . . . . . . . . 437
Adding custom marker types . . . . . . . . . . . . . . . . . . . . . . . . . . . . . . . . . . . . . . . . . . . . . . . . . . . . . . . . . . . . 440
Adding titles and other static text to lists and indexes . . . . . . . . . . . . . . . . . . . . . . . . . . . . . . . . . . . . 441
Formatting lists and indexes . . . . . . . . . . . . . . . . . . . . . . . . . . . . . . . . . . . . . . . . . . . . . . . . . . . . . . . . . . . . . 441
Changing the sort order of indexes . . . . . . . . . . . . . . . . . . . . . . . . . . . . . . . . . . . . . . . . . . . . . . . . . . . . . . 449
Working with group titles in indexes . . . . . . . . . . . . . . . . . . . . . . . . . . . . . . . . . . . . . . . . . . . . . . . . . . . . . 451
Working with TOCs in structured documents . . . . . . . . . . . . . . . . . . . . . . . . . . . . . . . . . . . . . . . . . . . .453
Generating TOCs and other lists in structured documents . . . . . . . . . . . . . . . . . . . . . . . . . . . . . . . . 454
Updating and editing lists in structured documents . . . . . . . . . . . . . . . . . . . . . . . . . . . . . . . . . . . . . . 455
Adding index marker elements in structured documents . . . . . . . . . . . . . . . . . . . . . . . . . . . . . . . . . 456
Formatting lists and indexes in structured documents . . . . . . . . . . . . . . . . . . . . . . . . . . . . . . . . . . . . 458
Troubleshooting TOCs and lists in structured documents . . . . . . . . . . . . . . . . . . . . . . . . . . . . . . . . . 459
Embedding TOCs in structured documents . . . . . . . . . . . . . . . . . . . . . . . . . . . . . . . . . . . . . . . . . . . . . . 460
Chapter 13: Books
About book files . . . . . . . . . . . . . . . . . . . . . . . . . . . . . . . . . . . . . . . . . . . . . . . . . . . . . . . . . . . . . . . . . . . . . . . . 462
Building books . . . . . . . . . . . . . . . . . . . . . . . . . . . . . . . . . . . . . . . . . . . . . . . . . . . . . . . . . . . . . . . . . . . . . . . . . . 462
Working with files in a book window . . . . . . . . . . . . . . . . . . . . . . . . . . . . . . . . . . . . . . . . . . . . . . . . . . . . 465
Determining how documents and pages are numbered . . . . . . . . . . . . . . . . . . . . . . . . . . . . . . . . . . 468
Inserting numbering in your documents . . . . . . . . . . . . . . . . . . . . . . . . . . . . . . . . . . . . . . . . . . . . . . . . . 470
Changing the format of files in a book . . . . . . . . . . . . . . . . . . . . . . . . . . . . . . . . . . . . . . . . . . . . . . . . . . . 472
Using book-wide commands . . . . . . . . . . . . . . . . . . . . . . . . . . . . . . . . . . . . . . . . . . . . . . . . . . . . . . . . . . . . 473
Updating books . . . . . . . . . . . . . . . . . . . . . . . . . . . . . . . . . . . . . . . . . . . . . . . . . . . . . . . . . . . . . . . . . . . . . . . . 473
Comparing books . . . . . . . . . . . . . . . . . . . . . . . . . . . . . . . . . . . . . . . . . . . . . . . . . . . . . . . . . . . . . . . . . . . . . . . 474
Troubleshooting books . . . . . . . . . . . . . . . . . . . . . . . . . . . . . . . . . . . . . . . . . . . . . . . . . . . . . . . . . . . . . . . . . 475
About structured book files . . . . . . . . . . . . . . . . . . . . . . . . . . . . . . . . . . . . . . . . . . . . . . . . . . . . . . . . . . . . . 476
Generating and updating structured books . . . . . . . . . . . . . . . . . . . . . . . . . . . . . . . . . . . . . . . . . . . . . . 477
Working with book structure . . . . . . . . . . . . . . . . . . . . . . . . . . . . . . . . . . . . . . . . . . . . . . . . . . . . . . . . . . . . 478
vii
Chapter 14: Revision management
About revision management . . . . . . . . . . . . . . . . . . . . . . . . . . . . . . . . . . . . . . . . . . . . . . . . . . . . . . . . . . . . 482
About change bars . . . . . . . . . . . . . . . . . . . . . . . . . . . . . . . . . . . . . . . . . . . . . . . . . . . . . . . . . . . . . . . . . . . . . . 482
Comparing document versions . . . . . . . . . . . . . . . . . . . . . . . . . . . . . . . . . . . . . . . . . . . . . . . . . . . . . . . . . . 484
Determining the number of words and characters . . . . . . . . . . . . . . . . . . . . . . . . . . . . . . . . . . . . . . . 487
Track Edited Text . . . . . . . . . . . . . . . . . . . . . . . . . . . . . . . . . . . . . . . . . . . . . . . . . . . . . . . . . . . . . . . . . . . . . . . . 487
Chapter 15: Managing files using WebDAV
File management using WebDAV (Windows) . . . . . . . . . . . . . . . . . . . . . . . . . . . . . . . . . . . . . . . . . . . . . 492
Getting started with workgroup management . . . . . . . . . . . . . . . . . . . . . . . . . . . . . . . . . . . . . . . . . . . 493
Managing document links . . . . . . . . . . . . . . . . . . . . . . . . . . . . . . . . . . . . . . . . . . . . . . . . . . . . . . . . . . . . . . 498
Chapter 16: Importing, linking, and exporting
About importing files into FrameMaker . . . . . . . . . . . . . . . . . . . . . . . . . . . . . . . . . . . . . . . . . . . . . . . . . . 501
Choosing the right method for importing and linking . . . . . . . . . . . . . . . . . . . . . . . . . . . . . . . . . . . . 501
Using Copy and Paste . . . . . . . . . . . . . . . . . . . . . . . . . . . . . . . . . . . . . . . . . . . . . . . . . . . . . . . . . . . . . . . . . . . 502
Using the Import command to import text . . . . . . . . . . . . . . . . . . . . . . . . . . . . . . . . . . . . . . . . . . . . . . . 502
Using the Import command to import graphics . . . . . . . . . . . . . . . . . . . . . . . . . . . . . . . . . . . . . . . . . . 508
Using drag and drop (Windows) . . . . . . . . . . . . . . . . . . . . . . . . . . . . . . . . . . . . . . . . . . . . . . . . . . . . . . . . . 511
Using OLE (Windows) . . . . . . . . . . . . . . . . . . . . . . . . . . . . . . . . . . . . . . . . . . . . . . . . . . . . . . . . . . . . . . . . . . . 512
Using graphic insets (UNIX) . . . . . . . . . . . . . . . . . . . . . . . . . . . . . . . . . . . . . . . . . . . . . . . . . . . . . . . . . . . . . . 514
Exporting text and graphics . . . . . . . . . . . . . . . . . . . . . . . . . . . . . . . . . . . . . . . . . . . . . . . . . . . . . . . . . . . . . 515
Importing text into structured documents . . . . . . . . . . . . . . . . . . . . . . . . . . . . . . . . . . . . . . . . . . . . . . . 516
Inserting imported graphic elements into structured documents . . . . . . . . . . . . . . . . . . . . . . . . . 518
Using the File Import feature . . . . . . . . . . . . . . . . . . . . . . . . . . . . . . . . . . . . . . . . . . . . . . . . . . . . . . . . . . . . 519
Importing SWF files into FrameMaker documents (Windows) . . . . . . . . . . . . . . . . . . . . . . . . . . . . . 522
Importing three-dimensional objects into FrameMaker documents (Windows) . . . . . . . . . . . 524
Chapter 17: Hypertext and view-only documents
About online systems . . . . . . . . . . . . . . . . . . . . . . . . . . . . . . . . . . . . . . . . . . . . . . . . . . . . . . . . . . . . . . . . . . . 528
Preparing areas for becoming active . . . . . . . . . . . . . . . . . . . . . . . . . . . . . . . . . . . . . . . . . . . . . . . . . . . . . 529
Inserting hypertext commands . . . . . . . . . . . . . . . . . . . . . . . . . . . . . . . . . . . . . . . . . . . . . . . . . . . . . . . . . . 532
Creating hypertext links . . . . . . . . . . . . . . . . . . . . . . . . . . . . . . . . . . . . . . . . . . . . . . . . . . . . . . . . . . . . . . . . . 536
Creating button matrices . . . . . . . . . . . . . . . . . . . . . . . . . . . . . . . . . . . . . . . . . . . . . . . . . . . . . . . . . . . . . . . . 540
Creating pop-up menus . . . . . . . . . . . . . . . . . . . . . . . . . . . . . . . . . . . . . . . . . . . . . . . . . . . . . . . . . . . . . . . . . 541
Creating alert messages . . . . . . . . . . . . . . . . . . . . . . . . . . . . . . . . . . . . . . . . . . . . . . . . . . . . . . . . . . . . . . . . . 543
Creating ways to start or open . . . . . . . . . . . . . . . . . . . . . . . . . . . . . . . . . . . . . . . . . . . . . . . . . . . . . . . . . . . 544
Creating ways to close or exit . . . . . . . . . . . . . . . . . . . . . . . . . . . . . . . . . . . . . . . . . . . . . . . . . . . . . . . . . . . . 546
Testing and troubleshooting hypertext documents . . . . . . . . . . . . . . . . . . . . . . . . . . . . . . . . . . . . . . 547
Adding hypertext links to generated files . . . . . . . . . . . . . . . . . . . . . . . . . . . . . . . . . . . . . . . . . . . . . . . . 548
Working in view-only documents and books . . . . . . . . . . . . . . . . . . . . . . . . . . . . . . . . . . . . . . . . . . . . .551
Working with FluidView format . . . . . . . . . . . . . . . . . . . . . . . . . . . . . . . . . . . . . . . . . . . . . . . . . . . . . . . . . . 553
Inserting hypertext command elements in structured documents . . . . . . . . . . . . . . . . . . . . . . . . 555
Chapter 18: HTML, XML, and Adobe PDF conversion
About HTML . . . . . . . . . . . . . . . . . . . . . . . . . . . . . . . . . . . . . . . . . . . . . . . . . . . . . . . . . . . . . . . . . . . . . . . . . . . . 556
About Adobe PDF . . . . . . . . . . . . . . . . . . . . . . . . . . . . . . . . . . . . . . . . . . . . . . . . . . . . . . . . . . . . . . . . . . . . . . . 575
About tagged Adobe PDF . . . . . . . . . . . . . . . . . . . . . . . . . . . . . . . . . . . . . . . . . . . . . . . . . . . . . . . . . . . . . . . 581
viii
Defining a tagged Adobe PDF file . . . . . . . . . . . . . . . . . . . . . . . . . . . . . . . . . . . . . . . . . . . . . . . . . . . . . . . 582
Troubleshooting and tips on PDF conversion . . . . . . . . . . . . . . . . . . . . . . . . . . . . . . . . . . . . . . . . . . . . 582
Saving structured documents as Adobe PDF . . . . . . . . . . . . . . . . . . . . . . . . . . . . . . . . . . . . . . . . . . . . .583
Defining PDF job options . . . . . . . . . . . . . . . . . . . . . . . . . . . . . . . . . . . . . . . . . . . . . . . . . . . . . . . . . . . . . . . 584
Chapter 19: Processing XML
Migration from unstructured FrameMaker to XML . . . . . . . . . . . . . . . . . . . . . . . . . . . . . . . . . . . . . . . . 586
XML with FrameMaker . . . . . . . . . . . . . . . . . . . . . . . . . . . . . . . . . . . . . . . . . . . . . . . . . . . . . . . . . . . . . . . . . . 619
XML with XSL transformation . . . . . . . . . . . . . . . . . . . . . . . . . . . . . . . . . . . . . . . . . . . . . . . . . . . . . . . . . . . . 621
XML with Cascading Style Sheets . . . . . . . . . . . . . . . . . . . . . . . . . . . . . . . . . . . . . . . . . . . . . . . . . . . . . . . . 622
XML with Schema . . . . . . . . . . . . . . . . . . . . . . . . . . . . . . . . . . . . . . . . . . . . . . . . . . . . . . . . . . . . . . . . . . . . . . . 622
Chapter 20: UNIX macros and utilities
About the UNIX version of FrameMaker . . . . . . . . . . . . . . . . . . . . . . . . . . . . . . . . . . . . . . . . . . . . . . . . . . 625
Using UNIX keyboard macros . . . . . . . . . . . . . . . . . . . . . . . . . . . . . . . . . . . . . . . . . . . . . . . . . . . . . . . . . . . . 625
Capturing UNIX screen images . . . . . . . . . . . . . . . . . . . . . . . . . . . . . . . . . . . . . . . . . . . . . . . . . . . . . . . . . . 630
Performing command-line operations with fmbatch (UNIX) . . . . . . . . . . . . . . . . . . . . . . . . . . . . . . 630
Printing with fmprint (UNIX) . . . . . . . . . . . . . . . . . . . . . . . . . . . . . . . . . . . . . . . . . . . . . . . . . . . . . . . . . . . . . 636
Copying file hierarchies with fmcopy (UNIX) . . . . . . . . . . . . . . . . . . . . . . . . . . . . . . . . . . . . . . . . . . . . . 636
Inverting images with fminvert (UNIX) . . . . . . . . . . . . . . . . . . . . . . . . . . . . . . . . . . . . . . . . . . . . . . . . . . . 636
Converting color images to monochrome (UNIX) . . . . . . . . . . . . . . . . . . . . . . . . . . . . . . . . . . . . . . . . . 637
Chapter 21: Creating accessible documents (Windows)
Authoring for accessibility . . . . . . . . . . . . . . . . . . . . . . . . . . . . . . . . . . . . . . . . . . . . . . . . . . . . . . . . . . . . . . . 638
Using accessibility features in FrameMaker . . . . . . . . . . . . . . . . . . . . . . . . . . . . . . . . . . . . . . . . . . . . . . . 638
Setting your FrameMaker workspace for high-contrast viewing . . . . . . . . . . . . . . . . . . . . . . . . . . . 639
Preparing documents for accessibility . . . . . . . . . . . . . . . . . . . . . . . . . . . . . . . . . . . . . . . . . . . . . . . . . . . 639
Testing accessibility in files using a screen reader . . . . . . . . . . . . . . . . . . . . . . . . . . . . . . . . . . . . . . . . 640
Chapter 22: Structured authoring using DITA
Introduction . . . . . . . . . . . . . . . . . . . . . . . . . . . . . . . . . . . . . . . . . . . . . . . . . . . . . . . . . . . . . . . . . . . . . . . . . . . . 642
About DITA in FrameMaker 8 . . . . . . . . . . . . . . . . . . . . . . . . . . . . . . . . . . . . . . . . . . . . . . . . . . . . . . . . . . . . 653
Using DITA in FrameMaker 8 . . . . . . . . . . . . . . . . . . . . . . . . . . . . . . . . . . . . . . . . . . . . . . . . . . . . . . . . . . . . . 656
Tips . . . . . . . . . . . . . . . . . . . . . . . . . . . . . . . . . . . . . . . . . . . . . . . . . . . . . . . . . . . . . . . . . . . . . . . . . . . . . . . . . . . . 670
Chapter 23: Adobe Technical Communication Suite features in Adobe FrameMaker
Creating and editing images using RoboScreen Capture . . . . . . . . . . . . . . . . . . . . . . . . . . . . . . . . . 671
Inserting and editing Adobe Captivate demos . . . . . . . . . . . . . . . . . . . . . . . . . . . . . . . . . . . . . . . . . . .672
Launch Adobe Acrobat Connect from Adobe FrameMaker . . . . . . . . . . . . . . . . . . . . . . . . . . . . . . . 674
Sending PDFs for review . . . . . . . . . . . . . . . . . . . . . . . . . . . . . . . . . . . . . . . . . . . . . . . . . . . . . . . . . . . . . . . . 675
Appendix A: Typing in dialog boxes . . . . . . . . . . . . . . . . . . . . . . . . . . . . . . . . . . . . . . . . . . . 677
About typing in dialog boxes . . . . . . . . . . . . . . . . . . . . . . . . . . . . . . . . . . . . . . . . . . . . . . . . . . . . . . . . . . . . 677
Windows . . . . . . . . . . . . . . . . . . . . . . . . . . . . . . . . . . . . . . . . . . . . . . . . . . . . . . . . . . . . . . . . . . . . . . . . . . . . . . . 677
UNIX . . . . . . . . . . . . . . . . . . . . . . . . . . . . . . . . . . . . . . . . . . . . . . . . . . . . . . . . . . . . . . . . . . . . . . . . . . . . . . . . . . . 679
Appendix B: Keyboard shortcuts . . . . . . . . . . . . . . . . . . . . . . . . . . . . . . . . . . . . . . . . . . . . . 681
Keyboard shortcuts for Windows . . . . . . . . . . . . . . . . . . . . . . . . . . . . . . . . . . . . . . . . . . . . . . . . .681
Keyboard shortcuts for UNIX . . . . . . . . . . . . . . . . . . . . . . . . . . . . . . . . . . . . . . . . . . . . . . . . . . . . . . . . . . . . 738
ix
Shortcuts for specific keyboards . . . . . . . . . . . . . . . . . . . . . . . . . . . . . . . . . . . . . . . . . . . . . . . . . . . . . . . . . 775
Working with structure . . . . . . . . . . . . . . . . . . . . . . . . . . . . . . . . . . . . . . . . . . . . . . . . . . . . . . . . . . . . . . . . . . 786
Index . . . . . . . . . . . . . . . . . . . . . . . . . . . . . . . . . . . . . . . . . . . . . . . . . . . . . . . . . . . . . . . . . . . . . 788
1
Chapter 1: Getting started
If you haven't installed your new software, begin by reading some information on installation and other prelimi-
naries. Before you begin working with your software, take a few moments to read an overview of Adobe® Help® and
of the many resources available to users. You have access to plug-ins, templates, user communities, seminars,
tutorials, RSS feeds, and much more.
Installation
Requirements
To review complete system requirements and recommendations for your Adobe software, see the Read Me file on
the installation CD.
Install the software
1Close any other Adobe applications open on your computer.
2Insert the installation disc into your CD drive, and follow the on-screen instructions.
Note: For more information, see the Read Me file on the installation CD.
Activate the software
If you have a single-user retail license for your Adobe software, you will be asked to activate your software; this is a
simple, anonymous process that you must complete within 30 days of starting the software.
For more information on product activation, see the Read Me file on your installation CD, or visit the Adobe website
at www.adobe.com/go/activation.
1If the Activation dialog box isn't already open, choose Help > Activate.
2Follow the on-screen instructions.
Note: If you want to install the software on a different computer, you must first deactivate it on your computer. Choose
Help > Deactivate.
Register
Register your product to receive notifications of updates and other services.
To register, follow the on-screen instructions in the Registration dialog box, which appears after you install and
activate the software.
If you postpone registration, you can register at any time by choosing Help > Registration.

ADOBE FRAMEMAKER 8
User Guide
2
Adobe Help
Adobe Help resources
Documentation for your Adobe software is available in a variety of formats.
In-product and LiveDocs Help
In-product Help provides access to all documentation and instructional content available at the time the software
ships. It is available through the Help menu in your Adobe software.
LiveDocs Help includes all the content from in-product Help, plus updates and links to additional instructional
content available on the web. For some products, you can also add comments to the topics in LiveDocs Help. Find
LiveDocs Help for your product in the Adobe Help Resource Center, at www.adobe.com/go/documentation.
Think of Help, both in the product and on the web, as a hub for accessing additional content and communities of
users. The most complete and up-to-date version of Help is always on the web.
PDF documentation
The in-product Help is also available as a PDF that is optimized for printing. Other documents, such as installation
guides and white papers, may also be provided as PDFs. All documents available in the OnlineManuals folder in the
previous versions of Adobe FrameMaker® are posted on the Adobe web.
All PDF documentation is available through the Adobe Help Resource Center, at www.adobe.com/go/
documentation.
To see the PDF documentation included with your software, look in the Documents folder on the installation or
content CD.
Printed documentation
Printed editions of the product Help are available for purchase in the Adobe Store, at www.adobe.com/go/store. You
can also find books published by Adobe publishing partners in the Adobe Store.
A printed Getting Started Guide is also included with the software.
Customer support
Visit the Adobe Support website, at www.adobe.com/support, to find troubleshooting information for your product
and to learn about free and paid technical support options. Follow the Training link for access to Adobe Press books,
a variety of training resources, Adobe software certification programs, and more.
Downloads
Visit www.adobe.com/go/downloads to find free updates, tryouts, and other useful software. In addition, the Adobe
Store (at www.adobe.com/go/store) provides access to thousands of plug-ins from third-party developers, helping
you to automate tasks, customize workflows, create specialized professional effects, and more.

ADOBE FRAMEMAKER 8
User Guide
3
Adobe Labs
Adobe Labs® gives you the opportunity to experience and evaluate new and emerging technologies and products
from Adobe.
At Adobe Labs, you have access to resources such as these:
•Prerelease software and technologies
•Code samples and best practices to accelerate your learning
•Early versions of product and technical documentation
•Forums, wiki-based content, and other collaborative resources to help you interact with like-minded developers
Adobe Labs fosters a collaborative software development process. In this environment, customers quickly become
productive with new products and technologies. Adobe Labs is also a forum for early feedback, which the Adobe
development teams use to create software that meets the needs and expectations of the community.
Visit Adobe Labs at www.adobe.com/go/labs.
User communities
User communities feature forums, blogs, and other avenues for users to share technologies, tools, and information.
Users can ask questions and find out how others are getting the most out of their software. User-to-user forums are
available in English, French, German, and Japanese; blogs are posted in a wide range of languages.
To participate in forums or blogs, visit www.adobe.com/communities.
What's new
Top new features of Adobe FrameMaker 8
Unicode support Support for the Unicode text encoding standard lets you author content in multiple languages. All
features in FrameMaker, such as find and change, markers, hypertext, and catalog entries, support Unicode. You can
export to PDF with Unicode bookmarks, tags, comments, and so on. You can import or export Unicode content from
other applications. Additional dictionaries help you author content in more languages.
Enhanced conditional text features Single-sourcing of documents is enhanced by the following features:
•Manage condition tags, using the new Manage Conditional Tag dialog box.
•Add new condition tags, using the new Add Conditional Tag dialog box.
•Rename condition tags.
•Use the New Color button in the Edit Conditional Tag dialog box to define a new color for a condition tag.
•Visually distinguish text with multiple condition tags, as the color of the text depends on the set of tags applied to
the text. For more information, see “Appearance of text with multiple condition tags” on page 307.
•Build Boolean expressions with complex combinations of condition tags and Boolean operators to generate condi-
tional output.

ADOBE FRAMEMAKER 8
User Guide
4
Enhanced Structured/XML authoring Structured authoring is improved with the following enhancements:
•XML roundtripping is enhanced to preserve XML comments as markers. System variables and Processing
Instructions (PIs) are also roundtripped.
•You can import element formatting from CSS into DTD, so you can ensure consistent formatting across different
XML applications. The CSS file can be referenced in the XML document or manually imported. Multiple CSS files
can be imported sequentially, for multi-level formatting.
•Support for single-sourcing workflows lets you filter structured documents. The single-sourcing workflows are
preserved across other XML applications, which use attribute values for filtering XML documents.
Filter By Attribute You can filter structured documents based on attribute values using complex Boolean expres-
sions. Multiple expressions can be created and saved for generating different outputs.
Track Text Edits You can track text edits made in a document. The added and deleted text are highlighted for visual
distinction. You can navigate through the edited sections and accept or reject specific changes. You can also preview
the document to see its original or final state. The changed information is preserved in the XML roundtrip.
DITA application pack The in-built DITA application pack and a DITA menu, facilitate DITA authoring. You can
generate a FrameMaker document directly from a DITA Map. You can use the standard FrameMaker features while
authoring DITA content.
3D workflows (Windows® only) You can insert 3D objects (U3D format) in FrameMaker 8 documents only. You can
also set parameters, such as default view, rendering mode, background color, and lighting scheme for the 3D object.
You can publish the document in PDF format with active 3D models. The 3D objects are preserved in the XML
roundtrip.
Support for SWF files (Windows only) You can create documents with SWF files, such as Adobe Captivate® movies.
The SWF object is preserved in the XML roundtrip.
HTTP file path support (Windows only) You can specify an HTTP path to import graphics into a document, either
by copying or by reference. The HTTP path is preserved in the XML roundtrip.
Enhanced WebDAV support The WebDAV support is extended to allow authoring and editing of XML files located
on the Web-based Distributed Authoring and Versioning (WebDAV) server.
Import of Office 2007 content (Windows only) You can import content from Microsoft® Word® and Microsoft
Excel® 2007.

5
Chapter 2: FrameMaker basics
The Welcome Screen
By default, the Welcome Screen appears when you open FrameMaker only when Adobe Flash® Player is installed in
your machine. If you want, you can prevent the Welcome Screen from appearing using the following steps.
To prevent the display of the Welcome Screen:
1Select File > Preferences > General.
The Preferences dialog box appears.
2Select the Don't Show Welcome Screen option if you don’t want this dialog box to appear when you open
the software.
3Click Set.
The Welcome Screen isn’t displayed the next time you open FrameMaker.
Note: You can also select the Don’t Show Welcome Screen Again option in the Welcome Screen.
About the workspace
The Adobe FrameMaker workspace comprises structured and unstructured interfaces. A workspace includes a
Document window with formatted contents or the Structure View window with the Element Catalog. When you
work in the unstructured workspace, the only window available is the Document window, which displays the content
of your document as it will appear on a printed page or online. Alternatively, the Document window and the
Structure View window are available when you work in the structured workspace. These windows help you organize
elements in a valid structure.
When you open the application for the first time, FrameMaker provides you with the option to work in the Unstruc-
tured FrameMaker workspace, or in the Structured FrameMaker workspace. You can change the interface you work
in by selecting the desired workspace. After you select the workspace, FrameMaker opens in the selected mode in
each successive launch of the application, regardless of the structure status of the document you open.
To switch between unstructured FrameMaker and structured FrameMaker:
1Select File > Preferences > General (Windows), or File > Preferences (UNIX®).
2In the Product Interface list, select FrameMaker or Structured FrameMaker.
3Click Set. You are prompted to restart FrameMaker for the preference change to take effect.
Components of the FrameMaker workspace
FrameMakercomprises several components and operations common to the structured and unstructured
workspaces.

ADOBE FRAMEMAKER 8
User Guide
6
Document window
A Document window appears when you open a structured or unstructured FrameMaker document. The window
shows the document with its text formatted, its graphics and other items in place, and everything laid out in a page
design. If more than one document is open, a Document window appears for each one.
Customizing the document display in the Document window
You can change the way each document window looks in the following ways:
•Zooming in and out
•Changing the preset display units
•Showing and hiding window guides
•Changing the set of menu commands
Zooming in and out
You can zoom in to focus on details or zoom out to see more. The Zoom pop-up menu, in both the Document
window and Structure View for structured documents, shows the current zoom setting.
A. Zoom pop-up menu B. Zoom Out button C. Zoom In button
You can change the zoom setting of one or more documents in a book by selecting the documents in the book
window and choosing a command from the View > Zoom menu.However, the Fit Page In Window, Fit Window to
Page, and Fit Window To Text Frame will affect only selected documents that are open.
To change the zoom setting:
❖Do one of the following:
•To magnify text and objects, click the Zoom In button. FrameMaker zooms in on the area of the page containing
the insertion point or selection. If the document doesn’t contain an insertion point or a selection, FrameMaker
zooms in on the center of the page.
•To decrease the magnification, click the Zoom Out button.
•To display text and objects at a particular magnification, select a percentage from the Zoom pop-up menu.
•To display the entire page in the current window, select Fit Page In Window from the Zoom pop-up menu.
To resize the window to the size of the page:
❖Select Fit Window To Page from the Zoom pop-up menu. If the view options are set to display facing pages, the
window is resized to accommodate two pages side by side.
To resize the window to the size of the text frame:
❖Select Fit Window To Text Frame from the Zoom pop-up menu.
A
C
B
A
C
B

ADOBE FRAMEMAKER 8
User Guide
7
To change the available zoom settings:
1Select Set from the Zoom pop-up menu.
2Do one of the following:
•To change the available zoom settings, select the percentage you want to change and enter the new percentage.
Enter any percentage from 25% to 1600%. The values are sorted in the ascending order, so you can enter values in
any text box.
•To return to the default percentages, click Get Defaults.
Note: You can customize the default zoom settings. For information, see the online manual Customizing FrameMaker
on the Adobe website: www.adobe.com/devnet/framemaker/pdfs/Customizing_Frame_Products.pdf.
3Click Set.
To make 100% zoom match the page size in Windows:
1Select File > Preferences > General.
2For Monitor Size, specify the diagonal size of your monitor, and then click OK.
If screen-to-paper fidelity is not critical, you may want to leave Monitor Size set to Default. This ensures cross-appli-
cation compatibility, which is important if you frequently edit embedded OLE objects within a document.
Changing the preset display units
Some text boxes in dialog boxes require a unit of measurement (such as points or inches) for the value you enter. You
can specify the default units for font size and line spacing (font size units) and for other measurements (display
units). The default units of measurement appear after the values in the text boxes. If you enter a value without a unit
of measurement, FrameMaker uses the default unit.
To change the preset units:
1Make the appropriate document window or book window active. If a book window is active, select the documents
you want to work in.
2Select View > Options.
3Specify values for Display Units and Font Size Units, and then click Set.
To enter different units in a text box:
❖Enter one of the following abbreviations for the units along with the numeric value:
•cm to specify centimeters
•mm to specify millimeters
•" or in to specify inches
•pc, pi, or pica to specify picas
•pt or point to specify points
•dd to specify didots
•cc or cicero to specify ciceros
•Q to specify Q units (refers to font size and line spacing for Japanese language only)
FrameMaker converts the entry to the preset display units when you click a command button in the dialog box.

ADOBE FRAMEMAKER 8
User Guide
8
For example, if your document’s display units are picas and if you want to set a paragraph indent of 1 inch, enter 1"
in the First Indent text box. When you click Apply, the measurement changes to the number of picas that corre-
sponds to 1 inch.
Showing and hiding window guides
You may want to show several visual guides in the document window. The following types of guides are available:
•Borders around text frames, graphic frames, and imported objects
•Markers, paragraph returns, and other symbols in running text
•Rulers along the top and left side of the window
You can also show a grid of horizontal and vertical lines for drawing, resizing, and aligning graphics. For information
on this grid, see “Using grids” on page 311.
The visual guides are all nonprinting, so you do not need to hide them when you print.
To show or hide visual guides:
1Make the appropriate document window or book window active. If a book window is active, select the documents
you want to affect.
2Do the following:
•To show or hide borders, select View > Borders. (If the book window is active, select View > Show Borders or
View > Hide Borders.)
•To show or hide the text symbols, select View > Text Symbols. The following symbols may appear in the
document window.
•To show or hide the rulers, select View > Rulers.
To change the spacing of ruler or grid intervals:
1Make the appropriate document window or book window active. If a book window is active, select the documents
you want to affect.
2Select View > Options.
3Select a new setting from the Rulers pop-up menu or from the Grid pop-up menu, and click Set.
Text symbol Meaning
End of paragraph
End of flow and end of table cell
Tab
Anchored frame and table anchor
Marker
Forced return
Manual equation alignment point
Nonbreaking space
Discretionary hyphen
Suppress hyphenation

ADOBE FRAMEMAKER 8
User Guide
9
Changing the set of menu commands
You can display a subset of menu commands called quick menus. The quick menus do not have commands for
formatting text, editing some aspects of graphics, and inserting some objects such as markers and variables.
If you do not see all the menu commands described in this manual, you may have the quick menus displayed.
Note: If you’re using a structured document, your application developer may have changed the commands available in
the complete menus.
To display the quick menus:
❖Select View > Menus > Quick.
To return to the complete menus:
❖Select View > Menus > Complete.
To customize menus:
❖Add, move, or remove menus and commands as described in the online manual Customizing FrameMaker.
This manual is available on the Adobe website: www.adobe.com/devnet/framemaker/pdfs/
Customizing_Frame_Products.pdf.
File display options
FrameMaker contains an option that allows you to display the file name before the path in the frame titles of
document windows, so that you can see the file name if a long path name would otherwise hide it.
•In Windows, there is a new flag, DisplayFileLeafFirst, in the initialization file, maker.ini. If the value
is On, the file name in the document or book window title is shown in the format filename pathname. This format
is also used to display the file name in the dialog that lists all open files. By default the value is set to Off, the line
is marked as a comment, and the file name is displayed in the format pathname filename, as previously.
•In UNIX, there is a new boolean xresource, Maker.displayFileLeafFirst. When this is set to True, the
file name in the document or book window title is shown in the format filename pathname. By default the value
is set to False, and the file name is displayed in the format pathname filename, as previously.
The flag does not affect how the root name of the folder or directory tree is shown in individual file names inside the
book window.
Paging through a document in the Document window
You can page through a Document window using controls in the status bar.
A. Previous Page button B. Next Page button
You can also define how FrameMaker displays pages when you scroll—up and down, left and right, or two pages at
a time.
If the document you are paging through is part of an open book, FrameMaker may display an alert message
prompting you to choose to open the next or previous document in the book. For example, if you click the Previous
Page button on the first page of a document, clicking Yes in the alert message box will open the previous document
in the book. The last page of that document will appear.
AB

ADOBE FRAMEMAKER 8
User Guide
10
To go to another page:
❖Do one of the following:
•To go to the next page, click the Next Page button.
•To go to the previous page, click the Previous Page button.
•To go to the first page in the document, Shift-click the Previous Page button.
•To go to the last page in the document, Shift-click the Next Page button.
•To go to a specific page or the page containing a specific line number, click in the Page Status area, specify the page
or line number you want to display, and click Go.
•To go to the page containing the insertion point, click in the Page Status area, click Page Containing the Insertion
Point, and click Go.
•To move quickly through the pages, scroll vertically.
You can click or select in the Structure View to display the corresponding page in the document window.
This is often the quickest way to go to the page you want. For information on working in Structure View, see “The
Structure View window” on page 12.
To set how pages scroll:
1Make the appropriate document window or book window active. If a book window is active, select the documents
you want to affect.
2Choose View > Options.
3Choose one of the following options from the Page Scrolling pop-up menu:
•To display pages from top to bottom (for example, page 2 below page 1), choose Vertical.
•To display pages from left to right (for example, page 2 to the right of page 1), choose Horizontal.
•To display pages two at a time, side by side, choose Facing Pages.
•To display as many pages as will fit in the window from left to right, choose Variable.
4Click Set.
To make pages display more quickly:
❖Do the following:
•Open the document by bypassing the update of imported graphics, cross-references, and text insets. (Opening a
document without updating references makes a document open faster but may slow down the display of
individual pages.) For more information on this, see “Opening documents without updating references” on
page 23.
•Turn off the display of graphics by choosing View > Options, deselecting the Graphics option, and clicking Set.
The graphics also do not appear in print.
•Display small text as gray bars by choosing File > Preferences > General, entering a point size in the Greek Screen
Text Smaller text box, and clicking Set. Whenever text in your document is displayed in a point size smaller than
the size you specified, it appears on the screen as a gray bar.
Using command shortcuts
You can use the following types of shortcuts in a structured or unstructured document:
•Keyboard shortcuts for all commands (for a list of these shortcuts, see the online Help).

ADOBE FRAMEMAKER 8
User Guide
11
•The QuickAccess bar, which has several pages of commands for working with documents and editing text,
graphics, and tables
•The Formatting bar, which contains text formatting commands
•The Track Text Edit bar, which contains commands for tracking, accepting, and rejecting text edits
•The context pop-up menus, which have commands that are useful at the location of the pointer
Important: When using structured documents, keep in mind that shortcuts have the same effect on your document’s
structure as their menu-command equivalents. For example, if you paste an element using a context menu, the element
may not be valid at its new location. Or if you change text to italics using a QuickAccess command, you may be
overriding an element’s format rules.
You can view multiple documents in different tabs. When you select the Tabbed Bar option in the View menu, the
tabs of open FrameMaker document windows appears.
FrameMaker also provides a formatting bar for quickly modifying a paragraph’s spacing, alignment, or tab stops. You
should use this bar only in an unstructured document, because in structured documents these properties are usually
handled by elements. For more information, see “Changing text without using the catalogs” on page 103.
Note: If you select text to which different font types, font sizes, and paragraph tags have been applied, the Paragraph
Format, Font Name, and Font Size menus in the Formatting bar will display blank entries. For example, if you select
text containing font sizes 12 and 14, the entry in the Font Size menu will appear blank.
Using the QuickAccess bar
You can keep the QuickAccess bar open in the workspace and click commands as you need them. See the Quick
Reference Card for a list of the available commands.
To display the QuickAccess bar:
❖Select View > QuickAccess bar.
To use the QuickAccess bar:
❖Do any of the following:
•To select a command from the bar, click the command button.
•To display a different group of commands, click on the bar.
•To change to vertical or horizontal orientation, click on the bar.
•To view help for the commands, click on the bar.
To close the QuickAccess bar:
❖Do one of the following:
•(Windows) Select View > QuickAccess bar.
•(UNIX) Place the pointer on the bar and press Control+c.
Using context menus
The context menus contain commands for the item under the pointer—for example, text, a graphic, selected table
cells, or the document as a whole when the pointer is in the margin.
To display a context menu:
❖Right-click.
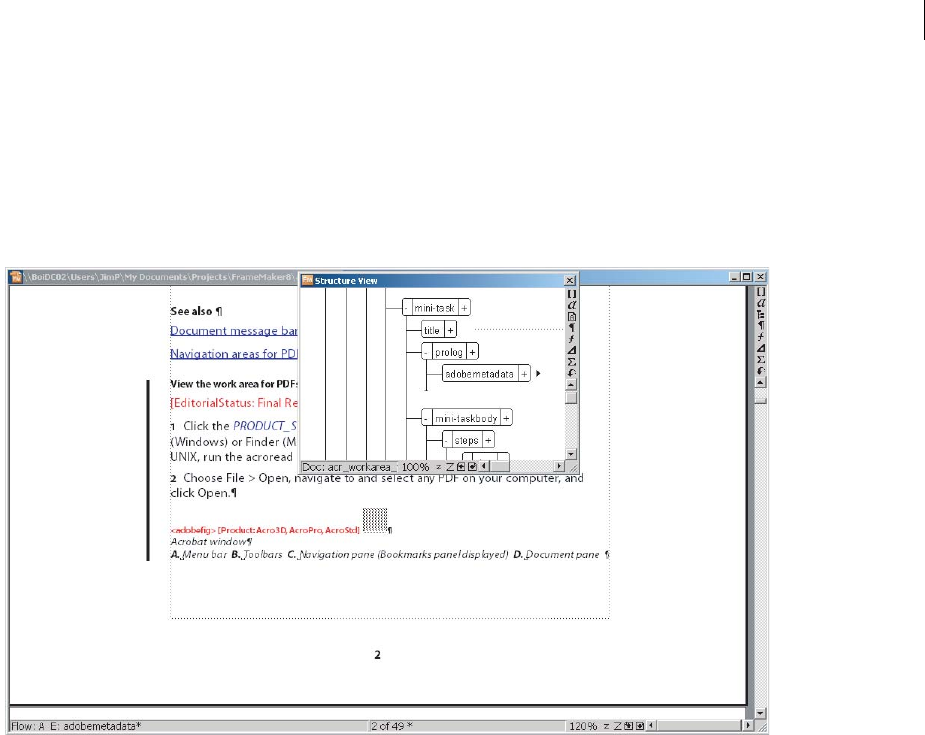
ADOBE FRAMEMAKER 8
User Guide
12
Understanding the structured workspace
About the structured workspace
When you work with structured documents, you’ll use the Document window and the Structure View window with
the Element Catalog. These windows help you organize elements in a valid structure.
Contents and structure information
To work with the structured workspace, you must be in the Structured FrameMaker interface. For information on
working in Structured FrameMaker, see “About the workspace” on page 5.
The Structure View window
The Structure View window shows a hierarchy of elements for the document (or the flow within a document) that
has the insertion point or selection. The view uses bubbles to represent elements and their relationship to one
another, and it identifies errors in the document’s structure. You can also display attributes in the Structure View.
The document window and Structure View are both editable, and anything you do in one is mirrored in the other.
You can have the two views open side by side, to keep track of both contents and structure. If you click or select in
one view, an insertion point or selection appears at the equivalent place in the other view, and any editing you do in
one is reflected in the other. If you click or select in an unstructured flow in a document window, the Structure View
is empty.
Note: If you are using the OpenWindows windows system for UNIX, you cannot resize the Structure View window when
the pushpin feature is turned on.
To display the Structure View:
❖Click the Structure View button at the upper right corner in the document window.
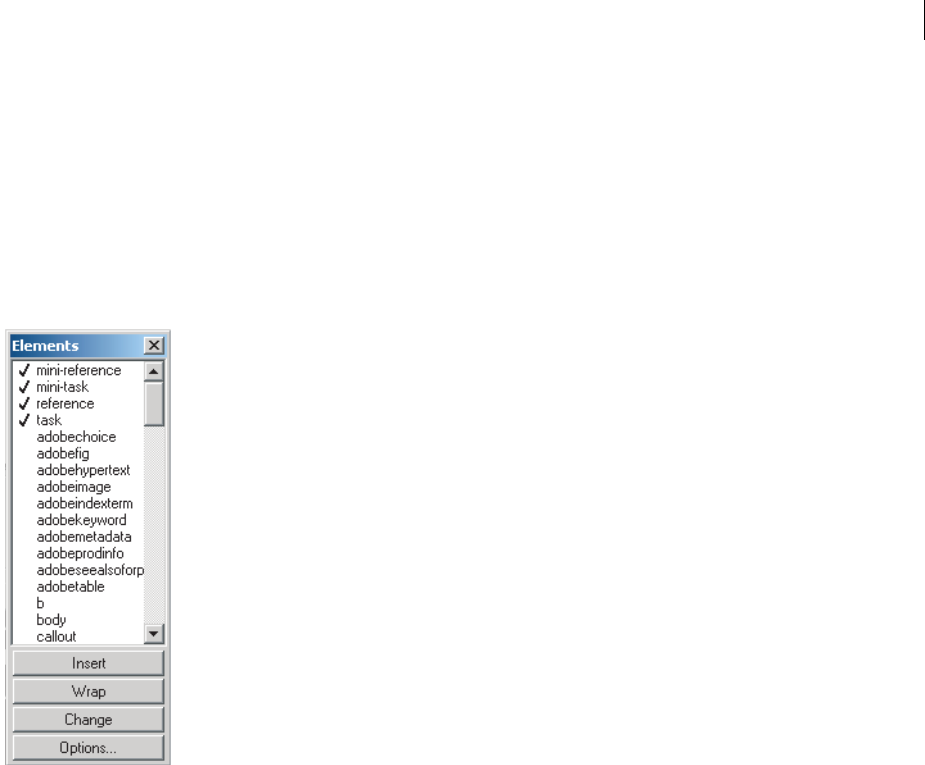
ADOBE FRAMEMAKER 8
User Guide
13
You edit text and other contents in the document window. You can edit the structure of a document in either view,
but it’s usually easier to make your changes in the Structure View, where you can drag and drop bubbles to rearrange
elements or select bubbles to edit them in other ways.
The structured document’s Element Catalog
A structured document’s Element Catalog lists the elements you can use at the current location, provides commands
for adding and editing elements, and may display other information about the current location, such as whether you
can type text.
Element Catalog
To display the Element Catalog:
❖Click the Element Catalog button at the upper right in the document window.
The information in the Element Catalog comes from content rules in the definition for the current element—
the element with the insertion point or selection. The current location is the position of the insertion point or
selection in that element.
The catalog is initially preset to show only the elements that are valid at the current location, though you can have it
display more elements if you want greater flexibility (see “Changing the scope of elements available in a structured
document” on page 18).
The catalog is empty if you click or select in an unstructured flow, if the document does not have any element defini-
tions, or if no more elements are required at the current location and no optional elements are available.
The Element Catalog uses the following symbols to identify whether an element is valid:
Heavy check mark The element is valid at the current location. If you insert the element, the current (parent)
element will be correct and complete up to this location.
Plus sign (+) The element is an inclusion (SGML only) in the current element and is valid at the current location.
The plus sign always appears next to a heavy check mark. Inclusions are valid only in SGML documents, so this sign
will not appear in XML documents.

ADOBE FRAMEMAKER 8
User Guide
14
Even though inclusions are as valid as elements identified with just a heavy check mark, you might find it helpful
to list inclusions separately (see “Changing the scope of elements available in a structured document” on page 18).
If a document has many inclusions, it can be difficult to find other valid elements in the catalog.
Question mark (?) The element is a possible replacement for the element right after the insertion point or for the
selected elements. It is valid at the current location, but will make child elements after it invalid. If you insert an
element with a question mark, the current (parent) element will be complete and correct up to this location, but
you’ll have to correct errors after the new element.
Light check mark The element is valid later in the current element. If you insert one of these elements, the current
(parent) element will be correct but incomplete up to this location. You’ll have to go back and fill in missing
child elements.
No symbol If an element in the catalog has no symbol, it is not valid at the current location or later in the current
element. It may be valid earlier in the current element or outside the element.
The Element Catalog may also include the following indicators to provide other information about the
current location:
<TEXT> You can type text at this point.
<UNDEFINED> The current element does not have a definition in the document. The element was probably pasted
from a document with different element definitions. (This does not appear when the catalog is set to display all
elements.)
<INVALID> The contents of the current element are invalid. (This does not appear when the catalog is set to display
all elements.)
You can use buttons in the Element Catalog to insert an empty element, wrap an element around contents, and
change the type of an existing element. For details on working with the catalog, see “About elements” on page 521.
Customizing the display of the structured workspace
You can customize the FrameMaker workspace by showing element boundaries and other guides in a document
window, showing attributes for new elements in the Structure View, and changing the set of menus in the menu bar.
Collapsing and expanding elements
You can collapse an element bubble in the Structure View to stack the element and all of its descendants into a single
bubble. This does not affect the placement of the insertion point, the contents of the element, or the way in which
the element appears in the document window.
Collapsed element
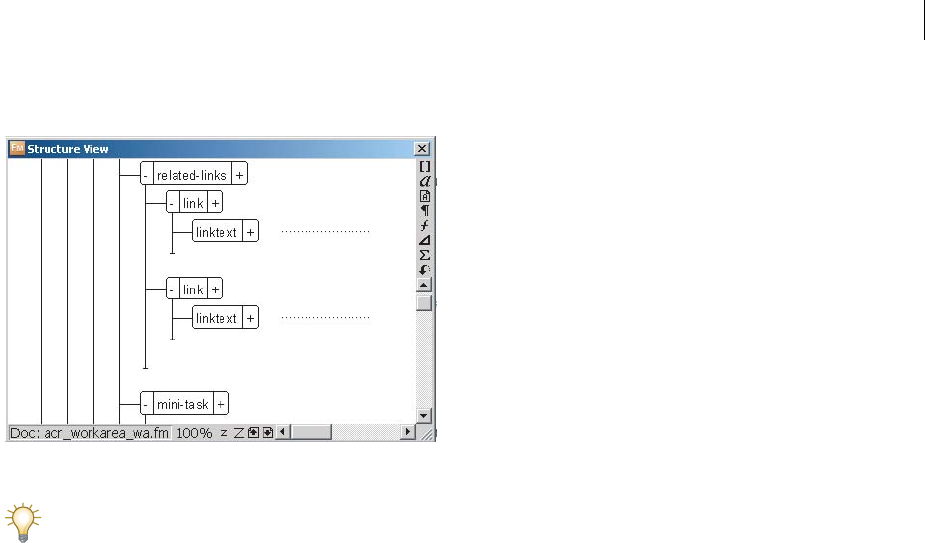
ADOBE FRAMEMAKER 8
User Guide
15
Expanding an element shows all the bubbles again.
Expanded element
Collapsing elements gives you a higher-level look at a document’s structure and makes it easier to move elements
around. You may find it especially helpful to collapse long lists of items and procedures with many steps.
When an element has descendants, a plus sign or minus sign appears on the left side of the element’s bubble:
•A plus sign (+) appears when the element is collapsed, indicating that more element bubbles are available for
viewing. The plus sign is red if there is invalid content anywhere inside the collapsed element.
•A minus sign (–) appears when the element is expanded.
To collapse or expand an element:
❖Click the minus sign or plus sign on the left side of the element’s bubble.
To collapse or expand an element and all its siblings:
❖Shift-click the minus sign or plus sign on the left side of the element’s bubble.
Showing and hiding attributes for an element
An element may be defined to have attributes, which provide supplemental information about the element. For
example, an attribute might describe the draft version of a Chapter element or the level of classification of a Memo
element. For more information on the uses of attributes, see “Attributes for elements” on page 522.
You can show all of an element’s attributes, none of its attributes, or only the attributes that are required or have a
value. You can also show or hide attributes for all new elements you add to a document (see “Changing the scope of
elements available in a structured document” on page 20).
When an element is defined to have attributes, a plus sign or minus sign appears on the right side of the
element’s bubble:
•A plus sign (+) appears when some or all of the attributes are hidden, indicating that more attributes are available
for viewing.
•A minus sign (–) appears when all the attributes are showing.
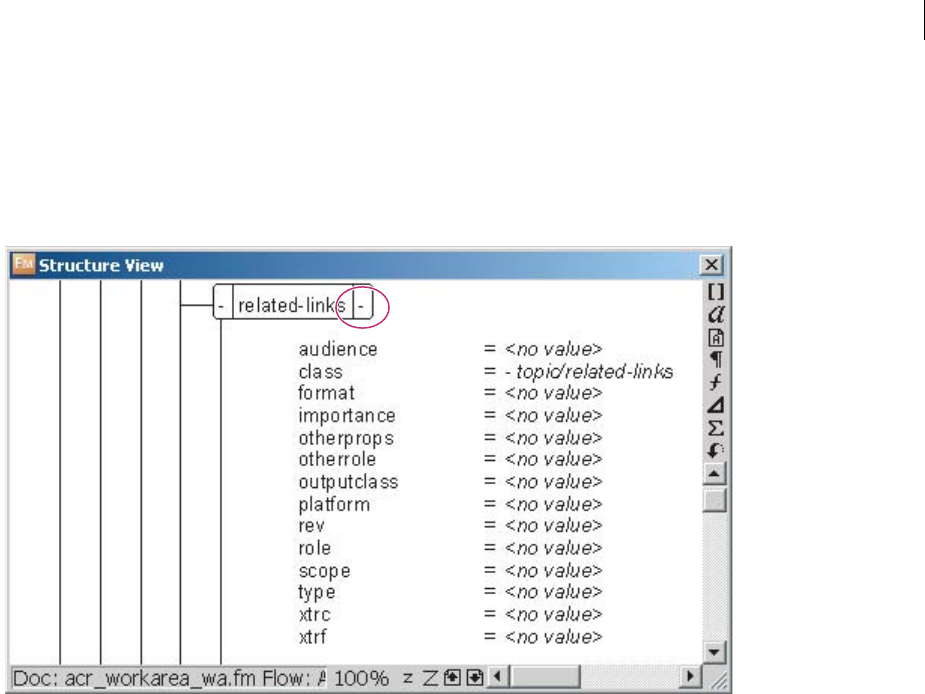
ADOBE FRAMEMAKER 8
User Guide
16
To show or hide attributes for an element:
❖Click the plus sign or minus sign on the right side of the element’s bubble.
As you click the sign, you cycle through three possible displays. Clicking a minus sign hides the attributes. If no
attributes are showing, clicking a plus sign shows attributes that are required or have a value. If some attributes are
already showing, clicking a plus sign shows all the attributes.
Click the minus sign to the right of the element to hide attributes. The sign will become a plus sign. Click the plus sign to show attributes that
are required or have an attribute. The sign then becomes a minus sign. Click the minus sign again to show all attributes.
To show or hide attributes for an element and all its siblings:
❖Shift-click the plus sign or minus sign on the right side of the element’s bubble.
Showing and hiding element boundaries
Element boundaries mark each element’s beginning and end in a document window. Working with boundaries
showing can help you see how a document’s contents fit into its elements, and can make it easier to place an insertion
point properly or to make the right selection.
For most elements, the boundaries can appear as opening and closing brackets ( [ ] ) or as two boxes with an element
tag. For some elements (graphics, footnotes, markers, tables, and equations), the element’s location can be marked
only by one box with a tag. Table parts themselves, such as table titles and cells, do not display element boundaries.
However, element boundaries do display inside of table parts.
When elements are inside other elements, their brackets or tags nest to show the hierarchy.
Note: The brackets and tags that mark element boundaries are characters that both print and occupy document space.
You may wish to hide them before printing to prevent them from printing and to view a document layout that is not
altered by the element boundaries.
To show or hide bracket element boundaries:
1Make the appropriate document window or book window active. If a book window is active, select the documents
you want to affect.
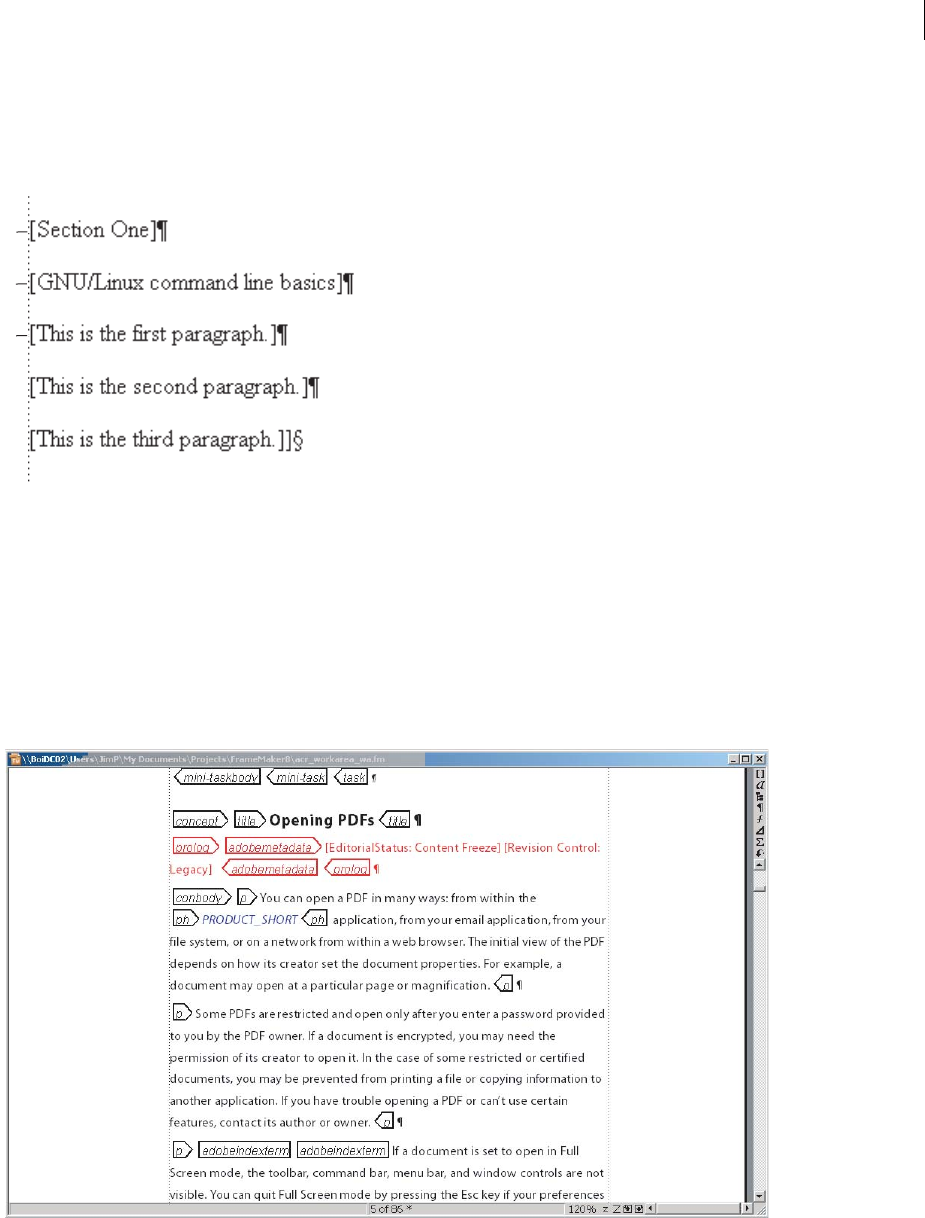
ADOBE FRAMEMAKER 8
User Guide
17
2Select View > Element Boundaries. (If the book window is active, select View > Show Element Boundaries or
View > Hide Element Boundaries.)
Most types of elements have an opening bracket ( [ ) and a closing bracket ( ] ).
A. Section element B. Head element C. Para element
To show or hide tag element boundaries:
1Make the appropriate document window or book window active. If a book window is active, select the documents
you want to affect.
2Select View > Element Boundaries (as Tags). If the book window is active, select View > Show Element Boundaries
(as Tags) or View > Hide Element Boundaries (as Tags).
Most types of elements have an opening boundary tag and a closing boundary tag. Some elements, such as footnotes,
have no boundary tags. They appear as a single tag.
Tag eleme nt boundaries
C
B
A

ADOBE FRAMEMAKER 8
User Guide
18
Showing and hiding attributes for new elements
You can show or hide attributes for new elements in the Structure View. The view can display all the attributes in the
flow, none of the attributes, or only the attributes that are required or have a value. This setting applies to new
elements as you enter them.
You can also show or hide attributes for an individual element (see “Showing and hiding attributes for an element”
on page 17).
To show or hide attributes for new elements:
1Make the appropriate document window or book window active. If a book window is active, select the documents
you want to affect.
2Select View > Attribute Display Options, choose the display option you want, and click Set.
Changing the scope of elements available in a structured document
When adding elements to a structured document, you may want to insert only elements that are valid at the current
location. (These are the elements that have heavy check marks, heavy check marks and a plus sign, and question
marks in the Element Catalog.) If you prefer to add elements this way, you can work from the beginning of a
document to the end and be sure that its structure is valid at every point along the way.
There may be times when you want to work more loosely though, and in these cases you can make more elements
available. For example, some draft documents may not need to adhere strictly to a predefined structure, but will
follow the structure only as a guideline. Or you may plan to make your document conform to a structure but do not
have all the information you need to complete it from start to finish.
When more elements are available, the additional elements appear in the Element Catalog and are available if you
insert elements from the keyboard. You can also list inclusions after other valid elements in the catalog.
The Element Catalog displays symbols to identify valid elements (see “Using the structured document’s Element
Catalog” on page 15). When showing invalid elements, you can still use the symbols as suggestions for building a
valid structure.
To change the scope of elements available:
1Make the appropriate document window or book window active. If a book window is active, select the documents
you want to affect.
2Select Element > Set Available Elements. You can also click Options in the Element Catalog.
3Select one of the following options in the Show Tags For area:
•To show only elements that are valid for the current location, select Valid Elements for Working Start to Finish.
Use this option if you plan to go through a document from start to finish and fill in the elements in their correct
order and hierarchy.
•To show elements that are valid for the current location or later in the current element, select Valid Elements for
Working in Any Order. Use this setting if you plan to build a valid document but not necessarily by working from
start to finish. This is helpful if you don’t have all the information you need.
•To show elements allowed anywhere in the current element, select Elements Allowed Anywhere in Parent.
Use this setting if you want more flexibility for filling in elements. You can insert elements that are invalid and
correct the errors later.
•To show all elements defined for the document, select All Elements. Use this setting if you’re not building a valid
document, if you want flexibility and will correct errors later, if you’re wrapping elements around contents, or if
you want to see what’s available elsewhere in the document.

ADOBE FRAMEMAKER 8
User Guide
19
•To show a set of elements that you specify, select Customized List. Use this setting to work with a subset of the
elements, to display elements in a fixed order, or to work with a list that is static instead of context-sensitive.
4If you selected Customized List, click Edit and create or change a list of elements.
To move element tags between the Show and Don’t Show lists, use the arrow buttons or double-click the element tags.
Transfer all of the elements from one list to another by holding down Shift as you click an arrow button. Click the
Move Up and Move Down buttons to arrange the elements in the Show list in the order you want them to appear in
the Element Catalog. Click Set when the list is the way you want it.
Note: A customized list of tags is always the same regardless of the location of the insertion point, so be careful to include
all the tags you’ll need. The only indication of validity is a check mark next to a tag.
5To list inclusions separately in the Element Catalog, turn on List After Other Valid Elements.
This groups the inclusions right after the other valid elements. Use this setting if you have a large number of inclu-
sions that you rarely need.
6Click Set.
Working with unstructured FrameMaker documents
Creating documents
You can create a document by using a template that defines how a document looks. Or you can start with the equiv-
alent of a blank paper. When you create a document, a document window appears. For information about the
Document window, see “Document window” on page 6.
In FrameMaker, you can create either structured or unstructured documents. Structured documents are required for
working with SGML and XML formats, while unstructured documents are not set up for exporting to SGML or
XML. For information on working with structured documents, see “Working with structured FrameMaker
documents” on page 32.
Creating documents from templates
Templates are the foundation of the FrameMaker approach to document publishing. They affect every aspect
of a document’s appearance and help to keep that appearance consistent from one page to the next and from
one document to another. Unstructured FrameMaker comes with Standard Templates for letters, memos, fax,
envelope, reports, outlines, pagination sheet, newsletters, and books. However, you can use any document as a
template. If the document contains text and graphics, you can delete them and then insert your own.
To create a document from a template:
1Choose File > New > Document. In UNIX, you can also click New in the main FrameMaker window.
2Navigate to the document you want to use as a template (either the standard ones or your own). If you want to use
a standard template—one in the FrameMaker Templates folder—but the contents of another folder appear in the
New dialog box, navigate to the Templates folder in one of the following locations:
•(Windows) The FrameMaker8 folder.
•(UNIX) The fminit/language/Templates directory within the FrameMaker installation location. (In the path
above, replace language with the name of the language you’re using—for example, usenglish or ukenglish.)

ADOBE FRAMEMAKER 8
User Guide
20
3Select a template and click New (Windows) or Create (UNIX). The new, untitled document contains the formats
and content from the template.
To view information about the standard templates, choose File > New > Document, click Explore Standard
Templates, and select a template in the scroll list. After viewing the information, click Create to create an
empty document from the selected template, or click Show Sample to view a document that contains sample text
and graphics.
Creating documents from blank paper
If no standard template or other existing document looks the way you want, you can use a blank paper document. A
document created from blank paper includes a few basic formats. You can use these formats as is, change them, or
create new ones.
You can customize the document FrameMaker uses to create portrait, landscape, and custom documents.
For details, see “Changing templates for blank paper and text files” on page 414.
To create a document from blank paper:
1Choose File > New > Document. In UNIX, you can also click New in the main FrameMaker window.
2Do one of the following:
•To create a standard one-column document, click Portrait or Landscape.
•To create a document with exactly the page size, margins, and number of columns you want, click Custom.
3If you clicked Custom, do the following and then click Create:
•Choose a preset page size or enter the width and height for the pages.
•Enter the number of columns and a gap. The gap is the space between columns.
•Enter values for the margins, as measured from the edge of the page.
•Select a pagination option. If you select Double-Sided, choose Right 1st Page or Left 1st Page from the pop-up
menu to determine the side on which the document starts.
•Choose the display units for the document. Display units are the units that FrameMaker uses when it measures
distances in your document. These display units appear in dialog boxes and in the document window’s status bar.
For information, see “Changing the preset display units” on page 7.
Opening documents
In addition to FrameMaker documents, you can open text files, files in MIF (Maker Interchange Format), files in
MML (Maker Markup Language), and XML and SGML documents in Structured FrameMaker. You can also open
files created in other applications, such as Microsoft Word, if the required filter is installed. Much of the file’s
formatting is retained when you open the file. For information on filters, see the online manual Using Filters.
When you open a document, a Document window appears.
To open a file:
1Select File > Open. In UNIX, you can also click Open in the main FrameMaker window.
2Locate the document you want to open and click Open. If FrameMaker displays an alert message or a dialog box
before opening the document, see “Messages and dialog boxes that may appear when opening documents” on
page 21.

ADOBE FRAMEMAKER 8
User Guide
21
Opening a document usually updates graphics imported by reference, text insets, cross-references, and system
variables (if there are any). For information on preventing automatic updating of references, see “Opening
documents without updating references” on page 23 and “Suppressing automatic updating of cross-references” on
page 209.
You can limit the files listed in the Open dialog box by entering wildcards (regular expressions in UNIX) in
the Open File Named text box. For example, if you enter *.new, you see any folder or document that has the
extension .new. If you enter Chapter?, you see any folder or document whose name consists of Chapter followed by
a single character. To re-display the entire contents of the folder, enter * in the text box.
To open a recently opened document:
1Go to the bottom of the File menu, which lists the last five files you opened.
2Select the file.
Messages and dialog boxes that may appear when opening documents
If one of the following alert messages or dialog boxes appears, you must click OK or provide more information before
continuing.
Missing fonts or font metric information If you click OK to continue, new fonts replace the missing ones. As a result,
line breaks, page breaks, and the width of text lines may change (see “Troubleshooting unavailable fonts” on page 21).
Missing imported graphics Skip the missing graphic or specify a new location for it (see “Locating missing graphics”
on page 510).
Missing text insets Click OK to continue opening the file. You can locate the insets later (see “Locating the source
of unresolved text insets” on page 507).
Text file Specify how to convert the text lines to paragraphs. For details, see “Opening text files” on page 22.
Unresolved cross-references Click OK to continue opening the file. You can resolve the cross-references later
(see “Resolving cross-references” on page 209).
Unknown file type Select a file type in the list and click Convert to continue opening the document.
Troubleshooting unavailable fonts
You may get an alert message that indicates the document you’re opening uses unavailable fonts. Fonts can become
unavailable for a number of reasons: the document may have been edited on a different system with fonts not
installed on the system you’re using; a font may have been removed or become damaged; the default printer for your
system may have been changed.
If the Remember Missing Font Names option in the Preferences dialog box is selected, FrameMaker preserves the
names of unavailable fonts. If missing font names are remembered, the original fonts will reappear when you open
the document on a computer that has the fonts installed, even if you save the document with substitute fonts.
To fix the problem of missing fonts, consider the following options:
Check for damaged fonts Determine whether the fonts that are unavailable in FrameMaker are installed on your
system and available in another application. If another application can use fonts that FrameMaker cannot use, the
fonts may be damaged. Reinstall them using the original media. For more information on troubleshooting font
problems, isolating damaged fonts or a damaged fonts folder, or reinstalling Type 1 fonts, see the Adobe Web site.

ADOBE FRAMEMAKER 8
User Guide
22
Remap unavailable fonts If you cannot install or reinstall the unavailable fonts, you may want to permanently remap
the unavailable fonts to available fonts, so that the alert message does not appear when you open the document. You
do this by deselecting the Remember Missing Font Names option in the Preferences dialog box before you open the
file. However, be aware that doing this will cause you to lose the original font information referenced in the
document.
Switch printers (Windows only) FrameMaker reads font information stored in the printer driver so that it can make
fonts stored at the printer available for use within FrameMaker. In some cases, changing the default printer can
change one or more fonts available in FrameMaker.
Obtain and install the missing fonts For example, if you and a co-worker are editing the same documents, and you
would like to use the same fonts as your co-worker, consider purchasing and installing copies of the fonts.
Opening text files
Text-only files do not contain graphics or formatting information. When you open a text-only file, you may be asked
to confirm that it is a text file.
To open a text file:
1Select File > Open, and open a .txt file (see “Opening documents” on page 20). The Unknown File Type dialog
box appears.
2Select the Text option.
3Click Convert. The Reading Text File dialog box appears.
4Select one of the following options:
•To break the text into paragraphs only at blank lines, select Merge Lines into Paragraphs. Use this option for a
paragraph-oriented text file such as a file containing document text.
•To break the text into paragraphs at the end of each line, select Treat Each Line As a Paragraph. Use this option
for a line-oriented text file, such as a file containing computer code.
•To convert the text into a table, select the Convert Text to Table. Use this option if the content of your source file
is tabulated.
5Select the desired Encoding scheme. By default, the Japanese encoding scheme is selected.
6Click Read. The text appears in a document that is created from a special template. You can customize the template
so that documents created from text files are formatted differently (see“Changing templates for blank paper and text
files” on page 414).
7If you selected the Convert Text to Table option, the Convert to Table dialog box appears.
8Select the desired options and click Convert. The text file content is converted into a table and opened as a
FrameMaker document.
Opening documents that are in use
You can avoid making changes to documents that are already opened by others.
A lock file (*.lck) is created every time you open a document. This lock file prevents others from making changes to
the file while you work in it. A lock file is in the same folder as the original document, and is removed when you close
the document.
In Windows, you can turn off file locking. For details, see “Using files across platforms” on page 31.

ADOBE FRAMEMAKER 8
User Guide
23
If you try to open a document that’s already open and if you have write permission to the document, a dialog box
appears, showing the name of the document, who opened it last and when, and the computer on which it is open.
You might also see this dialog box after a system crash when you open a document you were last using.
To open a document that’s already in use:
1Open the file (see “Opening documents” on page 20).
2Do one of the following:
•If you want to look at the file but not change it, click Open for Viewing Only, and then click Continue. The
document appears in View Only format.
•If you want to edit a copy of the file, click Open Copy for Editing, and then click Continue.
•If you want to edit the file and you know that no one else is using it, click Reset File Lock and Open, and then click
Continue. Use this option after a system crash to open a document that was open at the time of the crash.
Opening documents in an earlier version of FrameMaker
Using FrameMaker 8 you can open .fm files you created using FrameMaker 7. However, if you want to open .fm files
you created using FrameMaker 6 or earlier, you must save them as MIF files. You can then open these MIF files in
FrameMaker 8.
Opening documents without updating references
A document can open slowly if it contains many cross-references to other files, large imported graphics, or many text
insets. You can open a document faster by bypassing the update of imported graphics, cross-references, and text
insets. However, if you use this method to open documents, keep in mind that FrameMaker will not warn you about
missing items or unresolved cross-references. For this reason, you should occasionally open a document in the
normal way.
To open a document without updating references:
1Choose File > Open, and select the file you want to open.
2Do one of the following:
•(Windows) Control-click Open.
•(UNIX) Shift-click Open.
After the file is open, FrameMaker will import and display graphics as needed on a page-by-page basis. You can
manually update cross-references and text insets by using Edit > Update References. If the page display is too slow,
reopen the document in the usual way. For displaying pages faster, see “Customizing the document display in the
Document window” on page 6.
Opening files after a system crash
If your system crashes, an automatically saved file will contain recent changes to the file. A file is saved
automatically in the following situations:
•If you selected Automatic Save in the General Preferences dialog box, autosave files (whose filename contains
.auto) are created at regular intervals.
•If your system becomes unstable, FrameMaker tries to create a recover file (whose filename contains .recover) with
your most recent changes.

ADOBE FRAMEMAKER 8
User Guide
24
To reopen a file after a system crash:
1Open the file you were working on last (see “Opening documents” on page 20).
2Do one of the following:
•If a recover file exists, open it when prompted and check whether your latest changes are there. If they are, save the
recover file with the same name as the document you were originally working on and then delete the recover file.
•If no recover file exists, open the autosave file when prompted and save it with the same name as the file you were
originally working on. The autosave file contains all the changes you made up until the time of the last automatic
save. The amount of work lost depends on the time interval you set between saves and when your system crashed.
Saving documents
You can save a document using its current name and location, or save a copy of the document using a different name
or location. You can save a document in several formats, including Hypertext Markup Language (HTML), Extensible
Markup Language (XML), and Portable Document Format (PDF).
When a document or a book needs to be saved, an asterisk (*) appears in the Page Status area of the status bar.
An asterisk indicates unsaved changes.
It’s a good idea to avoid using accented characters, symbols, and other special characters in your filenames.
You may encounter problems if you try to open the file in another operating system.
To save a document:
1Do one of the following:
•To overwrite the current version on the disk, choose File > Save.
•To save the file in a different folder or using a different name, choose File > Save As.
2If you choose the Save As command, or if the file has never been saved, specify the new filename and location. If
you want to save the file in a different format, choose the format from the pop-up menu (see “File formats you can
save in” on page 25).
3Click Save. If you choose Text Only format, you must specify how to treat the text and tables in the document (see
“Saving documents in Text Only format” on page 26).
To save a book:
1Do one of the following:
•To overwrite the current version on the disk, choose File > Save Book.
•To save the file in a different folder or using a different name, choose File > Save Book As.
2If you choose the Save Book As command, or if the file has never been saved, specify the new filename
and location.
Note: The Save Book As command saves the book file only, not the files in the book. If you are saving the book to a new
location, you will need to open and save each file individually.
To save all open documents:
❖Hold down Shift and choose File > Save All Open Files.

ADOBE FRAMEMAKER 8
User Guide
25
To return to the saved version of your document:
❖Choose File > Revert to Saved and click OK.
File formats you can save in
You can use the Save As command to save a file in the following formats:
Document 8.0 Saves the FrameMaker 8 document or book as a document or book that you can open and edit in
FrameMaker 8.
View Only 8.0 Produces a book or document that users can open but can’t edit. If you accidentally save a file in View
Only format, you can make it editable by pressing Esc Shift+f l (lowercase L) k. Then you can save the document or
book in Document or Book format.
Document 7.0 Saves the FrameMaker 8 document or book as a 7.0 document or book that you can open and edit in
FrameMaker 7.0. FrameMaker 8 specific features are ignored in FrameMaker 7.0.
MIF 8.0 Creates a text file containing FrameMaker 8 statements that describe all text and graphics. To avoid
overwriting your original document, save the MIF file under a different name. (For example, add a .mif extension to
the name.) For information on MIF, see the online manual MIF Reference.
MIF 7.0 Creates a text file containing FrameMaker 7.0 statements that describe all text and graphics. To avoid
overwriting your original document, save the MIF file under a different name. (For example, add a .mif extension to
the name.) For information on MIF, see the online manual MIF Reference.
Text Only Creates a text file without graphics or formatting information. To avoid overwriting your original
document, save the text file under a different name. (For example, add a .text extension to the name.) For infor-
mation, see “Saving documents in Text Only format” on page 26.
PDF Creates a Portable Document Format (PDF) file that can be viewed in Adobe Acrobat® and other applications
that support PDF files (see “About Adobe PDF” on page 575).
SGML Creates an SGML file with the contents, elements, and attributes from your document (see “Opening and
saving structured files” on page 60).
HTML Creates an HTML document that can be viewed on the World Wide Web. For information on adjusting the
mapping of paragraph and character tags to predefined HTML elements, see “Adjusting HTML mappings” on
page 561.
Note: When you save a structured FrameMaker document as HTML, all attributes with the same name are mapped to
the same value, even if the attributes have different values for different elements. To use different values for these
attributes after exporting, use a text editor to edit the resulting file.
XML Creates an XML document that can be used for data exchange and viewed on the World Wide Web. For more
information, see “Saving a structured document in SGML or XML format” on page 63.
Other file formats Create files that can be read by other applications. For example, you can save in Rich Text Format
(RTF), which is supported by many word processors, or in any other format for which an export filter is installed.
Most formatting is preserved, and formats are usually converted to word-processing styles. For details, see the online
manual Using Filters and “Using Save As to export to other formats” on page 515.
Note: You can use the Print command to save a PostScript® file (see “Creating PostScript files” on page 30).
Filename extensions for saved files (Windows)
When you save a file for the first time in Windows, FrameMaker automatically adds these extensions: .fm for
documents, .book for book files, and .mif for MIF files. With these extensions, the files will continue to be recognized
as FrameMaker files by the Windows operating system.

ADOBE FRAMEMAKER 8
User Guide
26
If you don’t want these special extensions to be added to the filenames you assign, enclose the filenames in double
quotation marks. Windows won’t recognize a file without one of these extensions as a FrameMaker file, but you’ll
still be able to open the file in FrameMaker.
If you assign an extension that’s registered by another application (for example, .doc), your extension won’t be
replaced by the FrameMaker extension.
Saving documents in Text Only format
Saving a document in Text Only format creates a text file with the text encoding of your choice: ANSI (Windows),
ISO Latin-1 (UNIX), or ASCII. (On Japanese-language systems, you can also use JIS, Shift-JIS, or EUC. On other
Asian-language systems, you can use encodings for the supported languages.) Only ordinary text—text in text
frames and tables—is saved; graphics, text in graphic callouts, footnotes, and formatting information are not saved.
Reformat line lengths and hyphenation as needed before saving the file (see“Changing indents and alignment” on
page 111 and “Changing hyphenation and line breaks” on page 119).
If some characters are not available in the text encoding that you choose, those characters will be replaced in the text
file. For example, when you save a document in Text Only format using ANSI (Windows), ISO Latin-1 (UNIX), or
ASCII encoding, spaces (including thin, en, em, and numeric spaces) are converted to regular spaces.
To save a document as text only:
1Choose File > Save As.
2Specify the filename and location, and choose Text Only format.
3Click Save.
4Do one of the following:
•To break each line into a separate paragraph, click At the End of Each Line. This option maintains a file’s original
line breaks and blank lines. Use this option for a line-oriented file such as computer code.
•To merge adjacent lines into paragraphs and insert a carriage return only at blank lines, click Only Between
Paragraphs. Use this option for paragraph-oriented files, such as files containing document text.
5If you want to save table text, select Include Text from Table Cells. Then do the following:
•Specify the order in which you want the table cells saved (row by row or column by column).
•Choose whether to separate cells with tabs or with carriage returns by choosing items from the pop-up menus.
6If the text file will be used on a platform that uses a different text encoding, choose an appropriate encoding from
the Text Encoding pop-up menu.
7Click Save.
Exporting XML from unstructured documents
You can export both structured and unstructured files to XML. The mapping used by the export to specify what
element to create for each paragraph tag in the source FrameMaker file is defined on a reference page, and the export
function creates an XML file and a corresponding cascading style sheet (CSS), which can be used with the document.
For information on exporting structured documents as XML, see “Saving a structured document in SGML or XML
format” on page 63.
To save a document in XML format:
1Do one of the following:
•Select File > Save As XML.

ADOBE FRAMEMAKER 8
User Guide
27
•Select File > Save As and choose XML from the pop-up menu. Give the filename an extension of .xml.
2Specify the file location.
3Click Save.
Backing up and saving automatically
FrameMaker can back up and save your work automatically.
To specify an automatic save option:
1Do one of the following:
•(Windows) Choose File > Preferences > General.
•(UNIX) Choose File > Preferences.
2Do the following:
•To create a backup file every time you save, select Automatic Backup on Save. This creates a copy of the file before
your latest changes are saved. If a backup file already exists, the new backup file overwrites it. (The filenames of
backup files contain .backup.)
•To create an autosave file at regular intervals, select Automatic Save and enter an interval (in minutes) in the text
box. This causes a copy of the file to be saved periodically without your having to choose File > Save. (The
filenames of autosave files contain .auto.) When you save manually or revert to the last-saved version with the
Revert to Saved command, the autosave file is deleted.
3Click Set.
Adding metadata to a document
FrameMaker includes built-in support for Extensible Metadata Platform (XMP). Metadata, or file information,
is descriptive information that can be searched and processed by a computer. Use it to provide information about the
contents of a document, and to preserve information about a document that will be opened in other Adobe applica-
tions. If you export the file to PDF, much of this metadata will appear in Acrobat.
Metadata tags travel with the document and describe its content. By embedding them in your documents, you make
the documents easier to track, manage, and retrieve.
Note: Metadata in a book file may override metadata in a document file. If your document is part of a book file, you
may want to open the book file and select the document before you add metadata.
To add metadata to a document:
1Make the appropriate document window or book window active. If a book window is active, select the documents
you want to affect.
2Choose File > File Info.
3Enter the desired information in the text box next to any or all categories.
4For Marked, choose Yes if the document is copyrighted, or No if the document is explicitly in the public domain.
Choose Unknown if you’re not sure.
5Click Set.

ADOBE FRAMEMAKER 8
User Guide
28
Printing documents
When you print a document, you can specify options such as how many copies to print and whether to print crop
marks and registration marks. The available options vary slightly with the platform and the printer you are using.
When you’re working with structured documents, element boundaries, either as brackets or as tags, are printable
characters. If you’re showing these boundaries in the document window, you may want to hide them before you print
(see “Showing and hiding element boundaries” on page 16).
Note: For PostScript printing, FrameMaker recommends a PostScript Level 2 or higher output device. Make sure you use
a print driver and PPD for such a device.
For information on printing a book made up of several documents, see “Printing from a book window” on page 467.
Important: If you have turned off graphics in the View Options dialog box, graphics will not appear in the
printed document.
Note: The Printing feature supports the Unicode text encoding standard.
To print a document:
1Choose File > Print.
2Specify the page range you want to print.
3Select other print options, and then click Print.
In UNIX, if you want to change the print settings for a document but don’t want to print it yet, change the settings
in the Print dialog box and click Save Settings Only.
Print options
The following print options are available for all printers. All these options are in the Print dialog box. For information
on additional options available for your printer, see your printer documentation.
Note: (Windows) FrameMaker products for Windows have no control over the abilities or limitations of any printer
driver. FrameMaker products can only support printer drivers that have been approved for use in the version of Windows
FrameMaker is running on. If you are using an outdated printer driver, you may experience problems, such as lost
graphics and characters and the inability to open documents. See the Adobe Web site for information on installing the
latest PostScript drivers.
Collating To print one complete copy before printing the next copy, select Collate when you’re printing multiple
copies. Printing might be slower when Collate is selected.
Printing double-sided To print a double-sided document when you’re not using a duplex printer, print the odd-
numbered pages, turn the paper over in the printer, and print the even-numbered pages. Depending on how your
printer produces pages, you may need to select Last Sheet First before you click Print, because turning the paper over
in the printer may reverse the page order.
Changing page order To print a document starting with the last page, select Last Sheet First.
Printing more quickly To print a document more quickly, select Low-Resolution Images. In Windows, imported
images are printed as gray boxes. In UNIX, they are printed with lower resolution.
Printing crop marks and registration marks To print a document with crop marks and registration marks, choose an
option from the Registration Marks pop-up menu. In some instances, you may want to scale down the printed page
image so that crop marks and registration marks will fit on the page.
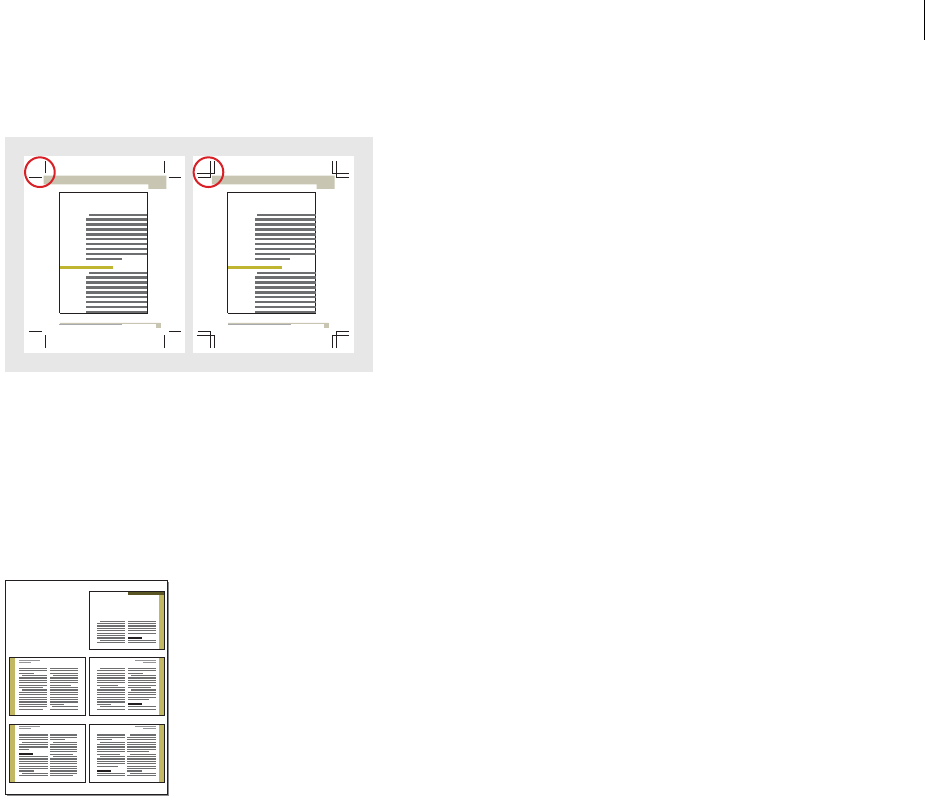
ADOBE FRAMEMAKER 8
User Guide
29
You can choose between Western and Tombo (Japanese) crop marks.
Western and Tombo crop marks
Reducing or enlarging the page image To print a reduced or enlarged page image centered on the page, enter a
percentage in the Scale text box.
Printing thumbnails To print thumbnails (small images of several pages on one page), enter values in the Thumb-
nails text boxes. In the Rows text box, enter the number of thumbnails you want to print down the page. In the Cols
text box, enter the number of thumbnails you want to print across the page.
Thumbnails
Skipping blank pages (Windows) To prevent printing blank pages, select Skip Blank Pages.
Printing colors in black and white To ensure that colored items (FrameMaker drawn images and text) are printed in
black and white rather than in shades of gray, do one of the following:
•(Windows) Select Spot Color As Black/White.
•(UNIX) Edit the beginning of the ps_prolog file in $FMHOME/fminit. The ps_prolog file contains instructions
for changing print settings. Changes to the file take effect immediately. To make changes without affecting other
users, save a copy of the file with the changes to your personal fminit folder (~/fminit/ps_prolog).
Feeding paper manually To print the document on paper that is not in your printer’s paper cassette, do one of
the following:
•(Windows) Choose File > Print Setup. Choose Manual Feed from the Source pop-up menu, and click OK.
•(UNIX) Select Manual Feed.
Note: (Windows) The Print Document dialog box in FrameMaker contains some options that may also appear in the
Windows printer Properties dialog box, such as the number of copies. When you print a document, FrameMaker printer
settings override Windows printer settings.
Chapter 1: Color and
Commercial Printing
1
Chapter 1: Color and
Commercial Printing
1
1
C
OLOR AND
C
OMMERCIAL
P
RINTING
Chapter
1
1
1
1
1

ADOBE FRAMEMAKER 8
User Guide
30
Changing paper size (UNIX) To print the document on a different paper size, choose a paper size from the Paper Size
pop-up menu, or type the dimensions in the Width and Height text boxes. Because these dimensions describe the
physical size of the paper in the printer’s paper cassette (not the orientation of the document), the Width setting
should always match the width of the edge of the paper that feeds into the printer.
If your document’s pages are larger than the size of the paper, you’ll see an alert message. If you decide to print the
document, the printer crops the document.
Downloading fonts (UNIX) To choose the fonts to download to the printer, choose from the Download Roman Fonts
pop-up menu. You don’t need to download fonts that are already in the printer’s memory or on a hard disk attached
to the printer. For example, if your printer contains the Standard 35 fonts, choose All but Standard 35. To enable
subsetting and downloading of Asian fonts, select the Download Asian Fonts option. If your document includes
TrueType fonts and you’re printing to a PostScript Level 1 printer, select the Download TrueType as Type 1 option.
The Standard 35 fonts (Avant Garde, Bookman, Courier, Helvetica, Helvetica Narrow, New Century Schoolbook,
Palatino, Symbol, Times, Zapf Chancery, and Zapf Dingbats font families) are usually included with
PostScript printers.
You can modify the UNIX font configuration file (fontlist) to override the Download options in the Print dialog box.
To print out a list of resident fonts on a PostScript printer, print the printerfont.ps script located in the
$FMHOME/fminit/pstools folder.
Using a different printer (UNIX) To use a different printer, choose the printer name from the Destination pop-up
menu. All printers configured for your computer should appear in the pop-up menu. If a printer doesn’t appear, or
if you’re using a special printing script (for example, to send a fax), choose Other Printer from the pop-up menu and
type the appropriate parameters into the text box that appears.
Creating PostScript files
You can create a description of a document called a PostScript file (also called a print file). You might use a PostScript
file to download the document later to a PostScript printer or to send the document to a service provider for
typesetting. In addition, you can create an Adobe PDF file; see “Enabling and disabling SWF file embedding in
PDFs” on page 580.
To create a single print file from a document:
1Choose File > Print.
2Do one of the following and then click Print:
•(Windows) Select Print to File and enter the path and filename in the text box, or click Browse to specify a folder
and filename.
•(UNIX) Choose PostScript File from the Destination pop-up menu and enter the path and filename in the text
box, or click Browse to specify a directory and filename.
You might want to enter a .ps extension for your PostScript file.
To create a single print file for a book:
1In the book window, choose File > Print Book, or select the documents you want to print and choose File > Print
Selected Files.

ADOBE FRAMEMAKER 8
User Guide
31
2Do one of the following and then click Print:
•(Windows) Select Print to File and enter the path and filename in the text box, or click Browse to specify a folder
and filename. Choose Single File from the Save Book As (or Save Selected Files As) pop-up menu. Then click
Print.
•(UNIX) Choose Single PostScript File from the Destination pop-up menu and enter the path and filename in the
text box, or click Browse to specify a directory and filename. Then click Print.
To create a series of separate print files for a book:
1In the book window, choose File > Print Book, or select the documents you want to print and choose File > Print
Selected Files.
2Do one of the following:
•(Windows) Select Print to File and enter the path and filename in the text box, or click Browse to select a folder
and type a filename. Choose Single File or Separate File for Each Document from the Save Book As or Save
Selected Files As pop-up menu. Then click Print.
•(UNIX) Choose PostScript File for Each Document from the Destination pop-up menu, and then click Print.
Using files across platforms
You help keep FrameMaker files fully compatible across platforms with compatibility preferences. For more infor-
mation on cross-platform and network compatibility, see the online manual Working on Multiple Platforms, which
is located in the OnlineManuals folder.
To change compatibility preferences:
1Do one of the following:
•(Windows) Choose File > Preferences > General.
•(UNIX) Choose File > Preferences.
2Do the following:
•To preserve the names of unavailable fonts when FrameMaker substitutes existing fonts, select Remember Missing
Font Names. The original fonts will reappear when you open the document on a system that has the missing fonts
installed. For more information, see “Troubleshooting unavailable fonts” on page 21.
•(Windows) To display errors that FrameMaker finds as it opens files, select Show File Translation Errors.
•(Windows) To specify another platform with which to maintain filename compatibility, choose a setting from the
Cross-Platform pop-up menu.
•(Windows) To warn a user on a network before opening and modifying the document if it is already open for
another user, select Network File Locking.
•(Windows) To add a FrameImage facet to bitmap graphics imported by copying, select Save FrameImage with
Imported Graphics. Each graphic will be saved in its native format and in FrameImage format (a format that is
supported on all platforms). When you open the document on another computer or on a platform that doesn’t
support the native format, the FrameImage copy will be used.
3Click Set. The settings take effect immediately.

ADOBE FRAMEMAKER 8
User Guide
32
Closing documents
You can close a document at any time. If you have unsaved changes, you’ll be asked whether you want to save the
changes. (A document with unsaved changes contains an asterisk in the Page Status area of its status bar.)
If imported graphics, text insets, cross-references, or system variables were updated when you opened your
document, the document is marked as changed (with an asterisk in the status bar) when it opens. Similarly, because
printing a document causes cross-references (if there are any) to be updated, printing a file may also cause a
document to be marked as changed.
To close a document:
❖Choose File > Close.
To close all open documents:
❖Hold down Shift and choose File > Close All Open Files.
Working with structured FrameMaker documents
Elements in structured documents
You can add elements to a document to build its structure, and you can edit existing elements in many ways.
The Structured FrameMaker interface guides you so that you build a structure that is valid.
If you create a FrameMaker document by opening a structured file, you do not need to add elements to it. The
document already has elements generated from the structured markup. But you can edit the document’s elements,
and add more elements, just as if you had created the document in FrameMaker.
About elements
To build a document’s structure, you can either add elements to the document and then fill in the contents, or select
existing contents and wrap them in elements.
A structured document has element definitions stored in its Element Catalog. These definitions describe the
allowable contents for each type of element the document can have, and they may also specify attributes and
formatting for the elements. If all the elements in a document have contents and attributes that meet these specifi-
cations, the document is valid.
Valid contents for elements
An element’s definition has content rules that determine what the element can contain. For example, the definition
of a Section element might specify that a Section must begin with a Head element, then must have a Para element,
and then can have any combination of Para, Figure, and other Section elements. A Para element might allow text and
CrossRef elements, in any order.
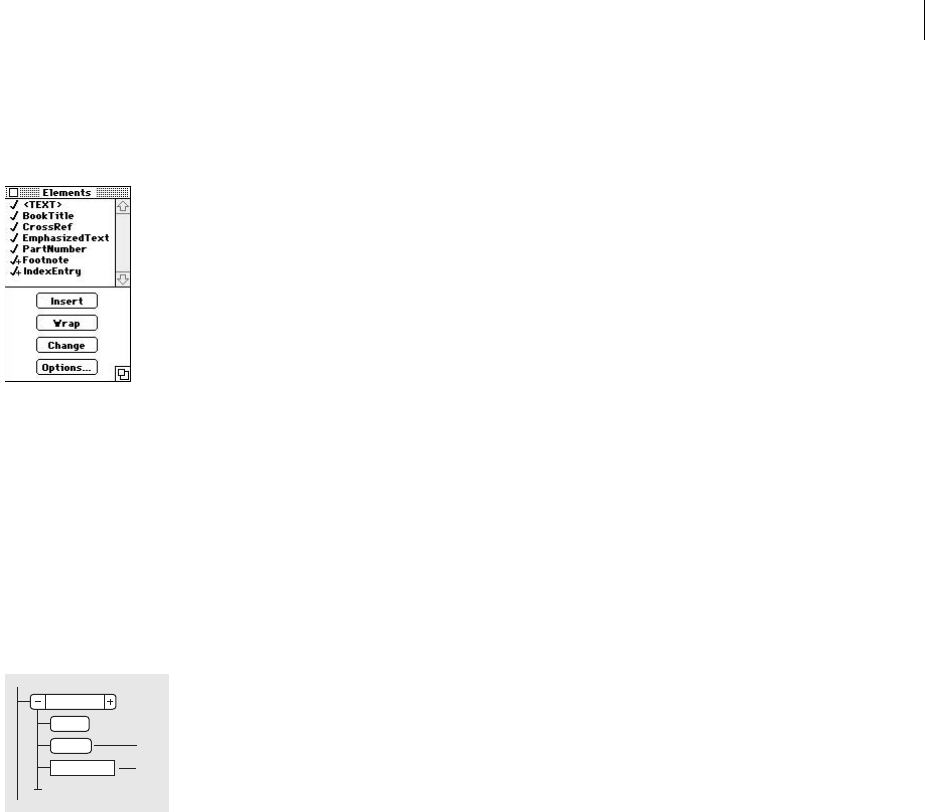
ADOBE FRAMEMAKER 8
User Guide
33
You don’t need to know the specifics about whether or where your contents will be valid. Use the Element Catalog
as a guide—it lists elements that are valid for the current location and tells when text is allowed. (Valid elements have
a heavy check mark in the catalog.)
Valid contents for the current location
Two classes of elements
Elements fall into two basic classes determined by their allowable contents:
•A container element can hold text, other elements, or both. Container elements build the document’s structure.
In a typical document, most elements are containers—such as heads, paragraphs, sections, and tables. These
elements are represented in the Structure View by bubbles with round corners.
•An object element is a single object—a marker, cross-reference, system variable, equation, or anchored frame. You
cannot type in these elements or add child elements to them. Object elements are represented by bubbles with
square corners.
A. Containers have round-cornered bubbles.
B. Object elements have square-cornered bubbles.
A container element can be defined to remain empty. For example, a table cell might be empty as part of a table’s
design. If an element is defined as empty, its text snippet in the Structure View is <EMPTY>. If an element contains
only spaces or nonprintable characters such as tabs, the snippet is <WHITESPACE>.
Section
Head
Para
CrossRef
A
B
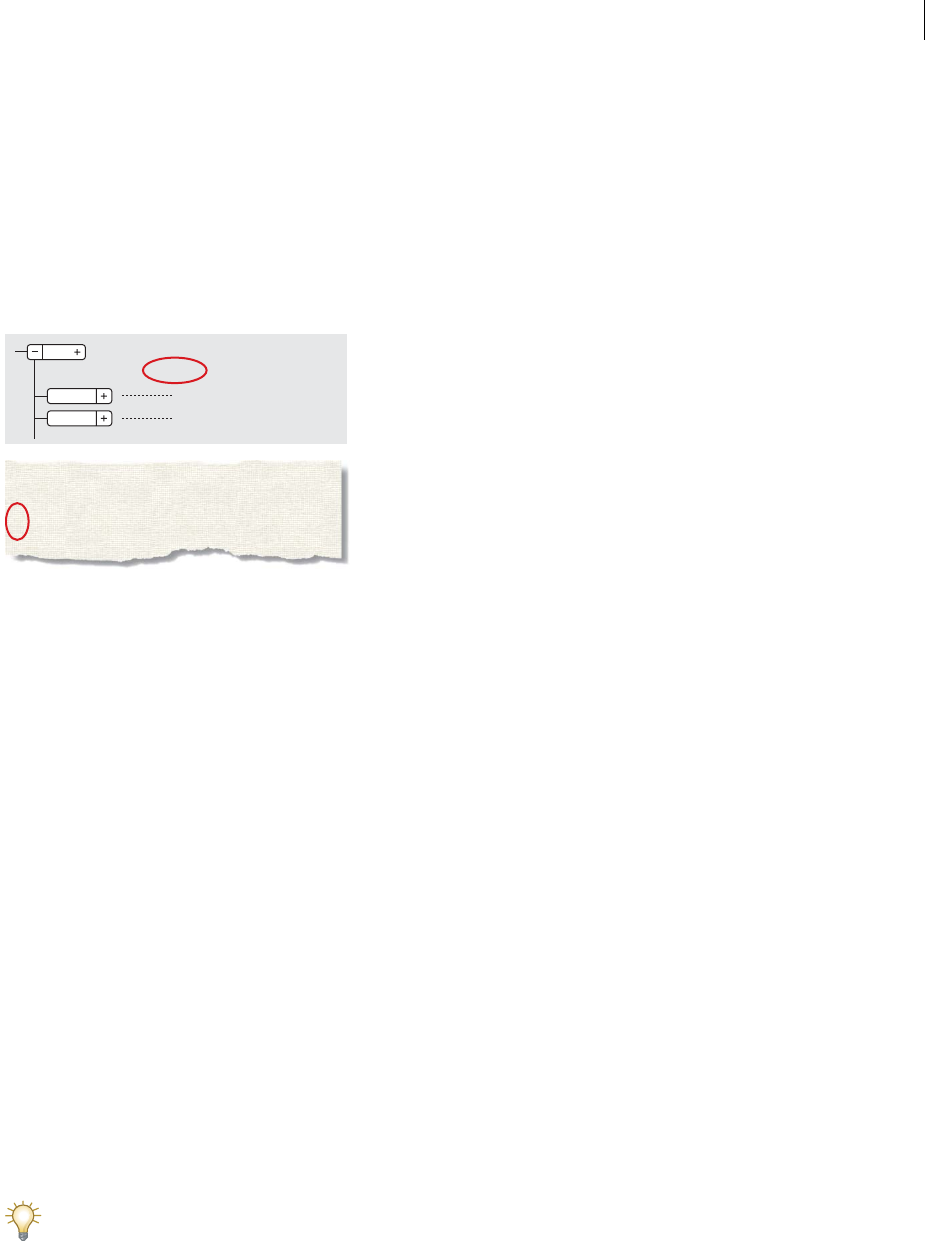
ADOBE FRAMEMAKER 8
User Guide
34
Attributes for elements
An element can have attributes, which provide information about the element that is not part of the element’s
contents. You can show attributes and their values in the Structure View.
Attributes are optional—it is up to the developer to define them for an element. Your document might use attributes
for several purposes:
•To control the formatting of an element. For example, a Type attribute in a List element might have two possible
values—Bulleted and Numbered—that determine whether the list has bulleted or numbered items. Or a Prefix
attribute in a Note element might provide text such as Important to display at the beginning of the note.
Attributes can provide formatting information.
•To record descriptive information about an element. For example, an attribute called Security in a Memo element
might describe the level of classification for the memo, such as TopSecret. An attribute value can even affect how
the file is processed—a TopSecret value, for example, might trigger a custom routine that hides the element when
the document is displayed.
•To store source and destination information for elements, typically for cross-referencing. For example, a Section
element might have an ID attribute that stores a unique value. A Cross-Reference element that points to the
Section stores the same value in a Reference attribute, to maintain the connection between the elements. This use
of attributes conforms to structured requirements.
You typically enter and edit the values for attributes, unless the attributes are defined to be read-only. (ID attributes
used in cross-references are often read-only so that they will be generated by FrameMaker.)
Adding elements
To add an element to a document, you either insert an empty element and enter contents, or wrap an element around
existing contents. If the element has been defined to have attributes, you can also provide attribute values as you add
the element.
Note: Before you can begin, your document must have element definitions in its Element Catalog. If necessary, import
the element definitions from a structured template (see “Importing element definitions” on page 44).
The Element Catalog shows the elements that are available at the current location. You can change the scope of
elements available—for example, to show elements that are not valid at the current location (see “Changing the scope
of elements available in a structured document” on page 18).
Ask your application developer for a summary of what each element can contain. It may be helpful to refer to this
information as you work.
9.2.2.1 When to Install Door Panels
Install door panels under the following conditions:
1. when a door panel has been removed to be repaired or unjammed
2. when a damaged door panel is being replaced with a new one
1. when a door panel has been
2. when a damaged door panel
List
Type = Numbered
ListItem
ListItem

ADOBE FRAMEMAKER 8
User Guide
35
When you add an element, you may see text or other elements inserted along with it. For example, if you insert
a Note element, the word Note may appear, or if you insert a List element, a ListItem child element may appear. An
element’s definition determines whether text or child elements are inserted automatically.
Note: Element names support the Unicode text encoding standard.
Adding elements to an empty document
You add structure to an empty document by inserting elements one at a time. You can enter all the elements in their
correct order and hierarchy as you go along, or you can work more loosely, concentrating on contents rather than on
structure, and then validate later to correct errors.
To add elements to an empty document:
1If the document does not have element definitions, import the definitions (see “Importing element definitions”
on page 44).
2Specify the scope of elements available (see “Changing the scope of elements available in a structured document”
on page 18).
3Insert elements from the Element Catalog (see “Adding elements” on page 34). Begin at the highest-level element
and then let the catalog guide you.
4If necessary, supply attribute values (see “Assigning attribute values” on page 46).
5Add contents to the elements. You can add contents as you insert elements, or later.
Validate the document and correct any errors (see “Validating documents” on page 52).
Adding elements to a document with contents
You add structure to an existing unstructured document by wrapping its contents in a hierarchy of elements.
The conversion process retains formatting in paragraphs, tables, and in objects of all types (cross reference, marker,
graphic, equation, footnote, system variable, Rubi and Rubi group). (If the document has a conversion table, you can
apply the table to the document to give it structure, rather than adding structure manually. See “Adding structure to
documents using conversion tables” on page 66.)
Enhanced conversion to structure
The conversion tool that allows you to add structure to unstructured documents is enhanced in several ways:
•The root element can now be specified in the conversion table and added automatically, where it was previously
necessary to add it manually after performing the conversion.
Specify “RE:RootElement” in the first column of the conversion table, and the name of the root element in the
second column.
•The conversion process can now retain formatting in paragraphs, tables, and in objects of all types (cross
reference, marker, graphic, equation, footnote, system variable, Rubi and Rubi group).
Use the FrameMaker utility "Create and Apply Formats" before conversion to turn format overrides and untagged
formatted text into named paragraph and character formats, which can be carried forward into the structured
document and EDD.
For additional details of conversion table specifications and how the conversion is performed, see Appendix A,
“Conversion Tables for Adding Structure to Documents,” in the Structure Application Developer’s Guide.
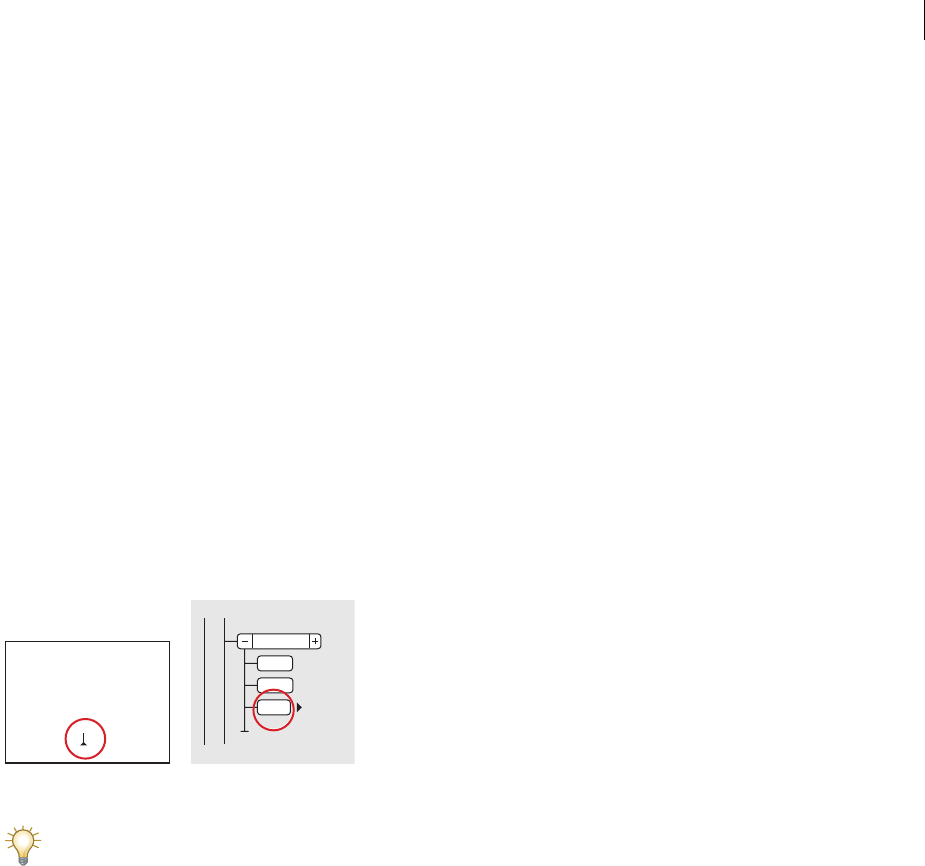
ADOBE FRAMEMAKER 8
User Guide
36
To add elements to a document with contents:
1If the document does not have element definitions, import the definitions (see “Importing element definitions”
on page 44).
2Specify the scope of elements available (see “Changing the scope of elements available in a structured document”
on page 18). You may find it easier to use the All Elements option.
3Select contents and wrap them in elements from the Element Catalog (see “Adding elements” on page 34). Begin
at the lowest levels and work your way up.
4If necessary, supply attribute values (see “Assigning attribute values” on page 46).
5Change the NoName element to the valid highest-level element. The NoName element is created as the
highest-level element once you wrap your initial content. Change elements with default tags (such as TABLE)
to valid elements.
6Validate the document and correct any errors (see “Validating documents” on page 52).
Inserting elements
You can insert an empty element and then fill it in with contents. If you have turned on element boundaries, then
once you insert an element, a pair of element boundaries appears in the document window, and a new bubble appears
in the Structure View.
Empty element boundaries (left) and bubble for the new element (right)
If you haven’t yet fully planned your document, you may want to insert just the high-level elements, such as Section
and Head elements, and then use this structure as an outline for developing the document.
To insert an element using the Element Catalog:
1Click where you want to insert the element. If you’re inserting it between other elements, you might find it easier
to work in the Structure View rather than the document window.
2Select an element tag in the Element Catalog, and click Insert. If only one element appears in the catalog, you can
click Insert without selecting it.
You can also double-click an element tag to insert the element.
3If the Attributes for New Element dialog box appears, enter attribute values for the element and click Insert
Element (see “Entering attribute values as you insert elements” on page 46).
This dialog box appears only if the element has attributes and if an option is set in the New Element Options dialog
box to prompt for attribute values when you insert new elements.
4If you inserted a table, a marker, a graphic, or a cross-reference, provide more information about the element in
the dialog box that appears.
9.1.1 [[Chapter Ove
9.1.1.1 [[Procedu
[This chapter descr
AstroLiner T440B
[ ]]
Section
Head
Para
Para

ADOBE FRAMEMAKER 8
User Guide
37
To insert an element using the keyboard:
1Click where you want to insert the element, and press Control+1 (one).
2Start typing the element’s tag until it appears in the Tag area of the document window’s status bar. The elements
available are the same ones that currently appear in the Element Catalog.
Element tag
You can also type lowercase letters to search forward or uppercase letters to search backward through the elements
that begin with those letters, or you can use the up and down arrow keys to scroll through all the elements.
3Press Return. If you decide to cancel, press Esc (Windows) or Control+c (UNIX).
Pressing Return to insert elements
In many cases, pressing Return inserts an element automatically. Whenever you press Return, FrameMaker
checks the current element’s definition for the following conditions—in the following order—and may insert a
child element:
One valid element If only one child element is valid at the current location, pressing Return adds that element. For
example, after you add a Section, a Head might be the only element permitted next. This technique can also work to
create repeating elements, where pressing Return inserts the same type of element. Body paragraphs and list items
are often defined as a repeating element.
More than one valid element If more than one child element is valid, pressing Return highlights the Tag area
to prompt you for an element tag. You can type until the tag you want appears, and then press Return to insert
the element.
End of an element If the insertion point is at the end of an element and no more child elements are valid, pressing
Return looks for valid elements in ancestors after this location. If a valid element is found, the insertion point moves
to the ancestor and the element is inserted (if only one is valid) or the Tag area is highlighted (if more than one
element is valid).
Other conditions If none of the preceding conditions are true, pressing Return causes a beep and no element
is inserted.
Wrapping elements around existing contents
You can add structure to contents already in a document by wrapping a new element around the contents.
The contents can be any part of a document, including other elements.
When you wrap an element, a pair of element boundaries appears around the contents in the document window (if
element boundaries are showing), and a new bubble appears in the Structure View. The element’s contents are
formatted as specified in the element’s format rules.
Element boundary (left) and Bubble for the new element (right)
9.1.1 [[Chapter Ove
9.1.1.1 [[Procedu
[This chapter descr
AstroLiner T440B
[The procedures f ]
Section
Head
Para
Para The pr
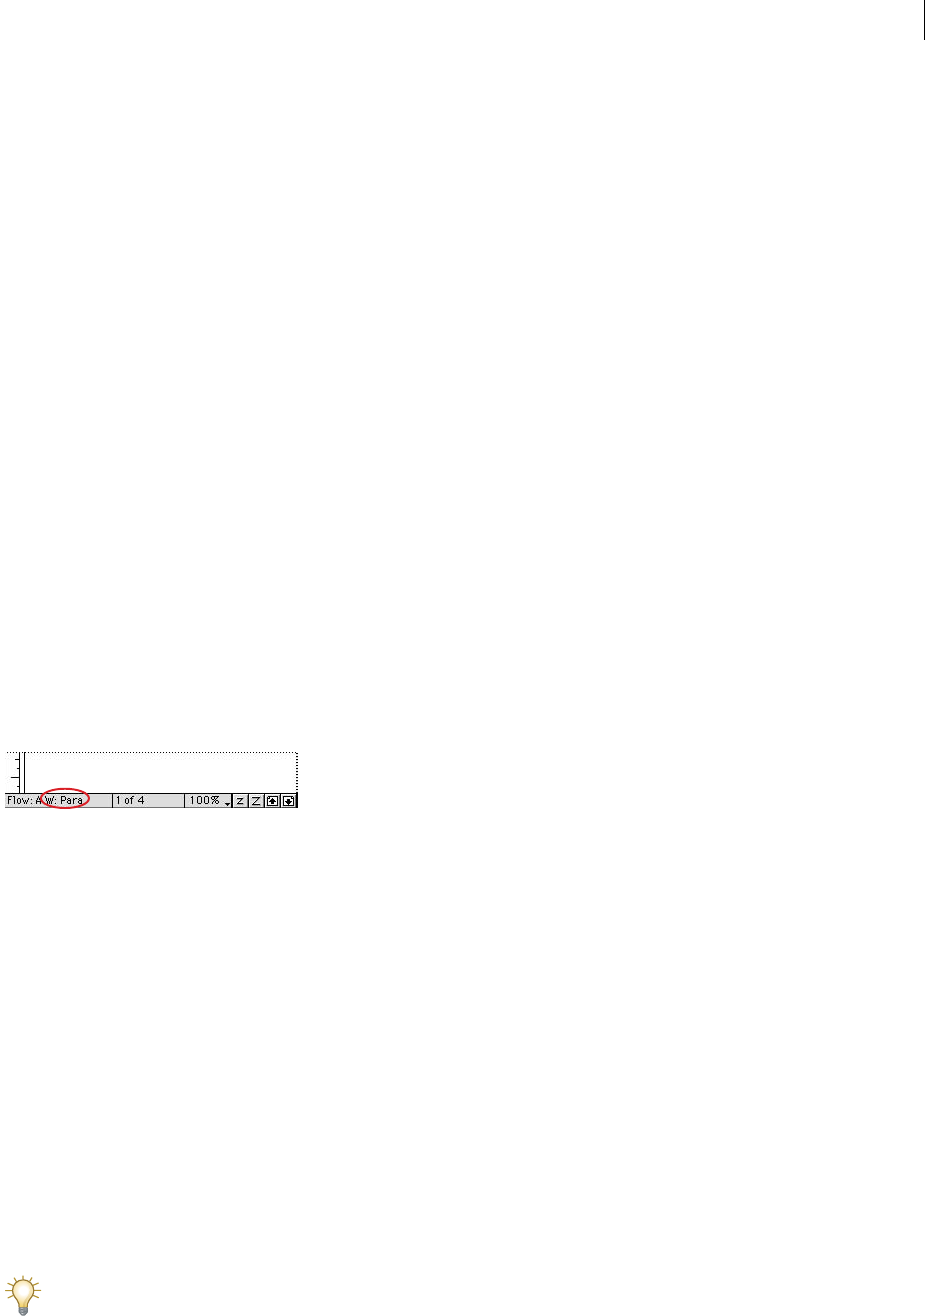
ADOBE FRAMEMAKER 8
User Guide
38
Note: You cannot wrap contents in elements that are for parts of tables (such as rows or cells), but you can wrap text or
other elements that are within a cell or a table title element. If you want to convert text and elements to a table,
use Table > Convert to Table rather than wrapping (see “Converting text to tables” on page 162).
After wrapping an element, you may need to edit the document to correct structure errors. For example, if you wrap
Para elements in a Section element that requires a Head element, you’ll need to insert the Head. For help on finding
and correcting structure errors, see “Finding and correcting errors” on page 51.
To wrap an element using the Element Catalog:
1Select the contents you want to wrap in an element. If you’re selecting text, use the document window. If you’re
selecting entire elements, you may find it easier to use the Structure View.
2Select an element tag in the Element Catalog, and click Wrap. If only one element appears in the catalog, you can
click Wrap without selecting it.
You can also double-click an element tag to wrap an element around the selection.
3If the Attributes for New Element dialog box appears, enter attribute values for the element and click Insert
Element (see “Entering attribute values as you insert elements” on page 46).
This dialog box appears only if the element has attributes and if an option is set in the New Element Options dialog
box to prompt for attribute values when you insert elements (see “Setting options for inserting new elements” on
page 39).
To wrap an element using the keyboard:
1Select the contents you want to wrap in an element and press Control+2.
2Start typing the element’s tag until it appears in the Tag area of the document window’s status bar. The elements
available are the same ones that currently appear in the Element Catalog.
Element tag
You can also type lowercase letters to search forward or uppercase letters to search backward through the elements
that begin with those letters, or you can use the up and down arrow keys to scroll through all the elements.
3Press Return. If you decide to cancel, press Esc (Windows) or Control+c (UNIX).
When wrapping elements throughout a document
Wrapping is useful for providing an existing unstructured document with a structure. (For an overview of this
process, see “Adding elements to a document with contents” on page 35.) It’s easiest to wrap the document’s contents
by starting at the lowest levels and working your way up, as follows:
•Begin by working in the document window and wrapping text ranges, system variables, and other items that are
inside paragraphs. Don’t worry about errors you see in the Structure View. You’ll correct many of these errors
when you wrap the lowest levels in parent elements, and you can correct the other errors when you’re finished.
•Next, wrap paragraphs, headings, and other paragraph-level items in their elements.
•Finally, work in the Structure View and wrap the elements you have so far in parent elements, such as Section
and List.
If you find yourself wrapping selections in the same type of element over and over again, you can repeat the last
Element Catalog command by pressing Esc e e.

ADOBE FRAMEMAKER 8
User Guide
39
When you wrap the first element in the document, the Structure View immediately changes to show a default invalid
structure, as follows:
•A highest-level element is added with the tag NoName, unless you begin by wrapping the contents in a valid
highest-level element. NoName is a placeholder for your valid highest-level element.
•All tables become structured and are given default element tags, such as TABLE and ROW.
•Objects become elements with default tags such as CROSSREF, GRAPHIC, and EQUATION.
•Footnotes become FOOTNOTE.
•Rubi text becomes RUBI and RUBIGRP elements.
Note: Variables and markers do not become structured object elements.
You can correct the structure of the document when you’re finished wrapping elements.
If your application developer has set up a conversion table for the document, you can apply the table to wrap
elements throughout the document all at one time (see “Adding structure to documents using conversion tables” on
page 66). This is much faster than wrapping manually.
Setting options for inserting new elements
There is seldom a right or wrong way to add new elements to a document. For example, you might prefer to enter
attribute values later rather than when you first add elements. And you might find it distracting to have child
elements inserted automatically along with the elements you add.
To set options for inserting new elements:
1Make the appropriate document window or book window active. If a book window is active, select the documents
you want to affect.
2Choose Element > New Element Options.
3Specify how you want to be prompted for attribute values when you add new elements:
•To enter all possible attribute values as you add elements, select Always Prompt for Attribute Values.
•To enter only required attribute values as you add elements, select Prompt for Required Attribute Values.
•To enter attribute values after adding elements, select Do Not Prompt for Attribute Values.
4To allow FrameMaker to insert child elements automatically for new elements, select Allow Automatic Insertion
of Children.
An element’s definition may specify a sequence of child elements to insert. For example, a List might have an Item
that is inserted along with it, and that Item might have a Para.
5Click Set.
To speed up the process of adding new elements, select Do Not Prompt for Attribute Values and Allow Automatic
Insertion of Children.
Editing elements
You can edit a document’s structure in many ways—including changing an element to a different type, rearranging
elements, and splitting and merging elements.

ADOBE FRAMEMAKER 8
User Guide
40
After editing one part of a document, you may need to edit the document further to correct content errors. For
example, if you split a Section element in two, you may need to add a Head element for the new second Section. Use
the Structure View as a guide for finding errors as you work, or validate the document when you’re finished.
Changing elements to another type
You can change an existing element to another element of the same type. For example, you may want to convert a
Para element into a Head element, or a series of Para elements into ListItem elements that you plan to wrap in a List
element.
However, not all elements can be converted to other elements. For example, if you change a Para element containing
text to a Marker element containing the same text, the name of the element will change, but the text will not be
converted to marker text.
Note: If you want to change contents to a table, use Table > Convert to Table to convert text rather than changing an
element (see “Converting text to tables” on page 162).
To change an element using the Element Catalog:
1Select the element. You can select more than one element, even if the elements do not have the same tag. All the
elements will be changed to the new type of element. However, the elements’ children are not changed, but they may
become invalid due to the changed parent.
2Select an element tag in the Element Catalog and click Change. The element’s bubble in the Structure View
changes to the new tag, and the contents are formatted as specified in the new element’s format rules. Attributes in
the element may become invalid.
To change an element using the keyboard:
1Select the element and press Control+3.
2Start typing the tag of the new element until it appears in the Tag area of the document window’s status bar.
The elements available are the same ones that currently appear in the Element Catalog.
Element tag
You can also type lowercase letters to search forward or uppercase letters to search backward through the elements
that begin with those letters, or you can use the up and down arrow keys to scroll through all the elements.
3Press Return. If you decide to cancel, click in the document without pressing Return.
You can use Edit > Find/Change to change many occurrences of an element at one time (see “Finding elements and
attributes” on page 49). For example, if you’ve imported new element definitions that use an element named Par
instead of Para, you can change all Para elements to Par.
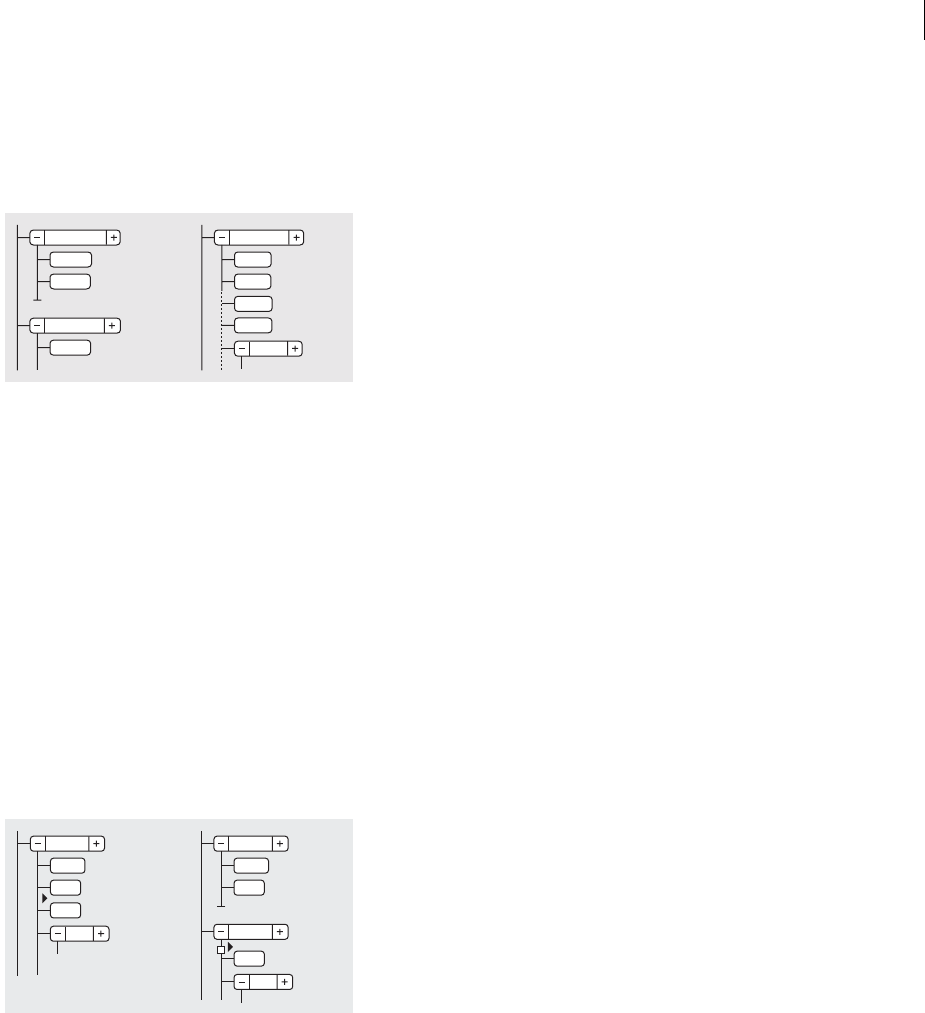
ADOBE FRAMEMAKER 8
User Guide
41
Merging two or more elements into one
You can merge two or more elements into a single element. For example, you might combine two Section
elements into one. Merging puts the contents of the second element (including any child elements) at the end of the
first element.
Merging two Sections, before and after
You may need to edit the document after merging elements.
Note: If you want to combine table cells, use Table > Straddle rather than merging the cells (see “Straddling and unstrad-
dling cells in structured tables” on page 198). You cannot combine other table parts.
To merge two or more elements into one:
1Select the elements you want to merge. The elements can be of different types, but they must be siblings and next
to each other in their parent element.
2Choose Element > Merge.
Merging retains the attributes for the first element only.
Splitting elements in two
You can split an element into two elements that have the same tag and are at the same level. For example, you might
split a Section element in two.
Splitting a Section, before and after
You may need to edit the document after splitting an element. In the example above, after splitting you would add a
Head for the new second Section.
Note: You cannot split an element that is a table part (such as a row or cell).
To split an element in two:
1Click where you want to split the element. The contents after the insertion point will go in the new
second element.
2Choose Element > Split.
Para
Section
Section
Para
Para
Section
List
Head
Head
Head
Head
Para
Section
Section
Para
Para
Section
List
Para
List
HeadHead
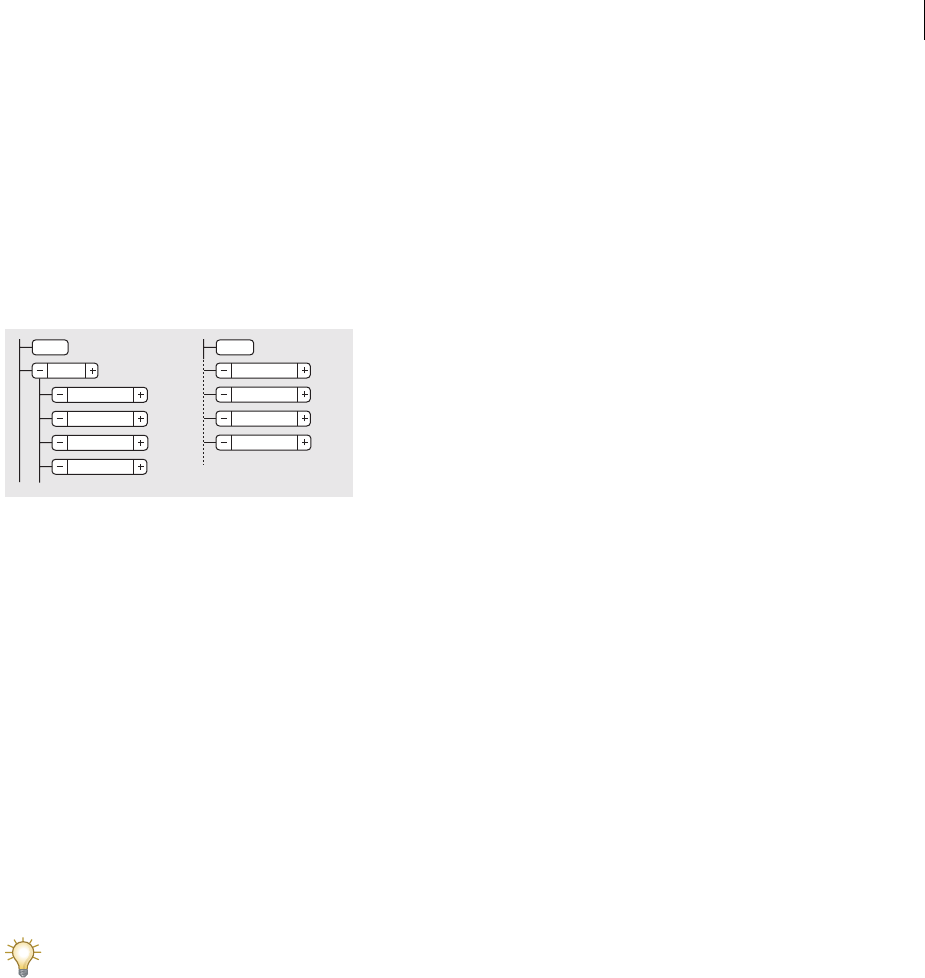
ADOBE FRAMEMAKER 8
User Guide
42
Splitting might result in two elements with identical attributes. However, if the original attribute had a Unique ID
attribute, the second element loses its ID value.
Unwrapping the contents of elements
Unwrapping deletes an element but leaves its contents in the same place in the document. You usually unwrap
elements as part of a larger editing process. For example, if you plan to convert ListItem elements into Para elements,
you might need to unwrap the parent List element first. Then use Edit > Find/Change to convert the ListItem
elements to Para elements.
Unwrapping ListItems, before and after
You may need to edit the document after unwrapping an element. For this example, you would change the ListItem
elements to valid elements or rewrap them.
Note: You cannot unwrap an element that is a table part (such as a row or cell).
To unwrap the contents of an element:
1Select the element with the contents you want to unwrap. For example, if you’re unwrapping ListItem elements in
a List, select the List element.
2Choose Element > Unwrap.
Moving elements
You can move an element to another location in a document by dragging its bubble in the Structure View. When you
move an element, its contents, including descendants, all move along with it. This does not affect the contents of the
Clipboard.
If you’re moving an element that has many descendants, collapse the element first (see “Collapsing and expanding
elements” on page 14).
You can also move an element by cutting it to the Clipboard and pasting, even across documents. If you paste an
element from another document, the element may not be defined in your document. If you don’t plan to add a
definition for the element, change the element to a valid one. You cannot cut and paste elements in a book file.
Para
List
ListItem
ListItem
ListItem
ListItem
Para
ListItem
ListItem
ListItem
ListItem
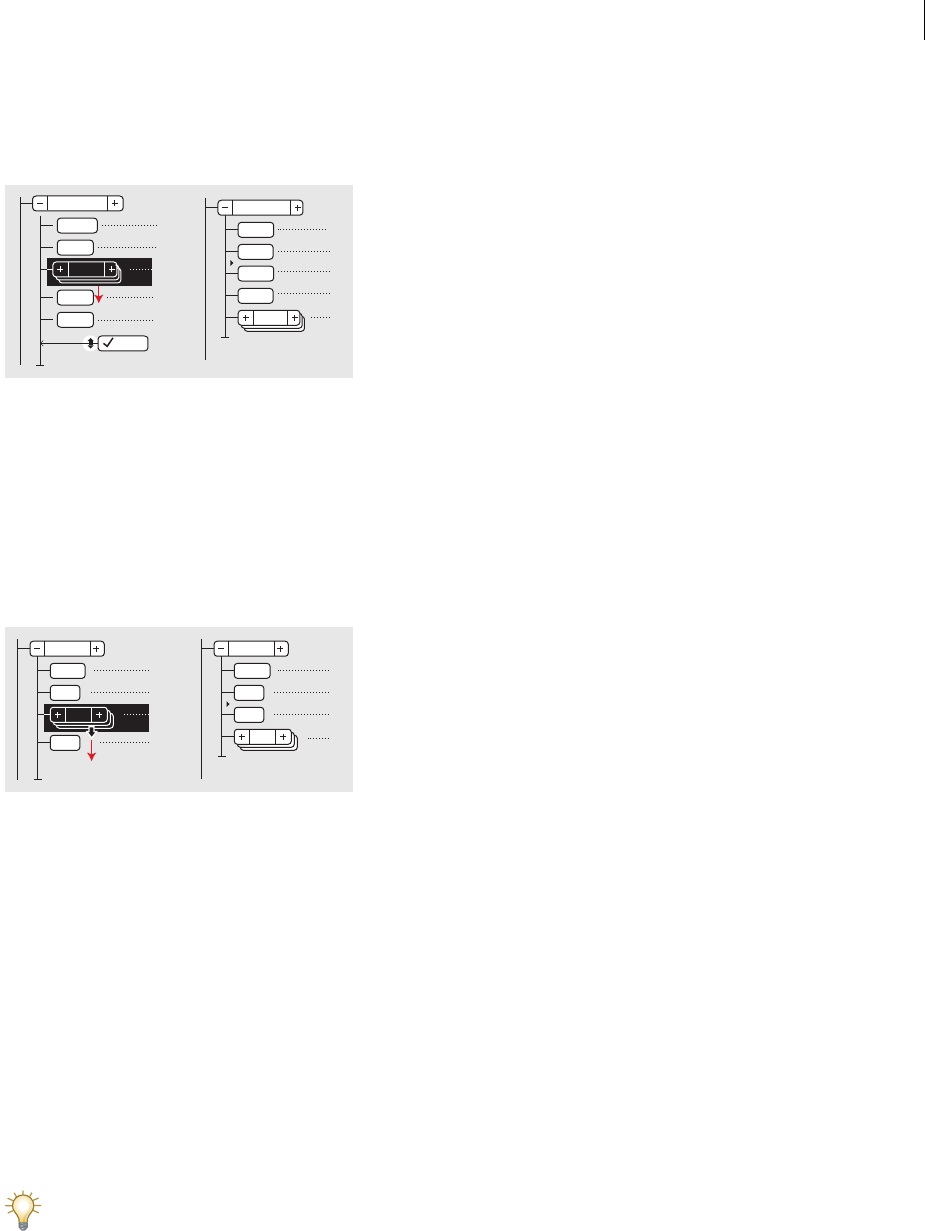
ADOBE FRAMEMAKER 8
User Guide
43
To move an element by dragging:
❖Drag the element’s bubble to the location you want. As you drag, the pointer changes to a solid up-and-down
arrowhead, and an arrow moves to indicate where the bubble will go if you release the mouse button.
Moving a List, before and after
If the element is valid in the location where the arrow points, a check mark or question mark appears in the bubble.
These symbols have the same meanings as they do in the Element Catalog (see “The structured document’s Element
Catalog” on page 13).
To nudge an element one place:
❖Drag the element’s bubble slightly to one side or up or down. As you drag a small distance, the pointer changes to
a single arrow. (If you drag too far, the arrow changes to an up-and-down arrowhead.)
Nudging a List one place, before and after
When you release, the element moves one place in the indicated direction, as follows:
•Moving an element up puts it right above the sibling right before it. Moving an element down puts it below the
sibling after it.
•Moving an element to the left makes it a child of its parent. Moving an element to the right makes it a child of the
sibling after it.
Copying elements
You can use the Structure View to make a copy of an existing element and put the copy in a new location. This does
not affect the contents of the Clipboard.
When you copy an element, the element’s contents are copied along with it. Generally, the element’s attributes are
also copied—but if you duplicate an element with an ID attribute, the ID value is discarded in the copy.
If you’re copying an element that has many descendants, collapse the element first (see “Collapsing and expanding
elements” on page 14).
You can also copy an element by copying it to the Clipboard and pasting, even across documents. If you paste an
element from another document, the element may not be defined in your document. If you don’t plan to add a
definition for the element, change the element to a valid one. You cannot copy and paste elements in a book file.
Section
Head
Para
Para
Para
List
List
Section
Head
Para
Para
Para
List
Section
Head
Para
Para
List
Section
Head
Para
Para
List
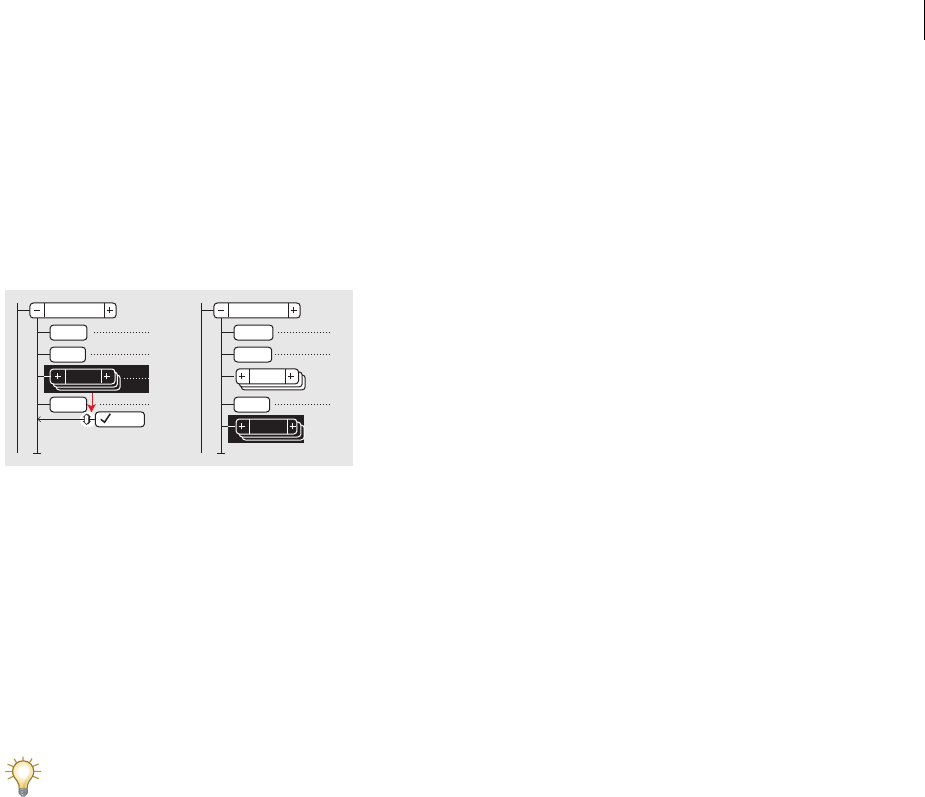
ADOBE FRAMEMAKER 8
User Guide
44
To copy an element by dragging:
❖Do one of the following:
•(Windows) Hold down Alt and drag the bubble to the location you want.
•(UNIX) Hold down Control and use the middle mouse button to drag the bubble to the location you want.
As you drag the bubble, the pointer changes to a hollow, stacked up-and-down arrowhead, and a horizontal arrow
moves to indicate where the copy will go if you release the mouse button.
Copying a List, before and after
If the element is valid in the location where the arrow points, a check mark or question mark appears in the bubble.
These symbols have the same meanings as they do in the Element Catalog (see “The structured document’s Element
Catalog” on page 13).
Importing element definitions
A document’s element definitions describe allowable contents for each type of element, and may also describe how
the elements are formatted and whether they have attributes for storing supplemental information. Before you can
add elements to a document, the document must have element definitions in its Element Catalog.
If you’re not sure whether a document has element definitions, open the Element Catalog and click in a text flow.
If you see elements in the catalog, the document has definitions. You may need to select the All Elements option to
get elements to appear (use Element > Set Available Elements).
Usually you import definitions from a template, but your developer may ask you to import them directly from
the EDD.
To import element definitions:
1Open the template or EDD with the element definitions. The template or EDD must be named and saved.
2Open the document or book that you want to update. If a book window is active, select the documents you want
to update.
3In the document or book you’re updating, choose File > Import > Element Definitions.
4Choose the template or EDD from the Import from Document pop-up menu. The menu lists all open,
named documents.
5If you want to remove special formatting and book-related changes in the document, do the following:
•To remove format rule overrides, select While Updating, Remove Format Rule Overrides. Use this setting if you
have made text or paragraph formatting changes to elements and now want to return to the formatting described
in the element definitions. See “About formatting overrides” on page 52 for cautions on this.
•To remove element information derived from a book file, select While Updating, Remove Information Inherited
from Book. Use this setting if the document used to be included in a book but is now a stand-alone document.
List
Section
Head
Para
Para
List
List
Section
Head
Para
Para
List

ADOBE FRAMEMAKER 8
User Guide
45
6Click Import. FrameMaker adds the definitions to the document’s Element Catalog, replacing any definitions that
are already there. Then it validates the document so that errors are identified in the Structure View, and reapplies
format rules from the definitions.
Removing elements
You can remove any element, with or without its contents. For example, you may want to delete a Section element
and its contents, or delete the Section but leave the contents in place, so you can put them in a different element.
For elements that are defined to contain text or other elements (round-cornered bubbles in the Structure View), you
can also delete the contents and leave the empty element in the document. But you cannot do this for elements that
are a single object (square-cornered bubbles). Because these elements do not have contents, you must delete the
entire element.
To remove an element and its contents:
❖Select the element and press Delete.
To remove an element but not its contents:
❖Select the element and choose Element > Unwrap. The contents may be reformatted as defined by their
new context.
To remove the contents of an element but not the element itself:
❖Select the contents and press Delete. For details on selecting contents, see “Placing the insertion point” on page 71
and “Selecting text” on page 75.
To remove an element and its contents and replace it with another element:
❖Select the element. Then select the replacement element in the Element Catalog, and click Insert. A new empty
element replaces the selected element and its contents.
Removing all elements from a document
There may be times when you want to remove all elements from a document so you can base the document on
paragraph and character formats rather than on elements.
To remove all elements from a document:
❖Choose Special > Remove Structure from Flow. If the document has additional structured flows, repeat this
command for each flow.
FrameMaker removes all elements from the current text flow. If the formatting was created or modified by format
change lists in the element catalog, the removed elements become format overrides in the document.
Note: If you want to create named formats for each removed element variation and save them in the catalog, use the
Create & Apply Formats command.

ADOBE FRAMEMAKER 8
User Guide
46
Assigning attribute values
Attributes store supplementary information about an element that does not appear with the contents of the
document. You can see attributes and their values in the Structure View. (See “Showing and hiding attributes for new
elements” on page 18 for details on displaying attributes.)
Attributes in the Structure View
An attribute’s definition specifies the type of values that are acceptable (such as text or numeric) and might include
a list of possible values or a numeric range.
The definition also determines whether the value is optional, required, or read-only, and it might provide a default
value. You can assign values to an attribute if the attribute is not read-only.
If an attribute’s current value does not conform to the specifications in its definition, the attribute is invalid. For
information on finding and correcting problems with attributes, see “Finding and correcting errors” on page 51.
Note: You may want to let FrameMaker provide the values for ID and ID Reference attributes used in cross-referencing.
(In fact, these attributes are often defined to be read-only.)
Entering attribute values as you insert elements
You may want to enter some attribute values as you insert elements, particularly for required attributes and attributes
that affect formatting. Optional attributes might wait for a later pass.
Some font property values used in an element definition document (EDD) require that you use specific units.
For example, if the Offset Horizontal value is set as a percentage of an em space, typing 5pt will create an offset of 5
em spaces instead of 5 points.
Do not use multibyte (Asian-language) characters when entering attribute values. These characters may not be
exported to SGML correctly because multibyte characters are not supported in the SGML workflow.
Note: Attribute names support the Unicode text encoding standard.
To enter attribute values as you insert an element:
1Make sure you are prompted for attribute values when you insert elements (see “Setting options for inserting new
elements” on page 39).
2Insert the element (see “Inserting elements” on page 36). If attributes are defined for the element, the Attributes
for New Element dialog box appears, listing all the attributes (except read-only ones) defined for the element.
3For each attribute value you want to provide, select the attribute in the Attribute Name scroll list, enter the value
in the Attribute Value text box, and click Set Value. If an attribute is required, you must enter a value for the element
to be valid.
Chapter
Title
ChapNumber
ChapName
ID = <no value>
DraftVersion = Alpha Draft
XRefLabel = <no value>

ADOBE FRAMEMAKER 8
User Guide
47
If an attribute has a set of predefined values, choose from the Attribute Value pop-up menu rather than entering
avalue.
Attribute Value pop-up menu
The value you can enter, such as text or a number, is determined by the attribute’s type. For details on attribute types,
see “Types of attributes” on page 48.
A description of the selected attribute (its type, whether a value is required, and so on) appears in the dialog box
below the Attribute Value area.
4Click Insert Element.
Entering or editing attribute values for elements already in a document
You can enter and edit attribute values for elements already in a document if the attributes are not read-only.
If you need to change an attribute name rather than a value, use Edit > Find/Change (see “Changing elements or
attributes you find” on page 50). You may need to do this if you imported element definitions that use different
attribute names with identical meanings, such as Security instead of SecurityLevel. The new attribute name must be
defined for the element.
To enter or edit an attribute value for an element already in a document:
1Select the element with the attribute value you want to change.
You can select more than one element of the same type, and apply the change to all. The elements must be
contiguous. For example, if several Para elements in a row have a Security attribute, you can change the value of that
attribute for all the Para elements at one time.
2Display the Attributes dialog box by doing one of the following:
•Click the Attributes button at the upper right corner in the document window. When you open the dialog box
this way, you can keep it open to edit attribute values for more than one element.
•Double-click an attribute name or value in the Structure View. Or, click in the element, press Control+7, type the
name of the attribute to edit, and press Return. When you open the dialog box this way, you’ll close it after editing
attribute values for the element.
3For each attribute value you want to enter or edit, select the attribute in the Attribute Name scroll list, enter the
value in the Attribute Value text box, and click Set Value.
If an attribute has a set of predefined values, choose from the Attribute Value pop-up menu rather than entering
avalue.
4If you displayed the Attributes dialog box by double-clicking in the Structure View or pressing Control+7,
click Done.
To remove an attribute value:
❖Select the value in the Attributes dialog box, and click Delete Value.
You can use Edit > Find/Change to edit attribute values for many occurrences of an element at one time (see
“Changing elements or attributes you find” on page 50).

ADOBE FRAMEMAKER 8
User Guide
48
Types of attributes
An attribute’s type determines the kind of values that are allowed in the attribute. For example, the value version 1 is
not valid for an attribute defined as an integer, but the value 1 is valid. Numeric types (such as integer or real) can
also be limited to a predefined range by their attribute definition.
Choice An attribute with a list of predefined values.
ID Reference An attribute with a value that is a Unique ID value from another element. It is typically used for
element-based cross-references.
ID References An attribute with a value of one or more Unique ID values from another element. (Your
developer may specify this attribute if you’re exporting to a structured application that uses multiple values for
source information.)
Integer An attribute with a whole number value (no decimal parts). Examples of valid integers are 22, -22, and +322.
An integer can be defined to fall within a range.
Integers An attribute with a value of one or more integers. Enter each number on a separate line in the Attribute
Value text box.
Real An attribute with a real number value, with or without a decimal part (the value can also be expressed in scien-
tific notation). Examples of valid real numbers are 2, 22.4, -0.22, and 2.3e-1. A real number can be defined to fall
within a range.
Reals An attribute with a value of one or more real numbers. Enter each number on a separate line in the Attribute
Value text box.
String An attribute with a value of a series of characters (text).
Strings An attribute with a value of one or more strings. Enter each string on a separate line in the Attribute Value
text box.
Unique ID An attribute with a value of a unique text string. An element can have only one ID attribute (which can
be of type Unique ID or Unique IDs). All ID values must be unique in the document or book. An element with a
Unique ID attribute can be the source for an element-based cross-reference.
Unique IDs An attribute with a value of one or more unique text strings. Enter each string on a separate line in the
Attribute Value text box. (Your developer may specify this attribute if you’re exporting to a structured application
that uses multiple values for source information.)
Copying attribute values
You can use the Clipboard to copy and paste attribute values from one element to another. If you paste values to an
element that does not have corresponding attributes defined, the attributes will be invalid. To preserve element-
based cross-references, an ID attribute value is not pasted.
If you copy an attribute from another document, the attribute may not be defined in the current document.
To copy attribute values:
1Select the element with the attribute values you want to copy, and choose Edit > Copy Special > Attribute Values.
All attribute values associated with the element are copied to the Clipboard.
2Select a different element and choose Edit > Paste.

ADOBE FRAMEMAKER 8
User Guide
49
To delete an undefined attribute copied from another document:
❖Select the element with the undefined attribute, open the Attributes dialog box, select the attribute, and click
Delete Attribute. In the next dialog box that appears, remove the attribute for the current element or for all elements
that have the attribute.
Improved validation of EDD attributes
When validating the elements in an EDD, attributes in if-then clauses were not validated in earlier versions of
FrameMaker. For example, suppose that the possible values of an attribute are A or B or C, and a context rule says If
[attrval = “D”]. This was not previously flagged as an error when the element definitions were imported. It is
now correctly reported as an invalid structure.
Similarly, if an element’s text formatting rules or prefix/suffix rules use attribute names in the context specifications,
the attribute name and case must match the attribute definition in the element’s definition.
If an attribute’s value is changed to the same value it previously had, the action is not flagged as a change. This
enhances performance by eliminating unnecessary value checking.
Finding elements and attributes
You can search for elements and attributes in a structured document to help keep track of these items or to make
changes to them quickly. This is especially useful when you want to apply the same change to more than one occur-
rence of an element or attribute.
You can also search for many other items in FrameMaker, including strings of text, specific formatting, unresolved
cross-references, and objects (such as anchored frames) that are not elements. See “Searching for any item” on
page 77.
Note: The Find/Change feature supports the Unicode text encoding standard.
Searching for element tags, attribute names, or attribute values
You can search for an element tag, attribute name, and attribute value either separately or in combination. For
example, you can search for an element tagged List to find each List element, or you might limit the search to find
only List elements that have a Security attribute set to Classified.
To search for an element tag, attribute name, or attribute value:
1Choose Edit > Find/Change.
2Choose Element from the Find pop-up menu.
3Select the options you want in the Find Element dialog box.
The settings can be used in many combinations. These are a few examples:
•To find any element, leave all three text boxes empty.
•To find a specific element, type an element tag but leave the Attribute Name and Attribute Value text boxes empty.
•To find any element with a specific attribute, type an attribute name but leave the Element Tag and Attribute Value
text boxes empty.
•To find any element with a specific attribute value, type an attribute value but leave the Element Tag and Attribute
Name text boxes empty.
•To find a specific combination of element and attribute, type an element tag and choose an attribute name.

ADOBE FRAMEMAKER 8
User Guide
50
•To find a specific combination of element and attribute value, type an element tag and choose an attribute name
and an attribute value. (If the attribute type is Choice, type the value.)
•To find a specific element with an attribute that has no value, type an element tag, choose an attribute name, and
choose <No Value> from the Attribute Value pop-up menu.
Leave a text box empty if you do not want to restrict the search. An empty text box has the same effect as searching
for any element, or choosing either <Any Attribute> or <Any Value>.
4Click Set.
5In the Find/Change dialog box, select Consider Case, Whole Word, Use Wildcards, or Find Backward.
6Click Find.
Note: FrameMaker normally begins searching at the insertion point and continues throughout the document. When a
search reaches the end of the document, it continues at the beginning. After searching the main flow, it looks at other text
frames and text lines. Because a search is flow by flow, it may appear to jump around the document.
To search for the next occurrence of the item:
❖Click Find Again in the Find/Change dialog box, or choose Edit > Find Next.
To reverse the search direction:
❖Select Find Backward in the Find/Change dialog box and click Find.
To cancel a search:
❖Do one of the following:
•(Windows) Press Esc.
•(UNIX) Press Control+c.
Changing elements or attributes you find
After you find an element, attribute, or attribute value, you can change it to another element, attribute, or value. For
example, you can quickly and globally change the value of a SecurityLevel attribute from Declassified to Top Secret.
When changing items in a document, you can change each occurrence of the item as it is found or have FrameMaker
automatically make the change throughout the document.
If you’ve pasted material from another document or have imported new element definitions, the Find/Change
command is a powerful clean-up tool for returning your document to its proper state. For example, if you paste a
table from an unstructured document, the table and its parts receive default, invalid element tags. You can use
Find/Change to change CELL elements, for example, to TableCell elements.
To change an element or attribute you find:
1Choose Edit > Find/Change.
2In the Find/Change dialog box, choose Element from the Find pop-up menu.
3Select the options you want in the Find Element dialog box, and click Set. Then choose an option from the Change
pop-up menu in the Find/Change dialog box, and type the replacement tag or value.

ADOBE FRAMEMAKER 8
User Guide
51
The Find Element dialog box and the Change pop-up menu work together. These are a few examples of combina-
tions you can use:
•To change one element to another, type an element tag in the Find Element dialog box but leave Attribute Name
and Attribute Value empty. Then choose Element Tag To in the Change pop-up menu and type an element tag.
•To change one attribute to another, type an attribute name but leave Element Tag and Attribute Value empty. Then
choose Attribute Name To and type an attribute name that is defined for this element.
•To change one attribute value to another, type an attribute value but leave Attribute Name and Attribute Value
empty. Then choose Attribute Value To and type a value.
•To change an attribute with a specific name to a certain value, type an attribute name but leave Element Tag and
Attribute Value empty. Then choose Attribute Value To and type a value.
•To change a specific element with a specific attribute value to another element, type an element tag and choose
an attribute name and attribute value. Then choose Element Tag To in the Change pop-up menu and type an
element tag.
•To remove an attribute value, type an attribute value but leave Element Tag and Attribute Name empty. Then
choose Attribute Value To and leave the Choose text box empty.
If you try to make a change that is not allowed—for example, if you try to remove an element tag—an alert message
appears explaining the problem.
4Click Find.
5When FrameMaker finds the element or attribute, do one of the following:
•To make the change but not continue searching for other occurrences of the item, click Change.
•To make the change and continue searching for other occurrences, click Change & Find.
•To change all occurrences of the item, specify all occurrences in the document or only occurrences in the current
selection and click Change All.
Important: When you change all occurrences, you cannot undo the changes with Edit > Undo. Consider saving the
document and then manually changing several occurrences of the text. When you’re confident that the changes are
exactly what you want, click Change All.
To delete an element you find:
❖Choose To Text from the Change pop-up menu, leave the Change text box empty, and click Change. You can also
simply press Delete.
Finding and correcting errors
An error in a structured flow can be a structure problem, such as an element in an invalid location, or an invalid
attribute, such as an attribute with a missing required value. Your element definitions have content rules and attribute
information that describe what is correct for your document.
You can use the Structure View to find errors in elements and attributes. When a collapsed element has invalid
content in its structure, the plus sign on the left of the element name is red. You can also validate a document to find
errors. After you know where the errors are located, use the Element Catalog and the Structure View as guides to
help you correct them.
If you’ve made any formatting changes to text in elements, the elements may not conform to their format rules. For
information on removing format rule overrides, see “Removing format rule overrides in structured documents” on
page 140.
ADOBE FRAMEMAKER 8
User Guide
52
Using the Structure View to find errors
When an element doesn’t conform to content rules and attribute descriptions in the document’s element definitions,
the Structure View identifies the error for you.
Missing elements If an element is missing one or more child elements required by the element definitions, a small
red hole appears on the vertical line where the child element should be.
At least one required child element is missing.
Elements at an invalid location If an element is at a location not allowed by the content rules, the vertical line next
to it is broken from the position of that element to the end of the parent element.
The Para element is invalid at this location.
Undefined elements If an element is not defined for the document, its bubble is red. This may happen if you have
pasted the element from another document.
Invalid attributes If an attribute has an invalid value or is not defined for the document, it appears with a red x to
the left of the attribute name and its value is red.
The DraftVersion attribute is invalid.
Attributes missing a required value If an attribute does not have a value, <no value> appears to the right of the
attribute name. If the attribute requires a value, <no value> is red and a red hole appears to the left of it.
The XRefLabel attribute is missing a required value.
Validating documents
When FrameMaker validates a document, it searches for elements that do not conform to content and attribute rules
in the document’s element definitions. If FrameMaker finds an error, it selects the element and describes the error.
Section
Para
ListItem
ListItem
Para
Chapter
x DraftVersion = Alpha Draft
XRefLabel = <no value>
Chapter
DraftVersion = Alpha Draft
XRefLabel = <no value>
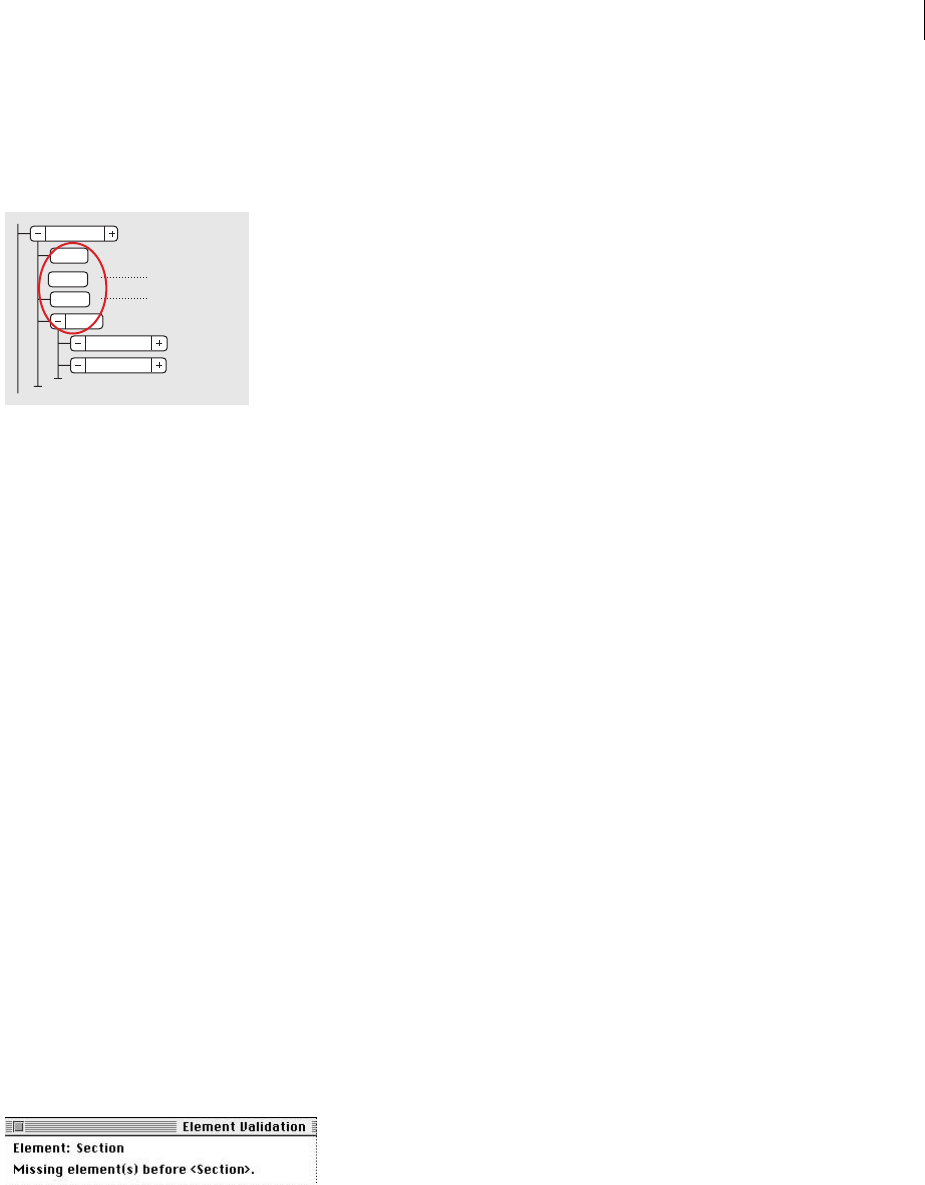
ADOBE FRAMEMAKER 8
User Guide
53
You can validate an entire document, the current flow, or the current element. If you validate the current element,
FrameMaker does not check the descendants of the element’s child elements. For example, if you validate the Section
element below, FrameMaker makes sure that the Head element, the two Para elements, and the List element are valid,
but does not check the List Item elements in List.
Only the section’s child elements are validated.
If the document has conditional text, only the versions that are showing are validated.
You can also validate an entire book including all its files, only the book file, or only the current element in the book
file (see “Validating structured books” on page 480).
To validate a document:
1Choose Element > Validate.
2Select Entire Document, Entire Book, Current Flow, or Current Element to specify the scope of the validation.
3To exclude missing elements or attribute values from the search, select Ignore Missing Elements or Ignore Missing
Attribute Values.
If these settings are selected, FrameMaker does not look for places where a required child element or a required
attribute value is missing. You may want to select these if you are not trying to build a complete document yet.
4Click Start Validating.
FrameMaker starts checking at the beginning of the current element. If you’re validating only the current element,
it checks the element with the insertion point or the selected element. If more than one element is selected, it checks
the first element in the selection.
5If FrameMaker finds an error, click Start Validating again when you’re ready to continue validating.
The top of the Element Validation dialog box shows the tag of the element and a brief message about the problem.
(See “Validation error messages” on page 54 for descriptions of the messages that can appear.)
Element and error identified
You can correct the error, ignore it, or click Allow as Special Case. If you mark it as a special case, FrameMaker won’t
identify the error the next time you validate the document.
Para
Para
ListItem
ListItem
List
Section
Head
When a door
When a oor

ADOBE FRAMEMAKER 8
User Guide
54
6Repeat step 5 until FrameMaker does not find any more errors.
When FrameMaker reaches the end of the document, it returns to the beginning and continues validating. When
FrameMaker reaches the end of a flow, it continues to the next one.
Note: When validating a book, FrameMaker tells you if a file in the book has invalid content, but for a more detailed
evaluation, you must open and validate the file.
While validating the elements in an EDD, attributes in if-then clauses are validated. For example, suppose that the
possible values of an attribute are A or B or C, and a context rule says If [attrval = “D”]. This is flagged as an
error and reported as an invalid structure when the element definitions are imported.
Similarly, if an element’s text formatting rules or prefix/suffix rules use attribute names in the context specifications,
the attribute name and case must match the attribute definition in the element’s definition.
If an attribute’s value is changed to the same value it previously had, the action is not flagged as a change. This
enhances performance by eliminating unnecessary value checking.
To clear all special cases:
1Choose Element > Validate.
2Click Clear Special Cases. FrameMaker clears the special cases in the document, the flow, or the element—
whichever scope is selected in the dialog box.
Validation error messages
The following error messages can appear at the top of the Element Validation dialog box. (In the descriptions, tag
represents an element tag, name represents an attribute name, and value represents an attribute value.)
Current flow is unstructured. The current flow does not have elements in it.
Element is undefined The element is not defined in the document. You may have copied this element from another
document.
Missing element before tag At least one required element is missing before the specified element.
More contents required at end At least one more child element is required at the end of the current element.
No current element There is no insertion point or selection. (This message appears when the scope is set to Current
Element.)
No current flow There is no insertion point or selection. (This message appears when the scope is set to
Current Flow.)
Not highest-level element The element is not permitted at the highest level in the document.
<TEXT> not permitted in this element The element contains text, but text is not allowed.
<TEXT> not valid at this position The element is allowed to have text but not at this location.
The name attribute refers to an undefined ID value The attribute is an ID Reference and refers to a Unique ID value
that doesn’t exist in the document (or in the book, if you’re validating a book).
The name attribute is undefined for this element The definition of this element does not include a name attribute.
This element should be a type The element is the wrong type, where type can be graphic, marker, cross-reference,
equation, or system variable. For example, a cross-reference element might consist of text instead of a cross-reference.
Value must be a type for name attribute The attribute value is the wrong type for the attribute.
Value for name attribute must be in the range from nto nThe attribute’s numeric value is out of the specified range.
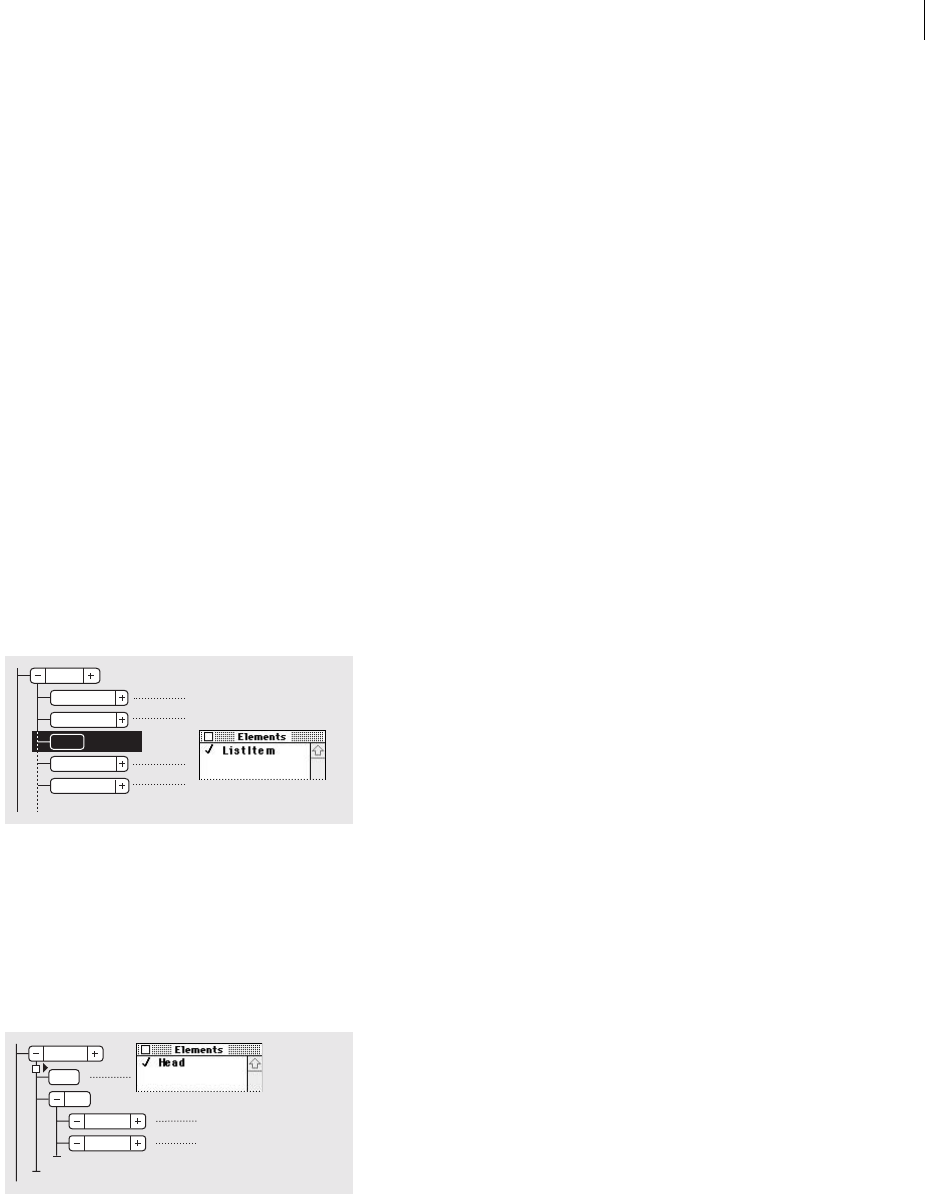
ADOBE FRAMEMAKER 8
User Guide
55
Value for name attribute is not one of the allowed choices The attribute’s value must match a value from the pop-up
menu of valid choices.
Value for name attribute must be unique A Unique ID value must be unique for all elements in the document
or book.
Value required for name attribute. The attribute does not have a required value.
tag excluded in this element The tag element is not allowed because of an exclusion rule for the parent or one of
its ancestors.
tag not permitted in this element The tag element is not allowed anywhere in the parent element.
tag not valid at this position The tag element is allowed in the parent element but not at the current location.
Correcting errors in elements
After you have identified errors in elements and attributes, use the Element Catalog and Structure View as guides for
correcting them.
To correct an element in an invalid location:
❖Move the element to a valid location (see “Moving elements” on page 42), or change it to an element that is valid
for its current location (see “Changing elements to another type” on page 40).
You can select an invalid element, or if you’re validating, FrameMaker selects the element for you. When the element
is selected, the Element Catalog shows which elements are valid at that location.
ListItem is valid at this location.
To correct a structure with a missing child element:
❖Insert the required element (see “Inserting elements” on page 36).
You can click where an element is missing, or if you’re validating, FrameMaker places the insertion point there
for you. When the insertion point is at the location of the missing element, the Element Catalog shows which
elements are valid at that location.
Head is required at this location.
To correct an element with invalid contents (with the text snippet <INVALID CONTENT>):
❖Change it to an element that allows those contents (see “Changing elements to another type” on page 40).
List
ListItem
ListItem
ListItem
ListItem
Head
Para
ListItem
ListItem
List
Section

ADOBE FRAMEMAKER 8
User Guide
56
To correct an invalid attribute value:
❖Change the value to one that is valid for the attribute (see “Entering or editing attribute values for elements already
in a document” on page 47).
To remove an undefined attribute:
❖Select the element with the undefined attribute, open the Attributes dialog box, select the attribute, and click
Delete Attribute. In the next dialog box that appears, remove the attribute for the current element or for all elements
that have the attribute.
To resolve a cross-reference with an invalid ID:
❖Select the cross-reference, choose Special > Cross-Reference, and change to a source that has a valid ID (see
“Maintaining cross-references” on page 208).
About structured documents
Almost all documents have an implicit structure. In each type of document, the contents naturally consist of logical
units that appear in a consistent order and with a particular hierarchy. In FrameMaker, you can work with a
document’s structure explicitly by organizing the contents of the document—its sections, heads, paragraphs, figures,
tables, and so on—in logical units called elements. (See “About elements” on page 32). Together, the elements form
the hierarchy that represents the structure.
For example, a Section element for a section of a book might include a Head element with heading text, a Para
element with body text, and a List element that contains several ListItem elements with text.
A. Section element that contains everything in the section B. Head element C. Para element D. List element
E. ListItem elements in the List element
Structured formats in FrameMaker
Using FrameMaker, you can import and export structured documents in either SGML or XML (including XHTML
1.0) format. Once you import a structured file, it is no longer an SGML or XML file; it is a structured FrameMaker
document. To return it to its original format, save it as SGML or XML (see “Saving a structured document in SGML
or XML format” on page 63).
C
B
D
A
E

ADOBE FRAMEMAKER 8
User Guide
57
About SGML
Standard Generalized Markup Language (SGML) is the international standard for all markup languages for data
exchange and storage.
SGML is a descriptive, rather than procedural, markup language, meaning the same document can be processed by
different systems, each applying different processing instructions to relevant sections. You can transfer SGML
documents from one system (hardware and software environment) to another without any loss of data.
SGML was the first language to instigate the Document Type Definition (DTD), which formally defines
the document by its components and structure. Documents of the same type can then be verified and
processed uniformly.
A document that conforms to the structure of a DTD is said to be valid.
About XML
Extensible Markup Language (XML) is a generalized format for representing structured information, especially for
the Web. Like HTML and SGML, XML requires the use of elements and structure. However, XML differs from
HTML in that it is extensible—users may define custom sets of element tags. XML is a subset of SGML, and can be
used for essentially the same purposes as SGML, without many of the complex SGML features.
You can use XML for storing data in an XML repository, which lets you easily reuse materials, search for text, collab-
orate with other authors, and manage documents. You can also use XML and the template-driven workflow in
FrameMaker for multichannel publishing.
An XML document that conforms to the structure of a DTD is said to be valid. An XML document that uses tags
that conform to the standard XML specifications is said to be well-formed.
About XHTML 1.0
Extensible HyperText Markup Language (XHTML) is an extension of HTML that is based on XML and is designed
to work with XML-based applications. It can be viewed, edited, and validated with standard XML tools. Using
XHTML is an easy way to migrate from HTML to XML while retaining your content’s forward and backward
compatibility. For more information on HTML, see “About HTML” on page 556.
About structured templates
A template is a document that stores properties you use in more than one place. You can create a new document from
a template to give it all the template’s properties, or you can import specific properties from the template later.
FrameMaker templates give your documents their layout and formatting, and specify their structure requirements.
Structured FrameMaker comes with Structured Templates for letters, memos, fax, envelope, reports, outlines,
newsletters, books, FAQs, and Single source book.
Templates can store the following properties:
•Element definitions that specify allowable contents, attributes, and formatting for elements
•Paragraph, character, and table formats that work with formatting information in the element definitions
•Page layouts that determine the number and position of columns on pages, and background items such as
running headers
•Reference pages that store repeatedly used graphics and formatting information
•Variables you use as placeholders for text that FrameMaker updates
•Formatting information for cross-references, equations, and conditional text
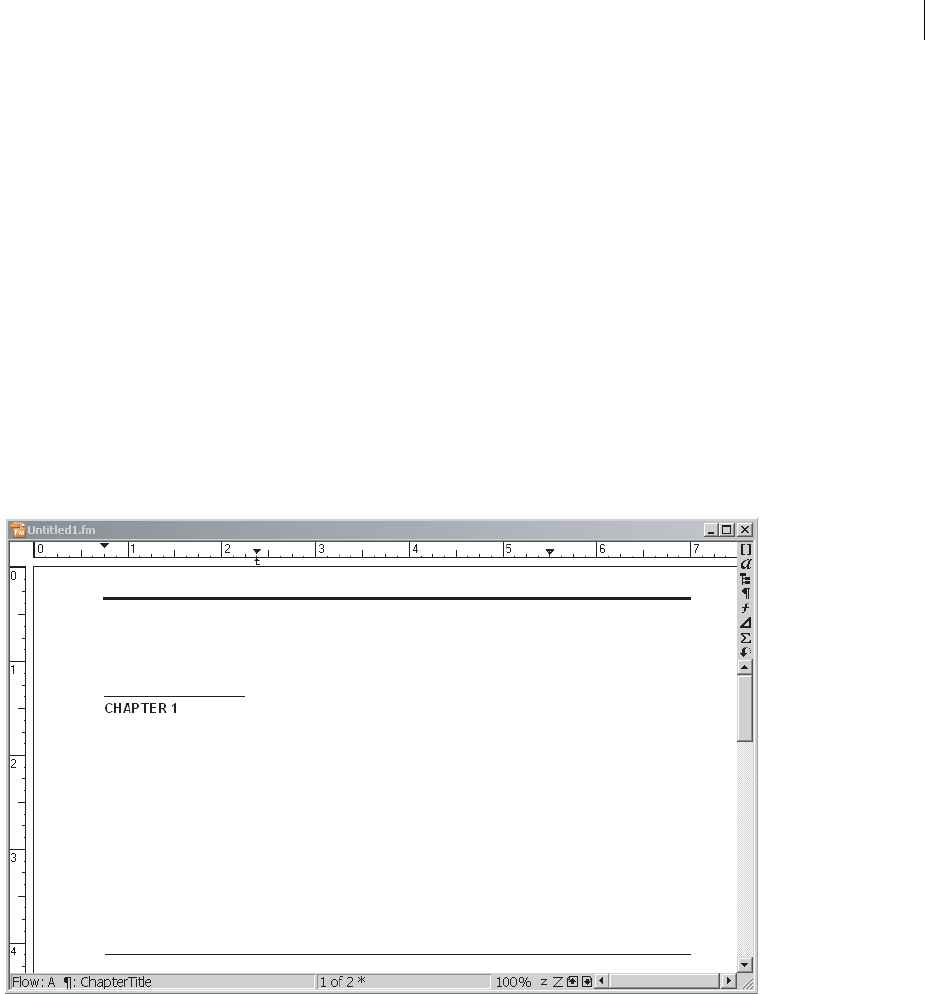
ADOBE FRAMEMAKER 8
User Guide
58
•Definitions for colors you can apply to text and objects
•Document-wide settings, including footnote properties, custom marker types, and feathering options for
line spacing
•Specifications for combined Japanese and Western fonts (on Japanese-language systems)
Note: If you’re working with structured files, an application developer may have set up special documents that handle the
translation to and from the structured application. These documents may include a template that formats the structured
files in FrameMaker. This template is applied automatically when you import from the structured application.
Using structured documents in FrameMaker
In the typical workflow, you begin working with structured documents by creating a new document (most often
from a template) or by opening an existing document in Structured FrameMaker.
A structured document contains more than just the elements and contents you add to it. It can also store page
layouts, catalogs of element definitions and formats, and other properties that facilitate and even automate your
work. These properties normally come from the document’s template.
A template provides a foundation for other documents.
Creating documents from a structured template
When you create a document from a structured template, the document is an exact copy of the template, including
its element definitions and other properties and any contents it might have.
Typically, you use a custom template that is part of your application, but FrameMaker also comes with some
predefined structured templates for reports, viewgraphs, and outlines.
As you work in the template, FrameMaker helps you organize elements in a valid structure and formats
everything for you automatically—you don’t need to know XML or SGML syntax to create XML- or SGML-
compatible documents.
ADOBE FRAMEMAKER 8
User Guide
59
Your developer may provide documentation that describes how to work with the elements defined for the appli-
cation. If you want to create a document that will not be structured, either use an unstructured template or start with
the equivalent of a blank piece of paper. For more information, see “Creating documents” on page 19.
To create a document from a structured template:
1Make sure you are running Structured FrameMaker. If you are not running Structured FrameMaker, choose File
> Preferences > General, select Structured FrameMaker for Product Interface, click Set, and restart FrameMaker.
2Choose File > New > Document. In UNIX, you can also click New in the main FrameMaker window.
3Navigate to the template you want. If you want to use a structured template that came with Structured
FrameMaker, navigate to the Structured folder in the Templates folder in one of the following locations:
•(Windows) The FrameMaker8 folder
•(UNIX) The fminit/language/Templates/Structured folder within the FrameMaker installation folder (where
language is the name of the language you’re using—for example, usenglish)
4Select the template and click New (Windows) or Create (UNIX).
5When the template opens, resize the document window so that you can clearly see the page. Then click the
Structure View button in the upper right corner of the document window to display the Structure View, which
shows the structure hierarchy. Position the two windows so that you can see both at once. You can also click the
Element Catalog button to display the Element Catalog.
A. Template in a document window B. Element catalog C. Structure view
6Do any of the following:
•Add text for each required element and any optional elements you want. You can add text by clicking to place the
insertion point in the document window (see “Working with text in structured documents” on page 95 and
“Entering text in a structured document” on page 99).
•Add new elements from the Element Catalog (see “Adding elements” on page 34).
AC
B

ADOBE FRAMEMAKER 8
User Guide
60
•In the Structure View, expand the elements by clicking the + (plus sign) on the left side of the element bubbles;
collapse them by clicking the - (minus sign) on the left side (see “Collapsing and expanding elements” on page 14).
•View the element’s attributes by clicking the + (plus sign) on the right side of the element bubbles (see “Showing
and hiding attributes for an element” on page 15).
•Change an element’s attributes (see “Assigning attribute values” on page 46).
•Rearrange or restructure elements or sections in the document (see “Moving elements” on page 42).
•Add cross references (see “Working with cross-references in structured documents” on page 217).
•Manipulate the current structure—change an element to another type, merge two elements, split an element in
two, or wrap an element in a new parent element (see “Editing elements” on page 39).
•Validate the document to ensure that it has a valid structure for export to XML or SGML (see “Finding and
correcting errors” on page 51).
•Save or export the document to XML or SGML (see “Saving a structured document in SGML or XML format” on
page 63).
Creating a new structured document
To create a structured document from scratch, make sure you have an EDD and a structure application available (see
“About structured applications” on page 61). You can use the EDD file and sample structure application included
with FrameMaker (see the folders located in the Structure folder), or you can create your own. For information on
creating a structured application and EDD, see the Structured Application Developer’s Guide, located in the Online-
Manuals folder in the FrameMaker8 folder.
To create a new structured document:
1Make sure you are running Structured FrameMaker.
2Choose File > New > Document.
3Select Portrait, Landscape, or Custom to set the page dimensions.
4Open a structured document or EDD that includes the elements you want to use, and then import elements into
the new document (see ““Importing element definitions” on page 44).
5Add text and elements to the document (see “Adding elements” on page 34).
6Save the document as a structured FrameMaker document or in the desired format (see “Saving a structured
document in SGML or XML format” on page 63).
Opening and saving structured files
You can open and work with any structured file in FrameMaker, as long as the file has an associated application.
The contents, elements, and attributes from the file are preserved, and the file appears just like a regular FrameMaker
document.
Using Structured FrameMaker you can open XML and SGML documents. After editing the structured file, you can
save it back to its original format, such as XML or SGML; any changes you made to contents, elements, and attributes
will usually be preserved. (See your developer about limitations your application may have on mapping between
structured files and FrameMaker.)

ADOBE FRAMEMAKER 8
User Guide
61
About structured applications
A structured application is a collection of files that describes how to process a structured file in FrameMaker. The
application usually includes a DTD, which defines the elements and attributes, and other items, such as read/write
rules and an import template.
To be able to work with a structured file, you need to have an application associated with the file. A developer
typically sets up this application for you and may associate it with the appropriate files. You can also select the appli-
cation yourself as you open or save, or change the application while the file is open.
Important: Use the application that was designed for the file. If you’re not sure which one to use, ask your
application developer.
You can open an SGML or XML file without using an application—for example, if you’re just browsing the file, or if
you don’t know which application to use and will select one later. The file will have structure but only basic default
formatting (with all text in body paragraphs), and objects such as tables and graphics will generally not be imported.
You’ll be able to edit the structure and contents of the file, but you may not be able to save it back to the structured
format (XML or SGML), because some mapping information may be unavailable.
An SGML or XML file does not include any specifications on how its contents are to be formatted, but your struc-
tured application may have a template that formats the file in FrameMaker. If you use an application that does not
have a template, the file opens using basic default formatting.
Opening structured files
You can open a structured file just as you open any other kind of file. A new FrameMaker document appears, with
all the contents of the structured file.
If you want to view or edit the structure markup directly, you can also open the file as text (see “Opening SGML,
XML, MIF, and MML files as text” on page 68).
Default encoding settings for opening structured files are ISO-8859-1 for SGML and UTF-8 for XML. If the original
files have different encoding settings, FrameMaker uses those settings instead of the default settings.
To open a structured file:
1In Structured FrameMaker, choose File > Open. On UNIX systems, you can also click Open in the main
FrameMaker window.
2Locate the file you want to open and click Open. If the file has an associated application, the document opens and
you’re ready to begin.
3If the Use Structure Application dialog box appears, choose an application name from the Use Structured Appli-
cation pop-up menu and click Set. Then do one of the following:
•To associate an application with the file, choose the name of an application.
•To use default mapping and no read/write rules, choose <No Application>. You may want to use this option to
browse a file you don’t plan to save.
Note: When characters in an original XML file don’t map into the FrameMaker document, the characters are marked
as unknown. They don’t appear in FrameMaker, but they are preserved on XML export.
Converting structured files to FrameMaker format without opening
You can convert one or more structured files to FrameMaker without having to open them. The files you convert
should either be the only contents of a single folder or all have a unique filename extension in a folder, and they
should all use the same structured application.

ADOBE FRAMEMAKER 8
User Guide
62
To convert structured files to FrameMaker format:
1Choose StructureTools > Utilities > Convert Structured Documents.
2Choose an application for the converted files from the Application pop-up menu.
3In the Input Structured Documents area, specify the location and filename extension of the original files. If you
need to look for the location, click Browse and navigate to it.
The filename extension is required. You can type an asterisk (*) in the Suffix text box to convert all files in the folder.
4In the Output FrameMaker Files area, specify a location and filename extension for the FrameMaker files. If you
need to look for the location, click Browse and navigate to it.
The filename extension is optional. If you leave the Suffix text box empty, the converted files will have no extension.
If you type *, the files will have the same extension as the original structured files. If you use *, store the structured
files in a different folder from the converted files.
5To overwrite an existing batch of converted files in the output folder, select Allow Existing Files to Be Overwritten.
Important: Use this option for overwriting an earlier version of converted files with the same name. Be careful not to
overwrite the original structured files. Either store the structured files in a separate folder or give them a different
filename extension.
6Click Convert.
Changing the associated structured application
After you open a structured file, you can change the application associated with it. The new application is used for
the file when you next open the file or save it as a structured document.
FrameMaker 8 allows you to associate a structured book with the DITA-Book- FM application, or a structured
document with a DITA-Map-FM or DITA-Topic-FM application. Use the DITA-Book- FM application to build a
FrameMaker book that contains all of the files in an open DITA map (<dita>, <ditamap>, or <map>). The element
definition document (EDD) and structured template used in this application can be customized for hardcopy or PDF
output. Use the DITA-Map-FM application to create and edit DITA maps (both .map and .ditamap files). Use the
DITA-Topic-FM application to author topic, concept, reference, or task information types. If needed, the EDD and
structured template can be optimized for screen viewing or topic proofing.
Important: Consult your developer before changing the application. For best results, use the application that was
designed for the file.
If you need to change the application for a group of files, you can ask a developer to specify this in an application
definition file so that you don’t need to change it in each file manually.
To change the associated structured application:
1Click in the document you want to change.
2Select StructureTools > Set Structured Application, choose the name of the application from the Set Structured
Application pop-up menu, and click Set.
Converting structured FrameMaker documents to SGML or XML
You can convert one or more structured documents to SGML or XML, without having to save them individually. The
files you convert should either be the only contents of a single folder or all have a filename extension that is unique
in a folder, and they should all use the same structured application.
For information on opening SGML or XML files as text, see “Opening SGML, XML, MIF, and MML files as text” on
page 68.

ADOBE FRAMEMAKER 8
User Guide
63
To convert FrameMaker documents to a structured format:
1Choose StructureTools > Utilities > Convert Documents to Structured Format.
2Choose an application for the converted files from the Application pop-up menu.
3In the Input FrameMaker Files area, specify the location and filename extension of the FrameMaker files. If you
need to look for the location, click Browse and navigate to it.
The filename extension is required. You can type an asterisk (*) in the Suffix text box to convert all files in the folder.
4In the Output Structured Documents area, specify a location and filename extension for the converted files. If you
need to look for the location, click Browse and navigate to it.
The filename extension is optional. If you leave the Suffix text box empty, the converted files will have no extension.
If you type *, the files will have the same extension as the FrameMaker files. If you use *, store the FrameMaker files
in a different folder from the converted files.
5To overwrite an existing batch of converted files in the output folder, select Allow Existing Files to Be Overwritten.
Important: Use this option for overwriting an earlier version of converted files with the same name. Be careful not to
overwrite the FrameMaker files. Either store those files in a separate folder or give them a different filename extension.
6Click Convert.
Saving a structured document in SGML or XML format
You can save any structured FrameMaker document as SGML or XML. The contents, elements, and attributes from
the document are preserved; however, formatting is not preserved. You can save to a different structured document
type than the original (such as SGML to XML), but you may encounter errors due to differences in DTDs.
When you save Unicode content as an XML file, Adobe FrameMaker 8 specifies the encoding automatically.
By default, Adobe FrameMaker 8 uses the UTF-8 encoding format.
Before saving a document as SGML or XML, you should validate it and correct any errors in the elements and
attributes (see “Validating documents” on page 52). Otherwise, the markup may be invalid.
When saving structured XML documents, make sure valid XML element names start with a letter and contain only
alphanumeric characters, periods, or hyphens. Spaces, underscores, and other characters in XML element names are
invalid characters, and are either converted to hyphens (-) or generate errors.
Headings, tables, and reference pages are not used in XML export, and the default tag names are simply the
format names.
Default encoding settings for exporting structured documents are ISO-8859-1 for SGML and UTF-8 for XML. If the
structured document is an imported SGML or XML file, FrameMaker uses the encoding settings in the original file
instead of the default settings.
To save a document in SGML or XML format:
1Select File > Save As.
2Specify a filename and location. You may want to add the appropriate extension (such as .sgm or .xml) to
the filename.
3Select SGML or XML from the pop-up menu and click Save. If the document has an application associated with
it, the document is saved.

ADOBE FRAMEMAKER 8
User Guide
64
4If the Set Structured Application dialog box appears, choose an application name from the Set Structured Appli-
cation pop-up menu and click Continue. Then do one of the following:
•To associate an application with the document, choose the name of an application.
•To use default mapping and no read/write rules, choose <No Application>.
If FrameMaker finds any structure errors when you save a document, it lists error messages in a view-only error log.
If a message refers to an error in the FrameMaker document, the message is linked to the document. For most errors,
you can click the message to go to the location of the problem.
When you open the structured documents, import element definitions into them (see “Importing element defini-
tions” on page 44). You’ll probably also need to make a few corrections to their structure.
Importing properties from a template
You can import element definitions and other properties into your document from any FrameMaker document.
Typically, this other document is a template that you did not use for creating the document. (If you created your
document from the appropriate template, you don’t need to import properties; the document already has the
properties it needs.)
If your document’s template has been revised, you should import from the template again to update your document.
You can also import properties into all the files in a book at once (see “Importing formats into a structured book” on
page 481).
Importing formats
You can import a wide variety of formatting information—including page layouts, paragraph and table formats,
variable and color definitions, and conditional text settings.
To import formats:
1Open the template with the formats. The template must be named and saved.
2Open the document or book that you want to update. If a book window is active, select the documents you want to
update.
3In the document or book you’re updating, choose File > Import > Formats.
4Choose the template from the Import from Document pop-up menu. The menu lists all open, named documents.
You can also choose the current document to reapply the formats the document already has. This is useful mainly
for removing formatting changes, as described in step 6.
5Select the Import and Update settings you want to apply to the current document. See “Importing format settings”
on page 65 for details on the settings.
•If you’re updating cross-reference formats, math definitions, or variable definitions, and if any of these items uses
character formats, also select Character Formats so that any new formats are added to the document.
•If the HTML mappings have been modified, select Reference Pages.
6If you want to remove formatting changes that are not saved in catalog formats, do the following:
•To remove page breaks that are not part of a paragraph format, select Manual Page Breaks.
•To remove paragraph, character, page layout, and table formatting overrides, select Other Format/Layout
Overrides.

ADOBE FRAMEMAKER 8
User Guide
65
Important: In most cases, you should not select Other Format/Layout Overrides in a structured document because the
element definitions may use format overrides. See “About formatting overrides” on page 66 for more information.
7Click Import.
Importing format settings
When you import formats, FrameMaker merges the new formatting information into the document. For example,
if you import table formats, the formats are added to the Table Catalog. If a format already in the catalog has the same
name as an imported format, the imported format replaces the original one. But any formats not overwritten remain
in the catalog.
Paragraph formats The template’s Paragraph Catalog is merged into the document, and all formats in the catalog are
reapplied in the document.
Character formats The template’s Character Catalog is merged into the document, and all formats in the catalog are
reapplied in the document.
Page layouts The template’s master pages are merged into the document, and body pages are updated with the
master page changes. If the template and the document both have a master page with the same name, the master page
of the template replaces that of the document. FrameMaker copies the change bar properties, all the settings in the
Page Size and Pagination dialog boxes, and most settings in the View Options dialog box.
Table formats The template’s Table Catalog and ruling styles are merged into the document, and all formats in the
catalog are reapplied in the document.
Color definitions The template’s color definitions and views are merged into the document.
Reference pages The template’s reference pages (except for FrameMath™ reference pages) are merged into the
document. If the template and the document both have a reference page with the same name, the reference page of
the template replaces that of the document. To import the FrameMath reference pages, select Math Definitions.
Document properties The template’s custom marker types and footnote properties; the volume, chapter, page,
paragraph, footnote, and table footnote numbering styles in the Numbering Properties dialog box; the characters in
the Allow Line Breaks After setting in the Text Options dialog box; and the Feather settings in the Line Layout dialog
box are merged into the document. The PDF Setup settings (other than the bookmark settings) are also merged into
the document. On Japanese-language systems, the rubi properties and kumihan rules (Japanese-language
typesetting rules) are also merged into the document.
Variable definitions The template’s variable definitions are merged into the document.
Cross-reference formats The template’s cross-reference formats are merged into the document, and internal cross-
references are updated.
Conditional text settings The template’s condition tags and Show/Hide settings are merged into the document.
Math definitions The template’s equation size and font settings, custom math element definitions, and FrameMath
reference pages are copied into the document. If any custom math elements in the document are deleted when the
reference pages are merged, FrameMaker replaces the math elements in equations with the name of the math
element enclosed in question marks.
Note: In FrameMaker equations, the term “math element” refers to part of an expression. A math element is not a struc-
tural element.
Combined fonts On Asian-language systems, the specifications of combined fonts are merged into the document.

ADOBE FRAMEMAKER 8
User Guide
66
About formatting overrides
The formatting information for a document can come from format rules in element definitions and from predefined
formats stored in catalogs. It is possible for a document to have overrides to both sources of information:
•A format rule override is a deviation from a text element’s format rules. For example, if the rules specify a
paragraph format for an element and you apply a different format, or if the rules specify boldface text and you
change the text to italics, you are overriding the element’s format rules.
•A format override is a deviation from a catalog format for text or a table. For example, a paragraph format may
specify the Times font family. If you change some text that uses that format to the Palatino font (without saving
the change in the format), you are overriding the format. Format rules often use a few catalog formats and specify
format overrides to them as needed to describe many different formatting variations.
Generally, you should not introduce either type of override into your structured document. Let the document handle
the formatting automatically, and see your application developer if you’d like to change any of the formatting
properties.
If your document does have overrides, you can remove them throughout the document all at once when you import
and update.
Important: If you need to remove both kinds of overrides from a document, import formats and remove format
overrides first, and then import element definitions and remove format rule overrides. Removing the rule overrides last
ensures that the elements will conform to their format rules.
Adding structure to documents using conversion tables
If an application developer has set up a conversion table for a document, you can use the table to wrap contents in
elements throughout the document in one operation. This is a quick way to turn an unstructured document with
contents into a structured document.
When you apply a conversion table to a document, FrameMaker uses elements throughout the document but does
not put definitions in the Element Catalog. To do that, you’ll still need to import the element definitions.
You’ll probably need to make a few corrections to structure that was added from a conversion table. For information
on validating and editing structured documents, see “Validating documents” on page 52 and “Editing elements” on
page 529.
About conversion tables
A conversion table identifies types of contents by their paragraph and character tags, and specifies the particular
elements for those contents; it might also specify parent elements. A paragraph tagged Body might be wrapped in an
element tagged Para, for example, and a Head and the Para elements that follow it might be wrapped in a parent
Section element.
Note: The Conversion Tables feature supports the Unicode text encoding standard.
Because conversion tables work with paragraph and character tags, they are particularly helpful when these tags have
been used consistently in a document.
Even if paragraph and character tags are not consistent in the document, you may still want to use a conversion
table to wrap basic contents such as body paragraphs. Then wrap the rest of the contents manually (see “Wrapping
elements around existing contents” on page 37).

ADOBE FRAMEMAKER 8
User Guide
67
Applying a conversion table to a document or a book
A conversion table can quickly add structure to the current document or to the book and its files. FrameMaker puts
the structured version of the document in a new unnamed file.
To apply a conversion table to a document:
1Open the document or book you want to add structure to, and open the file with the conversion table.
2Make sure that the document is not already structured by clicking in the main flow and looking in the Structure
View. If the view is empty, the document is unstructured.
3In the document you’re adding structure to, choose StructureTools > Utilities > Structure Current Document or
Structure Current Book.
4Choose the file with the conversion table from the Conversion Table Document pop-up menu and click Set.
FrameMaker applies the conversion table to the document.
If FrameMaker finds any errors in the table, it creates an error report in an unnamed document. Ask your developer
to correct the errors and then apply the table again.
5Save the newly structured document or documents.
6Import element definitions into the document (see “Importing element definitions” on page 44). In most cases,
you’ll also need to make corrections and refinements to the new structure.
Applying a conversion table to a group of documents
You can add structure to one or more documents without having to open them. The documents should either be the
only contents of a single folder or all have a filename extension that is unique in a single folder.
For more information on conversion tables, see the Structured Application Developer’s Guide, located in the Online-
Manuals folder.
To apply a conversion table to a group of documents:
1Open the file with the conversion table.
2Choose StructureTools > Utilities > Structure Documents.
3Choose the file with the conversion table from the Conversion Table Document pop-up menu.
4In the Input Unstructured Files area, specify the location and filename extension of the documents you’re adding
structure to. If you need to look for the location, click Browse and navigate to it.
Applying a conversion table to a group of documents

ADOBE FRAMEMAKER 8
User Guide
68
The filename extension is optional. You can leave the Suffix text box empty to add structure to all documents in
the folder.
5In the Output Structured Files area, specify a location for the structured versions of the documents. If you need
to look for the location, click Browse and navigate to it.
6To overwrite an existing batch of structured files in the output folder, select Allow Existing Files to
Be Overwritten.
7Click Add Structure.
Working with XML documents
About Element Definition Document (EDD) and Document Type Definition (DTD)
Element definitions are defined in an Element Definition Document (EDD), which is normally embedded in the
template. The EDD contains both structural rules for the document (Document Type Definition or DTD) and
styling rules, which dictate how elements of a specific type are styled. An application developer generally creates the
EDD from an existing DTD file or from scratch. For more information, see the Structured Application Developer’s
Guide located in the OnlineManuals folder.
All structured documents in FrameMaker use elements. Each element has a name, or tag, such as Section, Head, or
List. The element tags that are available are determined by the document’s element definitions.
You can add and edit elements in a structured document, as well as work with the contents in more conventional
ways. Structured FrameMaker templates contain definitions of all the elements that can be used in the document as
well as the document’s page layout and formatting. For more information about working with Elements, see
“Elements in structured documents” on page 32.
Opening SGML, XML, MIF, and MML files as text
SGML, XML, MIF, and MML are all text formats, so you can open them as text. SGML and XML are structured
document formats that contain the content of a document (the styling is typically defined by a template, which
contains the page layout and element definitions). For more information, see “Structured formats in FrameMaker”
on page 56. MIF lets you exchange information between FrameMaker and other applications. MML is a markup
language you can use with any text editor to create simple, unstructured FrameMaker documents.
When you open an SGML, XML, MIF, or MML file, it is normally opened in the FrameMaker format. You may want
to open one of these files as text to view or edit the markup.
Markup in an SGML file

ADOBE FRAMEMAKER 8
User Guide
69
To open an SGML, XML, MIF, or MML file as text:
1Select File > Open and choose the file you want to open.
2Do one of the following:
•(Windows) Control-click Open.
•(UNIX) Shift-click Open.
3In the Reading Text File dialog box, select an option for reading the file and click Read.
Importing CSS element styles into an EDD file (Windows)
You can import element formatting from CSS into EDD to ensure consistent formatting across different XML appli-
cations. The CSS file can be referenced in the XML document or manually imported. Multiple CSS files can be
imported sequentially for multi-level formatting.
When importing element styles, FrameMaker retains the context information (element property or selector) from
the CSS and imports it into the appropriate EDD contexts.
Note: FrameMaker imports style information only at the element level.
You can also set CSS2 preferences in XML using Structured FrameMaker. For more information, see the
Structured FrameMaker Developer's Guide, located in the Documents folder.
1Open the EDD file in structured FrameMaker.
2Select StructureTools > Import CSS Styles. The Import CSS dialog box appears.
3Select a CSS file, and click Open.
4If the Structured Application element in the EDD file doesn’t define an application name, the Use Structured
Application dialog box appears. Select the application that was used to create the EDD file. Click Continue.
The CSS file is imported into the EDD file.
Note: If the EDD already contains formatting rules, the CSS properties are appended to the existing rules. If the CSS
properties overlap some of the existing rules, the CSS properties replace the existing rules in the EDD. The EDD doesn’t
support all properties and selectors defined in CSS 2.0. If a property or selector in the CSS file can’t be mapped to an
equivalent EDD rule, that property or selector is ignored. No error is displayed when this happens, and no error log is
created.
After importing the CSS styles, you can import element definitions from the EDD into a template and use the
template to open an XML file.
As an alternative to the CSS import process, you can use FrameMaker to open an XML file that already has CSS styles
associated with it. When you open the XML file, FrameMaker reads the DTD and CSS files and generates a
temporary template that is used to open the XML file.
About CSS export
You can export XML style information available in your document for all elements using the Cascading Style Sheets
2 (CSS2) format, to an EDD file. You can then import these CSS Style definitions from the EDD file to new XML
files. Cascading Style Sheets let authors attach styles, such as fonts and spacing, to structured XML files. CSS2 format
is a W3C standard.

ADOBE FRAMEMAKER 8
User Guide
70
When you choose the Generate CSS2 command, styles from well-formed structured documents are generated, based
on the formatting information available in the EDD associated with the source document. FrameMaker exports style
information only at the element level. For example, if you apply a style to only one particular word in the Text
element, that one instance of style is not exported.
You can set CSS2 preferences in the XML application. For example, you can determine whether the CSS2 file is
automatically generated when you export to XML. For more information, see the Structured Application Developer's
Guide, located in the OnlineManuals folder.
To export CSS for a FrameMaker XML file:
1Open the template or document with an associated EDD in Structured FrameMaker.
2Select StructureTools > Generate CSS2.
About XML namespaces
An XML namespace is a collection of names for specific element types and attribute names within an XML
document. The scope of a namespace extends beyond its containing document.
Because a single XML document can contain elements and attributes that can be used by multiple software applica-
tions, you can use namespaces to differentiate which elements and attributes are to be used by which applications.
Software applications that process XML use namespaces to recognize which tags and attributes they are designed
to process.
Names from XML namespaces may appear as qualified names, which contain a single colon, separating the name
into a namespace prefix and a local part. The prefix, which is mapped to a Uniform Resource Identifier (URI)
reference, selects a namespace. The combination of the universally managed URI namespace and the document's
own namespace produces identifiers that are universally unique.
Using XML namespaces in FrameMaker
FrameMaker supports namespace usage for all elements in an XML document. When you import an XML document
containing namespaces, all namespace information is preserved.
You can view, edit, add, or delete namespaces to an XML document in Structured FrameMaker using the
Namespaces command. You can also use this command to view the definition of the prefix on an element tag and
select the element that defines the prefix.
By default, namespaces in FrameMaker are handled as namespaces, appearing in the Namespaces dialog box.
However, you can disable namespaces in the application and have them handled as attributes instead, appearing in
the Structure View.
To view or edit namespaces:
1Open the document in Structured FrameMaker.
2Select an element in the Structure View.
Note: Elements that contain namespaces appear in Structure View with an asterisk (*) next to their names.
3Choose Element > Namespaces.
4In the Namespaces dialog box, click Select Defining Element to view the namespace for the selected element in
the Structure View.
5Make any desired changes to the Declared Namespaces, Prefix, or Path and then click Add, Change, or Delete. To
close without saving your changes, close the dialog box without clicking an option.

ADOBE FRAMEMAKER 8
User Guide
71
Word processing
For editing text, FrameMaker is flexible and straightforward. You can add or delete text, and you can copy or move
it to another location.
FrameMaker includes the following powerful editing tools:
•The Find/Change command, which can find not only text but also items such as character formats, paragraph tags,
anchored frames, and the contents of the Clipboard
•The Spelling Checker, which can find and correct misspellings and common typing errors such as extra spaces
and repeated words
•The Thesaurus, which defines words and provides synonyms, antonyms, and related words
Note: The Find/Change, Spelling Checker, dictionary, and thesaurus features support the Unicode text
encoding standard.
Placing the insertion point
Click to put the insertion point in any text in the document window. The insertion point marks where you enter
or edit text. When you click on a special text item such as a cross-reference, variable, or text inset, you select the
entire item.
The location of the insertion point determines the current paragraph—the paragraph to which paragraph formatting
commands are applied.
If you can’t place the insertion point in or next to text, the text might be background text that was typed on a master
page. You can display the master page that contains the text and put the insertion point in the text on that page (see
“Displaying master pages” on page 383). In other cases, you might not be able to place the insertion point in text
because the text is automatically generated (for example, paragraph autonumbers or cross references) or because it’s
repeated from the previous page (for example, table titles or table headings).
Entering and editing text
You enter text by typing in the document window. As you type, the text flows to another line or column. Press Return
only when you want to begin a new paragraph. When you reach the end of a page, FrameMaker automatically creates
a new page. If you want to force a line or page break at a specific location, see “Changing hyphenation and line
breaks” on page 119 or “Changing page and column breaks” on page 120.
To adjust the space between paragraphs, change the spacing properties in the paragraph format rather than press
Return repeatedly. For details, see “Changing spacing” on page 115.
Along with the standard characters on your keyboard, you can type bullets, mathematical symbols, spaces of various
widths, international characters, and other special characters.
Many features make typing easier. For example, Smart Quotes inserts the appropriate left or right quotation mark
when you type a straight quotation mark. Smart Spaces prevents you from typing more than one space in a row.
Using tabs
Each time you press Tab, a tab symbol is embedded in the text. The symbol does not appear in the printed
document, but it is visible on-screen when text symbols are visible.

ADOBE FRAMEMAKER 8
User Guide
72
If the current paragraph has tab stops set, FrameMaker moves the insertion point and text one tab stop each time
you press Tab. If tab stops are not set, pressing Tab doesn’t move the insertion point and text. If you press Tab more
times than you have tab stops, the Tab symbols overlap. If you later add tab stops to the paragraph, FrameMaker
positions the text correctly at the tab stops.
FrameMaker uses tab stops that are absolute rather than relative. With relative tab stops, each time you press Tab, the
insertion point moves to the next available tab stop. With absolute tab stops, the nth tab on a line moves the insertion
point to the nth stop. If that tab stop is to the left of the insertion point, the insertion point does not move.
Press Tab three times to move to the third tab stop.
For information on the types of tab stops you can add to a paragraph, see “Changing tab stops” on page 113.
Typing special characters
You use combinations of keys to type bullets, dashes, fixed-width spaces, and accented characters such as ç, ñ, and
ö. If the Symbol font is installed on your system, you can type any of the symbols in that font—for example, ©, ∴,
and ∞. If the Zapf Dingbats font (or any other “picture” font) is installed on your system, you can type any of the
special symbols in that font—for example, ▲ ✌ ■ ✓. In FrameMaker 8, character (ALT) sequences are not imple-
mented for Dingbats and Symbol fonts, as Microsoft® Windows® provides Unicode equivalents of codepage 1252 for
these fonts, by default. The character (ALT) sequences are implemented for the MakerRoman font family only.
You can type bullets and dashes. You can also type fixed-width spaces. For a list of characters in the Symbol and Zapf
Dingbats fonts, a list of accented characters in the standard character set, and information on inserting the Euro
currency symbol, see the online manual FrameMaker Character Sets.
Note: Some special characters are entered or displayed differently in dialog boxes. In Windows, you enter a sequence of
characters beginning with a backslash (\); these sequences are listed in “Appendix A: Typing in dialog boxes” on page 677.
On UNIX systems, the backslash sequences may appear in text boxes, even though you don’t have to type the sequences
to enter the characters
To type a bullet (•):
❖Press Control+q Shift+%. You can also press Meta+period (UNIX).
To type an em dash (—):
❖Press Control+q Shift+q.
To type an en dash (–):
❖Press Control+q Shift+p.
Typing special spaces
When you press the spacebar, you insert a proportional space (whose width depends on the characters on either side
of it). You can also insert special fixed-width spaces—for example, to increase the space between two words. When
you type a special space between two words, the words always remain together on one line.
Mount Everest 29,028 ft
World’s Major MountainsWorld’s Major Mountains

ADOBE FRAMEMAKER 8
User Guide
73
You can use the following types of special spaces:
•An em space is the same width as the point size of the font you use. For example, if you use a 10-point font, an em
space is 10 points wide.
•An en space is half the width of an em space.
•A numeric space is the same width as the font’s zero (0) character. All digits are typically the same width. This
space is useful for aligning numbers in a column without using tabs.
•A thin space is one-twelfth the width of an em space. A thin space is often used when a very small space is needed
to separate two characters—for example, between a number and the unit of measure that follows it, or between
characters that appear too close together—for example, /).
•A nonbreaking space is the same width as the default space width for the font.
To type an em space:
❖Do one of the following:
•(Windows) Press Esc space m or Control+Shift+space.
•(UNIX) Press Esc space m.
To type an en space:
❖Do one of the following:
•(Windows) Press Esc space n or Alt+Control+space.
•(UNIX) Press Esc space n.
To type a numeric space:
❖Press Esc space 1 (one).
To type a thin space:
❖Press Esc space t.
To type a nonbreaking space:
❖Press Control+space.
A nonbreaking space symbol appears when text symbols are visible.
Using Smart Spaces or Smart Quotes
When Smart Spaces is on, you can’t type more than one proportional space in a row. However, you can type multiple
fixed-width spaces (see “Typing special spaces” on page 72).
When Smart Quotes is on, FrameMaker uses a curved left or right quotation mark whenever you press the , , or
key. If you prefer to use straight quotation marks, turn off Smart Quotes. You can use combinations of keys to type
curved quotation marks when Smart Quotes is off, or to type straight quotation marks when Smart Quotes is on.
Smart Quotes doesn’t apply to text in dialog boxes. For information on typing quotation marks and apostrophes in
dialog boxes, see the online manual FrameMaker Character Sets and “Appendix A: Typing in dialog boxes” on
page 677.”
Note: For information on customizing quotation marks for languages other than US English in Windows or on UNIX
systems, see the online manual Customizing FrameMaker. This manual is available on the Adobe website:
www.adobe.com/devnet/framemaker/pdfs/Customizing_Frame_Products.pdf.
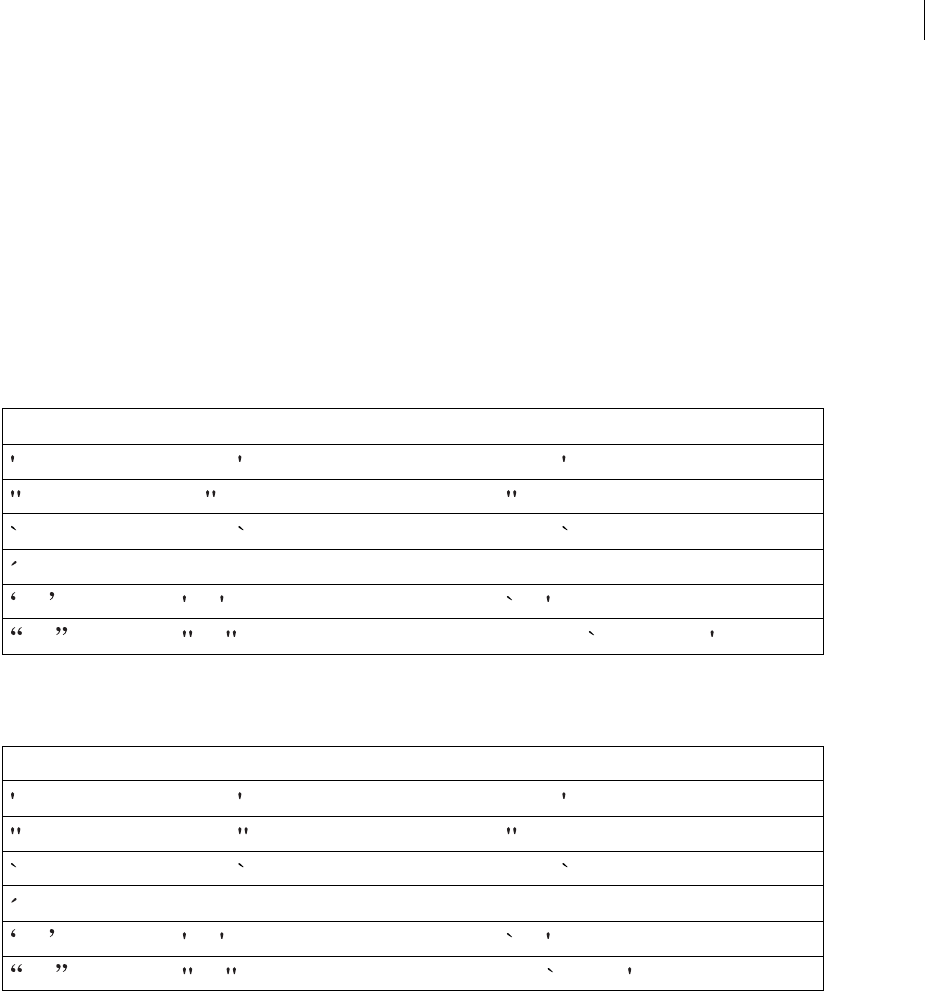
ADOBE FRAMEMAKER 8
User Guide
74
To turn Smart Spaces or Smart Quotes on or off:
1Make the appropriate document window or book window active. If a book window is active, select the documents
you want to affect.
2Choose Format > Document > Text Options.
3Change the Smart Spaces or Smart Quotes option and click Apply. When you select Smart Quotes, FrameMaker
doesn’t change any quotation marks that are already in the document. To find straight quotation marks and
apostrophes, and change them to curved quotation marks and apostrophes, use the Spelling Checker (see “Checking
spelling” on page 85) or the Find/Change command (see “Searching for any item” on page 77).
To enter straight and curved quotation marks in Windows:
❖Do one of the following:
To enter straight and curved quotation marks on UNIX systems:
❖Do one of the following:
Typing special text items
In addition to text, you can insert special text items such as cross-references, footnotes, variables, and markers.
Inserting a variable automatically places the date, time, page count, filename, or text that you define into a document.
FrameMaker updates variables when they change. Markers can be used to generate lists and indexes and to insert
hypertext commands.
To insert a special text item:
❖Choose the appropriate command from the Special menu. For information, see the following:
•On cross-references, see “Inserting cross-references” on page 201.
•On footnotes, see “Working with footnotes” on page 211.
•On variables, see “About variables” on page 226.
To type With Smart Quotes on, press With Smart Quotes off, press
Control+ Control+
Esc
Control+ Control+
Control+q plus (+) Control+q plus (+)
and and and
and and Alt+Control+ and Alt+Control+
To type With Smart Quotes on, press With Smart Quotes off, press
Control+ Control+
Control+
Control+ Control+
Control+q plus (+) Control+q plus (+)
and and and
and and Meta+ and Meta+

ADOBE FRAMEMAKER 8
User Guide
75
•On markers for generated lists and indexes, see “Preparing documents for a list of markers” on page 421 and
“About indexes” on page 427.
•On markers for hypertext commands, see “Inserting hypertext commands” on page 532.
Selecting text
You usually select text before you edit it. You also select text before you change its format, such as its font size or style.
Selected text is highlighted.
For information on selecting text in tables, see “Typing and selecting text in tables” on page 158.
To select text:
❖Do one of the following:
•To select a range of text, drag through the text (or click one end of the text and Shift-click the other).
•To select a word, double-click it.
•To select a paragraph, triple-click it.
•To select all the text in a flow, click in the flow and choose Edit > Select All in Flow.
•To shorten or extend an existing selection, Shift-click at the new beginning or end of the selection.
Copying, moving, and deleting text
You use the Edit menu commands to cut, copy, and paste text to and from the Clipboard. When you use Edit > Cut
or Edit > Copy, the cut or copied text remains on the Clipboard until you choose Cut or Copy again.
Pasted text always retains its character format properties. If the pasted text contains paragraph symbols , the
paragraph format associated with each paragraph is also pasted. Otherwise, the pasted text takes the paragraph
format of the paragraph in which it’s pasted.
You copy text more quickly if you bypass the Clipboard. You can do this, however, only if the original text and the
new location are visible and exist in the same document. You must use the Clipboard to copy and paste text from one
document to another.
Note: Text pasted into a new document retains the character and paragraph tags that were assigned to it in the original
document. The tags of the pasted text may not be similarly defined in the new document. An asterisk appears next to
the tag name in the status bar when the cursor is within the pasted text to indicate that the text has no equivalent tag in
the current document.
To copy text quickly without using the Clipboard:
❖Put the insertion point where you want to insert the copied text, and then do one of the following:
•(Windows) Hold down Alt and select the text you want to copy.
•(UNIX) Hold down Control and use the middle mouse button to select the text you want to copy.
To delete or replace text:
❖Select the text and do one of the following:
•To delete the text, press Delete. You can also choose Edit > Clear.
•To replace the text, type the new text.

ADOBE FRAMEMAKER 8
User Guide
76
If the text you delete or replace contains the end of a paragraph and the paragraph symbol, the beginning of the
paragraph is merged with the next paragraph. If you didn’t intend to combine the two paragraphs, immediately
choose Edit > Undo. Then select the text you want to delete or replace (but not the paragraph symbol), and try again.
To delete a page of text:
❖Do one of the following:
•To delete both the page and its text, choose Special > Delete Pages. If the page contains the beginning of a table
that continues on another page, the entire table is deleted.
•To delete just the text on a page, select the text and press Delete.
For information on deleting empty pages at the end of a document, see “Adding and deleting empty pages” on
page 382.
Entering rubi text for Japanese
Rubi text—small characters that appear above other characters—is used in Japanese-language documents to indicate
pronunciation. Rubi text can also be used with English language documents.
A. Rubi text B. Oyamoji text
If either Japanese or English fonts are installed on your system, FrameMaker provides commands for entering rubi
and for specifying how you want the rubi to appear. For information on adjusting the size, location, and spacing of
rubi text, see “Adjusting spacing in Japanese documents” on page 117.
To type rubi:
1Select the characters above which you want to type rubi. The selected text cannot contain a paragraph symbol
or a forced return symbol .
2Choose Special > Rubi and type the text. (If the Rubi command doesn’t appear on the Special menu, press Esc s r
instead of choosing Special > Rubi.) The rubi appears above the selected characters. If the selected characters span
two lines, the characters will all appear on the same line.
Note: If the rubi collides with the preceding line of text, either set the line spacing large enough to accommodate the rubi
(at least 150% of the font size) or turn off fixed line spacing (see “Adjusting vertical spacing” on page 115).
3To return to the regular text when you finish typing the rubi, click in it or choose Special > Rubi again.
About searching
In addition to text, you can search for any of the following items:
Text formats and tags Character format properties, or specific paragraph or character tags. In structured
FrameMaker, Element appears right after text, so you can search for element tag, attribute name, attribute value, or
simultaneously for all three.
For information on how to find and then replace text formats, see “Globally applying formats to text” on page 106.
A
B

ADOBE FRAMEMAKER 8
User Guide
77
Markers Any markers regardless of their marker types, markers of a specific type, or markers that contain
specified text.
Cross-references Any cross-references regardless of their formats, cross-references that use a specific format, or
unresolved cross-references—cross-references that FrameMaker is unable to update. When an unresolved cross-
reference is found, the marker text of the cross-reference appears in the Find text box.
Text insets Any text imported by reference. You can also search for unresolved text insets—insets that cannot be
updated from their sources. However, you can’t search for graphics subscribers or OLE linked objects. (To list OLE
links in Windows, choose Edit > Links.)
Variables Any variables regardless of their variable names, or specific variables.
Rubi Any rubi text, when Japanese fonts are installed on your system.
Anchored frames You can find graphics by searching for the anchored frames that contain them. Graphics placed in
non-anchored frames will not be found.
Footnotes Any text or table footnotes.
Tables Any tables regardless of their table format tags, or tables with a specific tag.
Conditional text Any conditional text regardless of its condition tags, text with specific condition tags, or uncondi-
tional text. FrameMaker cannot find conditional table rows or hidden conditional text.
Automatic hyphen Words that are hyphenated automatically.
Text and character format on the Clipboard Text that matches the Clipboard’s text, capitalization, and character
formatting.
Searching through a document
If you are searching in a document, FrameMaker begins searching at the insertion point and continues through the
document. It searches only pages of the type the insertion point is on—for example, only body pages or only master
pages. When FrameMaker reaches the end of the document, it continues the search at the beginning. After searching
the main text flow, it searches other text in the document. Because FrameMaker searches flow by flow rather than
page by page, it may appear to jump around within the document while searching.
Searching throughout a book
If you are searching throughout a book, FrameMaker begins searching from the active document (or from the first
document of the book if the book window is active) and continues searching until all documents in the book
have been searched. If a document cannot be opened, the document is skipped and a message appears in the Book
Error Log.
Note: When you are searching through a book, you cannot search the master or reference pages.
For more information on working with book-wide features, see “Using book-wide commands” on page 473.
Searching for any item
When you search for an item, you can customize the search by considering case, matching whole words only, or using
wildcards. Wildcards let you search for character patterns and for text that appears at the beginning or end of a line.
When FrameMaker finds an item, you can replace the item or continue searching for other occurrences of the item.
You can search for an item in the selection, in the document, or throughout the entire book. For more information
on searching throughout a book, see “Searching throughout a book” on page 77.

ADOBE FRAMEMAKER 8
User Guide
78
FrameMaker 8 uses the UTF-8 encoding format. Therefore, every character in a .fm or XML document containing
Unicode encoded text uses multiple bytes. As a result, only the string entered in the Find field is used to perform the
search operation.
You can specify a search string which includes a range of characters. For example, you can specify a string such as
"[d-w]" to locate text containing characters between "d" and "w". However, searching in a range is applicable only to
Unicode characters, and users can search for any character that belongs to the Basic Multilingual Plane (BMP).
Unicode code points can also be used for performing search and replace operations. For example, you can provide
\uXXXX as the input to locate a character that has code point XXXX. Thus, to search for letter "A" whose code point
is u+0041 you can specify \u0041 in the Find/Change dialog box.
You can also use wild card characters while searching for Unicode text.
To search for any item:
1Do one of the following:
•To search in a document, click where you want to begin the search.
•To search within a selection, select the text.
•To search throughout the entire book, open the book or a document that belongs to the book.
•To search through one or more documents in the book, select the documents in the book window.
2Choose Edit > Find/Change.
3Specify whether you want to search through the book, document, or selection. The Selection option lets you
search through selected text if text is selected in a document, or it lets you search selected files if one or more book
files are selected.
4Choose the item you want to find from the Find pop-up menu (see “About searching” on page 76).
5Do one of the following:
•If you chose Text, Paragraph Tag, Character Tag, Marker of Type, Marker Text, Cross-Reference of Format,
Variable of Name, or Table Tag from the Find pop-up menu, enter the particular item you want to find in the Find
text box.
•If you chose Character Format or Conditional Text from the Find pop-up menu, enter additional information in
the dialog box that appears. For information, see “Searching for character format properties” on page 80 and
“Searching for conditional text” on page 82.
•If you chose any other item from the Find pop-up menu, skip step 6 and proceed to step 7.
6If you entered text in the Find text box, customize the search by doing the following:
•To find or ignore an item with specific capitalization, select or turn off Consider Case. For example, if you enter
MAIN in the Find text box and Consider Case is selected, you won’t find Main. If Consider Case is turned off,
you’ll find MAIN, Main, and main.
•To match only a complete word, enter the word in the Find text box and select Whole Word. For example, if you
enter phone in the Find text box and select Whole Word, you won’t find telephone.
•To find a set of characters that may be part of a longer word or part of more than one word, turn off Whole Word.
For example, if you enter old in the Find text box and turn off Whole Word, you’ll find words such as bold and
oldest as well as old.

ADOBE FRAMEMAKER 8
User Guide
79
•To find an item by using wildcards, enter the text and wildcards in the Find text box and select Use Wildcards. For
example, if you enter Number[1-9] in the Find text box and select Use Wildcards, you’ll find all occurrences of
the word Number followed by any number between 1 and 9. For information, see “Using wildcards in a search” on
page 79.
Note: In Asian documents with multibyte characters, the bracket characters [ ] do not work as wildcards.
7Click Find. If FrameMaker finds an exact match, it displays the page that contains the item and selects the item.
For information on how FrameMaker searches in a document or book, see “Searching through a document” on
page 77 or “Searching throughout a book” on page 77.
To find the next occurrence of an item:
❖Click Find in the Find/Change dialog box or choose Edit > Find Next.
To reverse the search direction:
❖Select Find Backward in the Find/Change dialog box and click Find.
To cancel a search:
❖Do one of the following:
•(Windows) Press Esc.
•(UNIX) Press Control+c.
Entering text in the Find text box
You can enter any characters in the Find text box. However, the following characters require special treatment:
•To find a single backslash (\), enter two backslashes (\\) in the Find text box. A single backslash usually indicates
a special character.
•To search for a wildcard character as an ordinary character when the Use Wildcards option is selected, precede
the wildcard character with a backslash. For example, to find an asterisk, enter \* in the Find text box.
Searching for special characters and nonprinting symbols
You can search for any text, including single characters, phrases, and special characters that aren’t on your keyboard.
When you enter special characters in a dialog box on UNIX systems, the characters may be represented as a sequence
of characters beginning with a backslash (\). In Windows, you’ll need to type the backslash sequence—see “About
typing in dialog boxes” on page 677.
Using wildcards in a search
When Use Wildcards is selected in the Find/Change dialog box, you can use the following wildcards to find
character patterns.
To find Do this Example
Zero or more characters, excluding
spaces and punctuation
Enter an asterisk (*). f*t finds words such as fit and feet.
Any single character, excluding spaces
and punctuation
Enter a question mark (?). f??t finds four-letter words that begin with f and
end with t—for example, foot and feet.

ADOBE FRAMEMAKER 8
User Guide
80
To find nonprinting symbols (such as tab, paragraph, and end-of-flow symbols) and positions (such as the start of a
paragraph or word), use the following character sequences.
For example, you could find empty paragraphs by searching for \P\p (beginning of paragraph followed by end
of paragraph).
You can use most of these sequences for both searching and replacing—for example, replacing a forced return
symbol with an end-of-paragraph symbol. However, you cannot replace with the end-of-flow, start-of-paragraph,
start-of-word, or end-of-word sequence.
Searching for character format properties
You can search for any character format property—for example, any text in italics. Or you can search for text with
several properties—for example, 12-point Helvetica bold.
You can also search for text with specific properties and capitalization—for example, the word London in 10-point
italic text. With these specifications, FrameMaker won’t find London if it’s a different size, isn’t italic, or is capitalized
differently.
To search for text with a specific paragraph or character tag, use the Paragraph Tag or Character Tag find options.
One or more spaces and punctuation
characters
Enter a vertical bar (|). *any| finds words such as any. and many?. If
Whole Word is turned off, it also finds Tiffany, but
not anything.
Any one of several characters Type the characters within brackets
([and ]).
[rml]ate finds rate, mate, and late. If Whole Word
is turned off, it also finds berate, isolate, and
material.
Any one character not in a specified
group of characters
Precede the characters in brackets with
a caret (^).
[^rml]ate finds fate, gate, and date, but not rate,
mate, or late.
The beginning of a line Enter a caret (^). ^f finds any word that starts with f at the begin-
ning of a line. You cannot combine this wildcard
with the Whole Word option.
The end of a line Enter a dollar sign ($). f$ finds any word that ends with f at the end of a
line. You cannot combine this wildcard with the
Whole Word option.
To find Enter this sequence
Tab \t
Forced return \r
End of paragraph \p (lowercase)
Start of paragraph \P (uppercase)
End of flow or end of table cell \f
Start of word \<
End of word \>
To find Do this Example

ADOBE FRAMEMAKER 8
User Guide
81
To search for character format properties:
1Click in text with properties similar to (or the same as) the properties you want to find.
2In the Find/Change dialog box, choose Character Format from the Find pop-up menu.
3Do one of the following:
•To search for the properties of the current text, leave the properties as they are.
•To search for text with different properties, change the properties to match that format.
•To search for text with some properties specified and some overlooked, set the properties you want to overlook to
As Is. You set a property to As Is by clicking a check box until it is gray (Windows), or dim (UNIX), by choosing
As Is from a pop-up menu, by selecting As Is in a scroll list, or by deleting the text in a text box. For example, if
you don’t care what color is assigned to the text, choose As Is from the Color pop-up menu.
•To find text with only a few properties, set all properties to As Is by pressing Ctrl+Shift+F8 (Windows), or
Shift+F8 (UNIX). Then specify only the properties you want to find.
4Click Set, and then click Find.
After making some changes in the Find Character Format dialog box, you can reset the dialog box to match the
format of the current text. To do this, press Ctrl+Shift+F9 (Windows), or Shift+F9 (UNIX).
To search for specific text and character format properties:
1Copy the text with the character format you want to find. You can copy as much text as you like, but FrameMaker
uses only the first 126 characters on the Clipboard.
2In the Find/Change dialog box, choose Text & Character Formats on Clipboard from the Find pop-up menu.
Don’t type the text you want to find in the Find text box.
3Click Find.
Searching for markers
FrameMaker uses markers for cross-references, indexes, and other purposes. It can find any type of marker or just
the marker type you specify. When text symbols are visible, a symbol indicates a marker.
FrameMaker can also find markers with specific marker text.
To search for a marker:
1In the Find/Change dialog box, do one of the following:
•To find any marker in the document, choose Any Marker from the Find pop-up menu, and leave the Find text box
blank.
•To find a specific type of marker, choose Marker of Type from the Find pop-up menu, and enter the marker type
in the Find text box.
•To find a marker with specific text, choose Marker Text from the Find pop-up menu, and enter the marker text in
the Find text box.
2Click Find. If the Marker dialog box is open (Special > Marker), the marker text for the found marker
appears there.
Important: If you want to replace the text in a found marker, use the Marker dialog box to edit the marker text.
If you use the Find/Change dialog box, you’ll replace the marker rather than the marker text.

ADOBE FRAMEMAKER 8
User Guide
82
Searching for conditional text
You can search for visible text that has specific condition tags. When FrameMaker finds visible conditional text, it
selects all adjacent text that uses these condition tags.
FrameMaker cannot find conditional table rows.
To search for conditional text:
1Make sure that the text with the condition tags you want to find is visible (see “Changing the view of conditional
documents” on page 306).
2In the Find/Change dialog box, choose Conditional Text from the Find pop-up menu. The Find Conditional Text
dialog box appears.
3Do the following:
•To find text with a particular condition tag, move the condition tag to the In list.
•To find text that doesn’t have a particular condition tag, move the tag to the Not In scroll list.
•If you don’t care whether found text has a particular tag, move the tag to the As Is scroll list.
•To find all conditional text, move all tags to the As Is scroll list.
•To find unconditional text, select Unconditional.
Note: To move a condition tag between scroll lists, select the tag and click an arrow, or double-click the tag. To move all
tags from one scroll list to another, select a tag in the list and Shift-click an arrow.
4Click Set, and then click Find.
Using the Find/Change command from the keyboard
You can search for items without using the mouse. You use keyboard shortcuts to open the Set Find/Change Param-
eters dialog box (which contains the same options as the Find/Change dialog box), to move the insertion point
between the options, and to start a search. These keyboard shortcuts are useful in macros that automate finding and
changing. In Windows, you can use a third-party macro application to create macros that work with FrameMaker.
On UNIX systems, you can use File > Utilities > Keyboard Macros (see “Using UNIX keyboard macros” on
page 625).
To use the Find/Change command from the keyboard:
1In a document window, press Esc f i s.
2Fill in the Set Find/Change Parameters dialog box as you would the Find/Change dialog box, and then
press Return.
Use keyboard shortcuts to move from setting to setting and to choose items from pop-up menus. For a list of
keyboard shortcuts, see online Help.
3To start the search, do one of the following:
•(Windows) Press Control+Shift+f.
•(UNIX) Press Esc f i n.
4To search again, repeat step 3.
Searching for Unicode characters
You can search a FrameMaker document for any character that belongs to the Basic Multilingual Plane (BMP)
Unicode character set by using Unicode code points.

ADOBE FRAMEMAKER 8
User Guide
83
To search for a character with the code point XXXX, you must specify the search string in the format \uXXXX. For
example, to search for the letter A with a code point of u+0041, input the string \u0041.
You can also search for a range of Unicode characters. For example, the search string [d-w] searches for all characters
from ‘d’ to ‘w’. Unicode characters can also be used to define ranges, which translate to Unicode code points. The
specified code points must fall within the BMP Unicode character set. For example, when you specify the string ‘[α-
γ]’, FrameMaker searches for all characters between code point 03B1 (which is small letter ALPHA) and code point
03B3 (which is small letter GAMMA).
Note: A code point is any value in the Unicode codespace, which is a range of integers from 0 to 10FFFF16. This
particular range is defined for the codespace in the Unicode Standard only. Other character encoding standards may use
other codespaces.
Troubleshooting a search
If you don’t find the item even though you’re sure it’s there, check the Find/Change dialog box for the following
possible problems:
•Did you spell the text in the Find text box correctly?
•Did you include too many or too few spaces? Are they the right type of spaces? When you enter text that includes
spaces in the Find text box, FrameMaker searches for the text with the same number of spaces in the same places.
You can find special spaces, such as em spaces and thin spaces, as well as regular spaces.
•Are you using the appropriate options? For example, is Whole Word selected when it should be turned off?
•If your document uses conditional text, is the text for which you’re searching hidden?
•If you’re searching for an item on a master page, is the insertion point on a master page?
•If you want to search throughout the entire book, make sure the Book option is selected in the Find/Change dialog
box.
Changing items you find
After you find an item, you can change it in several ways. Generally, you find text and replace it with other text, but
you can also change the character format of the found item or apply the contents of the Clipboard to the item. For
example, you can copy a variable to the Clipboard and replace a word with the variable. Or you can replace a word
with a graphic in an anchored frame.
You can change each occurrence of the item as it is found, or have FrameMaker automatically make the change
throughout the document, book, or selection.
To change any item:
1Specify the item you want to find in the way described in “Searching for any item” on page 77.
2In the Find/Change dialog box, do one of the following:
•To replace the found item with text, choose To Text and type the text in the Change text box. For information, see
“Replacing found items with text” on page 84.
•To change character format properties of the found text, choose Character Format and then specify the properties
in the dialog box that appears. For information, see “Changing character format properties” on page 84.
•To apply the contents of the Clipboard to the found item, choose By Pasting. Then select the item you want to paste
and copy it to the Clipboard.
3Click Find to find the first match.

ADOBE FRAMEMAKER 8
User Guide
84
4Do one of the following:
•To change the found occurrence but not continue searching for the item, click Change.
•To continue searching but not change the found occurrence, click Find.
•To change the found occurrence and continue searching for the item, click Change & Find.
•To change all occurrences of the item, specify the scope of the change (all occurrences in the document, book, or
selection) and click Change All. A message will indicate the number of changes made.
Important: When you change all occurrences, FrameMaker may make changes you didn’t intend—for example,
changing occurrences of a word when it is part of a longer word (if you don’t select Whole Word). Also, you can’t undo
the changes. For these reasons, consider saving your document and then clicking Find and then Change to replace several
found occurrences. When you’re confident that FrameMaker will replace only the items you want, click Change All.
If you click Change or Change & Find when no text is selected in the document, FrameMaker inserts or applies the
replacement item at the insertion point.
To delete a found item:
❖In the Find/Change dialog box, choose To Text from the Change pop-up menu, leave the Change text box empty,
and click Change. You can also simply press Delete.
Replacing found items with text
You can replace anything that FrameMaker finds with text. For example, you can replace a word with another word
or replace a marker with a phrase.
If capitalization is important, you can have FrameMaker use the same capitalization that is used in the original text
by selecting the Clone Case option in the Find/Change dialog box. For example, if you select Clone Case and type
tea in the Find text box and coffee in the Change text box, FrameMaker replaces tea with coffee and Tea with Coffee.
You can type any text, including special characters not found on the keyboard—for example, em spaces and
paragraph symbols. For information on these characters, see “Typing special characters” on page 72 and “Typing
special spaces” on page 72. For a list of special characters, see “About typing in dialog boxes” on page 677. To include
a backslash (\) in replacement text, type two backslashes (\\) in the Change text box.
You can’t change marker text (such as an index entry) by using the Find/Change dialog box. If FrameMaker finds the
marker text you specify, and if you type different text in the Change text box and click Change, FrameMaker replaces
the marker—not the marker text—with the text in the Change text box. To change marker text, use the Special >
Marker command (see “Editing and deleting list entries” on page 424).
Changing character format properties
You can change the character format properties of any text that FrameMaker finds. For example, you can search for
the name of a product and change the text to italic small caps. Or you can search for all text with particular properties
and then change the properties.
To specify the character format properties you want to change:
1Do one of the following:
•If you’re changing several character format properties, click in text that has a character format similar to the one
you want to apply to the found text.
•If you’re changing one or two character format properties, click in any text.

ADOBE FRAMEMAKER 8
User Guide
85
2In the Find/Change dialog box, choose To Character Format from the Change pop-up menu, specify the character
format you want to use, and then click Set.
To prevent FrameMaker from applying a property to found text, set the property to As Is. You set a property to As Is
by clicking a check box until it is gray (Windows), or dim (UNIX); by choosing As Is from a pop-up menu; by
selecting As Is in a scroll list; or by deleting the text in a text box. For example, if you don’t care what color is assigned
to the text, choose As Is from the Color pop-up menu. If you want to change all properties to As Is, press
Ctrl+Shift+F8 (Windows), or Shift+F8 (UNIX).
After making some changes in the Change to Character Format dialog box, you can reset the dialog box to match
the format of the current text. To do this, press Ctrl+Shift+F9 (Windows), or Shift+F9 (UNIX).
Checking spelling
The FrameMaker Spelling Checker uses several dictionaries to check text for spelling errors. When the Spelling
Checker finds a questionable word, it suggests the most likely correction along with some other possibilities. You can
select a correction, type your own correction, or leave the word unchanged.
The Spelling Checker helps correct your typing as well as your spelling. For example, you can check for repeated
words, unusual hyphenation or capitalization, straight quotation marks (when curved should be used), and
extra spaces.
You can spell-check the current page, the open document, the entire book, or selected files within the book, however,
the spell check will only check on pages of the type you are viewing, for example, master pages or body pages.
Spell-checking throughout a book
If you are spell-checking throughout a book, FrameMaker begins spell-checking from the active document (or from
the first document of the book if the book window is active) and continues spell-checking until all documents in the
book have been checked. If a document cannot be opened, the document will be skipped and a message will appear
in the Book Error Log. When spell-checking throughout a book, you cannot spell-check master or reference pages.
For more information on working with book-wide features, see “Using book-wide commands” on page 473.
About FrameMaker dictionaries
When you spell-check a document, FrameMaker compares each word in it with the words in the
following dictionaries:
•The main dictionary contains words found in a standard dictionary. You can’t add words to or delete words
from this dictionary.
•The default site dictionary contains some technical terms. You can add words common to your site or
workgroup—for example, the company name and product names. In Windows, the site dictionary is normally in
the site.dict file in the FrameMaker dict folder. On UNIX systems, it’s in $FMHOME/fminit/site.dict.
•Yo u r personal dictionary contains words you use often. Because FrameMaker uses this dictionary whenever you
spell-check any document, use this dictionary for words that are neither document-specific nor site-specific (for
example, your name). You can add or delete words. You can also create several personal dictionaries and switch
between them.
•The document dictionary contains words that are acceptable in a particular document. FrameMaker uses this
dictionary regardless of who is editing the document. You can add words to or delete words from it. Unlike the
other dictionaries, the document dictionary is part of the document rather than a separate file.

ADOBE FRAMEMAKER 8
User Guide
86
When you are spell-checking throughout a book, words that are added to your personal dictionary will be applied
to all documents in a book. Words that are added to the document dictionary will be used only in the current
document, not in all the documents in the book. For information on merging your document dictionaries, see
“Managing personal and document dictionaries” on page 91.
In Adobe FrameMaker 8, the dictionaries, hyphenation, and Thesaurus are Unicode-enabled.
New dictionaries have been added for Greek, Russian, Czech, Polish, Hungarian, Turkish, Slovak, Slovenian,
Bulgarian, Croatian, Estonian, Latvian, Lithuanian, and Romanian languages. However, the Thesaurus is not
available for these languages.
Existing dictionaries for the following languages have been updated to Proximity® version 11.0: US English, British
English, German, Swiss-German, French, Canadian-French, Spanish, Catalan (Thesaurus not available), Italian,
Portuguese (Thesaurus not available), Brazilian (Thesaurus not available), Danish, Dutch, Norwegian, Nynorsk
(Thesaurus not available), Finnish (Thesaurus not available), Swedish, New German, New Swiss German, and New
Dutch.
Checking for spelling and typing errors
When you spell-check a document, FrameMaker questions any words that aren’t in one of its dictionaries. If a
questioned word is spelled correctly, you can confirm its spelling by adding the word to your personal dictionary or
to the document dictionary. If a questioned word is misspelled, you can correct it. FrameMaker usually provides
suggestions for the correct spelling.
To check and correct spelling:
1Choose Edit > Spelling Checker.
2Do one of the following:
•To check all text in a document, click in the document and then click Document in the Spelling Checker
dialog box.
•To check all text on a page, click on the page and then click Current Page in the Spelling Checker dialog box.
•To search throughout the entire book, open the book or a document that belongs to the open book and then click
Book in the Spelling Checker dialog box. For more information, see “Using book-wide commands” on page 473.
•To check specific text, select the text.
•To check a word, place an insertion point in the word.
In most cases, you’ll want to spell-check the text on the body pages. If a body page isn’t displayed, choose View >
Body Pages.
3Click Start Checking. If you’re checking a selection of text or a single word, Shift-click Start Checking.
FrameMaker begins spell-checking at the insertion point. When it finds a questionable word, the word appears at
the top of the Spelling Checker dialog box. The message to the left of the text box—for example, Misspelling —
explains why the word has been questioned.
Note: FrameMaker does not spell-check superscript and subscript text or manually micropositioned text (for example,
text with a manual baseline shift).
4Correct or confirm the spelling in one of the following ways:

ADOBE FRAMEMAKER 8
User Guide
87
•To correct a misspelling, make sure the correctly spelled word is in the Correction text box and click Correct. If
the suggested word is not the word you want, you can select a different word in the Correction scroll list or enter
the word in the Correction text box. You can also move the insertion point to the document window and type the
word correctly there.
•To correct a typing error (for example, repeated words such as and and), make sure the correctly typed text is in
the Correction text box and click Correct. FrameMaker lists only one suggestion for mistyped text. If the
suggestion is not correct, you can enter the correct text in the Correction text box, or type it directly in the
document window.
If FrameMaker questions something that you don’t consider to be a typing error, you can turn off the option to find
that type of potential error. For example, you can stop FrameMaker from questioning the use of straight quotation
marks. For information, see “Changing Spelling Checker options” on page 88.
•To add a word to a personal dictionary, make sure the intended word appears next to “Misspelling” at the top of
the Spelling Checker dialog box and click Learn.
•To add a word to a document dictionary, make sure the intended word appears next to “Misspelling” at the top of
the Spelling Checker dialog box and click Allow in Document.
Note: If FrameMaker adds a word that contains uppercase letters to a personal or document dictionary, when Unusual
Capitalization is selected in the Spelling Checker Options dialog box, it considers any other capitalization of the word a
spelling mistake. For example, if FrameMaker learns Trinidad, it questions the spelling of TRINIDAD and trinidad.
However, if it learns trinidad, in all lowercase letters, it does not question any type of capitalization of the word.
5If necessary, click Start Checking to find the next questionable word.
When spell-checking a book, an alert message prompts you to save the document before continuing with the next
document. When the last document in the book has been checked, a Spelling OK or Finished checking spelling
message appears.
To check spelling in text insets:
❖Open the inset’s source file and check the spelling there.
To cancel the Spelling Checker:
❖Do one of the following:
•(Windows) Press Esc.
•(UNIX) Press Control+c.
Correcting spelling errors automatically
You can have FrameMaker automatically correct future occurrences of a misspelled word or typing error. The error
won’t be questioned in any document you open, and you won’t have to provide the correction. FrameMaker keeps
track of the errors to correct automatically until you exit or until you instruct FrameMaker to stop making the
corrections.
Before you decide to change a particular misspelling or typing error automatically, make sure you know what other
changes will be made. For example, if you use the Automatic Correction option when correcting a repeated word,
FrameMaker will correct every repeated word even though some may be correct (such as had had). Similarly, if thst
is a misspelling of both test and that, you won’t want to change it automatically to either word.

ADOBE FRAMEMAKER 8
User Guide
88
To correct spelling errors automatically:
1Choose Edit > Spelling Checker and click Start Checking.
2When FrameMaker questions a word or typing error, select Automatic Correction and click Correct.
To stop making automatic corrections before exiting:
1Choose Edit > Spelling Checker and click Dictionaries.
2In the Dictionary Functions dialog box, click Clear Automatic Corrections, and then click OK.
Changing Spelling Checker options
When you spell-check a document, FrameMaker also checks for errors that don’t involve spelling—for example,
repeated words, extra or misplaced spaces, or unusual capitalization. You can specify the kinds of typing errors for
which you want to look.
You can also limit the spell-check so that FrameMaker overlooks certain types of words. For example, you may want
to overlook words that contain numbers.
To change Spelling Checker options:
1Choose Edit > Spelling Checker and click Options.
2Do the following:
•In the Find area, specify the kinds of typing errors you want to find. For example, select Unusual Capitalization if
you want to find words with uppercase letters in inappropriate locations (for example, GReen).
•In the Ignore area, specify the kinds of words you want to overlook. For example, select Words with Digits if you
want to ignore words that contain numbers.
Keep in mind that the more words FrameMaker overlooks, the greater the possibility that your document will
contain misspelled words. For example, if you choose to ignore words containing a period, you’ll also skip over a
sentence that begins without a space after the preceding period.
•If you change the Spelling Checker options and then want to reset the default options, click Get Defaults. If you
change the Spelling Checker options in Windows, and then exit FrameMaker without resetting the default
options, your current settings become the default options.
3Click Set.
Rechecking after changing dictionary options
FrameMaker ordinarily rechecks only paragraphs that have been edited since the prior check. If you change options
after spell-checking a document, you may want to run the Spelling Checker again after instructing FrameMaker to
mark all paragraphs for rechecking.
For more information on changing dictionary functions, see “Managing dictionaries” on page 90.
To mark all paragraphs for rechecking:
1Make the appropriate document window or book window active. If a book window is active, select the documents
you want to affect.
2Choose Edit > Spelling Checker. If a book window is active, choose Selection to affect only the selected files or
Book to affect the entire book.
3Click Dictionaries.
4Select Mark All Paragraphs for Rechecking and click OK.

ADOBE FRAMEMAKER 8
User Guide
89
Assigning text to be ignored by spell-checker
If you don’t want FrameMaker to spell-check certain text, change its Language property to None (see “Checking
spelling in different languages” on page 89). For example, you may not want to spell-check paragraphs of
computer code.
When you set the language of text to None, FrameMaker no longer provides hyphenation for it.
Checking spelling in different languages
All text is assigned a language. When you spell-check, FrameMaker uses the main dictionary of the language
assigned to the text. You can change the language used to spell-check text by changing the language assigned to the
text. You can also add Unicode (UTF-8) encoded words to user and personal dictionaries in FrameMaker.
The FrameMaker CD contains dictionaries for all supported languages. However, the default Windows installation
contains only one dictionary in a single language.
When spell-checking a document with different languages, note the following:
•In an Asian-language document, some special characters may not be displayed in the Spelling Checker as they are
in a Western-language document. For example, a backslash will be displayed as a yen symbol, and a nonbreaking
hyphen will be displayed as a blank.
•In an Asian-language document that contains Roman text, make sure you turn off the Straight Quotes option in
the Spelling Checker dialog box so that the Spelling Checker does not stop on properly spelled words.
Changing the language of text in a document
•To change the language of a single paragraph, or of all the paragraphs in a document, use the Language property
in the Default Font properties of the Paragraph Designer (see “Using a designer to change font properties” on
page 108).
•To change the language of a range of text within a paragraph, or the language of a text line, use the Language
property in the Character Designer (see “Using a designer to change font properties” on page 108).
Controlling hyphenation
When you add a word to a personal dictionary, FrameMaker calculates the points at which it can hyphenate the
word. If the suggested hyphenation points aren’t appropriate, you can change them before adding the word. You can
also specify that a word is always or never hyphenated. For example, you can hyphenate heavy-duty wherever it
appears but never hyphenate your company’s name.
After you make hyphenation changes, you should rehyphenate the document. For additional information on
hyphenation, see “Changing hyphenation and line breaks” on page 119.
When you want strict control over hyphenation (for example, before printing the final draft of a book), you may
want to search your document for all hyphens that FrameMaker has inserted automatically. To do this, choose
Automatic Hyphen from the Find pop-up menu in the Find/Change dialog box.
To show a word’s hyphenation points:
❖Choose Edit > Spelling Checker, type the word in the Word text box, and click Show Hyphenation. If the word is
in the main dictionary or your personal dictionary, FrameMaker uses the dictionary to determine the hyphenation
points. If the word isn’t in one of these dictionaries, FrameMaker calculates the hyphenation points.
ADOBE FRAMEMAKER 8
User Guide
90
To change the hyphenation of a word:
1Show the word’s hyphenation points as described in the previous procedure.
2Adjust the hyphenation and click Learn. You can add and delete hyphens as necessary.
Reappear cannot be hyphenated as re-appear.
To prevent FrameMaker from ever hyphenating a word:
1Enter the word in the Correction text box.
2Click Show Hyphenation.
3Remove all hyphens from the word.
4Insert a hyphen at the beginning of the word.
5Click Learn.
The word “intro” cannot be hyphenated.
To rehyphenate an entire document:
1Make the appropriate document window or book window active. If a book window is active, select the documents
you want to affect.
2Choose Edit > Spelling Checker. If a book window is active, choose Selection to affect only the selected files or
Book to affect the entire book.
3Click Dictionaries.
4Select Rehyphenate Document, Rehyphenate Selected Files in Book, or Rehyphenate All Files in Book, and then
click OK.
Managing dictionaries
You have editorial control over your document, personal, and site dictionaries. For example, you can add and delete
words and change the hyphenation of words. You can also choose different dictionaries, merge one dictionary into
another, and delete dictionaries.

ADOBE FRAMEMAKER 8
User Guide
91
Managing personal and document dictionaries
FrameMaker automatically creates a personal dictionary for you and a document dictionary for each of your
documents. You can use the Spelling Checker to add or delete words in these dictionaries, or you can manage the
dictionaries directly. When you work with a dictionary directly, you can examine and edit its contents or merge it
with another dictionary. You can create multiple personal dictionaries and then use them one at a time.
If you make changes to either a personal or document dictionary, mark all paragraphs for rechecking before you
spell-check the document again. For instructions, see “Rechecking after changing dictionary options” on page 88.
To delete a word from the personal or document dictionary:
❖Choose Edit > Spelling Checker, enter the word in the Correction text box, and click Unlearn.
To delete the contents of the document dictionary:
1Make the appropriate document window or book window active. If a book window is active, select the documents
you want to affect.
2Choose Edit > Spelling Checker. If a book window is active, choose Selection to affect only the selected files or
Book to affect the entire book.
3Click Dictionaries.
4Choose Clear from the Document Dictionary (or Document Dictionaries) pop-up menu and click OK.
To delete a personal dictionary:
❖Delete the file that contains the dictionary. (To find the name of the personal dictionary, choose Edit >
Spelling Checker, and then click Dictionaries. The name of your personal dictionary appears in the Dictionary
Functions dialog box.)
To create another personal dictionary:
1Place words (with a hyphen at each hyphenation point) in a document. Type as the first line in the document:
<MakerDictionary 2.0>
2When you save the file, choose Text Only format and click Save. Then click Only between Paragraphs and
click Save.
To use a different personal dictionary:
1Choose Edit > Spelling Checker and click Dictionaries. The name of your personal dictionary appears in the
Dictionary Functions dialog box.
2Choose Change Dictionary from the Personal Dictionary pop-up menu and click OK.
3Specify the name of the file that contains the personal dictionary you want to use.
To check the spelling of a document without using the personal dictionary:
1Make the appropriate document window or book window active. If a book window is active, select the documents
you want to affect.
2Choose Edit > Spelling Checker. If a book window is active, choose Selection to affect only the selected files or
Book to affect the entire book.
3Click Dictionaries.
4Choose Set to None from the Personal Dictionary pop-up menu and click OK.

ADOBE FRAMEMAKER 8
User Guide
92
To copy the contents of a dictionary to a file:
1Make the appropriate document window or book window active. If a book window is active, select the documents
you want to affect.
2Choose Edit > Spelling Checker. If a book window is active, choose Selection to affect only the selected files or
Book to affect the entire book.
3Click Dictionaries.
4Choose Write to File from the Personal Dictionary or Document Dictionary pop-up menu and click OK.
5Specify the file to which you want to copy the dictionary’s contents. You can edit this file and then use it as a new
dictionary.
If a book window is active when you choose this command, the document dictionaries are copied to a single file.
To merge the contents of a dictionary with the current personal or document dictionary:
1Make the appropriate document window or book window active. If a book window is active, select the documents
you want to affect.
2Choose Edit > Spelling Checker. If a book window is active, choose Selection to affect only the selected files or
Book to affect the entire book.
3Click Dictionaries.
4Choose Merge from File from the Personal Dictionary or Document Dictionary pop-up menu and click OK.
5Specify the file you want to merge with the current dictionary.
You can use the Merge from File command to merge a single dictionary into multiple book files so that all the files
in your book will share the same dictionary.
Managing site dictionaries
You can specify a different site dictionary for each of several projects, among other purposes. You can also edit your
site dictionary directly.
If FrameMaker is used across a network at your site, a system administrator probably manages the site dictionary.
To specify a different site dictionary:
❖Do one of the following:
•(Windows) Specify the dictionary in the maker.ini file. For information, see the online manual Customizing
FrameMaker on the Adobe website: www.adobe.com/devnet/framemaker/pdfs/
Customizing_Frame_Products.pdf.
•(UNIX) Edit the Maker.siteDict resource. For information, see the online manual Customizing FrameMaker on
the Adobe website: www.adobe.com/devnet/framemaker/pdfs/Customizing_Frame_Products.pdf.
Editing dictionary files
You can change the contents of your personal or document dictionary by clicking Learn, Allow in Document, or
Unlearn in the Spelling Checker dialog box as you spell-check. You can also edit your personal, document, and site
dictionaries directly.
To edit a dictionary file directly:
1If you’re editing a personal or document dictionary, use FrameMaker to write the dictionary’s contents to a file.
For instructions, see “Managing personal and document dictionaries” on page 91.

ADOBE FRAMEMAKER 8
User Guide
93
2Edit the file. If you use FrameMaker to edit a dictionary, be sure to do the following:
•When you open the file, select Treat Each Line as a Paragraph in the Reading Text File dialog box and click Read.
•When you save the file, choose Text Only format. Make sure the file is named correctly and click Save. Then click
Only between Paragraphs and click Save.
3Merge the dictionary file with another dictionary. For instructions, see “Managing personal and document dictio-
naries” on page 91. If you removed words from the dictionary, delete the original dictionary before merging the file.
Otherwise, the deleted words remain in the dictionary.
Adding unknown words to a dictionary
If your document contains many correctly spelled words that FrameMaker will question, you can expedite spell-
checking by adding these words to a dictionary in a separate operation before you begin to spell-check.
To add all unknown words to a dictionary:
1Make the appropriate document window or book window active. If a book window is active, select the documents
you want to affect.
2Choose Edit > Spelling Checker. If a book window is active, choose Selection to affect only the selected files or
Book to affect the entire book.
3Click Dictionaries.
4Click Write All Unknown Words to File and click OK.
5Specify a filename for the dictionary file, and click OK or Save. FrameMaker creates a dictionary file that contains
all the unknown words in the document. The dictionary file doesn’t include typing errors such as repeated words,
capitalization errors, or extra spaces.
6Edit the dictionary file with a text editor or with FrameMaker (see “Editing dictionary files” on page 92). Delete
any words you don’t want to add to your dictionary, such as misspelled words.
7In the Spelling Checker dialog box, click Dictionaries.
8Choose Merge from File from the Personal Dictionary or Document Dictionary pop-up menu, and click OK. If
you expect the words to appear in several documents, you should merge the words with a personal dictionary, or you
can merge them into all the files in a book.
9Name and save the dictionary file.
Adding hyphenated compound words to your personal dictionary
Your document may contain a hyphenated compound word—a word or phrase made up of multiple words
connected by hyphens. By default, FrameMaker spell-checks each word in a hyphenated compound word rather than
checking the hyphenated compound word as a whole. For example, when spell-checking the word heavy-duty,
FrameMaker checks heavy and then checks duty. By changing the default settings, you can spell-check hyphenated
compound words as single words, and you can add hyphenated compound words to your personal dictionary.
To add a hyphenated compound word to your personal dictionary:
1Choose Edit > Spelling Checker and click Options.
2Select Unusual Hyphenation and click Set. FrameMaker will spell-check hyphenated compound words as single
words, rather than checking the individual words.

ADOBE FRAMEMAKER 8
User Guide
94
3In the Word text box in the Spelling Checker dialog box, enter the hyphenated compound word to be added
to your personal dictionary. Include a hyphen at the beginning of the compound word, and type a backslash (\)
before each hyphen that connects words.
For example, to add the word heavy-duty, type -heavy\-duty. For information on specifying hyphenation points, see
“Controlling hyphenation” on page 89.
4Click Learn.
Using the Thesaurus
You use the Thesaurus to look up synonyms, related words, and antonyms for words you specify. For example, if you
specify figment, the FrameMaker Thesaurus provides synonyms such as fiction and fable, related words such as
concoction and fantasy, and antonyms such as fact. The Thesaurus lets you improve on a word already in a document
or search for the right word to insert. For example, you can replace figment with any of its synonyms, related words,
or antonyms.
The search for a word doesn’t need to end with the first set of synonyms, related words, and antonyms you find. You
can look up any one of these words and display its synonyms, related words, and antonyms. You can quickly go back
to any of the last 10 words you looked up.
Looking up words
When you look up a word, information about the word appears in the Thesaurus dialog box.
If more information is available than fits, you can use the arrow buttons at the bottom of the dialog box to view the
additional information. FrameMaker displays the synonyms, antonyms, and related words with capitalization that
matches the capitalization of the word you looked up.
To look up a word visible in the document window:
❖Select the word and choose Edit > Thesaurus.
To look up a word not visible in the document window:
1Make sure that no text is selected, then choose Edit > Thesaurus.
2Enter the word and click Look Up.
To look up a phrase:
1Make sure that no text is selected and choose Edit > Thesaurus.
2Enter the phrase, including any hyphens, in the Thesaurus Look Up dialog box, and click Look Up.
Note: If you try to specify a phrase by selecting it in the document window, FrameMaker looks up only the first
selected word.
To look up a synonym, a related word, or an antonym displayed in the Thesaurus dialog box:
❖Click the word. Synonyms, related words, and antonyms are shown in bold.
To look up a word again:
❖Choose the word from the Word pop-up menu in the Thesaurus dialog box. This menu lists the last 10 words you
looked up.

ADOBE FRAMEMAKER 8
User Guide
95
Choosing a language to use
FrameMaker uses the language of the current text. If a word isn’t selected or the insertion point isn’t in a paragraph,
FrameMaker uses the language of the interface you chose when you installed FrameMaker. You can override the
default language in new documents by creating your own template for custom new documents. For information, see
“Changing templates for blank paper and text files” on page 414.
The Thesaurus for a language is installed along with the dictionary for that language. For information, see “Checking
spelling in different languages” on page 89.
To specify a different language when looking up a word:
1Click Look Up in the Thesaurus dialog box.
2Enter the word you want to look up, choose a language, and click Look Up.
Using words from the Thesaurus
You can add or replace a word in your document from the Thesaurus dialog box. The addition or replacement can
be either the word looked up or one of the words in bold.
When replacing a selected word in your document with a word from the Thesaurus dialog box, you replace only the
selected word—not all occurrences of the word. To replace all occurrences, use Edit > Find/Change (see “Changing
items you find” on page 83).
To insert a word looked up in the Thesaurus dialog box:
1Do one of the following:
•To add the word, place an insertion point in the document.
•To replace a word in the document, select the word.
2Click Replace.
To insert a word that appears in bold in the Thesaurus dialog box:
1Do one of the following:
•To add the word, place an insertion point in the document.
•To replace a word in the document, select the word.
2Control-click the word in the Thesaurus dialog box and click Replace.
Working with text in structured documents
Many of the procedures for selecting and editing text in a structured document differ from the procedures for
working with unstructured documents.
Placing an insertion point in a structured document window
You can place the insertion point anywhere inside a text frame in a document window. An insertion point also
appears at the corresponding place in the Structure View.
If you’re placing the insertion point in the middle of text, you must use the document window rather than the
Structure View. But in some other cases, particularly when placing the insertion point at the beginning or end of an
element, or between elements, you’ll probably find it easier to click in the Structure View.
ADOBE FRAMEMAKER 8
User Guide
96
Work with element boundaries showing so that you can see the beginning and end of each element (see “Showing
and hiding element boundaries” on page 16). After clicking, check the status bar for the tag of the current element;
this will help you verify that you clicked in the element you want. Be aware that because FrameMaker treats element
boundaries as actual characters, FrameMaker reformats the document whenever you turn element boundaries on or off.
To place the insertion point inside an element’s text:
❖Click in the text.
If you click at the beginning of the text, the triangle insertion point in the Structure View has a line to its left . If
you click at the end of the text, the triangle has a line to its right . If you click in the middle of the text, the triangle
is hollow .
To place the insertion point at the beginning of an element’s text:
❖Click just inside the element’s opening boundary.
Insertion point at the beginning of text
To place the insertion point at the end of an element’s text:
❖Click just inside the element’s closing boundary.
Insertion point at the end of text
To place the insertion point between two elements:
❖Click between the closing boundary of one element and the opening boundary of the other.
Insertion point between two elements
[ This chapter
side doors on
for the
ght rail cars. ]
9.1.1.1 [[Pro
[This chapte
side doors o
ADOBE FRAMEMAKER 8
User Guide
97
Placing an insertion point in the Structure View
In the Structure View, you can place the insertion point at the beginning or end of text in an element or between two
elements. An insertion point also appears at the corresponding place in the document window.
To place the insertion point at the beginning of an element’s text:
❖Click to the left or in the first half of the text snippet. After you click, a line on the left side of the triangle insertion
point indicates that the point is at the beginning of text.
Insertion point at the beginning of text
To place the insertion point at the end of an element’s text:
❖Click to the right or in the second half of the text snippet. After you click, a line on the right side of the insertion
point indicates that the point is at the end of text.
Insertion point at the end of text
To place the insertion point between two elements:
❖Click to the right of the vertical line connecting the elements, between the two bubbles.
Insertion point between two elements
Selecting in a structured document window
You can select entire elements and any part of a document’s contents in a document window. A corresponding
selection also appears in the Structure View.
If an element has contents, you can select all or part of the contents without selecting the element itself. If an element
consists of a single object, such as a graphic or a cross-reference, you must select the entire element.
When you select an entire element, its contents are selected along with it.
Work with element boundaries showing so that you can see the beginning and end of each element (see “Showing
and hiding element boundaries” on page 16). After selecting, check the status bar for the tag name of the selection’s
parent element. The tag name appears following the “E:” text. The tag name helps you verify that you selected the
element you want.
To select text in an element but not the element itself:
❖Drag through the range of text. Be careful not to drag across an element boundary. If you do, you will select the
entire element.
Selected text
Para This chapter describes
Para This chapter describes
Section
Head
Para This chapter describes m...
9.1.1.1 Procedures in Th...
9.1.1.1 [[ Procedures in this chapter ]¶
ADOBE FRAMEMAKER 8
User Guide
98
To select one element:
❖Drag from anywhere inside the element to outside one of its element boundaries.
Selected element
To select more than one element:
❖Drag through the elements. FrameMaker selects each element as you drag across one of its boundaries.
Selecting in the Structure View
You can select entire elements or an element’s contents in the Structure View. A corresponding selection also appears
in the document window.
If an element has contents, you can select all of the contents without selecting the element itself. If an element is a
single object, such as a graphic or a cross-reference, you select the entire element. (Elements that may have contents
have round-cornered bubbles; elements that are a single object have square-cornered bubbles.)
When you select an entire element, its contents are selected along with it.
To select one element:
❖Click the middle of its bubble.
Selected Section element and contents
To select more than one element:
❖Click the first bubble and then Shift-click the other bubbles.
You can also drag to the right of the vertical line connecting the elements. Start above the first element you want to
select, and drag down to the last element you want to select.
To select the contents of an element that has no descendants but not select the element itself:
❖Double-click the text snippet.
Selected contents of Head
To select the contents of an element that has descendants but not select the element itself:
❖Double-click to the right of the vertical line connecting the first level of descendants.
Selected contents of Section, including descendants
9.1.1.1 [[Procedures in this chapter]¶
Section
Head
Para This chapter describes m...
9.1.1.1 Procedures in Th...
Head 9.1.1.1 Procedures in Th...
Section
Head
Para This chapter describes m...
9.1.1.1 Procedures in Th...
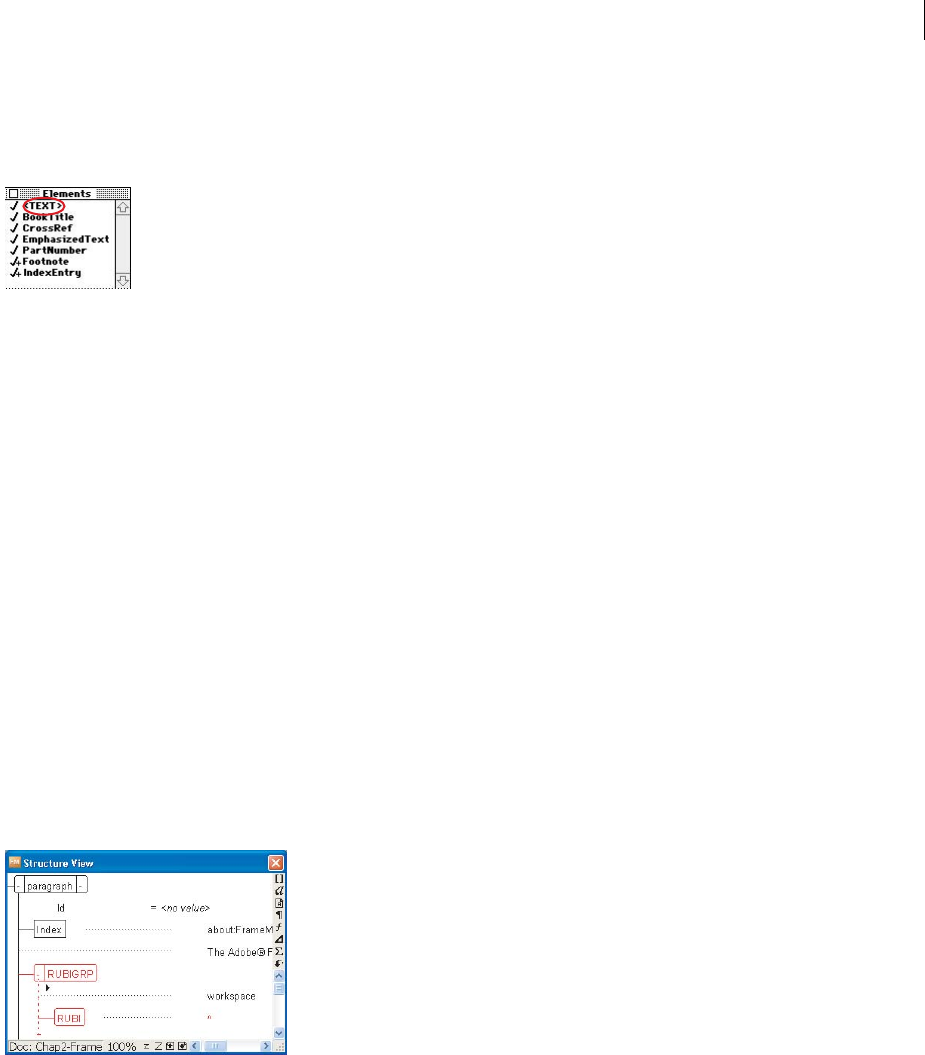
ADOBE FRAMEMAKER 8
User Guide
99
Entering text in a structured document
The Element Catalog describes what the current element can contain. You can enter text whenever <TEXT> appears
in the catalog.
You can enter text at the current location.
As you type text, the text flows to another line or column, and FrameMaker automatically creates new pages as you
need them.
FrameMaker may also add some text if your elements were defined that way. For example, the Item elements in a List
might have numbers that FrameMaker generates automatically, a Section might begin with boilerplate text that
FrameMaker inserts automatically, or you may have specified that FrameMaker automatically adds child elements
to an element.
To enter text:
1Place the insertion point where you want to enter the text.
2Begin typing. Don’t press Return unless you want to insert a new element (or begin a new paragraph in an
unstructured flow).
To continue typing in another element, either move the insertion point to the other element or insert a new element.
In some cases, pressing Return inserts an element (it depends on how the elements are defined). For more infor-
mation, see “Pressing Return to insert elements” on page 37.
Entering rubi text for Japanese in a structured document
If Japanese or English fonts are installed on your system, FrameMaker provides commands for entering rubi and for
specifying how you want the rubi to appear (see “Entering rubi text for Japanese” on page 76).
Structure of a rubi group
Your application will probably also have elements defined for containing the rubi text—a child element for the rubi
and a rubi group element for the rubi element and the oyamoji text together.
For information on entering rubi text without using elements (which you normally do only in an unstructured flow),
see “Entering rubi text for Japanese” on page 76.

ADOBE FRAMEMAKER 8
User Guide
100
To enter rubi text using elements:
1Click where you want the rubi text to appear.
2Select a rubi group element in the Element Catalog and click Insert. Bubbles for the rubi structure appear in the
Structure View.
3If the Attributes for New Element dialog box appears, enter attribute values for the element and click Insert
Element (see “Inserting elements” on page 36).
4Type the oyamoji text. Do not press Return in this text. If the text breaks into two lines, the characters will all
appear on the same line.
5Move the insertion point to the rubi child element and type the rubi text.
To wrap a rubi structure around text that will become oyamoji text:
1Select the text you want to become oyamoji. The text cannot contain a paragraph symbol or a forced return
symbol . If the text breaks into two lines, it will be moved to one line.
2Select a rubi group element in the Element Catalog and click Wrap. Bubbles for the rubi structure appear in the
Structure View.
You can also use Special > Rubi to wrap a rubi group. If more than one rubi group element is available, choose one
from the Element Tag pop-up menu in the dialog box that appears.
3If the Attributes for New Element dialog box appears, enter attribute values for the element and click Insert
Element (see“Inserting elements” on page 36).
4Type the rubi text.
To wrap an invalid rubi structure around text:
❖Do one of the following:
•To wrap a rubi group element that is valid in another part of the document, use the All Elements setting to make
the element available everywhere (see “Changing the scope of elements available in a structured document” on
page 18). Then select the text and wrap the rubi group around it.
•To wrap an invalid rubi group element with the default tag RUBIGRP, select the text and choose Special > Rubi.
(A default rubi group is created if no defined rubi group elements are available.)
You might use an invalid rubi structure if no rubi group element is available at the location you want. After inserting
the element, talk to your developer about making the element valid at this location.
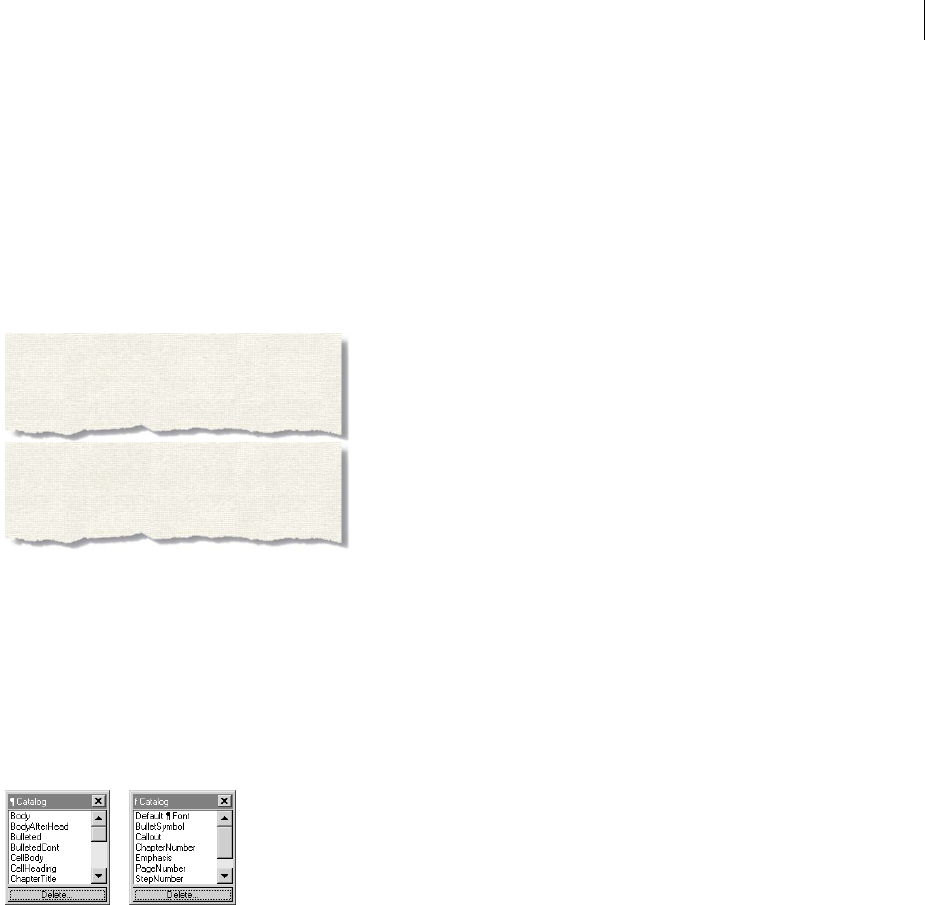
ADOBE FRAMEMAKER 8
User Guide
101
Text formatting
You can change the look of text either by applying predefined formats—which usually make several changes at
once—or by changing one property at a time.
Each format is made up of many properties. When you use a paragraph format, you apply settings for indentation,
alignment, font properties, automatic numbering, tab stops, hyphenation, word spacing, and so on. When you use a
character format to change selected text within a paragraph, you can change a number of font properties of the text
without changing the rest of the paragraph.
Each paragraph has properties that determine its appearance and position on the page.
Text format properties also include those used to create page breaks, numbered and bulleted lists, and straddle, side,
and run-in heads.
About paragraph and character formats
Each document contains two text-related catalogs: a Paragraph Catalog and a Character Catalog. These catalogs,
which appear in floating palettes, contain predefined formats.
Paragraph Catalog and Character Catalog
Applying formats from catalogs is the easiest way to change the look of text and to ensure that your documents are
formatted consistently. This consistency simplifies making changes later as well as converting documents to other
formats such as HTML.
The name of a format is its tag. You or a template designer defines the properties of a format, including its tag, in
special dialog boxes called designers.
The formats in the Paragraph Catalog affect whole paragraphs; the formats in the Character Catalog affect any
amount of selected text—usually just portions of paragraphs.
The Earth has two vast mountain ranges. The Rocky
Mountains and Andes run through North and South
America; the mighty Himalayas, Alps, and Atlas
Mountains stretch across Asia, Europe, and North Africa.
The Earth has two vast mountain ranges. The Rocky Mountains
and Andes run through North and South America; the mighty
Himalayas, Alps, and Atlas Mountains stretch across Asia, Europe, and
North Africa. Other signi cant ranges include the Urals, which are
Mountains
Mountains

ADOBE FRAMEMAKER 8
User Guide
102
Applying predefined formats to text
Applying a predefined format from the Paragraph Catalog or the Character Catalog changes text to match the
format’s properties.
Body paragraph format applied
Same text, different format
On looking towards the upper portion of the
glacier, at the spot where it precipitates itself
into the passage which conducts it to the valley
like a furiously boiling cascade with wild
On looking towards the upper portion
of the glacier, at the spot where it precipitates
itself into the passage which conducts it to the
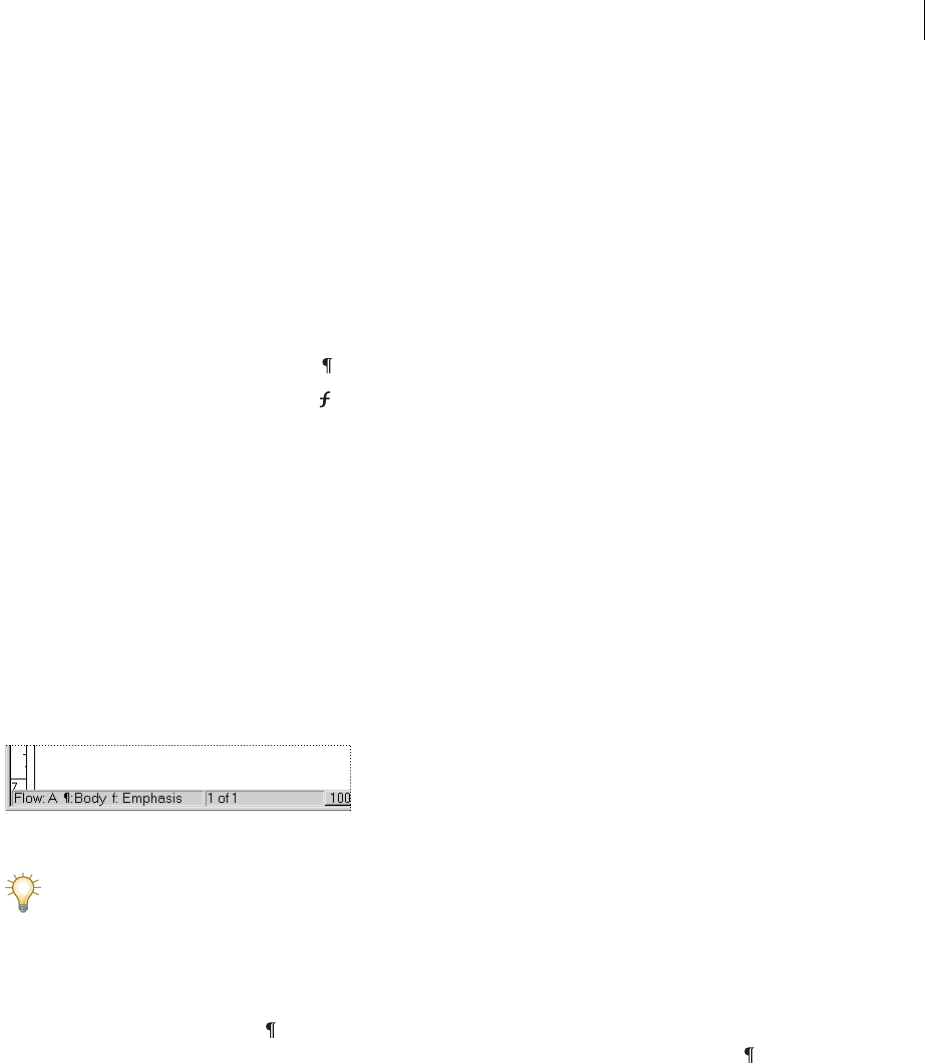
ADOBE FRAMEMAKER 8
User Guide
103
An easy way to access predefined formats is to open a floating palette of formats, called a catalog, and leave it open
to the side of your documents. Then, you only need to click a format’s name (its tag) to apply it.
A special entry in the Character Catalog lets you restore the default font to text. The default font is the font (and point
size, style, and so on) used for a paragraph unless you explicitly change it.
You can also redefine a catalog format and then apply it to all the text in the document that’s tagged with that format;
see “Redefining (updating) formats” on page 134.
To display a catalog:
❖Do one of the following:
•To display the Paragraph Catalog, click in the upper right corner of the document window.
•To display the Character Catalog, click in the upper right corner of the document window.
To apply a paragraph or character format:
1Select the text you want to change by doing one of the following:
•To apply changes at the paragraph level, click in a paragraph or select several paragraphs.
•To apply changes at the character level (typically, to portions of a paragraph), select any amount of text. (Avoid
selecting an entire paragraph. If you do, the character format you apply is considered a change to the paragraph’s
default font.)
•To apply changes only to the characters you are about to type, click in the paragraph without selecting any text.
2Click a format in a catalog to apply that format to the selection. The Tag area on the left side of the status bar
changes to show the new tag. For example, the selection might have a Body paragraph format and an Emphasis
character format.
The screen tag area displays character and paragraph formats.
To apply a format from the keyboard, press Control+9 (for paragraph formats) or Control+8 (for character
formats). At the status bar prompt, start typing the format’s tag until the name appears. (Lowercase letters search
forward; uppercase letters search backward.) You can also use the up arrow and down arrow keys to scroll through
formats. Press Return to apply the format. To cancel, click in the document without pressing Return.
To restore the paragraph’s default font and default properties:
❖Select the text and click Default Font in the Character Catalog. For example, if you apply the Emphasis format
to a word and then decide you don’t want it to have this format, select the word and apply Default Font from the
Character Catalog.
Changing text without using the catalogs
You usually format text by applying predefined formats from the Paragraph or Character Catalog. However, you can
also change individual properties of a paragraph or a portion of a paragraph. If the resulting format doesn’t match
the corresponding predefined format in the catalog for that text, the format change is considered an override of that
catalog format. For information, see “About format overrides” on page 107.
You can change individual properties in the following ways:

ADOBE FRAMEMAKER 8
User Guide
104
•You can use the Paragraph Designer to change or override any format properties for paragraphs (see “About
format overrides” on page 107).
•You can use the Character Designer or commands on the Format menu—Font, Size, and Style—to change or
override the character format of selected text or at the insertion point (see “Changing font properties” on
page 107). You can also use the QuickAccess Bar to change many font properties (see “Using the QuickAccess bar”
on page 11).
•You can copy a format, including any overrides, by choosing Edit > Copy Special > Paragraph Format or Character
Format, and paste it elsewhere.
•You can use the formatting bar to change or override several paragraph properties.
The formatting bar contains pop-up menus and tab wells that you can use to set alignment, spacing, and tab stops. Any
changes you make take effect immediately, changing the appearance of the text to reflect the new settings. Changes
made using the formatting bar are often overrides to the format properties.
A. Alignment and spacing B. Tab well s C. Paragraph format pop-up menu
To display or hide the formatting bar:
❖Do one of the following:
•(Windows) Choose View > Formatting Bar.
•(UNIX) If the rulers aren’t already visible, display them by choosing View > Rulers and then clicking the
formatting bar toggle. Click the toggle again to hide the formatting bar.
Using the designers
There are two special dialog boxes for formatting text: the Paragraph Designer and the Character Designer. You can
use these designers to change and create formats.
ABC
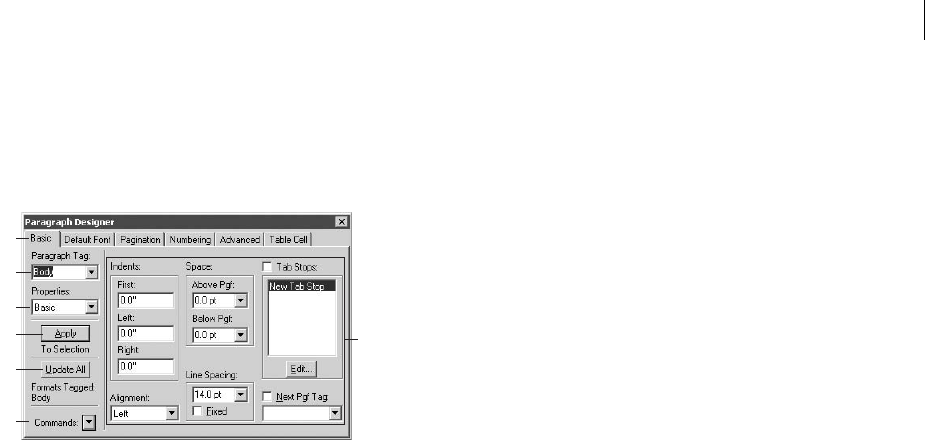
ADOBE FRAMEMAKER 8
User Guide
105
The Paragraph and Character Designers
The designers include several areas and commands for creating, changing, and overriding formats. The Paragraph
Designer contains several groups of properties, displayed one at a time (it’s shown here displaying the Basic group of
properties). The Character Designer contains only one group.
Paragraph Designer
A. (Windows) Click a tab to display a group of properties.
B. Choose from the Paragraph Tag pop-up menu to display the stored properties for that format.
C. Choose from the Properties pop-up menu to display a group of properties.
D. Apply all properties in all property groups (including the tag) to the current paragraph’s format.
E. Update all paragraph formats that have the same tag, including the format stored in the Paragraph Catalog.
F. Choose commands for updating specific properties of selected paragraph formats.
G. View or change the group’s properties.
Note: Paragraph and Character tags support the Unicode text encoding standard.
To display a designer:
❖Do the following:
•To display the Paragraph Designer, choose Format > Paragraphs > Designer.
•To display the Character Designer, choose Format > Characters > Designer.
To use a designer:
1Display a group of formatting properties in the Paragraph Designer by choosing the group from the Properties
pop-up menu or, in Windows, by clicking a tab.
2Make the changes to properties that you want. For an overview of the changes you can make, see “About format
overrides” on page 107.
3Click Apply To Selection.
Note: Click Apply To Selection when you want to override the format for the current paragraph. Click Update All only
when you want to globally change (update) the format, as described in “Redefining (updating) formats” on page 134.
To reset properties after making some changes in a designer:
❖Do one of the following:
•To reset the properties to match the current selection, including any format overrides, click in text or choose Reset
Window from Selection from the Commands pop-up menu.
•To reset the properties to match the stored format, choose the format from the Tag pop-up menu. Do this even if
its tag is already displayed in the Tag text box.
A
B
C
D
E
F
G

ADOBE FRAMEMAKER 8
User Guide
106
Using As Is
The As Is setting can appear in the Paragraph, Character, or Table Designer, as well as in dialog boxes throughout
FrameMaker. When properties are set to As Is in a designer, text boxes are blank, As Is appears in pop-up menus,
and check boxes appear as in the following illustration.
Check boxes can be selected (on), As Is, or off. You may have to click a check box twice to set it to the state you want.
As Is has the following uses:
•As Is can indicate that selected items have different properties. For example, if you select a right-aligned paragraph
and a left-aligned paragraph, the Alignment pop-up menu displays As Is.
•As Is lets you change some, but not all, of the properties when working in a designer. For example, if you want to
change all headings from centered to left-aligned but want to leave the rest of their properties intact, you can set
the rest to As Is, and then update all heading formats. For information, see “Redefining (updating) formats” on
page 134.
•As Is lets you create character formats that specify the properties that won’t be changed when you apply the format
to text. In this case, the As Is property is stored as part of the character format. For information, see “Redefining
(updating) formats” on page 134.
Globally applying formats to text
You may occasionally need to apply a format globally to multiple paragraphs of your choosing. For example, you
could retag all paragraphs currently tagged Head2 as Head1.
To globally apply a format to text:
1To apply a format to text that has several different tags, select consecutive paragraphs or text items that have those
tags. Otherwise, skip this step (that is, it makes no difference what is selected).
2Display the Paragraph or Character designer, and then choose the format you want to apply from the Paragraph
Tag or the Character Tag pop-up menu.
3Choose Global Update Options from the Commands pop-up menu.
4Do one of the following:
•To update all text and formats in the document, click All Paragraphs and Catalog Entries, or All Characters and
Catalog Entries.
•To update all text in the selection and all paragraphs or text items that have the same tags as the selected
paragraphs, click All Matching Tags in Selection.
•To update formats with a specific tag, choose a tag from the All Tagged pop-up menu.
5If you’re retagging paragraphs, click All Properties in the Use Properties area.
6Click Update.
Windows
Unix
Selected As Is Deselected

ADOBE FRAMEMAKER 8
User Guide
107
About format overrides
When you make a text formatting change that doesn’t match the text’s predefined format, it is usually a
format override.
FrameMaker indicates text format overrides by displaying an asterisk (*) next to the tag in the Tag area and in the
Paragraph Format pop-up menu on the formatting bar.
An asterisk indicates a format override.
If you use the catalog formats to maintain consistency in a document, you’ll probably want to avoid overrides.
You can do this by applying formats from the catalogs or by redefining (updating) the catalog format to match the
current text. For details, see “Applying predefined formats to text” on page 102 and “Redefining (updating) formats”
on page 134.
If you’re formatting quick, one-time-only documents, these format overrides pose no problem. For example, you
may want a particular Body paragraph to function as a title of a memo without having to define and apply a new Title
format. In such a case, you simply change the paragraph’s format without updating the catalog format.
If you later update the catalog format, you can choose whether you want to retain format overrides. If you decide you
want to create separate formats instead of using overrides, you can use File > Utilities > Create & Apply Formats (see
“Changing format overrides to new formats” on page 558).
You can override many format properties, including font properties, indent and alignment properties, tab stops,
spacing properties, line breaks and hyphenation, page breaks, graphics as part of a paragraph format, headings, and
autonumbering.
Note: When you apply font formatting to parts of a paragraph, that formatting is not considered an override to the
paragraph format unless you apply it to the entire paragraph.
Changing font properties
You can use either the Format menu or the Character Designer to change the font family, size, or style of selected
text. You use the Paragraph Designer to change the default font properties of an entire paragraph. The font families
and styles available depend on which fonts are installed.
If you change the font properties of selected text, those properties are retained when you later update the properties
of the entire paragraph.
You can change the font properties of text created with the Text Line tool as well as paragraph text.
Note: (Windows) Do not use the Courier font when Adobe Type Manager® is turned off or not installed. If you do use
Courier without ATM, FrameMaker products will not accurately display the Courier font.
Using font commands on the Format menu
Format changes you make using the Format menu commands take effect immediately. They are considered overrides
when they don’t match the font properties in the predefined formats.
To change font properties with Format menu commands:
❖Do the following:
•To change a font family, choose Format > Font and choose a font family from the list.

ADOBE FRAMEMAKER 8
User Guide
108
•To change a point size, choose Format > Size and choose a point size from the list. Choose Other to enter a point
size not on the list.
•To change font style, choose Format > Style and choose a font style from the list. Many but not all of the choices
that appear in the designers also appear here. To remove other style properties, choose Plain Text.
Note: Even if a font has more than one weight—for example, Helvetica Condensed Bold and Helvetica Condensed
Black—the Format > Style submenu will list only Bold. To choose other weights, use the Default Font properties of the
Paragraph Designer or use the Character Designer instead.
Using a designer to change font properties
Use the Paragraph Designer to change the default font properties of an entire paragraph. Use the Character Designer
to change the font properties of specific text within a paragraph.
To change a font property using a designer:
1Do one of the following:
•To change the default font properties of an entire paragraph, click in the paragraph, choose Format > Paragraphs >
Designer, and then choose Default Font from the Properties pop-up menu in the Paragraph Designer.
•To change the font properties of specific text within a paragraph, select the text and choose Format > Characters >
Designer.
•To change the font properties of text you will enter within a paragraph, click in the text and choose Format >
Characters > Designer.
2Change the settings in the designer. For information, see “Using the designers” on page 104.
3Click Apply To Selection.
Using a designer to apply a capitalization style to text changes only the appearance of the text (for example, makes
lowercase text appear in uppercase letters). To permanently change the text itself, use the Capitalization dialog box
to replace selected text with text that is all uppercase, all lowercase, or initial caps. To display the dialog box, press
Esc e Shift+c.
Font changes you can make in the designers
You’ve probably seen many of the settings in other word processors, but a few may be new to you. The following list
explains those that you may not be familiar with:
Numeric Underlining To use a single offset and thickness for an underline regardless of the character’s font or size,
choose Numeric Underlining. Neither regular nor numeric underlining affects tab characters. If you want the tab
space to be underlined, format that tab stop so that it uses a nonbreaking space as a leader.
Numeric and regular underlining
Change Bar To display a change bar next to text, select Change Bar.
Color To display the text in a different color, choose a color from the Color pop-up menu. If you defined your own
colors, they appear in the pop-up menu.
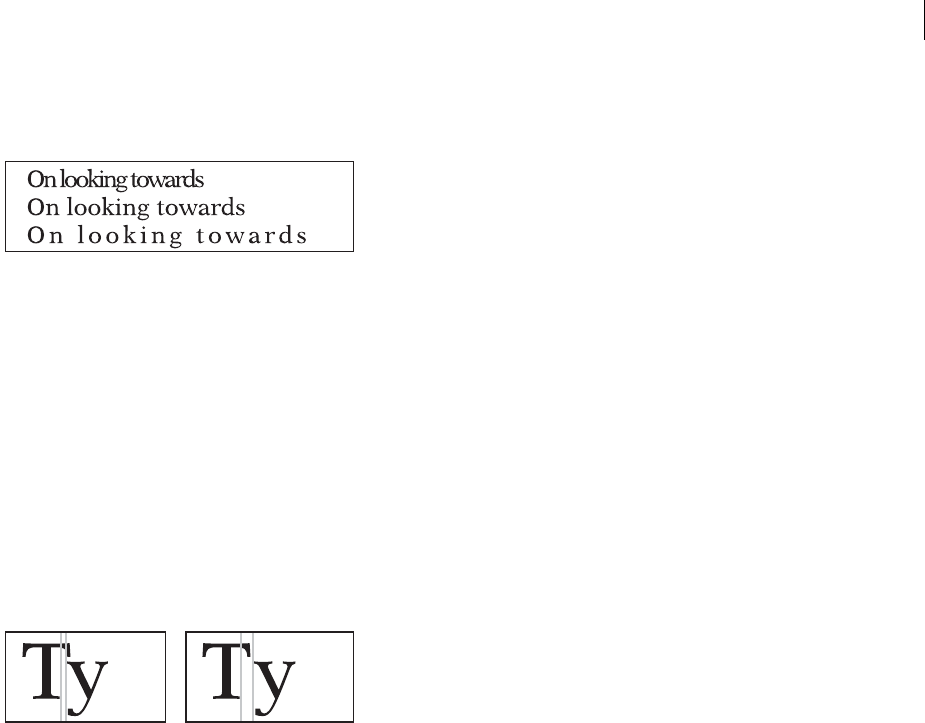
ADOBE FRAMEMAKER 8
User Guide
109
Spread To add or subtract space between characters, enter a percentage for Spread. Spread (also called tracking) is
expressed as a percentage of an em space. Normal spread is 0%.
-10% spread (top), 0% spread (center), 10% spread (bottom)
Stretch To set the width of the character shapes, enter a percentage for Stretch.
Capitalization To display all characters in uppercase but use slightly smaller capital letters for text that was in
lowercase, choose Small Caps. For example, Note appears as NOTE.
Language To change the language associated with the text, choose from the Language pop-up menu. The language
you choose affects the text in system variables as well as both spell-checking and hyphenation. Also, changing the
language to None prevents the selected text from being spell-checked.
Pair Kern To adjust the space between two characters in the same word, select Pair Kern. Pair kerning also turns on
ligatures, such as fi and fl, in printed documents (except in Windows, which does not support these ligatures). The
kerning pairs and the ligatures that have been defined depend on the font. In UNIX, you can customize kerning pairs
(see the online manual Customizing FrameMaker Products on the Adobe website: www.adobe.com/devnet/frame-
maker/pdfs/Customizing_Frame_Products.pdf).
Kerning pairs turned on and off
Tsume To move a Japanese character closer to the characters next to it, select Tsume. (This option is available only
when you can type Japanese text in documents and dialog boxes.) The amount of space a variable-width character
(such as a parenthesis) can move is determined by the metrics for that character.
Adjusting superscripted, subscripted, and small cap text properties
Adjustments to the properties of subscript, superscript (including footnote references), and small cap text apply to
all such text in the document.
To specify the size and shape of small caps or the size, shape, and placement of super- or subscripted text:
1Make the appropriate document window or book window active. If a book window is active, select the documents
you want to affect.
2Choose Format > Document > Text Options.
3Specify a size, offset, and stretch percentage.
When calculating the size and offset, FrameMaker multiplies the percentage you enter by the point size of the
affected characters. For example, a 40% superscript offset value will raise a 10-point character 4 points.
The stretch percentage is the amount that characters are condensed or expanded. For information, see “Condensing
and expanding characters” on page 110.
4Click Apply.
ADOBE FRAMEMAKER 8
User Guide
110
You can manually fine-tune the placement of superscripted or subscripted text by selecting it and then pressing
Alt+arrow key (Windows), or Control+arrow key (UNIX).
Condensing and expanding characters
You can achieve some effects by stretching characters.
Text unchanged (top) and condensed 75% (bottom)
To change the width of text precisely:
1Do one of the following:
•To change the width of an entire paragraph, click in the paragraph, choose Format > Paragraphs > Designer, and
then choose Default Font from the Properties pop-up menu.
•To change the width of specific text within a paragraph, select the text and choose Format >
Characters > Designer.
2Enter a percentage in the Stretch text box. A value of 100% means the width of characters is as defined for the font.
A value less than 100% condenses the width; a value greater than 100% expands the width.
3Click Apply To Selection.
In Japanese documents, use a stretch value greater than 100 to simulate heitai (horizontally stretched characters).
Use a stretch value less than 100 and increase the point size of text to simulate chotai (vertically stretched
characters).
To change the width of a text line by dragging:
1Select the text line you want to change. You can also select a grouped object that includes a text line. (Be sure you
select a text line and not a text frame. For information on text lines, see “Using text with graphics” on page 323.)
2Drag one of its handles until the text is stretched to the shape you want. Dragging a corner handle changes the point
size as well as the character width.
Working with combined fonts of Japanese and Western characters
In addition to containing the full Japanese syllabary, Japanese fonts include a set of Western characters to facilitate
entering non-Japanese characters and numbers. You can define your own combined font—a font that uses a specified
Western font with a specified Japanese font. For example, you can create a font that uses Mincho for Japanese
characters but switches to Palatino for Western characters.
If you’re working on a system that supports Japanese text and if combined fonts are included as part of a template,
they will be available to you automatically as long as the specified fonts are installed. If your system supports the
typing of Japanese text in documents and dialog boxes, combined fonts appear at the top of the font lists along with
regular Western and Japanese ones.
FrameMaker supports Japanese single-byte, half-width katakana characters in combined fonts.

ADOBE FRAMEMAKER 8
User Guide
111
For information on working with Korean and Chinese characters, see the online manual Chinese and
Korean Features.
To create or change a combined font:
1Make the appropriate document window or book window active. If a book window is active, select the documents
you want to affect.
2Choose Format > Document > Combined Fonts. (This command will appear only if your system supports the
typing of Japanese text in documents and dialog boxes.)
3Do one of the following:
•To create a new combined font, enter a name in the Combined Font Name text box.
•To change a combined font, select its name from the Combined Fonts list.
4Do the following:
•To specify the Japanese font, choose from the pop-up menu of font families in the Asian Text area.
•To specify the Western font, choose from the pop-up menu of font families in the Western Text area.
•To adjust the relative size and baseline offset of the Western text, enter values for Size and Offset. The size and
offset of the Western text are percentages of the Asian point size. Use a negative offset to move the text below the
baseline.
5Do one of the following:
•To create a new combined font, click Add.
•To finish editing a combined font, click Change.
6Click Done.
Note: (Windows) You can turn off the Allow Bolded and Obliqued Styles setting in the Asian Text area of the Edit
Combined fonts dialog box so that bolding or italicizing the Western font will not automatically enbold or italicize the
Asian text.
To copy a set of combined fonts:
❖Choose File > Import > Formats and select Combined Fonts. For details on importing formats from one
document to another, see “Importing and updating formats” on page 415.
Changing indents and alignment
The left and right indents of a paragraph determine where the paragraph’s left and right edges are positioned. Text
lines up against both these edges when it’s justified, and against one when it’s left or right aligned.
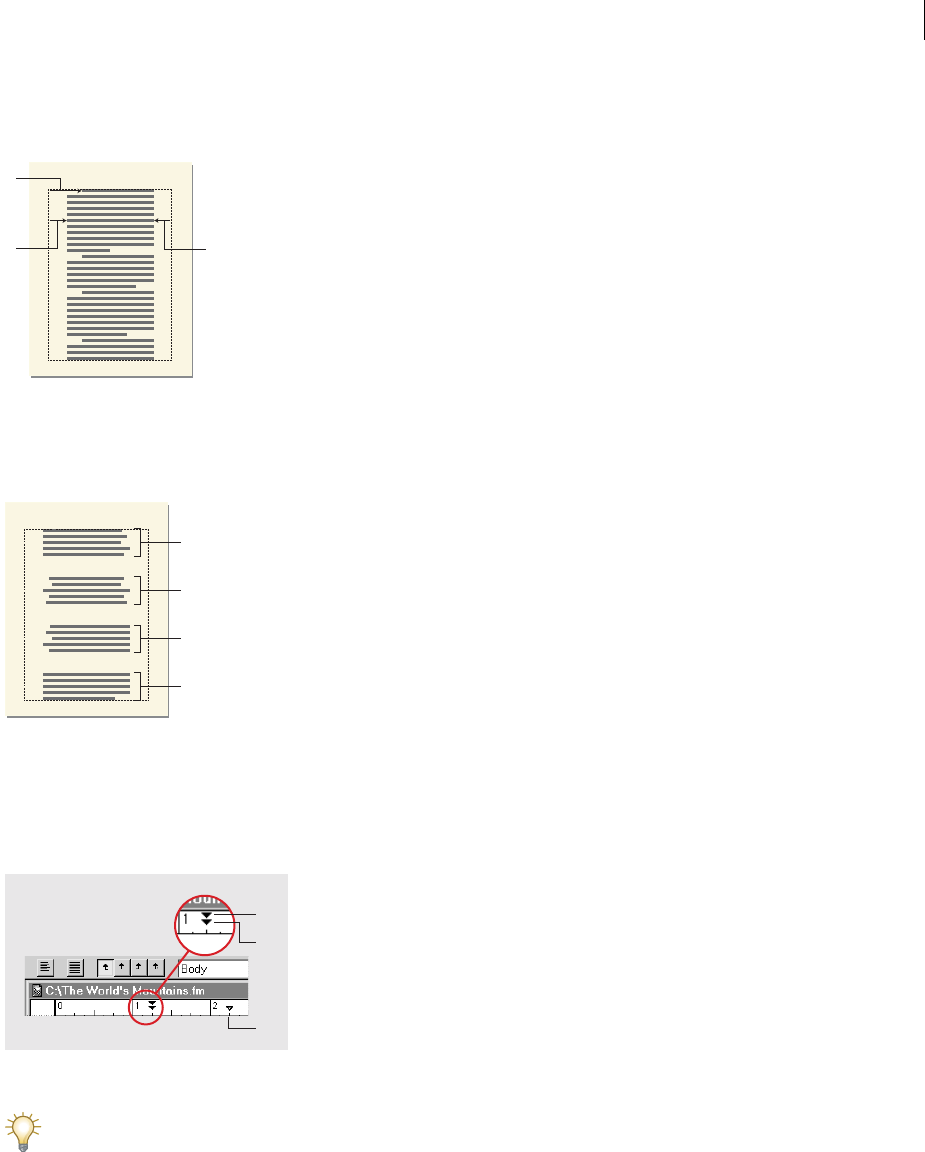
ADOBE FRAMEMAKER 8
User Guide
112
You can specify different indents for the first line of a paragraph and for all lines after the first to achieve special
effects, such as a hanging indent.
A. First indent B. Left indent C. Right indent
The alignment property of a paragraph determines how the paragraph is positioned between the left and right
indents (not between the edges of the text column).
A. Left aligned B. Centered C. Right aligned D. Justified
To indent a paragraph using the ruler:
1Click in the paragraph—or select the paragraphs—you want to indent.
2Drag the indent symbol to a new location on the ruler.
A. First indent B. Left indent C. Right indent
To align an indent with a ruler marking, turn the snap grid on (use Graphics > Snap). When you drag an indent
symbol, it snaps to locations corresponding to the snap grid.
To indent a paragraph using an indent value:
1Click in the paragraph—or select the multiple paragraphs—you want to indent.
2Display the Basic properties of the Paragraph Designer. Enter the indents you want in the First, Left, and Right
text boxes, and then click Apply To Selection. (A hanging indent uses a smaller value in the First text box than in the
Left text box.)
A
BC
A
B
C
D
A
B
C

ADOBE FRAMEMAKER 8
User Guide
113
To set a paragraph’s alignment:
1Click in the paragraph—or select the multiple paragraphs—whose alignment you want to set.
2Do one of the following:
•Display the formatting bar and choose an alignment from the Alignment pop-up menu.
•Display the Basic properties of the Paragraph Designer, choose from the Alignment pop-up menu, and click Apply
To Selection.
Note: If you use Shift+Enter or Shift+Return to insert a forced return within a fully justified paragraph, the line that
ends with the forced return will not be justified.
Changing tab stops
You can use tab stops to align text at specific places.
Changing or creating a tab stop is a two-step process. First, you need to define a tab stop. Then, you press the Tab
key in a document to move the insertion point to the defined tab stop. If you press Tab and the insertion point doesn’t
move, a tab stop needs to be defined.
Tab stops will already be defined for many paragraph formats. To change the predefined tab stops, you can change
the format by using the formatting bar or the Paragraph Designer.
You can choose from four types of tab stops—left, center, right, and decimal.
A. Left tab stop B. Center tab stop C. Right tab stop
D. Decimal tab stop
You can also specify a pattern of characters—a leader—to fill the space between a tab and the character following it.
Typically, a leader is a series of periods, but you can use any character or any series of characters. Tab leaders are
useful in tables of contents that have a wide gap between columns.
Tab leaders
Everest Everest Everest 2.6794
Lhotse Lhotse Lhotse 293.1
K2 K2 K2 18.36
A B C D
Contents Page
Everest 69
Lhotse 76
K2 83
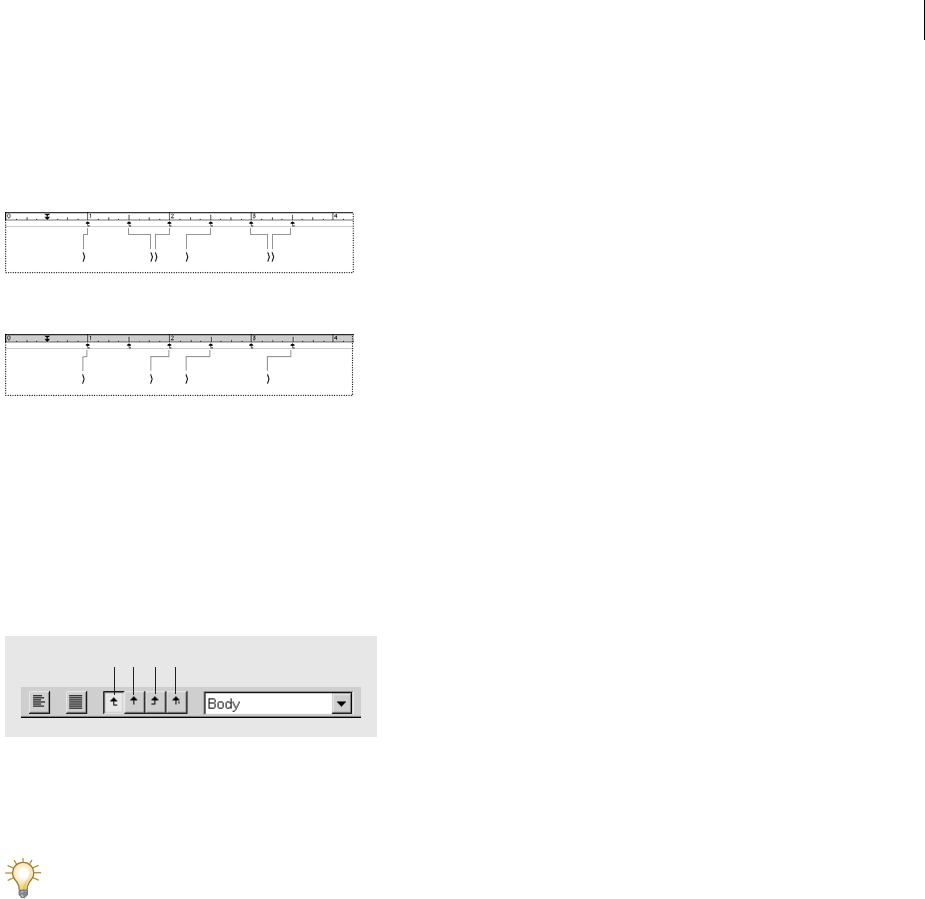
ADOBE FRAMEMAKER 8
User Guide
114
Note: Unlike word processors, FrameMaker uses tab stops that are absolute rather than relative. With relative tab stops,
each time you press Tab, the insertion point moves to the next available tab stop. With absolute tab stops, the nth tab on
a line moves the insertion point to the nth stop. If no corresponding tab stop is defined, FrameMaker’s tab does nothing
(the tab symbol overlays the current character).
With FrameMaker’s absolute tabs, you insert three tabs to move text (K2) to the third tab stop.
With relative tabs, one or two tabs can move text to the third tab stop.
To add, move, edit, or delete a tab stop using the formatting bar:
1Click in a paragraph or select multiple paragraphs, and display the formatting bar. If you selected several
paragraphs, only the tab stops common to all the selected paragraphs appear in the formatting bar.
2Do one of the following:
•To add a tab stop, drag a tab stop symbol from the appropriate tab well on the formatting bar to the desired
position below the top ruler.
A. Left B. Center C. Right D. Decimal
•To move a tab stop, drag it to a new position. FrameMaker moves tabbed text in the paragraph from the existing
tab stop to the new position.
To align tab stops with ruler markings, turn the snap grid on (use Graphics > Snap). When you drag a tab symbol,
it snaps to locations corresponding to the snap grid.
•To add multiple tab stops at regular intervals, double-click the existing tab stop (on the top ruler) that you want
to duplicate at regular intervals. Enter the interval between tabs in the Repeat Every text box and click Edit.
•To change a tab stop, double-click it, enter a new tab position in the New Position text box, and choose a different
alignment. (The position is the distance from the left edge of the column to the tab stop.) Then click Edit. You can
also drag a new tab stop on top of an existing one on the ruler to replace it.
•To delete a tab stop, drag it off the bottom of the top ruler.
•To delete all tab stops, double-click a tab stop and click Delete All.
To add, edit, or delete a tab stop using the Paragraph Designer:
1Click in the paragraph—or select the multiple paragraphs—you want to change.
2Display the Basic properties of the Paragraph Designer.
3In the Tab Stops area, do one of the following:
•To add a new tab stop, double-click New Tab, make the desired settings, and click Continue.
AnnapurnaLhotse DhaulagiriK2 Everest
AnnapurnaLhotse Dhaulagiri
K2 Everest
BCD
A

ADOBE FRAMEMAKER 8
User Guide
115
•To edit a tab stop, double-click it, change the settings, and click Continue.
•To delete a tab stop, double-click it and click Delete.
•To delete all tab stops, double-click any tab stop and click Delete All.
4Click Apply To Selection.
To define a leader for a tab:
1Double-click the tab stop on the ruler.
2In the Leader area of the dialog box, click one of the predefined tab leaders or enter your own custom leader.
3Click Edit.
To specify a decimal tab character:
1Double-click the tab stop on the ruler.
2Enter the decimal character in the Align On text box in the Alignment area and click Edit. For example, you can
use a comma when you’re working with European decimals.
Changing spacing
You can control the space between paragraphs and lines (vertical spacing) and the space between words and
characters (horizontal spacing). Spacing properties go by different names in different contexts. For example, the
space between characters is often called pair kerning; adjusting the letterspacing in a line is spread or tracking; and the
line spacing of a paragraph (measured from the baseline of one line to the baseline of the next) includes its leading.
Adjusting vertical spacing
Several properties affect the vertical spacing of a paragraph, as the following illustration shows.
A. Space above paragraph B. Space below paragraph
C. Line spacing
In a multicolumn layout, you can also adjust vertical spacing in columns by feathering (vertically justifying) the text
in them. For information, see “Feathering text to the bottom of text frames” on page 395.
To change the space above and below a paragraph:
1Click in a paragraph or select several paragraphs whose spacing you want to change.
2Display the Basic properties of the Paragraph Designer and enter a value in the Space Above and Space Below text
boxes, or choose values from the pop-up menus. (The space between paragraphs is determined by the Space Below
setting of the first paragraph or the Space Above setting of the second paragraph, whichever is larger.)
C
A
B
Mountains
The Earth has two incredibly vast mountain
ranges. The Rocky Mountains and the Andes
run through North and South America; the
mighty Himalayas, Alps, and Atlas Mountains
stretch across Asia, Europe, and North Africa.
Other signi cant ranges include, the Sierra
Nevadas in North America, the Urals located

ADOBE FRAMEMAKER 8
User Guide
116
If a paragraph falls at the top of a column, FrameMaker ignores the Space Above setting. If the paragraph falls at the
bottom of a column, FrameMaker ignores the Space Below setting.
Note: When an anchored frame is positioned below the current line and its anchor symbol appears in the last line of a
paragraph, the space below the paragraph usually appears between the frame and the next paragraph. However, if the
frame is anchored in a straddle paragraph, the space below is discarded. And if the frame is a straddle frame but is not
anchored in a straddle paragraph, the space below appears between the anchor symbol and the frame.
If you know the space you want between paragraphs but don’t want to use the Paragraph Designer, select the
paragraphs and choose Space Between from the Spacing pop-up menu on the formatting bar.
To change the space between lines of a paragraph:
1Click a paragraph or select several paragraphs whose spacing you want to change.
2Display the Basic properties of the Paragraph Designer and choose a type of line spacing from the Line Spacing
pop-up menu, or enter a value in the text box. (You can also choose from the Spacing pop-up menu on the formatting
bar.)
3To allow extra space between lines to accommodate superscripts, subscripts, rubi text, and larger font sizes that
may appear in the paragraph, turn off Fixed.
Fixed line spacing
Line spacing not fixed
4Click Apply To Selection.
Adjusting horizontal spacing
As FrameMaker fills a line of text, it adjusts the space between characters according to kerning and tracking
properties. The spacing between words is based on the following values, which are stored as part of the
paragraph format:
•The minimum spacing is the smallest space allowed between words.
•The maximum spacing is the largest space allowed between words before FrameMaker tries to hyphenate words
or add space between letters in justified paragraphs.
•The optimum spacing is what FrameMaker tries to achieve.
The Earth has two incredibly vast mountain
ranges. The Rocky Mountains1 and Andes2 run
through North and South America; the mighty
Himalayas, Alps, and Atlas Mountains stretch
across Asia, Europe, and North Africa. Other sig-
The Earth has two incredibly vast mountain
ranges. The Rocky Mountains1 and Andes2 run
through North and South America; the mighty
Himalayas, Alps, and Atlas Mountains stretch
across Asia, Europe, and North Africa. Other sig-

ADOBE FRAMEMAKER 8
User Guide
117
These values are expressed as a percentage of the standard space character for the paragraph’s default font. Values
below 100% create tighter word spacing; values above 100% create looser spacing.
Tight word spacing has a more justified look.
Looser word spacing has a more ragged right edge.
To adjust the space between words:
1Click a paragraph or select several paragraphs whose spacing you want to change.
2Display the Advanced properties of the Paragraph Designer and specify the minimum, optimum, and maximum
space to allow between words.
3Click Apply To Selection.
Note: Lines of text in a justified paragraph can have more than the maximum space between words if FrameMaker can’t
fit a word on a line and can’t hyphenate it. To avoid this, add extra space between characters in justified text by choosing
Allow Automatic Letter Spacing in the Word Spacing area.
To apply character spacing (pair kerning):
❖Select the Pair Kern option. For information, see “Font changes you can make in the designers” on page 108.
To apply spread (tracking):
❖Change the Spread. For information, see “Font changes you can make in the designers” on page 108.
Adjusting spacing in Japanese documents
If your system supports the typing of Japanese text in documents and dialog boxes, you can adjust the following
spacing properties:
•You can use a special group of properties in the Paragraph Designer to control some aspects of Japanese character
spacing.
•You can also change the size, spacing, and alignment of rubi text throughout a document.
•You can affect the spacing of variable-width Japanese characters by selecting the Tsume font property
(see “Adjusting rubi text size, placement, and spacing” on page 118).
These properties can be part of a predefined format, but you can change that format for particular paragraphs if you
need to.
For information on working with Korean and Chinese characters, see the online manual Chinese and
Korean Features.
The Rocky Mountains and Andes run through
North and South America; the mighty Alps, Atlas,
and Himalaya Mountains stretch across Asia,
North Africa and Europe. Other significant
The Rocky Mountains and Andes run
through North and South America; the
mighty Alps, Atlas, and Himalaya
Mountains stretch across Asia, North Africa

ADOBE FRAMEMAKER 8
User Guide
118
Adjusting the space around characters and punctuation
You can change the space between Japanese and Western characters, and also the spacing between
Japanese characters.
To adjust the space between Japanese characters:
1Click a paragraph or select several paragraphs whose spacing you want to change.
2In the Paragraph Designer, display the Asian properties. This group of properties is available only if your system
supports the typing of Japanese text in documents and dialog boxes.
3Do the following:
•To adjust the space between Japanese characters and Western ones, enter minimum, maximum, and optimum
percentages in the upper group of text boxes.
•To adjust the space between Japanese characters, enter minimum, maximum, and optimum percentages in the
lower group of text boxes.
•To determine the space between characters and special punctuation characters (yakumono), choose from the
Punctuation pop-up menu. Squeeze as Necessary means space around punctuation is reduced only when special
punctuation handling (kinsoku shori) occurs. Never Squeeze means no space adjustment is made around punctu-
ation. Always Squeeze means space is always reduced around punctuation.
•To achieve a monospaced look in Japanese text, choose Never Squeeze from the Punctuation pop-up menu and
turn off Tsume (see “Font changes you can make in the designers” on page 108).
Adjusting rubi text size, placement, and spacing
Rubi text is made up of small characters (usually kana) appearing above other text, called oyamoji. You can control
the size of the rubi text as well as how it is spaced and aligned with respect to its underlying oyamoji text. Your
settings affect rubi text throughout a document.
A. Rubi text B. Oyamoji text
To adjust the size, placement, and spacing of rubi text:
1Make the appropriate document window or book window active. If a book window is active, select the documents
you want to affect.
2Choose Format > Document > Rubi Properties. This command is available only if your system supports the
typing of Japanese text in documents and dialog boxes.
3Choose a value from the Size pop-up menu or enter a value in the text box. The value you enter can be a percentage
of the point size of the underlying oyamoji (such as 50%), a point size (such as 8pt), or any other unit of
measurement, including Q units.
4Do the following:
•To let rubi text overhang non-oyamoji text if it needs to, click Let Rubi Overhang Surrounding Hiragana.
•To remove preceding or trailing space when rubi text appears at the start or end of a line, click Align All Characters
at Line Boundaries.
A
B

ADOBE FRAMEMAKER 8
User Guide
119
5Click an option in the Rubi Alignment for Japanese Oyamoji area. The illustrations in the dialog box show how
rubi text will be spaced and aligned when it’s above Japanese characters and when its length is less than or greater
than the underlying Japanese text.
6Click an option in the Rubi Alignment for Other Oyamoji area. The illustrations in the dialog box show how rubi
text will be spaced and aligned when it’s above non-Japanese text, and when its length is less than or greater than the
underlying text.
7Click Set.
Changing hyphenation and line breaks
When FrameMaker hyphenates text, it breaks words at the ends of lines so that the lines are approximately the same
length. Hyphenation can be part of the paragraph format, but you can change that format for particular paragraphs
if you need to.
In addition to automatic hyphenation, you can hyphenate words and adjust line breaks manually.
Note: Line break settings apply to Western text only. You can modify how lines break in Japanese text by modifying a
MIF template (see the online manual MIF Reference).
To change automatic hyphenation in paragraphs:
1Click in a paragraph or select several paragraphs whose hyphenation you want to change.
2Display the Advanced properties of the Paragraph Designer, and do the following in the Automatic
Hyphenation area:
•To let FrameMaker hyphenate the paragraph, select Hyphenate.
•To specify the maximum number of consecutive lines that can end with a hyphen, enter a value in the Max. #
Adjacent text box.
•To specify the minimum length of a hyphenated word, enter a value in the Shortest Word text box.
•To specify the minimum number of letters that can precede and follow a hyphen, enter values in the Shortest
Prefix and Shortest Suffix text boxes, respectively.
3Click Apply To Selection.
To prevent the last word in a paragraph from hyphenating, set the maximum number of adjacent hyphens to 0 or
choose None for the language for that word in the Character Designer. (However, setting Language to None
prevents the word from being spell-checked.)
To change the hyphenation of a word:
1Click in the word you want to change.
2Do the following:
•To add a discretionary hyphen—an allowed hyphenation point—at the insertion point, press Control+hyphen. A
discretionary hyphen symbol appears above the word when text symbols are visible.
•To specify that the current word not be hyphenated, press Esc n s. A suppress hyphenation symbol ( ) appears
under the word when text symbols are visible. (In dialog boxes, you may need to enter a special code for the
suppress hyphenation symbol; see “About typing in dialog boxes” on page 677.)
•To enter a hyphen that will not be allowed to fall at the end of a line (a nonbreaking hyphen), press Esc hyphen h.
(In dialog boxes, you may need to enter a special code for the nonbreaking hyphen; see “About typing in dialog
boxes” on page 677.)

ADOBE FRAMEMAKER 8
User Guide
120
To add or remove hyphenation points in a word anywhere in a document:
❖Use the Spelling Checker. For details, see “Checking spelling” on page 85.
To force a line break:
❖Click where you want to break the line and press Shift+Return. A forced return symbol appears at the end of the
line when text symbols are visible.
To keep two words together on the same line:
❖Select the space between the two words and press Control+space. FrameMaker places a nonbreaking space
symbol between the words.
To specify the characters that can precede a line break:
❖Choose Format > Document > Text Options, enter the characters in the Allow Line Breaks After text box,
and click Set. For example, you might want to remove the slash character from the list if you use terms such as and/or.
Changing page and column breaks
FrameMaker breaks text across pages according to the settings stored in the document’s paragraph formats, but you
can change that format for particular paragraphs if you need to. The page-break controls in the paragraph formats
make up a document’s page-breaking rules—for example, that a heading must be followed by at least three lines of
text on the same page.
To control where a paragraph starts:
1Click in the paragraph you want to change.
2Display the Pagination properties of the Paragraph Designer and do the following:
•To start a paragraph at the top of the next column, next page, next left page, or next right page, choose from the
Start pop-up menu.
•To let a paragraph start anywhere, removing any special page break, choose Anywhere from the Start
pop-up menu.
•To keep the paragraph in the same column as the next or previous paragraph, select Next Pgf or Previous Pgf, or
both. These properties keep the end of one paragraph together with the beginning of another; however, not all
lines of the paragraphs necessarily stay together. The Widow/Orphan Lines property of each paragraph controls
how many lines of the paragraphs must stay together.
•To set the minimum number of widow lines and orphan lines—lines isolated at the top or bottom of a column—
enter a value in the Widow/Orphan Lines text box. (To keep all lines of a paragraph in the same column, specify
a large number, up to 100, for the Widow/Orphan Lines setting.)
3Click Apply To Selection.
You can also set the Start property using the Special > Page Break command. Settings you make using this
command appear as changes to the paragraph format just as if you had used the Paragraph Designer.

ADOBE FRAMEMAKER 8
User Guide
121
Adding graphics to paragraph formats
A paragraph format can include a line or other graphic that appears above or below a paragraph, but you can change
that format for particular paragraphs if you need to. For example, all top-level headings in a document might rest on
a long thin line.
Graphic above
Graphic below
To put a graphic above or below a paragraph:
1On a reference page, draw or import the graphic in a reference frame, or locate one already there that you want to
use. For information on creating reference frames, see “Using reference frames on reference pages” on page 406.
2Click in the paragraph you want to change. To put a line above or below several adjacent paragraphs, select all the
paragraphs.
3Display the Advanced properties of the Paragraph Designer, and choose the name of a reference frame from the
Frame Above Pgf or from the Frame Below Pgf pop-up menu. All reference frames appear in the pop-up menus.
4Click Apply To Selection.
Because the Frame Above Pgf and the Frame Below Pgf settings can’t place graphics to the right or left of a
paragraph, you can’t use these settings to put boxes around text. However, you can box text by using a single-cell
table with outside ruling.
Specifying formats for the paragraphs that follow
Well-designed templates often connect formats so that FrameMaker automatically applies a format to the paragraph
that follows the current one—that is, to the new paragraph created when you press Return. For example, you can
specify that a Body format follow a Head1 format, so that the next paragraph will be tagged Body when you press
Return in a Head1 paragraph. If you press Return with this setting blank, FrameMaker applies the current
paragraph’s format to the new paragraph.
To specify a format for the paragraph that follows:
1Click in the paragraph.
2Display the Basic properties of the Paragraph Designer, and choose a tag from the Next Pgf Tag pop-up menu.
FrameMaker applies this tag when you press Return to create a new paragraph.
3Click Apply To Selection.
The Earth has two enormous mountain ranges.
The Rocky Mountains and Andes run through North and
The World’s Mountains
The Earth has two enormous mountain ranges.
The Rocky Mountains and Andes run through North and
The World’s Mountains
ADOBE FRAMEMAKER 8
User Guide
122
Formatting text as headings
Paragraph formats include properties for creating the following types of special headings.
Side heads Heads that stand to the side of the normal body text, so that they are prominent and easy to scan. You can
use them to create marginal notes or other types of text that you want to display outside of the normal body text.
Side heads
Straddle heads Heads that span columns in a multicolumn layout. They are also good for scanning purposes.
Straddle heads
Run-in heads Although run-in heads are on the same line as normal body text, they’re separate paragraphs.
Therefore, you can include them in tables of contents, create cross-references to them, include them in headers and
footers, and so on.
Run-in heads
Heading styles are part of a document’s paragraph formats, but you can change that format for particular paragraphs
if you need to.

ADOBE FRAMEMAKER 8
User Guide
123
Creating side heads
If you want a document to use side heads, you start by defining a side-head area in its layout. A side-head area is set
up for an entire flow at a time, but you can change the size and placement of the area in specific text frames in the
flow. When you set up a side-head area in a flow, FrameMaker immediately moves all paragraphs not designated as
side heads to the body-text area.
When a side head appears in a multicolumn text frame, the preceding text is balanced across the columns. If a page
contains several text frames, each text frame contains its own side-head area.
Side heads in a single, multicolumn text frame (left) and in separate, single-column text frames (right)
To set up or change a side-head area:
1Click in the text flow that you want to change to have a side-head area, or click in the text frame that has a side-
head area you want to change.
2Do one of the following:
•To create or change the side-head area for the entire document, choose Format > Page Layout > Column Layout.
Note: The header/footer will change positions once you complete the above procedure.
•To change the side-head area for a single text frame, click in the text frame and choose Format > Customize
Layout > Customize Text Frame.
3Select or turn off Room for Side Heads. This setting always applies to the entire flow, even if you are changing side-
head settings for a single text frame.
4Specify the width of the side-head area and the gap between the side-head and body-text areas. (The space above
the side head and the preceding paragraph is determined by the Space Below setting of the previous paragraph or
the Space Above setting of the side head, whichever is greater.)
5Choose an option from the Side pop-up menu to determine where you want side heads to appear.

ADOBE FRAMEMAKER 8
User Guide
124
To create a side head:
1Click in the paragraph you want to make a side head.
2Display the Pagination properties of the Paragraph Designer, click Side Head, and choose an option from the Side
Head Alignment pop-up menu.
First baseline alignment
Top edge alignment
Last baseline alignment
3Click Apply To Selection.
Creating straddle heads
Straddle heads span columns in a multicolumn text frame. When a heading paragraph straddles columns, the text
above the heading is balanced across the columns.
To create a straddle head:
1Click in the paragraph you want to change.
2Display the Pagination properties of the Paragraph Designer and click Across All Columns or Across All Columns
and Side Heads.
Across All Columns (left) and Across All Columns and Side Heads (right)
3Click Apply To Selection.
Major
Mountains
The Earth has two enormous
mountain ranges.The Rocky
Mountains and Andes run
through North and South
Major
Mountains
The Earth has two enormous
mountain ranges.The Rocky
Mountains and Andes run
through North and South
Major
Mountains The Earth has two enormous
mountain ranges.The Rocky
Mountains and Andes run

ADOBE FRAMEMAKER 8
User Guide
125
Creating run-in heads
Because run-in heads have the same margins and are on the same line as normal body text, they typically have a
different font or weight for contrast. They may also use a punctuation mark to set them off from the text that
follows. If you find that the default punctuation is not suitable, you can easily override it with a new one on a case-by-
case basis.
All of this is defined in the paragraph format, but you can change that format for particular paragraphs if you need to.
Note: The space between the run-in head and the preceding paragraph is determined by the Space Below setting of the
previous paragraph or the Space Above setting of the run-in head, whichever is greater.
To create or change a run-in head:
1Click in the paragraph you want to change. If the paragraph is already a run-in head, it will be on the same line as
the paragraph following it; for this reason, be sure to click carefully.
2Display the Pagination properties of the Paragraph Designer and click Run-In Head and, if necessary, enter the
punctuation, space, or combination of punctuation and space that you want to use.
3Click Apply To Selection.
4Display the Default Font properties and change the run-in head’s font so that it stands out from the surrounding
text, if you want.
5Click Apply To Selection.
To override the punctuation for a run-in head:
❖Enter the punctuation you want after you’ve typed the run-in head. FrameMaker ignores the punctuation
specified in the Default Punctuation text box but retains any special characters that are part of the default, including
em and en spaces. For example, if the default punctuation is a period, you can override this by typing a colon at the
end of the run-in head.
About numbered and bulleted lists
You create numbered and bulleted lists by using paragraph formats that have an autonumber format defined. As you
add autonumbered paragraphs to your document, FrameMaker numbers them appropriately and renumbers
existing autonumbered paragraphs if necessary.
Autonumbered paragraphs are numbered consecutively in a text flow. If your document contains several text flows,
autonumbered paragraphs in each flow will be independent of the others.
You define autonumbering in the Numbering properties of the Paragraph Designer. An autonumber format can
include a series label, a counter, tabs, and any additional text you need.
Note: An autonumber format does not have to specify paragraph numbering. When used without building blocks, the
“autonumber” format is a handy way to insert automatic text or symbols. For example, it can autoinsert a bullet symbol
or the word Note.
Series label Series labels identify different types of autonumber series within the same text flow. For example, if you
want to number figures independently of tables or headings, you would specify a different series for each. (But each
set of steps, for example, would not be a different series.)
On the other hand, table and figure numbers must all be in the same series to be based on section numbers.

ADOBE FRAMEMAKER 8
User Guide
126
Counter A counter is a placeholder (building block) that FrameMaker replaces with a number or letter in the
autonumber. For example, the counter <n+> increments the paragraph’s number by 1; if the paragraph is the
second in a series, FrameMaker replaces <n+> with the number 2. You can use multiple counters in a format.
For details on counters, see “Using counters in autonumber formats” on page 129.
You can also add chapter <$chapnum> and volume <$volnum> building blocks in a format. For more information,
see “Basing autonumbering on volume and chapter numbers” on page 130.

ADOBE FRAMEMAKER 8
User Guide
127
Tabs, text, and punctuation An autonumber format can also include tabs, text, bullets, spaces, or punctuation.
Autonumber format
A. Series label B. Text C. Counter D. Tab
Numbered list
You can change the autonumber format for particular paragraphs if you need to, or you can create your own format.
CDAB
Step 1: Acquire passport and visa
Step 2: Purchase climbing gear
Step 3: Arrange air travel

ADOBE FRAMEMAKER 8
User Guide
128
Formatting text as numbered lists
You create a numbered list by using paragraph formats that include numbering—in the form of special building
blocks, called counters—in their autonumber formats.
Creating a numbered list sometimes involves formatting the first item in the list with a paragraph format that resets
the counter to 1, and then formatting the remaining items with a different format that increments the counter. For
example, you might apply a Step1 format to the first item in a list and then StepNext to the rest. Formats can also be
defined in a way that lets you apply a single format to all items in a numbered list. The choice lies with the template
designer. (For information, see “Resetting a series” on page 133.)
To create a numbered list:
1Select adjacent paragraphs that you want to autonumber. To change a single paragraph to be part of a numbered
list, click in the paragraph.
2Display the Numbering properties of the Paragraph Designer and enter a series label in the Autonumber Format
text box if you need more than one autonumber series in the document.
A series label consists of any single printable character followed by a colon (for example, S:). If you use a series label,
it must appear at the beginning of the format.
3Specify the rest of the autonumber format. Enter any text you want to have appear automatically with the
autonumber format. You can enter tabs or counters from the Building Blocks scroll list. When you select an item, it
appears at the insertion point in the Autonumber Format text box. For information on counters, see “Using counters
in autonumber formats” on page 129.
Note: You may have to use special codes to enter characters such as nonbreaking spaces, em spaces, and curved quotation
marks. For information, see “Appendix A: Typing in dialog boxes” on page 677.
4Select a Character Format for the autonumber in the Character Format scroll list. If you don’t specify a format, the
autonumber appears in the paragraph’s default font.
5Choose a position for the autonumber from the Position pop-up menu. Autonumbers at the end of paragraphs
are rare except in equation formats.
6Click Apply To Selection.
7If you inserted a tab (\t) in step 3, set a corresponding tab stop for the paragraph format. For details, see “Changing
tab stops” on page 113.
To remove autonumbering from a paragraph:
1Click in a numbered list, and then turn off Autonumber Format in the Numbering properties of the Paragraph
Designer. You must click the check box twice to turn off the setting; clicking it only once changes it to As Is.
2Click Apply To Selection.
Formatting text as bulleted lists
You create a bulleted list by using paragraph formats that include a bullet symbol in their autonumber format.
In addition to the regular bullet symbol ( ) found in all text fonts, you can use any character in any installed font,
including a dingbat font such as Zapf Dingbats. For example, you could define a Zapf Dingbats square ( ) as a
bullet symbol.

ADOBE FRAMEMAKER 8
User Guide
129
To create a bulleted list:
1Select adjacent paragraphs that you want to make into a bulleted list. To change a single paragraph to be part of
a bulleted list, click in the paragraph.
2Display the Numbering properties of the Paragraph Designer and click the bullet and tab symbols (\b and \t) in
the Building Blocks scroll list.
3Click Apply To Selection.
4If you inserted a tab (\t) in step 2, set a corresponding tab stop for the paragraph format. For details, see “Changing
tab stops” on page 113.
To remove a bullet from a paragraph:
1Click in a bulleted list, and then turn off Autonumber Format in the Numbering properties of the Paragraph
Designer. You must click the check box twice to turn off the setting; clicking it only once changes it to As Is.
2Click Apply To Selection.
To use a special bullet symbol:
1Create a character format that uses the font of the bullet symbol you want to use. For example, to use 9-point
Zapf Dingbats, create a character format using that font. Give the format a descriptive name such as BulletFont.
For information on creating character formats, see “Using a designer to change font properties” on page 108.
2Display the Numbering properties of the Paragraph Designer and enter the character corresponding to the
bullet symbol you want in the Autonumber Format text box (rather than select the symbol in the Building Blocks
scroll list).
For example, if you want a Zapf Dingbats square bullet, enter a lowercase n, which appears as in that font. To find
the character that corresponds to the bullet symbol you want, see the character set for that font (see the online
manual FrameMaker Character Sets for the character sets for the Symbol and Zapf Dingbats fonts).
3Click the tab symbol (\t) in the Building Blocks scroll list or enter spaces.
Note: You may have to use special codes to enter characters such as nonbreaking spaces or em spaces. For information,
see “Appendix A: Typing in dialog boxes” on page 677.”
4In the Character Format scroll list, click the bullet character format that you created.
5Click Apply To Selection.
Using counters in autonumber formats
A counter consists of angle brackets (< >) that surround a display style and an increment value.
A. Display style B. Increment value
Note: The Custom Autonumbering feature supports the Unicode text encoding standard.
To indicate the display style, use a counter with one of the following letters.
A B

ADOBE FRAMEMAKER 8
User Guide
130
To indicate how an autonumber is incremented, use a counter with an increment value, as shown in the
following examples.
By default, each counter is initially set to zero, but you can specify a different initial value. Thereafter, the counter
can maintain its current value, be incremented by 1, or be reset to a different value. For example, use <n=1> in the
format that resets numbering to 1 at the beginning of a new set of numbered steps.
To keep the value the same but not display it, put a blank space between the angle brackets. If you leave out the blank
space, the angle brackets appear as part of the autonumber format.
Basing autonumbering on volume and chapter numbers
You can insert <$volnum> and <$chapnum> building blocks in paragraph formats. The volume and chapter
numbers are determined by the settings in the Numbering Properties dialog box (see “Determining how documents
and pages are numbered” on page 468).
The following table illustrates how you can combine the chapter building block with other building blocks:
For this numbering style Use
Numeric (1, 2, 3, …) n
Lowercase Roman (i, ii, iii, iv, …) r
Uppercase Roman (I, II, III, IV, …) R
Lowercase alphabetic (a, b, c, …, aa) a
Uppercase alphabetic (A, B, C, …, AA) A
To Use
Keep the value the same <n>
Set the value to 1 or to any other number you enter after the equal sign <n=1>
Increase the value of the counter by 1 <n+>
Keep the value the same but not display it <>
Reset to zero (or any other number) but not display it < =0>
Example Autonumber format
Volume 3
Chapter 3
Volume <$volnum>
Chapter <$chapnum>
Example Autonumber format
Section 1.1
Section 1.1.1
Figure 1-1
Table 1-1
S:Section <$chapnum>.<n+><=0>
S:Section <$chapnum>.<n>.<n+>
F:Figure <$chapnum>-<n+>
T:Table <$chapnum>-<n+>

ADOBE FRAMEMAKER 8
User Guide
131
Basing autonumbering on section numbers
You can create a different series for each type of numbering scheme in a document. For example, headings, figures,
and tables could each have a different series label. But suppose you want numbering to be based on section numbers
such as the numbering shown in the following table.
If you set up different series for sections, figures, and tables, FrameMaker wouldn’t be able to base the figure and table
numbers on the section numbers. To achieve this type of numbering, construct autonumber formats in a single series
(using the same series label for each format). The following table shows the autonumber formats you could create.
The formats are presented in a table so that you can clearly see each counter’s position in the string.
The counter’s position determines how the counter is incremented.
Whenever a paragraph tagged SectionTitle occurs, the section number is incremented by 1, and the remaining
counter values are reset to zero. Each <n+> counter in the remaining formats refer to a different type of item
(headings, figures, and tables), so they’re incremented independently.
The < > counters keep FrameMaker from resetting values back to zero.
Using multiple counters in an autonumber format
An autonumber format can contain more than one counter. For example, autonumbers for a series of section and
subsection titles might each contain two counters.
The counters in each format are independent of each other. A counter’s position in the string determines how it’s
displayed and incremented. When incrementing a counter, FrameMaker bases its value on the corresponding
counter in the previous autonumber paragraph in the same flow.
Section number Figure number Table number
Section 1
1.1
1.2
Figure 1-1
Figure 1-2
Table 1-1
Table 1-2
Section 2
2.1
2.2
Figure 2-1
Figure 2-2
Table 2-1
Table 2-2
Paragraph format Autonumber format
SectionTitle H:Section <$chapnum>< =0>< =0>< =0>
Head1 H: <$chapnum>.<n+><> <>
FigureTitle H:Figure <$chapnum><>-<n+><>
TableTitle H:Table <$chapnum><><>-<n+>
These counters In this format Would appear as
<$chapnum>.<n=0>Head1 1.0
<$chapnum>.<n+>Head2 1.1
<$chapnum>.<n+>Head2 1.2
<$chapnum>.<n=0>Head1 2.0
ADOBE FRAMEMAKER 8
User Guide
132
The following example shows multiple counters in section titles and subtitles. The counter before the period is incre-
mented independently from the counter after the period.
The following example uses as many as three counters in a single format.
The following example demonstrates outline style autonumber formats.
The autonumber in the heading Opening a file is reset to A; the second counter in the previous paragraph’s format
resets the numbering to zero (without displaying it), so <A+> increments the counter to 1 (or A, the first letter of
the alphabet).
The < > counter in the Head2 format keeps the value of the first counter the same but doesn’t display it. If the < >
counter were not in that position, the <A+> in the Head2 format would refer to the first counter (not the second),
and FrameMaker would produce the following result.
Outline style autonumber format
Example Autonumber
format
Tag
1.0 Getting started
1.1 Installing
1.2 Backing up
2.0 Entering data
<n+>.<n=0>\t
<n>.<n+>\t
<n>.<n+>\t
<n+>.<n=0>\t
Head1
Head2
Head2
Head1
Example Autonumber
format
Tag
1.0 Getting started
1.1 Installing
1.2 Backing up
1.2.1 Errors
1.3 Entering data
<n+>.<n=0>\t
<n>.<n+>\t
<n>.<n+>\t
<n>.<n>.<n+>\t
<n>.<n+>\t
Head1
Head2
Head2
Head3
Head2
Example Autonumber
format
Tag
I Getting started
A Installing
BBacking up
II Entering data
A Opening a file
BSaving a file
<R+>< =0>\t
<><A+>\t
<><A+>\t
<R+>< =0>\t
<><A+>\t
<><A+>\t
Head1
Head2
Head2
Head1
Head2
Head2
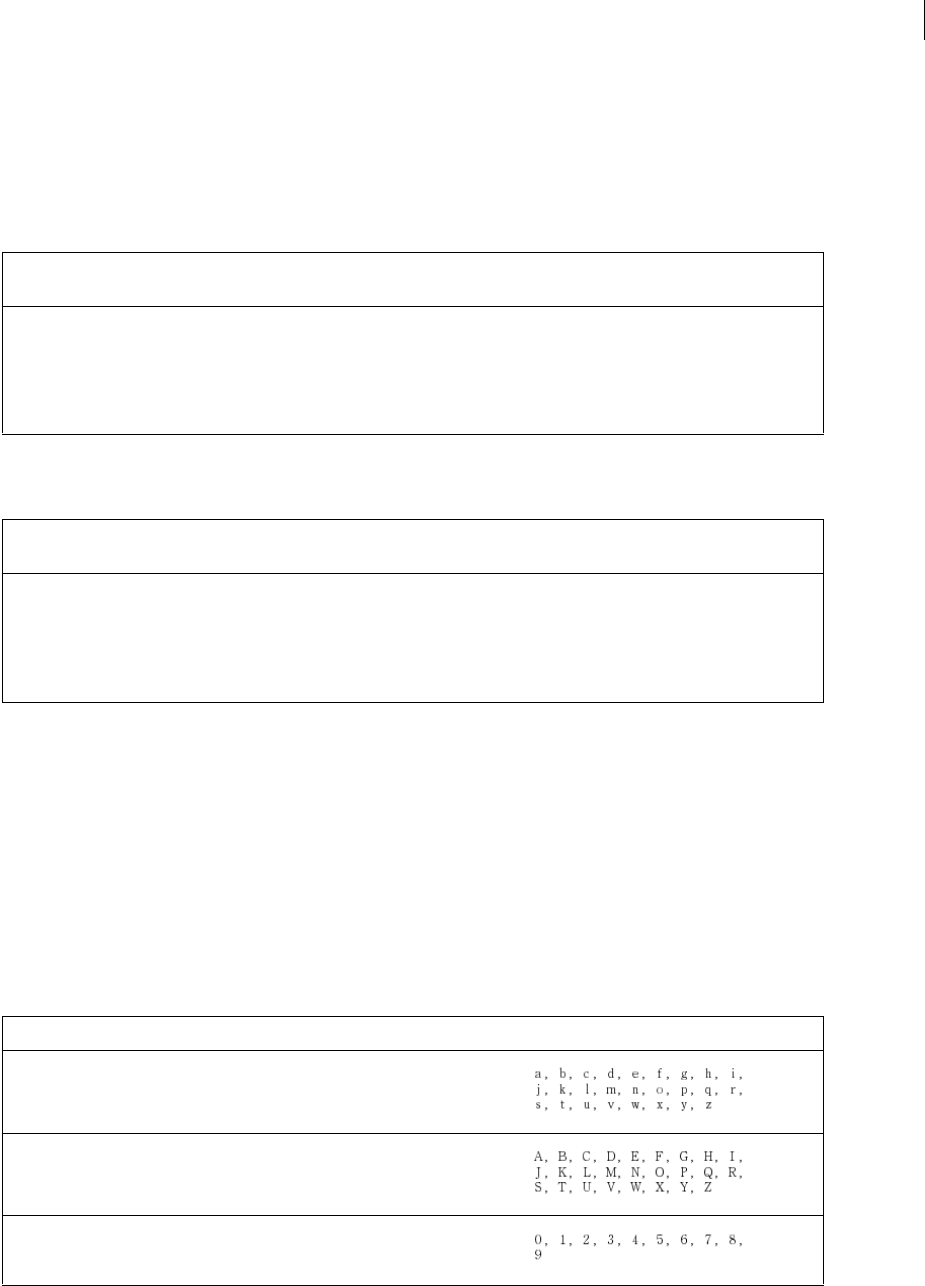
ADOBE FRAMEMAKER 8
User Guide
133
Resetting a series
Some numbering series—such as a list of numbered steps—start at 1 every time they are used. You can reset such a
series in two ways, as illustrated in the next two examples.
The first example shows how to restart series numbering by using the <n=1> building block for the first step in the
series, and then using <n+> for subsequent steps.
The second example shows another way to reset the counter so that you don’t have to use a unique format to start a
numbered list. Instead, a paragraph that introduces the list uses a format that resets the counter.
The < =0> counter in the StepIntro format resets the S series to zero but doesn’t display the number.
If a counter is incremented, any omitted counters in the series to the right of it are reset to zero. For example, the
following autonumber formats are equivalent:
S:<n+>< =0>\t
S:<n+>\t
Using Japanese numbering options
If your system supports the typing of Japanese text in documents and dialog boxes, you can use the following
additional counters in autonumber formats.
Be sure you use these numbering options only with Japanese text and with Japanese fonts.
Example Autonumber
format
Tag
Step 1. Unpack it.
Step 2. Back it up.
Step 3. Run setup.
Step 1. Save your file.
S:Step <n=1>.\t
S:Step <n+>.\t
S:Step <n+>.\t
S:Step <n=1>.\t
Step1
StepNext
StepNext
Step1
Example Autonumber
format
Tag
To install the software:
Step 1. Unpack it.
Step 2. Back it up.
Step 3. Run setup.
S:<=0>
S:Step <n+>.\t
S:Step <n+>.\t
S:Step <n+>.\t
StepIntro
Step
Step
Step
Building block Meaning Characters, in this order
<zenkaku a>Fixed-width lowercase Roman alphabet
<zenkaku A>Fixed-width uppercase Roman alphabet
<zenkaku n>Fixed-width Arabic numbers
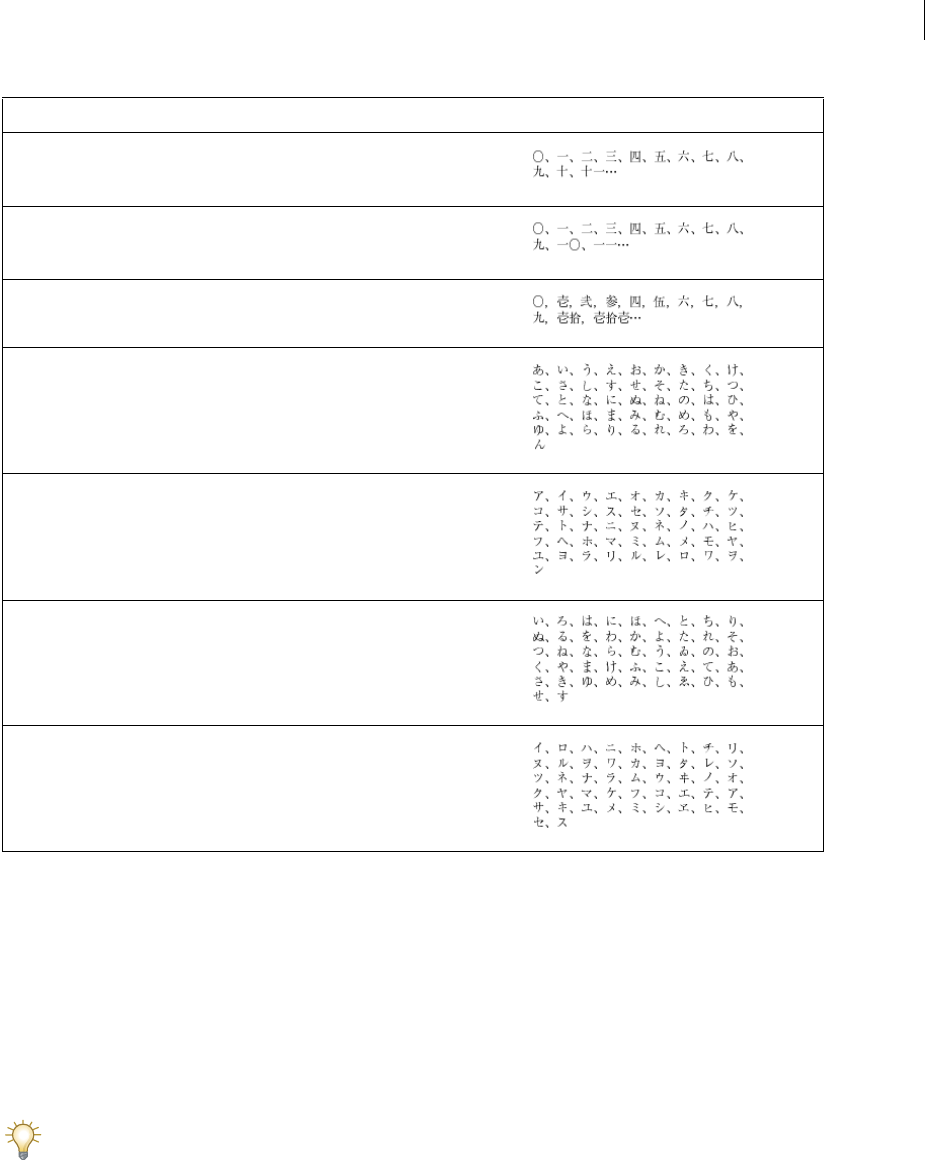
ADOBE FRAMEMAKER 8
User Guide
134
Redefining (updating) formats
You can change the format properties of specific passages of text from the predefined properties of the formats they
are tagged with—that is, the properties stored in the Paragraph or Character Catalog. Alternatively, you can make
the same changes to properties but then use them to redefine, or update, the stored formats and all the text in the
document tagged with them. For example, you can update all Head1 paragraphs in a document to use a different font
and to be side heads.
When you update a format, you can update all properties or just one group of properties. For example, you could
change the default font family for all formats in a document without changing any other properties.
If you change properties in a designer and then decide you don’t want to update the format, you can cancel the
operation and reset the properties by simply clicking in text. You can also choose Reset Window from Selection from
the Commands pop-up menu in the designer.
<kanji kazu>Standard kanji numbering, where double-digit numbers
are made up from the traditional kanji characters for ten,
one hundred, and so on
<kanji n>Numbers used for street addresses, phone numbers,
postal codes, and so on, where double-digit numbers are
made up from the kanji characters for zero through nine
<daiji>Numbers used in financial or banking contexts made up
of old-style kanji numerals
<hira gojuon>Hiragana characters in the standard order
<kata gojuon>Katakana characters in the standard order
<hira iroha>Hiragana characters in the literary order (rare)
<kata iroha>Katakana characters in the literary order (rare)
Building block Meaning Characters, in this order

ADOBE FRAMEMAKER 8
User Guide
135
To update a paragraph format:
1Do one of the following:
•To display the properties of a paragraph (including any overrides), choose Format > Paragraphs > Designer and
click in a paragraph that has the format you want to update.
•To display the properties of a paragraph format stored in the catalog (that is, without overrides), choose Format >
Paragraphs > Designer and then choose the format from the Paragraph Tag pop-up menu.
2Change any of the paragraph’s properties.
3Click Update All.
If the paragraphs being updated have format overrides (that is, if their formats don’t match the formats stored in the
catalog), an alert asks whether you want to remove them.
To update a paragraph format using the formatting bar:
❖Click in the paragraph whose format you want to update and choose Update All from the Paragraph Format pop-
up menu on the formatting bar.
To update specific properties of paragraph formats:
1To update several formats, select consecutive paragraphs that have the formats you want to change. To update all
paragraph formats or just one, skip this step.
2Choose Format > Paragraphs > Designer, display the desired group of properties, and choose Set Window to As Is
from the Commands pop-up menu. (FrameMaker won’t change properties set to As Is.)
When set to As Is, text boxes are blank, check boxes are dim, and pop-up menus display As Is (see “Using As Is” on
page 106).
3Change only the properties you want to update.
4Choose Global Update Options from the Commands pop-up menu.
5Click the current property group in the Use Properties area.
6Do one of the following:
•To update all formats in the document, click All Paragraphs and Catalog Entries.
•To update all paragraphs in the selection and all paragraphs with the same tags, click All Matching Tags
in Selection.
•To update formats with a specific tag, click All Tagged and choose a tag from the pop-up menu.
7Click Update.
To update a single property group of a paragraph format:
1Indicate the scope of the changes you want to make by doing one of the following:
•To update one paragraph format or all paragraph formats in the document with a property group from a
paragraph, click in that paragraph or select consecutive paragraphs.
•To update more than one paragraph format but not all paragraph formats, select consecutive paragraphs that use
the formats you want to update.
2Choose Format > Paragraphs > Designer, and delete the tag from the Paragraph Tag text box if the text box isn’t
empty. Deleting the tag sets the text box to As Is, which keeps FrameMaker from changing the tags of the formats
you update.

ADOBE FRAMEMAKER 8
User Guide
136
3Display the property group you want to update, and change the properties as needed.
4Choose Global Update Options from the Commands pop-up menu.
5Click the current property group in the Use Properties area.
6Do one of the following:
•To update all formats in the document, click All Paragraphs and Catalog Entries.
•To update all paragraphs in the selection and all paragraphs with the same tags, click All Matching Tags
in Selection.
•To update formats with a specific tag, click All Tagged and choose a tag from the pop-up menu.
7Click Update.
To update a character format:
1Choose Format > Characters > Designer, and choose the format you want to change from the Character Tag
pop-up menu.
2Change any of the properties. Many character formats have properties set to As Is; be careful not to change them
unless you want the updated format to apply that property.
3Click Update All.
If the paragraphs being updated have format overrides, an alert asks whether you want to remove them.
To update specific properties of character formats:
1To update several formats, select text that includes the character formats you want to change. To update all
character formats or just one, skip this step.
2In the Character Designer, choose Set Window to As Is from the Commands pop-up menu.
When set to As Is, text boxes are blank, check boxes are dim, and pop-up menus display As Is (see “Using As Is” on
page 106).
3Change only the properties you want to update. (When it updates the other formats, FrameMaker won’t change
properties still set to As Is.)
4Choose Global Update Options from the Commands pop-up menu.
5Do one of the following:
•To update all characters in the document—including characters in text lines, the default font properties of all
paragraph formats, and the properties of all character formats—click All Characters and Catalog Entries.
•To update all characters in the selection and all characters with the same tags, click All Matching Tags in Selection.
•To update formats with a specific tag, choose a tag from the pop-up menu.
6Click Update.
To update several formats at once:
❖Import paragraph or character formats from another document by using File > Import > Formats. If any formats
have the same name in both files, the imported format overwrites the document’s format. For details, see “Importing
and updating formats” on page 415.

ADOBE FRAMEMAKER 8
User Guide
137
Renaming and deleting formats
You may need to rename or delete a format when designing a template. You may also need to rename a format if, for
example, you want to import a catalog from a template and don’t want a format to be overwritten.
Deleting a format from a catalog does not affect any paragraphs or characters that have the same tag—the paragraphs
or characters simply have a tag that isn’t in the catalog. If you want to change the format of these paragraphs or
characters, you can then retag them (see “Applying predefined formats to text” on page 102).
To rename a catalog format:
1Choose Format > Paragraphs > Designer or Format > Characters > Designer, and choose the format you want to
rename from the Paragraph Tag or Character Tag pop-up menu.
Do this even if the format you want is already displayed to ensure that the properties do not include any format
overrides or As Is settings.
2Enter a new name in the Paragraph Tag or Character Tag text box and click Update All.
3Click OK.
To delete a format from a catalog:
1Display the Paragraph Catalog (click in the upper right corner of the document window) or the Character
Catalog (click ).
2Click Delete.
3Select the format in the scroll list and click Delete. You can delete additional formats if you want to.
4Click Done.
To delete all unused formats from a catalog:
1Display the Paragraph Catalog (click in the upper right corner of the document window) or the Character
Catalog (click ).
2Click Delete.
3Click Delete until all formats have been removed, and then click Done.
4Choose File > Utilities > Create & Apply Formats, and then click Continue. Any paragraph or character format
used in the document is added back to the catalog. Formats with overrides reappear as new and separate formats.
For information, see “Changing format overrides to new formats” on page 558.
Note: In order to avoid creating paragraphs for every override in your document (for example, you may end up with 10
body paragraphs), import the formats from your template. Importing formats from a template overrides any changes to
paragraph and character tags and does not create additional tags in your document. For more information on importing
formats, see “Importing and updating formats” on page 415.
Creating new formats
When working from a stable template, you rarely need to create a new format. However, if you’re designing a new
template or if the template you’re using is incomplete, you may need to create new formats.
The easiest way to create a format is to modify the properties of an existing format. For example, to create various
heading levels, you can start with the first level and then change the font size and style to create the other levels.

ADOBE FRAMEMAKER 8
User Guide
138
When you’re naming new formats, keep the following suggestions in mind:
•Use consistent naming conventions for similar kinds of paragraphs or text items within a paragraph. For example,
if you use Head1 for first-level headings, use Head2 for second-level headings.
•If you want to apply formats by using the keyboard (by pressing Control+8 or Control+9), name the formats
so that often-used ones are unique or alphabetically first in their letter group. For example, tag names such as
“H1 Head2” or “H2 Head2” facilitate quick access when using the keyboard.
•Give each format a name that’s easy for you and others to remember, recognize, and type. Also, if you assign a tag
based on its use and not its appearance (for example, Emphasis rather than Italics), you’ll be able to change the
format properties without having to change the tag.
•Be aware of capitalization. Tags are case-sensitive: Body is not the same as body. Also, you may want related tags
to appear together in the catalog. For example, Body and IndentedBody won’t be next to each other but Body and
BodyIndent will be.
•If you have many formats, you can avoid excessive scrolling in the catalogs by bringing often-used formats to the
top of the catalog by preceding them with a period. Similarly, you can force rarely used formats to the bottom of
the catalog by preceding them with a z or a tilde (~).
To create a paragraph format:
1Click in a paragraph whose format is similar to the one you want to create. Be careful not to select multiple
paragraphs so that no properties are set to As Is.
2Choose New Format from the Commands pop-up menu in the Paragraph Designer and enter a name for the new
format in the Tag text box.
3To be able to update the new format or copy it to other documents by using the File > Import > Formats
command, select Store in Catalog. Formats that aren’t stored in the catalog can be applied to other paragraphs only
by copying and pasting.
4To apply the new format to the current paragraph, select Apply to Selection.
5Click Create.
6If you didn’t select Apply to Selection in step 4, choose the new format name from the Paragraph Tag
pop-up menu.
7Modify any of the properties you want, including font properties, indent and alignment properties, tab stops,
spacing properties, line breaks and hyphenation, page and column breaks, graphics as part of a paragraph format,
connecting format, headings, and autonumbering.
Don’t set any property to As Is. Paragraph formats must have all properties specified. (An alert message warns you
if not all settings are specified, so you can go back and change any As Is properties.)
8Click Update All.
To create a character format:
1In the Character Designer, choose Set Window to As Is from the Commands pop-up menu. Properties set to As
Is won’t change when you apply the character format. When set to As Is, text boxes are blank, check boxes are dim,
and pop-up menus display As Is (see “Using As Is” on page 106).
2Change only the properties you want to include in the character format. For information on modifying font
properties, see “Changing font properties” on page 107.
3Choose New Format from the Commands pop-up menu in the Character Designer, and enter a name for the new
format in the Tag text box.
ADOBE FRAMEMAKER 8
User Guide
139
4Select Store in Catalog.
5To apply the new format to the current selection, select Apply to Selection.
6Click Create.
Formatting text in structured documents
When working with structured documents, you can add or delete text, copy or move it to another location, and
change text in any other way you want. You can also identify revised text with change bars.
As you add text to elements, the text is formatted automatically. You do not ordinarily need to work with any text
formatting tools in a structured flow.
Format rules and catalog formats in structured documents
A document’s element definitions typically have format rules. For elements that allow text, these rules can describe
every aspect of how the text is formatted—including the font, text size, and text style of characters; the line spacing,
indentation, and alignment of paragraphs; and more subtle controls such as word spacing and how words break for
hyphenation.
A document might also store predefined catalog formats called paragraph formats (for whole paragraphs) and
character formats (for text ranges within paragraphs). Like the element definitions, these formats come from a
template. The format rules often work hand in hand with the catalog formats—it depends on how the application
developer has set this up for your document.
A. Formatted Head element B. Formatted Para element
In most cases, the format rules work with a few catalog formats and specify changes to the formats as needed. The
rules may even allow elements to inherit at least some of their formatting from ancestors. For example, a Para
element might use a catalog format called Body, and the descendants of Para might inherit Body from it, with some
changes. An Emphasis child element would use Body but with italics added.
In general, you should not make formatting changes to text in an element (such as applying a font), because you may
be overriding some format rules. You should also not modify the formats in catalogs—particularly if the format rules
in your document use inheritance, because the change may ripple through elements that inherit their format.
Allow the elements to handle the formatting of text in documents. Talk to your developer if you want to change the
formatting in any way.
In an unstructured document, you can format text by applying the catalog formats or by making changes manually.
A
B
ADOBE FRAMEMAKER 8
User Guide
140
Context-sensitive format rules in structured documents
Format rules are sometimes context-sensitive, specifying different formatting possibilities that are determined by
location or attribute value. For example, a Head element might contain 14-point text in all caps if it occurs in a first-
level Section, or 12-point text in a second-level Section.
A. Head element in a first-level section
B. Head element in a second-level section
Item elements in a list might be displayed with numbers if the parent List element has a Type attribute set to
Numbered, or with bullets if the Type attribute is set to Bulleted.
Context-sensitive formatting gives your elements modularity. You can insert the same type of element at several
levels in the document’s structure, with appropriate formatting applied at each level. And as you move these elements
from one level to another, they are reformatted automatically.
Viewing the element hierarchy
To view the hierarchy of the elements in a document, use the Show Element Context window. This window shows
the selected element and its ancestors all the way up to the root element as well as the format rules from the element
catalog, which are applied to the element selected in the hierarchy. If the document is or has been part of a structured
book, the hierarchy includes elements above the document’s root element all the way up to the book root element,
even if the book isn’t currently open. Use the Show Element Context window to view the set of formatting rules that
are in place for the element in the current context. Also, if there is a named character or paragraph format in use, you
can open the Designer to inspect the details of the named format.
To open the Show Element Context window:
❖Select StructureTools > Show Element Context.
Removing format rule overrides in structured documents
Text formatting information for a document can come from format rules in element definitions as well as from
predefined formats stored in catalogs.
A format rule override is an override you make to a text element’s format rules. For example, if you select a Para
element and use the QuickAccess bar to make its text bold, you may be overriding the element’s format rules. If your
document has any format rule overrides, you can remove them.
When the current element has a format rule override, the Tag area of the status bar has an asterisk next to the
element tag.
The Para element has a format rule override.
B
A

ADOBE FRAMEMAKER 8
User Guide
141
To remove format rule overrides throughout a document:
1Make the appropriate document window or book window active. If a book window is active, select the documents
you want to affect.
2Choose File > Import > Element Definitions.
3Choose Current from the Import from Document pop-up menu.
4Select While Updating, Remove Format Rule Overrides, and click Import.
To remove format rule overrides in one element:
1Select the element in the Structure View.
2Select the same element in the Element Catalog and click Change. This removes overrides from the element and
all its descendants.
To remove format rule overrides quickly throughout a document, remove them from the highest-level element.
Text with symbol fonts in structured documents
FrameMaker does not remove a format rule override that involves a stored character format using the Symbol or
Zapf Dingbats font. For example, if there is text in your document with a character format called MathExample that
uses the Symbol font, this formatting remains in place even after you remove format rule overrides.
This behavior prevents special characters and symbols from being lost. To manually remove the override, select the
text and choose Format > Characters > Default Paragraph Font.
Object elements in structured documents
Elements that are a single object, such as a cross-reference or an equation, also may have format rules. In these cases,
the rules provide a preselected setting, such as a cross-reference format or an equation size, for new instances of the
element. You can change this setting for an element, but the change is not considered to be an override. Reapplying
the format rules has no effect on these elements.
Multiple Undo/Redo
The undo capability is available for several commands, and you can undo and redo multiple operations.
Note: Undo is not supported for structured books.
Undo and Redo commands
A Redo icon has been added to the toolbar, next to the Undo icon. Click this button to redo the most recently undone
action in the current document:
Redo

ADOBE FRAMEMAKER 8
User Guide
142
A Redo command also appears in the Edit menu and in context menus, under the Undo command, showing the
most recent redoable command in the current document. For example:
If there is no action available for Undo or Redo in the current document, the corresponding menu items and toolbar
buttons are grayed.
When one or more actions are available for Undo or Redo in the current document, the new History item below
Redo is also active. It brings up the command History palette, which allows you to undo or redo an action other than
the most recent one, along with all of the subsequent actions; see “Command History palette” on page 142
Document-level command history
FrameMaker maintains a history of undoable commands, so that you can select one or more recent commands to
undo or redo.
The command history is available through the Edit menu and context menus. The command history is kept
separately for each document, so undoing or redoing an operation in one document does not change the undo
capability of another open document.
Saving a document (with Save, Save As, or autosave) clears both the undo and redo history for that document.
Generally, commands that do not change the content, such as copying text, cannot be undone and do not affect the
command history.
Cursor movement and object selection actions are not undoable, but when a previous state is restored, it includes the
original cursor location and object selection state.
Commands that affect an external file (such as Spell Checker commands that update the user dictionary) are
not undoable.
For a complete list of commands that can and cannot be undone, and commands that clear the command history,
see “Undo status of all commands” on page 144.
Command History palette
The Edit > Undo and Redo menus show the most recent command, but a complete command history is available in
the new History palette, available from Edit > History or the keyboard shortcut Esc+e+h. This palette allows you to
select a specific action to undo or redo. The command history is shown only for the active document.
ADOBE FRAMEMAKER 8
User Guide
143
In the command History palette, the most recent command is highlighted. Commands listed above the most recent
are undoable. Commands listed below the most recent are redoable, and are marked with an asterisk (*).
You can undo and redo actions only in the order in which they were originally performed. When you select a
command to undo, all later commands (which have been affected by the selected action) are also undone.
FrameMaker also moves the selected command and all succeeding commands to the Redo list. Similarly, redoing a
command moves it and later commands back to the Undo list.
For example, consider the following command history, where “Change font” is the most recent action:
If you choose to undo the Insert Tab operation, that action and all later actions are undone and moved to the
Redo list:
Any new action that modifies the document clears the Redo history:
Undo history Redo history
Change font
Insert Tab
Paste
Cut
Typing
Undo history Redo history
Paste
Cut
Typing
Change font
Insert Tab
Undo history Redo history
Draw line
Paste
Cut
Typing

ADOBE FRAMEMAKER 8
User Guide
144
Undo status of all commands
The following tables show actions that can be undone and redone, and operations that clear the Undo and Redo
command histories for one or all documents.
Undoable commands
These commands are undoable and appear in the command History palette.
Commands are identified in this table by their Command name and Label in the command configuration files
found in $FMHOME/fminit/configui, and by the string that appears in the command History palette when the
command is executed.
The names of the command configuration files are:
•(Windows) cmds.cfg, wincmds.cfg, mathcmds.cfg
•(UNIX) Commands, XCommands, MathCommands.
UNDOABLE COMMANDS
Command Label Command History palette
ParaPlacementBodyStraddle Set Para Placement Body Straddle Set Para Placement Body Straddle
ParaPlacementFullStraddle Set Para Placement Full Straddle Set Para Placement Full Straddle
ParaPlacementRunIn Set Para Placement Run-in Set Para Placement Run-in
ParaPlacementSidehead Set Para Placement Sidehead Set Para Placement Sidehead
ParaPlacementNormal Set Para Placement Normal Set Para Placement Normal
ViewBodyPages Body Pages Body Pages
ViewMasterPages Master Pages Master Pages
ViewReferencePages Reference Pages Reference Pages
Footnote Footnote Footnote
FootnoteProperties Footnote Properties Footnote Properties
LineLayout Line Layout Line Layout
ToggleSideheadsOnOff Toggle Room For Side Heads On/Off Toggle Room For Side Heads On/Off
RotatePage Rotate Page Counterclockwise Rotate Page Counterclockwise
RotatePageClockwise Rotate Page Clockwise Rotate Page Clockwise
RotatePageNormal Unrotate Page Unrotate Page
SplitTextFrame Split Text Frame Split Text Frame
CustomizeTextFrame Customize Text Frame Customize Text Frame
CutHead Disconnect Previous Disconnect Previous
CutTail Disconnect Next Disconnect Next
TableInsert Insert Table Insert Table
TableResizeColumns Resize Columns Resize Column
TableRowFormat Row Format Row Format
TableStraddle Straddle Straddle
Unstraddle Unstraddle Unstraddle
TableConvert Con&vert to Paragraphs Convert to Paragraphs
TableConvert Con&vert to Table Convert to Table
TableAddRowsOrColumns Add Rows or Columns Add Rows or Columns
UnifyTableFormats Unify Table Formats Unify Table Formats
AddRowsAbove Add Rows Above Add Rows Above
AddRowsBelow Add Rows Below Add Rows Below
AddColumnsToLeft Add Columns To Left Add Columns To Left
AddColumnsToRight Add Columns To Right Add Columns To Right
ClearLeavingCellsEmpty Clear Leaving Cells Empty Change To Table
ClearRemovingCells Clear Removing Cells Change To Table
TablePasteReplaceSelection Paste Replacing Selection Paste Replacing Selection
TablePasteBefore Paste Before Paste Before
TablePasteAfter Paste After Paste After
TableShrinkWrapColWidth Shrink Wrap Column Width Shrink Wrap Column Width

ADOBE FRAMEMAKER 8
User Guide
145
CharTabForTableCell Tab For Table Cell Tab For Table Cell
TBL_DESIGNKIT_APPLY Change To Table
TBL_DESIGNKIT_UPDATEOPTIONS Change To Table
TBL_DESIGNKIT_UPDATEALL Change To Table
TBL_DESIGNKIT_NEWFORMAT New Table Format
KBD_TBLFMT_DELETE Delete Table Format
InsertNewHypertext Insert New Hypertext Hypertext
CrossReference Cross-Reference CrossReference
InsertNewMarker Insert New Marker Marker
ConditionVisibility Show/Hide Conditional Text Show/Hide Conditional Text
ToggleCondUseFormatOverride Conditional Text Format Overrides Toggle conditional Indicators On/Off
QuickConditionalIn Quick Conditional Text In Conditional Text
QuickConditionalNotIn Quick Conditional Text NotIn Conditional Text
QuickConditionalUn Quick Conditional Text Unconditional Conditional Text
Apply Conditional Text Conditional Text / Unconditional Text
KBD_CONDEDIT Change to Conditional Tag
CenterPara Center Paragraph/Objects
LeftPara Left Justify Paragraph/Objects
RightPara Right Justify Paragraph/Objects
FullyJustifyPara Fully &Justify Paragraph/Objects
RepeatLastParaCommand Repeat Last Paragraph Command
UnifyParas Unify Paragraphs
DecLineLeading1pt Decrement Line Leading 1 pt
IncLineLeading1pt Increment Line Leading 1 pt
HyphenationOff Hyphenation Off
HyphenationOn Hyphenation On
SingleSpaceParas Single Space Paragraphs
OneAndHalfSpaceParas One And A Half Space Paragraphs
DoubleSpaceParas Double Space Paragraphs
SpaceBetweenParas Space Between Paragraphs
CustomLineSpacingParas Custom Line Spacing For Paragraphs
ParaTopOfPage Start Para At Top Of Page
ParaTopOfColumn Start Para At Top Of Column
ParaTopOfLeftPage Start Para At Top Of Left Page
ParaTopOfRightPage Start Para At Top Of Right Page
ParaAnywhere Start Para Anywhere
SetLineSpaceFixed Set Line Spacing Fixed
SetLineSpaceFloating Set Line Spacing Floating
ParaNewFormat New Paragraph Format
ParaUpdateFormat Update Paragraph Format
<other Paragraph Designer>Apply Paragraph Format
TabLeft Tab Left
TabCenter Tab Center
TabRight Tab Right
TabDecimal Tab Decimal
UpperCaseText Uppercase Selected Text Uppercase Selected Text
LowerCaseText Lowercase Selected Text Lowercase Selected Text
InitialCapsText Initial Caps On Selected Text Initial Caps On Selected Text
SetToLowerCase LowerCase
SetToInitialCap Initial Capital
SetToUpperCase UpperCase
Capitalization Capitalization
YankKillBuffer Yank Kill Buffer Paste
AlignTop Top Align Top Align
AlignMiddle Top/Bottom Align Middle Align
AlignBottom Bottom Align Bottom Align
UNDOABLE COMMANDS
Command Label Command History palette

ADOBE FRAMEMAKER 8
User Guide
146
ToggleGraphicsDisplay Graphics Toggle Graphics On/Off
GraphicsFlipUpDown Flip Up/Down Flip Up/Down
GraphicsFlipLeftRight Flip Left/Right Flip Left/Right
RotateCounterclock90 Rotate 90 Degrees Counterclockwise Rotate 90 Degrees Counterclockwise
GraphicsScale Scale Scale
GraphicsSmooth Smooth Smooth
GraphicsUnsmooth UnSmooth UnSmooth
GraphicsReshape Reshape Reshape
GraphicsJoinCurves Join Join
GraphicsSetNumSides Set # Sides Set # Sides
GraphicsBringToFront Bring to Front Bring to Front
GraphicsSendToBack Send to Back Send to Back
GraphicsGroup Group Group
GraphicsUngroup Ungroup Ungroup
GraphicsAlign Align Align
GraphicsDistribute Distribute Distribute
RotateClockwise90 Rotate 90 Degrees Clockwise Rotate 90 Degrees Clockwise
GraphicsObjProps Object &Properties Object Properties
RotateGfxClockwise Rotate Clockwise
RotateGfxCounterClock Rotate Counterclockwise
GraphicsRotate Rotate Rotate
RotateAgain Rotate Again Rotate Again
RotateToNatural Rotate to Natural Orientation Rotate to Natural Orientation
RotateToPrevious Rotate to Previous Orientation Rotate to Previous Orientation
ResetNatural Reset Natural Orientation Reset Natural Orientation
SetThinLineWidth Set to Thinnest Line Width Set to Thinnest Line Width
SetThickLineWidth Set to Thickest Line Width Set to Thickest Line Width
IncrementLineWidth Increment Line Width Increment Line Width
DecrementLineWidth Decrement Line Width Decrement Line Width
SetFirstPenPattern Set First Pen Pattern(black) Set First Pen Pattern(black)
SetLastPenPattern Set Last Pen Pattern(none) Set Last Pen Pattern(none)
IncrementPenPattern Increment Pen Pattern Increment Pen Pattern
DecrementPenPattern Decrement Pen Pattern Decrement Pen Pattern
SetFirstFillPattern Set to First Fill Pattern(black) Set to First Fill Pattern(black)
SetLastFillPattern Set to Last Fill Pattern(none) Set to Last Fill Pattern(none)
IncrementFillPattern Increment Fill Pattern Increment Fill Pattern
DecrementFillPattern Decrement Fill Pattern Decrement Fill Pattern
SetPatternSolid Set Pattern Solid Set Pattern Solid
SetPatternDashed Set Pattern Dashed Set Pattern Dashed
SelectFirstDashedPattern Set First Dashed Pattern Set First Dashed Pattern
SelectLastDashedPattern Set Last Dashed Pattern Set Last Dashed Pattern
SelectPreviousDashedPattern Select Previous Dashed Pattern Select Previous Dashed Pattern
SelectNextDashedPattern Select Next Dashed Pattern Select Next Dashed Pattern
RunaroundProperties Runaround Properties Runaround Properties
RunAroundContour Runaround Contour Runaround Contour
RunAroundBoundingBox Runaround Bounding Box Runaround Bounding Box
RunaroundOff Runaround Off Runaround Off
DeleteBack1Char Delete Back Character Delete Text
DeleteForw1Char Delete Forward Character Delete Text
DeleteBackToPrevWordEnd Delete Back To Prev Word End Delete Back To Prev Word End
DeleteForwToNextWordStart Delete Forward To Next Word Start Delete Forward To Next Word Start
DeleteForwToEndOfLine Delete Whole Line Delete Whole Line
DeleteForwToNextSentenceEnd Delete Forward To Next Sentence End Delete Forward To Next Sentence End
DeleteBackToStartOfLine Delete Back To Start Of Line Delete Back To Start Of Line
Move1PtUp Move 1 Point Up Move 1 Point Up
Move1PtDown Move 1 Point Down Move 1 Point Down
UNDOABLE COMMANDS
Command Label Command History palette

ADOBE FRAMEMAKER 8
User Guide
147
Move1PtLeft Move 1 Point Left Move 1 Point Left
Move1PtRight Move 1 Point Right Move 1 Point Right
RemoveAllKerning Remove All kerning Remove All kerning
IncFontSize Increment Text Size 1 pt
DecFontSize Decrement Text Size 1 pt
Move6PtUp Move 6 Point Up Move 6 Point Up
Move6PtDown Move 6 Point Down Move 6 Point Down
Move6PtLeft Move 6 Point Left Move 6 Point Left
Move6PtRight Move 6 Point Right Move 6 Point Right
DeleteBackToPrevWordStart Delete Back To Prev Word Start Delete Back To Prev Word Start
DeleteForwToNextWordEnd Delete Forward To Next Word End Delete Forward To Next Word End
DeleteForwToNextSentenceStart Delete Forward To Next Sentence Start Delete Forward To Next Sentence Start
DeleteBackToPrevSentenceEnd Delete Back To Prev Sentence End Delete Back To Prev Sentence End
Tab Tab Tab
CharShiftSpace Shift Space Typing
CharTabForTableCell Tab for table cell Typing
TransposeChars Transpose Characters Transpose Characters
CharDiscretionaryHyphen Discretionary Hyphen Discretionary Hyphen
NoHyphenWord No Hyphenation In Word No Hyphenation In Word
StyleSmallCaps SmallCaps SmallCaps
StyleDoubleUnderline Double Underline Double Underline
CharacterNumericUnderline Numeric Underline Numeric Underline
SelBold Bold
SelItalic Italic
SelUnderline Underline
SelPlain Plain
PageBreak PageBreak PageBreak
CharQuickKey Quick Character Quick Character
CharacterNoStretch Set Stretch to 100% Set Stretch to 100%
CharacterLessStretch Condense Stretch by 5%pts Condense Stretch by 5%pts
CharacterMoreStretch Expand Stretch by 5%pts Expand Stretch by 5%pts
StyleBold Bold Bold
StyleItalic Italic Italic
StyleUnderline Underline Underline
StylePlain Plain Plain
StyleSuperscript Superscript Superscript
StyleSubscript Subscript Subscript
CharacterNormal Set Characters To Normal Set Characters To Normal
IncrementTextOnePt Increment Text Size 1 pt Increment Text Size 1 pt
DecrementTextOnePt Decrement Text Size 1 pt Decrement Text Size 1 pt
CharacterSqueezeSpace Squeeze Spacing 20% of em Squeeze Spacing 20% of em
CharacterSpreadSpace Spread Spacing 20% of em Spread Spacing 20% of em
CharacterRepeatLast Repeat Last Font Command Repeat Last Font Command
StyleStrikethrough Strikethrough Strikethrough
StyleOverline Overline Overline
StyleChangeBar Change Bar Change Bar
CharacterKerned Pair Kern Pair Kern
AnchoredFrame Anchored Frame Anchored Frame
ParaQuickKey Quick Paragraph Quick Paragraph
CharacterDefaultPgfFont Default Paragraph Font
ShowParagraphTags Update Paragraph Format
ShowCharacterTags Update Character Format
<other Character Designer>Apply Character Format
New Character Format
Variable Variable Variable
HeaderFooterInsertPageNum Insert Page # Insert Page #
UNDOABLE COMMANDS
Command Label Command History palette

ADOBE FRAMEMAKER 8
User Guide
148
HeaderFooterInsertPageCount Insert Page Count Insert Page Count
HeaderFooterInsertCurrentDate Insert Current Date Insert Current Date
HeaderFooterInsertOther Insert Other...>Insert Other Variable
QuickVariables Quick Variable Quick Variable
ShowFontChoices Change Font
Size7 7 FontSize Change
Size9 9 FontSize Change
Size10 10 FontSize Change
Size12 12 FontSize Change
Size14 14 FontSize Change
Size18 18 FontSize Change
Size24 24 FontSize Change
SizeOther 36 FontSize Change
SizeChoose Other… FontSize Change
ImportFile File Import File
ImportObject Object Import Object
ViewBordersOn Show Borders Show Borders
ViewTextSymbolsOn Show Text Symbols Show Text Symbols
ViewRulersOn Show Rulers Show Rulers
ViewGridLinesOn Show Grid Lines Show Grid Lines
ViewElementBoundariesOn Show Element Boundaries Show Element Boundaries
ViewElementTagsOn Show Element Boundaries (as Tags) Show Element Boundaries (as Tags)
ViewGraphicsOn Show Graphics Show Graphics
ViewBordersOff Hide Borders Hide Borders
ViewTextSymbolsOff Hide TextSymbols Hide TextSymbols
ViewGraphicsOff Hide Graphics Hide Graphics
ViewOptions Options View Options
ViewBorders Borders Toggle Borders On/Off
ViewTextSymbols Text Symbols Toggle Text Symbols On/Off
ViewRulers Rulers Toggle Rulers On/Off
ViewGridLines Grid Lines Toggle Grid Lines On/Off
CharNonBreakHyphen Non Breaking Hyphen Non Breaking Hyphen
CharHardSpace Hard Space Hard Space
CharHardReturn Hard Return Hard Return
CharNumberSpace Number Space Number Space
CharThinSpace Thin Space Thin Space
CharEmSpace Em Space Em Space
CharEnSpace En Space En Space
Return Return Typing
Nudge1ptUp Move 1 Point Up
Nudge1ptDown Move 1 Point Down
Nudge1ptLeft Move 1 Point Left
Nudge1ptRight Move 1 Point Right
AlignGfxTop Top Align
AlignGfxTBCenter Top-Bottom Center Align
AlignGfxBottom Bottom Align
AlignGfxLRCenter Left-Right Center Align
AlignGfxLeft Left Align
AlignGfxRight Right Align
ChangeBars Change Bars Change Bar
TextOptions Text Options Text Options
SmartSingleQuote Smart Single Quote Typing
SmartDoubleQuote Smart Double Quote Typing
ReplaceOnce Replace Replace
ReplaceAll ReplaceAll ReplaceAll
ReplaceAndFindAgain Replace And Find Again Replace And Find Again
UNDOABLE COMMANDS
Command Label Command History palette

ADOBE FRAMEMAKER 8
User Guide
149
Cut Cut Cut
Paste Paste Paste
Paste Special Paste Special Paste
Clear Clear Clear
ThesaurusReplace Replace active selection with word from
thesaurus
Replace
CorrectWord Correct Word Correct Word
CheckDocument Spell Check Document Correct Word
KBD_RUBIPROPS Rubi Properties... Rubi Properties
KBD_HIDE_RULERS Hide Rulers Hide Rulers
KBD_HIDE_GRID Hide Grid Lines Hide Grid Lines
KBD_HIDE_ELEM_BORDER Hide Element Boundaries Hide Element Boundaries
KBD_HIDE_COND_IND Hide Conditional Text Indicators Hide Conditional Text Indicators
KBD_ZOOMIN <ReservedLabel Short &In>
<ReservedLabel Long Zoom &In
Zoom In
KBD_ZOOMOUT <ReservedLabel Short &Out>
<ReservedLabel Long Zoom &Out>
Zoom Out
KBD_ZOOM_FIT_PAGE Fit Page in Window Fit Page in Window
KBD_ZOOM100 <ReservedLabel Short &100%>
<ReservedLabel Long Zoom to &100%>
Zoom to 100%
KBD_ELEM_BORDER Element Boundaries Toggle Element Boundaries On/Off
KBD_BOOKADDFILE <ReservedLabel Short &Files...>
<ReservedLabel Long Add &Files to
Book...>
Add File(s) to Book
KBD_BOOKDELETEFILE <ReservedLabel LongMultiple &Delete Files
from Book>
<ReservedLabel LongSingle &Delete File
from Book>
<ReservedLabel Short &Delete from Book>
Delete File(s) from Book
KBD_PASTE Paste Paste
KBD_CLEAR Cl&ear Delete File(s) from Book
ELEM_INS_CAT_AT_SEL
ELEM_INSERT_CUSTOM_1
ELEM_INSERT_CUSTOM_2
ELEM_INSERT_CUSTOM_3
ELEM_INSERT_CUSTOM_4
ELEM_INSERT_CUSTOM_5
ELEM_INSERT_CUSTOM_6
ELEM_INSERT_CUSTOM_7
ELEM_INSERT_CUSTOM_8
ELEM_INSERT_CUSTOM_9
ELEM_INSERT_CUSTOM_10
Insert Element
KBD_INSERTQUICK Insert Element Insert Element
ELEM_WRAP_CAT_AT_SEL Wrap Element
KBD_WRAPQUICK Wrap Element Wrap Element
ELEM_CHANGE_CAT_AT_SEL Change Element
KBD_CHANGEQUICK Change Element Change Element
KBD_ATTREDITQUICK Quick Attr Edit Change Element Attributes
KBD_ELEM_MERGE_1ST Merge Merge Element(s) into First
KBD_ELEM_MERGE_LAST Merge Into Last Merge Element(s) into Last
KBD_ELEM_SPLIT Split Split Element
KBD_ELEM_UNWRAP Unwrap Unwrap Element
ELEM_BAM Repeat Last Element Command Repeat Last Element Command
KBD_ELEM_TAGS Element Boundaries (as Tags) Show Element Boundaries as Tags
KBD_TOGGLE_COLLAPSE Toggle Element Collapse Toggle Element Collapse
KBD_TOGGLE_COLLAPSE_ALL Toggle Element Collapse All Siblings Toggle Element Collapse (all siblings)
KBD_ELEM_TRANSPOSE_NEXT Transpose With Previous Transpose with Previous Element
KBD_ELEM_TRANSPOSE_PREV Transpose With Next Transpose with Next Element
UNDOABLE COMMANDS
Command Label Command History palette

ADOBE FRAMEMAKER 8
User Guide
150
KBD_ELEM_PROMOTE Promote Element Promote Element
KBD_ELEM_DEMOTE Demote Element Demote Element
KBD_SMEQN Small Equation New Small Equation
KBD_MEDEQN Medium Equation New Medium Equation
KBD_LGEQN Large Equation New Large Equation
KBD_PUTINLINE Shrinkwrap Equation Shrinkwrap Equation
KBD_ANTIPUTINLINE Unwrap Equation Expand to Column Width
KBD_EQUATION Equation Sizes… Equation Size Properties
KBD_MATH_FONTS Equation Fonts… Change Equation Fonts
KBD_MATH_UPDATE_ELEM Update Definition Update Math Element Definition
KBD_MATH_NEW_ELEM Add Definition to Catalog Add Math Element Definition
MathAlignSetManual Align Set Manual Align Set Manual
MathAlignClearManual Align Clear Manual Align Clear Manual
MathSetManualLineBreak Set Manual Line Breaks Set Manual Line Breaks
MathClearManualLineBreaks Clear Manual Line Breaks Clear Manual Line Breaks
MathAddFractions Add Fractions Add Fractions
MathOrderinSum Order Sum Order in Sum
MathOrderinSumotherway Order Sum Reverse Order in Sum other way
MathFactor Factor Factor
MathFactorSome Factor Some Factor Some
MathMultiplyOut Multiply Out Multiply Out
MathMultiplyOutOnce Multiply Out Once Multiply Out Once
MathDistribute Distribute Distribute
MathDistributeOver Distribute Over = Distribute Over Equality
MathLongDivision Long Division Long Division
MathRemoveDivision Remove Division Remove Division
MathRemoveDivisionOnce Remove Division 1 Level Remove Division Once
MathRemoveNegPowers Remove Negative Powers Remove Negative Powers
MathRemoveNegPowersOnce Remove Negative Powers 1 Level Remove Negative Powers Once
MathNumberCrunch Number Crunch Number Crunch
MathShowAllDigits Show All Digits Show All Digits
MathEvaluate Evaluate Evaluate
MathEvalSubstitutions Evaluate Substitution Eval Substitutions
MathIntegrate Evaluate Integrals Integrate
MathDifferentiate Evaluate Derivatives Differentiate
MathDifferentiateOnce Evaluate Derivatives 1 Level Differentiate Once
MathEnterDefinition Enter Rule Enter Definition
MathApplyDefinition Apply Rule Apply Definition
MathDesignateDummy Designate Dummy Designate Dummy
MathSimplify Simplify Simplify
MathSimplifySome Simplify Some Simplify Some
MathIsolateTerm Isolate Term Isolate Term
MathPulloutoneterm Expand First Term Pull Out One Term
MathPullOutAllTerms Expand All Terms Pull out all terms
MathCreate1x1matrix Create 1 x 1 Matrix Create 1 x 1 Matrix
MathTransposeMatrix Matrix Transpose Matrix Transpose
MathMatrixAlgebra Matrix Algebra Matrix Algebra
MathAlignMatrixRowToggle Toggle fixed/proportional Align Matrix Row Toggle
MathAlignMatrixColToggle Toggle fixed/proportional Align Matrix Column Toggle
BookSetupFile Set Up Generated File Set Up Generated File
TableOfContents Table of Contents Table of Contents
ListOfFigures List of Figures List of Figures
ListOfTables List of Tables List of Tables
ListOfParagraphs List of Paragraphs List of Paragraphs
ListOfParagraphsAlphabetical List of Paragraphs (Alphabetical) List of Paragraphs (Alphabetical)
ListOfMarkers List Of Markers List Of Markers
UNDOABLE COMMANDS
Command Label Command History palette

ADOBE FRAMEMAKER 8
User Guide
151
Commands that clear the command history
These commands clear the Undo/Redo history and cause all entries to be removed from the command
History palette.
Commands are identified in this table by their Command name and Label in the command configuration files,
found in $FMHOME/fminit/configui).
The names of the command configuration files are:
•(Windows) cmds.cfg, wincmds.cfg, mathcmds.cfg
•(UNIX) Commands, XCommands, MathCommands.
ListOfMarkersAlphabetical List of Markers (Alphabetical) List of Markers (Alphabetical)
ListOfReferences List of Reference List of Reference
StandardIndex Standard Index Standard Index
IndexOfAuthors Index of Authors Index of Authors
IndexOfSubjects Index of Subjects Index of Subjects
IndexOfMarkers Index of Markers Index of Markers
IndexOfReferences Index of References Index of References
ShowImportFiles — Import File
Accept TrackText Edit Accept Edit Accept edit
Reject TrackText Edit Reject Edit Reject edit
Accept All TrackTextEdit Accept All Accept all
Reject All TrackTextEdit Reject All Reject all
UNDOABLE COMMANDS
Command Label Command History palette
152
Chapter 3: Unicode support
About Unicode support
Adobe FrameMaker supports the Unicode text encoding standard. You can author content in multiple languages and
create multilingual documents. To author content in a language other than English, you must do the following:
1Start your computer in the UTF-8 locale.
2To enable the dictionaries or open the thesaurus, select the desired language from the Input Method Editor (IME)
Language bar.
3Start typing the content in the selected language.
Certain features support Unicode, such as find and change, markers, hypertext, and catalog entries. You can export
to PDF with Unicode bookmarks, tags, comments, and so on. You can import or export Unicode content from other
applications. There are additional dictionaries to help you author content in more languages.
Unicode support on Solaris
The Solaris® operating system uses locales to separate language and cultural-specific information from the appli-
cation code. A locale is the language and cultural data set by the user and dynamically loaded into memory at run
time. These locale settings are applied to any applications that are launched within the operating system. To take
complete advantage of Unicode support, ensure that you log on to a session running the UTF-8 locale and open
FrameMaker in the same locale.
Note: On Solaris, you must have access to fonts containing the glyphs (characters) used in Unicode- encoded text in order
for the text to be appear correctly.
Solaris versions and locales supported
UTF-8 support for internal text encoding is supported on Solaris versions 2.8 and later.
On Solaris, you can work in the following UTF-8 locales:
•en_US.UTF-8 (US English)
•fr_FR.UTF-8 (French)
•de_DE.UTF-8 (German)
•it_IT.UTF-8 (Italian)
•ko_KR.UTF-8 (Korean)
•zh_CN.UTF-8 (Simplified Chinese)
•zh_TW.UTF-8 (Traditional Chinese)
The following language and code maps are supported on Solaris:
•Cyrillic - cc
•Greek - gg
•Unicode Hex - uh
•Unicode Octal - uo

ADOBE FRAMEMAKER 8
User Guide
153
•Lookup - ll
•Japanese - ja
•Korean - ko
•Simplified Chinese - sc
•Traditional Chinese - tc
•English/European - Control + Space
Note: Locale-specific features, such as date and time formats for different locales are not supported in FrameMaker. You
can’t type Unicode characters in non-Unicode locales.
FrameMaker features supporting Unicode content
Support for Unicode-encoded content in FrameMaker lets you to do the following tasks:
•Create, open, and edit FM and MIF files containing Unicode content.
•Create XML files containing Unicode content by converting them to the UTF-8 encoding.
•Work with documents containing Unicode content.
•Author documents containing multilingual paragraphs and words. For example, you can have a set of Greek
characters followed by Russian characters, and then by French text in the same paragraph. Full authoring support
(without dictionaries and hyphenation) is extended for Japanese, Korean, Traditional Chinese and Simplified
Chinese. In addition, full authoring support (including language rules, dictionary, hyphenation) is extended for
US English, French, German, Swiss German, Canadian French, and British English.
•Save Unicode content in PDF, HTML, and XML.
•Import from text files containing the UTF8, UTF16, UTF16 BE, UTF16 LE, UTF32, UTF32 BE, and
UTF32 LE encodings.
•Export to text files with UTF8, UTF16, UTF16 BE, UTF16 LE, UTF32, UTF32 BE, and UTF32 LE
Unicode encodings.
•Convert and import text of non-Unicode encodings such as FrameRoman, JISX0208.ShiftJIS, BIG5,
GB2312-80.EUC, and KSC5601-1992, which were supported in earlier versions of FrameMaker.
•Use the relevant language Spelling Checker to check Unicode content.
•Use the relevant language dictionary and thesaurus for Unicode content. By default, dictionaries of all languages
supported in FrameMaker are installed. Dictionary and hyphenation support are extended for the following
languages in: Spanish, Italian, Portuguese, Danish, Dutch, Swedish, Norwegian, Nynorsk, Finnish, Catalan, Greek,
Russian, Czech, Polish, Hungarian, Turkish, Slovak, Slovenian, Bulgarian, Croatian, Estonian, Latvian,
Lithuanian, and Romanian. All language dictionaries have been updated to use Proximity version 11.0. The
dictionary, hyphenation, and thesaurus features have been enhanced to handle Unicode characters.
•Provide Unicode-encoded input and viewing Unicode content in fields, dialog boxes, wizards, and forms.
•Perform document comparisons on Unicode content.
•Generate conversion tables, TOCs, lists, indexes, and document reports using Unicode content.
•Create templates for different languages based on Unicode content.

ADOBE FRAMEMAKER 8
User Guide
154
•Use Unicode characters in features such as master page names, paragraph and character tags, table tags, variables
and variable names, user-defined menu item names, color definition names, math equations, file paths, hypertext,
footnotes, cross-references, custom autonumbering, FrameVector, file info, conditional text tag, object attributes,
element names, and attribute names.
•Roundtrip Unicode content encoded in UTF-8. Unicode content using UTF-8 encoding is roundtripped correctly
when you save a FrameMaker document in XML, HTML, MIF, or FM formats. FrameMaker 8 lets you to save
either FrameMaker 8 (Unicode) or FrameMaker 7.0 documents. Files containing Unicode characters must be
saved in either the FrameMaker 8 (Frame Binary) or MIF 8 (MIF-Unicode) formats. When you save a
FrameMaker document to XML, UTF-8 encoding standard is used.
•Generate MIF files by saving MIF documents in the MIF 8 (MIF-Unicode) or MIF 7 (MIF Classic) formats. The
MIF-Unicode format generates a file that preserves all Unicode content. The MIF-Classic format generates a file
that is compatible with earlier versions of FrameMaker and is also forward-compatible. All the Unicode content
that can’t be represented in the earlier format is replaced with characters that can be configured in the configu-
ration file (maker.ini on Windows).
•Type special characters. On UNIX, a language/UTF range selection dialog box appears to the left of the document
window. You can use this interface to select different ranges, such as math characters and currency characters, and
input them directly with Unicode content into FrameMaker documents. This feature is not available on Windows.
•Use keyboard shortcuts for characters in the Equation palette only.
•FrameMaker continues to support automatic language detection by the Spell-check functionality with many more
languages - When you run the Spell-check functionality, FrameMaker uses the dictionary of the language selected
for a Paragraph tag in the Paragraph Designer. For example, if the language associated with the Body Paragraph
tag is Bulgarian, FrameMaker uses the Bulgarian dictionary to check the spelling of all text to which the Body tag
has been applied. Alternatively, if the language associated with the Code Paragraph tag is US English, FrameMaker
uses the US English dictionary to check the spelling of all text to which the Code tag is applied.
•Use the Find/Change feature for Unicode content. Because FrameMaker uses the UTF-8 encoding standard, every
character uses multiple bytes. Find/Change lets you search for a range of Unicode characters that belong to the
Basic Multilingual Plane (BMP) only. You can search for Unicode characters, a combination of text and Unicode
characters, or for a combination of characters in different languages. The search using Hexcode (\x) must specify
UTF-8 values. You can include wild cards when searching for Unicode characters.
•Use code points of the Unicode code set, in the dialog boxes.
•Sort tables in which cells contain Unicode content. FrameMaker sorts strings in tables, based on the locale of the
computer where FrameMaker is installed. You must change the locale of your computer to apply the sorting
method relevant to the desired locale.
•Sort indexes with symbols in multilingual FrameMaker documents, based on the Unicode Collation Algorithm
(UCA) of the Unicode text-encoding standard.
•Copy content from other Unicode-compliant applications. FrameMaker supports copying and pasting content
across FrameMaker documents and from other Unicode-compliant applications, such as Microsoft Word. In
Windows, the copy and paste operation assumes that the clipboard text is in the UTF-16 format. For example, if
you use the “Paste Special” command, the “Unicode Text” option pastes the content as Unicode text. On the Solaris
platform, this functionality is limited by your locale setting. You must have the UTF-8 locale set in order to copy
Unicode content. As the Paste Special functionality is not available on Solaris, use the Paste command to convert
the copied text to Unicode text.
•Automatically update the date, time, currency, and numeral formats in variables based on language. When
you change the language of a paragraph containing variables, the formats of date, time, currency, and
numerals change.

ADOBE FRAMEMAKER 8
User Guide
155
Setting up your computer and keyboard to work with
multiple languages
Selecting fonts to work with multilingual documents
To enter characters for a selected language in a document, you must select language-specific fonts.
Note: The MinionPro and MyriadPro fonts have been updated with new language ranges.
Viewing and editing multilingual FrameMaker documents
Before you input and display multilingual text in your document, configure the regional language or locale settings
on your computer to add the required languages for keyboard input.
•Windows: The Microsoft Windows XP Service Pack 2 (SP2), Microsoft Windows 2000, and Windows Vista™
operating systems have Regional and Language settings, which can be used to add additional languages for
keyboard input. These languages and speech settings appear in the Language bar on the desktop. After you select
a language and set up a localized keyboard, you can start typing the required text in the document. The keyboard
layouts are defined by Microsoft.
•Solaris: The Solaris operating system has UTF and non-UTF locale settings. FrameMaker honors the default
locale that has been specified. However, if you want use Unicode characters on Solaris, you must select a
UTF-8 locale and an on-screen keyboard or a localized keyboard. For example, if FrameMaker is running on the
Turkish UTF-8 locale, you can enter Unicode characters in FrameMaker documents.
You can type words in the selected language or input appropriate Unicode characters.
Setting up input languages on Windows
1On your computer, open the Control Panel and double-click the Regional and Language Options icon. The
Regional and Language Options dialog box appears.
2Click the Languages tab.
3Click the Details button. The Text Services and Input Languages dialog box appears.
4In the Settings tab, click the Add button. The Add Input Language dialog box appears.
5Select a language from the Input language list.
6Click OK. The selected language is included in the Installed services list.
7Select the desired language in the Default input language list.
8Click Apply and click OK to save the settings and close the Text Services and Input Languages dialog box.
9Click the Regional Options tab, and then choose the language you selected in the Default input language list.
10 Click Apply and then click OK to save the settings and close the Regional and Language Options dialog box. The
Language bar or the Input Method Editor (IME) appears in the system tray of your computer.
11 Open FrameMaker, and then type the content. The text appears in the selected language.
Note: If you change the language in the Default input language list and the Regional Options tab, the language selected
in the Language bar is also updated automatically.

ADOBE FRAMEMAKER 8
User Guide
156
Launching the soft keyboard on Windows
1From the Start menu, select Programs > Accessories > Accessibility > On-Screen Keyboard.
2Click OK. You can then start using the on-screen keyboard.
Using third-party keyboard layout software on the Windows operating system
There are several third-party keyboard layout software applications available for different languages in the Windows
operating system. When these layouts are activated, FrameMaker starts receiving input according to the keyboard
mappings set by the third-party software. FrameMaker does not alter any of the key definitions.
Setting up input languages on Solaris
Complete one of the following steps to set up input languages on the Solaris operating system:
•Press the Compose key and enter the two-letter language code. For example, to input text in the Thai language,
press the Compose key and the code “tt”. Press Control+Space as a shortcut to select the default English/European
input mode.
•Click the Status bar and select an input mode.
Next, open the on-screen keyboard to enter UTF-8 characters in the FrameMaker document. A range of
international keyboards are available through the Solaris Function Keys utility. This feature appears an
on-screen keyboard with keys that correspond to those on the physical keyboard. When you display one of the
international keyboards through a DeskSet or other XView application, the keys you type on your physical keyboard
remap to the international characters. The international characters appear in the text region of the XView application
window.
Displaying a keyboard in the language of your choice
1Select Workspace > Utilities > Function Keys.
2Pin the Function Keys window to the workspace.
3Click SELECT in an XView application window, such as a Command Tool, in which you want to use a set of inter-
national characters.
4Press the Language key on your keyboard, and then continue to press it until instructed to release it. This key is
labeled PrSC, or Print Screen. Each of the function keys labels displays one of the international languages that the
virtual keyboard supports.
5Click SELECT on More To Cycle Through The Available Character Sets.
6Click SELECT on the button for the language you want to use.
7Click SELECT on the Show button. The virtual keyboard for that language appears on the workspace.
8Pin the keyboard window.
9Click SELECT on the Set button in the Function Keys window.
10 Release the language button.
11 Begin typing in the XView application window from which you opened the keyboard. The characters you type
appear in the chosen character set.
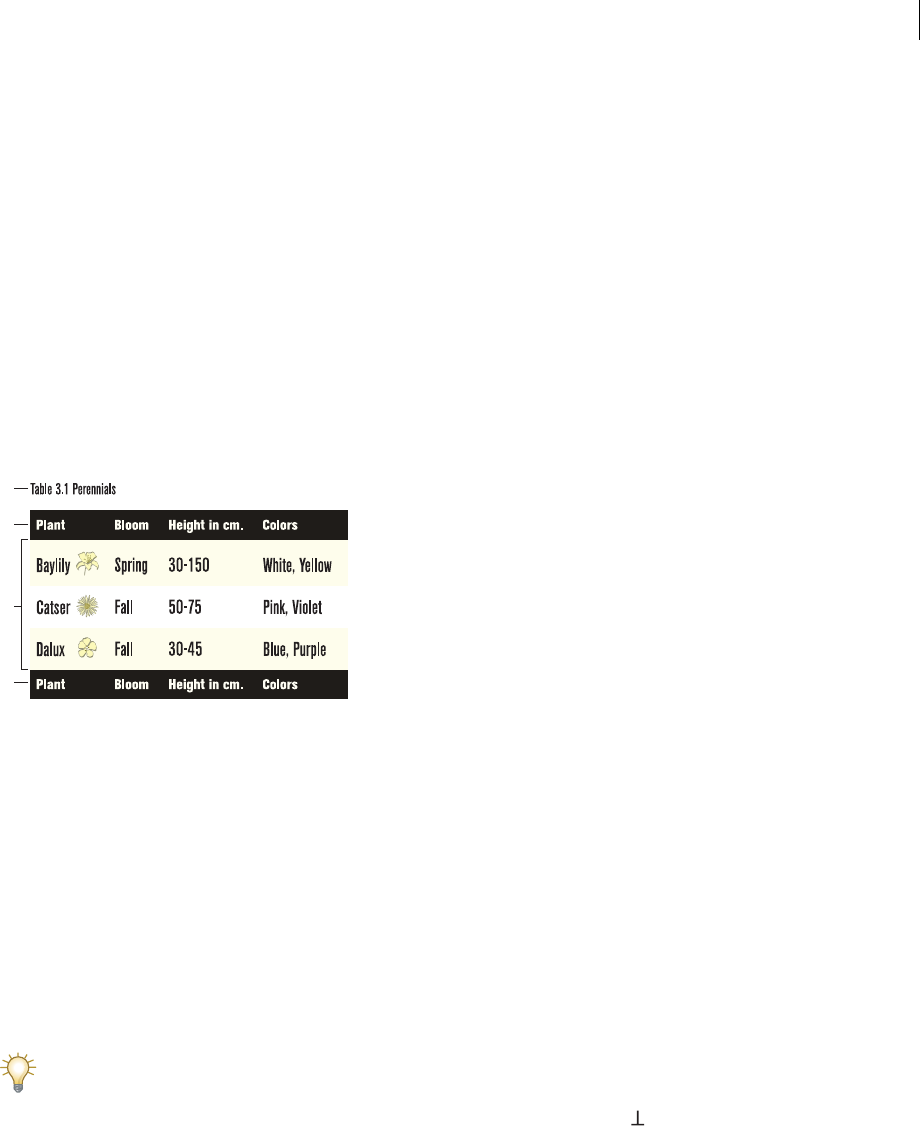
157
Chapter 4: FrameMaker tables
About tables
When you insert a table in a document, it already has rows and columns with cells that you can fill in. It also has a
particular format that helps to define its look.
You can insert a table and fill it with text and graphics, or convert existing text to a table. You can also rearrange and
resize columns and rows, rotate tables and cells, adjust cell margins and alignment, change ruling and shading, and
remove or add titles. You can use the Table Designer to create table formats or change them globally across
adocument.
A table typically has heading and body rows and a title. Occasionally, it may have footing rows as well.
A. Table title B. Table heading C. Table body D. Table footing
The look of a table is determined by its format, which includes the following types of properties:
•Properties set in the Table Designer, such as a table’s position, cell margins, regular ruling and shading, and
whether it has a title.
•Three types of default properties: the number of body, heading, and footing rows; the number of columns; and
paragraph formats for the title, heading, footing, and body cells of each column. All three are supplied when you
first insert a table. Changing the default properties of a format does not change the appearance of tables that use
that format, but it changes how a new, empty table looks when you insert it.
After you insert a table, you can perform extensive custom formatting, such as straddling or rotating cells, or applying
special ruling or shading to selected cells. Custom formatting is not stored as part of the table format. For this reason,
custom formatting is retained when you change or reapply a table format.
Right-click a table to display a context menu for tables. Or use the QuickAccess bar to perform common tasks for
tables. See “Using the QuickAccess bar” on page 11 and online Help.
When you insert a table, it’s anchored at the insertion point. A table anchor symbol appears there when text
symbols are visible.
A
B
C
D
A
B
C
D

ADOBE FRAMEMAKER 8
User Guide
158
Inserting tables
When you insert a new, empty table, you select a format for the table. Table formats are stored in a catalog, as are
paragraph and character formats. However, the Table Catalog appears in the Insert Table dialog box, rather than in
a floating palette.
To insert a new, empty table:
1Click in the line of text to which you want to anchor the table. You can insert a table anywhere except in a footnote.
For information on inserting a table within another table, see “Inserting a table within a table” on page 161.
2Choose Table > Insert Table.
3Select a format for the table. If the format you need is not in the list, you can import the format from another
document (see “Importing and updating formats” on page 415), or create your own format (see “Creating table
formats” on page 185).
4If necessary, enter a different number of rows or columns in the text boxes.
5Click Insert. An anchor symbol appears at the insertion point when text symbols are visible. (Deleting the
symbol deletes the table.)
Note: In multicolumn page layouts, the table may straddle columns, and its position may be affected by straddle
paragraphs. For information, see “Making tables straddle” on page 169.
Filling in tables with text and graphics
Each intersection of a column and row is a table cell, and each cell can contain text and anchored frames. (Anchored
frames, in turn, can contain graphics or other tables.) As you type text or insert an anchored frame in a cell, the cell’s
height expands as needed.
You can copy, cut, and paste the contents of cells just as you do text and graphics in any other part of a document.
Special system variables let you specify continuation text in the titles or heading rows of multipage tables.
Typing and selecting text in tables
In addition to typing text in a table, you can also insert cross-references, table footnotes, variables, and markers. The
tab character is the only character you have to enter in a special way in a table cell.
You select text in a table cell in the usual way or with one of several shortcuts. Note that selecting the text in a cell is
different from selecting the cell itself. When you select the cell itself, a selection handle is visible (see “Selecting table
cells” on page 159).
To insert a tab in a table cell:
❖Press Esc Tab.
To select the contents of the next or previous cell:
❖Press Tab or Shift+Tab.
To select the contents of the cell below or above:
❖Do one of the following:
•(Windows) Press Control+Alt+Tab or Control+Alt+Shift+Tab.
•(UNIX) Press Meta+n or Meta+p.

ADOBE FRAMEMAKER 8
User Guide
159
To select the contents of the current cell:
❖Press Esc t h a. If the cell contains just one paragraph, you can also triple-click the text to select the paragraph.
Selecting table cells
When you work in a table, you may need to select cells, rows, columns, or the entire table. When you select a cell
itself rather than the text in a cell, a selection handle is visible.
When you select a cell, you see its selection handle.
For information on selecting text in cells, see “Typing and selecting text in tables” on page 158.
To select a single cell:
❖Control-click the cell.
To select multiple cells:
❖Drag across all the cells you want to select, or do one of the following:
•To select an entire row, press Esc t h r.
•To select an entire column, press Esc t h c. You can also select a column quickly by dragging from a heading cell
into the first body cell.
•To select the entire table, press Esc t h t.
To extend a selection:
❖Click in the first cell you want to include in the selection, and then hold down Shift and double-click the last cell
you want to include.
Copying or moving the contents of cells
You can paste a cell’s contents from the Clipboard to other cells in the same table or in a different table. You can
duplicate just the cell’s contents or both its contents and format (such as any custom ruling and shading).
To copy or move both a cell’s contents and its format:
❖Select the entire cell by dragging across the border and then dragging back. The selection handle is visible when
the cell is selected. Copy or cut the cell, and then paste. You can select multiple cells to copy or cut.

ADOBE FRAMEMAKER 8
User Guide
160
Formatting text in tables
You format text in a table cell just as you format paragraphs in a regular column of text—for example, with paragraph
or character formats.
When you insert a new, empty table, the title and the heading, footing, and body cells for each column are assigned
the default paragraph formats stored as part of the table format. You can apply a different format to any paragraph
in any cell, and you can modify the format of any paragraph.
Adding or removing table titles
A table title appears above or below a table and is repeated on all pages of a multipage table. You can format title text
just as you would any other paragraph in a document. For example, you can center the title, set its default font, and
include an autonumber format.
Whether a table has a title and how it’s formatted is defined in the table format. You change the format by using the
Table Designer.
When you insert a table with a title, an empty text frame appears for the title. If the title format has been defined to
include an autonumber, the autonumber text appears. In either case, you type the text of the title yourself.
To add or remove a table title:
1Click in the table you want to change and choose Table > Table Designer.
2In the Basic properties of the Table Designer, choose Above Table, Below Table, As Is, or No Title from the Title
Position pop-up menu.
3Specify the amount of space between the table and the title.
4Click Apply to Selection.
To display the title only on the first page of a multipage table, set the title position to No Title and use a body
paragraph as the title. To prevent the title from becoming separated from the table, make sure the anchor symbol
is in the title text and that the table’s Start property is set to Anywhere.
Adding “continuation” text
In a multipage table, you may want to display special “continuation” text in the title or in heading or footing rows.
Two system variables include text for this purpose: Table Continuation and Table Sheet.
A. and C. Table Sheet variable B. Table Continuation variable
You can change the default definitions of these variables, just as you do for other system variables. For details, see
“Changing variable definitions” on page 232.
A CB

ADOBE FRAMEMAKER 8
User Guide
161
To add continuation text:
1On the first page of the table, click in the title or in the heading or footing where you want to insert the variable.
2Choose Special > Variable.
3Select either the Table Continuation variable or the Table Sheet variable, and click Insert.
On the first page of a table, the variable appears as a nonbreaking space . On subsequent pages, it displays the text
in its definition—for example, (Continued) if you use the Table Continuation variable.
Placing graphics in table cells
To draw or import a graphic in a cell, you use an anchored frame placed inside the cell. The following steps provide
general instructions on inserting a graphic in a cell. You can adapt the instructions to position the anchored frame
differently or to insert a graphic in a cell that also contains text.
Note: Avoid using cropped anchored frames in heading or footing cells of a table. Such frames might not be cropped when
that cell repeats on subsequent pages.
To place a graphic in a cell:
1Click in a paragraph in the cell where you want to place the graphic.
2Do one of the following:
•To create an anchored frame where you can draw, use Special > Anchored Frame to create an anchored frame that’s
anchored at the insertion point—see “About Anchored Frames” on page 345.
•To create an anchored frame for an imported graphic, use File > Import > File to import the graphic.
3If the anchored frame is wider than the cell, resize the column (see “Resizing columns” on page 171).
A quick way to resize a column to match a cell’s contents is to place the insertion point in the cell that has the desired
length of text and press Esc t w.
4If necessary, use Graphics > Align to center the graphic in the frame.
Inserting a table within a table
Before you can insert a table in a cell, you need to create an anchored frame in the cell and draw a text frame in the
anchored frame. Then you insert a table in the text frame and format it just as you would any other table.
To place a table in a cell:
1Click in the cell in which you want to insert a table.
2Use Special > Anchored Frame to create an anchored frame that’s anchored below the current line—see “About
Anchored Frames” on page 345. Try to set the width and height of the frame to be slightly larger than the width and
height of the table you want to insert.
3If the anchored frame is wider than the cell, resize the column (see “Resizing columns” on page 171).
4Use the Text Frame tool on the Tools palette to draw a text frame in the anchored frame (see “Using text with
graphics” on page 323).
5Click in the text frame and insert a table.

ADOBE FRAMEMAKER 8
User Guide
162
Converting between text and tables
Converting text to tables
You can convert text that’s already in your document to a table, or you can convert text in a text file as you open or
import the file. In a structured document, the text is wrapped into a structure of table and table-part elements.
After converting text to a table, you might have to touch up the table, removing blank cells or recombining text that
was split into two or more cells. In most cases, you can edit the table directly in the document. However, if you
converted text that was imported by reference, you must edit the text in the original file.
To convert text to a table:
1Select the text you want to convert.
2Choose Table > Convert to Table.
3If you’re working in a structured document, choose a table element from the Element Tag pop-up menu.
4Select a format for the table.
Note: In a structured document, the table element may have a format preselected, but you can change the format and it
will not be considered a format rule override.
5Specify how you want to convert paragraphs by doing one of the following:
•To convert text that uses tabs to separate information, click Tabs.
•To convert text that uses spaces to separate information, click Spaces and then enter the minimum number of
spaces that indicate a separate cell.
•To convert text that uses other characters to separate information, click Other and then type the characters that
can be used to separate cells.
•To convert each paragraph (such as those in a bulleted list) to a cell, click A Cell and then enter the number of
columns you want in the table.
6In the Heading Rows text box, enter the number of heading rows you want in the new table. If the paragraphs
you’re converting don’t include headings and you want to fill in the headings later, select Leave Heading Rows Empty.
7Click Convert.
Note: When working with structured documents, the Structure View has bubbles for the new elements. If the Attributes
for New Element dialog box appears, enter attribute values for the table element and click Insert Element (see “Inserting
elements” on page 36).
To convert a text file to a table as you open the file:
1Choose File > Open, and select the text file you want to open.
2If the Unknown File Type dialog box appears, select Text, and then click Convert.
3Click Convert to Table, and then click Read.
4Follow the instructions for converting text already in your document to a table, starting from step 3 in the
previous procedure.

ADOBE FRAMEMAKER 8
User Guide
163
To convert a text file to a table as you import the file:
1Click where you want to import the file.
2Choose File > Import > File, and select the text file you want to import and the import method. For information,
see “Importing unformatted text” on page 503.
3Click Convert to Table and then click Import.
4Follow the instructions for converting text to a table, starting from step 3.
If you want to merge a text file into an existing table, import the text file (see “Inserting a table within a table” on
page 161) and convert it to a table. Then copy the rows and paste them into the existing table.
To touch up a table after conversion:
❖Do any of the following:
•To combine text that is split across two or more rows, cut and paste the text from the lower cells into the upper
cell, and delete the extra rows.
To quickly combine text in adjacent cells, select the cells, choose Table > Straddle, and then choose Table >
Unstraddle. This leaves empty rows or columns that you can delete.
•To fix half-empty columns, cut and paste the text into the correct locations, and delete the extra columns.
•To fix major errors, you may want to return to the original text (choose Edit > Undo if necessary), edit the text
(for example, by deleting extra tabs and forced returns), and then convert the text to a table again.
Converting tables to text
You can convert any table to text within FrameMaker, or you can copy the table as text to another application. You
can also convert all the tables in a document at one time.
In structured documents, when you convert tables to text, all the table and table-part elements, except for the
cells, are unwrapped. Change the cells to other elements or make other changes to correct the structure of
the document.
To convert a table to text within FrameMaker:
1Click in the table you want to convert to text.
2Choose Table > Convert to Paragraphs.
3Click Row by Row or Column by Column, and click Convert.
Table converted to text
A. Row by row B. Column by column
AB

ADOBE FRAMEMAKER 8
User Guide
164
To copy a table to another application as text:
1Copy the table to the Clipboard.
2In another application, choose Edit > Paste. The table is pasted, row by row, with tabs separating table cells, and a
paragraph return at the end of each row.
To convert all tables in a document to text:
❖Save the document in Text Only format, and specify how you want the tables converted (see “Saving documents
in Text Only format” on page 26).
Copying, moving, and removing tables
You can remove tables either by cutting them, which places them on the Clipboard, or by deleting them, which
does not.
To copy, move, or remove a table:
1Control-triple-click a cell to select the entire table.
2Do one of the following:
•To copy the table, choose Edit > Copy.
•To move the table, choose Edit > Cut. If a dialog box appears, click Remove Cells from Table, and click Cut. Then
click where you want to move the table, and choose Edit > Paste.
•To remove the table (without changing the contents of the Clipboard), press Delete.
Changing the look of tables
When you insert a table, its appearance is determined by its table format. If the preset properties of the format are
not to your liking, you can change them.
You can change the look of tables in many ways:
•Using the Table Designer, you can change the table’s indents, cell margins, spacing, alignment, ruling, and shading.
You can also adjust the title position, numbering, and the start position of the table.
•Using commands on the Table menu, you can rotate and straddle cells, change cell height and page breaks, and
apply custom ruling and shading.
When you use the Table Designer to make a formatting change that doesn’t match the table’s predefined format, the
change is a format override. Overrides are lost if you reapply the predefined format to the table. Changes made with
the Table menu commands are not lost.
You can use the Table Designer and Table menu commands to change the look of tables. Template designers and
other advanced users might also use the Table Designer to create new table formats and to change formats globally
throughout a document (see “Creating table formats” on page 185).
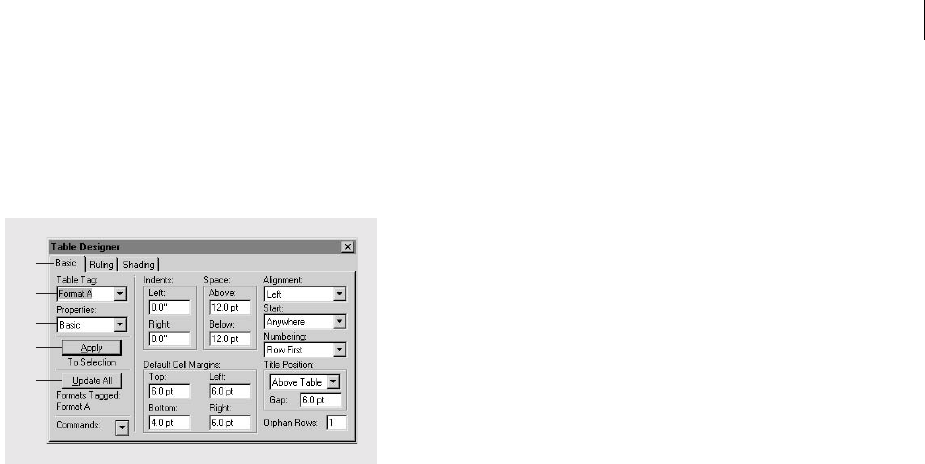
ADOBE FRAMEMAKER 8
User Guide
165
Using the Table Designer
The Table Designer includes several areas and commands for creating, changing, and overriding table formats. The
designer contains several groups of properties, displaying one at a time. It’s shown here displaying the Basic group
of table properties.
Table Designer
A. (Windows) Click a tab to display a group of properties.
B. Choose from the Table Tag pop-up menu to display the stored properties for that format.
C. Choose from the Properties pop-up menu to display a group of properties, either Basic, Ruling, or Shading.
D. Apply all properties in all property groups to the current table’s format.
E. Update all table formats that have the same tag, including the format stored in the Table Catalog.
On the left side of the Table Designer, you choose a table format and property group. The table formats stored in the
Table Catalog appear in the Table Tag pop-up menu. (In Windows, you can also click a tab to display a
property group.)
On the right side of the Table Designer, you change the table’s properties. The table’s appearance doesn’t change until
you apply the properties.
To display the Table Designer and a property group:
1Choose Table > Table Designer.
2Choose a group of properties from the Properties pop-up menu or, in Windows, click a tab.
To apply property changes:
❖Click Apply To Selection. When you make a formatting change that doesn’t match the table’s predefined format,
it’s considered a format override.
Note: You won’t need to click Update All unless you want to make a global change—change the table format and all
tables in the document with the same format. Because Update All redefines a format, use it with caution.
To reset properties after making some changes in the Table Designer:
❖Do one of the following:
•To reset the properties to match the current table, including any format overrides, click in the table or choose Reset
Window from Selection from the Commands pop-up menu.
•To reset the properties to match the stored table format, choose the format from the Table Tag pop-up menu. Do
this even if its tag is already displayed in the Table Tag text box.
A
B
C
D
E
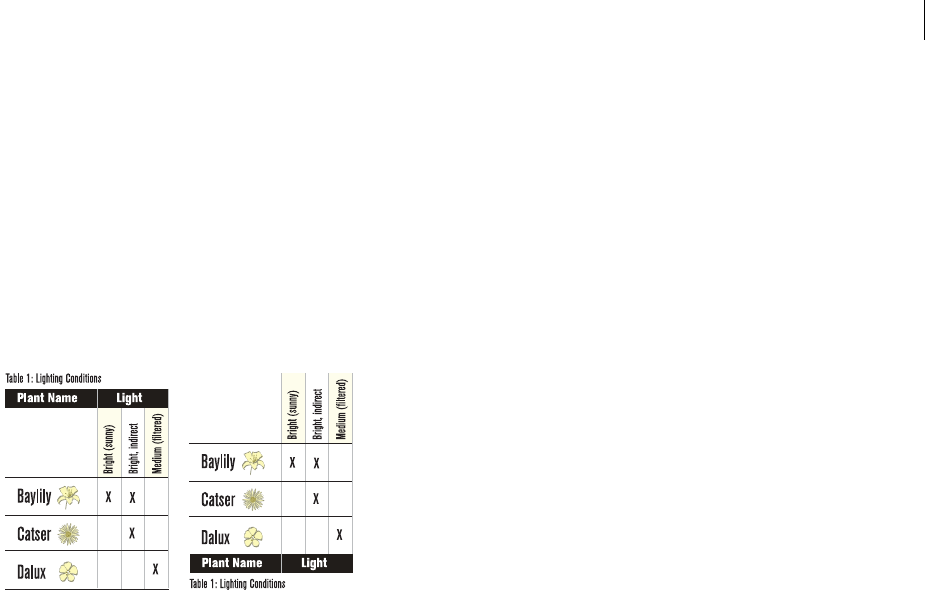
ADOBE FRAMEMAKER 8
User Guide
166
Applying different table formats
You select a format when you insert a new table, but you can apply a different format at any time.
When you apply a different format to an existing table, only the properties set with the Table Designer change. The
following two categories of settings—which are not set in the Table Designer—do not change:
•Customizations made by using Table and Graphics menu commands, such as a forced page break, straddle cell,
and rotated cells.
•The number of rows and columns, the widths of columns, the paragraph format of the title, and the paragraph
formats of text in the heading, body, and footing cell of each column—all of which are supplied when you first
insert a table.
When a new format is applied to this table, custom changes such as rotated cells are retained.
For information on table formats, see “About tables” on page 157.
To apply a different format to an existing table:
1Click in the table that you want to apply a new format to.
2Choose Table > Table Designer.
3Choose the format you want to apply from the Table Tag pop-up menu, and click Apply To Selection.
Applying a format to several tables
You can apply a format to all tables in the document, to all tables with tags (format names) that occur in a selection,
or to all tables that have a particular tag. For example, you could apply Format B to all tables currently tagged
Format A.
When you apply a format to a table, only those properties set with the Table Designer change. Default properties not
set in the Table Designer and custom settings are not affected. (These settings are described in “Applying different
table formats” on page 166.)
To apply a format to several tables with a certain tag:
1Select the tables you want to change by doing one of the following:
•To apply a format to all tables in the document, click in any table.
•To apply a format to several tables, but not all tables, in the document, select consecutive tables. (To select multiple
tables, you must select their anchor symbols.)
2Choose Table > Table Designer.
3Choose the format you want to apply from the Table Tag pop-up menu, and choose Global Update Options from
the Commands pop-up menu.

ADOBE FRAMEMAKER 8
User Guide
167
4Choose the tables you want to reformat by doing one of the following:
•To retag all tables in the document, click All Tables and Catalog Entries.
•To retag the tables in the selection and all tables with the same tags as these tables, click All Matching Tags in
Selection.
•To retag all tables with a specific tag, choose a tag from the pop-up menu.
5Click All Properties in the Use Properties area, and click Update.
Positioning tables on a page
When you insert a table, the space above and below the table and its alignment and indents are determined by the
table format. If you need to change these positioning properties, use the Table Designer.
Other positioning properties—straddling and text runaround—are not part of a table’s format. You control these
properties on a table-by-table basis.
Aligning and indenting tables
The alignment of a table determines how the table is positioned between its left and right indents.
The left and right indents determine where the table’s edge is positioned horizontally when it’s left-aligned or
right-aligned.
To align or indent a table:
1Click in the table you want to change, and choose Table > Table Designer.
2In the Basic properties of the Table Designer, do the following:
•To specify an alignment, choose it from the Alignment pop-up menu.
•To specify a left and right indent, enter values.
3Click Apply to Selection.
Adjusting the space above and below tables
You specify the space above and below a table just as you control the space above and below a paragraph.
The space between a table and the paragraph above it is determined by the table’s space above setting or the
paragraph’s space below setting, whichever is larger. The space between a table and the paragraph below it is deter-
mined by the table’s space below setting or the paragraph’s space above setting, whichever is larger. When the table
is at the top or bottom of a column, the above or below setting is ignored.
To specify the space above or below a table:
1Click in the table you want to change, and choose Table > Table Designer.
2In the Basic properties of the Table Designer, enter spacing values in the Above and Below text boxes.
3Click Apply to Selection.
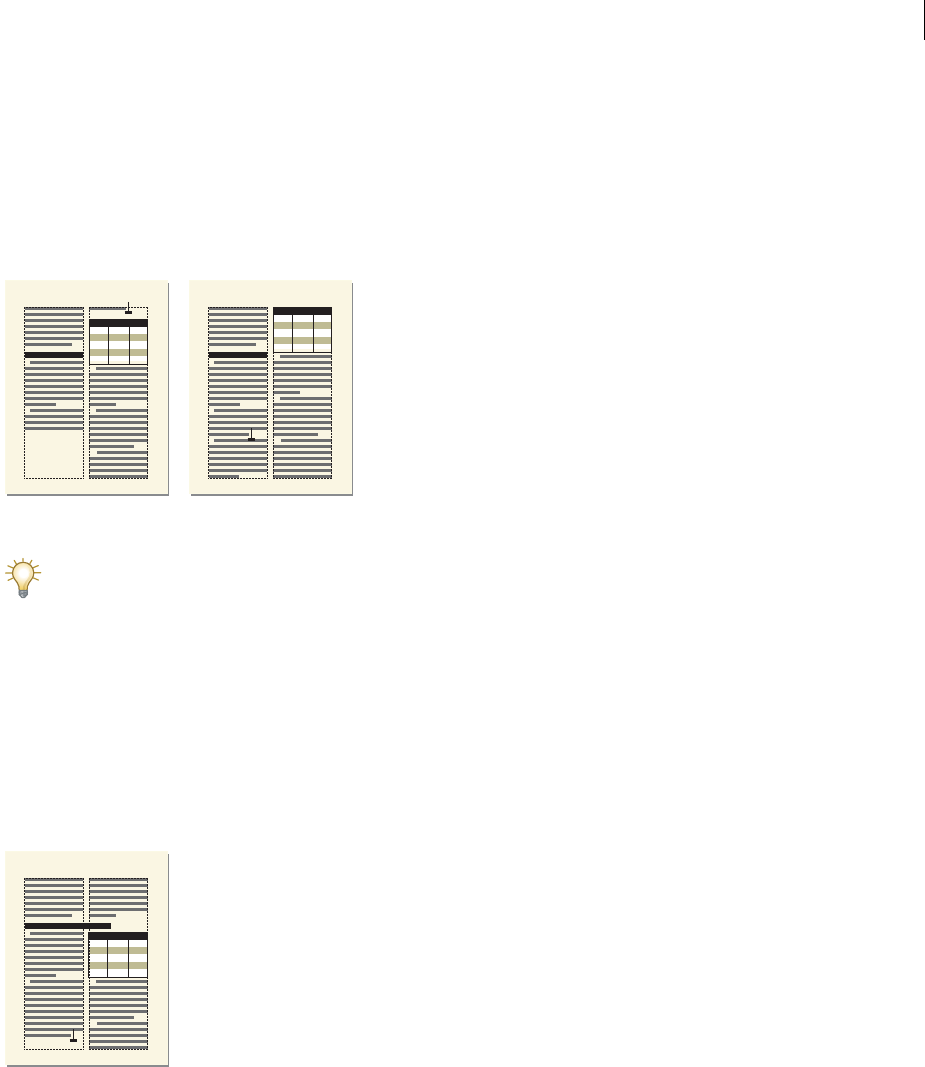
ADOBE FRAMEMAKER 8
User Guide
168
Controlling where tables begin
Normally, a table appears below the line of text containing the anchor symbol. However, you can force a table to start
at the top of a page or column, or you can let the table float.
If there is not enough room in the text column where a floating table is anchored, a floating table moves to the first
text column that can hold it. However, the line of text containing the table’s anchor symbol does not move. If the table
moves to the next text column, text fills the space below the line containing the anchor symbol.
Normal table and a floating table
If you want a table to start at the very top of a page with no text preceding it, anchor it on the previous page and
set the table to float. If you want it to always float, make its orphan setting a large number such as 200 (see
“Keeping a minimum number of rows on a page” on page 177).
To control where a table begins:
1Click in the table you want to change and choose Table > Table Designer.
2In the Basic properties of the Table Designer, choose the placement from the Start pop-up menu.
3Click Apply to Selection.
If the anchor symbol for a top-of-column table appears below a paragraph that straddles columns, the table appears
in the next column but just below the straddle paragraph, instead of at the top of the column.
A top-of-column table anchored below a straddle
To control how a table breaks, see “Controlling page breaks in tables” on page 176.
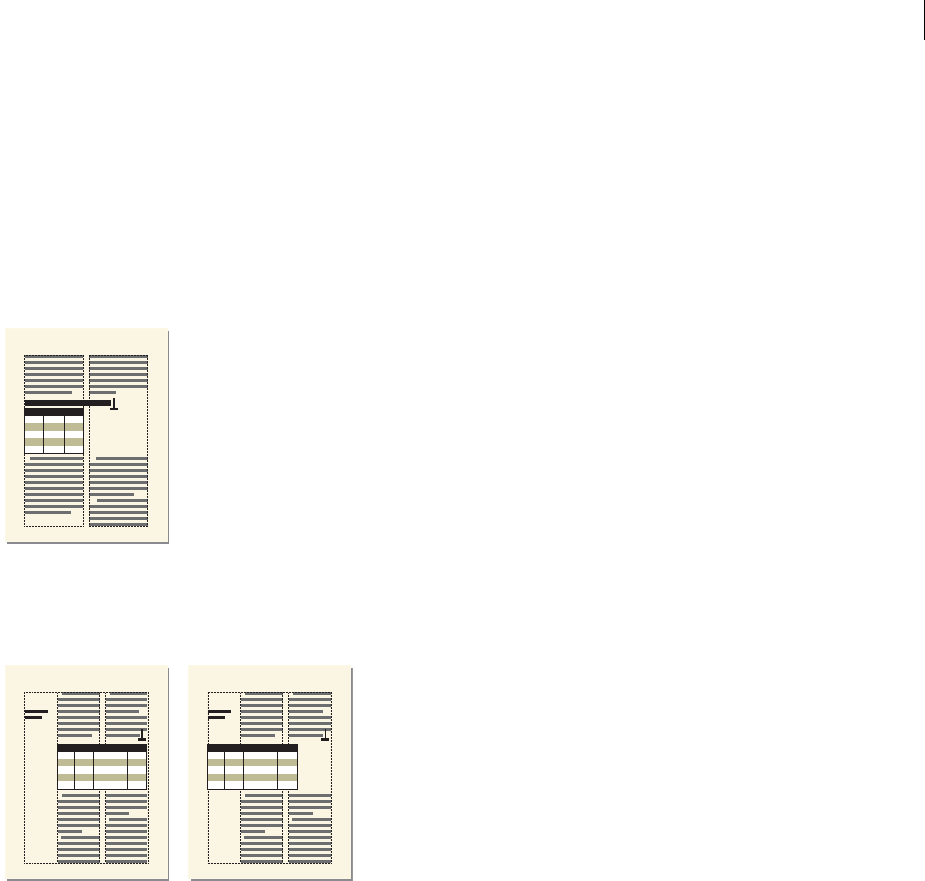
ADOBE FRAMEMAKER 8
User Guide
169
Making tables straddle
Tables may straddle columns in multicolumn layouts, and their positions may be affected by straddle paragraphs.
For information on straddle paragraphs, see “Creating straddle heads” on page 124.
To make a table straddle:
❖Do one of the following:
•Anchor the table in a straddle paragraph. A table anchored in a straddle paragraph, whatever the table’s width,
always straddles the full width of the text frame.
A table anchored in a straddle paragraph
•Extend the table width into a second column of the body area (see “Resizing columns” on page 171). If you want
the table to straddle both the side-head area and the body area, extend it into the side-head area as well.
Straddling all columns and straddling side-head area
To unstraddle a table:
❖Do one of the following:
•To unstraddle a table that’s anchored in a straddle paragraph, move the anchor to a nonstraddle paragraph.
•To unstraddle a table that’s anchored in an unstraddled paragraph, resize the column widths of the table to fit in
the text column (see “Adjusting rows and columns” on page 170).

ADOBE FRAMEMAKER 8
User Guide
170
Running text around tables
Text does not run around a table that is anchored directly in a column of text. You can, however, run text around a
table that’s in an anchored frame or in a text frame that’s disconnected from the main flow. (However, a table in a
disconnected text frame won’t autonumber with tables in the main flow.)
Table in an anchored frame and a table in a disconnected text frame
To run text around a table in an anchored frame:
1Use Special > Anchored Frame to create an anchored frame with an anchoring position of Run into Paragraph.
2Draw a text frame in the anchored frame and then place the table in it (see “Using text with graphics” on page 323).
To run text around a table that remains stationary on the page:
1Draw a text frame directly on a page and drag it where you want it (see “Using text with graphics” on page 323).
This type of text frame is not connected to the main flow.
2Choose Graphics > Runaround Properties, click Run around Bounding Box, and click Set.
3Insert a table in the text frame.
Adjusting rows and columns
Adding and deleting rows and columns
You can specify how many rows or columns you want to add and where you want to insert them.
To quickly add a row below the current one:
❖Press Control+Return. The new row uses the same paragraph formats as the previous row.
To add a row or column:
1Click in a table cell next to where you want to add the row or column.
2Choose Table > Add Rows or Columns, and specify the number of rows or columns you want to add and where
you want to insert them.
You can add rows above or below the indicated cell or in the heading or footing areas. You can insert columns to the
left or right of the indicated cell.
3Click Add.

ADOBE FRAMEMAKER 8
User Guide
171
The cells in the new rows or columns use the same paragraph formats as the current row or column. For example,
when you click in a cell and add three rows, the cells in all three rows will have the same paragraph formats as the
cells in the row in which you clicked.
To delete a row or column:
1Select the rows or columns you want to delete, making sure you select entire rows or columns. (If you don’t, the
contents of the selected cells are deleted without a prompt for a decision.)
2Press Delete, click Remove Cells from Table, and click Clear.
Copying and moving rows and columns
You can duplicate or move rows and columns, along with their contents, by copying or cutting them to the Clipboard
and then pasting at a new location.
When working with structured documents, copying or moving rows or columns may make the structure of a table
invalid. Use the Element Catalog and Structure View as guides.
The cells on the Clipboard replace the current rows or columns according to the following rules:
•If the number of rows or columns on the Clipboard is equal to the number of selected rows or columns, they are
replaced exactly.
•If the number on the Clipboard is greater than the number you select to replace, only as many rows or columns as
will fit are pasted.
•If the number on the Clipboard is less than the number you select to replace, the Clipboard contents are repeated
so that they fill the rows or columns.
To split a table, cut rows or columns from a table and paste them where you want to make a new table. To combine
two tables, cut the rows and columns from one table and paste them into another.
To copy or move rows or columns:
1Select the rows or columns, and do one of the following:
•If you are copying them, choose Edit > Copy.
•If you are moving them, choose Edit > Cut, click Remove Cells from Table, and then click Cut.
2Click next to where you want to insert the rows or columns, and choose Edit > Paste. You can insert them next to
the current row or column, or you can replace the current row or column.
You can also drag a row’s bubble in the Structure View to move the row, or Alt-drag (Windows), or Control-middle-
drag (UNIX) the bubble to copy the row. For details, see “Copying elements” on page 43.
Resizing columns
The quickest way to change the width of a column is to drag a column boundary. You can also resize columns
precisely by using a dialog box, and you can copy and paste a column’s width in order to duplicate that width in the
same table or in a different table.

ADOBE FRAMEMAKER 8
User Guide
172
To resize a column by dragging:
❖Do one of the following:
•To change a column width, select a cell in that column and drag its handle until the column is the size you want.
You can drag a handle to resize a column.
Select several columns to resize them together.
•To move the border between two columns so one column grows wider and the other narrower, Alt-drag
(Windows) or Shift-drag (UNIX) a selection handle. The overall width of the table doesn’t change.
To align the column border with the snap grid, choose Graphics > Snap before you change the width.
To specify a precise column width:
1Select cells in the columns you want to resize (if you’re resizing a single column, you can just click in it), and
choose Table > Resize Columns.
2Do one of the following:
•To specify a value for the width, click To Width and enter the value.
•To set the width to a percentage of the original width, click By Scaling and enter a percentage.
•To make the column the same width as another column in the table, click To Width of Column Number and enter
the column number.
•To make the widths equal parts of a total, click To Equal Widths Totalling and enter the total width.
•To specify a total width while still keeping the columns’ proportions the same, click By Scaling to Widths Totalling
and enter the total width.
•To set the width to match the widest paragraph or frame in the selected cells, click To Width of Selected Cells’
Contents and enter a maximum width.
3Click Resize.
To copy and paste a column width:
1Click in the column whose width you want to copy.
2Choose Edit > Copy Special > Table Column Width.
3Click in the column you want to change and choose Edit > Paste. Only the column width is pasted; the contents
of the cells remain unchanged.
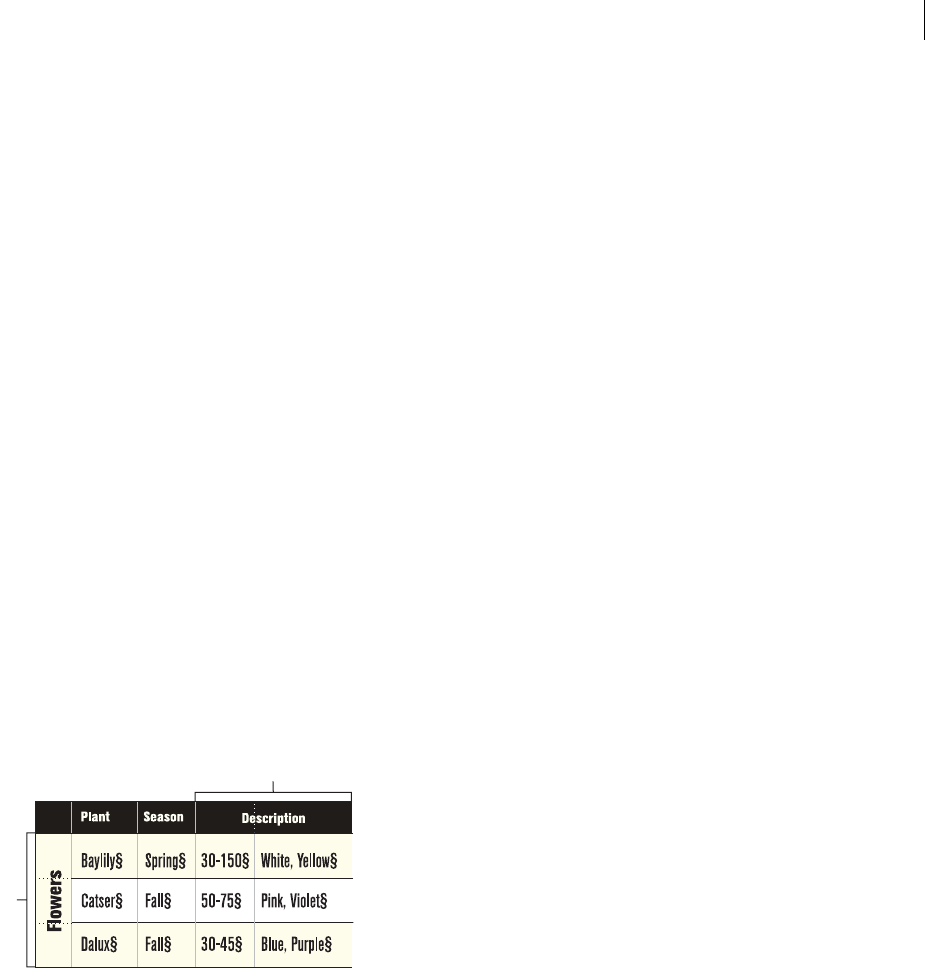
ADOBE FRAMEMAKER 8
User Guide
173
Adjusting the height of rows
The height of a row changes automatically to fit the cell’s contents, but you can increase the height further if you want.
You can also make all rows in a table the same height.
Note: When working with a structured document, adjusting the height of a row does not affect the structure of the table,
and it is not a format rule override.
To adjust the height of a row:
1Click in the row that has the height you want to increase, and choose Table > Row Format.
2Enter values for the minimum and maximum row height and then click Set.
To make all rows the same height:
1Determine the height of the tallest row in a table by doing the following:
•(Windows) Hold down Alt+Shift while drawing a selection border around the row.
•(UNIX) Hold down Control+Shift while drawing a selection border around the row.
2Note the height, which appears in the status bar.
3Select the entire table, and choose Table > Row Format.
4Specify this value for the minimum row height and click Set.
You may have to repeat these steps if you edit the contents of the cells causing their heights to change.
Straddling and unstraddling cells
You can combine cells horizontally into a single cell that straddles several columns, or vertically into a single cell that
straddles several rows. In a straddle cell, text and graphics flow across cell borders as if there were a single cell.
A. Cell straddling rows B. Cell straddling columns
If you straddle cells that have contents, the contents of those cells also merge, creating a separate paragraph for each
merged cell. You can also unstraddle cells.
To make a cell straddle several rows or columns:
❖Select the cells you want to straddle, and choose Table > Straddle.
To unstraddle a cell:
❖Select the straddle cell, and choose Table > Unstraddle. The contents of the straddle cell appear in the upper left
new cell, not back in the original cells.
B
A

ADOBE FRAMEMAKER 8
User Guide
174
Sorting columns and rows
You can rearrange the cells of columns or rows into either ascending or descending order. Ascending order sorts
from the beginning of the alphabet or the lowest number; descending order sorts from the end of the alphabet or the
largest number.
Original table (left) and sorted by first column (right)
Numbers are sorted based on their numerical value. For example, “124” appears after “23” in a list of numbers. When
sorting numbers, currency symbols are ignored, but negative signs are recognized. For example, -9 or (9) sorts before
9 in an ascending sort. The comma and decimal separators displayed in numbers are treated according to the
Regional options set for numbers and currencies on your system.
Text always comes after numbers in a sort. Text strings in tables are sorted based on the default system locale.
You can sort by date or time as long as you enter it as text, use a consistent format, and include leading zeros. For
example, if you’re using dd/mm/yy and hh:mm:ss formats, enter 04/12/2017 or 09:30:25.
To sort a table:
1Save your document, so that you can revert to your last saved version if the sort gives unexpected results.
2Make sure there are no hidden conditional rows in the table (use Special > Conditional Text).
3Do one of the following:
•To sort all columns or all rows in a table, click anywhere in the table.
•To sort only certain rows, select cells in the rows you want to sort.
4Choose Table > Sort.
5If you’re sorting all rows or all columns, click Select All Body Rows.
6Do any of the following:
•To sort the rows of the table, click Row Sort. If the rows contain heading or footing cells as well as body cells, only
the body cells will be sorted.
•To sort the columns of the table, click Column Sort.
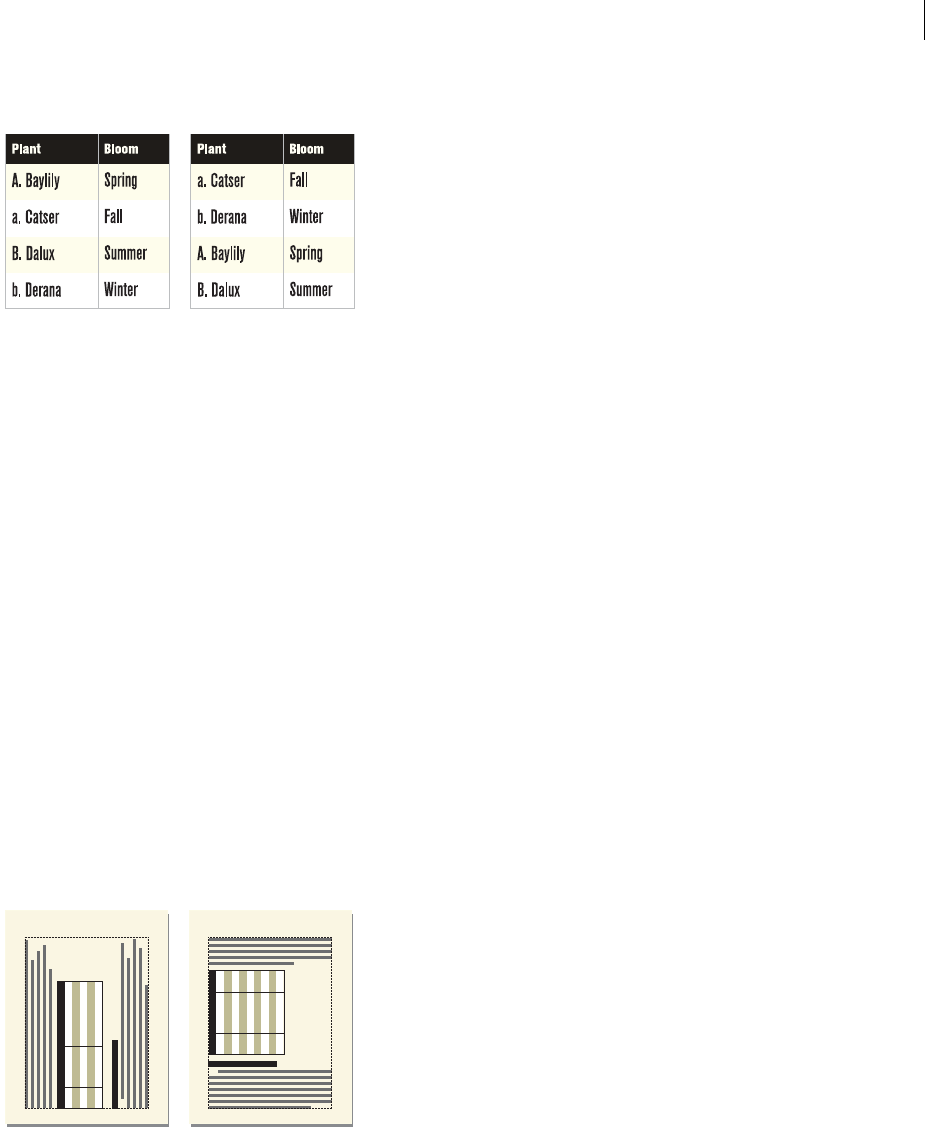
ADOBE FRAMEMAKER 8
User Guide
175
7To sort uppercase letters apart from lowercase letters, select Consider Case.
Ascending sort with and without Consider Case selected
8Choose a primary sort key by selecting from the Sort By text box and clicking Ascending Sort or Descending Sort.
You may sort straddle cells as long as they don’t extend past a row or column that you’re using as a sort key.
(Use Table > Unstraddle and try again.)
9Optionally, choose a second and third sort key from the Then By areas.
10 Click Sort.
Note: Adobe FrameMaker will correctly sort numbers preceded by the special symbols ()+-,. and $. However, combining
several of these symbols in a cell may adversely affect sorting. For example, a table cell containing -2 will fall correctly
between -1 and -3, but a cell containing -2+3 will not (it will be interpreted as -23).
Note: The Table sorting feature supports the Unicode text encoding standard.
Rotating cells and tables
When you rotate a cell in a table, you can type in it just as you do in any other cell.
You can also rotate an entire table by placing the table in an anchored frame that is rotated. The rotated table can be
in a page of unrotated text or in a rotated page (one that uses a rotated master page). Place the table on a rotated page
instead of rotating the table itself if you want background items (such as headers or footers) or body text to be rotated
as well as the table. You cannot edit a table in a rotated page.
Table on a rotated page (left) and table in a rotated anchored frame (right)

ADOBE FRAMEMAKER 8
User Guide
176
To rotate a cell:
1Select the cells you want to rotate, and choose Graphics > Rotate.
2Specify the orientation you want for the cells and click Rotate.
Rotated cells can save space.
As you type in a rotated cell, the cell height increases and the text doesn’t wrap. You can limit the height of rotated
cells so that text will wrap when it reaches the limit. For details, see “Adjusting the height of rows” on page 173.
To insert a rotated table in a page of unrotated text:
1Insert an anchored frame (see “Creating anchored frames” on page 346), and draw a text frame in it. For infor-
mation on drawing a text frame, see “Using text with graphics” on page 323.
2Insert the table in the text frame. For details, see “Inserting tables” on page 158.
3Select the text frame, choose Graphics > Rotate and rotate the text frame counterclockwise. You may need to
adjust the size of the text frame or the anchored frame to view the entire table.
If you want to edit the table, unrotate the text frame and then rotate it back when you’re finished.
To create a rotated table on a page with other rotated text:
❖Create a rotated master page and apply it to the body page where the table appears.
For details, see “Creating a rotated master page” on page 390 and “Assigning master pages to body pages” on
page 392. If document editing causes the table to move to a different page, you’ll need to reapply master pages.
Controlling page breaks in tables
If all the rows of a table don’t fit in a text column, some of the rows move to the next page or column. You can control
how the table breaks between pages or columns. For example, you can set the minimum number of rows that can
appear on a page or column, or specify that two rows always appear together on the same page or column. You can
also force a break at any row in a table.
When you insert a table, the minimum number of rows in a column or on a page is determined by the table format.
You can change this number in the Table Designer.
On the other hand, keeping two rows together and forcing a page break are not part of the format; they are custom
settings, which you make on a case-by-case basis. If you apply a different format to the table, these settings are
not overwritten.
For information on controlling where a table starts on a page or in a column, see “Controlling where tables begin”
on page 168.

ADOBE FRAMEMAKER 8
User Guide
177
Keeping a minimum number of rows on a page
If a table won’t fit on one page or in one column, the location of the page break is based on the number of orphan
rows allowed for the table. The orphan row property determines the minimum number of body rows that must be
kept together on a page or in a column.
For example, the following figure shows a table with an orphan row property set to 3, so that at least three body rows
must appear on each page. If there weren’t room for three rows on the first page, the whole table would move to the
next page.
Note: When working with structured documents, changes to page breaks do not affect the structure of a table and are
not format rule overrides.
To set the minimum number of rows on a page or in a column:
1Click in the table you want to change, and choose Table > Table Designer.
2In the Basic properties of the Table Designer, enter the number of rows in the Orphan Rows text box. The number
can be between 1 and 255.
3Click Apply to Selection.
Specifying a large orphan row setting, such as 99, prevents a table from breaking across columns or pages.
Keeping rows together
You can specify that a particular row should always stay with the previous or next row.
To keep rows together:
1Select the row you want to keep together with the next or previous row, and choose Table > Row Format.
2In the Keep With area, choose Next Row or Previous Row, and click Set.
Breaking tables at a specific place
Just as you can have a table or paragraph always start at the top of a page or column, you can do the same with a
specific row in a table. Later, you can remove the page break if you want to.
To add or remove a page break in a table:
1Click in the row you want to change, and choose Table > Row Format.
2Do one of the following:
•To force the row to the top of the next column, choose Top of Column or one of the Top of Page options from the
Start Row pop-up menu.
•To remove a page break, choose Anywhere from the Start Row pop-up menu.
3Click Set.
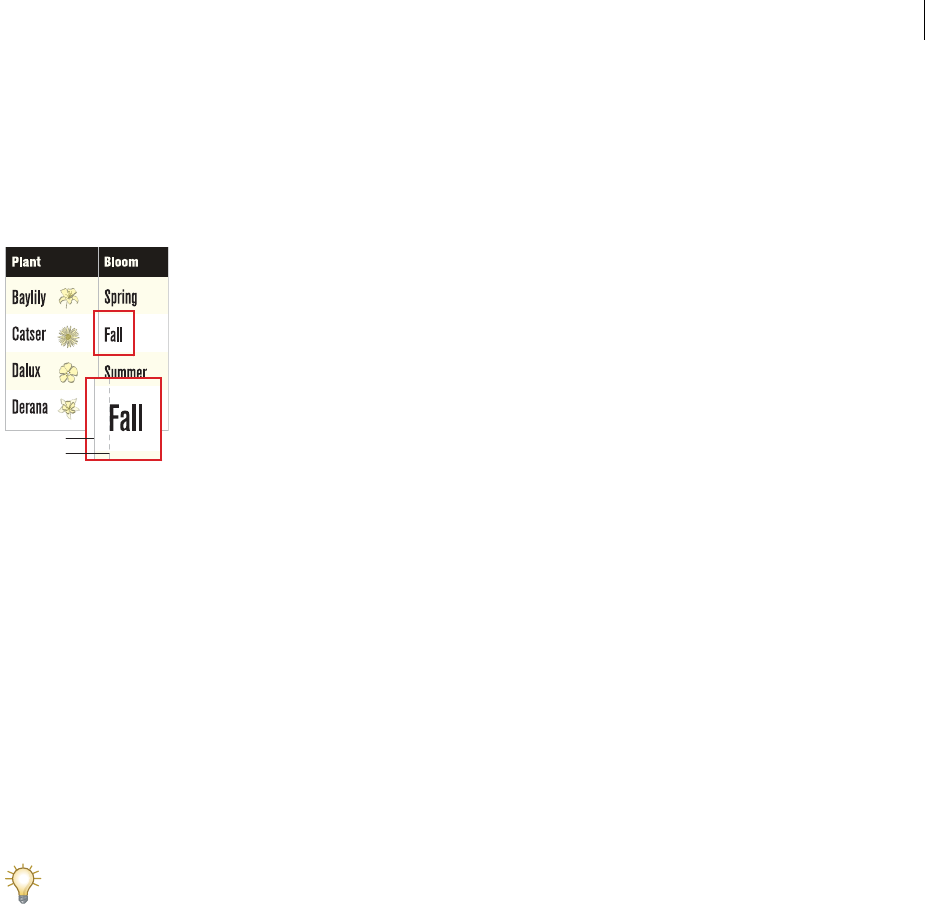
ADOBE FRAMEMAKER 8
User Guide
178
Positioning and autonumbering text within cells
When you insert a table, its cell margins—the distance between the cell edge and the cell text frame—are determined
by the table format. The indent properties of text in the cell, which are measured from the cell margins, are part of
the text’s paragraph format.
A. Left cell margins
B. Paragraph’s left indent
You can change the default cell margins for a table, and customize the margins and the vertical alignment of text in
particular cells. You can also specify the direction of autonumbering within cells—across rows or down columns.
Setting default cell margins
Default cell margins apply to all cells in the table.
To set default cell margins in a table:
1Click in the table you want to change and choose Table > Table Designer.
2In the Basic properties of the Table Designer, enter the values for the top, bottom, left, and right margins in the
Default Cell Margins area.
3Click Apply to Selection.
If you want text to look vertically centered, make the top margin larger than the bottom margin. For example,
make the top margin 5 points and the bottom margin 3 points.
Customizing cell margins
You use the Paragraph Designer to change the default settings for the margins of specific cells. When you customize
cell margins in a table this way and later apply a different format to the table, the custom cell margins are not
overwritten by the new table format’s default margins.
Because custom cell margins are part of a paragraph format, they aren’t normally stored as part of the Table Catalog
format. However, the paragraph formats of the first title paragraph and the first paragraph in the heading, body, and
footing rows of each column are stored. If you customize the cell margins of any of these paragraphs and then store
the table format in the catalog, future tables that use that table format will have the custom settings as their defaults.
To customize a cell margin:
1Click in the first paragraph of the cell whose margins you want to customize.
2Choose Format > Paragraphs > Designer to display the Paragraph Designer.
3Choose Table Cell from the Properties pop-up menu.
A
B

ADOBE FRAMEMAKER 8
User Guide
179
4In the Cell Margin area, specify the margins you want to customize by doing one of the following:
•To create a margin relative to the default cell margin, choose From Table Format, Plus from the pop-up menu and
then enter a value.
•To create a fixed margin measured from the edge of the cell, choose Custom from the pop-up menu and then enter
a value.
5Click Apply to Selection.
Customizing vertical alignment of text
You use the Paragraph Designer to change the default vertical alignment of specific cells. When you customize
vertical alignment in a table this way and later apply a different format to the table, the custom vertical alignment
settings are not overwritten by the new table format’s alignment margins.
Top, middle, and bottom vertical alignment
You can specify the vertical alignment for individual cells—at the top, in the middle, or at the bottom. When you
change the vertical alignment in a table and later apply a different format to the table, the custom vertical alignment
settings are not overwritten by the new table format’s default alignment settings.
Because alignment settings are part of a paragraph format, they aren’t normally stored as part of the Table Catalog
format. However, the paragraph formats of the first paragraph in the heading, body, and footing rows of each column
are stored. If you customize the alignment of any of these paragraphs and then store the table format in the catalog,
future tables that use that table format will have the custom settings as their defaults.
To customize the vertical alignment of text in a cell:
1Click in the cell you want to customize.
2Choose Format > Paragraphs > Designer to display the Paragraph Designer.
3Choose Table Cell from the Properties pop-up menu and then choose Top, Middle, or Bottom from the Cell
Vertical Alignment pop-up menu.
4Click Apply to Selection.
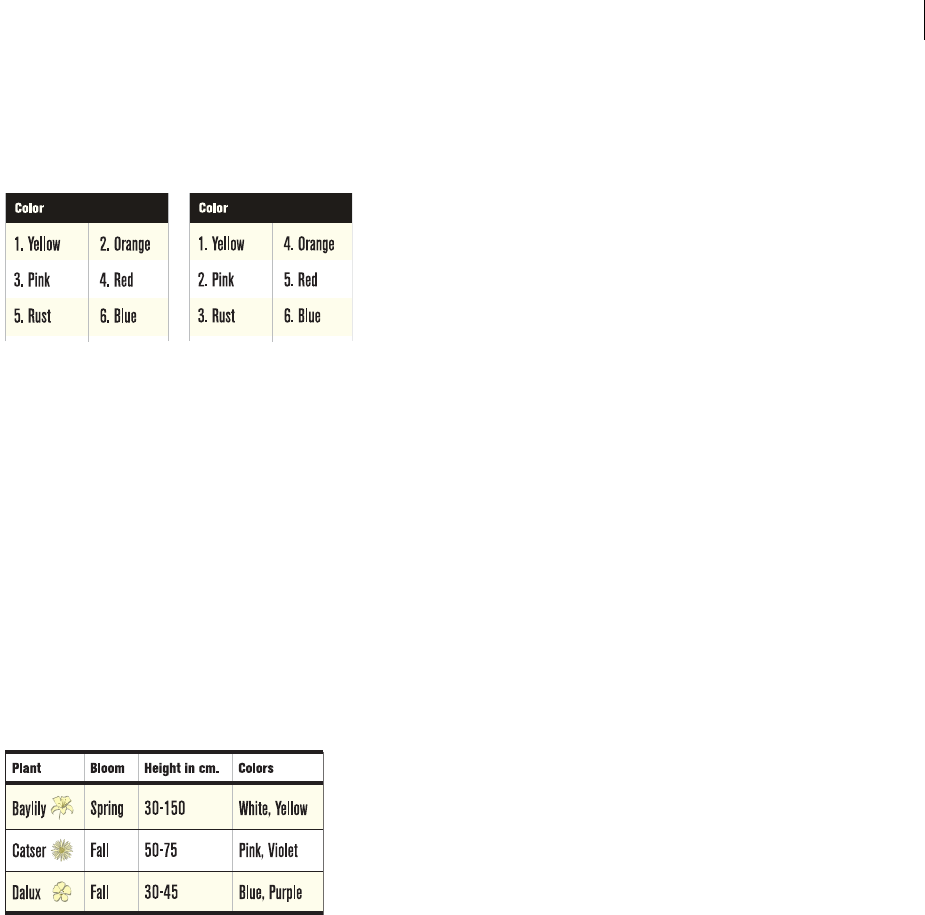
ADOBE FRAMEMAKER 8
User Guide
180
Specifying the direction of autonumbering
When you insert a table, the direction of autonumbering within cells—either across rows or down columns—is
determined by the table format. This property also sets the direction of autonumbering for table footnotes.
Autonumbering across rows and down columns
To change the direction of autonumbering in a table:
1Click in the table you want to change, and choose Table > Table Designer.
2In the Basic properties of the Table Designer, choose Row First or Column First from the Numbering
pop-up menu.
3Click Apply to Selection.
Working with ruling and shading
You can create more attractive and effective tables by using ruling and shading. For example, you could use ruling
around the outside edges of a table and shading only in the heading cells. Or you could use ruling to separate all cells
in a table and use shading for every other body row.
All cells are ruled; every other body row is shaded.
When you insert a table, its regular ruling and shading are determined by the table format. Regular ruling and
shading affect entire rows and columns in a specified repeating pattern. You can use the Table Designer to change a
format’s ruling or shading properties for particular tables that use the format.
You can also set up custom ruling and shading for a table. Custom ruling and shading aren’t limited to entire rows
or columns and aren’t part of the table format. If you customize the ruling or shading of a table and later apply a
different format to the table, the custom ruling or shading is not overwritten by the new format.

ADOBE FRAMEMAKER 8
User Guide
181
Setting up regular ruling
You can specify a ruling pattern for columns, body rows, heading and footing rows, and outside edges of a table. If
you need to diverge from the pattern anywhere in the table, use a custom setting (see “Customizing ruling” on
page 181).
Changing the table ruling
To set up or remove regular ruling:
1Click in the table you want to change and choose Table > Table Designer.
2In the Ruling properties of the Table Designer, set up the ruling styles for columns, body rows, heading and
footing rows, and outside edges.
3Click Apply to Selection.
Customizing ruling
You can customize the ruling for individual cells, rows, or columns. Unlike a table’s regular ruling, a table’s custom
ruling is not stored as part of the table format. Wherever the regular and custom settings are in conflict, the custom
settings prevail.
To customize ruling or remove custom ruling:
1Select the cells, rows, or columns that you want to customize.
2Choose Table > Custom Ruling & Shading.
3Select a custom ruling style, or select From Table to remove custom ruling.
The scroll list shows the document’s predefined ruling styles. For information, see “Creating or changing ruling
styles” on page 181.
4In the To Selection area, specify the parts of the current selection that you want to change.
5To keep from inadvertently changing any shading, turn off Custom Cell Shading.
6Click Apply.
Creating or changing ruling styles
You can create additional ruling styles (such as Double, Thick, or Thin line styles), and edit or delete existing ones.
If you edit a ruling style, the change applies to both the regular and custom ruling that use that style.
When editing ruling styles, you may want to zoom in to a high percentage. This lets you see slight differences in
line thickness.

ADOBE FRAMEMAKER 8
User Guide
182
To create or change a ruling style:
1Choose Table > Custom Ruling & Shading.
2Select a style in the scroll list that you want to edit or, if you’re creating a new style, select one similar to the style
you want to create.
3Click Edit Ruling Style.
4Enter the width, and choose a color and pen pattern for the style.
5Click Single or Double to specify single or double lines. If you click Double, specify a value for the gap separating
the lines.
6If you’re creating a new style, type a name in the Name text box.
7Click Set.
To delete a ruling style:
1Choose Table > Custom Ruling & Shading.
2Select the style you want to delete.
3Click Edit Ruling Style and click Delete. If the style was used for a table’s regular ruling, the occurrences of the
style use no ruling. If the style was used for custom ruling, the table’s regular ruling is restored.
Setting up regular shading
You can specify a shading percentage for heading and footing rows, and two percentages for body rows or columns.
For example, you can fill the heading row and every other body row with different shades. If you need to diverge
from the regular shading anywhere in the table, use a custom setting (see “Customizing shading” on page 183).
Changing the table shading
To set up regular shading:
1Click in the table you want to change, and choose Table > Table Designer.
2In the Shading properties of the Table Designer, specify the shading for heading and footing rows and for body
rows or columns.
3Click Apply to Selection.

ADOBE FRAMEMAKER 8
User Guide
183
Customizing shading
As with ruling, you can customize the shading or color for individual cells, rows, or columns to draw attention to
specific areas of a table. A table’s custom shading is not stored as part of the format. Wherever the regular and custom
settings are in conflict, the custom settings prevail.
To customize shading or remove custom shading:
1Select the cells, rows, or columns that you want to customize, and choose Table > Custom Ruling & Shading.
2Specify a fill percentage and color for the shading. Choose From Table to remove custom shading.
3To keep from inadvertently changing any ruling, turn off Custom Cell Ruling.
4Click Apply.
Displaying a cell’s ruling and shading settings
Because regular and custom ruling and shading work together, you sometimes need to determine which is which.
To display a cell’s ruling and shading settings:
1Select the cells, rows, or columns that have the ruling and shading properties you want to see.
2Choose Table > Custom Ruling & Shading, and click Show Current Settings.
In the dialog box, Mixed means that the selected cells use more than one custom ruling style, fill, or color. From Table
means that the selected cells use the regular ruling or shading set in the Table Designer.
Redefining (updating) table formats
If you’re a template designer or if your document lacks a format you need, you may need to globally redefine (update)
a table format throughout a document.
To change a table format, you change a table’s properties and then change the corresponding catalog format to match
the table.
The properties applied to the catalog format include those set in the Table Designer and the defaults not set in the
Table Designer—for example, the default paragraph formats (see “About tables” on page 157). In addition, properties
set in the Table Designer (but not default properties that aren’t changed in the Table Designer) are applied to existing
tables in the document that have the same tag.
If you change properties in the Table Designer and then decide you don’t want to update the format, you can cancel
the operation and reset the properties by simply clicking in text. You can also choose Reset Window from Selection
from the Commands pop-up menu in the Table Designer.
To redefine a table format:
1Click in a table whose format you want to redefine, and choose Table > Table Designer. If the table you click in has
format overrides, these overrides—not the catalog format’s definition—appear in the Table Designer.
2If you want to base the changed format on the catalog format, without any overrides, choose the format tag from
the Table Tag pop-up menu, even if the tag you want is already displayed in the Table Tag text box.
3Do the following:
•Use the Table Designer to change any of the settings for the Basic, Ruling, or Shading properties.

ADOBE FRAMEMAKER 8
User Guide
184
•Change any of the default properties, such as the number of rows and columns, widths of columns, and the
paragraph format of the title and of the first paragraph of each column. These properties are supplied when you
first insert a new, empty table (see “Applying different table formats” on page 166).
4Click Update All. If any of the tables being updated contain format overrides, an alert message asks whether you
want to remove them.
Changing properties in several table formats at the same time
You can change specified properties of several table formats at the same time. For example, you can change all table
formats from centered to left-aligned. Rather than update each format separately, you can update them all at the same
time.
To change specific properties in several table formats:
1Select the tables whose formats you want to redefine by doing one of the following:
•To redefine the format of all tables in the document, click in any table.
•To redefine several table formats, but not all formats in the document, select consecutive tables that use the
formats you want to redefine. (To select multiple tables, select their anchor symbols.)
2In the Table Designer, display the group of properties from which you want to apply one or two properties.
3Change the properties as needed.
4Choose Global Update Options from the Commands pop-up menu.
5Choose the table formats you want to apply the properties to.
6Click the current property group in the Use Properties area and click Update. If any of the tables being updated
contain format overrides, an alert message asks whether you want to remove them.
FrameMaker applies the properties to the Table Catalog formats you specified and to all tables in the document with
the same tags.
Using one group of properties to redefine other formats
You can use a group of properties from one table format to redefine (update) other formats. For example, if you want
to change the default ruling properties of all tables in a document, you can change them for one format and apply
the changes to the remaining formats in the catalog without changing any other properties.
To use a group of properties from one table format to redefine another table format:
1Select the tables whose format you want to redefine by doing one of the following:
•To redefine one table format or all table formats in the document, click in any table.
•To redefine several table formats, but not all formats in the document, select consecutive tables whose formats you
want to redefine. (To select multiple tables, select their anchor symbols.)
2In the Table Designer, choose the property group you want to update—Basic, Ruling, or Shading.
3Delete the tag from the Table Tag text box if the text box isn’t empty. Deleting the tag sets the text box to As Is,
which keeps FrameMaker from changing the tags of the formats you update (see “Using As Is” on page 106).
4Change any of the table’s properties.
5Choose Global Update Options from the Commands pop-up menu.
6Choose the table formats you want to apply the properties to.

ADOBE FRAMEMAKER 8
User Guide
185
7Click the current property group in the Use Properties area and click Update. If any of the tables being updated
contain format overrides, an alert message asks whether you want to remove them.
FrameMaker applies the properties to the Table Catalog formats you specified and to all tables in the document with
the same tags.
Renaming and deleting table formats
You may need to rename or delete a table format when designing a template. You may also need to rename a table
format if you want to copy an entire catalog from a template and don’t want a format to be overwritten.
Deleting a format from a catalog does not affect any tables that have the same tag—the tables simply have a format
that isn’t stored in the catalog. If you want to change the format of these tables, you can then retag them (see
“Applying different table formats” on page 166).
To rename a table format:
1Click in a table whose format you want to rename.
2In the Table Designer, choose the tag you want to change from the Table Tag pop-up menu.
Make sure you perform this step even though it means choosing the same tag as the one currently displayed.
Choosing a tag from the pop-up menu ensures that the stored format properties—not overrides—are displayed.
3Type a new name in the Table Tag text box, and click Update All.
4Click OK.
To delete a format from the Table Catalog:
1In the Table Designer, choose Delete Format from the Commands pop-up menu.
2Select the format in the scroll list and click Delete. You can delete additional formats if you want to.
3Click Done.
Creating table formats
Typically, you insert tables using the table formats already defined in the document. Occasionally, you may need to
override a table format or customize it in special cases.
If you’re a template designer, however, or if your document lacks a format you need, you may need to create a table
format. You can create a new format by modifying the properties of an existing table and storing the format in the
Table Catalog with a different tag.
To create a new table format:
1Click in a table that has a format similar to the one you want to create. (The more similar it is to the format you’re
defining, the fewer changes you’ll have to make.)
2Set up the rows and columns by adding or deleting body, heading, and footing rows and adjusting columns as
necessary. (See “Adjusting rows and columns” on page 170.)

ADOBE FRAMEMAKER 8
User Guide
186
3Use the Table Designer to modify any of the table’s properties:
•Its position in the text frame (see “Positioning tables on a page” on page 167)
•Whether it has a title (see “Adding or removing table titles” on page 160)
•Its Orphan Rows setting (see “Controlling page breaks in tables” on page 176)
•Its cell margins (see “Positioning and autonumbering text within cells” on page 178)
•Its ruling and shading (see “Working with ruling and shading” on page 180)
Don’t set any property to As Is. Table formats must have all properties specified. (An alert message warns you if not
all settings are specified so you can go back and change any As Is properties.)
4Use the Paragraph Designer to create or change any of the following paragraph formats, which are stored as part
of a table format: the paragraph formats of the first title paragraph, and the first paragraph in the heading, body, and
footing rows of each column.
5When the table looks the way you want, choose New Format from the Commands pop-up menu in the
Table Designer.
6Enter a name for the new format in the Tag text box.
7To store the format in the Table Catalog, select Store in Catalog.
8To apply the new format to the current table, select Apply to Selection.
9Click Create.
Working with tables in structured documents
Structured tables work in much the same way as unstructured tables. Much of the table’s structure is determined by
its element definition. When you insert the table, at least some row and cell elements are inserted along with it, ready
for you to provide the contents.
Elements for structured tables and table parts
A table and its table parts (such as title, rows, and cells) are each represented in an element. You can see and work with
these elements in the Structure View.
Table and table part elements
TableTitle
Table
TableHead
TableRow
TableRow
TableRow
TableCell
TableCell
TableCell
TableBody

ADOBE FRAMEMAKER 8
User Guide
187
When you insert a table element, some of the table parts are inserted automatically. You can use the Element Catalog
as a guide for building the rest of the table. If you add more table parts, they may also have an initial structure; for
example, a new row element contains cell elements. The content rules for table and table-part elements define an
initial structure for that element.
A table may also have cells that are defined to remain empty. No valid elements can be inserted in these cells, and
you cannot type in them. An empty cell element’s tag may describe the use of the cell—look for names such as Blank-
Header or SpacerCell.
How structured tables are formatted
The appearance of a structured table is determined by its table format, a variety of settings in the Table menu, and
paragraph formats for text.
Table formats A table format controls the spacing, indentation, and alignment of a table in a column, the start
position on a page, the location of the title, default margins for cells, the direction of autonumbering in cells, and
default ruling and shading. A document stores table formats in a Table Catalog.
The format rules for a table element may suggest a particular table format. You can apply a different format to
the table, either when you create the table or later, and the change is not considered a format rule override. (Changing
the table format makes a table invalid, though, if the format adds a title and the table’s content rules don’t allow one.)
Table menu commands The Table menu has commands for rotating and straddling cells, changing cell height and
page breaks, adding rows and columns, and applying custom ruling and shading to cells. These settings take prece-
dence over the table format for particular cells.
You can use any of the Table menu commands in a structured table. The commands are not format rule overrides
and, except for Add Rows and Columns, do not affect the structure of the table.
Paragraph formats Paragraph formats define fonts, line spacing, and other properties for text in the cells and the
title. Table-part elements may specify paragraph formats.
Inserting structured tables
When working in a structured flow, you use a table element to insert a table. The new table appears in the document
with elements for table parts, such as a title, a heading row, and some body rows. The element definitions for the table
and table parts determine the table’s configuration. You can change the number of rows and columns as you insert
the table, though your change may make the table invalid.
Table parts inserted automatically
Title
Table
Head
Row
Cell
Cell

ADOBE FRAMEMAKER 8
User Guide
188
To add other table-part elements to the table, use the Element Catalog as a guide.
A table is anchored to a specific location in text. As you edit the text, the table moves in the document along with the
text. An anchor symbol appears at the table’s anchor location in the document window.
When you insert a table, you specify where to anchor it. For example, you might anchor a table in a Para element (as
a child element to the Para) or you might anchor it in a Section element (as a sibling to Para and other elements in
the Section). It depends on how the elements are defined for your document.
To insert a table element:
1Click where you want to insert the table.
2Select a table element in the Element Catalog, and click Insert.
You can also use Table > Insert Table to insert an element. If more than one table is available, choose the one you
want from the Element Tag pop-up menu in the Insert Table dialog box.
3To change the table format, select a format in the scroll list. The table element may have a format preselected, but
you can change the format and it will not be considered a format rule override.
Consult your developer before changing a table format. Your element catalog may have a separate element defined
for each format you’ll need.
4If necessary, change the number of rows and columns. Changing these numbers may make the table invalid.
5Click Insert. FrameMaker inserts an anchor symbol at the insertion point and a table with predefined
descendant elements. The Structure View has bubbles for the new elements.
6If the Attributes for New Element dialog box appears, enter attribute values for the table element and click Insert
Element (see “Entering attribute values as you insert elements” on page 46).
Select cells in the table and then right-click to display a context menu for working with the cells. You can also use
the QuickAccess bar as a quick way to apply table commands (see “Using the QuickAccess bar” on page 11).
If no table element is available at the location you want, you might use an invalid element. After inserting the table,
talk to your developer about making it valid at this location.
To use an invalid table element:
❖Do one of the following:
•To use a table that is valid in another part of the document, either insert the table in a valid location and then move
it, or use the All Elements setting (see “Changing the scope of elements available in a structured document” on
page 18) to make the table available everywhere and then insert the table where you want it.
•To insert an invalid table with default tags, choose Table > Insert Table and choose TABLE from the Element Tag
pop-up menu. (This option appears in the menu if the document has no defined table elements.) The table and
table parts will have default tags, such as TABLE, HEADING, and ROW. After replacing the table with a valid
table, change the table parts to valid elements. (See “Editing elements” on page 39 for instructions on changing
elements.)
Note: Changing an invalid table with default tags to a valid table can be a laborious process, so it’s usually best to work
with tables that are defined.

ADOBE FRAMEMAKER 8
User Guide
189
Filling in structured tables with text and graphics
Each intersection of a column and row is a cell. In a structured table, each cell is an element with a definition that
describes possible contents for the cell—usually text, but anchored frames or other elements may also be used.
(Anchored frames might, in turn, contain graphics or other tables.) As you type text or insert an anchored frame in
a cell, the cell’s height expands as needed.
You can copy, cut, and paste the contents of cells just as you do text and graphics in any other part of a document.
Special system variable elements may be available that specify continuation text in the titles or heading rows of
multipage tables.
Typing and selecting text in structured tables
You can type text in the current cell when the <TEXT> indicator appears in the Element Catalog. You may also be
able to insert footnotes, cross-references, and other text-related elements in the cell. Use the Element Catalog as
aguide.
To place the insertion point in a table cell:
❖Click in the cell, or click to the left of the cell’s text snippet in the Structure View.
To select all the contents of a cell (but not the cell itself):
❖Click in the cell and press Esc t h a, or double-click the cell’s bubble in the Structure View. You can also triple-click
a cell’s contents if it contains just one paragraph.
To select the contents of the next or previous cell:
❖Press Tab or Shift+Tab.
To select the contents of the cell below or above:
❖Do one of the following:
•(Windows) Press Control+Alt+Tab or Control+Alt+Shift+Tab.
•(UNIX) Press Meta+n or Meta+p.
To insert a tab in a cell:
❖Press Esc Tab.
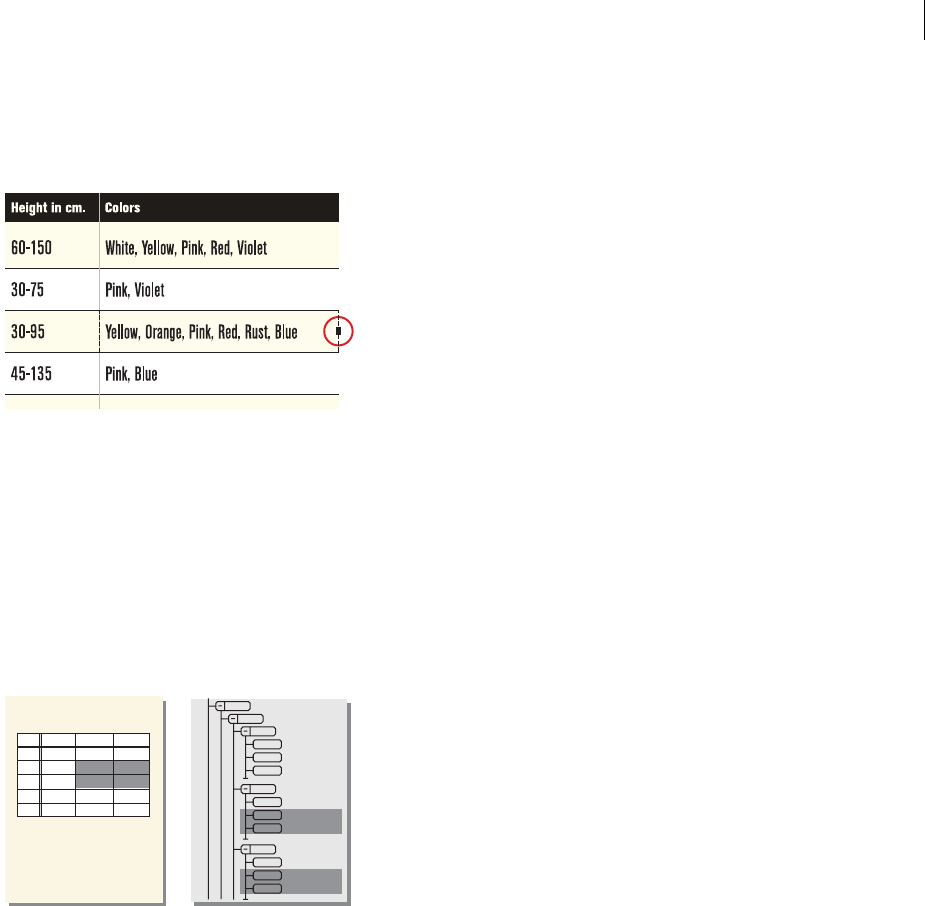
ADOBE FRAMEMAKER 8
User Guide
190
Selecting structured table cells
When you work in a table, you may need to select cells, rows, columns, or the entire table. When a cell (rather than
its contents) is selected, a handle appears with the cell in the document window.
Selection handle
To select a single cell:
❖Drag across the cell’s boundary and back, or click the cell’s bubble in the Structure View. You can also Control-
click the cell.
To select multiple cells:
❖Drag across the cells, or click the first cell and then Shift-click the last cell in the selection.
Note: A contiguous selection of cells in the document window may not appear as contiguous bubbles in the
Structure View.
Selected cells (left) and bubbles (right)
To select a row:
❖Drag across the cells in the row, click in the row and press Esc t h r, or click the row’s bubble in the Structure View.
Note: If you click between table-part elements (such as between two rows) in the Structure View, the insertion point
appears in the Structure View but not in the document window.
To select a column:
❖Click in the column and press Esc t h c, or drag from a heading cell into the first body cell.
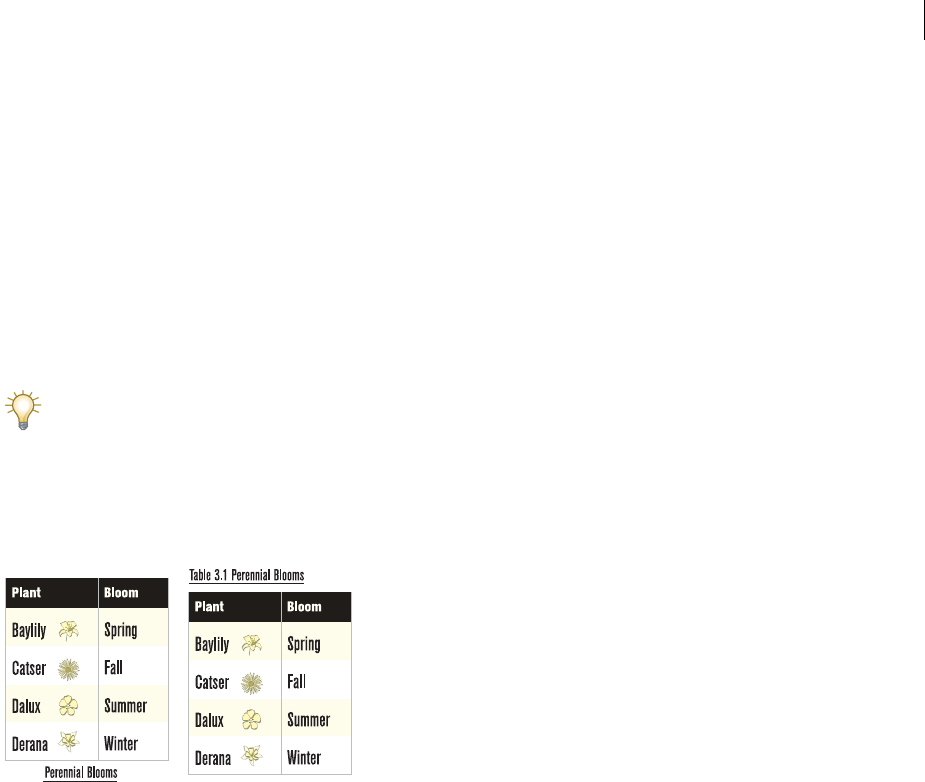
ADOBE FRAMEMAKER 8
User Guide
191
Copying or moving the contents of cells in structured tables
You can paste a cell’s contents into another cell in the same table or a different table. Use the Element Catalog as a
guide to be sure you’re pasting into a location that allows the contents.
When selecting contents to paste, you select either the contents only or the entire cell. If you select the cell, the cell’s
formatting (such as any special shading or ruling) is pasted along with the contents.
To copy or move a cell’s contents:
1Select the contents (see “Typing and selecting text in structured tables” on page 189), or select the entire cell if you
want to include the formatting (see “Selecting structured table cells” on page 190). You can also select multiple cells.
2Cut or copy the selection, click in another cell, and paste.
You can also drag a cell’s bubble in the Structure View to move the cell, or Alt-drag (Windows), or Control-middle-
drag (UNIX) the bubble to copy the cell. For details, see “Copying elements” on page 43.
Adding or removing structured table titles
A table title appears above or below a table and is repeated on all pages of a multipage table. The title typically has
format rules that control the look of the title, such as its font and whether it is centered or autonumbered.
Title centered below (left), autonumbered title left-aligned above (right)
A table’s element definition sometimes specifies whether or not the table should have a title. You can add a title to
any table, but you should check in the Structure View to be sure that the title is not invalid in the table.
The title element is always the first child element of a structured table, regardless of whether the title appears above
or below the table.
To add or remove a table title:
1Click in the table and choose Table > Table Designer.
2In the Basic properties of the Table Designer, choose Above Table, Below Table, or No Title from the Title Position
pop-up menu.
3Specify the gap between the table and the title.
4Click Apply to Selection. If the title has been defined to be autonumbered, the number (such as Table 1) appears
in the title cell. You enter the text of the title yourself.
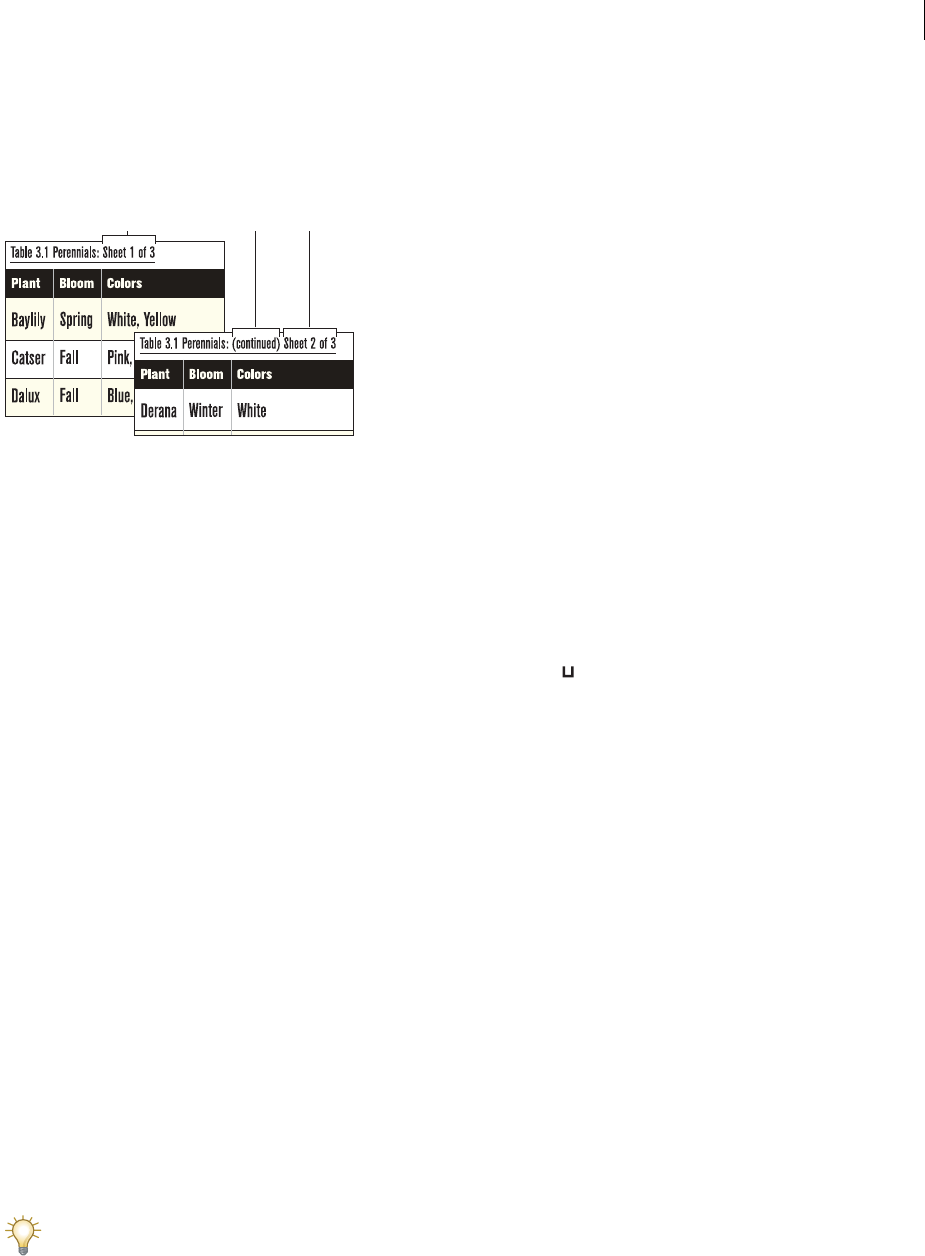
ADOBE FRAMEMAKER 8
User Guide
192
Adding “continuation” text to structured tables
In a multipage table, you may want to include special “continuation” text in the title or in heading or footing rows.
Your document may have variable elements defined for this purpose, such as one that displays (continued) and
another that tells the number of sheets in the table.
A. and C. Table Sheet variable B. Table Continuation variable
To add continuation text:
1On the first page of the table, click in the title or in the heading or footing where you want to insert the
variable element.
2Select a variable element for continuation text in the Element Catalog, and click Insert. The variable appears at the
insertion point, and a bubble appears in the Structure View, with a text snippet that shows the first part of the
variable’s text.
On the first page of the table, the variable appears as a nonbreaking space . On subsequent pages, the variable
displays its text—for example, (continued).
Placing graphics in structured table cells
If your table cells allow graphic elements, you can draw or import graphics in the cells. A new graphic element can
be either an empty anchored frame that you can draw in or an anchored frame with an imported graphic.
For information on drawing graphic objects in an anchored frame, see “About Anchored Frames” on page 345.
To place a graphic in a table cell:
1Click where you want to place the graphic in the cell.
2Select a graphic element in the Element Catalog and click Insert. The element’s definition determines which dialog
box appears.
3Do one of the following:
•If the Anchored Frame dialog box appears, choose At Insertion Point from the Anchoring Position pop-up menu,
and click New Frame.
•If the Import File dialog box appears, select the file to import, and click Import.
An anchored frame appears in the cell, and a bubble with the text snippet GRAPHIC appears in the Structure View.
4If the anchored frame is wider than the cell, resize the column (see “Resizing columns” on page 171).
To resize a column to match its contents, select the column and press Esc t w.
5If necessary, center the graphic in the frame. Select the graphic, choose Graphics > Align, select T/B Centers or
L/R Centers (or both), and click Align.
A CB
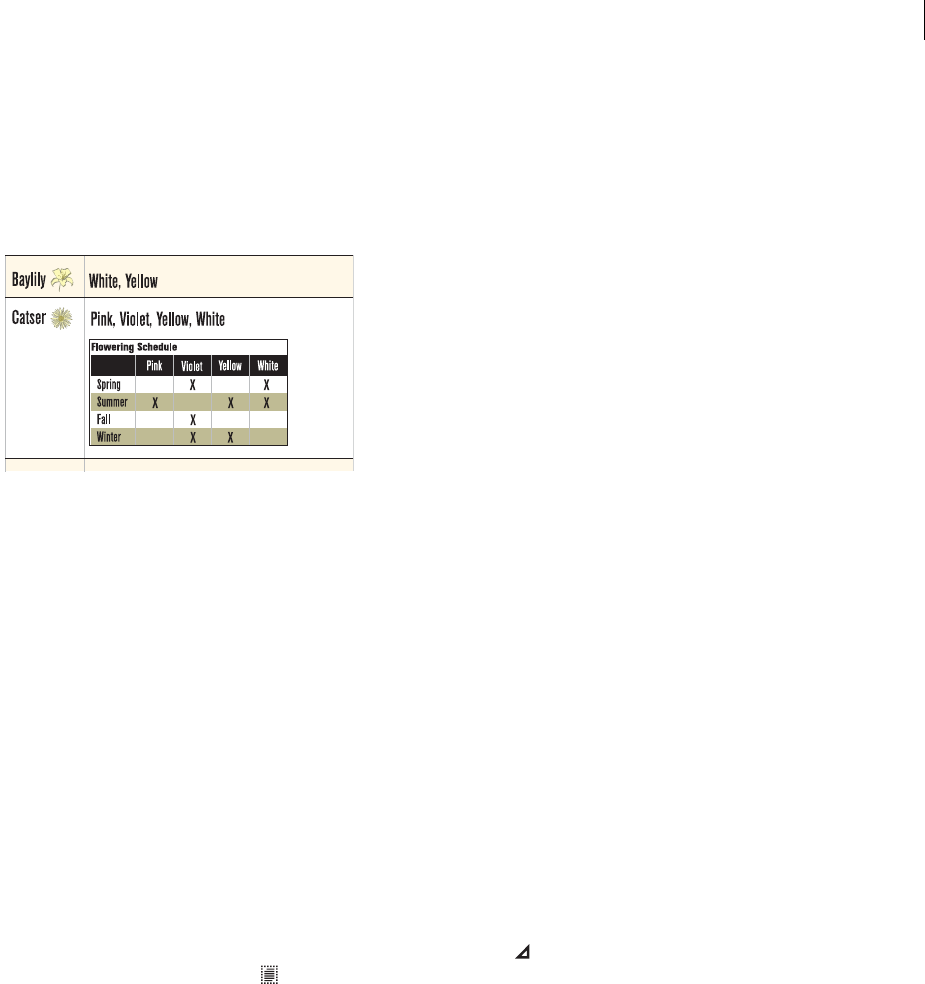
ADOBE FRAMEMAKER 8
User Guide
193
Nesting structured tables in table cells
You can insert a table within a table cell—for example, to show two independent tables side by side (in separate cells)
or to nest tabular material.
Before you insert a table in a cell, you add an anchored frame to the cell and draw a text frame in the anchored frame.
The cell must allow graphic elements.
Nested table
Important: If you export a document to SGML or XML, you can lose the contents of anchored frames in it because they
are not part of the main structured flow. Work with your application developer if you plan to export to SGML or XML
to avoid losing data in the nested table.
To nest a table in a table cell:
1Click where you want to place the table in the cell.
2Select a graphic element for empty anchored frames in the Element Catalog, and click Insert.
You can also use Special > Anchored Frame to insert an element. Choose a frame element from the Element Tag pop-
up menu in the Anchored Frame dialog box.
3Choose At Insertion Point or Below Current Line from the Anchoring Position pop-up menu, set the width and
height of the frame, and click New Frame.
Anchor the table below the current line if the cell has other text (as in the example above). Try to set the size of the
frame to be slightly larger than the size of the table.
4If the anchored frame is wider than the cell, resize the column (see “Resizing columns” on page 171).
5Draw a text frame in the anchored frame. Click the Tools button at the upper right in the document
window, click the Text Frame tool in the Tools palette, drag to draw the frame, and click Set in the dialog box that
appears.
See “Using text with graphics” on page 323 if you need more information on text frames.
6Click in the text frame and use Table > Insert Table to insert an unstructured table.

ADOBE FRAMEMAKER 8
User Guide
194
Copying, moving, and removing structured tables
You can copy, move, or remove an entire table. For these purposes, it’s usually easiest to select and work with the table
in the Structure View.
If you copy or move an unstructured table to a structured flow, the table is given a basic structure with default
elements named TABLE, HEADING, ROW, and so on. Change the default elements in the new table to appropriate
elements defined in the document.
If you copy or move a structured table to an unstructured flow, the table structure may no longer be valid.
To select a table:
❖Click the table’s bubble in the Structure View or control-triple-click a cell.
To copy or move a table:
1Select the table.
2Choose Edit > Copy; or choose Edit > Cut, select Remove Cells from Table, and click Cut.
3Click where you want to insert the table and choose Edit > Paste. Look at the Element Catalog before pasting to
verify that the location is valid for a table.
You can also drag a table’s bubble in the Structure View to move the table, or Alt-drag (Windows), or Control-
middle-drag (UNIX) the bubble to copy the table. For details, see “Copying elements” on page 43.
To remove a table without using the Clipboard:
❖Select the table element in the Structure View, and then press Delete.
Applying different formats to structured tables
A table format controls many aspects of a table’s appearance, including its indentation, spacing, alignment, autonum-
bering, cell margins, and title. (See “How structured tables are formatted” on page 187.)
The format rules for a table element may suggest a particular table format, but you can apply a different format, either
when you insert the table or later, and the change is not considered a format rule override. If you remove format rule
overrides in the document, the table will not return to its original format.
When you apply a different table format, only the properties associated with table formats change in the table. That
is, any customizations you’ve made to the table—the column widths, the number of rows and columns, and the
settings from the Table menu—are not affected.
Table with old (left) and new (right) formats; custom rotated cells retained

ADOBE FRAMEMAKER 8
User Guide
195
You can apply a table format to one table or to a group of tables that currently use a certain format.
Important: If a new table format adds a title to the table and the table’s content rules do not allow a title, the title
is invalid.
Your application developer may have suggestions on which formats are appropriate for particular tables. If a
document does not have a format that meets your needs, see your developer about redefining a format or creating a
new one.
To apply a different format to a table:
1Click in the table.
2Choose Table > Table Designer.
3Choose the format from the Table Tag pop-up menu, and click Apply To Selection.
To apply a format to several tables that use a certain format:
1Select tables by doing one of the following:
•To apply a format to several consecutive tables, select the table elements in the Structure View.
•To apply a format to tables throughout the document, click in any table.
2Choose Table > Table Designer.
3Choose the format from the Table Tag pop-up menu, and choose Global Update Options from the Commands
pop-up menu.
4Specify the tables to reformat by doing one of the following:
•To reformat the tables in the selection and all tables with the same format as these tables, select All Matching Tags
in Selection.
•To reformat all tables that use a specific format, choose a format from the All Tagged pop-up menu.
5Select All Properties in the Use Properties area, and click Update.
Positioning structured tables on a page
The space above and below a table, and the table’s alignment and indentation, are determined by the table format.
You can control other positioning properties—straddling and text runaround—on a table-by-table basis.
Making structured tables straddle
Tables can straddle text columns in a multicolumn layout. Straddling does not affect the structure of a table and is
not a format rule override.
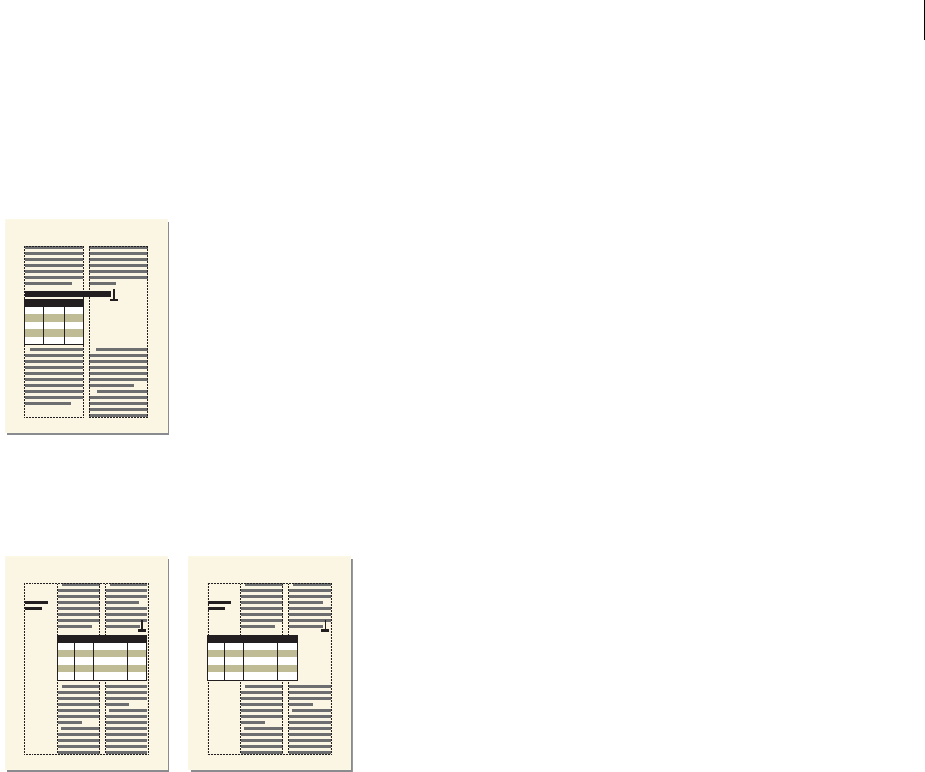
ADOBE FRAMEMAKER 8
User Guide
196
To make a table straddle:
❖Do one of the following:
•Anchor the table in a paragraph element that’s formatted to straddle the columns. If the table is wide enough, it
straddles the full column width. If it is not wide enough, the plane of the table nevertheless straddles the full width.
The plane of a one-column table straddling the full column width
•Extend the table width into a second column of the body area (see “Resizing columns” on page 171). If you want the
table to straddle both the side-head area and the body area, extend it into the side-head area as well.
Straddling all columns (left), straddling columns and side-head area (right)
To unstraddle a table:
❖Do one of the following:
•To unstraddle a table that’s anchored in a straddle paragraph element, move the anchor to a nonstraddle element.
•To unstraddle a table that’s not anchored in a straddle paragraph element, resize the column widths of the table to
fit in the text column (see “Straddling and unstraddling cells in structured tables” on page 198).
Running text around structured tables
Text does not run around a table that’s anchored directly in a column of text. But if your developer has set up the
application this way, you can run text around a table in an anchored frame or in a text frame that’s disconnected from
the main flow.
A table in an anchored frame moves with the text it’s anchored to. A table in a disconnected text frame remains in
place on a page while other text flows around it.
Important: The contents of an anchored frame or a disconnected text frame are not part of a document’s main struc-
tured flow, so they are not normally exported to SGML. If you plan to export to SGML, work with your application
developer to avoid losing data in the table.
A table in a disconnected text frame will not autonumber with tables in the main flow.

ADOBE FRAMEMAKER 8
User Guide
197
To run text around a table in an anchored frame:
1Click in text where you want to anchor the table.
2Select a graphic element for an empty anchored frame in the Element Catalog, and click Insert.
You can also use Special > Anchored Frame to insert an element. Choose a frame element from the Element Tag pop-
up menu in the Anchored Frame dialog box.
3Choose Run into Paragraph from the Anchoring Position pop-up menu, set the width and height of the frame,
and click New Frame. Try to set the size of the frame to be slightly larger than the size of the table.
4Draw a text frame in the anchored frame. Click the Tools button at the upper right in the document window,
click the Text Frame tool in the Tools palette, drag to draw the frame, and click Set in the dialog box that appears.
5Click in the text frame and use Table > Insert Table to insert an unstructured table.
To run text around a table that remains stationary on the page:
1Draw a text frame directly on a page and drag it where you want it. This type of text frame is not connected to the
main structured flow.
2Choose Graphics > Runaround Properties, click Run around Bounding Box, and click Set.
3Click in the text frame and use Table > Insert Table to insert an unstructured table.
Adjusting rows and columns in structured tables
You can add, remove, copy, move, and resize rows and columns in a table, and you can make selected cells straddle
rows or columns. For information on selecting cell, rows, and columns, see “Selecting structured table cells” on
page 190.
Adding and removing rows and columns in structured tables
You can specify how many rows and columns you want to add and where to insert them. A new row already contains
cell elements.
Adding rows or columns may make the structure of the table invalid. For example, a table set up to contain only
three columns will be invalid if you add a fourth. Check the Structure View when you’re finished to be sure the table
is still valid.
It’s best to use the Element Catalog for adding heading or footing rows, because tables are often defined to have a
specific number of these rows.
To quickly add a row below the current one:
❖Press Control+Return. The new row has the same structure and paragraph formatting as the current one.
To add a row using the Element Catalog:
❖Click where you want to add the row in the Structure View, select a row element in the Element Catalog, and click
Insert. See “Adding elements” on page 34 for details.
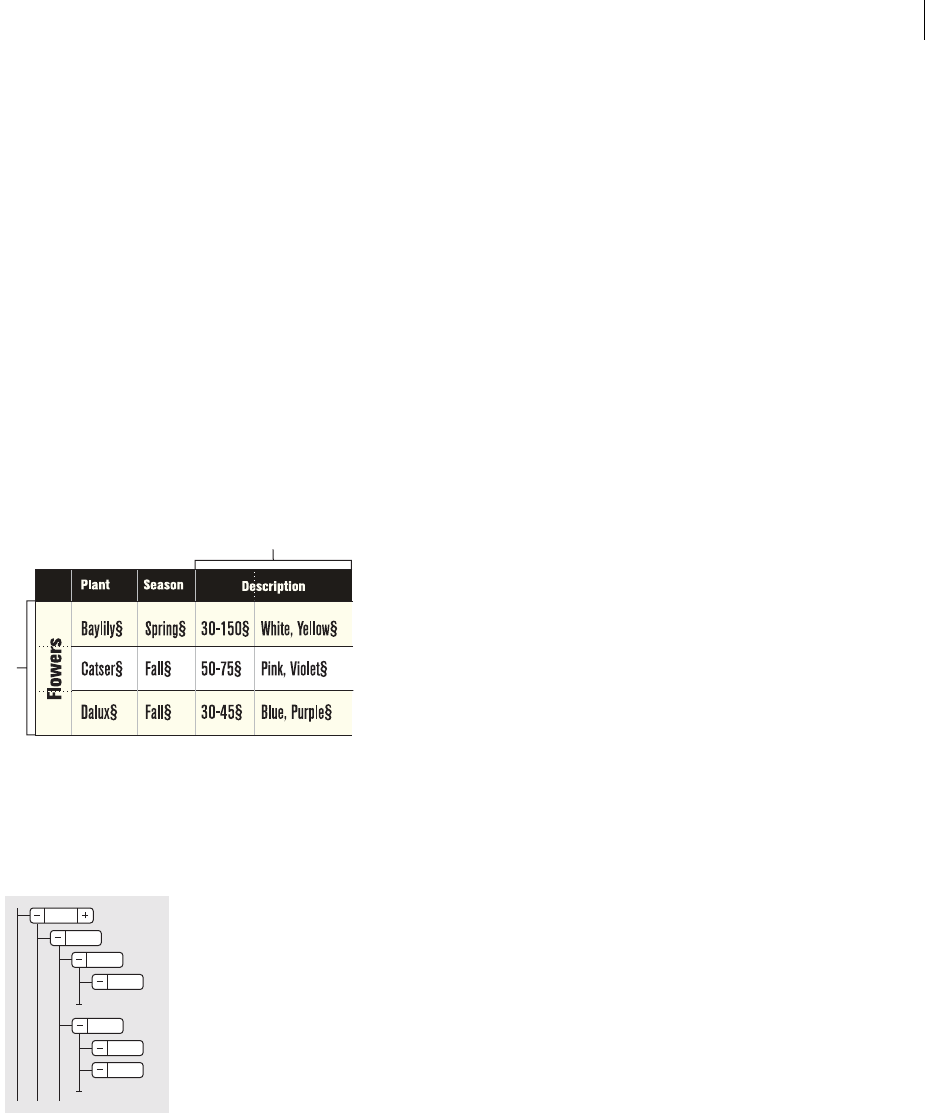
ADOBE FRAMEMAKER 8
User Guide
198
To add rows or columns using a Table command:
1Click in a table cell next to where you want to add the rows or columns.
2Choose Table > Add Rows or Columns, and specify the number of rows or columns to add and where you want
to insert them. You can add rows above or below the current cell, and columns to the left or right of the cell.
3Click Add. The new rows or columns have the same structure and paragraph formatting as the current row
or column.
To remove a row or column without using the Clipboard:
1Select the row or column. You need to select entire rows or columns; if you don’t, the contents of the selected cells
will also be removed.
2Press Delete, click Remove Cells from Table, and click Clear.
Straddling and unstraddling cells in structured tables
You can combine cells horizontally into a single cell that straddles several columns, or vertically into a single cell that
straddles several rows. Text and graphics flow across cell borders as if it were a single cell.
A. Cell straddling rows B. Cell straddling columns
The elements of the combined cells merge into the element of the cell at the upper left in the original selection.
In the Structure View, you can usually spot a straddle cell because one row has fewer cells than other rows in
the table.
The first row has a single straddle cell.
If you straddle cells that have contents, the contents of those cells also merge, creating a separate paragraph for each
merged cell. You can also unstraddle cells.
To turn several cells into a single straddle cell:
❖Select the cells and choose Table > Straddle.
B
A
Table
Head
Row
Row
Cell
Cell
Cell
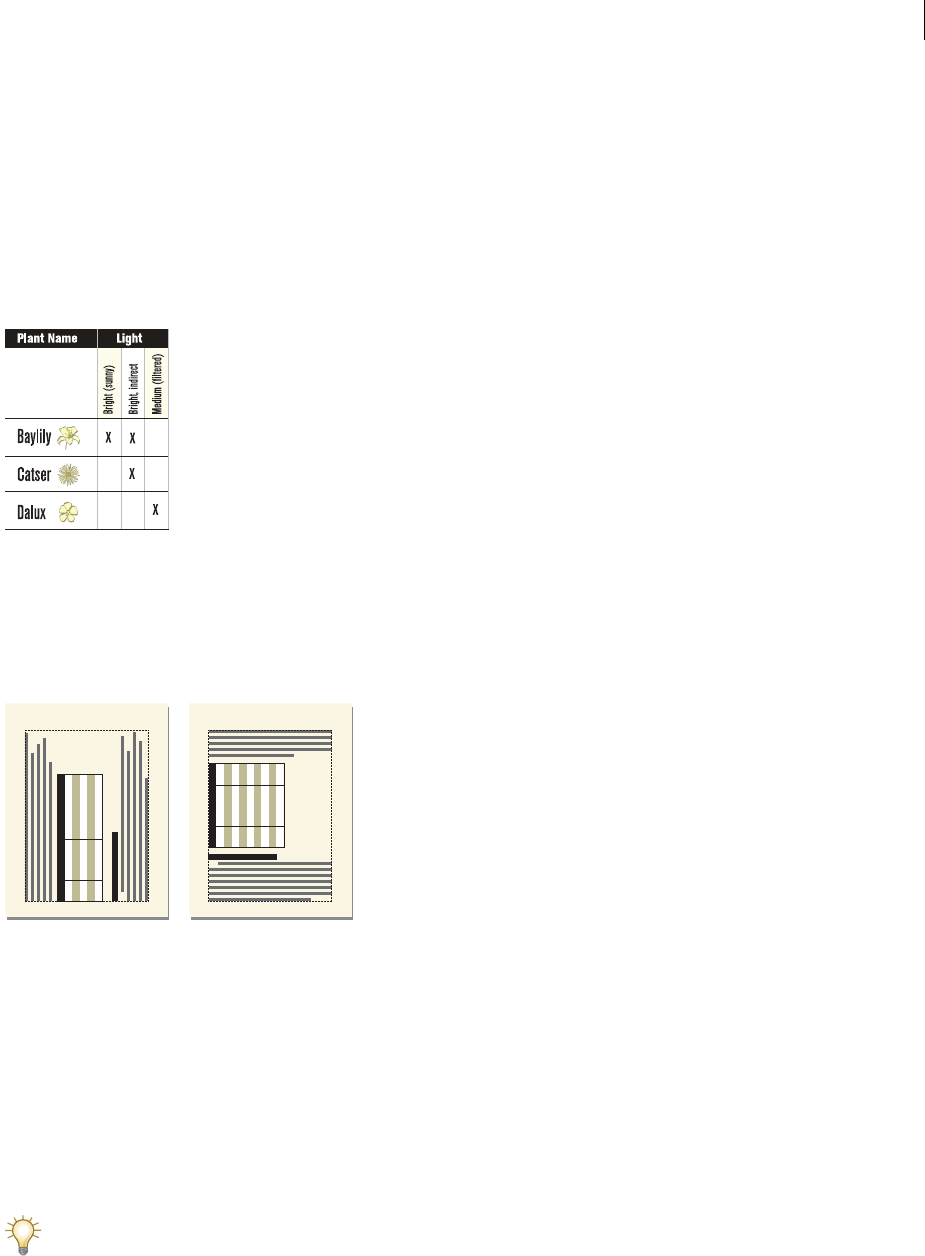
ADOBE FRAMEMAKER 8
User Guide
199
To unstraddle a cell:
❖Select the straddle cell and choose Table > Unstraddle. The contents of the straddle cell appear in the new cell at
the upper left, not in the original cells.
Rotating cells and tables in structured documents
When you rotate a cell in a table, you can type in it just as you do in any other cell.
Rotated cells
If your developer has set up the application this way, you can also rotate a table. A rotated table can be in an anchored
frame on a page of unrotated text or on a rotated page (one that uses a rotated master page). Place the table on a
rotated page instead of rotating the table itself if you want background items (such as headers or footers) or body text
to be rotated as well as the table.
Table on a rotated page (left), rotated table on a regular page (right)
Note: A rotated table in an anchored frame is not part of a document’s main structured flow and is not normally
exported to SGML. If you plan to export to SGML, you may want to rotate the page rather than just the table. If you
must rotate just the table, work with your application developer to avoid losing data in the table.
Rotating a cell or a page with a table does not affect the structure of a table, and it is not a format rule override.
To rotate cells:
1Select the cells and choose Graphics > Rotate.
2Specify the orientation you want for the cells and click Rotate.
As you type in a rotated cell, the cell height increases and the text doesn’t wrap. You can limit the height of rotated
cells so that text will wrap when it reaches the limit (see “Adjusting the height of rows” on page 173).

ADOBE FRAMEMAKER 8
User Guide
200
To insert a rotated table in a page of unrotated text:
1Click in the text where you want to anchor the table.
2Select a graphic element for empty anchored frames in the Element Catalog and click Insert.
3Choose Below Current Line from the Anchoring Position pop-up menu, set the width and height of the frame,
and click New Frame. Try to set the size of the frame to be slightly larger than the size of the table.
4Draw a text frame in the anchored frame. Click the Tools button at the upper right corner in the document
window, click the Text Frame tool in the Tools palette, drag to draw the frame, and click Set in the dialog box that
appears.
5Click in the text frame and use Table > Insert Table to insert an unstructured table.
6Choose Graphics > Rotate and rotate the text frame. You may need to adjust the size of the text frame or the
anchored frame to view the entire table.
To edit a rotated table:
❖Unrotate the text frame, edit the table, and then rotate it back when you’re finished.
To create a rotated table on a page with other rotated text:
❖Apply a rotated master page to the page with the table. See your application developer about master pages defined
for this purpose and how to use them.
201
Chapter 5: Cross-references and footnotes
Inserting cross-references
In Adobe FrameMaker, when you need a cross-reference, you specify its source and the predefined wording to use—
for example, whether it contains the heading text, section number, or page number. FrameMaker inserts the text of
the cross-reference (for example, See “Volcanism and Plate Tectonics” on page 7-71) for you. Later, if page numbers
or headings change when you edit the source documents, FrameMaker can automatically update the cross-
references.
You can also add footnotes to body text and tables; FrameMaker numbers and positions the footnotes for you
as you type.
FrameMaker provides two types of cross-references—to paragraphs and to specific spots within paragraphs. In both
cases, FrameMaker uses markers to keep track of the sources of cross-references.
Paragraph cross-references are easier to create than spot cross-references because you don’t have to manually mark
a particular spot. Paragraph cross-references also make it easier to edit a document that contains them, because you
don’t have to work around an easy-to-miss marker in the middle of a paragraph as you do with spot cross-references.
If you’re inserting a cross-reference in a structured document, see “Working with cross-references in structured
documents” on page 217.
Note: The Cross-references feature supports the Unicode text encoding standard.
Inserting paragraph cross-references
Paragraph cross-references refer to a heading or some other text that occupies a whole paragraph. If the paragraph
extends beyond the page on which it begins and the cross-reference includes a page number, the page number is that
of the beginning page. Because most cross-references are to entire one-line or two-line paragraphs—for example,
headings, figure titles, and table titles—you’ll probably use paragraph cross-references most of the time.
Paragraph cross-reference
If you insert a paragraph cross-reference to a text inset, the cross-reference marker may be lost when the text inset
is updated. To prevent the marker from being lost, first insert a cross-reference to the paragraph in the text inset’s
source document.

ADOBE FRAMEMAKER 8
User Guide
202
To insert a paragraph cross-reference:
1If you’re cross-referencing another document, open that document. You must have write permission to the
document to add a cross-reference marker to it.
2Click where you want to insert the cross-reference. You can insert a cross-reference in text frames but not in text
lines (graphic objects created with the Text Line drawing tool).
3Choose Special > Cross-Reference.
4If you’re cross-referencing information in another document, choose the name of that document from the
Document pop-up menu.
5Choose Paragraphs from the Source Type pop-up menu. All the tags in the document’s Paragraph Catalog appear
in the scroll list.
6In the Paragraph Tags scroll list, select the tag of the paragraph you want to cross-reference. For example, if you’re
cross-referencing a paragraph tagged Head1, select Head1 in the Paragraph Tags scroll list. All Head1 paragraphs
then appear in the Paragraphs scroll list.
7In the Paragraphs scroll list, select the paragraph to cross-reference.
8Choose the format of the cross-reference from the Format pop-up menu. The menu lists the cross-reference
formats in the current document.
9Click Insert. FrameMaker puts the cross-reference at the insertion point and a marker at the start of the
paragraph to which the cross-reference refers. FrameMaker inserts a marker only if a cross-reference marker isn’t
already there.
To insert a cross-reference to a paragraph in a text inset:
1Open the source of the inset by double-clicking the inset and then clicking Open Source.
2Insert a cross-reference to the paragraph anywhere in the source document.
3Delete the cross-reference text. The marker will remain.
4Save the source document, and then update the text inset by using Edit > Update References in the document that
contains the text inset.
5Insert another cross-reference to the paragraph, this time in the document that contains the inset. The cross-
reference uses the marker in the updated inset.
Inserting spot cross-references
Spot cross-references refer to an individual word or phrase—a spot—in a paragraph. For example, use a spot cross-
reference if you have a paragraph that spans two pages and you want to refer to the second page of your reference.
Spot cross-reference

ADOBE FRAMEMAKER 8
User Guide
203
To insert a spot cross-reference:
1Click where you want to insert the marker. For example, if you want to direct readers to a definition, click at the
start of the defined word. Or, if you want to direct readers to an anchored frame, click next to the anchored frame
symbol. You can put a marker anywhere within a column of text.
If you want to insert a cross-reference marker in a text inset, insert the marker in the source document (see
“Displaying the source of a cross-reference” on page 203).
2Choose Special > Marker.
3Choose Cross-Ref from the Marker Type pop-up menu.
4Enter an identifying word or phrase for the marker in the Marker Text box. The marker text can be up to 255
characters long. (Each character in a Japanese font counts as two characters.)
For example, if you insert a marker where inertia is defined, you can enter Definition of inertia. This text appears
in the Cross-Reference dialog box to help you identify the source. It doesn’t appear in the cross-reference itself.
5Click New Marker. A marker symbol appears at the insertion point when text symbols are visible.
6Insert a cross-reference as if it were a paragraph cross-reference (see “Inserting paragraph cross-references” on
page 201) but in step 5, choose Cross-Reference Markers from the Source Type pop-up menu. Then select the
marker text in the Cross-Reference Markers scroll list, choose a cross-reference format, and click Insert.
To display the information that is kept in cross-reference markers, you can generate a list of Cross-Ref markers (see
“Resolving cross-references” on page 209). Alternatively, you can use Edit > Find/Change to find markers of type
Cross-Ref (see “About searching” on page 76).
Working with cross-reference markers
FrameMaker uses a marker (of type Cross-Ref) to keep track of the source of each cross-reference. If you move a
marker and then update cross-references, the marker’s new location is used to update the cross-reference.
For paragraph cross-references, the marker text contains a number assigned to the marker, and the paragraph tag
and text of the paragraph being cross-referenced. (The marker text is not updated, so the tag and text may not match
the cross-reference.) For spot cross-references, the marker text is the text you typed for the marker.
When you insert a paragraph cross-reference, a cross-reference marker is inserted for you automatically at the
beginning of the paragraph if necessary. Before you insert a spot cross-reference, however, you must insert a marker
manually to mark the spot.
Within a document, when you copy and paste text that contains a cross-reference marker, the marker is not dupli-
cated. The cross-reference continues to refer to the text in its original location.
Displaying the source of a cross-reference
You can easily display the source of any cross-reference, even if the source is in a different document.
To display the source of a cross-reference:
❖Double-click the cross-reference, and then click Go to Source. FrameMaker displays the page that contains the
source of the cross-reference and places the insertion point at the beginning of the source paragraph.

ADOBE FRAMEMAKER 8
User Guide
204
You can also use one of the following shortcuts to select the cross-reference marker:
•(Windows) Alt-Control-click the cross-reference.
•(UNIX) Control-right-click the cross-reference.
If the source is in a different document, hold down Shift while using one of the preceding shortcuts to open the
document without closing the current document.
Editing cross-references
You copy, move, and delete cross-references, as well as cross-reference elements in structured documents, just as you
do regular text. You can also edit a cross-reference in the following ways:
•Reword the cross-reference by choosing a different cross-reference format.
•Refer to different information by choosing a different source.
If you want to edit the text of the cross-reference as you do regular text, you must convert it to text. After conversion,
the text can no longer be updated as a cross-reference.
To select a cross-reference:
❖Click it once.
Note: When working with structured documents, you can click the cross-reference element in either the document
window or the Structure View.
To choose a different source or format for a cross-reference:
1Double-click the cross-reference. If the source is located in a different document, click OK to open the
source document.
2Specify a source or format in the same way that you would when inserting a cross-reference (see “Inserting cross-
references” on page 201).
3Click Replace.
To convert a cross-reference to text:
1If you’re converting a single cross-reference, select it; otherwise, click in the document.
2Choose Special > Cross-Reference.
3Click Convert to Text.
4Indicate the scope of cross-references to convert and click Convert.

ADOBE FRAMEMAKER 8
User Guide
205
Creating cross-reference formats
Cross-reference formats help maintain a consistent cross-reference style throughout a document by determining the
appearance of each cross-reference—its wording, the information it contains, and its character format. For example,
the format of the cross-reference See “Volcanism and Plate Tectonics” on page 7-71 determines that the section title is
in quotation marks. The cross-reference format also provides the words See and on page, and it provides building
blocks that represent the actual section title and page number.
A. Text y ou type B. Building blocks
A cross-reference format consists of a name and a definition. The entire definition, including building blocks, can
be up to 255 characters long.
FrameMaker templates include several cross-reference formats. You can change them or create others. If another
document contains the cross-reference formats you want, you can import them into your document (see
“Importing and updating formats” on page 415 and “Changing the format of files in a book” on page 472).
To create a cross-reference format:
1Choose Special > Cross-Reference.
2Click Edit Format.
3Type a name for the cross-reference format in the Name text box. Format names are case-sensitive page and Page
would be different formats.
4Do any of the following:
•To use text (such as See or on page) in a cross-reference format, click in the Definition text box and enter the text.
For information, see “Including text in a cross-reference” on page 206.
•To include a building block that refers to source information, such as a page number, chapter number, or heading
text, click in the Definition text box and then click the building block in the Building Blocks scroll list. The
building block appears at the insertion point. For information, see “Using building blocks for source information”
on page 206.
•To change the character format within the cross-reference, click in the Definition text box and then click the
character format at the bottom of the Building Blocks scroll list. The building block appears at the insertion point.
To return to the default paragraph format before the end of the cross-reference, insert <Default ¶Font> in the
definition. For information, see “Using building blocks for character formats” on page 207.
5Click Add and then click Done. The new cross-reference format appears in the Formats pop-up menu in the
Cross-Reference dialog box.
A
B

ADOBE FRAMEMAKER 8
User Guide
206
Including text in a cross-reference
You can include specific characters or words in the cross-reference. In most cases, you simply enter the text in the
Definition text box. But a few characters are entered or displayed differently.
For example, an angle bracket (< or >) in a cross-reference format ordinarily signals a building block. To include an
angle bracket as part of the text, precede it with a backslash (\).
For information on adding volume and chapter numbers to cross-references, see “Including volume and chapter
numbers in cross-references” on page 471.
Note: Some special characters are entered or displayed differently in dialog boxes. In Windows, you enter a sequence of
characters beginning with a backslash (\); these sequences are listed in “Appendix A: Typing in dialog boxes” on page 677.
In UNIX systems, the backslash sequences may appear in text boxes, even though you don’t have to type the sequences
to enter the characters.
Using building blocks for source information
You use building blocks to include information about the source of the cross-reference, such as its paragraph text
(but not the cross-reference marker text), paragraph autonumber, or volume, chapter, or page number. Building
blocks for source information appear in angle brackets (< and >) and begin with a dollar sign ($). The following
building blocks are grouped by the type of information they represent.
Source file FrameMaker provides the following building blocks for referring to the source file.
Source paragraph FrameMaker provides the following building blocks for referring to the source paragraph.
Building block Meaning
<$filename>The name of the source document
<$fullfilename>The full pathname of the source document
<$volnum>The volume number of the document that includes the source paragraph
<$chapnum>The chapter number of the document that includes the source paragraph
Building block Meaning
<$pagenum>The page number of the source paragraph
<$paratext>The text of the source paragraph, excluding its autonumber (If the character
format of text in the source paragraph was changed by applying a Character
Catalog format, the font family, superscript, and subscript properties are
preserved in the text of the cross-reference.)
<$paratag>The tag of the source paragraph
<$paranum>The source paragraph’s entire autonumber, including any text in the auto-
number format
<$paranumonly>The source paragraph’s autonumber counters, including any characters
between them

ADOBE FRAMEMAKER 8
User Guide
207
Paragraph preceding the source paragraph A cross-reference to a subsection often needs to identify the section that
contains it. For example, a cross-reference to a subheading might identify the main heading under which it is found,
as in the following: See “Types of Plate Boundaries” in “Plate Tectonics.” In the example, Types of Plate Boundaries is
the source paragraph, and Plate Tectonics is the main heading under which the source paragraph appears.
FrameMaker provides the following building blocks for referring to a paragraph preceding the source. In each of the
building blocks, replace tag (in brackets) with the tag of the paragraph to which you want to refer, but don’t delete
the brackets. For example, if you want to refer to the text of the preceding paragraph tagged Head1, use
<$paratext[Head1]>.
Important: Don’t use a paragraph tag that includes brackets ([ ]).
Using building blocks for character formats
All formats in the document’s Character Catalog appear at the end of the Building Blocks scroll list. You insert them
as you do other building blocks.
If you don’t insert a character format in a cross-reference format, FrameMaker uses the font at the insertion point
when a cross-reference is inserted with that format. If you change the character format for the cross-reference, the
change applies only to the cross-reference, not to the text following it in the paragraph.
Important: Don’t use a character tag that includes angle brackets (< >).
Examples of cross-reference formats
The first four examples in the following table include building blocks that refer to the source paragraph. The first
example uses a chapter number building block and the source paragraph’s text (see “Including volume and chapter
numbers in cross-references” on page 471). The second includes the source paragraph’s text and autonumber. The
third includes only the source paragraph’s text. The fourth includes only the page number of the source paragraph.
Building block Meaning
<$pagenum[tag]>The page number of the preceding paragraph with the specified tag
<$paratext[tag]>The text of the preceding paragraph with the specified tag, excluding its
autonumber (If the character format of text in the source paragraph was
changed by applying a Character Catalog format, the font family, super-
script, and subscript properties are preserved in the text of the cross-refer-
ence.)
<$paratag[tag]>The tag of the preceding paragraph with the specified tag
<$paranum[tag]>The entire autonumber of the preceding paragraph with the specified tag,
including any text in the autonumber format
<$paranumonly[tag]>The autonumber counters of the preceding paragraph with the specified
tag, including any characters between them
Example Format
Chapter 4, “Climatic Effects.” <$chapnum>, “<$paratext>.”
Section 2.3.4, Volcanoes. Section <$paranumonly>, <TitleFont><$paratext>.
See Plate tectonics, next. See <TitleFont><$paratext> <Default ¶ Font>, next.
page 23 page <$pagenum>
See “Magma” in “Volcanoes.” See “<$paratext>” in “<$paratext[Head1]>.”

ADOBE FRAMEMAKER 8
User Guide
208
The last example includes a building block that refers to a paragraph preceding the source paragraph. In this
example, the cross-reference format could also be the following:
See “<$paratext>” in “<$paratext[Title, Head1]>.”
In this case, the cross-reference refers to either the chapter title (Title) or the section heading (Head1), whichever is
closer to the Magma source paragraph.
You can use the </> building block as a substitute for <Default Para Font> in cross-reference definitions.
Editing cross-reference formats
When you change or delete cross-reference formats, the changes are reflected immediately in all cross-references that
use the affected formats.
You can change the format of cross-references in a text inset (text imported by reference) if the inset uses the formats
of the document into which it is imported. If the inset uses formats from the source document, you need to change
the formats in the source document.
To change a cross-reference format:
1Choose Special > Cross-Reference and click Edit Format.
2In the Formats scroll list, select the format you want to change, and then edit the definition. You can use text and
building blocks in the same way you do when creating a cross-reference format (see “Creating cross-reference
formats” on page 205).
3Click Change, and then click Done. If cross-references in the document use the format, the Update Cross-
Reference dialog box appears. Indicate the scope of cross-references to update, and then click Update.
To delete a cross-reference format:
1Choose Special > Cross-Reference, and click Edit Format.
2In the Formats scroll list, select the format you want to delete.
3Click Delete, and then click Done. If cross-references in the document use the format, you are asked whether you
want to convert these cross-references to text.
Maintaining cross-references
If you edit the source of a cross-reference or if the pagination of the source document changes, the cross-reference
may no longer be accurate. You can update cross-references to be sure that they show correct information from
the source.
Normally, FrameMaker updates all cross-references when you open a document. It also updates all internal cross-
references and cross-references to open documents when you print a document. You can also update cross-refer-
ences manually. If the document contains unresolved cross-references—cross-references to sources that
FrameMaker can’t find—you’ll need to help locate the sources.
Note: FrameMaker does not update cross-reference when opening a document in the following circumstances: when
fonts or dictionaries are missing, when opening a document saved with an earlier version of FrameMaker, and when
opening a MIF file.

ADOBE FRAMEMAKER 8
User Guide
209
When editing text, make sure you don’t accidentally delete cross-reference markers; see “Resolving cross-references”
on page 209.
Suppressing automatic updating of cross-references
If a document contains many cross-references, you can improve its opening time by suppressing automatic updating
of the cross-references. After you suppress automatic updating, cross-references are no longer updated when you
open the document. However, internal cross-references and cross-references to open documents are still updated
automatically when you print.
To suppress automatic updating of cross-references in a document:
1To suppress updating in a document, choose Edit > Update References.
2Choose Suppress Automatic Updating from the Commands pop-up menu.
3Select Suppress Automatic Updating of All Cross-References, and then click Set. Click Done. Cross-references will
be updated only when you print or when you manually give instructions to update.
To suppress automatic updating of cross-references in a book:
1In a book window, choose Edit > Suppress Automatic Reference Updating.
2Select Suppress Automatic Updating, and then click Set. Cross-references will be updated only when you print or
when you manually give instructions to update.
Updating cross-references manually
You should update all cross-references in a document before distributing the document. You should also routinely
update after editing the document or editing any other documents that are sources for the cross-references. For
information on updating cross-references in a book, see “Updating books” on page 473.
FrameMaker does not update cross-references when opening a document in the following circumstances:
•When cross-references refer to information in hidden conditional text. Show the text that contains the sources of
the cross-references before updating the cross-references.
•When fonts or dictionaries are missing.
•When opening a document saved with an earlier version of FrameMaker.
•When opening a MIF file.
To update cross-references in a document manually:
1Choose Edit > Update References.
2Select All Cross-Reference, and then click Update. If FrameMaker resolves all the cross-references, you’re finished.
If FrameMaker can’t resolve all the cross-references, the Update Unresolved Cross-References dialog box appears.
Resolving cross-references
Occasionally, FrameMaker can’t update a cross-reference for the following reasons:
•The marker indicating the source of the cross-reference has been moved to a different file, or the file itself has been
moved or renamed.

ADOBE FRAMEMAKER 8
User Guide
210
•The marker indicating the source has been deleted.
•The file containing the marker is currently open by someone else on the network server.
When FrameMaker can’t resolve a cross-reference during an automatic update (when opening or printing), an alert
message appears. You can resolve the cross-references after dismissing the message.
If you want to inspect all the unresolved cross-references at the same time, you can generate a list of unresolved
cross-references.
To resolve a cross-reference when a marker has been moved to another file or the file has been renamed:
1Choose Edit > Update References.
2Choose Update Unresolved Cross-References from the Commands pop-up menu.
3In the Total of Unresolved Cross-References scroll list, select the file that used to contain the source of the
unresolved cross-reference. The text below the scroll list indicates how many cross-references to the selected file
are unresolved.
4In the Look In scroll list, select the file that contains the source, and click Open.
If FrameMaker can’t perform the update, select a different file in the Look In scroll list, and then try again.
5To resolve cross-references to any other file listed in the Total of Unresolved Cross-References scroll list, repeat
steps 3 and 4. Then click Done.
To resolve a cross-reference when a marker has been deleted:
1Choose Edit > Find/Change.
2Choose Unresolved Cross-Reference from the Find pop-up menu and click Find. FrameMaker finds the first
unresolved cross-reference and selects it. The marker text of the last-used source marker for the cross-reference
appears in the Find text box to help you locate the source.
3If you no longer need the cross-reference, delete it. Otherwise, do one of the following:
•If FrameMaker finds an unresolved paragraph cross-reference, double-click the cross-reference to display the
Cross-Reference dialog box, specify a different source, and click Replace.
•If FrameMaker finds an unresolved spot cross-reference, insert a new cross-reference marker in the appropriate
text (see “Inserting cross-references” on page 201). Use exactly the same marker text that appears in the
Find/Change dialog box.
4Repeat steps 2 and 3 until all unresolved cross-references are resolved.
To generate a list of unresolved cross-references:
1Choose Special > List of > References. When prompted, specify whether you want to create the generated file as
a stand-alone document or add it to a book.
2Move Unresolved Cross-Refs to the Include References scroll list, and then click Set.
The generated list includes the page number of each unresolved cross-reference, indicates whether each missing
source is internal (in the current document) or external (in a different document), and includes additional infor-
mation—for example, the tag and text of the source paragraph. The tag and text may be inaccurate because
they aren’t updated after you initially insert the cross-reference. For spot cross-references, the list includes the
marker text.
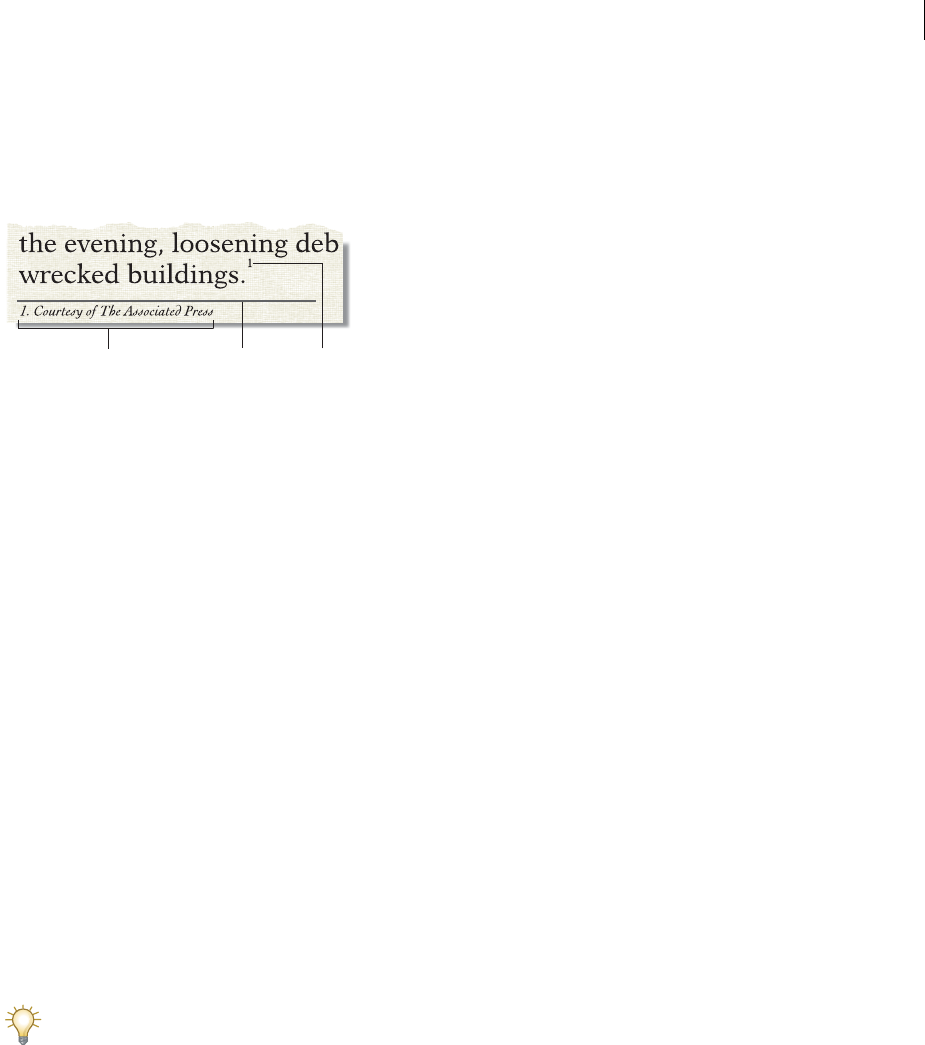
ADOBE FRAMEMAKER 8
User Guide
211
Working with footnotes
When you insert a footnote reference and footnote, FrameMaker gives it a number, formats the text of the footnote,
and inserts a separator if the footnote is the first one in a column.
A. Footnote B. Footnote separator C. Footnote reference
As you insert, move, and delete footnotes, FrameMaker adjusts the numbering. As you edit the surrounding text,
FrameMaker moves the footnotes from page to page as needed.
The footnote reference and the footnote itself usually appear in the same column. When you insert a footnote
reference in a table, the footnote appears at the end of the table. If the table flows onto a second page, all the footnotes
appear on the second page regardless of the page on which the footnote reference appears.
FrameMaker allows document footnotes to be numbered consecutively across all files in a book. See “Changing the
footnote numbering style” on page 214.
If you’re working with footnotes in a structured document, see “Working with footnotes in structured documents”
on page 223.
Note: The Footnotes feature supports the Unicode text encoding standard.
To insert a footnote:
1Click where you want the footnote reference to appear. You can insert a footnote reference in a column of text or
in a table cell.
2Choose Special > Footnote. FrameMaker inserts the footnote reference, displays the footnote number at the
bottom of the column or below the table, places the insertion point after the footnote number, and renumbers any
footnotes that follow. (Footnotes are numbered consecutively in a text flow. If your document contains several text
flows, footnote numbering in each flow will be independent of the others.)
3Type the text of the footnote at the insertion point. When you finish typing the footnote, return to the main text
by clicking in it or by choosing Special > Footnote again.
To place two footnote references together, place a space or a comma between them—for example, references 56
or
references 5,6. Otherwise, the second footnote won’t be created. If you place a comma between the footnote refer-
ences, you should manually format the comma in superscript.
To edit a footnote:
❖Select the footnote text and edit it as you do other text. You can’t change a footnote number, because FrameMaker
maintains the numbering.
C
AB
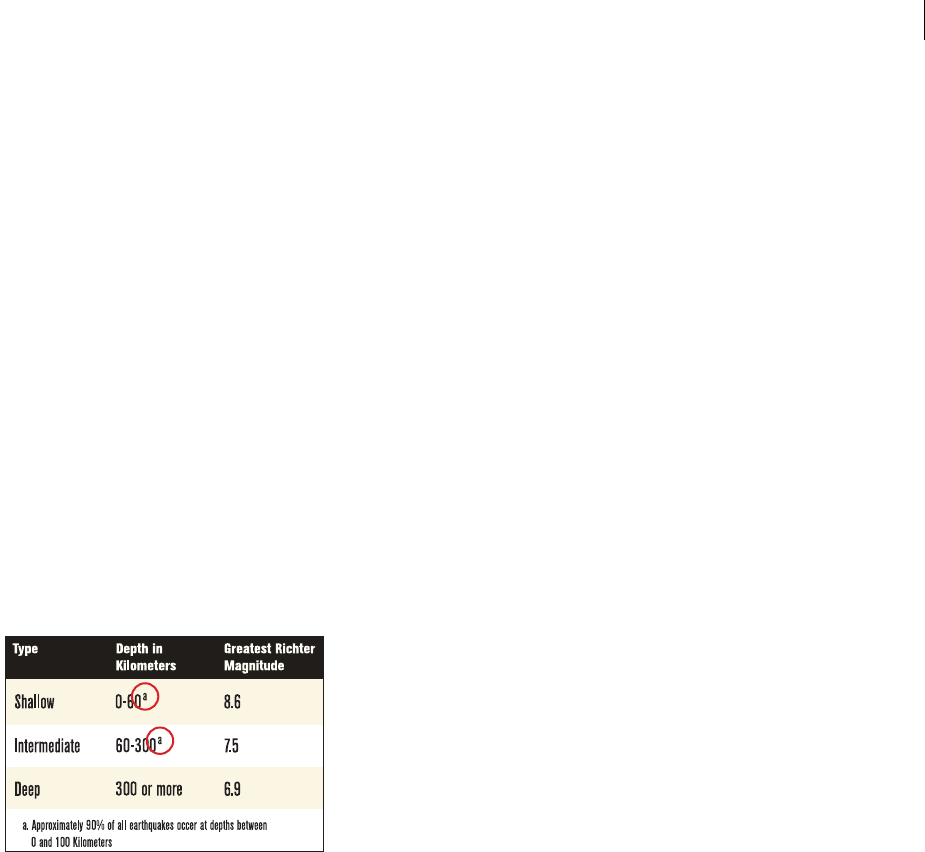
ADOBE FRAMEMAKER 8
User Guide
212
To duplicate, move, or delete a footnote:
1Select the footnote reference (not the footnote text).
2Do one of the following:
•To duplicate or move the footnote, use Edit > Copy or Edit > Cut, and then Edit > Paste.
•To delete the footnote, press Delete.
Keeping a footnote in the same column as its reference
FrameMaker sometimes can’t keep footnotes in the same column as the corresponding footnote reference. For
example, if you insert a footnote reference at the bottom of a column of text so there is no space for the footnote
below it, FrameMaker moves the footnote to the bottom of the next column. In such cases, you can force a column
or page break before the footnote reference to keep the reference and the footnote together in the same column.
Adding text to a footnote may cause the last footnote in a column or on a page to move to the bottom of the next
column or page. To reduce the chance of a footnote not fitting in a column, allocate more space for footnotes in a
column (see “Changing footnote properties” on page 213).
Inserting more than one reference to a footnote
You can create a single footnote that has several footnote references—for example, a table footnote with references
in several cells.
Two references for one footnote
You create multiple footnote references by inserting the first reference in the usual way and then using
cross-references for additional footnote references.
If you add or remove a footnote that appears before the footnote being cross-referenced, the cross-reference may
refer to the wrong number. Choose Edit > Update References to update the numbering.
To insert more than one reference to a footnote:
1Insert the first footnote reference.
2If necessary, create a cross-reference format for additional footnote references.
The cross-reference format must display the footnote number correctly. For example, if footnote references are
displayed in superscript, and if the document contains a Superscript character format, a cross-reference format
defined as <Superscript><$paranumonly> displays the autonumber of a paragraph as a superscript. When you use
it to refer to a paragraph that contains a footnote, it displays the footnote number in superscript.
3Click where you want to insert the additional footnote reference.

ADOBE FRAMEMAKER 8
User Guide
213
4Choose Special > Cross-Reference to insert a cross-reference to the footnote where you clicked. Use the
cross-reference format you created in step 2.
5Click Insert. FrameMaker inserts a cross-reference that is identical to the original footnote reference.
Maintaining cross-references to footnotes after editing
After you edit a document, make sure the additional references to footnotes are accurate. For example, a cross-
reference to a footnote reference may be misnumbered, or the footnote—unless the reference is in a table—may be
on the wrong page. If a cross-reference is misnumbered, update the cross-references in the document (see
“Maintaining cross-references” on page 208). If the footnote is on the wrong page, fix the page break or move
the footnote.
Changing footnote formats
You can change any of the footnote properties—for example, the style of numbers, the numbering format, or
the paragraph format to use for footnote text. And you have complete control over the size and contents of the
separator—the area between the bottom of the column or table and the first footnote.
FrameMaker uses different formats for document and table footnotes.
Changing footnote properties
When you change footnote properties, all the changes except the paragraph format are applied to both new and
existing footnotes.
To change footnote properties:
1Make the appropriate document window or book window active. If a book window is active, select the documents
you want to affect.
2Choose Format > Document > Footnote Properties. To edit table footnote properties, choose Table Footnote from
the pop-up menu.
3Do the following:
•To adjust the maximum height allowed for footnotes in a column, enter a value in the Maximum Height Per
Column text box.
•To use a different paragraph format for new footnotes, enter the format’s tag in the Paragraph Format text box.
(The format must be stored in the document’s Paragraph Catalog.) To use a different format for an existing
footnote, apply the format to it directly.
By default, documents may include paragraph formats named Footnote and TableFootnote to be used for new
footnotes. To change the look of footnotes, change these formats. See “About paragraph and character formats” on
page 101.
•Specify the format of the footnote reference in the main text and of the footnote number in the footnote. Either
number can be in the superscript, baseline, or subscript position, and either can have a prefix and suffix.
4Click Set.

ADOBE FRAMEMAKER 8
User Guide
214
Changing the footnote numbering style
You use the Numbering Properties dialog box to change footnote and table footnote numbering styles.
Note: If you’re working with documents that are part of a book, it’s a good idea to set the properties from the book
window rather than directly from the document window. When the book is updated, the book properties will override
the document properties.
1Make the appropriate document window or book window active. If a book window is active, select the documents
you want to affect.
2Choose Format > Document > Numbering. Choose either Footnote or Table Footnote from the pop-up menu.
3Choose a numbering style from the Format pop-up menu. If you choose Custom, you can specify a set of custom
footnotes in the Custom Numbering dialog box; click Set when you’re done.
Your custom style can use any combination of numbers, letters, and symbols, which will be used in the order
you enter them. If you use symbols in a custom style and your document contains more footnotes than symbols, the
symbols are repeated. For example, if you use the two symbols * and †, and the document contains three footnotes,
the third footnote is marked **. The footnote number will appear in the default font of the footnote’s paragraph
format.
Custom footnote numbering
Note: Some special characters are entered or displayed differently in dialog boxes. In Windows, you enter a sequence of
characters beginning with a backslash (\); these sequences are listed in “About typing in dialog boxes” on page 677. On
UNIX systems, the backslash sequences may appear in text boxes, even though you don’t have to type the sequences to
enter the characters.
4Choose whether you want document footnote numbers to be restarted on each page, start numbering footnotes
at a specific number, or be continued from the previous chapter in the book. When you number sequentially, you
can start from any number. The numbering of table footnotes always starts over with each table.
5Click Set.
Changing the footnote separator
The footnote separator is a graphic frame automatically placed between the bottom of the body text or table and the
first footnote. It usually contains a line or other design element to provide visual separation between the body text
and footnotes. The height of the frame determines the space between the body text or table and the footnote.
ADOBE FRAMEMAKER 8
User Guide
215
Separator frames for document and table footnotes are stored on a reference page (see “Working with reference
pages” on page 404). Their names are the same as the paragraph formats used for these footnotes—by default,
Footnote and TableFootnote.
Reference page
Footnote separator on body page
To change the footnote separator:
1Choose View > Reference Pages and display the page that contains the footnote separator frame.
2Resize the frame or edit its contents. You can change the size or position of the line in the frame, or remove or
replace the line. If you reduce the height of the frame, the first footnote is positioned closer to the bottom of the text
or table. If you move the line downward in the frame, the first footnote stays in the same position but the line moves
closer to it.
To add space, but not a line, between the body text or table and the footnotes, leave the separator frame empty.
3Choose View > Body Pages.
Using footnotes in multicolumn layouts
The placement of footnotes in multicolumn layouts depends on the location of the footnote reference and on the
presence or absence of side heads or text that straddles columns.
Side heads In a single-column document with side heads, footnotes in the body column run the width of the body
column, but footnotes in a side head span the side-head area and the body column.
Footnotes in side head span body column and side-head area.
If you want a footnote in a side head to be aligned with footnotes in the body column, change the indents of the
footnote in the side head area by adding a distance equal to the width of the side-head area plus the gap (see
“Changing indents and alignment” on page 111).
1
2
2
1
ADOBE FRAMEMAKER 8
User Guide
216
Straddles In a multicolumn format where some text straddles all columns and other text does not, footnotes may or
may not straddle the columns. Footnotes whose references appear in straddle text always straddle the columns, and
these footnotes appear at the bottom of the text frame. Footnotes whose references appear in nonstraddle text
straddle the columns if the footnotes’ paragraph format is set to Across All Columns (in the Pagination properties
of the Paragraph Designer).
Footnote across all columns
If the paragraph format is set to In Column, the footnote appears either just above the next straddle paragraph
(if there is one on the page) or at the bottom of the column.
Footnote in column
If the footnotes appear out of order, select Across All Columns for the footnote paragraph format to force all
footnotes to appear in numerical order at the bottom of the page.
Working with endnotes
Endnotes appear at the end of a document rather than at the bottom of a page or below a table. You type the endnotes
at the end of the document just as you would any other paragraphs, give the endnotes paragraph autonumbers, and
then use cross-references to the autonumbered paragraphs as endnote references.
FrameMaker does not automatically maintain endnotes. If you change the order of endnote references while editing
the document, you’ll need to rearrange the endnotes in matching order. If you delete an endnote, you’ll need to delete
the reference to it manually. If you’re not willing to maintain the endnotes in these ways, use footnotes. FrameMaker
automatically maintains footnote order and numbering.
1
1
1
1

ADOBE FRAMEMAKER 8
User Guide
217
To create endnotes:
1Type the first endnote at the end of the document and assign it the paragraph format for endnotes. The paragraph
format should include an autonumber so the endnotes will be numbered consecutively.
2Click where you want to insert the endnote reference and cross-reference the endnote. Use the cross-reference
format you created for endnotes.
For example, if endnote references are to be displayed in superscript, and if the document contains a Superscript
character format, the cross-reference format <Superscript><$paranumonly> displays the autonumber of the
endnote paragraph as a superscript.
3Create additional endnotes as you created the first one.
To maintain endnotes:
❖Do the following:
•If you change the order of endnote references while editing the document, rearrange the endnotes to match the
order of the references. Then update the cross-references to update the endnote reference numbers. For infor-
mation on updating cross-references, see “Maintaining cross-references” on page 208.
•If you delete an endnote, delete all references to it. Otherwise, the reference will be an unresolved cross-reference.
Working with cross-references in structured
documents
When working with structured documents, FrameMaker keeps cross-references, variables, and footnotes up to date
for you. To add a cross-reference in FrameMaker, you normally use an element designed for that purpose. The cross-
reference element points to a location, or source, that can be in the same document or a different document. The
source is also normally an element, such as a Chapter, Section, Figure, or Table element.
When you use an element at both ends of a cross-reference—that is, the cross-reference element and another element
as the source—the reference is represented in the document’s structure and is preserved if you export to XML
or SGML.
Most element-based cross-references show text from the source element, up to the first paragraph break. In the
following example, the cross-reference points to a Section element and shows text from the Head element at the
beginning of the Section.
An element-based cross-reference shows text from the source element.
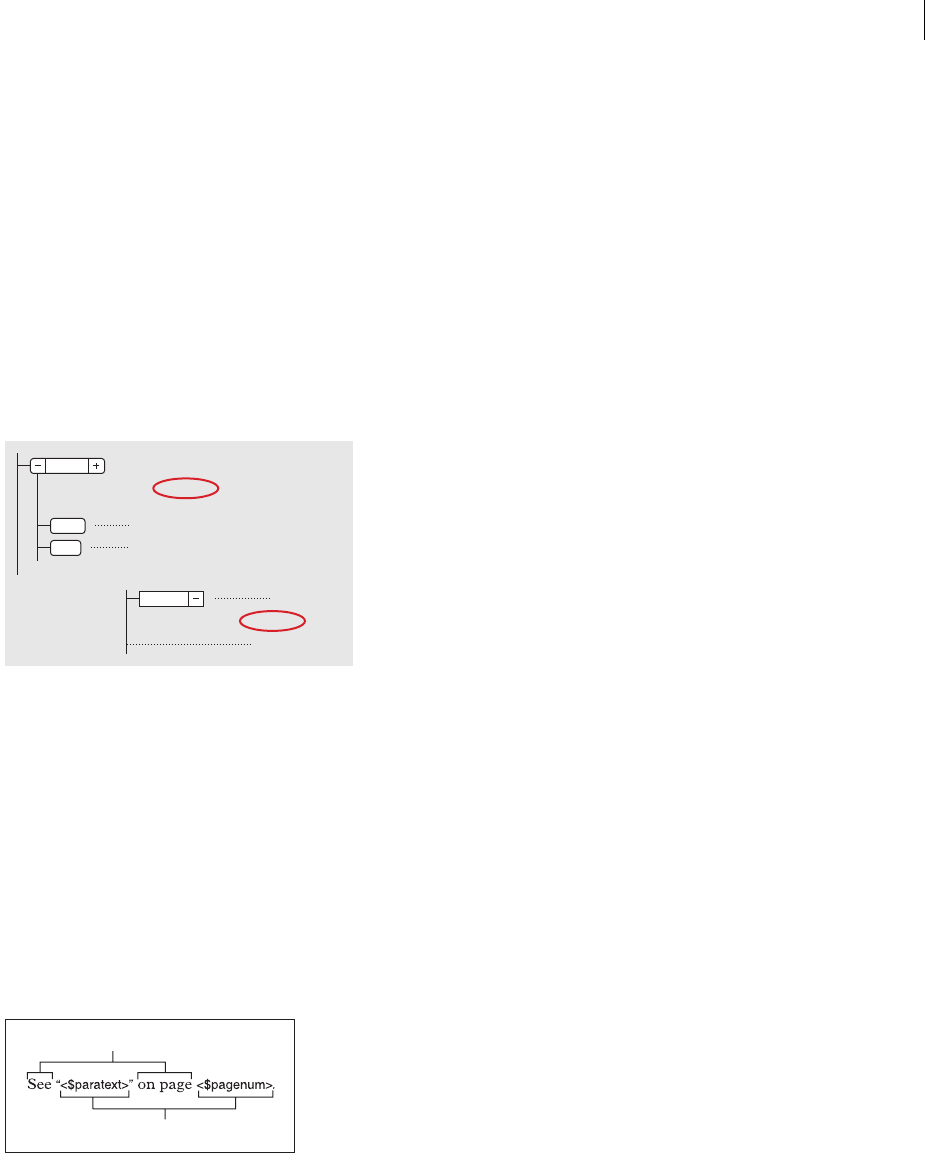
ADOBE FRAMEMAKER 8
User Guide
218
If a cross-reference points to a source in an unstructured flow, the source can be either a whole paragraph or a
marked spot in text. It is also possible to point to a paragraph or a spot in a structured flow, but it’s best to point to
another element. (Cross-reference elements are often defined to be invalid if they point to anything other than
an element.)
ID and ID Reference attributes in structured documents
FrameMaker uses attributes in cross-reference and source elements to maintain the connection between the two
elements. The source element has an ID attribute that stores a unique identifier in the document or book. The cross-
reference element has an ID Reference attribute that also stores the source’s identifier as a way of keeping track of
what the reference points to.
You can see these attributes if you look at the Structure View with attributes showing, but you usually do not need
to do anything with them.
ID from the source element (above); same ID stored in cross-reference (below)
In most cases, FrameMaker provides the IDs for you, as random eight-character strings. (If your attributes are set up
this way, you can provide the IDs yourself.) Then when you insert a cross-reference and specify its source,
FrameMaker fills in the cross-reference’s attribute with the ID from the source.
An ID that FrameMaker generates conforms to the structure reference concrete syntax so that your cross-references
are preserved if you export to a structured format.
Cross-reference formats in structured documents
A cross-reference format defines the appearance of a cross-reference: its wording, the source information it shows,
and, optionally, any special text formatting. For example, the cross-reference See “Volcanism and Plate Tectonics” on
page 7-71 might use this format:
A. Text that appears literally B. Building blocks
The building blocks of the formula are replaced with source information and are updated when necessary—for
example, if the source element’s page number changes.
When you insert a cross-reference, you can select the format to use. A cross-reference element may have a format
already associated with it as part of its element definition.
9.2.1.2 How to Remove Door Panels
The following procedure applies to r...
ID = BFEAABC
XRefLabel = Section
Para
Section
CrossRef 9.2.1.2
above.
ID Ref = BFEAABC
Head
A
B

ADOBE FRAMEMAKER 8
User Guide
219
If your document does not have a cross-reference format you need, ask your developer to create one or to modify an
existing format.
Use the following building blocks to create cross-reference formats that refer to structured FrameMaker elements:
Inserting element-based cross-references in structured
documents
When inserting a cross-reference, you normally use a cross-reference element and point the reference to another
element. The source element might be an entire section or chapter, a table or graphic, a paragraph, or a location
within a paragraph (such as a definition)—it depends on how the elements are defined in your document.
Note: An element can be a source for cross-references only if it has a unique ID attribute. If you want to insert a cross-
reference to a source that does not have an ID attribute, ask your application developer to add the attribute to the source
element’s definition.
For information on inserting a cross-reference that’s not an element, or pointing to a source that is a paragraph or
spot, see “Inserting cross-references” on page 201.
To insert an element-based cross-reference:
1If the source element is in another document, open that document. If the source element does not have a value
assigned to its ID attribute, you must have write permission to the other document so that FrameMaker can provide
an ID.
2Click where you want to insert the cross-reference element. You can insert a cross-reference in text frames but not
in text lines (graphic objects created with the Text Line drawing tool).
3Select a cross-reference element in the Element Catalog and click Insert.
You can also use Special > Cross-Reference to insert an element. If more than one element is available, choose the
one you want from the Element Tag pop-up menu in the Cross-Reference dialog box.
Building block Meaning
<$elempagenum>The page number of the source element
<$elemtext>The text of the source element (up to the first paragraph break), excluding
its autonumber, but including any prefix and suffix specified in the element
definition
<$elemtextonly>The text of the source element (up to the first paragraph break), excluding its
autonumber and any prefix and suffix specified in the element definition
<$elemtag>The tag of the source element
<$elemparanum>The entire autonumber of the source element’s first paragraph (or of the
paragraph containing the source element), including any text in the auto-
number format
<$elemparanumonly>The autonumber counters of the source element’s first paragraph (or of the
paragraph containing the source element), including any characters between
the counters
<$attribute[name]>The value of the attribute with the specified name (or, if no value is specified,
the default value)

ADOBE FRAMEMAKER 8
User Guide
220
4If you’re cross-referencing information in another document, choose the name of that document from the
Document pop-up menu.
5Choose Elements Listed in Order or Elements Listed by ID from the Source Type pop-up menu. The tags of all
elements for which an ID attribute is defined (in the source document’s element definitions) appear in the Element
Tags scroll list.
List elements by IDs if you provided the IDs and have used values that identify the elements’ contents.
(If FrameMaker provided the IDs, the values are random strings that will not be helpful in finding the element
you want.)
6Select the tag of the source element in the Element Tags scroll list. For example, if you’re cross-referencing a
Section element, select Section. All Section elements in the source document appear in the Elements scroll list.
Some elements may use context labels to provide information about the element’s location in the structure. For
example, if Section elements can be nested within other Section elements, the labels might identify whether the
elements are first-, second-, or third-level sections.
Context labels
If an element uses context labels, a <no label> entry also appears in the scroll list for occurrences not described by
the labels. In the example above, Section(<no label>) represents Section elements that are at a fourth level or lower
in the document.
7Select the element you want to cross-reference in the Elements scroll list.
If you chose Elements Listed in Order from the Source Type pop-up menu, the elements are listed in the order they
appear in the document.
If you chose Elements Listed by ID, they are listed in alphabetical order by ID value. The ID value appears first,
followed by a colon and the starting text of the element. Elements with no ID value appear at the end of the list,
preceded by a colon.
8To change the cross-reference format, choose from the Format pop-up menu. The menu lists cross-reference
formats stored in the current document. The cross-reference may have a format preselected, but you can change the
format and it will not be considered a format rule override.
Consult your developer before changing a cross-reference format. Your document may have a separate element
defined for each format you’ll need.
9Click Insert. FrameMaker puts the cross-reference at the insertion point. A bubble for the reference appears in the
Structure View, with a text snippet that shows the first part of the text from the reference.
10 If the Attributes for New Element dialog box appears, enter attribute values for the cross-reference, and select
Insert Element (see “Entering attribute values as you insert elements” on page 46).
If no cross-reference element is available at the location you want, you might use an invalid element. After inserting
the element, talk to your developer about making it valid at this location.

ADOBE FRAMEMAKER 8
User Guide
221
To use an invalid cross-reference element:
❖Do one of the following:
•To use a cross-reference element that is valid in another part of the document, either insert the element in a valid
location and then move it, or use the All Elements setting (see “Changing the scope of elements available in a
structured document” on page 18) to make the element available everywhere and then insert the element where
you want it.
•To insert an invalid cross-reference element with a default tag, choose Special > Cross-Reference, and choose
CROSSREF from the Element Tag pop-up menu. (This option appears in the menu if no defined cross-reference
elements are available.)
Working with ID values in structured documents
FrameMaker uses attributes to maintain the connection between a cross-reference element and a source element.
The source element has an ID attribute with a value that uniquely identifies the location in the document. When you
insert a cross-reference to the source, the same value is stored in an IDRef attribute for the cross-reference element.
If you insert a cross-reference to a source that has an ID attribute but does not yet have a value for the attribute,
FrameMaker automatically provides the value.
ID attributes are often defined to be read-only so that FrameMaker always provides the ID values. An ID that
FrameMaker generates is an eight-character string that conforms to the XML or SGML reference concrete syntax.
How ID attributes are validated in structured documents
FrameMaker tries to ensure that your IDs are unique in the following ways:
•When FrameMaker generates an ID, it is virtually guaranteed to be unique in its document—and even in its book,
because documents in a book have different filenames and part of the generated IDs comes from the filename.
•If you enter an ID that is not unique, the ID is not accepted. FrameMaker does not test for whether an entered ID
is used in a different document in a book, but you can validate the book to find duplicate IDs (see “Validating
structured books” on page 480).
•If you paste a copy of an element with a duplicate ID, the pasted element loses its ID.
It is still possible for a document to end up with IDs that are not unique—for example, if you show hidden condi-
tional text that contains an element with the same ID as another element. The duplicate IDs are identified as invalid
in the Structure View. (The ID is in red and has a red x to its left.)
Invalid value
Chapter
x DraftVersion = Alpha Draft
XRefLabel = <no value>

ADOBE FRAMEMAKER 8
User Guide
222
An ID Reference attribute may be defined to require a value. If an attribute requires a value but does not have one,
the cross-reference probably points to a paragraph or spot within text rather than an element. FrameMaker identifies
the attribute as invalid in the Structure View. (The attribute has a red hole to its left and <no value> in red where the
value should be.)
Missing a required value
Providing your own ID values in structured documents
If the ID attributes are not read-only, you may want to provide the IDs so that you can use values that are more
meaningful. Give the source elements their IDs before inserting cross-references to them.
To provide a value for an ID attribute:
❖Enter an ID in the Attributes dialog box. You can use any combination of characters on your keyboard, up to 255
characters. For information on entering attribute values, see “Assigning attribute values” on page 46.
Keep in mind that the ID will appear in the Cross-Reference dialog box and in the Structure View. Use a brief name
that you’ll remember or recognize later. For example, you might assign the ID value Art to an element for a chapter
titled The Art Department.
If you plan to export to XML or SGML, follow the naming rules for the syntax you’ll be using in XML or SGML.
Ask your developer for recommendations on name length and characters allowed.
You can also edit an ID (unless the attribute is defined to be read-only), but any cross-references pointing to the
element will be unresolved.
If you need to change an element’s ID, you can update existing cross-references to the element. Search for elements
that have an ID Reference attribute with the old ID, and replace the old ID with the new one. For more information
on searching for attribute values, see “Finding elements and attributes” on page 49.
Resolving cross-references in structured documents
Occasionally, FrameMaker does not update a cross-reference because it cannot find the source. This can happen for
one of the following reasons:
•The source of the cross-reference has been moved to a different file, or the source file itself has been moved
or renamed.
•The source has been deleted, or if the source is a paragraph or spot, the marker indicating the source has
been deleted.
•The value for the source element’s ID attribute or the cross-reference’s ID Reference attribute has been changed or
deleted. The ID value must be the same at both locations.
For more information on resolving cross-references, see “Resolving cross-references” on page 209.
To resolve a cross-reference when the source has been deleted:
1Choose Edit > Find/Change.
Chapter
DraftVersion = Alpha Draft
XRefLabel = <no value>
ADOBE FRAMEMAKER 8
User Guide
223
2Choose Unresolved Cross-Reference from the Find pop-up menu and click Find. The Find/Change dialog box
finds the first unresolved cross-reference and shows the ID, element tag, and text of the source.
3Do one of the following:
•If you do not need the cross-reference, delete it.
•If you want the cross-reference to point to a different source, double-click the reference in the document window
to display the Cross-Reference dialog box, specify a source, and click Replace.
4Repeat step 2 and step 3 until all unresolved cross-references are resolved.
To resolve a cross-reference when the ID and ID Reference values do not match:
❖Edit the ID or the ID Reference value so the two values match. (ID attributes are often read-only, so you may have
to edit the ID Reference.) For information on editing attribute values, see “Entering or editing attribute values for
elements already in a document” on page 47.
To generate a list of unresolved cross-references:
1Choose Special > List of > References. When prompted, specify whether you want to create the generated file as
a stand-alone document or add it to a book.
2Move Unresolved Cross-Refs to the Include References scroll list, and then click Set.
The generated list includes the page number of each unresolved cross-reference, indicates whether each missing
source is internal (in the current file) or external (in a different file), and shows the ID, element tag, and text of the
source element.
Generated list of unresolved cross-references
Note: The element information in a generated list may be inaccurate because it is not updated after you initially insert
cross-references.
Working with footnotes in structured documents
As with unstructured documents, you can insert a footnote to text in a column or in a table in a structured document.
A. Footnote B. Footnote separator C. Footnote reference
C
AB

ADOBE FRAMEMAKER 8
User Guide
224
Your document stores properties that determine the appearance of footnotes—for example, the style of the
numbering (numbers, letters, or symbols), the paragraph format for footnote text, and the spacing above separators.
If you need to change any of these properties, see your application developer.
For general information on footnotes, and information on inserting a footnote that’s not an element (which you can
do only in an unstructured flow), see “Working with footnotes” on page 211.
To insert a footnote element:
1Click where you want the footnote reference to appear.
2Select a footnote element in the Element Catalog and click Insert.
FrameMaker inserts the footnote reference, displays a footnote number at the bottom of the column or end of the
table, and renumbers any footnotes that follow. A bubble for the footnote appears in the Structure View, with a text
snippet that shows the beginning of the footnote text.
You can also use Special > Footnote to insert a footnote element. If more than one footnote element is available,
choose one from the Element Tag pop-up menu in the dialog box that appears.
3If the Attributes for New Element dialog box appears, enter attribute values for the element and click Insert
Element (see “Assigning attribute values” on page 46).
4Type the text of the footnote at the insertion point. When you finish typing the footnote, return to the main text
by clicking in it or by choosing Special > Footnote.
If no footnote element is available at the location you want, you might use an invalid element. After inserting the
element, talk to your developer about making it valid at this location.
To use an invalid footnote element:
❖Do one of the following:
•To use an element that is valid in another part of the document, either insert the element in a valid location
and then move it, or use the All Elements setting (see “Changing the scope of elements available in a structured
document” on page 18) to make the element available everywhere and then insert the element where you want it.
•To insert an invalid footnote with the default tag FOOTNOTE, choose Special > Footnote. (A default footnote is
created if no defined footnote elements are available.)
To change the text of a footnote:
❖Select the footnote text and edit it as you do other text. You can’t change a footnote number because FrameMaker
maintains the numbering.
To select a footnote for other editing:
❖Click the footnote reference (not the footnote text), or click the footnote’s bubble in the Structure View.
ADOBE FRAMEMAKER 8
User Guide
225
Inserting more than one reference to a footnote in a structured document
You can create a single footnote that has several footnote references—for example, a table footnote with references
in several cells.
Two references for the same footnote
To do this, you insert the footnote in the usual way and then use cross-references for the additional references to it.
You need to have a special cross-reference element already defined for the additional references. The element should
display a reference number in the same way that the original footnote reference does. For example, if the number is
in superscript in the original reference, the number in the cross-reference element should also be in superscript.
Note: If you add or remove a footnote that appears before the footnote being cross-referenced, the cross-reference may
refer to the wrong number. Choose Edit > Update References to update the numbering.
To insert more than one reference to a footnote:
1Insert the footnote element.
2Where you want an additional footnote reference, insert a cross-reference element that was defined to display only
a footnote reference (see “Inserting element-based cross-references in structured documents” on page 219).
Working with endnotes in structured documents
In structured documents, you usually use elements to set up endnotes. The endnote element is a regular
autonumbered paragraph (not a footnote element). The cross-reference element displays a reference number to
the endnote.
For general information on endnotes, setting up endnotes without using elements (which you normally do only in
an unstructured flow), and maintaining endnotes, see “Working with endnotes” on page 216.
To create endnotes:
1Insert the endnote element at the end of the document, and type the text of the note.
2Click where you want to insert the reference to the endnote.
3Insert a cross-reference element that was defined to display an endnote reference (see “Inserting element-based
cross-references in structured documents” on page 219).
4Create additional endnotes as you created the first one.
Note: Make sure that the sequence of endnotes is the same as the sequence of references in the document. FrameMaker
does not automatically sequence endnotes as it does with footnotes.

226
Chapter 6: Variables and equations
About variables
To use a short passage of text (for example, a word or phrase representing a product or company name) in several
places in a document, or to include information that is updated automatically (for example, the current date), use
variables. Variables save you the trouble of typing or changing the text yourself.
Variables are useful when you expect certain text to change often or when you know the same text will be used in
several places. User variables, such as a product name, are defined by you. System variables, such as the current date,
use information supplied by Adobe FrameMaker and your computer system.
User variables
Each user variable has a name and a definition. A definition includes text and optional building blocks for the
character format of the text. For example, suppose you define a variable as follows:
<BookTitleFormat>The Earth Sciences
If the BookTitleFormat character format is defined as italics, this variable will appear on the page as
The Earth Sciences.
You can change the definition of any user variable. For example, if you’re using a variable to represent the title of a
book, you can change the definition of the variable when the book’s title changes. When you change the definition,
all occurrences of the variable in your document are updated to use the new definition.
The standard templates don’t provide any user variables. If you’re using one of these templates, you have to create
your own user variables. If you’re using a template created at your site, it may already include some user variables.
System variables
Documents come with a set of system variables. The variables display information that FrameMaker generates—for
example, the current page number, the page count of the document, or the current date. You can’t add to the set,
delete a variable from it, or rename system variables.
Each system variable has a name and a definition. A system variable definition can contain the following items:
•Building blocks for system information such as the month, day, year, and filename
•Text characters such as the comma and the spaces that appear in the date May 1, 1997
•Building blocks for character format changes
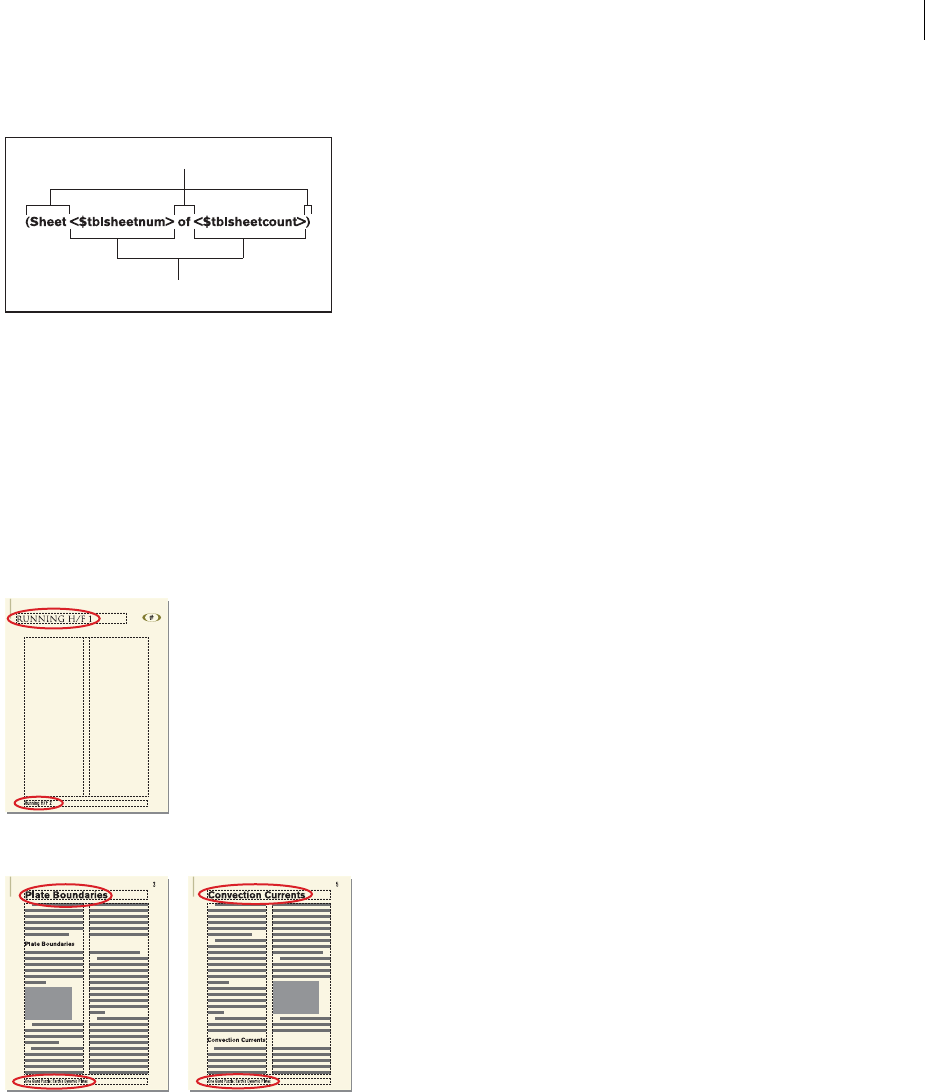
ADOBE FRAMEMAKER 8
User Guide
227
For example, the Table Sheet variable that appears in a table title as (Sheet 3 of 5) has the following definition.
A. Text y ou type B. Building blocks
You can change the definition—the way the information is displayed—by adding, removing, or rearranging building
blocks and by editing the text in the definition. For example, you can change the format used to display the current
date. For a complete list of the system variables and their default definitions, see “Default values for system variables”
on page 228.
Probably the most common way to use system variables is in background text frames, such as headers and footers.
(A background text frame is on a master page and doesn’t have a flow tag.) The contents of these text frames appear
on the corresponding body pages. For example, you can use system variables to create running headers and footers
that contain chapter titles, section headings, or other information that may change from page to page.
System variable names appear on master pages.
FrameMaker provides values on body pages.
The values of system variables inserted on master pages are updated automatically. However, if you place a system
variable on a body or reference page, the value is updated only when you open or print the file. You can also manually
update the value of the variable when the file is open.
Note: Variables and Variable names suppor t the Unicode text encoding standard.
A
B
A
B

ADOBE FRAMEMAKER 8
User Guide
228
Default values for system variables
Most system variables can be inserted on a body, reference, or master page. However, the Current Page # and
Running H/F variables can be inserted only in a background text frame on a master page.
Inserting variables
You can insert a variable on any type of page in a document—a body page, master page, or reference page. You can
insert a variable in a text frame but not in a text line.
To insert a variable:
1Click to place the insertion point where you want the variable to appear. If you’re inserting the Current Page #
variable or a running header/footer variable (see “About running header/footer variables” on page 234), you must
click in a background text frame on a master page.
2Choose Special > Variable.
3Select a variable in the Variables scroll list.
System variable Default definition (US English version) Example of display
Current Page # <$curpagenum>3
Page Count <$lastpagenum>18
Current Date (Long) <$monthname> <$daynum>, <$year>October 11, 1997
Current Date (Short) <$monthnum>/<$daynum>/<$shortyear>10/11/97
Modification Date (Long) <$monthname> <$daynum>, <$year>,
<$hour>:<$minute00> <$ampm>
September 24, 1997, 10:48 am
Modification Date (Short) <$monthnum>/<$daynum>/<$shortyear>9/24/97
Creation Date (Long) <$monthname> <$daynum>, <$year>July 1, 1997
Creation Date (Short) <$monthnum>/<$daynum>/<$shortyear>7/1/97
Filename (Long) <$fullfilename>(Windows) c:\Memos\Staffing.fm
(UNIX) /usr/tom/Memos/Staffing.fm
Filename (Short) <$filename>Staffing.fm
Table Continuation (Continued) (Continued)
Table Sheet (Sheet <$tblsheetnum> of <$tblsheetcount>) (Sheet 1 of 2)
Volume Number <$volnum>3
Chapter Number <$chapnum>3
Running H/F 1 <$paratext[Title]>The Turbulent Oceans
Running H/F 2 <$paratext[Heading1]>Threat of Extinction
Running H/F 3 <$marker1>Plate tectonics
Running H/F 4 <$marker2>Volcanoes
Running H/F 5–12 <$paratext[paratag]>Lava

ADOBE FRAMEMAKER 8
User Guide
229
The scroll list contains the variables allowed at the insertion point in the document. For example, if the insertion
point is in a text frame on a body page, the scroll list doesn’t contain the Current Page # variable. The user variables
appear in the scroll list after the system variables. The last system variable is Table Sheet.
4Click Insert.
In most cases, the value of a variable inserted on a master page appears on both the master and the corresponding
body pages. However, if you insert the Current Page # variable, a number sign (#) appears on the master page, and
the actual page number appears on the body page. If you insert a running header/footer variable, the variable name
appears on the master page, and the value appears on the body page.
To insert a variable by using the keyboard:
1Click where you want to insert the variable and press Control+0 (zero). The Tag area on the left side of the status
bar prompts you for a variable name.
Typing the variable name
2Start typing the variable name.
Type lowercase letters to search forward, uppercase to search backward. You can also use the Up Arrow and Down
Arrow keys to scroll through variables. You need to type only enough letters to identify the variable uniquely. For
example, if the only variable that begins with B is BookTitle, the phrase BookTitle appears in the Tag area when you
type B.
3Press Return to insert the variable in the document. If you decide to cancel the operation, Press Control+c or click
in the document without pressing Return.
Editing variables
When you insert a variable, its value is displayed at the insertion point. You can then move it, replace it with another
variable, or delete it.
You can’t edit occurrences of a variable directly in a document. To change the variable, you change its definition
(see “Changing variable definitions” on page 232), or you convert it to editable text and then edit the text in
the document. If you convert the variable to text, however, the text is no longer updated when the variable
definition changes.
To copy or move a variable:
1Click the variable to select it.
2Copy or move the variable as you do editable text—by using the Edit > Copy, Edit > Cut, and Edit >
Paste commands.
To replace a variable:
1Double-click the variable to display the Variable dialog box.
2Select a different variable in the Variables scroll list, and click Replace.

ADOBE FRAMEMAKER 8
User Guide
230
Deleting variables
You can delete an occurrence of a user or system variable. You can also delete the definition of a user variable.
Deleting a variable definition converts all occurrences of the variable in your document to editable text.
To delete a variable in a text inset, delete the variable in the source document.
To delete one occurrence of a variable:
❖Click the variable once to select it and press Delete. Backspacing the insertion point over a variable doesn’t delete
the variable.
To delete a user variable definition:
1Choose Special > Variable.
2Select the variable in the Variables scroll list and click Edit Definition.
3Click Delete and then click Done.
Converting variables to text
After you convert a variable to text, you can edit the text. However, the text will no longer be treated as a variable.
To convert a variable to text:
1If you want to convert a single occurrence of the variable, select it.
2Choose Special > Variable and click Convert to Text.
3Do one of the following:
•To convert a single occurrence of a variable, click Selected Variable.
•To convert all occurrences of a particular variable, select the variable in the Variables Named scroll list, or choose
the variable’s element tag from the Variables with Element Tag pop-up menu (structured documents only).
•To convert all variables in the document, click All Variables.
4Click Convert.
Updating system variables on body or reference pages
When you change the definition of a variable, FrameMaker immediately updates the variable throughout the
document, regardless of the type of page on which the variable appears. However, if the value (not the definition) of
a variable changes, occurrences of the variable on body and reference pages will be updated automatically only when
you open or print the file. Variables on master pages are updated when you save the document. If the value of a
variable changes after you open or print the file, you can update the variable manually.
Note: Although updated variables may print, they do not automatically appear on-screen unless you redraw the
document by pressing Control+l (lowercase L).

ADOBE FRAMEMAKER 8
User Guide
231
To update system variables manually:
1Choose Special > Variable.
2Click Update and then click OK.
Importing variable definitions
When you want to use another document’s variable definitions, copy those definitions to your document or to files
in a book by using the File > Import > Formats command. For more information, see “Importing and updating
formats” on page 415 and “Changing the format of files in a book” on page 472.
Creating user variables
Before you create a user variable, decide on the name of the variable, the text it will contain, and the character format
of the text. For example, you might create a user variable for a product name that may change or for a long manual
name that is difficult to type.
If you don’t specify a character format in the variable definition, the variable uses the format at the insertion point. If
you change the character format for the variable, the change applies only to the variable, not to the text that follows.
To create a user variable:
1Click in a text frame and choose Special > Variable.
2Click Create Variable.
3Enter the name and definition of the variable. Variable names are case-sensitive; Title and title would be different
variables. The complete definition, including typed text and character formats, can be up to 255 characters long. You
cannot use system variable building blocks for user variables.
To include an angle bracket in a variable definition as text, precede it with a backslash (\).
Note: Some special characters are entered or displayed differently in dialog boxes. In Windows, you enter a sequence of
characters beginning with a backslash (\); see “About typing in dialog boxes” on page 677. On UNIX systems,
the backslash sequences may appear in text boxes, even though you don’t have to type the sequences to enter
the characters.
4To change the character format within the variable definition, do the following:
•To use a character format stored in the Character Catalog, place the insertion point in the Definition text box
where you want to change the character format, and then click the character format in the Character Formats
scroll list. The scroll list includes all the formats in the Character Catalog of the current document.
Important: Don’t use a character format whose tag includes angle brackets.
•To change the character format back to the paragraph’s default font before the end of the variable, place the
insertion point in the Definition text box where you want to change the character format, and then click
<Default Font> in the Character Formats scroll list.
5Click Add. The variable appears in the User Variables scroll list.
6To add more user variables, repeat steps 3 through 5.
7Click Done to return to the Variable dialog box and then click Done.

ADOBE FRAMEMAKER 8
User Guide
232
Changing variable definitions
You can change a variable’s definition at any time. For example, if you use a variable for a product’s code name, you’ll
eventually need to change the definition to the final product name.
When you change the definition of a variable, the variable is immediately updated throughout the document,
regardless of the type of page on which it appears. If the variable is in a header or footer on a master page, you may
need to redisplay a body page to see the update.
Note: If a variable is in a text inset that uses the source document’s formats, you must change the variable definition in
the source document. For information on text insets and their formatting options, see “Importing formatted text” on
page 502.
To change a variable definition:
1Click in a text frame and choose Special > Variable. If you’re changing the definition of the Current Page # variable
or a running header/footer variable, you must click in a background text frame on a master page.
2Select a variable in the Variables scroll list and click Edit Definition.
3Do one of the following:
•For user variables, edit the name or definition, and click Change.
•For system variables, edit the definition and click Edit. You can insert a building block for system-supplied infor-
mation or for a character format at the insertion point by clicking the building block in the Building Blocks scroll
list. Only the building blocks that are appropriate for the variable (for example, <$fullfilename> and <$filename>
for the filename variables) appear in the scroll list. All the character formats in the Character Catalog appear at
the bottom of the scroll list.
You can change the text and character format within the definition as described in “Creating user variables” on
page 231.
4If you’re editing a user variable, you can edit additional variables by selecting them in the scroll list, changing their
definitions, and clicking Change.
5Click Done.
Changing definitions of date and time variables
FrameMaker includes both long and short versions of variables for the current date, the date the document was last
modified, and the date the document was created (for example, February 17, 1997 1:12 pm). FrameMaker provides
the following building blocks for date and time variables.
Building block What it displays Example
<$second>
<$second00>
Seconds 8 or 32
08 or 32
<$minute>
<$minute00>
Minutes 8 or 32
08 or 32
<$hour>
<$hour01>
<$hour24>
Hours 8 or 12
08 or 12
08 or 22
ADOBE FRAMEMAKER 8
User Guide
233
FrameMaker uses the language of the current paragraph to determine the language used in date and time variables.
For example, the current day name variable may appear as Wedn esd ay in an English paragraph but as Miercoles in a
Spanish paragraph. If you change the language of a paragraph, the system variables in the paragraph are updated to
use the new language.
If your system supports the typing of Japanese text in documents and dialog boxes, the following additional building
blocks are available for Japanese dates.
Japanese dates appear in a variable when the variable uses a Japanese font family and the Language property is set to
Nihongo. For information on related Chinese and Korean features, see the online manual on Chinese and Korean
features in the Documents folder.
<$ampm>
<$AMPM>
Morning or evening designation am or pm
AM or PM
<$daynum>
<$daynum01>
Number of the day 8 or 28
08 or 28
<$dayname>
<$shortdayname>
Name of the day Monday
Mon
<$monthnum>
<$monthnum01>
Number of the month 8 or 12
08 or 12
<$monthname>
<$shortmonthname>
Name of the month August
Aug
<$year>
<$shortyear>
Year 1997
97
Building block Example
<$daynumkanjikazu> or
<$daynumkanjinumeric> or
<$monthnumkanjikazu> or
<$monthnumkanjinumeric> or
<$imperialyear>1 or 10
<$imperialyear01>01 or 10
<$imperialyearspecialkanjikazu> or
<$imperialyearspecialkanjinumeric> or
<$imperialyearkanjikazu> or
<$imperialyearkanjinumeric> or
<$imperialera>
Building block What it displays Example

ADOBE FRAMEMAKER 8
User Guide
234
Creating variables for running headers and footers
A running header/footer variable gives information about the contents of a page and can change from page to page.
You might use running header/footer variables to include information such as the number and title of the current
chapter, the name of the current first-level section, or the current page number.
In addition to using running header/footer variables, you can also use the <$chapnum> and <$volnum> building
blocks to add chapter and volume numbers to headers and footers. See “Including volume and chapter numbers in
headers or footers” on page 471.
About running header/footer variables
Running headers and footers use system variables such as the current page and current date variables. They also use
twelve system variables provided especially for running headers and footers (Running H/F 1, Running H/F 2, and
so on).
Running header/footer variables can refer to a paragraph with a particular tag—usually a title or heading
paragraph—or to marker text. You can use these variables with their default definitions, or you can customize
them—for example, by changing the tag that appears in the variable definition.
You insert a running header/footer variable in a background text frame on a master page in the same way that you
insert variables elsewhere (see “Inserting variables” on page 228).
By default, the Running H/F 1 and Running H/F 2 variables use definitions that refer to the Title and Heading 1
paragraph tags, respectively. The Running H/F 3 and Running H/F 4 variables use definitions that refer to markers.
The Running H/F 5–12 variables use definitions that refer to paragraph tags you specify. You can change these
default definitions either before or after you insert the variable. For instructions on changing a variable definitions,
see “Changing variable definitions” on page 232.
Running headers and footers based on paragraph tags
The following table contains examples of running headers and footers that refer to paragraph tags.
Running header/footer
variable definition
Explanation Examples of display
<$paratext[Head1]>The text of the first paragraph that FrameMaker
finds with the tag Head1
Types of plate boundaries
<Header><$paratext [Head1]>The text of the first paragraph with the tag Head1
(The text appears in the Header character
format—uppercase, italic letters.)
TYPES OF PLATE BOUNDARIES
<$paranum[SectTitle]>The complete autonumber of the first paragraph
with the tag SectTitle
Chapter 2
<$paranumonly[SectTitle]>The autonumber counters for the first paragraph
with the tag SectTitle
2
<$paratag[Chapter]>The tag of the first paragraph with the tag Chapter Chapter
<$paratext[SectTitle, AppendixTitle]>The text of the first paragraph with either the Sect-
Title or AppendixTitle tag
PLATE TECTONICS
ADOBE FRAMEMAKER 8
User Guide
235
Displaying paragraph text, tags, or autonumbers
The most common use of running headers and footers is to show the text, autonumber, or tag of paragraphs with a
specified tag. For example, a running header might show the current section heading or chapter number.
FrameMaker searches each body page to find a paragraph with the tag you specify and then puts the paragraph’s text,
autonumber, or tag in the running header or footer for that page. If a page doesn’t contain a paragraph with the tag
you specify, FrameMaker searches backward through the preceding pages and uses information from the first appro-
priate paragraph it finds.
The following building blocks in running header/footer variables refer to a paragraph tag.
Follow these guidelines for using paragraph tag building blocks:
•Don’t use a paragraph tag that includes brackets.
•Replace paratag in the building block with the tag of the paragraph for which you want to display information.
Don’t delete the brackets. For some examples, see “About running header/footer variables” on page 234.
•You can include more than one paragraph tag in the [paratag] part of a building block. When you include multiple
paragraph tags, FrameMaker uses the first paragraph it finds with one of the tags. Separate the tags with commas,
as in the following example: <$paratext[Head1, Head2]>
Displaying text from a marker
If the text you want to show in a header or footer doesn’t appear in a paragraph of its own, you can show text
associated with a marker. For example, you can use a marker to show an abbreviated version of a title or to
summarize the contents of a page. When text symbols are visible, marker symbols indicate the location
of markers.
Page header contains abbreviated heading.
In this example, the marker in the heading contains the marker text Plate boundaries. A running header/footer
variable then displays the marker text in the page header.
FrameMaker searches for a marker just as it does for a paragraph tag, searching the current page and then backward
from the current page until it finds a marker of the specified type. You can use two marker types for running headers
or footers: Header/Footer $1 and Header/Footer $2.
Building block What it displays
<$paratext[paratag]>The paragraph’s text
<$paranum[paratag]>The paragraph’s autonumber, including any text in the auto-
number format
<$paranumonly[paratag]>The paragraph’s autonumber counters, including any characters
between them
<$paratag[paratag]>The paragraph’s tag

ADOBE FRAMEMAKER 8
User Guide
236
To display text from a marker:
1Insert a Running H/F variable in the header or footer on a master page (see “About running header/footer
variables” on page 234). By default, the Running H/F 3 and Running H/F 4 variables use definitions that look
for markers.
2Edit the definition of the variable to use a <$marker1> or <$marker2> building block (see “Changing variable
definitions” on page 232). The <$marker1> building block displays the text of a Header/Footer $1 marker. The
<$marker2> building block displays the text of a Header/Footer $2 marker.
3Display a body page and click where you want to insert a marker.
4Choose Special > Marker.
5In the Marker dialog box, choose either Header/Footer $1 or Header/Footer $2 from the Marker Type pop-up
menu, enter the marker text, and click New Marker. When you enter the marker text, make sure that the spaces,
punctuation, and capitalization are as you want them.
Note: You can’t format marker text in the Marker Text box. To format the marker text, insert a character-format
building block before the marker building block in the system variable definition.
Displaying a condition tag
In a document that uses conditional text, you can show a condition tag that appears on the current page in the
running header or footer. (For information on conditional text, see “About conditional text” on page 296.) A
predefined variable is not included for this purpose, but you can redefine any of the existing running header and
footer variables to use the condition tag building block. Unlike the system variables that refer to a paragraph or a
marker, variables with the condition tag building block search only on the current page.
To display a condition tag:
1Insert a Running H/F variable in the header or footer on a master page (see “Creating variables for running
headers and footers” on page 234).
2Edit the definition of the variable to use the <$condtag [hitag, …,lotag, nomatch]> building block (see “Changing
variable definitions” on page 232).
Replace hitag, lotag, and the ellipsis with one or more condition tags you want FrameMaker to find. Replace nomatch
with the text you want to display if FrameMaker doesn’t find one of the tags in the definition. If you don’t want to
display any text when there’s no match, enter a nonbreaking space (a backslash followed by a space) in place of
nomatch.
FrameMaker searches a page for the condition tags you specify. If it finds one of the tags, the tag appears in the
running header or footer. If it finds more than one tag, the tag that appears first in the definition appears as the value
of the variable.
Displaying the security level
If your document contains classified information, you can use condition tags in running headers or footers to display
the highest security level on a page.
To display the security level on a page:
1Apply condition tags, such as Top Secret and Secret, to the classified information.
2Set up headers or footers to include these tags on pages that contain classified information. For example, to display
Top Secret on pages that contain both Top Secret and Secret information and Unclassified on pages that contain
neither condition tag, define the building block as <$condtag[Top Secret,Secret,Unclassified]>.
ADOBE FRAMEMAKER 8
User Guide
237
Creating dictionary-style headers or footers
You can use dictionary-style headers or footers to show the range of information that appears on one body page or
on two facing body pages. Dictionary-style headers or footers appear frequently in documents such as dictionaries,
indexes, and glossaries.
Headers show first entry on left and last on right.
To create a dictionary-style header or footer:
1Insert a different running header/footer variable in the header or footer of each of two facing master pages
(“Creating variables for running headers and footers” on page 234). For example, insert Running H/F 1 on the left
master page and Running H/F 2 on the right master page.
2Edit the definition of the variable on the left master page to use the <$paratext[paratag]> building block
(see “Changing variable definitions” on page 232). Replace paratag with the paragraph tag of dictionary terms.
3In the same way, edit the definition of the variable on the right master page to use the <$paratext[+,paratag]>
building block. The plus sign (+) tells FrameMaker to find the last paragraph on the page matching the tag rather
than the first paragraph.
Working with variables in structured documents
As with unstructured documents, you can use either system or user variables in structured documents.
System variables display information that your system generates. You can add a system variable to a structured flow,
with or without a special variable element.
User variables display text associated with the variable. You do not use special variable elements for user variables but
insert them directly in elements defined for text.
The following building blocks in running header/footer variables refer to an element tag:
Building block Meaning
<$elemtext[tag]> The text (up to the first paragraph break), excluding its auto-
number, but including any prefix and suffix specified in the
element definition
<$elemtextonly[tag]>The text (up to the first paragraph break), excluding its autonumber
and any prefix and suffix specified in the element definition
<$elemtag[tag]>The tag
<$elemparanum[tag]>The entire autonumber of the element’s first paragraph

ADOBE FRAMEMAKER 8
User Guide
238
Using valid variables in structured documents
Variables in FrameMaker are exported as entities, and usually the entity name is the same as the variable name.
However, if you create a variable whose name is not a valid XML or SGML name, the entity name will not be the
same as the variable name.
Here are some examples of invalid names:
•A name with multibyte (Asian-language) characters.
•A name that includes anything other than alphanumeric characters, hyphens, or periods.
•A name containing more characters than the number specified by the value of NAMELEN in the XML or SGML
declarations for the particular application.
Inserting system variable elements in structured documents
You can use an element to insert a system variable in a structured flow. FrameMaker comes with a set of system
variables, and a variable element’s format rules determine which variable to use with it. You cannot change a system
variable element to use a different variable.
The values of system variables you insert are updated when you open or print the document. You can also update
system variables manually. (System variables in headers or footers are updated when the page is redisplayed.)
For information on inserting a system variable that’s not an element, see “Inserting variables” on page 228.
To insert a system variable element:
1Click where you want to insert the variable.
2Select a system variable element in the Element Catalog and click Insert.
3If the Attributes for New Element dialog box appears, enter attribute values for the element and click Insert
Element (see “Adding elements” on page 34).
The current value of the variable appears at the insertion point. A bubble for the variable appears in the Structure
View, with a text snippet that shows the beginning of the variable’s text.
If no variable element is available at the location you want, you might use an invalid element. After inserting the
element, talk to your developer about making it valid at this location.
To use an invalid system variable element:
❖Insert an element that is valid in another part of the document. Either insert the element in a valid location and
then move it, or use the All Elements setting (see “Changing the scope of elements available in a structured
document” on page 18) to make the element available everywhere and then insert the element where you want it.
To update all system variables in the document:
❖Choose Special > Variable, click Update, and then click OK.
<$elemparanumonly[tag]>The first paragraph’s autonumber counters, including any charac-
ters between them
Building block Meaning
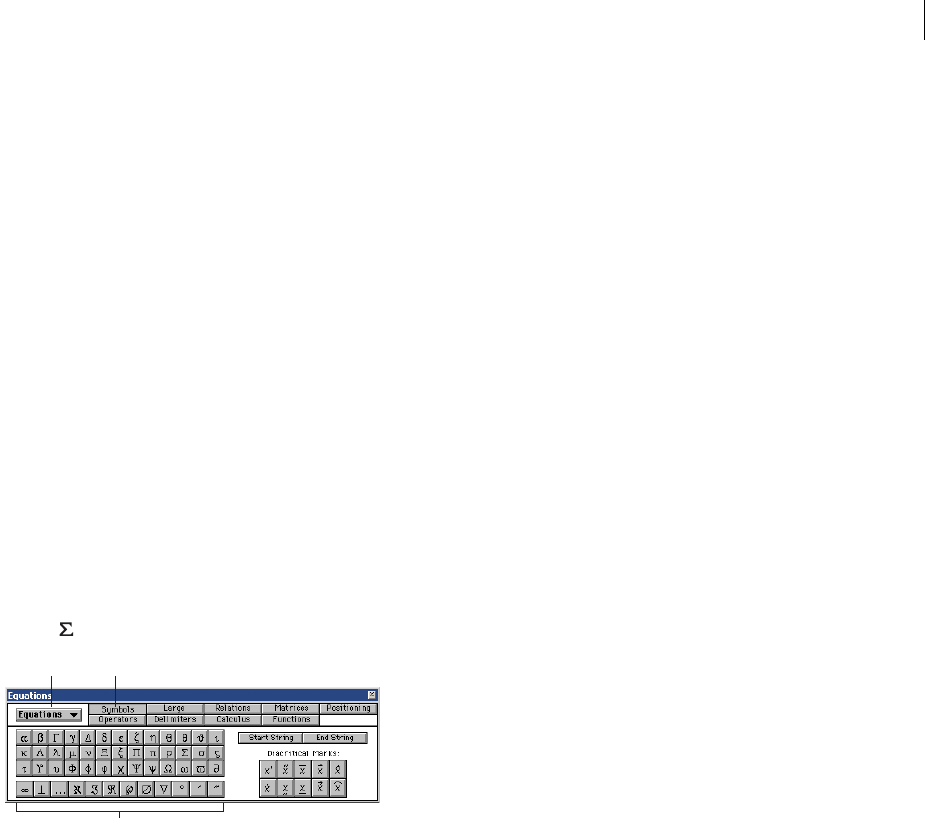
ADOBE FRAMEMAKER 8
User Guide
239
Inserting user variables in structured documents
You can insert a user variable directly in text, without using a special variable element. Your application may have
some user variables already defined, and you can define and maintain other user variables as needed. If the value of
a user variable changes, it is updated automatically wherever it occurs.
For information on defining user variables, see “Creating user variables” on page 231. For information on inserting
variables, see “Inserting variables” on page 228.
About Equations
FrameMaker provides a full palette of math elements to streamline the creation of typeset equations. After you create
equations, you can reformat them by changing their fonts, their alignment, and the exact positioning of their math
elements. You can also use commands on the Equations palette to evaluate equations mathematically.
Using the Equations palette
The Equations palette contains the commands you use to create and change equations, as well as the symbols,
operators, functions, and other math elements you insert in equations. To display the palette, click the Equations
button at the upper right in the document window.
A. The Equations pop-up menu appears on every page.
B. The names of the pages appear here, with the current page highlighted.
C. This part of the palette changes from page to page.
The Equations palette contains nine pages of math elements and commands. To display a page, click its name at the
top of the palette.
Symbols Greek characters, atomic symbols, diacritical marks, and strings
Operators Roots, powers, signs, subscripts, superscripts, and logic symbols
Large Sums, products, integrals, intersections, and unions
Delimiters Parentheses, brackets, braces, and substitution
Relations Equal, less than, greater than, similar to, subset of, superset of, and proportional to
Calculus Integrals, derivatives, partial derivatives, gradients, and limits
Matrices Matrices and matrix commands
Functions Trigonometric, hyperbolic, and logarithmic functions; commands for evaluating expressions; and
commands for creating and applying rules
AB
C

ADOBE FRAMEMAKER 8
User Guide
240
Positioning Controls to adjust the position of an expression and the spacing around it, commands to specify
alignment, and commands to set and clear manual line breaks
About positioning equations
You can put an equation in line with paragraph text or on display in a paragraph of its own. In either case,
FrameMaker creates an anchored frame for the equation. You can also position an equation with other objects in an
existing graphic frame—for example, to annotate a graphic or to put more than one equation in a graphic frame. The
graphic frames that contain equations can be either anchored or unanchored.
A. Inline B. Display C. In a graphic with other objects
Creating equations
To create an equation, you insert an equation object in the document and then insert math elements in the equation.
This section discusses how you can create an equation object. For instructions on inserting math elements into the
equation, see “Inserting math elements” on page 243.
For information on creating equations for SGML and XML, see “About equation elements in structured documents”
on page 282.
When working with an equation, zoom in until it’s easy to read.
To create an inline equation:
1Click in text where you want to insert the equation. If the text is in a rotated text frame, unrotate the frame first
by selecting the rotated text frame and pressing Esc g 0 (zero).
2Choose Special > Equations, or click the Equations button at the right side of the document window.
3On the Equations palette, choose one of the New Equation commands from the Equations pop-up menu. Small,
Medium, and Large specify the font sizes used in the new equation.
and Suppose that xx
0
=yy
0
=
xx
0
–2
a2
------------------- yy
0
–2
b2
--------------------+1=
x2–2
16
------------------ y4–2
9
-----------------+1=
A
B
C
ADOBE FRAMEMAKER 8
User Guide
241
A new equation object appears as a question mark in a frame anchored below the line with the insertion point. The
first math element you insert replaces the question mark prompt.
New inline equation
4Insert the math elements in the equation by typing the elements or by clicking items on the Equations palette.
Inserted elements
5Choose Shrink-Wrap Equation from the Equations pop-up menu. This shrinks the frame around the equation
and puts the equation in the line of text at the anchor symbol.
Shrink-wrapped inline equation
6If the equation seems too close to the text on either side, insert a space before or after the frame. FrameMaker
treats the frame that contains an in-line equation as a character and doesn’t provide extra space around it.
7If the equation is too tall for the line, open up more space above or below the line by using the Line Spacing pop-up
menu on the formatting bar to turn off fixed line spacing. For details, see “Changing spacing” on page 115.
To create an equation in a paragraph of its own (a display equation):
1Click in an empty paragraph.
2Apply a paragraph format from the Paragraph Catalog (see “Applying predefined formats to text” on page 102) or
set up your own format. The paragraph format determines the alignment (left, right, or center), vertical spacing, and
any autonumber for the paragraph that contains the equation.
If you created the document from a book or report template, use the Equation paragraph format. You can also copy
this format to your document, but you’ll probably want to make some changes (for example, to the Default Font
and Spacing properties).
3Click the Equations button at the right side of the document window.
Suppose that the axes of an ellipse lie along
the line ¶
?
Suppose that the axes of an ellipse lie along
the line ¶
xx
0
=
Suppose that the axes of an ellipse lie along
the line ¶xx
0
=
ADOBE FRAMEMAKER 8
User Guide
242
4On the Equations palette, choose one of the New Equation commands from the Equations pop-up menu. Small,
Medium, and Large specify the font sizes used in the new equation.
A new equation object appears as a question mark in a frame anchored below the empty paragraph. The first math
element you insert replaces the question mark prompt.
New equation in anchored frame
5Insert the math elements in the equation by typing the elements or by clicking items on the Equations palette.
Inserted elements
6Choose Shrink-Wrap Equation from the Equations pop-up menu. This shrinks the frame around the equation
and puts the equation in the empty paragraph.
Shrink-wrapped equation in its own paragraph
To create an equation in a graphic frame with other objects:
1Click the Equations button at the right side of the document window.
2Select a graphic frame or an object in a graphic frame.
3On the Equations palette, choose one of the New Equation commands from the Equations pop-up menu. Small,
Medium, and Large specify the font sizes used in the new equation.
The ellipse is represented by the following
equation:¶
¶
?
xx
0
–? 2
a2
-------------------- yy
0
–
?2
b2
-------------------- 1=+
The ellipse is represented by the following
equation:¶
¶
xx
0
–2
a2
-------------------- yy
0
–
?2
b2
-------------------- 1=+ ¶
The ellipse is represented by the following
equation:
ADOBE FRAMEMAKER 8
User Guide
243
A new equation object appears as a question mark inside the frame. The first math element you insert replaces the
question mark prompt.
New equation object
4Insert the math elements in the equation by typing the elements or by clicking items on the Equations palette.
5To place the equation exactly where you want it, first select it by Control-clicking the equation.
6Move the equation by doing one of the following:
•Drag it with the mouse.
•Move it with the arrow keys.
•Position it precisely with the Graphics > Object Properties command.
For details, see “Moving objects” on page 330.
Inserting math elements
An equation contains expressions made up of math elements—characters, text strings, operators, and other mathe-
matical elements from the Equations palette.
A. Alphanumeric character B. Text string
C. Expression D. Operator
After you create an equation object, you insert math elements in it by typing them or by clicking them on the
Equations palette. (The Equations palette doesn’t have to be open when you insert an item from the keyboard.) For
details on creating equations, see “Creating equations” on page 240. For a general description of the math elements
on the Equations palette, see “Using the Equations palette” on page 239.
Use the following general steps when you insert any math element. For details on inserting particular types of
elements, see the following sections beginning with “Inserting text strings” on page 245.
Note: Math equations support the Unicode text encoding standard.
Its horizontal axis is 12 units long. Its vertical
axis is 7 units long. ¶
?
xa–2yb–2
+
Radius
2
=
B
CD
A
ADOBE FRAMEMAKER 8
User Guide
244
To insert a math element in an equation:
1Select an expression or put the insertion point in an equation.
2Do any of the following:
•To insert a math element by using the Equations palette, click the element.
•To insert an alphanumeric character or a symbol that appears on the keyboard, type it. You can type parentheses,
brackets, plus signs, equal signs, and so on. If you type an open parenthesis, FrameMaker inserts the closing paren-
thesis.
•To insert an element by using a keyboard shortcut, press the sequence of keys.
•To insert an element by typing a backslash sequence, type a backslash (\) and the string that identifies the element,
and then press Return. For example, to insert the symbol for infinity , type \infty and press Return.
•To insert a custom math element, see “Inserting custom math elements” on page 251.
If an element needs one or more operands, a question mark prompt appears for each operand; otherwise, an
insertion point appears. To move from one operand to another, press Tab.
About the scope of operations
When you insert a math element in an equation, FrameMaker adjusts the mathematical syntax. The result depends
on the scope of operation—the selection or the location of the insertion point. For example, when you insert x in a
fraction, the result depends on whether the numerator, the denominator, or the entire fraction is selected.
In the first example, only the 7 is multiplied by x. In the second example, FrameMaker adds parentheses to show that
the entire expression 2y + 7 is multiplied by x. In the last example, the entire fraction is multiplied by x. The size of
the insertion point in the first and last examples indicates the scope.
Many mistakes in equations result from an incorrect scope of operation—having too little or too much selected when
inserting an element. Be careful to select the range you want before inserting an element. For information on
changing the selection in an equation, see “Editing equations” on page 252.
If you multiply by xThe result is
or
or
2y7+
4
---------------
2y7+
4
---------------
2y7
x
+
4
------------------
2y7+
4
---------------2()y7+
x
4
----------------------
2y7+
4
---------------
2y7+
4
---------------
2y7+
4
---------------
x
ADOBE FRAMEMAKER 8
User Guide
245
Inserting text strings
A text string is a series of characters that is interpreted as a unit. Unlike characters that make up an expression, the
characters in a text string don’t usually appear in italics and aren’t multiplied together.
A. Tex t strings
Text strings have no mathematical meaning in FrameMaker. For example, evaluation commands can evaluate the
function tan but not the string “tan”.
To insert a text string in an equation:
1On the Symbols page of the Equations palette, click Start String. Two double quotation marks ("") appear. You can
also type an apostrophe (') or a double quotation mark (") to start the string.
2Type the text of the string. The quotation marks disappear, and the text appears as you type. To insert a straight
apostrophe or straight double quotation mark as part of the string, hold down Control while pressing the key.
3Click End String on the Symbols page or press Return.
Inserting horizontal and vertical lists of expressions
An equation object usually contains one equation or expression. But you can set up a horizontal or vertical list in
which several expressions are contained in the same object. When you select a list, all the expressions in the list are
selected as one object.
A. Horizontal list B. Vertical list aligned on equal signs
FrameMaker aligns the expressions in the list automatically. When you move the list, all the expressions maintain
their relative positions. For information on changing the alignment of items in a list of expressions, see “Aligning
items in lists, matrices, and multiline equations” on page 265.
To insert a horizontal or vertical list of expressions:
1Select the expression you want to be the first item in the list.
2On the Operators page of the Equations palette, click the horizontal list element or vertical list element .
A horizontal or vertical list appears. The selected expression appears as the first item in the list. A second item
appears in the list as a question mark prompt.
Before clicking After clicking
one electron volt 1.60 10 19–joule=
A A
2xy3ab
yx3–
?2
=
x26x–9+=
A
B
???
ADOBE FRAMEMAKER 8
User Guide
246
In the first example, a horizontal list is inserted. In the second example, a vertical list is inserted, and the
selected expression becomes the first item in the list. In the last example, a vertical list is inserted as part of a
larger expression.
To add an item to a horizontal or vertical list:
1Select one of the items in the list.
2On the Operators page of the Equations palette, click the horizontal list element or vertical list element .
3Insert the math elements in the list item by typing the elements or by clicking items on the Equations palette. For
instructions, see “Inserting math elements” on page 243.
Inserting symbols
The Symbols page on the Equations palette contains the Greek alphabet, other symbols, and diacritical marks.
The Symbols page
The Symbols page doesn’t include Greek letters that have Roman-alphabet equivalents, such as the uppercase alpha
(A). The following examples show the result of clicking on the Symbols page.
Diacritical marks appear on the element to the left of the insertion point or on the selected expression. Click the dot
or prime button once for each dot or prime diacritical mark you want to insert.
Note: If you want a summation, product, or partial differential element to be interpreted and manipulated mathemat-
ically, insert the element from the Large page or Calculus page rather than from the Symbols page. Elements from the
Symbols page are not evaluated.
Before clicking After clicking
Before clicking After clicking
abcabc
?
abcabc
?
y
7+
y
7+
y7+

ADOBE FRAMEMAKER 8
User Guide
247
Inserting operators
The Operators page on the Equations palette contains commonly used operators—addition, subtraction, multipli-
cation, and division—as well as roots, powers, signs, subscripts, superscripts, and logic symbols.
The Operators page
If an expression is selected when you insert the operator, the expression becomes the first operand. The following
examples show the result of clicking the plus sign or the division operator on the Operators page.
You can represent the division operator as a slash (/), a horizontal bar , or a division symbol . For details, see
“Toggling an element’s format” on page 254.
FrameMaker can evaluate exponents mathematically, but not superscripts.
A. Superscript B. Exponent
Inserting large elements
The Large page on the Equations palette contains sums, products, integrals, intersections, and unions.
The Large page
Before clicking After clicking
2x2x?
+
2x2x+?
( )
3xy3xy
-----?
AB
x3x2++ =
y2
ADOBE FRAMEMAKER 8
User Guide
248
If an expression is selected when you insert a large element, the expression becomes the first operand. The following
examples show the result of clicking the summation symbol on the Large page.
You can add an operand after inserting a math element from the Large page. For details, see “Inserting operators” on
page 247.
Inserting delimiters
The Delimiters page contains delimiters such as parentheses, brackets, and braces.
The Delimiters page
If an expression is selected when you insert a pair of delimiters, the expression is placed inside the delimiters. The
following examples show the result of clicking the parentheses on the Delimiters page.
You can also represent parentheses as brackets ([ ]) or braces ({ }). For details, see “Toggling an element’s format” on
page 254.
Inserting relations
The Relations page contains relation symbols such as =, <, >, , , , , and .
The Relations page
Before clicking After clicking
Before clicking After clicking
2x2x?
2x2
x
2x2x( )
?
2x
ADOBE FRAMEMAKER 8
User Guide
249
All relation symbols—except the binary equal sign —apply to the character to the left or right of the insertion
point or to the selection. When you insert a relation symbol between multiplied elements, it applies to the elements
on either side of the insertion point.
Binary equal signs appear to the right of the current expression (as shown in the second example). When the
insertion point or selection is in a subscript or superscript, the equal sign appears in the subscript or superscript.
To insert a binary equal sign at the insertion point rather than to the right of the expression:
❖Press Esc m =
Inserting calculus elements
The Calculus page contains integrals, derivatives, partial derivatives, gradients, and the limit function.
The Calculus page
If an expression is selected when you insert the calculus element, the expression becomes the first operand.
The following examples show the result of clicking the integral symbol on the Calculus page.
You can change the position of operands and add operands. For details, see “Toggling an element’s format” on
page 254 and “Adding operands to math elements” on page 254.
Before clicking After clicking
Before clicking After clicking
Before clicking After clicking
abcabc=
2x3y+2x3y
+=?
2xp3y+2xp=3
y
+
?
a
b
-- a
b=
-----------------
?
( )
x2
x
2?
x2xdx2
x
d
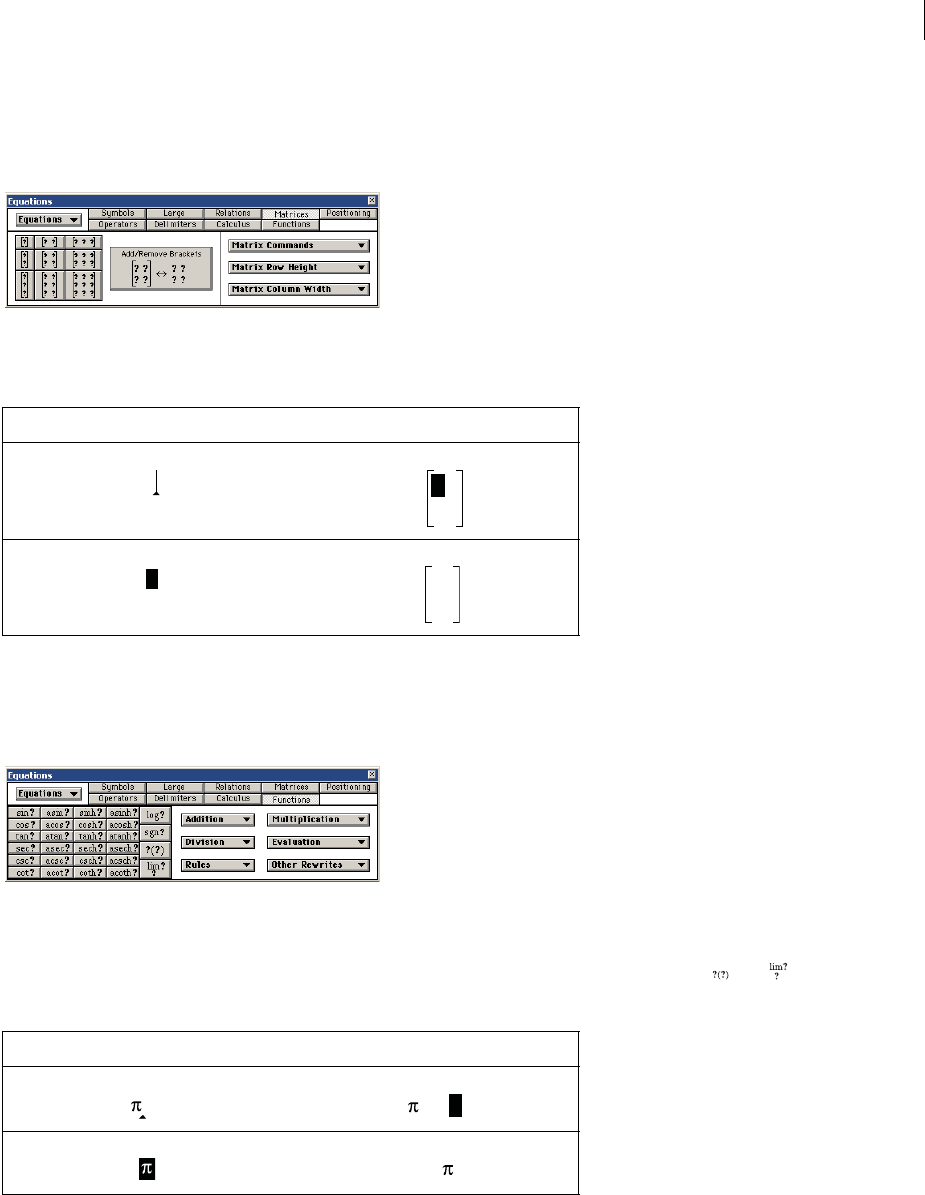
ADOBE FRAMEMAKER 8
User Guide
250
Inserting matrices
The Matrices page contains elements for matrices ranging in size from 1 by 1 to 3 by 3. After creating a matrix, you
can add rows and columns. For details, see “Changing matrices” on page 255.
The Matrices page
If an expression is selected when you insert the matrix element, the expression becomes the first cell in the matrix.
Inserting functions
The Functions page contains trigonometric, hyperbolic, and logarithmic functions, and also the sign, limit, and
general functions.
The Functions page
FrameMaker places functions at the insertion point or at the selection. When an expression is selected, the
expression becomes the argument of the function—except for the limit and general functions and .
The following examples show the result of clicking the sin function on the Functions page.
Before clicking After clicking
Before clicking After clicking
3x3x?
??
?
3x3x?
??
sin ?
sin

ADOBE FRAMEMAKER 8
User Guide
251
Inserting custom math elements
In addition to inserting math elements that are built into FrameMaker, you can insert custom math elements that
have been defined for a document. For details on defining custom math elements, see “Creating and defining math
elements” on page 257.
Custom math elements have no mathematical meaning in FrameMaker. For example, a custom math element for an
operator will be treated as an operator in an equation, but FrameMaker will not be able to evaluate it.
To insert a custom math element in an equation:
1On the Equations palette, choose Insert Math Element from the Equations pop-up menu.
2Select the element name and click Insert.
Shrinkwrapping equations
Shrinkwrapping an equation shrinks the surrounding anchored frame so that it’s just large enough for the equation,
changes the frame’s anchoring position to At Insertion Point, and puts the insertion point after the frame.
Before shrinkwrapping
After shrinkwrapping
Shrink-wrap an equation when you finish working with it so that the equation doesn’t take up any more space than
it needs and so that it aligns with the baseline of the surrounding text. Unwrap an equation to enlarge the anchored
frame for easy editing.
To shrinkwrap or unwrap an equation:
1Click in the equation or select its frame.
2On the Equations palette, choose Shrink-Wrap Equation or Unwrap Equation from the Equations pop-up menu.
The edges of a shrinkwrapped equation may not appear on-screen, but they will appear in the printed document.
If you want to shrinkwrap all inline equations in selected book files, select the documents in the book and then press
Esc r w m. See “In-line anchored frames” on page 347.
A circle whose center is at the origin and
whose radius is r is represented by the
equation
¶
x2y2
+r2
=
¶
x2y2
+r2
=
A circle whose center is at the origin and
whose radius is r is represented by the
equation

ADOBE FRAMEMAKER 8
User Guide
252
Editing equations
You can edit an equation as you edit text—adding, changing, rearranging, and removing math elements, and cutting,
copying, and pasting them. As you edit an equation, the syntax of the equation is adjusted as necessary.
You can change a matrix—add or delete rows and columns, delete brackets, and change row height and column
width. You can also choose among several representations for some math elements such as parentheses, and you can
add operands to others such as integrals and summations.
If your equation is shrinkwrapped, unwrap the equation before editing it. This makes the anchored frame full-sized
again, giving you more room to work.
Note: To edit a rotated equation, you first need to restore the equation or text frame to its unrotated position by pressing
Escg0(zero).
To place and move the insertion point in an equation:
❖Do one of the following:
•To put the insertion point next to a specific character, click as close as possible to the character.
Placing insertion point next to character
•To put the insertion point next to an entire equation, click at the far right of the equation. The size of the insertion
point depends on its location in the equation. This helps you determine whether the insertion point is in the
right place.
Placing insertion point next to equation
•To move the insertion point left or right, press the Left Arrow or Right Arrow key.
•To move the insertion point from beside a fraction to its numerator, press the Down Arrow key.
•To move the insertion point beside a fraction from the denominator, press the Up Arrow key.
To select part of an equation by using the mouse:
❖Drag through the elements you want to include. As you drag, the selection expands to include the
next subexpression.
Fx
() 1
2
-----------=
1
2
-----------=
F (x) ?
ADOBE FRAMEMAKER 8
User Guide
253
To extend the selection using the keyboard:
❖Press the spacebar. The selection expands to include the next higher expression. The following example shows the
result of pressing the spacebar repeatedly.
To change the selection:
❖Do one of the following:
•To change the selection to the next subexpression on the right, press the Right Arrow key.
•To change the selection to the next subexpression on the left, press the Left Arrow key.
•To change the selection to the next question mark prompt, press Tab.
To replace a math element:
1Select the element you want to replace and press Delete.
2Click on the Equations palette or type to insert the replacement. The new element replaces the prompt.
To delete a math element:
1Select the element you want to delete and press Delete. A question mark prompt replaces the element.
2Press Delete again. The prompt disappears. FrameMaker also removes any elements that are no longer
necessary—for example, a plus sign or parentheses.
To delete an entire equation:
1Control-click the equation to select the equation.
2Press Delete.
Removing delimiters
After entering or editing an equation, you may end up with extra delimiters—parentheses, braces, and brackets. You
can remove extra delimiters, but if you later use evaluation commands, FrameMaker evaluates the equation as if the
delimiters were still present.
Original selection
Pressed once
Pressed twice
x
bb
2– 4ac
–
2a
------------------------------
=
x
bb
2
–
2a
-------------------------------= –
4
ac
x
bb
2
–
2a
------------------------------=–
4
ac
ADOBE FRAMEMAKER 8
User Guide
254
To remove all parentheses, braces, and brackets in an expression:
1Select the expression.
2On the Delimiters page of the Equations palette, click Remove Parentheses.
To remove one delimiter:
❖Place the insertion point to the right of the delimiter and press Delete. If the delimiter has a mate, such as the left
parenthesis between a and b in the example, the mate is also removed.
Toggling an element’s format
Some math elements can be represented in more than one way. For example, delimiters can appear as , , or .
Division can appear as , or .
To toggle an element’s format:
1Select the entire element.
2On the Operators, Large, Delimiters, or Calculus page of the Equations palette, click Toggle Format. The
command is the same on all four pages and operates on any element with multiple formats. You might need to click
more than once to get the format you want.
Adding operands to math elements
Radical symbols, gradient symbols, and logarithms can have one or two operands. Integrals and other symbols on
the Large and Calculus pages can have one, two, or three operands.
Operands
You can add operands to these elements without starting over.
Before clicking After clicking
Before After
(2a(b)) 2ab
2ab
() 2ab
3x2 dx
0
2

ADOBE FRAMEMAKER 8
User Guide
255
To add an operand to a math element:
1Click or select anywhere in the expression with the element.
Insertion point in equation
2Click Add Operand on the Large or Calculus page. A question mark prompt appears where the new operand will
appear.
Added operand
Changing matrices
You can change the number of rows or columns in a matrix and add or remove brackets around the matrix. You can
allow the column width to vary from column to column, depending on the contents, or specify that all columns be
of equal width. Similarly, you can allow the row height to vary from row to row.
You can also transpose a matrix and perform matrix algebra (see “Matrix Commands pop-up menu” on page 270).
To add a row or column to a matrix:
1Put the insertion point in the matrix.
2On the Matrices page of the Equations palette, choose Add Row or Add Column from the Matrix Commands
pop-up menu.
Axn
n1=
?
ADOBE FRAMEMAKER 8
User Guide
256
Add Row adds a row at the bottom. Add Column adds a column at the far right.
To delete a row or column from a matrix:
❖Select the row or column and press Delete.
To add or remove brackets around a matrix:
1Select the entire matrix.
2On the Matrices page of the Equations palette, click Add/Remove Brackets.
To change the row height or column width in a matrix:
1Select the matrix.
Before Add Column After Add Column
Before After
ab
cd
abc
cd
?
?
abc
dei
ab
de
ADOBE FRAMEMAKER 8
User Guide
257
2On the Matrices page of the Equations palette, choose All Equal or Proportional from the Matrix Row Height or
Matrix Column Width pop-up menu.
Equal row heights (left) and Proportional row heights (right)
If you choose Proportional, each row will be tall enough to hold the tallest cell in the row; each column will be wide
enough to hold the widest cell in the column. If you choose All Equal, each row will be tall enough to hold the tallest
cell in the entire matrix; each column will be wide enough to hold the widest cell in the entire matrix.
Creating and defining math elements
If you need a math element that doesn’t appear on the Equations palette, you can create a custom element—for
example, a new operator such as . However, FrameMaker won’t be able to evaluate custom math elements mathe-
matically.
If you want to display a built-in element on the palette differently in your document, you can redefine the element.
For example, you can redefine the asin (inverse sine) function so it appears as sin–1. You can redefine the appearance
of a built-in element, but you can’t change its type. For a description of the custom math elements you can create, see
“Math element types” on page 257.
You can also import math element definitions from another document. For details, see “Importing and updating
formats” on page 415.
Math element types
A math element’s type indicates how the element behaves in relation to other elements around it. For example, a plus
sign (+) has the type infix, which means that it has two operands, one to the left and one to the right.
You can define custom math elements of the following types.
Type Example Number of operands
Atom None
Delimiter One
Function One, to the right of the element
Infix Two, to the left and the right of the element
Large Up to three, above, below, and to the right of the element
x3+
y
------------x
xy2–
x3+
y
------------x
xy2–
sin
+
x2
1
ADOBE FRAMEMAKER 8
User Guide
258
You cannot define custom math elements of the following types.
Limit Up to two, below and to the right of the element
Prefix One, to the left of the element
Postfix One, to the right of the element
Vertical list Two, one above the other (The text line that defines a custom vertical list
is used as a separator between list items.)
Type Example
Derivative
Diacritical mark
Horizontal list
Matrix
Root
Script
Substitution
Vertical division bar
Type Example Number of operands
1
x2
----
x
lim
–
x
d
d
x
yxy+
,
x
x
3
,
20
x
x3=
!

ADOBE FRAMEMAKER 8
User Guide
259
Creating and changing math element definitions
Custom math element definitions are stored on one or more reference pages whose name begins with FrameMath.
Each definition is a text line in an unanchored graphic frame whose name is the element name.
A. Graphic frame B. Text line
To define a custom math element or change a built-in math element’s definition:
1Choose View > Reference Pages and display a FrameMath reference page.
If the document doesn’t contain a FrameMath reference page, display a reference page and then choose Special > Add
Reference Page. Name the new page FrameMath1. (Capitalize the letters F and M as shown.)
2Use the Graphic Frame tool to draw an unanchored graphic frame on the page (see “Using reference frames on
reference pages” on page 406).
3In the Frame Name dialog box, enter a name for the math element. If you are redefining a built-in element, enter
that element’s name. To find the name of a built-in element, see the following procedure.
4Use the Text Line tool to add a text line in the graphic frame (see “Using text with graphics” on page 323).
5Create the math element in the text line using the following guidelines:
•You can type any characters in the text line, and you can change the character format (see “Applying predefined
formats to text” on page 102 and “Changing font properties” on page 107). You can also move the characters by
using micropositioning shortcuts.
•For all math elements except delimiters, the text line represents just the mathematical symbol, not the operands.
When you later insert the element in an equation, FrameMaker places the operands in the appropriate places,
based on the type of math element. For example, a large element, such as a summation or an integral sign, has up
to three operands—one above, one below, and one to the right of the symbol.
•A custom delimiter can contain only one operand, even though some built-in delimiters contain two or three. To
indicate the location of the operand, insert a space in the text line. If you do not insert a space in the text line,
FrameMaker places the operand between two copies of the delimiter.
A. Characters in delimiter
B. Space indicates the operand.
•FrameMaker uses the first text line in the frame for the custom math element, so make sure there’s only one text
line in the frame.
6Select the graphic frame.
B
A
(]
A
B

ADOBE FRAMEMAKER 8
User Guide
260
7On the Equations palette, choose Add Definition to Catalog from the Equations pop-up menu.
8If you’re defining a custom math element, choose an element type from the pop-up menu, and click Add. For
information on the types of elements you can define, see “Math element types” on page 257.
To find the name of a math element:
1Place the insertion point in an equation.
2On the Equations palette, choose Insert Math Element from the Equations pop-up menu.
3Turn off Show Custom Only, and then scroll through the element names to find the one you want.
4Click Cancel.
To change a custom math element definition:
1Display the FrameMath reference page that contains the math element by doing one of the following:
•If the custom math element appears in an equation, select the element, and choose Update Definition from the
Equations pop-up menu on the Equations palette. Then click Go to Frame.
•If you haven’t inserted the custom math element into an equation, choose View > Reference Pages. Then display
the FrameMath reference page you want.
2Edit the text line that defines the math element. When you display a body page again, FrameMaker uses the
modified definition, and shrinkwraps the equations again.
To delete a custom math element definition:
❖Display the FrameMath reference page that contains the math element and delete the graphic frame. If the
element appears in an equation, FrameMaker displays the element name, surrounded by question marks, instead of
the element.
Positioning math elements in an equation
FrameMaker positions math elements according to their mathematical meaning in an equation. In some cases,
though, you may want to microposition elements—reposition them so they’re closer to or farther from other elements
in the equation.
Before and after micropositioning
2k7–
k1=
10
2k7–
k1=
10

ADOBE FRAMEMAKER 8
User Guide
261
You can also control the amount of white space on each side of an element—left, right, above, and below.
A. Default spacing B. Space added to the left and right
C. Space removed from the left and right
You can change the spacing in a math element definition, so the new spacing appears wherever the element appears
in the document.
Positioning expressions precisely
When you microposition an element or expression, its position changes with respect to all other elements in the
equation. For example, if you microposition the middle expression closer to the one on the left as shown below, it
moves farther away from the one on the right.
Before and after micropositioning
To position a selected expression:
❖On the Positioning page of the Equations palette, click a micropositioning arrow. Click as many times as necessary.
(Each click moves an expression one pixel on the screen.) Zoom in for greater precision.
Micropositioning arrows
To remove micropositioning from a selected expression:
❖On the Positioning page of the Equations palette, click the button at the center of the Microposition area .
To inspect the position offsets of a selected expression and adjust them numerically:
1On the Positioning page of the Equations palette, click Position Settings. The exact offsets appear in the Microp-
osition Offset area of the Math Element Position Settings dialog box.
2To adjust the position, enter values in the Microposition Offset area and click Set.
AB+
AB+
AB+
A
B
C
x()x4–x1–() xx 4–()x1–()
ADOBE FRAMEMAKER 8
User Guide
262
Changing the spacing around an expression
You can change the amount of white space around elements or expressions. For example, you can force FrameMaker
to use larger delimiters around an expression by increasing the amount of white space above and below the
expression.
Original spacing and space added below
To add or subtract white space around a selected expression:
❖On the Positioning page of the Equations palette, click a plus sign (+) to add white space or a minus sign (–) to
remove it.
Spacing controls
Click as many times as necessary. Each click adds or subtracts one pixel of space. Zoom in for greater precision.
Note: To change the spacing around a math element of type infix, prefix, postfix, or delimiter, adjust the space around
the adjacent math elements instead. For example, to add space on either side of the plus sign in the expression a+b, select
the a and add space to the right. Then select the b and add space to the left. For a description of math element types, see
“Math element types” on page 257.
To restore the default amount of white space around a selected expression:
❖On the Positioning page of the Equations palette, click the button at the center of the Spacing area .
To inspect the spacing values of a selected expression and adjust them numerically:
1On the Positioning page of the Equations palette, click Position Settings. The exact spacing appears in the Spacing
area of the Math Element Position Settings dialog box.
2To adjust the spacing values, enter values in the Spacing area, and click Set.
Changing the spacing for a math element wherever it appears
You can update some math element definitions—infix, prefix, postfix, large, scripts, and the division bar—with new
spacing. When you do, FrameMaker adjusts the spacing around the element wherever it appears in the document
and rewraps the equations. For a description of math element types, see “Math element types” on page 257.
2k6–
k1=
10
2k6–
k1=
10
Its horizontal axis is 12 units long. Its vertical
axis is 7 units long. ¶
?

ADOBE FRAMEMAKER 8
User Guide
263
You can also change the spread—the space between characters—uniformly in all small, medium, and large
equations. For details, see “Changing equation fonts throughout a document” on page 268.
To change the spacing for a math element wherever it occurs:
1After you adjust the spacing around the element in an equation, select the element.
2On the Equations palette, choose Update Definition from the Equations pop-up menu.
3Do one of the following:
•To update the spacing for the element throughout the document, click Update.
•To reset the spacing to the default, click Get Default.
Setting line breaks and aligning equations
You can control when an equation breaks across lines and the alignment of the lines in a multiline equation, or of
the items in a list or matrix. You can also align several equations with one another, even if they appear in different
anchored frames.
Aligned along left side of equal signs
You can manipulate equation objects as you do other objects. For information on grouping, aligning, distributing,
and rotating objects, see “Editing and arranging objects” on page 329.
Changing an equation’s line breaking
When an equation breaks across lines, the entire equation remains in a single anchored frame. You can set where an
equation breaks across lines automatically. When you change the line-break width, the equation is reformatted to the
new width.
Original equation
Equation set to break at 1.25"
2a3bc–+ 2x1+=
3ab–4x=
2bc+3x7–=
2a3b–7c2–+ 2x4+=
x1+()
4x44x36x24x1++++=
x1+()
4x44x3
6x24x1
+
+++
=

ADOBE FRAMEMAKER 8
User Guide
264
You can also force a line break at a specific location in the equation. However, don’t use manual line breaks to create
separate equations. Instead, insert a vertical list of expressions (see “Inserting horizontal and vertical lists of expres-
sions” on page 245).
To change an equation’s automatic line-break width:
1Click in the equation or select any part of it.
2Choose Graphics > Object Properties.
3Edit the value in the Automatic Line Break After text box, and click Set. The value is preset to the width of the
equation’s frame.
To insert a manual line break:
1Click where you want the equation to break into two lines.
2On the Positioning page of the Equations palette, choose Set Manual from the Line Breaking pop-up menu.
A line-break symbol appears at the insertion point when text symbols are visible.
Manual line break
To remove a manual line break:
1Select the part of the equation that contains the line-break symbol.
2On the Positioning page of the Equations palette, choose Clear Manual from the Line Breaking pop-up menu.
Aligning display equations
The alignment (left, center, or right) of a display equation is controlled by the format of the paragraph that contains
the equation.
Paragraph alignment set to Center
To change the alignment of a display equation:
❖Click in the paragraph that contains the equation (not in the equation itself) and choose the alignment from the
Alignment pop-up menu in the formatting bar or in the Paragraph Designer. For details, see “Changing indents and
alignment” on page 111.
x1+
()
8x88x728x656x5
70x456x328x28x1
++++
++++
=
The ellipse is represented by the following
equation¶
xx
0
–
()
2
a2
-------------------- yy
0
–
()
2
b2
-------------------- 1
=+ ¶
ADOBE FRAMEMAKER 8
User Guide
265
Aligning items in lists, matrices, and multiline equations
You can automatically align items in a vertical list and lines in a multiline equation along their left or right sides, their
centers, or their equal signs. You can also set your own manual alignment points for items in a vertical list and for a
multiline equation. Manual alignment points override automatic alignment.
Aligned on left side and at manual alignment point
You can align the items in a horizontal list along their tops, bottoms, or baselines.
Baseline-aligned
You can also align the cells in each row of a matrix along their tops, bottoms, or baselines. You can align the cells in
each column at the right, left, or center, or along equal signs.
Aligned along:
A. Baselines B. Centers
To set automatic alignment for a vertical list or multiline equation:
1Click in the equation or list.
2On the Positioning page of the Equations palette, choose an item from the Left/Right pop-up menu. When you
choose Left of = or Right of =, the lines are aligned along one side of an equal sign. A line with no equal sign is aligned
along its left side.
To set a manual alignment point for a multiline equation or for an item in a vertical list:
1Do one of the following:
•Click in the first line of a multiline equation where you want subsequent lines to align.
•Click in a vertical list item where you want the item to align with the rest of the list.
C2rd==
Ar2
=
C2rd==
Ar2
=
k
k1=
5
xy+
xy+x
x2xx1–
A
B

ADOBE FRAMEMAKER 8
User Guide
266
2On the Positioning page of the Equations palette, choose Set Manual from the Left/Right pop-up menu. A manual
alignment symbol appears at the insertion point when text symbols are visible. Subsequent lines of a multiline
equation are left-aligned with the manual alignment point. A vertical list item aligns with other items in the list at
the manual alignment point.
To clear a manual alignment point:
1Select the part of the equation that contains the manual alignment point.
2On the Positioning page of Equations palette, choose Clear Manual from the Left/Right pop-up menu. You can
also clear a manual alignment point by setting another.
To align items in a horizontal list:
1Click in the list.
2On the Positioning page of the Equations palette, choose an item from the Up/Down pop-up menu.
To align cells in a matrix:
1Click in the matrix.
2On the Positioning page of the Equations palette, choose an item from the Up/Down pop-up menu or from the
Left/Right pop-up menu. The Left/Right and Up/Down commands affect the whole matrix. To align individual cells,
use micropositioning (see “Positioning expressions precisely” on page 261).
To check alignment settings for a horizontal or vertical list, or for a matrix:
1Do one of the following to select the entire list or matrix:
•Drag through the list or matrix.
•Put the insertion point in the matrix and press the spacebar repeatedly.
2On the Positioning Page of the Equations palette, click Position Settings.
Aligning several equations
You can align several equation objects with one another in a graphic frame, just as you align other objects. You can
also align several equation objects along a manual alignment point, even when they’re in separate graphic frames.
Equations aligned at manual alignment points
FrameMaker maintains the equation objects’ alignment as you edit the equations. For example, if two equations are
left-aligned, the left alignment is maintained as the equations expand or shrink.
To left-, center-, or right-align equations in a frame with one another:
1Select the equations to be aligned by control-clicking the first equation; Control+Shift-click the other equations.
Make sure that the last equation you select is the one you want to align with.
x2+2x24x4++=
x3+x2–x2x6–+=

ADOBE FRAMEMAKER 8
User Guide
267
2Choose Graphics > Align.
3Select the left/right alignment you want, and click Align. For more information, see “Aligning objects” on
page 331.
To align equations along a point:
1Set the manual alignment point in one of the equations you want to align. You do this in an equation just as you
set a manual alignment point in a vertical list (see “Aligning items in lists, matrices, and multiline equations” on
page 265).
If you don’t set a manual alignment point, FrameMaker aligns an equation on the left.
2Click in the equation and choose Graphics > Object Properties.
3Choose Manual from the Alignment pop-up menu and specify the location of the alignment point within the
frame in the Alignment Point Offset area. The left offset is the distance from the left edge of the frame to the manual
alignment point—for example, the right side of an equal sign.
You don’t need to specify the top offset precisely. You can move the equation up or down later, just as you do any
other object.
4Click Set.
5Repeat steps 1 through 4 for each equation you want to align. Use the same distance from the left edge for each
equation, but change the top offset to position the equation vertically in the frame. If the equations you’re aligning
are in different anchored frames, make sure the frames’ left edges align with one another.
Changing font settings in equations
A document contains font settings that apply to all equations in it. These settings determine the font sizes and
spacing for small, medium, and large equations. They also determine the character format used for Greek characters
and for symbols, functions, numbers, strings, and variables.
You can change the preset size of an entire equation, and you can change the character format of individual math
elements—for example, to use color or a special font.
Font changes
You can also change the font sizes and character formats used for all equations in a document.
Changing the character format in individual equations
You can change the preset size—Small, Medium, or Large—and color of an entire equation, or the character format
of just one element or expression. For example, you might want to display an element in a larger point size or in bold.
a
xy
y1
x
b
2
22
00
2
+=
(())

ADOBE FRAMEMAKER 8
User Guide
268
You can’t change the spread, stretch, superscript, subscript, underline, overline, strikethrough, change bar, or pair
kerning properties for any element. You also can’t change the font family for individual Greek characters and symbols
and for some operators. For information on changing the font family for all Greek characters and symbols in a
document, see “Changing equation fonts throughout a document” on page 268.
To change the preset size or color of an equation:
1Click in the equation and choose Graphics > Object Properties.
2Do one of the following:
•To change the equation’s size, choose a size from the Size pop-up menu, and click Set. If the equation is shrink-
wrapped, FrameMaker rewraps it.
•To change the equation’s color, choose a color from the Color pop-up menu, and click Set.
To change the character format of an element or expression:
❖Select the element or expression, and use the same method you would use with text. For details, see “Using font
commands on the Format menu” on page 107 and “Using a designer to change font properties” on page 108.
To create a superscript or subscript:
❖Use the appropriate operator. For details, see “Inserting operators” on page 247.
To change the spread of characters:
❖Microposition them by using the positioning page of the Equations palette. For details, see “Positioning expres-
sions precisely” on page 261.
To put a line over or under an expression:
❖Use the diacritical marks on the Symbols page of the Equations palette.
Changing equation fonts throughout a document
You can change the font size and spacing for all small, medium, and large equations in a document. When you make
global font changes, FrameMaker reformats and rewraps all shrinkwrapped equations in the document.
Greek characters and symbols in equations normally appear in the Symbol font, but you can use fonts such as Mathe-
matical Pi and Universal Greek if these fonts are installed on your system.
Functions, numbers, and strings normally appear in Times New Roman or Times. Variables normally appear in
italic. You can change the character format of each of these kinds of elements. For example, you can display all
elements in Helvetica, with functions in italic and variables in bold.
Note: Don’t delete formats from the Character Catalog if you’re using them to specify the character format of math
elements. If you delete these character formats from the Catalog, all equations in the document will be reformatted using
the default font.
To change equation font size and spacing throughout a document:
1On the Equations palette, choose Equation Sizes from the Equations pop-up menu.
2Do one of the following:
•Specify the font sizes and spread, and click Set. Spread is expressed as a percentage of the font size. Positive spread
values cause wider spacing around elements; negative values cause narrower spacing.
•Click Get Defaults.
ADOBE FRAMEMAKER 8
User Guide
269
To change the font for Greek characters and symbols:
1On the Equations palette, choose Equation Fonts from the Equations pop-up menu.
2Choose one of the available fonts from the Math Symbols pop-up menu, and click Set.
To change the character format for functions, numbers, strings, and variables:
1Create the character format you want (see “The Paragraph and Character Designers” on page 105).
2On the Equations palette, choose Equation Fonts from the Equations pop-up menu.
3Choose the character format from the Functions, Numbers, Strings, or Variables pop-up menu, and click Set. The
pop-up menus contain the formats stored in the Character Catalog.
Evaluating equations
After you create an expression or equation, you can transform it by changing its mathematical representation.
For example, you can multiply polynomials, factor terms, simplify expressions, and combine fractions.
You can also evaluate it by substituting values and performing computations.
To transform or evaluate an expression:
1Select the expression, or part of it.
Original selection
Expanded
Multiplied out
Multiplied out again
Original selection
Expanded
Value substituted
Result computed
y=(x+4)3
y
=(x+4)(x+4)(x+4)
y
=(x+4)(x
2
+8x+16)
y
=x3+12x2+48x+64
x
3
x1=
3
x3
x3=x3
x1=
–
27 1–
26
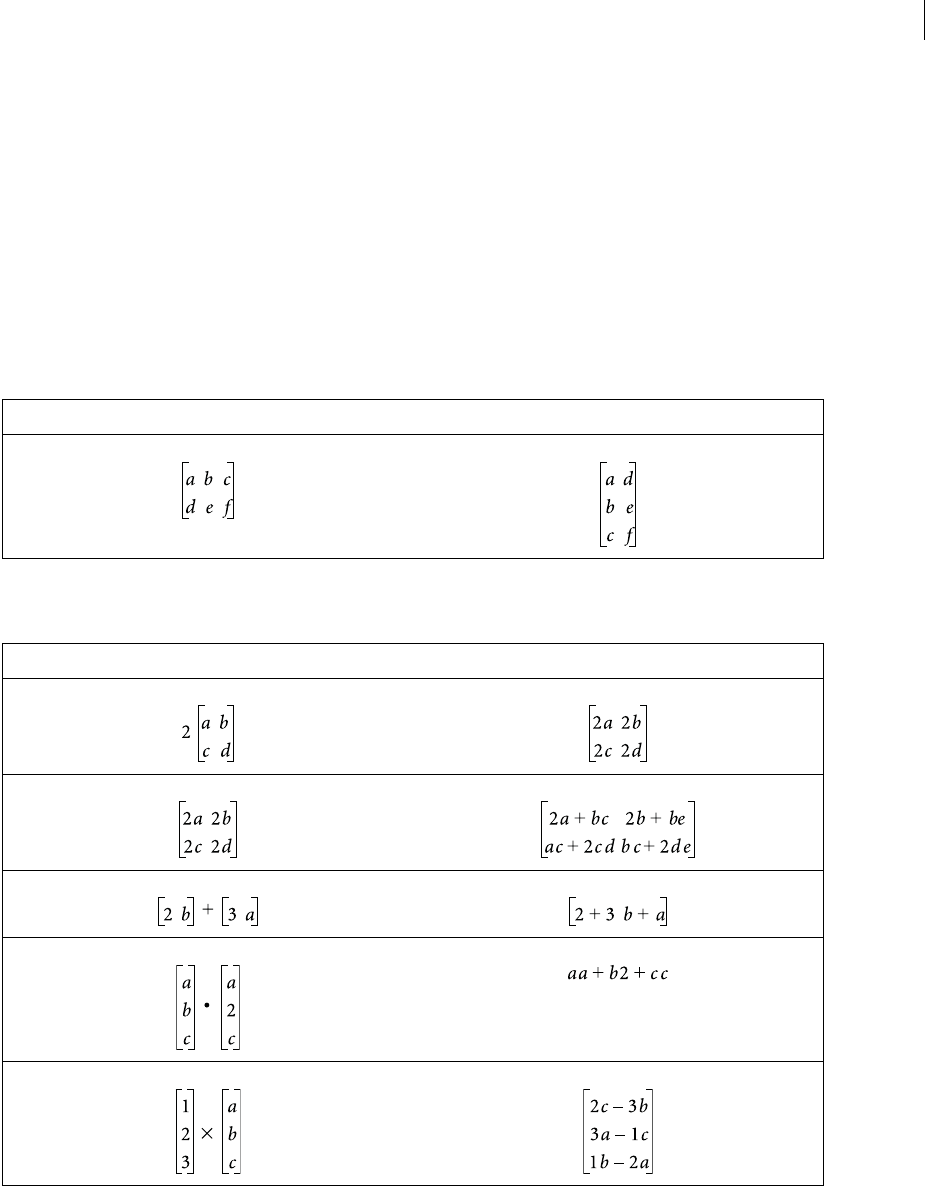
ADOBE FRAMEMAKER 8
User Guide
270
2Choose a command on the Matrices or Functions page of the Equations palette. For example, you might select an
expression and then choose Multiply Out from the Multiplication pop-up menu on the Functions page.
For details, see the following sections, which describe the commands on the Matrix Commands pop-up menu of the
Matrices page and the commands on the six pop-up menus of the Functions page.
Matrix Commands pop-up menu
Use the Matrix Commands pop-up menu on the Matrices page to create, edit, and evaluate matrices.
This section describes the Matrix Transpose and Matrix Algebra commands. For information on the other
commands on the menu, see “Changing matrices” on page 255.
Matrix Transpose Transposes the rows and columns of a selected matrix.
Matrix Algebra Performs matrix multiplication and addition, and evaluates dot and cross products in a
selected matrix.
After performing matrix algebra, you can use the Simplify command to combine like terms (see “Other Rewrites
pop-up menu” on page 279).
Selected matrix After transposing
Selected matrix (or matrices) After matrix algebra

ADOBE FRAMEMAKER 8
User Guide
271
Addition pop-up menu
Use the Addition pop-up menu on the Functions page to add fractions and order polynomials.
Add Fractions Adds selected fractions, expressing the result as a single fraction. This command also combines
like terms.
If the selected expression contains the sum of more than two fractions, Add Fractions adds only the first two. Use this
command repeatedly to combine all the fractions.
Order Sum Arranges polynomials in decreasing powers of a selected variable.
Order Sum Reverse Arranges polynomials in increasing powers of a selected variable. In the following example, you
select an x—any x—before choosing Order Sum Reverse.
Selected fraction After adding
Selected expression
Added once
Added twice
Before ordering After ordering
Before ordering After ordering
2bx 3ay+
by
----------------------
-
-
2x
y
----- 3a
b
----- 2a
3b
-----–+
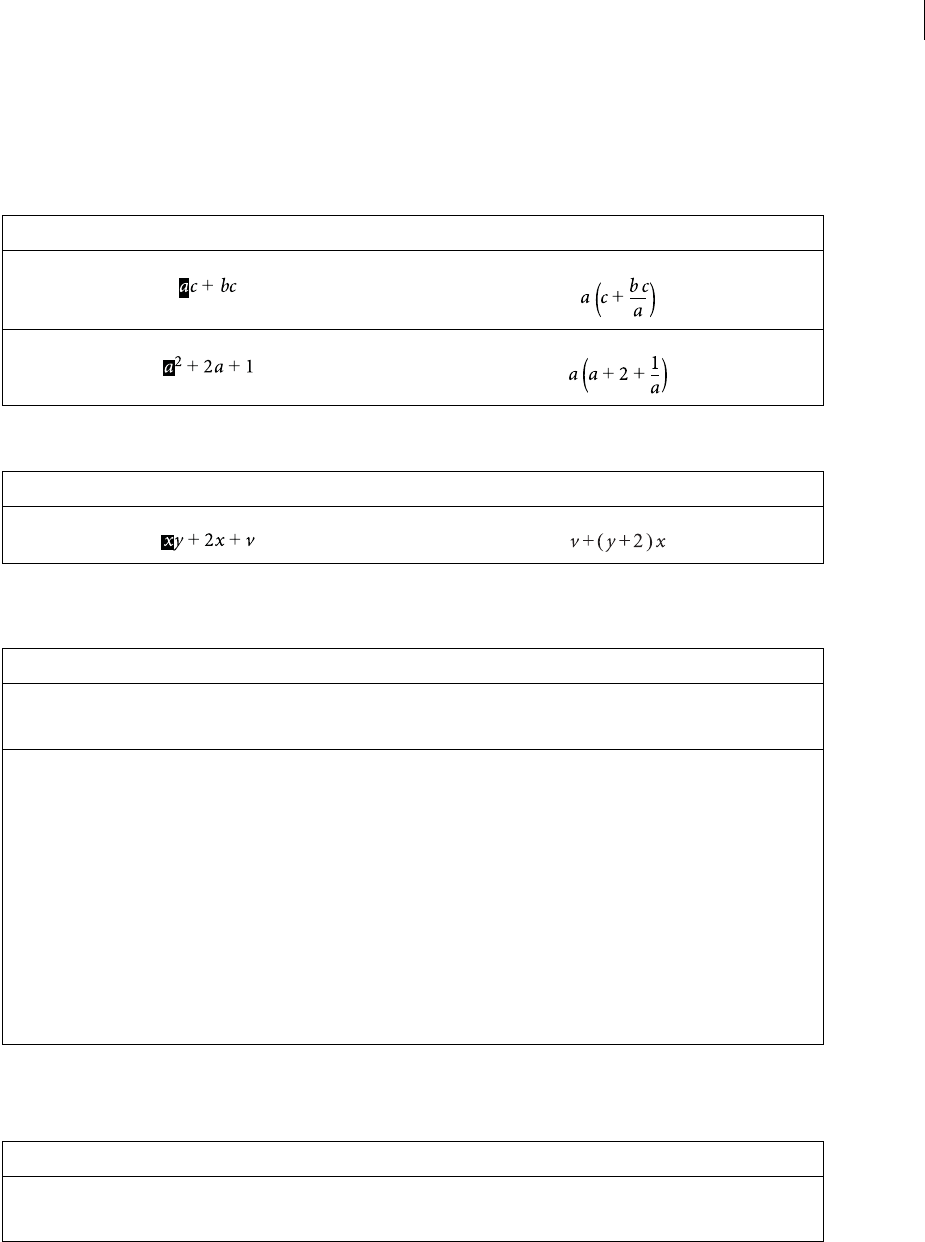
ADOBE FRAMEMAKER 8
User Guide
272
Multiplication pop-up menu
Use the Multiplication pop-up menu on the Functions page to factor terms, multiply out expressions, and distribute
multiplication and division over addition.
Factor Factors a selected term out of a product.
Factor Some Factors a selected term from only those terms that contain it.
Multiply Out Simplifies the selected expression, distributes multiplication over addition, and expands a selected
term raised to a positive integral power.
The Simplify command also simplifies the selected expression (see “Other Rewrites pop-up menu” on page 279).
Multiply Out Once Multiplies the first pair of factors on the left side of a selected expression.
If you use this command several times, the results appear in a different form.
Before factoring After factoring
Before factoring After factoring
Selected expression After multiplying
Selected expression After multiplying
(a–3)(2a+4)2a22a
–
12–
2
(a+2b)
a24ab4b2
++
abc+()2a() ab(2a)+ac(2a)
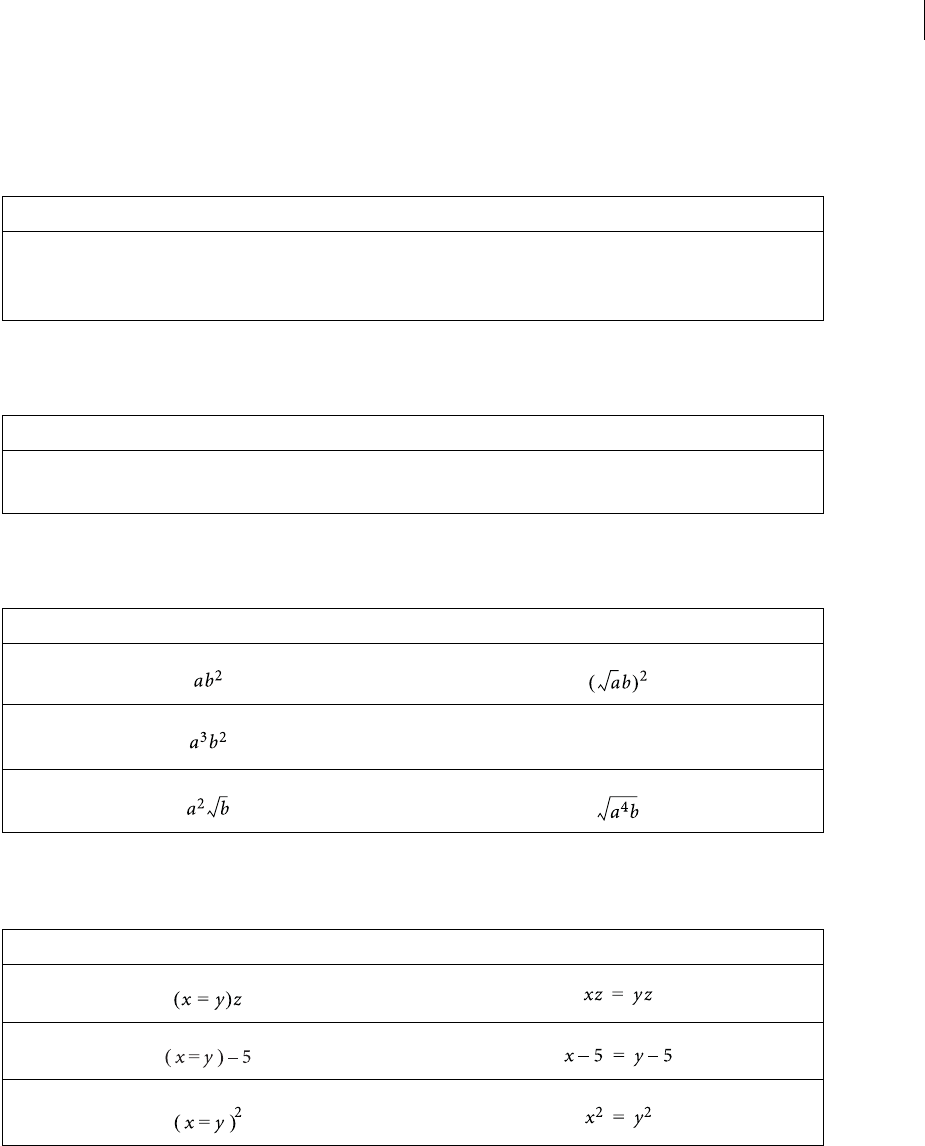
ADOBE FRAMEMAKER 8
User Guide
273
Distribute Performs a variety of operations depending on the expression you select, as shown in the
following examples:
•Distributes division over addition.
Use the Add Fractions command to perform the reverse operation (see “Addition pop-up menu” on page 271).
•Distributes multiplication over addition.
Use the Factor command to perform the reverse operation.
•Transforms products and quotients involving radicals and exponents into a single expression raised to a power.
Use the Simplify command to perform the reverse operation (see “Other Rewrites pop-up menu” on page 279).
Distribute Over Equality Performs the same operation on both sides of an equal sign.
Selected expression After distributing
Selected expression After distributing
Selected expression After distributing
Selected expression After distributing
ab+
c
------------a
c
-- b
c
--+
abc+() abac+
(a b )
3/2
2
ADOBE FRAMEMAKER 8
User Guide
274
Division pop-up menu
Use the Division pop-up menu on the Functions page to perform long division, convert division to multiplication,
and convert negative exponents to positive.
Long Division. Performs long division in a fraction that contains a polynomial numerator and denominator.
In the following example, you select an x—any x—before choosing Long Division. You would select an x in the
fraction of the first result and choose Long Division again to obtain the second result.
Remove Division Converts division to multiplication in a selected expression by changing positive exponents in a denomi-
nator to negative and negative exponents in a denominator to positive.
To convert negative exponents to division operators, use the Remove Negative Powers command.
Remove Division 1 Level Converts division to multiplication, as Remove Division does, but applies only to the first
level of operators.
To convert the first level of negative exponents into division operators, use the Remove Negative Powers 1
Level command.
Before dividing
Divided once
Divided twice
Selected expression After removing division
Selected expression After removing division
x22x1++
x1+
--------------------------
x1x1+
x1+
--------------+
x1+
x
y
2
---- xy2–
bc
d
--+
x
-----------
bcd 1–
+()x1–
x
y
2
---- xy2–
bc
d
--+
x
----------
-
bc
d
--+x1–
ADOBE FRAMEMAKER 8
User Guide
275
Remove Negative Powers Converts negative exponents to positive in a selected expression by replacing multipli-
cation with division and division with multiplication.
Remove Negative Powers 1 Level Converts negative exponents to positive, as Remove Negative Powers does, but
applies only to the first level. If the selected expression has no negative exponents at the first level, this command has
no effect.
Evaluation pop-up menu
Use the Evaluation pop-up menu on the Functions page to evaluate expressions numerically.
Number Crunch Changes integers to floating-point numbers in a selected expression and then evaluates
the expression.
Use the Show All Digits command to show up to 15 decimal places in a floating-point number.
Selected expression After removing negative powers
Selected expression After removing negative powers
(no effect)
Selected expression After number crunch
xy2–x
y
2
----
1–1–
(b+cd )xbc
d
--+
x
-----------
1–2–
(b+c ) 1
1–2
-----------------------
(b+c )
xy2–xy2–
3
2
-----
sin 1–
3–3
2
log 2e –1 2.6230813
e27+29.380205
ADOBE FRAMEMAKER 8
User Guide
276
Number Crunch displays NaN (Not a Number) for operations that result in undefined values and Infinity for opera-
tions that result in a value too large to calculate. Extremely small numbers may be evaluated to zero.
Show All Digits Shows the full internal accuracy of a floating-point number.
Evaluate Evaluates the selected expression. The operations performed depend on the type of expression selected, as
shown in the following examples:
•Rewrites an expression raised to a power less than 20 as a product.
•Computes the factorial of an integer. If the result is too large to calculate, the result appears as Infinity.
•Computes the determinant of a 1-by-1 or 2-by-2 matrix.
•Extracts a term from a sum or product.
Selected expression After number crunch
Selected number After showing all digits
Selected expression After evaluating
Selected expression After evaluating
Selected expression After evaluating
Selected expression After evaluating
1
0
-- 1
0
--–NaN
1
0
-- Innit
y
3.1415927 … 3.1415926535897
a3aaa
5!120
ab
cd
ad bc–
x3
x1=
5
1x3
x2=
5
+
ADOBE FRAMEMAKER 8
User Guide
277
•Evaluates a substitution just as the Evaluate Substitution command does.
•Rewrites an Evaluate Between operator as a difference.
•Rewrites the logarithm of a product as a sum of logarithms and rewrites a logarithm of a power as a product.
•Rewrites a logarithm to a base in terms of natural logarithms.
•Rewrites a choice function in terms of factorials.
Evaluate Substitution Performs a specified substitution and then simplifies the expression. When an Evaluate
Between operator is selected, this command rewrites the expression as a difference.
Selected expression After evaluating
Selected expression After evaluating
Selected expression After evaluating
Selected expression After evaluating
Selected expression After evaluating
x
2
x6=
8x2
x8=x2
x6=
–
2xylog 2log xlog
y
log++
an
log nalog
x
2
log
x
log
2log
---------
x
y
x!
y
! (x – y)!
x
2
x1=
6x2
x6=x2
x1=
–
2x()sin xp=
ADOBE FRAMEMAKER 8
User Guide
278
Evaluate Integrals Rewrites a selected integral with a polynomial integrand. This command converts a definite
integral into an indefinite integral evaluated between the upper and lower bounds. Use Evaluate Integrals several
times to integrate a polynomial fully.
Evaluate Derivatives Evaluates a selected derivative, applying the chain rule to complex expressions when necessary.
This command evaluates a partial derivative only when all dependencies are explicitly written.
This command treats elements in a total derivative as if they depended on the variable of differentiation. Use the
Evaluate command to expand an nth derivative before using Evaluate Derivatives to evaluate it.
Evaluate Derivatives 1 Level Evaluates only the first level of a selected derivative.
Rules pop-up menu
Use the Rules pop-up menu on the Functions page to store and apply rules that transform expressions.
For example, use Enter Rule to store a rule such as a = a + 3. Then use Apply Rule to substitute a + 3 for a in another
expression.
Enter Rule Stores a rule for substituting one expression for another. Select the expression you want to store as a rule
before you choose Enter Rule. You can store only one rule at a time.
Selected expression
Evaluated once
Evaluated twice
Before After
Before After
x2
x
d
1
3
xd()x2
x1=
3
x3
3
----
x1=
3
(3x –2x –3)
dx
d2
39x24
x
–
xxysec xytan (xy2sec2xy+ytanxy)tanxytanxysecxytanx
y
(3x +2x +3)
dx
d2
3xd
d3x3
xd
d2x2
xd
d3++
ADOBE FRAMEMAKER 8
User Guide
279
Designate Dummy Designates a selected term to be a dummy variable. A dummy variable in a rule allows you to
substitute the expression on the right side of the rule for any variable, not just the variable explicitly named on the
left. A dummy variable appears in boldface. For example, if you designate x in the rule x = a – 2 to be a dummy
variable, you can substitute a – 2 for any variable in an expression, not just x.
Select the term you want to be a dummy variable before you choose Designate Dummy. Then use the Apply Rule
command to replace a selected expression with the expression assigned to the dummy variable.
Apply Rule Substitutes one term or set of terms for another in a selected expression, using the rule stored with the
Enter Rule command.
Before you apply a rule that contains a dummy variable, select the term you want the variable to replace. In the
following example, x is the dummy variable in the rule.
Other Rewrites pop-up menu
Use the Other Rewrites pop-up menu on the Functions page to simplify algebraic expressions and to isolate and
expand terms.
Simplify Simplifies the selected expression. To evaluate fractions that involve infinity or division by zero, use the
Number Crunch command instead of Simplify (see “Evaluation pop-up menu” on page 275).
The operations performed depend on the type of expression selected, as shown in the following examples:
•Performs integer arithmetic.
Rule entered
Selected expression
After rule is applied
Rule entered
Before rule is applied
After rule is applied
Selected expression After simplifying
aa3+=
a22ab–b2
+
(a+3) –2b(a+3)+b
22
xy
a22ab–b2
+
a22ab–y2
+
c0+
c
4!24
1
3
-- 2
5
--+11
15
----
ADOBE FRAMEMAKER 8
User Guide
280
When the result is too large to calculate, it appears as Infinity.
•Groups terms in a sum or product.
•Divides out common factors in a fraction.
Use the Remove Negative Powers command to remove negative powers from the result (see “Division pop-up menu”
on page 274).
•Interprets the complex number i, represented by the Greek letter iota .
•Distributes exponentiation across multiplication and division.
Note that simplifying x produces rather than .
Selected expression After simplifying
Selected expression After simplifying
Selected expression After simplifying
Selected expression After simplifying
2ab3ab+5ab
ab(ac)a2bc
axa2x3+a3x3+
ab()
2
a2b
------------- 1b
2x3y2
6xy5
--------------x2y3–
3
------------
ab–ab
xy()
2x2y2
x
y
2x2
y
2
-----
ADOBE FRAMEMAKER 8
User Guide
281
Simplify Some Simplifies the selected expression, as the Simplify command does, but does not multiply fractions.
Isolate Term Isolates a selected expression on one side of the equal sign. This command does not combine terms or
solve for the selected expression.
Expand First Term Expands the first term of a selected summation or product.
Expand All Terms Expands all terms of a selected summation or product.
Selected expression After simplifying
Selected expression After isolating term
Selected expression After expanding
Selected expression After expanding
8km
hr
------ 4km
hr
------
+12km
hr
-------
x3x2++ 0=1/ 3
x
=(–x–2)
bxby+
c
=xcb
y
–
b
------------=
xlog
z
=xe
z
=
x3
x
2=
4
x3
x
3=
4
8+
x32–()
x
2=
5
6x32–
x3=
5
x3
x
2=
482764++
x32–
x
2=
56(25)62(123)
ADOBE FRAMEMAKER 8
User Guide
282
About equation elements in structured documents
An equation element provides a frame with an equation object into which you can enter mathematical expressions.
Like an anchored frame for graphics, an equation frame is anchored to a specific location in text.
Inline and display equations in structured documents
You can insert an equation element inline with paragraph text or in a separate display paragraph.
A. Inline equation B. Display equation
An equation element appears in the document’s structure where it is anchored to text, regardless of the equation’s
position on the page. In the Structure View, the element is represented by a square-cornered bubble with the snippet
<EQUATION>. The equation itself is not part of the structure.
Equation element
If you export to SGML or XML, FrameMaker writes the equation to a separate graphics file and adds an entity
reference to it from your SGML or XML file.
Equations in graphic frames in structured documents
You can also put an equation in an anchored frame that’s already been inserted for graphics. Do this if you want to
combine the equation with graphic objects. If the anchored frame is an element, the element is part of the document’s
structure, but the frame’s contents (including the equation) do not appear in the structure.
An equation in an anchored frame with graphics may produce unwanted results if you export to SGML or XML. In
general, if you plan to export to SGML or XML, put only one object in a frame.
Suppose that the axes of an ellipse lie
along the lines The ellipse is
represented by the following equation.
0
xx
0
–
a2
---------------------- yy
0
–2
()
b2
---------------------------1=+
A
B
x = x .
2
Para
Inline Eq <EQUATION>
Para

ADOBE FRAMEMAKER 8
User Guide
283
Creating equations in structured documents using
elements
You create an equation by inserting an equation element and then entering the mathematical expressions for
the equation.
For details on the mathematical expressions in equations, or for information on inserting an equation that’s not an
element, see “Creating equations” on page 240.
Note: In the FrameMaker User Guide, the term “math element” refers to part of an expression, such as an operator. It is
not a structural element.
You can use any equation element for both inline and display equations. Some documents may also have a paragraph
element defined that provides formatting properties for the display equations.
The format rules for an equation element suggest a set of font sizes for the equation: Small, Medium, or Large. You
can change to a different set of font sizes, and the change is not considered a format rule override. (That is, if you
remove format rule overrides in the document, the equation does not return to its original font size.)
To display the Equations palette:
❖Choose Special > Equations, or click the Equations button at the upper right in the document window.
To create an in-line equation using an element:
1Click in text where you want to insert the equation. If the text is in a rotated text frame, unrotate the frame first
by pressing Esc g 0 (zero).
2Select an equation element in the Element Catalog and click Insert.
You can also use the Equations palette to insert an element. Choose a New Equation command from the Equations
pop-up menu in the palette. If more than one equation element is available, choose the one you want from the
Element Tag pop-up menu in the dialog box that appears.
A new equation object appears as a question mark in a frame anchored below the line with the insertion point, and
a bubble with the text snippet <EQUATION> appears in the Structure View. The first math item you enter replaces
the question mark prompt.
New equation object
3Enter the equation by typing numerals and other items or by clicking items on the Equations palette (see “Using
the Equations palette” on page 239).
Suppose that the axes of an ellipse lie
along the line
¶
?

ADOBE FRAMEMAKER 8
User Guide
284
4Choose Shrink-Wrap Equation from the Equations pop-up menu in the palette. This shrinks the frame around
the equation and puts the equation in the line of text at the anchor symbol.
After shrinking a frame around an in-line equation
5If the equation seems too close to the text on either side, insert a space before or after the frame. FrameMaker
treats a frame that contains an inline equation as a character and doesn’t provide extra space around it.
If an inline equation is too tall for its line, you may want to turn off fixed line spacing for that paragraph.
To create a display equation using an element:
1If your document has a paragraph element defined for formatting display equations, click where you want the
equation’s paragraph, select the paragraph element in the Element Catalog, and click Insert.
This element might define space above and below the equation, alignment in the text column, and an
autonumbered caption.
2Click in an empty paragraph element where you want to insert the equation.
3Select an equation element in the Element Catalog, and click Insert.
You can also use the Equations palette to insert an element. Choose a New Equation command from the Equations
pop-up menu in the palette. If more than one equation element is available, choose the one you want from the
Element Tag pop-up menu in the dialog box that appears.
A new equation object appears as a question mark in a frame anchored below the line with the insertion point, and
a bubble with the text snippet <EQUATION> appears in the Structure View. The first math item you enter replaces
the question mark prompt.
New equation object
4Enter the equation by typing numerals and other items or by clicking items on the Equations palette (see “Using
the Equations palette” on page 239).
Suppose that the axes of an ellipse lie
along the line. ¶xx
0
=
2ab
()

ADOBE FRAMEMAKER 8
User Guide
285
5Choose Shrink-Wrap Equation from the Equations pop-up menu. This shrinks the frame around the equation
and puts the equation in the empty paragraph.
After shrinking a frame around a display equation
If no equation element is available at the location you want, you might use an invalid element. After inserting the
element, talk to your developer about making the element valid at this location.
To use an invalid equation element:
❖Do one of the following:
•To use an element that is valid in another part of the document, either insert the element in a valid location and
then move it, or use the All Elements setting (see “Changing the scope of elements available in a structured
document” on page 18) to make the element available everywhere and then insert the element where you want it.
•To insert an invalid equation element with the default tag EQUATION, choose a New Equation command from
the Equations pop-up menu in the Equations palette. (The element has a default tag if no defined equation
elements are available.)
To create an equation in an anchored frame element:
1Select an anchored frame or a graphic object in the frame.
2Choose a New Equation command from the Equations pop-up menu in the palette. Small, Medium, and Large
specify the font sizes used in the new equation.
A new equation object appears as a question mark inside the frame. The first math item you enter replaces the
question mark prompt. The equation does not appear in the document’s structure.
New equation object in a frame with graphic objects
3Enter the equation by typing numerals and other items or by clicking items on the Equations palette (see “Using
the Equations palette” on page 239).
To change the font sizes used in an equation:
❖Click in the equation, choose Graphics > Object Properties, choose a size from the Size pop-up menu, and click
Set. (This is not a format rule override.)
The ellipse is represented by the following
equation¶
xx
0
–
()
2
a2
-------------------- yy
0
–
()
2
b2
-------------------- 1=+
¶
Axn
n1=

286
Chapter 7: Filter By Attribute
About Filter By Attribute
Elements in a structured document can have one or more attributes associated with them. Using FrameMaker, you
can filter a structured document based on the value of these attributes. Other XML applications may also use the
same attribute-value pair to filter the documents. Thus, single sourcing workflows can be preserved across other
XML applications.
The Filter by Attribute feature simplifies the task of filtering a structured document for complex output scenarios.
You define a filter using a Boolean expression containing attribute-value pairs. You can create multiple filters, save
them, and use them for filtering a document based on different output scenarios.
When a filter is applied to the document, elements that have filter attributes that do not meet the filter criteria are
filtered out. When an element is filtered out, all the child elements are also filtered out. For more information, see
“Example of a filter” on page 289.
Note: You can’t filter a document based on Conditional Tags and Attribute values simultaneously.
Note: The conditional indicators are disabled when a filter is used. It can be enabled only when no filter is applied to
the document.
Table 1 - Comparison of the Show/Hide feature using Conditional Text and the Show/Hide feature using Filter By Attribute
Conditional Text Filter By Attribute
Based on conditional tags Based on attributes
Must be defined in a document Already exists in a structured document
Condition indicators are available to visually display
the content, based on various conditions
No indicators
Only one expression can be saved at a time Multiple expressions can be saved at a time
Available in both structured and unstructured
FrameMaker
Available in structured FrameMaker only
(unstructured documents do not have elements and attributes)
Allows hiding an entire document, resulting in an
empty-content document
Does not allow the hiding of the entire document, as it does not allow hiding
of the root element
Allows selection of even the smallest portion of a
document for hiding
The smallest unit that can be hidden using this feature is an element.
For each condition tag, there are only two options
to choose from: SHOW or HIDE
Allows better level of granularity in terms of creating a hide condition,
because an attribute can have several values (based on its definition).
Hence, each attribute value has a separate SHOW or HIDE possibility.
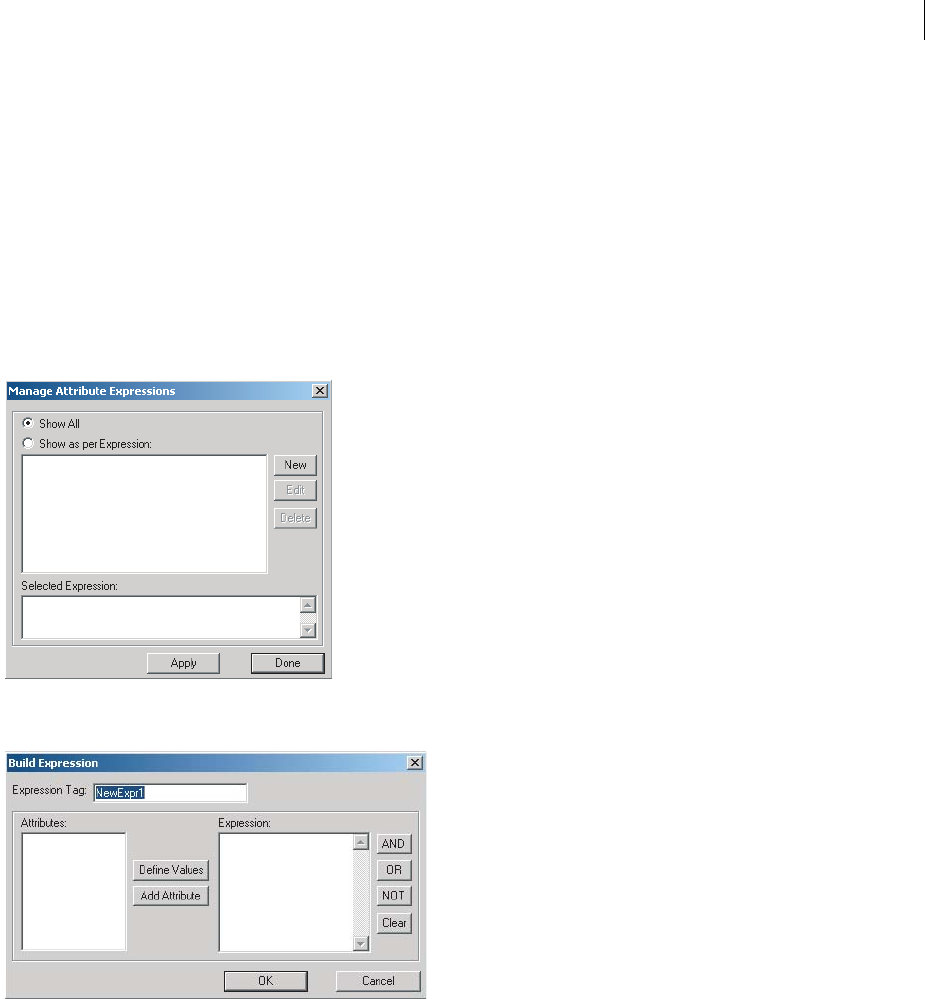
ADOBE FRAMEMAKER 8
User Guide
287
Build a filter
A filter is defined by a Boolean expression of attribute-value pairs. You can build a filter using the Build Expression
dialog box, which provides a simple interface to build the expression using Boolean operators. You can define
attribute-value pairs using the Define Attribute Values dialog box. You can select multiple values for each attribute.
You can save a filter as a named expression. You can build and save multiple filter expressions in a structured
document. However, you can apply only one filter at a time. The last filter you apply in a document is the active filter.
Use the Manage Attribute Expressions dialog box to manage the filters.
1Select Special > Filter By Attribute. The Manage Attribute Expressions dialog box appears.
2Click New. The Build Expression dialog box appears.
3Enter a unique name for the filter in the Expression Tag field.
4Select an attribute from the Attributes list.
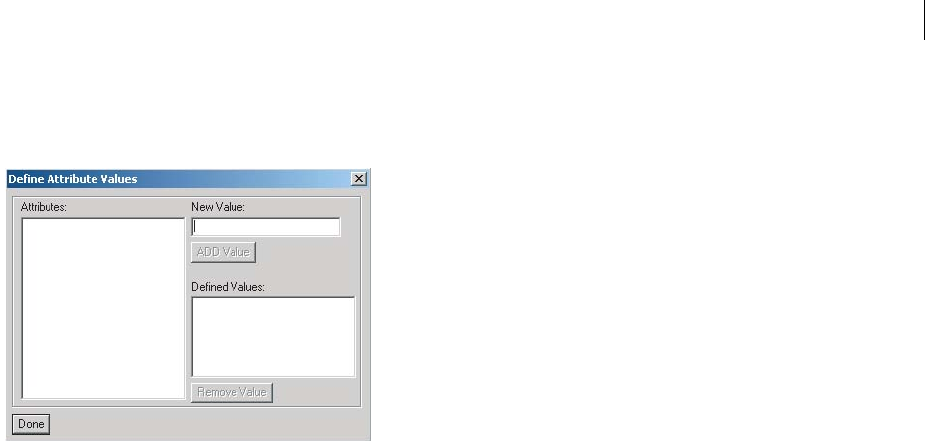
ADOBE FRAMEMAKER 8
User Guide
288
5Do the following to define values for attributes you want to use to build the expression:
aClick Define Values. The Define Attribute Values dialog box appears.
Note: Attribute names are case-sensitive, but attribute values aren’t case-sensitive.
bSpecify a value in the New Value field, and then click ADD Value. The new attribute value is included in the
Defined Values list.
Note: If you want to remove a value, select it in the Defined Values list, and then click Remove Value.
cClick Done.
6Click Add Attribute to include the attribute in the expression.
7Click the desired button to insert a Boolean operator in the expression.
Note: Use the Clear button to refresh the Expression area.
8Click OK.
Note: You can view the contents of a filter in the Selected Expression area by selecting a filter in the list of filters.
9Click Done to close the Manage Attribute Expressions dialog box.
Keep the following points in mind when building a filter:
•Ensure that you enter valid attributes in the filter. All valid attributes are listed in the Attributes list of the Build
Expression dialog box.
•Enclose the value of the attribute in double quotation marks.
Correct: (Language=“French” OR Language=“German” OR Language=“Japanese”)
Incorrect: (Language=French OR Language=German OR Language=Japanese)
Note: FrameMaker doesn’t support expressions where the attribute value is missing. For example, “(Language=“”)” is
not supported in an expression.
•Enclose all attribute-value pairs within parentheses. While all attribute-value pairs for a specific attribute can be
placed within the same pair of parentheses, you can also place the attribute-value pairs for a specific attribute in
different pairs of parentheses.
Correct: (Language=“French” OR Language=“German” OR Language=“Japanese”)
Correct: (Language=“French” OR Language=“German” OR Language=“Japanese”) AND (Version=“1.0”)
Correct: (Language=“French” OR Language=“German”) AND (Language=“Japanese”)
Incorrect: Language=“French” OR Language=“German” OR Language=“Japanese”

ADOBE FRAMEMAKER 8
User Guide
289
•Only use the OR operator between attribute-value pairs for an attribute. Do not use the AND operator.
Correct: (Language=“French” OR Language=“German” OR Language=“Japanese”) AND (Version=“1.0”
OR Version=“2.0”)
Incorrect: (Language=“French” OR Language=“German” AND Language=“Japanese”) AND
(Version=“1.0” OR Version=“2.0”)
•When the NOT operator is used, ensure that it is placed before the opening parenthesis of an
attribute-value group.
Correct: NOT (Language=“French” OR Language=“German” OR Language=“Japanese”) AND
(Version=“1.0” OR Version=“2.0”)
Correct: (Language=“French” OR Language=“German” OR Language=“Japanese”) OR NOT
(Platform=“Windows”)
Incorrect: (NOT Language=“French” OR Language=“German” OR Language=“Japanese”) AND
(Version=“1.0” OR Version=“2.0”)
Incorrect: (Language=“French” OR Language=“German” OR Language=“Japanese”) OR
(Platform=“Windows” NOT Platform=“UNIX”)
•If you have multiple attributes in a filter, insert the Boolean operator between two groups of attribute-value pairs.
Correct: (Language=“French” OR Language=“German”) AND (Platform=“Windows” OR
Platform=“UNIX”)
Incorrect: (Language=“French” OR Language=“German”) (Platform=“Windows” OR Platform=“UNIX”)
Example of a filter
FrameMaker generates customized output of a structured document after processing the filter you applied to
the document.
Consider a scenario in which you want the following elements and attributes to be applied to the various paragraphs
in a structured document.
Table 2
Paragraph Element Attribute Value assigned
Paragraph 1 TextContent1 Language Japanese
Version 2.0
Platform Windows
Paragraph 2 TextContent1 Language Japanese
Version 2.0
Platform UNIX
Paragraph 3 TextContent2 Language Japanese
Version 2.0
Paragraph 4 TextContent2 Language English
Version 1.0
Paragraph 5 SysReq Platform Windows
Paragraph 6 SysReq Platform UNIX
Paragraph 7 LegalContent Copyright Condensed

ADOBE FRAMEMAKER 8
User Guide
290
1Copy the “Sample XML code” on page 294, which is based on this scenario, to create an XML file with the
elements, attributes, and attribute values (listed in Table 2).
2Open the XML file in FrameMaker. These elements, attributes, and attribute values appear in the Structure
View window.
3Type text in the relevant elements.
For example, type Japanese text relevant to version 2.0 on Windows in the TextContent1 element.
4Create the following filter to generate a Japanese document for the Windows platform:
(Language=“Japanese”) AND (Platform=“Windows”)
Processing of the filter by FrameMaker
FrameMaker matches each attribute-value pair in the filter with every element in the document. The result of
matching the attribute-value pair with an element is indicated by one of the following values:
•True: The attribute in the filter is an attribute of the element being matched, and the value in the filter matches
the value of the attribute of the element.
•False: The attribute in the filter is an attribute of the element being matched, but the value in the filter does not
match the value of the attribute of the element.
•Don’t-Care: The attribute in the filter is not an attribute of the element being matched.
The following table demonstrates how the filter is processed:
(Language=“Japanese”) AND (Platform=“Windows”)
Table 3
Paragraph Element Attribute Value assigned Verification of element
based on the filter
Result
Paragraph 1 TextContent1 Language Japanese Is Language=Japanese?
Is Platform = Windows?
True
True
Version 2.0
Platform Windows
Paragraph 2 TextContent1 Language Japanese Is Language=Japanese?
Is Platform = Windows?
True
False
Version 2.0
Platform UNIX
Paragraph 3 TextContent2 Language Japanese Is Language=Japanese?
Is Platform = Windows?
True
Don’t-Care
Version 2.0
Paragraph 4 TextContent2 Language English Is Language=Japanese?
Is Platform = Windows?
False
Don’t-Care
Version 1.0
Paragraph 5 SysReq Platform Windows Is Language=Japanese?
Is Platform = Windows?
Don’t-Care
True
Paragraph 6 SysReq Platform UNIX Is Language=Japanese?
Is Platform = Windows?
Don’t-Care
False
Paragraph 7 LegalContent Copyright Condensed Is Language=Japanese?
Is Platform = Windows?
Don’t-Care
Don’t-Care

ADOBE FRAMEMAKER 8
User Guide
291
Based on the results of filter processing as listed in Table 3, and the rules listed in Table 5, FrameMaker computes the
final value of the filter to determine the inclusion or exclusion of elements from the output. The overall computation
returns one of the following values:
•True (or) Don’t-Care: The element is included in the output.
•False: The element is excluded from the output.
The operator precedence that FrameMaker uses while processing filters is listed below in the descending order
of precedence:
1Parenthesis
2NOT
3AND
4OR
Additional filter processing in the example
For element TextContent1 in Paragraph 1, the filter is processed as follows:
1The attribute-value pair Language=“Japanese” evaluates to True and the attribute-value pair
Platform=“Windows” evaluates to True.
2The result of computing the filter is True and True, and the final computation of the element based on the rules
is True. Hence, Paragraph 1 is included in the output.
Table 4 demonstrates how the entire document is filtered:
Table 4
Paragraph Element Attribute-value pair matching against each
element
Result based on the rules Action
Paragraph 1 TextContent1 Is Language=
Japanese?
True True AND True=True Include in
output
Is Platform=Windows? True
Paragraph 2 TextContent1 Is Language=
Japanese?
True True AND False=False Exclude from
output
Is Platform=Windows? False
Paragraph 3 TextContent2 Is Language=
Japanese?
True True AND Don’t- Care=True Include in
output
Is Platform=Windows? Don’t-Care
Paragraph 4 TextContent2 Is Language=
Japanese?
False False AND Don’t-Care=False Exclude from
output
Is Platform=Windows? Don’t-Care
Paragraph 5 SysReq Is Language=
Japanese?
Don’t-Care Don’t-Care AND True=True Include in
output
Is Platform=Windows? True

ADOBE FRAMEMAKER 8
User Guide
292
Paragraphs 1, 3, 5, and 7 are included in the output, based on the rules listed in “Table 5” on page 293.
Note: When an element is included in the output, the inclusion or exclusion of each of its child elements is determined
by processing each child element. However, when a parent element does not satisfy the filter and is excluded from the
output, its child element is also excluded from the output even if the child element satisfies the filter. In addition,
FrameMaker does not process the root element while running the filter. Hence, the root element is always included in the
output.
Apply a filter
Use the following instructions to apply a filter you have created to your structured document.
1Select Special > Filter By Attribute. The Manage Attribute Expressions dialog box appears.
2Select Show As Per Expression to preview the elements that satisfy the filter when it is applied to the document.
Note: If you select the Show All option, then the active filter, if any, is disabled, and all elements in the document are
available for viewing and editing in FrameMaker. Also, any conditional text that is hidden appears. You can’t undo the
Show All operation.
3Select a filter in the list.
4Click Apply.
Note: You can’t undo the Apply command after applying a filter.
Save a document after applying a filter
When you save a document as a FrameMaker 8 or MIF 8 file, all filters using attribute values, including the filter you
have applied to the document, are saved. The attribute values you have defined for this feature are also saved.
Note: When you save a document in the XML format, all filters using attribute values, are saved. However, the attribute
values you have defined for this feature aren’t saved.
Paragraph 6 SysReq Is Language=
Japanese?
Don’t-Care Don’t-Care AND False=False Exclude from
output
Is Platform=Windows? False
Paragraph 7 LegalContent Is Language=
Japanese?
Don’t-Care Don’t-Care AND Don’t-
Care=Don’t-Care
Include in
output
Is Platform=Windows? Don’t-Care
Table 4
Paragraph Element Attribute-value pair matching against each
element
Result based on the rules Action

ADOBE FRAMEMAKER 8
User Guide
293
Modify a filter
Use the following steps to modify a filter:
1Select Special > Filter By Attribute. The Manage Attribute Expressions dialog box appears.
2Select a filter in the list.
3Click Edit. The Build Expression dialog box appears.
4Modify the filter in the Expression area.
5Click OK to close the Build Expression dialog box.
The modified content of the filter appears in the Selected Expression area of the Manage Attribute Expressions
dialog box.
Delete a filter
Use the following steps to delete a filter:
1Select Special > Filter By Attribute. The Manage Attribute Expressions dialog box appears.
2Select a filter in the list.
3Click Delete.
4If the filter you are deleting has been applied to the document, FrameMaker displays a message indicating that the
selected expression is currently applied to the document. Click OK.
5Click OK to confirm the deletion.
6Click Done to close the Manage Attribute Expressions dialog box.
Note: When you delete an active filter in a document, all elements that were excluded by the filter are again made
available for viewing, editing, or generating output.
Additional information
Rules used to process filters
Table 5 lists the rules that FrameMaker uses for processing filters.
Table 5
Rule Description Operator/Resultant Value
<Don't-care> OR <Don't-Care><Don't-Care>
<Don't-care> OR <True><True>
<Don't-care> OR <False><False>
<True> OR <Don't-care><True>
<False> OR <Don't-care><False>
<Don't-care> AND <Don't-Care><Don't-Care>

ADOBE FRAMEMAKER 8
User Guide
294
Sample XML code
Copy the following code to a FrameMaker document, and then save it as an XML file.
<?xml version="1.0" encoding="UTF-8" ?>
<!DOCTYPE Doc (View Source for full doctype...)>
- <Doc>
- <Para>
<TextContent1 Language="Japanese" Version="2.0" Platform="Windows">TextContent1
with Language="Japanese" Version="2.0" Platform="Windows"</TextContent1>
</Para>
- <Para>
<TextContent1 Language="Japanese" Version="2.0" Platform="UNIX">TextContent1
with Language="Japanese" Version="2.0" Platform="UNIX"</TextContent1>
</Para>
- <Para>
<TextContent2 Language="Japanese" Version="2.0">TextContent2 with
Languaue="Japanese" Version="2.0"</TextContent2>
</Para>
<Don't-care> AND <True><True>
<Don't-care> AND <False><False>
<True> AND <Don't-care><True>
<False> AND <Don't-care><False>
NOT <Don't-care><Don't-care>
<True> OR <True><True>
<False> OR <True> <True>
<True> OR <False><True>
<False> OR <False><False>
<True> AND <True><True>
<False> AND <True><False>
<True> AND <False><False>
<False> AND <False><False>
NOT <True> <False>
NOT <False><True>
Table 5
Rule Description Operator/Resultant Value

ADOBE FRAMEMAKER 8
User Guide
295
- <Para>
<TextContent2 Language="English" Version="1.0">TextContent2with
Language="English" Version="1.0"</TextContent2>
</Para>
- <Para>
<Sysreq Platform="Windows">Sysreq with Platform="Windows"</Sysreq>
</Para>
- <Para>
<Sysreq Platform="UNIX">Sysreq with Platform="UNIX"</Sysreq>
</Para>
- <Para>
<LegalContent Copyright="Condensed">LegalContent with
Copyright="Condensed"</LegalContent>
</Para>
</Doc>

296
Chapter 8: Conditional text
About conditional text
If you’re preparing several versions of a document, each with minor differences, you can use one Adobe FrameMaker
document for all the versions. The one document contains conditional text and conditional graphics.
You may also need to author different types of content for different output formats using the same
FrameMaker document. For example, FrameMaker content that you write for the PDF print version may need to be
re-authored and formatted differently for the HTML Help version. In this situation, you can use one document to
include content for the various output formats, and tag them differently using condition tags.
You can also use conditional text to include comments to yourself or to your reviewers. You can hide the comments
before you print the final copy.
Conditional text differs from one version of a document to another. Unconditional text is common to all versions.
You can make any unit of text conditional, from one character to entire sections. Anchored graphics, tables,
cross-references, footnotes, markers, and table rows can be conditional. You make an item conditional by applying
condition tags.
Two versions of a data sheet
Conditional text can be used to create two data sheets in one document. The text and graphics common to both data sheets are
unconditional. The text and graphics that appear in only one data sheet are assigned a condition tag that identifies the data sheet.
A. The art and first paragraph contain both conditional and unconditional information. B. Unconditional text.
A
A
B
B
A
A
B
B

ADOBE FRAMEMAKER 8
User Guide
297
The condition tags of the current selection (or at the insertion point) appear in parentheses in the Tag area of the
status bar.
Tag area of status bar
You can change the appearance of conditional text so that it’s easy to identify by using condition indicators—style and
color changes.
Condition indicators (strikethrough and underline) identify two conditions.
You can view and print conditional text in several ways. For example, you can view all versions of the document
or hide selected versions, or you can show or hide condition indicators. Whatever you display appears in the
printed document.
Conditional text enhancements
The Conditional Text feature simplifies and enhances single-sourcing documents. You can use the conditional text
enhancements to do the following tasks:
•Manage condition tags using the new Manage Condition Tag dialog box.
•Add new condition tags using the new Add Condition Tag dialog box.
•Use the New Color button in the Edit Conditional Tag dialog box to define a new color for a condition tag.
•Visually distinguish text with multiple condition tags, with the color of the text depending upon the set of tags
applied to the text. For more information, see “Appearance of text with multiple condition tags” on page 303.

ADOBE FRAMEMAKER 8
User Guide
298
•Build Boolean expressions, using the new Build Expression dialog box, to generate conditional output with
complex combinations of condition tags and Boolean operators.
Planning conditional documents
When planning a conditional document, you should examine the nature of the material and, because others may
have to work in or maintain a conditional document you create, look at how several people can take turns working
with it. Plan to treat conditional material consistently to make the document easier to use and maintain. Others will
need to know the conventions you followed as you applied condition tags.
Use the following guidelines when planning a conditional text project.
Number of versions Define how many versions your finished project will contain. For example, if you’re creating a
manual that describes a program that runs on both Windows and UNIX platforms, you might want to be able to
produce at least two versions: a Windows version and a UNIX version. If you want to produce these versions with
editorial comments sprinkled in the text during the review process, you’ll want even more versions: UNIX with
comments, UNIX without comments, Windows with comments, and Windows without comments.
Number of condition tags required Decide how many condition tags you need to produce the desired versions. A
version of a document is defined by a unique set of condition tags. For example, a version of a finished Windows
manual might be defined by having a Windows condition tag showing, a UNIX condition tag hidden, and a
Comments condition tag hidden. In this example, you would need to decide whether to use one condition tag for
Windows comments and another for UNIX comments, or whether to use a single condition tag for both Windows
and UNIX comments.
Organization of content Evaluate the extent to which the document can be conditional and how you can organize
the material to simplify development and maintenance. For example, you might be able to organize a book so that
conditional text is limited to a few documents. Or you might choose to keep versions of a particular chapter in
separate files rather than in conditional text, and then use a different book file for each version of the book. Alterna-
tively, in a structured document, you might want to specify entire chapters of a book for printing only.
Graphics If a document will contain graphics imported by reference into a conditional anchored frame, create
separate folders for the graphics in each version. This simplifies file management when you need to copy or archive
a version of the document with its graphics files.
Table 1 - User interface enhancements for the Conditional Text feature in FrameMaker
User interface Enhancement
Conditional Text dialog box The Edit Condition button is modified as the Manage Tag button.
Edit Conditional Tag dialog box •The field name has changed to “Rename Tag”
•The New Color button is added.
Show/Hide Conditional Text dialog box A new Show As Per Expression option, used to create a Boolean expression,
is added.
A new Show If all Conditions Applied option is added in the Show As Per
Condition area.
New dialog boxes •Manage Condition Tag
•Add Condition Tag
•Build Expression

ADOBE FRAMEMAKER 8
User Guide
299
Variables Words and phrases that are used repeatedly in a document—for example, product and company names—
are easier to work with as variables than as conditional text.
Decide whether your conditional documents will need different variable definitions for each version. For example,
the data sheet illustrated in “About conditional text” on page 296 may use a variable with the product’s name, but the
conditional document describes two products. You can create a template for each version of the document. Each
template should have only one version visible and should define the variables for that version. You can then use File >
Import > Formats to switch the variable definitions from one version to another.
Tagging strategy Determine the smallest unit of conditional text. For example, if a conditional document will be
translated to another language, a whole sentence should be the smallest amount of text you make conditional.
Because word order often changes during translation, using conditional text for part of a sentence could complicate
translation.
Decide whether to make spaces and punctuation conditional. If conditional text begins or ends with
punctuation, make the punctuation conditional too. This makes the text easier to read when you’re viewing
more than one version.
To avoid word spacing problems, such as having an unconditional space followed by a conditional space, set
standards for handling spaces following conditional text (either always conditional or always unconditional).
Decide the order in which conditional text will appear and use this order throughout the document. The order can
help subsequent authors maintain the document.
Multiple authors If a conditional document will have several authors, follow these guidelines:
•Plan document organization and work flow. For example, you may want to break a document into small files so
several people can work on different parts of the document at the same time.
•Decide how you will provide explanatory notes to other authors. To help explain a conditional document, add
helpful comments and apply the predefined Comment condition tag to them.
Creating, changing, and deleting condition tags
You can define unique condition indicators for every condition tag that you create in a FrameMaker document.
Then, you can distinguish text in one version from text in another. If your conditional document will be used to
create more than two versions, use color indicators. In the Add Condition Tag and Edit Condition Tag dialog boxes,
you can create a new color and apply it as a condition indicator for a condition tag. You can rename a condition tag in
the Manage Condition dialog box. You can modify the name, style, color, and condition indicators of a condition tag.
If another document contains the conditional text settings that you want to use in your current document, import
them by choosing File > Import > Formats. For information, see “Importing and updating formats” on page 415
and “Changing the format of files in a book” on page 472.
Note: Condition Tag names support the Unicode text encoding standard.
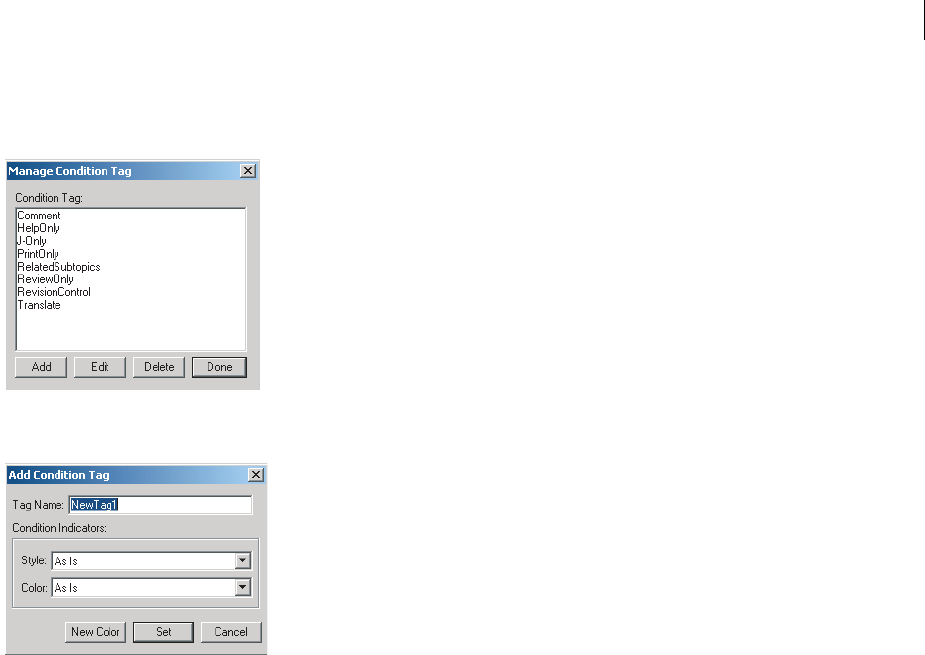
ADOBE FRAMEMAKER 8
User Guide
300
To create a condition tag:
1Select Special > Conditional Text > Manage Condition. The Manage Condition dialog box appears.
2Click Add. The Add Condition Tag dialog box appears.
3Enter a name in the Tag box. Try to use meaningful names that begin with a unique first letter for setting up
keyboard shortcuts.
4Select a style from the Style list.
5Do one of the following:
•Select a color from the Color list.
•Click New Color. The Color Definitions dialog box appears. Define the required color settings for the new color
you are creating, and click Add. For information, see “Defining and modifying colors and tints” on page 368. Click
OK to confirm, and click Done. Select the new color preference in the Color list.
6Click Set.
7Click Done.
Note: You can also open the Manage Condition dialog box from the Apply Condition Tag dialog box by clicking the
Manage Tag button.
To edit a condition tag:
1Select Special > Conditional Text > Manage Condition. The Manage Condition dialog box appears.
2Select a tag to edit.
ADOBE FRAMEMAKER 8
User Guide
301
3Click Edit. The Edit Condition Tag dialog box appears.
4Modify the name in the Tag text box.
5Specify style and color condition indicators.
6Do one of the following:
•Select a color from the Color list.
•Click New Color. The Color Definitions dialog box appears. Define the required color settings for the new color
you are creating, and click Add. For information, see “Defining and modifying colors and tints” on page 368. Click
OK to confirm, and click Done. Select the new color preference in the Color list.
7Click Set.
8Click Done. The modifications are applied across the current FrameMaker document.
Note: You can also edit a tag name from the Conditional Text dialog box by clicking Manage Tag and modifying the tag
name in the Edit Condition Tag dialog box.
To delete a condition tag from a document:
1Select Special > Conditional Text > Manage Condition. The Manage Condition dialog box appears.
2Select the tag you want to delete.
3Click Delete.
4Click OK to confirm.
5Click OK again. FrameMaker removes the condition tag from any text that uses it and deletes the tag from
the Manage Condition dialog box. If any text is tagged with only the condition tag you are deleting, the Delete
Condition Tag dialog box appears. Select the option to make the text unconditional or to delete the text, and
click OK.
6Click Done.
If you want to delete condition tags that aren’t used in a document but you’re not sure which condition tags are
used, use Special > List of > References to generate a list of references that includes condition tags (see “Generating
TOCs and other lists” on page 421).
ADOBE FRAMEMAKER 8
User Guide
302
Using Boolean expressions to generate conditional
output
You can generate conditional output by building a Boolean expression with combinations of condition tags and
Boolean operators.
For example, your document contains the Comment, Print, Help, and PDF condition tags. To show text tagged with
the Print and PDF condition tags only, click Build Expression, and define the following expression in the Build
Expression dialog box: "Print" AND "PDF". After applying this expression, the document displays only text marked
with the Print and PDF condition tags. Alternatively, to include text tagged with either the PDF or Print condition
tags in the output, you can modify the expression as follows:
"PDF" OR "Print"
To create a Boolean expression:
1Do one of the following:
•Select Special > Conditional Text > Show/Hide Conditional Text.
•Select Special > Apply Conditional Text. The Conditional Text dialog box appears. Click the Show/Hide button.
2(Optional) Select the Show As Per Expression option.
Note: All conditional expressions created and applied in the document, are listed in the Expression pop-up menu.
3Click the Build Expression button. The Build Expression dialog box appears.
4Select a tag from the Condition Tag list and click the Add Tag button, or double-click the tag you want to add. The
tag appears in the Expression area.
5Click the AND, OR, or NOT button.
6Repeat steps 4 and 5 to add tags and build the required expression. Place the cursor in the Expression area to create
or edit an expression.
7Click OK to close the Build Expression dialog box.
8Click the Set button.
9Click OK to continue. Only the conditional text that matches the expression is displayed in the output.
Click the Clear button in the Build Expression dialog box to completely clear an expression.

ADOBE FRAMEMAKER 8
User Guide
303
Applying and removing condition tags
To make text conditional, you apply tags using the Conditional Text dialog box or the keyboard, or by copying and
pasting condition tag settings. You can apply multiple tags to text in a FrameMaker document.
Appearance of text with multiple condition tags
FrameMaker enables you to distinguish text to which a single condition tag has been applied, from text to which
multiple condition tags have been applied.
When you apply a new condition tag to a selected text to which another condition tag has already been applied, the
color of the text is changed to a different color. This color is midway of all colors of the condition tags you have
already applied to the current text.
You can also use the Find/Change command to paste condition tag settings. For details, see “Searching for condi-
tional text” on page 82 and “Changing items you find” on page 83.
You can merge two versions of a document into one conditional document. When you merge two versions,
FrameMaker compares them and creates a composite conditional document. For information on comparing and
merging documents, see “Comparing document versions” on page 484.
To apply a condition tag to an item:
1Select the item you want to make conditional, as described in the following table:
Note: You can make text in text frames conditional, but not text in text lines.
Table 2 - Applying conditional tags to text
To make this conditional Select
Text in a text frame, table cell, or footnote Text
Anchored frame and its contents Frame’s border or anchor symbol
An entire table Table’s anchor symbol
Table row Whole row
Cross-reference or variable Cross-reference or variable text
Footnote Footnote reference (the number in the main text)
Marker Marker symbol

ADOBE FRAMEMAKER 8
User Guide
304
2Select Special > Conditional Text > Apply Conditional Text. The Conditional Text dialog box appears.
3To apply a condition tag, move it to the In scroll list. To remove a condition tag, move it to the Not In scroll list.
Condition tags in the As Is scroll list will not be applied or removed.
•To move a condition tag between scroll lists, select the tag and click an arrow, or double-click the tag.
•To move all tags from one scroll list to another, select a tag in the list and Shift-click an arrow.
4Click Apply. FrameMaker applies the settings to the text. If you apply a hidden condition tag, the selected text
disappears, unless it is also tagged with a condition that is displayed. For information about viewing hidden text, see
“Changing the view of conditional documents” on page 306.
To apply a condition tag by using the keyboard:
1Select the item to which you want to apply a condition tag, and press Control+4.
2At the status bar prompt, start typing the tag name. You may need to type only a few characters before the name
appears in the Tag area. Type lowercase letters to search forward; type uppercase letters to search backward. You can
also use the Up Arrow and Down Arrow keys to scroll through the tags.
3Press Return to apply the condition tag. If you decide to cancel the operation, click in the document without
pressing Return.
To copy and paste condition tag settings:
1Put the insertion point in text that uses the condition tag settings you want to copy.
2Choose Edit > Copy Special > Conditional Text Settings.
3Make a selection or click to place the insertion point.
4Choose Edit > Paste. If you paste the settings into a different document, the pasted tags appear in that document’s
Conditional Text dialog box so you can use them again.
Avoiding unresolved cross-references
If you insert a cross-reference to a paragraph (such as a heading), and if the first word in the paragraph is conditional,
the Cross-Ref marker that FrameMaker inserts will also be conditional (with the first word’s condition tag settings).
This means the marker will be hidden when you hide the first word’s conditions. As a result, the cross-reference may
be unresolved if condition tag settings of the cross-reference and of the cross-reference marker differ.

ADOBE FRAMEMAKER 8
User Guide
305
To avoid this, select just the Cross-Ref marker at the beginning of the source paragraph, and make it unconditional.
The marker will always be visible, so the cross-reference will be resolved no matter which version is visible.
Removing condition tags from an item
Removing a condition tag from an item is different from deleting a tag from a document. When you remove a tag
from an item, the tag remains in the document so it can be applied again later. When you delete a tag from the
document (see “Creating, changing, and deleting condition tags” on page 299), FrameMaker removes the condition
tag from any text that uses it and deletes the tag from the Conditional Text dialog box.
To remove a condition tag from an item:
1Select the item with the tag you want to remove and choose Special > Conditional Text > Apply Conditional Text.
The Conditional Text dialog box appears.
2Do one of the following:
•To remove some condition tags but leave the text conditional, move the condition tags you want to remove to the
Not In scroll list. (To move a condition tag between scroll lists, select the tag and click an arrow or double-click
the tag.)
•To remove all condition tags and make the text unconditional, select the Unconditional option.
3Click Apply.
To remove a condition tag from an item using the keyboard:
1Select the item from which you want to remove condition tags and press Control+5.
2At the status bar prompt, start typing the tag name. You may need to type only a few characters before the name
appears in the Tag area. Type lowercase letters to search forward; type uppercase letters to search backward. You can
also use the Up Arrow and Down Arrow keys to scroll through the tags.
3Press Return to remove the condition tag from the item. If you decide to cancel the operation, click in the
document without pressing Return. If the selection contains only the condition tag you’re removing, a dialog box
appears in which you choose either to make the text unconditional or to delete it.
To remove all condition tags using the keyboard:
❖Select the item from which you want to remove all condition tags (thus making the item unconditional) and press
Control+6.
Working in conditional documents
You can view or print all unconditional and conditional text simultaneously, or you can hide the conditional text of
one or more versions. FrameMaker ignores hidden conditional text when formatting a document. When text
symbols are visible, hidden conditional text is represented on-screen by a conditional text marker .
Markers show where conditional text is hidden.

ADOBE FRAMEMAKER 8
User Guide
306
Changing the view of conditional documents
A conditional document can display any number of conditions at a time and can have any of its condition indicators
on or off. For example, you can change the view to display the condition tags for one particular version, for several
versions, or for all versions. If you’re displaying more than one version, or if you’re showing one version and want to
see which part is conditional, you may want the condition indicators on.
You can view conditional text by selecting one of the following options:
•Show All: Select this option to show all text to which condition tags have been applied.
•Show As Per Condition: Select this option to show text based on a specific condition tag.
•Show As Per Expression: Select this option to show text based on an expression that includes a complex combi-
nation of condition tags and Boolean operators. For more information about defining an expression, see “Editing
elements in conditional structured documents” on page 309.
To change the view of a conditional document:
1Do one of the following:
•To change the view of a conditional document, choose Special > Conditional Text and click Show/Hide
Conditional Text.
•To use the book window to change the view of conditional documents, select the desired documents, and then
choose Special > Conditional Text> Show/Hide Conditional Text.
2Do one of the following to select the conditional text that you want to show or hide in the document:
•Select the Show All option.
•Select the Show As Per Condition option. Move the desired condition tags between scroll lists by selecting a tag
and clicking an arrow, or double-clicking the tag. To move all tags from one scroll list to the other, select one tag
in the list and Shift-click an arrow. If any of the condition tags in the Show list is applied to text in your document,
the relevant conditional text appears in the document. You can select the Show If All Conditions Applied option
to show conditional text only if all condition tags that you have selected in the Show list are applied to that text.
•Select the Show As Per Expression option, and then select an expression from the pop-up menu. For more infor-
mation about creating an expression, see “Using Boolean expressions to generate conditional output” on page 302.
3Indicate whether you want to display condition indicators.
Note: Condition indicators are style and color parameters that are used to distinguish conditional text from plain text.
For example, you can create a Condition Tag called Private Comment and configure its Style as Double Underline, and
its Color as Blue.
4Click Set.
To switch the view of a document quickly from one version to another, create a template for each version.
Each template should have the appropriate Show/Hide settings for a version. You can then use File > Import >
Formats to change the view of a conditional document from the template (see “Importing and updating formats” on
page 415 and “Changing the format of files in a book” on page 472).
Note: If you select the Show All option, the active expression, if any, is disabled, and all elements in the document are
available for viewing and editing in FrameMaker, and for generating the desired output.
ADOBE FRAMEMAKER 8
User Guide
307
Viewing imported conditional text
When you import text containing passages of conditional text, all the condition tags applied to text in the source
document are imported so that you can use them to show or hide imported conditional text. Even if the text is
imported by reference and appears in a text inset, you can change the view of conditional text in the inset.
Text is shown or hidden based on the following:
•When the Show All option is selected in the destination document, all conditional text appears.
•When the Show As Per Condition option is selected in the destination document, conditional text matching any
of the selected condition tags in the Show list appears in the document. If the Show If All Conditions Applied
option is selected in the destination document, all conditional text in the document is displayed only if all the tags
that you selected in the Show list have been applied to text in the document.
•When the Show As Per Expression option is selected in the destination document, only conditional text that
is based on the selected expression appears. For more information about defining an expression, see “Using
Boolean expressions to generate conditional output” on page 302.
Note: If you don’t select any of these options, conditional text is initially shown or hidden according to the settings in the
destination document. If imported condition tags don't match tags in the destination document, conditional text is
initially shown or hidden according to the settings in the source document.
Editing conditional text
When you work in a conditional document, hidden text is generally ignored. This means, for example, that the
Find/Change and Spelling Checker commands check only displayed text. However, you can cut, copy, and paste
hidden text by selecting the conditional text marker and by using the commands on the Edit menu.
Work with text symbols turned on when you’re working in a conditional document. Conditional text markers alert
you to text that is in other versions of the document.
To edit conditional text:
❖Use the Edit menu commands as usual.
When you copy text, FrameMaker copies its conditional text markers and condition tag settings. When you paste
text with a condition tag that’s not in the destination document, FrameMaker adds the tag to the destination
document. When you try to move or delete hidden conditional text, FrameMaker displays an alert message that lets
you proceed and delete the text or cancel the command.

ADOBE FRAMEMAKER 8
User Guide
308
To apply format changes to hidden text:
❖Use Format > Paragraphs > Designer and Format > Characters > Designer.
Paragraph and character format changes you apply to selections don’t update conditional text hidden within the
selection. To apply a format change to all paragraphs or characters, including hidden conditional text, click Update
All in the designer or choose Update All from the Paragraph Format pop-up menu on the formatting bar.
Applying format changes with Import > Formats also updates hidden conditional text.
To spell-check or search through all text:
❖Show all conditional text (see “Changing the view of conditional documents” on page 306) before using Edit >
Spelling Checker or Edit > Find/Change.
Finding conditional text
You can search for items tagged with a visible condition tag. FrameMaker will find conditional text in text frames,
graphic frames, and table cells, but will not find conditional table rows. For details, see “Searching for conditional
text” on page 82.
Finalizing conditional documents
Before you produce a finished version of a conditional document, follow these guidelines:
•Change your view of the document to include only the version you want to print, and turn off
condition indicators.
•If your document contains variables, make sure the variable definitions are correct for the version you’re printing.
•Spell-check the document. This will catch double spaces and punctuation problems caused by incorrectly tagged
conditional text.
•Update cross-references. If the document contains unresolved cross-references, they may refer to Cross-Ref
markers in hidden conditional text. Show the version and update the cross-references again. For information on
resolving cross-references, see “Resolving cross-references” on page 209. Also see “Avoiding unresolved cross-
references” on page 304.
•Create a copy of the document for each version before manually adjusting line and page breaks. Use the copy for
each version for making the adjustments and for printing. These adjustments will differ with each version. Use the
original document for future edits.
•If the document is part of a book, update the book and its generated files. If the book contains documents with
different condition indicators for the same tag, or if some condition tags are displayed in one document but are
hidden in another, FrameMaker displays an alert message. If this occurs, click Cancel to stop generating and
correct your documents’ conditional text settings.
•After generating an index, check it for double question marks (??), which indicate missing or incorrect index
markers. For information, see “Troubleshooting indexes” on page 437.

ADOBE FRAMEMAKER 8
User Guide
309
Editing elements in conditional structured documents
You can insert, wrap, merge, and split elements in conditional structured documents as you can in other documents.
FrameMaker applies the following conditions as needed:
•When you insert an element, the new element takes the condition tags of the location of the insertion point.
•When you wrap an element, the new element generally takes the condition tags of the location of the selection.
But if the selection crosses boundaries, see the following two items.
•When you wrap a selection that crosses the boundaries of two conditions, the new element does not take any
condition tags but the contents of the element keep their tags.
•When you wrap a selection that crosses the boundary of conditional and unconditional text, the new element does
not take any condition tags and the contents are still partly conditional and partly unconditional.
•When you merge two or more elements that have different condition tags, the new element does not take any
condition tags but the contents of the element keep their tags.
•When you split an element, the two elements have the same condition tags as the original element.
Each version in a conditional document should be valid, so you need to validate the document showing only one
version at a time. Validity is usually not important when several versions are showing.
Note: If a filter is applied to a structured document, this expression overrides all conditional text in the document. When
you apply a filter to a structured document to generate output, conditional indicators are disabled. If you switch back to
using conditional text to generate the output, you may need to re-enable the conditional indicators. For more infor-
mation, see “Filter By Attribute” on page 286.
310
Chapter 9: Graphics and anchored frames
About Graphics
In Adobe FrameMaker, you can draw rectangles, ovals, and polygons, as well as straight and curved lines. You
can create complex illustrations by combining several objects, and include text in illustrations. You can also
specify object properties (such as fill pattern, line width, and color), and you can resize, reshape, rotate, and
rearrange objects.
You can also place illustrations directly on the page, in anchored graphic frames that move with the text, or in
unanchored graphic frames that crop the edges of the illustration. For information on anchored frames, see “About
Anchored Frames” on page 345. For information on unanchored graphic frames, see “Cropping or masking
graphics” on page 343. For information on importing graphics, see “Importing, linking, and exporting” on page 501.
Displaying the Tools palette
You use the Tools palette to select drawing tools and to apply properties. The Tools palette contains the following:
•Selection tools that control how you select text and objects
•Drawing tools for drawing objects
•Pop-up menus for changing an object’s drawing properties
A. Selection tools
B. Drawing tools
C. Drawing properties
On UNIX systems, a large Tools palette includes some commands from the Graphics menu. The properties appear
in areas where you can click to apply them rather than choosing them from a pop-up menu.
A
B
C
A
B
C

ADOBE FRAMEMAKER 8
User Guide
311
To display the Tools palette:
❖Click the Tools button on the right side of the document window.
To toggle between the small and large Tools palettes (UNIX):
❖Click the Tools palette toggle in the lower left corner of the Tools palette.
Using grids
Two grids help you draw and align objects:
•The visible grid appears as horizontal and vertical lines on-screen, but not on the printed page. A graphic frame
contains its own visible grid, which begins at the upper left corner of the frame.
•The invisible snap grid attracts objects to it. As you draw, rotate, resize, or drag objects (and when you drag indent
and tab stop symbols on the ruler), they snap to the invisible grid.
Note: If Snap and Gravity are both selected in the Graphics menu, gravity takes precedence. For information on Gravity,
see “About gravity” on page 333.
To show or hide the visible grid:
❖Choose View > Grid Lines. If the visible grid doesn’t appear in a text frame, change the frame’s fill pattern to None
(see “Applying and changing drawing properties” on page 318).
To turn the snap grid on or off:
❖Choose Graphics > Snap.
To change the grid spacing:
1Choose View > Options.
2Do any of the following:
•To set the space between lines in the visible grid, choose the spacing from the Grid Lines pop-up menu.
•To set the interval for the snap grid, enter the interval in the Grid Spacing text box.
•To set the snap interval for rotating objects, enter the number of degrees in the Snap Rotate text box.
If you intend to use the grids together, make the visible grid spacing a multiple of the snap grid interval. For
example, if the snap grid spacing is 0.125 inch, you could make the visible grid spacing 0.125 inch, 0.25 inch,
or 0.5 inch.
3Click Set.
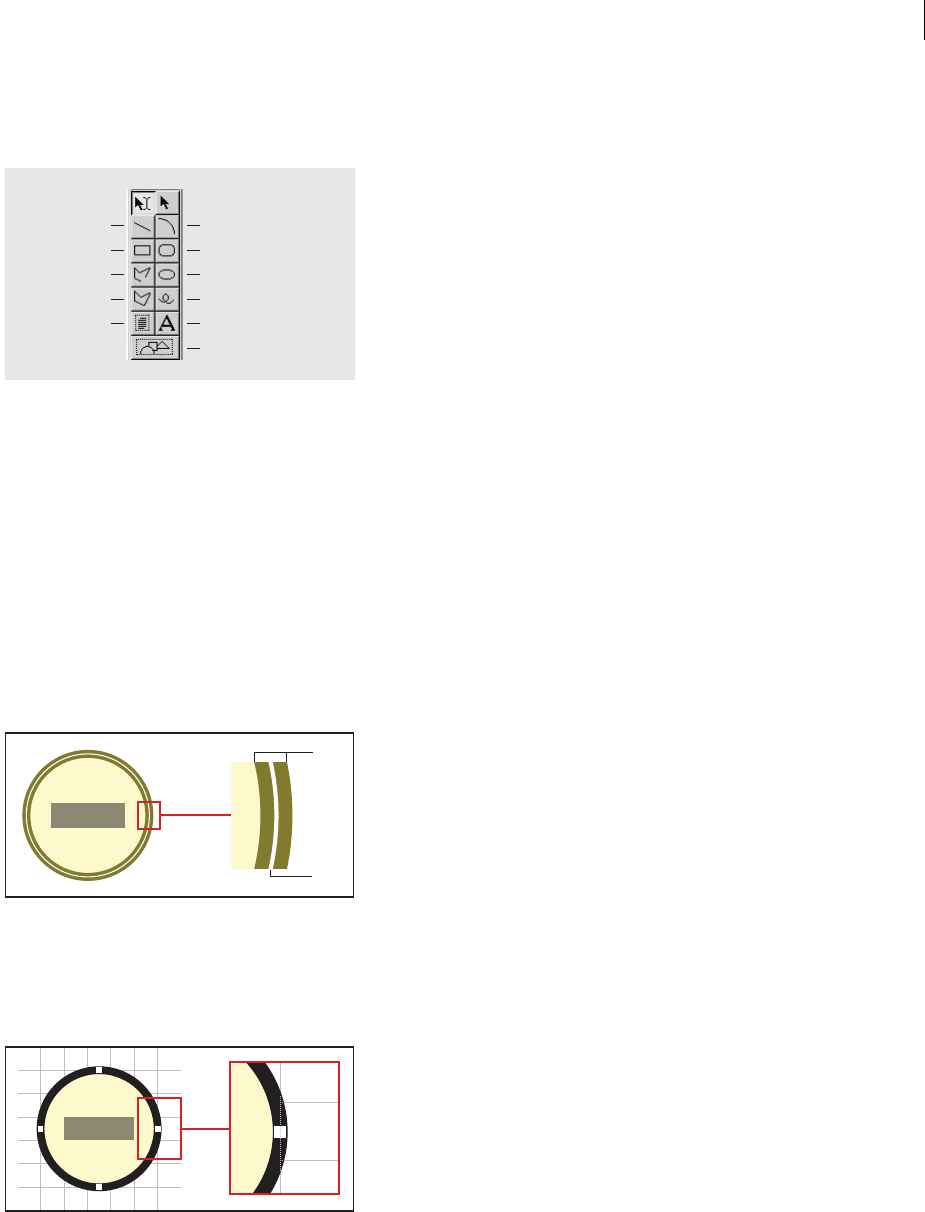
ADOBE FRAMEMAKER 8
User Guide
312
Drawing objects
The Tools palette contains tools for drawing objects.
Drawing tools
Use the Line, Polyline, Arc, and Freehand tools to create various types of lines. Use the Rectangle, Rounded
Rectangle, Oval, and Polygon tools to create closed shapes. You can also use the Rectangle or Oval tool and the
Graphics > Set # Sides command to create a regular polygon (a polygon with equal sides and equal angles).
Use either the Text Frame tool or the Text Line tool to add text to a graphic, and use the Graphic Frame tool to crop
objects. For an overview of text frames and graphic frames, see “About frames” on page 322. For information on
cropping objects, see “Cropping or masking graphics” on page 343.
About paths
An object’s path is an imaginary line through the center of the object’s border. The path appears as an outline when
you draw an object.
A. Border B. Path
FrameMaker uses the path to position objects. For example, when you use the Align command to align objects, the
objects are aligned along their paths, not along the outside of their borders. When the snap grid is on as you draw,
FrameMaker aligns the path with the snap grid.
Objects are aligned along their paths.
Line
Rectangle
Polyline
Polygon
Text Frame
Arc
Rounded Rectangle
Oval
Freehand
Text Line
Graphic Frame
A
B
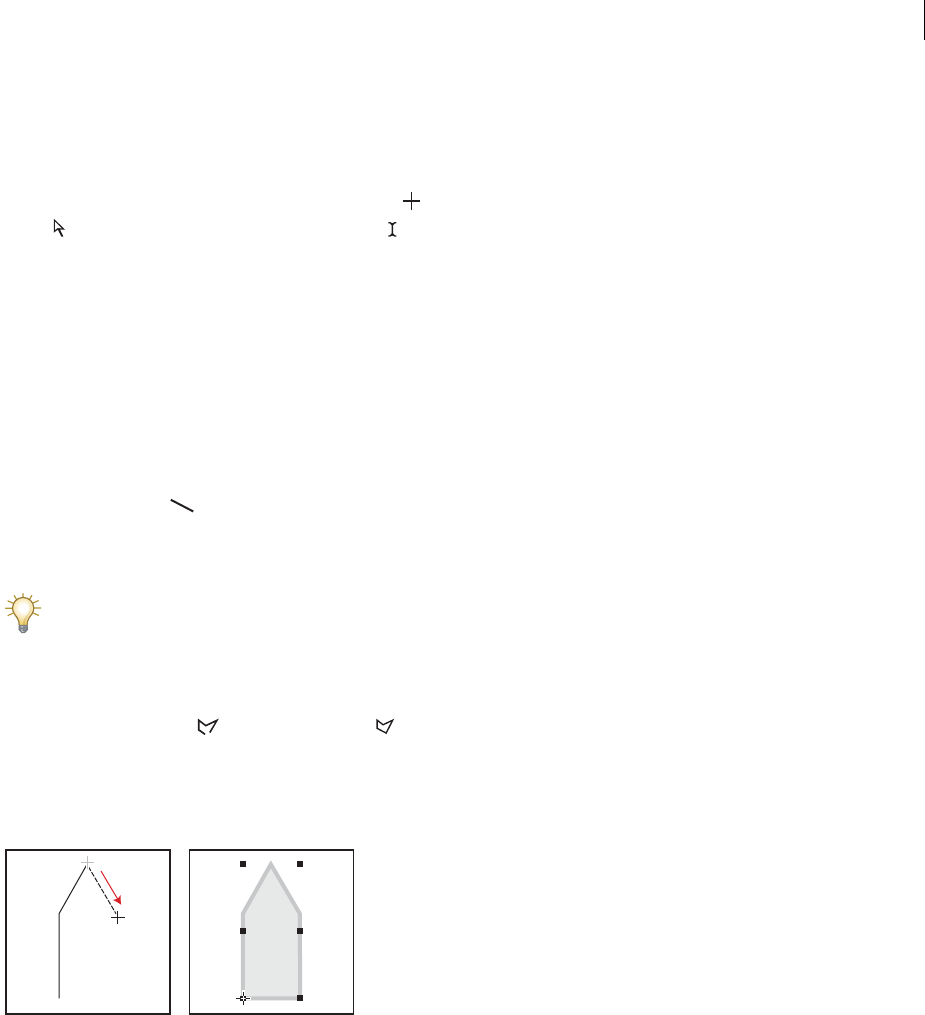
ADOBE FRAMEMAKER 8
User Guide
313
Using the drawing tools
Drawing an object is a simple series of clicks or drags. As you draw, you see the outline of the object.
When you draw an object, the pointer is a cross hair . After you draw, the pointer normally changes back to an
arrow so you can select objects, or to an I-beam so you can select or type text. To draw another object, you
usually have to click a drawing tool again.
When you draw an object directly on a page, it doesn’t move with the text, although text can run around the object.
If you want the object to be “anchored” to surrounding text (that is, to move as you edit the text), you can draw the
object in an anchored frame, or draw it on a page and then move it into an anchored frame.
When you draw an object, it uses the drawing properties that are selected on the Tools palette. The object is also
selected, to make changing these properties easier. For information on applying properties, see “Applying and
changing drawing properties” on page 318.
To draw a straight line:
1Click the Line tool .
2Click at the start and end of the line. You can also drag from the beginning to the end of the line. To draw a
horizontal or vertical line, or a line at a 45-degree angle, Shift-click or Shift-drag.
To draw several lines that touch one another, use the Polyline tool to draw several connected lines as a single object
(see “About gravity” on page 333). You can also use the Line tool to draw the lines and then use the Gravity feature
to make sure they touch one another.
To draw a polyline or polygon:
1Click the Polyline tool or the Polygon tool .
2Click at each vertex in turn. To draw a horizontal or vertical segment, or a segment at a 45-degree angle,
Shift-click.
3Double-click at the last vertex.
Click at each vertex and then double-click to end.
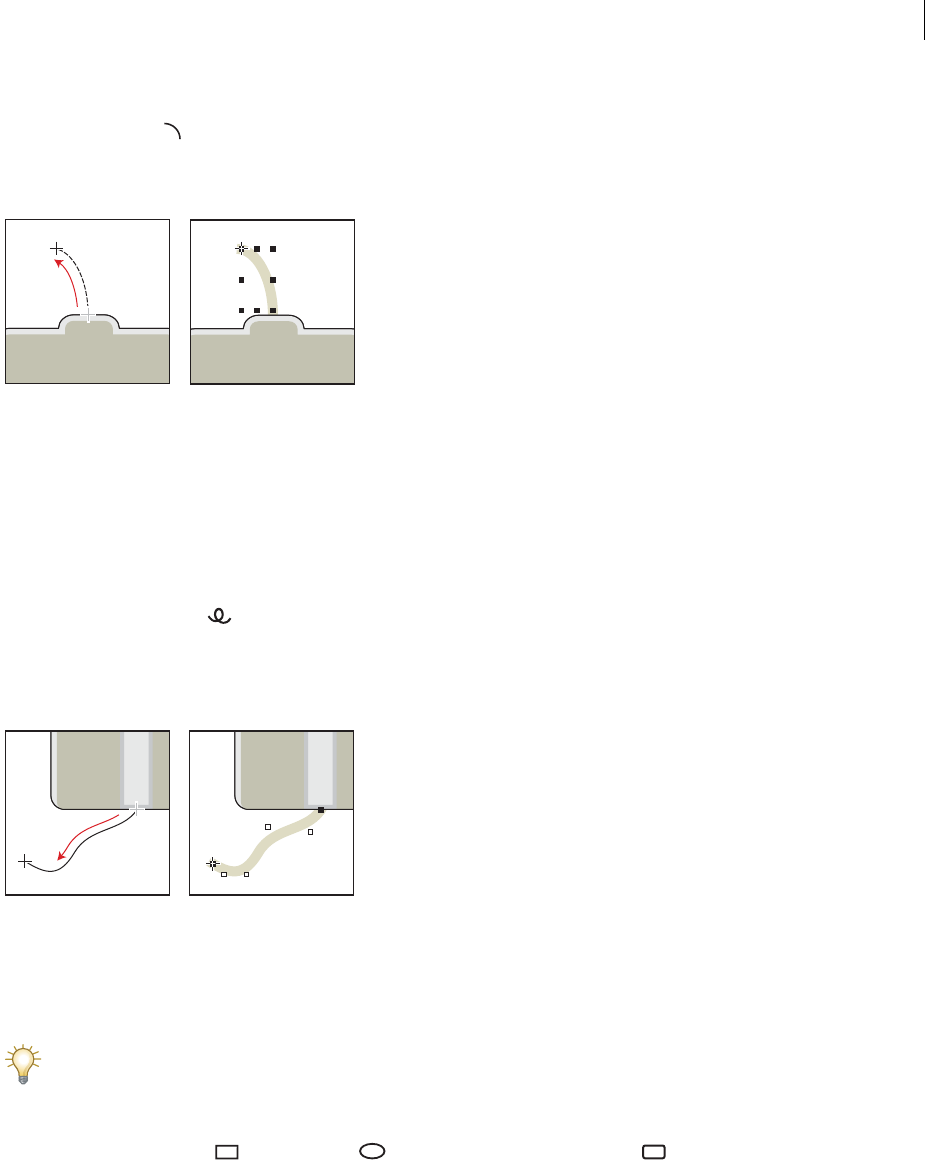
ADOBE FRAMEMAKER 8
User Guide
314
To draw an arc:
1Click the Arc tool .
2Put the pointer where you want to start the arc and drag along the path of the arc. To draw a circular arc,
Shift-drag.
Drag and then release.
If the arc isn’t the shape you want (for example, if it’s concave rather than convex), don’t release the mouse button.
Drag the cross back to the starting point and draw the arc again, dragging along the path you want the arc to trace.
Initially, the angle of the arc will be 90 degrees. For information on changing the angle, see “Reshaping objects” on
page 341.
To draw a freehand curve:
1Click the Freehand tool .
2Put the pointer where you want to start the freehand curve, and drag along the path of the curve. The snap grid
is ignored for all but the first point of a freehand curve; however, you may want the snap grid to be off when you draw
the curve.
Drag and then release.
When you release the mouse button, FrameMaker approximates a curve along the path you drew and displays
reshape handles and control points so you can reshape the curve. For information, see “Resizing and reshaping
objects” on page 338.
For more precise control over the shape of a freehand curve, create a curve by drawing polylines or polygons and
then smoothing them. For information on smoothing, see “Smoothing and unsmoothing objects” on page 340.
To draw a rectangle, a rounded rectangle, or an oval:
1Click the Rectangle tool , the Oval tool , or the Rounded Rectangle tool .
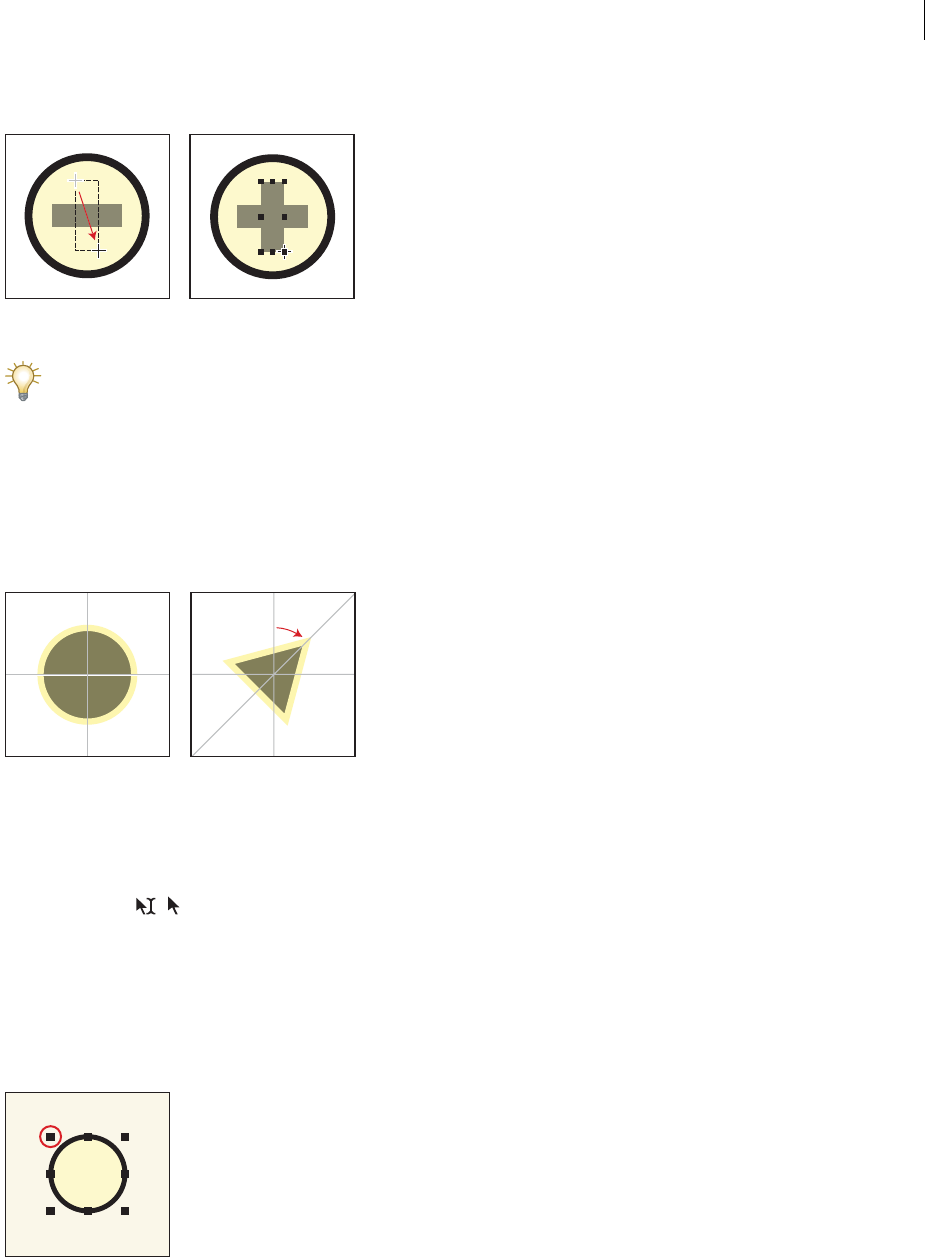
ADOBE FRAMEMAKER 8
User Guide
315
2Drag diagonally across the area in which you want the object to appear. To draw a square or circle, Shift-drag.
Drag and then release.
To draw a border around a graphic, draw a rectangle with a fill pattern of None around the graphic.
To draw a regular polygon:
1Draw a circle or square that is slightly larger than the regular polygon you want to create. If you draw a rectangle
or an oval, the polygon you create won’t be regular.
2Select the object and choose Graphics > Set # Sides.
3Specify the number of sides and the start angle of the polygon, and click Set.
Original object and regular polygon, with number of sides = 3 and start angle = 45
To draw several objects of the same type without clicking the tool each time:
❖Do one of the following:
•For all objects except text lines, Shift-click the tool. To stop using the tool, click another drawing tool or one of the
selection tools , on the Tools palette.
•For text lines, press Return at the end of a text line and continue typing. For information on creating text lines, see
“Using text with graphics” on page 323.
Selecting objects
You select objects to change their properties or to edit them. When an object is selected, handles appear around it.
Selection handle
0º
90º
0º 45º
90º
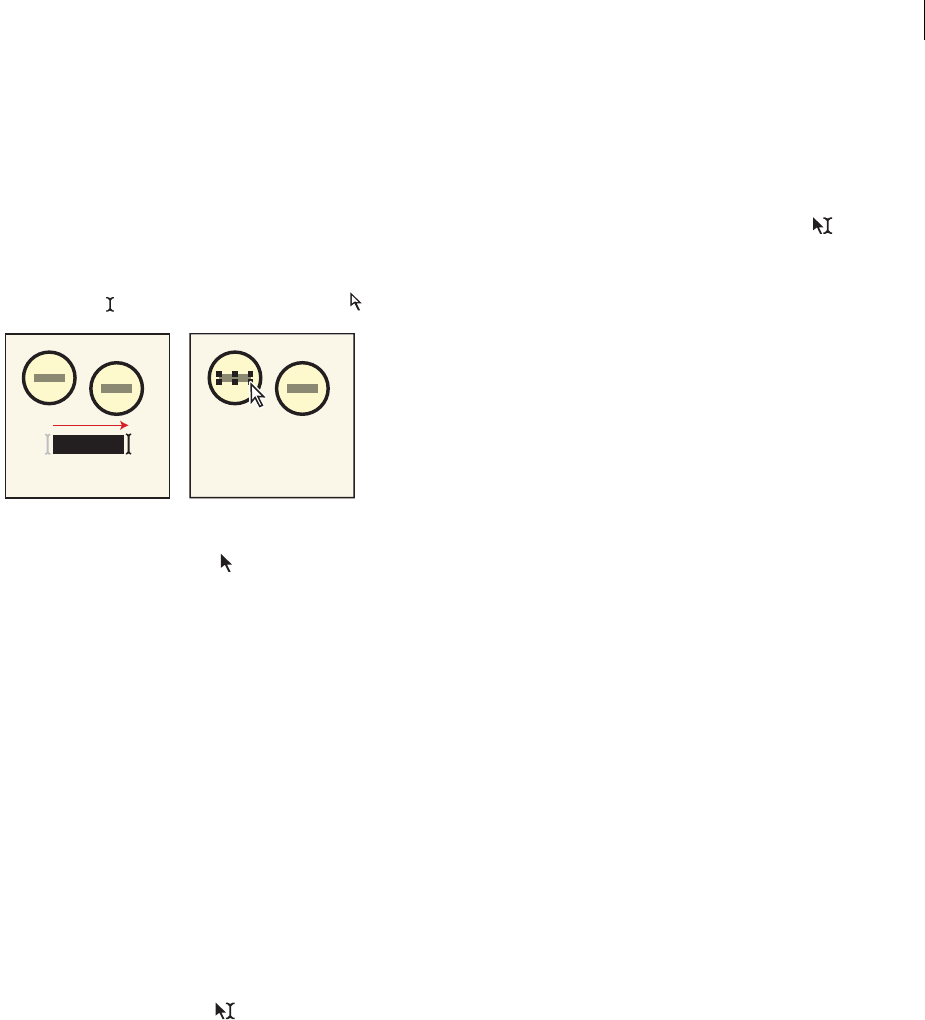
ADOBE FRAMEMAKER 8
User Guide
316
You can select several objects at the same time, or you can add objects to an existing selection. However, all the
objects must be on the same page or in the same graphic frame. When you select a graphic frame, any selected objects
are deselected.
The following tools are available for selecting:
•The Smart Selection tool
allows you to place an insertion point or select text when the pointer is over text, and to select objects when the
pointer is over an object. When the Smart Selection tool is active, the pointer changes shape as you move it—to
an I-beam over text or to a hollow arrow over objects. In general, use the Smart Selection tool as you work.
With an I-beam pointer, you can select only text. With a hollow arrow pointer, you can select only objects.
•The Object Selection tool always selects objects. Use the Object Selection tool when you’re working with text
lines and text frames as objects—for example, when you want to move or resize a text frame. When you click in
text with the Object Selection tool active, you select the text line or text frame as an object rather than put an
insertion point in the text.
To activate a selection tool:
❖Click the Smart Selection or Object Selection tool on the Tools palette.
To keep the Object Selection tool active after drawing an object:
❖Shift-click the tool on the Tools palette. Otherwise, FrameMaker reverts to the Smart Selection tool after you draw
an object.
To select an object:
❖Click the object. If the object is transparent—that is, if it has a fill pattern of None—click its border. When you
click overlapping objects, FrameMaker selects the object in the foreground.
To select a text line or text frame when the Smart Selection tool is active:
❖Control-click the text line or text frame.
Negative
Electrons
Negative
Electrons
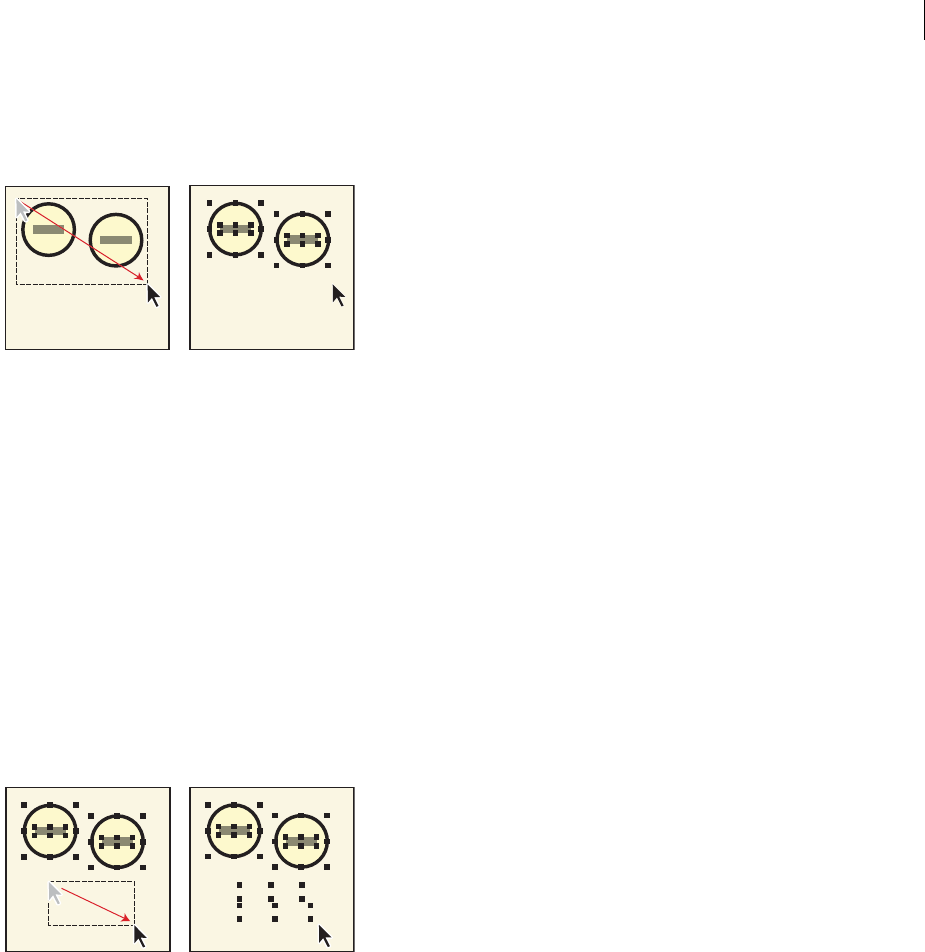
ADOBE FRAMEMAKER 8
User Guide
317
To select several objects in the same area:
❖Point outside the objects and drag diagonally to draw a selection border around them. All objects you want to
select must be completely within the selection border.
Drag to select several objects.
Note: If you move the object rather than draw a selection border (because the pointer was over an object), immediately
choose Edit > Undo. Then draw a selection border in the way described in the following procedure.
To force FrameMaker to draw a selection border:
❖Control-Shift-drag.
To add an object to a selection:
❖Shift-click the object. You can also Control-click the object.
To add a text line or text frame to the selection when using the Smart Selection tool:
❖Control-click.
To add several objects in the same area to a selection:
❖Shift-drag diagonally to draw a selection border.
Shift-drag to add objects to the selection.
If any objects within the selection border were selected when you began dragging, they are deselected.
To select all objects in a graphic frame or on a page:
❖Do one of the following:
•To select all objects in a graphic frame, select the frame or any object in the frame, and then choose Edit > Select
All in Frame.
•To select all objects on a page, click outside any objects or text on the page and choose Edit > Select All on Page.
Negative
Electrons Negative
Electrons
Negative
Electrons Negative
Electrons
Negative
Electrons
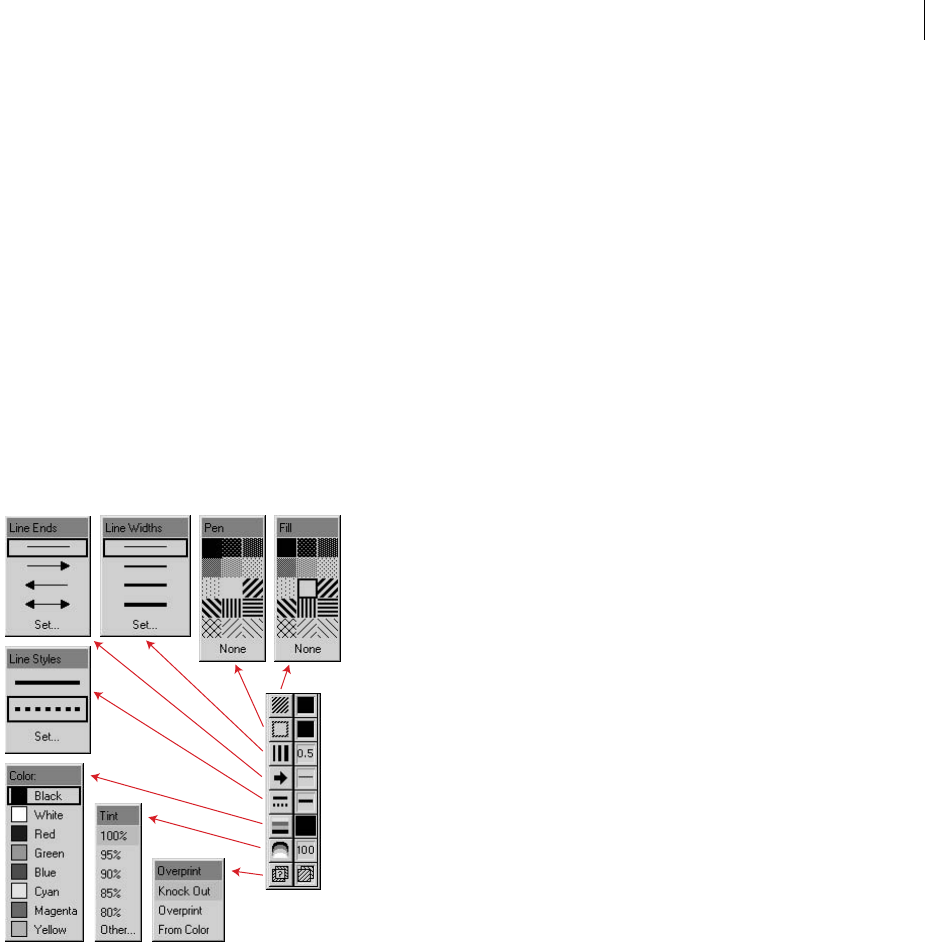
ADOBE FRAMEMAKER 8
User Guide
318
To deselect objects:
❖Do one of the following:
•To deselect an object, click outside it.
•To deselect one of several selected objects, Shift-click the object (not a handle). You can also Control-click
the object.
•To deselect all selected objects, click on the page away from any objects.
•To deselect several objects in the same area, point outside all the objects and Shift-drag diagonally to draw a
selection border around the objects. When you release the mouse button, all the objects completely within the
selection border are deselected. If any objects within the selection border were not selected when you began
dragging, they are selected.
Applying and changing drawing properties
An object’s drawing properties include the fill pattern, pen pattern, line width, line ends, color, and whether the line
is solid or dashed. You change drawing properties from pop-up menus on the Tools palette.
Pop-up menus on the Tools palette
You can change drawing properties before you draw an object, or you can select objects that you’ve already drawn
and then change their properties. After you change a property, it becomes the current property—that is, it will be
applied to any object you draw. For example, if you choose a line width of 1 point, this is applied to all newly drawn
objects until you choose another line width or exit FrameMaker.
You can also make objects look alike by applying one object’s properties to another object.
You can customize the choices that appear on the Tools palette. For information on changing the line widths, line
ends, or line styles, see “Changing line properties” on page 320. For information on changing the colors in the Color
pop-up menu, see “Defining and modifying colors and tints” on page 368. For information on changing the pen or
fill patterns you can choose on UNIX systems, see the online manual Customizing FrameMaker on the Adobe
website: www.adobe.com/devnet/framemaker/pdfs/Customizing_Frame_Products.pdf.
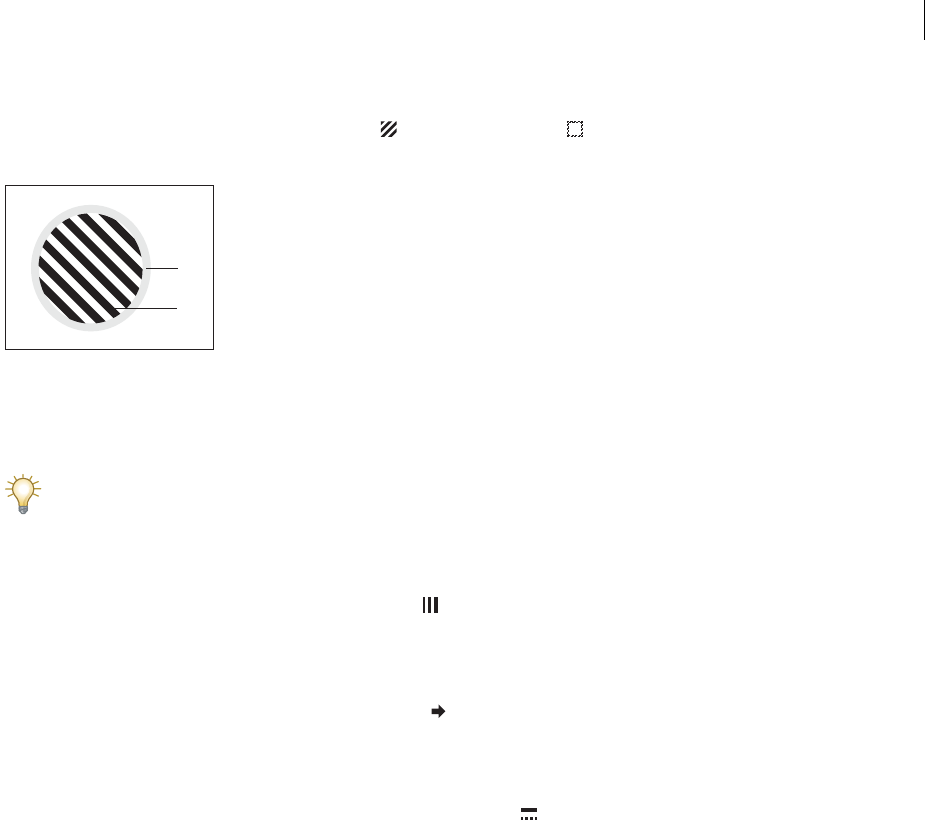
ADOBE FRAMEMAKER 8
User Guide
319
To apply a fill pattern or pen pattern to a selected object:
❖Choose the pattern from the Fill pop-up menu or Pen pop-up menu . You can fill any objects except lines,
text lines, and equations.
A. Pen pattern B. Fill pattern
The eight gray fill and pen patterns have the following percentages: 100, 90, 70, 50, 30, 10, 3, and 0 (no ink,
typically white).
To make an object transparent (so objects in back of it show through), choose a fill pattern of None. If you don’t
want the object to have a border, choose a pen pattern of None. To see the border of an object that uses both a pen
and a fill pattern of None, choose View > Borders.
To choose a line width for a line or an object’s border:
❖Choose a width from the Line Widths pop-up menu . You can change the line width of any object except
text lines.
To change the ends of an arc, a line, a polyline, or a freehand curve:
❖Choose the line end from the Line Ends pop-up menu . You can use no arrowhead or place an arrowhead at the
beginning, at the end, or at both ends.
To make a line or object’s borders solid or dashed:
❖Choose a solid or dashed style from the Line Styles pop-up menu .
To assign a color to an object:
1Choose the color from the Color menu.
2To use a tint of the color, choose a tint value from the tint menu. If the value you want doesn’t appear on the menu,
choose Other from the menu, enter a tint value, and click Set.
If an object isn’t visible after you assign it a color, make sure that the color isn’t in the Invisible scroll list in the Define
Color Views dialog box for the current view (see “Viewing colors” on page 370).
You can also assign the same color to all objects in a document (see “Applying colors and tints” on page 366).
Note: To control whether an object overprints or knocks out objects beneath it, use the Overprint pop-up menu.
For information, see “Knocking out and overprinting” on page 371.
To change the color of text in a text frame:
❖Use the Character Designer or the Paragraph Designer. For details, see “Using a designer to change font
properties” on page 108.
A
B

ADOBE FRAMEMAKER 8
User Guide
320
To inspect an object’s drawing properties or apply them to other objects:
1Select the object that has the properties you want to inspect or copy.
2Hold down Shift and choose Graphics > Pick Up Object Properties. The properties of the selected object become
the current properties on the Tools palette. Any object you draw picks up those properties.
3To apply the properties to existing objects, select the objects you want to change. In the Tools palette, click the
current drawing properties you want to apply to the selected objects.
Current drawing properties
Changing line properties
You can change the following line properties that appear on the Tools palette:
•The values assigned to the line widths that appear in the Line Widths pop-up menu. (For information on changing
the line widths that appear on UNIX systems when you start FrameMaker, see the online manual Customizing
FrameMaker on the Adobe website: www.adobe.com/devnet/framemaker/pdfs/
Customizing_Frame_Products.pdf).
•The cap style, which determines the appearance of any line ends that don’t have an arrowhead.
•The pattern that FrameMaker uses when you choose the dashed line style from the Line Styles pop-up menu. (The
pattern that appears in the pop-up menu doesn’t change, but FrameMaker uses the new pattern.)
In Windows, the new line width settings remain until you change them. The other new settings remain until you
change them or exit FrameMaker. On UNIX systems, the new settings remain until you exit FrameMaker.
None of the changes described here are applied automatically to existing objects. However, you can apply the new
settings to both new and existing objects.
Note: Dashed lines and polylines may appear solid on-screen and in print if the lines are especially thick and contain
acute angles or have round or projecting caps. To make the lines print correctly, change the Line Ends Options setting to
Butt, use a smaller line width, or redraw the object using separate lines.
To change line width settings:
1Choose Set from the Line Widths pop-up menu on the Tools palette.
2Do one of the following:
•To change the line widths, enter the new line widths and click Set. You can enter the values in any order. When
you click Set, the line widths are sorted from smallest to largest. The widths that appear in the pop-up menu
don’t change.
•To revert to the line widths you had when you started FrameMaker, click Get Defaults.
ADOBE FRAMEMAKER 8
User Guide
321
To change the line cap style:
1Choose Set from the Line Ends pop-up menu on the Tools palette.
2Select a line cap style and click Set.
A. Butt B. Round C. Projecting
To change the dashed line style:
1Choose Set from the Line Styles pop-up menu on the Tools palette.
2Click one of the patterns and click Set.
You can also create custom dashed line styles. For information, see the online manual Customizing FrameMaker on
the Adobe website: www.adobe.com/devnet/framemaker/pdfs/Customizing_Frame_Products.pdf.
To create a dotted line that uses round dots, use a dashed line style of short dashes with a round line cap.
Changing the arrow style
You can choose from among several preset arrow styles. Arrow styles are determined by their base angle, tip angle,
and length.
A. Base angle B. Tip angle C. Length
None of the changes described here are applied automatically to existing objects. However, you can apply the new
arrow style to both new and existing objects.
To change or customize arrow styles:
1Choose Set from the Line Ends pop-up menu on the Tools palette.
2Do one of the following:
•Click a preset arrow style and click Set.
A
C
B
A
B
C
ADOBE FRAMEMAKER 8
User Guide
322
•Fill in a custom base angle, tip angle, length, and style, and then click Set. You can use the following values for the
custom options.
FrameMaker ignores the Base Angle option when you use Stick. The length you specify applies to objects that have
a line width of 1 point. When you use a thicker line width, the arrowhead is longer.
The following table contains sample custom arrows and their settings.
About frames
Text and graphics appear in rectangular frames. Text f rames control placement of the document text. Graphic frames,
which can be anchored or unanchored, control the position and look of graphics.
hold graphics related to specific text and move along with the text as you edit it. For information, see “About
Anchored Frames” on page 345.
Unanchored frames are used to crop graphics that stay in the same place on the page. You can also use unanchored
frames to hold reference art. You draw unanchored graphic frames with the Graphic Frame tool on the Tools palette.
For details, see “Cropping or masking graphics” on page 343, and “Using reference frames on reference pages” on
page 406.
Note: Graphics placed in unanchored frames will not be exported to HTML, Microsoft Word, or RTF.
Option Values
Base Angle Between 10 and 175 degrees (and at least 5 degrees greater than the tip angle)
Tip Angle Between 5 and 85 degrees
Length Between 0 and 255 points
Style Filled
Hollow
Stick
Arrow Base Angle Tip Angle Length
70 degrees 30 degrees 10 points
80 degrees 30 degrees 10 points
70 degrees 15 degrees 10 points
70 degrees 30 degrees 5 points
120 degrees 30 degrees 5 points
ADOBE FRAMEMAKER 8
User Guide
323
If you want the graphic to appear at a specific location on a page (for example, for a logo or a bleed tab), draw or
import the graphic directly on the page. If you need to crop a graphic or include it as reference art on a reference
page, you place it in an unanchored graphic frame.
A. Graphic drawn on page B. Tex t line C. Anchored frame D. Text frame for document text
You can use text frames along with graphics—for example, as callouts or captions. You can also use text frames
in anchored frames to create effects such as sidebars. For single lines of text in graphics, you can also use the Text
Line tool. For details, see “Using text with graphics” on page 323.
Using text with graphics
You can add single lines of text or text frames to a graphic.
A. Text line B. Tex t f rame
A text line is a single line of text that FrameMaker treats independently from other text. Text lines grow or shrink in
length as you edit them, but they don’t wrap to the next line. You typically use text lines for single-line callouts and
for text you want to resize in the same way that you resize other objects.
You can assign character formats and a spell-checking language to text lines. However, text lines can’t have paragraph
formats, and they can’t contain anchored frames, markers, variables, cross-references, or conditional text.
Unlike a text line, a text frame can contain more than one line of text. You use text frames for multiline callouts,
paragraphs of text, and any other text you want FrameMaker to wrap automatically from line to line. When graphics
overlap text in a text frame, you can run the text around the graphics.
When you resize a text frame created with the Text Frame tool , the font size remains the same. However, when
you resize a text line created with the Text Line tool , the font height and width change proportionally. See
“Resizing objects” on page 339.
NEW
A
B
CD
AB
D-size
Replace all ba tteries at the same
time. We recommend not mixing
similar size ba tteries with v arying
charges. Remov e ba tteries from
device if it will not be used f or an
extended period of time . DO NO T try
to recharge this ba ttery.
ADOBE FRAMEMAKER 8
User Guide
324
To add a text line to a graphic:
1Click the Text Line tool . The pointer changes to a crossed I-beam when you move it to the document
window. The small horizontal line across the pointer indicates the baseline position of the text.
2Click in the document to place an insertion point, and then type the text. FrameMaker uses the last character
format you typed or selected in the document.
Click and then type.
The text line is left aligned on its alignment point (where you clicked). For information on changing the alignment
of a text line, see “Changing indents and alignment” on page 111.
3To create several text lines, press Return at the end of one text line to create another. You can then select the text
lines independently and move them as needed.
To change the character format of text in a text line, use the font commands on the Format menu or the Character
Designer (see “Changing font properties” on page 107). To change the font of several text lines at the same time,
select the text lines as objects and change their format.
To add a text frame:
1Click the Text Frame tool .
2Drag diagonally where you want to add the text frame.
Drag and then release.
3Specify the number of columns and the gap between them, and then click Set.
4Double-click in the text frame to place an insertion point in it, and then type the text.
Double-click and then type.
Electrons
An electr on
ADOBE FRAMEMAKER 8
User Guide
325
Fixing text frames that overflow
When the text you type overflows the text frame, the insertion point moves below the bottom of the frame and the
new text doesn’t appear. The bottom border of the text frame appears as a solid line when borders are visible.
Overflowing text frame
You can enlarge the frame so the text fits, or you can connect the flow of the text frame to another frame
(see “Disconnecting text frames” on page 402). You can also decrease the font size of the text.
To enlarge a text frame:
1Control-click the text frame to select it.
2Drag a handle to enlarge the frame.
Creating reverse text
You can create reverse text (text that appears in a light color on a dark background) for special emphasis. The reverse
text can be in a text frame or a text line.
To create a reverse text frame:
1Set the desired fill pattern and color of the text frame.
2Set the text frame’s pen pattern to None.
3Change the color of the text with the Character Designer or the Paragraph Designer (see “Using a designer to
change font properties” on page 108).
Set color of text frame and then change color of text.
An electron is an
elementary particle
consisting of a
charge of negative
electricity equal to
about 1.602 X 10
—1 9
coulomb and having
a mass w hen at rest
of about 9.1 07 X 1 0
—28
gram or 1/1837 that
An electr on is an
elementary par ticle
consisting of a
charge of nega tive
electricity equal to
about 1.602 X 10 —19
coulomb and having
a mass when at rest
of about 9.107 X 10 —28
gram or 1/1837 tha t
An electr on is an
elementary par ticle
consisting of a
charge of nega tive
electricity equal to
about 1.602 X 10 —19
coulomb and having
a mass when at rest
of about 9.107 X 10 —28
gram or 1/1837 tha t
ADOBE FRAMEMAKER 8
User Guide
326
4If necessary, change the indentation and alignment of the text with the Paragraph Designer (“Changing indents
and alignment” on page 111).
Centered between equal left and right indents
To create a reverse text line:
1Draw an object to act as the background for the text. Generally, it’s best to use a nearly black fill pattern for
the object.
2Outside the background object, add a text line and type its text.
3Control-click the text line to select it.
4Move the text line so part of it disappears into the background object.
Draw object and text line and then move line part of the way.
5Choose a light color from the Color pop-up menu on the Tools palette. The text appears partially cut out of the
background object.
If the text doesn’t appear in front of the object, choose Graphics > Bring to Front. If you still have trouble, make sure
the current color view of the document shows the text line’s color as Cutout. For details, see “Viewing colors” on
page 370.
6Move the text line so all its letters appear cut out of the background object.
Choose a light color and then move the text line all the way.
An electr on is an
el ementary par ticle
co nsisting of a
ch arge of nega tive
el ectricity equal to
ab out 1.602 X 10 —19
co ulomb and having
a m ass when at
r est of about
9. 107 X 10 —28gram
Electrons Electrons
Electrons Electrons
ADOBE FRAMEMAKER 8
User Guide
327
Adding titles to illustrations
You can include a text line or text frame in a graphic as a title. You can also use a paragraph above or below an
anchored frame as a title for the frame’s graphic. However, you may find it easier to use table commands instead.
Single-cell table with table title below
You can also use multicell tables to achieve various effects with graphics and text. For example, the next example is a
two-cell table. The first cell contains several autonumbered paragraphs; the second cell contains the figure.
One-row table containing two cells
Use the guidelines provided here for setting up the paragraph formats, table formats, and anchored frames you’ll
need if you want to use single-cell tables and their titles for illustrations and their captions.
To use a table for an illustration and its title:
1Use the Table > Insert Table command to create a single-cell table wide enough for your figure.
2Use the Table > Table Designer command to specify the location of the title (see “Adding or removing table titles”
on page 160).
3Type the text of the title.
4Format the table title.
5Store the format for the table title in the Paragraph Catalog (see “Creating new formats” on page 137).
6Change the cell’s paragraph format to turn off fixed line spacing so that the size of an anchored frame can affect
the paragraph’s line spacing. For details, see “Changing spacing” on page 115.
7Create an anchored frame in the cell, anchored at the insertion point (see “Creating anchored frames” on
page 346). If necessary, the cell grows vertically to accommodate the frame’s height.
8Put the graphic in the anchored frame and resize the frame.
9If the frame is wider than the cell, change the column’s width. You can select the table cell and drag a handle to
change the width, or you can use the Table > Resize Columns command (see “Resizing columns” on page 171).
10 Store the table format in the Table Catalog (see “Creating table formats” on page 185).
D, C,AA and AAA size batteries
1
2
3
1. Electr ons enter a ba ttery at the
positive electr ode.
2. A piece of steel dr aws nega tively
charged electr ons toward it.
3. The electr ons are nega tively
charged and push one another
through the steel and out the
bottom of the ba ttery beginning
the ener gy cir cuit.

ADOBE FRAMEMAKER 8
User Guide
328
11 The next time you add a table for a figure and its title, either use the Table > Insert Table command or copy and
paste the table.
Running text around graphics
You can make the text in a text frame run around a graphic that overlaps the text. (However, text will not run around
a text line or an equation.) When a graphic is placed directly on a page or in an unanchored frame, the text can follow
the contours of the graphic, or it can align vertically at the edge of an imaginary box bounding the graphic.
Text run around contour and run around bounding box
You can also run text around anchored frames—for example, to set a small graphic or a drop cap at the beginning of
a paragraph. For information on running text around an anchored frame positioned in this way, see “Anchored
frames run into paragraph text” on page 354.
When text in a text frame runs around a graphic, FrameMaker does not feather text in that frame. See “Feathering
text to the bottom of text frames” on page 395.
To set runaround properties for a graphic:
1Draw or place the graphic on a page. When you place the graphic on a master page, it appears as a background
graphic on all associated body pages. You can then make the text on all the associated body pages run around
the graphic.
Make sure you click in the page margin before importing or pasting the graphic. Otherwise, the document may
contain an insertion point, which will cause the graphic to be placed in an anchored frame.
2Select the graphic. If the graphic is made up of several objects, select all the objects.
3If you want to run text around the contour of an imported graphic, make sure the graphic is behind the text frame.
To do so, select the graphic and choose Graphics > Send to Back.
4If the graphic’s runaround properties aren’t set as you want them, choose Graphics > Runaround Properties, and
do one of the following:
•To make text run around the graphic, click a runaround style and enter a gap.
•To prevent text from running around the graphic, click Don’t Run Around.
Note: If the Style setting is As Is when you display the Runaround Properties dialog box, you selected several graphics
that have different runaround properties.
5Click Set.
If the settings don’t produce exactly the results you want, add an object (with a pen and fill pattern of None) near
the graphic to create the desired contour for the text to run around.
An electr on is an
elementary par ticle
consisting of a
charge of
negative
electricity
equal to
about
1.602 X 10 —19
coulomb and
having a mass
An electr on is an
elementary par ticle
consisting
of a char ge
of nega tive
electricity
equal to
about
1.602 X 10 —19
coulomb
and having a mass

ADOBE FRAMEMAKER 8
User Guide
329
Editing and arranging objects
You can edit and arrange objects in a number of ways:
•You can move, duplicate, and delete objects.
•You can connect objects as you draw, resize, or reshape them.
•You can rearrange objects in relation to one another by changing their stacking order, aligning them, and spacing
them apart.
•You can join individual lines and curves to create complex outlines, which you can then fill or color.
Cutting, copying, pasting, and deleting objects
You can use the Edit menu commands to cut, copy, and paste objects to and from the Clipboard. When you use Edit >
Cut or Edit > Copy, the cut or copied objects remain on the Clipboard until you choose Cut or Copy again.
You can also duplicate or delete objects quickly without using the Edit menu commands.
To cut, copy, and paste an object by using the Clipboard:
1Select the object and choose Edit > Cut or Edit > Copy.
2Do one of the following:
•To paste the object on a page, click in the margin of the page.
•To paste the object in an existing graphic frame, click the frame’s border to select the frame.
•To paste the object in text, click in the text where you want to paste the object.
3Choose Edit > Paste. When you paste the object in a graphic frame or on a page that is the same size as the one
from which you copied or cut the object, FrameMaker puts the object in the same relative location. Otherwise,
FrameMaker centers the object.
When you paste an object into text, FrameMaker creates an anchored frame to hold the object, and centers the object
in the frame. An anchor symbol appears at the insertion point when text symbols are visible.
To copy an object by dragging:
1Select the object.
2Point on the object (not on a handle), and do one of the following:
•(Windows) Alt-drag the duplicate of the object, or right-drag the object and then choose Copy Here from the
shortcut menu that appears. To constrain the duplicate’s movement to either a horizontal or vertical direction,
hold down Shift while you drag.
•(UNIX) Control-drag the duplicate of the object with the middle mouse button. To move the duplicate in any
direction, release the Control key and the mouse button after you make the duplicate. Then drag the duplicate
where you want it. Holding down Shift constrains the duplicate’s movement.
To delete an object:
❖Select the object and press Delete.

ADOBE FRAMEMAKER 8
User Guide
330
Moving objects
You can quickly move an object by dragging it, or you can make small position adjustments by moving the object
with the arrow keys. You can also specify its exact position by using a dialog box. To move an object by dragging it,
you must drag its border (not a handle).
To move an object by dragging:
1Select the object.
2Do one of the following:
•Drag in the direction you want to move the object.
•To move the object horizontally or vertically, Shift-drag.
•To move an object into a graphic frame, drag it until the pointer is in the frame.
•To move an object out of a graphic frame, drag it until the pointer is outside the frame. As you drag, the frame’s
border may temporarily crop the object.
When you drag the object, the status bar shows the distance from the upper left corner of the object to the upper left
corner of the page (or frame, if the object is in a graphic frame). When rulers are visible, lines in the rulers show you
the object’s position. If the snap grid is on, objects snap to the invisible grid as you drag them.
If your screen does not redraw properly when moving an object, press Ctrl+l (lowercase L) to redraw the screen.
To move an object in small increments:
❖Select the object and do one of the following:
•(Windows) Hold down Alt and press an arrow key to move 1 point, or hold down Alt+Shift and press an arrow
key to move 6 points. However, do not use an arrow key on the numeric keypad.
•(UNIX) Hold down Control and press an arrow key to move 1 point, or hold down Shift+Control and press an
arrow key to move 6 points.
The preceding distances assume a 100% zoom setting. The actual distance moved depends on the current zoom
setting, so you can do finer work when you’re zoomed in closer. For example, at 200% zoom, the distance is halved.
At 50% zoom, the distance is doubled.
To specify the exact position of an object:
1Select the object and choose Graphics > Object Properties.
2Do one of the following:
•For all objects except text lines and equations, specify the offset from the top and left edges of the page or graphic
frame in the Offset From area.
A. Offset from left B. Offset from top
A
B
ADOBE FRAMEMAKER 8
User Guide
331
•For text lines and equations, specify the offset in the Alignment Point Offset area.
Left-aligned text line
A. Offset from left B. Offset from top
3Click Set.
Changing the stacking order of objects
When you draw or paste an object, FrameMaker places it in front of all other objects on the page or in a graphic
frame. You can control how objects overlap by putting them in front of or in back of other objects.
Circle in front and circle in back
To change the stacking order of objects:
❖Select one of the objects and do one of the following:
•To put an object in front of other objects, choose Graphics > Bring to Front.
•To put an object in back of other objects, choose Graphics > Send to Back.
To create a drop shadow, stack two objects and offset them slightly.
Aligning objects
You can align objects (except graphic frames) with one another in the following ways:
•You can align objects along a horizontal line by specifying the top/bottom alignment.
Bottoms aligned and top/bottom centers aligned
Electrons
A
B
ADOBE FRAMEMAKER 8
User Guide
332
•You can align objects along a vertical line by specifying the left/right alignment.
Left sides aligned and left/right centers aligned
To align objects:
1Select the objects and choose Graphics > Align. To align a single object in a graphic frame or on a page—for
example, along the left side of a graphic frame—select only the object you want to align.
2Choose the alignment you want and click Align. To align objects in only one direction, set the other direction
to As Is.
FrameMaker aligns the objects—along their paths—with the last object you select. For example, “Top Align”
will align selected objects with the last selected object and may not be the object that is currently highest in the
anchored frame.
If you selected objects by dragging a selection border, FrameMaker aligns the objects with the object in
the foreground.
Aligning text lines
When you create a text line, it is left aligned on its alignment point (where you clicked). You can change the
alignment to centered or right aligned. FrameMaker then maintains the text line’s alignment when you insert text.
Centered text line remains centered as you type.
To change the alignment of a text line:
1Select the text line and choose Graphics > Object Properties.
2Choose a new alignment from the Alignment pop-up menu and click Set.
Negative Electron
Electron

ADOBE FRAMEMAKER 8
User Guide
333
Distributing objects
You can move objects—distribute them—so they have an equal amount of space between them. You can distribute
objects horizontally and vertically.
Objects before and after distributing (with zero edge gap)
Equidistant centers and equidistant edges
If you specify the exact space between the objects (the edge gap), FrameMaker moves all objects except the one at
the left or top. If you specify that the objects’ centers or edges should be equidistant, FrameMaker leaves the left and
right, or top and bottom, objects where they are and moves the others.
To distribute objects:
1Select the objects and choose Graphics > Distribute.
2Choose the spacing you want and click Distribute. To distribute objects in only one direction, set the other
direction to As Is.
When you specify a large edge gap, objects may move off the page and disappear from sight. If they do, immediately
choose Edit > Undo.
About gravity
With Gravity on, an object attracts the pointer as you draw, resize, or reshape a nearby object. Gravity has no effect
when you move objects.
Objects have gravity along their paths and at their corners. Rectangles and ovals also have gravity at their centers.
Some points on an object exert a greater pull than others. For example, the corners of a triangle attract the pointer
more than its sides do.
Gravity extends the same distance on the screen regardless of the zoom setting. When you zoom in, objects and the
space between them appear larger, so you can drag a handle or draw closer to an object without the object attracting
the pointer.
ADOBE FRAMEMAKER 8
User Guide
334
Making objects touch
It’s easier to make objects touch when you use “gravity.” If Gravity and Snap are both selected in the Graphics menu,
gravity takes precedence. For information on the snap grid, see “Using grids” on page 311.
To make two objects touch each other:
1If Gravity isn’t already on, choose Graphics > Gravity.
2Drag a handle of an object, or draw an object, close to the object to which you want to connect. As you drag, the
handle jumps so the two objects touch each other.
Gravity ensures perfect alignment.
Making lines intersect cleanly
Depending on their properties and the angle between them, two connected lines may appear not to intersect cleanly.
For example, lines intersect cleanly when they are the same thickness, meet at right angles, and use a projecting cap;
lines don’t intersect cleanly when they use a projecting cap but don’t intersect at right angles. Notice the different
intersections created by using the three line cap styles.
A. Projecting B. Butt C. Round
To make lines intersect cleanly:
❖Do one of the following:
•If the lines don’t meet at a right angle, try a round cap for both lines.
•If the lines aren’t the same thickness, try a butt cap for the thinner line when the lines meet at their endpoints and for
the stem of a T when they meet in a T.
For information on changing the line cap style, see “Changing line properties” on page 320.
A
B
C
ADOBE FRAMEMAKER 8
User Guide
335
Grouping and ungrouping objects
When several objects (except graphic frames) are part of the same graphic, you can group the objects. You can then
edit and arrange them as a single object.
You can combine a group of objects with other objects to form an even larger group. Because FrameMaker groups
and ungroups objects hierarchically, the first set of grouped objects is maintained as a set when you group other
objects with it.
For information on joining objects to create a single continuous object, see “Joining lines and curves” on page 335.
To group objects:
❖Select the objects and choose Graphics > Group. One set of handles appears around the group.
Objects selected and then grouped
To ungroup objects:
❖Select the group and choose Graphics > Ungroup. Handles appear on each object in the group. When a group has
been grouped with other objects, you must choose Ungroup more than once to ungroup all objects.
Joining lines and curves
You can create complex outlines by joining individual lines, polylines, arcs, and smoothed polylines that were created
with FrameMaker drawing tools. Joining creates a single continuous curve. You can then change the new curve’s
properties, such as its line width, pen and fill patterns, and color.
Objects drawn, and then positioned and selected
Objects joined, and then fill pattern added
ADOBE FRAMEMAKER 8
User Guide
336
To join lines and curves:
1Position the objects so that their endpoints touch. The ends of the lines or curves must be within 1 point of each
other and the objects cannot be grouped. If necessary, choose Graphics > Gravity and zoom in.
2Select the objects and choose Graphics > Join. The new curve takes on the properties of the last object selected
before joining—for example, the object’s line width, pen pattern, or color. (In the preceding illustration, the last
object selected before joining was the arc.)
Note: If you join lines or curves by mistake, immediately choose Edit > Undo. Joining creates a single continuous object
that cannot be “unjoined” at a later time in the way that grouped objects can be ungrouped.
Flipping objects
You can create a mirror image of an object by flipping it up and down or left and right.
A. Original B. Flipped up/down C. Flipped left/right
To flip an object:
❖Select the object and choose Graphics > Flip Left/Right or Graphics > Flip Up/Down. If the object contains text,
the text isn’t flipped. For example, the text in a flipped text line doesn’t appear flipped, but the alignment point of the
text line is flipped.
To create a symmetrical object:
1Draw one half of the object and copy it.
Draw and then make a copy.
2Flip the copy and move it until it touches the original.
Flip and then move.
ABC
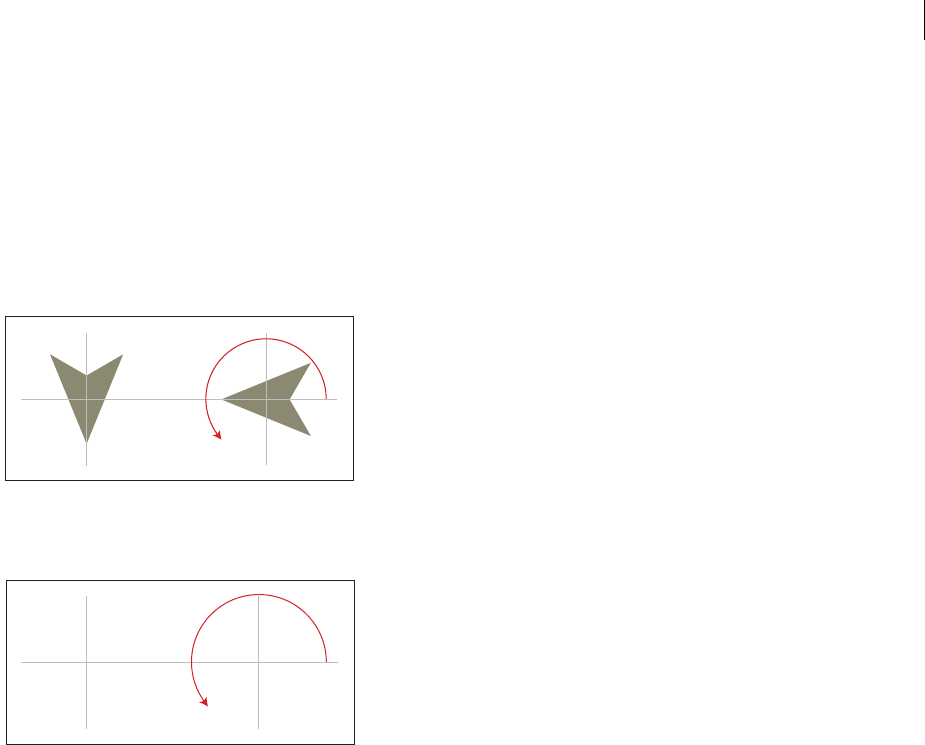
ADOBE FRAMEMAKER 8
User Guide
337
Rather than move the duplicate to the original, you can use the Distribute command with an edge gap of zero (see
“Distributing objects” on page 333) to ensure exact alignment of the objects.
Rotating objects
You can rotate all objects (except equations and graphic frames) any number of degrees. You can rotate graphic
frames and equations in 90-degree increments.
All objects (except equations and text lines) rotate around their centers.
Rotating objects
Equations and text lines rotate around their alignment points.
Rotating text
You may find it easier to edit objects—for example, to align and distribute them—in their unrotated position. After
you edit an object, you can rerotate the object to restore it to its rotated position.
Note: If you rotate an imported PICT image or a page containing an imported PICT image, the image may print poorly.
To improve printing, convert the image to TIFF or EPS and reimport the image.
To rotate an object by dragging:
1Select the object.
2Do one of the following:
•(Windows) Hold down Alt and drag a handle.
•(UNIX) Hold down Control and drag a handle with the right mouse button.
When the snap grid is on, the object snaps to multiples of the angle specified in the View Options dialog box
(see “Using grids” on page 311). To constrain the rotation to 45-degree increments, also hold down Shift while
you drag.
To rotate an object precisely from its current position:
1Select the object and choose Graphics > Rotate.
2Specify the direction and amount of rotation and click Rotate. If you rotate several ungrouped objects in this way,
each object rotates around its center.
Electron
Electron
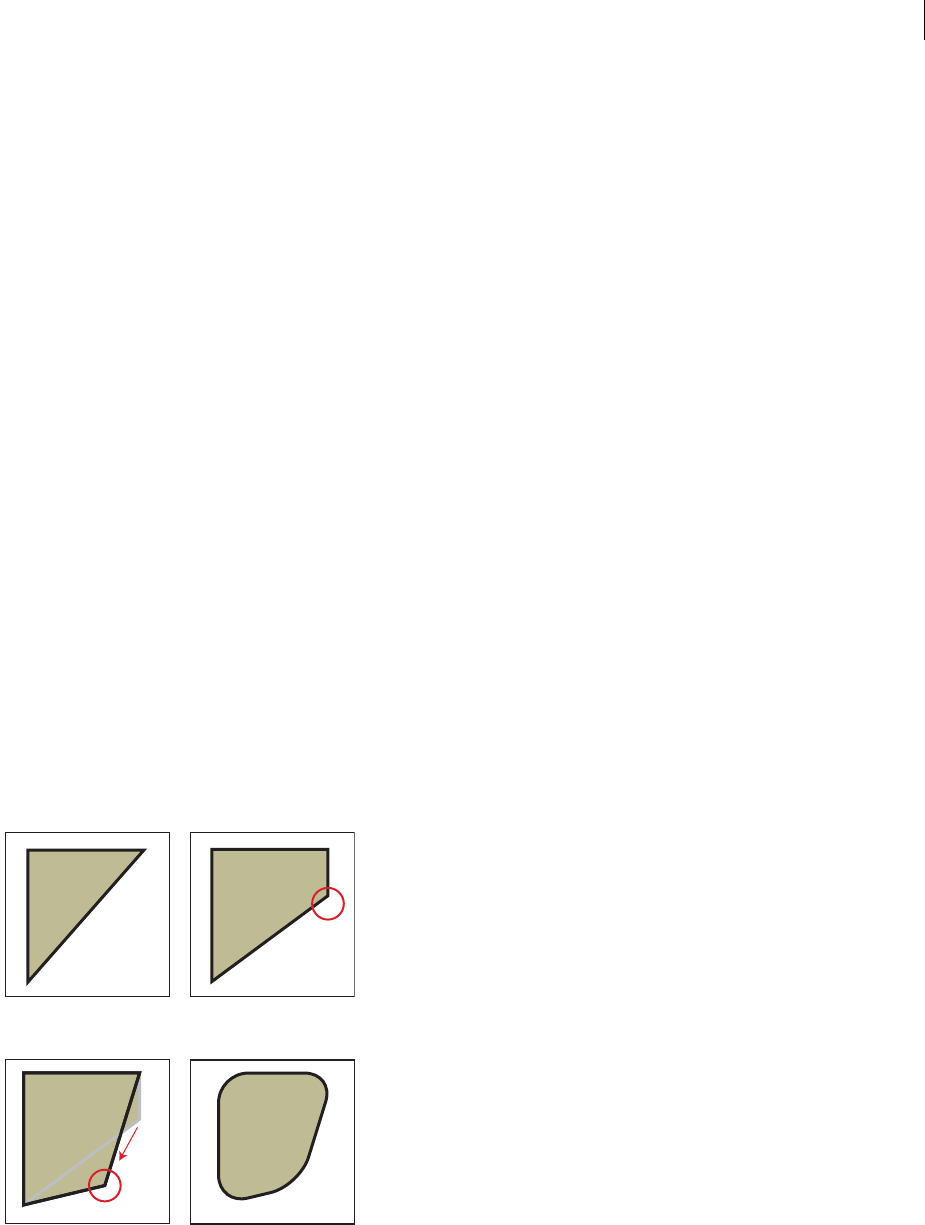
ADOBE FRAMEMAKER 8
User Guide
338
To rotate an object precisely from its unrotated position:
1Select the object and choose Graphics > Object Properties.
2Enter the angle in the Angle text box and click Set.
To quickly unrotate or rerotate an object:
❖Do one of the following:
•To unrotate an object (change it to its unrotated position), press Esc g 0 (zero).
•To rerotate an object (after unrotating it), press Esc g 1 (one).
To reset the rotation of a polygon, polyline, freehand curve, or grouped object to zero:
❖Select the rotated object and press Esc g 9. The object’s rotation doesn’t change, but its handles are repositioned
around the object so that they are parallel to the window borders.
To rotate an equation or graphic frame:
1Select the object and choose Graphics > Rotate.
2Click the rotation angle you want (in 90-degree increments) and click Rotate. You specify the rotation from the
equation’s or frame’s unrotated position.
To inspect the rotation angle:
❖Select the object and choose Graphics > Object Properties. For equations and graphic frames, you can also choose
Graphics > Rotate. The rotation angle appears in the dialog box.
Resizing and reshaping objects
As you refine a graphic, you can change the size and shape of objects. Reshaping possibilities are unlimited. For
example, you can add a corner to a polyline or polygon, move a corner to change its shape, and smooth a polyline to
create a freehand curve.
Original polygon and then with corner added
Corner moved and then smoothed

ADOBE FRAMEMAKER 8
User Guide
339
Resizing objects
You can resize all objects, including text lines. When you resize a text frame created with the Text Frame tool , the
text remains the same size. When you resize a text line created with the Text Line tool , the font height and width
change proportionally.
Before and after resizing a text line (not a text frame)
To resize an object by dragging:
❖Select the object and do one of the following:
•To change either the width or the height, drag a side handle.
•To change both the width and the height, drag a corner handle.
•To increase or decrease the dimensions proportionally, Shift-drag a corner handle.
The object’s dimensions appear in the status bar as you drag.
To resize an object precisely:
1Select the object and choose Graphics > Scale.
2Do one of the following:
•To increase or decrease the height and width proportionally, enter a scale factor and click Scale. The scale factor
is always relative to the object’s current size (100% means no change).
•To specify the exact dimensions you want, enter the dimensions and click Scale. The dimensions shown when you
display the dialog box are the object’s current (unrotated) dimensions.
Resizing imported graphics
You can resize imported graphics back to the original size.
To resize your imported graphics back to 100%:
1Select the object and choose Graphics > Object Properties.
2For Scaling Percent, type100%, and click Set.
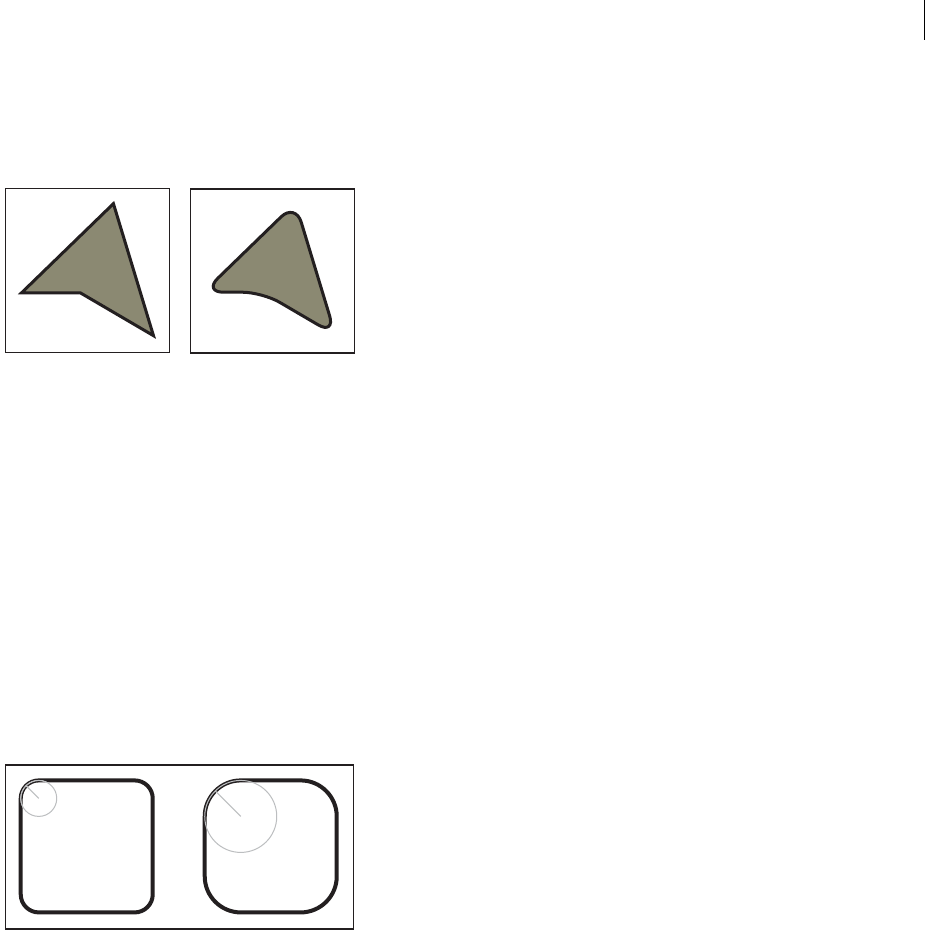
ADOBE FRAMEMAKER 8
User Guide
340
Smoothing and unsmoothing objects
You can smooth polylines, polygons, rectangles, and rounded rectangles. When you smooth a polyline, polygon, or
rectangle, you change its angles to smooth curves. When you unsmooth a curve, you restore its angles.
Before and after smoothing
Each time you smooth a rounded rectangle, you increase the curvature of its corners (its corner radius).
To smooth an object:
❖Select the object and choose Graphics > Smooth. After smoothing a polygon or polyline, reshape handles and
control points appear so you can reshape the curve (see “Reshaping objects” on page 341).
To unsmooth an object:
❖Select the object and choose Graphics > Unsmooth. If you later smooth the object, its shape may be somewhat
different from the original.
Changing the corner radius of a rounded rectangle
You can define the curvature of the corners of a rounded rectangle by specifying the radius of an imaginary circle
drawn in the corner of a rectangle. The longer the radius, the more curved the corners.
Radius (r) = .125" and radius (r) = .25"
When you specify a corner radius, you also change the current drawing properties. New rounded rectangles you
draw have this corner radius until you change it with the Object Properties command or until you exit FrameMaker.
To change the corner radius of a rounded rectangle:
1Select a rounded rectangle and choose Graphics > Object Properties.
2Enter the corner radius and click Set. The largest meaningful radius is one-half the length of the shortest
rectangle side. For example, if the rectangle is 2 inches by 4 inches, the largest meaningful radius is 1 inch (one-half
of 2 inches).
rr
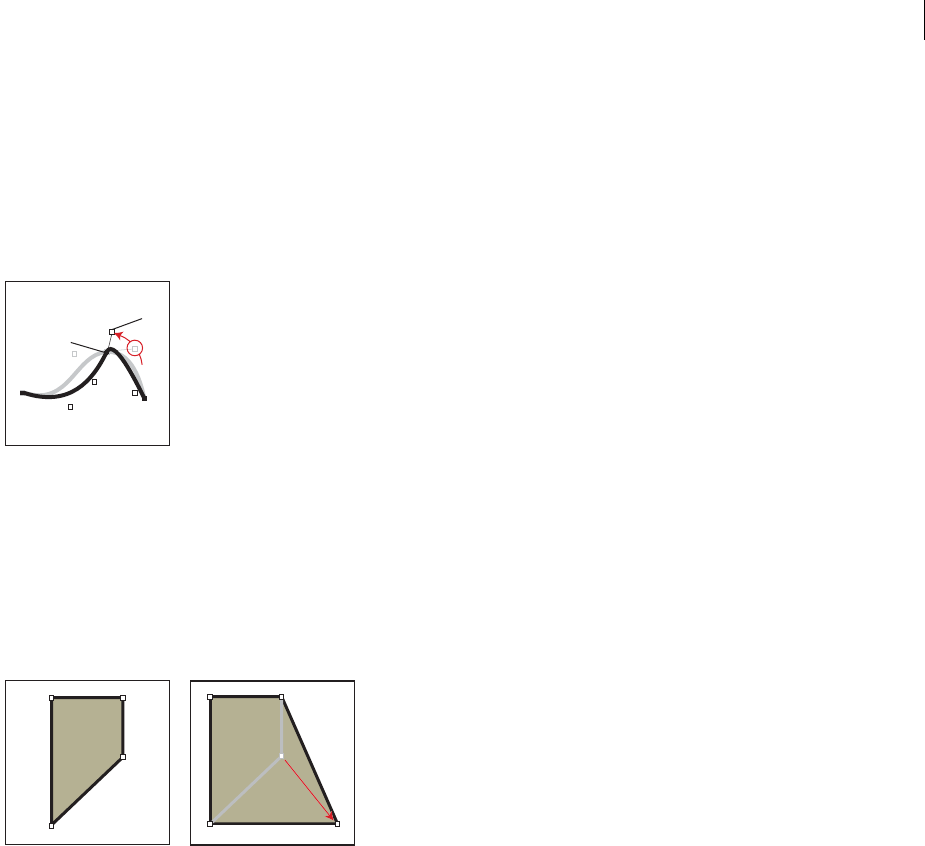
ADOBE FRAMEMAKER 8
User Guide
341
Reshaping objects
You can change the shape of lines, polylines, polygons, curves, and arcs as follows:
•Reshape a line, polyline, or polygon by moving its corners one at a time. You can also add and remove corners.
•Reshape a curve by changing the position of its reshape handles (which define the curve and control its location)
and its control points (which adjust the curvature). You can also add and remove reshape handles to change the
number of points that define the curve.
A. Reshape handle B. Control point
•You reshape an arc by dragging its endpoints or by changing the percentage of a circle that the arc represents.
To move a corner of a polyline or polygon:
1Select the object and choose Graphics > Reshape. Reshape handles appear on the object, replacing the
selection handles.
2Drag a handle. To move the handle horizontally or vertically, Shift-drag.
Choose Reshape and then drag.
To add or remove a corner or reshape handle:
1Select the line, polyline, polygon, or curve, and choose Graphics > Reshape.
2Do one of the following:
•(Windows) Control-click where you want to add a reshape handle (or corner), or Control-click the handle you
want to remove.
•(UNIX) Middle-click where you want to add a reshape handle (or corner), or middle-click the handle you want
to remove.
To reshape a curve:
1Select the curve and choose Graphics > Reshape. Reshape handles appear at the locations that define the curve.
Control points also appear around one of the handles.
2If the control points aren’t the ones you want, click the handle where you want to change the curve. Control points
appear around the handle that you click—the two control points that correspond to the handle and the next closest
one on each side of the handle.
B
A
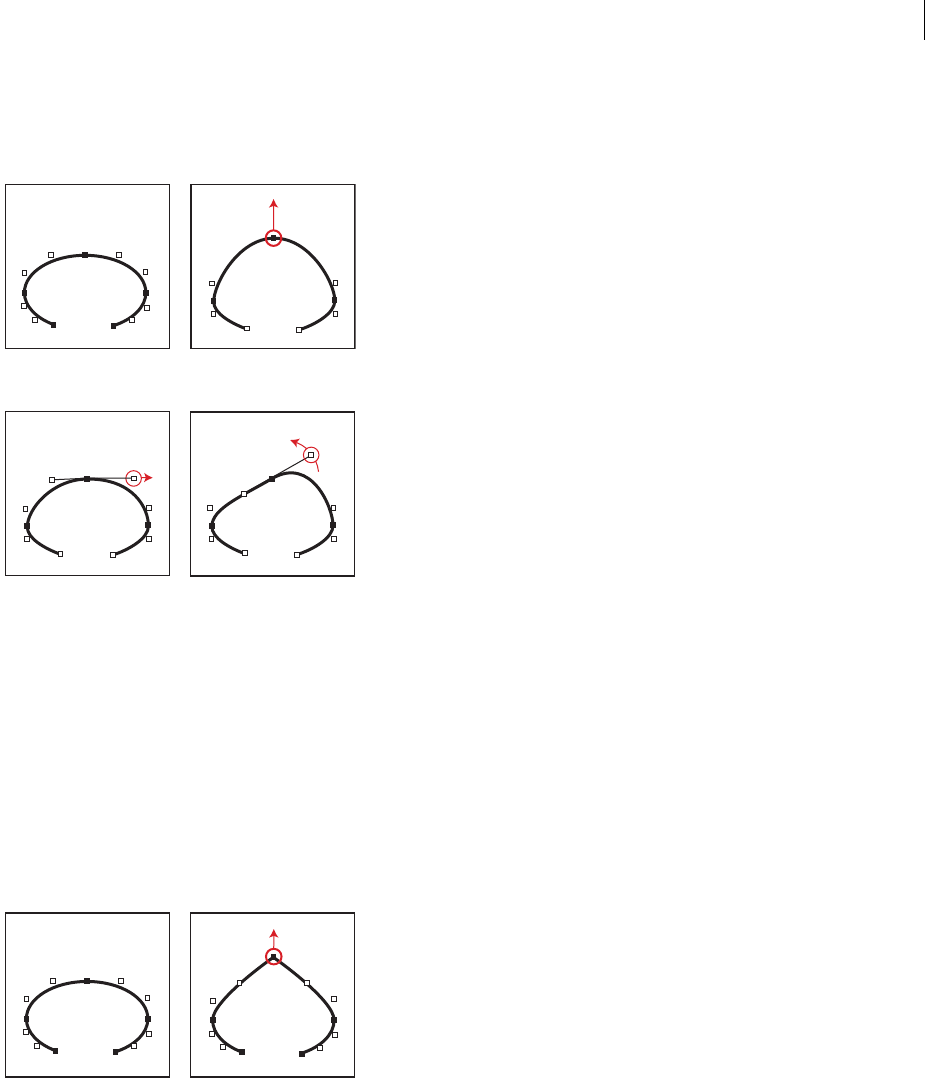
ADOBE FRAMEMAKER 8
User Guide
342
3Drag a handle to change the position of the curve at the handle, or drag or rotate a control point to change the
curvature. When you begin to drag, a lever appears that touches the curve at the handle. You can achieve different
effects by dragging along the lever or by rotating it.
Choose Reshape and drag handle.
Drag a control point.
As you drag a reshape handle, the control points move as well, so the result is a smooth curve. As you drag a control
point, the curvature changes on both sides of the handle, so the result is also a smooth curve.
To crimp a curve:
1Select the curve and choose Graphics > Reshape.
2If the control points aren’t the ones you want, click the reshape handle where you want to change the curve.
3Do one of the following:
•(Windows) Drag a handle or control point with the right mouse button.
•(UNIX) Control-drag a handle or the control point.
Crimping a curve.
To reshape an arc by dragging:
1Select the arc and choose Graphics > Reshape. Reshape handles appear on the object, replacing the
selection handles.
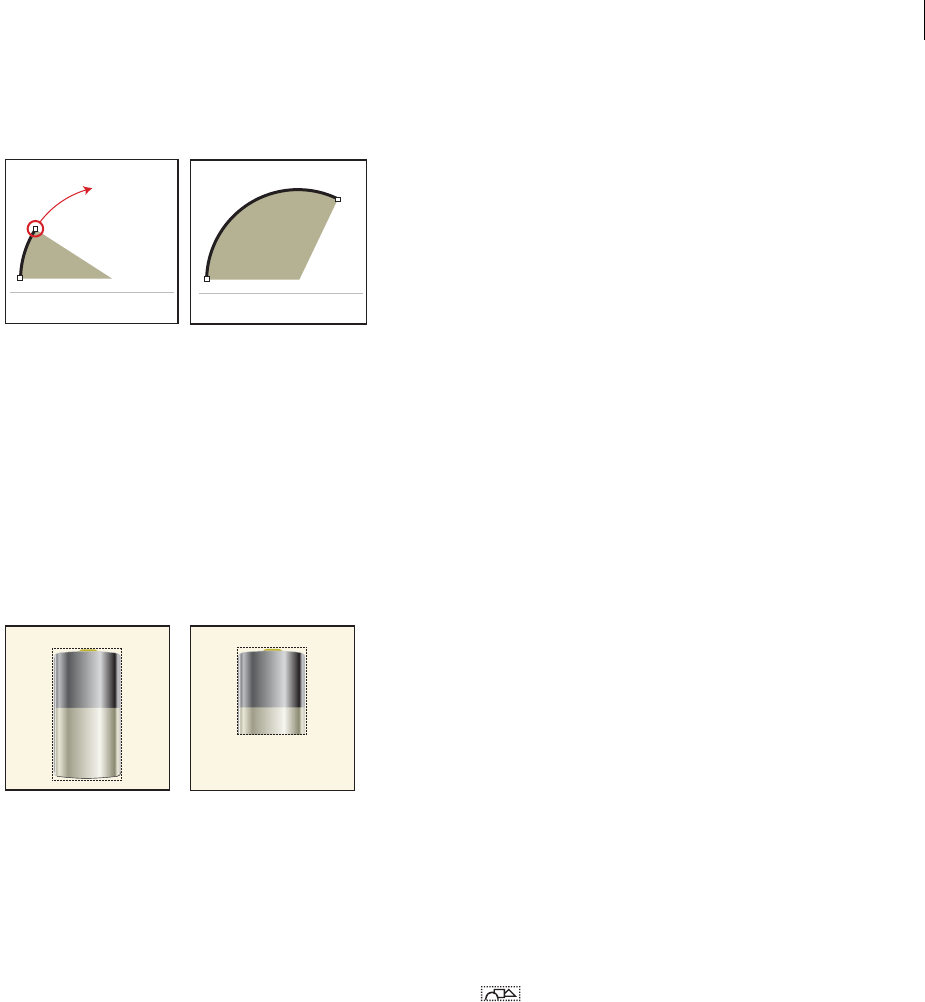
ADOBE FRAMEMAKER 8
User Guide
343
2Drag a handle. As you drag, the start and end angle of the arc and the percentage of a circle that the arc represents
appear in the status bar.
Drag to reshape an arc.
To reshape an arc precisely:
1Select the arc and choose Graphics > Object Properties.
2Enter a new Start Angle and End Angle, and click Set.
Cropping or masking graphics
When you want to crop the edges of a graphic, place the graphic in an anchored or unanchored graphic frame. An
anchored graphic frame moves with the surrounding text. An unanchored graphic frame stays wherever you place
it on a page, even when the text around it moves as the result of editing.
Uncropped and cropped graphics in graphic frames
When you want to mask an area of a graphic, particularly if the part you want to mask is in the middle of a graphic,
you can cover the area with nonbordered objects.
To crop the edges of a graphic:
1Do one of the following to create a graphic frame:
•To create an unanchored frame, click the Graphic Frame tool on the Tools palette and then drag to draw the
frame. To draw a square frame, Shift-drag.
•To create an anchored frame, use Special > Anchored Frame (see “Creating anchored frames” on page 346).
2Do one of the following to put the graphic in the frame:
•Drag the graphic into the frame.
•Select the graphic, choose Edit > Copy or Edit > Cut, select the frame border, and then choose Edit > Paste.
3Resize the frame around the graphic.
To mask an area within a graphic:
❖Put graphic objects (such as rectangles and polygons) with a white fill and pen pattern in front of the parts you
want to mask.
Arc: 270 - 306 10% Arc: 270 - 27 32.5%
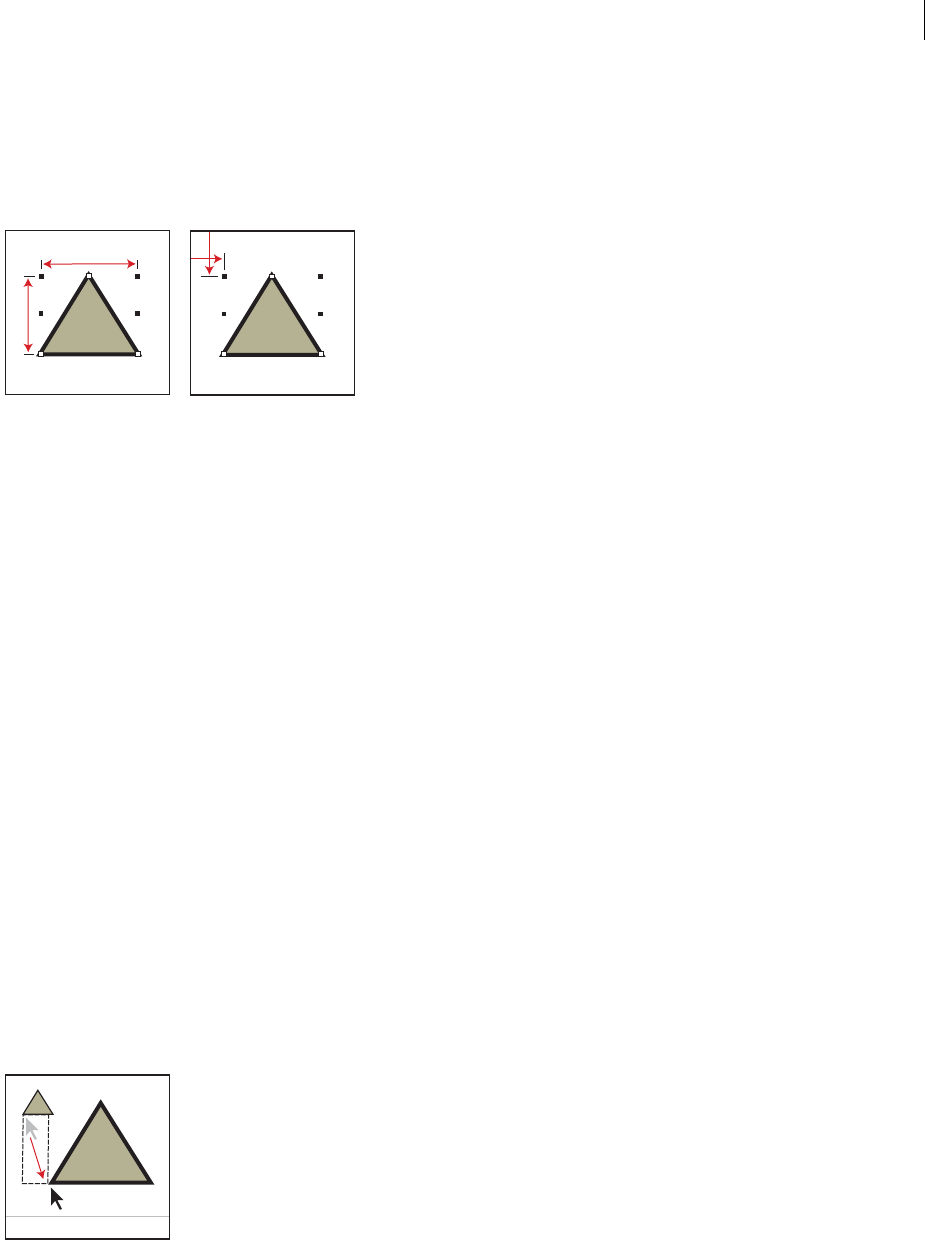
ADOBE FRAMEMAKER 8
User Guide
344
Measuring objects
As you arrange and resize objects in an illustration, you may want to know an object’s dimensions and exact position.
The size of an object is the size of the rectangle that encloses its path. The position is the distance from the top and
left edges of the page or graphic frame.
Object size and object position
To measure an object:
❖Do one of the following:
•Select the object and choose Graphics > Object Properties. The width and height of the object appear in the Size
area of the Object Properties dialog box.
•With Snap off, select the object, point on one of its handles, and hold down the mouse button. The dimensions
appear in the status bar. If you move the mouse by mistake and resize the object, immediately choose Edit > Undo.
To view the position of an object:
1Select the object.
2Choose Graphics > Object Properties. For all objects except equations and text lines, the distance from the upper
left corner of the page or graphic frame to the object’s topmost and left-most point appears in the Offset From area.
For equations and text lines, the distance from the upper left corner of the page or graphic frame to the alignment
point at the baseline of the text line or equation appears in the Alignment Point Offset From area.
To view the position of an object as you move it:
❖Look in the status bar. The distance between the object and the upper left corner of the page or graphic frame
appears in the status bar. When rulers are visible, guidelines in the rulers also show the position of the object.
To measure any distance on the page:
1Point where you want to start measuring.
2Shift+Control-drag to force a selection border to appear, but don’t release the mouse button.
3When the selection border encompasses the area you want to measure, look in the status bar for the dimensions.
Dimensions appear in the status bar.
In the example, the important dimension is the height (35 points between the bases of the triangles).
W: 13 pt h: 35 pt

ADOBE FRAMEMAKER 8
User Guide
345
About graphic elements in structured documents
When working with structured documents, you use special elements to place graphics. A graphic element provides
an anchored frame for holding graphic objects. The frame is anchored to a specific location in text. As you edit the
text, the frame and its contents move in the document along with the text. The element appears in the document’s
structure, but the graphic or equation itself is not part of the structure.
For information on anchored frames, see “Creating anchored frames” on page 346. For information on importing
graphic elements into structured documents, see “Using structured documents in FrameMaker” on page 58.
Types of graphic elements in structured documents
A new graphic element is either an empty anchored frame or an anchored frame with an imported graphic. When
you insert the element, its format rules determine whether you see a dialog box for setting up a frame or for
importing a graphic file:
•For an element that is an empty anchored frame, you specify the size of the frame, its anchoring position, and some
formatting properties such as alignment. You can fill in the frame by drawing, pasting, or importing graphic
objects in it.
•For an element that is a frame with an imported graphic, you specify the file to import. The graphic appears below
the line with the anchor symbol, in a frame just large enough for it.
After you’ve inserted a graphic element, you can put different contents in the frame, resize the frame, change
the anchoring position, and edit the frame in other ways. These changes are not considered to be format
rule overrides.
About Anchored Frames
You often need to keep an illustration with particular document text. In FrameMaker, you do this by putting the
illustration in a graphic frame anchored to the text—an anchored frame. When you edit the text, the frame and its
contents move along with the text automatically.
You can use an anchored frame for an illustration in a column of text—below the line that contains the anchor
symbol , or at the top or bottom of the column. You can use an anchored frame for small graphics that appear in
line with paragraph text or for art that appears between columns or in the page margin.

ADOBE FRAMEMAKER 8
User Guide
346
You can also use an anchored frame to achieve special effects such as positioning an anchored frame in the top corner
of a paragraph with the paragraph text running around the graphic.
A. Graphic in the top corner of a paragraph
B. Illustration in a column of text C. Margin art
D. Small graphic in a line of text
If you want an illustration to stay at a specific place on the page—for example, as a logo on letterhead stationery—
don’t use an anchored frame. Instead, draw, paste, or import the illustration directly onto a body or master page
without placing an insertion point in the text. Then move the illustration to the desired position. (For information
on working with master pages, see “Displaying master pages” on page 383.)
By default, an anchored frame has no pen or fill pattern, which makes it invisible on the page unless borders
are visible.
Creating anchored frames
An anchored frame is created automatically when you paste or import a graphic at an insertion point. You can keep
the properties assigned to the frame, or you can change them.
When you create an anchored frame using the Special > Anchored Frame command, you specify the location of the
frame and its size and position. You can also specify other properties that depend on the frame’s position. For
example, when the frame is placed in the line at the insertion point, you can specify its distance from the baseline of
the text. When the frame is placed in a column of text, you can specify its alignment. You can change any of the
properties, including the frame’s position, at any time.
When you create an anchored frame, you can use Object Properties to set unique tags to your anchor. These tags
simply create a structure for the layout of your document. You can uniquely define an element for your frame that
maps to tags in your PDF format.
When you tag your document, you name each document property. This will allow you to easily change the look and
feel of your document without changing the content.
For details, see “Editing anchored frames” on page 359.
To create an anchored frame automatically:
❖Do one of the following:
•Paste an object into text at the insertion point by cutting or copying the object, clicking in text where you want to
insert the anchor symbol, and choosing Edit > Paste.
C
A
D
B
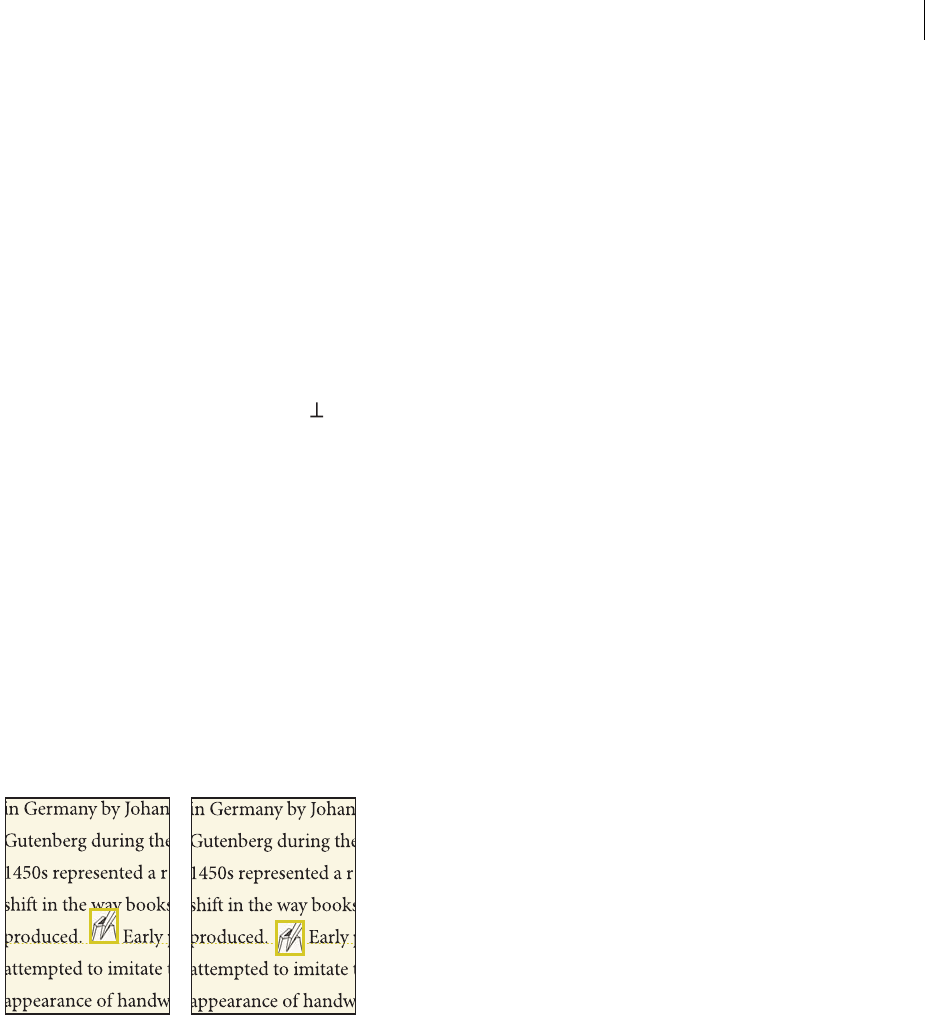
ADOBE FRAMEMAKER 8
User Guide
347
•Import a graphic into text by clicking in text, choosing File > Import > File, and selecting the graphic file you want
to import. You can also import a graphic in other ways, depending on the platform. (See “Choosing the right
method for importing and linking” on page 501.
The pasted or imported object appears in an anchored frame that is centered below the current line. Once the frame
is created, you can change its properties. For details, see “Editing anchored frames” on page 359.
To create an anchored frame with specific options:
1Click in text where you want to place the anchor symbol and choose Special > Anchored Frame. You can create
an anchored frame in a text frame or in a table cell, but not in a text line.
2Choose the frame’s anchoring position and specify its properties. The properties that appear in the Anchored
Frame dialog box depend on the anchoring position.
3Click New Frame. An anchor symbol appears at the insertion point when text symbols are visible.
To create a tag for an anchored frame:
1Select your anchored frame, and choose Graphics > Object Properties.
2For Tag, type the desired name, and click Set.
In-line anchored frames
To position an anchored frame in line with paragraph text—for example, to hold a small graphic such as a picture of
a keycap—choose the At Insertion Point anchoring position in the Anchored Frame dialog box. When you put a
space on either side of the anchored frame, the frame moves along from one line to another as you edit the document,
as if it were a word (rather than being attached to the preceding or following word).
You can adjust the frame’s position up or down relative to the baseline of text by dragging the frame or by specifying
a value for the Distance above Baseline option in the Anchored Frame dialog box. A value of zero aligns the bottom
of the frame with the baseline of the text. A positive number moves the frame up; a negative number moves it down.
Zero distance and negative distance
ADOBE FRAMEMAKER 8
User Guide
348
If the frame obscures text in the line above or below, turn off fixed line spacing to allow the line height to change with
the contents of the line (see “Changing spacing” on page 115).
Fixed line spacing on and off
To shrink an anchored frame to the dimensions of its contents and place it in the line at the anchor symbol,
select the frame or an object in the frame and press Esc m p. To enlarge a frame and place it below the line that
contains the anchor symbol, select the frame or an object in it and press Esc m e.
Anchored frames in a column of text
To position an anchored frame in a column of text, choose the Below Current Line, At Top of Column, or At Bottom
of Column anchoring position in the Anchored Frame dialog box.
Below current line and at top of column
An anchored frame positioned at the top or bottom of the column moves only when its anchor symbol moves to
another column.
Important: To place an anchored frame below a line that contains a run-in head, place the anchor symbol in the body
paragraph, not in the run-in head. Otherwise, the anchored frame obscures the text below the run-in head.
ADOBE FRAMEMAKER 8
User Guide
349
When you choose the Below Current Line, At Top of Column, or At Bottom of Column anchoring position, you can
set the following properties.
Horizontal alignment Choose the frame’s horizontal alignment from the Alignment pop-up menu. You can align the
frame at the left, center, or right. In a double-sided document, you can also align the anchored frame closer to or
farther from the binding edge.
Farther from binding
Cropping To prevent a wide frame from extending beyond the edge of the column, use the Cropped option.
Cropped off and on
For information on how cropping works in a multicolumn layout, see “Anchored frames in multicolumn layouts” on
page 350.
Floating Use the Floating option to let the frame float to the next column that can hold it if the frame and its anchor
symbol won’t fit in the same column.
Floating off and on
When Floating is off, both the frame and anchor symbol move to the first column that can hold them. White space
remains at the bottom of the column. When Floating is on, the anchor symbol doesn’t move, but the frame floats to
the next column that can hold it. Text from the next column fills the space between the anchor symbol and the frame.
ADOBE FRAMEMAKER 8
User Guide
350
Anchored frames in multicolumn layouts
An anchored frame in a multicolumn text frame can straddle columns, and its position may be affected by
straddle paragraphs.
In a straddle paragraph When a frame is anchored in a straddle paragraph, the frame straddles columns just as the
paragraph does.
Wider than a column An uncropped anchored frame that extends into a second column of the body area straddles
columns in the body area. A frame that extends into the side-head area straddles the side-head area as well.
Straddling side-head area and all columns, and straddling only columns
A cropped anchored frame straddles columns only when it’s anchored in a straddle paragraph.
At top or bottom of column When the anchor symbol for a top-of-column anchored frame appears below a straddle
paragraph, the frame appears in the column just below the straddle paragraph rather than at the top of the column.
Anchored at top of column and at bottom
A bottom-of-column anchored frame is positioned similarly when the anchor symbol appears above a
straddle paragraph.
You can force the anchored frame to appear at the top or bottom of the column (above or below a straddle paragraph)
by making the frame straddle the columns. To do so, turn off Cropped in the Anchored Frame dialog box and resize
the anchored frame until it extends into another column.
Anchored frames outside a column of text
To position an anchored frame outside a column of text, choose the Outside Column anchoring position in the
Anchored Frame dialog box. For information on positioning an anchored frame so it always appears in the page
margin, even in a multicolumn document, see “Anchored frames in the page margins” on page 354.

ADOBE FRAMEMAKER 8
User Guide
351
When you choose the Outside Column anchoring position, you can set the following properties.
Side of column You can position the anchored frame at the left or right side of the column, or along the side that’s
closer to or farther from the edge of the page.
Anchored at left and at right
ADOBE FRAMEMAKER 8
User Guide
352
For a double-sided document, you can also position the frame closer to or farther from the binding edge.
Farther from binding

ADOBE FRAMEMAKER 8
User Guide
353
Distance above baseline You can adjust the frame’s position up and down relative to the baseline of text by dragging
the frame or by specifying a value for the Distance above Baseline option in the Anchored Frame dialog box. A value
of zero aligns the bottom of the frame with the baseline of the text. A positive number moves the frame up; a negative
number moves it down.
Zero distance and negative distance above baseline
You can’t position the anchored frame above the top or below the bottom of the text frame. If the setting would place
the anchored frame above or below the text frame, FrameMaker puts it as high or as low as possible. If you later edit
the text so that the anchor symbol moves away from the top or bottom of the text frame, FrameMaker adjusts the
anchored frame’s position.
Distance from column You can adjust the frame’s position left and right relative to the edge of the column by
dragging the frame or by specifying a value for the Distance from Column option in the Anchored Frame dialog box.
A value of zero aligns the edge of the frame with the edge of the column. A positive number moves the frame away
from the column; a negative number moves it into the column.
Zero distance and positive distance from column
The distance is always relative to the edge of the column, so the frame may appear between columns on a multi-
column page. If you need to widen the gap between columns to make room for the frame, see “Changing the page
margins and number of columns” on page 382 and “Changing margins and column layout on specific pages” on
page 387. Or, if you’re working in a structured document, see your developer to widen the gap between columns to
make room for the frame.
ADOBE FRAMEMAKER 8
User Guide
354
Anchored frames in the page margins
To position an anchored frame so it always appears in the margin (even in a multicolumn layout), choose the Outside
Text Frame anchoring position in the Anchored Frame dialog box. You can then specify the options described in the
previous section. However, the distances you specify are from the edge of the text frame, which may differ from the
edge of the text column on multicolumn pages.
Closer to page edge and farther from page edge
In a single-column layout, the Outside Text Frame option has the same effect as the Outside Column option.
Anchored frames run into paragraph text
To position an anchored frame in the top corner of a paragraph (with the paragraph text in that column running
around the frame), choose the Run into Paragraph anchoring position in the Anchored Frame dialog box. For
example, you can set a small graphic or a drop cap at the beginning of a paragraph.
When the anchored frame is taller than the paragraph, the text from subsequent paragraphs runs around the frame
unless the paragraph that contains the anchor symbol is a straddle paragraph.
Frame spanning paragraphs and in a straddle paragraph
When you choose the Run into Paragraph anchoring position, you can set the following properties:

ADOBE FRAMEMAKER 8
User Guide
355
Alignment You can align the anchored frame on the left or right side of the paragraph. For a double-sided
document, you can also choose Side Closer to Binding or Side Farther from Binding.
Closer to binding
ADOBE FRAMEMAKER 8
User Guide
356
The frame is aligned with the paragraph’s left indent when it appears at the left side of the paragraph, and with the
right indent when it appears at the right side. When the paragraph has a first-line indent, the anchored frame does
not change the position of the indent.
Graphic extending beyond first-line indent
09_17a
ADOBE FRAMEMAKER 8
User Guide
357
Larger first-line indent
When you want to preserve a first-line indent, make the first-line indent setting for the paragraph larger than the
width of the anchored frame (see “Changing indents and alignment” on page 111).Or, if you’re working with a struc-
tured document, see your developer about making the first-line indent setting for the paragraph larger than the
width of the frame.
Gap You can specify the gap between the anchored frame and the paragraph text that runs around it.
Filling anchored frames
You can draw graphics in an anchored frame, drag or paste graphics from another part of the document, or import
or paste graphics from another document or application. Use these methods to put graphics and text in unanchored
graphic frames as well as in anchored frames.
You can position a graphic in an anchored frame and then use a text frame or text line inside the anchored frame for
the figure title. But you might find it easier to position and number the title consistently if you put the figure in a
single-cell table and then set up the table title as a figure title. For information, see “Adding titles to illustrations” on
page 327.
09_17a

ADOBE FRAMEMAKER 8
User Guide
358
An anchored frame’s contents are clipped when they extend into or beyond the frame’s border.
A. Frame border B. Cropped graphic C. Cropped callout
To select a graphic frame:
❖Click the frame’s border. If the border isn’t visible, choose View > Borders.
To put graphics or text in a graphic frame:
❖Do one of the following:
•To draw a graphic or add text, use one of the tools on the Tools palette. For details, see “Drawing objects” on
page 312 and “Using text with graphics” on page 323.
Important: Be sure to start drawing the object inside the frame. Otherwise, the object will be on the page and not in the
frame.
•To move a graphic into a frame, drag the graphic until the pointer is within the frame’s borders. The object jumps
into the frame when you drag across the frame’s border.
•To paste a graphic into a frame from the Clipboard, select the frame and choose Edit > Paste.
Original
Outline
Bitmap
A
B
C

ADOBE FRAMEMAKER 8
User Guide
359
•To import a graphic into a frame, select the frame and choose File > Import > File. You can also import a graphic
in other ways, depending on the platform.
Note: If a graphic looks as though it’s in the anchored frame, but it doesn’t move with the frame as you edit the
surrounding text, the graphic is probably in front of the frame rather than in the frame—perhaps because you pasted
it on the page rather than in the frame. Drag the graphic completely away from the frame and then drag it back into
the frame.
To prevent an anchored frame from clipping its contents:
❖Do one of the following:
•If there’s room outside the anchored frame, make the frame larger.
•If there’s room inside the anchored frame, move the object away from the edge of the frame. For details, see
“Moving objects” on page 330.
•If the contents are clipped only by the width of the border, use the Tools palette to make the anchored frame’s
border narrower or to change the pen pattern to None (see “Applying and changing drawing properties” on
page 318).
•If a frame and its contents are clipped by the edge of a column of text, choose Special > Anchored Frame, turn off
Cropped, and then click Edit Frame.
Editing anchored frames
You can change the size of an anchored frame, its anchoring position, and the properties you set when you created
the frame. When working with a structured document, these changes do not affect the structure of the document
and are independent of the element’s format rules.
You can also manipulate anchored frames as you do other objects. For example, you can change a frame’s drawing
properties (such as pen width), and you can duplicate, delete, move, or resize it.
To change a frame’s anchoring position and related properties:
1Select the frame and choose Special > Anchored Frame.
2Change the settings and click Edit Frame.
To resize an anchored frame:
❖Do one of the following:
•To resize the frame quickly but approximately, select the frame and drag one of its handles. The size appears in the
status bar as you drag.
•To resize the frame precisely, select the frame and specify its size with the Graphics > Object Properties,
Graphics > Scale, or Special > Anchored Frame command.
•To resize an anchored frame to fit the object in the frame, press Esc M P.
•To resize a graphic within an anchored frame, see “About frames” on page 322.
To change the drawing properties of an anchored frame:
❖Select the frame and use the Tools palette to specify the properties you want. For example, you can change a frame’s
pen pattern to make the frame’s border printable or change its fill pattern to shade the interior of the frame.

ADOBE FRAMEMAKER 8
User Guide
360
To copy or move an anchored frame:
1Select the frame and choose Edit > Copy or Edit > Cut. You don’t need to select the anchor symbol.
2Click in text where you want to insert the frame and choose Edit > Paste. The anchor symbol appears at the
insertion point when text symbols are visible. When working with a structured document, look at the Element
Catalog before pasting to verify that the location is valid for graphic elements.
In some cases (for example, when a frame is positioned at the top or bottom of a column), the frame does not change
position even though the anchor symbol moves. If you find it difficult to reposition a frame anchored to the outside
of a rotated text frame or column, unrotate the text frame, position the anchored frame, and then rerotate the text
frame. See “Rotating objects” on page 337.
If you’re working with a structured document, you can also drag a frame’s bubble in the Structure View to move
the frame, or Alt-drag (Windows), or Control-middle-drag (UNIX) the bubble to copy the frame. For details, see
“Copying elements” on page 43.
To delete an anchored frame:
❖Select the frame and press Delete.
To move a frame’s anchor symbol:
1Select the frame. You don’t need to select the anchor symbol.
2Choose Edit > Cut, click in text where you want to insert the anchor symbol, and choose Edit > Paste. The anchor
symbol appears at the insertion point when text symbols are visible.
In some cases—for example, when the frame is positioned at the top or bottom of a column of text—the frame may
not change position even though the anchor symbol moves.
To move an anchored frame without moving its anchor symbol:
❖Do one of the following:
•For quick but approximate repositioning, drag the frame.
•For more precise repositioning, move the frame in small increments with the arrow keys (see “Moving objects” on
page 330).
•For greatest precision, specify the location of the frame with the Special > Anchored Frame command.
Some anchored frames cannot be moved without moving their anchor symbols. However, you can move a frame
vertically when it’s anchored at the insertion point, outside the column of text, or outside the text frame. When a
frame is anchored outside the column or text frame, you can’t move it above the top or below the bottom of the
text frame.
Note: When you move a frame into a column, the text in the column doesn’t adjust to accommodate the frame. Use the
Run into Paragraph anchoring position to move the frame completely inside the column and to run the text around the
frame automatically. You can also change the paragraph indents to make room for the frame.
Preparing anchored frames for tagged PDF
If you plan to export your document to a tagged PDF or to XML, you can include object attribute information for
your anchored frames.

ADOBE FRAMEMAKER 8
User Guide
361
Alt text is different than graphics or standard text. Alt text is typically used for describing an image so that screen
readers can read it aloud. Actual text is for reading aloud the actual text, as in the case of a drop cap. For example, if
the author is using a drop cap for the letter A in the word “Adobe” but still wants the screen readers to read the word
as “Adobe” and not as “dobe,” this can be done by filling in actual text. The attribute will be saved to alt text and actual
text in tagged PDF and XML.
When you provide alternate text attribute on an anchored frame, the corresponding figure elements in PDF and
graphic elements in XML get an “alt text” attribute. Actual Text attribute is processed only for tagged PDF. XML
export ignores this attribute.
Note: Object attributes support the Unicode text encoding standard.
To add object attributes:
1Select the frame and choose Graphics > Object Properties.
2Click Object Attributes.
3In the Text Attributes section, add your alt text and actual text, and then click Set.
Note: Screen readers may ignore actual text when alt text is present.
Anchored frames in structured documents
In a structured document, a graphic element provides an anchored frame for holding graphic objects. The frame is
anchored to a specific location in text. As you edit the text, the frame and its contents move in the document along
with the text.
How frames are anchored in structured documents
When inserting a graphic element, you specify where you want to anchor the element’s frame. For example, you
might anchor the frame in a Para element (and the graphic will be a child element to the Para), or you might anchor
it in a Section element (as a sibling to Para and other elements in the Section). It depends on how the elements are
defined for your document.
In the document window, an anchor symbol appears at the anchor location in text when View > Text Symbols is
turned on. The frame can appear in a variety of positions on the page—including in-line with text, next to or below
a paragraph, or in a page margin. You specify an anchoring position relative to the anchor symbol.
Several positions for anchored frames

ADOBE FRAMEMAKER 8
User Guide
362
A graphic element appears in the document’s structure where it is anchored to text, regardless of the frame’s position
on the page. In the Structure View, the element is represented by a square-cornered bubble with the snippet
<GRAPHIC>.
Graphic element
Inserting anchored frame elements in structured documents
You use an anchored frame element to insert an anchored frame in a structured flow. You specify the location of the
frame relative to the insertion point, the size of the frame, and several formatting properties. The formatting
properties you set are independent of the element’s format rules, not overrides to them.
For information on inserting an anchored frame that’s not an element (which you can do only in an unstructured
flow), see “Creating anchored frames” on page 346.
To insert an anchored frame element:
1Click where you want to anchor the frame.
2Select an anchored frame element in the Element Catalog and click Insert.
You can also use Special > Anchored Frame to insert an element. If more than one frame element is available, choose
the one you want from the Element Tag pop-up menu in the Anchored Frame dialog box.
3Choose the frame’s anchoring position and specify its size and formatting properties. The properties that
appear in the dialog box depend on the anchoring position you choose. See “In-line anchored frames” on page 347
for details.
4Click New Frame. The anchored frame appears in the document window, with an anchor symbol at the
insertion point when View > Text Symbols is turned on. A bubble with the text snippet <GRAPHIC> appears in the
Structure View.
If no anchored frame element is available at the location you want, you might use an invalid element. After inserting
the element, talk to your developer about making the element valid at this location.
To use an invalid anchored frame element:
❖Do one of the following:
•To use an element that is valid in another part of the document, either insert the element in a valid location and
then move it, or use the All Elements setting (see “Changing the scope of elements available in a structured
document” on page 18) to make the element available everywhere, and then insert the element where you want it.
•To insert an invalid anchored frame element with a default tag, choose Special > Anchored Frame, and choose
GRAPHIC from the Element Tag pop-up menu. (This option appears in the menu if no defined frame elements
are available.)
<GRAPHIC>
Figure
Para
Para

ADOBE FRAMEMAKER 8
User Guide
363
Filling anchored frames in structured documents
In a structured document, you can draw graphics in an anchored frame, drag or paste graphics from another part of
the document, or import or paste graphics from another document or application. Although the graphic element is
part of the document’s structure, the contents you put in the frame are not.
You can even use an anchored frame to hold text, such as text in a sidebar. To do this, draw a text frame in the
anchored frame. Keep in mind, though, that the text is not part of the document’s structure.
A frame’s contents are generally preserved when you export to XML or SGML. FrameMaker writes the contents to a
separate file and adds an entity reference to it from your XML or SGML file.
Important: To prepare for export to XML or SGML, put only one graphic in each frame for the best results. If your
graphics are bitmaps, do not use a display bit depth of 1 bit or 24 bits; reset your display to 8 bits. Ask your application
developer for other advice to be sure your frames’ contents will be fully preserved.
After filling a frame with graphics, you can edit the graphics in many ways—for example, by changing line widths,
applying fill colors, and aligning, stacking, or grouping several objects.
For instructions on filling an anchored frame, see “Filling anchored frames” on page 357.

364
Chapter 10: Color
About Color
Color adds excitement to any document. With Adobe FrameMaker, it’s easy to apply color to text and objects. Once
color is in place, you can print to a color printer or create color separations for a service bureau or commercial
printer. You can also print to a PostScript file and deliver the file to a commercial printer for postprocessing in
another application.
You can define your own colors and tints, using any of several color models or libraries.
Color models
When you use a color model to define colors, you build the color you want by manually adjusting its components,
such as the amount of pure red or the amount of saturation.
You can choose from three color models: CMYK, RGB, and HLS.
CMYK Use the CMYK model when you plan to create color separations for four-color process printing. Colors are
created by combining cyan, magenta, yellow, and black (CMYK) inks. When you color separate your document, each
color component is printed on a separate plate, in a different concentration, depending on how much is needed to
create the desired color. For information, see “Separating colors” on page 373.
RGB Use the RGB model to create colors that will be seen on a monitor (for example, for online documentation).
Colors are created by combining red, green, and blue (RGB) light.
HLS Use the HLS model if you are familiar with color wheels. This model is most like the one artists use to mix colors
and is often used in software color pickers. Colors are created by adjusting hue, lightness, and saturation (HLS). Hue
controls the amount of red, green, yellow, blue, and so on. Lightness controls the lightness or darkness of a color.
Saturation controls the amount of gray in the color.
Planning to use color
As you plan to use color, consider these tips:
Identify how the color will be printed or viewed Knowing and understanding the final output of your color
document can greatly affect your color decisions:
•For online output, use the RGB or HLS color models. Your guide to correct color is how your documents look on
your monitor.
•For desktop printing, use the CMYK model to define your colors and test them on the printer you’ll be using. Your
guide to correct color is how your documents look on your printer.
•For commercial printing, use colors from a library supported by your commercial printer. Don’t rely on the on-
screen versions of library colors; use a swatch book. (A computer monitor can’t show you exactly how a color will
look when printed.) Many sections in this chapter apply only to commercial printing, such as the sections on spot
colors, overprinting, trapping, and color separating.

365
Learn the limits of the medium Become familiar with the range of colors available on your monitor or printer.
For example, a system set to display 256 colors cannot display tints below 16% accurately in FrameMaker.
Learn the limits of your system (Windows only) FrameMaker for Windows converts all color values to RGB when
printing or saving as Adobe PDF. This is because FrameMaker uses the Windows Graphical Device Interface (GDI)
commands to communicate with printer drivers. GDI only accepts RGB color values.
However, FrameMaker retains whatever color values are specified within Encapsulated PostScript (EPS) graphic
objects, including CMYK colors, RGB colors, grayscale, spot colors, device-independent colors (such as CIE L*a*b
color). The graphical information within an EPS file is passed directly into the output PostScript stream, bypassing
any Windows GDI processing. EPS graphic objects can be created from text, vector graphics, or images of any type
supported by Adobe PostScript. Because of this capability, EPS graphics can be saved or exported from Adobe
Acrobat, Adobe Illustrator®, Adobe Photoshop®, Adobe Streamline™, and Adobe InDesign®, as well as many other
third-party application programs.
Note that FrameMaker also creates separations in equivalent RGB values. EPS graphics, however, are separated
according to the color values specified within the EPS graphic itself.
Talk to your commercial printer Find out whether your commercial printer has any special requirements or sugges-
tions for efficient color production.
Consult a professional designer The advice of a designer can make the difference between good color and great
color results.
Use formats to apply color Using paragraph and character formats to assign colors to text ensures that similar
passages are the same color. It also makes it easier to change colors throughout your documents.
Using color libraries
When you use a color matching system—a color library—you choose from colors defined by a color vendor. The
advantage of using a “premixed” library color is that you’re assured that commercial printers can precisely match the
formula represented by the vendor’s swatch book. For this reason, don’t change the definition of a color from a library
if you plan on printing commercially.
Every color from a library is defined as either a spot color or a process color. A spot color is printed on a printing
press with premixed inks by using a single printing plate. A process color is printed on a press by overlapping dots of
cyan, magenta, yellow, and black (CMYK) on separate plates.
Before choosing a color from a color library, ask your commercial printer for a list of supported libraries. For best
results, choose colors from a swatch book, rather than relying on the on-screen representation of the color.
FrameMaker includes the following libraries:
Crayon Adobe developed the Crayon library to provide access to common RGB colors using everyday names in
alphabetical order. Do not use Crayon colors as spot colors.
DIC The DIC Color Guide provides spot colors. It is used mostly in Japan.
FOCOLTONE The FOCOLTONE® Colour System provides 860 process (CMYK) colors.
Greys The Greys library, developed by Adobe, provides both process and spot shades of gray in 1% increments.
MUNSELL The Munsell System provides colors defined on the RGB model.

366
Online The Online color library provides 216 “Web-safe” colors that have a consistent appearance on all platforms
when viewed with a Web browser.
PANTONE Most of the libraries in the PANTONE® MATCHING SYSTEM are for spot colors. Only the two
PANTONE process libraries are for selecting process colors. Separate PANTONE libraries are available for colors
that will be printed on coated and uncoated paper. The PANTONE ProSim Euro library uses color definitions that
match the printing systems prevalent in Europe.
TOYO The TOYO Color Finder provides over 1000 colors based on the most common printing inks in Japan.
TRUMATCH The TRUMATCH® 4-Color Selector provides over 2000 process colors that cover the CMYK visible
color spectrum in even steps.
To get information on a color library:
❖Choose View > Color > Definitions, choose a library from the Color Libraries pop-up menu, and then
click About.
To choose a color using a color library:
❖Follow the steps in “Defining and modifying colors and tints” on page 368.
Important: When you choose a color from a library, its predefined name appears as its Ink Name in the dialog box. If
you change the definition of the library color, the Ink Name disappears, indicating that the color no longer matches the
formula defined by the vendor. Changing the definition of a library color is not ordinarily recommended. To restore the
original definition, choose the color again from the library and click Change.
To add a color library for use in FrameMaker:
1Place the library file into the following folder:
•(Windows) The Fminit\Color folder
•(UNIX) $FMHOME/fminit/color
2Restart FrameMaker.
You can add any library file formatted in the ASCII Color Format (.acf ), version 2.1 or earlier, or in the Binary Color
Format (.bcf), version 2.0. You can’t use FrameMaker to save a .bcf library file.
Applying colors and tints
The method you use to apply a color or a lightened version of a color (a tint) depends on the current selection. Any
entry in a Color pop-up menu can be applied to FrameMaker text or objects. FrameMaker supplies a set of sixteen
standard colors that you can add to (see “Defining and modifying colors and tints” on page 368, for details).
You can apply two types of tints:
•Color-level tints are tints you define and name by using View > Color > Definitions (see “Defining and modifying
colors and tints” on page 368). These tints appear in the Color pop-up menus in dialog boxes and designers.
•Object-level tints are tints you apply to an object whereby the object’s original color is lightened by a specified
percentage. You apply an object-level tint by using the Tint pop-up menus on the Tools palette or in an object’s
Object Properties dialog box.
Note: You can’t colorize TIFFs in Windows or UNIX.

367
To apply a color or tint to text or an object:
❖Use a paragraph format, character format, or the Tint and Color pop-up menus to assign a color or a tint.
To apply a tint to an object by using a fill pattern:
1Select the object you want to tint.
2Choose one of the first eight fill patterns from the Fill pop-up menu on the Tools palette. The fill patterns apply
the following percentages to the object’s current color.
To apply color or tint to Use
Paragraphs A Paragraph Catalog format, or the Color pop-up menu on the Tools palette or in the
Paragraph Designer
A selected word or phrase in a paragraph A Character Catalog format, or the Color pop-up menu on the Tools palette or in the
Character Designer
A text line A Character Catalog format, or the Color pop-up menu on the Tools palette or in the
Character Designer
Objects or imported graphics The Color pop-up menu or the Tint pop-up menu on the Tools palette
A text frame The Fill pop-up menu on the Tools palette to change the frame’s fill pattern from
None, and then the Color pop-up menu or the Tint pop-up menu to assign a color
Text in a table A Paragraph Catalog or Character Catalog format, or the Color pop-up menu on the
Tools palette or in a designer
Cells in a table The Color pop-up menu in the Custom Ruling and Shading dialog box, or in the
Table Designer
Change bars The Color pop-up menu in the Change Bar Properties dialog box
Conditional text The Color pop-up menu and the New Color button in the Edit Condition Tag
dialog box
Equations or math elements in an equation A Character Catalog format, or the Color pop-up menu on the Tools palette, or in the
Character Designer
Fill Pattern Tint Percentage
100%
90%
70%
50%
30%
10%
368
To apply the same color to all drawn objects and text:
❖Do one of the following:
•(Windows) Hold down Shift+Alt and choose a color from the Color pop-up menu on the Tools palette.
•(UNIX) Hold down Shift+Control and choose a color from the Color pop-up menu on the Tools palette.
Defining and modifying colors and tints
You create or modify colors and tints (percentages of a specified color) by adjusting the color components in the
model you’re using or by choosing a predefined ink from a color library. New colors and tints appear in all Color
pop-up menus and scroll lists.
You can also use the New Color button in the Add Condition Tag and Edit Condition Tag dialog boxes to select
unique colors for condition tags, which lets you distinguish one tag from another.
You can’t change the sixteen standard colors, except for their overprint and Print As properties. However, you can
define your own colors using lowercase versions of these names (black, blue, and so on). Also, the Crayon library
has its own versions of these colors, which you can use or redefine under another name.
To define or modify a color or tint:
1Make the appropriate document window or book window active. If a book window is active, select the documents
you want to affect.
2Choose View > Color > Definitions.
3Do one of the following:
•To define a new color, enter a new name in the Name text box.
•To modify an existing color (or base color), choose its name from the pop-up menu to the right of the Name text
box (or type its name until the color definition appears).
4Specify how to print the color by choosing one of the following options from the Print As pop-up menu:
•To define a tint, choose Tint. A tint is always displayed and printed in the same manner and on the same plate as
its base color. The base color also determines the color components.
•To define a spot color, choose Spot.
•To define a color printed with CMYK inks, choose Process.
•To define a color that is not printed, choose Don’t Print.
5To change the color model, choose from the Model pop-up menu. For details, see “Color models” on page 364 and
“Planning to use color” on page 364. (The color model of the tint is determined by the base color.)
6Adjust the color components by dragging the sliders or entering values. If you’re defining a tint, choose a color
from the Base Color pop-up menu and set the percentage. To reset any changes you’ve made, click the Current
color box.
3%
0% (color of paper)
Fill Pattern Tint Percentage

369
Note: Your monitor may not be able to accurately display the color or tint that you define. For example, a tint value of
less than 10% of the base color will probably not be displayed accurately on-screen (or on some printers). Also, UNIX
systems that use 8-bit color may have problems displaying colors that are not in their color maps (For information, see
the online manual Customizing FrameMaker on the Adobe website: www.adobe.com/devnet/framemaker/pdfs/
Customizing_Frame_Products.pdf).
7To make this color print on top of other colors when printing separations, choose Overprint from the Overprint
pop-up menu; see “Knocking out and overprinting” on page 371.
8To create a new color, click Add (or click the New color box); to modify the current color, click Change.
9Define or modify additional colors as needed, and then click Done.
To define a color from a color library:
1Make the appropriate document window or book window active. If a book window is active, select the documents
you want to affect.
2Choose View > Color > Definitions.
3Choose a library from the Color Libraries pop-up menu. For information, see “Using color libraries” on page 365.
4Choose a color from the library of predefined colors. If you know the name, you can quickly scroll to it by starting
to type its name.
5Click Done. The color you choose appears as the Ink Name in the Color Definitions dialog box.
Note: Colors from color libraries often have a preferred color model and type. When you choose a color, the color model
or type may change automatically. Under normal conditions, you should not change these settings. Similarly, you won’t
ordinarily want to change the color definitions of a library color. If you do, the Ink Name disappears and the color no
longer matches the formula defined by the vendor.
6To make this color print on top of other colors when printing separations, choose Overprint from the Overprint
pop-up menu; see “Knocking out and overprinting” on page 371.
7Click Add.
8Define additional colors as needed, and then click Done.
If you want to use the operating system’s color picker to define a color, choose Common Color Picker (Windows).
You use these color pickers just as you do in other applications.
To delete a color or tint:
1Make the appropriate document window or book window active. If a book window is active, select the documents
you want to affect.
2Choose View > Color > Definitions.
3Choose a color or tint from the Name pop-up menu. (You can’t delete the basic sixteen colors.)
4Click Delete. If the color is in use, an alert message asks whether you want to change items that use this color to
black. If you delete the base color of a tint, the tint becomes a percentage of black.
5Repeat the process to delete more colors. When you’re finished, click Done.
Note: Color definition names support the Unicode text encoding standard.

370
Viewing colors
A color view specifies which colors are visible. For example, if your document uses black and a spot color, one view
could display both colors and another view could display only the spot color.
Both colors visible and only one color visible
For each view you set up, specify which colors you want to display, which to display as cutouts (shown as white when
overlapping different colored objects), and which not to display at all.
To set up a view:
1Make the appropriate document window or book window active. If a book window is active, select the documents
you want to affect.
2Choose View > Color > Views.
3Click a view number and move the color names to the appropriate scroll lists. Tints do not appear in this dialog
box; they appear along with the color they were based on.
To move a color, select it and click an arrow, or double-click it. To move all colors, select a color and Shift-click an
arrow. To reset any changes you’ve made, click Get Default.
The name of the color may be clipped in the scroll boxes, but the full name of the selected color appears below the
scroll boxes.
Leave View 1 unmodified, with all colors (except white) in the Normal scroll list. When you draw an object in a
color that is invisible in the current view, FrameMaker automatically switches to View 1.
4Repeat step 3 for each view you want to set up, and then click Set. The currently selected view is displayed.
To use a color view:
1Make the appropriate document window or book window active. If a book window is active, select the documents
you want to affect.
2Do one of the following:
•Choose View > Color > Views, select the view you want to display, and click Set.
•Press Esc v number, where number is the number of the view (1 through 6) you want to display.

371
Printing color documents
You can print each page of a document as a composite. A composite page contains all the colors that are used on the
page. You print a composite color document when printing to a desktop color printer.
Alternatively, you can print each page of a document as a series of color separations—where color images are split
into several pages, each of which contains one component color. A commercial printer uses the separations to make
printing plates, one for each color.
You can also print mirror and negative images, which may be required when commercially printing to film.
If color objects overlap in your document, you can overprint, which prints an object (most often a dark one) on top
of another color object, or you can create a knockout, in which the top color is printed but colors behind it are not.
You can also use trapping to ensure that there is no gap between objects.
To print composite pages:
1Choose File > Print.
2Make sure Print Separations is unselected.
3Set the remaining print options as necessary and click Print. For information on the other options, see “Print
options” on page 28.
Knocking out and overprinting
When one color object overlaps another, FrameMaker normally knocks out the overlapped portion so that it does
not print in a color separation (it appears as the color of the paper). If you’re producing color separations and printing
commercially, registration errors may occur, and you may see small gaps between colors.
Accurate and inaccurate registration

372
To avoid gaps between colors, you can apply overprinting to the top object so that the overlapped portion is not
knocked out.
Knocked out and overprinted
You can also use overprinting to combine two colors for special effects.
To knock out or overprint all objects of a particular color:
1Define a color. (See“Defining and modifying colors and tints” on page 368.)
2To make this color print on top of other colors when printing separations, do one of the following:
•To have any object that uses this color overprint, choose Overprint.
•To have any object that uses this color knock out, choose Knock Out.
To apply knocking out or overprinting to objects:
1Select the object and open the Tools palette or choose Graphics > Object Properties.
2Choose one of the following from the Overprint pop-up menu:
•To have this object overprint objects beneath it, choose Overprint.
•To have this object knock out objects beneath it, choose Knock Out from.
•To have this object use the overprint setting defined for the color, choose From Color. This is the
recommended setting.
Overprinting images created in other applications
If you want images created in other applications to overprint other objects when printed from FrameMaker, note the
following special cases:
•CMYK TIFF files overprint objects on spot color plates under all of the following conditions: if printed as separa-
tions, if their Overprint attribute is set to True, and if their Fill property is set to None.
•EPS files do not overprint other objects when printed as separations.

373
Trapping
In commercial printing, overprinting to compensate for registration errors may produce unacceptable color mixing.
If this happens, the object may need to be trapped instead of overprinted. A trap is a line bordering the object on top
that is just wide enough to fill the color gap and to overprint the other object along the border of its cutout.
Without trapping and with trapping
Having a commercial printer trap your documents for you saves you the effort of hand-trapping each object individ-
ually. Also, manual trapping may have to be undone if you later decide to have a commercial printer do the trapping.
To trap an object:
1Create a border for the object on top by duplicating the object and setting the duplicate’s fill pattern to None. Be
sure the duplicated object is exactly over the original.
2Set the line width of the border as appropriate for the size and contour of the object, the type of printing paper,
and the accuracy of the printing press. Consult your commercial printer for information on suitable line widths
for trapping.
Also, because the stroke of a line is always centered on an object’s edge, you will have to double the line width speci-
fication that the commercial printer gives you.
3Select the border and choose Overprint from the Tools palette.
Separating colors
When you print color separations within FrameMaker, you choose which colors you want to print as spot
colors, which to print as process colors, and which not to print at all. Text and graphic objects are printed in black for
each separation, with shades of gray indicating the percentages of color saturation. The color name of each
separation is printed outside of the registration marks (if registration marks are on and if there’s room on the page).
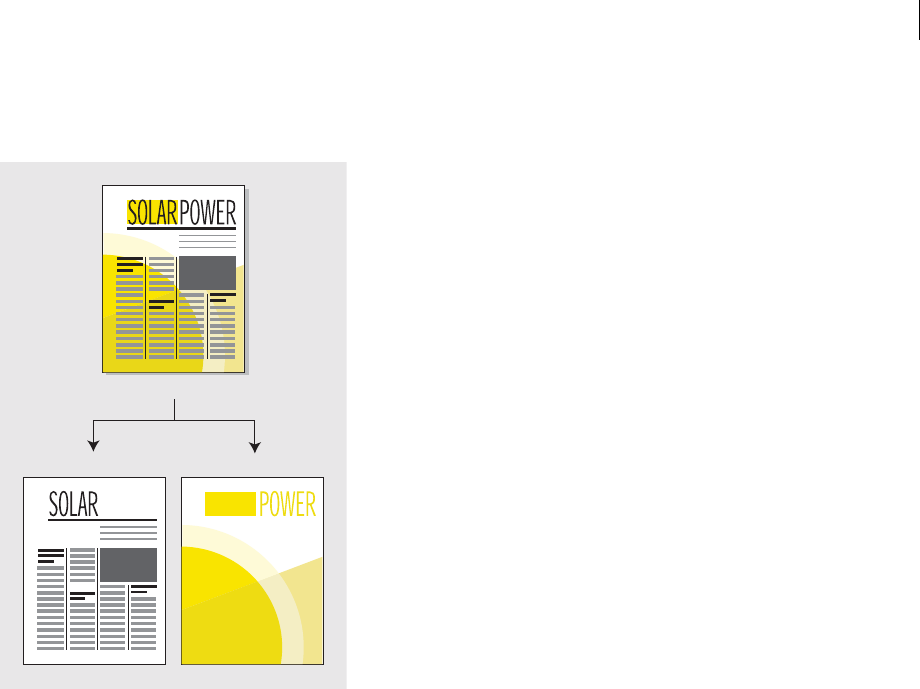
374
Note: For best results, print CMYK colors as process rather than spot-color inks. You can check plate assignments in the
Separations Setup dialog box (File > Print and click Separations Setup).
A. Composite image B. Black separation C. Spot color separation
Imported color graphics are separated if they are in CMYK, TIFF, DCS, or EPS line art format. Also, bitmap images
in EPS graphics can be separated as long as they can also be separated in Adobe Illustrator.
You can also separate a document by printing to a single PostScript file and then having a commercial printer
separate the file for you. For details, see “Postprocessing color documents” on page 376.
(Windows) Make sure spot colors with identical definitions have the same names. Spot colors with the same
definition but with different names appear on different plates when you print color separations. (For UNIX, spot
colors with the same definition and different names print on the same plate.)
To create color separations from within FrameMaker:
1Make sure you have not set colors to print as black and white instead of shades of gray, as described in “Print
options” on page 28.
2Choose File > Print.
3Choose an option from the Registration Marks pop-up menu. You can choose between Western and Tombo
(Japanese) crop marks.
4To print all pages for one plate and then all pages for the next plate, deselect Collate. Select Collate to print all
plates for one page before printing all plates for the next page, and so on.
5Click Separations Setup. If necessary, move the color names to the appropriate scroll lists and click Set. To move
a color, select it and click an arrow, or double-click the color. To move all colors, select a color in the list and Shift-
click an arrow.
Tints do not appear in this dialog box; they print on the same plate as the base color.
BC
A

375
If your printer can’t print process color separations, the dialog box contains only the Print As Spot and Don’t Print
scroll lists. The scroll list where each color appears by default depends on how the color was defined on its Print As
setting. For information, see “Defining and modifying colors and tints” on page 368.
6Specify halftone screen settings. (See “Setting up halftone screens” on page 375.)
7In the Print dialog box, make sure Print Separations is selected, set the remaining print options as necessary, and
then click Print.
For information on specifying emulsion and image exposure, see “Printing negative and mirror images” on page 375.
Minimizing the number of color separations
Because commercial color printing can be costly, you should consider how to print your documents with the fewest
number of separations. For example, if your commercial printer uses a six-stage press, you could print four-color
process separations and two spot colors. If your printer uses a four-stage press, you could use four-color process
separations to simulate the spot colors.
If a document contains two differently named colors with the same color values, FrameMaker prints two identical
separations, one for each color name, and both colors will print on each separation. To avoid this, name colors
consistently across documents and applications. If a document contains inconsistently named colors, print duplicate
separations and then manually remove one of the duplicates.
You can reduce the cost of printing color separations by not printing blank sheets. Select Skip Blank Pages in the
Print dialog box (Windows), or Skip Blank Separation Pages in the Set Print Separations dialog box (UNIX).
Setting up halftone screens
Process color separations are printed using grids of black dots for each color—the larger the dots, the more
color is printed. The halftone screen settings control how close together the dots appear, the orientation of the
grid (the screen angle), and the dot shape. For information, consult your printer documentation and your
commercial printer.
To change halftone screen settings:
❖Do one of the following:
•(Windows) Choose File > Print, click Separations Setup, and then click Halftone Screens. Adjust the settings as
needed and click Set.
•(UNIX) Edit the beginning of the ps_prolog file, located in $FMHOME/fminit. This file contains full instructions
for changing print settings. Changes to the file take effect immediately. To make changes without affecting other
users, save your changes to ~/fminit/ps_prolog.
Printing negative and mirror images
If your commercial printer requires you to print files to film, you may be instructed to print negative images in which
all text and objects are inverted. Or you may need to print flipped images with the emulsion side down, which mirror
the pages’ normal appearance. Emulsion is the photosensitive substance on the film surface.
Note: The settings may differ depending on the printer driver you’re using, and they may not be available with non-
PostScript printer drivers.

376
To print negative and mirror images:
❖Do one of the following:
•(Windows) Choose File > Print Setup. Click Properties to access the printer driver options. Locate and set the
options that control negative and mirror images.
•(UNIX) Follow the steps for printing color separations in “Separating colors” on page 373, but for step 5 choose
Plate Imaging settings before clicking Set in the Set Print Separations dialog box. (Clicking Emulsion Down
creates a mirror image.)
Postprocessing color documents
You can have a document color separated or have all objects in a document or book trapped by printing to a
PostScript file, and then having a commercial printer process the file for you. Creating a PostScript file in this way
embeds instructions in the file. These instructions conform to the Adobe Document Structuring Convention (DSC).
DSC enhances the performance of postprocessing products that perform trapping and imposition. DSC also lets you
take full advantage of products that support Open Prepress Interface (OPI) version 1.3. OPI reduces the hardware
overhead for working with high-resolution color images.
Having a commercial printer trap your documents for you saves you the effort of hand-trapping each object
individually.
For information on preparing PostScript files for postprocessing tasks, see “Creating PostScript files” on page 30.
Note: Before beginning, ask your commercial printer for any special instructions for producing PostScript files.
To use OPI with high-resolution images:
1Ask your service bureau or commercial printer to make high-quality scans of your artwork, keep the high-
resolution images, and give you OPI-ready low-resolution EPS or TIFF versions of the images to work with.
2Import (by reference or by copying) the low-resolution images into your document (see “Using the Import
command to import graphics” on page 508).
3Create a print file, or a series of print files for a book. (See “Creating PostScript files” on page 30.)
OPI-enhanced PostScript files contain information that the commercial printer’s software uses to match the
placeholder images with the high-resolution ones at print time.
Printing to typesetters (Windows)
Here are some tips for printing to Linotronic typesetters in Windows:
•Some Linotronic typesetters automatically put registration marks on the page. Check with your service bureau to
see if you need to use the Registration Marks setting when you print.
•Not all Linotronic models support thumbnails. Test various thumbnail settings to find the optimum setting. Some
Linotronic models will print 1 x 2 thumbnails correctly, but not 2 x 2 thumbnails.
•Some Linotronic drivers fail to let you enter a custom paper size even after you have chosen User Defined Size in
the Paper Size pop-up menu. To enter a custom paper size, right-click the Linotronic driver and choose Properties.
Click the Paper tab, and then select the custom paper size icon from the scrolling list of icons.

377
Chapter 11: Page layout and templates
About page layout
When you use templates designed for the types of documents you create, the page layout is already set up for you in the
templates. You may occasionally need to assign a custom master page to a body page (for example, for a first page),
but you usually won’t need to make the page layout changes discussed here.
When you design a template, you’ll probably require several types of page layout. For example, you might create
special layouts for the first page of a chapter, a rotated page, or a page with a different number of columns. You might
also create layouts for documents that contain multiple text flows.
FrameMaker documents contain three types of pages that help you set up your page layout:
•Master pages specify the page layout and the background text for document pages (for example, page headers
and footers).
•Body pages show the background text and graphics from the corresponding master page and contain a
document’s content.
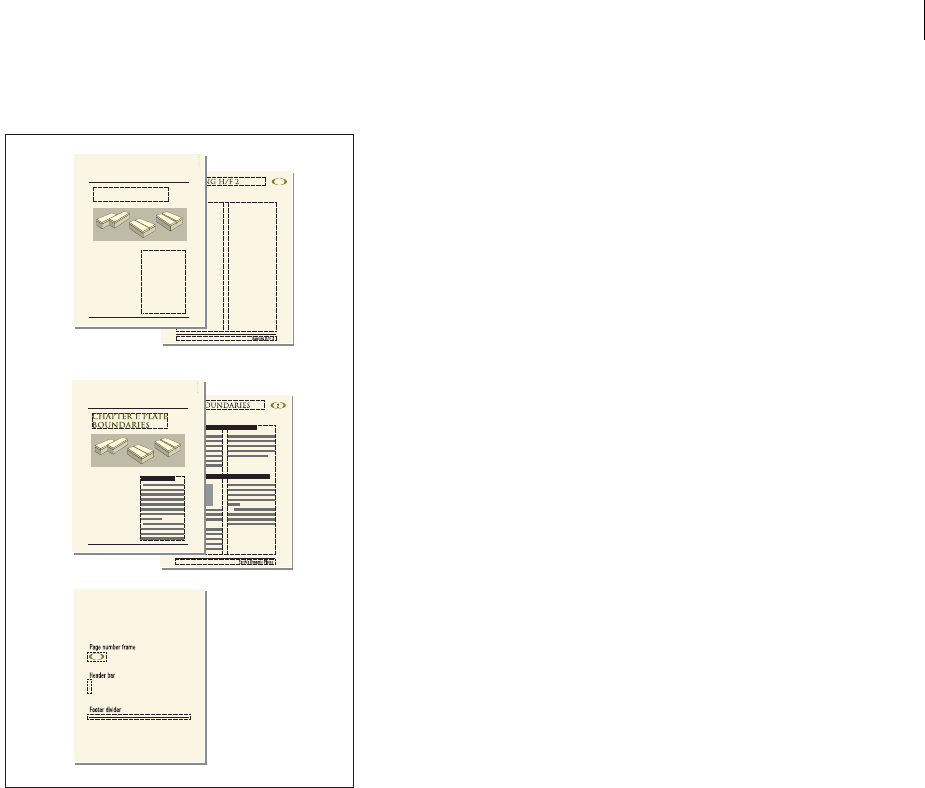
ADOBE FRAMEMAKER 8
User Guide
378
•Reference pages hold boilerplate graphics that you can use throughout a document.
A. Master pages: first and right
B. Body pages: first chapter page and right page
C. Reference page
About master pages
FrameMaker uses master pages to keep track of a document’s page layout. A double-sided document contains at least
two master pages, one for left pages and one for right pages. A single-sided document uses the right master page only.
Documents can also contain custom master pages, which you can use for special types of pages. You can also create
layouts directly on body pages for one-time-only use.
The basic layout of a document includes its page size and margins, the number of columns on each page, whether
the document is single-sided or double-sided, and how pages are numbered. If your document’s layout is symmet-
rical (that is, if facing pages have matching top, bottom, inside, and outside margins), and if it uses no master pages
other than the standard left and right pages that FrameMaker provides, you can change the basic layout without
displaying the master pages.
#
A
B
C
#
A
B
C
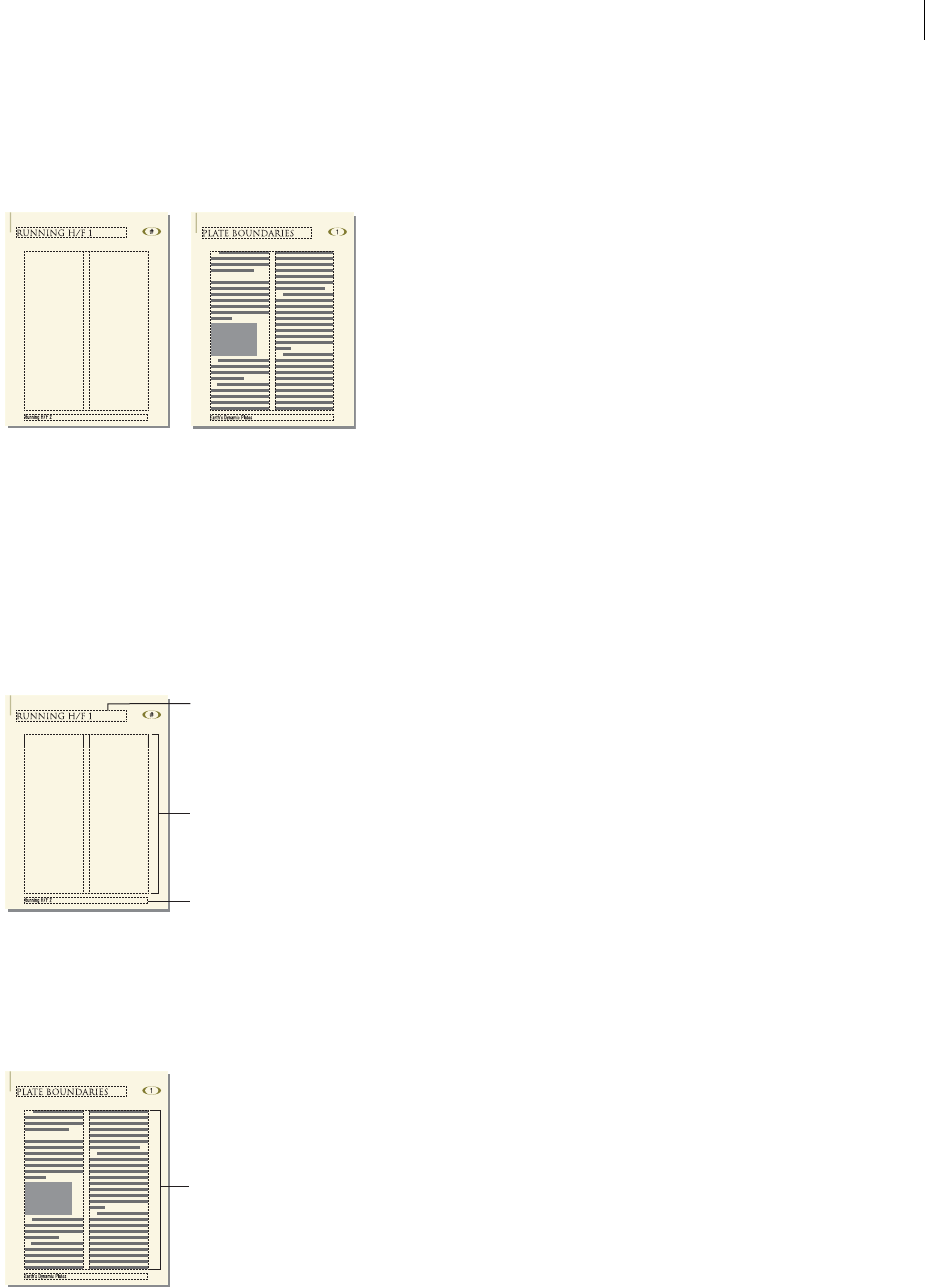
ADOBE FRAMEMAKER 8
User Guide
379
If your page layout is more complex, or if you need to create other design components such as page headers and
footers, you must work with the components directly on the master pages. You can draw or import graphics—such
as lines, boxes, or company logos—anywhere on a master page, as well as type text on them. Graphics and text appear
on the corresponding body pages exactly as they appear on the master page, as part of the body page’s background.
Master page and body page
Master pages can contain the following types of text frames:
•A template text frame contains a tagged text flow—a flow with a name. When you add a body page, the template
text frame is copied to the new body page. You then type the document’s text in this text frame on the body page.
You can type text in a template text frame on a master page, but the text won’t appear on body pages.
•A background text frame contains an untagged text flow—a flow with no name. Its contents appear on corre-
sponding body pages, but you can edit them only on the master pages. Background text frames are typically used
for page headers and footers.
Master page
A. Untagged background text frame
B. Template te xt f rame
When you add text and illustrations to your document on body pages, FrameMaker adds body pages as necessary
and automatically uses the page layout from the left or right master page.
A. On body pages, you type in a text frame copied from the template text frame.
A
B
A
A
ADOBE FRAMEMAKER 8
User Guide
380
About text flows and flow tags
A text flow is a series of connected text frames through which the text flows in a document. Most documents have a
single text flow, from the first page to the last, in which FrameMaker handles the text frame connections automati-
cally. You make the text frame connections yourself only for documents in which you need to weave several text flows
together—for example, with a newsletter in which you need to continue a front-page article on the back page,
skipping over other articles on the intervening pages (see “About multiflow documents” on page 397).
The current text frame’s flow tag appears in the Tag area of the status bar. In new, blank documents, the tag for the
text flow is A.
Tag area of status bar
Changing the basic page layout of a document
You can make changes to a document’s basic page layout—its page size, column layout, and whether it is single-sided
or double-sided—directly from a body page. When you make one of these changes, FrameMaker automatically
updates both the left and right master pages, and updates the layout of any body pages that use those master pages.
If any of these body pages contain layout overrides (see “About layout overrides” on page 387), you are asked to
confirm that you want to make the updates.
If your document uses another master page—for example, for the first page of the document—you must make any
layout changes on that master page. For details, see “Changing page layout on specific pages” on page 387, “Creating
and editing custom master pages” on page 389, and “Assigning master pages to body pages” on page 392.
Changing the page size
You can change a document’s page size by choosing a standard page size or by specifying a custom size. FrameMaker
will then resize the text frames on the left and right master pages (but not on any custom master pages) to maintain
the current page margins.
Margins are maintained when you change page size.
If the document contains custom master pages, FrameMaker won’t let you change to a page size that can’t accom-
modate the text frames on those master pages.
To change the page size:
1Make the appropriate document window or book window active. If a book window is active, select the documents
you want to affect.
2Choose Format > Page Layout > Page Size.
ADOBE FRAMEMAKER 8
User Guide
381
3Do one of the following:
•Choose a standard size from the Page Size pop-up menu. The correct dimensions appear in the Width and Height
text boxes.
•Enter dimensions in the Width and Height text boxes. Custom appears in the pop-up menu. The custom page size
you specify can be very small, depending on the document’s margin settings, or as large as 216 inches by 216
inches (approximately 548 centimeters by 548 centimeters).
4Click Set.
Changing the pagination
You can change a single-sided document to double-sided or the reverse. When you set up a double-sided document,
you specify whether the first page is a left or a right page.
Single-sided document
Double-sided document
To change the pagination:
1Make the appropriate document window or book window active. If a book window is active, select the documents
you want to affect.
2Choose Format > Page Layout > Pagination.
3Select one of the options in the Pagination area. If you select Double Sided, also specify whether the first page is
a left or right page. If you are applying pagination in a book, you can choose Read from File to use the page side
specified in the file, or you can choose Next Available Side to avoid a blank page.
Depending on which option you selected, a blank page may be added to the previous file in the book so that the
document can start on the page you specified. See also “Adding and deleting empty pages” on page 382.
4Click Set. If the document contains custom master pages or page layout overrides, an alert message asks how you
want to proceed.
##

ADOBE FRAMEMAKER 8
User Guide
382
Adding and deleting empty pages
You can specify that you want a document to have an even or odd number of pages. If necessary, FrameMaker adds
a blank page at the end of the document to achieve the correct pagination.
Conversely, a document may contain unwanted blank pages at the end, left there because you deleted or reworked
text. You can tell FrameMaker to delete these empty pages whenever you save or print the document.
FrameMaker deletes a blank page only if it uses the left or right master page, doesn’t contain the start of a flow, and
has no layout overrides. (For information on layout overrides, see “About layout overrides” on page 387.)
FrameMaker doesn’t delete a page if it contains an empty paragraph but is otherwise blank.
If you use the document window to change the pagination of a document that is part of a book, the settings may be
overridden when you update the book. You can make sure the book pagination is correct by changing a document’s
setup from the book window.
To add or delete a blank page when saving and printing:
1Make the appropriate document window or book window active. If a book window is active, select the documents
you want to affect.
2Choose Format > Page Layout > Pagination.
3From the Before Saving & Printing pop-up menu, choose an option and click Set.
If blank pages are not added or deleted as expected, make sure that all pages in the document are autoconnected (see
“About the Autoconnect setting” on page 400).
Changing the page margins and number of columns
The margin is the distance between the page edge and the text frame. For a single-sided document, you set margins
for the top, bottom, left, and right sides of the text frame. For a double-sided document, you set the top, bottom,
inside, and outside margins for a symmetrical look.
Symmetrical layout
ADOBE FRAMEMAKER 8
User Guide
383
To set up asymmetrical left and right margins, you change the text frames directly on the master pages. For example,
you could make the text frames on both the left and right pages appear on the right side of the page, leaving an area
of white space on the left. For information on working directly with master pages, see “Changing page layout on
specific pages” on page 387.
Asymmetrical layout
You can divide a text frame into two or more equally spaced columns of equal widths. To create a multicolumn layout
with unequal column widths or gaps, use one text frame for each column of text and position the text frames one by
one. Draw the text frames or set up one text frame the way you want it and then duplicate it. For information, see
“Adding template text frames on master pages” on page 388 and “Adding text frames on body pages” on page 388.
To change the margins and number of columns:
1Place the insertion point in the main text flow or click in the page margin. If a book window is active, select the
documents you want to affect.
2Choose Format > Page Layout > Column Layout.
If the layout is asymmetrical (for example, with a different number of columns, or a different inside or outside
margin on the left and right master pages), an alert message asks whether you want to proceed. To retain the
asymmetry, change the layout directly on the master pages (see “Changing page layout on specific pages” on
page 387).
3To change the margins, enter the values in the Margins area. The margins and the gap (space) between columns
determine the individual column width.
4To change the number of columns or the gap between columns, enter new values in the Columns area.
All columns will be the same width and will be separated by a uniform gap. To create a multicolumn layout that
contains columns (or gaps between columns) of differing widths, see “Adding template text frames on master pages”
on page 388.
5Click Update Entire Flow. If the new column width is too narrow to accommodate some anchored frames or tables
in the document, an alert message asks whether you want to proceed. If you click OK, you can manually resize the
tables and frames.
Displaying master pages
When working with master pages, you move back and forth between them and the body pages. When a master page
is visible, its name and the number of master pages in the document appear in the Page Status area of the status bar.
Page Status area of status bar
ADOBE FRAMEMAKER 8
User Guide
384
To display master pages:
❖Choose View > Master Pages. The master page used by the current body page appears, with the text frame and
column borders visible.
To view other master pages when a master page is visible:
❖Do one of the following:
•Click the Next Page or Previous Page button.
•Press the Page Up or Page Down key.
•Use the scroll bar.
To return to body pages while master pages are visible:
❖Choose View > Body Pages. The most recently displayed body page appears. If FrameMaker detects any layout
overrides on body pages (see “About layout overrides” on page 387), an alert message asks how you want to
handle them.
Using headers, footers, and other background text
You set up headers and footers by displaying master pages and typing text in background text frames. The contents
of background text frames appear on body pages, but you can only edit them on master pages.
Header and footer text frames on master page
The headers and footers might include the page number, date, chapter number and title, section number and title,
author, revision number, and draft release (such as preliminary and final).
You create and edit header and footer text as you do any other paragraph text. You can apply paragraph and character
formats, add and move tab stops, and add graphics such as a line above or below the text. In addition, you can add
system variables for information such as the page number or the current date, and you can change the size and
placement of the header and footer text frames. When you modify these text frames on a master page, FrameMaker
automatically updates any body pages that use that master page.

ADOBE FRAMEMAKER 8
User Guide
385
You can also add other background text on master pages. For example, in the FrameMaker fax template, the infor-
mational headings are in a background text frame on the master page.
A. Informational headings
For more information on creating headers and footers, see “Entering header or footer information” on page 385 and
“Including volume and chapter numbers in headers or footers” on page 471.
Creating and modifying background text frames
When you create a new, blank document, FrameMaker creates background text frames for headers and footers on
the left and right master pages. To make it easy to add centered and right-aligned information in headers and footers,
FrameMaker automatically adds center and right tab stops at the center of the text frame and at the right margin.
You can draw background text frames for additional header and footer information or for other background text.
Note: You can create single lines of background text by using the Text Line tool, but you can’t apply paragraph formats
to the text or insert variables in it. For information on creating text lines, see “Using text with graphics” on page 323.
To add a background text frame on a master page:
1Draw the text frame by using the Text Frame tool (see “Using text with graphics” on page 323).
2In the Add New Text Frame dialog box, click Background Text and click Add. The new text frame, like all text
frames for background text on master pages, is untagged.
3Double-click in the text frame to place the insertion point, and then insert the header, footer, or other
background text.
To resize or move a background text frame:
1Select the text frame by control-clicking the text frame.
2Do any of the following:
•To resize the text frame, drag a handle. For other methods, see “Resizing objects” on page 339.
•To move the text frame, drag its border (not a handle). For other methods, see “Moving objects” on page 330.
Entering header or footer information
You can create simple headers and footers by typing text in the header and footer text frames on the master pages.
In addition, you can specify items such as the current chapter and page numbers, the document’s total page count,
and the current date. FrameMaker displays a system variable in the header or footer on the master page and replaces
it with the correct value on each body page that uses that master page.
A
ADOBE FRAMEMAKER 8
User Guide
386
You can also create running headers and footers in which the text changes from page to page. In the following figure,
the running header contains the current section heading; the footer contains the page number and some text typed
directly into the background text frame.
Running headers and footers
To create running headers and footers, you insert running header/footer variables in background text frames on
master pages. For information on setting up these variables, see “Creating variables for running headers and footers”
on page 234.
To enter text, page numbers, dates, and other information:
1On a master page, click in the header or footer where you want to add information.
2Do any of the following:
•To insert static text, type the text.
•To insert volume or chapter numbers, choose Special > Variable. Then double-click Volume Number or Chapter
Number in the Variables scroll list, and click Insert. For information on setting up numbering, see “Determining
how documents and pages are numbered” on page 468.
•To insert the current page number, choose Format > Headers & Footers > Insert Page #. Type text next to the page
number to produce numbering such as page 1. For information on choosing the page numbering style (for
example, numeric, Roman, or alphabetic), see “Determining how documents and pages are numbered” on
page 468.
•To insert the page count, choose Format > Headers & Footers > Insert Page Count. Use the page count with the
page number and text you type to produce numbering such as page 3 of 4.
•To insert the current date, choose Format > Headers & Footers > Insert Current Date. FrameMaker updates the
date whenever it redisplays the page—for example, when you scroll, zoom, or go to the page.
•To insert a different variable, choose Format > Headers & Footers > Other and specify the variable. For more
information, see “Inserting variables” on page 228.
To add centered information in headers and footers, press Tab to move the insertion point to the centered tab stop.
To add right-aligned information, press Tab again to move the insertion point to the right-aligned tab stop.

ADOBE FRAMEMAKER 8
User Guide
387
Changing page layout on specific pages
The preceding sections describe how to change the basic layout of the left and right master pages and all body pages
that use them. Those basic techniques apply only to a symmetrical page layout—one in which facing pages have the
same number of equal-width columns, and equal top, bottom, inside, and outside margins.
You can create an asymmetrical layout by adding or changing text frames directly on the master pages. For example,
you may want the left margin to be wider than the right on both left and right pages. Or you may want a single-
column layout on the left page and a two-column layout on the right. You can even create a layout that contains
columns with different widths or with different gaps by using several text frames on a page—one text frame for each
column.
About layout overrides
When you make changes on a master page, FrameMaker automatically updates all body pages using that master
page. When you make layout changes on a body page (for example, by changing the number of columns, the
gap between columns, or the margins), you create an override to its master page’s layout. You can then do any of
the following:
•Update the master page and all corresponding body pages with your changes (see “Updating body and master
page layouts” on page 388).
•Create a new master page based on the body page changes (see “Creating custom master pages” on page 389).
•Do neither of the above, leaving the override as a one-time-only page layout (see “Creating one-time-only page
layouts” on page 389).
Changing margins and column layout on specific pages
The following steps always produce either a single-column layout or a multicolumn layout with equal-
width columns.
If you want to create a multicolumn layout with unequal column widths or gaps, use one text frame for each column,
and position the text frames one by one. For information, see “Adding template text frames on master pages” on
page 388 and “Adding text frames on body pages” on page 388.
To change the margins and column layout on a page:
1Select the text frame whose margins you want to change by control-clicking the frame.
2Choose Format > Customize Layout > Customize Text Frame.
3Do the following:
•To change the margins, specify the new size and position in the Unrotated Size and Offset From areas. The Offset
from Top and Offset from Left options specify the top and left margins. The bottom and right margins are then
determined by the text frame’s width and height.
•To change the number of columns or the gap between columns, change the values in the Columns area.
4Click Set.
Another way to change the margins is to select a text frame and then drag a resize handle. When you resize a multi-
column text frame, the column widths change to fit within the text frame, but the column gap remains the same.

ADOBE FRAMEMAKER 8
User Guide
388
Adding template text frames on master pages
For a master page to contain unequal-width columns of text, or to set up the layout for a newsletter or other
document in which the articles don’t flow continuously from the first page to the last, you use multiple text frames—
one for each column. For example, for a page with two unequal-width columns, you would add a second template
text frame. You can add a template text frame by drawing it or by duplicating an existing one.
To add a template text frame on a master page:
1To draw the text frame, use the Text Frame tool on the Tools palette (see “Using text with graphics” on page 323).
To draw more than one text frame, draw them in the order you want them connected.
2In the Add New Text Frame dialog box, click Template for Body Page Text Frame, and choose a tag from the Flow
Tag pop-up menu. Choose the current flow tag, unless you’re setting up a text frame for a different flow in a
multiflow document.
3In the Columns area, specify the number of columns in the text frame and (if it’s more than 1) the gap between
adjacent columns. If you’re setting up a layout with unequal-width columns, set the number of columns to 1, because
you use a separate text frame for each column.
4Click Add.
5Move the text frame as needed.
To copy an existing text frame, select the frame, choose Edit > Copy, and then choose Edit > Paste. FrameMaker
copies the text frame, its contents, and its properties (including the flow tag).
Adding text frames on body pages
When you draw a text frame on a body page, you are prompted for the number of columns and the gap between
them. However, FrameMaker does not assign a flow tag and does not connect the text frame to existing text frames
on the page. To use the new text frame as part of the document’s text flow, connect it to the flow (see “Connecting
text frames” on page 401). If the new text frame is the first one in the flow, also select Autoconnect so that new pages
will be added automatically as needed (see “About the Autoconnect setting” on page 400).
Updating body and master page layouts
You can change template text frames on more than one master page and then update all corresponding body pages
in one step. However, if you make column layout changes on a body page, you must update the corresponding master
page before you can update the other body pages that use that master page.
Before FrameMaker updates body pages, it checks whether any body pages have column layouts that override their
master page (see “About layout overrides” on page 387). If any pages contain layout overrides, you specify whether
to keep the overrides.
To update body pages with master page changes:
1After making layout changes on master pages, display body pages.
2If FrameMaker displays an alert message, specify whether to keep or remove layout overrides, and then click
Continue. If you keep layout overrides, FrameMaker updates those body pages with the master page’s background
text and graphics, but does not update the template text frames.
To update a master page with body page changes:
1Choose Format > Page Layout > Update Column Layout. A message asks you to confirm the master page and
body pages that are to be updated.
2Click Update.
ADOBE FRAMEMAKER 8
User Guide
389
3If FrameMaker displays an alert message, specify whether to keep or remove layout overrides on the pages being
updated, and then click Continue.
Creating one-time-only page layouts
You may need to change the layout of only one body page in a document. For example, you can make a text frame
longer to fit one more line of text on the page, or shrink a text frame to make room for a graphic placed directly on
the body page. When you change the column layout of a body page without updating the master page, you create a
layout override.
For information on changing the column layout on a body page, see “Changing margins and column layout on
specific pages” on page 387. For information on adding a text frame, see “Adding text frames on body pages” on
page 388.
Creating and editing custom master pages
Documents may need body pages with layouts that differ from those of the left and right master pages. For example,
you can create a different look for the first page of a document, or you can include a landscape page in a portrait
document. For such cases, you create custom master pages. (A document can contain up to 100 master pages.)
The first page uses a different layout.
You can also rename master pages and delete master pages that you no longer need.
Creating custom master pages
You create a custom master page by starting out with a blank page or by basing the new page on an existing master
page. After you create the custom master page, change its column layout, and add background text and graphics (see
“Changing page layout on specific pages” on page 387). You then assign the custom master page to one or more body
pages (see “Assigning master pages to body pages” on page 392).
To create a custom master page that is empty or that is based on another master page’s layout:
1Display the master page that you want to use as a basis for the new master page.
2Choose Special > Add Master Page and enter a name for the new master page in the Name text box.
3Do one of the following:
•To create a master page with a layout that matches the layout of an existing master page, choose the master page
from the Copy from Master Page pop-up menu.
•To create an empty master page, click Empty.
4Click Add.
ADOBE FRAMEMAKER 8
User Guide
390
To create a custom master page based on a body page’s layout:
1Make the column layout changes you want on a body page.
2With the body page displayed, choose Format > Page Layout > New Master Page.
3Enter a name for the master page and click Create.
Note: Master pages support the Unicode text encoding standard.
Reordering custom master pages
You can reorder custom master pages to view them in any order you want. The Right and Left master pages always
remain at the beginning.
To reorder custom master pages:
1Open a master page, and then choose Format > Page Layout > Reorder Custom Master Pages.
2Select a master page in the Custom Master Pages list, and click Move Up or Move Down to move the
page accordingly.
3Repeat step 2 as often as necessary to achieve the order you want.
4Click Set. If you were previously viewing a custom master page, note that a different master page may now
be visible.
Creating a rotated master page
You can create a custom master page that changes the orientation of a body page. For example, you can create a
rotated orientation for a body page with a very wide table.
Right page uses a rotated master page.

ADOBE FRAMEMAKER 8
User Guide
391
To create a rotated master page:
1Create a custom master page. (See “Creating custom master pages” on page 389.)
2On the master page, set up any text frames and background text and graphics that you want to have the same
orientation (unrotated) as headers and footers on the other master pages.
Unrotated master page
For example, if you want to achieve the effect shown in the illustration at the beginning of this section, you would
set up the headers and footers now. If you want them to be rotated, you would add them later. For information on
drawing background text frames, see “Creating and modifying background text frames” on page 385.
3Choose one of the Format > Customize Layout > Rotate Page commands. When FrameMaker rotates the page,
part of the page will probably be out of view. You can adjust the window size to see as much of the page as possible.
Rotated master page
4Create the text frames, background text, and background graphics that you want to display rotated. For example,
to achieve the effect shown in the illustration at the beginning of this section, you would add the template text frame
now.
You can type in rotated text frames, or you can unrotate the page to make typing faster. To unrotate a page, choose
Format > Customize Layout > Unrotate Page. When you’re finished, you can rotate the page again.
Renaming and deleting custom master pages
You can rename a custom master page—for example, to avoid overwriting a master page when importing master
pages from a template that contains a master page with the same name. You can’t rename the master pages named
Left and Right.
If a document no longer uses a custom master page, you can delete it. You can’t delete the left or right master page
or any master page currently assigned to a body page.
To rename a custom master page:
1Display the master page and click the page name in the status bar.
2Enter the new name and click Set.

ADOBE FRAMEMAKER 8
User Guide
392
To delete a custom master page:
1Display the master page and choose Special > Delete Page.
2Click OK.
Assigning master pages to body pages
You can assign a master page to a body page at any time. FrameMaker uses the template text frame from the master
page and displays background text and graphics.
You can also choose to assign no master page to a body page. Because it’s not associated with a master page, this type
of body page has no headers, footers, or other background text or graphics. (If the body page contains a text frame,
the text frame is unaffected.) For example, if each chapter in a book must contain an even number of pages, and if
the last page of a chapter contains no body text, you may not want that page to use a master page, so that it will be
completely blank.
For information on assigning master pages to pages containing specified paragraph tags or elements, see “Assigning
master pages to body pages containing paragraph tags” on page 392 and “Assigning master pages to pages containing
elements” on page 407.
To assign a different master page to body pages:
1With a body page displayed, choose Format > Page Layout > Master Page Usage.
2In the Use Master Page area, do one of the following:
•To assign the left or right master page, click Right (in a single-sided document) or Right/Left (in a
double-sided document).
•To assign a custom master page, choose the page name from the Custom pop-up menu.
•To assign no master page, choose None from the Custom pop-up menu.
3In the Apply To area, do one of the following:
•To apply the change to the current body page, click Current.
•To apply the change to a range of pages, enter the starting and ending page numbers in the Pages text boxes.
•To apply the changes only to odd or even pages within a range, select Even or Odd.
•To apply the changes only to pages within a range that currently use a particular master page, choose a page from
the pop-up menu in the Apply To area.
4Click Apply.
Note: If the master page contains a template text flow not found on the body page, FrameMaker adds the text frames
that contain that flow to the body page. If the body page contains a flow not found on the master page, FrameMaker
leaves the text frames that contain that flow unchanged. This action could result in overlapping text frames.
Assigning master pages to body pages containing paragraph tags
You can assign master pages to body pages that contain specified paragraph tags. For example, you may want all
pages that include the Title paragraph tag to be formatted with a custom master page called First.
ADOBE FRAMEMAKER 8
User Guide
393
You map the paragraph tags to the master pages using the Reference Pages mapping table. When you choose the
Apply Master Pages command, the master page will be applied to the body pages on which the referenced paragraph
tag appears.
In this example, the First master page will be applied to body pages containing Title paragraph tags.
For information on assigning master pages to elements in structured documents, see “Assigning master pages to
pages containing elements” on page 407.
To assign a master page to body pages on which a paragraph tag appears:
1Choose View > Reference Pages.
2Click the Next Page button until the five-column UnstructMasterPageMaps table appears.
If the mapping table does not appear in the reference pages, choose Format > Page Layout > Apply Master Pages.
3For Book Update (Yes or No), type Ye s or No to determine whether the specified master page will be applied
when you choose Apply Master Pages from a book.
4Edit the mapping table by doing the following:
•Under the Paragraph Tag Name column heading, type the name of the paragraph tag to which you want the master
page to be applied. This column is required for master pages to be applied. Spell the paragraph tag name correctly,
using the same capitalization that the paragraph tag uses.
•Under the Right-Handed Master Page column heading, type the name of the master page you want to apply. This
column is required for master pages to be applied. The specified master page will be applied to all body pages,
including left-handed pages in double-sided documents on which the paragraph tags appear, unless you specify a
different master page under the Left-Handed Master Page column. Master page names are case-sensitive.
•Under the Left-Handed Master Page column heading, type the name of the master page that you want to apply to
the left-handed body pages on which the paragraph tags appear in double-sided documents. This column
is optional.
•Under the Range Indicator column heading, type Single to apply the master page only to the body page on which
each paragraph tag appears; type Span pages to apply the master page to the entire span of pages to which the
paragraph tag is applied; or type Until changed to apply the master page to all pages, until the next body page with
a different paragraph tag listed in the mapping table is encountered. If this cell is blank, master pages are applied
to single pages.
•Add notes to the Comments column. Text you type in this column does not affect how master pages are applied
in any way.
•To map additional master pages to paragraph tags, add and fill out additional table rows.
5When you are done, choose View > Body Pages.
6Make the appropriate document window or book window active. If a book window is active, select the documents
you want to affect.
ADOBE FRAMEMAKER 8
User Guide
394
7Choose Format > Page Layout > Apply Master Pages, and then click Yes to override manually applied
master pages.
Adobe FrameMaker searches each body page for the first occurrence of any paragraph tag specified in the Master
Page Maps table. When it finds text containing the specified paragraph tag, it applies the specified master page.
Aligning text across columns
You can use the following techniques to align text in the columns of a multicolumn layout so that the text has an even
appearance:
•Balance text in a flow. FrameMaker distributes text evenly across the columns of a text frame that isn’t full of text.
•Feather (vertically justify) text in a flow, so that the last line of text in each column reaches the bottom of
the column.
•Synchronize (align) text in a flow. The first lines of body paragraphs line up whenever they appear side by side
in columns.
If feathering and synchronization are both on for a flow, feathering takes precedence over synchronization. However,
the first lines in the columns are synchronized with each other.
Balancing text across columns
In a layout that uses a multicolumn text frame, you can balance the text across columns that aren’t full of text—for
example, columns on partly empty pages that precede forced page breaks, and columns on the last page of a
document. You can balance text across columns throughout a text flow or in an individual text frame.
Balancing off and on
To balance text across columns throughout a text flow:
1If a document window is active, place the insertion point in the main text flow or click in the page margin. If a
book window is active, select the documents you want to affect.
2Choose Format > Page Layout > Column Layout.
3Select Balance Columns and click Update Entire Flow.
To balance text across columns in a single text frame:
1Click in the text frame and choose Format > Customize Layout > Customize Text Frame.
2Select Balance Columns and click Set.
ADOBE FRAMEMAKER 8
User Guide
395
Feathering text to the bottom of text frames
When FrameMaker feathers text, it first adds space between paragraphs, up to a limit that you set. If more adjustment
is necessary, it adds space between lines, up to another limit that you set. FrameMaker does not feather the text in a
text frame in which text runs around graphics.
Before and after feathering
In a multicolumn text frame that contains straddles—paragraphs, tables, or anchored frames—FrameMaker adds
vertical space to align the last baselines of text in adjacent columns above each straddle.
Before and after feathering with straddling
When text is feathered, the display of pages may be slower. For this reason, you may want to feather text only after
you finish editing a document.
To feather text in a text flow:
1If a document window is active, place the insertion point in the main text flow. If a book window is active, select
the documents you want to affect.
2Choose Format > Page Layout > Line Layout.
3Select Feather, and enter the maximum amount of space FrameMaker can add between lines (Interline Padding)
and between paragraphs (Inter- Padding).
FrameMaker won’t exceed the padding limits you set. If it’s not possible to feather text in a column without exceeding
the limits, FrameMaker does not feather text in that column.
4Click Update Flow.
Note: Feathering leaves room for the largest possible descender in the largest font size used in the line, even if no character
with such a descender actually appears. If the last line in a column seems too high, check to see whether the column
contains a nonprinting character (such as an anchor symbol) in a font that’s larger than that of the surrounding text.

ADOBE FRAMEMAKER 8
User Guide
396
Synchronizing baselines across columns
When you synchronize (align) text in a flow, FrameMaker creates an invisible grid in each text frame and aligns the
baseline of the first line of each specified paragraph to the grid. FrameMaker also aligns the first line after an
anchored frame and tries to align the first line in each column.
Before and after synchronizing
Because headings in large fonts often appear at the tops of columns, you can specify a first-line synchronization limit.
This limit controls whether the baseline of a heading is placed on the first grid line when the heading falls at the top
of a column, even when the heading’s default font is larger than the grid can accommodate. To place the baseline of
a heading on the first grid line, FrameMaker lets the heading extend above the top of the column as shown in the
illustration. FrameMaker won’t synchronize font sizes larger than the limit you set.
To synchronize baselines across columns:
1Check the paragraph formats of the paragraph types you want to synchronize to make sure they all have the same
default font size and line spacing. Fixed line spacing should be on (see “Changing spacing” on page 115).
2Click in the flow you want to synchronize (or select the documents in the book that you want to affect) and choose
Format > Page Layout > Line Layout.
3Select Baseline Synchronization and turn off Feather.
4In the Synchronization area, enter the line spacing you want to use for the text frame grid in the Synchronize ’s
text box. Use the same line spacing as in the paragraphs you want to synchronize. Otherwise, FrameMaker won’t
synchronize the paragraphs with the text frame grid.
5In the First-Line Synchronization Limit text box, enter the largest font size to align at the top of a column. For
example, suppose the line spacing for body paragraphs is 12 points, the column grid is 12 points, and the headings
are 18 points. If you want the headings to be aligned when they appear at the top of a column, specify 18 as the first-
line limit.
6Click Update Flow. Because no descenders appear above the first line in a column, the first grid line is offset from
the top of the column a distance equaling two-thirds of the specified line spacing.
Synchronizing baselines in adjacent text frames
In some documents, such as multiflow newsletters, each page may contain several text frames—one for each column
of text. When the tops of adjacent text frames start at the same position on the page, their invisible text frame grids
line up nicely. When text frames start at different positions, however, you may need to adjust their tops to line up
their grids.
ADOBE FRAMEMAKER 8
User Guide
397
Line up the grids by resizing adjacent text frames so that the distance between their tops is evenly divisible by the
grid. For example, if the grid is 12 points, you can start a text frame 144 points (12 times 12 points) from the top of
an adjacent text frame.
A. Grid spacing B. Distance evenly divisible by the grid
Use the snap grid to correctly position the text frames. To do so, specify a snap grid equal to the text frame grid.
Then resize the text frames until their tops snap to the grid. For more information, see “Using grids” on page 311.
About multiflow documents
In most documents, the text frame on each page is automatically connected to the text frame on the next to form a
single text flow running through the entire document.
Single text flow
However, a document can have separate text flows, each with its own text frame connections. For example, a
bilingual document may contain side-by-side translations of the same text.
Text in left column flows to left column on next page.
1
PLATE BOUNDARIES
B
A
ADOBE FRAMEMAKER 8
User Guide
398
In a newsletter, on the other hand, each article may have its own text flow. You specify how the text flows by
connecting the text frames yourself.
Text from first page flows to two different pages.
When a text frame fills in a multiflow document, you can tell FrameMaker not to add a new page. That way, you can
add pages yourself and control the connections. Because each flow’s autonumbering is independent of the
numbering in other flows, you can maintain separately numbered lists, headings, and figure titles for each flow.
Setting up multiflow documents
You set up a document with side-by-side text flows by laying out and connecting the text frames on the master pages.
Because the text frame connections are the same throughout the document, you usually don’t need to make further
changes on the body pages.
You set up a newsletter or magazine that requires nonparallel, multiple flows by establishing a column layout on the
master pages. However, the master pages act only as the basic layout grid. You resize, delete, connect, and disconnect
the text frames on the body pages until they look right. This approach gives you the greatest flexibility in determining
the way text flows through the document.
Note: If you’re creating a newsletter or magazine that has articles that flow consecutively from the first page to the last,
you don’t need to use the techniques described here. Instead, you can use a single text flow. You can create special effects
by making text run around graphics, and by making paragraphs, tables, and frames straddle columns. For an example
of this technique, see the newsletter template provided with FrameMaker.
To set up side-by-side flows:
1Set up the flows on one of the master pages (see “Adding template text frames on master pages” on page 388). Use
a text frame for each flow and assign a different flow tag to each text frame. Make sure that Autoconnect is on for
each flow so that FrameMaker adds a new body page whenever text reaches the end of one of the flows (see
“Changing flow tags and Autoconnect” on page 400).
Left and right master pages for a side-by-side flow
2Repeat the previous step for the remaining master pages. All master pages should have the same flow tags.
Otherwise, FrameMaker won’t alternate properly between the left and right master pages when adding body pages.
ABAB
ADOBE FRAMEMAKER 8
User Guide
399
Important: To create a new body page correctly when text reaches the bottom of a text frame, the appropriate left or
right master page must contain all of the flow tags on the current body page. If any flow tag is missing, FrameMaker
creates the new page with the current body page’s master page instead.
3Update the body pages with the master page changes by displaying body pages.
To set up flows for a newsletter or magazine:
1Decide on the number of columns, and put that number of single-column text frames on each master page (see
“Adding template text frames on master pages” on page 388). All of the text frames should be in the same flow. You’ll
use these text frames as the layout grid within which you’ll have text flow.
First master page
Left and Right master pages with the same flow
2Turn off Autoconnect so that FrameMaker won’t automatically add pages (see “About the Autoconnect setting”
on page 400).
3Update body pages with the master page changes by displaying body pages.
4On each body page, resize, disconnect, and connect text frames as necessary. Don’t update the master pages as you
make changes on the body pages. (See “Connecting text frames” on page 401 and “Disconnecting text frames” on
page 402.)
5To synchronize text baselines in the newsletter, make sure the text frames are placed appropriately. If the
document contains several text flows, synchronize baselines for each flow. For information, see “Synchronizing
baselines across columns” on page 396 and “Synchronizing baselines in adjacent text frames” on page 396.
6Manually create new disconnected body pages as necessary (see “Adding new, disconnected pages” on page 401).
7Connect text frames between pages as necessary.
AAA
AAA AAA
ADOBE FRAMEMAKER 8
User Guide
400
Controlling the flow of text
A flow’s basic properties are its flow tag and its Autoconnect setting. Autoconnect determines whether a new page
is automatically generated when the flow’s text frames are full. Most documents contain a single, autoconnected text
flow that you won’t need to change. (In a new, blank document, the main flow is tagged A.)
If you need to assign a flow tag (for example, when creating side-by-side text flows), you can do so at any time. You
need to assign a tag only once for a flow. After that, connecting a text frame to the flow assigns the tag to the text
frame. If you change the flow tag or the Autoconnect setting in one text frame in a flow, the change is made to the
entire flow.
You can control the flow of text by connecting, disconnecting, and splitting text frames in a flow. You can also add
and delete disconnected pages.
About the Autoconnect setting
In a document with one flow or parallel flows, Autoconnect is usually on to tell FrameMaker to add a new page
whenever the flow’s text frames are full. The new page takes the column layout of the appropriate master page (left
or right), and the text frames on the new page are automatically connected to the text frames on the original pages.
When working on a document with nonparallel, multiple flows, you’ll usually turn off Autoconnect. This allows
you to add a new, disconnected body page wherever you want, and to control the connections between it and
existing pages.
If Autoconnect is off, and if the flow contains more text than it can hold in its text frames, the text overflows at the
end of the last text frame in the flow. The bottom border of an overflowing text frame appears as a solid line when
borders are visible.
Overflowing text frame
If you try to type in an overflowing text frame, you’ll hear a beep. Overflowing text is not deleted; it’s just hidden
from view. As soon as you connect the overflowing text frame to another text frame, the hidden text reappears in the
next text frame.
Changing flow tags and Autoconnect
You normally change flow tags and the Autoconnect setting on master pages. If two text frames are connected, you
must disconnect them before you can change one of their flow tags (see “Disconnecting text frames” on page 402).
To change a flow’s tag or Autoconnect setting:
1Click in a text frame in the flow.
2Choose Format > Customize Layout > Customize Text Frame.
3Enter a tag for the flow in the Flow Tag text box. You should keep flow tags short so they won’t obscure other infor-
mation in the Tag area of the status bar. You can’t assign a tag that is already used on the current page.

ADOBE FRAMEMAKER 8
User Guide
401
Note: If you want two text frames on a page to have the same flow tag, connect the text frames (see “Connecting text
frames” on page 401).
4If you want FrameMaker to add a new page when you fill the last column on a page, select Autoconnect.
5Click Set.
Adding new, disconnected pages
In documents with one main flow or two parallel flows, you normally don’t add disconnected body pages; you
let FrameMaker add connected pages automatically when necessary. In a multiflow document in which Autoconnect
is off, or in other specialized documents, you can add new, disconnected body pages. When the text reaches the end
of a text frame, you add a new page and connect the text frames.
To add a new, disconnected page:
1From a body page, choose Special > Add Disconnected Pages.
2Choose the location and number of pages you want to add.
3Choose a master page from the Use Master Page pop-up menu and click Add.
Deleting disconnected pages
When you delete disconnected pages in a multiflow document, FrameMaker also deletes the pages’ contents.
To delete disconnected pages:
1Click in a page you want to delete and choose Special > Delete Pages.
2Specify the first and last disconnected pages you want to delete and click Delete. If you want to delete only one
page, enter its page number in both text boxes.
Connecting text frames
When two text frames are connected, the text flows from the end of the first text frame to the beginning of the
second. You can connect a text frame on a master page to any other text frame on the same master page, and you can
connect a text frame on a body page to any text frame on any body page. You can also connect a text frame in the
middle of a flow.
When you connect two text frames, FrameMaker assigns the first text frame’s flow tag to the second frame. If the first
text frame is untagged, the second frame’s tag is used. That way, all connected text frames belong to the same flow
and have the same tag. If the first text frame contains overflowing text, the text flows into the second frame when
you make the connection.
To connect two text frames:
1(Windows and UNIX) Select the two text frames in the order in which you want text to flow. To select the text
frames, control-click the text frames.
If the text frames are on different pages, the first frame is deselected when you select the second one, but FrameMaker
keeps track of the first selection.
Note: To add a text frame to the middle of a flow, first select the text frame you want to add, and then select the frame
that should follow it.
2Choose Format > Customize Layout > Connect Text Frames. If the first text frame you selected isn’t on a page
that’s currently visible, an alert message asks whether you want to connect to that frame.

ADOBE FRAMEMAKER 8
User Guide
402
Disconnecting text frames
You disconnect text frames when you want to create separate flows—for example, to place an article in a specific
location in a newsletter, or to create a pull-quote. If you need to start a new flow in the middle of a column, you can
split the text frame that contains the column in two (see “Splitting text frames” on page 402), and then disconnect
the two text frames.
You can disconnect a text frame from the preceding text frame, the following one, or both. You can also remove a
text frame from the middle of a flow.
Disconnecting text frames does not affect existing text in the frames. To move text to a different text frame, cut and
paste it after disconnecting the frames.
Note: When you disconnect text frames on the same body page, FrameMaker creates separate flows with no flow tags.
When you disconnect text frames on different body pages, FrameMaker creates separate flows with the same flow tag.
In either case, if you’re creating a newsletter-type document where Autoconnect is off for each flow, the flow tags don’t
matter. FrameMaker won’t create new pages automatically and, thus, won’t need to make text frame connections.
To disconnect text frames:
1Select the text frame you want to disconnect by control-clicking the text frame.
2Choose Format > Customize Layout, and then choose Disconnect Previous, Disconnect Next, or
Disconnect Both.
To remove a text frame from the middle of a flow:
1Select the text frame immediately preceding the one you want to remove. To do this, control-click the text frame.
2Select the text frame immediately following the text frame you want to remove.
3Choose Format > Customize Layout > Connect Text Frames. If the first text frame you selected isn’t on a page
that’s currently visible, an alert message asks whether you want to connect to that frame.
Splitting text frames
You can split a text frame in two, and then disconnect the two text frames to start a new flow. For example, you may
want a new article with its own flow to start in the middle of a text frame. You can also “unsplit” text frames after
splitting them.
The second of three text frames is split, disconnected from the first text frame, and retagged.
To split a text frame:
1Click in the line above where you want to split the text frame and choose Format > Customize Layout > Split Text
Frame. FrameMaker splits the text frame below the line that contains the insertion point, creating two separate but
connected text frames.
2Select the bottom text frame by control-clicking the text frame.
AAA ABB
A
ADOBE FRAMEMAKER 8
User Guide
403
3Disconnect the text frame from the previous one by choosing Format > Customize Layout > Disconnect Previous.
If the flow was tagged, FrameMaker removes the flow tag. If Autoconnect was on before you disconected the text
frames, it is now off for both text frames.
4Resize the text frames as necessary.
To unsplit text frames:
❖Do one of the following:
•If you haven’t made any other changes since splitting the text frame, choose Edit > Undo.
•If you made another change but you haven’t yet disconnected the two text frames, delete the lower frame and then
resize the remaining text frame to the size of the original unsplit frame.
•If you have already disconnected the two frames, cut the text from the second text frame and paste it at the end of
the first text frame. Then delete the second text frame and resize the first one to the size of the original unsplit
frame. If you need to turn Autoconnect back on or reassign a flow tag for the text flow, use Format > Customize
Layout > Customize Text Frame.
Cross-referencing text frames
When an article in a newsletter or magazine continues from one page to another, you can use cross-references to tell
the reader where to turn to continue reading and to indicate where the end of the article is continued from.
Indicate where the flow continues, and where it is continued from.
To cross-reference a disconnected text frame:
1Resize the two text frames to make room for the cross-references. Drag the bottom of the first text frame upward
and the top of the continuation text frame downward.
2Draw a small text frame below the text frame on the first page, and another above the text frame on the continu-
ation page. Don’t connect either text frame to any other text frame.
3Insert a cross-reference in the empty text frame on the first page, referring to the continuation page of the article.
For information on working with cross-references, see “Inserting cross-references” on page 201.
4Insert a cross-reference in the empty text frame on the continuation page, referring to the first page of the article.
Tracking a text flow
In a document with many flows, it’s easy to lose sight of where a flow continues. You can zoom out to see more of a
text flow or move from one text frame in a flow to the next.
ADOBE FRAMEMAKER 8
User Guide
404
To see more of a text flow:
1Zoom out to 25% and adjust the window size to see as many pages as necessary.
2Click in the flow you want to check and choose Edit > Select All in Flow. The flow is highlighted, showing how it
traverses the pages of the document.
To move through a flow’s text frames:
❖Do one of the following:
•To display the next connected text frame, click in the last line of a text frame and press the Down Arrow key.
•To display the preceding connected text frame, click in the first line of a text frame and press the Up Arrow key.
Working with reference pages
You can use reference pages to store frequently used graphics that you want to position consistently throughout a
document, and then use the graphics on body pages where they’re needed. If you place a graphic in a reference
frame—an unanchored graphic frame on a reference page—you can use the frame as a property of a paragraph
format. For example, to design a heading with a line below it, draw the line in a reference frame, and then include
the reference frame in the heading’s paragraph format.
Reference page and body page
Reference pages can also hold boilerplate material or clip art that you can copy and paste on body pages—for
example, symbols for cautions and notes. And specialized reference pages can contain hypertext commands,
formatting information for generated lists and indexes, definitions of custom math elements, and mappings for
converting to XML and HTML.
A document normally contains at least one reference page. You can add your own graphics to an existing reference
page, and you can create additional reference pages (up to 100).

ADOBE FRAMEMAKER 8
User Guide
405
To display reference pages:
❖Choose View > Reference Pages. The name of the current reference page appears in the Page Status area of the
status bar.
Page Status area
If the document doesn’t contain any reference pages, the Add Reference Page dialog box appears. Create the first
reference page by entering a page name and clicking Add.
To view other reference pages when a reference page is visible:
❖Do one of the following:
•Click the Next Page or Previous Page button.
•Press the Page Up or Page Down key.
•Use the scroll bar.
To create a reference page:
1Display reference pages and choose Special > Add Reference Page.
2Enter a name for the reference page and click Add.
To return to body pages:
❖Choose View > Body Pages. The most recently displayed body page appears.
Renaming and deleting reference pages
You can rename a reference page—for example, to avoid overwriting the reference page when you import reference
pages from a template that contains a reference page with the same name.
If a document no longer uses a reference page, you can delete it. However, if you delete a reference page that contains
a graphic used in a paragraph format, the graphic no longer appears in paragraphs using that format. When this
happens, the Frame Above or the Frame Below pop-up menu in the Advanced properties of the Paragraph
Designer is set to As Is for the paragraphs.
To rename a reference page:
1Display the reference page and click the page name in the status bar.
2Enter the new name and click Set.
To delete a reference page:
❖Display the reference page and choose Special > Delete Page.

ADOBE FRAMEMAKER 8
User Guide
406
Using reference frames on reference pages
You can use a graphic as part of a paragraph format if you have put the graphic in a reference frame on a reference
page. For information on using a reference frame in a paragraph format, see “Adding graphics to paragraph formats”
on page 121.
Graphics in reference frames
When you select a reference frame on a reference page, its name appears in the status bar after the word Frame.
To create a reference frame on a reference page:
1Click the Graphic Frame tool on the Tools palette, and then drag to draw the frame. To draw a square frame,
Shift-drag.
2Enter a name in the Name text box and click Set. Use a short, descriptive name you’ll recognize later when the
name appears in the Frame Above and the Frame Below pop-up menus in the Advanced properties of the
Paragraph Designer.
3Put a graphic in the frame. You can draw the graphic, import a graphic file, or combine drawn and
imported graphics.
4Adjust the frame’s size and shape if necessary. When you use a reference frame above or below a paragraph on a
body page, the whole frame—not just the graphic inside it—appears on the body page. The height of the frame affects
the spacing of text above and below the frame.
5Use the Text Line tool to type the frame’s name above the frame (see “Using text with graphics” on page 323).
Typing the name helps you identify the frame when you view the reference page. It does not rename the
reference frame.
To rename a reference frame:
1Select the reference frame and click the frame’s name in the status bar.
2Enter the new name and click Set. You should also type the new name in the text line above the reference frame.
If you rename a reference frame used in a paragraph format, you need to update the format so that it uses the new
frame name (see “Adding graphics to paragraph formats” on page 121).
To change other properties of a reference frame:
❖Select the frame and use either Graphics > Object Properties or the options on the Tools palette. For details, see
“Applying and changing drawing properties” on page 318, “Moving objects” on page 330, and “Resizing and
reshaping objects” on page 338.

ADOBE FRAMEMAKER 8
User Guide
407
Setting up boilerplate graphics on reference pages
You can set up boilerplate graphics—for example, margin symbols—in anchored frames on a reference page. Then
you can copy the anchored frames to body pages. When you do this, the graphics appear correctly positioned in their
anchored frames.
You can copy and paste boilerplate graphics onto body pages.
You can also place graphics directly on reference pages and then copy and paste them anywhere on body pages.
To set up a boilerplate graphic in an anchored frame:
1Create a reference page with the same column layout as the body page on which you want to display the graphic.
This ensures that the graphic is positioned correctly when you copy it to body pages. To set up the column layout,
you can copy the text frame from a body page and paste it on the reference page.
On the reference page, set up the anchored frame exactly as you want it to appear on body pages.
2Draw the graphic in the anchored frame, or paste or import it into the frame. You may want to add some text
outside the anchored frame to identify the graphic. For example, in the illustration, Caution Symbol identifies
the graphic.
Assigning master pages to pages containing elements
To assign master pages to body pages containing elements in structured documents, you map the elements to the
master pages using the Reference Pages mapping table. When you choose Apply Master Pages, the master page will
be applied to the body page on which the referenced element appears.
For more information on assigning master pages, see “Assigning master pages to body pages containing paragraph
tags” on page 392.
To assign a master page to body pages on which an element appears:
1In Structured FrameMaker, choose View > Reference Pages.
2Click the Next Page button until the eight-column StructMasterPageMaps table appears.
If you’re working on a document created in a previous version of FrameMaker, choose Format > Page Layout >
Apply Master Pages, so that the mapping table appears in the reference pages.
3To the right of Book Update (Yes or No), type Yes or No to determine whether the specified master page will be
applied when you choose Apply Master Pages from a book.

ADOBE FRAMEMAKER 8
User Guide
408
4Edit the mapping table by doing the following:
•Under the Element/Paragraph Tag Name column heading, type a valid prefix (E: for element tag, or P: for
paragraph tag), followed by the name of the element or paragraph tag to which you want the master page to be
applied. If no prefix is applied, an element tag is assumed. Spell the name correctly, using the same capitalization
that the element or paragraph tag uses. This column is required for master pages to be applied.
•Under the Right-Handed Master Page column heading, type the name of the master page you want to apply. The
specified master page will be applied to all body pages, including left-handed pages in double-sided documents
on which the elements or paragraph tags appear, unless you specify a different master page under the Left-
Handed Master Page column. Master page names are case-sensitive. This column is required for master pages to
be applied.
•Under the Left-Handed Master Page column heading, type the name of the master page that you want to apply to
the left-handed body pages on which the elements or paragraph tags appear in double-sided documents. This
column is optional.
•Under Attribute Name, type a valid attribute name to further define the mapping context.
•Under Attribute Value, type a valid attribute value to further define the mapping context.
•Under Context, type a value for an element’s context label to further define the mapping context.
•Under the Range Indicator heading, type Single to apply the master page only to the body page on which each
element or paragraph tag appears; type Span pages to apply the master page to the entire span of pages to which
the element or paragraph tag is applied; or type Until changed to apply the master page to all pages until the next
body page with a different element or paragraph tag listed in the mapping table is encountered. If this cell is blank,
master pages are applied to single pages.
•Add notes to the Comments column. Text you type in this column does not affect how master pages are applied
in any way.
•To map additional master pages to elements or paragraph tags, add and fill out additional table rows.
5When you are done, choose View > Body Pages.
6Make the appropriate document window or book window active. If a book window is active, select the documents
you want to affect.
7Choose Format > Page Layout > Apply Master Pages, and then click Yes to override manually applied
master pages.
FrameMaker searches each body page for the first occurrence of any element or paragraph tag specified in the Master
Page Maps table. When it finds text containing the specified element or paragraph tag, it applies the specified
master page.
About Templates
Templates are FrameMaker documents you use as a foundation for formatting other documents. Templates provide
an easy way to ensure that your design is consistent from one document to another. You can create a new document
from a template or import formats from a template into an existing document.
This topic addresses the template designer, the person who creates templates for a workgroup. If you’re not designing
or editing templates, the only information in this chapter you’ll need is “Using templates,” and “Importing and
updating formats” on page 415.
ADOBE FRAMEMAKER 8
User Guide
409
Using templates
When you create a document, FrameMaker prompts you for a template to base it on. FrameMaker provides a number
of general-purpose templates to choose from. In a workgroup setting there may be other choices, designed for your
particular documents.
You can also import the import styles defined in an external CSS file into your EDD file. For more information, see
“Importing CSS element styles into an EDD file (Windows)” on page 69.
You can apply a template (A) to a document (B) to update the document’s design.
For information on creating a new document based on a predefined template, see “Creating documents” on page 19.
Planning templates
As you develop a custom template, try to anticipate the needs of other users and consider a wide range of issues that
apply across documents. For example, you may want to consider the following issues.
Anticipated template use Try to anticipate the situations in which your template will be used. Define all the formats
and other design properties you think users might need. The more complete your template, the less users will need
to customize their documents. For information on the formats and design properties you may need, see “Creating
templates” on page 410.
Existing templates Before you create your own templates, take a look at existing templates, especially those provided
with FrameMaker. You can use the templates as examples of how to set up items such as master pages, paragraph and
character formats, headers and footers, cross-reference formats, and autonumbering.
If you find an existing template that’s close to what you want, use it as the basis for your template. Modify the template
and save it under a different name as a new custom template.
Online viewing If you’re designing a document that will be used primarily online (but not in HTML format), make
sure that the page size is no larger than the smallest screen size on which it will be displayed. Your document may
need to be in landscape orientation if it will be used on laptop computers.
#
PLATE BOUNDARIES
3
Plate
Boundaries
3
A
B

ADOBE FRAMEMAKER 8
User Guide
410
If you’ll convert documents based on the templates to HTML, be sure to use formats and design elements that have
HTML equivalents. For example, background graphics on master pages of your FrameMaker documents won’t
appear in the HTML files, rotated text will appear unrotated in the HTML files, and footnotes may not look the way
you want.
Localization If documents based on your template will be translated into other languages, consider letting the trans-
lators review the template design. Some design elements may not work well with another language. The standard
page size and default measurements may need to be different for use in other countries.
Fonts Decide on the fonts to use as early as possible. Fonts affect many other design elements—for example, line
height in paragraphs, and the height of header and footer columns.
Platforms If documents based on the templates will be edited on several platforms, use fonts that are available on all
of them. Also, set up cross-platform file naming conventions for your templates, for the documents that will be based
on the templates, and for the folders in which the documents will be stored. For details, see the online manual
Working on Multiple Platforms.
Ease of use Try to make your templates usable as well as attractive. For example, consider the following guidelines:
•Because people who use your template may not know FrameMaker as well as you do, keep the design as simple
and easy to use as possible.
•Set up the template so that it works as seamlessly and automatically as possible. For example, specify a Next Tag
in the Basic properties of the Paragraph Designer, or select Keep with Next or Keep with Previous in the
Pagination properties.
•If you’re preparing a set of templates for a book, prepare templates for a table of contents and an index as well as
for the other files in the book. Also, consider making the templates general so that you have as few of them as
possible. For example, you could create one template that is used for chapters, prefaces, and appendixes. That way,
you won’t have to update many templates if you need to make changes.
•Set up a master page for each page layout needed. For example, a chapter template might contain master pages for
a first page, a right page, a left page, and a rotated page—even though only one or two of the chapters will contain
pages that need to use the rotated master page.
•Document your template for other people who will use it. If the template contains sample text, you can use that
text to describe the parts of the template. For example, a body paragraph might contain the text This is a body
paragraph. When you finish the template, prepare a document summarizing its contents, and put that document
in the same location as the template.
Creating templates
When you set up a template, you lay out master pages, define and apply formats, and define special text, such as
cross-reference formats and variables. This section provides only an overview to the process of creating a template.
For detailed instructions, see the other chapters in this book.
Designing the page layout
Begin a template by specifying the overall page layout. This includes choosing the page size, defining the column
layout, creating master pages, and defining the basic document properties. For details, see “Page layout and
templates” on page 377.

ADOBE FRAMEMAKER 8
User Guide
411
To design the page layout:
1Create a new document. You can start with either a custom new document or a copy of an existing document you
plan to modify.
To see how facing pages look as you design the page layout, display them side by side. Choose View > Options, and
then choose Facing Pages from the Page Scrolling pop-up menu. Make the document window larger and zoom out,
if necessary, to fit both pages in the window.
2Define the column layout. If you started with a custom document, you have already specified the margins and the
number of columns. If you’re modifying an existing document, you may want to change the column layout.
3Add and name any custom master pages you’ll need.
4Enter background text and graphics on the master pages, including headers and footers.
If a running header or footer shows the text or an autonumber of a document paragraph, such as a chapter or section
title, it contains a Running H/F variable that refers to the paragraph. To set this up, decide what the tag for that
paragraph will be.
5Define the custom document properties, such as numbering and text options, and specify the view options.
Designing text formats
After designing the page layout, define how you want the text to be formatted. A good template has a paragraph and
character format for every type of text that will be used in the documents. Consider the following guidelines:
•If your document will be opened or printed on computers other than your own, use fonts that are widely available.
•Paragraph formats provide the foundation of text formatting, so set them up before setting up the
character formats.
•When creating a character format, set all the options in the Character Designer as As Is, and then specify only the
settings you want to change. This way, the format will work with any paragraph format.
•Use tags that express the purpose rather than the appearance of the text. For example, name a format for empha-
sized text Emphasis rather than Bold. Then if you decide to change to italics for emphasized text, you can redefine
the Emphasis format without having to retag any text.
•Use names that are easily recognizable. For example, you might name the formats for numbered lists Step1 and
StepNext rather than st1 and stn. Or, if you want to use the keyboard to apply paragraph and character tags,
consider naming your tags st1 Step1 and stn StepNext. That way the tags and descriptions are quickly available
from the keyboard. For more information, see “Applying predefined formats to text” on page 102.
•If the template uses more than one series of autonumbers, add a series label to the format for each autonumber.
For example, define step autonumbers as S:<n+>, where S: is the series label.
•In paragraph formats, use either Space Above or Space Below consistently to add space above or below the
paragraph. (FrameMaker uses only the larger of the two values to determine the space between paragraphs.)
Standardizing graphics, frames, and tables
If the documents will contain graphics, frames, or tables, follow these guidelines to maintain consistency:
•Put standard items on a reference page. You can include graphics that users will need again and again—for
example, a symbol that calls attention to notes and cautions, or an anchored frame with a standard height and
width. Users can copy and paste these items as needed.

ADOBE FRAMEMAKER 8
User Guide
412
•Create a paragraph format for anchored frames to provide consistent spacing around graphics. For example, a
paragraph format named Frame could contain a Space Below setting of 20 points and a Line Spacing setting of
zero. Then, each frame could be anchored to a blank paragraph with the Frame tag. Alternatively, you can use
single-cell tables and their titles for graphics and their captions.
•If you’ll use text frames for graphic callouts, create a paragraph format for the callouts. If you’ll use text lines for
callouts, create a character format. (You can’t apply a paragraph format to a text line.)
•Choose a color model and redefine colors and color views if necessary.
•Prepare standard table formats. Not all the properties you set for tables can be imported into another document.
The width of text in actual tables varies greatly, as do other properties. So, regardless of how you prepare your
tables, users will probably need to adjust some of these properties themselves. Think of your tables as models for
users to start with. For a list of the properties that are stored in the table format, see “About tables” on page 157.
Setting up numbering
The page numbering for new documents is set to Restart at 1. If you’re building a template for continuous page
numbering in books, you may want to set the page numbering in the template to Continue Numbering from
Previous Page in Book. In addition, you may want to set the chapter numbering to Continue Numbering from
Previous File in Book. For more information on setting up numbering, see “Determining how documents and pages
are numbered” on page 468.
Defining special text
A template can include definitions and specifications for handling special text. You may need to do the following to
set up special text items:
•Select a footnote numbering style and number format, and other footnote properties.
•Define formats for cross-references. Standardize as much of the cross-reference format as possible. For example,
if cross-references should always be introduced by see, include that word in the format definition.
•Consider defining user variables for product names, document names, and other items that may change during
the course of the project.
•Define condition tags, condition indicators, and view settings for conditional text.
•Define custom marker types if you’ll need to create specialized indexes.
•Define equation sizes and fonts if any documents will have equations.
Setting up HTML options
If documents based on your templates will be converted to HTML, you’ll need to set up the mappings and conversion
macros that define how documents are converted. In particular, you should do the following:
•Set up the mappings from FrameMaker paragraph formats and character formats to HTML tags.
•Create the conversion macros that convert cross-reference formats to a form suitable for online documents.
•Create any other conversion macros you may need (for example, to place a logo at the top of every new Web page,
or to define the title of the HTML document).
Setting up Japanese-language options
If your documents will contain Japanese-language text, define the combined fonts you want to use and set the
properties of rubi text.

ADOBE FRAMEMAKER 8
User Guide
413
Testing templates
Before making your templates available to other users, test the templates thoroughly. You test a template by creating
several sample documents from it and then examining the documents to make sure that everything looks and works
the way you want. When testing a template, do the following:
•Intermingle different types of paragraphs on a page to make sure the line spacing and leading look right. Try each
type of paragraph in a place where you expect it to be used. Sometimes a paragraph looks good in one place but
not in another. For example, the space after a body paragraph may look correct when it appears before another
body paragraph, but the space might be too large when it appears before a list.
•Review all autonumbering carefully. Examine the numbering for steps, figures, and any other autonumbered
paragraphs defined in the template. Check the alignment of double-digit lists and chapter numbers.
•Apply each master page to a body page.
•Try each condition tag with its indicators on to make sure the indicators are clear and achieve the effect you want.
•Test the color definitions to make sure color objects look the way you expect. Remember that colors on your
monitor may not look exactly the same as printed colors. If necessary, test some sample output with your
commercial printer.
•Create tables using various table formats.
•Create equations to try out equation sizes and fonts and custom math element definitions.
•Generate a table of contents from a sample document. Check the chapter and heading autonumbering.
•Add several sample documents to a book and update the documents. Check any cross-chapter autonumbering,
such as chapter and page numbers.
•Print a sample document to see how it looks.
•If the documents will be converted to HTML, test the conversion process.
Organizing templates in a folder
A template folder should contain all the related templates as well as a document that describes the templates and how
to use them.
To organize templates in a folder:
1Create a new folder and give it a name that identifies the purpose of the templates. If other users will work with
the templates on a network, put the folder where your users have access to it and will be able to find it.
In UNIX, you could also make the templates available to all users by saving them in the Templates folder
($FMHOME/fminit/language/Templates, where language is the name of the user interface language—for
example, usenglish or ukenglish). In Windows, you can change the default template folder (For information, see the
online manual Customizing FrameMaker on the Adobe website: www.adobe.com/devnet/frame-
maker/pdfs/Customizing_Frame_Products.pdf).
2Move each template into the folder.
3Set the file permissions so that template users have only read access to the templates.

ADOBE FRAMEMAKER 8
User Guide
414
Creating templates for generated files
When you generate a table of contents, an index, or another kind of generated file, if the folder that contains the
source document or book file contains a file whose name matches the generated filename, FrameMaker uses the
formatting of the existing file when generating the new one. In effect, the existing file serves as the new generated
file’s template, just as if you had imported formats from it. Use this feature to create generated-file templates that
contain page layouts, paragraph and character formats, and the formatting information that appears on the
reference page.
You can also update the formats in a generated file by importing formats from a template. However, you’ll probably
need to generate the file again after importing formats to see all the formatting. For information, see “Importing and
updating formats” on page 415.
To create a template for a generated file:
1Open the document or book file from which you want to generate the table of contents, index, or other file.
2Generate the file.
3Format the generated file. This formatted file is your template.
4Save the generated file. Make sure that this generated-file template is in the folder that contains the document or
book file that you will use to create a new generated file.
Creating templates to change conditional text settings
If you often change the view of conditional documents in a book, you may find it helpful to have a template for each
view. You can then change the view of all the files in the book at the same time by importing the conditional text
settings from one of the templates into the book file.
If you want to change the view of a single document that contains conditional text, it is easier to change the
document’s Show/Hide settings (see “Changing the view of conditional documents” on page 306).
To create templates that change conditional text settings throughout a book:
1Set up a basic template for the conditional document with all conditions and condition indicators visible. You’ll
import conditional text settings from this template before editing a document.
2Set up a template for each combination of conditions you want to view. Use these templates to view or print one
version of the document at a time. You can also use the template to change variable definitions that are unique to
aview.
Changing templates for blank paper and text files
When you create a blank paper document by clicking Portrait, Landscape, or Custom in the New dialog box, the
document contains many default settings and formats—for example, display units, paragraph and character formats,
table formats, variable definitions, cross-reference formats, and the contents of reference pages.
You can change the custom template for blank paper so that it contains the formats you want. The template can
contain the same formats as any other template, except for the page layout. The master page layout, number of
columns, and margins are determined when you create the blank paper documents.

ADOBE FRAMEMAKER 8
User Guide
415
You can also change the custom template that FrameMaker uses when you open text files.
Note: In Windows, you can change the filename that FrameMaker looks for when it creates a blank paper document or
opens a text file. For information, see the online manual Customizing FrameMaker on the Adobe website:
www.adobe.com/devnet/framemaker/pdfs/Customizing_Frame_Products.pdf.
To change the template for blank paper:
1Change a document so it contains the formats and settings you want. Leave existing master pages empty and do
not create custom master pages.
2Remove all text frames from both the left and right master pages—even if a document is single-sided. (If the
document is single-sided, choose Format > Page Layout > Pagination, select Double Sided, and click Set. Then select
and delete the text frames on the master pages.)
3Choose Special > Delete Pages and delete all body pages.
4Save the document, using one of the following filenames and locations:
•(Windows) The Custom file in the FrameMaker fminit folder. (When you choose New > Adobe FrameMaker
document from the context menu in a folder or on the desktop, the Shellnew.fm file is used.)
•(UNIX) The NewTemplate file in the $FMHOME/fminit/language/CustomDocs folder (language is the name of
your user interface language—for example, usenglish or ukenglish).
To change the template for text files:
1Change a document so it contains the formats and settings you want. For example, you can put headers and
footers, a Paragraph Catalog, and master page graphics in the template document.
2Delete all text on the body pages.
3Click in the empty text frame on page 1, and tag it with the paragraph format you want all text in the document
to use. The default template uses the Body paragraph format.
4Save the document, using one of the following filenames and locations:
•(Windows) The txttmplt file in the FrameMaker fminit folder.
•(UNIX) The ASCIITemplate file in the $FMHOME/fminit/language/CustomDocs folder (language is the name of
your user interface language—for example, usenglish or ukenglish).
To set up multiple templates for text files in UNIX:
❖Name each template suffixTemplate, where suffix is the suffix of the text file being opened. When you open a text
file that has a filename suffix, FrameMaker looks for a corresponding suffixTemplate file before it looks for an
ASCIITemplate file. If it finds a suffixTemplate file, it uses the file as the template for the text file. For example, when
you open a text file that ends with .c, FrameMaker looks for a file named cTemplate to use as a template.
Importing and updating formats
You can import paragraph formats, table formats, variable definitions, and other properties from any document.
Typically, this other document is a template (though it doesn’t need to be). You can also retain or remove any
format overrides in the document—for example, changes that were made to a paragraph but not stored in the
Paragraph Catalog.
You can also import properties into several (or all) files in a book at the same time.

ADOBE FRAMEMAKER 8
User Guide
416
To import and update formats in a document or book:
1Open the document that contains the formats you want to import.
2Make the appropriate document window or book window active. If a book window is active, select the documents
you want to update.
3In the document or book you’re updating, choose File > Import > Formats.
4Do one of the following:
•To import formats from a document, choose the document from the Import from Document pop-up menu. The
pop-up menu lists all open, saved documents.
•To reapply formats from the current document, choose Current from the Import from Document pop-up menu.
5Select the Import and Update settings you want to apply to the current document. By default, all options are
selected. To deselect or select all options at once, click Deselect All or Select All. If you’re updating variable defini-
tions, cross-reference formats, or math definitions, and if any of these items use character formats, select Character
Formats so that the formats are added to the document.
For information on these settings, see “About import and update settings” on page 416.
6To remove changes that you made to individual formats and didn’t save in a catalog, do the following:
•To remove page breaks that are not a part of a Paragraph Catalog format, select Manual Page Breaks.
•To remove paragraph, character, page layout, and table formatting overrides, select Other Format/Layout
Overrides (see “About format overrides” on page 107, “Changing the look of tables” on page 164, and “About
layout overrides” on page 387).
7Click Import.
About import and update settings
When you import formatting information from a template, FrameMaker merges the information into the document
rather than completely replacing the information. For example, when you import paragraph formats, FrameMaker
adds the formats to the document’s Paragraph Catalog. If any formats have the same name in both documents, the
imported format overwrites the original format. Any formats that are not overwritten remain in the document.
Note: Format names are case-sensitive, so Body is not the same as body.
Paragraph formats The template’s Paragraph Catalog is merged into the document, and all formats in the catalog are
reapplied in the document. The template’s PDF bookmark settings are also copied into the document.
Character formats The template’s Character Catalog is merged into the document, and all formats in the catalog are
reapplied in the document.
Page layouts The template’s master pages are merged into the document, and body pages are updated with the
master page changes. If the template and the document both have a master page with the same name, the template’s
master page replaces the document’s. FrameMaker copies the change bar properties, all the settings in the Page Size
and Pagination dialog boxes, and most settings in the View Options dialog box.
Table formats The template’s Table Catalog and ruling styles are merged into the document, and all formats in the
catalog are reapplied in the document.
Color definitions The template’s color definitions and views are merged into the document.

ADOBE FRAMEMAKER 8
User Guide
417
Document properties The template’s custom marker types and footnote properties; the volume, chapter, page,
paragraph, footnote, and table footnote numbering styles in the Numbering Properties dialog box; the characters in
the Allow Line Breaks After setting in the Text Options dialog box; and the Feather settings in the Line Layout dialog
box are merged into the document. The PDF Setup settings (other than the bookmark settings) are also merged into
the document. On Japanese-language systems, the rubi properties and kumihan rules (Japanese-language
typesetting rules) are also merged into the document.
Reference pages All the template’s reference pages (except for FrameMath reference pages) are merged into the
document. If the template and the document both have a reference page with the same name, the template’s reference
page replaces the document’s. To import FrameMath reference pages, select Math Definitions.
Variable definitions The template’s variable definitions are merged into the document.
Cross-reference formats The template’s cross-reference formats are merged into the document, and internal cross-
references are updated.
Conditional text settings The template’s condition tags and Show/Hide settings are merged into the document and
applied to conditional text.
Math definitions The template’s equation size and font settings, custom math element definitions, and FrameMath
reference pages are copied into the document. If a custom math element in the document is deleted when the
reference pages are merged, FrameMaker replaces the math element in equations with the name of the element
enclosed by question marks.
Combined fonts On Japanese-language systems, the specifications for combined Japanese and Western fonts are
merged into the document and applied to text that uses combined fonts.

418
Chapter 12: Tables of contents and
indexes
About Tables of Contents
In Adobe FrameMaker, tables of contents (TOCs), lists of figures, and other such lists are generated from the text of
specified paragraphs in a set of documents. An index is generated from markers you insert in documents. You can
easily update both tables of contents and indexes whenever you revise the documents they’re based on.
There are various types of lists, such as tables of contents, and indexes. You can create and update lists, create and
update indexes, and title and format both lists and indexes.
About generated files
A generated file is a file created by FrameMaker by extracting paragraphs or marker text from a source document or
from several documents in a book. Each time the generated file is updated, all the old paragraphs or marker text are
discarded and the current text from the source documents replaces them. In this way, FrameMaker keeps generated
files such as tables of contents and indexes current and accurate.
You can generate several types of lists and indexes in addition to a table of contents and standard index. For example,
you can generate lists and indexes that contain text from paragraphs or from markers that you inserted in the text.
The result may be a table of contents based on heading paragraphs, a list of illustrations based on figure titles, or an
index based on special author markers.
Most lists and indexes fall into three categories: lists of paragraphs (or elements in structured documents), lists
of markers, and indexes of markers. A fourth category, lists and indexes of references, is used less often, for
special purposes.
Tables of contents and other lists of paragraphs or elements
Lists of paragraphs contain the text of specified paragraphs (those with the tags you specify), with one entry per
paragraph (or elements in structured documents). You can generate the following lists of paragraphs (or elements in
structured documents):
•Tables of contents, which contain headings of specified levels, listed in the order in which they occur in the
source documents
ADOBE FRAMEMAKER 8
User Guide
419
•Lists of figures, tables, or paragraphs (or elements), which contain figure captions, table titles, or the text of other
specified paragraphs, listed in the order they occur in the source documents
Lists of paragraphs include TOCs and lists of figures.
•Alphabetical lists of paragraphs (or elements), which contain the same information as the other lists but present
them in alphabetical order
Note: Tables of contents and lists support the Unicode text encoding standard.
Lists of markers
Lists of markers contain entries corresponding to the markers inserted on body pages in the source document. The
markers are manually inserted on body pages in the source document (normally as marker elements in structured
documents), and the marker text appears in the generated list. For example, you could create a list of reviewers’
comments on a draft by generating a list of markers of type Comment. In a standard list of markers, entries appear
in the order that they occur in the source document or book. You can also generate alphabetical lists of markers.
A list of Cross-Ref markers

ADOBE FRAMEMAKER 8
User Guide
420
Indexes of markers
Indexes of markers include standard indexes, author and subject indexes, and indexes of other types of markers. The
markers are manually inserted on body pages in the source document, and the marker text appears in the index. You
can use syntax (building blocks) in the marker text to specify index levels and special page numbering, sorting, and
formatting. Entries are sorted alphabetically, and entries with the same text are merged into a single entry with
several page references.
An index of Cross-Ref markers
Lists and indexes of references
Lists and indexes of references help you track special categories of information. You can generate lists and indexes of
condition tags, external cross-references, unresolved cross-references, fonts, text insets, unresolved text insets,
imported graphics.
A list of fonts and an index of fonts
Preparing the sources for TOCs and other
generated lists
A table of contents or other generated list is based on the content of its source. The source can be either a single
document or a group of documents in a book. In most cases, you must prepare the source documents to get the
results you want.
Preparing documents for a TOC or other list of paragraphs
When you generate a table of contents or other paragraph list, you choose the tags of the paragraphs you want to
include. In the source document, do the following to avoid problems in generated lists:
•Tag paragraphs consistently. For example, use Heading1 for all first-level headings; don’t use it for any
other paragraphs.
Index of Markers
10279
head1
Continental drift 74
10557
Step
fossil evidence 66
Index of Fonts:
List of Fonts:
Trajan-Regular @ 18.0 pt 1 Helvetica Light @ 8.5 pt 1
Helvetica @ 6.5 pt 1 Helvetica Bold @ 10.0 pt 1
Trajan-Regular @ 10.0 pt 3-9 Helvetica Light @ 10.0 pt 5-7
Helvetica @ 10.0 pt 1-10 Helvetica Bold @ 10.0 pt 2-3

ADOBE FRAMEMAKER 8
User Guide
421
•Make each item you want to include in the list a single paragraph. For example, you won’t get the desired results
if a heading is two lines (with each line separated by a paragraph return).
Note: You usually generate a list of references—such as a list of fonts or unresolved cross-references—for your own use
while working with a document. You do not need to prepare the document before generating such a list.
Preparing documents for a list of markers
Before you generate a list of markers, the markers must be inserted in the source document.
In some cases, the markers may already have been inserted by FrameMaker into the document for another purpose
(for example, Cross-Ref markers or Conditional Text markers). But in other cases, such as a list of reviewers’
comments, you insert the markers yourself before generating the list.
Note: You can enter a tab character in marker text by typing either \t or the hexadecimal code \x08. However, if you
generate a list of markers, only tabs entered as hexadecimal codes appear. If you generate an index of markers, only tabs
entered as \t appear.
To insert a marker in a source document:
1Click where you want to insert the marker and choose Special > Marker.
2Choose a marker type from the pop-up menu. You can use any predefined marker type except Conditional Text,
Header/Footer $1, Header/Footer $2, or Cross-Ref. You can also define your own marker types. (See “Adding
custom marker types” on page 440.)
3Enter text that you want to appear as the list entry in the list. You can enter up to 255 characters (127 Japanese
double-byte characters). You can type the text or use alternative methods to enter marker text without typing. (See
“Adding index markers” on page 428.)
4Click New Marker. A marker symbol appears when text symbols are visible.
Generating TOCs and other lists
You can generate tables of contents and lists of paragraphs, markers, or references from a book or from a single
document. For information on generating indexes, see “Generating indexes” on page 432.
If you’re working with structured documents, see “Generating TOCs and other lists in structured documents” on
page 454 for element-specific information.
To generate a table of contents or list for a book:
1Open the book window and select the file below where you want the generated file to appear.
2Do one of the following:
•Choose Add > Table of Contents.
•Choose Add > List of, and then choose a type of list from the menu.
The items you see in the dialog box depend on the type of list you’re generating.
3In the Add File pop-up menu, specify whether the generated list will appear before or after the current document.
4Enter a suffix or keep the default one. The suffix indicates the type of generated file. For example, TOC is the usual
suffix for a table of contents.

ADOBE FRAMEMAKER 8
User Guide
422
Note: The suffix is not the same as the filename’s extension. The suffix is used with paragraph tags in the generated lists,
and appears as part of the generated file’s filename, such as UserGuideTOC.fm.
5Move items to the Include scroll list. To move an item between scroll lists, select the item and click an arrow, or
double-click the item. To move all items from one scroll list to the other, Shift-click an arrow.
6To have each entry in the generated list be linked to its source, select Create Hypertext Links. These links let you
jump to the source of an entry by clicking on the entry (see “Testing and troubleshooting hypertext documents” on
page 547).
7Click Add, and then click Update. FrameMaker generates the list. You can view the generated list by double-
clicking its name in the book window.
8Save the generated list in the same folder as the source document or book. If you want to rename the generated
file, use the book window to do so—FrameMaker will rename it on the disk and update all references.
The first time you generate a list (if you don’t use a template as described in “Formatting lists and indexes using
templates” on page 441), the list uses the page layout (master pages) of the first non-generated document in the book,
and all entries look the same. For information on changing the format of a list—changes that won’t be lost when you
regenerate the list—see “Formatting lists and indexes” on page 441.
If the list already exists in the source document’s folder when you save it, save it in the same folder and don’t change
the filename. That way, the list’s formatting is used when you generate the list again. Otherwise, formatting changes
won’t be retained when you update the list.
To use a template or an existing generated file in a new book file, add it to the book as a generated file. Then put
the existing file in the folder that contains the book file, using the name that appears in the book window.
9Save any open files in the book. Open files are updated only in your computer’s memory and not on the disk. If a
file isn’t open, the changes are made on the disk.
To generate a table of contents or list for a single document:
1Do one of the following:
•Choose Special > Table of Contents.
•Choose Special > List of, and then choose a type of list from the menu.
2When prompted, specify whether you want to create the generated file as a stand-alone document or add it to
abook.
If you choose Yes to create a standalone document, FrameMaker will create a generated list in the original
document’s folder. If you choose No, FrameMaker adds the generated file to an open book, or creates a new book
if necessary.
3Enter a suffix or keep the default one. The suffix indicates the type of generated file. For example, TOC is the usual
suffix for a table of contents.
Note: The suffix is not the same as the filename’s extension. The suffix is used with paragraph tags in the generated lists,
and appears as part of the generated file’s filename, such as Chapter1TOC.fm.
4Move paragraph tags, marker types, or reference types to the Include scroll list. To move an item between scroll
lists, select the item and click an arrow, or double-click the item. To move all items from one scroll list to the other,
Shift-click an arrow.
5To have each entry in the generated list be linked to its source, select Create Hypertext Links. These links let you
jump to the source of an entry by clicking on the entry (see “Testing and troubleshooting hypertext documents” on
page 547).

ADOBE FRAMEMAKER 8
User Guide
423
6Do one of the following:
•If you are creating a stand-alone list, click Set. FrameMaker generates and displays the list.
•If you are adding the list to a book, click Add, and then click Update. If a new book is created, choose File > Save
Book As, and then save the book.
7Save the generated list in the same folder as the source document or book.
The first time you generate a list (if you don’t use a template as described in “Formatting lists and indexes using
templates” on page 441), the list uses the page layout (master pages) of the source document or of the first
nongenerated document in the book, and all entries look the same. For information on changing the format of a
list—changes that won’t be lost when you regenerate the list—see “Formatting lists and indexes” on page 441.
8Save the list in the same folder as the source document or book. For information on renaming generated files, see
“Renaming files in books” on page 466.
Updating and editing TOCs and lists
A generated list (such as a table of contents) can quickly become outdated. You can update a table of contents to
include revised headings and up-to-date page numbers, or change which paragraphs are included.
You edit entries in a list by editing their corresponding paragraphs or markers in the source document and then
regenerating the list. If you revise entries by typing directly in the list, your changes will disappear when you
regenerate it.
For example, if you fix a typing error directly in a table of contents, that error will reemerge the next time you
generate because it still exists in the source paragraph. To permanently fix an error, you must correct it by changing
the paragraph or marker text in the source document and then regenerating the list or index.
This section describes updating and editing generated lists of paragraphs, not lists of markers. For information on
updating and editing indexes or lists of markers, see “Updating and editing indexes” on page 434.
To update a TOC or list that is part of a book:
1Make changes to the source documents as needed.
2In the book window, choose Edit > Update Book.
3Move the lists you want to update to the Generate scroll list, make sure Generate Table of Contents, Lists, and
Indexes is selected, and then click Update.
To add or remove paragraph tags included in a TOC or list that is part of a book:
1Select the generated file (such as the table of contents) in the book window.
2Choose Edit > Set Up Table of Contents or Set Up List of type.
3Move items between the list boxes as desired, and click Set. Then click Update.
To update a TOC or list that is a standalone document:
1Make changes to the source document as needed.
2In the source document, choose the command (such as Table of Contents) from the Special menu, and then
choose Yes when prompted to create a standalone document.
3Move items between the list boxes as desired, and click Set.

ADOBE FRAMEMAKER 8
User Guide
424
Finding the source of list entries
When you need to revise an entry, you must trace the entry back to its source—the corresponding paragraph in the
source document—to revise the entry.
The quickest way to find the source of a list entry is to use the hypertext link on the entry in the generated file. This
hypertext link can display and select the corresponding information in the source document. You can also find and
select an entry in the source document by using the Find/Change command.
To find the source of a list entry by using a link:
1If you did not select Create Hypertext Links when you generated the list or index, select it now and regenerate the
list.
2In the generated list, do one of the following:
•(Windows) Alt-Control-click an entry in a list.
•(UNIX) Control-right-click an entry in a list.
FrameMaker opens the source document to the page that contains the corresponding paragraph and selects it.
To find and select a paragraph by using Find/Change:
1In the source document (not in the generated list), choose Edit > Find/Change.
2Choose Paragraph Tag from the Find pop-up menu and enter the tag you want.
3Click Find.
Editing and deleting list entries
You revise the contents of entries by changing their corresponding paragraphs in the source document.
To edit a list entry:
❖In the source document, edit the paragraph text.
To delete a list entry:
❖In the source document, delete the paragraph text.

ADOBE FRAMEMAKER 8
User Guide
425
Troubleshooting TOCs and lists
Minor problems in the source document may cause corresponding problems in the list. For example, an incorrectly
tagged paragraph may cause an extra entry to appear in the list or to be missing from it. Or an empty paragraph may
cause an extra line to appear in the list.
A table of contents
A. An extra line appears here.
B. This entry doesn’t belong in the list.
Extra entries or lines Incorrect formatting in the source document can cause extra paragraphs to appear in a list such
as a table of contents. To correct this, do the following:
•If the list contains an entry that doesn’t belong there, check the corresponding paragraph tag or marker type in the
source document and either apply a different format to the paragraph or change the marker type.
•If the list contains an extra line with only a page number, delete the corresponding empty paragraph in the source
document. If you need extra space between paragraphs in the source document, use the spacing properties of the
paragraphs’ formats rather than insert an empty paragraph.
Missing entries To include entries that appear in the source document, but not in the list, do one of the following:
•If all entries with a particular paragraph tag or marker type are missing, make sure the Include scroll list in the Set
Up dialog box contains the correct items.
•If an occasional entry is missing, check the tag of the corresponding paragraph or the type of the corresponding
marker in the source document. If the paragraph tag or marker type is incorrect, the information won’t be
included in the list.
Split entries A multiline heading in the source document can be a problem if the line breaks were created by pressing
Return so that each line is a separate paragraph. The list will contain an entry for each paragraph in the heading.
Fixing the list requires using only one paragraph for the heading in the source document.
Avoid using forced returns in a heading; forced returns appear in the generated TOC. Instead, to force a heading to
break into two lines where you want, change the right indent of the heading paragraph in the source document. If
the heading is centered, you may want to change both the left and right indents. You can also use nonbreaking spaces
to force a heading to break acceptably.
Bad line breaks Bad line breaks in the list or its source document may separate information that belongs together in
the list. To correct this, do one of the following:
•Change the characters after which FrameMaker allows line breaks. For example, FrameMaker normally allows a
line break after an en dash (–). To disallow breaks after an en dash, use Format > Document > Text Options. See
“Changing hyphenation and line breaks” on page 119.
•In the special text flow on the reference page, use nonbreaking spaces between the text and page number for each
entry so that a page number does not appear on a line by itself. See “Editing special text flows for lists and indexes”
on page 443 and “Changing hyphenation and line breaks” on page 119.
Continental drift
Fit of the Continents
Many rocks are broken by the effect of
freezing and thawing
10
13
13
34
A
B

ADOBE FRAMEMAKER 8
User Guide
426
Disappearing titles A title you entered may disappear the next time you generate the list unless you follow the steps
in “Adding titles and other static text to lists and indexes” on page 441.
Disappearing formatting If your formatting changes aren’t retained when you regenerate (see “Formatting lists and
indexes” on page 441), do the following:
•If you changed the filename or location of the list, change the name and location back. FrameMaker won’t find any
formatting changes unless you save the list in the same folder as the source document and use the filename that
FrameMaker assigns.
•To retain paragraph and character format changes, store them in the list’s Paragraph Catalog or Character Catalog,
making them available the next time you generate the list. For details, see “Redefining (updating) formats” on
page 134.
•To retain other changes, make them in the special text flow, as described in “Editing special text flows for lists and
indexes” on page 443.
Embedding TOCs in a document
A typical table of contents is a separate file whose contents are mostly automatically generated by FrameMaker.
However, if you want a small table of contents embedded at the start of a document instead of being a separate file,
you can create the table of contents with cross-references.
A TOC embedded at the start of a document
FrameMaker does not automatically maintain this type of table of contents. If you change the order of references or
delete a heading while editing the document, you’ll need to rearrange the entries or delete an entry in the table of
contents yourself.
Another approach is to generate a separate table of contents and then import the generated file by reference. The
resulting text inset in the document is automatically updated when the table of contents changes. For information,
see “Importing formatted text” on page 502.
To embed a TOC in a document by using cross-references:
1Create a cross-reference format that formats text the way you want the table of contents entries to look. Typically,
this format would contain the <$paratext> and <$pagenum> building blocks. For details, see “Creating cross-
reference formats” on page 205.
2At the start of the document, set up a cross-reference to each paragraph you want to appear in the table of contents
(see “Inserting cross-references” on page 201). Use the cross-reference format you created in the previous step.
Newsletter
Table of Contents
1
1
2
2
2
3
4
4
3
7
6

ADOBE FRAMEMAKER 8
User Guide
427
To maintain a TOC embedded in a document:
❖Do the following:
•If you change the order of paragraphs while editing the document, rearrange the cross-references to be in the same
order as the references. Then update the cross-references to update the table of contents (see “Maintaining cross-
references” on page 208).
•If you delete a paragraph that’s included in the table of contents, delete the cross-reference to it. Otherwise, the
table of contents entry will be an unresolved cross-reference.
To embed a TOC in a document as a text inset:
1Generate a table of contents in the usual way (see “Generating TOCs and other lists” on page 421).
2Import the table of contents into a document (see “Using the Import command to import text” on page 502).
About indexes
In a typical index, entries are generated from markers and are sorted alphabetically. Entries with the same text
are merged into a single entry with several page references. You can add special building blocks to marker text
to control the form of the index entry—for example, to specify that it’s a subentry or a cross-reference to
another entry.
Index entries
A. Main entry
B. Subentries
C. Cross-reference to another entry
D. Page range
Most of the time, you’ll use the Index marker type to create the standard index you find in the back of most books.
You can also create specialized indexes by using predefined marker types such as Subject or Author, or by using other
marker types that you create (see “Adding custom marker types” on page 440).
Note: Indexes support the Unicode text encoding standard.
Index
A
Abrasion, 29, 30
glacial, 26
water, 20-22
wind, 32
See also sandstone
Abyssal plain, 42-43
Alluvial fan, 22, 43, 46
A
D
B
C
ADOBE FRAMEMAKER 8
User Guide
428
Adding index markers
Before generating an index for a document, you insert the markers for the index entries.
Index marker placed in the source document, and the formatted entry appearing in the index
To insert an index marker:
1Click where you want to insert the marker and choose Special > Marker. You can insert markers only in
text frames.
2Choose a marker type from the pop-up menu. Typically, you’ll use the Index marker type. To create several
indexes for a document—for example, a subject index and an author index—use a different marker type for each.
3Enter the text of the index entry in the Marker dialog box. You can enter up to 255 characters (127 Japanese
double-byte characters). You can also use any of the following building blocks in marker text to control the form of
the index entry and its location in the index.
If you’re working in Japanese fonts, enter all these building blocks except the brackets ([ ]) using single-byte
characters.
Note: To enter a backslash or any special character used in these building blocks—colon, semicolon, bracket, or angle
bracket—as regular characters, precede it with a backslash (\).
4Click New Marker. A marker symbol appears when text symbols are visible.
Building block Meaning
: (colon) Separates levels in an entry
; (semicolon) Separates entries in a marker
[ ] (brackets) Specifies a special sort order for the entry
<$startrange>Indicates the beginning of a page range
<$endrange>Indicates the end of a page range
<$nopage>Suppresses the page number in the entry
<$singlepage>In a marker that contains several entries, restores the page number for an entry that
follows a <$nopage> building block
Character tag between angle brackets (< >) Changes the character format (for example, <Emphasis>)
<Default Para Font>Restores the paragraph’s default font
Continental drift:Pangea
Pangea
About 200 million years ag
this supercontinent began
breaking into smaller conti
which then "drifted" to th
present positions. The fit o
America and Africa, ancien
similarities, fossil evidence
Continental drift
fossil evidence, 36-37
rock structures, 35-36
Pangea, 38
Continental glacier, 39, 40-
Continental margin, 44
Continental rise, 48-50
ADOBE FRAMEMAKER 8
User Guide
429
To insert an index marker without typing:
❖To reduce or eliminate typing when creating index markers, do one of the following:
•Insert an empty marker (a marker with no text in it) at the beginning of the word you want to index. When you
generate the index, the text to the right of the marker, up to the first space, becomes the text of an entry.
•To use text that appears in the document as the marker text, simply select the text in the document. As long as the
selected word or phrase doesn’t contain a marker, it automatically appears in the Marker Text box.
To put several entries in one marker:
❖Type several entries in the marker, using a semicolon (;) between entries, as in the following examples.
In the second example, <$nopage> affects subsequent entries in the marker. To return to a single page number,
<$singlepage> is included with the next entry in the marker.
You can type any number of spaces after the semicolon to improve readability. Initial spaces are ignored when
compiling the index unless they’re special ones such as nonbreaking or em spaces. (If you’re working in Japanese
fonts, only single-byte space characters are ignored.)
Using subentries in index entries
You can group several entries under one entry for a larger category of information by marking them as subentries.
You can also create subentries to subentries.
Subentries
To create a subentry:
❖Separate the entry from the subentry with a colon (:). For example, to create the first subentry in the illustration,
enter Continental drift:fossil evidence
A subentry is always preceded by the entry to which it is subordinate. If you need two subentry levels, place a colon
between the subentry and the sub-subentry. For example, enter Continental drift:fossil evidence:dating of
Marker text Result in index
Abrasion; Water erosion Abrasion 10
Water erosion 10
<$nopage>Erosion. See Abrasion;<$singlepage>Abrasion Abrasion 10
Erosion. See Abrasion
Continental drift
fossil evidence, 36-37
rock structures, 35-36
Pangea, 38
Continental glacier, 39, 40-41
Continental margin, 42, 44
Continental rise, 45-46
ADOBE FRAMEMAKER 8
User Guide
430
Using cross-references in index entries
Indexes often contain cross-reference entries to direct readers to related terms. This makes it unnecessary to
duplicate the entries and page numbers for related terms that already appear in the index.
Cross-references
Cross-references can also appear as subentries (usually preceded with See also, as in the illustration). For information
on sorting cross-reference subentries so that they appear at the top or bottom of the list of subentries for the same
main entry, see “Specifying sort orders in indexes” on page 431.
To create a cross-reference in an index entry:
❖Insert a marker and use <$nopage> at the beginning of the marker text to prevent a page number from appearing
with this entry. For example, to create the first cross-reference in the illustration, enter <$nopage>Abrasion. See
also Sandstone
Using page ranges in index entries
You can use a page range such as 36–37 to mark information that spans several pages.
Page ranges
You can create a page range in an entry by manually inserting two markers to indicate the range, one at the beginning
of the range and the other at the end. You can also have FrameMaker create page ranges for you automatically
whenever the same marker text occurs on consecutive pages of a document. For example, instead of 3, 4, 5, the entry
would automatically appear as a page range (3–5).
To manually create a page range for an index entry:
1Insert an index marker at the beginning of the information, with <$startrange> at the beginning of the
marker text. For example, to create the first page number in a range, enter <$startrange>Continental drift:fossil
evidence
2Add an index marker (or marker element, if working with a structured document) at the end of the information,
identical to the first except that you enter <$endrange> rather than <$startrange> at the beginning of the marker
text. For example, to create the second page number in a range, enter <$endrange>Continental drift:fossil
evidence
If both markers appear on the same page, the page range collapses to a single page number.
Abrasion, 29, 30
glacial, 26
wave, 31-32
wind, 32
See also Sandstone
Abyssal plain, 42-43
See also Bajada
Continental drift
convergent boundary, 17
divergent boundary, 21
fossil evidence, 36-37
rock structures, 35-36
Pangea, 38

ADOBE FRAMEMAKER 8
User Guide
431
To automatically create page ranges in an index:
1Display the reference page that contains the special text flow for indexes, as described in “Editing special text flows
for lists and indexes” on page 443.
2Type the <$autorange> building block at the beginning of the paragraph whose tag begins with the marker type.
For example, to collapse the entries generated from markers of type Index into page ranges when possible, edit the
paragraph tagged IndexIX to contain the following building blocks: <$autorange><$pagenum>
Using character formats in index entries
You can change the character format of specified text or of the page number in an entry. For example, you may want
a book title to appear in italics, or you may want a particular page number to appear in bold. The character format
must be stored in the Character Catalog of the index.
Character formatting
For information on specifying paragraph formats for entries in an index, see “Changing paragraph and character
formats of entries” on page 443.
To use a character format in an index entry:
1Enter an index entry, as described in “Adding index markers” on page 428.
2To format part of the entry in a character format, do one of the following:
•To format specific text in an entry, type the character tag between angle brackets (< and >) before the text and
type <Default Para Font> after it. For example, to create the entry “Tidal Waves See Tsunami,” you might enter
this marker text: Tidal Waves <Emphasis>See <Default Para Font> Tsunami
Character format tags affect only the entry they precede. For example, <bold>fruit:strawberry would generate a
two-line entry that shows “fruit” as bold and “strawberry” without bold. To format both entries in bold, enter
<bold>fruit:<bold>strawberry
•To format only the page number, type the character tag between angle brackets at the end of the marker text. For
example, to create the entry “Erosion 24,” you might enter this marker text: Erosion<Bold>
If you’re using a special character format for many—but not all—page numbers in an index (for example, to use
bold for principal entries), you may want to create a custom marker type with that formatting. See “Adding custom
marker types” on page 440.
Specifying sort orders in indexes
You can change where an entry appears in the index by specifying a sort order. For example, even though 486 would
normally appear with other numbers in the index, you may want it to appear under F (as if it were spelled out as four
eighty-six).
Similarly, if you’re using a See also cross-reference in a subentry, you can ensure that it is the last one under the
main entry.
Sedimentary rock, 21-21, 67-68
chemical, 46-47
lithification, 58
Seiche, 39, 50-51
Seif dune, 55, 58
Seismic sea wave,
See Tsunami
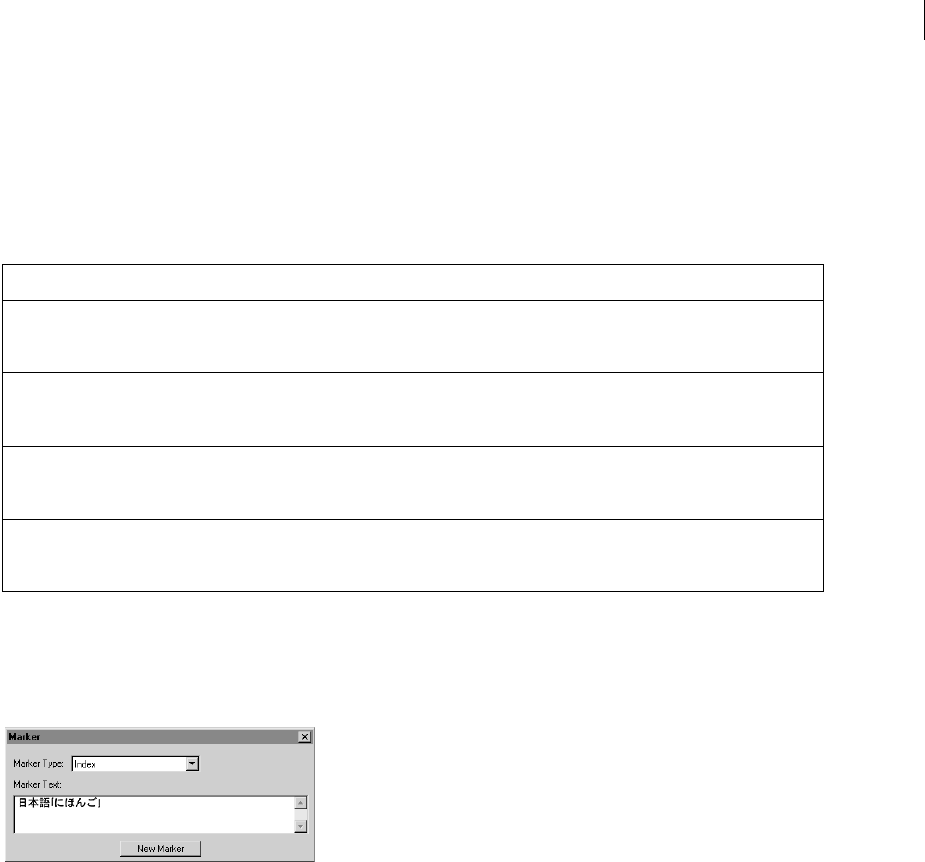
ADOBE FRAMEMAKER 8
User Guide
432
If you’re working in Japanese, kanji characters always need a special sort order defined. (For information on Japanese
sort order, see “About Japanese sort order” on page 451)
To specify a sort order for an index entry:
❖Add text between brackets ([ and ]) at the end of the marker text, indicating exactly how you want the
entry sorted.
Note: The sorting information, in brackets, must be the last item in the marker text.
To specify the sort order for a kanji index entry:
❖Enter its pronunciation (yomigana) in brackets in the marker text. (Double-byte bracket characters may be used.)
Sort order for kanji index entry
Generating indexes
After you insert index markers in your source document, you can generate a standard index or any other index of
markers. When you revise your source document, you can generate the index again to update it. For information on
generating tables of contents and other lists, see “Generating TOCs and other lists” on page 421.
You ordinarily use predefined marker types. However, you can create your own marker types for special effects in
indexes, such as displaying principal entries in bold or adding custom text to some page entries but not to others.
The custom text might be the word note to follow some page numbers and figure to follow others. Scholarly indexes
might use abbreviations, such as ff and passim after page numbers.
You can also generate a special-use index of references, such as an index of fonts used in a document. This type of
index is not generated from markers.
You can generate an index from a single document or from a book.
Index marker text Result in index Explanation
1950s[Nineteen fifties] Neap tides 47
1950s 10
North America 21
Sorts under N (for Nineteen fifties)
Erosion:of soil
[Erosion:soil]
Erosion
rate 32
of soil 10
Ignores the word of
<$nopage>Erosion:
see also Wind
[Erosion:aaa]
Erosion
see also Wind
rate 16
Sorts as the first entry under
Erosion
<$nopage>Erosion:
see also Wind
[Erosion:zzz]
Erosion
rate 16
see also Wind
Sorts as the last entry under
Erosion

ADOBE FRAMEMAKER 8
User Guide
433
To generate an index for a book:
1Open the book window and select the file above where you want the generated file to appear.
2Do one of the following:
•Choose Add > Standard Index.
•Choose Add > Index of, and then choose the type of specialized index you want to create.
3Move the marker types you used for the entries to the Include Markers of Type scroll list.
Generating a book index
To move an item between scroll lists, select the item and click an arrow, or double-click the item. To move all items
from one scroll list to the other, Shift-click an arrow.
4In the Add File pop-up menu, specify whether the generated list will appear before or after the current document.
5Enter a suffix or keep the default one. The suffix indicates the type of generated file. For example, IX is the usual
suffix for a standard index.
Note: The suffix is not the same as the filename’s extension. The suffix is used with paragraph tags in the generated lists,
and appears as part of the generated file’s filename, such as UserGuideIX.fm.
6To link each entry in the generated index to its source, select Create Hypertext Links.
7Click Add, and then click Update. FrameMaker generates the index and displays it in a separate document.
8Save the index in the same folder as the source document or book. If you want to rename the generated file, use
the book window to do so—FrameMaker will rename it on the disk and update all references.
The first time you generate an index, it uses the page layout of the first nongenerated document in the book, and all
entries look the same. (You can avoid this unformatted look by using a template; see “Formatting lists and indexes
using templates” on page 441.) For information on making changes to the format of an index—changes that won’t
be lost when you regenerate it—see “Formatting lists and indexes” on page 441.
9Save any open files in the book. Open files are updated only in your computer’s memory and not on the disk. If a
file isn’t open, the changes are made on the disk.
To generate an index for a single document:
1Do one of the following:
•Choose Special > Standard Index.
•Choose Special > Index of, and then choose the type of specialized index you want to create.
2When prompted, specify whether you want to create the generated file as a standalone document or add it to
abook.
If you choose Yes to create a stand-alone document, FrameMaker will create a generated index in the original
document’s folder. If you choose No, FrameMaker adds the index to an open book, or creates a new book if necessary.

ADOBE FRAMEMAKER 8
User Guide
434
3Enter a suffix or keep the default one. The suffix indicates the type of generated file. For example, IX is the usual
suffix for a standard index.
Note: The suffix is not the same as the filename’s extension. The suffix is used with paragraph tags in the generated lists,
and appears as part of the generated file’s filename, such as UserGuideIX.fm.
4To link each entry in the generated index to its source, select Create Hypertext Links.
5Do one of the following:
•If you are creating a stand-alone index, click Set. FrameMaker generates and displays the index.
•If you are adding the index to a book, click Add, and then click Update. If a new book is created, choose File > Save
Book As, and then save the book.
The first time you generate an index, it uses the page layout of the source document or of the first nongenerated
document in the book, and all entries look the same. (You can avoid this unformatted look by using a template; see
“Formatting lists and indexes using templates” on page 441.) For information on making changes to the format of an
index—changes that won’t be lost when you regenerate it—see “Formatting lists and indexes” on page 441.
6Save the index in the same folder as the source document or book. For information on renaming generated files,
see “Renaming files in books” on page 466.
To generate a standard index that displays page numbers in a variety of ways:
1Create one or more custom marker types (see “Adding custom marker types” on page 440), and name them in a
way that indicates their intended use. For example, if you want to distinguish index entries that refer to footnotes,
you might create a marker type called IndexNote.
2Index your source document, using the Index marker type for regular entries and your custom marker types for
the others.
3Generate the index. Select the Index marker type along with the custom ones.
In the index, edit the special text flow on the reference page for the custom marker (the reference page would be
called IX) to add text after the page number or to change character format. For example, you might change the text
for IndexNoteIX as follows to have [note] appear after the page number: <$pagenum> [note].
For details, see “Manually adding text to entries” on page 447, and for adding a character format, see “Changing
paragraph and character formats of entries” on page 443.
4Update the index again for your edits to take effect.
Updating and editing indexes
An index can quickly become outdated. With an index, you typically need to make some changes after you review
the index for the first time. For example, you may see that some entries do not use parallel phrasing, or you may
decide to change the organization of some entries.
You edit entries in an index by editing their corresponding paragraphs or markers in the source document and then
regenerating the index. If you revise entries by typing directly in the index, your changes will disappear when you
regenerate it.
For example, if you fix a typing error directly in an index, that error will reemerge the next time you generate because
it still exists in the source marker. To permanently fix an error, you must correct it by changing the marker text in
the source document and then regenerating the index.

ADOBE FRAMEMAKER 8
User Guide
435
This section describes updating and editing generated indexes (or lists of markers), not lists of paragraphs such as
tables of contents. For information on updating and editing lists of paragraphs, see “Updating and editing TOCs and
lists” on page 423.
To update an index that is part of a book:
1Make changes to the source document as needed.
2In the book window, choose Edit > Update Book.
3Move the lists you want to update to the Generate scroll list, make sure Generate Table of Contents, Lists, and
Indexes is selected, and then click Update.
To add or remove items included in an index that is part of a book:
1Select the generated index in the book window.
2Choose Edit > Set Up Standard Index (or Set Up Index of type).
3Move items between the list boxes as desired and click Set. Then click Update.
To update an index that is a stand-alone document:
1Make changes to the source document as needed.
2In the source document, choose the command (such as Standard Index) from the Special menu, and then choose
Yes when prompted to create a stand-alone document.
3Move items between the list boxes as desired, and click Set.
Finding the source of index entries
When you need to revise an entry, you must trace the entry back to its source—the corresponding marker (or marker
element, if working with a structured document) in the source document—to revise the entry.
The quickest way to find the source of an index entry is to use the hypertext link on the entry in the generated file.
This hypertext link can display and select the corresponding information in the source document. You can also find
and select a marker in the source document by using the Find/Change command. Or, if you’re working with a struc-
tured document, you can select the element in the Structure View if you can see its bubble.
Important: If you’re generating extremely large indexes (indexes of more than 50,000 markers), don’t use Create
Hypertext Links. Generating indexes of this size with Create Hypertext Links selected will take a very long time or might
not succeed.
To find the source of an index entry by using a link:
1If you did not select Create Hypertext Links when you generated the index, select this option and regenerate.
2Choose Special > Marker.
3In the generated index, do one of the following:
•(Windows) Alt-Control-click a page reference in an index.
•(UNIX) Control-right-click a page reference in an index.
FrameMaker opens the source document to the page that contains the corresponding marker and selects it. The
marker text appears in the Marker dialog box.

ADOBE FRAMEMAKER 8
User Guide
436
To select a marker by using Find/Change:
1In the source document (not in the generated list), choose Edit > Find/Change.
2Do one of the following:
•If you’re working in an unstructured document, choose Any Marker, Marker of Type, or Marker Text from the
Find pop-up menu. Enter the marker type or marker text as needed.
•If you’re working in a structured document, choose Element from the Find pop-up menu, enter the tag of the
element you want to find, and click Set.
3Click Find.
Note: When a marker is selected, the marker text appears in the Marker dialog box. Don’t click Change in the
Find/Change dialog box to change the marker text. If you do, FrameMaker replaces the marker itself. Instead, change
the text in the Marker dialog box and then click Edit Marker.
To select a marker in the source document:
❖Drag through it. As long as the selected text contains only one marker, its text appears in the Marker dialog box.
If more than one marker is selected, the text of the first marker appears.
Editing and deleting index entries
You revise the contents of entries by changing their corresponding markers (or marker elements) in the
source document.
To edit a marker (or marker element):
❖Select the marker (or element), change the text in the Marker dialog box, and click Edit Marker.
To delete a marker (or marker element):
❖Select the marker (or element) in the source document and press Delete.
Creating a master TOC or index for several books
When you produce several related books, you may want to create a master table of contents (TOC) or index for
the books.
Master index
Master Index
Abrasion, R:29, U:30
glacial, R:26
river, U:20-U:22
wave, U:31-U:32
wind, R:32
See also sandstone
Abyssal plain, R:42-R:43
R = Reference; U = User's Guide

ADOBE FRAMEMAKER 8
User Guide
437
To set up a book file to create a master TOC or index:
1Create a new book file that contains the files in all the books in order (see “Creating book files” on page 463).
If you’re adding files that were generated in the original books, add them to the new book as document files (see
“Adding files to books” on page 463). If you need to update those generated files, do so from their original book file,
not from the master book file.
2Add a table of contents, an index, or other generated file to the new book file. This generated file will be the
master file.
3Using the book window, specify how volume, chapter, and page numbers for each document should appear in the
master generated file. See “Setting up numbering” on page 469.
Note: When you update the book, the book’s numbering options will override the documents’ numbering options, unless
you select Read from File.
4Using the book window, specify the appropriate pagination and page layout options (see “Changing the basic page
layout of a document” on page 380).
5Generate and update the file (see “Updating books” on page 473).
Troubleshooting indexes
If you type marker text incorrectly, the index will reflect it. The first time you generate an index, problems
often appear.
Missing entries If an entry is missing entirely from the generated index, do the following:
•Check whether the corresponding marker (or marker element) is an incorrect marker type. You can do this by
generating a list of markers that includes all marker types and then searching the list for the entry you want. For
details, see “Generating TOCs and other lists” on page 421.
•Check whether the corresponding marker (or marker element) is in hidden conditional text by using Special >
Conditional Text to show all conditional text, and then generating the index again.
•Check whether the marker (or marker element) was deleted accidentally.
Entries containing double question marks Double question marks (??) in a page range indicate that FrameMaker
can find only one of the two markers that define the range. If you see double question marks, do the following:
•Check that neither marker (or marker element) is missing.
Missing <$startrange> and the resulting page range
<$endrange>Continental rise
Continental drift
fossil evidence, 36-37
rock structures, 35-36
Pangea, 38
Continental glacier, 39, 40-41
Continental margin, 42, 44
Continental rise, ??-46

ADOBE FRAMEMAKER 8
User Guide
438
•Check that the spelling, punctuation, and capitalization of the marker text match exactly.
Inconsistent spelling and the resulting page range
•Check that <$startrange> appears in the first marker (or marker element) and that <$endrange> appears in the
second marker (or marker element).
<$endrange> comes first and causes the resulting page range.
Missorted entries Most sorting problems are the result of incorrect marker text. If you see missorted entries, do
the following:
•Check that the colons and semicolons are used correctly. If a semicolon appears where a colon belongs, two main
entries appear rather than one subentry. If a colon is missing, a subentry appears incorrectly as a main entry.
Missing colon and the resulting missorted entry
•Check that sorting information is present and correct, and appears between brackets ([ ]) at the very end of the
marker text (see “Specifying sort orders in indexes” on page 431). For example, if you want to sort a cross-
reference as the last subentry, the sorting information in the marker text for it should end with :zzz.
Missing :zzz and the resulting missorted entry
<$startrange>
Continental drift:Pangaea
<$endrange>
Continental drift:Pangea
Continental drift
fossil evidence, 36-37
rock structures, 35-36
Pangaea, 38-??
Pangea, ??-39
Continental glacier, 39, 40-41
Continental margin, 42, 44
<$endrange>
Continental drift:Pangea
<$startrange>
Continental drift:Pangea
Continental drift
fossil evidence, 36-37
rock structures, 35-36
Pangea, ??-38, 39-??
Continental glacier, 39, 40-41
Continental margin, 42, 44
Continental rise, 45-46
Continental drift:Pangea
Continental drift Pangea
Continental drift
fossil evidence, 36-37
rock structures, 35-36
Pangea, 38
Continental drift Pangea, 39
Continental glacier, 39, 40-41
Continental margin, 42, 44
<$nopage>Continental drift:
See also Wegner
Continental drift
fossil evidence, 36-37
rock structures, 35-36
Pangea, 38
See also Wegner
transform boundaries, 77
Continental glacier, 39, 40-41

ADOBE FRAMEMAKER 8
User Guide
439
•If sorting errors occur in a pattern—for example, if all numeric entries appear at the end of the index rather than
at the beginning—check that the sorting information in the special text flow on the reference page is correct. For
details, see “Changing the sort order of indexes” on page 449.
Page numbers with See or See also cross-references A cross-reference index entry may incorrectly contain a page
number. Make sure that <$nopage> appears at the beginning of the marker text for the cross-reference entry.
Missing <$nopage> and the page number wrongly appears
Bad line breaks If entries break between numbers in a page range or between the end of the entry and the first page
number, do the following:
•Change the characters after which FrameMaker allows line breaks. To disallow line breaks after certain characters,
such as an en dash (–), use Format > Document > Text Options (see “Changing hyphenation and line breaks” on
page 119).
•To force the end of an entry to appear on the same line as the page number, use a nonbreaking space, an en space,
or an em space as the separator between them.
•If you specified in the special text flow on the reference page that spaces or hyphens appear between page numbers
in a range, make sure they are nonbreaking (see “Editing special text flows for lists and indexes” on page 443 and
“Changing hyphenation and line breaks” on page 119).
•Change the volume or chapter numbering for the source document’s page numbers (see “Setting up numbering”
on page 469). If the book’s pages are numbered by chapter (1-1, 1-2, …, 2-1, 2-2, …), the volume or chapter number
should be followed by a nonbreaking hyphen. See “Changing hyphenation and line breaks” on page 119.
Bad line breaks
Disappearing titles A title you entered may disappear the next time you generate the index, unless you follow the
steps in “Adding titles and other static text to lists and indexes” on page 441.
Disappearing formatting If your formatting changes aren’t retained when you regenerate (see “Formatting lists and
indexes” on page 441), do the following:
•If you must rename a generated file, do so using the book window. FrameMaker will rename the file in the book
window and on disk.
•To retain paragraph and character format changes, store them in the index’s Paragraph or Character Catalog,
making them available the next time you generate the index. For details, see “Redefining (updating) formats” on
page 134.
Continental drift:
See also Wegner
[Continental drift:zzz]
Continental drift
fossil evidence, 36-37
rock structures, 35-36
Pangea, 38
See also Wegner, 10
Continental glacier, 39, 40-41
Continental margin, 42, 44
Continental drift, 36-37
Continental drift Pangea, 38-
39
Continental glacier formation,
39, 40-41
Continental margin, 42, 44

ADOBE FRAMEMAKER 8
User Guide
440
•To retain other changes, make them in the special text flow, as described in “Editing special text flows for lists and
indexes” on page 443.
Adding custom marker types
You can create your own marker types and then use them in lists or indexes just as you would any other type of
marker. Once a new marker type has been created, it can be shared with other documents and books.
For an example of using custom marker types with indexes, see “Generating indexes” on page 432.
To add or delete a custom marker type:
1Choose Special > Marker and choose Edit from the Marker Type pop-up menu.
2Do one of the following:
•Type a new name and click Add.
•Choose a name from the pop-up menu and click Delete.
3Click Done.
You can also use the book window to edit custom marker types. Select the documents you want to affect, and then
press Esc e m t.
To copy a marker type from one document to another:
❖Do one of the following:
•Copy a marker or text containing a marker and paste it in another document.
•Choose File > Import > Formats and import Document Properties.
To rename a marker type:
1Choose Special > Marker and choose Edit from the Marker Type pop-up menu.
2Choose the marker type you want to rename from the pop-up menu and click Change.
3Do one of the following:
•To rename the specified markers with a new name, enter the new name in the To text box.
•To rename the specified markers with the name of another marker type, choose the new marker type from the To
pop-up menu.
4Click OK, and then click Done.

ADOBE FRAMEMAKER 8
User Guide
441
Adding titles and other static text to lists and indexes
If you want to add a title or other unchanging text in your list or index, add it after you generate the list or index the
first time.
Static text as a title in a generated file
You can also add static text to a template and then use the template to format a list or index (see “Formatting lists
and indexes using templates” on page 441).
To create a title for a list or index:
1Type the title before the first entry on a body page.
2Use the Paragraph Catalog to give the text a special paragraph format for static text; or create a new paragraph
format for the title.
3If you create a new paragraph tag, make sure it does not end with the suffix assigned when you created the
generated file, such as IX for a standard index or TOC for a table of contents. When you generate the index again,
FrameMaker replaces only the paragraphs that have tags ending with the suffix.
Formatting lists and indexes
The first time you generate a list or index (if you don’t use a template as described in “Formatting lists and indexes
using templates” on page 441), it uses the page layout of the source document or the first nongenerated document
in the book, and all entries look the same. You can change the page design and the formats in the list or index after
you generate it, just as you do in any other document. When you generate the file again, your changes are retained.
For example, you can change the headers and footers, the number of columns of text, and the paragraph and
character formats used for entries. You can use a tab and tab leader dots before the page numbers in entries, or
include the autonumber of a paragraph in an entry. You can also include the chapter and volume numbers in entries.
You can also control the formatting of generated lists or indexes by changing the contents of the special text flow on
the reference page of the generated file. The special text flow is created when the list or index is first generated.
For information on changing paragraph and character formats, see “Redefining (updating) formats” on page 134.
Formatting lists and indexes using templates
You can use a template for a list or index rather than generating the list or index and then making format changes
one by one. For information on creating a template for a list or index, see “Creating templates for generated files” on
page 414 and most of the remaining sections of this chapter.
General Index
A
Abrasion, 29, 30
glacial, 26
water, 20-22
wind, 32
See also Sandstone
Abyssal plain, 42-43
Alluvial fan, 22, 43, 46

ADOBE FRAMEMAKER 8
User Guide
442
To have FrameMaker use a template for a generated file:
1Copy the template to the source document’s folder using the same filename as the list or index.
2Generate the list or index.
You can also use File > Import > Formats to import a template’s formats. Then generate the list or index again so
any changes in the special text flow are reflected in the generated file.
About special text flows
Many formatting aspects of a list or index are controlled by a special text flow on a reference page in the generated
file. The name of the reference page matches the default suffix, such as TOC for a table of contents or IX for a
standard index.
For generated lists, each paragraph in the flow corresponds to a paragraph tag or marker type you included in the list.
These paragraphs have tags that end with the default suffix. For example, a paragraph tagged Heading1TOC in the
text flow for a table of contents corresponds to the entries for first-level headings (tagged Heading1 in the source
document).
Special text flow on reference page for a table of contents
For indexes, the paragraphs in the flow correspond to the marker types you included in the index, the levels of entries
and subentries, the sort order, the separator text used, and several other index properties.
Special text flow for an index
A. Separators placeholder
B. Levels of entries
C. Group titles placeholder
D. Sort order
E. Ignore characters placeholder
If the list or index was created with hypertext links, the special text flow also contains a paragraph that specifies the
form of the hypertext commands in the generated file. The paragraph’s tag begins with the word Active.
Special text flows for lists and indexes have special paragraphs with placeholder text. This placeholder text lets you
specify how your entries will look when you regenerate the file.
<$paratext>
Chapter <$chapnum>
<$paratext>
<$paratext>
<$paratext>
<$pagenum>
<$pagenum>
<$pagenum>
<$pagenum>
A
B
C
D
E
1, 2–3
Level2IX
Level1IX
Symbols[\ ];Numerics[0];A;B;C;D;E;F;G;H;I;J;K;L;M;N;O;P;Q;
R;S;T;U;V;W;X;Y;Z
<$symbols><$numerics><$alphabetics>
-–—

ADOBE FRAMEMAKER 8
User Guide
443
Editing special text flows for lists and indexes
Building blocks such as <$pagenum> and <$paratext> in each paragraph of the special text flow determine the infor-
mation that appears in the list or index and the order in which the information appears. You can use the following
building blocks in the special text flow.
To edit the special text flow for a list or an index:
1In the list or index, choose View > Reference Pages.
2Display the reference page that contains the text flow you want. (The reference page name matches the default
suffix, such as TOC for table of contents or IX for a standard index.)
3Edit the appropriate paragraphs in the text flow. For specific editing instructions, see “Changing paragraph and
character formats of entries” on page 443 and the following sections.
4Choose View > Body Pages.
5Generate the index again to see the effect of your changes.
Note: Make sure you generate the list or index from the source document, not from the generated file.
Changing paragraph and character formats of entries
You can change the look of entries in a generated list and index by modifying their paragraph formats.
You can also change the character format of any text appearing in a list and of all index page numbers created with
the same marker type. For example, you could make all page numbers italic.
Note: If you create a new character format in the source document after you generate the list or index, you may have to
use File > Import > Formats to import the character format into the generated list. This is necessary only if you use the
new character format in a paragraph or marker that’s part of the list or index. If you created the character format before
first generating the list or index, FrameMaker imports it for you into the generated file.
Building block Meaning
<$autorange>Automatically creates index page ranges (see “Using page ranges in index entries” on
page 430)
<$numerics>
<$alphabetics>
<$symbols>
<$kana>
Specifies the overall sort order in an index (see “Changing the sort order of indexes” on
page 449)
<$pagenum>Displays the page number on which the source paragraph or marker appears
<$volnum>Displays the volume number of the document in which the source paragraph or marker
appears
<$chapnum>Displays the chapter number of the document in which the source paragraph or marker
appears
<$paratext>Displays the text of the paragraph, excluding any autonumber
<$paranum>Displays the paragraph’s entire autonumber, excluding spaces and tabs at the end of the
autonumber (for example, Section 2.1.1)
<$paranumonly>Displays the paragraph’s autonumber counters and the characters between them (for
example, 2.1.1)
<$paratag>Displays the source paragraph’s tag

ADOBE FRAMEMAKER 8
User Guide
444
To change the paragraph format of entries:
1In the list or index, display the reference page that contains the special text flow. Usually this is TOC for a table of
contents and IX for a standard index.
2Locate the placeholder paragraphs that have paragraph formats corresponding to the list or index entries. (For
example, Level1IX is the format for the placeholder text for the first-level index entry, and Head1TOC is the format
for a Head1 entry in a table of contents.)
3Change the properties of the paragraph formats, such as indents and font size, and update the paragraph formats,
so that they are available the next time you generate the file. For details on modifying formats, see “Redefining
(updating) formats” on page 134. The placeholder paragraphs show you how the entries will look.
Formatted placeholder paragraphs
To change the character format of entries:
1In the list or index, create a new character format and store it in the Character Catalog (see “Creating new formats”
on page 137).
2Choose View > Reference Pages and display the reference page that contains the special text flow.
3In the paragraph whose tag corresponds to the entries you want to change, do the following:
•In a list, enter the character tag between angle brackets (< >) before the text you want to change. To change back
to the paragraph’s default font, enter <Default Para Font>. For example, you could define a format tagged
ChapNumFont, and then use it to format chapter numbers in a larger font in a table of contents.
Reference page and resulting TOC
1, 2–3
Level2IX
Level1IX
Symbols[\ ];Numerics[0];A;B;C;D;E;F;G;H;I;J;K;L;
M;N;O;P;Q;R;S;T;U;V;W;X;Y;Z
<$symbols><$numerics><$alphabetics>
-–—
Pangea
Continental drift
Continental glacier
37
35
39
Chapter 2
<ChapNumFont> <$paratext> <Default Para Font> ....<$pagenum>

ADOBE FRAMEMAKER 8
User Guide
445
•In an index, enter the character tag, between angle brackets (< >), to the left of <$pagenum>. For example,
if IndexPgNum is a character format defined for italic page numbers in a standard index, you could use it to
format just the page numbers in the paragraphs tagged IndexIX.
Reference page and resulting index
You can also change the character format of text that appears in a list or index by applying a character format
directly to the building block rather than preceding the building block with a character tag enclosed in angle
brackets. Be careful not to apply the character format to the paragraph symbol.
Including volume, chapter, and paragraph autonumbers
In a generated list, you can include autonumbers—text and numbers inserted automatically as part of a paragraph
format—in addition to (or instead of) page numbers in entries. In an index, you can use autonumbers instead of page
numbers if all paragraphs that contain index markers are also autonumbered.
Index using section symbols and section numbers instead of page numbers
You can use the following building blocks to add autonumbers:
•<$volnum> and <$chapnum>, which include the volume and chapter counters. (See “Determining how
documents and pages are numbered” on page 468.)
Building block for volume and chapter autonumbering, and resulting index
<IndexPgNum> <$pagenum>
Index
A
Abrasion, 156, 158
glacial, 145
river, 105-6
wind, 32
Bonding
covalent, 33-34
ionic, 32-33
metallic, 36
Continental drift
fossil evidence, 36-37
rock formation, 35-36
Pangea, 38
Abrasion, §3.1
glacial, §3.3, §5.9, §6.1
river, §10.1
wave, §10.3
wind, §10.2
See also Sandstone §6.2
Vol. <$volnum>-<$chapnum>.<$pagenum>
Index
A
Abrasion, Vol. 1-3.1
glacial, Vol. 1-3.3
Bonding, Vol. 2-6.3
covalent, Vol. 2-6.4
Reference page
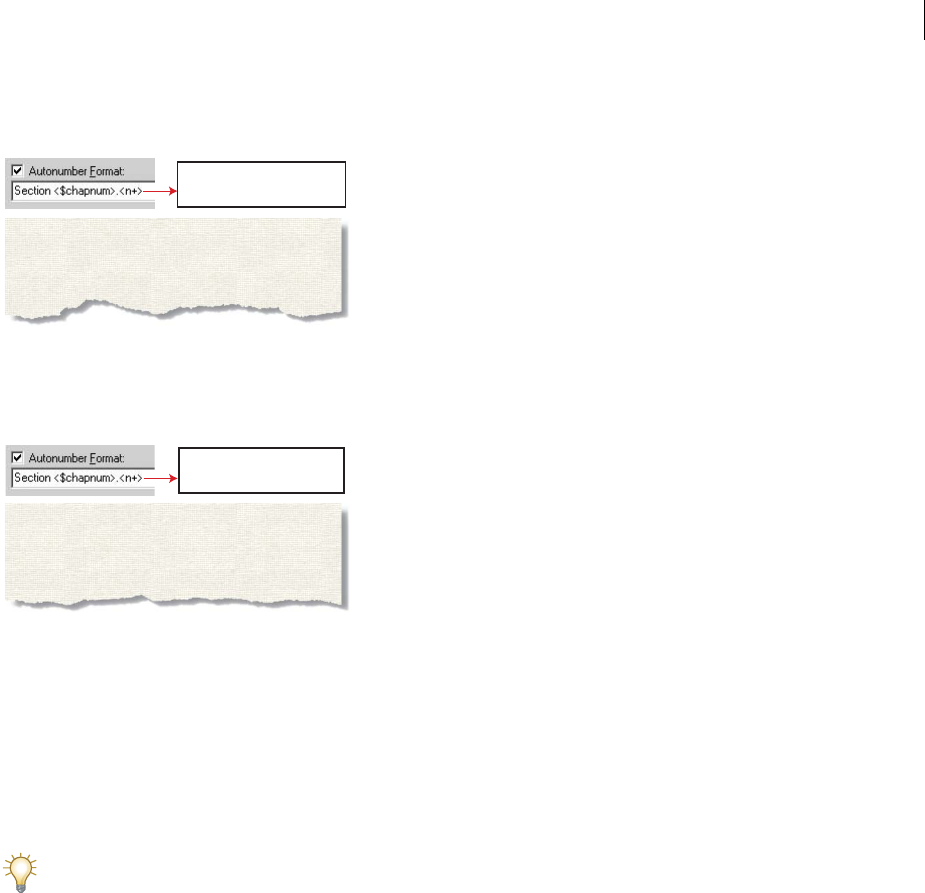
ADOBE FRAMEMAKER 8
User Guide
446
•<$paranumonly>, which includes the counters and the characters between them (for example, 2.2 for a paragraph
whose autonumber is Section 2.2).
Building block for paragraph autonumbering using section numbers, and resulting index
•<$paranum>, which includes the counters and all text in the autonumber (except for spaces or tab characters at
the end).
Building block for paragraph autonumbering using “Section” text and section numbers, and resulting index
To include volume and chapter autonumbers:
1Choose View > Reference Pages and display the reference page that contains the special text flow.
2In a list or index, type the <$volnum> or <$chapnum> building block where you want to insert the autonumber.
For example, to include the chapter number along with the page number (such as 3-1) in entries generated
from markers of type Index, type <$chapnum>- before the <$pagenum> building block in the paragraph
tagged IndexIX.
To make sure numbers such as “3-1” don’t break between lines, insert a nonbreaking hyphen by pressing Esc hyphen
h. (See “Changing hyphenation and line breaks” on page 119.)
To include paragraph autonumbers:
1Choose View > Reference Pages and display the reference page that contains the special text flow.
2Do one of the following:
•In a list, type the <$paranumonly> or the <$paranum> building block where you want to insert the autonumber.
•In an index, replace the <$pagenum> building block with <$paranum> or <$paranumonly> in the paragraph with
the tag that begins with the marker type. For example, to include the paragraph autonumber rather than the page
number in entries generated from markers of type Index, replace the <$pagenum> building block in the paragraph
tagged IndexIX.
Changing page number separators
A typical index entry such as Erosion 1, 2–3 includes a space after the entry text, a comma and a space between page
numbers, an en dash to show a page range, and nothing after the last number. You can change the en dash to the word
to, or change this separator text in any other way. For example, you could change the separator text so that a comma
appears after the entry, such as Erosion, 1.
<$paranumonly>
Index
A
Abrasion, 3.1
glacial, 3.3
Bonding, 6.3
covalent, 6.4
Cap rock, 9.1
Cavern, 9.2
Reference page
<$paranum>
Index
A
Abrasion, Section 3.1
glacial, Section 3.3
Bonding, Section 6.3
covalent, Section 6.4
Reference page
ADOBE FRAMEMAKER 8
User Guide
447
To change page number separators:
1Choose View > Reference Pages, and display the reference page that contains the special text flow.
2Edit the Separators paragraph. (Look for the paragraph containing 1, 2–3.) You can change any separator, but you
must use the placeholder numbers 1, 2, and 3.
A custom Separators paragraph on the IX reference page
A. En dash B. Em space
Manually adding text to entries
You can add text to all entries generated from paragraphs with a particular tag or markers of a particular type. For
example, you can enclose page numbers in brackets.
Brackets added in a TOC
You can also use custom marker types with added text to display page numbers in a variety of ways in an index. For
example, suppose you want to generate the following scholarly index.
Custom page numbers added in an index
To do this, you need two custom markers: one for page numbers followed by ff, and one for page numbers followed
by note. You might call these markers Indexff and IndexNote.
When generating the index, you include all three marker types (Index plus the two new ones). After generating the
index for the first time, you can edit the special text flow for the marker types on the reference page.
The next time you generate the index, the changes appear in the generated index.
Marker type Edit to the reference page Result
Indexff <$pagenum> ff 15 ff
IndexNote <$pagenum> note 15 note
A
B
1, 2
–
3
Continental drift
Fit of the Continents
Fossil Evidence
Paleoclimatic Evidence
[10]
13
16
34
Continental drift 30, 47
fossil evidence, 36, 38 ff
rock structures, 37 note, 42
Pangea, 38
See also Wegner
Continental glacier, 39, 41
Continental margin, 42, 44 ff
Continental rise, 45-47
Continental shelf 50

ADOBE FRAMEMAKER 8
User Guide
448
To manually add text in an entry:
1Choose View > Reference Pages, and display the reference page that contains the special text flow for the list
or index.
2Enter the text where you want it to appear. For example, to enclose all page numbers in brackets, enter brackets
around the page number building blocks: <$paratext> [<$pagenum>]
Using tabs and tab leaders
You can use tabs to align page numbers in a list or index. You can also use tabs to add tab leaders, such as a row of
dots, between entry text and page numbers.
Right-aligned tab stop with leader dots in a TOC
Tab stops make index page numbers line up in columns.
To use tabs and tab leaders in a list:
1Choose View > Reference Pages and display the reference page that contains the special text flow for the table of
contents or list.
2Select the space between the <$paratext> and <$pagenum> building blocks in the paragraph whose tag matches
the entries you want to change, and then press Tab.
3Change the paragraph format of the entries by adding a tab stop where you want to align the page numbers (see
“Changing tab stops” on page 113). Define the format to include leader dots, if you want. Then update the paragraph
formats so the changes are available the next time you generate the list. For details, see “Redefining (updating)
formats” on page 134.
To use tabs and tab leaders in an index:
1Choose View > Reference Pages, and display the reference page that contains the special text flow for the index.
2Select the space before the number 1 in the Separators paragraph, and then press Tab.
3Change the paragraph format for each level of the index by adding a tab stop where you want to align the page
numbers (see “Changing tab stops” on page 113). Define the formats to include leader dots, if you want. Then update
the paragraph formats of all entries at each level of the index, so the changes are available the next time you generate
the index. For details, see “Redefining (updating) formats” on page 134.
Rearranging information in list entries
You can specify the order in which the parts of a list entry appear. For example, you can specify that the page number
appear first, followed by the paragraph text.
Continental drift
Fit of the Continents
Fossil Evidence
Paleoclimatic Evidence
10
13
16
34
Index
A
Abrasion 14, 29, 30
glacial 26
water 20-21, 40
wind 40, 132

ADOBE FRAMEMAKER 8
User Guide
449
To rearrange information in list entries:
1Choose View > Reference Pages, and display the reference page that contains the special text flow for the table of
contents or list.
2Rearrange the building blocks. For example, to put the page number first, followed by the paragraph text,
rearrange the building blocks: <$pagenum> <$paratext>.
Changing the sort order of indexes
Indexes are sorted so that special symbols appear first, numbers appear second, and alphabetic characters appear last.
By default, a few punctuation characters are ignored in sorting, and alphabetic characters appear in the correct sort
order for the English language.
Note: When generating indexes in multilingual documents, symbols sort based on the Unicode Collation Algorithm
(UCA) of the Unicode text encoding standard.
You can change the sort order of index entries—for example, to sort alphabetic characters based on the sort order
for another language. You can also change whether the index sorts entries letter by letter or word by word.
You change the sort order by editing the contents of the IgnoreChars and the SortOrder paragraphs in the special
text flow of the reference page for the index. For information, see “Editing special text flows for lists and indexes” on
page 443 and the following sections.
Specifying characters to ignore
By default, FrameMaker ignores hyphens, nonbreaking hyphens, en dashes, and em dashes when sorting index
entries. You can specify other characters to be ignored—for example, underscore characters, periods, brackets,
braces, and quotation marks.
An IgnoreChars paragraph with added characters
To specify the characters to ignore when sorting an index:
1Choose View > Reference Pages, and display the reference page that contains the special text flow for the index.
2Edit the IgnoreChars paragraph.
Note: If you’re working with Japanese fonts, you may want to include the Chouon character in the IgnoreChars
paragraph. The Chouon character is normally used in Japanese to lengthen the vowel sound that it follows, but you
probably won’t want it to affect the sort order.
Sorted letter by letter Sorted word by word
Seabed
Sea level
Seasonal change
Sea walls
Sea level
Sea walls
Seabed
Seasonal change
--– —,._()[]{}$!'""
ADOBE FRAMEMAKER 8
User Guide
450
To sort letter by letter instead of word by word:
1Choose View > Reference Pages, and display the reference page that contains the special text flow for the index.
2Add a space at the beginning of the IgnoreChars paragraph in the special text flow of the index. (The space cannot
be at the end of the paragraph.)
Specifying sort order
The SortOrder paragraph in the special text flow contains building blocks that control how characters are sorted in
an index.
SortOrder paragraph
Each sort order building block represents several characters in a particular order. The following table shows the
order for US English. The alphabetic sort order differs slightly for other languages.
To sort symbols, numbers, or other characters in another location in an index:
1Choose View > Reference Pages, and display the reference page that contains the special text flow for the index.
2Rearrange the building blocks in the SortOrder paragraph in the special text flow. For example, to put symbols at
the end of an English-language index instead of at the beginning, arrange the building blocks as follows:
<$numerics><$alphabetics><$symbols>
To specify your own sort order:
1Choose View > Reference Pages, and display the reference page that contains the special text flow for the index.
2Replace a building block in the SortOrder paragraph with the specific characters in the order you want them
sorted. Follow these rules when entering a new sort order:
•If you replace <$alphabetics> with individual characters, separate the letter groups with a space. (Letter groups—
for example, Ffƒ—are characters that are sorted as if they were the same character, unless they are the only
characters that differ in the sorted text. In that case, the first character in the string appears first.)
•If you replace <$symbols> with individual characters, use a backslash before the angle bracket symbols (< >).
•Don’t press Return at the end of a line. Let FrameMaker wrap the characters automatically from line to line.
•To indicate that a letter pair should be sorted as a single character, specify the letter pair between angle brackets
(< >)—for example, CÇcç<CH><Ch><ch>. In this example, all the characters or letter pairs are in the same letter
group (the letter C). The letter pair CH is sorted after the letter C, and uppercase letter pairs are sorted before
lowercase letter pairs.
Building block Characters, in this order
<$numerics>0 1 2 3 4 5 6 7 8 9
<$alphabetics>AÁÀÂÄÃÅaáàâäãåª Bb CÇcç Dd EÉÈÊËeéèêë Ffƒ Gg Hh IÍÌÎÏiíìîï Jj Kk Ll M
m NÑnñ OÓÒÔÖÕØoóòôöõøº Pp Qq Rr Ss Tt UÚÙÛÜuúùûü Vv Ww
Xx YŸyÿ Zz
<$symbols>All other characters in ASCII order
<$symbols><$numerics><$alphabetics>

ADOBE FRAMEMAKER 8
User Guide
451
About Japanese sort order
A document that uses Japanese fonts includes the <$kana> building block, which controls sorting of Japanese kana
(hiragana and katakana).
Single-byte (half-width) katakana are converted to double-byte katakana in the generated file when sorted. The sort
order of kanji is determined by its kana pronunciation (yomigana), as illustrated in “Specifying sort orders in
indexes” on page 431. Because of this, the <$kana> building block also controls how most kanji sort.
The sort order of kanji without yomigana and of Japanese symbols (double-byte numerics and Roman alphabetics)
is not included by default in the <$kana> building block. Instead, kanji is sorted by code value and appended after
characters sorted by <$kana>.
If you want to sort kanji without yomigana and Japanese symbols differently, add these characters to the
<$numerics>, <$alphabetics>, or <$kana> building blocks. For example, double-byte Japanese characters could be
added to the <$symbols> building block.
Working with group titles in indexes
Index entries are initially grouped one letter at a time—all the As, all the Bs, and so on—using the uppercase letter
as a group title. In a small index or when only a few entries appear under some letters such as X, Y, and Z, you may
want to group letters differently and change the group titles.
Building block Characters, in this order
<$kana>
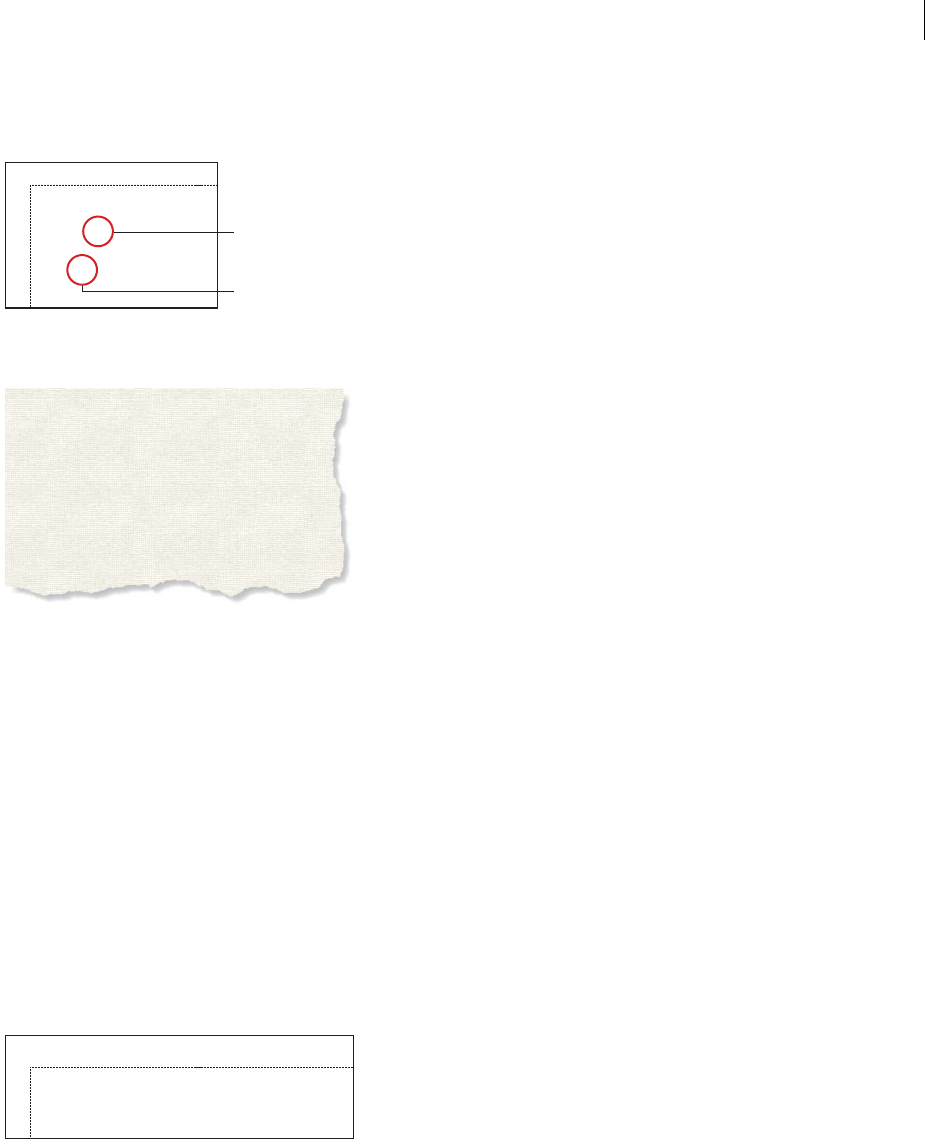
ADOBE FRAMEMAKER 8
User Guide
452
FrameMaker inserts group titles as if they were index entries but uses a different paragraph format. It uses the labels
and sort positions you specify in the GroupTitles paragraph in the special text flow.
An edited GroupTitles paragraph on the IX reference page
A. Sorting information B. Group title
The result in the index
To change the groupings and group titles:
1Choose View > Reference Pages, and display the reference page that contains the special text flow for the index.
2Edit the GroupTitles paragraph in the special text flow. For example, edit the group titles (the characters between
semicolons, excluding bracketed text), or delete group titles you don’t want. Type text between brackets ( [ ] ) to
specify where you want the group titles sorted.
For example, to collapse all entries that start with V through Z into a single group whose title sorts under V, edit the
GroupTitles paragraph so that its last entry is V–Z[V].
Note: The first two entries in the GroupTitles paragraph define what group titles to use for symbols and numbers and
where to place these titles. You can change the titles, but changing the sort information of these two groups might give
unexpected results.
To create an index without group titles:
❖Edit the GroupTitles paragraph in the special text flow to look like this:
To create an index with neither a group title nor a space between entry groupings:
❖Delete all the text in the GroupTitles paragraph in the special text flow, but don’t delete the paragraph symbol.
Symbols[\ ] ;Numerics [0] ;
A-C[A];D-F[D];
G-I[G];J-L[J];
M-O[M];P-R[P];
S-U[S];V-Z[V]
A
B
J-L S-U V-Z
Jetty, 96, 108
Joint, 115
Kaolinite, 105-6
Kettle, 132
Lava, 46
Lithification, 78
Levee
artificial, 110
Salt dome, 70
Sedimentary rock
chemical, 33-34
detrital, 32-33
type, 136-40
Shale, 137-38
Silicate, 39-46
ferromagnesian, 42
Valence electron
Ventifact, 99-101
Viscosity, 82
Wash, 134-35
Wave, 145-51
characteristics, 4
oscillation, 51
refraction, 47-49
[ \ ];[0];[A];[B];[C];[D];[E];[F];[G];[H];[I];[J];[K];[L];[M];
[N];[O];[P];[Q];[R];[S];[T];[U];[V];[W];[X];[Y];[Z]
ADOBE FRAMEMAKER 8
User Guide
453
To create quick access to group titles in a hypertext document:
❖Generate clickable thumbtabs to the group titles to make navigating through the index easier. For information, see
“Adding hypertext links to generated files” on page 548.
Working with TOCs in structured documents
In FrameMaker, a table of contents, list of figures, or other similar list is generated from text in specific elements in
a document. An index is generated from text in marker elements you insert in a document.
Preparing structured documents for a TOC or other list of elements
When you generate a table of contents or other element list, you choose the tags of the elements you want to include.
In the source document, do the following to avoid problems in the list:
•Make sure that the elements are tagged correctly and consistently in the document. If any text is not in the right
element (such as heading text in a Para element rather than in a Head element), it will not appear in the list.
•Make each item you want to include in the list a single paragraph in an element. If an element has more than one
paragraph, only text from the first paragraph will appear in the list. For example, you won’t get the results you want
if a heading is two lines, with each line in a separate paragraph.
•Validate the document to make sure it does not have any structure errors (see “Validating documents” on page 52).
Note: You usually generate a list of references—such as a list of fonts or unresolved cross-references—for your own use
while working with a document. You do not need to prepare the document before generating such a list.
Preparing structured documents for a list of markers
Before generating a list of markers, you need to insert the markers in the source document. You usually insert
markers as elements so they appear in the document’s structure.
Marker element
As you insert markers, you enter text in them that will appear in the generated list. You can see at least part of this
text in the Structure View.
For information on inserting a marker that’s not an element, see “Preparing documents for a list of markers” on
page 421.
To insert a marker element for a generated list:
1Click where you want to insert the marker.
2Select a marker element in the Element Catalog and click Insert.
Head
Para
Pangaea
Check Adler Source
About 200 Million
AuthorNote
Section

ADOBE FRAMEMAKER 8
User Guide
454
You can also use Special > Marker to insert an element. If more than one marker element is available, choose the one
you want from the Element Tag pop-up menu in the dialog box that appears.
3To change the marker type, choose from the Marker Type pop-up menu. Changing to another type is not a format
rule override, even if the element has a type preselected.
Consult your developer before changing a marker type. Your document may have a separate element defined for each
marker type you’ll need.
If you change the marker type, you can use any predefined type except Cross-Ref, Conditional Text,
Header/Footer $1, and Header/Footer $2. Some custom types may also be available.
4Enter the text you want to appear as the entry in the list. You can enter up to 255 characters (127 Japanese
characters). Type the text or use alternative methods to enter text (see “Adding index markers” on page 428).
5Click New Marker. If text symbols are showing, a marker symbol appears in the document window. A bubble
for the marker appears in the Structure View, with a text snippet that shows the beginning of the marker’s text.
6If the Attributes for New Element dialog box appears, enter attribute values for the marker element and click Insert
Element (see “Entering attribute values as you insert elements” on page 46).
If no marker element is available at the location you want, you might use an invalid element. After inserting the
element, talk to your developer about making the element valid at this location.
To use an invalid marker element:
❖Insert an element that is valid in another part of the document. Either insert the element in a valid location and
then move it, or use the All Elements setting (see “Changing the scope of elements available in a structured
document” on page 18) to make the element available everywhere and then insert the element where you want it.
Generating TOCs and other lists in structured
documents
After you’ve prepared a source document for a TOC or other list, you’re ready to generate the list. You can generate
a list from a book or from a single document.
Note: A generated list is initially unstructured, but you can add structure to it. You often regenerate a list several times
in the process of getting it right, and each time you regenerate, the list loses its structure. Wait until the list is in its final
version before adding structure to it.
Although the steps for generating TOCs and lists in structured documents are the same as for unstructured
documents (see “Generating TOCs and other lists” on page 421), consider the following additional points:
•The items in the scroll lists vary depending on the type of list you’re gathering. For example, the element and
paragraph tags in the source document appear for a table of contents. (Paragraph tags appear after element tags
and are preceded by a paragraph symbol .) For a list of references, the available reference types appear.
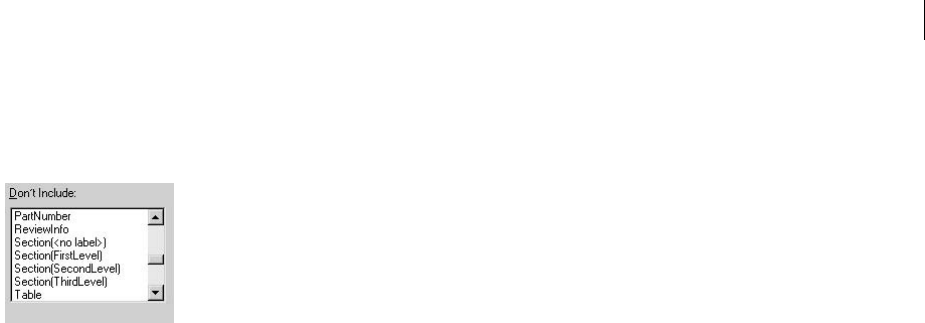
ADOBE FRAMEMAKER 8
User Guide
455
•Some element tags may have context labels that provide information about the element’s location in the structure.
For example, if Section elements can be nested within other Section elements, context labels might identify
whether the elements are first-, second-, or third-level sections.
Context labels
•If an element uses context labels, a <no label> entry also appears in the scroll list for occurrences not described by
the labels. In the example above, Section(<no label>) represents Section elements that are at a fourth level or lower
in the document.
•If an element has more than one paragraph, only text from the first paragraph will appear in the generated list. For
example, the first paragraph within a Section element—usually its Head—will appear.
•The first time you generate a list (if you don’t use a template), it uses the page layout (master pages) of the first
non-generated document in the book, and all entries look the same. The list also has element definitions from the
source document.
Updating and editing lists in structured documents
You edit entries in a list by editing the corresponding elements in the source document and then regenerating. If you
edit entries by typing directly in the list, your changes will disappear the next time you regenerate it.
If a generated list is structured, you’ll lose the structure every time you regenerate. Do not add structure to a list until
it is in its final version.
For information on updating lists, see “Updating and editing TOCs and lists” on page 423.
Finding the source of list entries in structured documents
When an entry needs to be edited, you trace the entry back to the corresponding element in the source document to
make the revision.
The quickest way to go to the source of a list entry is to use the hypertext link on the entry in the generated file to
display and select the element in the source document. You can also go to an element by using the Find/Change
command, or select the element in the Structure View if you can see its bubble.
To find the source of an entry by using a link:
1If you did not select Create Hypertext Links when you generated the list, select this option and regenerate the list.
2If you’re revising a marker element, choose Special > Marker so you can see the marker text.
3In the generated list, do one of the following:
•(Windows) Control-Alt-click an entry.
•(UNIX) Control-right-click an entry.

ADOBE FRAMEMAKER 8
User Guide
456
FrameMaker opens the source document to the page that contains the element and selects it. If the element is a
marker, the marker text appears in the Marker dialog box.
To find the source of an entry by using Find/Change:
1If you’re revising a marker element, choose Special > Marker so you can see the marker text.
2In the source document (not in the generated list), choose Edit > Find/Change.
3Choose Element from the Find pop-up menu, enter the tag of the element you want to find, and click Set.
4Click Find. FrameMaker goes to the page that contains the element and selects it.
Note: When a marker element is selected, the marker text appears in the Marker dialog box. Don’t click Change in the
Find/Change dialog box to change the marker text. If you do, FrameMaker replaces the marker itself. Instead, change
the text in the Marker dialog box, and then click Edit Marker.
Editing and deleting list entries in structured documents
You revise the entries in a list by changing their elements in the source document.
To edit a marker element:
❖Select the element, change the text in the Marker dialog box, and click Edit Marker.
To delete any element:
❖Select the element in the source document and press Delete.
Adding index marker elements in structured
documents
Before generating an index, you need to insert index markers in the source document. You usually insert markers as
elements so they appear in the document’s structure.
Index marker element
Head Pangaea
Continental Drift: Pangaea
IndexEntry
Section
ADOBE FRAMEMAKER 8
User Guide
457
As you insert markers, you provide text that describes how to organize the source information in the index.
Marker text
For information on inserting a marker that’s not an element, see “Adding index markers” on page 428.
To insert an index marker element:
1Click where you want to insert the marker.
2Select a marker element in the Element Catalog and click Insert.
You can also use Special > Marker to insert an element. If more than one marker element is available, choose the one
you want from the Element Tag pop-up menu in the dialog box.
3To change the marker type, choose from the Marker Type pop-up menu. Changing to another type is not a format
rule override, even if the element has a type preselected.
Consult your developer before changing a marker type. Your document may have a separate element defined for each
marker type you’ll need.
You can generate an index from the predefined Index, Subject, and Author marker types. Some custom types may
also be available.
4Type the text of the index entry. You can enter up to 255 characters (127 Japanese characters). You can also use any
of the following building blocks in marker text to control the form of the index entry and its location in the index.
Note: To enter a backslash or any of the special characters used in these building blocks—bracket, colon, semicolon, or
angle bracket—as a regular character, precede it with a backslash (\).
Building block Meaning
: (colon) Separates levels in an entry
; (semicolon) Separates entries in a marker
[ ] (brackets) Specifies a special sort order for the entry
<$startrange>Indicates the beginning of a page range
<$endrange>Indicates the end of a page range
<$nopage>Suppresses the page number in the entry
<$singlepage>Restores the page number for an entry that follows a <$nopage> building block in a
marker that contains several entries
Character tag between angle brackets (< >) Changes the character format (for example, <Emphasis>)
<Default Para Font>Restores the paragraph’s default font
About 200 million years ago
this supercontinent began
breaking into smaller contine
which then "drifted" to their
present positions. The fit of
South America and Africa, an
climatic similarities, fossil evi
Continental Drift
fossil evidence, 36-37
rock structures, 35-36
Pangaea, 38
Continental glacier, 39, 40-41
Continental margin, 42, 44
Continental rise, 45-46
Pangaea
Continental Drift: Pangaea

ADOBE FRAMEMAKER 8
User Guide
458
5Click New Marker. If text symbols are showing, a marker symbol appears in the document window. A bubble
for the marker appears in the Structure View, with a text snippet that shows the beginning of the marker’s text.
6If the Attributes for New Element dialog box appears, enter attribute values for the marker element and click Insert
Element (see “Entering attribute values as you insert elements” on page 46).
If no marker element is available at the location you want, you might use an invalid element. After inserting the
element, talk to your developer about making the element valid at this location.
To use an invalid marker element in indexes:
❖Insert an element that is valid in another part of the document. Either insert the element in a valid location and
then move it, or use the All Elements setting (see “Entering or editing attribute values for elements already in a
document” on page 47) to make the element available everywhere and then insert the element where you want it.
To specify marker text without typing:
❖Do one of the following:
•To use one word in the document as the index entry, insert an empty marker element (with no text in it) at the
beginning of the word. When you generate the index, the word to the right of the marker becomes the text of an
entry.
•To use a range of text in the document as the index entry, select the text before inserting the marker element. If
the selected word or phrase doesn’t contain a marker, it automatically appears in the Marker Text box.
Formatting lists and indexes in structured documents
A generated list or index in structured documents has the same formatting properties as unstructured documents:
•A page design, such as running headers and footers, and the layout of text columns.
•Catalogs of paragraph and character formats for text in the entries.
•A special flow on a reference page that controls many characteristics of the entries, such as tabs and tab leaders,
page number separators, a sort order for index entries, and which text to display from source elements.
Typically, these properties are stored in a special template for lists and indexes. If you have such a template,
FrameMaker can apply it to a list or index when you first generate the file.
If you do not use a template when you generate a list or index, the generated file gets its formatting properties from
the source document (with a few additional catalog formats). After generating, you can either import the properties
you want from the template or make formatting changes manually in the generated file.
As long as the generated file has the filename that FrameMaker assigns it and is in the same folder as the source
document, the file keeps its formatting properties every time you regenerate it.
For information on changing the formatting properties manually, see “Formatting lists and indexes” on page 441.
To apply a template to a list or index when you generate the first time:
1Copy the template to the source document’s folder, using the same filename as the list or index—for example,
Chap1TOC.fm.
2Generate the list or index. The generated file replaces the template and takes the template’s formatting properties.

ADOBE FRAMEMAKER 8
User Guide
459
To apply properties from a template after you generate the first time:
1Import the formatting properties you want (see “Importing and updating formats” on page 415).
2Regenerate the list or index so that any changes in the special flow are reflected in the index.
Troubleshooting TOCs and lists in structured
documents
Minor problems in the source document may cause corresponding problems in the generated list. For example, an
incorrectly tagged element may cause an extra entry to appear in the list or to be missing from the element. Or an
empty element may cause an extra line to appear in the list.
Problems in an index
A. Extra line B. Doesn’t belong in list
The following information describes typical problems and possible solutions.
Note: For more information on solutions described here that affect catalog formats or the special flow on a reference
page, consult your application developer.
Extra entries or lines Incorrect tagging in the source document can cause extra paragraphs to appear in the
generated list. To correct this, do the following:
•If the list contains an entry that doesn’t belong there, check the corresponding element in the source document
and change the element to a type that does not appear in the list.
•If the list contains an extra line with only a page number, there may be an empty element in the source document;
delete the empty element. If you need extra paragraph spacing in the source document, use an element that is
defined to provide the spacing rather than using an empty element.
Missing entries To include entries that appear in the source document but not in the list, do one of the following:
•If all entries with a particular element tag are missing, make sure the Include scroll list in the Set Up dialog box
contains the correct items.
•If an occasional entry is missing, check the tag of the corresponding element in the source document. If the
element is tagged incorrectly, the information won’t be included in the list.
Incomplete entries When an element contains more than one paragraph, the list includes an entry for only the first
paragraph. A multiline heading in the source document can be a problem if each line is a separate paragraph.
Avoid using forced returns in a heading; forced returns appear in the generated TOC. Instead, to break a heading
into two lines (while still including all of its text in the list), use nonbreaking spaces to force a break. Or you can adjust
the right indent for the heading to force a break, or the right and left indents if the heading is centered, though this
will be a format rule override.
A
brasion, 297, 299
glacial, 265
265
river, 205-206
wave, 317-318
Abyssal plain, 428-429
Many rocks are broken by
A
B

ADOBE FRAMEMAKER 8
User Guide
460
Important: Be aware that these techniques create overrides to both paragraph styles and element definitions. As such,
they may not be retained when importing formats or element definitions, or when changing the context of the element
by editing other parts of the structured document.
Bad line breaks Bad line breaks in the list or its source document may separate information that belongs together in
the list. To correct this, do one of the following:
•Change the characters after which FrameMaker allows line breaks. For example, FrameMaker normally allows a
line break after an en dash (–). To disallow breaks after an en dash, use Format > Document > Text Options.
•In the special text flow on the reference page, use nonbreaking spaces between the text and page number for each
entry so that a page number does not appear on a line by itself.
Disappearing titles A title you entered may disappear when you regenerate, unless you give the title a paragraph
format as described on “Adding titles and other static text to lists and indexes” on page 441.
Disappearing formatting If your formatting changes aren’t retained when you regenerate, do the following:
•If you changed the filename or location of the list, change the name or location back. FrameMaker won’t find any
formatting changes unless you save the list in the same folder as the source document, and use the filename that
FrameMaker assigns.
•To retain paragraph and character format changes, store them in the list’s Paragraph or Character Catalog, making
them available the next time you generate the list.
•To retain other changes, make them in the special text flow on the reference page.
Embedding TOCs in structured documents
A table of contents is typically a separate file with contents that are automatically generated by FrameMaker. If you
want a small table of contents embedded at the beginning of the source document instead of in a file of its own, you
can set up the table of contents with cross-references.
A special cross-reference element should already be defined for your document.
FrameMaker does not automatically maintain a table of contents that uses cross-references. If you change the order
of sections in the document or delete a section, for example, rearrange the entries or delete an entry in the table of
contents yourself.
You can also generate a separate table of contents and then import the generated file by reference at the beginning of
the source document. In this case, the text inset with the table of contents is automatically updated when the table of
contents changes.
To embed a TOC in a document by using cross-references:
❖For each item you want to appear in the table of contents, insert a cross-reference element (see “Inserting element-
based cross-references in structured documents” on page 219). The document may also have paragraph elements
defined for formatting See your application developer for information.
Note: Make sure that the sequence of entries in the table of contents reflects the sequence of source elements in the
document. This isn’t automatic as it is with a generated table of contents.

ADOBE FRAMEMAKER 8
User Guide
461
To maintain a TOC that uses cross-references:
❖Do the following:
•If you change the order of source elements while editing the document, rearrange the cross-references to be in the
same order as the sources. Then update the cross-references (see “Updating cross-references manually” on
page 209).
•If you delete a source element, delete the cross-reference to it. Otherwise, the entry in the table of contents will be
an unresolved cross-reference.
To embed a TOC in a document as a text inset:
1Generate a table of contents in the usual way (see “Generating TOCs and other lists” on page 421).
2Import the table of contents into the source document. For details, see “Using the Import command to import
text” on page 502.

462
Chapter 13: Books
About book files
You can group separate documents into one FrameMaker book. This grouping lets you generate a single table
of contents or index for the documents, and it greatly simplifies printing, numbering, cross-referencing,
and formatting.
A book file is a special FrameMaker file that ties several files together so you can work with them as a unit.
For example, you can number pages and paragraphs continuously from one file to the next, and update cross-refer-
ences across the files all at once.
A book file contains the filenames of the documents that make up a book—including documents such as chapters
and appendixes, and generated files such as a table of contents and an index. The book file also contains pagination
and numbering settings for each file in the book.
Each file in a book can have its own numbering system. For example, you might start page numbering at i on the title
page, at 1 in the first chapter, and then number continuously through subsequent chapters. You can also add chapter
and volume numbers to page numbers—for example, the chapter 2 in the page number 2-1.
When you update the book, FrameMaker creates or updates generated files and updates numbering throughout the
files. FrameMaker also updates cross-references to match the new numbering.
Building books
When you’re ready to assemble a book, you create the book file that will contain a list of all the files in the book,
in order.
Keep your book organized by putting all the component files into one folder and making each chapter a
separate FrameMaker document. (To improve performance, you may want to break up very long chapters
into separate files.)
Overview of book building
Book building refers to the process of assembling a book from its components. Most components like preface,
chapters, and appendixes exist as separate files before you add them to a book. Other components like the table of
contents and indexes are generated as part of the book building process.
To build a book:
1Create the book (see “Creating book files” on page 463).
2Add all the other documents needed in the book (see “Adding files to books” on page 463).
3Add the filenames for any generated file you’ll want for the book, such as a TOC or index.
4Set up volume, chapter, page, and paragraph numbering (see “Determining how documents and pages are
numbered” on page 468).

ADOBE FRAMEMAKER 8
User Guide
463
5Update the book to add content to the TOC and index and to fix numbering across the book. Any errors or
unresolved cross-references will now be obvious (see “Updating books” on page 473).
6After fixing errors (see “Troubleshooting books” on page 475), generate and update again.
Note: Books support the Unicode text encoding standard.
Creating book files
You can create the book file from any document that will be in the book. Once a book file is created, FrameMaker
provides special menu commands for working with it.
To create a book file:
1Open a document, and then choose File > New > Book. An alert message asks if you want to include the document
in the book.
Note: (UNIX) If no document or book window is open, you can press Esc f Shift+n to create a new book.
A new book window appears showing the contents of the book.
Contents of a new book is displayed in the new book window
2Use File > Save Book As to save the book file. In Windows, a book extension is added to the filename when
you save it.
Adding files to books
You can add two kinds of files to books: documents and generated files. When you add a file to a book, the file’s name
and location are added to the book file, and a link is established between the file and the book. When you use the
book window to rename the file, FrameMaker changes the filename on disk and updates cross-references, hypertext
links, and text insets. FrameMaker can then find the document or generated file when you use commands in the
book window that apply to it. Books can also include non-FrameMaker documents.
In the book window, the icon appears next to documents, and the icon appears next to generated files.
For information on adding generated files to a book, see “Generating TOCs and other lists” on page 421.
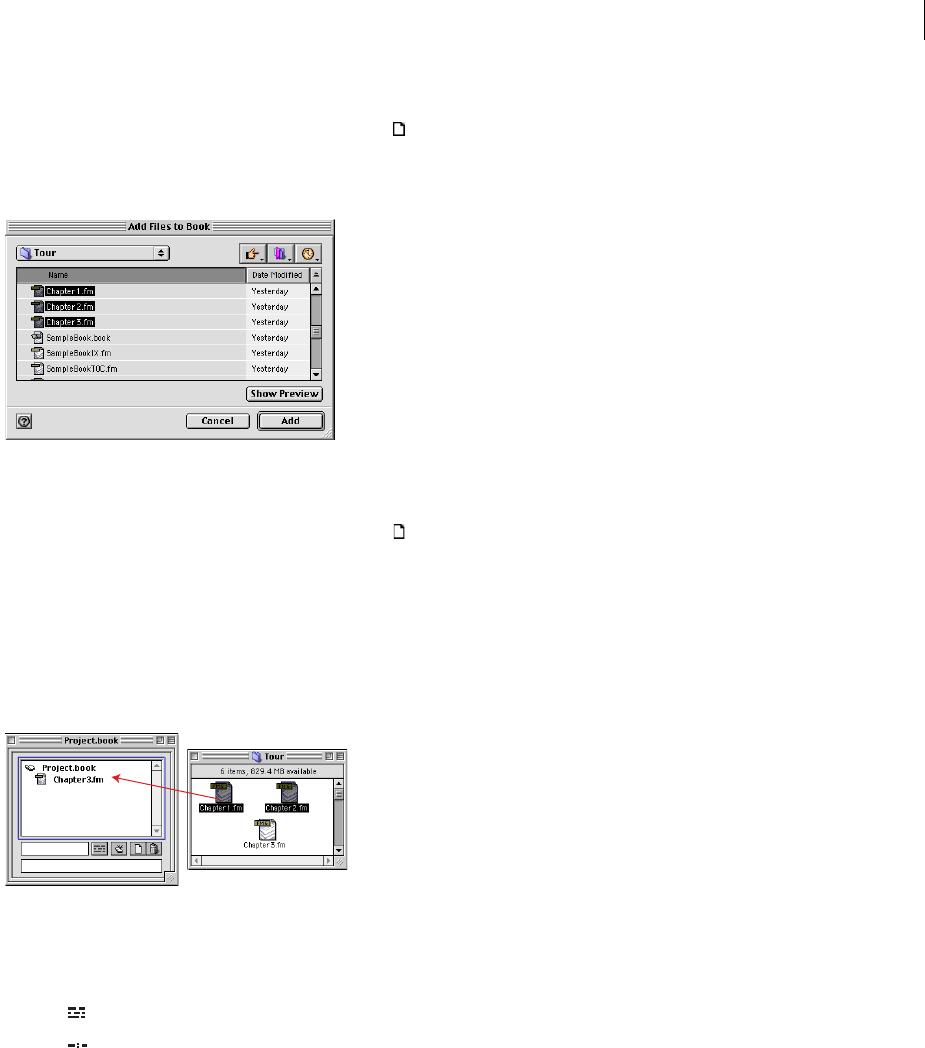
ADOBE FRAMEMAKER 8
User Guide
464
To add document files to a book (Windows):
1In the book window, choose Add > Files or click .
2Select the document file or files you want to add to the book (see “Selecting files in a book” on page 465), and then
click Add.
Select files you want to add to your book
To add document files to a book (UNIX):
1In the book window, choose Add > Files or click .
2Select the document file and click Add. The Add Files to Book dialog box reappears.
3Continue to add files to the book. When you are finished adding files, click Done.
To drag files to a book (Windows):
❖Drag files from another book window or a file manager window (such as Explorer or Finder) into the
book window.
Adding files by dragging them into a book window
To toggle between displaying filenames and text:
❖In the book window, do one of the following:
•Click to display the first paragraph in the main flow of each document (such as “Chapter 2: Color”).
•Click to display the documents’ filenames.
To add generated files to a book:
1Open the book window and select the file next to where you want the generated file to appear.
2Do one of the following:
•Choose Add > Table of Contents, or choose Add > List of, and then choose a type of list from the menu. For more
information, see “Generating TOCs and other lists” on page 421.
•Choose Add > Standard Index, or choose Add > List of, and then choose the type of specialized index you want
to create. For more information, see “Generating indexes” on page 432.

ADOBE FRAMEMAKER 8
User Guide
465
Adding metadata to a book
FrameMaker includes built-in support for Extensible Metadata Platform (XMP). Metadata, or file information,
is descriptive information that can be searched and processed by a computer. Use it to provide information about the
contents of a document and to preserve information about a document that will be opened in other Adobe applica-
tions. If you export the file to PDF, much of this metadata will appear in Adobe Acrobat.
Metadata tags travel with the document and describe its content. By embedding them in your documents, you make
the documents easier to track, manage, and retrieve.
Metadata in a book file will override metadata in a document file when you have selected more than one document
in a book and then selected File Info from that book.
If a checkbox next to any of the eight info fields is checked, the book's metadata for that field will override the
document's metadata.
To ensure your metadata is not overwritten, open the book file and select the document before you add metadata.
To add metadata to a book:
1Select the book you want to add metadata to.
2Choose File> File Info.
3Complete the metadata form and click Set.
Working with files in a book window
In a book window, you can rename and rearrange files, and you can open, save, and print files.
You can select one or more documents in the book window and apply formatting changes to the selected documents.
For example, you can change the page layout, remove change bars, select numbering options, and change the zoom
settings of selected documents.
It’s a good idea to use the book window to apply changes to documents that belong to a book. If you set up
numbering, pagination, and color definitions in individual documents, these changes may be overridden when you
update the book.
Selecting files in a book
You can select files in a book by clicking them, or you can use the Select All commands.
To select files in a book:
❖Do one of the following:
•Click the file icon.
•In the book window, choose Edit > Select All, and then choose a selection option from the menu. For example,
choosing Generated Files will select only the index, list, and table of contents files.
•Ctrl-click to select noncontiguous files or Shift-click to select a range of files.

ADOBE FRAMEMAKER 8
User Guide
466
Rearranging and deleting files
You can change the order of files in a book file and delete files from a book. When you delete files in a book window,
the filenames are removed from the book window, but the files remain on the disk.
To rearrange files in a book:
❖In the book window, select one or more files and drag the selected files to the desired position in the book window.
To delete files in a book:
1In the book window, select the file or files you want to delete.
2Choose Edit > Delete File from Book, or click the Delete icon in the book window.
Renaming files in books
When you rename a file in a book, FrameMaker will rename the corresponding file on the disk. FrameMaker will
also update cross-references, hypertext links, and text inset links in the other files in the book.
When you add a generated file (such as a table of contents or index) to a book, the file is assigned a name based on
the book’s filename. If you leave generated files with the default filename, the filename is changed in the book, but
not on disk, when you rename the book. If you rename the generated file so it doesn’t have the default name,
renaming the book won’t rename the generated file.
For example, suppose that in Sample.book, you have a generated file SampleTOC.fm. If you rename the book to
New.book, the generated file will be renamed as NewTOC.fm in the book window, but not on disk. However, if you
rename the generated file to Contents.fm and then rename the book, the generated TOC will still be named
Contents.fm in the book window and on disk.
To change the name of a document in a book:
1In the book window, select the file you want to rename, and then choose Edit > Rename File.
2Type the new name of the file and press Return or Enter. When the alert message appears, click OK to update other
files in the book.
To change the name of a book file within FrameMaker:
❖In the book window, use File > Save Book As to save the book file using a different filename.
Note: The Save Book As command saves the book file only, not the files in the book. If you are saving the book to a new
location you will need to open and save each file individually.
Using Revert to Saved Book
Choose File > Revert to Saved Book to return to the previously saved version of the book. This command affects files
that have been added or deleted, as well as settings that have been applied to documents in the book, such as
numbering, pagination, color definitions, and file setup specifications. The contents of documents are not changed.

ADOBE FRAMEMAKER 8
User Guide
467
Opening, closing, and saving from a book window
You can use a book window to open, save, print, and close individual files in a book. You can also open, save, and
close all the files in a book and print and update the format of several files or all files.
(Windows) When you open a non-FrameMaker document from the book window, the appropriate application, if
available, is launched.
To open files from a book window:
❖Do one of the following:
•To open one file in a book, make sure only the file is selected and double-click it. You can also select the
filename and press Enter. If you’re working with a structured document, double-click its element bubble in the
Structure View.
•To open several files in a book, select the files you want to open and press Enter.
•To open all files in the book, hold down Shift and choose File > Open All Files in Book.
Note: Using Open All Files in Book can be a time-consuming procedure if there are many cross-references or text insets
to update in the files. You can suspend this automatic updating by choosing Edit > Suppress Automatic Reference
Updating from a book window, selecting the appropriate check box, and then clicking Set. When you open an individual
document that has settings for automatic update, cross-references and text insets are still updated.
To close or save all files from a book window:
❖Do one of the following:
•Hold down Shift and choose File > Close All Files in Book. All the components in the book are closed, but the
book window remains open.
•Hold down Shift and choose File > Save All Files in Book (the book file is also saved). The book and all the files
in the book are saved.
Printing from a book window
You can use a book window to print the entire book or to print selected files. For more information, see “Printing
documents” on page 28.
When you’re working with structured documents, element boundaries (either as brackets or as tags) are printable
characters. If you’re showing these boundaries in any of the files, hide them before you print (see “Showing and
hiding element boundaries” on page 16).
To print files from a book window:
1To make sure your page numbering, cross-references, text insets, and generated files are up to date, update the
book before you print files from it.
2Do one of the following:
•In the book window, select the file or files you want to print, and then choose File > Print Selected Files.
•In the book window, choose File > Print Book.
3Specify printing options and click Print. All normal printing options are available except print range.

ADOBE FRAMEMAKER 8
User Guide
468
To print to file:
1Select File > Print.
2Do one of the following:
•(Windows) Select Print to File, and browse to the document you wish to print. The browse button allows the user
to specify the Print to File location.
Note: You can print book to a Single file or as Print separate print job for each file.
•(UNIX) From the pop-up menu, choose to print to file books as a Single print job or a separate print job for each
file within the book.
You can create a PostScript file for the whole book or for each file in the book. For information, see “Creating
PostScript files” on page 30.
To stop printing:
❖Do one of the following:
•(Windows) Press Esc.
•(UNIX) Press Control+c.
Determining how documents and pages are numbered
You can change volume, chapter, page, paragraph, footnote, and table footnote numbering in your documents.
By default, FrameMaker uses a numeric style (1, 2, 3, …), starting with page 1. You can start the document with a
page number other than 1, or choose a different numbering style (Roman or alphabetic, uppercase or lowercase). If
your system supports the typing of Japanese text in documents and dialog boxes, several Japanese numbering styles
are also available.
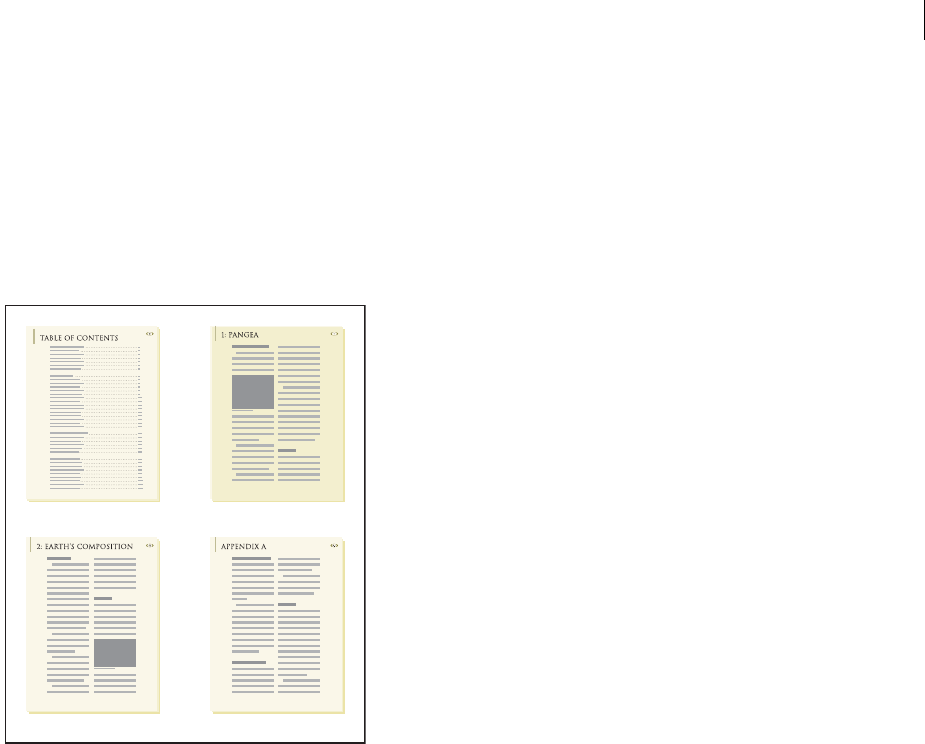
ADOBE FRAMEMAKER 8
User Guide
469
Setting up numbering
All body pages in a document use the same numbering style. You can, however, use different numbering styles from
document to document in a book. For example, a preface might use Roman numerals, while the remainder of a book
uses Arabic numerals.
When setting up numbering, you use the Numbering Properties dialog box to set the volume, chapter, page, and
footnote values for the document, or for each document in the book. Volume and chapter settings are useful for
creating a multiple numbering system, such as 3.1.1, 3.1.2, and so on.
Page numbers can restart in some files but be continuous in others.
After you set up numbering in a document or book, you can use the Volume Number, Chapter Number, and Current
Page # variables in page headers and footers. You can also use the <$volnum>, <$chapnum>, and <$pagenum>
building blocks in cross-reference formats, paragraph auto numbers, and generated files such as indexes.
For information on specifying numbering for footnotes, see “Changing the footnote numbering style” on page 214.
Important: The numbering properties in the book will override the numbering properties in documents that belong to
the book. If you are setting up page numbering in a book, make sure you change the numbering properties by selecting
documents in the book window instead of making changes to the individual documents.
To specify volume or chapter numbers:
1If the document is part of a book, open the book and select the document in the book window.
2Choose Format > Document > Numbering.
3Select Volume or Chapter from the pop-up menu. In Windows, you can click the tabs at the top of the dialog box.
4Do one of the following:
•Select Volume # or Chapter #, specify the number of the volume or chapter, and choose a numbering style from
the Format pop-up menu.
•Select Continue Numbering From Previous File in Book.
•Select Use Same Number As Previous File.
i, ii, iii 1-24
25-54 A-1, A-2, A-3

ADOBE FRAMEMAKER 8
User Guide
470
•If a book window was active when you opened the dialog box, you can select Read From File, which uses the
numbering value specified in the associated document.
•If you selected more than one file in the book window, you can choose As Is to use the numbering values specified
in the selected documents.
5Click Set.
To specify page numbers and numbering style:
1If the document is part of a book, open the book and select the document in the book window.
2Choose Format > Document > Numbering.
3Select Page from the pop-up menu. In Windows, you can click the Page tab at the top of the dialog box.
4Do one of the following:
•Select First Page #, specify the starting number of the page, and choose a numbering style from the Format
pop-up menu.
•Select Continue Numbering From Previous Page in Book.
•If a book window was active when you opened the dialog box, you can select Read From File, which uses the
numbering value specified in the associated document.
•If you selected more than one file in the book window, you can choose As Is to use the numbering values specified
in the selected documents.
5Click Set.
To specify paragraph numbers and numbering style:
1If the document is part of a book, open the book and select the document in the book window.
2Choose Format > Document > Numbering.
3Select Paragraph from the pop-up menu.
4Specify whether you want to restart paragraph numbering or continue numbering from the previous paragraph
in the book. If a book window was active when you opened the dialog box, you can select Read From File, which uses
the numbering values specified in the associated document.
5Click Set.
Inserting numbering in your documents
After you set up volume, chapter, and page numbering in books, the next step is to add variables or building blocks
to cross-reference formats, headers and footers, paragraph numbering, or generated lists such as tables of contents
and indexes.
For information on adding numbering to paragraphs, see “Basing autonumbering on volume and chapter numbers”
on page 130. For generated lists, see “Including volume, chapter, and paragraph autonumbers” on page 445.
Note: In most instances, numbered lists created in FrameMaker 5.0 or earlier versions remain unchanged when the
document is opened in FrameMaker 6.0 or later versions. However, to take advantage of the volume and chapter
numbering, you may want to replace building blocks such as <$paranum> and <$paranumonly> with <$volnum> and
<$chapnum> building blocks. These variables are available only in FrameMaker 6.0 and later versions.
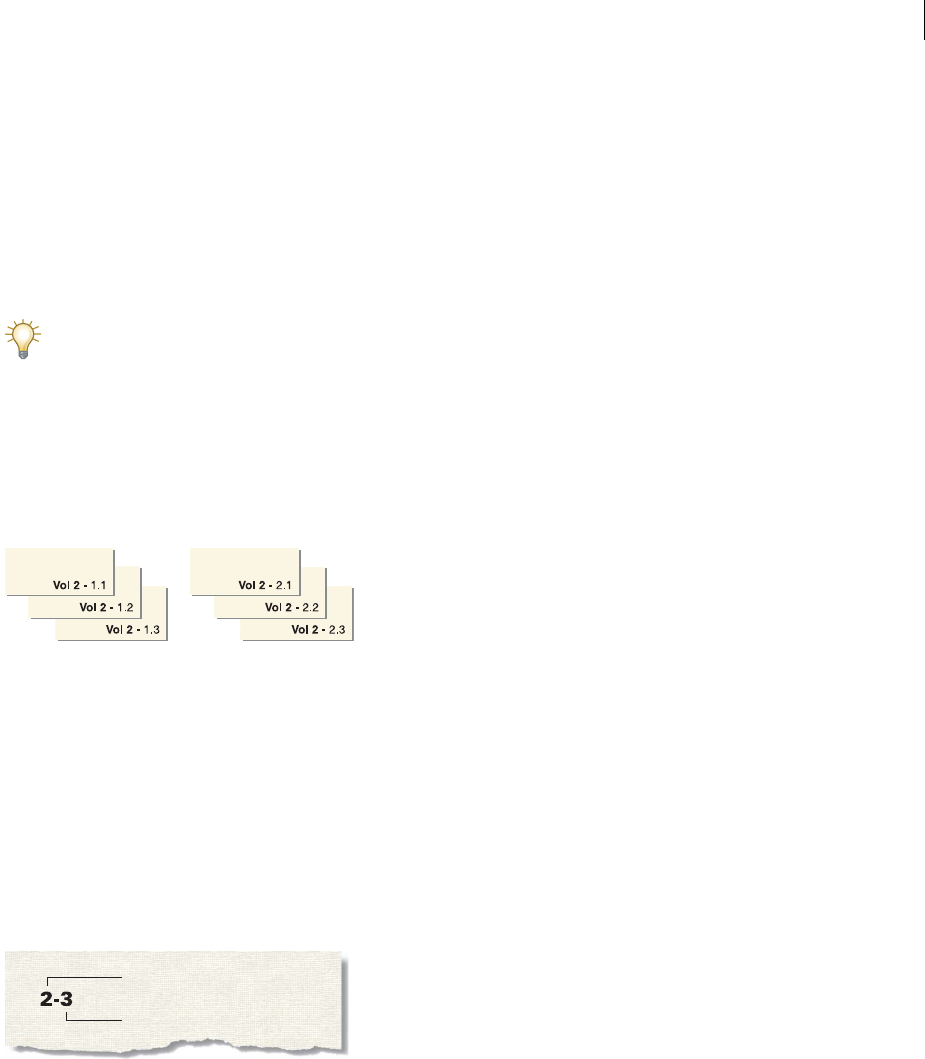
ADOBE FRAMEMAKER 8
User Guide
471
Including volume and chapter numbers in cross-references
If your book’s pages are numbered by chapter (for example, 2-6), you probably want cross-references to include the
chapter number as part of the page number—for example, see page 2-6.
To include volume or chapter numbers in cross-references:
❖Create a cross-reference format (see “Creating cross-reference formats” on page 205) that includes the volume or
chapter number building block. The cross-reference format might look like this: See page <$chapnum>–
<$pagenum>
To keep the chapter number on the same line as the page number, use a nonbreaking hyphen in the cross-reference
format (see “Changing hyphenation and line breaks” on page 119).
Including volume and chapter numbers in headers or footers
Some books have pages numbered by chapter, such as 2-3 for page 3 of Chapter 2 or A-2 for page 2 of Appendix A.
To number pages by chapter, you can use a Chapter Number (or Volume Number) variable, a running header/footer
variable for the chapter numbers, or you can type the chapter number directly in the header or footer of each chapter.
When you use a variable, the numbers are updated automatically whenever you update the book.
To create a multi-level numbering effect, add chapter and volume numbers to your document.
To include volume or chapter numbers in a header or footer:
1Display the master page that contains the header or footer. See “Displaying master pages” on page 383.
2Place the insertion point in the header or footer where you want to add numbering and use the Special > Variable
command to insert the volume number or chapter number variable. For details, see “Inserting variables” on
page 228.
3Insert the appropriate punctuation, such as a hyphen or period.
4To add page numbering, choose Format > Headers & Footers > Insert Page #.
The header or footer should look like this on a body page:
A. Chapter number variable (<$chapnum>)
B. Current Page # variable
Including the total page count of a book in a header or footer
You may want a header or footer to show the total number of pages of a book—for example, 4 of 200 on page 4 of a
200-page book.
When you insert the page count in a file’s header or footer with the Page Count variable, the header or footer shows
the number of pages in that file, not in the entire book. To show the number of pages in a book, you can use a cross-
reference to a special paragraph you create.
A
B

ADOBE FRAMEMAKER 8
User Guide
472
To show the total page count of a book in a header or footer:
1Set up the files in the book for continuous page numbering (see “Setting up numbering” on page 469).
2Display the master page for the last page of the last file in the book (see “Displaying master pages” on page 383),
and place the insertion point in an otherwise empty paragraph of the header or footer.
3Insert the Page Count variable by choosing Format > Headers & Footers > Insert Page Count.
Page Count variable in a separate paragraph
4Create a new paragraph format for the paragraph with the page count and store it in the Paragraph Catalog (see
“Using the designers” on page 104). Having a unique format for this paragraph makes it easier to cross-reference
it later.
5If you don’t want the page count to appear where you put it, either resize the text frame so the page count is hidden
or set the paragraph’s color to White.
6In the other files in the book, insert cross-references to the paragraph with the page count on each master page of
each document (see “Inserting cross-references” on page 201). The cross-reference format should use the
<$paratext> building block.
7Put the cross-references in the header or footer on each master page of each file in the book, including the last one.
Changing the format of files in a book
To change the page design, paragraph formats, or other formats of files in a book, you can make the changes in one
file and then update all the files in the book at once.
To change the format of multiple files in a book, you can also select the files in the book window and then apply the
formatting to the selected files. See “Using book-wide commands” on page 473.
To change the format of files in a book:
1Open or create the file that contains the formats you want to use. The file must be named and saved.
2In the book window, select the file or files you want to change, and then choose File > Import > Formats.
3From the Import From Document pop-up menu, select the file with the formats you want to import.
4Choose the settings you want to import and update (see “Importing and updating formats” on page 415).
5Click Import. If a file isn’t open, it’s updated on the disk. If a file is open, it’s updated only in your computer’s
memory and not on the disk. You must save the file to keep the changes.

ADOBE FRAMEMAKER 8
User Guide
473
Using book-wide commands
Many FrameMaker commands can be used across some or all documents in a book. For example, you can search for
and replace a phrase throughout the entire book. In addition, you can change view options, spell-check, and change
the page layout of selected files in the book. When working with structured documents, you can also edit attributes,
set available elements, and set new element options in the book.
If the document associated with a book is open, FrameMaker applies the book-wide command to the document, but
the document will not be saved or closed. If the document associated with the book is not open, FrameMaker will
open the document, apply the book-wide command, and then save and close the document.
If the values in a dialog box appear to be incorrect when applying a command, update the book and
try again.
To use a book-wide command:
1In the book window, select the file or files you want to change.
2Choose the desired command (such as Edit > Find/Change) from a menu, or use the appropriate
keyboard shortcut.
If FrameMaker cannot open a selected file or if other problems occur when you apply the command to a selected file,
a message appears in the Book Error Log.
Updating books
After setting up a book and specifying numbering properties for each file in the book, you update the files. This is
the last step in book building.
Even though you generate and update in one step, the two processes are different:
•Generating creates the table of contents, other generated lists, and indexes in the book file. The first time you
generate a list or index, it uses the page layout (master pages) and reference pages of the first nongenerated
document in the book file.
•Updating corrects the numbering in all files in the book, reimports text insets, and revises cross-references so they
are correct based on the new numbering. Empty pages are added or deleted where required.
Be sure to generate and update a book whenever you make any of the following changes to a document or a book file:
•Editing that affects pagination
•Editing that affects the wording of a generated file (such as changes to a chapter title)
•Adding a new color (so that color separations will be accurate)
•Changing conditional text settings or indicators
•Changing the numbering of documents or generated files
•Changing formatting information in the special text flow on a reference page of a generated file (see “Editing
special text flows for lists and indexes” on page 443)
•Rearranging, adding, or removing files in a book

ADOBE FRAMEMAKER 8
User Guide
474
To update the files in a book:
1In the book window, choose Edit > Update Book, or click the Update Book icon .
2Select whether you want to update numbering, cross-references, text insets, or generated files, such as tables of
contents and indexes.
3Move the names of the files you want to generate to the Generate scroll list.
To move a filename between scroll lists, select the filename and click an arrow or double-click the filename. To move
all filenames from one scroll list to the other, Shift-click an arrow.
Note: Only generated files appear in the list. If no files are present, the book has no generated files. If no files appear in
the lists—or if you move all the files to the Don’t Generate list—you should still continue to the next step to update the
book’s pagination, numbering, text insets, and cross-references.
4Click Update. For information on messages you may see in the Book Error Log, see “Troubleshooting books” on
page 475.
5Save the open files to keep the changes. Open files are updated only in your computer’s memory and not on the
disk. If a file isn’t open, the changes are made on the disk—even if the file is in View Only format.
Comparing books
FrameMaker can compare two versions of a book to show you what has changed. It looks not only at the text in the
two versions, but also at footnotes, markers, anchored frames, text insets, variables, and cross-references. For details,
see “Items compared” on page 486.
When you compare two versions of a book, only documents with matching filenames are compared.
Note: FrameMaker doesn’t compare the structure of the two versions. Also, when comparing large documents, you may
encounter memory issues. Increase memory allocation or swap space (UNIX) if necessary.
To compare two versions of a book:
1Open both versions of the book file.
2In the book window of the newer version, choose File > Utilities > Compare Books.
3Specify the older version and the documents you want to create.
The summary document gives a report of differences in the files. Composite documents (which have a CMP suffix)
show the differences in the files side by side.
4To set up the comparison options, click Options (see “Comparing document versions” on page 484).
5Click Compare. When the comparison is complete, only the summary document appears.
6Click a page number in the list of changes to open the composite document or to jump to the spot where that
change occurs in either the newer or older document.

ADOBE FRAMEMAKER 8
User Guide
475
Troubleshooting books
You might encounter problems or error messages when working with books. Even though you can update and generate
a book without error messages, the book may still have some problems that need correcting.
Generated file is empty Make sure the name of the generated file is preceded by a generated files icon in the book
window. If it isn’t, the file was added as a document to the book file rather than as a generated file (see “Adding files
to books” on page 463). When a file is added as a document file, FrameMaker won’t generate it. Also check that the
setup of the generated file is correct.
Slow performance To improve performance, open as many files in the book as possible before you use Edit > Update
Book or File > Import > Formats in a book window. After using the command, save all the files in the book.
Chapter starts on wrong side You need to correct your documents’ pagination. See “Adding and deleting empty
pages” on page 382.
Interpreting error messages
The Book Error Log reports all errors that occur when you apply a command to a book. In addition, many error
messages contain hypertext links so that you can click the message in the Error Log to display the location of the
error. When you update, the following alert messages or Book Error Log messages may appear.
Unresolved Cross-Refs The Book Error Log lists all files that contain unresolved cross-references (see “Resolving
cross-references” on page 209).
Inconsistent Show/Hide Settings, Inconsistent Use Condition Indicators, or Inconsistent Condition Indicator
The indicated file contains conditional text settings that differ from those in the previous file in the book. You can
make the settings in each file the same (by using Special > Conditional Text) or you can update the settings
throughout the book at once. To do this, change the settings in one file and then use File > Import > Formats to apply
the settings to the entire book (see “Changing the format of files in a book” on page 472).
Inconsistent Numbering Properties The numbering properties specified in the component are different from the
book’s numbering properties. The book’s numbering properties override those of the document. See “Determining
how documents and pages are numbered” on page 468.
Inconsistent Color Settings The indicated file contains color separation settings or color definitions that differ from
those in the previous file in the book (see “Separating colors” on page 373 and “Defining and modifying colors and
tints” on page 368).
Couldn’t Open File The Book Error Log will indicate if the file was saved using an older format, if it used unavailable
fonts, or if it cannot locate the file. For more information on the problem, open the file to see the alert message
that appears.
Book Not Self-Consistent The contents of generated files, the page count, or cross-references continued to change
while generating and updating files in the book. For example, if a book contains both a list of markers and an alpha-
betical list of markers, and if both contain hypertext links, the number of markers grows each time the files are
generated. If this happens, move one of the generated lists out of the Include scroll list when you use the
Generate/Update command again.
Inconsistent Element Boundary Settings In a structured book, element boundaries are showing in some files in the
book but not in others. Fix the settings in individual files to make them consistent (see “Showing and hiding element
boundaries” on page 16).

ADOBE FRAMEMAKER 8
User Guide
476
About structured book files
Like any file in FrameMaker, a book file can be structured. Each document and generated file is an element in the
book, and you can work with the elements’ bubbles in the Structure View to change the order of files or to remove
one from the book. You can also validate the contents of an entire book at one time.
A book and its files might all use the same Element Catalog so that a single catalog defines a valid structure for every-
thing in the book. Or the parts of a book might use different catalogs so that each catalog has only the elements it
needs. Ask your developer how your catalogs are set up for books.
To assemble a book, create a book file that contains a list of the documents in the book. Then add the documents to
the book file, in the order you want. If a document in the book is structured, the book file is automatically structured.
You can also add structure to a book file later by importing element definitions into it.
Creating structured book files
You can create a structured book file from any structured document that will be in the book. Once a book file is
created, FrameMaker provides special menu commands for working with it.
A new book file has the same Element Catalog as the document you create it from. The book has a preliminary
structure with a highest-level element called NoName and an element called BOOK-COMPONENT for the
document. As you add other files to the book, you’ll see a new element for each one. You can correct the structure
when you’re finished adding files.
If you do not have a structured document for building the book, you can create the book and give it element defini-
tions later (see “Importing element definitions into structured books” on page 479).
To create a book file:
1Choose File > New > Book. If a document is active, an alert message asks if you want to include it in the book. A
new book window appears showing the contents of the book.
Note: In UNIX, if no document or book window is open, you can press Esc f Shift+n to create a new book. In Windows,
use alt-f-n-b.
2Use File > Save Book As to save the book file. In Windows, the .book extension is added to the filename when
you save it.
Adding files to structured books
You can add FrameMaker documents and generated files to a book. The name and location of the files are stored in
the book file so that FrameMaker can find the files when you work with them using book commands.
As you add files to a book, the files appear as element bubbles tagged BOOK-COMPONENT in the Structure View.
FrameMaker revises these tags later when you update the book.
A bubble appears for each file you add.
BOOK-COMPONENT
BOOK-COMPONENT
BOOK-COMPONENT
BOOK-COMPONENT
NoName

ADOBE FRAMEMAKER 8
User Guide
477
Usually a generated file doesn’t exist yet when you add it to a book file; it is created when you update the book. The
name of a generated file is based on the book’s filename, so make sure the book has the name you want before adding
the generated file.
For information on adding generated files such as indexes and tables of contents to a book, see “Generating TOCs
and other lists in structured documents” on page 454 and “Generating indexes” on page 432.
Renaming, rearranging, and deleting files in structured books
You can rename, rearrange, or delete a file in a book. For information, see “Working with files in a book window” on
page 465.
When working with structured books, you can also rearrange and delete files by working with element bubbles in
the Structure View. You’ll probably want to do this only after updating the book so that the text snippets identify
the files.
If you delete a file from a book you’ve updated, the file may retain some structure information inherited from the
book. Remove this information from the file to make it a stand-alone document again (see “Removing inherited
information from structured files” on page 481).
Generating and updating structured books
After setting up a book and specifying page and paragraph numbering for each file in the book, you need to generate
and update the files. Although you generate and update in one step, the two processes are different:
•Generating creates the table of contents, other generated lists, and indexes in the book file. The first time you
generate a list or index, it uses the page layout (master pages) and reference pages of the first nongenerated
document in the book file.
•Updating revises the book’s element tags from information in the files, reapplies format rules from the book’s
element definitions, corrects numbering, reimports text insets, and revises cross-references so they reflect the
numbering. Empty pages are added or deleted where required.
Before you update a book the first time, each file in the book is represented by an element called BOOK-
COMPONENT. When you update, the element for each structured file changes to the tag of the highest-level
element in that file—typically a tag such as Chapter that describes the file as a whole. (If a file has more than one
flow, the tag comes from the highest-level element in flow A.)
Chapter is the highest-level element in the files.
The elements for any unstructured files in the book are still called BOOK-COMPONENT. To change BOOK-
COMPONENT to an element tag, add structure to the files and then generate and update again. For information on
making other corrections to the book’s structure, see “Editing the structure” on page 478.
Chapter
Chapter
Chapter
Chapter
NoName

ADOBE FRAMEMAKER 8
User Guide
478
Be sure to generate and update a book whenever you make any of the following changes to a document or a book file:
•Changing the highest-level element in one of the book’s files
•Importing new or revised element definitions
•Editing that affects pagination
•Editing that affects a generated file (such as an additional Section element or a wording change to a chapter title)
•Adding a new color (so that color separations will be accurate)
•Changing conditional text settings or indicators
•Changing the setup of documents or generated files
•Changing formatting information in the special text flow on a reference page of a generated file
•Rearranging, adding, or removing files in the book
For information on generating and updating files in a book, see “Generating TOCs and other lists in structured
documents” on page 454.
To update the files in a book:
1In the book window, choose Edit > Update Book or click the Update Book icon .
2Select whether you want to update numbering, cross-references, text insets, OLE links, and generated files, such
as tables of contents and indexes.
3Move the names of the files you want to generate to the Generate scroll list. To move a filename between scroll
lists, select the filename and click an arrow, or double-click the filename. To move all filenames from one scroll list
to the other, Shift-click an arrow.
Note: Only generated files appear in the list. If no files are present, the book has no generated files. If no files appear in
the lists—or if you move all the files to the Don’t Generate list—you should still continue to the next step to update the
book’s elements and other properties.
4Click Update. For information on messages you may see in the Book Error Log, see “Troubleshooting books” on
page 475.
5Save the open files. Open files are updated only in your computer’s memory and not on the disk. If a file isn’t open,
the changes are made on the disk.
Working with book structure
Editing the structure
A new book file has a structure with a highest-level element called NoName and an element called BOOK-
COMPONENT for each document and generated file you added to the book. When you update the book, the
elements for structured files change to the tag of the highest-level element from the file.
In most cases, you need to make a few corrections in the structure of a book file after updating. For example, you
should change the NoName element to the highest-level element defined for the book. And if any file elements are
still called BOOK-COMPONENT, add structure to those files and then generate and update again (see “Updating
books” on page 473).

ADOBE FRAMEMAKER 8
User Guide
479
The book’s element definitions may also require you to group elements in higher-level elements such as FrontMatter,
Body, and Appendixes.
Typical structure for a book file
To open a file quickly, double-click its bubble in the Structure View.
You can edit the structure of a book in most of the same ways that you edit a document—by inserting, wrapping, and
changing elements; merging and splitting; dragging and deleting bubbles in the Structure View; and so on. However,
you cannot merge or split elements that represent files, and you cannot undo a cut or paste in a structured book that
contains anything other than the default structure.
For general information on editing structure, see “Importing element definitions into structured books” on
page 479.”
Importing element definitions into structured books
You can import element definitions into a book file and into any files contained in the book. The definitions are
stored in the Element Catalog for the book and the other files. You may need to import element definitions in the
following cases:
•To add structure to an unstructured book. After importing the definitions, you can insert elements in the
book file.
•To update the element definitions in a book or its files. You need to update definitions whenever the application
developer revises the definitions in your template.
•To give a book and all its files the same element definitions. You may want to update a book if its files were created
from different templates.
When you import element definitions into a book, FrameMaker replaces the definitions in the book and all its files
with the new definitions and reapplies format rules from the definitions. It also validates the book file.
For general information on importing element definitions, see “Importing and updating formats” on page 415.
To import element definitions into a book:
1Open the book you want to update and the template, document, or book with the definitions to import.
2In the book window, select the files into which you want to import element definitions, and choose File > Import
> Element Definitions.
3Choose the template or document from the Import from Document pop-up menu. The menu lists all open, saved
documents and books.
Chapter
Chapter
Chapter
Chapter
Title
Book
TOC
Body
FrontMatter
Preface

ADOBE FRAMEMAKER 8
User Guide
480
4To remove format rule overrides in the files, select While Updating, Remove Format Rule Overrides. Use this
setting if you have made text or paragraph formatting changes to elements and now want to return to the formatting
described in the element definitions.
5Click Import. FrameMaker updates the element definitions in the book file and in the files listed in the Update
scroll list.
Validating structured books
You can validate an entire book (including its files), only the book file, or only the current element in the book file.
If you validate the entire book, the structure of the book and each file is checked against the Element Catalog for
the book.
When FrameMaker finds an error, it selects the element and displays an error message at the top of the Element
Validation dialog box. If the error is in the book file, FrameMaker uses the same messages it displays when validating
a document. If the error is in one of the other open files, the “File contains a validation error” message appears. You
can validate that file to learn about the error.
If you want to skip an element when validating, you can mark the element as a special case.
For general information on validating, see “Validating documents” on page 52.
To validate a book:
1In the book window, choose Element > Validate.
2Select Entire Book, Book Elements Only, or Current Element to specify the scope of the validation.
3To exclude missing elements or attribute values from the search, turn on Ignore Missing Elements or Ignore
Missing Attribute Values.
If these settings are on, FrameMaker does not look for places where a required child element or a required attribute
value is missing. You may want to turn these on if you are not trying to build a complete book at this time.
4Click Start Validating.
5If FrameMaker finds an error, specify whether to allow the error to remain, and then click Start Validating again.
The top part of the Element Validation dialog box shows the tag of the element and a brief message about the
problem. (See“Validation error messages” on page 54.)
Element and error identified
If you want the error to remain as it is, click Allow as Special Case.
6Repeat step 5 until FrameMaker does not find any more errors.
To clear all special cases:
1Choose Element > Validate.
2Click Clear Special Cases. FrameMaker clears the special cases in the entire book, only the book file, or only the
current element—whichever scope is selected in the dialog box.

ADOBE FRAMEMAKER 8
User Guide
481
Removing inherited information from structured files
When you generate and update a book, the files in the book inherit structure information from the book file. A file’s
Element Catalog may have inclusions and exclusions from the book, and other inherited information in the file may
affect the formatting of its text elements.
If you delete a file from a book to use the file as a stand-alone document, reapply the file’s element definitions to
remove any structure information that came from the book. If the file’s text formatting was affected by this structure
information, reapplying the definitions also restores the file’s original formatting.
To remove inherited information from a file:
1Make the appropriate document window or book window active. If a book window is active, select the documents
you want to affect.
2In the file, choose File > Import > Element Definitions.
3Leave the Import from Document pop-up menu set to Current, select While Updating: Remove Information
Inherited from Book, and click Import.
Importing formats into a structured book
You can import formatting information—such as page layouts, paragraph formats, and reference pages—into the
files of a book. You can also remove format overrides in the files, such as a font change made to a paragraph that was
not stored in the paragraph’s format.
Important: The format rules in element definitions often specify overrides so that a file can use as few catalog formats
as possible. Normally, when importing formats into a structured book, you should not remove format overrides. For a
discussion of format overrides, see “About formatting overrides” on page 66.
In general, when you import formats, FrameMaker merges the new formatting information into the document
rather than replacing the existing information.
To import formats into a book:
1Open or create the file that contains the formats you want to use. The file must be named and saved.
2In the book window, select the file or files you want to change, and then choose File > Import > Formats.
3Choose the template or document from the Import from Document pop-up menu. The menu lists all open, saved
documents.
4Select the Import and Update settings you want to apply to files in the book. (For details on these settings, see
“Importing and updating formats” on page 415.)
If you’re updating cross-reference formats, math definitions, or variable definitions, and any of these items uses
character formats, also select Character Formats so that any new formats are added to the files.
5If you want to remove formatting changes you made but didn’t save in a catalog, do the following:
•To remove page breaks that are not part of a paragraph format, select Manual Page Breaks.
•To remove paragraph, character, page layout, and table formatting overrides, select Other
Format/Layout Overrides.
In most cases, you should not select Other Format/Layout Overrides in a structured book because the element
definitions may use format overrides. You can select this in an unstructured book without any repercussions.
6Click Import. The formatting information is merged into the files.
482
Chapter 14: Revision management
About revision management
You can use the following methods to track revisions to documents:
•You can add change bars that identify new or changed material.
•If you receive a revised document with changes that have not been flagged by change bars, or if you want more
specific information on the changes, you can compare the new version to an older version.
•You can use the Track Text Edit feature to track text edits in a document.
Also, you can use conditional text to include revision comments and comments to reviewers (see “Conditional text”
on page 296)
About change bars
A change bar is a vertical line (usually in the margin) that visually identifies new or revised text. If you want all
changes marked, you can have change bars appear automatically whenever you insert, change, or delete text.
Change bars identify new or revised text.
At times, you may want to flag only the most important changes to your document rather than flag every change.
For example, if you’re sending out the second revision of a document for review, you may not want to call the
reviewers’ attention to every added comma or reorganized sentence. Instead, you probably want reviewers to focus
on substantive changes. In these situations, you can select specific text to mark with change bars rather than add the
change bars automatically.
When working with a structured document, adding change bars manually to particular text is useful for marking a
few revisions or for identifying changes in structure, attributes, or formatting. Your custom application may have an
element defined for this purpose.
Note: When working with structured documents, change bars do not detect changes that affect only structure (for
example, if you unwrap an element), attributes, or formatting.
Later you may want to remove the change bars from text. For example, between drafts of a manual you’ll want to
remove the old change bars before adding new ones.

ADOBE FRAMEMAKER 8
User Guide
483
You can insert change bars in the newer of two versions of a document by comparing the versions. For information
on adding change bars this way, see “Comparing document versions” on page 484.
Note: When you add change bars to an entire paragraph of text and then update the paragraph’s format (for example,
by importing formats from another document), don’t remove format overrides during the update if you want to retain
the change bars. Adding change bars to an entire paragraph alters the paragraph’s format, and the alteration counts as
a format override.
To add change bars automatically:
1Make the appropriate document window or book window active. If a book window is active, select the documents
you want to affect.
2Choose Format > Document > Change Bars.
3Specify the thickness of the change bars and the distance from the column of text to the change bars.
4Choose the position of the change bars from the Position pop-up menu. Choose Side Closer to Page Edge or Side
Farther from Page Edge if you want the position of the change bars to vary from side to side based on the page layout.
The position is relative to the edges of the column that contains the changed text, regardless of the number of
columns on the page.
5Choose a color for the change bars from the Color pop-up menu.
6Select Automatic Change Bars, and click Set.
Automatic change bars don’t detect changes in graphics imported by reference unless the imported file’s name has
been changed. Automatic change bars also don’t detect changes that affect only formatting. For example, if you only
change the tag of a paragraph from Body to Bullet, no change bar will appear. In this case you can add a change bar
manually if necessary.
Note: If cross-references are updated when Automatic Change Bars is selected, change bars will appear next to all
changed cross-references.
To add change bars manually to selected text:
❖Select the text you want to mark and choose Format > Style > Change Bar. You can also use the Default Font
properties in the Paragraph Designer.
To add change bars manually to entire paragraphs:
1Click in a paragraph or drag through several paragraphs. (You don’t need to select an entire paragraph.)
2Choose Format > Paragraphs > Designer and display the Default Font properties.
3Select Change Bar, and click Apply to Selection.
Using a character format to apply change bars
Another way to selectively apply change bars to text is by using a character format. Once you create the character
format, you select the text and apply the character format to it (see “Applying predefined formats to text” on
page 102). Using a character format also allows you to retain change bars when you update your document with new
paragraph formats and remove format overrides.
If you mark text as changed by applying a character format that displays a change bar, you can remove the change
bar in any of the ways described in the next section. However, the only way to remove the format’s tag from the text
is to select the text and apply the Default Font from the Character Catalog.

ADOBE FRAMEMAKER 8
User Guide
484
To create a character format that adds change bars:
1Click in any paragraph and choose Format > Characters > Designer.
2In the Character Designer, choose Set Window to As Is from the Commands pop-up menu.
3Select Change Bar, and then choose New Format from the Commands pop-up menu.
4Enter a tag name and click Store in Catalog.
5Click Create.
Removing change bars
You can remove all the change bars in a document at the same time or selectively. You can remove the change bars
for a single document or from selected files in a book.
To clear all change bars in a document:
1Make the appropriate document window or book window active. If a book window is active, select the documents
you want to affect.
2Choose Format > Document > Change Bars.
3Select Clear All Change Bars, and click Set.
To remove specific change bars:
❖Do one of the following:
•Select the text and choose Format > Style > Change Bar. You can also use the Default Font properties in the
Paragraph Designer. If some of the selected text isn’t marked with a change bar, you need to choose Format >
Style > Change Bar twice to remove the change bars.
•To remove a change bar applied by a character format, select the text and apply the Default Font from the
Character Catalog (see “Applying predefined formats to text” on page 102).
To examine and change text marked with change bars, use the Find/Change command. You can search for text
that has the Change Bar property set or for text that uses a character format that sets the Change Bar property.
For information, see “Searching for any item” on page 77 and “Searching for character format properties” on page 80.
Comparing document versions
When you compare two versions of a document, FrameMaker creates the following documents:
•The composite document is a conditional document that combines the newer and older versions; it shows the
differences side by side. You can specify the condition tag to apply to changed text, and whether changes should
be flagged with change bars.
•The summary document contains a general summary and a revision list for each type of item being compared.
You can create the summary as a hypertext document, with links to the actual pages where the changes occurred.
By creating a hypertext summary document, you can quickly display changed pages for reading or editing.
For information on comparing books, see “Comparing books” on page 474.
Note: If you are comparing large documents or documents with tables, you may need to swap space (UNIX).

ADOBE FRAMEMAKER 8
User Guide
485
To compare two versions of a document:
1Open both versions of the document. If the documents contain conditional text, all conditions must be visible.
2In the newer version, choose File > Utilities > Compare Documents.
3Choose the older version from the pop-up menu, and specify the documents you want FrameMaker to create. All
open, named documents (except the current document) are listed in the Older Document pop-up menu.
4Click Options, do the following, and click Set:
•Specify how to display inserted text in the Mark Insertions With area. You can use the default condition tag
(Inserted), use a different condition tag, or choose not to mark inserted text.
•Specify how to display deleted text in the Mark Deletions With area. You can use the default condition tag
(Deleted), use a different condition tag, or use text that you specify. To omit deleted text from the composite
document, click Replacement Text and leave the text box empty.
•To mark all changes (insertions and deletions) with change bars in the composite document, select Mark Changes
with Change Bars. FrameMaker uses the current change bar settings for the document.
If all you want to do is add change bars to the newer version of a document, select Mark Changes with Change
Bars. Also click Replacement Text in the Mark Deletions With area and leave the Replacement text box empty.
5Click Compare. When the comparison is complete, FrameMaker displays the summary and composite
documents. If the two versions are the same, neither document is created.
For information on the items compared and on the form and content of composite and summary documents, see
“About composite and summary documents” on page 486.
6To make the summary report a hypertext document, select Create Hypertext Links in Summary. When you click
the page number of a change in the summary, FrameMaker displays the page. You can display pages of the newer
version, the older version, or the composite document that contains that change.
Comparing documents that contain multiple flows
You can compare documents with multiple flows. However, to prevent FrameMaker from comparing the wrong
flows, make sure each flow has a unique tag and that the flows to compare have the same tag. For information on
changing a flow tag, see “Changing flow tags and Autoconnect” on page 400.
If a document contains different flows with the same name (for example, separate flows named “A” on disconnected
pages), an alert message lists the duplicate flows when you try to compare the documents. Flows will be compared
only if there is one flow of the same name in both documents.
Comparing documents that contain conditional text
When you compare documents that contain conditional text, FrameMaker ignores hidden text and graphics that are
not showing.
To compare documents containing conditional text:
1Do one of the following:
•To compare the full texts of two documents that contain conditional text, show all conditions before performing
the comparison. For more information, see “Changing the view of conditional documents” on page 306.
•To compare specific texts of two documents that contain conditional text, show conditions based on a specific
expression before performing the comparison.
•To ignore conditional text while comparing documents, hide all conditions before performing the comparison.

ADOBE FRAMEMAKER 8
User Guide
486
2Compare the documents (see “Comparing document versions” on page 484).
Any hidden conditional items in the newer document remain (and remain hidden) in the composite document that
is produced.
Note: Any hidden conditional items in the newer document remain (and remain hidden) in the composite document
that is produced.
About composite and summary documents
When you compare documents, FrameMaker creates two documents that display the results.
Composite document In the composite document, FrameMaker considers differences to be insertions or deletions.
For example, if the contents of a graphic frame have changed, both versions appear in the composite. The older
version is marked as deleted; the newer version is marked as inserted. Variables in the composite document use the
newer definitions, but they aren’t marked as changed. Only inserted and deleted variables are considered changes.
Summary document In the summary document (named Summary.fm), differences are considered to be insertions,
deletions, or changes. If an item has moved, it’s marked as deleted and inserted. FrameMaker displays the number of
the page on which the change occurs in the newer version, the older version, and the composite document. For inser-
tions, the page number given for the older version is the page where the item would be inserted to match the newer
version. For deletions, the page number for the newer version is the page where the item would have appeared if it
hadn’t been deleted.
If your document contains duplicate markers, the first occurrence of the marker is listed in the summary document.
You can find the other occurrences in the document by using the Find/Change command.
Note: If you create multiple summary documents, you should unlock each file by pressing Esc Shift+f l (lowercase L) k
and using the Save As command to give each document a unique name.
Items compared
When comparing two versions of a document, FrameMaker checks the contents of flows with the same names on
body and reference pages. It looks at text, footnotes, anchored frames, tables, variables and their definitions, cross-
references and their formats, footnote text, marker types, and marker text. FrameMaker doesn’t compare structure
elements, but it does compare the element contents.
The following are some specific differences that FrameMaker can find.
Anchored frames FrameMaker compares the objects in the frame. If the objects are different, or if they are in
different positions (for example, if you changed their front-to-back order), FrameMaker marks the entire anchored
frame as changed.
Cross-references FrameMaker checks whether a cross-reference is external or internal. It also checks the cross-refer-
ences format name, the marker text at the source, and the pathname of the referenced file (for external cross-refer-
ences). If any of these are different, FrameMaker marks the cross-reference as changed.
Text insets FrameMaker compares the modification date, the filename, the relative pathnames of text insets, and the
way the inset was imported (for example, whether the lines were merged into paragraphs). If any of these are
different, it marks the entire text inset as changed.
Imported graphics FrameMaker compares the contents and dpi scaling of the imported graphic. For example,
it checks whether the object has been flipped or rotated, and compares the size of the bounding box. It also compares
how the graphic was imported—by reference or by copying. If the graphic was imported by reference, FrameMaker
compares the pathnames. If any of these properties are different, it marks as changed the line that contains the
anchored frame of the imported graphic.

ADOBE FRAMEMAKER 8
User Guide
487
Equations FrameMaker compares the size of the equation, the location of the equation within its graphic frame, and
the math expressions. If any of these are different, it marks the entire equation as changed.
Tables FrameMaker checks the number of rows and columns, whether cells are straddled, and whether cells are
rotated. If any of these are different, FrameMaker marks as changed the line that contains the table's anchor. If text in
cells has changed, only the new table appears in the composite document and FrameMaker marks as changed the
line in the cell that has changed. If more than 75% of the cells have changed, it marks the entire table as changed.
Both the English version of FrameMaker and the Japanese version running on a Japanese OS can compare Japanese
text. FrameMaker doesn’t compare master page flows (including header and footer flows) or untagged flows; graphic
objects or text lines not in anchored frames; anchored frame positions; footnote properties or numbers; paragraph,
character, or table tags; text or table formatting; tags in the Paragraph Catalog, Character Catalog, or Table Catalog;
or the contents of text insets. Because FrameMaker doesn’t check the formatting of text or tables, it won’t notice
different ruling or shading in a table or a different color assigned to text.
Determining the number of words and characters
You can determine the number of words or characters in a document. Counting the number of characters in a
document is especially useful for Asian-language documents with double-width (multibyte) characters. The
word count report gives the number of single-width characters, double-width characters, and the total number
of characters.
To determine the word count in a document:
1Choose File > Utilities > Document Reports.
2Select Asian Character Count or WordCount, and then click Run.
Track Edited Text
You can use the Track Text Edits feature to track text edits in a document. The added and deleted text is highlighted
for visual distinction. You can navigate through the edited sections and accept or reject specific edits. You can also
preview the document to see its original or final state.
Note: Changes to formatting and element attributes are not tracked.
Table 1 - Tracked and untracked text edits in Unstructured documents
Tracked text edits Untracked text edits
Adding and deleting text using the keyboard Adding rows in tables
Adding text between deleted text Modifying content in cross-references
Cutting, copying, and pasting text Modifying content in markers
Inserting and deleting anchored frames Modifying content in equations
Adding, editing, and deleting headers and footers Adding or deleting text using APIs
Inserting and deleting footnotes Inserting, modifying, and deleting graphics
Adding, editing, or deleting text within footnotes Changing formatting

ADOBE FRAMEMAKER 8
User Guide
488
Turn on or off text edit tracking
You must turn on the Track Text Edit feature to track your edits to text. By default, the Track Text Edit feature is
turned off.
To view the Track Text Edit Bar:
1Open the FrameMaker document you want to edit or review.
2Select View > Track Text Edit bar.
To turn on text edit tracking:
❖Do one of the following:
•Select Special > Track Text Edit > Enable.
•Click the icon in the Track Text Edit bar.
Modifying text using the Find/Change feature Text within hypertext marker
Correcting spelling errors using the Spelling Checker
feature
Adding and removing Page break
Replacing text using the Thesaurus feature Converting table to text
Inserting, deleting, and pasting cross-references Replacing variables
Adding and deleting markers Replacing cross-references
Importing and deleting file by reference or by copying Adding and deleting the Conditional Text marker
Inserting, pasting, and deleting variables Importing by copying into MIF files
Editing text within a table cell Inserting Rubi
Inserting, pasting, and deleting tables
Inserting and deleting equations
Changes to text in Rubi
Table 2 - Tracked and untracked text edits in Structured documents
Tracked text edits Untracked text edits
Inserting elements using the Return key Deleting root element
Inserting or deleting text within an element Editing attributes of an element
Deleting elements Merging elements
Cutting, copying, and pasting text Splitting elements
Unwrapping and wrapping text
Dragging or dropping elements in the structure view window
Table 1 - Tracked and untracked text edits in Unstructured documents
Tracked text edits Untracked text edits

ADOBE FRAMEMAKER 8
User Guide
489
To turn off text edit tracking:
❖Do one of the following:
•Select Special > Track Text Edit > Enable.
•Click the icon in the Track Text Edit bar.
Both editors and reviewers can use the Track Text Edit feature to track and show edits in the document.
Tracking text edits
When you start typing text in a document where the Track Text Edit feature is turned on, the string
“(FM8_TRACK_CHANGES_ADDED)” or “(FM8_TRACK_CHANGES_DELETED)” appears on the left side of
the status bar of the document window. Text additions appear in a forest green font, and deletions appear in a red
font with a strikethrough.
Saving a document with text edits as XML
You can save a document with tracked text edits as XML. You can open the XML document in FrameMaker, enable
tracking of text edits, and then edit the document. When you save the FrameMaker document back to XML, the
edited information is preserved through the XML roundtrip.
If the application used to edit and save the XML file disables roundtripping of ConditionalText PIs, then all Track
Text Edit related information is lost during the XML roundtrip. By default, Conditional Text roundtripping is
enabled for any XML application, unless you specify other settings for using the ConditionalText element in struc-
tured applications.
Find text edits in a document
You can find specific text edits.
Do one of the following:
•Select Special > Track Text Edit, and then select Show Next or Show Previous.
•Click the Show Next or Show Previous icons in the Track Text Edit bar.
Accept or reject text edits
You can accept or reject edits one at a time or all at the same time.
To accept or reject individual text edits:
1Select the text edit, and then do one of the following:
•Select Special > Track Text Edit > Accept Edit.
•Click the icon in the Track Text Edit bar.
2Select the text edit, and then do one of the following:
•Select Special > Track Text Edit > Reject Edit.
•Click the icon in the Track Text Edit bar.

ADOBE FRAMEMAKER 8
User Guide
490
To accept or reject all text edits:
Do one of the following:
•Select Special > Track Text Edit, and then select Accept All or Reject All.
•Click the Accept All or Reject All icons in the Track Text Edit bar.
Once you accept a text insertion or deletion, that text edit becomes part of the file. If you accept an insertion of text,
the inserted text is retained. If you accept a deletion of text, the deleted text is removed. If you reject an insertion of
text, the inserted text is removed. If you reject a deletion of text, the deleted text is retained in the file. The inserted
or retained text acquires the formatting of its surrounding text.
Preview a document with text edits
Before you accept all text edits, you can choose to preview the final document with all the text edits incorporated in
the document. Alternatively, you can preview the original document without the text edits incorporated in
the document.
You can view a document containing tracked text edits in two modes: Tracking mode and Preview mode. When you
preview a document with text edits, the document display switches from the Tracking mode to the Preview mode.
By default, the preview of a tracked document is turned off (the Preview Off command under the Track Text Edit
option in the Special menu is disabled). You must turn on the preview by selecting the Preview Final or the Preview
Original option.
Note: You can’t undo the Preview Final or Preview Original command in a document.
To preview the final document with text edits:
Do one of the following:
•Select Special > Track Text Edit > Preview Final.
•Click the icon in the Track Text Edit bar.
To preview the original document with text edits:
Do one of the following:
•Select Special > Track Text Edit > Preview Original.
•Click the icon in the Track Text Edit bar.
Accepted edits are implemented in the document. Rejected edits are deleted, and the document is restored to its
original state.
Note: When you select the Preview Final or Preview Original option for the first time in your document, the Preview Off
option is enabled.
If you modify the document where the Preview Final or Preview Original option is selected, and the Track Text Edit
feature is turned on, FrameMaker switches from the Preview mode to the Tracking mode. If you modify text in this
mode, you can’t undo the changes you make.
To turn off the Preview mode:
❖Do one of the following:
•Select Special > Track Text Edit > Preview Off.
•Click the icon in the Track Text Edit Bar.

ADOBE FRAMEMAKER 8
User Guide
491
Save and publish a document with text edits
When you save a document after inserting text edits, the suggested edits are retained.
When you publish the document as a PDF, the text edits are retained and published to the output. If you publish a
FrameMaker document to HTML or RTF, the text edits are accepted, and the document is published with the edited
content. If the Preview mode is turned on, then the document is published based on the Preview Final or Preview
Original option you selected.
Print a document with tracked text edits
You can print a FrameMaker document with edited text, such as additions or deletions of text. Text editions are
printed in the same way as they appear in the FrameMaker document.

492
Chapter 15: Managing files using
WebDAV
File management using WebDAV (Windows)
FrameMaker supports the Web Distributed Authoring and Versioning (WebDAV) server technology. Using this
technology, you can connect to a WebDAV server, download and upload documents, lock documents so others
cannot work on them at the same time as you do, and add (upload) additional documents to your server. Use a
WebDAV server to work in a collaborative environment without worrying about version control. WebDAV manages
files so that documents will be not be accidentally overwritten, or updated, or lost.
How does WebDAV work?
WebDAV technology enables you to read and write files over a a modified hypertext transfer protocol. Files reside
on the server within a directory structure and are “checked out” to your local machine. Your local machine has a
directory structure that mirrors the WebDAV server structure, so when you check out files, the files are downloaded
to your machine and placed in the mirrored folder.
When file is checked out, it is automatically assigned a Web address, or URL. This URL contains information about
the location of the file within the directory structure and is used to track and access the file by using links to manage
your documents. For more information about links, see “Managing document links” on page 498.
Why WebDAV?
WebDAV offers two distinct advantages over traditional file servers.
Workgroup management When a file is managed by a WebDAV server, multiple users can download copies of the
file, but only one user at a time can check out the file. The user who checks out the file can share his or her work with
other users by updating the file on the server; however, other users can’t make changes to the managed file until it is
checked in. This check out/check in system allows multiple users to access the same file but prevents users from
overwriting each other’s work.
This version control process of passing documents from one collaborator to another is called workgroup
management.
Remote file management Because WebDAV works over Web accessible networks, location doesn’t matter. Team
members can share files regardless of their proximity.
Managed documents Managed documents are defined as FrameMaker documents and book files. Links are files,
graphics, hypertext links within the document or book file.

ADOBE FRAMEMAKER 8
User Guide
493
Getting started with workgroup management
To use the workgroup management features in FrameMaker, you must be able to connect to a WebDAV server. Once
connected, you must specify a URL for each document. This is all you need to manage your workgroup and success-
fully use WebDAV. In FrameMaker 8, you can author and edit XML files, and FM and MIF files, located on the
WebDAV server. For XML files, you must download the read-write rules and all related files from the server, one at
a time.
For more information about WebDAV, check out www.webdav.org.
WebDAV server requirements
Different WebDAV servers have different authentication requirements. Some servers require you to enter a user
name and password for every transaction; other servers require authentication only the first time you check out
a managed document. When the Authentication dialog box appears, enter your user name and password, and
click OK.
When adding a new server to the workgroup environment, you will need to provide a unique server nickname (this
will appear in the Workgroup Servers list), a URL for the server, and the local directory the server directory will
map to.
Important: Firewall software can interfere with the process of connecting to a WebDAV server. Check with your system
administrator, or refer to your firewall software documentation for information about setting firewall and proxy config-
uration settings to access outside servers.
To set up a server for use with FrameMaker:
1Choose File > Workgroup > Workgroup Ser vers.
2Select a current server listed in the dialog box, or click New Server to choose an additional server.
3Add a server nickname and server URL. The user name and password entries are optional when setting up the
server. However, when you upload and download files, you will need to enter a name and password.
4Specify a folder in which you want to store local copies of managed documents. To change the default location,
click Choose, and specify a different folder.
5Click OK to save the server information.
6Click Done to close the Workgroup Server dialog box.
Setting preferences for managed documents and their links
If your Workgroup Preferences are set to download all links, when you open a book file all the files in the book and
all the links in each file will also be downloaded. If your Preferences are set not to download links, then you have to
manually download each file and its links.
To set preferences for opening managed documents:
1Choose File> Preferences> Workgroup.
2Select the following options for Check Out from Server:
•Always automatically checks out the document when you open it.
•Ask displays a dialog box when you open a document that is checked in.
•Never opens the local copy of the document without displaying a dialog box and without checking it out.

ADOBE FRAMEMAKER 8
User Guide
494
3Select one of the following options for Update from Server (affects only documents that are checked in):
•Always automatically downloads the latest version of the document from the server.
•Ask displays a dialog box if the document has been updated on the server.
•Never opens the local copy of the document without displaying a dialog box and without downloading the latest
version of the document from the server.
4Select one of the following options for Update Nonhypertext Links when the Document is Opened (this applies
to imported graphics, text insets and other non-hypertext links):
•Always automatically updates links when you open a document.
•Ask displays a dialog box when you open a document that contains managed links.
•Never opens the local copy of the document without displaying a dialog box and without updating links.
5Select one of the following options for Update Hypertext Links when the Document is Opened.
•Always automatically updates hypertext links when you open a document.
•Ask displays a dialog box when you open a document that contains hypertext links.
•Never opens the local copy of the document without displaying a dialog box and without updating hypertext links.
Note: If Always or Ask is selected, every link within an index or table of contents file will open. Depending upon the size
of your file, choosing these options may cause your file to open very slowly.
6Select one of the following options for Check In Links when Checking in Document:
•Always automatically checks in links when you check in a document.
•Ask displays a dialog box when you check in a document that contains links.
•Never does not check in the linked files when you check in a document.
7Click OK.
To turn off WebDAV functionality:
1Choose File > Preferences > Workgroup.
2Uncheck the Enable Workgroup functionality option.
3Click OK. The WebDAV options will not appear under the File menu until you turn on the functionality again.
Adding documents to the server
After you’ve connected to your WebDAV server, add a document to your server, or download a document from your
server to begin your workflow.
To add a document to a WebDAV server:
1Open the unmanaged FrameMaker document, choose File > Workgroup > Save As.
2Select the server and folder where you want to place the file. You can also create new folders on the server by
selecting the New Folder button.
3Change the filename if necessary, select the Format if necessary and turn off the Keep Checked Out option if you
do not want the file to be automatically checked out after uploading to the server.
4Click Save. The file is copied to the server and to your managed files folder. Your document is now a
managed document.
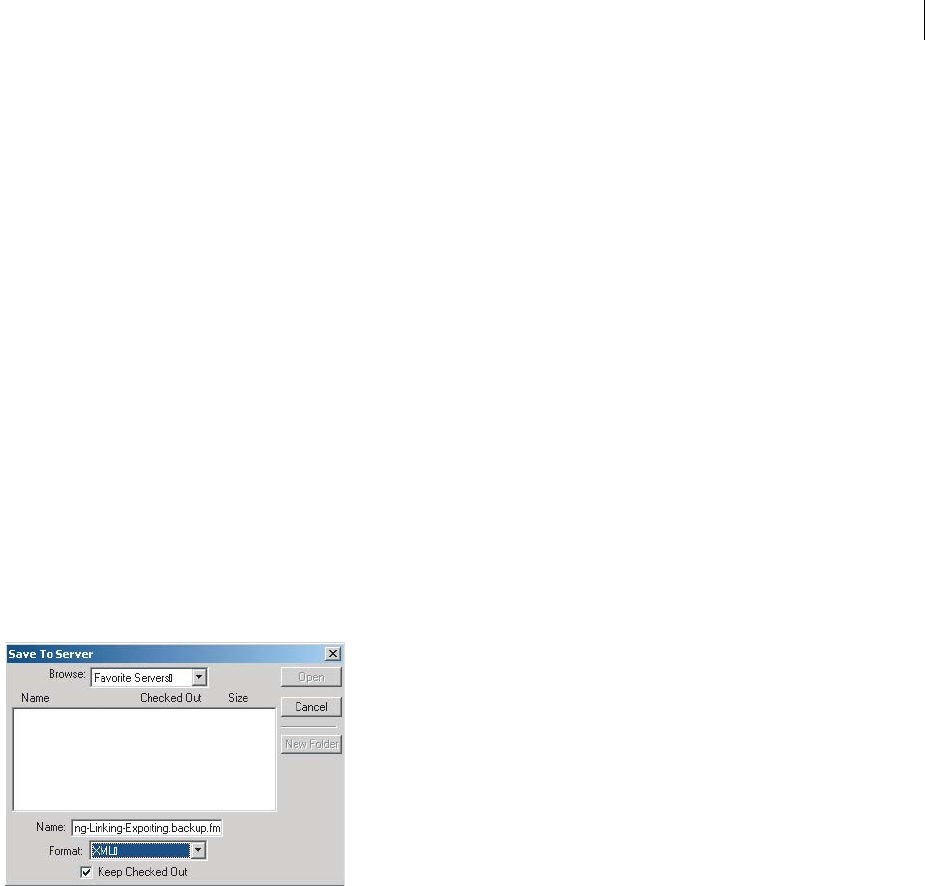
ADOBE FRAMEMAKER 8
User Guide
495
Opening documents from WebDAV
To begin modifying a managed document, you will need to download it to your local machine and then check it out.
To open a document from your WebDAV server:
1Choose File > Workgroup > Open.
2Select the file you want to open from your specified server and click Open. Your document is downloaded to your
local machine and placed in a mirrored folder. Each local machine has a directory structure that mirrors the
WebDAV ser ver structure.
Note: Depending on your Workgroup Preferences settings, FrameMaker may download all the linked files automatically
or ask if you want the linked files downloaded.
Saving documents in XML format on WebDAV
The WebDAV feature lets you author, edit, and save XML documents located on the WebDAV server.
1In structured FrameMaker, select File > Workgroup > Save As.
2In the Save To Server dialog box, select the server and folder where you want to place the file. You can also create
new folders on the server by clicking the New Folder button.
3Specify the filename and ensure that the extension is .xml.
4Select the XML format.
5By default, the Keep Checked Out option is selected. You can deselect the option if you do not want the file to be
automatically checked out after saving it to the server.
6Click Save. The file is copied to the server and to your managed files folder. Your document is now a managed
document. The title of the “Save” button changes to “Open”.
Checking documents out and in
Checking out a document prevents other users from overwriting your work. When you’re finished making edits,
check the document in to update your changes to the server and release the lock on the managed document.
While you have a document checked out, you can save changes to the managed document on the server. This allows
you to share your work with other users without giving up the lock on the document.
To check a document out
❖Select File > Workgroup > Check Out.

ADOBE FRAMEMAKER 8
User Guide
496
To check multiple documents out:
❖Hold down the Shift key and select File > Workgroup > Check Out All Open Documents.
Each open document will be checked out and downloaded to your local hard drive.
To cancel a check out:
❖Choose File > Workgroup > Cancel Check Out.
You’ll be prompted to verify that you want to cancel the check out.
Note: Once you save a file to the server, you cannot roll back to a previous version.
To cancel check out of multiple documents:
❖Hold down the Shift key and select File > Workgroup > Cancel Check Out of Open Documents.
To check a document in:
❖Choose File > Workgroup > Check In.
The file will be saved to the server, the lock release will be removed so someone else will be able to check the file out.
Your local version will be locked and uneditable.
To check in multiple documents:
❖Hold down the Shift key and select File > Workgroup > Check In All Open Documents. All open documents that
are checked out will be checked in.
Editing a managed document
Edit a managed document exactly as you would any FrameMaker document.
Saving a managed document
When saving, you can save to your hard drive or to the WebDAV server.
To save a managed document to your hard drive:
❖Click File > Save.
To save a managed document to a WebDAV server:
❖Do one of the following:
•Click File > Workgroup > Save.
•Click File > Workgroup > Save As to save your managed Document, MIF, or XML document to a different
location. Click Save.
Note: The Save As command will remove the management information from the document regardless of whether the
document is being saved to a location in a managed folder or not.

ADOBE FRAMEMAKER 8
User Guide
497
Updating all open documents
While you have a document checked in, you can download the document from the server. This allows you to get the
latest version from the server even if the document is checked out to another user.
To update an open document:
❖Hold down the Shift key and Click File > Workgroup > Update.
To update all open documents:
❖Click File > Workgroup > Update All Open Documents.
Reverting to server version
While you have a document checked out, you can roll back to the server version. This allows you to discard all
changes made to your local file and replace it with the most current server version.
To revert an open document:
❖Click File > Workgroup > Revert.
To revert all open documents:
❖Hold down the Shift key and choose File > Workgroup > Revert All Open Documents.
Importing a file from a server
You can import a file directly from any server and add it to your Workgroup.
To import a file from the server:
1Choose File > Workgroup > Import.
2The Import from Server dialog displays, select the server and file that you want to import.
3Select whether to Import by Reference or Copy into Document, and click Import. The file will be downloaded to
your managed files folder. If there is a copy already in the managed file folder, you’ll be prompted to overwrite it.
Accessing other files on a WebDAV server
You can download files from the WebDAV server that FrameMaker cannot open or import. You can also add such
files to the server from FrameMaker. If you download a file that already exists at the download location, FrameMaker
will update it with the latest version from the server.
To download a file from the WebDAV server:
1Choose File > Get File from Server.
2Select a server, a directory, and the file you want to download, and click Open.
Note: If you have a version of this document on your local hard drive, you’ll be prompted to overwrite the file.
To upload a file to the WebDAV server:
1Choose File > Put File on Server.
2Select the file you want to upload along with the server, and click Save.

ADOBE FRAMEMAKER 8
User Guide
498
Managing document links
The WebDAV Links palette contains information both for local links (located on your hard disk) and for managed
links (those located on a server). Links represent paths to your managed documents.
The Links palette is where you add, update, and save all your links and get information about your managed
document and selected links.
The links palette displays information about all of your managed document links.
There are three key items within the managed links palette: Document URL, Selection URL, and Document/Selection
Status. Document URL displays the URL for your active document; Selection URL displays the URL of the selected
link (for example, a file in a book or an imported graphic); Selection Status displays the state of the selected URL (for
example, Checked In, Checked Out, or Not Managed).
To manage document links:
1Choose File > Links to open the Links palette.
2Select one or more links in the Links palette.
3Choose Save Link in the Links palette menu.
To add and save links to the server:
1Choose File > Links to open the Links palette.
2Highlight the link(s) you want to add. This can be an imported graphic in a FrameMaker document, or a file in
the book file.
3Choose one of the following:
•Save Link As
•Save Selected Links As
•Save All Links As
4You will be prompted for a filename for each link. You can use the default name or enter a different name. All links
will be added to the same server and directory.
To add all links to the server:
1Choose File > Links to open the Links palette.
2Do not select any links in your document or book.
3Select Save All Links As, then select the server and directory you wish to save the links to.
Note: You will be prompted for a filename for each link. You can use the default name or enter a different name. All links
will be added to the same server and directory unless you choose a different location.

ADOBE FRAMEMAKER 8
User Guide
499
To save managed link updates:
1Choose File > Links to open the Links palette.
2Select the link you wish to save.
3Choose Save Link in the Links palette menu.
To update or revert managed links to the latest version on the server:
1Select one or more links in the Links palette.
2Choose Revert Link.
To check in managed links to the server:
1Select File > Links to open the Links palette.
2Select the link(s) you want to check in.
3Select one of the following:
•Check In Link
•Check In Selected Links
•Check In All Managed Links
To check out managed links to the server:
1Select File > Links to open the Links palette.
2Select the link(s) you want to check out.
3Select one of the following:
•Check Out Link
•Check Out Selected Links
•Check Out all Managed Links
To cancel check out managed links:
1Select File > Links to open the links palette.
2Select the link(s) you want to cancel check out.
3Select one of the following:
•Cancel Link Check Out
•Cancel Check Out of Selected Links
•Cancel Check Out All Managed Links

ADOBE FRAMEMAKER 8
User Guide
500
To revert managed links to the latest version on the server:
1Select the links you want to revert.
2Select Revert Link.
To update managed links to the latest version on the server:
1Select one or more links in your document or book.
2Select one of the following:
•Update Link
•Update Selected Links
•Update All Managed Links

501
Chapter 16: Importing, linking, and
exporting
About importing files into FrameMaker
You can import other Adobe FrameMaker documents, documents created in other applications, text files, and
graphic files. You can also import SWF files and 3D objects into FrameMaker documents. An imported object can
simply be copied into the document. It can also be linked—such as when you import by reference—so that it remains
tied to its source for easy updating.
You can export text and graphics to other applications by using a number of techniques, some of which are unique
to the platform you’re working on.
Choosing the right method for importing and linking
You can bring text or graphics into a FrameMaker document by doing the following:
•Use the Clipboard to copy and paste text or graphics from another application.
•Use File > Import > File.
•(Windows) Use Object Linking and Embedding (OLE).
•(Windows) Drag objects between windows.
•(UNIX) Use a graphic inset editor.
You use some of these methods for importing by copying and some for importing by reference. You use the File >
Import > File command, available on all platforms, for both.
Importing by copying
You can import by copying by using the Clipboard or File > Import > File, or (in Windows) by dragging objects
between windows.
Importing by copying makes it easy to transfer the imported material from one location to another, but it increases
the document size. In addition, if you make changes to the source material, you must reimport it to update the
document with the latest version.
Importing by reference
You can import by reference by using File > Import > File, OLE (Windows), or a graphic inset editor (UNIX).
When you double-click a graphic imported by reference you (Windows) open the application.

ADOBE FRAMEMAKER 8
User Guide
502
Importing by reference keeps the imported text or graphics linked to the source file. FrameMaker stores the
pathname to the source file in the document. Each time you open the document, FrameMaker locates the file on the
disk and re-displays it. If the source file was revised, FrameMaker updates the document with the latest version.
Importing by reference can reduce total file size because it lets you use the same material in several places without
storing the contents of imported images or text in the FrameMaker document. Text imported by reference is called
a text inset.
For information on how the pathname is stored when importing by reference, see “Using pathnames when
importing by reference” on page 508.
Using Copy and Paste
Perhaps the easiest way to import text and graphics is by copying to and pasting from the Clipboard. Note
the following:
•You can convert tab-delimited text to a table using the Table > Convert to Table command.
•Text formatting is lost unless you’re pasting into another FrameMaker document.
•(Windows) Choosing Edit > Paste Special sometimes offers you more options. For example, you can exchange
formatted text between FrameMaker documents and Microsoft Word documents in RTF format by using Paste
Special instead of Paste.
Using the Import command to import text
You can use the File > Import > File command to import text on all platforms. This method provides more flexibility
than using the Clipboard.
However, if you’re working on only one platform, you might want to use a platform-specific approach. For infor-
mation, see “Using OLE (Windows)” on page 512.
The text you import can be formatted or unformatted. Unformatted text contains only the words; there is
no information on fonts, indents, spacing, autonumbering, and so on. Formatted text contains these types
of information.
Importing formatted text
You can import formatted text into a FrameMaker document by importing from the following sources:
•A text flow from another part of the same document
•A text flow from another FrameMaker document
•A text flow from another FrameMaker document that is a Maker Interchange Format (MIF) file (see “Importing
MIF files” on page 506)
•A file created in another application, such as Microsoft Word, for which there is an installed filter
When you import text from another FrameMaker document, you also import cross-references, footnotes, variables,
markers, tables, and anchored frames. Conditional text in the flow is also imported. When you import text from
another application, some of these special items may be imported, depending on the capabilities of the other appli-
cation and the filter used.

ADOBE FRAMEMAKER 8
User Guide
503
To import formatted text:
1Click where you want to insert the text and choose File > Import > File.
2Specify the file that contains the flow you want to import and the import method (see “Choosing the right method
for importing and linking” on page 501).
3Click Import.
4If the Unknown File Type dialog box appears, select a file type and click Convert. The dialog box that appears next
depends on the import method you chose in step 2. The Import Text Flow by Reference dialog box contains settings
for specifying how to update the imported flow. Choose a body page flow or a reference page flow. Typically, the text
you import will come from body pages. Reference pages can contain flows with boilerplate text or graphics for use
on body pages.
5Specify how to format the imported text by doing one of the following:
•To apply the current document’s formats to the imported text whenever their tags match, click Reformat Using
Current Document’s Formats. If the tags don’t match, the formatting of imported text is unaffected. Usually, you
would also select the options to remove manual page breaks and other format overrides (such as font properties
or tab settings) so that the imported text looks like text in the current document with the same tags.
•To remove the formatting from the imported text and apply the character and paragraph formatting used at the
insertion point, click Reformat as Plain Text. (Text in tables or anchored frames retains the formatting it had in
the source document.)
•To keep the formatting from the source document, click Retain Source’s Formatting. Formats in the imported text
aren’t added to the current document’s format catalogs. If you later modify the current document’s formats, the
imported text formats won’t be affected—even if the tags in the current document and imported text match.
6If you are importing the text by reference, specify how to update the text inset by doing one of the following:
•To update the text inset whenever you open the document, click Automatic.
•To update only when you specify, click Manual.
7Click Import. If you imported the text by reference, it appears as a text inset. (A text inset is linked to the source
document and can’t be edited outside of that source document.)
Importing unformatted text
When you import the text from an unformatted text file, you specify whether to import it by copying or by reference
and how to treat lines in the text file. The imported text adopts the character and paragraph formatting used at the
insertion point.
To import a text file:
1Place the insertion point where you want to insert the text, and then choose File > Import > File.
2Specify the text file you want to import, and the import method. For information, see “Choosing the right method
for importing and linking” on page 501.
3Click Import. The dialog box that appears depends on the import method (Import by Reference or Copy into
Document) you chose.
4Specify how to treat the imported text by doing one of the following:
•To break the text into paragraphs only at blank lines, click Merge Lines into Paragraphs. Use this option for a
paragraph-oriented text file such as a file containing document text.

ADOBE FRAMEMAKER 8
User Guide
504
•To break the text into paragraphs at the end of each line, click Treat Each Line As a Paragraph. Use this option for
a line-oriented text file such as a file containing computer code.
•To convert the imported text to a table, click Convert to Table. Specify a table format and other settings. Use this
option only if the file contains delimited text, such as text output from a database program.
5If you are importing the text by reference, specify how to update the text inset by doing one of the following:
•To update the text inset whenever you open the document, click Automatic.
•To update only when you specify, click Manual.
6If necessary, choose a character encoding from the Text Encoding pop-up menu. Do this only if you know the
preselected encoding is incorrect. If you force an incorrect encoding, character substitution may occur or some
characters may appear as question marks.
7Click Import. If you imported the text by reference, it appears as a text inset.
Importing Adobe Illustrator files
You can import Adobe Illustrator 9.0 and 10.0 files into FrameMaker. FrameMaker imports the files in PDF; conse-
quently, some complicated graphics, or graphics that use transparency may not print as expected on a PostScript
Level 1 or non-PostScript printer.
The Adobe Illustrator import feature is available in Windows.
Note: Illustrator 9.0 and 10.0 files will be imported at the page size of the file, not the image size. Resize the anchored
frame in order to crop any white space from the image.
Importing Microsoft Word files
You can import Microsoft Word documents with .doc or .docx file extensions into FrameMaker documents.
If you saved your Microsoft Word document in the Word 97-2003 format, you can import it using the Microsoft
Word or the Microsoft Word 2007 filter. However, if you want to import a Microsoft Word 2007 document, you must
use the Microsoft Word 2007 filter. You can import RTF files using the Microsoft RTF 1.6 filter in the Unknown File
Type dialog box.
1Place the insertion point in the document where you want to insert the text, and then choose File > Import > File.
2Specify the file you want to import, select the Import by Reference or Copy Into Document option, and then
select Import.
Depending on the document you are importing, the Microsoft Word or Microsoft Word 2007 filter is selected in the
Unknown File Type dialog box.
3Click Convert. The Import Text Flow by Copy or the Import Text Flow by Reference dialog box appears.
4In the Flow to Import area, select a Body Page Flow or a Reference Page Flow.
5In the Formatting of Imported Flow area, select one of the following options:
•To select the Remove Manual Page Breaks option and the Other Format Overrides option, click Reformat Using
Current Document's Formats.
•To convert the imported content to plain text and then insert it in the document, click Reformat as Plain Text.
•To retain the imported content in its original format and then insert it in the document, click Retain
Source's Formatting.

ADOBE FRAMEMAKER 8
User Guide
505
6In the Import Text Flow by Reference dialog box, select one of the following options in the Updating of Imported
Flow area:
•To update the imported flow area automatically, click Automatic.
•To update the imported flow area manually, click Manual.
7Click Import.
Note: Bookmarks within Word documents become cross-reference markers; annotations in Word documents become
conditional text with the condition “Comment” when imported by reference; hidden text in Word documents becomes
conditional text with the condition “Hidden” when imported.
Importing Microsoft Excel files
You can import Microsoft Excel documents with .xls or .xlsx extensions into FrameMaker documents.
If you saved your Microsoft Excel document in the Excel 97-2003 Workbook format, you can import it using
the Microsoft Excel or the Microsoft Excel 2007 filter. However, if you want to import an Microsoft Excel 2007
document, you must use the Microsoft Excel 2007 filter.
1Click where you want to insert the file, and choose File > Import > File.
2Specify the file you want to import, select Import by Reference or Copy Into Document option, and click Import.
Depending on the document you are importing, the Microsoft Excel or Microsoft Excel 2007 filter is selected in the
Unknown File Type dialog box.
3Click Convert. The Import Text Flow by Copy or the Import Text Flow by Reference dialog box appears.
4In the Flow to Import area, select Body Page Flow or Reference Page Flow.
5In the Formatting of Imported Flow area, select one of the following options:
•To select the Remove Manual Page Breaks option and the Other Format Overrides option, click Reformat Using
Current Document's Formats.
•To convert the imported content to plain text and then insert it in the document, click Reformat as Plain Text.
•To retain the imported content in its original format and then insert it in the document, click Retain
Source's Formatting.
6In the Import Text Flow by Reference dialog box, select one of the following options displayed in the Updating of
Imported Flow area:
•To update the imported flow area automatically, click Automatic.
•To update the imported flow area manually, click Manual.
7Click Import.
Importing RTF files
FrameMaker now supports RTF 1.6 Import and Export.

ADOBE FRAMEMAKER 8
User Guide
506
Importing MIF files
MIF is a text format that lets you exchange information between FrameMaker and other applications. All types of
format and page layout information are translated to MIF commands. FrameMaker interprets the commands in the
MIF file, turning them back to formatting and layout properties.
You can import the text of a specified flow of a MIF file as you do any FrameMaker file (see “Importing formatted
text” on page 502). When you import by copying, all reference and master pages are imported as well as the body
pages. The body text appears on a disconnected page. For information on connecting pages and flows, see
“Connecting text frames” on page 401. For information on MIF, see the online manual MIF Reference.
Importing PDF files
When you import a PDF file into a FrameMaker document, the PDF file is treated as a graphic. Only one page of the
PDF file can be imported into the FrameMaker document at a time. Both process and spot colors can be displayed
and printed.
Graphics that use transparency may not print as expected on a PostScript Level 1 or non-PostScript printer.
When a document that was created on a Windows platform contains an imported PDF file, and is then opened on a
UNIX system, the PDF image displays as a gray box.
FrameMaker does not support PDF files that use multibyte (Asian-language) fonts.
To import a PDF file:
1Specify the position of the graphic (for details, see “Using the Import command to import graphics” on page 508).
2Choose File > Import > File.
3Select the PDF file you want to import and click Import.
4If the PDF file has more than one page, you will need to specify the page number in the Select PDF Page dialog
box. Use the slider to display a thumbnail image of the page you want, and then click Select.
Viewing the properties or source of text insets
You can view the filename and file type of the source document, the date it was last modified, the date the text inset
was last updated, and the inset’s update setting. You can also display the source of a text inset.
To view the properties or source of a text inset:
1Click the text inset to select it and choose Edit > Text Inset Properties. You can also double-click the inset.
2If you want to open the source of the text inset, click Open Source. The source is opened as a
FrameMaker document.
Controlling the updating of text insets
You can control how and when text insets are updated from their source documents. For example, you can
specify either automatic or manual updating, and you can manually update a single text inset or several insets in
the document.
Note: Text imported by reference is automatically updated only if its datestamp indicates that it is out of date. However,
because the time settings may differ between file systems or networks, it’s possible that an out-of-date text inset won’t be
updated automatically. In this case, you can manually update the inset.

ADOBE FRAMEMAKER 8
User Guide
507
To change the updating of a selected text inset:
1Select the inset to update.
2Choose Edit > Text Inset Properties and click Settings.
3Specify manual or automatic updating and click Import.
To suppress the updating of all text insets in a document:
1Choose Edit > Update References.
2Choose Suppress Automatic Updating from the Commands pop-up menu, and then choose the items you don’t
want to be updated automatically.
3Click Set and then click Done.
To suppress the updating of all text insets in selected book files:
1In a book window, select the file or files you want to update.
2Choose Edit > Suppress Automatic Reference Updating.
3Select Suppress Automatic Updating and click Set.
To manually update a single text inset:
❖Select the inset, choose Edit > Text Inset Properties, and then click Update Now.
To manually update multiple insets in a document:
1Choose Edit > Update References.
2Select the types of insets you want to update and click Update.
To interrupt the updating of text insets, press Control+c.
Converting text insets to editable text
When you convert a text inset to editable text, FrameMaker no longer updates it. You can convert a single text inset
or all the text insets in a document.
To convert one or more text insets to editable text:
1If you’re converting one text inset, click it to select it.
2Choose Edit > Text Inset Properties.
3Click Convert to Text, specify whether to convert the selected inset or all insets in the document, and then
click Convert.
Locating the source of unresolved text insets
If FrameMaker can’t locate the source file for a text inset during updating (or if the format of the source file has
changed since the last update), an alert message appears. After dismissing the alert message, you can locate the
unresolved text inset and then re-import the text.

ADOBE FRAMEMAKER 8
User Guide
508
To locate the source of an unresolved text inset:
1Choose Edit > Find/Change.
2Choose Unresolved Text Inset from the Find pop-up menu and click Find to select the first unresolved text inset.
3Choose Edit > Text Inset Properties, note the pathname and file type of the inset, and then click Cancel.
4Using the pathname and file type information, re-import the text as described in “Importing formatted text” on
page 502 or in “Importing unformatted text” on page 503.
If a document contains many unresolved text insets, it may be more convenient to generate a list of unresolved text
insets. For information, see “Generating TOCs and other lists” on page 421.
Using pathnames when importing by reference
When you import by reference with File > Import > File, the pathname to the text or graphic can be either absolute
or relative. A relative pathname begins at a current folder or one folder up the hierarchy and specifies the file’s
location from there. An absolute pathname begins at the root of the file system (the topmost folder) and fully specifies
the file’s location from there. The following table lists examples of absolute paths.
FrameMaker stores relative pathnames whenever possible so that it can find an imported file even when you move
both the document and the source file—as long as you keep the files in the same relative locations. If you save the
document in a different folder, FrameMaker adjusts the pathnames of the imported files accordingly. However, if the
path to the imported file traverses the root (the topmost folder) of the file system, FrameMaker uses an absolute
pathname that begins at the root.
To ensure that FrameMaker uses relative pathnames, make sure it does not have to traverse the root to locate the file.
Using the Import command to import graphics
You can use File > Import > File to import graphics on all platforms. (For information on the pathnames used when
you import graphics by reference, see “Using pathnames when importing by reference” on page 508.)
However, if your documents will be edited only on a single platform, you might want to consider a platform-specific
approach. For information, see “Using OLE (Windows)” on page 512, and “Using graphic insets (UNIX)” on
page 514.
You can import a graphic into an anchored or unanchored graphic frame, into a rectangle that serves as a bounding
box, or directly onto a page. If you want the graphic to move with text as you edit the document—for example, a
graphic in longer documents or documents intended for HTML conversion—import the graphic into an anchored
frame. If you want the graphic to stay where you put it—for example, if the graphic is the logo of a letterhead—import
it onto the page and position it where you want it.
When you import a graphic, you sometimes specify an import filter on the basis of the graphic’s format. When you
import a bitmap image, you also specify its scale in dots per inch (dpi). The larger the dpi value, the smaller the
graphic is on the page.
Platform Absolute path
Windows d:\Graphics\Mountain.gif
\\DocServer\Graphics\Mountain.gif
UNIX /usr/doc/graphics/mountain.rf

ADOBE FRAMEMAKER 8
User Guide
509
When you copy an image, or copy an image by reference, into a document, you can specify an HTTP path from
which to import the graphic. The HTTP path is preserved in the XML roundtrip.
When you import an image, it is stored as a temporary file on the local computer. If you import the same file again,
the file is not downloaded. If you modify the file after importing it into FrameMaker, the modifications will not take
effect until you delete the temporary file and import the graphic again into the FrameMaker document, or set the
value of the AlwaysDownloadURL flag in maker.ini to On. However, if you copy the FrameMaker document
containing the imported graphic to another computer, the file is downloaded again when you import it by specifying
the HTTP file path.
To import a graphic:
1Specify the position of the graphic by doing one of the following:
•To place the imported graphic in a graphic frame, select an existing frame or put an insertion point in a text frame.
•To place the imported graphic directly on a page, click in the page margin.
•To use a drawn rectangle to define the size of the imported bitmap graphic, select an existing rectangle or draw
one (do not select an anchored or unanchored frame). The graphic replaces the rectangle if the Fit in Selected
Rectangle option is selected when you import; however, the aspect ratio of the graphic remains unchanged.
•To replace an existing graphic, select it.
2Choose File > Import > File.
3Select the graphic file you want to import, or specify the HTTP path of the graphic file to import, and the import
method. For information, see “Choosing the right method for importing and linking” on page 501.
4Click Import. If the graphic is not a bitmap, it now appears in the document and you’re finished.
5If the Unknown File Type dialog box appears when you click Import, select a file type in the scroll list and
click Convert.
If the imported graphic is not a bitmap, it now appears in the document and you’re finished.
6If you're importing a bitmap graphic, choose a scaling option or Fit in Selected Rectangle and click Set.
Note: When you import a graphic into a structured document by specifying an HTTP path, the graphic is
downloaded each time you import the graphic. The graphic’s HTTP path is retained when the document is saved as an
XML document.
For the best printed results, choose a dpi value that divides evenly (or leaves only a small remainder) into the
resolution of your printer or typesetter. For the best screen representation, choose a dpi value that divides evenly
into your screen resolution. (Windows screens typically have a resolution of 96 dpi, and UNIX is usually 90 dpi.)
For more information, see “Resizing objects” on page 339, and “Resizing imported graphics” on page 339.
Importing SVG files
When importing a Scalable Vector Graphic (SVG), the SVG Import dialog box allows the user to select the raster-
ization quality of the image. By increasing the rasterization quality, printed and PDF versions are crisper; however,
increasing the rasterization also increases the file size of the image, and it takes longer to import it.
Imported SVG images will display as bitmaps. However, embedded imported animations will not be functional
in FrameMaker.

ADOBE FRAMEMAKER 8
User Guide
510
To import an SVG image:
1Choose File > Import > File.
2Select the SVG image, and then click Import.
3In the Import SVG dialog box, specify the Raster Quality.
4Specify Image Dimensions if they are different than the default size (you can not scale proportionally in
this dialog).
5Click Set.
Note: Depending on the rasterization quality and your available memory, it may take several minutes for the SVG image
to import.
Importing movies (Windows)
In Windows, you can add movies to documents by embedding .avi or .mov files. For details see “Using OLE
(Windows)” on page 512.
When you print a document containing a QuickTime movie, only the movie’s title appears.
Note: Don’t move or delete the original QuickTime movie file, even if you used the Copy into Document option when
you imported it. Even with this option, the entire QuickTime movie is not copied into your document.
Locating missing graphics
When you open a document that contains graphic files imported by reference, FrameMaker looks for the referenced
graphic files. If it can’t find a graphic file, it displays a dialog box.
To locate a graphic FrameMaker can’t find:
1When FrameMaker displays the Missing File dialog box, do one of the following:
•To find and display the graphic, use the scroll list to select it and click Update Document to Use New Path.
FrameMaker continues to use the new path to try to find other missing files while opening the document.
That way, if you move all your graphic files to a new location, you have to specify the new path only once.
•To skip the graphic file, click Skip This File. The skipped graphic appears as a gray rectangle in the document. The
next time you open the document, FrameMaker tries to find the file again.
•To skip other graphic files if they can’t be found, click Ignore All Missing Files.
2Click Continue.
To view an imported graphic’s filename:
❖Select the graphic that has been imported by reference and choose Graphics > Object Properties. The graphic’s
name and path appear in the dialog box.
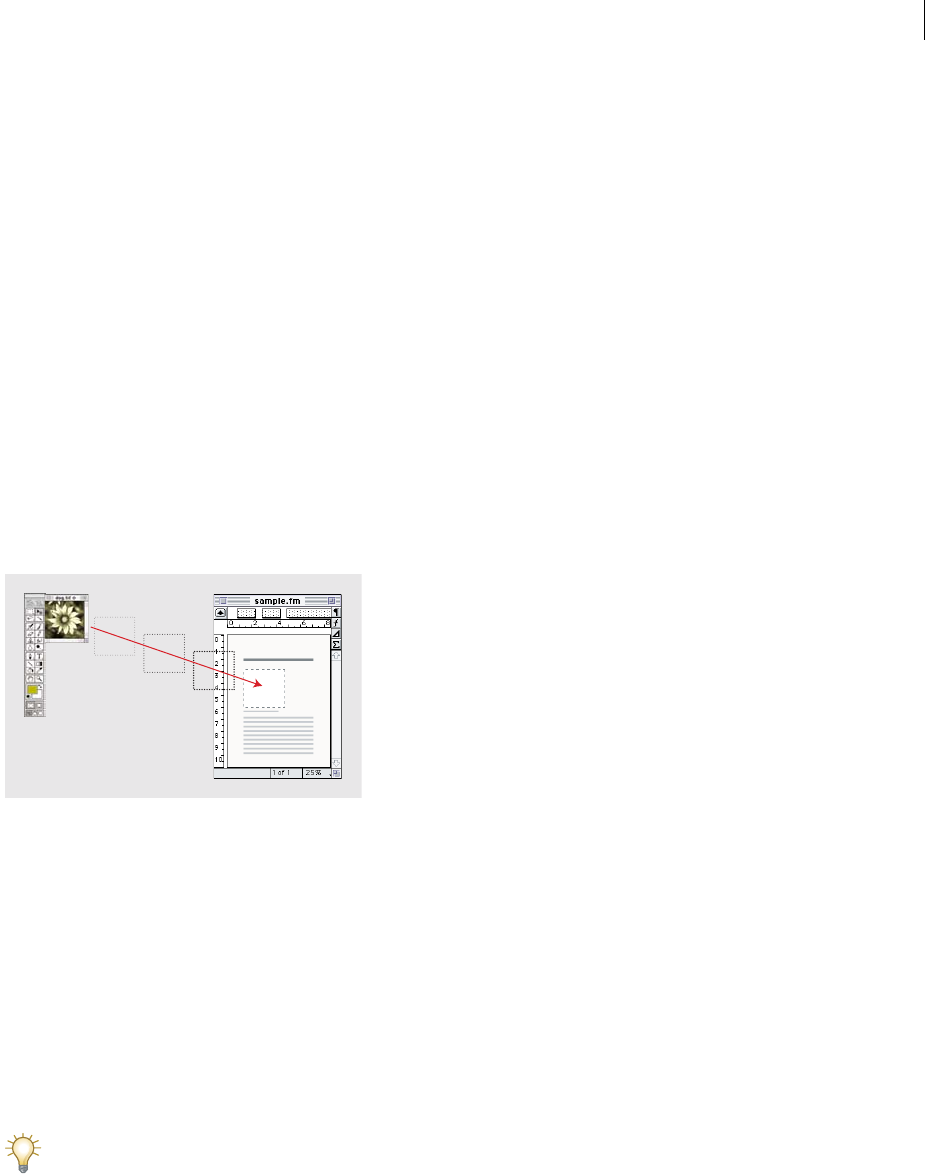
ADOBE FRAMEMAKER 8
User Guide
511
Changing the size of bitmaps
Changing the dpi value or the scaling factor changes the size of a bitmap graphic.
To make a bitmap larger or smaller:
❖Do one of the following:
•Select the bitmap, choose Graphics > Object Properties, and click Set dpi.
•Select the bitmap, choose Graphics > Scale, and specify a scale factor.
•Shift-drag a corner handle of the bitmap. Holding down Shift while you drag maintains the proportions of
the graphic.
Note: If the graphic is a TIFF file (or other format that uses dpi settings), scaling needs to be done through the Object
Properties to ensure the dpi value is not lost when scaled using the Scale dialog.
Using drag and drop (Windows)
Import and export are greatly simplified when you can just drag an object to its new location.
Drag a graphic from Photoshop into FrameMaker
FrameMaker supports the following drag-and-drop operations:
•You can move a graphic from one open FrameMaker document window to another by dragging the graphic.
In Windows, you can also copy it by Control-dragging it or display a context (shortcut) menu when you drop it
by right-dragging it.
•You can drag a graphic between a FrameMaker document window and any other application that supports drag-
and-drop operations.
•You can drag a graphic file from a folder or the desktop into an open document window.
•In Windows, you can drag one or more document files into the application window to open the files, or you can
drag a single file into a document window to embed that file (see “Embedding with OLE” on page 512).
Even though you can’t drag and drop selected text, you can move text by dragging the frame that contains the text.
This is a good way to manipulate small blocks of text in graphic frames, such as captions, callouts, and pull quotes.

ADOBE FRAMEMAKER 8
User Guide
512
Using OLE (Windows)
In Windows, you can use Object Linking and Embedding (OLE) as an alternative to the cross-platform File >
Import > File command when importing by reference. Consider the following factors when deciding whether to
import text and graphics by reference or to use OLE to embed or link them instead:
•If you want to collapse a linked file to an icon instead of displaying the full contents of the file in your document,
use OLE linking.
•If the material you want to include is in a format that FrameMaker can’t open, use OLE.
•If you edit or view your document on multiple platforms, use import by reference. OLE works only in Windows.
•If the text or graphics you want to include comes from an application that doesn’t support OLE, use import
by reference.
•If the material you want to include comes from another FrameMaker document, use import by reference. This
provides many more import options.
Embedding with OLE
You can use OLE to embed text or graphics in a FrameMaker document. Embedded material retains its association
with the application that created it (but does not retain a dynamic link to its source document). This lets you double-
click an embedded object to open the object in the application that created it. Be sure to use an application that
supports OLE as a server to create the object you want to embed.
You can also embed multimedia objects such as video or movie files (.avi or .mov files) and sound files (.wav files).
To embed only part of a file with OLE:
1In its own application, open the file and copy the part you want to embed.
2In FrameMaker, click where you want to embed the text or graphics, and choose Edit > Paste Special.
3Click Paste, select a format for the object (look for a format that starts with “embedded”), and then click OK.
To embed a whole file with OLE:
❖Click where you want to embed the text or graphics and choose File > Import > Object. You can then embed a
new, empty file, or specify an existing one.
To embed by dragging with OLE:
❖Do one of the following from an application that supports drag-and-drop features:
•To move text or graphics into a FrameMaker document, drag the object.
•To make a copy of an object instead of moving it, Control-drag the object.
•To choose between moving or copying when you release the mouse button, right-drag the object.
Linking with OLE
When you link to an OLE text or graphic object in a document, FrameMaker not only maintains information about
the application that created the object but also keeps a dynamic association with the source document. If the source
material changes, its representation in the FrameMaker document is updated as well. Be sure to use an application
that supports OLE as a server to create the object you want to link to.

ADOBE FRAMEMAKER 8
User Guide
513
You edit linked text or graphics by editing the original source document. For information on editing linked text, see
“Editing OLE objects” on page 513.
To link to only part of a file:
1In its own application, open the file and copy the part you want to link to.
2In FrameMaker, click where you want to place the linked text or graphics, and choose Edit > Paste Special.
3Click Paste Link, select a format for the object (look for a format that starts with “linked”), and then click OK.
To link to a whole file with OLE:
1Click where you want to place the linked file and choose File > Import > Object. Click Create from File and then
select Link.
2Specify the file you want to link to and click OK.
Editing OLE objects
You edit an OLE object by using the application that originally created it. When you finish editing, the changes
appear in the FrameMaker window.
To edit an embedded OLE object:
❖Double-click it. The object appears in the creating application where you can edit it.
To edit a linked OLE object:
❖Do one of the following:
•Double-click the OLE object. Either the object appears in a new window in the application that created it or the
menus in the FrameMaker window temporarily merge with the menus of the creating application. In either case,
the changes you make are reflected in the original document.
•Edit the original document outside of FrameMaker, in the application that created it.
For information on editing linked text, see “Controlling the updating of OLE links” on page 513.
Controlling the updating of OLE links
You can control how and when OLE linked objects are updated from their source documents. For example, you can
specify either automatic or manual updating, and you can manually update a single linked object or several objects
in the document.
You cannot specify updating for OLE embedded objects because an embedded object is not dynamically linked with
the original document.
To change the updating of a linked OLE object:
1Select the object, and choose Edit > Links.
2Select the linked source from the list, click either Automatic or Manual as the update type, and then click OK.
To suppress the updating of all linked OLE objects:
1Choose Edit > Update References.
2Choose Suppress Automatic Updating from the Commands pop-up menu, and then choose the items you don’t
want to be updated automatically.

ADOBE FRAMEMAKER 8
User Guide
514
3Click Set, and then click Done.
To manually update a single OLE link object:
❖Choose Edit > Links, select the source file you want to update, and then click Update Now.
Canceling OLE links
When you break an OLE link, the text or graphic remains in your document, but is no longer updated when the
source changes. The text becomes editable.
To cancel an OLE link:
❖Select the object, choose Edit > Links, and then click Break Link.
Using graphic insets (UNIX)
A graphic inset is a graphic created in a special UNIX application—a graphic inset editor—and then inserted in
a document. You use the inset editor to create or modify the graphic inset, or you can start the editor from
within FrameMaker.
Your system administrator can configure FrameMaker to use inset editors (see the online manual
Customizing FrameMaker on the Adobe website: www.adobe.com/devnet/framemaker/pdfs/
Customizing_Frame_Products.pdf) and can provide more information on the inset editors you can use. In general,
you work with graphic insets just as you do with other imported graphics—you can cut, copy, and paste them. (Avoid
rotating an inset. When you reopen the graphic inset in the inset editor, and then paste it back into your document,
the rotation might be lost.)
To create a graphic inset in UNIX:
1Choose Special > Graphic Inset. If only one inset editor is available, an alert message asks whether you want to
start the editor. If more than one inset editor is available, you can choose the editor to start.
2Use the inset editor to create the graphic inset. For information, see the documentation for your inset editor.
3Do one of the following:
•To place the inset in a graphic frame, select the frame or put the insertion point in a text frame.
•To place the inset directly on a page, click in the page margin.
4Choose the command in the inset editor that places the graphic inset in a document.
To edit a graphic inset in UNIX:
1Double-click the graphic inset. If prompted, click OK to start the editor.
2Use the inset editor to modify the graphic inset.
3Choose the command in the inset editor that places the graphic inset in a document.

ADOBE FRAMEMAKER 8
User Guide
515
Exporting text and graphics
You can use the following techniques to export text and graphics:
•Copy and paste between files and applications.
•Save a document in another format.
•Use print options to create a PostScript or EPS file. For information, see “Creating PostScript files” on page 30.
•Create a Portable Document Format (PDF) file (see “About Adobe PDF” on page 575).
•Save as HTML, which can convert a document’s graphics to GIF, PNG, or JPEG format (see “Specifying graphics
conversion” on page 571).
•Save as XML (see “About XML” on page 57).
•(Windows) Send the document as an e-mail attachment.
•(Windows) Use drag-and-drop techniques (see “Using drag and drop (Windows)” on page 511).
Note: (UNIX) Some graphics conversions are available using command-line utilities. For information, see the online
manual Using Filters.
Using Save As to export to other formats
You can export a FrameMaker document to other applications by saving it in other formats (see “Saving documents”
on page 24). When you save a document in a word-processing format, it can be used in that application with most
of its formatting intact. The available formats depend on the platform you’re using and the filters installed.
Two text-based file formats—Rich Text Format (RTF) and Maker Interchange Format (MIF)—are interchange
formats. These are widely recognized by other programs and can often serve as a bridge from FrameMaker to an
application that does not recognize the native format.
Saving MIF files
You can save FrameMaker files in the MIF 7.0 (MIF-Classic) or MIF 8.0 (MIF-Unicode) formats. When you choose
to save a FrameMaker document as a MIF file, you can select the MIF 7.0 or MIF 8.0 option.
•MIF-Classic: Choosing this format generates a MIF that is similar to the original format, which is forward-
compatible. All Unicode content that can’t be represented in the earlier format is replaced with a character that you
can configure using the configuration file (maker.ini on Windows).
•MIF-Unicode: Choosing this format generates a MIF that contains Unicode strings. All string data is in
UTF-8 format.
You can also save a document as a HTML, XML, or PDF file.
Sending files in e-mail (Windows)
You can send a document as an e-mail attachment if a mail system compatible with the Messaging Application
Programming Interface (MAPI) is installed on your Windows computer. If your computer is not yet configured for
MAPI, Windows guides you through a number of dialog boxes when you first try to send a document. If you need
assistance, ask your network administrator for help.
Note: The send e-mail menu and shortcut works only for single documents and not on a book file. You cannot send a
book file via e-mail.
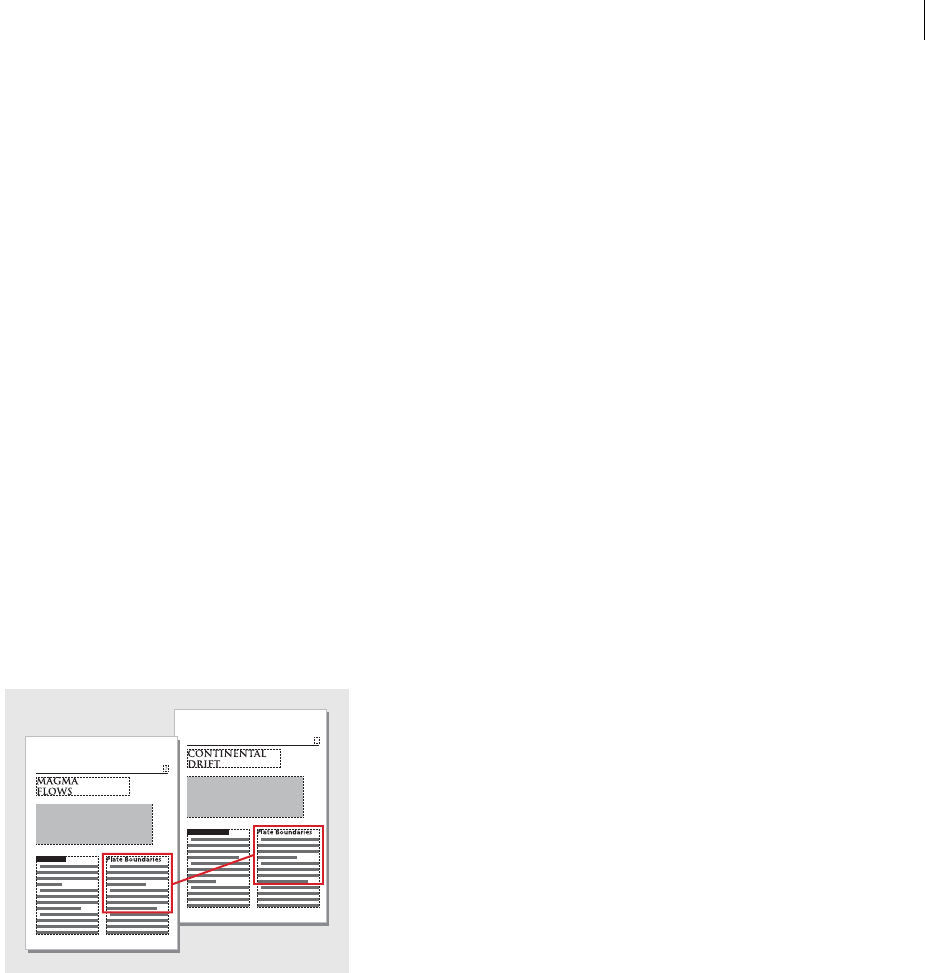
ADOBE FRAMEMAKER 8
User Guide
516
To send a document as an e-mail attachment in Windows:
1Choose File > Send.
2Pick an e-mail profile to use from the Choose Profile dialog box, and click OK.
3Fill in the e-mail fields, and then send the message as you normally do.
Importing text into structured documents
You can import text into a structured FrameMaker document from the following sources:
•A text flow from another part of the document, from another structured FrameMaker document, or from a MIF
file. Any conditional text in the flow, cross-references, tables, markers, footnotes, variables, and anchored frames
are imported.
•A file created in another application for which an import filter is installed on your system. Special items such as
cross-references and tables may also be imported—depending on the application and the filter used.
If the text you import is structured, you can retain or remove the structure. If the text is formatted, you can retain or
remove the formatting, or reformat the text using formatting information in the current document.
Imported text can be copied into the document, which is equivalent to using the Copy and Paste commands, or it
can be imported by reference as a text inset, in which case it retains a link to its source file. When you import by
reference, the text inset displays in the document window but is not editable. If the inset is structured, its structure
appears in the Structure View but is not editable.
A text inset remains linked to its source document.
This section describes how to import text that is structured or formatted. For information on importing a text file or
a MIF file, or on updating and working with a text inset after importing it, see “Using the Import command to import
text” on page 502.
To import text:
1Click where you want to insert the text.
2Choose File > Import > File.
3Select the file with the text you want to import, and specify whether to import by copying or by reference
(see “Importing by copying” on page 501).
4If the Unknown File Type dialog box appears, select a file type, and click Convert.
33
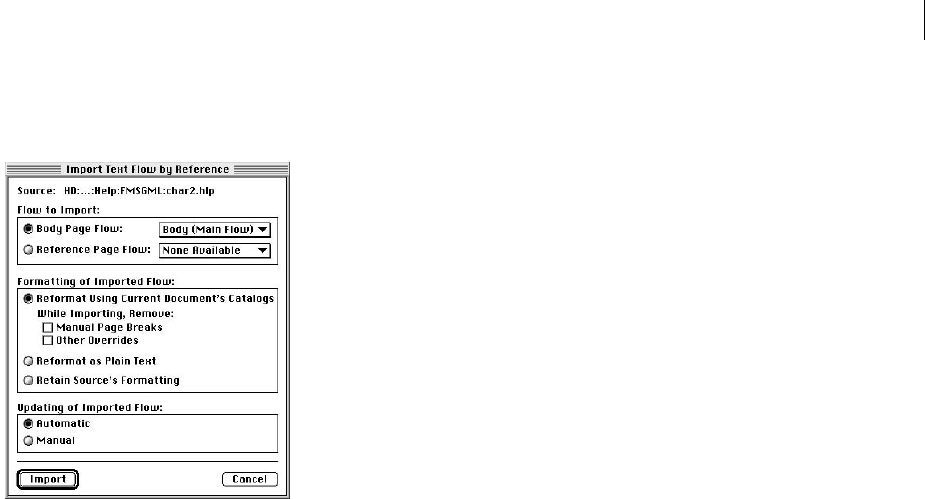
ADOBE FRAMEMAKER 8
User Guide
517
The dialog box that appears next depends on the import method you chose in step 3. The Import Text Flow by
Reference dialog box contains settings for updating the imported flow.
Specify how you want to format and update your import text flow.
5Choose a body page flow or a reference page flow from a pop-up menu. Most often, you import text on body
pages. Reference pages can contain flows with boilerplate text for use on body pages.
6Specify how to handle the structure and formatting of the imported text by doing the following:
•To retain the structure of the flow and apply the current document’s formats and element format rules to the text,
select Reformat Using Current Document’s Formats. If element tags in the two documents don’t match, the
formatting of the imported text is unchanged. Usually, you would select the options for removing page breaks and
other format overrides so that the imported text looks like text in the current document.
•To remove the structure and formatting from the text, and apply the formatting used at the insertion point, select
Reformat as Plain Text. (Text in tables or anchored frames retains the formatting it had in the source document.)
•To remove the structure but retain the formatting, select Retain Source’s Formatting. Formats used in the
imported text are not added to the current document’s catalogs. If you later modify the current document’s
formats, the imported formats won’t be affected—even if the tags in the current document and imported
text match.
7If you’re importing by reference, specify how to update the text inset by doing one of the following:
•To update the text inset whenever you open the document, select Automatic.
•To update only when you specify, select Manual.
8Click Import.

ADOBE FRAMEMAKER 8
User Guide
518
Inserting imported graphic elements into structured
documents
Some graphic elements are defined for you to import a graphic along with the element. When you insert the element,
FrameMaker displays an import dialog box. The graphic you import appears in an anchored frame below the line
with the anchor symbol, and the frame is automatically sized just large enough for the graphic.
Imported graphic in an anchored frame
After inserting the element, you can edit the frame by moving it, resizing it, and so on (see “Editing anchored frames”
on page 359).
You might also import a graphic into an existing anchored frame—for example, if you used a graphic element that
placed an empty frame in the document.
When you import a graphic element, you can make it part of your document (imported by copying) or keep it linked
to its original application or document (imported by reference). For more information, see “Choosing the right
method for importing and linking” on page 501.
For information on inserting an imported graphic that’s not an element (which you can do only in an unstructured
flow), see “Using the Import command to import graphics” on page 508.
To insert an imported graphic element:
1Click where you want to anchor the frame.
2Select an imported graphic element in the Element Catalog, and click Insert.
You can also use File > Import > File to insert an element. Select a file and click Import. If more than one imported
graphic element is available, choose the one you want from the Element Tag pop-up menu in the next dialog box
that appears.
3Select the graphic file you want to import and specify whether to import by copying or by reference (see
“Importing by copying” on page 501).
4Click Import.
5If the Unknown File Type dialog box appears, select a file type in the scroll list and click Convert.
6If the graphic you’re importing is a bitmap, choose a scaling option from the pop-up menu and click Set (see
“Changing the size of bitmaps” on page 511). The larger the dpi (dots-per-inch) value, the smaller the graphic is on
the page.
An anchored frame with the imported graphic appears in the document window, with an anchor symbol at the
insertion point. A bubble with the text snippet <GRAPHIC> appears in the Structure View.

ADOBE FRAMEMAKER 8
User Guide
519
If no imported graphic element is available at the location you want, you might use an invalid element. After
inserting the element, talk to your developer about making the element valid at this location.
To use an invalid imported graphic element:
❖Do one of the following:
•To use an element that is valid in another part of the document, either insert the element in a valid location and
then move it, or use the All Elements setting (see “Changing the scope of elements available in a structured
document” on page 18) to make the element available everywhere and then insert the element where you want it.
•To insert an invalid element with the default tag GRAPHIC, use File > Import > File to import a graphic. (The
element has a default tag if no defined imported graphic elements are available.)
To add an imported graphic to an existing anchored frame:
❖Select the frame and use File > Import > File to import the graphic.
Platform-specific methods of importing graphic elements
Elements that are defined to import graphics use a file-import method available on all platforms. To import a graphic
file by reference if you’re working on a single platform, consider using OLE in Windows, or graphic insets in UNIX.
To use a platform-specific method of importing, insert an anchored frame element, select the frame, and specify the
import method.
Using the File Import feature
You can import Adobe PageMaker®, QuarkXPress®, Adobe Photoshop, JPEG 2000, SVG, PDF (UNIX), and Adobe
Illustrator (UNIX) files into FrameMaker.
“Importing PageMaker and QuarkXPress files” on page 519
“Importing Photoshop files” on page 521
“Importing JPEG 2000 files” on page 521
“Importing SVG images” on page 521
“Importing PDF and Illustrator files (UNIX)” on page 522
Importing PageMaker and QuarkXPress files
FrameMaker lets you import PageMaker 6.5 or 7.0 and QuarkXPress 3.3 or 4.1 documents.
FrameMaker imports the main components of PageMaker and QuarkXPress files as described below.
Master Pages FrameMaker adds a new master page for each master page in the document you are importing.
All master-page items are placed on their corresponding master pages in FrameMaker. If you have custom-named
master pages in PageMaker, FrameMaker uses the same name.
For QuarkXPress documents, FrameMaker imports all text objects on master pages as text flows, and preserves all
body-page overrides. FrameMaker drops any overrides for other objects on body pages.
Sections FrameMaker ignores sections and imports their contents only.
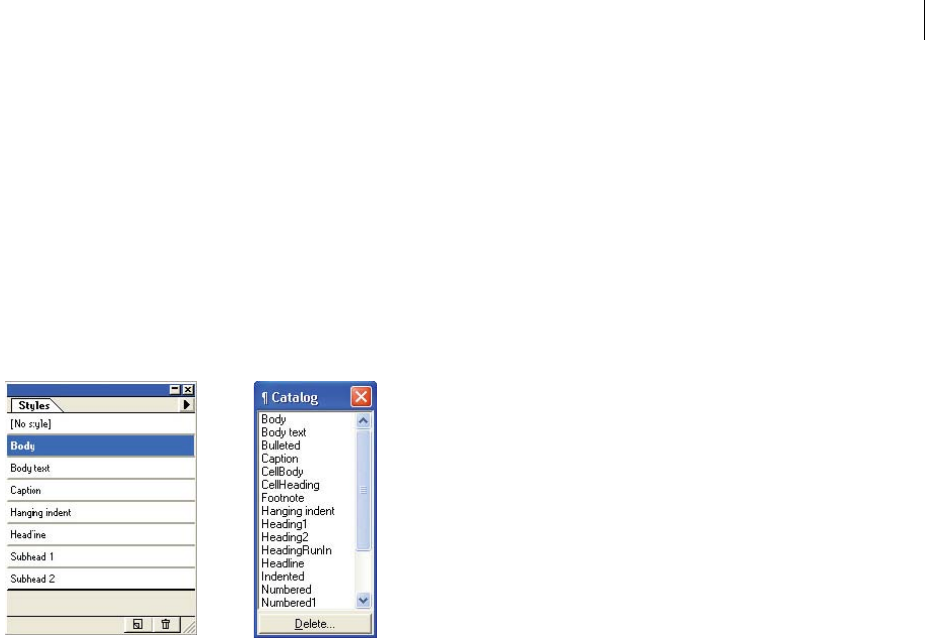
ADOBE FRAMEMAKER 8
User Guide
520
Layers FrameMaker treats all layers in an imported document as one layer. The page items are drawn according to
their stacking order on the page, starting with items on the master page and then items on the body page.
Character styles FrameMaker creates new character formats for the character styles in the document you’re
importing. If a character style has the same name as a character format in FrameMaker, the attributes in the character
format are replaced by the corresponding attributes from the imported file. FrameMaker doesn’t import PageMaker
or QuarkXPress character attributes that aren’t supported by FrameMaker.
Paragraph styles FrameMaker creates new paragraph formats for the paragraph styles in the document you’re
importing. If a paragraph style has the same name as a paragraph format in FrameMaker, the attributes in the
paragraph format are replaced by the corresponding attributes from the imported file. FrameMaker doesn’t import
PageMaker or QuarkXPress paragraph attributes that aren’t supported by FrameMaker.
FrameMaker creates a paragraph format (right) for each paragraph style (left) in the PageMaker document you’re importing.
Paragraphs with local overrides in the original document are also treated as overrides by FrameMaker.
Importing tagged text from PageMaker displays the actual tag names in the FrameMaker document. You should
deselect Export Tags in the PageMaker Text Export dialog box to import the text only, not the tag name.
Paragraph rules FrameMaker imports paragraph rules as a single-line frame defined in the reference pages. All
other settings applied to the rules, such as line colors, line styles, and so on, are not imported.
Drawing objects FrameMaker imports all drawing objects. If fill and stroke colors are different, the fill color is used
for both stroke and fill. The runaround settings are dropped.
Non-printing objects FrameMaker doesn’t import non-printing objects.
Tate-Chu-Yoko Because FrameMaker doesn’t support vertical text, FrameMaker treats Tate-Chu-Yoko as
horizontal text.
Color definitions FrameMaker creates color definitions to match custom colors or colors from a color library that
are defined in the PageMaker or QuarkXPress file. However, if a color definition with the same name already exists
in FrameMaker, the FrameMaker color is used, and no new color is created.
Graphics FrameMaker uses its filters to import linked (referenced) graphics files. If it doesn’t have the appropriate
filter, FrameMaker doesn’t import the graphics files. In the case of embedded graphics, FrameMaker uses the image
data to import the graphics.
When importing a floating graphic, FrameMaker positions the graphic at the same position as in the original file.
When importing an inline graphic, FrameMaker positions the graphic in the text flow in the same text position as
in the original file.
OLE objects FrameMaker supports OLE. FrameMaker imports OLE objects as long as FrameMaker supports the
graphic format.

ADOBE FRAMEMAKER 8
User Guide
521
Grouped objects FrameMaker supports hierarchical grouping of objects.
Hyperlinks FrameMaker supports hyperlinks. For PageMaker documents, FrameMaker imports object and page
item anchors as cross-references.
Table of contents FrameMaker imports the table of contents generated in QuarkXPress or PageMaker as
regular text.
Pasteboards FrameMaker imports all pasteboard objects inline in their corresponding anchored frame.
FrameMaker creates a separate section in the reference pages for the pasteboard objects it imports.
Indexing FrameMaker imports all index entry markers but treats the index as regular text.
To import a PageMaker or QuarkXPress file:
1In FrameMaker, choose File > Open, and specify the PageMaker or QuarkXPress file you want to import.
2Choose the appropriate file type in the Unknown File Type dialog box:
•If importing a PageMaker file, choose PageMaker [version] Document or PageMaker [version] Template.
•If importing a QuarkXPress file, choose QuarkXpress Document (3.3-4.1x).
3Click Convert. If the Missing File dialog box appears, navigate to the folder that contains the missing file, click the
name of the file, and click Continue.
Importing Photoshop files
FrameMaker supports importing of Adobe Photoshop (PSD) files. FrameMaker converts PSD files to native Frame-
Image format and converts the color space (Photoshop RGB, CMYK, LAB, Indexed, Grayscale, or Bitmap) to RGB.
You import PSD files the same way you import other types of graphics.
Importing JPEG 2000 files
FrameMaker supports JPEG 2000, a version of the popular JPEG image-compression format.
When importing JPEG 2000 files, the filter converts the supported color modes of RGB, CMYK, Grayscale, and LAB
and discards unsupported modes such as Index. The filter does not support 16-bit-per-channel images.
To import a JPEG 2000 file:
1Choose File > Import > File.
2Specify the file you want to import, and select Import By Reference or Copy Into Document.
3Click Import. If the Unknown File Type dialog box appears, select JPC, J2C, JPX, JPF, J2K, or JP2, and
click Convert.
Importing SVG images
FrameMaker prints SVG images to PostScript printers by rendering the images as vector graphics using Encapsu-
lated PostScript (EPS). For non-PostScript printers, FrameMaker uses the FrameImage format.
In addition, when you create a PDF file from a document containing an SVG image, the image appears as vectors,
which improves its look in Acrobat and allows you to zoom in on it without pixilation.
Note: Embedded SVG image animations aren’t functional in FrameMaker.

ADOBE FRAMEMAKER 8
User Guide
522
To import an SVG image:
1Choose File > Import > File.
2Click Import.
3Specify the file you want to import, and select Import By Reference or Copy Into Document.
4Click Import.
5In the Import SVG dialog box, specify the raster quality.
6Specify image dimensions if they’re different from the default size (you can’t scale proportionally in this
dialog box).
7Click Set.
Note: Depending on the rasterization quality and available memory, it might take several minutes for the SVG image
to import.
Importing PDF and Illustrator files (UNIX)
You can import Adobe PDF files and Illustrator 9 and 10 files into a FrameMaker document.
When you import a PDF or Illustrator file into FrameMaker, the file is treated as a graphic, and only one page can
be imported at a time. You can import it either by copy or by reference. Both process and spot colors can be displayed
and printed.
Note: Graphics that use transparency might not print as expected to a PostScript Level 1 or non-PostScript printer. If you
run FrameMaker using the -noapi option (./maker.exe -noapi), you won’t be able to import PDF files.
To import a PDF or Illustrator file:
1In FrameMaker, choose File > Import > File, and specify the PDF or Illustrator file you want to import.
2Select either Import By Reference or Copy Into Document.
3Click Import.
4If the file has more than one page, specify the page number you want by typing the page number into the text box.
5Click Select.
Note: Illustrator 9 and 10 files are imported at the page size of the file. Resize the anchored frame to crop any white space
from the image.
Importing SWF files into FrameMaker documents
(Windows)
You can import SWF files (for example, Adobe Captivate demos) into FrameMaker documents by copying or
by reference.
Note: Ensure that you have installed Adobe Flash Player on your computer to play SWF files.
1Place the insertion point in your document where you want the SWF file to appear.
2Select File > Import > File.
The Import dialog box appears.

ADOBE FRAMEMAKER 8
User Guide
523
3Navigate to, and select, the SWF file you want to insert.
4Select the Copy Into Document or Import by Reference option.
5Click Import.
The Imported Graphic Scaling dialog box appears.
6Select the desired DPI.
7Click Set.
When you click Set, the first frame of the SWF file appears in the document. If you imported the file by reference,
double-click the first frame to play the SWF file in a separate Adobe Flash Player window. If you copied the SWF file
into the document, a bitmap image of the first frame is displayed. Click the frame to activate the SWF file. If the first
frame is blank, the anchored frame containing the SWF file appears blank.
Note: You can’t use any graphic operations on a SWF file in a FrameMaker document.
Saving a document containing SWF files
You can save a document containing SWF files in PDF, HTML, and XML formats. Also, you can print documents
containing SWF files.
Saving documents containing SWF files as PDF
1Select File > Open, and then open the FrameMaker book or file containing SWF files.
2Select File > Save As PDF.
3You can change the save location and the filename if you want, and then click Save.
4Click Set in the PDF Setup dialog box to generate a PDF with the default settings. Or, set additional options, and
then click Set. The SWF file imported into the book or file and it is saved. If you have installed Flash Player on your
computer, you can open the PDF and play the SWF file.
Note: By default, FrameMaker is configured to embed SWF files in PDFs. However, you can disable this option. For more
information, see “Enabling and disabling SWF file embedding in PDFs” on page 580.
When you open a PDF containing a SWF file, the Manage Trust For Multimedia Content dialog box appears. Select
the Play The Multimedia Content This One Time or Play The Multimedia Content And Add This Document To My
List Of Trusted Documents option and click Play. Ensure that you have installed Adobe Acrobat Reader® 7.0.7 or
later, or Adobe Acrobat 3D version 7.0.7 or later, to view the generated PDF containing SWF files.
Saving documents containing SWF files as HTML
You can import a SWF file into a document and save it as an HTML file. When you do this, a CSS file generates
automatically. If you imported a SWF file by copying it into an Unstructured document, the SWF files are saved as
GIFs with the HTML file. If you imported a SWF file by copying it into a Structured document, the SWF files are
saved separately. When you open the HTML file, click the SWF content to play it.
1Select File > Open, and then open the FrameMaker book or file containing SWF files.
2Select File > Save As HTML.
3You can change the save location and the filename if you want, and then click Save.

ADOBE FRAMEMAKER 8
User Guide
524
Saving documents with SWF files as XML
You can save a FrameMaker file containing a SWF file as XML. When you open the XML file in FrameMaker, the
SWF file is preserved through XML roundtrip. To ensure roundtripping of SWF files, make sure that the XML file
contains correct read write rules before you save the file as XML.
Note: Ensure that you create or open an XML file containing a graphic element definition before importing a SWF file
into it.
1Select File > Open, and then open the XML file containing SWF files.
2Select File > Save As XML.
3You can change the save location and the filename if you want, and then click Save.
If the SWF content was embedded in the FrameMaker file, and the document is saved as XML, the SWF content is
saved as an independent SWF file. In addition, a reference to SWF is created in the XML.
Printing a FrameMaker file with SWF files
You can print a FrameMaker document with SWF files. The SWF files are printed as frames. If the first frame
contains an image, the bitmap of the image is printed.
1Open the FrameMaker document containing SWF files.
2Select File > Print.
3Set the remaining print options as necessary, and then click Print. For information on the other options, see “Print
options” on page 28.
Importing three-dimensional objects into FrameMaker
documents (Windows)
You can import 3D objects (U3D format) into documents by copying or by reference. You can set parameters for the
3D object, such as default view, rendering mode, background color, and lighting scheme. You can also choose to
render a 3D object in an anchored or unanchored frame.
1Place the insertion point in your document where you want the 3D object to appear.
2Select File > Import > File.
The Import dialog box appears.
3Navigate to, and select, the U3D file you want to import.
4Select the Copy Into Document or Import By Reference option.
5Click Import.
The Imported Graphic Scaling dialog box appears.
6Select the desired DPI.
7Click Set.
When you click Set, the bitmap of the 3D object appears in the document. If you imported the 3D object by copying
it, the U3D file is embedded in the document as a device-independent bitmap (DIB) in the document. If you
imported the 3D object by reference, a bitmap image linked to the source U3D file is inserted in the document.
Regardless of the method of importing the 3D file, the file is rendered in the DIB facet in the document.

ADOBE FRAMEMAKER 8
User Guide
525
When you import the 3D object into a document and save it in PDF or XML format, all information about the 3D
object is preserved.
Saving a document containing 3D objects
You can save a document containing 3D objects in PDF and XML formats.
1Select File > Open, and then open the FrameMaker book or file containing 3D objects.
2Select File > Save As PDF.
3You can change the save location and the filename if you want, and then click Save.
4Click Set in the PDF Setup dialog box to generate PDF with the default settings. Or, set additional options, and
then click Set. The U3D file imported into the book or file is saved along with all its views. When you open the PDF,
the view you last selected for the 3D object in the document displays in the PDF.
Note: By default, FrameMaker is configured to embed 3D objects in PDFs. However, you can disable this option. For
more information, see “Enabling and disabling 3D object embedding in a PDF” on page 581.
In the PDF, click the 3D object to view the 3D toolbar and to activate the interactive features of the 3D object.
The Adobe Acrobat 3D toolbar, which is displayed above every 3D object in a PDF, lets you zoom, pan, rotate, and
analyze 3D designs.
Saving documents containing 3D objects as XML
You can save a FrameMaker file containing a 3D object as XML. When you open the XML file in FrameMaker, the
3D object is preserved through XML roundtrip. The 3D object is extracted and saved as an independent U3D file,
along with the XML file. When the file is opened again in FrameMaker, the 3D object appears at the location where
it was inserted.
To preserve changes made to a 3D object during a roundtrip in an XML file, you must add a new attribute called
insetdata with the following properties in the Graphic section of the DTD file, along with other attributes such as
Offset and DPI:
insetdata CDATA #IMPLIED
Similarly, you must add the following lines in the XSD file:
<xsd:attribute name="insetdata" type="xsd:string" use="optional"/>
Note: The insetdata attribute does not support read/write rules.
If you don’t modify the DTD and XSD files, U3D files can still be exported to XML. However, changes made to the
U3D file in FrameMaker will not be preserved during a roundtrip.
1Select File > Open, and open the FrameMaker file containing 3D objects.
2Select File > Save As XML.
3You can change the save location and the filename, and then click Save.
Note: When you open the XML file in a 3D compatible XML Editor, the relevant graphic element contains a reference
to the U3D file, with the filename and location of the U3D file. If you open the XML file in FrameMaker, the 3D object
appears as a bitmap image.

ADOBE FRAMEMAKER 8
User Guide
526
Printing a FrameMaker file with 3D objects
You can print a document with 3D objects. The 3D objects are printed as bitmap images.
1Open the document containing 3D objects.
2Select File > Print.
3Set the remaining print options as necessary, and then click Print. For information on the other options, see “Print
options” on page 28.
Configuring a 3D model imported into FrameMaker
You can configure a 3D model you have imported into a document by setting its background color, lighting schemes,
changing views, and rendering mode.
Setting the background color for a 3D object
You can change the color that appears behind a 3D object. The default background color is white.
1Select a 3D object.
2Select Graphics > 3D Menu option > Background Color.
The Color dialog box appears.
3Select the desired color.
4Click OK.
Setting lighting schemes for a 3D object
You can select from a wide range of 3D lighting schemes to cast a 3D object using different light sources. The default
lighting scheme for all 3D objects is Lights From File.
1Select a 3D object.
2Select Graphics > 3D Menu option > Lighting, and choose one of the following light sources: Lights From File, No
Lights, White Lights, Day Lights, Bright Lights, Primary Color Lights, Night Lights, Blue Lights, Red Lights, Cube
Lights, CAD Optimized Lights, or Headlamp.
Setting views for 3D objects in FrameMaker
The 3D object you import into a document can contain predefined views. You can change the view set for the object;
the selected view is rendered when the document is saved. When you convert this FrameMaker document to a PDF,
all predefined views of the 3D object are available in the PDF. The last view that you selected in the document before
saving becomes the default view in the PDF.
1Select a 3D object.
2Select Graphics > 3D Menu option > Show Existing Views, and then choose a view from the list that appears in
the dialog box.
3Click OK.
The object is displayed in the selected view.
Note: If you save the document as a PDF, all views of the U3D objects will be available in the converted document.

ADOBE FRAMEMAKER 8
User Guide
527
Rendering a 3D object in a document
The rendering modes for 3D objects vary from the Wireframe, Solid, to Transparent Bounding box. The default
rendering mode is Solid.
1Select a 3D object.
2Select Graphics > 3D Menu option > Rendering Mode, and then choose one of the following rendering modes:
Bounding Box, Transparent Bounding Box, Transparent Bounding Box Outline, Vertices, Shaded Vertices,
Wireframe, Shaded Wireframe, Solid, Transparent, Solid Wireframe, Transparent Wireframe, Illustration, Solid
Outline, Shaded Illustration, or Hidden Wireframe.
The object is rendered in the selected mode.
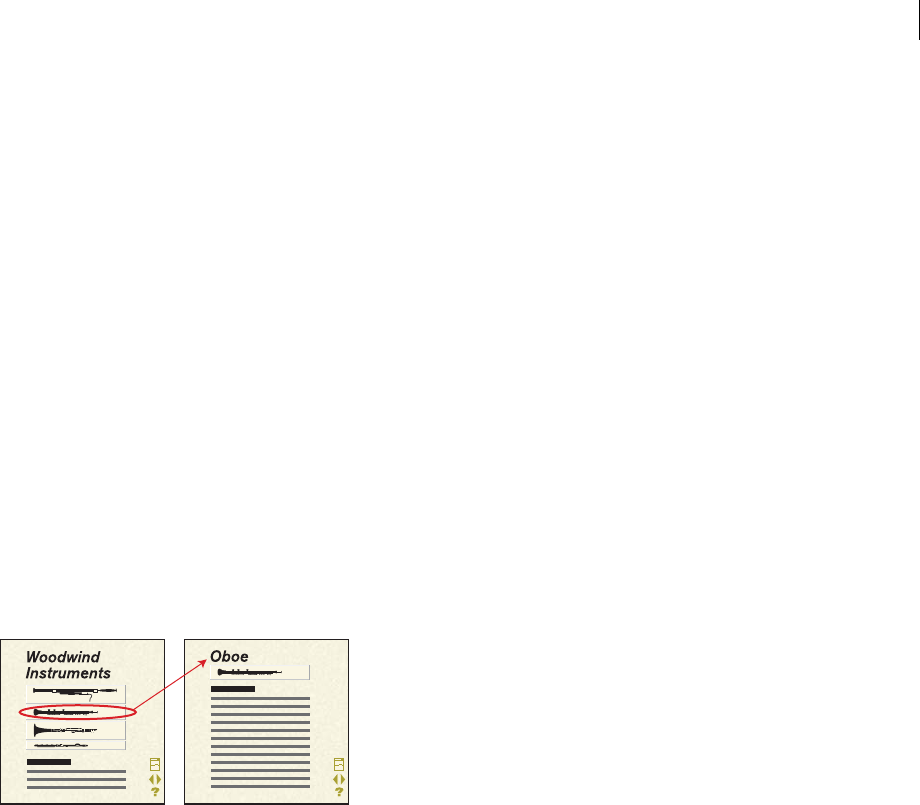
528
Chapter 17: Hypertext and view-only
documents
About online systems
You can distribute hypertext documents online as part of an online system. Readers can then page through the
contents sequentially or explore at random, following the links you provide. You can create a simple online system
from documents that you print (including a table of contents and index that contain hypertext links), or you can
create a more elaborate online environment that contains extensive navigation aids such as document maps and
navigation buttons.
When you set up an online system, you create a series of hypertext documents. In each document, you designate
active areas. An active area contains a hypertext command that instructs FrameMaker how to respond when a reader
clicks there.
For example, readers might click in a list to learn about a specific item, click part of a graphic for a more detailed
drawing of that part, or click in an index for information about the indexed term. They can choose a topic from a
pop-up menu, or they can click buttons to navigate through a document.
Click an active area to display related information.
Distributing hypertext documents
You can save a document in Portable Document Format (PDF) or in Hypertext Markup Language (HTML) format
for distribution on the World Wide Web or on an intranet.
You can also distribute your hypertext documents to readers in View Only format. Readers can use FrameMaker to
open, read, search, and print such documents and they can use the embedded hypertext links, but they can’t edit
the documents.

ADOBE FRAMEMAKER 8
User Guide
529
Planning online systems
Creating effective and easy-to-use online documents takes careful planning. You need to design a page size and
layout that’s appropriate for the type of computer the document will be read from and for the type of reader who will
use it. Well-designed online systems often include graphics or symbols (in the same place on each page) that the
reader can click to navigate through the system.
Navigation aids are important in an online system.
When creating documents for online distribution, follow these simple guidelines:
•Write several short documents rather than one long one. A long document takes longer to open.
•Keep all the documents that make up the system together in one folder. Then you won’t have to keep track of
pathnames for imported graphics and for hypertext commands that require filename specifications.
•If you’ll distribute the documents as FrameMaker files, use fonts that are readily available. You may want to
use fonts such as Times and Helvetica because these fonts are available on most computers and on all
PostScript printers.
Preparing areas for becoming active
A reader navigates through a hypertext system by clicking active areas—areas containing hypertext commands—or
by scrolling up or down. An active area can be a range of text, a graphic, or a part of a graphic. You can set up active
areas on body pages, or you can set them up on master pages so they appear in the same location on all body pages.
For example, you can set up navigational buttons on master pages. When a reader clicks on an active area, the area’s
hypertext command is executed.
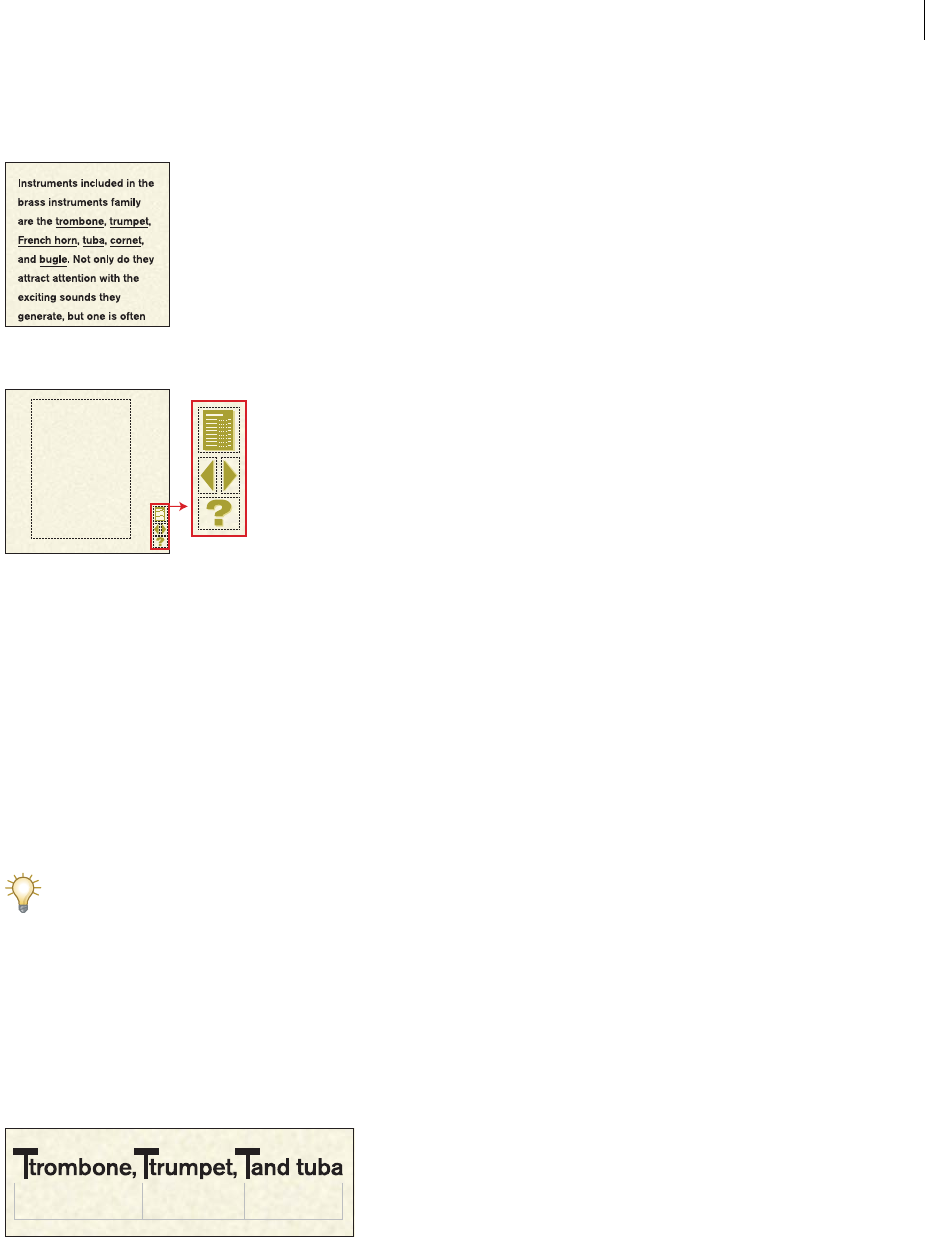
ADOBE FRAMEMAKER 8
User Guide
530
Before you insert a hypertext command, you prepare the area. For example, you can prepare a range of text by
making it visually different from surrounding text.
Underlined text on body page can be active.
Graphics on master pages can be active.
Preparing text areas
A text area can be a word, a phrase, or an entire paragraph. If your reader clicks in a text area that contains a hypertext
command, FrameMaker finds the hypertext command, highlights the area, and performs the command.
To prepare a text area:
❖Do one of the following:
•To designate a word or a phrase as an active area, select the text and change its character format. Changing the
character format defines the boundaries of the text area. Most formatting differences are recognized. Only pair
kerning, spread, stretch, change bars, language, and case are ignored.
To designate a word or phrase as an active area without changing its appearance, use a character format that sets
all properties to As Is (see“Using As Is” on page 106 and “Applying predefined formats to text” on page 102).
•To designate an entire paragraph as an active area, make sure the paragraph contains no character format changes.
As long as the paragraph contains only one hypertext command and no character format changes, FrameMaker
highlights the entire paragraph and performs the command when a reader clicks anywhere in the paragraph.
•To designate several adjacent words or phrases in a text string as active areas, use the same character format for
the entire text string. Then insert the various hypertext commands. FrameMaker divides the text into active areas
based on the locations of the markers. When a reader clicks in the text, FrameMaker determines which active area
was clicked and executes the correct hypertext command.
Markers divide text into active areas.
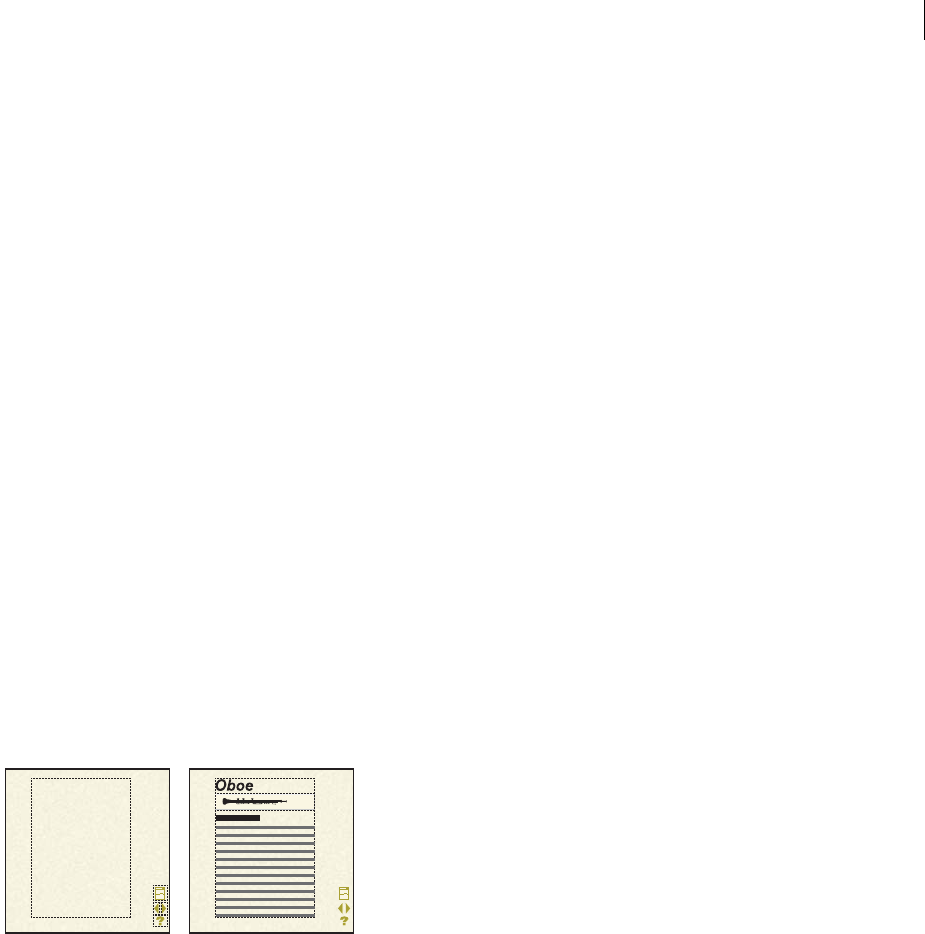
ADOBE FRAMEMAKER 8
User Guide
531
Preparing graphics
Graphics often provide visual cues for hypertext actions. For example, readers can click an icon to display infor-
mation on a topic, or an arrow to display the next page.
An active area over a graphic can contain a hypertext command that jumps to another location or one that divides
the graphic into a matrix of hypertext commands.
Note: If you’re preparing documents for distribution in HTML format, you can use active areas over anchored graphics
to create image maps. Unanchored graphics on master and body pages won’t be converted to HTML.
To prepare a graphic:
1Draw a text frame that covers the entire graphic you want to make active. Later, you’ll place a hypertext command
in the text frame. (When the reader clicks an active text frame, FrameMaker will highlight the entire frame.) For
information on using the Text Frame tool to draw a frame, see “Using text with graphics” on page 323.
Make sure that the graphic is not set to have text run around it (see “Running text around graphics” on page 328).
2Set the text frame’s fill and pen patterns to None (see “Applying and changing drawing properties” on page 318).
This makes the text frame transparent so that readers see the graphic behind the frame.
3Choose Graphics > Bring to Front to place the text frame in front of the graphic, if it isn’t already there.
(Unless you placed the graphic on the page after drawing the text frame, the text frame will already be in front of
the graphic.)
Preparing the same area on multiple pages
You can create an area that appears in the same location on more than one page. You do this by setting up the area
on a master page and inserting the hypertext command there. For example, you can create buttons on master pages
that readers can click on body pages to display the next or previous page.
Navigation buttons on master page appear on body pages.
You can override active master page graphics on individual body pages if you want to send the reader somewhere
else. For example, you can create a Next Page button with an override on the last body page of each document
because there is no next page to display.
To have an active area appear on more than one page:
❖Set up the area on a master page rather than on a body page (see “Preparing text areas” on page 530 and “Preparing
graphics” on page 531). The active area appears in the background of corresponding body pages. When your reader
clicks that area on a body page, the hypertext command on the master page is activated.
When you draw the text frame on a master page, FrameMaker asks whether you want to create a template frame or
a background frame. Text frames for active areas should be background (untagged) text frames.
ADOBE FRAMEMAKER 8
User Guide
532
To override a master page command on an individual body page:
❖Do one of the following:
•Put a graphic or a different hypertext command over the area on the body page. For example, you can create an
inactive, shaded button covering the Next Page button on the last body page of each document.
Master page commands can be overridden by graphics on body pages.
•Place a text frame that contains its own hypertext command over the graphic on the body page.
Inserting hypertext commands
You use a marker to insert a hypertext command in a prepared area. After you insert a command and save the
document in View Only format, the area becomes active. When a reader clicks an active area, FrameMaker highlights
the area and executes the command.
Hypertext commands let your readers navigate through the view-only documents. If you’re distributing the
documents in View Only format, hypertext commands can also display alerts, close documents, exit FrameMaker,
and start other applications.
Hypertext command marker
After inserting a hypertext command, you can test the command without saving the document in View Only format
(see “Working in view-only documents and books” on page 551).
Note: To insert a hypertext command in a text inset, insert the command in the text inset’s source document.
To insert a hypertext command:
1Click in a prepared area where you want to insert a hypertext command. (For details, see “Preparing areas for
becoming active” on page 529.) You can insert hypertext commands in text frames but not in text lines (graphic
objects created with the Text Line drawing tool). To prevent extra spacing in the hypertext command when
exporting, insert your markers at the beginning or end of a word.
2Choose Special > Hypertext.

ADOBE FRAMEMAKER 8
User Guide
533
3Choose a hypertext command from the Command pop-up menu. The syntax for the command appears below the
pop-up menu, and the command name appears in the text box. (For a description of the items in the Command
pop-up menu, see “Hypertext commands” on page 534.)
4Enter parameters in the text box as needed (for example, a filename and linkname). For details, see “Creating
hypertext links” on page 536 and the sections that follow it.
Hypertext commands must always appear in lowercase. The parameters can be uppercase or lowercase, but they are
case-sensitive. The entire command can be up to 255 characters long. (Each character in a Japanese font counts as
two characters.)
Note: If you enter a filename parameter for a file that isn’t in the same folder as the current document, you must specify
a path to the document (see “About pathnames in commands” on page 535).
5If you want FrameMaker to validate the command when you insert it, select Validate Command upon Insertion.
6Click New Hypertext Marker. FrameMaker checks the syntax in the text box. If Validate Command upon
Insertion is selected, FrameMaker also validates the command. For example, FrameMaker validates a Jump to
Named Destination command by verifying that the destination link exists in the specified document.
If FrameMaker finds an error, an alert message describes it, but the command is still inserted in a marker of type
Hypertext. A marker symbol appears at the insertion point when text symbols are visible.
Note: Hypertext markers support the Unicode text encoding standard.
To edit a hypertext command:
1If the document is in View Only format, do one of the following to change it to Document format:
•If the Hypertext dialog box is open, click Make Editable.
•Press Esc Shift+f l (lowercase L)k.
2Choose Special > Hypertext if the Hypertext dialog box isn’t open.
3Select the marker that contains the command you want to edit. To select a marker in an otherwise empty text
frame, double-click anywhere in the frame. You can also use the Find command to find and select hypertext markers.
The hypertext command appears in the Hypertext dialog box.
If no other markers appear near the marker you want to edit, drag through the marker to display its hypertext
command in the Hypertext dialog box.
4Edit the command in the text box, and click Edit Hypertext Marker. Even if text around the marker is selected,
only the command in the marker is affected.
5If you want to return the document to View Only format, do one of the following:
•Click Make View Only in the Hypertext dialog box.
•Press Esc Shift+f l (lowercase L)k.
To delete a hypertext command:
❖Select the marker that contains the command and press Delete. To select a marker in an otherwise empty text
frame, double-click anywhere in the frame. You can also use the Find command to find and select hypertext markers.

ADOBE FRAMEMAKER 8
User Guide
534
Hypertext commands
FrameMaker supports the following hypertext commands. For a full description of each command and its syntax,
see the cross-referenced information.
Alert Displays an alert box (see “Creating alert messages” on page 543).
Alert with Title Displays an alert box with a user-defined title (see “Creating alert messages” on page 543).
Specify Named Destination Marks the location that will be displayed when either a Jump to Named Destination or
an Open Document command is executed (see “Creating links to specific topics” on page 537).
Jump to Named Destination Displays the location in the current or a different document that contains a corre-
sponding destination link (see “Creating links to specific topics” on page 537). The page is displayed in the
active window.
Jump to Named Destination & Fit to Page Displays the location in the current or a different document that contains
a corresponding destination link and then resizes the window to fit the document page displayed (see “Creating links
to specific topics” on page 537).
Jump to First Page Displays the first page of the current or a different document (see “Creating links to pages” on
page 538). The page is displayed in the active window.
Jump to Last Page Displays the last page of the current or a different document (see “Creating links to pages” on
page 538). The page is displayed in the active window.
Go to URL Launches browser and displays the specified Web page (see “Creating links to Web pages” on page 539).
Jump to Page Number Displays a specific page in the current or a different document (see “Creating links to pages”
on page 538). The page is displayed in the active window.
Jump to Previous Page Displays the previous page of the current document (see “Creating links to pages” on
page 538). The page is displayed in the active window.
Jump to Next Page Displays the next page of the current document (see “Creating links to pages” on page 538). The
page is displayed in the active window.
Jump Back Displays the last location the reader viewed (see “Creating a way to retrace steps” on page 540). The page
is displayed in the active window.
Jump Back & Fit to Page Displays the last location the reader viewed and then resizes the window to fit the
document page displayed (see “Creating a way to retrace steps” on page 540).
Open Document Displays the page that contains the corresponding Specify Named Destination command (see
“Creating links to specific topics” on page 537). In Windows, the page appears in a new window (leaving the active
window open) only if the page is in a different document. In UNIX, the page always appears in a different window.
Open Document & Fit to Page Displays the page that contains the corresponding Specify Named Destination
command and then resizes the new window to fit the document page displayed (see “Creating links to specific topics”
on page 537). In Windows, the page appears in a new window (leaving the active window open) only if the page is
in a different document. In UNIX, the page always appears in a different window.
Open Document as New Opens a document as a new, unnamed document (see “Creating links to new documents”
on page 539). The document is displayed in a new window, leaving the active window open.
Open Document at First/Last Page Displays the first or last page (see “Creating links to pages” on page 538). In
Windows, the page appears in a new window (leaving the active window open) only if the page is in a different
document. In UNIX, the page always appears in a different window.

ADOBE FRAMEMAKER 8
User Guide
535
Open Document at Page Number Displays a specific page (see “Creating links to pages” on page 538). In Windows,
the page appears in a new window (leaving the active window open) only if the page is in a different document. In
UNIX, the page always appears in a different window.
Popup Menu Displays a pop-up menu of items, each containing a hypertext command (see “Creating pop-up
menus” on page 541).
Button Matrix Allows the user to choose from a matrix of items that execute hypertext commands (see “Creating
button matrices” on page 540).
Message Client Communicates with other applications (see “Creating ways to start or open” on page 544). Also
creates a link to a URL (Universal Resource Locator) on the World Wide Web or an intranet for use in documents
that are later converted to HTML (see “Setting up links to URLs” on page 558).
Close current window Removes the active window from the screen (see “Creating ways to close or exit” on
page 546).
Close All Hypertext Windows Removes all view-only windows from the screen (see “Creating ways to close or exit”
on page 546).
Exit Application Exits the FrameMaker application (see “Creating ways to close or exit” on page 546).
About pathnames in commands
Many hypertext commands can contain a pathname. In a pathname, folder levels are separated by a slash (/), even
in Windows. In UNIX, the pathname can include environment variables, such as $HOME, to indicate the reader’s
home directory.
If your hypertext documents will be used on several platforms, use filenames that are valid on all the platforms. For
information on file naming requirements on different platforms, see the online manual Working on
Multiple Platforms.
Note: A hypertext command that contains a single-character filename may not work.
Relative pathnames FrameMaker searches for a relative pathname beginning in the folder that contains the current
document. To go up one folder level, use two periods (..). For example, suppose a hypertext command refers to a
document named Trombone that is stored in a folder named Brass. If the Brass folder is in the same folder as the
current document, use the pathname Brass/Trombone.
If the Brass folder is at the same level as the folder that contains the current document, use ../Brass/Trombone.
Absolute pathnames FrameMaker searches for an absolute pathname beginning at the top of the file system.
In Windows, the absolute pathname begins with the drive specifier, a colon, and a slash. In UNIX, an absolute
pathname begins with a slash.
For example, suppose a hypertext command refers to a document named Trombone in a folder named Brass. In
Windows, if the Brass folder is at the top level of drive E, use the pathname E:/Brass/Trombone. In UNIX, if the Brass
folder is at the top of the file system, use the pathname /Brass/Trombone.
Absolute pathnames are not recognized across platforms, so you should always use relative pathnames if your
hypertext documents will be viewed on multiple platforms.

ADOBE FRAMEMAKER 8
User Guide
536
Hypertext commands in HTML and PDF documents
When you convert a document to HTML or PDF, some FrameMaker hypertext commands work in the converted
files in the same way that they work in view-only FrameMaker documents, while others do not. The differences are
described in the following table.
Creating hypertext links
You can create links to information in different locations in the same document or in different documents. For
example, you can create links that jump to specific topics or pages, and you can use FrameMaker cross-references as
links. You can also allow your readers to retrace their jumps.
If your documents will be distributed in PDF or HTML format, some of the commands described in this section will
not work. For details, see “Hypertext commands in HTML and PDF documents” on page 536.
Command PDF HTML
Alert, Alert with Title Appears as a note, with no title Does not work
Jump to Named Destination Works as described in this chapter Works as described in this
chapter
Jump to Named Destination & Fit to Page Works as described in this chapter, but
doesn’t fit to page
Works as described in this
chapter, but doesn’t fit to page
Jump to First Page, Jump to Last Page, Jump to Page
Number, Jump to Previous Page, Jump to Next Page
Works as described in this chapter Does not work
Jump Back, Jump Back & Fit to Page Does not work Does not work
Open Document Works as described in this chapter Works as described in this
chapter
Open Document & Fit to Page, Open Document as New,
Open Document at First Page, Open Document at Last
Page, Open Document at Page Number
Works as described in this chapter, but
doesn’t fit to page or open a separate
window
Works as described in this
chapter, but doesn’t fit to page
or open a separate window
Pop-up Menu Does not work Does not work
Button Matrix Does not work Works as described in this
chapter, if the text frame
containing the command is
in an anchored frame in the
main text flow
Message URL Works when PDF is opened in browser;
however, the link may not work in
Acrobat
Works as described in this
chapter
Message Client Does not work Does not work
Close current window, Close All Hypertext Windows, Exit
Application
Does not work Does not work
ADOBE FRAMEMAKER 8
User Guide
537
Creating links to specific topics
You can create a link from one location in a hypertext document to a topic in another location. You use one
command to specify the topic you want to display, and you use another to mark the spot on the linked page.
A. Specify the topic to display. B. Mark the topic.
FrameMaker can display the linked information in the same window or in a new window (leaving the active
window open).
To identify a linked topic:
❖Follow the instructions in “Inserting hypertext commands” on page 532 to insert a Specify Named Destination
command. This command uses the following syntax:
newlink linkname
In this example, linkname is a word or phrase that identifies the destination. A linkname with a trailing space differs
from a linkname without a trailing space. Also, the linkname is case-sensitive; French Horn is not the same as french
horn.
A. Jump to Named Destination command: gotolink trombone B. Specify Named Destination command: newlink trombone
Note: If you omit the Specify Named Destination command, the Jump to Named Destination and Open Document
commands do nothing when clicked unless they refer to a filename. In that case, the other file will open, showing the
first page.
To create a link to a specific topic:
❖Follow the instructions in “Inserting hypertext commands” on page 532 to insert one of the following
hypertext commands:
•To display the linked information in the same window, insert a Jump to Named Destination command.
This command uses the following syntax:
gotolink filename:linkname
AB
A B

ADOBE FRAMEMAKER 8
User Guide
538
•To display the linked information in a different window, insert an Open Document command. (In Windows, the
information appears in a new window only if it’s in a different document.) This command uses the following
syntax:
openlink filename:linkname
In this example, filename is the name of the document you want to display, and linkname is the descriptive word or
phrase that you used in the corresponding Specify Named Destination command.
If the linked information is in a document whose page size differs from the current document’s, you can display the
information in a window that is resized to fit the page. To do this, use the Jump to Named Destination & Fit to
Page command or the Open Document & Fit to Page command.
Creating links to pages
You can create a link to the first, last, previous, or next page in the same document or in a different document.
You can also create a link to a specific page number.
You can create navigation aids for your readers by creating links to the next and previous pages on the master pages
of a document.
To create a link to a page:
❖Follow the instructions in “Inserting hypertext commands” on page 532 to insert one of the following
hypertext commands:
•To display the linked page in the same window, insert a Jump to Page Number, Jump to First Page, or Jump to Last
Page command. The commands use the following syntax:
gotopage filename:pagenumber
gotopage filename:firstpage
gotopage filename:lastpage
•To display the linked page in a different window, insert an Open Document at Page Number, Open Document at
First Page, or Open Document at Last Page command. (In Windows, the page appears in a new window only if
the page is in a different document.) These commands use the following syntax:
openpage filename:pagenumber
openpage filename:firstpage
openpage filename:lastpage
Note: When you insert a hypertext command to display a specific page number, use the actual page number in the
document. For example, if the destination document MyDoc uses Roman numerals for page numbers and begins on page
v, the command to display the third page would be openpage MyDoc:vii.
•To display the next or previous page of the current document, insert a Jump to Previous Page or Jump to Next Page
command. (If the first page of the document is already displayed, Jump to Previous Page has no effect; if the last
page of the document is displayed, Jump to Next Page has no effect.) These commands use the following syntax:
previouspage
nextpage

ADOBE FRAMEMAKER 8
User Guide
539
In these examples, filename is the name of the document you want to display, and pagenumber is the number of the
page you want to display. When the page you want to display is in the current document, don’t include the filename
and colon. The following table contains examples of the commands.
Creating links to new documents
You can create a link to another document and have FrameMaker open the document in another window as a new,
unnamed document. For example, you can create an online system for your site’s document templates.
To create a link to a new document:
❖Follow the instructions in “Inserting hypertext commands” on page 532 to insert an Open Document as New
command. This command uses the following syntax:
opennew filename
In this example, filename is the name of the document you want to use as a template.
Creating links to Web pages
You can create a link to a Web page on the Internet or a company intranet.
To create a link to a Web page:
❖Follow the instructions in “Inserting hypertext commands” on page 532 to insert a Go to URL command.
This command uses the following syntax:
message URL address
In this example, address is the name of the URL you want to jump to, such as http://www.adobe.com.
Creating links using cross-references
You use FrameMaker cross-references as hypertext links. When the reader clicks a cross-reference in a view-only
document, FrameMaker jumps to the source information. If a cross-reference is present in the same text area as a
hypertext command, the cross-reference takes precedence over the hypertext command.
You can use MIF to specify that cross-references should not be active in your hypertext document. You can also
specify that clicking an active cross-reference always causes FrameMaker to open a new window. For information on
using MIF to customize hypertext documents, see the online manual MIF Reference.
Highlighting markers in view-only documents
When you click an active area in a view-only document, FrameMaker doesn’t usually select the cross-reference
marker or the hypertext marker that identifies the linked information. (If the document is in FrameMaker
Document format, the marker is selected.) You can use MIF to specify that the markers should be selected.
For information on using MIF to customize hypertext documents, see the online manual MIF Reference.
Command Effect
gotopage 8 Displays, in the same window, page 8 of the current document
openpage Trombone:8 Displays, in a different window, page 8 of the document Trombone in the
current folder
ADOBE FRAMEMAKER 8
User Guide
540
Creating a way to retrace steps
You can create hypertext commands that allow readers to retrace the links they followed in a document window.
(FrameMaker maintains a stack of the last 255 links in each window.) For example, you might use these commands
on master pages to create a navigation aid that lets readers retrace their steps (for example, a “Go Back” button).
To create a way to retrace steps:
❖Follow the instructions in “Inserting hypertext commands” on page 532 to insert a Jump Back command.
This command uses the following syntax:
previouslink filename:linkname
In this example, filename and linkname define the location FrameMaker should display when the stack is empty. If
the stack is empty and if you haven’t provided a filename and linkname, FrameMaker leaves the current
page displayed.
If the linked information is in a document whose page size differs from the current document’s, you can display the
information in a window that is resized to fit the page. To do this, use the Jump Back & Fit to Page command.
Creating button matrices
You can create a button matrix of equal-sized cells that correspond to hypertext commands. When a reader clicks a
cell in a hypertext document, FrameMaker highlights the cell and executes the corresponding hypertext command.
For example, the button matrix could be a group of musical instruments.
A button matrix with three cells
If the reader clicks one of the instruments, FrameMaker highlights the area around the instrument and executes the
corresponding hypertext command.
To create a button matrix:
1Put the graphic in your document. The graphic should be appropriate for setting up as a matrix of
equal-sized cells.
2Prepare the graphic to be an active area by drawing a single text frame around the entire graphic (see “Preparing
graphics” on page 531).
3Click in the text frame to place the insertion point.
4Follow the instructions in “Inserting hypertext commands” on page 532 to insert a Button Matrix command in
the text frame (leaving the frame otherwise empty). This command uses the following syntax:
matrix rows columns flowname
ADOBE FRAMEMAKER 8
User Guide
541
In this example, rows and columns are the numbers of rows and columns in the matrix, and flowname is the flow tag
of a text frame you’ll create on a reference page. The flowname cannot contain embedded spaces.
For the example shown earlier, with two rows and three columns, and with the corresponding hypertext commands
in a reference page text frame whose flow tag is InstrumentTypes, the command would be as follows:
matrix 1 3 InstrumentTypes
5Draw a text frame on a reference page and assign a flow tag that matches the flowname in the Button Matrix
command. For information on using the Text Frame tool to draw a text frame, see “Using text with graphics” on
page 323. For information on assigning flow tags, see “Controlling the flow of text” on page 400.
6Click in the text frame to place the insertion point, and then type one hypertext command in each paragraph in
the text frame. The commands should correspond to the items in the first row of the matrix, from left to
right, followed by the second row, and so on. Each command must fit on one line. You can resize the text frame
if necessary.
The following illustration shows possible contents of the text frame for the example discussed at the beginning of
this section.
Text frame on reference page
Note: You can use the Hypertext dialog box as an aid in identifying the syntax of the commands you need to type, but
type the commands directly in the text frame. Don’t use the Hypertext dialog box to insert a hypertext marker.
Creating pop-up menus
Your hypertext document can display a pop-up menu from which readers can choose an item that links to related
information. The pop-up menu can, in turn, contain one level of submenus.
Hypertext pop-up menu and submenu
To create a pop-up menu of hypertext commands:
1Create the graphic button that the reader will click to display the pop-up menu.
2Prepare the graphic to be an active area by drawing a single text frame around the entire graphic (see “Preparing
graphics” on page 531).

ADOBE FRAMEMAKER 8
User Guide
542
3Follow the instructions in “Inserting hypertext commands” on page 532 to insert a Popup Menu command in the
text frame (leaving the frame otherwise empty). This command uses the following syntax:
popup flowname
In this example, flowname is the flow tag of a text frame you’ll create on a reference page. The flowname cannot
contain embedded spaces.
4Draw a text frame on a reference page and assign a flow tag that matches the flowname in the Popup Menu
command. For information on using the Text Frame tool to draw a text frame, see “Using text with graphics” on
page 323. For information on assigning flow tags, see “Controlling the flow of text” on page 400.
5Click in the text frame to place the insertion point, type the menu name in the flow, and press Return. (The first
item in the text frame will always be considered as the title of the pop-up menu.) The menu name appears in UNIX,
but not in Windows.
6Type a menu item in each subsequent paragraph. The contents of each paragraph will appear as a command in
the pop-up menu. If necessary, widen the text frame so that each item fits on a single line.
7Follow the instructions in “Creating hypertext links” on page 536 to insert a hypertext command in each line
except the line that contains the menu name. For example, you can use a Jump to Named Destination command to
display related information, an Alert command to provide a short message to your readers, or a Popup Menu
command to display a submenu of items.
The text frame for the pop-up menu described at the beginning of this section might look like the following.
Text frame for sample hypertext pop-up menu
Note: You won’t be able to open the pop-up menu until you insert at least one hypertext marker on the reference page.
To create a pop-up submenu of hypertext commands:
1Locate the text frame on the reference page that describes the pop-up menu for which you want to create
asubmenu.
2Follow the instructions in “Inserting hypertext commands” on page 532 to insert a Popup Menu command in the
line for which you want the submenu to appear. This command uses the following syntax:
popup flowname
In this example, flowname is the flow tag of a text frame you’ll create on a reference page. The flowname cannot
contain embedded spaces.
3Create the submenu by following steps 4 through 7 in “Hypertext commands” on page 534. However, you can’t
use a Pop-up Menu command in the submenu, because you can’t create a submenu within a submenu.

ADOBE FRAMEMAKER 8
User Guide
543
The text frame for the submenu shown at the beginning of this section would have a flow tag of Seals. It might look
like the following.
Text frame for sample hypertext pop-up submenu
Creating alert messages
You can create a hypertext command to display an alert box that contains a title and a message. If you don’t specify
a title in the command, the alert box contains the default title “FrameMaker—Alert”.
You can also specify a default title for all hypertext alert boxes in a document.
To create an alert message:
❖Follow the instructions in “Inserting hypertext commands” on page 532 to insert one of the following
hypertext commands:
•To display a hypertext alert box with the default title, insert an Alert command. This command uses the following
syntax:
alert message
•To display an alert box with a title other than the default, insert an Alert with Title command. This command uses
the following syntax:
alerttitle title:message
In this example, title is the title of the alert box and message is the text you want to display in the alert box. The total
number of characters in title and message cannot exceed 243 characters. (Each character in a Japanese font counts as
two characters.)
For example, the following command displays an alert box whose title is “Unavailable” and whose alert message is
“This document is currently under construction.”
alertitle Unavailable:This document is currently under construction
To specify a default title for alerts in a document:
1Draw a text frame on a reference page and assign the frame a flow tag of AlertTitle. For information on using the
Text Frame tool to draw a text frame, see “Using text with graphics” on page 323. For information on assigning flow
tags, see “Controlling the flow of text” on page 400.
2Type the default title in the text frame. For example, if “Not Available Online” appears in the flow, that title, not
“FrameMaker—Alert,” appears in the title bar of any alert box created with the Alert command.

ADOBE FRAMEMAKER 8
User Guide
544
The default title will also appear in the title bar of any alert box created with the Alert with Title command in the
following form, without a title:
alerttitle :message
Creating ways to start or open
You can use hypertext commands to start other applications. For example, a reader can start a database application
from a view-only document to retrieve and display data.
You can also use hypertext commands to accomplish the following tasks:
•(UNIX) You can execute UNIX commands. For example, a reader can click an active area to remove backup files.
You can also send messages to FrameMaker clients by using the Application Program Interface (API). For details,
see the FDK Programmer’s Guide, which is included in the Frame® Developer’s Kit.
In addition, you can create hypertext commands that link to a Universal Resource Locator (URL) when the
document is converted to Hypertext Markup Language (HTML). For information, see “Creating links to Web pages”
on page 539.
To create a way to start another application in Windows:
❖Follow the instructions in “Inserting hypertext commands” on page 532 to insert a Message Client. This command
uses the following syntax:
message system application path,windowstate
message winexec application path,windowstate
In these examples, application is the application filename, path is an optional command-line parameter, and window-
state specifies the state of the window that is opened. The possible windowstate values are as follows.
State Meaning
SW_HIDE Hides the window and activates another window
SW_MAXIMIZE Maximizes the specified window
SW_MINIMIZE Minimizes the specified window and activates the next window in the
Alt+Tab order
SW_RESTORE Activates and displays the window (If the window is minimized or
maximized, Windows restores it to its original size and position.)
SW_SHOW Activates the window and displays it in its current size and position
SW_SHOWDEFAULT Sets the show state based on the SW_ flag specified in the STARTU-
PINFO structure passed to the CreateProcess function by the program
that started the application
SW_SHOWMAXIMIZED Activates the window and displays it as a maximized window
SW_SHOWMINIMIZED Activates the window and displays it as a minimized window
SW_SHOWMINNOACTIVE Displays the window as a minimized window (The active window
remains active.)

ADOBE FRAMEMAKER 8
User Guide
545
If you omit the windowstate value, the window state is set to SW_SHOWNORMAL. For more information on
window states, see the documentation for the Windows software development kit.
For example, to start PaintBrush and open the Ship.pcx file on drive C in a minimized window, you would use the
following command:
message system pbrush.exe C:/Ship.pcx, SW_MINIMIZE
For an explanation of the use of the forward slash rather than the backslash, see “About pathnames in commands”
on page 535.
To create a way to open a file or another application:
❖Follow the instructions in “Inserting hypertext commands” on page 532 to insert a Message Client command. This
command uses the following syntax:
message openfile pathname
In this example, pathname is the path to the file, application, or AppleScript script.
For example, to start the application that created the Tuba.eps file (located in the Graphics folder on the drive named
HardDrive) and to open the file, use the following command:
message openfile /HardDrive/Graphics/Tuba.eps
To run the DocReport script (located in the Scripts folder on the drive named HardDrive), use the
following command:
message openfile /HardDrive/Scripts/DocReport
For an explanation of the use of the forward slash in pathnames, see “About pathnames in commands” on page 535.
To create a way to execute commands in UNIX:
❖Follow the instructions in “Inserting hypertext commands” on page 532 to insert a Message Client command. This
command uses the following syntax:
message system command
In this example, command is the text of any UNIX command you can type in a UNIX window.
For example, the following command lists the contents of the folder in which the document resides when the reader
clicks an active area that contains the command
message system ls ~
SW_SHOWNA Displays the window in its current state (The active window remains
active.)
SW_SHOWNOACTIVATE Displays a window in its most recent size and position (The active
window remains active.)
SW_SHOWNORMAL Activates and displays a window (If the window is minimized or maxi-
mized, Windows restores it to its original size and position.)
State Meaning

ADOBE FRAMEMAKER 8
User Guide
546
In this example, FrameMaker passes the command to sh(1) for execution; stdout and stderr are redirected to your
UNIX window. FrameMaker waits for the command, script, or program to finish before continuing.
You can use the environment variables FMDOCDIR and FMDOCNAME with the message system command.
When the reader clicks an active area that contains the command, FMDOCDIR is set to the folder that contains
the current document and FMDOCNAME is set to the name of the current document.
To create a way to send messages to an application that is already running in UNIX:
❖Follow the instructions in “Inserting hypertext commands” on page 532 to insert a Message Client command. This
command uses the following syntax:
message application parameters
In this example, application is the name of the application, and parameters are any parameters to be passed to the
application. For example, the following command causes an API client named ProductionCheck to process all files
in the Guide folder:
message ProductionCheck Guide/*
Creating ways to close or exit
The hypertext commands for closing files and exiting FrameMaker work in the same way as the commands on the
File menu.
If a reader executes a command to close a file that contains unsaved changes, FrameMaker prompts the reader to
save the document before closing.
To create a way to close documents:
❖Follow the instructions in “Inserting hypertext commands” on page 532 to insert one of the following
hypertext commands:
•To create a way to close the current view-only document, insert a Close active window command. This command
uses the following syntax:
quit
•To create a way to close all open view-only documents, insert a Close All Hypertext Windows command. The
Close All Hypertext Windows command also closes view-only documents that have already been closed to an
icon. This command uses the following syntax:
quitall
To create a way to exit FrameMaker:
❖Follow the instructions in “Inserting hypertext commands” on page 532 to insert an Exit command. This
command uses the following syntax:
exit

ADOBE FRAMEMAKER 8
User Guide
547
Testing and troubleshooting hypertext documents
After writing the document and inserting hypertext commands, test the commands. To speed up your testing of
hypertext commands, you can execute commands without first changing a document to View Only format and you
can force the destination of a hypertext jump to appear in a separate window.
You can also have FrameMaker validate all the commands in a document.
Note: In UNIX, to switch several documents at a time between View Only format and Document format, use fmbatch
(see “Starting fmbatch” on page 631).
To execute a hypertext command without changing the document to View Only format:
❖Do one of the following:
•(Windows) Control-Alt-click an active area.
•(UNIX) Control-right-click an active area.
FrameMaker executes the hypertext command as if the document were view-only.
To force the linked destination to appear in a different window:
❖Do one of the following:
•(Windows) If the document is view-only, Shift-click an active area. Otherwise, Control-Alt-Shift-click an
active area.
•(UNIX) If the document is view-only, Shift-click an active area. Otherwise, Shift-Control-right-click an
active area.
To validate all the commands in one or more documents:
1Make the appropriate document window or book window active. If a book window is active, select the documents
you want to affect.
2Press Esc v h. FrameMaker checks each hypertext command. For example, if a command refers to another
document, FrameMaker attempts to open the document; and if the command refers to a named destination,
FrameMaker verifies that the destination exists. If any problems are found, an alert message describes the first error
in the document. In a book, all errors are written in the Book Error Log.
Generating a list or index of hypertext markers
You can quickly check the text of hypertext commands by generating a list or index of hypertext markers. The
generated list will contain the text of all hypertext markers inserted on body pages and their page numbers.
To generate a list or index of markers:
❖Use the Special > List of > Markers or Special > Index of > Markers command. For information on generating
from a document, see “Generating TOCs and other lists” on page 421 and “Generating indexes” on page 432.
For information on generating from a book, see “Adding files to books” on page 463 and “Updating books” on
page 473.

ADOBE FRAMEMAKER 8
User Guide
548
Troubleshooting hypertext documents
Errors in hypertext commands or in their placement in the document, or formatting errors in active areas can cause
problems with the behavior of the commands. For example, an incorrect linkname will prevent a hypertext
command from being executed correctly.
This section describes some common hypertext problems and possible solutions.
Clicking an active area has no effect Check for the following possible problems:
•The document might not be in View Only format.
•If the active area is highlighted correctly when you click, a command may contain a linkname that doesn’t match
the corresponding link at the destination.
•If the active area isn’t highlighted when you click, the marker that contains the hypertext command may not be of
type Hypertext.
•If the active area is over a graphic, the text frame containing the hypertext marker may not be in front of
the graphic.
The jump goes to the wrong page The command may contain a correct filename but an incorrect linkname or an
invalid page number.
Only part of the active area is highlighted Check for the following possible problems:
•If you’re trying to make a range of text active, the text may contain an extra hypertext marker or the character
format may change within the range of text.
•If you’re trying to make an entire empty text frame active, the frame may contain an extra empty paragraph, or
extra characters or markers.
Items are missing from a pop-up menu The hypertext commands for missing menu items are incorrect. If the
pop-up menu does not appear, no commands are correct.
Adding hypertext links to generated files
When you generate an index or a list such as a table of contents, FrameMaker can insert hypertext links in the
generated file. These links can greatly enhance the usefulness of an online index or table of contents. When you click
a topic or page number in the generated file, the appropriate page in the linked document is displayed.
You can use generated hypertext documents for the following purposes:
•To distribute a generated table of contents or index in View Only format as a navigation tool for your
online documents.
•To debug documents. (For example, when creating an index, you can generate the index with hypertext links and
then quickly fix index marker errors by jumping to the exact locations of the markers.)
Generating a list of hypertext markers produces a list of markers drawn only from body pages. Hypertext markers
on master pages are not included.
You can activate the hypertext commands in a generated document without changing the document to View Only
format (see “Testing and troubleshooting hypertext documents” on page 547).

ADOBE FRAMEMAKER 8
User Guide
549
To add hypertext links to a generated file:
❖Do one of the following:
•From an individual FrameMaker document, select Create Hypertext Links when you use the File > Utilities >
Compare Documents command.
For more information, see “Comparing document versions” on page 484.
•When adding a generated file to a book, turn on Create Hypertext Links in the Set Up dialog box. If the generated
file has already been created, select the generated file in the book window and choose the appropriate Set Up
command from the Edit menu (such as Set Up Table of Contents).
For complete information on generating lists and indexes, see “Generating TOCs and other lists” on page 421 and
“Generating indexes” on page 432.
Adding linked thumbtabs to indexes
You can make a generated online index easier to navigate by adding thumbtabs. Readers click on a thumbtab letter
to display the page in the index that contains entries starting with that letter.
To add thumbtabs to a generated index:
1Generate the index with hypertext links. See “Adding hypertext links to generated files” on page 548.
2In the index, choose View > Master pages.
3On a master page, use the Text Line tool to create the thumbtab letters and then draw a text frame over each
thumbtab letter (see “Using text with graphics” on page 323).
4Insert a Jump to Named Destination command in the text frame for each thumbtab letter (see “Creating links to
specific topics” on page 537). For example, in the text frame over the thumbtab letter A, insert a Jump to Named
Destination command with the syntax gotolink A. (Each group title in the index already contains a corresponding
Specify Named Destination command as a result of generating the index with hypertext links.)
If the index contains a collapsed group title, such as P–R, insert a Jump to Named Destination command with the
same syntax for each of the thumbtab letters in the range. For example, insert gotolink P-R in the three text frames
for P, Q, and R.
5If the index uses more than one master page, copy the thumbtabs to the other master pages.
6Save the index in View Only format.
Controlling how source documents are displayed
When you click an active area in a generated hypertext document, FrameMaker opens a new window and
displays the correct page in the linked document. The linked marker or paragraph is highlighted and centered in the
window. You can change the display of the linked document—for example, to display the document in the active
window.
To control how a linked document is displayed:
1Generate the hypertext document (see “Adding hypertext links to generated files” on page 548).
2In the generated file, choose View > Reference Pages and display the reference page that contains the special flow
for the generated file.
ADOBE FRAMEMAKER 8
User Guide
550
The flow tag of the special flow is the same as the document’s suffix. For example, the special flow for a table of
contents is tagged TOC, and the special flow for an index is tagged IX. To determine a flow’s tag, click in the text
frame and look in the Tag area of the status bar.
Your flow tags are displayed in the tag area of the status bar.
3In the special flow, find the paragraph that controls how the linked document is displayed.
In a table of contents, the paragraph’s tag is ActiveTOC; in an index, it’s named ActiveIX. The paragraph will look
something like this:
openObjectId <$relfilename>:<$ObjectType> <$ObjectId>
To determine a paragraph’s tag, click in the paragraph and look in the Tag area of the status bar.
4Edit the paragraph so that it contains the display command you want.
For a list of the commands you can use, see “Display commands for generated documents” on page 550. In addition
to the commands in the list, you can use the Message Client command to send messages to applications that use the
Application Program Interface (API). For details, see the FDK Programmer’s Guide, which is included in the Frame
Developer’s Kit.
5Save the generated file, and then regenerate it.
Display commands for generated documents
When the reader clicks an active area in a generated hypertext document, FrameMaker displays the correct page in
the linked document. The following table lists some of the hypertext commands you can use to control how the
linked document is displayed. You should type the commands exactly as shown. Use the <$relfilename> building
block to create a relative pathname from the generated file to the linked document, and use <$fullfilename> for a full
pathname. (The following examples show only the <$relfilename> building block.)
To display Type
The linked marker or paragraph centered in the active
window
gotoObjectId <$relfilename>:<$ObjectType> <$ObjectId>
The linked marker or paragraph centered in the active
window resized to fit the page
gotoObjectIdFitWin <$relfilename>:<$ObjectType> <$ObjectId>
The linked marker or paragraph centered in a new
window
openObjectId <$relfilename>:<$ObjectType> <$ObjectId>
The linked marker or paragraph centered in a new
window resized to fit the page
openObjectIdFitWin <$relfilename>:<$ObjectType> <$ObjectId>
The page containing the linked marker or paragraph,
with nothing highlighted, in the active window
gotopage <$relfilename>:<$pagenumonly>
The page containing the linked marker or paragraph,
with nothing highlighted, in a new window
openpage <$relfilename>:<$pagenumonly>
An alert that displays the filename of the linked
document
alert <$relfilename>

ADOBE FRAMEMAKER 8
User Guide
551
Overriding the generated file’s display command
You can specify how a specific document is displayed, overriding the display command contained in the ActiveTOC
or ActiveIX paragraph in the generated file. For example, you may want a generated index that references several
files, including a glossary file, to display the glossary in one window and all the other files in another window.
To override the display command for a linked document:
1Draw a text frame on a reference page in the linked document, and assign the frame the flow tag HypertextLinks.
For information on using the Text Frame tool to draw a text frame, see “Using text with graphics” on page 323. For
information on assigning flow tags, see “Changing flow tags and Autoconnect” on page 400.
2Do one of the following:
•To display the document in the same window, type gotoObjectId
•To display the document in a different window, type openObjectId
3Save the document and regenerate (see “Generating TOCs and other lists” on page 421 and “Generating indexes”
on page 432). When you click in the generated file, the linked document will be displayed using the command
specified in the HypertextLinks flow, rather than using the command in the ActiveTOC or ActiveIX paragraph.
Incorporating generated files into an online system
If you’re using a generated hypertext document as a debugging tool, the document is ready to use when you generate
it. If, however, the generated file is going to be part of a hypertext online system, you may want to do the following
before distributing the documents to your readers in View Only format:
•Set up links from the documents back to the generated file. You can use any of the hypertext commands. For
example, you can create an Index or Table of Contents button that jumps back to the generated file.
•Add active areas to the master pages of documents for navigating through the online system. For example, you can
create buttons for paging forward and backward.
•Add links to other parts of the online system in the source documents and in generated files.
Working in view-only documents and books
You distribute online documents and books in View Only format. Readers can view, search, copy, and print—but not
edit—a view-only document or book using FrameMaker.
Readers will see the contents of a view-only document exactly as it appeared when you made it view-only. Before
changing a document to View Only format, use the View menu to turn off the display of the grid, the ruler, text
symbols, and borders. To display a view-only document without the menu bar or scroll bars, see the online manual MIF
Reference.
To save a document in View Only format:
1Choose File > Save As.
2Specify View Only format and click Save.
To switch several documents at a time between View Only format and Document format, select the files in the book
and press Esc Shift+f l (lowercase L) k. Choose the check box, and click Continue.

ADOBE FRAMEMAKER 8
User Guide
552
To save a book in View Only format:
1In the book window, choose File > Save Book As.
2Specify View Only format and click Save.
When a view-only book is open, you can click and to toggle between displaying filenames and text.
To change a document to View Only format without saving it:
❖Do one of the following:
•Choose Special > Hypertext and click Make View-Only.
•Press Esc Shift+f l (lowercase L) k. This keystroke also works for a book.
To change a view-only document to Document format:
❖Do one of the following:
•If the Hypertext dialog box is open, click Make Editable.
•Press Esc Shift+f l (lowercase L) k. This keystroke also works for a book.
To make a view-only book editable or an editable book view-only:
1In the book window, select any documents that you want to change from view-only to Document format.
2Press Esc Shift+f l (lowercase L)k.
3To make the selected files editable, click the check box. To make the selected files view-only, deselect the
check box.
4Click Continue.
Navigating to specific pages
You can display pages in view-only documents by following links in the documents, by using controls in the
document window, or by using menu commands.
To navigate to specific pages in view-only documents:
❖Do one of the following:
•Click any active area whose hypertext command jumps to a different location.
•Click the page buttons in the status bar.
•Use the scroll bar or the Page Up and Page Down keys.
•Use the commands on the Navigation menu.
•Right-click anywhere in the document window and choose a command from the context menu.
If you customized your view-only window environment as described in the online manual MIF Reference, some
viewing methods may not be available.
Jumping backward or forward
You can jump back to previous links and then jump forward again.

ADOBE FRAMEMAKER 8
User Guide
553
To jump backward:
❖Do one of the following:
•Click an active area with a Jump Back or Jump Back & Fit to Page command.
•Choose Navigation > Go Back.
•Right-click anywhere in the document window and choose Go Back from the context menu.
To jump for ward:
❖Press Esc v Shift+n. You can jump forward only if you have previously jumped backward.
Opening a new window
If a link is set to display a document in the active window, you can force FrameMaker to open a new window instead.
To open a new window when following a link:
❖Shift-click an active area. In Windows, FrameMaker doesn’t open a new window unless the link is to a
different document.
Using menu commands
Some FrameMaker commands are available in view-only documents. For example, you can copy text and
graphics from a view-only document and paste them in an editable document, search for text and paragraph tags,
and print.
View-only document windows use four FrameMaker menus: File, Edit, Navigation, and Windows. In order to use
some menu commands, you have to place an insertion point. Other menu commands, such as Edit > Copy, require
you to select items. View-only book windows use three FrameMaker menus: File, Edit, and Windows.
If you customized your view-only window environment, some commands may not be available. For information on
disabling commands, see the online manual MIF Reference.
To place the insertion point or to select an object in a view-only document:
❖Control-click.
To select in a view-only document:
❖Hold down Control and select text as you would in an editable document.
Working with FluidView format
A document in FluidView™ format appears as one continuous page, without headers, footers, or margins. When you
resize the document window, the text is reformatted to fit within the width of the new window.
In most cases, you work with FluidView documents just as you work with view-only documents. For example, you
can click hypertext links to navigate within and between documents. A FluidView document differs from a view-
only document in the following ways:
•Because the document appears on-screen as one continuous page, clicking the Page Up or Page Down button on
the bottom of the document window displays the previous or next screenful of text instead of the previous or
next page.

ADOBE FRAMEMAKER 8
User Guide
554
•The printed version of a FluidView document may not match what you see on the screen. You can use headers and
footers, multiple columns, and other page layout options to optimize the printed appearance of the document.
To change a document to FluidView format:
1Click in the text flow that you want to display in FluidView format. Only one text flow in a document can appear
in FluidView format at a time.
2Press Esc Shift+v Shift+f. This hides the headers, footers, margins, page breaks, and any background graphics;
removes multicolumn formatting; and makes the document view-only.
3Close the document, and when an alert message prompts you to save the document, click Save.
When you save the document in FluidView format and then reopen it, the main text flow (usually tagged A)
will always appear, even if a different text flow was visible when you changed the document to FluidView
format. However, when you click an active area that points to another flow, the new flow appears in the
FluidView document.
To change a FluidView document back to Document format:
❖Press Esc Shift+f l (lowercase L)k.
To restore margins, headers, and footers to a FluidView document but keep it view-only:
❖Press Esc Shift+v Shift+f.
Creating documents for use in FluidView format
Keep in mind the following points as you create FluidView documents:
•When users open a FluidView document that contains more than one text flow, the main flow always appears in
the document window. However, you can create links to other flows in the document. When a user clicks an active
area that points to another flow, the new flow appears in the FluidView document.
•Although a FluidView document may be as long as any FrameMaker document, try to keep the length of each
document under 200 inches. A page break will appear every 200 inches, and footnotes and graphic frames
anchored at the bottom of a column will appear at these page breaks instead of at the end of the document.
•Set anchored frames in your document to one of three anchoring positions: Below Current Line, At Insertion
Point, or Run into Paragraph. Frames anchored at positions other than these may produce unexpected results.
•You can change the view-only window display or selectively disable menu commands. These expert controls are
available through a Maker Interchange Format (MIF) file. For information on using MIF to set up the view-only
window, see the online manual MIF Reference.
Changing side-head area setup
You can use side heads in one format and not in the other. For example, you can display headings in the side-head
area in FluidView and in the body-text area in the printed copy.
To set up different side-head areas in Document format and FluidView format:
1Use Format > Page Layout > Column Layout to turn side-head formatting on or off while the document is in
Document format (see “Creating side heads” on page 123).
2Press Esc Shift+v Shift+f to change the document to FluidView format.

ADOBE FRAMEMAKER 8
User Guide
555
3Press Esc j p Shift+s to turn side-head formatting on or off in FluidView. For information on setting up side heads,
see “Formatting text as headings” on page 122.
Inserting hypertext command elements in structured
documents
A hypertext document is the same as any other Adobe FrameMaker document except that it is saved in View Only
format so that readers cannot edit it. The document can have structure, and you can use elements to embed hypertext
commands in the active areas. But the structure does not have any effect on how the reader works with the finished
document.
When working with structured documents, you can insert a hypertext command using an element; in all
other respects, you set up a hypertext document as described for structured documents the same as
unstructured documents.
To insert a hypertext command using an element:
1Click in an area that has been prepared for hypertext.
2Select a hypertext element in the Element Catalog and click Insert.
3If the Attributes for New Element dialog box appears, enter attribute values for the element and click Insert
Element (see “Inserting elements” on page 36).
4Choose a hypertext command from the Command pop-up menu (see “Hypertext commands” on page 534 for
details). The syntax for the command appears below the pop-up menu, and the command name appears in the
text box.
5Enter parameters in the text box (for example, a filename and linkname).
Hypertext commands must be in lowercase. The parameters can be in uppercase or lowercase, but they are case-
sensitive. The entire command can be up to 255 characters long (127 characters on a Japanese-language system).
Note: If you enter a filename parameter for a file that isn’t in the same folder as the current document, you must specify
a path to the document.
6If you want FrameMaker to check for errors in the command, select Validate Command upon Insertion.
7Click New Hypertext Marker. If text symbols are showing, a marker symbol appears in the document window.
A bubble for the marker appears in the Structure View, with a text snippet that shows the hypertext command.
FrameMaker checks the syntax for errors. If Validate Command upon Insertion is selected, it also checks the
command. For example, if the command is Jump to Named Destination, FrameMaker verifies that the destination
link exists in the specified document. If it finds an error, an alert message describes the error but the command is
still inserted.

556
Chapter 18: HTML, XML, and Adobe PDF
conversion
About HTML
HTML provides a set of elements that describe how each part of a document is used. For example, the P (paragraph)
element is a normal body paragraph; the H1 element is a first-level heading.
HTML elements are conceptually similar to Adobe FrameMaker formats. For example, HTML documents contain
body paragraph elements and heading elements, while FrameMaker documents contain paragraphs that use formats
designed for body paragraphs and headings.
FrameMaker document before and after HTML conversion
However, HTML elements differ from FrameMaker formats in the following ways:
•HTML documents use a standard set of elements, while FrameMaker documents can contain any number of
formats and use any names for the formats.
•HTML elements describe the structure of a document, not its format. A Web browser such as Netscape Navigator
or Microsoft Internet Explorer displays each element in a predefined format. Two browsers may display the same
element in different ways.
HTML documents can contain hypertext links to locations in the same file, or to other files anywhere on the Internet
or on an intranet. Most of the FrameMaker hypertext commands are automatically converted to HTML hypertext
commands when you save a document as HTML. (See “Hypertext commands in HTML and PDF documents” on
page 536.)

ADOBE FRAMEMAKER 8
User Guide
557
Preparing documents for conversion to HTML
You can write a single version of a document and then use that version to create HTML, XML, and PDF documents.
You don’t have to reformat or rewrite your document to produce Web pages.
HTML is an online format optimized only for certain kinds of presentation. For example, you can’t easily create a
two-column layout in HTML. For this reason, don’t expect your HTML documents to look identical to the
FrameMaker originals. If design items in your documents have no acceptable equivalents in HTML, consider
converting to PDF instead of HTML. For information, see “About Adobe PDF” on page 575.
What is converted
When you save a document as HTML, FrameMaker converts only the contents of the main text flow (the flow tagged
A). Make sure the text in flow A is the one you want and that all of flow A is connected. (See “Connecting text frames”
on page 401.)
If your document has multiple flows that you want preserved, consider saving as PDF instead. (See “Saving
documents and books as Adobe PDF” on page 575.) When you save as PDF, each flow can be converted to an
Acrobat article thread.
The contents of anchored frames in the flow are converted to graphics (including the text within anchored frames).
Graphics and text not in the main flow—whether they appear on master pages (such as headers and footers) or
directly on body pages (such as graphics placed directly on the page)—are not converted to HTML. If you want to
duplicate the effect of headers so that text or graphics appear at the top of every HTML document (for example, text
for a logo or navigation buttons), use macros, as described in “Using HTML conversion macros” on page 568.
Some FrameMaker hypertext commands convert to equivalent HTML links. For details, see “Hypertext commands”
on page 534.
HTML export issues
When you export to HTML, note the following issues:
•Vector graphics and text frames in anchored frames are converted to bitmaps. If the text in the converted graphic
is greeked, you can change the Greek Text Smaller Than setting in the Preferences dialog box.
•If you scale or crop GIF graphics that have been imported by reference, these settings will be lost when converted
to HTML.
•(Windows) HTML files produced by FrameMaker do not display line breaks when opened in Notepad. To view
the HTML file correctly, use FrameMaker, WordPad, or a browser that lets you view the source code.
•(UNIX) If you change the background color in FrameMaker to any color but white, exported graphics may include
this color. If necessary, reset the background to white and save as HTML again.
•If the document uses paragraph or character tag names that contain accented characters, you may have problems
viewing the characters with some browsers. To avoid this problem, rename paragraph or character tags to use
unaccented characters, or delete the cascading style sheet (.css) file that was created with the HTML file.

ADOBE FRAMEMAKER 8
User Guide
558
Using templates that map well to HTML
To minimize fine-tuning when you save documents as HTML, create your documents from one of the supplied
FrameMaker templates. The formats of these templates map easily to HTML equivalents.
Sample chapter template before and after HTML conversion
Using Web-safe colors
The Online color library provides 216 “Web-safe” colors that have a consistent appearance on all platforms when
viewed with a Web browser. For more information, see “Using color libraries” on page 365.
Changing format overrides to new formats
Accurate conversion depends on the consistent use of formats in your FrameMaker documents. Results will not be
as good if your documents use format overrides instead of defined formats stored in the catalogs. For example, a
document that uses a Body format for both regular paragraphs and headings will not convert to HTML accurately.
If your documents use overrides extensively, you should create and apply a new set of formats based on the overrides.
To create and apply a new set of formats based on the format overrides in a document:
1Choose File > Utilities > Create & Apply Formats, and then click Continue. Any format used in the document but
not stored in a catalog is added to the catalog. Also, if the document uses a format with a format override, a separate
format based on the override is added to the catalog.
For example, if a document contains a Body paragraph with an override (for example, a left indent), that paragraph
will be tagged Body1. If another override is used for Body (for example, a default font change), any paragraph using
that override will be tagged Body2.
2Open the Paragraph Catalog and Character Catalog to inspect the new tags. You may want to rename some
formats to make them easier to interpret. For example, you could rename Body1 to BodyIndent.
Setting up links to URLs
A uniform resource locator (URL) is the location of a document anywhere on the Internet or on an intranet. You can
embed a special marker in a FrameMaker document that becomes a link to a URL when the document is saved as
HTML or PDF.
ADOBE FRAMEMAKER 8
User Guide
559
To add a link to a URL:
1Select the text you want to be linked to a URL and apply a character format to it. For example, you might apply an
underline format to the words “Click here for more information.”
For more information, see “Preparing areas for becoming active” on page 529.
2Click in the formatted area, and choose Special > Hypertext.
3Choose Message Client from the Command pop-up menu and enter the following in the Syntax text box: message
URL url_name
Replace url_name with the URL you want to link to. For example, to link to the Adobe Systems home page, you
would enter the following:
message URL http://www.adobe.com
4Click New Hypertext Marker. When the document is converted to HTML, XML, or PDF, clicking on the
formatted text displays the location specified by the URL.
FrameMaker marker (top) and after conversion to an HTML link (bottom)

ADOBE FRAMEMAKER 8
User Guide
560
Setting up links for imagemaps
Imagemaps on a Web page are graphics with areas defined as links. Imagemaps can add visual interest to otherwise
plain text-only links to Web pages.
When you convert a FrameMaker document to HTML or XML, graphics in the main text flow are automatically
converted to imagemaps if you have set them up correctly. They convert in these cases:
•When a graphic in an anchored frame has one or more text frames on top of the graphic, and these text frames
have valid hypertext markers in them. For details, see “Preparing graphics” on page 531.
Graphics converted to imagemaps
•When a graphic in an anchored frame has a rectangular matrix of links over it. For details, see “Creating button
matrices” on page 540.
Saving documents as HTML
To convert a FrameMaker document to HTML, simply save it as an HTML file. Saving as HTML sets up definitions
for how each FrameMaker format will convert, or map, to an HTML element. You can also save a whole book as
HTML. (See “Converting books to HTML files” on page 572.)
FrameMaker automatically creates the mappings of formats to HTML elements upon initial conversion to HTML,
but you can fine-tune them, and make further customizations, by creating conversion macros. For information, see
“Adjusting HTML mappings” on page 561 and “Fine-tuning mappings by editing reference pages” on page 565.
Even if you plan to fine-tune the conversion, you should begin by saving as HTML. You can then fine-tune the
automatic mappings as needed.
To save a document in HTML format:
1Choose File > Save As and choose HTML from the pop-up menu.
2Give the filename an extension of .html, specify the file location, and click Save. The converted file is saved where
you specified.
3Open the HTML file in a Web browser to examine the converted file. If it meets with your approval, you’re done.
If you’d like to refine some mappings, continue by following the steps in “Adjusting HTML mappings” on page 561.

ADOBE FRAMEMAKER 8
User Guide
561
Preserving the FrameMaker look by using stylesheets
HTML was designed not as a formatting language but as a way of presenting the structure of a document (its
semantics). In some cases, however, you may be concerned with the format of a document as well as its semantics.
You may want to preserve the look of your FrameMaker document more than is possible with regular HTML
elements alone.
For example, suppose you have a document that uses blue 20-point type for the first letter of a chapter. An HTML
stylesheet can preserve unique formatting of this kind.
An HTML cascading stylesheet is created for you with the same name as the main HTML file but with an extension
of .css. It is a standardized file format that many Web browsers can use and interpret. A .css stylesheet contains
formatting specifications that can duplicate the font, style, size, indents, spacing, and margins of the original
document.
The HTML file contains a reference to a .css stylesheet. If the browser finds the stylesheet, it uses the information to
format the Web page. If the browser doesn’t support stylesheets, it uses only the built-in formatting defined for each
HTML element.
To use an HTML stylesheet:
1Save your document as HTML. (See “Saving documents as HTML” on page 560.) A .css file is automatically
created in the same folder as the HTML file.
2Copy the HTML stylesheet (.css file) to the Web server in the same folder as your HTML files.
Note: Stylesheets are sometimes called “cascading” because their format rules can overlap—and collide—with rules in
other stylesheets, such as a personal stylesheet set up by someone viewing your converted document. The stylesheet that
FrameMaker creates takes precedence over other stylesheets.
Adjusting HTML mappings
You can change the following HTML mappings:
•Paragraph formats map to HTML elements to define paragraph-level formatting (including formats for body
paragraphs and headings).
•Character formats map to HTML elements to define character-level formatting (including common mappings for
bold or emphasized text).
•Cross-reference formats map to HTML conversion macros to specify how cross-references will be displayed
in HTML.
After you save a document in HTML format, you may want to refine the mappings.
Note: A few mappings cannot be changed. For example, a FrameMaker table always converts to an HTML table, and
an anchored frame always becomes an image with an IMG tag.
To set up or modify HTML mappings:
1Choose File > Utilities > HTML Setup. FrameMaker either loads the current mappings into the HTML Setup
dialog box or, if no mappings have been created yet, creates default mappings.
2From the Map pop-up menu, choose the type of formats to map (paragraph, character, or cross-reference).
3Specify a mapping by choosing a FrameMaker format from the From pop-up menu and an HTML element or
macro from the To pop-up menu.

ADOBE FRAMEMAKER 8
User Guide
562
For information on the contents of the To pop-up menu, see “Paragraph-based HTML elements” on page 563 and
“Mappings for cross-reference formats” on page 564.
You can click in the document to select a format to adjust. The HTML Setup dialog box immediately shows the
current mapping for the format you click.
4Choose from the following options:
•If you’re mapping paragraph formats and want to include the paragraph autonumber in the converted text, click
Include Autonumber. (You don’t have to include an autonumber for items in a list.)
•If you’re mapping to Heading (AutoLevel) and want to start a new Web page whenever this format is found, click
Start New, Linked Web Page. For more information on mapping headings, see “Autolevel mappings for headings”
on page 562.
Use this option to break up a long FrameMaker document into several HTML files, each linked to a single file.
Whenever the specified format is found, FrameMaker leaves the heading in the original file (the parent file) and
makes it a link to a subdocument whose content starts at the heading format and continues until the next instance of
the format. For information on using this setting to simulate a table of contents, see “Creating links that simulate
a TOC” on page 573.
•If you’re mapping to the List Item element for either a bulleted or numbered list, and want to specify how many
levels deep the item is (which usually translates as how much the item should be indented), enter a Nest List at
Depth value. For more information on mapping lists, see “Mappings for lists” on page 563.
5Click Change to accept the mapping.
6Repeat steps 2 through 5 as needed.
7When you finish specifying mappings, close the dialog box and save the document as HTML, as described in
“Saving documents as HTML” on page 560.
If you want to edit the mapping tables on the HTML reference page, be sure to close the HTML Setup dialog box
first. Keeping the dialog box open results in an error when you try to edit the tables on that page.
Autolevel mappings for headings
HTML supports six levels of headings. You can convert any FrameMaker paragraph format to a heading by mapping
it to Heading (Autolevel). With this special mapping, headings in the document are mapped to H1, H2, and so on,
according to their relative levels and based on the highest-level mapping in that file. The advantage of this method
is that if the document is broken into separate HTML files, each will always have an H1 mapping and an appropriate
hierarchy of headings under that H1.
For example, suppose your document uses Title1, Title2, and Title3 formats. When you convert to HTML, you might
want to break up the document into two files, and the second file might contain only instances of Title2 and Title3.
The autolevel feature ensures that Title2 maps to H2 in the first file but maps to H1 in the second file.
For more information on how the autolevel headings work when you choose to split a document into separate HTML
files, see “Using the Headings reference page” on page 565.
If you want to fine-tune the autolevel mechanism or override the autolevel function and make mappings to specific
heading levels, you must edit special tables on reference pages of the FrameMaker document. For more information,
see “Using the Headings reference page” on page 565 and “Editing the HTML Mapping table” on page 567.

ADOBE FRAMEMAKER 8
User Guide
563
Mappings for lists
FrameMaker automatically maps bulleted lists to HTML unordered lists and numbered lists to HTML ordered lists.
If you want to override the automatic mapping, you must edit a table on the HTML reference page of the
FrameMaker document. (See “Editing the HTML Mapping table” on page 567.)
In the HTML Setup dialog box, you can define the level of a list by specifying a value for Nest List at Depth. Typically,
a browser displays different levels with different amounts of indentation.
You can include a FrameMaker autonumber in the converted text by choosing Include Autonumber. However, most
browsers provide their own bullet characters and numbers with lists, so you are unlikely to use this option when
converting lists.
Paragraph-based HTML elements
Mapping name in the
HTML Setup dialog box
Equivalent HTML
element
Recommended use and typical appearance in a Web browser
Heading (AutoLevel) H1, H2, H3, H4, H5,
H6
Six levels of headings, with H1 the largest and most prominent
Paragraph P Normal body paragraphs
Preformatted Text PRE Text that closely matches the original’s line breaks and spacing; usually
achieved by using multiple spaces and a fixed-width font
Address ADDRESS Text set off from the rest denoting an e-mail address or the like; usually
indented or italicized
Block Quote BLOCKQUOTE, BQ A quotation set off by indenting
List Item LI Item preceded by a bullet character when it is part of an unordered list (UL), or
by a sequential number when it is part of an ordered list (OL)
List Item (Continued) P Body paragraph within a list (not preceded by a bullet or number)
Data Term DT Item (such as a term in a glossary) that is to be defined by a DD element
Data Definition DD Definition of a term (a DT), such as in a glossary item
Data Definition (Continued) P Body paragraph within a data definition
Throw Away None Discarded during conversion to HTML
Character-based HTML elements
Mapping name in the
HTML Setup dialog box
Equivalent
HTML element
Recommended use and typical appearance in a Web browser
Blink (Netscape) BLINK Blinking text (may not work in non-Netscape browsers)
Citation CITE A citation, usually displayed in italics or underlined
Code CODE Computer-program code, usually displayed in a fixed-width font such as Courier
Definition DFN Definition of a term, usually displayed in italics
Emphasis EM Emphasized text, usually displayed in italics or underlined
Keyboard KBD Text that a user types, usually displayed in a fixed-width font such as Courier
Sample SAMP Text that appears in a fixed-width font such as Courier

ADOBE FRAMEMAKER 8
User Guide
564
Mappings for cross-reference formats
A typical cross-reference in a printed document such as “See “Syntax” on page 8 for more information” loses its
meaning in HTML documents, which don’t use page numbers. For this reason, cross-references are mapped by
default to a predefined cross-reference conversion macro called See Also. The See Also macro changes the cross-
reference so that it refers to the text of the paragraph but not to the page number (for example, “See “Syntax” for more
information”). The cross-reference text in the original document becomes an HTML link in the converted document
regardless of what format is used.
You can modify the See Also macro, or you can create your own macros and then map cross-reference formats
to them.
When you first map a cross-reference, the See Also macro is the only macro in the To pop-up menu in the HTML
Setup dialog box. If you create other conversion macros, they will appear in this menu as well. For information on
how to create and edit cross-reference macros, see “Using HTML conversion macros” on page 568.
Two other choices in the To pop-up menu let you map a cross-reference in other ways:
•Choose Original Cross-Reference Format to leave the text of the cross-reference unchanged.
•Choose Throw Away to delete the text of the cross-reference.
Short Quotation (Intl) Q Quotation of less than a full paragraph, usually displayed in quotation marks
(may not be recognized by all browsers)
Span (CSS) SPAN Text that is displayed as specified in an HTML stylesheet (by browsers that recog-
nize stylesheets) or without special formatting (by other browsers). For use when
no other mapping is appropriate—for example, for a drop cap.
Strong STRONG Emphasized text, usually displayed in bold
Typewriter TT Text in a fixed-width font such as Courier
Variable VAR A special term or, in programming contexts, the name of a variable, usually
displayed in italics or bold italics
Plain Text None Text that cancels any previous character mapping, displayed as appropriate for
the paragraph mapping
Throw Away None Discarded during conversion to HTML
Character-based HTML elements
Mapping name in the
HTML Setup dialog box
Equivalent
HTML element
Recommended use and typical appearance in a Web browser
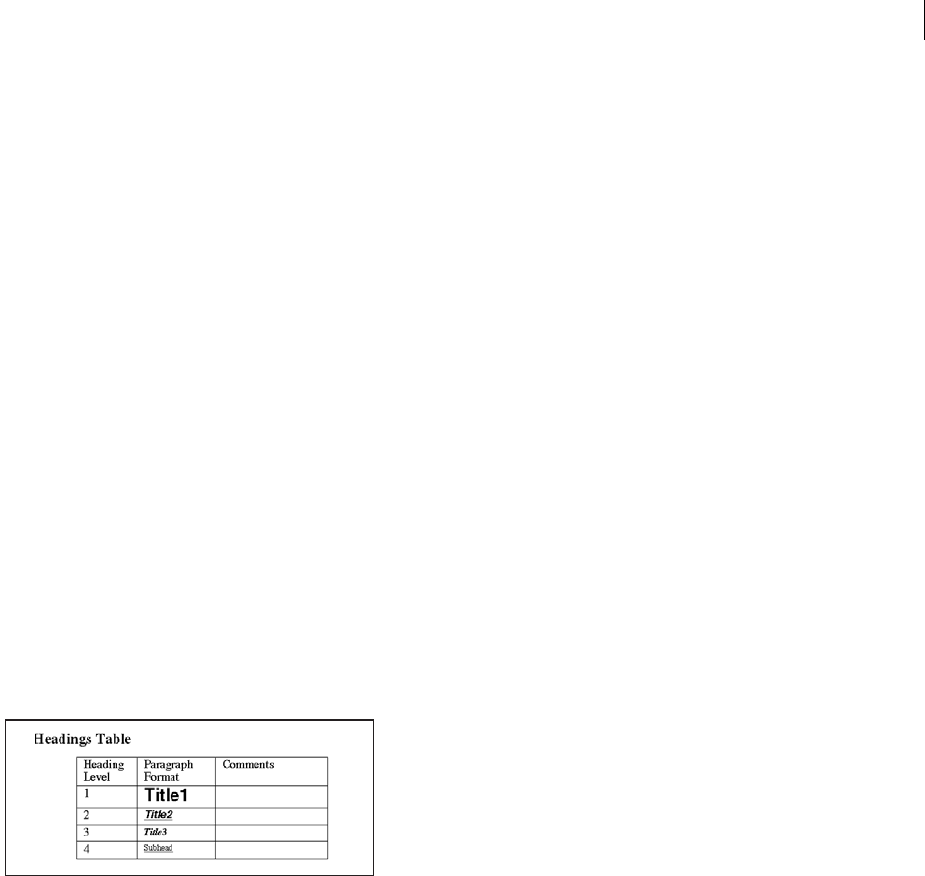
ADOBE FRAMEMAKER 8
User Guide
565
Fine-tuning mappings by editing reference pages
You can fine-tune the HTML conversion by editing tables on two special FrameMaker reference pages: the Headings
page and the HTML page. If you’re converting a book, the reference pages are BookHeadings and BookHTML. (See
“Converting books to HTML files” on page 572.) For general information on reference pages, see “Working with
reference pages” on page 404.
Note: Don’t edit the information on the HTML reference page unless you’re familiar with HTML coding. Most users
won’t need to edit the tables on this page.
The reference-page tables are set up automatically the first time you save as HTML or the first time you choose File >
Utilities > HTML Setup. The Headings reference page contains one table, the Headings table. The HTML reference
page contains the following tables:
•The HTML Mapping table. (See “Editing the HTML Mapping table” on page 567.)
•The HTML Options table, which contains the settings you make in the Options dialog box. (See “Specifying
graphics conversion” on page 571.)
•The HTML System Macros table, the HTML Cross-Reference Macros table, and the HTML General Macros table.
(See “Using HTML conversion macros” on page 568.)
•The HTML Character Macros table. (See “Converting special characters” on page 570.)
If the tables are large, the HTML reference page will continue on for as many pages as needed.
Using the Headings reference page
The Headings table on the Headings reference page identifies which tags should be used for headings and what their
hierarchy is.
The Headings Table sets up the relative hierarchy of the headings.
Using this table, you can modify the mappings for headings and the relative levels of those headings.
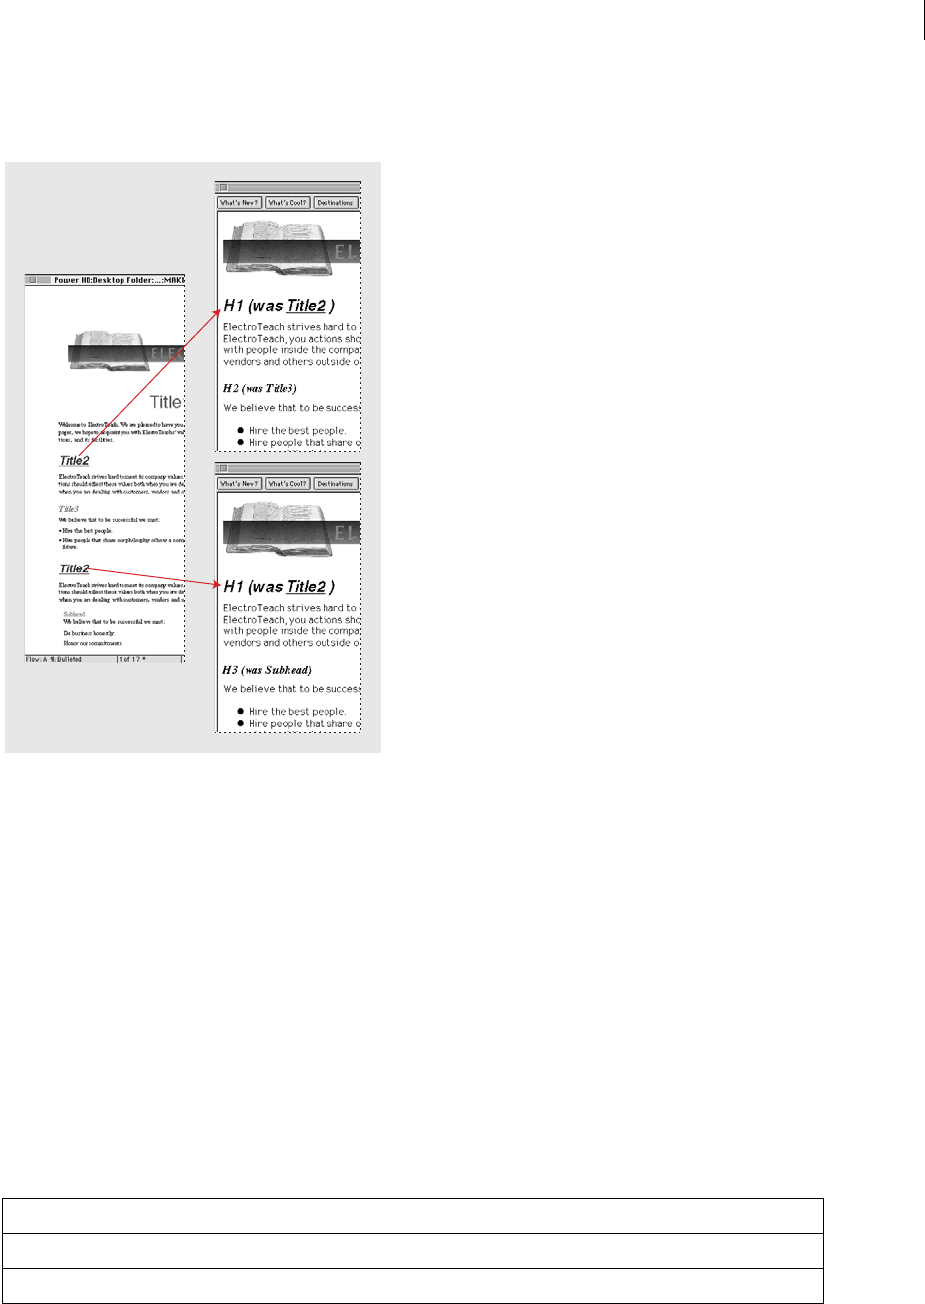
ADOBE FRAMEMAKER 8
User Guide
566
To help you identify heading formats, text appears in the same font and point size as the headings do on the body
pages of the document.
If you break up the document at Title2, you will produce two subdocuments. Whatever format you split on, that format becomes H1 in the
subdocuments. FrameMaker preserves the relative levels of headings even though they always start with H1. For example, in the second subdoc-
ument, Subhead appears as an H3.
To edit the Headings table:
1Choose View > Reference Pages and display the Headings page. (The Headings page will not exist until you save
the document as HTML, or choose File > Utilities > HTML Setup.)
2Edit the table by doing the following:
•To map a different paragraph format to a heading level, change the paragraph tag in the second column but don’t
change the heading level number. For example, if a Tip format is mapped to a level-6 heading but you want the
Warning format to be mapped at that level instead, just change Tip to War ning in the second column.
•To change the relative levels of headings, change the numbers in the Heading Level column. For example, to
promote the Warning format to a higher heading level, change the 6 to a 5 in the Heading Level column. (You don’t
have to change the order of the rows when you do this, but you might want to so that the table is easier to read.)
•To map several formats to a single level of heading, use the same number in the Heading Level column. For
example, the Note and Warning formats are both level-6 headings in the following Headings table.
Heading Level Paragraph Format Comment
6Note
6Warning
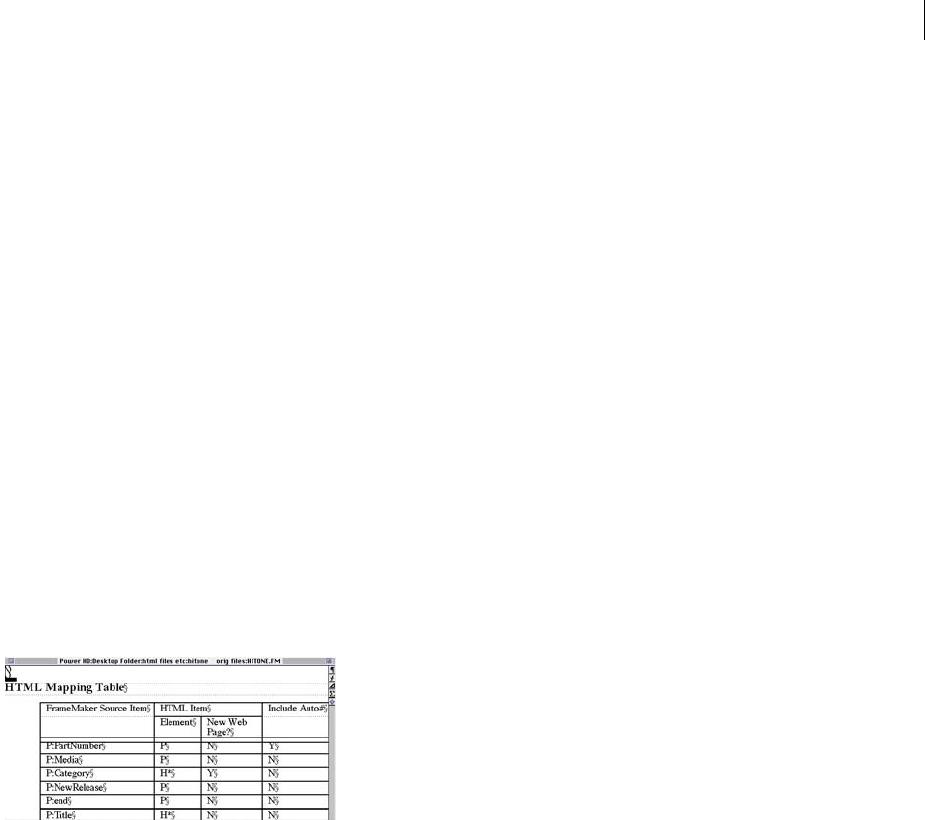
ADOBE FRAMEMAKER 8
User Guide
567
•To add a format to the Headings table, press Control+Return to add a row and then fill in the Heading Level and
Paragraph Format columns.
3If you removed or added formats in the Headings table, change their mappings in the HTML Mapping table as
well. For example, you might change the entry of a SubHead format from H* to P in the HTML Mapping table. For
more information on editing this table, see the next section.
Editing the HTML Mapping table
The HTML Mapping table on the HTML reference page contains the mappings you assign using the HTML Setup
dialog box. (Mappings for headings appear here too, as well as in the Headings table.) You usually don’t need to edit
this table directly, but you might want to edit it in the following situations:
•To bypass the autolevel mapping of headings and instead map a format explicitly to a heading level such as H1 or
H2. (See “Autolevel mappings for headings” on page 562.)
•To change many mappings quickly or globally by using Edit > Find/Change.
•To change a bulleted list to a numbered list, or the reverse.
•To use an HTML element that is not available through the HTML Setup dialog box.
•To document the mappings in the Comments column of the table.
The first column of the Mapping table contains a FrameMaker source item prefixed with a letter that indicates the
type of item: P for paragraph format, C for character format, or X for cross-reference format. The second column can
contain the name of an HTML element or an HTML conversion macro name.
The HTML Mapping table on the HTML reference page
For information on defining macros, see “Using HTML conversion macros” on page 568.
To edit a mapping using the HTML Mapping table:
1Choose View > Reference Pages and display the HTML page.
2Locate the Mapping table on that page, and find the format whose mapping you want to change.
3Make the following changes as needed:
•In the Element column, enter the name of the HTML element or conversion macro that the format is to be mapped
to. If you’re not sure of the correct HTML element name, see the tables in “Mappings for lists” on page 563. Enter
H* to map to an autolevel heading.
•In the New Web Page column, enter Y for Yes to create a separate HTML document whenever this format is found.
Otherwise, enter N for No.
•In the Include Auto# column, enter Y or Yes to include the full autonumber text of this format in the conversion.
Otherwise, enter N or No.
•In the Comments column, enter any text to document the purpose of the mapping, special cases, and so on. You
can leave this column blank.
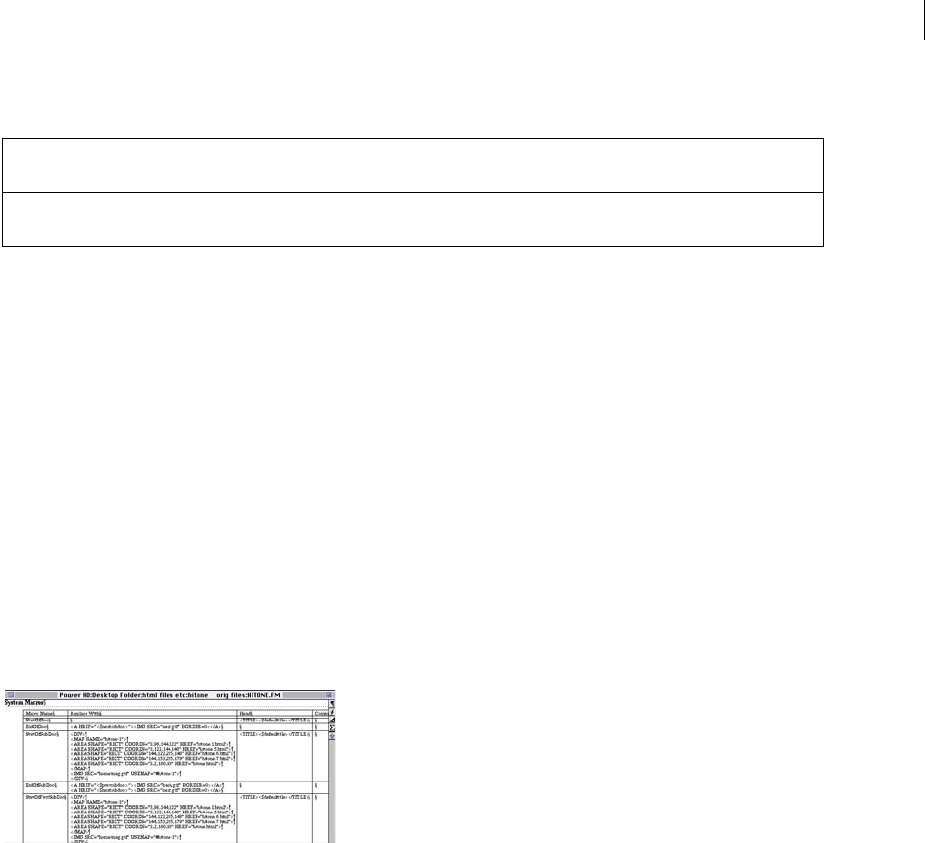
ADOBE FRAMEMAKER 8
User Guide
568
An edited row might look like this.
Using HTML conversion macros
You can use the following tables on the HTML reference page to define HTML conversion macros:
•The HTML System Macros table, which contains eight predefined macro names you can use to perform special
functions at the start or end of Web pages.
•The HTML Cross-Reference Macros table, which contains replacement text for FrameMaker cross-references.
•The HTML General Macros table, which contains general-purpose macros that you define (for example, the title
of the converted document).
Note: You cannot alter the System or General HTML macros in the HTML Setup dialog box.
After a macro is defined, you can use it by name in other macros, or you can map to it in the HTML Mapping table.
The macro name appears in the To pop-up menu in the HTML Setup dialog box, so you can map a format to it
without editing the Mapping table directly.
For examples of HTML conversion macros, see the reference pages of the templates that are included with
FrameMaker.
Sample conversion macros
To create or edit an HTML conversion macro:
1Choose View > Reference Pages and display the HTML page.
2Edit a macro in a table, or create a new row (by pressing Control+Return) and enter a new macro starting with a
macro name. (You can’t add macros to the HTML System Macros table; you can only edit their replacement text.)
Replacement text can contain any mixture of text, HTML codes, and FrameMaker building blocks. (See “Using
building blocks in HTML conversion macros” on page 569.) Be sure you enter valid HTML code; FrameMaker
doesn’t check the HTML syntax.
FrameMaker
Source Item
HTML
Element
New Web
Page?
Include
Auto#?
Comments
P:Fnote FOOTNOTE N N Won’t work in all
browsers

ADOBE FRAMEMAKER 8
User Guide
569
Using building blocks in HTML conversion macros
You can use the following building blocks in HTML conversion macros to include special types of text.
Building blocks are enclosed in angle brackets (< >) and begin with a dollar sign ($). Enter these building blocks in
all lowercase letters.
Note: The General Macros table has a column labeled “Head.” Use this column to define a title (see “Customizing titles”
on page 571) or to include special, advanced information about the HTML document (such as keywords that a search
engine might use). To fill in this column, you need to know the HTML elements that are permitted in the HEAD section
of an HTML document.
Redefining HTML system macros
HTML system macros are a special case because you can redefine them, but you cannot add new ones.
These macros are especially useful when splitting up documents into separate HTML files. For example, you can
define the StartOfSubDoc macro so that your company logo appears at the top of every new Web page.
In these descriptions, the parent document refers to the first Web page and subdocument refers to a document linked
to the parent document.
Building block Description
<$paratext>
<$paratag>
<$paranum>
<$paranumonly>
See “Using building blocks for source information” on page 206 and
“Using building blocks for character formats” on page 207 for details.
<$variable[varname]>Contains the text of the variable
<$defaulttitle>Contains the text of the first heading that appears in the current
document
<$nextsubdoc>Contains the URL of the next HTML subdocument
<$prevsubdoc>Contains the URL of the previous HTML subdocument
<$parentdoc>Contains the URL of the parent HTML document
System macro Use
StartOfDoc Inserts text at the top of the topmost Web page
EndOfDoc Inserts text at the end of the topmost Web page
StartOfSubDoc Inserts text at the top of each subdocument except the first and last
EndOfSubDoc Inserts text at the end of each subdocument except the first and last
StartOfFirstSubDoc Inserts text at the top of only the first subdocument created
EndOfFirstSubDoc Inserts the replacement text at the end of only the first subdocument
StartOfLastSubDoc Inserts the replacement text at the top of only the last subdocument
created
EndOfLastSubDoc Inserts the replacement text at the end of only the last subdocument

ADOBE FRAMEMAKER 8
User Guide
570
Converting special characters
The FrameMaker character set and the character set used by HTML and the Web are not identical. Because of this,
some characters are mapped to substitutions when converted to HTML. Some mappings are internal and rely on
special HTML codes called entities. (For example, curved quotation marks are changed to the entity for straight
ones.) Other substitutions are defined in the Character Macros table. For example, an em dash is defined as two
hyphens. If no mapping exists, the character is ignored.
The following characters either have special predefined mappings or are treated specially.
You can add or change mappings for characters by adding or editing entries in the Character Macros table. As the
previous table illustrates, you can map characters to text or to HTML character and entity references (which begin
with an ampersand and end with a semicolon).
To add or change a mapping for a special character:
1Choose View > Reference Pages and display the Character Macros table on the HTML page.
2Edit a mapping, or create a new row (by pressing Control+Return) and enter a new mapping.
If you’re unsure how to type a special character in the first column, look up its keystroke.
For example, to set up mappings for the dagger character, the trademark symbol, and the ae ligature, you could add
the following rows.
Character Default mapping Where defined
… (ellipsis) ... (three periods) Character Macros table
(em dash) -- (two hyphens) Character Macros table
(en dash) - (one hyphen) Character Macros table
¢ (cent) ¢ (HTML character reference) Character Macros table
© (copyright) © (HTML character reference) Character Macros table
® (registered) ® (HTML character reference) Character Macros table
? (degree symbol) ° (HTML character reference) Character Macros table
< and > (angle brackets) < and > (HTML entities) Internal
and (curved quotation marks) " (HTML entity for ") Internal
& (ampersand) & (HTML entity) Internal
Character Replace With Comments
† * Dagger symbol
™ (tm) Trademark symbol
æ æ ae maps to the HTML entity reference for that symbol

ADOBE FRAMEMAKER 8
User Guide
571
Specifying graphics conversion
When you save documents as HTML, all graphic files imported by copying into anchored frames are converted to
GIF format unless you specify that all the graphics be saved to another format. Each graphic is saved to a separate
file. Text in anchored frames is also converted to GIF.
Graphic files imported by reference are left in their original locations unless you specify that copies should be made.
In that case, the formats are inspected and converted as needed (preserving the dpi scaling of a graphic). The new
files are created in the same folder as the HTML document.
To specify the file format for converted graphics:
1Choose File > Utilities > HTML Setup and click Options.
2Specify the graphic file format you want. You can choose from the following formats:
•GIF is best used for nonphotographic images with no more than 256 colors.
•JPEG format is best used for images with a wide range of color, such as a 24-bit photograph.
•PNG format is a public-domain format that’s becoming more widespread on the Web. Like GIF, it is best used for
images with no more than 256 colors.
3Click OK.
To specify that graphics imported by reference be copied and converted:
1Choose File > Utilities > HTML Setup and click Options.
2Select Copy Files Imported by Reference.
Customizing titles
The title of an HTML document appears in the window’s title bar. When you add a bookmark to that page, it also
appears in the bookmark list. Initially, the <$defaulttitle> building block is used for the title, which uses the first
heading in an HTML file as the title for that file. Usually, the default titles are satisfactory. However, you can specify
a different title by editing macro tables on the HTML reference page.
System macros and general macros can define two sets of replacement text—one that appears in the body of the code
and one that is inserted in the head area.
You can modify the default title, or you can remove the default title and set up your own titles.
To modify the default titles:
1Choose View > Reference Pages and display the HTML reference page.
2In the HTML System Macros table, locate the four system macros that set up the default titles. Initially, they
use the <$defaulttitle> building block to assign the first heading in the file as the title. You can change any or all
of them.
3Change the default macro for Head. For example, the following macro changes the text of the title to static text.
Macro Name Replace With Head Comments
StartOfDoc <TITLE><$defaulttitle></TITLE>
Macro Name Replace With Head Comments
StartOfDoc <TITLE> My Book</TITLE>

ADOBE FRAMEMAKER 8
User Guide
572
To set up your own titles:
1Choose View > Reference Pages and display the HTML reference page.
2Remove the four default title replacement texts from the HTML System Macros table.
3In the HTML General Macros table, define a macro that uses the <TITLE> HTML element in the third column,
the Replace With (in HEAD) column. For example, the following macro uses a paragraph autonumber and text for
the title, and also as paragraph text in the document.
4Map the macro to the format that you’re splitting the HTML document on. (See “Adjusting HTML mappings” on
page 561.)
Converting books to HTML files
You follow the same basic procedure to save a book in HTML format that you use to save a single document. (See
“Saving documents as HTML” on page 560.) When FrameMaker maps the files in the book, it stores the mappings
on reference pages added to the first file in the book. You can edit the tables on the reference pages in the same way
you edit the tables on reference pages of individual documents.
The files in a book may not remain separate files when the book is saved as HTML. To break up a book file into
separate HTML files, use the Start New, Linked Web Page option. For information on using this option to simulate
a table of contents, see “Creating links that simulate a TOC” on page 573.
To save a book in HTML format:
1Open the book file and choose File > Save Book As.
2Choose HTML from the pop-up menu.
3Give the filename an extension of .html and click Save. The converted files of the book are saved where
you specified.
4Examine the converted files by opening them in a Web browser. If they meet with your approval, you’re done.
5If you’d like to refine some mappings, open the first file in the book file and display its BookHeadings or
BookHTML reference page. Edit the tables there. (See “Fine-tuning mappings by editing reference pages” on
page 565.) Then save the file and save the book file as HTML again.
If you fine-tuned the mappings for a document and want to use these mappings for a whole book, remove the
tables on the BookHeadings and BookHTML reference pages in the book file’s first file. Then copy the tables
on the document’s Headings and HTML reference pages and paste them onto the BookHeadings and BookHTML
reference pages.
Macro Name Replace With Head Comments
MyTitle <P><$paranum><$paratext></P><TITLE><$paranum><$paratext>
</TITLE>
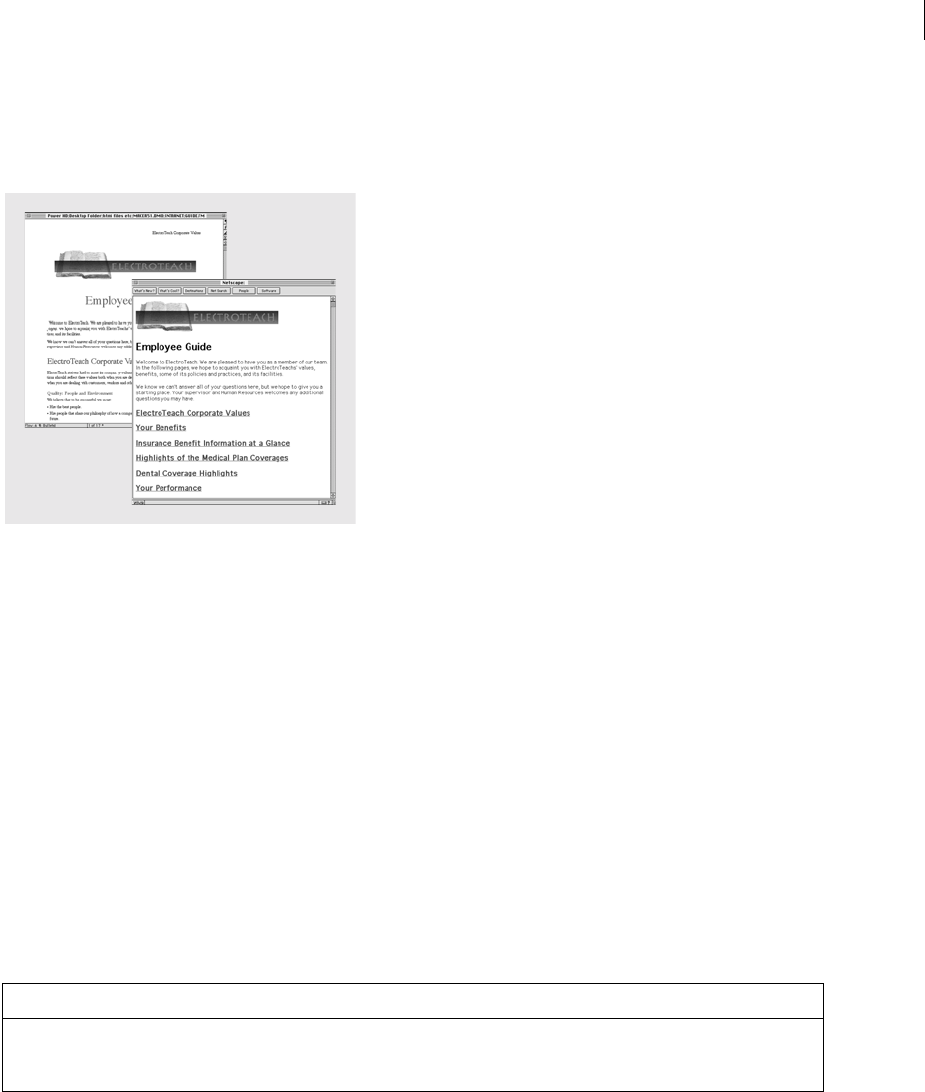
ADOBE FRAMEMAKER 8
User Guide
573
Creating links that simulate a TOC
You can convert a large file into a series of small HTML subdocuments that are linked to one parent document. The
parent document can then function as a linked table of contents for the subdocuments.
FrameMaker document and the simulated TOC in a Web page
Subdocuments are automatically named sequentially. For example, when you save MyDoc to HTML, the parent
document is called MyDoc.html, the first subdocument is MyDoc.1.html, the second one is MyDoc.2.html, and so
on. Don’t rename the files; otherwise, the links will become invalid.
The hierarchy of heading levels in the subdocuments is controlled by the Headings table.
To simulate a TOC:
1Adjust your document’s mappings so that a heading starts a new file. Do this by using the Start New, Linked Web
Page option in the HTML Setup dialog box. (See “Adjusting HTML mappings” on page 561.)
Note: Look for a heading whose contents are neither too large nor too small. (Readers might get lost if they have to do
too much scrolling or might be frustrated if the page they jump to has only one paragraph.) Also, you may want to make
sure some text appears before the first instance of the heading you choose so that there’s an introduction to the list of links.
2Give readers an easy way to return from the linked subdocuments to the parent document by defining the EndOf-
SubDoc or StartOfSubDoc system macro. The text or graphics defined by this macro will appear at the end or the
start of each linked Web page as in the following example.
3Save the file or book as HTML. The parent document will contain the linked table of contents.
Macro Name Replace With
EndOfSubDoc <HR><P><A HREF=”<$parentdoc>”> Return to main page</A></P>
<P><AHREF=”<$prevsubdoc>”> Go to previous page</A></P> <P><A HREF=
”<$nextsubdoc>”> Go to next page</A></P>

ADOBE FRAMEMAKER 8
User Guide
574
Inserting HTML code
You may want to insert special HTML code into your document (for example, the code that defines a Java applet).
To insert HTML code in a document:
1Choose View > Reference Pages and display the HTML reference page.
2In the HTML General Macros table, define a macro whose content is the HTML code.
3Choose View > Body Pages and place the insertion point where you want to insert the HTML code.
4Choose Special > Marker and choose HTML Macro as the marker type.
5Enter the name of the general macro as the marker text and click New Marker.
For example, you could enter the following Java code as a macro definition.
Where you want to insert this applet, you insert a marker whose marker type is HTML Macro and whose marker
text is MyCode.
Troubleshooting and tips on HTML conversion
Follow these guidelines to ensure a smooth conversion to HTML:
•When converting a book, open all documents before starting. This ensures that there will be no error messages
that might interrupt the conversion process.
•Make sure the table formats you use have regular ruling lines defined for at least one body row. Otherwise, the
HTML tables will have no lines around table cells.
•Make sure your documents contain no unresolved cross-references before you save as HTML. Unresolved cross-
references appear as broken links in HTML. For information on resolving cross-references, see “Resolving cross-
references” on page 209.
•If text or graphics don’t convert when they should, make sure they’re on body pages and not master pages, that
they are part of the main text flow (flow A), and that they’re in anchored frames.
•If you want to import the HTML conversion settings from one document to another, use the File > Import >
Formats command to copy reference pages. For details on importing reference pages, see “Importing and updating
formats” on page 415.
Saving structured documents as HTML
The procedures for saving structured documents as HTML are the same as for unstructured documents, with the
exception of mappings. In structured documents, all mappings are based on elements and attributes, rather than
character, paragraph, and cross-reference formats. Structured FrameMaker elements map to HTML elements to
define formats for containers. Structured FrameMaker attributes map to HTML attributes to define cross-references,
cascading stylesheets, languages, and alt-text for images.
Macro Name Replace With
MyCode <applet code="Bullets.class" width="600" height="6" codebase="classes/bullets/" >
<param name="bgColor" value="White"> </applet>

ADOBE FRAMEMAKER 8
User Guide
575
About Adobe PDF
You can save a FrameMaker document or book file as Adobe PDF, and distribute it in that format. Your readers can
view it with Acrobat, Acrobat Reader, or any other application that supports Adobe PDF files.
Important: Use version 7.0.7 or later of Acrobat or Reader when viewing converted files.
FrameMaker document before and after Adobe PDF conversion
When you save a FrameMaker document as Adobe PDF, the following changes occur:
•Cross-references and hypertext commands become links in the PDF file.
•In structured documents, elements you specify in the PDF Setup dialog box become bookmarks in the PDF file.
•Hypertext alert messages become notes in the PDF file.
•Hypertext URL messages (see “Setting up links to URLs” on page 558) become Web links in the PDF file.
•Other hypertext commands convert to equivalent HTML links. (See “Hypertext commands in HTML and PDF
documents” on page 536.)
•Paragraphs you specify in the Bookmarks panel of the PDF Setup dialog box become bookmarks in the PDF file.
In structured documents, element tags become bookmarks. (See “Saving structured documents as Adobe PDF”
on page 583.)
•Text flows used on body pages can become article threads in the PDF file.
•The PDF file contains tagged PDF information if you select the Generate Tagged PDF option. (See “Defining a
tagged Adobe PDF file” on page 582.)
•The PDF file can include document information such as the author’s name and keywords. See “Adding metadata
to a document” on page 27.
Saving documents and books as Adobe PDF
You convert a FrameMaker document to Adobe PDF by setting options in the PDF Setup dialog box, and then saving
the document as PDF. You can also print the document to a PostScript file, and then convert it. For information on
printing to a PostScript file, see “Creating PostScript files” on page 30.
•Windows Be sure to keep the Adobe PDF Creation Add-On printer instance.

ADOBE FRAMEMAKER 8
User Guide
576
•Solaris Be sure to keep the Normalizer 8 printer instance.
You can also use the Save As PDF option in the File menu.
To save a document or book as Adobe PDF:
1Open the document or book you want to save as Adobe PDF.
2If there are references to FrameMaker documents in other books, also open those book files. This ensures that
links will work properly when all the books are converted to PDF.
3In the original document or book file, do one of the following:
•Select File > Save As PDF. In the Save Document dialog box, click Save.
•Select File > Save As (or File > Save Book As), and choose PDF from the pop-up menu. Replace the filename
extension with .pdf. You can also change the save location and the filename. Then click Save.
4Click Set to generate PDF with the default settings in the PDF Setup dialog box. Otherwise, set additional options,
and then click Set.
To save a set of interlinked books as PDF:
1Open all the books you want to convert to PDF. This ensures that links will work properly when all the books are
converted to PDF.
2In the first book file, do one of the following:
•Select File > Save As PDF. In the Save Document dialog box, click Save.
•Select File > Save Book As, and then choose PDF from the pop-up menu. Replace the filename extension with .pdf.
You can also change the save location, but be sure to make the relative nesting of the converted PDF files the same
as the nesting of the original book files. Then click Save.
3Set up bookmarks and article threading.
4Repeat the process for the other linked books.
The options in the PDF Setup dialog box are grouped into four categories: Settings, Bookmarks, Tags, and Links.
Specifying general settings
Use general settings to set such options as registration marks, page size, and color conversion.
To specify general settings:
1In the PDF Setup dialog box, choose Settings from the pop-up menu, or click the Settings tab (Windows/UNIX).
2Choose an option from the PDF Job Options pop-up menu for creating Adobe PDF files. The options include
predefined settings plus any custom job options you created in Adobe PDF Creation Add-On (Windows), or
Normalizer 8 (UNIX). For descriptions of the predefined settings, see “Job options” on page 578.
In a book, the job options saved with the first file are applied to all files in the book. To get the results you want in
the exported PDF file, open the first file, choose Format > Document > PDF Setup, adjust the settings, and then
click Set.
3Type an opening page number and choose a zoom level.
4Choose an option from the Registration Marks pop-up menu. You can choose between Western and Tombo
(Japanese) crop marks.
5Specify a default page size. (FrameMaker uses the unit of measure specified using View > Options.)

ADOBE FRAMEMAKER 8
User Guide
577
6Specify the pages to convert to Adobe PDF. You can convert all of the pages in the file, or enter numbers repre-
senting a range of pages. You can leave the End Page text box empty to create a range from the page number you enter
in the Start Page text box to the end of the file.
Note: To ensure that the exported PDF file includes bookmarks, tags, and hypertext links, you must select All for the
Page Range.
7(UNIX) By default, FrameMaker converts CMYK colors to RGB when it prints and creates PDF files. To control
color conversion, do one of the following:
•To convert CMYK colors to RGB, select the option by the same name. If the color library you’re using has RGB
equivalents for CMYK values, those values will be used. If no equivalents are available, FrameMaker calculates the
RGB values. You can also control this setting in an Acrobat Distiller PDF job options file. However, the setting in
the PDF Setup dialog box takes precedence over the setting in the PDF job options file.
•To convert CMYK colors to sRGB, CalRGB, or another type of RGB, keep this option unselected and set the
values in the Acrobat Distiller PDF job options file. Deselecting this option lets you override the default
conversion of CMYK colors to RGB so that FrameMaker can preserve CMYK colors, which might result in better
printing quality.
Note: This option is not available in FrameMaker (Windows); CMYK colors always convert to calculated RGB values
in Windows.
Setting bookmarks
Use the bookmarks options to define bookmark levels, create bookmarks from paragraph tags, and set up
article threading.
To set bookmarks:
1In the PDF Setup dialog box, choose Bookmarks from the pop-up menu, or click the Bookmarks tab
(Windows/UNIX).
2Select Generate PDF Bookmarks.
3To specify at which level bookmarks appear expanded in the exported PDF, select an option from the Bookmarks
Expanded through Level pop-up menu. You can type a value, such as 2, to specify that you only want the top two
levels expanded.
4To indicate which paragraphs should be converted to PDF bookmarks, move paragraph tags between scroll lists.
The paragraphs in the Include Paragraphs scroll list will have bookmarks in the PDF file. To move a tag between
scroll lists, select the tag and click an arrow or double-click the tag. To move all the tags from one scroll list to the
other, Shift-click an arrow. To omit bookmarks, deselect Generate PDF Bookmarks.
5To change bookmark levels for the included paragraphs, select a paragraph tag and click a Bookmark Level arrow.
To change the level of all items, Shift-click a Bookmark Level arrow. If the indent for a tag exceeds six levels,
n> precedes the paragraph tag, where n is the indentation level of the paragraph tag.
6To include paragraph tags along with the paragraph text in the bookmarks, select Include Paragraph Tags in
Bookmark Text. Use this option to check the assigned levels of bookmarks in a draft of the PDF file. (Deselect this
option when you print the final draft of the document.)
7Set up article threading by doing one of the following:
•To have the reading order of each article follow the same order that the insertion point moves, select Articles
and choose Thread by Column from the pop-up menu. This setting is usually the most appropriate in multi-
column formats.

ADOBE FRAMEMAKER 8
User Guide
578
•To have the reading order of each article go from text frame to text frame, select Articles and choose Thread by
Text Frame from the pop-up menu. This setting is usually the most appropriate in single-column formats.
•To create no article threads, deselect Articles.
To create PDF bookmarks from structured documents, see “Saving structured documents as Adobe PDF” on
page 583.
Generating a tagged Adobe PDF file
FrameMaker lets you create Adobe PDF files with logical document structure and extensive metadata for repur-
posing content. For more information about the benefits of tagged PDF, see “About tagged Adobe PDF” on page 581.
To generate a tagged PDF:
1In the PDF Setup dialog box, choose Tags from the pop-up menu, or click the Tags tab (Windows/UNIX).
2Select Generate Tagged PDF. For details, see “Defining a tagged Adobe PDF file” on page 582.
Adding links from other documents
When you save a document as a PDF file, you can use named destinations to identify paragraphs that are referenced
by cross-references and hypertext links. If you intend to add links to the document from other documents after you
create the PDF files, select this option. Note that selecting this option increases the size of the PDF file.
If this setting is deselected and you add a link or cross-reference from one FrameMaker document to another, you
should resave both documents as PDF.
Note: If your document was created with a version of FrameMaker earlier than 6.0, you need to optimize the PDF file
size to take advantage of this option. (See “Optimizing files created in previous FrameMaker versions” on page 579.)
To add links from other documents after creating a PDF file:
1In the PDF Setup dialog box, choose Links from the pop-up menu, or click the Links tab (Windows/UNIX).
2Select Create Named Destinations for All Paragraphs.
Job options
FrameMaker uses the Adobe PDF Creation Add-On job options on Windows and Normalizer 8 on the
Solaris platform.
Adobe PDF Creation Add-On job options:
•High Quality Print
•PDFA 1b 2005 CMYK
•PDFA1b 2005 RGB
•Press Quality
•Smallest File Size
•Standard
Normalizer 8 job options:
•eBook
•High_Quality
•PDFX1a

ADOBE FRAMEMAKER 8
User Guide
579
•PDFX3
•Press
•Press_Quality
•Print
•Screen
•Smallest_File_Size
•Standard
Note: If you open a FrameMaker 7.0 document with the old Distiller job options and choose File > Save As PDF, you
might receive an alert that the specified PDF job options (Distiller job options) file don’t exist.
Reducing PDF file size
You can control PDF file size by using a variety of methods:
•You can deselect the Create Named Destinations for All Paragraphs option on the Links page of the PDF Setup
dialog box. (See “Adding links from other documents” on page 578.)
•Embedding fonts, especially Asian fonts, increases the size of a PDF file. To control font embedding, you can create
or modify a job options file using the Adobe PDF Creation Add-On (Windows), or Normalizer 8 (Solaris), and
then select it in the Settings page of the PDF Setup dialog box. For more information, see “Job options” on
page 578.
•If you don’t intend to repurpose the PDF file, you can deselect the Generate Tagged PDF option in the Tags page
of the PDF Setup dialog box. This option is on by default.
•You can also reduce file size by selecting Optimize when saving a PDF file.
Optimizing files created in previous FrameMaker versions
FrameMaker allows you to create named destinations only for paragraphs that are referenced in hypertext links or
cross-references, thereby reducing file size. However, documents created in versions of FrameMaker earlier than 6.0
must undergo a special conversion to take advantage of this method of marking.
FrameMaker includes two optimization commands: Options and Optimize File. The Options command lets you
change the default optimization options, which remain in effect until you change them, even if you exit and restart
FrameMaker. The Optimize File command uses the settings specified in the Optimization Options dialog box to
prepare your documents for reducing PDF file size.
To set optimization options:
1Choose Format > Document > Optimize PDF Size > Options.
2Do the following:
•Specify whether you want to optimize the size of all linked documents (documents that are targeted by hypertext
links or cross-references of the specified document), or the specified document only.
•If a document has been optimized previously, select Force Optimization to reoptimize. If this option is selected,
also select Clear Existing Optimization Info to remove previous optimization changes.
•To display a prompt that asks if you want to open linked files, select Prompt When Opening.

ADOBE FRAMEMAKER 8
User Guide
580
•To display a prompt that asks if you want to save a linked document that has been opened for optimization, select
Prompt When Saving. If selected, specify whether you want a prompt to appear for each file you save, or only for
previously optimized files.
•Specify whether you want to overwrite existing files (recommended), or to write files to a directory you specify
(for testing) when you click Browse.
•To stop optimization in case of an error, select Cancel On Error.
3Click Set.
To optimize documents for PDF file size:
1Choose Format > Document > Optimize PDF Size > Optimize File.
2Select the document or book you want to optimize and click Select.
Specifying PDF-conversion settings without saving as PDF
You can specify PDF-conversion settings for a document without actually saving it as a PDF file. You may want to
do this in a document so you can then import those settings to other documents, prior to conversion.
To specify PDF-conversion settings without saving as PDF:
1Make the appropriate document window or book window active. If a book window is active, select the documents
you want to affect, or select the book icon if you want the Document Information changes to affect the book.
2Choose Format > Document > PDF Setup, specify the settings, and then click Set.
Importing PDF-conversion settings
You can import all the settings in the PDF Setup dialog box from one document to another.
To import PDF-conversion settings:
❖In a document or book with selected files, choose File > Import > Formats and select Document Properties and
Paragraph Formats. For details on importing settings from one document to another, see “Importing and updating
formats” on page 415.
Enabling and disabling SWF file embedding in PDFs
By default, FrameMaker is configured to embed SWF files in PDFs. If you insert an SWF file in a document and
generate a PDF, the SWF file is embedded as a bitmap image in the PDF. You can open the PDF, locate the image,
and then click the BMP to play the SWF file. However, if you select the Don't Embed Adobe Flash File In PDF option,
the PDF will contain a BMP image, which is inactive.
To prevent embedding of SWF files in a PDF:
1Select File > Preferences > General.
The Preferences dialog box appears.
2Select the Don't Embed Adobe Flash File In PDF option.
3Click Set.
Note: To generate a PDF in which SWF files are played when the PDF is opened, ensure that the Don't Embed Adobe
Flash File In PDF option is not selected.

ADOBE FRAMEMAKER 8
User Guide
581
Enabling and disabling 3D object embedding in a PDF
By default, FrameMaker is configured to embed 3D objects in PDFs. If you insert a 3D file in a document and
generate a PDF, the 3D file is embedded as a bitmap image in the PDF. You can open the PDF, locate the image, and
then click the BMP to view the 3D file. However, if you select the Don't Embed 3D Model File In PDF option, the
PDF will contain a BMP image, which is inactive.
To prevent embedding of 3D objects in a PDF:
1Select File > Preferences > General.
The Preferences dialog box appears.
2Select the Don't Embed 3D Model File In PDF option.
3Click Set.
Note: To generate a PDF with active 3D objects, ensure that the Don't Embed 3D Model File In PDF option is
not selected.
About tagged Adobe PDF
Tagged PDF lets you create Adobe PDF files from FrameMaker with logical document structure and extensive
metadata for repurposing content. Logical structure refers to the organization of the document, such as the title page,
chapters, sections, and subsections. The logical structure can indicate the precise reading order and improve
navigation, particularly for longer, more complex documents.
For example, tagged Adobe PDF:
•Ensures that information is in the correct reading order on a page.
•Includes paragraph attributes needed to correctly reflow your documents’ contents into different-sized devices,
such as eBook reading devices.
•Ensures the reliable translation of text into Unicode, which is a standardized approach to describing text
characters regardless of font. This approach recognizes ligatures and hyphens, so that all characters and words can
be read correctly by a screen reader for Windows.
•Recognizes alternative text descriptions for graphics in anchored frames.
•Enables the document to be exported more reliably to Rich Text Format (RTF) and XML from Acrobat 7.0 for
reuse in other documents.
Tagged Adobe PDF files include the author’s content, including pages, articles, paragraphs, tables, and graphics in
anchored frames. Tagged PDF files do not include the following information found in standard PDF files:
•Comments, such as online notes, graphic markups, and text markups.
•Pagination artifacts, including all content that comes from master pages (such as page numbers and running
headers), and any graphic objects outside anchored frames.
•Layout and typographic artifacts, such as colored bars between columns of text, horizontal lines separating
footnotes from text, and table borders.
•Printing artifacts, such as crop marks, registration marks, and page information printed outside of the crop marks.

ADOBE FRAMEMAKER 8
User Guide
582
Comments and artifacts aren’t referenced by the logical structure tree, because they’re not considered useful when
repurposing the document’s content.
For more information on the advantages of using tagged PDF, see the Adobe Web site.
Defining a tagged Adobe PDF file
The Generate Tagged PDF option in the PDF Setup dialog box provides improved access to content in PDF files. For
more information, see “About tagged Adobe PDF” on page 581.
Important: The Generate Tagged PDF option works only if you’re using Acrobat Distiller 5.05 or later (Windows), or
the internal distillation process (UNIX), which are part of your FrameMaker installation.
To define a tagged PDF file:
1Open the PDF Setup dialog box as explained in “Saving documents and books as Adobe PDF” on page 575.
2Choose Tags from the pop-up menu, or click the Tags tab (Windows/UNIX).
3Make sure that Generate Tagged PDF is selected.
4Set up the paragraph structure level by doing the following:
•To change structure levels for the included paragraphs, select a paragraph tag and click a Logical Structure Level
arrow. To change the level of all items by one level, Shift-click a Logical Structure Level arrow. If the indent for a
tag exceeds six levels, n> precedes the paragraph tag, where n is the indentation level of the paragraph tag.
•To indicate which paragraphs should be included in the PDF structure, move paragraph tags between scroll lists.
The paragraphs in the Include Paragraphs scroll list will be used to define the structural relationship between
FrameMaker’s paragraph tags in the PDF file. To move a tag between scroll lists, select the tag and click an arrow
or double-click the tag. To move all the tags from one scroll list to the other, Shift-click an arrow.
5Click Set.
Troubleshooting and tips on PDF conversion
Follow these guidelines to ensure a smooth conversion to PDF:
•For the best display of bitmap graphics, import them into the FrameMaker document at a dpi value that divides
evenly into the resolution of the intended display device.
•To improve the display performance of PDF files, avoid using complex master pages that contain multiple complex
graphics. You can also improve graphics display and reduce file size by selecting Optimize when saving a PDF file
in Acrobat. (See Acrobat online Help.)
•If you’re converting a book that has a table of contents or an index, be sure to include the TOC or index file in the
book file before you save as PDF.
•If performance is slow when viewing a large document converted to PDF, reopen the FrameMaker document or
book and deselect Articles. Then convert to PDF again.
•If you’re printing a book as separate files, all PDF files will be created in the same folder, regardless of where the
original documents are. For this reason, be sure that all the original documents in the separate folders have unique
names before saving as PDF. Otherwise, some files will overwrite others.

ADOBE FRAMEMAKER 8
User Guide
583
•If the PDF file is too large, see “Reducing PDF file size” on page 579.
•If you’re working with documents created with a version of FrameMaker earlier than 6.0, make sure you optimize
the document to reduce file size. See “Optimizing files created in previous FrameMaker versions” on page 579.
•Make sure you don’t remove the Adobe PDF Creation Add-On (Windows), or Normalizer 8 (Solaris) printer
instance, as they are used to create PDF files from FrameMaker documents.
•(Windows) Set the output format of the PostScript driver to Optimize for Portability.
•(Windows) Do not create hypertext links to filenames that use accented characters in their names. Such filenames
may change when you save as PDF, causing the hypertext links to fail.
•To include graphic content in tagged Adobe PDF files, put graphic objects in anchored frames. Add alternate text
descriptions for the graphics. (See “Preparing anchored frames for tagged PDF” on page 360.)
Saving structured documents as Adobe PDF
The procedures for saving structured documents as Adobe PDF are the same as for unstructured documents, with
the exception of setting bookmarks. In structured documents, you create bookmarks from element tags, rather than
from paragraph tags.
Important: Tagged PDF is based on paragraph format tags. Each tag is mapped to an element in the PDF structure. A
FrameMaker structured document won’t retain the structure when exported to Tagged PDF. Note that the paragraph
levels in the Tags panel of the PDF Setup dialog determine the relative structure level of the PDF file.
To set bookmarks in structured documents:
1Open the document or book you want to save as PDF.
2If there are references to FrameMaker documents in other books, also open those book files. This ensures that
links will work properly when all the books are converted to PDF.
3In the original document or book file, choose File > Save As (or File > Save Book As), and choose PDF from the
pop-up menu. Replace the filename extension with .pdf. You can also change the location and the filename. Then
click Save.
4In the PDF Setup dialog box, choose Bookmarks from the pop-up menu, or click the Bookmarks tab (Windows).
5Select Generate PDF Bookmarks.
6To specify at which level bookmarks appear expanded in the exported PDF, select an option from the Bookmarks
Expanded through Level pop-up menu. You can type a value, such as 2, to specify that you only want the top two
levels expanded.
7Choose Elements from the Bookmark Source pop-up menu.
8Indicate which elements to convert to PDF bookmarks by moving element tags to the Include scroll list. To move
an element tag between scroll lists, select the tag and click an arrow, or double-click the tag. To move all tags from
one scroll list to the other, Shift-click an arrow. To omit bookmarks, deselect Generate PDF Bookmarks.

ADOBE FRAMEMAKER 8
User Guide
584
Some element tags may have context labels that provide information about the element’s location in the structure.
For example, if Section elements can be nested within other Section elements, context labels might identify whether
the elements are first-, second-, or third-level sections.
Context labels
If an element uses context labels, a <no value> entry also appears in the scroll list for occurrences not described by
the labels. In the example above, Section (<no value>) represents Section elements that are at a fourth level or lower
in the document.
9To include element tags along with text in the bookmarks, select Include Element Tags in Bookmark Text. Use this
option to check the levels of bookmarks in a draft of the PDF file. Deselect this option when you print the final draft.
10 Click Set.
To set other PDF options, see “Saving documents and books as Adobe PDF” on page 575
Defining PDF job options
FrameMaker uses the Adobe PDF Creation Add-On job options on Windows and Normalizer 8 job options on the
Solaris platform.
Adobe PDF Creation Add-On job options:
•High Quality Print
•PDFA 1b 2005 CMYK
•PDFA1b 2005 RGB
•Press Quality
•Smallest File Size
•Standard
Normalizer 8 job options:
•eBook
•High_Quality
•PDFX1a
•PDFX3
•Press
•Press_Quality
•Print
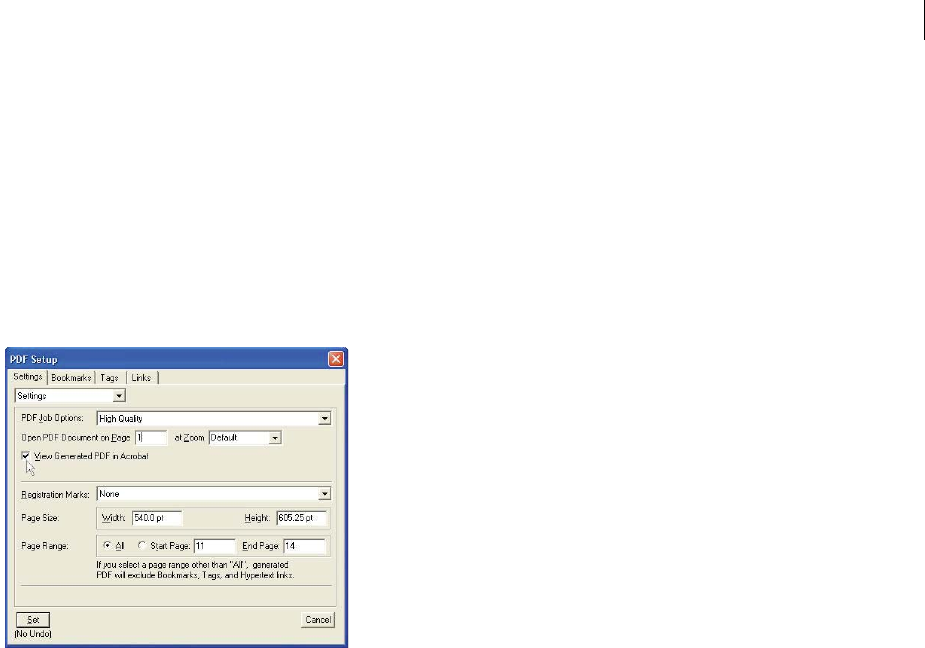
ADOBE FRAMEMAKER 8
User Guide
585
•Screen
•Smallest_File_Size
•Standard
Using the View Generated PDF in Acrobat option
The option, View Generated PDF in Acrobat in the PDF Setup dialog box, lets you specify whether to automatically
start Acrobat and open the generated PDF file. (The PDF Setup dialog box opens when you click PDF Setup in the
Print Document dialog box.)
Selecting the View Generated PDF in Acrobat option
Using the Convert CMYK Colors to RGB option (UNIX)
By default, FrameMaker converts CMYK colors to RGB when it prints and creates PDF files. You can change this
setting in the PDF Setup dialog box. Deselecting this option lets you override the default conversion of CMYK colors
to RGB so that FrameMaker can preserve CMYK colors, which might result in better printing quality.
About the Adobe PDF printer (Windows)
If you have the Adobe PDF Creation Add-On (Windows), or Normalizer 8 (Solaris) installed, you can still convert
documents to PDF by creating a PostScript file and then distilling that file yourself. The name of the printer you use
to create PostScript files is Adobe PDF.

ADOBE FRAMEMAKER 8
User Guide
586
Chapter 19: Processing XML
Migration from unstructured FrameMaker to XML
Implementing structured FrameMaker is both an opportunity and a challenge. You can combine the powerful
features of Adobe® FrameMaker® 8 with structured authoring to create a sophisticated workflow. Within this new
authoring environment, you can automate formatting. You can also create, edit, and publish XML-based content, and
enforce required document structures.
The challenge is that building a structured workflow requires you to master new tools (such as the structure features
in FrameMaker), new concepts (structured authoring), and new technology (XML, structure definitions, and
perhaps Extensible Stylesheet Language (XSL) transformation). If you have no immediate need for XML, you can
implement structure in FrameMaker without providing support for XML import or export. This approach has a
smaller learning curve.
It is assumed that you are already working in unstructured (paragraph-based) FrameMaker and are considering a
move to structured FrameMaker.
What is XML?
Extensible Markup Language (XML) is a vendor-neutral, open format managed by the World Wide Web
Consortium (W3C). Like HTML, XML consists of tags enclosed in angle brackets (such as <example>), is relatively
easy to learn, and is stored in a text file. Aside from their superficial similarities, HTML and XML are used very
differently.
HTML coding is often done on the fly, but XML requires a rigorous approach. A fundamental rule for an XML file
is that it must be well-formed, which means that the XML document follows XML syntax rules. For example, all tags
must be opened and closed properly:
<p>This version is correct.</p><p>Each paragraph is opened and closed.</p>
<p>This is not allowed.<p>The first paragraph must be closed before the second paragraph
starts.
Well-formed documents are predictable, which makes it easier for software to process the XML files automatically.
Note: It’s possible to create well-formed HTML, but it’s not required in most environments. Web browsers can usually
render HTML that is not well-formed. XML must always be well-formed.
XML lets you define tags, thus creating your own markup language to describe document content. For example, in
a proposal document, you could create tags such as ProjectDescription and Costs.
The XML file is human-readable, but it can be tedious to identify where each tag begins and ends. In the following
example, the tags are bolded to make them easier to find.
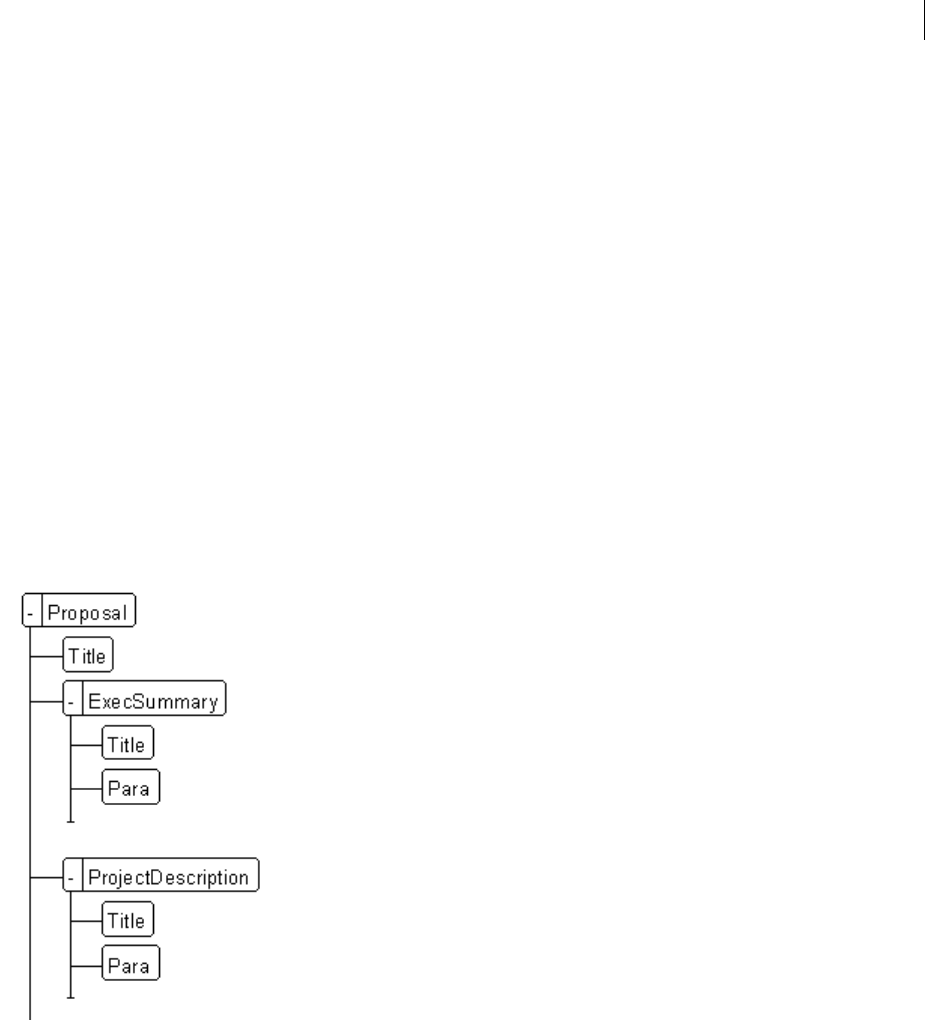
ADOBE FRAMEMAKER 8
User Guide
587
<?xml version="1.0" encoding="utf-8"?>
<Proposal>
<Title>Proposal for Widget Production</Title>
<ExecSummary>
<Title>Executive Summary</Title>
<Para>Lorem ipsum dolor sit amet, consectetuer adipiscing elit. Nunc
ultrices.</Para>
</ExecSummary>
<ProjectDescription>
<Title>Project Description</Title>
<Para>Duis vel libero. Integer venenatis nibh non magna. Morbi id leo.</Para>
</ProjectDescription>. . .
</Proposal>
Structured FrameMaker gives you a tree view of the document that arranges the elements hierarchically. It’s easy to see the
relationships among the tags.
FrameMaker renders the XML tags in a tree view
Capturing information hierarchy
Instead of style-based, paragraph-oriented word processing and desktop publishing, XML provides a foundation for
structured authoring; content is described by elements that are organized in a hierarchical tree. In word-processing
environments (such as unstructured FrameMaker), the relationship among the various document components is
apparent through formatting on the page. The document file, however, does not capture these relationships because
a word processor document is made up of a string of paragraphs. The relationship between a Body paragraph tag
and the preceding Heading1—the Body tag is logically subordinate to the Heading1—is not represented in an
unstructured FrameMaker file. Structured authoring, however, does capture the hierarchical relationships among
the document components.

ADOBE FRAMEMAKER 8
User Guide
588
The following figure shows unstructured and structured representations of the same document. The unstructured
paragraph tags are in a flat list; the structured elements are grouped to show relationships. The Graphic and Caption
element, for example, share a common Figure parent. Step elements are subordinate to the Procedure element.
Word processing versus structured authoring
Embedding metadata in XML
Elements in XML can have attributes, which enables you to store additional information about an element. For
example, you could provide an attribute that specifies the classification level for a topic:
<topic classification="secret">Secret information here</topic>
Often, attributes are used for basic document metadata, such as the name of the author and the last revision date of
a particular document.
Embedding document metadata
Why XML?
Creating an XML-based workflow is a significant effort, but it opens up some exciting new opportunities, such as
improving the consistency and organization of your files, reusing content, and reducing publishing costs. The
following sections provide some details.
Proinde cum venabere
Meditabar aliquid enotabamque, ut, si
manus vacuas, plenas tamen ceras
reportarem. Non est quod contemnas
hoc studendi genus:
1. Proinde cum venabere, licebit.
2. Ego ille quem nosti apros.
Ad retia sedebam
Topic
Title
Overview
Procedure
Step
Figure
Caption
Step
Graphic
Caption
Step1
Step2
Graphic
Heading1
Body
Paragraph tags Structure
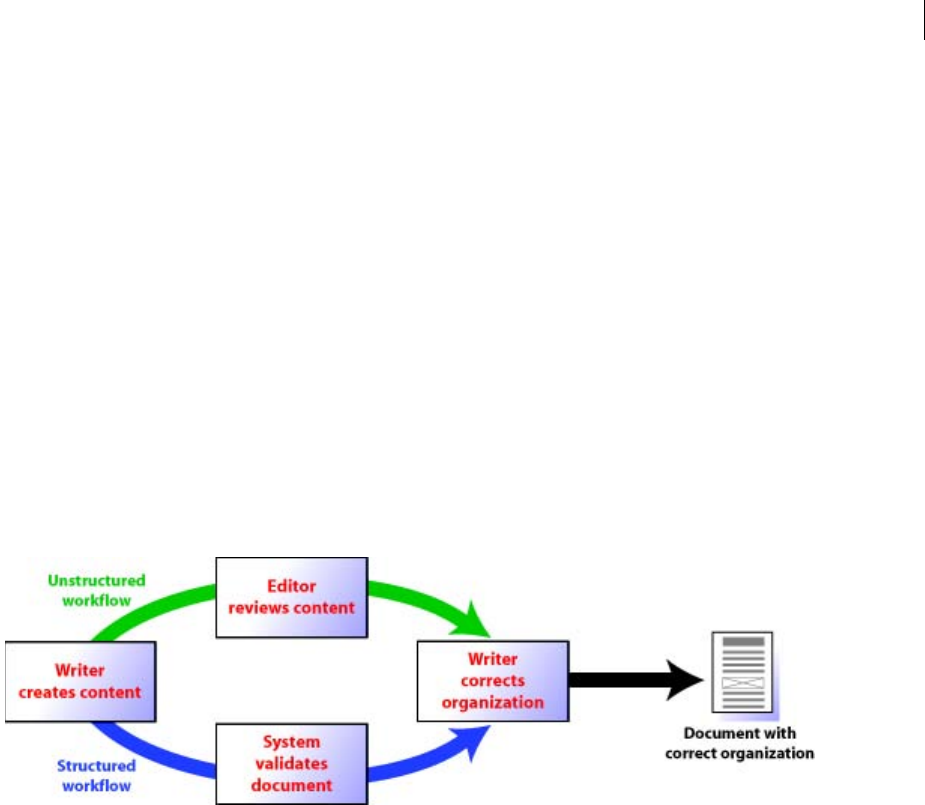
ADOBE FRAMEMAKER 8
User Guide
589
Enforcing consistent organization
In unstructured FrameMaker, a template specifies which formatting components are available in your files. Along
with the template, you provide usage rules. For example, you might specify that a simple proposal should have the
following content sequence:
1Proposal title
2Executive summary
3Project description
4Schedule
5Cost
You cannot enforce this required sequence in an unstructured template. Instead, you create a style guide, which
authors are supposed to read and comply with. To verify that a particular document follows the rules in the style
guide, a human editor must read the proposal and verify that each section is in the proper order.
XML technology lets you describe the required organization of the content with structure rules. A file that follows
these rules is valid. You can use software to validate your file and verify that it conforms to the rules you’ve estab-
lished, so that instead of a human reading the file to check its organization, the software can do the validation work.
Structured and unstructured workflow to create a document
In addition to built-in validation features, structured FrameMaker also provides guided editing, which supports
authors by displaying only the allowed elements as they are working. In other words, you can now enforce your
document organization through the template (rather than by human review).
For a proposal document, the structure rule would read as follows:
Title,ExecSummary,ProjectDescription,Cost,Schedule
This rule indicates that a syntax reference section must contain one Title, followed by one ExecSummary, and so on.
You can then specify further structure inside each element. For example, you can require that the ExecSummary
element contains a title and a paragraph:
Title,Para
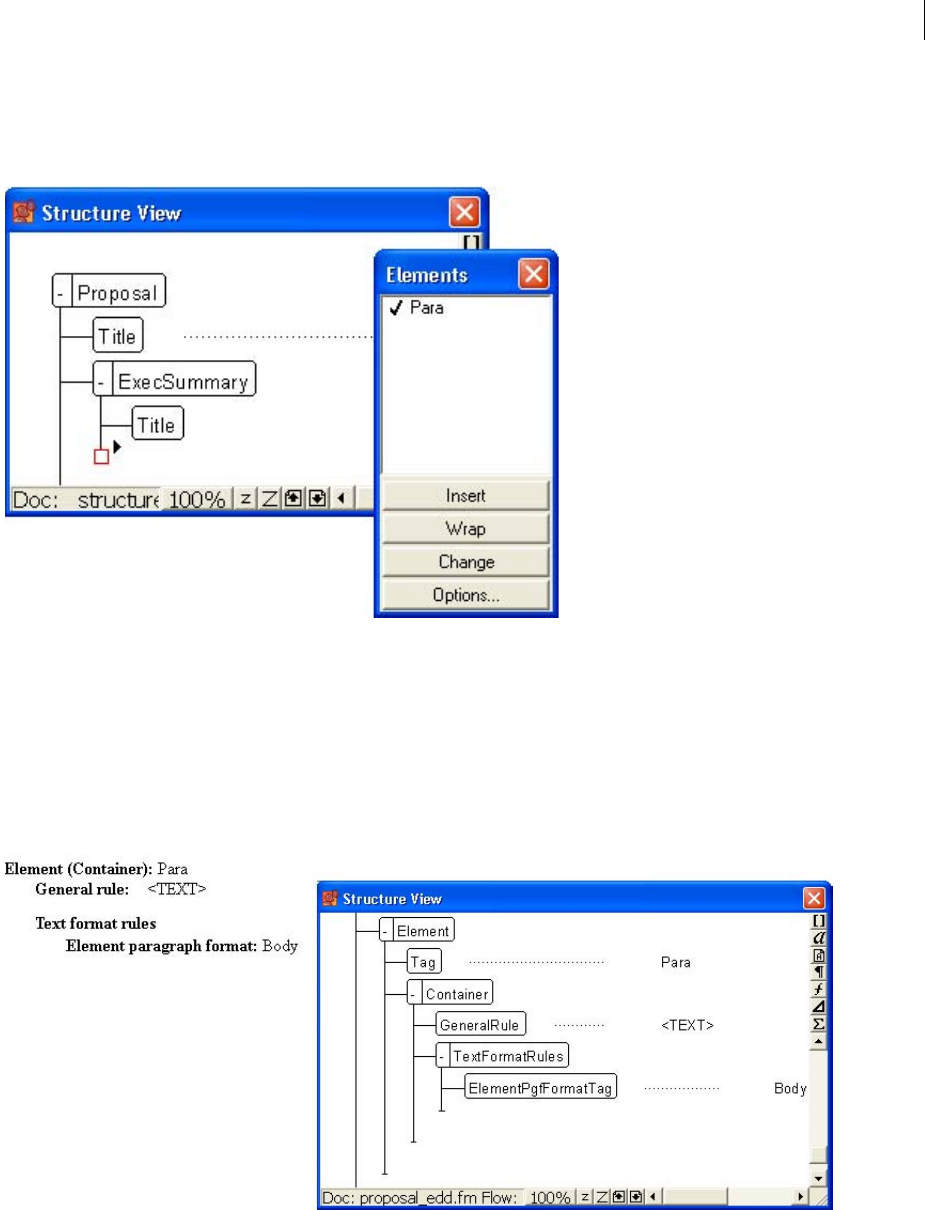
ADOBE FRAMEMAKER 8
User Guide
590
A document that omits one of these items, or that uses a different order for the elements, is not allowed.
FrameMaker’s structure view indicates in real-time where required content is missing, as shown in the following
figure:
FrameMaker’s structure view indicates that a required element is missing with a small red square. The Elements catalog indicates that a Para
element is allowed here.
Automating and enforcing formatting
In structured FrameMaker, authors do not work with formatting components such as paragraph and character tags.
Instead, they insert elements and element content into their documents. Document formatting is applied automati-
cally based on formatting information that is embedded in the structured template. The structured template is made
up of two components: formatting information and structure definitions. The structure definitions are stored in an
element definition document (EDD), which in turn references formatting information.
Formatting specifications in structured FrameMaker
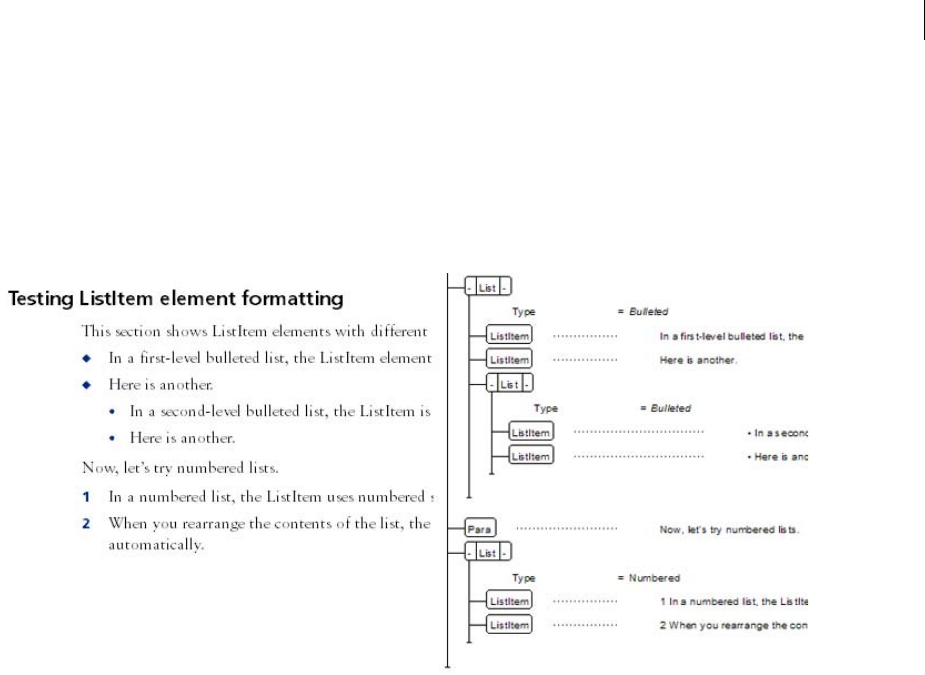
ADOBE FRAMEMAKER 8
User Guide
591
Element formatting is context-sensitive; that is, a single element can appear with different formatting in different
structured positions. A single ListItem element, for example, can replace half a dozen (or more) paragraph tags. The
following figure shows how formatting of the ListItem element changes based on its position and the value of the
parent List element’s Type attribute.
Note: Formatting in this example is controlled both by the nesting level of the ListItem and by the value of the Type
attribute on the container element List.
ListItem formatting in different contexts
As you position information in the structure, the context-sensitive formatting is updated immediately based on the
element position. This dynamic formatting is extremely powerful when combined with FrameMaker's WYSIWYG
interface.
ADOBE FRAMEMAKER 8
User Guide
592
Using metadata for versioning
At the document level, metadata provides keywords and other descriptions of a document. You can also use
metadata to identify information that is unique for a particular version of a deliverable. This technique lets you use
a single set of source documents to deliver highly customized information for each version. Consider, for example,
the problem of customized software development. If your company customizes its products for each client, you need
a way to identify what information belongs to each client. Using metadata, you can specify which clients each topic
applies to. When you are ready to deliver the information, you filter based on the metadata to create the appropriate
deliverables.
Filtering to produce client-specific deliverables
<topic client="A">
...
</topic>
<XML>
<topic client="A,B">
...
</topic>
<XML>
<topic client="B">
...
</topic>
<XML>
<topic client="A">
...
</topic>
<XML>
<topic client="A,B">
...
</topic>
<XML>
<topic client="A,C">
...
</topic>
<XML>
<topic client="A,C">
...
</topic>
<XML>
Client ASource files
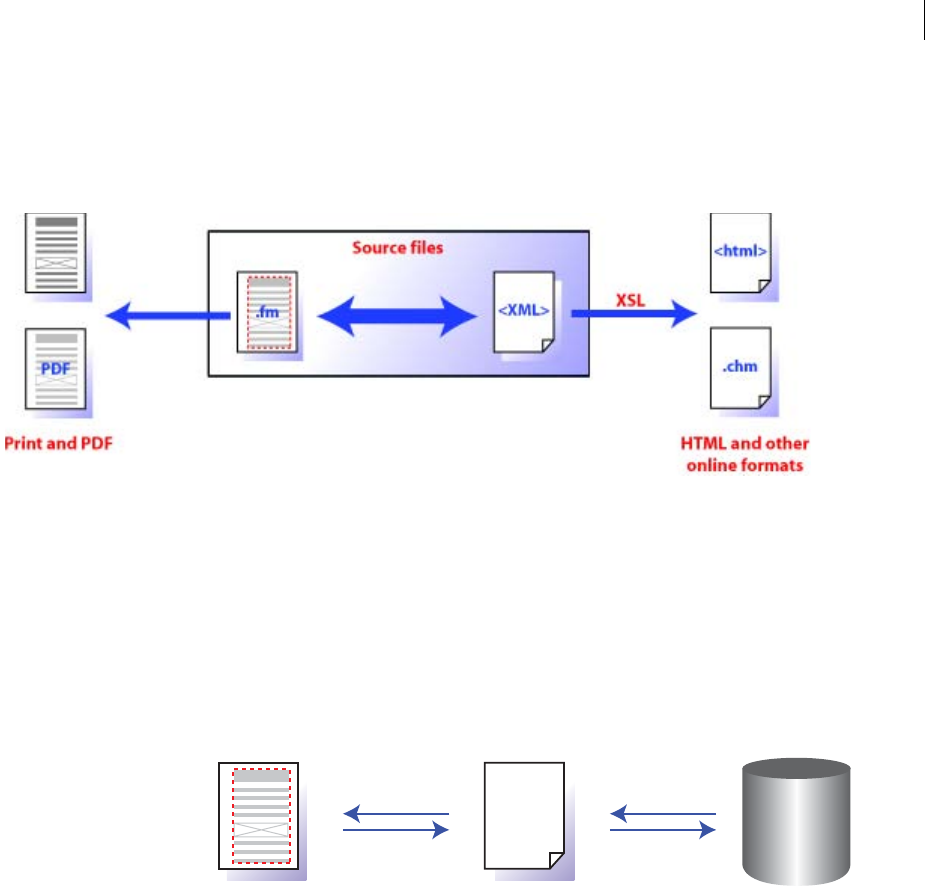
ADOBE FRAMEMAKER 8
User Guide
593
Publishing to multiple output formats
Many FrameMaker users are already familiar with single-sourcing workflows. In a structured FrameMaker
environment, you can take advantage of FrameMaker’s powerful print and PDF capabilities, and then generate XML
to create other outputs, such as HTML and online help formats.
Structured FrameMaker and XML in a multichannel workflow
You can also continue to use single-sourcing workflows that are based on unstructured conversion tools.
Supporting content reuse and exchange with XML
XML lets you move information from one authoring tool to another without losing information. You can develop
information in FrameMaker, save it out to XML, and then open the XML files in another tool. Perhaps a technical
writing group (which uses FrameMaker) needs to share information with a training group (which uses an XML-
based learning management system). You can use XML to exchange content between two otherwise incompatible
applications.
Reusing content between FrameMaker and a learning management system (LMS)
Reducing localization cost
When content is localized, the desktop publishing component is a significant part of the cost. Exact numbers will
vary for specific projects, but as a general rule, about half the total localization cost is for publishing and production.
A publishing workflow built on XML and structured authoring lets you automate much of the publishing effort, so
you can greatly reduce the ongoing costs associated with localization.
<XML> LMS
.fm
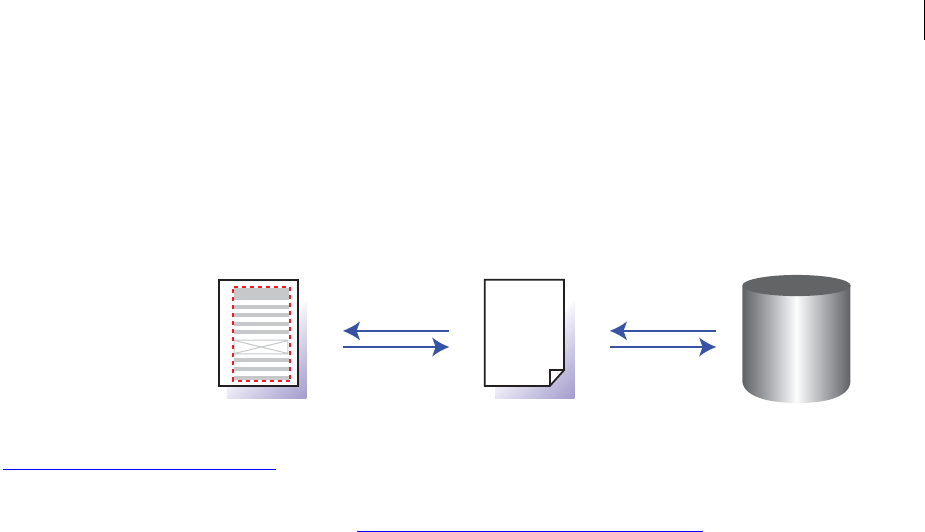
ADOBE FRAMEMAKER 8
User Guide
594
Simplifying database publishing
Instead of connecting directly into a database, you can use XML as an intermediate format. From the database, you
generate an XML file that contains the information you want to publish. On the FrameMaker side, you set up an
import application that provides formatting information for the XML elements. You then open the XML file in
FrameMaker, and the database information is formatted automatically.
Database publishing with FrameMaker and XML
For more information about database publishing, refer to the “Adobe FrameMaker 7.1 Database Publishing” at
www.adobe.com/go/documentation.
Note: To enable you to build automated, server-based solutions, Adobe offers the FrameMaker Server license. For more
information, visit the FrameMaker Server page, www.adobe.com/products/fmserver/main.html.
Complying with required document structures
The ability to enforce structure based on explicit rules improves consistency for any document. In regulated indus-
tries, the ability to verify that the required structures are being followed is critical. If your organization is required to
comply with specific structures due to government or industry standards, structured authoring can help you ensure
that your documents conform.
Why structured FrameMaker?
Structured FrameMaker produces a user-friendly structured authoring environment that lets you create XML.
Authors making the transition from unstructured FrameMaker will find many familiar publishing features. Both
versions of FrameMaker excel in creating, editing, and producing complex content, so authors can easily create PDF
files with bookmarks and hyperlinks, cross-references, tables of contents, and indexes. Moving to structured
FrameMaker gives you the best of both worlds—you can take full advantage of XML without giving up the powerful
authoring environment you appreciate in unstructured FrameMaker.
<XML> LMS
.fm
ADOBE FRAMEMAKER 8
User Guide
595
Migrating from unstructured FrameMaker to structured FrameMaker
The transition from unstructured, paragraph-based authoring to structured, element-based authoring can be
challenging. Authors must shift from the desktop publishing model to working with a tree view of a document.
Moving authors who are familiar with unstructured FrameMaker into structured FrameMaker reduces the learning
curve. Although the authoring experience changes, knowledge from unstructured FrameMaker is helpful when
working in the structured environment. For example, authors still insert cross-references with the Cross-Reference
dialog box, but instead of choosing paragraph tags and paragraph instances, they choose elements and element
instances.
Knowledge of cross-references from unstructured FrameMaker is helpful in structured FrameMaker
If you are working in unstructured FrameMaker, it’s likely that your documents follow a template with minimal
formatting overrides. This document consistency makes it easier to convert to structured documents. If, however,
authors create content with no accountability for consistent, repeatable formatting, then document conversion will
be a challenge. Most authors in FrameMaker-based environments are accustomed to following template rules, and
that discipline makes the transition to structured authoring easier.
Authoring visually
Structured FrameMaker gives you several different ways to look at your document. The document window is almost
identical to the document window in unstructured FrameMaker. Inside the document window, you have the option
to display element tags for a structured document.
Viewing element boundaries as tags
Creating excellent print and PDF output
Structured FrameMaker provides everything you need to create high-quality print and PDF output. Many other
XML authoring tools do not include a high-quality print solution, and designing a layout for print and PDF is much
more complex than publishing to the web. FrameMaker supports printing for structured documents and also lets
you create PDF files with bookmarks automatically built from a document’s element or paragraph tagging.
Unstructured FrameMakerStructured FrameMaker

ADOBE FRAMEMAKER 8
User Guide
596
Relatively low licensing cost
FrameMaker 8 gives you everything you need to build a structured authoring environment. You can build and
configure the environment before you deploy it to other authors. This gives you the ability to create a structured
environment without making a huge commitment to new software. You can scale the implementation by rolling out
FrameMaker and your structure configuration files to additional authors as needed.
Relatively low implementation effort
Implementing any structured authoring environment requires a significant effort. Reusing an existing formatting
template reduces the implementation effort required. FrameMaker also provides tools to help you convert your
unstructured documents into structured documents.
XML implementation options
You can combine structured FrameMaker and XML in several different ways. FrameMaker does not lock you into a
single workflow. Your options include the following:
•FrameMaker authoring with XML support. With this option, you use FrameMaker as your main authoring tool. As
needed, you save your files from FrameMaker out to XML, and then use that XML as needed. All content changes
are made in FrameMaker; when you need new XML files, you save out to XML again.
•FrameMaker authoring with XML source files. With this option, you use FrameMaker as your main authoring tool.
Your source files are XML. You open the XML files in FrameMaker, make changes, and save. When you save, your
XML source file is updated.
•FrameMaker and XML authoring. With this option, you produce content in FrameMaker and in other XML tools.
When you are ready to publish to print, you combine the XML created outside FrameMaker with FrameMaker-
based content, and then produce your final print or PDF deliverable. This workflow is useful in an environment
with many occasional content contributors. The content contributors may not need a powerful publishing
environment. Therefore, they may choose to produce their content in a low-end XML editor, and then deliver the
XML files to the FrameMaker-based publishing team. This workflow is also relevant if you have XML generated
from a database or another line-of-business application.
•XML authoring with FrameMaker publishing. With this option, you work mainly in another XML authoring tool,
and XML content is produced by a database system or other line-of-business application, or you are receiving
XML from outside your organization. When content is finished, you produce print and PDF by bringing the XML
into FrameMaker. You might build a server-based application with FrameMaker Server to automate this process.
Components of a structured authoring environment
In unstructured FrameMaker, setting up an authoring environment requires only a template file. When you define
the template and distribute it, authors are ready to begin work. In structured FrameMaker, you must provide some
additional files to authors.
Authoring only in structured FrameMaker
You can implement structure in FrameMaker without providing support for XML import or export. If you have no
immediate need for XML, this approach lets you experiment with structured authoring.
To establish a basic structured authoring environment in FrameMaker, you must create an element definition
document (EDD) that specifies the elements in your structure. Additionally, you need to link the element definitions
with formatting information. There are three ways to link elements in the EDD to formatting:
•Formatting template. You can assign formatting based on the various tags (paragraph tags, character tags, and so
on) in a template. If you already have a formatting template, you can reuse information in that template.
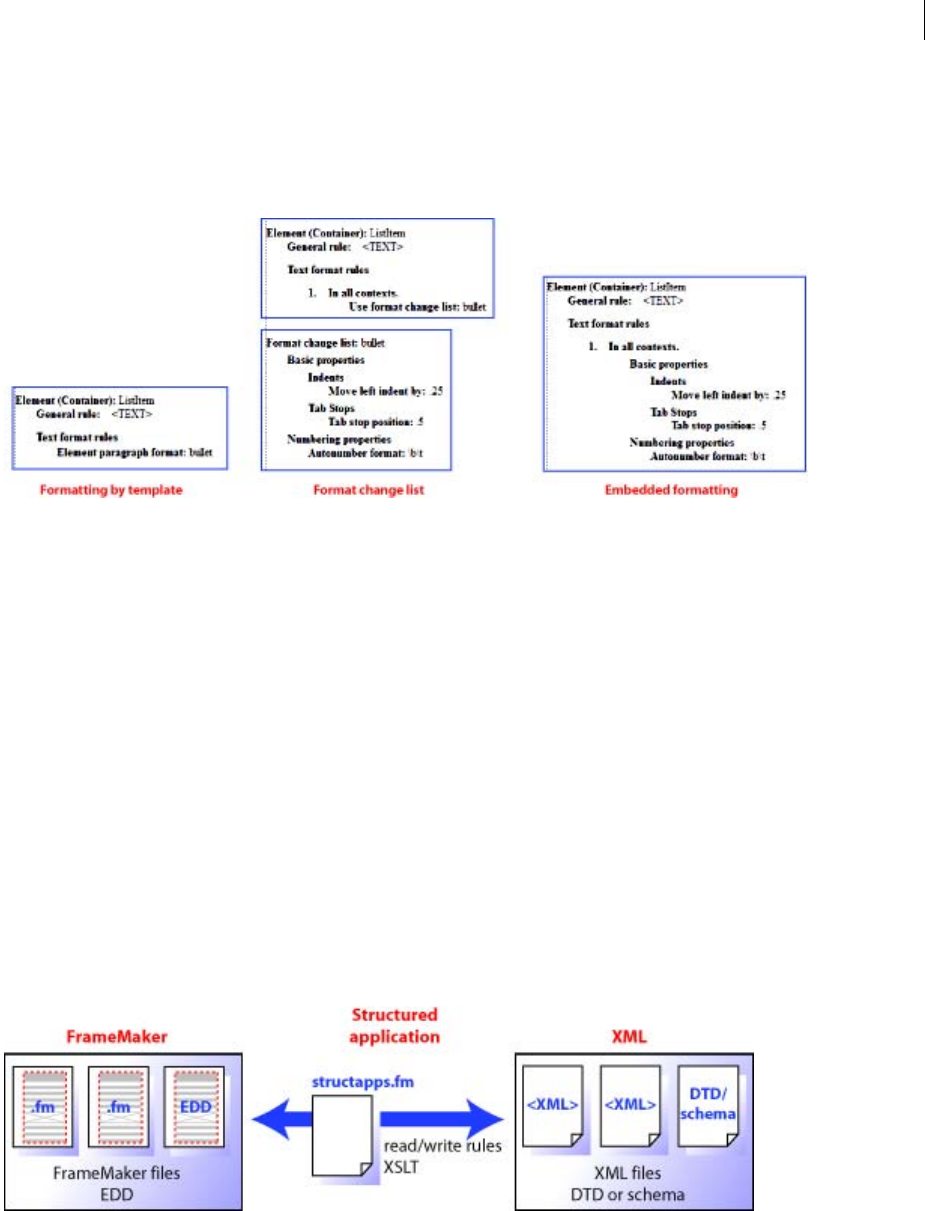
ADOBE FRAMEMAKER 8
User Guide
597
•Format change lists. You can create named formatting definitions in the EDD. The format change lists lets you
provide partial formatting specifications and inherit the rest from a few base paragraph tags. You can reuse format
change lists for related elements.
•Embedded formatting. You can specify formatting by writing the formatting into each element definition.
Comparing three formatting options in the EDD
If you choose to use format change lists or embedded formatting, you will still need a basic formatting template that
defines your master pages.
After you create the EDD and the formatting, you combine the two components to create a single structured
template. To create the structured template, you open the formatting template and import element definitions (File
> Import > Element Definitions) from the EDD. The resulting file is your structured template. You distribute this file
to document authors. Remember to keep a separate copy of the EDD so that you can make updates.
Structured authoring and XML
To provide support for XML import and export, you need the EDD, structured template, and a few additional files.
•XML structure definitions. A document type definition (DTD) or Schema file provides structure rules for XML
that match your FrameMaker element definitions. Unlike the EDD, DTDs and Schema files do not provide
formatting information.
•Read/write rules. The read/write rules control translation from FrameMaker structure to XML and back. Specifi-
cally, read/write rules help manage table translation and other complex formatting.
•Structured application. The structured application lists all of the component files in your structure implementation
and provides configuration information. For example, you can use the structured application to specify whether
and how to export conditional text tagging.
Components of a structured authoring environment
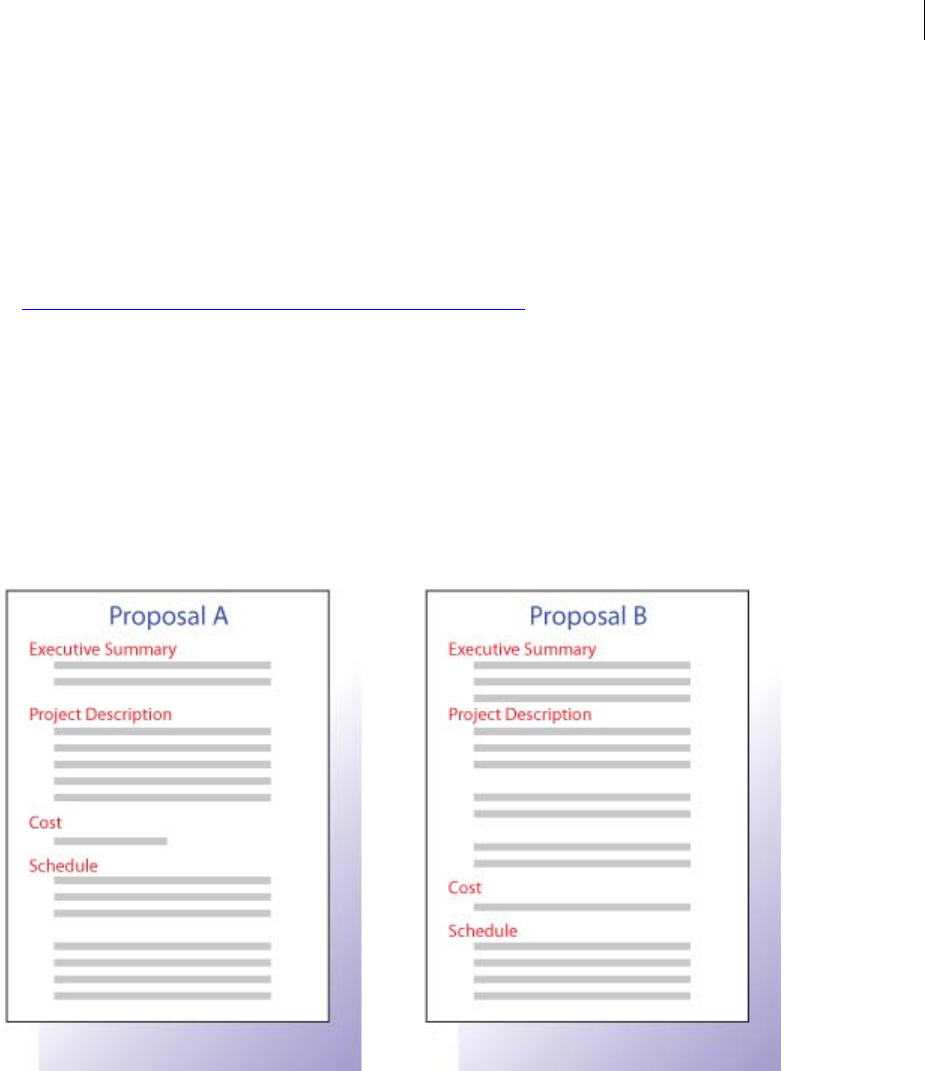
ADOBE FRAMEMAKER 8
User Guide
598
Extras
If the requirements for your authoring environment go beyond what’s available with a basic structured application,
FrameMaker offers several additional ways to customize XML processing. You can use any or all of the following:
•XSL pre- and post-processing. In addition to processing content with read/write rules, you can supply XSL trans-
formations that process your XML files during import or export. For example, you can rearrange the order of
elements in your XML files during import with an XSL transformation.
•FrameMaker API client. The FrameMaker Developer’s Kit (FDK, available at
partners.adobe.com/public/developer/framemaker/devcenter.html) allows you to customize and extend
FrameMaker’s functionality. For example, you could use the FDK to change how index markers are processed.
•Third-party plug-ins. Numerous plug-ins are available that extend FrameMaker’s functionality.
Getting started with structure
We recommend that you start by building a small structured application to familiarize yourself with all the compo-
nents you need. This section describes an application for a simple proposal.
Content analysis
Before building the proposal template, analyze existing proposals to identify their components.
Reviewing existing proposals
Based on this analysis, you create a content map. The proposal example results in the following sequence:
1Title
2Executive summary
•Title
•One paragraph
3Project description

ADOBE FRAMEMAKER 8
User Guide
599
•Title
•One or more paragraphs
4Cost
•Title
•One or more paragraphs
5Schedule
•Title
•One or more paragraphs
Note: You could probably build the EDD for this simple example without formal content analysis. For larger projects,
though, content analysis is critical.
Choosing an EDD strategy
There are several ways to begin building your EDD. You can:
•Create the entire EDD yourself.
•Import a DTD or Schema to create an EDD that contains structure definitions.
•Use a conversion rules table to structure an existing sample document and create a first draft of the EDD that
contains basic element definitions and formatting that matches your unstructured template.
•Modify an existing EDD—either one of the samples supplied with FrameMaker or an EDD from another source.
This section describes how to create a new EDD so that you can see how the process works.
Building the proposal EDD
Based on the content analysis, you can now create the proposal EDD.
To build the EDD:
1Make sure you are in structured FrameMaker. To switch from unstructured to structured FrameMaker, select File
> Preferences > General. In the Product Interface drop-down list, select Structured FrameMaker. Close and restart
FrameMaker.
2Select StructureTools > New EDD to create a new EDD file. FrameMaker inserts the first few default elements in
the EDD for you.
Note: The EDD is itself a structured FrameMaker document. You use the same guided editing environment to create the
EDD that you use to edit other structured documents.
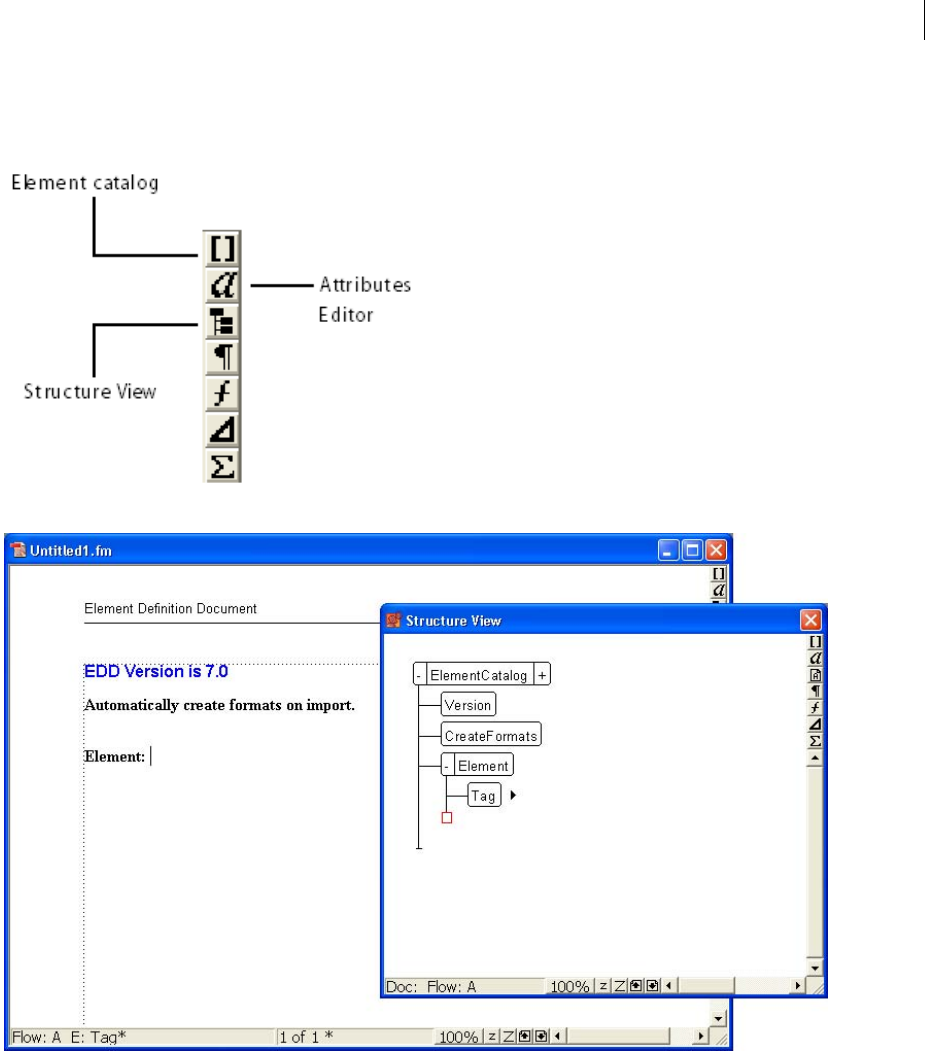
ADOBE FRAMEMAKER 8
User Guide
600
3Click the Structure View button to display the Structure View window. (The Structure View button is found in the
top right edge of your document window. Refer to the following figure.)
Structure View and other buttons
Getting started with an EDD
4Create the top-level Proposal element. Position your cursor to the right of the Tag bubble in the Structure View,
and type in Proposal. As you type, the letters appear in both the Structure View and the document window.
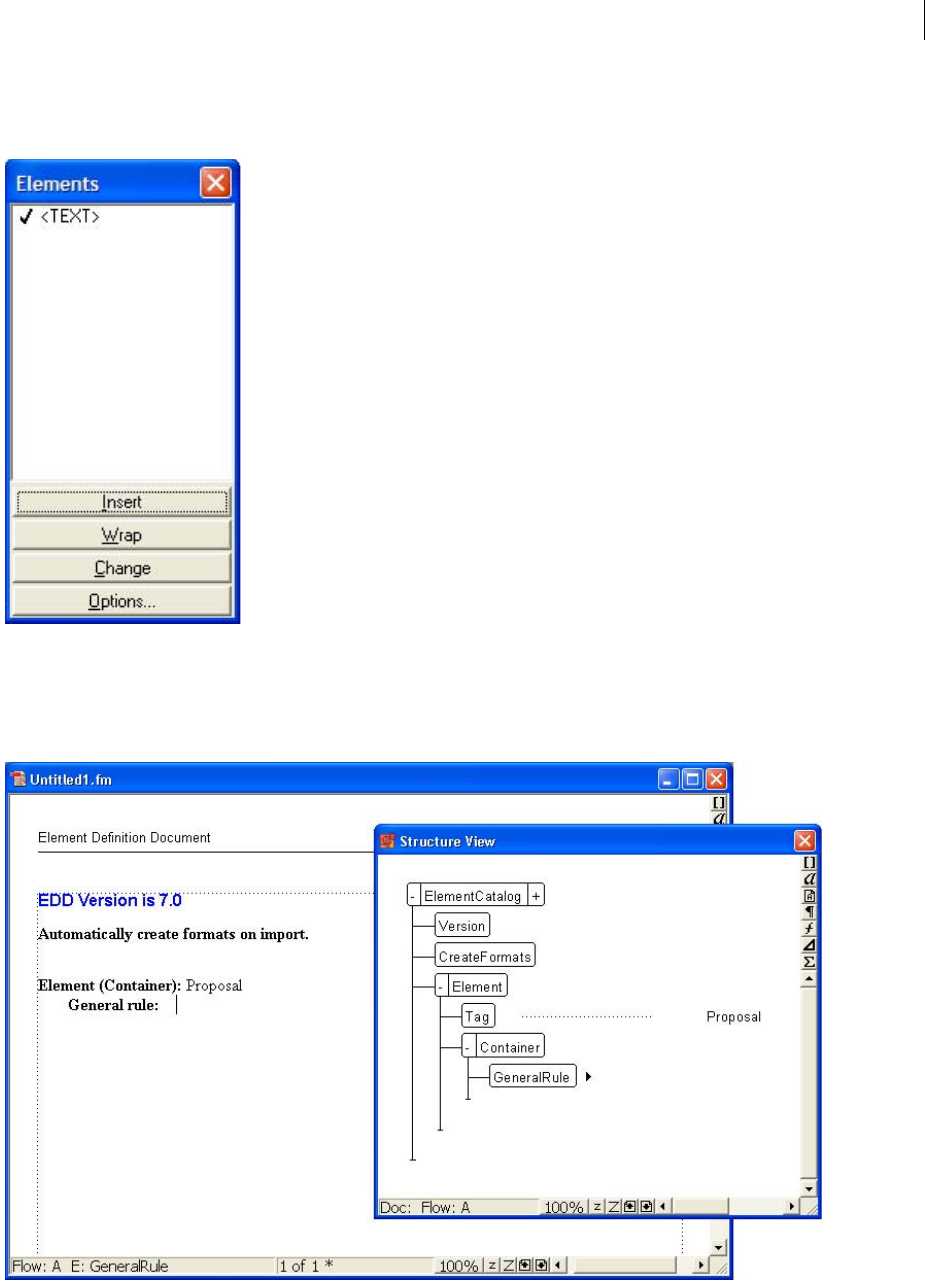
ADOBE FRAMEMAKER 8
User Guide
601
5Click the Elements Catalog button (found in the top right edge of the document window and of the Structure
View) to display the Elements catalog.
Elements catalog
6In the Structure View, click to the right of the red box (which indicates that additional information is required).
Notice that the contents of the Elements catalog change because of the new cursor location. In the Elements catalog,
select Container and click Insert. The Container element and a child GeneralRule element are inserted (as shown in
the following figure).
Adding the general rule for Proposal
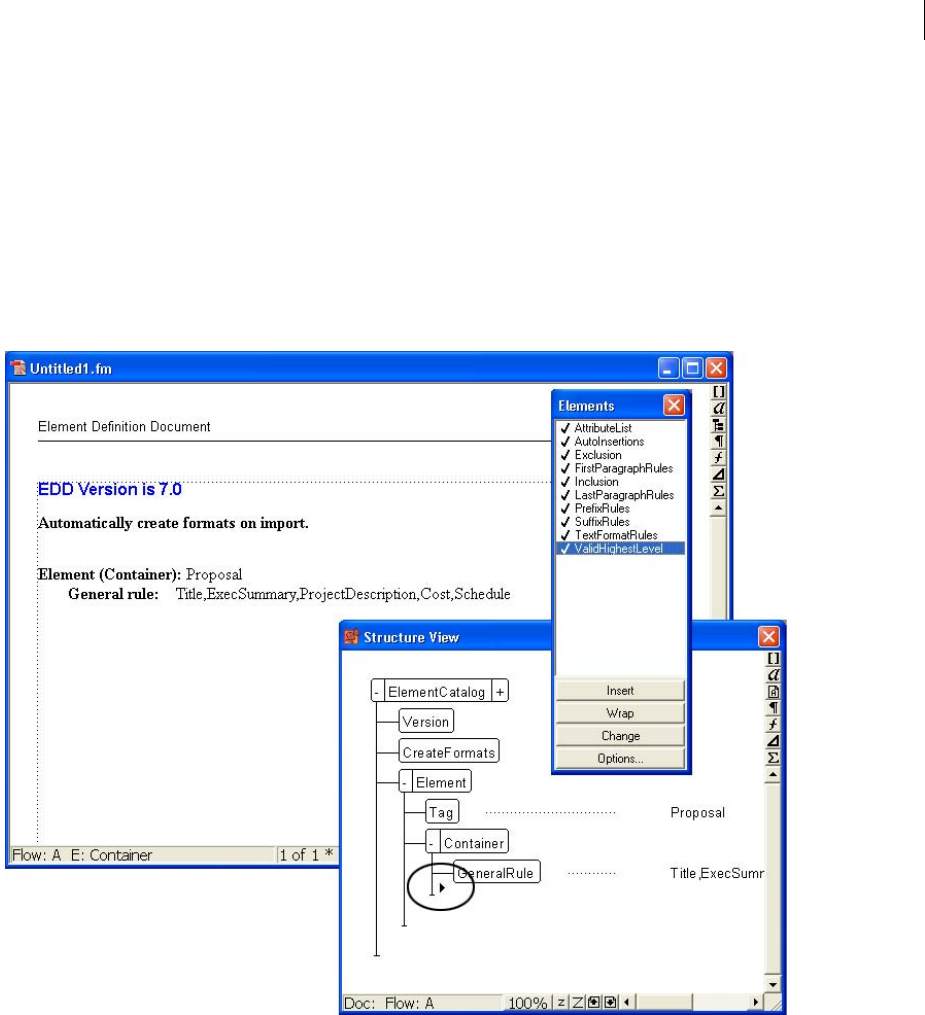
ADOBE FRAMEMAKER 8
User Guide
602
The general rule specifies which elements are allowed inside the proposal element. During the content analysis, you
identified the following: title, executive summary, project description, cost, and schedule.
7Type a general rule for Proposal:
Title, ExecSummary, ProjectDescription, Cost, Schedule
Note: Element names cannot contain spaces.
8Insert a ValidHighestLevel element as a sibling of the GeneralRule element. To do so, click underneath the Gener-
alRule element to position your cursor as shown in the following figure, click the ValidHighestLevel element in the
Elements catalog, and then click Insert.
Inserting the ValidHighestLevel elemen
The Proposal element is complete. You must now provide definitions for each of the child elements: ExecSummary,
ProjectDescription, Schedule, and Cost.

ADOBE FRAMEMAKER 8
User Guide
603
To define the child elements:
1Position your cursor at the bottom of the structure as shown in the following figure:
Getting ready to insert another element definition
2Using the Elements catalog, insert an Element bubble. Name the element ExecSummary, make it a container, and
specify the following as the general rule:
Title, Para+
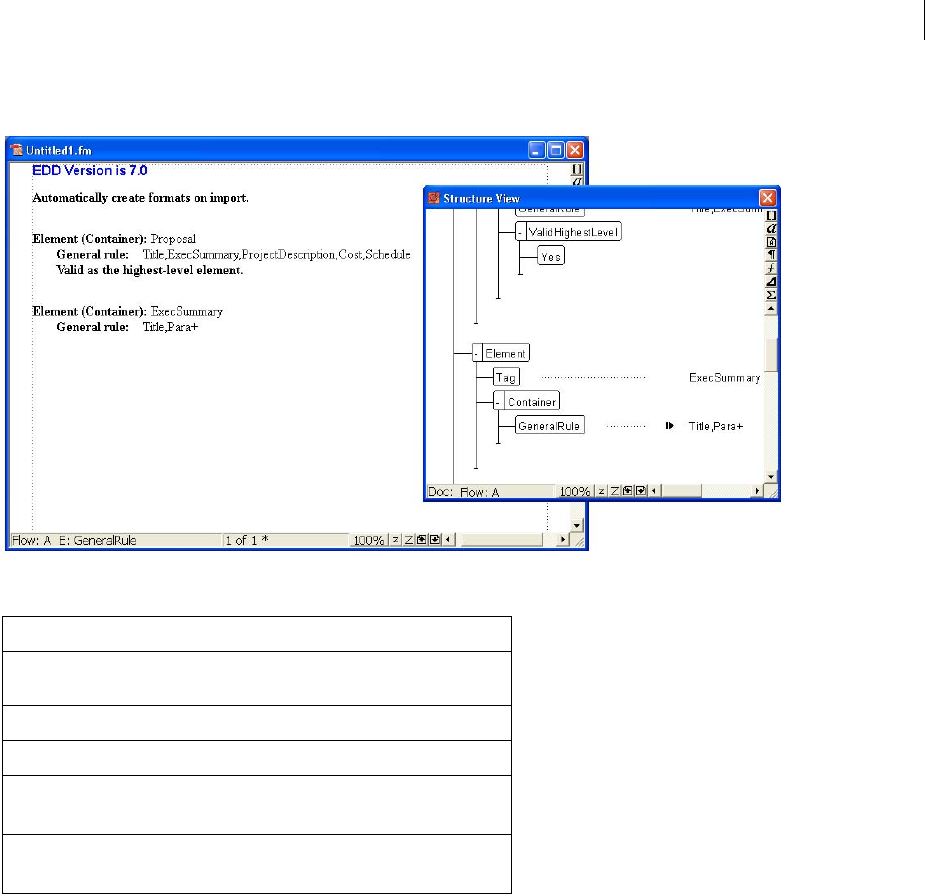
ADOBE FRAMEMAKER 8
User Guide
604
The result is shown in the following figure:
Adding the ExecSummary element
3Repeat step 2 to define the remaining elements. The general rules are shown in the following table:
4Save your EDD file as proposal_EDD.fm.
Testing the EDD
To test the EDD, you import it into a document and then verify that you can create the structure you expect. At this
point, the document will not have any flormatting, but you can verify that the structure is working as expected.
To verify that the structure is working as expected:
1Create a new, blank, portrait document by selecting File > New > Document, and then click Portrait.
Element General Rule
ProjectDescrip-
tion
Title,Para+
Cost Title,Para+
Schedule Title,Para+
Title <TEXT>
(Type the word TEXT with angle brackets around it.)
Para <TEXT>
(Type the word TEXT with angle brackets around it.)

ADOBE FRAMEMAKER 8
User Guide
605
2Make sure that the EDD and the new document file are both open. From the new document, select File > Import
> Element Definitions. In the Import from Document drop-down list, select the proposal EDD and click Import.
Importing element definitions from the EDD
Note: If your EDD is not displayed in the list, make sure that the EDD file is open and that you have saved it. Until you
save a document, it is not available in this list.
ADOBE FRAMEMAKER 8
User Guide
606
The structure definitions in your EDD are imported into the blank document. To verify that the definitions were
imported, position your cursor in the main text flow and then display the Elements catalog. You should see the
Proposal element, as shown in the following figure:
The Elements catalog shows permitted elements
3Insert a Proposal element. The Title element, which is required as the first child of Proposal, should now appear
in the Elements catalog.
4Insert the Title element.
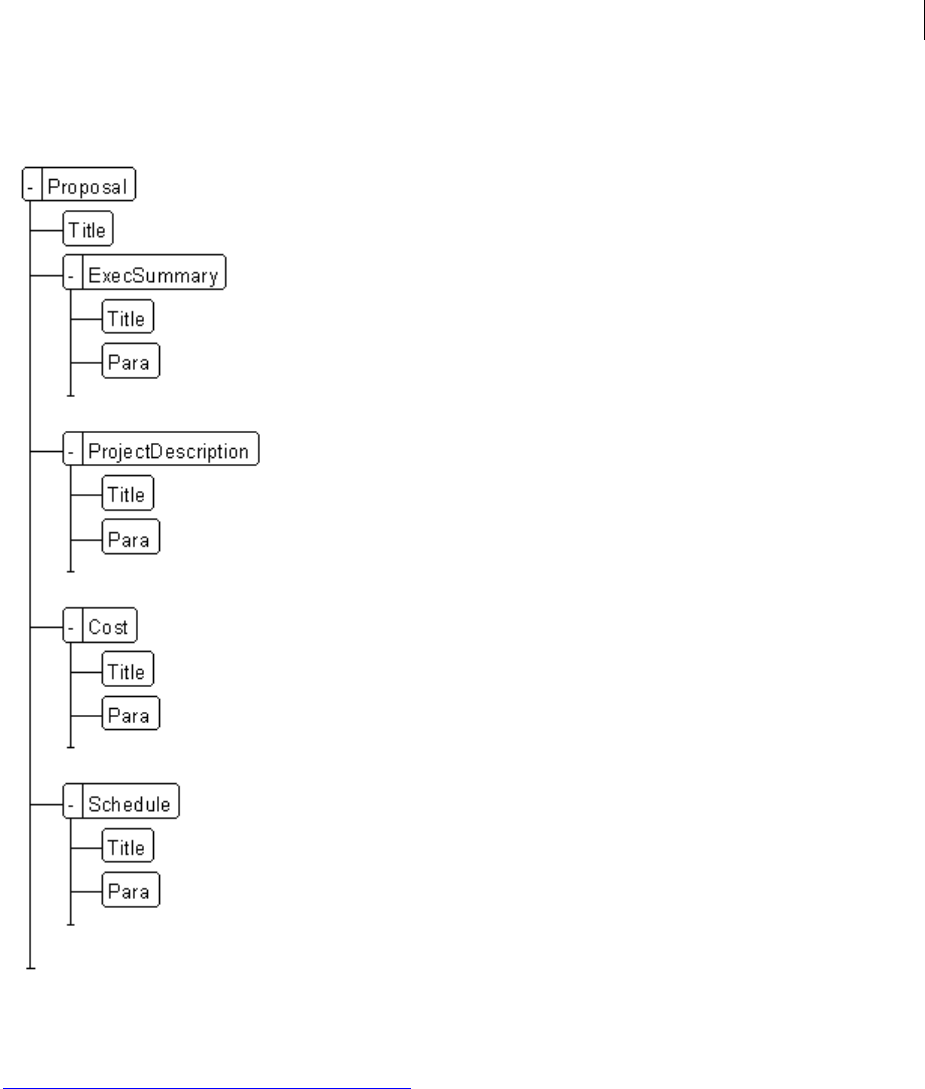
ADOBE FRAMEMAKER 8
User Guide
607
5Continue inserting elements until your proposal structure is complete. Your result must look like the following
figure:
Completed proposal structure
Note: If your structure doesn’t match the figure above, go back to your EDD, correct it, and then reimport the element
definitions. You can also check your EDD against the proposal EDD, which is available at:
www.adobe.com/products/framemaker/proposal_edd.
6Save your file as structured_proposal.fm.
Adding formatting to the EDD
You have now built an EDD that provides structure for a simple proposal. However, when you type content, no
formatting is applied. This section describes how to provide formatting, and how to automatically insert the correct
text for the various titles.
By default, text uses the Body paragraph tag.
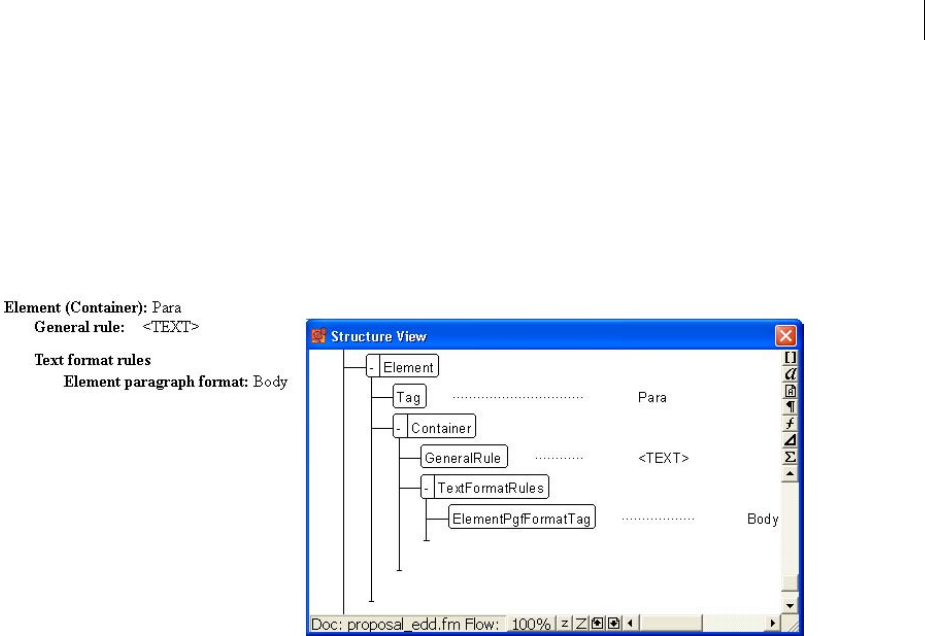
ADOBE FRAMEMAKER 8
User Guide
608
To change the Body tag definition:
1In structured_proposal.fm, select Format > Paragraph > Designer and change the default definitions of the Body
and Heading1 paragraph tags. For example, change the font or put a line above the Heading1. To make your changes
obvious, you may also want to assign unique colors to the two tags.
2In proposal_EDD.fm, modify the Para element definition to include a formatting rule. To specify that Para should
always use the Body paragraph tag, click under the GeneralRule element, add a TextFormatRules element, and then
add an ElementPgfFormatTag element. Type Body as the text for the ElementPgfFormatTag element.
Adding formatting rules to the EDD
For the Title element, you need more complex formatting rules. Title should automatically display section titles, such
as Executive Summary, Project Description, and so on. You must write a context rule that specifies what text to
display for each type of heading, and specify that Title uses the Heading1 paragraph tag.
3In proposal_EDD.fm, modify the Title element definition to use the Heading1 paragraph tag. Add the same
TextFormatRules and ElementPgfFormatTag elements as you did for the Para element.
Note: Like the paragraph tags, the information you enter is case-sensitive and space-sensitive. For example, “Heading1”
is not the same as “heading1” or “Heading 1.”
Next, add a prefix rule to the Title element. Prefix rules let you specify text that should appear at the beginning of
the element. Based on the Title’s position, you’ll specify which text should be displayed.
To add a prefix rule:
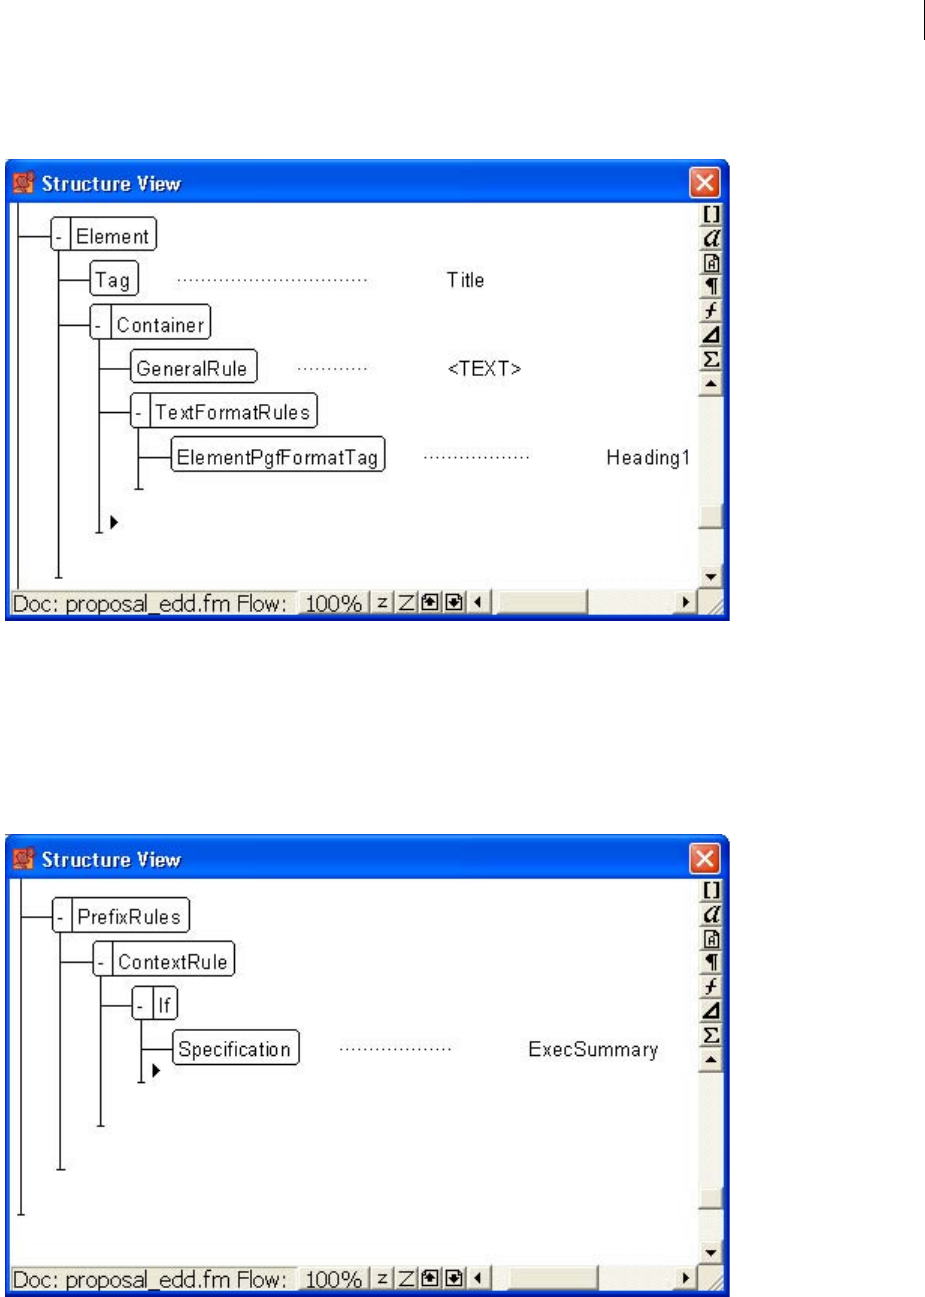
ADOBE FRAMEMAKER 8
User Guide
609
1Position your cursor in the Title element to insert a child of Container after TextFormatRules, as shown in the
following figure:
The cursor is positioned to insert a child of Container
2Insert a PrefixRules element.
3Insert a ContextRule element. The If and Specification elements are inserted automatically. For the Specification
text, type ExecSummary.
4Position your cursor underneath the Specification element (as displayed in the following figure) and insert a
Prefix element.
The cursor is underneath the Specification element and to the right of the If element line
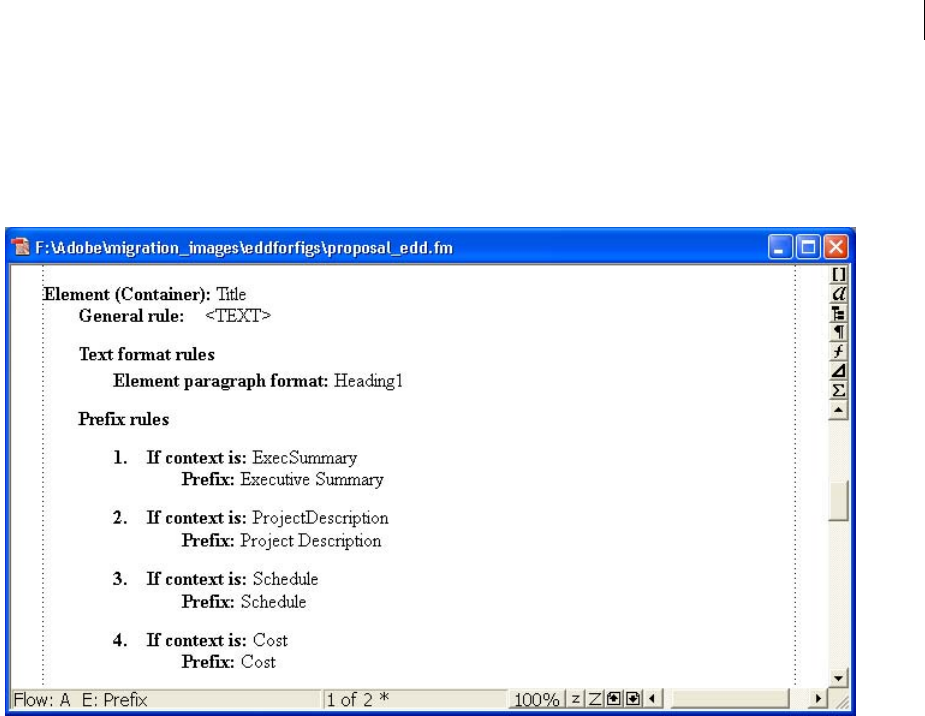
ADOBE FRAMEMAKER 8
User Guide
610
5For the Prefix element text, type:
Executive Summary
6Repeat steps 3 –5 for the other elements that need titles—ProjectDescription, Schedule, and Cost—and insert
the appropriate text for each prefix. The results are displayed in the following figure:
Context rules for Title element
To test the results:
1Save the EDD.
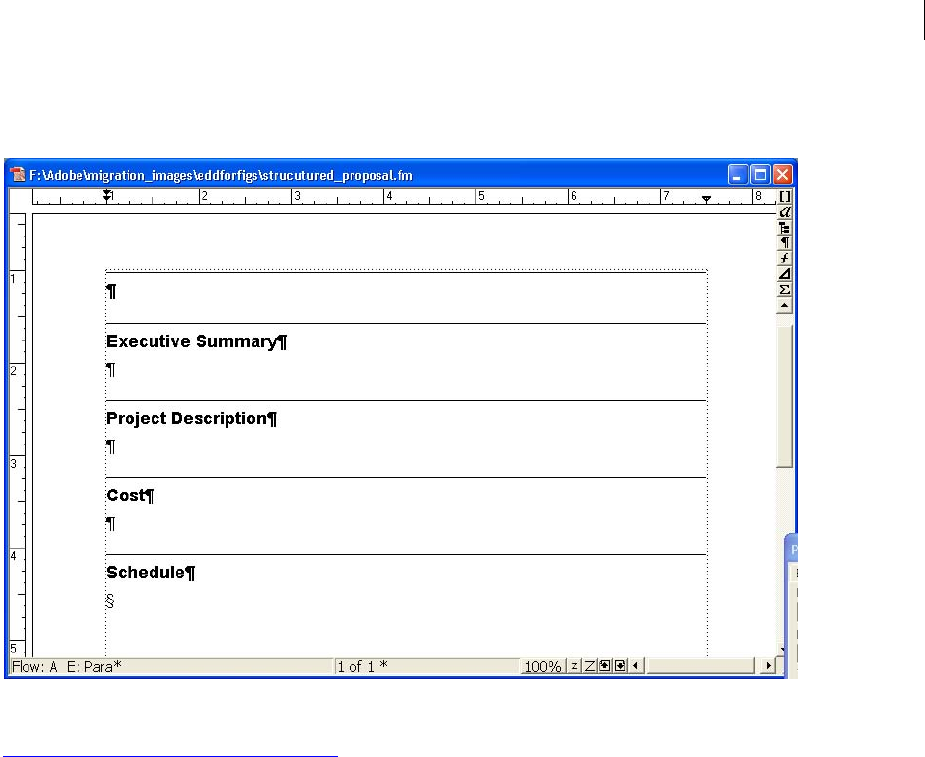
ADOBE FRAMEMAKER 8
User Guide
611
2Import the element definitions into your structured_proposal.fm file to test the results. Each section should
display the title text you’ve specified.
Testing the context rules
The completed EDD is available at:
www.adobe.com/framemaker/proposal_edd
Building the structured application
To enable XML import and export for structured proposals, you need to set up a structured application, which lists
the components of the structured authoring environment.
First, you need to create a document type definition (DTD) that matches the EDD.
To create a DTD:
1Open the proposal_edd.fm file in structured FrameMaker.
2Select StructureTools > Save As DTD. Specify the file name (proposal.dtd) and where you want to save the file,
and then click Save.
3In the Use Structured Application dialog box, leave the default selection, <No Application>, and click Continue.
4In the Select Type dialog box, select XML and then click OK. The DTD file is written out to the location you
specified.
You also need a structured template that contains formatting and EDD information.
To create a structured template:
1Open the structured_proposal.fm file.
2Delete all content from the file. The structured template must be empty.
3Save the file as proposal_template.fm.
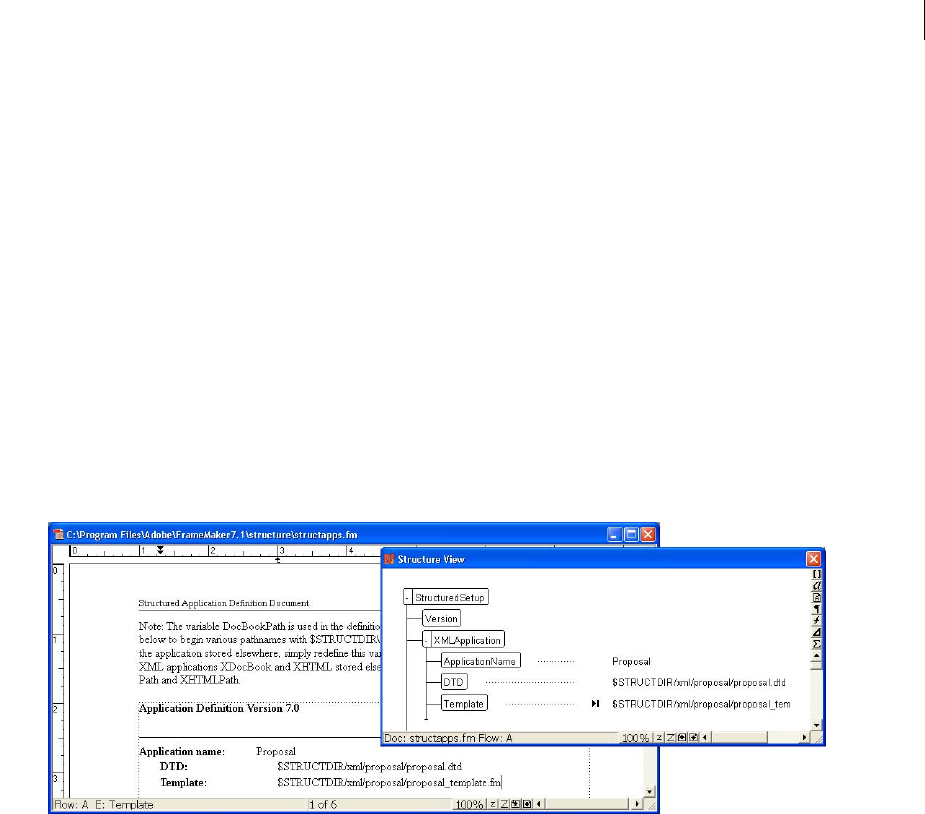
ADOBE FRAMEMAKER 8
User Guide
612
Now, you are ready to configure the structured application.
To configure the structured application:
1Select StructureTools > Edit Application Definitions. This command opens the structapps.fm file (installed in
FrameMaker’s structure directory) where application definitions are stored.
Note: Like the EDD, the application definition file is itself structured.
2Insert an XMLApplication element as a child of the StructuredSetup element. Type Proposal for the application
name.
3Insert a DTD element and specify the following as the DTD element text:
$STRUCTDIR/proposal/proposal.dtd
4Insert a Template element and specify the following as the Template element text:
$STRUCTDIR/proposal/proposal_template.fm
The completed application definition is displayed in the following figure:
Structure definitions for the Proposal application
5Select File > Save to save the structapps.fm file.
6Select StructureTools > Read Application Definitions to update FrameMaker with the new application definition.
Note: To verify that the application is installed correctly, select File > Set Structured Application to display the Set Struc-
tured Application dialog box. If you set up the applications definitions correctly, Proposal appears in the drop-down list.
Finally, you need to copy the application files into the directory where the structured application definition expects
them.
To copy the application files:
1Locate your FrameMaker installation directory using the file explorer (the default on a Windows machine is
C:\Program Files\Adobe\FrameMaker8).
2Navigate to the structure\xml directory.
3Inside the xml directory, create a proposal directory.
4Copy the proposal.dtd and proposal_template.fm files into the proposal directory.
Testing XML round-tripping
When you have configured the structured application, you can test XML round-tripping.

ADOBE FRAMEMAKER 8
User Guide
613
To test your implementation:
1Create a valid structured proposal in FrameMaker.
2Export the FrameMaker file to XML. To do so, select File > Save As and choose XML as the output format. If
prompted, select the Proposal application.
3Open the exported XML file in a text editor or an XML editor and verify that you have a valid XML file.
4In an XML or a text editor, modify the file you just exported. You can also create a new XML file that validates
against the proposal DTD. Save the new XML file.
5In FrameMaker, open the XML file. Verify that the XML file imports correctly and that formatting is applied
automatically.
Implementing structured FrameMaker
Implementation scenarios are rarely as straightforward as the proposal example outlined in the preceding section.
Before you begin building an EDD and a structured application, some planning is necessary.
Content analysis
The term content analysis describes a process in which you review existing documents to understand how they are
designed and what implicit structure they contain. Begin your analysis by making a list of the documents your
organization produces. Your list might include user guides, reference guides, white papers, tutorials, training
manuals, and online help. Make a list of the major components for each document type. For each component, list
whether the item is required, optional, and how often it occurs in that document. The following table displays a high-
level analysis for a book:
For major components, such as lessons (for training manuals) or chapters (for books), work your way down the
document hierarchy into smaller and smaller chunks, until you reach the bottom level of the hierarchy.
Component Required or optional? OccurRence
Front matter Required 1
Table of contents Required 1
Preface Optional 0 or 1
Chapter Required 2 or more
Appendix Optional 0 or more
Glossary Optional 0 or 1
ndex Required 1
Component Required or optional? OccurRence
Glossary Optional 1
Title Required 1
GlossEntry Required 1 or more
Term Required
<TEXT>
ADOBE FRAMEMAKER 8
User Guide
614
You must do a content analysis for every document type you want to create in your structured environment. When
you have developed a content model for each document, you can look for opportunities to refine the model and reuse
names. For example, an online help deliverable might consist of a collection of topics. Chapters in a book might also
consist of topics. If you create a Topic element that is usable for both printed and online materials, you can minimize
the number of elements in your structure definition and perhaps reuse information in both output formats.
It’s unlikely that your documents are perfectly consistent. You need to decide whether to create a structure that is
loose (allowing many variations) or strict (very few variations are permitted). You will have problems at both ends
of the spectrum:
•A very loose structure is quite complex, and can be difficult to maintain because so many variations are permitted.
•A very strict structure may disallow element combinations that are needed.
It’s very difficult to find the right balance between these two extremes. One approach is to allow variations only
where they add value. For example, the content of a glossary should be fairly straightforward. You could also create
reference materials (such as API documentation) that is highly structured. A standard online help topic, however, is
likely to require a significant number of choices.
Note: A similar problem occurs when creating unstructured FrameMaker templates. You want to minimize the number
of tags that must be maintained while providing all of the tags that are needed to create your content.
When the analysis is complete, you can decide whether to use an existing structure or to build your own. Numerous
XML implementations are available; DocBook and the Darwin Information Typing Architecture (DITA) are speci-
fications used for technical documentation. Standard structures are also defined for military documents (mil-specs
or mil-standards), aircraft maintenance manuals, and others. The following table describes some of the factors that
influence whether you will use a standard specification or build your own structure:
Definition Required 1 or more
<TEXT>
CrossRef Optional 1 or more
Printed Topic Online Topic Combined Topic
Topic Topic Topic
Title Title Title
Para Para Para
Steps Steps Steps
Can contain Para, List, Table,
Graphic, Note
Can contain Para, List, Table Can contain Para, List, Table,
Graphic, Note
RelatedTopics RelatedTopics
Component Required or optional? OccurRence

ADOBE FRAMEMAKER 8
User Guide
615
Building structure files
When you complete your content analysis, you will have structure maps similar to the ones displayed in the
preceding section. Decide whether to use an existing standard or create your own structure.
To create structure files without using an existing standard:
1In FrameMaker, create an EDD that matches your structure requirements.
2Test the EDD to verify that the structure definitions are correct.
3Add formatting to the EDD.
4Test the EDD to verify that the formatting works correctly.
5Create a DTD from the EDD.
You now have the two structure definition files you need—one for FrameMaker (EDD) and one for XML (DTD).
To use an existing standard:
1Obtain a copy of the standard files.
2Modify the provided DTD or Schema file to match your requirements.
3Open the completed structure file in FrameMaker to create an EDD.
4Add formatting to the EDD.
Note: FrameMaker includes several variations of DocBook as sample structured applications. If you plan to create
DocBook-based structure, consider modifying one of the provided applications.
When you have your structure definitions, you need to set up the structured application.
To set up the structured application:
1Open the structapps.fm file (select StructureTools > Edit Application Definitions).
2Add a new application definition to the file with pointers to your EDD and DTD/Schema files.
After setting up the application, you’ll want to fine-tune the import/export settings.
use a standard Build your own
You are required to deliver content that
follows the standard. For example, many
U.S. military contractors are required to
deliver documentation that follows a
published standard
You want to create a structure that matches your content analysis precisely.
Your content requirements closely
match an existing structure. You only
need to make minimal changes to the
standard structure.
Your content analysis indicates that your information does not match existing struc-
tures very well.
You do not want to spend a significant
amount of time building a structure,
and you are willing to change the orga-
nization of your content to fit it into an
existing structure.
The structure needs to match the content precisely.
A longer implementation period is an acceptable cost to ensure you can build
exactly what you need
You do not have the technical expertise
or resources available to build your own
structure.
You have resources available, whether in-house or as consultants, who can build the
structure.
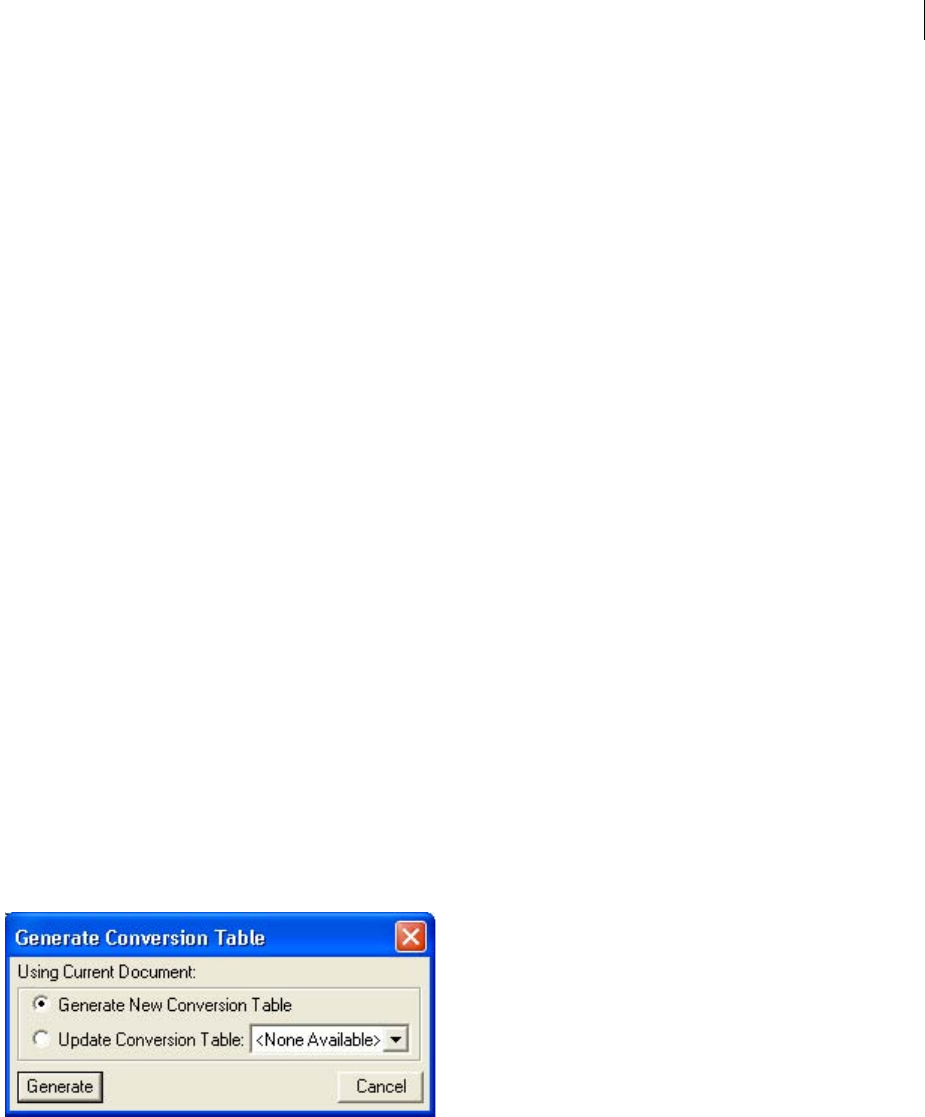
ADOBE FRAMEMAKER 8
User Guide
616
To fine-tune the import/export settings:
1Set up a read/write rules file with the necessary mappings.
2Set up XSL transformation files with any additional changes.
3Add a reference in the structured application definition to the read/write rules file and the XSL transformation
files.
4Add any other required configuration settings, such as handling of conditional text and external cross-references,
in the structured application definition.
Migrating unstructured files to structure
FrameMaker provides a mapping feature to help you transfer your unstructured documents into structure. Your
results depend on the following factors:
•Document consistency. Documents that implement a formatting template consistently, with few or no formatting
overrides, will convert better than documents that are full of overrides and custom paragraph or character tags.
•Similarity between unstructured and structured documents. A new document structure that is similar to the
organization in the unstructured documents eases the conversion process.
Mapping tags to elements
The conversion process creates structured elements from FrameMaker formatting components, such as paragraph
tags, character tags, markers, cross-references, and table components.
To begin the conversion process, select a document that is representative of your typical content. Ideally, this
document should contain examples of all of the formatting tags that would occur in your documents. These tags
must be shown in logical sequences (as they would occur in documents), so a formatting template that shows
examples of each paragraph tag in alphabetical order is not a good example document.
To configure the conversion:
1Open the example document.
2Import element definitions from the EDD into the example document.
3Select StructureTools > Generate Conversion Table. Select Generate New Conversion Table, then click Generate.
Creating a conversion rules table
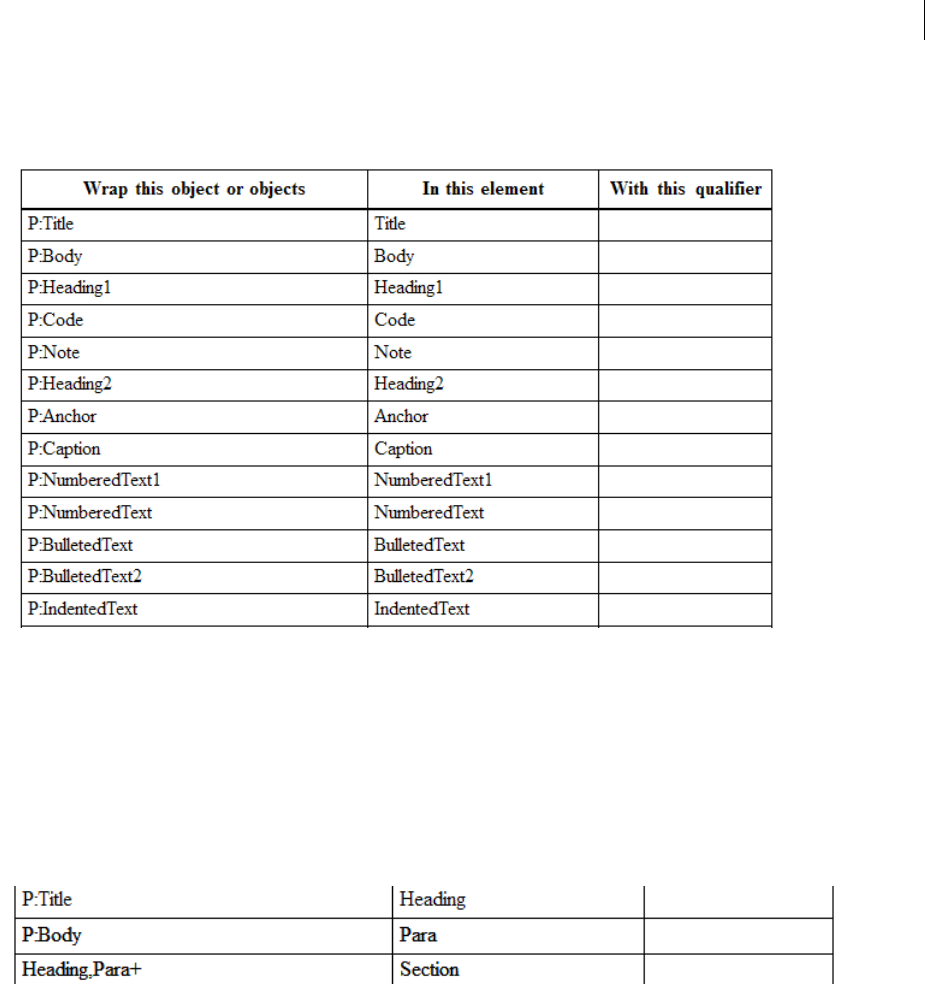
ADOBE FRAMEMAKER 8
User Guide
617
Adobe FrameMaker scans the document and creates a list of the formatting components that occur in this document.
Tags that are defined in the formatting catalogs but not used in the document are not included in the list.
Excerpt of a new conversion rules table
Note: FrameMaker assumes that the name of the formatting component will be the same as the name of the structure
element.
4Modify the mapping rules to match the structure. For example, FrameMaker assumes that the formatting tag
names match the element names, so in the preceding example, the Body paragraph (P:Body) is mapped to the Body
element. To change this mapping, change the second column (“In this element”) to read Para instead of Body.
5When you have mapped all of the formatting components, add additional entries to the table to create hierarchy.
For example, if a Section element typically contains a Heading and one or more Para elements, you add a row to the
table and specify how to create the Section element.
6(version 7.2) Add a root element mapping that specifies the top-level tag in the document, as shown here:
RE:RootElement Proposal
7Save the conversion rules table.
8To test the conversion rules table, open your example document, then select File > Utilities > Structure Current
Document. Select the conversion rules table document in the drop-down list, and then click Add Structure.
FrameMaker creates a new, untitled, structured document.
Keep refining and testing your conversion rules until you are satisfied with the document produced.
You can add tags to the conversion rules table by typing them or by scanning additional documents.
To add tags automatically:
1Make sure that the conversion rules table is open. Open the file that contains additional formatting components.

ADOBE FRAMEMAKER 8
User Guide
618
2Select StructureTools > Generate Conversion Table. Select Update Conversion Table and select your conversion
rules document in the drop-down list.
3Click Generate. FrameMaker scans the second sample document and adds additional formatting components to
the end of the conversion rules table.
Conversion rule examples
The order in which conversion rules are listed is significant. You must go from lower-level elements to higher-level
elements. For example, assume that you have the following mapping rules:
G: Graphic
P:caption Caption
E:Graphic,E: Caption Figure
The rule in which Graphic and Caption are wrapped into a Figure element must occur after the rules in which
Graphic and Caption are created.
If you need to map several paragraph tags to the same element and then wrap them into different parents, you use
the third column for a qualifier. It’s common, for example, to have a ListItem element that’s used for both bulleted
lists and numbered lists. When the bullet and step paragraphs are wrapped in the ListItem element, you need a way
to distinguish whether they belong in OrderedList or UnorderedList. To make this distinction, you use the qualifier
column, as shown in the following example:
bullet ListItem b
step1 ListItem st
step2+ ListItem st
E:ListItem[b]+ UnorderedList
E:ListItem[st]+ OrderedList
(version 7.2) To specify the root element of a document, you use the following:
RE:RootElement Chapter
You can only specify one root element per conversion table.
Graphics and tables are often anchored into the preceding paragraph in the unstructured document. When you
structure the document, the Graphic and Table elements end up as children of the preceding Para element (shown
in the following figure on the left).
The Promote command lets you create sibling elements
If you want the Graphic element to be converted as a sibling of Para (shown in the preceding figure on the right)
rather than a child, use the “promote” command:
G: Graphic(promote)
Handling conversion challenges
If the organization of your unstructured FrameMaker files matches the structure you have defined, you will be able
to automate almost all of the conversion process. There are, however, several situations that make conversions more
challenging. These scenarios include the following:

ADOBE FRAMEMAKER 8
User Guide
619
•Mapping from a single paragraph tag to multiple elements. For example, you might have an unstructured
document that uses a Heading1 for all major sections within a chapter. In your structure, you have specified that
a Chapter contains several different types of sections—Procedure, Concept, and Reference. If all of the sections
have the same organization, you will probably have to review the content to determine whether a particular
Heading1 should become a title in a Procedure, Concept, or Reference element. The best strategy is probably to
map everything to the element that occurs must often, and then make changes manually as needed.
•Adding metadata. Your new structure probably contains attributes, such as an author attribute for the top-level
Help element. If that information is not present in the unstructured file, you may have to manually insert the
attribute value.
•Inconsistent document organization. If the organization of the unstructured document does not match the
organization required by the EDD, you’ll need to change the content to match the required structure.
Automating conversion tasks
As you develop your conversion rules table, you will discover some conversion problems that require manual
cleanup. We strongly recommend that you use a scripting utility, such as FrameScript, to automate these tasks. Here
are some examples (from simple to more complex) of tasks you could automate:
•Deleting extraneous empty paragraphs.
•Changing text bolded with the Bold button (or Ctrl-B) to text bolded with a character tag. You can then map the
character tag to the appropriate element. (You could also use the Create and Apply Formats utility to assign new
character tags for mapping. However, you must use Create and Apply Formats for all overrides; if you want to
disregard some overrides, a scripting solution is more flexible.)
•Identifying and processing paragraphs that require unique treatment. In a well-designed template, converting
Note paragraph tags to Note elements is easy. You can just map them in the conversion rules table. Imagine,
though, that instead of using a Note paragraph tag, your content contains note information that uses the Body
paragraph tag. The authors have typed in the word “Note” at the beginning of each Body paragraph that is being
used as a note. (This inefficient approach is more common than you might think.) You cannot identify the Body
paragraphs that are being used as notes through the conversion rules table. Instead, you can write a script that
locates the problem paragraphs, removes the typed-in “Note” text, and applies a temporary Note paragraph tag.
In the conversion rules table, you can then map the Note paragraph tag to the Note element.
•Assigning different elements to table row and cell elements based on the table tag. For example, you might have
TableRow and TableCell for regular tables, but FieldName and FieldDescription for others. If the table paragraphs use
the same paragraph tags, conversion rules cannot distinguish between the two types of table rows and cells. With
scripting, you can post-process the structured document and assign specific table tags based on the parent Table
element. That is, any table that uses the generic Table element gets the TableRow and TableCell elements. Any table that
uses the FieldTable element gets the FieldRow element for rows, the FieldName element for the first cell in a row, and
the FieldDescription element for the second cell in a row.
If you can write down a generic process for the cleanup task, you can probably automate the task with a script.
XML with FrameMaker
You can open and save an XML file in FrameMaker.

ADOBE FRAMEMAKER 8
User Guide
620
Opening and saving XML files
When you open an XML file, FrameMaker retains the file’s .xml extension. Also, if you use the File > Save command,
FrameMaker saves the XML file in XML format using the .xml extension.
You can open XML files that use XML Schema; see “XML with Schema” on page 622.
Note: You can open XML files containing Unicode content. FrameMaker opens these files by converting them into UTF-
8 encoding.
To open an XML file:
1In Structured FrameMaker, choose File > Open. (In UNIX, you can click Open in the main FrameMaker window.)
2Select the file you want to open, and click Open.
3If the Use Structured Application dialog box appears, choose an application name from the Use Structured Appli-
cation pop-up menu, and click Set. Then do one of the following:
•To associate an application with the file, choose the name of an application.
•To use default mapping and no read/write rules, choose <No Application>. (You may want to use this option to
browse a file you don’t intend to save.)
The WebDAV feature is extended to allow authoring and editing of XML files located on the WebDAV server.
To save an XML file:
Do one of the following:
•Select File > Save As XML. In the Save Document dialog box, click Save.
•Select File > Save As. In the Save Document dialog box, select XML in the Save as type list, and click Save.
•Select File > Workgroup > Save As. In the Save To Server dialog box, select XML in the Format list, and click Save.
FrameMaker saves the file in XML format and preserves the .xml extension.
Save a FrameMaker file as XML, method 1
1In structured FrameMaker, select File > Save As XML.
2Select the folder in which to save the file.
3Specify a filename with an .xml extension.
4Choose XML (*.xml) from the Save As Type pop-up menu.
5Click Save.
Save a FrameMaker file as XML, method 2
1In structured FrameMaker, select File > Workgroup > Save As.
2In the Save To Server dialog box, select XML in the Format list.
3Click Save.
Save a FrameMaker file as XML, method 3
1In structured FrameMaker, select File > Workgroup > Save As.
2In the Save To Server dialog box, select XML in the Format list.
3Click Save.

ADOBE FRAMEMAKER 8
User Guide
621
Handling conditional text and XML
Structured FrameMaker allows you to export and import all conditional text (visible and hidden), along with infor-
mation about the condition tags, such as their show/hide status, color, and style.
To preserve conditional text when saving and opening XML files, the XML file that FrameMaker generates contains
the following:
•Conditional text tags corresponding to the conditional text present in the document.
•Condition indicators—color and effect— associated with each conditional text tag.
•The status—show or hide—for each condition tag.
•Start and end markers for sections corresponding to each tag.
In addition to normal text, support for conditional text in XML allows an entire table or table rows to be conditional.
The same applies to footnotes, markers, and anchored graphics. Also, conditional text can be inside a text inset (XML
or text).
Handling cross-references in XML
Structured FrameMaker allows you to generate and retain external cross-references when saving and opening XML
files.
For example, if your FrameMaker file contains a cross-reference to another file, when you save your file in XML,
FrameMaker generates tags representing the cross-reference along with information about the referenced file. When
opening the same XML file, FrameMaker converts the cross-reference tags and the information they contain into a
FrameMaker cross-reference.
FrameMaker supports a new attribute, srcfile, to retain external cross-reference information when generating
XML documents.
When you export a file containing an external cross-reference to XML, the srcfile attribute of the cross-reference
contains the name of the referenced file and the ID of the referenced element in the file.
Note: FrameMaker converts file paths in the generated XML to URIs.
Options for processing XML
FrameMaker provides options for processing XML. FrameMaker also allows XML import and export to support XSL
transformations (see “XML with XSL transformation” on page 621), and the Schema language for grammar and rule
definition (see “XML with Schema” on page 622). You can import an XML document that uses Schema, automati-
cally creating a Document Type Definition (DTD) from the referenced Schema, or you can create an Element
Definition Document (EDD) directly from a Schema definition. This release also enables validation against an
associated Schema upon both import and export.
XML with XSL transformation
XSLT (XML Style Transformation language), a specialized programming language written in XML, is the means by
which transformations defined in XSL (Extensible Style Language) are applied to XML documents. FrameMaker
includes an XSLT processor that allows you to associate an XSL file with an XML structure application or XML
document, and apply the transformations defined in that document when importing from or exporting to XML.
FrameMaker supports W3C XSLT 1.0 recommendations.

ADOBE FRAMEMAKER 8
User Guide
622
•New elements in the structure application (XSLTPreferences in the Stylesheets element of XMLAppli-
cation) allow you to specify an XSL file as part of your XML structure application, to be used for both import
and export.
•The xml-stylesheet processing instruction (PI) now allows you to specify an XSL file in an XML markup
document, which supercedes any XSL specified in the structure application when importing that document.
Upon import, XSL transformations are applied before the default read rules or any additional read rules you have
defined. That is, the result of applying an XSL transformation on import is a new file, which (if it is an XML file) is
passed to the read/write rules.
Upon export, XSL transformations are applied after the default or explicit write rules. The result of applying
read/write rules on export is a new XML file, which, if it is valid, is passed to the XSLT processor.
For additional information and further details of the new elements and PI, see the Structured Application Developer’s
Guide.
XML with Cascading Style Sheets
When an XML document is opened in FrameMaker, FrameMaker processes CSS2 by mapping the CSS information
to appropriate EDD rules in the EDD document.
The following scenarios describe the processing of CSS2 in FrameMaker:
•You open an EDD in FrameMaker and use the Import CSS Styles option in the StructureTools menu. FrameMaker
checks whether the current document is an EDD. If so, the Open dialog box appears and you can specify the CSS
file path. The CSS is then imported into the EDD. You can then import the element definitions from the EDD into
a template to use when you open an XML file. If the EDD contains formatting rules, the CSS properties are
appended to the existing rules if the properties are unique. Alternatively, the CSS properties you import will
overwrite the existing formatting rules of the EDD. You can also export XML style information to an EDD for all
elements in a document that use the Cascading Style Sheets 2 (CSS2) format, using the Generate CSS2 option in
the StructureTools menu.
•When you open an XML file that is associated (using xml-style sheet PI) with style sheets, FrameMaker reads the
DTD and the style sheet associated with the XML document, and then generates a temporary template to use for
opening the XML file. However, if a template is already specified in the “Structured Application” (used to open the
XML file), FrameMaker uses that template to open the XML file and will not generate any new template from the
DTD and style sheets.
Note: An XML file opened in FrameMaker can contain multiple CSS files. FrameMaker supports the author’s style sheet
only, and not the user’s style sheet.
XML with Schema
FrameMaker allows you to import XML markup documents that are associated with W3C's XML Schema language.
FrameMaker automatically creates a DTD and EDD from the Schema. FrameMaker validates the document
structure against the associated Schema upon both import and export to XML, but does not retain all Schema infor-
mation upon export.
For complete details of how Schema is mapped to DTD, see the Structure Application Developer’s Guide.

ADOBE FRAMEMAKER 8
User Guide
623
Note: This release offers support for Schema that is equivalent to what was previously available for DTD. That is, EDD
has not been extended to accommodate features in Schema that are not available in DTD. For this reason, Schemas are
read-only, and you cannot export the EDD back out to Schema.
Schema workflow
You can import an XML document that references a Schema file, and you can specify a Schema file in your structure
application, to use for validating a document upon export to XML.
1For a specific XML document, you can include the path of the schema file in the XML using attributes -
noNamespaceSchemaLocation or schemaLocation depending on whether your schema includes a target
namespace or not.
2To specify a Schema file for use in exporting XML, modify the structapps.fm file. Use the Schema element
as part of the XMLApplication to provide the Schema file path for export.
3Open the XML in Frame using a structured application. Edit it.
4Save the XML using a structured application. The Schema element in the structapps.fm file is output in the
file and validation is performed against it.
In this workflow, a DTD is generated automatically as an intermediary file from the Schema given in the XML
document, and you do not modify it. However, you can also use a Schema file to generate an EDD; see “Generating
an element catalog from Schema” on page 623.
Changes to structure application for Schema support
The new element Schema, a child of the XmlApplication element, specifies the path of a Schema file in the
structapps.fm structure application file. If instance documents use namespaces, the property Namespace in
XmlApplication must be set to true.
In order for a structure application to be selectable in the Use Structured Application list while importing a
document that is associated with a Schema, the Schema’s root element must be included in the application’s DOCTYPE
in the XmlApplication element.
Generating an element catalog from Schema
You can create a new EDD from a Schema definition, or import the elements from a Schema definition into an
existing EDD. FrameMaker converts the Schema definition to DTD first, and then creates or imports elements to an
EDD.
Use the following commands in the StructureTools menu:
•Open Schema: This command converts a specified Schema to DTD, and creates a new EDD from the DTD.
•Import Schema: This command converts a specified Schema to DTD, and imports elements from the DTD into
an existing EDD.
Each command opens a File Choose dialog box that allows you to specify the Schema file, then a Save dialog box in
which you specify where to save the resulting DTD file.
To create an EDD from Schema:
1In Structured FrameMaker, select StructureTools > Open Schema.
2Choose a Schema file.
3Choose a path for the DTD to be output.

ADOBE FRAMEMAKER 8
User Guide
624
4Examine the resulting DTD and make any modification you wish.
5Create an EDD from the generated DTD, as described in the Structure Application Developer’s Guide.
6Use this EDD to create a template that can be included in the Structured Application.
7Provide your DTD path along with the Schema Location in the input XML. This will make sure that FrameMaker
works correctly with your template. Validation of input and output XML is still performed against the Schema.

625
Chapter 20: UNIX macros and utilities
About the UNIX version of FrameMaker
The UNIX version of Adobe FrameMaker has several features that can increase your productivity.
•Macros can automate repetitive keyboard actions.
•The screen-capture feature lets you capture on-screen images that you can then import into
FrameMaker documents.
•Several UNIX command-line utility programs perform batch operations on FrameMaker files and work with
graphic files.
Using UNIX keyboard macros
A macro is a shortcut for a sequence of keystrokes. You assign the macro a trigger—a key sequence you’ll press to play
back the macro. When you press the trigger, the macro plays back as if you were typing the keystrokes yourself.
A macro can be simple—for example, it could type a word or phrase you use often—or it can be complex. For
example, it might search for the paragraph tag of a first-level heading, move the insertion point to the next
paragraph, and paste a format that’s on the Clipboard.
Before recording macros, become familiar with the extensive set of FrameMaker keyboard shortcuts. You’ll use them
to create macros. For a complete list of keyboard shortcuts, see the online Help.
You don’t need to use a macro to change the default keyboard shortcut for an action. You can add, change, or delete
the built-in shortcuts by following the instructions in the online manual Customizing FrameMaker Products. This
manual is available on this Adobe website: www.adobe.com/devnet/framemaker/pdfs/
Customizing_Frame_Products.pdf.
You can work with any number of macros at a time. Each macro can be about 600 keystrokes long. (Most nonprinting
keys—such as the spacebar, Return key, and function keys—count as two keystrokes.)
A macro can do anything you can do in FrameMaker, except the following:
•Pause for keyboard input and then continue
•Record mouse clicks or mouse movements
•Record the F10 keyboard shortcut that moves the focus to the menu bar
•Record the F4 keyboard shortcut that displays the appropriate context (shortcut) menu
•Record Japanese characters
To record a macro in UNIX:
1Choose File > Utilities > Keyboard Macros.
2Click Record a New Macro, click Begin, and then click OK.
3Type the keystrokes you want FrameMaker to record. When you press a key, FrameMaker records it and carries
out its normal function. You can also press the trigger for a macro that you’ve already recorded.

ADOBE FRAMEMAKER 8
User Guide
626
4To finish recording, choose File > Utilities > Stop Recording Keys.
5Press the key or combination of keys you want to use as a trigger, and then click Continue. You must type a trigger,
or the recording is canceled.
As you type the trigger, the keystrokes appear in the text box. (Function keys appear preceded with a slash; Control
appears as ^; Meta appears as ~; Shift appears as +; and Esc appears as \!) For more information on triggers, see
“Choosing a macro trigger” on page 626.
6Type a comment for the macro if you want, and click Continue.
To cancel recording in UNIX:
❖Choose File > Utilities > Stop Recording Keys, and click Cancel.
Choosing a macro trigger
Here are some guidelines for choosing a macro trigger:
•The trigger can contain up to 15 keystrokes.
•A trigger can be any keyboard key, but shouldn’t be one that already has a function assigned to it. For example,
don’t use the Tab key as a trigger, because you then can’t use it to insert a tab in text.
•A trigger can include any combination of the Control, Shift, and Meta keys—for example, Control+8 and
Meta+Control+8 are both valid.
•A trigger shouldn’t start with Esc or Control+r, followed by the first letter of a menu name. This will disable all the
shortcuts for that menu. For example, if you choose Esc e as a trigger, you can’t use the shortcuts for Edit menu
commands.
•A trigger shouldn’t duplicate a built-in shortcut unless you don’t mind losing the built-in shortcut. (For a list of
built-in keyboard shortcuts, see online Help.)
•Certain keys and key combinations have special meanings when you’re assigning a macro trigger.
To use these keys in a trigger, precede them with a backslash. For example, to use Control+g Delete as a trigger, press
Control+g, type a backslash, and then press Delete. The trigger appears as ^g/Delete.
•To include the backslash itself in a trigger, type it twice (\\).
Key sequence Meaning
Backspace, Delete, and Control+h Deletes the last trigger keystroke
Control+u Deletes the whole trigger
Return, Control+] Accepts the trigger (clicks OK)
Tab Moves to the next setting
Shift+Tab Moves to the previous setting
Control+Tab Moves to the first setting
Control+c Cancels the macro (clicks Cancel)

ADOBE FRAMEMAKER 8
User Guide
627
Playing back macros
When you play back a macro, FrameMaker responds as if you were typing the keystrokes stored in the macro.
Depending on the purpose of the macro, you may need to select text or objects before playing back the macro. For
example, if the macro changes the format of the current paragraph, put the insertion point in a paragraph before
playing back the macro.
Note: Macros may execute incorrectly when the insertion point is in an equation and you press the macro trigger from
a dialog box.
To play back a macro:
❖Press the macro’s trigger.
To cancel a macro while it’s playing:
❖Press Control+c.
Note: If you choose Edit > Undo after playing back a macro, only the last action of the macro will be undone. To undo
the effect of the whole macro, you must save your document before playing the macro, and then choose File > Revert to
Saved after the macro has finished.
Saving UNIX macros
You save the macros currently in memory by adding them to a macro file. FrameMaker adds any macros you
recorded since the last time you saved or cleared them.
If you save your macros in a file called fmMacros and store it in one of four locations, FrameMaker will load the
macro file automatically when it starts. It loads the first fmMacros file it finds as it searches in the following locations
in this order:
•The fminit directory where you started FrameMaker (./fminit)
•The directory where you started FrameMaker (.)
•The fminit directory in your home directory (~/fminit)
•Your home di rec tor y ( ~)
You can create special macro files for specific tasks, reading them into FrameMaker as needed. For example, you
could create a macro file for graphics tasks and a different macro file for working with text.
To save all current macros in a file in UNIX:
1Choose File > Utilities > Keyboard Macros, and do one of the following:
•To add the macros to your standard set of macros, make sure fmMacros is the filename in the Macro File text box.
•To add the macros to different macro file, use the scroll list to select a macro file.
•To create a new macro file, type a new filename in the Macro File text box.
2Click Add New Macros to File and click Begin.

ADOBE FRAMEMAKER 8
User Guide
628
Reading macros into memory
Reading macros from a macro file merges the macros in the file with the current macros. If a macro in the file uses
the same trigger as a current macro, the macro in the file replaces the current macro. If you want to replace all the
current macros with the macros in a file, clear the current macros before you read the macros from the file.
If your system crashed before you could save your macros to a file of your choosing, you can reload them by reading
in the file ~/fmMacrosLog.
To read a set of macros from a file in UNIX:
1Choose File > Utilities > Keyboard Macros and use the scroll list to select a macro file.
2Click Read Macros from File, and then click Begin.
Clearing macros from memory
When you record macros or read them from a file, the macros are stored in your workstation’s memory. You can clear
the current macros from memory at any time. (If you want to use the macros again, be sure you save them before
you clear them from memory.)
When you clear macros, FrameMaker also clears shortcuts that were added in a menu customization file during the
session. For information on menu customization files, see the online manual Customizing FrameMaker Products.
To clear the current set of macros from memory:
❖Choose File > Utilities > Keyboard Macros, click Clear Current Macros, and then click Begin.
Deleting UNIX macros and triggers
If you want to discard the macros that you just recorded—but haven’t saved—you can clear the current macros (see
“Clearing macros from memory” on page 628). But if you have other newly recorded macros you want to save, or if
the macro has already been added to the file, delete the macro from the macro file.
To delete a trigger and use it in a different macro:
❖Record the new macro and give it the trigger you want. Even though FrameMaker has two macros with the same
trigger, it uses only the most recent macro for the trigger.
To delete a macro from a saved macro file:
1Save any newly recorded macros in a macro file (see “Saving UNIX macros” on page 627).
2Open the macro file and delete the macro definition. (If you use FrameMaker to edit the file, save the file in Text
Only format.) To identify the macro you want to delete, look for its trigger or its comment. The comment immedi-
ately precedes the macro definition. Be sure to delete the whole definition, including the final angle bracket (>).
Sample macro and its comment

ADOBE FRAMEMAKER 8
User Guide
629
3Clear the current macros (see “Clearing macros from memory” on page 628).
4Read the edited macro file back in (see “Reading macros into memory” on page 628).
Creating UNIX macros that use dialog boxes
This procedure describes the general steps for creating a macro that uses a dialog box. The specific steps will depend
on the dialog box you’re using and what you want to accomplish in the macro.
To create a macro that uses a dialog box:
1Start recording the macro, and use a keyboard shortcut to display the dialog box or to shift the focus to an already-
open dialog box. (For a list of these shortcuts, see online Help.)
2Press Control+Tab to move to the first setting in the dialog box. Pressing Control+Tab ensures that the macro
always starts filling in the dialog box at the same setting or field.
3Specify each setting of importance to you even if it’s already correct. Specifying each setting ensures that the macro
plays back in the same way no matter what state the dialog box is in when the macro starts.
To move forward from setting to setting, press Tab; to move backward, press Shift+Tab. For a full list of dialog box
shortcuts, refer to online Help.
4Press Return to accept the settings and to close the dialog box. Pressing Return has the same effect as clicking the
button that currently has the focus. If you want the macro to click a different command button, tab to the button,
and then press Return.
5Stop recording the macro.
To create a macro that starts or stops while a dialog box is open, display the dialog box as you usually do and then
press Control+] to start or stop the macro recording.
Creating UNIX macros that repeat
This procedure describes the overall steps for creating a macro that repeats a set number of times or indefinitely, until
you stop it by pressing Control+c.
To create a macro that repeats a set number of times:
1Record the macro you want to repeat and assign it a trigger (see “Choosing a macro trigger” on page 626).
2Start recording a second macro, and while recording, press the first macro’s trigger as many times as you want the
macro to repeat.
3Stop recording the macro.
To create a macro that repeats indefinitely:
❖Record the macro you want to repeat and make the last keystrokes you record the same as the macro’s trigger.

ADOBE FRAMEMAKER 8
User Guide
630
Capturing UNIX screen images
You can capture an image of any rectangular area of the screen and store it as an X Windows Dump (xwd) file. You
can edit the resulting file in any paint program that supports the xwd bitmap format. If you need to convert a color
image to black and white before importing it, see “Converting color images to monochrome (UNIX)” on page 637.
Once captured, you can import the image into FrameMaker (see “Using the Import command to import graphics”
on page 508).
To capture the edges of an image cleanly, move it over an empty window or a blank page in a document. If the
object is unmovable, you can edit the image in a paint program. You can also mask unwanted bits in FrameMaker
by drawing objects with white fill and no pen pattern on top of the parts you want to hide (see “Cropping or masking
graphics” on page 343). Then recapture the masked image to make the edits permanent.
Screen captures that include colors may not be totally accurate. For example, a screen capture of a blue dialog box
might have a darker shade of blue than the original.
To capture an image in UNIX:
1Position the image as needed.
2Choose File > Utilities > Capture and specify a filename and location for the image.
3Click Capture. After a short delay, the pointer changes to a cross hair (+).
4Drag from one corner to the opposite corner until the capture border surrounds the image. When you release the
mouse button, a message appears telling you the screen image has been captured.
Drag out a capture border and release to capture the image.
5Click Continue.
If you capture an image in an application that uses a different color map, you can move the pointer to the
application’s window during the delay mentioned in step 3, thus switching to the appropriate color map. To change
the delay period, edit the Maker.captureDelayTime resource, as described in the online manual Customizing
FrameMaker. This manual is available on this Adobe website: www.adobe.com/devnet/framemaker/pdfs/
Customizing_Frame_Products.pdf
Performing command-line operations with fmbatch
(UNIX)
You can use fmbatch to open, print, reformat, and save FrameMaker files without actually displaying them. You can
issue commands one at a time (interactively), or you can store commands in a text file—a batch file—and issue all
the commands in a single command.

ADOBE FRAMEMAKER 8
User Guide
631
Starting fmbatch
You start f mb atch by typing fmbatch, followed by optional start options, at a UNIX shell prompt (you may have to
change to $FMHOME/bin).
For example, enter fmbatch -v -makername maker MyCommands.txt to start FrameMaker, have fmbatch execute
the commands in the MyCommands.txt file, and echo those commands to the screen.
If you’ve set a language preference with the Maker.uiLanguage resource in your ~/.Xdefaults file, fmbatch uses that
language version as well.
Using fmbatch interactively
Use commands interactively (one at a time) for operations you perform infrequently.
To use fmbatch interactively:
1Type fmbatch at a UNIX shell prompt.
2Enter an fmbatch command (see “About fmbatch commands” on page 632) at the prompt.
Using fmbatch in batch mode
You can store fmbatch commands in a text file—a batch file—and issue all the commands in the file at once. Using
batch files is convenient when you need to perform the same set of operations frequently. For example, you can create
a batch file to open, print, and close a book file.
You can also create batch files from UNIX shell scripts. For more information, see “Creating batch files from scripts”
on page 635.
When you store a batch file in the same location as the files you want to use, you don’t have to use pathnames in your
fmbatch commands. Otherwise, use either absolute or relative pathnames.
To create an fmbatch batch file:
1Use any standard text editor to create a text file.
2Type fmbatch commands in the order you want them executed with each command on a separate line. Be sure to
include any needed options. (For a list of possible commands, see “About fmbatch commands” on page 632. For
details on the options for some commands, see the sections that follow.) Two special commands deserve special note:
•To enter a comment, type a number sign (#) at the beginning of the line.
•To display messages on-screen while the batch file is running, enter echo message, where message is the text you
want to display.
3Save the file. If you’re using FrameMaker to create the batch file, save it in Text Only format.
Start option Result
-makername maker Starts FrameMaker
-makername structured Starts Structured FrameMaker
-noerrorquit Starts FrameMaker and continues to run even if an error is encountered
-v Turns echoing on
batch_file Executes the commands in batch_file (omitting batch_file starts
fmbatch in interactive mode)

ADOBE FRAMEMAKER 8
User Guide
632
To use a batch file with fmbatch:
❖At a UNIX shell prompt, type fmbatch -v batch_file. To suppress commands from appearing as they are run in
the batch file, don’t use the -v option.
For example, to have fmbatch run a batch file called PrintBook, type fmbatch -v PrintBook
About fmbatch commands
The following table lists all the commands you can use with fmbatch. You can use these commands in either inter-
active or batch mode.
All fmbatch commands are case-sensitive. Some commands are followed by filenames. A few commands also need
options, as described in the sections that follow.
When using filenames with fmbatch commands, you may need to use single or double quotation marks to delimit
them. (If the filename includes single quotation marks, enclose the filename in double quotation marks, or vice
versa.) For example, to open a file that has single quotation marks in its name, type
Open "My 'Unquotable' Quotes File"
Opening, saving, and printing files with fmbatch
You can open any file with fmbatch that you can open with the FrameMaker File > Open command. You must use
fmbatch to open a file before you can perform any other fmbatch operations on it.
You can save an open document or a book file with the current filename and format, or you can save it with a
different name or format.
Note: When you save a document with fmbatch, it does not warn you about overwriting an existing file. The overwritten
file is given a .backup suffix.
You can print a file you opened with fmbatch using the file’s print settings or using the print settings from a different
FrameMaker document, which lets you, for example, specify one printer name for a group of documents.
Command Result
echo Prints messages to standard error output
help or ? Displays a list of fmbatch commands
UseFormatsFrom Imports and updates the formats in an open document or in all the documents in a book file,
using the formats from another open document
Open Opens a document or book file
OpenTextFile Opens a text file
ping Verifies that FrameMaker is still running
Print Prints an open file, using its own print settings or the print settings from another file
Quit Closes a file or exits fmbatch
Save Saves an open file
SaveAs Saves an open file, using a different name or format
system Runs a UNIX command
Update Updates cross-references and generates all the generated files in an open book

ADOBE FRAMEMAKER 8
User Guide
633
If the open file you’re printing is a book file, fmbatch prints the entire book. If you print a book file to a PostScript
print file, fmbatch creates a single large PostScript file.
You can also use fmprint to print files. For details, see “Printing with fmprint (UNIX)” on page 636.
To open a file with fmbatch:
❖In a batch file or at the fmbatch prompt, do one of the following:
•To open a FrameMaker document, enter Open filename. For example, enter Open chapt1.fm
•To open a text file, enter OpenTextFile type filename. The type option is one of the following.
For example, to open MyData.txt, a line-oriented text file, enter OpenTextFile a MyData.txt
To save an open file with fmbatch:
❖In a batch file or at the fmbatch prompt, do one of the following:
•To save a file with its current name and format, enter Save filename (for example, enter Save chapt1.fm).
•To save a file with a different name or format, enter SaveAs format oldname newname. The format option is one
of the following.
Specify only one format option. If you don’t specify a format option, fmbatch saves the file in its current format. You
can’t use the l, a, or t option when saving a book file. If a document is in View Only format, you can’t save it in
Document format with the SaveAs command.
For example, to save the FrameMaker document MyReport.fm as a MIF file, enter SaveAs m MyReport.fm
MyReport.mif
To print an open file with fmbatch:
❖In a batch file or at the fmbatch prompt, do one of the following:
•To print a file with its own print settings, enter Print filename
•To print a file with the print settings of another FrameMaker document, enter Print filename settings_file. (To set
up or change the print settings in the settings_file document, open a document—even a new, blank document—
choose File > Print, specify the settings you want, and click Save Settings Only. Then save the document.)
Type option File type
a A line-oriented text file (Each line is treated as a separate paragraph.)
t A paragraph-oriented text file (Consecutive nonempty lines are considered part of a paragraph, and an
empty line signifies a paragraph break.)
Format option Result
d Saves in Document format
l (lowercase L) Saves in View Only format
a Saves in line-oriented text format
t Saves in paragraph-oriented text format
m Saves in MIF
- (hyphen) Saves in the current format

ADOBE FRAMEMAKER 8
User Guide
634
For example, to print MyReport.fm with the print settings from the PrintToDuplex.fm document, enter Print
MyReport.fm PrintToDuplex.fm
Updating files with fmbatch
You can update all cross-references in a document or book that you opened with fmbatch. When you update a book,
fmbatch also regenerates all generated files in the book.
When you use a batch file (see “Using fmbatch in batch mode” on page 631) to update and generate files, fmbatch
quits if it encounters an error such as an unresolved cross-reference or a missing file (unless you start fmbatch with
the -noerrorquit option).
You can also import and update the formats in a document or in all files in a book. To do this, first use fmbatch to
open both documents or the document and book (both the target and the source for the import format process).
To update and generate files with fmbatch:
❖In a batch file or at the fmbatch prompt, enter Update filename (for example, to update and generate the files in
Reference.book, enter Update Reference.book).
To import formats with fmbatch:
❖In a batch file or at the fmbatch prompt, enter ImportFormats options filename filename_with_formats.
The options are any of the following.
If you don’t specify options, fmbatch imports all formats. The options correspond to the settings available with File
> Import > Formats. For information on the settings, see “About import and update settings” on page 416.
For example, to import the paragraph and character formats from Template.fm to Chapter2.fm while preserving the
manual page breaks, enter ImportFormats pfB Chapter2.fm Template.fm
Option Result
p Imports paragraph formats
f Imports character formats
l (lowercase L) Imports page layouts (master pages)
c Imports cross-reference formats
v Imports variable definitions
r Imports reference pages
t Imports table formats
x Imports conditional text settings
k Imports color definitions
m Imports math definitions
i Imports combined fonts (Japanese documents only)
d Imports document properties
B Preserves manual page breaks
O (uppercase O) Preserves other format and layout overrides

ADOBE FRAMEMAKER 8
User Guide
635
Closing files and exiting fmbatch
When you close a file or exit fmbatch, the program doesn’t check whether you saved changes. So be sure to save any
changes you made.
To close a file or exit fmbatch:
❖In a batch file or at the fmbatch prompt, do one of the following:
•To close a file, enter Quit filename. For example, to close Chapter2.fm, enter Quit Chapter2.fm
•To exit fmbatch, enter Quit
Using UNIX commands within fmbatch
You can use any UNIX command from within fmbatch. For example, you may want to copy or move files after you
process them.
To use a UNIX command within fmbatch:
❖In a batch file or at the fmbatch prompt, enter system "command". The command must be within single or double
quotation marks.
For example, to copy MyFile to /tmp, enter system "cp MyFile /tmp/MyFile"
Creating batch files from scripts
You can use fmbatch in shell scripts to automate some FrameMaker operations. For example, a shell script can use
fmbatch to generate a book file, save all documents in MIF, edit the MIF files to set the document’s window position
and size, and convert the MIF files back to Document format.
You can also use UNIX scripts to generate fmbatch batch files. The following example is a C-shell script that builds
a batch file to save all documents as MIF files. To use this script, type it exactly as shown, then change to the directory
that contains the documents you want to process and type the full path to the script. The script creates a batch file
that you can use with fmbatch at the current location.
#! /bin/csh -f
set scriptname = createbatch
set batchfile = commands.batch
rm -f $batchfile >& /dev/null
touch $batchfile
foreach f ( * )
# don’t add directories or the batch file itself
if ( ! -d "$f" && "$f" != "$batchfile" ) then
echo "Open $f" >> $batchfile
echo "echo Saving $f to $f.mif" >> $batchfile
echo "SaveAs m $f $f.mif" >> $batchfile
echo "Quit $f" >> $batchfile
endif
end

ADOBE FRAMEMAKER 8
User Guide
636
echo ""
echo "$scriptname is done. "
Printing with fmprint (UNIX)
You use the fmprint script to print one or more FrameMaker documents or books without opening and displaying
them. You can also use the print settings from a different FrameMaker document, just as you can when you use the
fmbatch Print command (see “Opening, saving, and printing files with fmbatch” on page 632).
To print a file with fmprint:
❖At a UNIX shell prompt, do one of the following:
•To print a file using its own print settings, enter fmprint filename
•To print a file using the print settings from another FrameMaker document, enter fmprint -p settings_file
filename. (To set up or change print settings in the settings_file document, open the document, choose File > Print,
specify the settings you want, and click Save Settings Only. Then save the document.)
Copying file hierarchies with fmcopy (UNIX)
The fmcopy script copies a file hierarchy from one place to another, preserving symbolic links and permissions. Use
it to copy FrameMaker installation files from one file system to another.
To copy a file hierarchy:
❖At a UNIX shell prompt, type fmcopy source_dir target_dir where source_dir is the directory you want to copy
and target_dir is the directory you want to copy to.
For example, to copy FrameMaker installation files from /var/frame to /var/FrameMaker, type fmcopy /var/frame
/var/FrameMaker
For on-screen instructions on fmcopy, type fmcopy at a UNIX shell prompt.
Inverting images with fminvert (UNIX)
You can use fminvert to invert a monochrome Sun rasterfile or X Windows Dump (xwd) 1-bit image so that portions
previously black appear white and portions previously white appear black.
To invert an image:
❖At a UNIX shell prompt, type fminvert filename inverted_filename where filename is the file you want to invert,
and inverted_filename is the name of the inverted file.

ADOBE FRAMEMAKER 8
User Guide
637
Converting color images to monochrome (UNIX)
Use xwd8to1 to convert color X11 xwd images to monochrome images. (You can use the screen-capture feature to
create xwd images; see “Capturing UNIX screen images” on page 630.)
Each color is converted to either black or white. The conversion is controlled by a cutoff value—between 1 and 100—
that determines the intensity at which colors should be converted to black. An intensity value of 1 causes only black
to be converted to white. An intensity value of 99 causes all colors except white to be converted to black. If you don’t
specify a cutoff value, xwd8to1 uses a cutoff value of 50.
To convert a color xwd image to monochrome:
❖At a UNIX shell prompt, type xwd8to1 -i cutoff filename filename.mono where filename is the name of the color
image, cutoff is the cutoff value used to convert colors to black or white, and filename.mono is the name of the
converted file.
638
Chapter 21: Creating accessible
documents (Windows)
Authoring for accessibility
Whether you’re publishing a document in HTML, Adobe PDF, or some other format, creating accessible documents
requires much more than simply representing the original document accurately. Sighted people can look at a printed
page and easily discern the difference between titles, subtitles, columns of text, headers, footers, and so on. Visual
clues, such as location of the text on the page, bold text, and large font sizes help them determine the structure of a
document so that they can read and navigate it easily.
Assistive technologies such as screen readers can’t depend on these visual clues. Instead, they rely on the underlying
computer-based information to provide that same structure. As a result, making documents accessible depends on
two things:
•Authoring the original documents so that they contain not just content (such as the text in the document) but also
information about the structure of the content (such as how the text flows within the page and from page to page).
•Using publishing tools such as Adobe FrameMaker software and Adobe PDF technology that can retain and
encode both the content and the structure so that they can be interpreted by Windows-based screen readers.
These same requirements apply to any type of publishing environment, regardless of the file format or application.
If you want to make it possible for people with screen readers to navigate documents correctly, the underlying struc-
tural information must be present.
Using accessibility features in FrameMaker
The FrameMaker software provides a number of features that improve access for visually impaired users.
In particular, it:
•Provides support for high-contrast viewing for users with low visual acuity.
•Creates tagged Adobe PDF files when converting FrameMaker files to tagged PDF, making it easier for people who
use screen reader software to navigate a document in the proper reading order. For information on how to turn
your FrameMaker documents into tagged Adobe PDF files, see “Defining a tagged Adobe PDF file” on page 582.
•Supports assistive technology, such as screen reader software for the Windows platform.
Screen readers let visually impaired users interact with the computer by interpreting what is happening on the screen
and sending that information to speech-synthesis devices. The screen reader will follow the logical structure of the
document. Screen readers can read FrameMaker documents viewed in FrameMaker, or tagged PDF documents
viewed in Adobe Acrobat 7.0 or Acrobat Reader 7.0.7. Refer to your screen reader documentation for information
on installation and use with documents viewed in FrameMaker or Acrobat.
For more information on accessibility in Adobe Acrobat and Adobe PDF documents, see the Acrobat online Help
and the Adobe Web site.
Note: UNIX does not offer a general accessibility interface for screen readers.

ADOBE FRAMEMAKER 8
User Guide
639
Setting your FrameMaker workspace for high-contrast
viewing
Adobe FrameMaker uses system colors to draw window backgrounds, text, and other graphics. Users who have
trouble discerning different colors or variations in contrast, or who have low visual acuity can set high-contrast color
schemes and custom text and background colors to make the information in the FrameMaker interface easier to
view. You can also use custom system cursors, in addition to the FrameMaker built-in cursors. Users can set the
system settings as their application default.
To set FrameMaker for high-contrast viewing:
1Open the Windows Control Panel.
2In your Windows system, go to the page where you control the appearance of interface items.
3Do any of the following:
•To change the appearance of all editable interface elements at once, choose a scheme option, such as one of the
High Contrast options.
•To change the appearance of one interface element, choose that element, and then change the appropriate settings.
4Click Apply.
FrameMaker will adjust colors and sizes of such interface items as the Quick Access Bar, title bars, menus, scroll bars,
dialog boxes, palettes, rulers, grids, and icons in window borders.
Important: FrameMaker does not adjust colors and sizes for all items. Some of these include the background color and
fonts for drawing the title bar in some palettes, such as Equations, and the fill color of graphic objects.
To use custom system cursors:
1After you install FrameMaker, locate the maker.ini file in the FrameMaker8 folder.
2Open the maker.ini file in a text editor.
3Change the value of UseSystemCursor to On.
4Save the maker.ini file and restart FrameMaker.
Preparing documents for accessibility
Both FrameMaker documents and tagged Adobe PDF documents can be read by screen readers on the
Windows platform.
To make an accessible FrameMaker document or tagged PDF document using FrameMaker, you must create the
document with accessibility in mind. Here are some things to consider to optimize your FrameMaker documents for
accessibility, and help screen reader applications use them:

ADOBE FRAMEMAKER 8
User Guide
640
Logical reading order Documents are more accessible if they have been authored with a logical structure in mind.
Using FrameMaker to define and create document structure, such as titles, chapters, headings, and multicolumn
text, can make it easier for assistive technologies such as screen readers to understand the logical reading order of
the content without any ambiguity. For example, if a tagged Adobe PDF document has been correctly authored using
two columns to create a two-column format, the screen reader will read all the way down the first column and then
proceed to the second column. On the other hand, if the writer used tabs to imitate the look of two-column text, the
screen reader would not recognize the layout as two-column. Instead, it would simply read horizontally, going from
the first line in the first column and then tabbing over to the first line in the second column.
The order in which you create frames in the original FrameMaker document is the order that is represented in the
logical structure tree of your tagged Adobe PDF file. Therefore, if you move frames in the FrameMaker layout, the
structure of your tagged Adobe PDF file will still show frames in the order created. To correct reading order
problems, you can use tools in Acrobat 7.0.
Note: Screen readers may not be able to correctly read multicolumn text if it is viewed in FrameMaker. If you want your
FrameMaker documents to be read by screen readers using FrameMaker, use single-column formatting. Otherwise, save
the document as tagged PDF.
Alternate text descriptions for graphic objects The document should contain written descriptions of graphic
objects in the document, including drop caps. These graphic objects must be in anchored frames. When a screen
reader encounters the graphic in the document, it will read the alternate text. Make sure you use text that makes
sense when read out of context. For example, you might want to add alternative text that begins with “A graphic
depicting” and then describe what the graphic depicts. For more information about adding alternate text, see
“Preparing anchored frames for tagged PDF” on page 360.
Fonts Be sure to use fonts that specify character encoding, so that the display and screen reader deliver the correct
characters. For more information, see the online manual FrameMaker Character Sets.
Navigation The document should include navigational and organization aids, such as a table of contents and useful
headings. This provides an easy way for users to move through the document so that they don’t have to read the
entire document page by page to find what they’re looking for.
Testing accessibility in files using a screen reader
Before making a FrameMaker file or tagged PDF file available for other users, test the file using a screen reader. This
will show you how the information in the document will actually be presented to users, and how well such things as
the reading order and navigational links will work.
If you encounter errors in a tagged PDF file, make corrections, where possible, in the original FrameMaker file, and
then resave it as tagged PDF. That way you maintain a single source file for publishing the content in additional
formats, such as XML, SGML, XHTML, and so on.
If you have Acrobat 7.0 installed, you can also use Acrobat tools to adjust the tagged PDF structure and the reading
order. In this case, however, your changes will be saved only in the PDF file, not in the FrameMaker file. For more
information on accessibility tools in Acrobat, see the Acrobat online Help or the Adobe Web site.

ADOBE FRAMEMAKER 8
User Guide
641
To test files for accessibility in screen readers:
1Start a screen reader for Windows. See the Install ReadMe file (Windows) for supported screen readers.
2Do any of the following, depending on whether you’re reading a FrameMaker file or tagged PDF file:
•Start FrameMaker and open the FrameMaker file in it.
•Start Acrobat and open the tagged Adobe PDF file in it.
3Use the screen reader to read the document.
4Check for problems, including the following:
•The document contains graphics, but there are no text descriptions for those graphics. To solve this problem, open
the original document in FrameMaker and make sure the graphics are in anchored frames. Then select each
graphic, choose Graphics > Object Properties > Object Attributes, and add alternate text descriptions.
•Text in columns isn’t read in the correct order. To solve this problem, touch up the reading order of elements in
the logical structure tree of your tagged Adobe PDF file using the Tags palette in Acrobat 7.0.

642
Chapter 22: Structured authoring
using DITA
Introduction
Extensible Markup Language (XML) authoring offers benefits to publishing organizations, including content reuse,
multichannel publishing, and standards-based information exchange. Darwin Information Typing Architecture
(DITA) offers a specific form of XML authoring that has the potential to revolutionize technical documentation.
The Adobe FrameMaker DITA feature extends the XML capabilities of FrameMaker by adding support for core
features of DITA. If you are already familiar with the basics of DITA, but are curious as to how DITA can be imple-
mented in FrameMaker, see “About DITA in FrameMaker 8” on page 653.
One question that organizations ask when considering a move to structured authoring is, “Which document type
definition (DTD) or schema should we use?” With XML—and associated authoring/publishing tools such as Adobe
FrameMaker —the DTD or schema defines the fundamental structure of authored content.
Some organizations build their own DTD or schema; others leverage a preexisting DTD or schema (for example,
Text Encoding Initiative, DocBook, or DITA). Factors such as the type of content being managed and the demands
for content delivery determine which option an organization chooses.
What is DITA?
As its name states, DITA is an information architecture. DITA is mostly defined by a set of DTDs and a parallel set
of schemas, which are maintained by the Organization for the Advancement of Structured Information Standards
(OASIS)—a nonprofit e-business consortium. DITA also enjoys the support of an increasing number of Open Source
and commercial software products and add-ons that enable users to author and publish their content using the DITA
content model.
DITA is more than just a schema/DTD. DITA represents an innovative philosophy and methodology for authoring
and managing content. For example, with DITA, a document is not authored from beginning to end; instead,
document components, or topics, are developed individually and assembled as needed (perhaps in a different
sequence or hierarchy for different forms of output or target audience) using a mechanism called a DITA map. DITA
offers a number of such mechanisms that are combined to facilitate content reuse, and multichannel publishing.
A brief history of DITA
In the late 1990s, organizations managing technical documentation faced a number of challenges because of the
advent and growth of the World Wide Web and the increased pace of technology development:
•Increased demand for multichannel publishing: Content that was once published only in book form now also
had to be published to Hypertext Markup Language (HTML) and other output formats. Localization require-
ments greatly increased the number of required content deliverables.
•Shorter development cycles: Software documentation had to be updated and released more rapidly to reflect the
faster pace of application updates.

ADOBE FRAMEMAKER 8
User Guide
643
•Increased demand for customized and versioned content delivery: As technologies were increasingly sold
as solutions built from components, the need to dynamically assemble information from modular
components grew.
•Proliferation of information-on-demand: With increasing access to information online, organizations could not
assume that users would read through an entire manual sequentially from beginning to end. Instead, users
expected to have random access to just those pieces of information needed at a specific time.
•Increase in the linking and cross-referencing of information: The hyperlinking made popular by the web
increased authoring focus on the relationships among pieces of information.
While IBM was further along than most organizations at the time in terms of structured authoring—having
pioneered the invention of Standard Generalized Markup Language (SGML) and having deployed a complex, inter-
nally built DTD on a broad scale—they still faced substantial challenges along these lines. The information struc-
tures developed over the years did not always suit the new forms of content delivery. Document architecture often
relied heavily on a book paradigm that did not fully support the more modular forms of output, such as compiled
Help or HTML. In some cases, sprawling, complex DTDs represented a huge learning curve for new authors.
Fortunately, the web brought increased publishing complexity as well as an array of new tools for solving publishing
challenges. New technologies such as XML, Extensible Style Language Transformation (XSLT), and Java emerged at
the same time that IBM was facing their information management challenges. Rethinking the technical documen-
tation publishing process made sense, given both the new challenges and the newly available tools.
Starting in 1999, the DITA document architecture was developed by a cross-company workgroup, including repre-
sentatives from IBM, Lotus, and Tivoli. The architecture went beyond defining content structure, prescribing
authoring techniques as well as specific toolset functionality. An IBM team built this new standard, naming it “The
Darwin Information Typing Architecture” and, in April 2001, revealed it to the public via IBM’s DeveloperWorks
website. Significant updates thereafter led to the release of the DITA Open Toolkit—a set of Open Source software
tools for DITA.
In March 2004, IBM donated DITA to OASIS. Since arriving at OASIS, the DITA project has seen unprecedented
activity as organizations rush to take advantage of an open standard that solves many of the problems authors have
faced for the past decade.
Early DITA adoption at Adobe
Among the early adopters of DITA was Adobe, who faced challenges in their Instructional Communications
department similar to the challenges IBM had faced that led to DITA. Not only did Adobe have to manage a large
amount of documentation, but they also had to translate and localize the content for global distribution.
With shorter release cycles for software quickly becoming a reality, translation and localization processes became
potential bottlenecks for large software companies such as Adobe. Improvements in translation efficiency was one
of the primary reasons Adobe selected DITA as an approach to managing Help content. The modular, topic-centric
nature of DITA, coupled with its emphasis on content reuse, meant that reusable document components could be
translated and localized individually. The components could also be reused and output to multiple formats, which
improved both the speed and cost-effectiveness of the localization process.
The Instructional Communications department at Adobe managed all Help content for Adobe Creative Suite® 2
using DITA, and authored it in FrameMaker. Not only was localization less costly and faster, but the modular nature
of DITA lent itself naturally to a collection of products such as Adobe Creative Suite: common content components
could be reused rather than rewritten for the different contexts in which they appeared. The success of this early
DITA implementation led Adobe to apply DITA authoring to other software documentation projects.
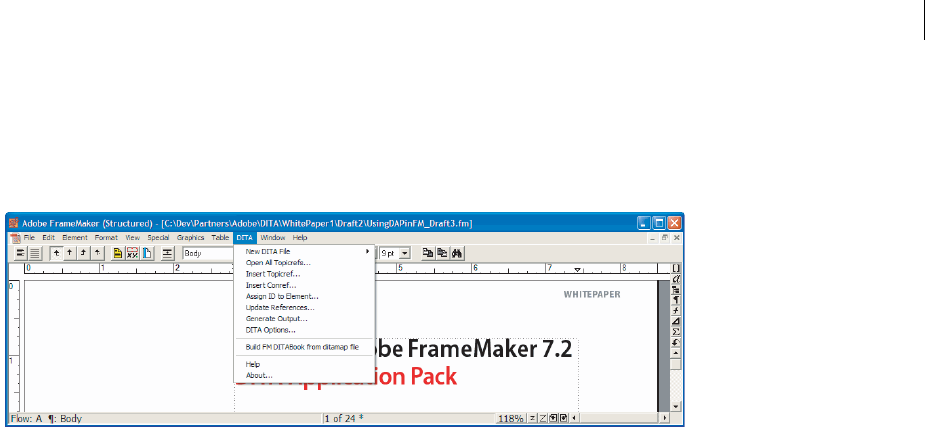
ADOBE FRAMEMAKER 8
User Guide
644
Adobe also began incorporating DITA into FrameMaker. With the release of FrameMaker 7.2, Adobe released
a Starter Kit for DITA, providing initial basic support of DITA structures. With the release of the Adobe FrameMaker
7.2 Application Pack for DITA, this support was extended to cover a wide range of DITA features. In FrameMaker
8, DITA has been integrated with FrameMaker.
FrameMaker 8 is integrated with DITA and continues to include the DITA menu that was introduced in the FrameMaker 7.2 user interface.
Following is a description of the core features of the DITA feature in FrameMaker.
Import/Export Processing
Table Support. Pre-parses the imported file to count the number of columns in tables that have no column number
attribute (required by FrameMaker to display a table). By default, this supports reltable and simpletable elements, but
can be extended to handle other table elements as specified by the user (in the ditafm.ini). The column number data
is used during the actual import of the file into FrameMaker to properly display those tables. This functionality may
be enabled/disabled by the user with the Options command.
Indexterm Support On import, the plug-in converts indexterm elements to a FrameMaker-compatible format.
DITA specifies that index subentries are defined by nested indexterm elements. This feature collapses nested
indexterm elements into a single semicolon-delimited string within the top-level indexterm element which can be
properly interpreted by FrameMaker and converted into an Index marker. This functionality keys off of the value of
the class attribute, allowing it to work for specialized instances of the indexterm element. On export, the Index
markers are converted back to valid nested indexterm elements. This functionality may be enabled/disabled by the
user with the Options command.
Special Reltable Support On import, the plug-in converts reltable/topicmeta elements to reltable/fm-reltablemeta
elements (to allow for proper mapping to a FrameMaker TableTitle object). Converts back to valid DITA topicmeta
elements on export.
Reference Support All references (topicrefs, conrefs, and xrefs) are represented in FrameMaker as “text insets.”
These text insets are not linked to text flows but are used as a means of locking a region of text and allowing the user
to click on the object. In order to maintain valid DITA files on export, the plug-in converts these text insets to the
appropriate XML structure.
DITA Map Support
A structure application is provided for DITA map development. This structure application provides support for
topicrefs and relationship tables. Through the import/export client and r/w rules, the resulting .ditamap file is
completely DITA-compliant, although within FrameMaker some additional elements have been added to provide
proper FrameMaker interaction. These elements have an “fm-” prefix.

ADOBE FRAMEMAKER 8
User Guide
645
When a .ditamap file is opened, all topicref elements are processed to include a new “fm-topicreflabel” element that
contains a text inset. This text inset displays the title (navtitle attribute) and filename (href attribute) of the referenced
file. When you double click the inset, the referenced file opens for editing. These labels are wrapped in conditional
text style named “DITA-Topicref.” You can change their color by editing the condition definition in the template file.
New topicref elements can be added using the Insert Topicref command from the DITA menu, or by inserting a
topicref element from the element catalog. Inserting a topicref displays a file dialog, letting you select the referenced
file. When the file is selected, the fm-topicreflabel element and inset are added. Topicref elements can reference other
DITA topic files or DITA map files.
Existing topicref elements can be updated so the label text reflects any updates in the referenced file. To update an
existing topicref, select the label and choose DITA > Update References. The Update References command also lets
you update all topicrefs in the .ditamap to reflect any changes in the referenced files. It also honors the setting of the
topicref’s locktitle attribute; if locktitle is set to ‘yes’ the navtitle text is not updated.
Conref Support
When a file is opened, the content of any conrefed elements is resolved and displayed as a text inset (which is colored
and styled by the “DITA-Conref” conditional style). The auto-loading functionality can be enabled or disabled using
the DITA Options command in the DITA menu.
The Reference Manager (displayed when you select the Insert Conref command from the DITA menu) allows you
to create conrefs to elements within the same file or in other files. In the Reference Manager dialog box, you select
from the files currently open, the element name (valid at the current insertion point), then from a list of matching
elements which have id attribute values (required for conrefing). The conrefed element is inserted as a text inset. You
can double-click the conref to re-open the Reference Manager and change the referenced element or edit the source
file. The Reference Manager also lets you display the list of all elements for conrefing (even if they have no id value).
You must provide the id value at insertion time.
The Update References command in the DITA menu provides an option to load and build the conref insets (if they
were not initially loaded by the auto-load functionality), and update the conrefs to reflect changes in the source files.
Xref Support
On the opening of a file, all xref elements are resolved and displayed as a text inset. The auto-loading functionality
can be enabled or disabled using the DITA Options command in the DITA menu.
When an xref element is inserted (from the element catalog), the Reference Manager dialog box appears, allowing
you to select the target element for the xref. Unless you enter text in the Alternate Xref Text field, the xref text will
match that of the target element. The External Xref button lets you create an xref to an external file.
Building a FrameMaker DITA book from a DITA map file
The Build FM DITABook from ditamap file command in the DITA menu lets you generate a FrameMaker book from
a DITA map file.
The highest-level topicrefs in your DITA map become chapters in the FrameMaker book, containing any nested
topicrefs. Formatting is determined based on the structure application you have selected for books in the DITA
Options dialog box.
General
The DITA Options command in the DITA menu provides the ability to specify the structure applications for the
opening of DITA map and DITA topic files, as well as enable/disable various DITA options.
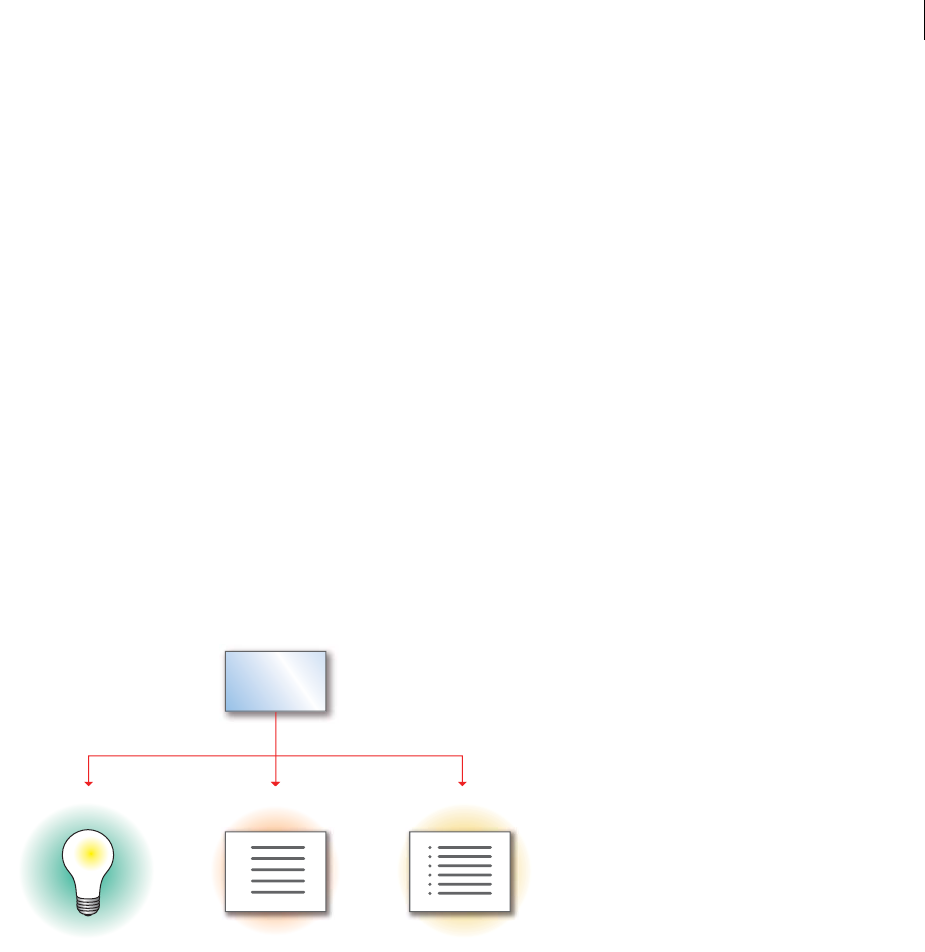
ADOBE FRAMEMAKER 8
User Guide
646
The items in the DITA > New DITA File menu option let you create different types of DITA files. The DITA topic
types listed are extracted from the element definition document (EDD) associated with the DITA structure appli-
cation (as specified in the Options dialog box). All elements of the class “topic/topic” will be added to the DITA >
New DITA File menu option, as will all elements of the class “map/map.” When you select the type of file to create,
you are first prompted for the filename to create. This differs from the standard FrameMaker “New” command in
the File menu because FrameMaker does not provide a method for creating an “Untitled” XML file (one that is not
saved to the file system). If you want to start with an “Untitled” file, select the standard New command and use the
DITA template as the template file.
Key DITA features
Several key features define the DITA approach to managing information:
•DITA architecture is based on topics. These core units of information serve as building blocks for all content.
•DITA topics include three core information types: task, concept, and reference.
•DITA maps assemble topics into sequence and hierarchy tailored to specific delivery requirements.
•The DITA object model is based on inheritance (hence the reference to Darwin). The task, concept, and reference
topics, for example, share a common base structure whose characteristics they inherit.
•Links between topics are defined and maintained using relationship tables.
•DITA enables reuse of units of content by means of the conref attribute. An example is a note, common to multiple
topics, that can be authored once and included by reference.
DITA topic, concept, task, and reference information types
The extremely modular, topic-centric nature of DITA is perhaps its most distinctive feature. The DITA topic has
been described as “a chunk of information organized around a single subject.” Authors new to DITA have to learn to
think of content in terms of these modular units of information. Instead of thinking in terms of a single, monolithic
document, authors working in DITA must create topics of different types as one process, then define the sequence
and hierarchy of these topics for different forms of delivery as a second, independent process.
Benefits of using DITA
Using DITA to manage content can offer many benefits:
•Ease of content reuse
•Ability to publish to multiple output formats using the DITA Open Toolkit
•Enhanced information exchange with other organizations using DITA
1
2
3
4
5
Concept Task Reference
TOPIC

ADOBE FRAMEMAKER 8
User Guide
647
•Ability to leverage a growing number of software tools for authoring, managing, and publishing DITA content
•Ease of authoring and publishing Help-based content, including efficient management of hyperlinks and relation-
ships between topics
•Reduction of translation cost as a result of topic-orientation and content reuse
The benefits of DITA will vary depending on specific organizations’ publishing requirements, as well as their ability
to successfully learn this modular approach to managing content. Some organizations will find DITA well worth the
initial investment in restructuring content and adopting topic-based authoring.
Understanding DITA
To understand DITA, you must consider its overall architecture, its philosophy of topic-based content management,
and the specific mechanisms by which it is implemented. Beyond the core DITA functionality available from the base
information set, an important consideration for most organizations will be how they could customize and extend
DITA to their own uses.
DITA architecture
DITA architecture is based on several principles:
•Reusability and modularity: The topic-based nature of DITA is a direct response to the realization that effective
content reuse is required to contain documentation costs. The modular nature of DITA means that reuse is antic-
ipated at the outset of a project by core features such as topic maps, content references (conrefs), and conditional
processing.
•Inheritance: DITA can be extended without having to extensively redesign publishing processes. For example,
when specializing the content model by defining a new form of topic specific to an industry, the specialized topic
inherits from the defined base class of topic, letting users automatically leverage the same processing as the
base class.
•Emphasis on content relationship: DITA was created with an awareness of the increasing criticality of relating
and linking information. The notion of related topics, for example, is anticipated by the content model itself, rather
than added after the fact as is common with older, print-centric, sequential architectures.
Topic-oriented authoring
With DITA, information is organized into separate units. Each unit is devoted to just one topic—for example, one
concept or one set of instructions—preferably composed with a minimum of information.
DITA provides a standard for structuring topics and content within topics. That standard is based on three broad
information categories into which almost all technical information can be classified:
•Task: Explanation of how to perform a specific topic (for example, the steps to save a file in a software application).
•Concept: Explanation of key conceptual information related to a task.
•Reference: Facts relevant to a task. Often reference topics are presented in table or list form to give users quick
access to information.

ADOBE FRAMEMAKER 8
User Guide
648
These are considered specializations of the base class of topic, from which they inherit a consistent core structure.
Elements common to the three standard DITA information types are title, description, prolog, and body. A DITA
document must contain at least one topic, and may contain many.
Task, concept, and reference inherit common structure from their parent information type topic.
DITA structure supports reuse of independent topics in any arrangement to form new documents. In fact, one of the
main reasons for the topic-based nature of DITA is to let authors reuse information.
Examples of reuse include compiling independently created and saved topics into new documents; automating links
and cross-references to, from, and within topics and documents; identifying and formatting information for various
kinds of distribution; formatting information so it can be handled by diverse processes; and segmenting authoring
responsibility across multiple authors or groups. Reuse can occur at the topic level (that is, when you rearrange a
collection of output via DITA maps), or at the subtopic level, such as when you reference a specific document
component within multiple topics via content reference attributes.
DITA maps
DITA maps offer powerful control over the publishing process, enabling you to define the sequence and hierarchy
of collections of topics at the point of content delivery.
Task to Pic Concept Topic Reference Topic
Common structure Header:
Title
Short description
Prolog
Body:
taskbody
Related links
Header:
Title
Short description
Prolog
Body:
conbody
Related links
Header:
Title
Short description
Prolog
Body:
refbody
Related links
Examples of optional
elements (within body)
Context
Prerequisites
Steps
Step-elements
Result
Examples
Post requirements
Section
Paragraph
Lists
Tables
Images
Examples
Section
Paragraph
Properties lists
Tables
Syntax
Examples
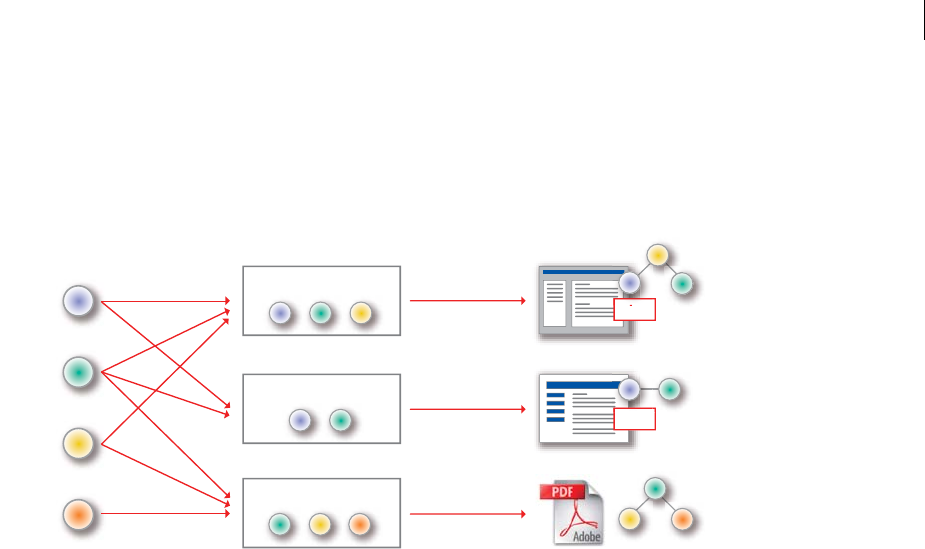
ADOBE FRAMEMAKER 8
User Guide
649
This method of assembling content from a set of components can make the publishing process very flexible, enabling
single-sourced, multichannel publishing. For example, rather than writing two slightly different versions of the same
document for different target audiences, authors can use DITA maps to produce multiple versions without
redundant effort.
Single-source publishing using DITA maps to produce multiple delivery formats
When creating DITA maps, you work primarily with four XML elements: <topicref>, <topichead>,
<topicgroup>, and <topicmeta>.
•The <topicref> element references a topic; you sequence and nest these elements to define how topics are
arranged in published output.
•The <topichead> element lets you add topic headings to sections containing multiple topic references.
•With <topicgroup>, you create collections of topic references without affecting their hierarchy. For example, you
could identify groups for linking without changing the overall structure of published output.
•The <topicmeta> element is used to define the metadata that applies to a topic (and nested topics) when it
appears in a map. It can also be used to override the title and short description of the topic when linking.
When you have created your DITA map, a subsequent publishing process assembles topics in the ways defined by
the DITA map.
Content referencing for reuse
Along with DITA maps, the conref (content reference) attribute is a primary mechanism for content reuse.
It references content that is anchored with an id attribute and inserts it in place of the element with the
conref attribute.
You can use conrefs either in a topic or in a map, to point to content in another topic or map. When you use a conref,
a change to that one referenced, single-document component will ripple through all documents that reference it.
A conref in one file:
<note conref="myfile.dita#mytopic/mynote"></note>
can reference content in another file (in this case, “myfile.dita”):
<topic id="mytopic">
...
T
opic 1
T
opic 2
T
opic 3
T
opic 4
Compiled help:
DITA MAPS DELIVERY FORMATSTOPICS
Web site:
Print output:
123
234
12
.chm
html
12
3
21
2
34

ADOBE FRAMEMAKER 8
User Guide
650
<note id="mynote">This is a reusable component</note>
...
</topic>
by specifying in the conref attribute the name of the file, the id attribute of the containing <topic>, and the id of the
referenced component. It is important that the element names match, and that the element using the conref
attribute is valid at the insertion point.
You can also use conrefs to reference content within the same file (omit the filename from the conref attribute in
this case).
While conrefs are resolved in typical DITA publishing processes, and the appropriate referenced section appears in
place of the reference, XML authoring tools that aren’t DITA-aware will not generally display the anchored text in
the conref location by default. FrameMaker adds support for conrefs, including display of referenced content in the
authoring environment.
Files supporting DITA
The app directory contains the files needed to support DITA. It includes the following files:
File Purpose
ditabase.dtd The parent file for the DITA 1.0 DTD
concept.dtd
reference.dtd
task.dtd
topic.dtd
Specialized DTDs provided with DITA 1.0
map.dtd DTD for DITA map files
highlightDomain.ent
mapGroup.ent
programmingDomain.ent
softwareDomain.ent
topicDefn.ent
uiDomain.ent
utilitiesDomain.ent
Modular components of the DITA DTD

ADOBE FRAMEMAKER 8
User Guide
651
The default structapps.fm file contains the definition of the DITA application. For information on creating and
editing structapps.fm, see the online manual, the Structured FrameMaker Developer’s Guide.
Next steps
Organizations that consider the potential value of DITA should carefully consider whether it is appropriate for their
needs. While DITA is enjoying increasing popularity, with a corresponding increase in the number of DITA-aware
publishing tools, it may not be the right structure for every situation.
concept.mod
highlightDomain.mod
map.mod
mapGroup.mod
metaDecl.mod
programmingDomain.mod
reference.mod
softwareDomain.mod
task.mod
tblDecl.mod
topic.mod
topicAttr.mod
uiDomain.mod
utilitiesDomain.mod
Modular components of the DITA DTD
catalog-dita.txt Catalog of DITA public entities (text version).
catalog-dita.xml Catalog of DITA public entities (XML version).
edd FrameMaker EDD, including formatting rules for supported DITA elements
rules Read/write rules
template Structured FrameMaker template to use on import
import.xsl XSLT stylesheet. Invoked by DITA structure application on import to transform DITA
constructs to FrameMaker objects.
export.xsl XSLT stylesheet. Invoked by DITA structure application on export to transform
FrameMaker objects to the DITA content model.
File Purpose

ADOBE FRAMEMAKER 8
User Guide
652
Evaluating DITA for your organization
The following questions can help evaluate whether the DITA content architecture is an appropriate solution for
your needs:
•How topic-oriented is the existing and anticipated content?
•Is content currently structured with XML?
•What are the required/desired forms of published output?
•How much customization for various audiences is required?
•How extensive are available authoring and document architecture resources?
Not all content is topic-oriented and thus may not be suited to authoring with DITA. DITA is appropriate when
modular content is possible, such as with content that naturally falls into independent topics or that has already been
authored in separate topics. A sequential structure—such as a novel, unique research report, or feature article—
would usually not be suited to DITA.
If topic-oriented authoring architecture is possible and appropriate, the next consideration would likely be the
amount of effort required for migrating to and working in DITA. If structured authoring (that is, XML authoring)
has already been or is being implemented, it will be easier to start implementing DITA.
An evaluation of the effort required for DITA should also include realistic consideration of the available document
architecture resources, as well as authors’ talent for and dedication to consistently writing for DITA’s topic-centric
structure. The appeal of DITA-associated toolsets, such as the DITA Open Toolkit, the prospect of efficient content
reuse and extensibility, and other powerful advantages DITA promises for publishing must be weighed against the
necessity that the content being authored can conform to modular structure.
The most suitable content for DITA may be software, or similarly, documentation that can be effectively delivered
in the form of compiled Help. In such cases, writers are usually very familiar with, if not already using, topic-based
authoring. The further content moves away from such a paradigm, the more analysis is required to determine if
DITA is the best alternative.
Before embarking on an enterprise-wide move to a DITA-based document structure and authoring paradigm, it
might be prudent to start with a pilot project of a clearly defined scope to discover the benefits of, and the resources
that would be required for, a larger-scale transition to DITA.
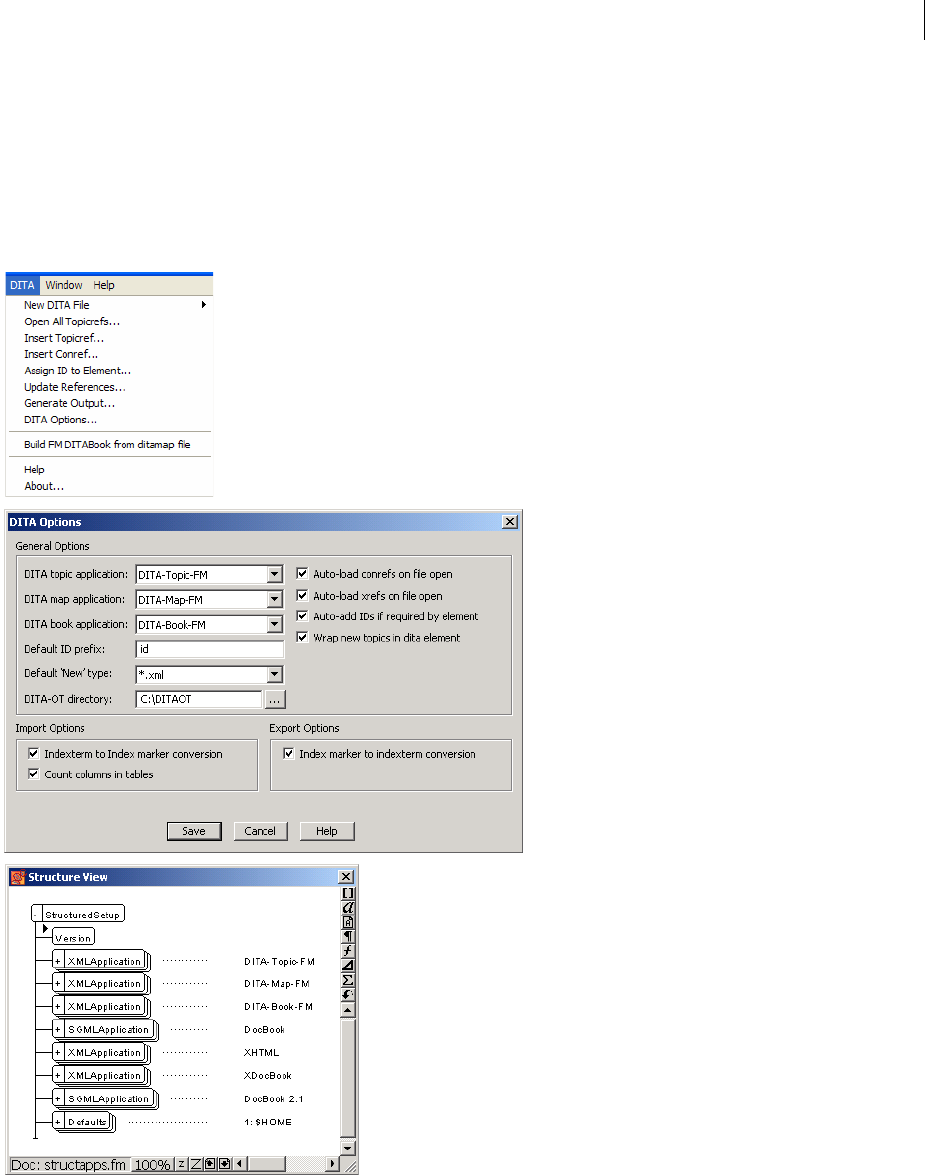
ADOBE FRAMEMAKER 8
User Guide
653
About DITA in FrameMaker 8
The DITA application pack in FrameMaker 8 extends the structured authoring functionality of FrameMaker to allow
authors to work more efficiently. The DITA feature consists of a set of plug-ins combined with a set of structure appli-
cations, which together provide core tools for DITA authoring and publishing. The DITA feature can be extended
for a variety of uses.
FrameMaker DITA supports DITA authoring and publishing through a set of plug-ins and structure applications.
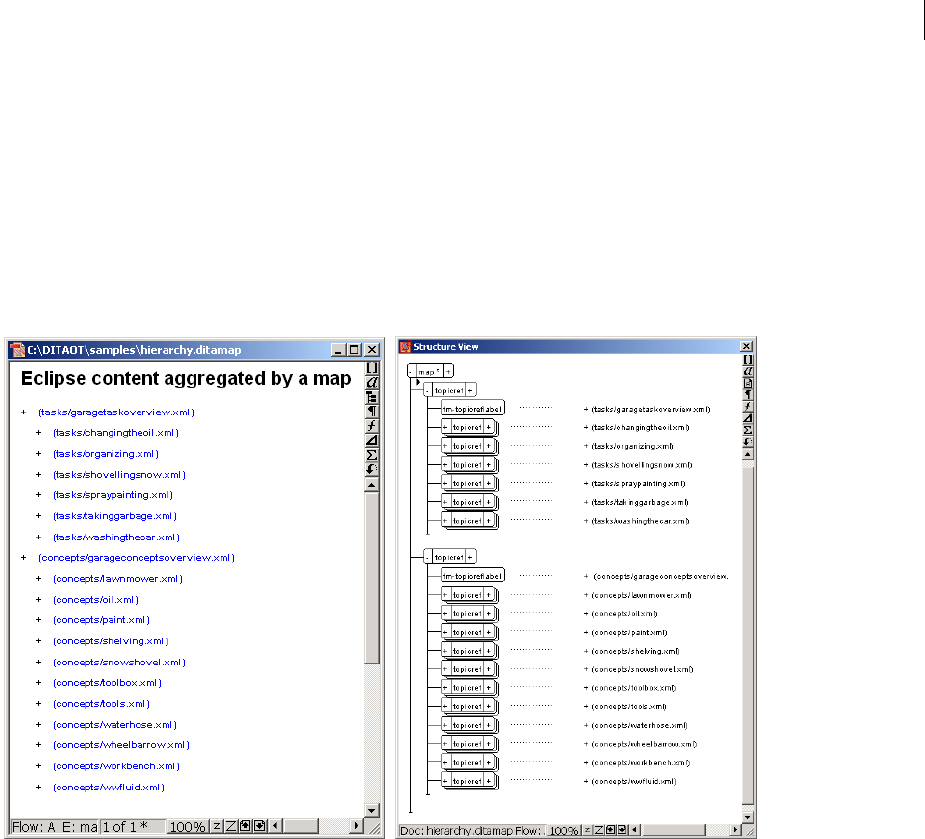
ADOBE FRAMEMAKER 8
User Guide
654
DITA features
Features offered with DITA support:
•Import/Export processing: Includes the use of some FrameMaker-specific constructs and elements (notable by
their fm prefix), which are present while authoring in FrameMaker but translated to DITA-conformant XML
during the import/export process, thus ensuring interoperability with other systems.
•DITA map support: The DITA feature in FrameMaker offers a structure application for creating and editing
DITA maps, as well as managing relationship tables. Double-clicking on a topic within a map opens the topic for
editing.
Working with DITA maps in FrameMaker
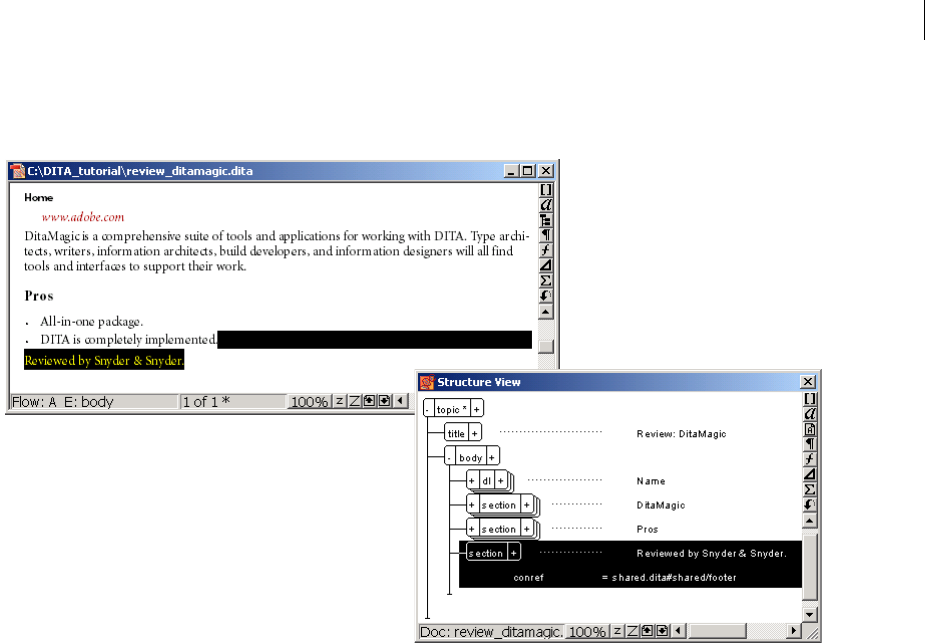
ADOBE FRAMEMAKER 8
User Guide
655
•Conref support: When you open a file, DITA resolves conrefs, and displays the referenced content as a text inset
in FrameMaker. The DITA feature also offers the Reference Manager dialog box for inserting conrefs.
Working with DITA conrefs in FrameMaker
•Xref support: When you open a file, the DITA feature automatically resolves <xref> elements and displays any
associated text within FrameMaker. You can turn this feature on or off.
•Output support: For content generation—such as Adobe PDF, compiled Help, and HTML—the DITA feature
enables you to build a FrameMaker book from a DITA map.
You can customize the DITA features using the DITA Options dialog box or by editing the ditafm.ini file.
Applications in DITA
The DITA integrated with FrameMaker 8 includes four FrameMaker applications:
•DITA-Topic-FM: Use this application to author topic, concept, reference, and task information types. If needed,
the EDD and structured template used in this application can be optimized for screen view and topic proofing (see
“Modifying template components and files for DITA structured templates” on page 669).
•DITA-Map-FM: Use this application to create and edit DITA maps (both .map and .ditamap).
•DITA-Book-FM: Use this application to build a FrameMaker book that consists of all the files in an open DITA
map (<dita>, <ditamap>, or <map>). The EDD and structured template used in this application can be
customized to format your content for hardcopy or PDF (see “Modifying template components and files for DITA
structured templates” on page 669).
Each application has an application definition that points to its components:
•Complete DITA DTD
•Read/write rules file
•A template (with a separate EDD)
•Application programming interface (API) clients and XSLT processing files, if necessary

ADOBE FRAMEMAKER 8
User Guide
656
•Entity locations
DITA-Topic-FM, DITA-Map-FM, and DITA-Book-FM use an API client for import and export; DITA-Book-FM
also uses an XSLT for preprocessing. The structure defined in DITA-Book-FM encompasses all the elements
included in DITA-Topic-FM, and it has some additional FrameMaker-specific wrapper elements to enable
FrameMaker book-building. To this end, this application also points to one non-DITA-generic .dtd file,
fm-ditabook.dtd.
Using DITA in FrameMaker 8
Earlier versions of FrameMaker provided DITA application packs and S1000D to let developers fully evaluate and
enhance XML authoring and publishing capabilities within FrameMaker using two leading open standards. In
addition, both application packs were companion pieces to earlier versions of the FrameMaker Developer Kit (FDK)
that provided sample content, tools, applications, and documentation.
FrameMaker includes an in-built DITA application pack and a DITA menu, which facilitate DITA authoring. You
can generate a FrameMaker document directly from a DITA Map. You can use the standard FrameMaker features
while authoring DITA content. With DITA's modular, reusable information elements, you can publish structured
documents across different formats and media, and also flexibly recombine information in almost any way you like.
DITA supports dynamic and personalized delivery of structured content, thus putting the reader in charge of what
content is important and how it should be packaged.
In structured FrameMaker, you open a new document and create a map to organize topics into the hierarchy for a
help system or website, or into a nested sequence for a book. You can also generate navigation hierarchies from the
map and generate links that are added to the topics.
DITA application pack enhancements include the following:
•The DITA application pack supports Unicode.
•You can generate a single compound FrameMaker document from a ditamap file and save it in the required format
(e.g., as a PDF file). The generated file is independent without any references to a document.
Note: The DITA application pack no longer supports the functionalities available through the use of the open
toolkit (OT).
Creating a DITA map
DITA maps offer powerful control over the publishing process, enabling you to define the sequence and hierarchy
of topics at the point of content delivery.
This method of assembling content from a set of components can make the publishing process very flexible, enabling
single-sourced, multichannel publishing. For example, rather than writing two slightly different versions of the same
document for different target audiences, authors can use DITA maps to produce multiple versions without
redundant effort.
While creating DITA maps, you work primarily with four XML elements: topicref, topichead, topicgroup, and
topicmeta.
•The topicref element references a topic; you sequence and nest these elements to define how topics are arranged
in published output.
•The topichead element lets you add topic headings to sections containing multiple topic references.
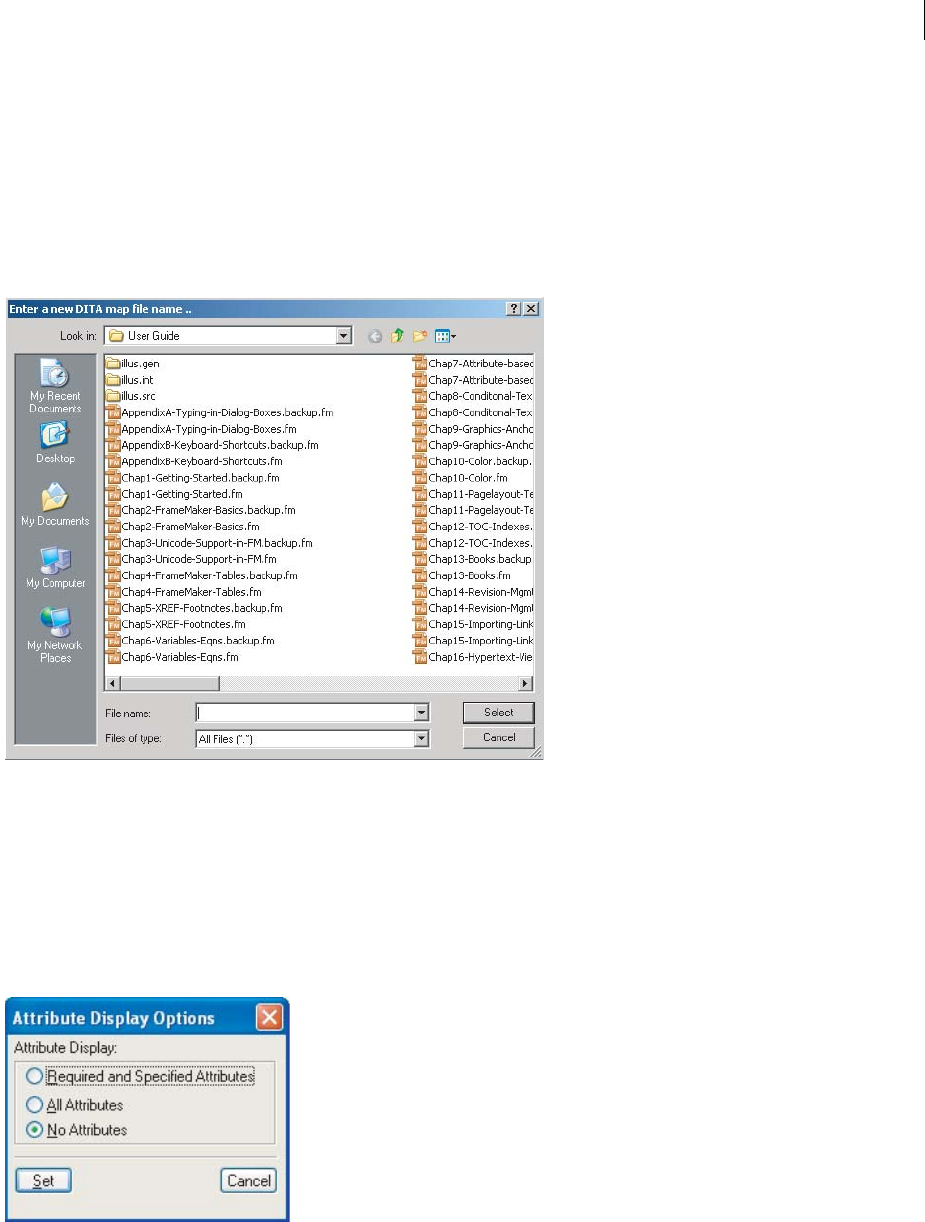
ADOBE FRAMEMAKER 8
User Guide
657
•With topicgroup, you create collections of topic references without affecting their hierarchy. For example, you
can identify groups for linking without changing the overall structure of published output.
•The topicmeta element defines the metadata that applies to a topic (and nested topics) when it appears in a map.
It can also be used to override the title and short description of the topic when linking.
To create a DITA map:
1Select DITA > New DITA File >New <map>. The Enter a New DITA Map File Name dialog box appears.
2In the File Name field, specify a unique name for the map file.
Note: If you do not provide a filename extension for the new file, a default name is added based on the type specified in
the Default File Type option in the DITA Options dialog box. DITA map files are assigned a .ditamap extension.
3Click Select. A new window appears for your new DITA map with the default title text MAP TITLE.
4In the Structure View window, click the plus (+) sign at the right-hand side of the <map> element bubble.
5Double-click the title attribute.
6In the Attributes dialog box, highlight the text in the Attribute Value field and specify the desired value.
7Click Set Value, and then click Done. The new DITA map file is saved with a .ditamap extension.
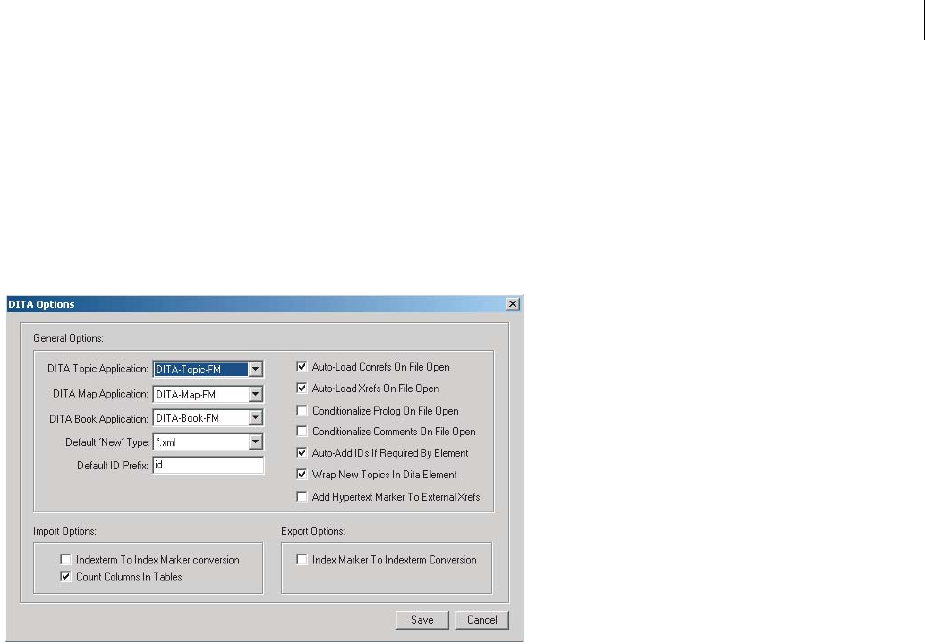
ADOBE FRAMEMAKER 8
User Guide
658
Creating a DITA topic
The DITA Options dialog box provides a check box for automatically wrapping new topic-level elements, such as
topic, concept, reference, and task, with a dita element (the default). Select this option and then create a
new topic.
To create a DITA topic:
1Select DITA > DITA Options, and choose Wrap New Topics In Dita Element.
2Click Save.
3Select DITA > New DITA File > New <topic>.
4Click Select. A new window appears for your new DITA topic with the default title text TOPIC TITLE.
5In the Structure View window, click the plus (+) sign at the right-hand side of the <topic> element bubble.
6Double-click the title attribute.
7In the Attributes dialog box, highlight the text in the Attribute Value field and specify the desired value.
8Click Set Value, and then click Done. The new DITA topic file is saved as an XML file.
Note: If you do not provide a filename extension for the new file, an extension is added based on the type specified in
the Default File Type option in the DITA Options dialog box.
Creating a DITA concept
You can create concept topics to define terms and explain concepts.
To create a DITA concept:
1Select DITA > New DITA File > New <concept>.
2Click Select. A new window appears for your new DITA concept with the default title text TOPIC TITLE.
3In the Structure View window, click the plus (+) sign at the right-hand side of the <concept> element bubble.
4Double-click the title attribute.
5In the Attributes dialog box, highlight the text in the Attribute Value field and specify the desired value.
6Click Set Value, and then click Done. The new DITA concept file is saved as an XML file.

ADOBE FRAMEMAKER 8
User Guide
659
Note: If you do not provide a filename extension for the new file, an extension is added based on the type specified in
the Default File Type option in the DITA Options dialog box.
Creating a DITA task
You can create a task topic to answer "How do I?" questions for a specific task by providing step-by-step
procedures.
To create a DITA task:
1Select DITA > New DITA File > New <task>.
2Click Select. A new window appears for your new DITA task with the default title text TOPIC TITLE.
3In the Structure View window, click the plus (+) sign at the right-hand side of the <task> element bubble.
4Double-click the title attribute.
5In the Attributes dialog box, highlight the text in the Attribute Value field and specify the desired value.
6Click Set Value, and then click Done. The new DITA task file is saved as an XML file.
Creating a DITA reference
You can create a reference topic that includes content such as additional information, a tip, a warning, or a
simple note.
To create a DITA reference:
1Select DITA > New DITA File > New <reference>.
2Click Select. A new window appears for your new DITA reference with the default title text TOPIC TITLE.
3In the Structure View window, click the plus (+) sign at the right-hand side of the <reference> element bubble.
4Double-click the title attribute.
5In the Attributes dialog box, highlight the text in the Attribute Value field and specify the desired value.
6Click Set Value, and then click Done. The new DITA reference file is saved as an XML file.
Opening all topic references in a .ditamap file
The topicref element identifies a topic (such as a concept, task, or reference) or other resource. A topicref
element can contain other topicref elements, allowing you to express navigation or table-of-contents (TOC)
hierarchies, as well as imply relationships between the containing topicref element and its children. You can set
the collection-type of a container topicref element to determine how its children are related to each other. You can
also express relationships among topicref elements using group and table structures (topicgroup and reltable).
Relationships are expressed as links in the output, with each participant in a relationship having links to the other
participants by default. You can fine-tune the output from your map by setting different attributes on topicref
elements. For example, the linking attribute controls how relationships to other topicref elements are expressed
as links, and the toc attribute controls whether the topicref element is displayed in the TOC or navigation output.
To open topic refererences in a .ditamap file:
1Open a .ditamap file containing topic references.
2Select DITA > Open All Topicrefs.
3Click OK to confirm the message displayed. The linked topic reference files are opened in separate windows.
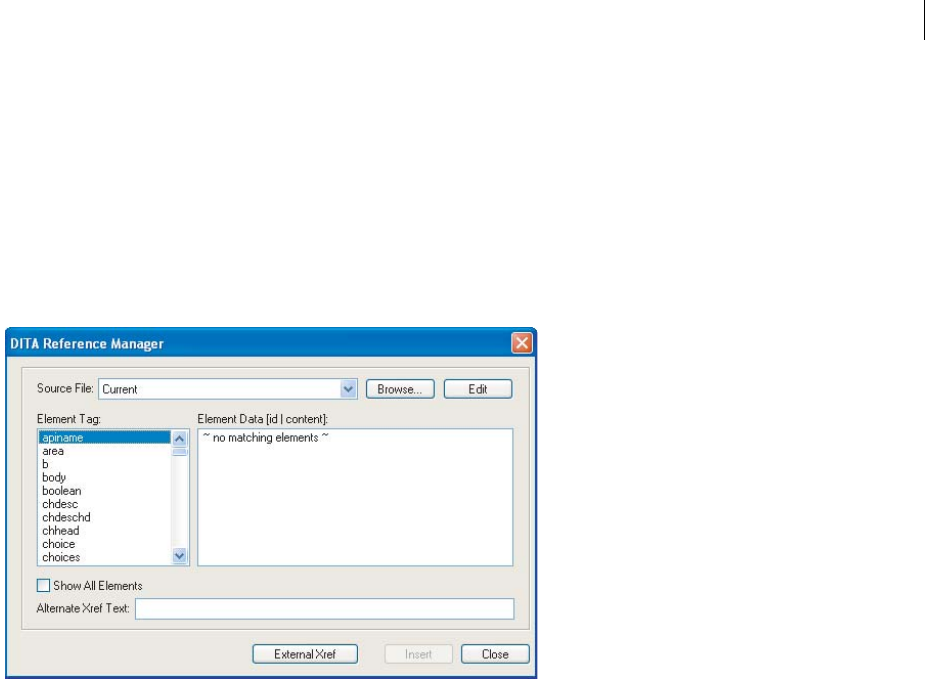
ADOBE FRAMEMAKER 8
User Guide
660
Inserting a topicref element in a .ditamap file
The Insert Topicref command inserts a new topicref element at the current insertion point of an open .ditamap
file, or overwrites a selected topicref element to reference a new file.
To insert a topicref element in a .ditamap file:
1Open a .ditamap file.
2Right-click an insertion point where you want to insert a new topicref element, and select Insert Topicref. The
Select a Topicref File dialog box appears.
3Select a file, or in the File Name field, specify the name of the topic file you want to insert as a topic reference in
the DITA topic.
4Click Select. The topic reference is inserted in the .ditamap file.
Inserting a conref element in a DITA topic
This section may be confusing because conref is described as a feature, an element, and an attribute. CW 4/17
DITA supports the conref feature of the DITA specification. When this feature is invoked, DITA inserts a content
reference as a text inset and tags it with the DITA-Conref conditional text tag. By default, the text color of this
condition tag is blue. However, you can modify it using the structured-template designer.
The Conref attribute is used to reference an ID on a topic that can be reused. For example, you could create a series
of topics in a compound (DITA) or nested context for authoring convenience, and then reference each topic individ-
ually into a new target location. During output processing, a lookup process pulls the contents of the first topic into
the calling topic markup that has the conref attribute.
To insert a conref element in a DITA topic:
1Open a .dita file.
2Collapse the body element.
3Click an insertion point below the body element and add a sibling to it.
ADOBE FRAMEMAKER 8
User Guide
661
4Select DITA > Insert Conref. The DITA Reference Manager appears.
5In the Element Tag pane, select a tag.
6In the Element Data field, select the desired item, and click Insert.
7Save and close the file.
By default, error messages are generated when you open a file that either contains a conref element or an xref
element that can’t be resolved, or references a file with one of those. If you prefer not to receive these messages,
choose DITA > DITA Options, and deselect both Auto-Load Conrefs on File Open and Auto-Load Xrefs on File Open.
Inserting cross-references in a DITA file
if the cross-reference element is available in your document, you can define the destination and link text for internal
and external xref elements.
To insert an internal cross-reference:
1Open a .dita file.
2Click an insertion point within an empty element.
3In the Element catalog, select Xref, and click Insert. The DITA Reference Manager appears.
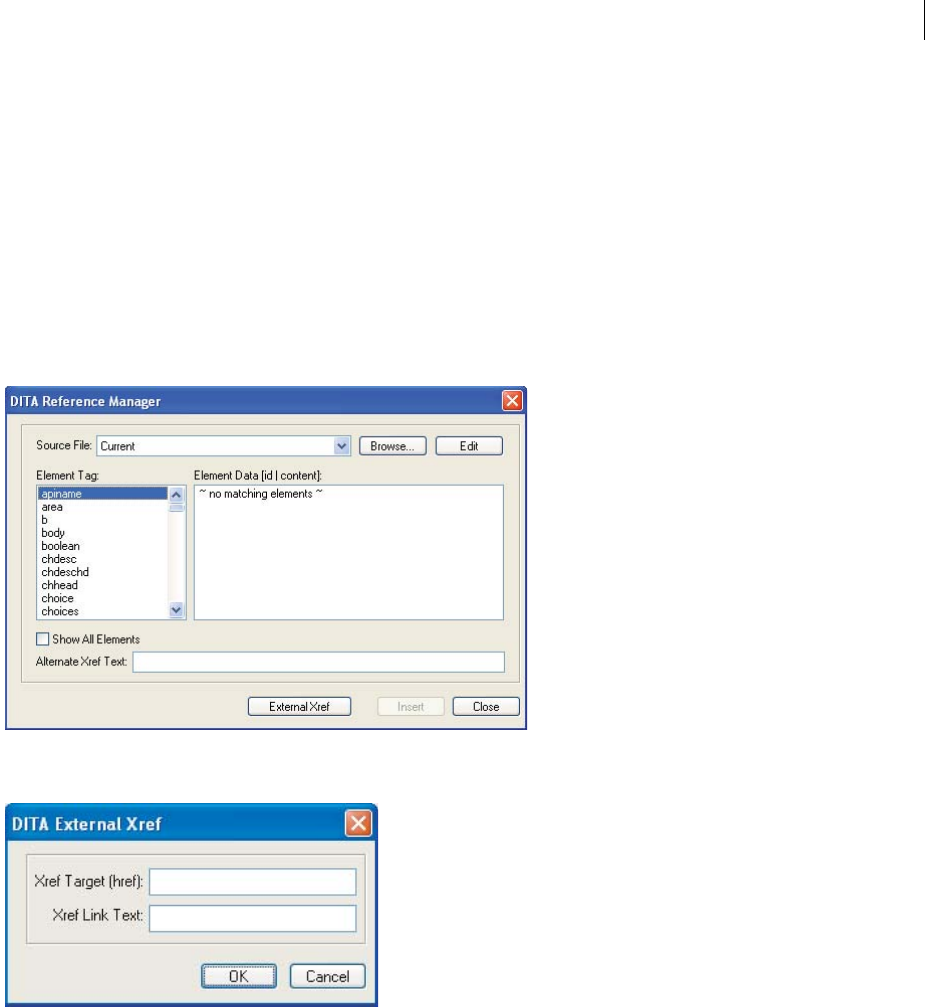
ADOBE FRAMEMAKER 8
User Guide
662
4Select an Element Tag from the list for which element data is available.
Note: Select the Show All Elements option to view all element data in the Element Data list.
5In the Alternate Xref Text field, type a text description that is displayed in place of the text of the selected element.
6Click Insert. The Update button is displayed if you are modifying an existing xref element.
To insert an external cross-reference:
1Open a .dita file.
2Click an insertion point within an empty element.
3In the Element catalog, select Xref, and click Insert. The DITA Reference Manager appears.
4Click External Xref. The DITA External Xref dialog box appears.
5In the Xref Target (href) field, type the URL of an external website.
6In the Xref Link Text field, type a text description that is displayed to indicate the referenced external website.
7Click OK.
8Click Close.
Note: When an external reference has been created, you can modify it by double-clicking it.

ADOBE FRAMEMAKER 8
User Guide
663
Assigning an ID to an element
You can configure DITA to assign a generated ID to the selected element. The ID value assigned to the selected
element is composed from values representing the year, month, day, hours, minutes, and seconds, plus two randomly
generated values. It is designed to be unique per-user for 100 years. You can specify an ID prefix in the Options dialog
box. If you specify a ID prefix for each user, the generated IDs are unique for each member of your team.
To assign an ID to an element:
1Select an element in the Structure View window.
2Select DITA > Assign ID to Element, or right-click the element, and select Assign ID to Element.
DITA generates an ID automatically and assigns it to the selected element.
Updating DITA references
You can configure DITA to update the content of topicref, conref, or xref elements.
Updating DITA maps
While working in DITA maps, you might find it necessary to update one or more topicref elements, which also
updates the DITA maps.
The Update Selected Topicref option is available only when your insertion point is in a topicref element. The
Update All Topicrefs in File option is only available when your insertion point is not in a topicref element. In
addition, the Update All Topicrefs in File option honors the setting of the locktitle attribute. If it is set to Yes, the
navtitle attribute of the topicref element will not be updated.
To update DITA maps:
1Select DITA > Update References.
2Do one of the following:
•If a topicref element is selected, click the Update Selected Topicref option. DITA updates the content of the
selected topicref element.
•If a topicref element is not selected, click the Update All TopicRefs in File option. DITA updates all topicref
elements in the current file to reflect any changes to titles in referenced files.
3Click OK.
Updating DITA topics
While working in DITA topics, you might find it necessary to update all conref or xref elements.
To update DITA topics:
1Select DITA > Update References.
2Do one of the following:
•Select the Update All Conrefs In File option. DITA updates all conref elements in the current file to reflect any
changes to the source content.
•Select the Update All Xrefs In File option. DITA updates all xref elements in the current file to reflect any
changes to titles in referenced files.
3Click OK.
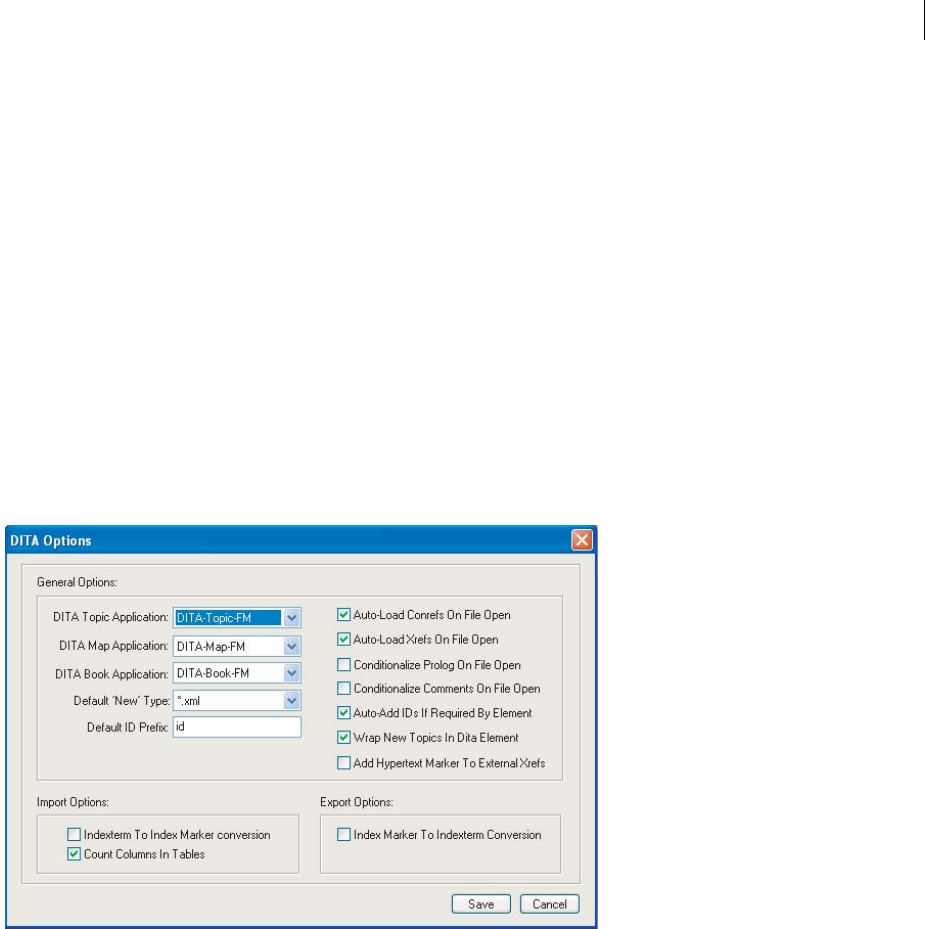
ADOBE FRAMEMAKER 8
User Guide
664
Generating a FrameMaker document from a DITA map
You can generate a FrameMaker document from a DITA map.
Generate a FrameMaker document from a DITA map
1Open a .ditamap file.
2Select DITA > Generate FM document from DITAMap. The Enter new Document Name dialog box appears.
3In the File Name field, specify the name of the FrameMaker document you want to create with the .fm extension.
FrameMaker generates the new structured FrameMaker document using the content from the .ditamap file. A
message confirms the successful completion of this task.
4Click OK.
Setting DITA options
You can use the DITA Options dialog box to set general, import, and export-related DITA options.
1Select DITA > DITA Options. The DITA Options dialog box appears.
2In the DITA Topic Application list, select a Topic Application. This selection determines the structure application
used when you open a new topic by double-clicking a topic reference, content reference, or cross-reference, or save
a topic opened in FrameMaker. It also determines the application used when DITA programmatically opens a topic
file when resolving references. In addition, this selection defines the “New <map>” entry that appears in the DITA
> New DITA File menu. The options available in the DITA Topic Application list are determined by the available
XML applications you have defined in your structapps definition file (structapps.fm).
3In the DITA Map Application list, select a Map Application. This selection determines the structure application
used when you open a new map by double-clicking a topic reference that references a DITA map, or save a map
opened in FrameMaker. In addition, this selection defines the “New <topic>,” “New <concept>,” “New <task>,” and
“New <reference>” entries that appear in the DITA > New DITA File menu. The options available in the DITA map
application list are determined by the available XML applications you have defined in your structapps definition file
(structapps.fm).

ADOBE FRAMEMAKER 8
User Guide
665
4In the DITA Book Application list, select a Book Application. This selection determines the structure application
used when you generate a FrameMaker book from a DITA map using Build FM DITABook from the DITA map File
option. The options available in the DITA Book Application list are determined by the available XML applications
you have defined in your structapps definition file (structapps.fm).
5Select *.xml or *.dita in the Default ‘New’ Type list. The default ‘New’ type specifies the file extension for a new
topic (.xml or .dita). This extension is applied only if you do not specify an extension for the new file.
6Specify an ID prefix in the Default ID Prefix field. This prefix is associated with new IDs generated by DITA.
7Deselect the Auto-Load Conrefs On File Open option. By default, this option is selected, and content references
are automatically loaded when you open a .dita file.
8Deselect the Auto-Load Xrefs On File Open option. By default, this option is selected, and cross-references are
automatically loaded when you open a .dita file.
9Select the Conditionalize Prolog on File Open option. When a DITA file that contains a prolog element is
imported with this option selected, a condition tag named DITA-Prolog is applied. By default, the structured
template contains these conditions set to Hide. In addition, the conditional text is saved (exported) regardless of
whether it is showing ("OutputAllTextWithoutPIs"). If, on import, no associated condition tag is found in the struc-
tured template, the DITA-Prolog is added and set to Show (in Red).
Note: If this option is not selected, all prolog (or draft-comment) elements are imported and displayed using the
formatting from the EDD and structured template with no condition tags applied.
10 Select the Conditionalize Comments on File Open option. When a DITA file that contains a draft-comment
element is imported with this feature selected, a condition tag named DITA-Comment is applied. By default, the struc-
tured template contains these conditions set to Hide. In addition, the conditional text is saved (exported) regardless
of whether it is showing ("OutputAllTextWithoutPIs"). If, on import, no associated condition tag is found in the
structured template, the DITA-Comment is added and set to Show (in red). If Conditionalize Comments on File Open
is not selected, all draft-comment elements are imported and displayed using the formatting from the EDD and
structured template with no condition tags applied.
11 Deselect the Auto-Add IDs if Required by Element option. By default, this option is selected, and IDs are
automatically added to elements that require IDs. The ID value assigned to the selected element is composed of
values representing the year, month, day, hours, minutes, and seconds, plus two randomly generated values. It is
designed to be unique per-user for 100 years.
12 By default, the Wrap New Topics In DITA Element option is selected and FrameMaker automatically wraps new
topic-level elements such as topic, concept, reference, and task, with a dita element (the default). Deselect this
option, if required.
13 Select the Add Hypertext Marker to External Xrefs option to add all new hypertext markers you define in a DITA
file to external xref elements. You can generate an active PDF link to a URL when xref elements with a source using
the external attribute are saved as PDF from an open document. If you select this option, when you open a DITA file
that contains an xref element with a source attribute of external, the element receives a link-asis character format and
an unstructured FrameMaker is placed therein. The text of the marker is the value of the xref element's href,
preceded by "message URL ." This will generate an active URL hyperlink that can be saved as PDF. (Previously, only
fm-xref elements could produce an active link in a PDF file generated from within FrameMaker using this
application.)
Note: This doesn’t make "internal" xrefs clickable in a PDF. To accomplish that, an fm-xref can be used wherever the
associated text can be gleaned from the source of the fm-xref.
14 Select the Indexterm to Index Marker Conversion option to convert all index terms to index marker elements
while importing a file into a structured document.

ADOBE FRAMEMAKER 8
User Guide
666
15 By default, the Count Columns in Tables option is selected. Deselect this option if you do not want FrameMaker
to track the number of columns across tables while importing a file into a structured document.
16 Select the Index Marker to Indexterm Conversion option to convert all index markers to index term elements
while importing a file into your structured document.
Setting options to display attributes
Attributes are used to help describe XML elements or provide additional information that can be used to, for
example, identify an element or apply formatting controls. Before working with attributes, you need to be able to
identify attributes in a document and expand or collapse them as required.
To set attribute display options:
1Select View > Attribute Display Options. The Attribute Display Options dialog box appears.
2Do one of the following:
•If you want elements to display only attributes that are either required or have values in the Structure View, select
Required and Specified Attributes.
•If you want elements to display all the attributes assigned to them in the Structure View regardless of values or
requirements, select All Attributes.
•If you want all elements to display their attributes collapsed in the Structure View, select No Attributes.
3Click Set.
Building FrameMaker books from DITA maps
The Build FM DITAbook From Ditamap file command lets you generate a FrameMaker book from a ditamap file.
The highest-level topcirefs in your DITA map become chapters in the FrameMaker book, containing any nested
topicrefs. Formatting is determined based on the structure application you have selected for books in the DITA
Options dialog box.
To build a FrameMaker book from a DITA map file:
1Choose DITA > Build FM DITABook from DITA Map File.
Note: Whenever you want to build a FrameMaker book from a DITA map, invoke the DITA-Map-FM application to
ensure that all the appropriate preprocessing and postprocessing takes place.
2In the Choose a Ditamap File dialog box, select .ditamap file, and then click Select.
Note: The book is generated using the DITA Book application specified in the DITA Options dialog box.

ADOBE FRAMEMAKER 8
User Guide
667
3In the Save Book dialog box, type a unique name for the book in the File Name field, and then click Save. A book
window appears, and each file is added to the book.
All of the power and capabilities of FrameMaker books are now at your disposal—from Table of Contents and Index
generation to the creation of high-quality PDF and HTML output.
Note: Double-clicking one of the files in the book window opens that file in a tab. Double-click the file name in the book
window a second time to open it in a separate window.
4Save the book.
Using indexterms
DITA supports indexterm marker elements in FrameMaker. The API client converts FrameMaker index markers
with colon-delimited subentries to nested XML indexterm elements for seamless export, and it reverses the
conversion for seamless import.
Before you convert index terms, copy the following code into WordPad, and save it as an XML file with the
name “review_ditamagic.xml”, in any folder. Open the file in FrameMaker using the DITA-Topic-FM Structured
Application:
<?xml version="1.0" encoding="UTF-8"?>
<!DOCTYPE topic PUBLIC "-//OASIS//DTD DITA Composite//EN" "ditabase.dtd" [
<!-- Begin Document Specific Declarations -->
<!-- End Document Specific Declarations -->
]>
<topic id = "software_review_ditamagic"
xmlns:ditaarch = "http://dita.oasis-open.org/architecture/2005/">
<title>Review: DitaMagic</title>
<body><dl><dlentry><dt>Name</dt>
<dd>DitaMagic</dd></dlentry>
<dlentry><dt>Version</dt>
<dd>1</dd></dlentry>
<dlentry><dt>Vendor</dt>
<dd>InfoTypes Ltd.</dd></dlentry>
<dlentry><dt>Platforms</dt>
<dd>Linux, Windows</dd></dlentry>
<dlentry><dt>Price</dt>
<dd>$100</dd></dlentry>
<dlentry><dt>Home</dt>
<dd><xref href = "http://www.adobe.com/" scope =
"external">www.adobe.com</xref></dd></dlentry></dl>
<section>DitaMagic<indexterm class = "- topic/indexterm ">DITA</indexterm><indexterm
class = "- topic/indexterm ">software</indexterm><indexterm
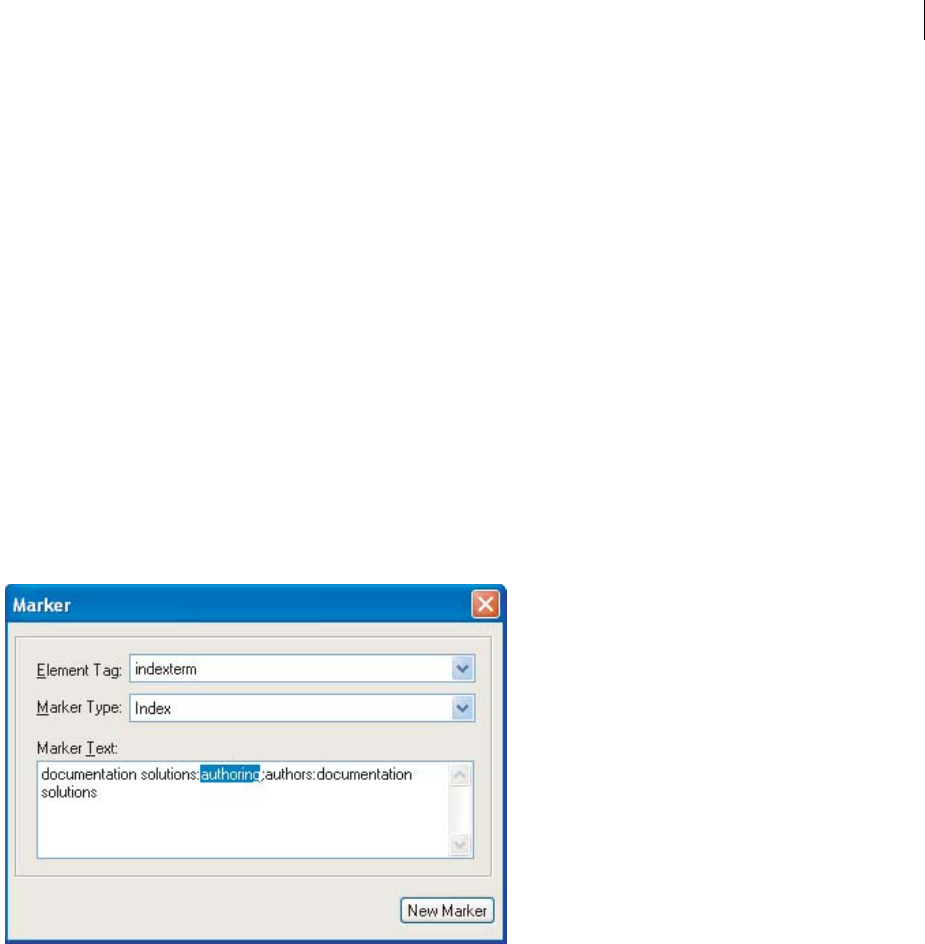
ADOBE FRAMEMAKER 8
User Guide
668
class = "- topic/indexterm ">authors</indexterm> is a comprehensive
suite of tools and applications for working with DITA. Type architects,
writers, information architects, build developers, and information
designers will all find tools and interfaces to support their work.</section>
<section><title>Pros</title><ul><li>All-in-one package.</li>
<li>DITA is completely implemented.</li></ul></section>
<section conref = "shared.dita#shared/footer"></section></body></topic>
To convert indexterms:
1Select File > Open.
2Open the review_ditamagic.dita file from the folder where you saved it.
3Select Edit > Find/Change.
4From the Find pop-up menu, choose Any Marker.
5Click Find.
6Select Special > Marker.
7In the Marker dialog box, change the secondary indexterm subentry authors to: authoring;documentation
solutions.
You have just corrected a tertiary index entry and added a separate primary entry. (The colons indicate indexterm
hierarchy, and the semicolon indicates that what follows is a primary entry.)
8Click Edit Marker, and close both the Marker dialog box and the Find/Change dialog box.
9Save and close review_ditamagic.xml.
10 Using a text or XML editor (or the text-editing capabilities of FrameMaker), open the review_ditamagic.xml file.
11 Locate (visually or by using the Find function) the indexterm elements.
The colon-separated Marker text is converted to a nested indexterm element, and the semicolon-delimited entry is
converted to a first-level indexterm element.

ADOBE FRAMEMAKER 8
User Guide
669
Note: On import, the nested set of <indexterm> elements is converted to one index marker element (a primary entry
with subentries) and the other <indexterm> element is converted to a second index marker element.
12 Close review_ditamagic.xml file without saving it.
Modifying template components and files for DITA structured templates
Since the DITA feature uses three separate but integrated FrameMaker applications, the structured template designer
can produce three (or more) distinct template designs.
Note: It is recommended that you avoid altering the structure itself. This structure is designed to work with the plug-ins,
the other components of this application, and the other applications that comprise this feature.
Following are descriptions of the three FrameMaker applications, along with their template components:
DITA-Topic-FM This application is used to create or open topic, concept, reference, or task elements. You can
modify the formats and page-layout features of the EDD and template components to optimize authoring at a topic
level. You can modify the following structured template files for look and feel:
•$STRUCTDIR\xml\DITA-Topic-FM\app\dita-topic.edd.fm
•$STRUCTDIR\xml\DITA-Topic-FM\app\dita-topic.template.fm
DITA-Map-FM This application is used to create or open DITA maps. You can modify the formats and page-layout
features of the EDD and template components to optimize the DITA map authoring experience. You can modify the
following structured template files for look and feel:
•$STRUCTDIR\xml\DITA-Map-FM\app\dita-map.edd.fm
•$STRUCTDIR\xml\DITA-Map-FM\app\dita-map.template.fm
DITA-Book-FM This application is used to build FrameMaker books from DITA maps. You can modify the formats
and page-layout features of the EDD and template components to produce, for example, high-quality print or PDF
output. You can modify the following structured template files for look and feel:
•$STRUCTDIR\xml\DITA-Book-FM\app\dita-book.edd.fm
•$STRUCTDIR\xml\DITA-Book-FM\app\dita-book.template.fm
The three-application approach provides the structured-template designer great flexibility in fine-tuning the DITA
authoring and document-production environment and output.
Publishing DITA documents
The DITA feature includes built-in methods to manage publishing to a wide range of formats, including compiled
Help, HTML, and FrameMaker books.
Customizing DITA support of FrameMaker
You can extend the capabilities of the DITA feature by using XSLT, the FrameMaker Developer Kit (FDK), or custom
plug-ins developed with third-party tools.
Using XSLT
You can reference XSLT style sheets for DITA in structure application definitions to transform the underlying XML
on import or export. XSLT is a key method of the DITA feature for processing DITA maps into FrameMaker books.
You can edit or chain the style sheets with other style sheets to change a behavior, or use additional style sheets to
change how FrameMaker imports, exports, or publishes DITA content.

ADOBE FRAMEMAKER 8
User Guide
670
Using the FDK
For developers, the FDK represents a very powerful way to work with the internal mechanisms of FrameMaker,
allowing them to work directly with the FrameMaker authoring environment and formatting engine. The main
DITA features are developed using the FDK, and developers can build additional plug-ins that extend this capability.
The FDK is available on the Adobe website: www.adobe.com/devnet/framemaker/.
Third-party tools
There are a wide range of third-party plug-ins available for FrameMaker. Some of the plug-ins already targeted
towards structured FrameMaker can be used to extend the capabilities of the DITA authoring in FrameMaker. Third
parties may offer tools that work directly in concert with the DITA’s associated plug-ins and structured applications
as well.
Tips
Following are tips for working with the Adobe FrameMaker DITA.
•If you make heavy use of references (conref or xref elements), you may find it more efficient to open the target
files first. Target files are the destination of an xref element or the source of a conref element. If the target files
are already open when you open topic files, the referencing process will go much faster.
•While converting an existing set of unstructured files into DITA, you may want to disable the auto-loading of xref
and conref elements. If auto-loading is enabled, you may encounter many referencing errors when opening files
if the targets of those references are not completely valid files.
•If you have titles that contain conref elements, be sure to have the target files open when updating the DITA map
file. Otherwise, the conref element content will not appear in the topic reference label.
671
Chapter 23: Adobe Technical
Communication Suite features in Adobe
FrameMaker
Creating and editing images using RoboScreen
Capture
RoboScreenCapture is a screen capture tool that can be used for capturing and editing images. You can use these
images in your help systems like online tutorials, manuals, training handouts, presentations, marketing materials,
and web pages.
Integration of Adobe® FrameMaker® 8 with RoboScreenCapture helps you do the following:
1Open RoboScreenCapture from Adobe FrameMaker.
2Insert images created in RoboScreenCapture into Adobe FrameMaker.
3Edit images imported by reference into Adobe FrameMaker using RoboScreenCapture. You can use the right-
click option Edit with RoboScreenCapture for an image to launch and edit the image in RoboScreenCapture.
Changes made to the image are reflected in Adobe FrameMaker after the image is saved and closed in RoboScreen-
Capture.
Note: This option is available only for image formats supported by RoboScreenCapture.
You can use RoboScreen Capture to perform the following tasks:
•Capture screens in 10 modes, including Free Hand, Virtual Screen, and Multi-Region
•Capture screens using a drop-down menu, assign your own keyboard shortcuts, and even control RoboScreen-
Capture with voice commands
•Capture difficult-to-grab screens such as DirectX, Direct3D, 3Dfx, Voodoo, and Glide mode games
•Capture more than is visible on the screen, such as long Web pages
•Edit images
•Save your screen capture in over 20 image formats
•Automatically save screen captures to image files
•Quickly add image stamps, frames, drop shadows, and more
•Change image colors, flip or rotate images, and crop images to a smaller size
•Add identifying stamps to each screen capture, such as a company name or logo
•Call-out specific areas of your capture with shapes, shadow effects, and more.
Creating images with RoboScreenCapture and inserting them into Adobe FrameMaker
You can use RoboScreenCapture from Adobe FrameMaker to capture a screenshot from an application running on
your computer, and save it in RoboScreenCapture. You can then import the file into an open FrameMaker document.

ADOBE FRAMEMAKER 8
User Guide
672
To create an image with RoboScreenCapture and insert it into Adobe FrameMaker:
1Open the FrameMaker document into which you want to insert images.
2Select File > Launch RoboScreenCapture. The RoboScreenCapture application opens.
3From RoboScreenCapture, capture a screenshot of the desired application using the various options in the
Capture menu.
4Save the file, and close RoboScreenCapture.
5In Adobe FrameMaker, select File > Import > File. The Import dialog box appears.
6Select the file created in RoboScreenCapture.
7Select Import by Reference.
8Click Import.
Editing imported images using RoboScreenCapture
You can use RoboScreenCapture to edit images inserted by reference into FrameMaker documents.
To edit an image in Adobe FrameMaker using RoboScreenCapture:
1Open Adobe FrameMaker.
2Select File > Open, and open a document with the image you want to edit.
3Select the image you want to edit.
4Right-click the image, and select Edit With RoboScreenCapture. The RoboScreenCapture application opens with
the image open for editing.
5Edit the image.
6Select File > Save.
7Select File > Exit to close the RoboScreenCapture application.
The edited image is updated in Adobe FrameMaker and is ready for use in the document.
Inserting and editing Adobe Captivate demos
Adobe Captivate is an e-learning authoring tool used to create software demonstrations, software simulations,
branched scenarios, and quizzes in the SWF format.
Integration of Adobe Captivate with Adobe FrameMaker enables you to do the following:
•Open Adobe Captivate from Adobe FrameMaker to create/record Adobe Captivate demos, and import the created
demos into Adobe FrameMaker as SWF files.
•Insert Adobe Captivate movies into a FrameMaker document.
•Edit an Adobe Captivate movie placed in a FrameMaker document.
Note: You must install Adobe Captivate 2 or Adobe Captivate 3 to use this feature.
To launch Adobe Captivate, create a movie, and insert it in a FrameMaker document:
1Open Adobe FrameMaker.

ADOBE FRAMEMAKER 8
User Guide
673
2Select File > Adobe Captivate > Launch Adobe Captivate. The latest version of Adobe Captivate installed on your
computer, opens. For example, if you have installed both Adobe Captivate 2 and Adobe Captivate 3, Adobe Captivate
3 opens.
3Select Edit > Preferences and set your recording options.
4Click Record or create a new project.
5Use the options to record, and save the movie. Publish the movie in the SWF format. For more information, see
Adobe Captivate User Guide. (www.adobe.com/support/documentation/en/captivate/)
6Close Adobe Captivate.
7In Adobe FrameMaker, select File > Open to open the document into which you want to insert the Adobe
Captivate demo.
8Place the cursor in the position where you want to insert the demo.
9Select Import > File.
10 In the Import dialog box, select the SWF file.
11 Select Import By Reference or Copy Into Document.
12 Click Import. The SWF file is inserted in the FrameMaker document.
To create and insert an Adobe Captivate movie into a FrameMaker document:
1Open Adobe FrameMaker.
2Select File > Open to open the document in which you want to insert the Adobe Captivate movie.
3Move the cursor to the position where you want to place the movie.
4Select File > Adobe Captivate > Insert Adobe Captivate Demo. A dialog box prompts you to enter a name for the
movie.
5Specify a name for the movie (for example, myMovie.swf).
6Click OK.
The Adobe FrameMaker window is minimized, and the startup screen of the latest version of Adobe Captivate
appears.
7Select Edit > Preferences and set your recording options.
8Click Record or create a new project.
9Use the options to record the movie. For more information, see Adobe Captivate User Guide.
(www.adobe.com/support/documentation/en/captivate/)
10 Select File > Exit. A dialog box prompts you to save the movie.
11 Click Yes.
Adobe Captivate closes and the Adobe FrameMaker application is restored with the SWF file inserted at the cursor
position.
To edit an Adobe Captivate movie:
1Open Adobe FrameMaker.
2Open the document containing the Adobe Captivate demo you want to edit.
3Select the movie.

ADOBE FRAMEMAKER 8
User Guide
674
4Do one of the following:
•Right-click the movie and select Edit with Adobe Captivate.
•Select File > Adobe Captivate > Edit with Adobe Captivate.
5If the project file of the movie is available, Adobe Captivate is launched with the project file open for editing. The
Adobe FrameMaker window is minimized.
6Edit the Adobe Captivate movie. For more information, see Adobe Captivate User Guide.
(www.adobe.com/support/documentation/en/captivate/)
7Select File > Exit. A dialog box prompts you to save the movie.
8Click Yes. The SWF file is automatically updated in the FrameMaker document.
Note: Ensure that you save the SWF file before you close Adobe Captivate.
Launch Adobe Acrobat Connect from Adobe
FrameMaker
You can launch Adobe® Acrobat® Connect™ from Adobe FrameMaker to set up or access online meeting rooms.
Note: For more information about using the various features of Adobe Acrobat Connect, see
www.adobe.com/support/acrobatconnect/.
Create an Acrobat Connect account
You must create an Adobe Acrobat Connect account before you set up an online meeting using Adobe Acrobat
Connect. You can create an account by setting up a trial account or by purchasing a subscription. The Adobe Acrobat
Connect functionality is enabled through Adobe® Acrobat® 3D Version 8.
Note: Reviewers must have Adobe® Reader® 7 or later versions installed to review the documents.
1Open Adobe FrameMaker.
2Select File > Start Meeting.
3Do one of the following:
•Click Create A Trial account to set up a trial account.
•Click Buy Now to purchase a subscription.
4Follow the onscreen instructions to set up the account.
Start a meeting with Adobe Acrobat Connect
You can launch Adobe Acrobat Connect from Adobe FrameMaker to set up or access online meeting rooms.
To start a meeting using Adobe Acrobat Connect:
1Select File > Start Meeting.
2Click Log In and enter the following information:
The URL of your meeting room in the format <connect.acrobat.com/<name of meeting room>
•Your log-in ID

ADOBE FRAMEMAKER 8
User Guide
675
•Your log -in p assword
3Click Log In.
4Click Send An E-mail invitation.
5Type the e-mail addresses of attendees and click Send.
6Click Share My Screen to share your computer interface with other users, and then select a screen-sharing option.
Desktop When you share your desktop, attendees see everything that happens on your computer screen, including
e-mail pop-ups, alerts, and all visible windows and applications. Use this option when your demonstration uses
several applications and windows, or when the areas you want to share are layered on top of each other.
Window You can share one or more windows currently open on your computer with the meeting participants. Only
the windows you select are visible to attendees. Use this option if you want to share only the information that appears
in selected windows.
Application You can share one or more applications that are currently running on your computer. Only the appli-
cations you select are visible to attendees (along with any windows associated with the applications). Use this option
if you want to demonstrate functionality or share documents that can be opened in one or more applications.
7When prompted to grant attendees access to the meeting, click Accept.
8Do one of the following:
•If you want an attendee to share his or her desktop, select the attendee's name in the Attendee List, click the Set
User Role button, and select the Set As Presenter To Allow Screen Sharing option.
•To chat with the attendees, type a message in the Chat pod, select the attendees to whom the message will be sent,
and click Send Message.
•To take notes during the meeting, use the Notepad.
Sending PDFs for review
You can use the Save as PDF (Send for Review) feature in Adobe FrameMaker to save a document as a PDF file, and
send the generated PDF file for review by e-mail. The selected file or book is converted to a PDF file, and attached
to a new e-mail message in the default e-mail application on your computer. You can now send the document for
review by typing the e-mail IDs of reviewers, and sending the e-mail.
Note: You can use this feature only if you have installed Adobe Acrobat 8 or later. Reviewers must have Adobe Reader 7
installed on their computers to review the document.
To generate a PDF and send it for review:
1Open document or book.
2Select File > Save As PDF (Send For Review). The Save Document dialog box appears.
3Specify the desired file name for the PDF, and click Save. The PDF Setup dialog box appears.
4Specify the desired settings for the PDF you are generating.
5Click Set.
The new PDF is generated using Acrobat Distiller. The generated PDF file opens in Acrobat with the Getting Started
page of the Send by Email for Review wizard displayed.
6Select the PDF file to be sent for review.

ADOBE FRAMEMAKER 8
User Guide
676
7Click Next. The Invite Reviewers page is displayed.
8Click Address Book, and select the e-mail addresses of persons who will review the PDF file. Click OK.
9Click Next.
10 In the Preview Invitation page, specify the Subject and content of the e-mail invitation that will be sent to the
reviewers.
11 Click Send Invitation.
An Outgoing Message Notification notifies you that an e-mail message has been sent to the default e-mail application
on your computer, and that the mail will be sent automatically by your e-mail client. A copy of the PDF is sent to the
reviewers as an attachment. When reviewers open this file attachment, Acrobat opens the PDF file with a
commenting toolbar.
12 Click OK.

677
Appendix A: Typing in dialog boxes
About typing in dialog boxes
You can enter characters that don’t appear on the keyboard (such as nonbreaking spaces, en dashes and em dashes,
and special hyphens) in dialog boxes.
Characters that don’t appear on the keyboard are handled differently on each platform, as follows:
•(Windows) You must enter a sequence of characters beginning with a backslash (\). The backslash sequences
appear in the dialog box, but the characters they represent appear in the document.
•(UNIX) You can enter the characters in the same way that you type them in a document window, but the backslash
sequences will appear in the dialog boxes.
In addition to the special characters described here, you can enter characters in the Find/Change dialog box that
indicate a position rather than a specific character (for example, \P for end of paragraph). For a list of these
characters, see “Searching for special characters and nonprinting symbols” on page 79.
For information on typing special characters in a document window, see “Typing special characters” on page 72,
“Typing special spaces” on page 72, “Changing hyphenation and line breaks” on page 119, and the online manual
FrameMaker Character Sets.
All key sequences described here begin with a backslash (\). To indicate a literal backslash in a dialog box, enter two
backslashes (\\).
Windows
You can enter many characters in a dialog box by pressing the corresponding keys on the keyboard. If a character
doesn’t appear on the keyboard, you can usually enter the character by using its ANSI or hex code or the character’s
key sequence. (See the online manual FrameMaker Character Sets.)
In some cases, however, you must type a character sequence beginning with a backslash (\) to enter a character in a
dialog box. The sequence appears in the dialog box, but the character appears correctly in the document. The
following table shows the sequences to type in a dialog box. In a few cases, you can choose between two backslash
sequences for a character. In these cases, the sequences are separated by a comma.
Character name Graphic Backslash sequence
Bullet \b
Circumflex \@
Dagger † \d
Dagger (double) ‡ \Shift+d
Dash (em) \m
Dash (en) \=
Ellipsis … \e

ADOBE FRAMEMAKER 8
User Guide
678
Florin ƒ \Shift+f
Forced return \r
Fraction \/
Grave \{
Guilsingl left \(
Guilsingl right \)
Hungarumlaut \&
Hyphen (discretionary) - \- (hyphen)
Hyphen (nonbreaking) - \+
OE ligature \Shift+o Shift+e
oe ligature \oe
Per thousand ‰ \%
Quote (base single) \,
Quote (base double) \g
Quote (double left) \`
Quote (double right) \'
Quote (single) \"
Space (em) \sm, \Shift+m
Space (en) \sn, \Shift+n
Space (nonbreaking) \space
Space (numeric) \s#, \#
Space (thin) \st, \i
Suppress hyphenation \_ (underscore)
Tab \t
Trademark serif \Shift+t Shift+m
Y dieresis \Shift+y : (colon)
Character name Graphic Backslash sequence

ADOBE FRAMEMAKER 8
User Guide
679
UNIX
To comply with the X Window System, FrameMaker uses X server fonts in dialog boxes. X server fonts use ISO
Latin-1 encoding for characters in Western fonts, so not all characters in the character set have a corresponding
character in the X server font.
The following table lists characters in the character set that don’t have corresponding characters in the X server font.
You can enter the characters by pressing the key sequences shown in the second column, or type them directly as
they appear in the second column. In a few cases, you can choose between two backslash sequences for a character.
In these cases, the sequences are separated by a comma.
Character Graphic Press (or type)
Breve Control+q y or type \u
Bullet Control+q % or type \b
Circumflex Control+q v or type \@
Dagger † Control+q space or type \d
Dagger (double) ‡ Control+q ` or type \Shift+d
Dot accent Control+q z or type \ .(period)
Dotless i Control+q u or type \l (lowercase L)
Ellipsis . . . Control+q Shift+i or type \e
Dash (em) Control+q Shift+q or type \=
Dash (en) Control+q Shift+p
fi ligature Control+q ^ or type \fi
fl ligature Control+q _ (underscore) or type \fl
Florin ƒ Control+q Shift+d or type \Shift+f
Forced return Control+j or type \r
Fraction Control+q Shift+z or type \/
Grave Control+` or type \{
Guilsingl left Control+q \ or type \(
Guilsingl right Control+q ] or type \)
Hungarumlaut Control+q } or type \&
Hyphen (discretionary) - Control+- (hyphen) or type \- (hyphen)
Hyphen (nonbreaking) - Meta+- (hyphen) or type \¬
OE ligature Control+q Shift+n or type \Shift+o Shift+e
oe ligature Control+q Shift+o or type \oe
Ogonek Control+q ~ or type \k
Per thousand ‰ Control+q d or type \%
Quote (base single) Control+q b or type \,

ADOBE FRAMEMAKER 8
User Guide
680
Quote (base double) Control+q c or type \g
Quote (double left) Control+q Shift+r or type \‘
Quote (double right) Control+q Shift+s or type \'
Quote (single) Control+' or type \"
Space (em) Esc space m (space=press spacebar) or type \sm, \Shift+m
Space (en) Esc space n or type \sn, \Shift+n
Space (nonbreaking) Control+spacebar or type \spacebar
Space (numeric) Esc space 1 (one) or type \s#, \#
Space (thin) Esc space t or type \st, \i
Tab Tab or type \t
Trademark serif Control+q * or type \Shift+t Shift+m
Y dieresis Esc % Shift+y or type \Shift+y :
Character Graphic Press (or type)

681
Appendix B: Keyboard shortcuts
Keyboard shortcuts for Windows
Keyboard shortcuts instructions:
•+ indicates that each key must be pressed simultaneously (for example, Control+z means to press the Control key
and the z key simultaneously). If the shortcut keystrokes do not contain the Shift+ sign, press each key in the order
the shortcut calls for (for example, Esc m p means to press and release the Esc (Escape) key, then the m key, then
the p key).
Navigating through documents
To display Press
Previous page Esc p p, Pg Up
Next page Esc p n, Pg Dn
First page Esc p f, Alt+Pg Up, Shift and click the Previous Page button
Last page Esc p l (lowercase L), Alt+Pg Dn, Shift and click the Next Page
button
Go To Page dialog box Esc v p, Control+g
To go to Do this
Source of a cross-reference Press Alt+Control and click an active area
A specific page Press Control+g or click the Page Status area and then type the
page number
Page containing the insertion point Press Control+g or click the Page Status area and then click Page
Containing the Insertion Point
To move the insertion point in text to Press
Start of a word Control+left arrow
End of a word Control+right arrow
Start of the next word Esc b w
Start of a sentence Control+Home
End of a sentence Control+End
Start of a paragraph Control+up arrow
End of the current paragraph Control+down arrow
Start of the next paragraph Esc b p
Top of a column Control+Pg Up

ADOBE FRAMEMAKER 8
User Guide
682
Drawing tools
Bottom of a column Control+Pg Dn
Start of a flow Alt+ Shift+Pg Up
End of a flow Alt+ Shift+Pg Dn
Start of a line Control+Pg Up
End of a line Control+Pg Dn
To choose this tool Use this shortcut
Arc Esc one a
Graphic Frame Esc one m
Freehand Esc one f
Last tool selected Esc one one
Line Esc one l (lowercase L)
Object Selection Esc one o
Oval Esc one e
Polygon Esc one p g
Polyline Esc one p l (lowercase L)
Rectangle Esc one r
Rounded Rectangle Esc one Shift+r
Smart Selection Esc one s
To choose this tool Use this shortcut
Text Frame Esc one t f
Text Line Esc one t l (lowercase L)
To draw Use this shortcut
Vertical, horizontal, or diagonal line Press Shift and draw a line
Square Press Shift and draw a rectangle
Circle Press Shift and draw an oval
Circular arc Press Shift and draw an arc

ADOBE FRAMEMAKER 8
User Guide
683
Book Commands
To Use this shortcut
Display the Tools palette Esc one w, Esc g Shift+t
Keep a tool active after use Press Shift and click a drawing tool
Return to the Object Selection tool after drawing Press Shift and click the Object Selection tool
To Do this
New Book Esc f Shift+n
Save Book Esc f s, Control+s
Rename File Esc f e or F2
Update Book Esc e Shift+u,Esc f g
Display filenames (in book window) Esc Shift+v Shift+m
Display paragraph headings (in book window) Esc Shift+v Shift+x
Delete File from Book Esc f x
Select All Files Esc e a
Save all files in book Esc f Shift+s
Close all files in book Esc f Shift+c
To Do this
Select All FrameMaker Files Esc e Shift+a Shift+f
Select All Non-Generated FrameMaker Files Esc e Shift+a Shift+n
Select All Generated FrameMaker Files Esc e Shift+a Shift+g
Select a range of files Shift+click
Select discontiguous files Control+click
Move a file up in book Esc m u
Move a file down in book Esc m d
Print Book Esc f p, Control+p
Print Selected Files in Book Esc f Shift+f

ADOBE FRAMEMAKER 8
User Guide
684
Finding and changing
To Press
Search forward Esc f i n,Esc e Shift+f, Control+ Shift+f, Alt+Control+s
Search backward Esc f i p, Alt+Control+f, Alt+Control+r
Change current selection Esc r o
Change all occurrences of Find text in document Esc r g
Change and search again Esc r a
Change settings to As Is in Find Character Format and Change To
Character Format dialog boxes
Shift+F8
Change settings to match selected text in Find Character Format and
Change To Character Format dialog boxes
Shift+F9
Display Set Find/Change Parameters dialog box Esc f i s
To find Type
Tab symbol \t
Forced return \r
End-of-paragraph symbol \p
Start of paragraph \P
Nonbreaking space \ (space)
Thin space \i, \st
To Find type
En space \N, \sn
Em space \M, \sm
Numeric space \#, \s#
End-of-flow symbol \f
` (grave) \{
\ (backslash) \\
Discretionary hyphen \- (hyphen)
Nonbreaking hyphen \+
Suppress hyphenation symbol \_ (underscore)
Start of word \<
End of word \>
With Use Wildcards turned on...
Any number of characters *

ADOBE FRAMEMAKER 8
User Guide
685
Working with tables
Spaces or punctuation | (bar)
Any one character ?
The beginning of a line ^
The end of a line $
Any one of the bracketed characters ab [ab]
Any character except ab [^ab]
Any character from a to f [a-f]
To select Press
A cell Control and click the cell
A row Control and double-click column border
A column Control and double-click row border
Current row Esc t h r
Current column Esc t h c
Current table Esc t h t, Control and triple-click a cell
To move to Press
Rightmost cell in current row Esc t m e
Leftmost cell in current row Esc t m a
Top cell in current column Esc t m t
Bottom cell in current column Esc t m b
Next cell and select its text Tab, Esc t m n
Previous cell and select its text Shift+Tab, Esc t m p
Cell below and select its text Alt+Control+Tab
Cell above and select its text Alt+Control+ Shift+Tab
To Press
Type a tab character in a cell Esc Tab
Add rows above selected row Esc t Shift+ r a
Add rows below selected rows Esc t Shift+ r b, Control+Return
Add columns to left Esc t c l (lowercase L)
Add columns to right Esc t c r
Paste by replacing selected rows or columns Esc t p r

ADOBE FRAMEMAKER 8
User Guide
686
Character and Paragraph Designers
Object selection
Use these shortcuts to select objects on the current page.
Paste rows or columns before selection Esc t p b
Paste rows or columns after selection Esc t p a
Resize columns so no paragraphs in selected cells wrap Esc t w
Resize selected columns without changing table’s width Alt and drag selected cell’s handle
Copy column width to Clipboard Esc e y w
To Use this shortcut
Change all settings to As Is Shift+F8
Change all settings to match selected text Shift+F9
To Use this shortcut
Display the previous set of properties Page Up
Display the next set of properties Page Down
Apply only the current group of properties Press Control and click Apply
To Use this shortcut
Select a text line or text frame Press Control and click the text line or text frame
Extend or shorten the selection Press Shift and click an object
Force selection border to appear (when dragging from outside all
objects is not possible)
Press Control+ Shift and drag diagonally
To Use this shortcut
Select the first object in the draw order Esc o Shift+f
Select the next object in the draw order Esc o n
Extend the selection to the next object in the draw order Esc o e
Deselect a text frame or text line and put the insertion point inside it
instead
Double-click in the text frame or text line

ADOBE FRAMEMAKER 8
User Guide
687
Editing text
To Press
Cut Esc e x, Shift+Delete, Control+x
Copy Esc e c, Control+c, Control+Insert
Paste Esc e p, Control+y, Shift+Insert, Control+v
Undo/Redo Esc e u, Control+ Shift+z, Control+ z, Alt+Backspace
Quick-copy text Click where you want to put the copied text and then press Alt
and drag through the text
Transpose characters Click between characters and then press Control+F9
Make selected text lowercase Alt+Control+l (lowercase L)
Make selected text uppercase Alt+Control+u
Make selected text initial caps Alt+Control+c
To select Do this
A word Double-click it
A word, then next words Double-click it and drag, double-click it and Shift -click
To select Do this
Current sentence, then next Press Esc h s, press Control+ Shift+End
Current sentence, then previous Press Esc Shift+h Shift+s, press Control+ Shift+Home
A paragraph Triple-click it
A paragraph, then next paragraphs Triple-click it and drag, triple-click it and Shift -click
To delete Press
Previous character Backspace
Backward to start of the previous word Esc k b
Backward to end of the previous sentence Esc k a
Next character Delete
Forward to end of a word Esc k f, Control+Delete
Forward to end of a line Control+Shift+Delete
Forward to start of the next sentence Esc k s

ADOBE FRAMEMAKER 8
User Guide
688
Function keys
Key Function Control Shift Alt
F1 Help Align top
F2 Plain text Align middle
F3 Underline Align bottom Overline
F4 Bold Cascade windows Exit
F5 Italic Tile windows
F6
F7 Point on document window
F8 Choose character format by
typing
Change dialog box settings to As Is
F9 Choose paragraph format by
typing
Transpose characters Change dialog box settings to match current text
F10 Display context menu

ADOBE FRAMEMAKER 8
User Guide
689
Entering special characters
To type Press
(bullet) Control+q %
† (dagger) Control+q space
‡ (double dagger) Control+q `
™ (trademark) Control+q *
© (copyright) Control+q )
® (registered trademark) Control+q (
¶ (paragraph symbol) Control+q &
§ (section symbol) Control+q $
… (ellipsis) Control+q Shift+i
(em dash) Control+q Shift+q
(en dash) Control+q Shift+p
‘ Control+'
" Esc "
(with Smart Quotes off) Control+q Shift+t
(with Smart Quotes off) Control+q Shift+u
(with Smart Quotes off) Control+q Shift+r, Alt+Control+‘
(with Smart Quotes off) Control+q Shift+s, Alt+Control+'
Em space Esc space m, Control+ Shift+space
To type Press
En space Esc space n, Alt+Control+space
Nonbreaking space Esc space h, Control+space
Numeric space Esc space 1 (one)
Thin space Esc space t
Nonbreaking hyphen Esc hyphen h
Suppress hyphenation symbol Esc n s
Discretionary hyphen Esc hyphen Shift+d, Control+hyphen
Forced return Shift+Return
To use this accent Press Esc, then type this Followed by one of these Example
´ (acute) ' (apostrophe) a, A, e, E, i, I, o, O, u, U É, é
` (grave) ` (left quote) a, A, e, E, i, I, o, O, u, U È, è

ADOBE FRAMEMAKER 8
User Guide
690
Other useful shortcuts
Element menu
˜ (tilde) ~ (tilde) a, A, n, N, o, O Ñ, ñ
¨ (dieresis) % (percent) a, A, e, E, i, I, o, O, u, U, y, Y Ü, ü
ˆ (circumflex) ^ (caret) a, A, e, E, i, I, o, O, u, U Ê, ê
° (ring) * (asterisk) a, A Å, å
¸ (cedilla) , (comma) c, C Ç, ç
To Press
Redraw the document display Control+l (lowercase L)
Quick-copy a selected object Alt and drag the object
Rotate an object arbitrarily Alt and use the left or right mouse button to drag a corner or
reshape handle
Move an object along vertical or horizontal axis Shift and drag object
To Press
Nudge an object 1 point/6 points Alt+arrow key/Alt+Shift+arrow key
Fit page in window Esc z p
Fit window to page Esc z w
Zoom to 100 percent Esc z z
Lock or unlock a document or book Esc Shift+f l (lowercase L) k
To choose Use this shortcut
Merge Esc Shift+e m
Split Esc Shift+e s
Unwrap Esc Shift+e u
Edit Attributes Esc Shift Shift+e Shift+a
To choose Use this shortcut
Namespaces Esc Shift+e Shift+n
Element Catalog Esc Shift+e Shift+c
Set Available Elements Esc Shift+e Shift+o Shift+c
New Element Options Esc Shift+e Shift+o Shift+i
Validate Esc Shift+e v

ADOBE FRAMEMAKER 8
User Guide
691
Conventions and Function keys
Keys
When you use keyboard shortcuts, Caps Lock must be off and, unless otherwise noted, a document window must
be active.
The following table lists the terms used for special keys.
Shortcuts
The following table explains the conventions for showing key sequences and key combinations. When an uppercase
letter appears in a shortcut, use the Shift key when typing the letter.
When one or more shortcuts accomplish the same action, the shortcuts are separated by commas; for example:
Control+n, Shift+down arrow. You can use either Control+n or Shift+down arrow to accomplish the same action.
Function keys
This notation Means
arrow key Up, down, right or left arrow keys
Esc The key labeled Esc
Control The key labeled Ctrl or Control
Alt The key labeled Alt
Shift The key labeled Shift
F2 The function key labeled F2. (If you should type F followed by 2,
the characters are shown as F 2)
space The space bar
plus The key labeled with a plus sign (+)
minus or hyphen The key labeled with a hyphen (-)
period The key labeled with a period (.)
comma The key labeled with a comma (,)
zero The key labeled with the numeral 0
one The key labeled with the numeral 1
This shortcut Means
Esc Shift+t r Press and release these keys in succession: the Esc key, the
uppercase letter T, and the letter r
Control+e Press Control and type the letter e
Control+ Shift+hyphen Press Shift and Control and type a hyphen
Key Function Control Shift Alt
F1 Help Align top
F2 Plain text Align middle

ADOBE FRAMEMAKER 8
User Guide
692
Mouse
The following table lists the terms used for mouse actions.
Color
Color selection
Color views
F3 Underline Align bottom Overline
F4 Bold Cascade windows Exit
F5 Italic Tile windows
F6
F7 Point on document window
F8 Choose character format by
typing
Change dialog box settings to As Is
F9 Choose paragraph format by
typing
Transpose characters Change dialog box settings to match current text
F10 Display context menu
This instruction Means
Click Click the mouse button
Right-click Click the right mouse button
Double-click Click the mouse button twice rapidly without moving the
mouse
Triple-click Click the mouse button three times rapidly without moving the
mouse
Shift-click Hold down Shift and click the mouse button
To Use this shortcut
Keep a color selected after use Press Shift and choose a color from the Color pop-up menu
Assign a color to all objects in a document, including text Press Alt+ Shift and choose a color from the Color pop-up menu
in the Tools palette
Display the Color Definitions dialog box Press Esc v c d
To Use this shortcut
Display Define Color Views dialog box Press Esc v c v
To Use this shortcut
Choose view number (1, 2, 3, 4, 5, or 6) from the Define Color Views
dialog box
Press Esc v and then the number

ADOBE FRAMEMAKER 8
User Guide
693
Menu commands
Context menus
File menu (document window)
To Do this
Display a pop-up menu of commands that apply to the current selec-
tion or context
Right-click on an object, in a document margin, or in a book
window
To choose Use this shortcut
New>Document Esc f n, Control+n
New>Book Esc f Shift+n
Open Esc f o, Control+o
Close Esc f c, Esc f q, Control+w, Control+F4, Control+Shift+w
Close All Esc f Shift+c, Esc f Shift+q
Save Esc f s, Control+s
Save All Esc f Shift+s
Save As Esc f a
Save As PDF Esc f w p
Save As XML Esc f w x
Revert to Saved Esc f r
Import>File Esc f i f
Import>Formats Esc f i o
Import>Object Esc f i b
Import>Element Definitions Esc f i e
Print Esc f p, Control+p
Print Setup Control+ Shift+p
Send Esc f m
Send All Open Files Esc f Shift+m
Utilities>Compare Documents Esc f t c
Utilities>Document Reports Esc f t r
Utilities>HTML Setup Esc f t h
Utilities>Create and Apply Formats Esc f t f
Preferences Esc f Shift+p
Exit Alt+F4

ADOBE FRAMEMAKER 8
User Guide
694
File menu (book window)
Edit menu (document window)
To choose Use this shortcut
New Document Esc f n, Control+n
New Book Esc f Shift+n
Open Esc f Shift o, Control+o
Open All Files in Book Esc f Shift+o
Close Book Esc f c, Control+w
Close All Files in Book Esc f Shift+c
Save Book Esc f s, Control+s
Save All Files in Book Esc f Shift+s
Save Book As Esc f a
Revert to Saved Book Esc f r
Import>Formats Esc f i o
Import>Element Definitions Esc f i e
Print Selected Files Esc f Shift+f,
Print Book Esc f p, Control+p
Print Setup Control+ Shift+p
Utilities>Compare Books Esc f b
Preferences Esc f Shift+p
Exit Alt+F4
To choose Use this shortcut
Undo/Redo Esc e u, Control+z, Alt+Backspace, Control+ Shift+z
Cut Esc e x, Control+x, Shift+Delete
Copy Esc e c, Control+c, Control+Insert
Paste Esc e p, Control+v, Shift+Insert
Paste Special Control+ Shift+v
Clear Esc e b
Copy Special>Attribute Values Esc e y a
Copy Special>Paragraph Format Esc e y p
Copy Special>Character Format Esc e y c
Copy Special>Conditional Text Settings Esc e y d
Copy Special>Table Column Width Esc e y w
Select All in Flow Esc e a, Control+a

ADOBE FRAMEMAKER 8
User Guide
695
Edit menu (book window)
Find/Change Esc e f, Control+f
Find Next Esc f i n, Esc e Shift+f, Control+ Shift+f
Spelling Checker Esc e s
Thesaurus Esc e t
Text Inset Properties Esc e i
Update References Esc e Shift+u
Links Esc e k
Object (No shortcut available)
To choose Use this shortcut
Undo/Redo Esc e u, Control+z, Alt+Backspace, Control+ Shift+z
Cut Esc e x, Control+x, Shift+Delete
Copy Esc e c, Control+c, Control+Insert
Paste Esc e p, Control+v, Shift+Insert
Paste Special Control+ Shift+v
Clear Esc e b
Copy Special>Attribute Values Esc e y a
Select All Files Esc e a
Select All FrameMaker Files Esc e Shift+a Shift+f
Select All Non-Generated FrameMaker Files Esc e Shift+a Shift+n
Select All Generated FrameMaker Files Esc e Shift+a Shift+g
Find/Change Esc e f, Control+f
Find Next Esc f i n, Esc e Shift+f, Control+ Shift+f
Spelling Checker Esc e s
Set Up Generated File Esc f d
Rename File Esc f e, F2
Delete File from Book Esc f x
Suppress Automatic Reference Updating Esc e Shift+s
Update Book Esc e Shift+u, Esc f g

ADOBE FRAMEMAKER 8
User Guide
696
Add menu (book window)
Element menu
Format menu
To choose Use this shortcut
Files Esc f f
Table of Contents Esc t o c
List of>Figures Esc l (lowercase L) o f
List of>Tables Esc l (lowercase L) o t
List of>Elements & Paragraphs Esc l (lowercase L) o p
List of>Elements & Paragraphs (Alphabetical) Esc l (lowercase L) o Shift+p
List of>Markers Esc l (lowercase L) o m
List of>Markers (Alphabetical) Esc l (lowercase L) o Shift+m
List of>References Esc l (lowercase L) o r
Standard Index of Authors Esc i x
Index of>Authors Esc i o a
Index of>Subjects Esc i o s
Index of>Markers Esc i o m
Index of>References Esc i o r
To choose Use this shortcut
Merge Esc Shift+e m
Split Esc Shift+e s
Unwrap Esc Shift+e u
Edit Attributes Esc Shift+e Shift+a
Namespaces Esc Shift+e Shift+n
Element Catalog Esc Shift+e Shift+c
Set Available Elements Esc Shift+e Shift+o Shift+c
New Element Options Esc Shift+e Shift+o Shift+i
Validate Esc Shift+e v
To choose Use this shortcut
Font (No shortcut available)
Size (No shortcut available)
Style>Plain Esc c p, F2
Style>Bold Esc c b, F4, Control+b, Control+ Shift+b

ADOBE FRAMEMAKER 8
User Guide
697
Style>Italic Esc c i, F5, Control+i
Style>Underline Esc c u, Control+u, Control+ Shift+u
Style>Double Underline Esc c d
Style>Overline Esc c o
Style>Strikethrough Esc c s, Control+/
Style>Change Bar Esc c h, Control+ Shift+h
Style>Superscript Esc c plus
Style>Subscript Esc c minus
Style>Small Caps Esc c m, Control+e
Characters>Designer Esc o c d, Control+d
Characters>Catalog Esc o c c
Characters>Default Paragraph Font Esc o c p
Paragraphs>Designer Esc o p d, Control+m, Control+ Shift+m
Paragraphs>Catalog Esc o p c
Page Layout>Column Layout Esc o c l (lowercase L)
Page Layout>Line Layout Esc o l l (lowercase L)
Page Layout> Page Size Esc o p s
Page Layout>Pagination Esc o p i
Page Layout>Master Page Usage Esc o m u
Page Layout>New Master Page Esc o m p
Page Layout>Update Column Layout Esc o u p
Customize Layout>Customize Text Frame Esc o c f
Customize Layout>Connect Text Frames Esc Shift+c Shift+c
Customize Layout>Disconnect Previous Esc Shift+c Shift+p
Customize Layout>Disconnect Next Esc Shift+c Shift+n
Customize Layout> Disconnect Both Esc Shift+c Shift+b
Customize Layout> Split Text Frame Esc Shift+c Shift+s
Customize Layout>Rotate Page Clockwise Esc p Shift+o
Customize Layout>Rotate Page Counterclockwise Esc p o
Customize Layout>Unrotate Page Esc p Shift+u
Customize Layout>Combined Fonts Esc o c o
Document>Numbering Esc o d n, Esc e n
Document>Change Bars Esc o b
Document>Footnote Properties Esc o f

ADOBE FRAMEMAKER 8
User Guide
698
View menu (document window)
Document>Text Options Esc o t o
Document>PDF Setup Esc o d a
Document>Rubi Properties Esc o r
Headers & Footers>Insert Page # Esc o h p
Headers & Footers>Insert Page Count Esc o h c
Headers & Footers>Insert Current Date Esc o h d
Headers & Footers>Insert Other Esc o h o
To choose Use this shortcut
QuickAccess Bar Esc v q
Formatting Bar Esc v F
Track Text Edit Bar Esc Shift+v e
Tabbed Bar Esc Shift+v Shift+t Shift+b
Borders Esc v b
Text Symbols Esc v t
Rulers Esc v r
Grid Lines Esc v g
Element Boundaries Esc v Shift+e
Element Boundaries (as Tags) Esc v Shift+t
Options Esc v o
Attribute Display Options Esc v Shift+a
Go to Page Esc v p, Control+g, Control+ Shift+g
Body Pages Esc v Shift+b
Master Pages Esc v Shift+m
Reference Pages Esc v Shift+r
Color>Views Esc v c v
Color>Definitions Esc v c d
Menus>Quick Esc v m q
Menus>Complete Esc v m c
Menus>Modify Esc v m m

ADOBE FRAMEMAKER 8
User Guide
699
View menu (book window)
To choose Use this shortcut
QuickAccess Bar Esc v q
Formatting Bar Esc v F
Tabbed Bar Esc Shift+v Shift+t Shift+b
Show Borders Esc Shift+v b s
Hide Borders Esc Shift+v b h
Show Text Symbols Esc Shift+v t s
Hide Text Symbols Esc Shift+v t h
Show Rulers Esc Shift+v r s
Hide Rulers Esc Shift+v r h
Show Grid Lines Esc Shift+v g s
Hide Grid Lines Esc Shift+v g h
Show Graphics Esc Shift+v v s
Hide Graphics Esc Shift+v v h
Show Element Boundaries Esc Shift+v Shift+e s
Hide Element Boundaries Esc Shift+v Shift+e h
Show Element Boundaries (as Tags) Esc Shift+v Shift+t s
Options Esc v o
Attribute Display Options Esc v Shift+a
Zoom>In Esc z i
Zoom>Out Esc z o
Zoom>100 percent Esc z z
Zoom>Fit Page in Window Esc z p
Zoom>Fit Window to Page Esc z w
Zoom>Fit Window to Text Frame Esc z f
Color>Views Esc v c v
Color>Definitions Esc v c d
Menus>Quick Esc v m q
Menus>Complete Esc v m c
Menus>Modify Esc v m m

ADOBE FRAMEMAKER 8
User Guide
700
Special menu
To choose Use this shortcut
Page Break Esc s p b
Anchored Frame Esc s a
Footnote Esc s f
Cross-Reference Esc s c
Variable Esc s v
Hypertext Esc s h
Marker Esc s m
Equations Esc s e
Filter By Attribute Esc a c
Conditional Text Esc s Shift+c
Manage Conditional Text Esc m Shift+c
Apply Conditional Text Esc s Shift+c
Show/Hide Conditional Text Esc v Shift+c
Show Condition Indicator Esc Shift+v o
Hide Condition Indicator Esc Shift+v Shift+o h
Toggle Conditional Indicators On/Off Esc v Shift+o
Show One Conditional Text Tag Esc q Shift+s
Select Same Condition Tags Esc h Shift+c
View the condition applied to the text where the cursor is placed Esc q Shift+c
Focus in Conditional Text Esc Shift+f i o
Close Conditional Text dialog box Esc Shift+c o
Turn on or off the Track Text Edit feature Esc s t o
Show Next Esc s t n
Show Previous Esc s t p
Accept Edit Esc s t a
Reject Edit Esc s t r
Accept All Esc s t Shift+a
Reject All Esc s t Shift+r
Preview Final Esc s t Shift+f
Preview Original Esc s t Shift+o
Preview Off Esc s p o
Rubi Esc s r
Table of Contents Esc t o c

ADOBE FRAMEMAKER 8
User Guide
701
Graphics menu
List of>Figures Esc l o f
List of>Tables Esc l o t
List of>Elements & Paragraphs Esc l o p
List of>Elements & Paragraphs (Alphabetical) Esc l o Shift+p
List of>Markers (Alphabetical) Esc l o m
List of>Markers Esc l o Shift+m
List of>References Esc l o r
Standard Index Esc i x
Index of>Authors Esc i o a
Index of>Subjects Esc i o s
Index of>Markers Esc i o m
Index of>References Esc i o r
Add Disconnected Pages Esc s p a
Delete Pages Esc s p d
Remove Structure from Flow Esc s s f
To choose Use this shortcut
Tools Esc g Shift+t, Esc one w
Group Esc g g
Ungroup Esc g u
Bring to Front Esc g f
Send to Back Esc g b
Align Esc g a
Distribute Esc g d
Reshape Esc g r
Smooth Esc g s
Unsmooth Esc g m
Flip Up/Down Esc g v
Flip Left/Right Esc g h
Rotate Esc g t
Scale Esc g z
Set # Sides Esc g n
Join Esc g j
Object Properties Esc g o

ADOBE FRAMEMAKER 8
User Guide
702
Pick up Properties Esc g Shift+o
Runaround Properties Esc g Shift+r
Gravity Esc g y
Snap Esc g p
3D Menu Alt + g + 3 + Shift+b
3D Menu Lighting option Alt + g + 3 + Shift+l (lowercase L)
Lights From File Alt + g + 3 + Shift+l + (lowercase L) Shift+l (lowercase L)
No Lights Alt + g + 3 + Shift+l (lowercase L) + Shift+n
White Lights Alt + g + 3 + Shift+l (lowercase L) + Shift+w
Day Lights Alt + g + 3 + Shift+l (lowercase L) + Shift+d
Bright Lights Alt + g + 3 + Shift+l (lowercase L) + Shift+b
Primary Color Lights Alt + g + 3 + Shift+l (lowercase L) + Shift+p
Night Lights Alt + g + 3 + Shift+l (lowercase L) + i
Blue Lights Alt + g + 3 + Shift+l (lowercase L) + u
Red Lights Alt + g + 3 + Shift+l (lowercase L) + Shift+r
Cube Lights Alt + g + 3 + Shift+l (lowercase L) + Shift+c
CAD Optimized Lights Alt + g + 3 + Shift+l (lowercase L) + Shift+o
Headlamp Alt + g + 3 + Shift+l (lowercase L) + Shift+h
Show Existing Views Alt + g + 3 + Shift+s
Render Mode option Alt + g + 3 + Shift+r
Bounding Box Alt + g + 3 + Shift+r + Shift+b
Transparent Bounding Box Alt + g + 3 + Shift+r + Shift+t
Transparent Bounding Box Outline Alt + g + 3 + Shift+r + Shift+o
Vertices Alt + g + 3 + Shift+r + Shift+v
Shaded Vertices Alt + g + 3 + Shift+r + Shift+s
Wireframe Alt + g + 3 + Shift+r + Shift+w
Shaded Wireframe Alt + g + 3 + Shift+r + h
Solid Alt + g + 3 + Shift+r + l (lowercase L)
Transparent Alt + g + 3 + Shift+r + r
Solid Wireframe Alt + g + 3 + Shift+r + i
Transparent Wireframe Alt + g + 3 + Shift+r + a
Illustration Alt + g + 3 + Shift+r + u

ADOBE FRAMEMAKER 8
User Guide
703
Table menu
StructureTools menu
Solid Outline Alt + g + 3 + Shift+r + d
Shaded Illustration Alt + g + 3 + Shift+r + e
Hidden Wireframe Alt + g + 3 + Shift+r + n
To choose Use this shortcut
Insert Table Esc t i
Table Designer Esc t d, Control+t, Control+Shift+t
Row Format Esc t r
Custom Ruling & Shading Esc t x
Add Rows or Columns Esc t a
Resize Columns Esc t z
Straddle/Unstraddle Esc t l (lowercase L)
Convert to Table/Convert to Paragraphs Esc t v
Sort Esc t s
To choose Use this shortcut
StructureTools>Set Structured Application Esc f + Shift+a, ALT + r + u
StructureTools>Utilities ALT + r + l
StructureTools>Utilities>Convert Structured Documents Esc f + t + s, ALT + r + l + c
StructureTools>Utilities>Convert Documents to Structured Format Esc f + t + d, ALT + r + l + d
StructureTools>Utilities>Structure Current Document Esc f + t + Shift+c, ALT + r + l + s
StructureTools>Utilities>Structure Documents Esc f + t + Shift+d, ALT + r + l + t
StructureTools>New EDD Esc f Shift+d Shift+n
StructureTools>Export Element Catalog as EDD Esc f Shift+d Shift+x
StructureTools>Import CSS Styles Esc f Shift+d Shift+j
StructureTools>Show Element context Esc f Shift+d Shift+e
StructureTools>Open DTD Esc f Shift+d Shift+o
StructureTools>Import DTD Esc f Shift+d Shift+m
StructureTools>Save as DTD Esc f Shift+d Shift+s
StructureTools>Open Schema Esc f Shift+d Shift+y
StructureTools>Import Schema Esc f Shift+d Shift+z
StructureTools>Edit Application Definitions Esc f Shift+d Shift+a
StructureTools>Read Application Definitions Esc f Shift+d Shift+r

ADOBE FRAMEMAKER 8
User Guide
704
DITA menu
Window menu
StructureTools>New Read/Write Rules Esc f Shift+d Shift+w
StructureTools>Check Read/Write Rules Esc f Shift+d Shift+c
StructureTools>Parse Structured Document Esc f Shift+d Shift+p
StructureTools>Generate Conversion Table Esc f Shift+d Shift+g
StructureTools>Generate CSS2 Esc f Shift+d Shift+h
To choose Use this shortcut
DITA>New DITA File>New <mapi>
Note: map<i> refers to an element whose class attribute
starts with map/map and can vary from 1 to i.
Esc Shift+n Shift+m i
DITA>New DITA File>New <topici>
DITA>New DITA File>New <concepti>
DITA>New DITA File>New <taski>
DITA>New DITA File>New <referencei>
Note: topic<i> refers to an element whose class attribute
starts with topic/topic and can vary from 1 to i..
Esc Shift+n Shift+t 1
Esc Shift+n Shift+t 2
Esc Shift+n Shift+t i
DITA>New DITA File>Refresh Menu Esc Shift+r Shift+m
DITA>Insert Conref Esc Shift+i Shift+c
DITA>Assign ID to Element Esc Shift+a Shift+i
DITA>Update References Esc Shift+u Shift+r
DITA>Open all Topicrefs Esc Shift+o Shift+a
DITA>Insert Topicref Esc Shift+i Shift+t
DITA>Build FM Document From DITA Map Esc Shift+g Shift+d
DITA>DITA Options Esc Shift+d Shift+o
To choose Use this shortcut
Cascade Shift+F4
Tile Shift+F5
Arrange Icons (No shortcut available)
Refresh Control+l (lowercase L)

ADOBE FRAMEMAKER 8
User Guide
705
Windows and dialog boxes
Window manipulation
To use these shortcuts, click in any FrameMaker window.
Display and activation
Use these shortcuts to display a window or dialog box and make it active. If it is already open but is behind another
window, these shortcuts bring it to the front.
Navigation within windows
Use these shortcuts to move to settings within dialog boxes and windows. When you use a keyboard shortcut in a
window or dialog box, the shortcut’s effect depends on the active setting. The active setting is highlighted, has a
dotted rectangle around it, or both.
To Use this shortcut
Redisplay a document window Esc w r, Control+l
(lowercase L)
Close the active window or modeless dialog box Alt+F4
Close the document window Esc f q, Esc f c, Control+F4, Control+w, Control+Shift+w
Minimize the document window Esc w c
To display this window and make it active Use this shortcut
Current document window Esc Shift+f i d, Shift+F7
Find/Change Esc Shift+f i f
Hypertext Esc Shift+f i h
Marker Esc Shift+f i m
Spelling Checker Esc Shift+f i s
Paragraph Designer Esc Shift+f i p
Character Designer Esc Shift+f i c
Conditional Text Esc Shift+f i o
Custom Ruling and Shading Esc Shift+f i r
Table Designer Esc Shift+f i t
Structure View Esc Shift+f i v
Element Validation Esc Shift+f i w
To move to the Use this shortcut
Next setting Tab
Previous setting Shift+Tab

ADOBE FRAMEMAKER 8
User Guide
706
Command buttons
Radio buttons and checkboxes
Pop-up menus
Scroll lists
Custom menus
Document design
Master and reference pages
To Use this shortcut
Click the default button Return
Click the active button space
Cancel a dialog box (but not a window) Esc
To Use this shortcut
Navigate through a group of radio buttons to turn a radio button on arrow keys
Cycle through checkbox states (off, on, As Is) space
To Use this shortcut
Move to the previous menu item up arrow
Move to the next menu item down arrow
Search forward and select an item starting with a typed letter UnShifted key
To Use this shortcut
Move to the previous item in a list up arrow
Move to the next item in a list down arrow
Search forward and select an item starting with a typed letter UnShifted key
Move an item in a scroll list to the opposite scroll list Double-click the item
Move all items in a scroll list to the opposite scroll list Press and click arrow between scroll lists
To Use this shortcut
Display a custom menu bar Esc v m u
To Use this shortcut
Rename a master or reference page (display the master or reference
page before using this shortcut)
Esc p Shift+n
Create a master page (display a body or master page before using
this shortcut)
Esc o m p or Esc p m
ADOBE FRAMEMAKER 8
User Guide
707
Page layout
Import formats
Side-head area
Text flows
Documents
Help
Open
To Use this shortcut
Update page layouts (display a body page before using this shortcut) Esc o u p
To Use this shortcut
Import the formats from another document Esc f i o
To Use this shortcut
Turn side-head area on or off Esc j p Shift+s
To Use this shortcut
Split a text frame below the insertion point Esc Shift+c Shift+s
Disconnect the text frame with the insertion point from the previous
frame in a flow
Esc Shift+c Shift+p
Disconnect the text frame with the insertion point from the next
frame in a flow
Esc Shift+c Shift+n
Disconnect the text frame with the insertion point from both the
previous and next frames
Esc Shift+c Shift+b
Connect two selected text frames Esc Shift+c Shift+c
To Use this shortcut
Display online Help Esc f h, F1
Adobe Online Esc w w w
Display Help on using the templates provided with FrameMaker Press Control+n and click Explore Standard Templates
To open Use this shortcut
A document in a book file Double-click the filename in the book window
All files in an active book window Esc f Shift+o, or press and choose Open All Files in Book from the
File menu
A MIF or an MML file as a text file Press Control and click Open in the Open dialog box

ADOBE FRAMEMAKER 8
User Guide
708
Save and Close
Cancel and Undo
Navigation within a document
Document redisplay
Zoom
To Use this shortcut
Display the Save Document dialog box Esc f a
Save a document or book Esc f s, Control+s
Save all open files Esc f Shift+s, or press and choose Save All Open Files from the
File menu
Save all open files in an active book window in a book Esc f Shift+s, or press and choose Save All Files in Book from the
File menu
Close all open files Esc f Shift+c, or press and choose Close All Open Files from the
File menu
Close all open files in an active book window in a book Esc f Shift+c, or press and choose Close All Files in Book from the
File menu
To Use this shortcut
Cancel some FrameMaker commands Esc
Undo some FrameMaker commands Esc e u, Control+z, Alt+Backspace, Control+Shift+z
To display the Use this shortcut
Previous page Esc p p, Page Up
Next page Esc p n, Page Down
First page Esc p f, Alt+Page Up, or press and click the Previous Page
button
Last page Esc p l (lowercase L), Alt+Page Down, or press and click the Next
Page button
Go to Page dialog box Esc v p, Control+g
To Use this shortcut
Redisplay a document Esc w r, Control+l (lowercase L)
To zoom Use this shortcut
In one zoom setting Esc z i
Out one zoom setting Esc z o
To fit page in window Esc z p

ADOBE FRAMEMAKER 8
User Guide
709
Hypertext documents
Document utilities
Spelling Checker
To fit window to page Esc z w
To fit window to text frame Esc z f
To 100 percent Esc z z
To Use this shortcut
Go to previous location on the hypertext stack Esc v Shift+p
Go to next location on the hypertext stack Esc v Shift+n
Activate a hypertext command without locking a document Press Control+Alt and click an active area
Lock or unlock a document Esc Shift+f l (lowercase L) k
Open Hypertext dialog box Esc s h
Insert new hypertext marker Esc m h
Move focus to Hypertext dialog box Esc Shift+f i h
Close Hypertext dialog box Esc Shift+c h
Validate a hypertext command Esc v h
Toggle FluidView locked format Esc Shift+v Shift+f
To Use this shortcut
Check selected text or a word containing the insertion point Esc l (lowercase L) s, or press Control and click Start Checking in
the Spelling Checker dialog box
Check the entire document Esc l (lowercase L) e
Check the current page Esc l (lowercase L) p
Correct a word Esc l (lowercase L) c w
Add a word to your personal dictionary (learn) Esc l (lowercase L) a p
Add a word to the document dictionary Esc l (lowercase L) a d
Add a word to automatic corrections Esc l (lowercase L) a c
Delete a word from your personal dictionary (unlearn) Esc l (lowercase L) x p
Delete a word from the document dictionary Esc l (lowercase L) x d
Clear automatic corrections Esc l (lowercase L) c a
Display the Spelling Checker Options dialog box Esc l (lowercase L) Shift+o
Display the Dictionary Functions dialog box Esc l (lowercase L) c d
Create a file of unknown words Esc l (lowercase L) b
To zoom Use this shortcut
ADOBE FRAMEMAKER 8
User Guide
710
Thesaurus
To use this shortcut, the document window, not the Thesaurus, must be active.
Document comparison
Document reports
HTML and PDF export
Reference Updating
Graphics
Drawing tools
Mark all paragraphs for rechecking Esc l (lowercase L) r
Show a word’s hyphenation Esc l (lowercase L) hyphen
Rehyphenate a document Esc l (lowercase L) Shift+r
Replace a questioned word Double-click the word in the Correction scroll list in the Spelling
Checker dialog box
To Use this shortcut
Replace a selection with the Thesaurus selection Esc Shift+t r
To Use this shortcut
Display the Compare Documents dialog box Esc f t c
To Use this shortcut
Display the Document Reports dialog box Esc f t r
To Use this shortcut
Create and apply formats Esc f t f
Open the HTML Setup dialog box Esc f t h
Open the PDF Setup dialog box Esc o d a
To Use this shortcut
Display the Suppress Automatic Reference Updating dialog box Esc e Shift+s
To choose this tool Use this shortcut
Arc Esc one a
Graphic Frame Esc one m
Freehand Esc one f
To Use this shortcut

ADOBE FRAMEMAKER 8
User Guide
711
Last tool selected Esc one one
Line Esc one l (lowercase L)
Object Selection Esc one o
Oval Esc one e
Polygon Esc one p g
Polyline Esc one p l (lowercase L)
Rectangle Esc one r
Rounded Rectangle Esc one Shift+r
Smart Selection Esc one s
Text Frame Esc one t f
Text Line Esc one t l (lowercase L)
To draw Use this shortcut
Vertical, horizontal, or diagonal line Press and draw a line
Square Press and draw a rectangle
Circle Press and draw an oval
Circular arc Press and draw an arc
To Use this shortcut
Display the Tools palette Esc one w, Esc g Shift+t
Keep a tool active after use Press and click a drawing tool
Return to the Object Selection tool after drawing Press and click the Object Selection tool

ADOBE FRAMEMAKER 8
User Guide
712
Fill patterns
“First,” “last,” “next,” and “previous” refer to positions in the Fill pop-up menu.
Pen patterns
“First,” “last,” “next,” and “previous” refer to positions in the Pen pop-up menu.
Line widths
“Next” and “previous” refer to positions in the Line Widths pop-up menu.
Line styles
To change an object’s line style, select the style from the Line Styles pop-up menu.
To change the current dashed line style, choose a pattern in the Dashed Line Options dialog box. “First,” “last,”
“next,” and “previous” refer to positions in this dialog box.
To change pattern to Use this shortcut
First fill pattern (solid) Esc zero f
Last fill pattern (none) Esc 9 f
Next fill pattern (if at the last pattern, this does nothing) Esc plus f
Previous fill pattern (if at the first pattern, this does nothing) Esc minus f
To change pattern to Use this shortcut
First pen pattern (solid) Esc zero p
Last pen pattern (none) Esc 9 p
Next pen pattern (if at the last pattern, this does nothing) Esc plus p
Previous pen pattern (if at the first pattern, this does nothing) Esc minus p
To change width to Use this shortcut
Thinnest line width Esc zero w
Thickest line width Esc 9 w
Next line width Esc plus w
Previous line width Esc minus w
To Use this shortcut
Apply the solid line style to an object Esc one d s
Apply the dashed line style to an object Esc one d d
Display the Dashed Line Options dialog box Esc one d i
Change to the first dashed line pattern Esc zero d

ADOBE FRAMEMAKER 8
User Guide
713
Object selection
Use these shortcuts to select objects on the current page.
Object manipulation
Change to the last dashed line pattern Esc 9 d
Change to the next dashed line pattern (if at the last pattern, this
does nothing)
Esc plus d
Change to the previous dashed line pattern (if at the first pattern, this
does nothing)
Esc minus d
To Use this shortcut
Select a text line or text frame Press Control and click the text line or text frame
Extend or shorten the selection Press and click an object
Force selection border to appear (when dragging from outside all
objects is not possible)
Press Control+ and drag diagonally
Select the first object in the draw order Esc o Shift+f
Select the next object in the draw order Esc o n
Extend the selection to the next object in the draw order Esc o e
Deselect a text frame or text line and put the insertion point inside
it instead
Double-click in the text frame or text line
To Use this shortcut
Move an object horizontally or vertically Press and drag the object
Maintain an object’s proportions while resizing Press and drag a corner handle
Pick up the properties of the currently selected object in the Tools
palette
Esc g Shift+o, or press and choose Pick up Object Properties
from the Graphics menu
Display the reshape handle and control points for the line, polyline,
polygon, or freehand curve currently selected
Esc g r, Control+r, Control+Shift+r
Move the control point horizontally or vertically Press and drag the control point
Change the curve on only one side of a reshape handle (crimp curve) Drag the control point with the right mouse button
Run text around the contour of a selected graphic Esc g w
Run text around the bounding box of a selected graphic Esc g Shift+w
Turn text runaround off for a selected graphic Esc g q
Quick-copy a selected object Press Alt and drag the object
Turn display of graphics off or on Esc v v
To Use this shortcut

ADOBE FRAMEMAKER 8
User Guide
714
Object movement
Use these shortcuts to move selected objects.
Object alignment
If only one object is selected, the object is aligned to the page or to the anchored or graphic frame that encloses the
object.
Object rotation
Add a reshape handle and control points Press Control and click a line, polyline, polygon, or freehand
curve with reshape handles and control points currently
displayed
Delete a reshape handle Press Control and click the reshape handle
Drag and drop between open windows or applications Drag (Control-drag to copy)
To move objects Use this shortcut
One point in specified direction (at 100 percent zoom setting) Alt+arrow key
Six points in specified direction (at 100 percent zoom setting) Alt+Shift+arrow key
To align object along Use this shortcut
Tops Esc j t, Control+F1
Top/bottom centers Esc j m,Control+F2
Bottoms Esc j b, Control+F3
Left sides Esc j l (lowercase L)
Left/right centers Esc j c
Right sides Esc j r
To Use this shortcut
Rotate 90 degrees clockwise Esc g plus
Rotate 90 degrees counterclockwise Esc g minus
Rotate precisely by using the Rotate Selected Objects dialog box Esc g t
Rotate again Esc g x
Return object to its unrotated orientation (zero degrees) Esc g zero
Rerotate object from its unrotated orientation to its previous
orientation
Esc g one
Set the current orientation of an object as the new unrotated
orientation
Esc g 9
Rotate an object arbitrarily Press Alt and drag a corner or reshape handle
Constrain rotation to 45-degree increments Press Alt+ and drag a corner or reshape handle
To Use this shortcut

ADOBE FRAMEMAKER 8
User Guide
715
Graphic frames
Markers and variables
Marker insertion
Variable insertion
Filter By Attribute
Track Text Edit
Rotate a page clockwise Esc p Shift+o
Rotate a page counterclockwise Esc p o
Unrotate a page Esc p Shift+u
To Use this shortcut
Shrink-wrap an anchored frame (shrink the frame to an object and
position the frame at the insertion point)
Esc m p
Unwrap an anchored frame (enlarge the frame) Esc m e
Rename a selected reference frame Click frame name in status bar
To Use this shortcut
Insert a marker Esc m k
Insert a hypertext marker Esc m h
Open the Edit Marker Types dialog box Esc e m t
To Use this shortcut
Insert a variable by typing the first characters of its name and
pressing Return
Esc q v, Control+zero
To Use this shortcut
Open the Manage Attribute Expressions dialog box Esc a c
To Use this shortcut
Turn on or off the Track Text Edit feature Esc s t o
Show Next Text Edit Esc s t n
Show Previous Text Edit Esc s t p
Accept Edit Esc s t a
Reject Edit Esc s t r
Accept All Esc s t Shift+a
To Use this shortcut
ADOBE FRAMEMAKER 8
User Guide
716
Conditional text display
Conditional text window
To use these shortcuts, click in the Conditional Text window.
Condition tags
Use these shortcuts to change the condition tag settings of selected text or table rows.
Equations
Equations pop-up menu
Reject All Esc s t Shift+r
Preview Final Esc s t Shift+f
Preview Original Esc s t Shift+o
Preview Off Esc s p o
To Use this shortcut
Display the Show/Hide Conditional Text dialog box Esc v Shift+c
Turn condition indicators on or off Esc v Shift+o
Select all text around the insertion point that has the same condition
tag settings
Esc h Shift+c
To Use this shortcut
Move all condition tags to the As Is scroll list Shift+F8
Change the scroll lists to match the condition tag settings of selected
text
Shift+F9
Move a condition tag between the In and the Not In scroll lists Double-click the tag
Move a condition tag from the As Is to the In scroll list Double-click the tag in the As Is scroll list
To Use this shortcut
Apply a condition tag to selected text by typing the first characters
of the tag and then pressing Return
Esc q Shift+c, Control+4
Remove a condition tag from selected text by typing the first charac-
ters of the tag and then pressing Return
Esc q Shift+d, Control+5
Make the selected text unconditional Esc q Shift+u, Control+6
Command Shortcut
New Small Equation Esc m s
New Medium Equation Esc m m
New Large Equation Esc m l (lowercase L)
To Use this shortcut

ADOBE FRAMEMAKER 8
User Guide
717
Symbols page
Greek letters
Press Return to end the backslash sequence shown in the third column.
Shrink-Wrap Equation Esc m p
Unwrap Equation Esc m e
Equation Sizes Esc p e
Equation Fonts Esc m f
Insert Math Element Esc m i
Add Definition to Catalog Esc m c
Update Definition Esc m Shift+u
Element Shortcut Backslash sequence
Control+Alt+a \alpha
Control+Alt+b \beta
Control+Alt+Shift+g \Gamma
Control+Alt+g \gamma
Control+Alt+Shift+d \Delta
Control+Alt+d \delta
Control+Alt+e \epsilon
Control+Alt+z \zeta
Control+Alt+h \eta
Control+Alt+Shift+q \Theta
Control+Alt+q \theta
Control+Alt+Shift+j \vartheta
Control+Alt+i \iota
Control+Alt+k \kappa
Control+Alt+Shift+l (L) \Lambda
Control+Alt+l \lambda
(lowercase L)
Control+Alt+m \mu
Control+Alt+n \nu
Control+Alt+Shift+x \Xi
Control+Alt+x \xi
Control+Alt+Shift+p \Pi
Command Shortcut
α
β
γ
γ
∆
∆
ρ
ζ
η
Θ
θ
ϑ
ι
κ
Λ
λ
µ
ν
Ξ
ξ
Π

ADOBE FRAMEMAKER 8
User Guide
718
Other special symbols
Press Return to end the backslash sequence shown in the third column.
Control+Alt+p \pi
Control+Alt+r \rho
Control+Alt+Shift+s \Sigma
Control+Alt+s \sigma
Control+Alt+Shift+e \varsigma
Control+Alt+t \tau
Control+Alt+Shift+u \Upsilon
Control+Alt+u \upsilon
Control+Alt+Shift+f \Phi
Control+Alt+f \phi
Control+Alt+j \varphi
Control+Alt+c \chi
Control+Alt+Shift+y \Psi
Control+Alt+y \psi
Control+Alt+Shift+o \Omega
Control+Alt+o \omega
Control+Alt+Shift+i \varpi
Control+Alt+7 \cpartial
Element Shortcut Backslash sequence
Control+Alt+1 \infty
Control+Alt+2 \bot
... Control+g period \ldots
Control+Alt+3 \aleph
Control+Alt+4 \Im
Control+m $ \Re
Control+Alt+5 \wp
Control+Alt+0 \emptyset
Control+Alt+6 \nabla
Element Shortcut Backslash sequence
π
ρ
Σ
σ
ς
τ
ϒ
υ
Φ
φ
ϕ
χ
Ψ
ψ
Ω
ω
ϖ
∂
∞
⊥
ℵ
ℑ
ℜ
℘
∅
∇

ADOBE FRAMEMAKER 8
User Guide
719
Strings
Diacritical marks
Operators page
Press Return to end the backslash sequence shown in the third column.
Control+m ) \degree
‘Control+Alt+`\prime
“Control+m " \pprime
Command Shortcut
Start String 'or "
End String Return
Element Shortcut
`(grave)
~ (tilde)
Control+g hyphen
Control+Alt+Shift+v
Control+g ^
period
Control+g ~ (tilde)
Control+g _ (underline)
Control+g right arrow
Control+g @
Element or command Shortcut Backslash sequence
+plus\plus
_ minus (after an operand)
?x? Control+m * (asterisk) \cross
Control+m period \cdot
Control+8 \bullet
Toggle Format Control+Shift+t, Esc m T
Control+Alt+/ \fract
Control+m / \div
Element Shortcut Backslash sequence
x'
x
˜
x
x
x
ˆ
x
·
x
˜
x
x
x
)
ADOBE FRAMEMAKER 8
User Guide
720
/
\over
?=? =\equal
Control+g = \uequal
Control+j \jotdot
?,? comma \comma
Control+q Shift+d \otimes
Control+q Shift+e \oplus
Control+q Shift+y \wedge
Control+q Shift+z \vee
Control+m i \cap
Control+m u \cup
Control+m comma \ucomma
; \semicolon
Control+m n \neg
-Control+hyphen \minus
Control+m 1 \mp
Control+q 1 \pm
Control+q Shift+q \grad
Control+q Shift+q (and add operand)
Control+m Control+d \change
Control+m x \box
Control+m o \boxdot
Control+m 2 \box2
Control+m a \forall
Control+m e \exist
Control+m t \therefore
Control+a, Esc m v l \atop
(lowercase L)
Control+m ; (semicolon), \list
Esc m h l (lowercase L)
* (asterisk) \times
Element or command Shortcut Backslash sequence
ADOBE FRAMEMAKER 8
User Guide
721
Large page
Press Return to end the backslash sequence shown in the third column.
Use these shortcuts to type each element on the Large page with only one operand. Then use Add Operand and
Toggle Format as needed.
Delimiters page
Press Return to end the backslash sequence shown in the third column.
Control+g | (bar) \abs
Esc m ^
Esc m Control+Shift - (hyphen)
Control+m Control+^
Control+m Control+ Shift - (hyphen)
Control+r \sqrt
Control+r (and add operand)
Control+Shift+e \sn
^\power
Control+m d \dagger
!\fact
Control+m s \ast
Control+q Shift+p \angle
Element or command Shortcut Backslash sequence
?Control+Shift+s \sum
?Control+Shift+p \prod
?Control+i \int
?NA \oint
?Control+m Shift+i \bigcap
?Control+m Shift+u \bigcup
Add Operand Control+Shift+n, Esc m n
Toggle Format Control+Shift+, Esc m Shift+t
Element or command Shortcut Backslash sequence
( ? ) (\id
[ ? ] [ (left bracket)
Element or command Shortcut Backslash sequence
∑
∏
∫
∫
°
∩
∪

ADOBE FRAMEMAKER 8
User Guide
722
? } { (left brace)
? | | (bar) \substitution
< ? > Control+m <\dangle
|?| Control+g | (bar) \abs
( ? Control+m ( \lparen
[ ? Control+m [ (left bracket)
{ ? Control+m { (left brace)
? | | (bar) (and add operand)
|? > Control+m k \ket
||?|| Control+m | (bar) \norm
? ) )\rparen
? ] ] (right bracket)
? } } (right brace)
? | | (bar) (and add two operands)
< ? | Control+m b \bra
Control+q i \ceil
( ?, ? ) Control+m Shift+n \inprod
[ ?, ? ] Control+m Shift+c \cmut
{ ?, ? } Control+m Shift+a \acmut
?_ (underline) \overline
< ? | ?> Control+m Shift+b \bket
Control+q k \floor
() Control+m h \choice
} ?Control+m Shift+d \downbrace
? Control+m Shift+p \upbrace
Toggle Format Control+Shift+t, Esc m T
Remove Parentheses Esc m r p
?
?

ADOBE FRAMEMAKER 8
User Guide
723
Relations page
Press Return to end the backslash sequence shown in the third column.
Element Shortcut Backslash sequence
? < ? <\lessthan
? > ? >\greaterthan
? = ? =\equal
? ~ ? Control+m ~ (tilde) \sim
? ? Control+q Shift+l (L) \subset
? ? Control+q Shift+i \supset
? ? Control+q comma \leftarrow
? ? Control+q period \rightarrow
? ? Control+q plus \lrarrow
? ? Control+m r \perp
? ? Control+g <\leq
? ? Control+g >\geq
? ? Control+q : (colon) \equiv
? ? Control+q ; (semicolon) \approx
? ? Control+q Shift+j \subseteq
? ? Control+q Shift+m \supseteq
? ? Control+q \ \Leftarrow
? ? Control+q ^ \Rightarrow
? ? Control+q [ (left bracket) \LRarrow
? ? Control+m p \parallel
? ? Control+q l (lowercase L) \ll
? ? Control+q g \gg
? ? Control+q = \notequal
? ? @\cong
? ? Control+q Shift+n \in
? ? Control+' \ni
? ? Control+q Shift+o
⊂
⊃
←
→
↔
⊥
≤
≥
≡
≈
⊆
⊇
⇐
⇒
⇔
||
«
»
≠
≅
∈
∋
∉
ADOBE FRAMEMAKER 8
User Guide
724
Calculus page
Press Return to end the backslash sequence shown in the third column.
Use these shortcuts to type each element on the Large page with only one operand. Then use Add Operand and
Toggle Format as needed.
= ? Control+g = \uequal
? ? Control+q Shift+k \notsubset
? ? Control+q 5 \propto
Element or
command
Shortcut Backslash sequence
Control+i \int
Control+Shift+i \oint
Add Operand Control+Shift+n, Esc m n
Toggle Format Control+Shift+t, Esc m T
Control+g t \optotal
Control+g Shift+t
Control+g p \oppartial
Control+g Shift+p
Control+g t (and add
operand)
Control+g Shift+t (and add operand)
Control+g p (and add operand)
Control+g Shift+p (and add operand)
Control+Alt+d \var
Element Shortcut Backslash sequence
⊄
∝
∫
∫
°

ADOBE FRAMEMAKER 8
User Guide
725
Matrices page
To insert a matrix of any size, first insert a 1 by 1 matrix. Then add rows and columns one at a time.
Matrix commands pop-up menu
Matrix row height pop-up menu
Matrix column width pop-up menu
Control+q Shift+q \grad
d ? Control+d \diff
Control+m c \curl
Control+Shift+d \partial
Control+m v \diver
Control+Shift+l (L) \lim
Control+m l (lowercase L) \lap
Command Shortcut
Add/Remove Brackets Control+Shift+t
Command Shortcut
Create 1 x 1 Matrix Esc x m
Add Row Esc x r
Add Column Esc x c, Control+Shift+c
Matrix Transpose Esc x t
Matrix Algebra Esc x a
Command Shortcut
Toggle fixed/proportional Esc m t r
Command Shortcut
Toggle fixed/proportional Esc m t c
Element or
command
Shortcut Backslash sequence

ADOBE FRAMEMAKER 8
User Guide
726
Functions page
To insert each function (except the general function and limit) from the keyboard, type its name as shown.
Addition pop-up menu
Multiplication pop-up menu
Division pop-up menu
Evaluation pop-up menu
Element Shortcut Backslash sequence
? ( ? ) Control+f \function
? Control+Shift+l (L) \lim
Command Shortcut
Add Fractions Esc m a a
Order Sum Esc m a o
Order Sum Reverse Esc m a Shift+o
Command Shortcut
Factor Esc m u f
Factor Some Esc m u Shift+f
Multiply Out Esc m u m
Multiply Out Once Esc m u Shift+m
Distribute Esc m u d
Distribute Over Equality Esc m u Shift+d
Command Shortcut
Long Division Esc m d l (lowercase L)
Remove Division Esc m d d
Remove Division 1 Level Esc m d Shift+d
Remove Negative Powers Esc m d n
Remove Negative Powers 1 Level Esc m d Shift+n
Command Shortcut
Number Crunch Esc m v n
Show All Digits Esc m v period
Evaluate Esc m v e
Evaluate Substitution Esc m v s
lim
?

ADOBE FRAMEMAKER 8
User Guide
727
Rules pop-up menu
Other rewrites pop-up menu
Positioning page
Micropositioning
The number of points shown in the following table is based on a zoom setting of 100 percent.
Evaluate Integrals Esc m v i
Evaluate Derivatives Esc m v d
Evaluate Derivatives 1 Level Esc m v Shift+d
Command Shortcut
Enter Rule Esc m r e
Apply Rule Esc m r a
Designate Dummy Esc m r d
Command Shortcut
Simplify Esc m o s
Simplify Some Esc m o Shift+s
Isolate Term Esc m o i
Expand First Term Esc m o e
Expand All Terms Esc m o Shift+e
To Use this shortcut
Move up 1 point Alt+up arrow
Move down 1 point Alt+down arrow
Move left 1 point Alt+left arrow
Move right 1 point Alt+right arrow
Move up 6 points Alt+Shift+up arrow
Move down 6 points Alt+Shift+down arrow
Move left 6 points Alt+Shift+left arrow
Move right 6 points Alt+Shift+right arrow
Remove micropositioning Alt+Home
Command Shortcut

ADOBE FRAMEMAKER 8
User Guide
728
Left/right (alignment) pop-up menu
Up/down (alignment) pop-up menu
Line breaking pop-up menu
Navigating in an equation
Moving the insertion point
Changing the selection
Command Shortcut
Left Esc m a l (lowercase L)
Center Esc m a c
Right Esc m a r
Left of = Esc m a plus
Right of = Esc m a =
Set Manual Esc m a s
Clear Manual Esc m a d
Reset Alignment Esc m a Shift+r
Command Shortcut
Top Esc m a t
Baseline Esc m a Shift+b
Bottom Esc m a b
Command Shortcut
Set Manual Esc m b s
Clear Manual Esc m b c
To move Use this shortcut
Left left arrow
Right right arrow
From beside a fraction to the numerator down arrow
To Use this shortcut
Select next prompt Tab
Increase scope of selection space
Select next element to the left left arrow
Select next element to the right right arrow

ADOBE FRAMEMAKER 8
User Guide
729
Moving math elements while retaining algebraic equivalency
Moving math elements without retaining algebraic equivalency
Tables
Selection in tables
To move Use this shortcut
Left Shift+left arrow
Right Shift+right arrow
Up Shift+up arrow
Down Shift+down arrow
To far left Control+Alt+left arrow
To far right Control+Alt+right arrow
Left into expression Control+Shift+left arrow
Right into expression Control+Shift+right arrow
To swap Use this shortcut
With element on left Control+m Control+left arrow
With element on right Control+m Control+right arrow
To select Use this shortcut
A cell Press Control and click the cell
A row Press Control and double-click column (vertical) border in
the row
A column Press Control and double-click row (horizontal) border in
the row
All text in current cell Esc t h a
Current cell, then next cell Esc t h e
Current row, then next row Esc t h r
Current column, then next column Esc t h c
Body cells in current column, then next body cells Esc t h b
Current table Esc t h t, or press Control and triple-click a cell
Extend or shorten the election Press Control+- and click the last cell you want in the selection

ADOBE FRAMEMAKER 8
User Guide
730
Movement in tables
Use these shortcuts to move to the indicated cell.
Tab characters in cells
Row and column manipulation
FrameMaker adds or deletes as many rows or columns as are currently selected.
To move to the Use this shortcut
Cell to the right Esc t m r
Cell to the left Esc t m l (lowercase L)
Cell below Esc t m d
Cell above Esc t m u
Rightmost cell in the current row Esc t m e
Leftmost cell in the current row Esc t m a
Top cell in the current column Esc t m t
Bottom cell in the current column Esc t m b
Top-left selected cell Esc t m s, Esc t h zero
Top-left cell Esc t m Shift+t
Beginning of cell Control+Page Up
End of cell Control+Page Down
Next cell and select all text in cell Tab, Esc t m n
Previous cell and select all text in cell Shift+Tab, Esc t m p
Cell below and select all text in cell Control+Alt+Tab
Cell above and select all text in cell Control+Alt+Shift+Tab
Anchor point of a table Esc t Shift+i
To Use this shortcut
Type a tab character in a cell Esc Tab
To Use this shortcut
Add rows above top selected row Esc t Shift+r a
Add rows below bottom selected row Esc t Shift+r b, Control+Return, Control+j
Add columns to left of leftmost selected column Esc t c l (lowercase L)
Add columns to right of rightmost selected column Esc t c r
Delete contents of selected rows or columns, but leave cells in table Esc t c e
Delete selected rows or columns from table Esc t c x
Sort rows and columns Esc t s
ADOBE FRAMEMAKER 8
User Guide
731
Row and column replacement
If the Clipboard doesn’t contain whole rows or columns, these shortcuts always replace the selected cells.
Vertical alignment in cells
To use these shortcuts, click in the first paragraph in a cell.
Column width
Table Designer
To use these shortcuts, click in the Table Designer.
Table formats
To paste whole rows or columns Use this shortcut
By replacing selected rows or columns Esc t p r
Before current selection (above top selected row or to left of leftmost
selected column)
Esc t p b
After current selection (below bottom selected row or to right of
rightmost selected column)
Esc t p a
To achieve Use this shortcut
Top alignment Esc j t, Control+F1
Middle alignment Esc j m, Control+F2
Bottom alignment Esc j b, Control+F3
To resize Use this shortcut
Columns so no paragraphs in selected cells wrap Esc t w
Selected column without changing table’s width Press Alt and drag selected cell’s handle
To Use this shortcut
Change all settings to As Is Shift+F8
Change all settings to match the selected table Shift+F9
Display previous page of properties Page Up
Display next page of properties Page Down
Apply only the current group of properties Press Control and click Apply
To Use this shortcut
Apply the current table’s format to the catalog and to all tables that
have the same tag
Esc t u t
Display the Edit Ruling Style dialog box Esc t e

ADOBE FRAMEMAKER 8
User Guide
732
Text
Insertion point movement
Use these shortcuts to move the insertion point.
Insertion point placement
Use these shortcuts to put the insertion point in an unrotated text frame on the current page. The draw order is the
order in which FrameMaker displays objects on a page; the first object in the draw order is the one at the back.
To move to Use this shortcut
Next character right arrow
Previous character left arrow
Beginning of a word Control+left arrow
End of a word Control+right arrow
Beginning of the next word Esc b w
Beginning of a line Home
End of a line End
Previous line up arrow
Next line down arrow
Beginning of a sentence Control+Home
End of a sentence Control+End
Beginning of the next sentence Esc b s
Beginning of a paragraph Control+up arrow
End of the current paragraph Control+down arrow
Beginning of the next paragraph Esc b p
Top of a column Control+Page Up
Bottom of a column Control+Page Down
Beginning of a flow Alt+Shift+Page Up
End of a flow Alt+Shift+Page Down
Start of first visible text flow Control+Shift+i
To put the insertion point in the Use this shortcut
First column of the first text frame in the draw order Esc b f
Next column, traversing text frames in the draw order Esc b n

ADOBE FRAMEMAKER 8
User Guide
733
Text selection
Click in text before using these shortcuts. If you use a shortcut with text already selected, FrameMaker extends
the selection.
To select Use this shortcut
Next character Esc h c, Esc Shift+h c,Shift+right arrow
Previous character Esc Shift+h Shift+c, Shift+Shift+left arrow
Current word, then next word Esc h w, Esc Shift+h w, Control+Shift+right arrow
Current word, then previous word Esc Shift+h Shift+w, Control+Shift+left arrow
Current sentence, then next sentence Esc h s, Esc Shift+h s, Control+Shift+End
Current sentence, then previous sentence Esc Shift+h Shift+s, Control+Shift+Home
Current line, then next line Esc Shift+h l (lowercase L) Esc h l (lowercase L), Shift+End
Current line, then previous line Esc Shift+h Shift+l (L), Shift+Home
Current paragraph, then next paragraph Esc h p, Esc Shift+h p, Control+Shift+down arrow
Current paragraph, then previous paragraph Esc Shift+h Shift+p, Control+Shift+up arrow
One line width of text, starting at insertion point Esc h d, Shift+down arrow
One line width of text, ending at insertion point Esc h u, Shift+up arrow
To top of a column Esc h t, Shift+Page Up
To bottom of a column Esc h m, Shift+Page Down
To beginning of flow Esc h g, Control+Shift+Page Up
To end of flow Esc h n, Control+Shift+Page Down
All text around the insertion point that has the same character format Esc h Control+Shift+f
To Shift the selection Use this shortcut
Right one character Esc h f
Left one character Esc h b
To select Use this shortcut
Extend or shorten a text selection Press and click where you want the selection to begin or end
Remove highlighting Esc h zero
Select a word Double-click the word
Select a word, then next words Double-click the word and then drag
Deselect a text frame or text line and place the insertion point in it Double-click in the text frame or text line

ADOBE FRAMEMAKER 8
User Guide
734
Text editing
Asian text
Text deletion
Capitalization
Use these shortcuts to change the capitalization of selected text.
To Use this shortcut
Select a paragraph Triple-click the paragraph
Select a paragraph, then next paragraphs Triple-click the paragraph and then drag
Transpose characters Control+F9
Cut Esc e x, Control+x, Shift+Delete
Copy Esc e c, Control+c, Control+Insert
Paste text that you cut or copied Esc e p, Shift+Insert, Control+v, Control+y
Quick-copy text Click where you want to place the copied text. Then press Alt
and drag through the text you want to copy.
To Use this shortcut
Type rubi text Esc s r
Display the Rubi Properties dialog box Esc o r
Define a combined font of Western and Japanese characters (only
available on Asian operating systems)
Esc o c o
To delete Use this shortcut
Previous character Control+h, Backspace
Backward to the start of the previous word Control+Backspace
Backward to the end of the previous sentence Esc k a
Next character Delete
Forward to the end of a word Esc k f, Control+Delete
Forward to the end of a line Control+Shift+Delete
Forward to the start of the next sentence Esc k s
To Use this shortcut
Change the current word to all lowercase Control+Alt+l (lowercase L), Control+Alt+Shift+L
Change the current word to all uppercase Control+Alt+u, Control+Alt+Shift+u
Change the current word to initial caps Control+Alt+c
Display the Capitalization dialog box Esc e Shift+c

ADOBE FRAMEMAKER 8
User Guide
735
Text formatting
Character and Paragraph Designers
Paragraph formats
Use these shortcuts to format selected paragraphs or the paragraph containing the insertion point.
To Use this shortcut
Change all settings to As Is Shift+F8
Change all settings to match selected text Shift+F9
Display the previous set of properties Page Up
Display the next set of properties Page Down
Apply only the current group of properties Press Control and click Apply
To Use this shortcut
Apply a paragraph format by typing the first characters of its tag and
pressing Return
Esc q p, F9, Control+9
Center a paragraph Esc j c
Left-align a paragraph Esc j l (lowercase L)
Right-align a paragraph Esc j r
Justify a paragraph (left and right) Esc j f
Position the current paragraph in the column, removing any strad-
dling or run-in formatting
Esc j p n
Change current paragraph to a run-in head Esc j p r
Change current paragraph to a side head Esc j p s
Make current paragraph straddle all columns Esc j p t
Make current paragraph straddle both the side-head area and
columns
Esc j p Shift+t
Change line spacing to single spacing Esc j one
Change line spacing to 1-1/2 spacing Esc j /
Change line spacing to double spacing Esc j 2
Change line spacing to fixed (default font size plus leading) Esc j x
Change line spacing to floating (largest font size plus leading) Esc j o
Increase line spacing 1 point Esc j plus, Esc plus one
Decrease line spacing 1 point Esc j minus, Esc minus one
Make paragraphs with the current paragraph’s tag and the Para-
graph Catalog definition match the current paragraph’s format
(unify)
Esc j Shift+u
Start a paragraph anywhere Esc j Shift+a
Start a paragraph at the top of a column Esc j Shift+c

ADOBE FRAMEMAKER 8
User Guide
736
Character formats
Use these shortcuts to change the character format of selected text or of text you are about to type.
Start a paragraph at top of a page Esc j Shift+p
Start a paragraph at the top of a left page Esc j Shift+l (L)
Start a paragraph at the top of a right page Esc j Shift+r
Turn on hyphenation Esc j h
Turn off hyphenation Esc j n
Repeat last paragraph-related command Esc j j
Display Paragraph Catalog Esc o p c
Display Update Paragraph Format dialog box Esc o p u
Display Space Between Paragraphs dialog box Esc j w
Display Custom Line Spacing dialog box Esc j u
To Use this shortcut
Apply a character format by typing the first characters of its tag and
pressing Return
Esc q c, F8, Control+8
Change text to default paragraph font; remove character tag from
text in a text line
Esc o c p
Turn bold on or off Esc c b, F4, Control+b, Control+Shift+b
Turn italic on or off Esc c i, F5, Control+i
Turn underline on or off Esc c u, F3, Control+u, Control+Shift+u
Turn double underline on or off Esc c d
Turn numeric underline on or off Esc c 2
Turn strikethrough on or off Esc c s, Control+/
Turn overline on or off Esc c o, Shift+F3
Change text to plain Esc c p, F2
Turn superscript on or off Esc c plus
Turn subscript on or off Esc c minus
Put text on baseline Esc c =
Change text to small caps Esc c m, Control+e
Turn change bars on or off Esc c h, Control+Shift+h
Turn pair kerning on or off Esc c k
Manually kern text 1 point in specified direction (at 100 percent
zoom setting)
Alt+arrow key
Manually kern text 6 points in specified direction (at 100 percent
zoom setting)
Alt+Shift+arrow key
To Use this shortcut

ADOBE FRAMEMAKER 8
User Guide
737
Working with structure
Remove all manual kerning Alt+Home
Increase size 1 point Esc c ] (right square bracket)
Decrease size by 1 point Esc c [ (left square bracket)
Squeeze 20 percent of an em space Esc [ (left square bracket) Shift+d
Spread 20 percent of an em space Esc [ (left square bracket) Shift+c
Set font stretch to 100 percent Esc [ (left square bracket) n
Reduce font stretch by 5 percent Esc [ (left square bracket) c
Increase font stretch by 5 percent Esc [ (left square bracket) e
Repeat the last font-related command Esc c c
Toggle Tsume (Japanese only) Esc c t
Display the Character Catalog Esc o c c
To move the insertion point Press
To start of the current element Esc s Shift+s
To end of the current element Esc s Shift+e
After the next element Esc s Shift+d, Alt+Control+down arrow
Before the previous element Esc s Shift+u, Alt+Control+up arrow
Before the current element’s parent Esc s Shift+b, Alt+Control+left arrow
To start of the next element’s contents Esc s Shift+n, Alt+Control+right arrow
To select Press
Current element Esc h Shift+e
Next element Esc h Shift+n, Alt+Control+Shift+down arrow
Previous element Esc h Shift+p, Alt+Control+Shift+up arrow
Siblings of the current element Esc h Shift+s
Parent of the current element Esc h e Shift+p, Alt+Control+Shift+left arrow
To extend the selection Press
Up by one element Alt+Control+Shift+up arrow
Down by one element Alt+Control+ down arrow
To Use this shortcut

ADOBE FRAMEMAKER 8
User Guide
738
Keyboard shortcuts for UNIX
Keyboard shortcuts instructions:
•+ indicates that each key must be pressed simultaneously (for example, Control+z means to press the Control key
and the z key simultaneously). If the shortcut keystrokes do not contain the Shift+ sign, press each key in the order
the shortcut calls for (for example, Esc m p means to press and release the Esc (Escape) key, then the m key, then
the p key).
Navigating through documents
To Press
To include the parent Alt+Control+Shift+left arrow
Insert element Esc Shift+e i, Control+1 (one)
Wrap element Esc Shift+e w, Control+2
Unwrap element Esc Shift+e u
Change element Esc Shift+e c, Control+3
Merge into first element Esc Shift+e m
Merge into last element Esc Shift+e Shift+m
Move element up one level Esc Shift+e Shift+p
Move element down one level Esc Shift+e Shift+d
Transpose element with previous element Esc Shift+e Shift+t
Transpose element with next element Esc Shift+e t
Split element Esc Shift+e s
Edit attribute value Control+7
Repeat last Element Catalog command Esc e e
Toggle display of element boundaries (as brackets) Esc v Shift+e
Toggle display of element boundaries (as tags) Esc v Shift+t
Validate a document Esc Shift+e v
Display Structure View Esc Shift+e Shift+v
To display Press
Previous page Esc p p, F6
Next page Esc p n, F7, Control+v
First page Esc p f, Shift+F6, and click the Previous Page button
Last page Esc p l (lowercase L), Shift+F7, and click the Next Page button
Go To Page dialog box Esc v p, Control+g

ADOBE FRAMEMAKER 8
User Guide
739
Drawing tools
To go to Do this
Source of a cross-reference Press Control and right-click an active area
A specific page Press Control+g or click the Page Status area and then type the page number
Page containing the insertion
point
Press Control+g or click the Page Status area and then click Page Containing the Insertion Point
To move the insertion point in
text to
Press
Start of the next word Esc b w
Start of the next paragraph Esc b p
To choose this tool Use this shortcut
Arc Esc one a
Graphic Frame Esc one m
Freehand Esc one f
Last tool selected Esc one one
Line Esc one l (lowercase L)
Object Selection Esc one o
Oval Esc one e
Polygon Esc one p g
Polyline Esc one p l (lowercase L)
Rectangle Esc one r
Rounded Rectangle Esc one Shift+r
Smart Selection Esc one s
To Use this shortcut
Text Frame Esc one t f
Text Line Esc one t l (lowercase L)
To draw Use this shortcut
Vertical, horizontal, or diagonal line Press and draw a line
Square Press and draw a rectangle
Circle Press and draw an oval
Circular arc Press and draw an arc

ADOBE FRAMEMAKER 8
User Guide
740
Book Commands
To Use this shortcut
Display the Tools palette Esc one w, Esc g Shift+t
Keep a tool active after use Press and click a drawing tool
Return to the Object Selection tool after drawing Press and click the Object Selection tool
To Do this
New Book Esc f Shift+n
Save Book Esc f s
Rename File Esc f e
Update Book Esc e Shift+u or Esc f g
Delete File from Book Esc f x
Display filenames (in book window) Esc Shift+v Shift+m
Display paragraph headings (in book window) Esc Shift+v Shift+x
Select All Files Esc e a
Select All FrameMaker Files Esc e Shift+a Shift+f
Save all files in book Esc f Shift+s
To Do this
Close all files in book Esc f Shift+c
Select All Non-Generated FrameMaker Files Esc e Shift+a Shift+n
Select All Generated FrameMaker Files Esc e Shift+a Shift+g
Select a range of files Shift+click
Select discontiguous files Control+click
Move file up in book Esc m u
Move file down in book Esc m d
Print Book Esc f p
Print Selected Files in Book Esc f Shift+f
To Do this
Close all files in book Esc f Shift+c
Select All Non-Generated FrameMaker Files Esc e Shift+a Shift+n
Select All Generated FrameMaker Files Esc e Shift+a Shift+g
Select a range of files Shift+click
Select discontiguous files Control+click

ADOBE FRAMEMAKER 8
User Guide
741
Finding and changing
Move file up in book Esc m u
Move file down in book Esc m d
Print Book Esc f p
Print Selected Files in Book Esc f Shift+f
To Press
Search forward Esc f i n, Esc e Shift+f
Search backward Esc f i p
Change current selection Esc r o, Control+%
Change all occurrences of Find text in document Esc r g
Change and search again Esc r a
Change settings to As Is in Find Character Format and Change To
Character Format dialog boxes
+F8
Change settings to match selected text in Find Character Format and
Change To Character Format dialog boxes
+Control+F8, Shift+F9
Display Set Find/Change Parameters dialog box Esc f i s
To find Type
Tab symbol \t
Forced return \r
End-of-paragraph symbol \p
Start of paragraph \P
Nonbreaking space \ (space)
Thin space \i, \st
To find Type
En space \ Shift+n, \sn
Em space \ _m, \sm
Numeric space \#, \s#
End-of-flow symbol \f
‘ (grave) \{
\ (backslash) \\
Discretionary hyphen \- (hyphen)

ADOBE FRAMEMAKER 8
User Guide
742
Editing text
Suppress hyphenation symbol \_ (underscore)
Start of word \<
End of word \>
With Use Wildcards turned on...
Any number of characters *
Spaces or punctuation | (bar)
Any one character ?
The beginning of a line ^
The end of a line $
Any one of the bracketed characters ab [ab]
Any character except ab [^ab]
Any character from a to f [a-f]
To Press
Cut Esc e x, Shift+Delete, Control+w
Copy Esc e c
Paste Esc e p, Control+y
Clear Esc e b
Undo/Redo Esc e u
To select Do this
A word Double-click it
A word, then next words Double-click it and drag, double-click it and -click
To select Do this
Current sentence, then next Press Esc h s
Current sentence, then previous Press Esc Shift+h Shift+s
A paragraph Triple-click it
A paragraph, then next paragraphs Triple-click it and drag, triple-click it and -click
To delete Press
Previous character Control+h, Delete, Backspace
Backward to start of a line Control+u, Control+Delete

ADOBE FRAMEMAKER 8
User Guide
743
Working with tables
Backward to end of the previous sentence Esc k a
Next character Control+d
Forward to end of a word Esc k f
Forward to end of a line Control+k
Forward to start of the next sentence Esc k s
To select Press
A cell Control and click the cell
A row Control and double-click column border
A column Control and double-click row border
Current row Esc t h r
Current column Esc t h c
Current table Esc t h t
To move to Press
Rightmost cell in current row Esc t m e
Leftmost cell in current row Esc t m a
Top cell in current column Esc t m t
Bottom cell in current column Esc t m b
Next cell and select its text Tab, Esc t m n
Previous cell and select its text Shift+Tab, Esc t m p
To Press
Type a tab character in a cell Esc Tab
Add rows above selected row Esc t Shift+r a
Add rows below selected rows Esc t Shift+r b, Control+Return
Add columns to left Esc t c l (lowercase L)
Add columns to right Esc t c r
Paste by replacing selected rows or columns Esc t p r
Paste rows or columns before selection Esc t p b
Paste rows or columns after selection Esc t p a
Resize columns so no paragraphs in selected cells wrap Esc t w
Resize selected columns without changing table’s width and drag cell’s handle
Copy column width to Clipboard Esc e y w

ADOBE FRAMEMAKER 8
User Guide
744
Entering special characters
To type Press
• (bullet) Control+q %
† (dagger) Control+q space
‡ (double dagger) Control+q `
™ (trademark) Control+q *
© (copyright) Control+q )
® (registered trademark) Control+q (
¶ (paragraph symbol) Control+q &
§ (section symbol) Control+q $
… (ellipsis) Control+q Shift+i
(em dash) Control+q Shift+q
(en dash) Control+q Shift+p
‘ Control+'
" Control+”
(with Smart Quotes off) Control+q Shift+t
(with Smart Quotes off) Control+q Shift+u
(with Smart Quotes off) Control+q Shift+r
(with Smart Quotes off) Control+q Shift+s
Em space Esc space m
To type Press
En space Esc space n
Nonbreaking space Esc space h, Control+space
Numeric space Esc space 1 (one)
Thin space Esc space t
Nonbreaking hyphen Esc hyphen h
Suppress hyphenation symbol Esc n s
Discretionary hyphen Esc hyphen Shift+d, Control+hyphen
Forced return Shift+Return, Control+j

ADOBE FRAMEMAKER 8
User Guide
745
Object selection
Use these shortcuts to select objects on the current page.
To type Press
En space Esc space n
Nonbreaking space Esc space h, Control+space
Numeric space Esc space 1 (one)
Thin space Esc space t
Nonbreaking hyphen Esc hyphen h
Suppress hyphenation symbol Esc n s
Discretionary hyphen Esc hyphen Shift+d, Control+hyphen
Forced return Shift+Return, Control+j
To use this accent Press Esc, then type this Followed by one of these Example
´ (acute) ' (apostrophe) a, A, e, E, i, I, o, O, u, U É, é
` (grave) ` (left quote) a, A, e, E, i, I, o, O, u, U È, è
˜ (tilde) ~ (tilde) a, A, n, N, o, O Ñ, ñ
¨ (dieresis) % (percent) a, A, e, E, i, I, o, O, u, U, y, Y Ü, ü
ˆ (circumflex) ^ (caret) a, A, e, E, i, I, o, O, u, U Ê, ê
° (ring) * (asterisk) a, A Å, å
¸ (cedilla) , (comma) c, C Ç, ç
To Use this shortcut
Select a text line or text frame Press Control and click a text line or text frame
Extend or shorten the selection Press and click an object
Force selection border to appear (when dragging from outside all
objects is not possible)
Press Control+ and drag diagonally
To Use this shortcut
Select the first object in the draw order Esc o Shift+f
Select the next object in the draw order Esc o n
Extend the selection to the next object in the draw order Esc o e
Deselect a text frame or text line and put the insertion point inside it
instead
Double-click in the text frame or text line

ADOBE FRAMEMAKER 8
User Guide
746
Function keys
Character and Paragraph Designers
Other useful shortcuts
Key Function Control Shift +Control
F1 Help Info
F2 Ch ange s elected to text to plain
text
Plain
F3 Underline the selected text Underline
F4 Apply Bold format to the
selected text
Bold
F5 Italicize the selected text Italics
F6 Page up First page
F7 Page down Last page
F8 Choose character format by
typing
Choose paragraph format by
typing
Change dialog box settings to As Is Change
settings to
match current
text
F9 Choose paragraph format by
typing
Change dialog box settings to match
current text
F10 Keyboard input to the menu
bar
To Use this shortcut
Change all settings to As Is Shift+F8
Change all settings to match selected text Control+Shift+F8, Shift+F9
Display the previous set of properties Esc p p, F6
To Use this shortcut
Display the next set of properties Esc p n, F7, Control+v
Apply only the current group of properties Press Control and click Apply
To Press
Redraw the document display Control+l (lowercase L)
Quick-copy a selected object Control and drag the object with the middle mouse button
Rotate an object arbitrarily Control and use the right mouse button to drag a corner or
reshape handle
Move an object along vertical or horizontal axis and drag object

ADOBE FRAMEMAKER 8
User Guide
747
Conventions and Function keys
Keys
When you use keyboard shortcuts, Caps Lock must be off and, unless otherwise noted, the pointer must be in the
document window.
The following table lists the terms used for special keys.
To Press
Nudge an object 1 point/6 points Control+arrow key/+Control+arrow key
Fit page in window Esc z p
Fit window to page Esc z w
Zoom to 100 percent Esc z z
Lock or unlock a document or book Esc Shift+f l (lowercase L) k
This notation Means
arrow key The up, down, right, or left arrow key
Esc The key labeled Esc
Control The key labeled Control
Shift The key labeled Shift
F2, L2, or R11 The function key labeled F2, L2, or R11. (If you should type F
followed by 2, the characters are shown as F 2)
space The space bar
plus The key labeled with a plus sign (+)
minus or hyphen The key labeled with a hyphen (-)
period The key labeled with a period (.)
comma The key labeled with a comma (,)
zero The key labeled with the numeral 0
one The key labeled with the numeral 1

ADOBE FRAMEMAKER 8
User Guide
748
Shortcuts
The following table explains the conventions for showing key sequences and key combinations. When an uppercase
letter appears in a shortcut, use the Shift key when typing the letter.
When two or more shortcuts accomplish the same action, the shortcuts are separated by commas; for example: Esc
q v, Control+zero. You can use either Esc q v or Control+zero to accomplish the same action.
Function keys
Mouse
The following table lists the terms used for mouse actions.
This shortcut Means
Esc Shift+t r Press and release these keys in succession: the Esc key, the
uppercase letter T, and the letter r
Control+e Hold down Control and press the letter e
Control+Shift+F8 Hold down Control and Shift and press the F8 key
Key Function Control Shift +Control
F1 Help Info
F2 Change selected to text to plain
text
Plain
F3 Underline the selected text Underline
F4 Apply Bold format to the
selected text
Bold
F5 Italicize the selected text Italics
F6 Page up First page
F7 Page down Last page
F8 Choose character format by
typing
Choose paragraph format by
typing
Change dialog box settings to As Is Change settings
to match current
text
F9 Choose paragraph format by
typing
Change dialog box settings to match
current text
F10 Keyboard input to the menu
bar
This instruction Means
Click Click the left mouse button
Middle-click Click the middle button of a three-button mouse, or simulta-
neously click both buttons of a two-button mouse
Right-click Click the right mouse button

ADOBE FRAMEMAKER 8
User Guide
749
Color
Color selection
Color views
DITA
Double-click Click the left mouse button twice rapidly without moving the
mouse
Triple-click Click the left mouse button three times rapidly without moving
the mouse
-click Hold down Shift and click the left mouse button
To Use this shortcut
Keep a color selected after use Press and choose a color from the Color pop-up menu
Assign a color to all objects in a document, including text Press Control+ and choose a color from the Color pop-up menu
in the Tools palette
Display the Color Definitions dialog box Press Esc v c d
To Use this shortcut
Display Define Color Views dialog box Press Esc v c v
Choose view number (1, 2, 3, 4, 5, or 6) from the Define Color Views
dialog box
Press Esc v and then the number
To choose Use this shortcut
DITA>New DITA File>New <mapi>
Note: map<i> refers to an element whose class attribute
starts with map/map and can vary from 1 to i.
Esc Shift+n Shift+m i
DITA>New DITA File>New <topici>
DITA>New DITA File>New <concepti>
DITA>New DITA File>New <taski>
DITA>New DITA File>New <referencei>
Note: topic<i> refers to an element whose class attribute
starts with topic/topic and can vary from 1 to i..
Esc Shift+n Shift+t 1
Esc Shift+n Shift+t 2
Esc Shift+n Shift+t i
DITA>New DITA File>Refresh Menu Esc Shift+r Shift+m
DITA>Insert Conref Esc Shift+i Shift+c
DITA>Assign ID to Element Esc Shift+a Shift+i
DITA>Update References Esc Shift+u Shift+r
DITA>Open all Topicrefs Esc Shift+o Shift+a
This instruction Means

ADOBE FRAMEMAKER 8
User Guide
750
Windows and dialog boxes
Main FrameMaker window
To use these shortcuts, point or click in a document window, or point in the main FrameMaker window.
Window manipulation
To use these shortcuts, point or click in any FrameMaker window.
Context menus
Display and pointer placement
Use these shortcuts to display a window or dialog box and direct keyboard input to it. If it is already open but is
behind another window, these shortcuts bring it to the front.
DITA>Insert Topicref Esc Shift+i Shift+t
DITA>Build FM Document From DITA Map Esc Shift+g Shift+d
DITA>DITA Options Esc Shift+d Shift+o
To choose Use this shortcut
New Document Esc f n
New Book Esc f Shift+n
Open Esc f o, Control+x Control+f, Control+x Control+v
Help F1 or Esc f h
Info Esc f Shift+i, Esc ? v, Control+Help
Exit Esc f c, Control+x Control+c
To Use this shortcut
Expose Esc w e
Hide Esc w h
Redisplay a document Control+l (lowercase L), Esc w r
Close any window or modeless dialog box Control+x Control+c
Close the document window Esc f c, Esc f q, Control+x Control+c
To Do this
Display a pop-up menu of commands that apply to the current selec-
tion or context
Right-click on an object, in a document margin, or in a book
window
To display this and direct keyboard input to it Use this shortcut
Current document window Esc Shift+f i d, F2
Find/Change Esc Shift+f i f
Hypertext Esc Shift+f i h

ADOBE FRAMEMAKER 8
User Guide
751
Navigation within windows
Use these shortcuts for windows and dialog boxes. When you use a keyboard shortcut in a window or dialog box,
the shortcut’s effect depends on the active setting. The active setting has a box around it.
Command buttons
Marker Esc Shift+f i m
Spelling Checker Esc Shift+f i s
Paragraph Designer Esc Shift+f i p
Character Designer Esc Shift+f i c
Conditional Text Esc Shift+f i o
Show/Hide Conditional Text Esc s Shift+c
Show Conditional Text Indicators Esc Shift+v Shift+o s
Hide Conditional Text Indicators Esc Shift+v Shift+o h
Toggle Conditional Indicators On/Off Esc v Shift+o
Show One Conditional Text Tag Esc q Shift+s
Manage Conditional Text Esc m Shift+c
Apply Conditional Text Esc s Shift+c
Select Same Condition Tags Esc h Shift+c
View the Condition applied to the text where the cursor is placed Esc q Shift+c
Focus In Conditional Text Esc Shift+f i o
Close Conditional Text dialog box Esc Shift+c o
Custom Ruling and Shading Esc Shift+f i r
Table Designer Esc Shift+f i t
Structure View Ctrl-r F i v
Element Validation Ctrl-r F i w
To move to the Use this shortcut
Next setting Tab
Previous setting Shift+Tab
First setting Control+Tab
To Use this shortcut
Click a default button that initiates a command (if no other command
button is active)
Return, space
Click a command button Return
Cancel a dialog box Control+c
To display this and direct keyboard input to it Use this shortcut

ADOBE FRAMEMAKER 8
User Guide
752
Radio buttons and checkboxes
Pop-up menus
Scroll lists
Custom menus
Document design
Master and reference pages
To Use this shortcut
Turn on a radio button space
Cycle through checkbox states (off, on, As Is) space
Turn off a checkbox 0 (zero)
Turn on a checkbox 1 (one)
To Use this shortcut
Display the pop-up menu space
Move to the first menu item 0 (zero)
Move to the next menu item down arrow, Control+n
Move to the previous menu item up arrow, Control+p
Choose the selected item Return, space
To Use this shortcut
Move to the previous item in a list up arrow, Control+p
Move to the next item in a list down arrow, Control+n
Choose an item space
Search forward and select an item starting with a typed letter UnShifted key
Search backward and select an item starting with a typed letter Shifted key
Move an item in a scroll list to the opposite scroll list Double-click the item
Move all items in a scroll list to the opposite scroll list Press and click arrow between scroll lists
To Use this shortcut
Display a custom menu bar Esc v m u
To Use this shortcut
Rename a master or reference page (display the master or reference
page before using this shortcut)
Esc p Shift+n
Create a master page (display a master or body page before using
this shortcut)
Esc o m p or Esc p m
ADOBE FRAMEMAKER 8
User Guide
753
Page layout
Import formats
Side-head area
Text flows
Documents
Help
Open
To Use this shortcut
Update page layouts (display a body page before using this shortcut) Esc o u p
To Use this shortcut
Import formats from another document Esc f i o
To Use this shortcut
Turn side-head area on or off Esc j p Shift+s
To Use this shortcut
Split a text frame below the insertion point Esc Shift+c Shift+s
Disconnect the text frame with the insertion point from the previous
frame in a flow
Esc Shift+c Shift+p
Disconnect the text frame with the insertion point from the next text
frame in a flow
Esc Shift+c Shift+n
Disconnect the text frame with the insertion point from both the
previous and next text frames
Esc Shift+c Shift+b
Connect two selected text frames Esc Shift+c Shift+c
To Use this shortcut
Display online Help Esc f h, F1
Display Help on using the templates provided with FrameMaker Press Esc f n and click Explore Standard Templates
To open Use this shortcut
A document in a book file Double-click the filename in the book window, Control+o
All files in a book Esc f Shift+o, or press and choose Open All Files in Book from
the File menu
An MIF or an MML file as a text file Press and click Open in the Open dialog box

ADOBE FRAMEMAKER 8
User Guide
754
Save and Close
Cancel and Undo
Zoom
Hypertext documents
To Use this shortcut
Display the Save Document dialog box Esc f a, Control+x Control+w
Save a document or book Esc f s, Control+x Control+s
Save all open files Esc f Shift+s, or press and choose Save All Open Files from the
File menu
Save all open files in a book Esc f Shift+s, or press and choose Save All Files in Book from the
File menu
Save As PDF Esc f w p
Save As XML Esc f w x
Close all open files Esc f Shift+c, or press and choose Close All Open Files from the
File menu
Close all open files in a book Esc f Shift+c, or press and choose Close All Files in Book from
the File menu
To Use this shortcut
Cancel some FrameMaker commands Control+c
Undo some FrameMaker commands Esc e u
To zoom Use this shortcut
In one zoom setting Esc z i
Out one zoom setting Esc z o
To fit page in window Esc z p
To fit window to page Esc z w
To fit window to text frame Esc z f
To 100 percent Esc z z
To Use this shortcut
Go to previous location on the hypertext stack Esc v Shift+p
Go to next location on the hypertext stack Esc v Shift+n
Activate a hypertext command without locking a document Press Control and right-click an active area
Lock or unlock a document Esc Shift+f l (lowercase L) k
Open Hypertext dialog box Esc s h
ADOBE FRAMEMAKER 8
User Guide
755
Document utilities
Spelling Checker
Thesaurus
To use this shortcut, point or click in the document window, not in the Thesaurus dialog box.
Move focus to Hypertext dialog box Esc Shift+f i h
Validate a hypertext command Esc v h
Toggle FluidView locked format Esc Shift+v Shift+f
To Use this shortcut
Check selected text or a word containing the insertion point Esc l (lowercase L) s, or press and click Start Checking in the
Spelling Checker dialog box
Check the entire document Esc l (lowercase L) e
Check the current page Esc l (lowercase L) p
Correct a word Esc l (lowercase L) c w
Add a word to your personal dictionary (Learn) Esc l (lowercase L) a p
Add a word to the document dictionary Esc l (lowercase L) a d
Add a word to automatic corrections Esc l (lowercase L) a c
Delete a word from your personal dictionary (Unlearn) Esc l (lowercase L) x p
Delete a word from the document dictionary Esc l (lowercase L) x d
Clear automatic corrections Esc l (lowercase L) c a
Display the Spelling Checker Options dialog box Esc l (lowercase L) Shift+o
Display the Dictionary Functions dialog box Esc l (lowercase L) c d
Create a file of unknown words Esc l (lowercase L) b
Mark all paragraphs for rechecking Esc l (lowercase L) r
Rehyphenate a document Esc l (lowercase L) Shift+r
Replace a questioned word Double-click word in the Correction scroll list in the Spelling
Checker dialog box
To Use this shortcut
Replace a selection with the Thesaurus selection Esc Shift+t r
To Use this shortcut
ADOBE FRAMEMAKER 8
User Guide
756
Document comparison
Document reports
Macros
HTML and PDF export
Reference Updating
Graphics
Drawing tools
To Use this shortcut
Display the Compare Documents dialog box Esc f t c
To Use this shortcut
Display the Document Reports dialog box Esc f t r
To Use this shortcut
Start/stop recording keys Control+] (right bracket)
To Use this shortcut
Create and apply formats Esc f t f
Open the HTML Setup dialog box Esc f t h
Open the PDF Setup dialog box Esc o d p
To Use this shortcut
Display the Suppress Automatic Reference Updating dialog box Esc e Shift+s
To choose this tool Use this shortcut
Arc Esc one a
Graphic Frame Esc one m
Freehand Esc one f
Last tool selected Esc one one
Line Esc one l (lowercase L)
Object Selection Esc one o
Oval Esc one e
Polygon Esc one p g
Polyline Esc one p l (lowercase L)
Rectangle Esc one r
Rounded Rectangle Esc one Shift+r

ADOBE FRAMEMAKER 8
User Guide
757
Tool usage
Fill patterns
“First,” “last,” “next,” and “previous” refer to positions in the Fill pop-up menu in the small Tools palette, and in the
Fill area in the large Tools palette.
Smart Selection Esc one s
Text Frame Esc one t f
Text Line Esc one t l (lowercase L)
To draw Use this shortcut
Vertical, horizontal, or diagonal line Press and draw a line
Square Press and draw a rectangle
Circle Press and draw an oval
Circular arc Press and draw an arc
To draw Use this shortcut
Vertical, horizontal, or diagonal line Press and draw a line
Square Press and draw a rectangle
Circle Press and draw an oval
Circular arc Press and draw an arc
To Use this shortcut
Display the Tools palette Esc one w, Esc g Shift+t
Keep a tool active after use Press and click a drawing tool
Return to the Object Selection tool after drawing Press and click the Object Selection tool
To Use this shortcut
Display the Tools palette Esc one w, Esc g Shift+t
Keep a tool active after use Press and click a drawing tool
Return to the Object Selection tool after drawing Press and click the Object Selection tool
To change pattern to Use this shortcut
First fill pattern (solid) Esc zero f
Last fill pattern (none) Esc 9 f
Next fill pattern (if at the last pattern, this does nothing) Esc plus f
Previous fill pattern (if at the first pattern, this does nothing) Esc minus f

ADOBE FRAMEMAKER 8
User Guide
758
Pen patterns
“First,” “last,” “next,” and “previous” refer to positions in the Pen pop-up menu in the small Tools palette, and in
the Pen area in the large Tools palette.
Line widths
“Next” and “previous” refer to positions in the Line Widths pop-up menu in the small Tools palette, and in the Line
Widths area in the large Tools palette.
Line styles
To change an object’s line style, select the style from the Line Styles pop-up menu in the small Tools palette, or the
Line Styles area in the large Tools palette.
To change the current dashed line style, choose a pattern in the Dashed Line Options dialog box. “First,” “last,”
“next,” and “previous” refer to positions in this dialog box.
To change pattern to Use this shortcut
First pen pattern (Solid) Esc zero p
Last pen pattern (none) Esc 9 p
Next pen pattern (if at the last pattern, this does nothing) Esc plus p
Previous pen pattern (if at the first pattern, this does nothing) Esc minus p
To change width to Use this shortcut
Thinnest line width Esc zero w
Thickest line width Esc 9 w
Next line width (if at the last line width, this does nothing) Esc plus w
Previous line width (if at the first line width, this does nothing) Esc minus w
To Use this shortcut
Apply the solid line style to an object Esc one d s
Apply the dashed line style to an object Esc one d d
Display the Dashed Line Options dialog box Esc one d i
Change to the first dashed line pattern Esc zero d
Change to the last dashed line pattern Esc 9 d
Change to the next dashed line pattern(if at the last pattern, this does
nothing)
Esc plus d
Change to the previous dashed line pattern (if at the first pattern, this
does nothing)
Esc minus d

ADOBE FRAMEMAKER 8
User Guide
759
Object selection
Use these shortcuts to select objects on the current page.
Object manipulation
To Use this shortcut
Select a text line or text frame Press Control and click a text line or text frame
Extend or shorten the selection Press and click an object
Force selection border to appear (when dragging from outside all
objects is not possible)
Press Control+ and drag diagonally
Select the first object in the draw order Esc o Shift+f
Select the next object in the draw order Esc o n
Extend the selection to the next object in the draw order Esc o e
Deselect a text frame or text line and put the insertion point inside it
instead
Double-click in the text frame or text line
To Use this shortcut
Move an object horizontally or vertically Press and drag the object
Maintain an object’s proportions while resizing Press and drag a corner handle
Display the properties of the currently selected object in the Tools
palette
Press Esc g Shift+o or press and choose Pick up Object Proper-
ties from the Graphics menu
Display the reshape handle and control points for the line, polyline,
polygon, or freehand curve currently selected
Esc g r
Move the control point horizontally or vertically Press and drag the control point
Change the curve on only one side of a reshape handle (crimp curve) Press Control and drag the control point
Run text around the contour of a selected graphic Esc g w
Run text around the bounding box of a selected graphic Esc g Shift+w
Turn text runaround off for a selected graphic Esc g q
Quick-copy the selected object Press Control and drag the object with the middle mouse
button
Turn display of graphics off or on Esc v v
Add a reshape handle and control points Middle-click a line, polyline, polygon, or freehand curve with
reshape handles and control points currently displayed
Delete a reshape handle Middle-click the reshape handle

ADOBE FRAMEMAKER 8
User Guide
760
Object alignment
If only one object is selected, the object is aligned to the page or to the anchored or graphic frame that encloses
the object.
Object rotation
Graphic frames
To align objects along Use this shortcut
Tops Esc j t
Top/bottom centers Esc j m
Bottoms Esc j b
Left sides Esc j l (lowercase L)
Left/right centers Esc j c
Right sides Esc j r
To Use this shortcut
Rotate 90 degrees clockwise Esc g plus
Rotate 90 degrees counterclockwise Esc g minus
Rotate precisely using the Rotate Selected Objects dialog box Esc g t
Rotate again Esc g x
Return object to its unrotated orientation (0 degrees) Esc g zero
Return object from its unrotated orientation to its previous
orientation
Esc g one
Set the current orientation of an object as the new unrotated
orientation
Esc g 9
Rotate an object arbitrarily Press Control and use the right mouse button to drag a corner
or reshape handle
Constrain rotation to 45-degree increments Press Control+ and use the right mouse button to drag a corner
or reshape handle
Rotate a page clockwise Esc p Shift+o
Rotate a page counterclockwise Esc p o
Unrotate a page Esc p Shift+u
To Use this shortcut
Shrink-wrap an anchored frame (shrink the frame to an object and
position the frame at the insertion point)
Esc m p
Unwrap an anchored frame (enlarge the frame) Esc m e
Rename a selected reference frame Click frame name in status bar

ADOBE FRAMEMAKER 8
User Guide
761
Graphic insets
Markers and variables
Marker insertion
Variable insertion
Filter By Attribute
Track Text Edit
To Use this shortcut
Edit a graphic inset Double-click the inset
To Use this shortcut
Insert a marker Esc m k
Open the Edit Marker Types dialog box Esc e m t
To Use this shortcut
Insert a variable by typing the first characters of its name and
pressing Return
Esc q v, Control+zero
To Use this shortcut
Open the Manage Attribute Expressions dialog box Esc a c
To Use this shortcut
Turn on or off the Track Text Edit feature Esc s t o
Show Next Text Edit Esc s t n
Show Previous Text Edit Esc s t p
Accept Edit Esc s t a
Reject Edit Esc s t r
Accept All Esc s t Shift+a
Reject All Esc s t Shift+r
Preview Final Esc s t Shift+f
Preview Original Esc s t Shift+o
Preview Off Esc s p o

ADOBE FRAMEMAKER 8
User Guide
762
Conditional text display
Conditional text window
To use these shortcuts, point or click in the Conditional Text window.
Condition tag settings
Use these shortcuts to change the condition tag settings of selected text or table rows.
Equations
Equations pop-up menu
To Use this shortcut
Display the Show/Hide Conditional Text dialog box Esc v Shift+c
Turn condition indicators on or off Esc v Shift+o
Select all text around the insertion point that has the same condition
tag settings
Esc h Shift+c
To Use this shortcut
Move all condition tags to the As Is scroll list Shift+F8
Change the scroll lists to match the condition tag settings of selected
text
Control+Shift+F8, Shift+F9
Move a condition tag between the In and Not In scroll lists Double-click the tag
Move a condition tag from the As Is to the In scroll list Double-click the tag in the As Is scroll list
To Use this shortcut
Apply a condition tag to selected text by typing the first characters
of the tag and pressing Return
Esc q Shift+c, Control+4
Remove a condition tag from selected text by typing the first charac-
ters of the tag and pressing Return
Esc q Shift+d, Control+5
Make selected text unconditional Esc q Shift+u,Control+6
Command Shortcut
New Small Equation Esc m s
New Medium Equation Esc m m
New Large Equation Esc m l (lowercase L)
Shrink-Wrap Equation Esc m p
Unwrap Equation Esc m e
Equation Sizes Esc p e
Equation Fonts Esc m f

ADOBE FRAMEMAKER 8
User Guide
763
Symbols page
Greek letters
Press Return to end the backslash sequence shown in the third column.
Insert Math Element Esc m i
Add Definition to Catalog Esc m c
Update Definition Esc m Shift+u
Element Backslash sequence
\alpha
\beta
\Gamma
\gamma
\Delta
\delta
\epsilon
\zeta
\eta
\Theta
\theta
\vartheta
\iota
\kappa
\Lambda
\lambda
\mu
\nu
\Xi
\xi
\Pi
\pi
\rho
Command Shortcut
α
β
Γ
γ
∆
δ
ε
ζ
η
Θ
θ
ϑ
ι
κ
Λ
λ
µ
ν
Ξ
ξ
Π
π
ρ

ADOBE FRAMEMAKER 8
User Guide
764
Other special symbols
Press Return to end the backslash sequence shown in the third column.
\Sigma
\sigma
\varsigma
\tau
\Upsilon
\upsilon
\Phi
\phi
\varphi
\chi
\Psi
\psi
\Omega
\omega
\varpi
\cpartial
Element Backslash sequence
\infty
\bot
... \ldots
\aleph
\Im
\Re
\wp
\emptyset
\nabla
\degree
‘ \prime
“ \pprime
Σ
σ
ς
τ
ϒ
υ
Φ
φ
ϕ
χ
Ψ
ψ
Ω
ω
ω
∂
α
β
ℵ
ℑ
ℜ
℘
∅
∇
ADOBE FRAMEMAKER 8
User Guide
765
Strings
Diacritical marks
Operators page
Element Shortcut
Start String ' or "
End String Return
Element Shortcut
` (grave)
~ (tilde)
period
Element or command Shortcut Backslash sequence
+plus\plus
_ minus (after an operand)
?x? Control+Shift+* (asterisk) \cross
Control+period \cdot
Control+8 \bullet
Toggle Format Control+Shift+t, Esc m Shift+t
NA \fract
Control+m / \div
/\over
?=? =\equal
Control+= \uequal
Control+j \jotdot
?,? comma \comma
Control+q Shift+d \otimes
Control+q Shift+e \oplus
Control+q Shift+y \wedge
Control+q Shift+z \vee
Control+m i \cap
Control+m u \cup
Control+comma \ucomma
x'
x
˜
x
·

ADOBE FRAMEMAKER 8
User Guide
766
; (semicolon) \semicolon
Control+m n \neg
-Control+hyphen \minus
Control+m one \mp
Control+q one \pm
Control+q Shift+q \grad
Control+q Shift+q (and add operand)
Control+m Control+d \change
Control+m x \box
Control+m o \boxdot
Control+m 2 \box2
Control+m a \forall
Control+m e \exist
Control+m t \therefore
Control+a, Esc m v l (lowercase L) \atop
Control+; (semicolon), Esc m h l (lowercase L) \list
* (asterisk) \times
Control+| (bar) \abs
Control+^
Control+_ (underline)
Control+m Control+^
Control+m Control+_ (underline)
Control+s \sqrt
Control+s (and add operand)
Control+Shift+e \sn
^ \power
Control+m d \dagger
! \fact
Control+m s \ast
Control+q Shift+p \angle

ADOBE FRAMEMAKER 8
User Guide
767
Large page
Press Return to end the backslash sequence shown in the third column.
Use these shortcuts to type each element on the Large page with only one operand. Then use Add Operand and
Toggle Format as needed.
Delimiters page
Press Return to end the backslash sequence shown in the third column.
Element or command Shortcut Backslash sequence
?Control+Shift+s \sum
?Control+Shift+p \prod
?Control+i \int
?NA \oint
?Control+m Shift+i \bigcap
?Control+m Shift+u \bigcup
Add Operand Control+Shift+n, Esc m n
Toggle Format Control+Shift+, Esc m Shift+t
Element or command Shortcut Backslash sequence
( ? ) (\id
[ ? ] [ (left bracket)
? } { (left brace)
? | | (bar) \substitution
< ? > Control+m <\dangle
|?| Control+g | (bar) \abs
( ? Control+m ( \lparen
[ ? Control+m [ (left bracket)
{ ? Control+m { (left brace)
? | | (bar) (and add operand)
|? > Control+m k \ket
||?|| Control+m | (bar) \norm
? ) )\rparen
? ] ] (right bracket)
? } } (right brace)
? | | (bar) (and add two operands)
∑
∏
∫
∫
°
∩
∪
ADOBE FRAMEMAKER 8
User Guide
768
Relations page
Press Return to end the backslash sequence shown in the third column.
< ? | Control+m b \bra
Control+q i \ceil
( ?, ? ) Control+m Shift+n \inprod
[ ?, ? ] Control+m Shift+c \cmut
{ ?, ? } Control+m Shift+a \acmut
?_ (underline) \overline
< ? | ?> Control+m Shift+b \bket
Control+q k \floor
() Control+m h \choice
} ?Control+m Shift+d \downbrace
? Control+m Shift+p \upbrace
Toggle Format Control+Shift+t, Esc m T
Remove Parentheses Esc m r p
Element Shortcut Backslash sequence
? < ? <\lessthan
? > ? >\greaterthan
? = ? =\equal
? ~ ? Control+m ~ (tilde) \sim
? ? Control+q Shift+l (L) \subset
? ? Control+q Shift+i \supset
? ? Control+q comma \leftarrow
? ? Control+q period \rightarrow
? ? Control+q plus \lrarrow
? ? Control+m r \perp
? ? Control+g <\leq
? ? Control+g >\geq
? ? Control+q : (colon) \equiv
? ? Control+q ; (semicolon) \approx
?
?
⊂
⊃
←
→
↔
⊥
≤
≥
≡
≈

ADOBE FRAMEMAKER 8
User Guide
769
Calculus page
Press Return to end the backslash sequence shown in the third column.
Use these shortcuts to type each element on the Large page with only one operand. Then use Add Operand and
Toggle Format as needed.
? ? Control+q Shift+j \subseteq
? ? Control+q Shift+m \supseteq
? ? Control+q \ \Leftarrow
? ? Control+q ^ \Rightarrow
? ? Control+q [ (left bracket) \LRarrow
? ? Control+m p \parallel
? ? Control+q l (lowercase L) \ll
? ? Control+q g \gg
? ? Control+q = \notequal
? ? @\cong
? ? Control+q Shift+n \in
? ? Control+' \ni
? ? Control+q Shift+o
= ? Control+g = \uequal
? ? Control+q Shift+k \notsubset
? ? Control+q 5 \propto
Element or command Shortcut Backslash sequence
? Control+i \int
Control+Shift+i \oint
Add Operand Control+Shift+n, Esc m n
Toggle Format Control+Shift+t, Esc m T
Control+g t \optotal
Control+g Shift+t
Element Shortcut Backslash sequence
⊆
⊇
⇐
⇒
⇔
||
«
»
≠
≅
∈
∋
∉
⊄
∝
∫
∫
°
ADOBE FRAMEMAKER 8
User Guide
770
Matrices page
To insert a matrix of any size, first insert a 1 by 1 matrix. Then add rows and columns one at a time.
Control+g p \oppartial
Control+g Shift+p
Control+g t (and add
operand)
Control+g Shift+t (and add operand)
Control+g p (and add operand)
Control+g Shift+p (and add operand)
Control+Alt+d \var
Control+q Shift+q \grad
d ? Control+d \diff
Control+m c \curl
Control+Shift+d \partial
Control+m v \diver
Control+Shift+l (L) \lim
Control+m l (lowercase L) \lap
Command Shortcut
Add/Remove Brackets Control+Shift+t
Element or command Shortcut Backslash sequence
ADOBE FRAMEMAKER 8
User Guide
771
Matrix Commands pop-up menu
Matrix Row Height pop-up menu
Matrix Column Width pop-up menu
Functions page
To insert each function (except the general function and limit) from the keyboard, type its name as shown.
Addition pop-up menu
Multiplication pop-up menu
Command Shortcut
Create 1 x 1 Matrix Esc x m, Control+x Control+x,
Add Row Esc x r
Add Column Esc x c, Control+Shift+c
Matrix Transpose Esc x t
Matrix Algebra Esc x a
Command Shortcut
Toggle fixed/proportional Esc m t r
Command Shortcut
Toggle fixed/proportional Esc m t c
Element Shortcut Backslash sequence
? (?) Control+f \function
Control+Shift+l (L) \lim
Command Shortcut
Add Fractions Esc m a a
Order Sum Esc m a o
Order Sum Reverse Esc m a Shift+o
Command Shortcut
Factor Esc m u f
Factor Some Esc m u Shift+f
Multiply Out Esc m u m
Multiply Out Once Esc m u Shift+m
Distribute Esc m u d
Distribute Over Equality Esc m u Shift+d

ADOBE FRAMEMAKER 8
User Guide
772
Division pop-up menu
Evaluation pop-up menu
Rules pop-up menu
Other Rewrites pop-up menu
Command Shortcut
Long Division Esc m d l (lowercase L)
Remove Division Esc m d d
Remove Division 1 Level Esc m d
Remove Negative Powers Esc m d n
Remove Negative Powers 1 Level Esc m d Shift+n
Command Shortcut
Number Crunch Esc m v n
Show All Digits Esc m v period
Evaluate Esc m v e
Evaluate Substitution Esc m v s
Evaluate Integrals Esc m v i
Evaluate Derivatives Esc m v d
Evaluate Derivatives 1 Level Esc m v Shift+d
Command Shortcut
Enter Rule Esc m r e
Apply Rule Esc m r a
Designate Dummy Esc m r d
Command Shortcut
Simplify Esc m o s
Simplify Some Esc m o Shift+s
Isolate Term Esc m o i
Expand First Term Esc m o e
Expand All Terms Esc m o Shift+e

ADOBE FRAMEMAKER 8
User Guide
773
Micropositioning
The number of points shown in the following table is based on a zoom setting of 100 percent.
Left/Right (Alignment) pop-up menu
Up/Down (Alignment) pop-up menu
Line Breaking pop-up menu
To Use this shortcut
Move up 1 point Control+up arrow
Move down 1 point Control+down arrow
Move left 1 point Control+left arrow
Move right 1 point Control+right arrow
Move up 6 points Control+Shift+up arrow
Move down 6 points Control+Shift+down arrow
Move left 6 points Control+Shift+left arrow
Move right 6 points Control+Shift+right arrow
Remove micropositioning Control+Home
Command Shortcut
Left Esc m a l (lowercase L)
Center Esc m a c
Right Esc m a r
Left of = Esc m a plus
Right of = Esc m a =
Set Manual Esc m a s
Clear Manual Esc m a d
Reset Alignment Esc m a Shift+r
Command Shortcut
Top Esc m a t
Baseline Esc m a Shift+b
Bottom Esc m a b
Command Shortcut
Set Manual Esc m b s
Clear Manual Esc m b c

ADOBE FRAMEMAKER 8
User Guide
774
Moving the insertion point
Changing the selection
Moving math elements while retaining algebraic equivalency
Moving math elements without retaining algebraic equivalency
To move Use this shortcut
Left left arrow
Right right arrow
From beside a fraction to the numerator down arrow
To Use this shortcut
Select next prompt Tab
Increase scope of selection space
Select next element to the left left arrow
Select next element to the right right arrow
To move Use this shortcut
Left Shift+left arrow
Right Shift+right arrow
Up Shift+up arrow
Down Shift+down arrow
To far left Control+m Control+Shift+l (lowercase L)
To far right Control+m Control+; (semicolon)
Left into expression Control+m Control+i
Right into expression Control+m Control+o
To swap Use this shortcut
With element on left Control+m Control+left arrow
With element on right Control+m Control+

ADOBE FRAMEMAKER 8
User Guide
775
Shortcuts for specific keyboards
Hewlett-Packard shortcuts
Redisplaying the page: To refresh a page’s display, press Clear display.
Moving the insertion point: To move the insertion point to the beginning of a line, press .
Moving within a document
Editing text
Note: *Does not put text on the Clipboard.
To move to the Use this shortcut
First page Shift+Page Up
Last page Shift+Page Down
Next page Press Page Down
Previous page Press Page Up
To Use this shortcut
Remove kerning Press Ctrl+Shift
To delete Use this shortcut
An entire line* Press Clear line
The next character* Press Delete char
The previous character* Shift+Delete char
Backward to start of current or previous word Control+Shift+Delete char
Backward to the start of a line Shift+Delete line
Backward to the start of a sentence Control+Shift+Delete line
Forward to the start of current or previous word Control+Delete char
Forward to the start of a line Press Delete line
Forward to the start of a sentence Control+Delete line

ADOBE FRAMEMAKER 8
User Guide
776
Sun shortcuts
Left keypad
The following table lists assignments for the keys on the left keypad.
Numeric right keypad
The following table lists assignments for keys on the numeric right keypad.
If you’re running the X/Motif® version of FrameMaker under Open Windows, you can turn on Num Lock to type
the numbers shown on the keys instead of performing the keyboard shortcut.
IBM shortcuts
Keys
The key referred to as Return is the key labeled Enter on the alphanumeric keypad.
Moving the insertion point
Key Function Function when used with Shift
L3 (Props) Displays Paragraph Designer
L4 (Undo) Undoes the last command
L5 (Front) Exposes the current window Hides the current window
L6 (Copy) Copies selection to the Clipboard
L8 (Paste) Pastes the contents of Clipboard
L9 (Find) Finds the next occurrence
L10 (Cut) Cuts the current selection and puts it on the Clipboard
Key Function Function when used with Shift
7 (Home) Moves the insertion point to the start of a line Moves the insertion point to the top of a column
9 (PgUp) Displays the previous page Displays the first page
5 Removes manual kerning of selected text
1 (End) Moves the insertion point to the end of a line Moves the insertion point to the bottom of a
column
3 (PgDn) Displays the next page Displays the last page
To move to the Use this shortcut
Top of a column Shift+Home
Bottom of a column Shift+End
Start of a line Press Home
End of a line Press End

ADOBE FRAMEMAKER 8
User Guide
777
Editing text
Selecting text
Printing
Tables
Selection in tables
To Use this shortcut
Delete the previous character Press Delete
Cut text and put it on the Clipboard Shift+Delete
Paste from the Clipboard Shift+Insert
To select Use this shortcut
The character to the right of the insertion point Shift+right arrow
The character to the left of the insertion point Shift+left arrow
One line width of text, starting at the insertion point Shift+down arrow
One line width of text, ending at the insertion point Shift+up arrow
To print the Use this shortcut
Current document Press Print Screen
To select Use this shortcut
A cell Control and click the cell
A row Control and double-click column (vertical) border in the row
A column Control and double-click row (horizontal) border in the row
All text in current cell Esc t h a
Current cell, then next Esc t h e
Current row, then next Esc t h r
Current column, then next Esc t h c
Body cells in current column, then next Esc t h b
Current table Esc t h t, or press Control and triple-click a cell
To Use this shortcut
Extend or shorten the selection Control+ Shift and click the last cell you want in the selection
ADOBE FRAMEMAKER 8
User Guide
778
Movement in tables
Use these shortcuts to move to the indicated cell.
Tab characters in cells
Row and column manipulation
FrameMaker adds or deletes as many rows or columns as are currently selected.
To move to the Use this shortcut
Cell to the right Esc t m r
Cell to the left Esc t m l (lowercase L)
Cell below Esc t m d
Cell above Esc t m u
Rightmost cell in the current row Esc t m e
Leftmost cell in the current row Esc t m a
Top cell in the current column Esc t m t
Bottom cell in the current column Esc t m b
Top-left selected cell Esc t m s, Esc t h zero
Top-left cell Esc t m T
Next cell and select all text in cell Tab, Esc t m n
Previous cell and select all text in cell Shift+Tab, Esc t m p
Anchor point of a table Esc t Shift+i
To Use this shortcut
Type a tab character in a cell Esc Tab, Control+i
To Use this shortcut
Add rows above top selected row Esc t Shift+r a
Add rows below bottom selected row Esc t Shift+r b, Control+Return
Add columns to left of leftmost selected column Esc t c l (lowercase L)
Add columns to right of rightmost selected column Esc t c r
Delete contents of selected rows or columns, but leave cells in table Esc t c e
Delete selected rows or columns from table Esc t c x
Sort rows and columns Esc t s
Resize Columns Esc t z
Straddle/Unstraddle Esc t l (lowercase L)
ADOBE FRAMEMAKER 8
User Guide
779
Row and column replacement
If the Clipboard doesn’t contain whole rows or columns, these shortcuts always replace the selected cells.
Vertical Alignment in Cells
Column width
Table Designer
To use these shortcuts, point or click in the Table Designer.
To paste whole rows or columns Use this shortcut
By replacing selected rows or columns Esc t p r
Before current selection (above top selected row or to left of leftmost
selected column)
Esc t p b
After current selection (below bottom selected row or to right of
rightmost selected column)
Esc t p a
To acheive Use this shortcut
Top alignment Esc j t
Middle alignment Esc j m
Bottom alignment Esc j b
To resize Use this shortcut
Columns so no paragraphs in selected cells wrap Esc t w
Selected column without changing table’s width Press and drag selected cell’s handle
To Use this shortcut
Change all settings to As Is Shift+F8
Change all settings to match the selected table Control+Shift+F8, Shift+F9
Display previous page of properties Esc p p, F6
Display next page of properties Esc p n, Control+v, F7
Apply only the current group of properties Press Control and click Apply

ADOBE FRAMEMAKER 8
User Guide
780
Table formats
StructureTools
To Use this shortcut
Apply the current table’s format to the catalog and to all tables that
have the same tag
Esc t u t
Display the Edit Ruling Style dialog box Esc t e
To choose Use this shortcut
Set Structured Application Esc f Shift+a
Convert Structured Documents Esc f t s
Convert Documents to Structured Format Esc f t d
Structure Current Document Esc f t Shift+c
Structure Documents Esc f t Shift+d
New EDD Esc f Shift+d Shift+n
Export Element Catalog as EDD Esc f Shift+d Shift+x
Import CSS Styles Esc f Shift+d Shift+j
Show Element context Esc f Shift+d Shift+e
Open DTD Esc f Shift+d Shift+o
Import DTD Esc f Shift+d Shift+m
Save as DTD Esc f Shift+d Shift+s
Open Schema Esc f Shift+d Shift+y
Import Schema Esc f Shift+d Shift+z
Edit Application Definitions Esc f Shift+d Shift+a
Read Application Definitions Esc f Shift+d Shift+r
New Read/Write Rules Esc f Shift+d Shift+w
Check Read/Write Rules Esc f Shift+d Shift+c
Parse Structured Document Esc f Shift+d Shift+p
Generate Conversion Table Esc f Shift+d Shift+g
Generate CSS2 Esc f Shift+d Shift+h

ADOBE FRAMEMAKER 8
User Guide
781
Text
Insertion point movement
Use these shortcuts to move the insertion point. Many of these shortcuts are based on Emacs commands.
Insertion point placement
Use these shortcuts to put the insertion point in an unrotated text frame on the current page. The draw order is the
order in which FrameMaker displays objects on a page; the first object in the draw order is the one at the back.
To move to Use this shortcut
Next character right arrow, Control+f
Previous character left arrow, Control+b
Beginning of the next word Esc b w
Beginning of a line Control+a
End of a line Control+e
Previous line up arrow, Control+p
Next line down arrow, Control+n
Beginning of the next sentence Esc b s
Beginning of the next paragraph Esc b p
Top of a column Shift+Home
Bottom of a column Shift+End
Start of first visible text flow Control+Tab
To put the insertion point in Use this shortcut
First column of the first text frame in the draw order Esc b f
Next column, traversing text frames in the draw order Esc b n

ADOBE FRAMEMAKER 8
User Guide
782
Text selection
Click in text before using these shortcuts. If you use a shortcut with text already selected, FrameMaker extends
the selection.
To select Use this shortcut
Next character Esc h c, Esc Shift+h c, Control+Shift+f, Shift+right arrow
Previous character Esc Shift+h Shift+c, Control+Shift+b, Shift+left arrow
Current word, then next word Esc h w, Esc Shift+h w
Current word, then previous word Esc Shift+h Shift+w
Current sentence, then next sentence Esc h s, Esc Shift+h s
Current sentence, then previous sentence Esc Shift+h Shift+s
Current line, then next line Esc h l (lowercase L), Esc Shift+h l (lowercase L)
Current line, then previous line Esc Shift+h Shift+l (L)
Current paragraph, then next paragraph Esc h p, Esc Shift+h p
Current paragraph, then previous paragraph Esc Shift+h Shift+p
One line width of text, starting at insertion point Esc h d, Control+Shift+n, Shift+down arrow
One line width of text, ending at insertion point Esc h u, Control+Shift+p, Shift+up arrow
To top of a column Esc h t
To bottom of a column Esc h m
To beginning of flow Esc h g
To end of flow Esc h n
All text around the insertion point that has the same character
format
Esc h Shift+f
To Shift select Use this shortcut
Right one character Esc h f
Left one character Esc h b
To Use this shortcut
Extend or shorten a text selection Press and click where you want the selection to begin or end
Remove highlighting Esc h zero
Select a word Double-click the word
Select a word, then next words Double-click the word and then drag
Deselect a text line or text frame and place the insertion point in it Double-click in the text line or text frame
ADOBE FRAMEMAKER 8
User Guide
783
Text editing
Asian text
Text deletion
Capitalization
Use these shortcuts to change the capitalization of selected text.
To Use this shortcut
Select a paragraph Triple-click the paragraph
Select a paragraph, then next paragraphs Triple-click the paragraph and then drag
Transpose characters Control+t
Cut Esc e x, Control+w, Shift+Delete
Copy Esc e c
Paste Esc e p
Create a paragraph below the insertion point without moving the
insertion point
Control+o
End a paragraph Return, Control+m
To Use this shortcut
Type rubi text Esc s r
Display the Rubi Properties dialog box Esc o r
Define a combined font of Western and Asian characters (only avail-
able on Asian operating systems)
Esc o c o
To delete Use this shortcut
Previous character Control+h, Delete, Backspace
Backward to the start of the previous word Esc k b
Backward to the start of a line Control+u, Control+Backspace, Control+Delete
Backward to the end of the previous sentence Esc k a
Next character Control+d
Forward to the end of a word Esc k f
Forward to the end of a line Control+k
Forward to the start of the next sentence Esc k s
To Use this shortcut
Display the Capitalization dialog box Esc e Shift+c

ADOBE FRAMEMAKER 8
User Guide
784
Text formats
Character and Paragraph Designers
Paragraph formats
Use these shortcuts to format selected paragraphs or the paragraph containing the insertion point.
To Use this shortcut
Change all settings to As Is Shift+F8
Change all settings to match selected text Control+Shift+F8, Shift+F9
Display the previous set of properties Esc p p, F6
Display the next set of properties Esc p n, F7, Control+v
Apply only the current group of properties Press Control and click Apply
To Use this shortcut
Apply a paragraph format by typing the first characters of its tag and
pressing Return
Esc q p, F9, Control+9
Center a paragraph Esc j c
Left-align a paragraph Esc j l (lowercase L)
Right-align a paragraph Esc j r
Justify a paragraph (left and right) Esc j f
Position the current paragraph in the column, removing any strad-
dling or run-in formatting
Esc j p n
Change the current paragraph to a run-in head Esc j p r
Change the current paragraph to a side head Esc j p s
Make the current paragraph straddle all columns Esc j p t
Make the current paragraph straddle both the side-head area and
columns
Esc j p Shift+t
Change line spacing to single spacing Esc j one
Change line spacing to 1-1/2 spacing Esc j /
Change line spacing to double spacing Esc j 2
Change line spacing to fixed (default font size plus line spacing) Esc j x
Change line spacing to floating (largest font size plus line spacing) Esc j o
Increase line spacing 1 point Esc j plus, Esc plus one
Decrease line spacing 1 point Esc j minus, Esc minus one
Make paragraphs with the current paragraph’s tag and the
Paragraph Catalog definition match the current paragraph’s
format (unify)
Esc j Shift+u
Start a paragraph anywhere Esc j Shift+a
Start a paragraph at the top of a column Esc j Shift+c

ADOBE FRAMEMAKER 8
User Guide
785
Character formats
Use these shortcuts to change the character format of selected text or of text you are about to type.
Start a paragraph at the top of a page Esc j Shift+p
Start a paragraph at the top of a left page Esc j Shift+L
Start a paragraph at the top of a right page Esc j Shift+r
Turn on hyphenation Esc j h
Turn off hyphenation Esc j n
Repeat last paragraph-related command Esc j j
To display the Use this shortcut
Paragraph Catalog Esc o p c
Update Paragraph Format dialog box Esc o p u
Space between Paragraphs dialog box Esc j w
Custom Line Spacing dialog box Esc j u
To Use this shortcut
Apply a character format by typing the first characters of its tag and
pressing Return
Esc q c, F8, Control+8
Change text to default paragraph font; remove character tag from
text in a text line
Esc o c p
Turn bold on or off Esc c b, Shift+F2
Turn italic on or off Esc c i, Shift+F3
Turn underline on or off Esc c u, Shift+F4
Turn double underline on or off Esc c d
Turn numeric underline on or off Esc c 2
Turn strikethrough on or off Esc c s, Shift+F5
Turn overline on or off Esc c o
Change text to plain Esc c p, Shift+F1
Turn superscript on or off Esc c plus
Turn subscript on or off Esc c minus
Put text on baseline Esc c =
Change text to small caps Esc c m
Turn change bars on or off Esc c h
Turn pair kerning on or off Esc c k
To Use this shortcut

ADOBE FRAMEMAKER 8
User Guide
786
Working with structure
Manually kern text 1 point in specified direction (at 100 percent
zoom setting)
Control+arrow key
Manually kern text 6 points in specified direction (at 100 percent
zoom setting)
Control+Shift+arrow key
Remove all manual kerning Control+z, Control+Shift+z
Increase size 1 point Esc c ] (right square bracket)
Decrease size 1 point Esc c [ (left square bracket)
Squeeze 20 percent of an em space Esc c left arrow, Esc [ (left square bracket) Shift+d
Spread 20 percent of an em space Esc c right arrow, Esc [ (left square bracket) Shift+c
Set font stretch to 100 percent Esc [ (left square bracket) n
Reduce font stretch by 5 percent Esc [ (left square bracket) c
Increase font stretch by 5 percent Esc [ (left square bracket) e
Repeat the last font-related command Esc c c
Toggle Tsume (Japanese only) Esc c t
Display the Character Catalog Esc o c c
To move the insertion point Press
To start of the current element Esc s Shift+s
To end of the current element Esc s Shift+e
After the next element Esc s Shift+d
Before the previous element Esc s Shift+u
Before the current element’s parent Esc s Shift+b
To start of the next element’s contents Esc s Shift+n
To select Press
Current element Esc h Shift+e
Next element Esc h Shift+n
Previous element Esc h Shift+p
Siblings of the current element Esc h Shift+s
Parent of the current element Esc h e Shift+p
To Use this shortcut

ADOBE FRAMEMAKER 8
User Guide
787
To Press
Insert element Esc Shift+e i, Control+1 (one)
Wrap element Esc Shift+e w, Control+2
Unwrap element Esc Shift+e u
Change element Esc Shift+e c, Control+3
Merge into first element Esc Shift+e m
Merge into last element Esc Shift+e Shift+m
Move element up one level Esc Shift+e Shift+p
Move element down one level Esc Shift+e Shift+d
Transpose element with previous element Esc Shift+e Shift+t
Transpose element with next element Esc Shift+e t
Split element Esc Shift+e s
Edit attribute value Control+7
Repeat last Element Catalog command Esc e e
Toggle display of element boundaries (as brackets) Esc v Shift+e
Toggle display of element boundaries (as tags) Esc v Shift+t
Validate a document Esc Shift+e v
Display Structure View Esc Shift+e Shift+v

788
Index
Numerics
3D files
disabling embedding in PDFs 581
enabling embedding in PDFs 581
3D objects
configuring 526
importing into FrameMaker
documents 524
integrating into FrameMaker
documents 524
saving in FrameMaker
documents 525
setting background color 526
setting lighting schemes 526
setting views 526
A
abandoning changes 25
about
color 364
DITA 642
DITA in FrameMaker 8 653
DITA maps 648
filters by attribute 286
importing files into
FrameMaker 501
integrating 3D objects in
FrameMaker documents 524
revision management 482
table of contents 418
the UNIX version of
FrameMaker 625
the workspace 5
tracking text edits 487
about CSS
in FrameMaker 622
absolute pathnames for imported
files 508
absolute tab stops 72
accent marks
index sort order for 450
accepting
text edits 489
accessibility
and screen readers 638
authoring for 638
custom color scheme 639
features in FrameMaker 638
high-contrast options 639
testing in tagged PDF
documents 640
activating
software 1
Active paragraph tag in generated
files 550
Add Fractions command 271
adding
attribute values 46
background text to master
pages 379, 384
brackets ([]) around matrices in
equations 256
change bars 482
change bars in composite
documents 485
corners to objects 341
documents to book files 463
elements 34
elements to empty documents 35
footers to pages 384
handles to objects 341
headers to pages 384
items to lists of expressions in
equations 246
marker types 440
operands in equations 254
pages automatically 71
pages, blank, at ends of
documents 382
pages, disconnected 401
paragraph formats to Paragraph
Catalog 138
points on freehand curves 341
rows and columns to matrices in
equations 254
sides to objects 341
table formats to Table Catalog 185
table rows and columns 170, 197
table titles 160, 191
text columns 387
text frames 388
text to entries in generated lists and
indexes 447
vertices to polygons and
polylines 341
words from Thesaurus 95
words to personal or document
dictionary 87, 93
Addition commands for
equations 271
addition operators in equations 247
adjacent text columns
balancing text across 394
feathering text in 395
synchronizing text baselines in 396
Adobe
DITA adoption 643
Adobe help 2
resources 2
Adobe Illustrator, importing files 504
Adobe Labs 3
Alert hypertext commands 534, 543
algebra, matrix 270
aligning
cells in equation matrices 266
colors (registration) 371
equations 264
equations with text baselines 251
graphics 331
horizontal list items in
equations 265
in-line graphics 347
lines in multiline equations 265
numbers on decimal 113
objects 331
objects with ruler markings 311
page numbers in generated lists
and indexes 448
paragraphs within indents 112
rubi text 118
tab stops with ruler markings 114
table column borders to grid 172
tables 167
text at left, right, center 112
text at tab stops 113
text in adjacent columns 394
text in headers and footers 386
text line objects 332
text vertically in table cells 179

789
text with bottom of column 395
vertical list items in equations 265
alphabetic groups in indexes 451
alphabetic numbering style
autonumbering with 129
page numbering with 469
<$alphabetics> building block in
special text flow for indexes 443
alphanumeric characters in
equations 244, 245
AM or PM in system variables 233
ampersands (&), converting to
HTML 570
anchor symbols 8
anchored frame elements
(structured) 362
anchored frames
anchor symbol for
(structured) 361
and unanchored graphic frames,
compared 322
changing settings of 359
conditional 303
copying, cutting, and pasting 360
creating 346
cropping 349
cropping contents of 359
deleting 360
drawing properties of 359
editing 359
editing contents of, in rotated text
frames 359
equations in 285
equations in structured
documents 282
floating 349
for boilerplate graphics 407
full-width 350
graphics not moving with 359
HTML conversion and 557
importing graphics into 519
in multicolumn layouts 350
in run-in heads 348
in structured documents 361
in structured table cells 192
inserting elements for 362
introduction 345
moving 360
moving, into text column 353
paragraph formats for 412
paragraph spacing and 116
placing graphics in 358
placing, in table cells 161
positioning, at insertion point 347
positioning, at top corner of
paragraph 354
positioning, between/outside
columns 350
positioning, in margin 354
positioning, in text column 348
preparing for tagged PDF 360
relationship to other elements 361
repositioning 360
resizing 359
resizing, by shrinkwrapping and
unwrapping 251, 348
rotating tables in 175
running text around 354
searching for 76
selecting 358, 363
selecting (structured) 363
straddling columns with 350
symbol for 8
tagged PDF 360
text in 357
text in, obscuring 348
types of 322
angle brackets (<>)
converting, to HTML 570
in autonumber formats 129
in cross-reference formats 206
in index entries 428
in index entries (structured) 457
in special text flows for generated
lists and indexes 443
in variable definitions 231
angles
arc start and end 342
halftone 375
regular polygon start 315
rotation 337
ANSI encoding, saving files using 26
antonyms, looking up, in
Thesaurus 94
apostrophes (’) 73
app directory 650
AppleScript scripts, hypertext
command to start 545
application programs, hypertext
commands to start 544
applications
associated with DITA 655
Apply Rule command 279
applying
a filter 292
character formats 102
character formats globally 106
character formats to characters
with certain tags 106
colors 366
condition tags 303
flow tags 400
formats to text 102
master pages to body pages 388,
392
master pages to elements
(structured) 407
master pages to paragraph tags 392
no master page to body pages 392
paragraph default font to text 103
paragraph formats 102
paragraph formats globally 106
paragraph formats to paragraphs
with certain tags 106
Table Designer properties 165
table formats 166
Arabic numerals
autonumbering with 129
footnote numbering with 213
page numbering with 469
architecture
DITA 647
arcs
drawing 314
joining 335
reshaping 342
arrow pointer 316
arrowhead line ends
changing shape of 321
creating 319
arrowhead pointers, when dragging
elements 43, 44
art, clip 404, 407
articles, PDF 577
As Is property settings
in designers 106
in hypertext active areas 530
ASCII encoding, saving files using 26
ASCIITemplate file 415
assigning
ID to an element 663
asterisks (*)

790
as symbol for formats with
overrides 107
as wildcard for finding 79
finding literal 79
in status bar 24, 107, 140
numbering footnotes with 213
asymmetrical page layouts 383
atom math element type 257
attraction, object (gravity) 333
<$attribute> building block
in cross-reference formats 219
attribute display options
setting 666
attribute values
adding to existing elements 47
adding to new elements 39, 46
copying 48
default 46
editing 47
finding and changing 49
for ID attributes 218, 221
invalid 52, 56
missing required 52
removing 47
required or optional 46
attributes
finding and changing 49
ID and ID Reference 218
in Structure View 46
read-only 46, 222
removing undefined 49, 56
rules defining 46
types of 48
undefined 52
uses for 34
author indexes 420
.auto filename extension 23, 27
autoconnecting 400
autolevel in HTML mappings 562
automatic backup on save 27
automatic hyphenation 119
finding 76, 89
automatic letter spacing 116
automatic save 27
automatic spell-check correction 87
autonumbering 125
based on section numbers 131
bullet symbols in 128
chapters 471
character formats in 128, 129
examples of 131
figures 131
footnotes 213
HTML mappings for 561, 563, 567
in cross-references 206
in generated lists 445
in indexes 445
in outlines 131
in running headers and footers 235
in tables 180
in templates 411
Japanese 133
resetting 133
suppressing display of 130
volumes 471
<$autorange> building block in
special text flows for indexes 443
autosave files 23, 27
.avi files
embedding 512, 513
importing 510
axis, flipping objects around 336
B
back, sending objects to 331
background graphics on master
pages 379
background text frames
creating 385
modifying 385
background text frames (untagged)
adding, to master pages 384
creating headers and footers
with 384
defined 379
system variables in 228, 385
background, white text on dark
(reverse text) 325
backslashes (\)
finding literal 79
for typing special characters in
dialog boxes 677
in index entries 428
backup files 27
backward compatibility
FrameMaker 8 23
balancing text across columns 394
baseline quotes, typing, in dialog
boxes 678, 679
baselines, text
aligning equations with 251
aligning, in adjacent columns 396
anchoring frames on 347
offsets from, for superscripts and
subscripts 109
offsets from, for Western
characters in combined
fonts 110
side heads and 124
batch operations, fmbatch and 630
beginning of line, finding 80
beginning of paragraph or word,
finding 80
beginning position
for paragraphs 120
for tables 168
benefits
DITA 646
bitmaps, capturing 630
black
converting to white in bitmap 636
printing colors as 29
reversing, text to white 325
blank pages
adding or deleting, at ends of
documents 382
color separations and 375
containing no background text or
graphics 392
preventing from printing 29, 375
blank paper documents
creating 20
template for 414
finding
See also changing found items
body pages
adding new, automatically 71
adding new, disconnected 401
adding text frames on 388
applying master pages to 388
applying no master page to 392
deleting disconnected 401
displaying 384
layout overrides on 387
preventing from creating 400
rotating 390
text flows on 398
updating master pages with
changes to 388

791
updating, with master page
changes 388
body-text areas, side heads and 122
boilerplate graphics 404, 407
book building described 462
Book Error Log 475
.book filename extension 25
book files
adding files to 463, 476
adding metadata to 465
Book Error Log 475
chapter numbering 469
closing 467
closing all files in 467
comparing 474
converting, to HTML 572
creating 462, 476
cross-references to chapter
numbers in 471
defined 462
deleting files in 466
fmbatch and 630
generating files in 473, 477
importing element definitions
into 479
importing formats into 472, 481
introduction 462
master table of contents or index
for several 436
naming 476
numbering 468
opening files in 465
page count, showing total in 471
planning templates for files in 410
printing 467
problems with 475
rearranging files in 466
removing files from 466
removing inherited information
from 481
renaming 466, 476
renaming documents in 466, 477
saving 24, 466, 476
saving all files in 467
searching book documents 77
spell-checking multiple
documents 85
structure of 478
updating 473, 477
updating formats in 472
updating, with fmbatch 634
validating 480
volume numbering 469
Book format 25
book windows 465
BOOK-COMPONENT element tag
changing 478
for files added to book 476, 477
in new book files 476
BookHeadings reference page, for
HTML mappings 572
BookHTML reference page, for
HTML mappings 572
bookmarks, PDF 577
bookmarks, PDF (structured) 583
boolean expressions
using 302
borders
drawing, around graphics 315
object path and 312
selection 317
bottom of column, positioning
anchored frame at 348
boxes, gray, as graphic image
placeholders 510
boxing paragraphs 121
braces ({}) in equations 248
removing 253
toggling format of 254
brackets ([])
around matrices in equations 256
as wildcards for finding 80
finding literal 79
in cross-reference formats 207
in equations 248
in index entries 428, 431
in index entries (structured) 457
in system variable definitions 235
removing, from equations 253
toggling format of, in
equations 254
breve characters ( ), typing, in dialog
boxes 679
bringing objects to front 331
broken line in Structure View 52
bubbles. See element bubbles
building
filters 287
FrameMaker books from DITA
maps 666
building blocks
in autonumber formats 126
in cross-reference formats 205, 218
in HTML macros 569
in index entries (structured) 457
in running header/footer
variables 235
in special text flows for generated
lists and indexes 443
in system variables 232
in variable definitions 231
bullet symbols (•)
autonumber formats and 128
typing 72
typing, in dialog boxes 677, 679
bulleted lists 128
HTML mappings for 563, 567
butt cap for lines 321
Button Matrix hypertext
command 535, 540
buttons
hypertext 531
bypassing text frames in text flow 402
C
calculus symbols in equations
adding operands to 254
inserting 247, 249
callouts
creating 323
formats for 412
canceling
changes in documents 25
find operations 79
macros 627
OLE links 514
spell-checking 87
update of text insets 507
cap style
for intersecting lines 334
for lines 321
capabilities
of DITA 654
capitalization
finding/changing and 78, 84
font property 108, 109
of format tags 138
spell-checking of 87
captions 327, 358
capturing screen images 630
caret characters (^)

792
as wildcard for finding 80
finding literal 79
typing, in dialog boxes 677, 679
Cascading Style Sheets 69
cascading style sheets
for XML 622
cascading stylesheets 561
case-sensitivity
finding/changing and 78, 84
of cross-reference format
names 205
of fmbatch commands 632
of format tags 138
of hypertext commands 533, 537
catalog formats, working with format
rules 139
cells in equation matrices,
aligning 266
cells, table
adding 197
aligning text in 179
anchoring tables in 161
centering text vertically in 179
changing height of 173
color in 366
combining (straddling) 173
copying or moving 191
copying, cutting, and pasting 159
formatting 160
formatting of structure 187
indenting paragraphs in 178
inserting tables into 161
margins in 178
moving between 158
numbering 180
placing graphics in 161, 192
placing tables in 193
removing 198
resizing 171
rotating 176, 199
ruling lines around 180
saving, as paragraphs 26
selecting 158, 190
selecting contents of 189
shading of 180, 182
straddling 173, 198
text in, positioning 178
typing in 158
unstraddling 173
cent signs (¢), converting, to
HTML 570
center tab stops 113
centering
paragraphs 112
text in headers and footers 386
text vertically in table cells 179
change bars
clearing 484
color of 366
finding 484
in composite (compared)
documents 485
introduction 482
removing 484
changing
found items 83
found marker text 81
changing elements to other types 40
changing found items
See also finding
elements and attributes 50
<$chapnum> building block
in cross-reference formats 206
numbering chapters 228
chapter numbers in books
autonumbering, in templates 411
in cross-references 206, 471
in headers and footers 386, 471
in paragraph formats 130
specifying 469
variables 228
Character Catalog 101
deleting formats from 137
displaying 103
character count 487
Character Designer 105
As Is property settings in 106
displaying catalog format
properties in 105
properties in 108
character formats 101, 139
adding change bars by using 483
applying 102
applying, globally 106
applying, to characters with certain
tags 106
As Is property settings in 106
changing with Find/Change
command 84
copying and pasting 104
creating, for format overrides 558
defining hypertext active area
with 530
deleting 137
designing, for templates 411
duplicating 415
finding 80
for text callouts 412
for text line objects 324
format overrides and 107
HTML mappings for 563
importing and updating 415
importing and updating, with
fmbatch 634
in autonumbering 128, 129
in cross-reference format
definitions 205, 207
in equations 267
in generated lists 443
in index entries 431, 443
in index entries (structured) 457
in variable definitions 231
removing, from text by restoring
paragraph’s default font 103
updating 134, 136
updating, in hidden conditional
text 308
character sets
for equations 267
in HTML documents 570
Japanese and Western,
combined 110
special characters 72
character spacing 109
between math elements in
equations 262, 268
in Japanese fonts 117
character tags
finding 76
guidelines for 138
removing, after deleting change
bars 483
characters
alphanumeric, in equations 244,
245
as tab leaders 115
check boxes, dim or dashed 106
checking documents in, out 495
child elements
for table titles 191

793
inserting automatically 35, 39
missing required 52, 55
choice attributes 48
choice functions in equations
defined 248
evaluating 277
chotai 110
Chouon character, in Japanese
sorting 449
circles, drawing 314
classified information 236
clearing
automatic corrections for spell-
checking 88
change bars 484
current macros 628
clip art 404, 407
Clipboard
copying objects without changing
contents of 329
copying text without changing
contents of 75
finding contents of 81
importing graphics and text
with 502
clipping graphic frame contents 359
Close Window hypertext
commands 535, 546
closing
all files in book file 467
book files 467
documents 32
documents, hypertext commands
for 546
files with fmbatch 635
CMYK color model
defined 364
separations in 373
collated copies, printing 28
colons (:) in index entries 428, 429
colons (:) in index entries
(structured) 457
color
about 364
color definitions, importing and
updating 415
with fmbatch 634
color libraries 365
color map, switching 630
color model 364
color monitors, colors on 364
color scheme, accessibility 639
color separations 371
adjusting registration for 371
cutouts in 370
emulsion 375
for EPS files 373
halftone screen settings for 375
knockouts 370
limitations in Windows
platform 365
printing 371
printing extra plates for 373
printing registration marks with 28
skipping blank pages in 375
spot colors 374
colors
applying 366
CMYK 364
Crayon 365
creating 368
deleting 369
DIC 365
displaying views of 370
editing definitions of 368
FOCOLTONE 365
for table ruling 181
for table shading 182
for text 108, 366
Greys 365
HLS 364
hue 364
in equations 268
in table cells 366
inconsistent settings for, in
books 475
invisible 370
libraries of 365
lightness 364
mixing 368
models for 364
MUNSELL 365
naming custom 368
of change bars 366
of objects 319, 366
online 366
Online color library 558
PANTONE 366
printing 371
printing extra plates for 373
printing, as black 29
removing gap between, when
printing 371
RGB 364
saturation 364
tints of 366
TOYO 366
TRUMATCH 366
wheels of 364
column-by-column conversion of
tables to paragraphs 163
columns, equation matrix
changing number 255
transposing, with rows 270
columns, table
adding 170, 198
copying and pasting widths of 172
copying, cutting, and pasting 171
default paragraph formats for 160
equal widths of 172
moving 171
numbering down 180
removing 198
replacing 171
resizing 171, 192
ruling lines in 180
selecting 159, 190
selecting in 158
shading in 180, 182
sorting 174
straddling cells in 173, 198
columns, text
adding 387
aligning text in adjacent 394
aligning text with bottom of 395
balancing text in 394
changing page size, effect on 380
cross-referencing, newsletter
style 403
feathering text to bottom of 395
gap between, changing 382, 387
gap between, in new documents 20
newsletter style 398, 399
number of, changing 382, 387
number of, in new documents 20
resizing 382, 387
space between, changing 382, 387
space between, in new
documents 20
straddling 169, 350

794
synchronizing text baselines in 396
tables straddling 195
combined fonts 110
combining
fractions in equations 271
table cells (straddling) 173, 198
tables 171
text flows 401
commands
book-wide 473
fmbatch 632
communities 3
comparing books 474
comparing documents 484
conditional 485
FrameMaker (structured) 486
items compared when 486
multiflow 485
compatibility preferences, network
and platform 31
components
of FrameMaker workspace 5
composite documents
about 486
described 484
composite pages, printing 371
compound words, hyphenating 93
condensing characters 110
condition indicators 297
displaying 306
inconsistent 475
condition tags 296
applying 303
classified information, indicating
with 236
copying and pasting 304
creating 300
deleting 301
displaying, in running headers and
footers 236
editing 300
finding 82
generating lists and indexes of 420
importing and updating 415
importing and updating, with
fmbatch 634
in composite documents 484
in text insets 307
keyboard shortcuts for
applying 304
removing, from text 305
conditional documents
changing view of 306
comparing 485
conventions for 298
cross-references to 304
editing 307
editing contents of 309
graphics in 298
inconsistent settings in 475
introduction 296
multiple authors, guidelines 299
planning 298
tagging strategy 299
templates for 299, 414
variable definitions in 299
versions in, displaying all 306
versions in, saving 308
working in 305
conditional text 296
anchored frames as 303
converting, to unconditional
text 305
cross-references as 303
deleting 307
elements as 309
finding 82, 308
footnotes as 303
hiding 306
importing and updating settings
for 415
importing and updating settings
for, with fmbatch 634
in text insets 307
items allowed in 303
markers as 303
punctuation in 299
showing 306
spell-checking 308
table rows as 303
tables as 303
text spaces in 299
variables as 303
conditional text and XML
handling 621
<$condtag> building block 236
configuring
3Dobjects 526
connecting
graphic lines 313, 333
objects by using gravity 333
text frames 388, 401
conref element
inserting 660
consecutive spaces 73
constraining
lines to horizontal or vertical 313
object movement 329, 330
container elements 33
See also elements
empty 33
footnotes 223
removing 45
content referencing for reuse 649
content rules 32
contents of elements
invalid 55
removing, but leaving elements 45
unwrapping 42
context labels in scroll lists 220
context labels in scroll lists
(structured) 455, 584
context-sensitive format rules 140
continuation columns in
newsletters 403
continuation text in table titles and
headings 160, 228
continuation text in tables 192
control points 341
conventions
for character and paragraph
tags 138
for conditional documents 298
Convert to Table command 38, 40
converting
between view-only and editable
documents 551
black to white in bitmaps 636
conditional text to unconditional
text 305
cross-references to text 204
imported graphic images to
monochrome 637
imported text to tables 162
tables to paragraphs of text 163
text insets to editable text 507
text to tables 162
to FluidView format 553
to PDF 575
variables to text 230
white to black in bitmaps 636

795
copying
attribute values 48
elements 43
structured tables 194
table cells and contents 191
copying and pasting
anchored frames 360
character formats 104
condition tags 304
cross-references 204
drawing properties 320
in equations 252
objects 329
objects into graphic frames 358
paragraph formats 104
table cell 159
table column widths 172
table rows and columns 171
tables 164
text 75
text frames 388
to import graphics and text 502
variables 229
copyright symbols (©), converting, to
HTML 570
corner radius of rounded
rectangles 340
corners, object, adding or
removing 341
correcting errors in structure 55
count, page
in books 471
in documents 385
system variables for 228
counters, autonumbering 126, 129
counting words and characters 487
crashes, opening documents after 23
Crayon color library 365
creating
anchored frames 346
book files 462, 476
character formats for format
overrides 558
colors 368
condition tags 300
cross-reference formats 205
DITA concept 658
DITA map 656
DITA reference 659
DITA task 659
DITA topic 658
documents 19, 20
documents, composite 484
documents, generated
hypertext 547
documents, hypertex 528
documents, summary 484
equations 240
footers 384
generated lists 421
graphic insets 514
headers 384
HTML macros 568
hypertext links 536
indexes 432
Japanese and Western combined
fonts 110
links to URLs 558
macro files 627
macros 625
master pages 389
math elements 257
page headers and footers 384
paragraph formats 138
paragraph formats for format
overrides 558
reference frames 405
reference pages 405
rotated page layouts 390
run-in heads 125
side heads 122
straddle paragraphs 122, 124
tab stops 113
table formats 185
table ruling styles 181
tables of contents 421
user variables 231
creation date variables 228, 232
crimping curved objects 342
crop marks, printing 28
cropping
anchored frames 349
in anchored frames (clipping
contents) 359
parts of graphics 343
crossed I-beam pointer 324
Cross-Platform pop-up menu 31
cross-reference formats 205
case-sensitivity of names for 205
changing 208
changing to other 220
deleting 208
editing 208
examples of 207
for additional footnote
references 212
for endnotes 216
HTML mappings for 564
importing and updating 415
importing and updating, with
fmbatch 634
in text insets 208
structured documents 218
cross-references
as hypertext active areas 539
as hypertext active areas in editable
documents 547
attributes for 218
autonumbering in 206
between text frames, newsletter
style 403
changing source of 204
chapter numbers in, for books 471
conditional 303
converting, to text 204
copying, cutting, and pasting 204
deleting 204
displaying sources of 203
editing 204
filenames in 206
finding 76
finding sources of 203
formatting text in 205, 207
generating lists and indexes of 210,
420, 421
ID attributes for 34, 218
in index entries 430, 439
inserting elements for 219
inserting, to paragraphs 201
inserting, to specific spots within
paragraphs 203
maintaining 208
markers for 203
moving 204
paragraph tags in 206
selecting 204
source information in 217
sources for 217
structured documents 217
suppressing automatic updating
of 23, 209

796
tables of contents using
(structured) 460
to conditional documents 304
to endnotes 216
to footnotes 212, 225
to text insets 202
types of, compared 201
updating 209
updating, with fmbatch 634
cross-references in XML
handling 621
CSS
importing 69
in FrameMaker 622
.css filename extension 561
<$curpagenum> building block 228
current date, system variables for
in headers and footers 385
inserting 228, 232
current drawing properties 318, 320
current macros, clearing 628
current page number, system variable
for
in headers and footers 385
inserting 228
current paragraph and insertion
point 71
cursor shapes, customizing 639
curvature
of freehand curves 341
of rounded rectangles 340
curved objects
crimping 342
reshaping 338
custom documents, creating 20
Custom file 415
customer support 2
customizing
arrowheads 321
cell margins in tables 178
dashed line style 321
DITA support of FrameMaker 669
line properties 320
marker types 440
page numbers 469
printing 28
table ruling 181
table shading 180, 183
tables 157
cutouts
in color separations 371
reverse text 325
cutting and pasting
anchored frames 360
cross-references 204
in equations 252
objects 329
objects into graphic frames 358
table cells 159
table rows and columns 171
tables 164
text 75
variables 229
D
daggers († ‡)
converting, to HTML 570
numbering footnotes with 213
typing, in dialog boxes 677, 679
daiji autonumbering 134
dashed line styles 319, 321
dashes
converting, to HTML 570
in check boxes 106
typing 72
typing, in dialog boxes 677, 679
date building blocks 233
dates, system variables for 228, 232
in headers and footers 385
day building blocks 233
DCS graphic files, printing 373
decimal places in equations 276
decimal tab stops 113
default
paragraph formats in tables 160
properties not set in Table
Designer 157
default attribute values 46
default element tags
See also BOOK-COMPONENT
element tag; NoName element
tag
for anchored frames
(structured) 362
for cross-references 221
for equations 285
for footnotes 224
for imported graphics 519
for tables 188, 194
for tables and objects, when
wrapping 39
in new book files 476
default font
applying to character 103
default font properties in
paragraphs 108
<Default Para Font> building block
in index entries 431
in special text flows for generated
lists 444
<Default Para Font> building block
in index entries (structured) 457
default properties
applying to font 103
<$defaulttitle> building block in
HTML macros 569
degree symbols (×), converting, to
HTML 570
deleting
a filter 293
anchored frames 360
blank pages at ends of
documents 382
character formats 137
color definitions 369
condition tags 301
conditional text 307
cross-reference formats 208
cross-references 204
custom master pages 392
equations 253
files from book files 466
footnotes 212
found items 84
graphics 329
hypertext commands 533
index entries 436
macros 628
marker types 440
markers 436
master pages, custom 392
math element definitions 260
math elements from equations 253
objects 329
pages 76
pages from ends of documents 382
pages, disconnected 401
paragraph formats 137
reference pages 405

797
rows or columns from matrix in
equations 256
tab stops 113
table formats 185
table ruling styles 182
tables 164
variables 230
delimiters in equations 248
defining 259
math element type 257
removing 253
using larger 262
derivatives in equations 249
adding operands to 254
evaluating 278
math element type 258
descendant elements
selecting 98
deselecting
objects 318
text 75
Designate Dummy command 279
Desktop Color Separation files,
printing 373
determinants in equation
matrices 276
diacritical marks in equations
inserting 246
math element type 258
diagonal lines, drawing 313
dialog boxes
macros for using 629
typing special characters in 677
DIC Color Guide 365
dictionaries
books 86
combining 92
languages for 89
main 85
managing 90
site 85, 92
dictionary-style running headers and
footers 237
dieresis, Y, typing, in dialog
boxes 678, 680
dim check boxes 106
disable
welcome screen 5
disabling
3D file embedding in PDFs 581
SWF file embedding in PDFs 580
disconnected body pages, adding or
deleting 401
disconnecting text frames 402
discretionary hyphens 119
symbol for 8
typing, in dialog boxes 678, 679
display equations
See also equations
aligning 264
creating 241
creating using elements 284
defined 240
structured documents 282
display resolution (imported graphic
scaling) 511
display units
dots per inch 511
displaying
body pages 384
catalog format properties in
Character or Paragraph
Designer 105
catalog format properties in Table
Designer 166
Character Catalog 103
color views 370
condition indicators 306
conditional text 306
cross-references, sources of 203
Equations palette 240, 283
filenames for imported
graphics 510
grid lines 311
master pages 383
Paragraph Catalog 103
reference pages 405
Table Designer 165
Tools palette 310
Distribute commands for
equations 273
distributing objects 333
DITA 647
adoption in Adobe 643
aplications 655
architecture 647
benefits 646
capabilities 654
content referencing for reuse 649
definition 642
evaluating for your
organization 652
history 642
integrated in FrameMaker 653
introduction 642
key features 646
topic-oriented authoring 647
understanding 647
DITA concept
creating 658
DITA file
inserting an xref 661
DITA map
creating 656
dita map 664
DITA maps
about 648
updating 663
using to build FrameMaker
books 666
DITA options
setting 664
DITA reference
creating 659
DITA references
updating 663
DITA support of FrameMaker
customizing 669
DITA task
creating 659
DITA topic
creating 658
DITA topics
updating 663
ditamap file
opening topicrefs 659
Division commands for
equations 274
division operators in equations 247
division signs (/), typing, in dialog
boxes 678, 679
document dictionary 85
adding words to 87, 93
books 86
editing 92
managing 90
Document format 25
document properties, importing 415
with fmbatch 634
document structure

798
adding 34
correcting errors in 51
editing 39
editing, in book files 478
retaining when importing text 517
Document Structuring
Convention 376
document window
resizing, automatically, hypertext
command for 538
document windows
insertion point in 95
selecting in 97
documents
adding elements to contents in 35
adding elements to empty 35
adding metadata to 27
adding, to book files 463
canceling changes in 25
closing 32
closing, hypertext commands
for 546
creating 19, 20
creating hypertext 528
deleting, from book files 466
editable, activating hypertext links
in 547
editing structure of 39
exporting, as e-mail
attachments 515
importing formats into 415
importing formats into, with
fmbatch 634
MML 68
numbering 468
opening in earlier FrameMaker
versions 23
page count of, in
headers/footers 385
page numbers in 385
printing 28
printing, with fmbatch 633
printing, with fmprint 636
rearranging, in book files 466
removing all elements from 45
renaming, in book files 466, 477
reverting to last-saved 25
saving 24
saving, automatically 27
testing templates for 413
typing in 71
validating 52
view-only 551
wrapping elements throughout 38
documents with 3D objects
printing 526
documents with SWF files
printing 524
dollar signs ($)
as wildcard for finding 80
finding literal 79
in cross-reference format building
blocks 206
dot characters (Ž), typing, in dialog
boxes 679
dotless i characters (€), typing, in
dialog boxes 679
dots in equations 246
dots per inch 511
dots, leader line 115
in generated lists and indexes 448
dotted line styles 319, 321
double-sided documents
changing pagination 381
creating 20
layout of 381
multiflow, master pages and 397
downloading fonts
to a printer 30
downloads 2
dpi 511
dragging (drag and drop)
to embed text or graphics 512
to import graphics 511
to import text] 512
draw order (object stacking, back to
front) 331
drawing objects 312, 323
arcs 314
Bezier (freehand) curves 314
circles 314
diagonal lines 313
drop shadows 331
ellipses 314
freehand curves 314
lines 313
ovals 314
polygons 313
polylines 313
rectangles 314
rounded rectangles 314
several, of same type 315
splines (freehand curves) 314
squares 314
text frames 324
text frames on body or master
pages 388
text lines 324
unanchored graphic frames 343
unanchored graphic frames on
reference pages 406
with snap grid on 311
drawing properties 318
current 318, 320
duplicating 320
inspecting 320
of anchored frames 359
drivers, printer 28
drop cap 354
drop shadows 331
DSC 376
dumps, capturing screen 630
duplicating
boilerplate graphics 407
by dragging 75
catalogs 415
drawing properties 320
folders with fmcopy 636
objects without using
Clipboard 329
text frames 388
text without using Clipboard 75
E
EDD
XML mappings 26
edge gap between objects 333
editing
anchored frame contents, when
rotated 359
anchored frames 359
attribute values 46
color definitions 368
condition tags 300
conditional documents 307, 309
cross-reference formats 208
cross-references 204
custom math element
definitions 260
dictionaries 92
elements 39

799
elements, in book files 478
equations 252
equations, rotated 252
footnotes 211
graphic insets 514
HTML macros 568
hypertext commands 533
index entries 435
Japanese and Western combined
fonts 110
marker text 436
OLE objects 513
table ruling styles 181
tables 158, 170
text 75
variable definitions 232
variables 229
editors, graphic inset 514
element
assigning an ID 663
element boundaries
for new elements 36, 37
element bubbles
for changed elements 40
for merged elements 41
for new elements 36, 37
for split elements 41
for unwrapped elements 42
round-cornered 33
square-cornered 33
when dragging elements 43, 44
Element Catalog
as guide for building structure 32
changing elements using 40
for book files 476
inserting elements using 36
wrapping elements using 38
element definitions
attribute rules in 46
content rules in 32
format rules in, for objects 141
format rules in, for text 139
importing and updating, in
books 479
introduction 32
element tags
See also default element tags
finding and changing 49
preparing, for generated lists
(structured) 453
element-based cross-references 217
elements
adding 34
adding to document with
contents 35
adding to documents 34
assigning attribute values for 46
assigning master pages 407
at invalid locations 52, 55
attributes for 34
changing to other types 40
classes of 33
copying 43
editing 39
empty 33
finding and changing 49
for rubi text 99
for tables and table parts 186
hierarchy 140
in conditional documents 309
inserting 36
merging two or more 41
missing required 52, 55
moving 42
placing insertion point between 96
removing 45, 51
replacing with other elements 45
selecting 97
splitting in two 41
undefined in document 52
unwrapping contents of 42
using in structured documents 32
valid contents for 32
wrapping 37
<$elempagenum> building block
in cross-reference formats 219
<$elemparanum> building block
in cross-reference formats 219
<$elemparanum> building blocks
in cross-reference formats 237
<$elemparanumonly> building block
in cross-reference formats 219
<$elemparanumonly> building
blocks
in cross-reference formats 238
<$elemtag> building block
in cross-reference formats 219, 237
<$elemtext> building block
in cross-reference formats 219, 237
<$elemtextonly> building block
in cross-reference formats 219, 237
ellipses (...)
converting, to HTML 570
drawing 314
typing, in dialog boxes 677, 679
em dashes (—)
converting, to HTML 570
typing 72
typing, in dialog boxes 677, 679
em spaces
typing 73
typing, in dialog boxes 678
e-mail, exporting documents in 515
embedding
graphics, sound, and text 512, 514
tables of contents in
documents 426
embedding tables of contents in
structured documents 460
empty angle brackets in autonumber
formats 130
empty container elements 33
empty text boxes 106
emulsion 375
emulsion setting, plate imaging 375
en dashes (–)
converting, to HTML 570
typing 72
typing, in dialog boxes 677, 679
en spaces
typing 73
enabling
3D file embedding in PDFs 581
SWF file embedding in PDFs 580
encodings, text 26
for HTML 570
endnotes
See also footnotes
inserting elements for 225
maintaining 217
working with 216
end-of-flow symbols (§)
finding 80
text symbols 8
end-of-paragraph symbols (¶)
finding 80
text symbols 8
endpoints of arcs 342

800
<$endrange> index marker building
block 430
<$endrange> index marker building
block (structured) 457
ends of lines, finding 80
ends of words, finding 80
Enter Rule command 278
entering text 71
See also typing
in dialog boxes 677
in tables 158
rubi 76
environment variables in hypertext
commands 535, 546
EPS files
printing color separations for 373
equal distance between objects 333
equal signs in equations 248
equation objects
entering expressions 282
question mark in 283, 284, 285
equations
aligning 264
aligning, with text baseline 251
changing matrices in 255
color in 268, 366
commands for evaluating 269
copying, cutting, and pasting
in 252
creating 240
decimal places in 276
defining custom math elements
for 257
deleting 253
display 240, 241, 284
editing 252
editing rotated 252
elements in structured
documents 282
evaluating 269
expressions in 244
floating-point numbers in 276
fonts for 267
fonts in 285
formatting of 283
importing and updating properties
of 415
importing and updating properties
of, with fmbatch 634
in anchored frames 240, 285
in existing graphic frames 242
Infinity in 276
in-line 240, 283
inserting elements for 283
inserting math elements in 243
introduction 239
line breaks in 263
lists of 245
mathematical syntax in 244
moving 243
multiline, aligning lines in 265
NaN in 276
placing insertion point in 252
positioning 243, 330
question mark prompt in 241
removing delimiters from 253
replacing part of 253
rotating 338
running text around 328
scope of operation in 244
selecting in 252
shrinkwrapping 285
shrinkwrapping and
unwrapping 251
shrinkwrapping in structured
documents 284
toggling format in 254
transforming 269
types of 282
Equations palette
displaying 240, 283
illustrated 239
error messages
when opening documents 21
when validating book files 480
when validating documents 54
errors in structure
correcting 55
using Structure View to find 52
validating to find 52
EUC encoding, saving files using 26
Euro currency symbol 72
Evaluate commands for
equations 276
evaluating
DITA for your organization 652
evaluating equations 269
even page count in documents 382
example
of a filter 289
exiting
fmbatch command for 635
hypertext command for 535, 546
Expand commands for equations 281
expanding characters 110
exponents in equations
evaluating 280
inserting 247
transforming 274
exporting
documents as e-mail
attachments 515
graphics 515
text, graphics 515
unstructured documents to
XML 26
using Save As command for 515
Extensible Metadata Platform
(XMP) 27, 465
external xref
inserting in DITA file 661
F
Factor commands for equations 272
factorials in equations
evaluating 276
inserting 247
feathering text in columns 395
features
of DITA 646
figures
autonumbering 131
titles for 327, 358
file display options 9
file formats
7.0 25
8.0 25
available, when saving 25
Document 25
FluidView 553
for movies 510, 512
FrameImage 31
FrameMaker can open and
import 20
FrameMaker can save to 25
GIF 571
HTML 556
JPEG 571
MML 68
PDF 575
PICT 337

801
PNG 571
PostScript 30
QuickTime movie 510
RTF 25
Text Only 25
unknown 21
View Only 551, 555
wav 512
XWD 630
File Info command 27
file information
adding to a book 465
adding to a document 27
file locking 22, 31
file translation errors 31
<$filename> building block
in cross-reference formats 206
in system variable definitions 228
filename compatibility 31
filename extensions
.auto 23, 27
.avi 510, 512
.backup 27
.book 25
.css 561
.fm 25
.html 560
.lck 22
.mif 25
.mov 510, 512
.pdf 576
.pdf (structured) 583
.recover 23
.text 25
.wav 512
.xml 27
for saved files 25
filename system variables 228
filenames
for documents in books 477
for imported files 508, 510
in cross-references 206
in hypertext commands 535
in system variables 228
files
autosave 23, 27
backup 27
lock (.lck) 22
printing to 30
recover 23
removing, from book files 466
view-only 25
fill patterns 318
fill percentage for table shading 182
filter
applying 292
deleting 293
example 289
modifying 293
rule table 293
filter by attribute
about 286
filters
building 287
for importing text 516
for opening and importing files 20
for saving files 25
finding
anchored frames 76
and changing 83
and deleting 84
attributes and values 49
beginning of line 80
beginning of paragraph 80
beginning of word 80
canceling search 79
canceling searches 50
capitalization and 78
change bars 484
character formats 80
character tags 76
Clipboard contents 81
conditional text 82
cross-references 76, 210
cross-references, sources of 203
elements 49
end of flow 80
end of line 80
end of paragraph 80
end of word 80
errors in structure 51
footnotes 76
forced returns 80
graphic files imported by
reference 510
graphics 77
hyphens, automatic 76, 89
index markers 435
items on master pages 83
keyboard shortcuts for 82
markers or marker text 81
missing source entries in generated
lists 425
names of math elements 260
next occurrence of item 50
nontext items 76
paragraph tags 76
publishers 76
searching generally 76
source entries in generated files
(structured) 455
special characters 79
subscribers 76
symbols 79
tables 76
tabs 80
text 76
text edits 489
text insets, sources of 507
text marked as changed 484
text subscribers 76
text with particular character
format 81
throughout a book 77
unresolved cross-references 222
variables 76
whole words 78
wildcards for 79
first page
hypertext links to 538
page side in new documents 20
first-line indent 111
first-line synchronization limit 396
fixed line spacing for text 116
fixed-width spaces, using 72
Flash content
saving in FrameMaker
documents 523
flipping graphic objects 336
floating anchored frames 349
floating table position 168
floating-point numbers in
equations 275
florin symbols (ƒ), typing, in dialog
boxes 678, 679
flow symbols (§)
finding 80
text symbols 8

802
flow tags
assigning 400
assigning, when adding text
frames 388
defined 380
HypertextLinks 551
multiflow documents and 397
pop-up hypertext commands
and 542
flows. See text flows
FluidView format 553
.fm filename extension 25
fmbatch utility 630
case-sensitivity of commands
for 632
closing files 635
commands list 632
echoing commands 631
executing UNIX commands 635
exiting 635
generating files 634
importing and updating
formats 634
opening files 632
printing files 633
printing messages to standard
error output 631
saving files 633
starting 631
updating cross-references 634
verifying FrameMaker is
running 632
fmcopy utility 636
$FMDOCDIR and $FMDOCNAME
environment variables in
hypertext commands 546
fminvert utility 636
fmMacros and fmMacrosLog
files 627, 628
fmprint utility 636
FOCOLTONE Colour System 365
folders
copying, with fmcopy 636
in hypertext command
pathnames 535
font properties 107
change bar 482
chotai 110
color 108, 366
heitai 110
horizontal scaling 110
language 109
lowercase 108, 109
pair kerning 109
point size 107
small caps 109
spread between characters 109
stretch 110
style 107
tsume 109
underlining 108
uppercase 108, 109
weight 108
fonts
downloading, to printer 30
generating lists and indexes of 420,
421
in equations 267, 285
in templates 411
Japanese and Western,
combined 110
Japanese, spacing in 109, 117
substitution of 21, 31
symbol, and format rule
overrides 141
unavailable 21, 31
footers, page
See also running headers and
footers
aligning text 386
chapter numbers in, for books 471
defined 384
HTML conversion and 557
rotating 390
suppressing, in view-only
documents 553
templates and 411
footing rows in multipage tables 160
footnotes
See also endnotes
changing text of 224
conditional 303
creating 211
cross-references to 212, 225
deleting 212
editing 211
finding 76
full-width 215
in multicolumn layouts 215
in structured documents 223
inserting 211
inserting elements for 224
keeping, together with footnote
references 212
numbering styles 214
properties of 213, 224
selecting in structured
documents 224
several references to on 225
several references to one 212
forced returns
finding 80
symbol for 8
typing, in dialog boxes 678, 679
format overrides
cautions about 139, 481
removing from books 481
format rule overrides
See also format overrides; format
rules
cautions about 139
removing from books 480
removing from documents, by
reapplying current rules 141
removing from one element 141
symbol fonts and 141
format rules 139
catalog formats and 139
context-sensitive 140
for cross-references 220
for equations 283
for graphics 345
for markers (structured) 454, 457
for object elements 141
for structured tables 187, 194
for system variables
(structured) 238
for text 139
when wrapping elements 37
formats
catalog 139
equation, toggling 254
importing and updating 415
importing and updating, in
books 472, 481
importing and updating, with
fmbatch 634
merging or overwriting 415
formatting
footnotes 213
HTML conversion and 561
structured tables 187

803
text in structured documents 139
formatting bar 104
formatting of generated files
(structured) 458
formatting of text
by context in document 140
catalog formats 139
format rules 139
in unstructured documents 139
overrides to 139
retaining when importing 517
formatting using attribute values 34
fraction signs (/), typing, in dialog
boxes 678, 679
fractions, combining 271
FrameImage file format, saving
imported graphics in 31
FrameMaker
about CSS 622
exiting, hypertext command
for 546
file formats 25
workspace components 5
FrameMaker 8
about DITA 653
backward compatibility 23
using DITA 656
FrameMaker books
building from DITA maps 666
FrameMaker document
generating from a dita map 664
FrameMaker documents
importing 3D objects 524
integrating 3D objects 524
saving as MIF files 515
FrameMaker file
saving a document with filters 292
FrameMath reference pages 259
frames. See anchored frames
freehand curves 314
adding and removing points
on 341
joining 335
reshaping 341
front, bringing objects to 331
<$fullfilename> building block
in cross-reference formats 206
in hypertext documents 550
in variable definitions 228
full-width anchored frames 350
full-width footnotes 215
full-width paragraphs 122, 124
full-width tables 169
functions in equations 250
font for 269
math element type 257
G
general settings, PDF 576
generated files in books
adding 421, 463
error messages 475
generating 477
hypertext links in 422, 547
master table of contents or index
for several books 436
renaming 466
troubleshooting 475
updating 473
updating, with fmbatch 634
generated hypertext documents 547
generated lists
adding or removing paragraph
tags 423
adding text to entries in 447
adding, to book files 421, 463
aligning page numbers in 448
and indexes, compared 418
autonumbering in 445
of condition tags 301
creating 421
editing 423
editing entries in (structured) 455,
456
embedding in documents 426
entries in, tracing back to
source 424
extra entries in 425
extra entries in (structured) 459
finding sources for
(structured) 455
formatting 441
formatting of (structured) 458
formatting, problems with 426
formatting, problems with
(structured) 460
generating 421
hypertext links in 422, 547
hypertext links in (structured) 455
incomplete entries in
(structured) 459
leader dots in 448
line breaks in 425
line breaks in (structured) 460
master, for several books 436
missing entries in 425
missing entries in (structured) 459
of condition tags 420, 421
of cross-references 210, 420, 421
of figures 445
of fonts 420, 421
of imported graphics 420, 421
of publishers 420, 421
of references 420, 421
of subscribers 420, 421
of text insets 420
preparing source documents
for 420
preparing, documents for
(structured) 453
rearranging information in 448
special text flows in 442
split entries in 425
static text in 441
tabs in 448
templates for 414, 441
templates for (structured) 458
titles for 441
titles for, disappearing 426
titles for, disappearing
(structured) 460
troubleshooting 425
troubleshooting (structured) 459
updating 423
updating, with fmbatch 634
generating
a FrameMaker document from a
dita map 664
generating a FrameMaker
document 664
GIF files, in HTML documents 571
glossaries, running headers and
footers for 237
gradients in equations 249
adding operands to 254
graphic frames
anchored and unanchored,
compared 322
and text frames, compared 322
clipping problems in 359
equations in 242
placing objects in 358

804
rotating 338
graphic insets
running text around 328
using (UNIX) 514
graphics
aligning 331
aligning, with snap grid 311
as hypertext active areas 531
as hypertext button matrices 540
autonumbering figures and 131
background, on master pages 379
boilerplate 404, 407
bringing, to front 331
capturing screen images 630
color of 319, 366
conditional, in anchored
frames 303
connecting, by using gravity 333
constraining movement of 329,
330
copying, cutting, and pasting 329
cropping 343
defined 310
deleting 329
deselecting 318
distributing 333
draw order of (object stacking,
back to front) 331
drawing borders around 315
drawing properties of 318
editing and arranging 329
elements for, types of 345
flipping 336
grouping and ungrouping 335
handles 315
in conditional documents 298
in HTML documents 571
in paragraph formats 121
in table cells 192
inspecting position of 344
joining 335
making touch 334
masking 343
measuring 344
moving 330
moving, into graphic frames 358
moving, to back or front 331
moving, with text 345
overlapping 331, 371
overprinting 371
path of 312
placing, in graphic frames 358
placing, in table cells 161
printing 28
properties of 318
reference frames containing 406
repeating, on pages 379
reshaping 338
resizing 338
rotating 337
rotating, by flipping 336
rotating, snap rotate interval
for 311
rounding corners of rectangles 340
scaling 338
selection 315
sending, to back 331
smoothing and unsmoothing 338
stacking 331
standardizing, for templates 411
symmetrical 336
tables for 327
text in 323
titles for 327, 358
transparent 319
trapping 373
grave characters (`), typing, in dialog
boxes 678, 679
gravity, connecting objects by
using 333
gray box in place of imported
images 510
gray check boxes 106
Greek letters
in equations 246
in equations, font for 269
Greys color library 365
grids 311
aligning tab stops to 114
aligning table column borders
to 172
page layout, for multiflow
newsletters 398, 399
synchronizing baselines to, in text
columns 396
using 311
grouping objects 335
GroupTitles paragraph tag in
indexes 451
guilsingl characters (‹ ›), typing, in
dialog boxes 678, 679
H
halftone screen settings 375
handles
adding or removing 341
reshape 341
selection, object 315
selection, table cell 159
handling
conditional text and XML 621
cross-references in XML 621
hanging indent 111
headers, page 384
See also running headers and
footers
aligning text 386
chapter numbers in, for books 471
HTML conversion and 557
rotating 390
suppressing, in view-only
documents 553
templates and 411
heading rows in multipage tables 160
Headings reference page, for HTML
mappings 565
heads, text
and next paragraph’s format 121
autonumbering examples 131
for alphabet groupings in
indexes 451
HTML mappings for 561, 565
keeping, with next paragraph 120
height
first-line synchronization limit 396
of footnotes 213
of table cells and rows,
changing 173
page 380
heitai 110
hidden cross-reference markers in
conditional text 304
hiding
conditional text 306
grid lines 311
hierarchy of object grouping 335
highest-level element
default NoName tag for 39
for files in books 477, 478
removing format rule overrides
from 141
history
DITA 642

805
HLS color model 364
hole, in Structure View
next to attribute 221
on line 52
horizontal (landscape) page
orientation in new
documents 20
horizontal distribution of objects 333
horizontal lines
drawing 313
horizontal lists of expressions in
equations 245
adding items to 246
aligning items in 265
math element type 258
horizontal movement, constraining
objects to 329, 330
horizontal scaling of text 110
hours in system variables 232
HTML documents
character set in 570
converting to 560, 572
creating several, from one
document 562
creating, from book file 572
export issues 557
graphics in 571
hypertext links in 536, 556
imagemaps in 560
preparing for conversion to 557
preserving formatting in 561
simulating table of contents
for 573
special characters in 570
stylesheets for 561
tables in 574
templates for converting to 412
titles of 571
troubleshooting 574
HTML elements
character-based 563
introduction 556
paragraph-based 563
templates for mapping to 558
.html filename extension 560
HTML macros 568
for cross-reference formats 564
for HTML code 574
HTML mappings
autolevel, for headings 562
automatic 560
editing, on reference pages 565,
571
for autonumbering 561, 563, 567
for character formats 563
for cross-reference formats 564
for headings 561, 565
for lists 563, 567
for paragraph formats 563
for special characters 570
for text heads 561
importing from another
document 574
tables for 565
templates containing 558
HTML reference page, for HTML
mappings 570, 571
hue, color 364
Hungarian umlaut characters ( ),
typing, in dialog boxes 678, 679
hyperbolic functions in
equations 250
hypertext active areas 529
button matrices as 540
cross-references as 539
cross-references as, in editable
documents 547
graphics as 531
text as 530
hypertext buttons 531
hypertext commands
activating, in editable
documents 547
case-sensitivity of 533, 537
converting, to HTML 536, 556
converting, to PDF 536
deleting 533
editing 533
environment variables in 535, 546
filenames in 535
for closing view-only
documents 546
for controlling generated hypertext
documents 550
for creating alerts 543
for creating button matrices 540
for creating pop-up menus 541
for executing UNIX
commands 545
for exiting 546
for linking to previous location in
stack 540
for linking to specific pages 538
for linking to specific topics 537,
538
for linking to URLs 558
for matrix cells 540
for opening files from other
applications 544
for opening new, unnamed
document 539
for quitting 546
for resizing document window 538
for retracing steps 540
for sending messages to another
application 544
for starting another
application 544
for starting AppleScript scripts 545
inserting 532
markers for 532
pathnames in 535
summary of 534
syntax for 535
testing 547
troubleshooting tips for 548
hypertext documents
as part of online systems 551
converting, to PDF documents 575
creating 528
deactivating cross-references
in 539
display commands for 550
displaying, in separate
windows 537, 553
generating lists or indexes as 547
making view-only or editable 551
online systems described 528
planning 529
retracing steps in 552
testing 547
troubleshooting tips for 548
hypertext icons 531
hypertext links
adding to generated files 548
converting, to HTML hypertext
commands 556
creating 536
cross-references as 539
in generated lists 422, 547
in generated lists (structured) 455

806
in indexes 433, 434, 547
in summary documents 484, 547
inserting command elements
for 555
missing, in pop-up menus 548
to specific pages 538
using, in editable documents 547
hypertext markers 532
hypertext stack
linking to previous location 540
retracing jumps in hypertext
documents 552
HypertextLinks flow tag 551
hyphenated compound words,
adding to personal dictionary 93
hyphenation
automatic 119
automatic, finding 76, 89
controlling 89
controls 119
in compound words 93
languages for 89
manual 119
of last word in paragraph 119
points 89
rehyphenating document 90
spell-checking and 89
suppressing 90, 119
hyphens (-) 119
discretionary 119
finding automatic 76, 89
nonbreaking 119
number of letters before or
after 119
typing, in dialog boxes 678, 679
I
I-beam pointer
crossed 324
selecting text 316
icons, hypertext 531
ID attributes
advice on values for 222
attribute type 48
correcting invalid 222, 223
for copied elements 43, 48
for cross-reference sources 34, 218
how validated 221
values automatically provided 218,
221
values manually provided 222
ID Reference attributes 48
for cross-references 218
IgnoreChars paragraph tag, in
indexes 449
illustrations, software, capturing 630
Illustrator
importing files 504
imagemaps, HTML, setting up links
for 560
imaging settings for plates 375
imperial era and imperial year in
system variables 233
imported graphics
assigning color to 366
converting, to monochrome 637
creating links to 512
cropping parts of 343
displaying filenames of 510
dots-per-inch setting for 511
generating lists and indexes of 420,
421
graphic insets 514
gray box in place of 510
HTML conversion and 571
in conditional documents 298
inserting elements for 518
into structured documents 518
inverting black and white 636
masking parts of 343
missing 510
opening documents without
updating 23
pathnames of 508
positioning 509
replacing 508
resizing 511
running text around 328
saving, in FrameImage format 31
scaling 511
SVG files 509
updating 502
importing 69
3D objects into FrameMaker
documents 524
CSS 69
files into FrameMaker 501
SWF files into FrameMaker
documents 522
importing and updating
element definitions, in book
files 479
formats, in book files 481
importing formats
for HTML mappings 574
into book files 472
into documents 415
with fmbatch 634
importing graphics
See also imported graphics
Adobe Illustrator files 504
and resolution 511
as graphic insets 514
by copying 501
by dragging 511
by embedding 512
by linking 512
by reference 501
by reference, compared to
linking 512
inserting elements when 518
into graphic frames 358
into structed documents 518
into structured table cells 192
methods 501
platform-specific methods 519
SVG files 509
with Clipboard 502
with Import command 508
importing movies 510, 512
importing PDF files 506
importing sound 512
importing text
by copying 501
by dragging 511
by embedding 512
by linking 512
by reference 501
by reference, compared to
linking 512
file types allowed 20
into structured documents 516
into tables 162, 503
methods 501
retaining structure and format
when 517
sources for imported text 516
with Clipboard 502
with Import command 502
in scroll lists 220

807
in scroll lists (structured) 455, 584
inches, abbreviation for
typing 73
indenting
in table cells 178
paragraphs 111
tables 167
text running around anchored
frames and 356
index entries
“See” and “See also” in 430, 439
See also indexes
adding text to 447
autonumbers in 445
character formats in 431, 443
character formats in
(structured) 457
cross-reference form of 430, 439
deleting 436
editing 435
finding markers for 435
formatting 431, 441
kanji, sort order of 432
leader dots in 448
letter-by-letter sort order of 449
line breaks in 439
page numbers in, aligning 448
page numbers in, removing 430,
439
page numbers in, separators
for 446
page ranges in 430
page ranges in, problems with 437
question marks, double (??), in 437
several, in one marker 429
sort order of 431, 449
sort order of, problems with 438
subentries in 429
synonyms in 430
syntax and punctuation of
(structured) 457
tabs in 448
tracing, back to source 435
word-by-word sort order of 449
index entries (structured) 457
indexes
adding, to book files 432, 463
aligning page numbers in 448
alphabet groupings in 451
and generated lists, compared 418
author 420
creating 432
formatting 441
formatting of (structured) 458
formatting, problems with 439
generating 432
group titles in 451
headers and footers for 237
hypertext links in 433, 434, 547
inserting marker elements for 457
master, for several books 436
of condition tags 420, 432
of cross-references 420, 432
of fonts 420, 432
of imported graphics 420, 432
of publishers 420, 432
of references 420, 432
of subscribers 420, 432
of text insets 420, 432
preparing documents for
(structured) 456
special text flows in 441
static text in 441
subject 420
templates for 414, 441
templates for (structured) 458
thumbtabs in 549
titles for 441
titles for, disappearing 439
troubleshooting 437
updating 434
updating, from template 441
updating, with fmbatch 634
indexterms
using 667
Infinity in equations 276
infix math element type 257
inherited information, removing
from books 481
initial structure for tables 187
in-line equations 240
See also equations
creating using elements 283
structured documents 282
in-line graphics 345, 347
inserting
an xref in a DITA file 661
conref element 660
cross-references to paragraphs 201
cross-references to specific spots
within paragraphs 203
footnotes 211
graphics in table cells 161
hypertext commands 532
markers for hypertext
commands 532
markers for lists of markers 421
markers for spot cross-
references 203
PDF files 506
SWF files into FrameMaker
documents 522
tables 158
tables in table cells 161
topicref element 660
variables 228, 385
inserting anchored frame elements in
(structured) 362
inserting elements 36
by pressing Return 37
for anchored frames 362
for cross-references 219
for endnotes 225
for equations 283
for footnotes 224
for hypertext commands 555
for imported graphics 518
for markers 453, 457
for structured tables 187
for system variables 238
setting options for 39
insertion point
in document windows 95
in equations 252
in Structure View 97
in tables 189
in view-only documents 553
placing anchored frames at 347
insertion point in text 71
moving 71
inset editors for graphic insets 514
installation 1
of software 1
integer attributes 48
integrals in equations 247, 249
adding operands to 254
evaluating 278
integrated
DITA in FrameMaker 653

808
integrating 3D objects
in FrameMaker documents 524
internal xref
inserting in DITA file 661
intersecting lines
cap style for 334
drawing 313
intersections in equations 247
adding operands to 254
introduction
to DITA 642
invalid attributes
correcting 56, 223
identifying 52, 221
invalid contents, elements with
correcting 55
invalid elements
for anchored frames
(structured) 362
for cross-references 221
for equations 285
for footnotes 224
for imported graphics 519
for markers 454, 458
for system variables 238
for tables 188
invalid locations, elements at
correcting 55
identifying 52
inverse (reverse) text 325
inverting bitmaps 636
invisible colors 370
ISO Latin-1 encoding, saving files
using 26
Isolate Term command 281
items in scroll lists (structured) 454
J
Japanese crop marks 29, 374, 576
Japanese fonts
and Western fonts, combined 110
spacing in 109, 117
tsume 109
Japanese-language documents
autonumbering in 133
date and time variables in 233
page numbering in 469
rubi text in 76, 118
setting up options 412
sort order of index entries in 432,
451
Java code, inserting, in HTML
documents 574
JIS encoding, saving files using 26
job options 578
joining objects 335
JPEG files, in HTML documents 571
Jump hypertext commands 534, 537
justification, paragraph 111
automatic letter spacing and 117
K
<$kana> building block in special
text flow for indexes 443
kanji
in date and time variables 233
sort order of, in indexes 432
keeping together
footnotes and footnote
references 212
lines of text 120
paragraphs 120
table rows 177
kerning
pair 109
spell-checking text with vertical 86
tsume 109
key combinations
for quotation marks 73
for special characters 72, 74
for typing characters in dialog
boxes 677
keyboard shortcuts
See also online Help; Quick
Reference Card
for applying condition tags 304
for changing element types 40
for changing to FluidView
format 554
for Find/Change command 82
for inserting elements 37
for inserting variables 229
for removing condition tags 306
for special characters 72
for toggling side heads 554
for wrapping elements 38
macros and 625, 626
knockouts in color separations 371
kumihan rules
importing 415
kumihan rules, importing
with fmbatch 634
L
landscape (horizontal) page
orientation in new
documents 20
languages
for dictionaries 109
for spell-checking and
hyphenation 109
for Thesaurus 95
Greek math symbols in
equations 246, 269
side by side, in parallel text
flows 397
large math element type 257
last page
hypertext links to 538
printing, first 28
<$lastpagenum> building block 228
last-saved version, reverting to 25
.lck filename extension 22
leader dots, tab 115
in generated lists 448
in indexes 448
learning words when spell-
checking 87
legends 327, 358
letter groups in indexes 451
letter spacing in justified text 117
letter-by-letter index sort order 449
libraries, color 365
library of clip art 404, 407
ligatures 109
converting, to HTML 570
typing, in dialog boxes 678, 679
lightness, color 364
limits in equations 249
math element type 258
line breaks, equation 263
line breaks, in generated lists
(structured) 460
line breaks, text 119
in generated lists 425
in indexes 439
in rotated cells 176
saving, in Text Only format 26
line cap styles 321
line screens, halftone 375
line spacing 115

809
baseline synchronization and 396
feathered text and 395
lines of text
anchoring tables in 158
finding beginning or end of 80
keeping, together 120
merging, into paragraphs when
saving in Text Only format 26
spacing of 115
widow or orphan 120
lines, graphic
above and below paragraphs 121
as footnote separators 214
changing properties of 318
connecting 313, 333
drawing 313
links
creating to Web pages 539
OLE 512
PDF 578
to URLs 539, 558
Linotronic typesetters 376
lists
autonumbered 125
bulleted 128
HTML mappings for 563, 567
lists of expressions in equations 245
aligning items in 265
math element type 258
lock file (.lck) 22
log file for macros 628
logarithms in equations 250
adding operand to 254
transforming 277
logic symbols in equations 247
logical structure, defined 581
Long Division command 274
M
Macintosh encoding, saving files
in 26
macros
canceling 627
clearing current 628
deleting stored 628
described 625
file syntax 628
in dialog boxes 629
log file for 628
macro files for 627
playing back 627
repeating 629
sample 629
main dictionary 85
managed documents
editing 496
saving 496
managed files, uploading changes
to 497
manual equation alignment point
symbols (|) 8, 266
manual feed, when printing 29
manual hyphenation 119
margins
See also page margins
changing 382
table cell 178
marker building blocks 236
marker lists
See also generated lists; markers
editing entries in (structured) 456
finding sources for
(structured) 455
fixing problems in 425
generating 421
indexes compared to 419
inserting elements for 453
preparing source documents
for 421
preparing structured documents
for 453
marker text
changing found 81
editing 436
finding 81
for spot cross-references 203
in running headers and footers 235
markers
as conditional text 303, 304
defining types of 440
deleting 436
entering text in, without typing
(structured) 458
finding 81
highlighting, in view-only
documents 539
inserting, for hypertext
commands 532
inserting, for lists of markers 421
inserting, for spot cross-
references 203
selecting 436
symbol for 8
symbol for (structured) 454, 458
types of (structured) 454, 457
marks, crop and registration 28
master indexes for several books 436
master pages
adding background text to 384
adding template text frames on 388
assigning, to body pages 388, 392
assigning, to elements 407
assigning, to paragraph tags 392
background objects 379
creating 389
creating custom 389
creating rotated 390
deleting custom 392
displaying 383
effect on body pages 379
hypertext active areas on 531
importing and updating 415
importing and updating, with
fmbatch 634
introduction 378
multiflow documents and 397
none assigned to body page 392
overriding layout of, on body
pages 387
planning 410
renaming 391
reordering 390
system variables on 228, 385
updating body pages with changes
to 388
updating, with body page
changes 388
master table of contents for several
books 436
math definitions
importing and updating 415
importing and updating, with
fmbatch 634
math element definitions
changing spacing in 262
creating 257
math elements
adding operands to 254
alphanumeric characters 244, 245
braces ({}) 248

810
brackets ([]) 248
calculus symbols 247, 249
character formats for 267
choice functions 247
copying, cutting, and pasting 252
custom, creating 257
custom, inserting 251
deleting, from equations 253
delimiters 248
derivatives 249
diacritical marks 246
differentials 249
dots 246
equal signs 248
exponents 247
finding names of 260
functions 250
gradients 249
Greek letters 246
inserting 243
integrals 247, 249
intersections 247
limits 249
logic symbols 247
matrices 250
micropositioning 260
operators 247
parentheses 248
positioning 260
primes 246
products 247
radicals 247
relations 248
replacing 253
roots 247
spacing around 262, 268
straight quotation marks in
strings 245
strings 245
subscripts 247
summations 247
sums 254
superscripts 247
toggling formats for 254
types of 257
unions 247
math equations. See equations
math fonts, installing 268
Mathematical Pi font in
equations 268
matrices in equations 250
aligning cells in 266
changing 255
computing determinant of 276
math element type 258
transposing rows and columns
in 270
matrices of buttons, creating
hypertext active areas in 540
Matrix commands for equations 270
measurement units
dots per inch 511
measuring objects and distances 344
menus
hypertext pop-up 541, 548
in view-only documents 553
merging elements into one 41
Message Client hypertext
command 535, 544
message URL 539
messages, hypertext alert 543
metadata
adding to a book 465
adding to documents 27
micropositioning math elements 260
Microsoft Windows encoding, saving
files in 26
Microsoft Word, opening files
from 20
MIF
saving FrameMaker
documents 515
MIF 7.0 file format
saving files in 25
MIF file
saving a document with filters 292
MIF file format
.mif filename extension for 25
importing files in 506
opening files in 20, 68
saving files in 25
MIF files 23
opening as text 68
minutes in system variables 232
mirror images
creating, by flipping objects 336
printing (emulsion down) 375
missing attribute values 52
missing entries in generated lists 425
missing entries in generated lists
(structured) 459
missing fonts 21, 31
missing imported graphics 510
missing index entries 437
missing links in hypertext pop-up
menus 548
missing required elements
correcting 55
identifying 52
missing text insets 507
mixing colors 368
MML file format 68
MML files, opening as text 68
models, color 364
modification date, system variables
for 228, 232
modifying
a filter 293
condition tags 300
template components for DITA
structured templates 669
monitors
color display on 364
monochrome, converting images
to 637
months in system variables 233
movement, constraining 329, 330
movies
embedding 512
importing 510
moving
anchored frames 360
anchored frames into text
column 353
between table cells 158
cross-references 204
elements 42
elements one level 43
equations 243
graphics 330
header/footer text frames 385
in documents, view-only
(navigating) 552
insertion point in equations 252
insertion point in text 71
master pages 390
objects 330
objects into graphic frames 358
objects to back or front 331
objects with text 345

811
structured tables 194
table cells and contents 191
table rows or columns 171
tables 164
text 75
variables 229
multibyte characters 487
multicolumn layouts
aligning text in 394
anchored frames in 350
footnotes in 215
margins of, changing, on one
page 387
new documents with 20
number of columns in,
changing 382, 387
straddle paragraphs in 122, 124
tables in 169
multiflow documents
comparing 485
newsletter-style text flows for 398,
399
parallel text flows for 397
text flows in 397
text flows in, tracking 403
multilingual documents, parallel text
flows for 397
multimedia files
embedding 512
importing 510
multipage tables
page breaks in 176
setting up 160
multiplication operators in
equations 247
Multiply commands for
equations 272
MUNSELL System colors 365
N
named destinations, PDF 578
naming
backup files 27
book files 476
character tags, conventions for 138
colors 368
generated files in books 466
master pages 391
paragraph tags, conventions
for 138
reference frames 406
reference pages 405
NaN (Not a Number) in
equations 276
navigating
in view-only documents 552
negative exponents, removing, from
equations 274
negative images, printing 375
nesting
tables in other tables 193
networks, compatibility across 31
new features 3
newsletters
continuation columns in 403
synchronizing text baselines in 396
text flows for 397, 399
NewTemplate file 415
next page
hypertext links to 538
next paragraph
keeping heads with 120
specifying format for 121
<$nextsubdoc> building block in
HTML macros 569
NoName element tag
in book files 476, 478
when wrapping elements 39
nonbreaking hyphens
typing, in dialog boxes 678, 679
nonbreaking hyphens, typing 119
nonbreaking spaces
symbol for 8
typing, in dialog boxes 678, 680
nonprinting items
finding 79
nontext items, finding 76
<$nopage> index marker building
block 430
<$nopage> index marker building
block (structured) 457
nudging elements one level 43
Number Crunch command 275
numbering
chapter and volume in paragraph
formats 130
chapters 228
chapters in headers 386
determining how pages are
numbered 468
footnotes 214
footnotes, styles for 213
in tables 180
lists 125
pages 468
pages in headers and footers 385
specifying volume and chapter 469
volumes 228
volumes in headers 386
numbers
aligning, on decimal 113
chapter, in books 471
floating-point, in equations 275
in equations, font for 269
sheet, of multipage tables 160, 228
numeric spaces, typing 73
in dialog boxes 678, 680
numeric underlining 108
<$numerics> building block in
special text flow for indexes 443
O
object (gravity), attraction 333
object elements
See also elements
cross-references 217
default structure for, when
wrapping 39
described 33
equations 282
format rules for 141
hypertext commands 555
imported graphics 518
imported graphics
(structured) 518
markers 453, 457
removing 45
system variables 238
object movement, constraining 330
object path 312
Object Selection tool 316
object stacking, back to front (draw
order) 331
<$ObjectId> hypertext building
block 550
objects
See also graphics; object elements
bringing objects to front 331
making touch 334
measuring 344
sending objects to back 331

812
<$ObjectType> hypertext building
block 550
odd page count in documents 382
Offset from Left option 387
Offset from Top option 387
offsets
of anchored frames 347
of equations 330
of objects 330
of objects, inspecting 344
of superscripts and subscripts 109
ogonek characters (ž), typing, in
dialog boxes 679
OLE objects
using 512
Online color library 366, 558
Open Document hypertext
commands 534, 537
Open Prepress Interface 376
opening
documents in earlier FrameMaker
version 23
topicrefs in a ditamap file 659
opening and saving
XML files 620
opening documents 20
after crashes or power failures 23
displaying file translation errors
when 31
faster 23
file formats recognized when 20
from book window 465
from other applications, hypertext
commands for 544
in book files 479
in use 22
lock files and 22
MIF and MML files 20, 68
new unnamed, hypertext
command for 539
SGML, XML, MIF, and MML files
as text 68
special cases when 21
substituting fonts when 21, 31
text files 22
updating references when 23
view-only, in new window 553
with fmbatch 632
with unknown file type 21
operands, adding, in equations 254
operators
in equations 247
inserting 247
OPI 376
optimizing documents for PDF file
size 579
options
for processing XML 621
setting to display attributes 666
order of index entries 431, 449
problems with 438
Order Sum commands for
equations 271
orientation, page
for new documents 20
rotated 390
orphan lines in paragraphs 120
orphan rows in tables 177
Other Rewrites commands for
equations 279
outlines, autonumbering 131
ovals, drawing 314
overflows, text frame 325, 400
overlapping objects 331
printing colored 371
overlapping text frames, causes
of 392
overprinting objects 371, 372
overrides, format 107
change bars and 483
creating character and paragraph
formats for 558
HTML conversion and 558
removing 134, 136, 183
removing, when importing
formats 415
table formats and 164
overrides, layout
changing page layout 387
removing, when importing
formats 415
overrides. See format overrides;
format rule overrides
overriding
default punctuation of run-in
heads 125
hypertext active areas on master
pages 531
oyamoji and rubi text 118
P
page breaks
controlling 120
in tables 176
starting position for tables and 168
page count
even or odd 382
in books 471
in documents 385
system variable for 228
page layout
basic, in templates 410
changing 380
column layout, changing 382
column layout, in new
documents 20
custom 387
custom master pages and 389
double-sided 381
headers and footers for 384
HTML conversion and 556
importing and updating 415
importing and updating, with
fmbatch 634
introduction 377
overriding 387
page size 380
portrait or landscape 20
rotated 390
single-sided 381
symmetrical and asymmetrical 382
thumbnails of 29
page margins
anchored frames in 354
changing, on individual page 387
changing, throughout
document 382
in new documents 20
suppressing, in view-only
documents 553
page numbers
highest, in book 471
highest, in document 385
hypertext links to 538
in cross-references 206
in documents 385, 470
in generated lists 447
page n of x style, in books 471
system variables for 228
page ranges in index entries
creating 430
problems with 437

813
page side, first
in new documents 20
page size
changing 380
of new documents 20
<$pagenum> building block
in cross-reference formats 206, 207
in special text flow for generated
lists and indexes 443
<$pagenumonly> hypertext building
block 550
pages
adding headers and footers to 384
adding, automatically 71
adding, disconnected 401
autoconnect and 400
blank, adding or deleting at ends of
documents 382
blank, preventing from
printing 29, 375
breaks between 120
changing pagination 381
counting, in books 471
counting, in documents 385
custom layout for 387
deleting 76
deleting, disconnected 401
deleting, from ends of
documents 382
double-sided, printing 28
orientation of, changing 380
orientation of, in new
documents 20
positioning tables on 195
preventing creation of 400
ranges of, in index entries 430, 437
rotating 390
thumbnails, printing 29
pagination
See also page numbers
changing 381
pair kerning 109
PANTONE libraries 366
paper size 30
Paragraph Catalog 101
adding formats to 138
deleting formats from 137
displaying 103
paragraph cross-references 201
paragraph default font, applying to
text 103
paragraph default properties,
applying to text 103
Paragraph Designer 105
As Is property settings in 106
Chinese spacing properties in 118
Default Font properties 108
displaying catalog format
properties in 105
Japanese spacing properties in 118
Numbering properties and
tables 180
Table Cell properties 178
paragraph formats 101, 139
applied to structured table 187
applying 102
applying, globally 106
applying, to paragraphs with
certain tags 106
copying and pasting 104
creating 138
creating, for format overrides 558
deleting 137
designing, for templates 411
duplicating 415
for anchored frames 412
for footnotes 213
for table text 160
for text callouts 412
graphics used in 121
HTML mappings for 563
importing and updating 415
importing and updating, with
fmbatch 634
in generated lists 443
in indexes 443
properties in 107
reference frames used in 404
specifying, for next paragraph 121
table cell margins and 178
updating 134, 136
updating, in hidden conditional
text 308
vertical alignment in table cells
and 179
paragraph symbols (¶)
end of paragraph 8
finding 80
paragraph tags
assigning master pages 392
finding 76
guidelines for 138
in cross-references 206
in running headers and footers 235
paragraphs
aligning 112
autonumbering 125
boxing 121
bulleted lists and 128
centering 112
change bars and 482
converting into table text 162, 503
current 71
finding beginning/end of 80
full-width 122, 124
graphic lines above and below 121
in running headers and footers 235
indenting 111
indenting, in table cells 178
justifying 111
justifying, automatic letter spacing
and 117
keeping lines together in 120
keeping, together on page 120
language for spell-checking and
hyphenation 89
line spacing within 115
lines above and below 121
lists, autonumbered 125
marking all, for rechecking 88
next, paragraph format for 121
rules above and below 121
run-in heads 122, 125
selecting 75
side heads 122, 554
space between, when
feathering 395
start position of 120
straddle 122, 124
tab stops in 113
word spacing in 116
parallel text flows, setting up 397
<$paranum> building blocks
in cross-reference formats 206, 207
in HTML macros 569
in running header/footer
variables 235
in special text flow for generated
lists and indexes 443
<$paratag> building block
in cross-reference formats 206, 207

814
in HTML macros 569
in running header/footer
variables 235
in special text flow for generated
lists 443
<$paratext> building block
in cross-reference formats 206, 207
in HTML macros 569
in special text flow for generated
lists and indexes 443
<$parentdoc> building block in
HTML macros 569
parentheses () in equations 248
removing 253
toggling format of 254
pasting. See copying; moving
path, object 312
pathnames, file location
for imported files 508
in hypertext commands 535
PDF documents
converting to 575
hypertext links in 536
importing pages into
document 506
optimizing for file size 579
preparing anchoraged frames
for 361
reducing file size 579
saving 575
setting up articles for 577
setting up bookmarks for 577
setting up bookmarks for
(structured) 583
specifying settings without saving
as PDF 580
PDF format 25
PDF job options 584
pen patterns 318
per thousand signs (‰), typing, in
dialog boxes 678, 679
personal dictionary 85
books 86
creating 91
managing 90
PICT format
problems printing rotated
graphics 337
placing insertion point
in equations 252
in text 71
in view-only documents 553
platforms, compatibility across 31
platforms, locking files across 22, 31
PM or AM in system variables 233
PNG files, in HTML documents 571
pointers
arrow 316
crossed I-beam 324
I-beam 316
Object Selection tool and 316
Smart Selection tool and 316
points
control 341
defining, for freehand curves 341
hyphenation 89
polygons
adding or removing corners and
sides on 341
drawing 313
drawing, regular 315
reshaping 341
polylines
adding or removing corners and
sides on 341
drawing 313
joining 335
printing 320
reshaping 341
polynomials, arranging 271
pop-up menus, hypertext 535, 541
troubleshooting 548
portrait (vertical) page orientation in
new documents 20
positioning
change bars 483
equations 243, 330
imported graphics 509
math elements in equations 260
tables in text frames 167
text in table cells 178
postfix math element type 258
PostScript files
documents printed as 30
postprocessing 376
power failures, opening documents
after 23
powers in equations, evaluating 280
preferences
autosave 27
backup 27
disable welcome scree 5
for inserting new elements 39
for showing file translation
errors 31
network and platform
compatibility 31
prefix math element type 258
preventing
bad page breaks 120
creation of new body pages 400
graphic frame from clipping
contents 359
hyphenation 90, 119
line breaks, text 120
printing of blank pages 29, 375
unresolved cross-references to
conditional text 304
widow/orphan lines 120
preview
final document with text edits 490
original document without text
edits 490
preview mode 490
previous location in hypertext
stack 540
previous page
hypertext links to 538
<$prevsubdoc> building block in
HTML macros 569
primes in equations 246
Print to File 468
printer drivers, Windows 28
printing
books 467
changing settings for 28
colors 371
colors as black 29
composite color pages 371
cross-references updated
when 208
customizing 28
dashed lines 320
DCS graphic files 373
documents 28
documents with 3D objects 526
documents with SWF files 524
FluidView documents 554
fmbatch messages 631
fmprint and 636
from book window 467
halftones 375

815
limitations on Windows
platform 365
negative or mirror images 375
pages, in books 467
PostScript files 30
RGB conversion on Windows
platform 365
rotated PICT images, problems
with 337
skipping blank pages when 29, 375
to files 30
to typesetters 376
with fmbatch 633
processing filters
using rules 293
processing XML
options 621
products in equations 247
adding operands to 254
evaluating 281
programs, application, hypertext
commands to start 544
projecting cap for lines 321
proportional spaces 72
ps_prolog file 29, 375
publishers
finding 76
generating lists and indexes of 420
publishing
documents with text edits 491
pull-quote, creating 402
punctuation
after run-in heads 125
in autonumber formats 127
in conditional text 299
spacing of, in Japanese fonts 118
squeezing 118
Q
question marks (?)
as wildcard for finding 79
double, in index entries 437
in equation objects 284
finding literal 79
in equation objects 283, 285
prompt, in equations 241
quick-copying
objects 329
text 75
QuickTime movies 510
quitting (exiting), hypertext
command for 546
quotation marks
converting, to HTML 570
straight, in equations 245
typing 73
typing, in dialog boxes 678, 679
R
radicals in equations 247
adding operands to 254
evaluating 273, 280
radius of rounded rectangle
corners 340
ranges, page, in index entries
creating 430
problems with 437
rasterfiles, capturing 630
read-only attributes 46, 222
real attributes 48
rearranging master pages 390
recording macros 625
recover files 23
rectangles
drawing 314
rounding corners of 340
redrawing the screen 230, 330
reducing
PDF file size 579
printed page images 29
reference frames 406
above and below paragraphs 121
as footnote separators 214
renaming 406
reference pages 404
boilerplate graphics on 404, 407
importing and updating 415
importing and updating, in
books 472
importing and updating, with
fmbatch 634
math element definitions on 259
special text flows on
(structured) 459
special text flows on, for generated
hypertext documents 549
special text flows on, for generated
lists and indexes 441
special text flows on, for HTML
conversion 565, 571
unanchored graphic frames on 406
registering
software 1
registration marks, printing 28
regular polygons 315
rehyphenating documents 90
rejecting
text edits 489
related words, Thesaurus lookup
of 94
relations in equations 248
relative pathnames for imported
files 508
relative tab stops 72
<$relfilename> hypertext building
block 550
remembering missing font names 21,
31
Remove Division commands for
equations 274
Remove Negative Powers, commands
for equations 275
removing
See also deleting
all elements in flow 45
attribute values 47
braces ({}) from equations 253
brackets ([]) from equations 253
brackets ([]) from matrices in
equations 256
change bars 484
character formats from text by
restoring paragraph’s default
font 103
condition tags from text 305
contents but not elements 45
corners from objects 341
custom table ruling 181
custom table shading 183
delimiters from equations 253
documents from book files 466
elements and contents 45
elements but not contents 45
entries from generated lists
(structured) 456
format overrides 134, 136, 183
format rule overrides 141
found elements 51
gap between printed colors 371
handles from objects 341
inherited information from
books 481

816
layout overrides 388
layout overrides when importing
formats 415
negative exponents from
equations 274
page numbers from index
entries 430, 439
parentheses from equations 253
points from freehand curves 341
sides from polygons and
polylines 341
structured tables 194
table rows and columns 198
table titles 160, 191
text frames from text flows 402
undefined attributes 49, 56
vertices from polygons and
polylines 341
renaming
book files 466, 476
documents in book files 466
generated files in books 466
master pages 391
reference frames 406
reference pages 405
Table Catalog formats 185
reordering master pages 390
repeating graphics 379
repeating macros 629
repeating tab stops 114
replacing
elements 45
found text 84
imported graphics 508
in equations 253
table rows and columns 171
text insets 502
variables 229
words by using Thesaurus 95
reproduction quality printing
(printing resolution) 28
requirements 1
resetting
autonumbers 133
properties in Table Designer 165
reshaping objects 338
adding or removing corners 341
arcs 342
handles for 341
resizing
anchored frames 359
anchored frames, by
shrinkwrapping and
unwrapping 251, 348
bitmaps 511
document window automatically,
hypertext command for 538
header/footer text frames 385
imported graphics 511
objects 338
table cells and columns 171
table rows 173, 198
text frames 338, 382, 387
text line objects 338
text lines vs. text frames 323, 339
resolution
halftone 375
printing 28
screen, for imported graphic
scaling 511
resolving unresolved cross-
references 209
resources
for Adobe help 2
restoring last-saved version 25
retracing jumps in hypertext
documents 552
Return key, pressing to insert
elements 37
reverse text 325
Revert to Saved Book 466
reverting to last-saved version 25
revision management
about 482
revisions, indicating with change
bars 482
RGB color model 364
Roman and Japanese fonts
combined 110
Roman numerals
autonumbering with 129
footnote numbering with 213
page numbering with 469
roots in equations 247
evaluating 273, 280
math element type 258
Rotate Page command 391
rotating
equations 338
graphic frames 338
master pages and body pages 390
objects 337
objects by flipping 336
objects, snap rotate interval for 311
pages 390
PICT images, and printing
problems 337
structured cells and tables 199
table cells 176
tables 175
round cap for lines 321
rounded rectangles
changing corner radius of 340
drawing 314
row-by-row conversion of tables to
paragraphs 163
rows, equation matrix
changing 255
transposing, with columns 270
rows, table
adding 170, 197
conditional 303
conditional, finding 82
converting text to 162
copying, cutting, and pasting 171
height of 173
keeping, together on page 177
minimum number of, on page 177
moving 171
numbering across 180
removing 198
replacing 171
resizing 173, 198
ruling lines in 180
selecting 159, 190
shading in 180, 182
sorting 174
start position of 177
straddling cells in 173
RTF, saving documents in 25
rubi text
entering 76
entering using elements 100
properties of 118
properties of, importing 415, 634
using invalid elements with 100
wrapping elements around 100
ruler markings
aligning objects with 311
aligning tab stops with 114

817
rules
used to process a filter 293
Rules commands for equations 278
ruling lines above and below
paragraphs 121
ruling lines in tables 180
displaying settings for 183
styles for 181
Ruling properties 181
run-in heads 122, 125
anchored frames in 348
Running H/F system variables 228
running headers and footers 234, 386
autonumbers in 235
based on paragraph tags 234
chapters 471
condition tags in 236
dictionary style 237
for indexes 237
glossary style 237
in books 471
marker text in 235
marker types 235
paragraph tags in 235
paragraph text in 235
volumes 471
running text around objects
anchored frames 354
equations 328
tables 170
text line objects 328
unanchored graphics 328
S
saturation, color 364
saving
all files in book 467
automatically 27
book files 466, 476
conditional document
versions 308
document with filters as a .fm
file 292
document with filters as a .mif
file 292
document with text edits as
XML 489
documents 24
documents with SWF files as
PDF 523
documents with SWF files as
XML 524
documents with text edits 491
files with fmbatch 633
FrameMaker document with filters
by attribute as an XML file 292
FrameMaker documents as MIF
files 515
FrameMaker documents
containing 3D objects 525
macros in file 627
PDF files 575
structured documents as PDF 583
table cells as paragraphs 26
saving Flash content
in FrameMaker documents 523
scaling
imported graphics 511
objects 338
printed page images 29
table columns 171
text horizontally 110
schema with XML 622
scope of operation in equations 244
screen angles, halftone 375
screen images, capturing 630
screen readers, testing files in 640
screen redraw 330
screen resolution (imported graphic
scaling) 511
script math element type 258
scrolling
continuous, in view-only
documents 553
searching
See also finding
for Unicode characters 82
graphics 77
throughout books 77
seconds in system variables 232
See Also (HTML macro for cross-
references) 564
“See” and “See also” index
entries 430, 439
selecting
anchored frames 358
anchored frames (structured) 363
contents of elements 98
cross-references 204
elements 98
equations 252
footnotes in structured
documents 224
hypertext markers 533
in equations 252
in Structure View 98
in tables 158
in view-only documents 553
markers 436
Object Selection tool and 316
objects 315
paragraphs 75
Smart Selection tool and 316
structured table parts 190
structured tables 194
tables 164
text 75, 97
text, in structured tables 189
words 75
selection borders 317
selection handles
object 315
structured table cells 190
table cell 159
selection tools 315
semicolons (;) in index entries 429
semicolons (;) in index entries
(structured) 457
sending objects to back 331
separator frames, footnote 214
Separators paragraph tag, in
indexes 446
Series label (autonumber
counters) 125
setting
background color for 3D
objects 526
DITA options 664
lighting schemes for 3D
objects 526
options to display attributes 666
views for 3D objects 526
setting up on-screen keyboard
unicode support 155
SGML
opening documents from, as
text 68
SGML files
opening as text 68
opening in standard
FrameMaker 68
SGML, preparing for export to

818
anchored frames 282
equations 282
ID attributes 222
shading
in objects 318
in tables 180, 182
in tables, displaying settings
for 183
shadows, drop 331
sheet numbering in tables 160, 228
shell environment variables in
hypertext commands 535, 546
Shift-JIS encoding, saving files
using 26
shortcuts. See keyboard shortcuts
Show All Digits command 276
Show Element Context
command 140
Show/Hide settings, conditional text,
inconsistent 475
shrinkwrapping
anchored frames 348
equations 284, 285
equations in anchored frames 251
side heads 122, 123, 215
keyboard shortcut for toggling 554
sides of objects, adding or
removing 341
sign function in equations 250
Simplify commands for
equations 279
<$singlepage> index marker building
block 428
<$singlepage> index marker building
block (structured) 457
single-sided documents
changing pagination 381
creating 20
layout of 381
site dictionary 85, 92
size
font, of text 107
of objects, changing 338
of objects, inspecting 344
of pages in new documents 20
of pages, changing 380
of printer paper 30
of rubi text 118
of small caps 109
of superscripts and subscripts 109
of Western characters in combined
fonts 110
Smart Quotes 73
Smart Selection tool 316
Smart Spaces 73
smoothing and unsmoothing
objects 338
snap rotate interval 311
software
activating 1
installation 1
registering 1
software illustrations, capturing 630
Solaris platform
unicode support 152
sort order, index 431, 449
problems with 438
sorting tables 174
SortOrder paragraph tag, in
indexes 449
sound files, embedding 512
spaces, text
in conditional text 299
in text files 26
nonbreaking spaces 72
typing 72
typing, in dialog boxes 678, 680
spacing
above and below tables 167
above side heads 124
around math elements 262, 268
between characters 109, 116
between columns, changing 382,
387
between columns, in new
documents 20
between letters, automatic 116
between lines of text 115
between objects, measuring 344
between objects, setting 333
between side heads and body
text 123
between tables and titles 160
between text columns 20, 382, 387
between words 116
feathering text and 395
in Japanese fonts 109, 117
pair kerning 109
when synchronizing text
baselines 396
special characters
changing found items to 84
converting, to HTML 570
finding 79
typing 72
typing, in dialog boxes 677
special text flows on reference pages
for converting to HTML 565, 571
for generated hypertext
documents 549
for generated lists and indexes 441
special text flows on reference pages
(structured) 459
Specify Named Destination hypertext
command 534, 537
spell-checking
canceling 87
capitalization of text when 87
changing options for 88
clearing automatic corrections
when 88
conditional text 308
correcting words automatically
when 87
current page 86
documents with different
languages 89
hyphenated compound words 93
hyphenation and 89
languages for 89
learning words when 87
marking all paragraphs for
rechecking 88
specific text 86
subscript and superscript text 86
text insets 87
text to ignore when 89
throughout book 85
typing errors 85
vertically kerned text 86
splitting
elements 41
files during HTML conversion 562
tables 171
text frames to start new flows 402
spot colors 374
spot cross-references 202, 203
spread
between characters in text 109
between math elements in
equations 262, 268
spreads, double-sided 381

819
squares, drawing 314
squeezing punctuation 118
stacking objects 331
start angles
for arcs 342
for regular polygons 315
start of paragraph, finding 80
start of word, finding 80
start positions
for paragraphs 120
for tables 168
starting
fmbatch 631
<$startrange> index marker building
block 430
<$startrange> index marker building
block (structured) 457
status bar
asterisks in 140
steps, retracing, in view-only
documents 552
straddles
anchored frames 350
feathering text in columns and 395
footnotes 216
paragraphs 122, 124
table cells 198
table cells as 173
tables 169, 195
streams (autonumber counters) 129
stretching characters 110
string attributes 48
strings in equations 245
font for 269
structure errors. See errors in
structure
Structure View
attributes in 46
default structure in, when
wrapping 39
equation elements in 282
finding errors using 52
graphic elements in 362
ID attributes in 218
insertion point in 97
invalid attributes in 221
selecting in 98
straddle table cells in 198
tables in 186
structured book
element hierarchy in 140
structured books
book files 476
importing element definitions
into 479
importing formats into 481
removing inherited information
from 481
validating 480
structured documents
adding index marker elements
in 456
anchored frames in 361
creating equations using
elements 283
cross-reference formats in 218
cross-references in 217
editing elements in
conditional 309
elements in 32
embedding tables of contents
in 460
endnotes in 225
entering text in 99
equation elements in 282
filling anchored frames in 363
finding list entry sources 455
footnotes in 223
formating lists, indexes 458
formatting text in 139
generating tables of contents
in 454
graphic elements in 345
ID and ID Reference attributes
in 218
importing graphics into 518
inserting element-based cross-
references in 219
inserting hypertext commands
into 555
inserting multiple references to
footnotes 225
list entries, editing and
deleting 456
marker lists in 453
providing your ID values in 222
removing format rule overrides
in 140
resolving cross-references in 222
rotating cells and tables in 199
saving as Adobe PDF 583
selecting in window 97
tables of contents in 453
troubleshooting lists in 459
valid variables in 238
variables in 237
working with ID values in 221
working with tables in 186
working with text in 95
structured tables
See also tables
adding ‘continuation’ text to 192
adding or removing titles 191
adding, removing rows and
columns in 197
adjusting rows and columns in 197
applying different formats to 194
copying or moving 194
copying, moving, removing 194
elements 186
elements for 186
filling in with text, graphics 189
in tables 193
inserting elements for 187
invalid elements 188
nesting tables in 193
placing graphics in cells 192
positioning on pages 195
removing 194
rotating 200
running text around 196
selecting 194
straddling and unstraddling cells
in 198
straddling columns 195
subentries in index entries 429
subject indexes 420
submenus, hypertext pop-up 542
subscribers
text, finding 76
text, generating lists and indexes
of 420
subscript text
in equations 247
size and placement of 109
spell-checking 86
substituting fonts when opening
documents 21, 31
substitution in equations
evaluating 277
math element type 258
rules for 278

820
subtraction operators in
equations 247
summary documents
about 486
described 486
summations in equations 247
adding operands to 254
evaluating 281
superscript text
in equations 247
size and placement of 109
spell-checking 86
support 2
suppress hyphenation symbols 8
typing, in dialog boxes 678
suppressing
automatic update of cross-
references 23, 209
automatic update of text insets 23,
507
autonumber display 130
hyphenation 90, 119
margins, headers, and footers in
view-only documents 553
updating of imported graphics 23
updating of linked objects 513
SVG files, importing 509
SWF files
disabling embedding in PDFs 580
enabling embedding in PDFs 580
importing into FrameMaker
documents 522
symbols
boilerplate graphics and 404, 407
finding 79
footnote numbering with 213
format rule overrides using 141
inserting 246
<$symbols> building block in special
text flow for indexes 443
symmetrical objects 336
symmetrical page layouts 382
synchronizing text baselines along
grid 396
synonyms
in index entries 430
looking up, in Thesaurus 94
syntax
for cross-reference formats 205
for hypertext commands 535
for index markers, problems
with 437
for macro files 628
for system variable definitions 232
mathematical, in equations 244
system crash, file recovery after 23
system variables
See also user variables; variables
adding to structured flow 237
default values for 228
inserting elements for 238
introduction 226
updating 238
systems, color 364
T
tab leader dots 115
in generated lists 448
in indexes 448
tab stops 113
absolute and relative 72
formatting bar and 104
in generated lists 448
in indexes 448
tabbed text
converting to table 162
typing 71
table anchor symbols 8, 168
Table Catalog
adding formats to 185
deleting formats from 185
displayed in Table Designer 165
Table Continuation system
variable 160, 228
Table Designer
applying properties from 165
As Is property settings in 106
displaying 165
displaying catalog format
properties in 166
properties of tables not set in 157
resetting properties in 165
Ruling properties 181
Shading properties 182
Table Designer, adding table titles
using 191
table formats
adding, to Table Catalog 185
applying 166, 184, 194
choosing, for new tables 158
creating 185
defined 157
deleting 185
displaying properties of, in Table
Designer 166
duplicating 415
HTML conversion and 574
importing and updating 415
importing and updating, with
fmbatch 634
overrides of 164
overrides of, removing 183
properties of 157, 167, 176
removing overrides, when
importing formats 415
renaming 185
structure 187
updating 183
table of contents
about 418
table of contents.See tables of
contents/
table parts
See also cells, table; columns, table;
rows, table
elements for 186
inserted automatically 187
wrapping contents in 38
table ruling styles 181
Table Sheet system variable 160, 228
table tags, finding 76
table titles
adding 160
autonumbering, based on section
numbers 131
removing 160
tables
See also structured tables
adding rows and columns 170
aligning, within indents 167
anchor symbol for 188
anchor symbols for 8
autonumbering in 180
boxing paragraphs within 121
cell margins in 178
centering text vertically in cells
of 179
color of ruling lines in 181
color of text in 366
combining 171
conditional 303

821
continuation text in 192
continuation text in, for titles and
headings 160, 228
converting text to 162
converting, to HTML 574
converting, to text 163
copying rows and columns 171
copying, cutting, and pasting 164
customizing 157
default paragraph formats for 160
default structure for, when
wrapping 39
deleting 164
displaying ruling and shading
settings of 183
editing 158
elements for 186
finding 76
floating 168
footnotes in 211
for figures or graphics 327
formatting multiple tables 184
formatting of 187
full-width 169
gap between titles and 160
graphics in 192
HTML mapping 565
importing text files into 162, 503
in multicolumn layouts 169
in tables 161
indenting 167
inserting new empty 158
inserting, in table cells 161
introduction 157
moving 164
moving rows and columns 171
multipage, setting up 160
orphan rows in 177
page breaks in 176
parts of 186
placing graphics in cells of 161
positioning 167
properties affecting 157
relationship to other elements 188
resizing columns 171
rotating 175
row height 173
ruling lines in 180
running text around 170
searching for 76
selecting 164, 190
selecting in 158
shading in 180, 182
sheet numbering in 160, 228
sorting 174
space above and below 167
splitting 171
start position for 168
straddling cells 173
straddling text columns 169
structured documents and 186
tabs in 158
titles of 160, 191
titles of, autonumbering, based on
section numbers 131
typing text in 158
vertical alignment of text in 179
tables of contents
See also generated lists
creating master for several
books 436
editing 423
embedding in documents 426
embedding in structured
documents 460
for HTML documents 573
generating 421
troubleshooting 425
updating 423
tabs
finding 80
in autonumber formats 127, 129
in generated lists 448
in index entries 448
inserting in tables 189
symbol for 8, 71
typing 71
typing, in dialog boxes 678, 680
typing, in tables 158
Tag area
asterisks in 140
when changing elements 40
when inserting elements 37
when wrapping elements 38
tagged PDF 578, 581
creating from FrameMaker 582
testing for accessibility 640
tags, metadata 27, 465
tall pages (portrait) in new
documents 20
template components
modifying for DITA structured
templates 669
template text frames (tagged) 379
adding, to master pages 388
assigning, to body pages 388
templates
and page layout 377
autonumbering in 411
creating 410
described 19
designing 409
folders for 413
fonts in 411
for blank paper 414
for book files 410
for conditional documents 299,
414
for generated files (structured) 458
for generated lists 414, 441
for HTML documents 412
for indexes 414, 441
for mapping to HTML
elements 558
for text files 414
importing formats from 415
introduction 409
organizing 413
standard 19
testing 413
Templates folder 19, 413
testing high-contrast viewing 640
testing tagged PDF documents 640
text
added automatically with
elements 35
adding change bars to 482
aligning 112
aligning, at tab stops 113
aligning, in multicolumn
documents 394
anchored frames obscuring 348
applying character and paragraph
formats to 102
autonumbering with 125
background 379
balancing, across columns 394
callouts 323
Character Catalog formats for 101
continuation, in table titles and
headings 160, 228

822
continuation, in tables 192
converting cross-references to 204
converting variables to 230
converting, to table 162
copying, cutting, and pasting 75
deselecting 75
drawing tools for 323
duplicating, by dragging 75
editing 75
feathering 395
flowing, around graphics 328, 354
flowing, around tables 170
formatting, in cross-
references 205, 207
formatting, in variables 231
formatting, with formatting
bar 104
hypertext active areas in 530
importing into structured
documents 516
in anchored frames 357
in footnotes 224
in graphics 323
in structured tables 189
in table cells, positioning 178
inserting strings 245
insertion point in 95
justifying 111
letter spacing within 109, 116
moving 75
numeric underlining of 108
orphan lines of 120
pair kerning 109
Paragraph Catalog formats for 102
pasting 75
pasting objects into 329
quick-copying 75
reverse (white on dark
background) 325
rubi, entering 76
rubi, properties of 118
running around tables 196
running, around graphics 328, 354
running, around tables 170
selecting 75, 97
static, in generated lists and
indexes 441
static, in HTML documents 571
synchronizing baselines of 396
typing, in dialog boxes 677
typing, in documents 71
typing, in rotated text frames 391
typing, in table cells 158
vertical alignment of, in table
cells 179
widow lines 120
wildcard searches for 79
text boxes, empty 106
text edits
accepting 489
finding 489
publishing 491
rejecting 489
saving 491
tracking 487, 489
.text filename extension 25
text files
.text filename extension for 25
opening 22
opening SGML, XML, MIF, and
MML as 68
saving 26
template for 414
text flows 380
about special, in indexes and
lists 442
balancing text in, across
columns 394
bypassing text frames in 402
combining 401
controlling 400
editing for lists and indexes 443
feathering 395
in multiflow documents 397
multiple nonparallel 398, 399
on body pages 398
overflowing 325, 400
parallel 397
removing all elements from 45
removing text frames from 402
side-head areas and 123
special, on reference pages
(structured) 459
splitting text frames into 402
synchronizing baselines in 396
tracking 403
text frames
adding 324
adding, on body and master
pages 388
aligning text with bottom of 395
and anchored frame positions 347
and other frame types,
compared 322
and text line objects, compared 323
assigning color to 319, 366
balancing text across columns
in 394
bypassing, in flow 402
changing page size, effect on 380
color of 366
connecting 388, 401
cross-referencing 403
disconnecting 402
drawing properties of 318
feathering text in 395
gutters for, changing 382
gutters for, in new documents 20
header and footer 384
in table cells 193, 197, 200
margins for, changing 382, 387
margins for, in new documents 20
number of columns in,
changing 382
number of columns in, in new
documents 20
overflowing 325, 400
overlapping, causes of 392
removing, from text flows 402
resizing 338, 382, 387
reverse text in 325
rotating 337
rotating tables in 176
selecting 316, 317
side heads in 122
splitting 402
synchronizing text baselines in 396
unrotating 338
unsplitting 403
text insets 502
as tables of contents
(structured) 461
conditional text in 307
converting, to editable text 507
cross-reference formats in 208
cross-references to 202
described 516
generating lists and indexes of 420
importing, from formatted text
files 502

823
importing, from unformatted text
files 503
missing, locating sources of 507
pathnames for 508
replacing 502
spell-checking 87
unresolved, locating sources of 507
updating options for 23, 503
variables in 232
text line objects
aligning 332
and text frames, compared 323
changing character format of 324
color of 319, 366
condensing or expanding 110
creating 324
drawing properties of 318
for math elements 259
moving 329
resizing 338
reverse text and 326
running text around 328
scaling, horizontally 110
selecting 316, 317
spell-checking and hyphenation
language of 89
stretching 110
Text Only format 26
text snippets
clicking near 97
for cross-references 220
for empty elements 33
for equations 282
for footnotes 224
for graphics (structured) 362
for invalid contents 55
for markers (structured) 454, 458
for system variables 238
for white space 33
text symbols
finding 79
Thesaurus 94
thin spaces
typing 73
typing, in dialog boxes 680
thumbnail images, printing 29, 376
thumbtabs, adding to an index 549
TIFF files, printing color separations
for 372, 373
time
in headers and footers 385
system variables for 228, 232
tints 366
titles
of generated files, disappearing
(structured) 460
of generated lists 441
of generated lists, disappearing 426
of graphics 327, 358
of HTML documents 571
of indexes 441
of indexes, disappearing 439
of tables 160, 191
of tables, autonumbering, based on
section numbers 131
TOCs. See also tables of contents/
toggling format of math elements 254
tombo crop marks, printing 28
Tools palette
displaying 310
drawing properties on 318
illustration 310
top of column/page
anchored frame position 348
paragraph position 120
table position 168
table row position 177
topic-oriented authoring
DITA 647
topicref element
inserting 660
TOYO Color Finder 366
tracking
changes while editing 488
text edits 487, 489
tracking changes
while editing 488
tracking mode 490
tracking text edits
turning off 488
turning on 488
trademark symbols
converting, to HTML 570
typing, in dialog boxes 678, 680
transforming equations 269
translation errors, file 31
transparent objects 319
transposing rows and columns in
matrices 270
trapping objects 373
triangle insertion point in Structure
View 96
triggers, macro 625, 626
trigonometric functions in
equations 250
troubleshooting
book files 475
filtering files 31
generated lists 425
generated lists (structured) 459
HTML conversion 574
hypertext documents 548
indexes 437
opening files 21
PDF conversion 582
searches 83
unavailable fonts 21, 31
TRUMATCH 4-Color Selector 366
tsume font properties 109
turning off
tracking text edits 488
turning on
tracking text edits 488
two-sided pages, printing 28
txttmplt file 415
type
reverse 325
size and style of 107
typesetters, printing to 376
typing
abbreviation for inches 73
bullets 72
dashes 72
hyphens 119
quotation marks 73
rubi text 76
spaces 72
special characters 72
special characters in dialog
boxes 677
tabbed text 71
text 71
text in dialog boxes 677
text in rotated text frames 391
text in structured documents 99
text in table cells 158
text, in structured tables 189
typing errors, correcting with
Spelling Checker 85

824
U
umlaut, Hungarian, characters ( ),
typing, in dialog boxes 678, 679
unanchored graphic frames
and anchored frames,
compared 322
drawing 343
drawing, on reference pages 406
placing graphics in 358
unanchored graphics
in page background 379
running text around 328
unavailable fonts 21, 31
unconditional text, restoring, by
removing condition tags 305
unconnected body pages 401
undefined attributes
identifying 52
removing 56
undefined elements
in Structure View 52
understanding 647
ungrouping
objects 335
Unicode characters
searching 82
unicode support
on Solaris 152
setting up on-screen keyboard 155
unions in equations 247
adding operands to 254
unique ID attributes. See ID
attributes
Universal Greek font in
equations 268
universal resource locators, creating
links to 558
UNIX commands
executing with fmbatch 635
hypertext execution of 545
UNIX encoding, saving files in 26
UNIX macros and utilities 625
UNIX utilities 630
UNIX version of FrameMaker
about 625
unresolved cross-references
causes of in structured
documents 222
finding 76, 210
finding in structured
documents 222
generating lists of 210, 223
HTML conversion and 574
resolving 209
to conditional documents 304
unresolved text insets
generating lists and indexes of 420
locating sources of 507
unrotating graphic objects 338
unsmoothing and smoothing
objects 338
unstraddling
structured table cells 199
structured tables 196
unstraddling table cells 173
unsymmetrical page layouts 383
unwrapping contents of elements 42
unwrapping equations in anchored
frames 251
Update Column Layout
command 388
updating
body pages with master page
changes 388
book files 473, 477
books with fmbatch 634
character formats 134, 136
character formats in hidden
conditional text 308
cross-references manually 209
cross-references when
printing 208
cross-references with fmbatch 634
cross-references, suppressing
automatic 23, 209
DITA maps 663
DITA references 663
DITA topics 663
documents from template 415
formats from another
document 415
formats from another document
with fmbatch 634
formats in books 472
generated files in book files 473
generated files with fmbatch 634
generated lists 423
generated lists from template 441
generated lists with fmbatch 634
graphics imported by reference 23,
502
imported template formats
and 415
indexes 434
indexes from template 441
indexes with fmbatch 634
linked objects 513
master pages with body page
changes 388
paragraph formats 134, 136
paragraph formats in hidden
conditional text 308
system variables (structured) 238
table formats 183
templates for 415
text insets, options for 23, 503
variables 230
URLs, creating links to 558
user communities 3
user variables 237
See also system variables; variables
creating 231
inserting (structured) 239
introduction 226
using
boolean expressions 302
indexterms 667
using DITA in FrameMaker 8 656
Using Filters online manual 25
utilities, UNIX 630
V
validating
book files 480
documents 52
error messages for, in book
files 480
error messages for, in
documents 54
validity
ID attributes and 221
requirements for 32
<$variable> building block in HTML
macros 569
variable definitions
editing 232
importing and updating 415
importing and updating, with
fmbatch 634
in conditional documents 299
variables

825
See also system variables; user
variables
as conditional text 303
changing definitions of 232
converting, to text 230
copying, cutting, and pasting 229
deleting 230
editing 229
environment, in hypertext
commands 535, 546
finding 76
for continuation text in tables 192
for dates 228, 232
for filenames 228
for page numbers 228
for running headers and
footers 234
for tables 160, 228
for time 228, 232
formatting text in 231
importing and updating 415
importing and updating, with
fmbatch 634
importing definitions 231
in background text frames 385
in conditional documents 299
in equations, changing font of 267
in text insets 232
inserting 74, 228, 385
introduction 226
moving 229
replacing 229
system, default definitions of 228
UNIX environment, in hypertext
commands 535
updating 230
user, creating 231
using conditional text or 299
variable-width Japanese text
(tsume) 109
vertical (portrait) page orientation in
new documents 20
vertical alignment of text in table
cells 179
vertical bar characters (|)
as manual equation alignment
point symbol 8, 266
as wildcard for finding 80
finding literal 79
vertical distribution of objects 333
vertical division bar math element
type 258
vertical kerning, spell-checking text
with 86
vertical lines, drawing 313
vertical lists of expressions in
equations 245
adding items to 246
aligning items in 265
math element type 258
vertical movement, constraining
objects to 329, 330
vertices
adding or removing 341
number of, in regular polygons 315
video files
embedding 512
importing 510
view only files 25
View Only format 555
view settings
for colors 370
for conditional documents 306
for conditional documents,
template for 414
view-only documents
continuous scrolling in 553
converting editable documents
to 551
displaying, in separate
windows 553
FluidView 553
highlighting markers in 539
hypertext commands to close 546
menus in 553
navigating in 552
placing insertion point in 553
selecting in 553
view-only documents, books 551
views
setting for 3D objects 526
<$volnum> building block
in cross-reference formats 206
228
volume numbers
cross-references 206, 471
in headers and footers 386
in paragraph formats 130
specifying 469
variables 228
W
.wav files, embedding 512
WebDAV
adding documents to the
server 494
checking documents out and
in 495
editing a managed document 496
getting started 493
importing a file from a server 497
managed documents 492
managing document links 498
managing link updates 499
managing links 498
opening documents from
WebDAV 495
remote file management 492
revert to server version 497
saving a managed document 496
saving documents on
WebDAV 495
sccessing other files on a WebDAV
server 497
server requirements 493
setting preferences 493
understanding 492
updating all open documents 497
Upload to Server command 497
workgroup management 492
workgroup server
configuration 493
Web-safe colors 366, 558
weight, font 108
welcome screen 5
disable 5
Western and Japanese fonts,
combined 110
Western crop marks 28
what’s new 3
wheels, color 364
white cutout (reverse text) 325
white, converting to black in
bitmap 636
wide pages (landscape) in new
documents 20
widow lines in paragraphs 120
width
equation line-break 264
line, graphic 320
of characters, stretching 110
page 380

826
table column, resizing 171
table ruling line 181
wildcards
for finding 79
Windows
printer drivers 28
word count 487
word-by-word index sort order 449
words
adding, to personal or document
dictionary 87, 93
selecting 75
spacing between 116
workflow management
uploading changes 497
workgroup management
getting started with 493
preferences for 493
workspace
about 5
components 5
wrapping
or converting to a table 38
wrapping elements 37
advice on 38
X
XML
equations 282
opening as text 68
preparing for export 222
with cascading style sheets 622
XML documents
exporting from unstructured
documents 26
opening as text 68
XML file
saving a FrameMaker document
with filters by attribute 292
.xml filename extension 27
XML files
opening and saving 620
opening as text 68
opening in standard
FrameMaker 68
XML format 25
XML with schema 622
XML with XSL transformation 621
XMP format 27, 465
XSL transformation
for XML 621
xwd format 630
xwd8to1 utility 637
Y
Y dieresis, typing, in dialog
boxes 678, 680
year
in headers and footers 385
in system variables 228, 233
