e DATA TT1000 Badge Reader User Manual configuration
e-DATA GmbH Badge Reader configuration
UserManual.wiki
>
e DATA
>
TT1000 User Manual
>
configuration user manual
Contents
1.
installation user manual
2.
configuration user manual
configuration user manual
Navigation menu
Upload a User Manual
Namespaces
Wiki Guide
HTML
PDF
Info
Views
User Manual
Discussion / Help
Navigation
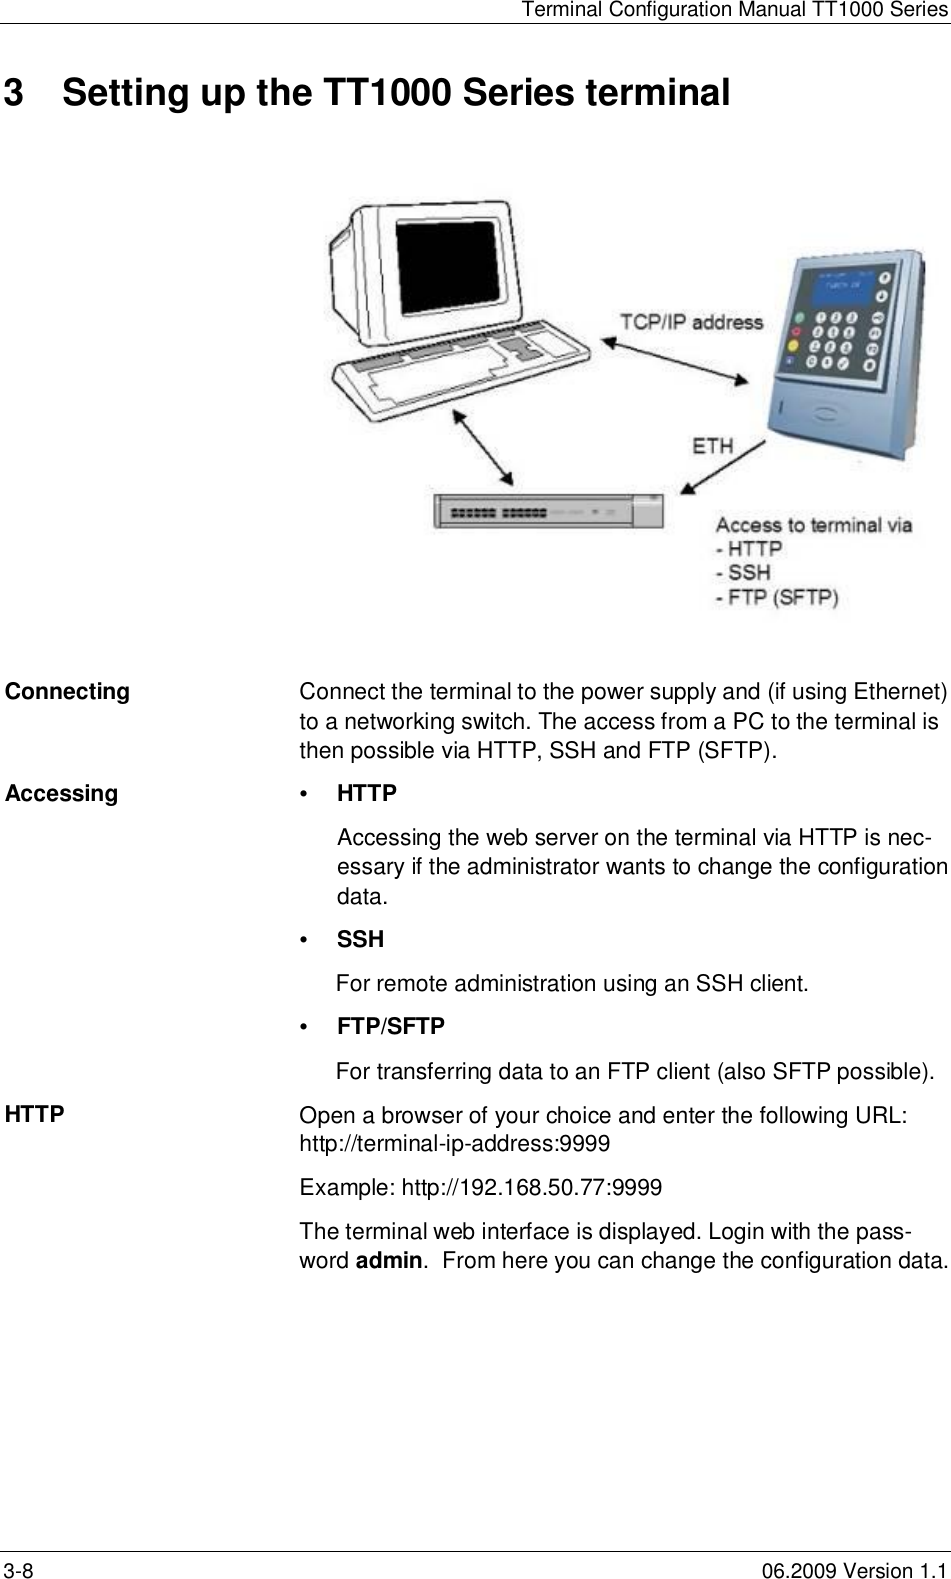
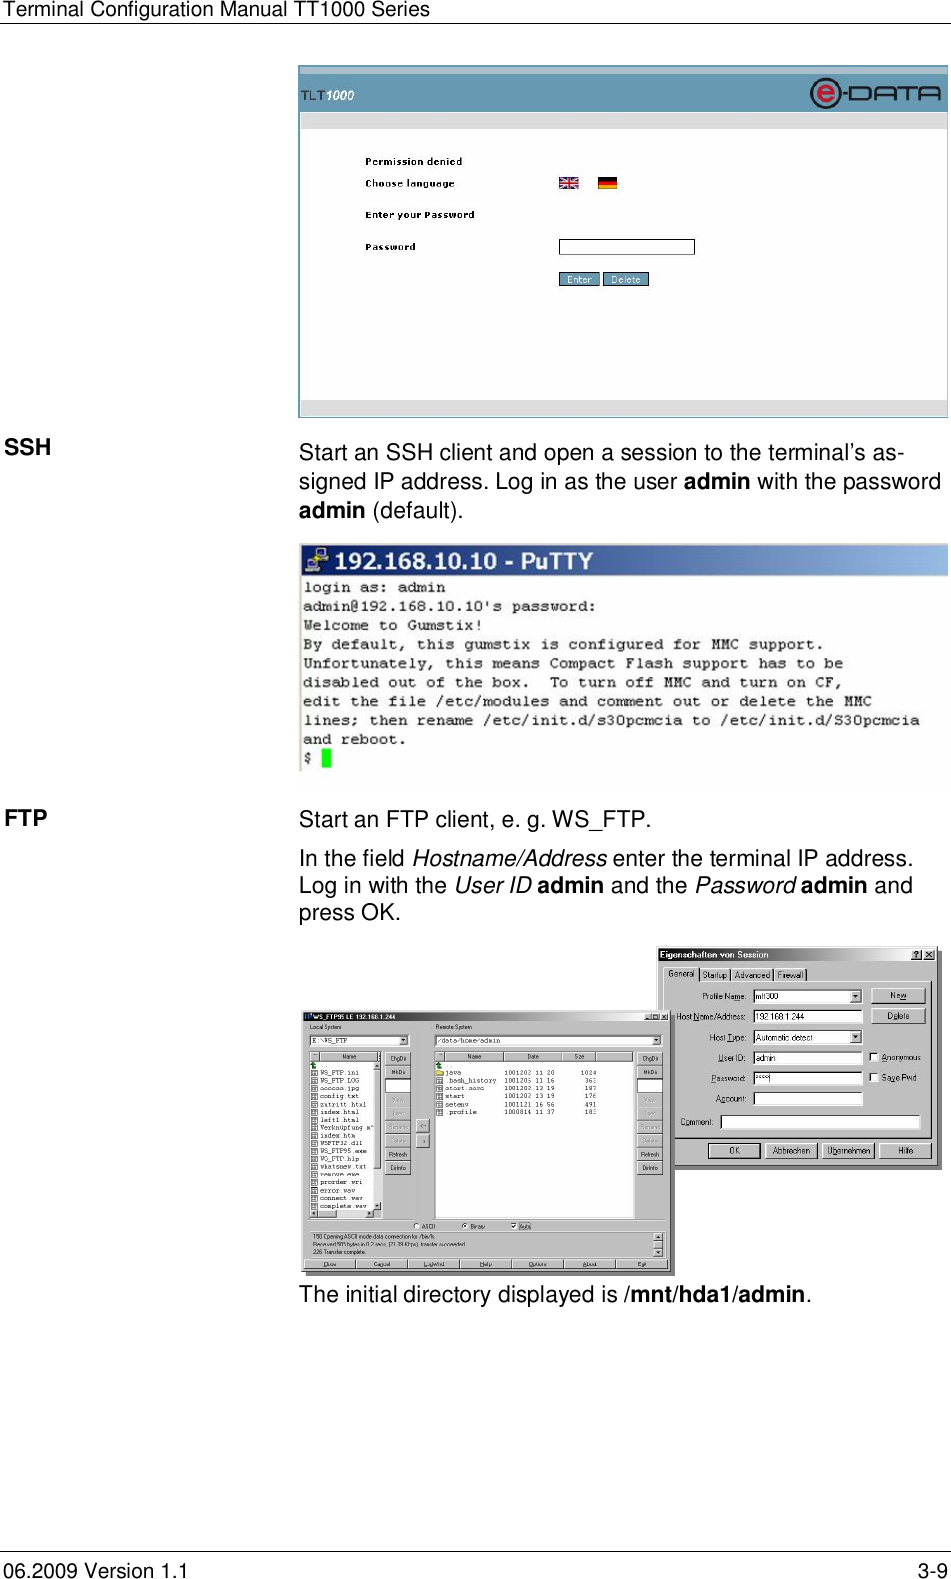
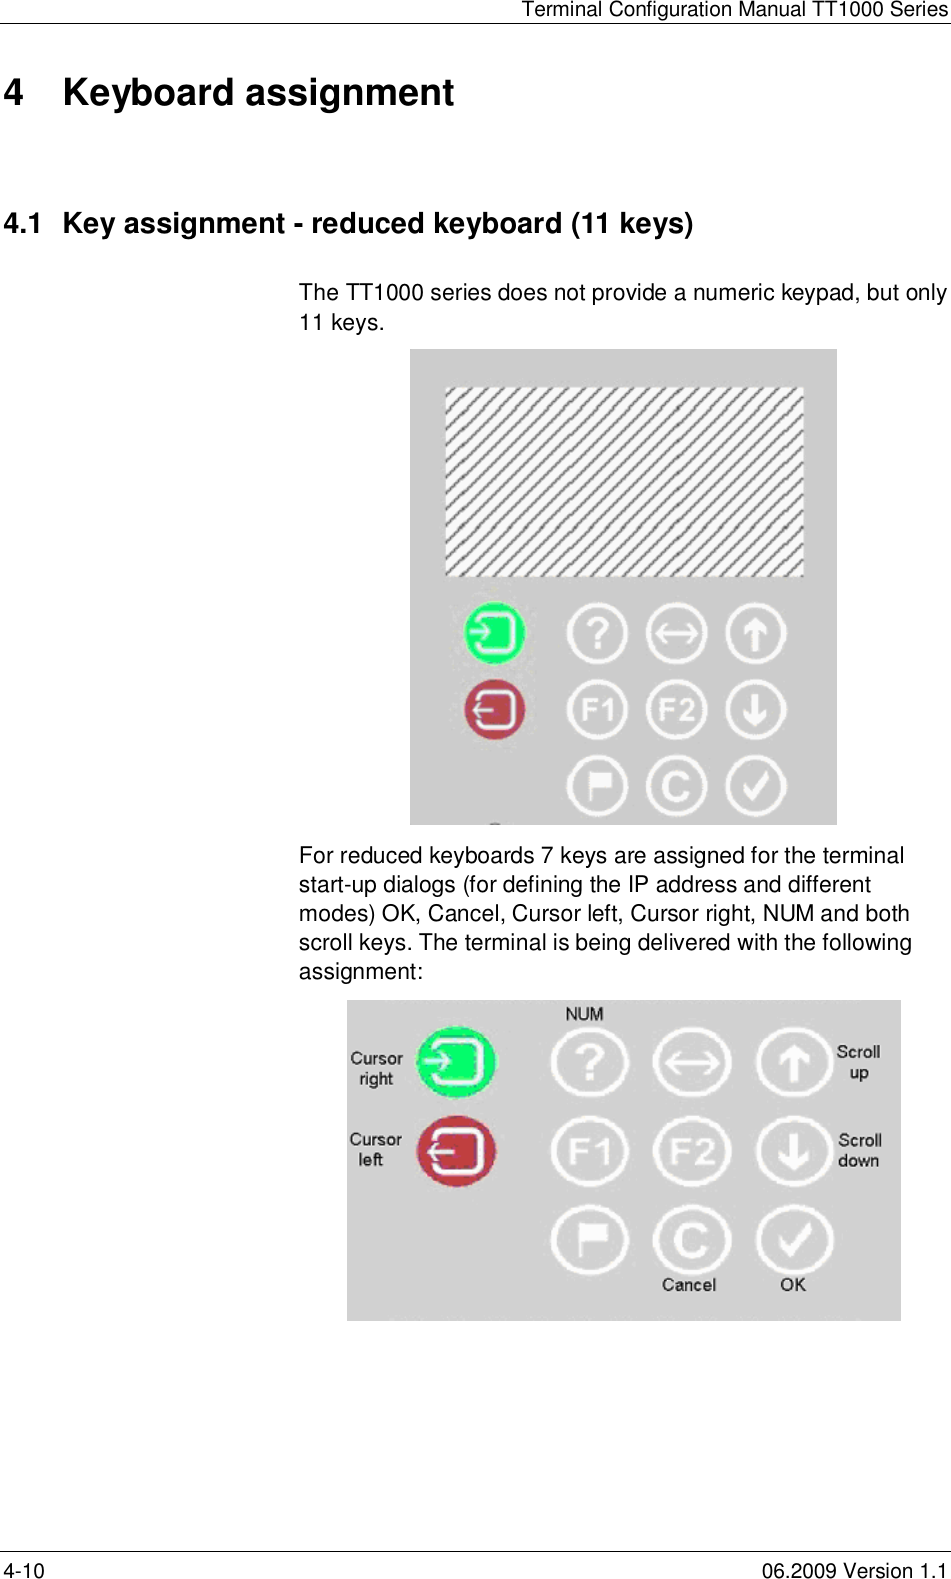
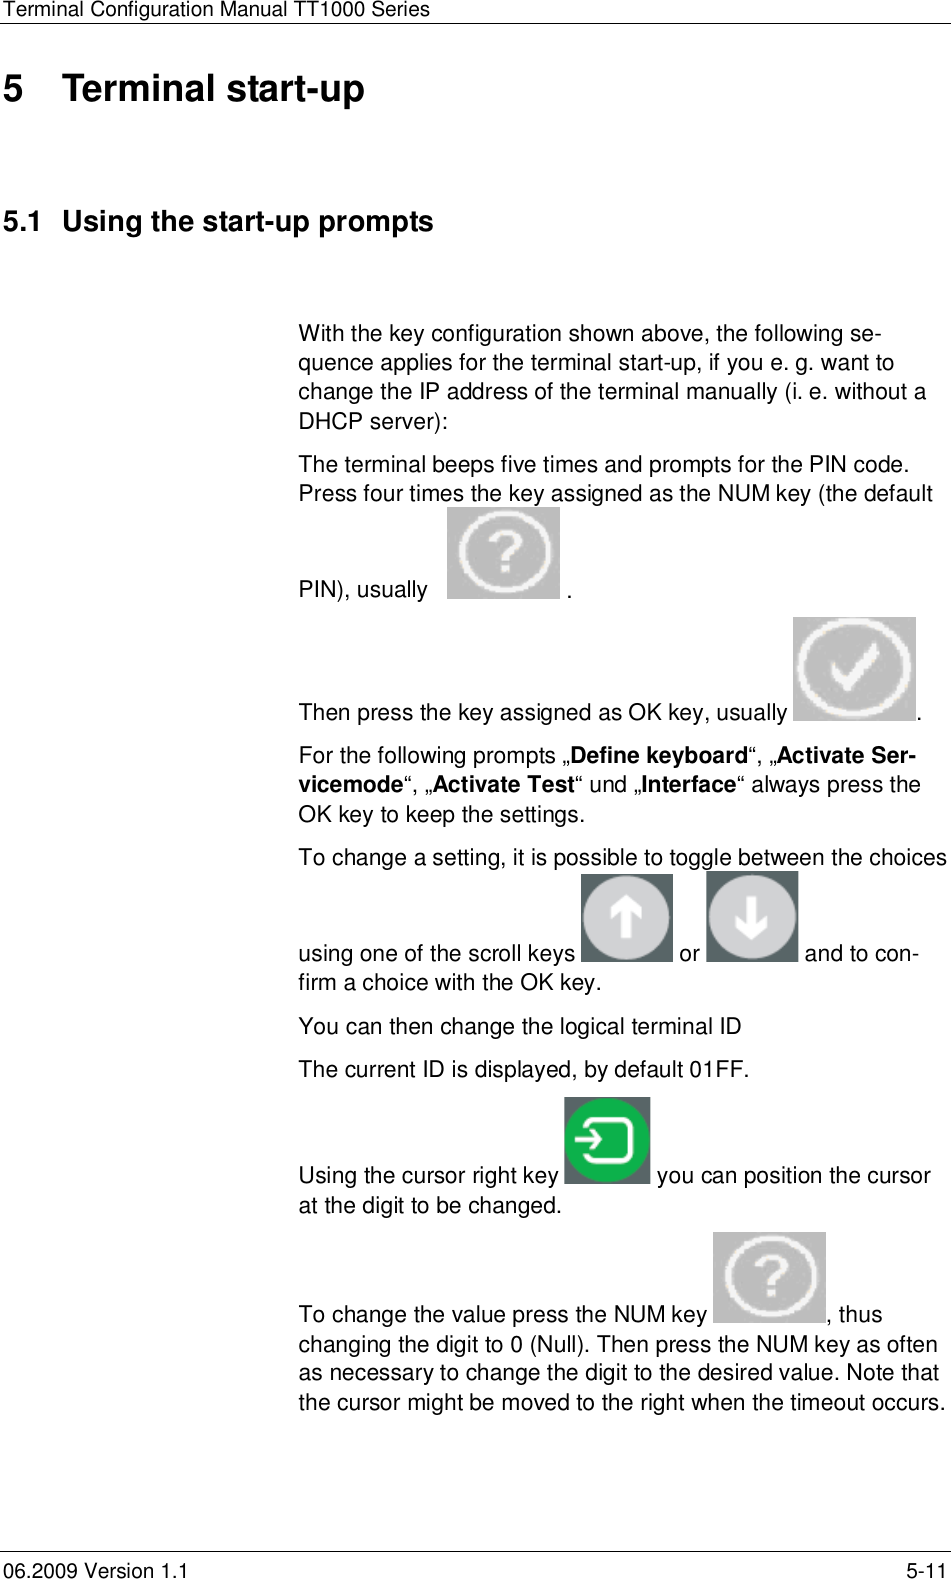
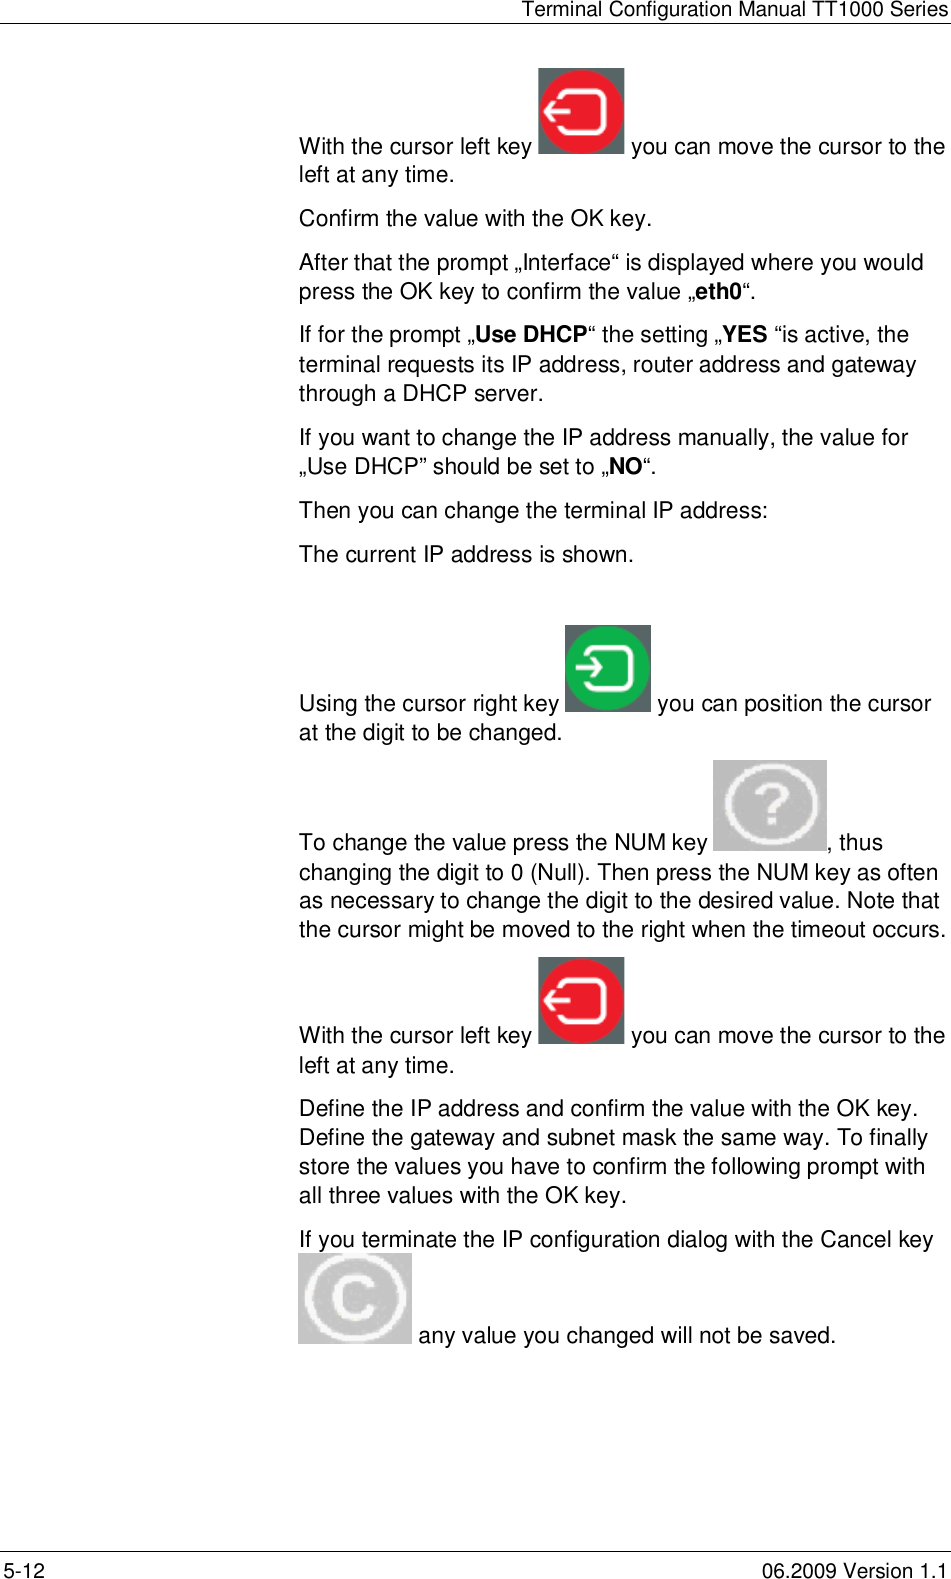
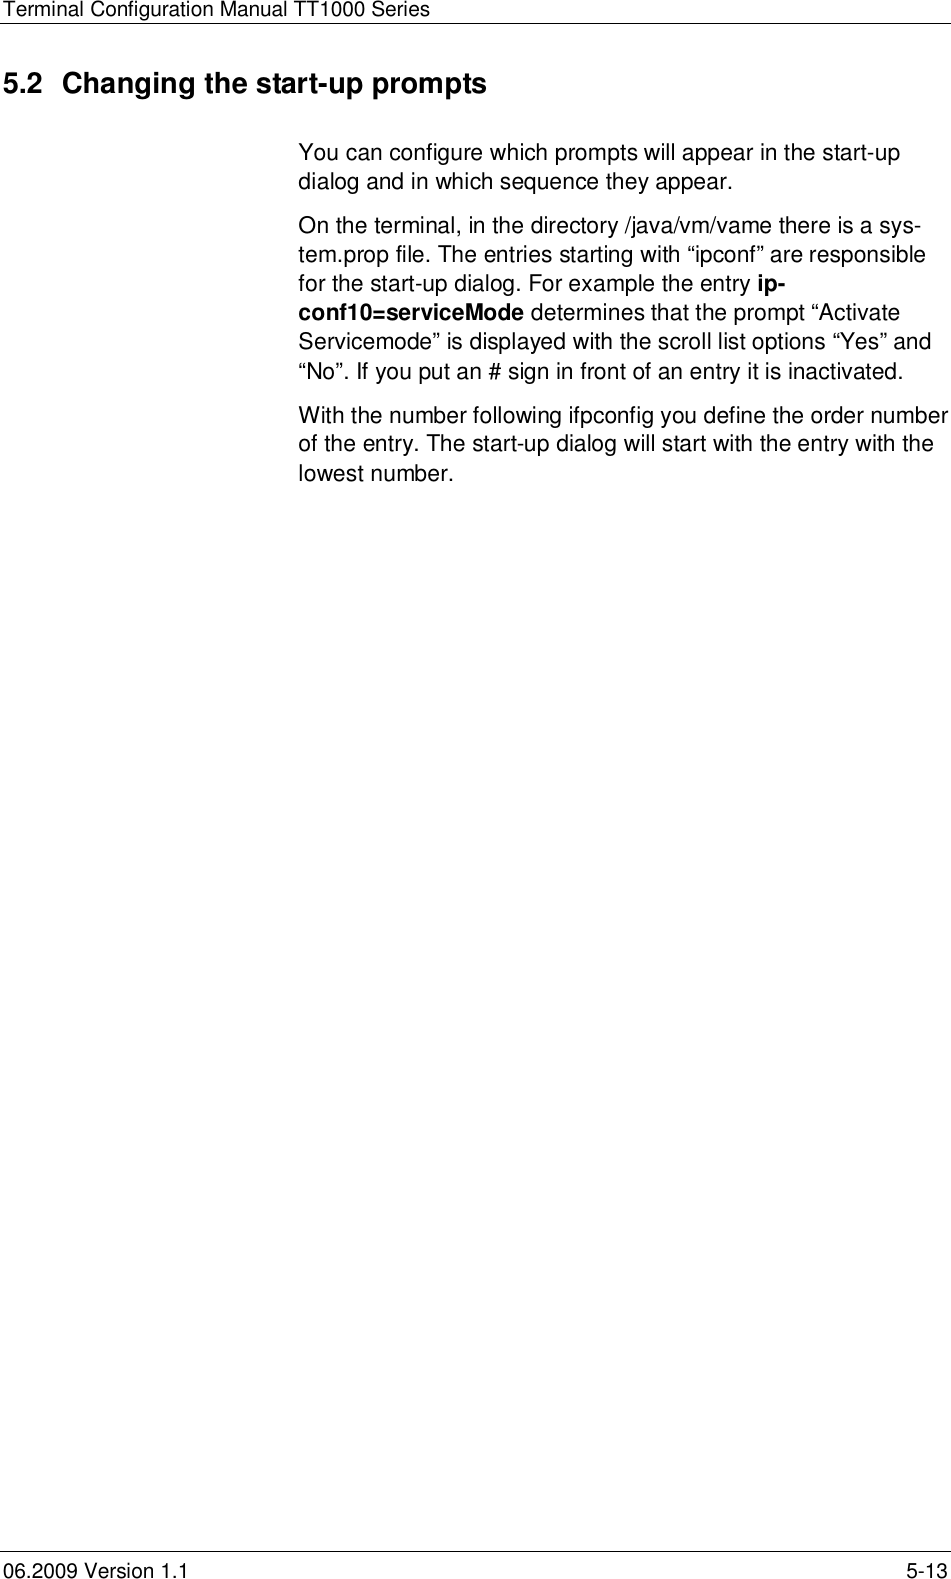
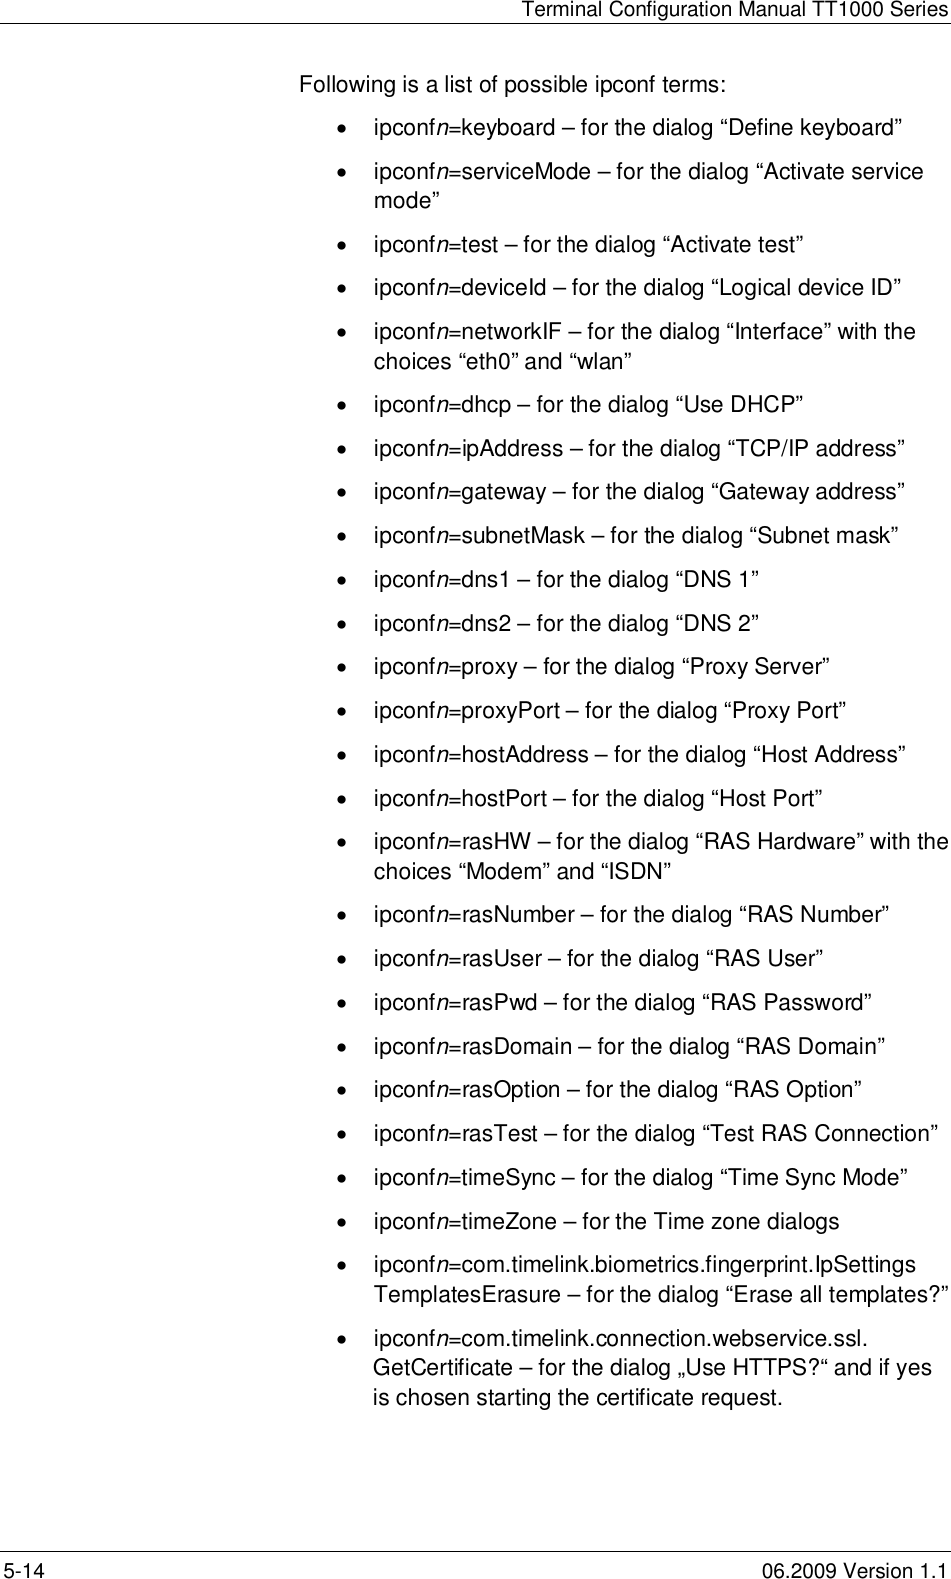
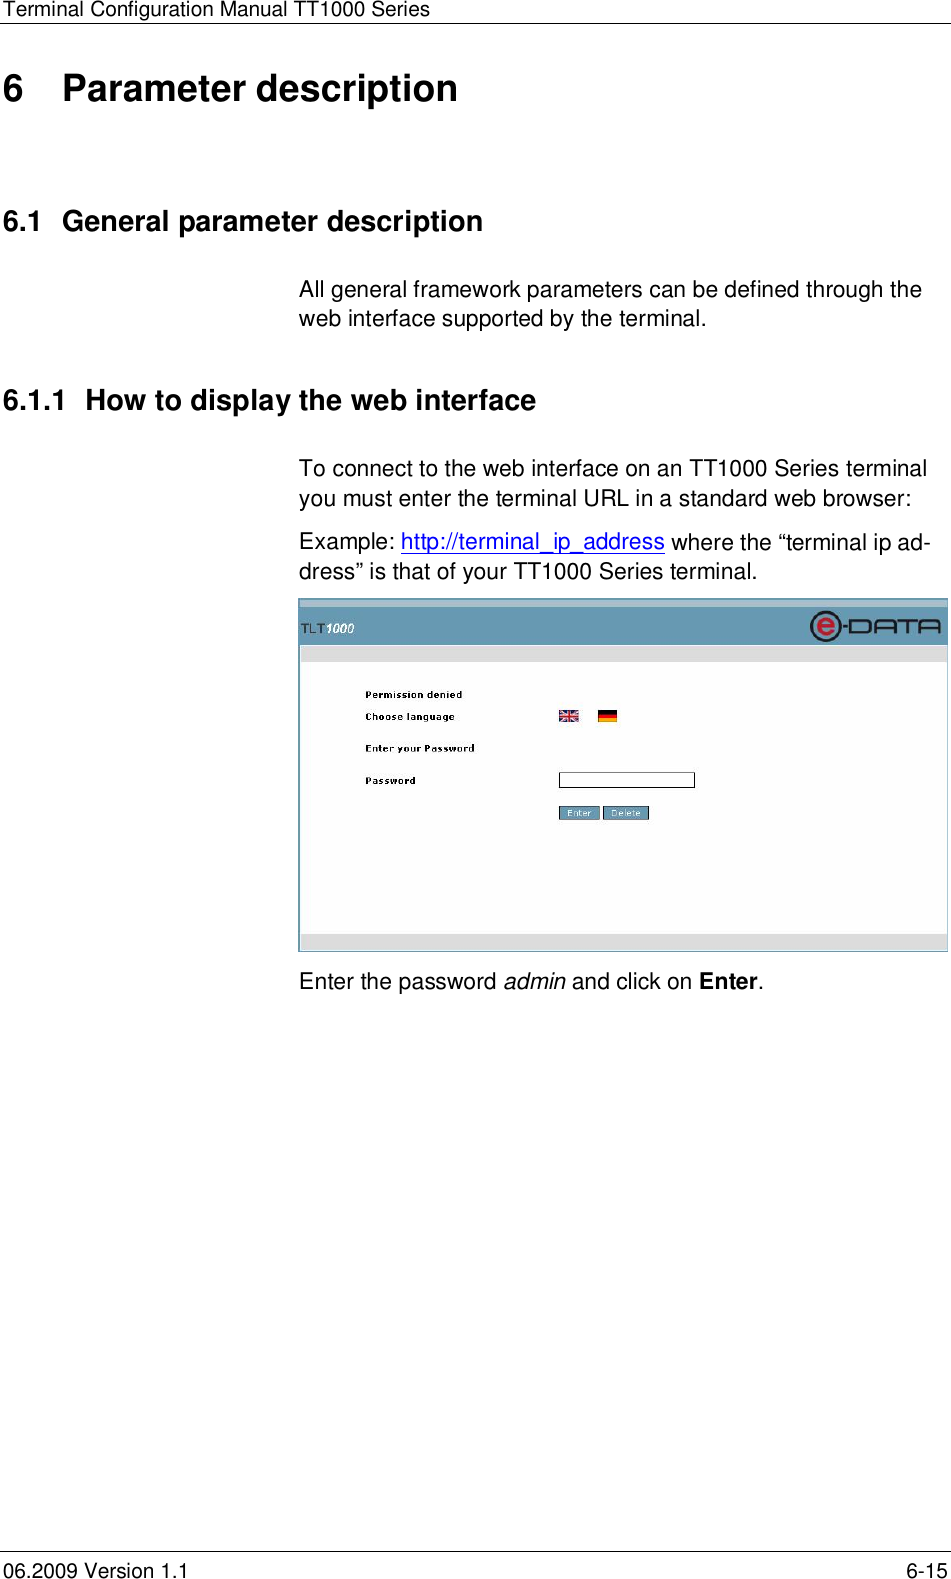
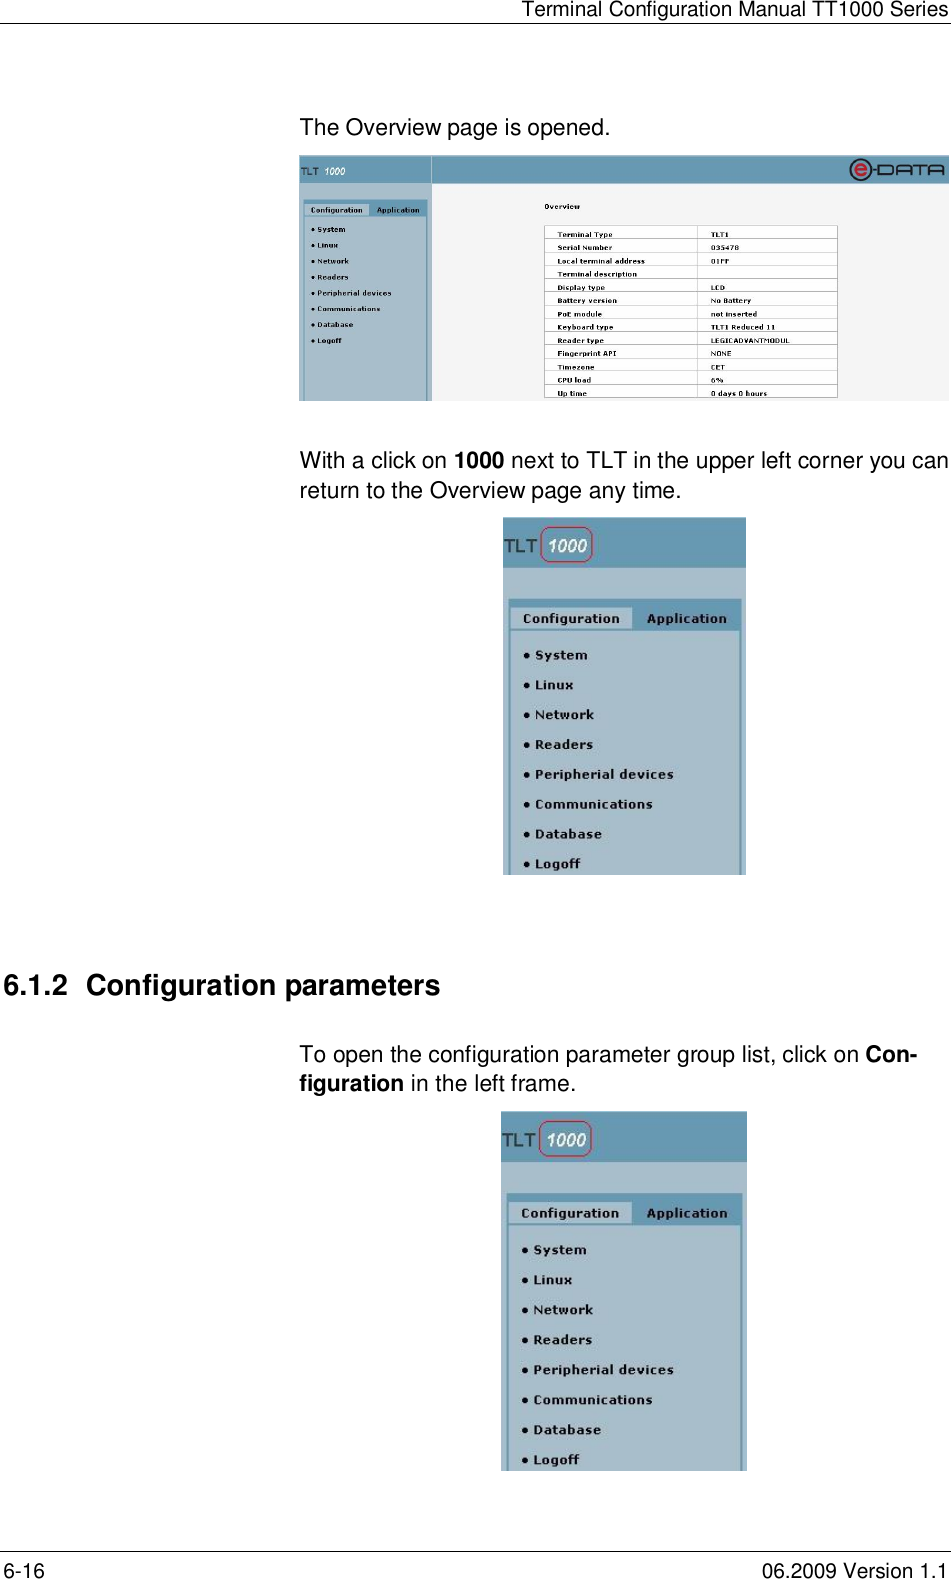

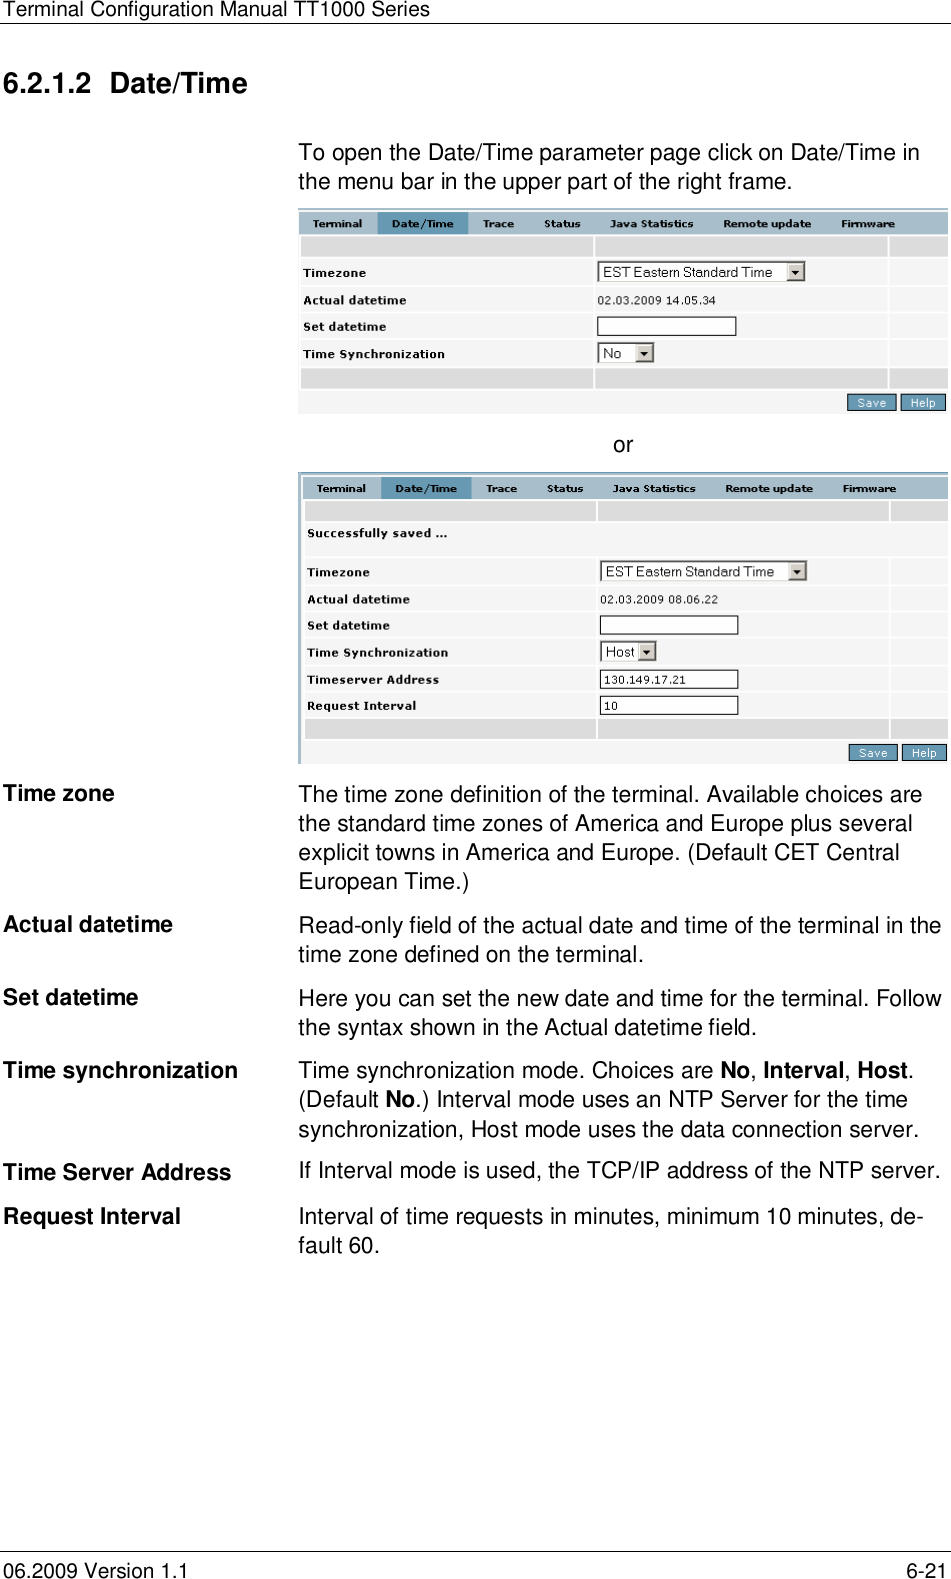
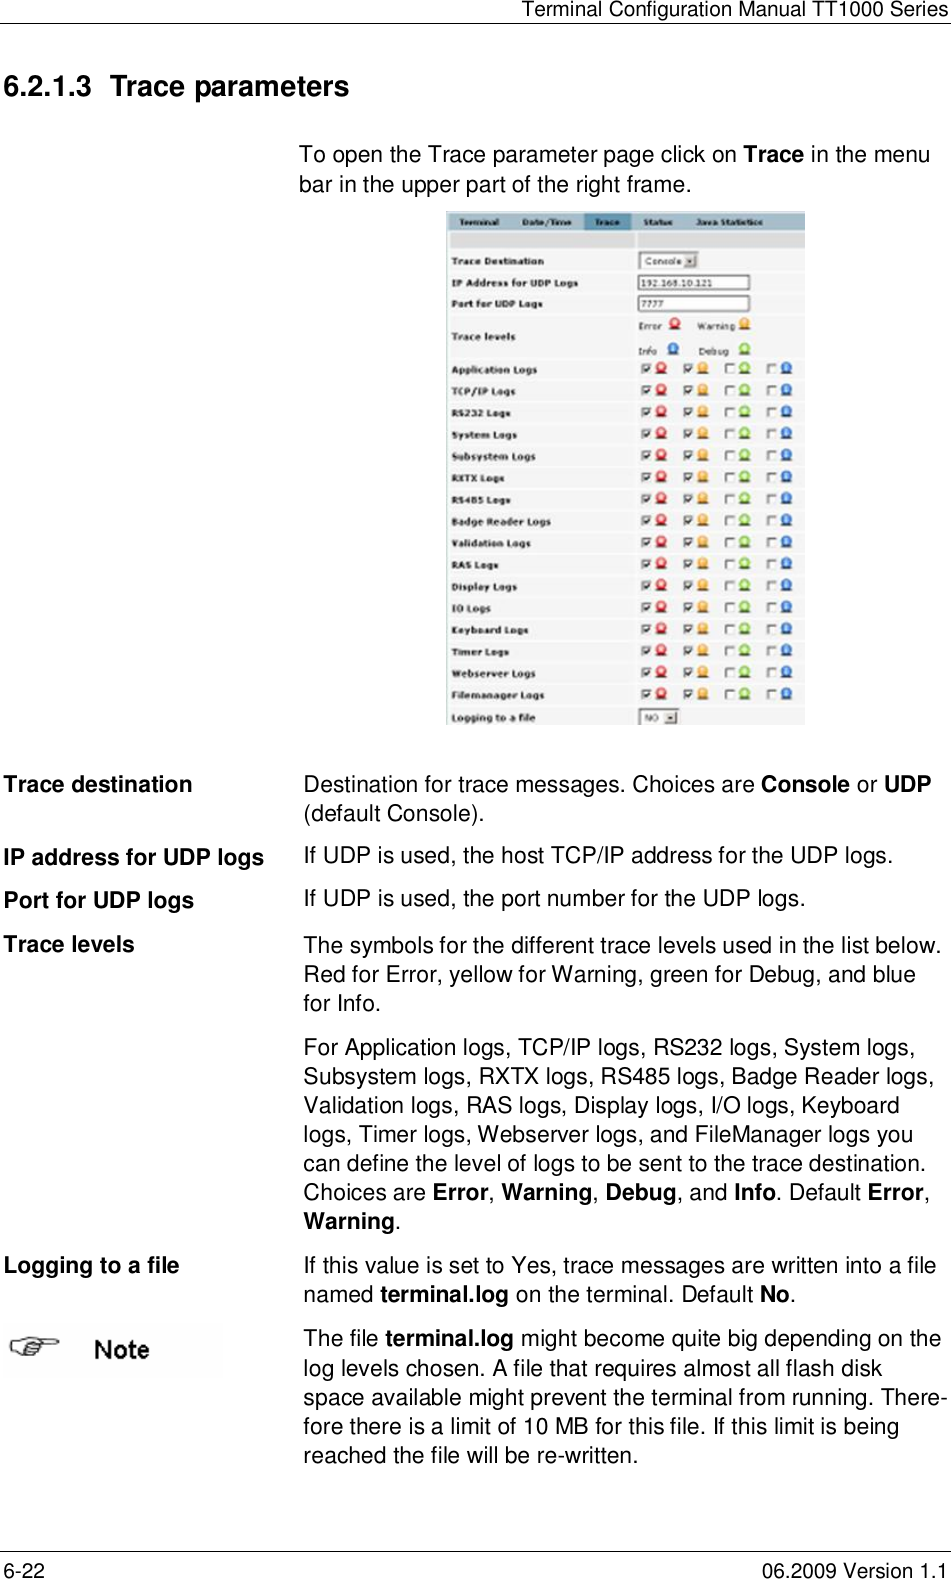
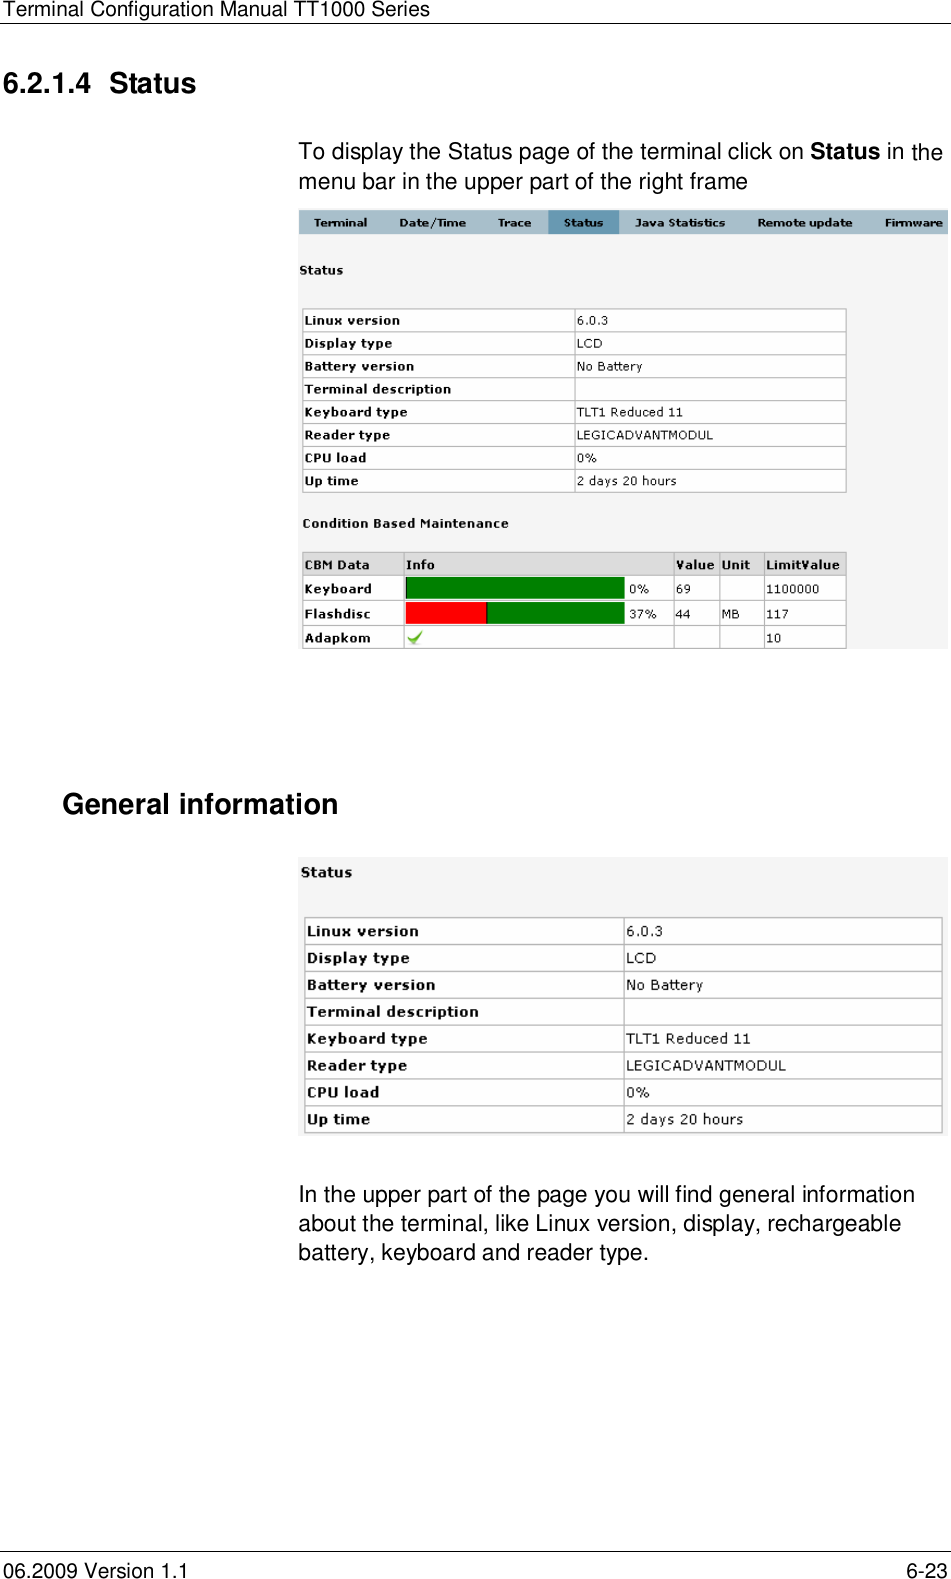
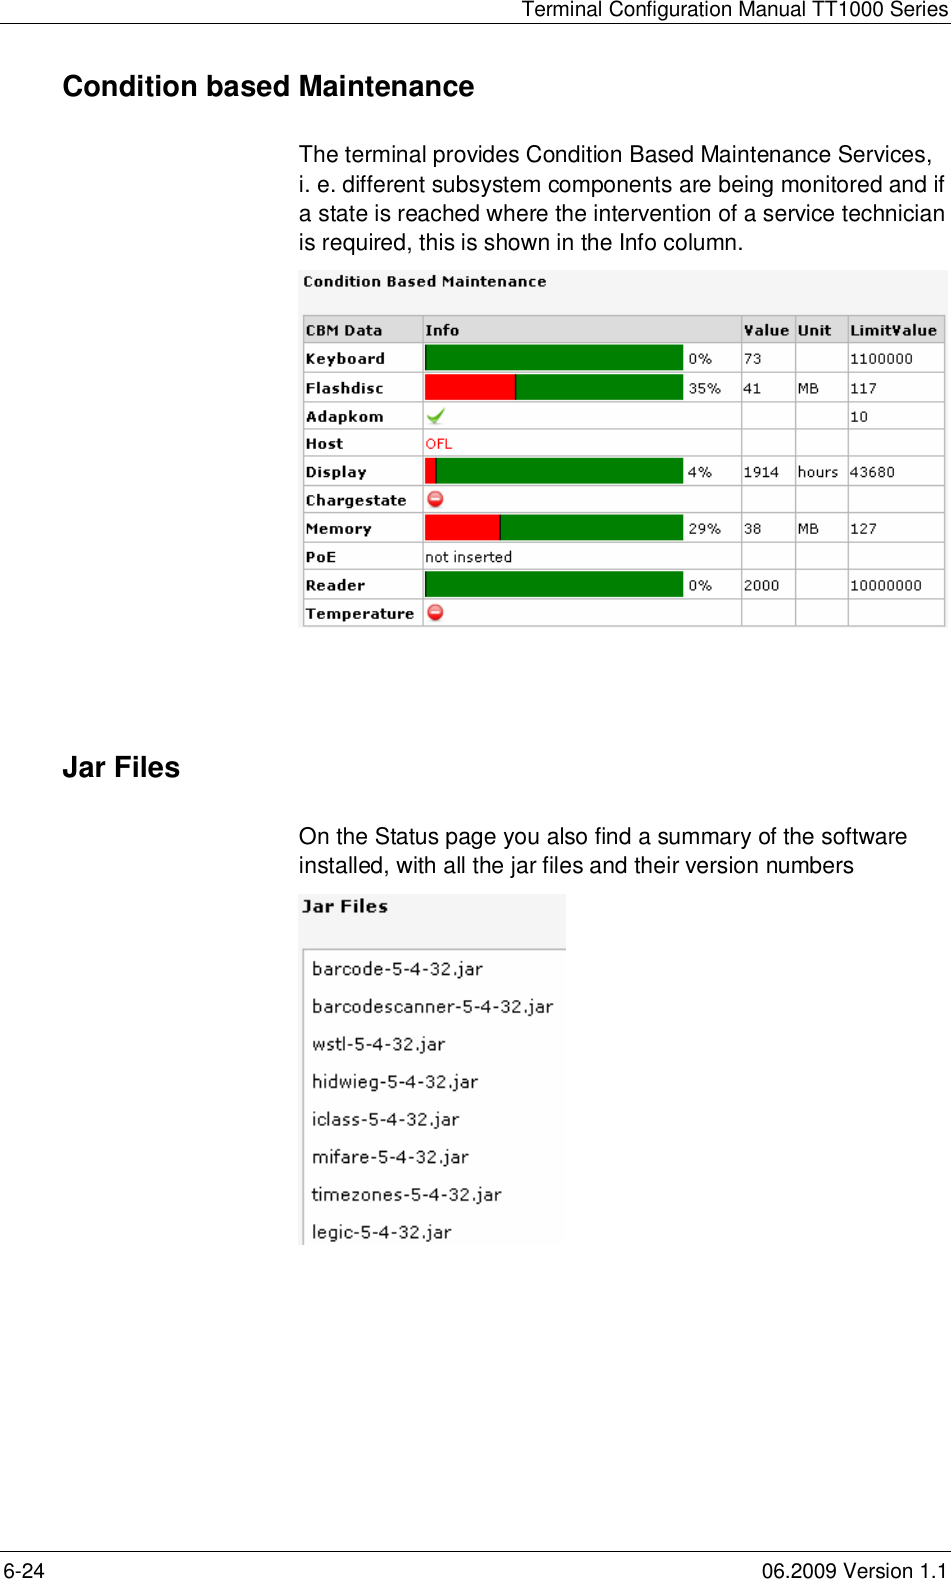
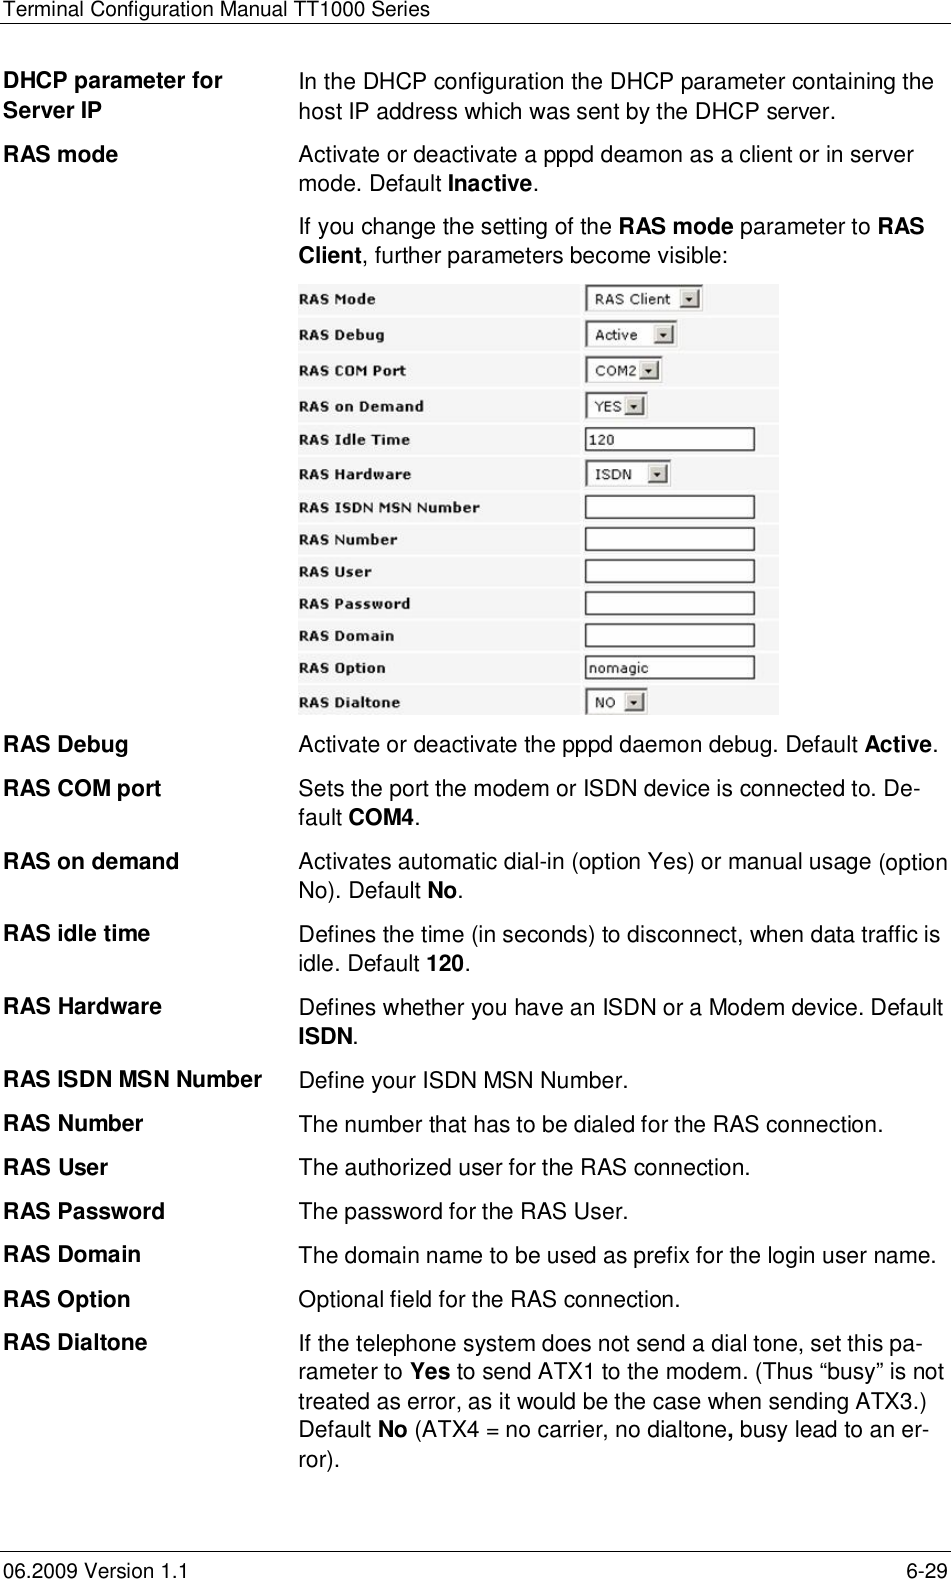
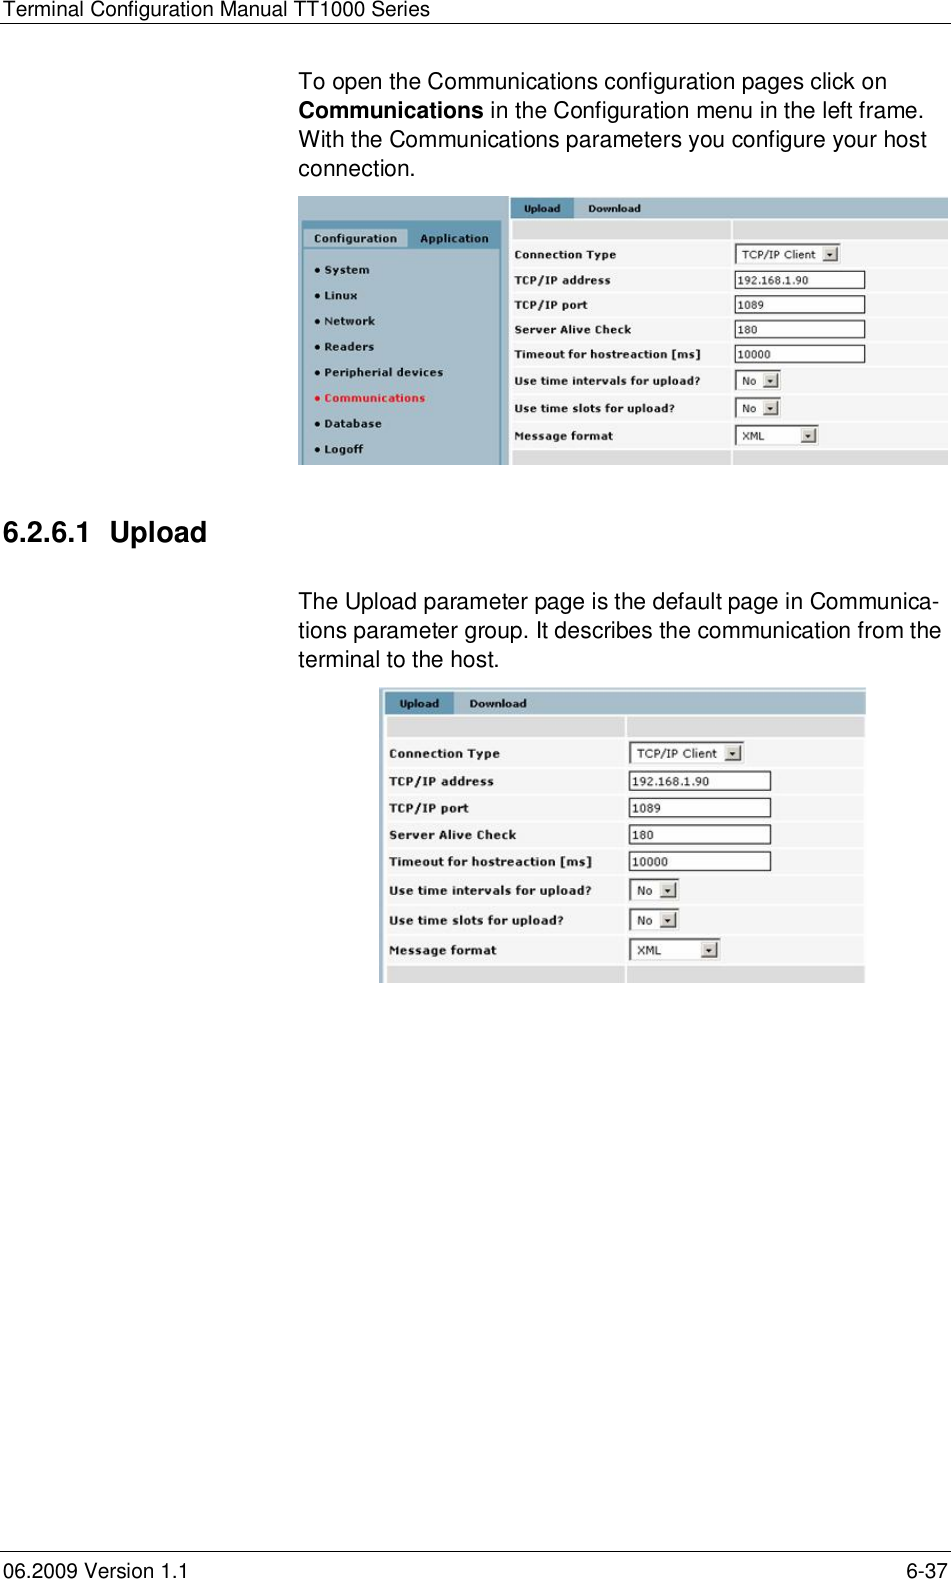
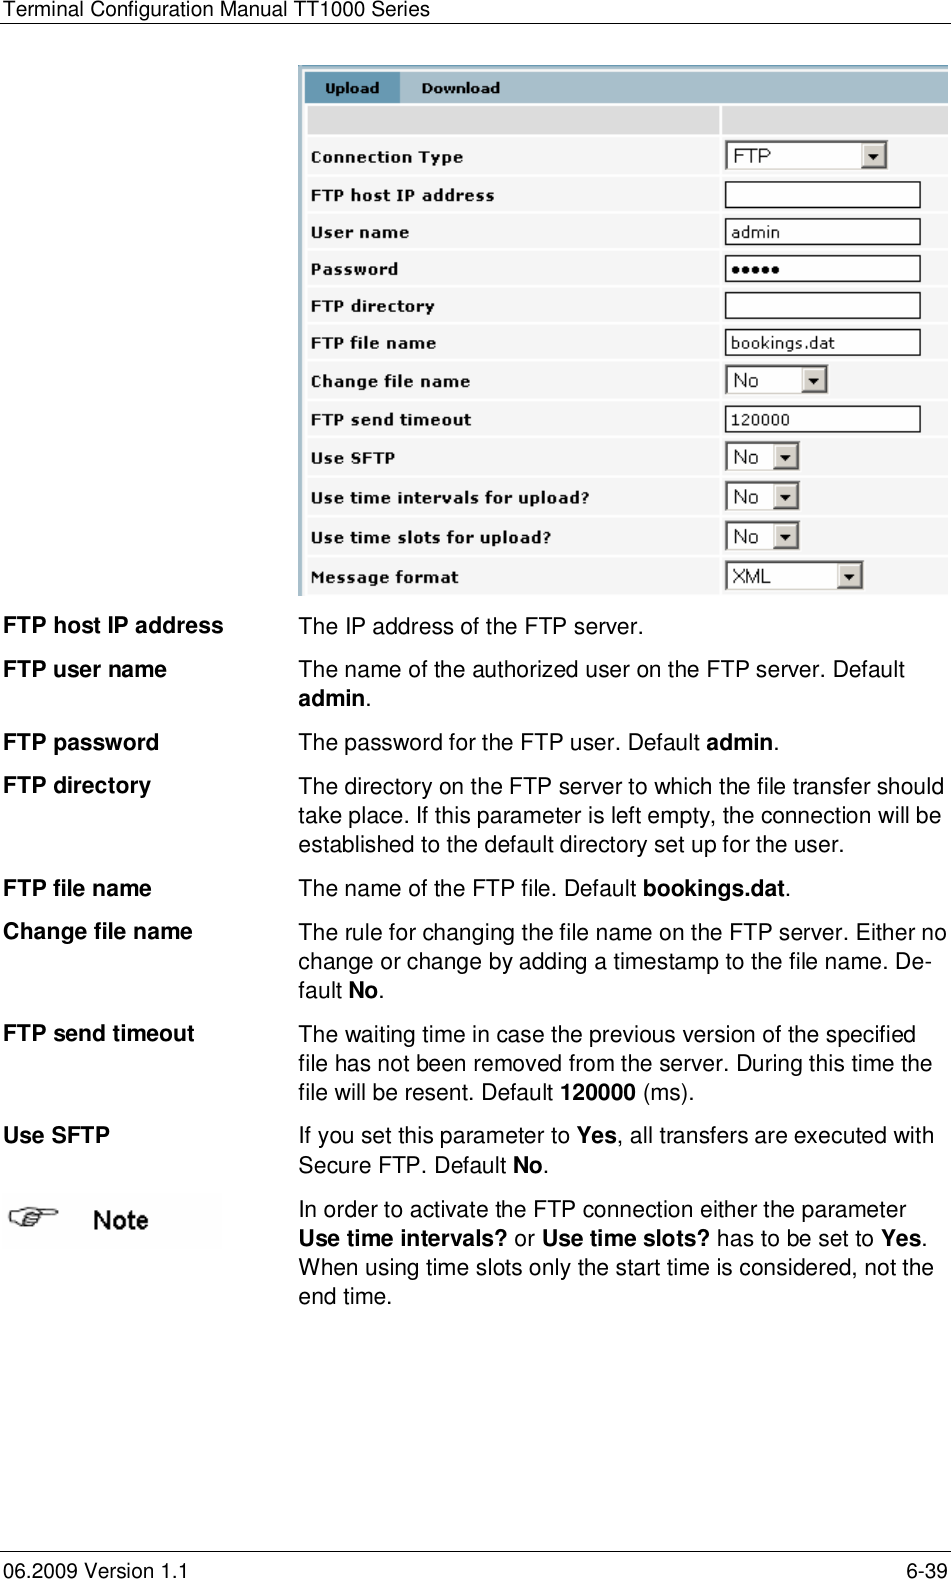
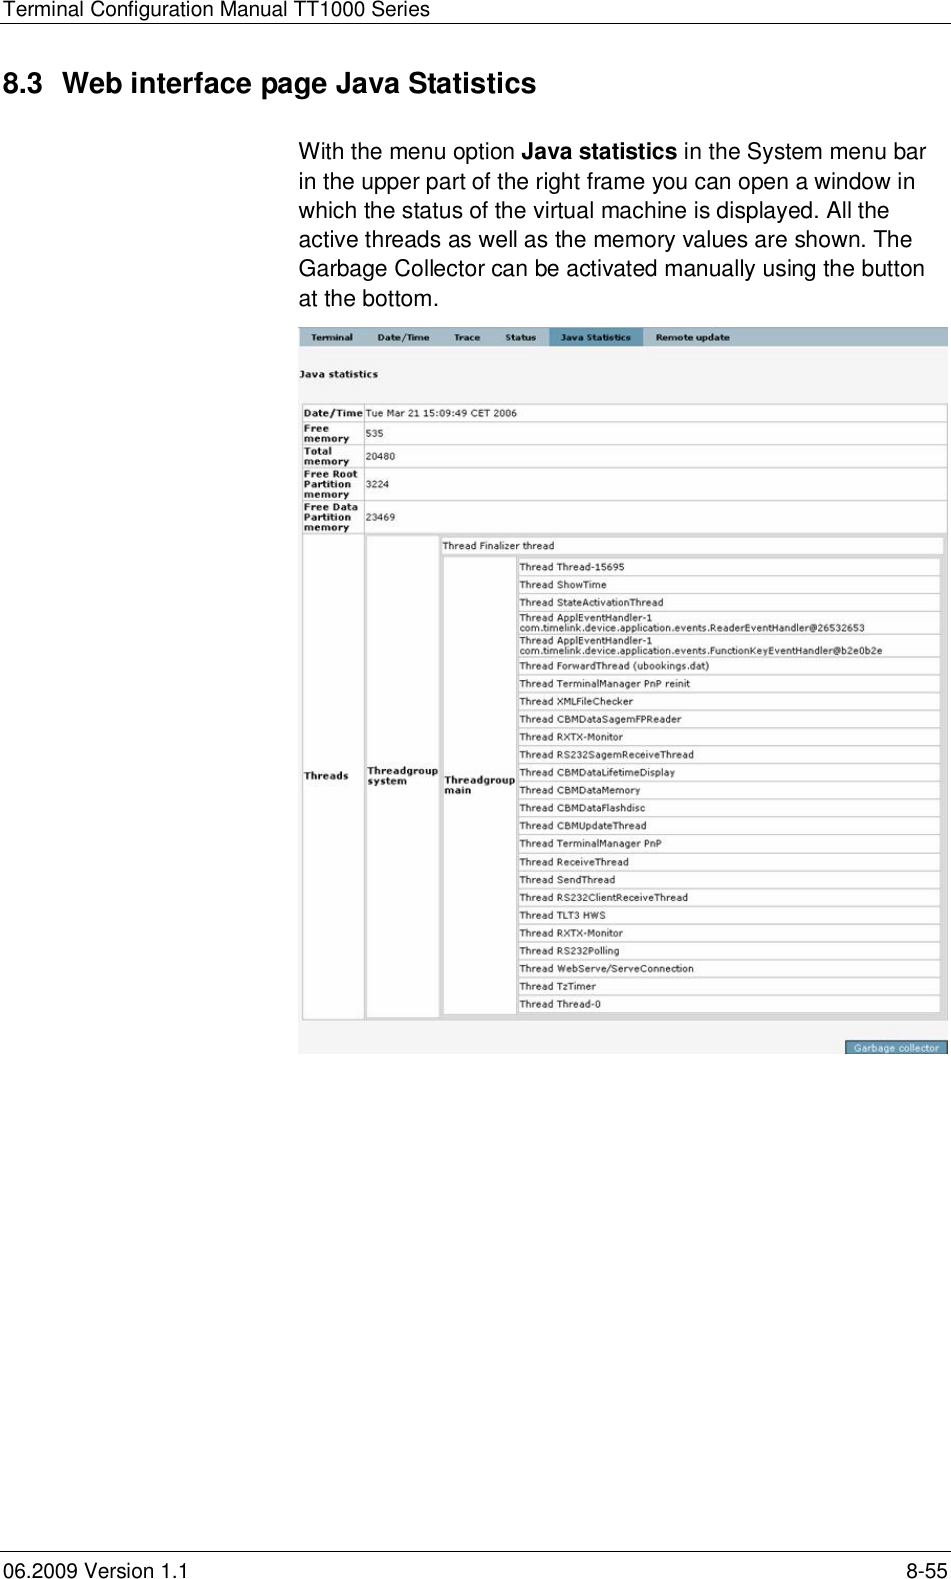
![Terminal Configuration Manual TT1000 Series6-38 06.2009 Version 1.1Connection type The protocol to be used for sending messages to the host.Choices are FTP,TCP-Client,TCP-Server, TN3270 and WebService. (A TCP-Server is waiting for a connection request anda TCP-Client is trying to open the connection.) Default TCP-Client.TCP/IP address The TCP/IP address used for the host data connection.TCP/IP port The TCP/IP port used for the host data connection, default1089.Server alive check The interval in seconds between the server alive check, default180.Time-out for host reac-tion [ms] Time-out interval for a confirmation message from the host(ms). Default 10000.Use time intervals forupload? Currently only for the connection type FTP. If this option is setto Yes, the connection to the FTP server will be establishedevery nminutes, where n is the connection interval you specifyin the next field. Default No.Upload connection in-tervalThe time interval in minutes you want the connection to the FTPserver to be established. Choose an interval not less than 10.Use time slots for up-load? By using online time slots you can restrict the permanent hostconnection to the specified periods of time. If you set this pa-rameter to Yes you have to at least define one start-end-pair,during which the connection to the host is to be established.You can define up to 10 time slots. Default No.Interval n Start [HH:MI] The time to go online in the format hh:mi.Interval n End [HH:MI] The time to go offline in the format hh:mi. If lower than the starttime, the next day is assumed.Note that for the connection typeFTP only the start time applies.Message format Defines the format in which the messages are to be sent to thehost. Default XML.After choosing and saving the Connection Type option FTP, thefollowing parameters are added to the page:](https://usermanual.wiki/e-DATA/TT1000.configuration-user-manual/User-Guide-1246813-Page-38.png)