eResearchTechnology SPS001 SpiroSphere is a diagnostic compact device to measure inspiratory and expiratory lung function parameters User Manual
eResearchTechnology GmbH SpiroSphere is a diagnostic compact device to measure inspiratory and expiratory lung function parameters
2AAUFSPS001 UserMan

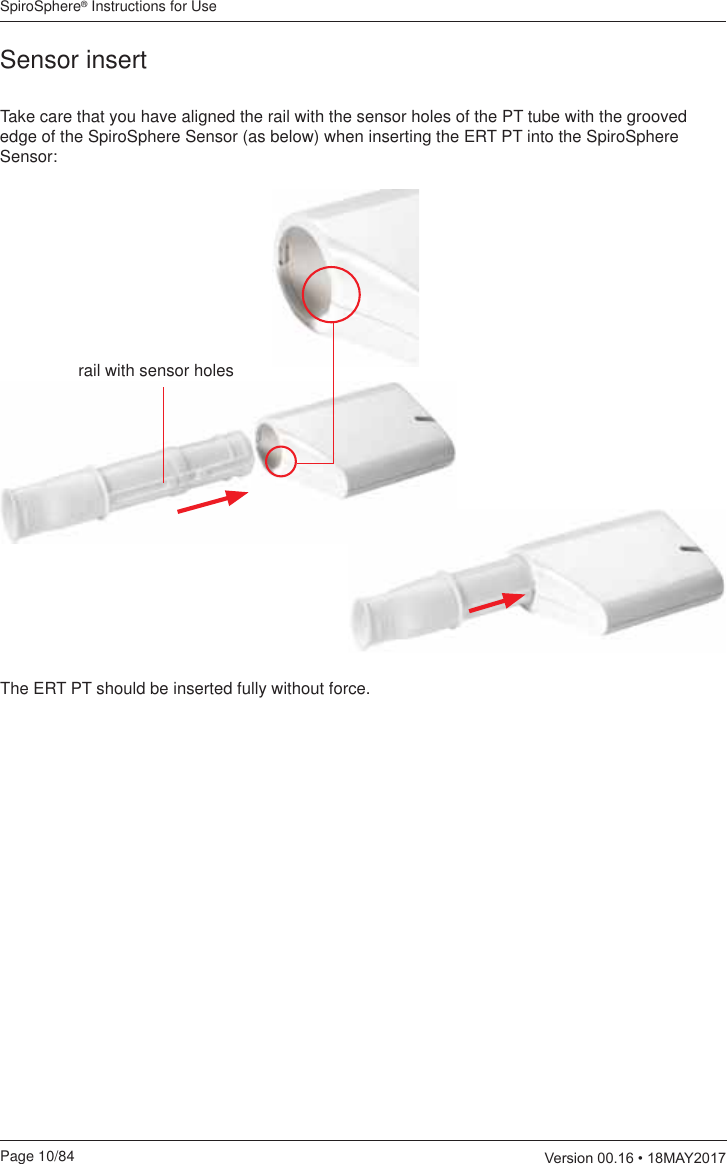


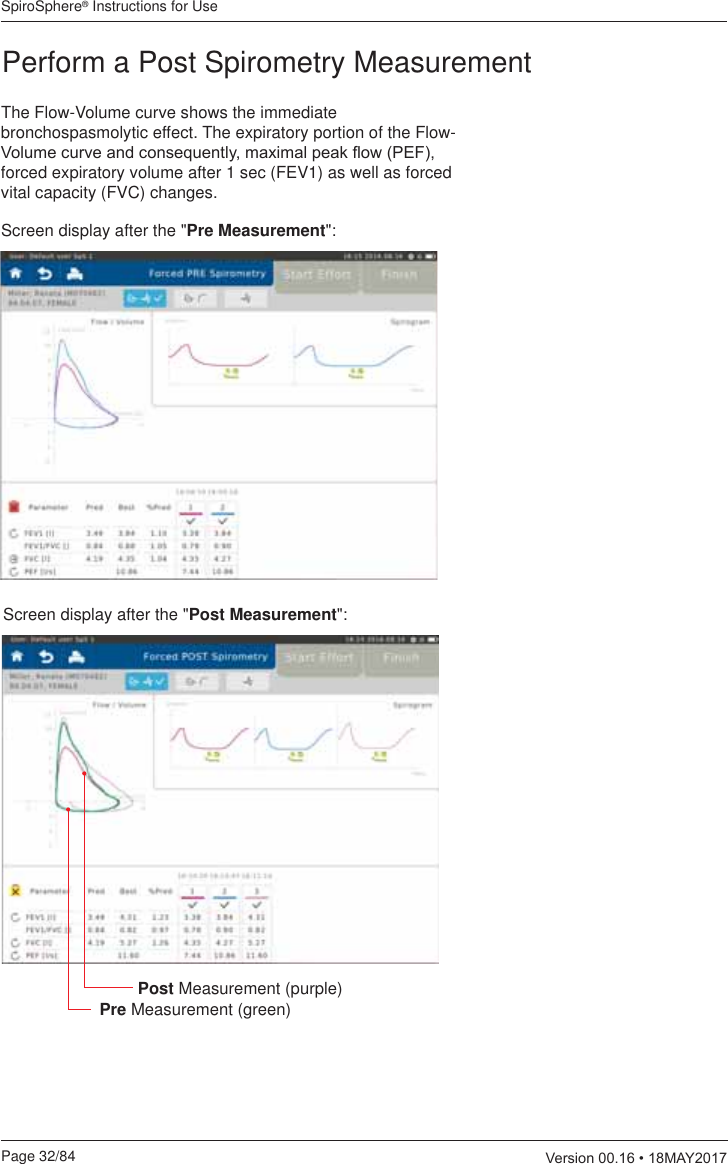

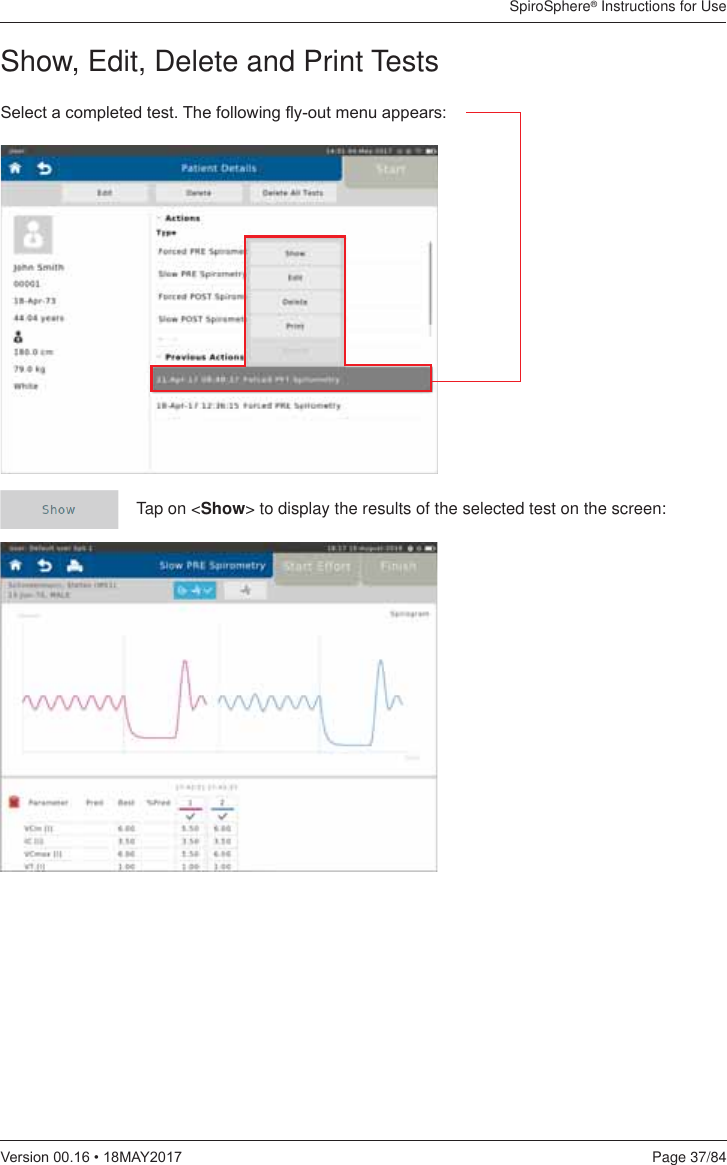
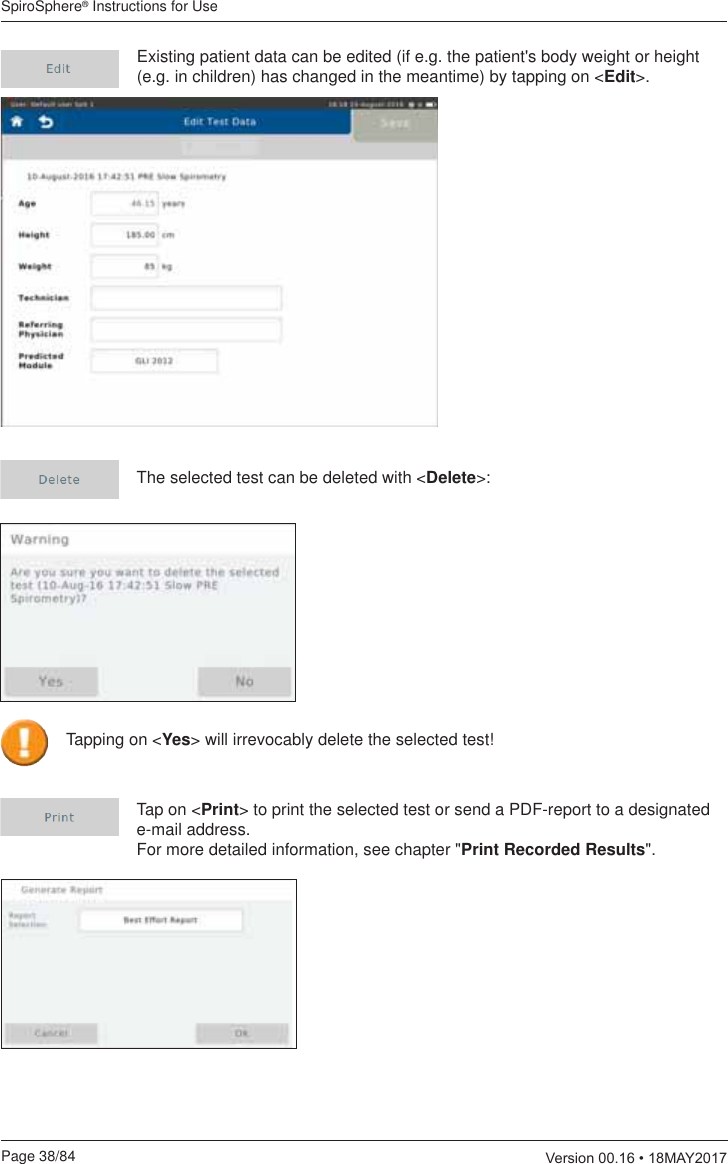
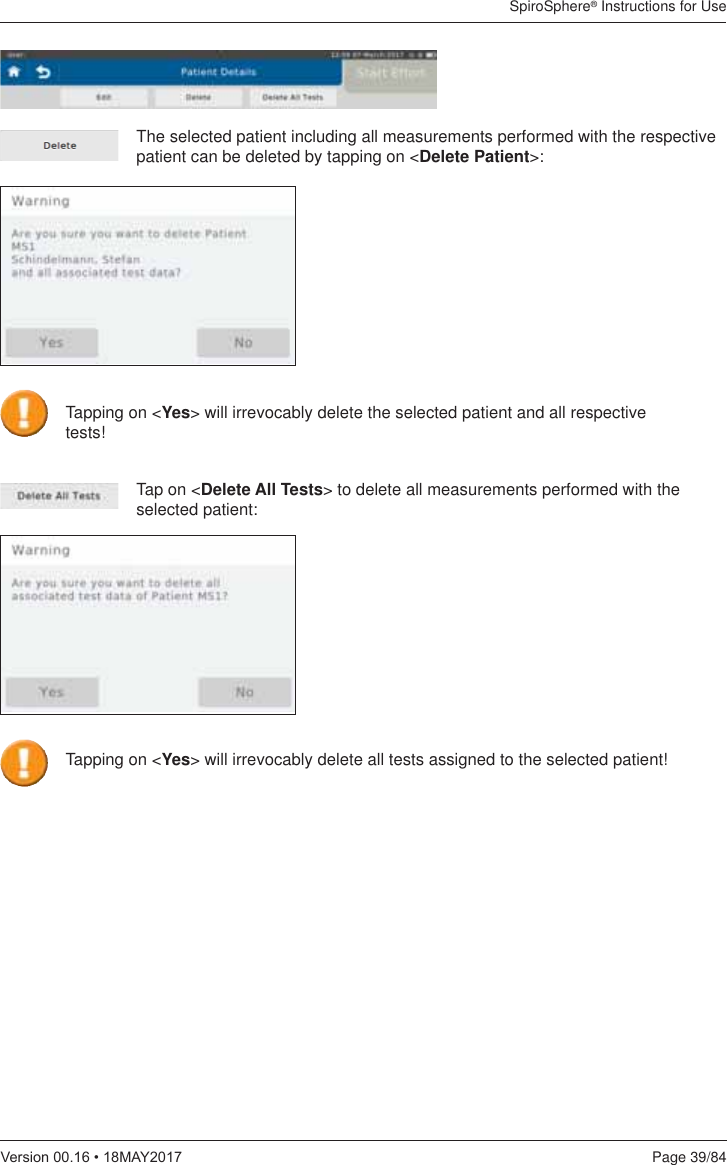
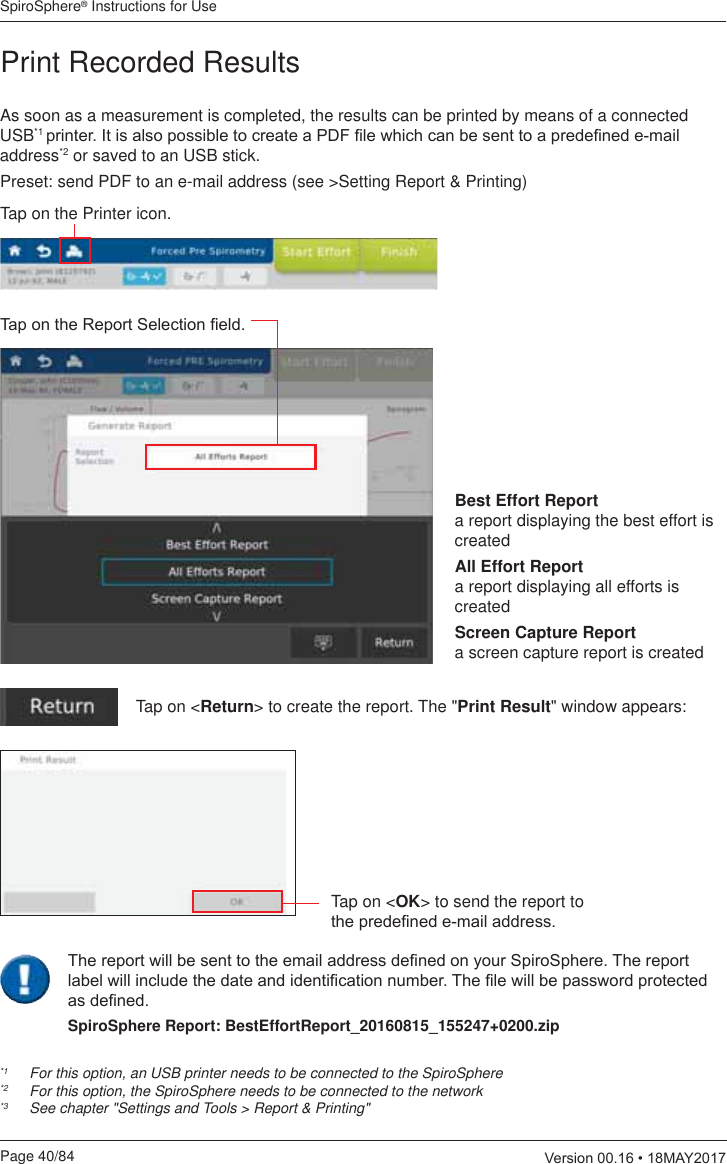
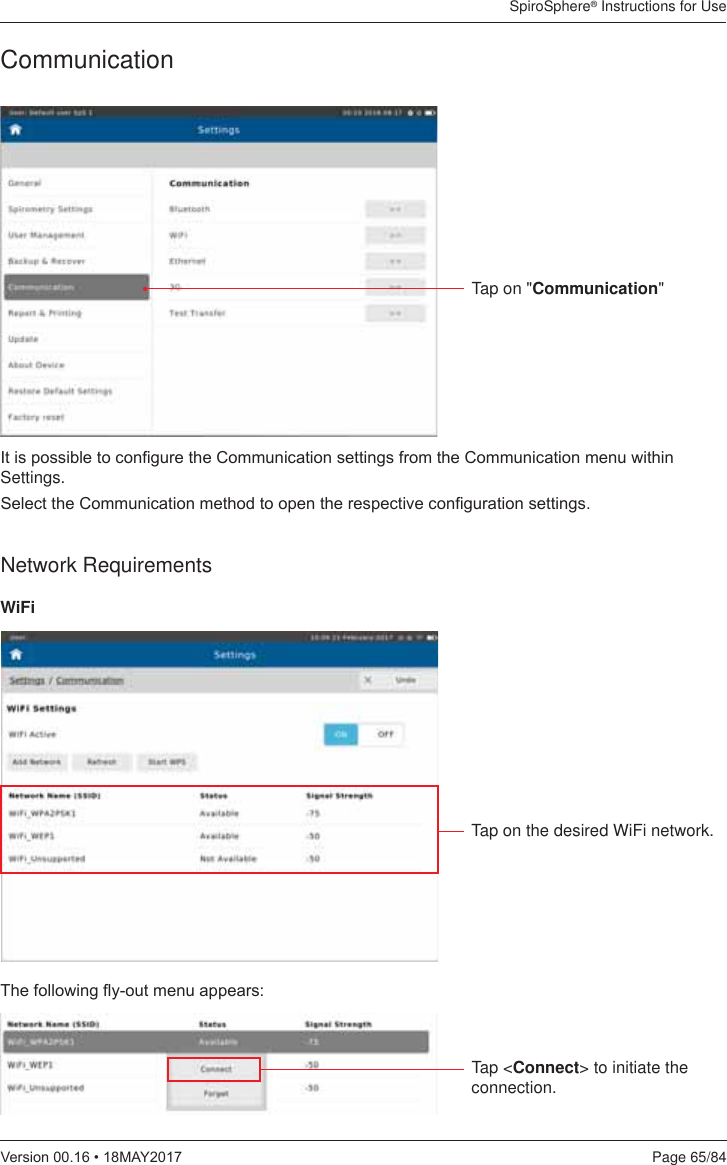
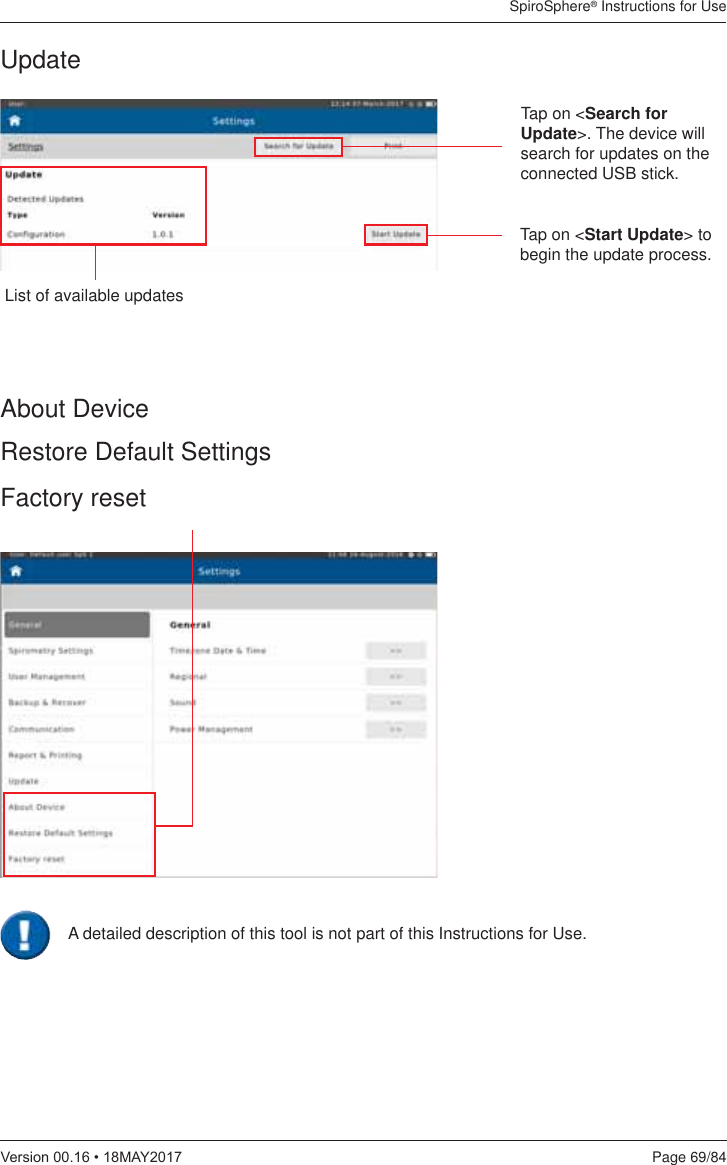
![SpiroSphere® Instructions for UsePage 46/84 9HUVLRQ0$<DecimalsSetting options: Preset:0, 1, 2, 3, 4 20, 1, 2, 3, 4 00, 1, 2, 3, 4 20, 1, 2, 3, 4 00, 1, 2, 3, 4 00, 1, 2, 3, 4 00, 1, 2, 3, 4 20, 1, 2, 3, 4 00, 1, 2, 3, 4 2MeasurementSpirometry Settings - Forced SpirometryExample: Preset 0: Preset 1: Preset 2:FVC [L] 5 5,1 5,10Scroll down to display further settings (if applicable)](https://usermanual.wiki/eResearchTechnology/SPS001/User-Guide-3407232-Page-46.png)