ecobee orporated EBSTAT Ecobee Smart Thermostat User Manual 2
ecobee Incorporated Ecobee Smart Thermostat 2
Contents
- 1. User Manual
- 2. User Manual 2
- 3. User Manual Module
User Manual 2
©2008 ecobee
333 Adelaide Street West/ 6th Floor
Toronto,/ Ontario/ M5V 1R5/ Canada
MA-106-0002-R1
Printed in Canada
User
manual
Smart
Thermostat

Getting started 2
Using the touch screen 3
Cleaning the touch screen 6
Displaying the information about your ecobee
smart thermostat 6
Contecting your thermostat to the internet 7
Setting up your smart thermostat 11
Programming your smart termostat 15
Understandig alerts 17
List of alerts 17
Using your smart thermostat 19
Scheduling a vaction 21
Reseting the smart thermostat 22
What do you do if you move? 22
Contents

Welcome
Welcome to the ecobee community.
ecobee helps homeowners conserve energy, save
money and reduce their environmental footprint.
Our green automation platform sits at the
convergence of energy conservation, green
technology, the networked home and consumer
electronics. Our products automate conservation,
making it easy to save without sacricing comfort.
We deliver intelligent conservation solutions for
real people – people with children, housework,
hectic schedules and demanding careers. ecobee
is part of an international ground swell,
empowered by the realization that there is a
need for action on the environment, and the time
is now. Our products and services are developed
with care, innovation and attention to detail. They
have a real and meaningful impact on our
customers and their communities.
ecobee - green made easy.
The ecobee system provides an excellent opportu-
nity to reduce your energy use and your
contribution to green house gas emissions.
For more information visit us at www.ecobee.com.
Product Features
Your ecobee system includes a fully featured,
programmable Smart Thermostat that monitors
temperature and humidity. It connects to the
Internet to maximize comfort and control, all while
minimizing your energy costs and your impact on
the environment.
Key features of the Smart
Thermostat include:
Colour touch screen display
Precision +/- 1°F (0.5°C)
temperature control
Humidity monitoring and
control
Seven-day programming
schedules
Vacation scheduling
Intelligent algorithms that
adapt to your home and
preferences
Advanced furnace fan control
Ventilator control
Quick Save energy saving
Remote access via the Internet
EnergyStar compliant
Flood detection capability
1 | 2
GETTING
STARTED
The Smart Thermostat uses touch screen tech-
nology that makes navigation easy. Apply light
pressure with your nger to the icons, buttons
and lists or drag you nger across the screen to
slide a slider or scroll through a list.
Note: To prevent damage to the touch screen, never use a
sharp object such as a pen, to press the icons, buttons and
lists.
When the screen shows a list of items, an arrow to the
right indicates more than two options to choose from.
Touching this type of list will bring you to a new list or
screen. If there are only two options for a given list entry,
those options will be displayed next to a switch within the
list. Pressing anywhere on the item will toggle from one
option to the other.
In the various screens on the thermostat, you have three
ways to navigate.
Press Cancel to go back to the previous screen
without saving changes.
Press Done to save changes and move to the next screen.
At any time press the ecobee button (found at the right-
hand side of the unit). This cancels any action and takes
you back to the home screen.
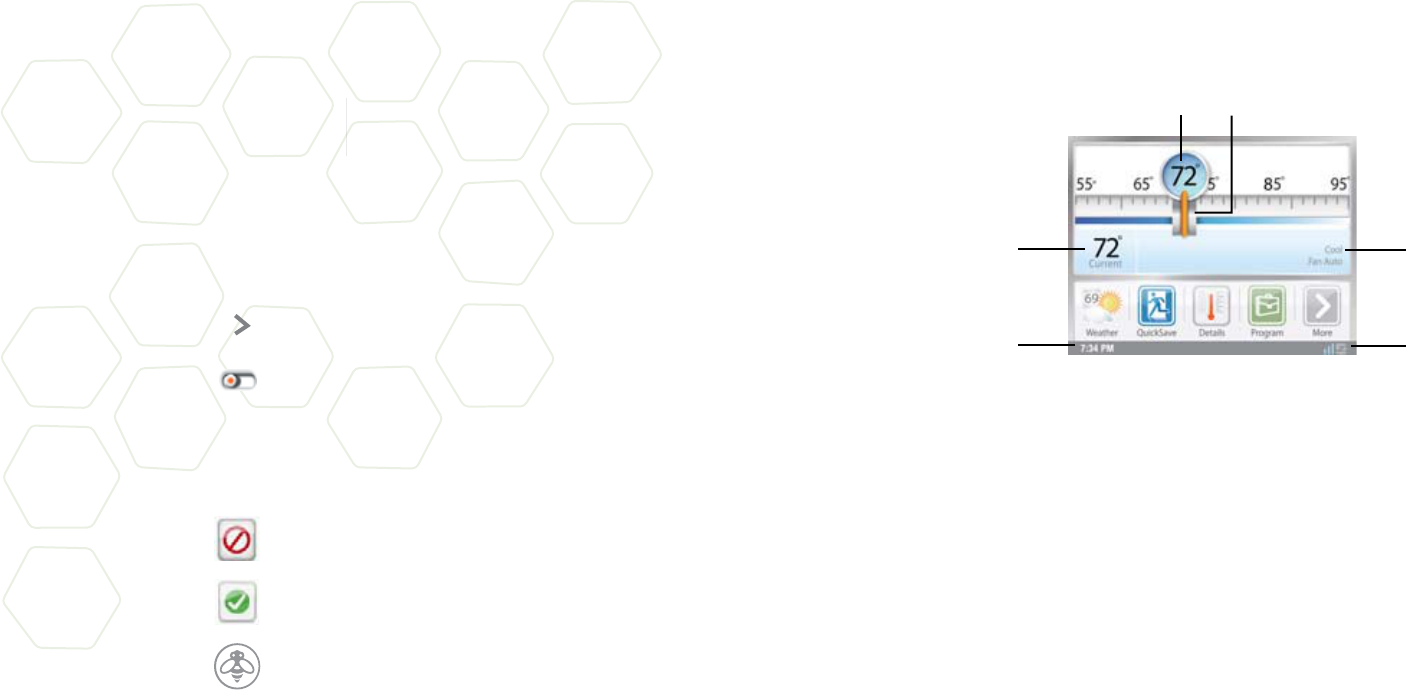
What’s on the Home Screen?
The Home Screen displays the current temperature in your home,
various heating and cooling settings, and icons for navigating to
other features and settings of the thermostat.
The Home Screen is the default display on your Smart Thermostat
USING THE
TOUCH SCREEN
Set temperature
The set temperature is the temperature the system is programmed
to maintain. You can adjust it manually, but for maximum savings
you should automate the temperature setting by programming the
thermostat. See Programming Your Smart Thermostat on page15.
Set Temperature Adjustment Slider
Using your nger, drag the slider back and forth to manually lower
or raise your set temperature. Tapping at either end of the tempera-
ture scale will move the slider by 1°F (0.5°C). When you manually ad-
just the set temperature you will put the system into a Hold mode.
See Holding Action on page 12.
Current Temperature
This is the temperature in the room where the Smart Thermostat is
installed. The thermostat sends signals to your heating and cooling
system to make sure this temperature matches the set temperature
on the thermostat. You can set the Smart Thermostat in Celsius or
Fahrenheit.
System and Fan Settings
Displays the mode your heating and cooling system is currently
running in, as well as the furnace fan setting. Press Details to adjust
these settings.
Wi Signal strength indicator
Indicates the strength of the signal the Smart Thermostat is receiv-
ing from your Wi router. You must have Wi enabled for the indica-
tor to work.
Current Date and Time
Displays the current date and time for your time zone.
3 | 4
12
34
56
1.
2.
3.
4.
5.
6.

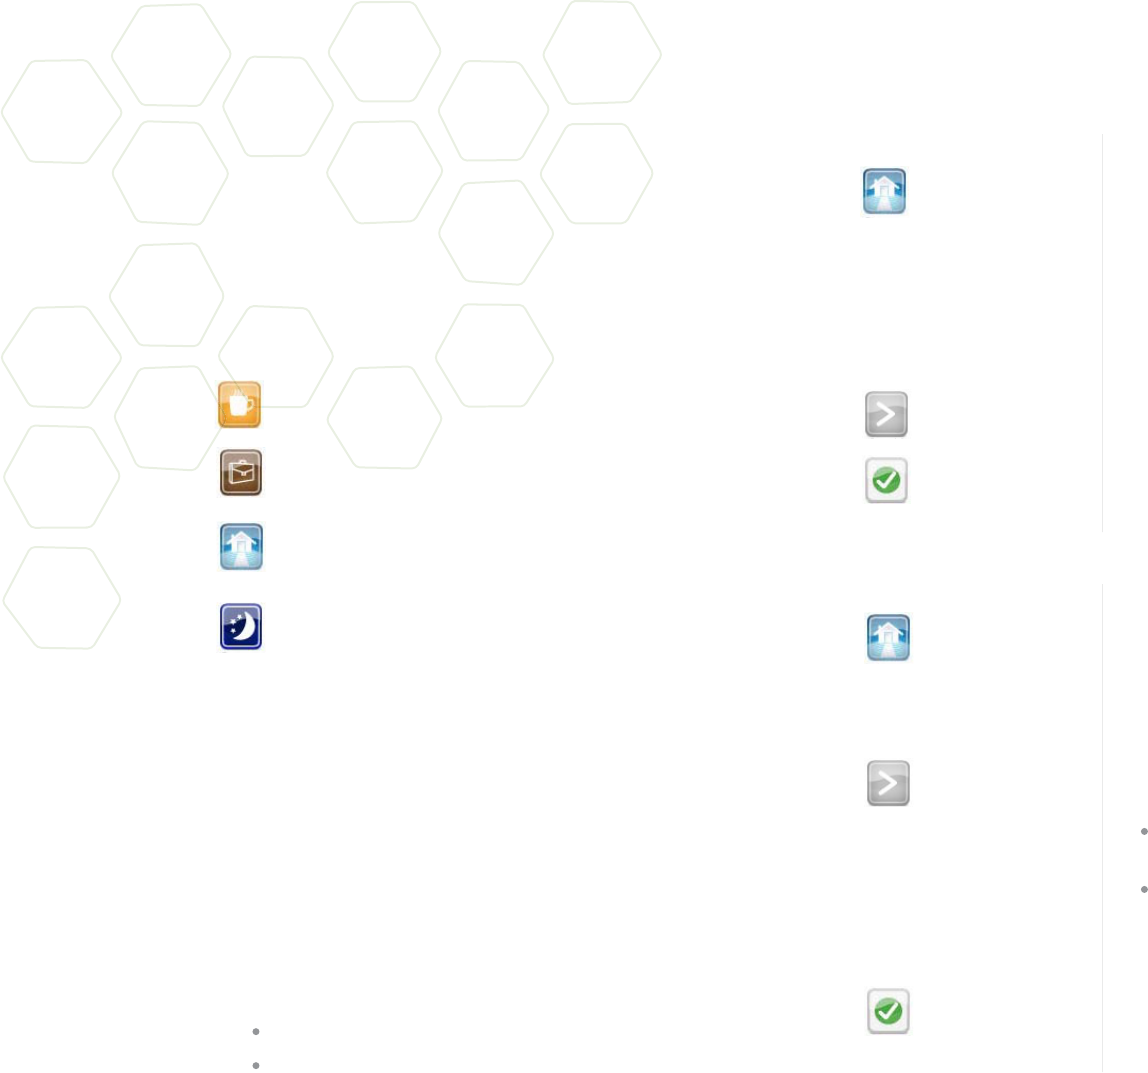
Feature Buttons
Feature buttons allow you to quickly access features of your eco-
bee Smart Thermostat. Pressing one of these buttons will active
that feature.
Register – Use the Register button to register your Smart
Thermostat with a personalized web portal at ecobee.
com. Refer to Web Registration below on page XX for
details. Once you’ve successfully registered, this button
is replaced by the Weather button.
Weather – The Weather button displays the current out-
door temperature and weather conditions for your home
location. Press this button to see the full ve-day forecast.
Please note that when you register your thermostat, it is
important to select your location accurately as ecobee will
use your local weather data to better control your heating
and cooling. You must register your thermostat for this
feature to operate.
Details – Press the Details button to see system details
such as humidity levels and furnace fan settings. If you
have a ventilator, humidier or dehumidier connected,
Details displays the current settings for those as well.
Program – Press Program to pre-program the desired
temperatures throughout the day for each day of the
week. Programming is the key to saving money on energy
bills because it lets you reduce energy consumption when
no one is home. The icon on this button changes to show
which period of the day (awake, away, home, sleep) is cur-
rently in eect.
If your thermostat has been manually adjusted, then the
Resume button will be displayed. Pressing the Resume
button will cause the system to revert back to the
scheduled program.
Quick Save – Pressing this button as you leave your home
will put your thermostat in an energy savings congura-
tion, much like turning o a light switch. To return your
thermostat to its previous settings, simply touch the touch
screen again.
More – Press this button to navigate to the full suite of
features available on your Smart Thermostat.
Cleaning the touch screen
Press the Clean me button to deactivate your touch
screen so that you can wipe it with a cloth. You can
clean the Smart Thermostat touch screen by spraying
water or any mild, non-abrasive household cleaner
suitable for glass surfaces into a clean cloth. Wipe the
surface of the touch screen with the slightly dampened
cloth.
Note: Do not spray any liquids directly onto your
Smart Thermostat.
The touch screen will be deactivated for 30 seconds
allowing you to wipe it clean. The time to reactivation of
the touch screen will count down.
Displaying information about your
Smart Thermostat
The About section of your thermostat displays useful
information about the thermostat and the technician
who installed it. You may need this information if you
are having diculties or require technical support.
The About screen displays the following information:
Copyright Information
ecobee Website
MAC Address – The Media Access Control address as-
signed to the Wi radio in your Smart Thermostat,
Serial Number – The number assigned to your Smart
Thermostat when it was manufactured,
Hardware Revision – The revision of the physical hardware
of your Smart Thermostat. This is currently called
Build Number,
Manufacturing Date – The date your Smart Thermostat
was manufactured,
Software Version – The current version of software run-
ning on your Smart Thermostat and Installer Information
(optional) If your installer has entered their contact infor-
mation then that information will appear here.
To clean the touch screen:
From the Home
Screen, press More.
Press Clean Me.
To display the About screen:
From the Home
Screen, press More.
Press Settings.
Select About from
the Menu.
5 | 6
You can manage your ecobee system
using the colour touch screen on the
Smart Thermostat or from your ecobee
personalized web portal. Internet access
lets you:
Program and congure your Smart Thermostat from your
personalized web portal.
Remotely control your Smart Thermostat from anywhere
you have Internet access.
Enable your Smart Thermostat to display and use local
weather data to maximize savings.
Receive important alerts and reminders about your
heating and cooling system.
A 1 year free subscription to the ecobee web portal in-
cluded with the purchase of the smart thermostat.
Note: To connect your system to your personalized ecobee web
portal you must have a broadband Internet connection and a
wireless home network.
Wi Specications
Your Smart Thermostat is designed to support:
A 802.11 b or g wireless router
WEP 64, WEP 128, WPA1 and WPA2 encryption methods
Dynamic and Static IP addressing
Setting up Wi
The Smart Thermostat is equipped with a wireless
interface that connects to any home wireless network.
You must enable the Wi radio in the Smart Thermostat
and congure it in order to access your home wireless
network.
When the Wi radio is turned on, the thermostat
displays a list of available networks, along with an
indication of the signal strength and whether security
encryption is used.
If your home network is not listed, or if the signal strength
is very low, try readjusting the antenna on your wireless
router. If that does not improve the signal you may need
to relocate your router.
Once your network has been detected, press on that list item to
continue with the conguration.
If the network is encrypted you will be asked to enter the password
for that network. This was the password you created when the
wireless network router was rst setup
Using the MAC address
You may have congured your network to lter for known MAC ad-
dresses. If this is the case refer to the section Displaying information
about your ecobee Smart Thermostat on page XX to nd the MAC
address for your Smart Thermostat.
Creating Your Personal Web Portal.
Once a wireless Internet connection is established, you
need to register the thermostat to create your personal
web portal that you can use to remotely manage your
ecobee Smart Thermostat.
Your e-mail and password are not stored in the thermo-
stat. You can change this information once the account
has been registered and activated.
If you do not receive a registration e-mail, please check
your junk mail folder as registration messages are
sometimes agged as junk mail.
Once you have completed the registration process, you
can go to www.ecobee.com to manage your ecobee
Smart Thermostat through your personal web portal
Note:Once registration is complete, the registration button
on the Home Screen is replaced with the Weather button
To register the thermostat:
From the Home Screen,
press Register.
You will be prompted
to enter your primary
e-mail address.
Press Done.
You will be prompted to
enter a password. Enter
a password with a mini-
mum of eight characters.
Press Done.
The Smart Thermostat
sends a registration
message to the specied
e-mail address. This e-
mail includes a link to
www.ecobee.com where
you will need to enter
the password to com-
plete the registration
To set up the Wi radio:
From the Home
screen, Press More.
Press Settings.
Switch Wi on.
Select your network
from the list of
available networks.
7 | 8
CONNECTING YOUR
THERMOSTAT
TO THE INTERNET

Re-registering The Thermostat
There are times when you may need to re-register your thermostat.
For example, if you are a new homeowner who has just moved to a
home with an existing ecobee Smart Thermostat.
Simply follow the registration process described above. All the
data collected for the thermostat since it was rst registered is
stored and can be viewed online after you nish re-registering.
As well, your ecobee Smart Thermostat will ask you if you would
like to re-register your thermostat when you connect it to a new
wireless network. Press No to continue to use the same web
account information. Pressing Yes, will cause the username and
password information associated with the thermostat to be reset
and the Register button will appear again on the home screen.
Replacing your thermostat
If you replace your ecobee Smart Thermostat, the initial setup
will be the same as when you congured the original ecobee
Smart Thermostat.
However, when you log into your ecobee web account you will
see two ecobee Smart Thermostats listed. You will be asked if you
want to copy the information from one ecobee Smart Thermostat
(the original ecobee Smart Thermostat) to the other. Select Yes, to
copy all of your programming and conguration information to
the new device and then delete the old device.
Registering additional devices
Your web account can support multiple ecobee Smart Thermo-
stats. If you have more than one, follow the same web registration
process described above.
When you log in to your ecobee web account, you will see all the
ecobee Smart Thermostats you have registered. Each device can be
individually programmed and controlled through the one account.
9 | 10
This section of the manual describes
how to set up and configure your Smart
Thermostat using the touch screen.
There are three key steps:
Personalizing your Smart Thermostat.
Set up Reminders.
Program the thermostat using the Wizard or Editor.
Personalizing your Smart Thermostat
Preferences allow you to personalize the way your ecobee Smart
Thermostat behaves and includes settings for how temperature,
time and date display on the thermostat.
Temperature Display
Touch Temperature Display to change the temperature
display between degrees Fahrenheit(°F) or degrees
Celsius (°C)..
Date and Time
Touch Date & Time to set your current time and time zone.
Program the time and date as well as your time zone.
If you are connected to the Internet, time and date are
programmed automatically.
The time zone determines when the system needs to
adjust for daylight savings time.
To adjust the date and/or time, use your nger to spin
the wheels up or down:
Time Format
Choose between the 24-hour clock and the 12-hour
clock with am and pm.
Sound Eects
The Smart Thermostat can make sounds when you
press a button or when an alert is generated. Press
Sound Eects to;
Turn on or o the sound when a
button is pressed
Select the volume of the sound when
a buttons is pressed
Turn on or o the sound when an alert is generated
Select the volume of the sound when an alert is generated.
Brightness
The touch screen display on your Smart Thermostat has adjustable
backlighting brightness. You can control the intensity when the
screen is active (i.e., you are pushing buttons) and when the display
is in standby mode. Press Brightness to:
Set the Active brightness intensity
Set the Standby brightness intensity
Set the minimum time that the smart thermostat will
keep the display in Active brightness before switching
to Standby brightness.
Holding Action
Whenever you adjust the set temperature manually, the Smart
Thermostat will indicate that you are holding. You can select how
long the Smart Thermostat will hold the new temperature before
reverting back to the regular program. The options are:
2 hours - After 2 hours have elapsed the Smart Thermostat
will revert back to its program.
Until next transition- If your program was scheduled to
adjust the temperature at 5pm, and you made an adjust-
ment at noon, choosing this option would result in your
Smart Thermostat re-adjusting the temperature at 5pm to
whatever was pre-programmed for 5pm
Indenite - If this option is selected your Smart Thermostat
will continue to hold at this temperature until you press the
Resume button located at the bottom of the home screen.
Update Program - If this option is selected when you
adjust the set temperature, the system will reprogram
the temperature for the period you are currently in.
Ask Me - If this option is chosen every time you adjust
the set temperature you will be asked which of the fol-
lowing options you would like to choose.
To set up Preferences:
From the Home
screen, Press More.
Press Settings.
Select Preferences and
adjust to your needs.
11 | 12
SETTING UP
YOUR SMART
THERMOSTAT
Quick Save Temperature Limits
In Quick Save mode, your system will automatically increase
(in cool mode) or decrease (in heat mode) the set temperature.
Use this option to program the maximum temperature change al-
lowed so your comfort is not compromised. The number you enter
is the dierence from the set temperature of the system before the
Quick Save feature is activated.
Setting up Reminders
Your Smart Thermostat can be programmed to remind you of
required lter changes and regular maintenance.
These reminders were congured by the technician dur-
ing installation. Changing them may eect the opera-
tion of your heating and cooling system.
Note: If you are not sure about what equipment you have
installed or whether you need to replace rather than
clean your lters, please contact your heating and cooling
technician, or consult your original heating and cooling
equipment manuals for the recommended maintenance
procedures.
Maintenance
The Maintenance alert is generated when regularly
scheduled maintenance is required. This alert, along
with your technician’s contact information (if pro-
grammed by the technician during installation), will be
displayed on the touch screen.
Select this item to turn the reminder on or o, show the
date of the last service, and select a reminder interval
between one and 24 months.
Furnace Air lter
Sets the reminder period for cleaning or
replacing the furnace air lter.
Select this item to turn the reminder on or o,
and to set the reminder interval in hours or
calendar months. You can also check the date
of the last lter change.
Humidity Filter (Optional)
Sets the reminder period for cleaning or changing the humidier lter.
Note: If your Smart Thermostat is not connected to a humidier, this
option will not be displayed.
Select this item to turn the reminder on or o, and to select the
reminder interval in hours or calendar months. You can also check the
date of the last lter change.
Ventilator Filter (Optional)
Sets the reminder period for cleaning or changing the ventilator lter.
Note: If your Smart Thermostat is not connected to a ventilator, this
option will not be displayed.
Select this item to turn the reminder on or o, and to set the reminder
interval in hours or calendar months. You can also check the date of the
last lter change.
Temperature Alerts
The Smart Thermostat can generate alerts when the temperature
in the home reaches a pre-programmed temperature. This protects
your home from damage due to freezing or excessive heat.
If this alert has been set up, you will see the alert on the thermostat.
If you’ve congured your personal web portal, you’ll also get an
alert e-mail.
Low Temperature Alert
Select this item to set the temperature at which the Smart Ther-
mostat will generate a Low Temperature alert. The range can be
adjusted to:
O – no alert will be generated
Set temperature range of 40 – 60°F (4.5 – 15.5°C)
High Temperature Alert
Select this item to set the temperature at which the Smart Ther-
mostat will generate a High Temperature alert. The range can be
adjusted to:
Off – no alert will be generated
Set temperature range of 90 – 100°F (32 – 35°C).
To set up Reminders:
From the Home
Screen, press More.
Press Settings.
Select Reminders.
Scroll through options
to set and adjust to
your needs.
13 | 14
Programming your Smart Thermostat
Depending on the time of day, and the day of the week, you need
exibility for the heating and cooling settings in your home.
For example, if there’s no one in the house during the workday you
might want to let the temperature go up in the summer, to reduce
energy used by the air conditioning system, and go down in the
winter, to reduce energy used by the furnace.
Your Smart Thermostat is exible – you can program four dierent
time periods per day, seven days a week. Each period is representing
by a unique icon. These icons can be found on various screen on the
Smart Thermostat as well as on your personalized web portal.
Awake- this represents the period when you are awake.
The start time of this period is typically when you get up
in the morning.
Work- this represents the period when you are at work and
the home is not occupied. The start time of this period is
typically when you leave to go to work.
Home- this represents the period when you are home. The
start time of this period is typically when you get home
from work in the evening.
Sleep- this represent the period when you are sleeping.
The start time of this period is when you go to bed at night.
We call it a Smart Thermostat because it learns how your home
and heating and cooling equipment perform. This means you can
be sure that your home is at the temperature you want, when you
want it, without wasting energy.
And when your schedule changes, you can quickly and easily up-
date the thermostat setting directly on the device itself or online
through your personalized web portal.
Your Smart Thermostat comes pre-programmed with EnergyStar
recommended settings. These settings can save you up to 33% on
your heating and cooling energy costs when compared to a non-
programmable thermostat.
If your preferences are dierent than the recommended settings,
you can easily adjust the time periods and temperatures of your
system. There are two ways to program the Smart Thermostat:
Use the Wizard that guides you through the steps
Use the more advanced Editor feature.
Using the Program Wizard
The Smart Thermostat Wizard takes you step-by-
step through a series of questions about when your
awake,, go to work, come homeand go to sleep. You’ll
then set appropriate temperatures for each of those
time periods.
Note: If your Smart Thermostat is in Hold mode, you
must press Resume in order to get to the wizard.
Note: The Smart Thermostat will not ask you what
temperature you want in your home during work
hours. Instead, it automatically sets this value to
minimize your energy consumption, while ensuring
the room temperature reaches the desired tempera-
ture when you come home. If you prefer to set this
temperature manually, use the Editor (see page XX).
If you want to change anything, you can either run
the Wizard again, or press Editor to make specic
changes (see Using the Editor below).
Using the Editor
The second way to edit your Smart Thermostat’s
program is to use the Editor. This method is more
advanced than the Wizard you can edit specic times
and temperatures, as well as furnace fan settings for
each day of the week.
Note: The Heat Set temperature turns the furnace on
and the Cool Set temperature turns the air condition-
er on. Setting a lower Heat temperature saves energy
in the winter, and setting a higher Cool temperature
saves energy in the summer.
You can also program the fan setting for
both Heat mode and Cool mode.
Select ON to run the fan continuously.
Select Auto to run the fan only when the heating,
cooling or ventilation equipment is running or to
satisfy the minimum fan on time as programmed by
your technician during the installation.
Note: Humidity levels are not included as a program-
mable option, even if a humidier or dehumidier is
installed and controlled by the Smart Thermostat.
To use the Wizard:
From the Home Screen,
press Program.
Press Wizard in the upper
right corner of the screen.
Answer each Wizard
question to best t your
daily rountine.
Press Next to go to the
next question.
When the congratulations
screen appears press Done.
15 | 16
To use the Editor:
From the Home Screen,
press Program.
Press Editor in the upper
left corner of the screen.
Select the days you wish
to adjust ( selecting more
than one day will change
settings for all selectd) and
press Next.
Adjust temperatue by
pressing the heat or cool
buttons on the right
hand side.
When the congratulations
screen appears press Done.

17 | 18
From time to time your ecobee system will
display an alert. For example, the alert might
be a reminder to change the furnace lter, or
perform regular maintenance.
As well, if you have a ood sensor installed in your house, the
system can alert you when water is detected, potentially sav-
ing you thousands of dollars from damage due to ooding.
If you have enabled the Internet connection to your Smart
Thermostat, these alerts can also be sent to you via e-mail.
When an alert displays, you can dismiss it or ask to be reminded
again later.
If you receive a furnace lter alert, for example, and choose Remind
me later, the alert will clear and then display again 24 hours later.
If you choose Dismiss when the alert displays, it will not redisplay
until the next time period for a lter change.
If your heating and cooling technician provided contact
information during installation (such as company name and
phone number), the alert will display this information.
List of Alerts
Below is a complete list of alerts. Depending on your
conguration, some of these may not apply to your system.
Compressor
Protection
Comms fault
Low Temp. Alert
High Temp Alert
Heat Not
Responding
Cool Not
Responding
Humidity Not
Responding
Input 1
Input 2
Maintenance
Reminder
Emergency
Demand Response
Event
Utility Price Event
Low Battery
Furnace Air Filter
Ventilator Filter
Humidier Pad
Loss of Wi
Loss of Internet
The battery in your Smart Thermostat
will need to be changed soon.
Your furnace lter needs to
be cleaned/changed.
Your ventilator lter needs to
be cleaned/changed.
Your humidier pad needs to
be cleaned/changed.
Your Smart Thermostat lost the connection
to your Wi router.
Your Smart Thermostat lost the connection
to the Internet.
The system prevented you from turning
on your compressor when the outside
temperature was too low.
There is no communication between t
he Smart Thermostat and the
Equipment Interface module.
The temperature in the home
is too low.
The temperature in the home
is too high.
The system has failed to heat
the home.
The system has failed to coo
the home.
The system has failed to maintain
the humidity level.
Used if this input is programmed to
generate an alert.
Used if this input is programmed to
generate an alert.
You are due for regular maintenance.
Your utility company has sent an
Emergency demand response event.
Your utility company has sent a price
event request.
UNDERSTANDING
ALERTS
The bright, easy-to-read and easy-to-use touch
screen interface on your Smart Thermostat
makes it easy to review and adjust the settings
any time you want.
Adjusting temperature
You can easily adjust the temperature setting in your
home without changing the thermostat’s programming.
Once you’ve adjusted the temperature, the slider
changes to indicate you are currently holding the set
temperature rather than running a program.
The Smart Thermostat will hold the new temperature for
the duration you specied in the Hold Action option dur-
ing the initial setup (see Holding Action pg XX) or until you
press Resume.
Viewing Details
The Details screen lists various temperature,
humidity and equipment details associated with
your Smart Thermostat.
There are eight items listed in the System Details screen.
Use the scrollbar on the right to see items at the bottom.
Current Temperature
The temperature in the room where the Smart Thermostat
is installed.
Set Temperature
The temperature the system is programmed to maintain.
Press this item to manually adjust the set temperature and
put the Smart Thermostat into Hold mode.
System Mode
Displays the mode your system is operating in. Press this
item to display a list of options:
Cool - The system will turn on the air conditioner when the
current temperature rises above the set temperature.
Heat - The system will turn on the furnace when the cur-
rent temperature drops below the set temperature.
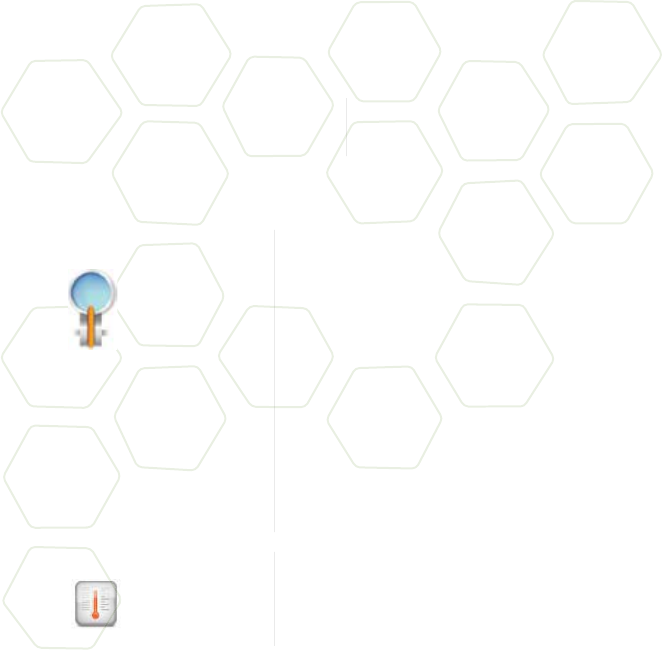
To adjust the temperature:
Use your nger to
press and move the set
temperature slider left
or right until the value
in the magnifying lens
displays the tempera-
ture you want.
(tapping either end of
the temperature scale
will move the slider by
1° (0.5’ C).
68°
To access your Details:
From the Home
Screen, press Details.
Auto - The system is in Auto-changeover mode and will activate
the heating or cooling systems to keep your home within the
desired range of set temperatures
O - The system is o and will only display the current temperature.
Fan Control
Displays the current furnace fan setting. Press this item to
toggle between:
On - The fan runs all the time regardless of programming or if there
is call for heat or cool. The fan will also run if the System Mode is O.
Auto - Turns on the furnace fan only when the system is heating,
cooling or ventilating your home, or to satisfy the minimum fan on
time as programmed by your technician during the installation.
Current Humidity
Displays the current percentage of relative humidity measured
in the room where the Smart Thermostat is installed. Humidity
displays even if your Smart Thermostat has not been congured to
control a humidier, dehumidier or ventilator.
Humidier
Humidity is an important factor in your overall comfort level.
If your Smart Thermostat was congured to control a humidier,
dehumidier or ventilator, you will be able to select the options
below to control the level of humidity in your home.
O – The system will not try to control the humidity in your home.
ON – When this feature is selected you will be able to set the humid-
ity between 20% to 50%.
Frost Control – If this option is enabled during the heating season,
the Smart Thermostat will automatically adjust the humidity levels
to minimize frost or condensation that can form on the windows of
your home.
Note: Internet access is required for this feature. Local outdoor temper-
ature and humidity information is required for optimum performance.
19 | 20
USING YOUR SMART
THERMOSTAT

Ventilator Max
If your system is equipped with a ventilation system, you can
manually switch the ventilator to the maximum setting directly
from your Smart Thermostat.
After you select this item, the ventilator switches into the
maximum mode for a pre-programmed period of time. The
ventilator then switches back to its normal operating state.
Scheduling a vacation
The Smart Thermostat’s Vacation feature helps you
conserve energy while you are away from your home
for extended periods of time and also ensures that
your home is comfortable when you return.
You can enter any number of uniquely named
vacations. Other features to choose from include:
ecobee optimize
Turn this option ON to tell the thermostat to
automatically set your heat temperature, cool
temperature, system mode and furnace fan settings
while you are away for maximum energy conservation.
Turn this option OFF to manually congure Heat
Temperature, Cool Temperature and Fan, as shown here:
Heat Temperature
Programs the set temperature when the system is in Heat mode, i.e.,
when the furnace is on. Set a lower temperature to save energy.
Cool Temperature
Programs the set temperature when the system is in Cool mode,
i.e., when the air conditioner is on. Set a higher temperature to
save energy. You can also choose to turn o your cooling system
while you are away to ensure it does not go on at all.
Fan
Toggles the fan setting between ON and Auto.
ON - The fan runs all the time regardless of programming or if there is
call for heat or cool. The fan will also run if the System Mode is OFF.
Auto - This option turns the furnace fan on only when the system
is heating, cooling or ventilating your home or to satisfy the
minimum fan on time as programmed by your technician during
the installation.
To schedule a vacaion:
From the Home
Screen, press More.
Press Vacation.
Press New and enter a
name and the dura-
tion of your vacation.
In either mode, the Smart Thermostat will ensure that when your
vacation ends the thermostat will revert to the regular settings.
Note: If you were running your regular program prior to the start of your
vacation, on your return the Smart Thermostat will restore your home to
those settings. If you were in Hold mode prior to the start of your vaca-
tion, the Smart Thermostat will restore the home to whatever the set
temperature was just prior to your vacation.
Resetting the Smart Thermostat
At some point during the life of the thermostat you
may want to quickly recongure it or restore it to
the default state.
Reset Registration
Resets the connection between your Smart Thermostat
and your personalized web portal.
After this reset, you must re-register your Smart
Thermostat if you want to continue to use your web
portal with this device.
All other preferences and setting will remain the same.
Reset Preferences/Program
Resets all your preferences, reminders, alerts and
programming to the original factory default state.
Wi settings and registration are not aected
Reset Installer Settings
Resets all the Installer setting back to the original factory
default state.
Note: This reset should only be performed by the
installation technician.
What to do if you move
If you decide to move there a few things you should
consider with regards to your ecobee system:
If you did not activate your personalized web portal you
simply take the Smart Thermostat with you, or leave it
in the house.
If you registered with ecobee.com, you need to update
your web portal to reect the change.
To Reset your thermostat:
From the Home
Screen, press More.
Press Settings.
Select Reset from
the list.. Choose the
Reset option that
suits your needs.
21 | 22

Leaving it behind
Log onto your web account and delete the device
you are leaving behind. This terminates the
association between your Smart Thermostat and
your personalized web portal.
You can always choose to add another device for your new home
with this same account.
The new homeowner will need to register the Smart Thermostat
and set up their own web portal.
Taking it with you
If you are taking the device with you, you will need to re-connect
the device to the Internet and possibly re-register if your IP
information changes. To re-register follow the original web
registration procedure in this manual.
23 | 24