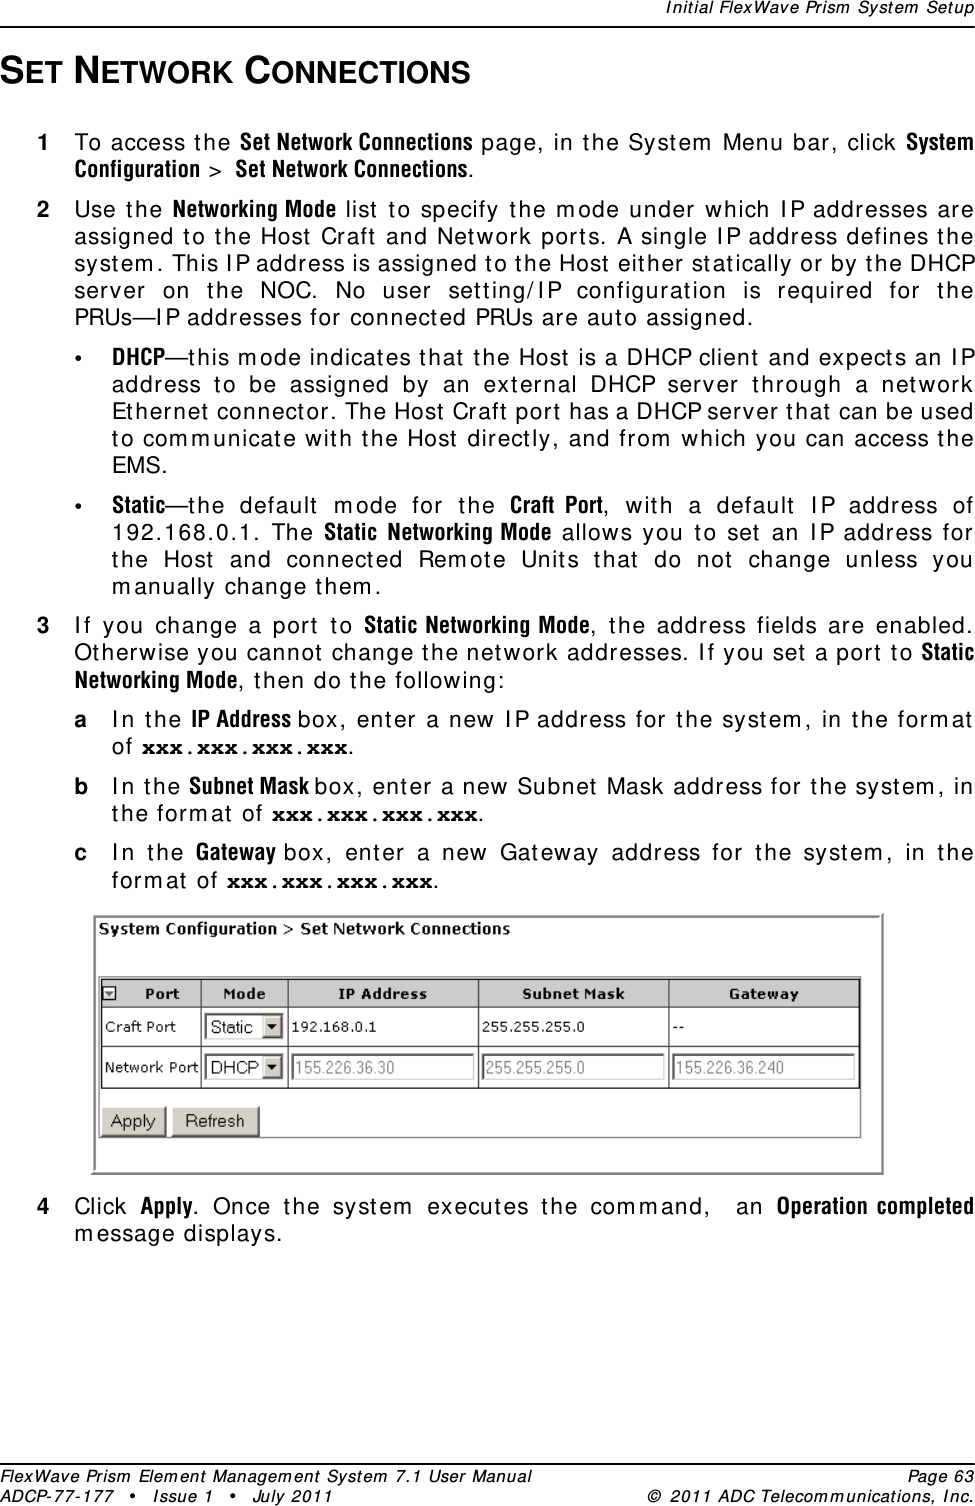
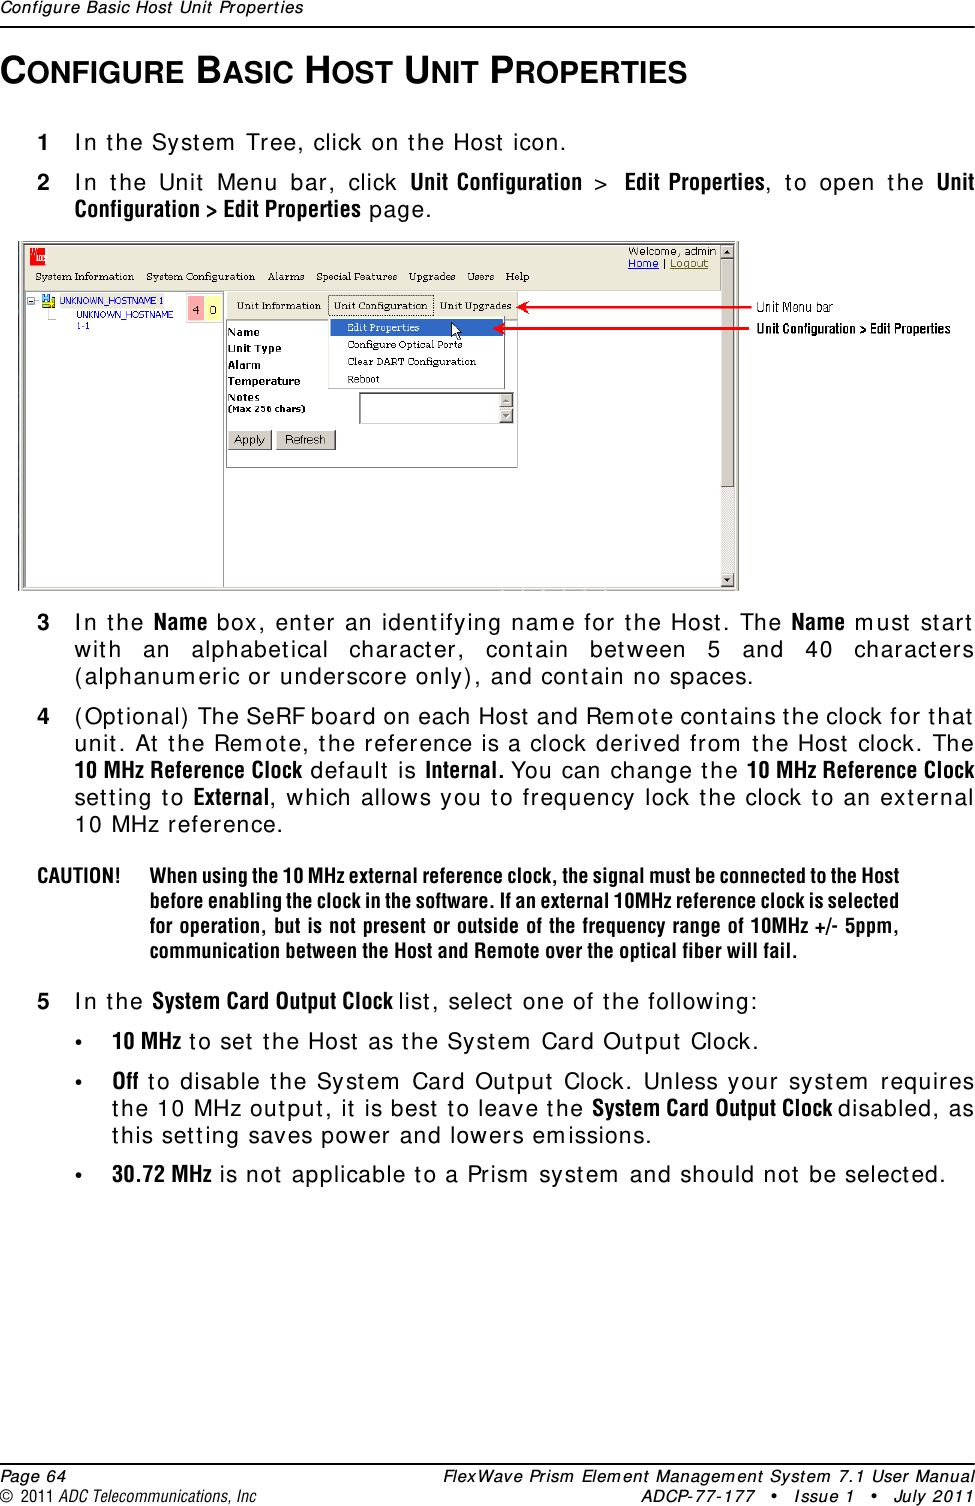
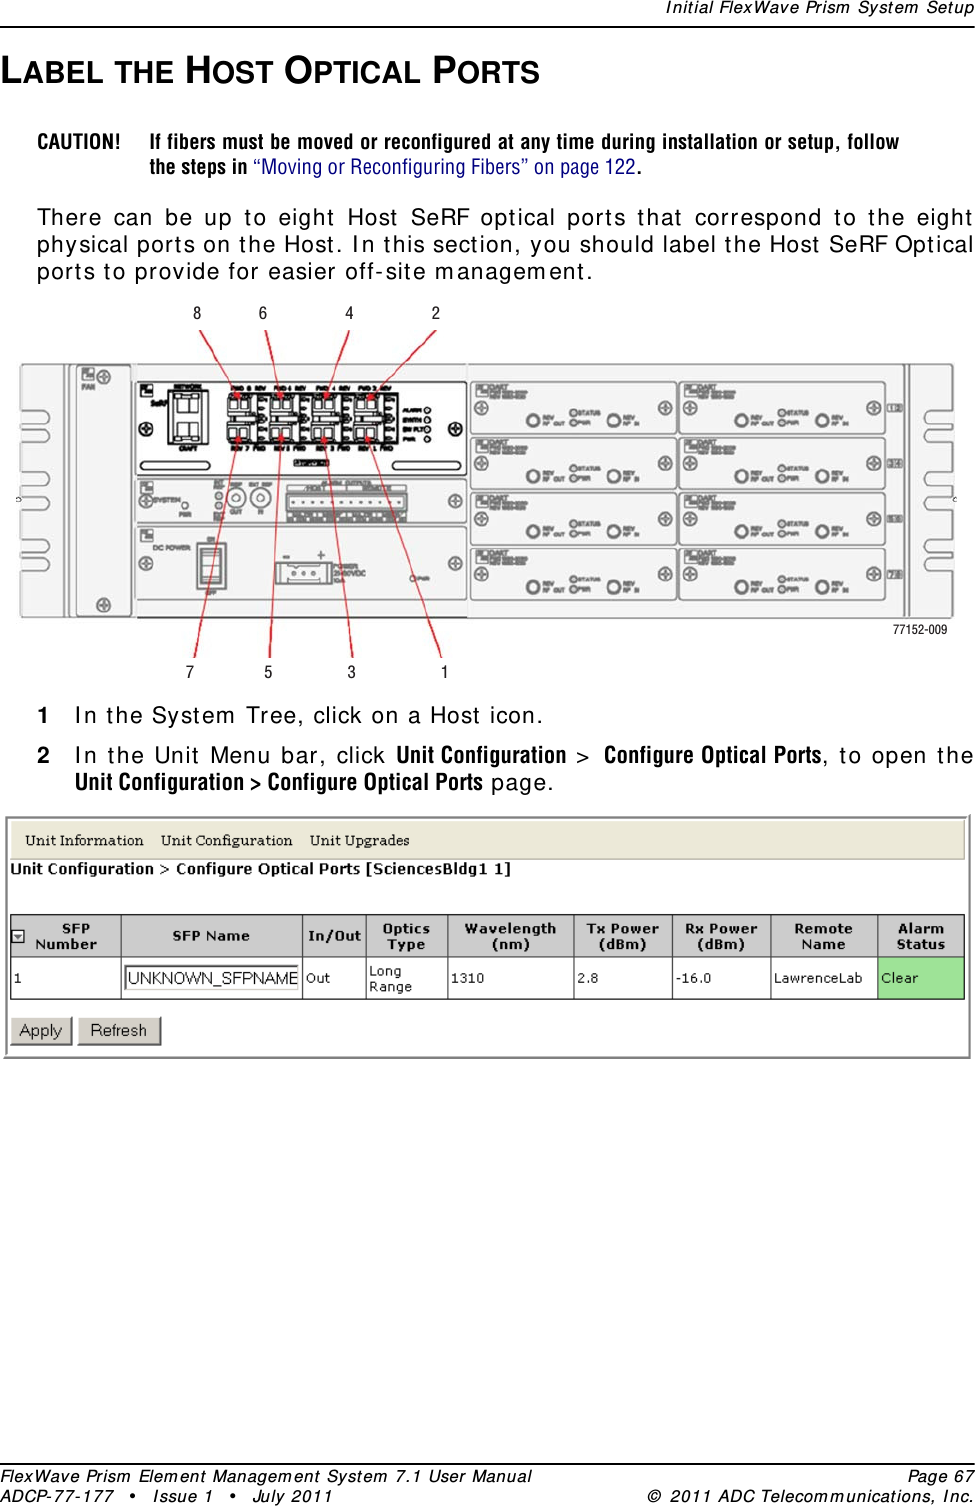
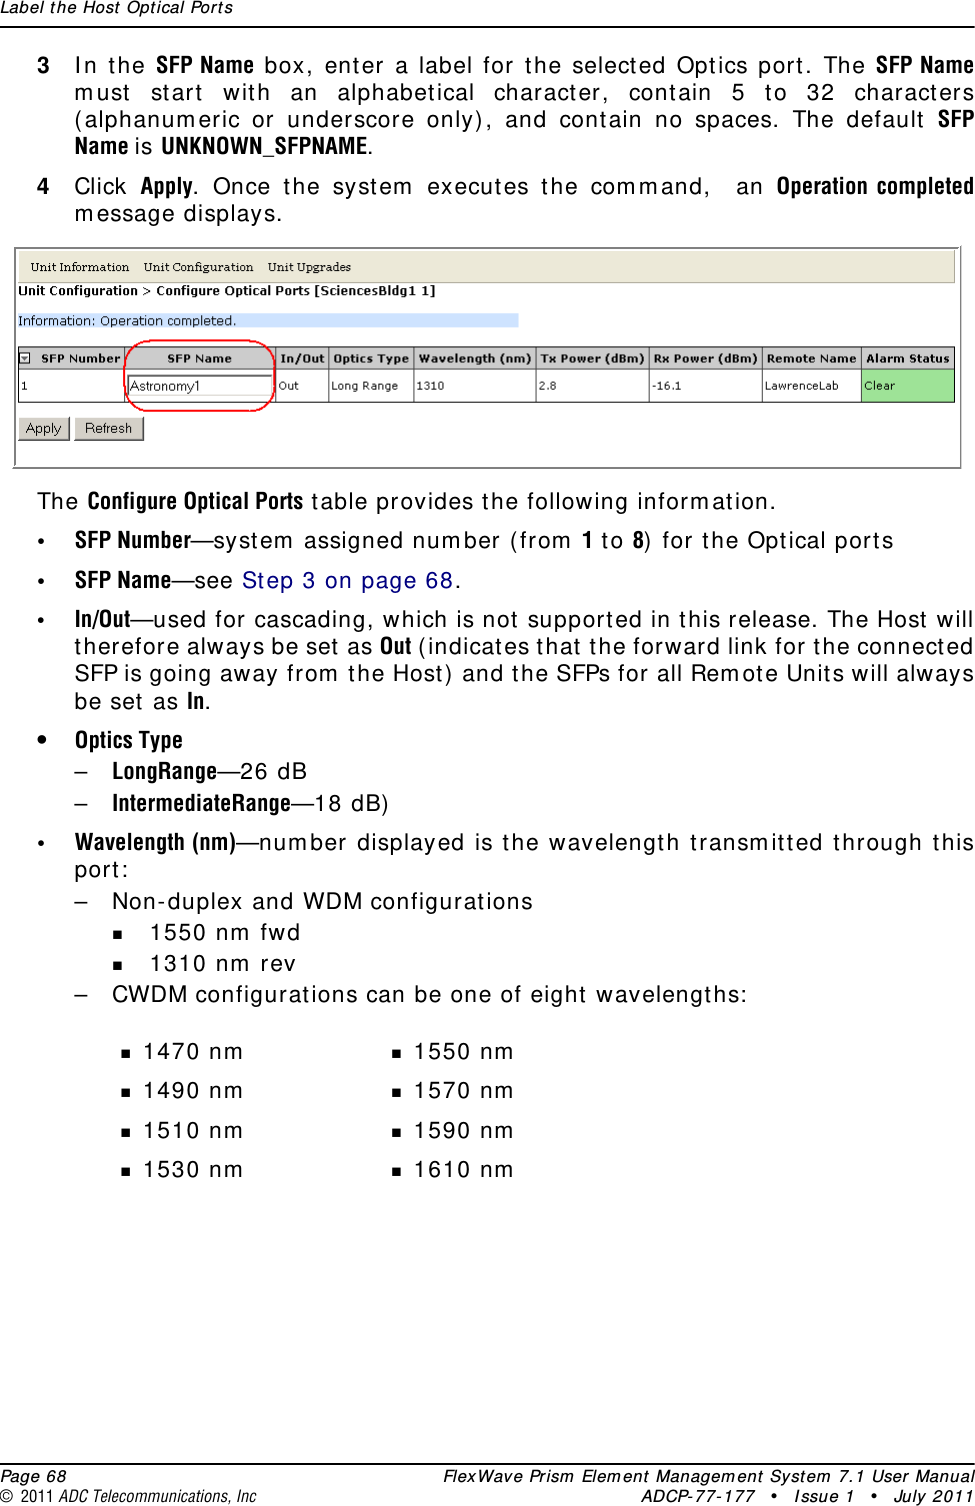
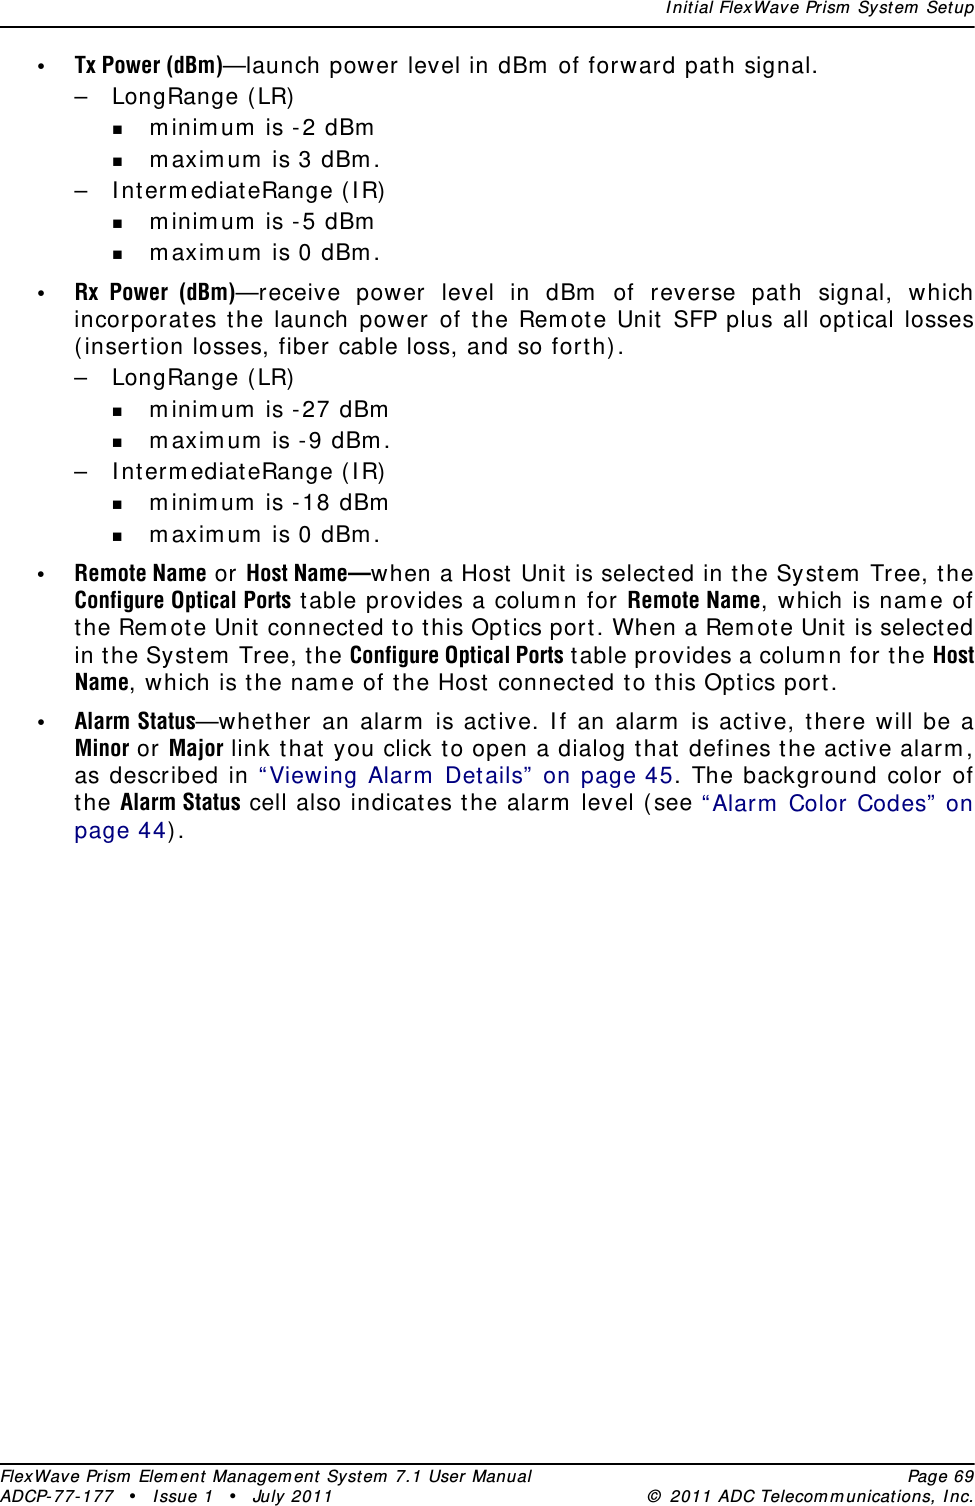
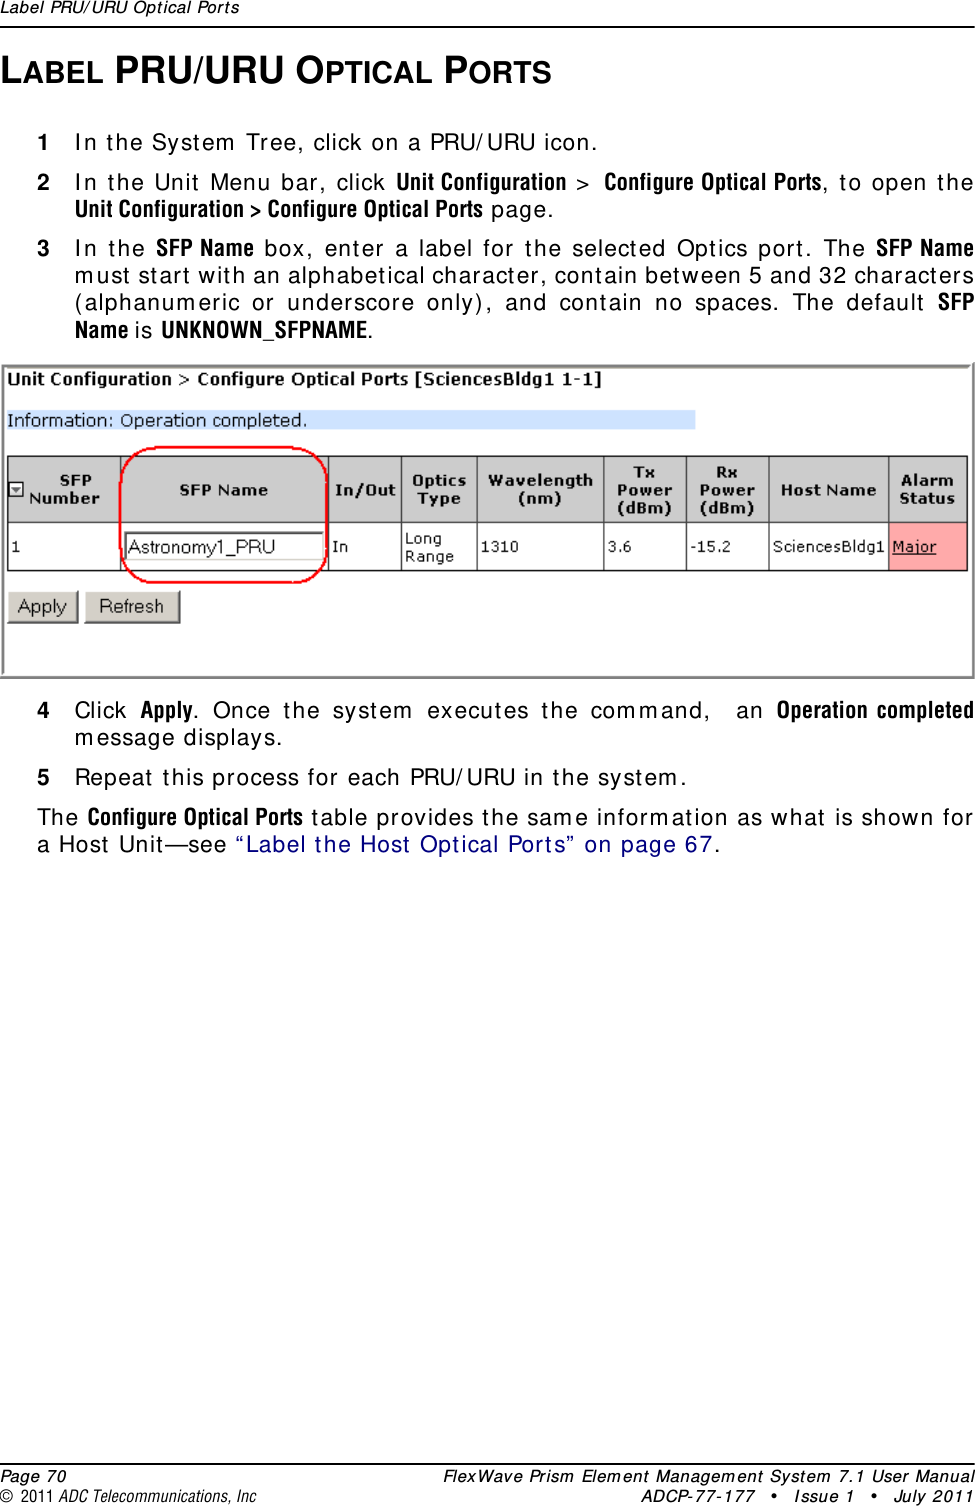
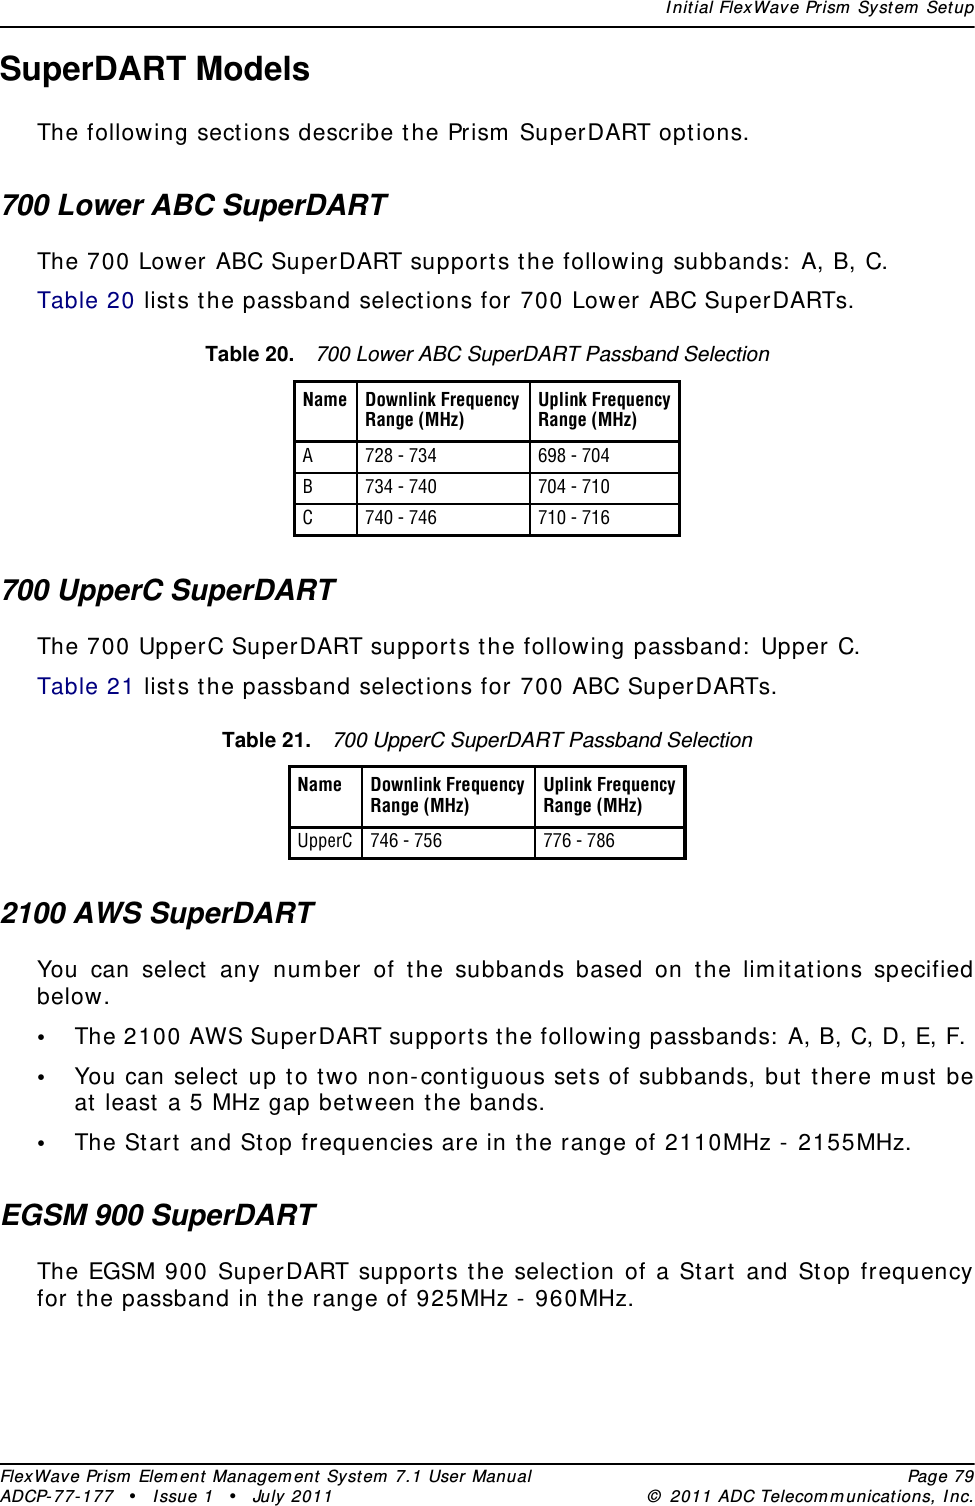
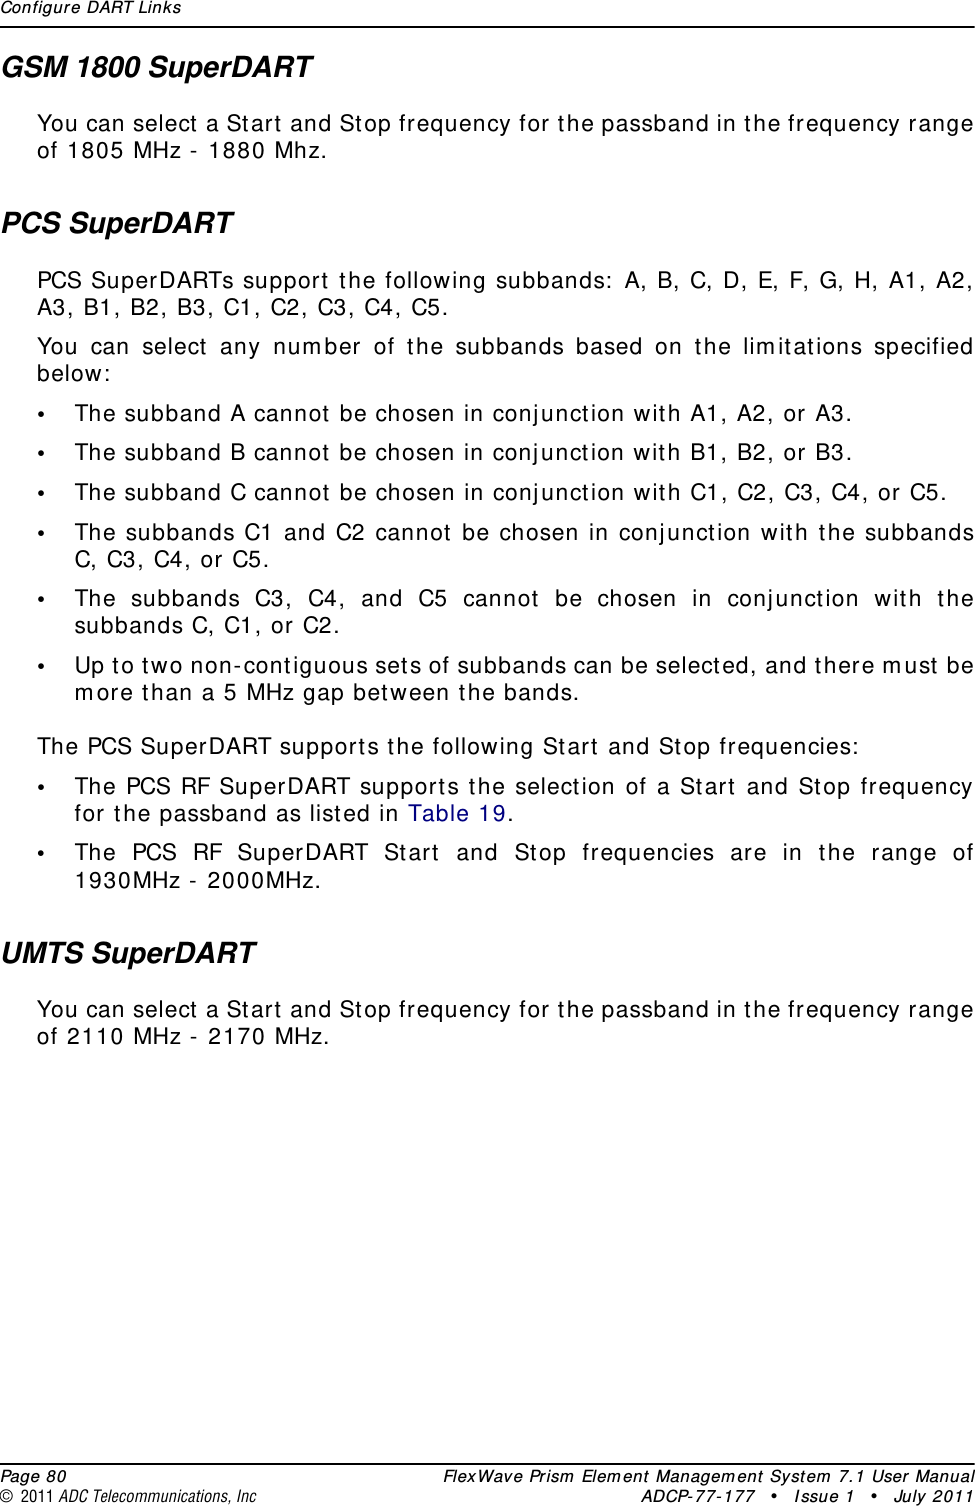
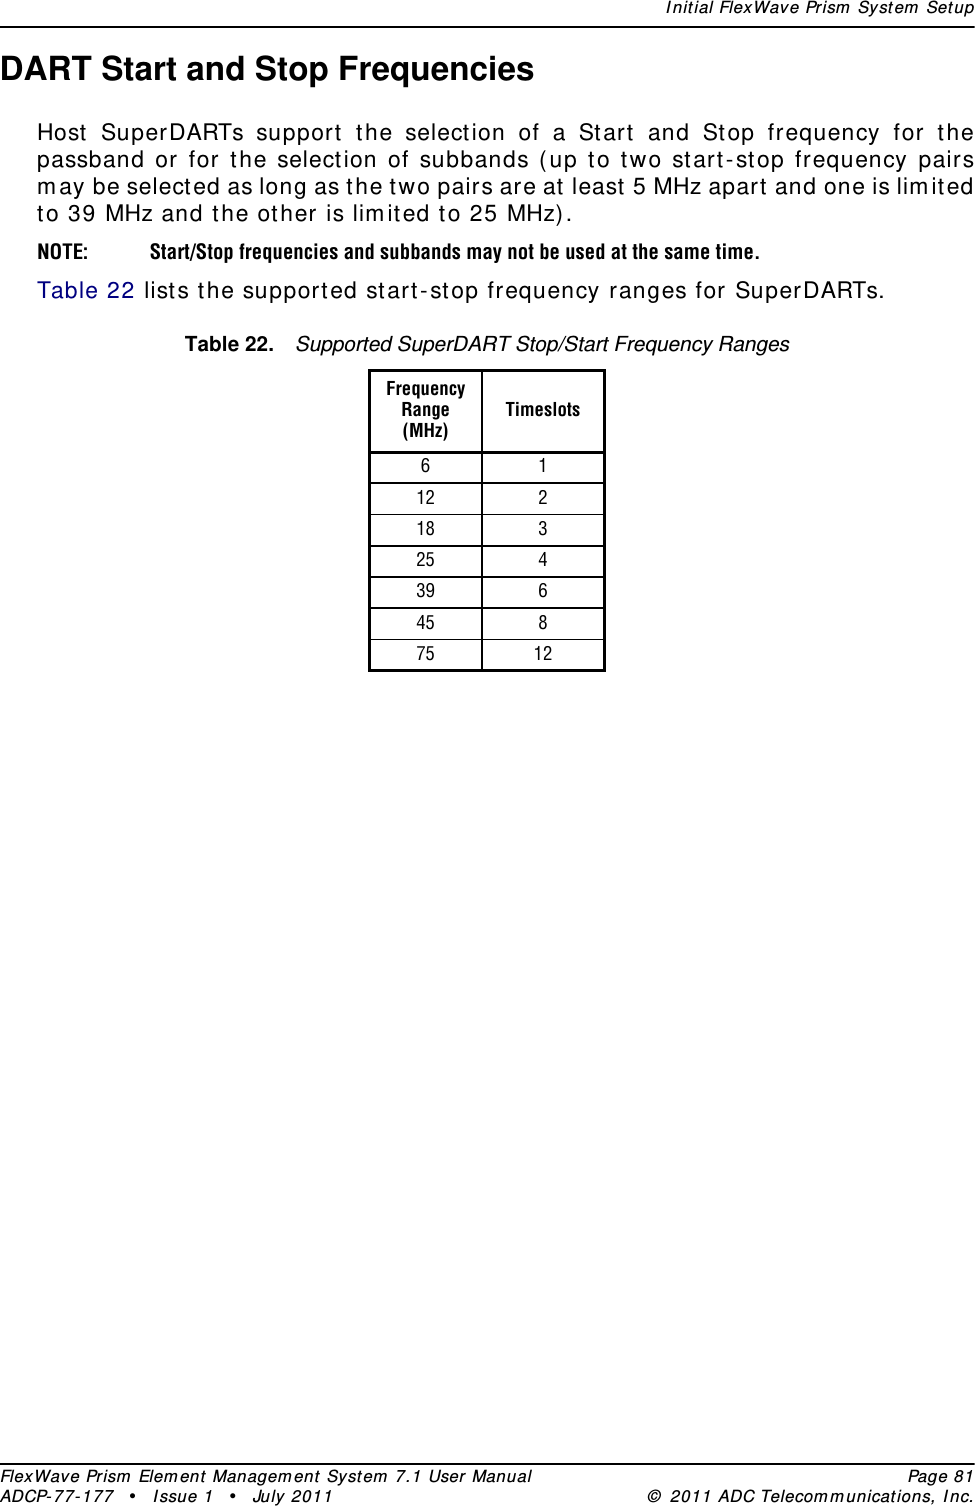
ADC Telecommunications PSM0804A FlexWave™ Prism - Cellular 40 Watt User Manual 2
ADC Telecommunications Inc FlexWave™ Prism - Cellular 40 Watt Users Manual 2
Contents
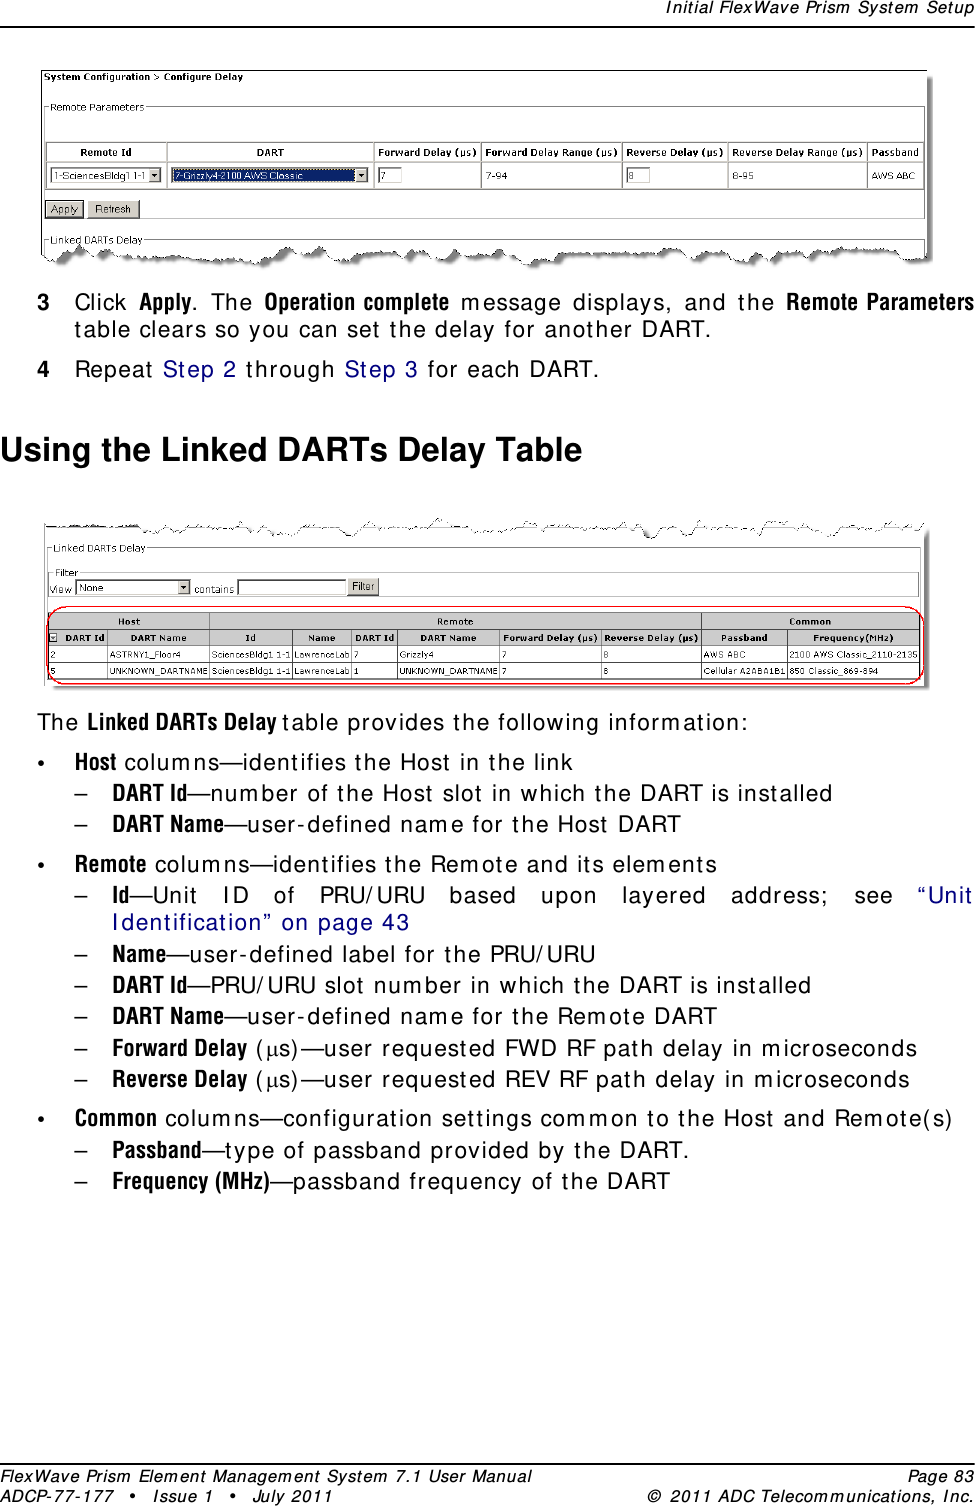
- 1. Users Manual 1
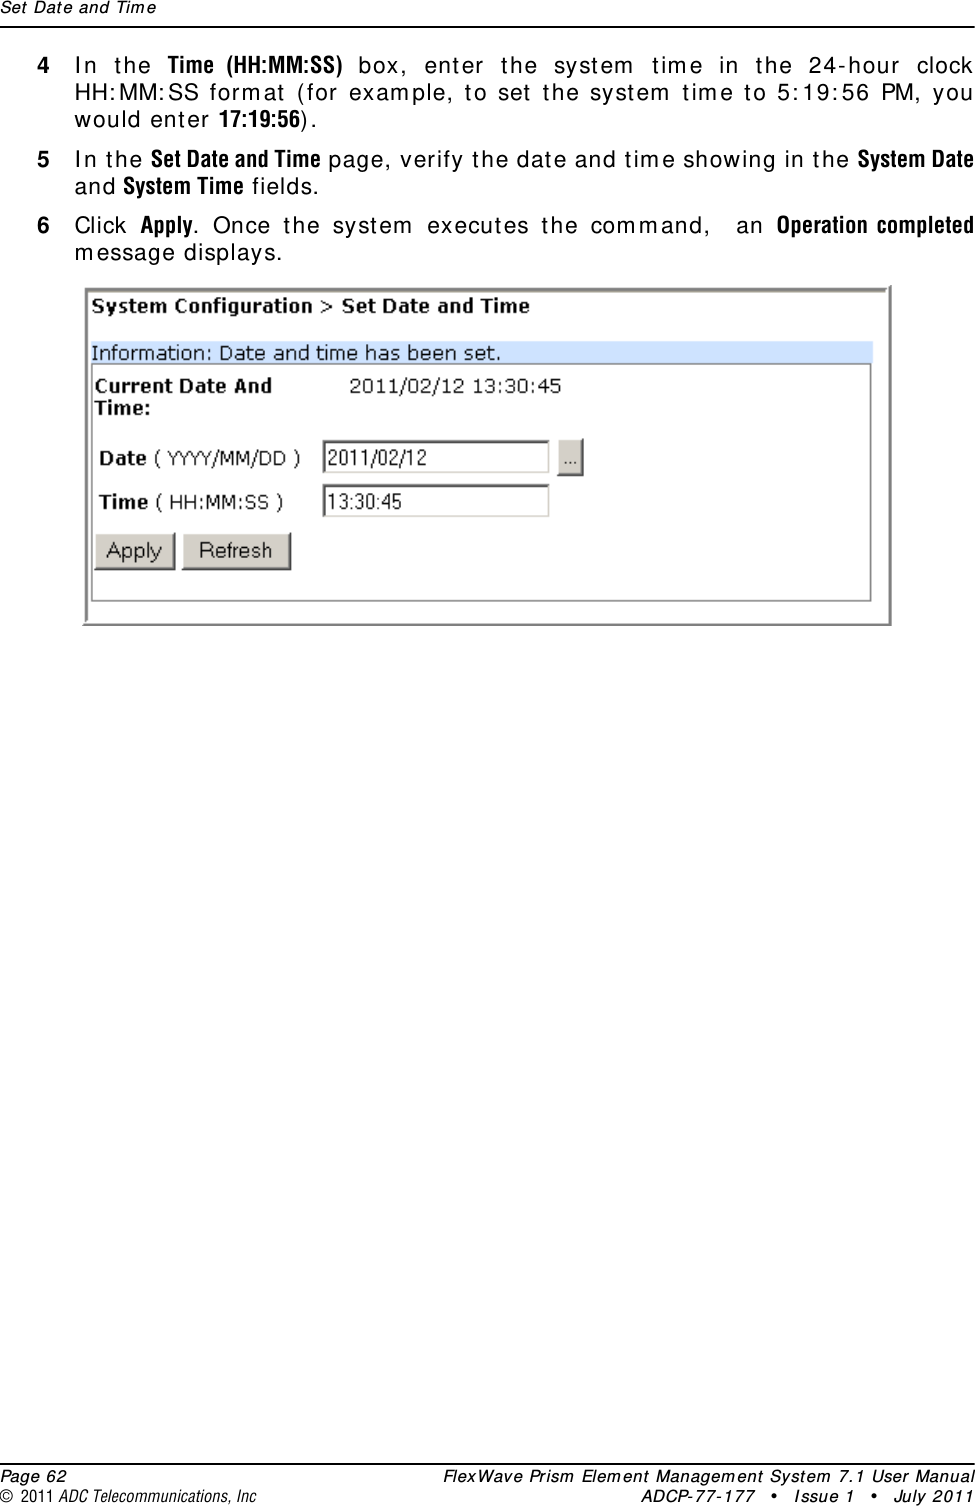
- 2. Users Manual 2
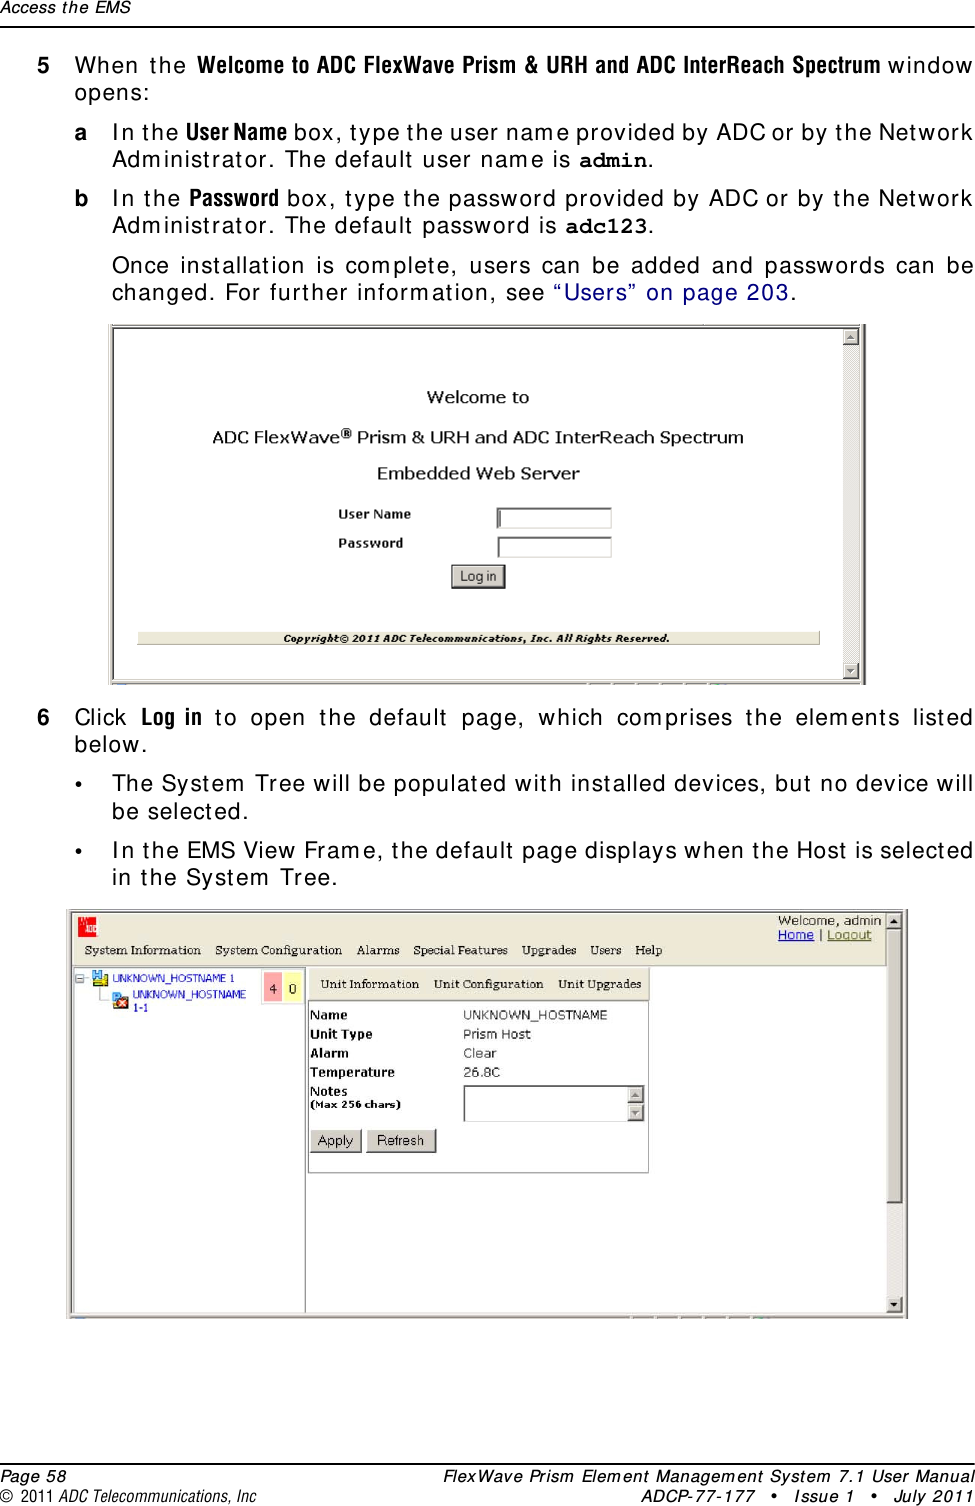
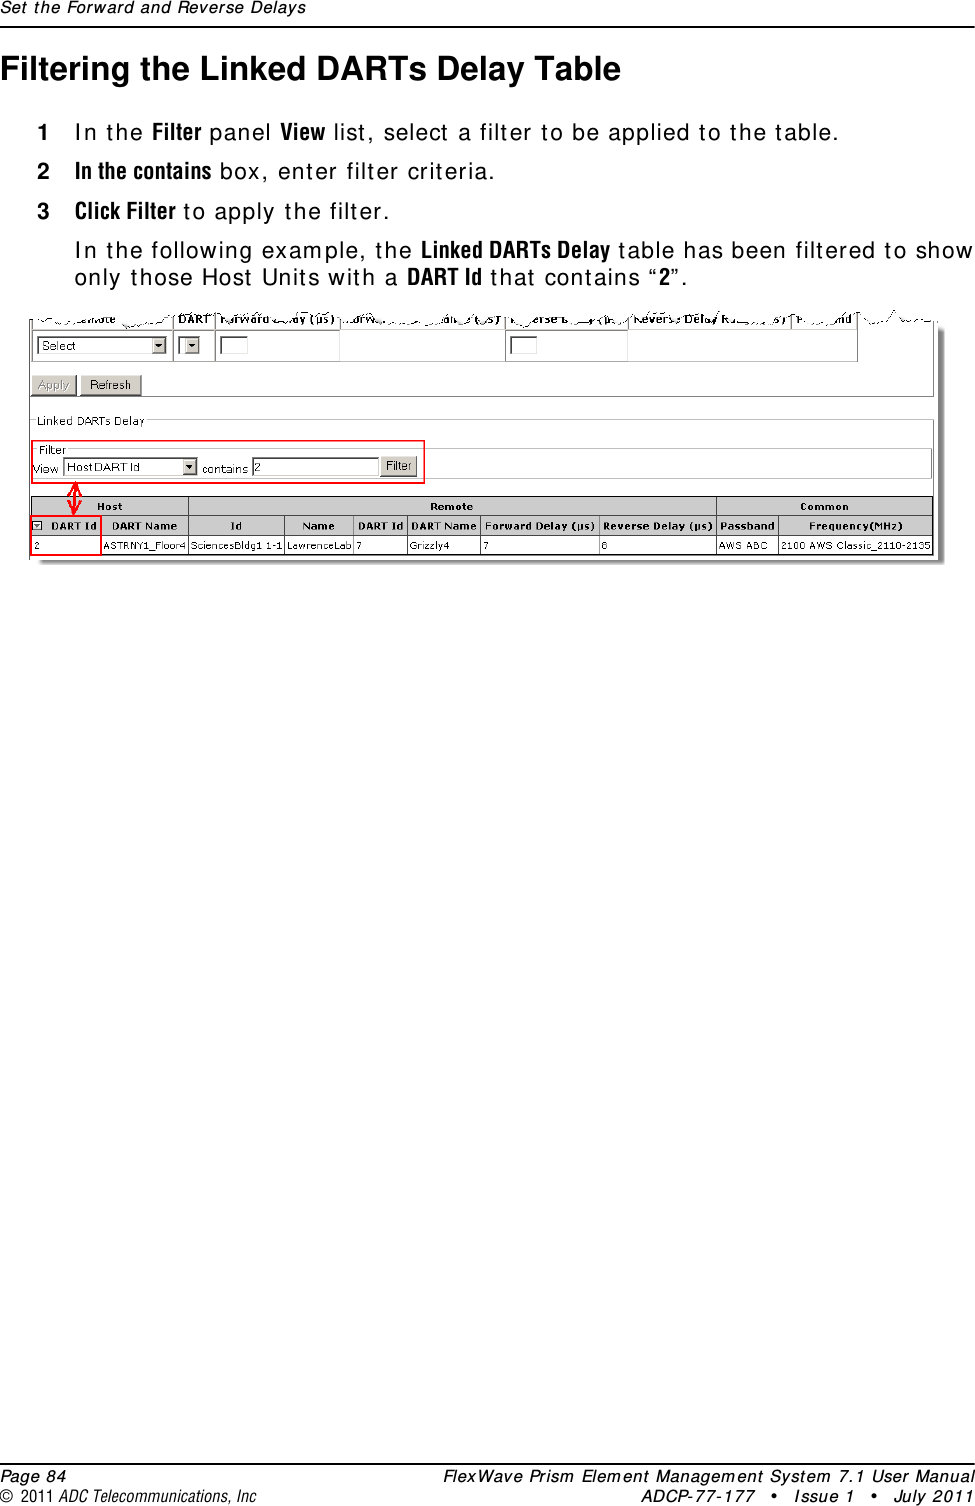
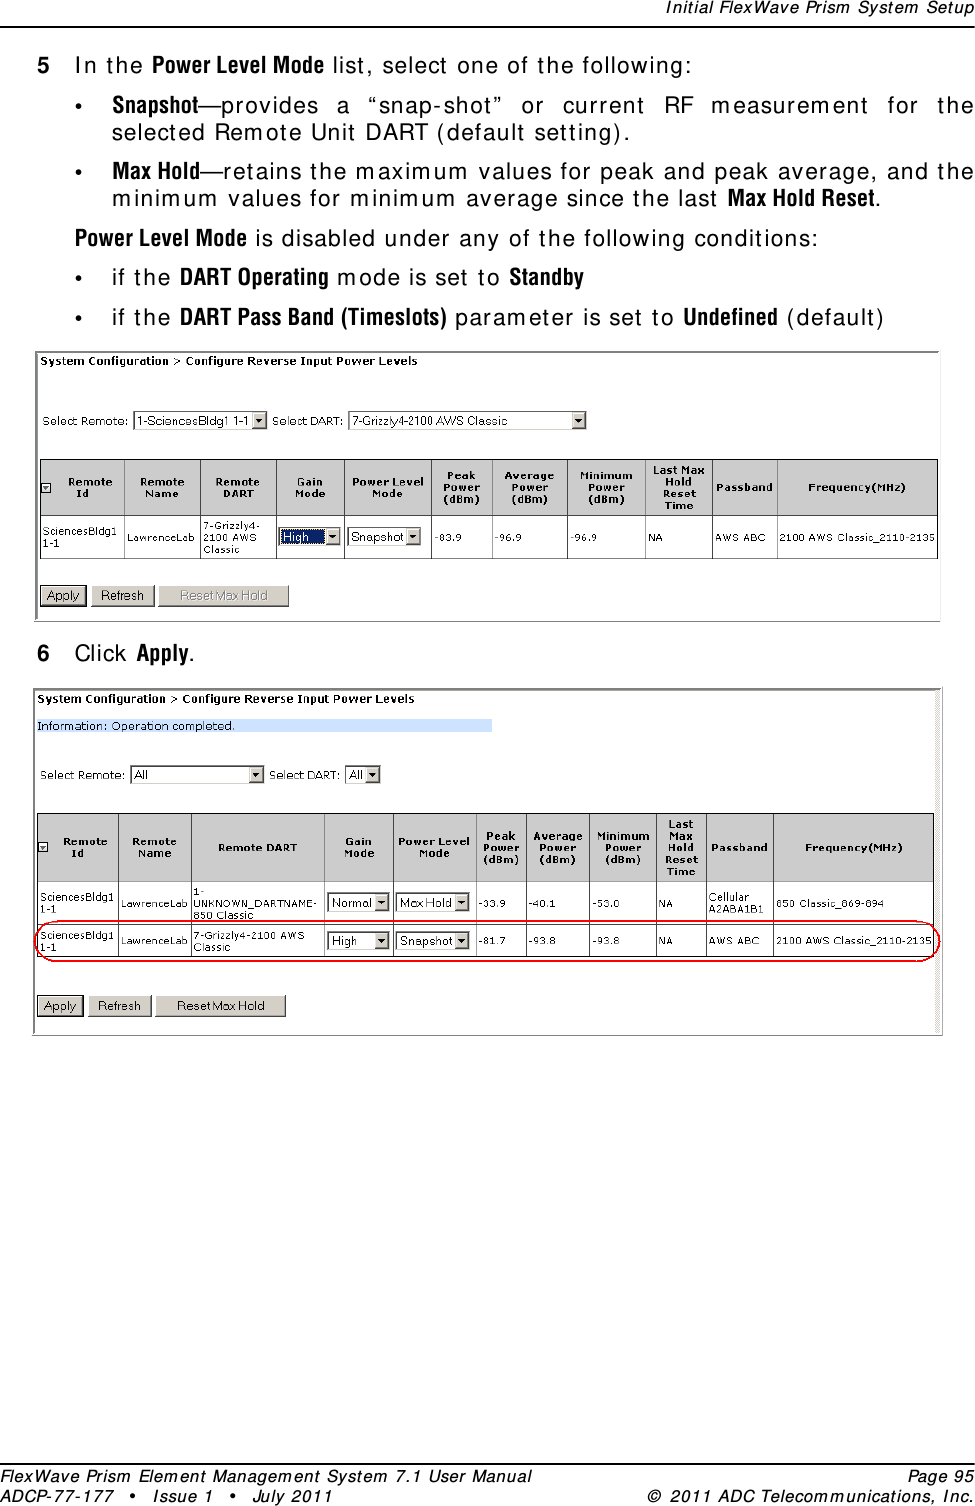
- 3. Users Manual 3
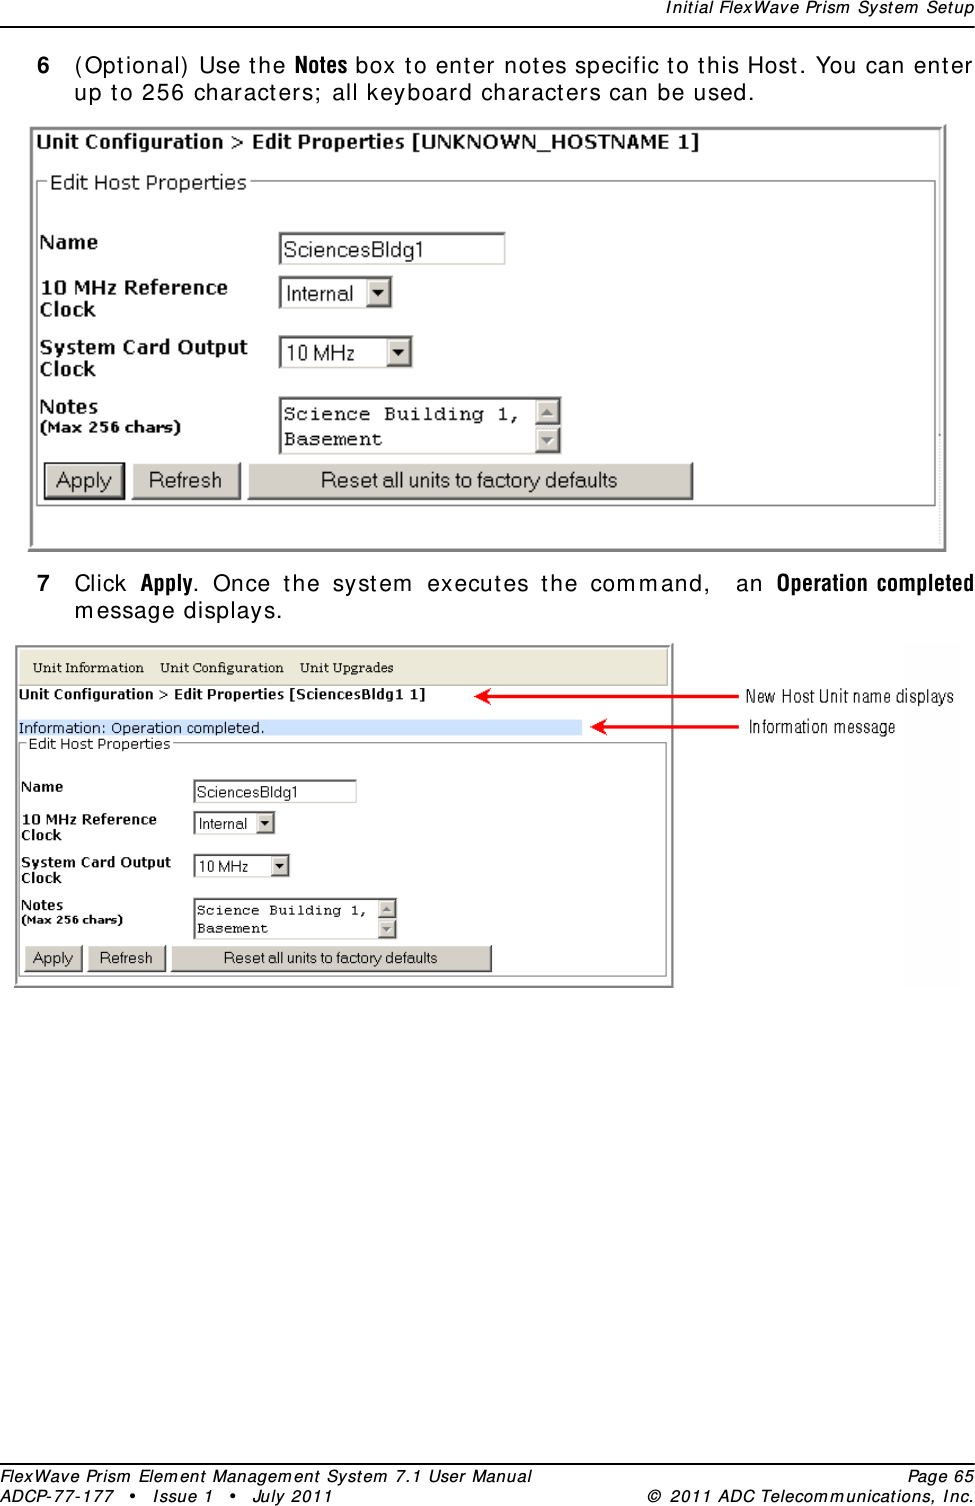
- 4. Users Manual 4
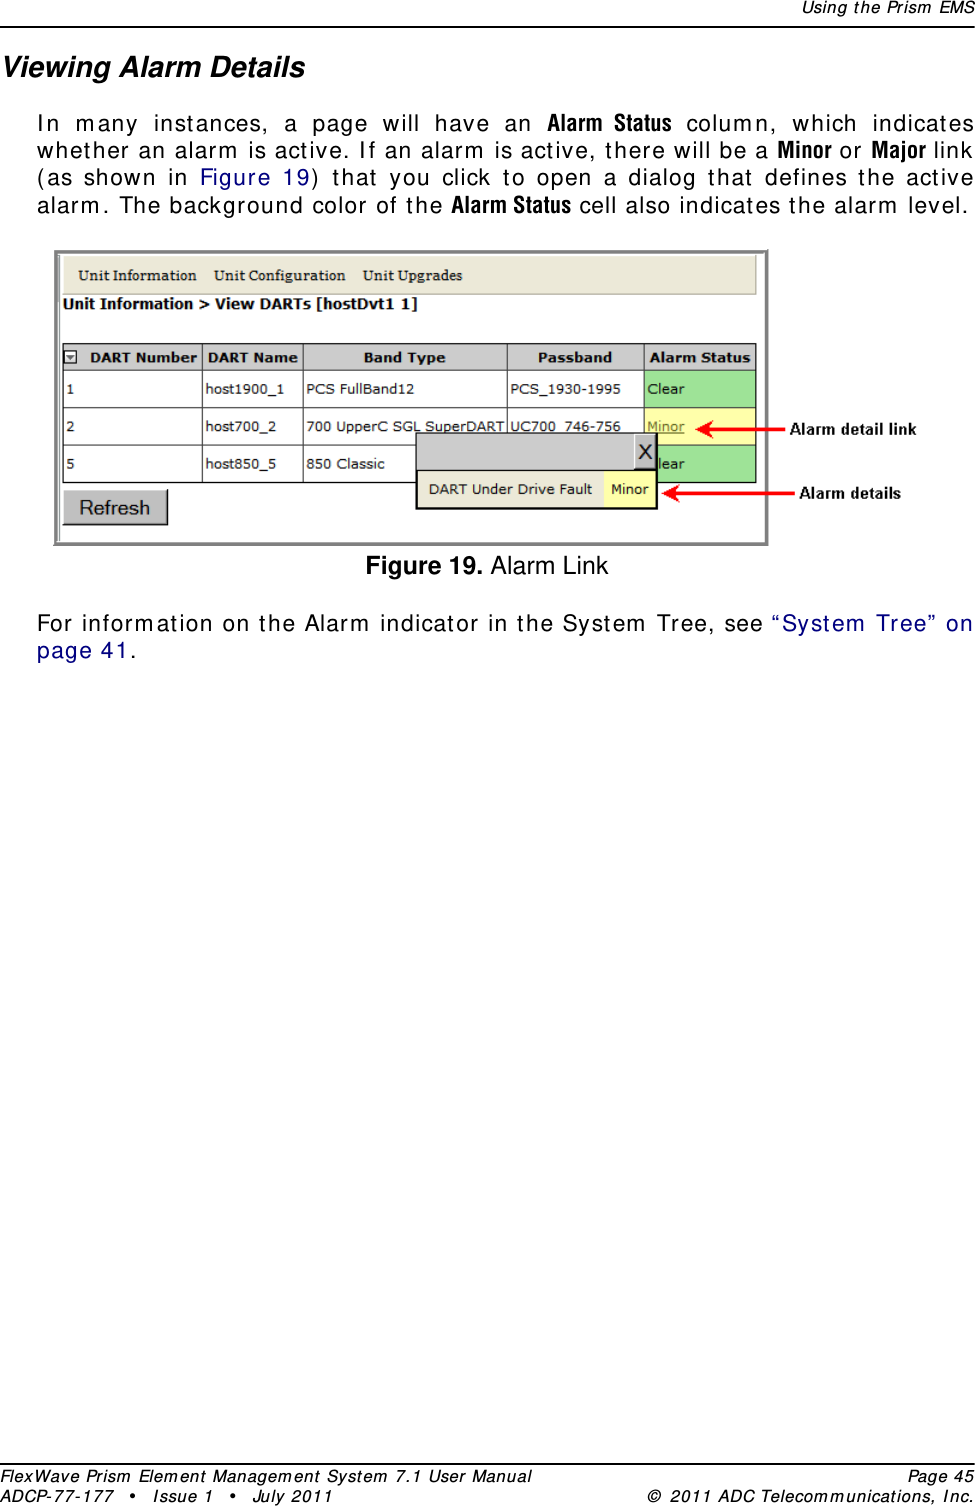
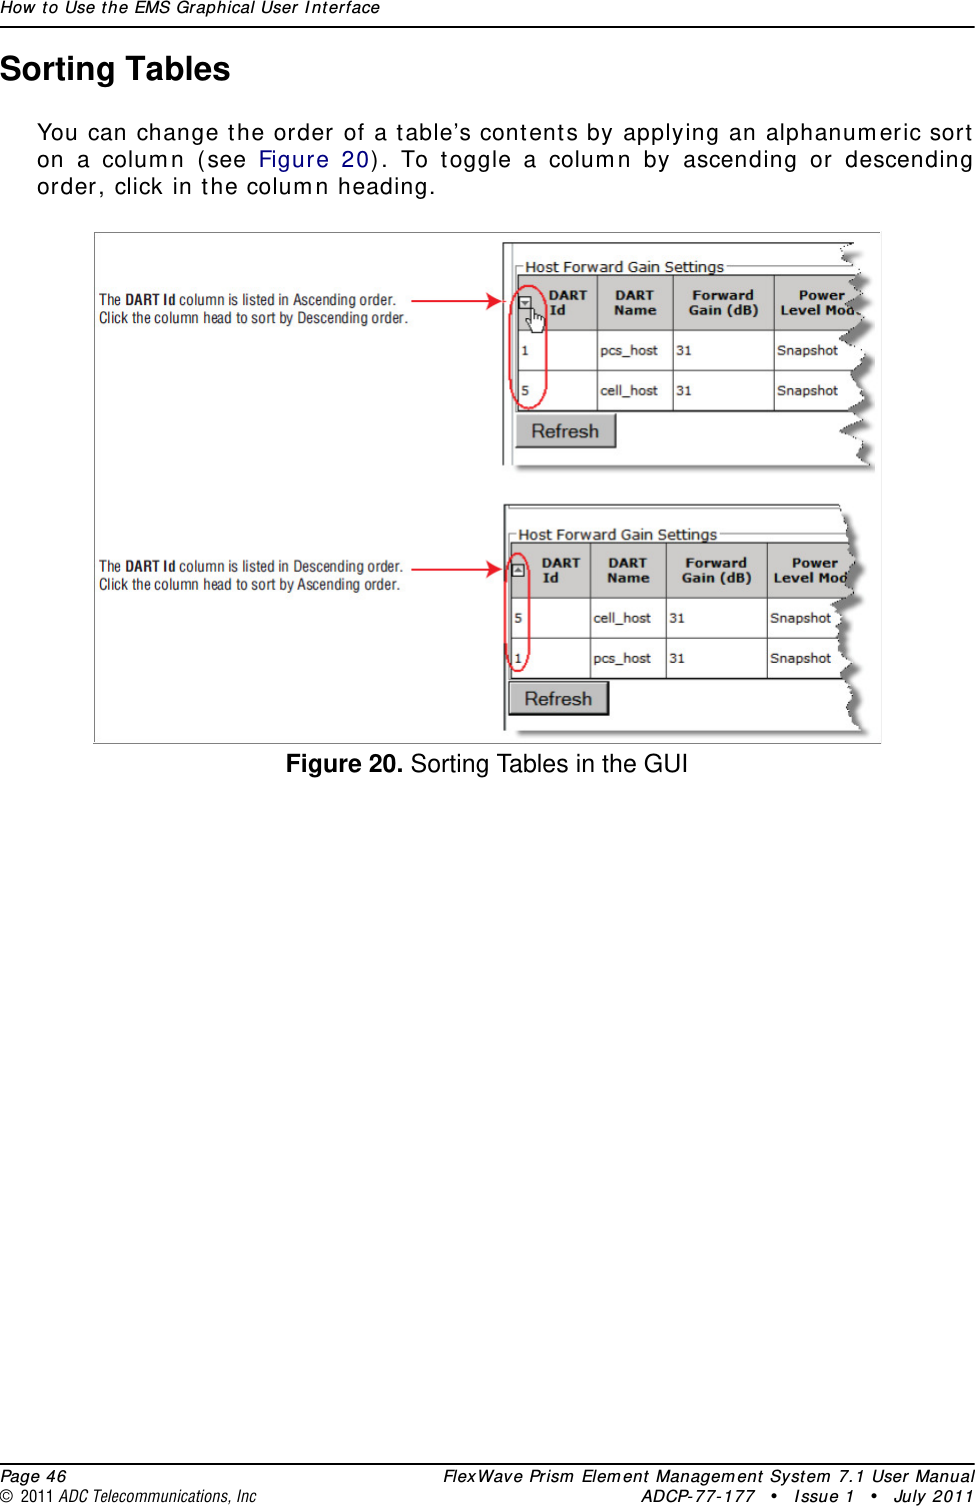
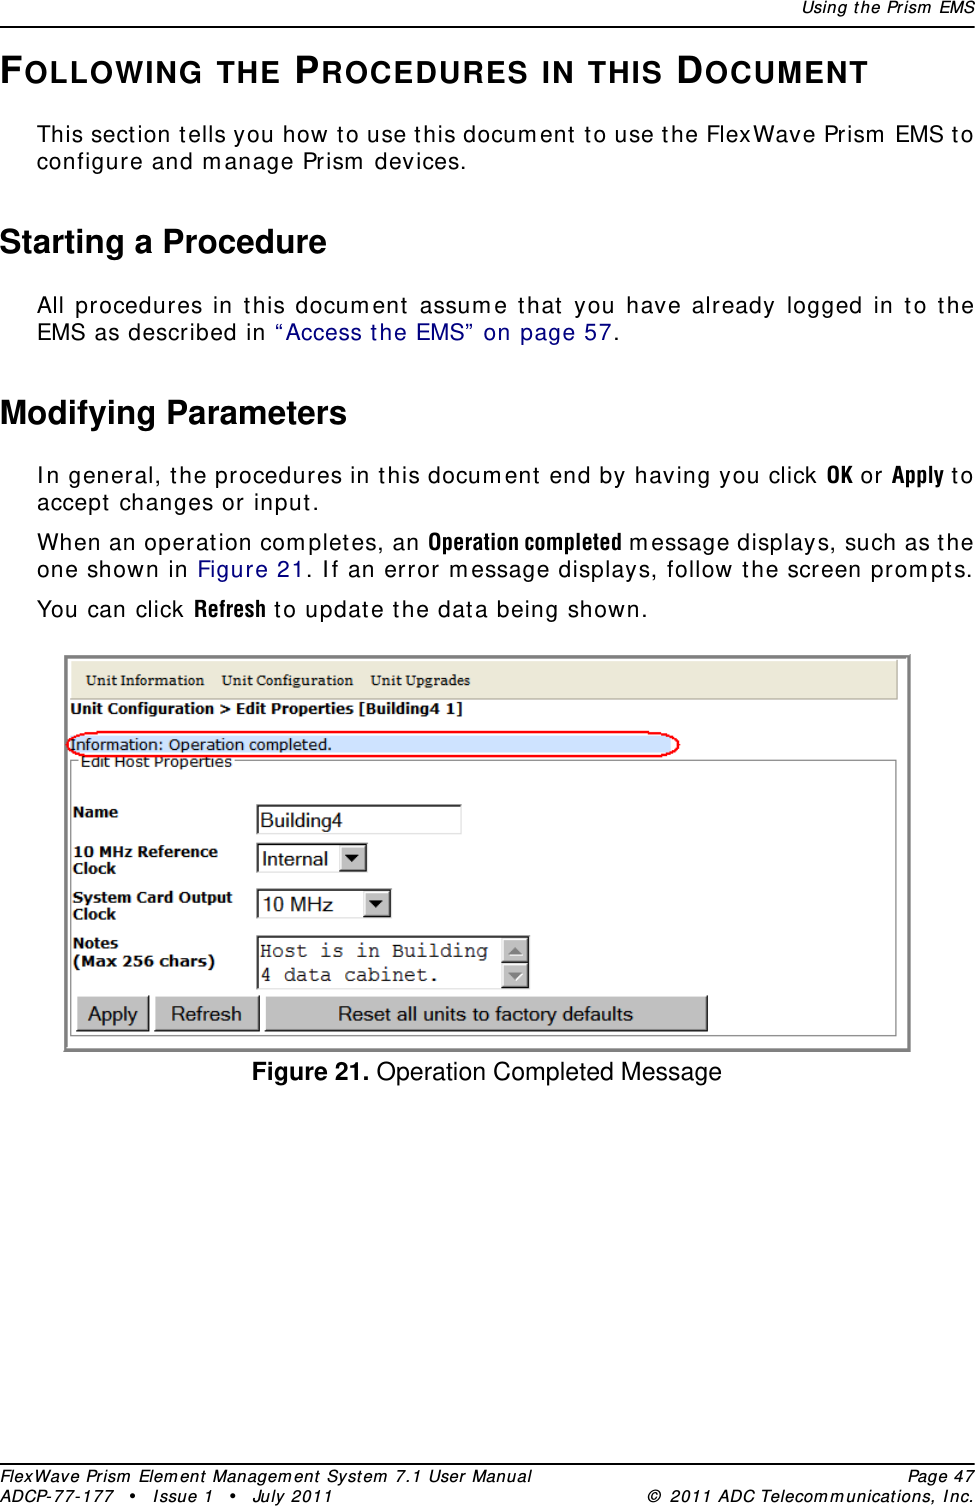
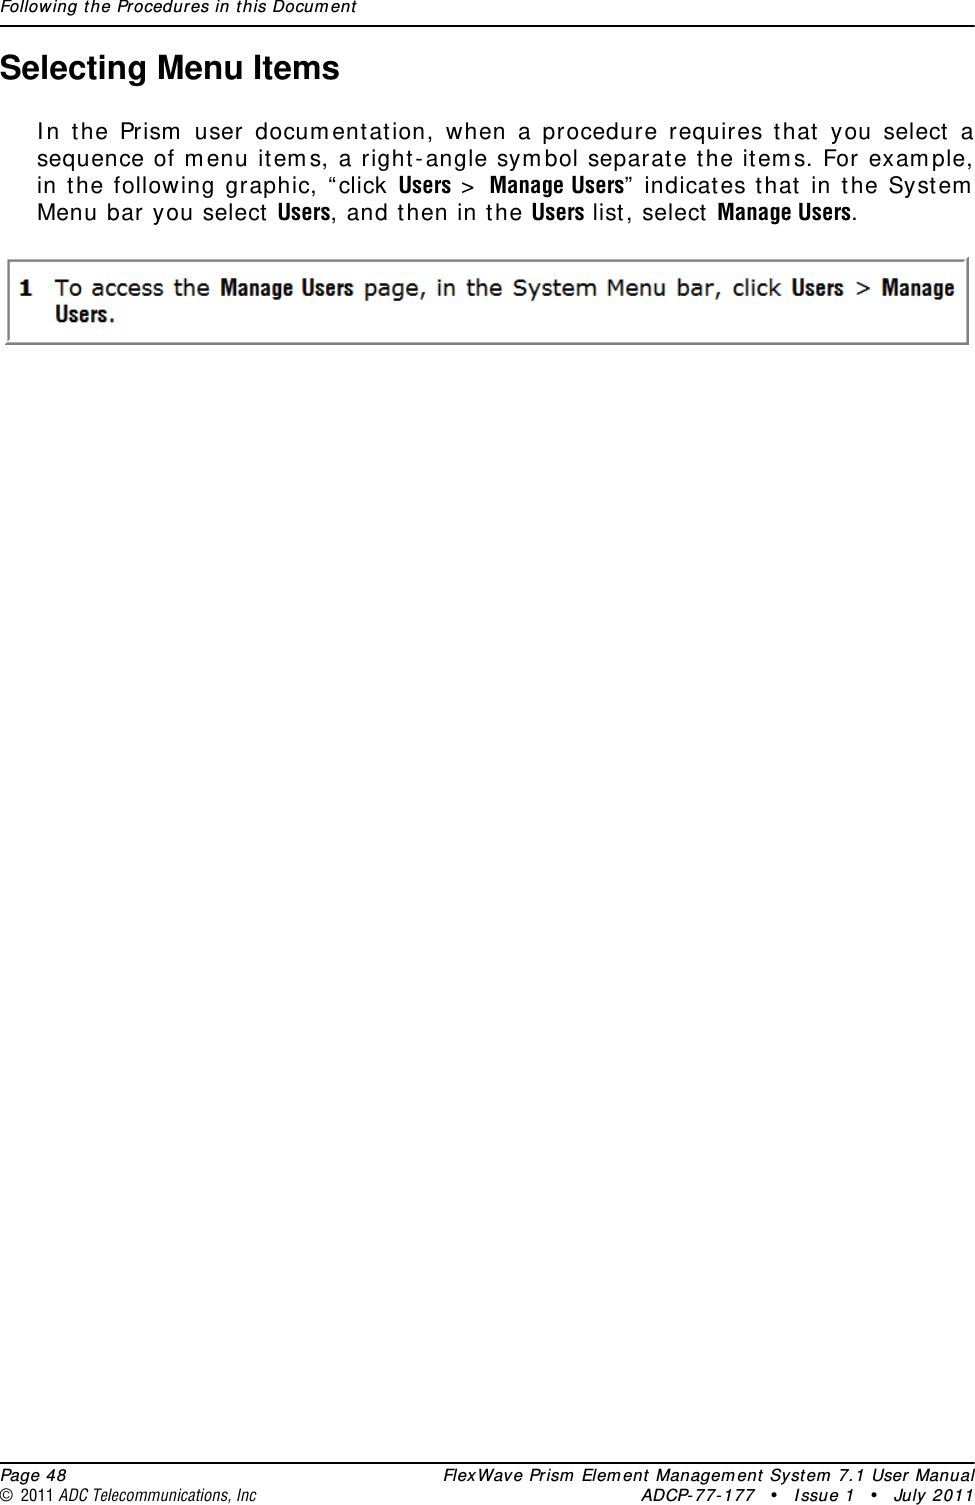
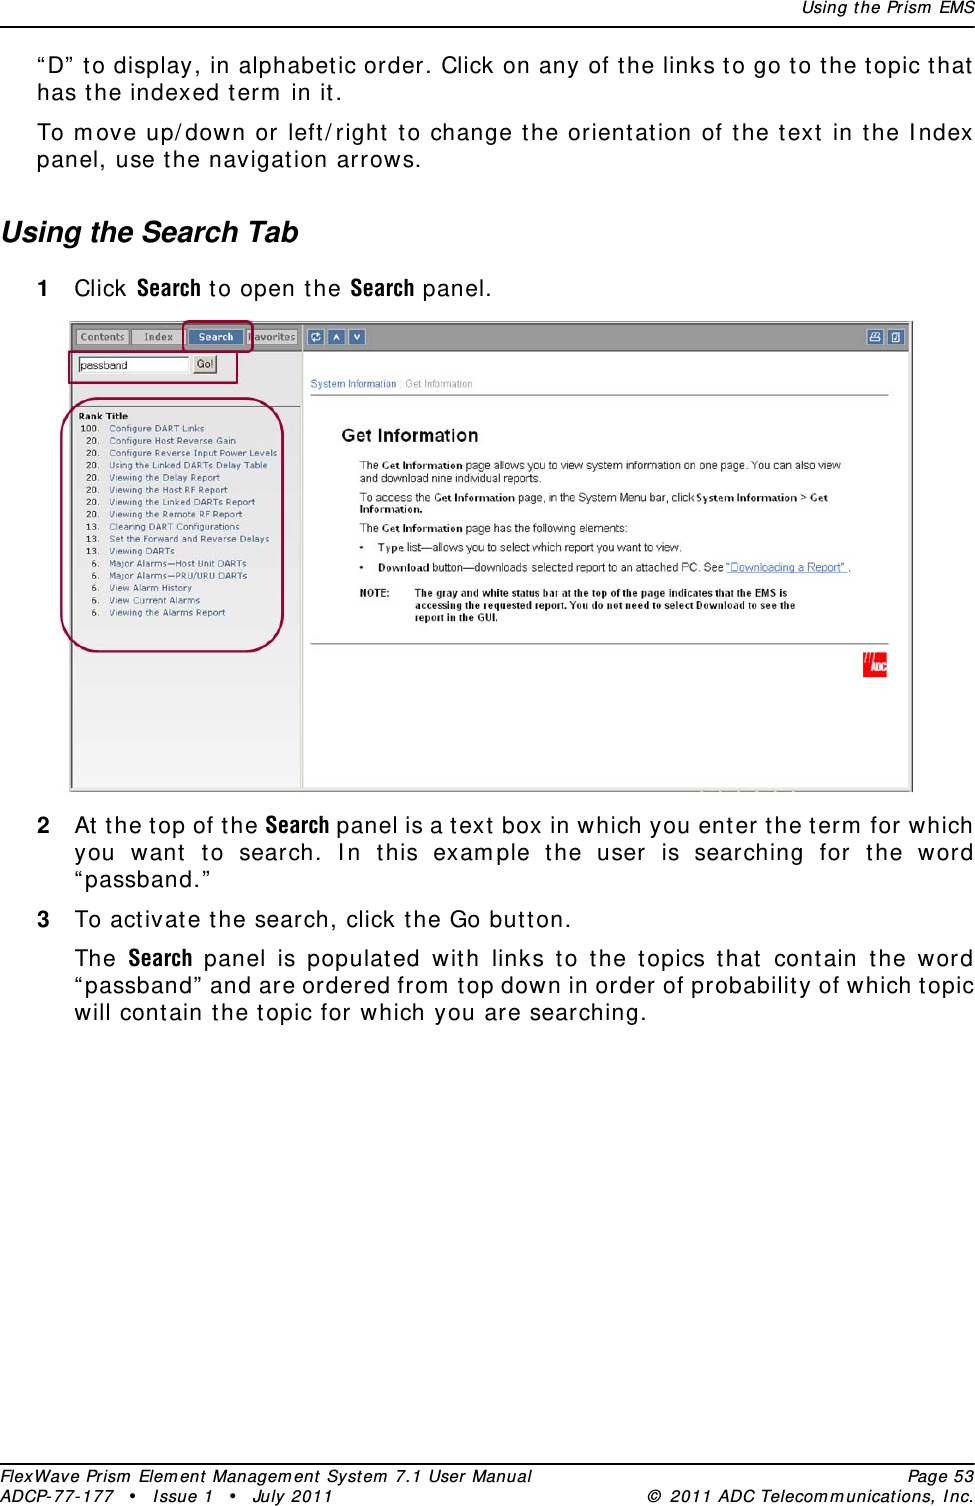
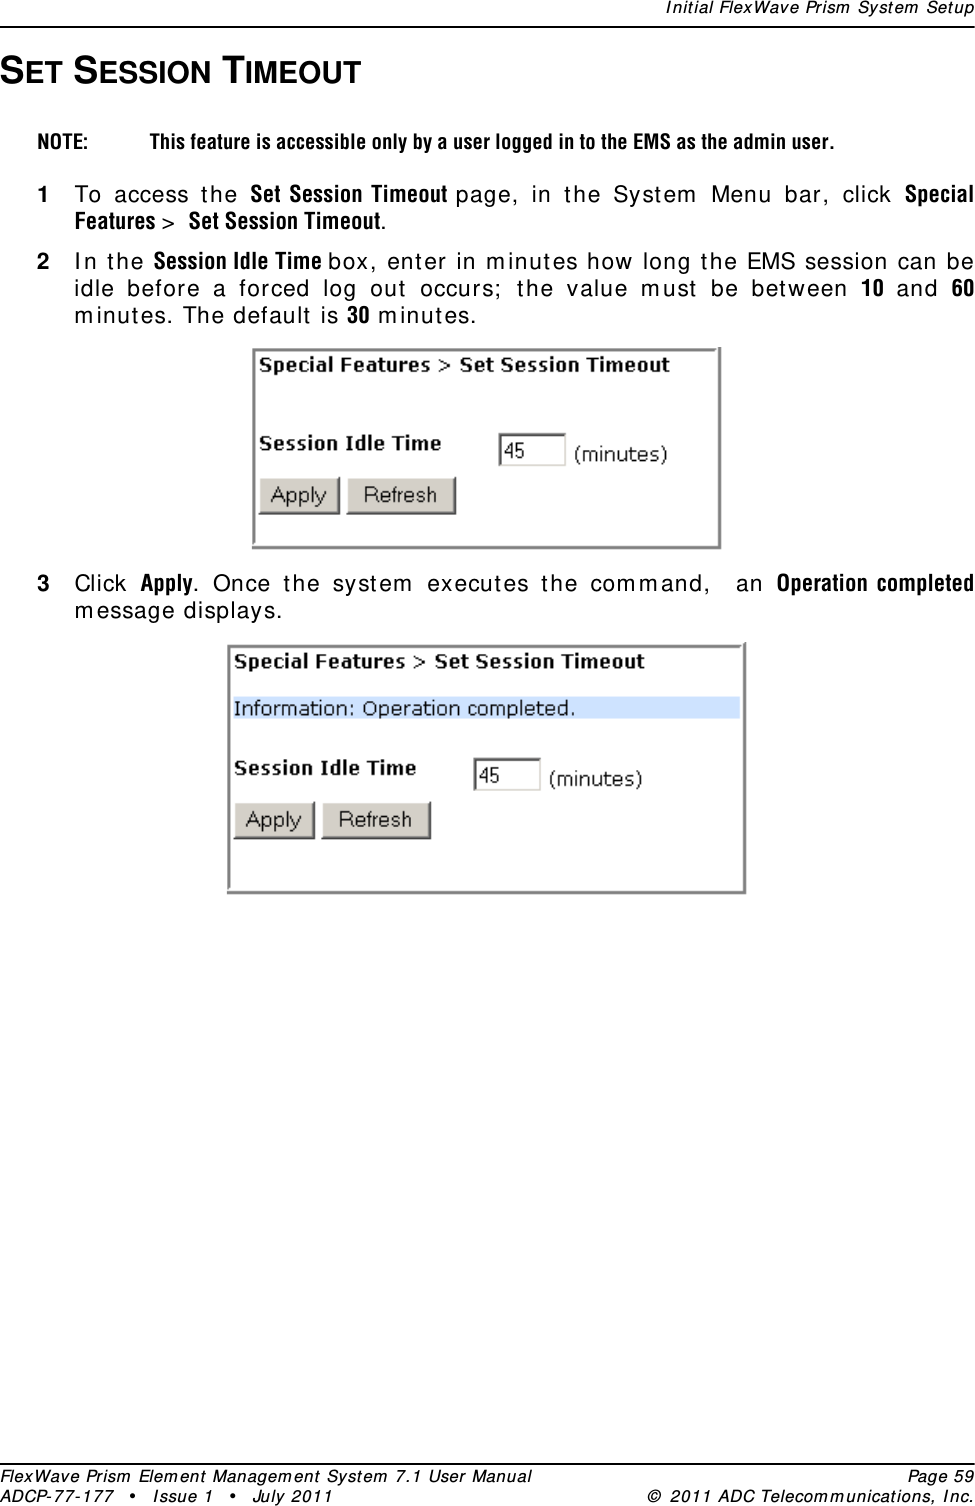
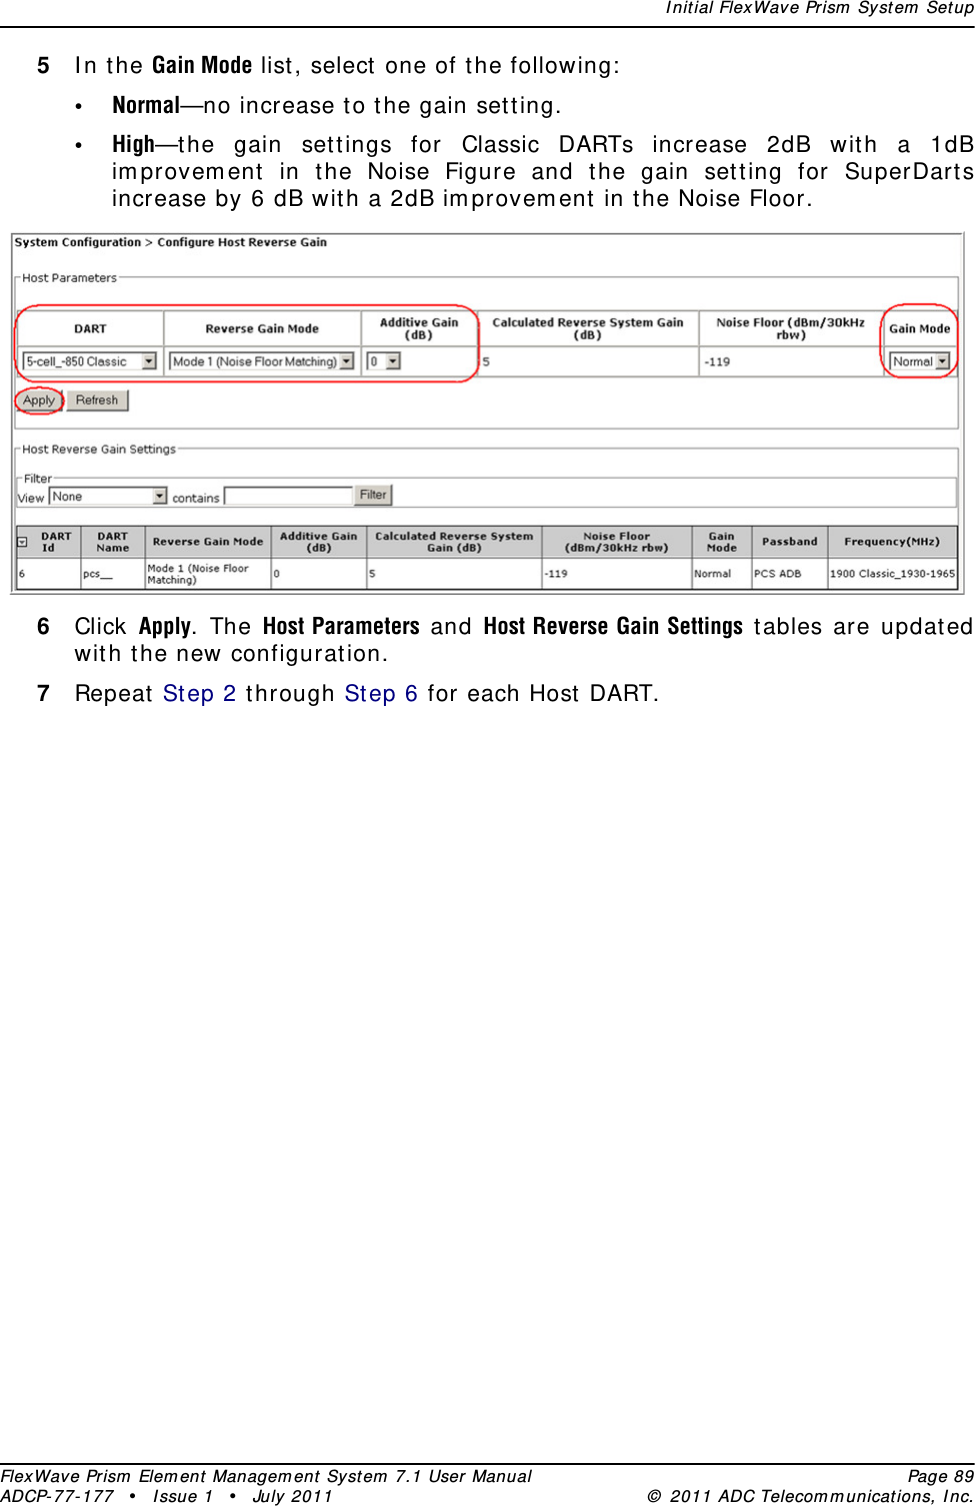
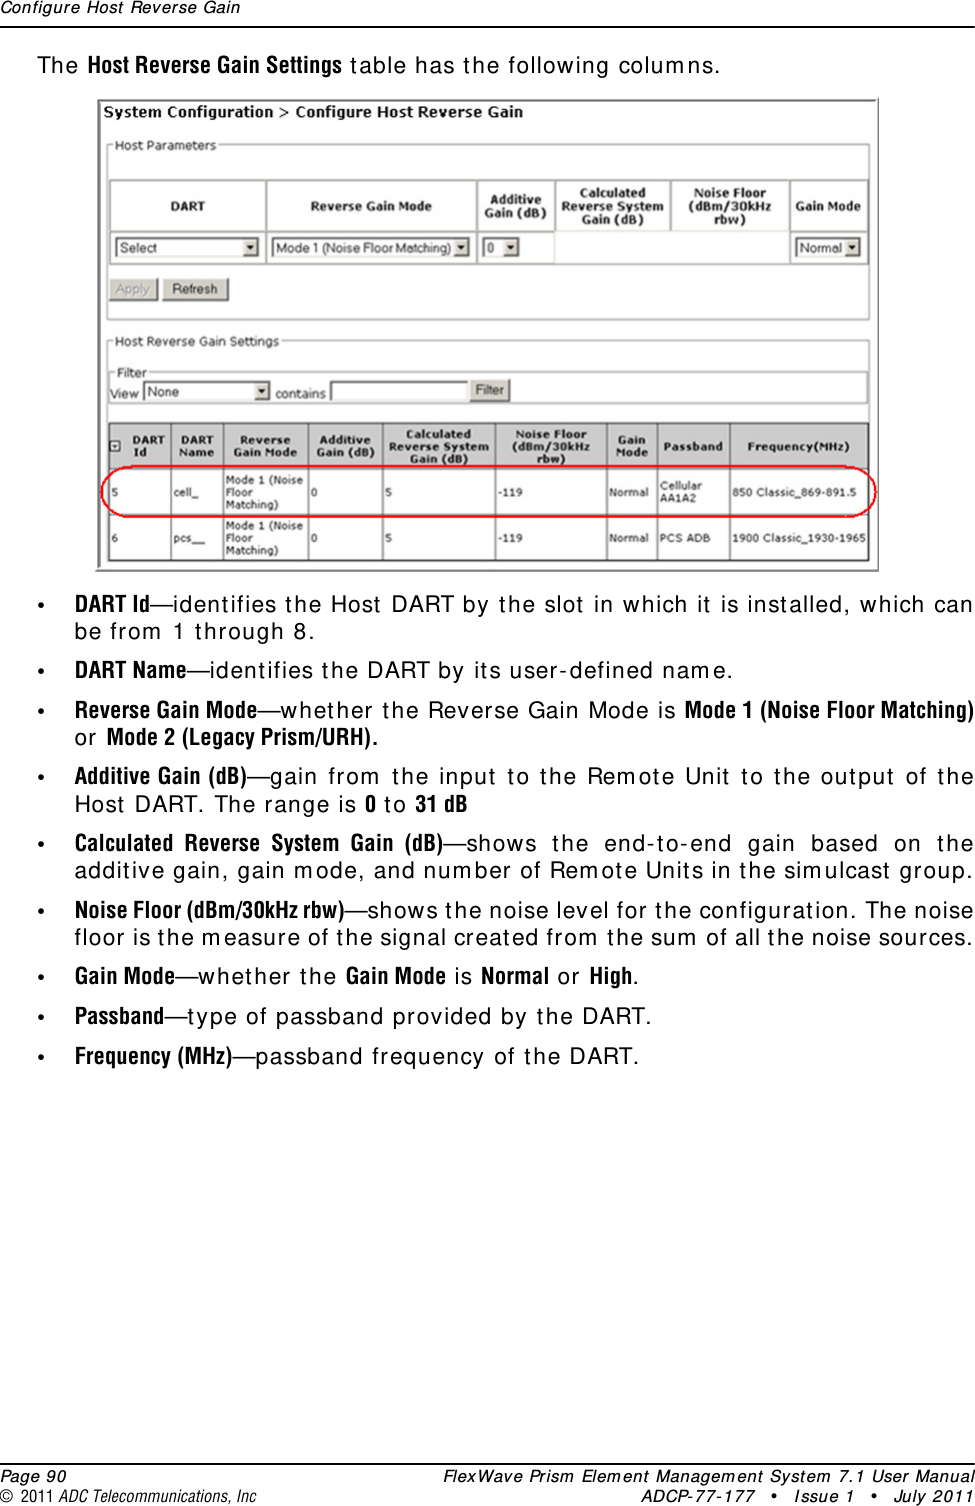
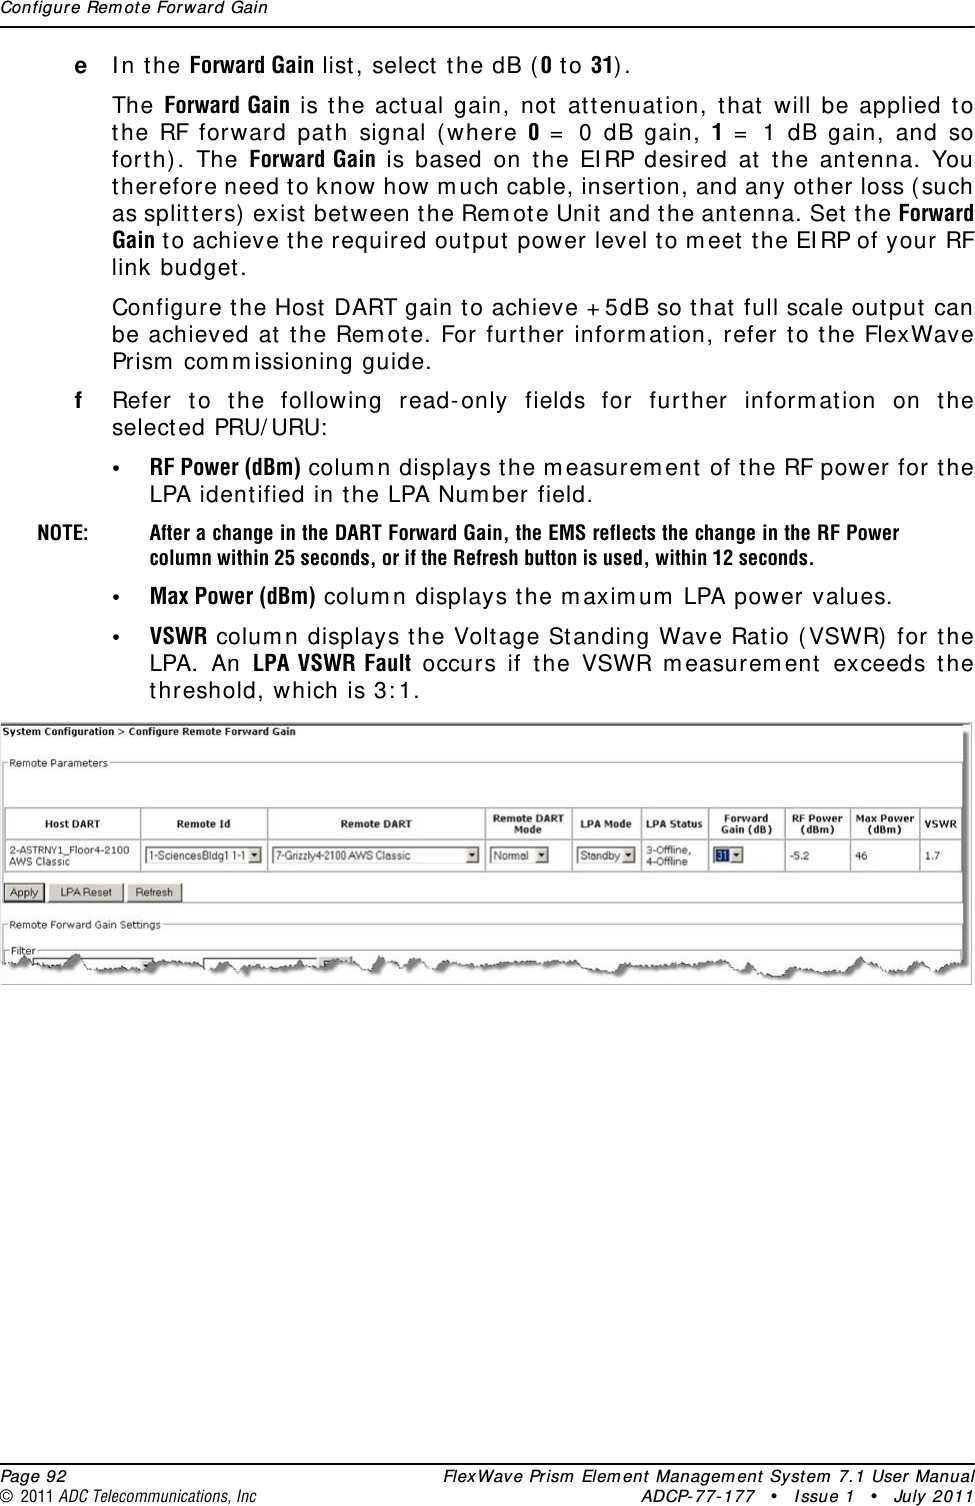
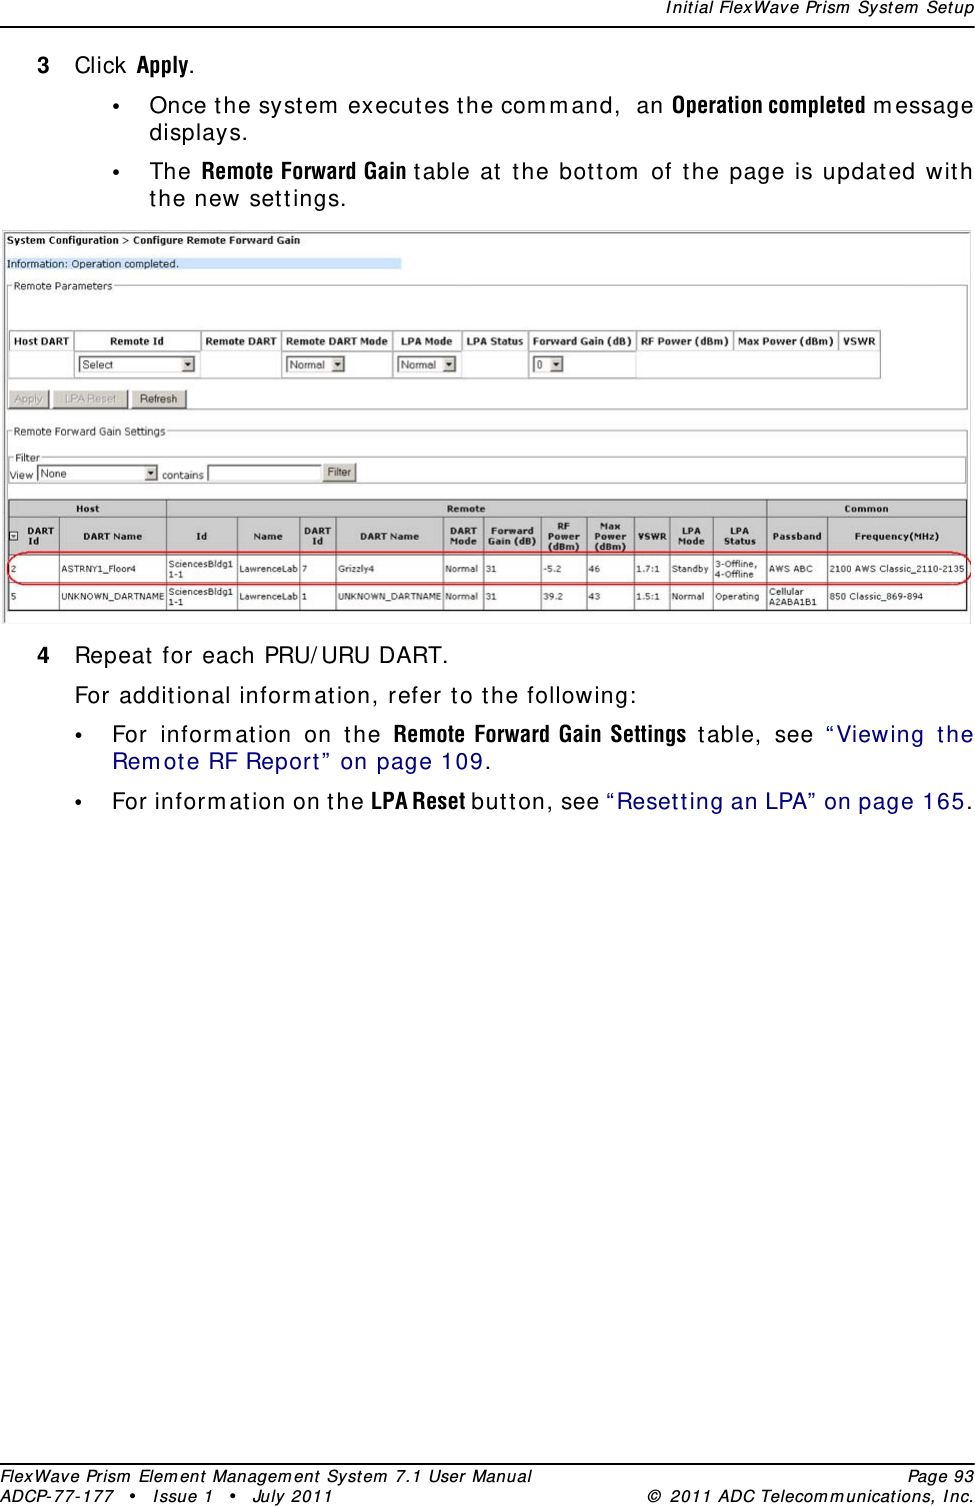
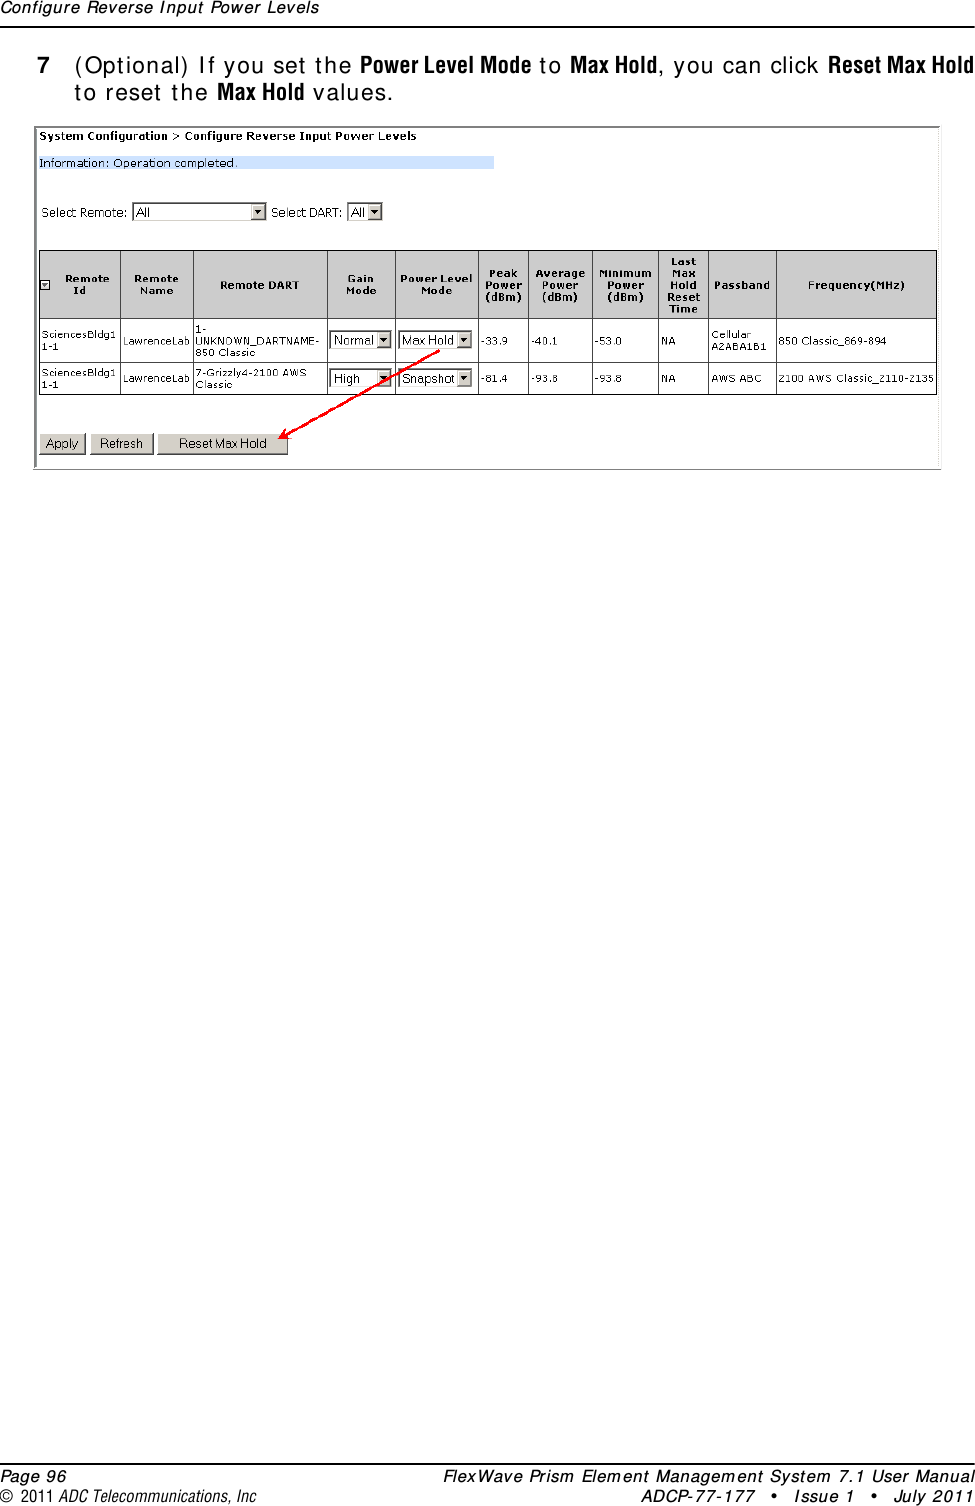
Users Manual 2