ASUSTeK Computer F94965AGN NOTEBOOK P.C User Manual AD5EA4E5A4E2A5552E706466
ASUSTeK Computer Inc NOTEBOOK P.C AD5EA4E5A4E2A5552E706466
UserManual.wiki
>
ASUSTeK Computer
>
F94965AGN User Manual
>
USERS MANUAL 1
Contents
1.
USERS MANUAL 1
2.
USERS MANUAL 2
3.
USERS MANUAL 3
4.
USERS MANUAL 4
USERS MANUAL 1
Navigation menu
Upload a User Manual
Namespaces
Wiki Guide
HTML
PDF
Info
Views
User Manual
Discussion / Help
Navigation
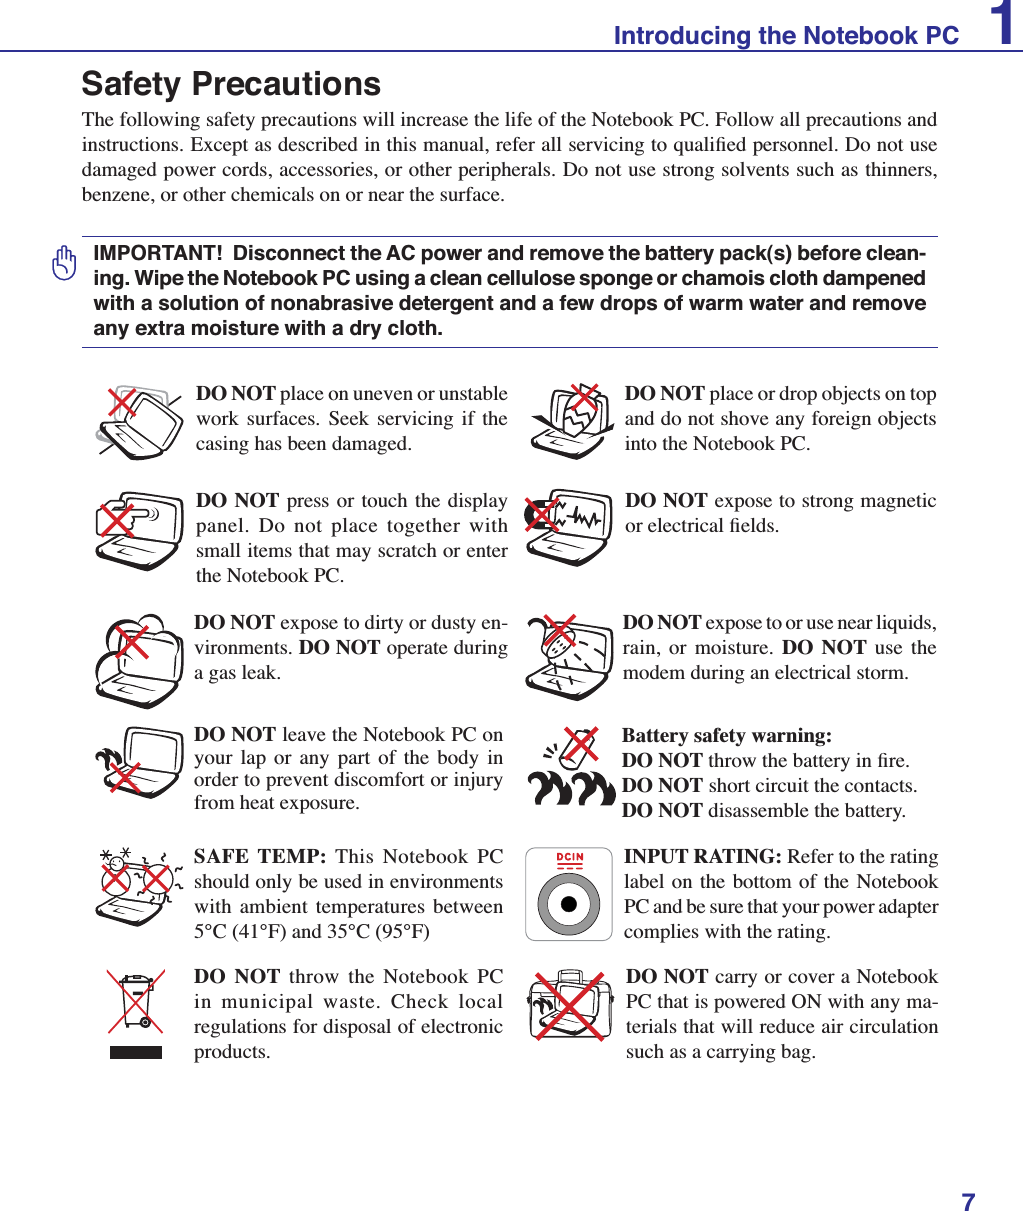
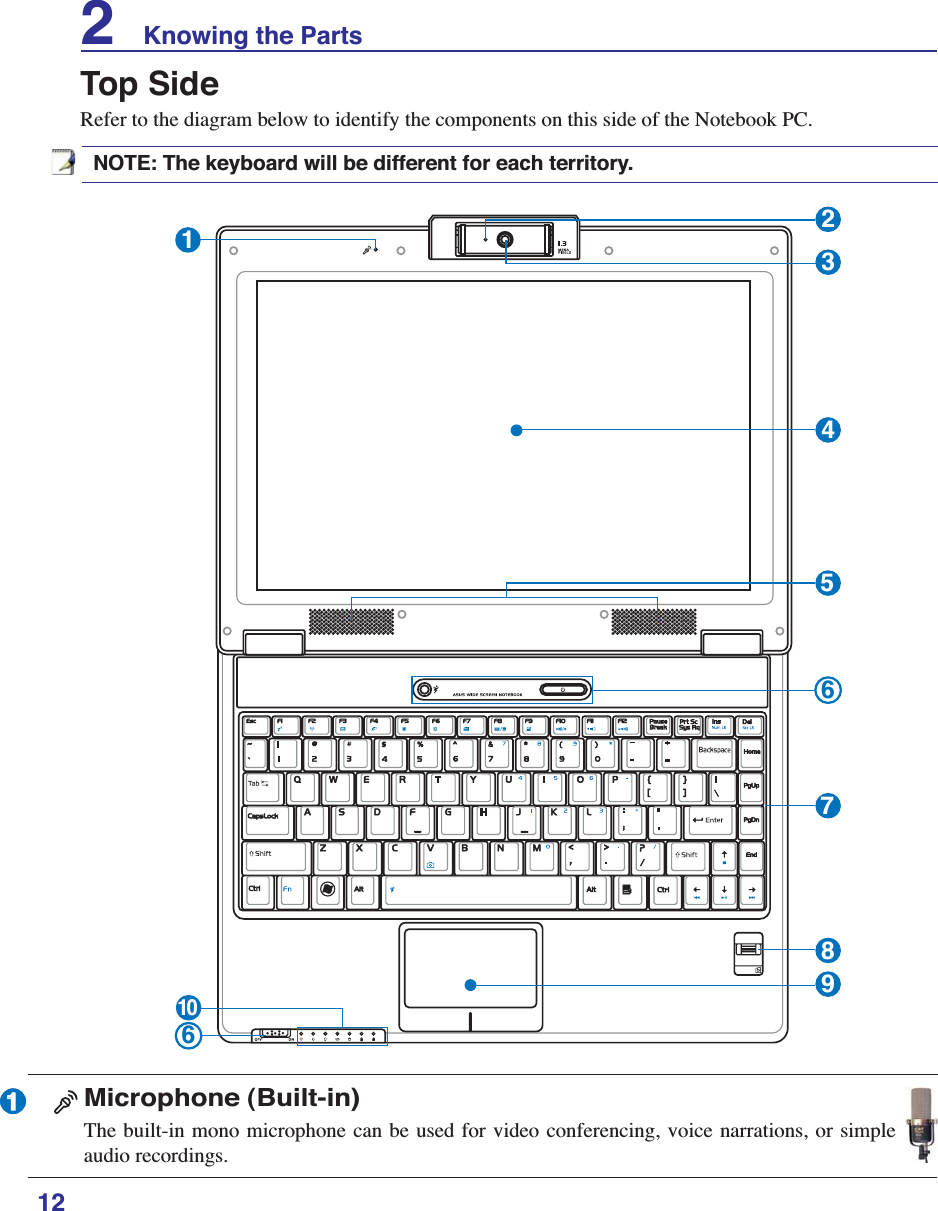
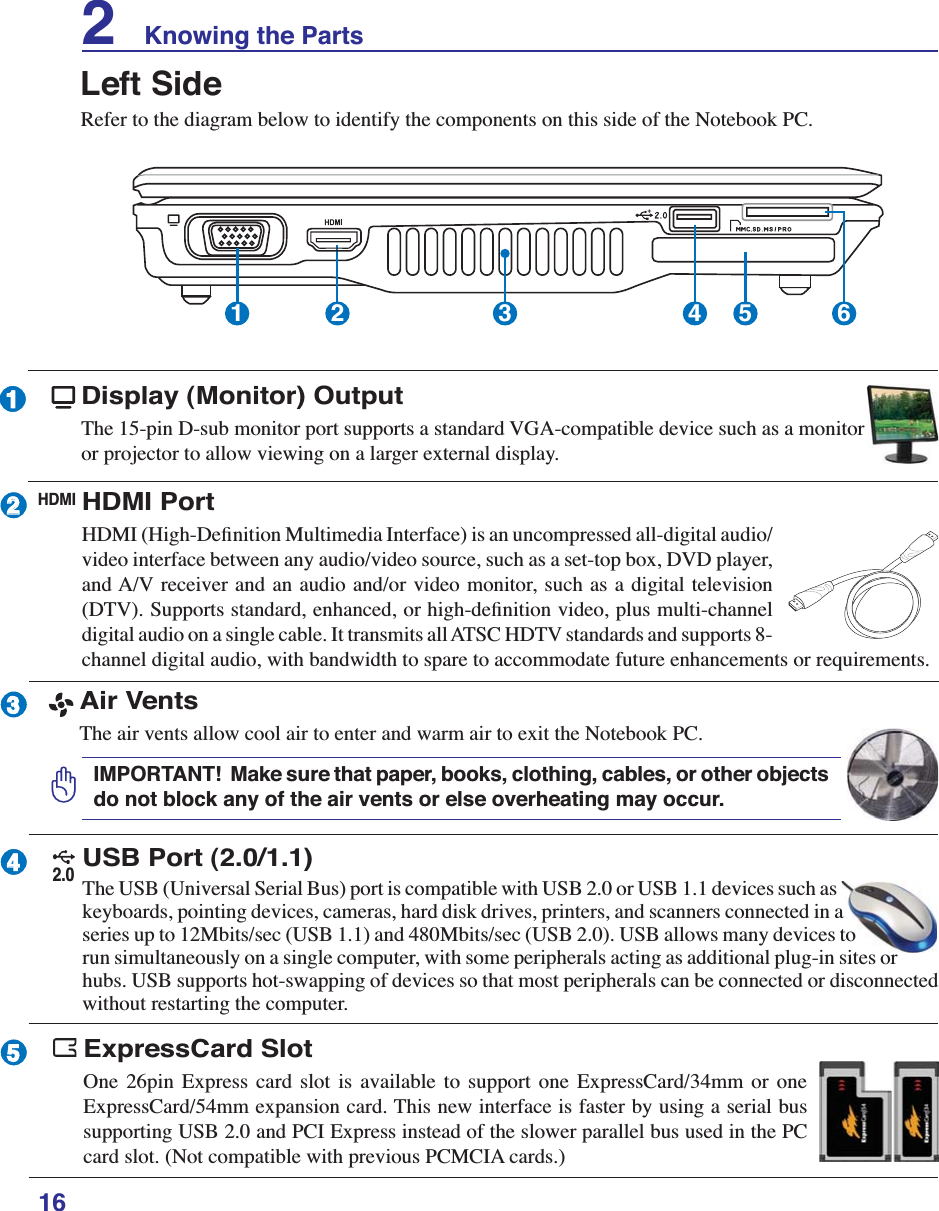
![61 Introducing the Notebook PCAbout This User’s ManualYou are reading the Notebook PC User’s Manual. This User’s Manual provides informa-tion on the various components in the Notebook PC and how to use them. The following are major sections of this User’s Manuals:1. Introducing the Notebook PCIntroduces you to the Notebook PC and this User’s Manual.2. Knowing the PartsGives you information on the Notebook PC’s components.3. Getting StartedGives you information on getting started with the Notebook PC.4. Using the Notebook PC Gives you information on using the Notebook PC’s components.5. Appendix Introduces you to optional accessories and gives additional information. Notes For This ManualA few notes and warnings in bold are used throughout this guide that you should be aware of in order to complete certain tasks safely and completely. These notes have different degrees of importance as described below:NOTE: Tips and information for special situations.TIP: Tips and useful information for completing tasks.IMPORTANT! Vital information that must be followed to prevent damage to data, com-ponents, or persons.WARNING! Important information that must be followed for safe operation.Text enclosed in < > or [ ] represents a key on the keyboard; do not actually type the < > or [ ] and the enclosed letters.< >[ ]](https://usermanual.wiki/ASUSTeK-Computer/F94965AGN.USERS-MANUAL-1/User-Guide-834291-Page-6.png)