ASUSTeK Computer F94965AGN NOTEBOOK P.C User Manual AD5EA4E5A4E2A5552E706466
ASUSTeK Computer Inc NOTEBOOK P.C AD5EA4E5A4E2A5552E706466
UserManual.wiki
>
ASUSTeK Computer
>
F94965AGN User Manual
>
USERS MANUAL 2
Contents
1.
USERS MANUAL 1
2.
USERS MANUAL 2
3.
USERS MANUAL 3
4.
USERS MANUAL 4
USERS MANUAL 2
Navigation menu
Upload a User Manual
Namespaces
Wiki Guide
HTML
PDF
Info
Views
User Manual
Discussion / Help
Navigation


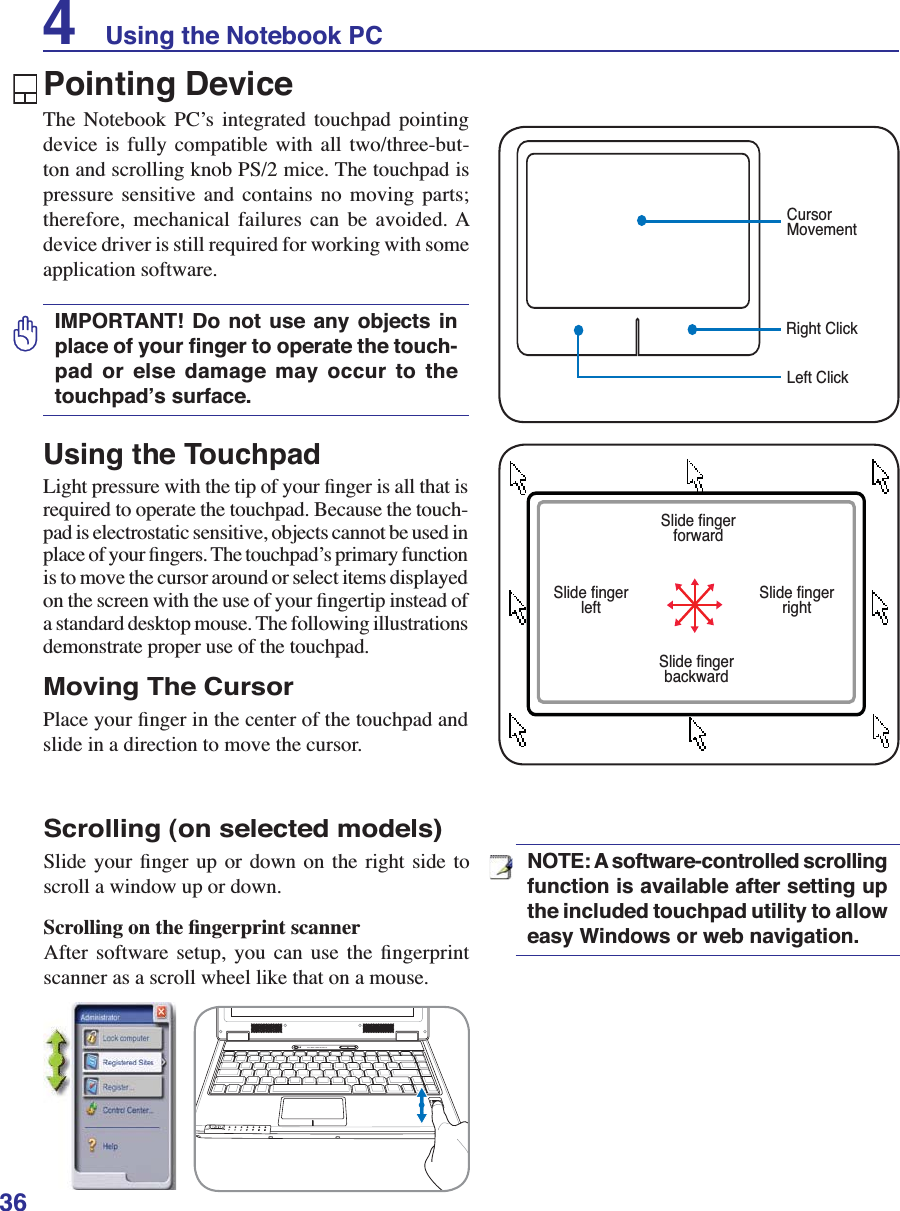
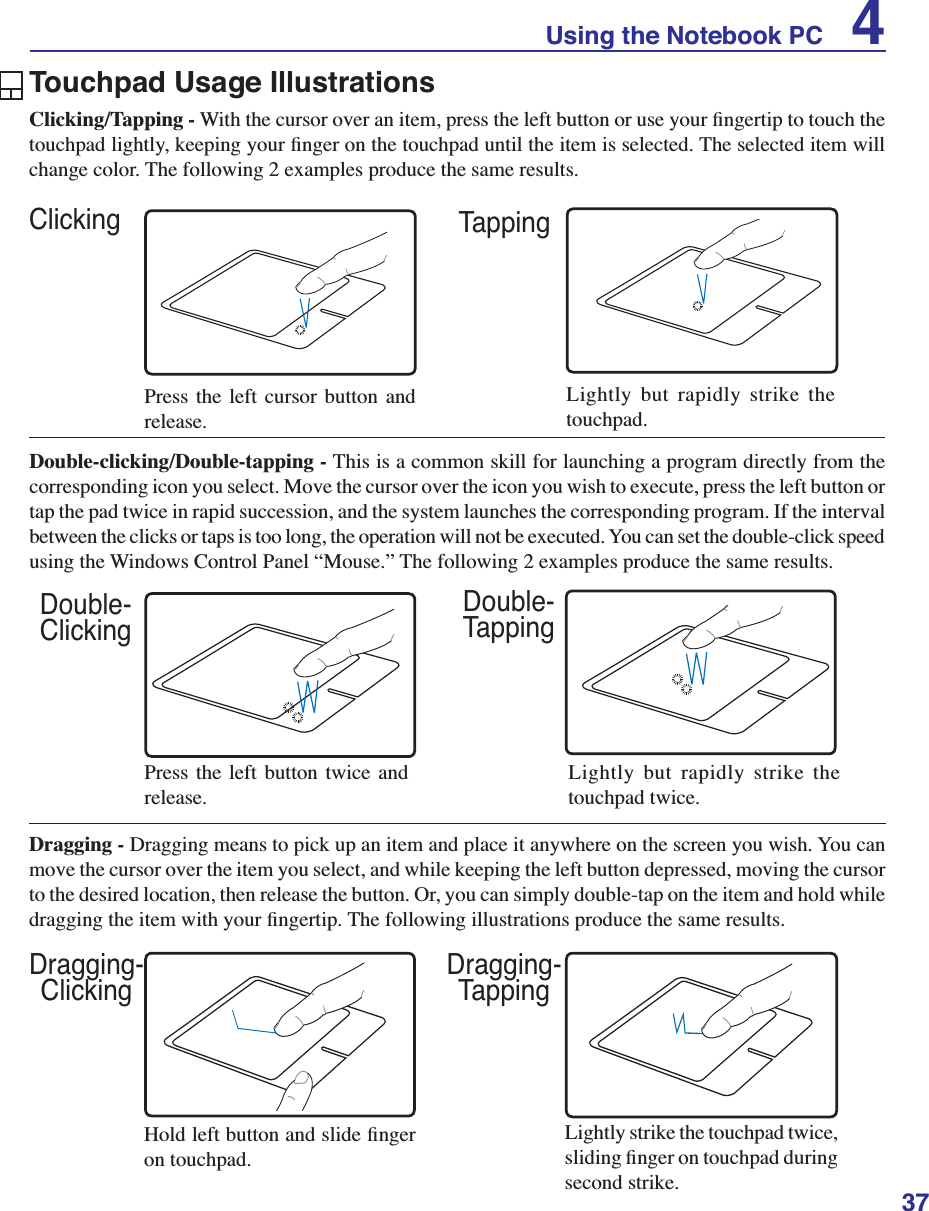
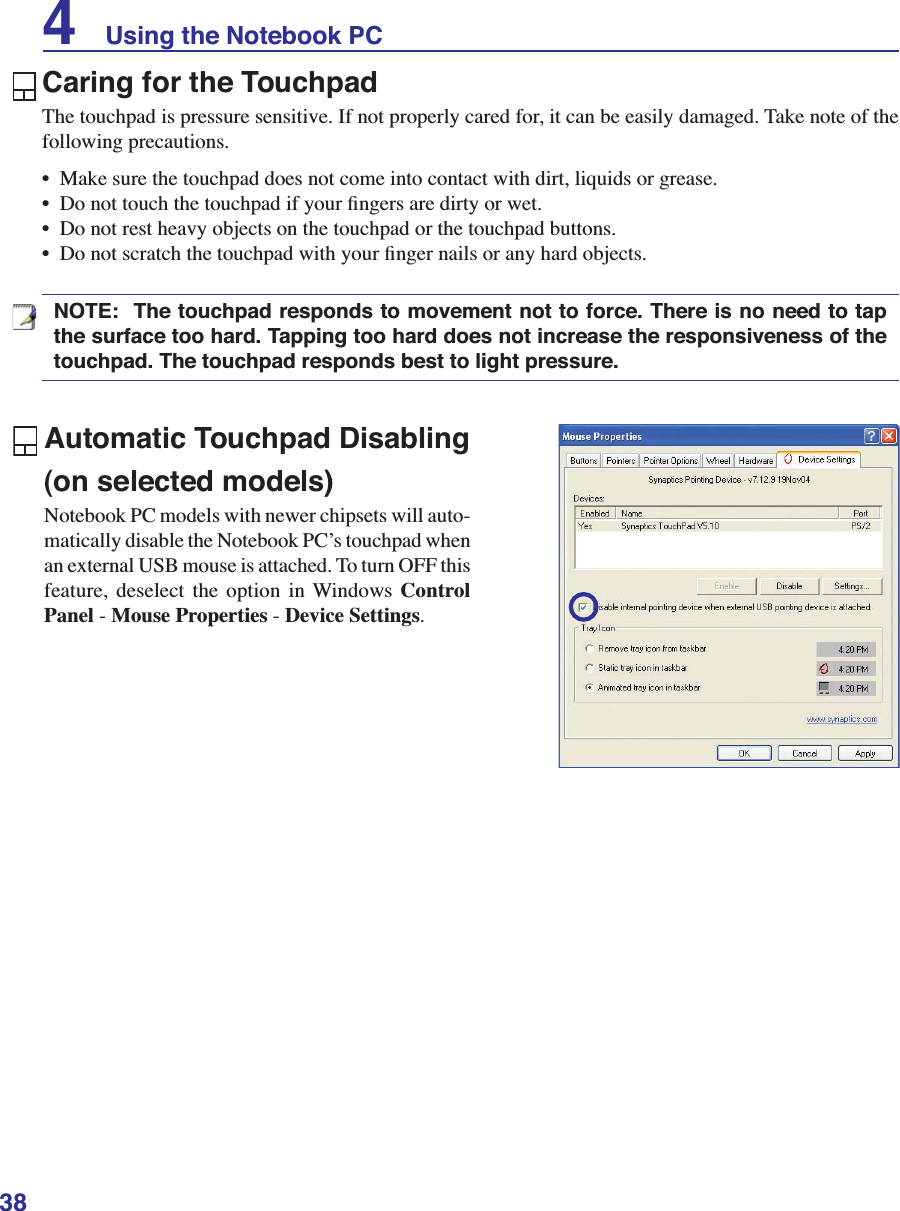
![343 Getting StartedCD Play/PauseDuring CD stop, begins CD play.During CD play, pauses CD play.CD StopDuring CD stop: Ejects the CD tray.During CD play: Stops CD play.CD Skip to Next Track (Fast Forward) & Audio Volume UpDuring CD play, this button has two functions:Track: Push once to skip to the next track during CD playing.Audio: Hold down to increase audio volume.Audio Volume ControlsFn + Speaker Icons (F10): Toggles the audio volume ON and OFFFn + Down Speaker Icon (F11): Decreases the audio volumeFn + Up Speaker Icon (F12): Increases the audio volumeMultimedia Control Keys (on selected models)The multimedia control keys allows for convenient controlling of the multimedia application. The fol-ORZLQJGHÀQHVWKHPHDQLQJRIHDFKPXOWLPHGLDFRQWURONH\RQWKH1RWHERRN3&CD Skip to Previous Track (Rewind) & Audio Volume DownDuring CD play, this button has two functions:Track: 7KHÀUVWSXVKZLOOUHVWDUWWKHFXUUHQWWUDFN6HFRQGSXVKZLOOVNLSWRWKHprevious track.Audio: Hold down to decrease audio volume.Use the [Fn] key in combination with the arrow keys for CD control functions.](https://usermanual.wiki/ASUSTeK-Computer/F94965AGN.USERS-MANUAL-2/User-Guide-834292-Page-14.png)
![47Using the Notebook PC 4These are examples of the Notebook PC connected to a Wireless Network.Desktop PCPDANotebook PCAccessPointDesktop PCPDANotebook PCWireless LAN Connection (on selected models)The optional built-in wireless LAN is a compact easy-to-use wireless Ethernet adapter. Implementing the IEEE 802.11 standard for wireless LAN (WLAN), the optional built-in wireless LAN is capable of IDVWGDWDWUDQVPLVVLRQUDWHVXVLQJ'LUHFW6HTXHQFH6SUHDG6SHFWUXP'666DQG2UWKRJRQDO)UHTXHQF\'LYLVLRQ0XOWLSOH[LQJ2)'0WHFKQRORJLHVRQ*+]*+]IUHTXHQFLHV7KHRSWLRQDOEXLOWLQZLUH-less LAN is backward compatible with the earlier IEEE 802.11 standards allowing seamless interfacing of wireless LAN standards.The optional built-in wireless LAN is a client adapter that supports Infrastructure and Ad-hoc modes JLYLQJ\RXÁH[LELOLW\RQ\RXUH[LVWLQJRUIXWXUHZLUHOHVVQHWZRUNFRQÀJXUDWLRQVIRUGLVWDQFHVXSWRmeters between the client and the access point.7RSURYLGHHIÀFLHQWVHFXULW\WR\RXUZLUHOHVVFRPPXQLFDWLRQWKHRSWLRQDOEXLOWLQZLUHOHVV/$1FRPHVwith a 64-bit/128-bit Wired Equivalent Privacy (WEP) encryption and Wi-Fi Protected Access (WPA) features.Ad-hoc modeThe Ad-hoc mode allows the Notebook PC to connect to another wireless device. No access point (AP) is required in this wireless environment.(All devices must install optional 802.11 wireless LAN adapters.)Infrastructure modeThe Infrastructure mode allows the Notebook PC and other wireless devices to join a wireless network cre-ated by an Access Point (AP) (sold separately) that provides a central link for wireless clients to commu-nicate with each other or with a wired network.(All devices must install optional 802.11 wireless LAN adapters.)](https://usermanual.wiki/ASUSTeK-Computer/F94965AGN.USERS-MANUAL-2/User-Guide-834292-Page-27.png)