ASUSTeK Computer M303 M303 GSM Camera Phone User Manual M303 UserMan
ASUSTeK Computer Inc M303 GSM Camera Phone M303 UserMan
UserManual.wiki
>
ASUSTeK Computer
>
M303 User Manual
>
Part 1
Contents
1.
Part 1
2.
Part 2
3.
Part 3
4.
Part 4
5.
Part 5
Part 1
Navigation menu
Upload a User Manual
Namespaces
Wiki Guide
HTML
PDF
Info
Views
User Manual
Discussion / Help
Navigation

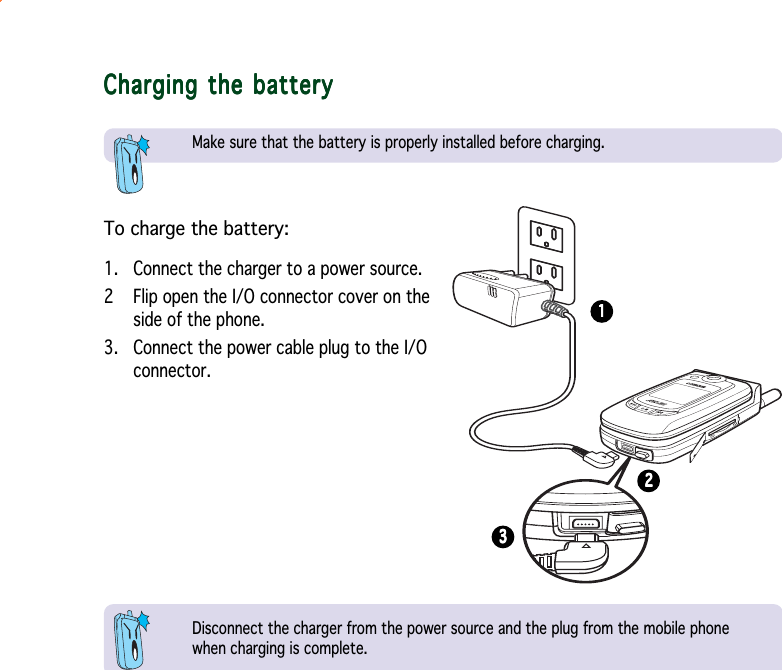
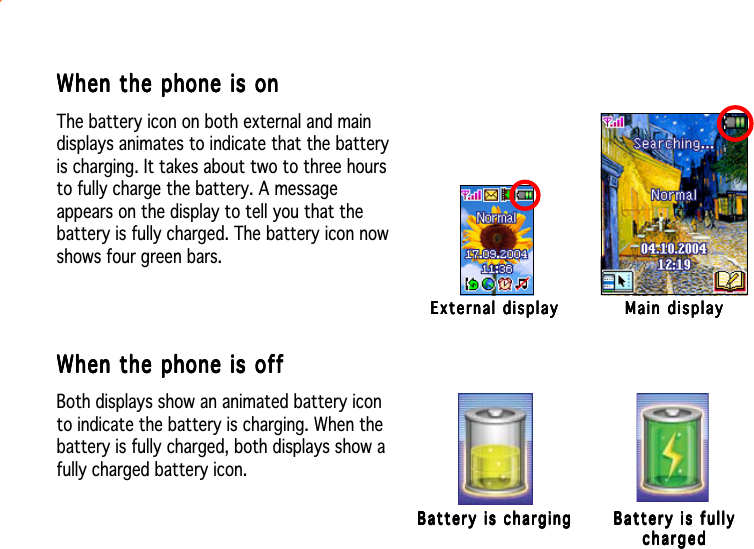
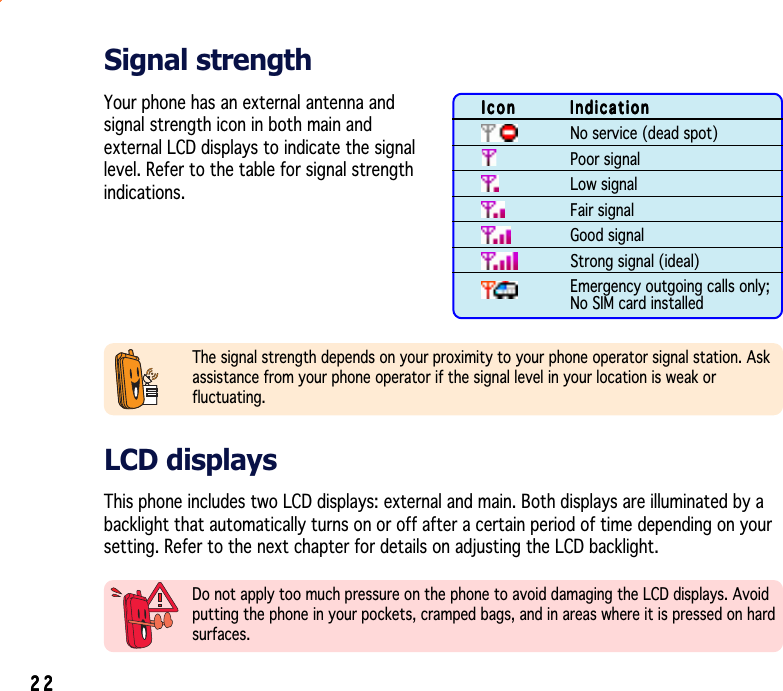

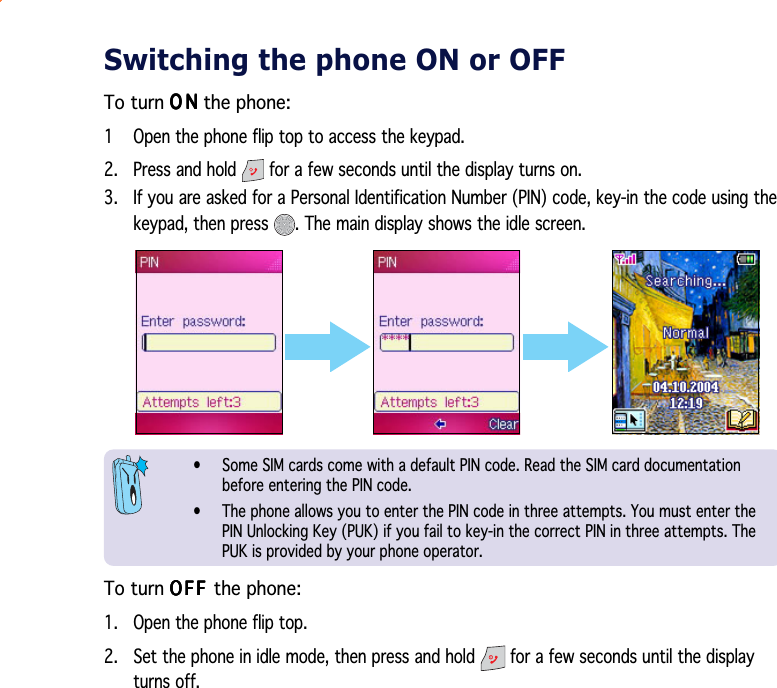
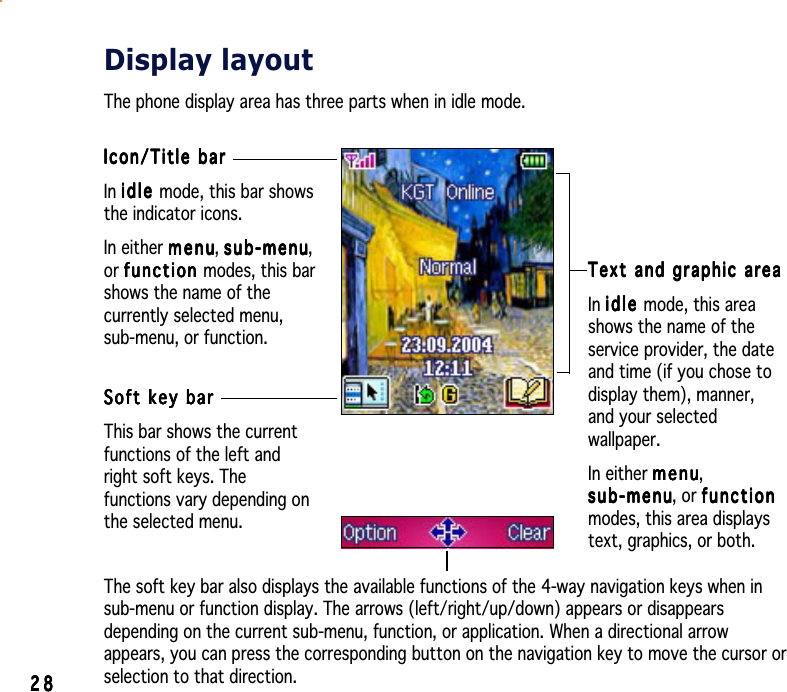
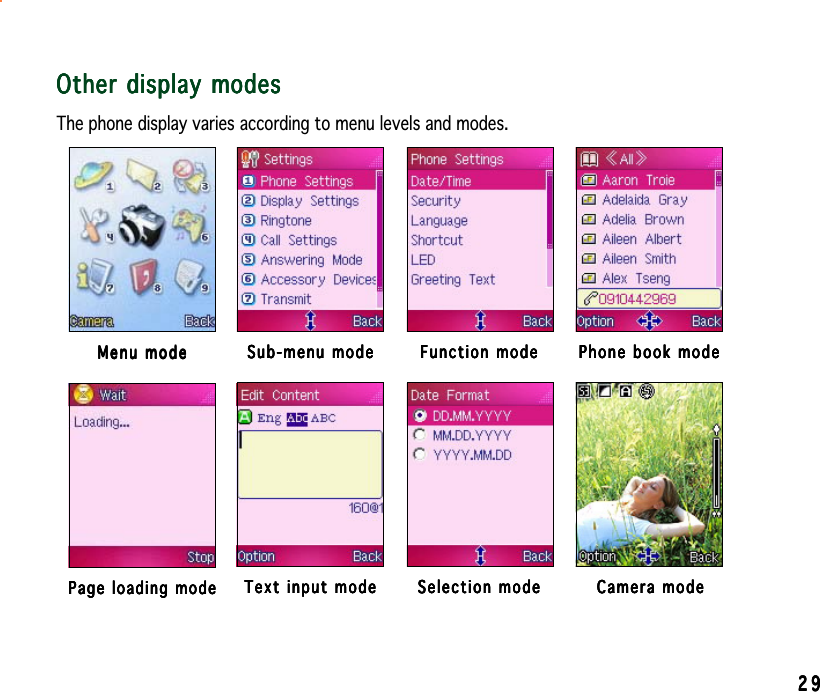
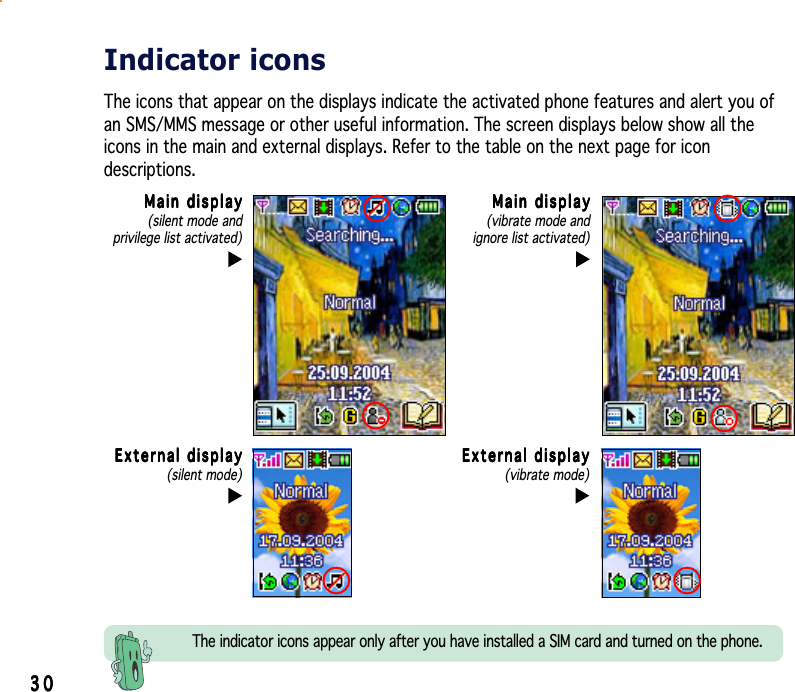
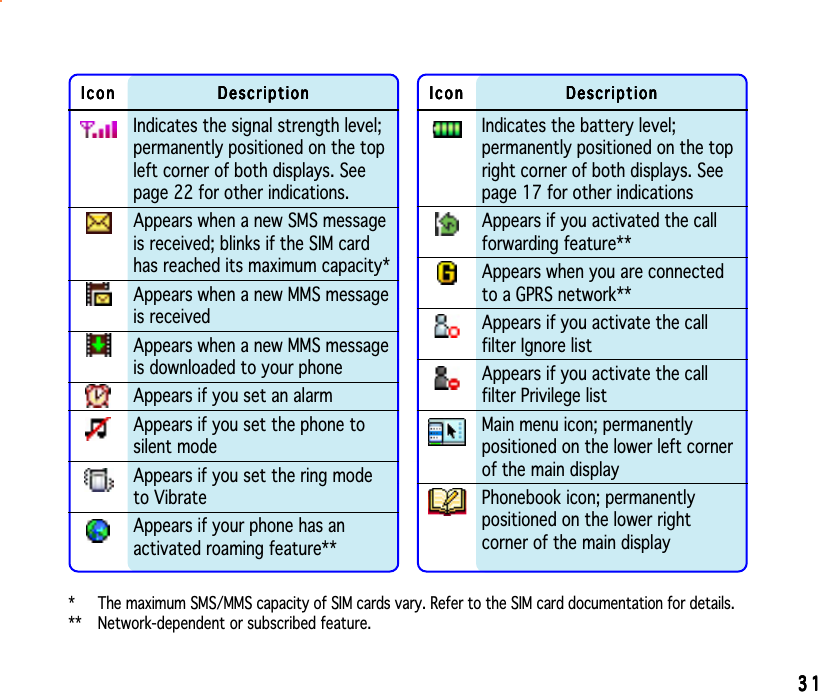
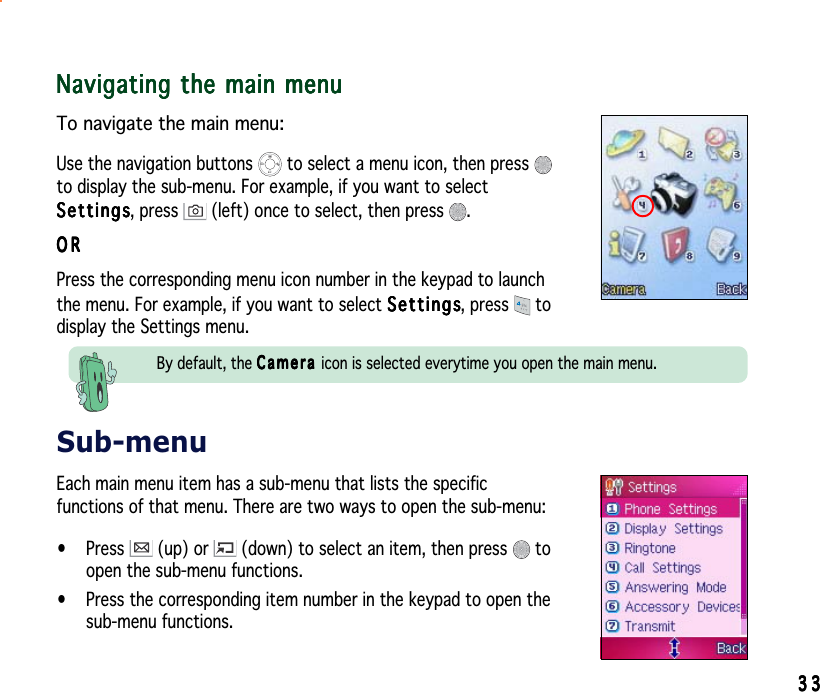
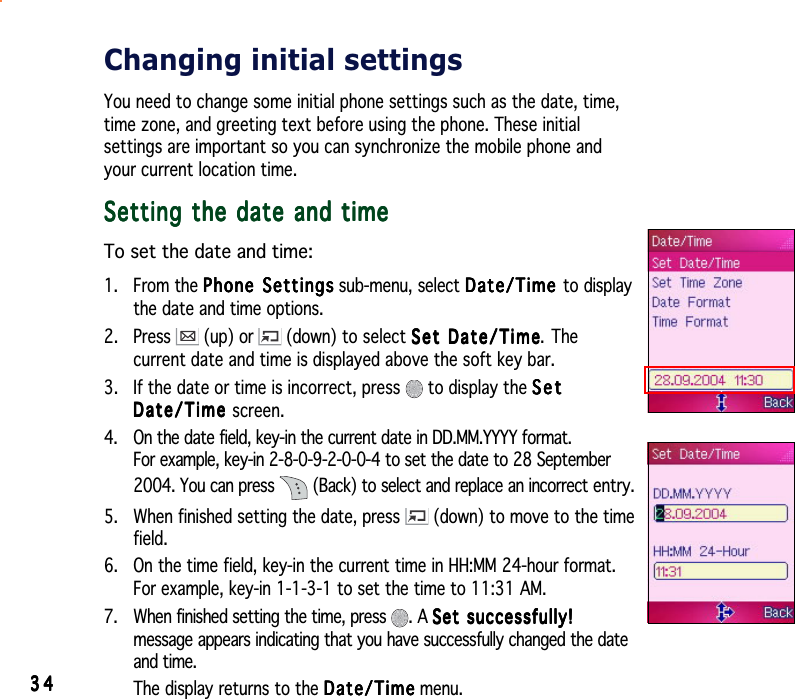
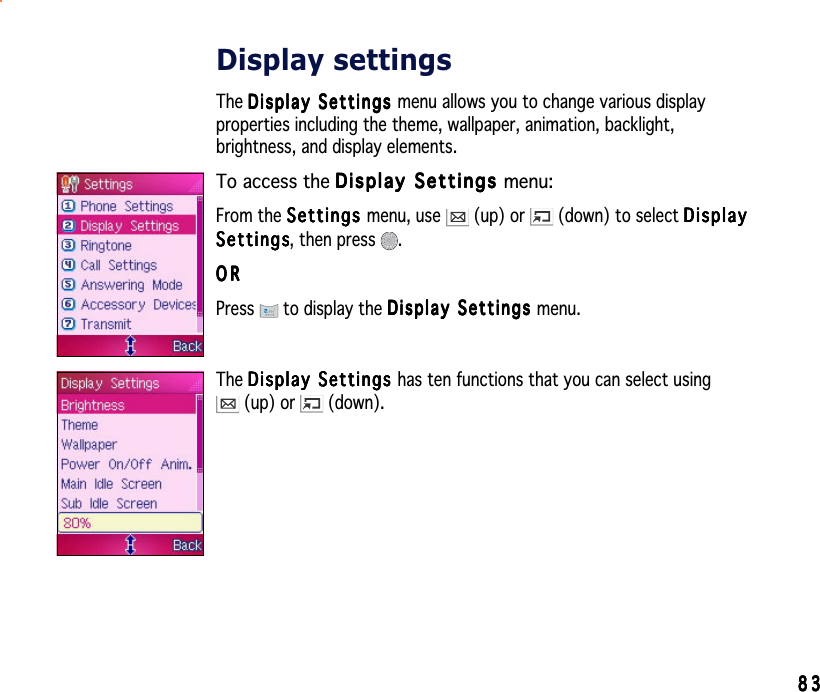
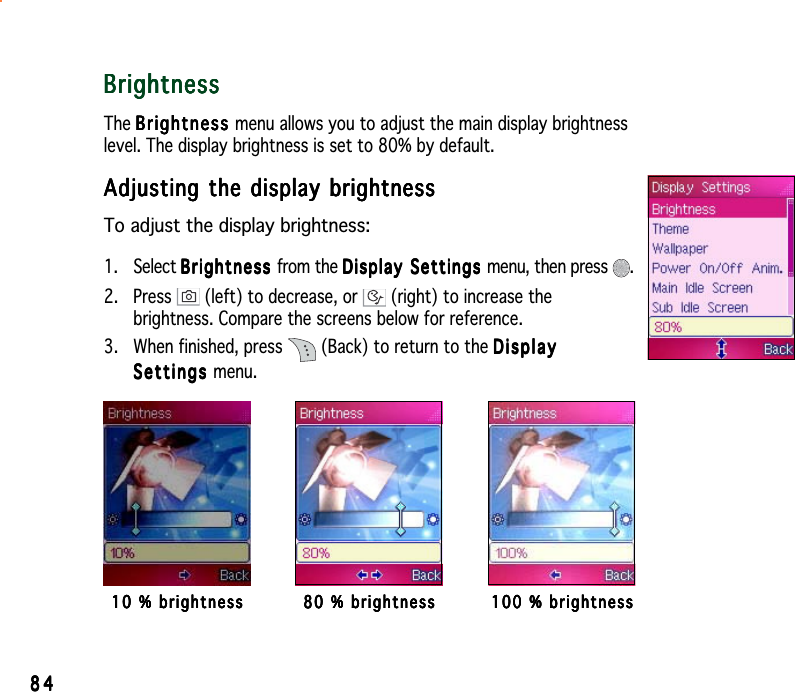
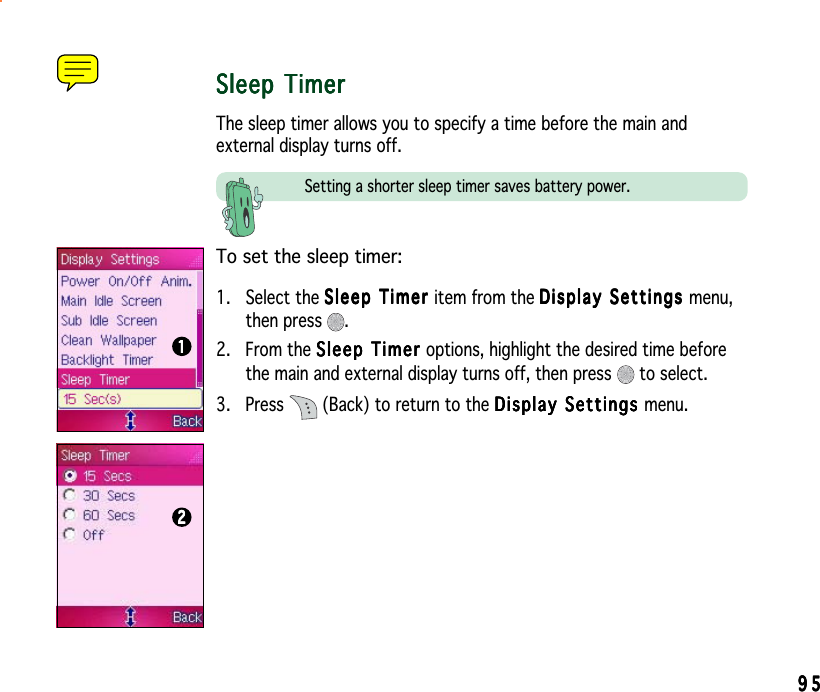
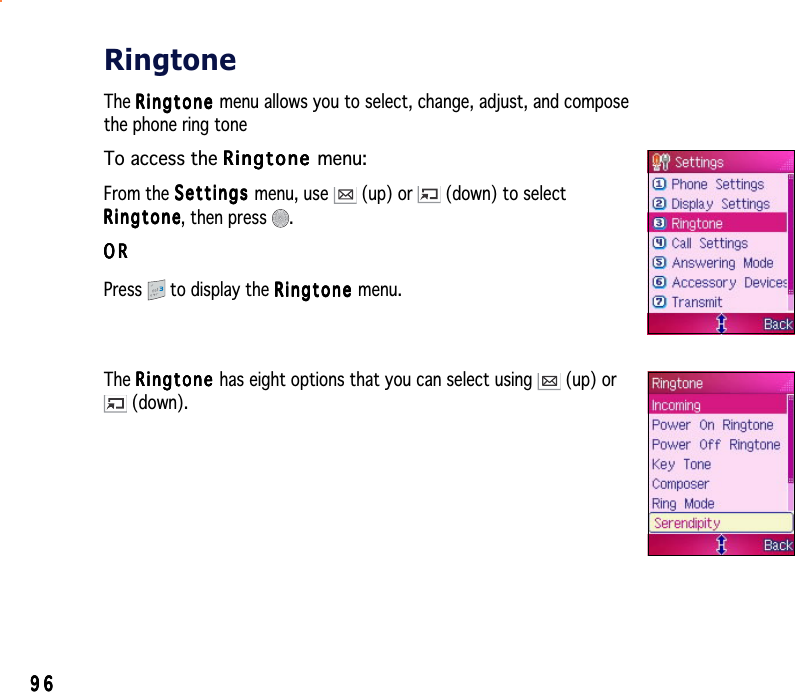
![3232323232Main menuThe icons in the main menu represents all the functions and features ofyour mobile phone. You can open the main menu by pressing [ ]when the phone is in idle mode. When selected, the menu icon animatesand the screen shows the menu description on the bottom left corner ofthe display.Refer to the table below for a brief description of the menu icons andthe their functions.IconIconIconIconIcon DescriptionDescriptionDescriptionDescriptionDescriptionNetworkNetworkNetworkNetworkN e t w o r k. Allows you to surf theInternet using the WAP feature of thephone and access other services offeredby your phone operator.MessageMessageMessageMessageM e s s a g e. Allows you to compose, edit,send, and manage SMS and MMSmessages to almost any mobile phone.MannerMannerMannerMannerM a n n e r. Allows you to select from fivepreset manners or to customize themanner ring tone, volume, etc.SettingsSettingsSettingsSettingsS e t t i n g s. Allows you to adjust thephone ringtone, display, security,connectivity, memory, and networksettings.IconIconIconIconIcon DescriptionDescriptionDescriptionDescriptionDescriptionCameraCameraCameraCameraC a m e r a. Allows you to capture, manage,and share photos and videos.FunFunFunFunF u n. Allows you to play Java games,compose ring tones, and access theImage Gallery.OrganizerOrganizerOrganizerOrganizerOrganizer. Allows you to organizeyour daily schedule using the Calendar,Alarm, World Clock, Text/Voice Memo,Currency Exchange, and other features.PhonebookPhonebookPhonebookPhonebookP h o n e b o o k. Allows you to add,organize, search contacts saved in thephone and SIM memory.CallsCallsCallsCallsC a l l s. Allows you to manage missed,dialled, and answered call information.](https://usermanual.wiki/ASUSTeK-Computer/M303.Part-1/User-Guide-509484-Page-24.png)