ASUSTeK Computer M303 M303 GSM Camera Phone User Manual M303 UserMan
ASUSTeK Computer Inc M303 GSM Camera Phone M303 UserMan
UserManual.wiki
>
ASUSTeK Computer
>
M303 User Manual
>
Part 5
Contents
1.
Part 1
2.
Part 2
3.
Part 3
4.
Part 4
5.
Part 5
Part 5
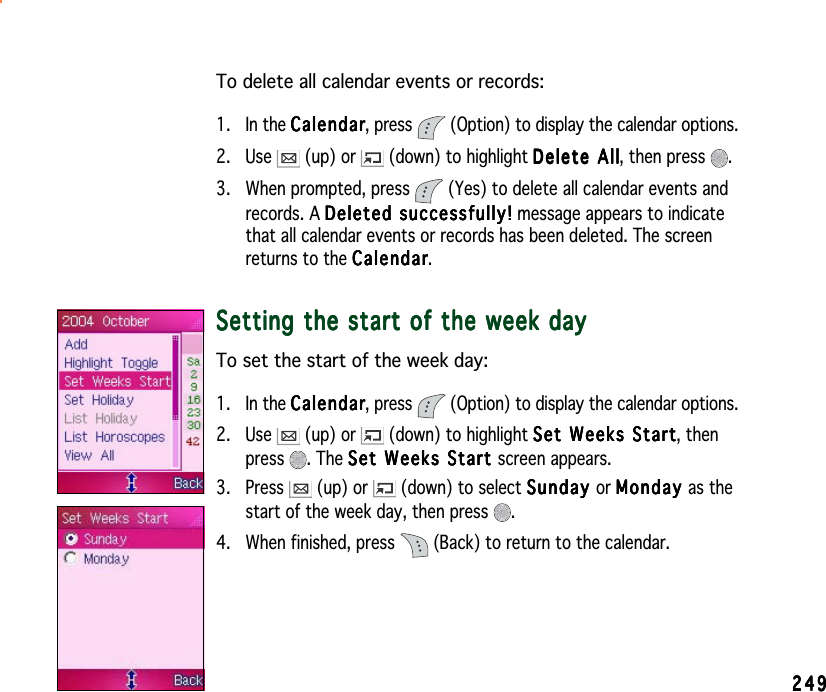
Navigation menu
Upload a User Manual
Namespaces
Wiki Guide
HTML
PDF
Info
Views
User Manual
Discussion / Help
Navigation

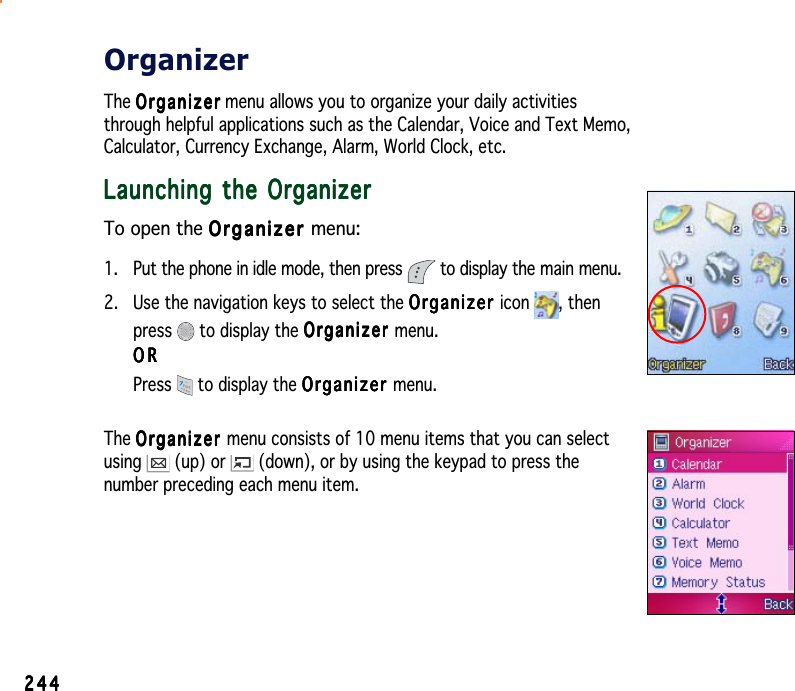

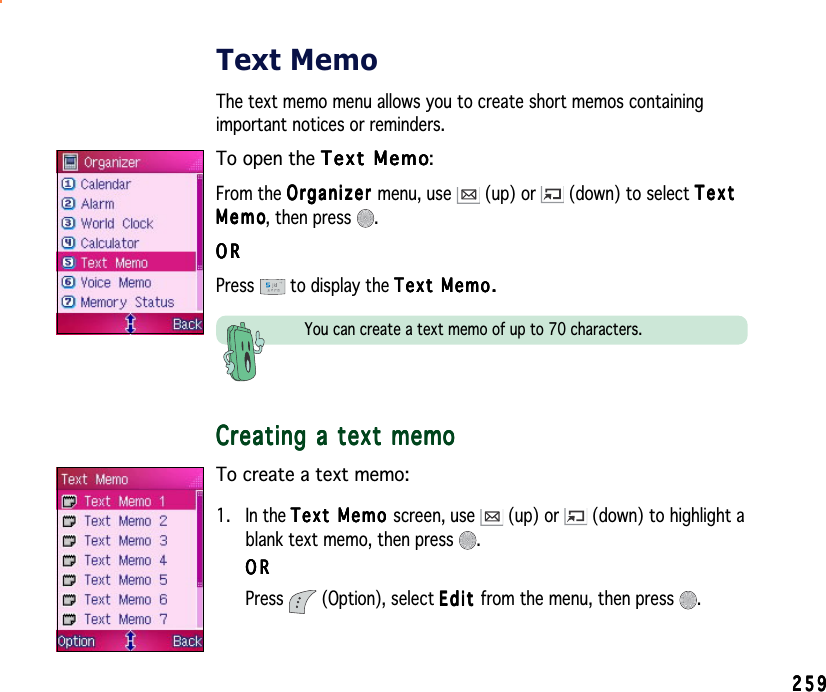
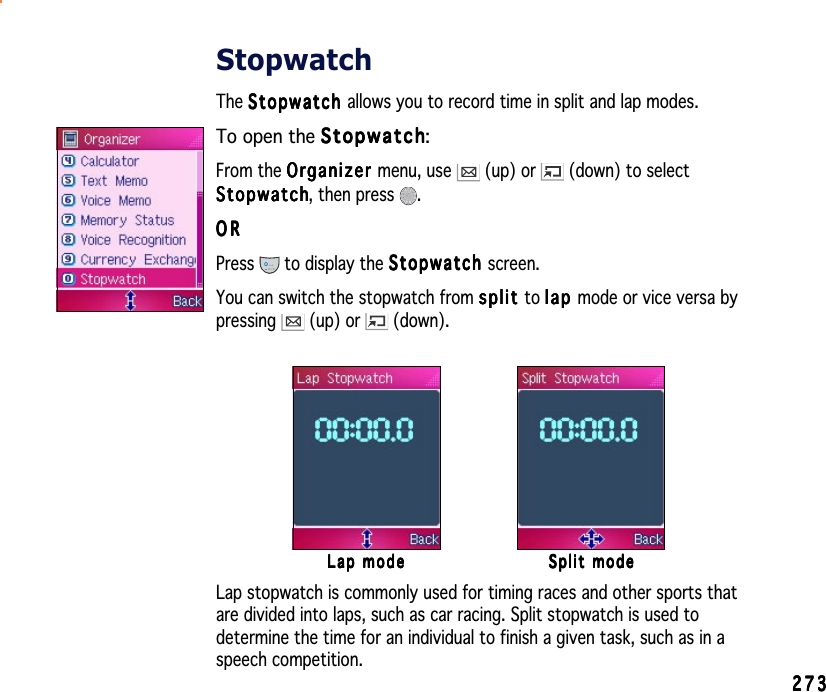
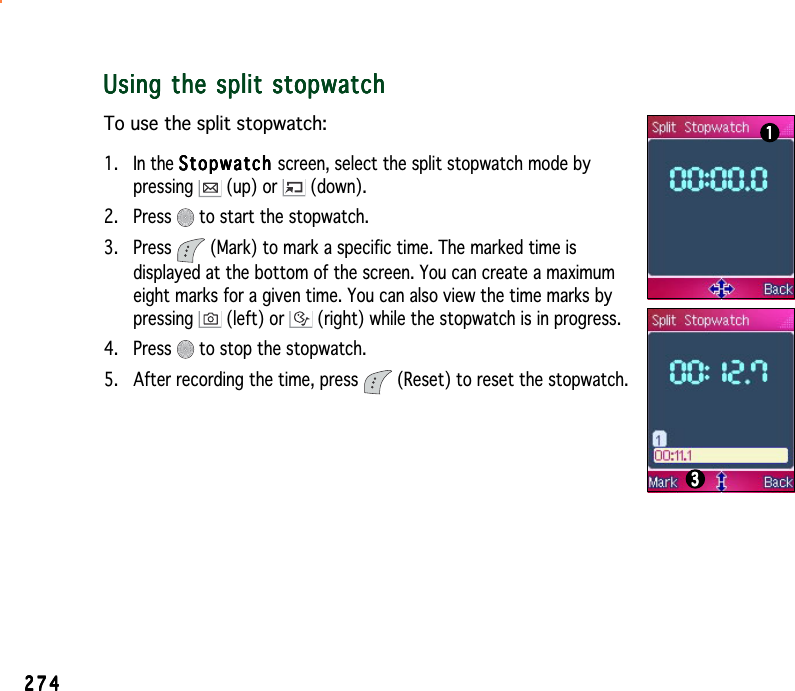
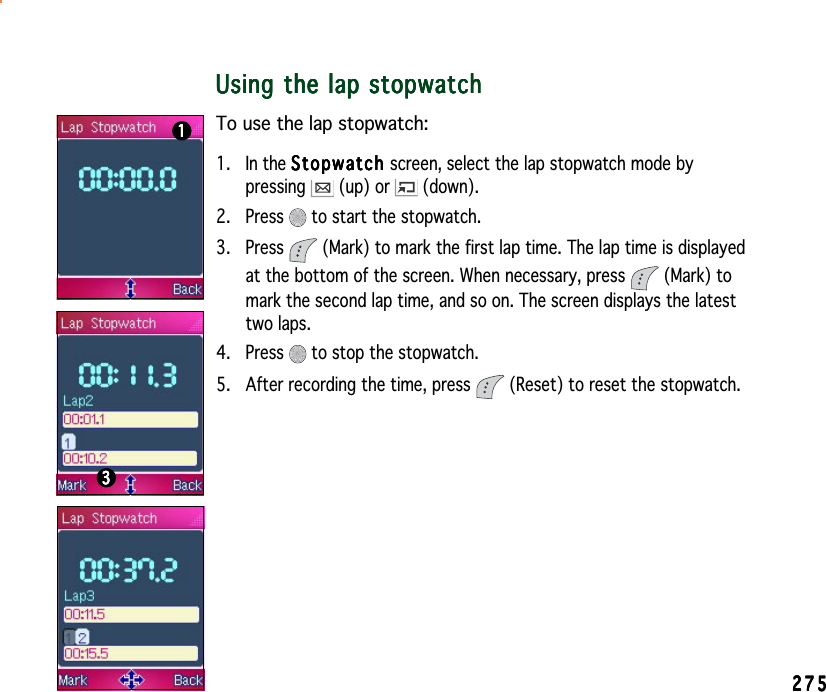
![258258258258258CalculatorThe calculator allows you to compute simple mathematical operations.To open the CalculatorCalculatorCalculatorCalculatorCalculator:From the OrganizerOrganizerOrganizerOrganizerOrganizer menu, use (up) or (down) to selectCalculatorCalculatorCalculatorCalculatorCalcul a t o r, then press .ORORORORORPress to display the CalculatorCalculatorCalculatorCalculatorCalculator.The function of the following keys changes when the phone is incalculator mode.KeyKeyKeyKeyKey FunctionFunctionFunctionFunctionFunction KeyKeyKeyKeyKey FunctionFunctionFunctionFunctionFunction[+] add [–] subtract[÷] divide [x] multiply[.] decimal point C / ACClear Back[=] equalThe calculator functions like a normal calculator. Use the keypad tokey-in the numerals, then select a mathematical operation to use.Press to return to the OrganizerOrganizerOrganizerOrganizerOrganizer menu.](https://usermanual.wiki/ASUSTeK-Computer/M303.Part-5/User-Guide-509488-Page-20.png)